Trayfoot Mountain – Paine Run Loop

This 9.5 mile loop in the southern district of Shenandoah National Park offers vistas, streams and quite a bit of solitude!  We think it would make a great short backpacking loop with a beautiful stream-side campsite along Paine Run.

View the Full Album of Photos From This Hike

Adam Enjoys the Blackrock Summit
Adam Enjoys Blackrock summit. Below: Adam hikes the Appalachian Trail just north of Blackrock Gap; Christine climbs on the rock pile; Adam spots the spur trail that leads to the Trayfoot Mountain Trail.

Adam Hikes the AT Christine on Blackrock Summit Spur Trail

Christine Says…

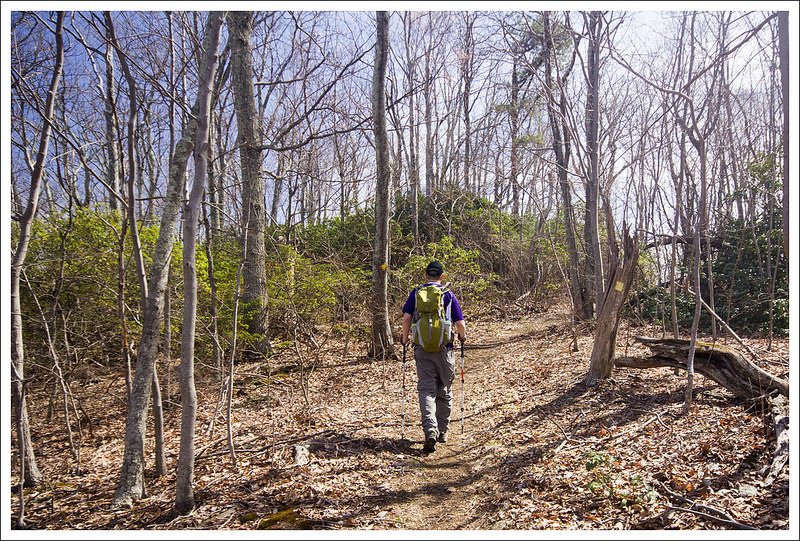
Every weekend this April has provided glorious hiking weather! I’m feeling so grateful that we’ve been able to get out so often and take full advantage of the warm, sunny days. On the Saturday before Easter, we chose to hike the challenging 9.5 mile Trayfoot Mountain – Paine Run loop.

This hike begins at the Blackrock Gap parking area (not to be confused with Blackrock summit parking). From the lot, cross to the eastern side of Skyline Drive and make your way north along the Appalachian Trail. After a couple tenths of a mile, the trail crosses back over the drive and heads steadily uphill for a little over a mile. As you climb, you’ll come to a junction – stay on the white-blazed AT, the turn to the right goes to the Blackrock shelter.

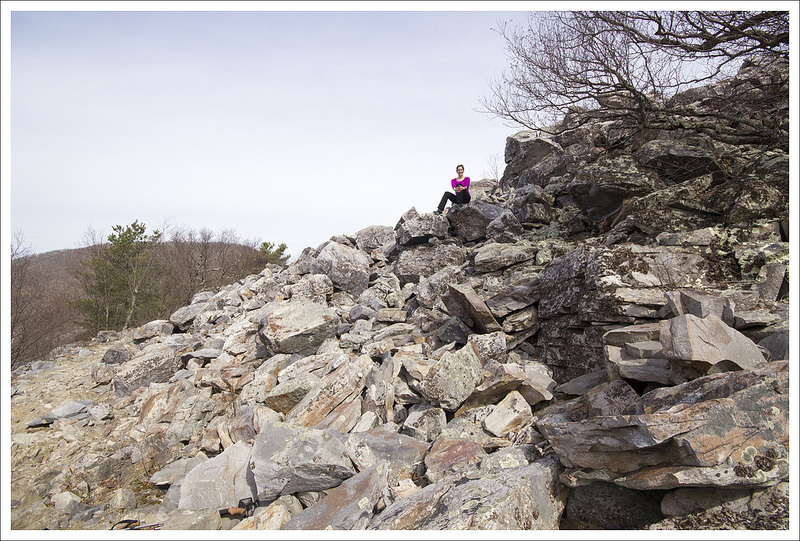
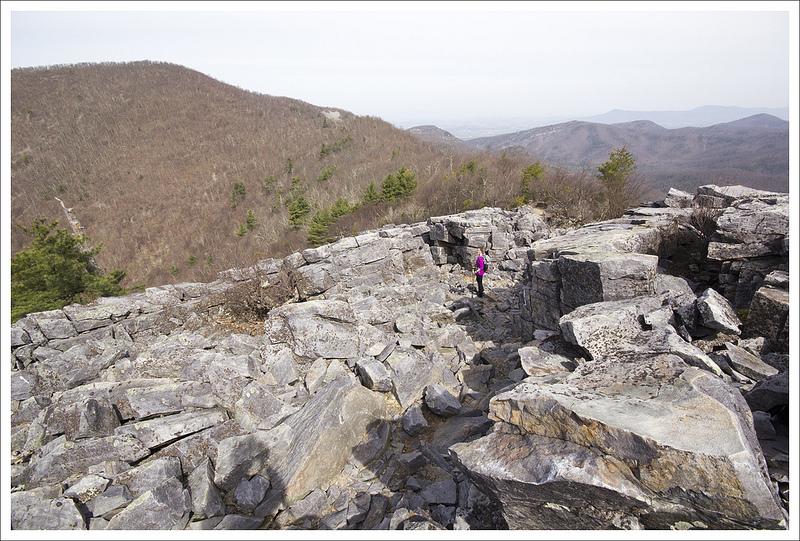
At 1.3 miles into the hike, you’ll reach a cement marker for the Trayfoot Mountain Trail. Do NOT take this turn unless you want to miss the splendor that is Blackrock Summit! Continue another tenth of a mile to the massive jumble of boulders and jagged rocks that makes up this impressive summit viewpoint. We took some time to enjoy the views and climb on the rocks. The views from this spot are probably the best on the entire hike, although there are a couple more nice spots yet to come.

Christine in the Maze
The trail passes through a corridor of rock. Below: Adam passes through the narrow opening; Climbing Trayfoot Mountain; From the ridgeline of Trayfoot there are several openings in the trees that give you views of a distant Skyline Drive.

Rock Corridor Climbing Trayfoot Skyline Drive

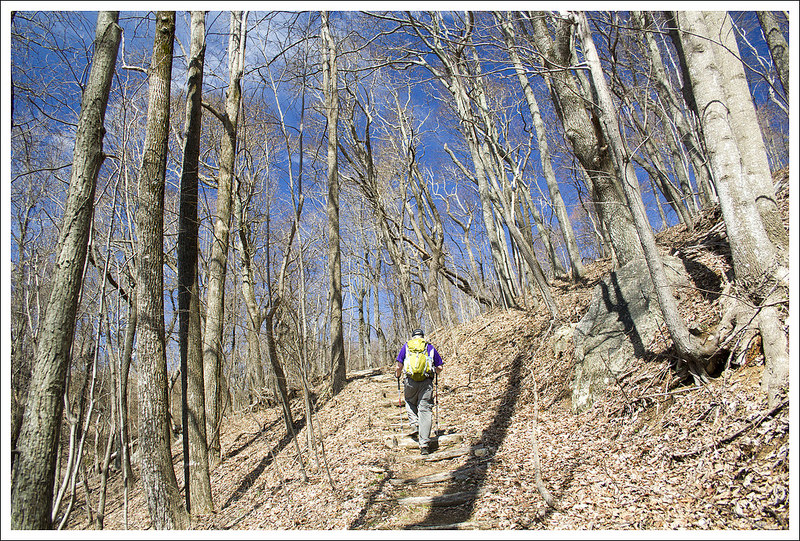
The Appalachian Trail skirts around the front edge of the summit before coming to a spur trail that leads down to the Trayfoot Mountain trail. The spur descends through a corridor of flat-sided slabs. When spur reaches the junction with the Trayfoot Mountain trail, turn right and follow the trail uphill along an old fire road.

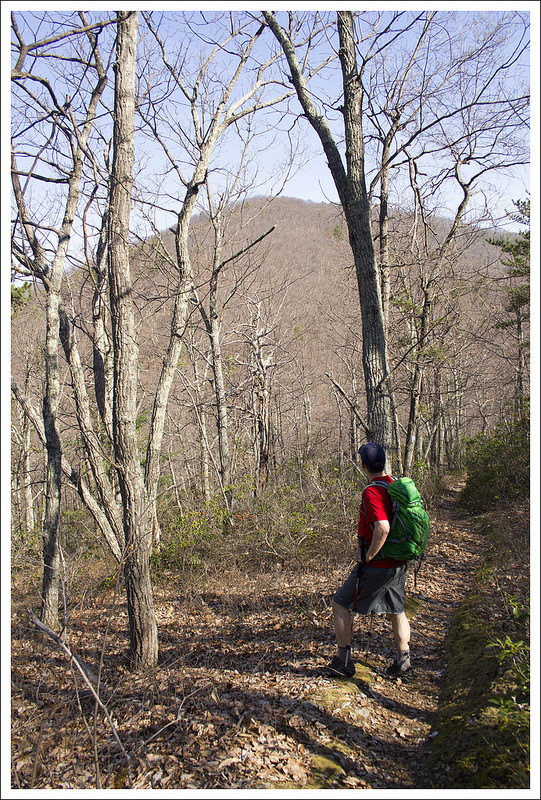
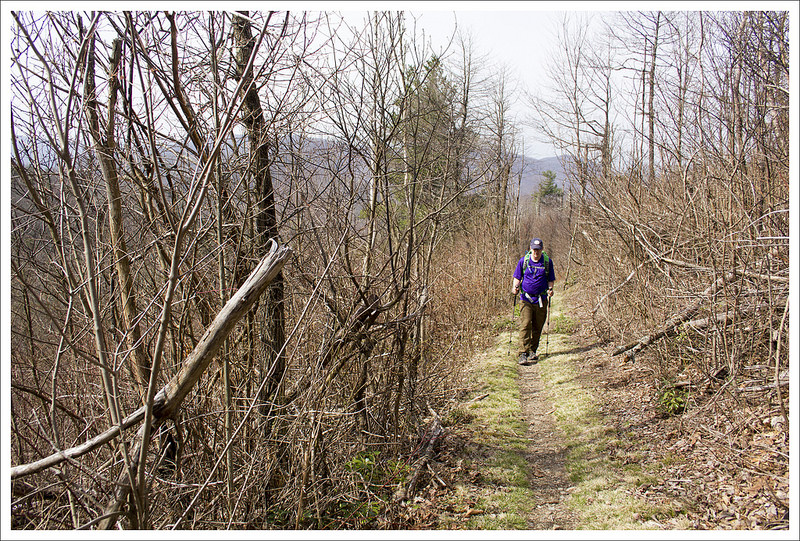
The uphill climb along this section is steady going! Near the top, you’ll pass another marker pointing toward the Furnace Mountain trail. Pass this and continue on the Trayfoot Trail until you reach the cement post marking the summit and high point of your hike. There are no views from this summit, but this starts the beginning of a lovely, easy ridge walk.

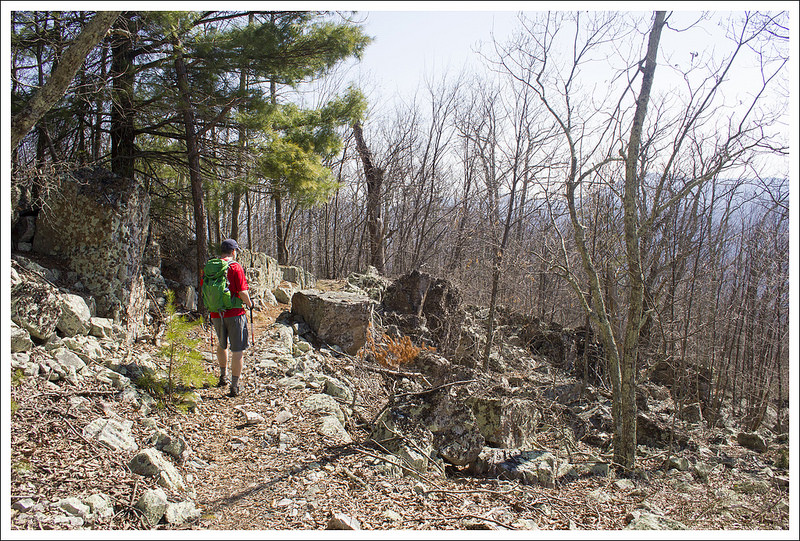
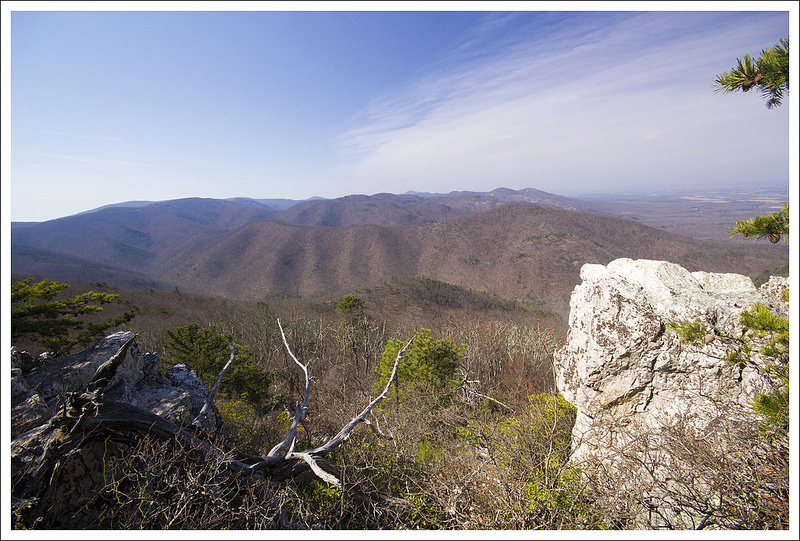
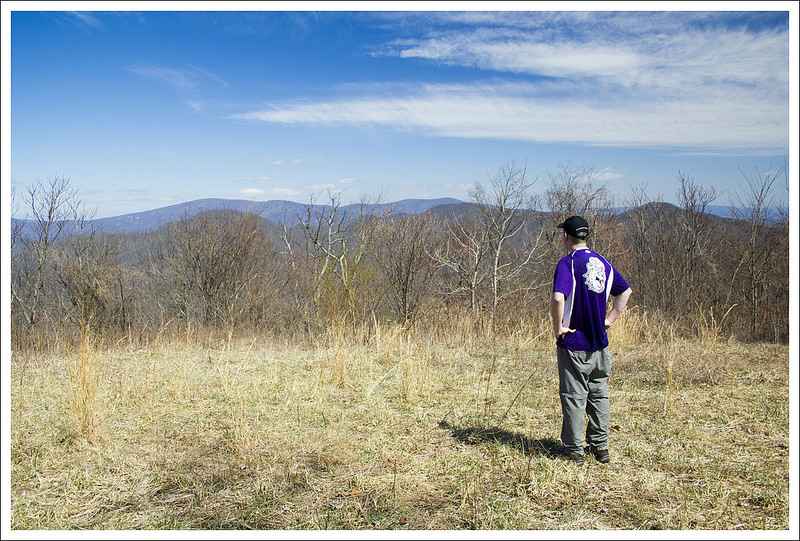
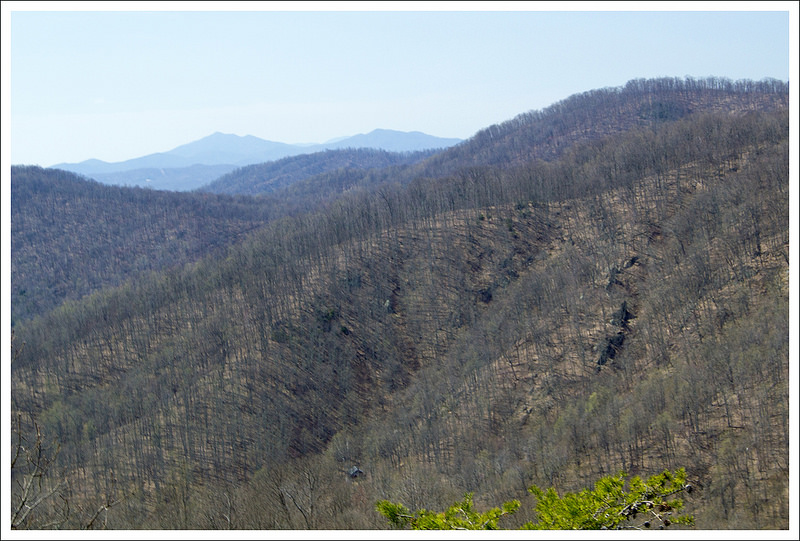
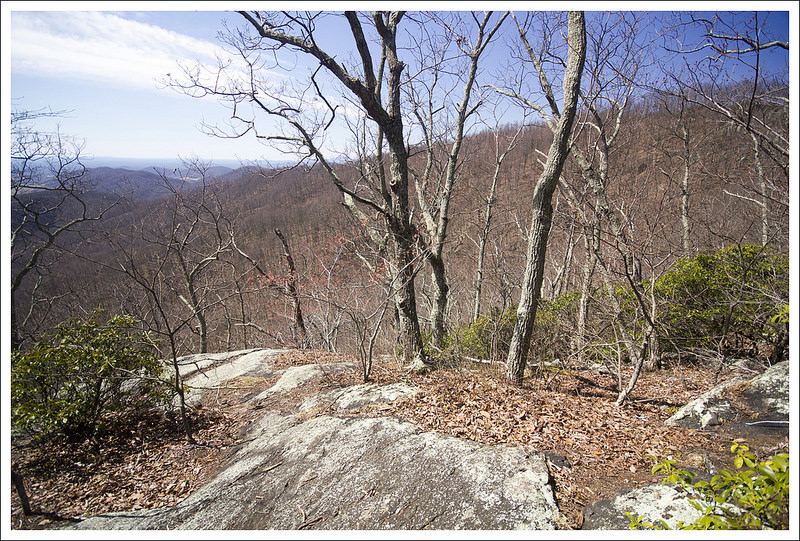
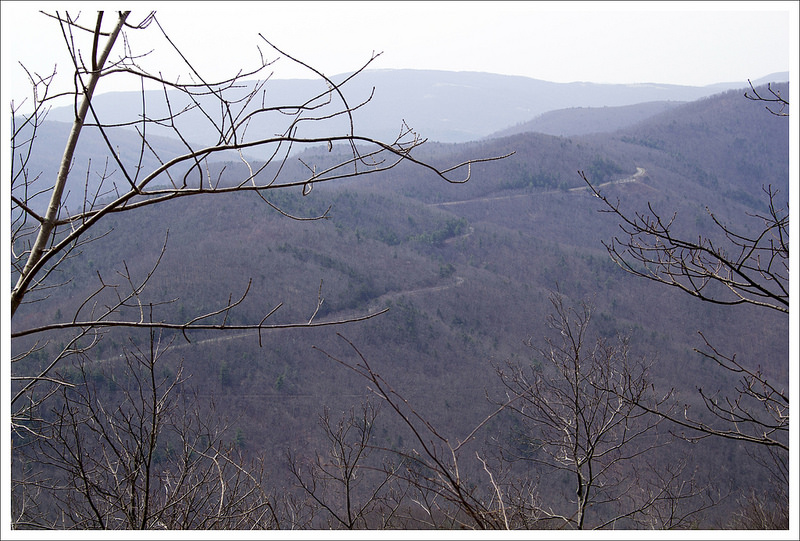
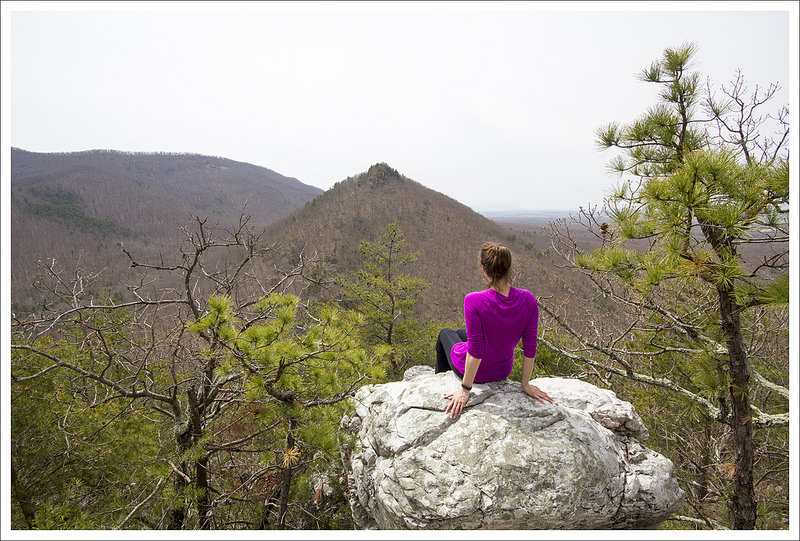
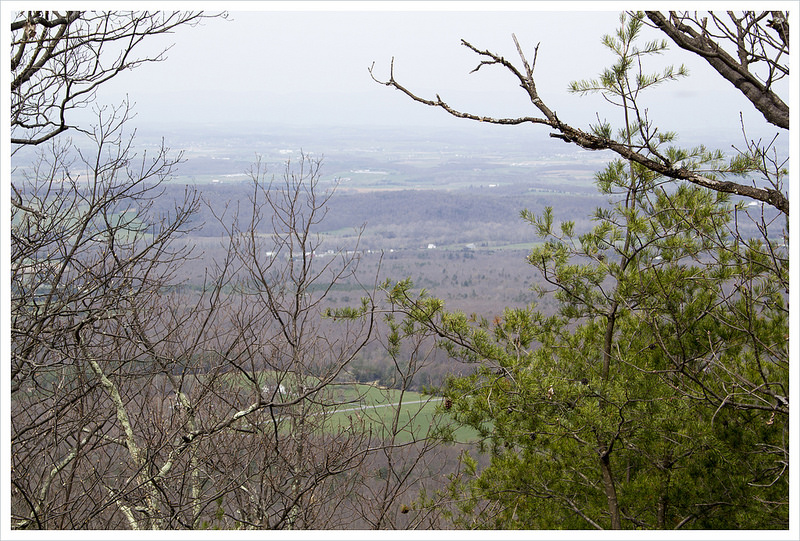
The ridge rolls gently along, offering nice views of the Paine Run valley and a distant glimpse of Skyline Drive. The trail eventually begins a long gradual descent to Paine Run. Your last sweeping vista on this hike comes at a pretty outcropping of rocks overlooking pointy Buzzard Rock.

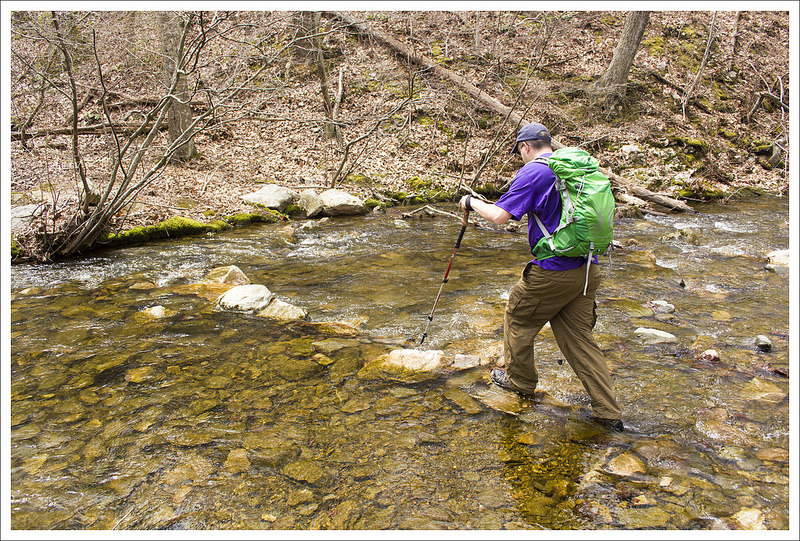
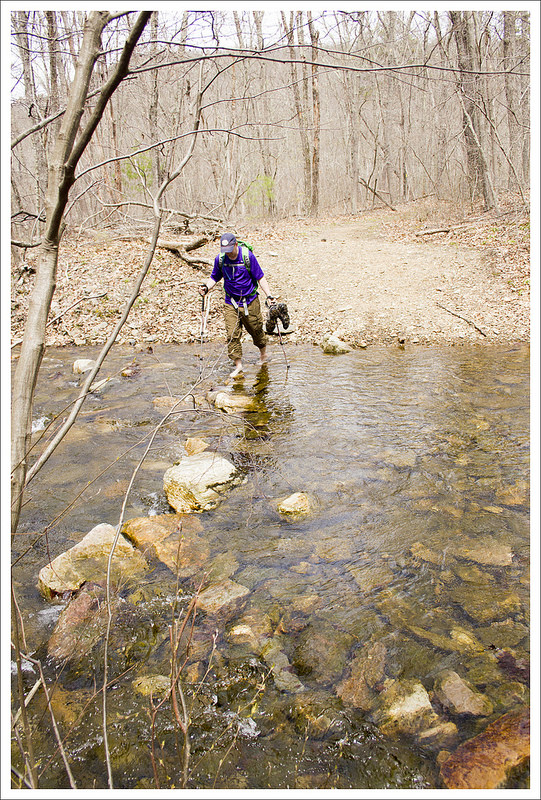
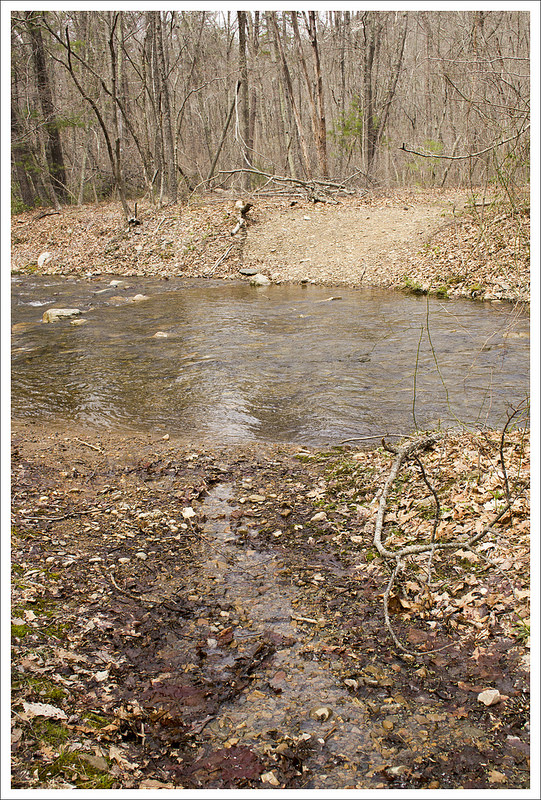
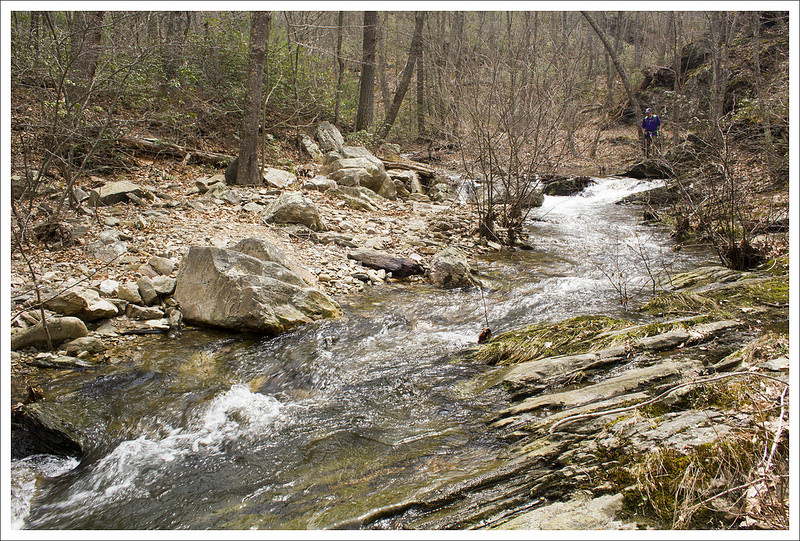
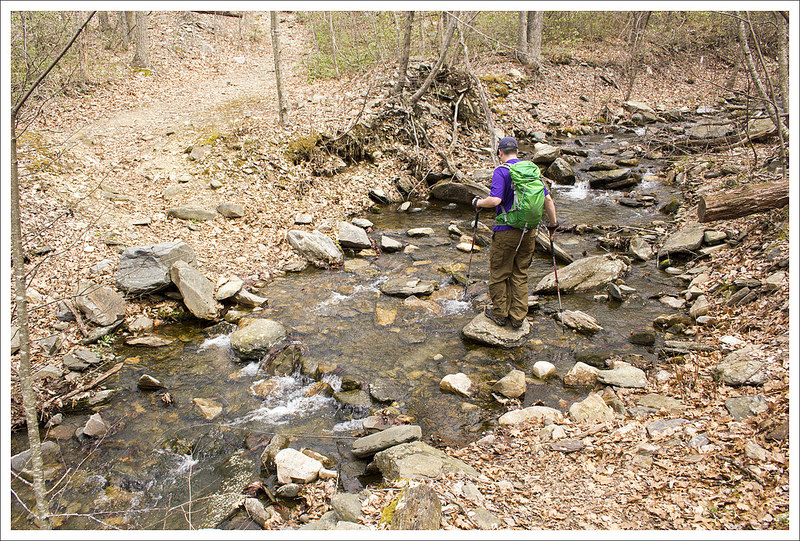
Switchbacks take you swiftly down to Paine Run.   Near the first stream crossing, a cement marker points you left onto the yellow-blazed Paine Run Trail, which is essentially an old roadbed. There were several stream crossings on this section of trail. All of them but the second crossing were easy. We found the stream wide and flush with water. Most of the stones people use to cross were underwater. Instead of trying to attempt the rock-hop, we took off our shoes and waded across. Refreshing!

Buzzard Rock View
You get a nice view of Buzzard Rock before descending to Paine Run. Below: Some interesting rock formations along the trail; Lunch stop; Glimpses of farm land.

Rock Walls Lunch Spot Farmland

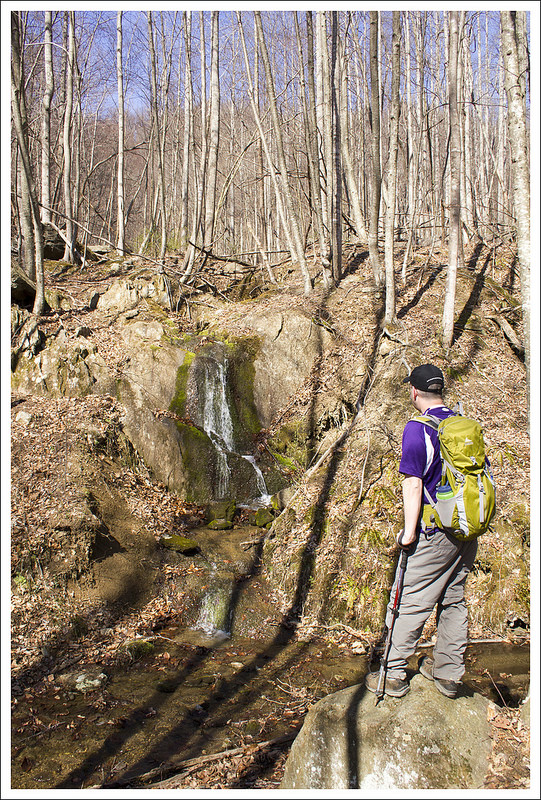
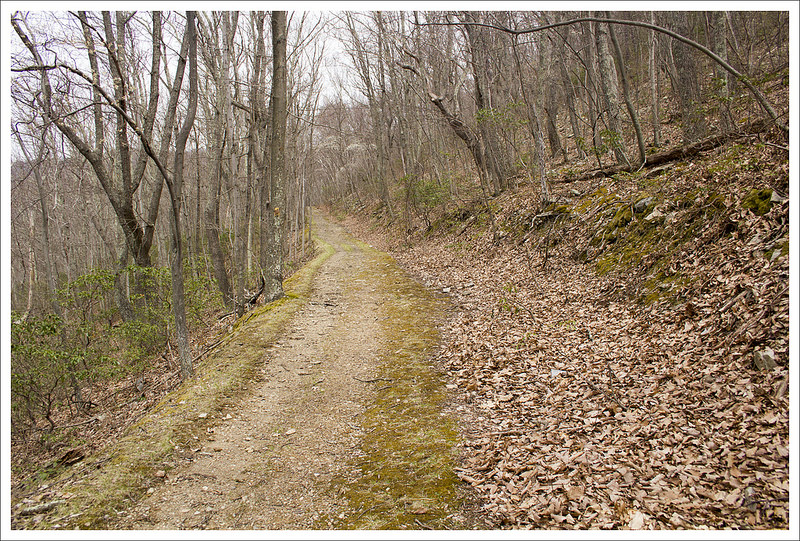
The Paine Run trail is very pleasant for a couple miles – sounds of running water and mountain views through the trees. When we hiked, the stream was flowing with lots of rapids and tiny waterfalls. I imagine it will run low and dry later in the summer. The path climbs so gradually you hardly notice you’re ascending! Eventually, you leave the streamside and head back toward Skyline Drive. After one final sharp switchback, you have one more moderately steep ascent back to your car.

All in all, I was pleasantly surprised with both the views and streams on this route. We had a great time!  MapMyHike said this hike is only 9.3 miles, but all other sources put it at 9.7-9.8… so who knows!

Adam Says…

We feel like we have covered so much of Shenandoah National Park on our blog, but it seems there is always another trail or loop that you can try.  We talked about  a hike to Blackrock summit before in our coverage of an AT segment, but this is a longer loop version that offers a few additional views and a stream to enjoy.  Other than the Blackrock summit, you will likely not see a lot of people on this trail.  We only saw a few people the entire day, which was a little shocking for a beautiful weekend day that happened to also be a free National Park entry day.

As Christine mentioned, you could skip the Blackrock summit trying to follow the signage, but you don’t want to miss the best part of the hike.  When we hiked previously, our route bypassed the spur trail that leads to the Trayfoot Mountain Trail.  This spur immediately gives you some additional views and some interesting rocks to scramble around.  Most people that are doing an out-and-back just to the summit from the northern approach will miss this area also.

First Attempt
Adam makes a first attempt to cross (with shoes). The second (successful) attempt was barefoot. Below: Adam descending to Paine Run; The shoeless crossing attempt, The trail goes right through the middle of the stream.

Descent to Paine Run Shoeless Trail

One thing that Christine and I both mentioned throughout the day is how this would make for a great overnight backpacking loop.  If you choose to do so, I would tackle all of the tough uphill climbing the first night, making your way through the Trayfoot Mountain trail and camp somewhere near Paine Run.  This will provide a great water source and there were some nice campsites near the water.  The following day, you’ll just have a steady, but not too strenuous hike back uphill to your car.

When we started walking the ridgeline of the Trayfoot Mountain trail, I felt like we stumbled across the best place I’ve ever seen to spot grouse.  We encountered three along our walk.  A couple of years ago, while hiking in Great Smoky Mountains National Park, we encountered our first grouse on a trail.  The beating of its wings created a strange echoing syncopation in our chest which made us both wonder if our heartbeats were going haywire.  Seeking sources online, we found it was a common sound for mating grouse.  We actually spotted several on this trail and when they took off in flight, we could briefly hear that same noise that perplexed us before.  What a relief to actually spot the culprits this time.

Paine Run Trail
Christine walks the wide, gradually ascending Paine Run Trail. Below: We found several blown-down bird’s nests along the trail; Pretty Paine Run; Another stream crossing.

Birds Nest Paine Run Another Crossing

Further along the Trayfoot Mountain Trail, we climbed up on a few rocks to enjoy our lunch and get some views.  I managed to pick some rocks which were not in the least bit contoured to our bodies, which made for an uncomfortable sitting.  It reminded me of how fast food chains design their seating area so the chairs are only comfortable for a short amount of time to prevent loitering.  We quickly ate and moved on.

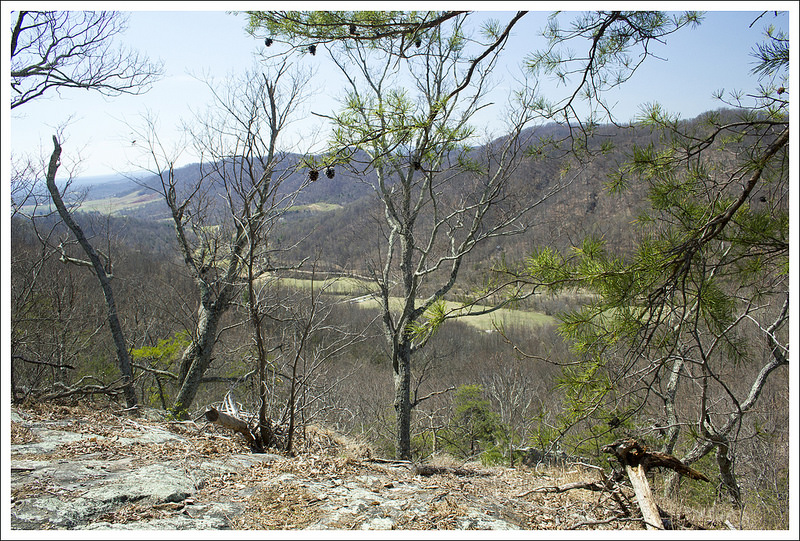
Around the 4.0 mile marker, the ridge line ends at a nice rock outcropping which gives you some last views before descending towards Paine Run.  Some local families like to park on the western outskirts of the park and hike up to this area for views.

When we reached Paine Run, the water was a little high from the recent rains.  There were a few places to rock-hop across.  In one spot, we did have to shed our shoes to make our way across.  Christine said I looked like a hobbit with my pantlegs pulled up halfway as I crossed.  I responded back in my geekiest way, “May the hair on my toes never fall off.”  I will say the water was very cold, but it felt so refreshing to my feet.  The sensation of the freezing water made me feel as if I had just received a nice massage on my feet.  After the refresher, I felt I could hike a lot longer.

Horses
The Paine Run Trail is popular with horseback riders. Below: The final ascent to the parking area; We spotted a bear on the drive home; Before we went home, we stopped for famous Shenandoah blackberry ice cream.

Final Ascent BearIce Cream

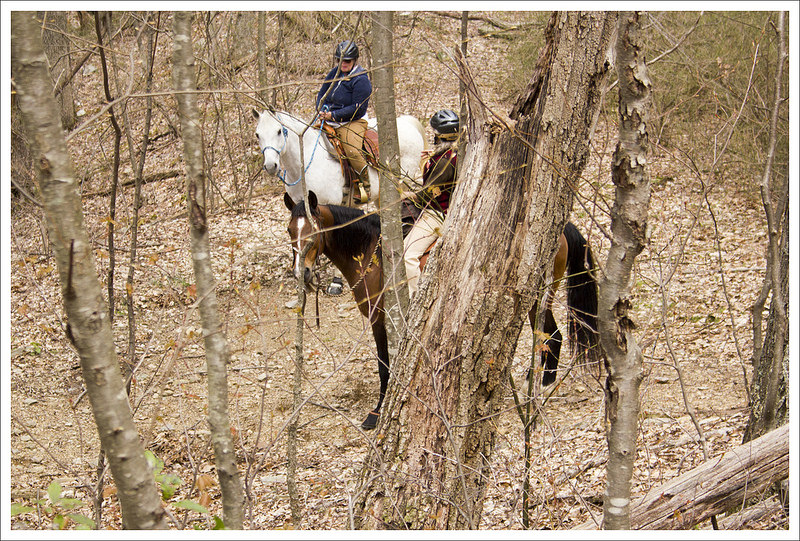
The stretch on the uphill Paine Run trail was very gradual.  While some people may think this was more of a boring stretch, I enjoyed the views of Paine Run along the side.  There were even a few very small waterfalls to enjoy since the water level was high.  We also came across a group horseback riding along the trail.  All yellow-blazed trails, like the Paine Run trail, in Shenandoah National Park allow horses on the trails.  This would be a great trip to take down to the water and let the horses rest and get a drink before returning.

We got back to our car and then heading north along Skyline Drive.  Within a few miles, I spotted a young black bear on the side of the road.   We were excited to have our first bear sighting of the year.  The bear quickly ran away once it knew it was spotted, but we hope we get to see many more this year.  We stopped at the Loft Mountain wayside to get our first blackberry milkshake of the year.  Appalachian Trail thru-hikers talk about these treats for days in advance of getting to Shenandoah and the hype is worth it.  However, their milkshake machine was broken and we had to settle for blackberry ice cream.  It was still a just reward for a long hike.

While we realize this hike is longer and not as popular as some of the others in the park, this hike really has some nice gems along the trail.  I was pleasantly surprised at what this had to offer!

Trail Notes

  • Distance – 9.5 miles
    (Check out the stats from Map My Hike)*
  • Elevation Change – About 2200 ft.
  • Difficulty – 3.5.  The climbs to Black Rock summit and Trayfoot Mountain can be a little steep, but the climb from Paine Run back to the parking area is very pleasant and gradual.  The length adds to the difficulty rating of this hike.
  • Trail Conditions – 4. The trail was clear and in great shape!
  • Views – 5.  The views from Black Rock summit are spectacular.  While the summit of Trayfoot Mountain has no view, there are other nice views from the Trayfoot Mountain trail – especially the outcropping that overlooks Buzzard Rock.
  • Streams/Waterfalls – 3.  Paine Run was surprisingly pretty and broad in the early spring.  As we hiked up the Paine Run trail, we had many stream crossings and nice views of the water.
  • Wildlife – 3.  We saw deer and lots of grouse on the trail.  We also saw a black bear shortly after leaving the parking area to come home!
  • Ease to Navigate – 4.  There are only a few, well-marked turns on this hike.
  • Solitude – 4.  We saw a few people near the stream that had come in from the western perimeter of the park, a few people on Black Rock Summit, and a trio of women on horses.  All-in-all, we enjoyed a lot of solitude for a long stretch of trail on a pretty ‘free park entry’ day!

Download a Trail Map (PDF)

Directions to trailhead: Located in the Southern Section of Shenandoah National Park.  Park at the Blackrock Gap parking lot around MM 87.3.  Cross the road and find the cement post for the Appalachian Trail.  Take a left, heading north, to start your hike.

MapMyHike is not necessarily accurate, as the GPS signal fades in and out – but it still provides some fun and interesting information.

Rocky Mount

The full Rocky Mount lariat is known as one of the Shenandoah’s most punishing hikes, but if you do it as an out-and-back (like us!), you get a moderate 6.8 mile hike with great views and a lot of solitude! Our route eliminates the less scenic Gap Run Trail on the back side of the mountain.

UPDATE: NEW PHOTOS FROM THE 2016 ROCKY MOUNT WILDFIRE

View the Full Album of Photos From This Hike

View from Rocky Mount
Adam takes in the view from the summit of Rocky Mount. Below: A view of Rocky Mount from the parking area on Skyline Drive; Wild violets along the trail; Adam walks through the mountain laurel.

Rocky Mount From Skyline Drive Violets Walking through Mountain Laurel

Adam Says…

We’ve covered most of Shenandoah National Park already – there aren’t many trails we haven’t written about! But, Christine did some research and found a hike we hadn’t done yet. We entered the park at Swift Run Gap.  We needed to buy a new annual pass, since ours had expired.  The park ranger asked where we were going and we said, “Rocky Mount”.  She looked at us with a disapproving pause and questioned why we would want to do that one.  Christine told her we had covered most of the rest of the Park and the ranger just handed back our pass with a shake of her head.  After leaving the fee station, we began to wonder how tough this hike really was.  We had heard it was one of the toughest in the park due to the elevation gain split over several tough climbs.   Most of the reviews we read were based on the Rocky Mount-Gap Run lariat loop which incorporates the Gap Run Trail. The back side of the mountain, which uses the Gap Run Trail, is repeatedly described as very steep and lacking in any  noteworthy scenery. So, we decided to do this one as an out-and-back hike that hit the big view payoffs.

The weather was quite warm based on what we had grown accustomed to during the cold winter.  The temperature was already in the 60s and it was barely 9:00 a.m.  We parked at the Twomile Run Overlook and then walked north for a short distance.  After the barrier wall ended on the western side of the road, we saw the concrete post on the left which marked the beginning of the blue-blazed Rocky Mount trail.  The trail begins with mostly descending through the woods.  You drop down about 700 feet (some level sections, some steep sections) until you reach the junction with the Gap Run Trail at 2.2 miles.  We stayed straight at this point and began a steeper ascent.  The trail climbs along a path that wraps around Rocky Mount, leading to a few (mostly obstructed) views along the way.  At 3.4 miles, the climb ends near the summit and you can see a short side path to the left leading to a rock outcropping.  Here is where the best views on the mountain can be seen.

View of Rocky Mount
Adam takes in a view of Rocky Mount through the trees.

We paused for a while to take some photos and eat some lunch.  However, there were biting bugs that were trying to eat me alive. It took away from the experience! After swatting and flailing like a man possessed, I covered my body in DEET.  Those insects were probably drooling over their first available human meal after months of starvation.  For some reason, they preferred me over Christine, who got quite a chuckle over my melodramatic gesticulations.  One thing that I don’t like about hot weather hiking are the insects.  Hopefully this isn’t a sign of what’s to come for the rest of the warm season.  We headed back the way we came, arriving back at the junction with the Gap Run Trail at 4.7 miles.  The trail then starts a rather long climb back up.  We finished the climb and got back to the trailhead to make the out-and-back trip 6.6 miles.

Christine Says…

An out-and-back route was the perfect way to tackle Rocky Mount – we enjoyed all of the views and suffered none of the slogging!  Certainly, there are some folks who like tough climbing and don’t need spectacular scenery to have an excellent day on the trail.  I’m not one of those people!  If I’m going to have a great time a tough hike – there must be views or waterfalls or a near 100% guarantee of seeing wildlife.   Don’t get me wrong, I love the cardio challenge.  It’s just not enough to make me endorse a hike as a must-do hike.

Nearing the Summit
The trail gets rockier near the summit. Below: Trail junction with Gap Run; Views from the trail – sometimes we had nice views, sometimes they were tree obstructed; The summit of Rocky Mount.

Trail Junction View Through the Trees Wilderness View

The day we hiked Rocky Mount was unseasonably warm.  I loved being back in shorts and a tank top again!  My mom always tells me that I should wear long sleeves and long pants to avoid ticks, but honestly the only ticks I’ve ever found attached to me have been on days that I DID wear full-coverage clothing and repellent.  I think it’s just easier to spot ticks moving on bare skin and flick them off before they attach.  I’ve also had good luck with using a combination of DEET and treating my clothing with permethrin.  Ticks are such a huge problem in our part of Virginia, and the recent increase in cases of Lyme disease is shocking and scary.  The threat isn’t enough to keep me off the trail, but I am definitely vigilant about preventative measures and doing thorough tick checks.  Typically, if you remove a tick within a few hours of it attaching, there isn’t time for Lyme disease to transmit into your blood stream. OK… end of my public service announcement!

Adam did a thorough job describing the terrain and distances.  I’ll just add that I found the ascents at both the middle and end of the hike to be fairly moderate.  They were probably a little tougher that day since we weren’t accustomed to the warmer weather yet.  It was in the low 80’s by the end of the hike.  The trail also had quite a bit of direct sun exposure.  The route will be shadier as the park gets leafier, but right now there is still a lot of light coming through the canopy.  I got a little bit of sunburn on my shoulders, but I was glad that the bare trees gave us views that we wouldn’t have been able to enjoy later in the season.

Walking Back
Christine enjoys views through the trees on the walk back.  Below: Adam takes in views; More views; pine needle covered trail.

Adam on the Summit Wilderness Piney Trail

We ate lunch on the rocky outcropping near the summit of Rocky Mount.  For whatever reason, the biting flies just weren’t bothering me.  Poor Adam – he’s not exaggerating when he describes his flailing.  He was pretty close to having a full insect-driven meltdown! After lunch, we returned the same way we came and headed back to our car.

Over the course of the hike, we didn’t see a single other hiker!  When we got back to the parking area, there was one guy who had just come off the trail, but he had done the loop in the opposite direction and our paths never crossed.   Rocky Mount is definitely one of the less-traveled trails in the park, but I think it is definitely worth doing.  I thought the views were well worth the climbs!  Ambitious hikers might enjoy the extra challenge of the mountain’s backside, but for me the 6.6 mile out-and-back was just right!

Trail Notes

  • Distance – 6.8 miles
  • Elevation Change – 1,937 ft.
  • Difficulty – 4.  The hike to the summit wasn’t too tough, but the return trip has a long, slogging uphill climb. 
  • Trail Conditions – The trail was well-maintained with only one blowdown on the entire trail.  The path was very clear and only covered by leaves in a few places. 
  • Views  4.  Great 180-degree views for miles from the rock outcropping.  
  • Streams/Waterfalls – 0. Nothing to report. 
  • Wildlife – 1. We didn’t see any wildlife on the trail, but we saw a ton of signs of either bobcat or coyote droppings on the trail.  Pressing forward from the summit, we did startle a hawk resting on a log. 
  • Ease to Navigate – 4.  As soon as you follow the trailhead, you just head straight on the Rocky Mount Trail.  The side path for the views at the rock outcropping isn’t marked, so it could be possible to just walk right past it. 
  • Solitude – 4.  We didn’t see anyone else on the trail, but at the trailhead we did run into a solo hiker that had finished the entire loop. 

Directions to trailhead:  In the Southern Section of Shenandoah National Park, park at the Twomile Run Overlook at MM 76.2.  Head north a short distance.  When you reach the end of the retaining wall, you’ll see the concrete post marking the trailhead (around MM 76.4) on the left (western) side of the road.

Fortune’s Cove Loop

This 5.1 mile loop hike is deceptively challenging.  Views and pleasant ridge walking are paired with some steep ascents and descents.

View the Full Album of Photos From This Hike

Fortune's Cove Views
Views from the Fortune’s Cove trail. Below: The preserve at Fortune’s Cove is operated by the Nature Conservancy; The trails are all well-marked and carry the Conservancy logo; Informational panel at the trailhead.

Nature Conservancy Nature Conservancy Trail Info

Christine Says…

Wow – the first weekend of April 2014 was GORGEOUS!  I think we (and every other hiker in Virginia) decided to hit the trails.  We tossed around the idea of going backpacking, but we just didn’t get our act together.  We perused our hiking book collection, a bunch of maps and several websites.  We settled on a hike we found on Hiking Upward – Fortune’s Cove.  It wasn’t a long drive from our house and looked like a good choice for early-season hiking.

We got to the trailhead parking lot right around 10:00 and found it jam-packed. There was one group of about 15 hikers getting ready to depart. I feel a little bad saying this, but I’m always a little deflated when I get someplace and find that we’re going to have lots of company on our hike.  We set out immediately, in hopes of putting a little distance between ourselves and the large group.  We hike quite a bit faster than most social groups, but the self-inflicted pressure to keep moving made me feel like I couldn’t pause to take photos.  I took most of my pictures while still walking, so they might be a little blurry or random.

Small Waterfall
We passed this small, but pretty, waterfall early in the hike.

We hiked the trail in the opposite direction of Hiking Upward.   In retrospect, I think I’d go the way their directions suggested – the ascent is longer, but more gradual.  We started our hike at the end of the parking lot with the informational bulletin board.  The trail actually starts from the main road, right before the turn-off to the parking lot.  Initially, the hike rambled along over rolling hills, climbing gradually uphill above the cove.  After crossing a small wooden footbridge over a creek, we were treated to a small but pretty waterfall.  After the waterfall the hike followed a series of switchbacks uphill. We eventually crossed a fire road and continued a short flat section of trail.  Soon, we  reached a junction.  At this point, you can take the shorter, easier Lower Loop around the cove, or follow the challenging, longer Upper Loop.  We wanted views, so we went with the Upper Loop.  From the junction to the cell towers atop the high knob, the climbing was pretty brutal – I’m not going to lie.  Sometimes there were switchbacks to ease the ascent, but other times the trail went straight up the mountainside.  We were still hiking hard to stay ahead of the group, so I was very relieved when the towers came into view through the trees. The climb was almost DONE!

Near the towers, the trail comes to another junction.  One spur leads to the tower and several decent views (although – the presence of towers really does detract from the beauty of the views).  The other direction continues to follow the Upper Loop trail around the perimeter of the cove. The remainder of the loop is rolling hills and ridge walking. There are several big descents and a couple short, steep ascents, but all the tough uphill is behind you at this point.  We chose to have lunch at the first little rocky outcropping with views.  It was nice to see Wintergreen and The Priest through a few (still bare) trees.  There was a ton of mountain laurel on the back half of this hike.  It should be beautiful in late May – early June!

Steep Uphill
Adam traverses steps on one of the steeper uphill sections. Below: the trail junction of the Upper and Lower Loop Trails; Adam approaches the towers at the high point of the hike; The views from the tower area are decent, but a little obstructed by trees.

Well-Marked Junction Cell Towers Views Near Tower

Some of the downhill on the back loop was very steep and covered with deep, slick, dry leaves.  We were both really thankful to have trekking poles.  We continued to enjoy occasional views, mostly looking into the cove, as the hike progressed.  At one point, we were hiking along in companionable silence, when suddenly a large German Shepherd bounded in our direction, barking loudly – fortunately he was friendly.  It turned out that a couple of hikers had two unleashed dogs on the trail.  We love dogs, but they’re not allowed in Fortune’s Cove. The restriction is clearly marked at trail entries and the rules are posted online, so please leave your dog home!

Eventually the Upper Loop and Lower Loop met back up at the final trail junction of the hike.  The last bit of the hike was fairly consistent, knee-grinding downhill. Adam asked me to hike in front of him, so he could ‘grimace in pain’ in the rear.  I was hiking along, when out of the blue, Adam bellowed and shouted.  At first I thought he hurt himself, but it turned out that a gigantic black snake had just slithered across his feet.  The thing was easily five feet long. I love snakes – Adam is less fond.

Through the trees, we could see our car in the parking lot drawing closer and closer.  We walked the last little bit of trail, enjoying the budding and blossoming trees at the lower elevations.  We saw cherry, redbud and pear all starting to flower.  It was a great hike for a pretty spring day.

Views on the Descent
There were nice views through the trees on the descent. Below: Our lunch spot; Abundant mountain laurel, Nice mountain views.

Lunch Spot  Abundant Mountain Laurel Mountain Views

Adam Says…

Fortune’s Cove Preserve consists of 755 acres that was donated by Jane Heyward to The Nature Conservancy.  The staff and volunteers help maintain this land and hiking trails.

As Christine mentioned, when we arrived at Fortune’s Cove, there were a ton of cars in the parking lot and a bunch of hikers ready to hit the trail.  I told Christine “Grab your stuff quickly and let’s get going.”  We didn’t want to experience this hike with a larger group and having to play leapfrog up the trail as we stop to take pictures.  I know that some people like to meet new people and enjoy the outdoors as a group, but we tend to hike with just the two of us or just another couple of people.  When we took our first pause for photos, we could see the group approaching, so we rushed ahead.  In fact, I would say we ascended the trail much faster than normal so we could stop to take photos at all.  Since this was one of our first hike with real elevation change in a while, we probably pushed ourselves harder than we wanted.

Looking into the Cove
From the ridge, you could see the winding road through the cove. Below:  More views on the way down; Blooming bloodroot; Redbuds are started to bloom, too!

Downhill Views Wildflowers Blooming Redbuds

From the parking lot and behind the large trail map of the preserve, we walked up the road about 20 yards and then saw the trail sign on the right of the road that marked the start of the trail.  The yellow-blazed trail starts off on a small ascent through a serene, wooded area.  You can see glimpses of the farmland to the right of the trail as you skirt around the property.  Eventually you will cross a couple of bridges over some creek beds and see a small, yet picturesque waterfall along the lefthand side of the trail around .75 miles.  Continuing from this point, the trail starts a more steady ascent.  At 1.1 miles, you reach the intersection with the white-blazed lower loop trail.  We took the upper loop trail, which had a warning sign for the steepness of the trail.  This truly was no joke as the trail had us slogging up the mountainside.   At 2.25 miles, we finally reached the top summit.  There was a small trail (only a tenth of a mile) to the left which led to the top of High Top Mountain, which had a large cell tower at the top.  The view was obstructed around us and being near a large tower didn’t make us feel like we were getting away to nature.  We rejoined the upper loop trail and continued on our hike.  We were now doing ridge-walking, so the toughest bit of climbing was behind us.  We took a brief rest to eat our packed lunch while seeing the obstructed views of The Priest and Wintergreen across the valley in front of us.

We pressed along the ridge hike, which quickly began to lead back down the mountain.  We were pleased to see there were several spots along the trail that led to some outcroppings of rocks with open views.  The views below sum up what I picture when I think of Central Virginia – rolling mountains and farm houses.  We continued down the steep trail, which had my knees feeling some pain.  At 4.4 miles, you reach another intersection with the white-blazed lower loop trail.  We continued down the mountain and made our way back to our car at 5.1 miles, passing through two blue posts before reaching the road and parking lot.

Fortune's Cove
The cove from the parking lot at the bottom. Below: Pear trees blooming; Blue Mountain Barrel House is just a few miles down Rt. 29; Beers!

Pear Blossoms Blue Mountain Barrel House Blue Mountain Barrel House Beers

After the hike, we decided we had earned a trip to the nearby Blue Mountain Barrel House to sample some beer and get a snack from the food truck located outside.  We enjoyed sitting outside with a few beers and were able to look out into the mountains on a gorgeous spring day.  If wine is more of your thing, you can get samples from March-November on Wednesday-Sunday afternoons at Mountain Cove Vineyards, Virginia’s oldest vineyard.

Trail Notes

  • Distance – 5.1 miles
    (Check out the stats from Map My Hike)*
  • Elevation Change – 1700 ft. (the big climb is about 1450, but once you add in all the little ups and downs, it’s closer to 1700)
  • Difficulty –  4.  There is some pretty serious climbing on this hike.  It surprised us how challenging it was!
  • Trail Conditions – 4.  The trail was in great shape in most places.  There were a couple mucky spots near drainage, and dry, fallen leaves made some of the descents slippery.
  • Views  3.  From the cell towers atop the High Knob to the junction with the Lower Loop, there are nice views in many spots along the trail.  Even though there are many views, we’ve marked this down to a 3 because most of the viewpoints are partially obstructed. 
  • Streams/Waterfalls – 2.  There is a small waterfall that probably only runs part of the year on the early part of this hike.
  • Wildlife – 2.  We didn’t see anything but a few birds and squirrels.  DOGS ARE NOT ALLOWED ON THIS PRESERVE!
  • Ease to Navigate – 5.  The trails on this preserve are more abundantly marked/blazed than almost any other place we’ve been.
  • Solitude –1.  We had heard this place wasn’t well known or popular, but on the day we went, we encountered a large group people hiking together (shout out to the PATC – Charlottesville Chapter) , plus about a dozen groups of 2-4 people.  It was a very busy day on the trail.  We’re not sure if this is the norm, but we’d give this hike low marks for solitude.

Download a Trail Map (PDF)

Directions to trailhead:  From Charlottesville, head south on US-29 for 28 miles.  Take a right on State Route 718.  Follow this for 1.6 miles and take a right on to State Route 651.  Follow this for 1.6 miles, passing Mountain Cove Vineyards on the right and then reaching the small parking lot.  The way we approached the route, was walk on the road past the large trail map board about 20 yards.  You’ll see the trail post to mark the start of the trail on the right side of the road.

MapMyHike is not necessarily accurate, as the GPS signal fades in and out – but it still provides some fun and interesting information.