This 9 mile hike’s distance could be cut in half if you have a car shuttle. When we hiked it, the Blue Ridge Parkway was closed for ice/snow, so we ended up parking at Reeds Gap, walking 4.8 miles on the Appalachian Trail and then walking 4.2 miles back along the closed parkway. Typically, this would be an easy hike with a couple nice views. In our case, it was a challenging icy hike in (occasional) white out conditions!
View the Full Album of Photos From This Hike


Adam Says…
As we slowly work on completing the entire Appalachian Trail through Virginia, we sometimes end up with small gaps in our contiguous miles. This 4.8 mile section was one of those and it was proving to be our nemesis. We had tried to share a shuttle with friends and park at both ends, but a closure of the parkway made those plans fall through.
Over our Christmas break from work, we tried to hike it by dropping Christine at one end and I would park at the other, passing in the middle, and then Christine hiking to the car and driving back to pick me up. It wasn’t preferable to do it this way because we like hiking together, but we really wanted to cover these miles. But on our way to the drop point, we saw several cars slide off the road (not far from a precipitous, cliff-side drop). Rain from the day before had left a thin sheen of ice on all the shady, curvy spots in the road.
One of the couples in a car that slid off the road was having a heated argument – he wanted to press on through the icy danger, but she wanted to call AAA and have the car towed off the mountain. We decided to backtrack and not risk it (especially not knowing the road conditions ahead), choosing to hike near Humpback Rocks instead. On our way to Humpback Rocks, we saw a park ranger making his way to the slippery road patch. They ended up closing the parkway just south of Humpback Rocks that day. The parkway closes quite often in the winter. Rangers would rather close the roads than risk having to come up and save people on the trails/roads when weather conditions could make it difficult.


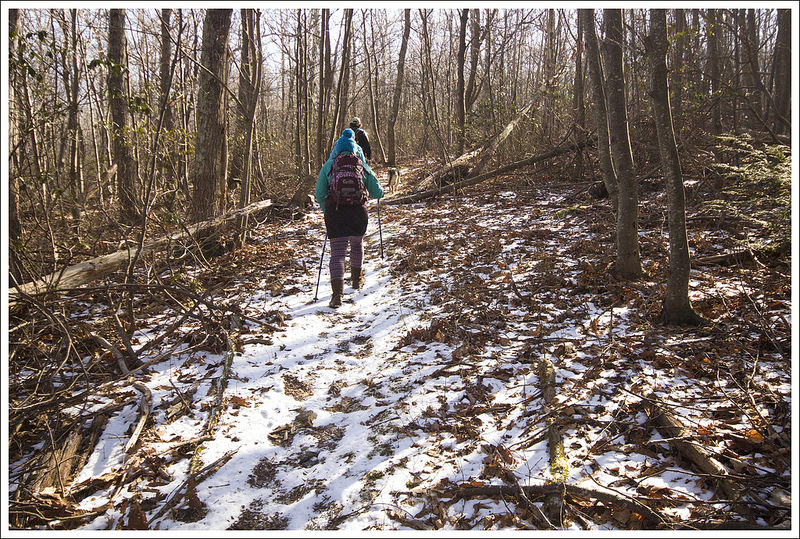
After those failed attempts, we decided to try this section again. The weather forecast suggested a warming, clearing day, no snow in the near future. There had been a short bout of freezing rain the night before, so we were a little concerned about roads, but we knew we could at least make it to Reeds Gap and hike from there. When we arrived at Reeds Gap, we found a few other cars there, but it looked like they were attempting to hike Three Ridges. We found the sign for the Appalachian Trail and crossed SR 664 to head north on the white-blazed Appalachian Trail. I was amazed at how icy the ground still was. It was manageable in normal hiking shoes, but still slippery in parts. Every step that I took left an icy footprint behind me, which made the trail look like an old Family Circus comic strip. At the least, they were good breadcrumbs left in case we needed to backtrack on the trail. Some of the branches from nearby trees were iced over and bowed over the trail, causing us to have to lift them over the trail. Some broken off pieces looked like broken antlers littering the ground.
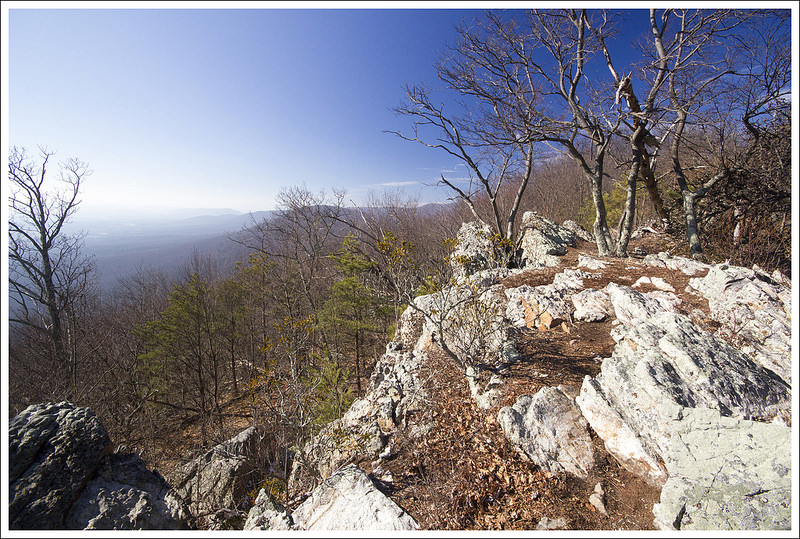
After going about .5 miles, the Appalachian Trail crosses the Blue Ridge Parkway. At this point, the trail descended through some slippery areas, so we decided to put on our Yaktrax to provide some traction. I don’t know how we would have made progress without them. After going just another mile or so, it started to snow. At first, it was just a few flurries, but it was picking up. At 3.5 miles, we came to a sign pointing out a short trail to the Rock Point Overlook. The snow was coming down so fast at this point, visibility was at a minimum. We ate a quick snack and then proceeded. At 4.35 miles, we arrived at the Cedar Cliffs overlook. The snow had been falling so hard, it was hard to find the trail. It was at this point, I realized that hiking along the AT in the snow wasn’t the best idea – all the trees were covered with snow, covering up any white blazes that would have been on the trees. We were so close to finishing this section and didn’t want to turn back at this point. I had Christine stand in one area that we knew was close to the trail and within eyesight while I scouted ahead to try and find a semblance of trail under our feet. Eventually, I found the trail again and we proceeded.


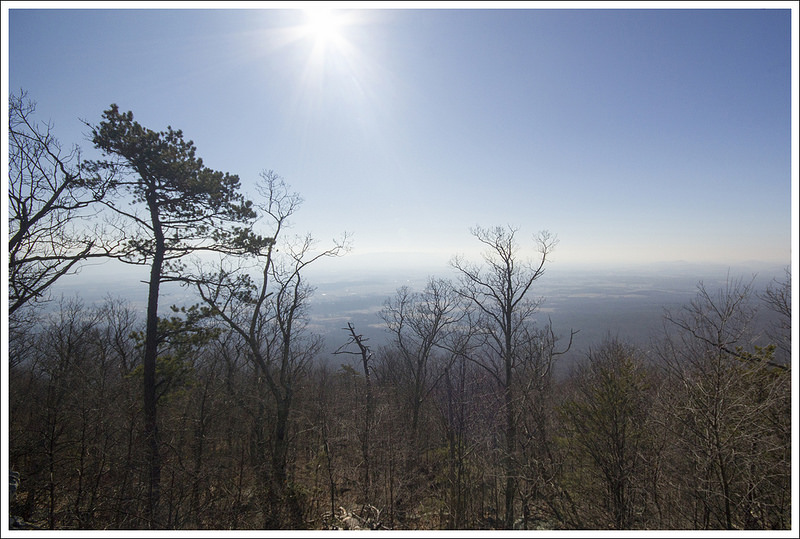
I started to worry at this point about being able to drive back down from the mountain if the roads were going to be bad. We made a decision that when we reached the road, we would hike back along the Blue Ridge Parkway to hopefully save time and get us back to our car more quickly. At 4.85 miles, we arrived back at the Blue Ridge Parkway. We took a right and headed south along the parkway and we were soon very glad we had made this decision. We came across some great views at overlooks along the road that we didn’t have along the trail. And then the snow stopped and the sun came out to start melting the snow, which eased my nerves. The views were outstanding on the way back as we could see a defining line of snow that had hit the mountains and clear fields at the lower elevations.
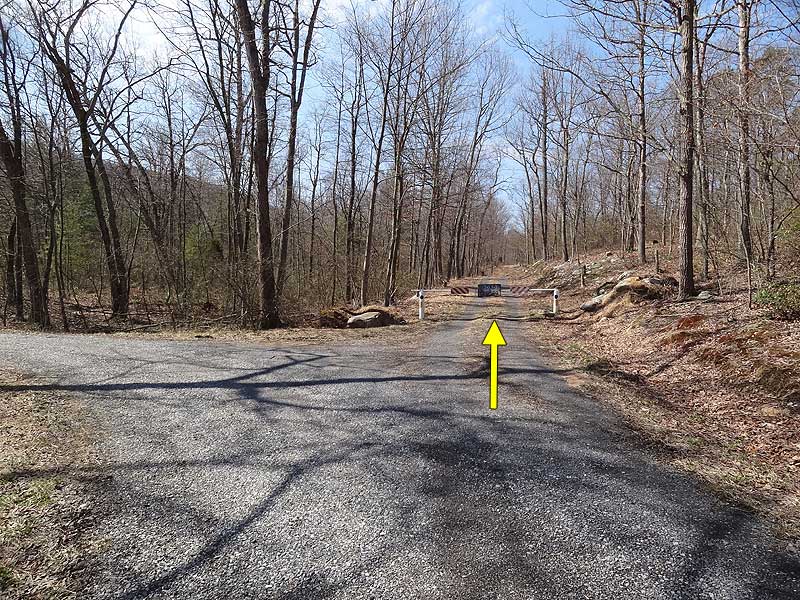
While this hike had a little bit of danger due to the weather, it was a visual winter wonderland. This is the definition of winter hiking. We arrived back at the gate that was blocking the parkway at 9.0 miles and got back in our car. We decided to hit Devil’s Backbone on our return trip home and then also stopped at some other Nelson County 151 highlights – Bold Rock Cider’s new tasting room and Silverback Distillery. It really was a great adventure and it made me feel very lucky to have a wife that will go on such crazy undertakings with me.
NOTE: From research we have done, the starting point is called “Reeds Gap” in some sources and “Reids Gap” in others. We went with the first spelling since that was how it was listed on PATC and NatGeo maps.
Christine Says…
Finishing this little 4.9 section of AT turned out to be more elusive than I ever would have believed possible. After a few attempts failed due to snow/ice, closed roads, and transportation problems, we finally successfully hiked from Reeds Gap to Dripping Rock!
On the day we accomplished this minor feat, conditions weren’t quite ideal. There had been a bit of freezing rain the night before, but the weather was forecast to warm and clear over the course of the morning. The Blue Ridge Parkway was still closed, so we couldn’t leave a shuttle-back car at Dripping Rock. This wasn’t a big deal – instead of hiking 4.9 miles once, we’d have to hike those same miles twice, making a total hike of almost ten miles. We left our car in the roadside parking on Route 664, next to the Appalachian Trail crossing. Route 664 (Reed’s Gap Rd.) crosses the Blue Ridge Parkway and is kept open year-round.
At Reeds Gap, everything upright was coated with a thick glaze of ice. It was foggy and gray and raw. We headed north on the AT, our feet crunching though the crust of ice. It was so peaceful and beautiful.


The Appalachian Trail soon crossed the Blue Ridge Parkway at the Three Ridges Overlook. The asphalt was like a skating rink! It looked like regular pavement, but it was as slick as a slip-and-slide. I could totally understand why the park service closed the road!
After crossing, there was a slight descent and the terrain became a little rockier. I started to lose my footing, so Adam helped me into my traction. The ice wasn’t thick enough or hard enough for Microspikes, so we went with Yaktrax. Mine are a touch too small for my boots, so getting them on is a two person effort. I brace on a rock and Adam yanks the Yaktrax with all his might until they snap into place! One day, I’ll buy some bigger ones. 🙂 Fitted with traction, we moved swiftly along with sure, confident footing. Snow started falling – flurries at first, then in earnest. It wasn’t supposed to snow, so we trekked on hoping the skies would soon clear up (like they were supposed to!) Ah… mountain weather at its unpredictable best!
We reached a small sign pointing us to the Rock Point Overlook. As we looked off the rocky outcropping, all we could see was clouds and swirling snow. Every now and then the clouds moved enough that we could see mountains on the other side of the gap. We ate a quick snack and moved on. The snow just kept coming down faster and faster. We started feeling a little worried about getting back to our car and finding Route 664 impassable.


In fair weather, there are more nice views along this stretch of the Appalachian Trail, but by the time we reached the vistas at Cedar Cliffs, we were practically in whiteout conditions. The white snow even camouflaged the white blazes on the trees. It was too bad, Cedar Cliffs had large rock ledges and would have been beautiful in clear conditions. About a half mile past the cliffs, we reached the Blue Ridge Parkway and the pullout for Dripping Rock Spring. We made it – we finished our section! At that point, the snow was still coming down hard and fast. To save time, we had decided to hike the parkway back to our car. It’s easy to move at speed when the terrain is uncomplicated. We still needed traction because the road was extremely slippery and treacherous.
It turned out that the road was the better choice for scenery, too! We saw some of the most spectacular winter vistas from Rock Point, Ravens Roost, and other openings along the way. I felt really privileged to see this scenery that most people don’t get to see when the road is closed to vehicles. As we hiked along, the promised clearing conditions finally happened. The ice on the road melted quickly and we were treated to a stunning display of sunshine and ice – it was like walking through a shimmering crystal forest.

We got back to our car pretty quickly and found the car and the road both free of ice! We headed down the other side of Route 664 (past Wintergreen Resort) to go to Devil’s Backbone for lunch. The brewery was packed! All the other women there were wearing makeup, skinny jeans, and tall boots. I was sweaty, disheveled, and dressed sort of like Rainbow Brite. But whatever… they had (after an hour’s wait) beer and good food.
We decided to take the 151 route home so we could pass Bold Rock and Silverback. Bold Rock recently finished their new tasting room. It’s rustic and elegant – with fireplaces and wonderful farmland views. After beers at Devils Backbone, we skipped drinking cider, but I’m glad we took the time to check out their new facilities.
Silverback is the area’s new distillery. They’ll eventually have whiskey made using local grains. But for now, they have moonshine, gin, and vodka. You can do a flight of tastings of their three spirits – a half ounce of each, either straight or mixed into signature cocktails. We ended up sharing a flight of three mini cocktails – a Moscow Mule, a Gin and Ginger, and Monkey Tea. I’m not much of a liquor/cocktail fan, but the drinks were fun and tasty. I definitely recommend checking these two spots out if you happen to be in the area!


Trail Notes
- Distance – 9 miles
(Check out the stats from Map My Hike)* - Elevation Change – 1050 ft.
- Difficulty – 2. The icy conditions made it more of a challenge, but overall this would be a fairly easy hike with not as much elevation gain. The distance may make it a little more difficult for those that are not used to going this far.
- Trail Conditions – 3.5. Again, the ice made this a bit more challenging, but this section of the AT was very well-maintained. There were a few loose, rocky sections.
- Views – 4.5. Most of what we were able to see was from the parkway, but I know the other overlooks would lead to panoramic views.
- Streams/Waterfalls – 1. There was one small, frozen over stream that might work as a water source.
- Wildlife – 1. We saw lots of deer leaping into the woods, but I wouldn’t expect a lot of other wildlife, especially since this is a well-traveled section.
- Ease to Navigate – 4. Just follow signs at the posts for the Appalachian Trail. Of course, since we lost the trail at one of the overlooks, we couldn’t give this a perfect score.
- Solitude – 3. Due to the nearby parking lot, I would expect this would be a place where people would explore the trail. Of course, most of the cars in the nearby parking lot are likely heading up Three Ridges from Reeds Gap instead.
Download a Trail Map (PDF)
Directions to trailhead: From I-64, take exit 96 for SR 624 toward Waynesboro/Lyndhurst. Turn on to S. Delphine Avenue and go 1.2 miles. The road becomes Mt. Torrey Road/SR 664. In 9.3 miles, turn left to stay on SR 664. Once you reach the top of the road in .8 miles, you will cross the Blue Ridge Parkway. Park at the large parking lot on the other side of the road. Across from the parking lot (and across SR 664), you will see the post and sign for the Appalachian Trail. Head north on the white-blazed trail.
* MapMyHike is not necessarily accurate, as the GPS signal fades in and out – but it still provides some fun and interesting information.


