Greenbrier River Trail – Cass to Marlinton (WV)

The Greenbrier River Trail is a rails-to-trails bike path that meanders 78 miles along the Greenbrier River in West Virginia. This portion we biked was about 25 miles from Cass to the little town of Marlinton.

Biking the Greenbrier River Trail
Adam crosses Sharps Bridge on the Greenbrier River Trail. Below:  Due to drought conditions, the Greenbrier River was very low;  Trail signs mark each entry to the trail; The Clover Lick Depot is one of the old train stops you’ll pass on the trail.

Adam on the River Greenbrier River Trail Sign with Bike Clover Lick Depot

Adam Says…

Our main reason for staying around the Marlinton, WV area was to do some biking on the Greenbrier River trail.  A few friends of mine that had done the Virginia Creeper Trail told me that we should do the Greenbrier River Trail sometime.  The trail was very similar to the Virginia Creeper.  They are both rails-to-trails biking trails and don’t take a ton of cardio effort or biking skills to complete.  The scenery may have been a little nicer along the Virginia Creeper; with mountain views and lots of bridges and trestles. However, the Greenbrier trail lacks the dense crowds that you find on the Virginia Creeper.  You’ll have lots of solitude on this trail, but there are also fewer amenities along the way (other than occasional restrooms at campsites).  Christine and I really enjoy the solitude more than anything, so it was great to get away for a nice, quiet, long bike ride.

We started our day with a car shuttle up to the northern terminus of the trail near Cass, WV.  We arranged the shuttle through Appalachian Sport.  We were the only people signed up for the shuttle, so we were able to arrange our own time.  It was nice to talk to our driver (wish we caught his name) about his impressions of the trail.  He was actually the one that gave us the news that JMU beat Virginia Tech in football.  We had been completely “off the grid” for a few days without any cellphone service, TV, or internet. We actually thought he was joking the first time he told us that JMU won.

Low Water Levels on the Greenbrier River
Water levels were very low on the Greenbrier River.  Below:  The trail follows the river for almost all of its 78 miles; Adam bikes along the crushed stone trail; A view of the lovely river.

The Greenbrier River Trail follows the river. Biking Along the Trail Greenbrier River Scenery

He frequently runs on the trail and told us about his goal to organize a Greenbrier River Challenge t0 raise funds with sponsorships for people to run the entire length of the trail.  A friend of mine from work is one of the few known people to run the entire trail in a single effort (I think he and a couple friends did all 78 miles in a little over 16 hours).  Our shuttle driver also told us that many people find the area between Cass and Marlinton to be the prettiest, but he thinks the entire trail is nice (with the exception of the more populated area between Marlinton and Seebert).

After being dropped off in the parking lot at the Northern Terminus of Slabtown (.5 miles from the town of Cass, WV), we got our gear together and headed down the trail.  Mile markers are posted along the way to help you plan your distance along the trail.  There are also slabs with the letter “W” along the trail, which were used by railroad engineers to know when to blow the whistle when they were approaching road crossings.  The first notable stop along the way is about 9.4 miles in when you reach the Clover Lick Depot.  This depot was built in the early 1900s and was recently renovated.  At mile 14.6, you will reach the Sharp’s tunnel and bridge.  The tunnel is 511 feet long and the bridge immediately after the tunnel is 229 feet long.  If you’re interested in parking your bike for a brief rest, right before the entrance to the tunnel there is a path to the left that leads down to the riverside. There is also a steep, slippery path up to the top of the tunnel for the more adventurous.  At mile 23.9, you will reach the water tank on the outskirts of Marlinton.  Shortly after you pass the water tank , you will reach the Marlinton Depot at mile 24.3.  The depot burned to the ground in 2008 and there are plans to have it rebuilt.  You can then bike a short distance back to where you left your vehicle.

Sharps Tunnel
The Sharps Tunnel is dark and deep!  Below:  Adam stands atop the tunnel entry;  By mid-day, big puffy clouds breezed into the sky.

Adam on top the Tunnel Entry Pretty Clouds Over the Greenbrier River

If you are interested in doing any geoaching along the bike trail, you can find a few along the way:

We definitely enjoyed our ride on the trail and I hope to come back at some point to try out some other sections of this trail.

Christine Says…

We had a great bike ride along the Greenbrier River Trail (GRT)!  I already can’t wait to go back and bike the remaining 53 miles.  Rails-to-trails riding is so pleasant and leisurely.  I love not having to worry about cars running me off the road.

If you’re going to bike a segment of the GRT, definitely look into arranging a shuttle. Typically, you leave your car at the end point, and the shuttle ferries you and your bikes to your start point. This allows you to bike a long section without having to retrace the trail to get back to your car.  You can also take your time exploring because you don’t have a set time to meet your ride at the end of your trip.  Shuttle companies are also a great source for trail tips – where to camp, where to eat, places to stop for water, etc.  We used Appalachian Sport, but there are several other shuttle companies in the area.

A View of Sharps Bridge
A View of Sharps Bridge.  Can you spot Christine on the trestle?  Below: A primitive campsite along the trail; Adam drives the old wagon; A few early hints of fall were evident in the trees along the trail.

Campsite Along the Trail Adam Driving the Old Wagon Biking Along

We met our shuttle at 8:30, loaded up our bikes and headed off on our 45-minute van ride to Cass.  The morning was still cool with thick mist lifting off the river.  Fall is definitely in the air!  We passed through Cass Scenic Railroad State Park on our way to the northern end of the GRT. Cass is near Snowshoe Mountain.  The area offers so many options for outdoor fun – skiing, mountain biking, canoeing, scenic railroads, fishing, hiking, etc.

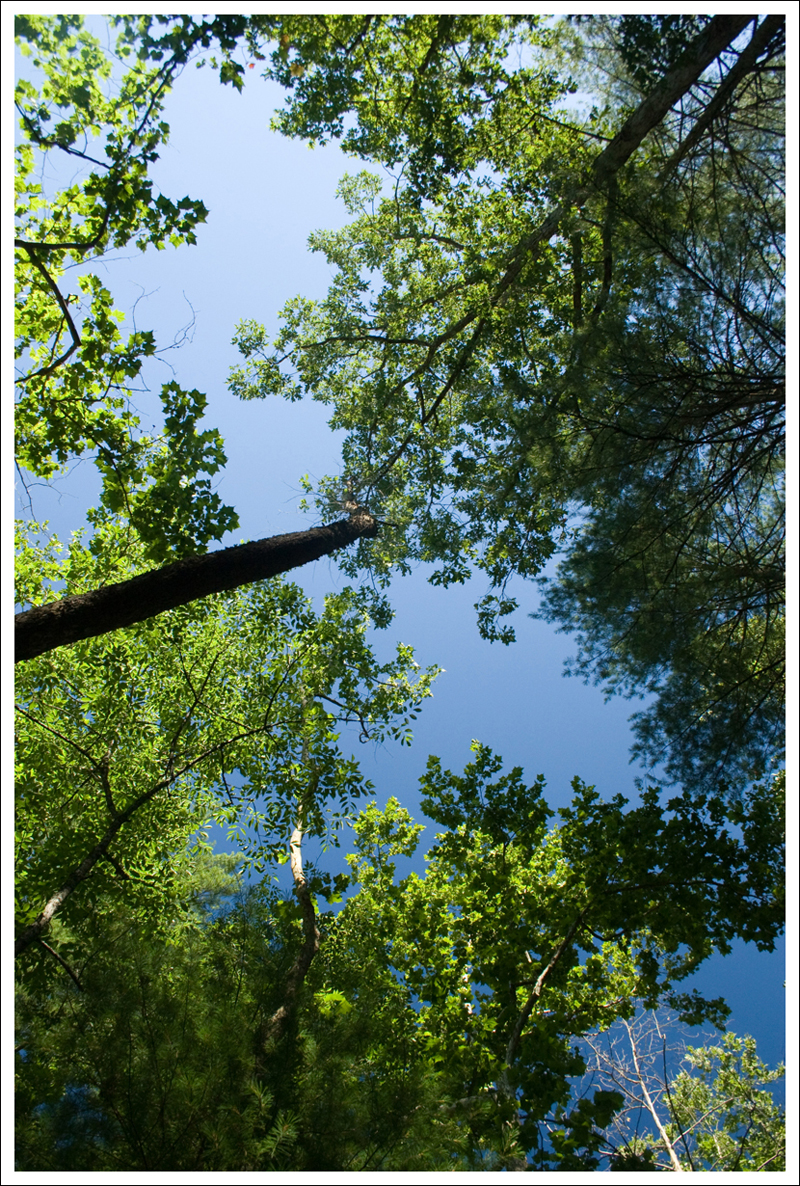
By 9:30, we were off and pedaling along the trail.  For several miles, we followed along the river – no sign of roads, people or houses.  It was wonderful!  The river was really low, but it was still gorgeous.  Every now and then, a deer would bound across the trail or go splashing across the river.  The fog burned off and opened up to crystalline clear blue skies – not a cloud in site.  Early splashes of fall color were already evident in the trees along the trail.

We passed a couple trailside campsites.  The GRT is also popular with equestrians, so campsites all included hitching posts. If I still had my horse, this would definitely be a dream ride!  Several of the campsites even had privies.

Occasionally, the trail passes by developed areas.  But “development” in this section of West Virginia usually means a few houses clustered along a quiet country road.  We passed a barn with equestrian services advertised on the building side.  They also had an old horse cart that Adam couldn’t resist.  We passed the Clover Lick Depot.  I think this area was probably a lot busier when the train was still running.  The depot building was really cute and had recently been restored.  Sadly, it’s not being used for anything.  I bet it would make a great trailside gift and snack shop, but I also bet it would be nearly impossible for a shop to stay in business along the GRT.  In the entire 25 miles we biked, I think we saw 6 people all day long.  With such low traffic, amenities will never spring up along this trail like they have along the Virginia Creeper.

One of my favorite things we passed along – or shall I say through – was the old Sharps Tunnel.  When we arrived at the tunnel opening, Adam scrambled up the hill to the top of the tunnel opening.  You can smell the inside of the mountain emanating from the tunnel.  It’s a hard smell to describe – the best I can describe is like a cool wind carrying the scent of tar, dampness and earth.  The tunnel is over 500 feet long and follows a curve.  This means that there is a section in the middle where there is absolutely no ambient light.  It is 100% completely pitch black and eerie as the grave.  For a few moments, I lost all sense of up, down, forward and backward.  It was like biking in space!  I shrieked with a mix of fear and giddiness until my bike hit light again.  It was really fun, but if you’re afraid of the dark or an uncertain biker, you might want to have a light on your bike or carry a headlamp in your bag.

There were a bunch of state park employees eating lunch on the other side of the tunnel.  I think they all heard me screaming in the tunnel, because they looked at me oddly.  Oh well…  I hope they were entertained.  As soon as you come out of the tunnel, you pass over the Sharps Bridge, which crosses the Greenbrier River on a tall trestle.

Baby Chipmunk
We spotted a couple of frightened baby chipmunks along the trail.  Below: Another view of Sharps Bridge; the Greenbrier River; The other baby chipmunk we spotted.  I hope they survived.

Another look at the trestle and Sharps Bridge Greenbrier River View The other chipmunk

Shortly after crossing the bridge, I saw a tiny animal dart across the trail – barely missing Adam’s bike wheels.  It was as small as a field mouse.  I braked when I saw the tiny creature still sitting along the trailside.  It turned out to be a tiny baby chipmunk.  It was too young to be away from the nest, and the mother chipmunk was nowhere in site.  We made sure the little guy was safely off the trail and headed on our way.  As Adam was walking back to his bike, he almost stepped on another baby chipmunk.  This one was sitting in the middle of the trail, trembling in fear.  We made sure the other chipmunk was safely off the trail and nestled under some leaves before we biked on.  I hope those little chipmunks somehow found some way to survive.  😦

Chipmunks and deer were not the only wildlife we saw along the way.  We also saw a couple different kinds of snakes.  One snake was the largest black snake I’ve ever seen!  He was lying half on and half off the trail, clearly in a state of torpor from the chilly weather.  At first, I thought it was a toy rubber snake that someone had tossed along the trail.  It didn’t move at all when I nudged it with a stick.  I pushed it again, and I noticed the body slowly constricting.  The stick I had was an old fallen tree branch – about eight feet long.  I pushed the snake again to get it off the trail, but this time the snake completely coiled up; raising its upper body off the ground and flicking its tongue at me.  He was still really slow and stiff, but definitely awake! Adam, who was sitting on his bike 50 feet away, wanted nothing to do with the snake at all.  Finally, I managed to push the snake completely off the trail into the grass.  Hopefully, he slithered away when the sunshine of the day warmed him up.  Later in the day, we saw another snake basking in the sun in the middle of the trail, but he moved out of the way really quickly.

Huge Black Snake
We saw this sleepy (but angry) black snake on the trail. Below:  Near Marlinton, we saw old farm buildings and fields; The old water tank;  The burned Marlinton depot; Adam checks out the inside of the train.

Old Farm Building Water Tank near Marlinton
Burned Marlinton Depot Adam Checks out the Train

The last few miles of the trail passed through more open terrain.  We saw fields and old abandoned farm buildings.  Shortly thereafter, we passed a huge water tank – the only one left standing along the trail.  Trains used to stop at this spot to fill up.  By the time you get to the water tank, the GRT switches from a crushed stone surface to paved.  The paved section is about five miles long.

In a few minutes, we were back in Marlinton at the old train depot.  The depot used to be the town visitor’s center, but as Adam mentioned, it burned down a few years ago.  We took a few minutes to climb aboard the old train car at the depot before heading back to our car.

After loading up, we had a delicious lunch at the Greenbrier Grille.  They had great sandwiches (I recommend the Steak & Mozzarella!) and a lovely deck overlooking the river.  We ate lunch to the sound of honking ducks in the river below.  The restaurant has a large menu of homemade desserts, but we were too full from the sandwiches.

The next day, we were on our way back to Virginia, but we’ll definitely be visiting Pocahontas County again!

Trail Notes

  • Distance – 24.3 miles
  • Elevation Change – Negligible.  Hardly any elevation change.
  • Difficulty – 2. While the biking is not difficult, the distance might be a little much for some people.  Hiking or biking it should be fairly easy.
  • Trail Conditions – 4.5 The trail is very well-maintained.
  • Views3.  The trail is scenic through most of the trail with views of the river most of the time.
  • Waterfalls/streams – 2. The path runs along Wilson Creek for part of the trip and the Greenbrier River for most of the trip.
  • Wildlife – 2.5 We saw deer a few times on the trail and in the river.  We also spotted some baby chipmunks, a blue heron, a couple snakes and some geese.
  • Ease to Navigate – 4.5. Just stay on the bike trail.  A few spots run parallel with other driveways/roads, but you shouldn’t have trouble if you stay on the trail.
  • Solitude – 3.  We were surprised with how few people were on the trail biking.  I think we only saw 6 people biking on the trail the entire day.

Directions to trailhead: The actual trailhead is located off Route 66/Back Mountain Road near Cass, WV.  There are clear signs to direct you to the trail.

View a Google Map of the Route

Falls of Hills Creek (WV)

The Falls of Hills Creek is a popular trail that (should) give you views of three plunging waterfalls in a short distance.  The trail is in need of some serious maintenance, as the lower – and most impressive – falls are completely inaccessible due to a collapsed boardwalk (as of fall 2010).

Bridge Over Hills Creek
While the waterfalls were practically non-existent due to very little rain for the past few months, the trail was still pretty. Below: We climbed many stairs and saw very little waterfall action; the Middle Falls were practically dry – the Upper Falls were completely dry and we didn’t even bother with photos; The path was scattered with fall leaves.

Many Stairs Middle Falls Path

Adam Says…

In planning our trip down to West Virginia, we had seen great pictures of the Falls of Hills Creek and thought it would be worth checking out.

The trail starts from the parking lot on a paved path and begins to descend.  The trail winds around while it descends.  At .3 miles, you come to your first overlook of the 25 foot Upper Falls.  You can’t really get great looks of the falls from the overlook, but we could tell there was not a lot of water flowing.  After this overlook, the trail continues on crushed gravel.  At .5 miles, you will come to an overlook that gives you nice views of the 45 foot Middle Falls from above.

Metal Steps
Many metal stairs lead to the lower viewing point for the middle falls. Below: Benches are available along the way if you need a rest; We saw a newt on the damp pathway; BUMMER!  The trail is closed off before we even get a view of the waterfall.

Bench Newt Bummer!

After you leave the platform, you will descend a metal stairwell that goes down several flights.  At the bottom of the stairwell, the trail continues on a boardwalk.  To the right is a short boardwalk path that gives you nice views of the Middle Falls from the bottom of the falls.  Go back up the boardwalk and take the path straight ahead that leads to the view to the Lower Falls.  Unfortunately, there has been some damage from last year’s winter storm on this last section of the trail, so the boardwalk was closed.  Even though the Lower Falls are supposed to be the most impressive with a 63 feet drop, we weren’t able to get to a place to see them.  Return the way that you came to complete the 1.8 mile out-and-back.  The way back includes a lot of stair climbing, so you will get a workout.

There are two geocaches located here:

The dry summer for the last month really hurt our ability to see these falls at the most impressive.  I’m guessing that the work on the Lower Falls will not be completed until the spring/summer of 2011 (at the earliest), so I would wait until this is done to visit this series.  The Lower Falls are considered the second highest cataract falls in West Virginia.

Christine Says…

I’m a little ambivalent about including this hike on our blog because I don’t feel like we saw what the hike really has to offer. It’s hard to be enthusiastic and share information about a waterfall hike when the waterfalls are mostly dry, and one is not even accessible.  But, the Falls of Hills Creek seem to be perennially popular, even in its diminished state.

We did this hike the afternoon we arrived in Pocohontas County.  It was a cloudy, dreary, drizzly day.  I figured if there were any water left in the falls, this weather would be ideal for taking long exposure shots of the water.  Even though the photos didn’t work out, the trail was still quite pretty.  I enjoyed the cool, damp day and walking though the lush green of the woods.  We got some good exercise in climbing the many stairs along the trail.

Signs of Fall
Signs of fall were all along the trail. Below:  Tiny wildflowers along the trail; The foreboding sign that made us carry 40 pounds of camera gear.

Wildflowers Threatening Sign

The one thing I found mildly disconcerting were the “thief alert” signs we found along the trail.  When we walked down, I had all my camera gear and laptop in the car (unusual for me!)  After I saw the sign, I took the route of paranoia and decided to carry everything with us.  Adam carried the big backpack with the laptop and I carried the cameras and the tripod.  It was kind of a shame, because we hardly used any of the gear we carried.

I would love to see the Falls of Hills Creek again sometime when the water is flowing and the lower falls are open.  Until then, I’ll reserve final judgment on this hike.

Trail Notes

  • Distance – 1.8 miles out and back
  • Elevation Change – 600 feet
  • Difficulty 2.  Just due to the stair-master quality of the hike, it’s not for everyone.
  • Trail Conditions 4.5. The trail is paved, then crushed gravel, and some boardwalk areas.
  • Views –0. Not really any views other than waterfalls.
  • Waterfalls/streams 3.5 There wasn’t any water in the falls, but normally this would be great for waterfalls.
  • Wildlife 0.  The trail is too populous to really attract wildlife.
  • Ease to Navigate 5.  Just straight down a paved path and back.
  • Solitude 1.  You should see people along this trail.

Directions to trailhead: From Mill Point, WV head west of WV 39/55.  After about 12 miles, you will find a sign for the Falls of Hills Creek scenic area on your left that leads to a parking lot.  The trail takes off from the left side of the parking lot.

Woodstock Tower

The Woodstock Tower hike is a fairly easy hike in the Lee Ranger District of George Washington National Forest that leads to a fire tower with 360-degree views of the surrounding area.

View from Woodstock Tower
The view from the Woodstock Tower is panoramic - offering views of the valley, river and distant mountains. Below: A wider view includes the mountains; It really wasn't the best time of day to photograph the actual tower -- I had to shoot right into the sun; The inside of the tower is covered with graffiti.

A wider view Tower Sunburst Inside the Tower

Adam Says…

After parking in the Little Fort Campground area, we headed up for our hike to Woodstock Tower.  The white-blazed Wagon Road/Nature Trail starts off as a rough fire road and after .1 mile, intersects with Peters Mill Run.  Peters Mill Run is an ATV/OHV trail, so look both ways before crossing this popular trail for ATVs and motorcycles.  Continue straight across Peters Mill Run to connect to the trail again.  The trail does go steadily up with a few switchbacks, but the switchbacks really make the trail easier of a climb.  The first switchback comes in around .25 miles and the second switchback comes around .5 miles.  After the second switchback, the trail does become steeper, but it ends after just a couple tenths of a mile.  At .7 miles, take a left on the pink-blazed Tower Trail.  It is only about .2 miles to reach the tower on a fairly level trail.

The Woodstock Tower
The Woodstock Tower. Below: A little bit of fall color was already showing; We took a break for water where the short trail meets up with the longer trail; Looking up through the Woodstock Tower.

A little fall foliage Water Stop Looking up through the tower

When we reached the tower, we climbed up the metal stairs to reach the top.  I’m not a big fan of heights, but I’m especially nervous when it involves man-made things.  The tower did seem quite sturdy, but it makes some noises when railings move slightly, so I was more eager to get down from the tower than the rest of Christine’s family.  The views are nice, but the area is quite crowded.  Unless you went up early in the morning, I fear that it would be hard to have a moment’s peace at the top.  There aren’t any signs posted for maximum number of people on the tower and you may have to hug the side of a platform as people pass in opposite directions.

There are a few geocaches in the nearby area:

Christine Says…

This was the second time I’ve been to the Woodstock Tower.  Last time I was there was several years ago in mid-October.  I remember the fall foliage being amazing from atop the tower. This time, the foliage had just the slightest hint of change, but the day was crystal clear and sunny – not a bit of haze – so the view was extra nice.

There are shorter ways to get to the view.  In fact, you can practically drive right up to it.  However, we chose to hike up from the Little Fort campground instead.   The slightly longer route gave my mom a chance to try out her new hiking boots.

Off Highway Vehicle
The area has lots of ATV and dirt bike trails. Below: All the roads and trails in this area are well-marked.

Wagon Road Campground Sign

Because the day was so beautiful, we had to share the tower with crowds of people.  At times, there was actually a line of people waiting to get to the top.  We even saw a person trying to coax their pit bull up the open, metal stairs.  That didn’t go so well, and they had to turn back about halfway to the top.  The inside of the tower is covered with graffiti and the area is littered with broken beer bottles and empty soda cans – a very unfortunate side effect of its popularity.

Despite the tower’s less-than-pristine nature, it still offers one of the best views of the mountains in the area.  It’s well worth the short walk.

Trail Notes

  • Distance – 2 miles
  • Elevation Change – about 500 feet
  • Difficulty –2. While you would think that going up 500 feet in one mile would be steep, the trail up seems to take off a lot of the steep terrain.
  • Trail Conditions – 3. The trail had some loose ground in a few areas (especially in the first .1 mile), but overall was well-maintained.
  • Views – 4.5. It does have 360-degree views, but we always enjoy views from natural surroundings like rock outcrops over man-made towers.
  • Waterfalls/streams 0. Non-existent.
  • Wildlife – 2. Too many people to see anything other than people.  May be good for hawk spotting or some other woodland birds.
  • Ease to Navigate – 4.  Not too many turns on this one and trails are well-labeled.
  • Solitude – 1. You will see lots of people on this trail during a nice day.

Directions to trailhead:
We approached this from I-81.  There are other ways to the east to approach this, but here is the most common way for anyone traveling via interstate.  Take exit 283 on I-81, heading east on 42.  Stay on 42 until it intersects with US 11.  Take a left on US 11, heading north through the town of Woodstock.  As soon as you pass the Woodstock Shopping Center, take a right on S.R. 665/Mill Road.  Take this until it ends at S.R. 758/Woodstock Tower Road.  Take a left here and continue to follow S.R. 758 up and down the mountain (this area can be scary when passing other vehicles – there are no guardrails in most spots).  Be sure to stay on S.R. 758 until you reach Little Fort Campground.  Turn into the campground area.  There are campsites and parking spots along the road here.  The trailhead is located on the right-hand side of the road near a campsite right before you reach the outdoor restrooms.

Buck Hollow – Buck Ridge

The Buck Hollow – Buck Ridge Trail is a steep hike in the Central District of Shenandoah National Park.  It takes a deep plunge along the Buck Hollow stream and a steep hike back up the Buck Ridge trail.

I've never seen so many different kinds of mushrooms/fungus along a trail in Shenandoah.
I’ve never seen so many different kinds of mushrooms/fungus along a trail in Shenandoah.  Below: When we hiked Buck Hollow in August of 2008, we saw two yearling bear cubs; the stream running through Buck Hollow is rather small and overgrown.

Bear

Adam Says…

I have to be honest – we have been putting off doing this trail for a while.  We first did this hike a few years ago and the memories of how tough a hike it was kept us from wanting to do it again.  Christine and I both weren’t feeling well the day we attempted it last time, but we were more pleased doing this hike this time.

The trail starts off from the Meadow Springs parking area.  After about 20 feet down the trail, you see a post marking the Buck Hollow trail.  Take a left to go down this trail.  The trail seems to constantly descend and is rather steep in many portions.  There are loose rocks and if you attempt this after a heavy rain, you should expect some mud and slick soil on the trail.  Along the side for much of the trail, you will see the Buck Hollow stream.  Around mile 1.75, you will make a few rock-hops across the stream.  The trail continues to descend and then finally seems to just parallel the stream.  At mile 2.8, you will reach a cement post, pointing you to take a right on to the Buck Ridge Trail.  You cross the stream again and then you will quickly come up to the dreaded stairs.

For any Lord of the Rings fans, these stairs remind me of the stairs of Cirith Ungol.  “Up, up, up, up the stairs we go.”  They are unrelenting and seem to last forever, but they last less than .3 miles.  Of course, you do gain over 400 feet of elevation in this short distance.  These stairs didn’t exist the last time we did the hike; the last time, we just had a steep section of loose soil to traverse.  The stairs help make this hike more manageable, so I do thank the workers that accomplished this laborious task!

Nice Camping Spot
At the bottom of Buck Hollow, there is a beautiful camping spot with flat, open forest and easy access to water. Below: The trail starts out at the Meadow Springs Parking Area; A trail through a small slot in the rocks leads hikers to the only open view on the trail.

Trail Marker Side Trail to Viewpoing

After the stairs, the trail continues to go uphill, but it is at a much more manageable grade.  Once you are high enough on the ridge, you are treated with views of Skyline Drive and mountain views around you (including Mary’s Rock).  We found a small crevasse bisecting a large rock formation that we were able to easily climb up to get some unobstructed views.  After mile 5.2, you do come up to another concrete post.  Take a right and you will reach the parking lot in a little over .3 miles.

One interesting note that I remember from our first hike of this loop trail was near the bottom of Buck Hollow.  We were hiking along and all of a sudden we startled two yearling bears.  One of them quickly climbed a tree and the other took off up the mountain.  We kept our distance, and the one that climbed the tree climbed back down and took off in the opposite direction.  As I looked to see where the bear went, I spotted a buck and a pileated woodpecker in the same direction.  I felt that I could have taken a picture that would have looked like a wildlife mural that you often see on brochures or placemats.

We were tired after we finished the hike, but this trip we definitely felt that it was more enjoyable than the first time we attempted it.

Christine Says…

When we woke up to cool, pretty weather on Saturday morning, we decided to end our hiking hiatus a week earlier than initially planned.  I had to be at an art show by 1:00, so we needed to find a hike that was relatively short and sort of close to home.  We’ve pretty much hiked and blogged about everything in the central district of Shenandoah National Park already… with the exception of the dreaded Buck Hollow-Buck Ridge hike.

Why dreaded?  As Adam mentioned, last time we did this hike we were both fighting colds and had zero energy.  And while Buck Hollow is not the longest or hardest hike we’ve done, it certainly felt like it the last time we were there.  We ran out of water, we were fatigued, the trail felt endless and daunting as soon as we started the uphill climb.  Other than seeing the two yearling bears, the Buck Hollow hike didn’t carry a single pleasant memory.  It just made me think of exhaustion, suffering and thirst.  🙂

When I mentioned to Adam that we should probably hike it again for the blog, he looked at me with incredulity and told me that he didn’t ever want to hike there again.  Somehow he was convinced to relent, and off we went!

This time, the hike was a lot more fun!  It was still a long, steep downhill –  but I really enjoyed marveling at the huge variety of mushrooms and fungi growing along the trail.  I don’t know if there is a name for people who collect/catalog fungus, but if such people exist – this is the trail for them.  We also happened to notice a beautiful backcountry campsite at the bottom of the hollow, where the trail leveled out.  Along with easy access to water, there was a wide, flat expanse under the shade of the trees.  The forest floor in this area was open with very little undergrowth.  There were also several huge piles of rocks – maybe from old stone walls or foundations in the area.  It was a great place to take a break and have a snack.

Stairs
Although the stairs don’t look steep in this photo, they ascend nearly 400 feet in just over two-tenths of a mile.  Below: The Buck Ridge trail is lined with dense mountain laurel; The only (mostly) open view comes from atop a rock along Buck Ridge.

Dense Mountain Laurel View from the Rock

The flat terrain at the bottom of the hollow doesn’t last long.  Shortly after passing the cement post marking the Buck Hollow – Buck Ridge junction, you’ll encounter what I think is the toughest, steepest section of climbing in all of Shenandoah National Park.  Indeed, it’s a short climb – but wow… it’s STEEP.  The terrain along this little section is the equivalent of gaining 2000 feet in elevation over a mile.  I think most hikers will agree — that’s TOUGH climbing.

The Potomac Appalachian Trail Club published a review of this hike in their October 2010 newsletter.  In it they say “Steep, does not begin to describe the trail ahead.”  They also call it scary and compare it to a descent into hell.  🙂 We concur!

I was quite glad when the terrain moderated, because the steep stair climb really exhausted my legs!

Butterflies
Butterflies were everywhere along the trail. Below: The PATC trail overseer clearly loves this area.

Plate

We also noticed the nice view from atop the rock that we had missed last time we hiked.  It’s funny how being fatigued and thirsty makes you miss the best things along a trail sometimes.  The last section of the trail along Buck Ridge passes through dense mountain laurel and through patches of blueberry and raspberry bushes.  I really thought we’d see more signs of bears (and maybe some actual bears!), but we really only saw one old pile of scat this time.

The Buck Ridge trail eventually meets up with Hazel Mountain Road for the last third of a mile.  This section of trail was quite familiar, since we hiked it just a couple months ago on our backpacking trip to Catlett Mountain.  When we arrived back at the parking lot, we noticed the PATC overseer’s car was in the lot – complete with a “BCKHLW” license plate.  Clearly, the overseer loves this section of the park and does a great job maintaining the trail.

It was a fun hike – one I enjoyed far more than I expected to!

Trail Notes

  • Distance – 5.6 miles loop hike
  • Elevation Change – 1750 feet
  • Difficulty – 4. The trail is steep at the start going down and once you reach the halfway point includes a steep uphill.  Not recommended for those with knee or ankle issues.
  • Trail Conditions –3. The Buck Hollow Trail is rocky and steep, so you have to watch your footing.  The Buck Ridge Trail had better trail conditions.
  • Views – 2. The views you get are from the Buck Ridge Trail portion.  While most of these are through the obstruction of trees, there is a nice place to climb on top of a rock for a view.
  • Waterfalls/streams 1.5. You do walk along the Buck Hollow stream, but there aren’t a lot of nice views of falling water.
  • Wildlife –3.5. There are signs of bear scat around.  The first time we went on this trail, we saw two yearling bears and a buck.  Both times we have spotted pileated woodpeckers and many typical woodland birds.
  • Ease to Navigate –4. Not too many turns, just read the concrete posts.
  • Solitude –3.5. We did see a number of people on the trail that seemed to be in a group, but this isn’t overly popular.  Some people will hike up from Rte 211 to Mary’s Rock, so you’re likely to only find people on the Buck Hollow portion of the trail.

Directions to trailhead:
At mile 33.5 on Skyline Drive.  Park at the parking lot on the eastern side of the road and the trail starts from the southern end of the parking lot.

Pocosin Mission Trail

The Pocosin Mission Trail is a fairly short walk along a fire road that leads to the ruins of an abandoned Episcopal mission.

Pocosin Mission Ruins
The Pocosin Mission ruins are slowly sinking back into the forest. Below: The fire road makes this trail pleasant and easy to walk along; The old church steps still stand at the site; Adam explores the ruins.

Pocosin Church Steps Adam Explores the Mission Ruins

Adam Says…

We’re back to Virginia hikes!  This week, we’ll be sharing a trio of short hikes.  In fact, the hikes are so short that we’re going to skip doing our typical dual write-ups.  I’ll cover this one, and Christine will cover the next two.

Since we had surprisingly nice temperatures on an August day (it didn’t get above 68 on our hike), we decided to go for three short hikes off Skyline Drive. The last time we did the Pocosin Mission Trail we were with a couple of friends.  Shortly after we got to the mission site, we were pounded with a fierce thunderstorm.  We were all so soaked to the bone, that we ended up buying clothes at the Big Meadows wayside, looking like complete tourists with all of our Shenandoah National Park gear.

PATC Cabin

The PATC maintain a cabin, available for rent, along the Pocosin Mission Fire Road. Below: Wildflowers (and bees) were abundant along the trail; We saw many varieties of berries; There were also butterflies everywhere.

Bees and Flowers Along the Pocosin Trail Berries Along the Trail Butterfly along the Pocosin Trail

On this trip, we had a nice easy stroll down the fire road.  After about .2 miles, the road crosses over the Appalachian Trail, but you just want to stay on the fire road for this trail.  We took a few minutes on our way down to stop by the PATC Pocosin Cabin, which can be rented by the PATC.  The cabin was locked, but we could tell that people renting this cabin would wake to a nice sunrise view.  Continue down the trail for another .8 miles until you reach another cement post, marking the junction with the South River Falls fire road.  You will see the remains of a cabin nearby and stone steps with a foundation.  After exploring, just go back to your car up the fire road.

The Pocosin Mission was an Episcopal mission established in 1904 for the mountain community living in the area.  “Pocosin” is a Native American word meaning “swamp”.  The mission building is actually where you see the stone steps, a small foundation, and a fallen-down chimney.  Be careful as you explore the area – there is a lot of broken glass and twisted metal.  The cabin has a rusted metal roof and there are plenty of rusted materials on the ground, so watch your kids carefully in this area.  In addition to these sites, there is also an overgrown cemetery that is across the trail from the mission, marked by old nameless headstones.

Old Church Walls and Fallen Chimney
The old church walls and a fallen chimney are still visible. Below: Buckets and an old sink can still be found inside the mission ruins.

Inside the Ruins

For those interested in the history of the people that lived on this mountain will enjoy visiting this site.  While there aren’t any views to speak of, the hike does cause you to speculate on how life was back in the early 1900s being a part of a community that lived and worshiped together.

Trail Notes

  • Distance – 2.2 miles out and back
  • Elevation Change – 450 feet
  • Difficulty 1.5.  Most people should be able to handle this.
  • Trail Conditions 4. It’s just a fire road, so not much difficulty for trail conditions.
  • Views –0. No views.
  • Waterfalls/streams 0. No streams/waterfalls.
  • Wildlife 2.  There should be a variety of wildlife in the vicinity.
  • Ease to Navigate 5.  Just straight down a road and back.
  • Solitude 4.  This isn’t a very popular spot, so you should have your peace.

Directions to trailhead:
Around mile 59.5 on Skyline Drive, you will see a small gravel road leading to a parking lot on the eastern side of the trail.  Park here, cross the chain, and walk down the fire road to start the trail.

West and East Rattlesnake (NH)

Special: New Hampshire Edition

Introductory Guide to Visiting the White Mountains

This fun, four-mile loop hike offers gorgeous scenery and amazing views with not much work.  The trail takes you across the summits of two small mountains – known as East and West Rattlesnake – overlooking the Squam Lakes.

Adam and the Rain Storm
Adam watches a rain storm pass over the Squam Lakes.  Below: The trail has many steps built into it.

Old Bridle Path

Adam Says…

Since we had already done a bunch of hikes to waterfalls over the last few days, we decided it was time to do a hike with some views.  We waited around in the morning due to rain and an overcast sky, but we caught a break shortly after lunch and decided to head out to the Rattlesnakes.  As Mark Twain said, “If you don’t like the weather in New England, wait a minute.”

We started the trail up the Old Bridle Path, which takes off from the marked parking lot for West Rattlesnake Mountain.  This area includes a lot of crossing trails that are all yellow-blazed, so you will need to pay attention to signs to be sure you are going the way you want.  The hike was a continual uphill with lots of steps built into the trail.  We found this part of the trail to be very well maintained and you will see lots of people on this section of your trip.  At .75 miles, you will come to a fork.  The right goes out to a nice overlook, but the left is where you will continue the trail.  At .9 miles, you will reach the summit of West Rattlesnake Mountain.  Look on the ground to find  a USGS marker to mark the elevation.

From the summit, we then took the Ridge Trail which leads to East Rattlesnake Mountain (one option is to take the Pasture Trail to the East Rattlesnake Trail, but that has a lot of elevation loss and gain.)  The Ridge Trail descends about 300 feet of elevation into a thick quiet wood.  Here is where the mosquitoes were unleashed on us since the breeze was non-existent to blow them away.  At 1.3 miles, you will reach a junction with the Col Trail, but continue on the Ridge Trail until 1.7 miles when you reach the East Rattlesnake Mountain summit.

First Viewpoint
The first viewpoint from high up comes along a small spur trail. Below: The Armstrong Natural Area sign provides some historical information about the area; Several trails intersect in this area; Watching the rain storm pass over the Squam Lakes.

Armstrong Natural Area SLA Sign West Rattlesnake

We headed back from the summit and at 2.1 miles, we took a right on the Col Trail.  The Col Trail descends a few hundred feet and was very overgrown and poorly maintained in several areas.  At 2.8 miles, it leads to a fire road.  Take a right on the fire road.  At 3.0 miles, you will reach Route 113.  Taking a left on the road, you will head back to your car to make this a four-mile loop.

Looking back, we might have decided to do this as an out-and-back hike and not ventured onto the Col Trail.  Walking on roads is never as fun as trails and it seems that the road goes on forever.

Both summits give you expansive views of the Squam Lakes and you can likely see several mountains surrounding you.  I was amazed at how many people were on West Rattlesnake Mountain and we only saw one other person at East Rattlesnake Mountain.  So, you can easily escape the crowds if you want with just a little longer hike.

There are a number of geocaches in the area for anyone interested:

Christine Says…

On this trip to New Hampshire, we spent far more time hiking to waterfalls and ponds than we did hiking to mountaintops.  We decided to save our summit hikes for days that offered clear views of the valleys below.  Unfortunately, we had a lot of hot, humid days that put the high peaks of the White Mountains into the clouds.  I know some people just like the workout and the act of hiking, regardless of whether or not there is a view.  I do too, but only to an extent. I can’t help but feel a little let down when a great view is covered in clouds and fog.

The morning we planned to hike the Rattlesnakes had been forecast to be sunny and pleasant.  However, in keeping with the theme for New Hampshire’s changeable weather, we woke to soggy clouds and pop-up showers.  The radar map indicated clearing as the day went on, so we sat and waited at the house.  When the sun finally broke through the clouds, we hopped in the car and raced off the trailhead.

The hike was easy and pleasant to the top of West Rattlesnake, and the views couldn’t have been nicer.  They reminded me a lot of the views we had from the Mt. Morgan – Mt. Percival hike.  (You can actually see the Rattlesnakes from above on that hike.) Both hikes overlook the Squam Lakes, but Mt. Morgan – Mt. Percival goes to higher mountains and offers a loftier view. If I were pressed to choose, I would say the Rattlesnakes view is nicer, but only because it’s a little closer to the lake.  The Squam Lakes Association does a fantastic job managing and maintaining the trails in this area.

East Rattlesnake
The view from East Rattlesnake is pretty and offers quite a bit more solitude. Below: The trails are nicely marked and expertly maintained by the Squam Lakes Association; Adam walks along the fireroad that joins the Col Trail to Route 113.

Col Trail Fire Road

Atop West Rattlesnake, we were able to sit on a sunny rock ledge and watch a leftover rain squall pass at a distance across Squam Lake.  The clouds were so dramatic and it was interesting to see the gray sheet of rain pass over the water.

We decided to continue along the trail and visit East Rattlesnake as well.  Although it’s less popular and has a smaller rock ledge, the other Rattlesnake offers views just as nice as its “sister”.  We had a couple options for hiking over to East Rattlesnake.  At first, we considered hiking the Pasture Trail so we could check out Five Finger Point.  A friend of mine from Flickr mentioned one of his favorite swimming spots was on the point, so I thought it might be fun to go check out the spot.  But, in the end, we decided to take the shorter route across the Ridge Trail.  The bugs ate me alive!  This trail was the one place in New Hampshire that my liberal application of DEET didn’t seem to deter the mosquitoes.  Two weeks after the hike, I still have a few marks leftover from bites I got on that hike.

On the return from East Rattlesnake, we wanted to get out of the woods and away from the bugs as quickly as possible.  Instead of doing the hike as an out-and-back, we followed the Col Trail back to the road and finished a loop with a mile of walking along Route 113.  The road walking wasn’t particularly fun or scenic, but at least I was away from most of the bugs.

Trail Notes

  • Distance – 4 mile, loop
  • Elevation Change – About 800 ft.
  • Difficulty –2.5. The walk up to West Rattlesnake is very easy.  The hike up East Rattlesnake is a little tougher.
  • Trail Conditions –3.5. The trail is very nicely maintained.
  • Views – 5. Stunning views of the Squam Lakes.
  • Waterfalls/streams 0. None to mention.
  • Wildlife –0. Unless you count mosquitoes and biting flies.
  • Ease to Navigate – 4. Although several trails cross in the area, everything is clearly marked.
  • Solitude – 1. On West Rattlesnake, you won’t get any solitude.  East Rattlesnake is quieter.  We saw only one other person there, while we saw close to 20 people atop West Rattlesnake.

Directions to trailhead:

From I-93, take Rt. 3 east to Holderness. From Holderness, follow Rt. 113 (a slow, curvy road) northeast for about 5.5 miles. Just past Pinehurst Road, park in the small lot on the right side of the road. The Old Bridle Path starts at the far end of the parking lot.

Sabbaday Falls (NH)

Special: New Hampshire Edition

Introductory Guide to Visiting the White Mountains

More of a pleasant stroll than an actual hike, this gentle path leads to one of New Hampshire’s most beautiful waterfalls.  The entire walk is only a mile (round-trip), so this waterfall is easily accessible by nearly anyone, regardless of age or fitness level.

Sabbaday Falls
Sabbaday Falls has two sections.  The top is a large, beautiful cascade. The bottom section takes almost a right angle through a slot in the rock. Below: A view looking downstream through the slot

A view looking downstream through the slot

Adam Says…

Sabbaday Falls has to be one of the prettiest waterfalls I have visited.  There is a reason it is on the current cover of the White Mountains Visitor Map & Guide – it is very photogenic.

The falls were once known as Church’s Falls, named after Frederic Church, who was a landscape painter.  The area is now known as Sabbaday Falls. The name was allegedly coined by some road builders who stashed their tools near the falls, so they wouldn’t have to carry them home at the end of the building season and could return to them the next year.  Before leaving on a Sunday morning they named the area for the “Sabbath Day” or shortened to “Sabbaday”.  Later, the Shackford family had a house nearby after the Civil War.  They housed guests visiting the White Mountains and ushered them to popular spots, such as these falls.

The Pool at the base of Sabbaday Falls
The pool at the bottom of Sabbaday Falls is lovely and green! Below: A wider view of the pool and lower half of the falls.

Wider view of the pool.

This is a fee area, so you will need to deposit $3 for a parking pass for the area.  The waterfall has an overall drop of 35 feet, but the main plunge is 22 feet.  The pathway up the stairs gives you very close looks along the entire waterfall.   Similar to much of the interesting geology in the area, this gorge was formed by a glacier carving through the rock.  You can see near the base of the falls, some clear lines of black basalt dikes mixed in with the granite.  These are formed from the rapid cooling of molten rock.

For those hoping to bag some geocaches, there are a few in the area:

This is a very easy “hike” that is very family-friendly and takes you to a great place to get some photos.  I highly recommend a trip next time you are in the White Mountains.

Christine Says…

This short one-mile walk can barely be considered a “hike” – it follows a smooth, well-graded path and several sets of wooden stairs to a view of spectacular Sabbaday Falls.

The wide, crushed stone trail runs parallel to crystal-clear Sabbaday Brook.  At .3 miles, you’ll arrive at a clear, green pool bottomed by round stones.   Water enters the pool through a narrow chute between two sheer rock walls.  At the top of the chute lies the lower half of the falls.  This section of the waterfall is the smaller of the two.   Even though it’s smaller, it’s no less pretty.  The rock formations are dramatic in this section.  There is even a perfect, round “pothole” in the stone.

Lower Sabbaday and the Slot in the Rock
Lower Sabbaday and the Slot in the Rock.  Below: The area includes several informational plaques about the area’s history.

Information About Sabbaday Falls

The top of the falls is about tenth of a mile beyond and is reached via a couple walkways and sets of steps.  The upper falls are quite a bit taller, and sit at almost a right angle to the lower falls.  Without a doubt, this is one of the prettiest waterfalls I’ve seen in the area so far.

The trail has a railing and staircases to make viewing safe and easy from almost any angle.  There are signs all up and down the trail indicating that swimming is prohibited in the falls.  However, when we visited, there was a group of four unsupervised kids that kept getting into the pool at the very top of the waterfall.  It was pretty dangerous.  They generally acted like idiots and were the main reason we didn’t hang around the falls for very long.

Sabbaday Falls is very popular, and you should expect thick crowds.

Trail Notes

  • Distance – 1 mile, out-and-back
  • Elevation Change – 125 ft
  • Difficulty – 1. Very easy!
  • Trail Conditions – 5. Smooth and well-graded with well-planned stairs and railings.
  • Views –0. You’ll be in the shady woods the entire time.
  • Waterfalls/streams 5. Simply gorgeous!
  • Wildlife – 0. The heavy human traffic probably scares any wildlife away.
  • Ease to Navigate – 5.  Impossible to get lost.
  • Solitude – 0. Prepare for heavy crowds. People love Sabbaday Falls!

Directions to trailhead:
From Conway, NH follow the Kancamagus Highway for about 15 miles.  The trail parking is well-marked.

The Basin & Kinsman Falls (NH)

Special: New Hampshire Edition

Introductory Guide to Visiting the White Mountains

The Basin  and Kinsman Falls is a short 1.2 mile out-and-back walk to a lovely waterfall in Franconia Notch State Park.  The trail follows Cascade Brook and passes many beautiful (and popular) water features.  The falls are also called Tunnel Falls.

The Basin
The Basin is a beautiful glacial pothole at the base of this hike. Below: Kinsman Falls is a pretty 20 foot waterfall that plunges into a wide pool at the bottom; Many of the streambeds look sculpted.

Kinsman Falls Water Features along the Trail

Adam Says…

We had visited the Basin last year, but it is always worth a quick stop off I-93.  It takes only .1 mile to reach it from the parking lot.  You will see signs to lead you directly to the Basin.  The Basin was formed about 15,000 years ago as an ice sheet eroded the pathway.  According to the plaque at the site there, Henry David Thoreau wrote “this pothole is perhaps the most remarkable curiosity of its kind in New England.” Samuel Eastman called this area, “One of the most beautiful haunts of Nature, a luxurious and delicious bath fit for the ablutions of a goddess.”

There are several paths to walk along in this area to explore streams and small waterfalls.   If you go back the way you came, you will see a larger junction with a sign for Kinsman Falls being .5 miles away.  The path up to Kinsman Falls was filled with roots and rocks, so you do need to continually watch where you are stepping.  Shortly up the ascent, you will see several spots to your left along the way of the river.  These are good places to soak in the sun or to wade in a small pool.  Be careful about footing if you venture into the water, since the water does rush through these areas rapidly. Getting back on the trail, you have more of an ascent, but you will quickly come up to the sign pointing to Kinsman Falls.  The falls were very impressive as they plunged into a serene pool at the base.

View of the Mountain from Cascade Brook
View of the Mountain from Cascade Brook.  Below:  Colorful fungus on the trail;  Christine’s dad and Adam climb back up from the base of the falls.

Orange Mushrooms Along the Trail Climbing Back up from the base of the falls.

I definitely recommend checking out these areas if you are taking a trip through the White Mountains. Most people just view the Basin and some of the swimming holes along the way and don’t venture any further, but it is worth the hike up to Kinsman Falls and most families can easily make the trip.

There are several geocaches in the area:

Christine Says…

We planned to do lots of family hikes on this visit to New Hampshire, but about a week before the trip an MRI revealed that my dad had torn his meniscus.  His doctor told him to be careful and to limit activity that could extend the tear.  Sadly, this put most of his hiking plans on hold for the time being.  He did decide that he felt up to joining us on the short hike past the Basin and up to Kinsman Falls.

Like Flume Gorge, this little hike packs in a lot of impressive scenery over a very short distance.  Also, like the Flume, it is extremely popular and crowded.

The Basin is such a gorgeous spot.  I love how the water curls through the rock formation.  The rock walls of the Basin are smooth and sculpted – they almost look unnatural. The water is blue-green colored and crystal clear.  It’s one of those spots you’ll never forget!

After the Basin, the beautiful water features keep on coming!  There are so many small waterfalls and cascades along the trail, that you always hear the pleasant sound of rushing water.  A sign marks the way to Kinsman Falls, but honestly, we could say “just follow the water uphill” and you’d find your way there.

The trail was rocky and root-y.
The trail was rocky and root-y. Below:  The base of the falls was a nice place to stop and contemplate nature; Cascade Brook rushes over the rocks.

Dad on the rocks Water flowing along Cascade Brook

The trail followed alongside Cascade Brook for a half mile.  There were many little side-trails leading to scenic spots along the brook.  Dozens of people reclined on the rocks while kids used the streambed like a natural waterslide.  One mother remarked to us that her family had visited the spot two days in a row, and both her boys had worn through the backsides of two sets of swim trunks.

The trail is muddy, with a mix of gnarled roots and slick granite underfoot.  It’s all uphill, but it’s never steep.  It really is an ideal family hike.

A small sign announces Kinsman Falls.  From the trail, you get a view of the falls from above.  The twenty-foot waterfall crashes into a large, round pool in a chasm below.  There is a rough footpath down to the base of the falls – take care if you climb down – it’s slippery with numerous rocks to scramble over.

There are lots of big rocks to sit on around the edge of the pool.  It’s a nice place to relax and enjoy feeling the mist from the falls spray your face.  We were really surprised to have the falls all to ourselves.  Even though there were many people in the area, no one else was at the waterfall.  Odd – but very welcome!  On our return trip, we passed quite a few people hiking up, so I suppose we just had fortuitous timing.

Trail Notes

  • Distance – 1.2 miles out-and-back. Plus a couple additional tenths of a mile to get to and from your car.
  • Elevation Change –Around 300 feet
  • Difficulty 2. The hike is all uphill over slick granite and gnarled roots, but it is short and never steep.
  • Trail Conditions 2. The trail is extremely rocky, muddy and covered with gnarled tree roots.
  • Views –2. From the Cascade Brook streambed, you get a decent view of the mountains.
  • Waterfalls/streams 5. Nothing short of spectacular!
  • Wildlife 0. A few squirrels and chipmunks.
  • Ease to Navigate 4. After walking uphill from the Basin, look for the sign to Kinsman Falls and follow the blue blazes uphill.
  • Solitude0. This area is extremely popular.  We saw dozen of people along the way, but surprisingly had Kinsman Falls all to ourselves.

Directions to trailhead:
From I-93N. Once you enter the Franconia Notch area, take the Basin exit.  The area is well-marked and has ample parking.

Knob Mountain – Jeremy’s Run Loop

The Knob Mountain – Jeremy’s Run Loop takes hikers along a 12.4 mile route through one of Shenandoah’s most popular backcountry camping areas.  This hike could be done as a long dayhike, but the campsites in the area are too inviting to pass up.

Pool on Jeremys Run
The Knob Mountain – Jeremy’s Run Loop offers beautiful stream scenery. Below: Mountain vistas can be seen along the descent on the Knob Mountain Trail; Blue Blazes mark the way across streams on the Jeremy’s Run Trail; Adam negotiates one of the many stream crossings.

View from the Knob Mountain Trail Water Crossing Adam Crossing the Stream

Adam Says…

Since the weather looked like it was going to be a cooler, we decided to take off and go on an overnight backpacking trip.  Our first overnight trip was the Hazel Mountain-Catlett Mountain trail which we did with a group from the PATC.  This trip was our first non-group outing, so we felt it would be a good chance to put into practice what we learned from our Backpacking 101 course.

To do this trail as a loop, leave from the Elkwallow picnic grounds.  You will see the entrance to the trail next to the pit toilet, which provides a last chance to “take care of business” before embarking on the hike.  You will begin the trail on a short spur trail to the white-blazed Appalachian Trail.  Turn left on the AT.  In .2 miles, you will reach the junction with the blue-blazed Jeremy’s Run Trail.  Continue straight on the Jeremy’s Run Trail.  Around 1.2 miles, you will reach the junction with the Knob Mountain Connector Trail.  Take a right at the post to join this trail.  As soon as you cross Jeremy’s Run with a little rock-hopping, you will begin this steep connector trail.   There are lots of switchbacks and this is definitely the steepest part of the entire trip.  Around 1.7 miles, you will reach a junction with the yellow-blazed Knob Mountain Trail.  Take a left at the trail junction and continue to follow this slowly ascending ridge trail.  We would probably name this portion of the loop the Bear Scat Boulevard, because there was a ton of bear evidence in the area.  You will see a few views through the trees, but nothing remarkable from the trail.  At mile 3.9 you will reach the summit of Knob Mountain, marked by a concrete post.  After the summit, you will begin your steep descent down the mountain.  This is broken up by several switchbacks.  The trail does open up at times to give you views of mountains along the way, including Strickler Knob and the Three Sisters.  At 6.8 miles, you will cross Jeremy’s Run and reach the junction with the blue-blazed Jeremy’s Run Trail.  Since we were fairly exhausted from our trip, we picked a campsite near the junction of the trail, which gave us great access to water.  From the junction, you just continue on the Jeremy’s Run Trail until you reach the parking lot, crossing over Jeremy’s Run fourteen times.   In some areas, it was necessary to rock hop across, but most of the time the traversing was quite easy.  I imagine during heavy rain seasons, this would be more of a challenge.

Filling Out Paperwork for a Backcountry Permit
The overnight trip started with a brief stop to fill out paperwork for our backcountry permit. Below:  Adam makes his way down the Jeremy’s Run Trail; Snacks on the Knob Mountain summit; A view through the trees from the Knob Mountain Trail.

Adam Hiking Snacks on the Knob Mountain Summit Views from Knob Mountain Trail

Jeremy’s Run truly provided a great opportunity for camping in the backcountry.  We saw several previously-used campsite areas, so we decided to use our Leave No Trace principles and use an existing campsite rather than creating our own.   The campsite was short walking distance to a reliable water source.  After starting our trip around 9:30AM, we arrived at camp around 1:00PM.  We were very hungry, so Christine worked on getting some lunch together and I began working on getting our tent set.  The ground was very hard and rocky, so it took an effort to find a good place to get stakes into the ground.  After lunch, we finished getting our sleeping pads/bags ready, hung our bear-bag rope, and prepared our kitchen area.  We got some water to use for the trip at the nearby stream and I dug a few preemptive catholes.  With every thing set, we decided to relax a little in our tents to stretch out our backs.  I like to bring a book along the trip so we took turns reading aloud a few chapters from A Walk for Sunshine by Jeff Alt, an entertaining read about hiking the Appalachian Trail.  We took a short nap and then played a few hands of the Monopoly card game we also brought.  We then broke in our new JetBoil and prepared a great dinner.  After cleaning up dishes, we went down to a place along Jeremy’s Run and stretched out on a large rock.   We watched several brook trout jump out of the water, catching mosquitoes that were lightly dancing on top of the water.  We retired to our tents to the sweet chorus of whippoorwills and the “who cooks for you” hoots of nearby barred owls.

Neighbor Mountain
On the hike down from the summit of Knob Mountain, hikers get a few decent views of adjacent Neighbor Mountain. Below: A scenic spot on Jeremy’s Run; Our campsite.

Jeremy's Run Camp

There were so many things I enjoyed about our trip.  We saw tons of wildlife – three black bears, a wild turkey, scarlet tanagers in glorious color, and heard lots of birds at night.  The temperature was perfect and the bugs were not out as much as we expected.  The trip also helped affirm our ability to handle a backpacking trip by ourselves. I think we really learned a lot of great skills in the last few months to help us feel well-prepared.   I was a little more apprehensive wondering if we could handle the 12+ mile hike with 35 pounds on my back, since our previous trip was about 8 miles total with a little less weight each.  The hike was more strenuous the first day, but we were able to complete the hike without much trouble.  I think we’re both looking forward to going on another backpacking trip, but we are now getting into the hot summer months.  Hopefully, we’ll be able to find a cooler weekend in the near future.

Christine Says…

When Mother Nature gives you the gift of a sunny, dry, 70-degree day in the midst of a long string of 90+ degree scorchers, you must take advantage of that gift!  We chose to make the most of the pleasant weather and go on an overnight backpacking trip.  One of the leaders on our last trip recommended Jeremy’s Run as one of his favorite places in the park.  As dayhikers (until recently), the Jeremy’s Run hike had always been a little out of reach.  At 12.4 miles with well over 2,500 feet of elevation gain, it was always more than we were willing to tackle on a day hike.  It seemed like a perfect candidate for this little weekend getaway.

After filling out all the requisite paperwork, we set out from the Elkwallow Picnic Area along the Appalachian Trail.  Right away, I was struck by how much heavier my pack was compared to our last trip.  On that trip, we had seven people to split the weight of group gear.  But this time, we had to carry our own stove, fuel, collapsible bucket, water filter, food and rope.  I also chose to carry my old dSLR camera, a couple card games, extra batteries, a fleece and my iPod.  In the end, my pack weighed in about nine pound heavier than our last outing.

I brought my iPod along this time for a couple reasons 1) I wanted to be able to listen to my “workout mix” when climbing a couple of the big hills on the route and 2) my iPod is loaded with audio books, which I thought would be pleasant to listen to after sunset in the tent.  The first big hill we hit was on the Knob Mountain Cut-Off Trail.  It was really steep, so I put in my earbuds and started chugging up the hill.  Listening to mindless pop music with a beat – anything from Tupac to Lady Gaga to Gnarls Barkley – makes climbing hills so much less painful.  I had worked up a pretty good rhythm, listening to the early 90’s party song, “Rump Shaker”, when I rounded a curve a spotted two black bears about 50 yards up the hill.  I’m not sure if they were a mom and a yearling or two adults.  We looked at them, they looked at us, then they quickly decided to leave the area.  I didn’t have time to free myself from my trekking poles and iPod cord to get a photo, but it was still a great treat to see the bears. Backpacking seems to involve an inordinate number of straps and buckles.  Sometimes, it makes me feel like a horse pulling a cart.

Christine On the Rocks
After camp was set up, Christine spent some time relaxing on the rocks in Jeremy’s Run. Below:  Adam collects water in a collapsible bucket to use for cooking later; Crocs and Socks – they might not be high fashion, but they’re functional; Playing Monopoly at camp.

Collecting Water Crocs and Socks Cards

After the cut-off trail met the Knob Mountain Trail, the tough climbing was over for the day.  I listened to my iPod a bit more, but eventually put it away in favor of listening to the birds and the breeze in the trees.  We took a snack break on the top of Knob Mountain.  There weren’t any views at the summit – just shade and a ton of poison ivy.  It felt really good to throw the pack off for a while and have a good stretch.  I could really feel the heavier pack weight bruising my hip bones.

The walk from the summit to Jeremy’s Run was all downhill.  The woods along the trail are pretty and occasionally open to views of the valley below.  You also get nice views of Neighbor Mountain, which lies parallel to Knob Mountain.  Another slightly longer loop hike option approaches Jeremy’s Run from Neighbor Mountain.

The downhill walk lasted a little over 3 miles.  We soon arrived at the stream, where the Knob Mountain Trail converges with both the Neighbor Mountain and Jeremy’s Run Trails.  We crossed the stream a couple times and decided it was high time to find a campsite.  We were both completely knackered after walking about 7 miles with our packs.  I honestly don’t know how thru-hikers cover 20-30 miles a day with even heavier packs.  I’m convinced I wouldn’t last a week!

We found a beautiful place for camp under the shade of pines and hardwoods.  It was clearly a place others have camped before.  Stones were arranged like seats in a semi-circle in one of the clearings.  It was also about 30 yards from a gorgeous spot along Jeremy’s Run – so we had great access to water.

We designated separate sleeping and kitchen areas right away.  Adam pitched the tent while I fixed lunch.  I made Buffalo Chicken Wraps – which were delicious. We found a place for our bear hang and dug a couple catholes for future use.  With camp all set up, we settled into our tent for a nap.

Post-nap, we collected water for cooking in our collapsible bucket.   On our water run, we also took some time to stretch out and lounge on one of enormous boulders in the middle of the stream.  The sky above was so blue and it was very soothing to watch the trees swaying above in the breeze. I actually tried out my Crocs again, and found them more comfortable, albeit considerably dorkier, with socks.  I may keep them as my camp shoes after all.

Filtering Water for Dinner
We filtered water for our dessert and boiled water for our entree. Below:  We had Pad Thai for dinner; Dark Chocolate Cheesecake for dessert.

Pad Thai Dark Chocolate Cheesecake

Around 5:30, we started getting things together for dinner.  Because this trip was rather impromptu, we brought pre-packaged dehydrated meals instead of taking the time to make homemade food.  But it was still delicious.  The Backpacker’s Pantry Pad Thai was filling and tasty.  It had a yummy, spicy peanut sauce with noodles and vegetables.  For dessert, we ended up having Dark Chocolate Cheesecake (instead of Tiramisu, as originally planned).  It was really tasty, too!  I was stuffed from dinner, so we decided to take a short walk down to a deep pool I had seen along the trail a way back.  We sat on a rock and just enjoyed the quiet of the evening.

It got dark quickly down in the hollow, so we retired to our tent a little before nine.  I listened to a book on my iPod and Adam read.  I started to doze off well before 10:00.  All through the night, I could hear a couple barred owls hooting, over and over and over again.  Pretty soon, a whippoorwill joined in and sang through almost the entire night.  I haven’t heard a whippoorwill since I was a child, so it delighted me to hear the song in the night again.  I slept pretty soundly, until the roar of a train whistle woke me up around 2:00 in the morning.  I could hear the wheels on the track so clearly; it seemed like the train was rolling through camp.  I guess some distant sounds really carry on the quiet night air.  When I awoke, I found I was drenched with sweat in my sleeping bag.  It was in the mid-50’s outside, so the down bag was a bit too warm.  However, if I slept outside my bag, I got cold quickly.  I want to get a blanket and sheet for my sleeping pad to make summer camping more comfortable.  Despite being hot or cold, I eventually fell back to sleep and stayed so until 6:30 a.m.

I got up before Adam and got the bear bag down, so I could start breakfast.  We ended up leaving the bacon home because we didn’t want to carry a pan.  Instead we had oatmeal, boxes of apple juice and hot chocolate.  It was a satisfying breakfast on the cool morning.

Bear on the Appalachian Trail
We saw three bears, including one on the Appalachian Trail.  Below: Another scenic pool on Jeremy’s Run; We encountered this loose dog on the trail (one of many).  He apparently lives on the border of the park and runs the trail often.;  Rocks in the stream bed were covered with moss.

Pool on Jeremys Run Loose Dog Mossy Rocks

We broke camp down quickly and were back on the trail around 8:00.  The second day of hiking was substantially shorter and easier than the first day.  With about 5.5 miles to cover, we knew we’d be back at the car by mid-morning.

The trail climbs ever so gradually along Jeremy’s Run.  We passed lots of fantastic campsites along the stream.  It’s no wonder this area is so popular with backpackers!  We crossed the stream 14 times over the course of the morning. Because of all the dry weather we’ve had lately, none of the crossings were challenging at all.  Most of them were bone dry, and the ones with water were still easily rock-hopped.

We took a snack break where the Jeremy’s Run trail crosses the Knob Mountain Cut-Off.  From this point, the trail follows the same route as we’d used hiking out the day before.  The grade becomes steeper for the last mile and eventually meets back up with the Appalachian Trail.  For this section, I put my iPod back on again to help endure the uphill.  “Rump Shaker” came up in the shuffle again, and after the first few moments, I spotted another bear.  There must be something about that song that conjures bears!  I did manage to get a few distant photos of this bear before he disappeared deeper into the woods.

About ten minutes later, we were back at our car and on our way.  We stopped by the Elkwallow wayside, where I rinsed my face and used  a flushing toilet!  Plumbing is so exciting after being without it.  On our way home, we stopped at McDonald’s for lunch.  Coke and salty French fries taste absolutely amazing after a long hike.  As luck would have it, their credit card machine was broken and they gave us our lunch for free!  It was a fitting bonus for a perfect trip.

Trail Notes

  • Distance – 12.4 miles
  • Elevation Change – 2600 ft
  • Difficulty – 3. If you were going to do this in one day without stopping, I would up the difficulty slightly due to the length.
  • Trail Conditions – 3.5. The trail was very well-maintained.  We saw evidence that the Knob Mountain trail had been cut back, but I can imagine in late spring, much of the trail could have some overgrown areas.  The ground was well-traveled and there were only a few rocky spots around the streams.
  • Views1.5. The best chance of views are on the descent from the Knob Mountain summit down to Jeremy’s Run.  After leaves fall, this may be slightly better.
  • Waterfalls/streams – 3.5. You do get lots of chances to cross Jeremy’s Run.  There was only a small fall near the base.  If you want to photograph streams, you should have plenty of opportunities.  You’ll also have a reliable water source.
  • Wildlife – 4. We saw black bears, a turkey, and scarlet tanagers; we heard whippoorwills and barred owls at night.
  • Ease to Navigate – 4. The trails are well-marked and just stick to the signs on the cement posts.
  • Solitude –3. This is a popular spot for backpacking and trail running.  However, we felt that we were able to find our own peace in the woods.  We also came across a dog that belongs to a nearby family that evidently roams the trails frequently, so we had a companion during part of the hike up from Jeremy’s Run.

Directions to trailhead:

Located in the northern section of Shenandoah National Park.  Park at the Elkwallow Gap picnic grounds around mile 24.3 of Skyline Drive.  The Jeremy’s Run trail begins next to the pit toilet at the parking lot.

Hazel Mountain – Catlett Mountain Loop

This nearly 8-mile loop takes hikers deep into a beautiful, remote section of Shenandoah National Park.  The trail passes bubbling streams, stands of hemlocks that haven’t yet fallen and crumbling stone walls left behind by families that used to live in the park.  This post could also be called part four of the Backpacking 101 series, because we did this trail as a backpacking trip with the great folks from the Potomac Appalachian Trail Club.

On the Hazel Mountain Trail
Walking the Hazel Mountain Trail was peaceful and green.

Adam Says…

This was our first overnight backpacking trip together and served as our graduation trip from the Backpacking 101 course we took through PATC.  We were unable to go on our previously-scheduled trip due to Christine’s sprained ankle she suffered on our Buzzard Rock hike. We were thrilled that our instructors gave us the opportunity for a make-up trip.  You can read our other sections of the review of this class in Part One, Part Two, and Part Three.

The outing leaders, John and Jeanne, chose the Hazel Mountain – Catlett Mountain loop for the trip. The hike winds around the mountains and through pretty forest, but doesn’t lead to any summit views.  The trail starts off from the Meadow Spring  parking lot around mile 33.7 on Skyline Drive.  Like many trails in Shenandoah National Park, the Hazel Mountain trail descends from the road.  You will stay on this trail until you reach the Catlett Mountain Trail.  The Hazel Mountain Trail is also marked on maps as a horse trail, so you may encounter horses on many of the trails around this area.

Day One Hiking: Shortly after leaving the parking lot, you will see a junction with the Buck Hollow Trail (a tough loop hike).  At .3 miles, you reach a trail junction with the Buck Ridge Trail (that is the loop back from the Buck Hollow Trail).  At 1.6 miles, you come to the first junction with the White Rocks Trail (another loop trail).  At 2.2 miles, you will see a post marking the junction with the Catlett Spur Trail, marking where you will rejoin the trail after you complete the loop.  While you just descended about 1000 feet, the trail begins to ascend from this point, gaining about 400 feet over the next .6 miles.  Around 2.8 miles, you will see the other junction with the White Rocks Trail.  Around 3.1 miles, you will reach the top of the climb and take a right to continue on the Hazel Mountain trail.  At mile 3.7, you will take a right on to the Catlett Mountain Trail.  We picked a campsite near the top of this trail, as it does provide a close proximity below to a spur of Runyon Run, a reliable water source on the trail.

Day Two Hiking: Upon leaving camp, you descend down to the stream we used as the water source.  Once you rockhop across Runyon Run, the trail ascends fairly steeply up 300 feet.  At mile 4.7, you will take a right onto Catlett Spur Trail.  The trail descends crossing over Runyon Run in a few spots.  You will eventually pass an old stone perimeter wall, marking land that may have marked a boundary for a settler’s house or farm.  At mile 5.6, you will come back to the junction with the Hazel Mountain Trail.  Take a left on the trail and ascend for the final 2.2 miles back to the parking lot.

Our Tent
Our tent set-up at camp. Below: The backpacking group at the beginning of the trip;  We took our packs off and enjoyed lunch at a boulder jumble near a stream; There were many different kinds of tents at camp… one of the group used a hammock.

Backpacking Group Backpacks Hammock

Christine and I had a great time on the trip.  We met up with our group at 9:30AM, reintroduced ourselves to each other, and got our packs ready for the trail.  We divided up some group gear that we needed to share for the trip and weighed our packs for curiosity.  I ended up with a little over 34 pounds in my pack and Christine had about 28 pounds.  I would say that our average for the group was a little under 30 pounds, so it was manageable for an overnight trip.  We hiked fairly fast, but we did take a few breaks to get a breather and eat some lunch.  We hiked onto the Catlett Mountain trail and found our campsite around 12:30.  We set up our tents and our kitchen area.  We put up a tarp and brought all of our dishes, utensils and food to the kitchen site.  Most of the group then decided to go down to Runyon Run, to load up some collapsible buckets for water for camp.  This was a chance for us to try out our new Katadyn Hiker Pro water filter to refill some water bottles.  When we hiked back up to the campsite, we happened to see an adult bear running from the direction of our campsite.  Unfortunately (or maybe fortunately?), we never saw him again.

Shortly after getting back to camp, we experienced a scary moment.  We thought two people had stayed back at camp when we went on the water run, but came back to see only John.  We started to hear shouts from the woods, but we couldn’t distinguish if the voice was shouting “Help” or “Hello”.  Our instructor grabbed his first aid kit and we continued to call back to the person.  We shouted “Are you hurt?” and “What’s your name?”, but we couldn’t distinguish the response.  We kept calling out and eventually we saw one of our group members emerge from the dense underbrush.  He had spotted a timber rattler that rose up against him.  He ran out of the way, but in his haste to get away from the snake, he got turned around and lost.  He had lost his whistle along the way, so he resorted to shouting to try and find his way back to the group.  It really shows that you can quickly get turned around and lost without your bearing in the woods.

We then learned how to hang a bear bag, tying a rock to a roop and throwing it over a branch (after dinner we substituted the rock with the actual bags to hang and tied the other end of the rope to a tree).  Since we had some time to kill in camp, Christine and I decided to take a quick siesta in our tent before dinner.  A storm quickly rolled in with loud thunder, high winds, and heavy rain.  It rained for close to an hour.  After it slowed to a light sprinkle, we made it back to the kitchen site, to find the rest of our group huddled under the tarp. Later, we ate an amazing dinner (which Christine will talk about) and cleaned up. After watching a nice sunset through the trees and hanging out with the group, Christine and I retired for the night.

Friendly Buck
This friendly buck visited our camp all weekend. Every time we were in our kitchen area, he came over to hang out.  Below:  Night falls at camp (notice all the rain on the tent!)

Night Falls at Camp

The next morning we got up early and worked on packing our gear.  We ate a wonderful breakfast and then broke  camp around 8:45AM.  We finished our hike, arriving back at our cars shortly after noon.  I think everyone was planning a victory meal after the trip, so we made a trip to McDonald’s in Luray.

We really enjoyed our first backpacking trip.  It was great to have this experience with the Potomac Appalachian Trail Club.  Our instructors were absolutely wonderful and really shared a lot of their experience with us.  It was also great to meet a lot of nice people through the Backpacking 101 class that share a common interest and experience level.  This trip really affirmed to us that we could handle doing an overnight backpacking trip and we are excited to try it again sometime in the very near future.

Christine Says…

On the eve of our backpacking trip, I was feeling exceedingly fretful.  I wondered if I’d be able to bear the heat/humidity without passing out. I worried that I’d be such a sluggish hiker that I’d slow the whole group down. I had concerns about the storms forecast for the day.  At one point when we were loading our backpacks. I looked and Adam and said “I don’t know if I’m cut out for this.”

But, wow… it turns out that I LOVE backpacking.  It was simultaneously fun, challenging and relaxing.   I was amazed at how comfortable my pack was – the 28 pounds felt balanced and easy on my back.  I may have sweated like crazy in the heat, but I managed to stay hydrated and felt really strong the entire hike.  I had such a sense of tranquility falling asleep in our tent after dinner, listening to the sounds of evening birds and the wind rustling in the trees.

I can’t say enough great things about our PATC (Potomac Appalachian Trail Club) trip leaders – John and Jeanne.  Their expertise made me feel really safe and confident on my “maiden voyage” overnight in the woods.  Actually, I have nothing but great things to say about our entire backpacking group.  Our fellow adventurers, Anthony, Suzanne and Ed were all friendly and fun people.

Adam Throws the Rope Over the Limb
Adam throws a rope over the fallen tree to create a bear hang.  He used a rock to make the throw easier.  Below:  A lot of planning went into picking the right spot for the hang; three waterproof bags were hung. The bags contained anything with a scent.

Planning the Bear Hang Bear Bags

Adam already did a thorough job describing the terrain and features along the route, so that leaves me to talk about FOOD (and maybe a few other things, too).  When I think of backpacking, I think of tuna pouches, power bars, beef jerky and freeze-dried, pre-packaged meals.  But, Jeanne is a true backcountry gourmand (she brought a lobster roll for her packed lunch!).   For dinner, we feasted on Chicken with Thai Peanut Sauce and Rice and Curried Couscous with Peas and Cashews.  We even had banana pudding, replete with fresh banana slices and Nilla Wafers for dessert.  Cleaning up was super-easy, since we did most of the cooking using Ziploc freezer bags.  You can pour boiling water right into the bags, and avoid dirtying a pot.  Individual utensils and bowls were cleaned by thorough eating (not a crumb left behind) and then sanitized with more boiling water.  People either drank the water or broadcast it into the woods – away from camp.  Either method is acceptable for Leave No Trace practices.  The main goal is not to send any food particles into the woods.

Breakfast the next morning exceeded all my expectations!  Of course… there was instant oatmeal and hot chocolate, but there was also real BACON and cheesy hashbrowns!  Jeanne brought Boar’s Head shelf-stable bacon, cheddar cheese, butter and dehydrated potatoes.  I decreed to Adam that we shall always have bacon when we go backpacking.  I’m totally spoiled for backcountry breakfast now!

Bacon at Camp
How cool is this… nice, crispy bacon in the backcountry.  Below: We also had cheesy hashbrowns for breakfast.  Below: On the hike out we passed several sections of old, stone walls; The group post-hike… all a lot sweatier than when we started.

Hashbrowns Stone Wall Backpacking Group, Post-Hike

Over breakfast, Adam and I spent some time talking to our trip leader, John, about everything from gear to favorite backpacking spots.  He’s like a walking encyclopedia of backpacking expertise.

I have so many fantastic memories from our first real backpacking trip… the outgoing buck that hung out with us all weekend, Adam sitting straight up in his sleeping bag (twice) to accuse me of being a bear, the feeling of being away from complications and civilization, but most of all, making new friends who might become future outing companions.

It was a rewarding experience, and I can’t wait to get out there again!

Trail Notes

  • Distance – 7.8 miles loop
  • Elevation Change – About 1000 feet, but there are also some ups and downs of about 400 feet on the Catlett Mountain-Catlett Spur Trail loop.
  • Difficulty – 3
  • Trail Conditions –3.  The trail isn’t too rocky, but is overgrown, especially the Catlett Mountain-Catlett Spur Trails.
  • Views0.  There were really no views of anything from this trail, since it is through a thick wooded area.
  • Waterfalls/streams – 2. Good water sources, but nothing too scenic.
  • Wildlife –4. With people in our group seeing deer, a bear, and a timber rattler, there should be a decent chance to see wildlife here. We also saw an American Redstart and a few red-spotted newts on the trail.
  • Ease to Navigate –3. There are lots of spurs off of the trails, but everything loops back at some point.  Pay attention to the cement posts and you shouldn’t have any difficulty.
  • Solitude – 2.5. The first section down to the White Rocks Trail seemed to include all the traffic that we saw.  This is popular with many day-trippers, since it is one of the first parking lots in the northern portion of the Central District of Shenandoah National Park.

Directions to trailhead:
On Skyline Drive, park at the Meadow Spring parking lot between mile markers 33 and 34.  The trail starts at the southern end of the parking lot.