Massanutten Ridge Trail

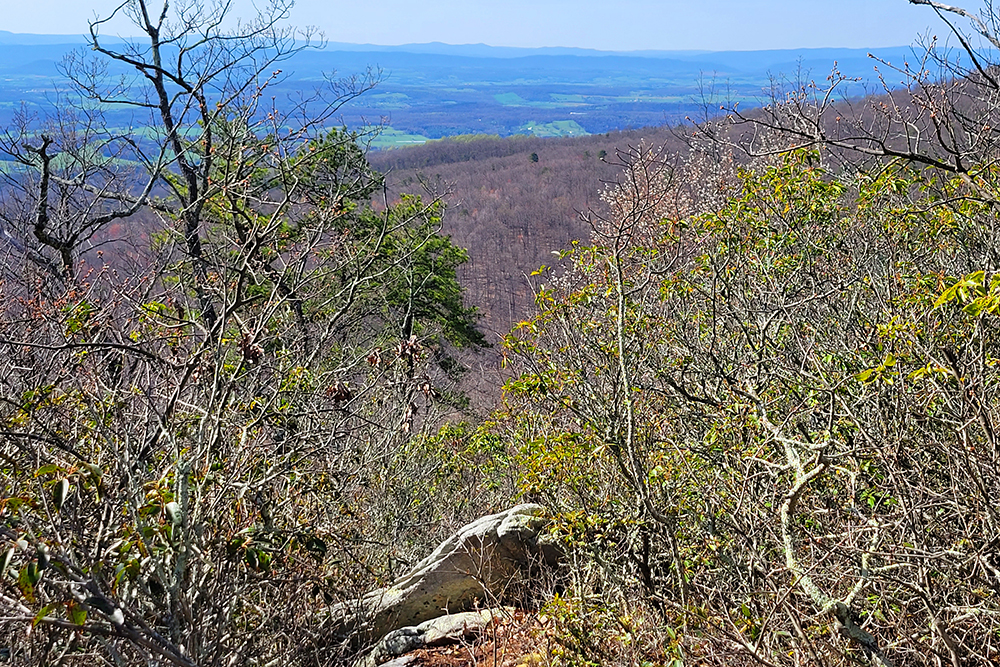
The Massanutten Ridge Trail is part of the network of trails on resort property. This hike departs from the overlook at the top of Del Webb Dr. in Massanutten Resort.   The hike is extremely rocky, but offers superb views from an outcropping above the ski lifts.

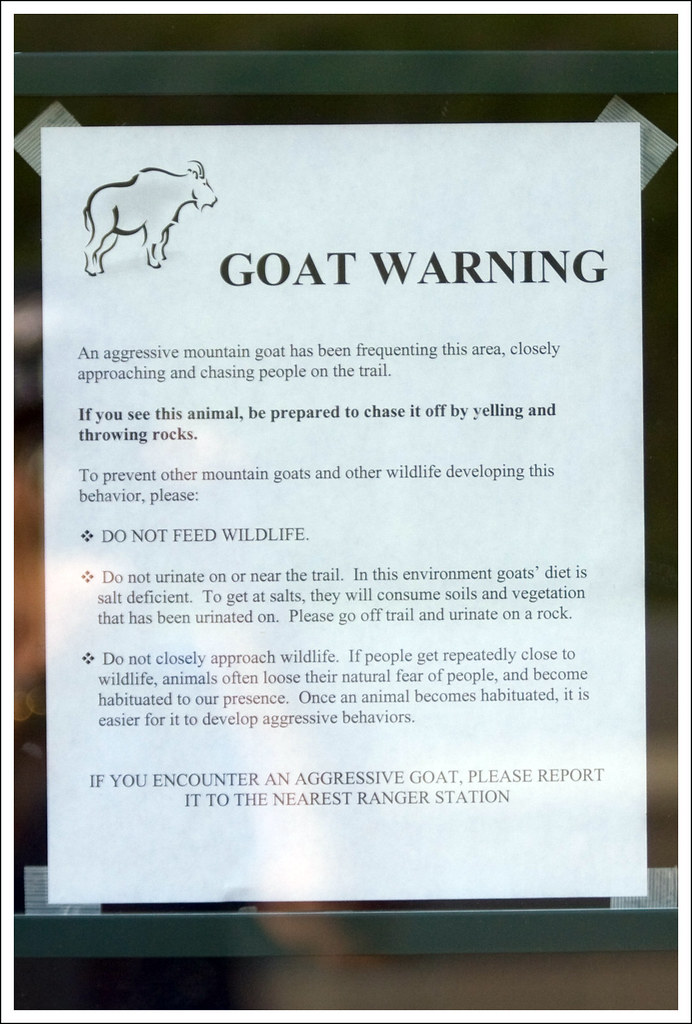
Update 6/6/2016:  As far as we’ve heard, no one has seen goats on this hike for quite a while, so they may no longer be there.  Also… watch out for snakes along the rocky scramble.  While there have been no reported sightings of goats, we have heard about multiple rattlesnake sightings.  Timber rattlesnakes are generally reclusive and non-aggressive. They would prefer to stay hidden and not bite, so be respectful of their space, but don’t be unduly afraid. 🙂

Chased by Goats
The friendly goats were the highlight of the Massanutten Ridge Trail. Below: The hike also provided beautiful views of the valley below; blueberries (not ripe yet) were abundant along the trail; The goats used us like human salt licks; When we tried to walk on, the goat chased us down the mountain.

View From Trail into Valley Blueberries The goats chased us on the trail

Adam Says…

If I could have a movie made about this hike it would be called “The Men Who Are Licked by Goats”.  Who would have thought that there would be feral goats on the top of Massanutten?

An online hiking group I had joined, Valley Hikers, completed the Massanutten Ridge Trail Hike recently, but I was unable to attend.  While we have been up to the beginning of this trail before, we hadn’t completed the entire hike before.  We recently did the Kaylor Knob hike, so we thought we would also take care of the other hike from the top of the Massanutten overlook.

We parked one car at the Massanutten General Store near the ski slopes and then drove to start our hike at the overlook at the top of Del Webb Drive.  At the parking lot, you are treated to views of the ski slopes and mountains around.  You start the trail by climbing up a staircase to get to the level ridge.  The blue-blazed trail starts with a fairly well-trodden wide path.  There are spots along the way to peak through to see some views along the first .25 mile.  Around the .5 mile marker, the trail becomes much rockier.  You will need to constantly look where your feet are stepping or you could easily sprain an ankle.  This rocky, difficult portion continues for about 1.5 miles.  At mile 1.25 on the trail, you come to a nice overlook on the right side of the trail to see some views to the North.  At 2.25 miles, the trail eventually joins a gravel road.  You will see some blue blazes directly across the road, but there is not a trail there.  Simply take a right at this junction and climb the gravel road to reach the cellphone towers at the top.  The trail picks back up just to the right of the highest cellphone tower.  As soon as you rejoin this trail, you will come to the best views on the trail at some rocky overlooks.  At mile 3.0, you will also see a hang-gliding ramp.  It is insane to think of people just running and jumping off of this.  To your left, you will be able to see the ski lift drop-off for the top of the Diamond Jim and ParaDice ski trails.  During the ski season, the lift area is blocked off (maybe to keep people from illegally jumping on the ski trails).  There was a rope blocking it off still, but the cordoned area does not completely block access to the trail.  Continuing past the hang-gliding area, the trail continues and you start your descent.  At mile 3.25, the trail leads to an opportunity to walk down the ski slope.  You could continue further on the actual trail, but we were unsure how close it would return us to our car.  We jumped on to the slopes to take a steep descent back to our car at 4.0 miles.  During this last .75 miles, you descend about 1000 feet of elevation.  I highly recommend taking trekking poles to help keep your balance as you navigate the steep terrain.

The hike followed the ridge and provided many views of Massanutten Resort and the valley on both the eastern and western sides. Below: The middle two miles of the hike was extremely rocky and required quite a bit of rock scrambling; A view of a pond at Massanutten resort; Eastern Fence Lizards in a mating dance; We even stumbled across a Box Turtle on the trail.

Rocky Footing View of Pond Eastern Fence Lizards Box Turtle

The highlight of the trip definitely had to be the goats that we saw at the top of the ski slopes.  As soon as they saw us, they came running toward us to lick the sweat off of us.  It reminded me of a sign that we saw during our trip to Olympic National Park, warning us not to urinate in public or goats would come.  They love salt and were quite eager to lick the salt off of us.  So, beware if you are not into that thing, but I thought it was funny.  The goats were extremely friendly and followed us around for a while at the higher elevations.

There are a couple of geocaches that you could do from this hike:

This hike was tough due to the trail conditions, but it was great to see the views and the wildlife on the trail.

Christine Says…

I had art shows to work over the weekend, so we needed to find a short hike that was located really close to our home.  The Massanutten Ridge Trail seemed to perfectly suit our needs. I thought the hike would be a piece of cake because the ridgeline has very little elevation change overall.  So, I was rather surprised to find that it was a real hike with challenging terrain.  The middle section had a lot of tricky footing and rock scrambling.  It was a constant up-and-down, resembling a small scale roller coaster. Normally, it would be the type of terrain I really enjoy, but I was fighting off a cold all weekend.  My stuffiness and fatigue made this squarely moderate hike feel a lot tougher than it typically would.  There were definitely a few scrambles where I would have been happy to hang-glide right off the side of the mountain just to avoid climbing over anymore rocks!

Goat -
The Goats were fun! Below: The cell towers on top of Massanutten are a real eyesore; trail markers along the trail are blue and show mileage; for the brave – there is a hang-gliding launch on top Massanutten; the sign shows gliding regulations and disclaimers; the mountain laurel was in full bloom along the trail; at the summit there were many vultures soaring.

Ridge Trail Marker Hanggliding Lauch Ramp
Trail Sign at Peak Mountain Laurel Vulture

My favorite part of the hike was the unexpected amount of wildlife we saw along the way.  It started off with a cute Box Turtle walking along the trail. Then we saw numerous Eastern Fence Lizards – two were even participating in a courtship dance.  There were lots of butterflies fluttering about and at the overlooks we saw plenty of vultures soaring on the thermals.  But the best part was seeing the two goats living at the top of Diamond Jim.  I spotted them first through an opening in the woods, and squealed “GOATS!”  I couldn’t stop laughing at the way they licked.  They went nuts for the salty sweat.  We decided to name the goats.  “Diamond” – the white goat – is shy.  She follows the other goat everywhere, but does not participate in the vigorous licking.  The red and white goat, we decided to name “Salt Lick”.  I think the basis of that name is pretty self-evident.

All in all, the Massanutten Ridge Trail was a pleasant surprise.  The views and the wildlife both far exceeded anything I expected.

Trail Notes

  • Distance – 4.0 miles as a shuttle trail or 6 miles out and back. (If you do this as an out and back, you will not be walking on the ski slopes and will likely miss the goats)
    (Check out the stats from MapMyHike – for the out-and-back – added 4/4/15)
  • Elevation Change – 1000 feet
  • Difficulty – 4. The elevation doesn’t change a lot initially, but the terrain will make it hard work and slow going.
  • Trail Conditions – 1.5. About 1.5 miles of the trail is rocky and then a very steep downhill at the end requires trekking poles to be safest.
  • Views4.  You get some different views along the way, but the best views are from near the cellphone towers and hang-gliding platform.
  • Waterfalls/streams – 0.
  • Wildlife – 4. There aren’t many places you get to see free-ranging goats and I think most people see them here.  We also saw lizards and a turtle.
  • Ease to Navigate – 3.5.  There was a couple of spots where it was a little difficult to see which way the trail goes, but since you’re on the narrow ridge, it is not hard to just stay on that ridge.
  • Solitude –3.5. We didn’t see anyone there, but you do typically see a lot of people on the initial trail.  The people you see will generally be during the first .5 mile.  Not many people continue on this trail after that.

Directions to trailhead:
From Harrisonburg, head east on US 33 for about 10 miles. Turn left at the Exxon on the left and head on SR 644, Resort Drive.  Follow this road and take a left on Massanutten Drive.  You will reach a guard house.  Let the guard know that you are here to hike and they will give you a guest pass.  After about 3 miles, take a right on Del Webb Drive. Follow Del Webb Drive for about two miles until you begin to drive up to the ridge, where there is a parking lot on the left.  The trail begins up the small, wooden set of stairs leaving the parking lot.

Flat Run Trail

Flat Run Trail is a short, fairly easy hiking and mountain bike trail in Douthat State Park.

Mountain Bike
A mountain bike works best on this trail. Below: The trail crosses the creek a couple times.

Bridge on the Flat Run trail

Adam Says…

After our hike up Beards Mountain, we decided to try out a short bike ride.  Douthat State Park is known to many bikers for having some great mountain bike trails and is host to the Middle Mountain Momma Bike Race.  We did see a couple mountain biking on our hike to Beards Mountain.  The man was looking happy at the top of the trail and the woman was pushing her bike up the hill looking miserable (I’m sure they had an interesting car ride home).

The Flat Run Trail is only a five mile out-and-back trail.  I would strongly suggest having a mountain bike for this trail.  Christine started off on her hybrid bike, but she didn’t enjoy jumping over the rocks in the creek without suspension.  I continued on the trip solo since I do have a mountain bike.  I found the trail to be fairly easy for mountain bikers.  There are a few large rocky creek beds to cross as the trail goes in between the main road and Wilson Creek.

After your first few creek crossings, you will come across a bridge pictured above at about the .5 mile point.  At the 1 mile mark, you should be able to see some great fishing spots to your left of Wilson Creek.  At 1.5 miles, you will see the swinging bridge that leads to the Brushy Hollow Trail.  At 2.25 miles, you will see the beginning of the Stony Run trail. At mile 2.5, you will reach the end with a trail that connects to a parking lot a few feet ahead to the right.  This marks the end of the trail, so you can return the way you came or bike along the road back to your vehicle.

While it was a short bike trail, I did enjoy seeing the creek along the way.  The trail wasn’t too bumpy (except for crossing the creeks) compared to other mountain bike trails I have done.

Christine Says…

I don’t have a mountain bike, so after two seconds of jarring bumps, I cut through the woods and continued riding on the road. That’s all I have to say about that.

Trail Notes

  • Distance – 5 miles
  • Elevation Change – Negligible.  Hardly any elevation change.  It is called Flat Run for a reason.
  • Difficulty – 2. Hiking or mountain biking it should be fairly easy. Most mountain bikers would give this a 1.
  • Trail Conditions – 3.5 A few creek sections to cross, but other than that, it’s well maintained.
  • Views0.  The trail is scenic in spots along the creek, but there isn’t anything very scenic on this trail.
  • Waterfalls/streams – 2. The path does run along Wilson Creek for part of the trip.
  • Wildlife – 1. You may see fish and minnows in the creek if you stop by to look.
  • Ease to Navigate – 4.5
  • Solitude – 4.  I  didn’t see any people on the trail.  I think for mountain biking, people do most of the more serious trails over this one.

Directions to trailhead: Take I-64 to exit 27 near Clifton Forge, VA heading north on state route 629.  Continue on this road until you enter the park.  In Douthat State Park, the trail begins about .25 miles south of the park office before the fee station.  However, you do need to pay the fee before parking and using the trails.  There is a parking lot and sign for the beginning of the trail.

Beards Mountain

Beards Mountain is a hike within Douthat State Park that provides lake and mountain views at various stages of the trail.

View of Douthat Lake from Beards Mountain
A view of Douthat Lake from the trail. Below: The trails in Douthat State Park are clear and well-marked.

Trail Signs

Adam Says…

This was our first trip to Douthat State Park and we were quite impressed.  The park contains over 40 miles of hiking trails.  The origin of the name “Douthat” is from a land patent given to Robert Douthat from the Governor Robert Brooke.  Part of this land makes up the park today.  The best guess as to how to pronounce the name I found was “dow-thut”.

Like most state parks, you have to pay $3 on the weekends to enter.  We went to the park office first to talk to someone about the two hikes we were contemplating – this one and Blue Suck Falls.  The Blue Suck Falls hike is close to 10 miles, so we opted for the shorter hike on this particular day.  Before we started, I wanted to check out two new programs that state parks are now offering.  The Trail Quest Program is something created to replace the state park passport program.  This program allows you to track the state parks you have visited online and there are some pins given as rewards based on how many you visit.  I started the passport system a while ago, which I have enjoyed, but I think this program is also a great idea.  The second opportunity is now all of the Virginia state parks are sponsoring geocaches.  Each park has a multi-stage geocache that leads you to a wildlife card for each park.  When you collect a number of these cards, you can also get some prizes.

View from the Trail
Most of the views along the hike were peeks through the trees. Below: Another glimpse through the trees; the stream along the Beards Gap Trail was made up of interesting terraced rocks; another view of Douthat Lake

Due to the tricky network of trails, I would recommend picking up a map at the park office.  The hike up Beards Mountain starts to the right of the park office entrance by taking the blue-blazed Beard’s Gap Trail.  This trail starts off relatively flat and crosses a creek a few times (it was dry when we crossed) before it starts an uphill climb with several switchbacks.  While I normally don’t enjoy switchbacks, this trail was well planned and it really takes the difficulty out of the elevation gain.  At 1.2 miles you will reach a trail junction and a hut that was created as an eagle scout project.  Take a left on this trail to join the yellow-blazed Mountain Top Trail.  At 1.7 miles, you will reach a junction of three trails.  You will see the Buck Hollow Trail and the Mountain Side Trail to the left, but you will just head straight continuing on the yellow-blazed Mountain Top Trail for the toughest climb of the trip.  At 1.8 miles, you will take a sharp right on a switchback and be able to see Douthat Lake below through the trees.  There are better views ahead.  The hike continues to climb up, leveling off around 2.0 miles, until you see a marker for the forest boundary around 2.5 miles.  At the marker, you will take a left to stay on the yellow-blazed Mountain Top Trail.  Around 2.7 miles, the trail begins to descend steeply.  Around mile 3.1 the woods will open up to reveal a very nice view of Douthat Lake below.  Around mile 3.4, as you are descending, you will come to another junction of trails.  Take a left on to the Mountain Side Trail.  This will continue be a fairly level trail that will eventually give you a third lower view of Douthat Lake around the 3.7 mile marker.  After the view, you will have a slight ascent back up to the familiar junction with the Mountain Top Trail.  At this junction, you will take a right down the blue-blazed Buck Hollow Trail.  Around the 4.7 mile marker, you will see a branched path that is marked as an Overlook Trail.  We did not go down that path this time, but it adds an extra .5 mile on to your trip.  Around the 5.4 marker, you will reach a junction and take a left on the white-blazed Wilson Creek Trail and you will cross a small bridge.  Shortly after rounding the corner, you will see a water tower that is on a gravel road.  Just cross the road and stay on the white-blazed trail.  The trail will eventually pass a few staff houses and a stone chimney around 6.9 miles.  Just travel the last .1 miles to reach the park office and your vehicle.

While we felt the views weren’t exceptional, we did really enjoy this hike.  We had a perfect hiking weather day with a cool breeze to keep from sweating profusely and to keep the bugs away.  We definitely plan on returning to visit and explore this park some more.  Most of the people that come here seem to come for fishing, picnics, and camping but I do think the trails we saw were very enjoyable.  While it was a longer hike, it wasn’t too tough to handle if you’re in decent shape.

Christine Says…

Beards Mountain was an enjoyable hike for a blustery spring day.  For a seven-mile hike, it was relatively easygoing. Most of the steep climbing was in the first third of the loop, which allowed for very pleasant downhill or level walking for the last two-thirds of the hike.

This was by far the windiest day I’ve ever been out in the woods – gusts were easily 45-50 mph.  The wind was really roaring through the mountains, catching on all the newly leafy trees.  Any time I looked up, I could see the treetops swaying and swirling dramatically above our heads.  Every now and then, we would hear branches snap – but thankfully none fell close to the trail.  It was nearly impossible to talk over the wind, so Adam and I hiked in silence most of the way.

Hiking Upward gave this trail a five-star rating for views, so I was really hoping there would be a pretty overlook to stop and eat our picnic lunch along the way.  Unfortunately, all of the views were merely small openings in the trees along the trail.  None of the viewpoints really had an off-the-trail space to sit and take in the view.  We ended up eating lunch along the ridge of Beards Mountain, near the National Forest border marker.  We love Hiking Upward, but have found that our opinions sometimes differ on what makes a five-star view.  For me, a top rated view has to be panoramic, unobstructed, offer a deep view into the landscape beyond and have a nice place for a couple people to sit and enjoy the vista. The views on this hike were nice, but I wouldn’t give them top marks.

Snake Along the Trail
We saw so many reptiles along the hike. Below:  The Visitor’s Center is both the start and end point of the hike.

Visitor Center

The descent on this hike was long and followed a (usually) gentle grade.  The one thing that made it tricky was the dryness/looseness of the soil and the narrowness of the trail.  There were a couple spots along the Mountain Side Trail that had precipitous drops on the downhill side.  For some stretches, the trail was only 12-18 inches wide – not even wide enough to use trekking poles.  Every now and then, a rock would slip off the edge of the trail, and bounce endlessly down the steep mountainside.   It made me think that someone could get hurt pretty badly if they took a wrong step.  On these sections, I just kept my eyes straight ahead on the trail and my feet.  If I looked downhill, I felt dizzy.

I think in early June, a lot of this loop hike will be extremely gorgeous!  I noticed a lot of the trail was lined with mountain laurel.  When it blooms in a few weeks, it should be amazing.

All in all, I was really impressed with Douthat State Park.  The trail system there is pretty expansive and well-maintained.  I’ll look forward to visiting the area again sometime.

Trail Notes

  • Distance – 7 miles loop
  • Elevation Change – around 1400 feet
  • Difficulty – 3.  Some sections are tougher than others, but we still felt it was fairly challenging.  The first couple of miles are the toughest.
  • Trail Conditions – 3.  The trails were in decent shape, but some were a little overgrown and there were some areas affected by landslides that made for a narrow trail and careful footing.
  • Views3.  The views are nice, but they are obstructed.  You won’t find overlooks with expansive views on the trail, but you do see pretty mountainous scenery through the trees throughout your hike.
  • Waterfalls/streams – 1.5 There are some streams that might be really beautiful in times with lots of rain.  The water was down to a trickle when we visited.
  • Wildlife – 2. We saw a couple of snakes on the trail, a few fence lizards, and some different bird species.
  • Ease to Navigate – 3.  The trail is well-marked, but there are a lot of intersections and different trails to make this a loop.
  • Solitude – 3.  We were surprised since it was a state park, but we only saw one hiker and a couple of mountain bikers on the trail.

Directions to trailhead: Take I-64 to exit 27 near Clifton Forge, VA heading north on state route 629.  Continue on this road until you enter the park.  Pay your fee at the gate and park at the park office just ahead on your right.  The trail starts to the right of the park office entrance.

Kaylor Knob

Kaylor Knob is a fairly easy 3.5 mile ridge hike offering nice (but slightly obstructed) views.  The summit is the highest point on Second Mountain.

Adam Says…

For those that regularly follow our blog, you may know that Christine sprained her ankle badly during our hike up Buzzard Rock.  While she was healing, we participated in a Backpacking 101 course through PATC. The workshop concludes with an overnight backpacking trip scheduled for the first weekend in May.  We decided to test out the ankle with some extra weight to see if going on the backpacking trip would even be possible.  So, we got our gear together and decided to do a short hike to Kaylor Knob after work last Friday.

While you can approach this summit from Cub Run, we decided to try the shorter approach,  taking off from the overlook at Massanutten Resort.  The hike starts across the road from the parking lot at the top of the overlook.  We have hiked this trail several times to the first overlook where a geocache is hidden, but this was the first time that we took the hike to the summit. 

Since the last time we did this hike, someone has improved the trail markings.  You simply follow the blue-blazed trail along the way (some points also have blue signs marked with a “K.K.” and the mileage).  At around .5 miles, you will come to a junction with another trail that is marked with pink blazes.  Just stay to the right and continue on the blue-blazed trail.  At .75 miles, you will come to a small rock outcropping that has a nice view to the west. 

If you continue up the hill past this outcropping, you will continue to walk along the ridge.  You will see views to the west and east through the trees that will open up at different spots.  At 1.75 miles, you will come to the summit, which is marked with a larger outcropping and nice views toward Shenandoah National Park. After taking some time to enjoy the views head back the way you came.

Adam tries out the backpack.

I do think the views to the east are better than the views to the west on this hike.  If you wanted to see a nice sunrise, you should get up early to make it to the summit by sunrise. 

This is a great short hike to do if you’re visiting the Massanutten area.

Christine Says…

Adam and I have a backpacking trip coming up, so I needed to get out there and give the ankle a good test drive.  Our original plan was to hike somewhere in Shenandoah on Saturday and then spend the night camping in our backyard.  However, the weather took a turn for the worse, and we ended up just squeezing in a quick hike to Kaylor Knob on Friday evening. (we also skipped the tent in the backyard  and slept in our nice, plush bed instead.)

I managed to load about 25 pounds of gear into our backpack for the “dress rehearsal”.  My ankle felt completely fine for the entire hike – stable and painless.  The pack was easy to carry and comfortable.  It did make the hills a little tougher, but I still felt really good.  I know our packs for the trip will be a little heavier, but this was still a decent test.

The Kaylor Knob hike is not particularly remarkable.  It’s pretty and peaceful and has two nice viewpoints along the way.  There are definitely more impressive trails in our area, but this one is a five minute drive from the house, so it was perfect for a quick after-work hike.

Note: If you have a couple days in the area, be sure to check out the Massanutten Ridge Trail!

Trail Notes

  • Distance – 3.5 miles out-and-back
    (Check out the stats from Map My Hike)*
  • Elevation Change – about 450 feet
  • Difficulty –1.5 Most people should be able to do this.
  • Trail Conditions – 3. While the trail is used often, it contains lots of pointy rocks.
  • Waterfalls/streams – 0. Non-existent.
  • Views – 2.5. Pretty, but not terribly open or panoramic.
  • Wildlife –1.5 There isn’t much room for wildlife on the top of this ridge.  Expect to see birds of prey soaring in view as well as many of the local birds in the thickets.
  • Ease to Navigate –4.5. If you stay on the blue-blazes, you’ll be fine.
  • Solitude –3. You may see some people due to its popularity with vacationers, but you should still have mostly solitude.

Download a trail map (PDF)

Directions to trailhead: From Harrisonburg, head east on US 33 for about 10 miles. Turn left at the Exxon on the left and head on SR 644, Resort Drive.  Follow this road and take a left on Massanutten Drive.  You will reach a guard house.  Let the guard know that you are here to hike and they will give you a guest pass.  After about 3 miles, take a right on Del Webb Drive. Follow Del Webb Drive for about two miles until you begin to drive up to the ridge, where there is a parking lot on the left.  After you park here, cross the road.  At the end of the guard rail you will begin the Kaylor Knob trail.

Part 2: Backpacking 101 with the PATC

Adam Says…

I must admit that had some anxiety about the Backpacking 101 course through Potomac Appalachian Trail Club.  I was a little worried about the status of Christine’s ankle sprain, the dynamics of the group, and wondering if people would be a little too “hard-core” about backpacking in general.

TREC Center
Most of the classroom sessions took place in the Turkey Run Education Center (T.R.E.C.)

I think all the worry was quickly alleviated once we started the weekend course.  Christine and I are both so happy that we signed up.

The first session of the day started with Trip Planning.  We brainstormed ideas on what you need to think about to plan a good backpacking trip.  I felt our group came up with great ideas and covered all of the necessities.  One group seemed more like the “party group” because they were concerned with who was bringing the frisbee, harmonica, and alcohol.  I don’t think most serious backpackers would want to lug the extra weight or dehydrate themselves with a bottle of whiskey.

Backpackers
These backpackers did a good job planning.

We then had a “Bio-Break”.  I remember when I saw this on the agenda initially, I was wondering what this could be.  It turns out to mean just a bathroom break.  Christine and I have started using this and I think we’ll teach this phrase to our dogs.   They also know “Go outside” and “Drain your lizard”, so what’s one new phrase for them to learn?

The next session taught us about clothing.   We learned about layering and the purpose for each layer of clothing.  This should help minimize what needs to be packed and ensures that our clothing is keeping our bodies at the right temperature and keeping us dry.  All of the students in class learned the mantra of “No Cotton”, since it gets wet easily and takes a long time to dry.

Next, we learned some basic skills in map reading, which I found to be quite easy.  I think most of the class was fairly confident with map reading, but it was great to work on map skills as small groups.  We also learned some basics on reading a compass.  I typically use my hand-held GPS, but it was good to have a refresher.   Our instructor suggested that we take a compass for when we leave the trail/camp for the bathroom.  We found a spot to approach and then followed the compass to get us there and back.

We took a short lunch break and then learned about the Ten Essentials that everyone needed to have available in their packs.

The instructors demonstrated different types of backpacks and talked about the pros and cons of internal frame packs, external frame packs, and frameless packs.  We split into groups based on height and learned about the different packs the instructors had.  We tried on various packs, discussed how to adjust for your individual needs, and then looked at how each of them were packed.  I personally liked the Gregory brand packs best, because I feel they worked a little better with my back and they gave some breathing room between my back which tends to sweat.   I ordered a Gregory Z65 and I’m excited to try it out.

The next session involved discussing sleeping bags and pads.  It seems that most backpackers go with a mummy-style bag.  They tend to be a little lighter, but they are not for the claustrophobic.  I know Christine will definitely want something different since she likes to not feel confined when she is sleeping.  I can usually fall asleep easily anywhere, so I’m not as concerned.   The instructor also showed us some different styles of sleeping pads (foam and self-inflating).   Again, I’m not as concerned about the type I get, but Christine will probably want a self-inflating pad, like what is offered from Therm-a-Rest.

Stove Demon
We saw a demo of a variety of stoves. Below: We liked the JetBoil.

We loved the JetBoil

Many of the people in our class decided to stay in Prince William Forest Park for the night.  We were staying with family nearby, so we didn’t brave the cold with the others.  Those staying overnight were given time to pitch their tents before dark.  This was a great opportunity for us to look around initially at some of the different tent options there are.  We did an instructor-led tour of the different tent options the next morning.

The end of the first full day involved a demonstration of stoves, cooking, and clean up.  We looked at a variety of stoves and talked about the benefits of each.  Our favorite that we will likely purchase is an integrated stove system made by JetBoil.  We felt that based on what we will likely do in the future, this will serve our needs well.  A co-worker is loaning me one this weekend to try out and learn more about.   The instructors then did a skit, acting out a “good backpacking trip” vs. a “bad backpacking trip”.  It was quite funny and showed the importance of planning ahead, delegating duties, and what to pack.  We then started on preparing dinner.   We split into four groups, with each group preparing a different meal.  This gave us all some experience with using a camp stove and understanding how things could be prepared in advance to save weight and time.  We had plenty to eat between all of the groups and we were able to sample a few of the other meals.  The one we cooked was rice-based, but flavored with cheese and dehydrated hamburger.  I think it was my favorite.

We all enjoyed a great camp dinner
Cheesy Rice and Beef.

After everyone had enough to eat, we worked on cleaning the pots.  Cleanup is a necessity and does have to be done after each cooked meal.  We learned different techniques of Leave No Trace ethics to ensure that cleanup was done in a way that leaves little to no impact on the environment.

I really felt liked I learned a ton of information in this first day of class and we were looking forward to another full day.  I felt the PATC did a wonderful job of explaining all the different types of gear and how to prepare for a backpacking trip.  After the next day of sessions, I feel well-prepared and excited to go on our first trip.

Buzzard Rock

This 4 mile out-and-back hike takes you to a ridge walk with views of Fort Valley below.

Adam on Buzzard Rock
From Buzzard Rock, you get a great view of Passage Creek and Fort Valley below. Below: The view below from this vantage point; Scrabbly pines are the predominant tree at the summit

View of Fort Valley

Adam Says…

This was the first time that we had done this hike.  The hike seems to be very popular for people from nearby Front Royal, Winchester and Northern Virginia.  It is not too difficult of a hike, which makes it a great hikes for families and newbie hikers.

You start the trail from the parking lot and you’ll follow the double white blazes for the entire trip.  You begin walking through a piney area that will smell nice if the area has been warmed up in the spring/summer sun.  The trail has some hills to go up and down and a few small streams to cross.  Around 1.0 miles, you will arrive at a frequently-used campsite.  Just cross the campsite and continue up the trail for about another .75 miles until you reach the first overlook.  You will continue up the hill to reach the ridgeline.  Continue to hike across the ridge to take in the views from different angles.  Once you feel that you have seen all that you would like, you can return the way you came.

Trail Sign
The trail is well-marked and connects to other local GWNF trails. Below: Lots of stuff along the trail is in bloom now; the rocks at the top are covered in lichen.

Blossoms Flowering Trees Lichen

For any of those people that are interested in geocaching, you can grab three easy ones along the trail.  All of them are normal-sized containers and have some things to trade.  One of these was placed by our inspiration for a lot of hikes, Hiking Upward.

Unfortunately, this trip was marred for us since my wife sprained her ankle very badly at the top of the ridge.  She somehow managed to hike back down under her own power despite my offerings to carry her down – quite a trooper!  We definitely will do this hike another time.

Christine Says…

Buzzard Rock was a beautiful hike for a beautiful spring day.   The summit offers a great scenic payoff with minimal effort.  The elevation gain of 650 feet is very gradual with the exception of one very short, steep climb to the ridgeline.

The early part of the hike passes close to civilization, so the sound of cars and glimpses of houses are always in sight.  However, within a half a mile, the trail leads away from everything and passes through a pretty stretch of open woods with very little undergrowth.  In early spring, the forest floor is covered with tiny wildflowers peeking out from under the brown leaves. The view from the trail eventually opens up and provides a nice view of the Front Royal Fish Hatchery and the surrounding valley below.

The view of the valley below is beautiful! Below: The Front Royal Fish Hatchery; A view of the Buzzard Rock “spine”

From this point on the trail is extremely uneven and rocky – big slabs of stone, angle up out of the ground like jagged teeth… more about that later.  The view from the top is not as dramatic as other Virginia hikes, mostly because you can’t see many distant layers of ridges.  What you do see is a deep, narrow valley below with Fort Valley Road and Passage Creek winding their way through.  Because of all the recent rain, we could hear creek’s roar even hundreds of feet above.

We enjoyed the view, had some trail mix and then headed back down the mountain.  I stopped along to way to photograph some flowering trees.  When I turned to rejoin Adam, I moved a bit too hastily and carelessly.  The toe of my boot got caught between two of the “jagged teeth” on the ridge.  My toe stopped dead, but my ankle kept moving.  It completely rolled to the side, resulting in a bad Grade 2 ankle sprain.

I was extremely glad to get back to parking lot so I could stop walking on my injured ankle. Below: My bruised and deformed ankle.

My ankle immediately started to bruise and swell, but I had no choice but to hike myself out.  Adam found a makeshift walking stick in the woods, and that helped offset weight on my injured foot.  Nonetheless, it was a long two miles back down to the car. I’ll be off the trails for several weeks to come while my ankle heals and rehabs.  I’m hoping it won’t take as long as the doctor predicted.  I hate to waste three (or more) weeks of this fantastic spring hiking weather.

Wookie Says...Wookie Says…

This was a great first hike of the year for me!  It wasn’t very steep, and I love to scramble on rocks.  What I liked less were all the small stream crossings on this trail.  I hate to get my paws wet and muddy, but that’s exactly what I ended up doing on this hike.  I actually acted quite brave, and on the return trip I crossed all the streams with confidence.  Maybe I’ll be a water loving dog yet!

Wookie on the Trail
Wookie had a great time on the hike.

I really enjoyed the breezy overlook atop Buzzard Rock.  I liked sniffing the air and feeling the sun on my back.  I even got to enjoy a few graham crackers from my masters’ trail mix.  I also got some water from my portable dog dish.

It was a great day, but I have a feeling I’m getting a bath when I get home.

Trail Notes

  • Distance – 4 miles – out-and-back
  • Elevation Change –around 650 feet
  • Difficulty – 2 This trail isn’t too steep and most people should be able to make it up to the top.
  • Trail Conditions – 3. The trail is in decent shape.  There are some muddy spots and a lot of jagged rocks on the ridge.
  • Views –3.5. There are great views along the entire ridge.  We would have liked it better if we couldn’t see a road below.
  • Waterfalls/streams –1. There are a few rock-hops across some streams, but nothing photo-worthy.
  • Wildlife – 1. This is a better bird-watching trip than a trip for spotting any mammals.  We were glad we saw a buzzard at the top since it is their rock.
  • Ease to Navigate – 4.5. The trail is well-marked with a white double blaze.
  • Solitude – 2 . This is a popular trail for local families and also rock climbers.

Directions to trailhead: From I-66, take 340 South Exit. Take a right on 55 – Strasburg Road. Take a left onto 678 – Fort Valley Road. Take a left onto Mountain Rd., Route 619, towards fish hatchery. Parking lot is on the right-hand side. If you are arriving from the south, go up 340 (following directions for Front Royal Airport) until you reach 619-Rivermont Drive. After a few miles, Rivermont Drive becomes Mountain Rd (At sharp right bend ~1/2 mile past Fire Dept.). Parking lot is on the left-hand side just past Massanutten Farms Rd. If you reach the fish hatchery or Fort Valley Road you have gone too far.

Corbin Cabin – Nicholson Hollow

This 4.2 mile hike leads you to a PATC cabin as well as a cabin once owned by a family from the mountain.

The Corbin Cabin sits alongside the Hughes River in what used to be known as Freestate Hollow.

Adam Says…

It was great to finally get out and do some hiking after the harsh winter!  I think it had been since November since we were able to actually enjoy a hike.  After some debating on which trail would be “less muddy”, we decided to try this hike.  We were surprised that the ground was actually in good shape and not muddy like we were expecting. The hike’s main draw is the historical interest.  The Corbins and Nicholsons were two families that lived in this area since the end of the Revolutionary War until the park authorities made them leave.

You begin the trail from the cement post across from the parking lot.  You start the trail walking through an area of mountain laurel that will bloom nicely in the Spring.  The trail descends through an elevation loss of 1500 feet over 1.4 miles.  Around the first half of a mile, you will begin to see a stream off to your left.  At .9 miles, you will come across some of the remnants of the families that inhabited this hollow through views of a rock wall to your right.  Downhill to the left you will see ruins of John “Russ” Nicholson’s cabin.  At 1.4 miles, you will hear the rushing of the Hughes River and see the ruins of an old cabin to the right that belonged to John T. Nicholson.  You can walk over to this area and peek inside to see the small one-room dwelling.  There is lots of glass and rusty metal, so be careful if you inspect this area.  You will see the Corbin cabin across the river.  You will need to rock-hop across the river, which is usually not too difficult.  This time, the water was higher than normal and we only had to partially put our feet in the water to get across.

The Corbin cabin is available to rent from the Potomac Appalachian Trail Club.  There are access points here to connect to Old Rag.  We plan on trying that out in the future sometime for a weekend of living like mountain folk.

The Nicholson Cabin
The Nicholson Cabin is across the river from Corbin Cabin. It’s slowly sinking back into the forest.

After you cross the creek to the cabin, take a right to join the Nicholson Hollow Trail.  After a short distance, you will have to do a little more rock-hopping as it crosses Indian Run.  You will start your steep ascent back up to Skyline Drive and at 3.6 miles you will reach the road.  When you come to Skyline Drive, take a left, heading south for about 75 yards.  You will cross the road and join a short spur trail.  After less than .1 mile, you will come across an intersecting trail with a cement post.  This is the Appalachian Trail.  Take a right, heading North on the Appalachian trail, you will descend and ascend for another .6 miles until you reach the parking lot.

Christine Says…

While this hike doesn’t offer any waterfalls or sweeping views, it does provide one of the park’s best peeks into area history.  The trail begins steeply downhill for about a mile until you reach the bottom of the hollow.  It’s a big drainage area with many small streams that pour into the Hughes River.

I love seeing all the remnants of old homesteads tucked into the woods. The main homesite, which lies on both sides of the Hughes River is such a perfect and idyllic spot.  If I were to choose anywhere in the park to build a home, I think it would be right here.  I can understand why John Nicholson was so heartbroken to leave.  I love to imagine what it would be like to go to bed each night listening to the bubbling sounds of the river and see the sun rise each morning between the mountain folds visible from the front porch.

We had the homesite to ourselves for a little while.  Fifteen minutes later, a couple guys with fishing poles arrived and we were on our way.  The long arm of the loop starts from Corbin Cabin and climbs steadily uphill for about two miles.  Most of it is moderate uphill climbing, but one section that passes through a thicket of mountain laurel is quite steep.  The final .6 miles of the hike follows the Appalachian Trail.

On the AT, we encountered a lost beagle.  She leapt out of the woods at us, probably expecting to see her people.   She had a collar, an identification tag and the remnants of a broken/frayed leash.  As soon as she realized she didn’t know us, she darted back into the woods.

We love dogs, and there was no way we were going to leave the beagle behind.  We tried to corral her in, using low voices and lots of “Good dog!” calls.  However, she was obviously terrified of strangers and started howling pitifully.  Bit by bit, we were able to get closer and closer to her.  We were just about to catch her when heard voices shouting down the trail, and the dog sprinted away.  Thankfully, this time she was running toward the call of her owners.  They were all happily reunited.  It turns out the dog broke her leash four hours earlier when she chased something away from camp.

I guess even when they’re leashed, dogs can get into trouble in the park.  I’m always surprised how many dogs we see running free with hikers.  It’s both good practice and park policy to keep dogs leashed on park trails.

Since this was our first real hike of the season, we were both pretty tired at the end.  We’re definitely looking forward to hitting the trails more regularly now that the weather is turning warmer.

Trail Notes

  • Distance – 4.2 miles – loop.
  • Elevation Change –1500 feet.
  • Difficulty – 3.5 The hike descends and ascends fairly steeply.
  • Trail Conditions – 4. The trail is in good shape.  There were a few blown-down trees covering the trail due to the winter.  Leaves on the trail make for a slick surface when going downhill.
  • Views –0. You are deep in the woods for the entire hike.
  • Waterfalls/streams –2. Near the cabins, you have a nice opportunity to see the Hughes River.
  • Wildlife – 1. We didn’t see anything alive, but found remnants of deer that didn’t survive the winter.  Expect to possibly see bear in the area.  Heard pileated woodpeckers and saw juncos.
  • Ease to Navigate – 4. Trails are clearly marked.
  • Solitude – 3. This trail isn’t the most popular due to the steep terrain, so you should likely only encounter people around the cabin and river.

Directions to trailhead:
From Skyline Drive, park on the western side at mile marker 37.9. Cross the road.  The trailhead begins at the cement post across from the parking lot.

Adam’s 2009 Hiking Highlights

Since Christine did some of the best in different categories, I thought I would do what is typical of most year-end reviews and do a top nine of ’09 list.  Here are my favorite hikes of the year:

9. The Priest – We’ve heard amazing things about this hike and we weren’t disappointed.  You can truly contemplate and appreciate nature while taking in the scenery at the top.

This View of McAfee is an Appalachian Trail Icon

8. McAfee Knob – This was our first time doing this hike, but I know we’ll want to go back sometime.  The summit gives you some amazing panoramic views.

7. Hawksbill Summit Loop – We really enjoyed the ability to see the peregrine falcons and talk to one of the volunteers who has been monitoring their nest.

The Brown House (as opposed to the White House) is where President Hoover stayed.

6. Mill Prong – Rapidan Camp – We had a wonderful time doing this hike.  Wading across the stream and getting a private tour of President Hoover’s retreat cabin made this a memorable trip.

5. Mary’s Rock – Starting our trail from the Jewell Hollow Overlook this time led to a wonderful ridge hike that made it much more enjoyable than previous trips.

Gorham Mountain's mix of mountain and ocean scenery makes the hike an annual favorite.

4. Gorham Mountain – This hike we did in Acadia National Park.  It is probably one of our all-time favorites and one we do every time we visit Maine.  This time, we had a lot of fog move in right after we reached the summit, but it is one not to be missed.

3. Mount Morgan – Mount Percival Trail – This trail we did on our visit to the White Mountains of New Hampshire.  The hike included a lot of interesting hiking to include climbing a series of ladders and navigating a cave crawl-through on the way down.  Great views.  The only letdown was Christine got stung by some weird insect which caused her to not feel great on the way back.

The Cold Mountain Summit

2. Cole (Cold) Mountain – This was a pleasant surprise to us.  I had heard good things about the hike, but this blew away my expectations.  Great views as you walk along the summit.  It really helped that we had a great day for fall foliage.

1. Mount Rogers – While we thought this day was going to be covered in fog, it turned out to be a marvelous hike.  This hike is what gives Virginia Highlands its name – gorgeous views all along, varied terrain, and the bonus of wild ponies.

South River Falls

This 4.6 mile hike leads you along the South River to an impressive waterfall that plunges deep into a canyon.  When the park has experienced lots of rain, this waterfall hike is one of the nicest Shenandoah has to offer.

Cascades along the South River
The South River is impressive in times of heavy rain.

Adam Says…

We have kept with a tradition the last few years of doing a hike on Thanksgiving morning.  It’s a great way to appreciate nature and try to do something active before a big meal.  This year, we decided to break the tradition of having a huge Thanksgiving meal with turkey and all the trimmings.  We decided to have an easier meal that we would both enjoy – homemade pizza.

We’ve hiked South River Falls before, but we’ve never had as much water in the falls before.  We thought it would be impressive, since we could hear rushing water through the South River a lot earlier than normal.  Waterfall hikes in Shenandoah National Park tend to be fairly tough ones.  Since you park on Skyline Drive at a high elevation, you have to hike down to the valleys where the falls are created.  What makes it difficult, at least psychologically, is that you get to the payoff fairly easily and then have to do the hard work on your way back to your vehicle.

The South River right at the crest of the waterfall.
The beauty of the South River is found mostly in its small details. The cascades and little falls leading the large waterfall are prettier than the main waterfall.  Pictured below: South River Falls from the overlook at the top of the canyon; the falls from the base.  You’ll see neither vantage point of the waterfall is terribly photogenic (especially after the leaves have come down). Both of the small photos below are from another date.  This time, the falls were much bigger – but it was too sunny to photograph them.

The view from the top of the canyon. The view from the base of the falls

The hike begins at the South River Picnic Area.  Look for the large sign about the hike on the northeastern side of the picnic area.   At slightly over .1 mile, you will cross the Appalachian Trail.  You will continue your descent and around 1 mile, you will rock-hop across a small creek that drains into the South River.  Usually this is not much of a challenge due to the water, but we found the water was higher than normal this time.  At 1.3 miles, you will come to a nice overlook for the South River Falls.  You really get a great view of the 83 foot waterfall.  It plunges to a rocky ledge and splits in two about half of the length of the waterfall.  If you continue on the trail for another .2 miles, you will arrive at a cement post and join a spur to the South River Fire Road.  If you continue on for another .2 miles, you will descend even further and arrive at another cement post.  Following the path from the cement post for another .1 mile, you will arrive at the base of the falls.  For any adventurous shutterbugs, there are ample opportunities near the base of the falls for long-exposure photography. Make sure you have your strength up, because you have 2.2 miles to hike at a steady incline back to your vehicle.

To follow the trail as a loop as we did, once you make your return from the base of the falls, go .7 miles until you reach the cement post and the junction with the South River Falls Trail. Stay on the fire road instead and after .4 miles more, you will reach the yellow-blazed South River Fire Road.  Take a left on the road.  In about a mile, you will reach the junction with the Appalachian Trail.  Take a left on the white-blazed AT, heading south for about .4 miles.  You will then reach the junction with the South River Falls Trail and only have about .1 mile to reach the picnic ground.

The hike was a tough one, but it was nice to get some exercise.  The thought of carving into our pizza helped us muster the energy to make it back.

Christine Says…

This was a great trail to burn off Thanksgiving calories!  The terrain is rugged and the return arm of the loop is nothing but steady, tough uphill climbing.  Even Wookie, who is normally a bundle of boundless energy, got quite tired on this hike.  By the time we got to the Appalachian Trail junction, his corkscrew tail was completely unfurled.   Even though there are some hikes in the park with more elevation gain, I think the 1300+ feet on the South River trail provides some of the park’s tougher climbing.   Anyone looking for an easier version of this hike should consider doing the short loop (3.2 miles) that returns after the overlook at the top of the falls.  By taking that route, you reduce the elevation gain to a very manageable 850 feet.

Despite the hard work required to get there, I really enjoyed seeing the South River and its namesake falls so flush with water.  The Shenandoah area has had over five inches of rain in the month of November – more than double the normal amount.  All of the park’s streams, rivers and waterfalls are flowing beautifully right now.  It’s a great time to get out and enjoy the scenery and the less-crowded conditions in the park.

Cascades along the South River
There are many small, but beautiful, waterfalls along the trail. Pictured below: Another pretty spot along the river.

Cascades along the South River

I had hoped to get some photo opportunities along the river on our Thanksgiving hike.  I did take a few shots, but the weather was less than cooperative.  It was too sunny to take shots of the moving water. Every now and then, I found a shady spot down in a deep ravine.  I did a bit of bushwhacking to get to a few pretty spots, but overall I don’t feel like I came home with any special photos.

Honestly, while South River falls is probably the park’s most impressive waterfall, it is not one that translates nicely on film.   The falls plunge into an enormous natural amphitheater.  The sheer rock walls are amazing, but they aren’t photogenic.  I’ve seen a few nice shots of South River Falls in the spring, when the water is flowing and the falls are surrounded by the lush new green of the trees and plants.  In the late fall and winter, the falls are really scrubby and barren looking.

I think some of the prettiest and most dramatic places along the South River come at the bottom of the falls.  In the last .1 mile of the trail, leading to the base of the falls, the water tumbles over a hundred feet down over giant boulders.  There are many small, beautiful waterfalls to enjoy before you get to work climbing back up to your car.

When we got home from our hike, we found several TICKS!  Can you believe it – ticks in late November; ticks after the mountains have had snow and temperatures at night are regularly below freezing?  These were tiny ticks – about the size of a pinhead.  We pulled one off Adam’s sweatshirt and two off of Wookie.  I hate having to watch for ticks year round, but it seems that we must.

Wookie Says...Wookie Says…
Hey all of you fellow hiking dogs.  It’s been a while since I’ve been hiking, so I’m going to let you know what I thought of the trail.  I enjoy getting the chance to get in the outdoors and I usually run laps around the house when my masters ask,  “Would you like to go on a car ride?”

The hike on South River Falls was pretty fun for the most part.  I enjoyed going downhill until I reached the stream to try and rock-hop.  I’ve done this hike before with my masters, but there was a lot of water this time around.  I don’t really like to get my feet wet and when I see any water on the hike, I try to take the driest option.  After Adam crossed the creek, I really didn’t want to follow him.  Only after Christine gave me a little nudge with her trekking poles, did I take the plunge and hop across the rocks.

Wookie Enjoyed the Hike
Wookie enjoyed the hike, but was exhausted the rest of the day.

All the rushing water on the trail, really made me need to go to the bathroom.  I tried to make my mark as much as possible to let all my fellow canines know that Wookie was here.  The hike back from the falls was pretty brutal for a small dog like me.  My tail was down a lot of the trip back, because it was exhausting.  At least I got some pizza scraps and a taste of sausage instead of turkey scraps this year.  For that, I was truly thankful.

Trail Notes

  • Distance – 4.6 miles – loop.
    (Check out the stats from MapMyHike – added 5/16/15)
  • Elevation Change –1315 feet.
  • Difficulty – 3. The return arm of the circuit climbs steeply uphill along a fire road for two straight miles.
  • Trail Conditions – 4. The trail is in great shape.
  • Views –0. You are deep in the woods for the entire hike.
  • Waterfalls/streams –4. In times of heavy rain, the South River is an impressive stream.
  • Wildlife – 0. We didn’t see *anything*, but over the summer there was a bear with three cubs in the area.
  • Ease to Navigate – 4. Trails are clearly marked.
  • Solitude – 2. This trail’s proximity to a park entrance makes it a popular hike.

Directions to trailhead:
From Skyline Drive, follow the drive to the South River Picnic Area (near mile marker 62).  The trailhead is located at the back end of the picnic grounds, across from the restroom facilities.

South Valley Trail

The South Valley Trail is a part of the 35 miles of hiking trails in Prince William Forest Park.  It is a nice stroll that takes you along the Quantico Creek.

Quantico Creek in the fall.
Even though the foliage was past peak on our hike, there were still some pretty spots along Quantico Creek.

Adam Says…

We went up this past weekend to visit Christine’s parents.  Her dad’s birthday is on Halloween and he usually likes to do something active to help celebrate.  He suggested a possible bike and hike in Prince William Forest Park.  We were expecting a lot of rain that weekend, so we decided to just do a hike.  While it was raining a little before we got there, we managed to do the hike with only a light drizzle at the end of the hike.

The sign marking the South Valley Trail
The South Valley Trail runs in a large loop around the park.  Pictured below: The hike starts off on Mawavi Road; A bridge over Quantico Creek;  Adam checks out evidence of beaver activity.

Walking down Mawavi Road The arched bridge at the end of the lake Evidence of beaver activity in the area.

Many people do not realize that Prince William Forest Park is part of the National Park Service.  The land was given this protection to find a new use for the land under Franklin D. Roosevelt’s New Deal.  It was used as a training school for the military during World War II, but was turned back over to the Park Service in 1946.

While the overall South Valley Trail is about nine miles, we decided to do the portion that highlighted the South Fork of Quantico Creek.  Her dad dropped a bike off at parking lot “I” and then we proceeded to lot “G” to start our trip.  Christine’s father used the bike as a shuttle at the end of the hike.  Upon reaching lot “I” at the end of the hike, he biked back to the car and then returned to pick the rest of us up.

We began by walking on Mawavi Road.  In about .4 mile, it intersects with the South Valley Trail.  We took a left on this trail.  The trail runs along Quantico Creek for the majority of the rest of this hike.  Shortly after joining the South Valley Trail, you will see a very narrow lake.  There are a couple of cabin camps on the opposite side of the lake, which are often used by Boy Scouts.  In 1.6 miles from the start, you will reach a junction with the High Meadows Trail.  Continue straight on the South Valley Trail until you reach the Scenic Drive.  Take a right and head down the road to your other vehicle at parking lot I, just about a tenth of a mile ahead.

Quantico Creek was dammed to create a lake.
Part of Quantico Creek has been dammed to create a lake. There is a group camp on the lakeshore.

We were expecting to see more color in the leaves this year, but it seems that things near the creek were a little past peak.  We did see lots of signs of beavers in the area, but we didn’t see any actual beavers.  The bridge and lake were interesting to view along the way, but this was more of a nice stroll through the woods than a momentous hike.  The grade during this hike was a mix of hills and flats, so most people could attempt this hike without much difficulty.  What amazes me most about this area is that it doesn’t seem to be heavily used.  You would think with the proximity to D.C. and the hordes of Northern Virginians, that it would be crawling with people.  But, we’ve been here several times and there doesn’t seem to be that many visitors.

Christine Says…

I’ve hiked along the South Valley trail many times over the years.  When I was a Girl Scout, we camped in the park frequently.  We took many day hikes along this trail.  As an adult, we’ve hiked it as a family several times.  In fact, it was the first trail we hiked after my younger brother returned from his first tour of duty in Iraq.   Like Adam said,  the South Valley trail is nothing spectacular.  There are no grand vistas or thundering waterfalls.  Instead, it’s simply a place to enjoy a quiet and peaceful walk through the woods.

There wasn't much foliage left, but this tree was pretty.
There wasn’t much colorful foliage left on the hike.  Pictured below: A pretty spot along the creek.

Quantico Creek in the fall.

The foliage was about a week or two past peak when we hiked this year.  There were a few ginkgo and beech trees still holding onto golden leaves, but most of the trees were bare or brown.  The last time I hiked this area was fall of 2007.   Even though it was much later in the season, the color lingered until almost December that year.  The photos below were taken on November 17, 2007.   I guess this is even more evidence that fall came and went early this year.

The foliage along this hike was much prettier in 2007.
The foliage along this hike was much prettier in 2007. Pictured below: A couple more shots from fall 2007.

The foliage along this hike was much prettier in 2007. The foliage along this hike was much prettier in 2007.

The terrain of this hike is very easy.  Since Prince William County doesn’t really have mountains, the park lacks tough grades and long climbs.  I would describe the trail as crossing rolling terrains.  You’re almost always walking uphill or downhill, but ascents and descents are never steep or long.  Quantico Creek is a lovely and lazy waterway along the trail.  There are a few places where the water forms small rapids and cascades, but most of the time it’s just a quiet, smooth ribbon of water through the woods.

The morning in Prince William Forest was a nice way to spend some time as a family.

Trail Notes

  • Distance – 3.1 miles
  • Elevation Change – Negligible
  • Difficulty – 1.  Not much uphill the way we traveled.
  • Trail Conditions – 4.  The trail is narrow, but in great condition.
  • Views –0. No views to really see.
  • Waterfalls/streams – 3. You will constantly get views of the stream nearby, but the water is usually fairly still.
  • Wildlife – 1. You’re likely to only see deer around here.  However, gnawed trees lead to the belief that there are beavers in the area.
  • Ease to Navigate – 3.5. A few turns, but easy to follow.
  • Solitude – 3. It’s Northern Virginia, so expect some people, but you should still have decent solitude.

Directions to trailhead:
From I-95, take exit 150 on to 619 heading west.  The Prince William Forest Park entrance is on the right.  Once you pass the gate, take a left at the first fork.  Once you pass parking lot C, take your next left.  To do the trail as a shuttle as we did, leave a vehicle or bike at lot I and then proceed to lot G.  Walk down the Mawavi Road to start the trip.