Appalachian Trail – Black Horse Gap to Jennings Creek

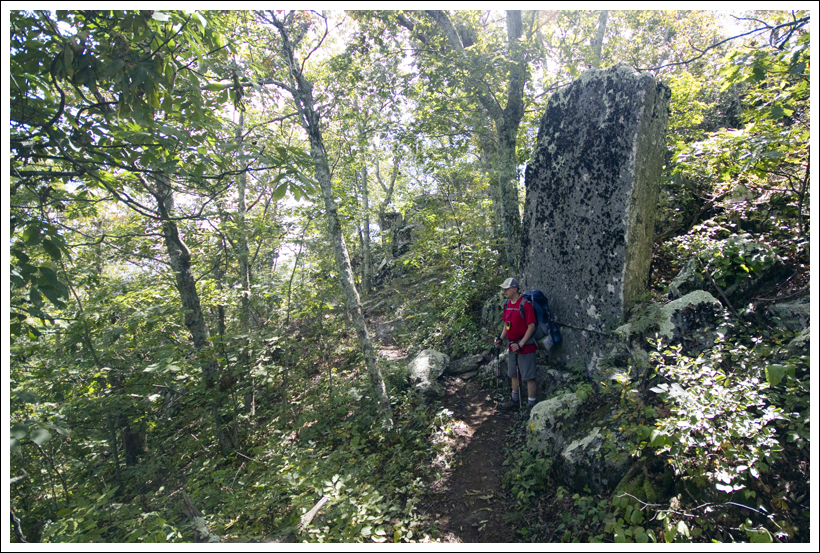
This 14.6 mile stretch of Appalachian Trail offers many splendid views as you closely follow the Blue Ridge Parkway.

View the Full Album of Photos From This Hike

Blackhorse Gap to Jennings Creek
Our first overnight backpacking trip of the season allowed us to watch the green of spring creeping its way up the mountainsides.

Day One…

When you are gifted a sunny 75-degree weekend in April, you must snatch it up and go backpacking!  At least, that is my belief on the matter. We had just such a weekend in mid-April this year, so we decided to get out there and work on completing some more Virginia Appalachian Trail miles.

We’ve already completed all the miles between Jennings Creek, VA and Harpers Ferry, WV, so we decided to pick up the next section south – Black Horse Gap northbound to Jennings Creek.  It was a relatively short route for an overnighter – twelve miles the first day and just three miles the second day.  We always try to do about 20 miles on a one-night trip, but access to road crossings for our shuttle drop-off made fifteen miles the best logistical option for this trip.

We looked up shuttle options in our AWOL Guide, and ended up hiring Homer Witcher to give us a ride to our start point.  Homer is a great trail ambassador – he’s in his 70s and still finds the time and energy to run on the AT most days.  He, his wife, and children are all avid, lifelong hikers – completing multiple section and thru hikes.  He told us he and his wife are planning another thru in 2017.  We greatly enjoyed talking to him on the ride over to Black Horse Gap.

Walking the Appalachian Trail
The signage for the AT along the Blue Ridge Parkway is nice. Below: Our start point at Black Horse Gap; Adam hikes through a rhododendron thicket; We had nice views through the trees for most of this hike.

Our Start Point Rhododendron Thicket Views Through the Trees

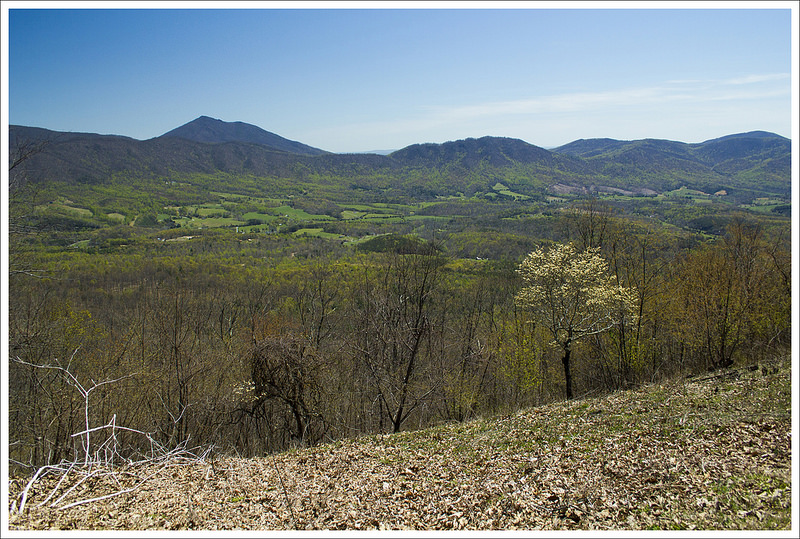
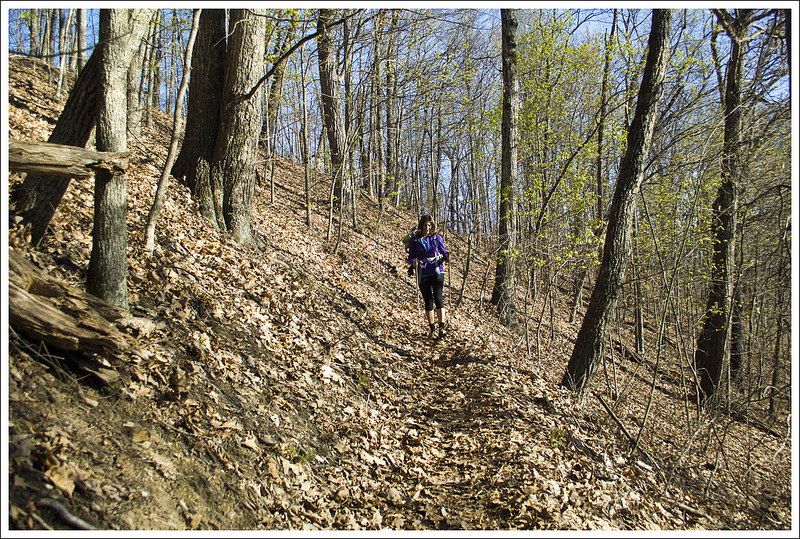
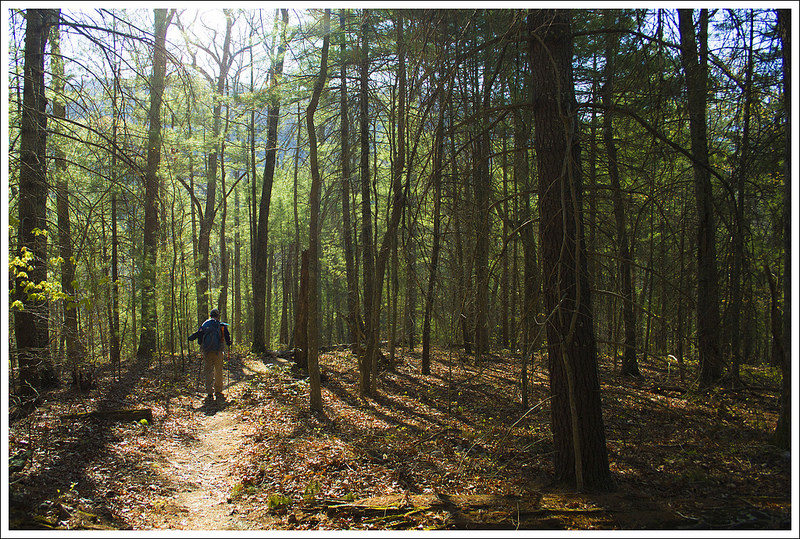
About a half hour later, we found ourselves standing along the Blue Ridge Parkway at Black Horse Gap.  We found the trail easily and started our northbound walk.  Over the first few miles of hiking, the AT crosses the Blue Ridge Parkway a couple times – at Taylors Mountain and Harveys Knob.  Both crossings offer panoramic vistas of the valley below.  Most of the views in this section include a nice look at Sharp Top, one of the areas most popular mountains for day hiking. The terrain along this stretch of trail could best be described as rolling – there were lots of ups and downs, none dramatic.  We passed a large group of Boy Scouts hiking along the trail.  They turned out to be pretty much the only people we saw on our hike.

By 12:30, we reached our lunch stop at Bobblets Gap shelter. We ate and assessed our water supply.  We knew we’d have another chance to resupply water at around the 8 mile mark, but read that the water source at Bearwallow Gap was iffy and seasonal.  I still had over two liters of water, some in my Camelbak and a full Smartwater bottle.  Adam filled his Camelbak to three liters and also had a full Smartwater.  Our planned campsite at the Cove Mountain Shelter is dry (no spring, no stream) and the closest water source to camp is three miles away in either direction, so we tried to guess how much water we would need to cook and hike the next day.  It’s a delicate balance between carrying too much heavy water and not enough, risking dehydration.

After lunch, we leapfrogged the same group of scouts again.  They had decided to skip the shelter since they had moms and lunch waiting for them at a road crossing ahead.  The post-lunch hiking was decidedly more uphill than the morning hiking.  We gradually climbed, crossing the parkway two more times at Peaks of Otter and Mills Gap.  At Mills Gap, we were able to get rid of our lunch trash at a roadside trashcan – being able to get rid of garbage is a real treat for any backpacker!  We took a rest at Mills Gap, reclining on a picnic table in dappled shade.  The temperatures weren’t that hot – maybe high 60’s, but the sun was incredibly strong and relentless through the mostly leafless trees.  We both got sunburned despite using sunscreen.

Beautiful Views from the Blue Ridge Parkway
The trail crossed the parkway numerous times – usually near vistas. Below: One of many road crossings with a view;  Blooming columbines; A huge retaining wall under the parkway; Bobblets Gap Shelter; Lunch and shelter log; A very dank water source.

Vistas along the BRP Columbine Retaining Wall
Bobblets Gap Shelter Lunch at Bobblets Gap Dank Water Source

After a little more climbing from Mills Gap, we started a nice descent to Bearwallow Gap and the VA43 road crossing.  We passed a murky, dank wildlife pond along the way – maybe it’s the bear wallow!  At the road crossing, we sat like a pair of hobos under the Blue Ridge Parkway road sign.  People driving past looked at us like we were a novelty.  There turned out to be plenty of water in the seasonal stream at the crossing, but neither of us had drunk much more water so we decided not to resupply again. That wasn’t the best idea – more about that later!

We crossed VA43 and immediately began the climb up Cove Mountain.   Within the first hundred feet there was a sign reminding us about the dry conditions at Cove Mountain Shelter.  We still were certain we had plenty of water.  As we ascended, I said to Adam “This isn’t bad!  The trail looked WAY steeper on the map!”  Adam replied, “I hope you’re not jinxing us.”  Well, I totally jinxed us.  The trail got much steeper and due to past forest fires, we were climbing in direct, unrelenting sunshine at the hottest part of the day.  We both went through much more water than we had planned for.  I chewed gum to try and preserve what water I had left.  We passed a couple small campsites along the ridge of Cove Mountain. We contemplated stopping for the day, but decided to press on to our planned stop.

Climbing Cove Mountain
Cove Mountain (one of several mountains by this name in the Blue Ridge) was the only tough part of the day. Below: Sitting like a hobo at the road crossing; It’s not nice to shoot at hikers; Beginning the climb up Cove Mountain; Campsites along the top of Cove Mountain; Adam gets nice views as we begin the descent to the shelter; Evidence of an old forest fire.

Hobo Gunshots at AT Sign Climbing Cove
Campsite on Cove Mountain Beginning the Descent Burnt Out

The descent of Cove Mountain was incredibly beautiful.  I think the area burned in 2011 or 2012, leaving spectacular open views along the ridgeline.  I was thankful for such beautiful, distracting views the last couple miles because my feet were killing me.  In addition to not refilling water when we should have, I made the mistake of trying out new gear on a long(ish) hike.  For many years, I have hiked in Thorlo thick-cushion hiker socks with a pair of silk sock liners.  I don’t get blisters -ever- with that combo.  This time, I decided to wear my Darn Tough wool socks.  They’re super popular with hikers and were always comfortable for me on day hikes – even long day hikes, but apparently I do need the extra cushioning I get from Thorlos when I’m carrying a heavier pack.  Lesson learned – don’t mess with the tried and true, especially when it comes to your feet!

We hobbled into camp around 3:30 – almost 12 miles in about 6 hours included stops for lunch, rest, and photography – not a bad pace for our first trip of the season.  We set up camp and spent the remainder of the afternoon reading and napping.   Despite being dry, Cove Mountain Shelter is an idyllic spot.  The shelter is typical, the privy is new, and there was space for a good number of tents both around and on the ridge above the shelter. Recently, I learned an interesting piece of trivia about the Cove Mountain Shelter from my friend Jeff Monroe (of Wandering Virginia). Apparently, this shelter used to sit at Marble Springs (where we camped on the second night of our Jennings Creek to the James River section).  When the area around Marble Springs became designated wilderness, the shelter was moved to its current location on Cove Mountain.

Road Around Mountain
It was neat to see Rt. 43 wrapping around the mountain. Below: The Cove Mountain Shelter; Tents and bear bags.

Cove Mountain Shelter Bear Hangs and Tents

Before dinner, Adam found a good tree and slung the rope for our bear hang.  As we prepared dinner, we rationed out our water, so we’d have enough for breakfast and our second day of hiking.  We were both pretty thirsty and wished we had filled up to the maximum at Bearwallow.  We even ended up drinking our dishwashing water.  Lots of ‘Leave No Trace’ folks always drink their wash water, but it’s also acceptable to broadcast water away from camp.  We usually broadcast.  But this time, we enjoyed a lovely ‘tea’ flecked with a mélange of buffalo chicken, macaroni and cheese, and crème brulee.  Mmmm! Even after conserving water, we really didn’t have much left for both breakfast and tomorrow’s hiking.

As we were finishing dinner, Boy Scouts started rolling into camp – first two, then five more, then another four, then the final three an hour later.  We were sure they had come off the trail at VA43. They’d been hiking since 9:30 a.m. – many of them were first time backpackers, a few were first time hikers!  The troop was from Roanoke Rapids, NC.  They were nice folks, but clearly new to backpacking, as they took the time to remove our bear hang from the tree, thinking it was litter!  Adam was not happy about having to get the rope back over the precarious branch, but in the end he agreed it was a little bit funny.

Good Night
We got to watch sunset from the hillside above the shelter. Below: The sun goes down over the Blue Ridge; Enjoying our view!

Pretty Sunset Happy Place

After dinner, we hiked up the hill behind the shelter to catch sunset.  The view was lovely! As soon as the sun went down, it got cold pretty quickly.  The dry, breezy conditions precluded a campfire, so we crawled into our tent a little after 8:00 p.m.  I fell asleep but was woken several times during the night to sounds of foxes, whippoorwills, and owls! Despite the interruptions, it was a peaceful night and I was so glad to be out in the woods again!

Day Two…

We knew our next day on the trail was going to be quite easy.  We woke up early before the Boy Scouts were even stirring.  It was quite chilly, so we were probably moving a little faster in the morning to get the blood flowing.  We packed away all of our stuff and enjoyed a breakfast of Little Debbie Peanut Butter Pies and coffee.  The plan was to have hot granola with Nido, but we didn’t have enough water left to make both hot cereal and coffee, so coffee and cookies won.  We left the shelter area and were on our way in a little over an hour.   Just about .2 miles away from the shelter, we came to a nice western morning view from the top of Cove Mountain.  The trail continued to ascend, but it was hardly noticeable.  From camp, the trail ascends about 200 feet in .8 miles.  At this point, the trail descends the rest of the way.  We were impressed with the views through the trees along the way.

View from Cove Mountain
A couple tenths of a mile past camp, we got a nice view from Cove Mountain. Below: Tents in the morning sun; Adam hikes along the Appalachian Trail; Christine descends toward Jennings Creek.

Tents in the Morning Walking the AT Descending to Jennings Creek

The trail on the descent was easy walking for the most part.  The trail had just a few longer switchbacks on it, but it was a nice, peaceful walk in the woods.  It was just a short amount of time before we could hear the sound of water from Jennings Creek and around 3.2 miles we were back at Jennings Creek Road.  We took a right and crossed over the creek for some picturesque creek scenes before getting to our car on the left side of the road.

Descending to Jennings Creek
Adam makes his way downhill through the evergreens. Below: Pretty Jennings Creek; The parking area at the AT crossing; We saw zebras on the way home.

Jennings Creek Parking at Jennings Creek Zebras

We had previously planned to get to Sonic in Waynesboro for a celebratory lunch and a stop at Rockfish Gap Outfitter’s Anniversary Sale (where I got a new Osprey Atmos pack), but arriving at the car around 9 a.m., we knew we had some time to kill.  We decided to stop on our way at the Virginia Safari Park near Lexington.  If you are a fan of animals, this is a must-see place to visit.  We drove through the loop (we could even see rhinos through the window) with a bucket of feed while zebras, emus, alpacas, elk, and yaks tried to rip it from our hands.  After driving through the loop, we also walked through their other exhibits, where we could see giraffes at eye level, walk among kangaroos, and see other animals through cages – tigers, hyenas, and monkeys.  I believe this was our third time visiting and there are always new additions every time we visit.

This section of the Appalachian Trail has some wonderful scenery on it.  If you are looking for a shorter, overnight trip with lots of views along the way, this hike won’t disappoint – just plan for water.

Trail Notes

  • Distance – 14.6 miles
    Check out the stats from Map My Hike [Day 1] [Day 2]*
  • Elevation Change – 1650 ft.
  • Difficulty –  3.  This was a pretty easy backpacking route.  It was perfect for our first outing of the season and gentle injury recovery.
  • Trail Conditions – 4.  The trail was in typical Appalachian Trail shape for this part of Virginia – well maintained and nicely graded.
  • Views  5.  There are many fantastic viewpoints along this route.  Most of them come from overlooks along the Blue Ridge Parkway – which you’ll cross multiple times on this route.
  • Streams/Waterfalls – 0.  This is a quite dry stretch of trail. There is a small, low-flow spring at Bobblets Gap and a seasonal stream at Bearwallow Gap. There is NO WATER SOURCE at the Cove Mountain Shelter, so plan ahead.
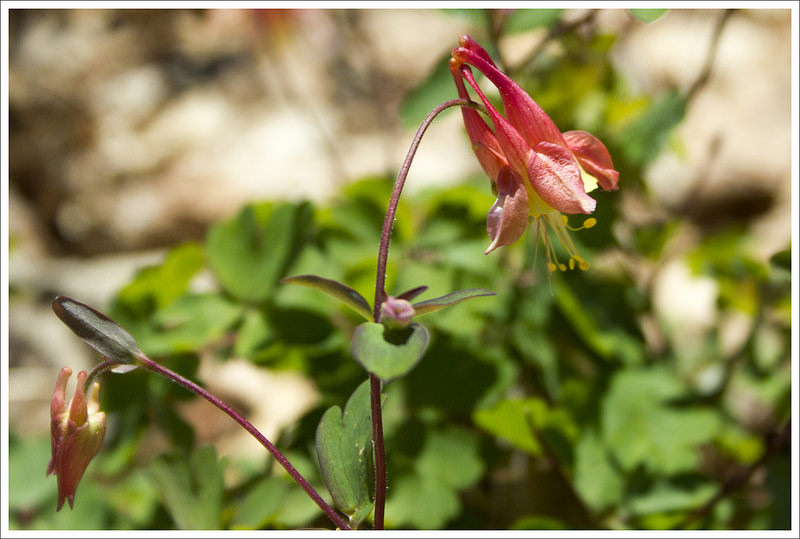
  • Wildlife – 3.  We saw several deer and had a barred owl and a whippoorwill in camp.
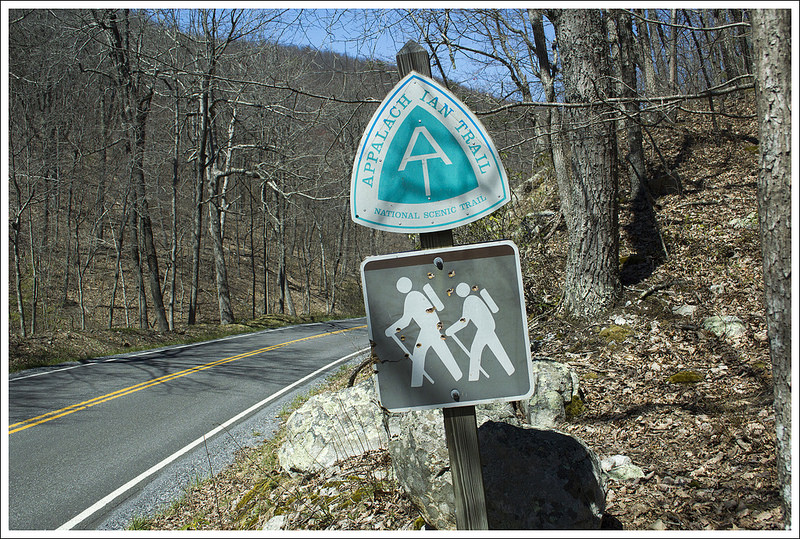
  • Ease to Navigate – 4.  The trail is well marked and easy to follow. There are road crossings and several other trail junctions, but the white blazes are easy to follow in most places.
  • Solitude – 3.  We actually saw very few people on this hike considering the beautiful weather and its proximity to the parkway.  

MapMyHike is not necessarily accurate, as the GPS signal fades in and out – but it still provides some fun and interesting information.

Download a Trail Map (PDF)

Directions to trailhead: To drop off first car: Take exit 168 off of I-81 toward Arcadia, VA.  Turn on to State Route 614/Arcadia Road off the exit.  Arcadia Road becomes Jennings Creek Road.  After 4.5 miles, you will see a large gravel parking lot after crossing Jennings Creek and you will see a sign for where the Appalachian Trail crosses.  Park in this lot. Coordinates 37.529352, -79.622693  To drop off second car and start your hike:  Continue down Jennings Creek Road from where you parked (not arriving the way you came).  In 1.8 miles, turn right on to State Route 618/McFalls Creek Road.  Go 4.1 miles and then turn right on to the Blue Ridge Parkway.  Follow this for 8.6 miles until you reach the small pulloff on the right side for Black Horse Gap.  With not much space here for a vehicle, you will likely want to park along the side of the road.  Just a few feet on the fire road, you will see the sign for the Appalachian Trail junction. Coordinates: 37.424611, -79.757202. Head right and start on the trail.

Three Ridges Wilderness

This 13.2 mile circuit can be done as a day-hike, but we recommend extending the beauty and wildness into an overnight backpacking loop. Take your time, and you’ll be treated to panoramic views, lovely mountain streams, demanding climbs and peaceful campsites.

View the full photo album from this backpacking trip on Flickr.

Christine Takes in a View of the Priest from Three Ridges Mountain
Christine takes in a a view of The Priest from Three Ridges mountain. Below: Welcome to the Three Ridges Wilderness;  Over half of the circuit follows the Appalachian Trail; Nothing beats a campfire in the evening.

Welcome to Three Ridges Wilderness Adam Hikes the Appalachian Trail Great Campfire

We had long been planning a three-day backpacking trip across Mt. Rogers, but as the day of the trip drew closer, we started seeing the term ‘Appalachian soaker’ thrown around in weather forecasts.  We’re fine with passing showers and fleeting thunderstorms, but we didn’t want to get pinned down on Mt. Rogers on a wet and stormy night.

Fortunately, the weather in central Virginia was far more favorable, so we ditched our Mt. Rogers plan, and decided to hit another backpacking circuit on our list – Three Ridges.   This route, which makes use of the Appalachian Trail and the Mau-Har Trail, is known as one of Virginia’s most rugged hikes.  Everything we read about the circuit in advance of our trip emphasized the hike’s strenuous nature. With roughly 6,800 feet of elevation change, you’re almost never walking on flat trail.  It’s a constant onslaught of heart-pounding climbs and knee-grinding descents. But along with the challenging terrain, you get spectacular views, beautiful streams and lovely campsites.

We started out early Saturday morning.  The first stop was fuel… for ourselves.  We had a huge breakfast at The Chuckwagon in Harrisonburg.  If you have a chance, stop by and indulge in one of their homemade 4-inch biscuits  (Adam’s favorite is ‘The Round-Up’) or a stack of their amazingly fluffy pancakes.  (Sadly… Chuckwagon closed in January 2013) With full stomachs, we made our way to Reed’s Gap at mile marker 13.7 on the Blue Ridge Parkway.

When we got to the parking area, the lot was already jam-packed, mostly with heavy-duty construction vehicles left idle for the weekend.  Just as we were about to give up and find a parking spot further down the parkway, one car pulled out and left an opening for us!

Some of the Meadow Mountain Climb was Rocky
Adam makes the initial climb up Meadow Mountain. The climbing was occasionally rocky, but never terribly steep.

We started the Map My Hike app on Christine’s phone, hoisted our packs, and headed south along the Appalachian Trail.  From the parking area, the trail hugs the edge of a meadow, which was full of blooming yellow ragweed and purple thistle.  It was such perfect weather for backpacking – sunny skies, low humidity and a crisp breeze.  The trail almost immediately began to climb uphill over Meadow Mountain.   The climbing was steady, but never difficult, for about .8 of a mile.

At the top of the ridge, there was a small dry campsite with obstructed views.  Department of the Interior boundary markers were all along the ridge.  We spotted at least three or four right next to the trail.  After walking briefly along level ridge, the trail descended to Maupin Field Shelter.  The shelter site had tons of space for tents (many of the tent sites were flat, soft and grassy), a typical AT three-sided hut, a metal bear-hang post and a picnic table.  The area also had an informational kiosk with trail notes and wilderness-usage policies.  There was also a child’s orthodontic retainer tucked into a Ziploc and pinned to the board.  We’re guessing there is now one retainer-less Boy Scout and a less than happy mother!

Christine Climbing Bee Mountain
Christine climbs the stone steps up Bee Mountain.

After Maupin Field Shelter we began climbing again, over Bee Mountain.  The climbing was slightly more strenuous, but definitely manageable.  In several places, rock steps were set into the trail to make the climbing easier.  Along the way, we started playing ‘Categories’.  It’s pretty basic – each player designates a category, then players take turns naming items that fit within that category.  For example, categories might include Movies Based on Comic Books or Items You Need on a Backpacking Trip. It’s pretty mindless, but it kills time.  Whoever successfully names the last item for the given category wins the round. The best category of the day was Complaints Uttered When Hills Are Steep. We won’t share the specifics of our trail talk here, but it was pretty funny to reflect on this topic!  Bee Mountain didn’t offer any views and was followed by a short descent before tackling the more serious climb up Three Ridges Mountain.

The climb up Three Ridges consisted of several steep pushes, with nice stops for views all along the way.  The first view, Hanging Rock, was very impressive, so we decided to break for lunch and enjoy the amazing vista.  As we ate our Panera bagels (Cherry-Vanilla with Justin’s Chocolate Hazelnut Butter for Christine and French Toast with Peanut Butter for Adam), we noticed two dogs fitted with radio collars – doubtlessly bear hunting dogs set loose in the woods for pre-season practice.  Both dogs were female; both were emaciated and showed signs of over-breeding.  We hate to cast aspersions or generalizations on any group of people, but we are not fans of hunters that use this type of technology to hunt bears.  Both of the dogs were pretty persistent about trying to steal our food.  The bolder dog, who was heavily perfumed by a skunk encounter, came within inches of snatching Christine’s bagel right out of her hand.

Bear Hunting Dog Looking at The Priest from Hanging Rock
One of the bear hunting dogs we encountered seemed to be enjoying a view of the Priest from the Hanging Rock Overlook. Below: Adam climbing the first uphill section of Three Ridges Mountain; Southbounders (BeeSting, Fats and Happy) contemplate the Priest and their upcoming climb;  The view from Hanging Rock.

Climbing Three Ridges Mountain Sobos and Adam on Hanging Rock Hanging Rock

While we sat at the overlook, we had a chance to chat with three Southbound AT hikers – Happy, Fats and BeeSting.  All three had started in Pennsylvania in August and were making their way toward Georgia.  Happy was already there when we arrived, so we got to talk with him for a good bit while he waited for his companions to show up.  He was from Las Vegas and on his first long-distance hike.  He told tales of his shoes breaking down on the Pennsylvania rocks, getting caught in a vicious cold-front driven storm on Bearfence Mountain, and his epic weight loss (40 pounds in less than a month!).  He was a nice kid and we enjoyed talking to him and telling him about some of the things he has to look forward along the trail in Virginia – The Priest, Spy Rock, Cove Mountain, McAfee Knob the Grayson Highlands.  He told us the friendliest place he’d stopped on the trail was the town of Waynesboro.

After a while, Fats and BeeSting came along.  They were a young couple from Montgomery County, Pennsylvania.  We didn’t talk to them as much, because we wanted to press on and make our way to camp by mid-afternoon.  Happy left a few minutes ahead of us, and we were sure we wouldn’t see him again.  Thru-hikers are known for keeping a blistering pace!

Upon leaving the vista, there was quite a bit more uphill climbing before we finally reached the true summit/highpoint of Three Ridges Mountain.  At the highpoint, we ran into a group of three women out on the same circuit we were hiking.  We chatted briefly about the great weather before leaving them to enjoy their lunch.

Christine and a Nice Three Ridges View
Christine enjoys the view on a perfect late-summer day.  Below: The actual high point of Three Ridges is in the trees; Adam walking through ferns along the trail.

Three Ridges Highpoint Adam Walking Through the Ferns

After the high point, the long, seemingly endless descent to Harper’s Creek began.  It wasn’t always super-steep.  Sometimes it almost leveled off.  As we were walking along,  we saw a bear dash off through the brush.  We were both glad that the bear hunting dogs hadn’t pestered the bear into a tree.  A few steps later, we heard an exuberant voice shouting into the wind  – ‘Woooooo!’  ‘Yeaaaaaah’!  ‘Echo Echo Echo’ and ‘I’m on TOP of the WORLD’.  As the voice drew nearer, we guessed it was Happy having a ‘mountain moment’.  Sure enough, he called to us through the trees so we could share the nice view spot he had found a little ways off the trail.

We left the spot before he did, knowing that there would be more views along the way. One unnamed view on the left side of the trail was especially beautiful.  We stopped for photos and a pack-less rest. A bit further along, we saw a huge flat, upright rock that looked just like a tombstone.  Immediately past that, we noticed a faint trail that climbed up steeply through the woods to a jumble of rock.  We guessed correctly that we had found Chimney Rock.  It was a great place to sit, and every bit as scenic as the very first overlook on Three Ridges.  We enjoyed looking down into the valley, dotted with homes, streams and a large Christmas tree farm.  The Priest, one of Virginia’s most beautiful and distinct mountains, loomed impressively across the way.

Adam Enjoys the View of the Priest from Chimney Rock
Adam enjoys one of the many spectacular views from Three Ridges Mountain. This particular stop came at a rocky outcropping known as Chimney Rock. Below: Views, views and more views!

Chimney Rock, No People Adam and his Backpack

After Chimney Rock, the last real vista was a wide flat shelf of rock overlooking the scene below.  After that, the downhill got pretty bad.  It was the bone-jarring, steep, type of downhill that makes your knees beg for mercy!  We both slipped a couple times on the descent.  It was probably all the fallen acorns – if your boot hits them just right, they sort of function like tiny roller-skate wheels.  Adam managed to hyperextend his knee on one slip, and hiked in a significant amount of pain the rest of the day.  Christine hit a loose flat rock and rode it like a surfboard until she finally landed hard, but unharmed, on her rear end.

Honestly, the uphill on this hike is moderately hard, but the downhill is brutal.  Anyone in reasonable condition should be able to handle the physical demands of the ascents along the trail, but if you have bad knees, the descents are nothing short of punishing. We both tried to keep our packs on the light side for this trip.  Christine’s pack was 22 pounds and Adam’s was 29… but that was before water.  After a dry week, we weren’t sure if Harpers Creek would be flowing, so we both carried quite a bit of extra water – 3.5 liters for Christine and 4 for Adam.  We knew there was a chance we wouldn’t need it, but when it comes to water it’s always better to be safe than sorry.

The Downhill Trail Was Rocky
The climb down from the summit of Three Ridges was grueling and rocky! Below: The trail went over many large boulders; It passed thick stands of rhododendron and mountain laurel; We were thrilled when the Harpers Creek shelter site came into view.

The Downhill was Punishing Climbing Downhill from Three Ridges Scout Camp

After over two miles of switchbacks, dangerous acorns and tricky rocks, the colorful domes of tents came into sight.  We had reached Harpers Creek Shelter – our stop for the evening. We found the shelter itself empty, but most of the tent sites adjacent to the shelter had already been claimed by a large group of Boy Scouts from Fluvanna County.

We found a mostly flat and smooth tent site across the creek, about 50 yards south of the shelter.  We figured it was a perfect spot – we were close to the shelter and could use it for a ‘kitchen’.  Also, the privy was on our side of the stream, but far enough from the tent that it wouldn’t be annoying when people went to use it.

For the most part, Harpers Creek wasn’t flowing.  There were several shallow pools in the streambed, which gave us plenty of access to water, but also provided a perfect breeding ground for mosquitoes.  Christine immediately noticed bites forming welts on her legs, so she quickly changed out of her shorts and into long pants.  She tried to change behind a large boulder, but she’s pretty sure the Boy Scouts saw her in her underpants, but hey… modesty sort of goes out the window in the backcountry.

Within twenty minutes, the tent was up, the sleeping pads were inflated, and sleeping bags were in place.  We set aside all the food, cooking implements, water filter and bear bags to take over to the picnic table at the shelter.  The Harpers Creek shelter was small and kind of dingy.  There was no shelter log.  Actually, the only thing in the shelter was a sodden pair of ‘tighty-whiteys’.

Adam set about collecting water.  We recently picked up a very handy collapsible bucket made by Sea to Summit.  It folds down to about the size of a deck of cards and weighs just a few ounces.  But, it allows us to collect up to nine liters of water at once.  Typically, we pump water through our Katadyn straight into the bucket.  Then we cover the bucket with a bandanna and usually have plenty for dinner, breakfast and bottle refills.

While Adam filtered water, Christine worked on collecting wood for a campfire.  It was already starting to get chilly, so it was a perfect night for a fire.  As is the case at most shelters, good firewood is hard to find.  There is always plenty of tinder/kindling, but the larger, long-burning pieces of wood are at a premium.  In the backcountry, we only use downed wood that we can break by hand.

Our Camp on Harpers Creek
Our camp on Harpers Creek. Below: Setting up our ‘kitchen’ at the Harpers Creek shelter; On the menu for dinner; Adam feeds the fire.

Setting Up Our Kitchen at the Shelter On the Menu Adam Fuels the Campfire

Christine made a teepee-style campfire with larger pieces of wood on the outside, and a tinder-packed center.  All of the wood collected from the forest floor was cold and damp, so the fire had a hard time catching at first.  A little squirt of alcohol-based hand sanitizer took care of that problem, and within a few minutes a small fire had sprung to life.

With the campfire going, water collected and the campsite set, it was time for dinner!  We keep saying we’re going to prepare our own fancy homemade backpacking meals, but when the time comes we always seem to find ourselves reaching for Mountain House or Backpacker’s Pantry.  It’s just easier, and for the most part, the packaged food is really tasty (notable exception – Natural High’s Banana Cream Pie – worst dessert EVER.) Our menu for the evening included Chili Mac with Beef as the entrée and Cheesecake for dessert.  Christine brought several sticks of cheddar cheese to mix into the chili and single-serving plastic bottles of Merlot. It was quite the feast!

After dinner, we put up our bear hang.  Oddly, this shelter did not have a metal post like most AT shelters in this part of Virginia.  We had to find a tree with a free branch.  After the food was secured, we settled into our camp chairs and enjoyed the fire.  Some people we’ve met along the trail think the camp chairs are a waste of pack space, but they fold down to about the size of a water bottle and weigh just about a pound.  We find them well worth the extra weight for the back-resting comfort they provide. We might not carry them on a long multi-day trip when every bit of pack space counts, but for a weekend trip, we like having creature comforts.

Adam Told Ghost Stories
Entertainment unfolds by the campfire. Below: Our tent at night.

Our Tent at Night

As we sat by the fire, we watched a little piece of comedy unfold on the other side of the stream.  A couple of the older Scouts had been assigned the task of hanging the group’s food.  We watched as they missed getting the rock and rope over the tree branch, dozens and dozens of times.  The boys took turns making fun of one another for their off aim.  Eventually, they got the rope over a branch.  They celebrated with a high-five and a ‘Woot!’.  But, the branch snapped off the tree as soon as they tried to hoist the weight of many food bags. Eventually they went for help and settled on a less-than-perfect, but still functional tree.  All in all, it took them over an hour to get their food hung.

Our campfire died around 9:00, so we headed back to the tent.  Adam read by headlamp and Christine listened to a book on her iPod.  For one of the first times ever, we both fell asleep quickly and slept soundly through the night.  We were actually awoken by voices and headlamps at what seemed like the middle of the night.  Christine rolled over and asked Adam ‘Is it around midnight and these kids are up late or is it morning already?’  It turned out that the Scouts were awake and cooking/packing up at 5:30 a.m.  We lazed around in the tent for another hour until the sun came up.

The Scouts actually hiked out around 7:00, just as we were getting breakfast together.  Usually, we’re the early risers and the first out of camp!  We made maple-brown sugar oatmeal with freeze-dried bananas and coffee and hot chocolate for breakfast.  We both ate two packs, knowing that we had a tough day of hiking on the Mau-Har Trail.

Christine is Ready to Tackle Day 2
After a good night of sleep, Christine is ready to tackle day two! Below: Adam changes out of his Crocs and back into boots; The Appalachian Trail departing Harpers Creek.

Changing Back Into Boots The Appalachian Trail Leaving Harpers Creek

After breakfast, we broke down camp.  Adam’s hyperextended knee was still pretty sore, so Christine stowed some of his gear in her pack to make his load a little lighter.  While she was transferring gear, she noticed that a mouse had chewed through the little mesh compartment on the hipbelt of Adam’s pack!  The only thing in the compartment was a set of car keys, so we’re really not sure why it was appealing to a mouse.  It reminded Adam of one of his favorite books as a kid – The Mouse and the Motorcycle.  He thought this mouse was trying to make a sequel with their car.

We left Harpers Creek around 8:00.  On our way out, we passed four or five other groups that had been tenting near the shelter.  All told, there were probably somewhere between 25 and 30 people camped along the creek that night. Quite a tent city!

After leaving the shelter site, we followed the Appalachian Trail for almost a mile, largely uphill, to its junction with the Mau-Har Trail.  The odd trail name is a combination of Maupin and Harpers – the names of the two shelters the trail runs between.  The Mau-Har was designed by a man named Angelo Filippi.  One funny review we read of the hike evidently thinks ‘designed’ is too kind a word for the trail.  The review states:

“We started from Reeds Gap and heading down the Mau-Har, cussing Angelo Philippe [sic] the whole dang way. I swear he unfolded a map, put it on the ground, pulled out a piece of string, dropped the string onto the map and said “There! That is where the trail should go!” What a jerk!”

Start of the Mau-Har Trail
The start of the Mau-Har Trail. Below: The Mau-Har trail starts innocently enough; Then it starts to climb more steeply downhill; And then it gets even steeper than it already was!

Mau-Har Starts Pleasantly The Mau-Har Gets Steep Then the Mau-Har Gets Even Steeper

To be fair, the trail was clearly designed to follow scenic Campbell Creek as closely as possible and following a creek that goes tumbling through a deep gorge is going to require some rugged climbing.  The Mau-Har trail descended very steeply to the creek.    Adam grimaced in pain from his knee injury on every downhill step.  The weight of his pack, combined with the steep trail was almost more than he could bear.  This was some of the gnarliest downhill we’ve ever done.

Eventually, we got to the spur trail that leads to a series of small waterfalls. Adam decided to stay put and rest his knee while Christine explored the falls. She took off with the camera, hoping to get a few documentary shots for the blog.  A few minutes later, Adam decided to follow.  He had heard there was a geocache hidden by the falls (known as “firedogs fishbowl”), but he had forgotten to input coordinates into his GPS.  He looked for it, but without coordinates it was pretty close to impossible to find.  The waterfalls were all very small due to low water flow.  In spring, with snowmelt and heavier rain, the creek is probably spectacular!

Christine at the Waterfall
Water volume in Campbell Creek was fairly low. Below: The section of the Mau-Har that follows Campbell Creek is very steep; Some sections require you to pull yourself over the rocks; Christine is happy for a more moderate grade.

Uphill on the Mau-Har Struggling Up the Mau-Har Happy for More Moderate Climbing

From the waterfall spur trail to the Maupin Field shelter, the Mau-Har climbs very steeply uphill.  At first, the trail is very rocky as it passes through the canyon.  You wind your way between and over boulders.  Sometimes you have to stow your trekking poles in one hand to pull yourself up over a big step.  It reminded us very much of hiking the gorge at Little Devils Stairs.  The terrain was very similar.  After leaving the canyon, the trail becomes less rocky, but no less steep.  A series of sweeping switchbacks carry you relentlessly uphill.  Eventually the grade becomes more moderate in the last half mile before you arrive at the Maupin Field shelter.

Near the end of the climb, Adam announced that he was going to stop at the shelter and ‘eat every single bit of anything edible left in his snack bag’.   Two packs of oatmeal, bananas and hot chocolate burn off pretty fast when the climbing is tough!  He proceeded to eat a Luna Bar, ShotBlox, a bag of cashews and a bunch of mini candy bars.  He reined himself in and skipped eating a dry packet of cocoa mix.

At Maupin Field, we read the shelter log.  Entries talked about the skunky, food-nabbing bear dogs (someone had named them Bagels and Muffins). A southbounder left a warning to northbounders about 20-30 miles of dry hiking.   Someone even left a really nice pair of ladies LaSportiva for someone to claim.

Maupin Field Shelter
Adam relaxes at the Maupin Field Shelter. Below: One of the stream crossings near Maupin Field Shelter; Adam checks out the shelter log; The Mau-Har’s end point at the shelter.

Stream Near Shelter Checking Out the Shelter Log The Mau-Har Starts Next to Maupin Field Shelter

The last 1.6 miles retraced our route from the morning before.  We had a gradual climb up and over Meadow Mountain and then back to our car at Reeds Gap.  We drove back toward home along the Blue Ridge Parkway, stopping at Humpback Rocks to wash our hands with soap and running water.  Our last stop was the Sonic in Waynesboro for more ‘refueling’.  We definitely earned some tater tots and CreamSlushes!

Three Ridges turned out to be a great alternative to our planned Mt. Rogers trip!  While the terrain was challenging, we think most people accustomed to backpacking/hiking would be up for the challenge and would enjoy the beautiful and wild scenery offered by this loop.

The one issue we would like to bring up is a discrepancy about the length of this hike.  Most sources list the loop at 14.4 miles.   Based on our information (maps, GPS, trailer marker posts), here is how we would break down the segment distances on the trail.

0.0 miles – Start from parking lot on Reeds Gap, heading south on the Appalachian Trail and begin your ascent.
.8 miles – The trail reaches the first ridge and shortly begins to descend through some switchbacks
1.6 miles – Reach the junction with the Fire Road (which heads to Love Gap).  Take a left to stay on the Appalachian Trail and pass a few side trails that lead to campsites at the Maupin Field Shelter.  The trail begins to climb again.
2.0 miles – Reach the summit of Bee Mountain
3.7 miles – Reach some great views from Hanging Rock.  Continue to climb further up through the woods.
4.2 miles – Reach the summit of Three Ridges
5.8 miles – Great viewpoint of the eastern ridge
5.9 miles – Reach the tombstone and take an immediate right up the path to reach Chimney Rock and the best views on the trail.  Rejoin the trail and descend steeply.
7.5 miles – Arrive at Harpers Creek Shelter across the creek and your stay for the night.  The next morning, cross back over the creek and continue on the Appalachian Trail.
7.6 miles – Cross Harpers Creek and the trail begins to ascend very steeply.
8.5 miles – Reach the junction with the blue-blazed Mau-Har trail.   Turn right and follow the trail that parallels Campbell Creek.
10.0 miles – Reach a sign designating a short yellow-blazed trail to a few waterfalls.  The waterfalls are only a  few hundred feet off the Mau-Har trail.  Retrace your steps and continue on the Mau-Har trail.
11.5 miles – Reach the Maupin Field Shelter.  Continue straight past the shelter to rejoin the Appalachian Trail.
11.6 miles – Take a left on the Appalachian Trail to retrace your steps back to your vehicle.
13.2 miles – Return to the Reeds Gap parking lot.

Returning to Reeds Gap
Returning to Reeds Gap. At this point, Adam said he was 90% sure he was going to survive the trip. Below: Christine had a great time!

She Survived

Trail Notes

  • Distance 13.2  miles
    (Check out the stats from MapMyHike [Day One] [Day Two])*
  • Elevation Change – About 3900 feet
  • Difficulty – 5.  This hike is no joke.  The downhill areas are steepest on the Appalachian Trail coming down from Chimney Rock and the uphill on the Mau-Har trail is equally brutal.
  • Trail Conditions – 2.5.  The trail starts off quite nicely, but once you reach Three Ridges, expect a rocky slide downhill and loose footing uphill for much of the hike. The Mau-Har Trail was pretty overgrown in places.
  • Views– 5.  Absolutely amazing.  Chimney Rock and Hanging Rock provide some of the nicest views.
  • Streams/Waterfalls – 3.  You’ll be near a stream most of the second day and there are a few small waterfalls.  The water wasn’t flowing too strongly though.
  • Wildlife –3.   We did see a bear.  Oh yeah, and the mouse ate through part of Adam’s backpack, so there is some wildlife out there.
  • Ease to Navigate – 4.  The trails were fairly well marked and signs were at the junctions.
  • Solitude – 2.  This is a tough hike, but it is popular for backpackers, trail runners, and day visitors to the shelters.

Directions to trailhead: On Blue Ridge Parkway, south of Humpback Rocks.  Park at mile marker 13.7 at Reeds Gap in the large lot.  Head south on the Appalachian Trail, marked with white blazes on a tree near the left of the open field. 

Mount Pleasant

This 5.4 mile loop hike takes you to the beautiful double summit of Mount Pleasant, across Pompey Mountain and then back down to your car.

NOTE (2/26/17): A recent hiker reported that the fall forest fire in this area did severe damage to this trail system.  He reports that many of the blazes have been destroyed and the trail is hard to follow.

Adam enjoys the vista from the west summit of Mount Pleasant. Below:  Moss was still the only greenery along the trail.  Leaves are still a few weeks away;  The sign at the trailhead marks the loop at 5.2 miles.  Our GPS marked it at 5.75, so we’ll split the difference in mileage for this blog post.

Trailhead Sign

Christine Says…

When we hiked the Cole Mountain trail last fall, we made a mental note to return to the area sometime to do the Mount Pleasant hike.   We’re so glad we did.  The hike up Mount Pleasant provides gorgeous views from both its east and west summits.  We had a crystal clear day and could see for miles in every direction.

We started out on our hike a couple hours later than we normally do.  The delayed start turned out to be quite fortuitous.  As we drove down Wiggins Spring Rd toward the trailhead, we saw 15-20 cars parked near the AT crossing and Cole Mountain trail.  We assumed that they were a group camping and hiking on the Cole Mountain trail and were thankful not to sharing trail with such a large crowd.  A little further down the road, the Mount Pleasant parking lot was empty with the exception of one frost-covered car that had obviously been left there overnight.

We started down the trail.  It was icy and muddy, but pleasantly flat for the first mile.  After we crossed a small stream, the upward climb began in earnest.  It wasn’t terribly difficult or steep climbing, but it was constant for the rest of the way to the summit.  Much of the trail was wet/soupy and covered with a thick layer of leaves.  There were several places that the trail was tough to follow, but I imagine that once more hikers pass this way, the trail will become clear again.

These could be the poster children for the defiance of Leave No Trace principles.  This was just a portion of the group we encountered.

At around the 1.5 mile mark, we started hearing distant voices in the woods – lots of distant voices.  I looked at Adam and said “I don’t think all those people are on Cole Mountain after all.” At 1.9 miles we came to a trail junction being used as a rendezvous point for about 30 kids on a church youth group trip. I have never heard people being so loud in the woods.  One group of three boys thought it was hilarious to repeatedly scream “NINKOMPOOP” at the top of their lungs as they headed down the trail.

After we cut through the crowd, we took a right turn and followed the spur trail up to the mountain top.  On the way up, we passed about 20 more hikers from the same youth group.  As I mentioned earlier, it was lucky we started our hike late, or else we might have been sharing the beautiful mountaintop with 50 shrieking kids.  As it turned out, we had the view all to ourselves.

At the summit, there was a small sign with arrows pointing to the east summit and the west summit.  We headed west first.  The west summit is on a dramatic outcropping of rocks.  It provides an expansive, layered mountain vista, including a great look at the bald summit of Cole Mountain.  The east summit is also lovely, albeit a little less dramatic.  The view is mostly valley and farmland.

We stayed at both summits longer than we normally would.  We wanted to put some time and distance between ourselves and the youth group.  We took in the view, had a snack and a drink and took a few photos.

The hike back down from the summit brings you back to the trail junction, where instead of turning left to hike back down the way you came up, you continue straight on the Henry Lanum Loop Trail.  This trail will almost immediately begin to climb upward again – over the summit of Pompey Mountain.  There are no views from this mountain.  After reaching the peak of Pompey, there is a short, but steep downhill.    The trail from this point on is a mix of uphill and downhill walking until you’re eventually returned to your car.   On this loop, you definitely spend more time hiking uphill than you do hiking downhill.  If you want less climbing, I recommend hiking this as an out-and-back.  It won’t make the hike much shorter, but will significantly cut down on the climbing.

Adam Says…

The summit provides a beautiful view of distant mountains. Below: A telephoto shot of the Cole Mountain summit from the west side of Mt. Pleasant; The eastern summit is beautiful, albeit a bit less dramatic.

View of Cole Mountain The East Summit

The hike up Mount Pleasant is one of the better hikes for views in Virginia.  If you have a few days to spend in this area, I would also recommend doing this and the Cole/Cold Mountain hike.  This area has some gorgeous mountains around you and the reason for the town nearby to be named Buena Vista.   When you combine both views from the two overlooks at Mount Pleasant, you get nearly a full view of the area around you.

The hike was not too difficult.  I would recommend that if just want to see the views, complete this hike as an out-and-back hike.  When we did this hike as a loop, we added on the trip up Pompey Mountain, but there are not any scenic views or much of note on the way back.

One interesting note about this trail is that you may see some remnants of fallen American chestnut trees throughout your hike.  They once covered this area until a fungal blight wiped out their population.   It is interesting to think how different these views would have looked in a canopy of chestnuts.

To know which way to start the hike can be a little tricky.  There are lots of paths away from the parking lot, including two blue-blazed trails marking the Henry Lanum Trail.  You will start the hike at the blue-blazed trail that starts off very flat.  The other blue-blazed trail looks clearly uphill and is the path that you will return. We felt this trail was a little hard to follow at times and could have used a few more blue blazes painted.  There were times we were unsure if we were still on the correct trail.

The trail starts off relatively flat or going downhill for about the first 1.5 miles.  Around 1.3 miles, you see a wooden sign that reads “Trail”, but other than that it is fairly easy to follow.  Keep following the blue blazes and you will eventually need to cross a couple of areas that may include small streams.   We didn’t have any trouble hopping across and I’m guessing that most of the year, it is relatively dry.  After you cross the stream, the trail will lead to the climb up to the summit.  Around 2.0 miles you will reach a junction sign that shows the Mount Pleasant Summit Spur Trail to the right.  This summit trail continues for about .4 miles until you reach the saddle.  A sign at the junction here shows there are overlooks to the West and East.  The western summit takes about .1 mile to reach and you will need to climb up the rock outcropping for the great views.  The eastern summit is closer and doesn’t require any climbing, but we were both more impressed with the views from the western summit.  Once you take some time to soak in the views, go back the way you came to reach the junction sign for the Summit Spur Trail.   If you want to continue the loop back to your car, you will continue straight on the Henry Lanum Trail.  This leads you through the forest for some more uphill climbs over Pompey Mountain.    From the junction sign, it is about 1.9 miles back to your vehicle.

Luckily, we were able to avoid the crowds of screaming teenagers that clearly don’t understand Leave No Trace principles.   Once more of the leaves start spreading their leaves, the summit overlooks will give you absolutely amazing views.

Trail Notes

  • Distance – 5.4 miles – loop.
  • Elevation Change –1350 feet.
  • Difficulty – 3.5 This loop has long, moderate uphills and shorter, steeper downhills.  It’s one of those trails that makes you feel like you’re always walking uphill.
  • Trail Conditions – 3. The trail is in decent shape.  There was a lot of mud when we hiked.
  • Views –5. The east/west double summit of Mount Pleasant is magnificent
  • Waterfalls/streams –1. There is a small stream in the woods on the departing arm of the loop.
  • Wildlife – 0. Nothing, but doubtlessly the large church group scared any wildlife away.  We did see lots of juncos along the trail.
  • Ease to Navigate – 2.5. In several spots, the trail was hard to find under thick leaves and blowdowns.  Some blazes are starting to wear away and it might be easy to miss turns.  I think ease of navigation will improve as spring/summer approach and hikers wear the path down.
  • Solitude – 3 . For today, we had a 0 for solitude, but we just had a bit of poor timing.  Being the namesake hike for this area, you will likely run into some other people on the hike.

Directions to trailhead:
Follow I-81 to Buena Vista (exit 188A).  After passing through the town of Buena Vista, follow US60/Midland Trail for 9.5 miles.  Take a left on Coffeytown Rd.  Follow Coffeytown for just under two miles.  Take a right on Wiggins Spring Rd. Follow Wiggins Spring for 3 miles.  This road will turn to a rugged gravel road.  Follow the signs for the Mt. Pleasant trailhead.  There is a small parking lot at the trailhead.

Cole/Cold Mountain

Amherst County’s Cole Mountain Loop is a moderate 6 mile hike with serious payoffs at the summit.  Situated in George Washington National Forest’s Pedlar Ranger District, this trail (also know as “Cold Mountain”) is one of Central Virginia’s only hikes to cross a bald, pasture-like summit.  Views of the valley from the saddle and summit are open in every direction.

The Cold Mountain summit is open and offers panoramic views in every direction. In this shot you can see the white Appalachian Trail blaze and the USGS benchmark.
The Cole Mountain summit is open and offers panoramic views in every direction. In this shot you can see the white Appalachian Trail blaze and the USGS benchmark.

Christine Says…

Despite the busyness of our weekend, Adam and I made time to hike the Cole Mountain loop on Sunday morning.  We had read a description of the trail on another hiking site.  Their reviewer compared the summit to Scotland or Switzerland.  I don’t know about that, but it was definitely some of the prettiest Virginia summit scenery I’ve ever seen.

We started out from home at 5:30 in the morning.  It was still dark, but we wanted to hike before the crowds and heat got too bad.  We made a short detour before the hike to visit Statons Creek Falls.  It was just a couple miles from the trailhead, and was well worth a look.

The Appalachian Trail crossing is well-marked. Park across from this sign in a small lot.

The forest service road to the Cole Mountain trailhead is unpaved and bumpy.  There is only room for five or six cars at the parking area, which is located right at an Appalachian Trail crossing.

The hike starts out downhill along the forest service road for a couple tenths of a mile.  You’ll soon pick up the blue-blazed Hotel Trail on the right side of the road.  The route follows the Hotel Trail for about 3.5 miles until a junction with the Appalachian Trail (AT).  The AT takes you up a series of switchbacks, across the Cole Mountain summit and eventually back down to the parking lot where you started out.

Just a few of the gorgeous wildflowers on display in the meadow.
Just a few of the gorgeous wildflowers on display in the meadow.  Pictured below:  The old hog wall, the open meadow along the Hotel Trail, a beautiful tree sheltering one of the loveliest backcountry campgrounds in Virginia.

hog wall hotel trail meadow hotel trail meadow campsite_1

The thing I loved about this hike was the ever-changing landscape along the way.  It was a perfect sampling of Virginia’s varied scenery.  The trail started off winding its way down through lush, green beds of ferns sheltered by old hardwoods.  After passing through a short tunnel of pines, the forest gave way to a wide meadow-like clearing filled with shoulder high wildflowers in every shade of pink, purple, yellow and white.   Descending back into the forest, we saw numerous remnants from a bygone mountain farm.  Crumbling stone “hog walls” and errant apple trees were easily spotted along the trail.

The Cow Camp Gap Shelter
The Cow Camp Gap Shelter.  Pictured below:  a checkerboard is painted onto the shelter floor, Adam enjoys reading the shelter journal

checkerboard journal

We took a snack break along a small stream just before the 3 mile mark.  There was a fire pit and log seats that made a perfect place to enjoy some trail mix and water.   We ended up taking another break a few tenths of a mile down the trail when we arrived at the Cow Camp Gap Shelter.  This shelter is just one of many three-sided huts located along (or near) the Appalachian Trail.  This one was especially nice.  There was a checkerboard painted on the floor, with acorn cap and twig game pieces.  The shelter had a newer log book, so there weren’t many entries to enjoy this time.  The site also had the biggest picnic table I’ve ever seen.  It made Adam look like he was hobbit-sized.

The shelter marks the beginning of the only serious uphill climb on this hike.  About a half mile after leaving the shelter, you meet up with the Appalachian Trail and head north.  Along the way, the forest begins to thin out, giving you glimpses of a view from rocky ledges along the trail.

Upon reaching the saddle of Cole Mountain, the terrain changes radically and instantly.  The trees disappear and a wide, pasture-like alley appears across the summit.  The field is dotted with giant boulders and speckled with wildflowers.  It’s a great place for a picnic lunch.  You certainly can’t beat the sweeping views in every direction.

Adam Says…

This truly was a wonderful hike!  I don’t think this hike is very well known to those that don’t live in Central Virginia, but it is a true gem and definitely worth a trip no matter where you live.  We had absolutely perfect hiking weather with beautiful blue skies, dappled with an occasional cloud.  We plan on coming back down to this area soon to try the nearby hike of Mount Pleasant.

Cole Mountain is also commonly known as Cold Mountain (and is listed as such on Hiking Upward), but when we saw its official name through the USGS was Cole Mountain, we are sticking with their name.  I know when I told my family about hiking Cold Mountain, they thought about the movie with Nicole Kidman and Jude Law.  That Cold Mountain is actually in North Carolina, along the Blue Ridge Parkway.

The first lookout point along the Appalachian Trail was already showing some signs of fall.

To begin the circuit that we chose, we took the Hotel Trail.  The origin of the name is supposedly derived from the landowner Joseph Richeson, whose house was known as The Hotel, due to the number of frequent guests.

Once you start the Hotel Trail, you will almost immediately come to a horse gate.  Go through the horse gate and continue to follow the blue blazes.  You will follow these blue blazes until you reach the junction with the Appalachian Trail.  At .9 miles, you will reach the beautiful field of wildflowers on your left that Christine mentioned.  At around 1.3 miles, you will reach a gorgeous spot for an overnight camp.  I would highly recommend this to anyone that is planning on doing a backpacking trip.  There is a large firepit formed with logs to sit and enjoy some S’mores over an open fire.

From the firepit, look to the northeast and you will see the blue blazes continue.  At 1.7 miles, you will come across the “hog wall”, which is neat to think about people that used this area in the past.  Continue down the trail until you reach the bottom of Cow Camp Gap at 2.9 miles.  On our way down, I heard some strong howling off in the distant which sounded like coyotes.  Since we’ve heard of this from other hikers, there must be some nearby.  You will see on the other side of a small stream, the Cow Camp Gap Shelter.  This is a great spot for any thru-hikers or people that just want to have a packed lunch, rest, or fill up water from the spring.  We always enjoy reading the logs that thru-hikers and backpackers leave during their trips there.  Once you see the shelter on the right, just stay on the trail until you reach the junction just ahead.  The path to the right will take you to the shelter and the spring, but after your stop, you will take the path to the left.   I imagine that during rainier times, this would be a nice spot to hear a trickling stream, but it was dried out when we were there.

From the junction at the shelter, you will have another .5 miles to reach the junction with the Appalachian Trail.  At 3.5 miles, take a right (North) on the Appalachian trail.  You will continue your ascent through a few switchbacks.  At 3.7 miles, you will reach the first of two nice spots for an overlook at the edge of the switchback.  Continue on the trail until you reach the large meadow with the summit.  You will see a few vertical 4 foot high rocks sticking out of the ground.  On the ground in the rock, you will see the USGS benchmark which marks the summit of Cole Mountain at 4,033 feet.  Take a moment to enjoy the views at the summit and continue to follow the AT white blazes going north.  You will see many gorgeous panoramic 360 degree views as you cross along the highlands for a few tenths of a mile.  The scenery was truly breathtaking as we trekked across the highlands of the saddle, across the bald summit. (Note: camping and/or fires are not allowed on the bald of Cold Mountain.) At the end of the meadow at 5.2 miles, you will begin your descent into the woods and back to your vehicle.  You will cross over a fire road, but stay on the white-blazed trail until you reach your vehicle.

Adam makes his way across the bald summit of Cole Mountain.
Adam makes his way across the bald summit of Cole Mountain.  Pictured below:  this bush was heavy with berries.

cold mountain summit_8

If you are into geocaching, there are a two that you can find along the way.  The first is at the “hog wall” and the second is near the summit.  There was also another at Statons Creek Falls, which I feel is one of the prettiest waterfalls in Virginia.  Here are links to the sites for those that are interested:

As a slightly humorous aside, we did see a couple of guys hiking that came over from another mountain.  They had already hiked for about 8 miles, making this hike their second summit.  They were planning on going back the way they came and making it a 17 mile hike to do in one day.  We saw them around noon and they were hoping to make it back to their car around dinner time.  They had a poor map and we tried to show them directions, but they were off quickly.  However, they ended up going the opposite way away from their vehicle.  We thought we should probably check the news to see if they became lost.  I hope they got back safely, but I’m sure they had to reheat their dinner.

I would definitely say that this hike is one of my favorites in Virginia.  The views were exceptional and the scenery along the entire trail was magnificent.  Make this a “must-do” hike in your future planning!  You won’t regret it.

Trail Notes

  • Distance – 6 miles loop
    (Check out the stats from Map My Hike)*
    Note – the MapMyHike stats show the loop in reverse. When we rehiked the route on 6/25/16, we did it the opposite way so we hit the meadow views first.
  • Elevation Change – 1490 feet – The trail starts out both up and down, but the ascent to the summit is about 1.5 miles uphill.
  • Difficulty 3. The trail starts with some ascents and descents.  Once you meet the AT, you have about a steady uphill for 1.5 miles, but it wasn’t too tough.
  • Trail Conditions 4. The trail is well-maintained and not too hard on the feet.  There are some downhill portions that have some loose rock.
  • Views – 5. It doesn’t get better than panoramic 360 degree mountain views. We felt the scenery throughout the trail was gorgeous.
  • Waterfalls/streams 0.5.  There is a stream near the Cow Camp Gap shelter, but it was down to a trickle for us.
  • Wildlife 1.5. We only saw a deer around here.
  • Ease to Navigate 3. There aren’t a lot of turns here, but you may feel a little confused starting off.
  • Solitude3.5. We did encounter a few people, but we had a lot of beauty to ourselves.  Expect to see a few people along the highlands at the top, but there is a ton of room to enjoy the scenery privately.

MapMyHike is not necessarily accurate, as the GPS signal fades in and out – but it still provides some fun and interesting information.

Directions to trailhead:   Take Exit 188A off of Interstate-81, merging on to US-60 towards Buena Vista.  After going through Buena Vista, take a left at Coffeytown Road/Rte 634.  After 1.6 miles, take a right on to Wiggins Spring Road/Rte 755.  While four-wheel drive isn’t necessary, I would recommend it since it is a rough gravel road.   Stay on this for about 2.5 miles until you reach parking on the left side of the road.  (GPS Coordinates for parking: 37.759652, -79.195336) Park your vehicle and then proceed further down the road for .2 miles.  Before the road splits, you will see two posts marked with blue blazes which will begin the Hotel Trail.

The Priest

The Priest is a wonderful segment hike along the Appalachian Trail in the George Washington National Forest’s Glenwood & Pedlar Ranger District.  The northbound trail access may be a little tough for some people to reach (4WD vehicles are strongly recommended), but if you can get there, you’ll be treated to magnificent views of the Tye River Valley.

Adam enjoys the view from The Priest

Adam Says…

This was hike number two for us on a three-hike-day.  This was our first trip up The Priest, and it was well-worth the bumpy drive to get to the trail.   See the directions to trailhead (below) for some special precautions to take when approaching the trailhead.  On route 826, we decided to go a little further than  Crabtree Meadows, but didn’t make it all the way up by car to the AT junction.  We ended up parking at a campsite and hiking up the fire road for .3 miles.  Many people will want to park at Crabtree Meadows, but that will add one mile to the overall distance.  Route 826 can be quite steep. In fact, some sections of the road are much steeper than anything you’ll see on the actual trail.  We saw a Jeep brigade coming down the steepest section of road, but they looked like seasoned off-roaders.

Route 826 gets progressively rougher.
Route 826 gets progressively rougher. Pictured below: A group of off-roaders make their way down the road.

When you reach the junction (you’ll see painted rocks indicating north/south) of the Appalachian trail, head north (left).  You will come across the Priest Wilderness sign and trail map. When I was telling someone earlier about doing this trail today, they were wondering about the origin of the name “The Priest”.  The true origin is unknown, but there are a few myths.  The first is that it was named after the DuPriest family that lived in the area.  The second is that a minister in the area gave some of these nearby mountains religious names.  The Cardinal and The Friar are both close to The Priest.

Adam enjoys reading the journal at the AT shelter.
Adam enjoys reading the journal at the AT shelter.  Pictured Below: Some of the entries are funny, some divulge a little bit too much information.

journal_3

We found that the trail was a steady incline, but nothing too strenuous.  There was supposed to be a side trail to The Little Priest at .7 miles, but we didn’t see it (but we weren’t looking too hard).  At .9 miles, you will see a blue-blazed spur trail to an Appalachian Trail shelter.  We definitely recommend taking the extra .2 mile round trip to visit the shelter.  These shelters are a great place for all of the AT hikers to get together and have a roof over their head for a night.  At most of the shelters, you can find a journal in which the hikers will write about their day or plans, leave notes for other hikers, etc.  Since this hike is The Priest, the theme of this logbook was to make a confession.  It was a lot of fun to read through the journal entries.  These confessions ranged from eating two Poptarts, to taking drugs, to not paying for supplies.  If you happen to be hiking the trail in June when most of the AT thru-hikers are passing through, consider bringing along some treats to share.  It’s a form of “trail magic” and is always appreciated.  (read the guidelines – there are some tips for dispensing good magic on the Appalachian Trail Conservancy Site)  We did see a few thru-hikers on the trail today, but we hadn’t thought ahead to bring anything.

Around 1.3 miles, you will see some overhanging rocks to the north that lead to some marvelous views.  Take some time to enjoy the views.  The summit is only .1 mile further, but there are no views at the summit.  We really enjoyed this hike and hope to do this one again as well as the nearby Spy Rock.

Christine Says…

The Priest was probably my favorite of the three hikes we did on this particular day. Discovering a new hike is always a real treat, especially when it turns out to be as nice as this one.

There are actually two different ways to access the summit of The Priest. The southbound ascent is longer and much tougher – it follows the AT along a series of forty switchbacks with just over 3000 feet of elevation gain. It might be the hike with the most elevation gain in all of Virginia. One hiker remarked in the journal that the southbound climb “made him realize that he’s not the man he thought he was.” I guess that’s one way of saying that the hike was a long, tough haul!

We chose the northbound ascent primarily based on our limited time. The hike was listed in our book as strenuous, but I did not find it to be tough at all. The uphill grade was constant, but gentle. Adam and I were easily able to carry on conversation without any huffing and puffing uphill.

The terrain on this hike was so pretty! Along the first part of the trail, forest floor was blanketed with lush ferns. Every now and then, we could catch glimpses through the trees of the valley below. The summit of The Priest is 4,063 feet, so we were pretty high up (by Virginia standards, anyhow).

This appeared to be a popular campsite.

When we finally gained the ridge, there was a perfect (and obviously popular) campsite. Encircling the area was a collection of huge boulders arranged in an almost Zen-like natural sculpture. Amidst the boulders, there was a fire pit and a large smooth, open place to set up tents. If I were to spend a night along the trail, this would be my ideal kind of campsite.

Shortly after the campsite, the trail split. One arm headed down to the shelter and the other continued along the AT up to the summit of The Priest. This section of trail was lined with mountain laurels and wild azaleas in full bloom. Several places along the trail were covered with a carpet of pink and white flower petals that had been blown from the bushes. It was almost dreamlike to walk through all the flowers. In the tree tops, we heard the constant sweet sound of warblers singing. We even caught a few glimpses of the birds. The ridge is fairly level, so this walking was very easy and pleasant.

Wild Azalea flowers carpeted the forest floor.
Wild Azalea flowers carpeted the forest floor. Pictured below: Many of the azaleas and mountain laurels were still in full bloom.

I had read that the summit of The Priest was a lovely shady place, but didn’t offer much in the way of panoramic views. So, it was much to my surprise and delight to find a worn path through the woods that led to an amazing outcropping of rocks with spectacular views of the entire valley below. Even though it was close to high noon, I loved photographing this spot along the trail. The sky conditions were a photographer’s dream – cerulean blue punctuated with both swishes and puffs of white cloud.

The summit was spectacular.

Adam and I sat on this spot for a good, long while. We shared a chocolate donut and some water, watched the hawks soar below and took in the valley view. Afterwards, we made the short walk to the actual summit. There was a fat toad sitting right along the trail at the summit. I like to think of him as the official summit marker.

This toad was our summit marker.

The hike back down to the car was fun – all downhill – just the way I like it!

Trail Notes

  • Distance – 2.8 miles out-and-back. We also recommend adding the .2 mile trail down to the AT shelter. If you park at Crabtree Meadows, add a mile on to the trail’s total length.
  • Elevation Change – 1,000 feet
  • Difficulty – 2. While the trail does have a moderate elevation change, the uphill is not too tough.  If you have to hike up the fire road from Crabtree Meadows to get to the trailhead, that will be much tougher than anything along the AT.
  • Trail Conditions – 4. Like most of the AT in Virginia, this section is nicely maintained.
  • Views – 4. Gorgeous views of about 150 degrees of views out into the Tye River Valley
  • Waterfalls/streams – 0. None, but there is a small spring-fed water source near the shelter.
  • Wildlife – 1.5. We didn’t see much, but this is wilderness area.  There are lots of nice birds for any ornithologists.  We saw a cerulean warbler, which has such a gorgeous song.
  • Ease to Navigate – 4.5. Just stay on the AT.
  • Solitude –4. Since it is difficult to get to, you may run across some backpackers or AT thru-hikers, but not many others.

Directions to trailhead: The best access to this trail is via VA-826.  If you are approaching from I-81, take exit 205 towards Steeles Tavern.  Take a left on to Rte. 11 and then a quick right on to VA-56 heading east.  Follow this past the Blue Ridge Parkway (near BRP Mile Marker 30) and then take a right shortly after the Fish Hatchery on to VA-826.  There is a sign at the entrance that you need to have four-wheel drive to travel on this road.  It is a bumpy gravel road where you have to cross several small streams.  Once you reach Crabtree Meadows, it is .5 mile before you can reach the AT trailhead to start The Priest trail.  Many cars should be able to get up to Crabtree Meadows, but the last .5 mile should be taken cautiously and done only if you have a confident driver and appropriate vehicle.

Crabtree Falls

Crabtree Falls is probably Virginia’s best-known waterfall hike. The hike is located a short distance from the Blue Ridge Parkway. The trail climbs alongside the falls and ends at an overlook of the Tye River Valley.

This is the first large cascade you'll encounter on the hike.
This is the first large cascade you’ll encounter on the hike.

Christine Says…

Crabtree Falls, located in George Washington National Forest’s Glenwood & Pedlar Ranger Districts, is one of the classic “must-hike” Virginia trails. When the area is experiencing good amount of rainfall, the 1,200 foot series of falls can be truly impressive.

Adam and I left our house at 5:45 a.m. on the morning of this hike. I wanted to get to the area before the sun started shining into the gorge. Sunny days usually mean crappy waterfall photos. On the morning of our hike, the area was forecast to have quite a bit of fog. I was really excited and had visions of the falls – cascading through the mist, lined with lush, blooming mountain laurel. Unfortunately, it was not to be. When we arrived, the fog was gone, the sun was already high in the sky and the laurel had mostly gone to seed. Nonetheless, I was still able to find a few shady spots along the way to take photographs.

The beautiful arched bridge over the Tye River.

The trailhead is located at the upper parking lot of the Crabtree Falls area. There is a $3.00 fee to use this area. Even though the trail starts from the upper lot, don’t miss walking down to the lower lot to take a walk across the beautiful laminated wooden arch bridge that crosses the Tye River. It was delivered to the area in a single piece and has graced the spot since 1978. Crossing the bridge used to be part of the hike, but improvements to the area expanded parking, added restrooms and shortened the trail.

As you start the hike, don’t neglect reading the bulletin board at the trailhead. It provides many cautionary tales concerning the waterfall’s deadly terrain.  As of June 2015, 29 people have fallen to their deaths at Crabtree Falls – most of them teenagers and young adults. The rocks surrounding the stream are coated with transparent algae. It doesn’t look wet or slippery, but it’s honestly as slick as grease in some spots. The forest service is always warning hikers to stay off waterfalls – but they really mean it at Crabtree.

Adam climbs the steps along the Crabtree Trail.

The first impressive cascade is at the very bottom of the trail and is accessible along a level, paved walkway. The trail to the summit starts on the right side of the paved path, and climbs quickly upward. The trail makes use of steps, railings, wooden walkways and switchbacks to traverse the steep terrain. Some of the switchbacks meander quite a distance from Crabtree Stream, but the sound of rushing water is ever present in the woods. You never move so far from the stream that you can not hear the sound of the waterfall. It’s such a soothing sound. There are five major cascades (and many smaller ones) that make up Crabtree Falls.

The trail is mostly well-graded and maintained. There are a few rocky sections, and some of the rocks may be loose or slippery. On the day we hiked, the trail was really muddy from all the recent rain, but it was still easily passable. I think most of the pretty sections of the falls are within the first three-quarters of the hike. The big, dome-shaped cascade at the top is impressive to see, but it just doesn’t photograph well. At the Tye Valley overlook at the top, you can’t see the falls below you at all. If you hadn’t just walked along the waterfall on your hike, you might not even believe it’s there. The view from the top is just so-so – mostly just tree-covered mountainsides. It pales in comparison to the waterfall views. Most hikers choose to turn around at this point, but you also have the option to continue the hike along the stream, ending up at Crabtree Meadows.

There are discrepancies about the length of this hike. On the internet, I’ve seen it listed everywhere from 2.2 to 4 miles. The on-site plaque at the base of the falls says the hike is two miles to the top, for a total 4 mile out-and-back. Our Blue Ridge Parkway hiking guide lists the hike at 3.4 miles, out-and-back. It seems like the happy medium distance, so we’ll go with that measure.

Adam Says…

The hike along Crabtree Falls is one of the best waterfall hikes, since you hike along the falls for most of the way.  I haven’t experienced any other hike in Virginia that allows you to walk along such an impressive series of falls.

Another beautiful section of falls along the trail.

This was our second trip to Crabtree Falls.  We were hoping to go in the late spring or early summer for views of mountain laurel along the stream.  It looks like in this area, we just missed the peak by about two weeks or the laurel didn’t bloom as well this year.  When you reach the top of the falls after a 1.7 mile hike, there is a stone platform at the top that provides you with nice views of the Blue Ridge Mountains.

The view from the top.

Near the entrance to the paved trail you will see a small family cemetery.  These are actually distant relatives of mine.  My great grandmother was a Fitzgerald and owned the farm next to the McCormick Farm.  My mother used to visit that farm often when she was little.  If you are interested in history, the McCormick Farm is open to visitors and has lots of exhibits showing the early farming techniques.  Cyrus McCormick was the inventor of the mechanical reaper which revolutionized farming.

This is a great hike that a lot of families do before picnicking at one of the tables near the lot entrance.  I know we will visit this location time and again.

Trail Notes

  • Distance 3.4miles out-and-back.
  • Elevation Change – 1000 feet
  • Difficulty – 3. This is a fairly steep trail with plenty of switchbacks.  However, most people will stop along the way to enjoy the falls, so it breaks up the pace.
  • Trail Conditions – 3. There are lots of pointy rocks along part of the trail, but there are some sections that are very nice.  The view to the lower falls is even paved for wheelchair access.
  • Views – 2. At the top of the falls, you get a decent view of the Tye River Valley
  • Waterfalls/streams – 4.5. This is one of the best waterfalls in the Central Virginia area.
  • Wildlife – .5. You probably won’t see anything here other than people.
  • Ease to Navigate – 4.5. Just stay on the trail.
  • Solitude –1. This is an extremely popular hike, so you will surely see people along the way.

Directions to trailhead: If you are approaching from I-81, take exit 205 towards Steeles Tavern.  Take a left on to Rte. 11 and then a quick right on to VA-56 heading east.  Follow this past the Blue Ridge Parkway (near BRP Mile Marker 30).  After a few more miles, you will see the signs for the parking area of Crabtree Falls on your right.  The parking lot loops around and you will see the trailhead and map near the restroom facilities.