This 3-mile hike leads to the old Snead Farm. It’s one of the few hikes in the park that really shows off what life at the turn of the twentieth century must have been like for the people who made their homes where the park now stands.
The barn at the old Snead Farm is still in good shape. Most of the other structures are gone, only foundations left. Below: There is a view from the fire road before you follow the final fork to the farm.
Christine Says…
The walk to Snead Farm is really easy and perfect for families. Much of the trail is level and follows a fire road. There are a couple of route options, too. If you start from the visitor’s center, you’ll walk .8 miles on the Dickey Ridge trail before reaching Snead Farm Road. This ends up making a three-mile route, and is the route we followed. You can also start from Skyline Drive, directly on the Snead Farm road. This cuts the route to a mere 1.4 mile out-and-back. Just be sure to follow the correct forks in the road, or you’ll find yourself on a walk to nowhere (like we did… more about that later). Whatever route you choose, the going is easy and relatively level.
As far as I know, Snead Farm has the only remaining barn left standing in the park. In fact, it’s one of the few non-park structures of any kind left standing within the boundaries. The doors are barred closed, so you can’t go inside – but you can peek through windows and gaps in the doors to see the old hayloft up top and animal stalls on the lower level.
Behind a tangle of vines, you can still climb down into the root cellar located behind the barn. The cellar is deep and lined with sturdy shelves, which undoubtedly held stores of food for the farm. The main house’s foundation and several sets of stairs still stand slightly uphill from the barn. The boxwoods that stood on either side of the front door are still there. They have grown tall and wild! The cistern is still there as well. The farm was occupied until the early 1950’s, so the site doesn’t feel as old as some other places in the park, like Pocosin Mission.
Adam Says…
Our hike to Snead Farm ended up being longer than we were expecting. We were using our Falcon Guide Shenandoah National Park book as a guideline and there was misleading information in the book. I’ll try to set things straight with our own directions. From the Dickey Ridge Visitor Center, cross Skyline Drive and walk to the flagpole. Take a right at the plaque with hike information. In .2 miles, you will come to the intersection with the Dickey Ridge Trail. Take a right here and proceed for about .3 miles until you reach a fire road (Snead Farm Road). Take a left on the fire road. In another .2 miles, you will reach a fork on the trail. Stay to the left. In another short distance, you will come to another fork where you will see a concrete post. Go to the right, heading uphill. You will continue this trail for about .5 miles until you reach Snead Farm. You will begin to see the barn through the trees.
We did misinterpret the information in the book since it told us to take a left at the last fork. Since we were going a different way than the book, we ended up second-guessing ourselves. When we thought we had gone far enough, we decided to turn around and take a different fork. When the other fork came to a dead-end at a utility building, we realized we had been going the right way. We went back the way we came, took the correct fork, and made our way to the farm. We ended up adding only an extra mile to our hike, but after doing a couple of other hikes that day, we weren’t in the mood for more miles.
The Snead Farm Fire Road is pleasant walking. Below: The old root cellar is still standing; Another view of the barn.
Christine and I marveled at how well-maintained the barn looks. Since it was abandoned in the 50s, it is clear that the park service has kept up with maintaining the barn and even painting it. I wonder if this will be a permanent part of the hike or if the park service will one day let this building fall prey to the elements and the woods.
Overall, this hike was a decent leg-stretcher and a good family hike.
Trail Notes
Distance – 3 miles
Elevation Change – 300 feet
Difficulty – 1.5 An easy walk down a mostly level trail.
Trail Conditions –3.5. Half of the trail followed the Dickey Ridge trail which was well-maintained and the rest is on fire roads.
Views – 1.5 Some views are seen from the final fork to get to Snead Farm.
Waterfalls/streams –0. Non-existent.
Wildlife –2. You may run into some of the usual park animals like deer and birds.
Ease to Navigate – 2.5. The turns did us wrong, so we’re marking it down.
Solitude – 2.5. This is a popular hike due to the proximity to the Northern entrance to Shenandoah National Park and the short distance.
Directions to trailhead: Follow Skyline Drive to the Dickey Ridge Visitors Center (around mile marker 4.6) Park at the visitors center. The trail begins on the east side of the drive, across from the center.
The hike to Lands Run Falls is a fairly easy 1.6 mile walk down an old park road. The waterfall is not terribly large or impressive, but it’s definitely worth a look if you’re in the mood for a short leg-stretcher.
Adam sits alongside Lands Run Falls. The falls were still a little on the low side despite five inches of recent rain.
Christine Says…
We planned to do a long hike on Saturday, but Adam was having knee trouble. Instead, we waited until Sunday and decided to try doing a few short, gentle hikes in the north district of Shenandoah National Park. It’s been several years since I ventured as far north in the park as Lands Run Falls, so it was a nice change of pace.
The walk to the waterfall stays on a wide gravel road the entire time, so the footing is easy and there is absolutely no place you can possibly take a wrong turn. The only place you might go wrong is by hiking across the top of the waterfall and missing it completely. The falls aren’t marked and they’re really not visible from the trail. You’ll know you’ve reached the falls when you pass over a small stream and culvert. You can also follow the sounds of falling water!
To get a good look at the falls, you’ll need to follow a worn path through the woods down into the ravine. It’s a fairly well-worn path, and the rocks in the ravine sort of form big steps. Be careful on the rocks immediately around the waterfall. They’re very slick and covered with moss and algae.
The last time I visited Lands Run Falls it was winter and there had been quite a bit more rain.
If you hit Lands Run Falls when there has been lots of rain, you’ll be treated to a pretty waterfall with three small, but distinct drops. The first drop of about 20 feet is the most accessible and the most photogenic. The other two drops are mostly obscured by blow-downs and underbrush. If the weather has been dry, Lands Run Falls probably is not worth your time. It frequently dries up completely in the summer.
In Henry Heatwole’s well-known Guide to Shenandoah National Park and Skyline Drive, he stated “This [Lands Run Falls] is an unrewarding experience for most people… This is for the very few hikers who are willing to go to a lot of trouble to find solitude beside a pool on a mountain stream.”
I wouldn’t characterize Lands Run Falls quite so grimly. I mean, it’s not spectacular – but it is definitely worth seeing if the water flow has been nice.
Adam Says…
We started off with this as our first of three short hikes for the day. I was battling some knee issues and Christine thought we should turn around because I was limping the first few steps. I felt I could make it though and luckily my knee felt better on the trip back up from the falls.
You descend 310 feet during this walk down the fire road. While it doesn’t seem quite as noticeable on the way down, you will feel the elevation change on the way back up. Most people should be able to do this hike, but you may need to take your time if the steepness gets to you.
Once you reach the area of the falls, to get the views that we did, you do need to climb down a steep section off the trail that can be slippery. I was able to do it on a bad knee, but you do have to watch your feet carefully. The fire road continues further for another 1.4 miles past the falls, but that only leads to a park boundary and there is nothing of interest to see.
The day was quite brisk with temperatures in the upper 40s. I initially wished that I had brought a fleece along, but once the blood got pumping I was fine in my T-shirt and shorts. The leaves were just starting to turn color – I think we’re still two weeks before peak season on Skyline Drive and higher elevations.
The Lands Run Fire Road descends about 300 vertical feet over .6 of a mile to the falls.
The trail was a nice quick view to a waterfall. I believe it is a somewhat popular trail, but that is largely due to the number of people that are driving down from Northern Virginia and are looking for a close waterfall hike. The falls themselves are pretty but they are not as impressive as many others in the park.
Trail Notes
Distance – 1.6 miles out and back
Elevation Change – Around 300 feet
Difficulty – 2. Relatively easy, but definitely uphill on the return trip
Trail Conditions – 4.5 The trail is a well-maintained fire road
Views – 0. The trail stays in the woods and does not offer any panoramic views
Waterfalls/streams –3. Lands Run Falls is small but pretty. It does dry up when there hasn’t been much rain
Wildlife – 2. You’ll likely see the usual park specimens along this trail – birds, squirrels and deer
Ease to Navigate – 4. The fire road doesn’t have any turns. Be careful not to miss the falls – you walk over a small stream and the waterfall cascades below the trail.
Solitude – 3. We saw a couple groups, but for a beautiful fall day, the traffic was light.
Directions to trailhead: Follow Skyline Drive to mile marker 9.2. Park in the lot on the west side of the drive. The hike starts at the south end of the lot.
This nine-mile loop offers glimpses of area history, great views of the tundra and peeks at distant mountains.
The trail offered many beautiful meadow views. Below: Adam checks out the sign at the entry to the Cranberry Glades boardwalk; The old Mill Point Federal Prison used to sit along the present-day Cowpasture Trail; The Thomas Reserve Trail is lined with ferns; A view of the Glades boardwalk.
Christine Says…
The morning did not start well. We drove into Marlinton, WV before our hike to make some reservations for a bike shuttle. Once we were in town, we learned that Verizon wireless was not available anywhere in the area (and I really needed to check in on a family emergency). We couldn’t find anyone that sold pre-paid phone cards in all of Marlinton. When we did find a phone card, we couldn’t find a pay phone that worked. Apparently, the only pay phone that works in all of Pocahontas County is at the hospital. After filling up at a BP station, the “service engine” light came on in our car and the gas gauge stopped working. (Can I blame BP for that?) Finally, to top everything off, we couldn’t find the trailhead for this hike. In the end, it all turned out OK, as it usually does. We ended up hiking a couple extra miles, but on a beautiful, cool, blue-sky day… that’s not a bad thing!
Our original plan was to hike the 7.1 mile Cowpasture Loop which encircles the entire Cranberry Glades Botanical Area and crosses into the beautiful, wild Cranberry Wilderness. But, the trailhead was not marked and the map we had did have enough detail to indicate the exact location. We ended up parking at the Thomas Reserve trailhead, instead. We knew this trail would intersect the Cowpasture Loop after about a mile or so.
This rock ledge along the Thomas Reserve Trail is probably a pretty waterfall when the stream isn’t dry. Below: The trailhead for the Thomas Reserve trail; Trails were adequately marked.
I’m really glad we went this way, because the Thomas Reserve Trail took us past some beautiful and interesting scenery. There were ruins that looked like some kind of old pool or water treatment facility. The concrete basin and pillars were still intact, along with several large pipes with wheels attached. I did a quick Google search to try and figure out exactly what the ruins are, but I didn’t have much luck. From that point, the trail passes through beautiful fern-carpeted forest and past a dry stream. The stream has an interesting rock ledge/cave that I think probably makes a lovely, small waterfall when water is actually running. Eventually, the path intersects an old road that is part of the Cowpasture Loop.
After a short walk along the old road, the trail opens up into a gorgeous open meadow with views of the mountains in the distance. This is the site of the old Mill Point Federal Prison. Even though the buildings were all torn down in the late 1950s and early 1960s, you can still see some leftover signs of the site – there are bits of road left, abandoned stairs to nowhere, an old well. There is also a series of informational signs that include old photos and talk about life at the prison. Apparently, it was a prison without walls or gates. Prisoners were treated to weekly movies and could spend their afternoons hiking in the area. I guess you could say it was very low security! We stayed at the prison site long enough to read the signs and enjoy the meadow view.
After the meadow, the trail climbed back into the forest, following rolling ups and downs for a couple miles. We saw lots of bear scat and several deer leaping across the trail. We crossed a small dry stream shortly before passing out into another wide open area. The meadows along this trail were really overgrown. The ragweed and other plants were shoulder-height and constantly batted me in the face as I walked the trail. Even so, the meadow areas of this hike were spectacular! This section in particular offered beautiful views of Kennison Mountain.
We got a nice view of a beaver dam on the Cranberry River. Below; The bridge over the Cranberry River.
The trail dips down to the South Fork of the Cranberry River. This crossing had a pretty arched bridge and a great look at an active beaver dam. There were crabapple trees everywhere – so I was really wondering if we’d eventually see a bear. We never did – just the deer and a very angry red squirrel.
From the river, the trail ascends to a ridge and follows a series of gentle ups and downs. We passed several beaver ponds and got nice looks at the bogs and glades the area is known for. One pond even has an elevated wooden platform to view the area. Because of the dry months we’ve had lately, the ground was much dryer than it should be. The ponds were so low, I wondered if the resident beavers were able to swim at all. While we were passing one of the ponds, we heard a huge tree come crashing to the ground someplace nearby. It must have been a monster tree – it sounded like gunshots as it splintered and fell to the ground with a huge KABOOM.
Just before coming out on FS Road 102, the trail passes over another pretty arched bridge. The walk along 102 is completely level and pretty uneventful. You’ll pass a gate and the board marking the entry to Cranberry Wilderness. The area looks fantastic for backpacking – lots of loops and shelter options. We’re already talking about making a three day trip sometime in the spring.
After crossing the chain gate, the walk is along the developed portion of 102. Cars passed by and the walking was really boring. When we got to the Cranberry Glades Boardwalk, we decided to add the .6 mile loop onto our larger loop. The boardwalks pass through a beautiful open bog area. If you visit the right time of year, you can even see carnivorous pitcher plants.
After the quick turn along the boardwalk, we walked the last mile along the paved road back to our car. By the time we got back, I was pretty tired and hungry and was looking forward to making homemade pizza for dinner back at our Watoga State Park cabin. Although the day got off to an inauspicious start, it really turned out to be perfect.
Adam says…
Christine had suggested this hike to me when we were planning our trip to Watoga State Park and I’m so glad that she suggested it. This hike is one of my favorites that we’ve done this year. It has some interesting history and the open views of tundra are nothing short of beautiful.
We saw these mysterious ruins along the Thomas Reserve Trail. Below: The Thomas Reserve trail begins; An old well at the prison ruins site.
We had trouble finding the start of the hike, since the trailhead for the start of the Cowpasture Loop was not marked. We saw a sign for the Thomas Reserve trail and I could tell from our map that it hooked up with the Cowpasture Loop. The Thomas Reserve Trail starts bisecting a field, but quickly moves into woods. At about .6 miles, we saw the pillars of the old “pool” that Christine mentioned off to the right of the trail. The trail continues for another .4 miles through the woods until it comes to a sign.
Take a right here to get on to the Cowpasture Loop. The trail is quite level at this point as you move through a field with great views of the tundra around you. Here, and in some places throughout the entire loop, there may be tall plants that you have to push aside, but you shouldn’t need to bushwhack. As you’re passing through the tundra area, you may notice several bluebird boxes. The trail begins to turn towards the left and then opens up to more of a clearing. You will see posts that give information about the Mill Point Federal Prison camp and life for the inmates. You will then come to a sign around mile 1.5. Take a left here to stay on the Cowpasture Loop. This will loop back around the tundra, paralleling Charlies Creek, and then goes back into the woods. You will start to reach some footbridges around the two mile mark that take you above some marshy areas.
The glades boardwalk is a pleasant .6 mile walk around the bog. Below: The walk along the forest road wasn’t that exciting; Once we got back to the paved portion of 102, there were some pretty scenes along the road.
After this point, you will begin to climb slightly up. At the height of this gradual hill, you will begin to see views of Kennison Mountain. At mile 3.5, the trail then takes a sharp left (marked by an arrow on a sign) and descends again. This area was quite overgrown, but the trail was still clearly visible. The trail tends to alternate at this point from going through areas of marshy glades to trails through the woods with slight ups and downs in elevation. At mile 5.7, you will see a destroyed sign where there is a side path of about 100 yards to an observation deck. This would be an excellent spot for birding. At mile 6.4, the trail connects again to FS 102. Take a left on the fire road until you reach the gate at mile 6.6. At mile 7.3, you will reach the parking lot for the Cranberry Glades Boardwalk loop. This loop is only about .5 miles and I would highly recommend it. There are interpretive signs along the boardwalk and it does give some more wonderful views throughout the loop. Once you complete the loop, just walk back up FS 102 to reach your car.
Difficulty – 3. This is really an easy hike, but we’ll give it a 3 due to the longer length.
Trail Conditions – 2.5. The trail was largely passable, but very overgrown. Several bridges over streams were broken and rotted through.
Views –3. You get some nice views of the mountains and great views of the glades/tundra.
Waterfalls/streams – 3. In times with normal to higher precipitation, this trail has great views of streams, ponds and the Cranberry River.
Wildlife – 4. We saw deer, signs of bears, active beaver dams, red squirrels and many kinds of birds.
Ease to Navigate – 3. Once you find the trailhead, the trail is relatively easy to follow.
Solitude – 4. Outside the popular boardwalk area, you probably won’t see a soul!
Directions to trailhead: From Mill Point, WV head west of WV 39/55. After about 7 miles, you will find a sign for the Cranberry Glades area on your right (FS 102). Head down this road for one mile until you reach the trailhead for the Thomas Reserve trailhead.
The view from the Massanutten Story Book Trail involves a short quarter-mile walk down a paved pathway.
The view from the Story Book trail overlooks 211 and the Page Valley. Below: The trailhead is marked by a large sign; Along the path, there is a series of interpretive signs that describe the geology and flora of the area.
Christine Says…
The Massanutten Story Book Trail is one of those ridiculously short path-walks that we personally wouldn’t consider a hike. Nonetheless, it goes to one of the nicer viewpoints in the Shenandoah Valley. Sure… you can see the Battle Creek Landfill and a distant Walmart, but you can also see the mountains that make up Shenandoah National Park and pretty much all of the Page Valley. It’s a beautiful spot.
To get to the view, just stroll down the level pathway for a quarter mile. At the end of the paved trail, you’ll come to an observation platform. It’s railed in and has several benches to rest upon. But, for an even better view, don’t miss following a rocky footpath to the right of the platform. It leads to a rock shelf overlooking the valley. The rocks that make up the ledge have the most fascinating texture.
One of the beautiful curved, wooden walkways. Below: At the end of the paved pathway, there is a platform from which to take in the view; Christine’s Mom and Dad take in the view (You can see our shadows, too!).
It looks like a lot of work/money has gone into cleaning up the Story Book Trail recently. The interpretive signs that had faded or been covered with graffiti have been replaced (although new graffiti is already showing up – seriously people, stop crapping up the outdoors… it’s disrespectful and stupid). The path looked like it had been repaved not too long ago. But, best of all, someone cleaned all the paint off the rock ledges that lie off the trail.
Adam Says…
Christine’s parents came down on a Sunday to meet up with us. We decided to take them on a couple of short hikes with great views. The first we did was Woodstock Tower and we finished it off with the Massanutten Story Book Trail. This trail is one of the easiest you will find, since the path is paved most of the way, with some beautiful wooden walkways in a few parts. Since it is also wheelchair accessible, just about anyone should be able to enjoy the views you will find here.
Adam enjoys the view from the ledge. Below: The path is paved; Some sections are traversed by beautiful curved bridges.
The trail also works as an interpretive trail, with many plaques to read along the way that give a great description of the geologic forces that have created the mountains in this area. There are two geocaches along this trail and one of these requires answers from the signs along the way.
Christine and I often say that some of the areas of George Washington National Forest lead to better views than you get through hikes in Shenandoah National Park and this trail is great evidence of this statement. If you haven’t done this one before and enjoy great views with little effort, this is a trail for you.
Trail Notes
Distance – .5 miles out and back
Elevation Change – negligible
Difficulty – 1. This trail is for everyone – paved for strollers and handicap accessible.
Trail Conditions – 5. The official trail is paved. You can leave the trail and scramble on the rocks for another view.
Views –5. Amazing views!
Waterfalls/streams – 0. No streams/waterfalls.
Wildlife – 0. The trail is too populous to really attract wildlife.
Ease to Navigate – 5. Just straight down a paved path and back.
Solitude – 0. You’ll see many people along this trail.
Directions to trailhead:
Reach the trailhead by turning on to Crisman Hollow Road (FD 274) off of 211 near Luray. Continue on this road for about a mile and park in a small lot off to the right. A wooden footbridge and trail marker will signify the start of the trail.
The Story of the Forest Trail is an easy family walk in the Big Meadows area of Shenandoah National Park. The entire loop is 1.8 miles and half of the trail is paved.
Whitetail Deer are a common sight along the Story of the Forest Trail. Below: No pets or bikes are allowed on the trail; The return arm of the loop follows a paved path along the road.
Christine Says…
The first weekend of September was spectacular – simply perfect weather to be outside. Adam and I decided to take a picnic dinner up to the park. The Big Meadows area has a 1.8-mile nature trail, called “Story of the Forest”, that joins the wayside and the campground. We decided that a pleasant pre-dinner stroll sounded ideal.
We parked at the Byrd Visitor’s Center, and set out from the north end of the lot. The trailhead is marked by a sign that also indicates that dogs and bikes are prohibited on this path.
The trail was lined with these small white wildflowers. Below: The Big Meadows-Skyland horse trail crosses the path.
The trail starts off gently downhill – passing through an area lush with ferns and wildflowers. After crossing a small footbridge over a stream that feeds Dark Hollow Falls, the trail bears left and heads deeper into the woods. You’ll pass over the Big Meadows-Skyland horse trail. After that, you’ll pass communication towers that are part of the lodging complex. Eventually, the campground will come into view. To make the hike into a loop, turn left when you see the campground. This will lead you back out to a paved bike path running parallel to the road through Big Meadows. The paved path will lead you back to the wayside and visitor’s center.
The Story of the Forest doesn’t offer anything especially unique , but it is a nice walk for anyone visiting the Big Meadows area.
Adam Says…
I think this was actually the first time I have done the Story of the Forest Trail. It is a very easy hike, so it is perfect for families with small children. You can also use this trail to connect to Dark Hollow Falls to create a longer hike. The trail is a nice walk in the woods, passing by some impressive trees and ferns. I was expecting a guide that would possibly tell the “story of the forest”, but there isn’t a hike brochure like there is at the Stony Man Trail.
There are a few turns that form this loop. The trail is marked on the cement posts as “nature trail”. Once you start the trail, you will go through the forest until you reach a couple of bridges that go over the Hogcamp Branch. In .2 miles, take a left at the junction to stay on the trail. In .4 miles, the trail will intersect with a horse trail – just go straight and don’t turn on the horse trail. In .8 miles, you will begin to see the Big Meadows campground. Take a left on the paved path to follow this back to the Big Meadows wayside, which is next to the Visitor Center. Grab a blackberry shake from the wayside and take a picture with the CCC statue at the visitor center to round out the experience.
This small footbridge crosses a stream that feeds Dark Hollow Falls. Below: When you pass the visitor’s center near the end of the loop, stop to pose with the CCC statue.
I’m surprised that Christine didn’t tell the story, but we passed a family that were slowly making their way along the trail. A girl hoisted on the shoulders of her father was soooo excited to see a deer. She said to us as we passed, “Take a picture of the deer.” We went a little further up the trail and saw a different deer. I stopped to take some pictures and the deer wasn’t being cooperative. When the deer got startled and bolted off, I said a curse word. I heard far off through the woods, the same girl say, “That man said a bad word.” I felt bad about that and Christine hasn’t let me live it down. I like to think that I was reinforcing her education rather than being a bad influence. If she hadn’t heard the word before, she wouldn’t know it was bad. At least that’s how I’m trying to justify it.
Trail Notes
Distance – 1.8 miles loop hike
Elevation Change – Negligible
Difficulty – 1. This trail is suitable for everyone.
Trail Conditions –4.5. The trail is very well-graded and easy to walk on. The return arm of the loop is a paved bike path.
Views – 0. None.
Waterfalls/streams – .5. In wet weather, you’ll cross a small stream that feeds Dark Hollow Falls.
Wildlife –3. There should be plenty of deer. Many folks have also spotted bears on this trail.
Ease to Navigate –4. Easy to follow, just look for the Nature Trail marked on cement posts.
Solitude–1. You’ll see many people on this trail, as it connects the Big Meadows campground to the wayside and visitor’s center.
Directions to trailhead:
Park at Big Meadows near the Harry S. Byrd Sr. Visitor Center (mile 51 on Skyline Drive). The trailhead starts across from the northern end of the Visitor Center parking lot.
Powell Gap is a fantastic short hike to a beautiful view of the eastern valley. Even if you’re not a regular hiker, this walk can be done by nearly anyone. The rock ledge on the ridge provides better views than many of the scenic pull-outs along Skyline Drive.
Adam Enjoys the View of Powell Gap. Below: Parking for this hike is right along the road. There is not a lot or pull-off.
Christine Says…
For the final leg in our mini-hike trio, we chose the short walk up to a rocky ledge overlooking Powell Gap. The hike follows the Appalachian Trail the entire way – which is only a brief half mile. The trail goes rather steeply uphill the entire way. And although it’s short, our Falcon Guide still rates this trail as “moderately strenuous”. I would agree with that assessment if this hike was longer, but due to the shortness, I think this trail would be quite easy for anyone to do.
The overlook along the ridge-line comes atop a beautiful, little rocky ledge. Views face eastward, and include a wonderful look at the rolling mountains and the valley below. If you look to the north, you can even see a little snip of Skyline Drive winding its way through the forest below.
The viewpoint is accessed via the Appalachian Trail.
We spent a good twenty minutes on the rock ledge. Adam covered his face with his cap and took a brief nap. He exclaimed “That was the most comfortable rock I’ve ever laid on!” when he woke up. Apparently, it was smooth and the shape cradled his back perfectly. While he dozed, I enjoyed the nice summer breeze and watched butterflies fluttering about in the trees right below the overlook.
I could have happily stayed longer, but we were both hungry and wanted to squeeze in a picnic lunch on the beautiful summer day. We ended up having our picnic back in Harrisonburg – at Lake Shenandoah. Even at high noon, it never got hotter than 81. It was such a perfect day!
Trail Notes
Distance – 1 mile out and back
Elevation Change – 300 feet
Difficulty – 2. Although the trail is a bit steep, the route is so short that the hike qualifies as easy.
Trail Conditions – 3. The trail is typical of this section of the AT – well graded, but some rocks and uneven footing.
Views – 3.5. A very nice view of the mountains and the eastern valley.
Waterfalls/streams – 0. None.
Wildlife – 2. We didn’t see anything, but in the park it is always possible to see deer, bears and other wildlife.
Ease to Navigate – 5. There is only one trail in the area, so it’s nearly impossible to get lost as long as you head south on the Appalachian Trail
Solitude– 4. This section of the AT is not heavily traveled. We did come across two section hikers.
Directions to trailhead:
At Mile 69.9 on Skyline Drive. Park on the eastern side of the road along the meadow. The trail begins just near the Powell Gap sign on the eastern side of Skyline Drive.
Simmons Gap is a very easy walk from the ranger station down to the park’s eastern border. It follows an old route used by the mountain people that inhabited the area.
The Simmons Gap fire road extends to the park boundary. Below: We saw a bear less than a tenth of a mile from the Simmons Gap parking area; Apple trees probably attract lots of wildlife; Bear scat was everywhere along the Simmons Gap trail.
Christine Says…
Truthfully, we probably wouldn’t have bothered with this hike if it weren’t so close in proximity to the other two we selected for the day. Our Falcon Guide said it was nothing special, but it was one of the few hikes left in the park that we haven’t done at least once. (There are a few long 10-16 miles hikes still on the to-do list, but we’ll likely do those as backpacking trips)
The walk down Simmons Gap was about what I expected – a quiet walk down a shady path through the woods. There wasn’t much scenery – no views and no waterfalls. The stream running along the trail was nearly dry despite the decent rain we’ve had lately.
As we walked, we kept our eyes peeled for bears. We had seen a bear less than a tenth of a mile from where we parked our car. Also, the fire road was practically paved with bear scat. Besides the ridge of Knob Mountain, I don’t think I’ve ever seen so much bear poop in one place. Unfortunately, all we saw was the poop… no bears!
Wildflowers along the Simmons Gap fire road. Below: The trail follows along, and eventually crosses a small stream.
There are many hints of a bygone era along the trail – old stone walls, crumbling foundations and the odd apple tree tucked into the forest. The spot where the fire road meets the park boundary is obviously used as a dump by people who are too rude and lazy to take their garbage to a proper facility. The streambed at the end of the trail was littered with everything from a broken baby stroller, to a beaten plastic Shrek suitcase to a box full of empty 2-liter bottles of Dr. Pepper. It was disgusting. I wish I knew what people were thinking when they did stuff like this. How could anyone back their car up to a beautiful mountain stream, and just empty their trunk-load of discarded property?
Despite the disappointment of seeing the litter, we still had a nice walk down the path. Although, I don’t think I’d recommend this hike to anyone.
Trail Notes
Distance –1.6 miles out and back
Elevation Change – About 200 feet
Difficulty –1. Easy walking with very little elevation change.
Trail Conditions – 4.5. This fire road is smooth and easy to walk on.
Views –0. You’ll be in the woods the whole time.
Waterfalls/streams – 1. The small stream is pretty and is often lined by stone walls, but it may be dry most of the summer.
Wildlife – 3. There’s a good likelihood of seeing bears in this area.
Ease to Navigate – 5. There is no place to go wrong. Follow the fire road straight out and back.
Solitude– 4.5. Because there isn’t much to see in this area, not many people come this way.
Directions to trailhead:
At mile 73.2 on Skyline Drive you will see a small parking lot on the western side of the road (directly opposite of the sign for the Simmons Gap Ranger Station). Cross Skyline Drive, walking on the paved road to the ranger station. You will see a chain guarding a fire road. Cross the chain and start the trail down the fire road.
Note – 10/11/10: In their October issue, Backpacker Magazine inaccurately listed Arethusa Falls as a Virginia destination. The falls are in New Hampshire.
This three mile hike leads to Arethusa Falls, which is (arguably) New Hampshire’s tallest single waterfall. The optional arm along Bemis Brook is challenging in spots, but offers more lovely stream scenery.
Arethusa Falls might not be the most photogenic of New Hampshire’s many waterfalls, but it is likely the tallest. Below: The optional side-loop trail along Bemis Brook takes you past Coliseum Falls.
Christine Says…
We originally planned on combining these two trails with Frankenstein Cliffs to make a loop, but unfortunately we ran short on time and just did the three mile out-and-back.
The trail along Bemis Brook was extremely tough walking! In addition to the roots, rocks and mud, we suffered a full-on mosquito assault. I spent a lot of the walk along the trail cursing and flailing my arms wildly. Even with DEET, the little buggers hovered right around my eyes, ears and nostrils, constantly buzzing in too close and getting caught in my eyelashes.
There were several very pretty small waterfalls along the Bemis trail. Coliseum Falls were especially picturesque. Since it was such a sunny day, I didn’t bother with a tripod. Long exposures weren’t a possibility in the harsh sun, so I just took snapshots along the way. The climb from Bemis Brook back up to the Arethusa Trail was practically vertical. We had to climb, hand-over-hand, grabbing roots and rocks to drag our way up the mountainside. There was one blown down tree that was particularly difficult to negotiate. It was one of those fallen trees that was a little too high to climb over, but a little too low to scramble under. I decided to clamber over it, and ended up getting my boot toe caught on the tree trunk. I took a spectacular fall down onto the roots and rocks. It absolutely left a big black and blue mark! I was really glad when we finally saw the junction with the Arethusa Trail!
This trailhead for this hike offers beautiful views of Frankenstein Cliffs looming overhead. The trail has an option to lengthen the hike by a few miles to gain access to the top of the cliffs. We ran out of time and had to pass on that option. Below: Trails in the area are clear and well-marked.
The rest of the way to the falls was much easier. It was uphill and muddy in spots, but the trail was well-graded and nice to walk along. The last stretch to Arethusa Falls led downhill into a chasm that opened to an amphitheater like setting. The falls were very impressive! The water falls like lace over the sheer rock face.
On the hike back, Adam and I waffled about whether or not to continue our hike up to Frankenstein Cliffs. We even started down the Cliffs Trail, before turning back in less than a tenth of a mile. We had plans to meet my parents in North Conway, and we just didn’t have time to finish the loop.
Arethusa Falls is a gorgeous 160 foot waterfall that is very popular with families. We started on the blue-blazed trail near the railroad tracks at the parking lot. After about .1 miles, you come to a junction with the yellow-blazed Bemis Brook Trail. We decided to do this side trail, since it goes partially along the water, guiding you to a few pools and smaller falls areas. Once you come up to the Coliseum Falls area, you will need to climb up almost vertically up the trail to join back with the Arethusa Falls trail. If you do want to do the Bemis Brook trail you should do this at the start of your trip rather than trying to descend it at the end. This part of the trip was tough and takes a lot of strength out of you in a short distance, so plan appropriately. Once we reached the junction at the top, we took a left to return to the Arethusa Falls trail. The trail continues to go uphill until you reach a junction with the Cliffs Trail. From this point, you continue downhill until you reach the falls in .2 miles. You return the way you came, but you will avoid the Bemis Brook Trail on the way back and just stay on the Arethusa Falls trail to reach your vehicle.
Arethusa Falls was named after the poem, “Arethusa” by Percy Bysshe Shelley. The falls were discovered by Edward Tuckerman, but named by Moses Sweetser and Professor Huntington in 1875.
The Bemis Brook Trail follows a beautiful stream for most of the way, until you get to the portion where it climbs, nearly vertically, back up to meet the Arethusa Trail. Below: The Arethusa Trail is much easier to walk – smooth and well-graded, compared to the Bemis Trail.
While I was off hunting for a geocache and Christine was taking some photos, she struck up a conversation with a man hiking solo on the trail. When I got back to them (after sliding down the hillside 20 feet on my butt), he wanted to take a look at my map. He was thinking about doing the Frankenstein Cliffs trail and then looping back to make it to his car. He was to meet up with his wife in less than two hours to take a ride up Mount Washington on the cog railroad. We told him that it might be hard to make it in time. He decided to go for it, but I don’t think there was any way he could have made it back in time for his trip up. We both pictured his wife riding solo up the railroad, muttering to herself, and awaiting the moment she could give her husband a piece of her mind.
We wish we had more time to do the Frankenstein Cliffs trail (these are named after an artist, not the doctor who created a monster), because we have heard that it does give you some nice views from the top. The trail is allegedly muddy and not as well maintained as the Arethusa Falls trail.
Trail Notes
Distance – 3 miles, out-and-back (2.8 if you leave the Bemis Brook Trail off and just stay on the Arethusa Trail the entire way)
Elevation Change – 650 ft to the falls. There might be a bit more climbing if you do Bemis Brook.
Difficulty – 3. The Arethusa Trail is squarely moderate. The Bemis Brook trail is more difficult with one killer climb uphill at the end.
Trail Conditions – 2.5 The Arethusa Trail is in nice condition most of the way. There are some muddy spots and we encountered a flew blow downs. The Bemis Trail is not easy walking. There are numerous fallen trees, tricky footing and if it’s the slightest bit damp, the trail is very slippery.
Views –0. You’ll be in the woods the entire time.
Waterfalls/streams – 4. The falls are large and impressive, but not terribly photogenic.
Wildlife – 0. The heavy human traffic probably scares any wildlife away.
Ease to Navigate – 5. Trails are marked and easy to follow.
Solitude– 2. Because the hiking is a little more challenging, you won’t see the same crowds as you do at Flume Gorge or Sabbaday Falls.
Directions to trailhead:
From I-93, follow New Hampshire Route 302 west through Crawford Notch State Park. A few miles past Sawyer Rock Picnic area you will see the Arethusa Falls parking area on the right.
The Greeley Ponds trail is a popular hike that leads to a pair of beautiful ponds surrounded by the White Mountains.
We didn’t have great weather for our hike to the Greeley Ponds. It was very muddy and overcast, but the ponds were still really pretty! Below: There were several small stream crossings along the hike; We saw Indian Pipes growing along the trail; the terrain in this area is very wet and dark, making it a perfect place for mosses and mushrooms.
Christine Says…
We got up early to take a scenic drive and do some hiking along the Kancamagus Highway. We decided to check out the trail leading to the Greeley Ponds. This hike intrigued me, because it is so different from anything we have in Virginia. Ponds and lakes are not terribly common in the Blue Ridge, so I thought a hike leading to two ponds surrounded by mountains sounded really perfect.
The trail did not disappoint! The woods in New Hampshire are so thick and green and different. I love the abundant evergreens in the New England woods. Everything is so fragrant, lush and moss-covered. Old fallen trees become nurseries for tiny mushrooms and tree seedlings. Streams trickle in seemingly every direction. Even the birds are different – singing unfamiliar songs up in the trees.
The Greeley Ponds Trail is relatively easy – with only about 500 feet of elevation gain over 2.5 miles. The things that slow you down are the roots, rocks and mud. You have to watch your feet with every step. We found our trekking poles to be very helpful. Many places along the trail are traversed using wooden planks and split logs. There are several small streams to cross along the way, hopping from rock to rock. Some of the trail system is a little confusing because cross-country skiing trails cross the hiking trail in many places. The key is to look for yellow blazes.
At the 1.7-mile mark, the Upper Greeley Pond comes into view. There are several places to climb down to the shoreline and take in views of the pond. Although Upper Greeley is the smaller of the two ponds, I found it the prettier of the two. I loved seeing the towering mountains all around the pond.
Lower Greeley Pond has a lot of dead trees at one end, giving it a swamp-like appearance. Below: Trailhead sign along the Kancamagus Highway; New Hampshire’s “Hike Safe” Signs are posted at all trailheads. Hike Safe (http://www.hikesafe.com) was developed by the state to help hikers become safer in the outdoors; Adam checks out the trail map illustrating skiing and hiking trails.
Lower Greeley Pond is just several tenths of a mile past the end of Upper Greeley. There is a big stand of what appears to be dead hemlocks at the end of the pond. It gives the pond a swamp-like appearance. The lower pond also has fewer places to enjoy a shoreline view.
We turned around for our return hike a little past the end of Lower Greeley Pond. Although, if you want a longer hike, the trail continues, following the Mad River all the way to Livermore Road.
We didn’t see a soul on the hike out to the ponds, but passed numerous groups of hikers on the return trip. Greeley Ponds is clearly a popular hike in this area.
Adam Says…
The Greeley Ponds Trail is close to the western side of the Kancamagus Highway, so it was our first stop along the way. The trail has a small parking lot that tends to get crowded during the busy summer. This is a fee area, so you’ll need to deposit $3 in an envelope and display your pass.
The trail wasn’t difficult, but due to the recent rain, it was a little muddy and slick in spots. I also felt overwhelmed by mosquitoes and had to flail around and swat them at every step. It reminded me of the quote from Lord of the Rings when Merry asks, “What do they eat when they can’t get hobbit?”. Well, my answer to Merry is “me”. The bug repellent held many off, but other than taking a DEET bath, you’ll likely find a bite or two without multiple applications along the hike. Christine asked if I would rather have the flies and mosquitoes in New Hampshire or the gnats and ticks in Virginia. Maybe it’s because of what I’m experiencing now, but give me some ticks and the threat of Lyme Disease over these pesky creatures.
Much of the trail was traversed by boardwalks and planks. Below: The trail intersects a couple other trails; Adam enjoys the view from a small, sandy beach at Upper Greeley Pond.
The yellow-blazed Greeley Ponds Trail goes for 1.3 miles until it reaches a junction with the East Osceola Trail (you could add this to your hike if you want for an additional three mile out-and-back hike). At this junction, you will see the sign stating you should reach the Lower Greeley Pond at 1.7 miles. The trail intersects several times with a blue-blazed trail, but this is a cross-country skiing trail to the ponds (Hikers stay off the ski trails in the winter, so they can avoid leaving footprints over the cross-country ski tracks). Both will get you to the same place, but you’ll notice the yellow-blazed trail will be a shorter route. Once the pond comes into view, you can see a short off-trail path to a beach-y area with good views of the pond. Going back on the trail, you continue along the bank and can continue to get different views. Staying on the main trail, you will reach the Upper Greeley Pond around the 2 mile marker. There are a few good views of this longer pond for the next few tenths of a mile and then you can return the way you came.
There is no camping allowed within .25 mile of the Greeley Ponds, but we did see some illegal campsites around the area created by people that weren’t respectful of the ecosystems around the area.
The area around the ponds, especially the Upper Greeley Pond seems like a great area for birdwatchers. We were treated with songs from warblers and the knocking of woodpeckers.
The hike exhibited a lot of different features of the area’s forests – dense pines and birches, gorgeous ponds, and erratic boulders along the way. The minimal elevation change makes this a good hike for families as long as you can maintain good footing on wet surfaces. We saw a few groups with dogs along the trail, so it is even four-legged friendly. (Please note…dogs are not allowed on the ski trails in the winter)
Trail Notes
Distance – 5 miles
Elevation Change – 500 ft
Difficulty – 2. The hike has a very gradual uphill.
Trail Conditions – 2. Like most trails in New Hampshire, this one is rocky, muddy and covered with roots.
Views –2. Some nice views of the mountains at the ponds.
Waterfalls/streams – 3.5. Ponds aren’t really lakes or streams, but they do qualify for a high rating for water features.
Wildlife – 2. Lots of bird species near the ponds.
Ease to Navigate – 3. Pay attention to the yellow blazes and you won’t get lost.
Solitude– 2. This is a popular and well-traveled hike.
Directions to trailhead:
Take I-93 Exit 32 at Lincoln and go east on Route 112/Kancamagus Highway about 10.5 miles to the marked Greeley Ponds parking lot.
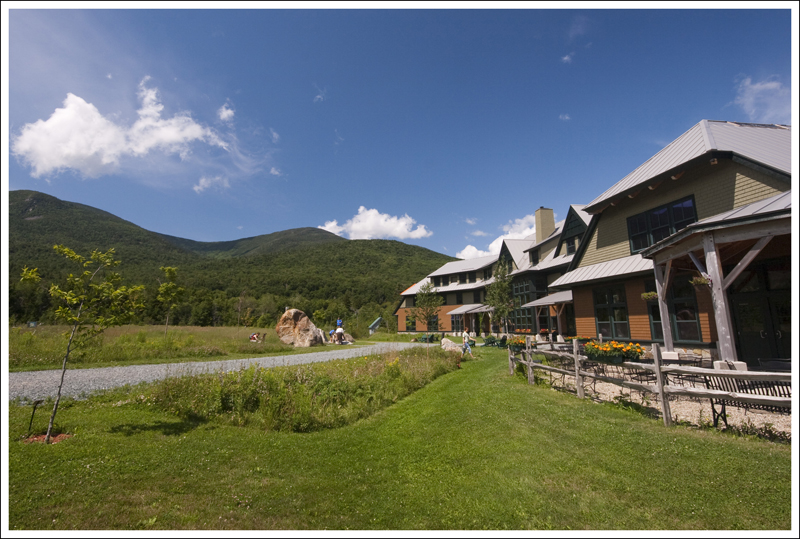
Located in Franconia Notch State Park, this two-mile path around the Flume Gorge showcases a lot of beautiful scenery on a short and easy walk. If you crave solitude, this is not the place for you. But if you don’t mind crowds and want to see some unique scenery, don’t miss a visit to this area.
The Flume is a beautiful and unique place. Below: Avalanche Falls is located inside the Flume; Liberty Gorge Cascade is also impressive; The trail is lined with large boulders called glacial erratics; The Sentinel Pine Covered Bridge is for pedestrians only.
Christine Says…
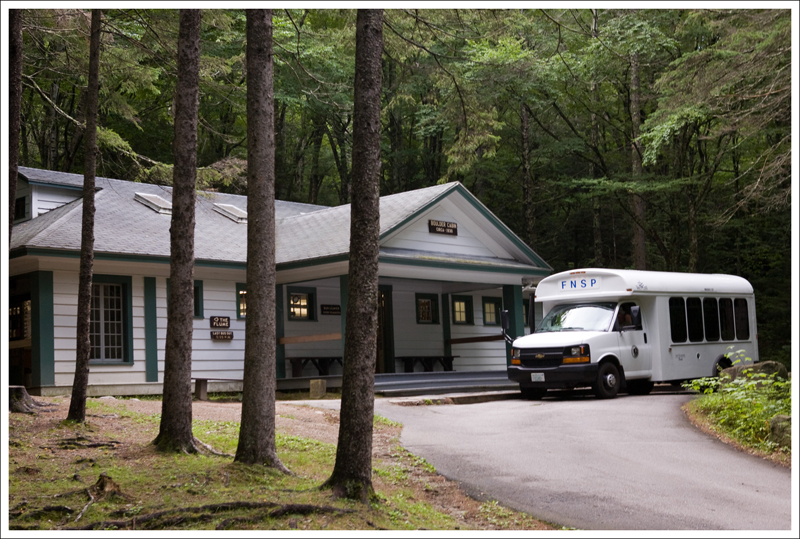
Last year, when we visited New Hampshire for the first time, we went to Flume Gorge with my parents. It was insanely crowded, unusually hot and glaringly sunny on that visit, so we decided to make a return visit on this trip – hoping that the clouds and cooler weather would keep the crowds at bay. There were definitely fewer people this time, but that’s not to say we had solitude. Flume Gorge is an extremely popular area. There will always be hordes of people, no matter the time of day, week or year you visit.
It’s no surprise the area draws such large crowds – it packs an amazing amount of unique scenery into an easy, two-mile loop. For anyone who doesn’t want to walk the two miles, there is a bus that will take visitors to a drop-off point at the Boulder Cabin. This option substantially shortens the distance and climbing necessary to see the gorge. However, bus riders miss seeing a lot of the other impressive scenery along the loop.
The two-mile loop starts off along a shady, wooded path that climbs down to the Pemigawasset River. In .25 miles, there is a bright, red covered bridge across the water – the bus goes through the bridge, but pedestrians cross a walkway attached to the side of the bridge. After a short uphill, both the bus riders and the walkers arrive at the Boulder Cabin. The building is full of exhibits – both historical and natural.
The first covered bridge in Flume Gorge is brilliant red. Below: Table Rock; The path through the woods is peaceful and shady; Bear Cave is located near the top of the Flume; The side view of Avalanche Falls.
After passing the cabin, the path follows alongside an area called Table Rock. The water in the river passes thinly over a wide, smooth expanse of granite. A sign announces the beginning of the Flume. The Flume is a fascinating geological area – a narrow slot canyon carved out from thousands of years of river flow over the rock. Wooden walkways are attached to the sheer canyon walls and allow people to climb through the gorge using a series of ramps and steps. Near the top of the Flume, visitors are treated to views of the crashing water of Avalanche Falls. The falls take several directional turns through the Flume – each angle makes it look like a completely different waterfall. After passing the waterfall, be sure to take a quick peek inside Bear Cave.
At the top of the Flume, the trail has two options – one returns people to Boulder Cabin and the bus stop, the other follows a trail for a little over a mile back to the main entry. If you’re able, it’s definitely worth following the longer route to see Liberty Gorge Cascade, the Pool, The Sentinel Pine Covered Bridge, the Wolf’s Den and several impressive erratics along the trail.
My favorite view along the trail came at the spot overlooking the Sentinel Bridge. Below: The river under the bridge is very scenic; The Pool is a wide, still spot on the river.
One of my favorite views along the trail was looking back at the Pool and the Sentinel Covered Bridge from a little spur trail to an overlook. From this point, the walk back is steeply uphill for a short while. Once you gain the ridge, the path levels off and you get a nice view of Liberty Mountain. A short while later, you arrive back at the visitor’s center – where you can treat yourself to an ice cream cone.
Even though Flume Gorge is crowded and rather expensive to visit, it’s still very worthwhile. Not many short two-mile loops pack in quite so much scenery into a pleasant, easy-to-walk package.
Adams Says…
After dropping off our thru-hiker friends, The Traveling Circus, we headed off to hike around Flume Gorge. We did this trip last year with Christine’s parents, but thought it was worth a second trip.
This is a very popular attraction and is definitely one of the highlights of the Franconia Notch State Park. Similar to many areas of New Hampshire, it requires a fee (in 2010, it was $13 for adults). The visitor center has a theatre that shows an informational film throughout the day and a few exhibits around the entrance. The snack bar is also fully equipped to provide enough refreshment and food for a lunch or snack.
The entire Flume Gorge area is loaded with small waterfalls and cascades. Below: Tree roots grow over rocks; The crowds at Flume Gorge are always thick; Ramps and stairs allow people to climb easily through the gorge; We saw lots of chipmunks and red squirrels.
This hike packs a lot of features into one short hike. The covered bridge was built in 1886. While you can’t walk inside since it is for bus traffic, it does provide a nice photo opportunity. Table Rock is a large rock outcropping where Flume Brook slowly glides over the water. The rock is 500 feet long and 75 feet wide. The Flume Gorge is quite impressive. You walk along a boardwalk that clings to one side of the gorge. The Conway granite walls rise on either side 70-90 feet as you see the brook rush out of Avalanche Falls and down the brook. We were impressed to see all of the small trees and moss that grows amazingly out of the cliff walls. The Flume was discovered in 1808 by a 93 year-old woman while she was fishing. Signs describe a large boulder that was suspended between the walls of the gorge but a storm in 1883 swept it away and no signs of the boulder have been spotted since. Avalanche Falls is an impressive 45-foot waterfall that you can see from several angles while along the boardwalk.
After walking another .5 miles from Avalanche Falls, Liberty Gorge is your next stop. There is a nice overlook to see the water flow through this gorge. After a few tenths of a mile past Liberty Gorge, you will come across the Pool overlook and another covered bridge. Shortly after the covered bridge, you have an option to join go through the one-way Wolf’s Den, but it does require crawling on your hands and knees to make it through the cave. We continued pass the Wolf’s Den, to catch the additional overlook of the Pool. We thought this was a better view of the covered bridge and the Pool. Continue from here to arrive at the Glacial Boulder garden to view some nice erratics.
While there aren’t any geocaches inside the gorge, there are a few outside the area:
Difficulty – 1.5. There are some steps and hills, but most people should be able to do this without too much effort.
Trail Conditions – 4.5 The trail is covered in small crushed gravel, allowing for easy footing.
Views – 1. You do get one view of Liberty Mountain, but otherwise you won’t see many far-off views.
Waterfalls/streams – 5. Great views of Avalanche Falls and much of the trip is in sight of water.
Wildlife – 1. We saw a few red squirrels and chipmunks, but this is so popular with tourists, you won’t see a lot of wildlife.
Ease to Navigate – 5. The area is secluded from other areas, so you can’t get lost. You just have options to cut distance off of the trail.
Solitude – 0. You will always find lots of people here.
Directions to trailhead:
From I-93, once you enter the Franconia Notch area, take the Flume Gorge exit. The area is well-marked. Park at the Visitor’s Center. The trail starts from the Visitor’s Center. Purchase tickets and proceed.


