Apple Orchard Falls – Cornelius Creek Loop

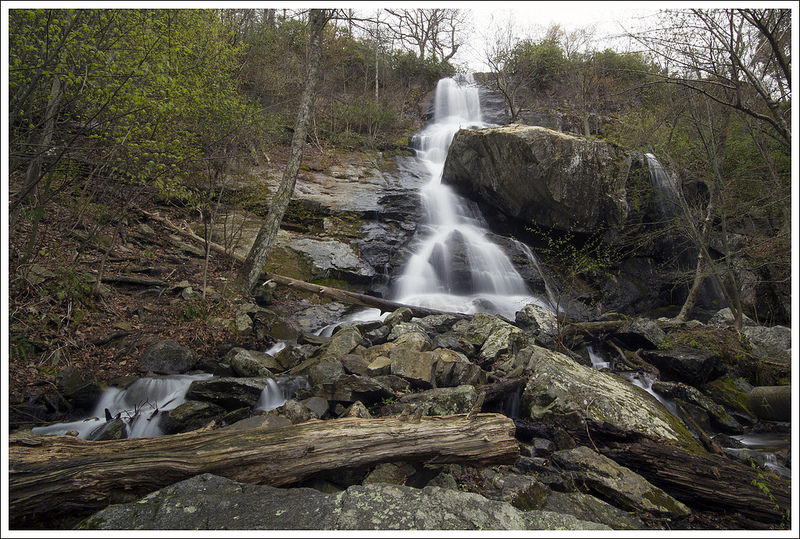
This 6-mile hike is jam-packed with spectacular stream scenery and waterfalls – the most impressive being the 200 foot Apple Orchard Falls.

View the Full Album of Photos From This Hike

Apple Orchard Falls
Beautiful Apple Orchard Falls plunges about 200 feet down the mountainside. Below: Even the fire roads were scenic on this hike; Abundant wildflowers including Dutchmans Breeches; There were several stream crossings to negotiate.

Fire Road Dutchmens Breeches Crossing

Christine Says…

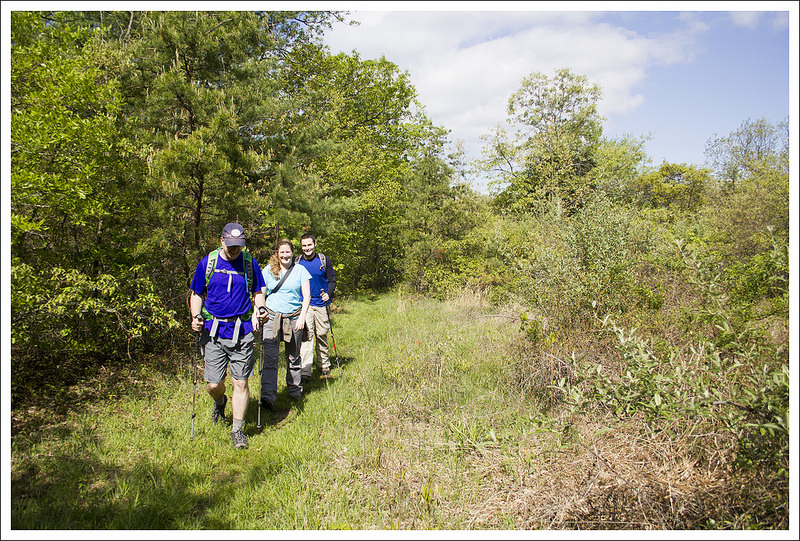
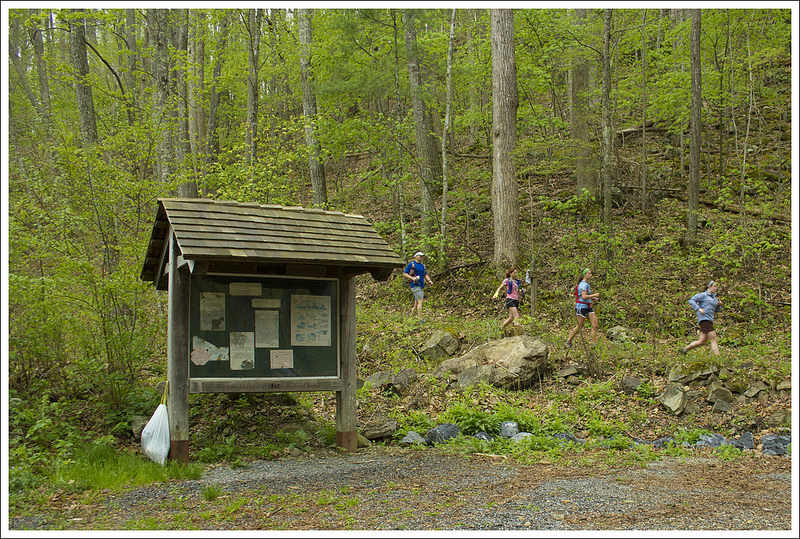
Apple Orchard Falls has been on our ‘must hike’ list for years now, and I’m so glad we finally got out there and did it!  It’s a bit of a drive from our home-base of the central Shenandoah valley, but it was well worth the trip!  We hiked it on a cool, rainy day in mid-April.  We thought we’d have the trail all to ourselves, but as our car bumped along the forest road nearing the parking area, a runner went by.  Then three more runners… and then a cluster of ten.  Pretty soon we realized that there was some kind of race going on in the vicinity.  It turns out we picked the same day as the Promise Land 50K for our hike.  We ended up sharing the first half of our six-mile route with 300+ trail runners.

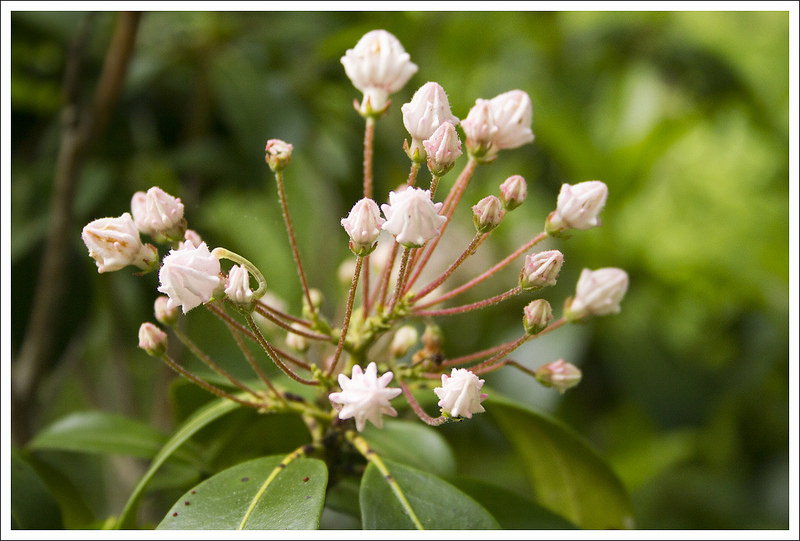
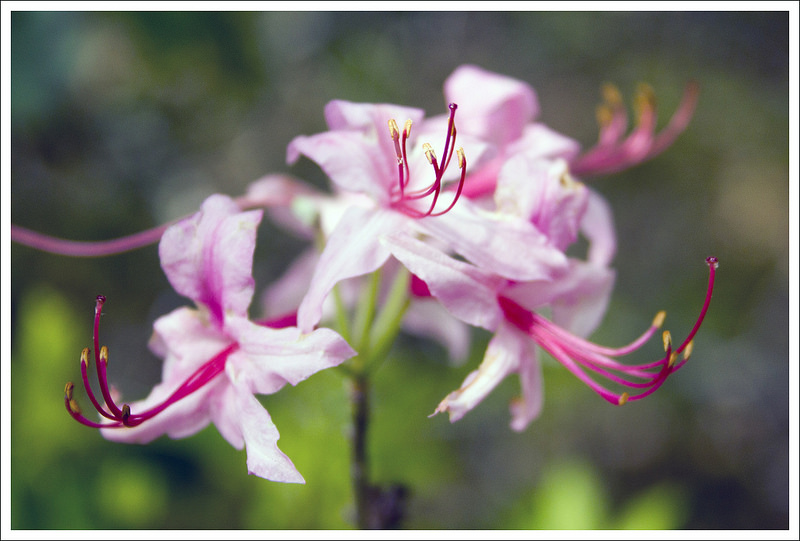
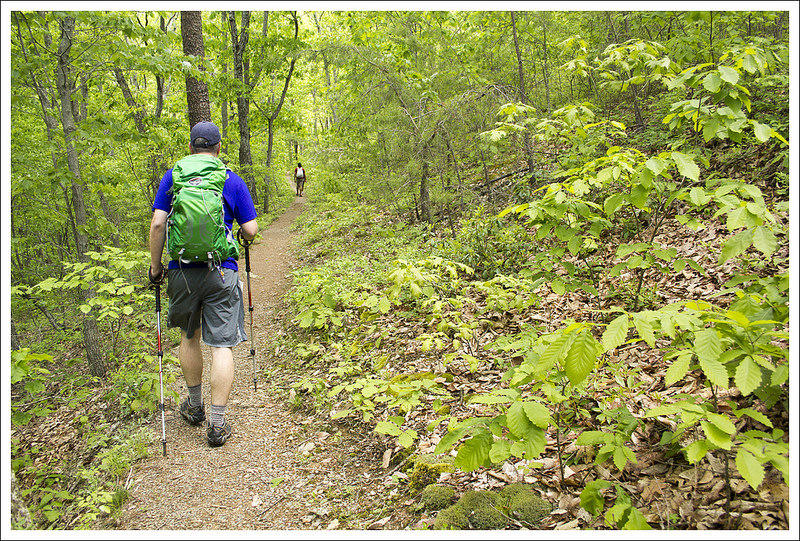
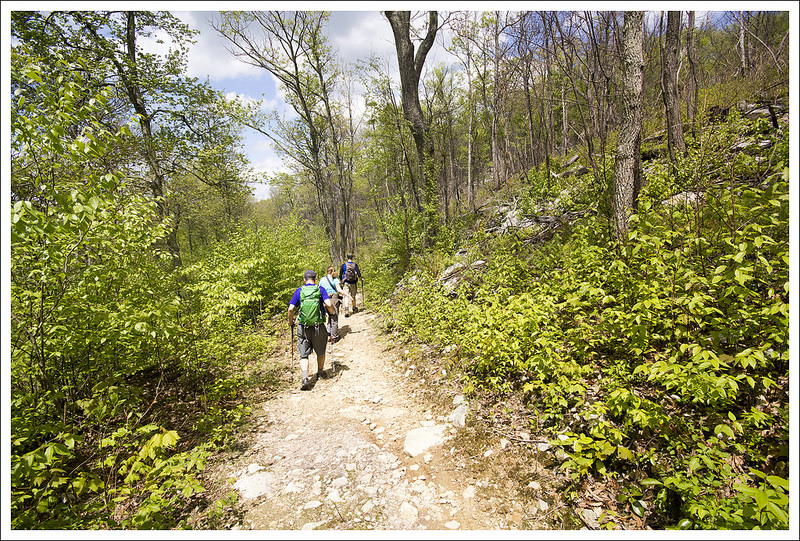
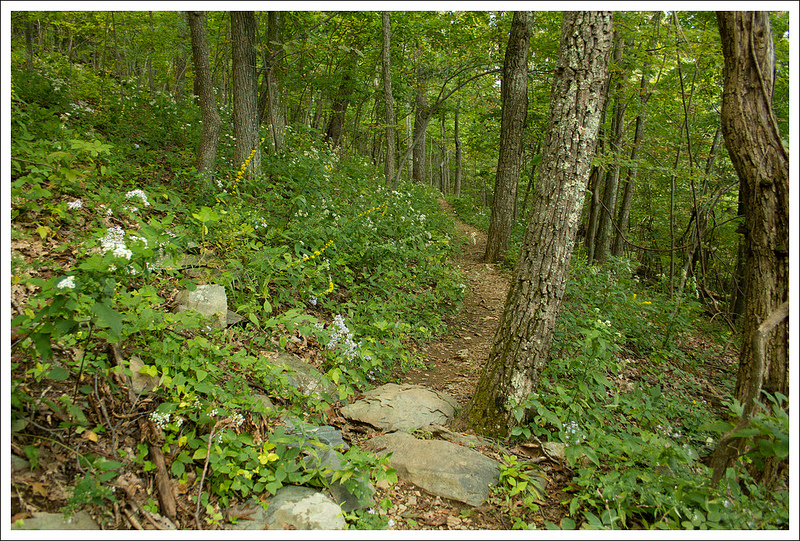
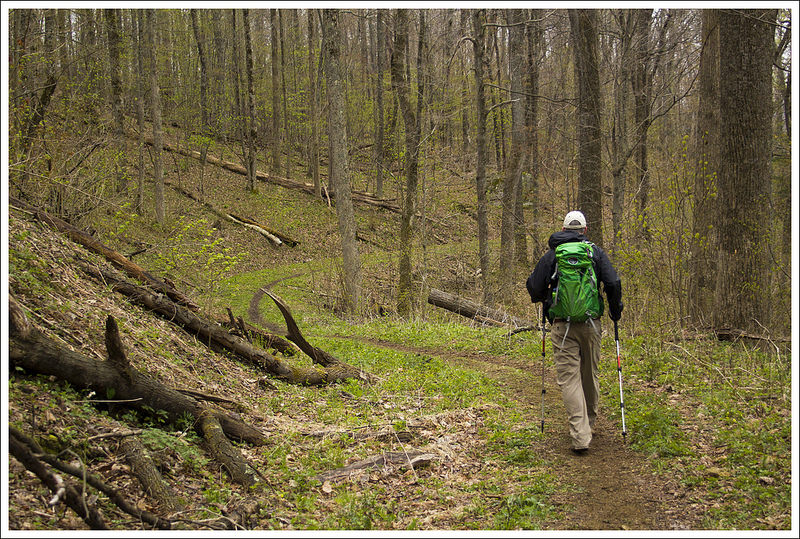
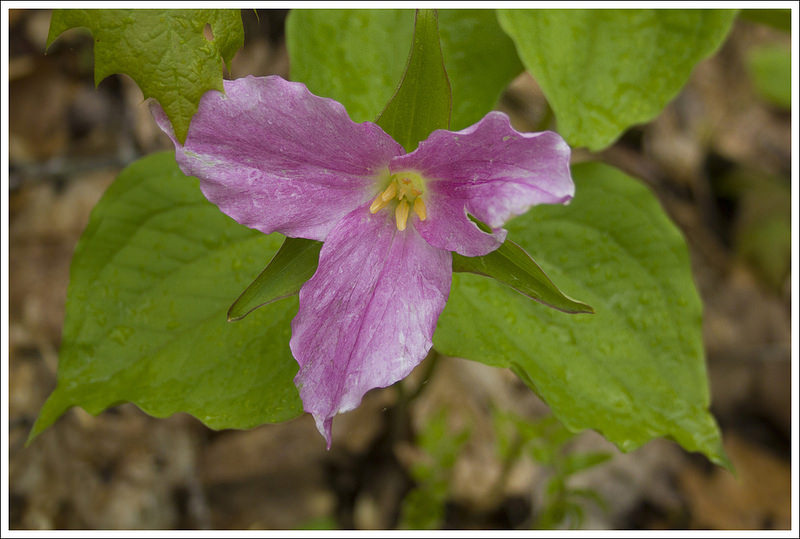
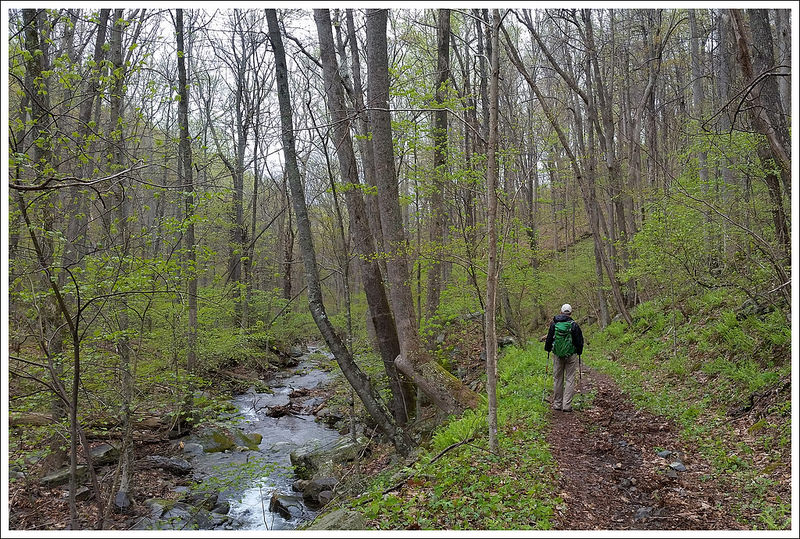
They were all friendly folks, but it was a little stressful to constantly be looking over my shoulder, watching to make sure there wasn’t a racer on my heels, needing to pass.  I certainly didn’t want to get in anyone’s way as they cruised toward victory or a personal record!  I still enjoyed the gorgeous stream scenery as we ascended alongside North Creek.  The sound of the water was soothing. The hillsides along the trail were covered with trillium and purple wild geraniums.  The air was filled with a light misty rain and all the trees were unfurling their brilliant spring green leaves.  With all these pleasures along the trail, I tried my best not to let the constant stream of passing racers disrupt the zen-like peace.

Christine checks out the creek early in the hike.
Christine checks out the creek early in the hike. Below: We hike the loop on the same day the Promised Land 50K was running.  It made for a crowded trail; Trillium was blooming everywhere; Pretty little rapids on the creek.

Promised Land 50K Runners Trillium Small Cascade on North Creek

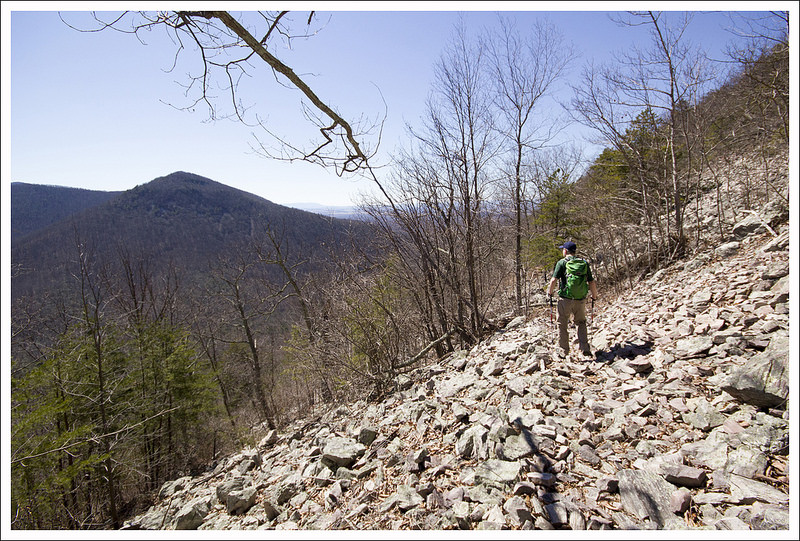
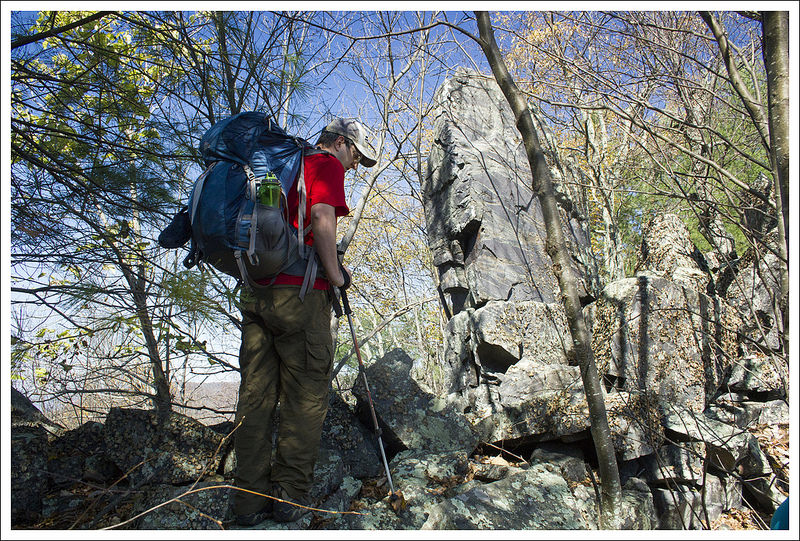
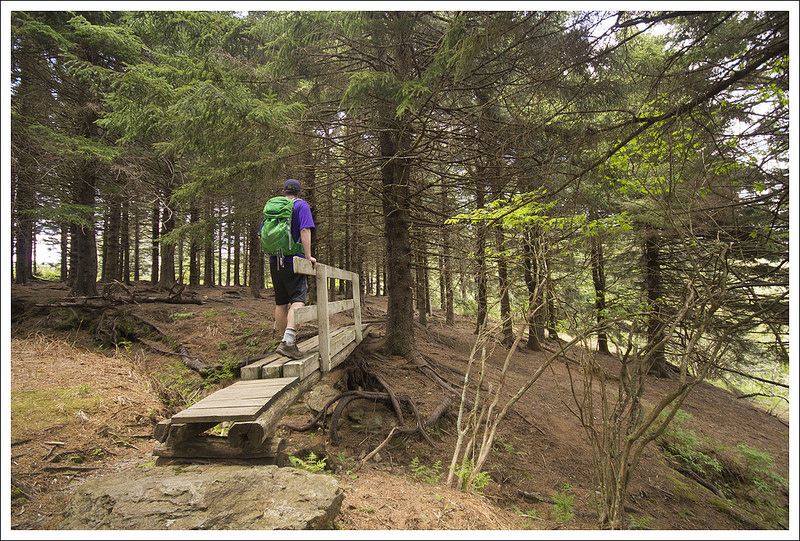
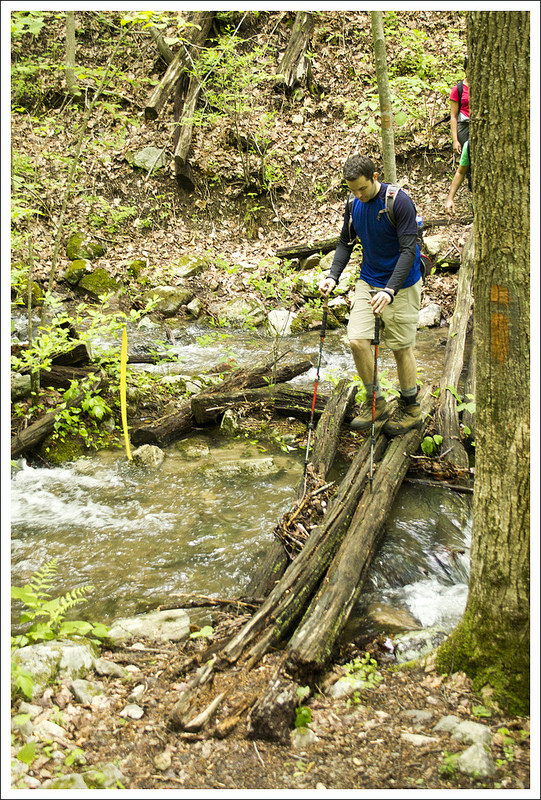
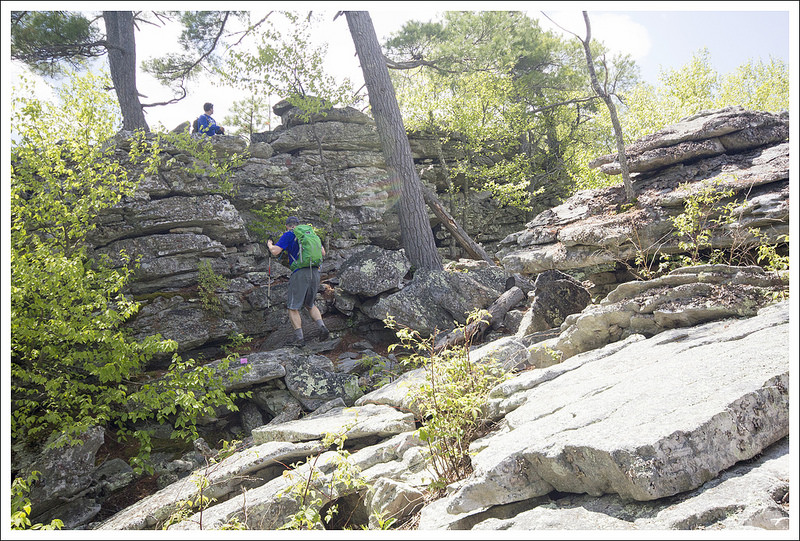
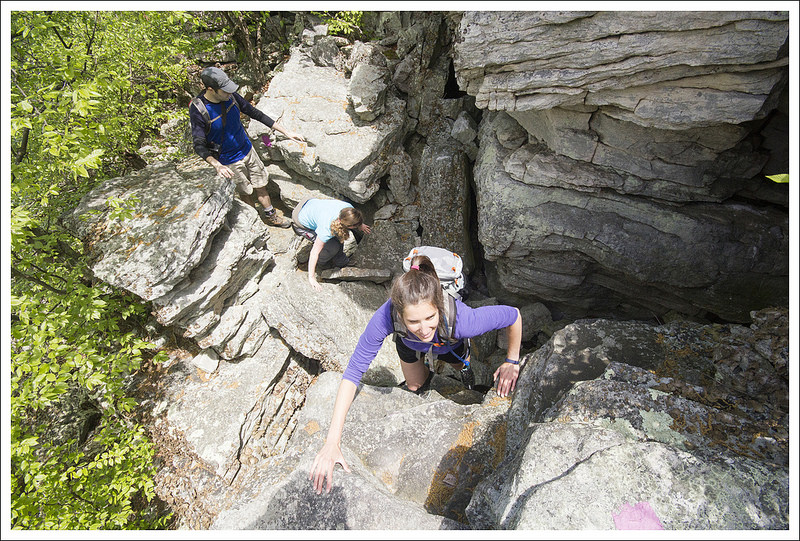
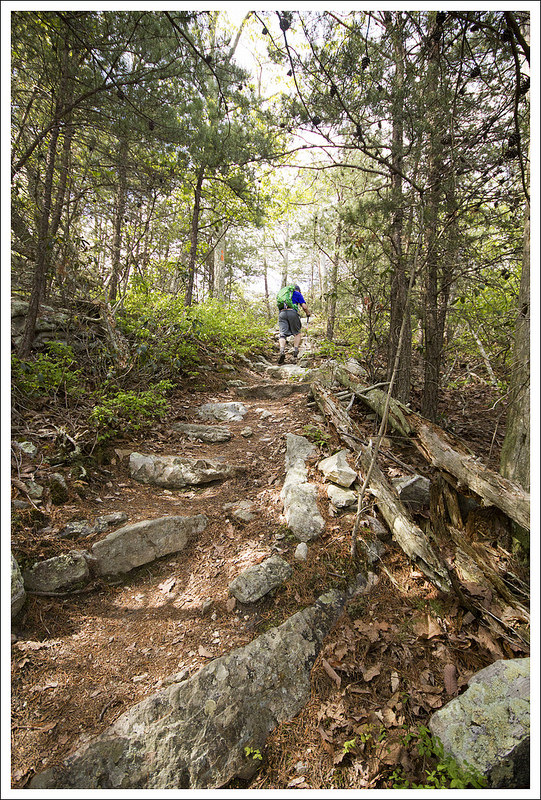
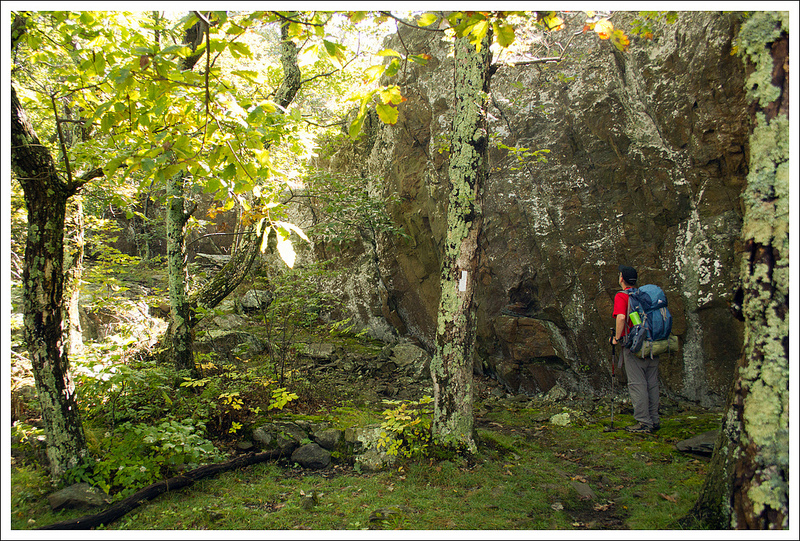
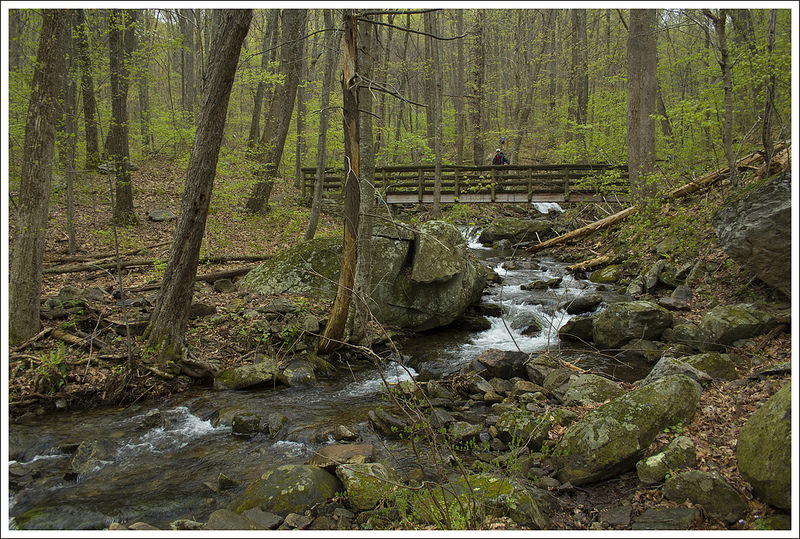
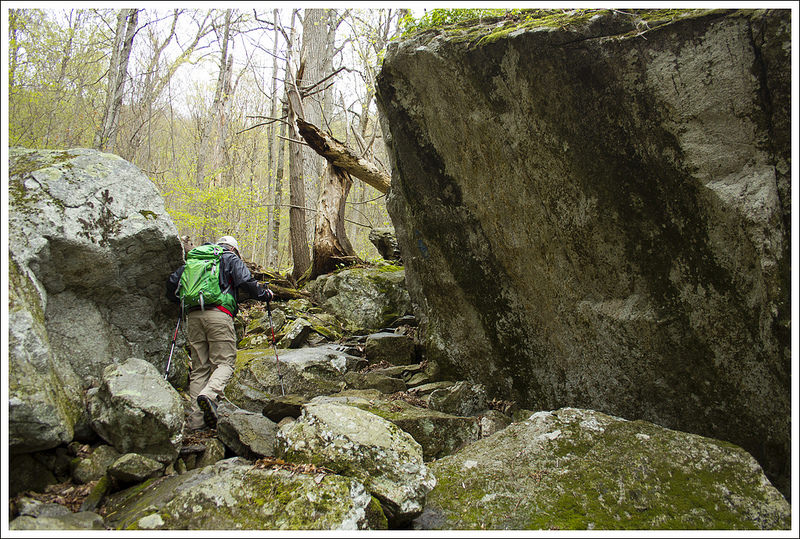
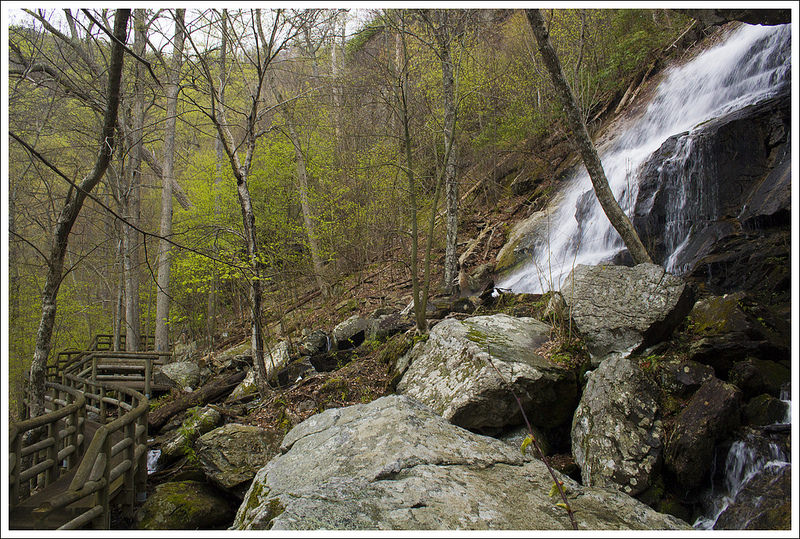
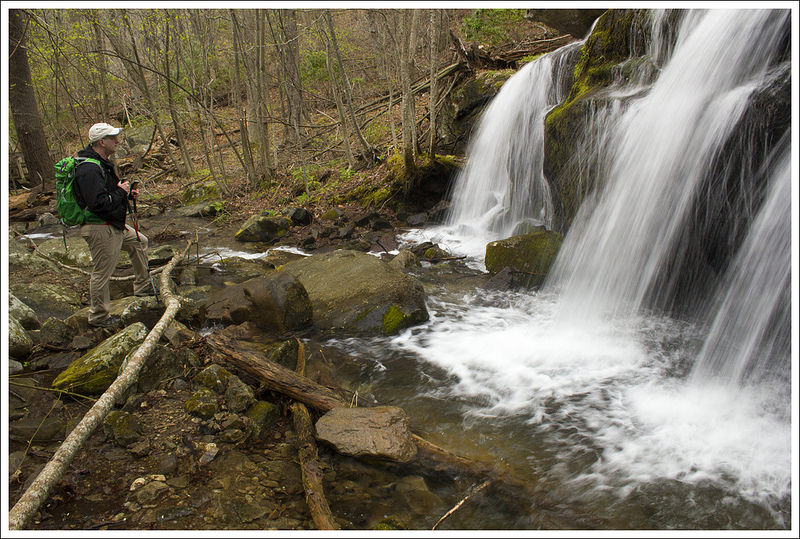
The trail was in great shape and ascended steadily and moderately uphill.  There were several sturdy footbridges across the creek on our hike up.  Around 1.3 miles into the hike, the climb became a little steeper and rockier. Right before reaching the base of the falls, we passed through a jumble of huge boulders.  At first, we could only see the falls through the trees.  They were majestic, but obscured by the foliage.  We continued uphill, making a wide switchback before coming to a curved wooden bridge and a viewing platform at the base of the fall’s largest plunge.

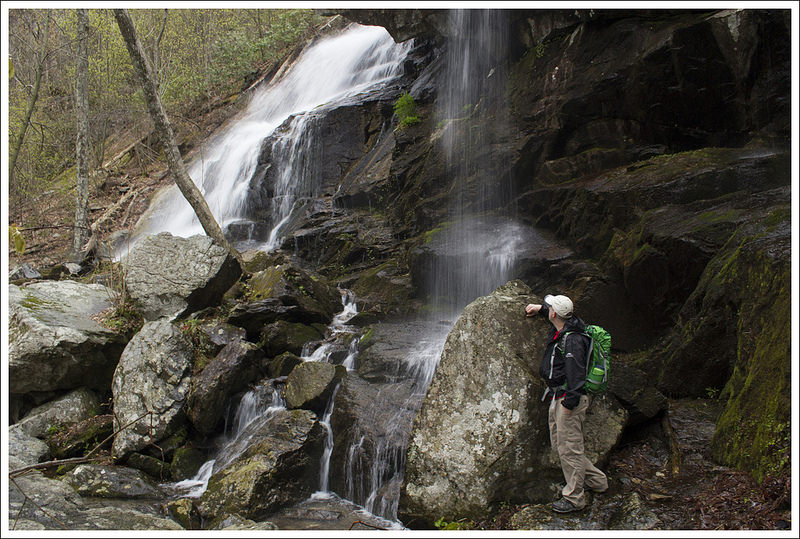
Adam set up my tripod and I spent some time photographing the waterfall from a variety of angles.  I wish the trees around the falls had been a little more ‘leafed out’.  The green would have made an even more attractive frame for the falls, but it was still very nice.  I was challenged by the rain – which was beginning to fall at a steadier pace. Droplets kept landing on my lens, and making blurry bubbles on each of my photos. I used a hat as an umbrella as much as I could. While we were enjoying the waterfall,  the bulk of the racers passed us by.

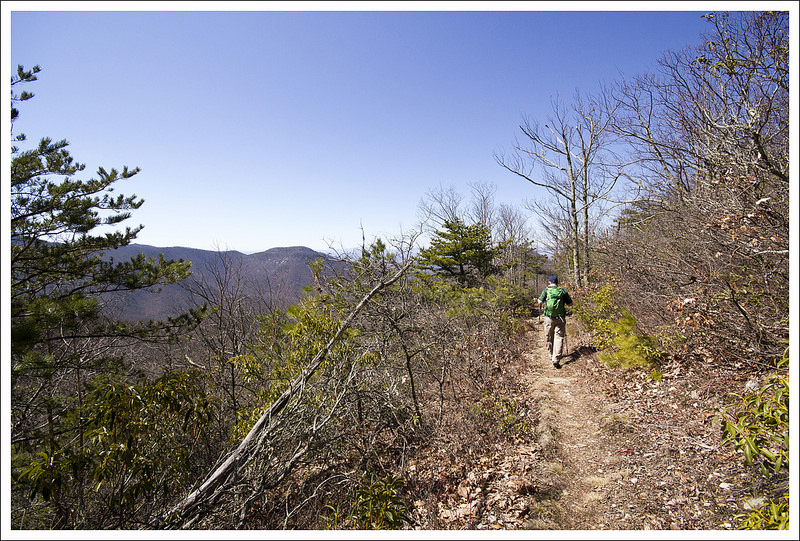
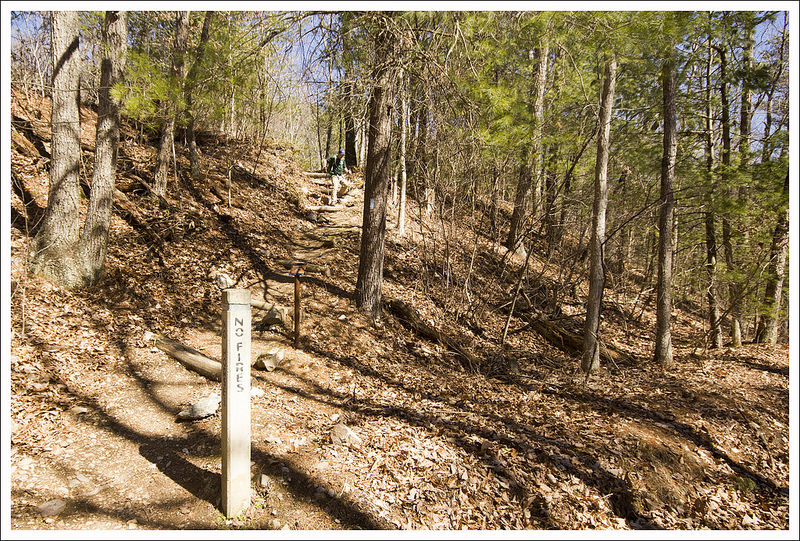
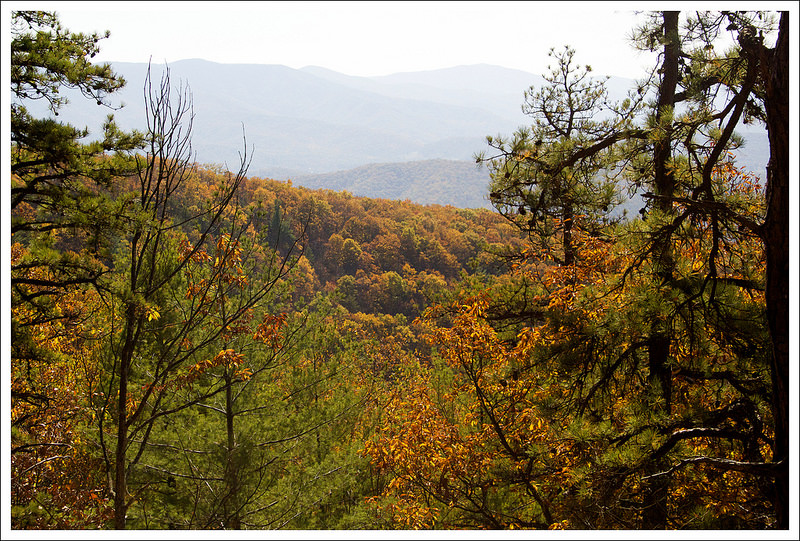
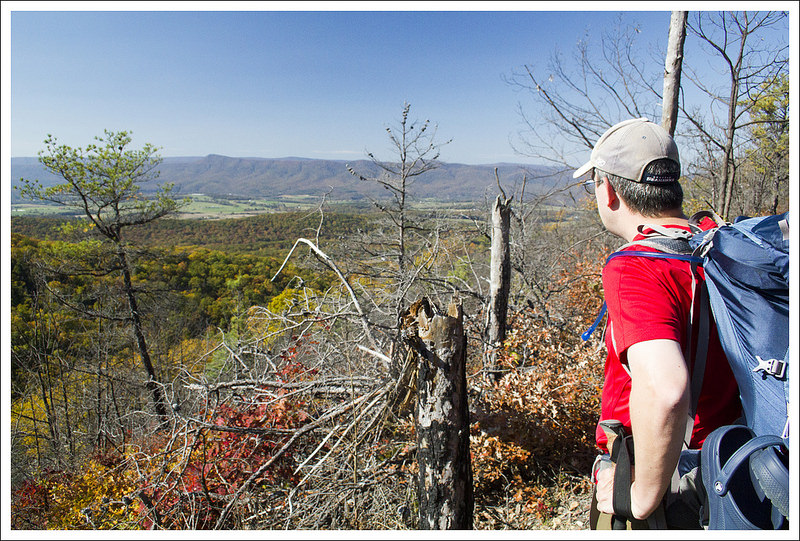
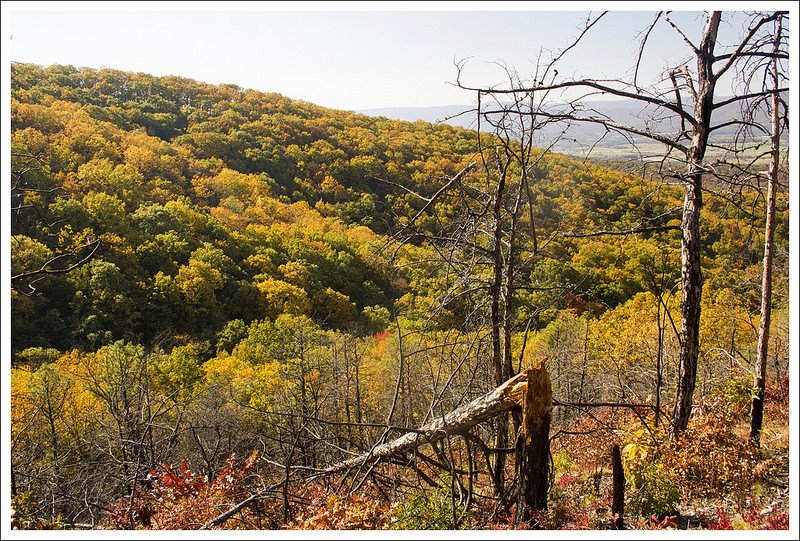
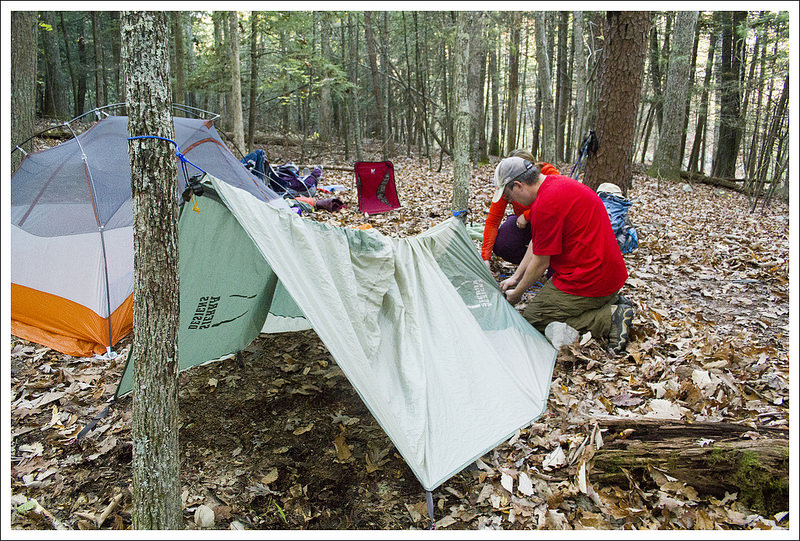
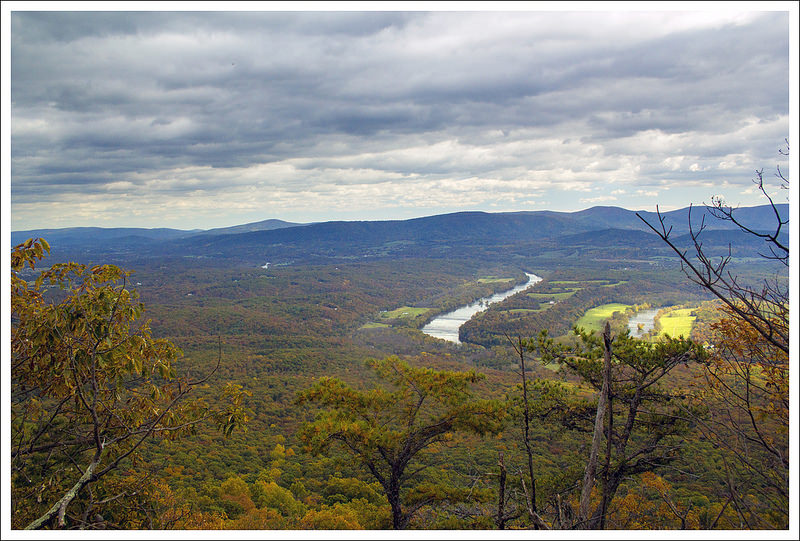
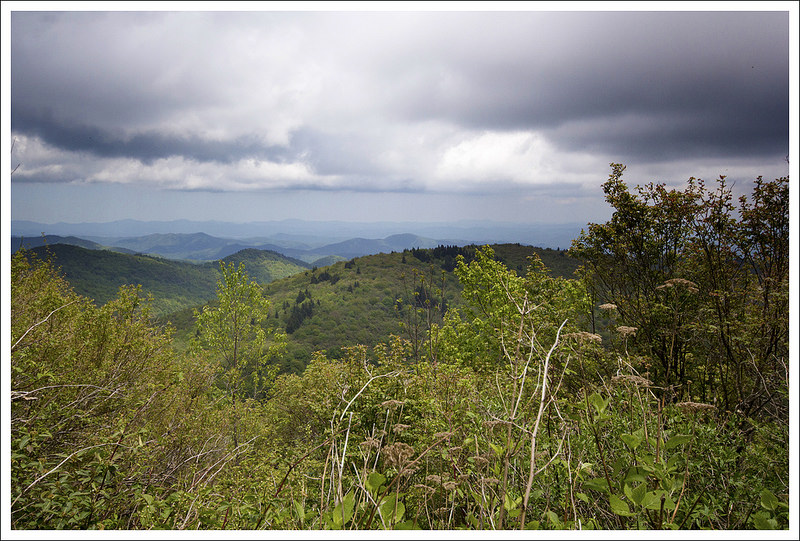
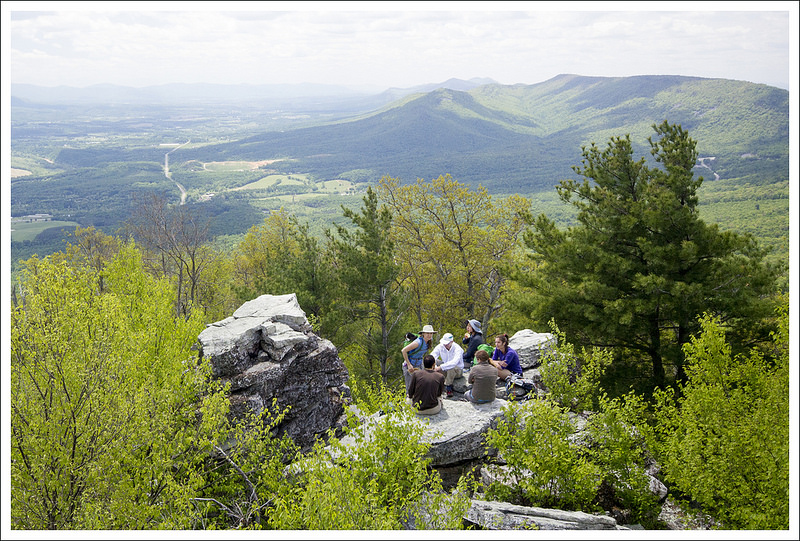
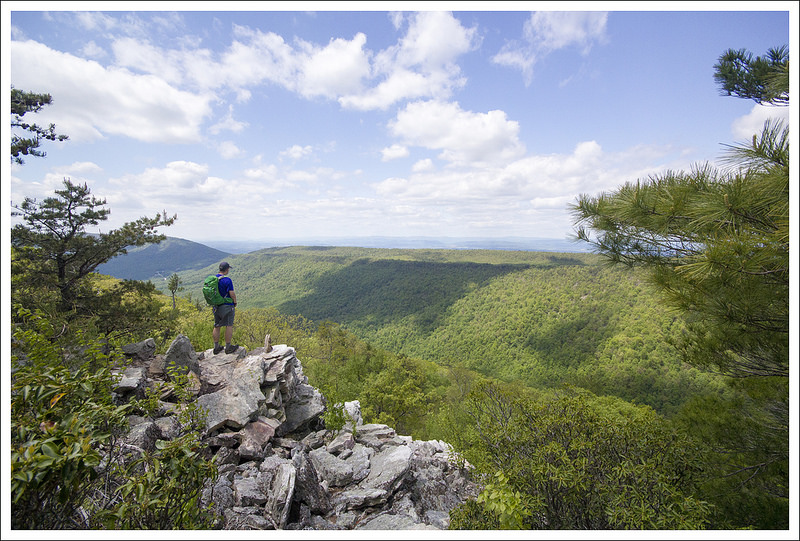
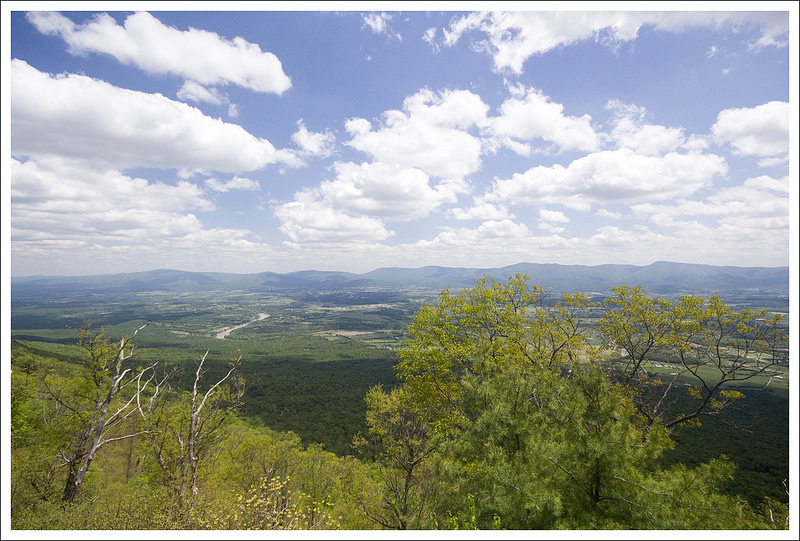
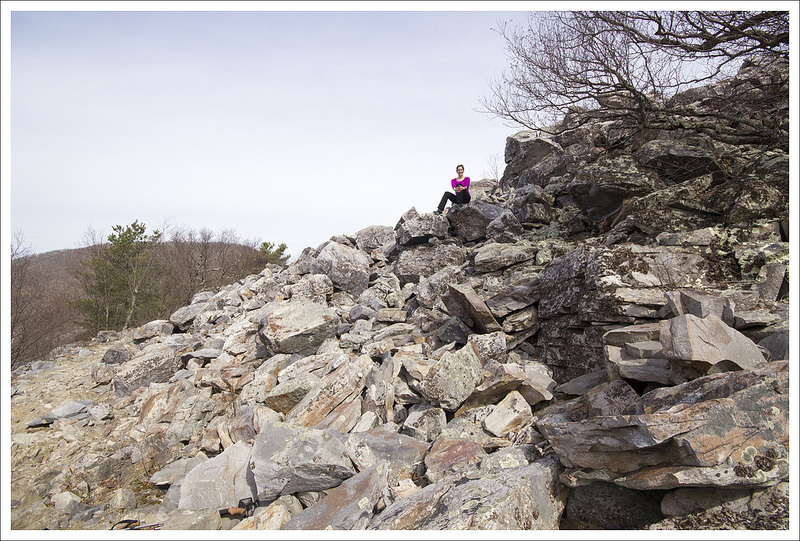
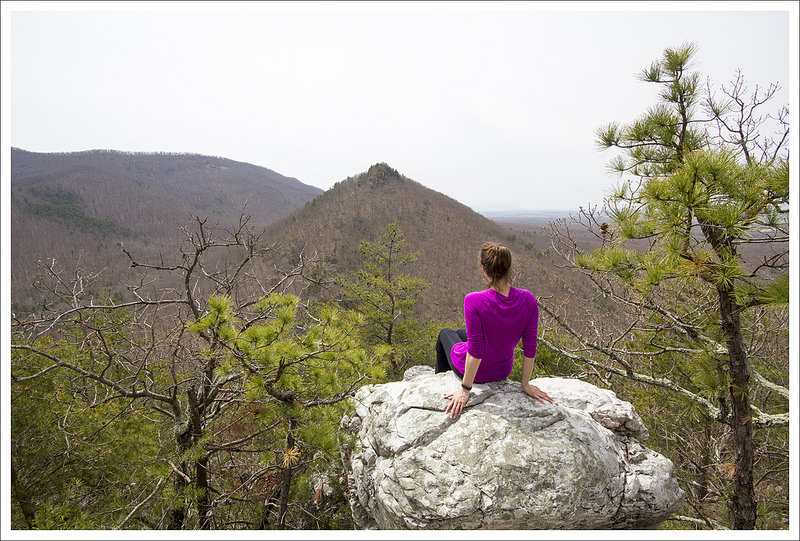
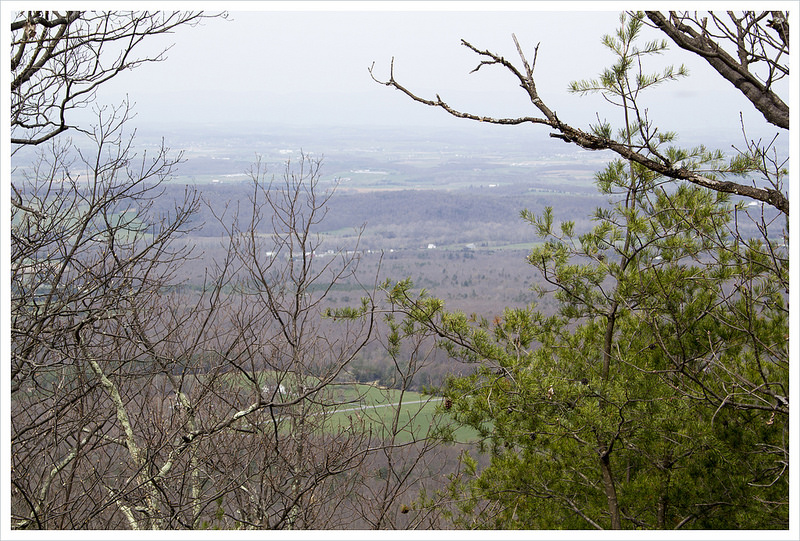
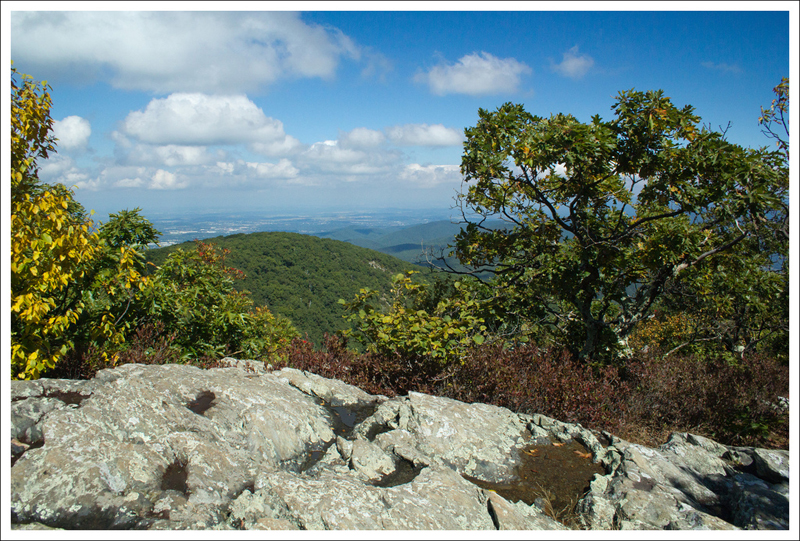
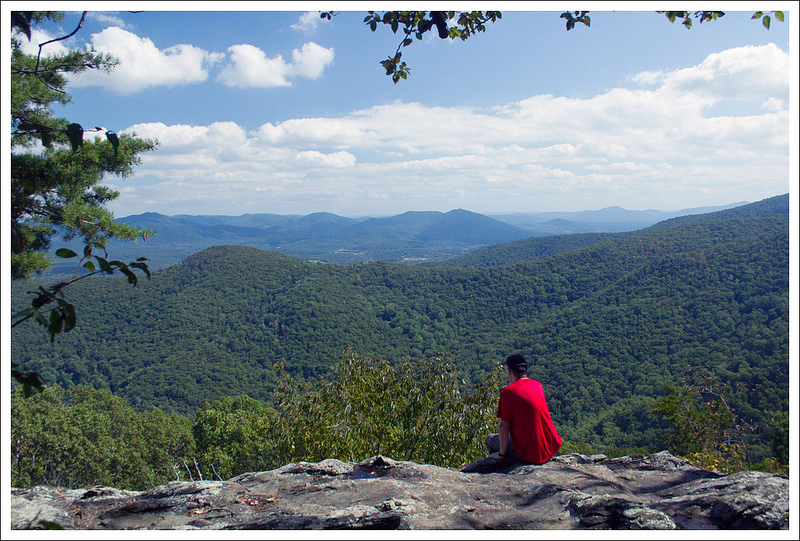
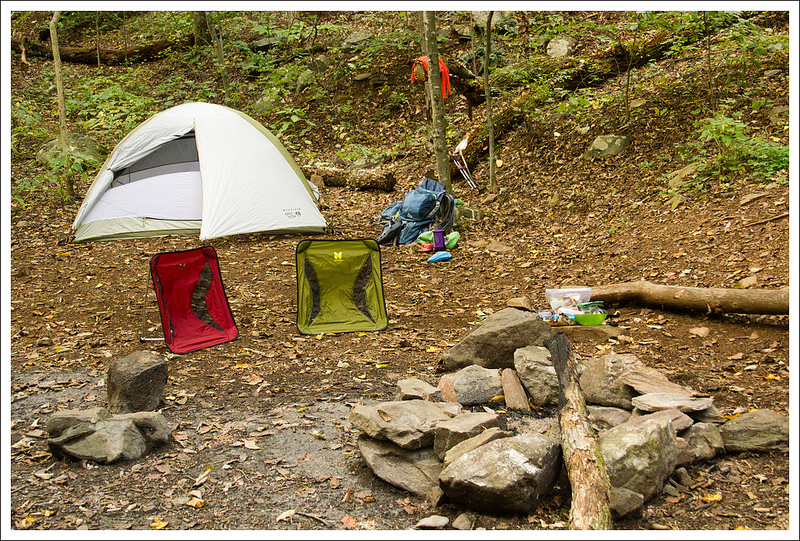
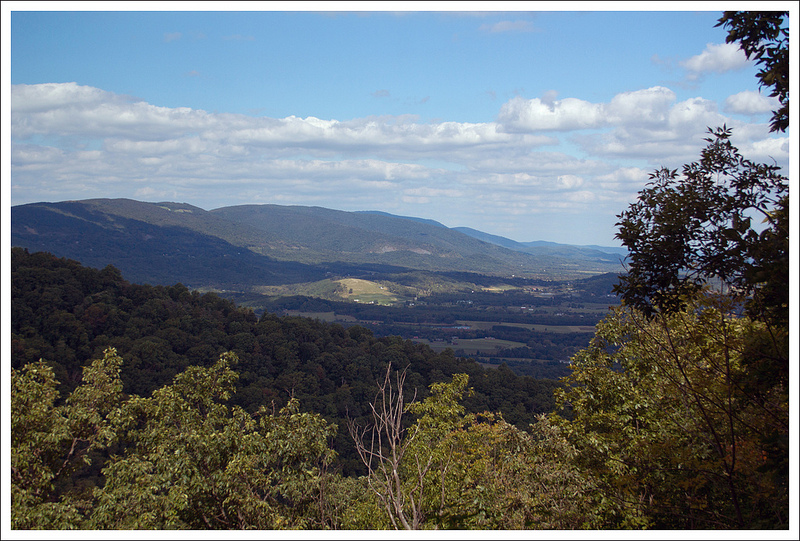
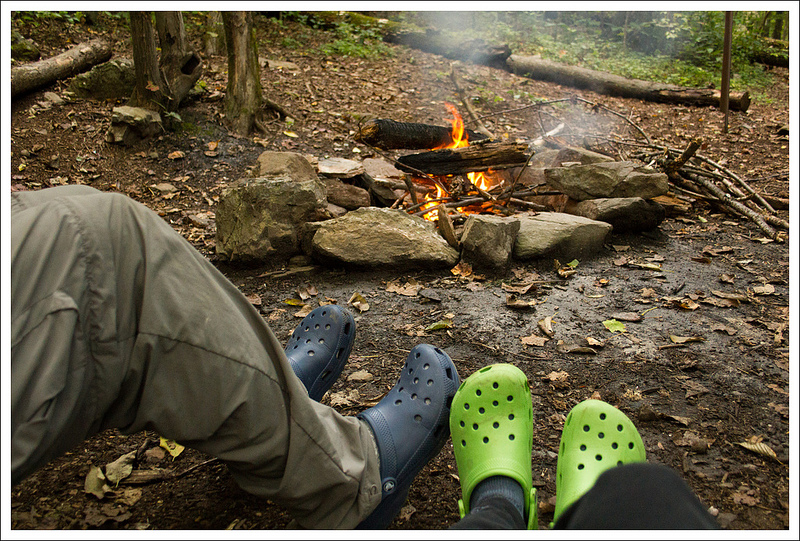
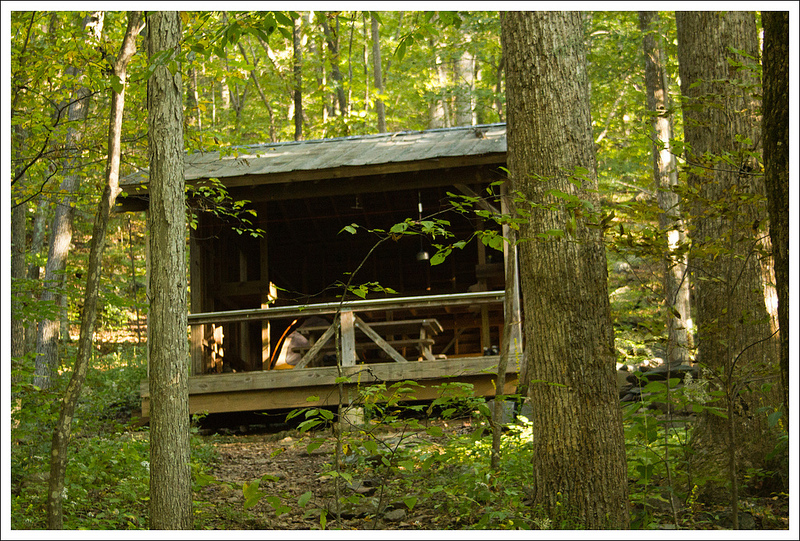
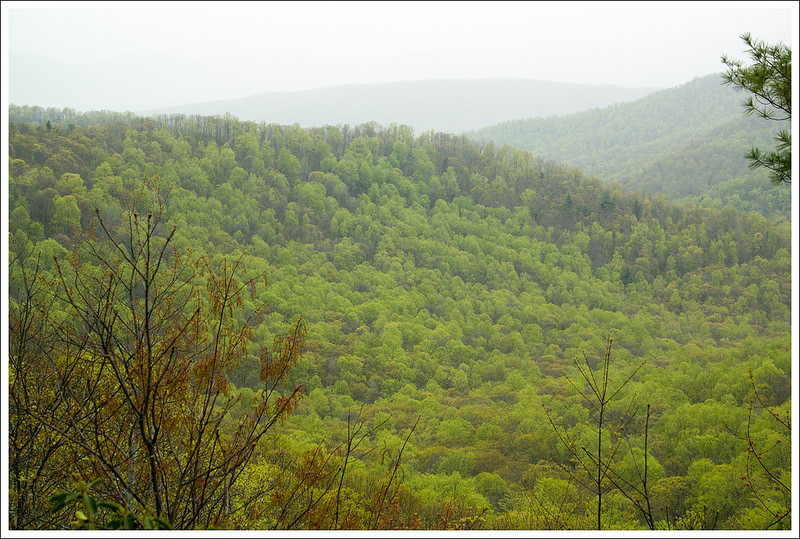
After leaving the falls, we climbed the 175 stairs above the falls.  About halfway up the stairs, we caught our one open view of the hike – a pretty peek out over a spring green valley.  Shortly after the top of the stairs, we passed another small waterfall.   There was a nice established campsite near the smaller fall.  What a idyllic place to spend a night!  In fact, we saw many great campsites all along this loop.  I think it would make a great beginner backpacking trip or short gear shakedown route.

Bridge
There were several sturdy, well-constructed bridges on the trail toward the falls.  Below: Just before reaching the falls you climb through an opening between huge boulders; The viewing deck for the falls is very nice; Adam checks out the falls.

Boulders  Side View Falls

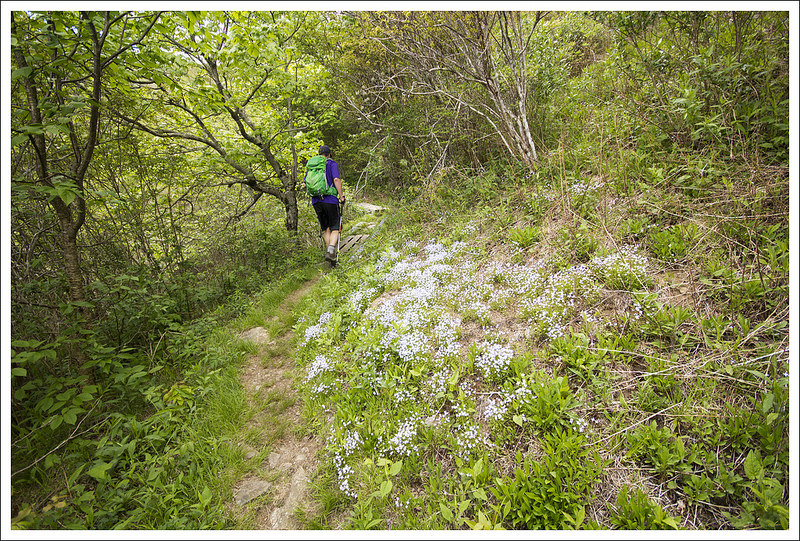
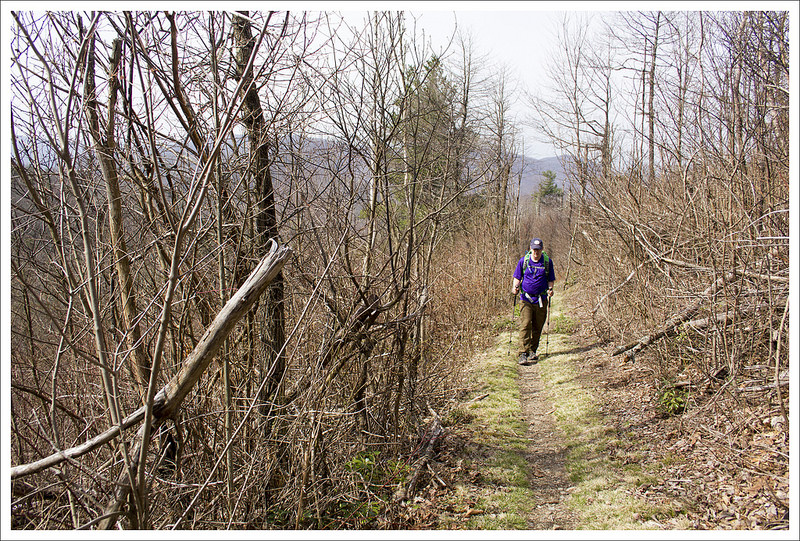
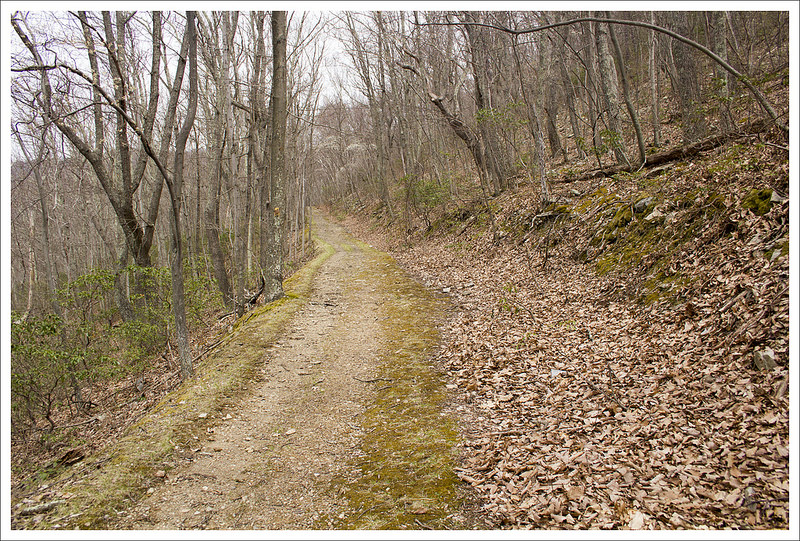
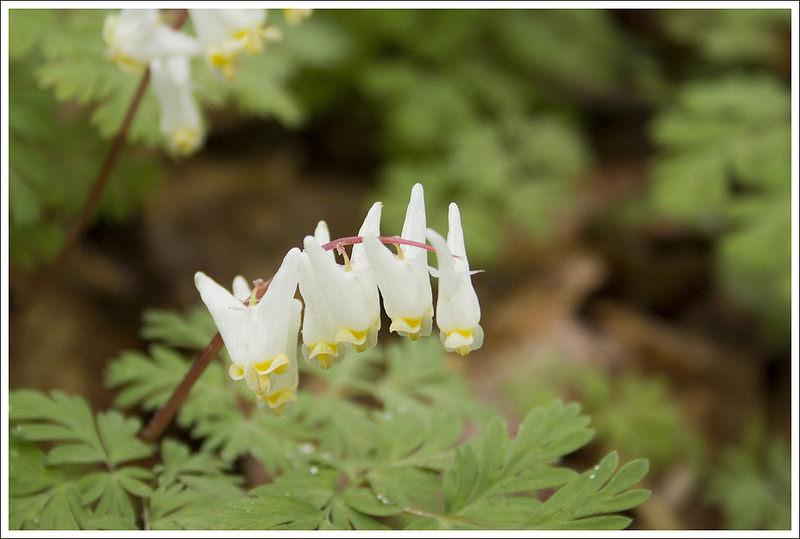
About a third of a mile past the small waterfall, we reached Apple Orchard Road, which is a grassy fire road that connects to the Cornelius Creek trail.  The racers all continued uphill toward the Blue Ridge Parkway.  We turned right and followed the fire road for about a mile to its intersection with the Cornelius Creek Trail.  Fire roads are typically sort of dull, but this one was actually quite nice – lush green, curvy, and decorated with wildflowers – more trillium, geraniums, violets, and enormous dense patches of Dutchman’s Breeches.

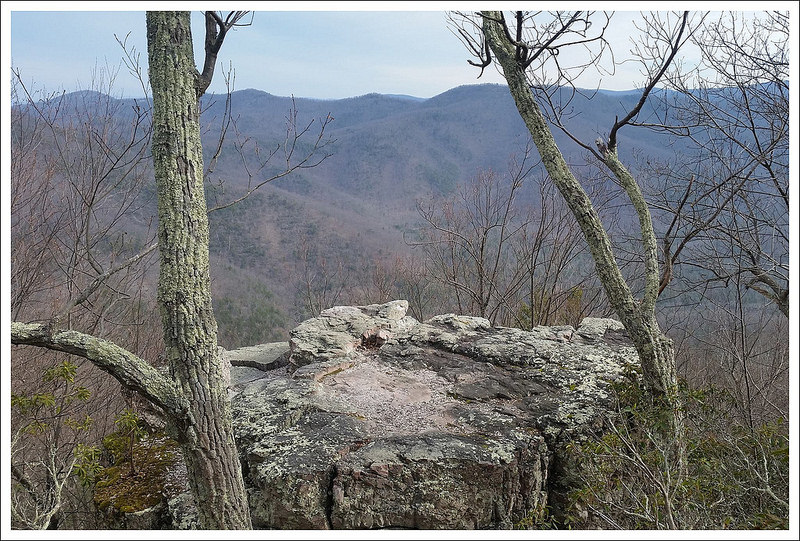
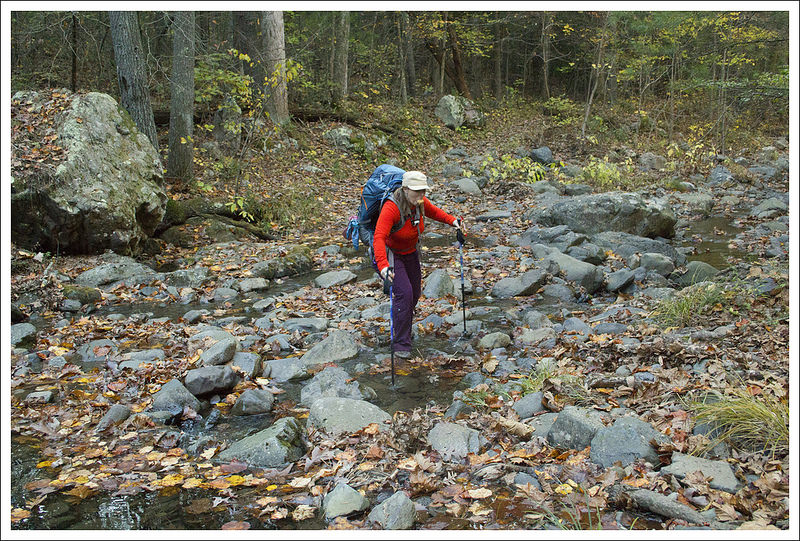
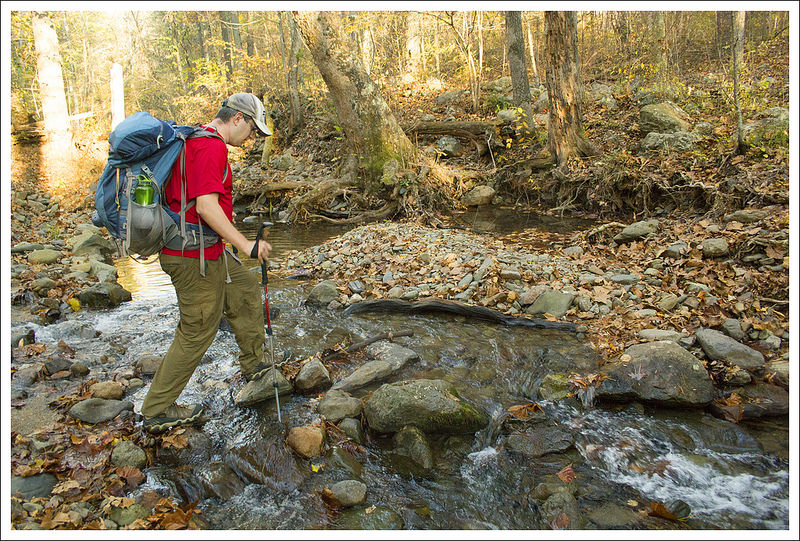
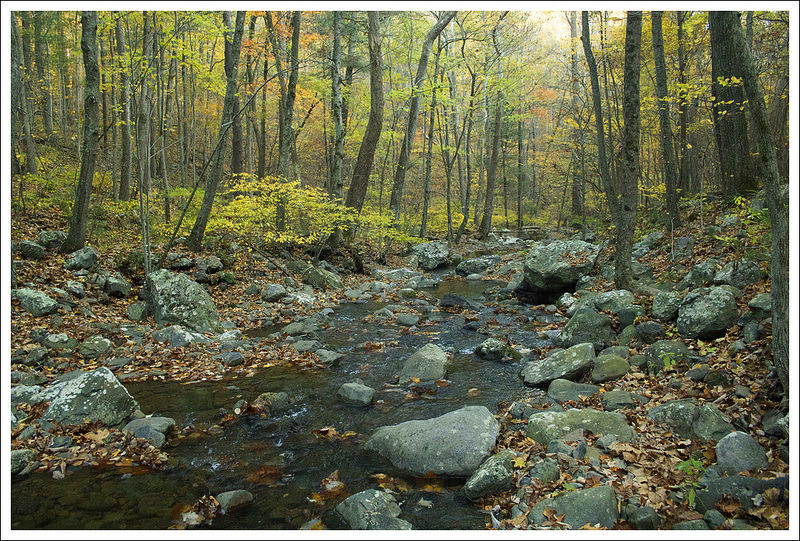
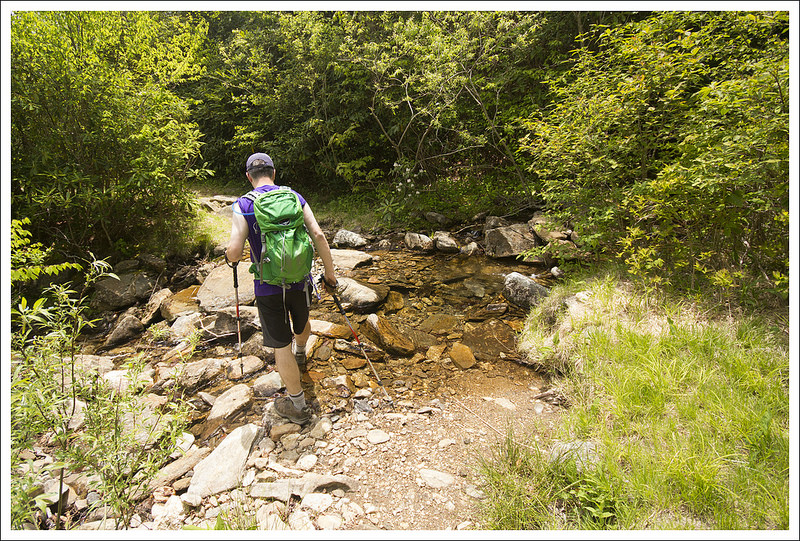
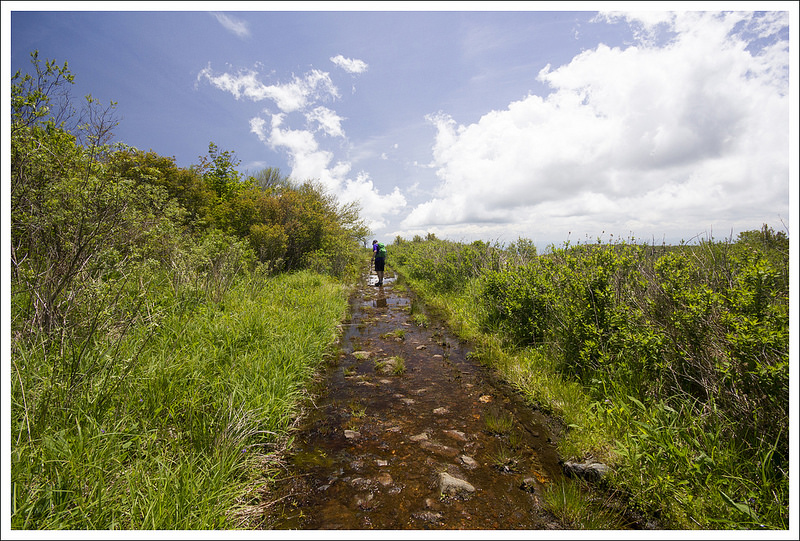
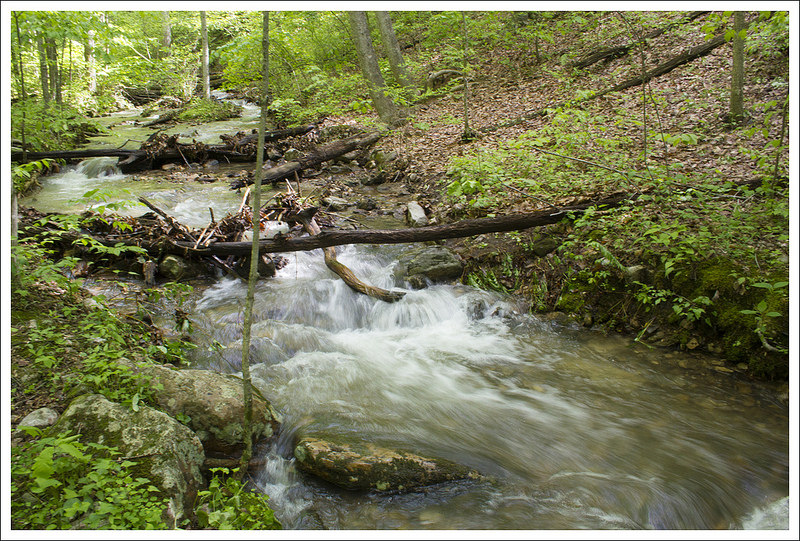
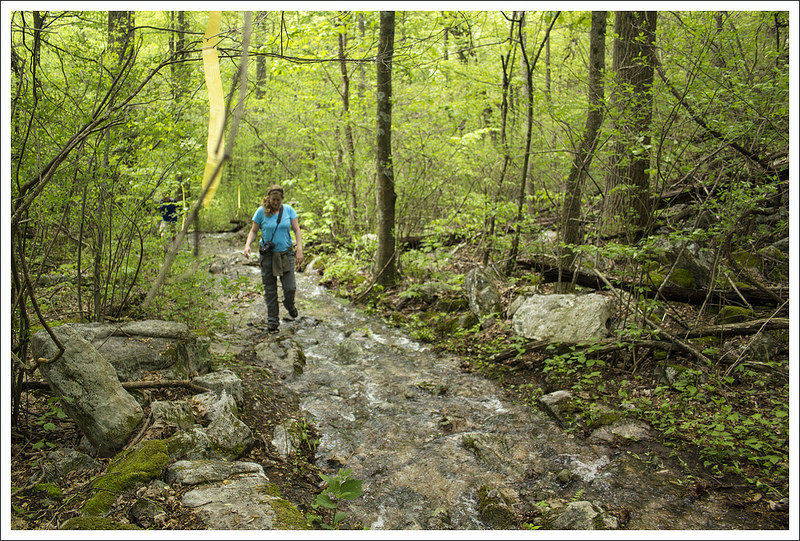
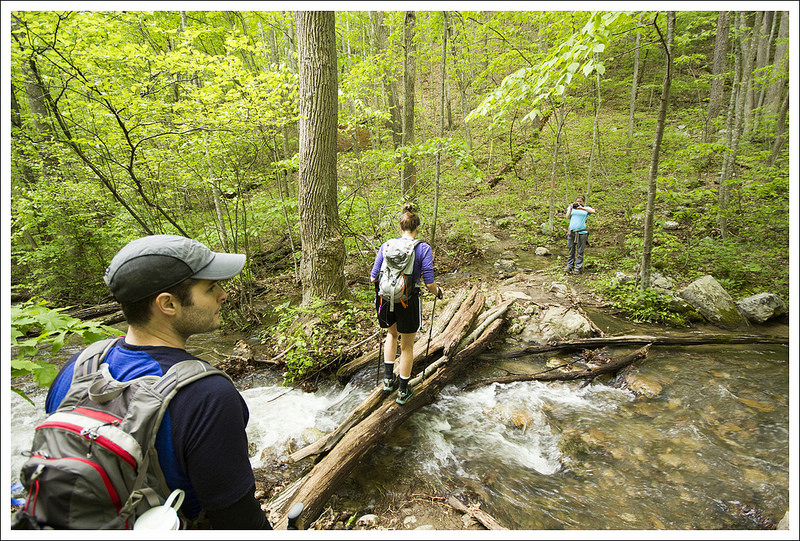
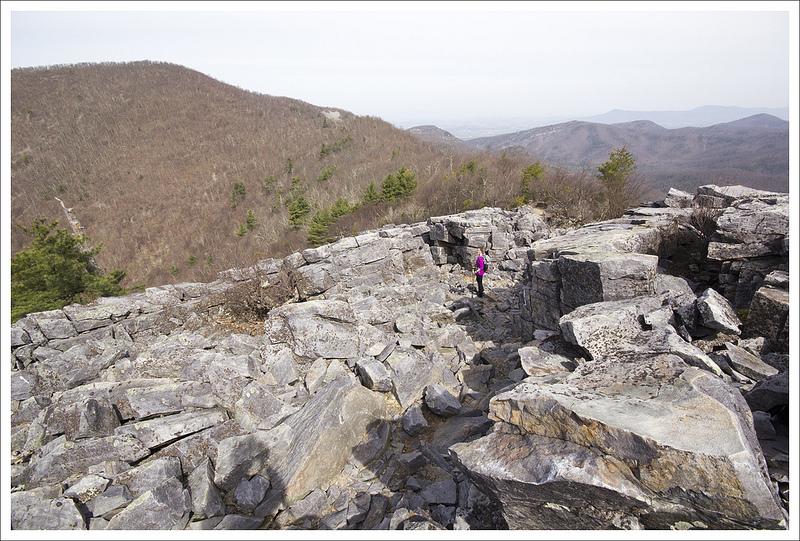
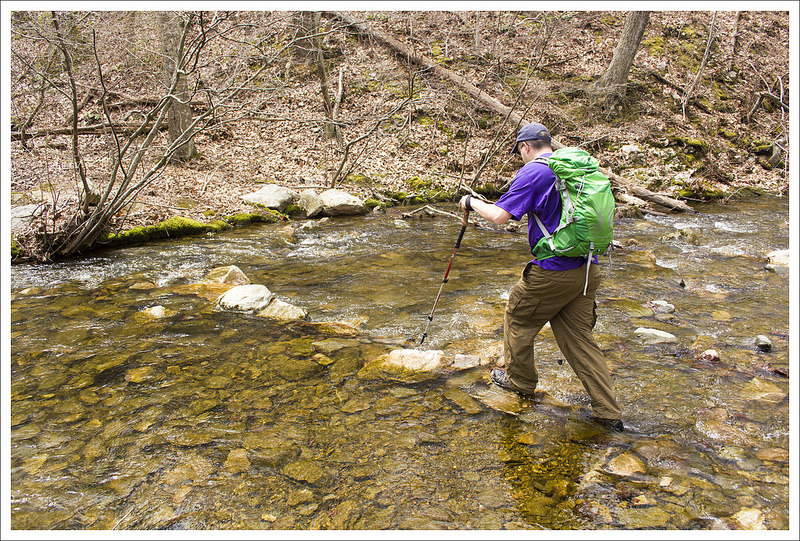
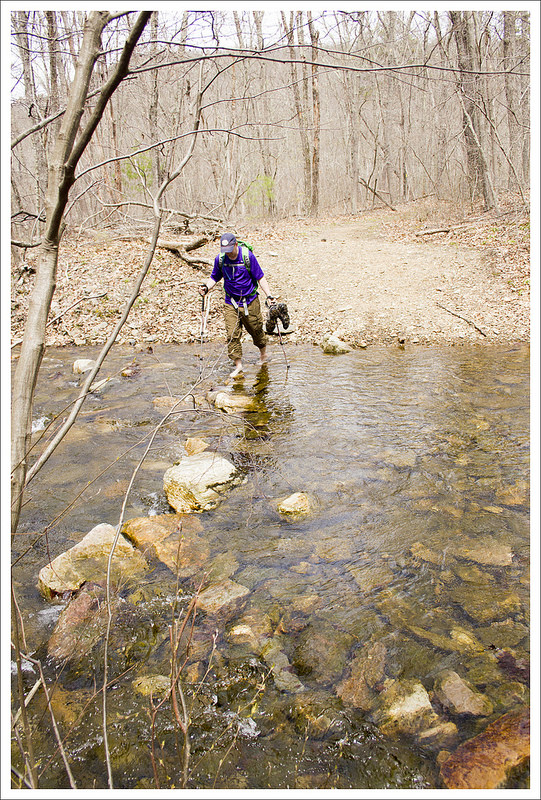
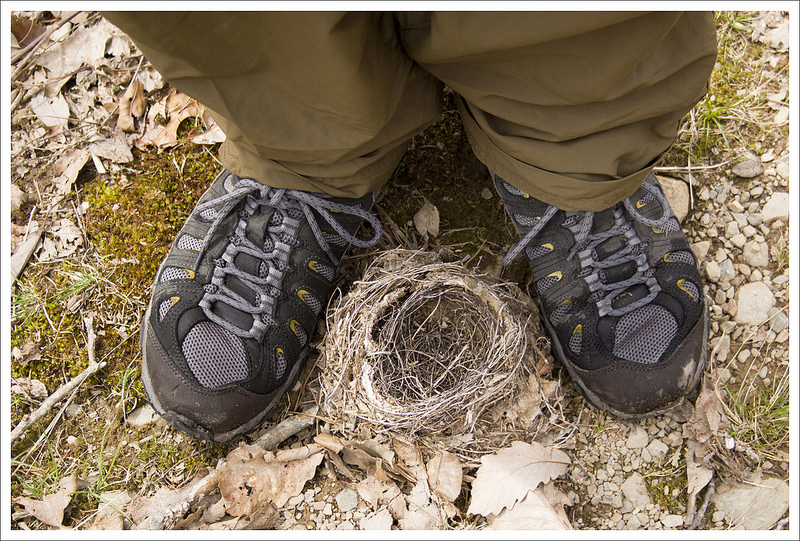
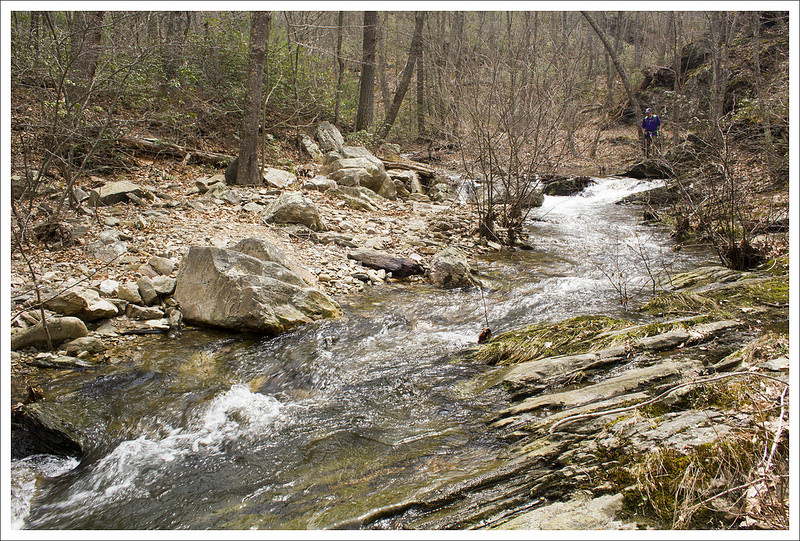
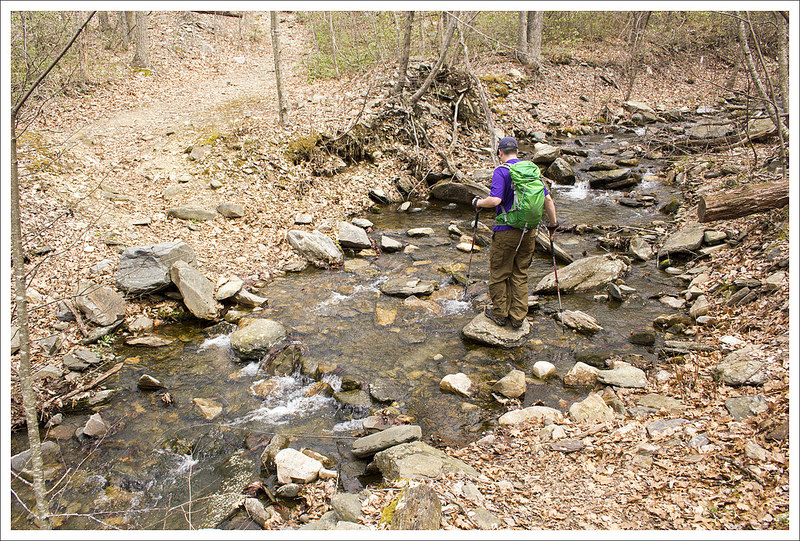
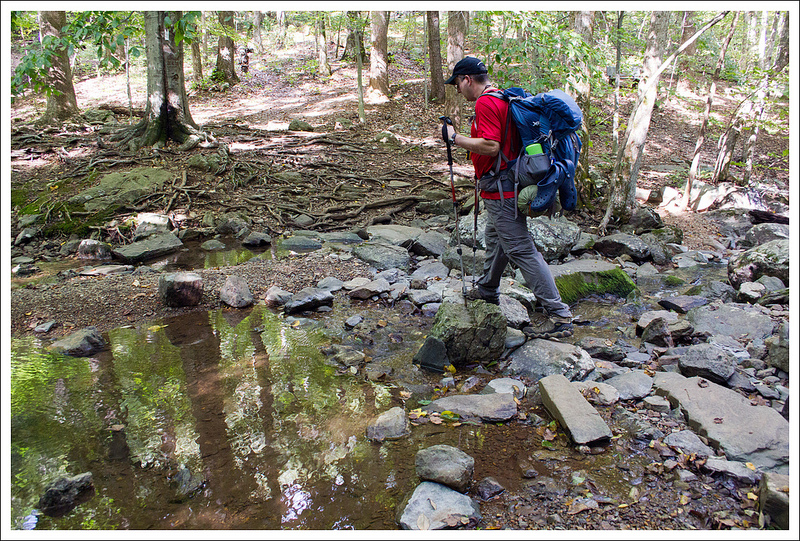
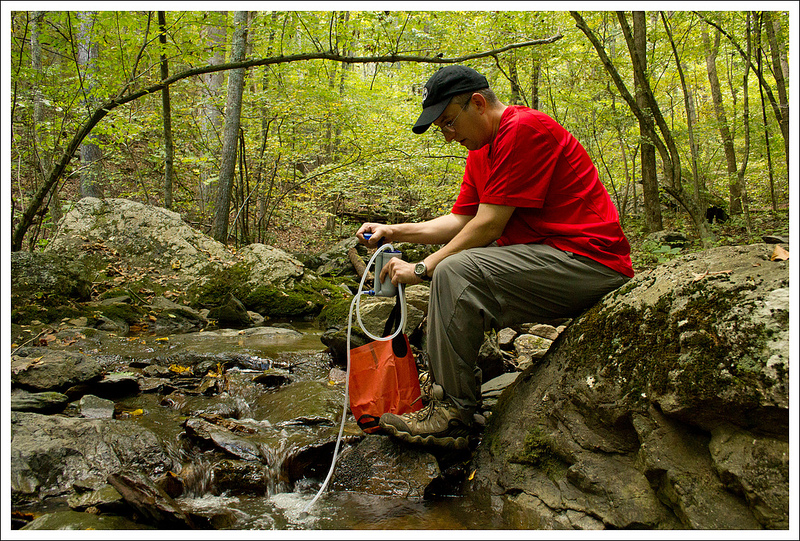
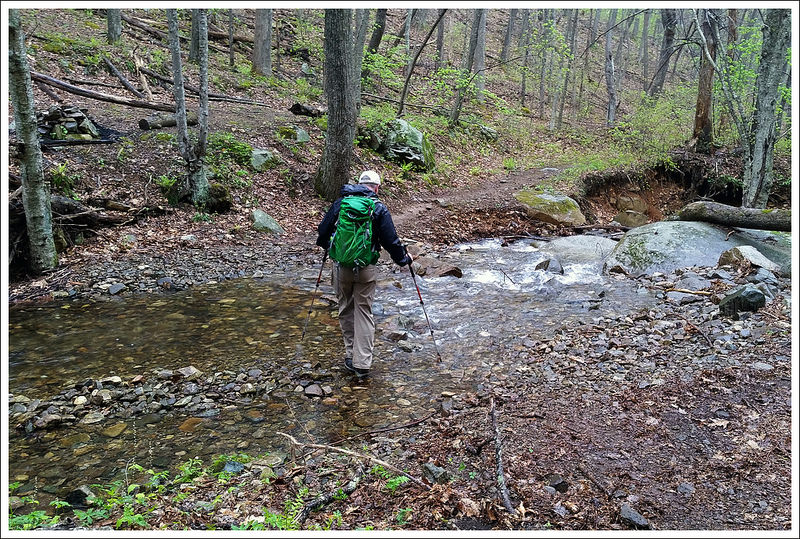
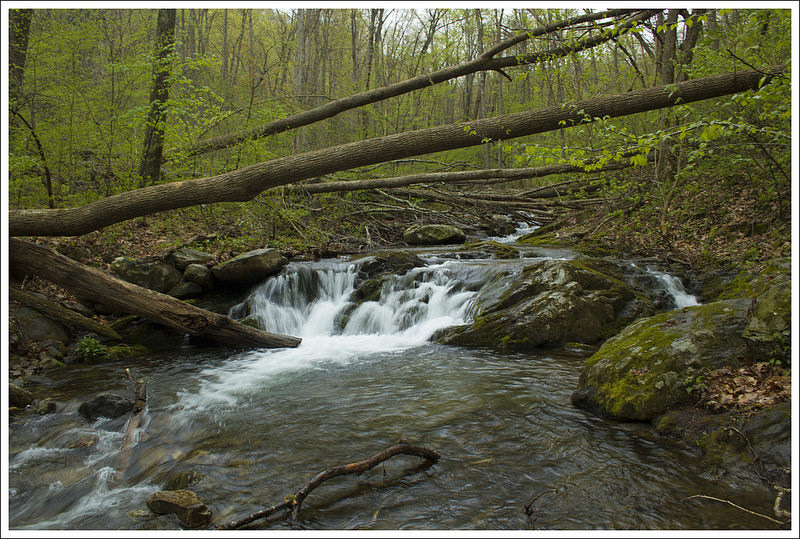
The Cornelius Creek trail was probably my favorite part of the hike.  The racers were off our tail, and I could fully focus on the spring forest and sound of flowing water.  The rain was coming down steadily, so my photo opportunities were a bit limited. Hopefully, I captured enough to adequately convey the feel of Cornelius Creek.  It was lovely with so many small cascades and swimming holes.  The only real challenge on this part of the hike were the two significant stream crossings.  The first (pictured at the top of the post) was wide, but not very deep.  Our toes got a little wet.  But the second was quite deep, wide, and fast-moving.  We packed all of our camera gear and electronics away in dry bags and plunged in.  Even rock-hopping, the water came halfway up to my knees.  The footing was small, shifty, and slick!  Thankfully, we made it across without falling completely into the water!  The last bit of walking was done with sodden shoes and socks – that squishy feeling is always so weird!

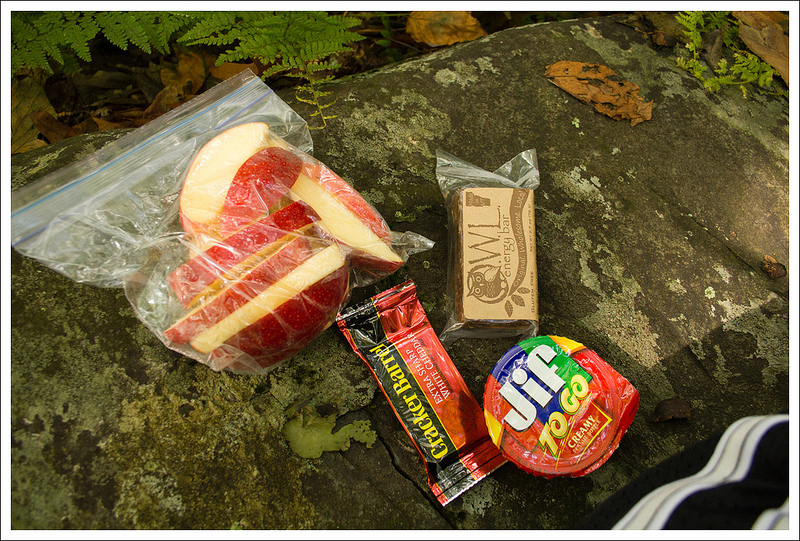
When we got back to the car the first thing I did was take off my soaked shoes and socks and put on flip flops!  Then we were off on our way for a well-deserved lunch at Peaks of Otter!

Adam Says…

We got up early to hit the road and beat the crowds on this hike.  With a gloomy day with some rain scheduled around the early afternoon, we wanted to make the best use of our day.  When we first saw the runners on the gravel road, I thought well at least they are going in the opposite way.  We parked our car at the end of the road and there was a race stop set up for people to check in, get some snacks and water and keep running.  Little did we know we would see most of them all again on the trail.

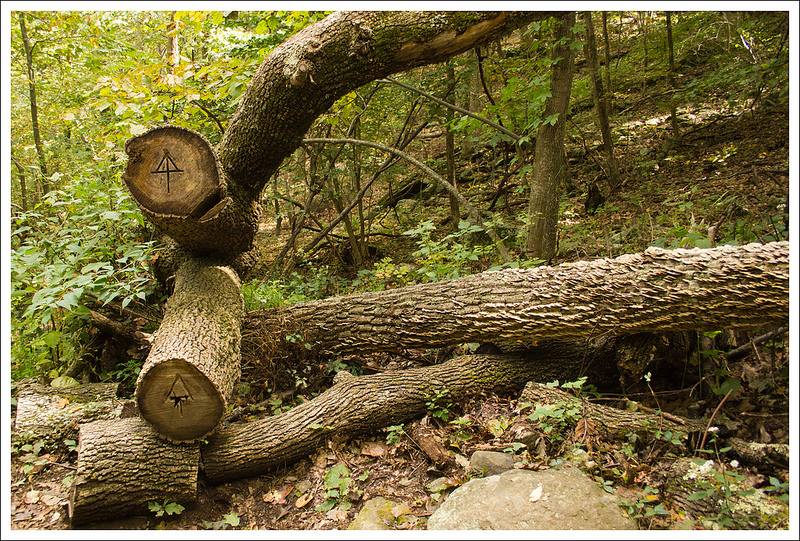
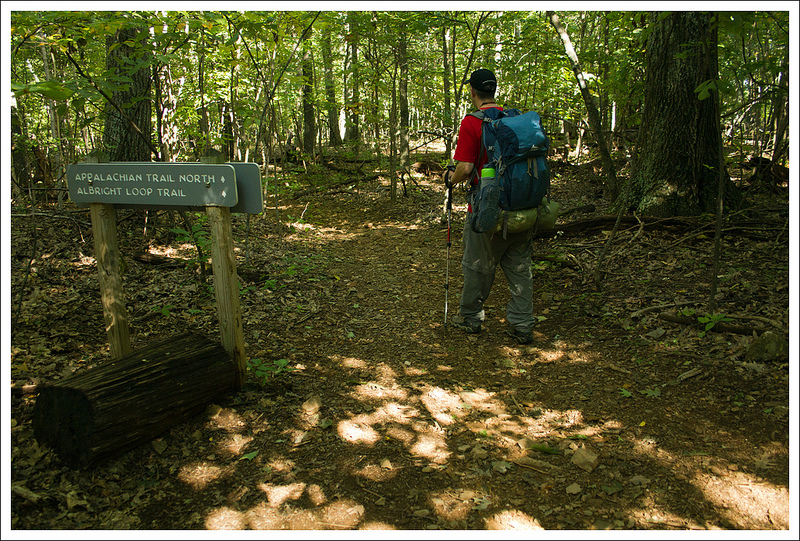
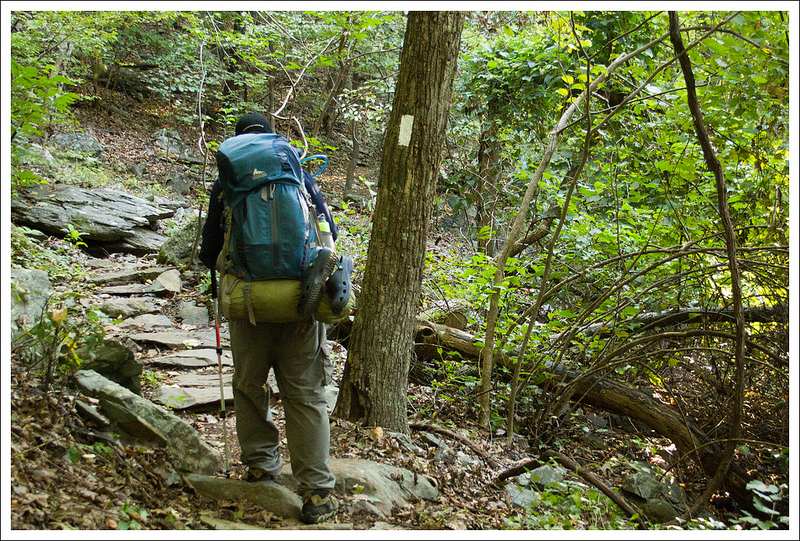
We got out of our car and found out that there were going to be runners on the trail.  We thought we would at least try to get a head start, so we jumped on the trail right away.  We took the blue-blazed Apple Orchard Falls trail left of the kiosk that came to a wooden bridge almost immediately.  We soon came across the first runner of the day on the trail, who we heard ended up coming in 2nd in the race.  Along the trail, there were funny signs to try and inspire the runners along the way (and most were done with Game of Thrones references).  At .2 miles, take a right at the intersection to stay on the trail.

Spring Green
A view into the valley on our way up the stairs. Below: Adam takes in a side view of the falls; Climbing the famous stairs, the smaller waterfall above Apple Orchard Falls.

Side View of Apple Orchard Stairs  Small Falls Above Apple Orchard

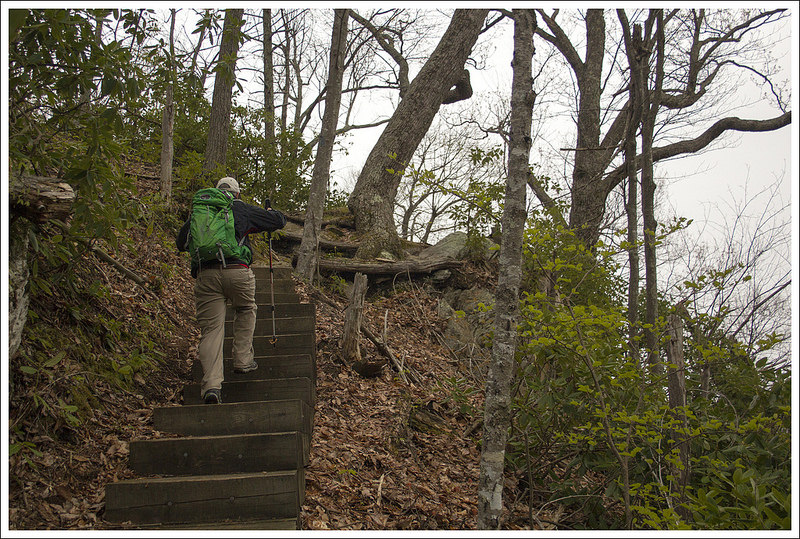
The trail continues along North Creek for a steady uphill.  At 1.2 miles, you reach a couple of bridges and a small creekside campsite.  Crossing over the second bridge, the trail becomes steeper uphill.  Eventually, you get some views of the falls to the right as you make the climb up.  But don’t worry, the trail leads right up to the falls.  The climb up to the falls is also very steep.  But, as you reach the falls at 2.0 miles, there is a nice bench and platform, inviting you to take your time to enjoy the views.  We stayed here for a while and saw a ton of runners pass by.  Some of them just took a quick glance, some walked slowly by, but one guy stopped to take a picture.  I guess the runners had different levels of competitiveness and different levels of exhaustion at this stage of the race.

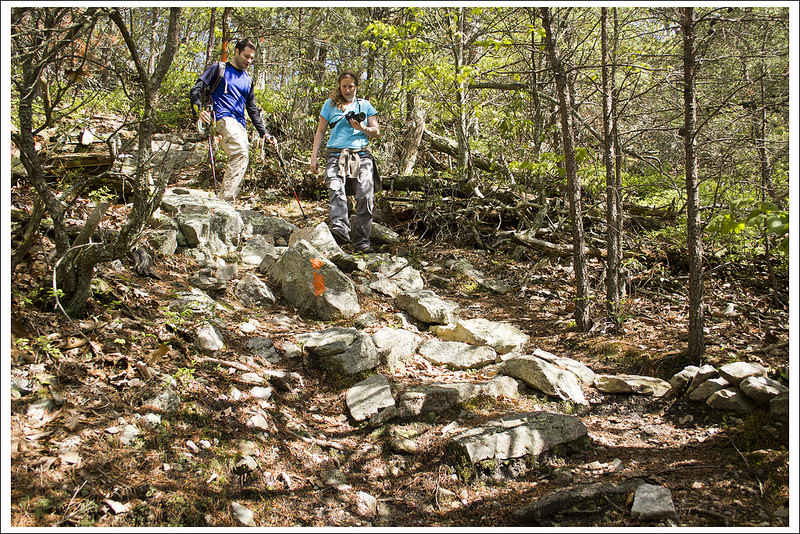
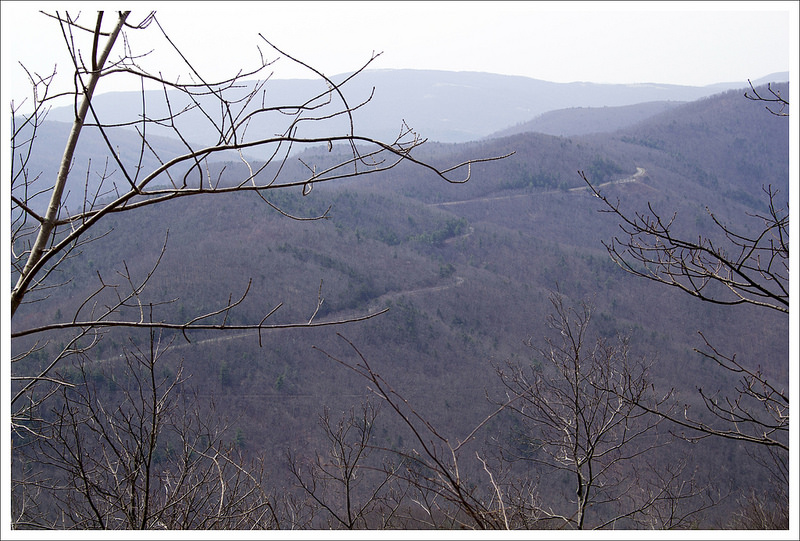
The trail continues on and winds around the hillside before beginning a series of stairs.  Along the climb, there was a nice viewpoint that gave you glimpses of mountains to the west.  We continued uphill along the trail until we reached another waterfall around 2.3 miles.  There was a nice campsite by this waterfall also and we thought it would be a great overnight stop for a backpacking trip. At 2.5 miles, we reached a junction with a fire road.  We took this fire road to the right.  At 3.7 miles, the trail meets a junction with the Cornelius Creek Trail.  We headed straight to start the Cornelius Creek Trail.  This trail descends quite steeply.  As we had seen the runners on this trail when we first arrived at the parking lot, I felt that I too was having to run down the steepness of this trail in the beginning.  Be careful where you step, since the trail is incredibly steep and filled with loose rock, begging for a twisted ankle or fall.  At 4.2 miles, the trail runs along Cornelius Creek.

Walking the Cornelius Creek Trail
Christine walks along in the rain. Below: Most of the hike closely follows water; A lovely little cascade on the Cornelius Creek Trail; Post hike beers at Apocalypse Ale Works.

Cornelius Creek Small Falls on Cornelius Creek Post Hike Beers at Apocalypse

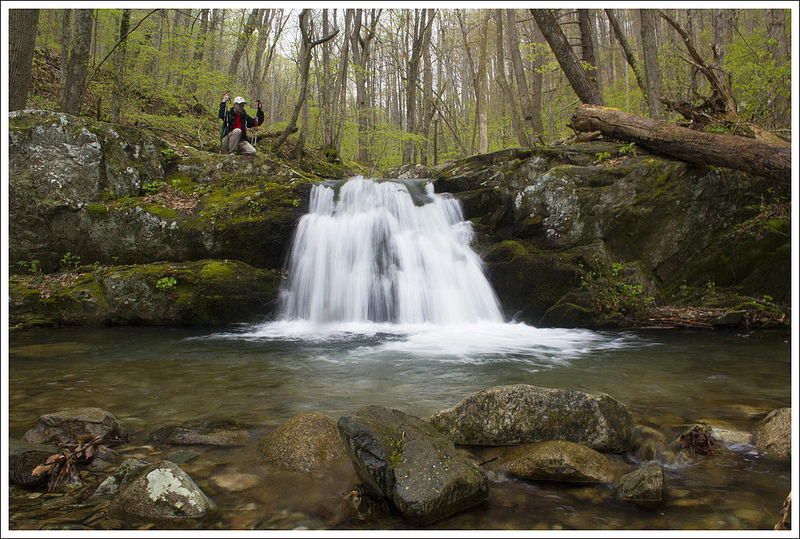
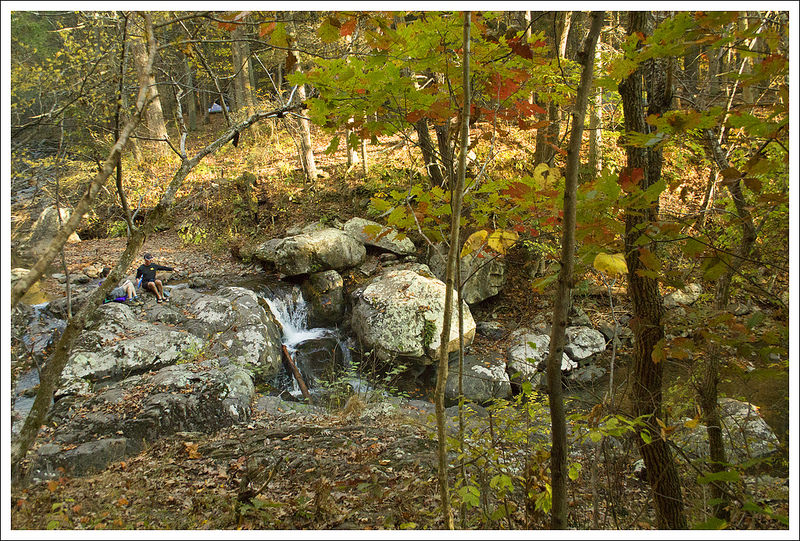
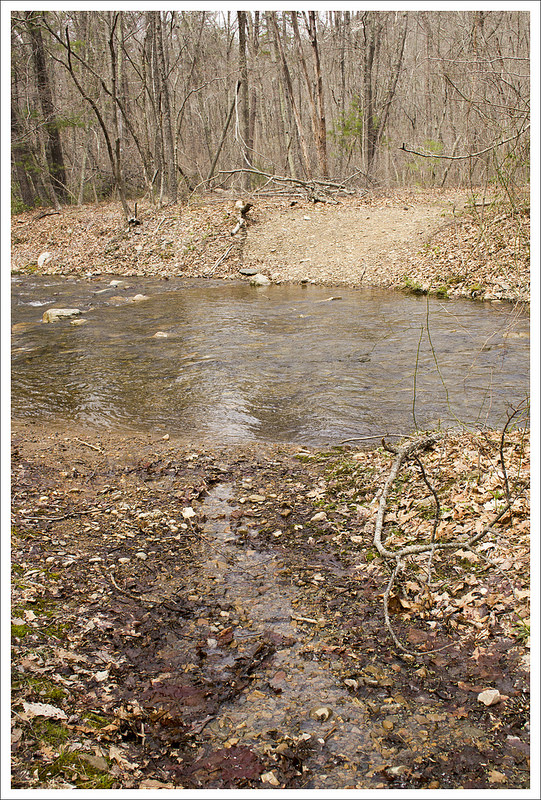
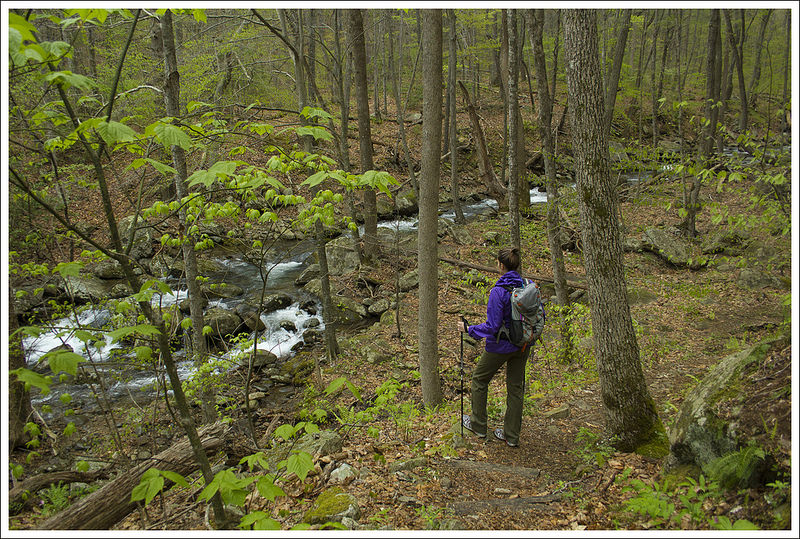
Cornelius Creek was a long exposure photographer’s dream.  There were so many spots where you saw small waterfalls and swimming holes along the way.  Contrasted with the lush green forest, it was truly beautiful to see.  We did have to cross Cornelius Creek a couple of times and with any recent rain, you are likely going to get your feet wet.  Be careful as there are some deep holes along the creek crossings that could have you up to your waist if you don’t step carefully.  We made it across and continued our hike.  The rain was coming down fairly steadily, so we didn’t stop a lot for fear of ruining camera gear, but it was one of the most beautiful creekside hikes you will see in Virginia.  Right before you return to the parking lot, you’ll see a large campsite (with even a rope swing put in).   We got back to the parking lot at the 6 mile marker.

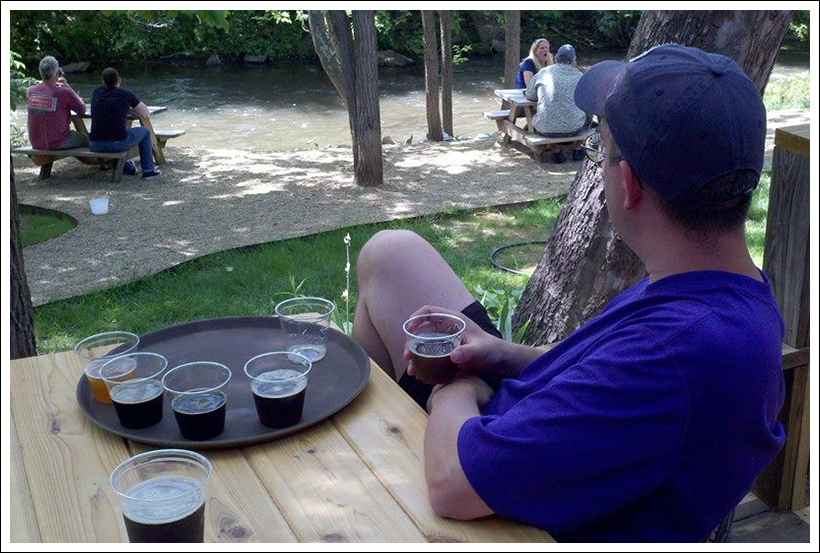
On our way back home, we took a detour and drove along the Blue Ridge Parkway to have lunch at Peaks of Otter.  My family used to picnic here yearly, so this spot always holds a near and dear place in my heart.  We had a nice lunch with music from a local singer.  We decided also to stop by Apocalypse Ale Works brewery for one of our favorite post-hike things to do – beer sampling.  The drive back home was rainy most of the day, but we felt like we had accomplished a lot on a dreary day.

Trail Notes

  • Distance – 6 miles
    (Check out the stats from Map My Hike)*
  • Elevation Change – 1438 ft.
  • Difficulty –  3.  This is a great moderate hike!
  • Trail Conditions – 4. The trail is very pleasant to walk.  Sturdy bridges and a wide viewing platform are available so the walk up to the falls along North Creek is pleasant and safe.  There are a couple crossings on the Cornelius Creek descent that can be tricky when there has been recent rain.
  • Views  2.  There is one nice view when you’re climbing the stairs after visiting Apple Orchard Falls.
  • Streams/Waterfalls – 5.  Spectacular – you are within view of the stream for most of the hike.
  • Wildlife – 1.  Too many people to see much wildlife!
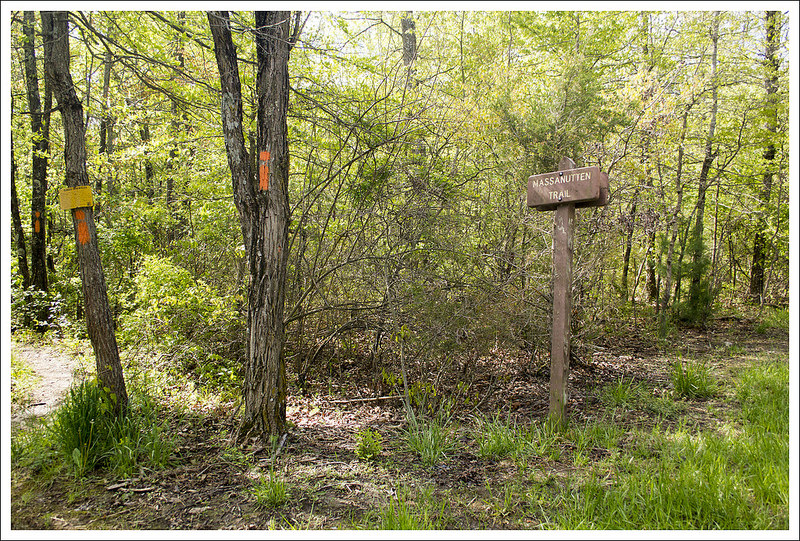
  • Ease to Navigate – 4. The signs make this route pretty easy to follow.  There are several places where trails go in multiple directions, but this route is well marked.
  • Solitude – 0.  It’s supposedly the most popular hike in Jefferson National Forest.  It was cool and rainy when we hiked it, so there weren’t many other day hikers.  But there were 300+ racers on the trail with us.

Download a Trail Map (PDF)

Directions to trailhead:  From I-81, take exit 168 for VA-614 toward Arcadia.  Turn on to VA-614 heading east and go 3.3 miles.  Turn left on to North Creek Road.  Go 2.8 miles and turn right on to an unnamed road*.  This road is a gravel road.  Follow it for 2.2 miles until you reach the large parking lot.  The trail starts left of the kiosk.  Right of the kiosk, the trail going uphill is your return route.  *Since this unnamed road can’t be found on GoogleMaps, I would suggest printing the trail map above to have a way to find this road.

Furnace Mountain – Austin Mountain Loop

This 12-mile loop combines numerous park trails into one great route!  You’ll pass by several gorgeous viewpoints, walk along pretty Madison Run, and cross massive talus slopes.  It’s a challenging hike with about 3,000 feet of climbing.

View the Full Album of Photos From This Hike

On the Shoulder of Austin Mountain
Adam crosses one of the large talus slopes on the side of Austin Mountain.

Christine Says…

The Austin Mountain – Furnace Mountain Loop has the reputation of being one of the park’s toughest and longest day hikes.  Not only is the terrain rocky and rugged, there is also a serious amount of climbing involved.  Essentially, you climb up from the valley floor, traversing several mountains along the way – Furnace, Trayfoot, Blackrock, and Austin. While you don’t technically reach the summits of Austin or Trayfoot, you come within a couple hundred feet of these viewless/inaccessible summits.

Most sources begin this hike from the Browns Gap parking area on Skyline Drive.  For us, it’s a much shorter drive to start down in the valley, at the park perimeter near Grottoes.  We parked along the roadside where Browns Gap Rd meets the Madison Run fire road.  This is a popular park entry point for hikers and equestrians alike.  It can get crowded if you don’t get an early start on the day.

Crossing Madison Run
Adam crosses Madison Run. Below: Pretty sun rays on the fire road; Walking up Furnace Mountain; Small talus slopes and views on the Furnace Mountain trail.

Browns Gap Fireroad Climbing Furnace View from the Furnace Mountain Trail

After walking up the Madison Run fire road for a short distance, the Furnace Mountain trail begins on the right with a rock-hop crossing of Madison Run.  For a little over a mile, you’ll ascend Furnace Mountain before coming to a cement post that marks the spur trail to the summit of Furnace Mountain.  The spur trail is about half a mile and leads to a fantastic viewpoint.  You can see Skyline Drive if you look carefully.  If you look across the gorge, you’ll see the huge talus slopes of Austin Mountain that you’ll cross later in the hike.  On this particular day, we skipped the side trail to the summit of Furnace.  We had hiked Furnace Mountain just a few weeks earlier and knew we had many miles to go and other views to enjoy along the way.

The ascent continues in earnest along the Furnace Mountain Trail.  Eventually, you’ll come to a junction with the Trayfoot Mountain trail.  Take a left and descend.  This trail is an old road bed, so it’s wide and nicely graded.  After a few tenths of a mile, you’ll come to another cement marker post.  Follow the trail to the right in the direction of Blackrock Summit.  This rocky jumble will be your best view on the hike!  We chose to eat lunch at this spot.  That probably wasn’t the best of ideas, because the strong wind made the summit bitterly cold.  It’s no fun to eat PB&J with your teeth chattering and while you’re wearing gloves.  Needless to say, we ate quickly!

Overlook on Furnace Mountain
The view from Furnace Mountain. Below:  From Furnace Mountain you can see the massive talus slopes on Austin Mountain; Looking back at Furnace Mountain; Junction of Furnace Mountain and Trayfoot Mountain trails.

View of Austin Mountain from Furnace Mountain Looking Back at Furnace Mountain Furnace-Trayfoot Junction

Rounding Blackrock Summit leads you to the Appalachian Trail.  To continue this route, head north on the AT for a couple miles until you reach the Browns Gap parking area on Skyline Drive.  This section of AT is fast going – it’s practically flat and uncomplicated.  You’ll pass the Dundo picnic area along the way.  If you run out of water, there is a clean tap at the picnic area.

From the Browns Gap parking area, follow the fire road downhill for .8 of a mile.  A cement post on the right marks the Madison Run Spur Trail.  This trail will go steeply uphill to a junction with the Rockytop and Big Run trails.  Bear to the left on the Rockytop trail.  Follow the Rockytop trail for several tenths of a mile until you reach another cement marker for the Austin Mountain trail. If you hike when leaves are off the trees, you’ll get some great ridge views in this area.

Once you turn left onto the Austin Mountain trail, you’ll have a little over 3 miles to go before you hit fire road again.  The terrain starts off easily enough, following a lovely ridge overlooking Dundo Hollow and Furnace Mountain (from earlier in your hike).   The views are really nice, and it’s impressive to look back on all the distance you’ve traversed!

Adam on Blackrock Summit
Adam takes in the view from Blackrock Summit.  Below: View from the Trayfoot Mountain trail; Arriving at Blackrock summit; Playing on the rocks.

View from Trayfoot Trail Blackrock Summit Blackrock Summit

But a little over a mile along the Austin Mountain trail, the talus slopes begin.  From there, it’s an endless field of loose rocks for nearly a mile.  When you think you’re done with rocks, surprise… there are more rocks!  Don’t miss looking up and behind you – the cliff-like wall of Austin Mountain looks like a crenulated castle wall. After you cross the last talus slope, you have a steep, knee-grinding descent back to the Madison Run fire road.

Once you reach the fire road, you just have a easy .6 mile road-walk back to your start point.  The stream is especially scenic along this stretch.  After getting back to the car, we decided we had earned milkshakes!  It was a fun day and a great challenge!

Adam Says…

We decided to try and tackle this loop since we wanted to get some good training for some longer hikes.  While we were able to get out and do a few good hikes over the winter months, this was definitely a challenging hike to do before we (or at least I) had gotten my “summer trail legs”.  This particular hike did a toll on me, especially the last couple of miles.

Junction of Trayfoot with the Appalachian Trail
The junction of the Trayfoot Mountain Trail and the Appalachian Trail. Below: Hiking the AT; Arriving at Browns Gap and the fire road; The junction with the Austin Mountain Trail.

Appalachian Trail Spur Trail Junction of Big Run & Austin Mountain Trails

The water across Madison Run was running a little higher and faster than normal, but we were able to rockhop across and begin our hike.  The hike up Furnace Mountain is a steady uphill, but does lead to some nice views along the way.  There is one section that has a small talus slope that we thought was impressive, but little did we know what Austin Mountain would bring later in the day.  At the junction of the spur trail, we met a couple that was doing the same loop but camped along Madison Run that morning.  They had started from the Browns Gap parking area in Shenandoah National Park, but had a day of mostly uphill climbing this day.  As Christine mentioned, we decided to skip the overlook and made our way to Blackrock Summit.

Talus Slopes
Huge talus slopes on Austin Mountain.  Below: Views from the Austin Mountain Trail; Talus slopes and a view of Furnace Mountain; Descending Austin Mountain.

Walking the Austin Mountain Trail Looking at Furnace Mountain from Austin Mountain Steep Descent of Austin Mountain

At Blackrock, the wind was incredibly strong and cold.  There was still ice in the crevices between the rocks in most places.  We sat out to eat some lunch, but our hands were trembling in the cold, which made for challenging and rushed eating.  We quickly got out of there and joined the Appalachian Trail, heading north.  We made quick time on this flatter section of trail and crossed Skyline Drive.  The trail stays close to Skyline Drive until you reach the Dundo picnic area (which does have bathrooms if you need it).

Passing the picnic area, we crossed Skyline Drive again after 6.5 miles.  After crossing the road, we made our way through the parking lot and crossed the gate blocking the fire road.  Heading down the fire road was easy walking.  At mile 7.3, we spotted the cement post on the side of the road, leading up the Madison Run Spur Trail.  This section was steep but short as we reached the crest and junction with the Rockytop Trail.  We took a left here which continues uphill and reaches the junction with the Austin Mountain Trail around 8.2 miles.  Bear to the left and the trail begins to go downhill finally.

Madison Run
Pretty Madison Run.  Below: Crenulations on Austin Mountain; Adam coming down to the fire road; Walking the fire road back to the car.

Spires on Austin Mountain Return to Fire Road Walking the Fire Road

Right before this junction, my IT bands near my right knee began to hurt.  Sometimes when one knee begins to hurt, you tend to overcompensate with the other.  We came across a hiker that was hiking up and he warned us there was a mile of loose rock to walk on.  We soon reached the huge talus slopes.  When you have one leg giving you pain, the last thing you want to see is loose rock footing for as long as you can see.  The views of the slope were impressive, as well as looking across the mountainous valley to see Furnace Mountain, but the pain was keeping me from having the best of times.  With vultures ominously circling above my head, I felt they didn’t have much faith I would make it.  Just when we thought we had reached across the slopes, the trail turns back and works it way down the mountain, giving us lower parts of the slopes and more rocks.  We finally reached the bottom of the trail and joined the Madison Run Road at 11.2 miles.  It was a flat walk along the side of a picturesque creek until we made our way back to the car in .8 miles.

While this was a tough hike, it was rewarding.  This hike has great views, unique geology, and a picturesque creek.  If you don’t want to tackle it in one day, it would make a nice backpacking loop, but I would recommend starting at Brown’s Gap to split the hike and leave you camping by the water source of Madison Run.

Trail Notes

  • Distance – 12 miles  Add .5 mile, each way, if you take the spur trail out to the overlook atop Furnace Mountain.  You can make a shorter, easier loop if you descend via the fire road and skip Austin Mountain)
    (Check out the stats from Map My Hike)*
  • Elevation Change – 2900 ft.
  • Difficulty –  4.5.  The length and amount of climbing make this tough.
  • Trail Conditions – 2.  While the trail was well-maintained, the footing on the talus slopes brings this score down due to the challenge of walking on loose rock for over a mile of the trail.   
  • Views  4.  You have nice views from Furnace Mountain if you add that spur, but Blackrock Summit and views along the Austin Mountain Trail make it worthwhile.
  • Streams/Waterfalls – 3.  Madison Run is a nice wide stream and reliable water source year-round.
  • Wildlife –2.  We didn’t see much, but there have been bear sightings along the Austin Mountain portion of the trail.
  • Ease to Navigate – 2.5.  There are lots of trails that cross, so pay attention to the signs.  The trickiest is around the Blackrock Summit area.
  • Solitude – 3.  You will likely see people at Blackrock summit, but not a lot of activity elsewhere. 

Download a Trail Map (PDF)

Directions to trailhead:  From I-81, take exit 256 heading east towards Weyers Cave.  Go 6.6 miles and take a left on US-340/Augusta Avenue.  Go .1 miles and take a right on Cary Street.  In .2 miles, continue on to VA-663/Brown’s Gap Road.  In 1.9 miles, turn right on to the dirt fire road.  Follow this 1.1 miles and you will reach the parking area.  Look for the concrete post for Furnace Mountain which will have you instantly rock-hopping across Madison Run to start your hike.

MapMyHike is not necessarily accurate, as the GPS signal fades in and out – but it still provides some fun and interesting information.

Neighbor Mountain – Jeremy’s Run Loop

This 14.7 mile route offers wilderness, beautiful views, and stunning stream scenery (even a small waterfall!)  It’s a wonderful, moderate overnight backpacking loop; or a really challenging day hike.  We set out intending to camp along Jeremy’s Run, but it didn’t quite go as planned!

View the Full Album of Photos From This Hike

Views from the Neighbor Mountain Trail
The views on this loop hike come along the descent of Neighbor Mountain. Below: The trailhead at Elkwallow Picnic Area;  Hiking along in golden woods; Adam and Kris at the junction of the Appalachian Trail and Neighbor Mountain Trail.

Neighbor Mountain - Jeremys Run Start Hiking Along Junction of AT and Neighbor Mountain Trail

Christine Says…

The final weekend of October 2014 was so beautiful – perfect, made-to-order backpacking weather. We decided to head out on one more overnighter before the weather turned cold. We invited our friend, Kris, to come along. She loves the outdoors as much as we do, and I was sure she’d enjoy this loop. Don’t miss her guest blogger entry later in this post! It had been several years since we last hiked in the vicinity of Jeremy’s Run, and I was really looking forward to camping along the beautiful stream.

After stocking up on some lunch provisions at Elkwallow Wayside, we finally hit the trail around 11:00. We figured we had a little over eight miles of hiking on our first day, so starting late morning would get us to camp before 3:00, with plenty of daylight left to pitch tents, cook dinner, and relax.

Neighbor Mountain Trail
Hiking along the Neighbor Mountain Trail. Below: The fall color was still close to peak; Adam checks out a rock formation; At the summit of Neighbor Mountain.

Golden Woods Rock Formation Summit of Neighbor Mountain

We started out at the Elkwallow Picnic Area. A short spur trail leads downhill to the junction with the white-blazed Appalachian Trail. The AT descends for about .3 of a mile before coming to a junction with the blue-blazed Jeremy’s Run Trail. Follow the Appalachian Trail, veering to the left. The trail ascends for a little over a mile before coming to a more level ridge. You’ll pass the junction with the Thorton River trail, continuing south on the AT. At just over four miles into the hike, you’ll reach the junction with the yellow-blazed Neighbor Mountain trail.

We decided this junction would be a nice place to stop for lunch (hummus – my favorite trail lunch of late – easy to eat and lots of quality calories!). After a relaxing, thirty-minute break, we took the turn onto the Neighbor Mountain trail. The path meandered across the ridge. For the first couple miles, it was mostly walking in the woods. There was a nice breeze and gorgeous sparkling sunshine was filtering through golden leaves. It was everything you want fall to be!

Even though there is no view, the summit of Neighbor Mountain is marked with a cement post. At the summit, I noticed I had picked up a ‘hitchhiker’ along the way – a walking stick bug was clinging to my pants. I wonder how far he had come with me. I picked him off, and set him on a fallen log off the trail.

Between six and seven miles into the hike, there are a few excellent views of the Massanutten ridge and Three Sisters. There was a forest fire in this area several years ago, so the view was pretty open and expansive. We all paused a while to enjoy the fall foliage.  It was so wonderful to see colorful mountains rolling our before us. We talked about how privileged and blessed we all felt to be out on such an amazing day!

View of Valley
Adam enjoys a view of the valley and mountains to the west. Below: This part of Neighbor Mountain burned in 2012.  Alot of damage is still evident; Fall color; Adam descends Neighbor Mountain toward Jeremys Run.

Neighbor Mountain Descent Neighbor Mountain Descent Neighbor Mountain Descent

The last mile and a half of the day was steady downhill, meandering across switchbacks until the Neighbor Mountain trail reached the bottom of the valley and Jeremy’s Run. As soon as you reach the stream, campsites are everywhere. The first few we passed were already taken, so we ended up returning to the hidden campsite we used several years earlier. It’s a flat spot under the trees shortly before the first water crossing.

And here’s where the story takes an unexpected turn…

Adam Says…

We all worked on pitching our tents and setting up camp. I set up our tent while Christine worked on inflating our sleeping pads. Kris was on the other side of the clearing working on setting up the one-person tent she had borrowed, when she suddenly she groaned, “Uh… guys – I think we might have a little problem.”

As it turned out, the tent bag only held the rain fly and the poles. The ground cloth and the actual tent were missing in action. She hadn’t checked the bag before hitting the trail.  We spent the next 45 minutes trying to improvise a shelter with everything and anything we had. We tried piling three people in our Big Agnes Copper Spur UL2 (bad idea). We discussed whether or not the evening would be suitable for cowboy camping under the stars. We talked through a few different scenarios: 1) we all hike back immediately, 2) I sleep under the tarp while Kris and Christine sleep in the tent, or 3) I hike back to the car tonight and pick them up in the morning.  I was least excited about the second option because the area felt tick-infested with the wet leaves.  We debated the options for a few minutes, but ultimately, we decided the best choice was to keep the group together and make our backpacking trip into a very long day hike.

Failed Camp
We tried to find a way to rig up shelter, but in the end we decided it was better to hike out. Below: Crossing the first stream and trying to eat something with enough calories to hike out happily; Adam doing one of many stream crossings; The best campsite along Jeremys Run sits above a waterfall.

Crossing Jeremys Run Crossing Jeremys Run Waterfall Campsite on Jeremy Run

We knew we only had a little over an hour of daylight left – the sun sets early behind the mountains surrounding Jeremy’s Run.  We rushed to pack everything up as quickly as we could. Cooking a hot dinner would have required getting more water, so we opted to just eat a few snacks from our bags.   We started off at a quick pace.  I twisted my knee at the first major water crossing we had to make, which made the rest of the trip pretty painful. But sometimes, you just have to suck it up and hike.

We soon passed another great campsite next to a small waterfall.  The trail meanders along and across Jeremy’s Run, requiring lots of rock-hopping across the stream.  The sun was dipping down quickly and we soon found that we needed to put on our headlamps.  Christine and Kris had legit headlamps, but I was using a small clip-on headlight that didn’t have the lumen output needed for a night hike.  When it reached dusk a few miles from our campsite, we came across a couple with a dog.  They asked us how far it was to the campsites and if they were all taken.  The guy was carrying an outrageous amount of gear and the girl looked completely miserable.  We knew they were going to be hiking to the campsites by nightfall and setting up camp in the dark.  I’m not sure if this was her first venture into overnight camping, but based on the daggers she was shooting him with her eyes, it may be their last.  They warned us they had seen a couple of bears just ahead of us, so we were on full alert.

Headlamps
We hiked by headlamp the last hour. Below: Jeremys Run in twilight; A large pool along the run; One of the last few stream crossings before it became too dark to take photos.

Jeremys Run Jeremys Run Jeremys Run

As it became fully dark, we still had a few stream crossings to make, which made it quite hazardous.  I reminded myself that the water wasn’t that deep so if we stepped in the water, we would probably be OK.  Another danger of night-hiking is the ability to lose the trail.  We really had to pay attention to the ground and try to keep an eye out for occasional blazes to make sure we would stay on the trail.  Hiking in the fall after most of the leaves have covered the trail provides an extra challenge.  Because I had a weaker headlamp, it was hard for me to lead along the trail since the lights from Christine and Kris were blasting my shadow ahead of me on the ground.  And then, I heard large noises in the woods, which I’m guessing was the bears that we had been warned about.  We kept talking loudly and playing some games to keep our minds sharp (animals/foods/colors that start with each letter of the alphabet) as we hiked along.

At 4.25 miles from our intended campsite, we finally came across a concrete marker post.  This post marked the junction with the Knob Mountain cutoff trail, so we knew were getting closer.  We kept straight on the Jeremy’s Run Trail and at 5.15 miles, we reached our first junction with the Neighbor Mountain Trail.  It was now just .3 miles straight ahead until we reached the parking lot where we started.  We made the last climb with renewed energy and celebrated that we made it through this adventure.

It was definitely one of the longest hikes we have done in a day and with the extra weight on our back, was one of the toughest.  We got back in the car and decided to go out to dinner to celebrate with drinks and food at Ciro’s in Elkton, VA.  We were physically exhausted and hungry, but it was quite an adventure we will never forget.

One takeaway I had from this trip was that we were all great at hiking together.  When we faced the challenge of not having two functional tents, we kept our wits about us, made a quick decision and went with it.  There was no complaining and we just relied on each other to get through.  If we had panicked or become overly upset, it could have led to a dangerous situation.  It is through this challenge, that we learned that having good hiking partners that work well together is a great trait to have for survival.  We all vowed to come back to this spot to camp together sometime in the spring to get the full experience through camping on Jeremy’s Run.  After the hike, Kris bought her own tent and I bought a better headlamp.

kris Kris Says…

Backpacking 101- It doesn’t matter if you were up late celebrating your birthday and borrowing some equipment…ALWAYS double check your equipment or your trip will not be so fly!

I was excited to be hiking with friends on a beautiful fall day.  We have always shared an appreciation of nature, lots of conversations and tons of laughter. I guess that is why we handled our little upset so calmly and reasonably. Although, I’m pretty sure I said  “Adam, just because I am a girl doesn’t mean you have to give up your tent.  I will cowboy up. Now, everyone hand over any booze or sleep aides you may have!” Of course that didn’t fly.

Ultimately we laughed at the situation, even as we crossed that creek 14 or so times and in the dark.  And I learned a few things on this trip: I am capable of hiking 15 miles with a 25 lbs pack in a day, Little Debbie Peanut Butter pies are so tasty and 400 calories, it was time to purchase my own backpacking tent, a packing checklist is important and a good attitude goes a long way.

I vowed to return to Jeremy’s Run and hike early enough to snag the sweet waterfall camp spot, I also plan to cowboy camp sometime just to prove I can (my dog will protect me).

Christine and Adam- you two are SuperFly!

Trail Notes

  • Distance – 14.7 miles
    (We had issues with MapMyHike on this trip, so we have partial stats. We have the Neighbor Mountain segment and most of the Jeremys Run to Elkwallow segment. We’re missing the portion along the Appalachian Trail and a few early tenths of a mile along Jeremy’s Run.  Technical issues!)*
  • Elevation Change – 2610 ft.
  • Difficulty –  4.  The terrain is fairly moderate throughout the hike, but the length ups the difficulty rating.
  • Trail Conditions – 3.  Sections along the Appalachian Trail and Neighbor Mountain are in great shape.  The Jeremy’s Run trail is rocky and has at least 14 water crossings – some of them can be challenging!
  • Views  3.5.  The views descending Neighbor Mountain are beautiful, but never fully open/panoramic.
  • Streams/Waterfalls – 3.5.  The stream is beautiful and scenic.
  • Wildlife – 5.  We saw a bobcat!  Hikers we passed at sunset told us there was a bear ahead, but we couldn’t see anything in the dark.  But, the last time we hiked in this area, we saw three bears.  We have also seen/heard owls, pileated woodpeckers, and whippoorwills.
  • Ease to Navigate – 4.  The junctions are clearly marked and easy to follow — unless you’re hiking in the dark!  🙂
  • Solitude –1.  It’s the most popular backpacking loop in the park’s northern district.

Download a Trail Map (PDF)

Directions to trailhead:  From the US-211 entrance of Shenandoah National Park, head north for 9 miles on Skyline Drive.  Take a left towards the Mathews Arm Campground.  In .7 miles, you will reach a parking lot.  The trail takes off next to the outdoor bathroom.

MapMyHike is not necessarily accurate, as the GPS signal fades in and out – but it still provides some fun and interesting information.

Veach Gap – Morgan’s Road

This hike is easy for a 7-miler!  Gentle grades along an old roadbed take you to a lovely view of the Shenandoah River and mountains beyond!

View the Full Album of Photos From This Hike

Veach Gap Hike
The Point overlook on the Veach Gap hike offers nice views of the bends of the Shenandoah River and the mountains of the national park beyond. Below: Adam crosses the closed gate at the beginning of the trail;  Christine hikes the Veach Gap trail; The main trail junction on this hike.

Start of Hike Veach Gap Hike Signs

Christine Says…

Throughout fall 2014, our employer (and alma mater), James Madison University, participated in the Outdoor Nation Campus Challenge.  Basically, students and employees accrued points for outdoor activities. The school that compiled the most points in the end won a prize of cash and outdoor gear. One component of the competition was completing a collection of eight local hikes.  The list included many hikes we had already done (Old Rag, Humpback Rock, Fridley Gap, High Knob Fire Tower).  Veach Gap was one of the only hikes on the list we hadn’t done, so we decided to check it out.

From the end of Veach Gap Rd. in Fort Valley, the hike begins along the Veach Gap Trail (blazed in gold), which is an old road bed.  Supposedly, this trail is what remains of the historical Morgan’s Road.  General George Washington requisitioned the road during the Revolutionary War.  It was built to be used as a path of retreat from Yorktown.  As we all know from history, the war went America’s way, and the retreat route was never needed. The road was still used locally for many years before falling into disuse and transitioning into a trail.

At one mile in, the Veach Gap trail crosses Mill Run.  This is really the only potentially confusing spot to navigate on the hike.  The trail crosses at a diagonal, so look carefully for the gold blazes on a tree slightly upstream.  Shortly after crossing the stream, you may notice a rock formation in the shape of an upside down ‘U’.  This is called an anticline, and it’s a very unusual geological feature in our area. I’m kind of ashamed to admit this, but we didn’t even stop to look at the anticline.  I forgot it was there, and my mind was more focused on fall colors, lofty views, and potential wildlife sightings.  But, if you’re a geology buff – don’t miss this feature!

Crossing Mill Run
Crossing Mill Run. You can see the blaze on the tree on the opposite bank. Below: Pretty fall leaves on the water; Blazes for Veach Gap, Tuscarora, and the Massanutten Trails; After the main trail junction, the Massanutten Trail became a little steeper and rockier.

Fall Leaves on Water Blazes Rockier Massanutten Trail

A short distance after crossing the stream, the Veach Gap trail merges and becomes jointly blazed with the orange-blazed Massanutten Trail and the blue-blazed Tuscarora Trail. The three trails share the route for (at most) a couple tenths of a mile. AT 1.2 miles,  you’ll come to another trail sign.  To the right, the trail heads in the direction of the Little Crease Shelter.  Stay to the left (blazed orange and blue), headed up Little Crease Mountain and toward Sherman Gap.  About a half mile after this intersection, you’ll pass a marked group campsite on the right.

Continue meandering uphill along a gentle grade.  At three miles, the trail becomes a bit steeper with switchbacks.  There was a significant forest fire here in 2012, so the canopy is thin and allows nice views along the climb.  We saw lots of charred stumps and blueberry bushes along the increasingly rocky trail.  Eventually, the trail leveled out along the ridge.  We soon reached The Point Overlook – a small outcropping of rocks overlooking a sweeping bend on the Shenandoah River.

We had a snack, took a few photos, and spent some time chatting with a fellow hiker (Hi, DJ!) before heading back down the way we came. Veach Gap was really a lovely hike to enjoy at the peak of fall foliage season.  After getting back to our car, we made the short drive into Front Royal so we could enjoy burgers and shakes at Spelunkers.  Great day!

Adam Says…

When we were reviewing the peakbagging hikes that were listed for JMU students/faculty to try for the Outdoor Nation competition, we were surprised to see this one on there.  My guess is the coordinators looked up hikes that were close to Harrisonburg without thinking of what would be seen on the hike.  We initially thought this wouldn’t be that nice of a hike, since we hadn’t heard anyone mention it before to us, but the views made this a pleasant surprise.

When we pulled up to the parking lot, we saw a few cars already in the parking lot and a group getting ready to hit the trail when we did.  Of course, we saw vehicles for hunters, so we were a little worried about how this trail was being used overall.  We were glad that we had brighter clothes on, which is always a precaution to consider during hunting season.  We started off on the gold-blazed Veach Gap trail by crossing through the gate and walking on the fire road.  The trail was very flat and passed through some younger forest.  We were greeted with sights and sounds of Mill Run to the left of the trail.

Opening Views
The higher we hiked, the more views we got through the trees. Below: Adam takes in the view; The ridge was burned by a forest fire in 2012.  The damage is still fresh and evident; Adam descends.

Another Take on the View Rocky Ridge Descending

We soon came across two bow hunters, that seemed to be milling around, more about enjoying the outdoors than they were about hunting.  At .35 miles, the fire road turns into trail.  At 1.2 miles, take a left at the junction and join the blue and orange-blazed Massanutten Trail.  The trail continued a slow, gradual climb heading northeast.  At 3.0 miles, the trail takes a sharp, southern route and at 3.2 miles, it switches back to the normal northeastern direction.  On our climb up, we passed by a large group of boy scouts that were covering some miles over the weekend, but were looking to camp near the crossing at Mill Run.  The slightly-obstructed views of the mountains beside us were so colorful in this peak fall setting.

As you climb up to the ridge, you start seeing a lot of the forest fire damage.  Since this happened in 2012, you start seeing some of the plants starting to grow in place of those that burned.  We reached the ridge and followed it for about .15 miles.  At 3.5 miles, we found a pile of rocks marking a short climb to the overlook where we stopped.  The true highlight of the view is seeing the bends of the Shenandoah River from this rocky perch.  There wasn’t a ton of room at the top that was unobstructed, but it was enough for a few people to take in the view.

If you feel like you would like a view hike with a good amount of solitude, this may be a great selection.

Trail Notes

  • Distance – 7 miles
    (Check out the stats from Map My Hike)*
  • Elevation Change – 1100 ft.
  • Difficulty –  2.  This is an easy hike to a nice viewpoint.
  • Trail Conditions – 4.  The trail was in great shape in most places.  Dry, fallen leaves made some of the descents slippery.
  • Views  3.5.  The view of the bends of the Shenandoah River is nice, but slightly obstructed.
  • Streams/Waterfalls – 2.  The stream along the early part of the trail is really pretty.
  • Wildlife – 2.  We didn’t see anything but a few birds and squirrels.
  • Ease to Navigate – 3.  There are a few junctions and a few unmarked trails that cross the route, but you should be fine if you follow the blazes.
  • Solitude –4.  We did see a troop of Boy Scouts and a handful of others hiking in this area on a perfect fall weekend near peak foliage color, but generally this area is very quiet.

Download a Trail Map (PDF)

Directions to trailhead:  From Luray, VA, take SR 675/Camp Roosevelt Road.  Go .8 miles and take a left to stay on SR 675.  In 2.2 miles, take a right to stay on SR 675.  In 7.8 miles, take a right on to SR 678/Fort Valley Road.  Follow this for 9.7 miles and then take a right onto SR 774/Veach Gap Road.  Follow this about .75 miles to the end of the road, where you arrive at a parking area.  The trail starts after you walk around the gate.

MapMyHike is not necessarily accurate, as the GPS signal fades in and out – but it still provides some fun and interesting information.

Bear Church Rock – via Bootens Gap

This 10.2 mile hike to Bear Church Rock from Bootens Gap (on Skyline Drive) is a great alternative to the route that begins down in the valley at Graves Mill.  While this route doesn’t include the scenic Staunton River or the Jones Mountain Cabin, it crosses some of the deepest, least traveled parts of Shenandoah National Park.  And in the end, you reach the same great viewpoint.  While this route is a little longer than the alternative, it has less climbing and feels a little more moderate.

View the Full Album of Photos From This Hike

View from Bear Church Rock
The view from Bear Church Rock reveals nothing but wilderness. The Staunton River flows through the valley below.  Below:  The hike begins on the AT northbound at Bootens Gap;  Christine passing large boulders on the Laurel Prong trail; Mountain laurel starting to bloom.

The AT at Bootens Gap Boulders on Laurel Prong TrailBoulders on Laurel Prong Trail Mountain Laurel Starting to Bloom

Adam Says…

Bear Church Rock really impressed us when we hiked it a few years ago, approaching it from Graves Mill.  However, we were thinking it would be nice to take a different route that would be more accessible from Skyline Drive.  This approach is a bit longer, but it has 400 fewer feet of elevation gain, making this an overall easier climb.

We started off from the Bootens Gap parking lot at Mile Marker 55 on Skyline Drive in the Central District of Shenandoah National Park.  We took the Appalachian Trail from the parking lot, heading north.  In .5 miles, we reached the junction with the Laurel Prong Trail.  We took a right to join this trail.  The Laurel Prong Trail ends up going through a relatively steep decline through a loose, rocky section.  The trail eventually bottoms out and you reach a junction with the Cat Knob Trail at 1.5 miles.  We took the Cat Knob Trail and began a steep incline.  The trail hits another junction with the Jones Mountain Trail at 2.2 miles.  Take a right on the Jones Mountain Trail.  At this point, the trail is relatively flat or downhill for most of the way to Bear Church Rock.  As you near your goal, you’ll see some pretty amazing standalone boulders along the trail. You will know you’re getting close to the viewpoint when the trail takes a sudden, precipitous downhill drop.  At 5.1 miles, you will reached an unmarked side trail that takes you up a about ten feet through the laurels onto a large rock outcrop with majestic, wilderness views.  Return the way you came to make this a 10.2 mile out-and-back.

Adam Hiking the Jones Mountain Trail
The Jones Mountain Trail traversed an expansive bed of lush, green ferns.  Below: Adam climbs Cat Knob – one of the few steep portions of the trail;  Park boundaries were well marked; One of many pink ladys slippers along the trail.

Climbing Cat Knob NPS Boundary Marking Pink Lady's Slipper

One thing to note on the trail is you do come across several times where the National Park crosses back and forth across boundary lines with the Rapidan Wildlife Management Area.  You may see some US Boundary markers in several places that marks the portion that is under National Park control versus Virginia control.

When we reached the highest point of the Cat Knob Trail, we found the largest concentration of pink lady slippers I have ever seen.  Everywhere we turned, we kept seeing more and more and they were at the peak of their bloom.  That was such a nice reward by coming this route.

Many Lady's Slippers
Usually photos of lady’s slippers are close-ups. This wider shot gives a better idea how these wildflowers are situated in the forest.  Below:  The portion of the trail outside the park is blazed differently;  The Rapidan Wildlife Management area; Adam makes the last final, steep descent to Bear Church Rock.

Blazes Wildlife Management Descent to Rock

Somewhere along the Jones Mountain Trail as we were making our approach to Bear Church Rock, my knee buckled and gave me a lot of pain for the rest of the day.  One hard part about hiking is if you get injured, you don’t have a lot of choice but to keep going.  I stopped about .25 mile before we reached the summit and rested.  I wasn’t sure if I would be able to make it all the way.  Christine went ahead to scout the way and see how much further.  Not wanting to be separated too long, I pushed myself onward and found her at the rock overlook.  We stayed there to rest for a while and we had the rock all to ourselves.  We were joined in about 20 minutes from a man from China who had come up the route from Graves Mill.  He didn’t speak English and we heard him on his walkie-talkie talking to someone that we presumed to be his wife.  We were guessing she was farther behind and he was assuring her he made it.  The climb the other way is quite steep, so I wouldn’t be surprised if she had either turned around or was just taking longer to get to the rock.

The views were spectacular.  While we had a bit of a cloudy day, it was nice to see the shadows from the clouds creeping along the mountain ridges in the distance.

We decided to make our way back.  I felt like the time at the viewpoint allowed me to rest my knee enough to make the return trip. I was hobbling slowly, but I had to keep pushing forward.  We got back to the car and I was glad to not have to take any more steps.

Christine Says…

It was National Trails Day, the weather was great – and even though neither of us was in the mood to go on a long car ride to a distant trailhead, we had to get out and hike! We settled on the hike from Skyline Drive to Bear Church Rock – mostly because it was close to home, but also because we’d never hiked it before. A few years ago, we hiked from the valley bottom in Graves Mill up to Bear Church Rock. That was a challenging and beautiful hike, so we thought it would be fun to visit the rock from the other approach.

From the parking lot at Bootens Gap, we headed north on the Appalachian Trail, gradually ascending Hazeltop Mountain. I was amazed by how lush and green everything in the park looked. It almost looked as green as the Smokies! Our last hike in the park had been in late April, before the leaves fully emerged. Spring always take a long time to fully arrive in the mountains.

After a short, easy stretch on the AT, we reached the junction with the Laurel Prong Trail. We turned right onto the trail and followed it downhill, over many rock jumbles along the shoulder of the mountain. In a saddle between two mountains, we reached the junction with the Cat Knob Trail.

Taking in the View at Bear Church
Adam takes in the view at Bear Church Rock.  Below: You’ll pass these rock formations on the final descent to Bear Church;  The rocks were covered with blooming mountain laurel;  There were also lots of ripening blueberries.

Rock Formations Mountain Laurels Blueberries

That trail climbed steeply over Cat Knob before reaching the junction with the Jones Mountain Trail. The Jones Mountain trail bears to the right. This section of trail actually departs Shenandoah National Park and enters the Rapidan Wildlife Management Area. You’ll notice park boundary signs and different orange/red blazes (as opposed to Shenandoah’s blue blazes) when you’re on this part of the hike.

This section of trail is incredibly beautiful! We enjoyed the expansive understory of ferns and countless pink lady’s slippers. The mountain laurel was just starting to bloom. The terrain along the Jones Mountain trail was rolling – lots of ups and downs, none of them too steep.   This route to Bear Church is probably less popular than the route from Graves Mill, so the trail was narrow and overgrown. Tall grasses brushed our legs all along the way. Adam said, “All I can think of is ticks. I feel like I’m crawling with them!’ Luckily, the permethrin we’ve been using on our clothes and gear really seems to be working. Neither of us found any ticks during a thorough post-hike check.

Around 4.9 miles into the hike, the trail took an incredibly steep downward turn. We lost about 200 feet of elevation in just over a couple tenths of a mile. We passed a few rocky outcroppings that looked like they might potentially have views, but they all turned out to be obscured by trees. Watch carefully for the spur trail to Bear Church Rock. It’s not a marked spur, so one could easily miss it.

On the hike, Adam had begun to wonder if we passed the view or if maybe it had been closed in by trees. I told him that it was a really open, spectacular view and that it had to be nearby. I told him I’d scout ahead and shout back if I found it. I ended up walking almost another half mile before I reached the spur trail! The distances in our guidebook were way off on describing the last mile of the hike to the viewpoint. Other sources I checked afterwards all put the distance anywhere between 9.5 and 11 (rather than the 8.5 miles indicated by our book).

Lush Green
Everything was so abundant and green on this pretty June day.  Below: Adam makes the steep ascent on the return from Bear Church Rock.  Fortunately it is only this steep for a short time; Coming off Cat Knob; We spotted a doe and fawn in the understory.  The fawn was pretty well hidden.

Steep Climb Coming Off Cat Knob Doe

There was a large hiking group on the rock, so I felt weird about shouting for Adam. They told me they were headed out the way we came and would send Adam down when they passed him. But, just as the final hiker departed, Adam arrived.

We had lunch on the rock and enjoyed the unspoiled, pristine views of the park. One of the nice things about Bear Church is that you really don’t see civilization from the viewpoint. You get great views of Fork Mountain, Cat Knob and the Staunton River Valley – but no roads or houses or farms. It’s beautiful! The mountain laurel around the rocky viewpoint were in full bloom and quite spectacular!

After a nice rest, we hiked back the way we came. Most of the return trip was uphill, but other than a short section of climbing right after leaving Bear Church it was very moderate, gradual climbing. The last little bit along the AT was smooth downhill. We saw a doe and fawn hiding in the ferns right before we got back to the car. Once we were back in the car, we decided to head up to Big Meadows for blackberry milkshakes (yay!) and to say hello to our PATC friends. We were glad to catch up with the pair of PATC volunteers who led our Backpacking 101 course several years ago. Good day!

Trail Notes

  • Distance10.2 miles
  • Elevation Change – About 1800 feet
  • Difficulty – 4.  The climb down and back up are not overly tough, but the distance gives it an above average difficulty. 
  • Trail Conditions – 2.5.  The rocky slope climbing down the Laurel Prong trail did have some loose rock.  The Jones Mountain Trail was quite overgrown along the way and we were walking through a lot of knee-high grassy areas.  Wear bug spray and check for ticks afterwards.
  • Views– 5.  Great mountain views from Bear Church Rock. 
  • Streams/Waterfalls – 0.  Non-existent. 
  • Wildlife – 2.  We didn’t really see much wildlife on this trail.  We thought much of it would be a great place to spot a bear since it is in a very wide part of Shenandoah National Park and not as well-traveled. 
  • Ease to Navigate – 3.  You do take four different trails to get to Bear Church Rock, so pay attention at the junction markers.
  • Solitude – 3.  Most of the people we saw on the trail were on the Laurel Prong portion (typically making their way to the Rapidan Camp).  I would expect that you would see someone at Bear Church Rock.

Download a Trail Map (PDF)

Directions to trailhead:  Follow Skyline Drive to mile marker 55.  Park at the Bootens Gap parking area on the east side of the drive.  The AT departs from the end of the parking lot.

Black Balsam & Tennent Mountain (NC)

North Carolina Hikes

This 6.6 mile loop offers some of the area’s most amazing high-elevation, Appalachian bald scenery!  It was right up there with Roan Mountain. The views are 360 degrees and showcase mountains in every direction.  If we were to hike it again, we’d do it as an out-and-back and skip the return arm of the loop along Graveyard Ridge and Mountains to the Sea.

View the Full Album of Photos From This Hike

Black Balsam Knob
Hiking Black Balsam and Tennent reminded us of both the Whites (in New Hampshire) and Roan Mountain (in Tennessee). Such spectacular, wide-open views! Below: The most scenic parts of the hike followed the Art Loeb Trail; The Graveyard Ridge section was wet and had a stream crossing; The end of the hike took us across numerous boardwalks/bridges.

Art Loeb Stream Boardwalk

Adam Says…

When we were planning our trip to the Smokies, we decided we wanted to spend the first few days near the Asheville, NC area and check out a few hikes along the Blue Ridge Parkway.  We had set out in the morning to check out the Graveyard Fields waterfalls.  On a trip here many years ago, we remembered how beautiful the series of waterfalls were.  We brought a book with a description of the hike that would include a visit to Black Balsam and Tennent Knob on the loop.  However, we didn’t have a map of the area other than what our book had provided.  After driving along the parkway for some time, we pulled up to where the parking lot would be (mile marker 418.8) and it was all blocked off by fencing.  It appears they are doing some major renovations of the parking area and stairs down to the Second Falls.  They had blocked off any access to the trail and instead had signs saying that you could access the trail from many miles away.  We were very disappointed, but decided to drive up further along the Parkway.  We took a right on the gravel road 816 (mile marker 420.2) and followed that until we saw a trail marker to the right that led up to Black Balsam Knob.  We were relieved we were going to be able to see the balds and I realized we were picking up our loop trail but just a little differently than we had originally intended.

From the road, you start on the Art Loeb trail.  In a few hundred feet, you will see a side trail to the right.  This is the Mountains to Sea Trail that will be your return from the loop.  Stay straight to continue on the Art Loeb Trail as it ascends past amazing vistas.  You will reach the summit of the Black Balsam Knob at .9 miles and will see many campsites at the top.  On a clear day from here you will have 360-degree views all around with the Smokies to the west and Mt. Mitchell to the north.  The trail took a sharp left at this point as you continue on the Art Loeb trail.  On Black Balsam Knob, there are many other trails cut-in over the years along the balds which makes it tricky to know if you are on the right trail.  As we left the summit area, we came to a junction between two trails that both looked legitimate.  One seemed to go over a hillside and the other went to the left and around.  We took the one to the left and saw a very worn sign that read “Art Loeb” so we knew we made the correct choice.  The trail wrapped around the hillside and went through a narrow path with waist-high shrubbery growing along the trail.  Our legs got a little scratched along the way, but we pressed on.  After a while the trail went through a few switchbacks while descending and then flattened out.  At this point, we could see Tennent Mountain ahead of us, so we felt comfortable that we were going the right way.  Soon, the shrubbery opened up into a clearing and we climbed up the rocky path and reached the summit of Tennent Mountain at 2.5 miles.

Approaching Black Balsam
Hiking across open, grassy balds at 6,000 ft. is such a treat!  Below:  The trail looks like a ribbon across the mountain tops; Lots of colorful tents on Black Balsam Knob; You can see a glimpse of the parking lot at the trailhead.

Trail Across the Summits Tents Parking Area

The summit of Tennent Mountain was just as scenic with more views in every direction.  From here we could also see Looking Glass Rock, one of the most iconic images along the Blue Ridge Parkway, in the distance.  We had our lunch on the top of this spot and then made the decision to do the full loop instead of just the out-and-back to the summits.  We continued forward on the Art Loeb Trail.  From here, there were a few more nice views but then the trail descended into a more wooded trail.  The trail passed a few more campsite options before we reached the area known as Ivestor Gap at 3.1 miles.  Ivestor Gap is a large open junction point where many trails converge.  There was a map that showed where we were, but none of the trails were marked to let us know which was the right one to take.  When you reach Ivestor Gap, take the larger trail to the right that looks like an old road.  This was the Graveyard Ridge Trail.   We were on this for only .3 miles, before passing a small spring in the rocks on the lefthand side of the trail, and took a sharp right to stay on to the Graveyard Ridge Trail, another unmarked junction [staying straight on the trail would begin the Greasy Cove Trail].   The Graveyard Ridge Trail was very rocky and had a lot of water on the trail, so there was some times of rock-hopping and getting your shoes wet.  While on this trail, you may have a few glimpses at Tennent Mountain above to see where you came from and there are a couple of spots for viewpoints.

At 5.1 miles, we reached another junction.  Deciding to forego the trip to see the waterfalls to Graveyard Fields (which would have probably added another 4.5 miles roundtrip to our hike), we took a sharp right up the Mountains to Sea Trail.  This trail was extremely steep and at times felt like a bushwhack as the trail was very overgrown.   In about .5 miles, you’ll gain over 500 feet of elevation, so it is a slow effort.  Eventually at 5.75 miles, the trail reached the top of the bubble and you got a few more views from a rocky outcropping.  Blazes were painted on the rock that led the way as the trail descends below.  The trail moves away from the ridgeline before switching back – it feels like the wrong direction, but it’s not.  The trail descends for a few hundred feet before climbing up again.  You’ll pass over several wooden footbridges along this section of the trail.  At about the 6.5 mile mark, the trail goes into a deep wooded area again and you reach the junction again with the Art Loeb Trail.  Turn left and you head back to 816 in a short distance.

Open Hiking
Spectacular views with every step!  Below: In the saddles between the high points, the trail was narrow and lined by dense shrubs;  Adam stands atop Tennent Mountain; Summit of Tennent Mountain.

Narrow Tennent Summit Tennent Mountain

At the top of Tennent Mountain, there is a plaque on the rocks dedicated to Gaillard Stoney Tennent (1872-1953) who “established organized hiking in North Carolina.”  I couldn’t find any more connections or information about Tennent online, but this sounds quite impressive.

If you are interested in Geocaching, there are several you could find along the trail (and it wouldn’t hurt to have a GPS handy):

While we tried to cover some extra ground on this trail by making it a loop (and leaving the option to inspect the waterfalls), I would recommend doing this trip as an out-and-back to Tennent Mountain.  The trail system is very confusing here since trails are rarely marked and junctions are not labeled (we’re a little spoiled here in Virginia).  We had to ask several people along the way if we were going in the right direction, so I can imagine a lot of people will feel lost at some point along this trail.   All that being said, the views from Black Balsam Knob and Tennent Mountain are breathtaking.  On a clear day, you can see for hundreds of miles and can see ridgeline after ridgeline of mountains around you with few glimpses of anything resembling civilization.  Don’t miss this one if you are looking for a hike along the Blue Ridge Parkway!

Christine Says…

Our first full day in Asheville, we got up early and had an amazing breakfast at Biscuit Head.  Seriously – if you’re in Asheville, go eat those biscuits! We had planned a 5.2 mile hike starting near Graveyard Fields on the Blue Ridge Parkway.  We drove the hour from Asheville to the trailhead to find the area completely closed off with an 8-foot tall chain link fence and orange plastic mesh.  Even the wooden stairs leading to the entire larger trail system were blocked off.  So, we grabbed our Falcon Guide for Hiking the Blue Ridge Parkway and started scrambling for alternatives.  We settled on a different hike that would still let us see Black Balsam Knob, and give us the option to visit the waterfalls (if we had energy to spare).

Christine Enjoys the View
Who wouldn’t want to spend all day enjoying views like these! Below: Views from the ridge after crossing the summit of Tennent Mountain; Adam approaching Ivestor Gap;  Shining Rock Wilderness sign at Ivestor Gap.

Looking Glass Approaching Ivestor Gap Ivestor Gap

The Falcon Guide offered vague (at best) descriptions of the hikes along the parkway, so we weren’t really sure how long the hike would be, what kind of elevation change we’d experience, what the terrain would be like or even the names of all the trails we would traverse.  We had a rough map of the area in the book, so we could make some educated guesses, but we definitely went into this hike with a lot less information than we normally do.

We found the trailhead parking area packed – the lot was full and cars lined both sides of the rough, potholed road.  We started off on a white blazed trail that climbed gently to sweeping views from bald Black Balsam Knob.  The first great views are less than a mile of relatively easy hiking from the trailhead, so we saw tons of people.    There were at least 3-4 tents sent up atop the bald.  It was gorgeous – but it was a zoo!

From there, the trail got a little confusing.  There are so many social paths to campsites worn into the mountain.  We had a hard time knowing for sure that we were still on the white-blazed Art Loeb trail.  There weren’t any blazes to be seen, and the only sign was so weathered that it looked like a blank piece of wood on a post.  We stood pondering our book/map for a few minutes, when a foursome passed and confirmed that they had hiked this area many times and we were indeed on the correct trail. A little later, we passed an actual Art Loeb trail sign.

Graveyard Ridge
Adam hikes in the stream that was the footbed on the Graveyard Ridge Trail. Below: Adam at the junction of the Graveyard Ridge and Mountains to Sea trails; Painted trillium; The early part of the Mountains to Sea trail was essentially a bushwhack.

Mountains to Sea Painted Trillium Bushwhack

The trail descended through thick, dense scrub – lots of berry bushes and rhododendron.   Eventually the trail opened back up and we began another ascent to the summit of 6,000 ft.+ Tennent Knob.  This outlook was even more spectacular than Black Balsam.  We could see for miles in every direction.  We stopped at this point and had lunch on the trail.  I had packed an apple, a Kind bar and some cookies from a bakery in the top of my pack. The strong sunshine had warmed the cookies to the point that they tasted like they had just come out of the oven.  So good!

After the summit of Tennent Knob, we descended again before reaching Ivestor Gap.  At the Gap, there was a troop of Boy Scouts at the information station.  We consulted our map again before heading down another unmarked trail that we believed to be correct.

The trail at this point became wet and streamlike.  We came across another hiker and his backpacking beagle!  The beagle was really sweet and apparently a good hiker – able to do 12 mile days!  The man was filling up his water bottles at a spring along the trail.  Right after the spring, the there was a trail junction. We took the sharp hairpin turn onto the unmarked Graveyard Ridge Trail.  It was a mostly flat, but very sloppy trail.  It was wet and muddy for most of the way.

Green
The Mountains to Sea trail eventually became less of a bushwhack, but it was still tricky to follow in places.  Below: Near the end of our hike, storm clouds filled the sky over the high peaks;  One of the trickier spots along the Mountains to Sea trail – the blazes were not readily visible and the trail went the opposite way it seemed it should; Pretty wildflowers along the trail.

Stormy Trail Descends Flowers

We eventually reached one of the only marked junctions on the hike, with a sign pointing toward the waterfalls and parkway one way and the Black Balsam Parking area the other way.  This is where we picked up the Mountains to the Sea trail.  This trail was also white blazed.  The trail was more of a bushwack than anything for a while.  It was very narrow and overgrown and headed steeply uphill.  We soon came to a rocky ledge with more nice views… and no sign of the trail continuing.  Again… we got the book out and were getting ready to make another guess.  The trail we needed to follow seemed to go in completely the wrong direction.  Adam looked at me and said ‘I’m just not confident this is the right trail!’  Fortunately, a couple hikers came up behind us.  They told us they were following the same loop we were, had done it before and had gotten lost before!  However, this time they were confident and able to point us in the right direction.  The trail that looked totally wrong turned out to be exactly correct!

From the ledge, we descended into dark woods, traversed numerous wooden footbridges across swampy areas and made one final ascent back to the parking area along the road.  All in all, we hiked 6.6 miles.  It was a great hike with spectacular scenery from Black Balsam and Tennent.  If I were to recommend the hike to others, I’d also suggest doing it as an out-and-back to see just the two bald summits.  The loop option was poorly marked and didn’t offer much in way of scenery.

Boardwalks
The last section of the hike had lots of planks, bridges and boardwalks that crossed swampy areas. Below: After the hike, we drove back to Asheville via Waynesville and stopped at Frog Level Brewery – nice stream-side setting and good beer!

Frog Level

After our hike, we decided to drive back to Asheville through Waynesville.  We heard it was a cute town and that Frog Level Brewing was worth a visit.  We were able to easily find the Brewery, and ended up enjoying samples at a nice picnic table by the river.  Nice finish to the day!

Trail Notes

  • Distance – 6.6 miles
    MapMyHike Stats
  • Elevation Change – about 1300 feet
  • Difficulty – 3.  The real difficulty is the Mountains-to-Sea Trail as it goes brutally up the mountain in some points. 
  • Trail Conditions –  2.  The trail up to Black Balsam was the best maintained.  The Art Loeb Trail around Black Balsam to Tennent Mountain was very brushy and overgrown.  The Graveyard Ridge Trail had a ton of water on the trail and The Mountains-to-Sea Trail was also very overgrown. 
  • Views – 5.  Amazing views from Black Balsam and Tennent Knob. 
  • Streams/Waterfalls – 1.  Just a couple of small crossings through some water on the trail, but nothing scenic. 
  • Wildlife – 1. We didn’t see anything other than a few birds on this trail. 
  • Ease to Navigate –  1.  You may often feel unsure if you are going the right way.  Trails are not blazed well and junctions are not marked.  The connection to the Graveyard Ridge trail is not marked.  There are also lots of other trails that have been cut through by hikers, but they aren’t labeled, especially near the top of Black Balsam Knob on the Art Loeb trail.
  • Solitude – 2.  On a nice day like we had, there were lots of others on the trail. 

Download a Trail Map (PDF)

Directions to trailhead:   At Mile Marker 420.3 on the Blue Ridge Parkway, turn onto 816.  Stay on that road for about 1 mile.  Park on the side of the road and you’ll see the trailhead on the right side of the road.

Strickler Knob – via Massanutten Trailhead

This 9.1 mile hike is challenging, but offers wonderful view payoffs and a fun rock scramble.  There is a shorter option for this hike for people wanting to skip the toughest part of the climb.

View the Full Album of Photos From This Hike

Crowds on Strickler Knob
Crowds gather on one of Strickler Knob’s perches. One person we met at the summit had a Cavalier King Charles spaniel in her backpack.  If you look closely at the photo, you can see the dog’s head sticking out of the pack.  Cute! Below: The Massanutten Trailhead on Crisman Hollow Rd.; Adam, Suzanne and Anthony begin the hike; Native pink azaleas.

Massanutten Trail Happy Hikers Pinkster

Christine Says…

Strickler Knob was the second hike we posted on Virginia Trail Guide… way back in May of 2009. In the years since we first did this hike, there was a bad forest fire in the vicinity, the Forest Service painted over the purple/pink blazes to the knob (and then someone put them back), and the trail became vastly more popular.

On this particularly beautiful morning, we were planning a hike in Shenandoah National Park, but at 7:45 a.m. a text popped up on my phone. It was from our friends, Suzanne and Anthony (we met them at PATC’s Backpacking 101 workshop several years ago). They had made a spur of the moment decision to drive down from Maryland to hike Strickler Knob and wondered if we might want to join them. We don’t see them often enough, so the answer was clearly YES!

However, I had a few concerns going into the hike. The first was the possibility of swift/deep streams and run off from the deluge of rain we had received a day earlier. Roads and bridges were washed out all over the area. The second was the fact that the MMT 100 was being run that weekend. I wasn’t sure if the trail would be crowded or have limited access due to the race. We decided to put those concerns aside and go for it.

We met our friends at the defunct Massanutten Visitor’s Center on Rt. 211 near Luray. From there, we proceeded in one car to the Massanutten Trailhead on Crisman Hollow Rd. Right as we arrived, a carload of six was also unloading at the trailhead. We ended up playing leap frog with them along the trail all day long.

Lady's Slipper
We spotted this beautiful pink lady’s slipper orchid along the trail. Below: Anthony and Suzanne make the steep descent of Waterfall Mountain; Mountain laurel is starting to bloom; Streams were running high.

Waterfall Mountain Descent Mountain Laurel Stream

The trail initially crossed a flat, open area and a view into the valley. But soon, the trail dropped very steeply downhill on Waterfall Mountain. I’m not really sure why it’s called Waterfall Mountain. We didn’t see any waterfalls along the way – maybe they’re someplace else, or maybe ‘waterfall’ just refers to the extremely quick drop in elevation. Along this section of trail, we all joked about what a tough climb uphill this would be at the end of the day. I enjoyed the flowers blooming along the trail. We spotted mountain laurel starting to bud and even a pink lady’s slipper!

Eventually the trail leveled out near a stream. We passed a large campsite near the water just before coming to our first stream crossing. The water was pretty high and fast, but some well-placed logs made the crossing doable. From there, the trail followed a series of ascents and descents with lots of little stream crossings along the way. Most of the small stream crossings are probably dry under normal circumstances. We soon came to a second large stream crossing. After that crossing, the trail followed the stream – literally. Due to the 4-5 inches of rain the area experienced, the trail was completely underwater. It didn’t even look like a trail, and the only way we were sure it was the trail was the presence of a blaze on a tree about 50 yards ahead. We walked for more than a mile in ankle deep water. It was fun, but it was also wet, sloppy and muddy!

We reached trail junction 408. This is where the folks coming up from Scothorn Gap join the trail. At this point, we turned right and followed the orange-blazed Massanutten Trail uphill in the direction of the Gap Creek Trail. This part of the trail is really easy – wide and very gently graded.  There were lots of pink native azaleas on one side of the trail. On the other side, the area burned out by a forest fire stood, charred – but slowly growing back.

Stream Crossing
Anthony makes his way across the logs traversing the stream. Below: Adam walks along one of the only flat sections of the trail.  It was a really short section; Suzanne walks along the under-water trail; This is the trail junction that trips a lot of people up.  Make sure you go uphill, remaining on the Massanutten trail, in the direction of Gap Creek.

Flat Stream Walking Tricky

When we reached the ridge, there was an obstructed view where the trail continues over the crest and then downhill. If you find yourself going downhill on the orange-blazed trail, you’ve passed the turn to Strickler Knob! At the top of the ridge, look carefully for purple/pink blazes on rocks and a reddish disk stapled to a tree. This is the way to Strickler Knob.

The walk to the knob starts off as a rocky but easily passable trail. But gradually the rocks become bigger, more jagged and trickier to traverse. It’s easy to lose the blazes as you pick your way along the rocks. You’ll come to one stunning viewpoint and think you’ve reached the end, but you still have the most intense part of the scramble to go! There are several steep, tall rock faces to negotiate before you finally come to a collection of towering rock stacks overlooking the Page Valley, Fort Valley and the Shenandoah River. The view from the knob is majestic!

On this particular day, Strickler Knob was packed. There were so many people at the overlook, it was hard to find a spot to sit. I think part of it was because the presence of two hiking clubs. But in addition to the clubs, there were also a number of couples and foursomes. Honestly, I’m shocked that this trail has become so popular! The crowds rivaled what I expect to see on a nice day on trails like Dark Hollow Falls or Hawksbill Mountain (in SNP).

We spent some time at the overlook eating lunch and taking photos. The hike back went really quickly. We walked in the water, we crossed the streams, we did all the little ascents and descents… and then we came to the base of Waterfall Mountain.

That climb was every bit as brutal as we all expected – gaining over 800 feet in about half a mile. The section isn’t climbed with mediating steps or switchbacks – it’s pretty much straight up the mountainside. We were all pretty glad when we got back to the flat, grassy section again!

When we got back to the car, the parking lot was much more crowded than when we had left it. We made the short drive back to the Massanutten Visitor’s Center and bid farewell to Anthony and Suzanne. It was a great hike and great to see them!

Burned Area
This area was burned by a forest fire several years ago. There is still a lot of black char, but new growth is starting to emerge. Below: The beginning of the Strickler Knob trail; Adam enjoys the first nice view; The scramble begins!

Strickler Trail First View Scrambling

Between the two routes to Strickler Knob, I would probably recommend the shorter route from Scothorn Gap to most hikers. You get all of the excellent scenery, and only miss the extremely challenging descent/ascent of Waterfall Mountain. The section on Waterfall Mountain doesn’t really offer any remarkable scenery, but it’s a great training hike if you’re looking for a cardio challenge or practice on elevation change. We probably benefited from the longer, tougher ascent to prepare for our upcoming Smokies Trip.

Adam Says…

Normally, when I describe the hike to Strickler Knob, I tell people that it’s an introductory rock-scrambling hike to see if you are ready for Old Rag.  While there is not as much rock-scrambling and navigating as Old Rag, there are a few spots towards the summit that will test you enough to see if you can pull yourself up some of the rocks and let you gauge your comfort-level with scrambling over some drops.  If you’ve already done Old Rag, this should be easy, but if you are intimidated by Old Rag from stories you’ve heard, try Strickler Knob first.  I would agree with Christine that this hike has become more popular over recent years.  When we had done the hike five years ago on a beautiful day, we only ran into one other couple on the entire trail; this time, it was crawling with people.

This is also a hike where people often get lost.  You won’t find the purple-blazed summit trail on any maps currently, so I would suggest bringing a copy of the map I’ve provided below.  I had a co-worker that tried to find the trail a few years ago (possibly when the blazes were still removed) to no luck.  We also came across a larger hiking group from Northern Virginia that had missed the trail completely.  When we gave them better directions, they turned around to attempt it again.  Part of this also has to do with what few blazes are actually on the trail.  You’ll know you are on a trail, you may just not be entirely sure which trail.

Scrambling
The group negotiates the rock scramble. Below: Adam makes his way through the rocks; Lots of rocks to climb; A nice perch on Strickler Knob.

Scrambling Rocks to Climb Adam on the Scramble

We started off the hike from the small parking area on Crisman Hollow Road.  The orange-blazed Massanutten trail starts off on nice, level terrain through a wooded area.  The trail soon opens up to more of a brushy, open field.  As the trail winds around through this area, there is even one spot that has a view into the valley below at .2 miles.  Shortly after this point as the trail winds around, the trail begins its very steep descent down Waterfall Mountain at .5 miles.  The entire time that we were hiking down, I was thinking this was going to be a pain to hike back up at the end of the hike.  The trail does have a few switchbacks, but the overall descent is tough on the knees as you descend about 800 feet in that half mile.  At the 1.0 mile marker, we finally reached the bottom of the descent and a junction with the Massanutten Connector Trail.  Take a left at this junction to stay on the main, orange-blazed Massanutten trail.  The trail begins to climb slightly at this point and at 1.2 miles, you will reach a nice back-country campsite along the side of the Big Run stream.  You’ll soon cross the stream (usually by balancing yourself along logs that have been laid across) and continue your climb.  After the second stream crossing, the trail begins a steeper climb with a large switchback to help ease the elevation gain.

Summit Crowd
The summit was very crowded, but the views were still fantastic!

Eventually the trail met the stream again and due to the heavy rains, the trail was completely submerged.  We ended up hiking what felt like almost a mile through a submerged trail by rock-hopping or just getting our feet wet and muddy.   The trail finally separated from the water and leveled out and we reached the junction with the yellow-blazed Scothorn Gap trail at 3.0 miles.  Take a right at this junction to stay on the orange-blazed Massanutten trail.  The trail feels more like a fire road at this point, as you’ll climb up slightly.  We were able to see a lot of the fire damage to the trees around, so there is little more than some lower brushy, understory on the trail at this point.  At 3.6 miles, you reach the crest of the trail and can see some obstructed views straight ahead.  At this point, look around to your right.  We found a small cairn on the ground and were able to see some red and purple blazes higher than eye-level on a few trees to mark the beginning of the purple-blazed trail to the summit of Strickler Knob.  The purple blazes at this point are typically marked on the rocks where you step.  The trail is very rocky at this point and you will be walking the ridgeline until you reach the summit.  The trail can also be a little hard to follow, but if you keep looking for the blazes and just remember you are walking the crest of the ridge, you should be fine.

At 4.2 miles, you reach a very nice viewpoint where you can get great views to the west.   Keep pressing forward and you’ll soon need to climb up a larger rock wall and then pass by a primitive campsite.  Just a few 100 feet away, you will reach the larger boulders of Strickler Knob at 4.5 miles.   You’ll see a large rock overhang that you’ll climb under.  There is a small area to take in a few views to the right.  For those that are most adventurous, the best views are to the left where the overhang is.  If you feel comfortable, you will need to navigate a crack between the two larger rock formations and hoist yourself up to the top of the rocks.  The views from both rock formations are absolutely breathtaking as you have 360-degree views from all around the valley.

Climbing Down
The climb down is as challenging as the climb up!  Below: More views from the top; The hike down; One final stream crossing.

View of the Valley Descent Stream Crossing

After eating a packed lunch, we made our way back the way we came.  We did have to face the waterlogged trail again.  We came across several groups on our way back that were also looking for directions.  One girl asked me if there was any other way back to the car other than going back up Waterfall Mountain.  I suggested that they make their way back through Scothorn Gap and then walk Crisman Hollow Road back.   We all definitely wished we didn’t have that steep trek back up Waterfall Mountain to do.  It is a very steep trail almost straight up the mountain and it takes quite an athlete to do this without taking a breather at some point on the return.  When we finally reached the top, we congratulated our success and then made the last .5 miles back to our car.

When we were hiking the trail, I kept thinking about the MMT 100 racers that were running this trail.  We had come across one of the race-workers and he told us that most of the fast runners were coming through this area near Waterfall Mountain around 8 p.m.  So, if you were a little slower than that you would be running this trail in the dark with a headlamp.  I can’t even imagine how tough this would be and how any of them would escape injury from running into a tree, twisting an ankle, or falling down the trail.

Brutal
The brutal ascent back up Waterfall Mountain at the end of the hike.

I would also recommend for most people to do the hike from Scothorn Gap instead of the route we took.  It is a lot of extra effort with nothing overly impressive to see along the way.

It was great to see our friends again.  We were all getting ready to head to the Great Smoky Mountains soon, so this was great training before we had to handle some of the tougher terrain that the park had to offer.

Trail Notes

  • Distance – 9.1 miles
  • Elevation Change – About 2250 ft.
  • Difficulty – 5. This rating is earned by both the hike length, the scramble to the knob, and the ascent of Waterfall Mountain that comes right at the end of the hike.  For an easier version of this hike, start at Scothorn Gap.
  • Trail Conditions –  2. No switchbacks, soggy streambeds, a couple crossings that can be challenging in wet weather, and a tough scramble.  This is not a beginner’s hike.
  • Views –  5.  Views from the knob are spectacular.
  • Streams/Waterfalls – 2.5.  The usually low streams were beautiful and running high when we visited, but they’re probably usually less impressive.
  • Wildlife – 0.  This trail is popular enough to scare away most wildlife.
  • Ease to Navigate –  2. Trails are sporadically blazed and can be hard to follow.  The junctions for trails leading to to the knob do not mention Strickler Knob.  We suggest bringing a map on this hike.
  • Solitude – 2.  This trail has become extremely popular!

Download a Trail Map (PDF)

Directions to trailhead:  From I-81, take exit 264 heading east through New Market.  Head east on West Old Cross Road for .2 miles.  Turn left on to US-11/N. Congress Street.  In .3 miles, turn right on to US-211/Lee Highway.  Go 3.6 miles and turn left on to Crisman Hollow Road (it is right before the green building on your right that is the Massanutten Visitors Center).  Follow Crisman Hollow Road for 2.2 miles (passing by the parking lot for the Massanutten Storybook Trail) until you reach where the orange-blazed Massanutten Mountain Trail crosses the road and the small parking area.  Park here, cross the road and start the trail.

Trayfoot Mountain – Paine Run Loop

This 9.5 mile loop in the southern district of Shenandoah National Park offers vistas, streams and quite a bit of solitude!  We think it would make a great short backpacking loop with a beautiful stream-side campsite along Paine Run.

View the Full Album of Photos From This Hike

Adam Enjoys the Blackrock Summit
Adam Enjoys Blackrock summit. Below: Adam hikes the Appalachian Trail just north of Blackrock Gap; Christine climbs on the rock pile; Adam spots the spur trail that leads to the Trayfoot Mountain Trail.

Adam Hikes the AT Christine on Blackrock Summit Spur Trail

Christine Says…

Every weekend this April has provided glorious hiking weather! I’m feeling so grateful that we’ve been able to get out so often and take full advantage of the warm, sunny days. On the Saturday before Easter, we chose to hike the challenging 9.5 mile Trayfoot Mountain – Paine Run loop.

This hike begins at the Blackrock Gap parking area (not to be confused with Blackrock summit parking). From the lot, cross to the eastern side of Skyline Drive and make your way north along the Appalachian Trail. After a couple tenths of a mile, the trail crosses back over the drive and heads steadily uphill for a little over a mile. As you climb, you’ll come to a junction – stay on the white-blazed AT, the turn to the right goes to the Blackrock shelter.

At 1.3 miles into the hike, you’ll reach a cement marker for the Trayfoot Mountain Trail. Do NOT take this turn unless you want to miss the splendor that is Blackrock Summit! Continue another tenth of a mile to the massive jumble of boulders and jagged rocks that makes up this impressive summit viewpoint. We took some time to enjoy the views and climb on the rocks. The views from this spot are probably the best on the entire hike, although there are a couple more nice spots yet to come.

Christine in the Maze
The trail passes through a corridor of rock. Below: Adam passes through the narrow opening; Climbing Trayfoot Mountain; From the ridgeline of Trayfoot there are several openings in the trees that give you views of a distant Skyline Drive.

Rock Corridor Climbing Trayfoot Skyline Drive

The Appalachian Trail skirts around the front edge of the summit before coming to a spur trail that leads down to the Trayfoot Mountain trail. The spur descends through a corridor of flat-sided slabs. When spur reaches the junction with the Trayfoot Mountain trail, turn right and follow the trail uphill along an old fire road.

The uphill climb along this section is steady going! Near the top, you’ll pass another marker pointing toward the Furnace Mountain trail. Pass this and continue on the Trayfoot Trail until you reach the cement post marking the summit and high point of your hike. There are no views from this summit, but this starts the beginning of a lovely, easy ridge walk.

The ridge rolls gently along, offering nice views of the Paine Run valley and a distant glimpse of Skyline Drive. The trail eventually begins a long gradual descent to Paine Run. Your last sweeping vista on this hike comes at a pretty outcropping of rocks overlooking pointy Buzzard Rock.

Switchbacks take you swiftly down to Paine Run.   Near the first stream crossing, a cement marker points you left onto the yellow-blazed Paine Run Trail, which is essentially an old roadbed. There were several stream crossings on this section of trail. All of them but the second crossing were easy. We found the stream wide and flush with water. Most of the stones people use to cross were underwater. Instead of trying to attempt the rock-hop, we took off our shoes and waded across. Refreshing!

Buzzard Rock View
You get a nice view of Buzzard Rock before descending to Paine Run. Below: Some interesting rock formations along the trail; Lunch stop; Glimpses of farm land.

Rock Walls Lunch Spot Farmland

The Paine Run trail is very pleasant for a couple miles – sounds of running water and mountain views through the trees. When we hiked, the stream was flowing with lots of rapids and tiny waterfalls. I imagine it will run low and dry later in the summer. The path climbs so gradually you hardly notice you’re ascending! Eventually, you leave the streamside and head back toward Skyline Drive. After one final sharp switchback, you have one more moderately steep ascent back to your car.

All in all, I was pleasantly surprised with both the views and streams on this route. We had a great time!  MapMyHike said this hike is only 9.3 miles, but all other sources put it at 9.7-9.8… so who knows!

Adam Says…

We feel like we have covered so much of Shenandoah National Park on our blog, but it seems there is always another trail or loop that you can try.  We talked about  a hike to Blackrock summit before in our coverage of an AT segment, but this is a longer loop version that offers a few additional views and a stream to enjoy.  Other than the Blackrock summit, you will likely not see a lot of people on this trail.  We only saw a few people the entire day, which was a little shocking for a beautiful weekend day that happened to also be a free National Park entry day.

As Christine mentioned, you could skip the Blackrock summit trying to follow the signage, but you don’t want to miss the best part of the hike.  When we hiked previously, our route bypassed the spur trail that leads to the Trayfoot Mountain Trail.  This spur immediately gives you some additional views and some interesting rocks to scramble around.  Most people that are doing an out-and-back just to the summit from the northern approach will miss this area also.

First Attempt
Adam makes a first attempt to cross (with shoes). The second (successful) attempt was barefoot. Below: Adam descending to Paine Run; The shoeless crossing attempt, The trail goes right through the middle of the stream.

Descent to Paine Run Shoeless Trail

One thing that Christine and I both mentioned throughout the day is how this would make for a great overnight backpacking loop.  If you choose to do so, I would tackle all of the tough uphill climbing the first night, making your way through the Trayfoot Mountain trail and camp somewhere near Paine Run.  This will provide a great water source and there were some nice campsites near the water.  The following day, you’ll just have a steady, but not too strenuous hike back uphill to your car.

When we started walking the ridgeline of the Trayfoot Mountain trail, I felt like we stumbled across the best place I’ve ever seen to spot grouse.  We encountered three along our walk.  A couple of years ago, while hiking in Great Smoky Mountains National Park, we encountered our first grouse on a trail.  The beating of its wings created a strange echoing syncopation in our chest which made us both wonder if our heartbeats were going haywire.  Seeking sources online, we found it was a common sound for mating grouse.  We actually spotted several on this trail and when they took off in flight, we could briefly hear that same noise that perplexed us before.  What a relief to actually spot the culprits this time.

Paine Run Trail
Christine walks the wide, gradually ascending Paine Run Trail. Below: We found several blown-down bird’s nests along the trail; Pretty Paine Run; Another stream crossing.

Birds Nest Paine Run Another Crossing

Further along the Trayfoot Mountain Trail, we climbed up on a few rocks to enjoy our lunch and get some views.  I managed to pick some rocks which were not in the least bit contoured to our bodies, which made for an uncomfortable sitting.  It reminded me of how fast food chains design their seating area so the chairs are only comfortable for a short amount of time to prevent loitering.  We quickly ate and moved on.

Around the 4.0 mile marker, the ridge line ends at a nice rock outcropping which gives you some last views before descending towards Paine Run.  Some local families like to park on the western outskirts of the park and hike up to this area for views.

When we reached Paine Run, the water was a little high from the recent rains.  There were a few places to rock-hop across.  In one spot, we did have to shed our shoes to make our way across.  Christine said I looked like a hobbit with my pantlegs pulled up halfway as I crossed.  I responded back in my geekiest way, “May the hair on my toes never fall off.”  I will say the water was very cold, but it felt so refreshing to my feet.  The sensation of the freezing water made me feel as if I had just received a nice massage on my feet.  After the refresher, I felt I could hike a lot longer.

Horses
The Paine Run Trail is popular with horseback riders. Below: The final ascent to the parking area; We spotted a bear on the drive home; Before we went home, we stopped for famous Shenandoah blackberry ice cream.

Final Ascent BearIce Cream

The stretch on the uphill Paine Run trail was very gradual.  While some people may think this was more of a boring stretch, I enjoyed the views of Paine Run along the side.  There were even a few very small waterfalls to enjoy since the water level was high.  We also came across a group horseback riding along the trail.  All yellow-blazed trails, like the Paine Run trail, in Shenandoah National Park allow horses on the trails.  This would be a great trip to take down to the water and let the horses rest and get a drink before returning.

We got back to our car and then heading north along Skyline Drive.  Within a few miles, I spotted a young black bear on the side of the road.   We were excited to have our first bear sighting of the year.  The bear quickly ran away once it knew it was spotted, but we hope we get to see many more this year.  We stopped at the Loft Mountain wayside to get our first blackberry milkshake of the year.  Appalachian Trail thru-hikers talk about these treats for days in advance of getting to Shenandoah and the hype is worth it.  However, their milkshake machine was broken and we had to settle for blackberry ice cream.  It was still a just reward for a long hike.

While we realize this hike is longer and not as popular as some of the others in the park, this hike really has some nice gems along the trail.  I was pleasantly surprised at what this had to offer!

Trail Notes

  • Distance – 9.5 miles
    (Check out the stats from Map My Hike)*
  • Elevation Change – About 2200 ft.
  • Difficulty – 3.5.  The climbs to Black Rock summit and Trayfoot Mountain can be a little steep, but the climb from Paine Run back to the parking area is very pleasant and gradual.  The length adds to the difficulty rating of this hike.
  • Trail Conditions – 4. The trail was clear and in great shape!
  • Views – 5.  The views from Black Rock summit are spectacular.  While the summit of Trayfoot Mountain has no view, there are other nice views from the Trayfoot Mountain trail – especially the outcropping that overlooks Buzzard Rock.
  • Streams/Waterfalls – 3.  Paine Run was surprisingly pretty and broad in the early spring.  As we hiked up the Paine Run trail, we had many stream crossings and nice views of the water.
  • Wildlife – 3.  We saw deer and lots of grouse on the trail.  We also saw a black bear shortly after leaving the parking area to come home!
  • Ease to Navigate – 4.  There are only a few, well-marked turns on this hike.
  • Solitude – 4.  We saw a few people near the stream that had come in from the western perimeter of the park, a few people on Black Rock Summit, and a trio of women on horses.  All-in-all, we enjoyed a lot of solitude for a long stretch of trail on a pretty ‘free park entry’ day!

Download a Trail Map (PDF)

Directions to trailhead: Located in the Southern Section of Shenandoah National Park.  Park at the Blackrock Gap parking lot around MM 87.3.  Cross the road and find the cement post for the Appalachian Trail.  Take a left, heading north, to start your hike.

MapMyHike is not necessarily accurate, as the GPS signal fades in and out – but it still provides some fun and interesting information.

North Fork Mountain to Chimney Top (WV)

This 6-mile hike is a bit challenging – tough climbing and a little hard to follow – but payoffs at the end make the effort well worth your while.  The views are spectacular – some of the best in the mid-Atlantic!

View the Full Album of Photos From This Hike

Amazing views from Chimney Top!
Amazing views from Chimney Top! Below: Adam checks out the trail information board; The spine of the mountain offers many magnificent views, if you’re willing to do a little climbing.

Trail Sign Scaling the Spine

Adam Says…

Our first experience hiking on North Fork Mountain was on my birthday in 2012 (birthday hikes are a tradition for us!) We decided tackle a little piece of the the trail from the base of the mountain to the well-known outcropping of Chimney Top.  This August day ended up being one of the hottest days of the year.  While hiking up the backside of this mountain, there was absolutely no breeze so the air was stifling.  We were quickly questioning why we chose this one, but we had to press on for tradition’s sake.  We reached the ridgeline and walked along for a while.  We eventually came across a few rocks that seemed to denote a path up.  We semi-bushwhacked up this trail and came to a rock column and climbed up to the top to enjoy the views.  We thought this may have been Chimney Top.  When we got back home and did more research, we realized we hadn’t found the true Chimney Top, so we vowed to return – and we did… on our sixteenth wedding anniversary in fall 2013.

First Outcropping
The first outcropping offers stunning views. Below: The view in the other direction from the first outcropping,

Views from Ridge

It was a perfect October day with the leaves just a shade past peak.  One of the difficulties about this trail is there are no solid online resources for maps and even using our mapping software (alltrails.com), the full trail doesn’t appear on any kind of topo maps.  We used our MapMyHike app on our phones to try and get accurate readings and I traced that outline on a topo map through alltrails.com to try and get a good resource if you want to attempt this hike.

We arrived at the small parking area and made our way up the trail.  The trail meanders for the first two miles through the woods with some slow switchbacks to help you gain elevation.  The thick canopy is high above you, but you will notice you will rarely feel much wind on this side of the mountain.  Around 1.5 miles, you make a steeper ascent up the mountain and reach the top of the ridgeline around 2.0 miles.  Once you reach the top, you can see down below to the North Fork of the South Branch of the Potomac River and WV-28/55 on the other side.  Both times we have been, you can see dots of people fishing in the river.  Across the way, you will see ridges of mountains with Canaan Valley hidden behind them.  Looking along the ridgeline, you’ll see sheer cliffs of rock, making this quite a remarkable scene.  From this ridgeline, we continued along the path.  The trail stays on the ridgeline allowing for several opportunities to check out the views for the next .5 mile.  Around 2.5 miles, the trail has been rerouted away from the ridgeline and you descend the mountain.  The signs say that it was to protect the nesting/hatching peregrine falcons, who have nested on the cliff faces. The signs are at least five years old, and October is not nesting season, so we’re not sure if the signs are still valid.

Fall Color
Fall color was pretty nice!  Below: The trail is often rocky and rough; Adam walks along the increasingly hidden trail.

Rocky Spine Tough Trail to Follow

The trail continues through this terrain for another .5 miles and then starts to gain elevation again.  At 3.0 miles, we came to a well-established campsite and could see the ridgeline just above it.  I walked over to the ridge, but the views were fairly obstructed.  I then saw a smaller campsite to the right of the trail.  Going to that campsite, I walked a short distance behind it on a small trail towards the ridgeline to discover the elusive Chimney Top.  The photos we will place should lead you to the proper campsite that leads to the correct trail.  We ate some lunch from the top of the cliffs near Chimney Top  Exploring a little around this area, you are able to see a most-impressive cliff face (where I’m assuming is the section protected for peregrine falcons).

After we ate our lunches and took in the scenery, I decided I wanted to try to climb up Chimney Top.  I had to find some good footholds, but I was able to get up without too much trouble, but please be careful if you try to do the same.  There are many sheer drops from here, so I wouldn’t advise any unsupervised children to be given free reign on this hike.  Head back the way you came to make this a 6 mile out-and-back.

I do believe that the scenery from this spot is one of the most dramatic and beautiful views you will get in Virginia and West Virginia.  The trail was called the best trail in West Virginia by Outside magazine in 1996 and I can see why.  Some people like to backpack the entire 34 miles of North Fork Mountain.  Since you are at the top of the ridgeline for this hike, there isn’t a reliable water source to be found so you would need to pack in a lot of water for this backpacking trip.  I would strongly recommend trying this hike on a beautiful spring or fall day.

Christine Says…

I’ll admit – I’m the reason it’s taken over three months to get this hike posted.   A foot injury, a lingering cold, and the unusually frigid temperatures have sent me into a state of lassitude.  I haven’t felt particularly motivated to hike or write.  I’m sure I’ll snap out of it completely sooner or later.  But today, I decided to give myself a little push and get this post live!

Fall foliage and amazing views.
Fall foliage and amazing views. Below: Adam checks out one of the campsites; A nice view of the cliff face along the mountainside.

Campsite The Cliff Wall

We were really excited to try this hike again.  Our trip on Adam’s birthday had been rewarding even though we missed out on the main view.  We started the morning with a big breakfast at Bright Morning Inn (Pumpkin Pancakes with Walnuts and Maple Butter Sauce!).   It’s one of our favorite places to eat in Canaan Valley/Davis – everything is always excellent there!

After parking, we started climbing the mountain, following the familiar ground we had covered the previous summer.  We spent a little time exploring the first of several impressive rock outcroppings on this hike.  While there, we took some time to chat with the only other two people we saw on the trail – a couple from Pennsylvania.  They were recent empty-nesters and were returning to backpacking for the first time in 20+ years.  They still had all their gear from the late 80’s/early 90’s – external frame packs, old fashioned sleeping pads, and I think I may have seen something cast iron!  It looked like a heavy load!

After leaving the first view, we pushed along the trail, passing the spur trail to our lunch spot from the 2012 attempt.  This spot is marked by a rock cairn and the worn footpath is well established.

I thought this rock formation near chimney rock looked like a tortoise.
I thought this rock formation near Chimney Top looked like a tortoise. Below: More views; Adam checking out another rock outcropping along the way.

More Views Another Outcropping

The route follows a series of rolling hills after passing the spur trail.  I thought the trail was pretty hard to follow along this section.  It’s a reroute, and vestiges of the old trail are still apparent.  It may have been because the trail was under so many leaves, but I still think the reroute isn’t fully established.  As we continued along, I asked Adam how much further we should go.  According to old information, we had hiked far enough to be well past Chimney Top. As it turns out, the reroute is just longer and follows a wide arc around the preserved cliff face.

Eventually, we reached a spot with numerous campsites.  That’s usually a good indicator that you’re near something desirable to hikers/campers.  In this case, spotting the campsites let us find yet another unmarked trail that led out to the spectacular view from Chimney Top.

We spent quite a while up there, enjoying the fall foliage and awesome views, eating our lunch and taking photos.  The hike back went very quickly… mostly downhill and along a route that felt a little more familiar.

Trail Notes

  • Distance – 6.0 miles
    (Check out the stats from Map My Hike)*
  • Elevation Change – 1725 ft.
  • Difficulty –  3.5.  The trail has some decent climbing on it.  Both times we’ve hiked it, there wasn’t any wind until the top, so the temperatures can be stifling. 
  • Trail Conditions – 1.5.  Trails are largely unmarked with reroutes not always clear.  Finding the actual viewpoint of Chimney Top can be a little challenging.  Watch out for loose rock on the ridgelines in case you go to check out any views.
  • Views – 5.  Absolutely stunning views and great ridgeline walking. 
  • Streams/Waterfalls – 1.  From way above, you’ll see North Fork Gap.  There isn’t a water source on this trail.
  • Wildlife – 1.  We barely saw squirrels, but you may have some views of preying birds.  Watch out for timber rattlesnakes on the rocky ridgeline.
  • Ease to Navigate – 2.5.   There is basically one trail to follow here, but it can be tricky finding Chimney Top.
  • Solitude – 4.5.  Typically, you’ll only see a few people on this trail.  Most will go to the first overlook and stop.

Download a Trail Map (PDF)

Directions to trailhead:  From Seneca Rocks, WV head northeast on WV-28N/WV-55E for 15.2 miles.  Take a right on to County Route 28/11/Smoke Hole Road.  You immediately cross a bridge where you may see people fishing in the stream.  In about .4 miles, there is a small parking lot on the right-hand side.  You’ll see the brown board which denotes the start of the trailhead.

MapMyHike is not necessarily accurate, as the GPS signal fades in and out – but it still provides some fun and interesting information.

Appalachian Trail – Dripping Rock to Rockfish Gap

This 14.5 mile section of the Appalachian Trail includes great views of Wintergreen Resort from Humpback Mountain.  The campsite for the evening is the Paul C. Wolfe Memorial Shelter, which is located on the bank of lovely, rushing Mill Creek.

View the Full Album of Photos From This Hike

Hiking Over Humpback Mountain
Adam traverses Humpback Mountain.  Below: We found trail magic right away on our hike; Adam climbing the southern side of Humpback Mountain; Rock walls along the trail.

Trail Magic Adam Hiking Rock Wall

Day One

For Christine’s birthday this year, we decided to do a quick overnight backpacking trip along the Appalachian Trail.  Following an all-day soaking rain and a cold front on Saturday, we had ideal weather for hiking and camping on Sunday into Monday – low humidity, clear skies, daytime highs in the 70s and a nighttime low near 45. It was perfect!

We started our morning with a big breakfast at Thunderbird Café and then made the 40 minute drive to the trailhead.  For this hike, we left one car parked in the small lot near where the Blue Ridge Parkway (BRP) crosses I-64 and Rt250.  From there, we drove our second vehicle to the Dripping Rock parking area at mile 9.6 on the BRP.  The name Dripping Rock refers to the small spring adjacent to the parking area.  Supposedly, it was a water source well-used by Monocan Indians en route to summer hunting grounds.

The AT crosses the parkway at this point, so it’s an easy place to hop on without using any access trails or spurs.  The hike starts out climbing gently uphill through the woods.  Almost immediately, we spotted a small cooler alongside the trail – trail magic!  We didn’t need (or take) any trail magic on our hike, but we were curious so we opened the cooler to see what was inside.  We found a log book, a camera, a small whiteboard, a bottle of ibuprofen and a nice supply of granola bars.  The camera and whiteboard were provided so that hikers could take photos with their trail names.

A couple tenths of a mile down the trail, we passed even more trail magic in the form of 2 liter-sized bottles of tap water from Wintergreen Resort.  Typically by September, streams and springs in the Shenandoah Valley are dry or running very low, so the free, clean water would be quite welcome.  The bottles were situated next to one of the trail’s spring-fed water sources.  We noticed the sign marking the spring indicated that water might be contaminated and should be filtered or boiled.  The sign included an outline drawing of a moose, and we both found it comical to think about the implausibility of Virginia water being contaminated by a moose.

Wintergreen View
Christine enjoys the outcropping overlooking Wintergreen.  Below: Hiking up Humpback Mountain; Adam checks out the view of Wintergreen; Pretty views.

Christine Hiking Wintergreen Views

The hike continued gradually uphill along the side of Humpback Mountain.  We saw several nice campsites along the trail.  Soon after that, the views started to open up.  We didn’t really have any expectations for great views on this hike.  We figured we might take the side trail to Humpback Rocks and eat lunch there.  We also knew from past hikes on Dobie Mountain that we’d be passing one decent overlook at Glass Hollow.  However, we were pleasantly surprised to find spectacular views along the rocky, spiny ridge of Humpback Mountain. These views are about 2.5 miles from the better known outcropping of Humpback Rocks, and we thought they were even nicer!  The crowds, graffiti and car noise always take away from the experience at Humpback Rocks. We had this lofty ridge all to ourselves.

We took some time to take off our heavy packs and enjoy the view.  We could see the Priest, Three Ridges and the slopes of Wintergreen Resort.  When we got home, we read more about this section of the trail and learned that the view is named Battery Cliff, because the condos on the slopes of Wintergreen look like fortifications from a distance.  The rocks on the cliffs are Catoctin greenstone formed in an ancient volcanic eruption.  When you sit on these rocks and look across to Wintergreen, you’re looking over to where the Appalachian Trail used to traverse the mountains.  Five miles of the trail used to cross the resort.  But in 1983, the resort sold the land to private developers – basically pulling the rug out from under the Appalachian Trail Conservancy.  Luckily, the organization was able to quickly pull funds together and preserve the land across Humpback Mountain – where the trail currently sits.

Leaving the open ridge, we dipped back into the woods and continued walking along a long, impressive stretch of stone ‘hog wall’.  People living in the area before the establishment of the parkway built these long walls to roughly mark property and attempt to contain livestock.  Eventually we arrived at a junction, one direction headed toward Humpback Rock and the other continued downhill along the Appalachian Trail.  We decided to skip the extra mileage it would take to visit the Rock and continue toward our destination.  We’ve seen the Rocks many times and didn’t really want to face the crowds that arrive with beautiful-weather Sundays.

Hog Wall
Adam walks along one of the many hog walls.

As we walked downhill, we started contemplating our lunch break.  We decided that the next spot with good ‘sitting rocks’ we’d stop for lunch.  As it turned out, the next rocks we found were just a few, big random flat boulders right alongside the trail. We had lunch of apples, peanut butter, cheese, and energy bars.  As we ate lunch, two groups of people passed us – a couple with their dog and a man who had just visited his daughter at JMU’s family weekend.  All in all, we only saw a total of eight people over the entire ten miles of hiking that day.  The solitude was nice!

After lunch, we continued the 5.5 mile descent toward our evening stop point.   The trail was in great shape and the downhill was easy going.  At the bottom of Humpback Mountain, the Appalachian Trail intersects with the Howardsville Turnpike – an old toll road that was heavily used to transport goods before the Civil War.  It’s long been reclaimed by the forest, but the wide, flatness of the trail still has the definite feel of a well-traveled road.  We continued along the Appalachian Trail until we spotted a small sign marking the Glass Hollow overlook. We followed the short access trail and spent a good twenty minutes relaxing on the beautiful rocky viewpoint.  The views this time were much clearer than they had been two years ago when we visited.

Glass Hollow
Taking in the view at Glass Hollow. Below: Trail lunch, AT logos carved on deadfall; Pretty trail with late season wildflowers.

Lunch AT Logo Pretty trail

After leaving the overlook, we continued along the Appalachian Trail, passing the junction with the Albright Loop Trail – a popular day hike in this area.  From this junction, you can follow the Albright Trail for two miles back to Humpback Rocks parking.  We continued northbound on the Appalachian Trail, descending Dobie Mountain.  The trail follows a series of gradual, well-graded switchbacks.  There is one nice view of the valley about halfway down the mountain.  Eventually, we started hearing the sounds of running water through the trees. After crossing Mill Creek, we arrived at our stop point for the evening – the Paul C. Wolfe shelter.  This shelter is one of the nicest we’ve seen. The location is beautiful, the picnic table is on the porch and the shelter has sidelights, so it’s bright and cheerful inside.  So many shelters are gloomy and dark.  We will caution you – the privy at Paul C. Wolfe shelter is kind of weird – the door is only a half-door.  When you sit on the toilet, you have a nice view – but people can also see you sitting there.

We were the first campers to arrive for the night, so we got a prime campsite near the banks of Mill Creek.  We had our own established fire pit and our own bear pole – fancy!  We immediately got started setting up camp and taking care of necessary chores.  Mill Creek was running beautifully, so we had a clear, cool water source to filter from.

Camp
Our nice campsite along Mill Creek. Below: Overlook on the descent of Dobie Mountain; Junction with the Albright Trail; Crossing Mill Creek

View from Dobie Albright Intersection Crossing Mill Creek

We decided to take our dinner up to the shelter so we could use the picnic table for meal prep.  Dinner consisted of pepper steak, wine and dark chocolate cheesecake.  As we were finishing up dinner, a southbound thru-hiker named Nightwalker arrived at camp.  He told us he had hiked almost 30 miles that day. He was from the Boston area and freshly out of high school.  We chatted with him a bit and marveled at him eating huge handfuls of candy corn mixed with Skittles.  He had the look of a true trail-weathered hiker – beard, tattered long-johns and feet held together by duct tape.

When the sun was going down, we headed back to our own camp.  Despite the heavy rains the night before, we were able to find enough old wood to have a small campfire for a while.  We heard another southbound hiker arrive sometime after sunset, but we never met him.  With the temperatures dropping with the darkness, we headed to bed around 9:00.  Both of us slept pretty well, but Christine woke up around 3:00 a.m., struggling to close both of the doors in the tent fly.  It was in the upper 30’s and she’s a cold sleeper.

Campfire
Our nice little campfire. Below: Adam filtering water; The Paul C. Wolfe Shelter; The steep climb that starts Day 2.

Filtering Water Shelter Climb Behind the Shelte

Day Two

We were up at first light, but noticed both the thru-hikers were still sleeping.  We didn’t want to disturb them, so we cooked our breakfast of oatmeal, cheese, coffee and hot chocolate near the fire pit at our campsite.  We were packed up and back on the trail within 45 minutes of waking up.

The morning’s hike consisted of a rather steep climb up Elk Mountain.  From the back of the shelter, the trail climbed almost straight up via a series of switchbacks.  We had about 1000 feet of climbing in just about a mile.  A8fter that, the remainder of the hike was more moderate or even gently downhill.

Mayo Cabin
The remnants of an old cabin sit right along the trail. Below: Approaching Rockfish Gap; We can see Rt. 250; Waynesboro’s great network of trail angels.

Done The Gap Trail Angels

The five miles of trail back to Rockfish Gap are largely unremarkable; just a nice walk through the woods.  There are a few small stream crossings, but no views along the way.  The one noteworthy feature would probably be the ruins of an old cabin, about 1.7 miles north of Paul C. Wolfe.  The chimney and hearth are still standing right alongside the trail.  Evidently, there is also a cemetery for the Lowe family and additional cabin ruins somewhere east of the trail, but we didn’t see it.  The trail exits onto Route 250 at Rockfish Gap through an opening in the guardrail.  Thru-hikers can find lists of trail angels at the guardrail opening.  Waynesboro has one of the best organized trail angel networks along the AT.  It’s easy to find a ride or shelter at this point on the trail.

We arrived back to our car around 10:30 in the morning.  By the time we shuttled back to our car parked at Dripping Rock, we were already thinking about lunch.  We realized how close we were to Devil’s Backbone Brewery and decided it was a perfect place to wrap up our backpacking weekend.  We had a huge lunch – beers, a big soft pretzel to share, and sandwiches (French Dip for Christine, BBQ for Adam). After lunch, we decided to take Rt. 151 back to Waynesboro.  This allowed us to also pass Bold Rock Cidery.  It’s definitely worth a stop if you enjoy hard cider.  Since it was a Monday, we were the only people there.  We got to go behind the scenes into the cider pressing room and the fermentation/bottling facility.  That was really neat!

Bold Rock
The tasting room at Bold Rock. Below: Enjoying a post-hike beer at Devil’s Backbone.

Devils Backbone

Trail Notes

  • Distance – 14.5 miles (9.5 miles on Day One, 5 miles on Day Two)
    (Check out the stats from Map My Hike – [Day One] [Day Two])*
  • Elevation Change – 1800 ft. on Day One, 1100 ft. on Day Two
  • Difficulty –  2.  This is an easy backpacking trip with moderate, well-graded climbing.
  • Trail Conditions – 4.5.  Trails are in excellent shape.
  • Views – 4.  Views from Humpback Mountain and Glass Hollow are beautiful!
  • Streams/Waterfalls – 3.  Mill Creek is pretty and a great water source.  There is a small waterfall and swimming hole downstream from the shelter.
  • Wildlife – 2.  We saw a few deer and heard owls at night.
  • Ease to Navigate – 4.   There are several intersections/junctions to pay attention to, but following the white blazes is pretty easy.
  • Solitude – 4.  Because we avoided Humpback Rock, we only saw a small handful of people on a beautiful Sunday.  

Download a Trail Map (PDF)

Directions to trailhead:  Follow the Blue Ridge Parkway to mile 9.6.  Park in the small Dripping Rock parking area.

MapMyHike is not necessarily accurate, as the GPS signal fades in and out – but it still provides some fun and interesting information.