Note – 10/11/10: In their October issue, Backpacker Magazine inaccurately listed Arethusa Falls as a Virginia destination. The falls are in New Hampshire.
This three mile hike leads to Arethusa Falls, which is (arguably) New Hampshire’s tallest single waterfall. The optional arm along Bemis Brook is challenging in spots, but offers more lovely stream scenery.
Arethusa Falls might not be the most photogenic of New Hampshire’s many waterfalls, but it is likely the tallest. Below: The optional side-loop trail along Bemis Brook takes you past Coliseum Falls.
Christine Says…
We originally planned on combining these two trails with Frankenstein Cliffs to make a loop, but unfortunately we ran short on time and just did the three mile out-and-back.
The trail along Bemis Brook was extremely tough walking! In addition to the roots, rocks and mud, we suffered a full-on mosquito assault. I spent a lot of the walk along the trail cursing and flailing my arms wildly. Even with DEET, the little buggers hovered right around my eyes, ears and nostrils, constantly buzzing in too close and getting caught in my eyelashes.
There were several very pretty small waterfalls along the Bemis trail. Coliseum Falls were especially picturesque. Since it was such a sunny day, I didn’t bother with a tripod. Long exposures weren’t a possibility in the harsh sun, so I just took snapshots along the way. The climb from Bemis Brook back up to the Arethusa Trail was practically vertical. We had to climb, hand-over-hand, grabbing roots and rocks to drag our way up the mountainside. There was one blown down tree that was particularly difficult to negotiate. It was one of those fallen trees that was a little too high to climb over, but a little too low to scramble under. I decided to clamber over it, and ended up getting my boot toe caught on the tree trunk. I took a spectacular fall down onto the roots and rocks. It absolutely left a big black and blue mark! I was really glad when we finally saw the junction with the Arethusa Trail!
This trailhead for this hike offers beautiful views of Frankenstein Cliffs looming overhead. The trail has an option to lengthen the hike by a few miles to gain access to the top of the cliffs. We ran out of time and had to pass on that option. Below: Trails in the area are clear and well-marked.
The rest of the way to the falls was much easier. It was uphill and muddy in spots, but the trail was well-graded and nice to walk along. The last stretch to Arethusa Falls led downhill into a chasm that opened to an amphitheater like setting. The falls were very impressive! The water falls like lace over the sheer rock face.
On the hike back, Adam and I waffled about whether or not to continue our hike up to Frankenstein Cliffs. We even started down the Cliffs Trail, before turning back in less than a tenth of a mile. We had plans to meet my parents in North Conway, and we just didn’t have time to finish the loop.
Arethusa Falls is a gorgeous 160 foot waterfall that is very popular with families. We started on the blue-blazed trail near the railroad tracks at the parking lot. After about .1 miles, you come to a junction with the yellow-blazed Bemis Brook Trail. We decided to do this side trail, since it goes partially along the water, guiding you to a few pools and smaller falls areas. Once you come up to the Coliseum Falls area, you will need to climb up almost vertically up the trail to join back with the Arethusa Falls trail. If you do want to do the Bemis Brook trail you should do this at the start of your trip rather than trying to descend it at the end. This part of the trip was tough and takes a lot of strength out of you in a short distance, so plan appropriately. Once we reached the junction at the top, we took a left to return to the Arethusa Falls trail. The trail continues to go uphill until you reach a junction with the Cliffs Trail. From this point, you continue downhill until you reach the falls in .2 miles. You return the way you came, but you will avoid the Bemis Brook Trail on the way back and just stay on the Arethusa Falls trail to reach your vehicle.
Arethusa Falls was named after the poem, “Arethusa” by Percy Bysshe Shelley. The falls were discovered by Edward Tuckerman, but named by Moses Sweetser and Professor Huntington in 1875.
The Bemis Brook Trail follows a beautiful stream for most of the way, until you get to the portion where it climbs, nearly vertically, back up to meet the Arethusa Trail. Below: The Arethusa Trail is much easier to walk – smooth and well-graded, compared to the Bemis Trail.
While I was off hunting for a geocache and Christine was taking some photos, she struck up a conversation with a man hiking solo on the trail. When I got back to them (after sliding down the hillside 20 feet on my butt), he wanted to take a look at my map. He was thinking about doing the Frankenstein Cliffs trail and then looping back to make it to his car. He was to meet up with his wife in less than two hours to take a ride up Mount Washington on the cog railroad. We told him that it might be hard to make it in time. He decided to go for it, but I don’t think there was any way he could have made it back in time for his trip up. We both pictured his wife riding solo up the railroad, muttering to herself, and awaiting the moment she could give her husband a piece of her mind.
We wish we had more time to do the Frankenstein Cliffs trail (these are named after an artist, not the doctor who created a monster), because we have heard that it does give you some nice views from the top. The trail is allegedly muddy and not as well maintained as the Arethusa Falls trail.
Trail Notes
Distance – 3 miles, out-and-back (2.8 if you leave the Bemis Brook Trail off and just stay on the Arethusa Trail the entire way)
Elevation Change – 650 ft to the falls. There might be a bit more climbing if you do Bemis Brook.
Difficulty – 3. The Arethusa Trail is squarely moderate. The Bemis Brook trail is more difficult with one killer climb uphill at the end.
Trail Conditions – 2.5 The Arethusa Trail is in nice condition most of the way. There are some muddy spots and we encountered a flew blow downs. The Bemis Trail is not easy walking. There are numerous fallen trees, tricky footing and if it’s the slightest bit damp, the trail is very slippery.
Views –0. You’ll be in the woods the entire time.
Waterfalls/streams – 4. The falls are large and impressive, but not terribly photogenic.
Wildlife – 0. The heavy human traffic probably scares any wildlife away.
Ease to Navigate – 5. Trails are marked and easy to follow.
Solitude– 2. Because the hiking is a little more challenging, you won’t see the same crowds as you do at Flume Gorge or Sabbaday Falls.
Directions to trailhead:
From I-93, follow New Hampshire Route 302 west through Crawford Notch State Park. A few miles past Sawyer Rock Picnic area you will see the Arethusa Falls parking area on the right.
More of a pleasant stroll than an actual hike, this gentle path leads to one of New Hampshire’s most beautiful waterfalls. The entire walk is only a mile (round-trip), so this waterfall is easily accessible by nearly anyone, regardless of age or fitness level.
Sabbaday Falls has two sections. The top is a large, beautiful cascade. The bottom section takes almost a right angle through a slot in the rock. Below: A view looking downstream through the slot
Adam Says…
Sabbaday Falls has to be one of the prettiest waterfalls I have visited. There is a reason it is on the current cover of the White Mountains Visitor Map & Guide – it is very photogenic.
The falls were once known as Church’s Falls, named after Frederic Church, who was a landscape painter. The area is now known as Sabbaday Falls. The name was allegedly coined by some road builders who stashed their tools near the falls, so they wouldn’t have to carry them home at the end of the building season and could return to them the next year. Before leaving on a Sunday morning they named the area for the “Sabbath Day” or shortened to “Sabbaday”. Later, the Shackford family had a house nearby after the Civil War. They housed guests visiting the White Mountains and ushered them to popular spots, such as these falls.
The pool at the bottom of Sabbaday Falls is lovely and green! Below: A wider view of the pool and lower half of the falls.
This is a fee area, so you will need to deposit $3 for a parking pass for the area. The waterfall has an overall drop of 35 feet, but the main plunge is 22 feet. The pathway up the stairs gives you very close looks along the entire waterfall. Similar to much of the interesting geology in the area, this gorge was formed by a glacier carving through the rock. You can see near the base of the falls, some clear lines of black basalt dikes mixed in with the granite. These are formed from the rapid cooling of molten rock.
For those hoping to bag some geocaches, there are a few in the area:
This is a very easy “hike” that is very family-friendly and takes you to a great place to get some photos. I highly recommend a trip next time you are in the White Mountains.
Christine Says…
This short one-mile walk can barely be considered a “hike” – it follows a smooth, well-graded path and several sets of wooden stairs to a view of spectacular Sabbaday Falls.
The wide, crushed stone trail runs parallel to crystal-clear Sabbaday Brook. At .3 miles, you’ll arrive at a clear, green pool bottomed by round stones. Water enters the pool through a narrow chute between two sheer rock walls. At the top of the chute lies the lower half of the falls. This section of the waterfall is the smaller of the two. Even though it’s smaller, it’s no less pretty. The rock formations are dramatic in this section. There is even a perfect, round “pothole” in the stone.
Lower Sabbaday and the Slot in the Rock. Below: The area includes several informational plaques about the area’s history.
The top of the falls is about tenth of a mile beyond and is reached via a couple walkways and sets of steps. The upper falls are quite a bit taller, and sit at almost a right angle to the lower falls. Without a doubt, this is one of the prettiest waterfalls I’ve seen in the area so far.
The trail has a railing and staircases to make viewing safe and easy from almost any angle. There are signs all up and down the trail indicating that swimming is prohibited in the falls. However, when we visited, there was a group of four unsupervised kids that kept getting into the pool at the very top of the waterfall. It was pretty dangerous. They generally acted like idiots and were the main reason we didn’t hang around the falls for very long.
Sabbaday Falls is very popular, and you should expect thick crowds.
Trail Notes
Distance – 1 mile, out-and-back
Elevation Change – 125 ft
Difficulty – 1. Very easy!
Trail Conditions – 5. Smooth and well-graded with well-planned stairs and railings.
Views –0. You’ll be in the shady woods the entire time.
Waterfalls/streams – 5. Simply gorgeous!
Wildlife – 0. The heavy human traffic probably scares any wildlife away.
Ease to Navigate – 5. Impossible to get lost.
Solitude– 0. Prepare for heavy crowds. People love Sabbaday Falls!
Directions to trailhead:
From Conway, NH follow the Kancamagus Highway for about 15 miles. The trail parking is well-marked.
The Basin and Kinsman Falls is a short 1.2 mile out-and-back walk to a lovely waterfall in Franconia Notch State Park. The trail follows Cascade Brook and passes many beautiful (and popular) water features. The falls are also called Tunnel Falls.
The Basin is a beautiful glacial pothole at the base of this hike. Below: Kinsman Falls is a pretty 20 foot waterfall that plunges into a wide pool at the bottom; Many of the streambeds look sculpted.
Adam Says…
We had visited the Basin last year, but it is always worth a quick stop off I-93. It takes only .1 mile to reach it from the parking lot. You will see signs to lead you directly to the Basin. The Basin was formed about 15,000 years ago as an ice sheet eroded the pathway. According to the plaque at the site there, Henry David Thoreau wrote “this pothole is perhaps the most remarkable curiosity of its kind in New England.” Samuel Eastman called this area, “One of the most beautiful haunts of Nature, a luxurious and delicious bath fit for the ablutions of a goddess.”
There are several paths to walk along in this area to explore streams and small waterfalls. If you go back the way you came, you will see a larger junction with a sign for Kinsman Falls being .5 miles away. The path up to Kinsman Falls was filled with roots and rocks, so you do need to continually watch where you are stepping. Shortly up the ascent, you will see several spots to your left along the way of the river. These are good places to soak in the sun or to wade in a small pool. Be careful about footing if you venture into the water, since the water does rush through these areas rapidly. Getting back on the trail, you have more of an ascent, but you will quickly come up to the sign pointing to Kinsman Falls. The falls were very impressive as they plunged into a serene pool at the base.
View of the Mountain from Cascade Brook. Below: Colorful fungus on the trail; Christine’s dad and Adam climb back up from the base of the falls.
I definitely recommend checking out these areas if you are taking a trip through the White Mountains. Most people just view the Basin and some of the swimming holes along the way and don’t venture any further, but it is worth the hike up to Kinsman Falls and most families can easily make the trip.
We planned to do lots of family hikes on this visit to New Hampshire, but about a week before the trip an MRI revealed that my dad had torn his meniscus. His doctor told him to be careful and to limit activity that could extend the tear. Sadly, this put most of his hiking plans on hold for the time being. He did decide that he felt up to joining us on the short hike past the Basin and up to Kinsman Falls.
Like Flume Gorge, this little hike packs in a lot of impressive scenery over a very short distance. Also, like the Flume, it is extremely popular and crowded.
The Basin is such a gorgeous spot. I love how the water curls through the rock formation. The rock walls of the Basin are smooth and sculpted – they almost look unnatural. The water is blue-green colored and crystal clear. It’s one of those spots you’ll never forget!
After the Basin, the beautiful water features keep on coming! There are so many small waterfalls and cascades along the trail, that you always hear the pleasant sound of rushing water. A sign marks the way to Kinsman Falls, but honestly, we could say “just follow the water uphill” and you’d find your way there.
The trail was rocky and root-y. Below: The base of the falls was a nice place to stop and contemplate nature; Cascade Brook rushes over the rocks.
The trail followed alongside Cascade Brook for a half mile. There were many little side-trails leading to scenic spots along the brook. Dozens of people reclined on the rocks while kids used the streambed like a natural waterslide. One mother remarked to us that her family had visited the spot two days in a row, and both her boys had worn through the backsides of two sets of swim trunks.
The trail is muddy, with a mix of gnarled roots and slick granite underfoot. It’s all uphill, but it’s never steep. It really is an ideal family hike.
A small sign announces Kinsman Falls. From the trail, you get a view of the falls from above. The twenty-foot waterfall crashes into a large, round pool in a chasm below. There is a rough footpath down to the base of the falls – take care if you climb down – it’s slippery with numerous rocks to scramble over.
There are lots of big rocks to sit on around the edge of the pool. It’s a nice place to relax and enjoy feeling the mist from the falls spray your face. We were really surprised to have the falls all to ourselves. Even though there were many people in the area, no one else was at the waterfall. Odd – but very welcome! On our return trip, we passed quite a few people hiking up, so I suppose we just had fortuitous timing.
Trail Notes
Distance – 1.2 miles out-and-back. Plus a couple additional tenths of a mile to get to and from your car.
Elevation Change –Around 300 feet
Difficulty – 2. The hike is all uphill over slick granite and gnarled roots, but it is short and never steep.
Trail Conditions – 2. The trail is extremely rocky, muddy and covered with gnarled tree roots.
Views –2. From the Cascade Brook streambed, you get a decent view of the mountains.
Waterfalls/streams –5. Nothing short of spectacular!
Wildlife – 0. A few squirrels and chipmunks.
Ease to Navigate – 4. After walking uphill from the Basin, look for the sign to Kinsman Falls and follow the blue blazes uphill.
Solitude – 0. This area is extremely popular. We saw dozen of people along the way, but surprisingly had Kinsman Falls all to ourselves.
Directions to trailhead:
From I-93N. Once you enter the Franconia Notch area, take the Basin exit. The area is well-marked and has ample parking.
Located in Franconia Notch State Park, this two-mile path around the Flume Gorge showcases a lot of beautiful scenery on a short and easy walk. If you crave solitude, this is not the place for you. But if you don’t mind crowds and want to see some unique scenery, don’t miss a visit to this area.
The Flume is a beautiful and unique place. Below: Avalanche Falls is located inside the Flume; Liberty Gorge Cascade is also impressive; The trail is lined with large boulders called glacial erratics; The Sentinel Pine Covered Bridge is for pedestrians only.
Christine Says…
Last year, when we visited New Hampshire for the first time, we went to Flume Gorge with my parents. It was insanely crowded, unusually hot and glaringly sunny on that visit, so we decided to make a return visit on this trip – hoping that the clouds and cooler weather would keep the crowds at bay. There were definitely fewer people this time, but that’s not to say we had solitude. Flume Gorge is an extremely popular area. There will always be hordes of people, no matter the time of day, week or year you visit.
It’s no surprise the area draws such large crowds – it packs an amazing amount of unique scenery into an easy, two-mile loop. For anyone who doesn’t want to walk the two miles, there is a bus that will take visitors to a drop-off point at the Boulder Cabin. This option substantially shortens the distance and climbing necessary to see the gorge. However, bus riders miss seeing a lot of the other impressive scenery along the loop.
The two-mile loop starts off along a shady, wooded path that climbs down to the Pemigawasset River. In .25 miles, there is a bright, red covered bridge across the water – the bus goes through the bridge, but pedestrians cross a walkway attached to the side of the bridge. After a short uphill, both the bus riders and the walkers arrive at the Boulder Cabin. The building is full of exhibits – both historical and natural.
The first covered bridge in Flume Gorge is brilliant red. Below: Table Rock; The path through the woods is peaceful and shady; Bear Cave is located near the top of the Flume; The side view of Avalanche Falls.
After passing the cabin, the path follows alongside an area called Table Rock. The water in the river passes thinly over a wide, smooth expanse of granite. A sign announces the beginning of the Flume. The Flume is a fascinating geological area – a narrow slot canyon carved out from thousands of years of river flow over the rock. Wooden walkways are attached to the sheer canyon walls and allow people to climb through the gorge using a series of ramps and steps. Near the top of the Flume, visitors are treated to views of the crashing water of Avalanche Falls. The falls take several directional turns through the Flume – each angle makes it look like a completely different waterfall. After passing the waterfall, be sure to take a quick peek inside Bear Cave.
At the top of the Flume, the trail has two options – one returns people to Boulder Cabin and the bus stop, the other follows a trail for a little over a mile back to the main entry. If you’re able, it’s definitely worth following the longer route to see Liberty Gorge Cascade, the Pool, The Sentinel Pine Covered Bridge, the Wolf’s Den and several impressive erratics along the trail.
My favorite view along the trail came at the spot overlooking the Sentinel Bridge. Below: The river under the bridge is very scenic; The Pool is a wide, still spot on the river.
One of my favorite views along the trail was looking back at the Pool and the Sentinel Covered Bridge from a little spur trail to an overlook. From this point, the walk back is steeply uphill for a short while. Once you gain the ridge, the path levels off and you get a nice view of Liberty Mountain. A short while later, you arrive back at the visitor’s center – where you can treat yourself to an ice cream cone.
Even though Flume Gorge is crowded and rather expensive to visit, it’s still very worthwhile. Not many short two-mile loops pack in quite so much scenery into a pleasant, easy-to-walk package.
Adams Says…
After dropping off our thru-hiker friends, The Traveling Circus, we headed off to hike around Flume Gorge. We did this trip last year with Christine’s parents, but thought it was worth a second trip.
This is a very popular attraction and is definitely one of the highlights of the Franconia Notch State Park. Similar to many areas of New Hampshire, it requires a fee (in 2010, it was $13 for adults). The visitor center has a theatre that shows an informational film throughout the day and a few exhibits around the entrance. The snack bar is also fully equipped to provide enough refreshment and food for a lunch or snack.
The entire Flume Gorge area is loaded with small waterfalls and cascades. Below: Tree roots grow over rocks; The crowds at Flume Gorge are always thick; Ramps and stairs allow people to climb easily through the gorge; We saw lots of chipmunks and red squirrels.
This hike packs a lot of features into one short hike. The covered bridge was built in 1886. While you can’t walk inside since it is for bus traffic, it does provide a nice photo opportunity. Table Rock is a large rock outcropping where Flume Brook slowly glides over the water. The rock is 500 feet long and 75 feet wide. The Flume Gorge is quite impressive. You walk along a boardwalk that clings to one side of the gorge. The Conway granite walls rise on either side 70-90 feet as you see the brook rush out of Avalanche Falls and down the brook. We were impressed to see all of the small trees and moss that grows amazingly out of the cliff walls. The Flume was discovered in 1808 by a 93 year-old woman while she was fishing. Signs describe a large boulder that was suspended between the walls of the gorge but a storm in 1883 swept it away and no signs of the boulder have been spotted since. Avalanche Falls is an impressive 45-foot waterfall that you can see from several angles while along the boardwalk.
After walking another .5 miles from Avalanche Falls, Liberty Gorge is your next stop. There is a nice overlook to see the water flow through this gorge. After a few tenths of a mile past Liberty Gorge, you will come across the Pool overlook and another covered bridge. Shortly after the covered bridge, you have an option to join go through the one-way Wolf’s Den, but it does require crawling on your hands and knees to make it through the cave. We continued pass the Wolf’s Den, to catch the additional overlook of the Pool. We thought this was a better view of the covered bridge and the Pool. Continue from here to arrive at the Glacial Boulder garden to view some nice erratics.
While there aren’t any geocaches inside the gorge, there are a few outside the area:
Difficulty – 1.5. There are some steps and hills, but most people should be able to do this without too much effort.
Trail Conditions – 4.5 The trail is covered in small crushed gravel, allowing for easy footing.
Views – 1. You do get one view of Liberty Mountain, but otherwise you won’t see many far-off views.
Waterfalls/streams – 5. Great views of Avalanche Falls and much of the trip is in sight of water.
Wildlife – 1. We saw a few red squirrels and chipmunks, but this is so popular with tourists, you won’t see a lot of wildlife.
Ease to Navigate – 5. The area is secluded from other areas, so you can’t get lost. You just have options to cut distance off of the trail.
Solitude – 0. You will always find lots of people here.
Directions to trailhead:
From I-93, once you enter the Franconia Notch area, take the Flume Gorge exit. The area is well-marked. Park at the Visitor’s Center. The trail starts from the Visitor’s Center. Purchase tickets and proceed.
The Knob Mountain – Jeremy’s Run Loop takes hikers along a 12.4 mile route through one of Shenandoah’s most popular backcountry camping areas. This hike could be done as a long dayhike, but the campsites in the area are too inviting to pass up.
The Knob Mountain – Jeremy’s Run Loop offers beautiful stream scenery. Below: Mountain vistas can be seen along the descent on the Knob Mountain Trail; Blue Blazes mark the way across streams on the Jeremy’s Run Trail; Adam negotiates one of the many stream crossings.
Adam Says…
Since the weather looked like it was going to be a cooler, we decided to take off and go on an overnight backpacking trip. Our first overnight trip was the Hazel Mountain-Catlett Mountain trail which we did with a group from the PATC. This trip was our first non-group outing, so we felt it would be a good chance to put into practice what we learned from our Backpacking 101 course.
To do this trail as a loop, leave from the Elkwallow picnic grounds. You will see the entrance to the trail next to the pit toilet, which provides a last chance to “take care of business” before embarking on the hike. You will begin the trail on a short spur trail to the white-blazed Appalachian Trail. Turn left on the AT. In .2 miles, you will reach the junction with the blue-blazed Jeremy’s Run Trail. Continue straight on the Jeremy’s Run Trail. Around 1.2 miles, you will reach the junction with the Knob Mountain Connector Trail. Take a right at the post to join this trail. As soon as you cross Jeremy’s Run with a little rock-hopping, you will begin this steep connector trail. There are lots of switchbacks and this is definitely the steepest part of the entire trip. Around 1.7 miles, you will reach a junction with the yellow-blazed Knob Mountain Trail. Take a left at the trail junction and continue to follow this slowly ascending ridge trail. We would probably name this portion of the loop the Bear Scat Boulevard, because there was a ton of bear evidence in the area. You will see a few views through the trees, but nothing remarkable from the trail. At mile 3.9 you will reach the summit of Knob Mountain, marked by a concrete post. After the summit, you will begin your steep descent down the mountain. This is broken up by several switchbacks. The trail does open up at times to give you views of mountains along the way, including Strickler Knob and the Three Sisters. At 6.8 miles, you will cross Jeremy’s Run and reach the junction with the blue-blazed Jeremy’s Run Trail. Since we were fairly exhausted from our trip, we picked a campsite near the junction of the trail, which gave us great access to water. From the junction, you just continue on the Jeremy’s Run Trail until you reach the parking lot, crossing over Jeremy’s Run fourteen times. In some areas, it was necessary to rock hop across, but most of the time the traversing was quite easy. I imagine during heavy rain seasons, this would be more of a challenge.
The overnight trip started with a brief stop to fill out paperwork for our backcountry permit. Below: Adam makes his way down the Jeremy’s Run Trail; Snacks on the Knob Mountain summit; A view through the trees from the Knob Mountain Trail.
Jeremy’s Run truly provided a great opportunity for camping in the backcountry. We saw several previously-used campsite areas, so we decided to use our Leave No Trace principles and use an existing campsite rather than creating our own. The campsite was short walking distance to a reliable water source. After starting our trip around 9:30AM, we arrived at camp around 1:00PM. We were very hungry, so Christine worked on getting some lunch together and I began working on getting our tent set. The ground was very hard and rocky, so it took an effort to find a good place to get stakes into the ground. After lunch, we finished getting our sleeping pads/bags ready, hung our bear-bag rope, and prepared our kitchen area. We got some water to use for the trip at the nearby stream and I dug a few preemptive catholes. With every thing set, we decided to relax a little in our tents to stretch out our backs. I like to bring a book along the trip so we took turns reading aloud a few chapters from A Walk for Sunshine by Jeff Alt, an entertaining read about hiking the Appalachian Trail. We took a short nap and then played a few hands of the Monopoly card game we also brought. We then broke in our new JetBoil and prepared a great dinner. After cleaning up dishes, we went down to a place along Jeremy’s Run and stretched out on a large rock. We watched several brook trout jump out of the water, catching mosquitoes that were lightly dancing on top of the water. We retired to our tents to the sweet chorus of whippoorwills and the “who cooks for you” hoots of nearby barred owls.
On the hike down from the summit of Knob Mountain, hikers get a few decent views of adjacent Neighbor Mountain. Below: A scenic spot on Jeremy’s Run; Our campsite.
There were so many things I enjoyed about our trip. We saw tons of wildlife – three black bears, a wild turkey, scarlet tanagers in glorious color, and heard lots of birds at night. The temperature was perfect and the bugs were not out as much as we expected. The trip also helped affirm our ability to handle a backpacking trip by ourselves. I think we really learned a lot of great skills in the last few months to help us feel well-prepared. I was a little more apprehensive wondering if we could handle the 12+ mile hike with 35 pounds on my back, since our previous trip was about 8 miles total with a little less weight each. The hike was more strenuous the first day, but we were able to complete the hike without much trouble. I think we’re both looking forward to going on another backpacking trip, but we are now getting into the hot summer months. Hopefully, we’ll be able to find a cooler weekend in the near future.
Christine Says…
When Mother Nature gives you the gift of a sunny, dry, 70-degree day in the midst of a long string of 90+ degree scorchers, you must take advantage of that gift! We chose to make the most of the pleasant weather and go on an overnight backpacking trip. One of the leaders on our last trip recommended Jeremy’s Run as one of his favorite places in the park. As dayhikers (until recently), the Jeremy’s Run hike had always been a little out of reach. At 12.4 miles with well over 2,500 feet of elevation gain, it was always more than we were willing to tackle on a day hike. It seemed like a perfect candidate for this little weekend getaway.
After filling out all the requisite paperwork, we set out from the Elkwallow Picnic Area along the Appalachian Trail. Right away, I was struck by how much heavier my pack was compared to our last trip. On that trip, we had seven people to split the weight of group gear. But this time, we had to carry our own stove, fuel, collapsible bucket, water filter, food and rope. I also chose to carry my old dSLR camera, a couple card games, extra batteries, a fleece and my iPod. In the end, my pack weighed in about nine pound heavier than our last outing.
I brought my iPod along this time for a couple reasons 1) I wanted to be able to listen to my “workout mix” when climbing a couple of the big hills on the route and 2) my iPod is loaded with audio books, which I thought would be pleasant to listen to after sunset in the tent. The first big hill we hit was on the Knob Mountain Cut-Off Trail. It was really steep, so I put in my earbuds and started chugging up the hill. Listening to mindless pop music with a beat – anything from Tupac to Lady Gaga to Gnarls Barkley – makes climbing hills so much less painful. I had worked up a pretty good rhythm, listening to the early 90’s party song, “Rump Shaker”, when I rounded a curve a spotted two black bears about 50 yards up the hill. I’m not sure if they were a mom and a yearling or two adults. We looked at them, they looked at us, then they quickly decided to leave the area. I didn’t have time to free myself from my trekking poles and iPod cord to get a photo, but it was still a great treat to see the bears. Backpacking seems to involve an inordinate number of straps and buckles. Sometimes, it makes me feel like a horse pulling a cart.
After camp was set up, Christine spent some time relaxing on the rocks in Jeremy’s Run. Below: Adam collects water in a collapsible bucket to use for cooking later; Crocs and Socks – they might not be high fashion, but they’re functional; Playing Monopoly at camp.
After the cut-off trail met the Knob Mountain Trail, the tough climbing was over for the day. I listened to my iPod a bit more, but eventually put it away in favor of listening to the birds and the breeze in the trees. We took a snack break on the top of Knob Mountain. There weren’t any views at the summit – just shade and a ton of poison ivy. It felt really good to throw the pack off for a while and have a good stretch. I could really feel the heavier pack weight bruising my hip bones.
The downhill walk lasted a little over 3 miles. We soon arrived at the stream, where the Knob Mountain Trail converges with both the Neighbor Mountain and Jeremy’s Run Trails. We crossed the stream a couple times and decided it was high time to find a campsite. We were both completely knackered after walking about 7 miles with our packs. I honestly don’t know how thru-hikers cover 20-30 miles a day with even heavier packs. I’m convinced I wouldn’t last a week!
We found a beautiful place for camp under the shade of pines and hardwoods. It was clearly a place others have camped before. Stones were arranged like seats in a semi-circle in one of the clearings. It was also about 30 yards from a gorgeous spot along Jeremy’s Run – so we had great access to water.
We designated separate sleeping and kitchen areas right away. Adam pitched the tent while I fixed lunch. I made Buffalo Chicken Wraps – which were delicious. We found a place for our bear hang and dug a couple catholes for future use. With camp all set up, we settled into our tent for a nap.
Post-nap, we collected water for cooking in our collapsible bucket. On our water run, we also took some time to stretch out and lounge on one of enormous boulders in the middle of the stream. The sky above was so blue and it was very soothing to watch the trees swaying above in the breeze. I actually tried out my Crocs again, and found them more comfortable, albeit considerably dorkier, with socks. I may keep them as my camp shoes after all.
We filtered water for our dessert and boiled water for our entree. Below: We had Pad Thai for dinner; Dark Chocolate Cheesecake for dessert.
Around 5:30, we started getting things together for dinner. Because this trip was rather impromptu, we brought pre-packaged dehydrated meals instead of taking the time to make homemade food. But it was still delicious. The Backpacker’s Pantry Pad Thai was filling and tasty. It had a yummy, spicy peanut sauce with noodles and vegetables. For dessert, we ended up having Dark Chocolate Cheesecake (instead of Tiramisu, as originally planned). It was really tasty, too! I was stuffed from dinner, so we decided to take a short walk down to a deep pool I had seen along the trail a way back. We sat on a rock and just enjoyed the quiet of the evening.
It got dark quickly down in the hollow, so we retired to our tent a little before nine. I listened to a book on my iPod and Adam read. I started to doze off well before 10:00. All through the night, I could hear a couple barred owls hooting, over and over and over again. Pretty soon, a whippoorwill joined in and sang through almost the entire night. I haven’t heard a whippoorwill since I was a child, so it delighted me to hear the song in the night again. I slept pretty soundly, until the roar of a train whistle woke me up around 2:00 in the morning. I could hear the wheels on the track so clearly; it seemed like the train was rolling through camp. I guess some distant sounds really carry on the quiet night air. When I awoke, I found I was drenched with sweat in my sleeping bag. It was in the mid-50’s outside, so the down bag was a bit too warm. However, if I slept outside my bag, I got cold quickly. I want to get a blanket and sheet for my sleeping pad to make summer camping more comfortable. Despite being hot or cold, I eventually fell back to sleep and stayed so until 6:30 a.m.
I got up before Adam and got the bear bag down, so I could start breakfast. We ended up leaving the bacon home because we didn’t want to carry a pan. Instead we had oatmeal, boxes of apple juice and hot chocolate. It was a satisfying breakfast on the cool morning.
We saw three bears, including one on the Appalachian Trail. Below: Another scenic pool on Jeremy’s Run; We encountered this loose dog on the trail (one of many). He apparently lives on the border of the park and runs the trail often.; Rocks in the stream bed were covered with moss.
We broke camp down quickly and were back on the trail around 8:00. The second day of hiking was substantially shorter and easier than the first day. With about 5.5 miles to cover, we knew we’d be back at the car by mid-morning.
The trail climbs ever so gradually along Jeremy’s Run. We passed lots of fantastic campsites along the stream. It’s no wonder this area is so popular with backpackers! We crossed the stream 14 times over the course of the morning. Because of all the dry weather we’ve had lately, none of the crossings were challenging at all. Most of them were bone dry, and the ones with water were still easily rock-hopped.
We took a snack break where the Jeremy’s Run trail crosses the Knob Mountain Cut-Off. From this point, the trail follows the same route as we’d used hiking out the day before. The grade becomes steeper for the last mile and eventually meets back up with the Appalachian Trail. For this section, I put my iPod back on again to help endure the uphill. “Rump Shaker” came up in the shuffle again, and after the first few moments, I spotted another bear. There must be something about that song that conjures bears! I did manage to get a few distant photos of this bear before he disappeared deeper into the woods.
About ten minutes later, we were back at our car and on our way. We stopped by the Elkwallow wayside, where I rinsed my face and used a flushing toilet! Plumbing is so exciting after being without it. On our way home, we stopped at McDonald’s for lunch. Coke and salty French fries taste absolutely amazing after a long hike. As luck would have it, their credit card machine was broken and they gave us our lunch for free! It was a fitting bonus for a perfect trip.
Trail Notes
Distance – 12.4 miles
Elevation Change – 2600 ft
Difficulty – 3. If you were going to do this in one day without stopping, I would up the difficulty slightly due to the length.
Trail Conditions – 3.5. The trail was very well-maintained. We saw evidence that the Knob Mountain trail had been cut back, but I can imagine in late spring, much of the trail could have some overgrown areas. The ground was well-traveled and there were only a few rocky spots around the streams.
Views – 1.5. The best chance of views are on the descent from the Knob Mountain summit down to Jeremy’s Run. After leaves fall, this may be slightly better.
Waterfalls/streams –3.5. You do get lots of chances to cross Jeremy’s Run. There was only a small fall near the base. If you want to photograph streams, you should have plenty of opportunities. You’ll also have a reliable water source.
Wildlife – 4. We saw black bears, a turkey, and scarlet tanagers; we heard whippoorwills and barred owls at night.
Ease to Navigate – 4. The trails are well-marked and just stick to the signs on the cement posts.
Solitude –3. This is a popular spot for backpacking and trail running. However, we felt that we were able to find our own peace in the woods. We also came across a dog that belongs to a nearby family that evidently roams the trails frequently, so we had a companion during part of the hike up from Jeremy’s Run.
Directions to trailhead:
Located in the northern section of Shenandoah National Park. Park at the Elkwallow Gap picnic grounds around mile 24.3 of Skyline Drive. The Jeremy’s Run trail begins next to the pit toilet at the parking lot.
This 9.8 mile circuit hike offers all the best of Shenandoah – panoramic views, bubbling streams, a swimming hole and even a nice final stretch along the Appalachian Trail. It comes close to our 10 mile limit for a day hike, but it’s definitely well worth the effort.
The view from Chimney Rock is very pretty on a clear day.
Christine Says…
The Riprap trail has long been on my list of hikes to tackle in Shenandoah National Park. Last Friday, we finally got around to it. I have to admit, the nearly ten-mile length and over 2,300 feet of elevation gain intimidated me just a little. The hikes we’ve completed that are close to that length (i.e. McAfee Knob or Mount Rogers) both have substantially less elevation gain. But, we had a free day and beautiful weather, so we decided to go for it. I’m so glad we went because the scenery on this trail showcased everything I love about Shenandoah. And, honestly… hiking 9.8 miles really wasn’t that hard.
We started the hike from the Riprap parking area at mile marker 90. We turned right at the end of the parking lot and followed the Appalachian Trail uphill for about a third of a mile. At the intersection with the Riprap trail, we turned left. The trail went alternately downhill and uphill for about three-quarters of a mile. We passed around a talus slope and came out to a viewpoint near Calvary Rocks. This was a great place to pause and take in the panoramic scene of the valley below. About a third of a mile downhill past Calvary Rocks, we arrived at Chimney Rock. I found this to be the prettier of the two views – but they were both very nice. The trail was especially pretty in late May because of all the blooming mountain laurel, wild azaleas and rhododendron. There were some sections that were so lush, I felt like I was walking through a tunnel of flowers.
Wild Azaleas, Rhododendron and Mountain Laurel. Below: The view near Calvary Rocks; Adam taking in the view from Chimney Rock.
From Chimney Rock, the trail follows a ridge for a while, with many nice views between the trees. There is still quite a bit of evidence of forest fire damage from the late 1990’s in this area. The mountainside is still rather barren and charred stumps are visible. Slowly, the trail descends into Cold Springs Hollow. We passed through some of the densest mountain laurel along this section. We saw and heard so many beautiful birds – everything from American Redstarts to Rose-Breasted Grosbeaks.
Near the bottom of the hollow, we started to pick up the stream. It started off as a trickle, gaining volume and speed as we climbed continually downward. There were a few small, unremarkable waterfalls in the gorge, but we didn’t stop walking until the first stream crossing. Adam and I sat on a couple big boulders in the middle of the stream and ate a few handfuls of trail mix.
The swimming hole displayed beautiful rhododendron reflections and was full of brook trout. Below: The trout were hard to photograph through the water, but you get the point.
We stopped again just a couple tenths of a mile later at my very favorite spot along the trail – a wide, green swimming hole shaded by the forest canopy. We sat along the pool for a long while. We watched colorful brook trout lolling in the water. Every now and then, one would splash up and break the quiet surface of the water. The water was so clear. We could see reflections of the rhododendron on the surface and big, round stones at the bottom of the pool. The spot is made even more beautiful by the gentle slide waterfall that cascades down and fills the pool.
After leaving the pool, we had almost about three-quarters of a mile of level walking and a couple more stream crossings. A post marks the intersection with the Wildcat Ridge Trail. We turned left, and enjoyed our last little bit of flat walking for a while. We decided to stop and eat lunch before the big uphill climb began. We had ham and cheese on crackers, chips and some candy – perfect to give us lots of energy!
Climbing along Wildcat Ridge is a steady uphill for almost three miles, but the grade is generally moderate. There were several more decent views through the trees along this section of trail. And of course, more mountain laurel! I think I must have said “This is SO PRETTY!” to Adam a dozen times as we walked through the flowers. This section is where we saw our only other hikers of the day – a young couple hiking the loop in the opposite direction. We got to the junction with the Appalachian Trail faster than we thought we would. We were anticipating another .7 miles of uphill climbing when we reached the marker post. It’s always such a pleasant surprise when an uphill climb ends earlier than you thought it would.
Adam and I both enjoyed the more level terrain along the Appalachian Trail.
We took a left onto the AT for the final 2.8 miles of the hike. This section was typical Appalachian Trail in Shenandoah – rolling hills, nothing too steep. We saw a brief glimpse of a bear diving into the mountain laurel about a mile into this stretch. After about an hour of walking on the AT, we arrived back at our car. My feet were a little sore and tired, but other than that I still felt pretty energetic. Riprap now claims the spot for the longest hike I’ve ever done in a day! The 9.8 mile circuit took us just under six hours – including our very frequent snack and photography stops. On the way home, we stopped and rewarded ourselves with Lime Cream Slushes from Sonic – my favorite post-hike treat.
Adam Says…
This may also be the longest hike I have done but it was well worth it! This hike really does have it all and we hit it at a great time of year. The mountain laurel and rhododendron were at peak on this trail and we often felt like we were in some type of fantasy land while being surrounded by pink flowers.
The views from Calvary Rocks and Chimney Rock give you some great 180 degree views to the north of the mountains. I was a little worried that the payoff for this hike was going to be over in the first couple of miles of the hike, but I was glad to be wrong. After we continued the descent from Chimney Rock, there were still some open views along the way. Once we reached the bottom of Cold Springs Hollow, we saw a glimpse of a waterfall along the way. Shortly after the falls and after crossing the stream you come to the beautiful swimming hole that Christine mentioned above. This was a great spot to relax and enjoy seeing the fish, or you could take a quick, refreshing dip.
View Along the Riprap Ridge. Below: The swimming hole is such a beautiful place – even though we constantly had to bat the bugs away. Note the slide falls coming down to the pool.
Once we were done with relaxing, we took the hike up the Wildcat Ridge Trail. This is a constant uphill for about three miles and does include a couple of switchbacks on the trail. However, we felt that the terrain wasn’t too steep. You continue to observe nice views as it hugs closely to the side of the mountain. Once we met up with the AT, the trail didn’t have a lot of elevation gain/loss. I do suffer from plantar fasciitis, so my feet were quite sore on the rocks of this section of the trail.
Butterfly on Mountain Laurel. Below: Adam hikes through the mountain laurel along the Appalachian Trail.
For those interested in geocaching, I did place an earthcache at the overlook for Calvary Rocks. This is a way to learn about the geology of the area and there are a few steps to get credit for the cache:
I definitely enjoyed my first trip of the Riprap trail, but I know it won’t be my last. This would also be a great place to do a backpacking trip, since there is a reliable water source at the bottom of the trail. We really felt like it was one of the prettiest trails we have done in all of Shenandoah National Park. Part of that largely is due to the abundance of blooming wildflowers, but another part was the views. The Riprap trail really has it all!
Trail Notes
Distance – 9.8 miles
Elevation Change – Around 2300 feet. The hike is a mix of uphill and downhill, with one long, steady uphill stretch of about three miles.
Difficulty – 4.5 While the elevation gain is substantial, the trail is rarely steep. Grades are moderate. We scored the hike a 4.5 mainly due to the length.
Trail Conditions – 4 Nice trail to walk along! The stream crossings are easy.
Views – 4. You get the best views from the Chimney Rocks and Calvary Rocks overlooks.
Waterfalls/streams –3 The stream was on the low side when we hiked, but was still pretty. The swimming hole at the bottom of the hollow is very beautiful.
Wildlife – 4 We saw lots of brook trout, a little toad, many bird species and we even caught a glimpse of a black bear’s rear end diving into the laurel thicket.
Ease to Navigate – 2 A few turns to make along the way. There are a few false trails leading away from the main trail and also one tricky turn after a creek crossing.
Solitude – 3 We saw only two other people on the entire loop. We hiked it on a beautiful Friday in late spring. I imagine the trail is much more crowded on weekends. It’s a very popular short backpack loop.
Directions to trailhead: From Skyline Drive, park on the western side at mile marker 90. There is a parking lot specifically for Riprap hikers.
This 4.6 mile hike leads you along the South River to an impressive waterfall that plunges deep into a canyon. When the park has experienced lots of rain, this waterfall hike is one of the nicest Shenandoah has to offer.
The South River is impressive in times of heavy rain.
Adam Says…
We have kept with a tradition the last few years of doing a hike on Thanksgiving morning. It’s a great way to appreciate nature and try to do something active before a big meal. This year, we decided to break the tradition of having a huge Thanksgiving meal with turkey and all the trimmings. We decided to have an easier meal that we would both enjoy – homemade pizza.
We’ve hiked South River Falls before, but we’ve never had as much water in the falls before. We thought it would be impressive, since we could hear rushing water through the South River a lot earlier than normal. Waterfall hikes in Shenandoah National Park tend to be fairly tough ones. Since you park on Skyline Drive at a high elevation, you have to hike down to the valleys where the falls are created. What makes it difficult, at least psychologically, is that you get to the payoff fairly easily and then have to do the hard work on your way back to your vehicle.
The beauty of the South River is found mostly in its small details. The cascades and little falls leading the large waterfall are prettier than the main waterfall. Pictured below: South River Falls from the overlook at the top of the canyon; the falls from the base. You’ll see neither vantage point of the waterfall is terribly photogenic (especially after the leaves have come down). Both of the small photos below are from another date. This time, the falls were much bigger – but it was too sunny to photograph them.
The hike begins at the South River Picnic Area. Look for the large sign about the hike on the northeastern side of the picnic area. At slightly over .1 mile, you will cross the Appalachian Trail. You will continue your descent and around 1 mile, you will rock-hop across a small creek that drains into the South River. Usually this is not much of a challenge due to the water, but we found the water was higher than normal this time. At 1.3 miles, you will come to a nice overlook for the South River Falls. You really get a great view of the 83 foot waterfall. It plunges to a rocky ledge and splits in two about half of the length of the waterfall. If you continue on the trail for another .2 miles, you will arrive at a cement post and join a spur to the South River Fire Road. If you continue on for another .2 miles, you will descend even further and arrive at another cement post. Following the path from the cement post for another .1 mile, you will arrive at the base of the falls. For any adventurous shutterbugs, there are ample opportunities near the base of the falls for long-exposure photography. Make sure you have your strength up, because you have 2.2 miles to hike at a steady incline back to your vehicle.
To follow the trail as a loop as we did, once you make your return from the base of the falls, go .7 miles until you reach the cement post and the junction with the South River Falls Trail. Stay on the fire road instead and after .4 miles more, you will reach the yellow-blazed South River Fire Road. Take a left on the road. In about a mile, you will reach the junction with the Appalachian Trail. Take a left on the white-blazed AT, heading south for about .4 miles. You will then reach the junction with the South River Falls Trail and only have about .1 mile to reach the picnic ground.
The hike was a tough one, but it was nice to get some exercise. The thought of carving into our pizza helped us muster the energy to make it back.
Christine Says…
This was a great trail to burn off Thanksgiving calories! The terrain is rugged and the return arm of the loop is nothing but steady, tough uphill climbing. Even Wookie, who is normally a bundle of boundless energy, got quite tired on this hike. By the time we got to the Appalachian Trail junction, his corkscrew tail was completely unfurled. Even though there are some hikes in the park with more elevation gain, I think the 1300+ feet on the South River trail provides some of the park’s tougher climbing. Anyone looking for an easier version of this hike should consider doing the short loop (3.2 miles) that returns after the overlook at the top of the falls. By taking that route, you reduce the elevation gain to a very manageable 850 feet.
Despite the hard work required to get there, I really enjoyed seeing the South River and its namesake falls so flush with water. The Shenandoah area has had over five inches of rain in the month of November – more than double the normal amount. All of the park’s streams, rivers and waterfalls are flowing beautifully right now. It’s a great time to get out and enjoy the scenery and the less-crowded conditions in the park.
There are many small, but beautiful, waterfalls along the trail. Pictured below: Another pretty spot along the river.
I had hoped to get some photo opportunities along the river on our Thanksgiving hike. I did take a few shots, but the weather was less than cooperative. It was too sunny to take shots of the moving water. Every now and then, I found a shady spot down in a deep ravine. I did a bit of bushwhacking to get to a few pretty spots, but overall I don’t feel like I came home with any special photos.
Honestly, while South River falls is probably the park’s most impressive waterfall, it is not one that translates nicely on film. The falls plunge into an enormous natural amphitheater. The sheer rock walls are amazing, but they aren’t photogenic. I’ve seen a few nice shots of South River Falls in the spring, when the water is flowing and the falls are surrounded by the lush new green of the trees and plants. In the late fall and winter, the falls are really scrubby and barren looking.
I think some of the prettiest and most dramatic places along the South River come at the bottom of the falls. In the last .1 mile of the trail, leading to the base of the falls, the water tumbles over a hundred feet down over giant boulders. There are many small, beautiful waterfalls to enjoy before you get to work climbing back up to your car.
When we got home from our hike, we found several TICKS! Can you believe it – ticks in late November; ticks after the mountains have had snow and temperatures at night are regularly below freezing? These were tiny ticks – about the size of a pinhead. We pulled one off Adam’s sweatshirt and two off of Wookie. I hate having to watch for ticks year round, but it seems that we must.
Wookie Says… Hey all of you fellow hiking dogs. It’s been a while since I’ve been hiking, so I’m going to let you know what I thought of the trail. I enjoy getting the chance to get in the outdoors and I usually run laps around the house when my masters ask, “Would you like to go on a car ride?”
The hike on South River Falls was pretty fun for the most part. I enjoyed going downhill until I reached the stream to try and rock-hop. I’ve done this hike before with my masters, but there was a lot of water this time around. I don’t really like to get my feet wet and when I see any water on the hike, I try to take the driest option. After Adam crossed the creek, I really didn’t want to follow him. Only after Christine gave me a little nudge with her trekking poles, did I take the plunge and hop across the rocks.
Wookie enjoyed the hike, but was exhausted the rest of the day.
All the rushing water on the trail, really made me need to go to the bathroom. I tried to make my mark as much as possible to let all my fellow canines know that Wookie was here. The hike back from the falls was pretty brutal for a small dog like me. My tail was down a lot of the trip back, because it was exhausting. At least I got some pizza scraps and a taste of sausage instead of turkey scraps this year. For that, I was truly thankful.
Difficulty – 3. The return arm of the circuit climbs steeply uphill along a fire road for two straight miles.
Trail Conditions – 4. The trail is in great shape.
Views –0. You are deep in the woods for the entire hike.
Waterfalls/streams –4. In times of heavy rain, the South River is an impressive stream.
Wildlife – 0. We didn’t see *anything*, but over the summer there was a bear with three cubs in the area.
Ease to Navigate – 4. Trails are clearly marked.
Solitude – 2. This trail’s proximity to a park entrance makes it a popular hike.
Directions to trailhead: From Skyline Drive, follow the drive to the South River Picnic Area (near mile marker 62). The trailhead is located at the back end of the picnic grounds, across from the restroom facilities.
The Doyles River-Jones Run loop is a nice six-mile hike that takes you past three sizable waterfalls and a lot of beautiful stream scenery.
There are three significant waterfalls along the Doyles River – Jones Run trail.
Christine Says…
Although, the wind, rain and (yes!) snow stripped the fall color from Shenandoah rather early this year, Adam and I still wanted to get out and hike on at least one glorious, sunny autumn day. There was still a little bit of colorful foliage hanging on in the south district of Shenandoah National Park, so we decided to hike the Doyles River- Jones Run loop on Sunday morning.
Parking is available at Brown Gap. Pictured Below: The fire road leading down from the parking lot is one of the prettiest in the park; the Shenandoah area has tons of Civil War history. We passed the grave of confederate solder, William Howard, along the way.
We got to the trailhead at Brown Gap right as the sun was coming up. It was f-f-freezing and windy. I carelessly left my hat and gloves at home, so I flipped up the collar of my fleece and retracted my hands into my sleeves. We set out down the Brown Gap fire road, which is one of Shenandoah’s prettier fire roads. It’s also where I used to ride my horse, “Friday”, whenever we trailed to the park. The morning sun was filtering through the golden leaves, and soon the activity of walking warmed me up enough that I didn’t miss my gloves at all. The fire road was really muddy, so I took that as a good sign that there would be plenty of water flowing in the three waterfalls we’d be passing along the route.
In fact, I was so sure that the waterfalls would be impressive, that I carried all the “big guns” in my photography arsenal – two camera bodies, three lenses, a shutter remote, a collection of neutral density and polarizing filters, extra batteries, memory card and my tripod (the one that feels like it weighs close to 100 pounds when I carry it on long hikes). I also brought my new tripod bag (by Kinesis) that allows me to carry the tripod backpack style – evenly centering the weight on my back. The sling style carrier I’ve been using for the past few years twists my neck and shoulders, so I try not to carry it on long hikes. The new bag was really nice, but it perfectly lined up the camera mount lock lever with my butt. Every step I took, the lever poked me quite rudely. I ended up giving the tripod to Adam. He’s taller, so he escaped the constant prodding. I ended up carrying the bag with the rest of the gear. It was much heavier, but still more comfortable.
When we reached the bridge at the junction of the fire road and the Doyles River trail, I groaned in dismay at the dry stream before us. We walked along the river, or at least where the river should have been for another .3 miles to get to the base of Upper Doyles River Falls. Normally, there are pretty little cascades leading down to the main double-terraced waterfall. This time the waterfall was barely a trickle. We ate our breakfast at the base of “Disappointment Falls” and headed on to the lower falls.
The photo above shows Upper Doyles Falls is October 2009 (left) compared to January 2009 (right).
Surprisingly, the lower falls were running quite a bit more than the upper falls. I think narrower chasm through the rocks allows the second falls to hold onto more water flow. The second falls is thin and almost chute-like. Even though the second waterfall had more water, it still wasn’t anything spectacular. When you’re a photographer hiking with 40+ pounds of gear and realizing the shots you had planned aren’t going to happen, the gear instantly feels twice as heavy. I think this is the point that I started to feel like Atlas with the world resting on my shoulders. 🙂
Lower Doyles Falls was a bit nicer than the upper falls.
Leaving the lower falls, the trail became incredibly beautiful. It followed a babbling brook through near-peak foliage. The trees were a spectacular mix of gold, orange and red – all set off by the brilliant blue sky above. This was, without a doubt, my favorite section of the trail.
So far, the hike had been relatively easy – just gentle up-and-down grades along the stream. At the junction of the Jones Run Trail, the real work started. In just under 2 miles, we picked up most of the elevation gain on the whole hike. It was steep, hard climbing to reach Jones Run Falls.
The foliage along the Jones Run Trail was spectacular. Pictured Below: Jones Run and Jones Run Falls.
The waterfall on Jones Run was running low, but it was still really pretty. From the waterfall back up to Skyline Drive, the grade of the trail moderates a bit. It’s still a lot of uphill mixed with periods of flat terrain. Eventually, you reach the junction with the Appalachian trail and follow it north for a little over a mile back to the Brown’s Gap parking lot. This section of the AT follows closely to the road, so you constantly hear cars and smell exhaust. The walk along this section is easy, but rather uneventful.
Overall, I think this was a great hike. I’m so glad we had a chance to be outdoors on a beautiful fall day, but I wish the waterfalls had been nicer. We’ll have to try hiking it again in the spring after heavier, more sustained rains.
Adam Says…
While we’ve hiked Doyles River a number of times, this was the first time that we had made a loop of the hike and added Jones Run. When we have done this before, we parked at the Doyles River parking lot around mile marker 81. We would normally hike down to both of the falls and then head back.
On this hike, we parked around mile marker 83 at the Brown Gap lot. We crossed the road and headed down the Brown Gap fire road. At about .4 miles, you see a short path leading up to the gravesite pictured above. In about 1.7 miles you will reach the junction with the Doyles River Trail. Take a right on this trail. After about two tenths of a mile, you will reach the Upper Doyles River Falls. There is a short spur path to lead down to the base of the falls. Once you rejoin the trail, you will then see the Lower Doyles River Falls after a tenth of the mile. Don’t try to blaze down off the trail to reach the falls. The trail loops around to bring you closer to the falls. When you reach near the base of the falls, there is a short, treacherous climb down to the base of these falls. When you join back to the trail, continue south down the Doyles River Trail. You will reach the Junction with the Jones Run Trail in about .6 miles from leaving the Lower Doyles River Falls. You begin your hike up to the Jones Run Falls and will reach them about .7 miles on this trail. After the falls, you will have a 1.2 mile hike up to the Jones Run Parking lot. Before you enter the parking lot, there will be a junction with the Appalachian Trail. Take a right on the AT, heading north until you reach the Brown Gap parking lot. The AT portion is about 1.3 miles back to your car, leading you to this overall hike of 6 miles.
The woods were very colorful at the lower elevations. Pictured Below: One downed tree we came across was so large that Adam could climb inside.
The hike is not that long being only six miles, but there is a lot of elevation gain from the base of the Doyles River Trail, leading up to the Jones Run Parking lot. Christine felt that it may be better to do this hike in reverse, but based on contours, I think either hike has a tough trip back at the end.
The waterfalls along the way on normal days are really some of the nicer waterfalls in Shenandoah National Park. The water flow didn’t allow us to see them at their best today, but we enjoyed them nonetheless. The Upper Doyles River Falls stands at 28 feet; the Lower Doyles River Falls plummets 63 feet.; the Jones Run Falls plunges 42 feet. If you’re looking for a hike to see multiple falls, this is the best one to do in Shenandoah.
More golden foliage along the trail.
On our way back to the car on the AT, we ran into a woman doing the trail in the opposite way. She had two pugs with her on the hike, named Titan and Zoot. They were eager to greet us, since they must have known we had three pugs of our own. They were very energetic to begin their hike to the falls, but we wondered how they fared on the steep way back. We wish we had taken some pictures of these boys, because they looked like they were ready for a great adventure that day.
There was a very long line of cars waiting to get into Shenandoah National Park
The foliage was just slightly after peak today. We decided to exit the south entrance of the park to reward ourselves with some frozen treats from Sonic. On our way out, we saw the longest line of cars we’ve ever witnessed trying to enter the park at the south gate. Cars were at a stand-still all the way down to the interstate. Three rangers were walking down the line, handing out information to make the fee stations handle things quickly. I guess everyone felt that it would be a nice day to see color in the park and hopefully they weren’t too disappointed in the color.
Trail Notes
Distance – 6 miles – loop.
Elevation Change –1875 feet
Difficulty – 4. The climb up from the bottom of Jones Run is tough!
Trail Conditions – 3.5 The trail is well-maintained and traveled.
Views –0. You might get a few glimpses of vistas through the woods along the fire road.
Waterfalls/streams –4. The waterfalls and streams along this trail are beautiful, especially when there is plenty of rain.
Wildlife – 1. Just a couple deer.
Ease to Navigate – 4. Trails are well marked and easy to follow.
Solitude – 3. You will likely see several other groups of hikers along the way, but it’s not as heavily trafficked as other waterfall trails in the park.
Directions to trailhead: From Skyline Drive, follow the drive to Brown Gap (near mile marker 83). The parking lot is on the west side of the drive. To begin the hike, walk across Skyline Drive and follow the Brown Gap fire road downhill.
The Virginia Creeper Trail is a picturesque rails-to-trails path that winds its way for thirty-four miles through the Mount Rogers recreational area. The trail starts in Whitetop and ends in Abingdon, with Damascus sitting right in the middle. The area caters to bikers, offering plenty of opportunities for shuttles, bike rentals and food along the way.
Adam crosses one of the many old railroad trestles along the Virginia Creeper Trail.
Adam Says…
The Virginia Creeper Trail is something we’ve wanted to do for years. It is very well known in the biking world as being one of the best rails-to-trails in the east.
The origin and history of the name has to do largely with the train that used to ride this route. The train was called the Virginia Creeper due to the slow churning of the train. The trail was also partly named in honor of the native vine that you will normally see turning crimson as an early sign of fall. The train ran its last trip in 1977 and it was converted and opened as a multi-use trail in 1984.
We were expecting rain that day and wanted to hit the trail as early as we could. We arranged for a shuttle to take us to Whitetop Station to begin our trip. We recommend the Virginia Creeper Trail Bike Shop. They are located in Abingdon and run a shuttle to Whitetop and will even pick you up in Damascus if you are thinking about only doing half of the trail. After we were dropped off, we decided to not lollygag, since the rain was imminent. We got through the first couple of miles of the trip with only a few errant raindrops, before the heavier rain started.
Despite the rain, we really enjoyed the beauty of the trail. There are 47 trestles and bridges that pass over the Green Cove Creek and the Whitetop Laurel Creek. You get gorgeous views of the rushing water in the creeks; pass by quaint, country farms; and canopy forests. We picked a perfect weekend to do this trip to see the beautiful fall foliage. The trail is shared by bikers, walkers, runners, horses, and even an occasional dog sledder in the winter.
Here are a few highlights along the way. There are also several information signs along the way that provide valuable insight into the history and nature of the area. You will see mile markers along the way to help point the way.
Mile 34 – The Whitetop Station to park your car. Bathrooms are available. Highest point on the trail at 3576 ft.
Mile 30.5 – Green Cove Station sells a lot of essentials and souvenirs. Bathrooms are also available.
Mile 27 – Creek Junction – Parking and Bathrooms are available. 563 foot trestle.
Mile 23 – Taylor’s Valley – Parking available. Daniel Boone campsite.
Mile 20.7 – Straight Branch – Parking and Bathrooms are available.
Mile 20 – Whitetop Laurel Falls – when you see a large overhanging rock, the falls are down a small path on the right side of the trail.
Mile 16 – Arrive at the town of Damascus. Railroad exhibit is available.
There are so many beautiful farm and stream scenes along the trail. The huge Christmas Tree farms along the way are lovely. Pictured Below: The trail follows a rushing stream with many small waterfalls; The fall color was spectacular in Mid-October.
For those that are interested in geocaching, there are a ton on this trail.
We definitely plan on coming back in the spring and tackle this another time. The rain got us fairly wet and also covered us with “Creeper Streak” – the streak created on your back from the wet dirt being kicked up from our back tire. We decided to stop after the halfway point and catch the shuttle back to our car. While the rain was annoying and kept us from relaxing and enjoying the trail as much as we wanted, we still felt the scenery around us made up for it.
Christine Says…
I woke up early the morning of our Virginia Creeper bike ride, peeked out the hotel window and started silently chanting the mantra “please don’t rain, please don’t rain, please don’t rain”. The sky was that heavy gunmetal gray that promises rain is coming sooner rather than later. It wasn’t supposed to start raining until the evening, but I was fairly certain that we were going to be in for a soggy bike ride.
Nevertheless, I donned my new padded bike pants and a fleece top and headed over to the bike shop to catch our shuttle ride out to Whitetop Station. The shuttle services for the Creeper Trail are a great idea, as they let bikers enjoy the whole trail without making a return trip over repeat scenery to get back to your car. I think most people just bike half the trail – Whitetop to Damascus, but we were really hoping to do the full 34 miles back to Abingdon.
The van ride out to the trail’s end was pretty long – about an hour along winding mountain roads. The driver shared lots of trail trivia and helpful tips to kill the time. Some of the things he shared:
Celebrities like to bike the Virginia Creeper (Clint Black, Troy Aikman, Emmitt Smith, some NASCAR driver I don’t remember). Apparently, Brad Pitt even has a home near Whitetop and has been spotted fishing the area’s rivers. (although I can’t find any evidence to corroborate this as fact)
Most of the accidents (75%) along the trail happen to males between the ages of 13 and 21. Boys on bikes are reckless, I suppose.
It’s a very bad idea to slam on your brakes when crossing wet railroad trestles. You WILL wipe out. I can vouch that this tip is quite true. We saw the same poor woman wipe out on two separate occasions – both times she was on a wet trestle.
The trail is probably the only 34 mile bike ride that you’ll actually gain weight on. There are snack shops, coffee house, bakeries, ice cream parlors and full service restaurants all up and down the trail.
The trestles along the trail are very picturesque. Pictured Below: We were lucky enough to bike the trail during the peak of fall color; The trail is a multiuse trail and is also used by pedestrians and equestrians.
On the ride out, the sky started spitting a bit of rain. It had stopped again by the time we were dropped off at Whitetop Station. We kept our fingers that it would continue to hold off. Adam and I don’t like biking or hiking in crowds, so as soon as we got our bikes off the trailer, we raced off to get a jump start on the crowd of bikers arriving at the trailhead. Our driver told us that on nice weekend days, the trail might see upwards of 2400 riders. Area bike shops have 1800 bikes available, and frequently sell out of rentals. I was a bit surprised that more people rent bikes than bring their own. Maybe most people don’t own bikes these days.
The trail was gorgeous – a leaf-covered pathway under an endless tunnel of fall-colored trees. Every now and then, we’d pass an opening that provided a view of the mountains or one of the area’s many vast Christmas tree farms. Around Green Cove Station the rain started in earnest, and never let up again. I had to put my camera in a trashbag I had packed in my bike rack. There were so many scenes along the way that deserved to be photographed with care. Sadly, with the rain, all I was able to do was take a few quick snapshots.
Even in the rain, the ride was incredibly beautiful. I loved crossing the old railroad trestles and riding alongside the rushing streams. We biked the entire stretch from Whitetop to Damascus in about ninety minutes. I would have loved to take more time to enjoy the scenery, but it was cold, wet and windy. I started thinking less about scenery, and more about a mug of hot chocolate and a steaming cup of soup.
In short order, we arrived in Damascus. We decided to try lunch at one of the places our shuttle driver had pointed out. He had mentioned that In the Country and Fattie’s Diner were both really good. I saw “Hot Soup” on In the Country’s sign, and I was sold.
The trail offers many charming places to stop for a delicious lunch or snack. Pictured Below: We had a fantastic lunch at “In the Country”; The only red train car along the trail is located in Damascus.
The staff at the restaurant was so friendly and welcoming. They didn’t even flinch when we walked in through their front door, soaking wet – covered with mud and trail grit. My ponytail felt like I’d dipped it in wet concrete and my legs were coated with black sludge from my ankles to my knees. Adam even had mud splashed up and down his cheeks. They invited us to eat inside in the warmth, but I felt too guilty about my filthiness and chose a picnic table under their covered porch.
Adam and I both got their boxed lunches which included a sandwich, side, drink and dessert. I chose their potato soup as my side. It totally hit the spot. Lunch was washed down with hot chocolate and followed up with delicious homemade pumpkin squares. We sat on the porch after lunch, watching others from our shuttle group pass by on their way to the pick-up point. I think most bikers take about two and a half hours to bike the Whitetop to Damascus section.
The rain was still falling steadily, and although we wanted badly to see the rest of the trail, we decided to call the bike shop and let them know we’d be joining the shuttle in Damascus. We met up with everyone at the red train car in the middle of Damascus. Everybody looked cold, dirty and tired. The heated shuttle van was such a welcome sight.
It was a real disappointment to miss the second half of the trail, but it’s also a great motivator for us to make a return trip to the area in the spring. I’ve heard the rhododendron and mountain laurel bloom along the Creeper is amazing!
Trail Notes
Distance – 18 miles for this segment
Elevation Change – From Whitetop to Damascus, you lose 1646 feet in elevation
Difficulty –1.5. You hardly have to pedal at all on this stretch of trail, so it is suitable for bikers of all fitness and skill levels
Trail Conditions –3.5. The trail is in good shape. There are some errant holes and jutting rocks to watch out for. Entrances and exits from the trestles can be jarring if you’re going moderately fast.
Views – 3. While the views aren’t high and lofty, they are still beautiful and showcase Virginia’s most picturesque scenery.
Waterfalls/streams -4. The two streams that flow along the trail are gorgeous and include many small waterfalls.
Wildlife –1. We didn’t see anything, but our shuttle driver told us people regularly spot deer and the occasional bear.
Ease to Navigate – 5. The trail is very simple to follow.
Solitude – 0. People love the Creeper! On nice days in the spring, summer and fall, the trail can see over 2000 bikers in a single day.
Directions to trailhead:
We recommend hiring a shuttle service in either Abingdon or Damascus. For a reasonable fee, they will drive you and your bikes to White Top Station. This lets you enjoy the entire trail without having to backtrack on the return trip to your car.
Last Saturday, we made a quick trip over the mountains into West Virginia. The foliage in the Canaan Valley (Tucker County) area is always way ahead of the color change in Virginia. We set out from home at 5:00 a.m. and made stops at Blackwater Falls State Park, Canaan Valley State Park, Douglas Falls and Dolly Sods Wilderness. Our whirlwind trip got us thinking about how many short walks in that area have major scenic payoffs.
Let’s start off with a few beautiful spots in Blackwater Falls State Park. All of the spots listed below are clearly marked on the park’s trail map. Pick up a copy at the lodge.
Lindy Point
The view from Lindy Point looks down into the Blackwater Canyon.
The walk out to Lindy Point is no more than a third of a mile along a relatively level path. The trail passes through dense rhododendron and can be quite muddy if there has been rain. At the end of the trail, you’ll come out to a platform built onto the side of the rocky cliff. The point offers a spectacular view of the Blackwater Canyon. If you sit quietly, chances are good that you’ll hear the river rushing through the chasm below. The view is made even more unique due to the enormous free-standing rock “chimneys” that surround the platform. There are several places that you can crawl through the rhododendron to stand directly on the rocks for a better view. Despite the spot’s beauty, Christine has not had great luck photographing this spot, but it’s all been a matter of timing. We’ve just never been lucky enough to hit the point on a day with nice “photo skies.” The photo included really doesn’t do the place justice.
Elakala Falls
There are several “falls of Elakala” along Shays Run.
This pretty waterfall is accessed by a short trail starting out from the park’s main lodge. The falls are less than a quarter mile down the trail. You’ll know you have reached the waterfall when you come to a wooden footbridge over Shays Run. The falls cascade directly under your feet at this point. The trail really doesn’t give you a good look at the waterfall, so take the time to follow the “unofficial” foot path down the ravine to the base of the falls. Elakala is prettiest in times of heavy waterflow. The stream leaving the base of the falls takes a beautiful swirling path across the moss-greened rocks. Don’t miss climbing a little farther down the ravine to see a couple other pretty waterfalls on Shays Run. The stream actually cascades all the way down to the bottom of the Blackwater Canyon, but it’s not really safe to go much beyond the second or third cascade. Last winter we were lucky enough to see Elakala falls completely frozen over. The sound of the water running under the ice was magical that day.
Blackwater Falls
The main attraction in Blackwater Falls State Park
This 62 foot cascade is park’s namesake and #1 attraction. You’ll have a couple options for accessing the waterfall. The park road that heads toward the main lodge has a paved, wheelchair-accessible path to a viewing platform far above the waterfall. The road that heads toward the picnic ground has a longer “staircase-path” that leads to several wooden viewing platforms. This path puts you a lot closer to the waterfall and offers a much prettier view. We’ve always liked visiting Blackwater Falls as soon as the sun comes up. At dawn, the path is deserted and the falls are often shrouded in a thin veil of fog. During more normal times, the area is extremely crowded with tourists.
And now a couple favorites outside the park.
Douglas Falls – Thomas, WV
The colors of Douglas Falls are amazing!
Blackwater Falls might be the area’s best-known waterfall, but we think Douglas Falls is the most beautiful. The rocks are brilliant red and the water is vivid green, making for a wonderfully photogenic color contrast. The color of the rocks is sadly unnatural, created by acid drainage from the mines and coke ovens in the area. It’s amazing that pollution could create something so pretty. The ride out to the falls is extremely rugged and potholed. You should plan on walking a mile or two if you don’t have a 4WD vehicle. The footpath down to the falls is very short, but very steep. Once you get down to the base of the falls, there is a path that follows the stream for a couple hundred yards. The whole area is worth exploring, but take extreme caution on the slippery rocks. The rocks around the stream are coated with slick, clear algae. We always move “crab-style” along the rocks to keep from falling.
Bear Rocks – Dolly Sods Wilderness
The landscape of Dolly Sods reminds us of Maine.
Another place to visit in the area is Bear Rocks in the Dolly Sods Wilderness Area. The overlook is surrounded by a vast plain of huckleberry and blueberry bushes that turn blaze red in the autumn. It’s a great place to spot migrating hawks. The rocky cliff is endlessly fun to scramble around on and provides beautiful views of the valley below. The plains framing the cliff are patterned with pathways through the berry bushes and punctuated with monolithic white rocks that have been sculpted by time and the elements. Whenever we visit Dolly Sods, we feel like we’re someplace far north of the Mid-Atlantic region. It feels more like Maine or Canada. There are several routes into Dolly Sods. We recommend the route from WV32 onto Laneville Road as the most passable and scenic. You might even see a black bear along the road if you’re lucky.


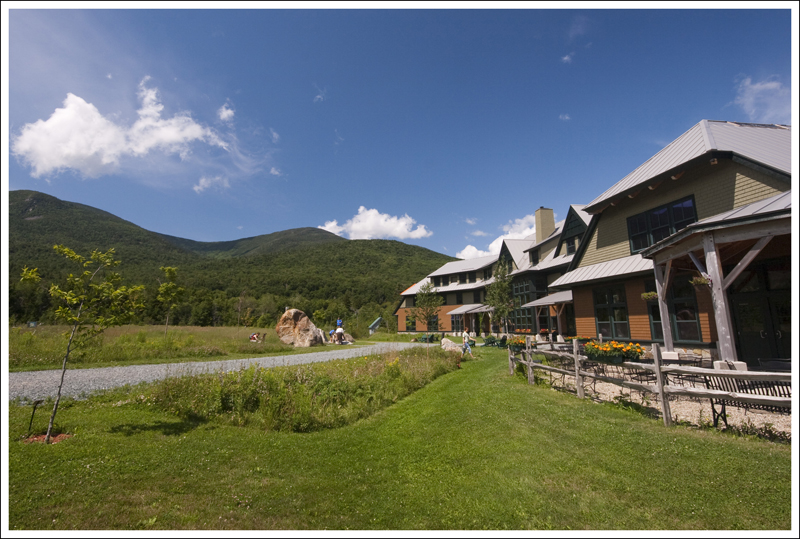
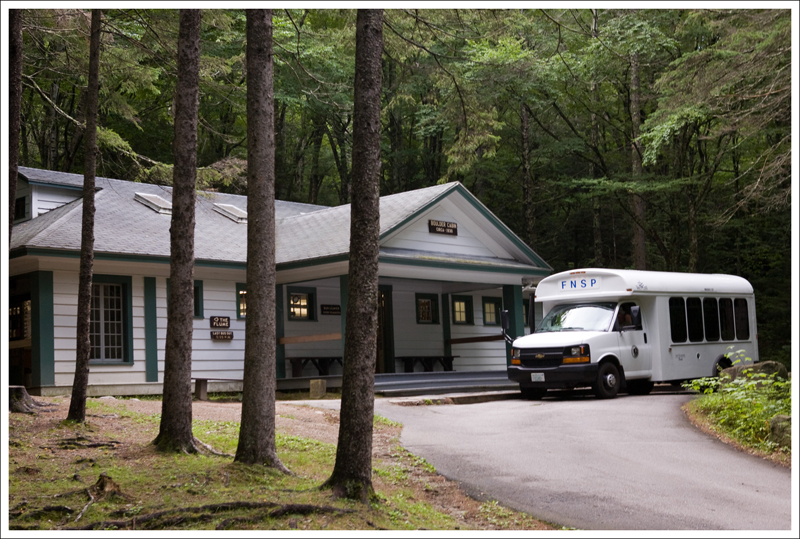