Mount Marcy (NY)

adirondacks

This 14.5 mile hike follows a moderate route to the summit of New York’s tallest mountain. At 5,343 feet, Mt. Marcy offers commanding views of the region from her above-treeline summit.  This is definitely the crowning jewel of a hiking week in the Adirondacks!

View the Full Album of Photos From This Hike

Mount Marcy Summit
The summit of Mount Marcy offers a spectacular view of the High Peaks region.

Christine Says…

For our grand finale in the High Peaks, we decided we had to hike New York’s tallest mountain – Mount Marcy!  After a day of rain (that caused us to bail out a mile short of the summit of Mt. Van Hoevenberg), we woke to bluebird skies and crisp, cool temperatures.  After a week of hazy, muggy conditions, we were going to get the prettiest day of our entire vacation week to hike the big mountain.  Perfect!

The hike of Mt. Marcy is almost 15 miles round-trip with 3,200 feet of climbing.  The trail is never horribly steep, but it’s still a long, challenging day for most hikers.  We set out early with our backpacks stuffed with essentials – several liters of water, multiple snacks, and warm layers for the summit.  We (once again) parked at the Heart Lake Program Center.

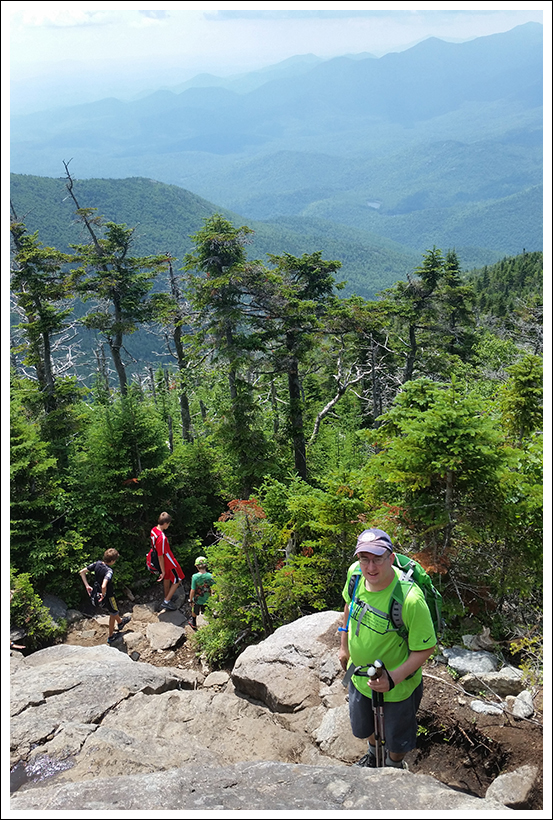
Despite our early start, there were crowds of hikers setting out for the day.  We never really had the trail to ourselves or experienced much solitude – not that we were expecting it on such a popular trail.  It was also one of those hikes that made me feel guilty each time I paused to take photos. At every photo stop, the slightly slower hikers behind us would catch up and pass us; only to have us on their heels saying ‘excuse me… may we pass?’ ten minutes later.  Because the crowd situation was a little stressful, I didn’t take a ton of photos on the ascent.

Marcy Dam Stream
Even though the pond disappeared when Hurricane Irene washed the sluicegate away, Marcy Dam is still very scenic. Below: Early parts of the hike were gentle and easy; The footbridge across the Marcy Dam; The dam spillway.

Early Flat Trail to Marcy Marcy Dam Bridge Marcy Spillway

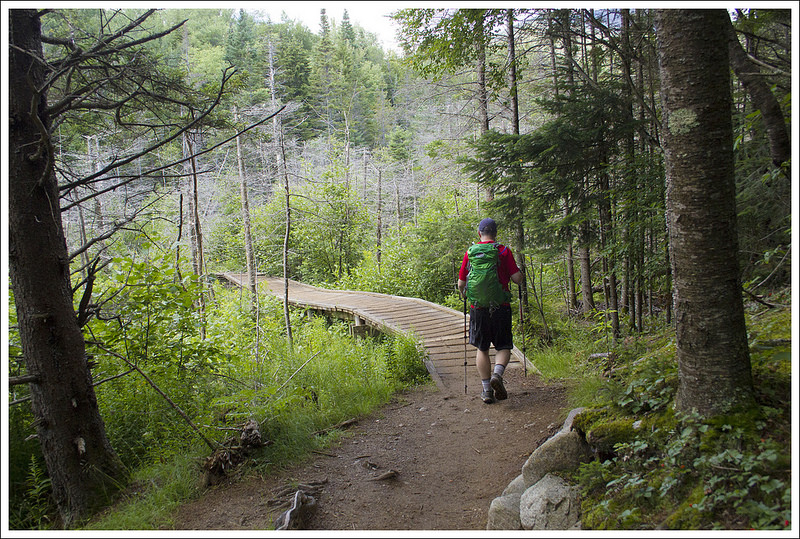
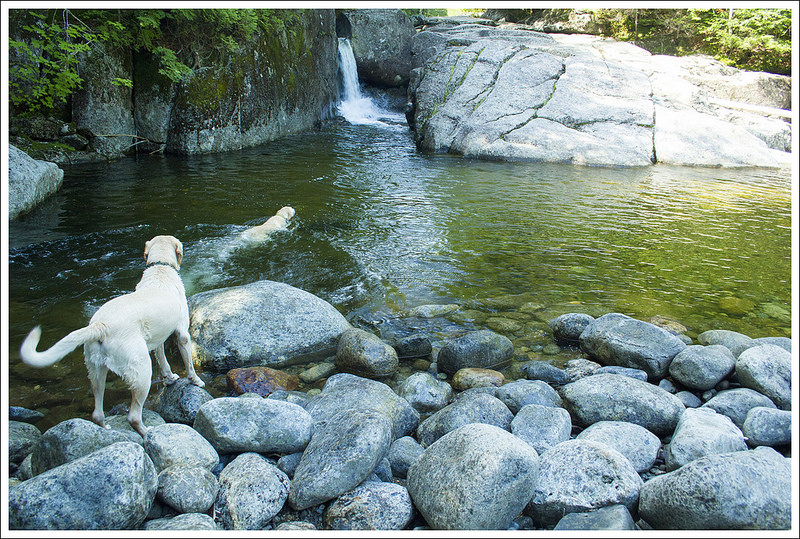
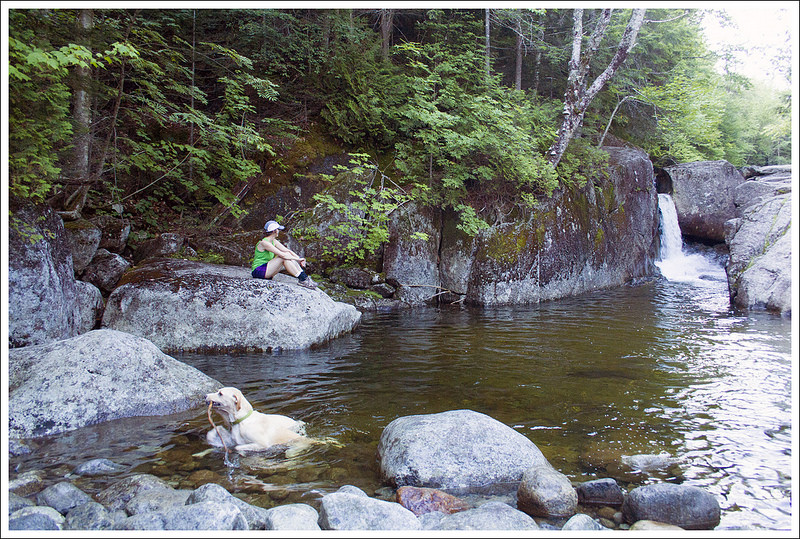
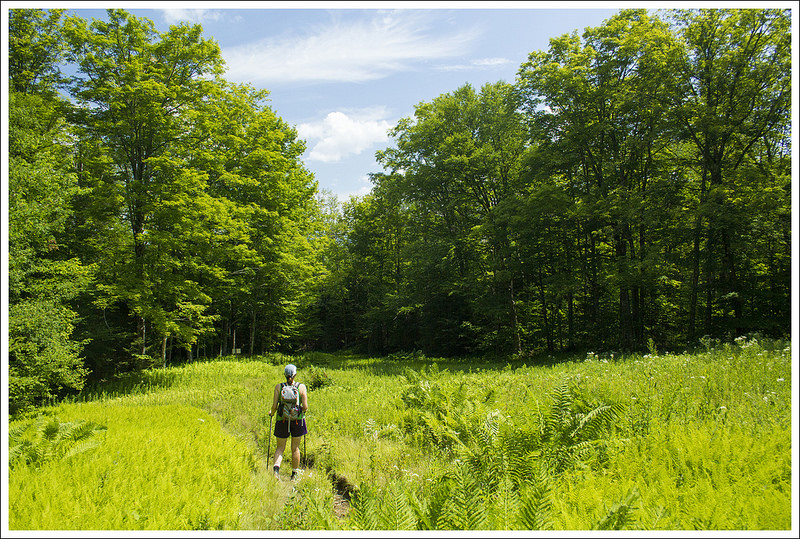
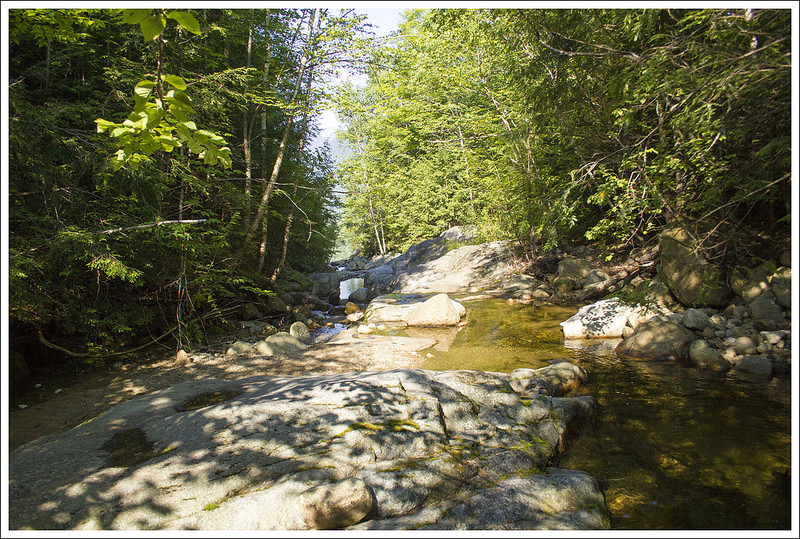
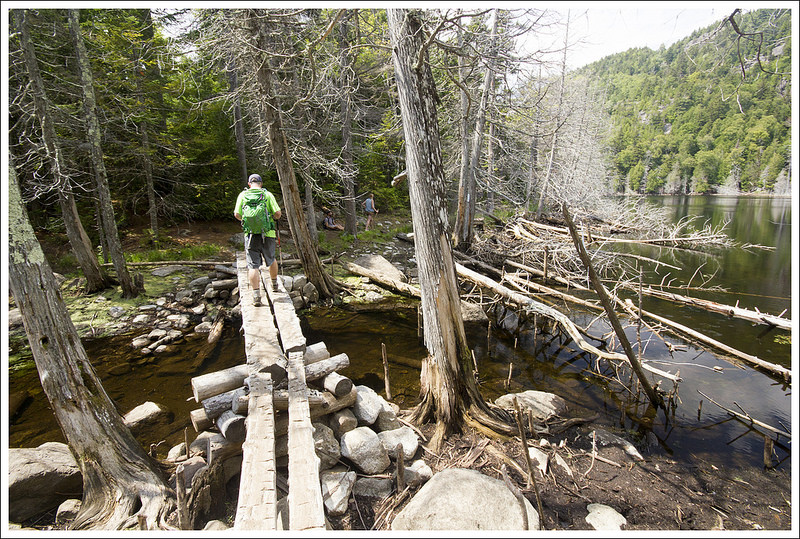
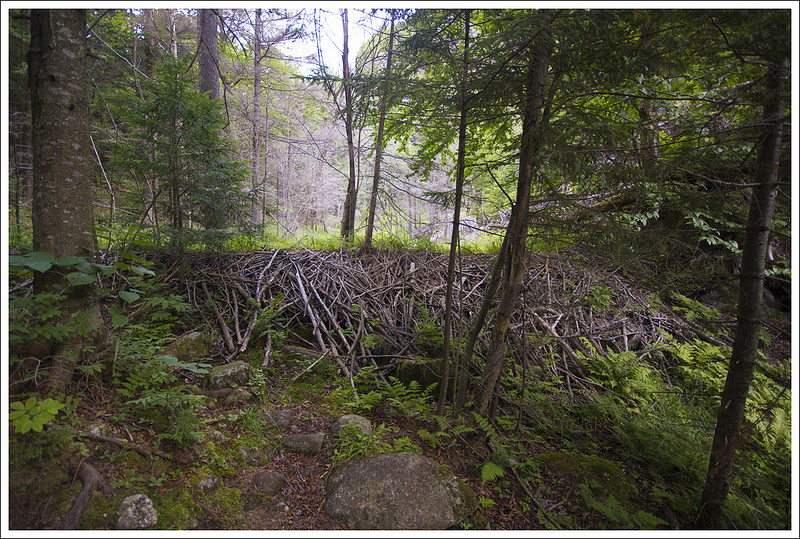
The first couple miles of the hike were easy going – it was mostly flat trail through lush mixed forest.   The first notable landmark we reached was Marcy Dam.  Until Hurricane Irene struck in 2011, the dam held back the waters of a scenic pond.  When the monster storm passed over, it washed away the sluice gate leaving behind a nothing but a mud flat with a stream passing through.  When we hiked by, I was unaware of the history and still found the dam extraordinarily beautiful!  Mount Colden, Avalanche Pass, and Wright Peak still stood tall over still water full of cloud reflections.  The New York DEC is planning on removing the dam completely over the next few years, so who knows how the vista will change. Read more about the dam.

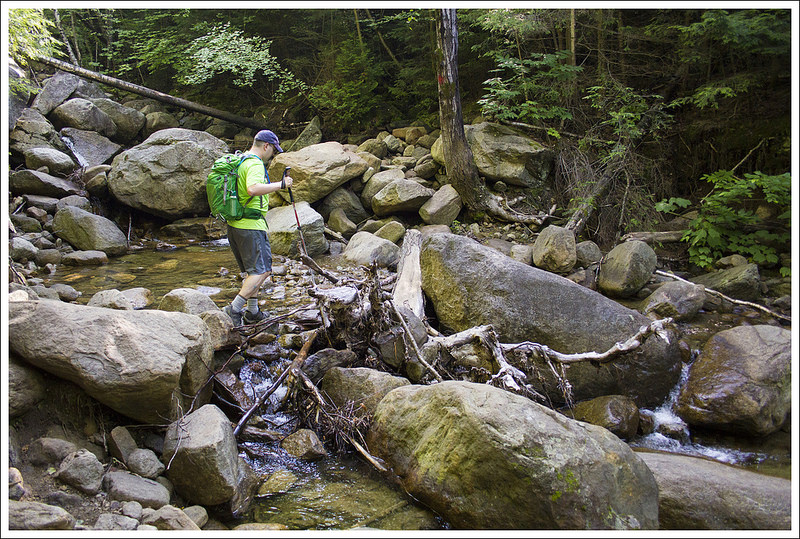
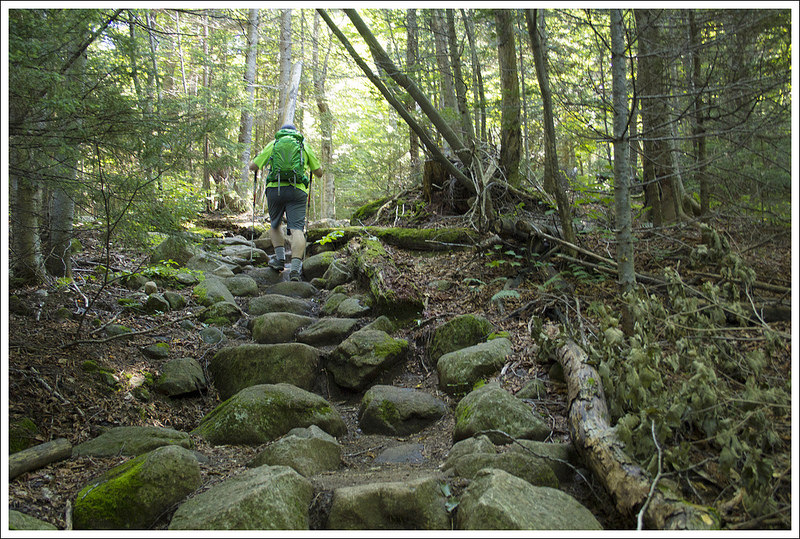
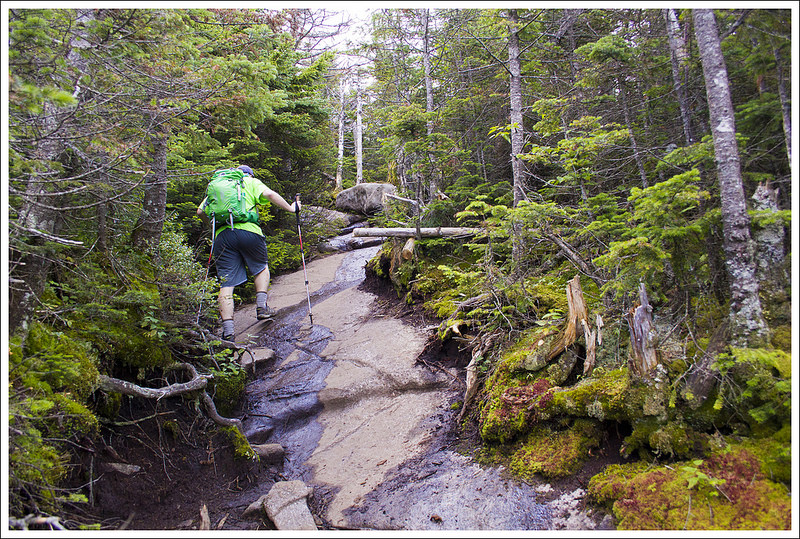
On the far side of the dam, we signed the trail register and began the climb toward the summit of Marcy.  The terrain was extremely varied – there were stream crossings, boulders, cobblestones, root jumbles, muddy spots, plank bridges, logs pressed into mud, and basic dirt trail.  The climbing was steady, but gentle almost the entire way to the summit.  One odd thing about the hike was that it was not very well-marked.  There were several major trail junctions that simply did not list the Marcy summit on the signs.  We consulted our map and hiking guide and were able to find the right way, but we met confused hikers at each junction.

Stream Crossing on Marcy
This stream crossing came shortly after passing Marcy Dam. Below: It was odd to see big signs stating ‘TOILET’ in the woods; The check-in station after crossing Marcy Dam; There was a bit of smooth granite early in the hike.

Toilets in the Woods Marcy Sign In Granite on Marcy

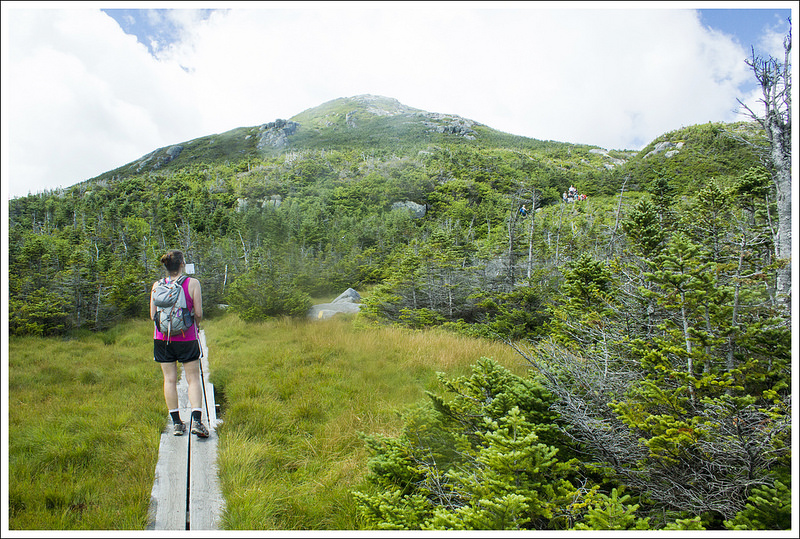
After passing through a stretch of trail with big logs pressed into the mud for footing, we reached a saddle on the mountain’s shoulder.  Plank bridges passed across an open, grassy marsh, giving us our first clear view of the bald, granite summit of Mount Marcy.

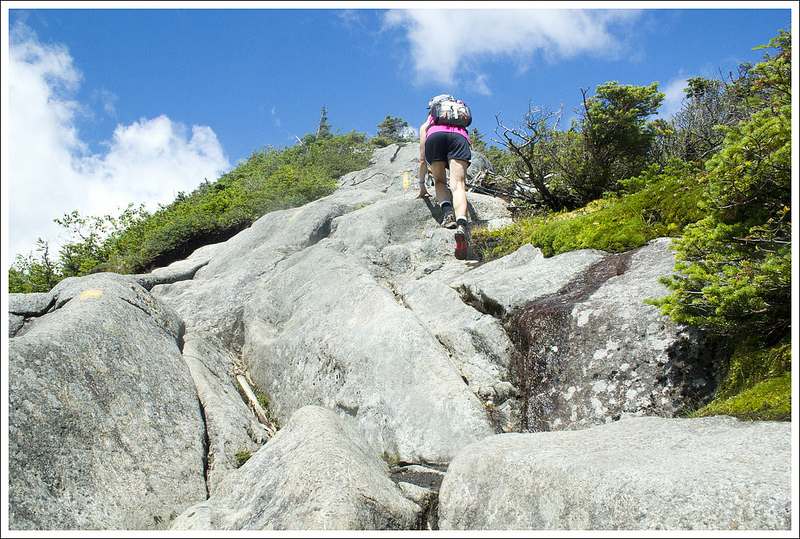
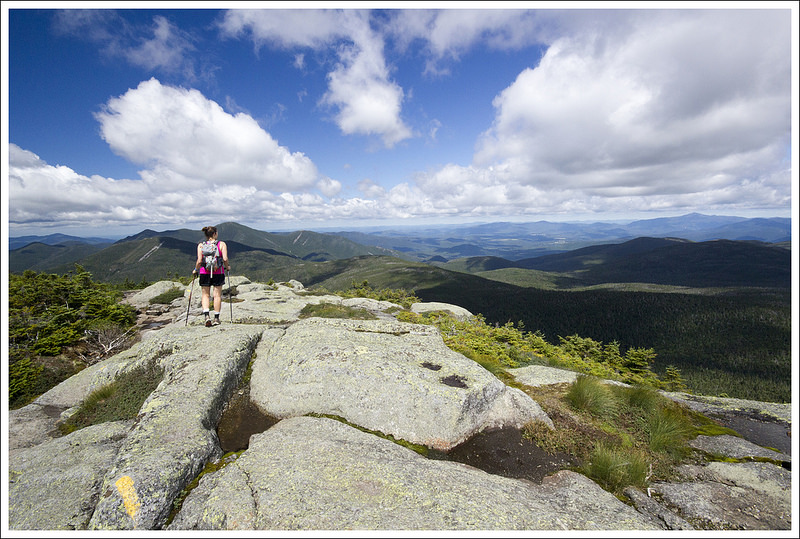
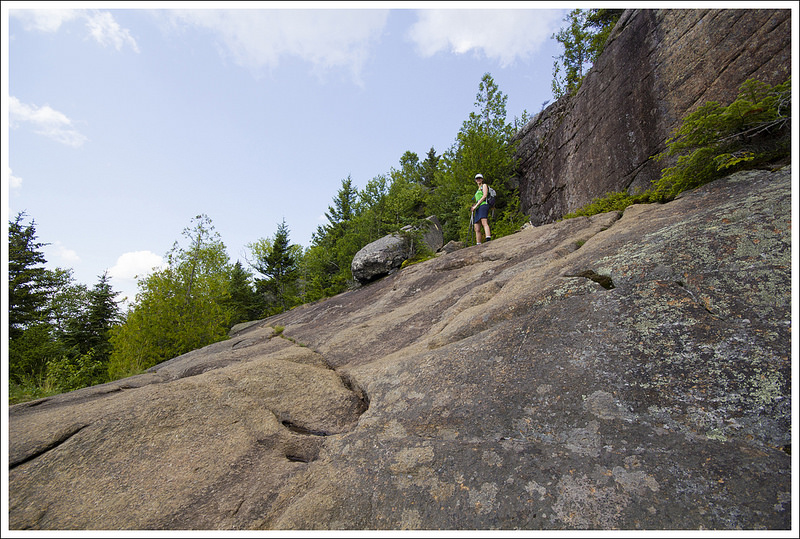
From there, the climbing became a bit more intense and steep.  We scrambled across granite faces and over boulders, following blazes and cairns along the way.  I didn’t particularly enjoy climbing up this part of the mountain.  I always feel like I’m slipping on smooth granite.  Also, my legs were covered with bruises from all the other rocks I’d climbed earlier in the week.  I’m like a ripe peach when it comes to bruising! At one point, I looked back at Adam and said ‘Seriously… more rocks.  I already look like an accident victim’.  Of course, Adam caught my expression on camera.  I’m not including that photo in the post, but it’s in the Flickr album if you want a good laugh.  I was not a happy hiker at that moment!

Marcy Cobbles
Much of the hike to the summit of Mount Marcy is covered with cobbles. Below: But there are also planks; And root tangles; And a bit of smooth, dirt trail.

Marcy Planks Marcy Roots Marcy Dirt Trail

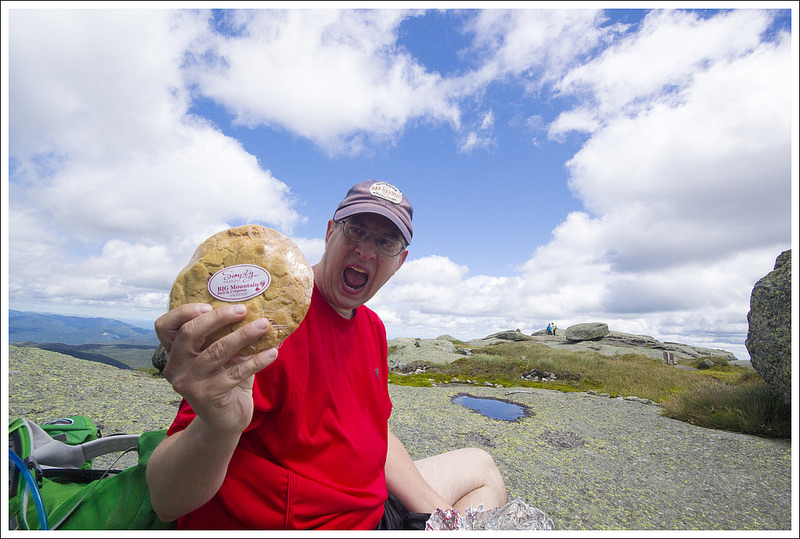
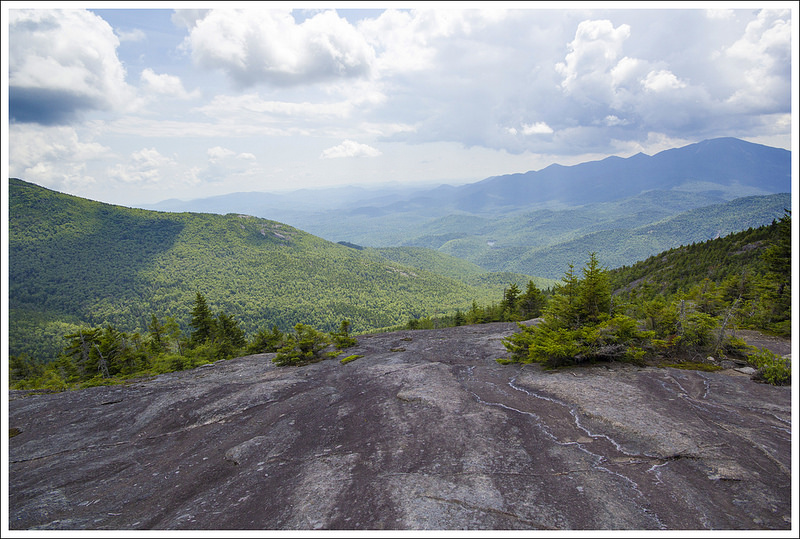
We slowly but surely made our way to the top – and it was so worth it! What a spectacular view!  The Adirondacks almost rival the White Mountains of NH for their terrain and views.  The wind was whipping across the summit, so I put on my jacket and found a place to eat lunch.  I had tired of PB&J, so I had pepperoni, cheese, and crackers and half of the biggest cookie I’ve ever seen.  The day before hiking Marcy, we had stopped for lunch at the Big Mountain Deli and Creperie.  In addition to amazing sandwiches (all named after the High Peaks) and crepes, they also sell giant cookies perfect for giant hikes.  I definitely recommend a stop there if you’re in Lake Placid!

After a while on top the world, it was time to climb down. We slithered and slid down the steepest parts, enjoying views all along the descent.  When we got back to the marshy saddle that had given us our first view of Marcy, I noticed that one of my trekking poles felt shorter than the other.  I figured that heavy use on the descent, had forced the pole to retract.  However, when I went to adjust it, I found the entire bottom third of my pole was GONE. It was too late and we had covered too much ground to go back for it.  I was able to extend the middle third and use the remnant of my pole the rest of the way down, but I was so bummed.  Those were great Komperdell poles and they carried me over many miles.

The rest of the descent was pretty easy and passed by quickly.  Sometime after Marcy Dam, my right foot decided it had enough for the day and started cramping.  It really hurt, but I was able to hobble my way back to the trailhead parking. We were both pretty happy to see the car!  What a great day and what a fitting end to our first week in the Adirondacks.  We can’t wait to visit again!

Marcy Log Trail
In the wetter, muddier areas, layers of logs were used to create a passable tread. Below: Signage was sometimes sporadic and incomplete;  As we climbed higher we started getting views of the mountains; Entering the Alpine Zone; From a marshy area, we got a nice view of the summit of Mount Marcy. (sorry for the hazy smears on the photos – the lens got wet!)

Marcy Signage Starting to Climb
 Marcy Alpine Zone Marsh on Marcy Flank

Adam Says…

When we first planned our trip to the Adirondacks, we both had put on our goals to hike Mount Marcy.  Being the tallest peak in New York, it is a big draw to people living or visiting the North Country of New York.  When we arrived in the parking lot early in the morning, we kept seeing groups upon groups of people hitting the start of the trail.  I felt pressure to try and get started as we knew more and more people were going to get on the trail as each minute passed.  This was a beautiful day, so we knew it would be a little more crowded than normal.

At the beginning of the trailhead there was a large stack of rocks with a sign asking to carry one to the top of Mount Marcy.  We didn’t realize the full purpose until we got to the summit, but the goal was to bring some small rocks up for preservation projects.  We both grabbed a rock, signed the registry at the kiosk, and started the hike.  The trail starts off mostly flat, with very little elevation gained.  The trail began as a beautiful path through thick woods.  We crossed a footbridge through a marshy area.  Further up the trail, we passed a sign that pointed towards Fangorn Forest.  As big Lord of the Rings fans, we quickly got the reference – I said to Christine, “What madness drove them in there?”, a quote from the movie The Two Towers and we both chuckled.  Staying on the main trail, we came to a large junction at the one mile marker.  There are a lot of trails that criss-cross through the hike up Mount Marcy.  We saw a lot of people consulting maps trying to decide what to do.  We did the same and I bore us left at the junction following the direction to the Marcy Dam lean-tos.  The trail begins to climb a bit here.

Scaling the Summit of Mount Marcy
More views of the summit above treeline. Even though it appears tree-covered, the trees are stunted and leaned to the side.  The remainder of the climb from this point traversed granite boulders and ledges. Below: Lots of granite to climb on – some of it was quite steep!

Climbing Mount Marcy Scaling the Granite on Marcy
Climbing Mount Marcy Almost to the Top of Mount Marcy

At 2.3 miles, we arrived at Marcy Dam, a very picturesque spot to enjoy some reflective water with mountains ahead.  The trail winds down and then crosses the water on a longer footbridge, before leading to the other side with another perspective view.  You will come across signs on this side of the water crossing that are pointing to several lean-tos, bathrooms, and campsites along the way.  We found it strange to have toilets this far off the main trail.  We didn’t realize until our return trip that a ton of people like to camp out here.  Many of the groups that we saw heading on the trail go no further than to one of these campsites, so numbers on the trail can be misleading.

From the other side of the dam, we found another kiosk which we signed again and followed the signs that pointed us to Mt. Marcy.  The trail starts off with a gradual climb here.  At 3.0 miles, we reached a junction with a side trail that led to Phelps Mountain.  Peakbaggers seeking all of the 46 mountains over 4000 feet would follow this side trail to summit Phelps Mountain, #32 on the list, in 1.2 miles (2.4 miles roundtrip from this point).  We skipped Phelps and continued up the trail.  The trail became steeper and rockier.

Looking Back at the View
Along the way, we took lots of opportunities to pause and take in the view behind us. Below: We deposited our small stones on the collection pile.  They’ll be used to build up the protected alpine environment; View from the summit; Adam is happy to be at the top!

Rock Collection on Mount Marcy Descent View Adam on Summit

At 4.2 miles, we reached another junction, which seemed to be the most confusing.  There were no signs stating which way went to Mt. Marcy.  The sign was weathered and half of the letters were hard to read, which only added to our confusion.  We saw several people at this junction trying to figure out the correct path.  Staying straight on the trail would lead you to Table Top Mountain, but we had to take a right on this trail and up a few rock stairs to stay on the trail to summit Mt. Marcy.  At about 4.4 miles, we came to another junction,  We bore to the left, which was the correct path.  The trail continued to be rocky and wet from recent rain.

At about 6.2 miles, we reached a large clearing, which gave us our first views of the summit.  At about 6.6 miles, we arrived at another junction, bore right, and the views above began to open up as we headed above treeline.  The last .6 miles were challenging, with some areas requiring you to scramble up using your hands as well as your feet.  There were also some sheer, slick granite faces, so you had to pay attention and take care.  We finally reached the top at 7.25 miles.  The wind was whipping around us fiercely, but the views were absolutely breathtaking.  I would say these views compare very similarly to some of the views we have seen in Mount Washington and Franconia Ridge in New Hampshire, two of our favorite all-time hikes.

Summit of Marcy
We made it to the summit! Below:  Summit scenery; A well-earned giant cookie!

Summit of Marcy Summit Descent giant cookie

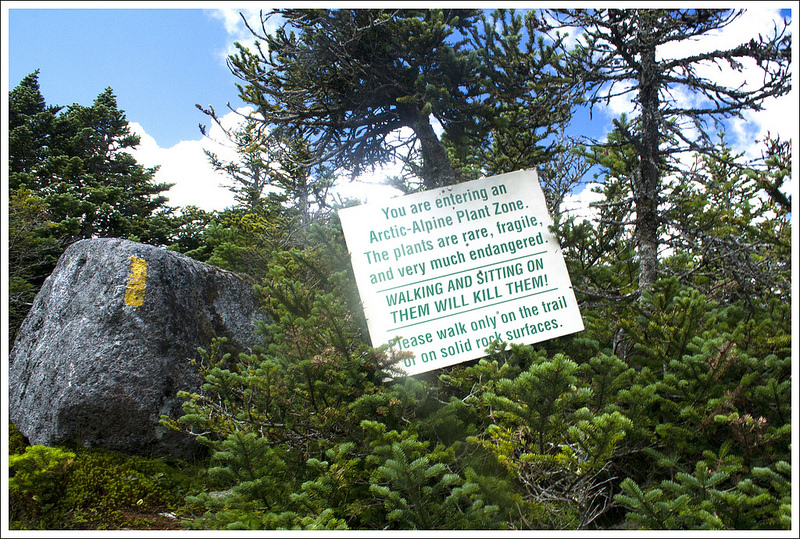
At the summit, there was another sign asking for everyone that carried their rock to drop it here.  While we stopped to eat a snack, we were greeted by a summit steward.  The Adirondack Mountain Club has hired people to talk to others at Mt. Marcy and other summits to educate people about the ecosystems and fragile plants that live on the top of these mountains.  They explained to us how the rocks we brought up would be placed to form barriers to protect plants from the wind and people.  I was amazed the ADK has people that hike Mt. Marcy every day to keep counts of people and talk to people at the summit.  We told the summit steward we have always wanted to be paid to hike and she was getting that dream job of ours. Read more about summit stewards.

We knew we had a long way back down, so we eventually pulled ourselves from the summit to make our way back down.  The views were so stunning coming down also.  On the way back down, I slid and pulled a muscle in my shoulder trying to stop my fall.  The mountains are no joke up here.

Summit Descent 3
After a nice stay, it was time to head down. Below: Steep descent and the last confirmed sighting of the bottom third of Christine’s trekking pole, Adam enjoys one last lofty view; Back into the woods for the rest of the climb down.

Summit Descent 4 Summit Descent 2 Adam Descending Marcy

We finally got back to our car after a long hike downward at 14.5 miles.  After the hike, we were completely beat.  We drove to Lake Placid and stumbled into Johnny’s, a pizza place.  I hobbled in and we ate in a pure exhausted state.

The memories on Mt. Marcy will last with me for the rest of my life.  It is an iconic mountain that definitely won’t disappoint if you can handle the climbing and distance.

Trail Notes

  • Distance – 14.5 miles
  • Elevation Change – 3200 ft.
  • Difficulty – 4.5.  It’s hard to give this a 5, because while the hike is long, it’s never a difficult hike.
  • Trail Conditions – 3. Parts of the trail are fantastic, other parts are a mess.
  • Views  5.  Spectacular, panoramic, top-of-the-world.
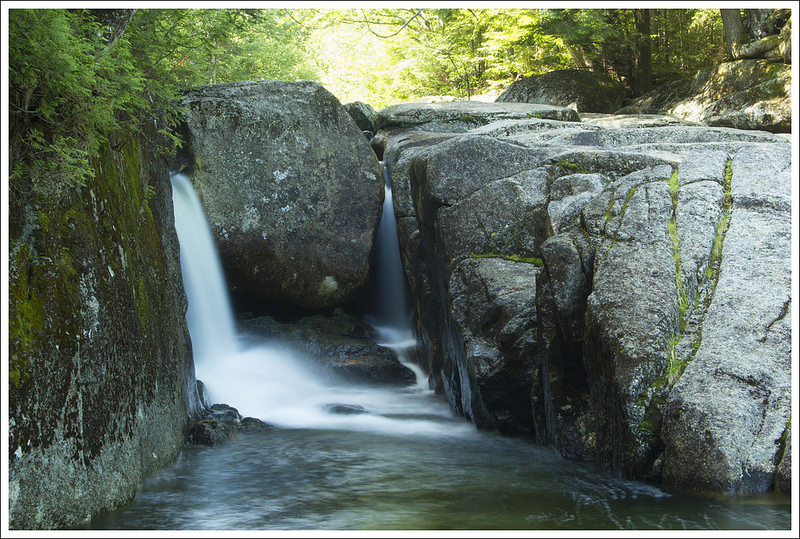
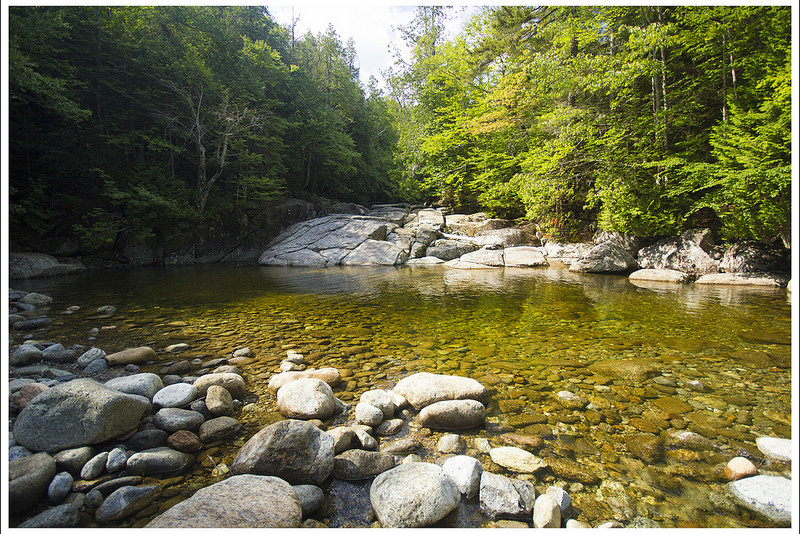
  • Streams/Waterfalls – 3. There are a few pretty streams along the hike.
  • Wildlife – 3. Red squirrels and lots of birds.
  • Ease to Navigate – 1.5.  With several junctions not giving good directions on which way to Mt. Marcy, bring along our map below and consult at every junction. 
  • Solitude – 1. This is a popular trail and you’ll see lots of people.

Download a Trail Map (PDF)

Directions to trailhead: From Lake Placid, go east on Rt. 73 to Adirondac Loj Rd., which is the first right after the ski jumps. The parking lots are 5 miles from Rt. 73. There is a $10/day parking fee. Park in one of the large lots near the High Peaks Information Center.  The trailhead is on the far side of the parking lot directly across from the High Peaks Information Center. GPS coordinates for this hike are: 44.1830461,-73.9644678

Rocky Falls & Heart Lake (NY)

adirondacks

This practically flat 5-mile hike takes you to a small, but lovely, double waterfall.  The pool beneath the falls is a great place to take a dip on a hot summer day.  After visiting the falls, the hike continues around the perimeter of Heart Lake.

View the Full Album of Photos From This Hike

Rocky Falls Feature
Rocky Falls is a small double waterfall. It may only be about 10 feet tall, but it’t located in a beautiful setting with an inviting plunge pool for swimming. Below: The trail is well marked and starts near the Adirondack Loj at Heart Lake; Entering the High Peaks Wilderness; Segments of logs are pressed into the trail tread to help manage muddiness and erosion.

Rocky Falls Trail Signage Entering High Peaks Wilderness Hiking Along to Rocky Falls

Adam Says…

As we were trying to mix up some easy hikes with some tough hikes in the Adirondacks, we settled on picking this easy hike to a nice waterfall.  This hike starts on the same path that led to Mt. Jo, beginning at the Heart Lake Program Center (the main hub for the Adirondack Mountain Club).  The trailhead parking at Heart Lake was $10.00 a day for non-members (ADK member parking was $5 and all prices went down by half for parking arrivals after noon.)   We recommend arriving early if you want to set out on any trail from this popular spot.

Stream on Rocky Falls Trail
There were several shallow stream crossings on the way to Rocky Falls.  Below: Some stream crossings had plank bridges; Signage along the trail; Gnarled tree roots.

Stream Crossing on Rocky Falls Rocky Falls Trail Signage 2 Neat Old Trees on Rocky Falls Trail

The trailhead starts to the right of the entrance station.  The trail starts off on a flat, easy path through the woods.  You pass the Heart Lake Nature Museum and then pass the junction to the Mt. Jo trail at .25 miles.  The trail stays flat and skirts along the north side of Heart Lake.  There are a couple of paths that lead down to the lakeside for peaceful views.  At .6 miles, you reach the junction that leads around Heart Lake, but stay straight on the trail.  Most of the hike is relatively uneventful, as you walk through some dense forest areas, with just a couple of stream crossings along the way.  We found very few people on the trail and it was an enjoyable walk slightly downhill.   At 2.0 miles, we reached a junction that showed the side trail to Rocky Falls.  It was only .2 miles to reach the falls.

When I had seen pictures of the falls online, the falls reminded me of two eyes with cascading tears.  We hung out a while at the bottom of the falls and were soon joined by a man with his two dogs.  They enjoyed jumping in the swimming hole and fetching a stick.  We could really tell they were having a great time and it was fun to watch their relentless pursuit.  There is a small path that leads to the top of the falls, but the most picturesque view is of the bottom of the falls.

Rocky Falls Wide View
A wide view of Rocky Falls and its plunge pool. Below: A different viewpoint of the falls; The pool under the falls; Looking downstream from Rocky Falls.

Another View of Rocky Falls Rocky Falls Swimming Hole Looking Downstream from Rocky Falls

We made our way back the way we came, now taking a slight uphill route from the falls.  At 4.0 miles, we came back to the junction with the trail that led around Heart Lake.  We decided to take this route in hopes of seeing the lake from a different angle.  This route actually led away from the lake so it didn’t provide any great views along the side as the northside did.  We passed through a short, open field used for skiing, but then came back into the woods.  We passed a few cabins and campsites along the lake.  At 4.5 miles, the trail met the lake again.  I found a nice bench and sat and enjoyed the serenity of the lake.  We then moved further down to the Adirondack Loj, where we saw several families that were out in the lake swimming, kayaking, and paddleboarding.  We read books by the lake for a while, enjoying the sunny day and then made our way back to the car.

One thing I feel is really special about this area is the ability for families to enjoy the outdoors in many different ways.  This hike and the surrounding areas is a great destination for people that enjoy the water, the views, and the hiking.  While I have seen more impressive waterfalls, this would be an easy family outing if you are staying nearby.

Christine Says…

Adam and I planned to hike Mount Marcy as the grand finale of our Adirondack week, so for Wednesday’s hike, we decided to stick with another easy trail so we could save our energy for our big, 15-mile route a couple days later.  Once again, we found ourselves setting off from the Adirondack Loj – it really is the heart of outdoor activity in that area.

Dogs at Rocky Falls
We saw many dogs – especially Labradors – at the falls.  Below: We enjoyed watching them dive, swim, and compete for their stick.

Dogs Swimming at Rocky Falls Dogs Swimming at Rocky Falls 2 Dogs Swimming at Rocky Falls 3

The trail leading to Rocky Falls was surprisingly flat and soft.  I had come to believe that everything in the Adirondacks was either slick granite, boulders, cobbles, or a tangle of gnarled roots; so terrain like this was a welcome surprise. The wide dirt path passed through beautiful shady woods.  Many of the muddy places along the trail had small logs pressed into the tread to make the mucky parts more passable.   It’s a clever, easy way to manage areas prone to wetness.

Another nice thing about the easy terrain was that it gave us a chance to cover ground at greater speed.  I’m not saying I like to rush through hikes, but sometimes complicated terrain slows you to just a mile an hour.  It felt good to stretch our legs and cover ground!  We reached the falls pretty quickly.  When we first arrived, there were a couple people climbing on the rocks above the waterfall, but we had the lower pool all to ourselves.  I was able to take advantage of some passing clouds to get a couple long exposure photos of the waterfall.  It was small, but very pretty.  The pool beneath the falls was very inviting.  I would have loved to go for a swim, but didn’t bring a towel or clothes to change into.

Crossing the Ski Slope
On the return hike, we followed the trail around the other side of Heart Lake. This took us by the Alice Waterhouse Ski Slope. Below: The trail didn’t follow Heart Lake’s shore very closely; One of the lean-to’s available for rent along Heart Lake; Canvas tents are also available.

eturn Hke From Rocky Falls 2 ADK Lean To Canvas Tent

After a few minutes, more people began to arrive.  The two dogs Adam mentioned were fun to watch, but they also meant I had to put my tripod away.  I don’t know what it is, but I am a wet dog magnet as soon as I get my good camera gear out!  Every time I tried to take a shot, they would come bursting out of the water and running in my direction at a full, water-spraying shake!  Oh well… I had already managed to take a few decent photos and really enjoyed watching the dogs dive and swim. When we went into Lake Placid the later, we actually ran into the hiker who had brought the dogs.  It turned out that he worked at Eastern Mountain Sports.  Funny… usually the people you pass on a day hike, you never see again.

After leaving the falls, we took the lake loop trail back to the Loj.  It was mostly walking through the woods.  Eventually we reached a cross country ski hill named in honor of Alice Waterhouse. Alice was an Adirondack legend – she hiked all the high peaks, skied, worked on trail maintenance, and volunteered her time working to preserve the area’s wilderness.  You can read more about her on the ADK Blog.

Heart Lake
After we finished our hike, we sat along the shore of Heart Lake and ate lunch and read books. Below: The Adirondack Loj; Heart Lake is clear and cool – a perfect spot to dunk tired feet.

ADK Loj Wading

After passing the ski hill, we quickly reached the lakeside camping area.  The lean-tos were really cute.  They reminded me of the Appalachian Trail shelters we see through much of Virginia.  It would be nice to camp there someday!  Before we knew it, we were back at the Loj.  We had packed a picnic of peanut butter sandwiches, chips, and cookies.  I bought more cold drinks from the info center and staked out a nice spot with two Adirondack chairs overlooking Heart Lake.  We spent the afternoon relaxing and reading books.  We watched people paddling the lake and even spotted a loon diving.  What a nice place to watch the world pass by.

Trail Notes

  • Distance – 5 miles
    (Check out the stats from Map My Hike)*
  • Elevation Change – 377 ft.
  • Difficulty – 1.5.  This trail is a rarity by Adirondack standards – the trail was flat and mostly dirt.  We think most people could easily manage this hike.
  • Trail Conditions – 4. The trail was in great shape with only a few muddy spots.
  • Views  2.  Views of the mountains across Heart Lake are pretty, but there are no lofty vistas on this hike.
  • Streams/Waterfalls – 3.5. The small double waterfall is the main point of this hike.  It’s a pretty spot, but there are more impressive waterfalls in the area.
  • Wildlife – 2. The area is heavily traveled and popular with families and dogs.  I wouldn’t expect to see lots of wildlife. Although, we did see a loon on Heart Lake.
  • Ease to Navigate – 4. Trails are generally easy to follow and well marked.
  • Solitude – 2. This is a popular trail in a busy area.

Download a Trail Map (PDF)

Directions to trailhead: From Lake Placid, go east on Rt. 73 to Adirondac Loj Rd., which is the first right after the ski jumps. The parking lots are 5 miles from Rt. 73. There is a $10/day parking fee. From the parking lot at the High Peaks Information Center at the end of Adirondak Loj Rd. return to the entrance station and find the trail at the far corner of the snowplow turnaround. GPS coordinates for this hike are: 44.1830461,-73.9644678

Giant Mountain (NY)

adirondacks

Giant Mountain is New York’s 12th tallest peak and the hike to the top is no joke!  With about 3,400 feet of elevation gain in just 3.4 miles, lots of slick granite and tangled roots to negotiate, and several short rock scrambles, this is not a beginner’s hike.  The views at the top and along the descent make the effort worthwhile, though.  The hike winds down with a visit to a lovely glacial pond called the Giant Washbowl.

View the Full Album of Photos From This Hike

Giant Mountain Summit
Crowd gathered on the summit of Giant Mountain. Most of the people were part of one very oversized hiking group. Below: Trailhead information; There was fog catching the sunlight early in our hike; The steady climb begins early on the route.

Giant Mountain Trailhead Giant Mountain Fog in the Woods Giant Mountain Climbing

Adam Says…

Giant Mountain is one of the Adirondack High Peaks, a collective name given to the 46 mountains that rise above 4000 feet.  A survey later showed that four of these peaks are actually slightly below 4000 feet (and one other should have been included), however the ADK is keeping all of the original 46 peaks in this club.   Giant Mountain stands as the 12th highest mountain in New York at 4,627 feet.  One thing we quickly discovered on our trip to this area is that there are lots of people trying to peakbag all 46 peaks – kind of a rite of passage for serious NY hikers.  So, you will likely find fellow hikers on the trail.  Giant also has several different ways to approach the summit, but this path would be the most popular, mostly because of the length and the access to see the Giant Washbowl and Nubble.  Some peakbaggers will approach this hike from another trail to the east to bag Rocky Peak Ridge, #20 on the Adirondack High Peak list.

We found the parking lot without much trouble and began our hike on the Roaring Brook Trail.  Within the first couple of tenths of a mile, the trail branches off to the left (the trail to the right leads to the base of Roaring Brook Falls) up a steady incline.  The trail starts off with a lot of roots, but these are soon replaced with lots of large rocks to navigate.  At about .5 miles, you reach a side trail while leads to a nice large campsite and the top of Roaring Brook Falls.  Be very careful if you check out the stream at the top, since people have fallen over the falls and died.  Backtrack your steps and rejoin the trail to continue the uphill climb.  At 1.2 miles, you reach a junction that leads to the Giant Washbowl and Nubble (your return trip on this loop).

Steep Rocks to Scale
The terrain ascending Giant Mountain is varied with rock scrambles, smooth granite, cobbles, roots, stream crossings and more! Below: The top of Roaring Brook Falls; A stream crossing;  Trail Junctions were well marked.

Top of the Falls Stream Crossing  Trail Junction

Continue uphill on the Roaring Brook Trail.  Keep an eye on where you place your feet as you have to navigate along rocky steps through most of the rest of the hike.  At 2.9 miles, you reach another junction.  Turn left to head to the summit of Giant.  This part of the trail had some extremely slick granite slabs to walk up.  We had just had rain a couple of days ago, so some of these giant slabs were very tricky to climb.   Eventually, you will reach the summit at 3.6 miles. Views at the top are truly breathtaking.

On our descent, we returned back the way we hiked up.  Christine was worried about the descent over the slick granite, but we took our time and even scooted down some surfaces on our butts to be extra safe.  At 4.4 miles, we reached the junction of the Ridge Trail (also known as the Zander Scott trail) and Roaring Brook Trail.  Instead of taking the Roaring Brook Trail back the way we came, we decided we wanted to see the Giant Washbowl.   The descent was steep this way down, but there weren’t as many slick granite rocks – the area is more exposed and the sun dries the rock off more quickly.  The way back on this trail gave us more incredible panoramic views, so we instantly knew we made the right choice.  I would recommend to descend on this trail rather than trying to ascend, because by descending you get the views in front of you instead of having to turn around constantly to enjoy the views.  We went at a slow pace through this section since it kept opening up to views.  At 5.5 miles, we reached another trail junction.  The trail that branches off to the right leads to the Giant Nubble.  We opted not to take this route, but from what I have read there are some great views that overlook the Washbowl and surrounding mountains.

Ladder
There was even a ladder to climb on the hike up. Below: Some of the climb involved clambering over big rounded rocks; Other parts were across smooth (often slippery) granite, Sometimes you had to drag yourself along the brush at the bottom of a granite slide.

Climbing the Cobbles Climbing the Granite Granite Slide

Continuing down the Ridge Trail, we came to the Giant Washbowl.  The Washbowl is a large pond, serving as a picturesque spot begging you to reflect along the calm waterside.  We crossed over a long, but low to the ground, log bridge that stretched over part of the creek.  On the other side of the log bridge was another junction and trail sign.  We took a right and followed this Giants Washbowl Trail that skirted the edge of the Washbowl.  On the other side of the Washbowl, we saw a huge beaver dam and tree stumps marked with gnawing beaver teeth.  The trail was mostly level, but did go slightly up and down at minimal climbs and descents.  I found this part of the trail to be more wet and slick with some rocks and almost had a bad fall, but was saved by my trekking poles.

At 6.3 miles, this section of the trail rejoined the opposite side of the Nubble Trail.  We kept straight on the trail and at 6.7 miles, we reached the junction with the Roaring Brook Trail.  We took a left here at this junction and followed the trail back to our car, which should bring you back around the 8 mile mark.

This hike was intimidating and a bit of a challenge.  I remember we had read this was a great family hike.  We were thinking they would never describe this as a family hike in Virginia, but I guess New York Adirondack hikers are a stronger breed than we are used to in Virginia.  We found that to be the case for most of the people we met up here.  People in the Adirondacks look healthier, seem to be in better shape, and have a close connection to the outdoors.  If you enjoy a bit of a challenge, the views are definitely worth it on this hike.  Pictures can’t do the views justice.  Be sure to add this one to your agenda if you are looking for a great hike in the High Peaks area.

Christine Says…

Adam did a great job doing all our pre-trip hike research  for our Adirondacks vacation! Over the course of the week, we hiked a mix of big mountains and small mountains. We saw quiet ponds and cascading waterfalls. Some days were easy strolls and other days were grueling climbs.  The hike of Giant Mountain was not our longest hike of the week, but I think it was definitely our toughest.  It had a monster elevation gain and I found the terrain physically challenging and a bit frightening in spots.

Super Steep
Near the summit, the climbing was tough and traversed large boulders. Below: First glimpses of the view; Before reaching the top, the trail offered a brief reprieve from relentless climbing as we walked across a saddle between peaks; Giant Mountain Summit

First Vies Saddle Giant Summit

The climb started off through lovely, shady forest.  The trail was cris-crossed with roots, but the footing was generally soft dirt.  The climb was steady and relatively steep.  As we climbed higher, the dirt trail gave way to increasing rocks.  At first, it was jumbles of boulders and cobbles.  We made our way, stepping carefully from stone to stone – making sure each was level and anchored before committing our full weight to the step.

Eventually, we started seeing fewer round boulders, and started seeing mostly smooth, slanted granite faces.  The granite was wet from storms the night before.  It was also covered with a coating of incredibly slick granite sand.  The climbing was very mentally challenging for me.  I get really nervous when I have to cover slippery terrain that lacks anything to grab onto in case of a slip or slide.  My vertigo makes me more prone to the sensation of losing my footing.

There were several spots on the climb of Giant that paralyzed me with panic and fear.  On one especially smooth, steep pass; I actually burst into tears because I was so certain I was going to fall off the mountain and die.  I gripped the tiny hand and foot holds, took deep breath, focused on the rock face in front of me, and climbed.  It sounds silly, but confronting and prevailing over fear like that makes me feel proud.  Of course, just when I’m feeling my proudest – some wiry, lean 22-year old guy trots up the same rock face with the agility of a mountain goat.  🙂  I just remind myself that my vertigo is an extra challenge and I still did it!!!

Giant Mountain Summit
Super views from the summit of Giant Mountain. Below: We had fantastic views on the hike down the Ridge Trail; Sometimes the trail disappeared; Our first view of the Giants Washbowl.

Great Views on Descent Direction First View of Giants Washbowl

Before reaching the summit, we crossed a nice saddle between knobs.  The trail was fairly level and soft and it was a great reprieve before one final scary rock scale to the summit.  It took me a few minutes of deep breathing and positive thinking to climb the one last steep spot to the summit.  And the summit was MAGNIFICENT!  Of course, some of the beauty was stolen from me because I was already thinking ‘How the heck am I going to get down from here?’  I need to remember to stay in the moment and wish I had taken more time just to enjoy being at the top of Giant.

We chatted with other hikers at the top.  We took photos.  And then it was time to climb down!  As luck would have it, the descent turned out to be no big deal for me.  I took my time, scooted on my rear end, and used my trekking poles and tree branches to brace myself.  One of the hikers we chatted with at the summit took a hard fall on slick rocks climbing down.  It looked like he hit his head, so I shouted to him to stay put and not try to get back up.  I started climbing back up toward him to make sure he was OK.  Fortunately, he was fine – just bruised and stunned.  It’s so easy for one misstep to become a serious injury on terrain like this.  In fact, there is a website that lists search and rescue missions for the Adirondacks.  Typically, crews go on anywhere from 5-15 missions a week to help injured, sick, and lost hikers.

Great Views on Descent
The descent on the ridge trail offered great views. It was like a theater with the mountains up on stage. Below: Some steep descents along the granite; So much granite; Really… there was a lot of granite.

Steep Slick Granite More Rock Faces Lots of Rocks

At the junction of the Roaring Brook and Ridge Trail, we stopped to review our map.  We started chatting with another couple we had met on the summit.  They didn’t have a map or a plan, so we shared information with them.  They decided to hike with us down the Ridge Trail to see the Giant Washbowl.  They had an adorable Jack Russell mix dog named Judy!  She was an agile and energetic hiker.

The views coming down the Ridge Trail were as nice as the summit.  It was like walking into a theater of mountains.  There were lots of granite faces and cobbles to negotiate on the way down.  Sometimes the trail was so rugged you were left wondering if it really was the trail!

We started seeing glimpses of the Washbowl from above.  It was even more beautiful up close.  I loved seeing the reflections of clouds and mountains in the water.  From there, the rest of the hike was pretty easy and the terrain was much more moderate.  We passed (and greatly angered) a couple red squirrels.  They’re pretty cute when they’re mad – chattering at you from tree branches.

Giants Washbowl
The Giants Washbowl is a beautiful mountain pond. Below: Seriously, these rocks are the trail; A bridge over the end of the pond; A dam at the top of the pond.

Seriously Rocks Bridge Over Pond Dam

When we were almost back to the car, we passed a large family group.  There were two women and about ten kids under the age of ten – all dressed in swimsuits and sandals.  They were considering walking to the top of the waterfall and asked what the terrain was like.  Fortunately, we were able to dissuade them from hiking the steeper rockier terrain by telling them that there was nothing really to see – which was true.  The top of the falls was really low and unimpressive.

We reached our car and decided ice cream was in order!  We definitely earned a treat after a hike like that!

Trail Notes

  • Distance – 8.1 miles
  • Elevation Change – 3408 ft.
  • Difficulty – 5.  The hiking up here is tough.  
  • Trail Conditions – 2.  While the trail is well-maintained, there are  a lot of rocks that make for very tricky footing.  There is also a few sections that require you to go up slick granite rocks that can be especially dangerous after recent rainstorms.  
  • Views  5.  Outstanding panoramic views.  Great views of many other high peaks in the area.  
  • Streams/Waterfalls – 2.5  The first mile of the trail gives you some occasional views of Roaring Brook.  A small side trail leads to the top of the Roaring Brook Falls.  The Giant Washbowl is also impressive to see.  
  • Wildlife – 2.  This is a popular trail so I wouldn’t expect to see much more than birds.
  • Ease to Navigate – 4.  Signs gave good information at the junctions.  There are different options to include trips to Giant Nubble and also to connect to Hopkins Moutain and Owl Head Lookout from the summit.
  • Solitude – 2.  Expect to see plenty of people on a nice day at the summit.  The summit has a lot of space to spread out and enjoy your own view.  

Download a Trail Map (PDF)

Directions to trailhead: From Keene, NY head southeast on NY-73E/NY-9 S.  Continue on NY-73E for about 6.1 miles.  There is a small parking lot on the left, which is shortly after you pass through St. Huberts.  The trailhead is at the end of the lot. Coordinates for trailhead parking are 44.1502704,-73.7676257.