The Virginia Creeper Trail is a picturesque rails-to-trails path that winds its way for thirty-four miles through the Mount Rogers recreational area. The trail starts in Whitetop and ends in Abingdon, with Damascus sitting right in the middle.
We biked the Creeper section from Whitetop to Damascus on a rainy day many years ago. We planned to do the whole thing that day, but the rain became a heavy downpour and it was too muddy to enjoy biking. We tried to come back a couple times to bike the second half, but were foiled by more rain and tornado damage. Last summer, we finally made it back to officially finish the remaining 16 miles between Abingdon and Damascus.
We have our own bikes, but they were badly in need of tune ups, so we left them home and rented from Blue Blaze Bike and Shuttle in Damascus, Va. Adam rented a mountain bike and I decided on a cool, purple cruiser. The trail’s terrain is generally smooth and covered with small gravel, so I decided to go with plush comfort rather than more rugged equipment. The rental shop was affordable and their bikes were impeccably maintained.
We booked seats on their first shuttle van of the day, and ended up being the only riders. Our driver was fun to talk to and was a regular hiker and biker. The shuttle took us from the shop back to mile zero in Abingdon, Va. From there, it was a mostly flat 16 mile ride back to their shop.
The section from Whitetop to Damascus is far more popular than the section we did this time – it’s a little more scenic and it’s all downhill, so it requires very little exertion. Our ride was still very easy, but we did have to pedal! The nice thing about biking the less popular half on a weekday was that we practically had the whole trail to ourselves. We saw just a handful of other runners and cyclists. The Creeper can get very crowded and congested, so this was a treat!
The main things to see along the Creeper Trail are beautiful waterways and railroad trestle bridges. The section we rode passed mostly through farmland, whereas the other half is more wooded. It was still really pretty, and the breeze from riding the bike made the heat bearable.
We stopped for a short snack and drink break at Alvarado Station about 8.5 miles into our ride. The station was once a railroad stop halfway between Abingdon and Damascus. It is the only stop for snacks and restrooms on this half of the trail. Across from the restroom building, there was a nice trailside park with a pavilion and porch swings. We sat by the river and enjoyed the view. We even saw a heron!
After our break we pedaled the remaining seven-ish miles into Damascus. The last mile or so follows the main road into town, so there are more road crossings and car noise. The nicest thing about trails like this is that the mostly keep car and bike traffic separated, so you always feel safe riding.
We got back into town, returned our rentals, got some lunch at Wicked Chicken Winghouse – another decent lunch stop in Damascus. Afterwards, we drove back to our AirBnB and picked up the dogs and took them for a two mile walk along the Creeper. After we got them nice and tired, we headed to Abingdon Vineyards to try some wine. The winery is dog friendly and has lots of outdoor tables along the stream. The day finished up with desserts from Anthony’s Desserts in Abingdon. If you’re in the area, this place has the most amazing sweets – don’t miss it!
More Photos
Trestle #1 on the Virginia Creeper
Biking on the Creeper
Crossing railroad trestles
Trestle #2 – they are all numbered and there are over 35!
Pretty farmland
Adam biking along
Taking a break in the shade
Alvarado Station park
Horses are welcome and common on the Creeper
My sweet purple cruiser
Some small rapids near Damascus
Pretty blooms along the trail
Bike selfie back in Damascus
Pugs on the Creeper!
Abingdon Vineyard
Wine flight
Don’t miss Anthony’s Desserts in Abingdon
Seriously – don’t miss Anthony’s Desserts! This is just half the case!
We did this 4.6 mile hike on an especially beautiful, misty summer morning. It was a moderate climb with lots of interesting things to see along the way – from an old sugar house to the headwaters of a flume gorge, to the lovely viewpoint.
Beautiful misty sunshine on the Kinsman Trail. Below: Trailhead sign; Early parts of the trail.
Christine Says…
This was the last hike of our 2017 trip up north. By the end of two weeks that involved five different dayhikes and a three-day overnight backpacking trip, we were both sore, bruised, and covered with bug bites and scratches. We were both pretty tired, but the weather was nice and we felt we should squeeze one more quick hike in before the long 12-hour drive home. The hike up the Kinsman Trail to Bald Peak was close to my parents’ house and didn’t look too grueling, so we decided it would be the perfect grace note on our wonderful summer vacation.
We parked in the lot for the Kinsman Trail on Route 116. We arrived early and there were plenty of open spots, however it was overflowing by the time we got back to the car around 11:00 a.m. The trailhead is popular as it provides access to the 4,000 footer, Mount Kinsman. Bald Peak isn’t a true summit, it’s a rocky outcropping on the shoulder of a mountain. While it might not be the pinnacle, it provides nice views and is well worth doing.
The first half mile of the hike meanders along single-track trail through the forest. The terrain is rolling and there are abundant ferns and shady hemlocks along the way. At .5 miles in, the trail will arrive a a junction with a wider, road-like trail. Take a right onto the wide trail. In a tenth of a mile, you’ll pass a neat, but overgrown, sugar house. It didn’t look like it had been used in many years. Follow the road/trail for another half mile before coming to another junction. Bear to the right, continuing to follow the steepening blue-blazed Kinsman Trail. Keep an eye out for the blue blazes to keep yourself on track.
This rundown, old sugar house is right along the trail. Below: Scenes along the Kinsman Trail
About .35 miles later, you’ll make your first stream crossing – there are several on this hike, along with several lovely (albeit small) waterfalls. The waterfall pictured below was at the second stream crossing. Continue following the Kinsman Trail for .65 miles to your third stream. This is Flume Brook. Once you cross the water, look for a small sign pointing to the right. Follow a spur trail steeply downhill along the gorge. The rock walls that make the flume are steep and deep, but you will hear water rushing in the gorge below. Be careful looking down into the gorge – the terrain around it is extremely steep and slippery. A fall here would necessitate a dangerous rescue operation if you even survived the initial plunge.
After enjoying the flume, backtrack up to the main Kinsman Trail. Hike a couple more short tenths of a mile uphill, and you’ll reach the next junction. Bearing to the left will take you up the Kinsmans, so stay to the right and head along the Bald Peak spur. The trail is blazed yellow and follows a short series of ups and downs for about a quarter mile. The spur was a beautiful mix of evergreens, moss, and granite. At the end of the spur, you’ll come out onto a wide rocky ledge. From the viewpoint, you should be able to see Mount Kinsman, Mount Moosilauke, and a great peek into Vermont. Once you’ve enjoyed the view, return to your car the same way you hiked up for a round trip of 4.6 miles.
Small waterfall on the Kinsman Trail to Bald Peak. Below: Mist in the forest; Small cascades; A look into the gorge.
Adam Says…
The Bald Peak hike had a lot of things that made us pick it – close by to where we were staying, waterfalls, plunging gorge, and view. This hike doesn’t get a lot of traffic except by locals since people will opt for bigger, grander views, but this one has a nice sampling of things to see.
The trail always seemed more of a gradual uphill and never felt too tough for us. In that first half mile, we came across the sugar house on the side of the trail. I peaked through the spaces in between the boards and saw some of the old materials used to collect maple sap inside.
Mosses on the Kinsman Trail. Below: The spur to Bald Peak; Hiking along the spur
We had picked a morning to hike this right after rain the previous day. The morning mist rising up through the trees caught the morning sunlight and the beams of light cast a mystical picture across the forest. The rain also made the hike slippery over some of the roots and rocks that you always have to step on in a hike in New Hampshire.
As Christine mentioned, when you pass over Flume Brook there is a small sign to view the gorge. We both started down this side trail, but it was incredibly slick. Christine stopped, but I decided I wanted to go further to see if I could actually be able to look down into the gorge. Christine was freaking out a bit that I was pushing on, but I did want to see if I could get some pictures. I went a bit further and actually slipped, sliding about 10 feet before I caught myself on the trail. One false step here could mean your death. The gorge was located just a few feet away from the trail and all I could see was that it went down quite a bit. There was never a good place to actually be able to see down into the gorge, so I would recommend skipping this feature – it’s too dangerous, anyway.
Bald Peak views. Below: More perspectives on the viewpoint.
When we reached the view at the top, I was impressed. It was a fairly clear morning so we could see all around us and far off to Vermont. We talked with a couple of women that loved to hike together that lived locally. They had been working on the 48 peaks above 4000 feet and had a lot of advice on places to hike in the future. We love picking the brains of local people for hiking suggestions. Many people that you may come across use this trail to go all the way to Mt. Kinsman without taking this spur trail to Bald Peak for an extra view. You will likely have solitude on this peak during most days. This was a nice final spot to take in some views of New England before heading back to Virginia.
Trail Notes
Distance – 4.6 miles
(Check out the stats from Map My Hike)*
Elevation Change – 1400 ft.
Difficulty – 3. Moderate and well-graded.
Trail Conditions – 3.5. The trail was nice, with some rocks and roots typical to the area.
Views – 4. Very nice, but not quite 360.
Waterfalls/streams – 4. The headwaters of the flume are pretty cool and there are several small waterfalls along the trail.
Wildlife – 3. Typical squirrels and birds.
Ease to Navigate – 4. The route was well-blazed/marked and easy to follow.
Solitude– 4. We only saw a handful of others along the way. This trail gets far less traffic than more popular hikes in the area.
This 3.6 mile, family-friendly hike has a bit of steady climbing to reach the ridgeline, but with two summits – both with amazing vistas – it’s a hike that should not be missed when visiting this area.
Adam takes in the amazing views from Middle Sugarloaf.
Adam Says…
If you are visiting the White Mountains of New Hampshire, I would definitely put Sugarloaf on your list of must-do hikes. With a total of just 3.6 miles to cover both summits, it’s a great family hike and the views on a clear day are hard to beat.
From the parking lot, cross the bridge. You will see the yellow-blazed trail head off to the right just past the bridge. This is the Trestle Trail and it goes along the Zealand River. There are a few places to duck off the trail and get some gorgeous water views. In just a quarter of a mile, the junction for the Sugarloaf summits branches off to the left. The trail goes over some boggy areas at first before coming to a boulder field. You will see two huge boulders (among others), that were dropped off by glacial melt many years ago. The trail really starts to climb at this point and at one mile, you will reach a junction sign that points to the left for Middle Sugarloaf and to the right for North Sugarloaf.
The hike starts off along the scenic Zealand River. Below: Trailhead parking along Zealand Road. For some reason, the pay stations were covered; Adam follows the Sugarloaf Trail away from the road; The trail follows the stream for a little while.
We opted to go to Middle Sugarloaf first. The trail continues to climb, often through some very rocky areas. Eventually, you come to a ladder staircase that is your last climb before reaching the summit area at 1.4 miles. After the staircase, the trail opens up from the trees and the vast expanse of views are all around you on a large open ledge. When you first emerge, straight ahead of you is Mt. Hale looking to the south. If you wind around towards the right, you will have great views of North Twin and South Twin mountains. If you wind around to the left, you will come to a viewpoint to the east where you can see the far-off Presidential Range and a keen eye may even see the tower at the top of Mount Washington on a clear day. This open area is a photographer’s dream, as there are gorgeous views no matter which way you look and it is easy to lose track of time exploring the summit area.
We eventually returned the way we came and reached the junction at 1.8 miles (keep in mind if you are tracking distances, you may have walked a couple of tenths around the summit of the Middle Sugarloaf). We then headed toward the North Sugarloaf summit, which is not as steep but winds around until it reaches the summit at 2.1 miles. The summit here gives you views of US-302 cutting through the landscape before the Presidential range, but you still have gorgeous views of mountains all around. This summit would look outstanding on most hikes but we were a little spoiled from the views at Middle Sugarloaf. Since North Sugarloaf is usually less crowded (many people just do an out-and-back to Middle Sugarloaf), you may have a little more solitude. We did come up to some families that were staying at the Sugarloaf campgrounds near the initial parking lot, that were alternating doing hikes to both summits on different days.
After a bit of climbing, you’ll reach this junction. We visited Middle Sugarloaf first. Below: A few scenes from the climb up to the ridge: wooden trestles over a muddy area, a giant boulder you can walk by (or through… see photo later in post), typical New Hampshire rockiness.
After taking in the views at North Sugarloaf, we headed back the way we came, reaching the junction at 2.5 miles and then getting back to our car around 3.6 miles. These peaks were ones that I’m sure we will come back to time and time again on a clear day. When you want a relatively easy hike for this region with a big payoff, look no further than this one. I would recommend hitting it in the early morning since this is an extremely popular hike so you can pick your prime place to sit down and soak in the beauty of the White Mountains.
Christine Says…
I don’t know what took us so long to do this hike. It’s been on our radar for years – ever since my parents initially moved to New Hampshire. I guess there are just so many amazing trails in the area, that sometimes we overlook the short/popular hikes for fear of them being overrun by crowds.
Honestly, the key for maximizing solitude on hiking is simply getting up early. I find it’s true everywhere. If you can get to trailhead parking just as the sun is coming up, you’ll almost always beat the big crowds of casual hikers that come out mid-morning.
There is a ladder-stair to reach Middle Sugarloaf. Below: The forest along the ridgeline was lush and gorgeous; Adam standing on Middle Sugarloaf; Middle Sugarloaf offers views in every direction.
We got a little bit turned around when we first started this hike. There is a trail that leads directly away from the parking area. We missed the fact that we had to cross the bridge to get to the Sugarloaf Trail and instead started walking along the closer trail. In a couple tenths of a mile, we reached a campground and knew we were going the wrong way. We backtracked, reread our guidebook, and were set straight a couple minutes later.
The early part of the hike followed the scenic Zealand river. The boggy areas Adam described were extremely buggy – mosquitoes everywhere! We had to stop and coat ourselves with OFF in order to proceed. The big climb starts pretty quickly after passing the huge boulders. It’s a steady climb until the junction. Once you reach the ridgeline, the hike becomes more moderate. We opted to visit the prettier Middle Sugarloaf first. As we were walking along, I wondered why there was a north and middle summit, but no mention of a South Sugarloaf. Apparently, there is a south summit, but it’s a total bushwhack and is therefore rarely visited. I found photos of that summit on another hiking blog, and it looks like a beautiful spot for people who have orienteering skills and enjoy exploring off-trail.
The views from Middle Sugarloaf are truly spectacular. Below: After passing the junction, we climbed up North Sugarloaf; The forest had a lot of evergreens, The summit had a some trees between two different places to take in the view.
On Middle Sugarloaf, we enjoyed the summit all to ourselves for a good 30 minutes. I basked in the sun and ate my traditional New England hiking snack of a whoopie pie. I rarely eat them in Virginia, but I have to have them on the trail in New England. It just seems right – possibly mandatory. 🙂
When a few more hiking groups began arriving at the summit, we decided it was time to make our way over to North Sugarloaf. The hike was pleasant and easy. When we got to the vista, we were a bit disappointed. It was just a small rock ledge with a partial view. It was packed with a large family group. Luckily, we realized this wasn’t the actual viewpoint – the trail continued from one opening back into the trees before coming out on a larger open area with another panoramic view. North Sugarloaf still doesn’t impress as much as Middle, but it was definitely worth checking out.
After enjoying a few more minutes of the view, we hiked down and made our way to one of our favorite post-hike hangouts in the area – the AMC Highlands Center. The rustic lodge serves as the main hub and information center for the White Mountain’s Presidential range. There is a gear shop, lodging, a lounge, and a decent cafe. We got sandwiches and beers and sat at a table outside so we could take in the view and sunshine. What a great day!
The views from North Sugarloaf are different, but also very nice! Below: Another North Sugarloaf view; This is the boulder you can walk through. There is a big slit in the middle; Another look at the beautiful Zealand River.
Trail Notes
Distance – 3.6 miles
(Check out the stats from Map My Hike)*
Elevation Change – 925 ft
Difficulty – 2.5. There is some climbing on this one, but since the distance is shorter take your time. Great for a family hike.
Trail Conditions – 4. This hike is very popular, so the trail is well worn.
Views – 5. On a clear day, you can see for hundreds of miles around you.
Waterfalls/streams – 4. Passing by the Zealand River in the very beginning of the hike gives you gorgeous river views.
Wildlife – 1. Other than birds, you likely won’t see a lot of wildlife due to the popularity of the hike.
Ease to Navigate – 4. There are a couple of turns to make, but overall the trail is well-blazed and signs at the junctions are helpful.
Solitude– 1.5. On a clear day in the summer, this will be a popular hike. There is typically more solitude on North Sugarloaf. Start early to avoid crowds and get good parking.
Directions to trailhead: Parking coordinates are: 44.254858, -71.503993. The trail begins on the far side of the bridge on the right, on the same side of the road as the parking area. There is normally a fee station box here, but the box was sealed when we were there. Typically, the hikes here would charge $3 for parking, so bring some cash for an envelope to pay the fee.
* MapMyHike is not necessarily accurate, as the GPS signal fades in and out – but it still provides some fun and interesting information.
This 3.6 mile hike takes you over more than 15 water-crossings to see a series of small waterfalls and swimming holes. The main scenic draw of this hike is the visit to the Devils Bathtub – a beautiful sandstone formation in the streambed.
The Devils Bathtub is a perfectly clear, oval pit in the sandstone. It really does look like a bathtub! When we visited the water levels were very low. Normally the striated area above the tub forms an even larger pool. Below: Stairs at the beginning of the hike; First water crossing; Early part of the trail.
Christine Says…
The Devils Bathtub popped up on our radar after getting quite a bit of attention on the internet. Sometime after 2014, it started showing up on Pinterest, on Reddit, on lists of most beautiful places in each state – even the Weather Channel called it Virginia’s hidden gem. As dedicated hikers, we wondered how such an amazing place could have escaped our notice for so long.
As it turned out, this hike has been hiding in our plain sight for years. The route to the Devil’s Bathtub is fully outlined in Bill and Mary Burnham’s ‘Hiking Virginia’ guidebook as part of the larger Devil’s Fork loop. Burnham’s description of the scenery was far less dramatic than accounts we read on the internet. And, we’re rarely in the far southwest corner of Virginia, so we stayed in the dark like most outdoorsy Virginians.
However, on our summer trip to the Abingdon area, we finally had a chance to find out first-hand if the Devil’s Bathtub lived up to its internet hype.
First off, the Devil’s Bathtub is in the middle of nowhere in Scott County, Virginia. There isn’t a nearby gas station to ask for directions or use the restroom. You probably won’t have any cell service, so make sure you have good directions and all your trail information ahead of time. Second, the last bit of road to get to the trailhead parking is quite rugged with mud and deep potholes in the road bed. Our Subaru did fine, but it was a bumpy ride! Third, parking for this hike is extremely limited with room for just a few cars. We visited early in the morning on a quiet, overcast weekday, so there was just one other car when we arrived. We’ve heard parking can be a nightmare for this hike, so time your visit strategically.
We saw dozens and dozens of these efts. Below: Scenery along the stream
Once we got past the logistical challenges – location, road access, and parking, we were all set to see this spectacular beauty spot! The hike started at the top of a staircase at the top of the parking area. At the top of the stairs, follow the trail to the left, passing almost immediately under/around a locked metal gate. In just a quarter mile, you’ll have your first of many stream crossings. The first crossing was the widest and deepest we experienced on the hike – and we visited during drought conditions. During periods of heavier rain or snow melt, this stream crossing could be quite a bit deeper and wider.
Shortly after the first stream crossing, you’ll reach marked split in the trail. You’ll want to bear to the left, following the arrow in the direction of the Devils Bathtub. The sign says it’s 1.8 miles to the Bathtub, but our GPS calculated the hike at almost a full half mile shorter by the end of the round trip. This route is also the most direct way to the scenery and is an out-and-back hike. There is a full 7-mile loop of this area, but all recent accounts say that most of the trail is poorly blazed, covered with blowdowns, and beset by aggressive wasps.
After the junction, we continued along following the yellow blazes. Even though the trail doesn’t climb much in elevation, it still provides challenges with its sporadic blazing and 15+ water crossings. It was really easy to lose the yellow blazes, as the trail is eroded and appears to have been relocated several times. We made our way by carefully looking for yellow blazes any time the trail wasn’t abundantly clear. We were lucky to visit in a time of low water, so all of the water crossings were easily passable. I imagine the way could be really tricky when there is more rain.
We passed a neat cliff-side that looked like it was built out of block. It was set off the trail, about 20 feet into the woods. Shortly after the cliff, the trail dipped down along an eroded bank next to the stream. There was a rope fixed to the uphill side of the trail to make passage a little easier. At the end of the rope, we reached the beautiful sandstone streambed that makes this area so popular.
Rock Formations on the Devils Bathtub Hike. Below: More stream scenery; A rope assist along the eroded trail; Steep eroded bank
The trail crossed the stream one final time at the base of a large pool with a small waterfall. I imagine a lot of people reach this point and think it’s the Bathtub. It’s a pretty spot with deep, clear green water. But, to get to the Bathtub you should continue along the trail up a short but very steep scramble up the bankside.
At the top of the bank, a newer wooden sign indicates that you’ve reached the Devil’s Bathtub. If you follow the footpath down to the stream’s edge, you’ll find the formation at the base of another small waterfall. It’s a gorgeous spot, though smaller than I expected it to be. The water was low on our trip, so I’d say the tub was only about half full!
We explored and photographed the area for a while… dismayed by the enormous amount of garbage left behind by other hikers. We saw dirty diapers, Styrofoam cups, beer cans/bottles, tampon applicators, sodden socks, discarded t-shirts, empty pudding cups, a spent asthma inhaler, and countless cigarette butts. I simply can’t understand how a person can visit such a naturally lovely place, and feel alright about leaving their trash behind. Adam and I ended up carrying out three bags of garbage, and it didn’t even make a dent in what was still left behind.
After a while, a couple more groups of hikers joined us at the Bathtub, so we decided to pack up and make our way back to the car. To exit, we simply retraced our steps. On the way out, I kept thinking about all the litter we saw on our hike. If you choose to do this hike (and we hope you will) please bring a trash bag and help clean up along the way! This is a gorgeous area – but it’s overused and fragile.
Adam Says…
A friend of mine had asked me about a year ago if we had hiked Devil’s Bathtub yet. After checking out pictures online, I knew this is one we had to put on our radar. Living several hours away and the fact this is a short hike made our decision to incorporate this hike into a four-day trip to check out a bunch of hikes in southwest Virginia.
This hike does have some challenges involved – navigating to parking without reliable GPS signal, the bumpy drive on the fire road to get to parking, the often poor blazing on the trail, and the numerous stream crossings. But with a little determination, we found our way to this gorgeous spot.
Adam enjoys the Devils Bathtub. Below: Signage; Terrain around the Bathtub; The Bathtub
From the parking lot, we heading up the short flight of stairs where we met the trail. There are no signs to say which way to go, but we took a left at the top of the stairs and found we were correct. The yellow-blazed trail leads to a gate and passing through, the trail leads down to your first of about 15 stream crossings at .15 miles. When we went, the water was at a low level, so if you are hiking when there has been a lot of rain, expect your feet to get wet and plan to do a lot of rock hopping. At about .2 miles, you reach a junction with the straight fork ridge spur trail. Bear left to stay straight on the trail.
The Devils Pool. Below: Small cascades; Pools along the stream.
At .7 miles, we reached the first of the hard to navigate sections. We approached this larger creek section and saw some blazes straight ahead, but also to the right of us. We went straight ahead and up a steep bank that went down a steep, slick hill back to the creek, only to realize this section had been re-routed. We went back to the original spot to cross, bore right to the larger fire road and found the blaze to continue on the trail.
At .9 miles, at the fifth stream crossing, we had a hard time finding where the blazes continued. We reached the large stream bed and rock-hopped and walked ahead on the creek about 75 yards before finding the yellow blaze going up a steep bank to the other side. Our instincts led us the right way, but the lack of blazes made this an unnecessary challenge. We got back on the trail and just a little over a tenth of a mile, we were standing above a swimming hole, looking down to the left. From the trash and abandoned clothing left behind, we could tell many people have taken a dip in this spot before. Continue on the trail and continue to cross the stream several more times.
A beautiful green, waterfall-fed swimming hole. Below: A sampling of litter; Butterflies
At about 1.5 miles, the trail reaches a large rock formation and you scale the side of it on a narrow path, but with some assistance to an anchored rope that guides you along. You then climb down to a stream crossing and swimming hole before making your way up a very steep bank to continue on the trail. From here, the hike is relatively flat and at 1.7 miles, you reach the sign for Devil’s Bathtub. There is a small lookout over the bathtub from here, but if you want to see it up close, the best thing to do is continue past the sign and stay on the trail. When you reach the stream again, cross it and then navigate along the side (the rocks were very slippery here) until you make your way down to the bathtub at 1.8 miles. The water again was low, so we were expecting a deeper basin of water from what we have seen in some pictures. The rock around the bathtub was covered in algae and very slick, so be careful!!
It took us a while to just remove enough trash around the site to get some decent pictures. As Christine mentioned, please bring a trashbag and help pick up around the area. The devastation of litter here made me quite sad that people would treat such a picturesque spot with such disrespect. We made our way back the way we came and saw a few people on our way back.
The green water plunging over and into the Devil’s Bathtub makes for one of those truly magical places in Virginia. If you are ever down in the southwestern part of Virginia, put this on your must-hike list.
Trail Notes
Distance – 3.6 miles
(Check out the stats from Map My Hike)*
Elevation Change – 580 ft
Difficulty – 3. The climb is easy and very small/gradual. The challenge factor is increased by the number of water crossings you must negotiate.
Trail Conditions – 2.5 The trail is eroded in numerous places and there is a real issue with litter.
Views – 0. None on this hike.
Waterfalls/streams – 5. The stream scenery is gorgeous!
Wildlife – 2. We saw lots of newts.
Ease to Navigate – 2.5 The trail is poorly blazed and hard to follow in several spots.
Solitude– 2. We visited on a quiet weekday, and still saw multiple groups of people.
Directions to trailhead: Parking coordinates: 36.819106, -82.628852. This location is very isolated and not really close to anything. It’s best to use the GPS coordinates and navigate fro=m your home direction.
* MapMyHike is not necessarily accurate, as the GPS signal fades in and out – but it still provides some fun and interesting information.
This is an easy 4.25 mile hike that take you to visit two special spots – a beautiful waterfall and one of the most popular swimming holes in the Smokies.
Mouse Creek Falls may not be the largest or most impressive of the waterfalls in the Smokies, but it is still a beautiful spot.
Christine Says…
On our third day of the trip, we decided to head into the national park and explore an area we hadn’t visited before – Big Creek in Cataloochee. This area is known for its population of elk, and for being much quieter than other parts of the park, like Cades Cove or Clingmans Dome.
The drive was a bit further than our previous two hike, but we had heard that Mouse Creek Falls and Midnight Hole were both beautiful, worthwhile destinations. As usual, we got an early start and beat the crowds to the trailhead.
Easy terrain makes this a popular family hike. Below: Trailhead sign for Mouse Creek Falls; Adam standing along the stream; Horse hitch near the falls.
The hike up Big Creek really couldn’t be much simpler or easier. It follows a wide, old road bed the entire way. At first, you can hear the rushing sounds of the creek in the distance, but within several tenths of a mile, the trail begins to closely follow the water.
Like most creeks in the Smokies, Big Creek is a jumble of big boulders that create lots of cascading rapids and small waterfalls – so beautiful! We saw a serious photographer hiking back from the falls with a large pack of gear and a heavy tripod. He visited the falls on a perfect day for waterfall photography. It was overcast and windless, which allows the opportunity for long exposure images. I always love the silky misty effect a slow shutter speed lends to the water, and I was pretty happy with the shots I got on this hike!
On the hike up, we skipped Midnight Hole. We figured we’d see the waterfall first, and then stop at other pretty spots on the hike back. The falls were indeed lovely, though the mosquitoes and biting flies were abundant and aggressive! This was the first and only time on the trip that I had to use bug spray. We took tons of waterfall photos, and then made our way back down the trail.
Christine enjoys Mouse Creek Falls. Below: Pretty stream scenery along Big Creek. Mouse Creek Falls are formed where smaller Mouse Creek pours into Big Creek.
On the way back, there were many more people out and about. Lots of them were dressed in swimsuits and had water-wings and innertubes. Apparently, this creek is one of the areas favorites for mountain swimming. When we reached Midnight Hole, there was a family of five there. The two youngest sons were taking turns plunging off rocks into the pool below. It was a cool, cloudy day, so they squealed each time they hit the icy water. The pool itself is deep and brilliant green – really an idyllic spot for a swim.
After leaving Midnight Hole, we stopped at a couple more pretty rapids along the stream for more photos. When we were on the trail, we jogged to outrun the mosquito assault! It was so buggy!
After this hike, we decided to drive into Asheville (yes… filthy and covered with bug spray) so we could visit a few breweries and get some lunch. We also managed stops at Vortex Donuts and French Broad Chocolates.
Adam Says…
Mouse Creek Falls is an easy family hike that everyone can enjoy. With the distance being only a little over two miles to the waterfall and very little change in elevation, it is a hike that even small kids won’t complain too much to do.
We started off early and had most of the trail to ourselves. We saw there were lots of places to step off the side of the trail to get views of rocky rapids down Mouse Creek, but we decided to make a beeline for the main waterfall. The trail had a slight incline, but never felt like a steep walk. We arrived at Mouse Creek Falls and made a climb down to near the base of the falls to get some photos of the stream and the falls together. If you don’t feel like climbing to the base, you can still get a distant, yet unobstructed view of the falls from the top. When another family arrived, we decided to leave to give them the solitude that we enjoyed, but we were equally pressured by all the mosquitoes at the water. We didn’t feel a ton of mosquitoes on the way up, but the entire trip back we were swarmed.
Midnight Hole is a popular swimming spot in the Smokies. Below: The water in Midnight Hole is clear and reflects the green of the trees around it; There is a picnic area along this lovely spot on Big Creek.
About .5 miles back on our return trip, we stopped to enjoy Midnight Hole. A pond is created here by two small waterfalls that dump water into this serene swimming hole. We lingered a bit at this spot before making our way back to our car, chased by a cloud of mosquitoes who seemed to not mind the bug spray we used. We made it back to our car quickly at a little over four miles and saw many people making their way up. I’m sure this is an extremely popular hike and swimming hole spot for many people. If you want to miss the crowds, go as early as possible.
On our way out, we passed by several buses that were unloading people for whitewater rafting along the Pigeon River. We saw probably a hundred people on the river in rafts and it looked like a great way to spend the day. We headed into Asheville, NC from our hike to sample some beers. It was Asheville Beer Week, so all of the breweries in the area were doing special events. We started off with lunch at Wicked Weed, where we enjoy the food as much as the beverages. From there, we stopped by a few more breweries to try one small sample at each – Green Man, Burial, and Hi-Wire. While we were there, there was a disc golf competition where event organizers moved a portable basket and the competitors threw their discs down the streets and alleyways as they moved from one brewery to the next. Luckily, the competitors were very accurate and I didn’t see any spectators beamed in the head.
Directions to trailhead: GPS coordinates for this trailhead are 35.751094, -83.109993. From Asheville, NC take I-40 West for 46 miles before taking exit 451 toward Waterville Road. Turn left onto Green Corner Road at the end of the exit ramp which merges onto Tobes Creek Road. Take the first left to cross a bridge and stay on Tobes Creek Road. Once you cross the bridge, take the first left onto Waterville Road. Follow this for two miles and you will then enter the Big Creek Entrance Road. Follow this for about a mile and you will reach the Big Creek Campground. You will find a large parking lot on the right and just before entering the parking lot, you will pass the trailhead for the Big Creek Trail, which is your starting point. This parking lot fills up quickly, so you may have to park along the roadside.
This 11 mile loop has everything – stunning views, scenic streams, a clear mountain pond, and even a small waterfall. You could hike it as a long(ish) day hike, but there is so much great camping along the way that it’s ideal for an easy overnight backpacking trip!
Views Along the Massanutten Trail. Below: The mountain laurel was just starting to bloom in mid-May; Christine and Adam attempt to fix Kris’s broken trekking pole with duct tape; Kris makes her way up the steepest, rockiest part of the hike.
Day One (4 miles)…
One thing that was true about May in 2016 was we had a TON of rain in Virginia. It was hard to find a time to actually go for a hike in good weather. We had been itching to try and do an overnight trip, but the threat of drenching downpours and storms was standing in the way. We had some very stressful days at work, so getting out and finding some peace away from the hustle of everyday life was just what the doctor ordered. In looking at the weather closely, we decided we may be able to get a short, overnight trip in if we timed it just right. We decided to do something very close by to our home to allow us to get on the trail quickly to get in a few miles before it started to get dark. We had called our friend, Kris, who was going to accompany us, and told her to be ready anytime during the Saturday afternoon. We felt like Doppler radar experts as we were tracking the storm movement and finally around 2:30PM, we felt the rain was going to stop to allow us to hike.
We got to the Massanutten Visitor Center and saw a lot of cars in the parking lot. We were thinking there was no way that others were on the trail at this same time due to all the rain we had in the last few days. A large camper was at the front and I talked to one gentleman out front. As it turns out, it was the Massanutten Mountain Trails 100 race that weekend, a 100-mile race along the Massanutten Mountain range that covers 16,200 feet of ascent. We were a little worried about the trail conditions and how many runners we may see along the way, but nothing was stopping us now.
Two nice views come in the first mile and a half of hiking. Below: The ascent along the orange-blazed Massanutten trail is fairly rocky and steep; Pink lady’s slippers were blooming everywhere; We hear rumbles of thunder!
From the parking lot, we took the white-blazed Wildflower trail (do not take the Nature trail at the end of the parking lot). This trail leads downhill and passes some comical information plaques along the way. At .3 miles, when you reach an intersection with the Massanutten South trail, take a right to start on the orange-blazed Massanutten South trail. The trail goes up a steep ascent and we found with the recent rain the footing was slippery and mucky in a few parts. On the ascent, we found that Kris’ new trekking poles weren’t locking properly, so we paused to get some duct tape to try and make a repair (not long after we realized that our fix didn’t hold up and she lost part of her pole somewhere along the trail). The uphill was quite steep and had us breathing heavily with our heavy packs, but this is the toughest part of the entire hike. We passed a hiker who was doing the reverse route and he told us right near the summit there were about 100 pink lady’s slippers along the trail. We decided to count what we had saw; while we didn’t see 100 of these rare wildflowers, we did count close to 60 over the weekend which may be the most we’ve ever seen on a trail. We came to the first overlook around the 1.6 mile mark (the second is just shortly ahead), took our packs off for a few minutes and enjoyed the panoramic views. The clouds after the recent storm blanketed the sky. We stopped at the second view also before continuing on. At 2.5 miles, the trail splits; head to the right to join the Bird Knob trail.
The Bird Knob trail is a ridge walk and is quite flat, which was a nice change from climbing. But, the sky began to get dark and we started hearing thunder in the near distance. Within five minutes, we started to feel rain. We decided to put on our pack covers and rain gear and it was just in the nick of time, as the clouds unleashed a downpour mixed with pea-sized hail. We kept marching through the hailstorm and within about 20 minutes, the storm had passed.
We wanted to camp by Emerald Pond, but the sites were taken early in the day. We found an equally nice spot in the meadow. Below: The rumbles of thunder turned into a downpour with hail – we were all prepared; Kris and Adam scout out the open meadow that would soon be our back-up campsite for the night; This grassy path departs the meadow. Shortly after this photo, we turned back and set up our camp at the top of the meadow.
At 3.8 miles, we reached a large open field with a campsite. We decided to press on to get a spot at Emerald Pond, so we skirted the left side of the field to stay on the trail. The trail then turns into an old logging road going downhill. About halfway down the road, we came across a couple of rain-soaked college-aged guys. They were asking if there were any campsites up ahead and they told us all the spots were taken at Emerald Pond. We mentioned the big field with lots of room and they left the way they came to go get the rest of their group and their packs. Since we heard there were no spots, we decided to turn around and get a nice spot in the open field. Christine scouted around and saw there were also sites in the woods next to a small hidden pond, but the bear scat around the site was a deterrent. We decided to camp near the fire pit we saw at the top of the field. One thing that was nice about camping in this grassy field was we knew we would have a comfortable floor bed to pitch our tent. We set up in a short amount of time and we were soon joined by about eight others in the field that night.
The wind had picked up as the storm front had moved through and I felt unprepared in terms of clothing. I switched out of my damp clothes, but I didn’t bring enough warmer clothes for that evening. We made a quick meal and were even able to start a fire at camp despite the wetness of the wood. After dinner, I was getting a little colder each minute, so I decided to call it an early night and get in my down sleeping bag while Kris and Christine talked until nightfall. It was a crazy day on the trail, but one thing I like about hiking is it is always an adventure.
Day Two (7 miles)…
The morning dawned sunny but frigid! Adam had been cold all night, so I let him stay curled up in his sleeping bag while I went to take down the bear hang. No one else who camped in the meadow was stirring, but the three of us quickly cooked breakfast and packed up camp. On our way out of the meadow, we all got a good chuckle over one of the tents set up nearby. It was technically pitched, but in no way like it was supposed to be. We’re guessing someone borrowed a tent and couldn’t figure out how to set it up. I love a backpacker’s ability to improvise!
After walking downhill to the bottom of the meadow, we picked up the old logging road for a few tenths of a mile until we reached an unmarked gravel road on the left. The gravel road led to Emerald Pond – a beautiful, spring-fed mountain pool. The last time we visited, we had the pond all to ourselves and very much enjoyed the peace and solitude. This time, the pond was crawling with other campers. They had big tents, tons of gear, and were dressed in jeans and work boots. We’re guessing that they parked on the nearby forest service road and walked the tenth of a mile to the prime campsite on the pond. I guess it’s worth noting that the early bird gets the worm when it comes to staking a claim on an Emerald Pond campsite! We didn’t want to intrude, so we just took a few photos from the near-side of the pond. The campsite side is prettier, so don’t miss visiting if the spot is open.
Emerald Pond is a much sought after campsite. It was full of people by mid-day. Below: Breaking down camp in the morning; Kris leaving camp; Adam passes the locked gate onto the forest service road.
We left the pond and continued a tenth of a mile to the forest service road. There was a locked gate where the trail met the road. At that point, we took a right and hiked downhill along the road (orange blazed) for a few tenths of a mile until we reached the junction with the Roaring Run Gap trail. The trail is on the left side of the forest road and is marked by a wooden post with two sets of blazes – light purple and pink. The climb up Big Mountain via the Roaring Run Gap trail (blazed purple) was our last big climb of the trip. For a little less than half a mile, the trail climbs steeply uphill over rocky terrain. At the top, we passed a small/dry campsite. On the descent, which came almost immediately, we glimpsed beautiful views through the trees. There were switchbacks and quite a few muddy spots along this stretch of trail. We cheered on the last few runners on the Massanutten 100 Miler race. Even if you’re finishing at the back of the pack in a race like that, you’re still tougher than we’ll ever be! We also met the sweeper who was jogging the course behind the last racer to pick up reflective hang-tags that helped keep runners on course during the night.
After about a mile of walking along the purple-blazed Roaring Run trail, we reached an unmarked junction with the pink-blazed Browns Hollow trail. The trail is a left turn from the Roaring Run Gap trail. Over four miles of the hike on day two follows this Browns Hollow trail – so look for the pink blazes.
We got nice glimpses through the trees on the Roaring Run Gap trail. Below: The route follows the forest service road for a short while. We shared much of our hike with runners competing in the Massnutten 100-miler; Roaring Run Gap trail is steep and rocky for a short while; Views through the trees.
The Browns Hollow trail starts off passing through pretty forest. There are stretches of trail that pass through impressive blueberry bushes. Eventually, you descend to Browns Run. Along the way, you’ll pass a couple nice campsites suitable for one or two small tents. Both sites had fire rings and easy access to water.
There are several beautiful rapids and a small, but lovely, waterfall on this section of trail. We all enjoyed walking through the verdant green forest, while listening to the sounds of bubbling water. It was gorgeous and peaceful. If you look around you’ll notice the stream runs through a pretty deep and dramatic gorge. The far side of the stream goes upward quickly and steeply. There were even a couple places that looked like there had been recent landslides. All the trees and dirt slid straight down the mountainside and ended in a jumble at the bottom. This part of the hike was gentle and easy, so we made great time and enjoyed chatting along the way. We counted more pink lady’s slippers and admired other spring blooms along the trail.
Small Waterfall on Browns Run. Below: Everything was lush and green from all the spring rain; One of several campsites along Browns Run; Walking the Browns Run Trail
At a little over the five mile mark of day two, you’ll cross Browns Run. I imagine most of the time this is a shallow, easy stream crossing. We hiked the trail after weeks of rain, and still found the crossing very doable. The stream was only 12-18 inches deep and there were enough large rocks to rock hop most of the way. There were a few places I had to submerge the toe of my boot on an underwater rock, but all three of us crossed without any trouble. Right after the crossing, there is a fantastic group campsite. The area is large and clear with space for multiple tents.
We continued to follow the Browns Hollow trail as it became a wide old road. We passed lots of blooming mountain laurel along this part of the hike. Eventually we came upon a picnic area with a shelter. At that point, we took a left onto the marked Wildflower Trail at this point. It passes a series of interpretive signs before eventually leading back to the Massanutten Visitors Center (closed) where we started out the prior morning.
Kris crosses Browns Run. Below: A large campsite right after the stream crossing; The trail turns into an old roadbed; Walking past blooming mountain laurel.
It was still before noon when we wrapped up, so we decided to drive back into Harrisonburg for lunch. We enjoyed burgers at Jack Brown’s and then headed over to Brothers Craft Brewing to enjoy their new Verdure series. They’ve done a tart Berliner-Weisse beer infused with all kinds of seasonal/summer fruits. They had Blackberry Verdure on tap. It was the perfect reward for a fun weekend of hiking.
Trail Notes
Distance – 11 miles Check out the stats from Map My Hike [Day 1] [Day 2]*
Elevation Change – 2290 ft.
Difficulty – 2.5. The toughest stretch is the initial push up to the viewpoints.
Trail Conditions – 3. There were a couple of blowdowns, some muddy patches due to the heavy rain, and a stream crossing, but footing was overall very good.
Views – 4. The two viewpoints provide some nice panoramic views.
Streams/Waterfalls – 3.5. Browns Run is a nice stream and a good water source. While not a stream or waterfall, Emerald Pond is extremely picturesque and would make a nice swimming hole.
Wildlife – 3. The start of the Wildflower Trail had us surrounded by birds. With bear scat spotted near our campsite, there is some bear activity here.
Ease to Navigate – 2. There are multiple trails that cross over between Bird Knob and the Massanutten trail. Take a map to make sure you are going the correct way.
Solitude – 2. While you won’t see many on the trail, we found a lot of locals like to drive in close and visit Emerald Pond.
* MapMyHike is not necessarily accurate, as the GPS signal fades in and out – but it still provides some fun and interesting information.
Directions to trailhead: GPS coordinates for this hike are 38°38’35.4″N 78°36’43.0″W. From I-81, take exit 264 for US-211 toward New Market/Timberville/Luray. Head east on US-211/W Old Cross Road and go .3 miles. Turn left onto N. Congress St. and go .3 miles. Turn right onto US-211 East and go 4.5 miles. Park at the old Massanutten Visitor Center parking lot on the right. The trail starts towards the front of the lot on the Wildflower Trail.
This four mile hike takes you by one of Virginia’s most beautiful waterfalls. The trail is engineered and mostly flat, so this hike is suitable for hikers of all levels.
Cascade Falls is one of those must-do hikes in Virginia, featuring one of the most picturesque scenes of a waterfall that you’ll get. We had been meaning to do this hike under more pleasant circumstances, but life doesn’t always work out that way. We were picking up our pug, Wookie (who many of you may remember has contributed his thoughts to some of our posts) from the Virginia Tech Veterinary Hospital. He has been suffering from chronic bronchitis – which is like COPD in humans – and had to have surgery to remove two of his lung lobes. We had a late afternoon pick-up for him, so we decided to go on a hike that morning while we were in the area.
There was tons of stream scenery along the hike. Below: The parking lot was packed; There were several wooden bridges along the hike; The trail was well-developed and engineered.
We arrived around 10:30 in the morning and found ourselves in a line of cars that were waiting for parking spaces. The tobacco-spitting parking lot attendant said it wasn’t like this a few years ago, but since Virginia Tech added this hike to a bucket-list during orientation for all of their incoming freshman, the place has been packed. Of course, we were doing this hike on the weekend before classes started at Virginia Tech, so there were students by the carload here. Only about eight cars back in line, we still had to wait about 45 minutes before we could park. I can only imagine that people that arrived around 11:00 would be waiting an eternity for a parking spot.
The trail starts at the end of the parking lot behind the information center and restrooms. Soon, you arrive at a bridge. The trail splits for an upper trail and lower trail. The attendant had suggested that we approach from the lower trail and then make a loop and return on the upper trail. We started on the lower trail, which hugs closely to Little Stony Creek the entire trip. Little Stony Creek has tons of spots to enjoy the views of the creek. You may even see a few paths that crossed the creek that were wiped out during a flood in 1996. The trail has been re-routed since then on the path you take now. There are some ups and downs as you go along the creek, but overall you are climbing along the trail.
Adam enjoys the stream.
At 2.0 miles, you will reach the large Cascade Falls. The water plunges 69 feet from the top over a large, wide wall making for an impressive scene. We saw probably over 100 Virginia Tech students at the falls, some were swimming in the always-cold water while others were climbing on the rocks (or the large rock slide to the right of the falls). It was nearly impossible to get any pictures without someone in it, but the shots do provide the sense of scale of the scene. We enjoyed watching the falls for a while and then proceeded up the stairs to the left. One path leads to another vantage point from next to the top of the falls, but this was more obstructed. We ended up taking the trail from the top of the steps, heading to the left, which came to a junction in a short distance. To the right, the trail continues on to Barney’s Wall, but we decided to just descend the upper trail since we were out of time. The upper trail consists of mostly a large fire road, making for much easier footing than the lower trail; however, you don’t get the views of Little Stony Creek like you did on the lower trail. The return trip was a nice walk through the woods on the trail until we reached our car back at 4.0 miles.
Adam makes the final approach. You can see the falls and the crowds if you look closely. Below: Some of the big trees from past flood damage still lay across the stream; Passing through dense mountain laurel and rhododendron; Virginia Tech students swimming in the plunge pool.
We hopped in our car quickly to allow for the next waiting person to be able to take our spot. The line of cars was quite long by this point.
Christine Says…
Cascade Falls – known better as ‘The Cascades’ – is a beautiful, easy hike to one of the nicest waterfalls I’ve seen! The parking lot and trail were both insanely crowded, but I think we were probably there on one of the year’s busiest days. It was a weekend, the weather was cool and sunny for August, and the new school year was about to start at nearby Virginia Tech.
I’ve never hiked anywhere that I’ve had to wait in line for a parking spot, but that was the case here! Fortunately, we had all day to wait before our dog was discharged from the hospital, so we weren’t in any rush.
People love to stand at the bottom on the falls. Below: Crowds at the falls.
We walked the lower trail on our way to the falls. It was more of an engineered pathway than a classic, dirt hiking trail. There were paved walkways, stone stairs, and bridges most of the way to the falls. All along the way, the trail followed a scenic stream. There were tons of small waterfalls and cascading rapids to enjoy along the route.
A couple tenths of a mile before we reached the main waterfall, the trail passed through a dense mountain laurel and rhododendron thicket. After that, the path opened up onto a lovely grotto like scene. The falls cascades over a cliff into a large plunge pool. There were MANY kids swimming and sunbathing around the falls. I think I still managed to get a couple decent photos.
A vertical view – without people! Below: The upper trail is accessed by a staircase above the falls; The hike back passed a cliff formation; Most of the hike back was on wide fire road.
On the way back, we took the upper trail. It was basically a wide, gentle fire road that led back to the parking area. After the hike, I cleaned up in the parking area restroom. It was nice! Instead of a pit toilet, it had flush toilets, running water, and soap! We stopped for beers and lunch at Bull & Bones Brewhaus, while we waited on the call to pick Wookie up from the vet.
I’d like to do this hike again sometime on a quieter day. I’d also like to hike it when my mind isn’t preoccupied with worrying about my dog. It was really a beautiful spot!
Trail Notes
Distance – 4.0 miles
(Check out the stats from Map My Hike)*
Elevation Change – 742 feet
Difficulty – 1.5 Not much climbing and most people can make this. This is a great family hike.
Trail Conditions – 3.5 There are spots where things can be quite rocky/muddy. Due to the traffic, some of the rocks are quite slick.
Views – 1.5 The one path to the top of the waterfall gives a nice view of the scene below, but not the best view of the waterfall.
Waterfalls/streams – 5 The waterfall is amazing and one of Virginia’s best. The views along Little Stony Creek are great also.
Wildlife – 1 Due to the popularity, you will likely only see birds in the trees.
Ease to Navigate – 3.5 There aren’t any blazes on the trail, but the trail is evident. We were a little confused trying to find our way to the upper trail since there are no signs marking the way.
Solitude– .5 Due to the popularity, you will likely see a lot of people on this trail and especially at the waterfall. Time your trip for a weekday, overcast or rainy day, or very early in the morning to beat the crowds.
Directions to trailhead: Take exit 118A-B-C on I-81. Take US-460W. After 25.9 miles turn right onto Mill Road. In .6 miles, take a right onto Cascade Dr (SR-T623) in Pembroke. The parking lot is in 2.9 miles. Parking is $3 and cash is required (they noted they do not give back change). Coordinates: 37.353523, -80.599566
* MapMyHike is not necessarily accurate, as the GPS signal fades in and out – but it still provides some fun and interesting information.
We’re back in the Smokies region for the next three hikes! Ramsey Cascades is the tallest waterfall in the park. It’s also one of the most popular – despite the fact that the hike is a strenuous 8-miler!
We’ve seen a number of the big waterfalls in the Smokies. Ramsey Cascades might be one of the prettiest. Below: Adam at the trailhead; The first part of the trail was along an old road; You could see and hear water for most of the hike.
Adam Says…
Our May vacation plans fell through due to a sick pet, but we were fortunate enough to slip away on a last-minute four day trip to the Smokies in mid-June. When we vacation, we tend to go hard. We try to pack in as much as we can during every waking moment of the day. While it may not be as relaxing as some people like on vacation, we feel we want as many experiences as possible. We like to tell each other that we can be tired and act like zombies at work for the first day back, so we stay “on the go” during vacation. So, to maximize our time, we woke up around 4:30 a.m., packed up the car, and headed out to the Smokies. When we got to the trailhead, it was a little after noon and the temperature and humidity made it feel like over 100 degrees. We typically like to start hiking (especially in the warmer months) early in the morning before you can feel the height of the day’s heat. This time, we were stuck with it. The small parking lot for the trail was packed with cars, so we ended up having to park a little down the road. So, we quickly got on the trail and pushed on. Most of the trail was fairly shady, so not being in direct sunlight helped.
The foot log across this chasm was narrow and long. Below: The chasm beneath the log bridge; Another view of the bridge’s narrowness; Christine under the giant tulip poplar.
The trail starts on a wide gravel fire road which made for easy footing. One family had ventured out before us when we were trying to find parking. We saw the mother of the family doubling back along the trail, looking for the rubber foot that was lost on one of her children’s trekking poles. When we came upon the rest of the family, it looks like they sent the mom off about a mile to look for it. We felt bad that the mom was spending all of this time searching while the rest of the group was just relaxing. At 1.5 miles, you reach an area that comes to edge of the stream. To the left, the trail goes through a deep tunnel of rhododendron. It is here the trail begins to climb and the trail becomes narrower.
At 2.1 miles, we reached a long foot log bridge. As I’ve stated before, I hate man-made things when it comes to heights. We had just passed another family on the hike, so I thought I would try to cross before they got there. I got a little ways along, chickened out, and returned to the start of the bridge. I knew it would take me a while to muster the strength to do it and I didn’t want to feel the pressure of judging eyes as I made my way across. I debated internally if I should just wait here and let Christine continue on, but I knew I would regret not making it to the falls. We let two families go by, one boldly taking selfies on the log. After they were out of sight, I decided to give it another try. As you can tell from the picture above, the bridge is only wide enough for an average person’s feet. I’m not sure how far the drop would be if you fell off, but I would guess you would likely break something if you fell. I decided to shuffle my feet side-by-side, while gripping the handrail white-knuckled. During half of the traverse, I could feel the bridge bounce slightly up and down with each step, not easing my comfort-level at all. I finally made it across and double-checked my map. I was hoping there was a loop on this hike, but since this is a straight out-and-back hike, I’d have to face this beast again. I rested on the other side a while, because I felt like I had just burned 2000 calories through the stress and adrenaline used crossing the log.
After crossing the narrow log bridge, the trail became increasingly steep and rugged. Below: Hiking along the rocky part of the trail; The second L-shaped log footbridge; Rocky trail; Arriving at the falls.
At 2.6 miles, we came across the three large tulip poplars. The size of these trees was truly impressive! There was a large group of high school JROTC students stopping here, so we decided to take time to appreciate them more on the way back. We continued up the steep trail, which was very tough in this muggy, hot weather. Eventually, at 4.0 miles, we arrived at Ramsey Cascades. The waterfall is probably 90 feet across and plunges down through cascading rocks over 100 feet. The rock outcropping to view the falls was packed with people, but we waited a while and eventually most of them left. This is one of the prettiest waterfalls in the Smokies, so it was worth the sweat and effort (and maybe even crossing that log bridge).
We made our way back fairly quickly since the hike was mostly downhill. We stopped to enjoy the large tulip trees along the way. When I got to the bridge this time, I folded up my trekking poles (which I didn’t do on the way across initially) and immediately went across. I was much quicker this time across, but it still took a toll on me. I rested again, ate some jelly beans to replenish my sapped energy, and continued back. The rest of the trip was easy and we made quick time back to our car.
We cranked up the AC in the car and drove to our hotel in Gatlinburg. Gatlinburg was even hotter than the trail, so it was hard to get cooled down for the rest of the day. But, we were so glad we made the trip out to view Ramsey Cascades.
Christine Says…
It was a little nuts to hop into the car at five in the morning just so we could pack one more day of hiking into our whirlwind, too-short, almost-completely-unplanned trip to the Smokies. We’ve visited the area for three consecutive years, but there are still so many mountains and streams for us to explore. We love coming back to this area!
The first hike on deck was Ramsey Cascades. It’s one of the park’s most popular and impressive waterfalls, and we’ve wanted to hike it for a while now. We arrived to the area a little before mid-day, so we decided to fuel up with a quick lunch at The Sub Station. It had great reviews on Yelp and it was right along our route. We scarfed down pulled pork sandwiches and then made our way to the Greenbrier section of the Smokies.
Arriving right at noon, the parking lot was already jam-packed with cars, so we had to find a pull off further down the road. As soon as I stepped out of the car, the heat and humidity hit me like a sucker punch. I looked at Adam and said, “We’re not used to this heat… this is going to be a brutal hike!” The area went on to set several heat records during our visit.
The first part of the hike followed an old gravel road. It climbed steadily uphill, but was nicely graded and easy to traverse. We saw lots of rosebay rhododendron starting to bloom along the trail. We also enjoyed the constant sound of running water from the Little Pigeon River.
Some people opted to swim in the basin beneath the falls. Below: A vertical version.
About a mile and a half in, the gravel road ended and the route became a narrow footpath through the lush green forest. This section of the hike followed alongside the Ramsey Prong which drains down the side of 6621-foot Mt. Guyot – the second tallest mountain in the park. As we walked, I tried to focus on the loveliness of the trail instead of how I was feeling. I was utterly gassed. The heat was getting to me and making me feel weak and lightheaded. I kept drinking water, but it just made the sandwich I’d had for lunch churn in my stomach. Maybe eating had been a bad idea. I kept pushing my physical discomfort to the back of my mind and focusing on putting one foot in front of the other. Sometimes, it just what you have to do!
At 2.1 miles, we reached the narrow log bridge that Adam described so thoroughly. The Smokies are full of these split log bridges, but this was the longest and highest one we’ve seen! I suppose these log bridges keep streams cross-able when water is high (as opposed to a rock hop) and are less expensive than real bridges to build/maintain. I like the way they blend into the natural scenery so nicely.
After crossing the bridge, we soon reached a grove of giant, old growth trees. There are three tulip poplars that you’ll notice immediately. They rise, straight and proud, from the forest floor – all of them dwarfing the other trees around them. They were such impressive trees!
The last mile to the falls was increasingly steep and rocky. We climbed stone steps, crossed another L-shaped log bridge, scrambled over boulders, and stepped over a couple shallow streams before reaching the falls. At first, we could just see it through the woods, but after climbing over one last large boulder, we came to a big clearing.
We stopped by the three giant tulip poplars again on the hike back. Below: Adam crossing one of the small streams; Back across the scary footbridge; Pretty green Smokies forest.
The falls were so impressive, plunging over 100 feet down the mountainside into a beautiful pool. There were tons of people gathered on the rocks. It was hard to find a place to sit and relax, but we eventually did. Despite warning about treacherous conditions, people were still swimming, wading, and climbing on rocks around the falls. We saw one young teenager come very close to taking a terrible fall onto the rocks. He was lucky that he caught himself at the last minute.
We stayed and enjoyed the falls for quite a while. This gave me a chance to cool off and eat a little sugary snack. That definitely made me feel better and helped my dizziness and fatigue. Eventually, the crowd thinned and we had the falls to ourselves. Or I should say mostly to ourselves with the exception of bees! I don’t know why it is, but there are massive numbers of bees living in hives around the falls. There are hundreds of them and they’re constantly buzzing around. Fortunately, they’re not aggressive and seemed happy to share the falls. Just be careful about sitting or putting your hands down. I’m sure they’d sting if someone tried to squish them!
After taking a bunch more photos, we made our way back down the trail. The downhill hiking went really quickly. Adam crossed the scary log bridge boldly on the return trip. We were back at the parking lot in half the time it took us to climb up!
Great steak dinner at Smoky Mountain Brewery post-hike. Below: Smoky Mountain Brewery flight; Pretzels and beer cheese!
Before we got in the car, I was very tempted to jump into the Little Pigeon River. The spot where we parked was right next to a deep, cool swimming hole. Adam told me it was a bad idea and that I’d be soaking wet in the car – so phooey – I passed on my chance to plunge in!
We had a short drive into Gatlinburg from the hike. Because we didn’t plan ahead for this trip, our choices for lodging were fairly limited – but we picked a winner. We ended up stayed at the Mountain House Motor Inn. It was clean and comfortable, with a super-strong air conditioner. It was also located within walking distance of all the downtown restaurants and shops.
We checked in, showered, and headed out for a great dinner at the Smoky Mountain Brewery! What a great first day of this mini vacation.
Difficulty – 4.5. The trail starts off fairly easy and gradual, but becomes steeper and rockier after the first 1.5 miles. The last few tenths of a mile to the falls are a scramble over boulders.
Trail Conditions – 3. The trail is rocky in places. There is also a long, narrow log bridge that might intimidate some hikers. It crosses a chasm over a stream and feels precipitous to anyone afraid of heights.
Views – 0. No views here – it’s all about the stream scenery!
Streams/Waterfalls – 5. The stream is beautiful and Ramsey Cascades is one of the park’s prettiest waterfalls.
Wildlife – 0. There were so many people on the trail we didn’t see any animals.
Ease to Navigate – 4. The trail is simple to follow. There aren’t any turns or junctions.
Solitude – 1. The trail is one of the park’s most popular.
Directions to trailhead: From Gatlinburg, TN, take US-321 N/East Parkway for about 5.5 miles. Turn right onto Greenbriar Road. Follow this for 3.1 miles before turning left onto Ramsey Prong Road. Go 1.5 miles and you should reach the parking lot for the trailhead. The trailhead starts at the end of the parking area. Coordinates: 35.702730, -83.357599
Adam takes in the view from Bluff Mountain. Below: The pond at Punchbowl Mountain Shelter; The shelter itself has seen better days; The Ottie Cline Memorial – put it place for a child lost in the mountains in the late 1800s.
Christine Says…
When Adam and I first started hiking sections of the Appalachian Trail, we focused on the trail through Shenandoah National Park. The park is close to our home, making it easy for us to bring two cars for a shuttle. We did short sections – most of our day hikes ranged from 6 to 8 miles. We did a couple sections as overnights, covering 10-12 miles total over two days. When we first started, those hikes really challenged me – but they also made me want more!
We’re now traveling further from home to complete sections, so we push to complete bigger miles to make the travel time more worthwhile. We’ve also found friends and businesses to help us shuttle along the way.
We met Lynchburg friends, Dennis and Tina to do this AT section from Punchbowl Mountain down to the James River. We’d never met them in person, but we’d chatted online about hiking and the Appalachian Trail for almost a year. We were really thankful for their good company on this hike!
We met early Saturday morning at the Foot Footbridge across the James River. ‘Foot Footbridge’ isn’t a typo. The bridge is named after hiking enthusiast, Bill Foot, who worked tirelessly (while also fighting cancer) to see that the bridge was built. It’s a beautiful and impressive bridge across the James River, and there is nothing else like it along the Appalachian Trail.
After Adam and I got acquainted with Dennis and Tina in the parking lot, we hopped in our car and made our way along the Blue Ridge Parkway to our start point – the Punchbowl Mountain Overlook. We left off here last fall after completing a 17 mile section from Hog Camp Gap.
The morning began with our only significant climb of the day- about 1400 feet over two miles to the summit of Bluff Mountain. About half a mile into our ascent, we detoured to visit the Punch Bowl Shelter. The shelter is a little bit run down and sits next to a murky, muddy, mosquito-haven of a pond. The shelters to the north and south of Punch Bowl (Brown Mountain Creek and Johns Hollow) are both much nicer places to stay the night.
The wildflower display was in full force when we hiked this section of trail. We saw dwarf irises, pink lady’s slippers; native pinxter azaleas, wild geraniums, rhododendron, mountain laurel; wild bleeding hearts; scarlet flycatch (in the full album), and spiderwort (in the full album). It was gorgeous!
After our short stop, we continued our climb to the spectacular open top of Bluff Mountain. We were swarmed by no-see-ums and gnats, but we still enjoyed the (almost) 360 views and watching the morning fog burn off the valley. The remains of a fire tower foundation still sit on the summit. Immediately upon leaving the summit, we stopped at the Ottie Cline Powell memorial. The marker tells the sad tale of a little 4-year old boy lost in the mountains in 1891.
From there, we had four miles of gentle downhill or practically flat ridge walking. It was delightful! Wildflowers were blooming like crazy! The woods smelled fresh, green, and earthy. Even though it was a warm, humid day, the cool mountain breezes made for perfect hiking weather. Along the ridge, we passed junctions with a couple trails – Saltlog Gap and Saddle Gap. I’ve heard these trails are pretty overgrown and don’t know much about them. From there, we enjoyed several great views along the ridge. The views far exceeded my expectations for hike, and I really enjoyed the bird’s eye view of the James River. About 7 miles into the hike, we passed the junction with the Little Rocky Row trail, and reached Fuller Rocks – another lovely view point.
After that view, we descended the mountain along 21 switchbacks. At first the descent was pretty steep, but eventually it moderated and entered a stand of enormous old trees. Dennis even took the time to hug a couple of them.
At 9.2 miles, we took the short side trail to visit Johns Hollow Shelter. The camp is located in a peaceful, open spot in the woods. The shelter is typical, but the tent area behind the shelter is especially nice. There was lots of flat, grassy space to pitch
Walking along the trail lined with yellow flowers. Below: Everything was turning brilliant spring green, Views from the ridge; Descending toward the James River.
After leaving Johns Hollow, we hiked about another half mile in the woods before crossing a gravel forest road. After the road, we quickly reached Rocky Row Run – a beautiful mountain stream that eventually feeds into the James.
The stream was very scenic and we all enjoyed the sound of the flowing water. There were lots of blooming wildflowers and rhododendron along the creek. We crossed a couple small wooden bridges along the way, before popping out on the side of Route 501. From there, we crossed the highway and returned back to the Foot Bridge and parking area at 10.6 miles (11 if you include mileage from shelter visits).
We all decided to walk across the bridge to check out views of the James! It was a beautiful view – especially looking back to all the distant rocky outcroppings we had stood upon earlier in the day. Standing on the bridge, my mind drifted to the next section south – wondering what it would be like and what challenges and gifts would lie ahead on the trail.
Dennis and Tina – thanks for hiking with us! Can’t wait to meet up again.
Adam Says…
This section of the Appalachian Trail was one we had contemplated doing for a while. We have covered now a section of contiguous miles that includes from this point up to Front Royal. It is easier to say, “We have walked from Front Royal to the James River” than to say “We have walked from Front Royal to a place off the Blue Ridge Parkway north of the James River”.
As Christine mentioned, when traveling further away from home the next concern is wondering if we need to bring two cars or figuring out if we can get someone to help us shuttle. It can be hard to find some friends that want to go trekking in the woods for over 10 miles. So, we were very glad to meet Dennis and Tina. They have done this section a number of times before but were willing to do it again with us.
This section was a surprise to us. We hadn’t seen enough nice pictures from these overlooks to know if it would be worthwhile to check. But, we hiked on a very clear day that made the scenery gorgeous.
A nice view of the James River looking in the direction of Apple Orchard Mountain. Below: Dennis points out landmarks from above; This fallen was perfectly balanced across several other standing trees. It looked like the mast of a ship; Tree hugger!
After meeting up, we drove to our starting point on the Blue Ridge Parkway. We met a few guys in the parking lot that were doing a multi-day backpack as well. We crossed the parkway and headed up the white-blazed Appalachian Trail, heading southbound. The beginning of the trail started a steep ascent. It was already a warm, muggy day, so with the extra work of going uphill I got sweaty very early in the hike. In .4 miles, we reached the side trail to the Punchbowl Shelter. The side trail was mostly downhill to the shelter. When we arrived, there was nobody staying there. The shelter is in a nice shady spot, but we could tell the insects were swarming near the pond. We checked out the trail log in the shelter and then made our way back up to the Appalachian Trail.
The trail continues to be mostly a steep climb until you reach the top of Bluff Mountain at 2.0 miles. There were great views to the west from the trail. The bugs were relentless (at least to me) from this open area, so while I would have liked to stay up there longer, I wanted to quickly get back into the woods and away from the bugs. We saw a brilliant indigo bunting flying around the treetops from the overlook. As soon as you get out of the clearing and back into the woods, you see the memorial for Ottie Cline Powell on the ground to the left.
Lovely Rocky Row Run ran along the last mile of the trail. Below: Johns Hollow shelter has a large, grassy field suitable for pitching multiple tents; An interesting cliff face along the trail.
The trail then begins a steep, downward descent. At 3.5 miles, you reach a junction with the Saltlog Gap Trail, but stay on the AT. The trail mostly levels out as you walk along a ridge for a while. At 4.6 miles, you reach a junction with the Saddle Gap Trail. Staying on the AT, the trail begins to climb a more gradual ascent until you reach Big Rocky Row at 6.1 miles. The views from this area were my favorite, as you got to see the James River below snaking through the landscape of mountains.
From here, the trail descends and you reach Little Rocky Row at 7.3 miles, also giving you nice views along the way as you walk down the ridge line. The rest of the hike is basically all downhill from this point until you reach the James River. At 9.2 miles, we reached the a short side trail that took a very sharp turn to Johns Hollow Shelter. We checked out this shelter and came across another two section hikers that were enjoying a week along the AT. There was a nearby stream for replenishing water and a privy. After eating a quick snack, we returned to join the AT again.
The trail again was mostly flat or downhill. We crossed the stream at 9.4 miles and then crossed the gravel VA 812 road to continue on the AT. As we were walking along, Dennis started talking about black snakes and within minutes we saw one directly on the trail as if he had summoned it. The forest through this section had many larger trees along the way and then opened up to beautiful rhododendron plants that were aligning the stream on both sides. It was such a serene setting. At 10.3 miles, we reached the Lower Rocky Row Run bridge. We crossed the run and then at 10.6 miles we were back at US 501. We crossed the road which had the trail lead us right to the parking lot where we started.
We already plan to get back together sometime with Dennis and Tina for a backpack trip sometime in the near future. It is always great to find like-minded people to experience the outdoors together!
Our hike concluded on the northern side of the James River. Below: Kayakers on the river; The Appalachian Trail crosses the James on a long footbridge.
Difficulty – 3.5. 11 miles is a little on the long side, but after climbing to the summit of Bluff Mountain early in the hike, the rest of the terrain is easy to moderate.
Trail Conditions – 4. Consistently well-maintained trail. Some parts of the trail are narrow along a steep hillside, but still easily passable.
Views – 5. Super views from Bluff Mountain, nice views along the ridge, and then amazing views of the James River.
Streams/Waterfalls – 3.5. The final stretch of this hike follows pretty Rocky Row Run, and of course – you end at the James!
Wildlife – 1. We saw a black snake.
Ease to Navigate – 4.5. Just keep following those white blazes south. The trail is easy to follow and well-marked.
Solitude – 3. We saw a fair number of hikers along the way, including quite a few northbound thru-hikers, but you never feel like the trail is crowded.
Directions to trailhead: To drop off first car: From I-81, take exit 188A to merge on to US-60E towards Buena Vista. Go 3.9 miles and then take a right on to US-501S at the Hardee’s. Follow 501S for 14.9 miles until you reach the parking lot on the right for the Appalachian Trial crossing. To get to your start point: Leaving the parking lot, turn right on to US-501S. Go .8 miles and continue straight to take VA-130 E. Go 2.8 miles and then turn left on to the Blue Ridge Parkway. Turn right on to the Blue Ridge Parkway and go 9.8 miles until you reach the small parking lot for Punchbowl Mountain where the Appalachian Trail crosses the parkway. Cross the road and you will see the Appalachian Trail marker which has the trail leading uphill.
Beautiful Apple Orchard Falls plunges about 200 feet down the mountainside. Below: Even the fire roads were scenic on this hike; Abundant wildflowers including Dutchmans Breeches; There were several stream crossings to negotiate.
Christine Says…
Apple Orchard Falls has been on our ‘must hike’ list for years now, and I’m so glad we finally got out there and did it! It’s a bit of a drive from our home-base of the central Shenandoah valley, but it was well worth the trip! We hiked it on a cool, rainy day in mid-April. We thought we’d have the trail all to ourselves, but as our car bumped along the forest road nearing the parking area, a runner went by. Then three more runners… and then a cluster of ten. Pretty soon we realized that there was some kind of race going on in the vicinity. It turns out we picked the same day as the Promise Land 50K for our hike. We ended up sharing the first half of our six-mile route with 300+ trail runners.
They were all friendly folks, but it was a little stressful to constantly be looking over my shoulder, watching to make sure there wasn’t a racer on my heels, needing to pass. I certainly didn’t want to get in anyone’s way as they cruised toward victory or a personal record! I still enjoyed the gorgeous stream scenery as we ascended alongside North Creek. The sound of the water was soothing. The hillsides along the trail were covered with trillium and purple wild geraniums. The air was filled with a light misty rain and all the trees were unfurling their brilliant spring green leaves. With all these pleasures along the trail, I tried my best not to let the constant stream of passing racers disrupt the zen-like peace.
Christine checks out the creek early in the hike. Below: We hike the loop on the same day the Promised Land 50K was running. It made for a crowded trail; Trillium was blooming everywhere; Pretty little rapids on the creek.
The trail was in great shape and ascended steadily and moderately uphill. There were several sturdy footbridges across the creek on our hike up. Around 1.3 miles into the hike, the climb became a little steeper and rockier. Right before reaching the base of the falls, we passed through a jumble of huge boulders. At first, we could only see the falls through the trees. They were majestic, but obscured by the foliage. We continued uphill, making a wide switchback before coming to a curved wooden bridge and a viewing platform at the base of the fall’s largest plunge.
Adam set up my tripod and I spent some time photographing the waterfall from a variety of angles. I wish the trees around the falls had been a little more ‘leafed out’. The green would have made an even more attractive frame for the falls, but it was still very nice. I was challenged by the rain – which was beginning to fall at a steadier pace. Droplets kept landing on my lens, and making blurry bubbles on each of my photos. I used a hat as an umbrella as much as I could. While we were enjoying the waterfall, the bulk of the racers passed us by.
After leaving the falls, we climbed the 175 stairs above the falls. About halfway up the stairs, we caught our one open view of the hike – a pretty peek out over a spring green valley. Shortly after the top of the stairs, we passed another small waterfall. There was a nice established campsite near the smaller fall. What a idyllic place to spend a night! In fact, we saw many great campsites all along this loop. I think it would make a great beginner backpacking trip or short gear shakedown route.
There were several sturdy, well-constructed bridges on the trail toward the falls. Below: Just before reaching the falls you climb through an opening between huge boulders; The viewing deck for the falls is very nice; Adam checks out the falls.
About a third of a mile past the small waterfall, we reached Apple Orchard Road, which is a grassy fire road that connects to the Cornelius Creek trail. The racers all continued uphill toward the Blue Ridge Parkway. We turned right and followed the fire road for about a mile to its intersection with the Cornelius Creek Trail. Fire roads are typically sort of dull, but this one was actually quite nice – lush green, curvy, and decorated with wildflowers – more trillium, geraniums, violets, and enormous dense patches of Dutchman’s Breeches.
The Cornelius Creek trail was probably my favorite part of the hike. The racers were off our tail, and I could fully focus on the spring forest and sound of flowing water. The rain was coming down steadily, so my photo opportunities were a bit limited. Hopefully, I captured enough to adequately convey the feel of Cornelius Creek. It was lovely with so many small cascades and swimming holes. The only real challenge on this part of the hike were the two significant stream crossings. The first (pictured at the top of the post) was wide, but not very deep. Our toes got a little wet. But the second was quite deep, wide, and fast-moving. We packed all of our camera gear and electronics away in dry bags and plunged in. Even rock-hopping, the water came halfway up to my knees. The footing was small, shifty, and slick! Thankfully, we made it across without falling completely into the water! The last bit of walking was done with sodden shoes and socks – that squishy feeling is always so weird!
When we got back to the car the first thing I did was take off my soaked shoes and socks and put on flip flops! Then we were off on our way for a well-deserved lunch at Peaks of Otter!
Adam Says…
We got up early to hit the road and beat the crowds on this hike. With a gloomy day with some rain scheduled around the early afternoon, we wanted to make the best use of our day. When we first saw the runners on the gravel road, I thought well at least they are going in the opposite way. We parked our car at the end of the road and there was a race stop set up for people to check in, get some snacks and water and keep running. Little did we know we would see most of them all again on the trail.
We got out of our car and found out that there were going to be runners on the trail. We thought we would at least try to get a head start, so we jumped on the trail right away. We took the blue-blazed Apple Orchard Falls trail left of the kiosk that came to a wooden bridge almost immediately. We soon came across the first runner of the day on the trail, who we heard ended up coming in 2nd in the race. Along the trail, there were funny signs to try and inspire the runners along the way (and most were done with Game of Thrones references). At .2 miles, take a right at the intersection to stay on the trail.
A view into the valley on our way up the stairs. Below: Adam takes in a side view of the falls; Climbing the famous stairs, the smaller waterfall above Apple Orchard Falls.
The trail continues along North Creek for a steady uphill. At 1.2 miles, you reach a couple of bridges and a small creekside campsite. Crossing over the second bridge, the trail becomes steeper uphill. Eventually, you get some views of the falls to the right as you make the climb up. But don’t worry, the trail leads right up to the falls. The climb up to the falls is also very steep. But, as you reach the falls at 2.0 miles, there is a nice bench and platform, inviting you to take your time to enjoy the views. We stayed here for a while and saw a ton of runners pass by. Some of them just took a quick glance, some walked slowly by, but one guy stopped to take a picture. I guess the runners had different levels of competitiveness and different levels of exhaustion at this stage of the race.
The trail continues on and winds around the hillside before beginning a series of stairs. Along the climb, there was a nice viewpoint that gave you glimpses of mountains to the west. We continued uphill along the trail until we reached another waterfall around 2.3 miles. There was a nice campsite by this waterfall also and we thought it would be a great overnight stop for a backpacking trip. At 2.5 miles, we reached a junction with a fire road. We took this fire road to the right. At 3.7 miles, the trail meets a junction with the Cornelius Creek Trail. We headed straight to start the Cornelius Creek Trail. This trail descends quite steeply. As we had seen the runners on this trail when we first arrived at the parking lot, I felt that I too was having to run down the steepness of this trail in the beginning. Be careful where you step, since the trail is incredibly steep and filled with loose rock, begging for a twisted ankle or fall. At 4.2 miles, the trail runs along Cornelius Creek.
Christine walks along in the rain. Below: Most of the hike closely follows water; A lovely little cascade on the Cornelius Creek Trail; Post hike beers at Apocalypse Ale Works.
Cornelius Creek was a long exposure photographer’s dream. There were so many spots where you saw small waterfalls and swimming holes along the way. Contrasted with the lush green forest, it was truly beautiful to see. We did have to cross Cornelius Creek a couple of times and with any recent rain, you are likely going to get your feet wet. Be careful as there are some deep holes along the creek crossings that could have you up to your waist if you don’t step carefully. We made it across and continued our hike. The rain was coming down fairly steadily, so we didn’t stop a lot for fear of ruining camera gear, but it was one of the most beautiful creekside hikes you will see in Virginia. Right before you return to the parking lot, you’ll see a large campsite (with even a rope swing put in). We got back to the parking lot at the 6 mile marker.
On our way back home, we took a detour and drove along the Blue Ridge Parkway to have lunch at Peaks of Otter. My family used to picnic here yearly, so this spot always holds a near and dear place in my heart. We had a nice lunch with music from a local singer. We decided also to stop by Apocalypse Ale Works brewery for one of our favorite post-hike things to do – beer sampling. The drive back home was rainy most of the day, but we felt like we had accomplished a lot on a dreary day.
Trail Conditions – 4. The trail is very pleasant to walk. Sturdy bridges and a wide viewing platform are available so the walk up to the falls along North Creek is pleasant and safe. There are a couple crossings on the Cornelius Creek descent that can be tricky when there has been recent rain.
Views – 2. There is one nice view when you’re climbing the stairs after visiting Apple Orchard Falls.
Streams/Waterfalls – 5. Spectacular – you are within view of the stream for most of the hike.
Wildlife – 1. Too many people to see much wildlife!
Ease to Navigate – 4. The signs make this route pretty easy to follow. There are several places where trails go in multiple directions, but this route is well marked.
Solitude – 0. It’s supposedly the most popular hike in Jefferson National Forest. It was cool and rainy when we hiked it, so there weren’t many other day hikers. But there were 300+ racers on the trail with us.
Directions to trailhead: From I-81, take exit 168 for VA-614 toward Arcadia. Turn on to VA-614 heading east and go 3.3 miles. Turn left on to North Creek Road. Go 2.8 miles and turn right on to an unnamed road*. This road is a gravel road. Follow it for 2.2 miles until you reach the large parking lot. The trail starts left of the kiosk. Right of the kiosk, the trail going uphill is your return route. *Since this unnamed road can’t be found on GoogleMaps, I would suggest printing the trail map above to have a way to find this road.


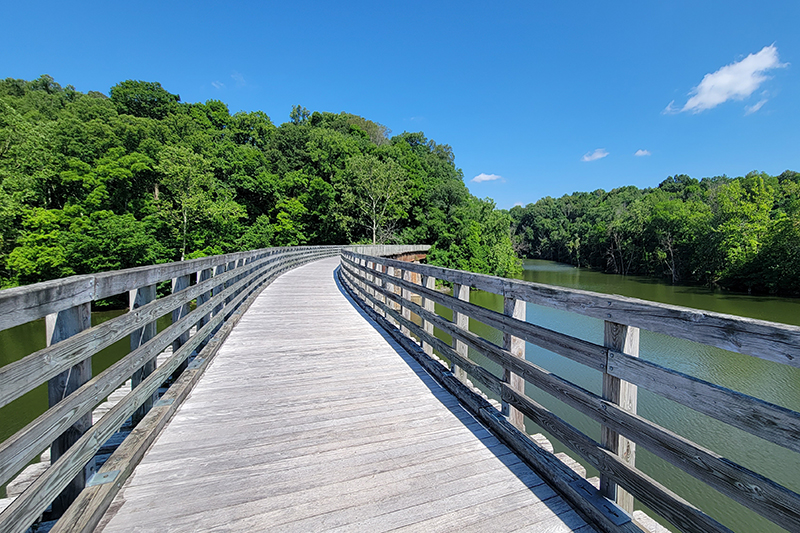
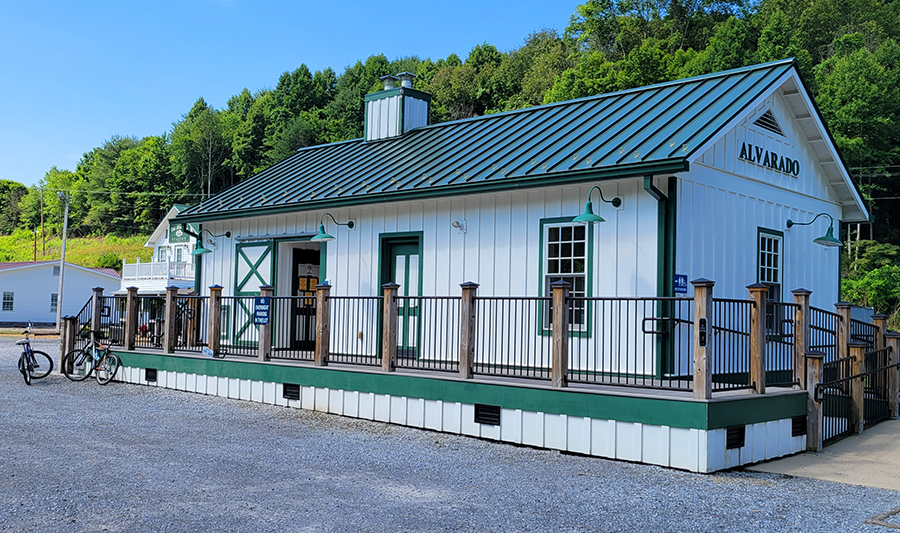

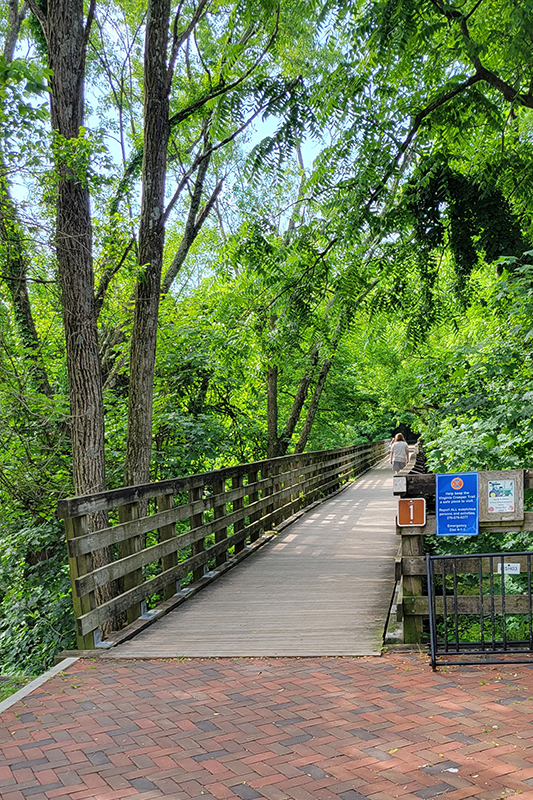
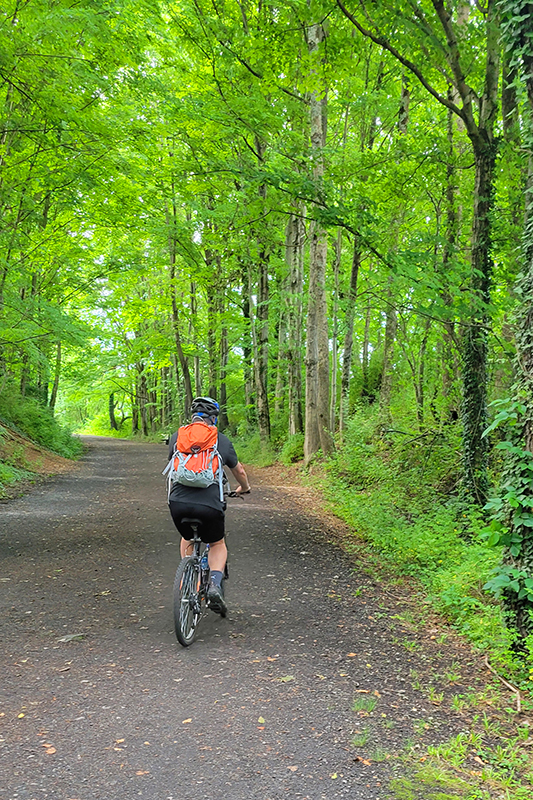
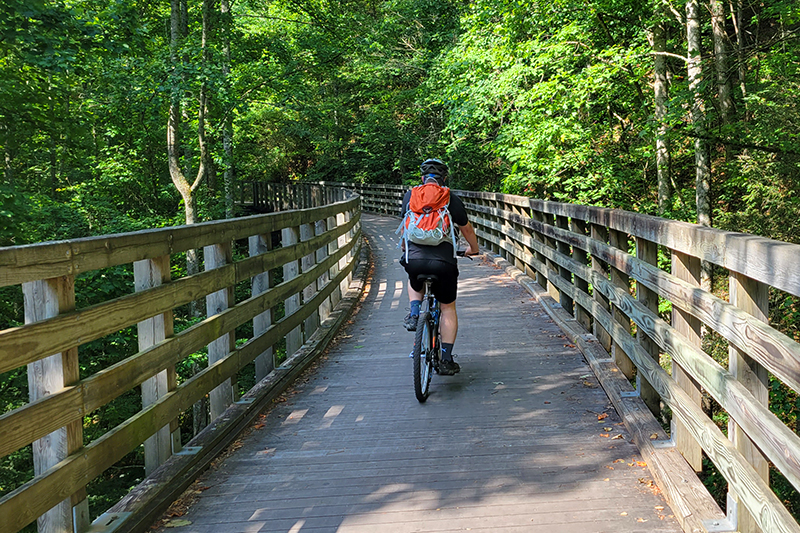
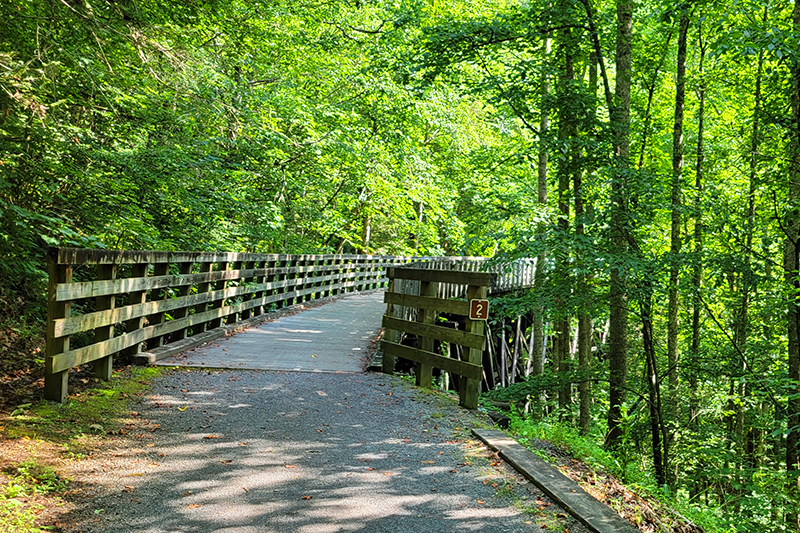
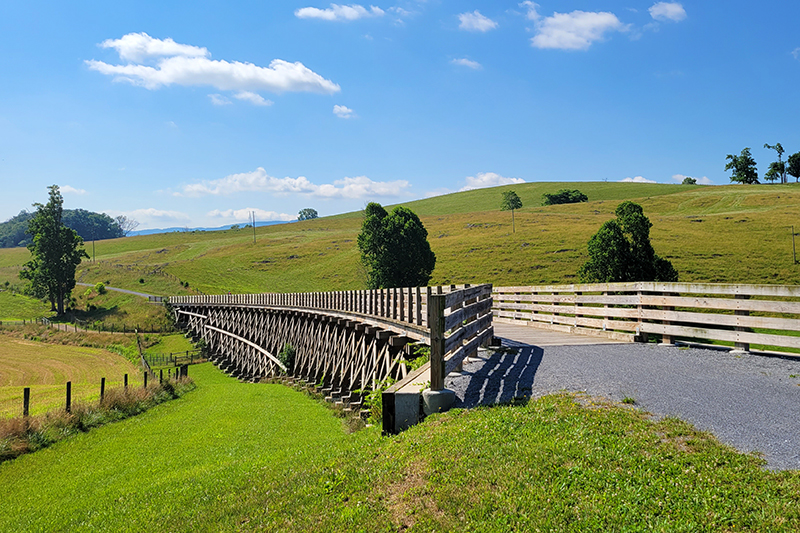
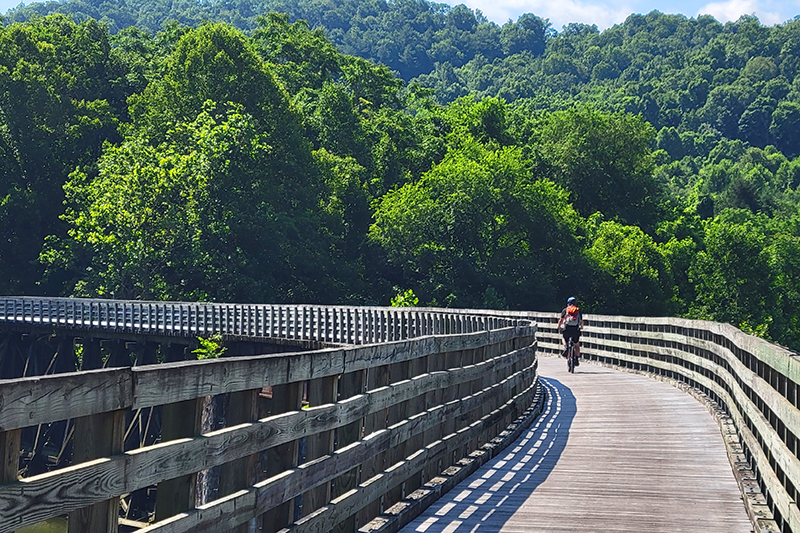
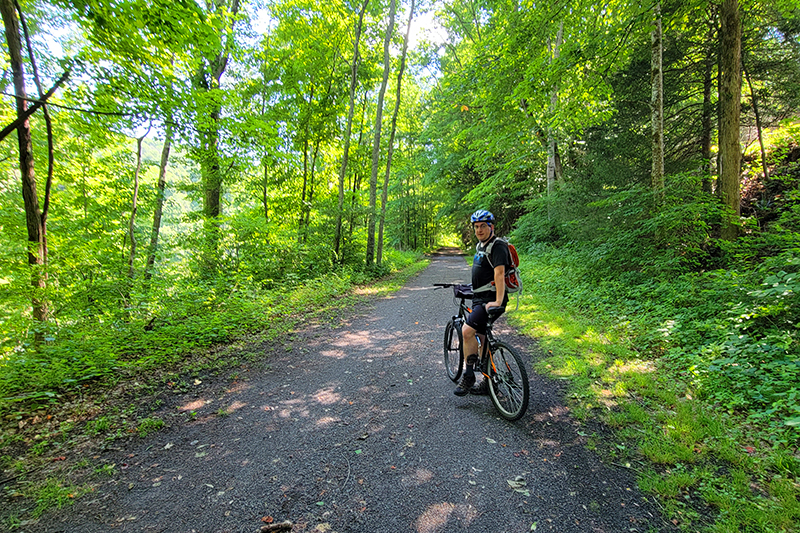
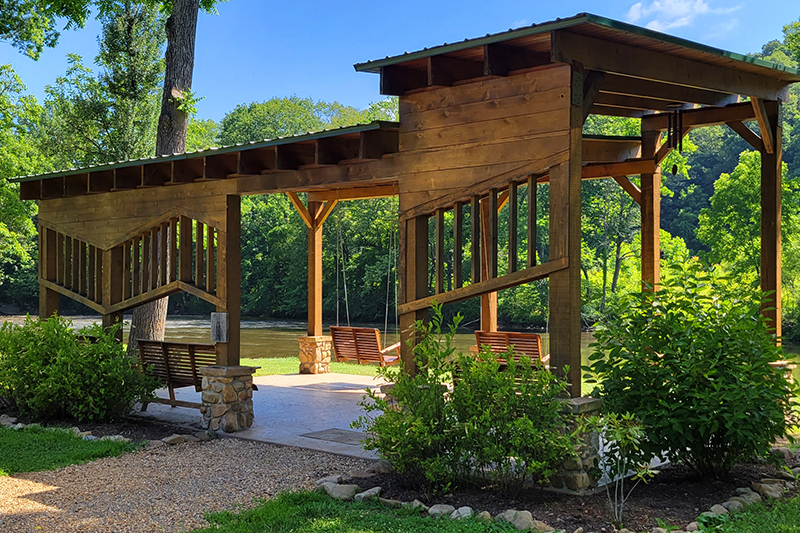
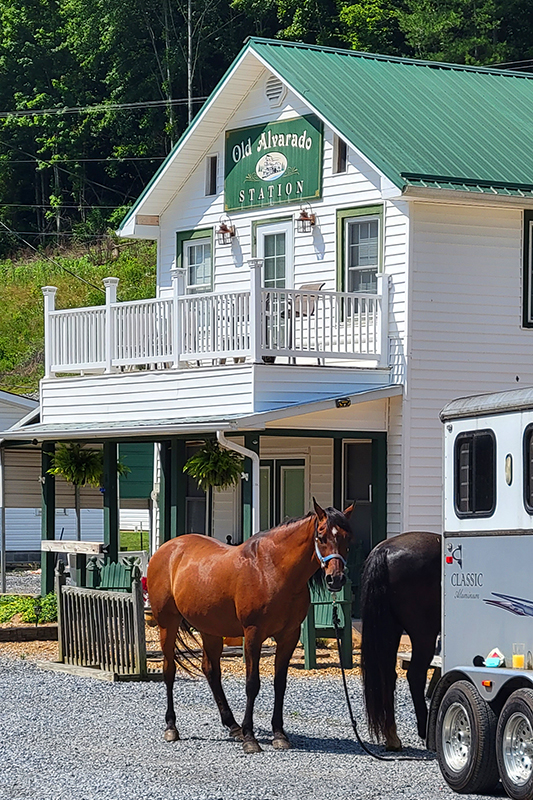
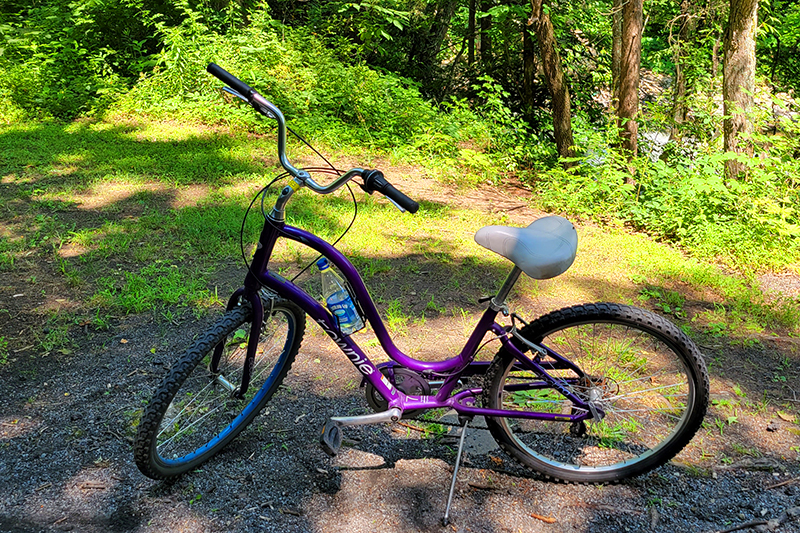
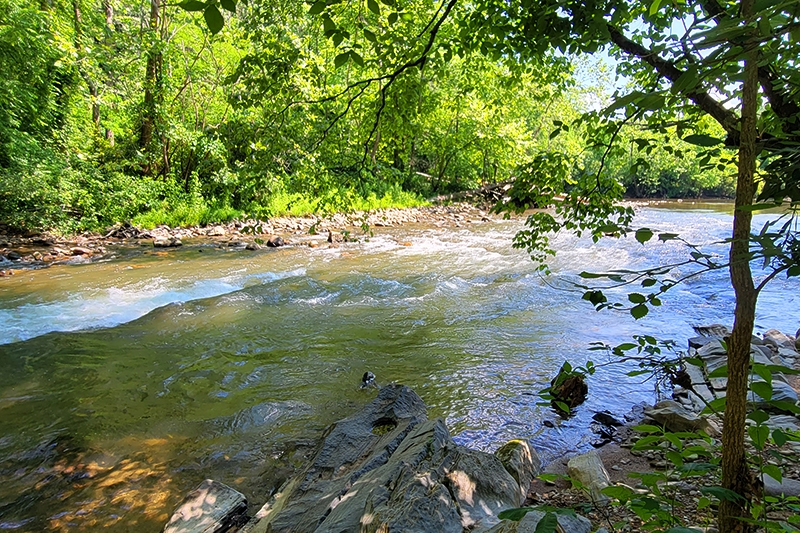
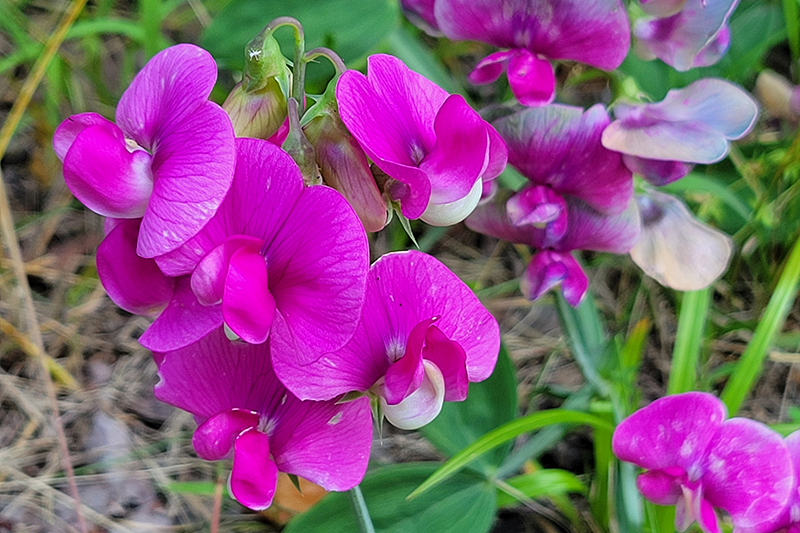
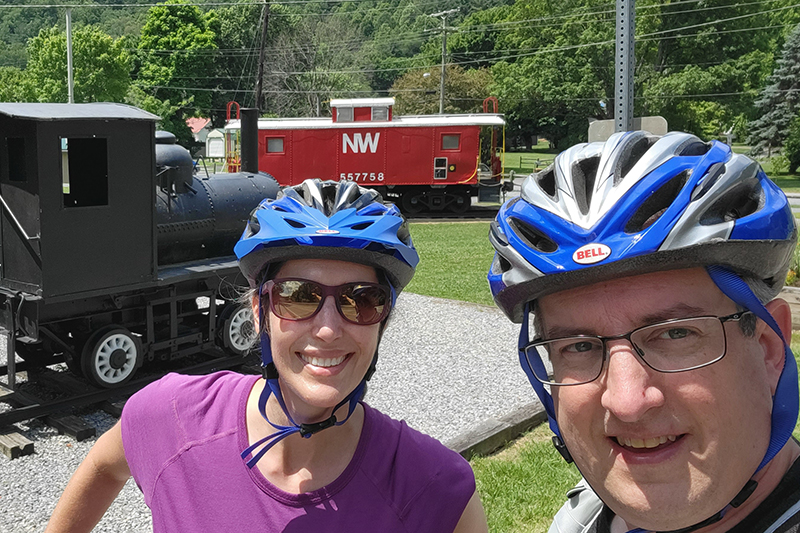
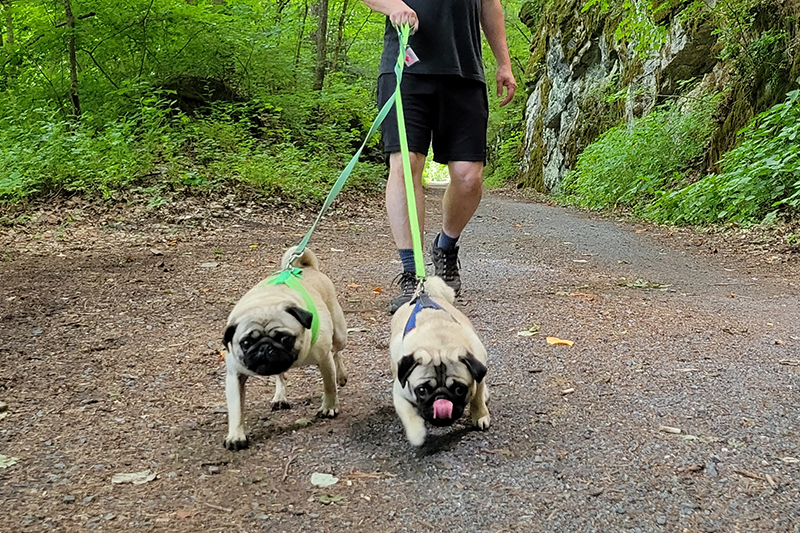
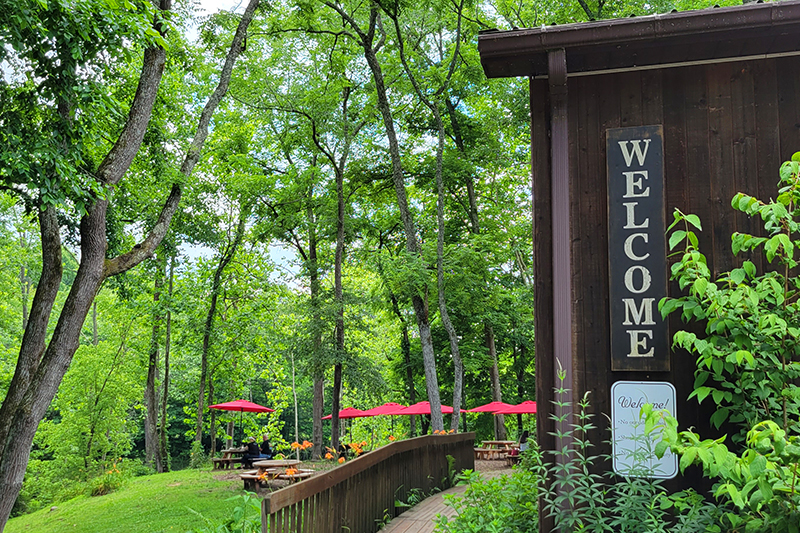


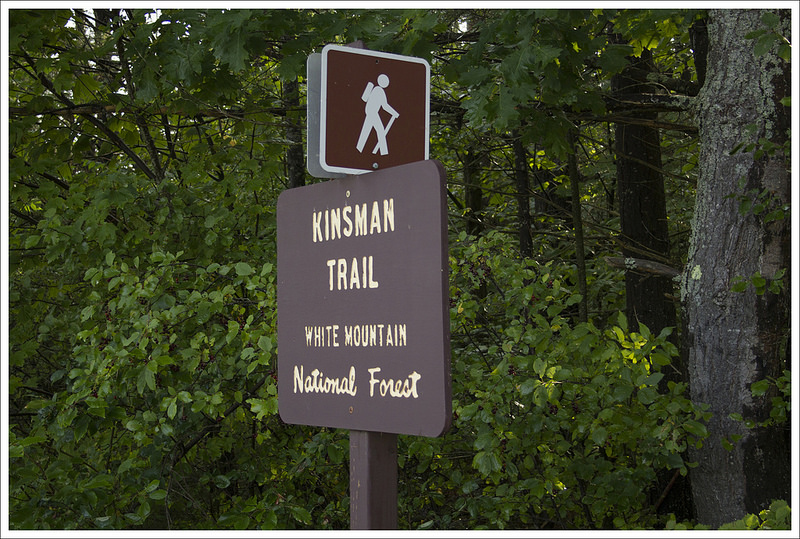


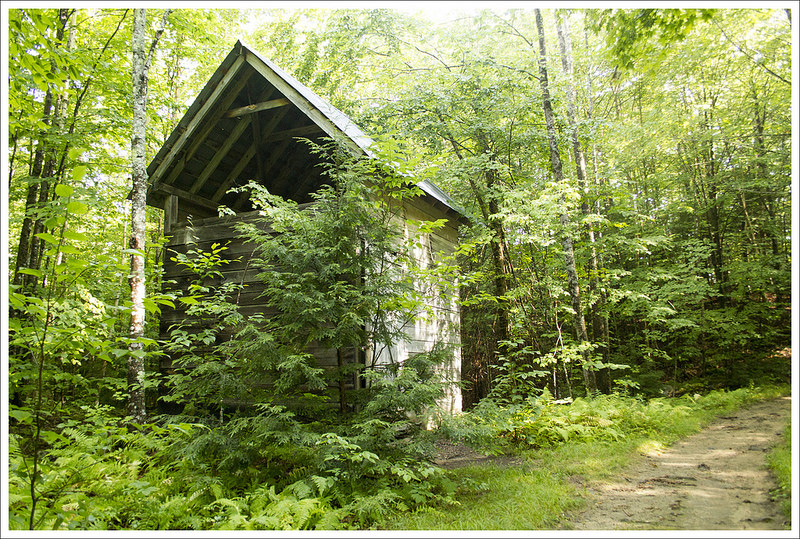


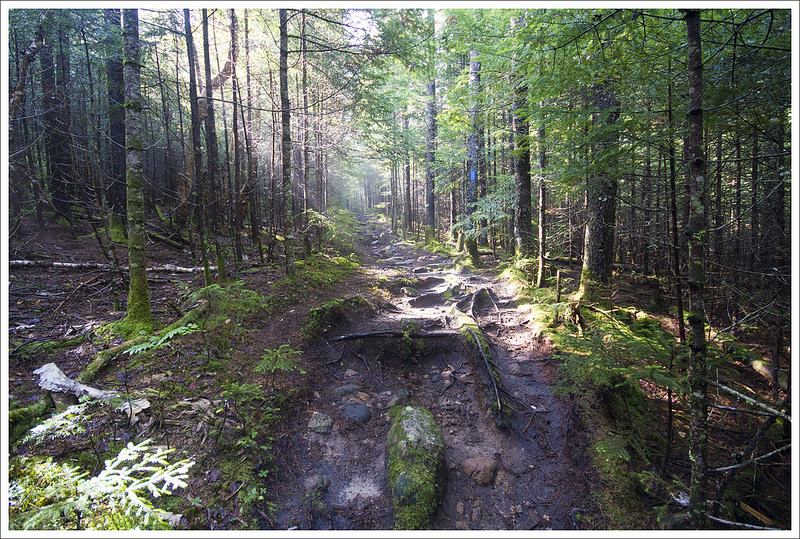
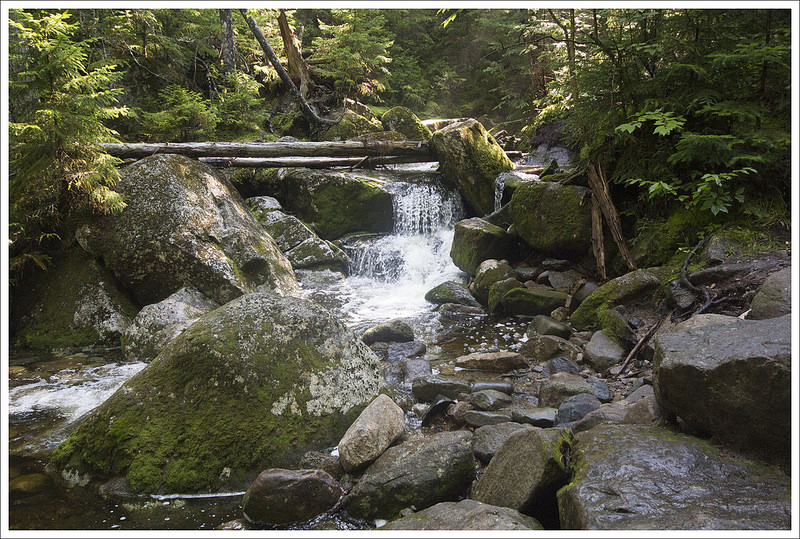


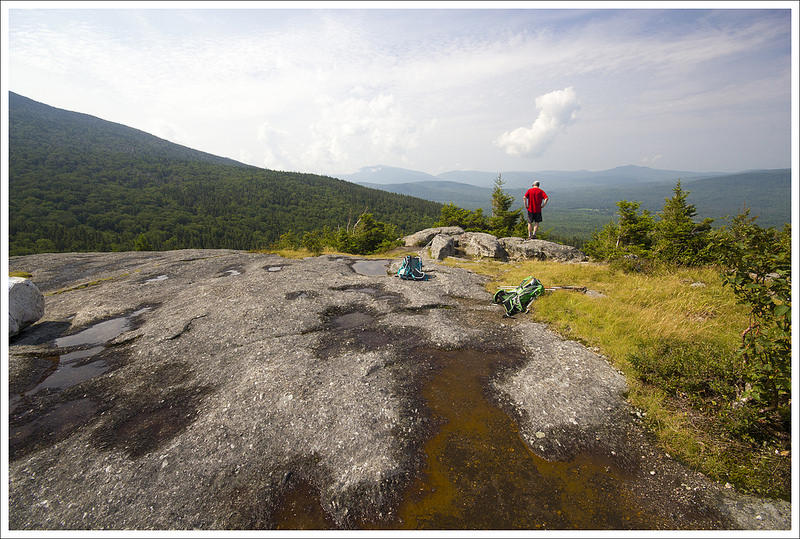


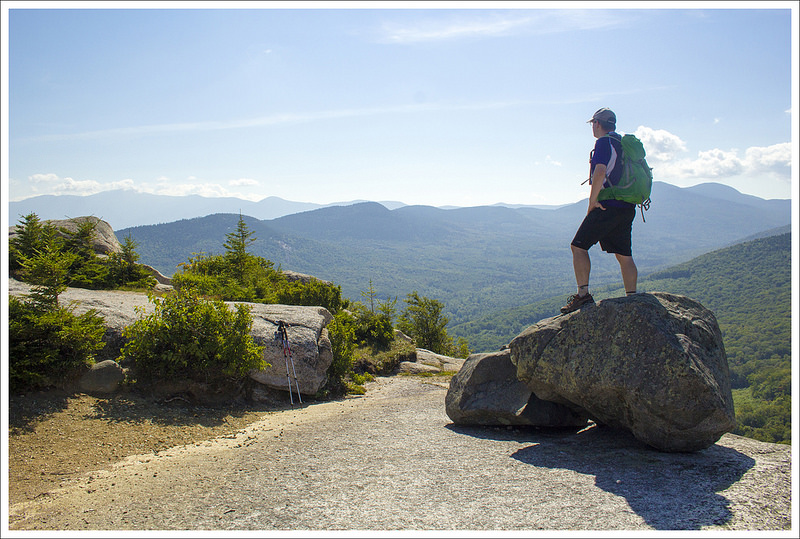


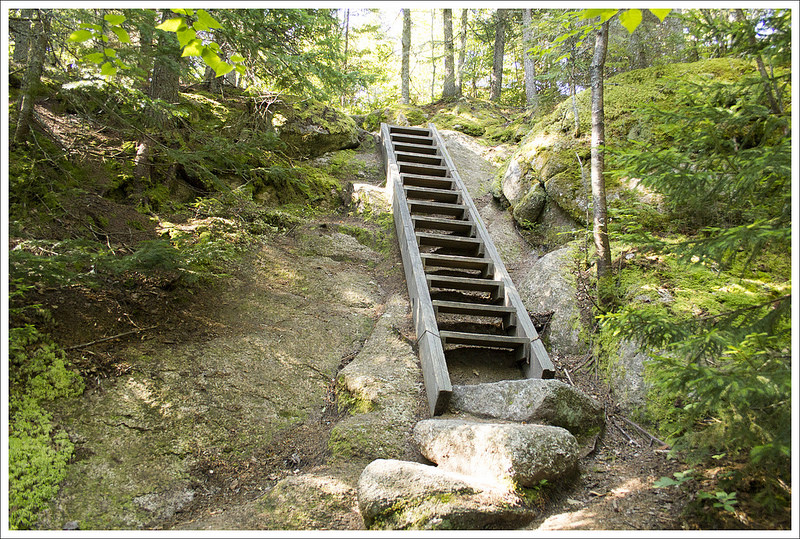


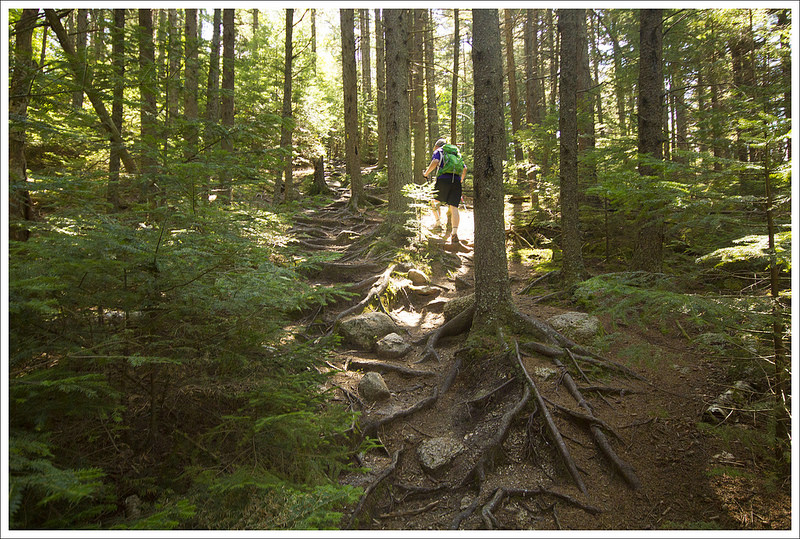


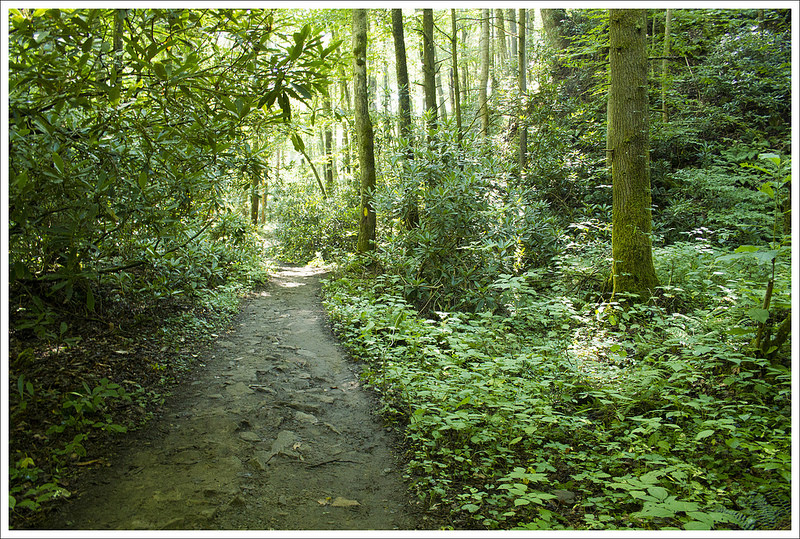

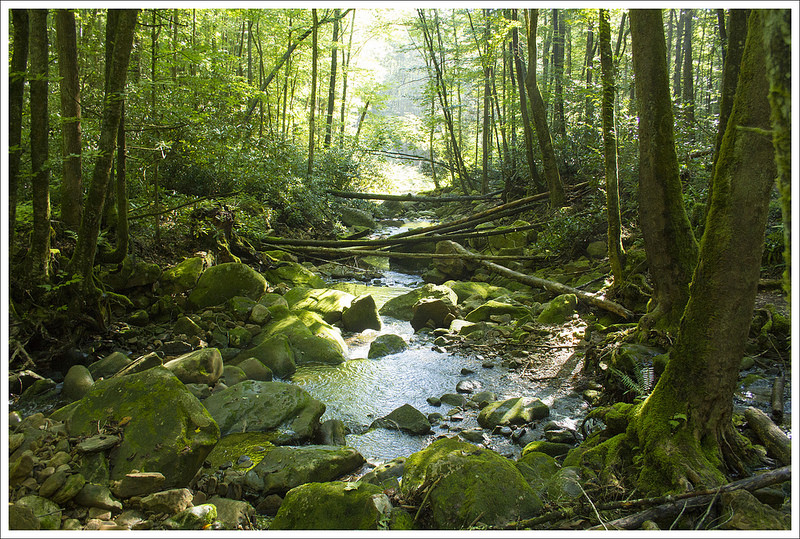
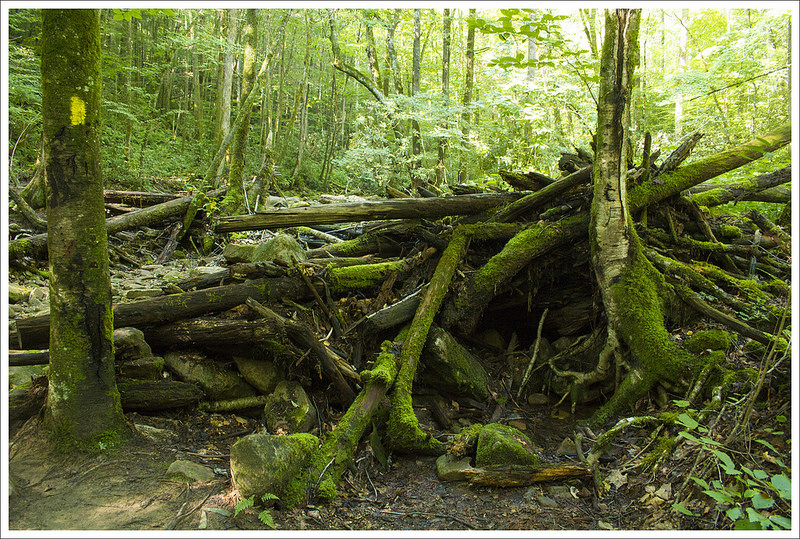
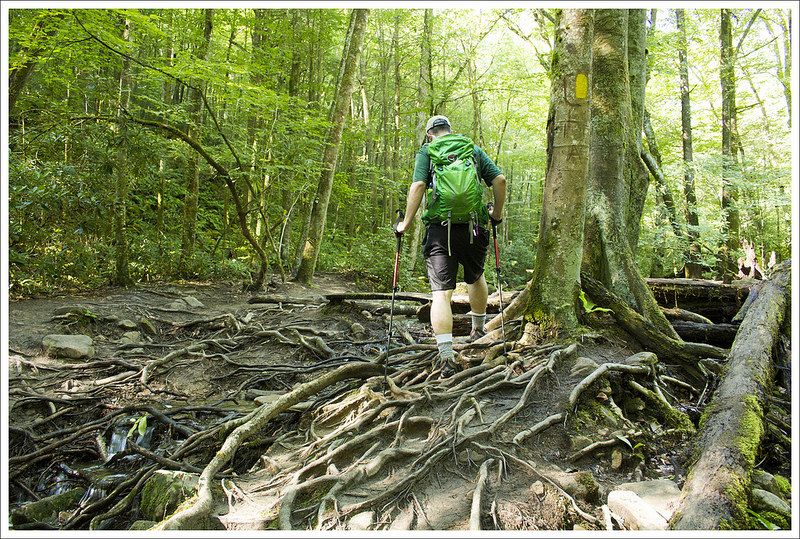
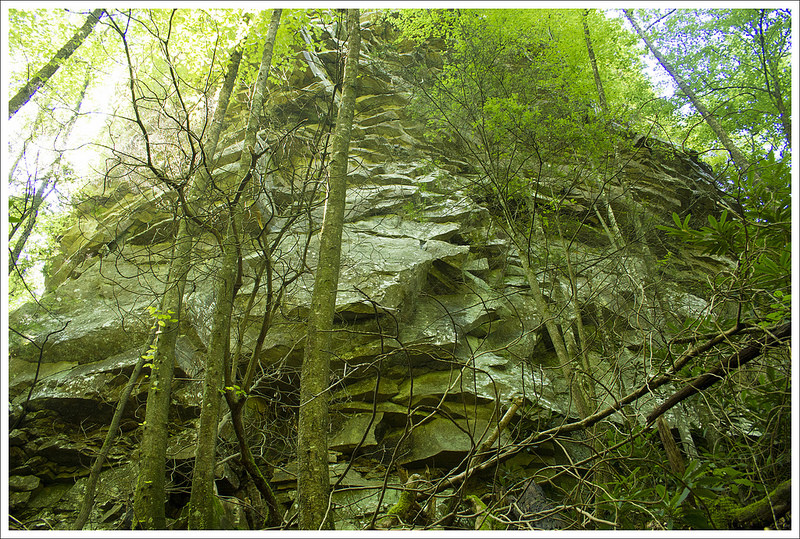


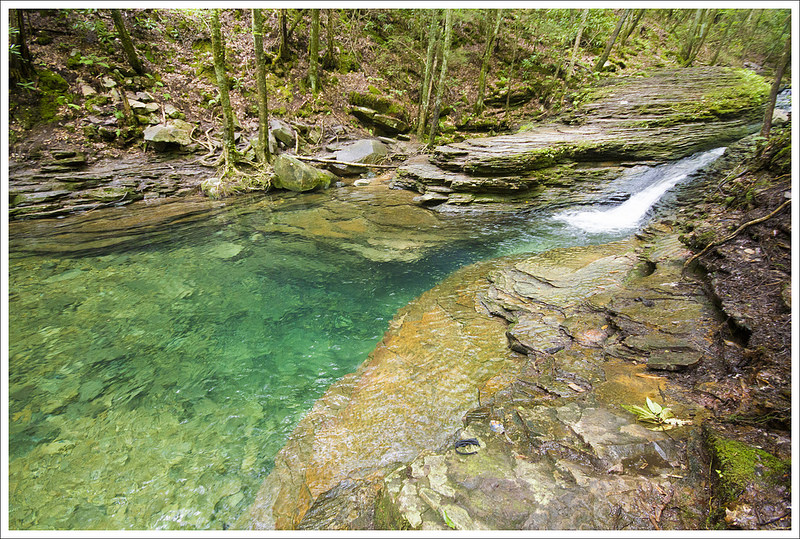


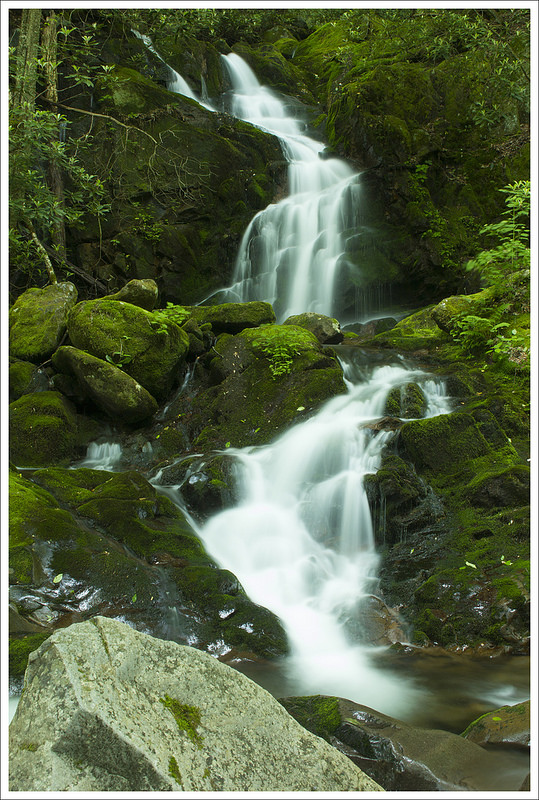
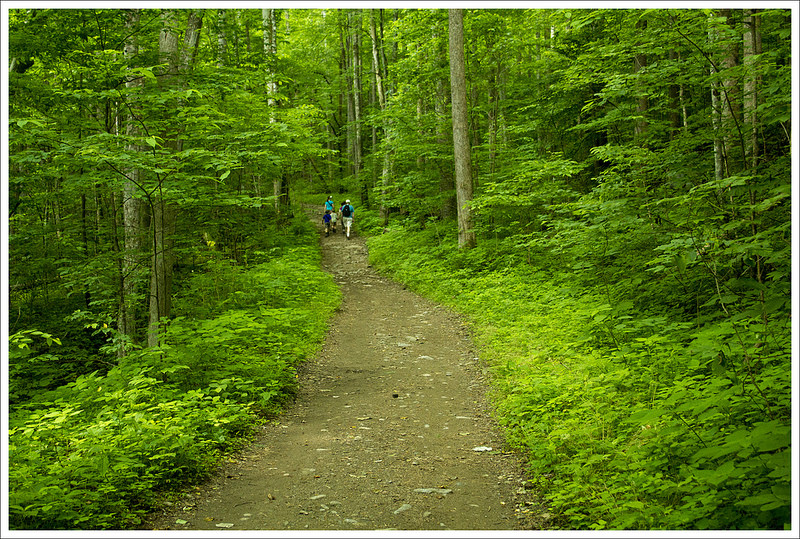


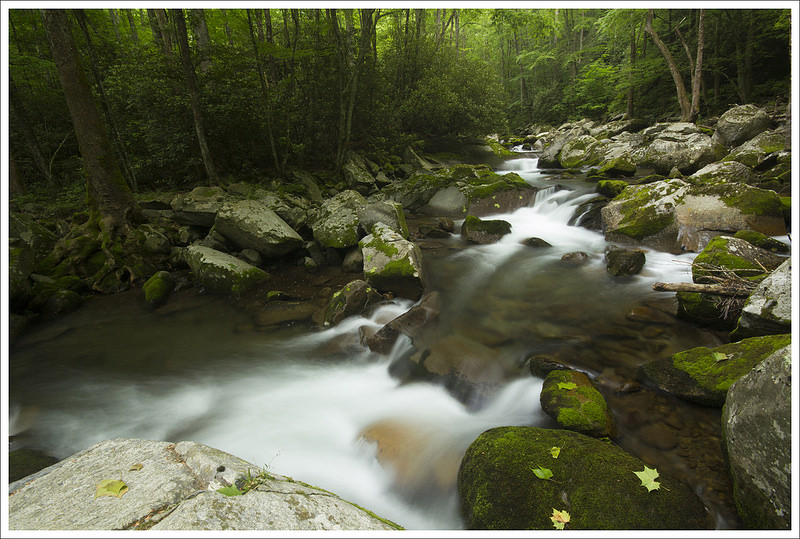


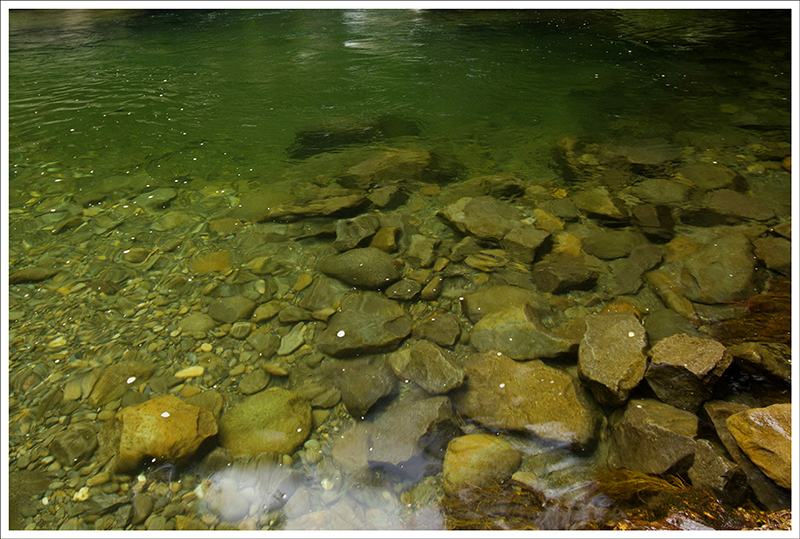


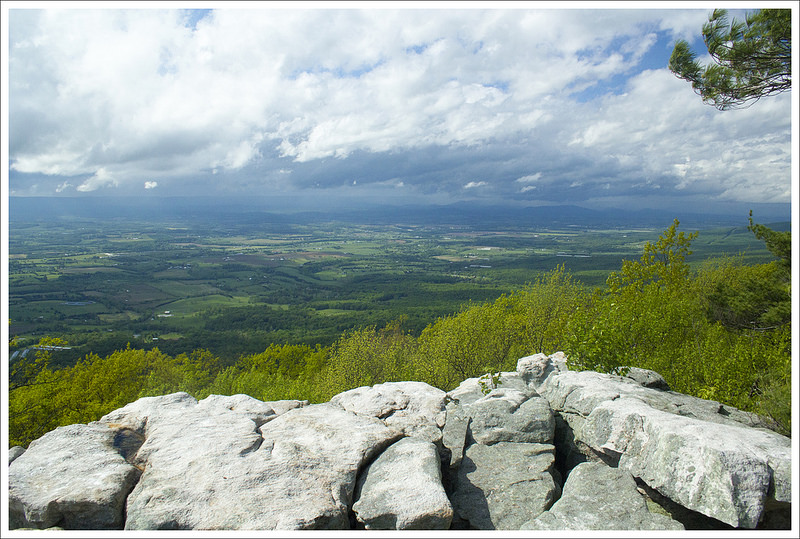


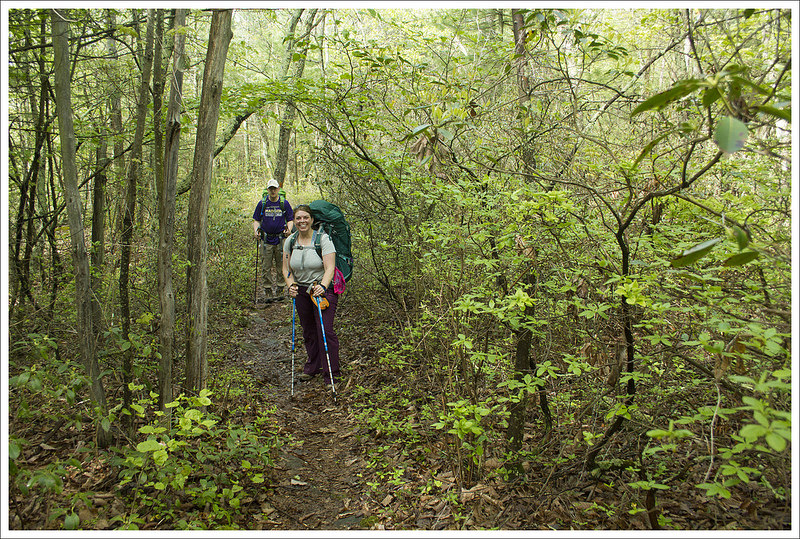
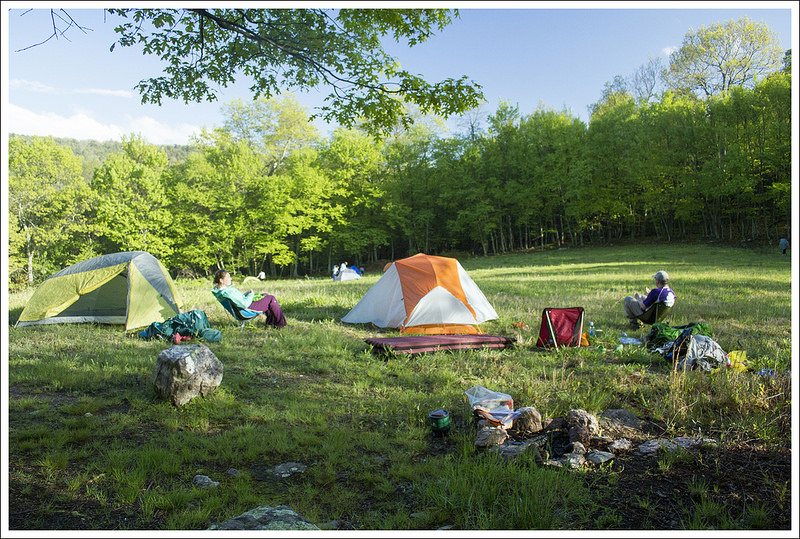


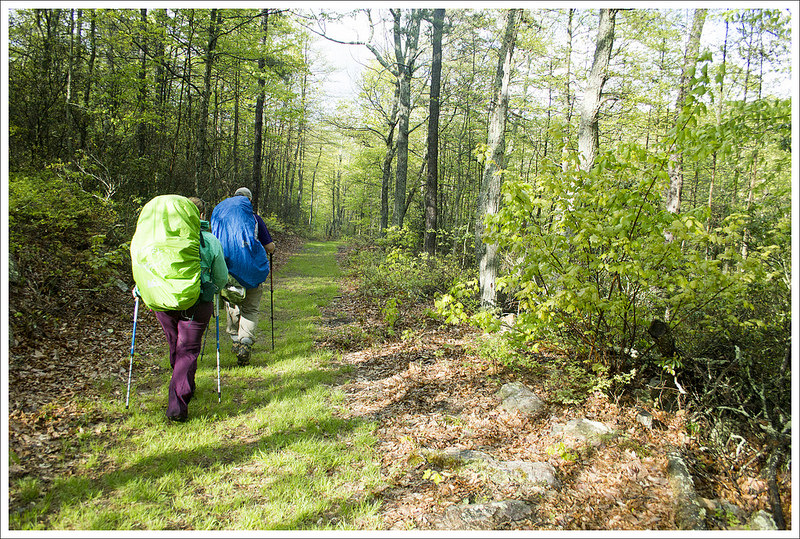
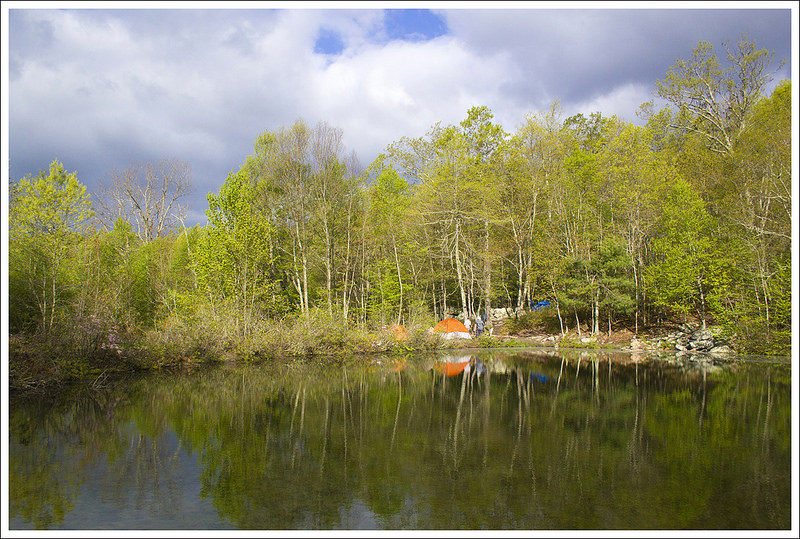
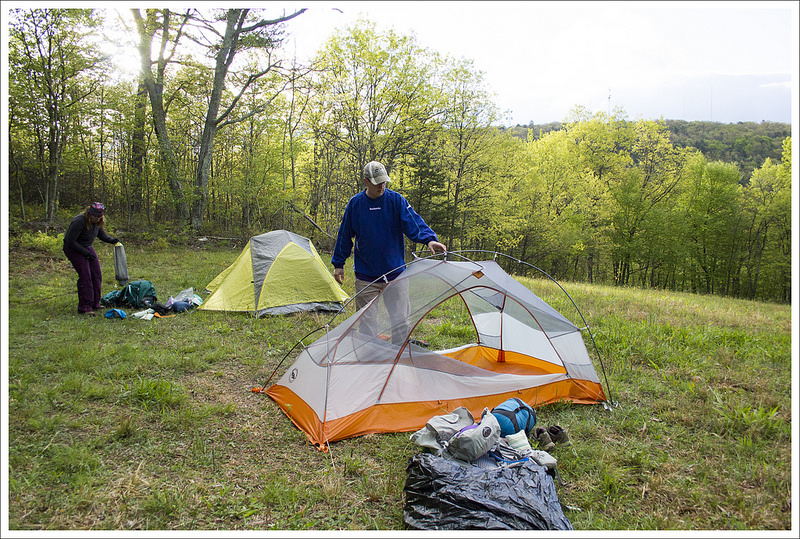

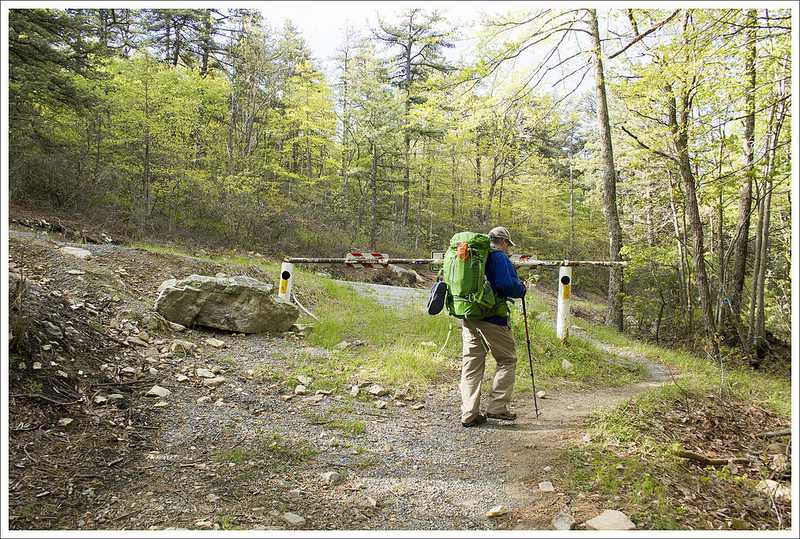

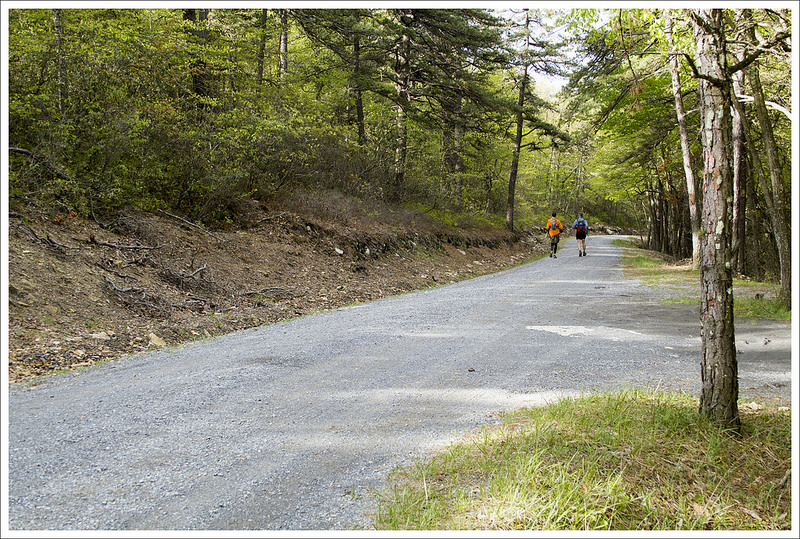

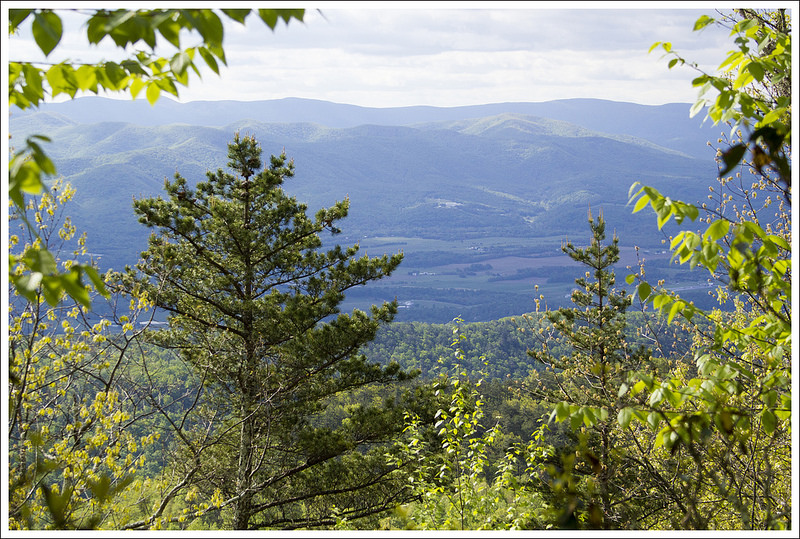


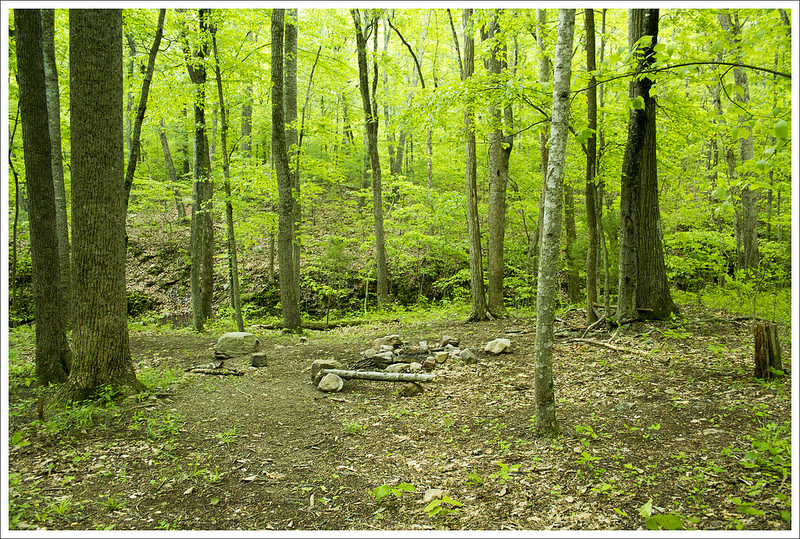
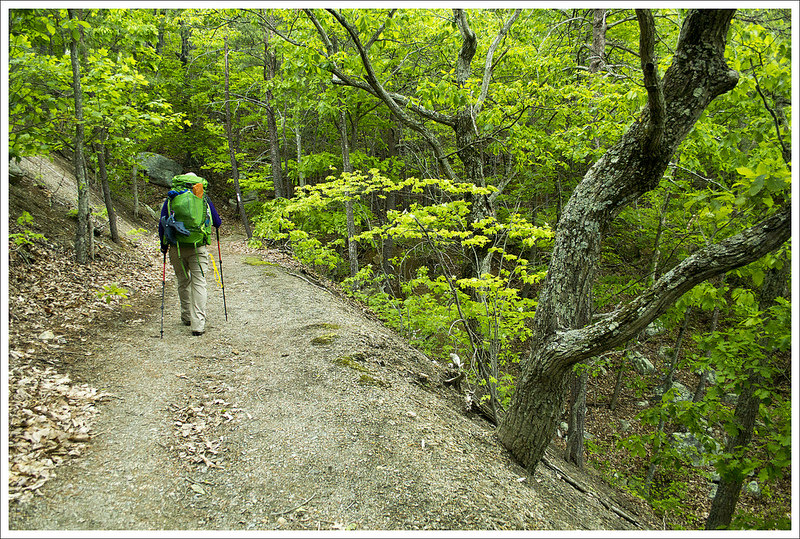
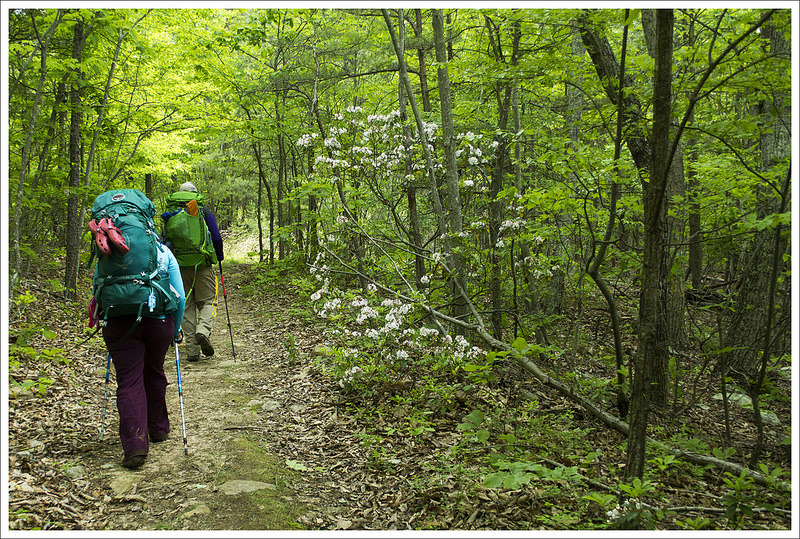


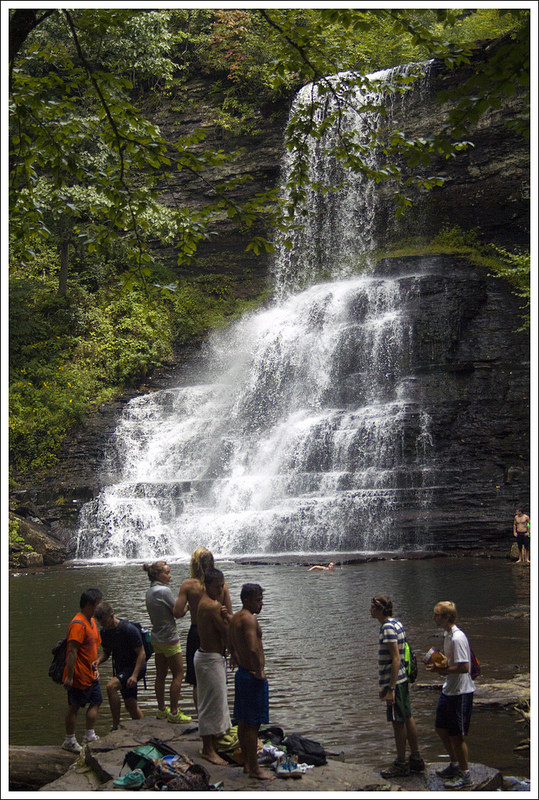
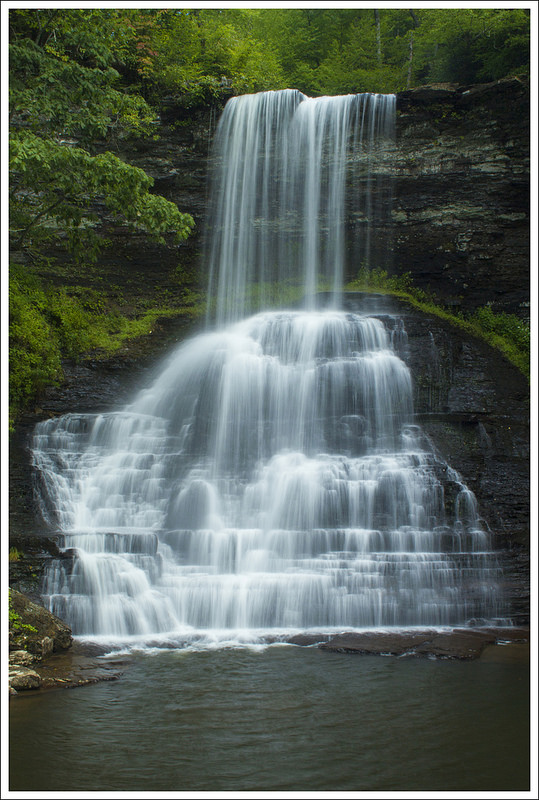


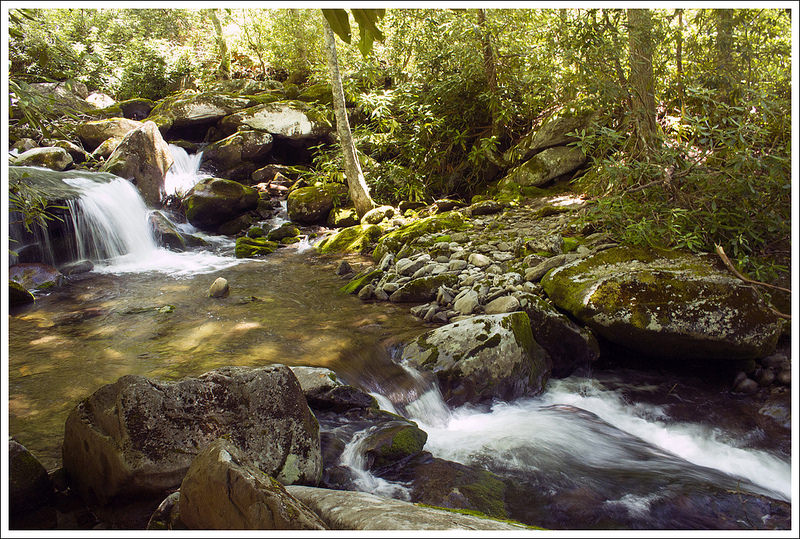


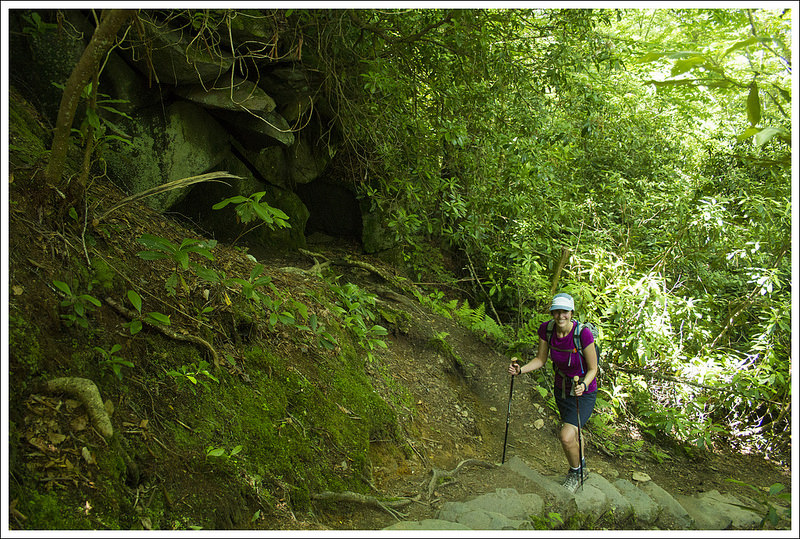


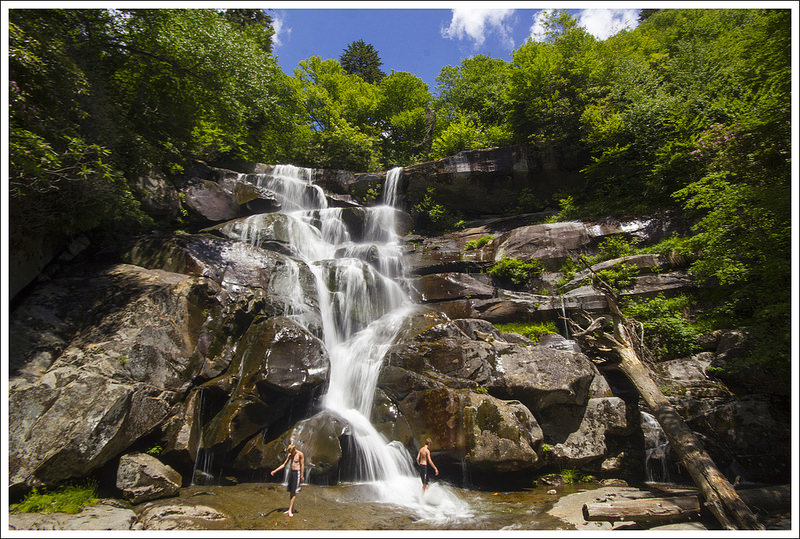
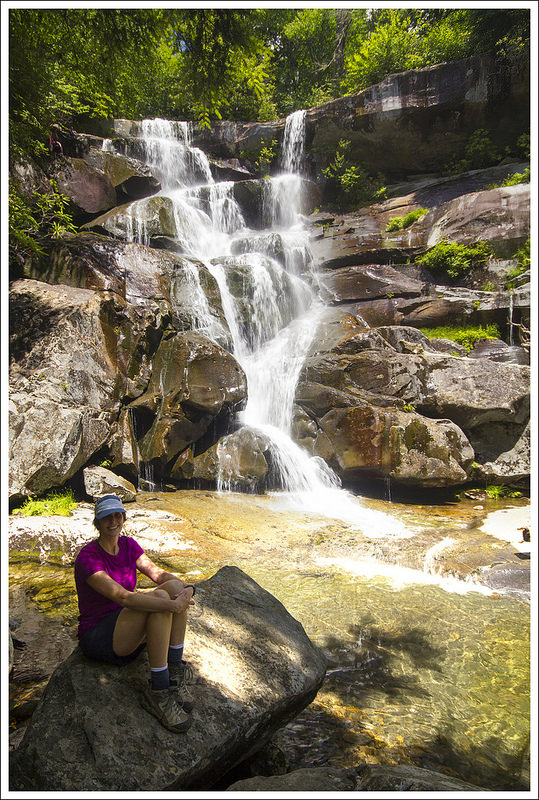

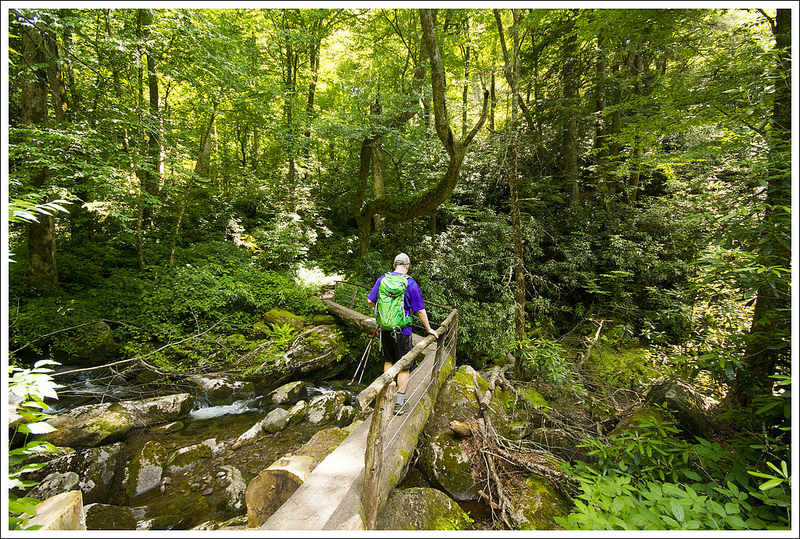


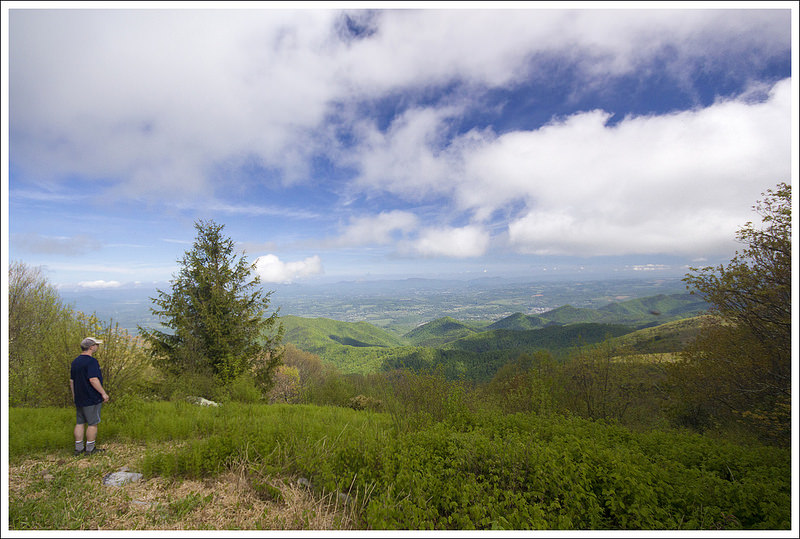
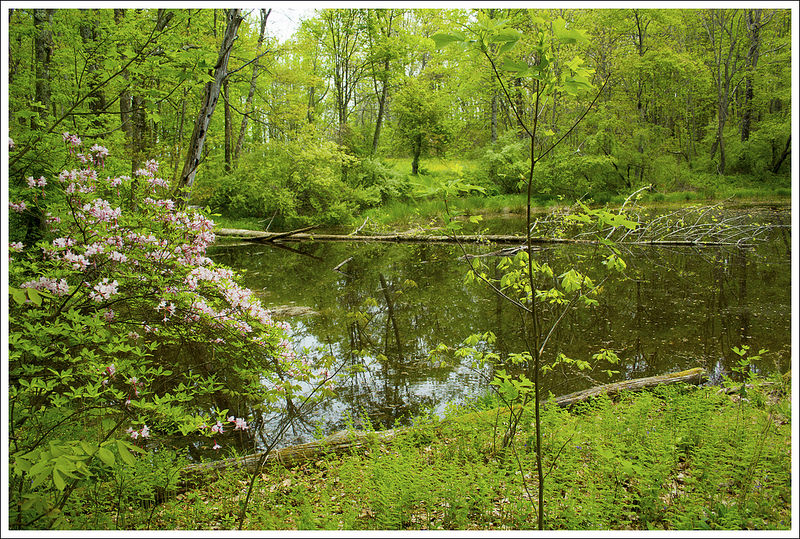

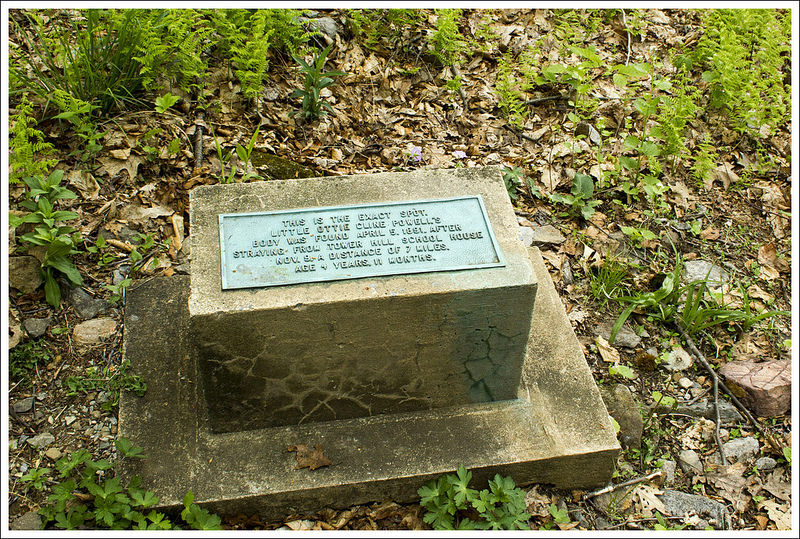

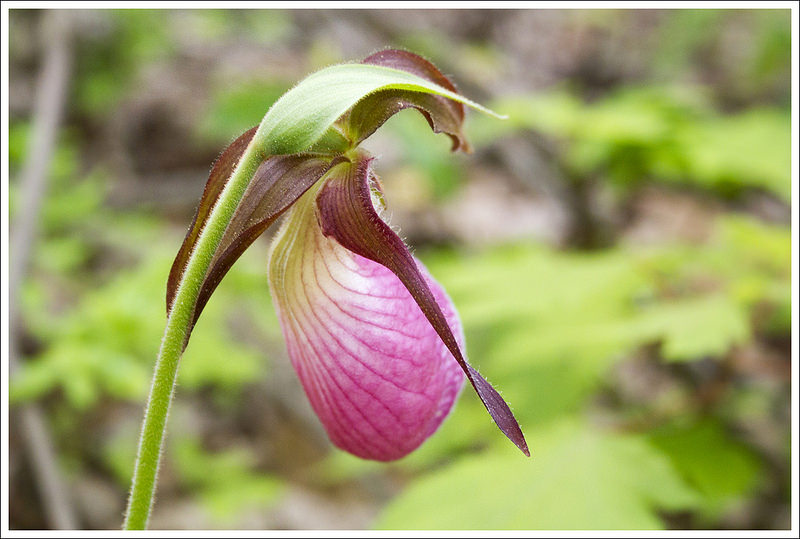
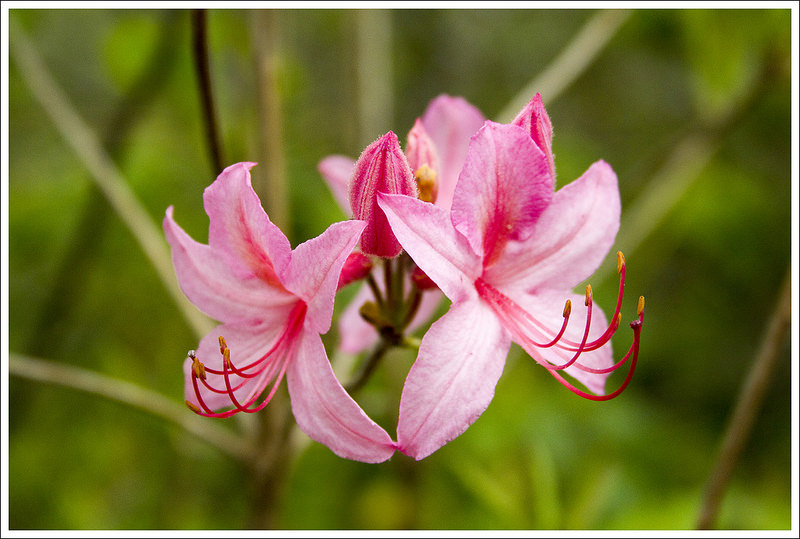
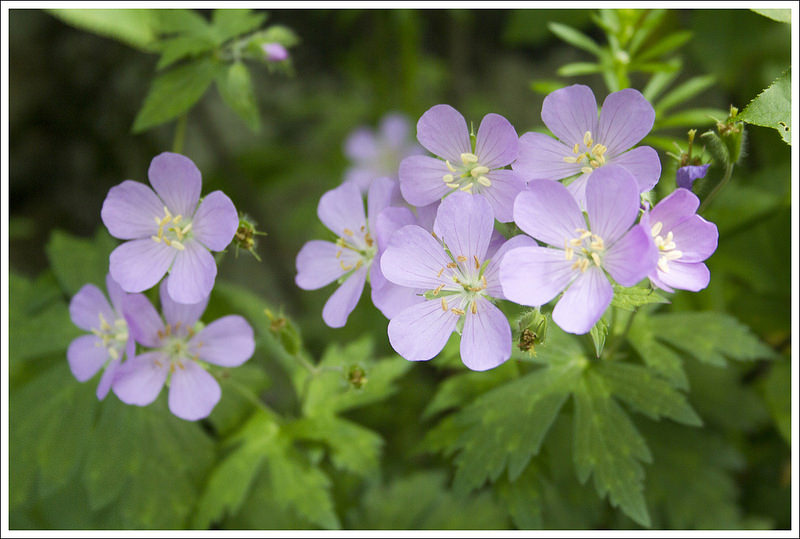
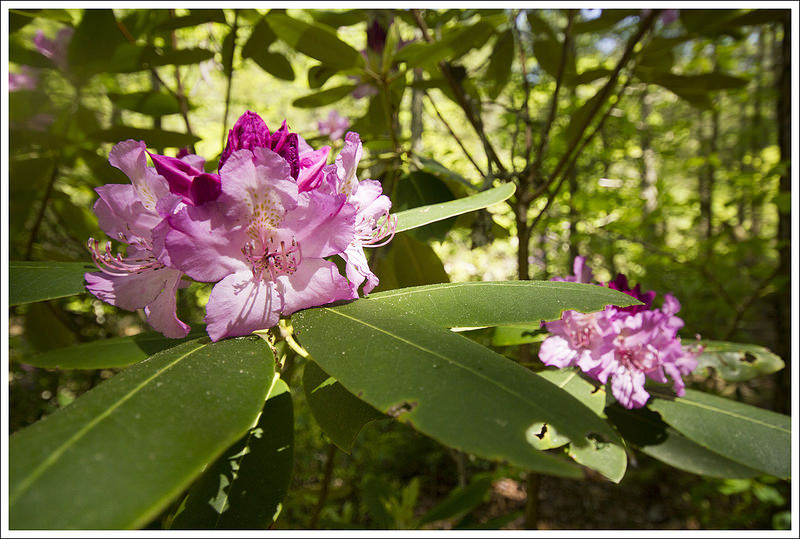
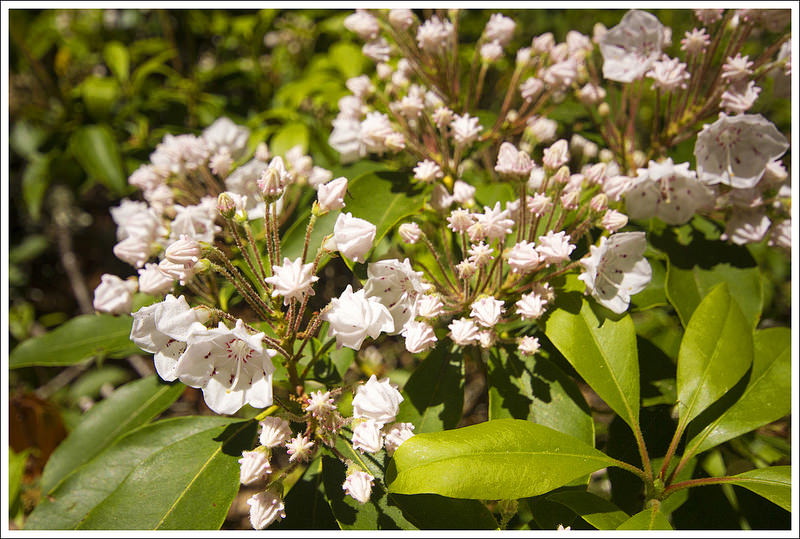
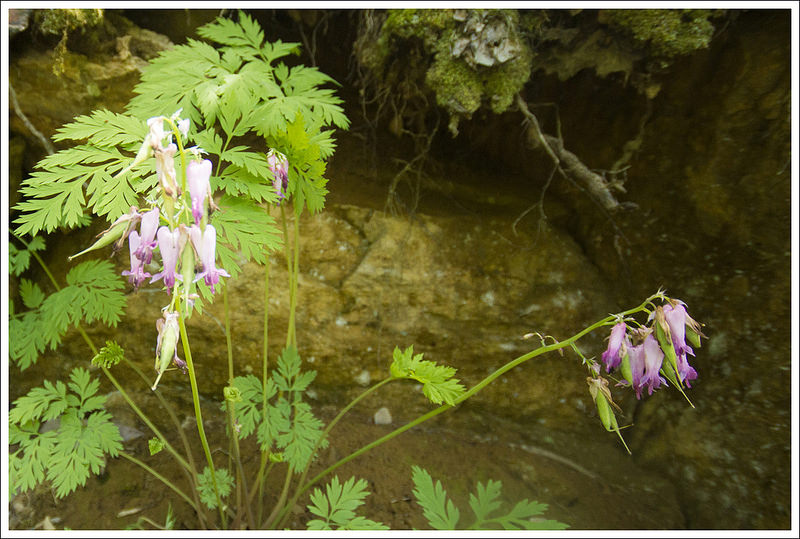
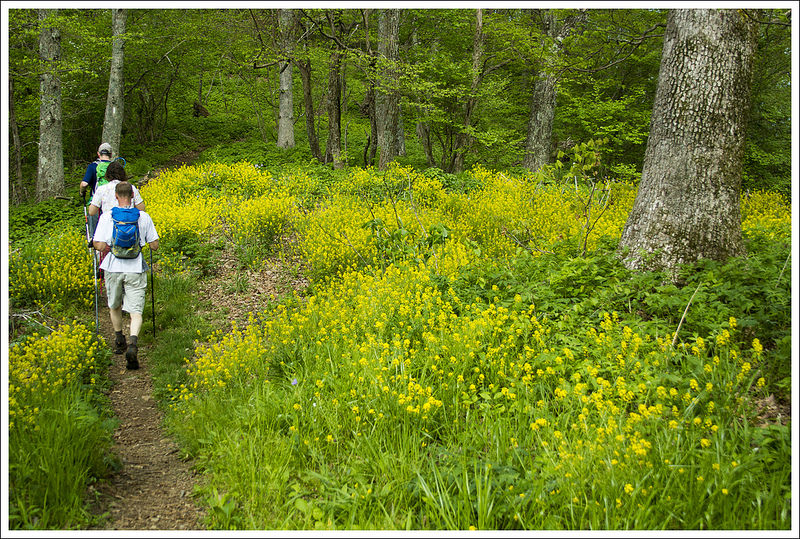
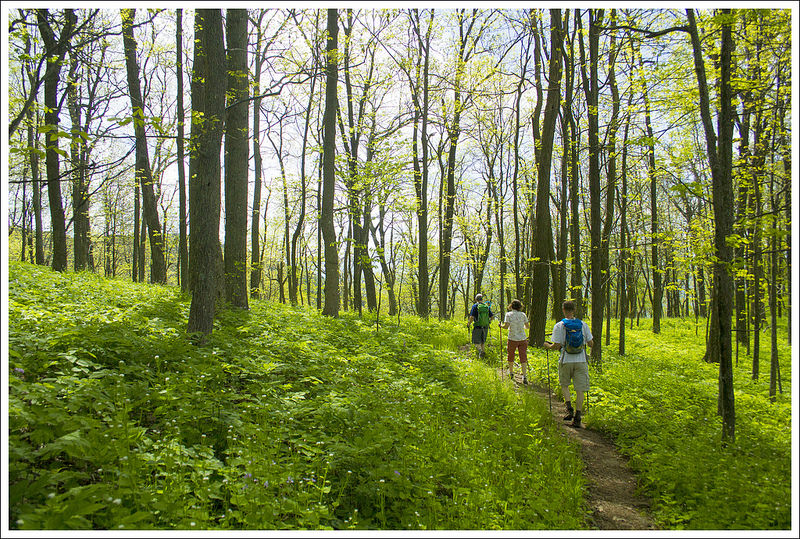
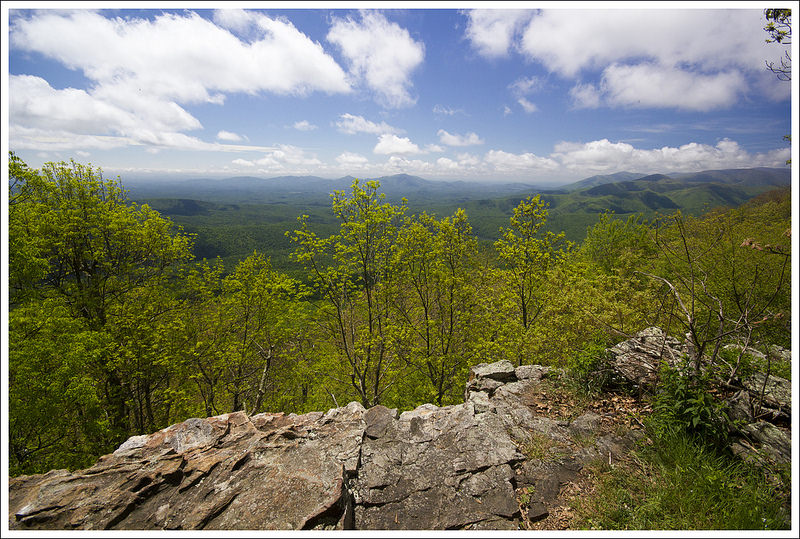
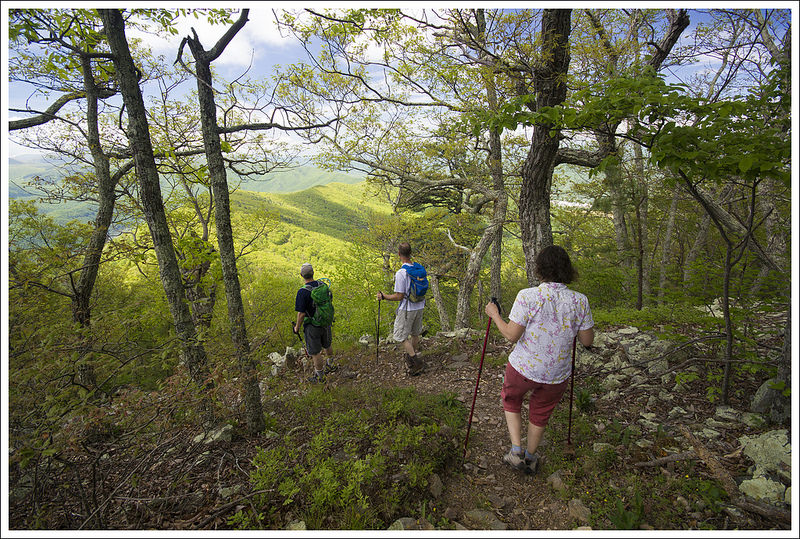
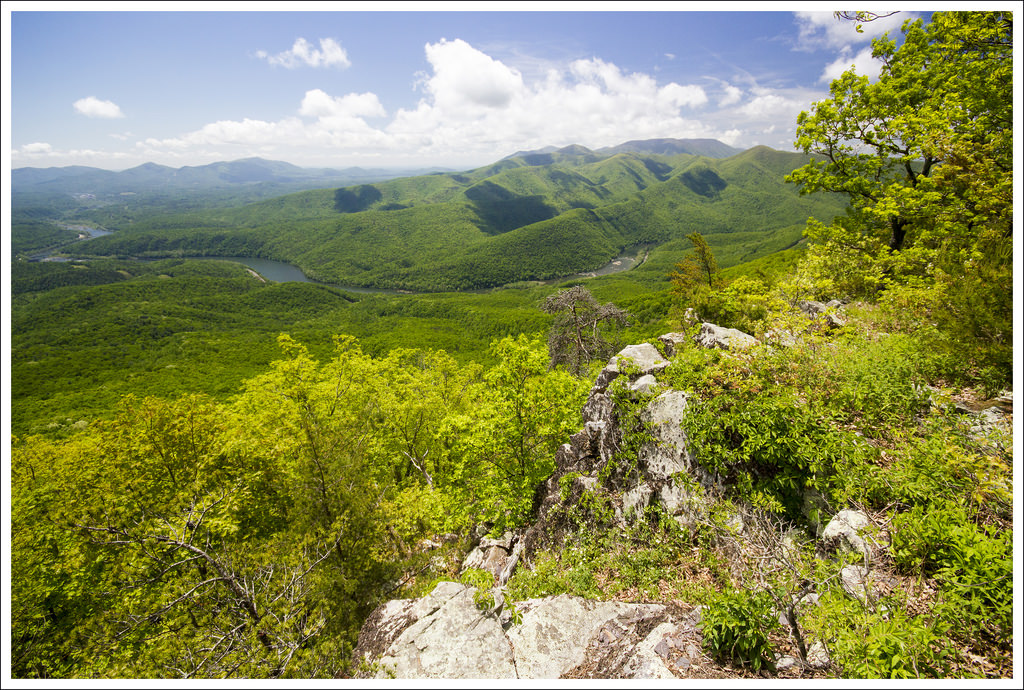
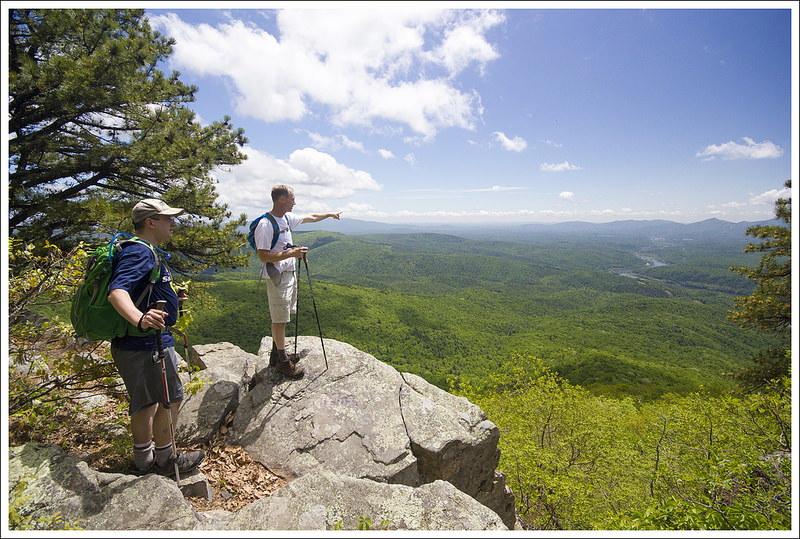
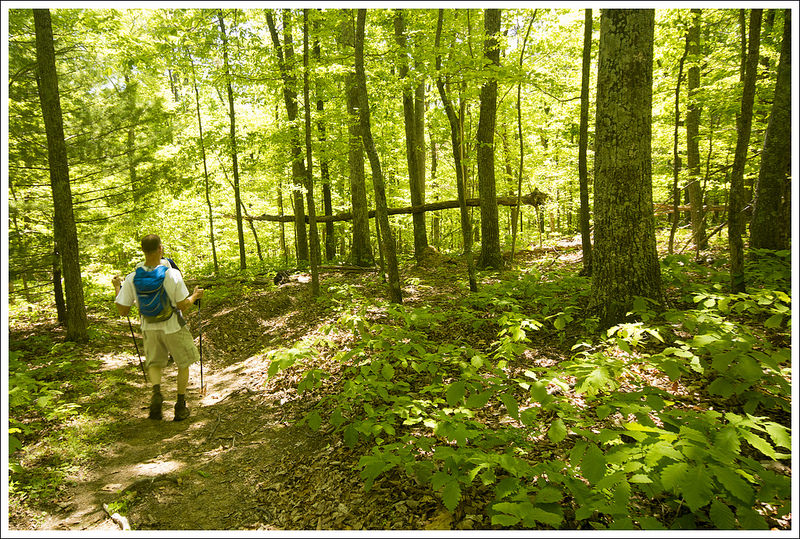
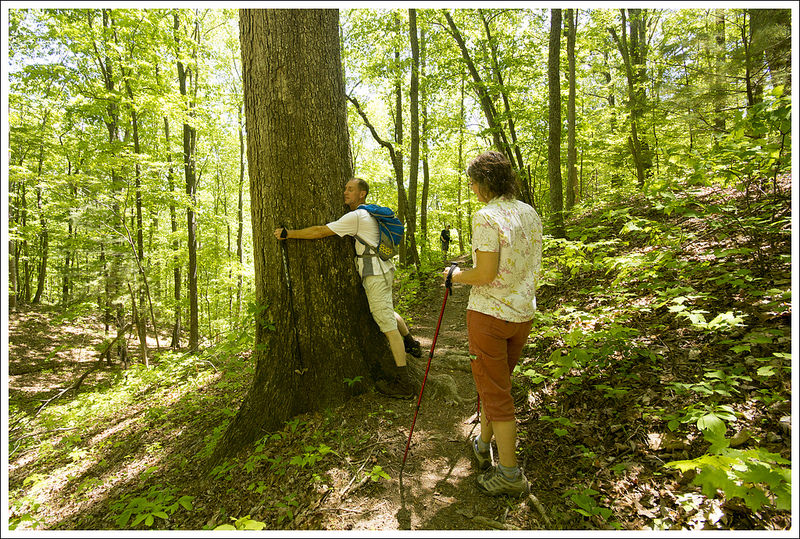
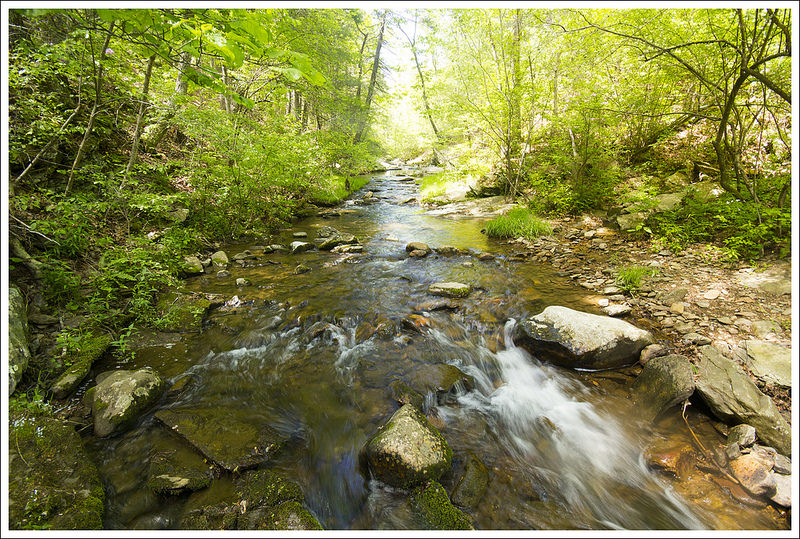
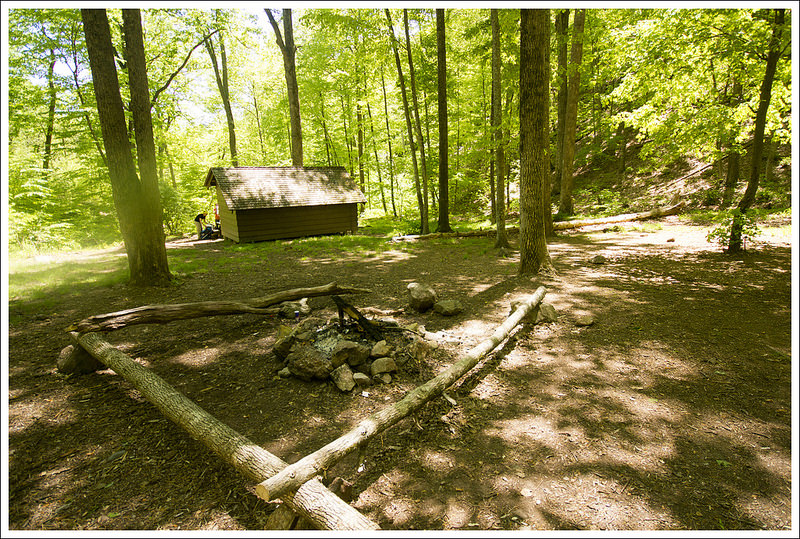
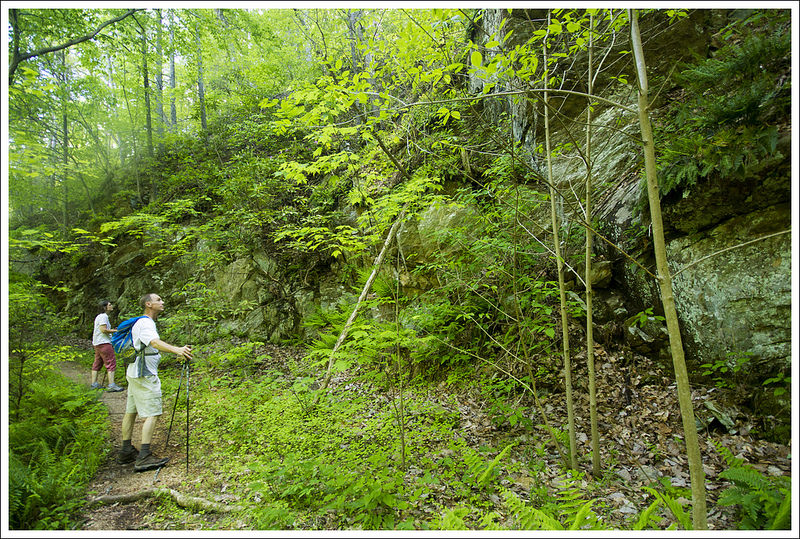
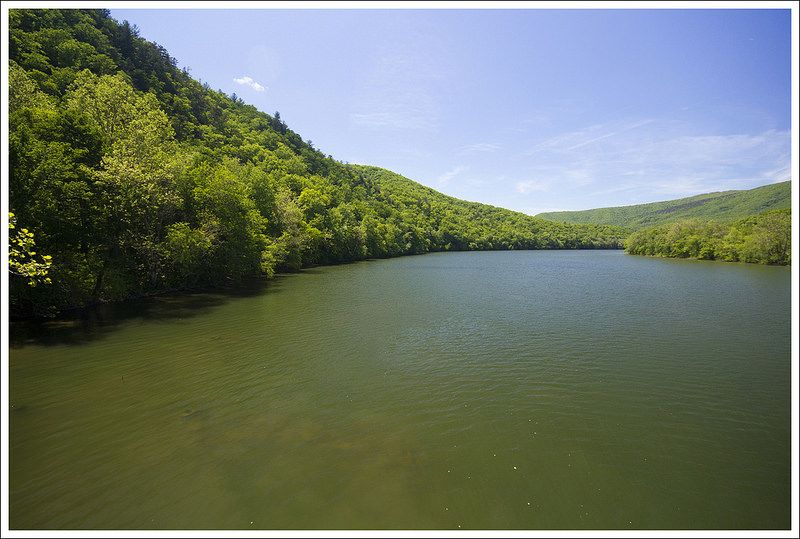
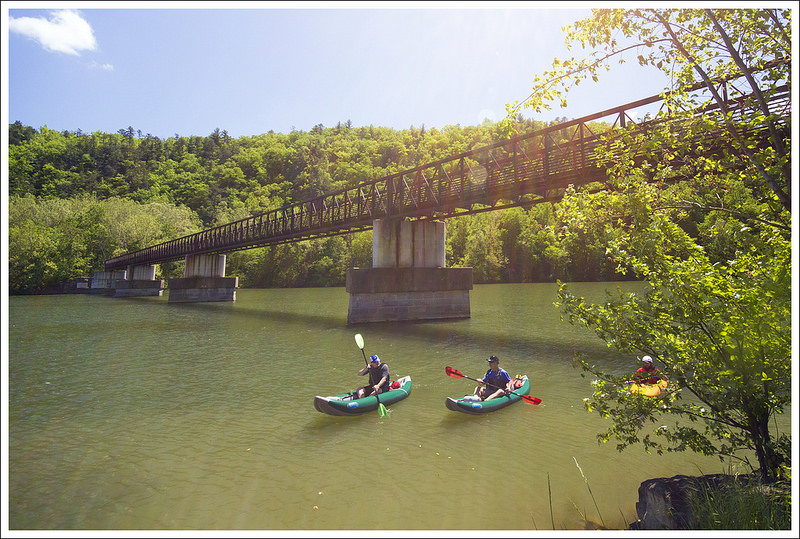
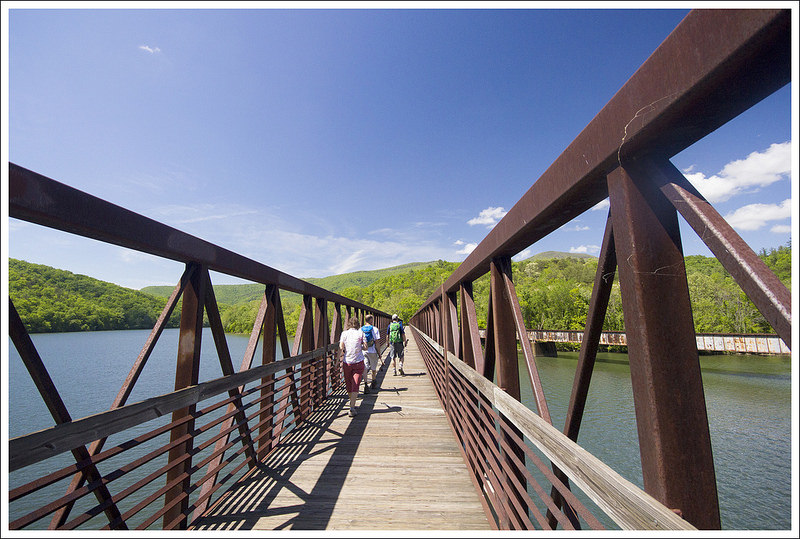
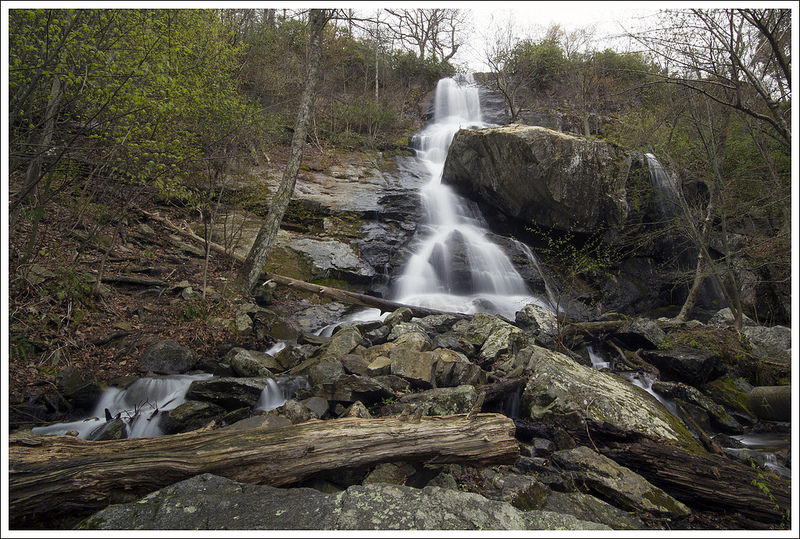
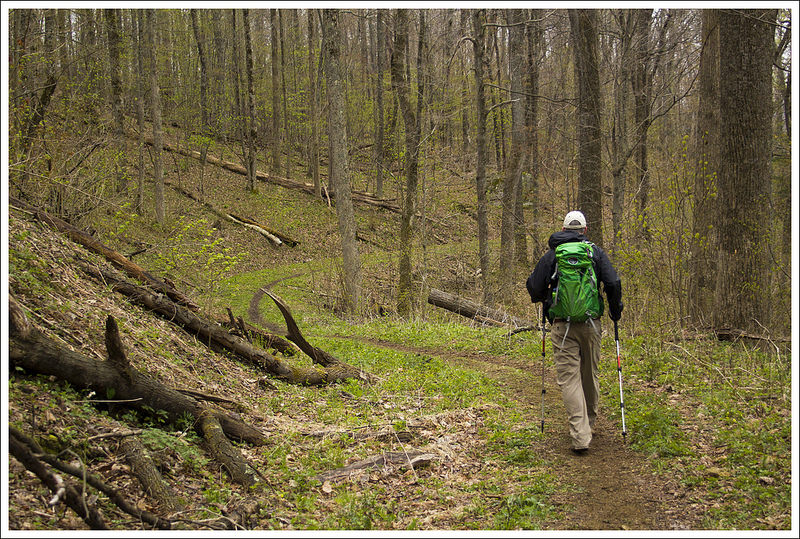
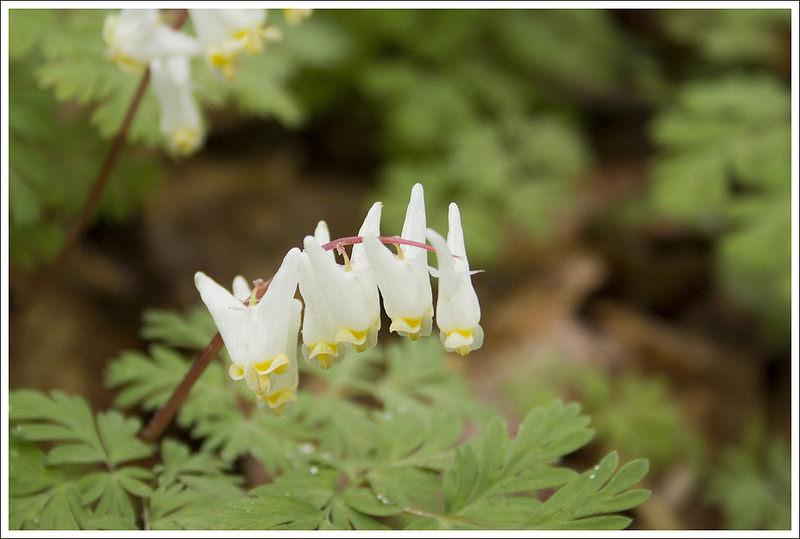
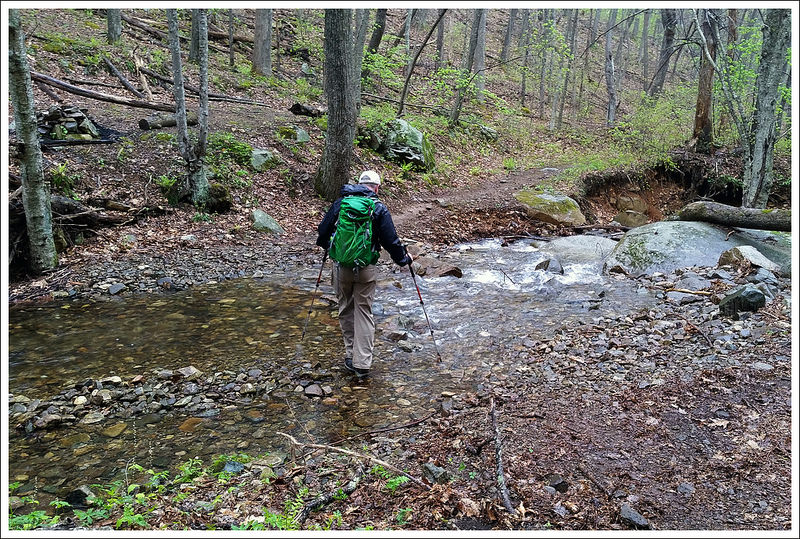
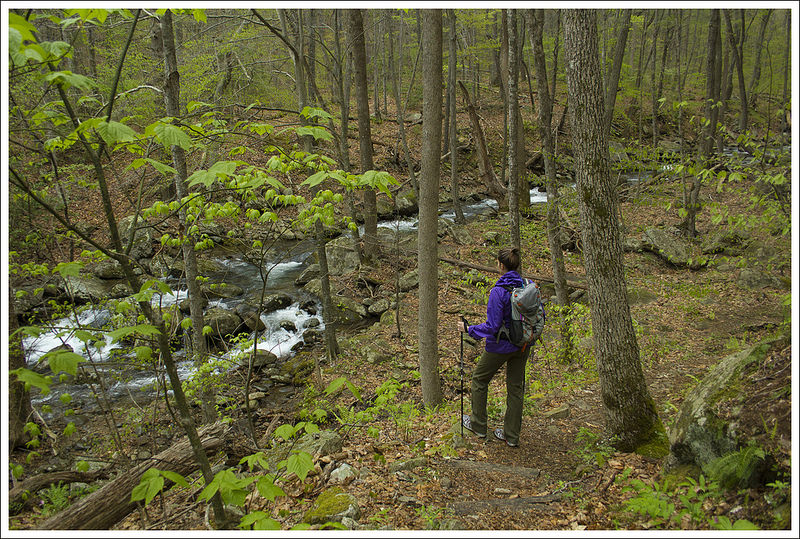
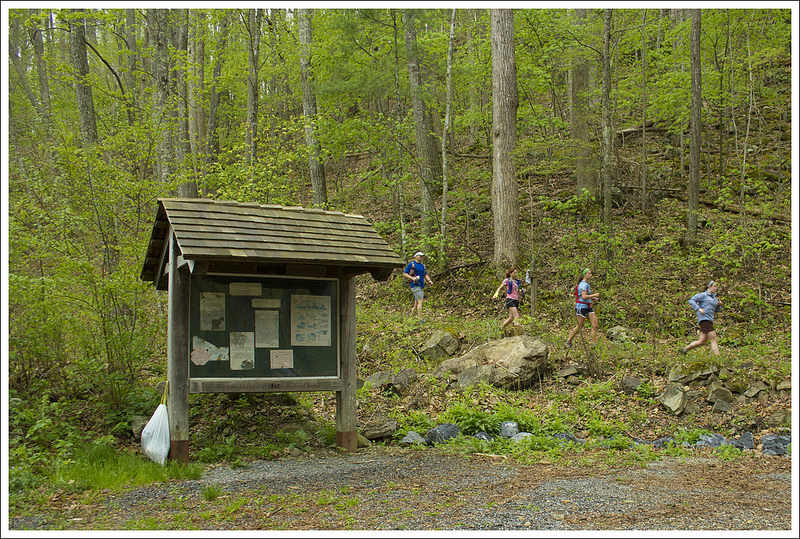
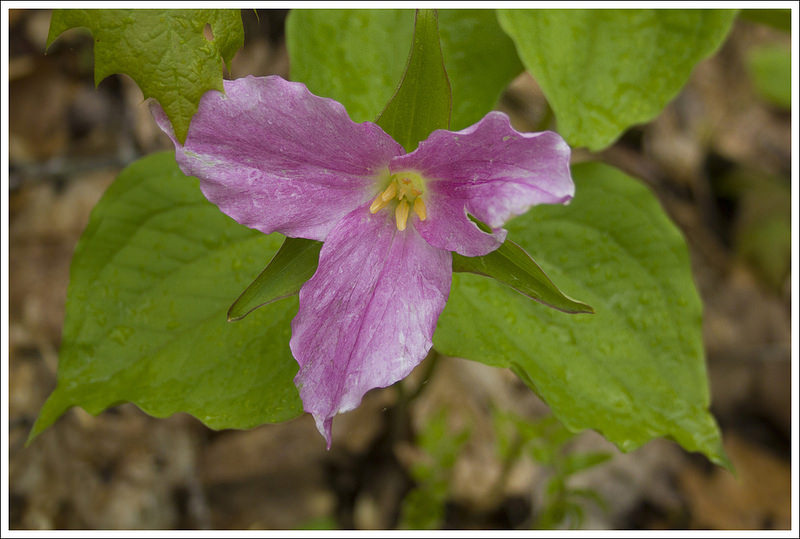
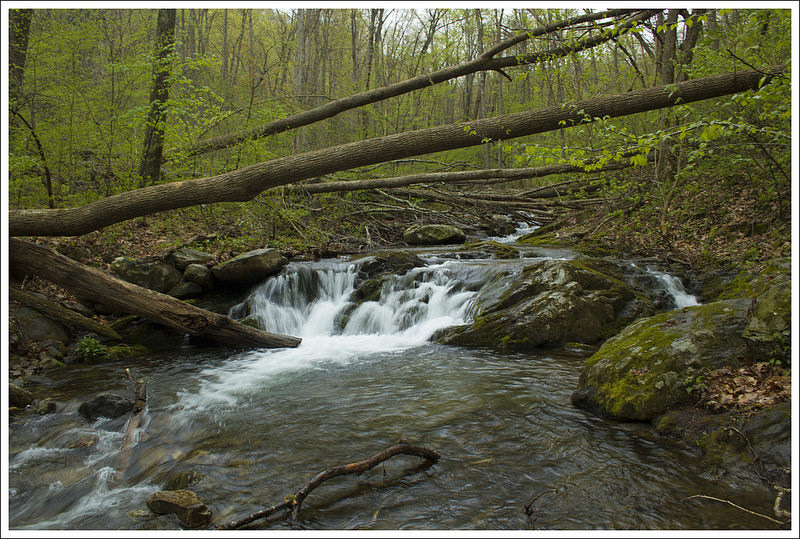
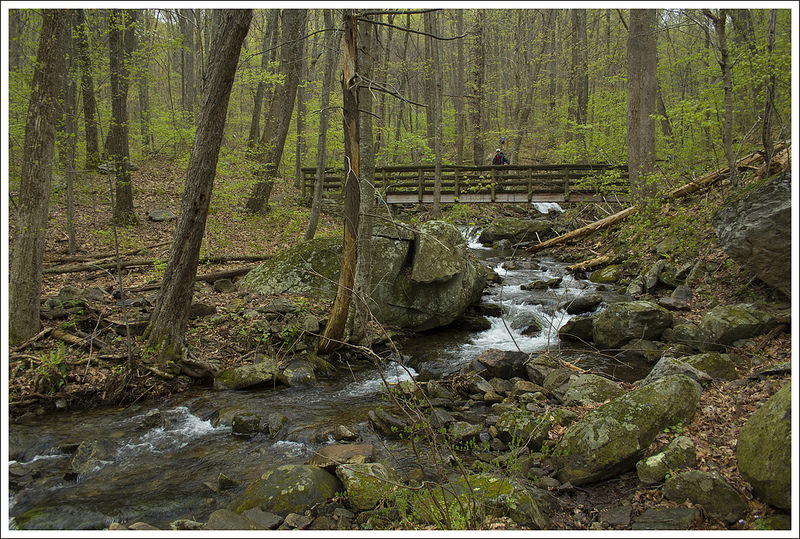
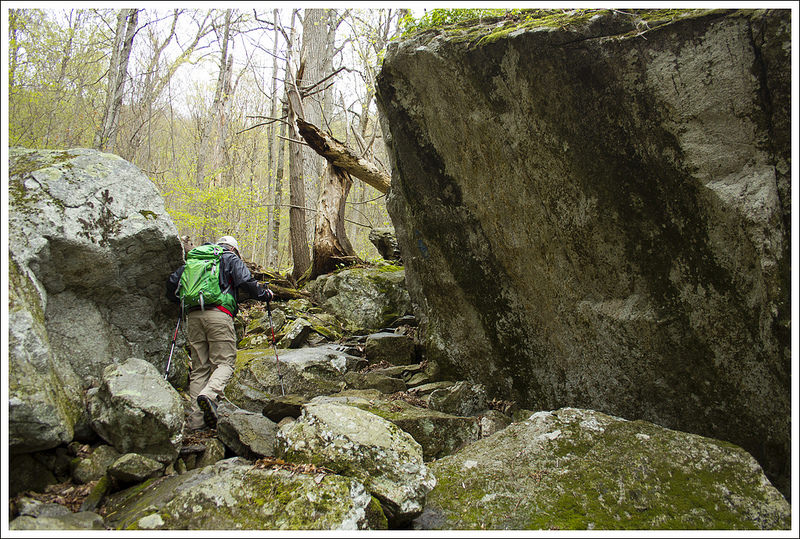
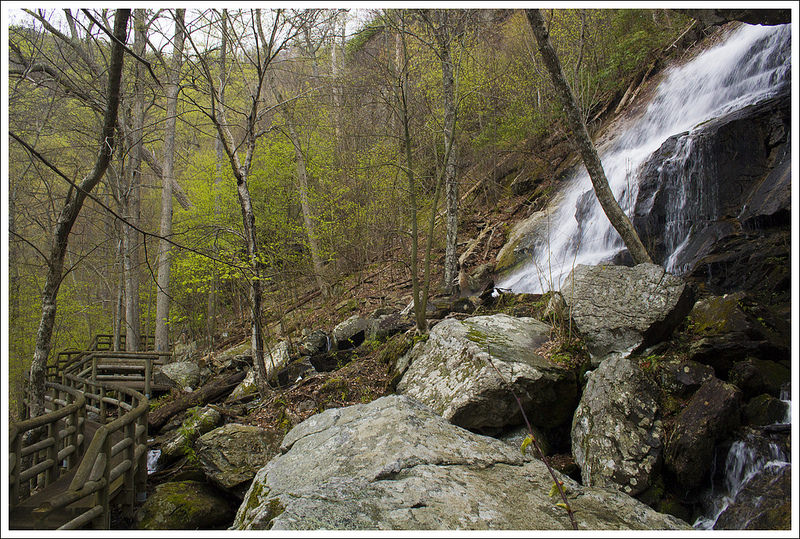
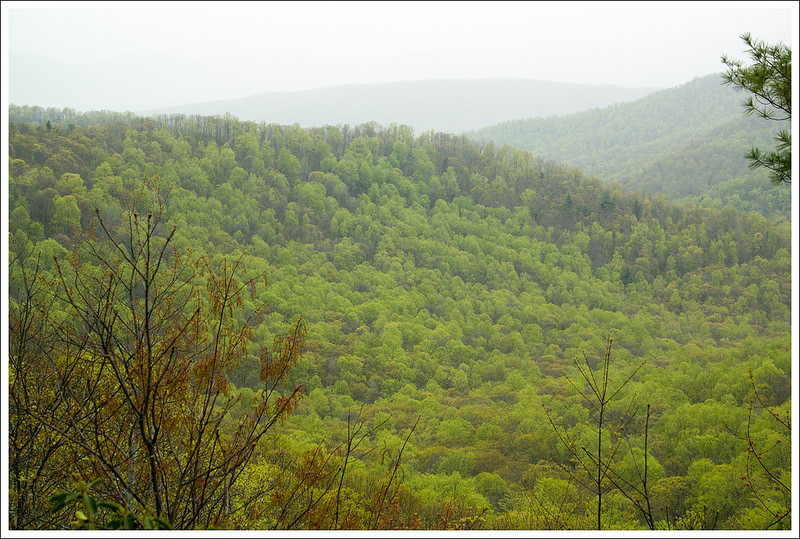
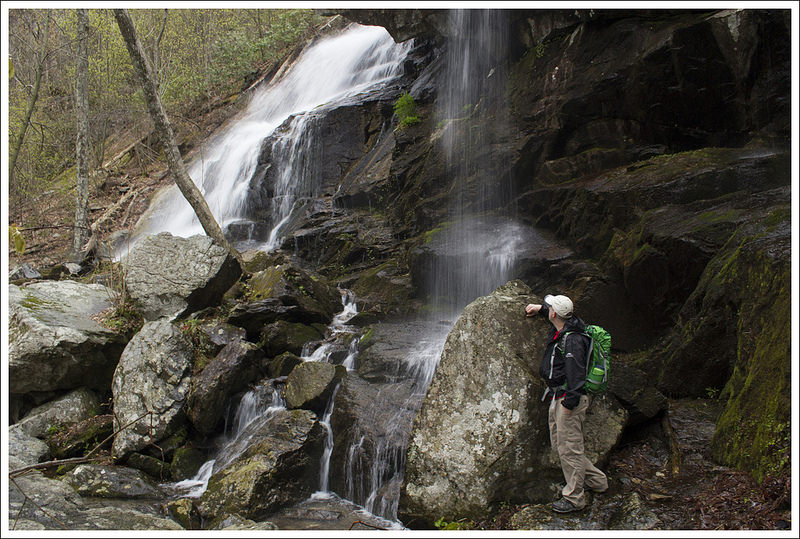
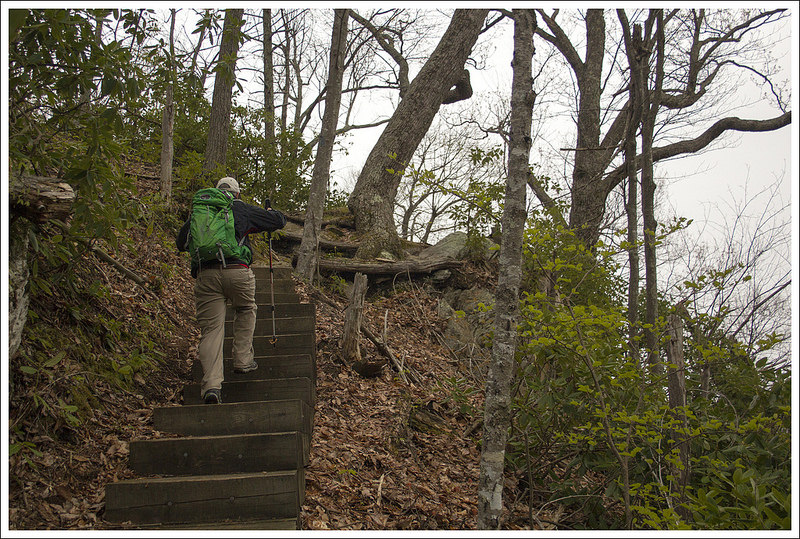
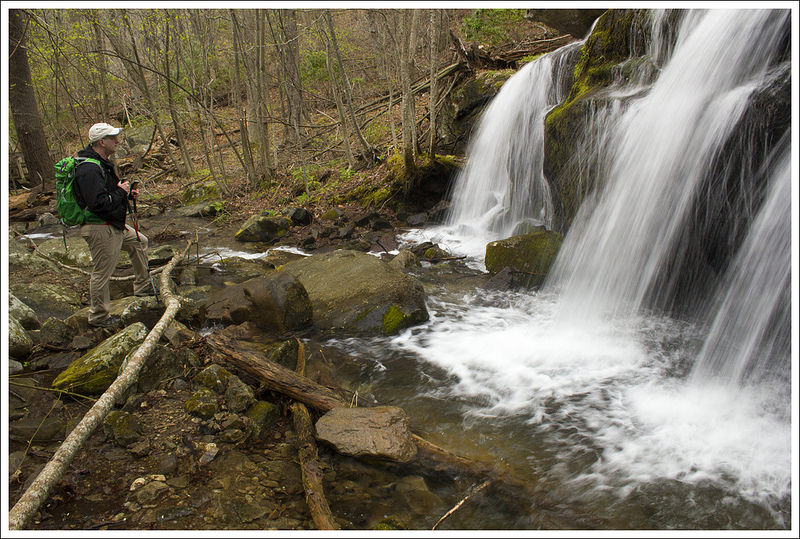

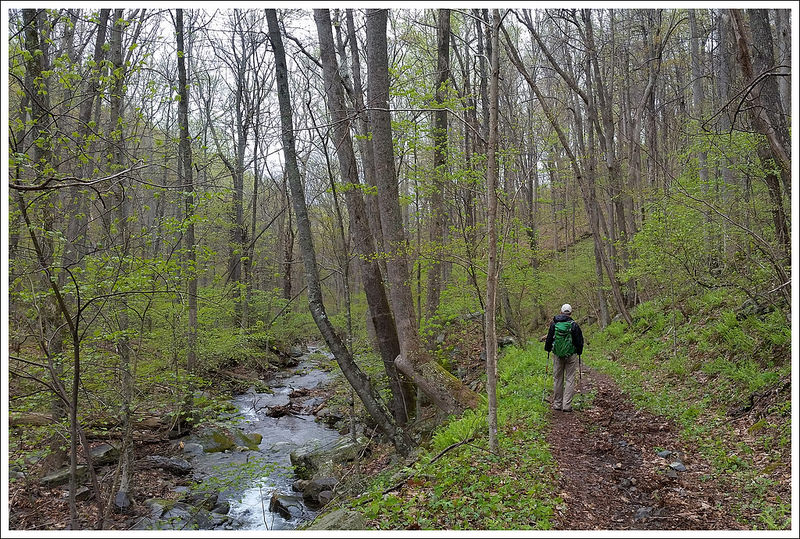
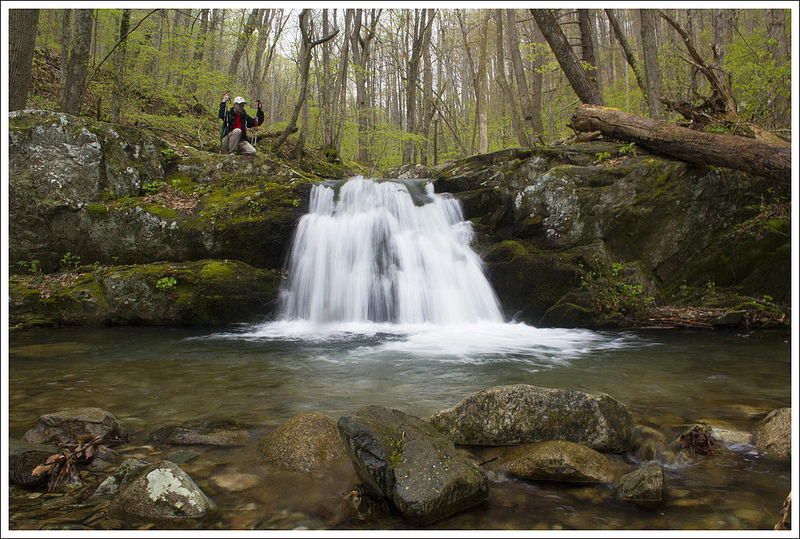
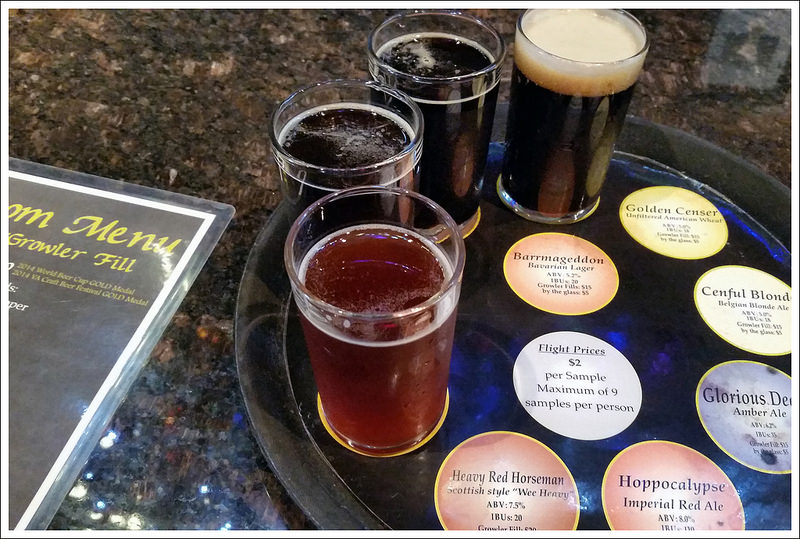
