Fridley Gap Loop

This six-mile loop hike in the Fridley Gap area of George Washington National Forest has everything – views, waterfalls, beautiful stream scenery, rugged climbing and great backcountry camping.  It’s a perfect hike to get away from the crowds in Shenandoah National Park.

View the full album of photos from this hike

Adam at the Overlook
If you miss spotting the faint side trail behind one of the many backcountry campsites along this loop, you’ll miss the best view of the hike! Below: Adam crosses the stream; A small waterfall on the stream; This loop has many choices for backcountry camp sites.

Adam Crossing Fridley Run Smal Waterfall Backcountry Site

Adam Says…

Last year, we made an attempt to do this Fridley Gap loop hike, but we had trouble finding one of the trails.  We bushwhacked for a while, but finally gave up.  This time when we returned, we had better directions and the blazes had recently been repainted on much of the loop.

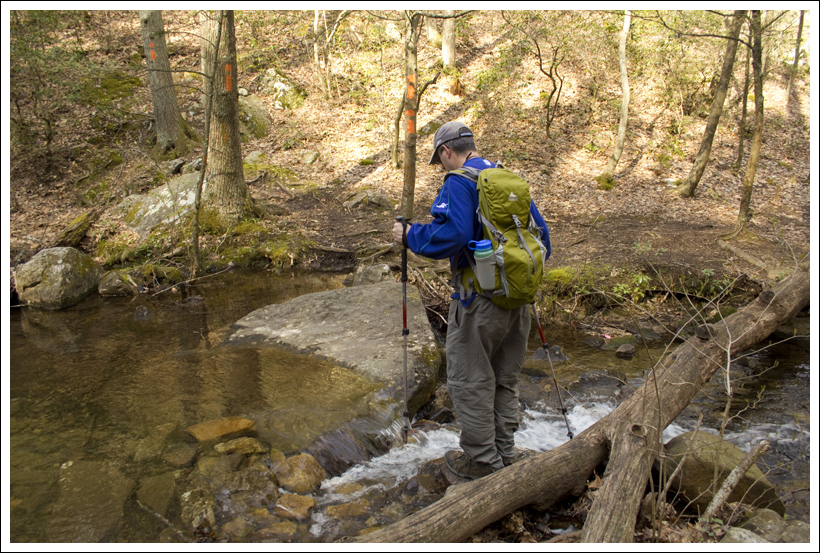
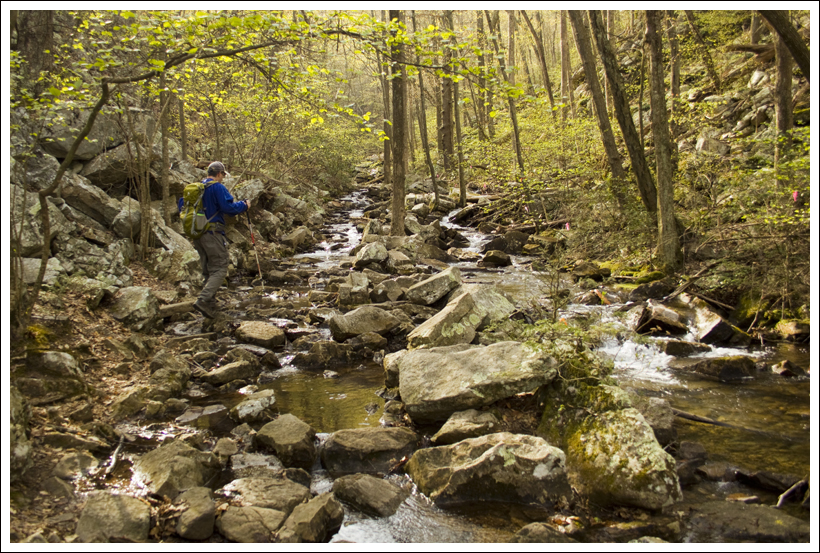
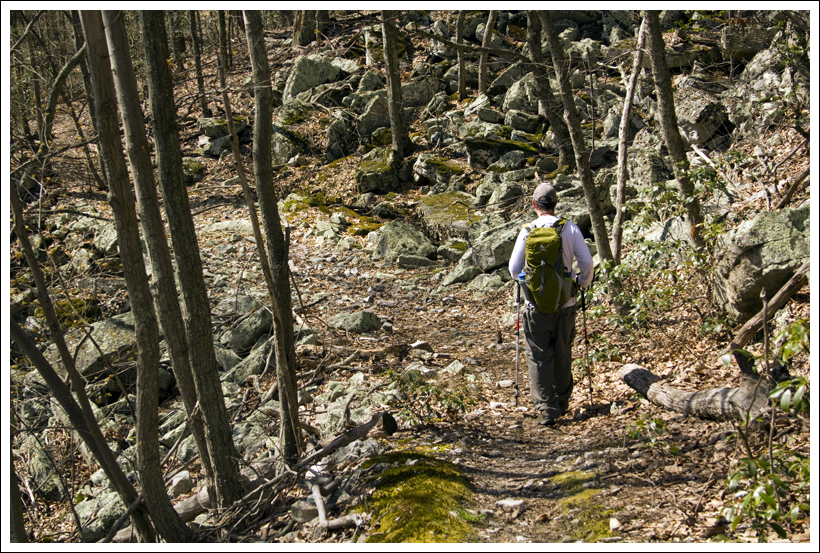
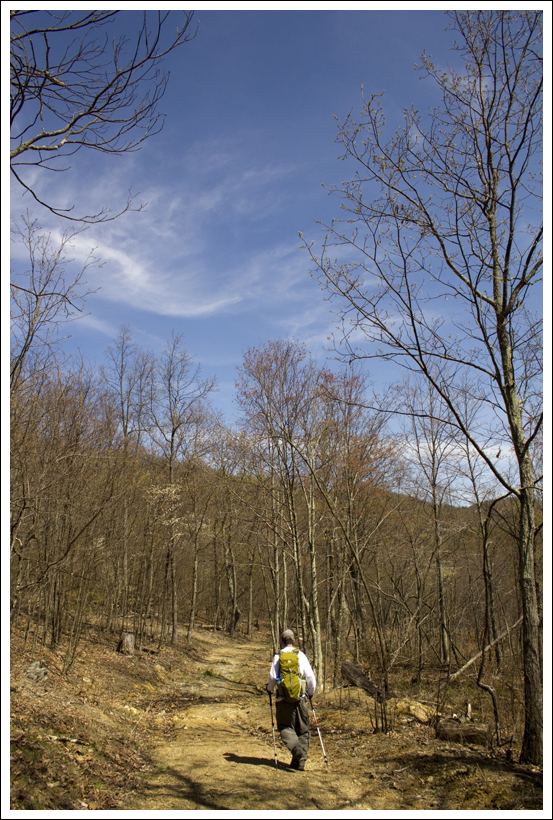
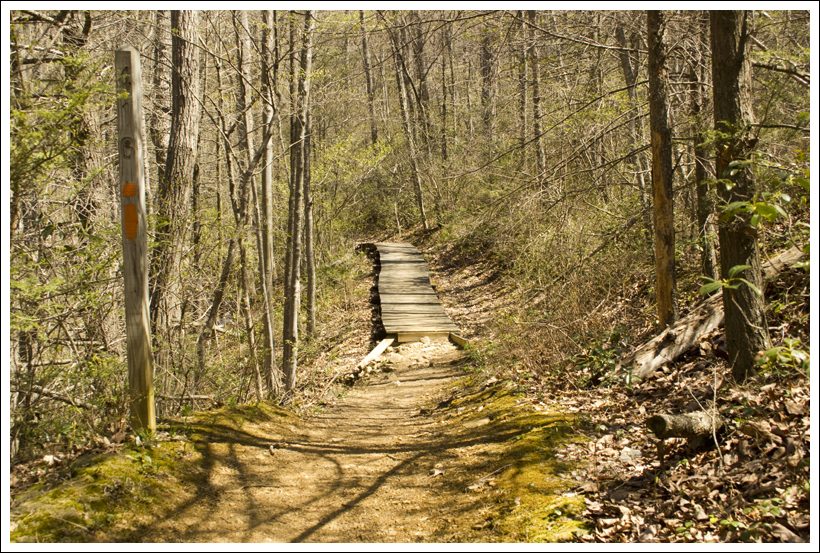
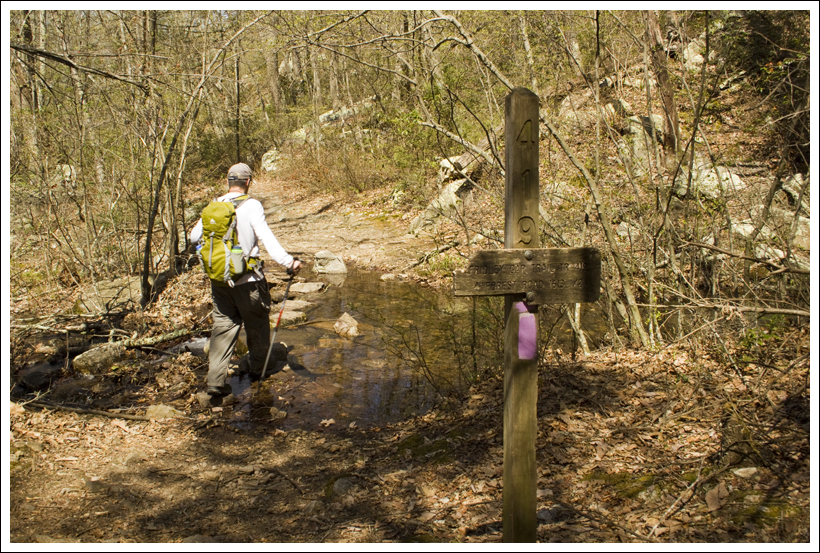
From the top end of the parking lot, we started on the trail.  We saw both purple and blue blazes early on, and started to worry.  (Fortunately, it turned out that this was the only section of the trail that hadn’t been recently re-blazed.)  Early parts of the trail traverse large rocks, and it’s sometimes tough to see exactly which way the trail goes. We saw faded red Xs painted on the surface of some of the rocks which let us know that we were going the right way.  The trail is uphill but not too steep.  In .2 miles, you come to a fire road.  Take a right here and continue on the fire road.  You will pass by some small falls and Mountain Run to the right and a large boulder slide to the left.  The trail actually follows the streambed, and you will need to rock-hop to continue on.  At .45 miles, you will reach another falls area and you will cross over Mountain Run until you see the trail junction cement post.  This is also the point that Mountain Run and Fridley Run join.  It was at this point that we failed last time trying to find the orange-blazed Massanutten South trail.  Looking at the cement post as you approached it, look back around 4:00.  You will see the orange blazes on the Massanutten South trail as you will cross the water again (this time it is Fridley Run) and climb up the hillside.  These weren’t painted on the trees before (they look fresh now), so you should be able to find your way more easily.

Walking in the Streambed
Early in the hike, the trail traverses the streambed. There are plenty of rocks, so it’s fairly easy to hop from spot to spot and avoid getting your feet wet. Below: Adam climbs up the trail shortly after the parking lot; A rockslide early on the hike; Blooming redbuds.

Adam Hiking Fridley Gap Trail Rock Slide Redbuds Blooming

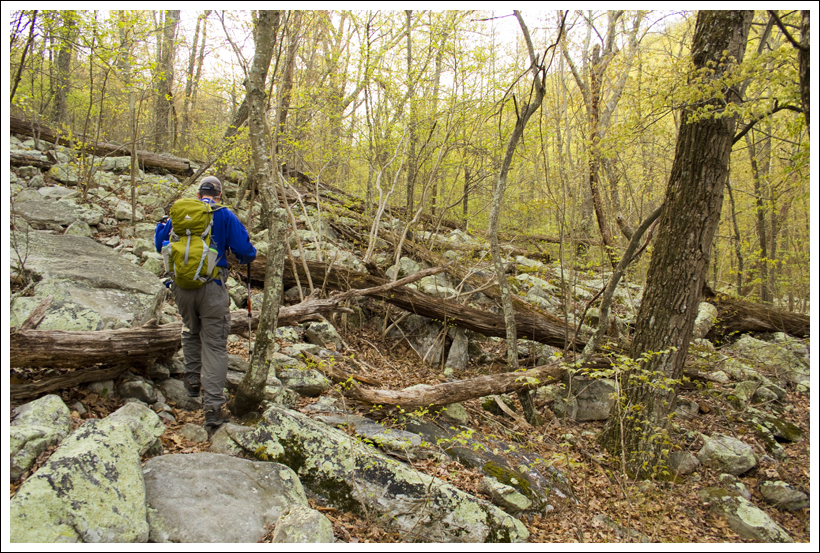
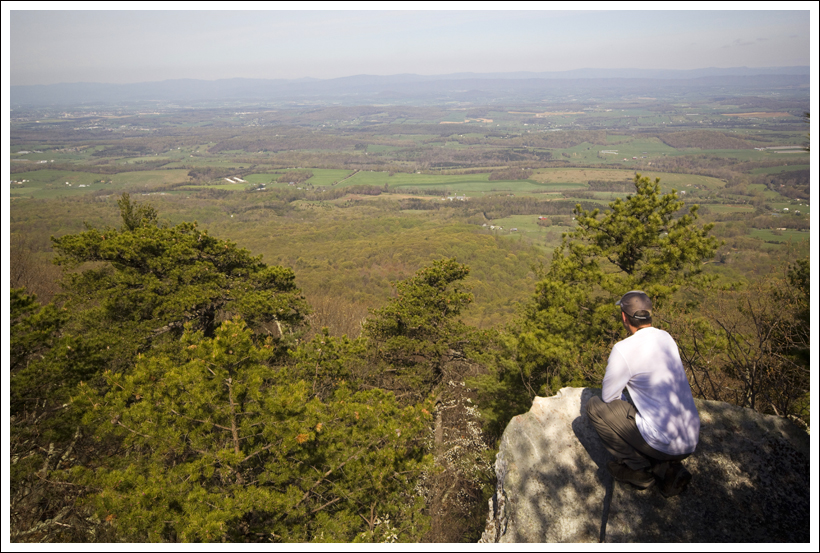
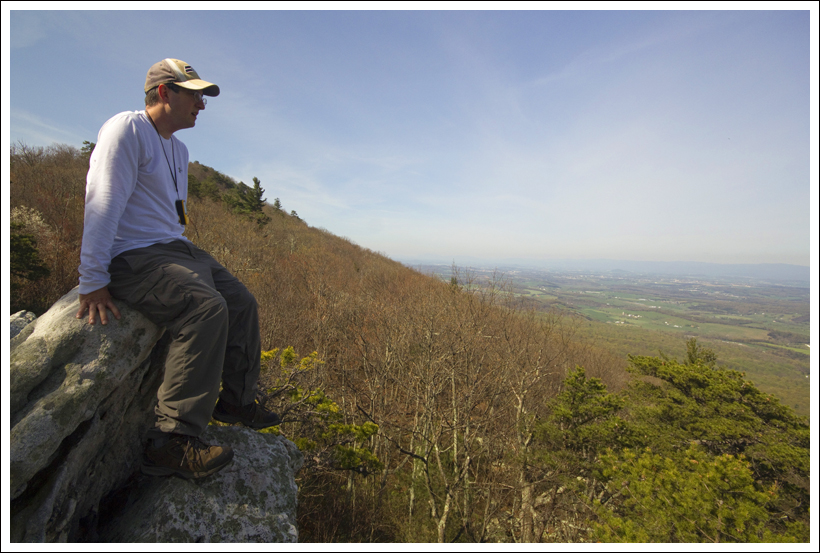
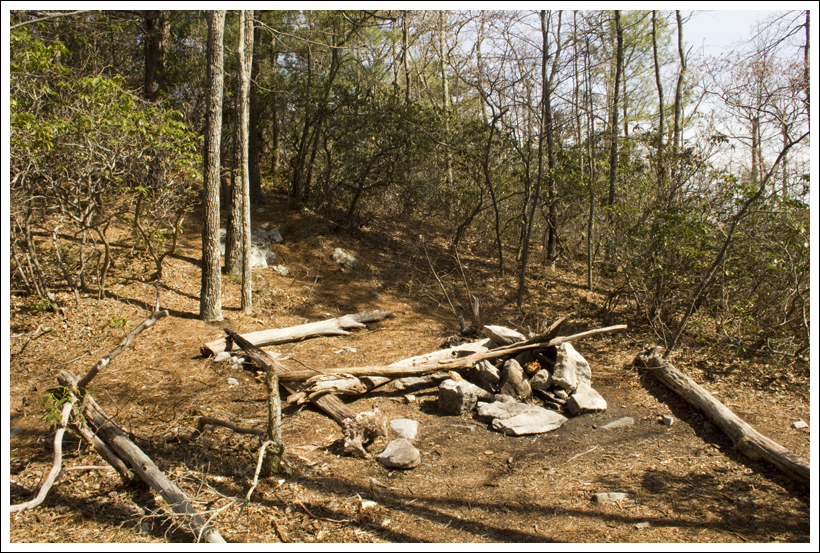
The climb up the Massanutten South trail is quite steep and you may need to stop a few times along the way to catch your breath.  This trail is also narrow and you may have to cross over a few blown-down trees, but the trail wasn’t too hard to navigate with the recent re-blazing.  At 1.85 miles, you will reach a campsite area.  Look closely and you will see a path that leads to a rock outcropping called Grubbs Knob Overlook.  Take this path up to the overlook to get the best views along the hike.   You will see the top of Grubbs Knob to the left from the overlook and views to the west.  After taking in the view, go back to the campsite and continue along the Massanutten South trail.  At 2.05 miles, the trail reaches its peak and then you will start to descend, as the trail takes a steep turn to the left.  You will make your way back down this very narrow path and cross Fridley Run at 2.70 miles.

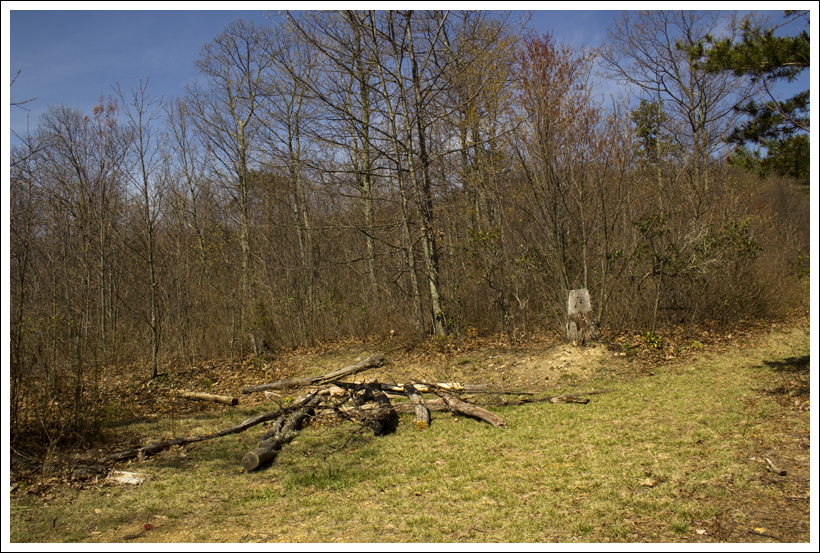
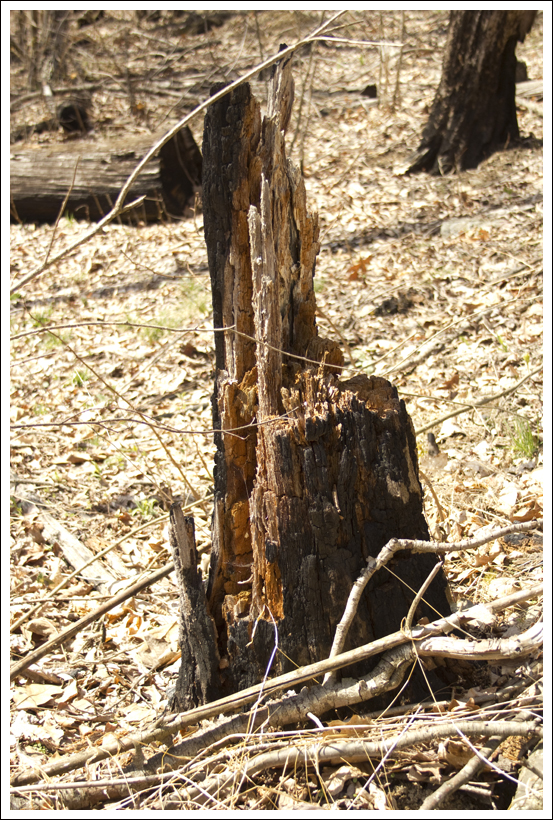
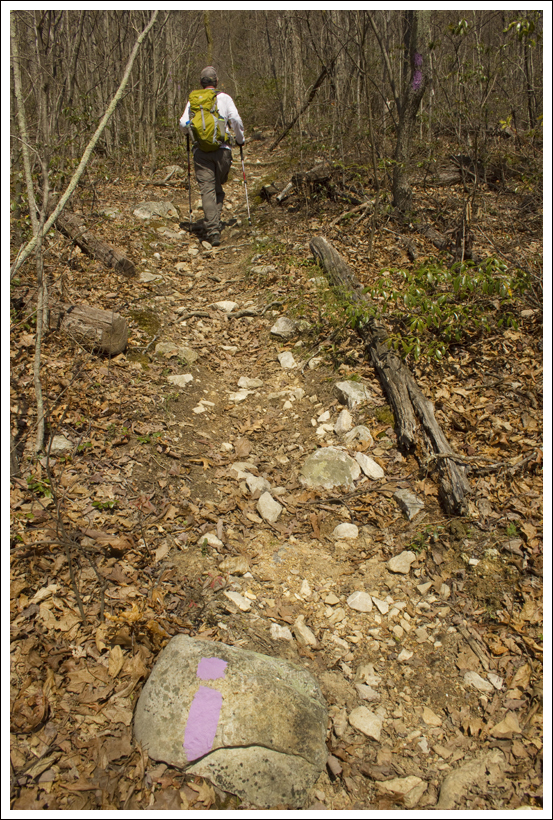
After crossing Fridley Run, you will begin to ascend on the trail again (turning again into a wider fire road) until you reach a rocky slide that gives you views of Fridley Gap and North Mountain at 3.25 miles.  Continue to ascend as you walk around part of Third Mountain. The fire road stops ascending at 3.5 miles.  The trail then descends and you reach another cement junction post at 3.84 miles.  Take a left on the purple-blazed Fridley Gap trail, which follow another wide fire road.  You will likely see lots of burned trees from a fire in 2010 that covered a big portion of this area.  At 4.5 miles, you will reach another junction. The purple-blazed Fridley Gap trail ascends to the left and continues through the woods.  Take this trail and begin a steep ascent across some switchbacks.  At 4.85 miles, you will reach the top of your climb and there are a few stones that you can rest on for a few minutes if you need to catch your breath.

Christine at the Small Waterfall
This small waterfall feeds one of the most popular swimming holes in the area. Below: More pretty cascades.

Mountain Run

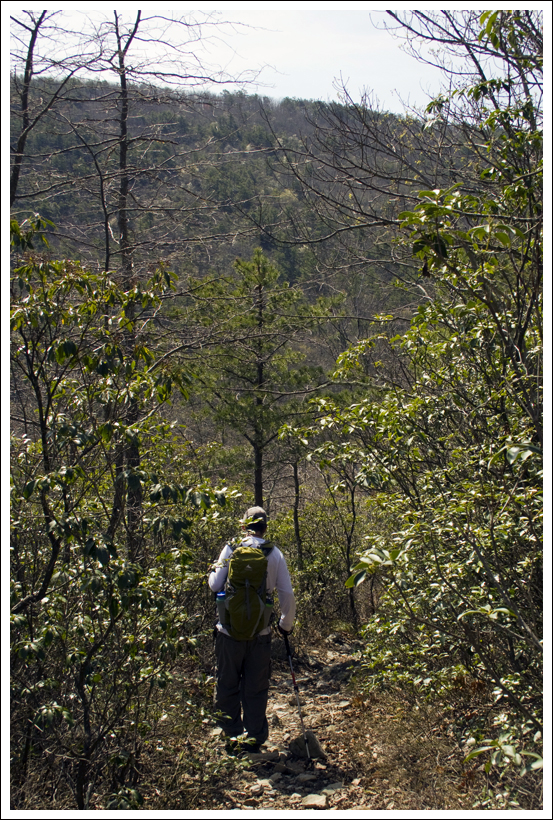
The trail now begins to descend very steeply.  We were so glad we had our trekking poles since the rocks under the leaves were often loose and it helped to lower ourselves down the steep steps.  We were also glad we did this hike this direction rather than the clockwise version of the loop.  At 5.5 miles, we reached another junction with the Massanutten South trail.  Take a left on the orange and purple-blazed fire road (don’t go the way that crosses the bridge) and you will reach the junction that closes the loop at 5.65 miles.  Take a right here, crossing Mountain Run again and make your way back down the fire road.  Be sure to catch the rocky path at 5.8 miles that leads back to the parking lot at 6 miles.

A funny moment happened along the hike.  Christine had programmed her phone to use the MapMyHike app.  In a recent upgrade, it now includes some vocal updates along the way, usually at the mile increments.  One time, we heard the voice say “Don’t stop now.  Walgreen’s is behind you.”  (Walgreen’s is now advertising on MapMyHike.)  While this is meant to be a word of encouragement to keep hiking strong, I was thinking of it as “Walgreen’s is chasing us.”  As I sometimes do, I started thinking of a parody song to the tune of the Road Runner Show TV theme song.  So for your enjoyment, here are my lyrics: “Fridley hiker, Walgreen’s is after you. Fridley hiker, if he catches you, you’re through.  That Walgreen’s is really a crazy store.  They have pharmaceuticals, toiletries, and so much more.  Fridley hiker, never, never, never slow down.  Fridley hiker. Walgreen’s is after you.  Fridley hiker.  If he catches you, you’re through.

There is one geocache along the trail, Fridley’s Cache, a normal-sized cache near the swimming hole.

It is always a good feeling to know that we redeemed ourselves by covering a hike that we had previously failed to navigate.  If you are looking for good views of streams or a swimming hole, along with a challenging hike to get some views, this may be a great hike to try out some time.

Rocks at Grubbs Overlook
The rocks at Grubbs Overlook might trick people into thinking there isn’t an open view. Below: Views from Grubbs Overlook and the campsite that sits adjacent to the overlook.

View from Grubbs Adam at Grubbs
A View Into the Valley
Campsite at the Grubbs Overlook

Christine Says…

Hallelujah for freshly painted blazes!  I was so frustrated last year when our attempt to hike the Fridley Gap Loop ended in failure.  The failure was mostly my fault.  I tried to map out the hike based on a course I saw on someone’s Runkeeper page.  There were no directions, just the route overlaid on a rudimentary map of the area.  I thought we’d be able to figure things out on our own with a NatGeo map of the area.  It turns out that faded blazes and a large group of people camping in the middle of the trail are insurmountable challenges to my ability to navigate.  We’ll let bygones be bygones and get on to the successful version of our Fridley Gap hike.

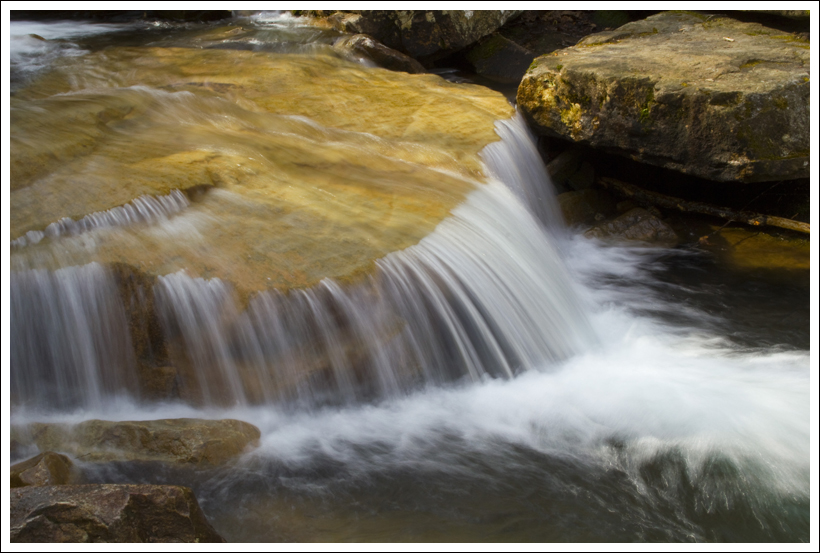
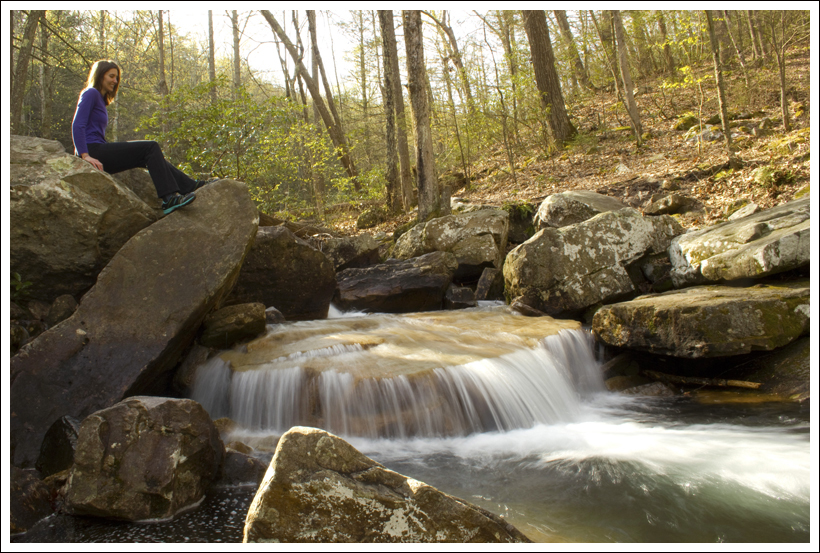
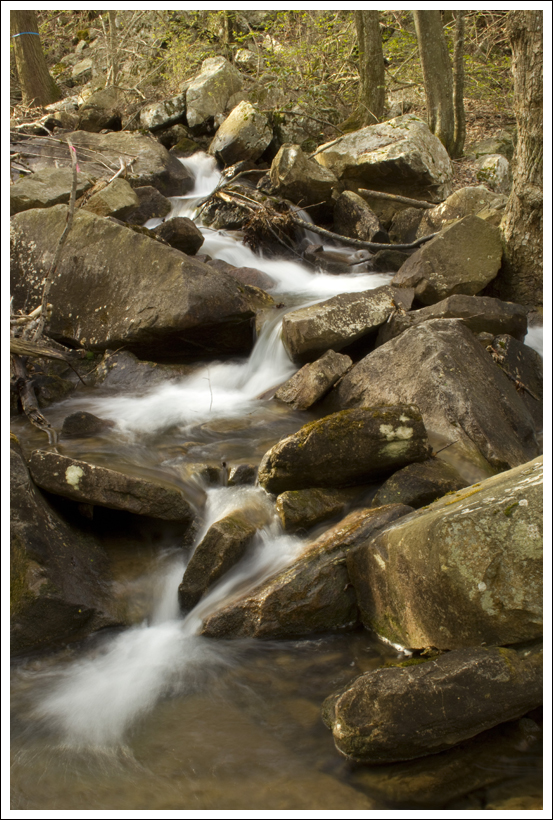
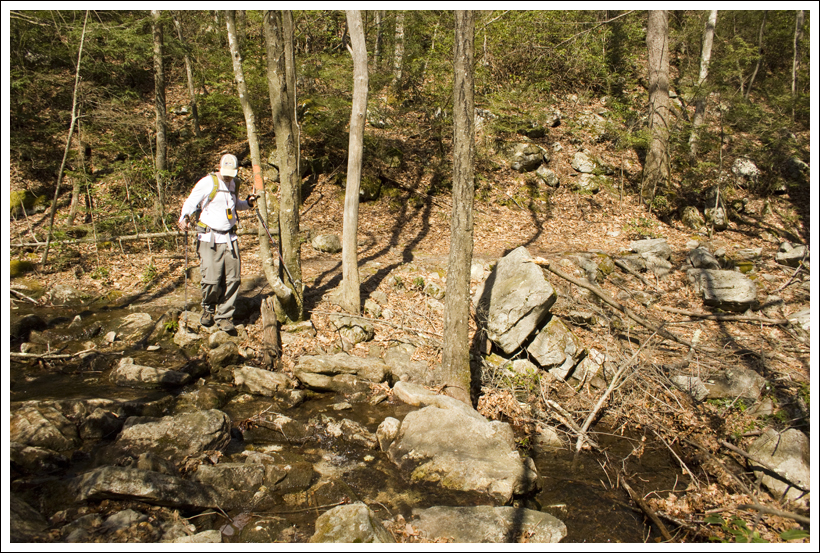
Let me start by saying, I loved this hike!  It was even better than I expected.  The stream was running beautifully, the views of the valley ‘greening up’ below were lovely and the weather was perfect (sunny, cool and breezy enough to keep the bugs away).  I really enjoyed the little rock-hop as the trail followed the stream bed.  The small waterfall and swimming hole were so pretty.

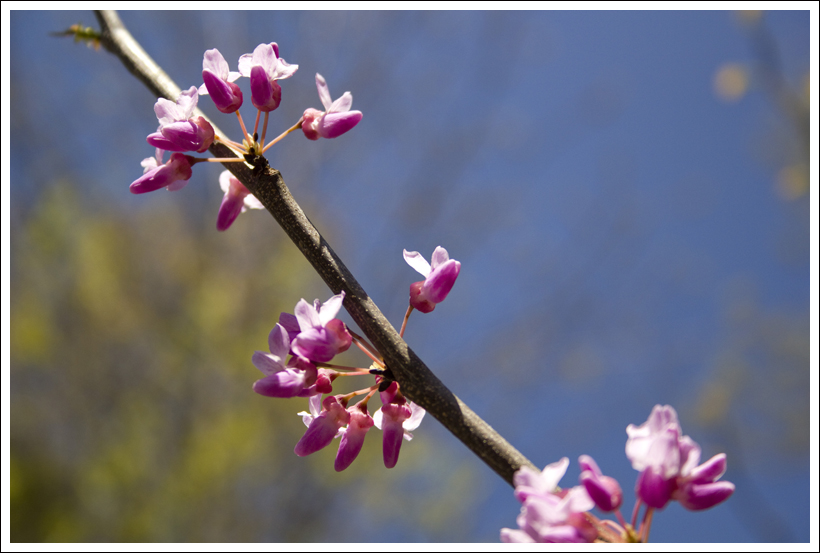
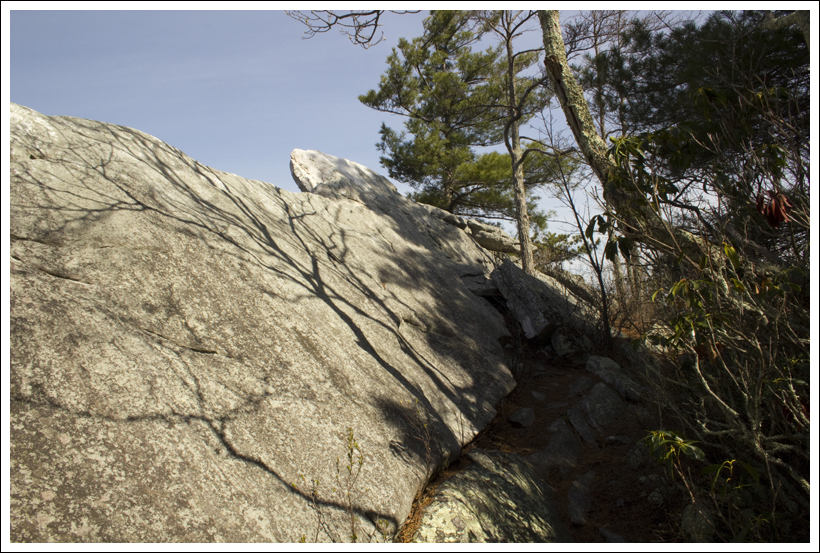
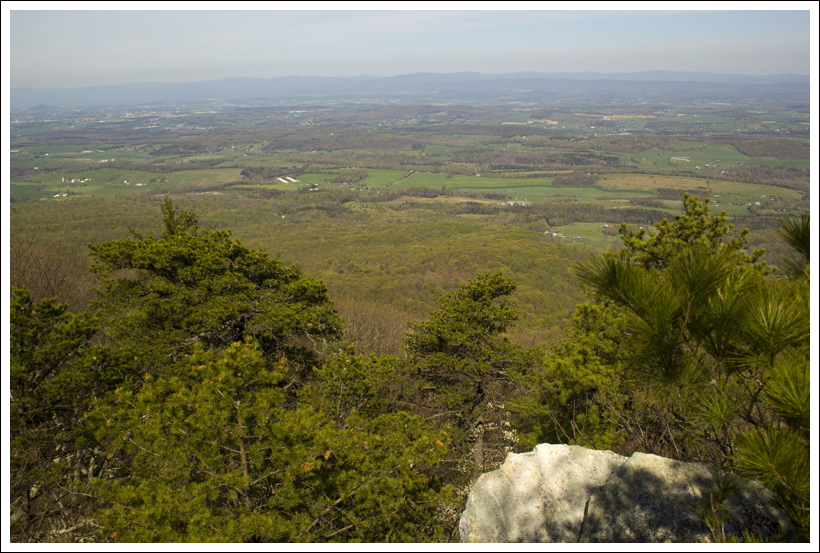
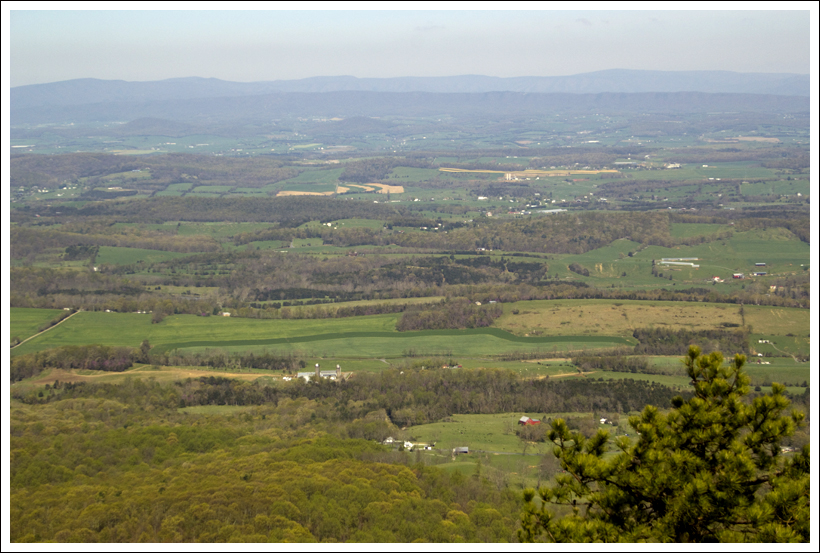
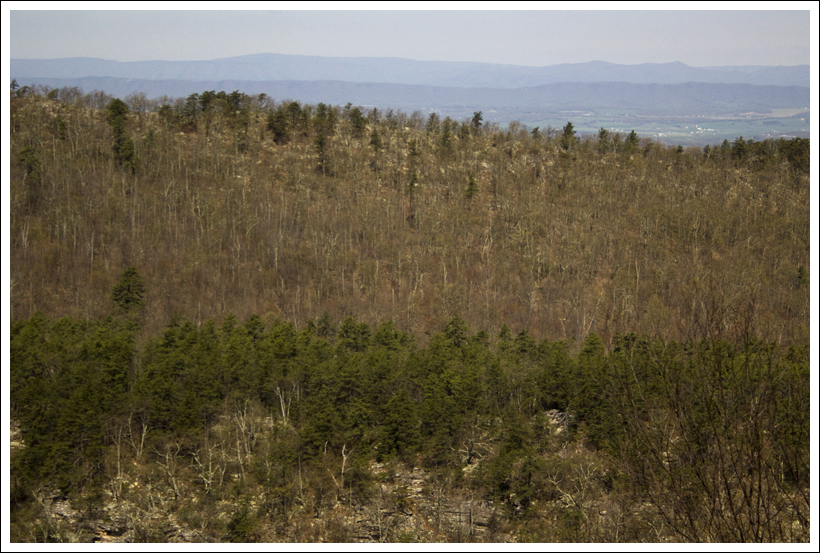
The climb up the Massanutten South trail to Grubbs Knob was steep enough to be challenging, but not so steep that we had to stop for a breather.  On the way up, we could see all the little signs of spring creeping back into the forest – tiny buds on trees, tightly curled ferns and the occasional early season wildflower poking up through the leaves.  The overlook at Grubbs Knob is rather easy to miss.  It lies at the top of a faint footpath above a campsite.  When you first climb to the top of the footpath, vertical, spine-like plates of rock obstruct any possibility for a view.  But if you climb along the rocks, eventually you come to a few footholds that allow you to scramble to the top of the rocks.  Once you’re there, the valley below spreads out as far as the eye can see – farms dotted with red barns; small country towns; and wide, green fields make up most of the vista.

Downhill Through Dense Laurel
The climb downhill after Grubbs Knob takes you through dense mountain laurel. The harsh light makes for an ugly photo… but you get the idea.  Below: Adam approaches the stream; Crossing Fridley Run.

Approaching Fridley Run Crossing the Stream Again

After leaving the Grubbs Overlook, we ascended a few more moments before taking a sharp downhill turn.  The trail passed through dense mountain laurel, with occasional peeks toward the next ridgeline.  Eventually, we heard the sound of water again.  For a short way, the trail followed Fridley Run.  But soon, we had to cross the stream and head back uphill along a wide fire road.  From the fire road, we caught our second open viewpoint of the hike.  It was a nice view, but nowhere nearly as lovely as the one from Grubbs Overlook.  It’s one thing to slog uphill and come to a magnificent rocky outcropping with a sweeping vista to appreciate.  It’s a little less stirring to stop along a roadside and take in a view of a couple mountain ridges.

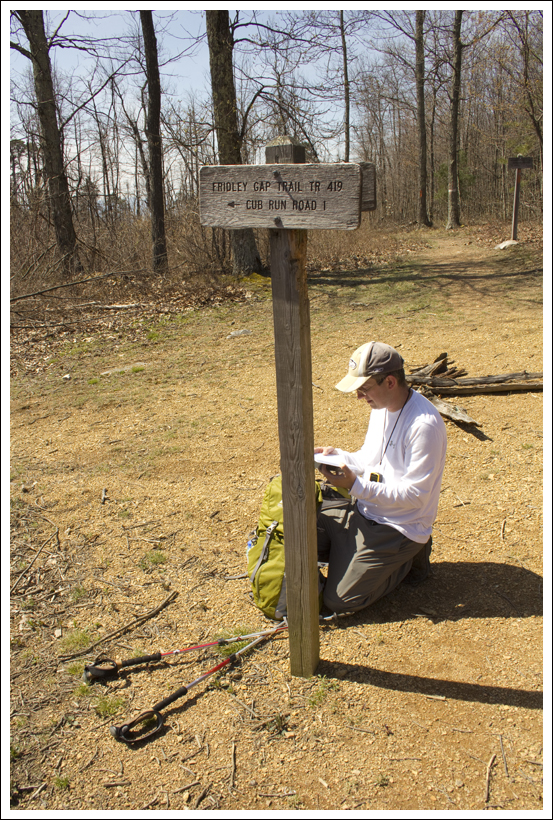
Eventually, the fire road met up at a four-way trail junction.  One direction headed toward the Boones Run shelter, another toward Cub Run Road, another continued along the Fridley Gap trail in the direction of Martins Bottom, and of course the fourth headed back in the direction from which we arrived.  Seeing this junction made me think of all the different ways these trails cross and connect.  There are definitely multiple possibilities for overnight backpacking loops in this area.

Second Overlook
The second overlooks comes at a spot along the fire road. Below: Adam checks out the map at this four-way trail junction; Continuing along the fire road before our climb up Third Mountain; Charred trees from the 2010 fire.

Four-way Junction Hiking Along the Fire Road Charred Trees

We followed the fire road to another junction.  Heading straight would have taken us toward Martins Bottom, but to stay on course we turned left and started very steeply uphill along the purple-blazed Fridley Gap trail.   By this point of the hike, I was pretty hungry and my energy was starting to flag.  If I were smarter, I would have eaten a snack before tackling the climb.  But I’m not smart, so I spent most of the climb complaining that I was hungry!

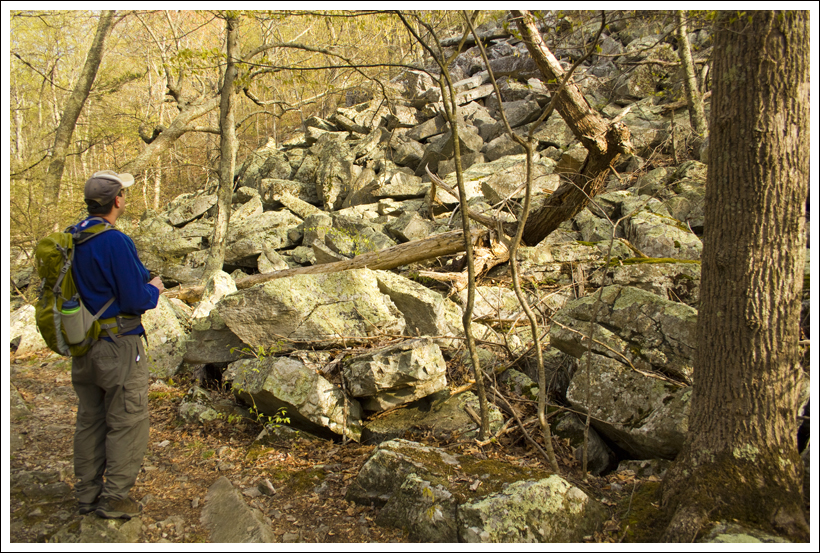
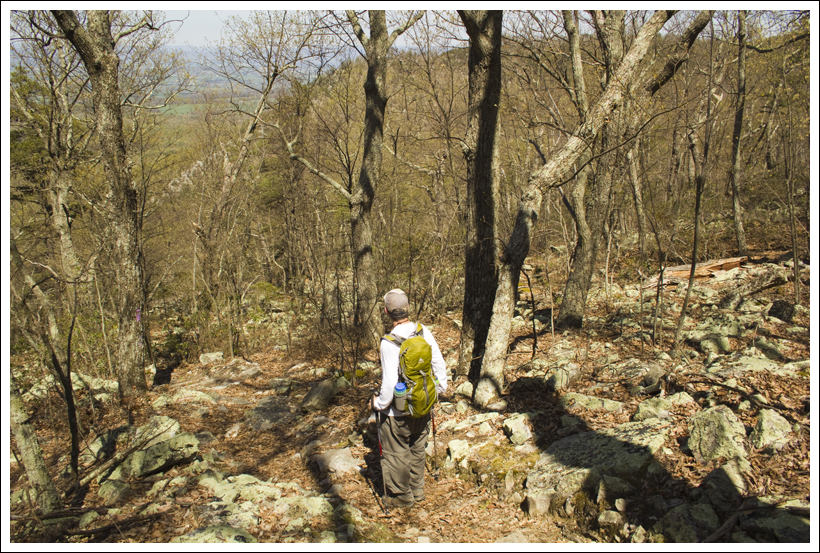
After a short break (and snack) atop the tree-covered peak of Third Mountain, we began a crazy-steep descent.  For three-quarters of a mile, we carefully picked our way down the craggy, leaf covered mountainside.  Through the trees, we could see some really fascinating rock formations on the shoulder of the next mountain over.  I kept trying to appreciate the view, but every time I did, I lost my footing a bit.  This climb down definitely makes the case for paying attention and using your trekking poles.

Steep Uphill Over Third Mountain
The ascent of Third Mountain may not look steep in this photo, but it is!  Below: Descending Third Mountain – you can see rock formations through the trees; A bridge not taken on the Massanutten trail; Adam once again crosses the stream we crossed early in our hike.

Steep Descent of Third Mountain Bridge on Massanutten Trail Final Stream Crossing

At the bottom of Third Mountain, we had just a short walk back to our original junction – the one where everything went wrong when we tried to hike Fridley Gap last year!  I was quite pleased to see that marker again and be 100% certain that we had actually found our way successfully this time around.  From the last junction, we retraced our steps through the streambed, past the rockslide and back to our car.

Trail Notes

  • Distance – 6 miles
    (Check out the stats from MapMyHike)*
  • Elevation Change –  1850 ft
  • Difficulty – 3.5.  The trail goes up and down several times. 
  • Trail Conditions – 3.  The trail had blowdowns, loose conditions, and narrowness, but there were also sections that followed a fireroad.  It gets an overall average rating. 
  • Views3.  The views from the Grubbs Knob overlook are the best on the trail, but if you miss the path from the campsite you’ll miss the best view on the loop.  The views along the path at 3.25 miles are nice, but not remarkable.
  • Waterfalls/streams – 4. The trail goes along (and through) Mountain Run and Fridley Run on several occasions.  The small falls and swimming hole gives it a bonus. 
  • Wildlife – 2. This may be a good hike for bird watching.  We saw a peregrine falcon soaring above at the Grubbs Knob overlook and enjoyed hearing the song of the eastern towhee along the way.
  • Ease to Navigate2.  If we got lost before, we have to give this a low rating.  The path to start the trail from the parking lot could be better blazed and there are several turns to make.
  • Solitude – 4.  You may see some people at the swimming hole or camping alongside the junction with Mountain Run and Fridley Run.  However, we only saw one other group after this point on a nice spring weekend day. 

Directions to trailhead:

From Harrisonburg, VA, head east on 33.  Take a left onto VA-620 North/Indian trail Road and continue for 1.7 miles.  The road will turn into Rt. 717.  Go 3.4 miles and take a right on Minie Ball Ln.  Go 1.1 miles.  At this point, the road will turn back into Rt. 620.  Go 2.7 miles and take a right, continuing on 620 for about half a mile.  Take a right onto Armentrout Path.  Take the first left onto Airey Ln.  Parking is a lot at the end of this gravel lane.  If you pass the lot, you are on private property. The directions to this trailhead are a little confusing, and we recommend putting the coordinates on the map below into your phone/GPS.

* MapMyHike is not necessarily accurate, as the GPS signal fades in and out – but it still provides some fun and interesting information.

Carriage Road Bike Ride – Witch Hole/Eagle Lake/Jordan Pond – Acadia National Park (ME)

Special: Acadia Edition

The bike ride along this loop gives you beautiful lakeside views in the interior of Acadia National Park.

Eagle Lake from the Carriage Roads
A view of Eagle Lake from the Carriage Roads.  Below:  The Duck Brook Bridge entrance to the Carriage Roads; There are lots of water lilies in Acadia’s ponds;  Adam bikes along the shore of Jordan Pond.  The rocks lining the trail are affectionately known as ‘Rockefeller’s Teeth’.

Duck Brook entrance  Water Lilies Rockefeller's teeth

Adam Says…

This is truly one of our favorite places to bike!  If you are ever near Acadia, I would recommend taking a bike ride around Eagle Lake.  While there are 45 miles of carriage roads in Acadia National Park, the loop around Eagle Lake is by far the most popular.

The carriage roads were donated and built by John D. Rockefeller, Jr., emulating the carriage roads his father created in Ohio and New York.  While the Park Loop Road provides access to much of the circumference of Acadia National Park and ocean views, the carriage roads provide great access to the interior, providing glimpses from the top of mountains and around the lakes and ponds.

I recently had a co-worker, Kristen, that was going to Maine to visit some family property.  Having been to Acadia many times, I planned out an ambitious day for her and her sister to capture the things I enjoy up here.  She wasn’t able to do everything I suggested, but she did the Eagle Lake/Jordan Pond section of the trail.  They rented bikes in Bar Harbor and decided to bike from town to reach the carriage roads.  There is a large hill from Bar Harbor to reach the entrance to the Eagle Lake parking lot.  Her sister was yelling up ahead to her, “KRISTEN!  I DON’T THINK I CAN MAKE IT!”  I should have been explicit in telling her to rent a bike rack and park near the carriage road entrance. Some people bike to the carriage roads from town, but I think it is best to park closer or you’ll burn up all your energy before you get to enjoy the actual ride.

Biking toward eagle lake
Adam on his rented comfort bike, passing under the Eagle Lake bridge. It was quite different from the mountain bike he normally rides.  Below: Christine’s parents take a break after a long uphill stretch along Eagle Lake.  This is the spot we took a wrong turn!

Parents at junction

We started our ride, by parking on Duck Brook Road.  Right before the roadside parking, you pass a beaver dam on New Mill Meadow.  Park your vehicle near the bridge that begins your journey.  The carriage road intersections are all numbered on wooden posts (that also serve as posts to provide you some overall direction) and have this trail started at Post #5.  We took a right after crossing the bridge to make our way around Witch Hole Pond.  The trail does tend to go uphill during this part of the section about 100 feet.  In 1.1 miles you will take a left at Post #3.  You will begin to see some up close views of Witch Hole Pond.  At 1.3 miles, you take a left at Post #2.  The trail continues to loop around Witch Hole Pond.  At mile 2.3, you will reach Post #4, bearing right and seeing views of the small Halfmoon Pond.  At mile 3.4, you will reach Post #6, going under a bridge and close access to the Eagle Lake parking lot.  Most people start their bike ride here, so expect lots of people around this bridge.  After going through the bridge, you will arrive at Post #9 at mile 3.5.   The trail goes along the western side of Eagle Lake, but goes up during one of the tougher sections of this loop ascending over 200 feet.  At mile 5.5, you will come to Post #8.  Take a break if you would like here, for the toughest part of the first section is over.  At Post #8, take a right (this is where I failed to follow the map closely which caused us to retrace our steps and made us go uphill).  At mile 5.7, you will reach Post #10.  Take a left at this junction to make your way.  The trail does ascend slightly.  At mile 7.0, the trail begins to open up to views of Jordan Pond and the Bubbles to your left.  At mile 7.9, you reach the Jordan Pond House and Post #14.  Bear left at this intersection for about .3 mile passing by Post #15 and Post #16.  Cross the Park Loop Road carefully and then you will see the large Jordan Pond Gatehouse.  Bike carefully through the gate.  At mile 9.8, you reach Post #17, near Wildwood Stables.  Take a left here and your climb begins again.  Once the trail levels out, you will pass by Bubble Pond on your right.  At mile 12.9, you reach Post #7.  Take a right at this junction and you will begin to enjoy the best views of Eagle Lake.  The trail continues along the eastern side of Eagle Lake.  At mile 15.1, you will reach Post #6 again.  Take a right and go under the bridge.  At mile 16.2, you will reach Post #4.  Take a right here and at mile 17.3, you will reach Post #5 to complete your loop.

As there are a lot of intersections, I would recommend picking up a map of the trails.  While you can purchase them from many places in Bar Harbor or Acadia National Park, they do have some decent carriage road maps that are free.  These are typically in some of the boxes attached to the post intersections near some of the entrances to the carriage roads.  I did spot these boxes at Post #5 and Post #8.

Lunch on the Lawn
Lunch on the lawn at Jordan Pond is not to be missed.  Below: Views of Jordan Pond and the Bubbles.

Jordan Pond and Bubbles The Bubbles

If you do your planning well, you can include a stop near the halfway point at the Jordan Pond House Restaurant.  This is a must-visit restaurant while in Acadia. Get a seat outside and enjoy popovers as you take in the scenes of Jordan Pond and the Bubbles.  The menu has been expanded since the last time we had been here, so we were thrilled to try some new things.  Christine really enjoys their lobster quiche and I like their cranberry walnut chicken salad sandwich.  While the prices are a little high, you do have one of the best views for a restaurant.  There are plenty of places nearby to lock your bike and there is a gift shop that sells everything from hiking gear to pottery to Gatorade.  They even sell Jordan Pond coffee and popover mix.

I have two favorite sections of scenery along this trail – the view near the rock slide approaching Jordan Pond and the eastern side of Eagle Lake.  This is a bike ride that almost invites you to take your time by soaking in the great views of the lake, taking your time to pick wild blueberries near Witch Hole Pond, or listening for the cry of loons on Eagle Lake or Jordan Pond.

Christine Says…

Biking Acadia’s Carriage Roads is always one of the Maine activities I look forward to most on our trips!  It’s funny, when I visited Acadia as a child and teen, I never tried the carriage roads by bike.  Instead I preferred to run.  Looking back, I don’t know what I was thinking!  Sure… the carriage roads are great for walking and running, but I can’t imagine a better way to see them than by bicycle (Unless I was given the option to go on horseback; but unless you arrive at Acadia with your own horse, the closest you can get is taking a chauffeured horse carriage ride.)  The car-free carriage roads in Acadia meander through the woods, passing ponds and lakes.  If you’re lucky, you’ll spot beavers or loons swimming.  You get occasional glimpses of the ocean.  You breathe in the clean, evergreen-scented air.  And best of all… you can bike right up to the Jordan Pond House and indulge in popovers with butter, popovers with strawberry jam, popovers with soup, popovers with salad and even popovers a la mode!  Don’t even get me started on how much I love popovers a la mode.  They’re one of my raison d’êtres.  I’m not even kidding – ask Adam!

Sometimes we bring our bikes on the long drive up to Maine, but this time we drove our small car to save gas money, and ended up renting bikes at the Bar Harbor Bicycle Shop.  The folks there are really friendly and knowledgeable and their bikes are all expertly maintained.  We tried renting a carrier for our car, but none of them worked with our particular hatchback.  Thankfully, my parents were vacationing with us and were able to haul our bikes to the start point of our ride.  Technically, you can ride your bike from the shop to the carriage road entrance, but it’s an arduous uphill ride along a very busy road.  Biking the few extra miles from the shop to the trails takes a lot of the enjoyment out of the ride, so we avoid it any way we can.

On this particular day, we decided to follow one of our absolute favorite routes.  Starting at Duck Brook Bridge, we biked around Witch Hole, then around Eagle Lake, past the north shore of Jordan Pond to the Jordan Pond House.  After lunch, we continued the route past Wildwood Stables, along Bubble Pond and the opposite shore of Eagle Lake.  A few final miles along the other side of Witch Hole returned us to our car.

Jordan Pond Gatehouse
Even though the Gatehouse sits in the park, it’s still privately owned. Below: A horse carriage on its way from Wildwood Stables to Jordan Pond.

Horse team

It’s a fabulous route that shows off a little bit of all of Acadia’s best scenery.  There are some substantial hills along the route, and it’s not uncommon to see people walking their bikes uphill instead of riding them.  I remember the first time I biked the carriage roads many years ago, the first steep hill along the first side of Eagle Lake about killed me!  Despite the fact I was beet red and out of breath, I was determined NOT to walk my bike.  I did have to take a water break or two, but I never had to get off and push my bike uphill.  Nowadays, I’m in much better shape (even though I’m almost 20 years older) and biking the hills is no sweat at all!  In fact, I must brag that I biked easily past dozens of people headed uphill.  🙂

The trail marker at the far end of Eagle Lake is one of the only places that directions get confusing along the ride.  The trail branches off in several different directions at this point.  As (bad) luck would have it, we biked following our instinctive directions instead of looking at our detailed map.  We ended up going the wrong way for almost two miles – mostly along a steep, beautiful downhill coaster of a descent.  This meant we had a tough uphill slog once we finally realized we were going the wrong way.

I suppose we could have kept on going in the wrong direction – most of the trails eventually cross one another and we would have ultimately arrived at the Jordan Pond House.  However, I really enjoy the ride along the north shore of the pond, so we decided to retrace our ride.  My parents decided to stay the course (my mom didn’t want to bike back uphill) and meet us at the Pond House.

The uphill turned out to be less painful than I imagined and after about 15 minutes, we were coasting downhill along the edge of Jordan Pond.  I enjoyed the sparkling water, the first glimpse of the Bubbles, passing the big rock slide and knowing I’d soon be eating popovers.

The ride along Jordan Pond goes really quickly.  At Jordan Pond, the first thing we always do is get our name on the waiting list for a table on the lawn.  If you visit the Pond House, you can almost always get an indoor table immediately, but you DO NOT want to do that.  The best place to sit is outside on the lawn at one of the picnic tables overlooking the water and the Bubbles.  I always start my meal off with lemonade.  It’s fresh-squeezed and comes unsweetened with a tiny pitcher of simple syrup, so you can sweeten the drink to your personal taste.  The regular lemonade is good, but the strawberry lemonade, loaded with fresh strawberry puree, is even better.  As soon as you finish placing your order, a waiter will come around with a basket of piping hot popovers.  They’re served with butter and homemade strawberry preserves.  On this particular day, I ordered the lobster quiche, which has always been a favorite of mine.  I also couldn’t refuse a second popover, even though it cost a little extra.  Because we were biking and I didn’t want to feel over-full, I had to pass on the a la mode (for now).

After lunch, we refilled water bottles and took a few minutes to digest lunch while browsing the Acadia gift shop.  We also stopped to chat with the Friends of Acadia who were working on fundraising and recruiting new members.  We joined a few years ago and are happy to support our favorite National Park.

After leaving the Jordan Pond House, we crossed the Park Loop Road and passed by the privately owned gate house.  We happened to time our departure perfectly to pass a team of draft horses pulling a buckboard up the hill.  They’re such huge and beautiful creatures!

The ride along this section is wooded and doesn’t pass anything remarkable.  You can take a side road to get down to Wildwood Stables and Day Mountain, but we continued on toward Bubble Pond.

Bubble Pond from the Carriage Roads
A look at Bubble Pond from the Carriage Roads

Bubble Pond is a gorgeous spot.  We’ve seen loons there and I’ve even taken a photo of the pond that was featured on the cover of Boston Magazine’s 2011 Summer Travel issue.  This year, the view was as lovely as ever, but the experience was marred by a couple changing the diaper of their caterwauling toddler.  They had the child laid out on a rock on the pond’s edge… the edge of the pond that is a source of public drinking water.  Ewww!  I know babies need changing, but for God’s sake… take the diaper-changing activities off the trail and away from the water source.

After passing the end of Bubble Pond, you go over a neat arched bridge, cross the Park Loop Road again and make the final push back toward the opposite shore of Eagle Lake.  As the trail gets closer to the lake side, you get some really lovely lake and mountain views.  You also pass one of the most popular kayak launch spots in the park.

Shortly after passing the launch, you arrive at the Eagle Lake parking area.  This area is another parking option for accessing the Carriage Roads, but it’s usually horrible congested.  We continued past this spot to bike the remainder of the trail along Witch Hole and back to our car.

Witch Hole
Witch Hole is very pretty – full of lily pads and beaver dams.

It was a fantastic ride – one that I know I’ll want to do again and again!  After we wrapped up the ride, we headed back to the hotel to get cleaned up before dinner.  Sometime between the end of the ride and leaving for dinner a heavy fog rolled over the island.  It’s really amazing how quickly clear blue skies can turn to thick, cottony fog in Maine!  It’s part of the island’s charm, I suppose!  We enjoyed the foggy evening at one of our favorite lobster pounds, Thurston’s (in Bernard).  If you’re on MDI and want a classic Maine lobster experience, don’t miss Thurston’s!

Trail Notes

  • Distance17.3 miles.  We added about another 4.4 miles due to our misdirection.
  • Elevation Change – Approximately 500 feet.
  • Difficulty – 2.  There are some uphill sections which will have you switching to lower gears, but it is doable for most people.  Take breaks whenever you need one or walk your bike up the steeper sections.
  • Trail Conditions – 4.5.  The only thing better is pavement.  The carriage roads have small crushed gravel, which is good for just about any type of bike.  I would recommend a hybrid or mountain bike though due to the gravel.
  • Views – 3.5.  Most of the views are of the lakes, so you can’t see for miles and miles in most parts, but the lakes and ponds are gorgeous.
  • Waterfalls/Streams – 4.  You get great views of Witch Hole Pond, Eagle Lake, Jordan Pond, and Bubble Pond.
  • Wildlife – 1.  You may see an occasional loon or gull in the lakes, but not much else other than a red squirrel.
  • Ease to Navigate – 3.  There are lots of turns on this trail, but bring a map and follow the signposts and you should do well.
  • Solitude – 0This is an extremely popular spot for bikers, walkers, runners, and even horses.  

Directions to trailhead: Head west on 233 out of Bar Harbor.  After about a mile outside of town, take a right on Duck Brook Road.  Travel for about two miles until you reach the roadside parking near the park service building.

Fisher Springs Run/Rohrbaugh Plains – Dolly Sods (WV)

The Fisher Springs Run – Rohrbaugh Plains hike is a five mile out-and-back that leads to spectacular wilderness views from a cliffside.

Rohrbaugh Cliffs at Sunset
Rohrbaugh Cliffs at Sunset. Below: Gearing up at the car before starting the hike;  Making the short walk down Forest Road 75; Adam points out our route on the trail sign.

Gearing Up Forest Road 75 Trail Sign

Christine and Adam Say…

For this particular post, we decided to team up and write one massive post, instead of the normal ‘He Says, She Says’ versions. Enjoy!)

Last year, we participated in a Potomac Appalachian Trail Club workshop called Backpacking 101 (read part one, part two, and part three).  Initially, we were scheduled to do an overnight trip to the Dolly Sods Wilderness as a ‘graduation’ from our class.  Sadly, we ended up missing that trip because Christine’s ankle sprain still hadn’t healed enough for the rigors of backpacking.  While the make-up trip we eventually did to Hazel Mountain in Shenandoah National Park was great, we still wanted to do an overnight trip in Dolly Sods.

Dolly Sods is such a unique area for the mid-Atlantic region. It’s the only area close to us with a sub-Arctic tundra climate – loaded with heath barrens, blueberry bushes, acidic bogs and coniferous forest.  You feel like you’re somewhere far north of West Virginia when you visit this wilderness area.

The route we chose through Dolly Sods was of a length and difficulty we would typically choose for an easy day hike.  (5 miles with 900 feet of elevation change)  But we decided it would be fun to do an easy hike and enjoy camping at one of the most beautiful sites in the entire Monongahela National Forest’s wilderness area.

We also were lucky to have some awesome company for this trip.  In Backpacking 101, we met a nice couple – Suzanne and Anthony.  We enjoyed hanging out with them on our class trip to Hazel Mountain and had stayed in touch with them ever since.  We tried planning trips together a couple times, but until this trip our schedules just hadn’t matched up.  We were thrilled when plans finally came together for this Fourth of July weekend trip.

Day One:

Suzanne and Anthony drove down to our house on Friday night so we would have time to go through all our gear before getting an early(ish) start on Saturday morning.  We spent most of the evening fiddling with our packs, splitting up shared gear and contemplating how many Clif bars we truly needed to survive our expedition. That evening, it looked like an REI store exploded in our basement.  We laughed about how much stuff we had to pack for just one night of camping.  We ran through our checklist to make sure we had everything – stove, tent, sleeping bag, clothes, food, emergency kit, etc.

On Saturday, we had a big breakfast and were out the door a little after 9:30.  We didn’t make it to the trailhead until after 1:00.  We made a stop at Seneca Rocks Visitor’s Center and ended up buying another trail guide and a new map for West Virginia hiking.  (Not for use on this trip, but just to have for the future.) We also stopped at the Subway in Franklin, WV to grab sandwiches to have for lunch on the trail.

When we got to the Fisher Springs Run trailhead, the parking lot was overflowing with cars.  A couple people had decided to park sideways in the lot instead of straight-on, so they took up space that could have accommodated five or six more cars.  It was a little annoying and worrisome – would we get out to Rohrbaugh Cliffs and find all the prime campsites already occupied?  We ended up parking a short distance down Forest Road 75, in a patch of dirt just wide enough to get our car off the road.

Sea of Ferns
The forest floor was a sea of ferns.  Below: Adam hikes along the Fisher Springs Run Trail; The trail junction of Fisher Springs and Rohrbaugh Plains; Subway for lunch;  Our huge pile of packs; Adam traverses a rocky section of trail, Suzanne crosses a small stream.

Adam hiking Junction of Fisher Springs Run and Rohrbaugh Plains Trails
Lunch break
Stack of packs Rocky trail Crossing the stream

We found space to shove the sandwiches into Suzanne’s pack, slathered ourselves with sunscreen and bug spray, and got to the business of walking.  Almost immediately after stepping off the dusty, gravel forest road onto the trail, we found ourselves ensconced in a cool, lush, green forest.  Ferns spread across the ground for as far as the eye could see.  The trail descended gradually, occasionally crossing small, mostly dry streams.  The trail got rockier as we followed it for a little over a mile to its junction with the Rohrbaugh Plains trail.  We stopped at the trail junction and ate our lunch.  We chatted with a passing backpacker who was doing a 19-mile loop through Dolly Sods.  She was on a solo trip and told us she was headed down into the Red Creek basin.  We asked her if she had noticed many camps set up near the cliffs.  She said she hadn’t seen anyone, so we took that as a hopeful sign.

After lunch, we took a left onto the Rohrbaugh Plains trail.  The trail at this point was all rocks.  They almost looked fitted together like a jigsaw puzzle.  Almost immediately after the rocky patch, we dipped deeply into a ravine with a pretty flowing stream.  It was a perfect water source for backpacking. We figured that in the worst case scenario, we could hike back to this point to fetch water for cooking and cleaning at camp.

The last 1.2 miles to our campsite ascended ever so slightly, winding past giant mossy boulders and through dense thickets of rhododendron.  With about a half mile to go, we passed another trail junction with the Wildlife Trail.  Taking the Wildlife Trail to the Rohrbaugh Plains trail is probably the most popular route for day hikers to reach Rohrbaugh Cliffs.  After this trail junction, we crossed a swampy, muddy area and walked across a grassy meadow.  A couple tenths of a mile past the meadow, we came to a beautiful clearing where we ended up making camp.

Crossing the meadow
Crossing the meadow. Below:  Christine and Adam’s camp; Adam collects water for cooking and cleaning; Anthony and Suzanne’s camp.

Camp Anderson Fetching water Camp Suzanne and Anthony

There were so many soft, flat spots that were perfect for our tents!  We chose a couple spots located out of sight of the trail.  We had a fire pit, a nice place for cooking, a view and shady trees.  It was nothing short of perfect.

It felt great to shed our packs and get to work setting up camp.  Our Mountain Hardwear tent (the Drifter 3) is super-simple and was pitched in just a few moments.  While Adam worked on staking the tent, Christine inflated our Big Agnes pads.  We put them in the tent along with our sleeping bags, so they’d have some time to re-fluff after being compressed in stuff sacks all day.

On this backpacking trip, we had a few new and exciting ‘creature comforts’.  Since our last backpacking trip, we acquired Alite camp chairs.  They’re so comfortable and lightweight!  We also both got the large Thermarest pillows.  They’re really bulky and take up a ton of pack space, but they’re very lightweight and make a world’s difference for getting comfortable at night.  Christine also brought a fitted sheet for her sleeping pad.  Even though the sheet is made by Thermarest, it fits the Big Agnes pad perfectly.  A sheet is not a necessity, but it definitely improves the texture and breathability of your sleeping pad.  Christine especially hates feeling clammy or slippery when she’s trying to sleep, so having the sheet made a huge difference.  Neither of us actually sleep inside our sleeping bag unless it’s freezing cold.  We prefer to open our bags up and use them like quilts.

After we finished setting up our tent, we carried our cooking stuff down to our kitchen area.  We also pulled out all our ‘smellables’ and set them aside so they could easily be stowed away in our hanging bear bag.  Christine found a couple branch stubs to hang our trekking poles and our packs. We both covered our packs with garbage bags in case it rained overnight.

Anthony and Suzanne were still working on getting there camp set up, so we decided to go on a water run.  We hadn’t passed a better water source after the stream near the trail junction, so we took our collapsible bucket and headed back down the trail.  Filling up was easy, but getting two gallons of water in a soft-sided bucket back to camp without spilling anything over a 1.2 mile distance was substantially trickier!  We were very thankful we went as a pair to get water, because it was nice to trade off carrying the bucket. We joked that it was like being in a challenge on some adventure reality show.  We made it back without much spillage at all!  (Note: We hiked this trail as a dayhike in 2014 and found a closer water source just a few hundred yards past where we stopped to camp… so you don’t have to hike back like we did!)

When we got back, Anthony and Suzanne were all set up, so we decided to walk a few hundred feet further down the trail to explore the cliffs.  Rohrbaugh Cliffs were spectacular.  The view into the valley below was all wilderness – not a single road or farm or house – just mountains and streams for as far as the eye could see.

Adam on rohrbaugh cliffs
Adam on Rohrbaugh Cliffs. Below: Wild, ripe blueberries; A cute frog that visited our camp; Rosebay Rhododendron were in bloom; Our group on Rohrbaugh Cliffs; A couple more views of the cliffside.

Wild blueberries Frog Rosebay rhododendron
The groupView from Rohrbaugh Cliffs Cliffside

We visited the area at a truly beautiful time of year.  The Rosebay Rhododendrons were just starting to bloom.  The mountain laurel was a bit past peak, but there were still plenty of flowers to enjoy.  And best of all WILD BLUEBERRIES were everywhere along the cliffs!  Suzanne and Christine were significantly more excited about the berries than the guys and spent a lot of time searching for ripe berries tucked into the bushes.

Most of the late afternoon was spent relaxing near camp and getting dinner ready.  Around 5:30, Adam got out the JetBoil and boiled water for all of our dinners.  We had wanted to come up with some homemade backpacking recipes, but never got our act together.  Adam and Christine ended up eating Backpacker’s Pantry Chicken Risotto with Mocha Mousse Pie for dessert.  It was satisfying and very filling!  Anthony and Suzanne had macaroni and cheese and blueberry cobbler from some backpacking meal company (AlpineAire) none of us had heard of before.  They were pretty happy with their dinner, too.

Chef adam
Chef Adam filters and boils water for dinner. Below: Chicken Risotto for dinner; Anthony and Suzanne relax after dinner; Playing Monopoly on the cliffs; Hanging our bear bag.

Chicken risotto Relaxing after dinner and dessert Monopoly Bear Hang

We cleaned up our dishes, brushed our teeth (We love Colgate Wisps for backpacking) and hoisted our bear bag into the highest, safest tree we could find.  We decided to play cards and watch sunset from the cliffs.  We found a big flat rock near the edge and played the card version of Monopoly. The game took a long time, and Adam eventually won.  The sky turned to hues of pink and soft purple and the sun dipped down behind the mountains.  It was so beautiful!

Shortly before full dark, a couple more groups of backpackers showed up – maybe five people and two dogs.  They set up their camps down the trail from us.  So even though we weren’t the only people up there, we still felt like we had a good measure of solitude.  It definitely was not the situation we feared when we saw the packed parking lot at the trailhead. We’re guessing most of the other backpackers ended up along Red Creek.

Once the sun was down, we all retreated to our tents.  Christine listened to a book on her iPod for a while.  By the light of his headlamp, Adam enjoyed reading some of his book by John Muir.  He’s been reading this book exclusively on backpacking trips.  It’s a nice tribute to read something by the ultimate outdoorsman while having our own experience with nature.

Christine started getting really sleepy, so she stowed her iPod away and dozed off, only to be woken almost immediately by the sound of fireworks in the valley below.  We think we heard fireworks shows from three different locations, because there were definitely three distinct grand finales.  The booming sounds and bursts of light in the sky came from different directions, too.  We contemplated leaving our tent and going back out to the cliffs to see if we could see the fireworks from above, but we ended up staying put. Christine didn’t feel like getting dressed again. When all was said and done, we kind of regretted not going back out to see the fireworks.

Eventually the fireworks drew to a close, and Christine drifted back to sleep.  Unfortunately, Adam did not sleep that well on this trip.  He was physically comfortable, but he just wasn’t tired enough to sleep soundly.  Going to bed shortly after sunset just isn’t what his body is used to, so he did a lot of tossing and turning during the night.

Our sunset card game
Our sunset card game.  Below:  Layers of mountains frame the Red Creek Valley; We had a pretty sunset; Suzanne takes a few final photos of the evening sky.

Mountain Layers Dramatic sky Taking one last photo

Around 2:30 a.m., Adam shook Christine awake to close the rainfly on the tent – a storm was approaching.  Christine stumbled and grumbled and totally failed at closing the fly.  Adam had to crawl over her to get both sides of the tent closed.  Christine completely lacks dexterity when she’s half asleep. The storm never really materialized beyond some lightning and wind.  We both fell back to sleep and didn’t wake up again until about 6:15.  Christine said it was the best night of sleep she’s ever had in a tent.

Day Two

Shortly after sunrise, we got out of the tent and took a walk over to the cliffs.  Christine thought there might be some pretty morning light, but it was completely cloudy.  Back at camp, we started breaking down our tent, deflating our sleeping pads and re-stuffing our sleeping bags.  We got the bear bag down and got everything ready to cook breakfast.

Christine tried Starbuck’s instant coffee, Via, for the first time.  It was surprisingly delicious.  Once she added sweetener and powdered Coffeemate, it tasted almost identical to a cup of brewed coffee.  In addition to coffee, we had boxes of apple-grape juice and instant maple-brown sugar oatmeal.  We figured that would be plenty of food to give us energy for the short hike out.

After everyone was done with breakfast, we finished packing up and cleaning up our camp area.  We were back on the trail by 8:45.  Our exit route simply retraced the trail we had hiked in.  We were back at the car by 10:15.

Breaking camp
Breaking camp in the morning.  Below:  Fat Boy’s Pork Palace for lunch!

Fat Boys Pork Palace

On the way home, we stopped at Fat Boy’s Pork Palace (now permanently closed) for lunch.  With a name like that, you know it’s going to have perfect options for a post-backpacking calorie splurge!  We enjoyed BBQ sandwiches with coleslaw and French fries.  Suzanne got breakfast and Anthony got a burger.  It was all delicious!

Once we were back at our house, we split up our group gear and saw Anthony and Suzanne on their way.  Christine said her post-backpacking shower might have been one of the best showers of her entire life.  It always feels awesome to wash away DEET, sunscreen and sweat!

We all had a great time on the trip. We’re already trying to plan our next backpacking adventure for some time in September!  Although, it’s going to be hard to top the scenery at Dolly Sods!

Trail Notes

  • Distance 5.2 miles total
  • Elevation Change – 900 feet.  The Fisher Springs Run trail descends about 500 feet and the Rohraugh Plains ascends about 400 feet.
  • Difficulty – 2.  The hike was not that difficult, even with 35 pounds on my back.
  • Trail Conditions –2.5The Fisher Spring Run trail was well-maintained, but there are lots of rocky spots on the Rohrbaugh trail where you could turn your ankle.
  • Views –5.  The views from Rohrbaugh cliffs were quite spectacular and it was nice to see the sun disappear over the mountains.
  • Wildlife – 1.  We were expecting to see some wildlife up here, but we didn’t see anything other than squirrels, frogs and some birds.  We did wake up to the sounds of dark-eyed juncos in the morning.
  • Ease to Navigate – 3.5.  There are not any blazes on trails at Dolly Sods, but the trails are very well-defined and signs are in place to mark junctions.  Stay on the trail as much as possible and you won’t have any trouble.  I can imagine that when leaves fall and cover the trail in the fall, it would be more challenging to find the trail.
  • Solitude –4.  On a nice day, you may see some people at the overlook. 

Directions to trailhead:  From Seneca Rocks, go North on WV 28 for 12 miles.  Take a left on Jordan Run Road.  Go one mile up Jordan Run Road and take a left on to Forest Road 19.  In 6 miles, Forest Road 19 comes to a T on to Forest Road 75.  Take a right, heading north on Forest Road 75.  Drive for three miles until reaching the small parking lot and the trailhead for Fisher Springs Run.

Flume Gorge Loop (NH)


Special: New Hampshire Edition

Introductory Guide to Visiting the White Mountains

Located in Franconia Notch State Park, this two-mile path around the Flume Gorge showcases a lot of beautiful scenery on a short and easy walk.  If you crave solitude, this is not the place for you.  But if you don’t mind crowds and want to see some unique scenery, don’t miss a visit to this area.

Scenes from the Flume
The Flume is a beautiful and unique place. Below: Avalanche Falls is located inside the Flume; Liberty Gorge Cascade is also impressive; The trail is lined with large boulders called glacial erratics; The Sentinel Pine Covered Bridge is for pedestrians only.

Avalanche Falls Liberty Gorge Cascade Glacial Erratic Sentinel Pine Bridge

Christine Says…

Last year, when we visited New Hampshire for the first time, we went to Flume Gorge with my parents.  It was insanely crowded, unusually hot and glaringly sunny on that visit, so we decided to make a return visit on this trip – hoping that the clouds and cooler weather would keep the crowds at bay.  There were definitely fewer people this time, but that’s not to say we had solitude.  Flume Gorge is an extremely popular area. There will always be hordes of people, no matter the time of day, week or year you visit.

It’s no surprise the area draws such large crowds – it packs an amazing amount of unique scenery into an easy, two-mile loop.  For anyone who doesn’t want to walk the two miles, there is a bus that will take visitors to a drop-off point at the Boulder Cabin.  This option substantially shortens the distance and climbing necessary to see the gorge.  However, bus riders miss seeing a lot of the other impressive scenery along the loop.

The two-mile loop starts off along a shady, wooded path that climbs down to the Pemigawasset River.  In .25 miles, there is a bright, red covered bridge across the water – the bus goes through the bridge, but pedestrians cross a walkway attached to the side of the bridge.  After a short uphill, both the bus riders and the walkers arrive at the Boulder Cabin.  The building is full of exhibits – both historical and natural.

Covered Bridge
The first covered bridge in Flume Gorge is brilliant red. Below: Table Rock;  The path through the woods is peaceful and shady; Bear Cave is located near the top of the Flume; The side view of Avalanche Falls.

Table Rock Shady Trail Bear Cave Avalanche Falls

After passing the cabin, the path follows alongside an area called Table Rock.  The water in the river passes thinly over a wide, smooth expanse of granite.  A sign announces the beginning of the Flume.  The Flume is a fascinating geological area – a narrow slot canyon carved out from thousands of years of river flow over the rock.  Wooden walkways are attached to the sheer canyon walls and allow people to climb through the gorge using a series of ramps and steps.  Near the top of the Flume, visitors are treated to views of the crashing water of Avalanche Falls.  The falls take several directional turns through the Flume – each angle makes it look like a completely different waterfall. After passing the waterfall, be sure to take a quick peek inside Bear Cave.

At the top of the Flume, the trail has two options – one returns people to Boulder Cabin and the bus stop, the other follows a trail for a little over a mile back to the main entry.  If you’re able, it’s definitely worth following the longer route to see Liberty Gorge Cascade, the Pool, The Sentinel Pine Covered Bridge, the Wolf’s Den and several impressive erratics along the trail.

Water Under the Sentinel Pine Bridge
My favorite view along the trail came at the spot overlooking the Sentinel Bridge. Below:  The river under the bridge is very scenic; The Pool is a wide, still spot on the river.

River under the Sentinel Bridge The Pool

One of my favorite views along the trail was looking back at the Pool and the Sentinel Covered Bridge from a little spur trail to an overlook.  From this point, the walk back is steeply uphill for a short while.  Once you gain the ridge, the path levels off and you get a nice view of Liberty Mountain.  A short while later, you arrive back at the visitor’s center – where you can treat yourself to an ice cream cone.

Even though Flume Gorge is crowded and rather expensive to visit, it’s still very worthwhile.  Not many short two-mile loops pack in quite so much scenery into a pleasant, easy-to-walk package.

Adams Says…

After dropping off our thru-hiker friends, The Traveling Circus, we headed off to hike around Flume Gorge.  We did this trip last year with Christine’s parents, but thought it was worth a second trip.

This is a very popular attraction and is definitely one of the highlights of the Franconia Notch State Park.  Similar to many areas of New Hampshire, it requires a fee (in 2010, it was $13 for adults).  The visitor center has a theatre that shows an informational film throughout the day and a few exhibits around the entrance.  The snack bar is also fully equipped to provide enough refreshment and food for a lunch or snack.

Cascade near table rock
The entire Flume Gorge area is loaded with small waterfalls and cascades. Below: Tree roots grow over rocks; The crowds at Flume Gorge are always thick;  Ramps and stairs allow people to climb easily through the gorge; We saw lots of chipmunks and red squirrels.

Tree growing over rock The Flume
The top of Avalanche Falls Chipmunk

This hike packs a lot of features into one short hike.  The covered bridge was built in 1886.  While you can’t walk inside since it is for bus traffic, it does provide a nice photo opportunity.  Table Rock is a large rock outcropping where Flume Brook slowly glides over the water.  The rock is 500 feet long and 75 feet wide.  The Flume Gorge is quite impressive.  You walk along a boardwalk that clings to one side of the gorge.  The Conway granite walls rise on either side 70-90 feet as you see the brook rush out of Avalanche Falls and down the brook.  We were impressed to see all of the small trees and moss that grows amazingly out of the cliff walls.  The Flume was discovered in 1808 by a 93 year-old woman while she was fishing.  Signs describe a large boulder that was suspended between the walls of the gorge but a storm in 1883 swept it away and no signs of the boulder have been spotted since.  Avalanche Falls is an impressive 45-foot waterfall that you can see from several angles while along the boardwalk.

After walking another .5 miles from Avalanche Falls, Liberty Gorge is your next stop.  There is a nice overlook to see the water flow through this gorge.  After a few tenths of a mile past Liberty Gorge, you will come across the Pool overlook and another covered bridge.   Shortly after the covered bridge, you have an option to join go through the one-way Wolf’s Den, but it does require crawling on your hands and knees to make it through the cave.  We continued pass the Wolf’s Den, to catch the additional overlook of the Pool.  We thought this was a better view of the covered bridge and the Pool.  Continue from here to arrive at the Glacial Boulder garden to view some nice erratics.

While there aren’t any geocaches inside the gorge, there are a few outside the area:

Trail Notes

  • Distance – 2 miles
  • Elevation Change 400 feet
  • Difficulty 1.5. There are some steps and hills, but most people should be able to do this without too much effort.
  • Trail Conditions 4.5 The trail is covered in small crushed gravel, allowing for easy footing.
  • Views – 1. You do get one view of Liberty Mountain, but otherwise you won’t see many far-off views.
  • Waterfalls/streams 5. Great views of Avalanche Falls and much of the trip is in sight of water.
  • Wildlife 1.  We saw a few red squirrels and chipmunks, but this is so popular with tourists, you won’t see a lot of wildlife.
  • Ease to Navigate 5. The area is secluded from other areas, so you can’t get lost.  You just have options to cut distance off of the trail.
  • Solitude0. You will always find lots of people here.

Directions to trailhead:
From I-93, once you enter the Franconia Notch area, take the Flume Gorge exit.  The area is well-marked.  Park at the Visitor’s Center.  The trail starts from the Visitor’s Center.  Purchase tickets and proceed.

Hazel Mountain – Catlett Mountain Loop

This nearly 8-mile loop takes hikers deep into a beautiful, remote section of Shenandoah National Park.  The trail passes bubbling streams, stands of hemlocks that haven’t yet fallen and crumbling stone walls left behind by families that used to live in the park.  This post could also be called part four of the Backpacking 101 series, because we did this trail as a backpacking trip with the great folks from the Potomac Appalachian Trail Club.

On the Hazel Mountain Trail
Walking the Hazel Mountain Trail was peaceful and green.

Adam Says…

This was our first overnight backpacking trip together and served as our graduation trip from the Backpacking 101 course we took through PATC.  We were unable to go on our previously-scheduled trip due to Christine’s sprained ankle she suffered on our Buzzard Rock hike. We were thrilled that our instructors gave us the opportunity for a make-up trip.  You can read our other sections of the review of this class in Part One, Part Two, and Part Three.

The outing leaders, John and Jeanne, chose the Hazel Mountain – Catlett Mountain loop for the trip. The hike winds around the mountains and through pretty forest, but doesn’t lead to any summit views.  The trail starts off from the Meadow Spring  parking lot around mile 33.7 on Skyline Drive.  Like many trails in Shenandoah National Park, the Hazel Mountain trail descends from the road.  You will stay on this trail until you reach the Catlett Mountain Trail.  The Hazel Mountain Trail is also marked on maps as a horse trail, so you may encounter horses on many of the trails around this area.

Day One Hiking: Shortly after leaving the parking lot, you will see a junction with the Buck Hollow Trail (a tough loop hike).  At .3 miles, you reach a trail junction with the Buck Ridge Trail (that is the loop back from the Buck Hollow Trail).  At 1.6 miles, you come to the first junction with the White Rocks Trail (another loop trail).  At 2.2 miles, you will see a post marking the junction with the Catlett Spur Trail, marking where you will rejoin the trail after you complete the loop.  While you just descended about 1000 feet, the trail begins to ascend from this point, gaining about 400 feet over the next .6 miles.  Around 2.8 miles, you will see the other junction with the White Rocks Trail.  Around 3.1 miles, you will reach the top of the climb and take a right to continue on the Hazel Mountain trail.  At mile 3.7, you will take a right on to the Catlett Mountain Trail.  We picked a campsite near the top of this trail, as it does provide a close proximity below to a spur of Runyon Run, a reliable water source on the trail.

Day Two Hiking: Upon leaving camp, you descend down to the stream we used as the water source.  Once you rockhop across Runyon Run, the trail ascends fairly steeply up 300 feet.  At mile 4.7, you will take a right onto Catlett Spur Trail.  The trail descends crossing over Runyon Run in a few spots.  You will eventually pass an old stone perimeter wall, marking land that may have marked a boundary for a settler’s house or farm.  At mile 5.6, you will come back to the junction with the Hazel Mountain Trail.  Take a left on the trail and ascend for the final 2.2 miles back to the parking lot.

Our Tent
Our tent set-up at camp. Below: The backpacking group at the beginning of the trip;  We took our packs off and enjoyed lunch at a boulder jumble near a stream; There were many different kinds of tents at camp… one of the group used a hammock.

Backpacking Group Backpacks Hammock

Christine and I had a great time on the trip.  We met up with our group at 9:30AM, reintroduced ourselves to each other, and got our packs ready for the trail.  We divided up some group gear that we needed to share for the trip and weighed our packs for curiosity.  I ended up with a little over 34 pounds in my pack and Christine had about 28 pounds.  I would say that our average for the group was a little under 30 pounds, so it was manageable for an overnight trip.  We hiked fairly fast, but we did take a few breaks to get a breather and eat some lunch.  We hiked onto the Catlett Mountain trail and found our campsite around 12:30.  We set up our tents and our kitchen area.  We put up a tarp and brought all of our dishes, utensils and food to the kitchen site.  Most of the group then decided to go down to Runyon Run, to load up some collapsible buckets for water for camp.  This was a chance for us to try out our new Katadyn Hiker Pro water filter to refill some water bottles.  When we hiked back up to the campsite, we happened to see an adult bear running from the direction of our campsite.  Unfortunately (or maybe fortunately?), we never saw him again.

Shortly after getting back to camp, we experienced a scary moment.  We thought two people had stayed back at camp when we went on the water run, but came back to see only John.  We started to hear shouts from the woods, but we couldn’t distinguish if the voice was shouting “Help” or “Hello”.  Our instructor grabbed his first aid kit and we continued to call back to the person.  We shouted “Are you hurt?” and “What’s your name?”, but we couldn’t distinguish the response.  We kept calling out and eventually we saw one of our group members emerge from the dense underbrush.  He had spotted a timber rattler that rose up against him.  He ran out of the way, but in his haste to get away from the snake, he got turned around and lost.  He had lost his whistle along the way, so he resorted to shouting to try and find his way back to the group.  It really shows that you can quickly get turned around and lost without your bearing in the woods.

We then learned how to hang a bear bag, tying a rock to a roop and throwing it over a branch (after dinner we substituted the rock with the actual bags to hang and tied the other end of the rope to a tree).  Since we had some time to kill in camp, Christine and I decided to take a quick siesta in our tent before dinner.  A storm quickly rolled in with loud thunder, high winds, and heavy rain.  It rained for close to an hour.  After it slowed to a light sprinkle, we made it back to the kitchen site, to find the rest of our group huddled under the tarp. Later, we ate an amazing dinner (which Christine will talk about) and cleaned up. After watching a nice sunset through the trees and hanging out with the group, Christine and I retired for the night.

Friendly Buck
This friendly buck visited our camp all weekend. Every time we were in our kitchen area, he came over to hang out.  Below:  Night falls at camp (notice all the rain on the tent!)

Night Falls at Camp

The next morning we got up early and worked on packing our gear.  We ate a wonderful breakfast and then broke  camp around 8:45AM.  We finished our hike, arriving back at our cars shortly after noon.  I think everyone was planning a victory meal after the trip, so we made a trip to McDonald’s in Luray.

We really enjoyed our first backpacking trip.  It was great to have this experience with the Potomac Appalachian Trail Club.  Our instructors were absolutely wonderful and really shared a lot of their experience with us.  It was also great to meet a lot of nice people through the Backpacking 101 class that share a common interest and experience level.  This trip really affirmed to us that we could handle doing an overnight backpacking trip and we are excited to try it again sometime in the very near future.

Christine Says…

On the eve of our backpacking trip, I was feeling exceedingly fretful.  I wondered if I’d be able to bear the heat/humidity without passing out. I worried that I’d be such a sluggish hiker that I’d slow the whole group down. I had concerns about the storms forecast for the day.  At one point when we were loading our backpacks. I looked and Adam and said “I don’t know if I’m cut out for this.”

But, wow… it turns out that I LOVE backpacking.  It was simultaneously fun, challenging and relaxing.   I was amazed at how comfortable my pack was – the 28 pounds felt balanced and easy on my back.  I may have sweated like crazy in the heat, but I managed to stay hydrated and felt really strong the entire hike.  I had such a sense of tranquility falling asleep in our tent after dinner, listening to the sounds of evening birds and the wind rustling in the trees.

I can’t say enough great things about our PATC (Potomac Appalachian Trail Club) trip leaders – John and Jeanne.  Their expertise made me feel really safe and confident on my “maiden voyage” overnight in the woods.  Actually, I have nothing but great things to say about our entire backpacking group.  Our fellow adventurers, Anthony, Suzanne and Ed were all friendly and fun people.

Adam Throws the Rope Over the Limb
Adam throws a rope over the fallen tree to create a bear hang.  He used a rock to make the throw easier.  Below:  A lot of planning went into picking the right spot for the hang; three waterproof bags were hung. The bags contained anything with a scent.

Planning the Bear Hang Bear Bags

Adam already did a thorough job describing the terrain and features along the route, so that leaves me to talk about FOOD (and maybe a few other things, too).  When I think of backpacking, I think of tuna pouches, power bars, beef jerky and freeze-dried, pre-packaged meals.  But, Jeanne is a true backcountry gourmand (she brought a lobster roll for her packed lunch!).   For dinner, we feasted on Chicken with Thai Peanut Sauce and Rice and Curried Couscous with Peas and Cashews.  We even had banana pudding, replete with fresh banana slices and Nilla Wafers for dessert.  Cleaning up was super-easy, since we did most of the cooking using Ziploc freezer bags.  You can pour boiling water right into the bags, and avoid dirtying a pot.  Individual utensils and bowls were cleaned by thorough eating (not a crumb left behind) and then sanitized with more boiling water.  People either drank the water or broadcast it into the woods – away from camp.  Either method is acceptable for Leave No Trace practices.  The main goal is not to send any food particles into the woods.

Breakfast the next morning exceeded all my expectations!  Of course… there was instant oatmeal and hot chocolate, but there was also real BACON and cheesy hashbrowns!  Jeanne brought Boar’s Head shelf-stable bacon, cheddar cheese, butter and dehydrated potatoes.  I decreed to Adam that we shall always have bacon when we go backpacking.  I’m totally spoiled for backcountry breakfast now!

Bacon at Camp
How cool is this… nice, crispy bacon in the backcountry.  Below: We also had cheesy hashbrowns for breakfast.  Below: On the hike out we passed several sections of old, stone walls; The group post-hike… all a lot sweatier than when we started.

Hashbrowns Stone Wall Backpacking Group, Post-Hike

Over breakfast, Adam and I spent some time talking to our trip leader, John, about everything from gear to favorite backpacking spots.  He’s like a walking encyclopedia of backpacking expertise.

I have so many fantastic memories from our first real backpacking trip… the outgoing buck that hung out with us all weekend, Adam sitting straight up in his sleeping bag (twice) to accuse me of being a bear, the feeling of being away from complications and civilization, but most of all, making new friends who might become future outing companions.

It was a rewarding experience, and I can’t wait to get out there again!

Trail Notes

  • Distance – 7.8 miles loop
  • Elevation Change – About 1000 feet, but there are also some ups and downs of about 400 feet on the Catlett Mountain-Catlett Spur Trail loop.
  • Difficulty – 3
  • Trail Conditions –3.  The trail isn’t too rocky, but is overgrown, especially the Catlett Mountain-Catlett Spur Trails.
  • Views0.  There were really no views of anything from this trail, since it is through a thick wooded area.
  • Waterfalls/streams – 2. Good water sources, but nothing too scenic.
  • Wildlife –4. With people in our group seeing deer, a bear, and a timber rattler, there should be a decent chance to see wildlife here. We also saw an American Redstart and a few red-spotted newts on the trail.
  • Ease to Navigate –3. There are lots of spurs off of the trails, but everything loops back at some point.  Pay attention to the cement posts and you shouldn’t have any difficulty.
  • Solitude – 2.5. The first section down to the White Rocks Trail seemed to include all the traffic that we saw.  This is popular with many day-trippers, since it is one of the first parking lots in the northern portion of the Central District of Shenandoah National Park.

Directions to trailhead:
On Skyline Drive, park at the Meadow Spring parking lot between mile markers 33 and 34.  The trail starts at the southern end of the parking lot.