Roan Mountain (TN)

Tennessee Hikes

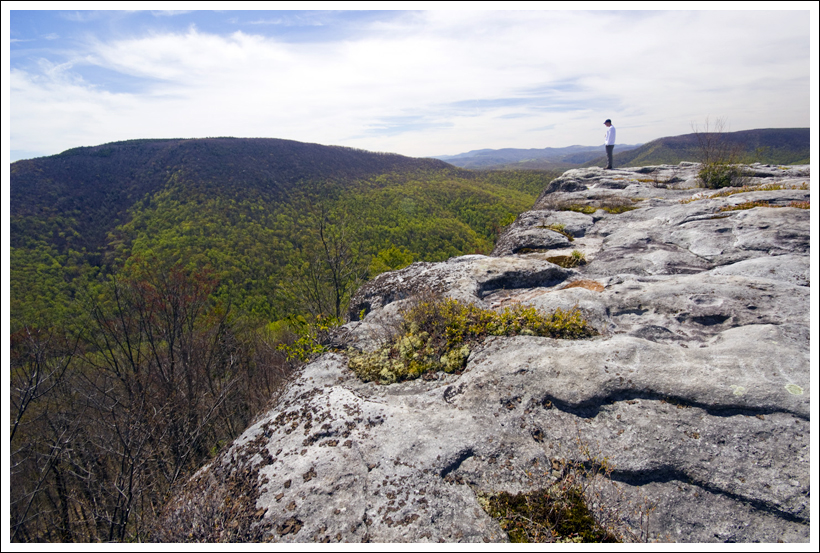
This might be one of the most beautiful view hikes we’ve done in the Appalachians!  The moderate 5.1-mile climb along a smooth, easy trail takes you over three lofty balds that will make you feel on top of the world!

View the full album of photos from this hike

Roan Views
The views on the Roan Mountain hike are amazing! There are open views of the mountains in every direction. Not many mountains in the area are as tall as Roan, so you’ll feel on top of the world this entire hike. If you look closely at this photo, you can see the Appalachian Trail meandering across ridgeline off in the distance. Below: Carvers Gap is on the Tennesse-North Carolina state line; Adam passes through one of the only tree-covered parts of the hike.

Carvers Gap Thick Pines

Christine Says…

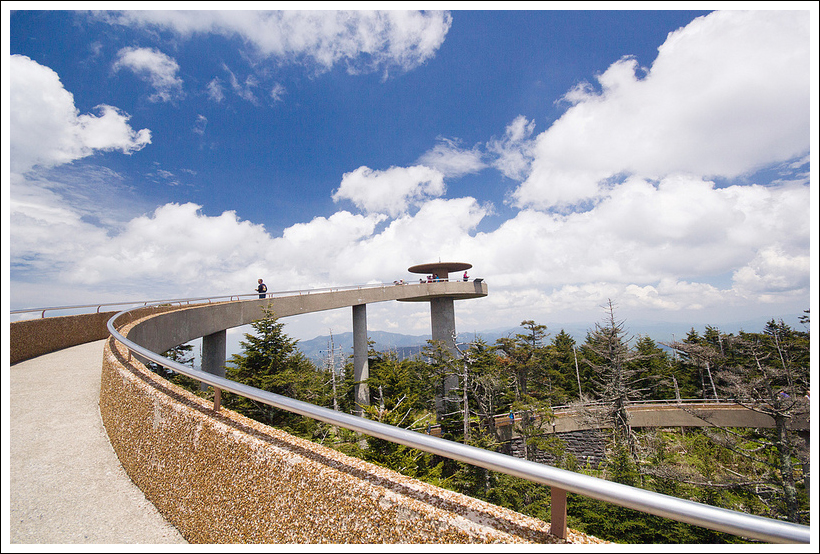
After five exciting, action-packed days in the Smokies, it was time to move on to the third stop on our Southern Appalachians tour.  We took our time leaving Gatlinburg.  We bought more donuts from The Donut Friar (yay!) and did some laundry at the hotel (boo!).  It’s no fun doing laundry on vacation – but five days of hiking creates quite a large heap of dirty clothes. After checking out, we meandered through Pigeon Forge.  That town is loaded with crazy tourist attractions.  I saw the Titanic, King Kong, an upside down building and even fed grapes and Milkbones to a trio of black bears (yes… it was safe and legal). [See a few amusing photos of Pigeon Forge] We even stopped at Wal-Mart to pick up extra memory cards for the camera.  This turned out to be one of the wisest decisions on the trip – more about that later!

By 11:00 we were cruising along, headed in the direction of Roan Mountain.  I’d long heard tales about the mountain’s famous balds and stellar views, and was so excited to finally have a chance to see for myself.

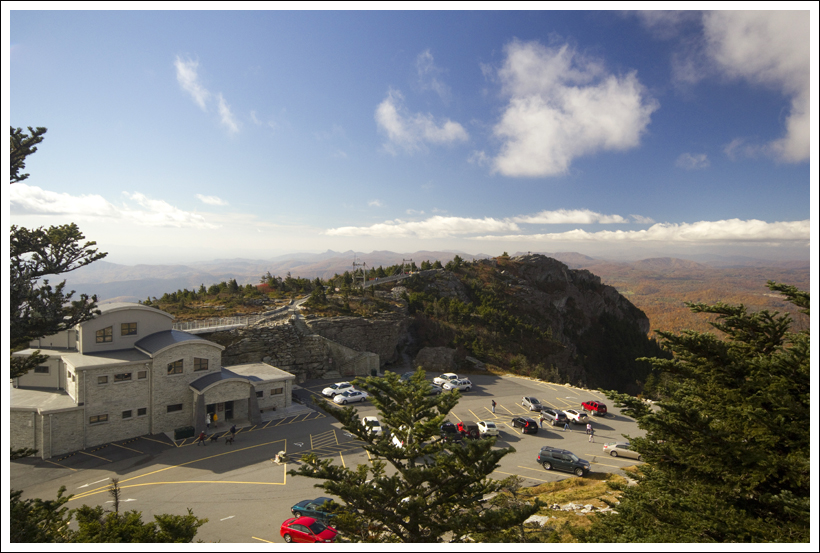
We finally got to Roan Mountain around 1:30 in the afternoon.  Our hike started off at Carvers Gap, straddling the North Carolina/Tennessee line at 5,512 feet.  Even from the parking lot, I could tell that this was going to be a special hike.  First of all, we had amazing weather!   Lower elevations were hot and sunny (mid-90’s back home in Virginia!), but Roan Mountain was sitting in the low 70’s with a pleasant breeze, brilliant blue skies, and puffy clouds.  It was truly perfect hiking weather.  Second of all, the view from Carvers Gap was lovely – hinting at the amazing vistas yet to come.

I put on a hat and lots of sunscreen, packed snacks and filled my CamelBak.  As it turns out, I missed a large spot on my shoulder with the sunscreen, and ended up with an incredibly stupid-looking sunburn for the remainder of the trip.

Awesome Roan Views
Christine takes in spectacular mountain views. Below: A photo similar to this, but including colorful Catawba rhododendrons was recently featured in Backpacker Magazine; Funny portrayal of an AT Thru-Hiker on the sign.

Backpacker Mag Photo Funny Sign

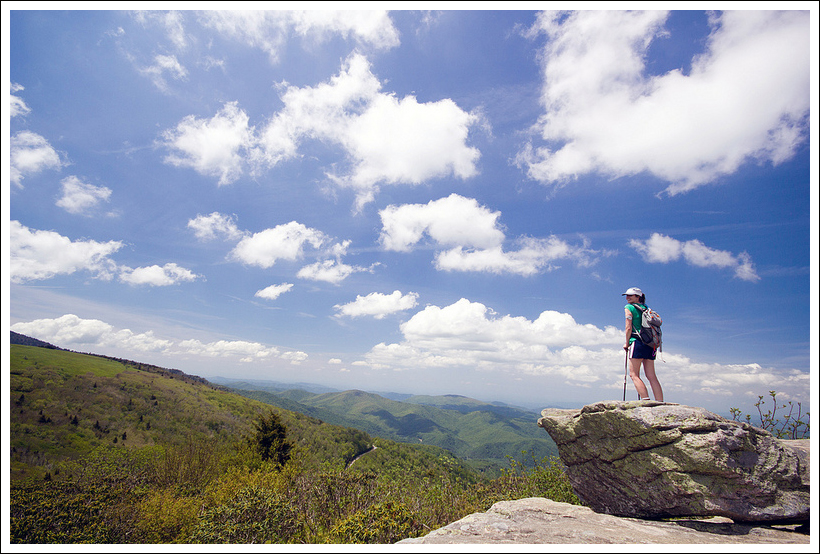
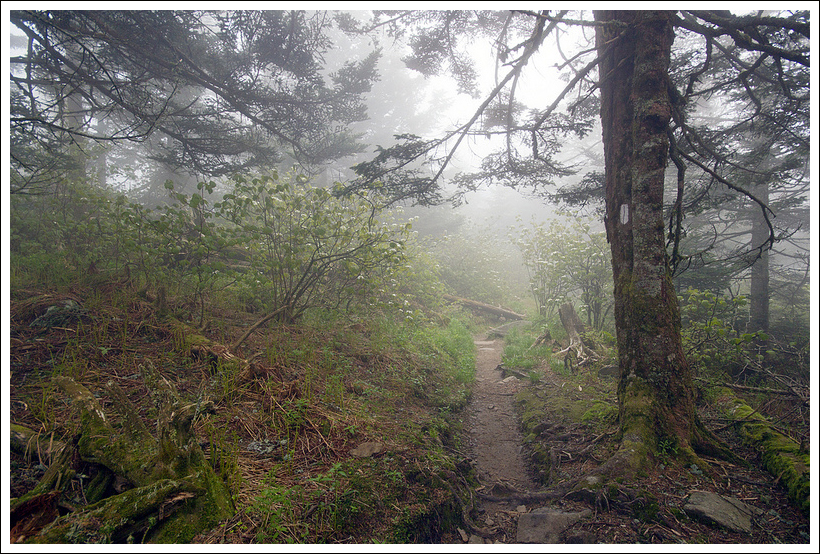
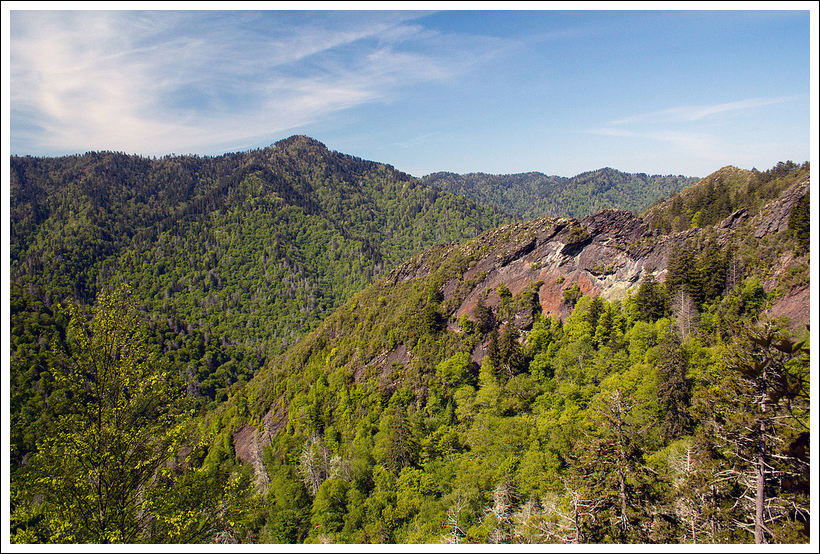
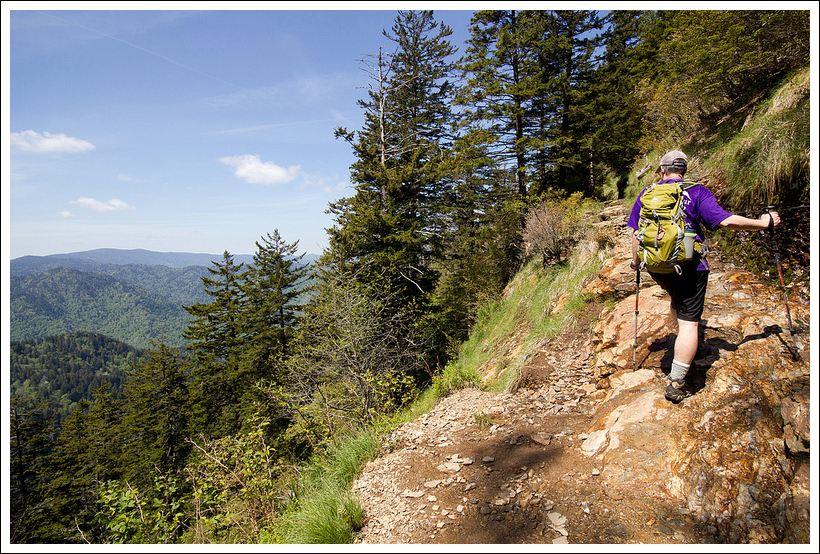
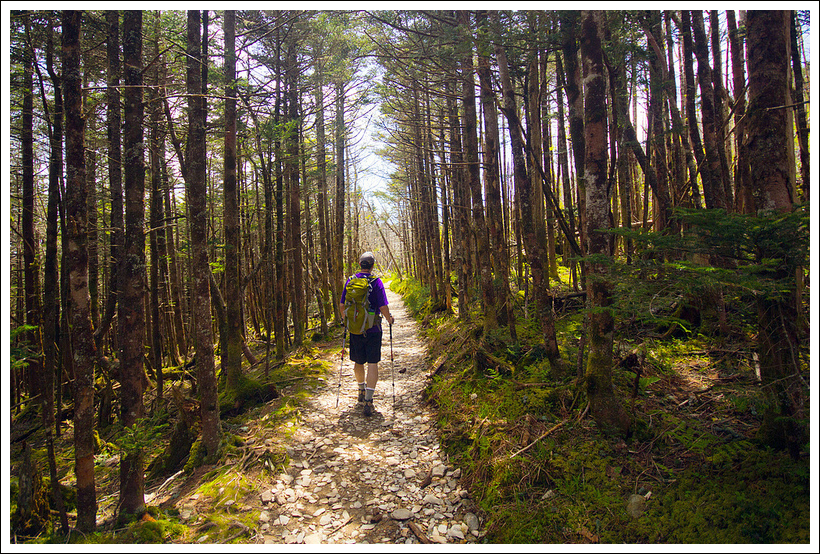
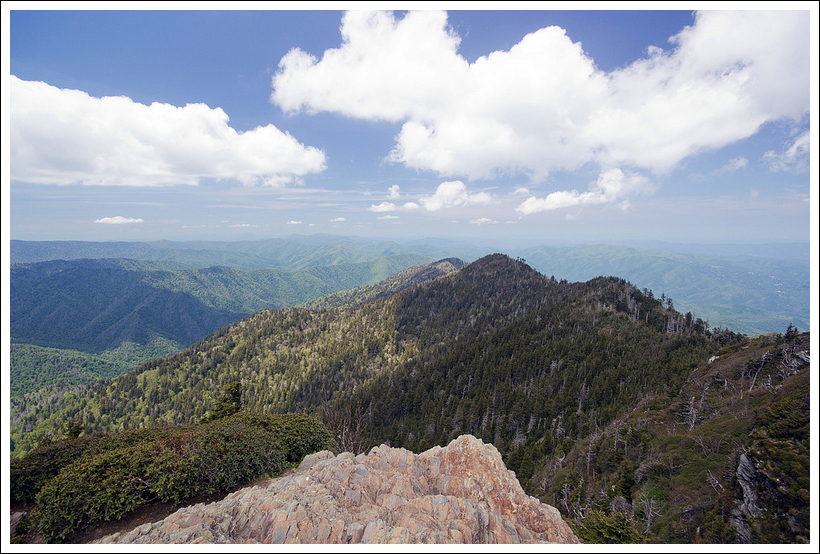
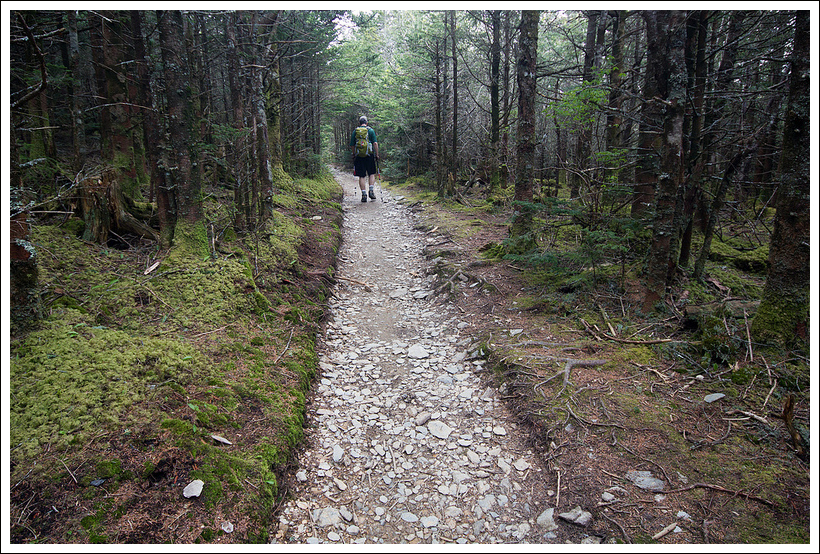
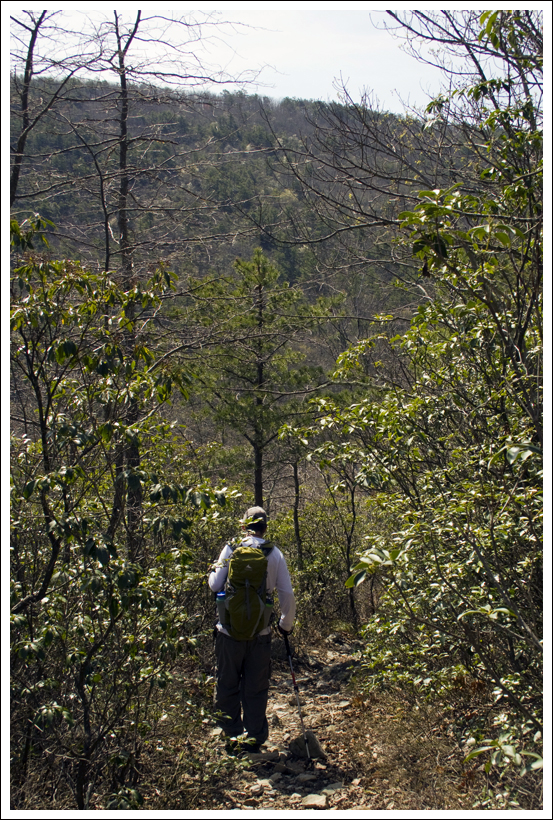
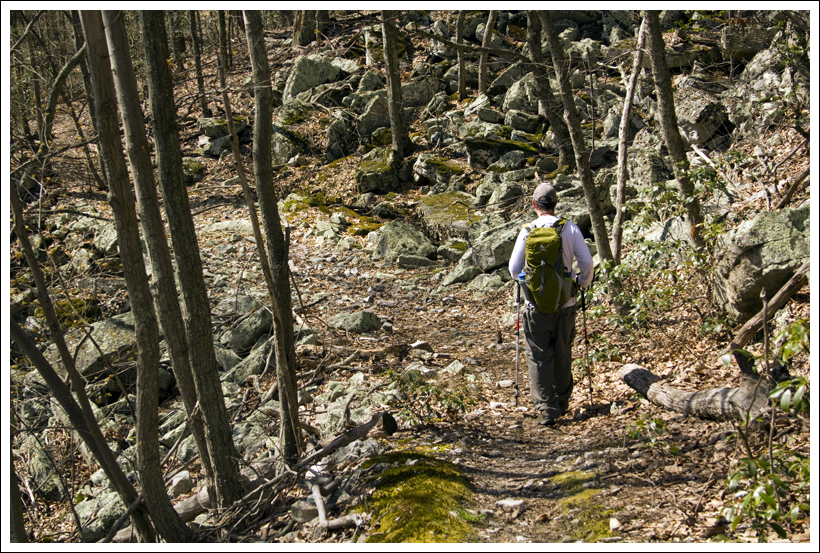
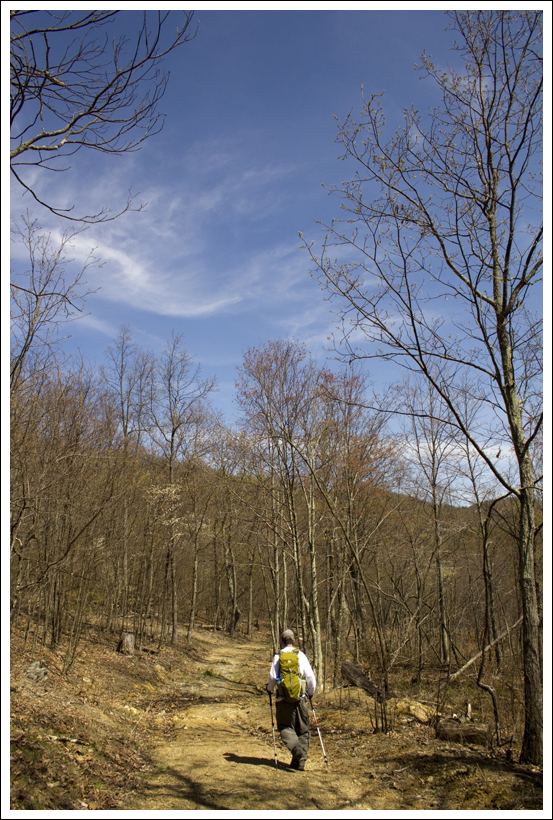
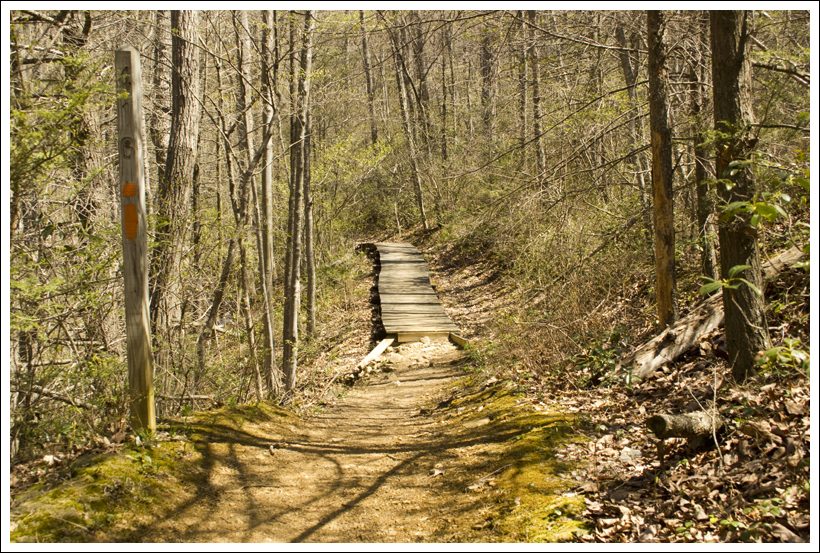
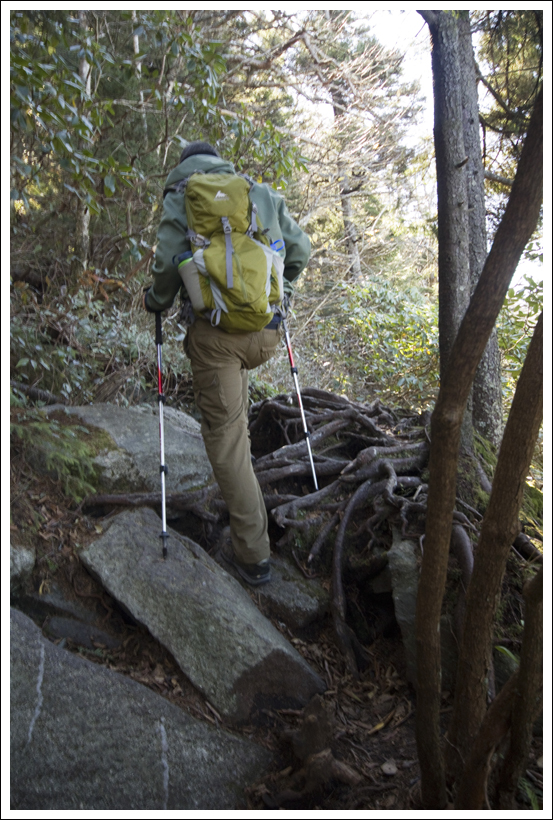
The hike climbs uphill from the parking lot, following the Appalachian Trail, before quickly entering a thick stand of evergreens.  This small patch of forest is one of the only spots on the hike that does not have a 360 degree panoramic view.  Once you clear these trees, the remainder of the hike is a spectacular, mile-high stroll along one of the most beautiful view trails I’ve ever seen.  Photos don’t come close to capturing how breathtaking views are along this stretch of trail.  If I’ve ever been any place that inspired me to have a Julie Andrew’s moment (you know… the opening scenes of the Sound of Music where she’s twirling around singing ‘The Hills are Alive’) – this was the place.  Of course, I didn’t actually do that, because truth be told, I don’t like musicals.  But, I kind of understand the urge to burst into song when I see someplace this beautiful!

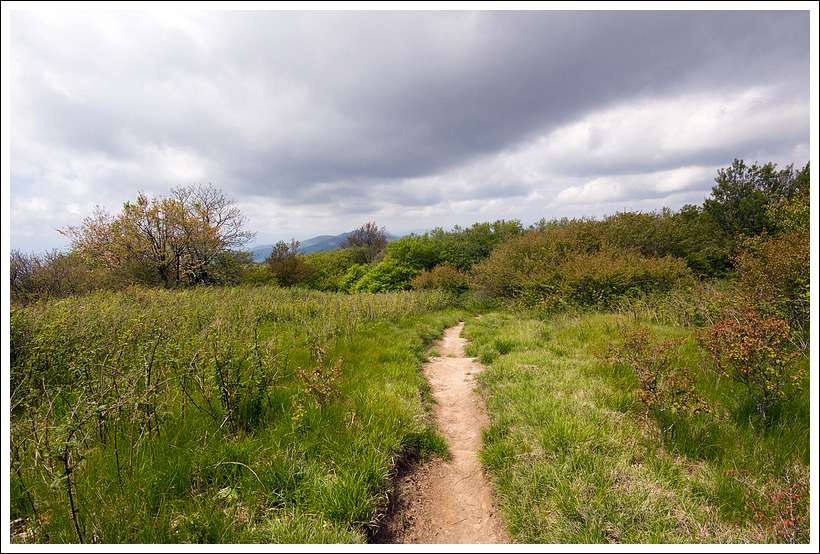
The first bald you come to is Round Bald at 5,826 feet.  The views were wonderful, and I loved seeing the Appalachian Trail winding like a ribbon across the balds in the distance.  From Round Bald, we descended into a small gap before climbing right back up to the summit of Jane Bald at 5,807 feet.

On Jane Bald I recognized a spot that had recently been featured in a photograph in Backpacker magazine.  I took my own, less exciting version of the shot.  Why less exciting, you ask?  Well, in addition to being famous for balds and view, Roan Mountain is also famous for its dramatic Catawba Rhododendron bloom.  The mountain is home to the world’s largest natural rhododendron garden.  Roan Mountain State Park even holds a festival every June to celebrate the peak color.  Many of the most memorable photos of Roan Mountain include the famous rhododendrons, including the one I had spotted in the magazine.  Our hike took place a couple weeks before the bloom began, so while we missed the color, we benefited from lower traffic on the trail.  I’ve heard Roan Mountain is crawling with crowds at bloom time!

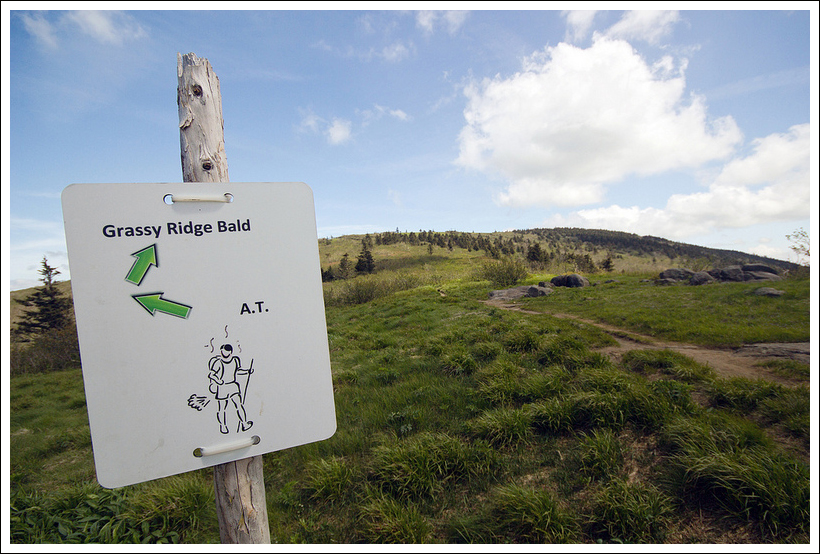
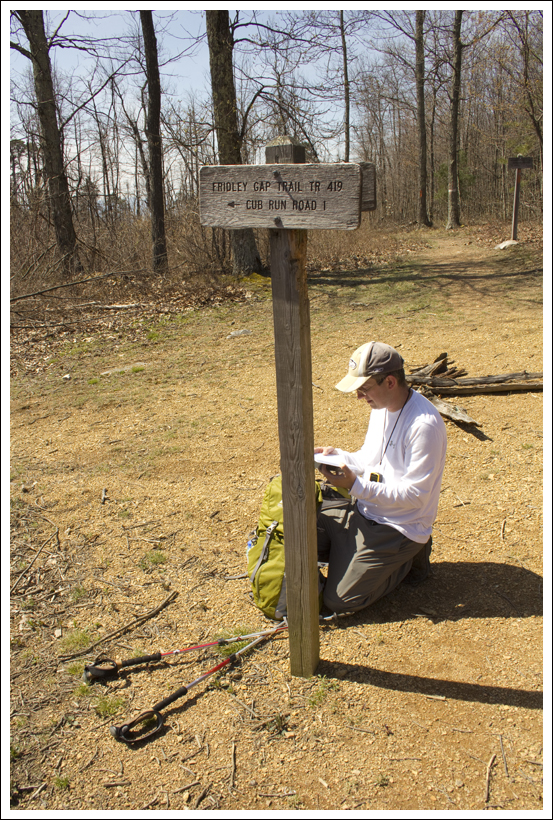
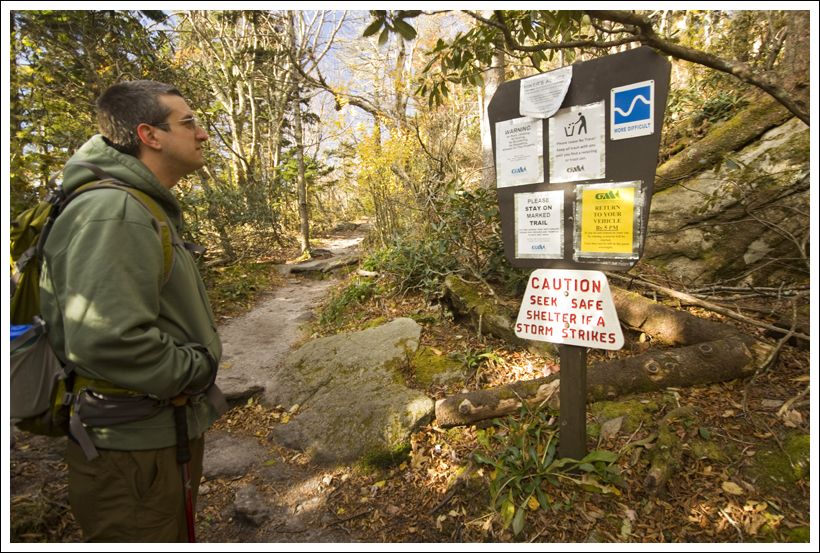
After enjoying the views from Jane Bald, we descended again to a split in the trail.  To the left, the Appalachian Trail continues, to the right a park trail continues to the third, and highest/largest of the three balds – Grassy Ridge Bald.  There was a funny, hand-drawn illustration of a thru-hiker on the trail junction sign.  I wonder if it was drawn by a thru-hiker or someone who was simply familiar with standard thru-hiker smells.

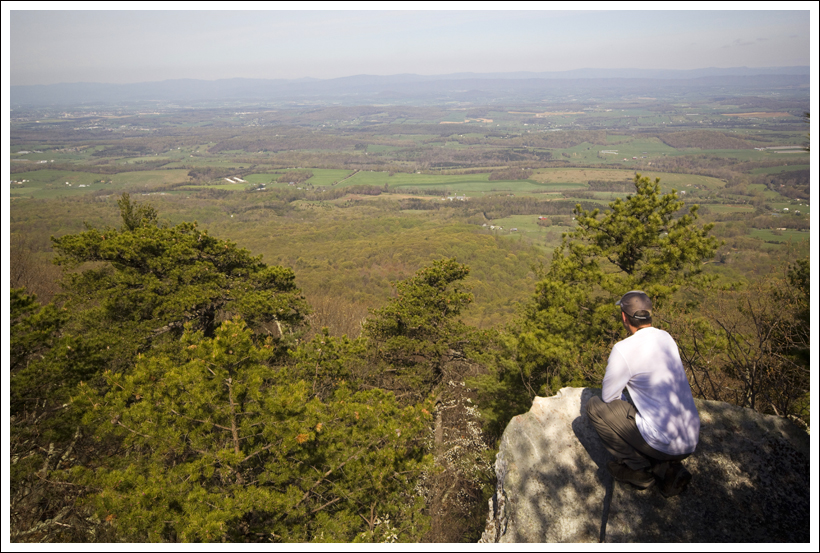
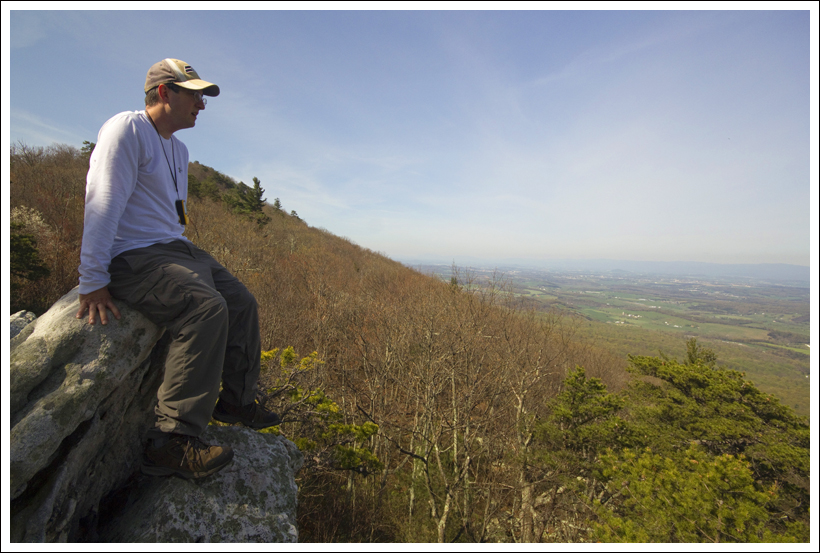
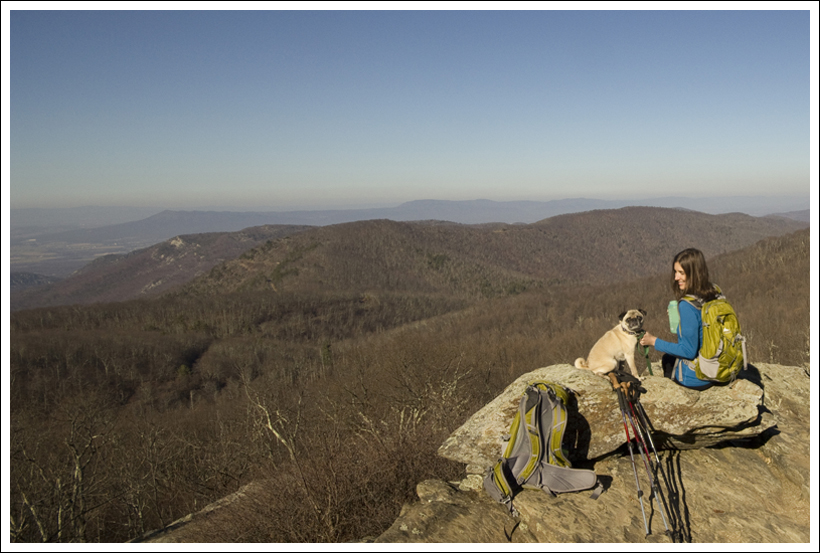
The climb to Grassy Ridge Bald (6,189 feet) is the only significant ascent on the hike.  An elevation gain of about 500 feet leads you a large grassy bald dotted with rocks. Adam did some hunting for geocaches, while I found the perfect rock perch for eating cookies.  I still had a pack of Oreos that had been part of my LeConte bagged lunch.  They were a nice treat to enjoy in such a beautiful place!

We spent a lot of time on Grassy Ridge enjoying the views and chatting with a local teacher we met at the summit.  He shared tales of running whitewater in the Smokies and hiking Half Dome in Yosemite.  He also told us a bit about how the balds are maintained.  Apparently, Roan Mountain uses a combination of mower and goat grazing to keep the balds cleared. I was hoping we’d spot the goats, but we never did.

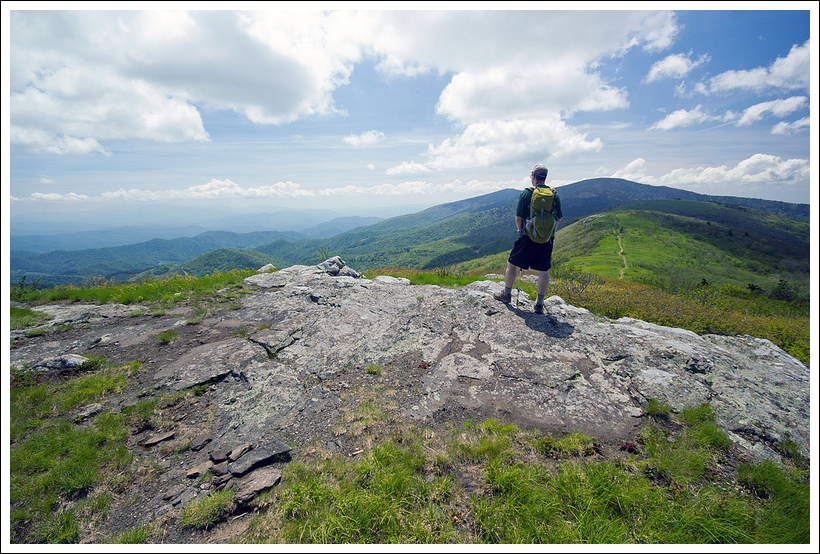
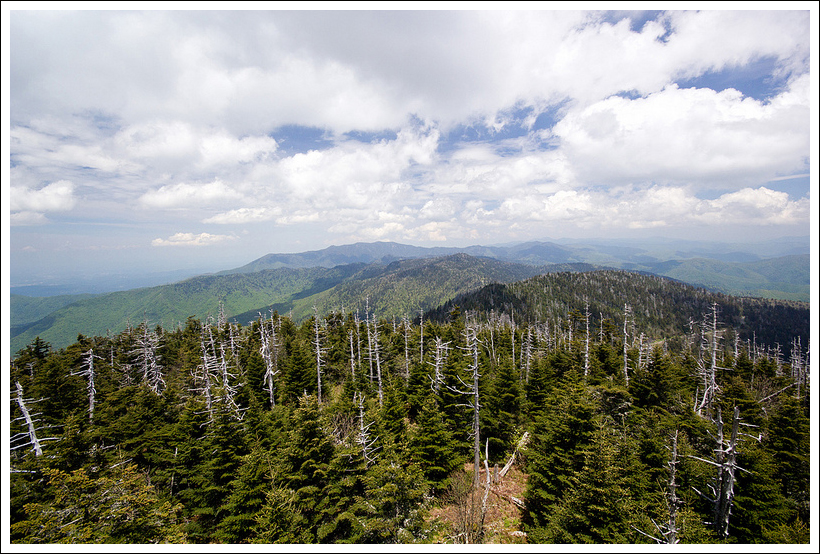
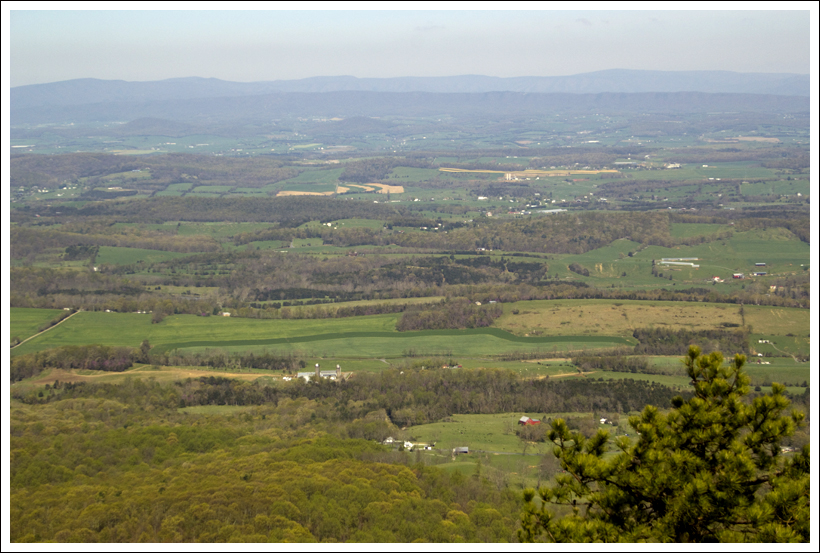
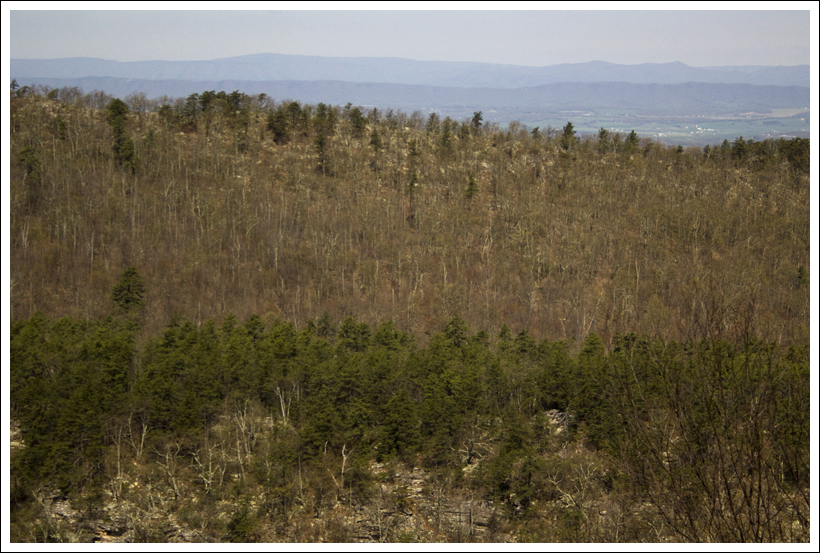
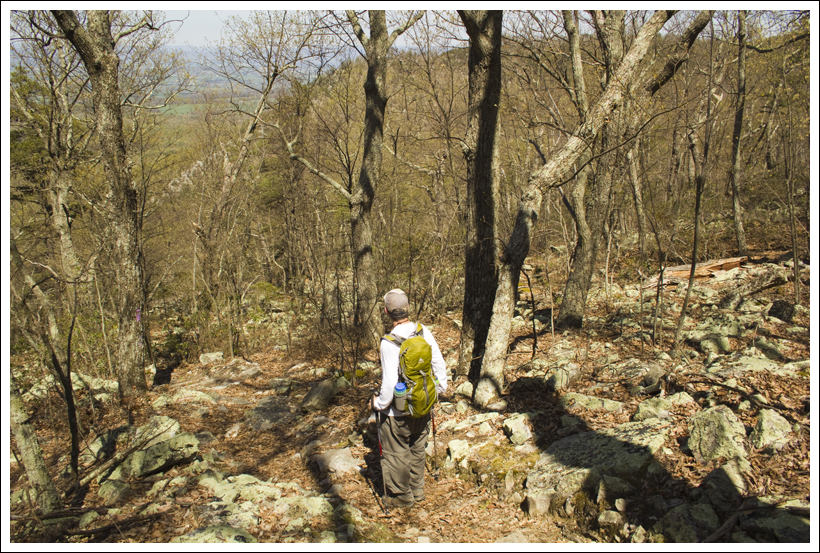
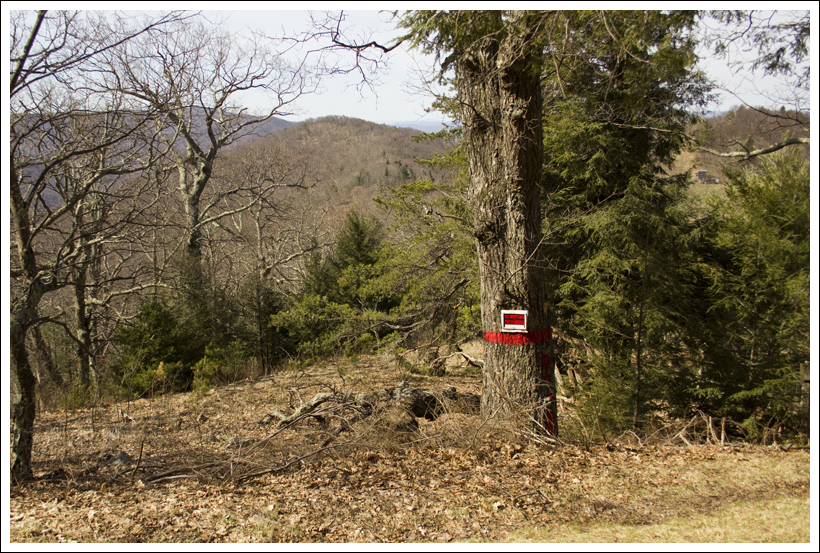
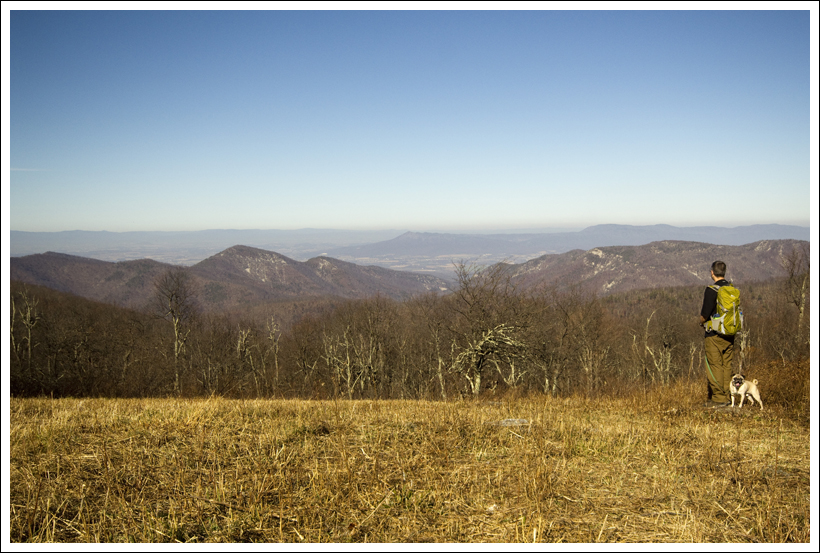
As late afternoon approached, we slowly made our way back down the trail.  The light was so beautiful on the mountains!  I still can’t believe how many ridges and layers of mountains we could see from the trail.  We recognized Mt. Mitchell by its height and Grandfather Mountain by its shape.

The walk back to the car went by way too fast for my liking!  As soon as we were back I told Adam, ‘I want to hike it again!’  And, I’m certain we will – Roan Mountain was far too perfect to visit just once.

Enjoying Grassy Ridge
Grassy ridge offered plenty of rocks to sit on while enjoying the views. Below: Adam checks out the Peake Memorial; Walking along wide, open trail!

Peake Memorial Top of the World

After leaving Roan Mountain, we had a fairly short drive to our lodgings in Pineola, NC.  We decided to stay in the same log cabin at the Pineola Inn that we rented when we visited the Linville area last fall. It’s such a nice, cozy place to stay in that area.

We grabbed some dinner at Nick’s in Banner Elk and then settled in for the evening.  Right after I downloaded my photos from the day, the screen of my laptop went black. As it turned out, the hard drive on my MacBook Pro chose the middle of vacation to call it quits.  Thank goodness I had picked up that extra memory card before starting the Roan Mountain hike!  If I hadn’t, I would have erased memory cards from earlier hikes and ended up losing files for good.   I am so glad that didn’t happen!

Adam Says…

This has been one of my favorite hikes of recent memory.  And that is saying a lot just coming from the Smokies.  As I was waiting for Christine to get started, I was looking up the hillside and knew we were in for an amazing trip.

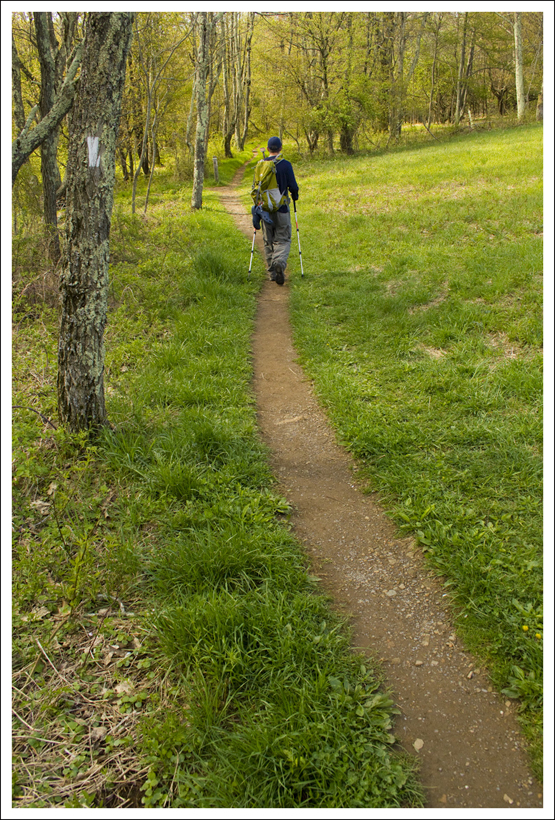
We crossed the road and went through the fence opening to start our hike.  The hike climbs along the Appalachian Trail through an open area and then ducks quickly into a small grove of woods.  Once you emerge out of the dense trees, the hiking is on open ground.  It was just a few minutes along this trail that I proclaimed to Christine that this may be the best views I’ve ever had on a hike.  It took her a little longer to admit the same thing, but soon she agreed.  The views were all around us and in every direction you could see miles of layered mountain ridges.   Since this hike straddles the border between North Carolina and Tennessee, I could see both states wanting to claim this hike for their own.  About .5 miles along the hike, you arrive at the summit of the first bald, Round Bald.  The views were great from here, but we knew we were just getting started.

Hiking Back
The hike back was so pretty… nothing like late afternoon light on mountains! Below: Taking in some final views; Dense rhododendron.

Super Views Rhodies

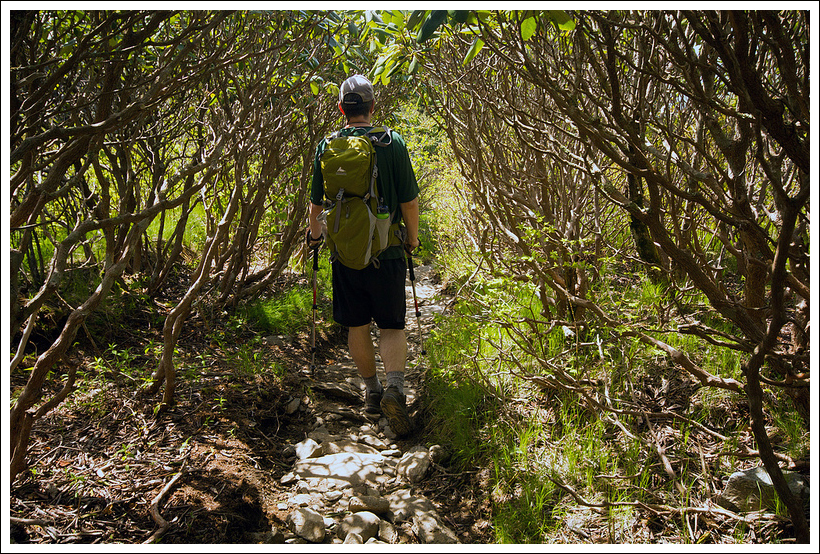
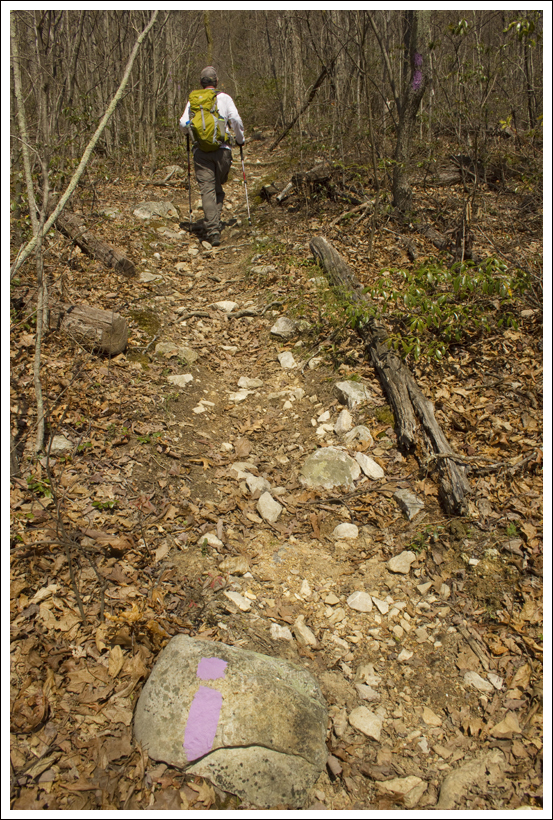
We continued along the trail, which descended through a clear path and ascended again when we reached Jane Bald at 1.3 miles.  The views continued to be amazing from near the summit of Jane Bald.  The trail then continues to climb as you are making your way to Grassy Ridge.  At 1.9 miles, you reach a junction – the left continues the Appalachian Trail, but take the right branch to reach the summit of the Grassy Ridge Bald.  The trail cuts through a thick area of rhododendron before emerging to the larger bald area at 2.5 miles.  At the summit of this bald, you’ll see a large rock that has a bronze plaque dedicated to Cornelius Rex Peake, who was a high-country farmer of this area.  What a nice tribute at such a scenic spot.

This is a place that you will want to spend some time.  The breathtaking views are in every direction and you will want to explore around the balds to take in views from a slightly different angle. Christine’s dad likes to sit and take in views for longer than we do.  We know we would literally need to drag him away from here if he visited or he would stay up here for days.  Head back the way that you came to reach your car in 5.1 miles.

If you enjoy geocaching, there are two that you can find on the trail – Zelda’s Double Blaze Treasure and Roan’s Revenge.  Unfortunately, I wasn’t able to claim either one after hunting a while, but hopefully they are being maintained.

We headed back down because of the time of day and wanted to make it to check into the Pineola Inn.  If you have a chance to visit this area, this is a great place to stay.  I know we are already getting excited about the next time we will come back here.  This is a place that you’ll want to visit more than once.

Trail Notes

  • Distance5.1 miles
    (Check out the stats from MapMyHike)*
  • Elevation Change – About 1150 ft.
  • Difficulty –  2.  The climbing on this hike was relatively gradual and gentle.
  • Trail Conditions – 4.  Very nice – well traveled and smooth.
  • Views – 5+.  Maybe the best views Virginia Trail Guide has ever seen
  • Streams/Waterfalls – 0.  None.
  • Wildlife – 1.  We didn’t really see anything beyond birds.
  • Ease to Navigate – 4.  Good signage at the one trail junction.  Each bald is marked.
  • Solitude – 2.  We saw a fair number of people, but I gather this was a lighter than usual crowd for Roan Mountain.

Directions to trailhead:  From Roan Mountain, TN (located on US-19E), head south on TN-143.  Go for 12.6 miles until you reach the top of the mountain and the parking lot for Carver’s Gap.  You should see a “Welcome to North Carolina” sign nearby.  Park in the lot on the right side of the road.  Cross the road and go through the fence opening to start your hike heading north on the Appalachian Trail.

* MapMyHike is not necessarily accurate, as the GPS signal fades in and out – but it still provides some fun and interesting information.

Silers Bald (NC)

Special: Smokies Edition

Introductory Guide to Visiting Great Smoky Mountains National Park

This ten-mile hike follows the Appalachian Trail along the Tennessee-North Carolina border.  Most of the hike is above a mile high, so in open spots you get some very impressive views of the Smokies.  The bald itself is rather disappointing, as it’s been mostly reclaimed by the forest, but we did enjoy the vistas and visiting two Appalachian Trail shelters.

View the full album of photos from this hike

Views from High
Since much of the hike is along a mile-high ridge, views can be spectacular (when you’re not in the clouds). Below: Adam climbs the foggy path to the Clingmans Dome Observation Tower, The tower looks kind of like a space ship; The Appalachian Trail in the fog.

Walking the Path to Clingmans Dome Clingmans Dome Observation Tower in the Fog Appalachian Trail in the Fog

Christine Says…

This is a hike we planned on doing on our Spring 2012 Smokies trip, but we had so much stormy weather that we didn’t want to risk a long, mostly unprotected hike along mile-high ridgeline. So, we settled for the shorter trip to Andrews Bald. In the end, it actually turned out that Andrews Bald was a larger, more scenic bald than Silers. But, we still found many reasons beyond the slightly disappointing bald to enjoy this hike.

We started pretty early on Tuesday morning, after a lavish breakfast at The Pancake Pantry (Swedish Crepes with lingonberries!!). It was sunny in Gatlinburg, but as we made the drive toward the summit of Clingmans Dome, clouds began to envelop the mountain. At the very top, we were completely socked in. We knew it would burn off over the course of the morning, so we started the climb up the paved road to the observation tower.

From there, we picked up the Appalachian Trail. We followed it, descending downhill, sometimes steeply and sometimes gently. There were some sections of descent that caused Adam and I to look at each other and say ‘This is not going to be a fun climb back up!’

Since we were completely in the fog, we had no idea what views or scenery the trail would have to offer on the return hike. It was almost like doing one hike in the morning, and a completely different hike in the afternoon. I kind of like that!  Also, the fog made the woods extremely beautiful and mysterious.  There’s just something about mist and evergreens!

Red Trillium
Because of the high elevation, a lot of earlier season wildflowers were still blooming. This red trillium was especially pretty! Below: Many different kinds of moss grow abundantly in the high country here; Flowering tree; Wildflowers along the trail.

Moss Flowering Tree Wildflowers

We saw lots of wildflowers, including some spectacular red trillium that Adam spotted. We listened to birds singing in the fog and watched the sky become increasingly brighter.

When we came to the first vista that wasn’t covered by fog, I got out my wide angle lens. Unfortunately, it had been sitting too close to my icy cold CamelBak water bag, so as soon as I got it out, it fogged up so badly I couldn’t take a single photo until it acclimated and dried out.

By the time we got to Double Springs Shelter, larger patches of blue were already opening in the sky. We took some time to read the shelter journal – lots of fun entries.

From Double Springs, the trail seemed to ascend and descend repeatedly. We watched the mileage on our GPS and thought that it was about time that we should be approaching the bald. Honestly, we could have passed it without notice. It wasn’t really much of a bald. It had been described in our guide as ‘a large, mostly grassy bald with a few heathers and berry bushes’. What we found was a small clearing with no grass, covered completely by tall bushes.

Mossy Woods
The forest is so beautiful, dense and ethereal.

We thought ‘This can’t possibly be it!?’ But, it was – as confirmed by GPS data and our imminent arrival at the second shelter – Silers Bald Shelter. We ate lunch at the shelter – Subway and these awesome locally-made trail bars by Granola Naturals (Toffee and Chocolate Granola Crunch Bar – YUM!) that we picked up at the NOC.

Right after lunch, we headed back the way we came. The hike back was tough, hiking ten miles after climbing LeConte the day before was probably not the best plan. But when we’re in the Smokies – we hike ‘til we drop.

Most of the way was hard, but not unbearably tough. However, the last push to Clingmans Dome was about a mile of very steep climbing. My legs were screaming and all I could think was ‘put one foot in front of the other, repeat, repeat, repeat’. The only thing that softened the pain of the climb were the spectacular views! These views made me oooh and ahhh repeatedly. Despite my exhaustion, I kept thinking ‘This is so darn gorgeous – worth every sore muscle and drop of sweat!’

There is nothing like hiking a mile-high ridge that offers views of the Smokies rolling out beneath you.

Inside the Double Springs Shelter
Adam checks out the shelter log at the Double Springs shelter.  Below: Arriving at the shelter; It was interesting to read entries.  Many thru-hikers struggled through deep snow in the Smokies.

Double Springs Log Book

Back at the Clingmans Dome observation tower, we were met by massive crowds. Lots of people had questions and made comments about our trekking poles. An older guy called us ‘show-offs’ – not really sure why, but it was done jokingly. Adam and I really enjoyed seeing our first clear view from the tower. The two previous visits had both been low visibility/cloudy, so this visit was a real treat!

After the hike, we headed back into town for a massive feast on Mellow Mushroom pizza followed by Kilwins Ice Cream and free samples of just about every wine, whiskey and moonshine offered in Gatlinburg. I think the town offers so many free alcohol samples to loosen tourists’ purse-strings. After 14 moonshine samples, who knows – you may just wake up owning a new airbrushed t-shirt that says ‘Sexy and I Know It’ (not that I did that).

Adam Says…

Christine and I had tried to get into good hiking shape for our trip to the Smokies.  We had grand ideas of all we wanted to accomplish – Christine had picked about 120 miles of hiking trails she wanted to do.  Christine did a much better job than I of getting in to shape.  Accomplishing this 10 mile hike after finishing about 11.5 miles of hiking through steep terrain up Mount LeConte the previous day, took a toll on me.  Since this hike is almost all downhill until you reach the bald and the shelter, I was dreading the return trip.

We enjoyed our trip last year to Andrews Bald where we were able to relax at a scenic spot from the bald area.  Silers Bald is not very “bald” at all.  In fact, I would say it doesn’t even show much of a receding hairline.  But, there were some nice views along the trail elsewhere.

Silers Bald
Silers Bald was less impressive than we expected.  Evidently, 100 years ago, balds stretched from Clingman’s Dome all the way over to Gregory Bald (which is hiked from Cades Cove).  The land was used for grazing.  Since becoming a park, nature had filled most of the bald terrain back in.  Below: One of our first views of the day not covered by clouds; As we approached Silers Bald, the forest changed from pines to grass and deciduous trees; Another view of Silers Bald.

First Views Forest Change Another Look at the Bald

As Christine mentioned, we started off the hike in the thick fog.   Visibility was minimal.  We were hoping that the hike would be similar to our first hike up Mount Rogers, where it felt like a different hike on the return trip.  Luckily, the fog lifted to give us this same experience.  It also made us feel that we were continuing to hike to get the best views; otherwise, this hike would have been more of a disappointment if we had the best views early.

We started off by hiking from the Clingman’s Dome parking lot up the steep hill for .5 miles.  The walk on the paved road is short, but very steep.  There is a reason there are benches on the side of the paved trail. – it can be a challenge for those out of shape.  Most of the people that are visiting Clingman’s Dome will just walk up the paved trail and return without venturing further.  Expect to see a ton of people on this part of the trail, but you’ll have a lot of seclusion for the rest of the trail.  After you near the winding tower of Clingman’s Dome, take the trail to the left that begins your hike on the Appalachian Trail.   You’ll stay on the Appalachian Trail throughout your hike.  At .75 miles, the trail opens up into an area filled with views along the trail.  Continue to go downhill (you’ll descend about 1100 feet over a little over the next two miles).  At 2.75 miles, you’ll reach a junction with the Goshen Prong Trail.  Continue to go downhill and at 3.25 miles, you’ll reach the Double Spring Gap Shelter.  The trail goes up and down slightly over this next section and at 3.75 miles, you’ll reach a smaller bald area known as Jenkins Knob.

Hiking Back
By the time we hiked back, skies had cleared and we had better views.  Below: Silers Shelter – our lunch stop; The return hike had some tough climbing.

Silers Shelter Lots of Clumbing

We found Jenkins Knob to be a little more impressive than Silers Bald in terms of views and openness.  The trail continues to mostly go downhill until it finally bottoms out around 4.5 miles.  At this point, the trail begins an uphill climb to Silers Bald.  At 4.7 miles, you pass the junction with the Welch Ridge Trail.  The trail becomes quite steep at this point until you reach the top of Silers Bald.  We found a USGS benchmark on the ground to signify the top of Silers Bald.  The trail begins to descend from the benchmark and opens up to the area that is Silers Bald.  The trail goes through the small bald area and reaches the Silers Bald overnight shelter at 5.1 miles.  Retrace your steps, largely uphill, to make your way back.

Back to Clingmans Dome
The views were much better from the tower on the return leg of our hike. Below: Adam at the end of the hike; Views from the observation tower.

Back at the Tower Views from the Tower

We were dreading the climb back up, especially after hiking up Mount LeConte the day before, but we were rewarded with great views as the fog and clouds lifted.  As we reached the paved trail to Clingman’s Dome, we climbed up to the top of the tower and we really felt like we earned the 360-degree views.  The elevation is 6643 feet (the tower adds another 45 feet) and you can stand at the top of the tower knowing you are at the highest part of the Great Smoky Mountains.  This spot is actually the third highest peak east of the Mississippi, to only be beaten by Mount Mitchell and Mount Craig.  We enjoyed spotting Mount LeConte from the tower, since it is the sixth highest peak east of the Mississippi.  We were ecstatic to see views from Clingman’s Dome, since the last two times we had visited we had clouds hanging on the mountain.  The clouds were still taking up a lot of the skies, but it didn’t prevent us from seeing miles of mountain ranges around us.

Christine mentioned that we enjoyed going back to Gatlinburg, TN and eating some pizza and drinking some free moonshine and whiskey samples.  While we didn’t feel the need to buy cheesy T-shirts, I definitely felt the need to visit the Hollywood Star Cars Museum.  While Christine waited for me, I toured around quickly but the highlight for me was to sit in the Batmobile from the 1966 TV show with Adam West.  I grew up watching re-runs of that show and it was my older brother’s favorite show as a child, so it was great to have something to make him jealous.  You can pay a little extra on the tour to have your photo taken within some of the cars.  I also got to see Ecto-1 from Ghostbusters,  a DeLorean from Back to the Future, KITT from Knight Rider, and the General Lee from the Dukes of Hazzard.  It’s a neat place to check out if you’re into Hollywood cars.

Trail Notes

  • Distance10 miles
    (Check out the stats from MapMyHike)*
  • Elevation Change – About 2200 ft. – it looks like closer to 1500 ft on GPS, but with all the rolling climbs it adds up to quite a bit more!
  • Difficulty – 4. The climbing and descending never seem to end on this hike.
  • Trail Conditions – 4.  This was mostly nice, well-worn Appalachian Trail walking.  The climb to the observation tower in paved.
  • Views – 3.5.  Very nice, but not quite panoramic.
  • Streams/Waterfalls – 0. None on the hike.
  • Wildlife – 2. We saw a lot of fresh bear scat on the hike, but no bears.  Clearly, they frequent the area.
  • Ease to Navigate – 4.  The trail is well-marked with white blazes and signed at each junction.
  • Solitude – 3.  Expect thick crowds at the observation tower, thinning toward Double Spring Shelter.  After Double Spring, we only saw a couple people.

Directions to trailhead:  From US-441, head south a short distance from Newfound Gap.  Take a right on to Clingmans Dome Road.  Go 6.4 miles until you reach the large parking lot area.  The paved trail up to Clingmans Dome starts at the end of the parking lot, passing a visitors center/gift shop.

* MapMyHike is not necessarily accurate, as the GPS signal fades in and out – but it still provides some fun and interesting information.

Alum Cave to Mount LeConte (TN)

Special: Smokies Edition

Introductory Guide to Visiting Great Smoky Mountains National Park

This eleven mile hike of Mount LeConte is beautiful and lots of fun!  The scenery is diverse – streams, views, towering bluffs, an arched rock that you get to climb through, and a visit to the famous LeConte Lodge.

View the full album of photos from this hike

View from LeConte Summit
LeConte provides great vistas from the Cliff Tops viewpoint, located about .2 miles above the lodge. Below: The Walker Camp Prong at the very beginning of the hike; A lot of the hike had views; The famous LeConte llamas.

Pretty Stream Open Views LeConte Llamas

Adam Says…

When we were planning our trip to Great Smoky Mountains National Park, the hike that we were most excited to do was the hike up Mount LeConte.  We hiked this trail last year by taking the Trillium Gap Trail, so it was time to try an alternate route.  Last time we had talked to several people that had taken the Alum Cave trail, so we thought it may be a good option.

The weather was gorgeous this day, but we knew we had a chance for thunderstorms in the afternoon, so we decided to get as early of a start as we could.  When we had hiked up via the Trillium Gap Trail, we didn’t run into a lot of hikers; however, it was evident early on this route was going to be a different story.  While Christine was taking advantage of the facilities near the trailhead, I was getting nervous as I saw large groups of people starting the trail.  We’re fairly fast hikers and I was worried we were going to get stuck in a jam behind families with small kids that would slow us down.  Christine arrived and we got on our way.

We both jumped into the hiking and started hiking at a frenetic pace.  We wanted to get in a spot that was far enough ahead of others where we could stop periodically and snap some photos.  It took us a while to get separated from the larger groups, so we didn’t take as much time to enjoy the scenery in the first mile.  We convinced ourselves that we could have more time to amble along on the return trip.

Waiting to Pass Through Arch Rock
Adam waits his turn to pass through Arch Rock.  Below: Early parts of the hike have gentle elevation gain and lots of roots; Christine crosses a foot bridge; The trail was extremely crowded.

Rooty Trail Christine Crossing Hiking with Crowds

The trailhead starts from the Alum Cave Bluff parking lot on US-441.  At the trailhead, there is a larger map and some trail information guides you can purchase for $ .50.  You will immediately cross a bridge over the Walker Camp Prong stream.  The trail starts off very flat, but you know you’ll have lots of climbing to do later on in the hike.  The first mile of the hike goes along the Alum Cave Creek.  There are several options to jump slightly off the main trail to take in the scenes of the cascading creek.  At 1.4 miles, you will reach a footbridge to cross Styx Branch before you reach the interesting geological feature known as Arch Rock.  Arch Rock is basically a hollowed-out rock tunnel.  You will climb up some steep stairs with a guideline as you go through to the top.  Once you emerge out of the top, you go a little further and then reach another footbridge to cross Styx Branch one more time.

The trail begins to climb more steeply at this point as you make your way to Alum Cave Bluffs.  At 2.4 miles, you start to come across a larger rock outcropping.  As the trail starts to climb around this, you behold the enormous Alum Cave Bluffs.  With the word “cave” being in the title, your initial expectations would be a large cave would be here.  However, the cave bluffs are basically a humongous rock overhang.  It is still jaw-dropping impressive and unlike anything I’ve seen.  The ground underneath is dry and dusty.  We saw a few drops of moisture come over the edge, but the overhang reaches out about 60 feet.  Standing at one end of the outcrop looking at people at the other end, gives you a perspective of how large of an area this is.

Alum Cave Bluffs
The Bluffs are impressive! Below: The beautiful, rugged terrain of the Smokies.

Beautiful, rugged Smokies

From the Alum Cave Bluffs, you will see a sign that shows the direction to continue up Mount LeConte.   The trail climbs steeply for the next .4 miles, passing some views of Little Duck Hawk Ridge.  The trail reaches a peak and then descends into a saddle for another .4 miles.  The trail begins to climb again rather steeply for a good portion of the remainder of the hike as you make your way up the mountain.  Along the way, you will pass by a rock slide, which opens up to some gorgeous views with nothing but layers of mountain ridges to see.  At 3.8 miles, you reach a set of stairs on a switchback to continue your climb.  The trail eventually comes into a steep, rocky climb with cables put in to use as handrails (since this trail gets very icy with little sun in the winter).

The trail finally starts to level off at mile 4.75 as you enter into a tunnel of fraser fir trees.  Continue on a short distance and then you’ll reach a junction with the Rainbow Falls Trail.  Continue a few hundred feet and you’ll reach the LeConte lodge.

Getting a spot at the LeConte Lodge is competitive and highly coveted by Smokies visitors.  Reservations are made by lottery and typically start booking in early October for the following year, so it takes some planning and a little luck to be able to stay in one of these spots on top of the mountain.  We were lucky enough to get a spot here last year and we hope that we’ll do it again in the future.

Great Views
The Alum Cave Bluffs trail had lots of nice views along the way. Below: Some slick, rocky areas along the trail had cables to provide assistance with staying upright; Parts of the trail were quite narrow; The last stretch toward the lodge is flat and passes through evergreens.

Cable Assist Narrow Trail Nearing the Summit

From the cabin area, we wanted to get some nice views and headed up the main path until we reached a junction.  Hang to the right to go to the Cliff Top trail. This trail is rocky and quite steep.  The sign says that it is .2 miles to the top, but it feels longer than that.  However, when you get to the Cliff Top area, you will have great views for miles on a clear day.  After taking in the views, we grabbed a sack lunch from the dining room to refuel for our trip back down.  We talked with some fellow hikers at the top and relaxed for a while.  After staying up there a previous year, it was hard to motivate ourselves to head back down.

On our way back down, the trip went by fairly quickly since everything was downhill.  It’s always interesting when you see people hiking uphill that look like they are in complete misery.  We spotted one woman, who was staring daggers at her husband (who I’m guessing convinced her to go hiking).  Her daughter was hanging back with her and said, “I love you, mom”.  The mother’s response was, “That’s nice”.  She was definitely not having a good time hiking.  We imagined how the father was going to get an earful for the rest of day.

If you are interested in geocaching, there are not a lot that are available in Great Smoky Mountains National Park since the national park prevents physical caches from being placed.  However, there is a virtual cache on the trail to find – Alum Cave Bluff.

Christine Says…

Monday morning dawned in spectacular fashion. It was cool, sunny and crystal clear. Even the typical haze that makes the Smokies seem smoky was absent. That was such a treat, because clear air really lets you appreciate the magnificent, green, lushness of the mountains in this area.

We kicked off our morning with breakfast at Mountain Perks – a little café and espresso bar across from the train depot in Bryson City. The owners, Jeff and Pam Pulley are so friendly and are ready to serve local tips alongside their tasty breakfast and even better coffee. I left there with a pound of their ‘Black Widow’ roast coffee to enjoy at home after the trip.

Fully fed and caffeinated, we made our way into the park. On the way to the Alum Cave Bluff trailhead, we spotted a couple elk grazing in a pasture just north of the Occonaluftee visitor center. What a treat!

Llama
We were happily surprised to find the llamas still at camp! Below: Adam arrives at LeConte lodge; The obligatory pose with the elevation sign; We purchased bag lunches from the lodge for $10.00. Lunch came with bottomless lemonade -of which we took full advantage.

Arriving Obligatory Pose Bag Lunch

We got to the Alum Cave Bluff parking area around 9:30, and found that it was already 100% full. We had to park a ways up the road on a pullout. We geared up, and hit the trail – along with dozens and dozens and dozens of other people. I’ve rarely hiked with so many people on the trail at the same time – even on Old Rag. I’ll admit, it made me a little stressed. As you might have guessed, I stop frequently to take photos along the way. Also, Adam and I are relatively fast hikers. So, when I stop to take photos, we end up leap-frogging the same people over and over again. That’s not a problem when there are only a few groups on a trail, but coming up on the heels of large multi-generational families time after time makes me feel bad. It’s easy to pass a couple, it’s more disruptive to squeeze past ten people, six of them kids under the age of ten. I probably didn’t take as many photos early in the hike as usual so that I could avoid being disruptive.

The first couple miles of the hike were relatively easy, following a stream and climbing very gently through the moss covered forest. The terrain changed when we reached Arch Rock. After crossing a log footbridge, stone steps led uphill steeply through an arch of stone. Very cool!

After the arch, the trail began to climb more steeply. In several places, wire was affixed to the rocky side of the trail to help you keep your footing over narrow, slick areas. We climbed uphill for about .7 of a mile before reaching the famous Alum Cave Bluff. Along the way, the trail alternated between rocky and forested. There was even one nice view on a rocky, sand myrtle-covered turn in the trail.

WOW! I had seen photos of the Bluffs, but they were even more impressive in person. The rock wall soared and arched overhead, forming an immense overhang. The terrain beneath the arch was dry and silty. It was tough to walk on and I imagine this area is tough to traverse when it’s wet and rainy.

Cliff Tops View
The nice view from Cliff Tops.  Below:  Time to leave the lodge; Adam walks along the trunk of a fallen giant; The steep and rocky descent.

Leaving the Lodge Huge Fallen Tree  Steep Going Down

I think a good number of people stop at the Bluff and then return to the parking area, so the trail traffic was much lighter after passing that area. We pressed on toward the summit of LeConte.

After the Bluff, the climbing is serious and steady. There are also a number of great views along the way. The Smokies really take my breath away. I kept thinking about how lucky and blessed I am to visit such places and have the physical capability to enjoy the tough climbs.

Eventually the trail turned a corner and leveled out and passed arrow-straight through an evergreen forest. The trail bed looked almost like cobblestones – white, round, smooth rocks. From that point, we had an easy .75 mile walk until we arrived at LeConte lodge.

At LeConte, we did all the obligatory things – took our photo in front of the dining hall with the elevation marker/date, said hello to the llamas, visited the office to get our exclusive summit-shop-only 2013 shirts, sat on rocking chairs, drank copious amounts of LeConte lemonade with our bagged lunches and made the .2 mile climb to enjoy the view from Cliff Tops.

Being at the top on a nice day was such a different experience than our 2012 visit in the rain! However, as the afternoon wore on, we noticed that some darker clouds were starting to build in the sky. We headed back down after about an hour at the summit.

The hike down went very quickly – all downhill! It’s amazing how much faster you can descend 2700 feet than you can climb it! We saw several cute red squirrels that took the time to chatter loudly at us. We scared a grouse from it’s resting spot – and the grouse scared us equally back! They really explode out of the brush when they startle!

Adam at the Bluffs
Adam rests at Alum Cave Bluffs. Below: Climbing back down through Arch Rock. Notice the tiny people waiting at the bottom; Painted trillium; This pretty stream follows the beginning and end of the hike.

Climbing Down Through the Arch Painted Trillium Pretty Stream

We enjoyed passing back under Arch Rock and taking some time to enjoy the beautiful stream beside the trail. We were back at the car before 3:00, tired but really happy with our day.

That evening for dinner, we rewarded ourselves with a feast at the Smoky Mountain Brewery. I got the Brewery Ale Steak, which might be one of the tastiest steaks I’ve ever eaten. I also really liked their Tuckaleechee Porter.

Trail Notes

  • Distance11 miles + a little extra for walking around the lodge grounds and up to the Cliff Tops Viewpoint
    (Check out the stats from MapMyHike)*
  • Elevation Change – About 2650 ft.
  • Difficulty –  4.  The hike up Mount LeConte is a steady uphill.
  • Trail Conditions – 4.  The trail is well-used and maintained, so we didn’t find much difficulty.  During heavy times of rain or ice, parts of the rocky areas could be incredibly slick.
  • Views – 4. The best views are along the hike up to Mount LeConte and at the Cliff Top overlook.
  • Streams/Waterfalls – 3.  Early in the hike, you do get some nice views of Alum Cave Creek and Styx Branch.
  • Wildlife – 2.  We did see some cute red squirrels, but last year people had seen a bear.  There were some nice spots for birdwatching though.
  • Ease to Navigate – 4.  There are not many places to get steered wrong based on signage and the trail was always clear.
  • Solitude – 0.  On a nice day, expect heavy crowds on the way up to Alum Cave Bluffs.  After that point, there should be fewer people on the way up Mount LeConte; however, this is definitely the most popular way up Mount LeConte.

Directions to trailhead:  From Gatlinburg, TN take US 441-S into Great Smoky Mountains National Park.  Go 11 miles.  Parking is available in a large lot on the left or alongside the road.  The trailhead starts near an opening on the southern side of the parking lot.

* MapMyHike is not necessarily accurate, as the GPS signal fades in and out – but it still provides some fun and interesting information.

Laurel Prong – Mill Prong Loop

This 7.3 mile loop has a bit of everything – views, waterfalls, history!  The route takes you over Hazeltop Mountain, along several streams and past President Hoover’s Rapidan Camp.

View the full album of photos from this hike
View a short video clip of Adam crossing the stream below Big Rock Falls

The Rapidan River
Camp Hoover sits where the Laurel Prong and Mill Prong spill together, forming the Rapidan River. Below:  Trillium was blooming everywhere when we hiked; The route had many stream crossings; Adam enjoys the view from Hazeltop.

Trillium Everywhere One of Many Stream Crossings Adam on Hazeltop

Christine Says…

We love hiking in this part of Shenandoah!  It’s the area we typically choose when we have out-of-town friends who want to visit Shenandoah National Park.  It’s also a likely choice when we’re hitting the trail with hiking newbies.  Why?  Well… we think it’s pretty much perfect.  The climbing isn’t difficult, so it helps convince non-hikers that hiking isn’t just torturous uphill climbing.  This area is great for spotting wildlife. (In his portion of the post, Adam will tell you more about the exciting wildlife experience he shared with his office.)  It’s also scenic, with lovely streams and a waterfall along the route.  There is even a significant piece of American history sitting in the middle of the forest – the Rapidan Camp, which served as Herbert Hoover’s presidential retreat.

Our normal route in the area is a relatively easy 4 mile out-and-back to ‘Camp Hoover’.  For this post, we decided to go the long way and make a 7.3 mile loop incorporating the Appalachian Trail, the Laurel Prong Trail and the Mill Prong Trail.   This longer route added a nice view, many stream crossings and a bit more elevation gain.

Apple Blossoms
Lots of trees were blooming in the park! Below: Adam walks along the Appalachian Trail.  Adam was like a wind sock on Hazeltop.

Adam on the AT Windy on Hazeltop

We parked at Milam Gap.  The hike started across Skyline Drive on the AT, headed southbound.  Almost immediately, the trail began a long, gentle ascent to the summit of Hazeltop Mountain.  The AT is so well-worn into the mountain that the path looked like a ribbon of dirt through the bright green of spring grass.  On this particular May morning, the trail was abundantly lined with my favorite wildflower – Trillium.  They were everywhere with big showy flowers in pink and white.  We also saw (and heard) many birds.  The prettiest songs came from the eastern towhees.  This type of towhee has striking orange, white and black markings, which makes them easy to spot.

After almost two miles of climbing, we reached the high point of the hike on Hazeltop Mountain.  There was one nice place to take in the view.  It was really windy on the rocky outcropping, but I enjoyed looking out over the spring-green valley. From the viewpoint, we hiked downhill for almost half a mile to reach the junction of the AT and the Laurel Prong Trail.

Views from the Laurel Prong
There are obstructed views from the Laurel Prong Trail. Below: Eastern Towhee; Huge boulders and rocks along the Laurel Prong Trail; A neat tree near the junction of the Cat Knob trail.

Eastern Towhee Rocks on Laurel Prong Neat Tree Near Cat Knob Junction

The Laurel Prong trail descends all the way to Camp Hoover.  Along the way, you’ll get some obstructed views from the trail, especially when trees are without their leaves.  There are lots of rocks and boulders lining the path, especially right at the beginning.  The lower parts of the Laurel Prong trail pass through a mix of open forest and mountain laurel thickets.  As you approach the low point of the hike, you should begin to hear the sounds of water.  Most of the time, streams along this trail will be shallow to non-existent.  When we hiked, it was after several days of heavy rain.   Single-step crossings became multi-rock hops and in many places the trail was under several inches of rain.  It was fun to cross so much water!

At around the 5.25 mile mark, we reached Camp Hoover.  It was a great spot to eat lunch, soak in the sunshine and enjoy the sound of rushing water.  The camp is built at the headwaters of the Rapidan River, making it an ideal fishing spot.  Most of the buildings that made up the camp have been lost to the ravages of time, but several cabins, including the president’s personal residence, have been renovated and preserved and are now open to the public (check park schedules for tour opportunities!).

While Adam napped in the sun, I went and did battle with my new carbon fiber tripod.  It’s really light and stable, but it’s like an engineering puzzle to get it initially set up!  I may have threatened to throw the tripod into the river.  I guess I should look at this hike as the tripod’s dress rehearsal. It can prove its true worth on another hike.  Besides, it really wasn’t a good day for taking photos of moving water (too sunny), but I think I was able to capture the impressive flow we witnessed on this day.  I’ve never seen the streams around Camp Hoover flowing so powerfully!  There were rapids and small waterfalls in places I’ve never seen them before.  It was beautiful!

Laurel Prong
The Laurel Prong joins with the Mill Prong to form the Rapidan River just a few hundred feet from this spot. Below: Adam cross the stream again; The Brown House has a great back porch; Another streamside view of the Brown House.

One of Many Stream Crossings The Brown House Streamside

After leaving Camp Hoover, we walked the trail along the Mill Prong.  There is one spot where the trail crosses the stream (right below Big Rock Falls).  We probably could have rock-hopped if we were careful, but both Adam and I decided to take off our boots and put on our Crocs to wade across the stream.  The water came over my knees, which is really high for this spot.

After crossing, we took a few minutes to enjoy Big Rock Falls and then made our way back toward Milam Gap.  For much of the way, the trail stayed close to the stream.  We had several more stream crossings to complete, but none that required a shoe swap.  The last couple miles of the hike went quickly, and we were back at the car by early afternoon.

We were surprised by how few people we ran into on the hike.  I would have expected big crowds on a perfect, sunny Mother’s Day, but we really only saw a handful of people – a few backpackers making a short overnight of the loop and a pair of birders at the camp.  I suppose we saw a few more people as we hiked back up the Mill Prong trail, but overall the crowds were light.

If I were to recommend a version of this hike – the 4 mile out and back or the 7.3 mile loop, I think I’d probably stick with the shorter version.  The longer version is nice, and great if you’re looking to pick up some mileage, but there’s really not a lot to see on the Laurel Prong and it can sometimes be really muddy.  The main reasons to hike in this area are Camp Hoover and beautiful stream scenery; and you get both of those on the shorter out-and-back.

Adam Says…

The hike down to the Rapidan Camp is always one of our favorites in Shenandoah National Park.  We have taken several groups of people down to this area.  When I talk to people about Shenandoah National Park, they have no idea that a Presidential retreat was once here and how this helped to establish a national park in Virginia.  This route adds a view to the hike for an extra bonus.

Big Rock Falls
Big Rock Falls was as big as we’ve ever seen it! Below: Adam crosses the stream right below Big Rock Falls; Lots of water in these little streams.

Crossing Mill Prong High Stream Flow

We’ve seen that on Hiking Upward and in our Hiking Shenandoah National Park Falcon Guide the hike was done in the reverse direction that we did the hike.  But, our way has less of a continuous elevation climb and it puts Camp Hoover in the last third of the route (save the best for last!).  We started off from the Milam Gap parking area and crossed Skyline Drive near the southern entrance to the lot to start on the Appalachian Trail.  Heading southbound on the white-blazed AT, we quickly came across the junction with the Mill Prong Trail.  This is your return route, so continue to go straight.  The trail gradually climbs up a total of 450 feet.  You reach a nice viewpoint to the right of the trail around 1.8 miles before you reach the Hazeltop summit in 1.9 miles.

The trail then begins to descend and at 2.6 miles, you reach the junction with the Laurel Prong Trail on the left.  Take this blue-blazed trail which continues to descend.  At the 3.6 mile, you will pass a junction with the Cat Knob Trail but stay on the Laurel Prong Trail.  At 4.9 miles, you reach another junction with the Fork Mountain Trail, but again stay on the Laurel Prong Trail.  The trail changes to yellow-blazed at this point, since it is now accessible to horses.  At 5.3 miles, you will pass by a fire road on the left and then come up to a side trail for Five Tents.  The Five Tents location was where some of the staff would stay at the Rapidan Camp, but there is no longer a building there.  Christine took this route, but I stayed straight and we met up shortly at the Rapidan Camp, entering near the Prime Minister’s Cabin.

Upon leaving the Brown House at Rapidan Camp, we caught the trail heading past the Creel Cabin.  Crossing the fire road, we picked up the yellow-blazed Mill Prong Trail which gradually ascends most of the way.  At 5.5 miles, you will cross Mill Prong (which may require you to wade across the water after heavy rainfall) and reach Big Rock Falls on the other side.   At 5.9 miles, you reach a junction with the Mill Prong Horse Trail.  Continue straight instead of taking this trail, but the blazes change to blue as it is no longer a horse trail.  The trail crosses Mill Prong again and then you will have a gradual climb back up.  At 7.3 miles, you reach the Appalachian Trail junction again.  Take a right and in a short distance you’ll reach the parking lot.

Abundant Trillium
Pretty pink trillium Below: Wild geranium (I think?); Ragwort; Adam finishes out the loop.

Wildflowers Ragwort End of the Loop

Last year, I brought a few of my co-workers down to the Rapidan camp for a team-building retreat.  I felt that if it was good enough for the President, it should be good enough for us.  When we arrived, a volunteer who stayed at the Creel Cabin, gave us a tour of the Brown House, where President Hoover stayed.  We learned a lot about Hoover, the problems he faced during his presidency, and his relationship to Franklin D. Roosevelt.  After the tour, we did some team-building and communication exercises to learn more about how to work best with each other.  While we were in the middle of making some breakthroughs, a small snake fell down off the roof just a few feet from where we were working.  One of my co-workers, who is not a hiker by any definition, jumped out of her seat and was constantly looking around for other animals.  After we made our way back up, we were talking along the way.  I heard some people say, “Adam, look out”.  I nearly walked right into a mama bear with three cubs.  The family of bears quickly took off up the hill.  I had told my co-workers that I’m usually pretty good at finding bears and we may see some.  They were thrilled to see the cubs, as a few of them had never seen a bear cub before.

Along with the possibilities of seeing bears, you can usually find this trail to be an excellent trail for birding.  The Laurel Prong and Mill Prong trails were filled with beautiful songs as we hiked along.  A couple that was hiking near us also recognized the song of a blackburnian warbler.

If you’re up for a longer hike to the Rapidan Camp, I would suggest this route.  The views from near Hazeltop summit were expansive, you get to see a nice waterfall, hear the songs of birds, and learn about the history of one of our Presidents and how it helped create a national park in Virginia.  This hike does have it all!

Trail Notes

  • Distance – 7.5 miles
    (Check out the stats from MapMyHike)*
  • Elevation Change –  1330 ft
  • Difficulty – 3.  This hike is not steep or difficult, but some hiking novices might find the 7+ mile distance a little challenging.
  • Trail Conditions – 4.  The trails were in great shape, despite being underwater in several place.  We didn’t see any blowdowns or sloppy areas.
  • Waterfalls/streams – 4.  Big Rock Falls, the Rapidan River, Mill Prong and Laurel Prong are all lovely and offer lots of water scenery along this hike!
  • Wildlife – 4. We didn’t see much on this particular day beyond birds, but we’ve seen lots of deer and bears on past trips.
  • Ease to Navigate – 4.  Trail directions are clearly marked at junctions with cement markers.
  • Solitude – 2. This is a popular hike, both as a day trip and a short overnight loop.

Directions to trailhead:

The hike starts at mile marker 53 on Skyline Drive.  Park in the Milam Gap lot, then cross the drive.  The trail picks up on the other side of the crosswalk.

* MapMyHike is not necessarily accurate, as the GPS signal fades in and out – but it still provides some fun and interesting information.

Table Rock (WV)

The drive to the trailhead is probably tougher than the actual hike, but this 2.4 mile out-and-back in the Canaan Backcountry has spectacular views and is well worth the bumpy ride to get to the trail’s start!

Christine on Table Rock
Table Rock has great views of the valley. Below: When the weather has been wet, there are several muddy sections to cross (it was quite dry when we visited); Later this summer, the rocks will be covered with blueberries.

Muddy Crossing Blueberry Blooms

Adam Says…

This hike was definitely one of those pleasant surprises you find once in a while.  We have been going to Canaan Valley for years (my wife has been going since she was a kid) and we never knew about this great place for hiking that was just a short distance from where we always stay.  I’ve driven by the Canaan Loop Road and thought to myself, “I wonder where that road goes.”  If I had known earlier that it led to this area of hiking, we would have tried this out a long time ago.

We had picked up the Day & Overnight Hikes: West Virginia’s Monongahela National Forest book a couple of years ago and have done a few of the hikes before.  This one led us right to the Canaan Loop Road for this great out-and-back hike.  When we started on the road, we passed by a few houses on the gravel, pothole-laden road and then quickly came upon a school bus parked in the middle of the road, blocking any traffic.  I thought this was odd (and possibly a little like the start to a horror movie), but I didn’t see anyone inside.  I walked up and saw a man about halfway down the bus that was straightening some things up.  I asked if he was moving and he darted up front, started the bus, and gunned it down the road.  We followed the bus for a while, but it was quickly leaving us in the dust kicked up from the gravel road.  After a few miles, we came upon the bus again as it was parking for a scouting group that looked like they were packing up after a large picnic.  We continued past the group on a very bumpy and narrow road that has some precarious edges that you just pray that another car doesn’t come the other way.  We only came across one other vehicle on the road, but I would warn you to be cautious as you make your way along the road and drive slowly.

Thick Rhododendron
The rhododendron along this trail was thick and jungle-like. There were lots of buds, so it should be a pretty bloom this year! Below: Trails are not typically well-marked in the Canaan backcountry; Adam walks through open forest; Crossing another muddy section.

Trailhead Sign Open Forest Mucky

After driving for exactly 10 miles on the Canaan Loop Road, we came to the parking area to the left for Table Rock.  We started down the trail.  The trail is technically blue-blazed, but you will likely only see a few of these blazes on the trees.  The trail is fairly obvious, but I can imagine after the leaves first fall, it could be a little tough to find your way.  The trail starts almost in a jungle of rhododendron, but that quickly opens up to an open forest of larger beech, maple, and birch trees.  The trail stays relatively flat the entire way and there are a few areas of mucky ground or pools.  Rocks and logs have been placed over in some of these to help you traverse, but in some areas after a good rain, you will likely need to get your shoes wet.  After about 1.1 miles, you come across a campsite.  Just ahead is Table Rock.

The outcropping has phenomenal views.  The rocks have crevasses that can be quite deep, so watch where you are stepping and be careful around the edges since there are huge drops below.  Since this place isn’t visited often except by locals, this will be a great off-the-beaten path hike that you can likely enjoy the views all by yourself.  The spruce-covered mountain across the gorge is Green Mountain.   Since this trail is flat, almost anyone could enjoy this hike.

It was quite breezy at the top and I had to hold my hat a few times as the wind picked up.  You can tell that this area does get a lot of wind that funnels quickly through the gorge.  We look forward to coming back to this area sometime soon and visit some of the other trails that crisscross around the Canaan Loop Road.

Christine Says…

Normally when we visit the Canaan Valley area, it’s all about hiking and nature and waterfalls!  This visit was all about… cleaning.  Adam and I agreed to take care of the annual spring cleaning of my parents’ rental property in the area.  In the three days we were there, we scrubbed, scoured, swept and probably did more than 20 loads of laundry.  It wasn’t a fun trip, but we did manage to get out for one short, nearby hike.

I have no idea how the trails off the Canaan Loop Road escaped our notice.  I guess when you’re close to Dolly Sods, Seneca Rocks, and Spruce Knob, other trails fall a bit by the wayside.  But, I’m really glad we took the time to drive the ten bumpy miles to this trailhead.

Greening Up
I love watching green creep up the mountainsides each spring. Below: Lovely trillium, A couple views of Table Rock.

Trillium Table Rock Table Rock

The hike to Table Rock was short, but had a spectacular payoff in terms of views and solitude.  The path led through gorgeous forest, alternating between dense stands of rhododendron and open, mossy forest.  The whole route is flat and easy, so in about 20-30 minutes, you’re already at the overlook.  The rocky shelf stands over a magnificent, undeveloped valley.  When we visited in mid-spring, the emergence of leaves created the effect of green creeping up the mountainsides.  So beautiful!  There were tons of blooming blueberry bushes in the area, too. It would be nice to visit in August and pick berries!

I also enjoyed the Painted Trillium along the trail.  Most of the trillium I see along the trails in Shenandoah is plain white or pink, so seeing a different variety was a nice change of pace.  We were there a little too early to see the rhododendron bloom, but most of the plants were abundant with buds.  It should be really pretty when they finally open!

Trail Notes

  • Distance – 2.4 miles
    (Check out the stats from MapMyHike)*
  • Elevation Change –  195 ft
  • Difficulty – 1. This trail is very flat, so just about anyone could enjoy it.
  • Trail Conditions – 3.5.  The trail isn’t that well-used, but it was still a worn path.  You may have to do a little rock-hopping to make it across some of the larger puddles.
  • Views4. Breathtaking views are clear from this point.  We enjoy not being able to see houses from great viewpoints and you shouldn’t see many signs of civilization from this outcropping.
  • Waterfalls/streams – 0. Non-existent.
  • Wildlife – 2. Other than a few birds, we didn’t see anything on the trail. 
  • Ease to Navigate – 3. There is only one trail on this hike, so there shouldn’t be any confusion.  The only reason to downgrade this is because it is not blazed often at all and in the fall it could be a little challenging to follow the path.
  • Solitude – 5.  We didn’t see anyone on a beautiful weekend day in the afternoon. 

Directions to trailhead:

From Davis, WV, head south on WV 32.  In 3.2 miles, turn right on to Canaan Loop Road (Forest Service Road 13).  Follow the road for exactly 10 miles.  The parking area is on the left and there is a wooden sign that shows the beginning of the trailhead.

* MapMyHike is not necessarily accurate, as the GPS signal fades in and out – but it still provides some fun and interesting information.

Fridley Gap Loop

This six-mile loop hike in the Fridley Gap area of George Washington National Forest has everything – views, waterfalls, beautiful stream scenery, rugged climbing and great backcountry camping.  It’s a perfect hike to get away from the crowds in Shenandoah National Park.

View the full album of photos from this hike

Adam at the Overlook
If you miss spotting the faint side trail behind one of the many backcountry campsites along this loop, you’ll miss the best view of the hike! Below: Adam crosses the stream; A small waterfall on the stream; This loop has many choices for backcountry camp sites.

Adam Crossing Fridley Run Smal Waterfall Backcountry Site

Adam Says…

Last year, we made an attempt to do this Fridley Gap loop hike, but we had trouble finding one of the trails.  We bushwhacked for a while, but finally gave up.  This time when we returned, we had better directions and the blazes had recently been repainted on much of the loop.

From the top end of the parking lot, we started on the trail.  We saw both purple and blue blazes early on, and started to worry.  (Fortunately, it turned out that this was the only section of the trail that hadn’t been recently re-blazed.)  Early parts of the trail traverse large rocks, and it’s sometimes tough to see exactly which way the trail goes. We saw faded red Xs painted on the surface of some of the rocks which let us know that we were going the right way.  The trail is uphill but not too steep.  In .2 miles, you come to a fire road.  Take a right here and continue on the fire road.  You will pass by some small falls and Mountain Run to the right and a large boulder slide to the left.  The trail actually follows the streambed, and you will need to rock-hop to continue on.  At .45 miles, you will reach another falls area and you will cross over Mountain Run until you see the trail junction cement post.  This is also the point that Mountain Run and Fridley Run join.  It was at this point that we failed last time trying to find the orange-blazed Massanutten South trail.  Looking at the cement post as you approached it, look back around 4:00.  You will see the orange blazes on the Massanutten South trail as you will cross the water again (this time it is Fridley Run) and climb up the hillside.  These weren’t painted on the trees before (they look fresh now), so you should be able to find your way more easily.

Walking in the Streambed
Early in the hike, the trail traverses the streambed. There are plenty of rocks, so it’s fairly easy to hop from spot to spot and avoid getting your feet wet. Below: Adam climbs up the trail shortly after the parking lot; A rockslide early on the hike; Blooming redbuds.

Adam Hiking Fridley Gap Trail Rock Slide Redbuds Blooming

The climb up the Massanutten South trail is quite steep and you may need to stop a few times along the way to catch your breath.  This trail is also narrow and you may have to cross over a few blown-down trees, but the trail wasn’t too hard to navigate with the recent re-blazing.  At 1.85 miles, you will reach a campsite area.  Look closely and you will see a path that leads to a rock outcropping called Grubbs Knob Overlook.  Take this path up to the overlook to get the best views along the hike.   You will see the top of Grubbs Knob to the left from the overlook and views to the west.  After taking in the view, go back to the campsite and continue along the Massanutten South trail.  At 2.05 miles, the trail reaches its peak and then you will start to descend, as the trail takes a steep turn to the left.  You will make your way back down this very narrow path and cross Fridley Run at 2.70 miles.

After crossing Fridley Run, you will begin to ascend on the trail again (turning again into a wider fire road) until you reach a rocky slide that gives you views of Fridley Gap and North Mountain at 3.25 miles.  Continue to ascend as you walk around part of Third Mountain. The fire road stops ascending at 3.5 miles.  The trail then descends and you reach another cement junction post at 3.84 miles.  Take a left on the purple-blazed Fridley Gap trail, which follow another wide fire road.  You will likely see lots of burned trees from a fire in 2010 that covered a big portion of this area.  At 4.5 miles, you will reach another junction. The purple-blazed Fridley Gap trail ascends to the left and continues through the woods.  Take this trail and begin a steep ascent across some switchbacks.  At 4.85 miles, you will reach the top of your climb and there are a few stones that you can rest on for a few minutes if you need to catch your breath.

Christine at the Small Waterfall
This small waterfall feeds one of the most popular swimming holes in the area. Below: More pretty cascades.

Mountain Run

The trail now begins to descend very steeply.  We were so glad we had our trekking poles since the rocks under the leaves were often loose and it helped to lower ourselves down the steep steps.  We were also glad we did this hike this direction rather than the clockwise version of the loop.  At 5.5 miles, we reached another junction with the Massanutten South trail.  Take a left on the orange and purple-blazed fire road (don’t go the way that crosses the bridge) and you will reach the junction that closes the loop at 5.65 miles.  Take a right here, crossing Mountain Run again and make your way back down the fire road.  Be sure to catch the rocky path at 5.8 miles that leads back to the parking lot at 6 miles.

A funny moment happened along the hike.  Christine had programmed her phone to use the MapMyHike app.  In a recent upgrade, it now includes some vocal updates along the way, usually at the mile increments.  One time, we heard the voice say “Don’t stop now.  Walgreen’s is behind you.”  (Walgreen’s is now advertising on MapMyHike.)  While this is meant to be a word of encouragement to keep hiking strong, I was thinking of it as “Walgreen’s is chasing us.”  As I sometimes do, I started thinking of a parody song to the tune of the Road Runner Show TV theme song.  So for your enjoyment, here are my lyrics: “Fridley hiker, Walgreen’s is after you. Fridley hiker, if he catches you, you’re through.  That Walgreen’s is really a crazy store.  They have pharmaceuticals, toiletries, and so much more.  Fridley hiker, never, never, never slow down.  Fridley hiker. Walgreen’s is after you.  Fridley hiker.  If he catches you, you’re through.

There is one geocache along the trail, Fridley’s Cache, a normal-sized cache near the swimming hole.

It is always a good feeling to know that we redeemed ourselves by covering a hike that we had previously failed to navigate.  If you are looking for good views of streams or a swimming hole, along with a challenging hike to get some views, this may be a great hike to try out some time.

Rocks at Grubbs Overlook
The rocks at Grubbs Overlook might trick people into thinking there isn’t an open view. Below: Views from Grubbs Overlook and the campsite that sits adjacent to the overlook.

View from Grubbs Adam at Grubbs
A View Into the Valley
Campsite at the Grubbs Overlook

Christine Says…

Hallelujah for freshly painted blazes!  I was so frustrated last year when our attempt to hike the Fridley Gap Loop ended in failure.  The failure was mostly my fault.  I tried to map out the hike based on a course I saw on someone’s Runkeeper page.  There were no directions, just the route overlaid on a rudimentary map of the area.  I thought we’d be able to figure things out on our own with a NatGeo map of the area.  It turns out that faded blazes and a large group of people camping in the middle of the trail are insurmountable challenges to my ability to navigate.  We’ll let bygones be bygones and get on to the successful version of our Fridley Gap hike.

Let me start by saying, I loved this hike!  It was even better than I expected.  The stream was running beautifully, the views of the valley ‘greening up’ below were lovely and the weather was perfect (sunny, cool and breezy enough to keep the bugs away).  I really enjoyed the little rock-hop as the trail followed the stream bed.  The small waterfall and swimming hole were so pretty.

The climb up the Massanutten South trail to Grubbs Knob was steep enough to be challenging, but not so steep that we had to stop for a breather.  On the way up, we could see all the little signs of spring creeping back into the forest – tiny buds on trees, tightly curled ferns and the occasional early season wildflower poking up through the leaves.  The overlook at Grubbs Knob is rather easy to miss.  It lies at the top of a faint footpath above a campsite.  When you first climb to the top of the footpath, vertical, spine-like plates of rock obstruct any possibility for a view.  But if you climb along the rocks, eventually you come to a few footholds that allow you to scramble to the top of the rocks.  Once you’re there, the valley below spreads out as far as the eye can see – farms dotted with red barns; small country towns; and wide, green fields make up most of the vista.

Downhill Through Dense Laurel
The climb downhill after Grubbs Knob takes you through dense mountain laurel. The harsh light makes for an ugly photo… but you get the idea.  Below: Adam approaches the stream; Crossing Fridley Run.

Approaching Fridley Run Crossing the Stream Again

After leaving the Grubbs Overlook, we ascended a few more moments before taking a sharp downhill turn.  The trail passed through dense mountain laurel, with occasional peeks toward the next ridgeline.  Eventually, we heard the sound of water again.  For a short way, the trail followed Fridley Run.  But soon, we had to cross the stream and head back uphill along a wide fire road.  From the fire road, we caught our second open viewpoint of the hike.  It was a nice view, but nowhere nearly as lovely as the one from Grubbs Overlook.  It’s one thing to slog uphill and come to a magnificent rocky outcropping with a sweeping vista to appreciate.  It’s a little less stirring to stop along a roadside and take in a view of a couple mountain ridges.

Eventually, the fire road met up at a four-way trail junction.  One direction headed toward the Boones Run shelter, another toward Cub Run Road, another continued along the Fridley Gap trail in the direction of Martins Bottom, and of course the fourth headed back in the direction from which we arrived.  Seeing this junction made me think of all the different ways these trails cross and connect.  There are definitely multiple possibilities for overnight backpacking loops in this area.

Second Overlook
The second overlooks comes at a spot along the fire road. Below: Adam checks out the map at this four-way trail junction; Continuing along the fire road before our climb up Third Mountain; Charred trees from the 2010 fire.

Four-way Junction Hiking Along the Fire Road Charred Trees

We followed the fire road to another junction.  Heading straight would have taken us toward Martins Bottom, but to stay on course we turned left and started very steeply uphill along the purple-blazed Fridley Gap trail.   By this point of the hike, I was pretty hungry and my energy was starting to flag.  If I were smarter, I would have eaten a snack before tackling the climb.  But I’m not smart, so I spent most of the climb complaining that I was hungry!

After a short break (and snack) atop the tree-covered peak of Third Mountain, we began a crazy-steep descent.  For three-quarters of a mile, we carefully picked our way down the craggy, leaf covered mountainside.  Through the trees, we could see some really fascinating rock formations on the shoulder of the next mountain over.  I kept trying to appreciate the view, but every time I did, I lost my footing a bit.  This climb down definitely makes the case for paying attention and using your trekking poles.

Steep Uphill Over Third Mountain
The ascent of Third Mountain may not look steep in this photo, but it is!  Below: Descending Third Mountain – you can see rock formations through the trees; A bridge not taken on the Massanutten trail; Adam once again crosses the stream we crossed early in our hike.

Steep Descent of Third Mountain Bridge on Massanutten Trail Final Stream Crossing

At the bottom of Third Mountain, we had just a short walk back to our original junction – the one where everything went wrong when we tried to hike Fridley Gap last year!  I was quite pleased to see that marker again and be 100% certain that we had actually found our way successfully this time around.  From the last junction, we retraced our steps through the streambed, past the rockslide and back to our car.

Trail Notes

  • Distance – 6 miles
    (Check out the stats from MapMyHike)*
  • Elevation Change –  1850 ft
  • Difficulty – 3.5.  The trail goes up and down several times. 
  • Trail Conditions – 3.  The trail had blowdowns, loose conditions, and narrowness, but there were also sections that followed a fireroad.  It gets an overall average rating. 
  • Views3.  The views from the Grubbs Knob overlook are the best on the trail, but if you miss the path from the campsite you’ll miss the best view on the loop.  The views along the path at 3.25 miles are nice, but not remarkable.
  • Waterfalls/streams – 4. The trail goes along (and through) Mountain Run and Fridley Run on several occasions.  The small falls and swimming hole gives it a bonus. 
  • Wildlife – 2. This may be a good hike for bird watching.  We saw a peregrine falcon soaring above at the Grubbs Knob overlook and enjoyed hearing the song of the eastern towhee along the way.
  • Ease to Navigate2.  If we got lost before, we have to give this a low rating.  The path to start the trail from the parking lot could be better blazed and there are several turns to make.
  • Solitude – 4.  You may see some people at the swimming hole or camping alongside the junction with Mountain Run and Fridley Run.  However, we only saw one other group after this point on a nice spring weekend day. 

Directions to trailhead:

From Harrisonburg, VA, head east on 33.  Take a left onto VA-620 North/Indian trail Road and continue for 1.7 miles.  The road will turn into Rt. 717.  Go 3.4 miles and take a right on Minie Ball Ln.  Go 1.1 miles.  At this point, the road will turn back into Rt. 620.  Go 2.7 miles and take a right, continuing on 620 for about half a mile.  Take a right onto Armentrout Path.  Take the first left onto Airey Ln.  Parking is a lot at the end of this gravel lane.  If you pass the lot, you are on private property. The directions to this trailhead are a little confusing, and we recommend putting the coordinates on the map below into your phone/GPS.

* MapMyHike is not necessarily accurate, as the GPS signal fades in and out – but it still provides some fun and interesting information.

High Knob & Hoover Ridge

This 5.75 mile hike takes you to an old fire tower sitting atop a high peak on the border of West Virginia and Virginia.  After visiting the tower, you can either head back to the parking area (which would cut the distance and make this a 3 mile total round-trip hike), or continue to explore the Shenandoah Mountain trail with a walk over to Hoover Ridge.

SPECIAL NOTES:  Please be conscientious and respectful when hiking in this area. Hiking trails near High Knob are adjacent to private land. Please honor posted ‘no trespassing’ signs and stay on official forest service trails.  Please do not tamper with posted private land signage.

High Knob Fire Tower
The High Knob Fire Tower provides panoramic views into both Virginia and West Virginia. Below: Adam looks at trail information in the kiosk in the parking area; The Shenandoah Mountain Trail is often lined with dense mountain laurel; Trail junction – one way climbs up the fire tower, another continues on the Shenandoah Mountain trail, and the third descends to the Brandywine Recreation area.

Parking Areas for High Knob Trail Dense Mountain Laurel Along High Knob Trail Trail Junction on Shenandoah Mountain Trail

View a 30 second video of the panoramic view from the High Knob fire tower.

Christine Says…

First of all, I’m not sure whether to call this a Virginia hike or a West Virginia hike.  While you park in West Virginia, the Shenandoah Mountain trail meanders right along the states’ borderline.  I believe the High Knob fire tower sits on the Virginia side of the line, but views look out into both states.  This is definitely a hike worth doing!

Our first attempt to hike High Knob was on April 7th, 2013.  That hike started off well enough, but within the first half mile the trail turned into a veritable luge track.  It was a smooth, slick, well-polished chute of ice!  Had we planned more extensively, we would have packed Yaktrax, but after a week of warm, sunny weather, we simply didn’t expect to see so much ice!  We watched a couple on the trail ahead of us falling down, over and over and over again.  The girl literally fell ten times in about two minutes.  She couldn’t make a single step of forward progress.  Adam and I looked at each other and said ‘Nah… we’ll come back and do this some other time.”

Mountain Laurel is Getting Ready to Blook
Fetterbush is blooming!  Below: Trails are marked with a double yellow blaze; Occasionally views opened up through the trees.

Yellow Blazes on Shenandoah Mountain Trail Views Along the Shenandoah Mountain Trail

The very next weekend, we headed back and ended up with much better hiking conditions.  The trail to High Knob is pretty basic – it follows the Shenandoah Mountain trail until a junction with a spur trail that leads directly to the tower.  The way is well marked with double yellow blazes and has nice footing.  The path passes through dense stands of mountain laurel.  From the number of flower buds on the laurel, it looks like it’s going to be a spectacular bloom this year!

About .8 mile into the hike, we reached the junction – hikers can turn uphill and take the spur trail to the fire tower, continue on the Shenandoah Mountain trail, or head downhill to the Brandywine Recreation Area.  We decided to visit the fire tower first, mainly because it was early and we wanted to avoid Sunday afternoon hiking crowds.  The spur to the High Knob tower is probably the steepest climbing of the entire hike.  While the section is steep, it’s also fairly short.  At the top of the climb, the trail comes out on a fire road that leads pretty much the rest of the way up to the tower. We were surprised how heavily the area was marked with ‘Private Land – No Trespassing’ warnings.  There were dozens of signs and trees spray-painted red.  I’m guessing the public land abuts private land that is heavily used for hunting, and the landowners are trying to protect hikers/bikers from getting shot.  Regardless, the area is very thoroughly and clearly marked – you shall not pass!

As we arrived at the fire tower, we passed a foursome of hikers headed down.  We had the tower all to ourselves for about twenty minutes.  We enjoyed the views in every direction!  I especially enjoyed looking down on Switzer Lake.  It brought back lots of memories from my days as a college student at JMU.  On warm spring days, my sorority would load up in cars and make the drive to Switzer for an afternoon of swimming (and perhaps some beverage consumption).  Swimming is no longer allowed in the lake (maybe it was never allowed?), as it’s used as a public water source.  Even though you can’t swim in the lake, it’s still a great place for scenery and birding.  A friend of mine has even seen bald eagles at Switzer!

Steep Climb on High Knob Spur Trail
Adam makes the steep climb between the Shenandoah Mountain trail and the fire road that leads to the High Knob Fire Tower. Below: Private land in the area is very thoroughly and clearly marked. A bird’s eye view of the private land from the fire tower.  I think those might be hunting camps/blinds.

Marked Private Land View of Private Land Approaching the Fire Tower

After enjoying the views and eating a snack, we climbed back down to the junction.  It was around 11:15 a.m. and we were torn – do we continue to explore Shenandoah Mountain or do we call it a day and get a nice lunch in Harrisonburg?  We didn’t have a coin, so Adam flipped his pass-case – card side up, we hike on – card side down, we go home.  The pass-case dictated a longer hike.

We followed the Shenandoah Mountain trail over to Hoover Ridge.  If I were to make a recommendation, I would tell people to skip this part of the hike.  In the end, the views weren’t worth the climb. The trail is narrow – too narrow to ever be level.  You hike most of the way with your uphill foot much higher than your downhill foot.  It’s also covered with tons of loose stone and slate that shifts under every step.  On the early spring day we hiked, the trail was still under a foot of dry leaves.  The footing was treacherous.  I was so glad for my trekking poles.

There are several steep climbs on the way to Hoover Ridge.  Once the trail meets the ridge walking along is pretty pleasant. The terrain is open and grassy and there are obstructed views of mountains in every direction.  You can even catch a glimpse of the fire tower off in the distance.  On Hoover Ridge, we decided we’d hiked enough for the day and turned back to make our return to the parking area.

Since it was mostly downhill, the walk went quickly.  We were back at our car by 1:15 and back in Harrisonburg for lunch a half hour later.  It was a great day to be out hiking after such a cold and snowy March!  We’ll definitely make a return hike to the fire tower… Hoover Ridge, not so much.

Adam Says…

As Christine mentioned, this was a second attempt at High Knob, since it was too ice-covered to walk up previously.  We hate having to bail on a hike, but we want to feel that it is something we can accomplish and still enjoy.  We’re glad that we waited for the snow to melt to enjoy this trek up to the fire tower.  Our friends at Hiking Upward covered this hike from the Brandywine Recreation Area, but this is a shorter way to accomplish the hike up to the top.  If you’ve purchased National Geographic’s Staunton/Shenandoah Mountain Trails Illustrated Map 791, you will see High Knob Fire Tower on the cover.

Christine Enjoys the Fire Tower View
Views from the fire tower look out in every direction. Below: You can see Switzer Lake from the fire tower; More views; Adam enjoys a snack (Trader Joe’s Monkey Business trail mix) on the fire tower.

Switzer Lake Views from the High Knob Fire Tower Enjoying a Snack on the Fire Tower

From the parking lot on 33, we took off down the stone steps.  The parking lot and surrounding areas has a lot of trash thrown around, so if you can, bring a trashbag and help to carry out some of the litter.  Once you join the Shenandoah Mountain trail at the bottom of the stone steps, the trail will be clear of litter.  The trail starts off fairly level and then gradually ascends up the mountain.  In .85 miles, you do reach a large junction that includes the spur trail to the High Knob Tower.  Take this spur trail up the mountain.  At about 1.1 miles, you will reach a forest road.  Take a right on the road (taking a left will put you on private land) and continue to follow the signs to the High Knob Tower.  Continue your ascent up the fire road until you reach the High Knob Tower at 1.4 miles.

We retraced our steps until we returned back to the junction of the Shenandoah Mountain Trail and High Knob Trail at 2.0 miles.  At this point, we took a left to get back on the Shenandoah Mountain trail.  This part of the trail was not well-maintained and we were constantly worried about turning our ankles on loose rocks that were hidden underneath the leaf-covered trail, crossing over tree blowdowns, or catching ourselves from falling off the narrow trail with our trekking poles.  The trail in most places along this section felt more like a narrow animal path than an actual trail.  The rough trail and the steepness in some sections really made us question how far we were going and if it was worth it. We made our way a little further uphill but we weren’t fighting rough terrain the whole way.  We reached the crest of Hoover Ridge at 3.5 miles, which gave us some obstructed views of the areas to the south.  After taking a few minutes to explore the open fields and campsites on Hoover Ridge, we made our way back.

Shenandoah Mountain Trail Cairn
One of the few tricky spots on the Shenandoah Mountain trail. The cairn indicates that hikers should take the lower trail, and not follow the trail partially blocked by branches. Below: Sign on Hoover Ridge

Signage on Hoover Ridge 


As Christine stated, I would agree that I probably wouldn’t add on Hoover Ridge to this hike unless you would like to get some extra hiking accomplished.  However, this was also the area that we saw the best wildlife.  We saw a deer in the distance take off when we were spotted and a grouse jumped out of some brush when we were walking by that caused us both to nearly jump out of our hiking shoes.

The hike up to High Knob is one that I think would be a perfect hike if your goal was to see great views from all directions. On a clear day, you should be able to see several layers of mountain ranges.  I’m sure the foliage scenery in the fall is breathtaking.  I can see this being a great hike to take some out-of-town visitors to show the splendor of the rolling Virginia and West Virginia mountains.

Trail Notes

  • Distance – About 5.75 miles
  • Elevation Change –  1168 ft
  • Difficulty – 3.5. This is a moderate hike in terms of elevation change.  On the day we hiked, the Shenandoah Mountain trail was still covered with deep, slick leaves and quite a few fallen trees.  These challenges increased the difficulty level somewhat.
  • Trail Conditions – 3.  The trail to High Knob is in great shape, but the Shenandoah Mountain trail is narrow and rocky.
  • Views5.  Views from the High Knob fire tower are spectacular and panoramic.  Views from Hoover Ridge are obstructed.
  • Waterfalls/streams – 0. There are no streams on this hike.
  • Wildlife – 2. We saw a deer and a grouse, but I think hunters scare off most wildlife in this area.
  • Ease to Navigate –3. Trails are generally well-marked/blazed, but there are a few mildly confusing spots on the walk to Hoover Ridge. There were a few worn paths in the woods that looked like old trails or animal paths.  As long as you still to the most well-worn pathway, you should be fine. Take care to observe posted signs for private land.
  • Solitude –2.  You will likely see quite a few people on the walk to the fire tower, but few along the way to Hoover Ridge.

Directions to trailhead:

Head on 33 West from Harrisonburg, VA.  In about 10 miles, you will enter into George Washington National Forest.  In 12 more miles, you will reach the parking lot on the left right after you see the “Welcome to West Virginia” sign.  A large kiosk with a map of the area gives some general information and you will see a break in the girders that will lead down to start your hike.

* MapMyHike is not necessarily accurate, as the GPS signal fades in and out – but it still provides some fun and interesting information.

Snowshoeing: Bald Knob from White Grass (WV)

If you’re looking for a great place to enjoy snowshoeing or cross-country skiing in the mid-Atlantic, don’t miss a visit to White Grass!  Their extensive network of trails offer something for every skill level.  Their terrain is beautifully groomed and the people who run the resort are so friendly and helpful.

If you don’t own snowshoes/cross-country skis, White Grass has them available to rent!

Christine at Summit of Bald Knob
Christine enjoys the view from Bald Knob. Below:  The morning started off cloudy; Learning about winter trees with the naturalist; Lots of old cross country skis.

Morning Sun Naturalist Shack and Skis

Adam Says…

It has been over a year since we went snowshoeing.  Our area of Virginia was robbed of any meaningful snow for the past two years, so we decided to cross the border to West Virginia to catch the elusive snow.  Christine’s parents had bought us each a pair of Tubbs Frontier snowshoes for Christmas over a year ago, but it wasn’t until now that we were able to break them in.  We were both very pleased with how they felt on our feet.  They felt lighter than many I had tried before and were a little more sleek than some others I had tried.  This enabled me to not feel too fatigued using them and I also didn’t feel like I had to walk like a cowboy in fear they would cross over and cause me to trip.

We had heard great things about White Grass from other friends of ours that had been there for cross-country skiing.  White Grass maintains a great website where they will post weather conditions, snowfall, pictures, and trail maps.  Check it out to get the best up-to-date information.  They will typically be open December-early March to access their 40km of trails.

When we first arrived at White Grass, we checked in at the lodge.  They informed us they were having a naturalist from the Canaan Valley Wildlife Refuge take a group out in about five minutes for a free snowshoe trail talk.  We grabbed our shoes and met up with him.  We were part of a small group of about 7 (including two little children).  The goal of the walk was to teach us about the different trees that can be found in Canaan Valley, how to identify them, and threats to their future.  We spent about an hour walking. The naturalist did a great job of teaching us many things about trees that I didn’t know before.  After the walk, we decided to make make our way over to Hellbender Burritos for two Gendarme burrito bowls to power us up for our big snowshoe trip in the afternoon.

Spring Orchard Trail
We started out along the Springer Orchard Trail. Below: Trail junction; Warming huts along the trail; Adam snowshoes along groomed trails.

Trail Junction  Warming Hut  Adam Snowshoeing

We returned to White Grass and paid our $20 trail use fee.  We asked the woman in the shop for some trail suggestions, and she kindly mapped out a route that would take us to the top of Bald Knob.  The trails criss-cross often and the maps, posted at each junction, a little confusing.  We found ourselves asking other skiers and snowshoers where they had been to help us navigate through the labyrinth of junctions.  We left the lodge and started on the Springer Orchard Trail, on the opposite side of the large Weiss Knob Slope that heads directly down the mountain.  We stayed on this trail for about .35 miles, passing the Plum Orchard trail, until we reached the Highland View trail.  We took a left on this trail and continued upward, crossing past several other confusing junctions.  We stayed on the Highland View Trail for about .35 miles, until we made it up to its end at the Sawmill Flats shelter at .8 miles.  The shelter was a small warming hut.  There were a few ammo boxes that included snacks and there were some containers of bird seed that you could throw out to chickadees.  From this point we made our way following the signs for the Double Trouble trail.  We reached the junction at 1.0 miles, took a right, and headed up the Double Trouble trail.  At 1.3 miles, we reached the Weiss Knob Ascent trail, took another right and made our way to the Roundtop shelter.

The shelter here was also filled with snacks and bird seed.  The birds here were more accustomed to people and would actually eat the seed out of your hand if you wait patiently.  We were also told that someone had left a Gatorade bottle of moonshine at the shelter.  I picked it up and saw some stuff floating in the bottle and decided to pass.  I find it is a good rule of thumb to at least know the person that has made the moonshine for you.  There’s no need to go blind without anyone to blame. 🙂

Christine and Adam at Roundtop Hut
Christine and Adam at Roundtop Hut. Below: Adam feeds a chickadee; Deeper snow as we climb upward; Snow draped on evergreens.

Adam Feeding a Chickadee Deeper Snow Snow on Spruce

We continued from this point following the signs to Bald Knob.  You will cross a Boundary trail and then make a right on the Bald Knob Trail to wind up the mountain.  The trail then takes a sharp right and a junction where you can continue to hike up the Bald Knob Trail.   We reached the summit at around 2.1 miles.  The scenery was breathtaking and you could see skiers on the Canaan Valley Ski slopes and mountains off in the distance covered in snow.  The wind is strong here at the top, so we didn’t stay incredibly long, but made our way back down.  We returned down the Bald Knob Trail to the Roundtop shelter and back down the Double Trouble trail.  However, instead of heading back to the Sawmill Flats shelter, we followed Double Trouble until it led us to the Lift Shack, crossing over the Weiss Knob slope.  Right behind the Lift Shack, we then took the Barton’s Bend Trail until we reached the Falls Overlook trail.   We took a left on the Falls Overlook Trail and then a left on the Three Mile Trail until it brought us back to the White Grass lodge.  Our return trip was around 2 miles, taking our snowshoe hike to be around 4.2 miles.

I had three big highlights on this trail.  Feeding birds out of my hand, the peaceful scenery through the spruce on the Bald Knob trail leading to great views, and looking back and seeing my wife smile.  I told her that her face was going to be sore from all the smiling she was doing.  We really had a wonderful time at White Grass and we can’t wait to return.  We will probably take the Three Mile Trail all the way up to the Roundtop Shelter next time.

Christine Says…

I love some parts of winter – the snow (too bad there can’t be snow without cold), the potential for workplace closures, and most of all snowshoeing!  For Christmas of 2011, my parents bought us snowshoes.  And well… many of you will remember winter of 2011-12 as ‘the winter that never happened’ in Virginia.  The only measureable snow we had was in October.  The rest of the season passed – mostly warm and sunny – leaving our snowshoes to gather dust in the garage.  This winter hasn’t been much better, but thankfully we live just a couple hours from Canaan Valley.  Even though the areas lies less than 90 miles away as the crow flies, they have vastly different weather.  It’s almost like a small chunk of Canada dropped into a bowl located in the mid-Atlantic.

Christine and a Chickadee
Christine feeds a chickadee.

Bald Knob Trail Roundtop Hut Christine on Snowshoes

We got up early on a Sunday morning and drove over to White Grass – one of the only big Nordic centers in our region. The entire drive, we saw nothing but bare grass and muddy fields.  I’ll admit that I was a little worried that we were driving over for nothing.  But as we grew closer, bare fields gave way to a dusting of snow and then smooth, billowing drifts.  On the final drive up to White Grass, the road was not even cleared.  As we pulled in to the parking area, an exuberant, bearded man gesticulated dramatically, guiding us to a parking spot. Every employee of the resort that we talked to during the day was super friendly and full of information happily shared about the area.

We headed into the lodge to get information and pay our trail use fees.  The lodge is warm, cluttered and cozy, lacking the slick, commercial feel of most ski operations.  Even though it wasn’t yet 10:00 a.m., it was packed with people chatting and enjoying hot beverages.  The woman at the cash register told us we had arrived just in time to go on a free snowshoe walk with a naturalist.  We had about five minutes to gear up and meet the group.  She told us to run on ahead and to pay our trail fee later on.  We ran back to the car, grabbed our snowshoes/poles, put on our layers, got the camera gear packed up and made it back just in time for the walk.  The walk was more talking than active snowshoeing, but I enjoyed learning more about the areas fragile ecosystem.

The snowshoe walk finished up a little after 11:00, so we decided to drive into Davis for an early lunch before our longer snowshoe trek.  At lunch, we learned something interesting – you can’t buy a beer in West Virginia on Sunday until 1:00 p.m.  The restaurant was pretty crowded, and I don’t think I saw a single table not try to order a beer. I guess everyone was visiting from out of town and didn’t know the law.

Christine Snowshoeing
Christine snowshoes uphill.  Below: Approaching Bald Knob, Bald Knob View, Enjoying the Summit

Approaching Bald Knob Bald Knob View Adam and Christine

After lunch, we headed back to Whitegrass.  With our trail feed paid and our route mapped out, we headed up the trail.  When I heard that we were walking up to the summit of Bald Knob, I was a little hesitant at first.   Hiking up to the summit of Bald Knob didn’t necessarily conjure pleasant feelings; rather I remembered the last time I attempted to climb that peak.  It was probably about 15 years ago when I was not a regular hiker and generally quite out of shape.  Adam and I had hiked Bald Knob from the Canaan Valley Ski Resort side.  We made it to the top, but it involved tears and suffering on my part.  I remember the trail being unbearably steep and thought it was going to kill me.

However, this time, I found the terrain easy, pleasant and totally manageable – even on snowshoes!   One of the nice things about White Grass is that the trail grooming takes some of the exertion out of snowshoeing.  When you snowshoe on fresh, unpacked powder, the shoes do keep you aloft on the snow — but only to a degree.  In fresh powder, you sink down and a certain level of ‘slogging’ is required.  At White Grass, most of the trails are packed and machine-groomed.  There are usually a pair of cross-country ski tracks worn into the snow, and then smooth packed trail alongside.  As snowshoers, we’re careful to stay off of the ski tracks, as the blades on the bottom of shoes can easily chew up the established tracks.

Walking the trail system at White Grass was so fun!  As Adam mentioned, I smiled the entire way!   I loved chatting with other people we met along the way.  I was enthralled by the gorgeous, snow-draped scenery.  I had a blast hand-feeding the chickadees at the warming up.  I have a slight phobia of flying things (bad experience with a bat and several moths over the years), so at first I looked away and closed my eyes as the chickadees fluttered down.  But after a few landings, I opened my eyes and watched the birds perch.  When they land, they are weightless; the only thing you feel is a slight pinch from their gripping feet.  One chickadee sat on my hand long enough to eat several seeds.  So fun!

When we made it to the summit of Bald Knob, I stood in awe of the beautiful, snowy valley laid out before me. The wind was whipping and clouds were moving in, so we didn’t stay long.  The walk down went by so quickly — all downhill.  We were back at the main lodge within an hour.

Expansive View
Even though Whitegrass is popular and heavily used, you never feel like it’s crowded. Below: Adam checks out the old, abandoned ski lift apparatus; Adam says hello to a friendly Whitegrass dog.

Old Lift Building Whitegrass Dog

I’m hoping that we’ll get another chance to visit White Grass one more time this season.  If we do get to go again, I definitely want to plan a meal at the White Grass Cafe.  The food people were eating in the lodge looked amazing!  We would have eaten there, but we already had plans to eat at another local favorite – Sirianni’s.  We love their pizza and can’t visit the area without going there to eat.

If we make a return trip, I’ll also be sure to take a few photos of the actual facilities – the lodge, the cafe, etc.  In the rush to meet the naturalist on time and my eagerness to spend as much time as possible on the trail, I neglected to take any photos of the facilities.  They are really cute, so I feel bad that I forgot.

Trail Notes

  • Distance – 4.2 miles.  This is approximate.  It was hard to gauge mileage when the trails crossed each other so frequently and were labeled on the maps in kilometers.
  • Elevation Change –  973 feet
  • Difficulty – 2. The trail did go uphill most of the way up, but the grade was only seriously steep in a few spots.
  • Trail Conditions – 4.  The trail was in excellent shape.  They spend a lot of time grooming the trails, so it was fine to have both snowshoeing and cross-country skiing on the same trails. 
  • Views4.  The views from Bald Knob are some of the best you’ll see of Canaan Valley.
  • Waterfalls/streams – 1. Only a few streams that you pass on the trail.
  • Wildlife – 2. Red squirrels, Chickadees, and pileated woodpeckers were spotted.
  • Ease to Navigate –1.5. You have to pay very close attention to the trails and maps at the junctions to keep your bearings.
  • Solitude –2.  The trails in this area are heavily trafficked, so expect to see others.  We still felt that we had plenty of room for ourselves though as people are spread across all the distance of trails.

Directions to trailhead:  The best directions can be found here  From Route 32 at Canaan Valley, take Freeland Road.  Follow the signs to White Grass.

Big Flat Mountain Loop

This 4.7 mile hike makes a wide circle around the entire Loft Mountain complex.  It starts at the wayside and makes use of three different trails in the area – the campground path, the Appalachian Trail and the Frazier Discovery Trail.

Christine and Wookie enjoy a view along the AT.
Christine and Wookie enjoy a view along the AT.  Below: Wookie enjoyed his outing.

Wookie and Adam on Campground Path Wookie in the Snow Thanksgiving Portrait

Christine Says…

So… it’s been a while since our last post.  We’ve been sitting on photos and information about our Thanksgiving hike for over two months now.  Things got a bit chaotic with the holidays (travel/family obligations),  I was sick for a full six weeks, and worst of all we lost one of our pugs (13-year old Mojo) after a short, tough, twelve-week battle with cancer.  Things finally feel like they’re getting back to normal again, and we’re hoping to spend some more time on the trail this winter.  Maybe even a snowshoeing trip?

Thanksgiving this year was a warm, delightful, sunny day.  I was at the tail end of being sick , so I waffled back and forth – relax on the couch watching the parade and dog show; or get up, get dressed and go for a hike.  In the end, the beauty of the day pushed me in the direction of Shenandoah National Park.  I wanted a shorter/easier hike without much climbing, so we settled on the Big Flat Mountain Loop. This loop encircles the Loft Mountain complex.  Here’s a bit of trivia – the campground complex is not actually on Loft Mountain – it’s on Big Flat Mountain – hence the name we’ve given this hike.  It’s also the same hike I chose for my annual Father’s Day hike last June.

We started off at the wayside and made our way up the crumbling, but still (technically) paved, campground path.  The path parallels the road, about 10-15 feet into the woods.  There were lots of downed trees and branches across the path that had fallen recently.  Wookie enjoyed getting his leash tangled in just about every obstacle.

The camp store stands quiet during the off season.
The camp store stands quiet during the off season. Below: The view from behind the amphitheater; The Loft Mountain Campground Amphitheater.

View from Behind the Amphitheater Amphitheater

We eventually came up to the camp store/laundry, which was closed for the season.  We let Wookie eat some snow and took a few minutes to consult our map to make a few more route decisions.  From there, we crossed the road and made our way toward the amphitheater.  The amphitheater has a fabulous view of the valley below.  It’s definitely worth a short stop along the way.

Near the amphitheater, we picked up the access trail for the AT.  After a short walk, we turned onto the Appalachian Trail, heading north.  The trail makes its way behind the Loft Mountain campground.  There are wonderful cliff-side views to the east and several spur trails lead to campsites and the camp store.  After passing the campground, there is a short downhill followed by the one semi-steep climb of the loop.  This climb, which normally would have been quite easy, almost killed me with my diminished aerobic capacity  It always amazes me how quickly one can get out of shape!

At the top of the climb, you’ll pass the first junction of the Frazier Discovery Trail.  If you take this junction, you miss two of the nicest views on the hike.  Continue a short way north, passing two spectacular views to the west.  The prominent sloping peak in the distance is Massanutten.  At the last view, you’ll see the other arm of the Frazier Discovery Trail.  Follow this trail (unless you have a dog with you!) back to the bottom of the mountain and the wayside.  If you do have a dog with you, you should continue north on the Appalachian Trail for almost another mile until you reach the spur trail to the Ivy Creek maintenance hut.  Follow that trail back down to the road/wayside.

I bring the issue of dogs up primarily because we got in trouble for using a short section of the Frazier Discovery Trail on the return arm of the loop.  The trail was marked ‘no pets’ – but only at the bottom of the mountain.  The spot we entered, at the top of the mountain – along the ridge, was not marked.  A ranger stopped us in the wayside parking lot and gave us a warning.

It was a nice way to spend the holiday!

Adam Says…

Christine and I both handle our festivities for Thanksgiving differently than most people.  We don’t do a large Thanksgiving dinner with the huge bird, cranberry sauce, stuffing, and all the other side dishes.  There is no pumpkin pie or a pulling of a ceremonial wishbone.  Instead, we have homemade pizza.  Christine isn’t a huge fan of turkey, so we have decided to have something that we both enjoy.  We also have started the tradition the last few years of starting the day off with a hike.  I definitely feel the touch of a higher presence when I’m communing with nature and there is no better setting to reflect on what I am thankful for in my life.

There were quite a few trees fallen across the trail.
There were quite a few trees fallen across the trail. Below: Adam walks along the Appalachian Trail; Views along the hike.

Walking the AT Views Near the Campground More Views

With pug in tow, we parked at the Lost Mountain wayside and restaurant.  There were only a few cars up here, which is typical of Thanksgiving and some of the colder months, so we knew we were in for a quiet hike.  We crossed the road and on the northern end of the parking lot and made our way on the paved walk .  After .1 mile, you reach a junction with the Frazier Discovery Trail, but stay on the paved walk.  The path is mostly paved or gravel.  We did have to hurdle or duck under a few blown trees across the path.   Around 1.6 miles, you reach the Loft Mountain Camp Store.  From here, we crossed the road and continued on the walkway for .1 mile to reach the Amphitheater.  They really picked a gorgeous spot for this structure, since you’ll have marvelous views.  I can only imagine watching the sunset during a ranger program for all the people camping overnight.

From the Amphitheater, the path begins to go downhill.  At 2.1 miles, you’ll reach a junction with the white-blazed Appalachian Trail.  Head left (going north) from this junction, going uphill along the AT.  At 2.4 miles, the AT begins to level out somewhat as you will navigate around the Loft Mountain campground.  You may smell hotdogs cooking and see glimpses of people and tents through the trees.  You will pass a few spur trails that serve as access for campers to the AT, but stay on the trail.   The trail stays fairly level for a while.  At 3.6 miles, you will reach the first junction with the Frazier Discovery Trail.  Stay straight on the AT and you will come to your first great view past the junction.  Continue on the AT and at 3.8 miles, you will reach the second junction with the Frazier Discovery Trail.  Take a left on this trail and you will immediately come up to another view.  Follow this steep downhill path and at 4.6 miles, you will reach the junction again with the paved walk.  Take a right and you will return to your vehicle at 4.7 miles.

Thanksgiving day view in Shenandoah National Park.
Thanksgiving day view in Shenandoah National Park. Below: Cliffside on the Frazier Discovery Trail.

Cliffsides on Frazier Discovery Trail

So, as we were hiking along, we typically like to reflect with one another for what we are thankful for.  We both were reflecting how thankful we were for each other, our family, our dogs, our jobs, our health, and our ability to share our love for the outdoors together.  Our hearts were a little more somber this day, since we had just recently received the bad prognosis for Mojo.  We’ve had him for most of the time we’ve been married and we give so much love to our pets, that are key members of our family.  We have lost Mojo since then, but he is forever in our hearts and we know he is in a more pleasant place now.   Hiking is a large metaphor for life, as you have some steps that are harder than others and stumbles along the way.  We have our love in our hearts to serve as our trekking poles to keep us balanced and help us reach the vistas along the way.

Wookie Says...Wookie Says…

I have to say… this was not one of my better hikes.  I accidentally broke SNP’s rules, and I feel really bad about it.  But, in my defense, if the park doesn’t want dogs on a certain trail, they really should mark it ‘No Pets’ at both the start and the end of the trail.  Because I entered the Frazier Discovery from the AT, I had no idea I wasn’t allowed to be there. The only sign indicating the rules was posted at the bottom of the mountain – way at the other end of the trail. Thankfully, the park ranger at the Loft Mountain wayside let me go with a warning.  I also came home with THIRTEEN ticks, even though I use a preventative.  Hopefully, I won’t get Lyme disease again. Despite the challenges and pitfalls, I still enjoyed being out on the trail.

Trail Notes

  • Distance – 4.7 miles.
  • Elevation Change –  675 feet
  • Difficulty – 1.5. The trail is gentle and rolling with only a couple very moderate climbs and descents.
  • Trail Conditions – 4.  The trail was in excellent shape.  There was a little snow still on the ground in a few spots, but nothing that caused us trouble. 
  • Views4.  There are many excellent views to both the east and west along this hike.
  • Waterfalls/streams – 0. None
  • Wildlife – 3. We didn’t see anything on this hike, but there are bears, deer, birds and other small creatures in the vicinity.
  • Ease to Navigate –3. You’ll have several different options for turns on this loop,  but as long as you don’t go south instead of north on the Appalachian Trail, you shouldn’t get lost.
  • Solitude –2.  The trails in this area are heavily trafficked, so expect to see other hikers.

Directions to trailhead:

Park at the Loft Mountain Wayside at Skyline Drive mile marker 79.5. Walk north along the drive for a 150 yard and then cross the drive to pick up the fire road. The trailhead is almost directly across the drive from the Patterson Ridge trail.

* MapMyHike is not necessarily accurate, as the GPS signal fades in and out – but it still provides some fun and interesting information.

MacRae Peak – Grandfather Mountain (NC)

North Carolina Hikes

This hike follows the Grandfather Trail across series of ladders and cables to the summit of MacRae Peak.  After climbing MacRae peak, we continued a little way along the trail before turning back right after Attic Window Peak. It’s a truly amazing hike with phenomenal views.

View the full photo album from this hike on Flickr

Top of MacRae Peak
Christine and Adam enjoy the view atop MacRae Peak. Below: Adam checks out the sign at the beginning of the Swinging Bridge Trail; A view of the bridge from the trail; the valley from the bridge.

Start of Bridge Trail Swinging Bridge View from the Swinging Bridge

Adam Says…

Hiking up Grandfather Mountain is nothing short of an adventure and one that I will not forget.  This will challenge you as much mentally as it will physically as you have to decide how far you can go.   Choosing to navigate up ladders on the side of a mountainside with nothing to save you from a nasty fall makes this hike one not for the faint of heart.  I have a fear of heights, but especially when it comes to trusting in man-made things that tested me a few times on this hike.  But  Christine and I kept saying, “I can’t believe we just did that” when we passed through these obstacles and the adrenaline kept us going.

We drove into Grandfather Mountain through the main entrance off 221.  If you are planning on doing any hiking on Grandfather Mountain, I would recommend starting as early as possible.  Starting later than when the park opens could lead to an extremely long line of cars waiting to enter on a weekend or pretty summer/fall day.  There is an admissions fee to get into the park ($18/adult with discounts for seniors and children at press time).  Another reason to start early is this hike does take a while.  While it is only a relatively short distance, you will want to take time to enjoy the numerous views and you will need to take time going up the ladders.  With a lot of people on the trail, there could be a bottleneck through some of these passes.  The park closes before nightfall and they do have rangers hiking along the trail to make sure that people get off the mountain in time.  If you don’t get back to your car by nightfall, they post they will send out a search.

Adam Crosses the Swinging Bridge
Adam crosses the Swinging Bridge. Below: A look back at the Top Shop from the beginning of the Grandfather Trail; Adam looks at MacRae Peak

Looking Back at the Bridge Complex Adam Looks at MacRae

At the entrance to the park, the ranger warned us that the winds were between over 30 mph at the top.  We made our way up the drive and stopped by Split Rock, a picnic spot and witnessed the drop in temperatures and wind firsthand.  We then made our way to the Nature Museum and wildlife habitat.  We walked around briefly and picked up a hiking trail map from the Nature Museum cashier.  We continued our drive along the curvy road up until we reached a parking lot attendant.  Since we were hiking, he instructed us to park in the lower lot to begin our hike.

From the parking lot, we took the Bridge Trail, a non-blazed trail that includes switchbacks through a hardwood forest.  After a short distance, we started hearing a mechanical, whistling sound.  This was the sound of wind whipping through the Mile High Swinging Bridge that lay above us.  At .4 miles, we reached the Mile High Swinging Bridge and visitor center.  The wind was blowing so hard up here.  I felt that I didn’t have warm enough clothes, so we went inside the visitor center to buy a hat and gloves to replace the ones I’d forgotten back at our hotel.  The wind was blowing much harder than 30-40mph.  I would guess that it was closer to 60mph.  My pants sounded like flags beaten by high winds and it was hard to even take a step ahead of you.  From the visitor center, we went up the stairs to reach the bridge.  Christine was eager to go across, but I had a lot of trepidation.  The bridge was “singing” more than “swinging”, but I was wondering if it was safe to cross.  Christine made her way across and per an earlier agreement,  if I was going to make her hike up Grandfather Mountain, I had to hold my end of the bargain and  walk across this 228 foot bridge.  Being 6 feet tall, the side railings barely reached my hips and I was worried that a strong enough wind would have blown me off.  The bridge has its name because the elevation here is 5280 feet above sea level making it a mile high.  The bridge actually only spans two rock formations that has an 80 foot drop, but it is still unnerving.  After making it across the bridge and back, we continued the hike.

Climbing Up the Grandfather Trail
Most of the way was steep and rocky.

Christine was having a difficult time making her way across the parking lot to the trailhead.  I would see her take one step forward and the wind blew her two steps to the side.  We made it to the other side and debated on if we could do this hike with such high winds.  I convinced Christine to go a little further, hoping that the brush would slow the wind and after a short distance we didn’t feel the affect of the wind.  We began the hike up using the Grandfather Trail, a blue diamond-blazed trail.  At .8 miles (including the hike from the parking lot), we reached a junction with the Grandfather Extension trail.  We kept going forward on the Grandfather Trail and at .9 miles, we reached Grandfather Gap, an open area that gives you great views.  Continuing on at 1.4 miles, we reached a junction with the Underwood Trail.  We stayed again on the Grandfather Trail and in a short distance the first ladder appeared.  This was a long ladder (the first of nine total) that helped you navigate through a tight gorge between two rocks, but was not that scary.  Shortly after this ladder, the real fun started where we had to do some rock scrambling, sometimes with the assistance of cables before coming up to a series of ladders.  These ladders were definitely more frightening as you had to often climb up one ladder and then take a step to the left and climb up another ladder.   We saw several people that got to the ladders and then wisely turned around as they didn’t think they can handle it.   Knowing your limitations is definitely important.  These ladders eventually led up to to one area that you were climbing up ladders on the side of the mountain with an insane drop to the side.  We made it up this final ladder and took a moment to reflect on what we did and take in the views from the side of the mountain.  We continued on the trail for a short distance and at  1.4 miles we reached a ladder on the side of the rock leading to the summit of MacRae Peak at 5845 feet.  You climb up this 20 foot ladder and then grab a cable at the top of the ladder to pull yourself up the rock.  You can find the benchmark for the peak at the top of the rock, giving you 360 degree views all around you, including the bridge to the southwest.

Christine Climbs a Ladder
Christine climbs a ladder on the Grandfather Trail. Below: One ladder went between two giant slabs of rock; Adam pulls himself up a sheer rock face; More ladders along steep, cliffside terrain.

Climbing Between Slabs Cable Pull Ladder Climb

We climbed back down the ladder and then continued on the Grandfather Trail to the next peak.  At 1.5 miles, we reached another junction with the Underwood trail.  Continuing on the Grandfather Trail, we went up to The Chute, a rock scramble that leads to the top of Attic Window Peak.  The scramble wasn’t too tough, but did require you to climb up on all fours at some points.  We reached the top at 1.7 miles and passed the overnight Attic Window campsite.  Continuing on the trail, we reached a junction with the Indian House Cave, a short but steep side trail that leads to a cave wall that was a shelter to Native Americans back in the day as artifacts were found here when it was first discovered.  We continued back on the Grandfather Trail and the trail here begins to be more of a ridge walk.  We took some time to find some nice spots to take in the views, eat some snacks, and then made our way back.  At the junction with the Underwood Trail at 2.2 miles, we ended up taking this Yellow Diamond blazed trail to avoid the ladders on the return.  This was a steep and rocky trail back without much to see and there is still one large ladder to climb down on the way, but it feels safer than the ones leading to MacRae Peak.  At 2.7 miles, we reached the opposite end of the Underwood Trail, rejoining the Grandfather Trail, by taking a right.  At 2.9 miles, we reached the junction with the Grandfather Extension trail and then took this Red Diamond blazed trail downhill through some switchbacks for .6 miles (with some more views along the way) until we reached our car at 3.5. miles.

Many people just drive to the upper parking lot to experience the Mile High Swinging Bridge and then return.  It is definitely a highlight of Grandfather Mountain, but we were so glad that we hiked past this feature.  The bridge used to be a wooden suspension bridge (erected in 1952) and used to sway more in the wind, but the side rails and floorboards were replaced with steel in 1999.

Adam Enjoying the View Near the Top of MacRae
Adam enjoys the view near the top of MacRae.  Below: The Blue Ridge Parkway winds its way through forest below Grandfather Mountain; the last ladder to the top of MacRae; Beautiful rugged scenery on Grandfather Mountain.

View From MacRae summit ladder Landscape on Grandfather Mountain

Grandfather Mountain was originally named Tanawha Mountain by the Cherokee, meaning “glorious hawk or eagle”.  It was named Grandfather Mountain by pioneers as one view of the mountain does look like an old man’s face staring up into the sky.  Daniel Boone once hunted in this area and John Muir after climbing Grandfather Mountain in 1898 proclaimed that the air during his climb had healed him of a bronchial cough.

Overall, I will say this has been one of my favorite and most memorable hikes that I have ever done.  The views are absolutely gorgeous around you, as you can see for miles around on a clear day.  Once you reached a viewpoint, you thought that it couldn’t get any better; but then you would take a few more steps and be even more impressed.  We definitely plan on returning to tackle the hike all the way to Calloway Peak, the tallest peak at 5946 feet.

Christine Says…

It’s kind of ironic that John Muir proclaimed that Grandfather Mountain’s air cured him of bronchitis. I was sick as a dog when I hiked this trail, and the air did not have any magical curative properties for me!  In fact, I think it may have helped precipitate my garden-variety bronchitis into a full-blown, month-long battle with pneumonia.

Some readers might wonder why I didn’t do the sensible thing and actually rest while I was sick.  I wish I had been smarter, but we had planned this trip several months earlier and were there to celebrate our 15th wedding anniversary.  There was no way I was going to miss it.  So… stupidly, I pushed myself mercilessly so that I could see and do all the things we had planned.  I had a great time on the trip, and especially this hike – but I definitely paid a high price for all that fun.

More Ladders Near the Chute
Adam approaches the rock scramble known as The Chute.  Below: The Chute

The Chute

Illness aside, this hike is probably near the top of my list of all-time favorite hikes.  The scenery was breathtaking.  Every boulder I rounded, every opening I stepped into; I practically gasped with disbelief at how truly beautiful nature can be.  The ladders and cables were a perfect balance of scary and fun. I felt challenged and rewarded in equal measures.

Our adventure started off in the hiker parking area on Grandfather Mountain.  The trail from the parking lot to the bridge was short and easy.  Almost immediately, we could hear the harmonic hum of the wind whipping through the bridge.  Evidently, the ‘singing bridge’ is a more accurate moniker than ‘swinging bridge’.  We spent a little time at the ‘Top Shop’.  We both crossed the bridge.  I was very proud of Adam for crossing.  He does not like heights and the bridge was not a happy place for him!

The bridge didn’t scare me at all, but the wind’s strength did!  The main trail system on Grandfather Mountain starts directly above the parking area.  The sign marking the trailhead is loaded with many, many warnings and cautionary tales.  On the way over the the trailhead, the wind literally blew me off my feet!  I rolled like a tumbleweed across the parking area – pretty remarkable for a full-grown, adult woman!  It was the strongest wind I’ve ever encountered — even topping the weather we experienced on Mt. Washington.  I told Adam that I thought it was stupid to hike in such strong wind, but he encouraged me to hike a little along the trail, in hopes that the trees and other obstacles would shelter us from the wind. Thankfully, he was right and the wind wasn’t bad for most of the hike.  

All of the ladders and cables were sturdy and securely fixed to the rock, so I never felt like I was in any real danger.  They greatly aided us in traversing some very steep terrain.  When you look at MacRae peak from a distance, it looks so steep and practically unscalable.  When you finally climb the last ladder to the highest point of the peak, you truly feel on top of the world!  We shared the peak with a group of Boy Scouts and a group of Amish men.  Quite an interesting mix of folks!

Beautiful views from Attic Window Peak
Beautiful views from Attic Window Peak.  Below: Tent site on Attic Window Peak; More gorgeous vistas

Tent Site More Views on Grandfather Mountain

After leaving MacRae, we continued along the Grandfather Trail in the direction of Calloway peak.  The trail took us through a fun and challenging rock scramble called ‘The Chute’.  Near there, we met one of the Grandfather Mountain rangers.  He was out hiking the trail to sweep for hikers in trouble and for people who might be cutting time short to make it back to the parking area by 5:00.

After the Chute, we passed the Attic Window Peak backcountry tent site.  After that, we walked a short way along an open, razorback ridge or rock.  We had more spectacular views looking toward Banner Elk and in the direction of Calloway Peak.  Along this ridge, we stopped for a snack.  While I was eating my Luna bar, I measured up the distance to Calloway peak.  I wasn’t feeling any better.  I was cold, stuffy, achy and exhausted.  As much as I wanted to reach Calloway peak, I wanted some soup and a hot bath even more.  I apologetically told Adam that I couldn’t go any further.  I could tell he was disappointed, but he willingly turned back.

Cliffside View
Adam enjoys cliffside views. Below:  Fall foliage from Grandfather Mountain; Our last ladder down the Underwood Trail, Fall Foliage; Rocky and rooty footing on the Underwood Trail.

Fall Color Final Ladder Grandfather Extension
Underwood Trail Adam Climbs Down the Underwood Trail

On the return, we took the Underwood Trail.  It was quite steep and rocky, but only required one downward ladder climb.  Eventually, we reached the junction of the Grandfather Trail and the Grandfather Extension.  The extension led us back down to the hiker parking area without having to cross the Swinging Bridge parking lot again.  That little section of trail had one pretty view from a bridge and lots of fall color.  We got back to the car and made our way back down the mountain.  I could not believe the line of cars waiting to get into Grandfather Mountain.  It stretched for several miles!  Insane!  I guess it’s a good idea to get an early start when you visit Grandfather.  All in all, it was a super day and a great hike.  I can’t wait to go back sometime when I’m not sick!

Trail Notes

  • Distance – about 3.5 miles
  • Elevation Change – about 1600 feet
  • Difficulty – 4.5.  The ladders and cables make this a tough hike.  The climbs over the mountains make this hike take a lot longer than you would normally on this distance.
  • Trail Conditions – 4.  The trail was in good condition.  Ladders and cables were sturdy and secure, but rainy/icy/snowy weather will make the rock climbing treacherous.  If you have a fear of heights, ladders or precipitous edges, this hike might not be for you.
  • Views5.  AMAZING!
  • Waterfalls/streams – 0. There are no streams on this hike.
  • Wildlife – 0. This area is heavily traveled, so it’s unlikely you’ll see wildlife.
  • Ease to Navigate –4. The junctions at all the trails are well-marked.  We got a little turned around through one of the rock scrambles.
  • Solitude – 1.5.  Expect to see lots of people on this trail unless you go at an off time.  But we never felt too crowded where we couldn’t enjoy things by ourselves.

Directions to trailhead:  The entrance to Grandfather Mountain is located on US 221, two miles north of Linville, North Carolina, and one mile south of the Blue Ridge Parkway at milepost 305.  Signs for the entrance are well-marked and an entrance station is right off the road with large gates.  Travel up the road by car until you reach the parking lot designated for hiking trails.  The trailhead for the Bridge Trail is on the left side of the parking lot as you are driving up. Coordinates for the hiker parking area are 36.096145, -81.831802.