Little Devils Stairs

We hope you enjoyed our special Great Smoky Mountains Edition!  Now we’re back to Virginia!  Although… honestly, the heat has kept us mostly off the trail lately.

The 5.5 mile Little Devils Stairs hike climbs through an impressive gorge along Keyser Run and loops back past a family cemetery that pre-dates the park.

Canyon Walls Along Little Devils Stairs Hike
it is Adam makes his way past rugged canyon walls on the Little Devils Stairs hike. Below: The parking lot at the end of Keyser Run Rd. provides access to the fire road and the Little Devils Stairs trail; When we hiked in early June, water was still flowing in the stream (but not much); Red columbine bloomed abundantly.

Start of Little Devils Stairs Hike Keyser Run Was Flowing Red Columbine

Adam Says…

To try and beat afternoon rain in the forecast, we decided to hike Little Devils Stairs early in the morning.  To cut back a little on the distance along fire roads, we decided to start the hike from the perimeter of the park (near Sperryville) rather than from Skyline drive.

The trail begins immediately going into the forest from the parking lot and is a very gradual ascent along Keyser Run.  After about .9 miles, the trail then begins to climb more steeply as you are climbing up the “stairs” along the gorge.  The climbing can be quite steep, at times requiring you to use your hands to also help balance or pull yourself up.  Over the next mile, you gain 1000 feet of elevation on your climb.  Along the way up the climb, you will come across several smaller waterfalls and will have to cross over the stream in a few places.  At 1.75 miles, the climb tapers off and the trail moves away from the gorge.  At 2.1 miles, you reach the junction with the Keyser Run Fire Road.  Take a left on this fire road and begin your descent.  The road was fairly uneventful, but it is a good place to spot butterflies and you may see a snake sunning itself on a part of the road.  At 3.9 miles, the road begins to enter the forest again and you will see some more old-growth hemlocks along the road that create a canopy over the road.  At 4.2 miles, you will reach the Bolen family cemetery.  Just ahead is the junction with the Hull School Trail, but stay on the fire road veering to the left.  At 5.4 miles, you will reach the park boundary and at 5.5 miles, you will return back to your vehicle in the small parking lot.

Steep Uphill on Little Devils Stairs
Adam climbs up the steepest part of the Little Devils Stairs hike. Below: There are many tiny waterfalls along the Little Devils Stairs hike; Christine contemplates the rocky climb through the gorge; Adam makes one of the many stream crossings.

Waterfall and Canyon Walls in Little Devils Stairs Pretty Keyser Run Christine Contemplates the Rocky Trail One of Many Stream Crossings on the Little Devils Stairs Hike

The highlight of this hike is definitely the gorge that was created along this geological fault line that eroded quickly.  At one point along the trail, you can see a sheer cliff face of rock.  I can easily imagine people rock climbing up this gorge wall with the proper technical gear.   I have seen Little Devils Stairs and Big Devils Stairs listed in a book about rock climbing in Virginia, so you may luck out and see some people navigating up to the top.

A sadder note along the trail is the Bolen family cemetery.  While we may enjoy the national park that is here, there were many families that were forced to uproot their lives and move out of the area as the government took over the land.  The cemetery of the family still stands and was rededicated in 2002.

Waterfall at the Top of Keyser Run
The largest of the falls was at the very top of the gorge. Below: There are many fallen trees, especially hemlocks in the gorge; We saw a lot of these flowers along the trail;  After exiting the gorge, most of the remainder of the trail is along the Keyser Run Fire Road.

Fallen Hemlocks Wildflower Along Little Devils Stairs Keyser Run Fire Road

Christine Says…

Little Devil Stairs is another hike we’ve had on our list of trails we wanted to add to the website for quite a while.  We’ve hiked it before –  the last time was probably about a year before we started this website. It’s a decent hike, but I’ll admit it’s not one of my favorites in the park.  The section of the hike that passes through the gorge is fun, tough and interesting – but that’s only a little over one mile of the entire five and a half miles.  Way more than half of the hike is along a fire road.  And if you’ve read our site with any regularity, you know how I feel about fire roads (they’re boring!)

The drive to the trailhead was really pretty.  We passed by Luray, over Thornton Gap and down past Sperryville.  There were lots of winding country roads, meadow views and meandering stone walls on the way to the parking area.  When we got there, we were the only car.  I absolutely LOVE having a trail all to myself!

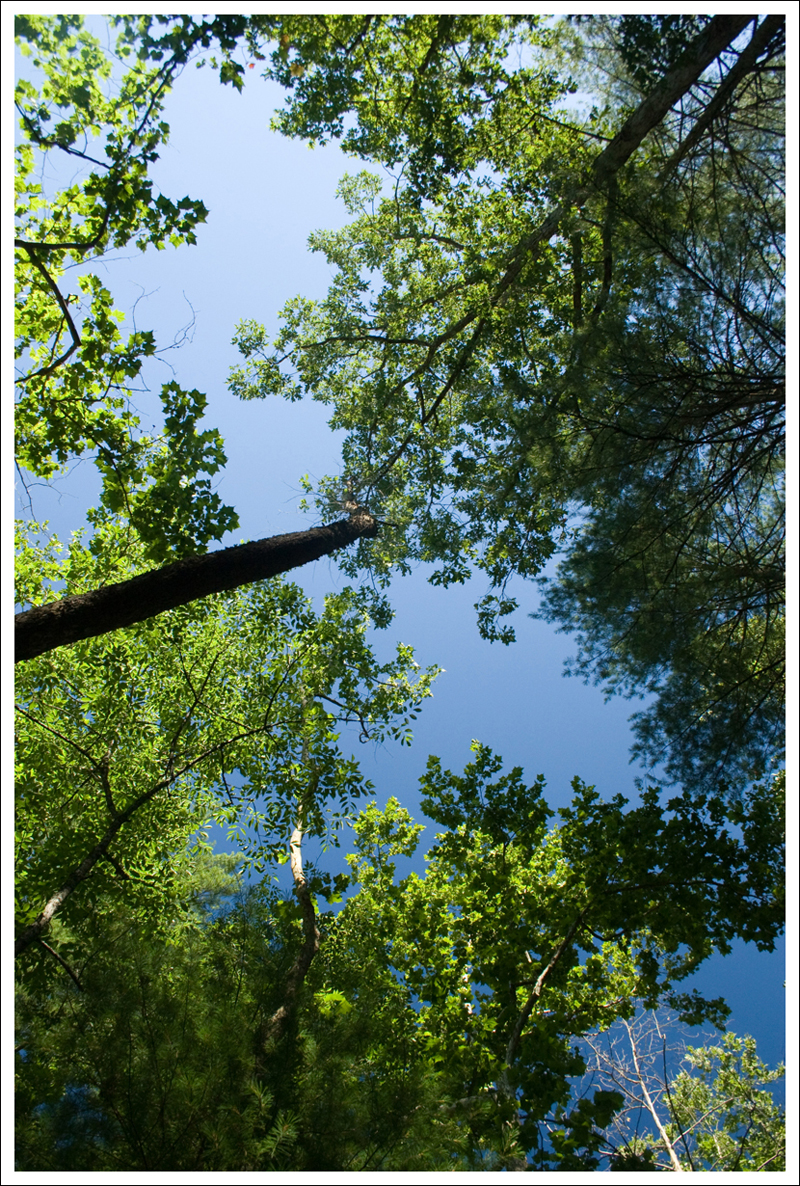
We started off climbing gently uphill through the woods, crossing several spots of dry streambed. The insect activity on this particular day was insane.  I alternated walking like a normal person with walking like a crazy person, arms flailing all around my face, trying to bat away the clouds of gnats and midges.  Between the bugs, the humidity and the heat – summer hiking can be really tough.

Bolen Cemetery
Adam reads headstones in the Bolen Cemetery. Below: The gate leading to the cemetery; A memorial poem from the cemetery’s re-dedication;  We saw lots of indian pipes along the hike.

Why Are the Mountains Blue - Bolen Cemetery Indian Pipes

I had been pretty concerned about the dry streambed crossings, but once we reached the gorge, the water flow picked up a bit.  Little Devil Stairs is definitely a hike you want to do when there has been a significant amount of recent rain.  The primary appeal of the gorge is the constant string of small waterfalls and rapids that pours down the ‘stairs’.  When the weather has been wet, Little Devils Stairs is lovely and wild.  The sound of running water hemmed in by stone walls constantly surrounds you. However, when the weather has been dry, the hike is nothing but steep uphill through a rugged, overgrown and brushy gorge.  The towering rock walls are still impressive, but without running water, something is missing from this hike.

With a thousand feet of elevation gain in just under a mile, the path up can be a real quad-burner if you’re not in decent shape.  It’s mostly walking along trail, but there are several sections where you must scramble up over giant stair-like rocks.  The top of the gorge is marked by the largest of all the waterfalls along Keyser Run.  After you pass the final fall, the trail grade becomes more gentle and passes through pretty, quiet forest.  In a short time, you’ll reach the Fourway Junction.  People hiking Little Devil Stairs from Skyline Drive will come down the trail at this junction.  For us, it was the point where the ‘hike’ ended and the fire road walking began.

Frittilary
We saw lots of butterflies on this hike! Below: I’ve never seen a yellow moth like this one before. I think it’s an Io moth because it had the ‘eye’ marking on it’s wings, though you can’t see them in the photograph; On the drive back through the park we spotted a pair of black bears mid-courtship (this is the male);While eating lunch at Big Meadows we met this cute biker dog.

Yellow Moth in Shenandoah Mated Pair of Black Bears - Boar Harley-Davidson Chihuahua

We considered jogging down the trail to make the distance pass more quickly, but I wanted to keep my camera and telephoto out in case we saw wild flowers, butterflies or bears!  The heavy camera kept bouncing on my hipbone, so I had to slow to a walk (I got a huge bruise anyhow).  And indeed – there were plenty of butterflies and wildflowers to photograph along the way.  We didn’t see a bear on the trail, but we did see one later as we drove back through the park.

The last point of interest along the fire road was the stop at the Bolen Cemetary.  It’s a beautiful spot for a final resting place – surrounded by a stone wall and shaded by elegant maple trees planted by the original property owner.  It’s one of the more meticulously maintained cemeteries in the park.  If you walk amongst the headstones, you can’t help but notice how young most people died.  So many babies, children and young adults rest under these markers.  When I was researching information about this trail, I came across a wonderful feature article from Blue Ridge Country magazine about the family reunions that still take place at the cemetery.  I enjoyed reading all the recollections of Beulah and Mary Bolen about their life in the area before the park existed.

After leaving the cemetery, the remaining distance along the fire road went steeply downhill.  We arrived back at our car fairly quickly and headed to Big Meadows to have some lunch in the park.  After lunch, the skies opened up and it poured down rain the rest of the day.  I’m glad we got a chance to get out before the weather changed!

Trail Notes

  • Distance 5.5  miles
  • Elevation Change – About 1650 feet
  • Difficulty –  3.  The climb up Little Devils Stairs can be strenuous in parts, but the fire road is easy walking.
  • Trail Conditions – 3.  The climb up the stairs is rocky and you do have to cross Keyser Run as the trail criss-crosses over in several places.
  • Views– 1.  From near the top of the gorge, you may get an obstructed view, but nothing spectacular.
  • Streams/Waterfalls – 3.5.  You are walking along Keyser Run through the first couple of miles of the hike.  The waterfalls are mostly small, but still nice to see.
  • Wildlife – 2. There are signs of bear scat in the area, but we didn’t see much wildlife other than a snake along the fire road.  You will hear lots of warblers and other birds as you enter the hemlock forest near the end of the hike.
  • Ease to Navigate – 3.5.  The blue blazes for the Little Devils Stairs hike are not as prevalent in some places and may require you to look around for the next one, especially in the fall when leaves cover the trail.  Posts at the trail junctions provide some great direction.
  • Solitude – 3.  Except on weekends, I wouldn’t expect to see a lot of people on this trail.

Directions to trailhead:  Off of 211 north of Sperryville, take a left on County Road 622/Gidbrown Hollow Road.  Follow this road for a few miles and then take a left on County Road 614/Keyser Run Road.  At the end of this road, you will reach a small parking lot.  The trailhead starts to the right of the parking lot, marked by a concrete post.

Laurel Falls (TN)

Special: Smokies Edition

Introductory Guide to Visiting Great Smoky Mountains National Park

This paved, easy 2.6 mile (round-trip) walk leads to Laurel Falls.  The 80-foot tall cascade is one of the Smokies most popular waterfalls.

Laurel Falls
Laurel Falls is easily accessed and one of the park’s prettiest waterfalls.

Christine Says…

If there is a trail most everyone does when visiting the Smokies,  it’s Laurel Falls.  This hike is popular for a number of reasons: 1) the falls are gorgeous 2) the trail is short, paved and not very steep and 3) the trailhead is close and easily accessed from Gatlinburg.

Adam and I always enjoy solitude when we hike, so we cooked up a plan to eat breakfast early and get to the falls before the crowds.  However, it turns out it’s very hard to find breakfast in Gatlinburg that starts serving before 7:00 a.m.  Even the free breakfast at our hotel wasn’t put out until 7:00.

We decided we would have to go with the flow and hope that most people would have a 9:00 a.m. breakfast and take their time starting their activities for the day. It turned out to be a great decision because we had an amazing breakfast at the Pancake Pantry.  Let’s just say, I was still very full on strawberry crepes and bacon when we got to the Laurel Falls trailhead.

I guess most people do prefer a more leisurely start to their day, because there were only a few cars in the lot when we arrived.  The trail climbs several hundred feet over the course of 1.3 miles.  The entire path is paved, making this trail ideal for families with children in strollers.  A person might be able to get a wheelchair up the trail, but the paving is not smooth and while the grade is gentle, it’s still all uphill until the very end.

Laurel Falls Trailhead
The hike begins with distance markers, interpretive brochures and bear warnings. Below: These Pancake Pantry pancakes are too yummy not to share, and they made a perfect pre-hike breakfast!

Pancake Pantry

There really isn’t much to say about the actual hike to the falls.  It was typical Smoky Mountain forest with a few glimpses of bigger mountains through the trees.  I imagine most people would be able to cover the distance in about 30 minutes.

The falls are spectacular and tumble down over several rocky tiers.  The upper falls are accessed directly by the trail.  Viewing the lower half of the falls requires a short boulder hop downhill off the trail.  Both parts of the falls are well worth visiting up close, so if you feel confident doing a little rock scrambling, do take the time to climb down.

We were lucky enough to have the falls mostly to ourselves.  A few people came by while we were there, but no one stayed long.  The heavier traffic started rolling in on our walk back down.  We passed so many people – dozens and dozens – making their way up the trail by 9:00 a.m.

In short, Laurel Falls is definitely worth a visit, but I recommend arriving early.  If you’re a photographer and want to take long exposures on the waterfall, the area is completely in the shade in the early morning, but I’m pretty sure sun would hit the falls by mid-day.

Adam Says…

We have just started to purchase art prints from all of the national parks we have visited.  The ones we have been buying are produced by Lantern Press and are for sale in the national park visitors centers.  We are hoping to one day frame and hang them in an area of our house.  When we were deciding which one we would get to represent the Smokies, we decided on the Laurel Falls print.  So, we definitely had to hike this one since we had the iconic image.

Christine Hiking the Paved Trail
Christine hikes along the paved path to Laurel Falls. She carried her big, heavy-duty tripod on this outing. Below: Christine jumped in the photo to add a sense of scale to Laurel Falls.

Laurel Falls and Christine

As Christine said, the hike just to the waterfall stays on the concrete path and it is uphill almost all of the way.  We saw several families on the way back that were not in the best of shape that were huffing and puffing their way to the falls and asking how much further.  However, I do think that most people should be able to make the hike.

If you are interested in making this a longer hike, you can continue past the falls to the top of Cove Mountain, making it a 8.0 mile out-and-back hike.  The trail after the falls isn’t paved and you would be looking at 2300 feet of elevation gain in the remaining 2.7 miles.  At the top of the mountain is a tower, but from what I have read part of the tower has been blocked off for a weather station and the views are not that remarkable.

Lower Laurel Falls
Accessing the lower falls requires a short, simple scramble from the trail.

There is a reason that this waterfall is so popular – it is one of the prettiest you will see.  The upper falls drop down 75 feet over three tiers.  The water running down is the Laurel Branch that is coming down from Cove Mountain and it will eventually feed into Little River.  I would encourage you to go after some rain has hit the Smokies to get the most water flowing through.  The lower part of the falls does take careful navigation to get down to the bottom, but if you want to venture down below, backtrack about 50 feet and you will see a common path to reach the bottom.  We witnessed a couple that tried to hike down to the bottom another way and the man fell hard on his way back up.

We had the falls for a few minutes by ourselves (it does pay to start early), but we soon met a newlywed couple.  Christine showed the wife how to do some long exposure pictures and then we went on our way.  We saw the hoards of visitors coming up the path and I could tell it was going to be a busy day at this popular spot.

Trail Notes

  • Distance2.6 miles
  • Elevation Change – about 300 feet
  • Difficulty –  1.  This is a short, easy hike with not much elevation change.
  • Trail Conditions – 5. The trail is paved and is suitable for strollers.
  • Views1.  A couple peeks through the trees.
  • Streams/Waterfalls – 5.  The falls are gorgeous!
  • Wildlife – 2.  Because of the popularity of this hike, I would guess a lot of animals are scared away.  Although… bear warnings are posted in the area.
  • Ease to Navigate – 5.   Very simple – just follow the path and you can’t get lost.  The trail continues past the falls, but we didn’t go that far.
  • Solitude – 0.  Expect to see masses of people!

Directions to trailhead:  Past the Sugarlands Visitor Center, take the Little River Road for 3.5 miles until you see signs for the falls.  Parking was available on both sides of the road.

Abrams Falls (TN)

Special: Smokies Edition

Introductory Guide to Visiting Great Smoky Mountains National Park

This popular five mile hike follows a beautiful stream for most of the route and ends with a visit to lovely Abrams Falls.

Abrams Falls
Abrams Falls pours out into a large, rock-surrounded pool. Below:  Beautiful stream scenery was abundant on this hike.

Slide Falls Abrams Creek

Christine Says…

Tuesday morning dawned thick with clouds and fog… a perfect day for a waterfall hike.  Although there were plenty of waterfalls near the Cherokee side of the Smokies, we decided to take a ride over to Cades Cove to hike the exceedingly popular Abrams Falls trail.

The easy five-mile hike is one of the top five trafficked trails in the park.  Since we had an early start on the day, we decided we could probably beat the worst of the crowds and enjoy seeing the falls with some semblance of solitude.

Getting to the trailhead took longer than we expected.  The drive along the Little River into Cades Cove was so pretty, I had to stop and take lots of photos.  Once we got into the cove, grazing horses, wild turkeys showing off their plumage, and abundant whitetail deer distracted us.  I wanted to stop at a few of the old cabins, churches and farms, but we decided that would have to wait for another day.

Adam on the Abrams Falls Trail
Adam enjoys the green vista along the Abrams Falls Trail. Below: Trail marker at the start; Bridges cross the stream multiple times along the trail.  This was the only full bridge.  The rest were hewn logs with rails on one side; Trail conditions were mostly smooth and gentle.

Trail Marker Bridge Near Beginning of Abrams Hike Adam on the Abrams Falls Trail

The Abrams Falls trailhead was at the end of an unpaved, muddy road.  (restroom facilities were available) The trail marker at the beginning indicated that the trail was moderately strenuous and would take 4-5 hours.  The sign also warned that no water or restrooms would be found at the falls.  I suppose this is a clear indicator that hikers of all experience levels and abilities use the trail.  And indeed this turned out to be true – I even saw a hiker wearing black pantyhose under a pair of denim shorts. That was a first for me!

The hike began by crossing a bridge over Abrams Creek.  All along the river, we saw fly fishermen.  The stream looked ideal for brook trout.  The trail runs parallel to the creek for much of the hike – sometimes at stream level, sometimes high above.

The trail is mostly flat with several short, but steep, climbs.  It mostly passes through thick green forest, with one exception.  Near the top of the steepest climb, the trail becomes rocky and almost barren, with many dead and toppled trees.  Maybe a fire or storm damaged the trail in this area, because it was nothing else like the rest of the hike.

A steep downhill climb and a walk across two log bridges empties you out into a grotto with Abrams Falls at the end.  When we visited, the falls were gushing!  The water was so powerful; I couldn’t take a long exposure of the waterfall without the water turning into a solid wave of white.

As expected, many people were enjoying the falls. Families picnicked, couples posed for photos and kids caught tadpoles in the pools of water between the rocks.  One of the notable features near the waterfall was a large glacial pothole.  It looked really similar to features I’ve seen in New Hampshire.

Christine Crosses the Log Bridge
Christine crosses a log bridge. Below:  A perfect round ‘pothole’ formed by the forces of nature; Blooming rhododendron.

Pothole Blooming Rhododendron

We didn’t spend long at the falls because we wanted to get back before it started raining.  The return leg of the hike just retraced our steps. On the way back, we passed even more people on their way to the falls.  This is definitely one of the Smokies most popular spots.  Understandably – such beautiful falls, and so easily reached (by most)!

Adam Says…

When we were thinking of some hikes we wanted to accomplish in the Smokies, we wanted to hike to a bald, a nice hike with views, and some waterfalls.  After accomplishing the first two items the first two days, it was time to do a waterfall.  We started fairly early in the morning knowing that we would have a longer drive to get to Cades Cove from our takeoff point of Bryson City.  When we had been driving on 441 to Newfound Gap, we had heard about construction but had never quite reached it.  When we crossed over Newfound Gap, we quickly ran into some construction as they were working on repaving the road.  Bringing the two-way road to a one-way road required us to wait about 20 minutes before the lead car allowed us to go further.  We finally got through the construction and made our way towards Cades Cove.   When driving on the one-way Cades Cove road, you should also expect to go very slow on this 11 mile road.  Cars creep along, hoping to see wildlife.  We were shocked to see so many cars stopped to a halt to take a picture of a deer.  I guess we feel a little spoiled in Virginia with all the deer we see regularly.  We typically have a yard full of deer every morning.

The hike to Abrams Falls starts off with an informational sign.  Soon you will cross a bridge and begin to see fly fisherman in Abrams Creek.  Abrams Creek is a great spot for fishing brook trout.  Rainbow trout tend to be found in higher elevations in the Smokies.  The trail has a slight incline with a few areas of steep climbs.  At .8 miles, you cross over the Arbutus Ridge, which changes the hike from being largely uphill to being more downhill.  At 2.25 miles, the trail then begins to take a steeper descent until you reach Abrams Falls at 2.5 miles.

Adam at Abrams Falls
Adam enjoys Abrams Falls.  Below: More lovely views of the stream along the trail; Adam crosses another log bridge.  There were probably four or five like this on the trail.

Stream on the Hike Another log bridge

Abrams Creek and Abrams Falls were named after Chief Abram (previously known as Chief Oskuah and also known as Old Abraham), the Cherokee Chief of Chilhowie nearby.  Chief Abram and a war chief known as Dragging Canoe were aligned with the British during the outbreak of the Revolutionary War and led an attack on Fort Watauga.  In 1788, Chief Abram was killed by tomahawks by the son of John Kirk, seeking vengeance for his family that had been massacred by Cherokees on Nine Mile Creek.

This hike was a little humbling to me.  As I was hiking early on uphill, I started feeling very weak and hot.  I was carrying Christine’s heavy tripod for a while, but I was surprised if this was the reason I was feeling so fatigued.  I had to stop for about 15 minutes and ate several hand-fulls of trail mix.  My blood sugar was quite low from not eating a huge breakfast before hiking.  As we rested, I felt lame for having to take a break and let other people pass us, but I know we made the right decision.  Within about 25 minutes, I felt more like myself as we continued hiking.

There are a number of log bridges on the trail, which have handrails around thigh or waist level on one side.  I’m not a big fan of heights or water (since I can’t swim), so these log bridges can feel a little unnerving for people like me.

As soon as we reached the falls, we set up the tripod and took some nice photos of the falls.  You should expect to see a lot of people at the falls and you will likely have to wait to get pictures of the falls that don’t have strangers in them.  The water does come out in a powerful force as it plunges about 20 feet into the pool below.  We spotted some crayfish moving from rock to rock near the shoreline.   We refueled with some very disappointing Kashi granola bars to make our hike up the steep section and returned to our car.

Trail Notes

  • Distance5.0 miles
  • Elevation Change – about 600 feet
  • Difficulty –  2.  There is a little bit of climbing on this hike, but most people will find the terrain fairly easy.
  • Trail Conditions – 4. The trail is well maintained and easy to walk.  It’s much less rocky and rooty than other trails in the Smokies.
  • Views0.  None on this hike.
  • Streams/Waterfalls – 5.  The stream and the falls are both spectacularly pretty!
  • Wildlife – 2.  Because of the popularity of this hike, don’t expect to see too many animals hanging out.  Although… we did see a turkey and a deer.  Otters have been spotted in Abrams Creek.
  • Ease to Navigate – 5.   Very simple – just follow the path and you can’t get lost.  There is one trail junction near the falls, but if you read the trail marker, you’ll stay the course.
  • Solitude – 0.  Lots of hikers, lots of fly fishermen.

Directions to trailhead:  Past the Sugarlands Visitor Center, take the Little River Road until you reach the Cades Cove Loop Road.  The Cades Cove Loop Road is closed until 10AM on Wednesdays and Saturdays to car traffic.  Follow the Cades Cove Loop Road 4.9 miles.  Take a right on the gravel road that leads to the Abrams Falls parking lot.  The trail starts at the end of the lot.

Bear Church Rock – via Graves Mill

Bear Church Rock is a 8.5 mile hike that leads to gorgeous, mountain views.  The hike passes alongside two rivers, waterfalls, and a PATC cabin. You can also reach this beautiful overlook from Skyline Drive (Bootens Gap).

Taking in the View From Bear Church Rock
Adam enjoys the view from Bear Church Rock. Below: The tall, straight trees along the Staunton River trail were very beautiful; Azalea blooming near the top of Jones Mountain; The last push to the rock almost killed Adam.

Beautiful, Tall Straight Trees on the Staunton River Trail Blooming Azalea Adam Almost Died

Adam Says…

Bear Church Rock is a hike that has it all – nice trail alongside a stream, a few small waterfalls, a visit to a PATC cabin, and a great view at the top.  The views are completely of mountains with rarely a sign of civilization.  I always feel like I am truly getting away when I don’t have to see houses or roads dotted across the landscape.  You can easily see Fork Mountain and Doubletop Mountain nearby, but past that ridge, you can also get glimpses of the ridge that makes up Skyline Drive.

The hike starts off on the Graves Mill Trail, which is a flat walk that runs along the Rapidan River.  At .5 miles, you reach a junction with the Staunton River Trail.  Take a left at the junction to follow the Staunton River Trail, which runs along the Staunton River.  Shortly after you join the trail, you will come across a beaver dam on the river and you’ll notice several stumps of trees that have been gnawed by beavers.  At 1.1 miles, you will see a small waterfall leading into a small pool off the trail that is worth a stop.  At 1.8 miles, you will see on the left side of the trail some piles of stone and on the right you’ll be able to see another small waterfall through the trees.  At 2.7 miles, you reach the junction with the Jones Mountain Trail.  Take a left on this trail.  The trail becomes very steep at this point and will remain so until you reach the top.  At 3.1 miles, you reach the junction with the McDaniel Hollow trail.  Take a left here to follow the Jones Mountain Trail.  At mile 3.4, you reach a junction that leads to the available-to-rent PATC cabin.  If you stay relatively straight on the trail, it leads to the PATC Jones Mountain Cabin.  We took this trail which starts off flat, but then descends rather steeply.  After visiting the cabin, return to reach the junction with the Jones Mountain Trail and head up the steep incline until you reach Bear Church Rock.  Continue back the way you came, but your return trip will be shorter if you have already visited the Jones Mountain Cabin.  The total trip should be 8.5 miles.

You could also approach this hike from Skyline Drive for a longer hike, following the Laurel Prong Trail to Cat Knob Trail to Jones Mountain Trail.  My guess is it would be about a 10 to 12-mile round-trip to approach it from that direction.

Start of the Staunton River Trail
Adam pauses to look at distances marked on the Staunton River trail sign. Below: Parking for this hike is at Graves Mill; The lovely Rapidan River; Trillium were still blooming along the trail, but were nearing the end of their peak.

Graves Mill Sign The Rapidan River Trillium

On our way up the Jones Mountain Trail, we ran into a few PATC volunteers that were working on maintaining the trail.  Some PATC members volunteer to help maintain the trails that run through Shenandoah National Park, the Appalachian Trail, and other regional trails.  One of the workers has been working on improving this trail for the last five years.  At the time that we saw them, they were working on building in some water bars through the trail that helps pull the water off the trail to prevent erosion.   They were digging drainage ditches, placing some dead black locust tree logs across the trail they had cut, refilling with dirt, and then mounding the dirt in a way that it was unnoticeable to hikers.  We learned that the black locust trees were great trail logs because they don’t rot.  We thanked them for helping to improve the trails and we plan on getting in touch with them to help them some weekend in the future.  We both feel that as much as we enjoy hiking, it would be nice to give back.

First Waterfall on Staunton River Trail
This was the first of many small waterfalls we saw along the Staunton River trail. Below: Another waterfall; There were many remnants of stone walls and stone structures in the woods along the trail; Adam stops to consult the map at the junction of the Staunton River and Jones Mountain trails.

Another Small Waterfall on the Staunton River Trail Old Stone Wall in Shenandoah Junction of Staunton River and Jones Mountain Trails

At one moment when we were hiking up the Jones Mountain Trail, I decided to take a break from the climb and sat on a log on the side of the trail.  As I was relaxing, a piece of the log broke off, causing me to hit myself in the head with one of my trekking poles.  I felt like I was in the Subway commercial of fat people breaking things.  Embarrassing, but funny.

This was our first time hiking this trail, but Christine and I both think this is one of the best trails in Shenandoah National Park.  If you can handle the distance and the steep climb, this should be on your “must” list.  For further reading about this area, check out Lost Trails and Forgotten People: The Story of Jones Mountain.  I think I would like to pick up a copy and learn more about this area, since it was such an amazing hike.

Christine Says…

Another weekend, another backpacking trip cancelled due to rainy weather – what can I say?  When you’re a fair-weather backpacker, lots of spring trips end up delayed.  We were pretty glad we postponed again, because the thunderstorms that passed through overnight on Saturday were pretty fierce and torrential.  I would not have enjoyed being in our tent during those winds and rains!  Fortunately, Sunday morning dawned dry, but foggy with a forecast of dissipating clouds followed by brilliant sunshine.  We decided to tackle the 8.5 mile route up Jones Mountain to Bear Church Rock.  It’s a hike we’ve been meaning to do, especially after seeing it covered by PATC – Charlottesville Chapter and Hiking Upward.

The hike vastly exceeded my already high expectations. I had the BEST time! Without a doubt, this hike has cracked my top-five list of hikes in Shenandoah National Park (along with Riprap, Mary’s Rock from Pinnacles, Rapidan Camp and the Rose River Loop).  This hike had it all – gorgeous river scenery, waterfalls, fantastic trail conditions, a rustic cabin, spectacular views and plenty of opportunities to spot wildlife.

Beaver Dam on the Staunton River
We saw this impressive beaver dam on the Staunton River. There were lots of gnawed trees (inset) around the water. Below: Showy Orchis is a common wildflower seen blooming along the trail; Everything was so lush and green; You may notice Adam’s pants tucked into his socks to avoid ticks. Ticks are out in force this year!

Wildflowers Along the Trail Beautiful Spring Trail Downhill Hike

We started out around 10:00 a.m. from the Graves Mill parking area.  The lot is small; with room for about 8-12 cars at most.  It was already mostly full when we arrived.  The hike starts off on the Graves Mill trail – a flat section of trail running parallel to the Rapidan River.  Within a half mile, the Graves Mill trail meets the Staunton River trail.  This trail is a gentle uphill grade, following within sight or earshot of the water.  One of the first interesting things we passed was a series of several beaver dams spanning the river.  I don’t know if they’re active dams or long abandoned.  We saw plenty of gnawed tree stumps, but no sign of beavers or any fresh activity.  A little further upstream, we passed the first of a series of small waterfalls.  All of the falls and cascades along the Staunton River are beautiful!  If you’re a photographer and like shooting long exposures on moving water, this river is a goldmine.  I’d love to return on an overcast day after there has been plenty of rain.  I think this trail would also be popular with people in search of the perfect summertime swimming hole.  There were so many deep, quiet pools between the faster moving cascades.

After about a mile and a half along the Staunton River trail, we reached the junction with the Jones Mountain trail.  Adam took a brief break at this point to consult the map. We quickly figured out that we were about to start climbing.  Overall, the path to Bear Church Rock requires about 2200 feet of elevation gain.

PATC Work Crew
PATC volunteers have been working on the trails in this area for over five years, spending 1000+ hours of their time.

After just a few minutes of walking, we heard voices and the sound of tools coming through the woods.  Shortly later, our paths crossed with a PATC trail crew hard at work installing water bars.  We learned from the crew that they’ve done over 1000 hours of work on this particular section of trail over the past five years.  No wonder the trail is in such magnificent shape.  Everyone who hikes in Shenandoah and enjoys the fantastic trail conditions owes a debt of gratitude to volunteer trail workers.  They do mind-boggling amounts of backbreaking labor to make the trails nice for everyone else.

After chatting with the trail crew for a few minutes, a couple came down the trail.  They mentioned that they had seen a bear with two tiny cubs just a few minutes earlier.  We were excited and hopeful that we might spot them too.  Unfortunately, we weren’t that lucky!

Eventually we reached a ‘Y’ in the trail, with one arm leading .3 of a mile down to the Jones Mountain cabin and the other arm leading a half mile up to Bear Church Rock.  We decided to visit the cabin first, and then enjoy lunch atop Bear Church.

The trail to the cabin led rather sharply downhill, first passing through an ancient, gnarled stand of mountain laurel.  The curly branches practically formed a tunnel over the trail.  All along the final descent to the cabin were stacks of firewood – also courtesy of PATC trail crews.  Apparently, there is a significant problem with cabin renter chopping down live trees near the cabin to use as firewood.  I find that SHOCKING!  What is wrong with people?  Who goes to a National Park… and chops down living trees (especially when deadfall is so abundant in the park)?

The Jones Mountain Cabin
The Jones Mountain cabin sits in a peaceful opening in the woods. Below: Christine walks through a tunnel of ancient mountain laurel on the path down to the cabin; Christine has new hiking shoes – Montrail Mountain Masochists (very comfy!); Christine enjoys the wilderness views from the rock.

Christine Hikes Through Old Mountain Laurel Love My New Montrails Christine On Bear Church Rock

After rounding a final bend, the roof of the cabin comes into view.  The Jones Mountain cabin is adorable – two stories with a big front porch.  We peeked in through an opening in the shutters and saw a big fireplace, a rustic wooden dining table and a sunny loft on the top level.  A privy and a spring are both located near the cabin.  What a great place to hike in and camp for a couple nights!

We didn’t stay long at the cabin because we were hungry for lunch and wanted to enjoy Bear Church Rock before any other hikers arrived.  The climb back up to the trail junction was pretty steep, but didn’t take too long.

The toughest climbing of the day came along the final push up to the rock.  After a few switchbacks, the trail went straight up the mountainside.  At the top, a little unmarked (but highly visible) path cuts through the vegetation onto a large rocky outcropping.  The trail continues past the little spur trail to the rocks, so don’t miss it!  If you continued along the trail, you’d eventually come to trails in the vicinity of Camp Hoover.

The view from Bear Church Rock is fantastic!  Instead of looking down into a valley full of roads, farms and small towns, you look down into wilderness.  You see nothing but trees and a line where the river cuts through the forest.  If you have a map, you can identify some of Shenandoah’s other peaks from this spot.  We hit this spot on a perfect spring day.  We had bluebird skies with only occasional puffy clouds.  The progression of spring was evident in the mountains – vibrant green climbing its way up toward the still barren mountain tops.  We enjoyed our lunch and relaxing in the sunshine.

Spectacular View from Bear Church Rock
Just some more beauty shots from atop Bear Church Rock.

Christine on Bear Church The Rock Continues Adam and Hiking Gear on Bear Church

The hike back down went quickly – with a descent so steep it was easier to run than to walk! We made the return trip to the car in about half the time it took us to climb up.  In the end, the entire hike took us about four hours, including stops at the cabin and half an hour for lunch.

Bear Church Rock is definitely worth doing!  What a beautiful day!

Trail Notes

  • Distance8.5 miles
  • Elevation Change – 2210 feet
  • Difficulty – 4.  The parts near the Rapidan and Staunton Rivers are very flat, but the uphill climbs are very steep.
  • Trail Conditions – 4. The trail is wide during much of the trail where you could even walk side-by-side with someone if you wanted.  The trails are well-maintained thanks to our PATC volunteers and it is not very rocky through most of the hike.
  • Views– 4. The view from Bear Church Rock is amazing.  It’s not a 360-degree view, but you can see mountains for miles and little sign of civilization.
  • Streams/Waterfalls – 4.5.  The rivers are nice to walk alongside.  You also have a beaver dam and a few small waterfalls on this trail.
  • Wildlife – 4.  We saw some snakes by the river and on the trail.  We saw deer by the Jones Mountain Cabin.  People coming down the trail when we were coming up had just seen a mama bear with two cubs.
  • Ease to Navigate – 4.  While the trail does have a few turns, it is well marked with concrete posts to help give you direction.
  • Solitude – 3.5.  We had the view to ourselves by going early in the day, but this is a fairly popular hike.

Directions to trailhead:  From Route 230 near Wolftown, VA turn on to Route 662.  Continue to follow the signs for 662.  In about 6 miles until 662 ends at a parking lot.  The trailhead is visible from the parking lot.

Lands Run Falls

The hike to Lands Run Falls is a fairly easy 1.6 mile walk down an old park road.  The waterfall is not terribly large or impressive, but it’s definitely worth a look if you’re in the mood for a short leg-stretcher.

Adam sits alongside Lands Run Falls.
Adam sits alongside Lands Run Falls.  The falls were still a little on the low side despite five inches of recent rain.

Christine Says…

We planned to do a long hike on Saturday, but Adam was having knee trouble.  Instead, we waited until Sunday and decided to try doing a few short, gentle hikes in the north district of Shenandoah National Park.   It’s been several years since I ventured as far north in the park as Lands Run Falls, so it was a nice change of pace.

The walk to the waterfall stays on a wide gravel road the entire time, so the footing is easy and there is absolutely no place you can possibly take a wrong turn.  The only place you might go wrong is by hiking across the top of the waterfall and missing it completely.  The falls aren’t marked and they’re really not visible from the trail.  You’ll know you’ve reached the falls when you pass over a small stream and culvert. You can also follow the sounds of  falling water!

To get a good look at the falls, you’ll need to follow a worn path through the woods down into the ravine.  It’s a fairly well-worn path, and the rocks in the ravine sort of form big steps.  Be careful on the rocks immediately around the waterfall.  They’re very slick and covered with moss and algae.

Lands Run in Winter
The last time I visited Lands Run Falls it was winter and there had been quite a bit more rain.

If you hit Lands Run Falls when there has been lots of rain, you’ll be treated to a pretty waterfall with three small, but distinct drops.  The first drop of about 20 feet is the most accessible and the most photogenic.  The other two drops are mostly obscured by blow-downs and underbrush.  If the weather has been dry, Lands Run Falls probably is not worth your time.  It frequently dries up completely in the summer.

In Henry Heatwole’s well-known Guide to Shenandoah National Park and Skyline Drive,  he stated “This [Lands Run Falls] is an unrewarding experience for most people… This is for the very few hikers who are willing to go to a lot of trouble to find solitude beside a pool on a mountain stream.”

I wouldn’t characterize Lands Run Falls quite so grimly.  I mean, it’s not spectacular – but it is definitely worth seeing if the water flow has been nice.

Adam Says…

We started off with this as our first of three short hikes for the day.  I was battling some knee issues and Christine thought we should turn around because I was limping the first few steps.  I felt I could make it though and luckily my knee felt better on the trip back up from the falls.

You descend 310 feet during this walk down the fire road.  While it doesn’t seem quite as noticeable on the way down, you will feel the elevation change on the way back up.  Most people should be able to do this hike, but you may need to take your time if the steepness gets to you.

Once you reach the area of the falls, to get the views that we did, you do need to climb down a steep section off the trail that can be slippery.  I was able to do it on a bad knee, but you do have to watch your feet carefully.  The fire road continues further for another 1.4 miles past the falls, but that only leads to a park boundary and there is nothing of interest to see.

The day was quite brisk with temperatures in the upper 40s.  I initially wished that I had brought a fleece along, but once the blood got pumping I was fine in my T-shirt and shorts.  The leaves were just starting to turn color – I think we’re still two weeks before peak season on Skyline Drive and higher elevations.

Lands Run Fire Road
The Lands Run Fire Road descends about 300 vertical feet over .6 of a mile to the falls.

The trail was a nice quick view to a waterfall.  I believe it is a somewhat popular trail, but that is largely due to the number of people that are driving down from Northern Virginia and are looking for a close waterfall hike.  The falls themselves are pretty but they are not as impressive as many others in the park.

Trail Notes

  • Distance – 1.6 miles out and back
  • Elevation Change – Around 300 feet
  • Difficulty – 2. Relatively easy, but definitely uphill on the return trip
  • Trail Conditions – 4.5 The trail is a well-maintained fire road
  • Views0.  The trail stays in the woods and does not offer any panoramic views
  • Waterfalls/streams – 3. Lands Run Falls is small but pretty.  It does dry up when there hasn’t been much rain
  • Wildlife – 2. You’ll likely see the usual park specimens along this trail – birds, squirrels and deer
  • Ease to Navigate – 4. The fire road doesn’t have any turns.  Be careful not to miss the falls – you walk over a small stream and the waterfall cascades below the trail.
  • Solitude – 3.  We saw a couple groups, but for a beautiful fall day, the traffic was light.

Directions to trailhead: Follow Skyline Drive to mile marker 9.2.  Park in the lot on the west side of the drive.  The hike starts at the south end of the lot.

Falls of Hills Creek (WV)

The Falls of Hills Creek is a popular trail that (should) give you views of three plunging waterfalls in a short distance.  The trail is in need of some serious maintenance, as the lower – and most impressive – falls are completely inaccessible due to a collapsed boardwalk (as of fall 2010).

Bridge Over Hills Creek
While the waterfalls were practically non-existent due to very little rain for the past few months, the trail was still pretty. Below: We climbed many stairs and saw very little waterfall action; the Middle Falls were practically dry – the Upper Falls were completely dry and we didn’t even bother with photos; The path was scattered with fall leaves.

Many Stairs Middle Falls Path

Adam Says…

In planning our trip down to West Virginia, we had seen great pictures of the Falls of Hills Creek and thought it would be worth checking out.

The trail starts from the parking lot on a paved path and begins to descend.  The trail winds around while it descends.  At .3 miles, you come to your first overlook of the 25 foot Upper Falls.  You can’t really get great looks of the falls from the overlook, but we could tell there was not a lot of water flowing.  After this overlook, the trail continues on crushed gravel.  At .5 miles, you will come to an overlook that gives you nice views of the 45 foot Middle Falls from above.

Metal Steps
Many metal stairs lead to the lower viewing point for the middle falls. Below: Benches are available along the way if you need a rest; We saw a newt on the damp pathway; BUMMER!  The trail is closed off before we even get a view of the waterfall.

Bench Newt Bummer!

After you leave the platform, you will descend a metal stairwell that goes down several flights.  At the bottom of the stairwell, the trail continues on a boardwalk.  To the right is a short boardwalk path that gives you nice views of the Middle Falls from the bottom of the falls.  Go back up the boardwalk and take the path straight ahead that leads to the view to the Lower Falls.  Unfortunately, there has been some damage from last year’s winter storm on this last section of the trail, so the boardwalk was closed.  Even though the Lower Falls are supposed to be the most impressive with a 63 feet drop, we weren’t able to get to a place to see them.  Return the way that you came to complete the 1.8 mile out-and-back.  The way back includes a lot of stair climbing, so you will get a workout.

There are two geocaches located here:

The dry summer for the last month really hurt our ability to see these falls at the most impressive.  I’m guessing that the work on the Lower Falls will not be completed until the spring/summer of 2011 (at the earliest), so I would wait until this is done to visit this series.  The Lower Falls are considered the second highest cataract falls in West Virginia.

Christine Says…

I’m a little ambivalent about including this hike on our blog because I don’t feel like we saw what the hike really has to offer. It’s hard to be enthusiastic and share information about a waterfall hike when the waterfalls are mostly dry, and one is not even accessible.  But, the Falls of Hills Creek seem to be perennially popular, even in its diminished state.

We did this hike the afternoon we arrived in Pocohontas County.  It was a cloudy, dreary, drizzly day.  I figured if there were any water left in the falls, this weather would be ideal for taking long exposure shots of the water.  Even though the photos didn’t work out, the trail was still quite pretty.  I enjoyed the cool, damp day and walking though the lush green of the woods.  We got some good exercise in climbing the many stairs along the trail.

Signs of Fall
Signs of fall were all along the trail. Below:  Tiny wildflowers along the trail; The foreboding sign that made us carry 40 pounds of camera gear.

Wildflowers Threatening Sign

The one thing I found mildly disconcerting were the “thief alert” signs we found along the trail.  When we walked down, I had all my camera gear and laptop in the car (unusual for me!)  After I saw the sign, I took the route of paranoia and decided to carry everything with us.  Adam carried the big backpack with the laptop and I carried the cameras and the tripod.  It was kind of a shame, because we hardly used any of the gear we carried.

I would love to see the Falls of Hills Creek again sometime when the water is flowing and the lower falls are open.  Until then, I’ll reserve final judgment on this hike.

Trail Notes

  • Distance – 1.8 miles out and back
  • Elevation Change – 600 feet
  • Difficulty 2.  Just due to the stair-master quality of the hike, it’s not for everyone.
  • Trail Conditions 4.5. The trail is paved, then crushed gravel, and some boardwalk areas.
  • Views –0. Not really any views other than waterfalls.
  • Waterfalls/streams 3.5 There wasn’t any water in the falls, but normally this would be great for waterfalls.
  • Wildlife 0.  The trail is too populous to really attract wildlife.
  • Ease to Navigate 5.  Just straight down a paved path and back.
  • Solitude 1.  You should see people along this trail.

Directions to trailhead: From Mill Point, WV head west of WV 39/55.  After about 12 miles, you will find a sign for the Falls of Hills Creek scenic area on your left that leads to a parking lot.  The trail takes off from the left side of the parking lot.

Arethusa Falls and Bemis Brook (NH)

Special: New Hampshire Edition

Introductory Guide to Visiting the White Mountains

Note – 10/11/10: In their October issue, Backpacker Magazine inaccurately listed Arethusa Falls as a Virginia destination. The falls are in New Hampshire.

This three mile hike leads to Arethusa Falls, which is (arguably) New Hampshire’s tallest single waterfall. The optional arm along Bemis Brook is challenging in spots, but offers more lovely stream scenery.

Arethusa Falls
Arethusa Falls might not be the most photogenic of New Hampshire’s many waterfalls, but it is likely the  tallest. Below: The optional side-loop trail along Bemis Brook takes you past Coliseum Falls.

Coliseum Falls

Christine Says…

We originally planned on combining these two trails with Frankenstein Cliffs to make a loop, but unfortunately we ran short on time and just did the three mile out-and-back.

The trail along Bemis Brook was extremely tough walking!  In addition to the roots, rocks and mud, we suffered a full-on mosquito assault.  I spent a lot of the walk along the trail cursing and flailing my arms wildly.  Even with DEET, the little buggers hovered right around my eyes, ears and nostrils, constantly buzzing in too close and getting caught in my eyelashes.

There were several very pretty small waterfalls along the Bemis trail.  Coliseum Falls were especially picturesque.  Since it was such a sunny day, I didn’t bother with a tripod.  Long exposures weren’t a possibility in the harsh sun, so I just took snapshots along the way.  The climb from Bemis Brook back up to the Arethusa Trail was practically vertical.  We had to climb, hand-over-hand, grabbing roots and rocks to drag our way up the mountainside.  There was one blown down tree that was particularly difficult to negotiate.  It was one of those fallen trees that was a little too high to climb over, but a little too low to scramble under.  I decided to clamber over it, and ended up getting my boot toe caught on the tree trunk.  I took a spectacular fall down onto the roots and rocks.  It absolutely left a big black and blue mark!  I was really glad when we finally saw the junction with the Arethusa Trail!

Frankenstein Cliffs
This trailhead for this hike offers beautiful views of Frankenstein Cliffs looming overhead. The trail has an option to lengthen the hike by a few miles to gain access to the top of the cliffs. We ran out of time and had to pass on that option. Below: Trails in the area are clear and well-marked.

Trail Sign

The rest of the way to the falls was much easier.  It was uphill and muddy in spots, but the trail was well-graded and nice to walk along.  The last stretch to Arethusa Falls led downhill into a chasm that opened to an amphitheater like setting.  The falls were very impressive!  The water falls like lace over the sheer rock face.

On the hike back, Adam and I waffled about whether or not to continue our hike up to Frankenstein Cliffs.  We even started down the Cliffs Trail, before turning back in less than a tenth of a mile.  We had plans to meet my parents in North Conway, and we just didn’t have time to finish the loop.

Instead, we visited the Appalachian Mountain Club’s Highland Center and got a few Cokes and relaxed in their lobby.  After we met up with my parents, we had an amazing lunch at Moat Mountain Brewery & Smokehouse.  If you’re ever in the area, don’t miss their barbecue and microbrews!

Adam Says…

Arethusa Falls is a gorgeous 160 foot waterfall that is very popular with families.  We started on the blue-blazed trail near the railroad tracks at the parking lot.  After about .1 miles, you come to a junction with the yellow-blazed Bemis Brook Trail.  We decided to do this side trail, since it goes partially along the water, guiding you to a few pools and smaller falls areas.  Once you come up to the Coliseum Falls area, you will need to climb up almost vertically up the trail to join back with the Arethusa Falls trail.  If you do want to do the Bemis Brook trail you should do this at the start of your trip rather than trying to descend it at the end.  This part of the trip was tough and takes a lot of strength out of you in a short distance, so plan appropriately.  Once we reached the junction at the top, we took a left to return to the Arethusa Falls trail.  The trail continues to go uphill until you reach a junction with the Cliffs Trail.  From this point, you continue downhill until you reach the falls in .2 miles.  You return the way you came, but you will avoid the Bemis Brook Trail on the way back and just stay on the Arethusa Falls trail to reach your vehicle.

Arethusa Falls was named after the poem, “Arethusa” by Percy Bysshe Shelley.  The falls were discovered by Edward Tuckerman, but named by Moses Sweetser and Professor Huntington in 1875.

Bemis Trail
The Bemis Brook Trail follows a beautiful stream for most of the way, until you get to the portion where it climbs, nearly vertically, back up to meet the Arethusa Trail. Below: The Arethusa Trail is much easier to walk – smooth and well-graded, compared to the Bemis Trail.

Arethusa Trail

While I was off hunting for a geocache and Christine was taking some photos, she struck up a conversation with a man hiking solo on the trail.  When I got back to them (after sliding down the hillside 20 feet on my butt), he wanted to take a look at my map.  He was thinking about doing the Frankenstein Cliffs trail and then looping back to make it to his car.  He was to meet up with his wife in less than two hours to take a ride up Mount Washington on the cog railroad.  We told him that it might be hard to make it in time.  He decided to go for it, but I don’t think there was any way he could have made it back in time for his trip up.  We both pictured his wife riding solo up the railroad, muttering to herself, and awaiting the moment she could give her husband a piece of her mind.

There are two geocaches you can get on the trail:

We wish we had more time to do the Frankenstein Cliffs trail (these are named after an artist, not the doctor who created a monster), because we have heard that it does give you some nice views from the top.  The trail is allegedly muddy and not as well maintained as the Arethusa Falls trail.

Trail Notes

  • Distance – 3 miles, out-and-back (2.8 if you leave the Bemis Brook Trail off and just stay on the Arethusa Trail the entire way)
  • Elevation Change – 650 ft to the falls.  There might be a bit more climbing if you do Bemis Brook.
  • Difficulty – 3. The Arethusa Trail is squarely moderate.  The Bemis Brook trail is more difficult with one killer climb uphill at the end.
  • Trail Conditions – 2.5 The Arethusa Trail is in nice condition most of the way.  There are some muddy spots and we encountered a flew blow downs.  The Bemis Trail is not easy walking.  There are numerous fallen trees, tricky footing and if it’s the slightest bit damp, the trail is very slippery.
  • Views –0. You’ll be in the woods the entire time.
  • Waterfalls/streams 4. The falls are large and impressive, but not terribly photogenic.
  • Wildlife – 0. The heavy human traffic probably scares any wildlife away.
  • Ease to Navigate – 5. Trails are marked and easy to follow.
  • Solitude – 2. Because the hiking is a little more challenging, you won’t see the same crowds as you do at Flume Gorge or Sabbaday Falls.

Directions to trailhead:
From I-93, follow New Hampshire Route 302 west through Crawford Notch State Park.  A few miles past Sawyer Rock Picnic area you will see the Arethusa Falls parking area on the right.

Sabbaday Falls (NH)

Special: New Hampshire Edition

Introductory Guide to Visiting the White Mountains

More of a pleasant stroll than an actual hike, this gentle path leads to one of New Hampshire’s most beautiful waterfalls.  The entire walk is only a mile (round-trip), so this waterfall is easily accessible by nearly anyone, regardless of age or fitness level.

Sabbaday Falls
Sabbaday Falls has two sections.  The top is a large, beautiful cascade. The bottom section takes almost a right angle through a slot in the rock. Below: A view looking downstream through the slot

A view looking downstream through the slot

Adam Says…

Sabbaday Falls has to be one of the prettiest waterfalls I have visited.  There is a reason it is on the current cover of the White Mountains Visitor Map & Guide – it is very photogenic.

The falls were once known as Church’s Falls, named after Frederic Church, who was a landscape painter.  The area is now known as Sabbaday Falls. The name was allegedly coined by some road builders who stashed their tools near the falls, so they wouldn’t have to carry them home at the end of the building season and could return to them the next year.  Before leaving on a Sunday morning they named the area for the “Sabbath Day” or shortened to “Sabbaday”.  Later, the Shackford family had a house nearby after the Civil War.  They housed guests visiting the White Mountains and ushered them to popular spots, such as these falls.

The Pool at the base of Sabbaday Falls
The pool at the bottom of Sabbaday Falls is lovely and green! Below: A wider view of the pool and lower half of the falls.

Wider view of the pool.

This is a fee area, so you will need to deposit $3 for a parking pass for the area.  The waterfall has an overall drop of 35 feet, but the main plunge is 22 feet.  The pathway up the stairs gives you very close looks along the entire waterfall.   Similar to much of the interesting geology in the area, this gorge was formed by a glacier carving through the rock.  You can see near the base of the falls, some clear lines of black basalt dikes mixed in with the granite.  These are formed from the rapid cooling of molten rock.

For those hoping to bag some geocaches, there are a few in the area:

This is a very easy “hike” that is very family-friendly and takes you to a great place to get some photos.  I highly recommend a trip next time you are in the White Mountains.

Christine Says…

This short one-mile walk can barely be considered a “hike” – it follows a smooth, well-graded path and several sets of wooden stairs to a view of spectacular Sabbaday Falls.

The wide, crushed stone trail runs parallel to crystal-clear Sabbaday Brook.  At .3 miles, you’ll arrive at a clear, green pool bottomed by round stones.   Water enters the pool through a narrow chute between two sheer rock walls.  At the top of the chute lies the lower half of the falls.  This section of the waterfall is the smaller of the two.   Even though it’s smaller, it’s no less pretty.  The rock formations are dramatic in this section.  There is even a perfect, round “pothole” in the stone.

Lower Sabbaday and the Slot in the Rock
Lower Sabbaday and the Slot in the Rock.  Below: The area includes several informational plaques about the area’s history.

Information About Sabbaday Falls

The top of the falls is about tenth of a mile beyond and is reached via a couple walkways and sets of steps.  The upper falls are quite a bit taller, and sit at almost a right angle to the lower falls.  Without a doubt, this is one of the prettiest waterfalls I’ve seen in the area so far.

The trail has a railing and staircases to make viewing safe and easy from almost any angle.  There are signs all up and down the trail indicating that swimming is prohibited in the falls.  However, when we visited, there was a group of four unsupervised kids that kept getting into the pool at the very top of the waterfall.  It was pretty dangerous.  They generally acted like idiots and were the main reason we didn’t hang around the falls for very long.

Sabbaday Falls is very popular, and you should expect thick crowds.

Trail Notes

  • Distance – 1 mile, out-and-back
  • Elevation Change – 125 ft
  • Difficulty – 1. Very easy!
  • Trail Conditions – 5. Smooth and well-graded with well-planned stairs and railings.
  • Views –0. You’ll be in the shady woods the entire time.
  • Waterfalls/streams 5. Simply gorgeous!
  • Wildlife – 0. The heavy human traffic probably scares any wildlife away.
  • Ease to Navigate – 5.  Impossible to get lost.
  • Solitude – 0. Prepare for heavy crowds. People love Sabbaday Falls!

Directions to trailhead:
From Conway, NH follow the Kancamagus Highway for about 15 miles.  The trail parking is well-marked.

The Basin & Kinsman Falls (NH)

Special: New Hampshire Edition

Introductory Guide to Visiting the White Mountains

The Basin  and Kinsman Falls is a short 1.2 mile out-and-back walk to a lovely waterfall in Franconia Notch State Park.  The trail follows Cascade Brook and passes many beautiful (and popular) water features.  The falls are also called Tunnel Falls.

The Basin
The Basin is a beautiful glacial pothole at the base of this hike. Below: Kinsman Falls is a pretty 20 foot waterfall that plunges into a wide pool at the bottom; Many of the streambeds look sculpted.

Kinsman Falls Water Features along the Trail

Adam Says…

We had visited the Basin last year, but it is always worth a quick stop off I-93.  It takes only .1 mile to reach it from the parking lot.  You will see signs to lead you directly to the Basin.  The Basin was formed about 15,000 years ago as an ice sheet eroded the pathway.  According to the plaque at the site there, Henry David Thoreau wrote “this pothole is perhaps the most remarkable curiosity of its kind in New England.” Samuel Eastman called this area, “One of the most beautiful haunts of Nature, a luxurious and delicious bath fit for the ablutions of a goddess.”

There are several paths to walk along in this area to explore streams and small waterfalls.   If you go back the way you came, you will see a larger junction with a sign for Kinsman Falls being .5 miles away.  The path up to Kinsman Falls was filled with roots and rocks, so you do need to continually watch where you are stepping.  Shortly up the ascent, you will see several spots to your left along the way of the river.  These are good places to soak in the sun or to wade in a small pool.  Be careful about footing if you venture into the water, since the water does rush through these areas rapidly. Getting back on the trail, you have more of an ascent, but you will quickly come up to the sign pointing to Kinsman Falls.  The falls were very impressive as they plunged into a serene pool at the base.

View of the Mountain from Cascade Brook
View of the Mountain from Cascade Brook.  Below:  Colorful fungus on the trail;  Christine’s dad and Adam climb back up from the base of the falls.

Orange Mushrooms Along the Trail Climbing Back up from the base of the falls.

I definitely recommend checking out these areas if you are taking a trip through the White Mountains. Most people just view the Basin and some of the swimming holes along the way and don’t venture any further, but it is worth the hike up to Kinsman Falls and most families can easily make the trip.

There are several geocaches in the area:

Christine Says…

We planned to do lots of family hikes on this visit to New Hampshire, but about a week before the trip an MRI revealed that my dad had torn his meniscus.  His doctor told him to be careful and to limit activity that could extend the tear.  Sadly, this put most of his hiking plans on hold for the time being.  He did decide that he felt up to joining us on the short hike past the Basin and up to Kinsman Falls.

Like Flume Gorge, this little hike packs in a lot of impressive scenery over a very short distance.  Also, like the Flume, it is extremely popular and crowded.

The Basin is such a gorgeous spot.  I love how the water curls through the rock formation.  The rock walls of the Basin are smooth and sculpted – they almost look unnatural. The water is blue-green colored and crystal clear.  It’s one of those spots you’ll never forget!

After the Basin, the beautiful water features keep on coming!  There are so many small waterfalls and cascades along the trail, that you always hear the pleasant sound of rushing water.  A sign marks the way to Kinsman Falls, but honestly, we could say “just follow the water uphill” and you’d find your way there.

The trail was rocky and root-y.
The trail was rocky and root-y. Below:  The base of the falls was a nice place to stop and contemplate nature; Cascade Brook rushes over the rocks.

Dad on the rocks Water flowing along Cascade Brook

The trail followed alongside Cascade Brook for a half mile.  There were many little side-trails leading to scenic spots along the brook.  Dozens of people reclined on the rocks while kids used the streambed like a natural waterslide.  One mother remarked to us that her family had visited the spot two days in a row, and both her boys had worn through the backsides of two sets of swim trunks.

The trail is muddy, with a mix of gnarled roots and slick granite underfoot.  It’s all uphill, but it’s never steep.  It really is an ideal family hike.

A small sign announces Kinsman Falls.  From the trail, you get a view of the falls from above.  The twenty-foot waterfall crashes into a large, round pool in a chasm below.  There is a rough footpath down to the base of the falls – take care if you climb down – it’s slippery with numerous rocks to scramble over.

There are lots of big rocks to sit on around the edge of the pool.  It’s a nice place to relax and enjoy feeling the mist from the falls spray your face.  We were really surprised to have the falls all to ourselves.  Even though there were many people in the area, no one else was at the waterfall.  Odd – but very welcome!  On our return trip, we passed quite a few people hiking up, so I suppose we just had fortuitous timing.

Trail Notes

  • Distance – 1.2 miles out-and-back. Plus a couple additional tenths of a mile to get to and from your car.
  • Elevation Change –Around 300 feet
  • Difficulty 2. The hike is all uphill over slick granite and gnarled roots, but it is short and never steep.
  • Trail Conditions 2. The trail is extremely rocky, muddy and covered with gnarled tree roots.
  • Views –2. From the Cascade Brook streambed, you get a decent view of the mountains.
  • Waterfalls/streams 5. Nothing short of spectacular!
  • Wildlife 0. A few squirrels and chipmunks.
  • Ease to Navigate 4. After walking uphill from the Basin, look for the sign to Kinsman Falls and follow the blue blazes uphill.
  • Solitude0. This area is extremely popular.  We saw dozen of people along the way, but surprisingly had Kinsman Falls all to ourselves.

Directions to trailhead:
From I-93N. Once you enter the Franconia Notch area, take the Basin exit.  The area is well-marked and has ample parking.

Knob Mountain – Jeremy’s Run Loop

The Knob Mountain – Jeremy’s Run Loop takes hikers along a 12.4 mile route through one of Shenandoah’s most popular backcountry camping areas.  This hike could be done as a long dayhike, but the campsites in the area are too inviting to pass up.

Pool on Jeremys Run
The Knob Mountain – Jeremy’s Run Loop offers beautiful stream scenery. Below: Mountain vistas can be seen along the descent on the Knob Mountain Trail; Blue Blazes mark the way across streams on the Jeremy’s Run Trail; Adam negotiates one of the many stream crossings.

View from the Knob Mountain Trail Water Crossing Adam Crossing the Stream

Adam Says…

Since the weather looked like it was going to be a cooler, we decided to take off and go on an overnight backpacking trip.  Our first overnight trip was the Hazel Mountain-Catlett Mountain trail which we did with a group from the PATC.  This trip was our first non-group outing, so we felt it would be a good chance to put into practice what we learned from our Backpacking 101 course.

To do this trail as a loop, leave from the Elkwallow picnic grounds.  You will see the entrance to the trail next to the pit toilet, which provides a last chance to “take care of business” before embarking on the hike.  You will begin the trail on a short spur trail to the white-blazed Appalachian Trail.  Turn left on the AT.  In .2 miles, you will reach the junction with the blue-blazed Jeremy’s Run Trail.  Continue straight on the Jeremy’s Run Trail.  Around 1.2 miles, you will reach the junction with the Knob Mountain Connector Trail.  Take a right at the post to join this trail.  As soon as you cross Jeremy’s Run with a little rock-hopping, you will begin this steep connector trail.   There are lots of switchbacks and this is definitely the steepest part of the entire trip.  Around 1.7 miles, you will reach a junction with the yellow-blazed Knob Mountain Trail.  Take a left at the trail junction and continue to follow this slowly ascending ridge trail.  We would probably name this portion of the loop the Bear Scat Boulevard, because there was a ton of bear evidence in the area.  You will see a few views through the trees, but nothing remarkable from the trail.  At mile 3.9 you will reach the summit of Knob Mountain, marked by a concrete post.  After the summit, you will begin your steep descent down the mountain.  This is broken up by several switchbacks.  The trail does open up at times to give you views of mountains along the way, including Strickler Knob and the Three Sisters.  At 6.8 miles, you will cross Jeremy’s Run and reach the junction with the blue-blazed Jeremy’s Run Trail.  Since we were fairly exhausted from our trip, we picked a campsite near the junction of the trail, which gave us great access to water.  From the junction, you just continue on the Jeremy’s Run Trail until you reach the parking lot, crossing over Jeremy’s Run fourteen times.   In some areas, it was necessary to rock hop across, but most of the time the traversing was quite easy.  I imagine during heavy rain seasons, this would be more of a challenge.

Filling Out Paperwork for a Backcountry Permit
The overnight trip started with a brief stop to fill out paperwork for our backcountry permit. Below:  Adam makes his way down the Jeremy’s Run Trail; Snacks on the Knob Mountain summit; A view through the trees from the Knob Mountain Trail.

Adam Hiking Snacks on the Knob Mountain Summit Views from Knob Mountain Trail

Jeremy’s Run truly provided a great opportunity for camping in the backcountry.  We saw several previously-used campsite areas, so we decided to use our Leave No Trace principles and use an existing campsite rather than creating our own.   The campsite was short walking distance to a reliable water source.  After starting our trip around 9:30AM, we arrived at camp around 1:00PM.  We were very hungry, so Christine worked on getting some lunch together and I began working on getting our tent set.  The ground was very hard and rocky, so it took an effort to find a good place to get stakes into the ground.  After lunch, we finished getting our sleeping pads/bags ready, hung our bear-bag rope, and prepared our kitchen area.  We got some water to use for the trip at the nearby stream and I dug a few preemptive catholes.  With every thing set, we decided to relax a little in our tents to stretch out our backs.  I like to bring a book along the trip so we took turns reading aloud a few chapters from A Walk for Sunshine by Jeff Alt, an entertaining read about hiking the Appalachian Trail.  We took a short nap and then played a few hands of the Monopoly card game we also brought.  We then broke in our new JetBoil and prepared a great dinner.  After cleaning up dishes, we went down to a place along Jeremy’s Run and stretched out on a large rock.   We watched several brook trout jump out of the water, catching mosquitoes that were lightly dancing on top of the water.  We retired to our tents to the sweet chorus of whippoorwills and the “who cooks for you” hoots of nearby barred owls.

Neighbor Mountain
On the hike down from the summit of Knob Mountain, hikers get a few decent views of adjacent Neighbor Mountain. Below: A scenic spot on Jeremy’s Run; Our campsite.

Jeremy's Run Camp

There were so many things I enjoyed about our trip.  We saw tons of wildlife – three black bears, a wild turkey, scarlet tanagers in glorious color, and heard lots of birds at night.  The temperature was perfect and the bugs were not out as much as we expected.  The trip also helped affirm our ability to handle a backpacking trip by ourselves. I think we really learned a lot of great skills in the last few months to help us feel well-prepared.   I was a little more apprehensive wondering if we could handle the 12+ mile hike with 35 pounds on my back, since our previous trip was about 8 miles total with a little less weight each.  The hike was more strenuous the first day, but we were able to complete the hike without much trouble.  I think we’re both looking forward to going on another backpacking trip, but we are now getting into the hot summer months.  Hopefully, we’ll be able to find a cooler weekend in the near future.

Christine Says…

When Mother Nature gives you the gift of a sunny, dry, 70-degree day in the midst of a long string of 90+ degree scorchers, you must take advantage of that gift!  We chose to make the most of the pleasant weather and go on an overnight backpacking trip.  One of the leaders on our last trip recommended Jeremy’s Run as one of his favorite places in the park.  As dayhikers (until recently), the Jeremy’s Run hike had always been a little out of reach.  At 12.4 miles with well over 2,500 feet of elevation gain, it was always more than we were willing to tackle on a day hike.  It seemed like a perfect candidate for this little weekend getaway.

After filling out all the requisite paperwork, we set out from the Elkwallow Picnic Area along the Appalachian Trail.  Right away, I was struck by how much heavier my pack was compared to our last trip.  On that trip, we had seven people to split the weight of group gear.  But this time, we had to carry our own stove, fuel, collapsible bucket, water filter, food and rope.  I also chose to carry my old dSLR camera, a couple card games, extra batteries, a fleece and my iPod.  In the end, my pack weighed in about nine pound heavier than our last outing.

I brought my iPod along this time for a couple reasons 1) I wanted to be able to listen to my “workout mix” when climbing a couple of the big hills on the route and 2) my iPod is loaded with audio books, which I thought would be pleasant to listen to after sunset in the tent.  The first big hill we hit was on the Knob Mountain Cut-Off Trail.  It was really steep, so I put in my earbuds and started chugging up the hill.  Listening to mindless pop music with a beat – anything from Tupac to Lady Gaga to Gnarls Barkley – makes climbing hills so much less painful.  I had worked up a pretty good rhythm, listening to the early 90’s party song, “Rump Shaker”, when I rounded a curve a spotted two black bears about 50 yards up the hill.  I’m not sure if they were a mom and a yearling or two adults.  We looked at them, they looked at us, then they quickly decided to leave the area.  I didn’t have time to free myself from my trekking poles and iPod cord to get a photo, but it was still a great treat to see the bears. Backpacking seems to involve an inordinate number of straps and buckles.  Sometimes, it makes me feel like a horse pulling a cart.

Christine On the Rocks
After camp was set up, Christine spent some time relaxing on the rocks in Jeremy’s Run. Below:  Adam collects water in a collapsible bucket to use for cooking later; Crocs and Socks – they might not be high fashion, but they’re functional; Playing Monopoly at camp.

Collecting Water Crocs and Socks Cards

After the cut-off trail met the Knob Mountain Trail, the tough climbing was over for the day.  I listened to my iPod a bit more, but eventually put it away in favor of listening to the birds and the breeze in the trees.  We took a snack break on the top of Knob Mountain.  There weren’t any views at the summit – just shade and a ton of poison ivy.  It felt really good to throw the pack off for a while and have a good stretch.  I could really feel the heavier pack weight bruising my hip bones.

The walk from the summit to Jeremy’s Run was all downhill.  The woods along the trail are pretty and occasionally open to views of the valley below.  You also get nice views of Neighbor Mountain, which lies parallel to Knob Mountain.  Another slightly longer loop hike option approaches Jeremy’s Run from Neighbor Mountain.

The downhill walk lasted a little over 3 miles.  We soon arrived at the stream, where the Knob Mountain Trail converges with both the Neighbor Mountain and Jeremy’s Run Trails.  We crossed the stream a couple times and decided it was high time to find a campsite.  We were both completely knackered after walking about 7 miles with our packs.  I honestly don’t know how thru-hikers cover 20-30 miles a day with even heavier packs.  I’m convinced I wouldn’t last a week!

We found a beautiful place for camp under the shade of pines and hardwoods.  It was clearly a place others have camped before.  Stones were arranged like seats in a semi-circle in one of the clearings.  It was also about 30 yards from a gorgeous spot along Jeremy’s Run – so we had great access to water.

We designated separate sleeping and kitchen areas right away.  Adam pitched the tent while I fixed lunch.  I made Buffalo Chicken Wraps – which were delicious. We found a place for our bear hang and dug a couple catholes for future use.  With camp all set up, we settled into our tent for a nap.

Post-nap, we collected water for cooking in our collapsible bucket.   On our water run, we also took some time to stretch out and lounge on one of enormous boulders in the middle of the stream.  The sky above was so blue and it was very soothing to watch the trees swaying above in the breeze. I actually tried out my Crocs again, and found them more comfortable, albeit considerably dorkier, with socks.  I may keep them as my camp shoes after all.

Filtering Water for Dinner
We filtered water for our dessert and boiled water for our entree. Below:  We had Pad Thai for dinner; Dark Chocolate Cheesecake for dessert.

Pad Thai Dark Chocolate Cheesecake

Around 5:30, we started getting things together for dinner.  Because this trip was rather impromptu, we brought pre-packaged dehydrated meals instead of taking the time to make homemade food.  But it was still delicious.  The Backpacker’s Pantry Pad Thai was filling and tasty.  It had a yummy, spicy peanut sauce with noodles and vegetables.  For dessert, we ended up having Dark Chocolate Cheesecake (instead of Tiramisu, as originally planned).  It was really tasty, too!  I was stuffed from dinner, so we decided to take a short walk down to a deep pool I had seen along the trail a way back.  We sat on a rock and just enjoyed the quiet of the evening.

It got dark quickly down in the hollow, so we retired to our tent a little before nine.  I listened to a book on my iPod and Adam read.  I started to doze off well before 10:00.  All through the night, I could hear a couple barred owls hooting, over and over and over again.  Pretty soon, a whippoorwill joined in and sang through almost the entire night.  I haven’t heard a whippoorwill since I was a child, so it delighted me to hear the song in the night again.  I slept pretty soundly, until the roar of a train whistle woke me up around 2:00 in the morning.  I could hear the wheels on the track so clearly; it seemed like the train was rolling through camp.  I guess some distant sounds really carry on the quiet night air.  When I awoke, I found I was drenched with sweat in my sleeping bag.  It was in the mid-50’s outside, so the down bag was a bit too warm.  However, if I slept outside my bag, I got cold quickly.  I want to get a blanket and sheet for my sleeping pad to make summer camping more comfortable.  Despite being hot or cold, I eventually fell back to sleep and stayed so until 6:30 a.m.

I got up before Adam and got the bear bag down, so I could start breakfast.  We ended up leaving the bacon home because we didn’t want to carry a pan.  Instead we had oatmeal, boxes of apple juice and hot chocolate.  It was a satisfying breakfast on the cool morning.

Bear on the Appalachian Trail
We saw three bears, including one on the Appalachian Trail.  Below: Another scenic pool on Jeremy’s Run; We encountered this loose dog on the trail (one of many).  He apparently lives on the border of the park and runs the trail often.;  Rocks in the stream bed were covered with moss.

Pool on Jeremys Run Loose Dog Mossy Rocks

We broke camp down quickly and were back on the trail around 8:00.  The second day of hiking was substantially shorter and easier than the first day.  With about 5.5 miles to cover, we knew we’d be back at the car by mid-morning.

The trail climbs ever so gradually along Jeremy’s Run.  We passed lots of fantastic campsites along the stream.  It’s no wonder this area is so popular with backpackers!  We crossed the stream 14 times over the course of the morning. Because of all the dry weather we’ve had lately, none of the crossings were challenging at all.  Most of them were bone dry, and the ones with water were still easily rock-hopped.

We took a snack break where the Jeremy’s Run trail crosses the Knob Mountain Cut-Off.  From this point, the trail follows the same route as we’d used hiking out the day before.  The grade becomes steeper for the last mile and eventually meets back up with the Appalachian Trail.  For this section, I put my iPod back on again to help endure the uphill.  “Rump Shaker” came up in the shuffle again, and after the first few moments, I spotted another bear.  There must be something about that song that conjures bears!  I did manage to get a few distant photos of this bear before he disappeared deeper into the woods.

About ten minutes later, we were back at our car and on our way.  We stopped by the Elkwallow wayside, where I rinsed my face and used  a flushing toilet!  Plumbing is so exciting after being without it.  On our way home, we stopped at McDonald’s for lunch.  Coke and salty French fries taste absolutely amazing after a long hike.  As luck would have it, their credit card machine was broken and they gave us our lunch for free!  It was a fitting bonus for a perfect trip.

Trail Notes

  • Distance – 12.4 miles
  • Elevation Change – 2600 ft
  • Difficulty – 3. If you were going to do this in one day without stopping, I would up the difficulty slightly due to the length.
  • Trail Conditions – 3.5. The trail was very well-maintained.  We saw evidence that the Knob Mountain trail had been cut back, but I can imagine in late spring, much of the trail could have some overgrown areas.  The ground was well-traveled and there were only a few rocky spots around the streams.
  • Views1.5. The best chance of views are on the descent from the Knob Mountain summit down to Jeremy’s Run.  After leaves fall, this may be slightly better.
  • Waterfalls/streams – 3.5. You do get lots of chances to cross Jeremy’s Run.  There was only a small fall near the base.  If you want to photograph streams, you should have plenty of opportunities.  You’ll also have a reliable water source.
  • Wildlife – 4. We saw black bears, a turkey, and scarlet tanagers; we heard whippoorwills and barred owls at night.
  • Ease to Navigate – 4. The trails are well-marked and just stick to the signs on the cement posts.
  • Solitude –3. This is a popular spot for backpacking and trail running.  However, we felt that we were able to find our own peace in the woods.  We also came across a dog that belongs to a nearby family that evidently roams the trails frequently, so we had a companion during part of the hike up from Jeremy’s Run.

Directions to trailhead:

Located in the northern section of Shenandoah National Park.  Park at the Elkwallow Gap picnic grounds around mile 24.3 of Skyline Drive.  The Jeremy’s Run trail begins next to the pit toilet at the parking lot.