This four mile hike offers lots of hiker solitude and some nice obstructed views. The area is popular for dirt-bikes and ATV use, and while they have their own trail system, you may find engine noise distracting at times on this hike.
Adam hikes the Massanutten Trail toward Waonaze Peak. Below: Park in the ATV lot at Edinburg Gap; Look for the orange-blazed Massanutten trail on the other side of 675; Mountain laurel was in full bloom when we did this hike.
Christine Says…
Near the end of May, we met up with our friends, Tony and Linda, to do a little hiking near Edinburg along the Massanutten Trail. Our original plan was to hike out to Opechee Peak, but the forecast had some pretty fierce thunderstorms, so we cut it short and did a four-mile out and back to Waonaze Peak. I think both of those peaks have really interesting names for our area. I did a little research into the name origins (probably Algonquian), but didn’t find anything. I also wonder if Waonaze rhymes with mayonnaise. Hmmm…
Overall, the hike was pretty basic. We started at the big ATV parking area at Edinburg Gap. ATV trail users must pay a fee to ride the trails, but hiking is free. There’s a informational kiosk at the parking lot that outlines the different trails in the area. From the parking lot, we crossed the road and picked up the orange-blazed Massanutten Trail. The trailhead is a little hidden in the trees, so look for blazes and a mileage sign to make sure you start in the right direction.
For the first mile, the trail meanders gradually uphill through dense stands of mountain laurel. We were lucky enough to hike during the peak bloom, so it was especially beautiful. At one mile in, we came to marked spring. Shortly after the spring, we passed a second trail mileage marker. Funnily, it was identical to the marker at the Edinburg Gap crossing. The Bear Trap Trail was 2 miles away at Edinburg Gap and still two miles away at a little over a mile into the hike. I guess sometimes trail signs should just be regarded as estimates!
We saw a big, fat timber rattlesnake along the trail. Below: Trail signage was kind of funny. Even after we had come a mile, the distances on the signs had not changed. Bear Trap Trail was two miles ahead at all times; We passed a spring with a broken sign warning people to treat the water before drinking; A full view of the rattlesnake.
After the mileage sign, the trail gets quite a bit rockier and steeper. We saw a big timber rattlesnake basking in the sun. This terrain is ideal for them, so be sure you’re on the lookout. Timber rattlers are typically non-aggressive and reclusive. Basically, if you ignore them, they’ll ignore you. Someone once told me this quote about timber rattlers — “Timber rattlers are first cowards, then bluffers, and last of all warriors.” I’ve found this to be true with my encounters.
The steeper, rockier section of the hike makes several big switchbacks and passes several big boulder jumbles. As you climb toward the high point of Waonaze Peak, the view toward Fort Valley and Kennedy Peak opens up. The overlook itself is nice, but partly obstructed. It would be much prettier in the winter when leaves are down. After we reached the high point, the trail quickly begins to descend into a saddle between Waonaze and Opechee peaks. We turned around at that point, but will tackle Opechee another day.
After the hike, we headed into Woodstock for beers and lunch at Woodstock Brewhouse — always a favorite!
Adam Says…
As Christine mentioned, this is a hike that we plan to do again and get all the way to Opechee. Seeing that the summit views were a bit overgrown, our plan is to try this one again when it is cooler and leaves are mostly down. We were the only hikers from this parking lot as this area is primarily used by ATVs on the trail systems nearby. There were a few times that we could see the ATV riders through the trees (and more occasions that we could hear their engines). When we started the hike, we had heard there were storms coming in the early afternoon. With the violent storms we have been getting over the summer, we didn’t want to risk doing too long of a hike on this day.
The obstructed viewpoint near the top of Waonaze Peak. It would be better in the winter. Below: A rocky descent; The trail has lots of rocky footing and boulder jumbles; More pretty mountain laurel.
The first mile of the hike was uphill but not terribly tough in terms of elevation or footing. The mountain laurel in full bloom made this a gorgeous early stretch of trail. The second mile was a bit more windy and rocky with lots of loose stones, so watch your footing especially on the downhill. Eventually, we came to an area of trail that gave us some obstructed views of Kennedy Peak. We thought about calling this hike Kennedy “Peek”, since you get obstructed views but we thought that would be just too confusing. Tony and Linda stopped at the overview here, but we decided to press on. We were first trying to see if there were better views at the top of the hill, but then the trail took off away from the view and was leading us through the saddle towards Opechee. Not wanting to leave our friends too long (and worried about clouds rolling in), we decided to turn back and make our descent.
Post hike refreshment at Woodstock Brewhouse. It’s one of our favorite post-hike hangouts.
We caught up with our friends and then continued downhill. I’m not a fan of any snakes, so I was especially cautious when we neared the area where the timber rattler had been spotted earlier. He had moved on (making me a tad nervous looking around for other spots he could be hiding) and we didn’t see any other snakes on the way back. When we got back to the cars, we then headed over to one of our favorite post-hike spots – Woodstock Brewhouse. We always enjoy talking about our hikes over great food and beverages here. While this peak didn’t lead to an amazing viewpoint, it was a good leg-stretcher that we had not explored before.
Trail Notes
Distance – 4 miles (Check out the stats from Map My Hike)*
Elevation Change – 1280 feet
Difficulty – 2. It does have just a bit of uphill, but fairly easy if you take your time.
Trail Conditions – 3. The trail isn’t well traveled, which makes it a little tougher on conditions. There are some rocky, steep sections with loose rock on the trail.
Views – 2. During the winter, it would probably rate higher. The views of mountains and farms below is nice, but obstructed.
Waterfalls/streams –0. Non-existent.
Wildlife – 3. We did see lots of small toads and saw the timber rattler. My guess is that a lot of the bigger animals like bears and deer are scared away by the noise of nearby ATVs. There were lots of pretty bird calls in the air.
Ease to Navigate – 3.5. Once you find the trail, it is fairly easy to stay on course. The signs showing that Bear Trap Trail is always two miles away was quite funny, so I don’t know how much you can trust these.
Solitude– 4.5. The trail you should mostly have to yourself, but you will hear some ATVs early on in the hike on nice weekend days.
Directions to trailhead: GPS Coordinates for this hike are 38.789125, -78.519384. Look for the ATV/OHV parking area at Edinburg Gap. Cross Rt. 675 and look for the orange-blazed Massanutten Trail across the road from the parking lot.
* MapMyHike is not necessarily accurate, as the GPS signal fades in and out – but it still provides some fun and interesting information.
We did this 27-mile Appalachian Trail section over three days at the tail end of summer 2017. The trail was beautiful and quiet with lots of interesting things to see along the way. We camped one night and spent the other luxuriating at Woods Hole Hostel. This may have been one of Christine’s favorite sections yet!
Kimberling Creek is beautiful, but not safe to drink from. There is a lot of cattle farming along the stream. Below: Some rocky slopes along the trail; The spur trail to Dismal Falls is well worth the detour; Shallow pools and flat rocks leading up to the falls.
We decided to celebrate Christine’s birthday by completing a section of the Appalachian Trail over a few days. I had a couple of surprises for her along the way which hopefully made it an even better trip for her. I arranged a shuttle driver to meet us at a parking lot off Narrows Road near Pearisburg, VA. We loaded up and he drove us on some beautiful back roads until we got to our dropoff point at Kimberling Creek. There was a small parking lot here and a suspension bridge that spanned the creek. We took a few pictures, crossed the road, and then started our trip north on the white-blazed Appalachian Trail on a two day trip back to our car. The trail started off with a bit of a steep climb, which is always a quick reminder of the weight you decided to pack in your backpack.
The water level was very low, but Dismal Falls was still beautiful. Below: Another angle on the falls; This area has tons of rhododendron tunnels; Walking through beautiful open forest.
The climb was short-lived and after about a mile, the trail started to slope back downhill. At 1.8 miles, we reached a side trail that showed that Dismal Falls was just .3 miles away. Since it was early in the day, we decided to check it out and we were so glad we did. Dismal Falls was one of the more picturesque waterfalls I have seen and the setting just invites you to waste some time there. Even with low amounts of water falling, it is a great swimming hole area with great places to perch above and watch the water. We ate some snacks, explored the nearby area, and took many pictures before deciding to head on. While we were there, we only had a few other people that came by and they all approached it from the roadside that we could see in the distance behind the waterfall. We were glad we put the effort to see such a beautiful place. We grabbed our stuff and then headed back to rejoin the AT, bringing our mileage to 2.4 miles.
This pond was a scenic spot along the trail. Below: While the trail was very dry when we hiked, this stretch has lots of bridges and planks to cross wet areas; The Waipiti Shelter used to be along this fire road. It was demolished after a couple hikers were murdered. A new shelter was built a little ways north; More beautiful forest.
Continuing on, most of the hiking for this day was rather pleasant – there was a slight uphill climb but overall was not too tough. There were lots of footbridges and water crossings along the way, so this was not a day where we felt like we needed to carry much water since we weren’t terribly far from a water source. Eventually, we hiked next to a large, scenic pond that joined up to a dirt road at about 8.4 miles. From here, it was just a couple of tenths of a mile to our first stop on our trip, Wapiti Shelter.
Our camp stop for the first night was the Waipiti Shelter. Below: The turn-off from the AT; Lots of entries in the log make mention of murders and hauntings, but this is not where the crime happened; Our tent site behind the shelter.
Wapiti Shelter has some dark history to it. Christine had already heard the story before, but she waited to tell me about it until we got there. The old Wapiti shelter was the place where a couple of murders had taken place in 1981. A man named Randall Lee Smith befriended a couple of hikers and then murdered them in their sleeping bags that night. Smith was captured and imprisoned, and then met parole to be released in 1996. In 2008, Smith returned just a few miles away and tried to kill two fisherman but wrecked his truck in the getaway and died from the injuries he sustained when he was taken to prison. If you want to read more about this story, check it out here. Keep in mind, that the shelter today is located a couple miles away from where the murder happened, so ghost stories that the trail journals would like you to believe are simply not true.
As we were setting up camp, I surprised Christine with an additional camp pillow for a birthday present. She had been complaining recently about how she wish she had multiple pillows when backpacking, because one inflatable pillow just wasn’t enough. She was thrilled when I brought the extra one out of my pack. We set up our tent not far from the shelter and a bit later, we were eventually joined by other hikers, including two from Australia and one from Germany. The best water source at this campsite was back the way we came at the bottom of the hill. We told the other campers about the murder story but only after they asked specifically about it after reading logbook entries. I think everyone slept well that night despite the ghost tale.
Christine Says: Day Two – Wapiti Shelter to Woods Hole Hostel (7.8 miles)
This section of Appalachian Trail had so many long, dark rhododendron tunnels. Below: Even when the rhododendron wasn’t a full tunnel, it was still very dense; The footbed was almost paved with flat, shale-like rock; I love trees with ‘arms’
Brrr – that was a cold night! I was glad to have spent it bundled up in my warmer sleeping bag with two pillows. Eventually we got moving, packed up, ate breakfast, and started our hiking for the day. We had all day to go eight miles, so we set out at a leisurely pace. We had about three straight miles of moderate uphill to our first view of the day. The trail was all green tunnel. We passed through thickets of mountain laurel and rhododendron and traversed lush beds of ferns.
At 2.7 miles in we reached a pretty outcropping of rocks with a great view of the valley below. We stopped briefly to enjoy the vista, but weren’t ready for a snack or a long break. The next 2.3 miles covered rolling terrain with lots of small ups and downs. The trail was pretty, but not remarkable. At five miles into our day, we reached the radio tower on Flat Top mountain. The tower viewpoint is about .1 miles off the trail and worth making the small detour. Behind the tower, there is a series of small cliffs with a commanding view. It’s the perfect place to take a lunch break.
There were several nice views near between Waipiti and Woods Hole. Below: Views from the trail.
The day had warmed up a bit and we were both running really low on water. Thankfully, we had enough to make Pack-It Gourmet cheese spread for lunch. We had cheese and crackers with candy and dried fruit for our mid-day meal. We also took a good long break and rested atop the rocks. It was peaceful to watch hawks and buzzards soaring on the breeze.
After a full hour of resting, we packed back up and set out to cover our final 2.8 miles of the day. The rest of the route was mostly downhill with only a few brief bumps to climb. In about .7 miles, we crossed the Ribble Trail. The sign indicated that supplies (like propane) were available somewhere down the Ribble Trail, but I would think most people would just continue on to Woods Hole or even Pearisburg if they needed something. Apparently, there is also a nice AT-Ribble Trail loop that is popular with locals. If we were to have followed the Ribble Trail, it would have rejoined the AT near Waipiti shelter, where we spent the prior night. Maybe one day, we’ll go back and explore the area more.
As long as you don’t look behind you, the view is pretty and pristine. Below: Descending toward Sugar Run Gap.
After crossing the junction with the Ribble Trail, we continued downhill; crossing Big Horse Gap/USFS 103 just a tenth of a mile later. In another 1.2 mile, we crossed another forest road. From this point, the last .5 miles of hiking went steeply downhill. The trail was a bit rocky and overgrown. At this point, I was starting to hit a wall. I was out of water and feeling really parched. We hadn’t passed a spring since first thing in the morning and the sun had been beating down on us all day. I told Adam I wanted to rest at the road crossing before we hiked down to Woods Hole Hostel – our destination for the evening. He said to me ‘But wouldn’t a massage be way more relaxing?’ It turned out he booked an hour long massage for me at the hostel. Say no more – I was up and ready to cover that last .5 miles of road walking to get to Woods Hole.
Normally, we wouldn’t stay at a hostel on a two-night backpacking trip, but Woods Hole is special. Family-run for decades, the quaint, old farmhouse is an Appalachian Trail legend and a beloved tradition for many hikers. The old farmhouse opened its doors to hikers in the 1980s. The hostel was originally run by Tillie and Roy Wood, but was taken over by their granddaughter Neville in 2007. Since then, she and her husband Michael have expanded on the hostel’s offerings, creating a mountain oasis that is simultaneously rugged and luxurious. There’s no television or cell phone signal, but there is beautiful organic food (that you get to help prepare!), massage services, and group yoga.
What a welcome site! Woods Hole Hostel was a luxurious stop on our backpacking trip. Below: Woods Hole scenes.
We arrived at the hostel around 2:00 p.m. Neville was still working on cleaning the house, so we bought a couple soda’s from the bunkhouse fridge, and settled into the swing on the front porch. We played with the dogs, said hello to the roaming duck, and peeked into the goat and pig sheds. The garden was still beautiful and abundant in late summer – tons of peppers, tomatoes, and squash. If you stay at the hostel, you can camp, stay in the bunkhouse, or stay in a private room inside the farmhouse. We chose to stay in ‘Tillie’s Room.’ It had a comfortable queen bed, private sink/vanity, and shared full bath. It was quite luxurious for trail accommodations. Even if you choose the more humble bunkhouse, it is still comfortable and neat as a pin. There are beds with fresh linens provided, a big common area with a couch, and a nice offering of snacks and supplies available for purchase. There are also shower and laundry facilities available for those staying in the bunkhouse.
We visited during a really quiet time of year. There was a smattering of SoBo thru-hikers on the trail, but in mid-September we had the entire house to ourselves. Once we got checked in, I decided to shower and spend some time in the farmhouse’s library. It was full of all kinds of books and mementos. I especially enjoyed looking through scrapbooks chronicling the hostel’s history over the years. Around 5:00, Neville said she was ready to do my massage. It was a wonderful treat and felt fantastic on my tired shoulders and calves.
Aumakua – one of Woods Hole’s sweet dogs. Below: Our comfortable lodging.
After the massage, we started to think about dinner! In the meantime, one southbound thruhiker arrived and booked a bed in the bunkhouse. Neville’s husband had errands to run, so it was just four of us for dinner. Neville and Michael typically prepare community meals with the help of hikers staying for the night. Everyone has a task and chips in to prepare and clean up after the meal. We had an amazing tomato-pepper-cucumber salad, homemade bread with aioli, locally raised pork, and a flavorful yellow Thai vegetarian curry for dinner. Everything was delicious, but the salad was a favorite and is something I’ve made at home ever since. Dessert was Neville’s homemade vanilla ice cream.
After dinner, Adam and I relaxed in the library and read until it was time for bed. It was lovely being lulled to sleep by the sound of a breeze in the trees outside. We both slept great!
Adam Says: Day Three – Woods Hole Hostel to Narrows (11.8 miles)
Our last day of hiking started in a blanket of fog. Below: Hiking up Sugar Run Road; The Appalachian Trail; Foggy views
We had our longest day on the trail ahead of us with the third day. We got up, packed up our gear, and enjoyed a wonderful breakfast prepared by Neville. We had asked if we could leave most of our gear there during the day to be able to “slackpack” without the weight. We carried water, some lunch, and a few layers of clothes but we were able to dump out so much of the weight. With this extra added comfort, we started on our hike for the day. We climbed up the steep gravel road and we quickly were so thankful we had dropped off our weight. We rejoined the AT at .5 miles and began our hike.
As we climbed higher the view opened and the fog lifted. Below: Docs Knob Shelter; Views from the trail; Thick overgrowth.
The morning started off foggy and cold and the section of AT started off uphill. At 1.9 miles, we reached a viewpoint, but it was completely socked in the fog so there was no point staying. The trail then took a descent and at 2.8 miles, we came upon Docs Knob Shelter. It was a nice shelter, but we were glad we had luxurious accommodations at Woods Hole Hostel the night before. The trail was up and down for a bit, before rising a bit to a nice viewpoint at 6.5 miles. The fog had lifted so we enjoyed nice views of the river cutting through a scenic mountain view. We stopped and ate some lunch here, but had to eat a bit away from the viewpoint since there were strong, cold winds. We pushed on as the trail became to climb very slowly and at 8.6 miles we reached another viewpoint. This was probably the nicest one in our opinion of the trip, since you had panoramic views of farmlands and mountains around you.
We had miles of easy walking along a ridge. Below: Late summer vegetation; Views from the trail; Descending to Angels Rest.
We continued the pleasant ridge walking and eventually the trail began to descend through an area that cut a path between very large rock boulders. We reached a sign that pointed to Angels Rest (a short .1 mile sidetrail) at 9.2 miles. Angels Rest is a large boulder that requires you to scale up it to get the view. We climbed up and the view is being combated by growing trees. The view in the distance is nice, but in my opinion the eyesore of looking down on a town (and correctional facility to boot) isn’t one that I particularly enjoy. I know lots of people hike up to this point from Pearisburg and return, but the better view would be if people would just continue a bit further. We climbed down disappointed this was the last view and then rejoined the trail.
Angels Rest and a view into Pearisburg. Below: New signage around Angels Rest; The rock at Angels Rest; Descending into Pearisburg.
The hike down from Angels Rest was extremely steep. We made the downward trip the rest of the way fairly quickly. At 11 miles we crossed over Cross Avenue, VA 634. We then crossed over Lane Street at 11.4 miles and then made it to Narrows Road and our car at 11.8 miles. When we got back to our car, we drove back to pick up our gear at Woods Hole Hostel (and also bought a nice soup bowl crafted by the owner) and then made our way to Ballast Point for some post-hike dinner and flight of beers. It was such a great birthday celebration and we had a wonderful experience!
The road to Pearisburg. Below: The trail between Pearisburg and Narrows; Parking.
Trail Notes
Distance – 27 miles (plus a couple extra miles to access views, shelters, and Woods Hole Hostel) (Check out the stats from Map My Hike* [Day One] [Day Two][Day Three])
Elevation Change – 4,885 feet
Difficulty – 3.5. The second day was the toughest climbing. Overall, it wasn’t very tough, but it was 27 miles.
Trail Conditions – 3.5. Some of the trail was overgrown in parts, but overall was fairly maintained and footing was reliable through most of the hike.
Views – 4. The view leading up to Angels Rest was the best.
Streams/Waterfalls – 4. Lots of stream crossings, but the highlight was early in the hike with Dismal Falls.
Wildlife – 2. We didn’t run into many signs of wildlife on the trail, but did see an occasional deer.
Ease to Navigate – 4. Sticking to the AT, you just look for white blazes. The side trails we took were well marked.
Solitude – 4. We had most of the trail to ourselves. Expect people at Dismal Falls and Angels Rest and not much in between.
* MapMyHike is not necessarily accurate, as the GPS signal fades in and out – but it still provides some fun and interesting information.
Directions to trailhead: Coordinates to drop off car and meet shuttle: 37.3341, -80.7553 (Narrows AT Parking Lot Off road, room for quite a few cars.) Shuttle drop-off/hike start coordinates: 37.1757, -80.9083 (Kimberling Creek Suspension Bridge has a a small parking area along VA606)
We did this 4.6 mile hike on an especially beautiful, misty summer morning. It was a moderate climb with lots of interesting things to see along the way – from an old sugar house to the headwaters of a flume gorge, to the lovely viewpoint.
Beautiful misty sunshine on the Kinsman Trail. Below: Trailhead sign; Early parts of the trail.
Christine Says…
This was the last hike of our 2017 trip up north. By the end of two weeks that involved five different dayhikes and a three-day overnight backpacking trip, we were both sore, bruised, and covered with bug bites and scratches. We were both pretty tired, but the weather was nice and we felt we should squeeze one more quick hike in before the long 12-hour drive home. The hike up the Kinsman Trail to Bald Peak was close to my parents’ house and didn’t look too grueling, so we decided it would be the perfect grace note on our wonderful summer vacation.
We parked in the lot for the Kinsman Trail on Route 116. We arrived early and there were plenty of open spots, however it was overflowing by the time we got back to the car around 11:00 a.m. The trailhead is popular as it provides access to the 4,000 footer, Mount Kinsman. Bald Peak isn’t a true summit, it’s a rocky outcropping on the shoulder of a mountain. While it might not be the pinnacle, it provides nice views and is well worth doing.
The first half mile of the hike meanders along single-track trail through the forest. The terrain is rolling and there are abundant ferns and shady hemlocks along the way. At .5 miles in, the trail will arrive a a junction with a wider, road-like trail. Take a right onto the wide trail. In a tenth of a mile, you’ll pass a neat, but overgrown, sugar house. It didn’t look like it had been used in many years. Follow the road/trail for another half mile before coming to another junction. Bear to the right, continuing to follow the steepening blue-blazed Kinsman Trail. Keep an eye out for the blue blazes to keep yourself on track.
This rundown, old sugar house is right along the trail. Below: Scenes along the Kinsman Trail
About .35 miles later, you’ll make your first stream crossing – there are several on this hike, along with several lovely (albeit small) waterfalls. The waterfall pictured below was at the second stream crossing. Continue following the Kinsman Trail for .65 miles to your third stream. This is Flume Brook. Once you cross the water, look for a small sign pointing to the right. Follow a spur trail steeply downhill along the gorge. The rock walls that make the flume are steep and deep, but you will hear water rushing in the gorge below. Be careful looking down into the gorge – the terrain around it is extremely steep and slippery. A fall here would necessitate a dangerous rescue operation if you even survived the initial plunge.
After enjoying the flume, backtrack up to the main Kinsman Trail. Hike a couple more short tenths of a mile uphill, and you’ll reach the next junction. Bearing to the left will take you up the Kinsmans, so stay to the right and head along the Bald Peak spur. The trail is blazed yellow and follows a short series of ups and downs for about a quarter mile. The spur was a beautiful mix of evergreens, moss, and granite. At the end of the spur, you’ll come out onto a wide rocky ledge. From the viewpoint, you should be able to see Mount Kinsman, Mount Moosilauke, and a great peek into Vermont. Once you’ve enjoyed the view, return to your car the same way you hiked up for a round trip of 4.6 miles.
Small waterfall on the Kinsman Trail to Bald Peak. Below: Mist in the forest; Small cascades; A look into the gorge.
Adam Says…
The Bald Peak hike had a lot of things that made us pick it – close by to where we were staying, waterfalls, plunging gorge, and view. This hike doesn’t get a lot of traffic except by locals since people will opt for bigger, grander views, but this one has a nice sampling of things to see.
The trail always seemed more of a gradual uphill and never felt too tough for us. In that first half mile, we came across the sugar house on the side of the trail. I peaked through the spaces in between the boards and saw some of the old materials used to collect maple sap inside.
Mosses on the Kinsman Trail. Below: The spur to Bald Peak; Hiking along the spur
We had picked a morning to hike this right after rain the previous day. The morning mist rising up through the trees caught the morning sunlight and the beams of light cast a mystical picture across the forest. The rain also made the hike slippery over some of the roots and rocks that you always have to step on in a hike in New Hampshire.
As Christine mentioned, when you pass over Flume Brook there is a small sign to view the gorge. We both started down this side trail, but it was incredibly slick. Christine stopped, but I decided I wanted to go further to see if I could actually be able to look down into the gorge. Christine was freaking out a bit that I was pushing on, but I did want to see if I could get some pictures. I went a bit further and actually slipped, sliding about 10 feet before I caught myself on the trail. One false step here could mean your death. The gorge was located just a few feet away from the trail and all I could see was that it went down quite a bit. There was never a good place to actually be able to see down into the gorge, so I would recommend skipping this feature – it’s too dangerous, anyway.
Bald Peak views. Below: More perspectives on the viewpoint.
When we reached the view at the top, I was impressed. It was a fairly clear morning so we could see all around us and far off to Vermont. We talked with a couple of women that loved to hike together that lived locally. They had been working on the 48 peaks above 4000 feet and had a lot of advice on places to hike in the future. We love picking the brains of local people for hiking suggestions. Many people that you may come across use this trail to go all the way to Mt. Kinsman without taking this spur trail to Bald Peak for an extra view. You will likely have solitude on this peak during most days. This was a nice final spot to take in some views of New England before heading back to Virginia.
Trail Notes
Distance – 4.6 miles
(Check out the stats from Map My Hike)*
Elevation Change – 1400 ft.
Difficulty – 3. Moderate and well-graded.
Trail Conditions – 3.5. The trail was nice, with some rocks and roots typical to the area.
Views – 4. Very nice, but not quite 360.
Waterfalls/streams – 4. The headwaters of the flume are pretty cool and there are several small waterfalls along the trail.
Wildlife – 3. Typical squirrels and birds.
Ease to Navigate – 4. The route was well-blazed/marked and easy to follow.
Solitude– 4. We only saw a handful of others along the way. This trail gets far less traffic than more popular hikes in the area.
This 3.6 mile, family-friendly hike has a bit of steady climbing to reach the ridgeline, but with two summits – both with amazing vistas – it’s a hike that should not be missed when visiting this area.
Adam takes in the amazing views from Middle Sugarloaf.
Adam Says…
If you are visiting the White Mountains of New Hampshire, I would definitely put Sugarloaf on your list of must-do hikes. With a total of just 3.6 miles to cover both summits, it’s a great family hike and the views on a clear day are hard to beat.
From the parking lot, cross the bridge. You will see the yellow-blazed trail head off to the right just past the bridge. This is the Trestle Trail and it goes along the Zealand River. There are a few places to duck off the trail and get some gorgeous water views. In just a quarter of a mile, the junction for the Sugarloaf summits branches off to the left. The trail goes over some boggy areas at first before coming to a boulder field. You will see two huge boulders (among others), that were dropped off by glacial melt many years ago. The trail really starts to climb at this point and at one mile, you will reach a junction sign that points to the left for Middle Sugarloaf and to the right for North Sugarloaf.
The hike starts off along the scenic Zealand River. Below: Trailhead parking along Zealand Road. For some reason, the pay stations were covered; Adam follows the Sugarloaf Trail away from the road; The trail follows the stream for a little while.
We opted to go to Middle Sugarloaf first. The trail continues to climb, often through some very rocky areas. Eventually, you come to a ladder staircase that is your last climb before reaching the summit area at 1.4 miles. After the staircase, the trail opens up from the trees and the vast expanse of views are all around you on a large open ledge. When you first emerge, straight ahead of you is Mt. Hale looking to the south. If you wind around towards the right, you will have great views of North Twin and South Twin mountains. If you wind around to the left, you will come to a viewpoint to the east where you can see the far-off Presidential Range and a keen eye may even see the tower at the top of Mount Washington on a clear day. This open area is a photographer’s dream, as there are gorgeous views no matter which way you look and it is easy to lose track of time exploring the summit area.
We eventually returned the way we came and reached the junction at 1.8 miles (keep in mind if you are tracking distances, you may have walked a couple of tenths around the summit of the Middle Sugarloaf). We then headed toward the North Sugarloaf summit, which is not as steep but winds around until it reaches the summit at 2.1 miles. The summit here gives you views of US-302 cutting through the landscape before the Presidential range, but you still have gorgeous views of mountains all around. This summit would look outstanding on most hikes but we were a little spoiled from the views at Middle Sugarloaf. Since North Sugarloaf is usually less crowded (many people just do an out-and-back to Middle Sugarloaf), you may have a little more solitude. We did come up to some families that were staying at the Sugarloaf campgrounds near the initial parking lot, that were alternating doing hikes to both summits on different days.
After a bit of climbing, you’ll reach this junction. We visited Middle Sugarloaf first. Below: A few scenes from the climb up to the ridge: wooden trestles over a muddy area, a giant boulder you can walk by (or through… see photo later in post), typical New Hampshire rockiness.
After taking in the views at North Sugarloaf, we headed back the way we came, reaching the junction at 2.5 miles and then getting back to our car around 3.6 miles. These peaks were ones that I’m sure we will come back to time and time again on a clear day. When you want a relatively easy hike for this region with a big payoff, look no further than this one. I would recommend hitting it in the early morning since this is an extremely popular hike so you can pick your prime place to sit down and soak in the beauty of the White Mountains.
Christine Says…
I don’t know what took us so long to do this hike. It’s been on our radar for years – ever since my parents initially moved to New Hampshire. I guess there are just so many amazing trails in the area, that sometimes we overlook the short/popular hikes for fear of them being overrun by crowds.
Honestly, the key for maximizing solitude on hiking is simply getting up early. I find it’s true everywhere. If you can get to trailhead parking just as the sun is coming up, you’ll almost always beat the big crowds of casual hikers that come out mid-morning.
There is a ladder-stair to reach Middle Sugarloaf. Below: The forest along the ridgeline was lush and gorgeous; Adam standing on Middle Sugarloaf; Middle Sugarloaf offers views in every direction.
We got a little bit turned around when we first started this hike. There is a trail that leads directly away from the parking area. We missed the fact that we had to cross the bridge to get to the Sugarloaf Trail and instead started walking along the closer trail. In a couple tenths of a mile, we reached a campground and knew we were going the wrong way. We backtracked, reread our guidebook, and were set straight a couple minutes later.
The early part of the hike followed the scenic Zealand river. The boggy areas Adam described were extremely buggy – mosquitoes everywhere! We had to stop and coat ourselves with OFF in order to proceed. The big climb starts pretty quickly after passing the huge boulders. It’s a steady climb until the junction. Once you reach the ridgeline, the hike becomes more moderate. We opted to visit the prettier Middle Sugarloaf first. As we were walking along, I wondered why there was a north and middle summit, but no mention of a South Sugarloaf. Apparently, there is a south summit, but it’s a total bushwhack and is therefore rarely visited. I found photos of that summit on another hiking blog, and it looks like a beautiful spot for people who have orienteering skills and enjoy exploring off-trail.
The views from Middle Sugarloaf are truly spectacular. Below: After passing the junction, we climbed up North Sugarloaf; The forest had a lot of evergreens, The summit had a some trees between two different places to take in the view.
On Middle Sugarloaf, we enjoyed the summit all to ourselves for a good 30 minutes. I basked in the sun and ate my traditional New England hiking snack of a whoopie pie. I rarely eat them in Virginia, but I have to have them on the trail in New England. It just seems right – possibly mandatory. 🙂
When a few more hiking groups began arriving at the summit, we decided it was time to make our way over to North Sugarloaf. The hike was pleasant and easy. When we got to the vista, we were a bit disappointed. It was just a small rock ledge with a partial view. It was packed with a large family group. Luckily, we realized this wasn’t the actual viewpoint – the trail continued from one opening back into the trees before coming out on a larger open area with another panoramic view. North Sugarloaf still doesn’t impress as much as Middle, but it was definitely worth checking out.
After enjoying a few more minutes of the view, we hiked down and made our way to one of our favorite post-hike hangouts in the area – the AMC Highlands Center. The rustic lodge serves as the main hub and information center for the White Mountain’s Presidential range. There is a gear shop, lodging, a lounge, and a decent cafe. We got sandwiches and beers and sat at a table outside so we could take in the view and sunshine. What a great day!
The views from North Sugarloaf are different, but also very nice! Below: Another North Sugarloaf view; This is the boulder you can walk through. There is a big slit in the middle; Another look at the beautiful Zealand River.
Trail Notes
Distance – 3.6 miles
(Check out the stats from Map My Hike)*
Elevation Change – 925 ft
Difficulty – 2.5. There is some climbing on this one, but since the distance is shorter take your time. Great for a family hike.
Trail Conditions – 4. This hike is very popular, so the trail is well worn.
Views – 5. On a clear day, you can see for hundreds of miles around you.
Waterfalls/streams – 4. Passing by the Zealand River in the very beginning of the hike gives you gorgeous river views.
Wildlife – 1. Other than birds, you likely won’t see a lot of wildlife due to the popularity of the hike.
Ease to Navigate – 4. There are a couple of turns to make, but overall the trail is well-blazed and signs at the junctions are helpful.
Solitude– 1.5. On a clear day in the summer, this will be a popular hike. There is typically more solitude on North Sugarloaf. Start early to avoid crowds and get good parking.
Directions to trailhead: Parking coordinates are: 44.254858, -71.503993. The trail begins on the far side of the bridge on the right, on the same side of the road as the parking area. There is normally a fee station box here, but the box was sealed when we were there. Typically, the hikes here would charge $3 for parking, so bring some cash for an envelope to pay the fee.
* MapMyHike is not necessarily accurate, as the GPS signal fades in and out – but it still provides some fun and interesting information.
This was a pleasant hike to a pretty waterfall located near a scenic backcountry campsite. At just under five miles with only 1100 feet of climbing, it’s one of the area’s easier hikes.
The water level was low from dry conditions, but the falls were still pretty. Below: Signage at the parking area; Early parts of the hike followed the road; The hike enters the woods.
Christine Says…
We stumbled across this hike in one of my parents’ hiking guide books. They had never done it, but the description sounded quite appealing for a quick morning hike. Trailhead parking is on Coppermine Road, a private gravel road off NH116. Be careful to park only in the designated area, so you don’t infringe on homeowner’s private property.
The first .4 mile of the hike follows the unpaved road. You’ll pass a number of private cabins as you walk. Look for yellow blazes and a hiker sign on the left side of the road. Follow the path into shady woods. The trees are a mix of evergreens, maples, and white birches. It’s a peaceful setting and a gentle uphill. At 1 mile in, Coppermine Brook meets the trail’s right side.
The remainder of the hike stays close to the brook’s path, so this is a great hike if you enjoy the sound of bubbling water. There are lots of places to leave the trail and explore the boulder-strewn streambed. When we visited, water was running low, so it was easy to hop rocks and stand in the middle of the stream without getting wet.
At 2.2 miles, the trail crosses the stream via a sturdy wooden footbridge. Another .2 miles beyond the bridge, you’ll reach Coppermine Shelter and the base of Bridal Veil Falls. The shelter is a three-sided lean to for overnight campers. The falls are behind the shelter, tucked into a small cliffside. The falls drop several times over granite shelves. To get to the prettiest view of the waterfall, you have to cross the bottom pool and climb up one of the granite shelves.
The Coppermine Trail climbs gently and is only moderately rocky. This small bridge crosses the stream just a couple tenths of a mile before the falls. Below: Typical terrain for this hike; Stream scenery.
When we visited, the granite was really slippery from a brief rain the night before. We scrambled up to a viewpoint and surveyed the area. Adam wanted to climb even further up to another higher pool at the point where the falls take their largest plunge. We discussed the best route, as it looked a bit perilous and tricky.
While we were talking about the scramble to the top, my parent’s hiking guidebook, which I had set next to my backpack, went sliding down the rocks and into the water. It careened down two drops of the stream before settling in a eddy in the pool at the very bottom of the falls. CRAP – the book was full of years’ worth of handwritten hiking notes! Adam scrambled quickly back down to the bottom of the falls and retrieved it. It was completely sodden and I felt awful about not being more careful with it.
Adam eventually made it to the higher pool and took some closer photos of the falls, but worrying about the book kind of took the luster off the rest of the hike. Eventually, we headed back the way we came in. The hike back was quick and all downhill. When we got in the car, I turned the air conditioning on full blast to dry out the book’s pages before they stuck together. It was pretty hopeless, though.
Despite the mishap with the book, we enjoyed the hike and highly recommend it.
Adam Says…
This hike was one of the easiest hikes we have done in the area. The hike to the falls is uphill, but very gradual. We never felt out of breath on this one, so it may be a good one for a family hike. The recent rain had left some of the trail quite slippery, especially near the final climb up to the falls. When Christine mentioned it was slippery, we had to scramble on all fours to be able to make it up, because our feet could not find purchase on the slick rock.
This trail has an interesting, yet mysterious, past to it. After hiking about 1.2 miles on the Coppermine Trail (a couple of tenths after the brook and trail meet), there is a plaque on a large boulder in the streambed. While we didn’t see the plaque on our trip, we read about it later. To find the plaque, look for an area that has a steep slope down to a flat area. The boulder sticks out into the stream about halfway along the flat area and the plaque is facing downstream. The plaque states, “In Memoriam to Arthur Farnsworth ‘The Keeper of Stray Ladies’ Pecketts 1939 Presented by a Grateful One”. According to a 1987 Magnetic North article, there is an answer to the meaning behind this mysterious message. Arthur Farnsworth worked at a resort called Pecketts, located in Sugar Hill. Farnsworth’s job at Pecketts was to make his guests feel most comfortable. The actress, Bette Davis stayed there in 1939 to relax after a tiring filming schedule. Bette Davis fell in love with the beauty and anonymity of this area, feeling she could escape the burden of her fame. The story to be told here is that she strayed away from a hiking party on this trail and Arthur Farnsworth was sent to find her. They fell in love and were married in 1940 and moved to California, but often came back to the White Mountains to visit. In 1943, Farnsworth died from a fall at their Sugar Hill home. Bette Davis continued to visit this area afterwards, but eventually sold her home on Sugar Hill in 1961. This plaque showed up during this time.
The last bit of climbing to the falls can be slippery. Below: Boulders along the trail; The Coppermine Shelter; The pool at the base of the falls.
As Christine mentioned, our hiking book fell into the water. To watch a book slowly go down the rocks and fall into the lower pool pictured above was worrisome. Knowing how long her parents had spent hand writing notes as a journal of all the hikes they had been on, we felt so terrible. Before we returned home with our soggy mess of a book, we stopped by the White Mountains Visitor Center and purchased two copies of the replacement book – AMC’s Best Day Hikes in the White Mountains. We bought two because we thought we would be permanently banned from borrowing books in the future. The book had been updated and now included a few more hikes. To try and make amends, I spent several hours that evening transferring all the notes from their previous book (miraculously still legible despite wet pages). Her parents were not upset, but I wanted to make sure we made it right.
We both highly recommend this hike if you want an easy day hike to do for a nice waterfall view. Just please keep your hiking book (or printouts from this website) in a safe place.
Trail Notes
Distance – 4.8 miles
(Check out the stats from Map My Hike)*
Elevation Change – 1100 ft.
Difficulty – 2. The climbing is gentle the whole way. The only challenge is scaling the rocks up to the base of the falls.
Trail Conditions – 4. This trail is only moderately rocky by New Hampshire standards.
Views – 0. There are no open views on this hike.
Waterfalls/streams – 4. The falls are small, but very pretty, The stream is also gorgeous. I wish we could have visited when there was more water running.
Wildlife – 2. Lots of birds and squirrels.
Ease to Navigate – 4. The trail is well-marked and easy to follow.
Solitude– 3. We saw a handful of people on our hike back, but had the falls to ourselves for almost half an hour.
Directions to trailhead: Parking coordinates are: 44.180903, -71.755717. Make sure you park in the designated parking area and nowhere else. This is a private road.
* MapMyHike is not necessarily accurate, as the GPS signal fades in and out – but it still provides some fun and interesting information.
This 4.9 mile hike was such a pleasant surprise. Our hiking guide said there were views, but didn’t really mention how nice they were! The route had moderate grades and the most blueberries we’ve seen on any of our New England hikes.
While Mount Roberts is a small peak, it offers great views of Lake Winnipesaukee. Below: The hike sets out on the grounds of Castle in the Clouds; Trails are well marked; The early part of the trail is very rocky!
Adam Says…
Since we did our big backpacking trip earlier in Vermont, we decided we would do a lot of easier hikes for the remainder of our trip to New England. We had been to Castle in the Clouds on a previous trip and there are a good number of hiking trails there that are maintained by the Lakes Region Conservation Trust. We saw a write-up about this hike in one of our hiking books, 50 More Hikes in New Hampshire, and decided to give it a try. We parked near the stables at the Castle in the Clouds. Walking up the road past the stables, the sign for the Mt. Roberts Trail was clearly labeled. We followed the trail which led us quickly into the woods and leads along the back side of the fenced-in stable property. The trail takes a sharp left and then a sharp right before you feel like you are really on a trail that is leading up a mountain.
In 1.2 miles you reach a side path that leads you to an area that is called Sunset Hill. It provides a great panoramic view of the valley below you, Lake Winnipesaukee, and mountains that range from the Belknap Range, Mount Kearsarge, Mount Cardigan, Squam Range, and Mount Moosilauke among many others. We talked to an older couple that were taking in the view and were local to the area. The husband talked about how he had been visiting this view for many years – its nice to have this as a place you can revisit. If you want to take a short hike or have small children, this may be a perfect family short out-and-back to do. After enjoying the view, we pressed on to the summit.
Most of the hike up Mount Roberts follows a ridgeline. Below: Adam makes his way along the granite ridge; Near the summit the trail goes back into a pine canopy; The summit.
The trail from this point began to be a little more steep, but overall we found it quite moderate. There were many times that the hike was in the open as we walked along rocky ridgeline, so keep an eye on the orange blazes painted on rocks to point where to go next. On the climb up, we noticed that most of the views were behind us, so we thought we would just press on and then enjoy most of the open views on the way back.
We reached the summit at 2.4 miles, which was marked by a sign in a cairn. The views from the summit were limited due to overgrowth around, but stepping on to the rocks gets you more of a view. As soon as we got to the summit marker, a snake darted out from the rocks so be careful where you step and place your hands. The view wasn’t as spectacular as what we had passed, so we made our way back after a short stay at the summit.
We noticed on our climb up, the abundance of blueberry bushes that were on the trail. We decided we would pick some to eat as a snack on the way back. I have never seen so many ripe, wild blueberries in one place than here. Everywhere we looked, there were blueberries and they were at the perfect ripeness – there is nothing like eating a snack provided by nature in a setting like this. On the way back, we took many more pictures and enjoyed the lake views from nice outcroppings.
We got back to our car at 4.9 miles and thought this was a perfect, easy hike that was much better than what we thought was described. I can see us visiting this hike often and I understand why that older couple keeps coming back. To finish the perfect day, we stopped by the Squam Lakeside, which serves our favorite lobster rolls with tons of fresh lobster and lime cream slushes.
Christine Says…
Adam described the hike really thoroughly, so I’ll chime in with just a few of my memories from the hike. The best part of the hike was the spectacular views on the hike down. It was like a mountain theater and truly breathtaking.
Another note – this hike was really popular with DOGS! I think we saw as many dogs as we did people along the way. From big labradors to jack russell terriers to a dachshund. After seeing one of the dogs make a ‘pit stop’ on the blueberries, it made me choose bushes that were far from from the trail to snack on.
You get great views of the Presidentials and Mount Chocorua from the summit of Roberts. Below: A great look at the rocky cone of Chocorua; Trail markers back to the castle grounds; This hike had so many blueberries!
Another thing that struck me on the early section of the hike was how tough the footing was to traverse safely. Climbing to Sunset Hill was a little bit steep, but the footing was the challenge. The area had a drought-y summer, so the dirt was loose and gritty. On top of the loose soil, there were lots of round, softball-sized stones. It was definitely ankle-turning terrain.
After we passed Sunset Hill, we came across a large group of backpackers from a girls’ summer camp. The Lakes Region of New Hampshire is packed with sleep-away camps. I was really glad to see such a big group of girls, campers and counselors alike, being exposed to overnight backpacking. When I was growing up, backpacking was typically something meant for boys. My Girl Scout troop’s camping trips were limited to cabins and platform tents. We learned to cook, do dishes, clean latrines, and make crafts. My first exposure to backpacking was a single overnight when I attended summer camp with the National Wildlife Federation the summer after my fourth grade year. After that, I never had the opportunity to backpack again until I was an adult. It’s something I truly love and I wish I’d started years before. Seeing all these girls on the trail also made me wonder how this hike hooks into the larger trail network in the area… something I plan to research!
You get great views looking toward the lake on the way down. Below: A moment to enjoy the lake view; Shuttles and the castle’s stable grounds; Post hike lunch of lobster rolls!
I guess another favorite memory from this hike was the great view of Mt. Chocorua and the Presidentials from the summit of Roberts. Yes… the mountains were far off and the view wasn’t panoramic, but those mountains are super impressive even at a distance. Mt. Chocorua was especially breathtaking from this angle, as you could really see the sheer stone cone of its summit.
And finally… who can forget lobster rolls! Squam Lakeside finds a way to pack about two full lobsters’ worth of tender meat onto a hot dog roll for each of their sandwiches. They’re nothing short of glorious!
Trail Notes
Distance – 4.9 miles
(Check out the stats from Map My Hike)*
Elevation Change – 1320 ft.
Difficulty – 2.5. With a short elevation gain, we never found this trail to be very tough. There are a few rocky areas, but they are short-lived.
Trail Conditions – 4. The Lakes Region Conservation Trust does a great job maintaining this trail. We never experienced any blow-downs or overgrown areas on the trail.
Views – 4.5. The Lake Winnipesaukee views were outstanding. Views from the summit were a bit disappointing, but you have plenty of other spots to enjoy on the way up.
Waterfalls/streams – 0. Non-existent.
Wildlife – 3. Watch out for snakes on the exposed rocks. Lots of bird watching to be done from the rocky overlooks also.
Ease to Navigate – 3.5. The trail was mostly easy to follow, but we did have to watch for some of the blazes on the open areas.
Solitude– 3. This is a popular hike in the summer. With that being said, there is plenty of space at the views to carve out your personal space if needed.
This easy 1.6 mile hike is a great beginner’s sample of what it’s like to hike in the White Mountains region. You get great views, rocky summits, and a little bit of rock scrambling. It’s a popular family hike, so expect a crowd! We enjoyed the scenery so much, that we returned a second time to hike just the Artists Bluff portion with our little pug, Wookie!
Wookie and Adam take in a great view of Franconia Notch from the viewpoint at Artists Bluff.
Christine Says…
When compared to all the surrounding mountains, Artists Bluff and Bald Mountain are downright tiny – topping out at around 2,300 feet. However, both summits offer outstanding views and the trail is just rugged enough to provide a fun little challenge. We thought it was a perfect recovery hike after our Vermont backpacking trip just a couple days earlier. We started off by parking in the Echo Lake lot. Exiting the lot, we took a right and walked east along the road (back toward the interstate) for a short distance. Across the road there is a clearly marked path with a sign pointing the direction toward Artists Bluff.
There are some short but steep climbs en route to Artists Bluff. Below: The beginning of the hike has a trailhead marker; Adam makes his way through the boulders; The trail is very rocky.
As you enter the woods, bear to the right. The return arm of the loop trail is to the left. The trail immediately begins a steep climb over rocky terrain. You’ll pass boulders and climb up stone stairs for a couple tenths of a mile. At .25 miles, you’ll reach a large boulder marked with red directional arrows and labels. Follow the marked spur trail to the right out to Artists Bluff. Enjoy the fantastic view of Echo Lake and Cannon Mountain Ski Area. You can see I-93 trailing its way through Franconia Notch. On the eastern side of the highway, you can see towering Mount Lafayette and Eagle Cliff. If you’re feeling adventurous and energetic, use another day to hike to the summit of Mt. Lafayette and take in the splendor of Franconia Ridge.
After enjoying the views from Artists Bluff, follow the spur trail back to the marked boulder at the junction. Follow the red blazes in the direction of Bald Mountain. The trail will meander up and down hills, crossing a saddle and climbing a small knob before reaching the Bald Mountain spur. This junction is about .65 miles into the loop. The spur trail circles around the shoulder of Bald Mountain, climbing gently until you reach the ledges directly beneath the summit.
A nice view of Cannon Mountain ski slopes, Echo Lake, and Franconia Notch. Below: The loop junction is well marked; A view across Franconia Notch looking toward the Lincoln and Lafayette; The saddle between Artists Bluff and Bald Mountain.
From here, there is a little over a tenth of a mile of steep boulder scrambling. Near the top, you will pass through a brief pine-covered area before stepping out onto an expansive dome of bare rock. Pay attention to where the trail exits the trees and steps out to the view. We kind of lost the way and had to backtrack to find the trail again. It wasn’t a big backtrack, but still worth noting. The view from the summit of Bald Mountain includes the ski area and a little bit of the lake, but it also includes views of mountain ranges to north and glimpses west into Vermont. It’s really an excellent vista!
After we spent some time enjoying the view all to ourselves – Artists Bluff is infinitely more popular than Bald Mountain – we made our way back down the spur trail. After returning to the junction with the loop follow the trail downhill for about .3 miles. At this point, you should see the road and alternate parking through the trees. Turn left, continuing on the loop for .4 miles. The last .4 miles parallels the road and returns you to where you started at the Echo Lake parking area.
Adam Says…
As Christine mentioned, we hiked this one twice. It’s an easy hike to fit in just about any day you have some extra energy while in the White Mountains. The first time we hiked it, we wanted to make sure it would be OK for Wookie to join us on a future hike. We always like to get him out for a hike or two on our vacations.
We knew there was rain coming later in the first day we hiked it, so we wanted to tackle it early. The trail up to Artists Bluff is short but steep. There are lots of boulders to scramble up, but if you take your time, most people should be able to handle it. On the first day, we came across two girls at the summit that were celebrating the view with morning mimosas. I could tell it was a nice moment for their friendship. We left the summit and backtracked until we veered off to the trail to head towards the Bald Mountain summit. On our way to the second summit, we came across a large family group from New Jersey. They had decided to do the full loop but skipped the summit of Bald Mountain. We could tell this was a family that didn’t do much planning for hiking, because they had a lot of questions about distance, directions, and terrain. It wasn’t long before we came to the junction where the Bald Mountain summit side trail is marked by a sign. It was a short, tough scramble up, but once we got to the top the views were great. The wind was incredibly strong that first day, so it was hard to stand straight and actually take a picture. We could only imagine how strong the wind was on the summit of Mt. Washington, just about an hour’s drive away.
The scramble to the summit of Bald Mountain is brief, but intense. Notice the red blaze way at the top? Below: The view from Bald Mountain looking toward Cannon Mountain ski area; The view off the back of Bald Mountain looks into Vermont; Christine scrambling down; Back at the parking area.
The views from Artists Bluff are a bit more picturesque with the lake below, but you get a highway view also. From the summit of Bald Mountain, the views are mostly of mountains beyond. You also will find that most people only hike to Artists Bluff and don’t take in nearby Bald Mountain, so there is more solitude on that summit.
We made our way back down to the junction and bore right to continue the loop and head back to the car. When we were almost back, we came across the same family that we had seen earlier. They were exhausted from the hike and were dreading their walk back to the car at the alternate parking lot. We offered to give them a ride, but they politely declined. One of the family members was then going to hike to the car and come back and pick them up.
On the second trip to do this hike, we just did the short trip to Artists Bluff. We were very proud of Wookie tackling the hike without any trouble. It was so cute to watch him navigate the boulders climbing up and down. On the ascent, his tail was down sometimes as he does when he is feeling less confident, but it was curled tightly on the way down as he was confident he knew the way back. He truly enjoyed himself up on the top and took in the scenery. We often wonder what is going through his mind at times, but we could tell that the view made him happy. We love our little hiking buddy!
Wookie Says…
It had been quite a while since I’ve been on a new hike. Whenever I see Adam and Christine put on their hiking clothes and grab their trekking poles, I’m hoping that I can come along. They usually leave me behind since a lot of hikes are tough on a short-legged pug like me, but this time my luck turned.
I enjoyed the hike up Artists Bluff but some of the boulders were huge. You can always see my quick brain working to find the easiest path up, but there were some steps that were just too large for me. Adam had to lift me up a few of them and on the return had to carry me down a couple. I mean, there is no need to overdo things when you have a perfectly capable human to take some of the danger out of it.
At the top, I did look out quite a bit and enjoyed the view. I was startled to see cars on the highway. This was my first hike ever where I could see and hear cars below, so it had me cock my head to the side as I was trying to figure it all out. We sat at the top for a good while and enjoyed the view. It was quite windy at the top, but the scenery was beautiful. I made my way quickly down in hopes that there would be an extra bowl of food at the end for all of my efforts. Instead of dog food, Christine surprised me with a glazed munchkin from Dunkin Donuts. I gulped it down and settled into a goof nap on the car ride back to grandma’s house.
I love a beautiful view! Below: But hiking makes me so tired!
Trail Notes
Distance – 1.6 miles
(Check out the stats from Map My Hike)*
Elevation Change – 433 ft.
Difficulty – 2. Most of this hike is very simple with easy terrain, however the ascent to the summit of Bald Mountain will require scrambling over bare rock. There are a couple steep, but short, climbs.
Trail Conditions – 3. The trail is generally well maintained and traveled. There will be some rocky areas and muddy areas.
Views – 5. Excellent views from both Artists Bluff and Bald Mountain. The Bald Mountain view is especially panoramic.
Waterfalls/streams – 0. You will see water in the viewshed, but there is none along the trail.
Wildlife – 2. You will likely see birds, chipmunks, and squirrels.
Ease to Navigate – 3. There are several junctions where trails intersect. There are also two places you can begin your hike. However, everything loops back, so you should find the trail system easy to follow. Pay attention to where the trail enters/exits the summit area of Bald Mountain. It is not clearly marked and is easy to lose if you’re not paying attention.
Directions to trailhead: Parking coordinates are: 44.178537, -71.696247. There is a large parking area near the entrance to Echo Beach. To begin the hike, park in the lot. On foot, take a right onto Profile Road and walk about a tenth of a mile along the road. The trail begins on the north side of Profile Road. You will see a sign marking the loop.
* MapMyHike is not necessarily accurate, as the GPS signal fades in and out – but it still provides some fun and interesting information.
We tackled this 24.5 mile section of Vermont’s Appalachian Trail during a spell of very hot, dry weather – especially by New England standards. The route has quite a bit of road-walking and traversing open fields in full sun. We’ll admit… it wasn’t one of our favorites.
This is the first section of Vermont’s Appalachian Trail that we have attempted. We looked at a few different routes but decided on this short three-day trip. We were staying with Christine’s parents in central New Hampshire and wanted to start tackling some miles nearby since they could watch our dog, Wookie, while we were backpacking. Another great thing about staying with them is they offered to provide the shuttle for us. Probably like most family members, they don’t quite understand what we were doing since they have never done a backpacking trip. We are often riddled with questions about where we are going, preparations, how we use different equipment, etc. They tried on our weighted packs and didn’t understand how we could walk for miles with these strapped to our backs and make decent time. They followed us in their car and we parked at our end destination. We then shuttled back in their car to Hanover, NH.
Shortly after leaving downtown Hanover, you cross the Connecticut River which is the state line between New Hampshire and Vermont. Below: the Connecticut River is a significant body of water; Hiking into Norwich, Vermont; Just a couple miles in to our hike, we were already in need of shade and a cold drink.
Before we began our trek, we had lunch with her parents at Molly’s in the heart of Hanover. They have great American fare and a trip to Molly’s has been an annual tradition for us for the last several years. We ate an early lunch, got our backpacks out of the car and started walking towards Dartmouth College on Main Street. The Appalachian Trail cuts right through the heart of Hanover, NH. It may be a rarity in most small towns to see people walking through your downtown with large backpacks, but Hanover is a classic hiker-friendly town. People would whisper as we walk by and take photos, making you feel like a celebrity more than anything. Of course, we had not walked all the way from Georgia to this point, but people are fascinated with long-distance backpacking. We took a few pictures on Dartmouth College’s quad lawn called The Green, walking by an admissions tour group, before turning down Wheelock Street/SR10 after just a few tenths from Molly’s to keep south on the Appalachian Trail. The white blazes that signify the AT trail markers through towns typically are blazes painted on lampposts or backs of signs.
The day was hot – abnormally hot for the summer in Vermont. The day was approaching 90 and we were walking on open road with no shade so we quickly got overheated. SR10 crossed over the Connecticut River and you see a sign halfway across the bridge that signifies the state border between New Hampshire and Vermont at .8 miles. With more road walking, we reached Norwich, VT and began to climb up a steeper section of sidewalk. With the sun beating down and the uphill climb, it was quite unbearable. At 2.7 miles, we rested at a gazebo in front of a church. Christine couldn’t take much more sun, so we threw our backpacks off and I went searching for places to buy some cold drinks in fear of losing all of our water in just a short amount of time. I found a nearby deli shop and got some cold drinks. We had trouble finding the blazes at this point so I also looked around for blazes (which ended up being on the opposite side of the road). Luckily, the road that I found the deli was also where the AT turned down Elm Street.
Vermont had so much road walking in the open sun. It was tough going! Below: Some nice people in the houses along the trail had cold drinks and ice; Finally some woods and shade; A tiny bit of “Vermud” – we had the mixed blessing of hiking during a drought-y time.
We continued on Elm Street going steeply uphill. There were several houses along the way that had trail magic – cold drinks and snacks in coolers or places to get a new paperback to read for the trail. I stopped again on our climb and took advantage of some ice cold water to drink and poor over my head to keep my body as cool as possible. We eventually came to a large kiosk (adorned with Uber business cards to avoid the road walking and get right into Hanover) where the AT finally entered into the woods and we had a bit of shade from the trees. The trail passed by a small stream (which was dry) and continued uphill. Overall the trail to our first shelter was mostly non-descript but serene. There was a brown path cutting through the sea of fern around us with pine, oak, and birch trees around us.
Happy Hill Shelter was cute, but lacked a consistent water source. We had to dry camp and fill up a couple miles into the next morning.
The trail crossed over a woods road at 4.5 miles and continued slightly up and down until we reached a junction with the blue-blazed Tucker Trail at 5.9 miles (a trail that also leads to Norwich, VT in 3 miles). From this point, it was just another .3 miles until we reached the sign that marked the side trail to the Happy Hill Shelter which was just less than a tenth off the main trail. We stopped for the night and were soon joined by some other hikers, including one of our favorites, Hobbes the dog, who had been suffering like all of us in the heat. He collapsed on the soft ground telling his owner, trail-named Calvin, that he was done for the day. He rolled onto his side while Calvin peeled off his doggy pack with no help from Hobbes. We talked while eating some dinner about things we had seen on the trail. We learned a bit about porcupines from one thru-hiker that told us that they mostly climb in trees during the day and are active at night. They gave us a warning to hang our poles because they like nibbling on the cork handles. We set up camp and tried to go to sleep but it was too hot of a night and everything felt clammy and sticky.
Christine Says: Day Two – Happy Hill Shelter to Thistle Hill Shelter (9.6 miles)
Our night at Happy Hill was kind of hot and fitful. Neither of us slept well. The tent was stuffy and I kept thinking I heard animals walking around the tent (porcupines!) The sun comes up so early in the New England summer that we were awake and packing up our gear before 6:00 a.m. We knew we had another hot day ahead of us, so getting an early start was important.
Our first stop of the day was 1.7 miles into the hike. We stopped to filter water from a unnamed small stream along the trail. Since the water source at the shelter had been dry, it was nice to replenish our Camelbaks.
The second day of hiking was a mix of forests, fields, and meadows. Below: Fields, fields, fields; Filtering water for the day; Pretty ferns!
Our first four miles of the day were mostly downhill and under the shade of the forest canopy. We walked through beds of fern, small meadows, and across a couple small streams. It was how I imagined Vermont would be.
At 3.4 miles into the day, we came out onto pavement and crossed under I-89. It’s always strange to step out of the woods and see 18-wheelers zipping by on a four-lane highway. The next mile of ‘hiking’ was over paved town roads heading into West Hartford. It was still pretty early, but the sun was already high in the sky and beating down full force on the asphalt. We were both red-faced and drenched with sweat.
The Harts provide support and kindness to all hikers. Adam got his AT passport stamped there. Below: Crossing under the interstate; The West Hartford Library; Bridge crossing over the White River.
We arrived to the main part of town right at 9:00 a.m. – which happened to be the same time the community library opened. The library door had a ‘hikers welcome’ sign, so we figured we’d go in and make use of their facilities. Even after one night in the woods, it’s wonderful to be able to wash your hands with soap and running water. The library attendant told us to make ourselves comfortable and to help ourselves to coffee or water from their cooler. We sat in the air conditioning and chugged a couple bottles full of chilled spring water. After about 45 minutes, we decided we should probably move on because the day was only going to get hotter.
We had only been walking about 50 feet when a woman starting waving and shouting to us from her front porch – “Hello hikers!! Come on over!” Adam and I always stop to chat with people and explore towns along the trail, so we made our way over to the house. It turned out we were at the Hart’s residence. The Hart’s are a well-known and valued provider of trail magic. She offered to cook us breakfast – there were eggs, pastries, muffins, watermelon, and cold sodas. We weren’t hungry, but we gratefully accepted a cold soda and stayed to chat for a while. People along the Appalachian Trail are always so kind and generous. Finally, we said farewell and made our way across the bridge over the White River and back into the woods.
Our first view of the trip. Below: A little mud; Another overgrown field; Resting in the shade.
The shade of the woods was short-lived and all the remaining miles of the day were uphill and mostly crossing open fields and forest with thin canopy. It was blazing hot. We took lots of breaks to cool off. We came to a partially obstructed view at 5.2 miles into the day. There was a bench shaded by an apple tree at the vista.
We took our lunch break at a forest road crossing at 7.5 miles into our day. We sat in the dirt and ate crackers and cheese, candy, and nuts. We were both running low on water, but figured we could make it a couple more miles to the water source at the shelter. While we ate, we checked out the large sugaring operation in the woods around us. It looked like there were miles of tubes to collect sap from the maple trees. It was neat and something we never see in Virginia.
After lunch, we made the final push to Thistle Hill shelter. There were so many open fields to climb across. It was in the mid-90s, breezeless, and the sun was unrelenting. I could feel my skin burning despite multiple applications of sunscreen. We both ran out of water and were so totally ready to be done for the day. As it so often goes, you reach camp just when you think you can’t take another step. We were so thankful to reach the spur trail to the shelter.
We were baking in the sun for much of day two. Below: Thistle Hill Shelter; Tent resting; Even Rosco was tired from the heat.
Adam probably had heat exhaustion and was badly dehydrated. He collapsed into the shade of the shelter to rest. I went about setting up camp while he took a break. After some time resting, we went to collect water. The source was really nice – a lacy little waterfall pouring over mossy rocks. I mixed electrolyte drinks and tried to get Adam to drink more. Several southbound thru-hikers we’d met the night before (and Rosco the dog) rolled into camp over the next hour.
We had an early dinner at the shelter. Everyone talked about the heat and the brutality of the five+ mile uphill climb. We retreated to our tent a little before sundown. Adam still didn’t feel well and I started to worry that it might be more than dehydration. At one point, I said to him, ‘We have cell service, we can call for help if you need it.’ He refused and fortunately started to feel better as the day cooled and the fluids started to rehydrate him.
More and more hikers arrived at camp as nightfall approached. I think there were probably close to 25 people camped at Thistle Hill by the time it was dark. A few more even stumbled in by headlamp as late at 10:00 p.m. We left our rainfly off the tent to catch the cross breeze, so every headlamp at camp woke us up. It was still a cooler, more comfortable night than we’d had at Happy Hill. We both got a decent night of rest in advance of our final day of hiking.
Adam Says: Day Three – Thistle Hill Shelter to Woodstock (8.7 miles)
With our last day ahead of us, we got up with the sunrise, used the neat screen-porch privy at the shelter, quickly packed up camp, and were on our way. I think only one thru-hiker made it out of camp before us. The heat was tough on a lot of us.
From the shelter, the trail descended. At 1.8 miles, we came to a junction marking a trail to the Cloudland Shelter (.5 miles west of the trail). This shelter used to be maintained by AT volunteers but was now on private land. Hikers can still stay there and it is owned by the owners of Cloudland Market. For the past two days we had been asking northbound hikers about Cloudland Market. It had been closed on Sunday and Monday when we started our hike but this was Tuesday and we had read in our AWOL thru-hiking guide that it was open on Tuesday. One guy had told us it was also closed Tuesday, but we had heard how great the shop was and thought a cold soda or snacking on some Vermont cheese could be nice. When we reached Cloudland Road at 2.3 miles, we saw a note taped to a sign stating that is was closed on Tuesday also, so we missed out.
The third day started off almost cool. Below: Tall, straight pines; Farm field; Old country road.
We crossed Cloudland Road and had a very steep climb up an open field of grass and wildflowers to reach a hilly summit at 2.9 miles. This was probably the nicest view on the trail and gave us a glimpse of Vermont farms and mountains in the distance. We stopped for just a short time because the sun was beating down again, whipping us to push on for shade. The trail descended from this point and then we had another short uphill to reach another small view at 3.7 miles. We could see ski slopes off in the hazy distance. From this second viewpoint, it was a steep downhill until we reached the paved Pomfret Road at 4.1 miles.
This was the best/prettiest view on the trip. Below: White birches; The trail followed an old road bed; Another view with ski slopes.
On the other side of the road, was a small brook and we filled up water while talking with a bunch of northbound thru-hikers. They were having a debate on who would win in a fight between a horse and a cow and asked us for an opinion. We debated with them on why we felt a horse would win (because it had more speed and agility and could also pull off a painful kick or bite). It was a fun conversation and reminded me that when you don’t have the depressing world news to hear every day that these common topics were more enjoyable than the nightly newscast. Conversation with hikers that are going the opposite way are your version of the internet. You get information about trail conditions, water sources, sights to see, and how much uphill is ahead (its always stated that its not too bad even if it is). We also heard from other hikers that this section of Vermont that we had picked was probably the least beautiful of any of the sections of Vermont. While it was disheartening to hear, it at least renewed our opinion that the rest of Vermont would have nice streams, views, and farmlands fit for a postcard and we should do more of it another year.
A stream crossing. Below: Pretty trail; So many fields; Huge broken tree.
After taking a short break and filling up with water we pressed on. We crossed another small stream and reached the gravel Bartlett Brook Road at 5.7 miles. At 6.5 miles, we crossed Totman Hill Road and reached another stream at 7.0 miles (where was all this water earlier in the trip?). At 7.3 miles, we reached Woodstock Stage Road and Barnard Brook. We had one less-steep climb up, a one mile climb up Dana Hill before descending again. On our final descent, we saw a black bear foraging off to the side that took off running when we got close. It was very exciting to finally see some wildlife and was a reward for the end of our journey! We finally reached our final road crossing at 8.7 miles, Barnard Gulf Road, and got back to where we had parked our car. We made it! We had been so hot and miserable for most of the trip we wondered if we would make the entire section. Filled with pride it was now time to fill our stomachs. We drove to nearby Long Trail Brewery for some cold beers and amazing food to toast our accomplishment.
The last big climb was a tough one! Below: Our final descent – close to where we saw the bear; Some well earned beers at Long Trail Brewery.
Trail Notes
Distance – 24.5 miles
Elevation Change – 6,341 ft
Difficulty – 4. This section had tons of steep, unrelenting ups-and-downs (most without a view payoff). It was similar to a bigger, badder version of Virginia’s roller coaster.
Trail Conditions – 3.5. The trail was generally well maintained, but there were some very overgrown sections. There was also a bit of mud and erosion in places.
Views – 2.5. There were a couple nice views from high meadows. They were pretty, but not spectacular. Many were partly obstructed.
Waterfalls/streams – 3. There were streams for water sources and several larger rivers to cross (on bridges).
Wildlife – 4. Other hikers near us saw porcupines and we saw a bear!
Ease to Navigate – 4. The trail was easy to follow with adequate blazing and signage.
Solitude– 3. Surprisingly, we saw very few people on the trail, but campsites were moderately crowded.
Directions to trailhead: The parking lot that we left our car was at 43.6552N 72.5662W on Barnard Gulf Road on VT 12. From here, we made our way to Hanover, NH by heading south on VT 12 for 3.7 miles. We turned left when reaching to town of Woodstock to stay on VT 12 for .6 miles before turning left on to US-4 east. Stay on US-4 East for 9.4 miles and then merge on to I-89 South. Stay on this for 3 miles before taking the I-91 exit towards Brattleboro/White River. Keep left at the fork and follow signs for I-91 North. Stay on I-91 North for a little over 5 miles before taking exit 13 for Norwich. Take a right to merge on to 10A/W. Wheelock Street. Follow this for .8 miles before turning right on to Main Street. Parking is available hourly behind a lot of the restaurants/shops but is a good dropoff point for a shuttle.
* MapMyHike is not necessarily accurate, as the GPS signal fades in and out – but it still provides some fun and interesting information.
This hike turned out to be a fantastic “plan B” after the weather at the higher elevations turned out to be overcast and drizzly with gusting winds. This section of Appalachian Trail was scenic with moderate grades and two nice vistas. The out-and-back route clocked in at just under six miles with 1,700′ of climbing.
We initially planned to do the Blackrock Mountain hike at the southern end of the Blue Ridge Parkway, but unsettled weather forced us to find an alternative hike that stayed below the cloud shelf. We skimmed our hiking books and searched a few websites before settling on an Appalachian Trail section in Nantahala National Forest. The hike started at Tellico Gap, which is also the trailhead for the Wesser Bald hike. We parked our car and made our way south along the white-blazed Appalachian Trail.
The terrain in this area was interesting because the road leading up to Tellico Gap had been the fire line during the cataclysmic forest fires that burned during fall 2016. One side of the road was burned, while the other side was practically untouched. At the parking lot, it was easy to see that the trail headed north to Wesser Bald was heavily charred and damaged, with entire hillsides of mountain laurel and rhododendron laid to waste. Fortunately, the trail headed south from Tellico toward Rocky Bald was still green, fern-covered and lush.
The hike started at Tellico Gap. Below: Lots of snails in this lush, wet forest; Flame azalea nearing the end of its bloom; Adam walks along the Appalachian Trail.
The trail began climbing pretty quickly and steadily, as it so often does when you leave a gap. At 1.5 miles into the hike, we passed the Big Branch Campsite on the right side of the trail. There was space for about four tents, a register log/box, a fire pit, and a water source. There are full shelters a few miles both north and south of the campsite, so I imagine the site is mostly in place to accommodate overflow during the busy thru-hiker season.
After we passed the campsite, the trail began to level out and follow a ridgeline. In .2 miles, we reached a blue-blazed spur trail to the left leading to the viewpoint at Rocky Bald. The trail climbed for about a tenth of a mile over a wide shelf of rock before reaching another fringe of trees. There were a few dry campsites tucked in to flat spots between the trees. At the outer edge of the line of trees, there was a rocky ledge with a log bench and an excellent vista. There was sunshine, but there were also many fast-moving low clouds. We weren’t sure how long the conditions would stay clear and dry, so we moved on to visit the next viewpoint.
This trailside campsite had a water source, tent space, and a log book.
The next vista was another 1.2 miles south along the Appalachian Trail. It was all ridge walking, so the terrain was rolling and fairly easy without any big climbs or descents. Our guidebook called the next view Copper Ridge Bald. It wasn’t really a bald. It was just a rock jumble with a partly obstructed view. If you’re hiking for scenery, I’d probably suggest hiking to Rocky Bald and skipping the second view – it just wasn’t that impressive. We stopped at the second view and ate lunch and watched the clouds thicken. When we started to hear distant rumbles of thunder, we decided it was time to head back.
The return hike was quick and almost completely downhill. We flew along the trail and made it back to the car in half the time it took us to climb up. Even though it wasn’t the day we planned, everything worked out perfectly.
Adam Says…
Christine mentioned that this was a “plan B” hike, but I thought I would elaborate on the “plan A”. We drove for about an hour along the Blue Ridge Parkway early in the morning to get started on our hike. However, there was heavy fog just about the entire drive up. We got to the trailhead and pulled the car over. I got out to try and find the trailhead, which was a challenge since at this point you could only see about ten feet in front of you. After we finally found the trailhead, we decided to see if we could wait a bit to see if the fog would lift. On some of these high elevations, the fog can blow over and clear out in a few minutes. So, we waited about an hour and there was no lifting. We knew we needed to do something else. The week that we were in North Carolina, we felt the weather was spotty and there were lots of low hanging clouds, so we ended up doing lots of lower elevation hikes to try and embrace what nature was allowing. So, we drove another hour and a half to get to a hike we hadn’t done yet.
Another look at the view from Rocky Bald. Below: The spur trail to Rocky Bald; Climbing the rock slab to get to the view; Nice views on the descent from Rocky Bald.
We got to the Tellico Gap parking lot and it was a little more packed than we were accustomed – likely due to our now later start. We got a parking spot and then headed south on the white-blazed Appalachian Trail. The trail was an uphill slog for the entire way to Rocky Bald, but the green and lush forest around us gave us nice scenery along the way. After we passed the campsite to the right, we arrived at the side trail to Rocky Bald at 1.7 miles. We took this side trail to Rocky Bald, which was a steep scramble up to the viewpoint. The viewpoint was marked with a nice log bench to sit on and view miles of mountains in front of us through the natural window. We took in the sites and decided to press on to Copper Ridge Bald. We rejoined the AT and continued south. This terrain was a fairly flat ridgeline. 1.2 miles away we reached the small overlook for Copper Ridge Bald. There was enough space for two of us to eat a snack, but the view was not as grand since some of the area was a bit overgrown. We questioned if we had reached the correct viewpoint so I scouted ahead and came across a hiker with his dog that said there were no viewpoints for the next bit. So, I returned and we ate our lunch (now joined by the dog begging for scraps) at Copper Ridge Bald. After eating, we made our way back the way we came and arrived back at our car quickly.
The walk to the second view was pretty. Below: The second view marked in our guidebook wasn’t as nice; Stopping at Wesser Brew and BBQ for beers after our hike; It’s our favorite outdoor riverside bar.
This was definitely a “when life gives you lemons, make lemonade” hike or maybe “when nature gives you fog over high mountains, go lower” is a better description. It wasn’t our original plan, but we had the ability to do some quick thinking and make a plan with what nature provided. When we do a lot of hiking on our vacation trips, we usually make a list of several hikes and pick what we want to do that morning. We didn’t have as much time to plan on this trip, so we had to do some “on the spot” planning. While it was a bit stressful to do so, we made a great decision and were rewarded with some nice views (and beat the impending rain storm). After the hike, we stopped at Wesser Brew and BBQ at the Nantahala Outdoor Center and enjoyed a beer under shelter by the riverside while the rain came down.
Directions to trailhead: From Bryson City, follow US 19/74 for 20 miles. Turn left on Wayah Road and follow it for five miles. Turn left on Otter Creek Road and drive 4.1 miles to Tellico Gap. The road is paved for the first 2.8 miles. At the crest of the hill, you will see the AT crossing and several parking spots. Follow the signs to Wesser Bald and Tellico Gap.
While the Road to Nowhere is popular and well-known, the adjacent Goldmine Loop seems lightly traveled and mysterious. We had a hard time finding reliable information about the trail and did some guesswork along the route. As it turns out, it’s a beautiful, jungle-like trail that leads down to the shores of Fontana Lake. The total route ended up being 4.7 miles with a moderate amount of climbing.
At the end of our hike, we enjoyed a rainbow over Fontana Lake.
Adam Says…
In early July, we made our way down to the southern end of the Smokies for a couple day stay in Bryson City, NC. There was lots of rain on and off during our trip, so we had to be strategic about timing our hiking possibilities. Our rental cabin was near a place in the Smokies called The Road to Nowhere. This is not a Talking Heads song reference, but a road that has an interesting history. In the 1930s and 1940s, Swain County donated a lot of its private land to the federal government to help create the Fontana Lake area of Great Smoky Mountains National Park. Hundreds of people were displaced from their homes when Old Highway 288 was covered by water after the creation of Fontana Dam. The government promised to create a new road that would connect Bryson City to Fontana (30 miles away to the west). They began work on constructing Lakeview Drive, but came across numerous environmental issues – a study released stated that completing the road would have major, adverse, long-term impacts to topography, geology, and soils. Construction was stopped at the long, impressive tunnel that marks the beginning of this hike. The environmental issue was eventually resolved, but the road was never continued. Ultimately in 2010, the Department of the Interior paid Swain County $52 million in lieu of finishing construction of the road.
The road ends in the tunnel and you come out on trail. Below: The trailhead; Blooming Rosebay Rhododendron; The tunnel.
The road ends at a gate before the tunnel, but before the gate there is a large parking lot on the right hand side of the road. You will see trail signs along the side of the road. We parked there, walked down the road, went around the gate, and made our way toward the tunnel. When you enter the tunnel, it will be quite dark. We used headlamps so we could see where we were stepping but the tunnel floor was quite flat and smooth. On the other side of the tunnel, the true Lakeshore Trail begins. Continuing a bit further up the trail, we reached a junction at .6 miles that is the Tunnel Bypass Trail. We took this trail which skirted alongside the hillside. It was incredibly humid from the recent rains and my glasses were fogging up and the ground was wet in many places. It continued to drizzle on and off.
Graffiti in the tunnel. Below: The first trail junction; Wet trail.
As we walked along we could clearly hear the sound of a barred owl nearby. It remained out of sight but was moving up ahead of us on the trail. At 1.8 miles, we reached the junction with the Goldmine Loop Trail. We took a right to get on this trail. The Goldmine Loop Trail descends for the next mile. At 2.4 miles we came to where Tunnel Branch runs alongside the trail. It was a very picturesque stream with lots of blooming rhododendron all around. At 2.8 miles, we reached the lowest part of elevation as we came to Goldmine Branch, a larger stream that leads into the Tuckaseigee River, which is part of the larger Fontana Lake waterway. Even though this is a river, it feels very much like a lake due to the beaver dams and high water level. A short side path leads you to a serene place to enjoy a waterside view. We continued back along the trail and our slow ascent began. This area was very mucky from all the water near this low part of the elevation and we slogged through some mud in a few places.
Near the trail’s low point, we saw a large hog trap that was placed by the park service. Wild hogs are destructive to the environment and have been known to be aggressive to humans. Just a short tenth of a mile from seeing the hog trap, we noticed something crashing through the woods toward us, followed by a deep guttural sound of a wild hog. Knowing how dangerous they are, we decided to move along quickly to leave the hog alone. It was quite a rush and we have never heard such sounds. At 3.2 miles, we reached a junction that leads to Campsite 67 (a site you must reserve through the GSMNP overnight camping permit system). We passed on checking this out since it was a bit off the trail and just continued onward. Shortly after this campsite trail, we came upon an old chimney from a home foundation. The ground was mucky and the area was heavily overgrown so we decided against checking out the site further. The trail then really began to ascend very steeply and we reached the junction with the Lakeshore Trail again at 4.1 miles. From here, we took a right on the Lakeshore Trail and then passed by the original Tunnel Bypass Trail junction just .1 mile later. We continued back the way we came to reach the tunnel and then back to our car on the other side to make this about a 4.7 mile round trip.
The rhododendron thickets here are extremely dense. Below: Rhododendrons; Views of storm clouds; Pretty, lush trail.
Christine Says…
We planned several amazing hikes for our whirlwind three-day Smokies trip… and not a single one panned out! Stormy weather and low clouds forced us to revisit all of the high elevation hikes we considered doing. We are capableof hiking in bad weather, but when you have a trail blog you want to do your best to capture views and landmarks. We did a bit of logistical scrambling to find lower elevation hikes where views might be open beneath the cloud shelf.
The first one we settled on was the Road to Nowhere paired with the Goldmine Loop. They hike was just a few minutes from our rental cabin, so it was easy to tackle after the rain stopped in the late afternoon. We didn’t get on the trail until almost 4:00 p.m. Online and printed guides listed the trail anywhere from three to seven miles. With the long days of summer in effect, we knew we could finish a hike in that range before the sun set. We still packed headlamps… just in case! They turned out to be handy for walking through the long, dark tunnel.
Adam sits alongside the Tuckaseigee arm of Fontana Lake. Below: Another angle on the water view; A hog trap; An old homestead chimney.
I thought the tunnel itself was really cool. It looks relatively short to the naked eye, but when you’re inside you walk much longer than you expect. The tunnel is a full quarter mile long and produces the most excellent echoes! The amount of graffiti was disappointing and seriously – can’t people think of better things to draw than penises? There were more of those drawn than any other element of graffiti. After the tunnel, we proceeded a short way down the trail to its junction with the Tunnel Bypass Trail.
The Bypass Trail descended into ever thickening rhododendrons. By the time we reached the Goldmine Loop, I felt like we were in a veritable jungle. I would never want to get lost off-trail in an area like this. The denseness of the forest would be very disorienting. I think the mist, the solitude, the hooting owl, the lack of good trail information, the hog sounds, and the thickness of the forest lent an eerie feeling to the entire hike. We’ve never hiked in the Smokies and seen so few people! I’ll admit, I felt a little bit uneasy on this hike. I rarely describe a hike as creepy, but this one may have approached that feeling!
I was pretty glad when the trail rejoined familiar terrain coming off the Goldmine Loop. On the return trip through the tunnel, we left our headlamps off and enjoyed the almost complete darkness. We just kept walking toward the spot of light at the far end of the tunnel. Soon we were back in the car and headed back to our little cabin in Bryson City. On the way, we stopped at an overlook that peered down into the watershed we just hiked. There was a gorgeous rainbow above and everything looked so peaceful below. It definitely didn’t feel eerie from above!
Difficulty – 3. The ground conditions made it a little tough and there was a steep ascent before we rejoined the Lakeshore Trail.
Trail Conditions –2. The trail was fairly well maintained, but the mucky conditions made for some times where we slogged along the trail at the lower elevations.
Views – 1. We did get a few obstructed views alongside the Tunnel Bypass Trail, but nothing much mentioning. Along the road leading up to the trail, there is a nice view of Fontana Lake alongside the road.
Streams/Waterfalls – 4. There were some nice stream views along the way and the mountain laurel created some extra scenery.
Wildlife – 4. This particular loop isn’t particularly well traveled, so don’t be surprised to find some wildlife. The wild hog encounter definitely gives this a higher score for us.
Ease to Navigate – 3. We had a hard time due to the lack of knowledge out there about the trail system. Hopefully, the map we are providing will help.
Solitude – 4. After we went through the tunnel, we only saw a few other people on the hike. This could be due to the recent rains, but this isn’t a popular area of the Great Smoky Mountain National Park except for local populations.
Directions to trailhead: From the center of Bryson City, NC head north on Everett Street. Everett Street becomes Fontana Road. Fontana Road becomes Lakeview Drive. Follow Lakeview Drive until you arrive at the parking lot before the road that closes off this Road to Nowhere, about 8.5 miles away from the center of Bryson City. Park in the parking lot and continue on foot up the road leading to the tunnel.
* MapMyHike is not necessarily accurate, as the GPS signal fades in and out – but it still provides some fun and interesting information.
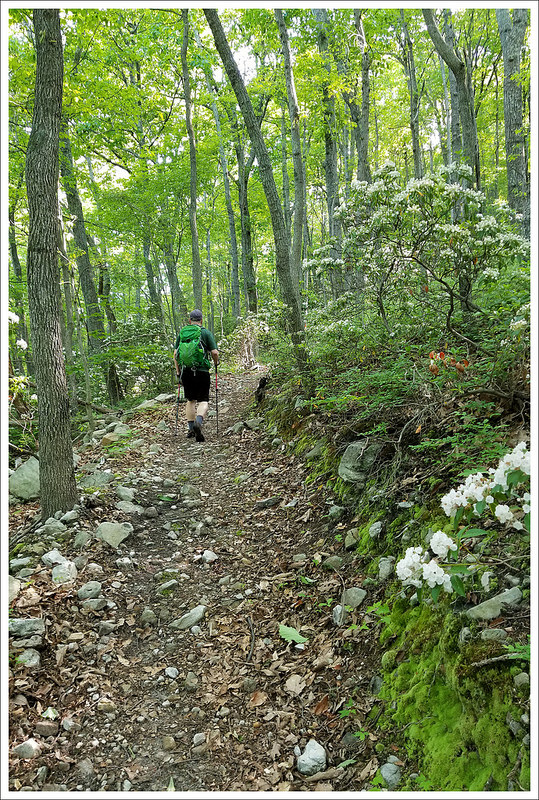

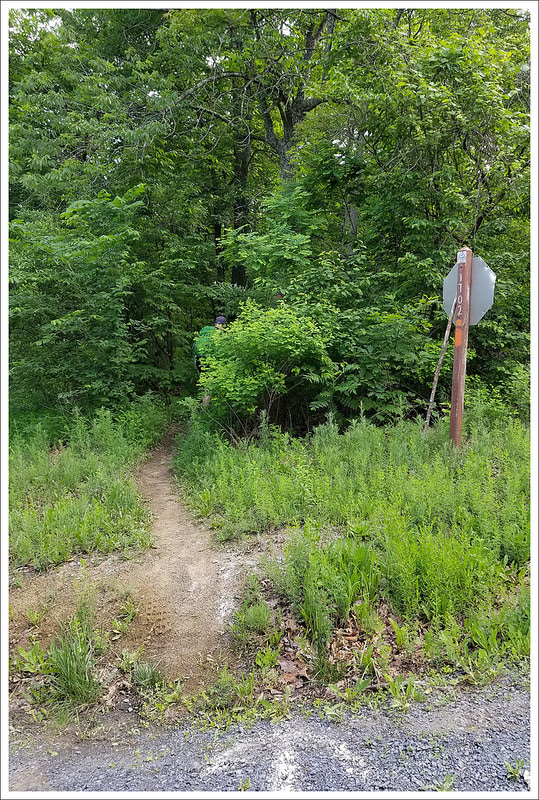
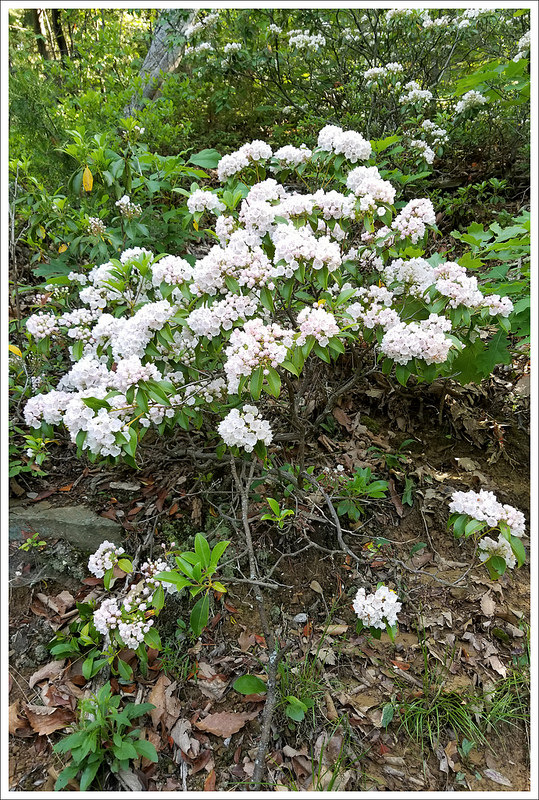


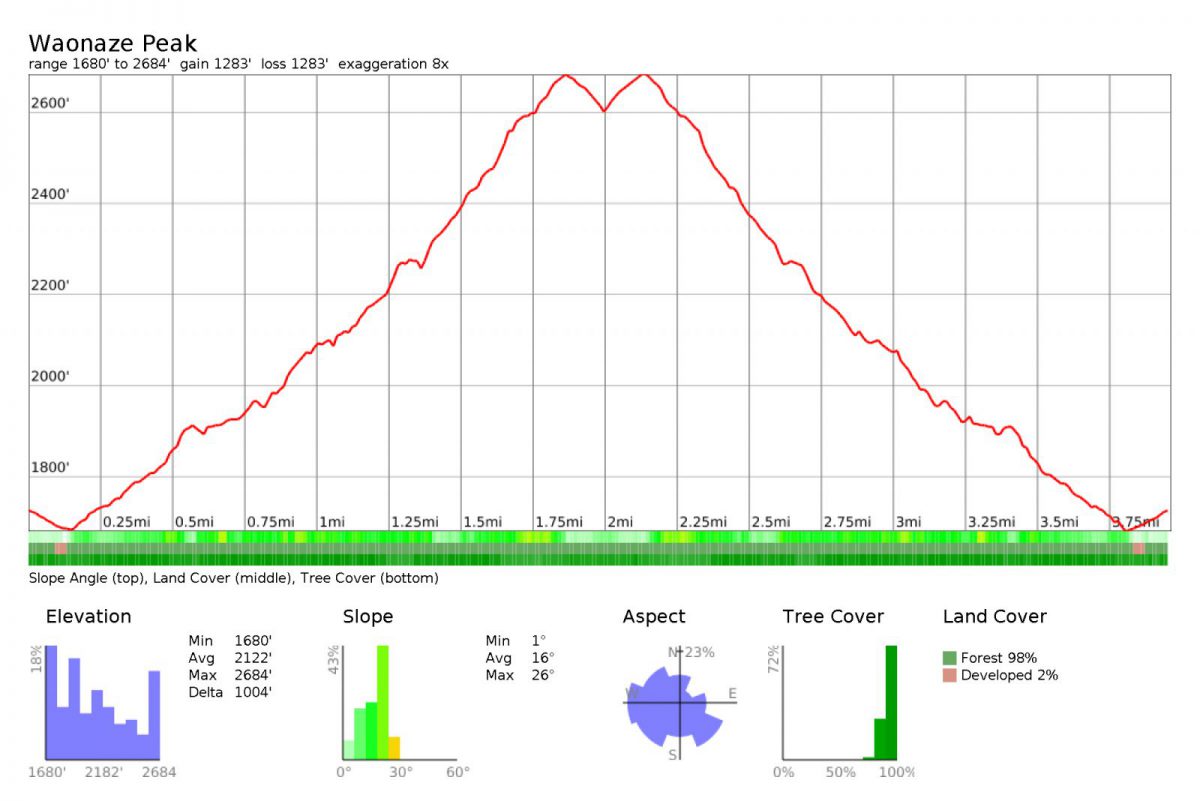

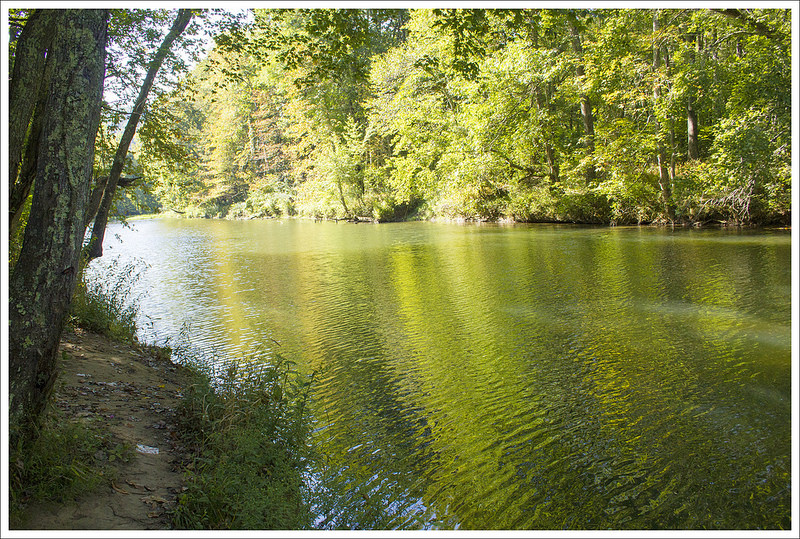
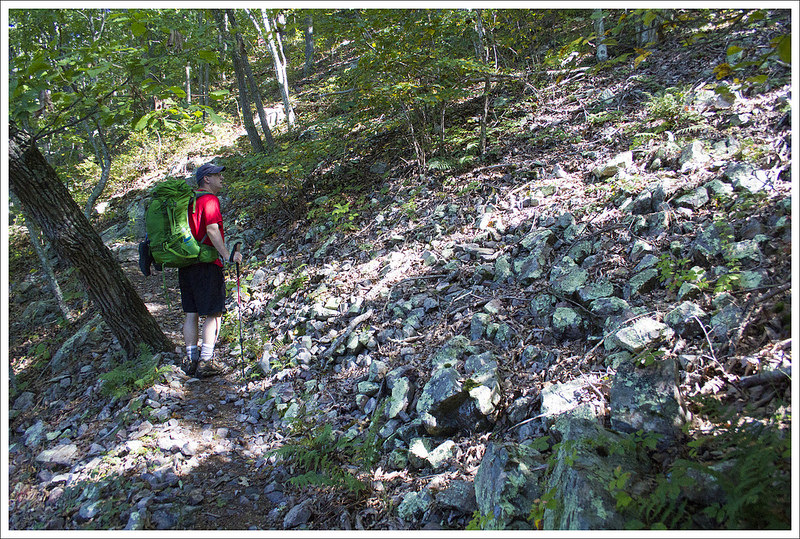


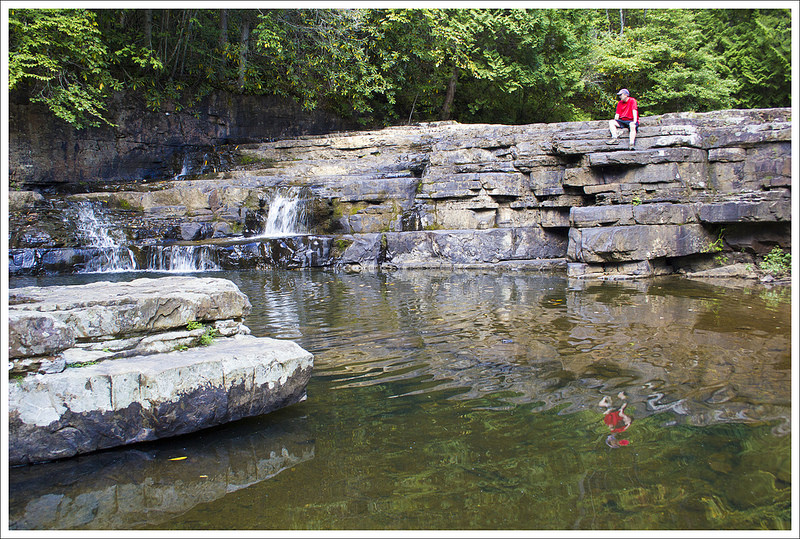
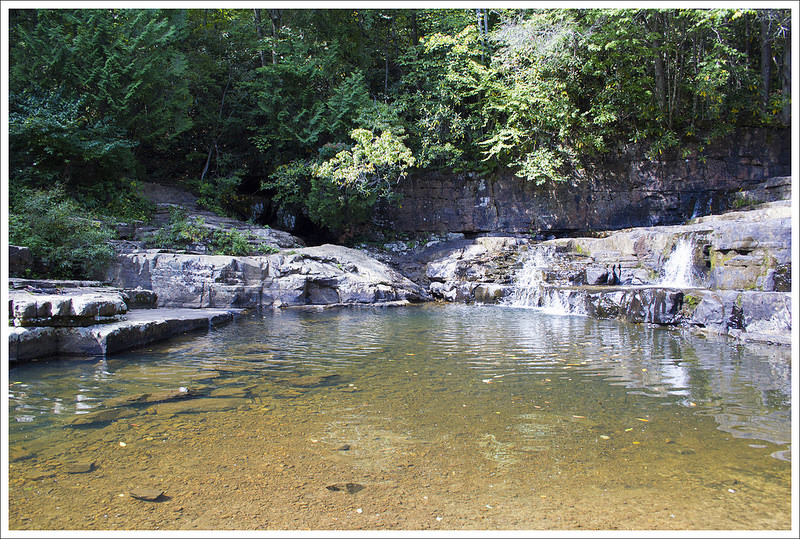

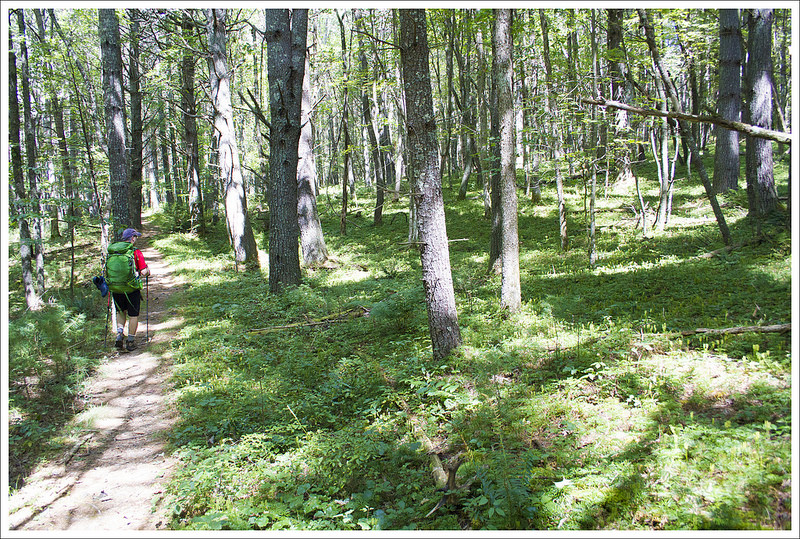

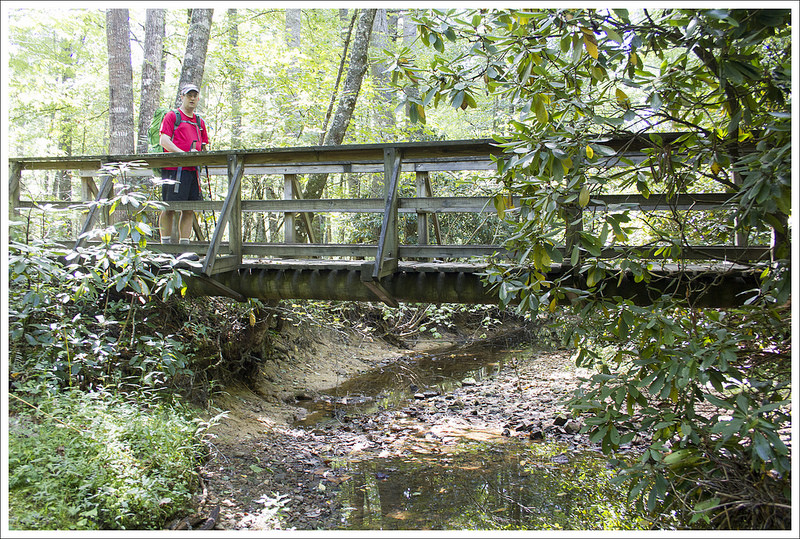

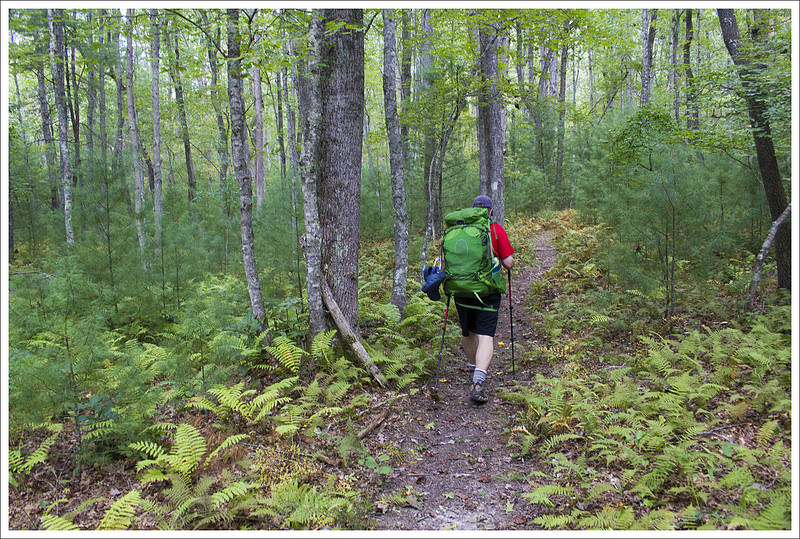


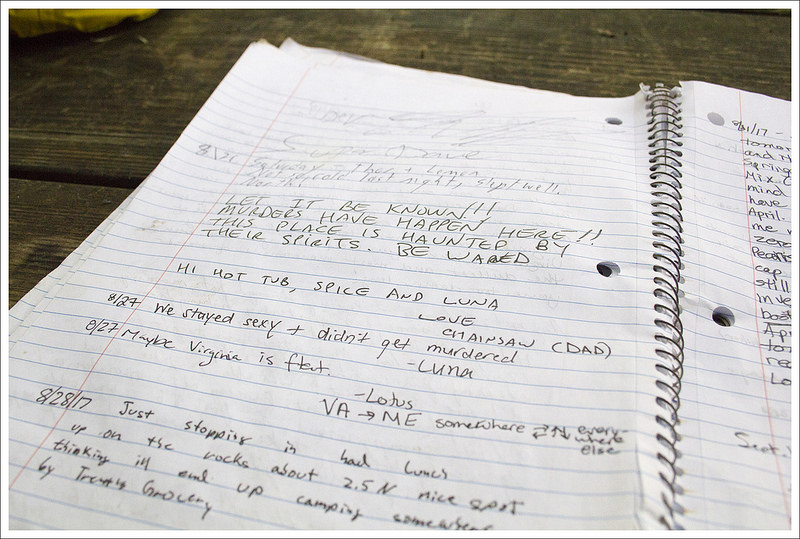
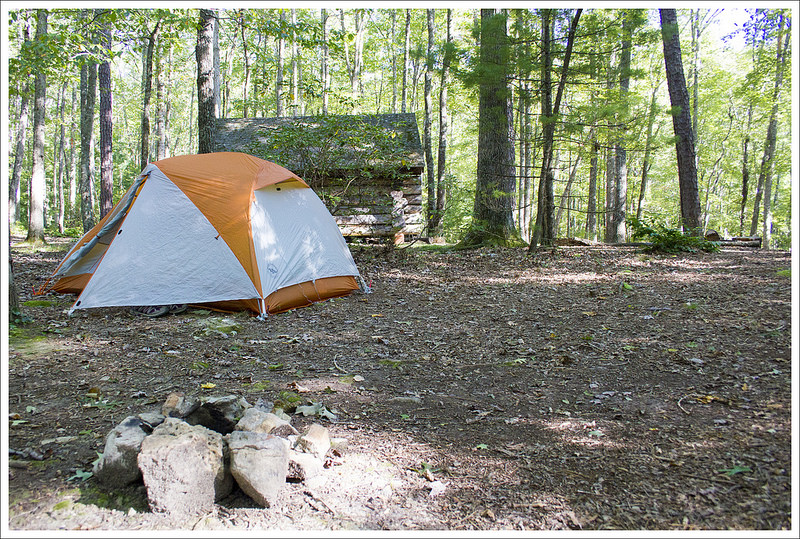
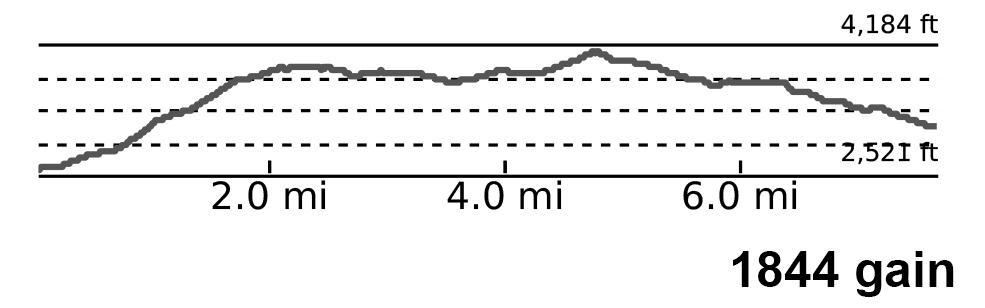
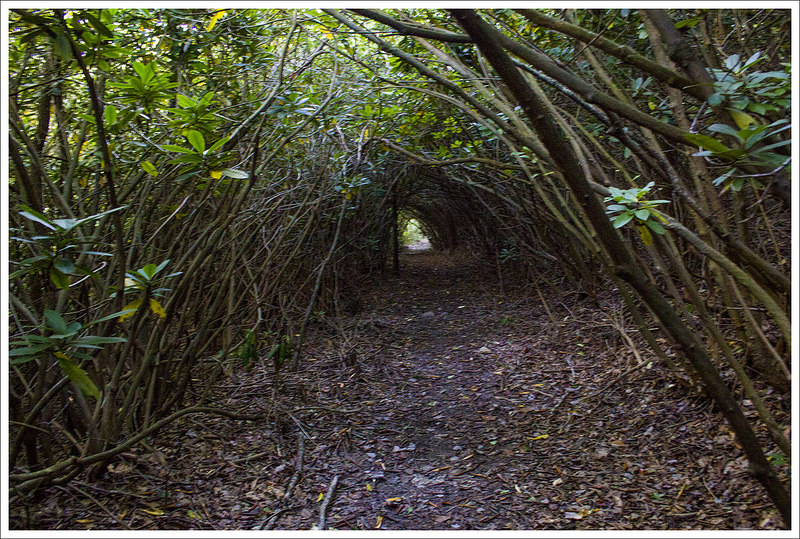
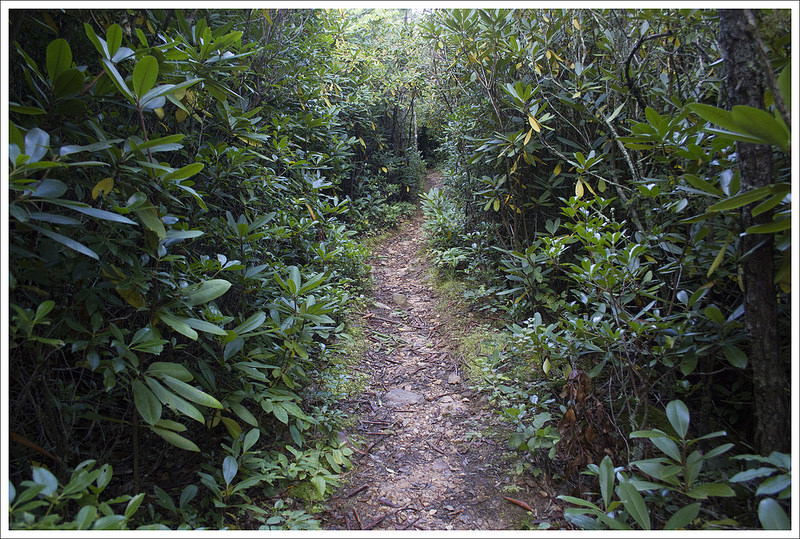


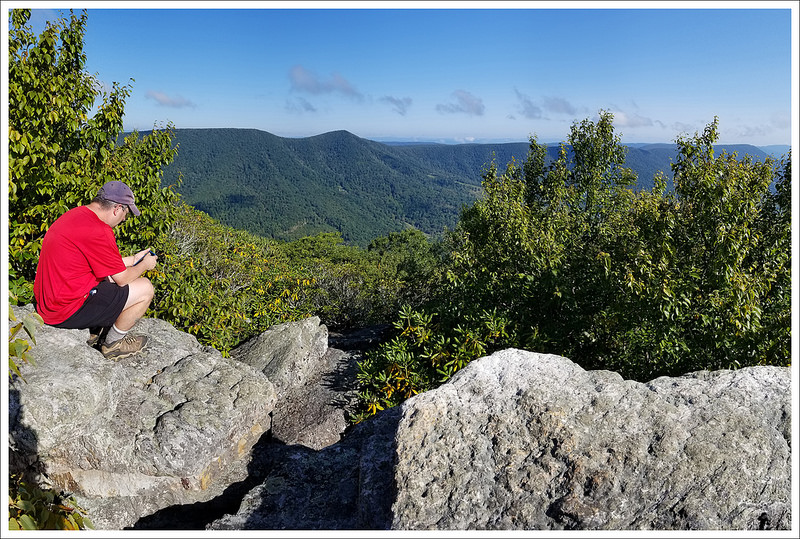
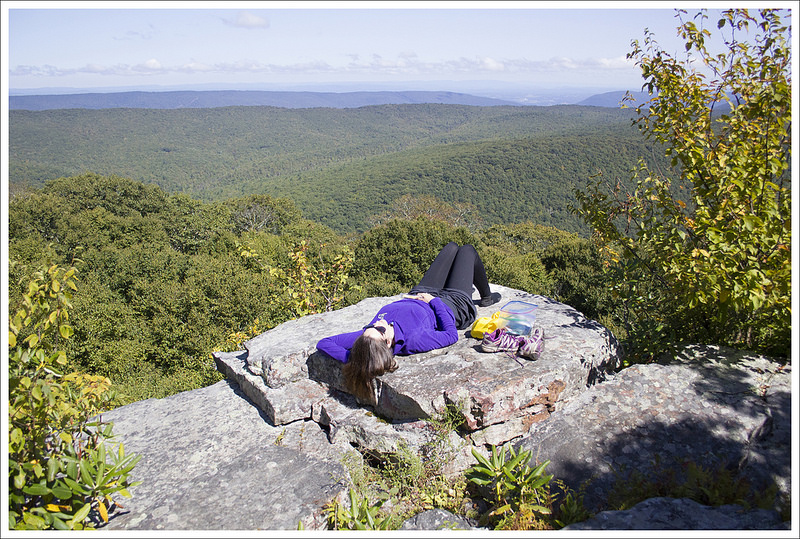
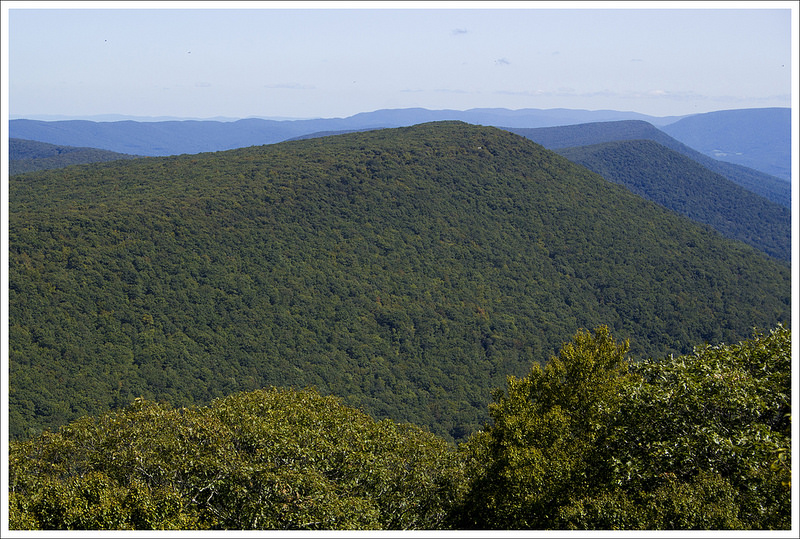

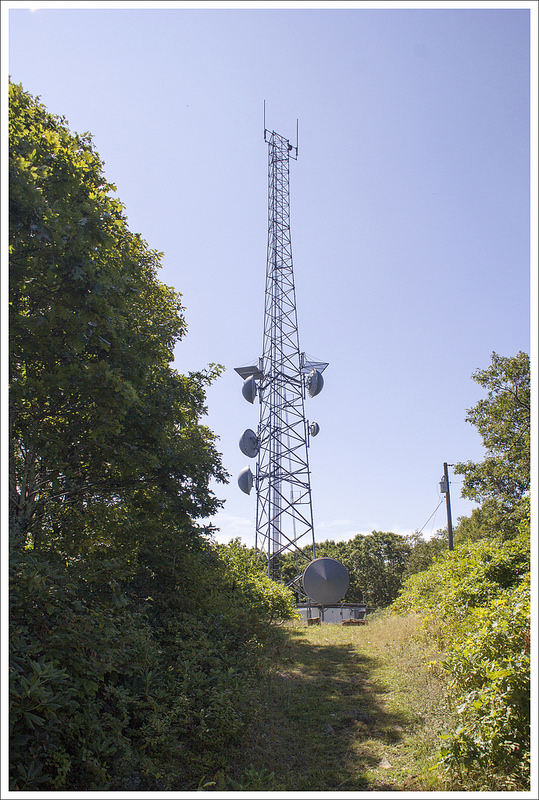

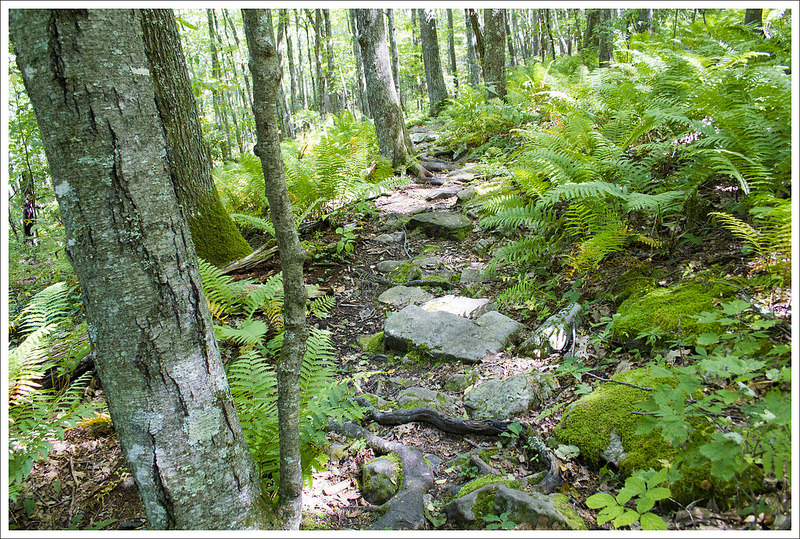
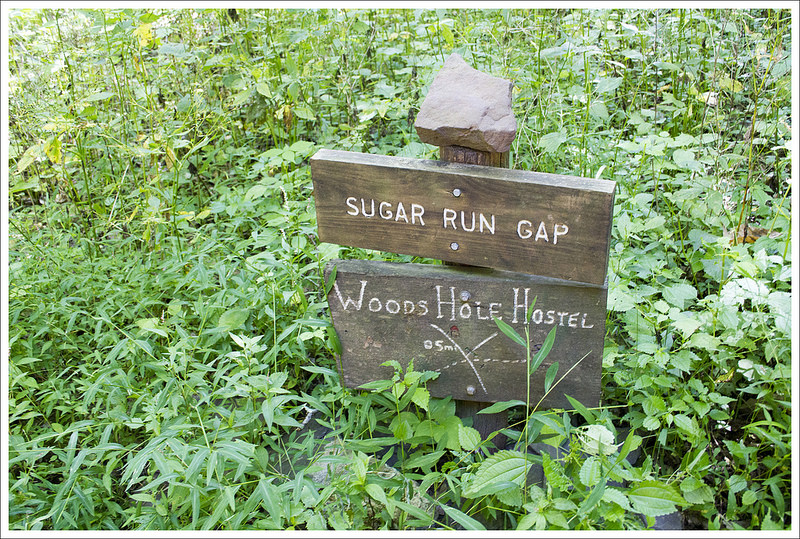

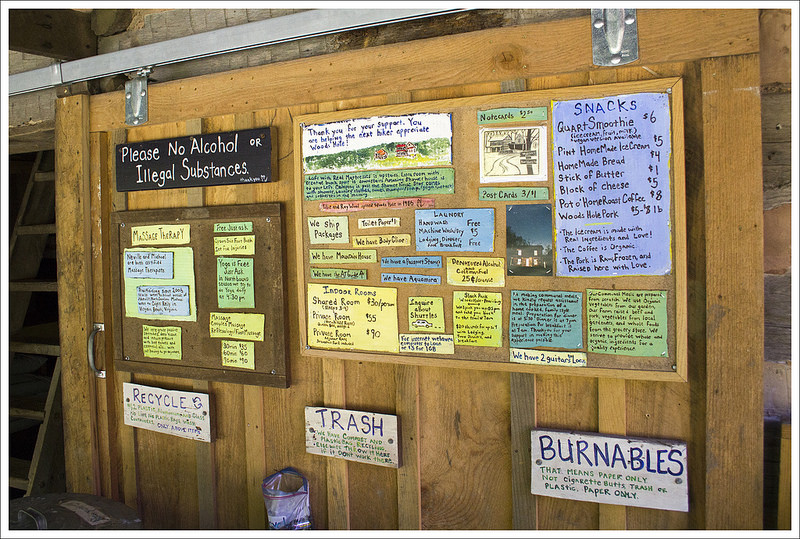
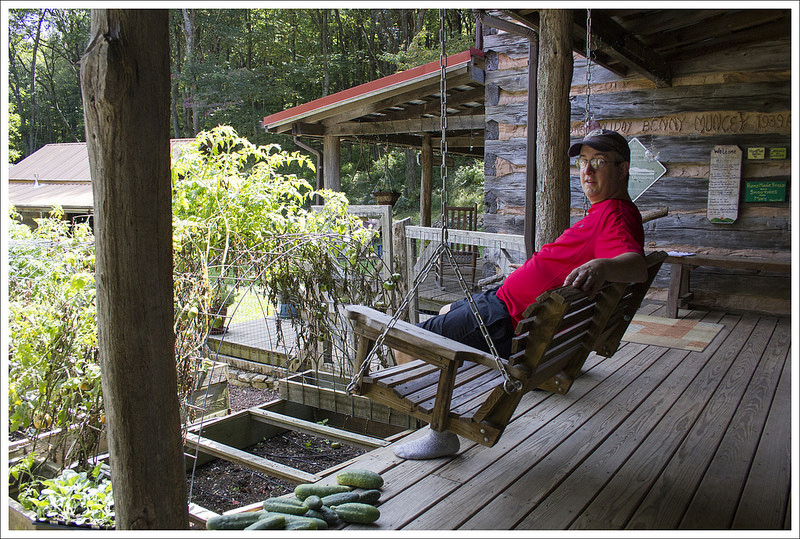

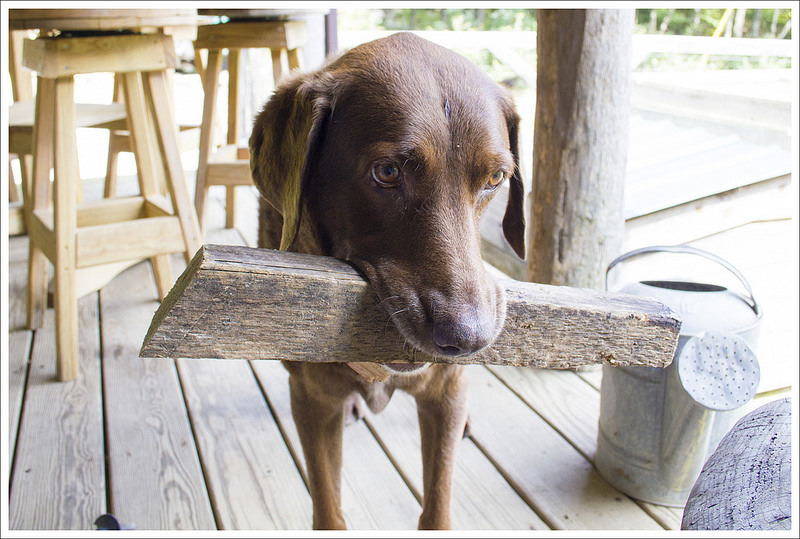
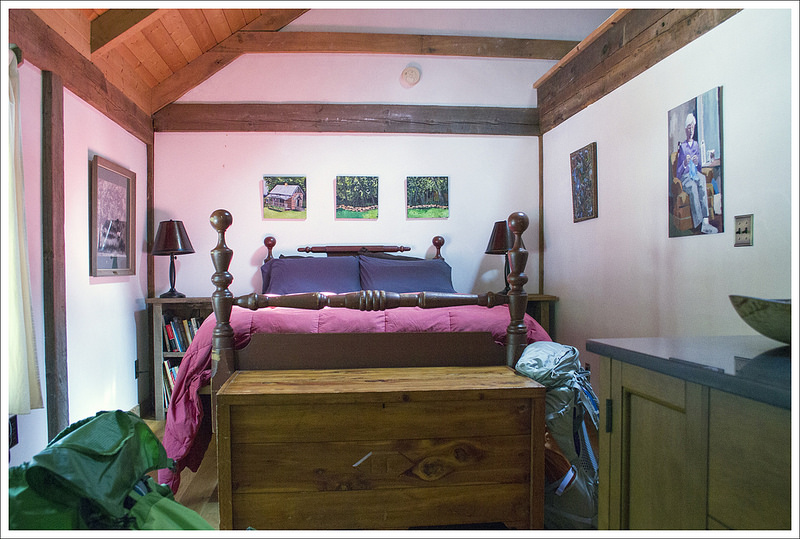
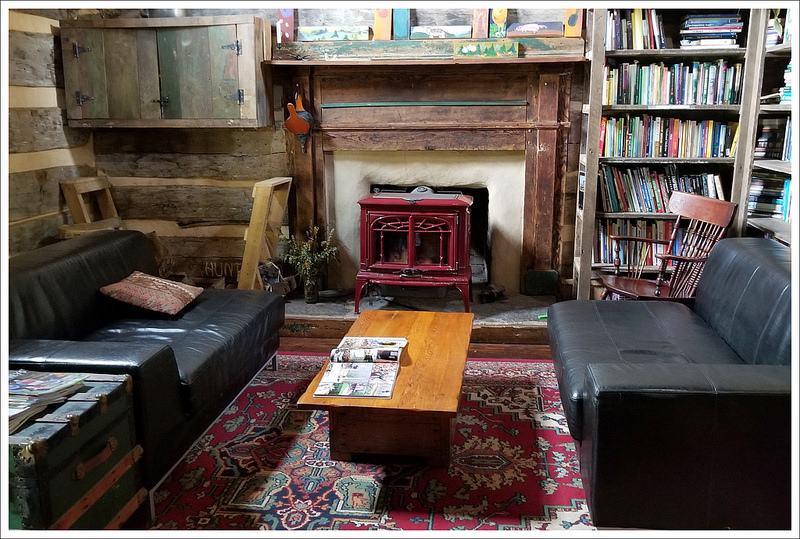
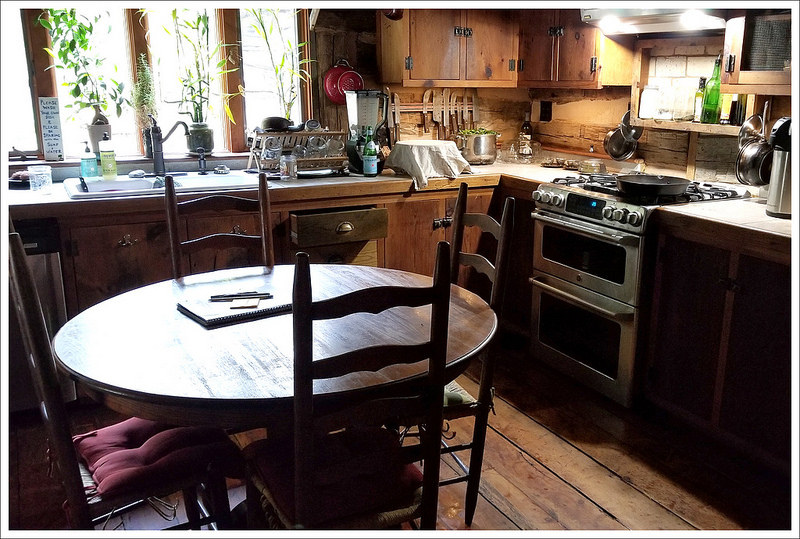
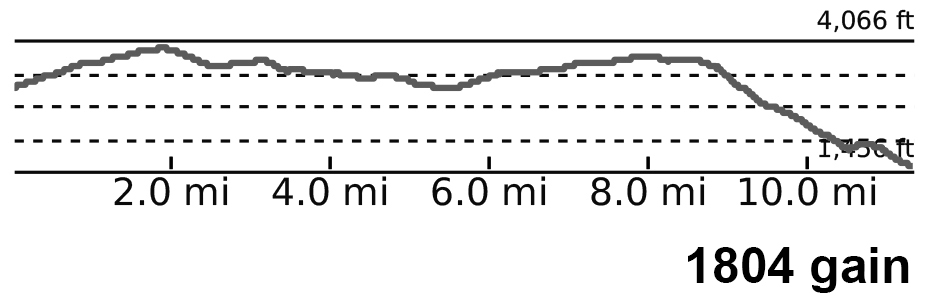
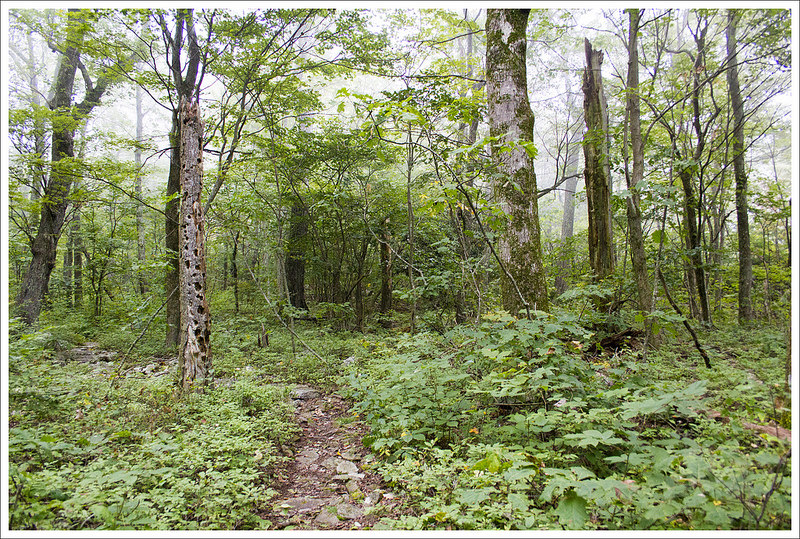
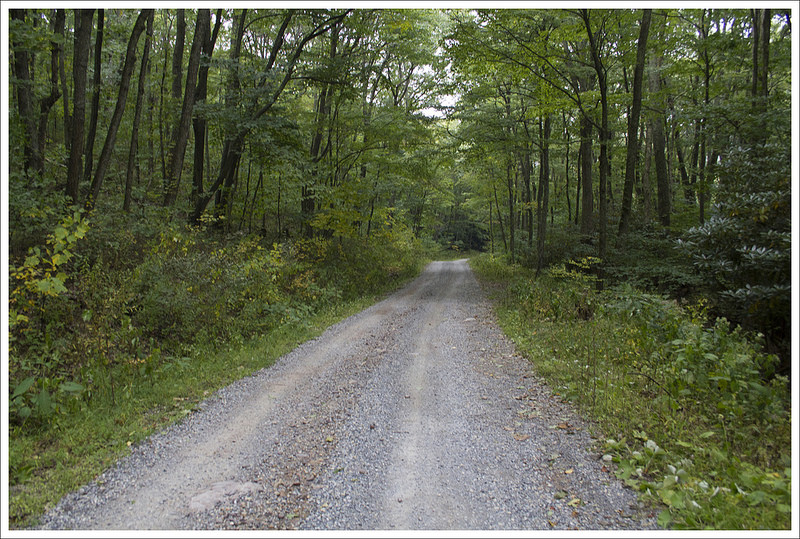
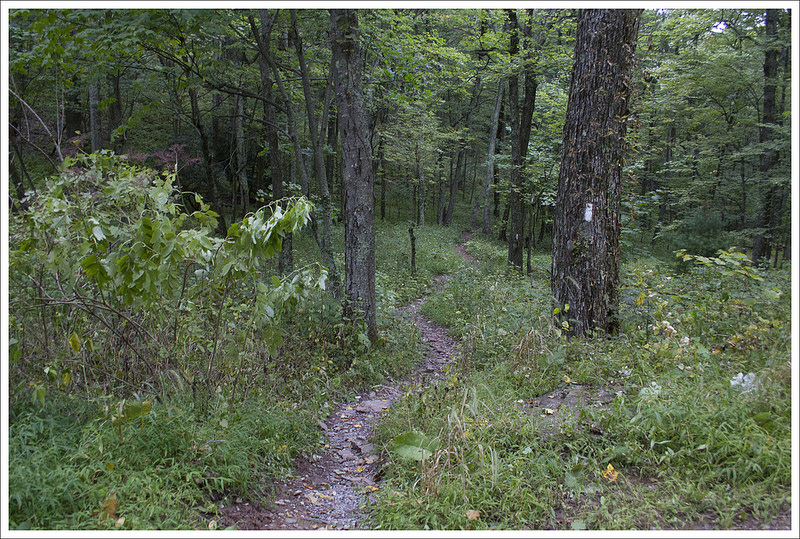
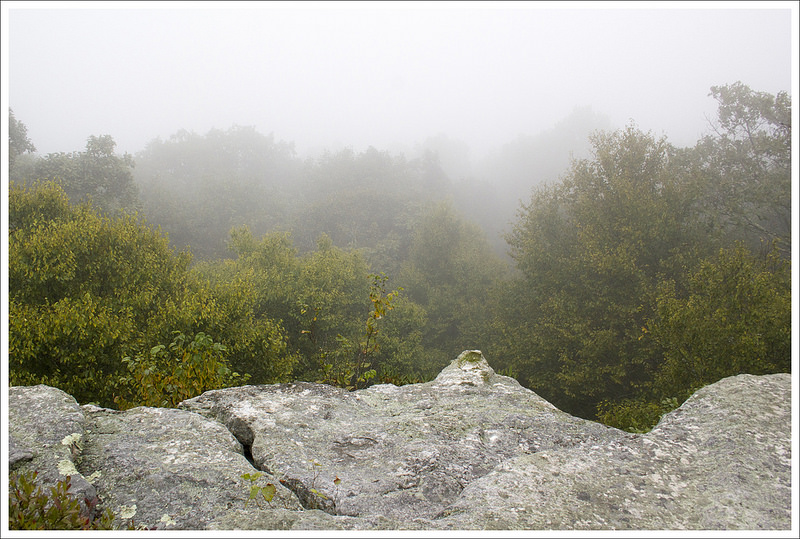

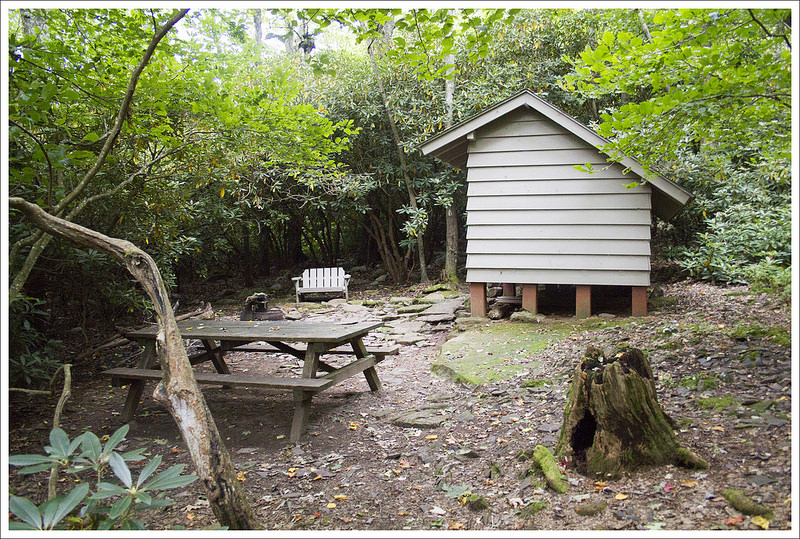
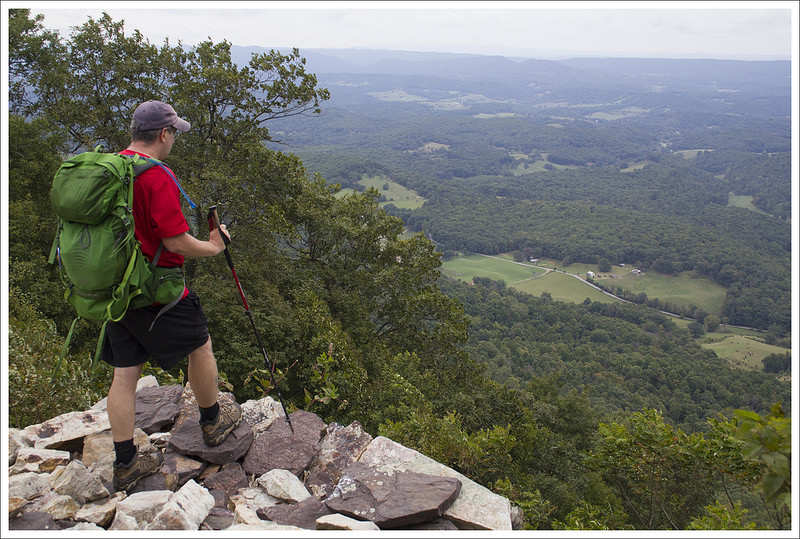

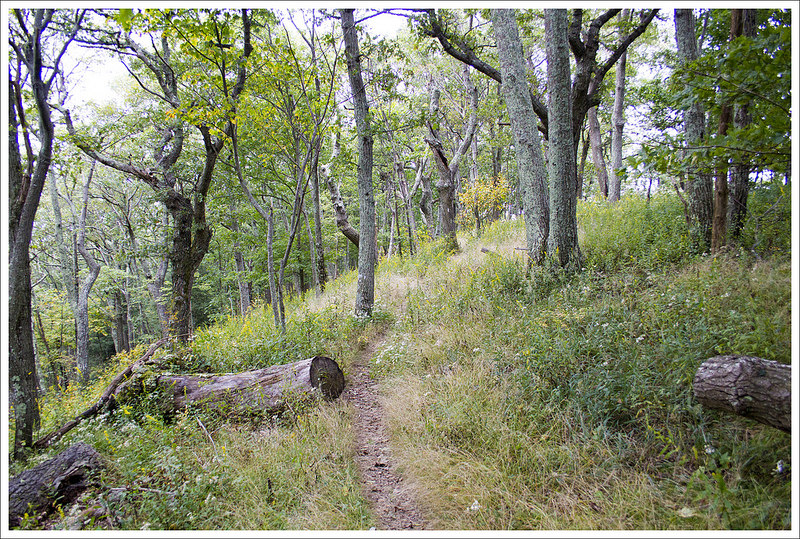
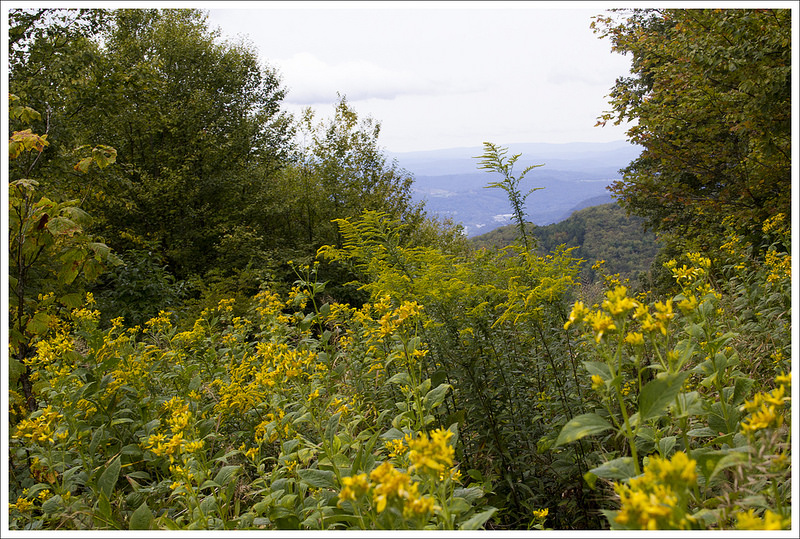
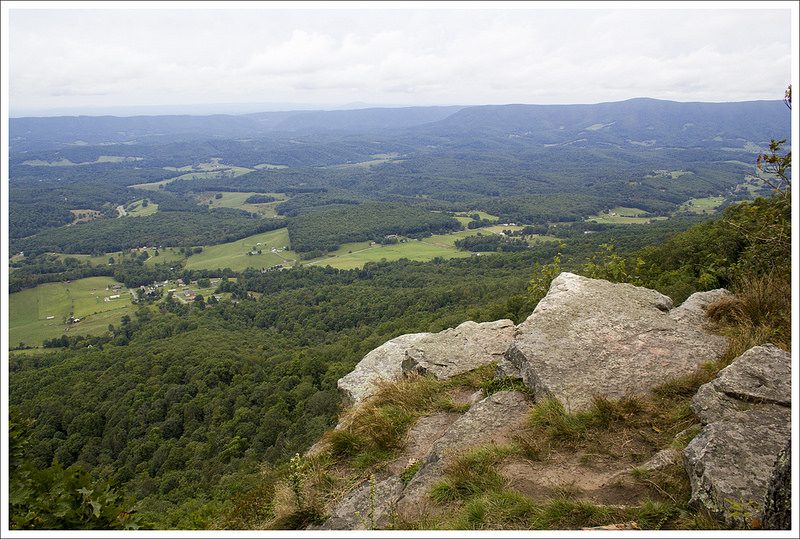
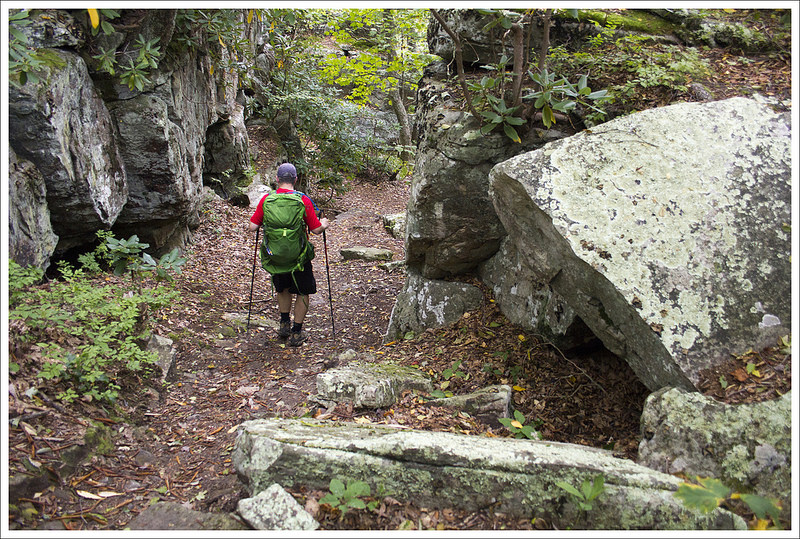

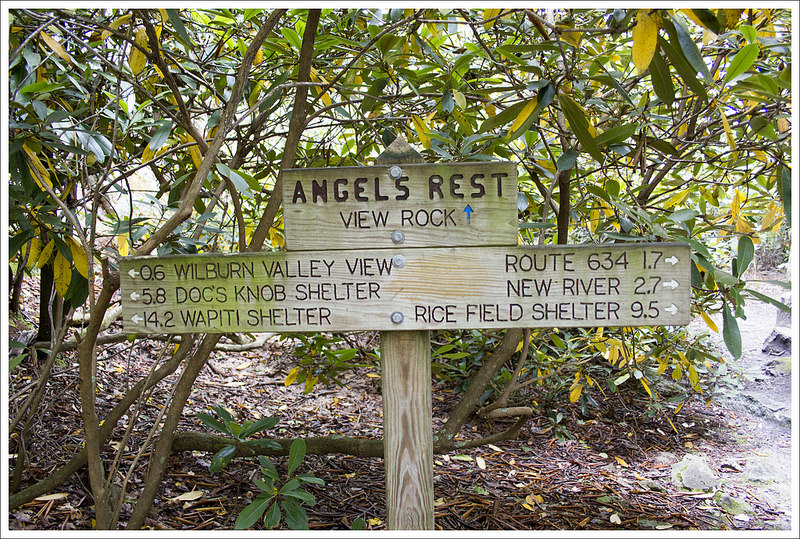

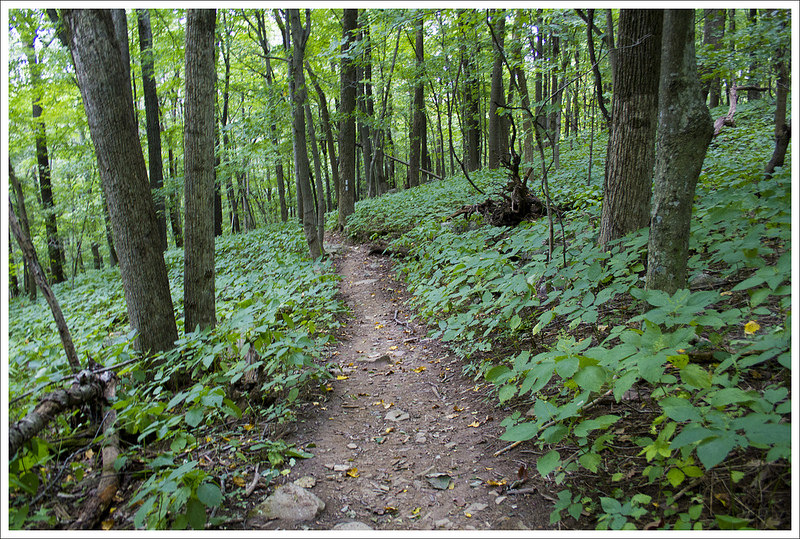
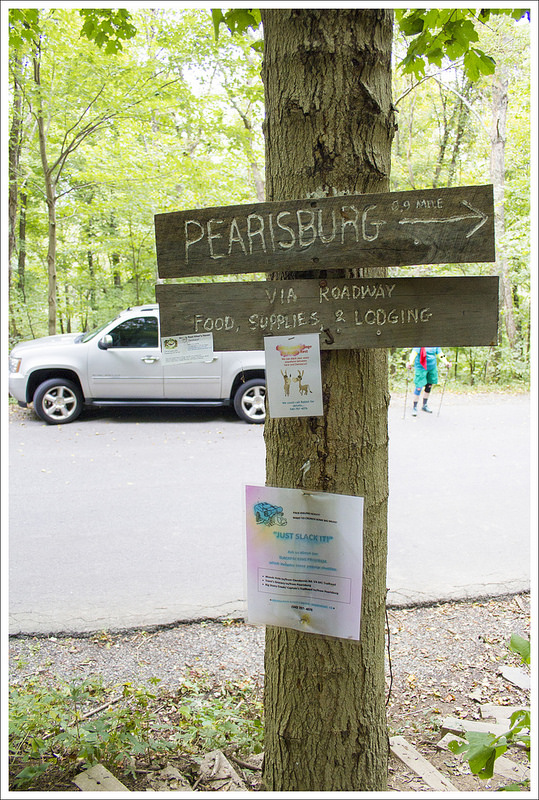
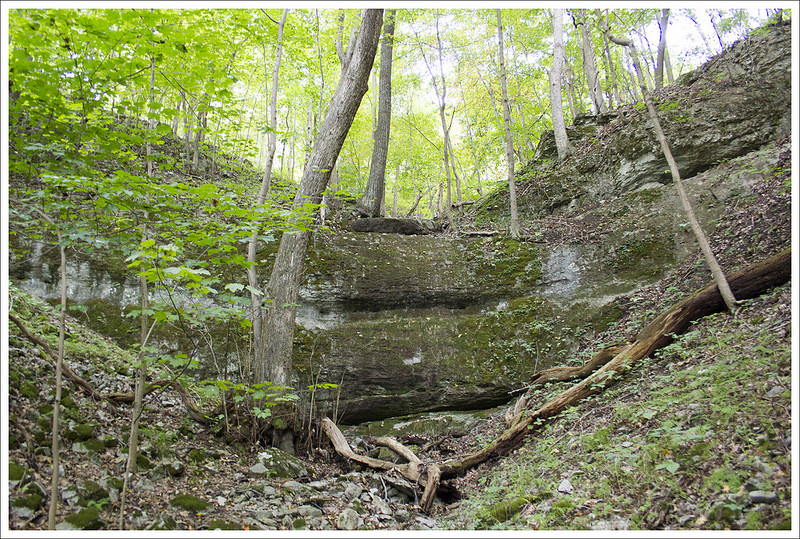

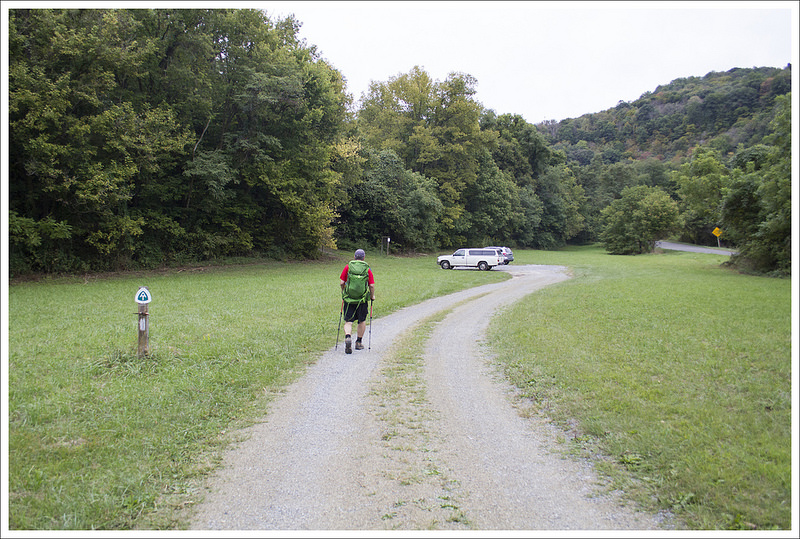


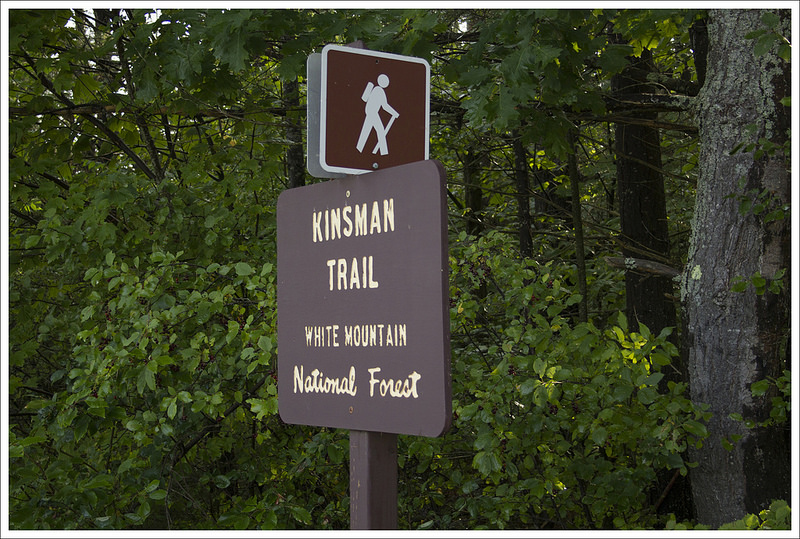


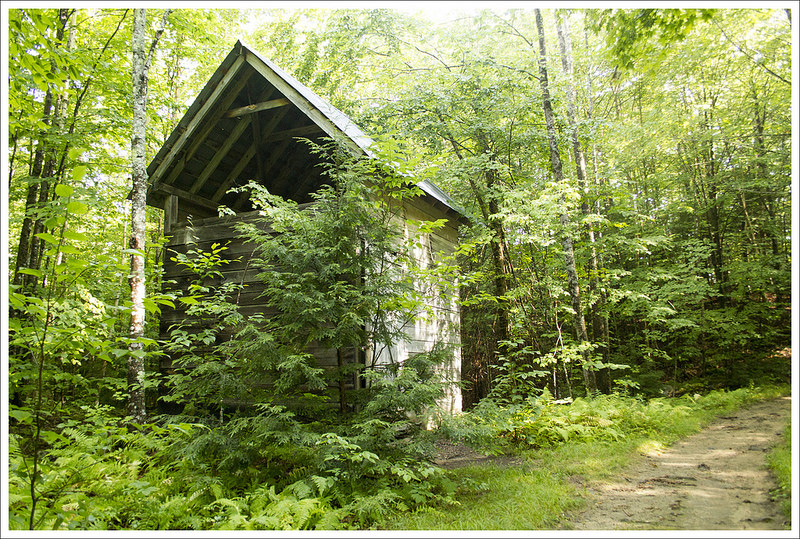


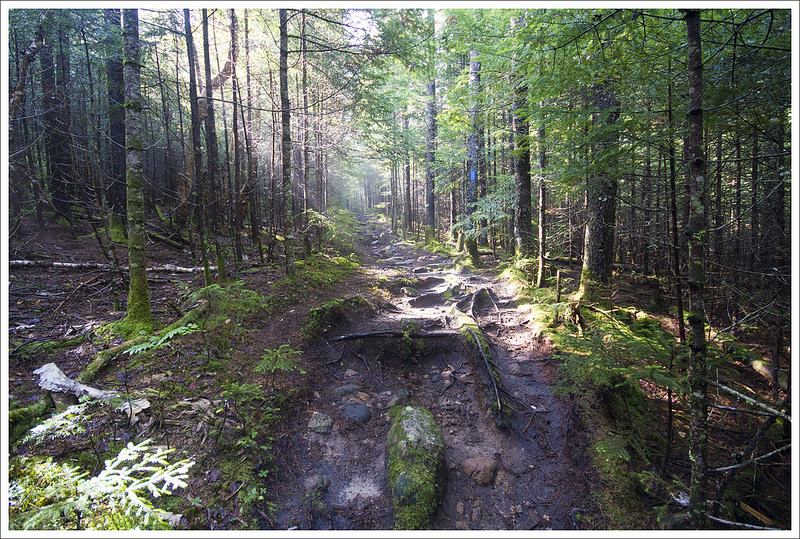
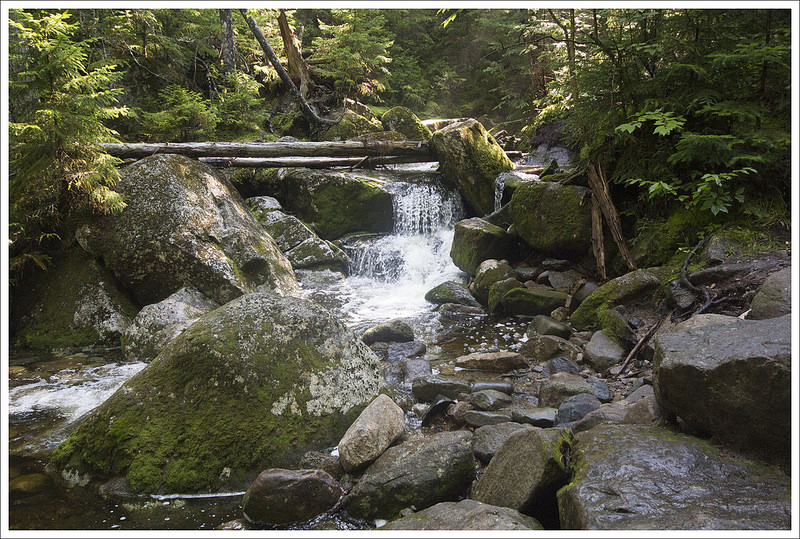


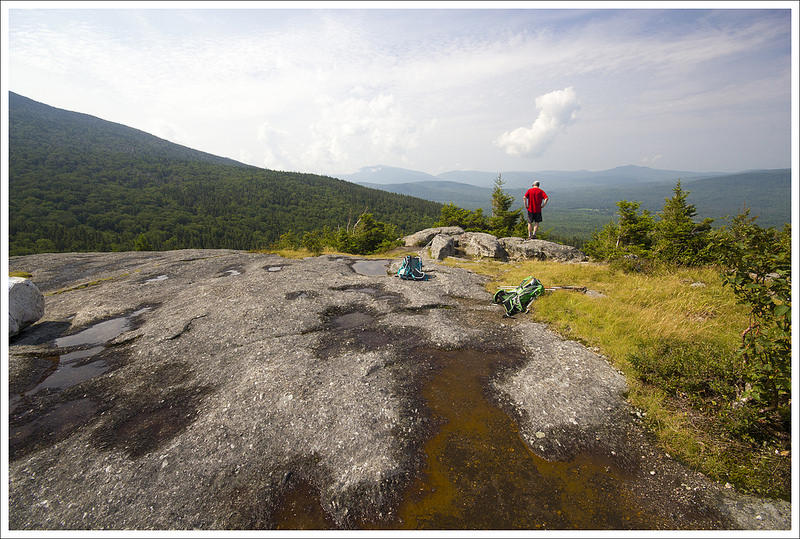


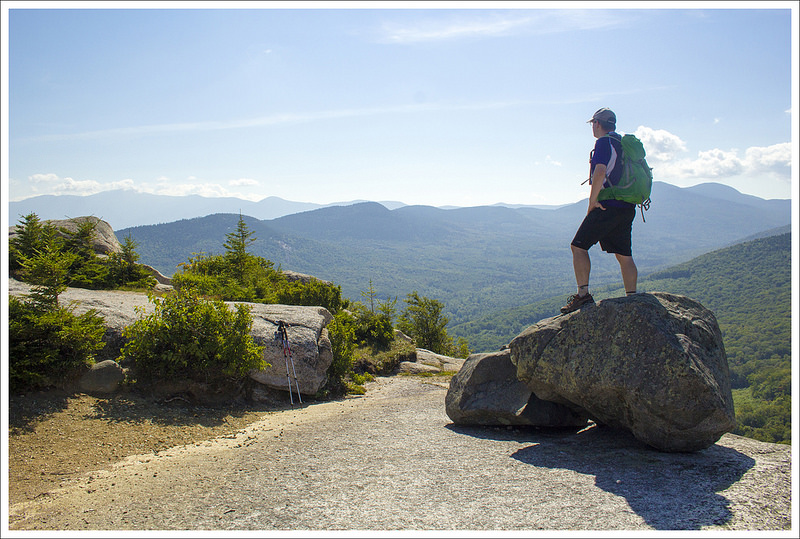


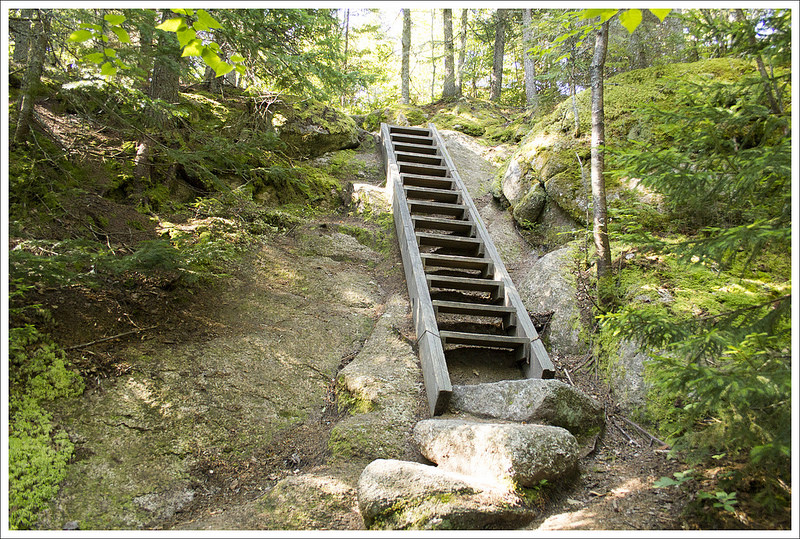


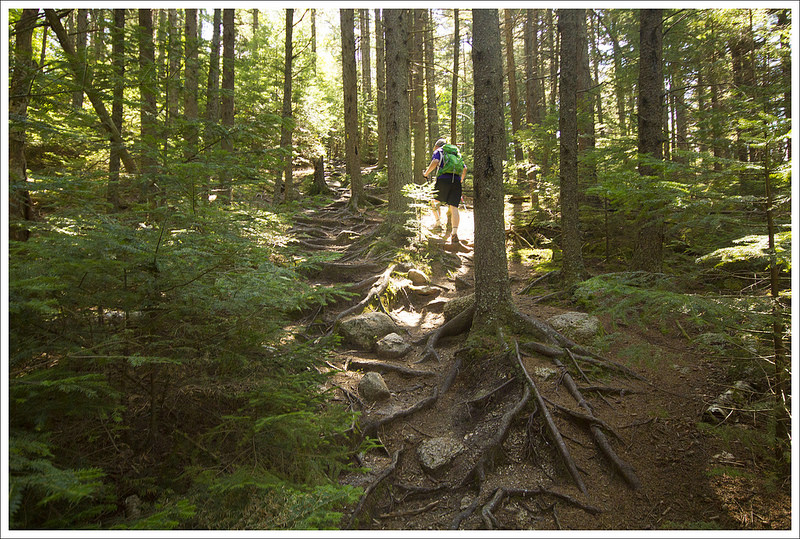


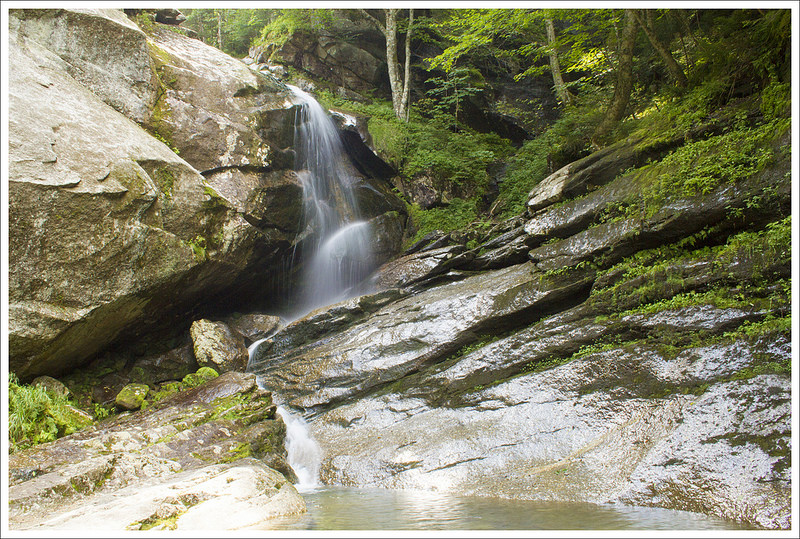
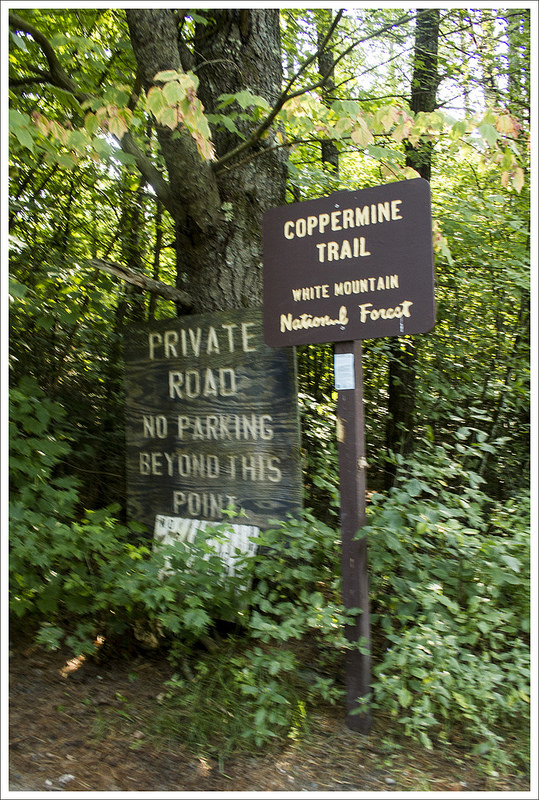
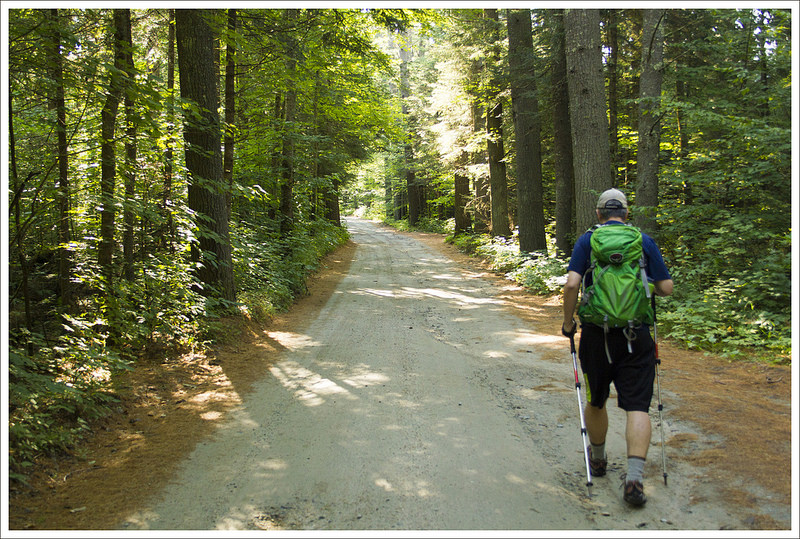
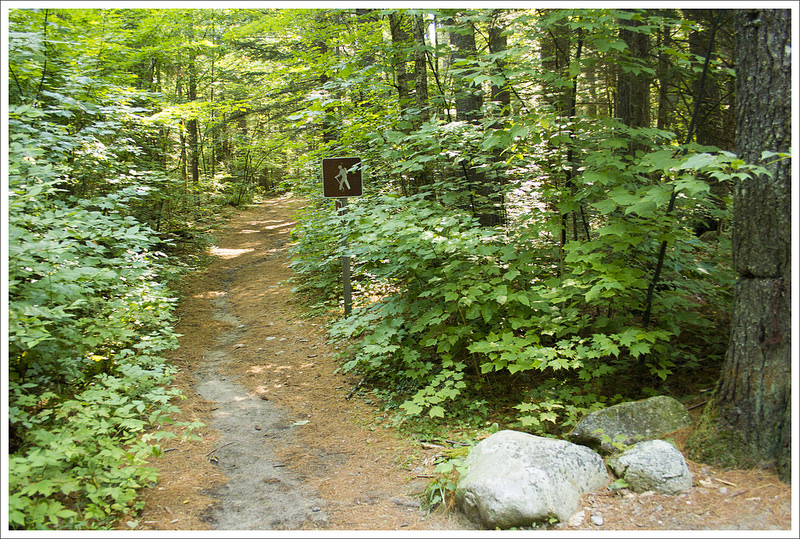
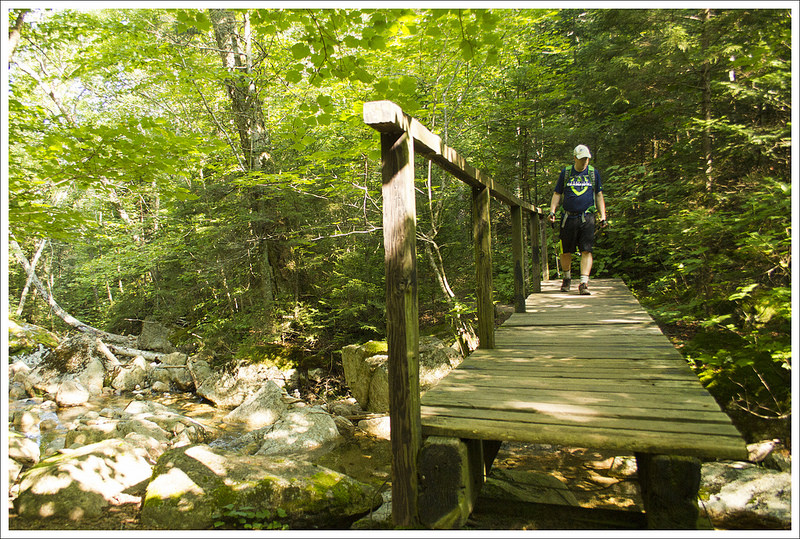
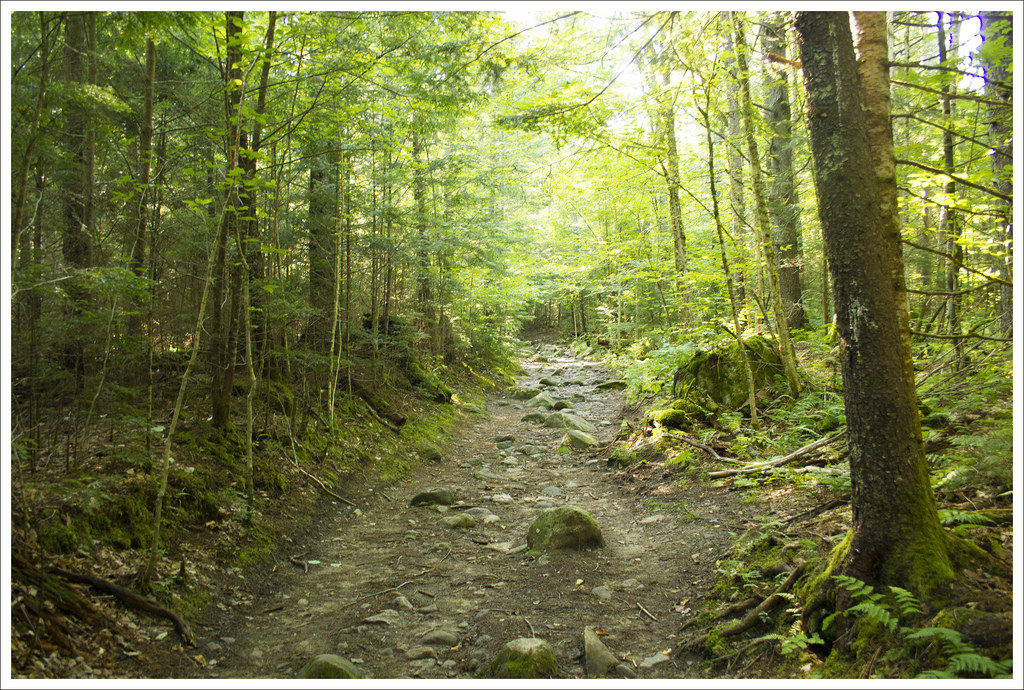
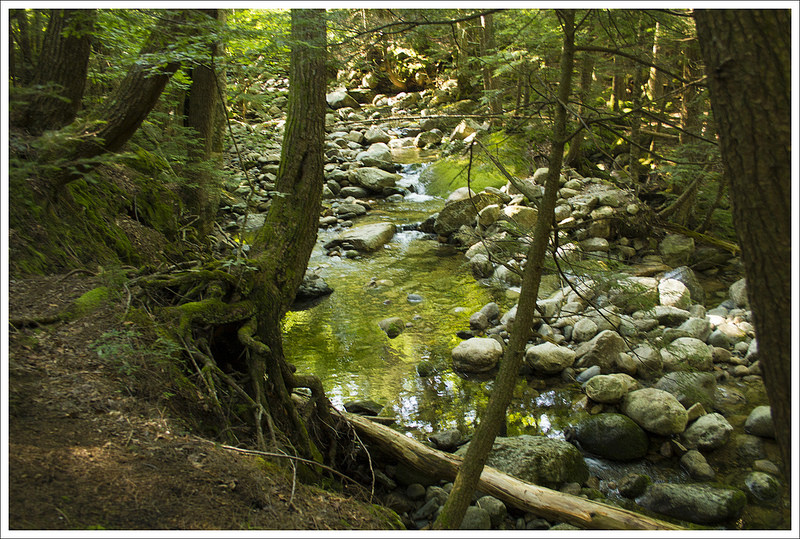
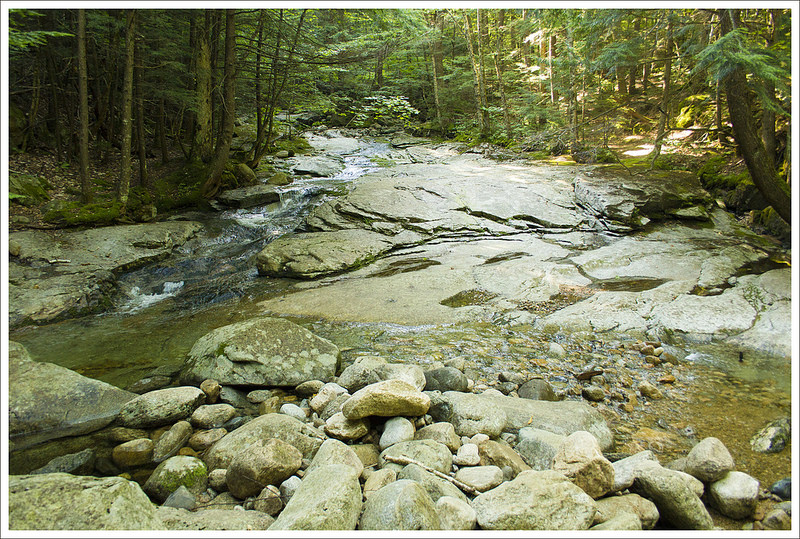
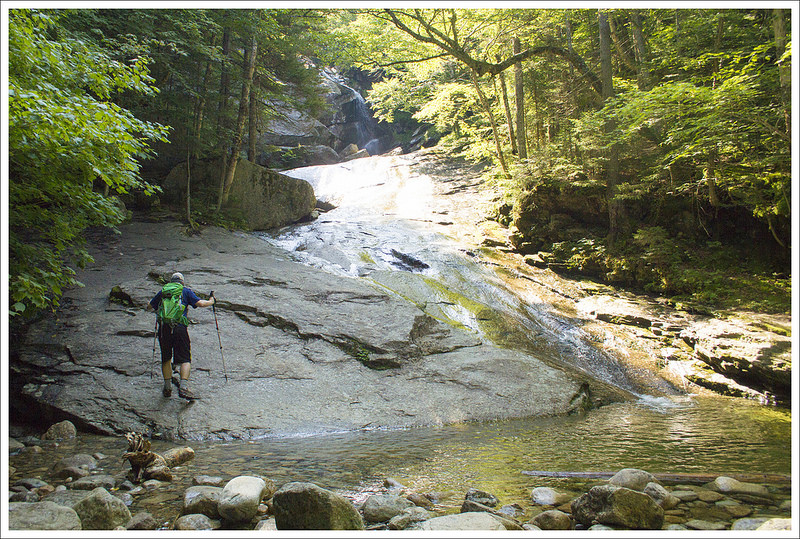
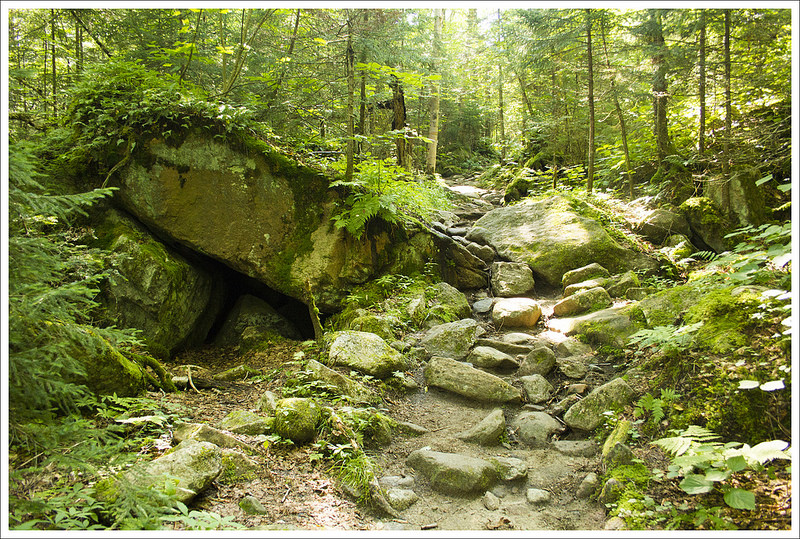

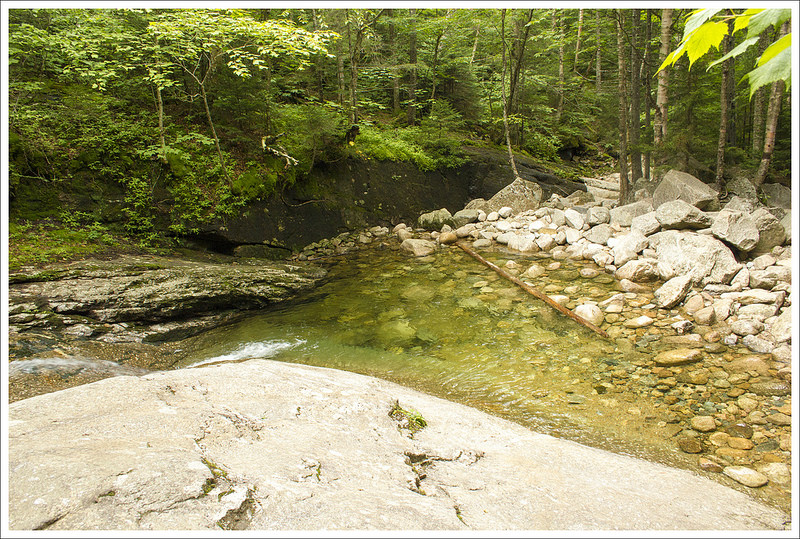
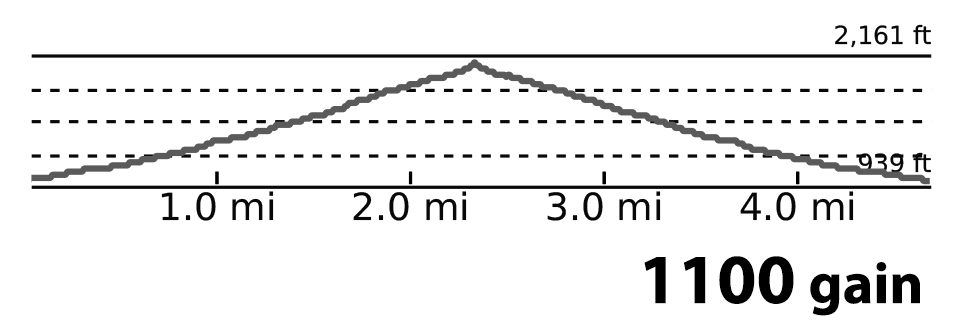
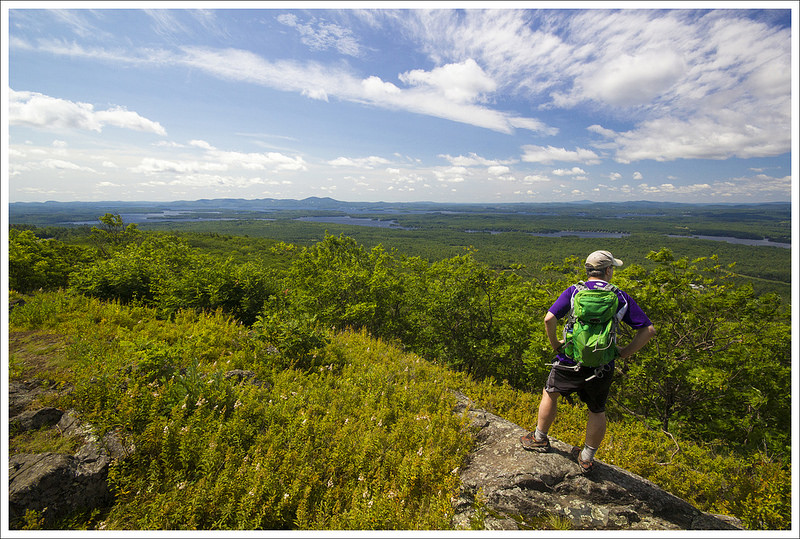


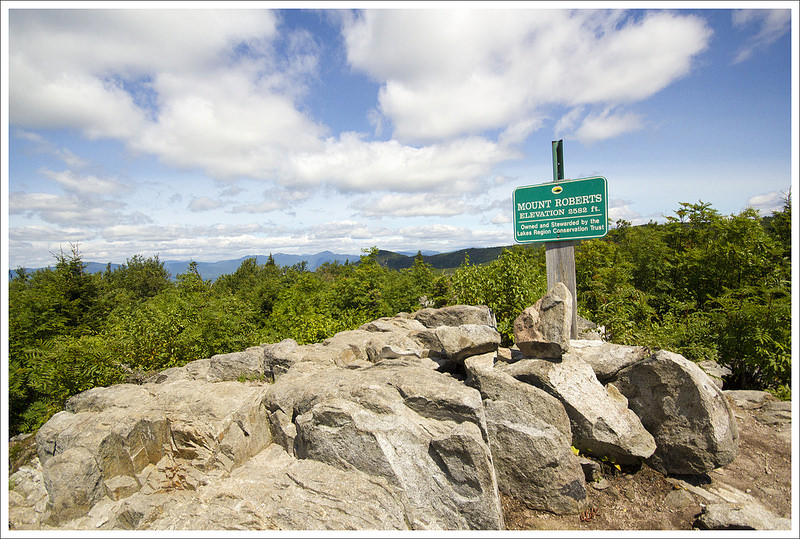


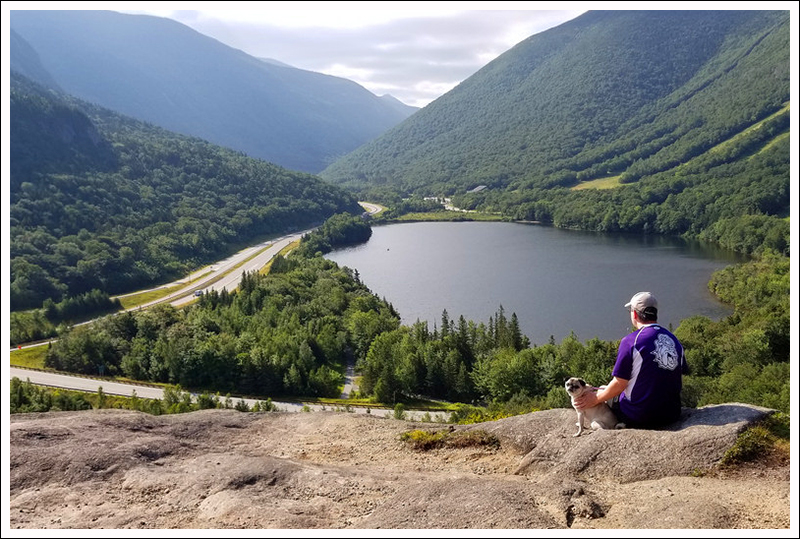


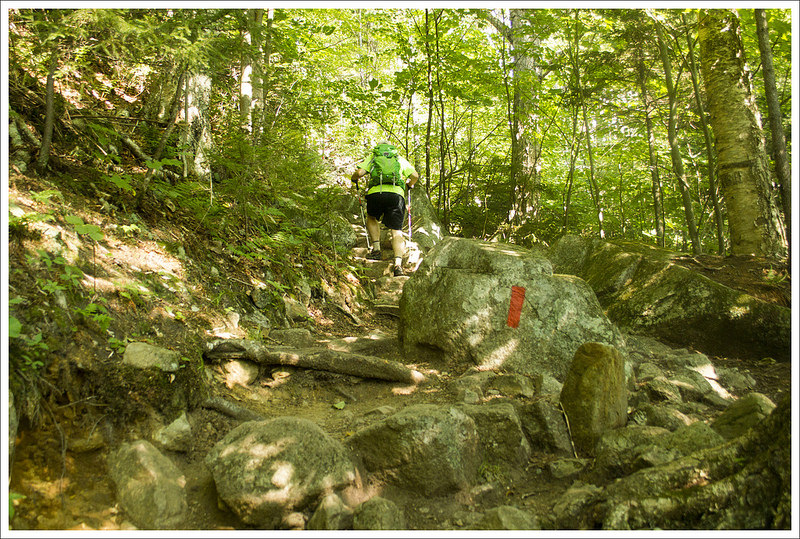
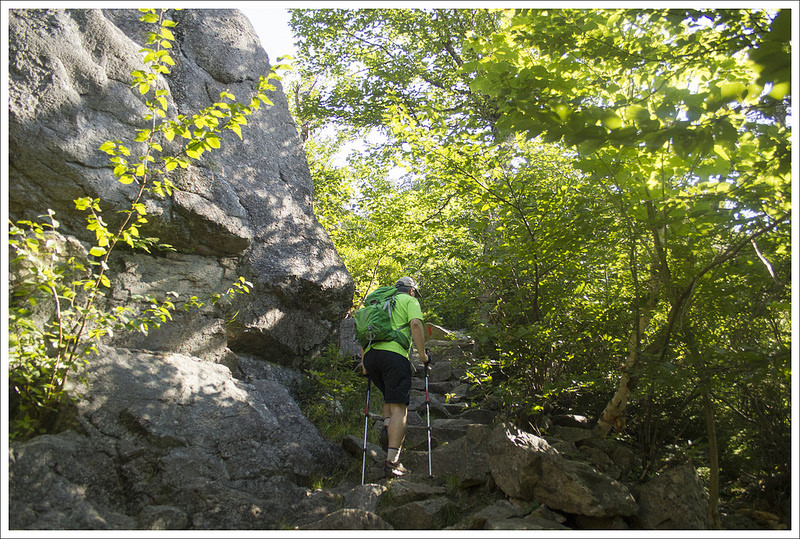


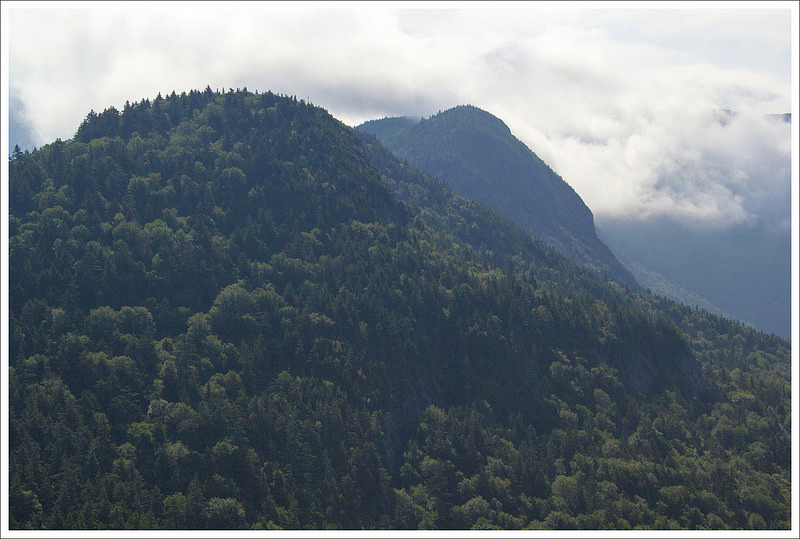

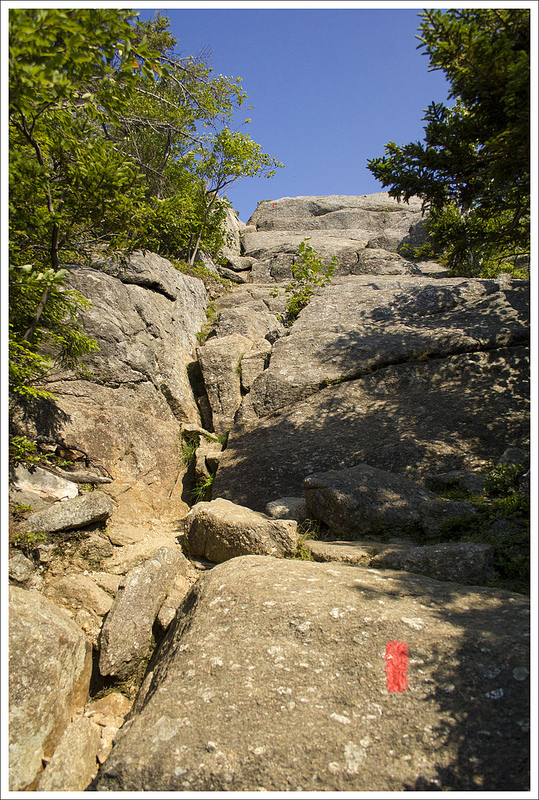


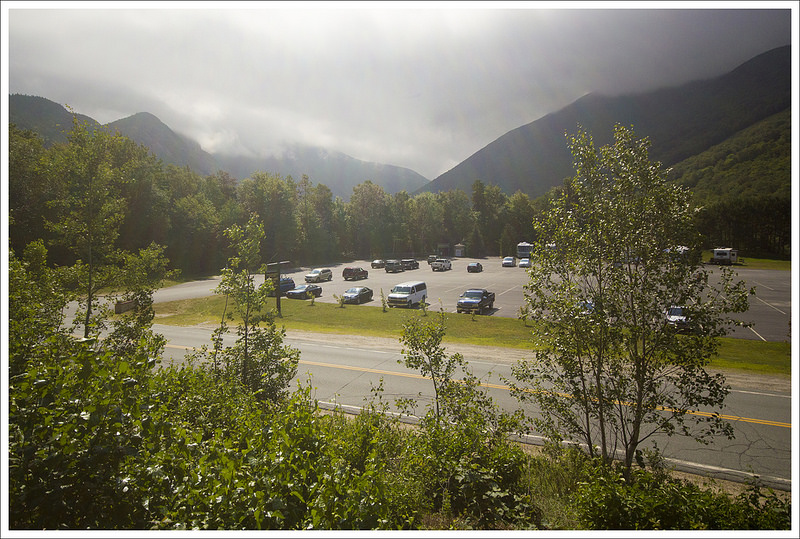
 Wookie Says…


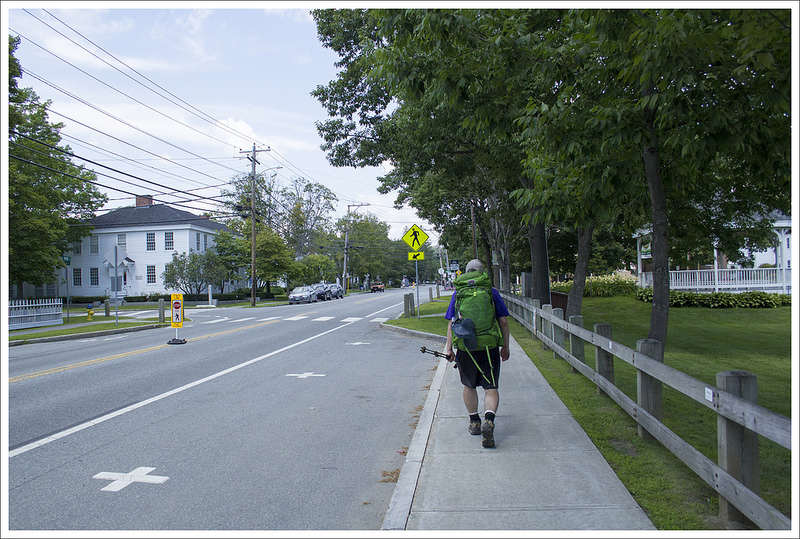
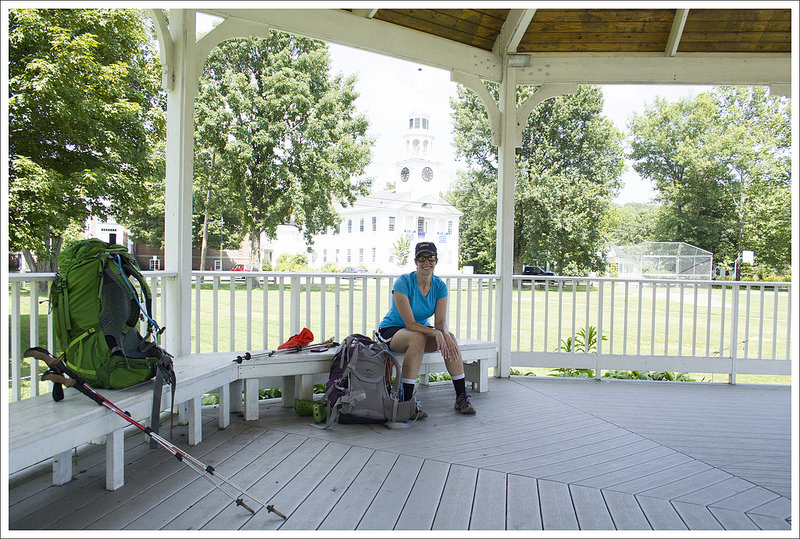
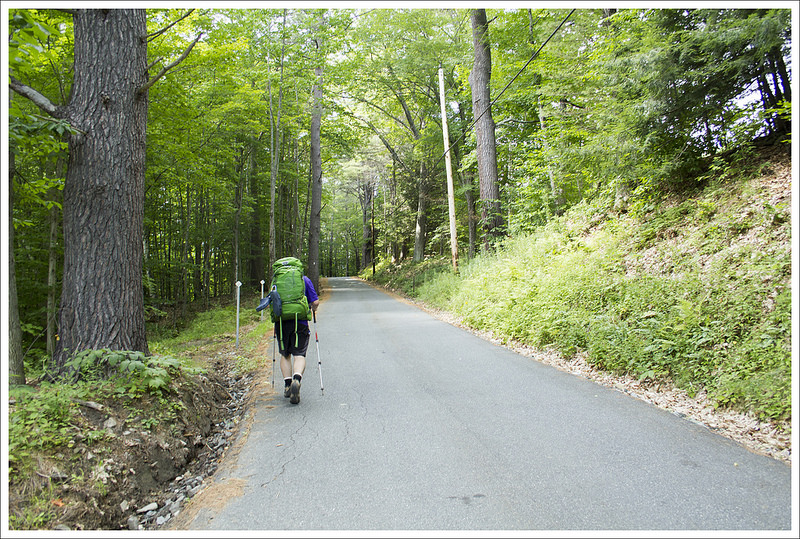
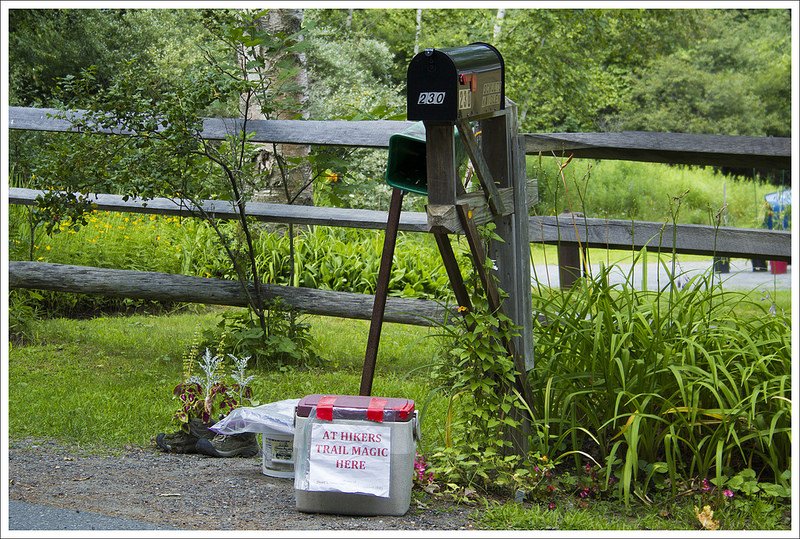
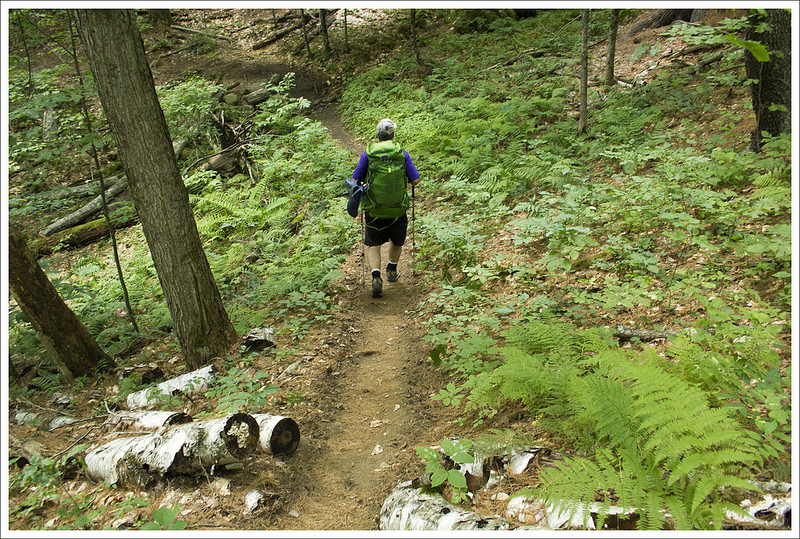
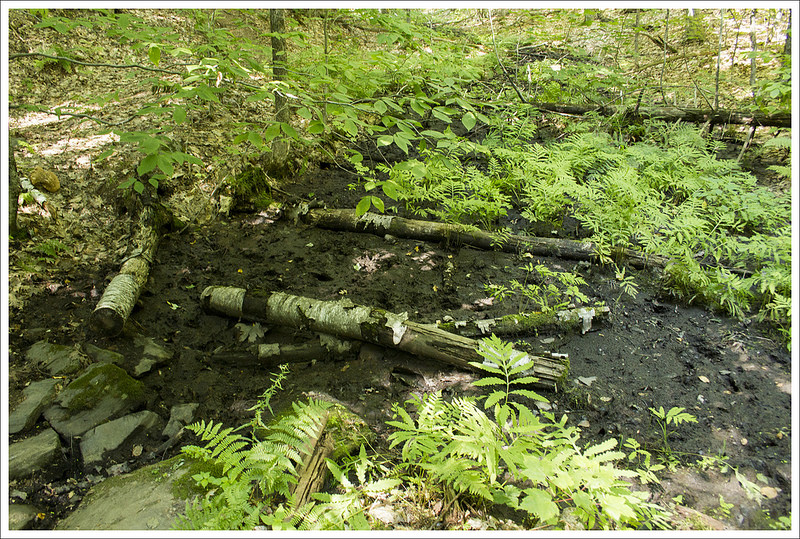
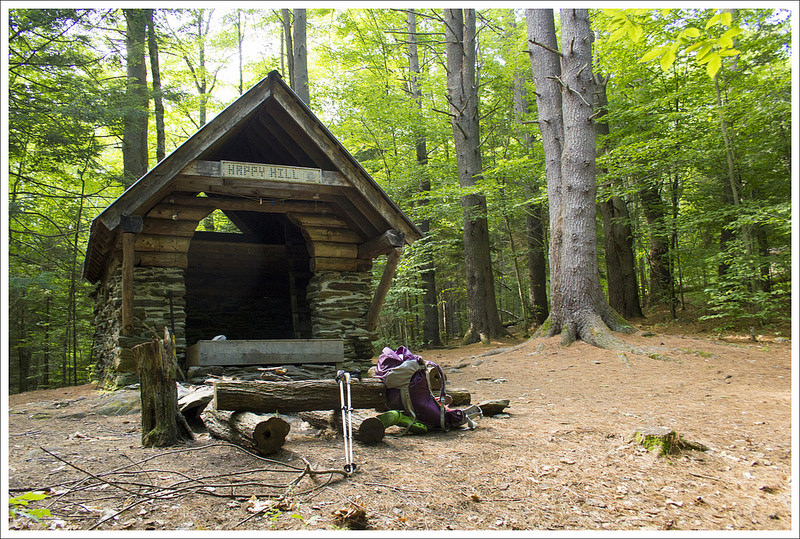
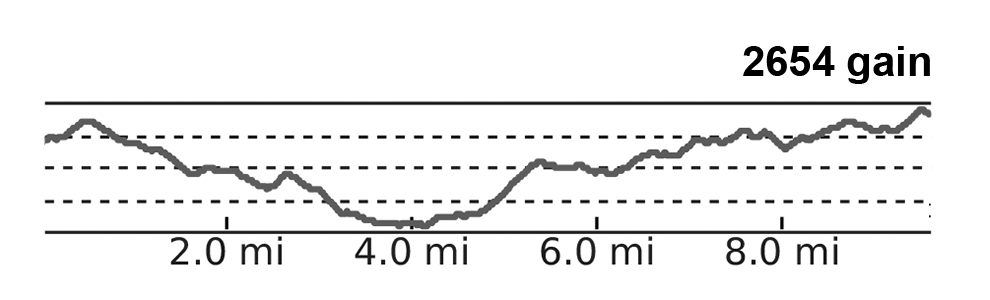


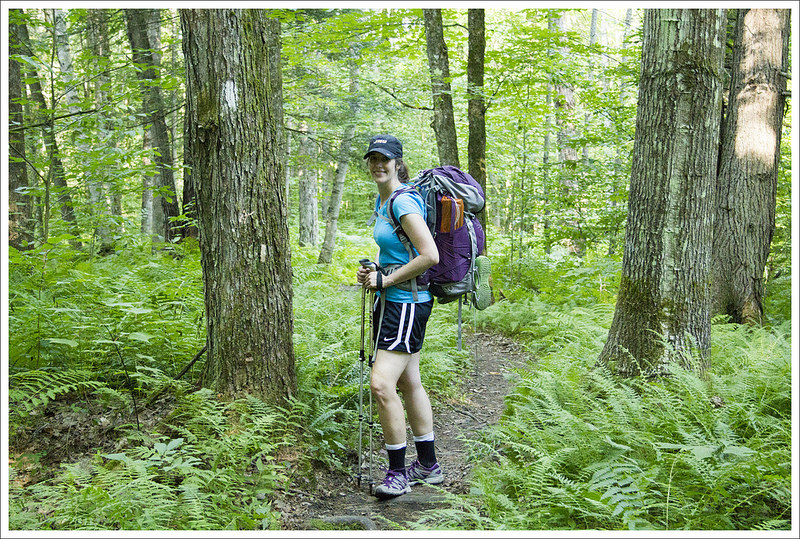
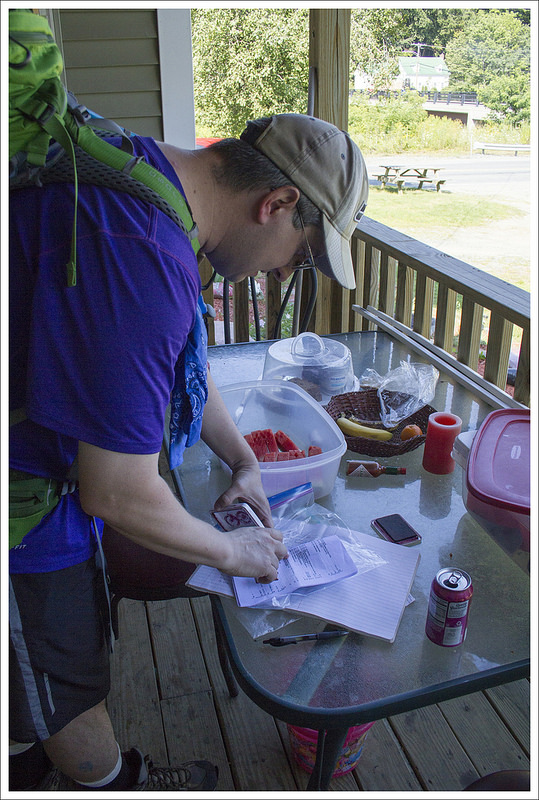


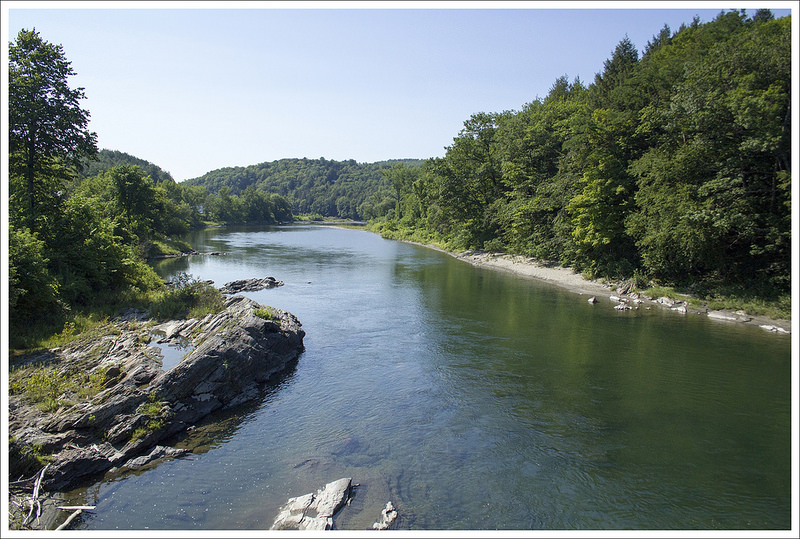
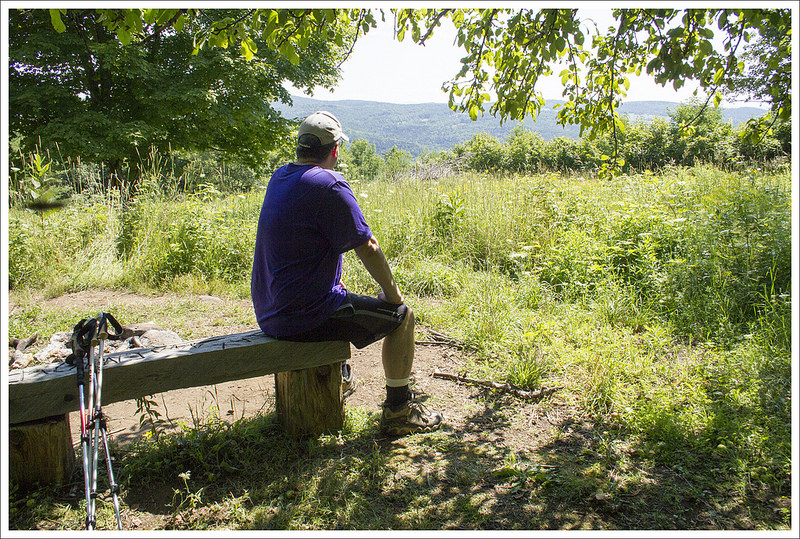
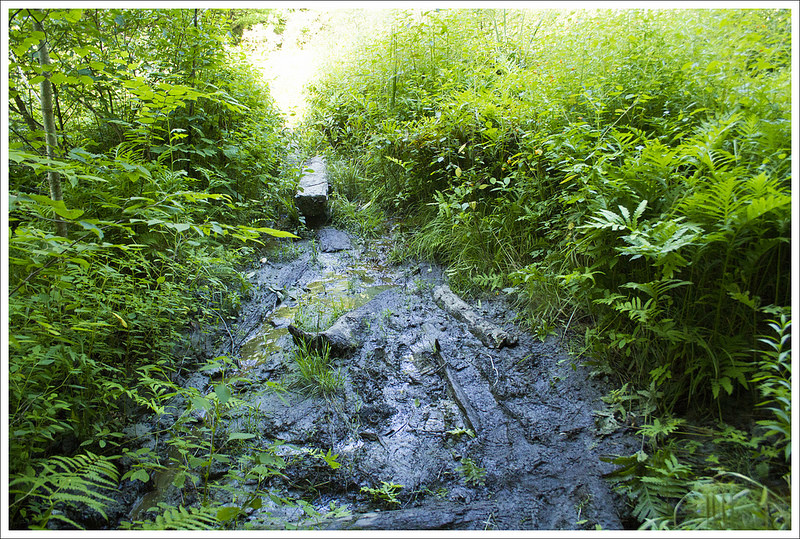
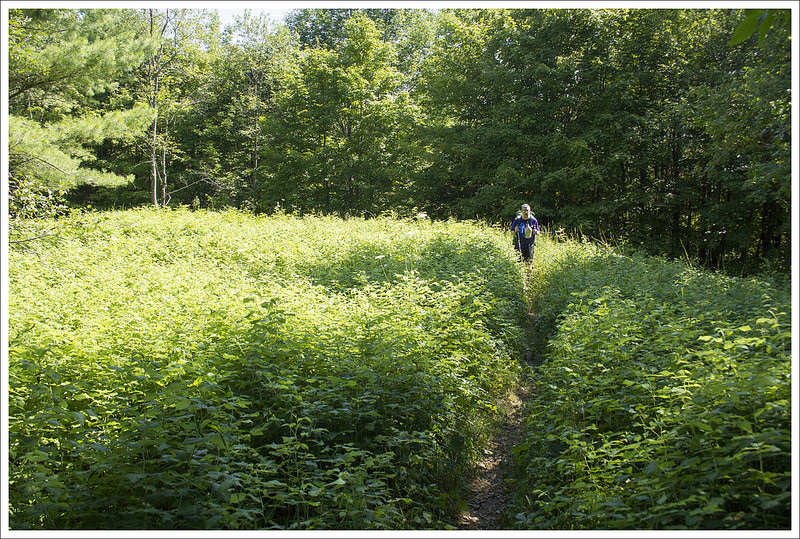
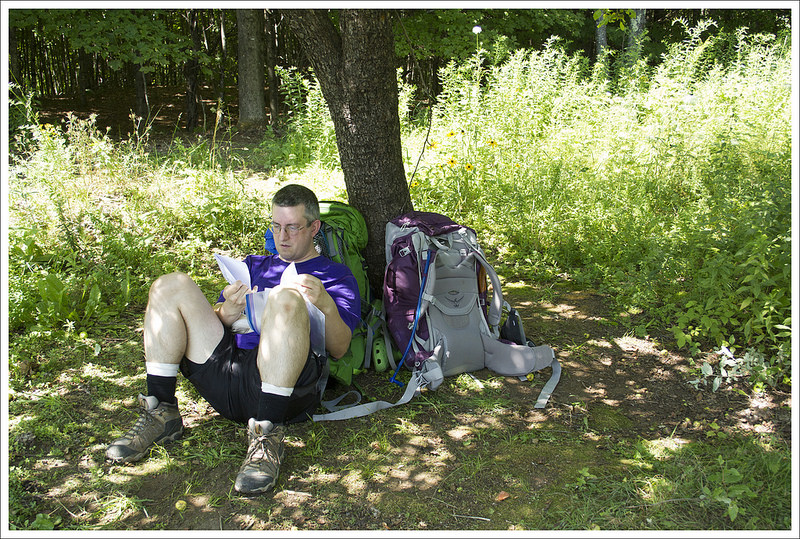


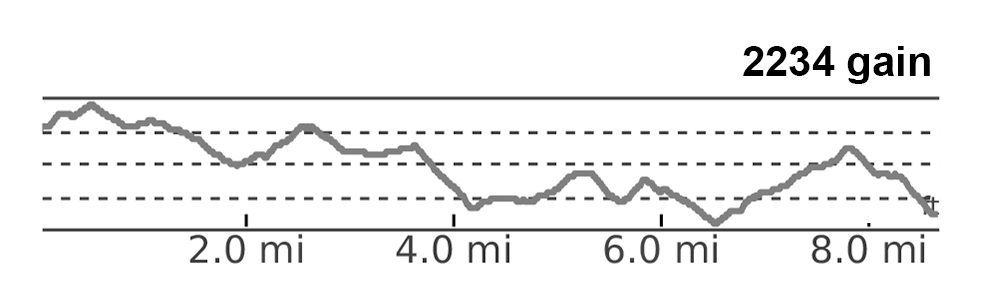

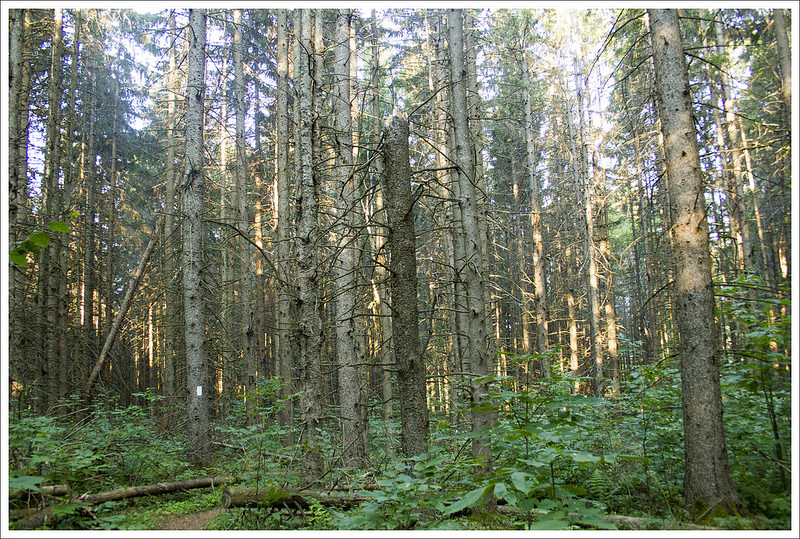
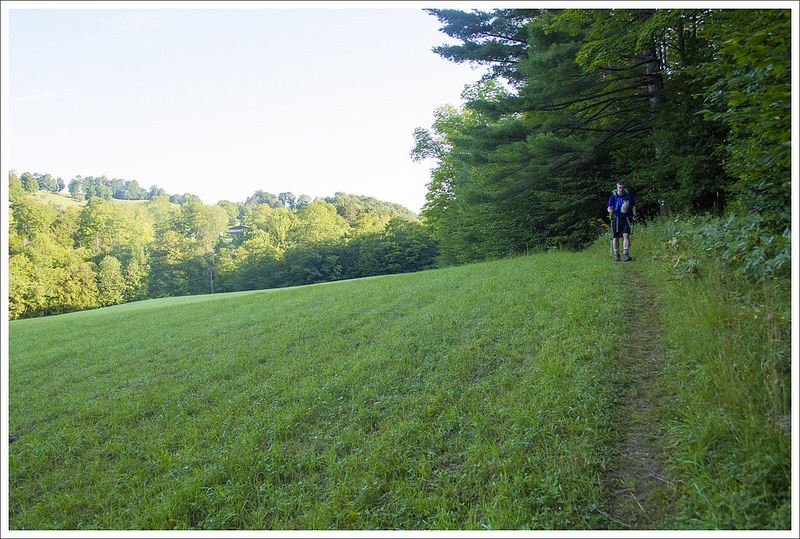
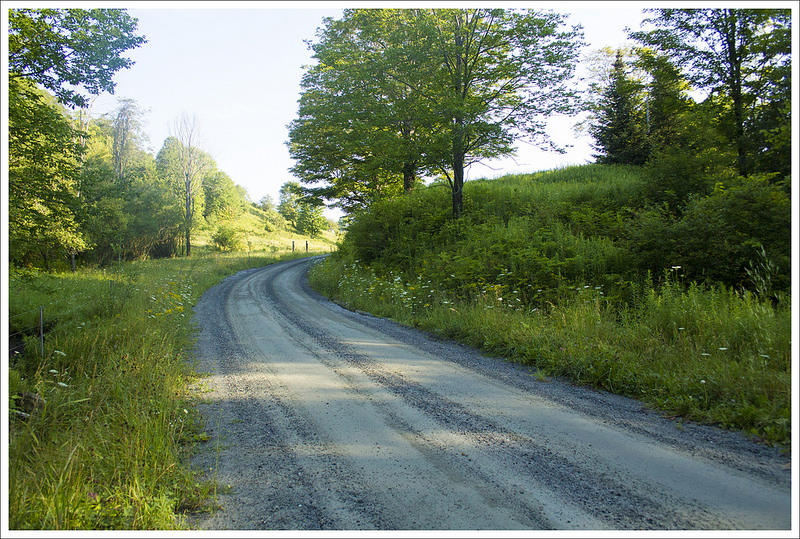

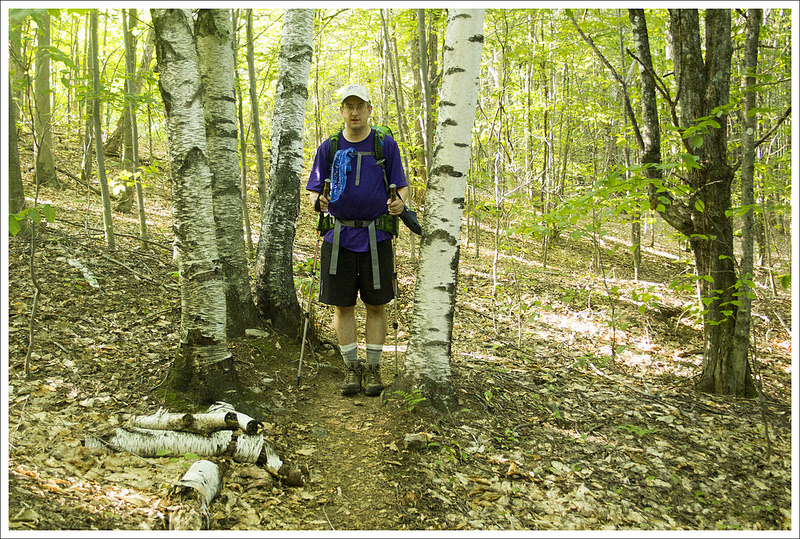
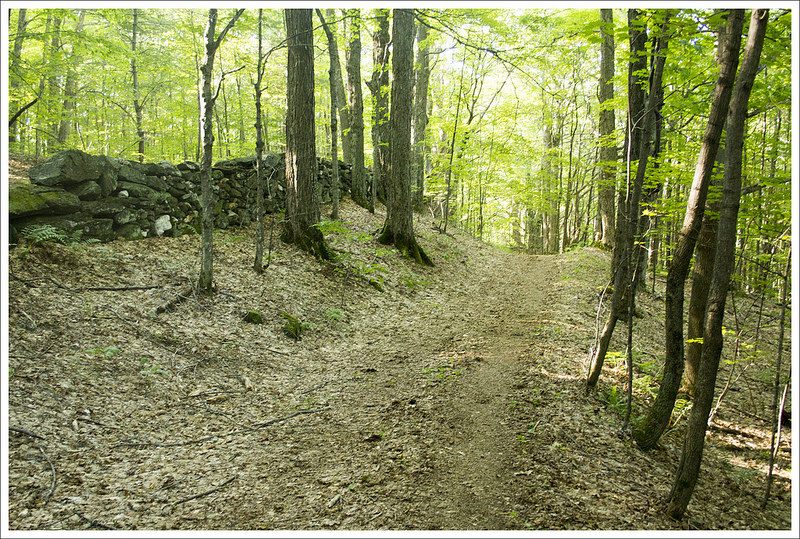
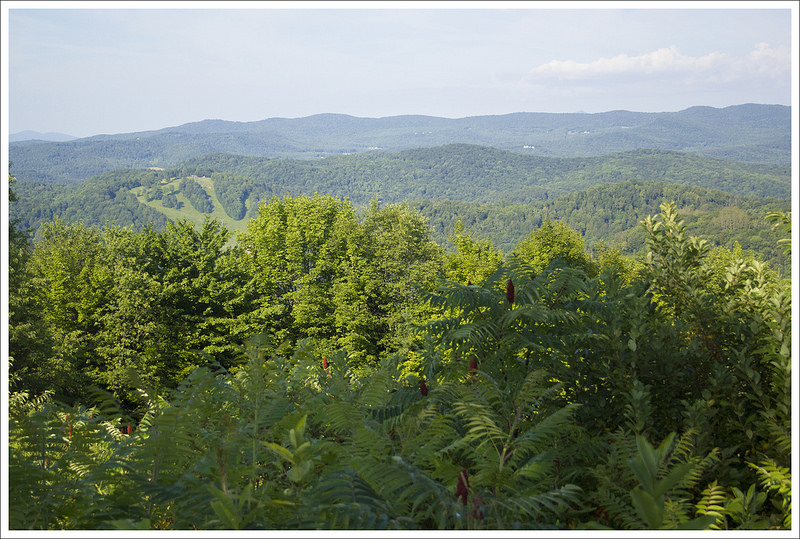
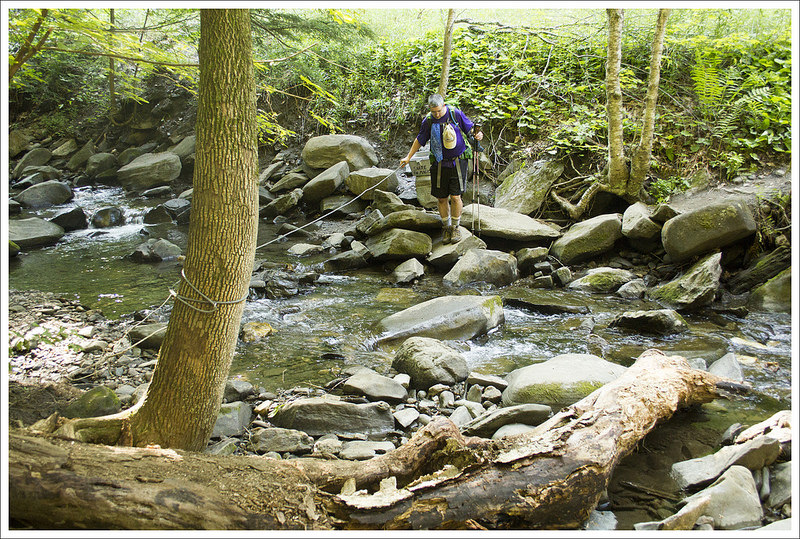
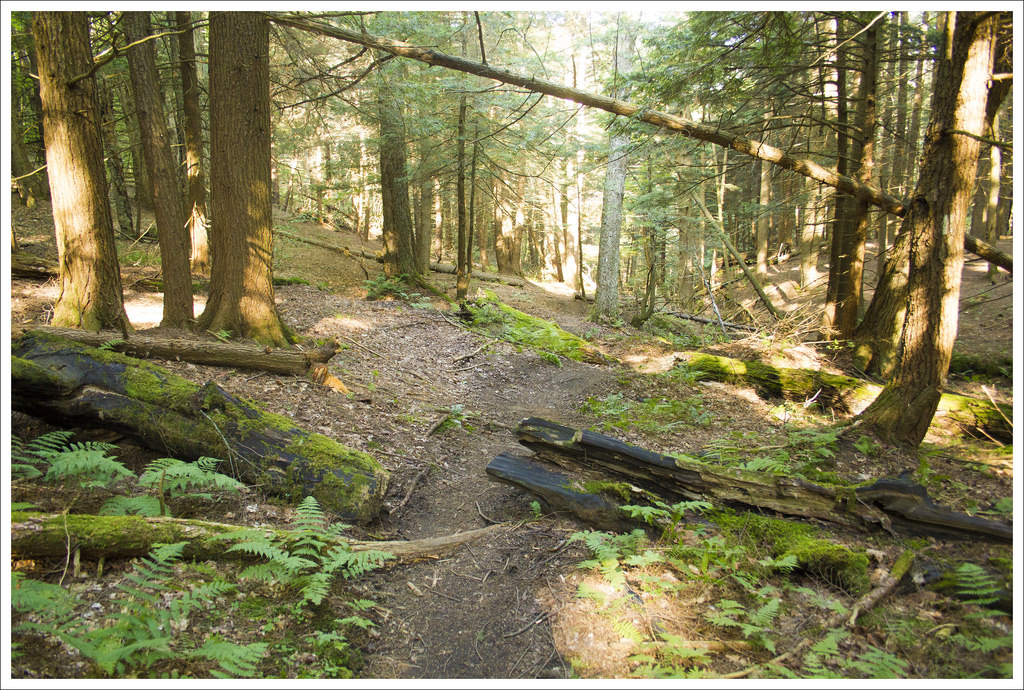
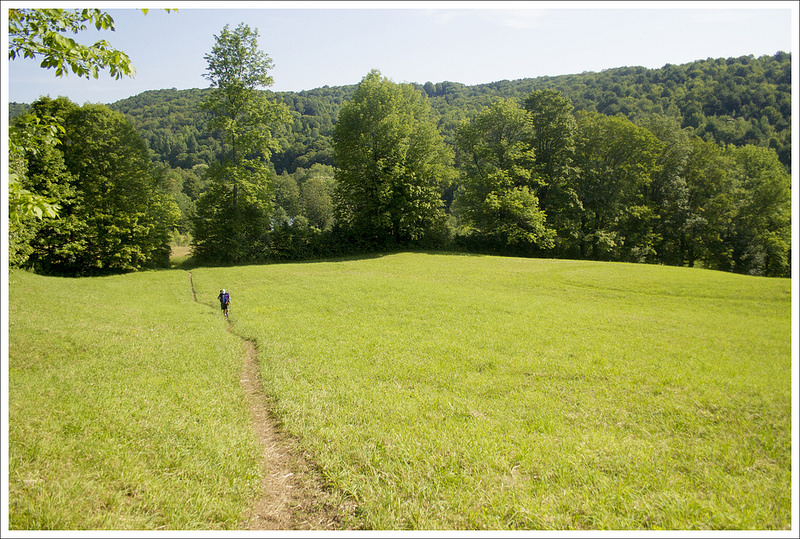


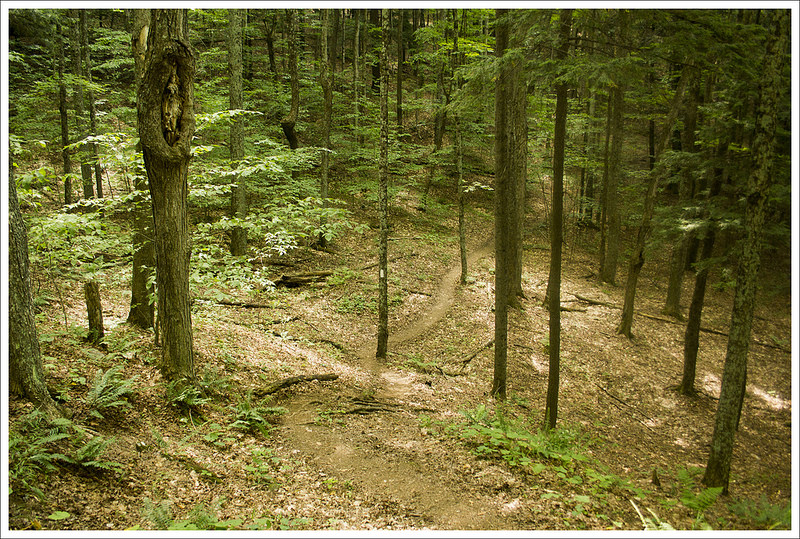
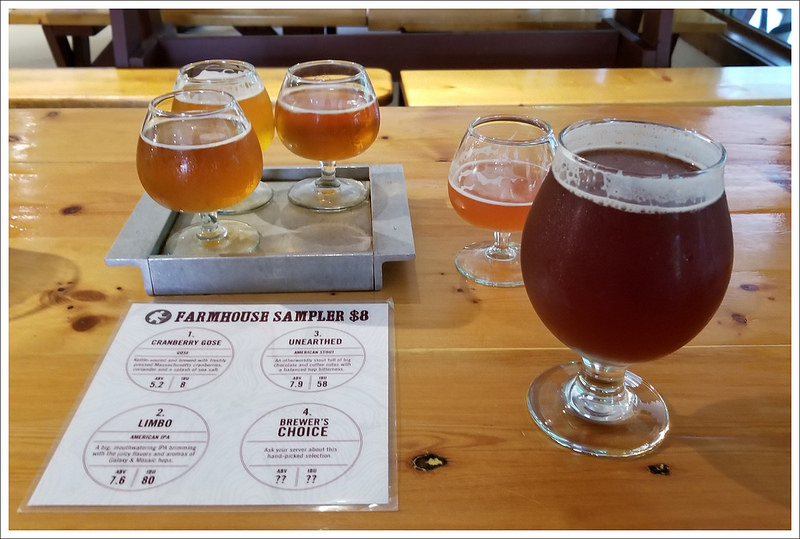

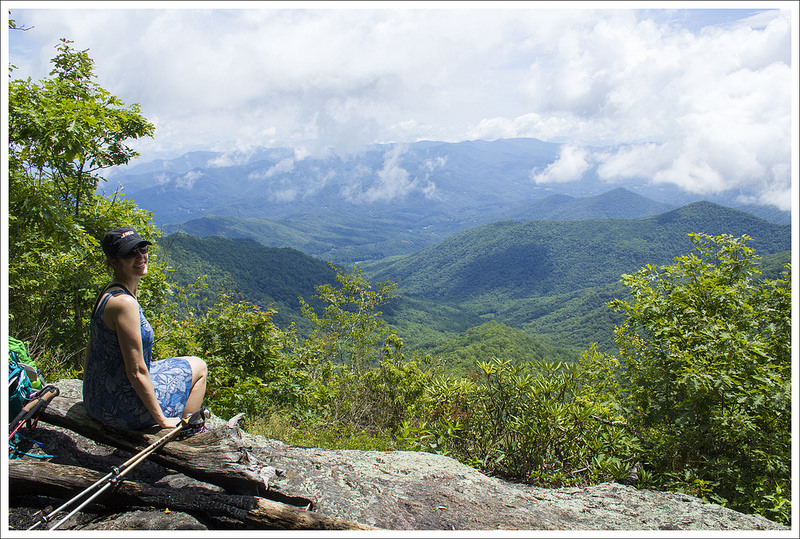
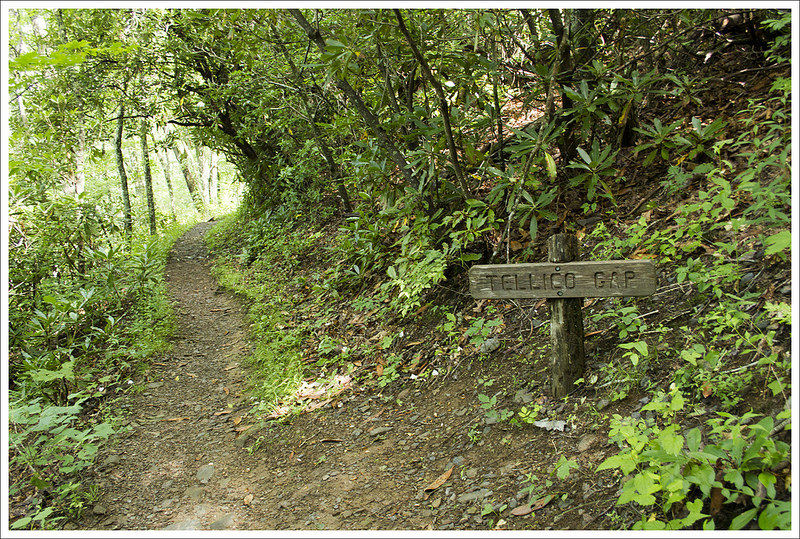
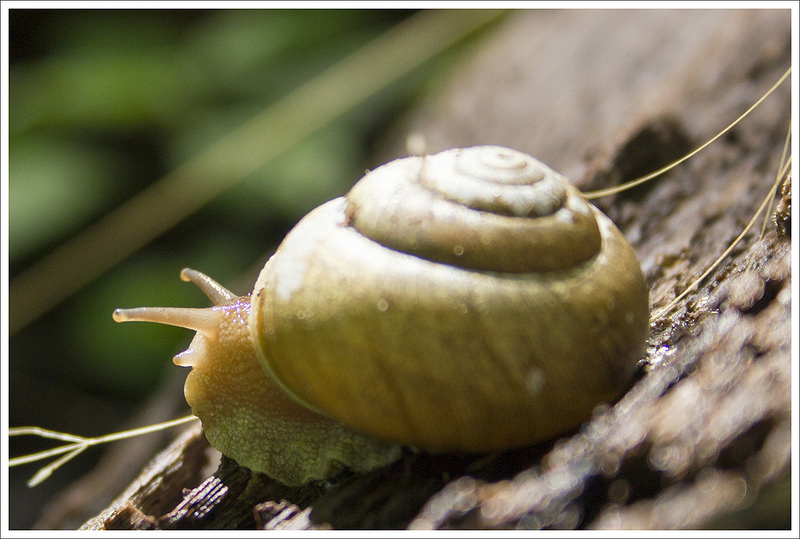
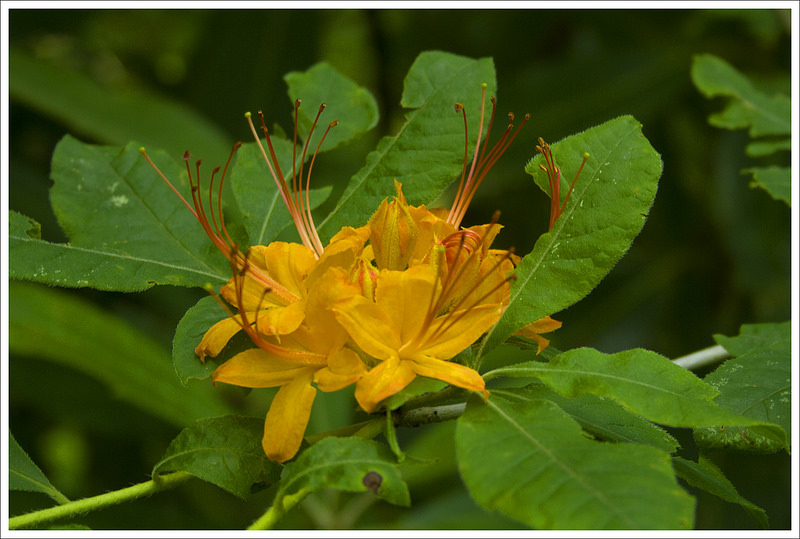
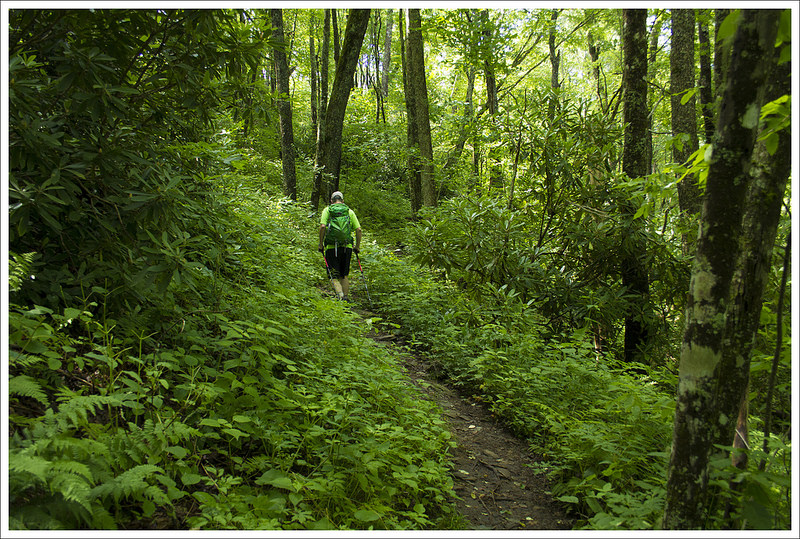


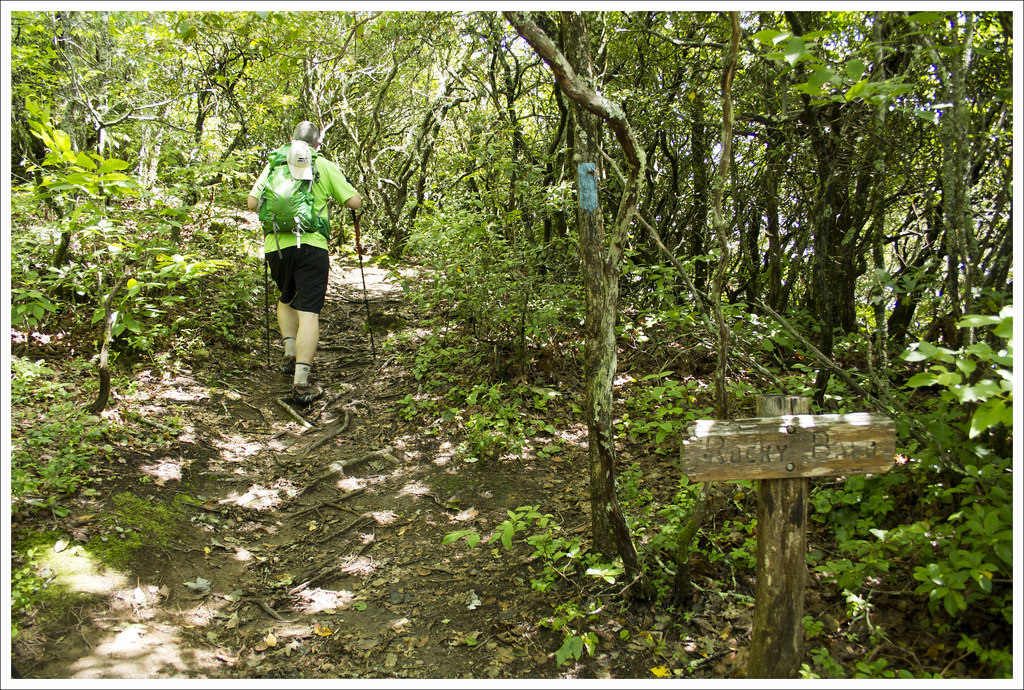
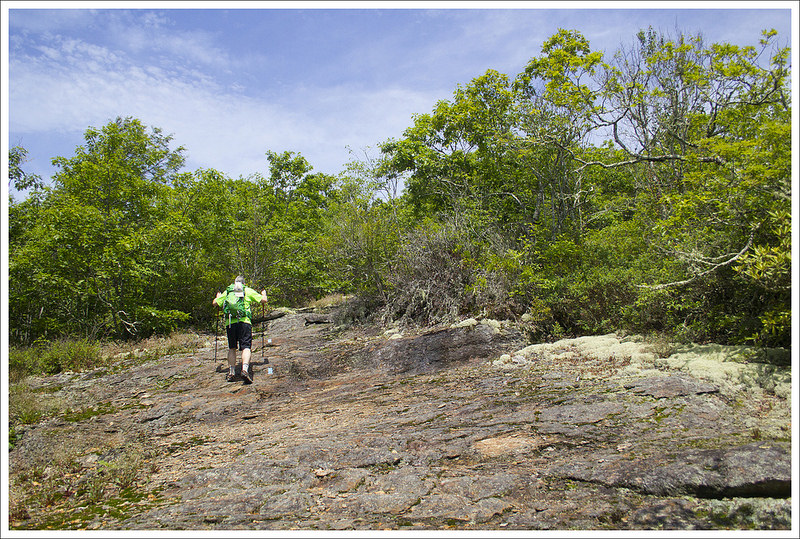
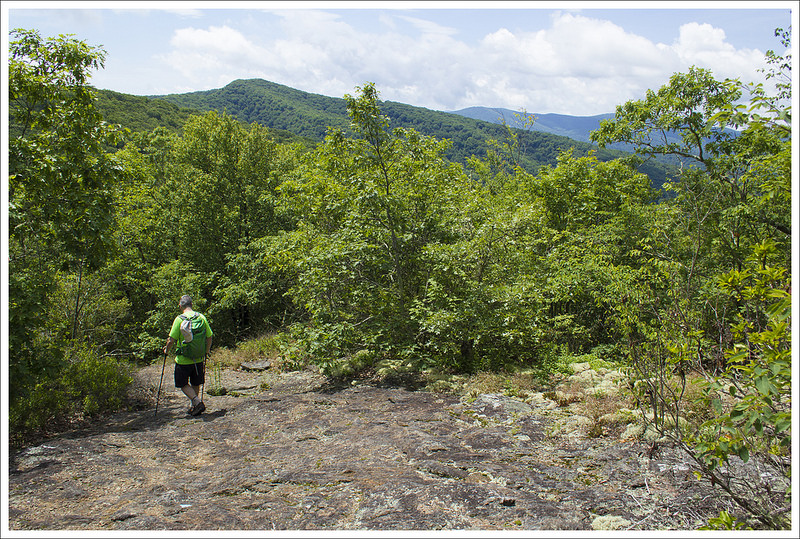
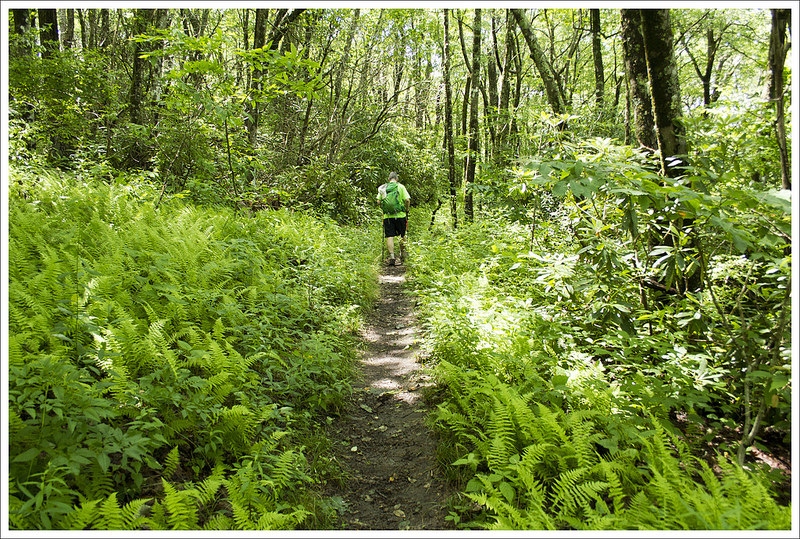
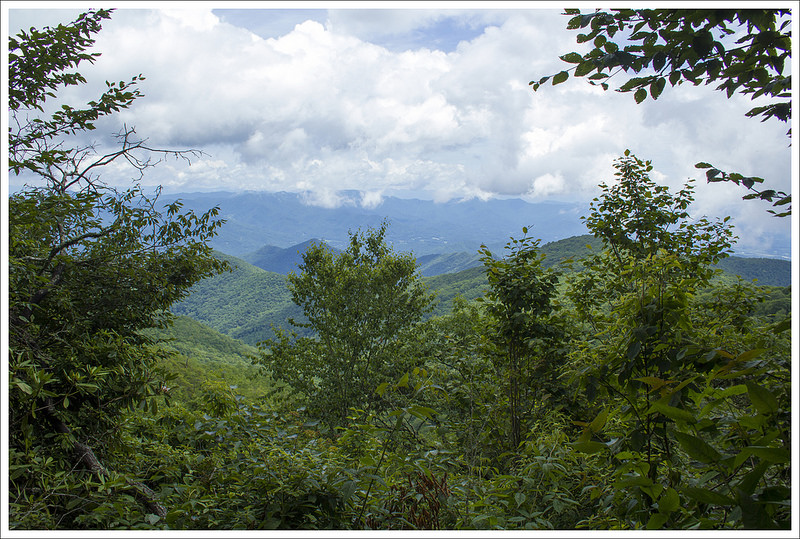
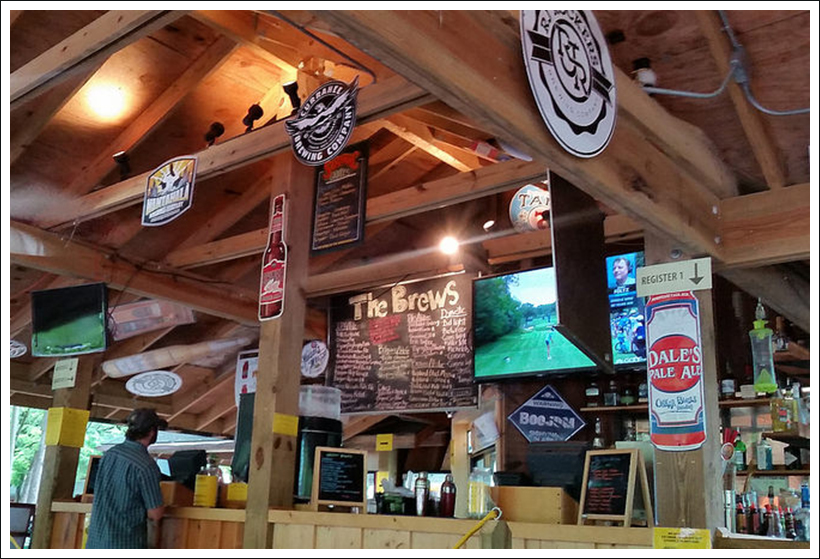

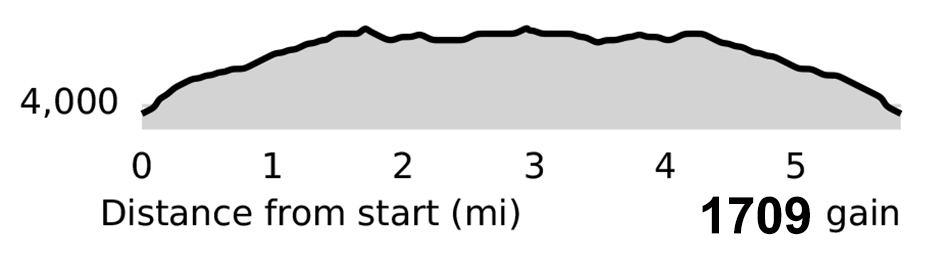


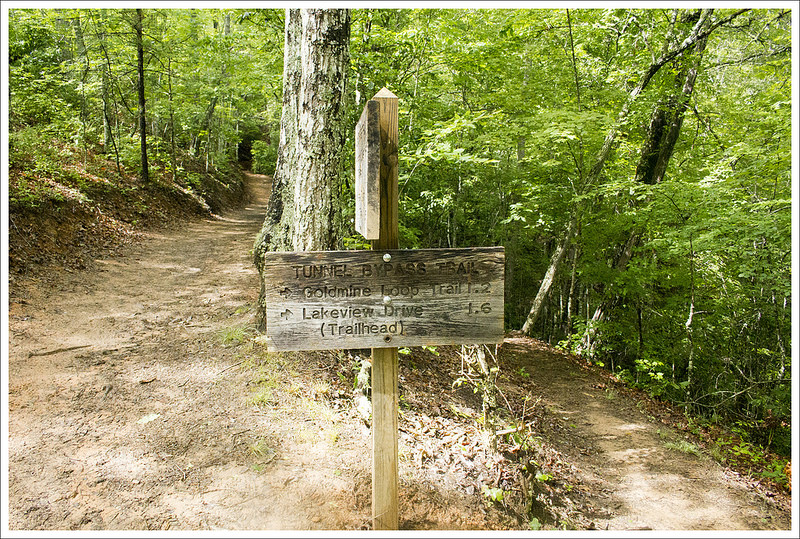


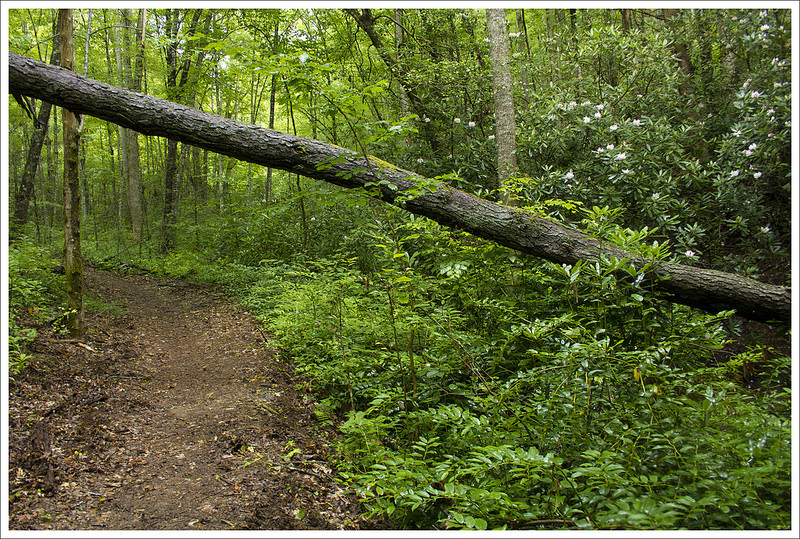
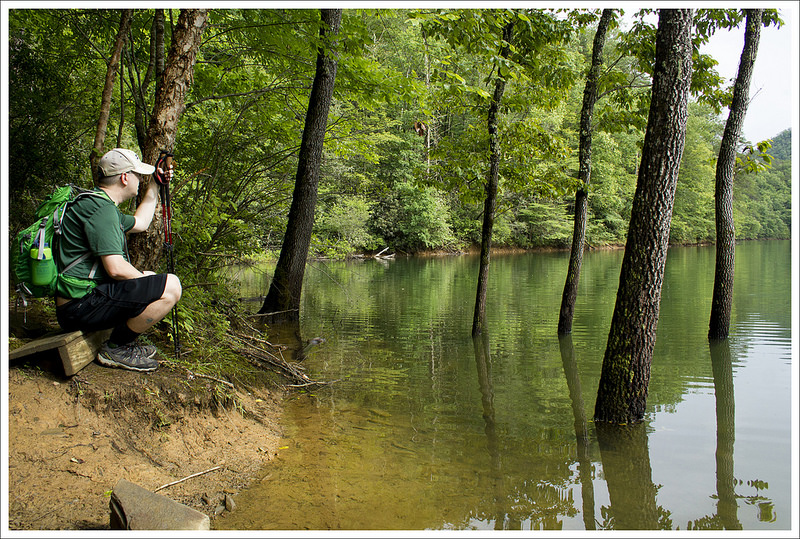

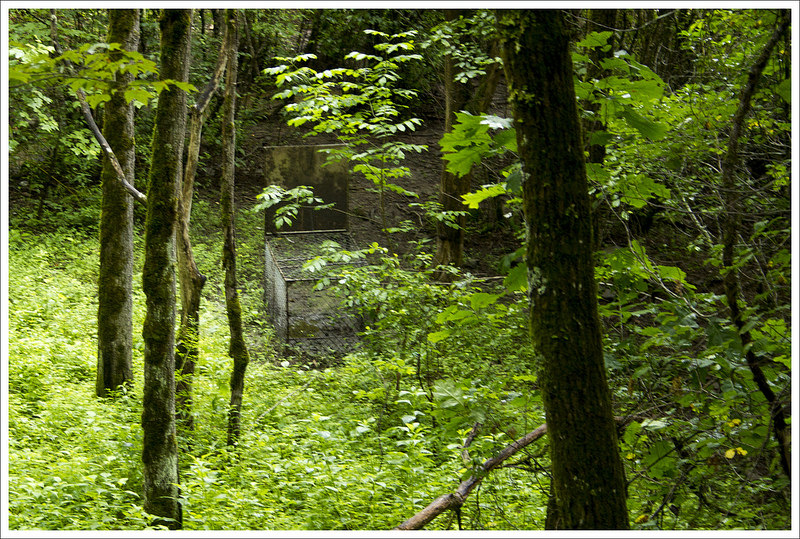


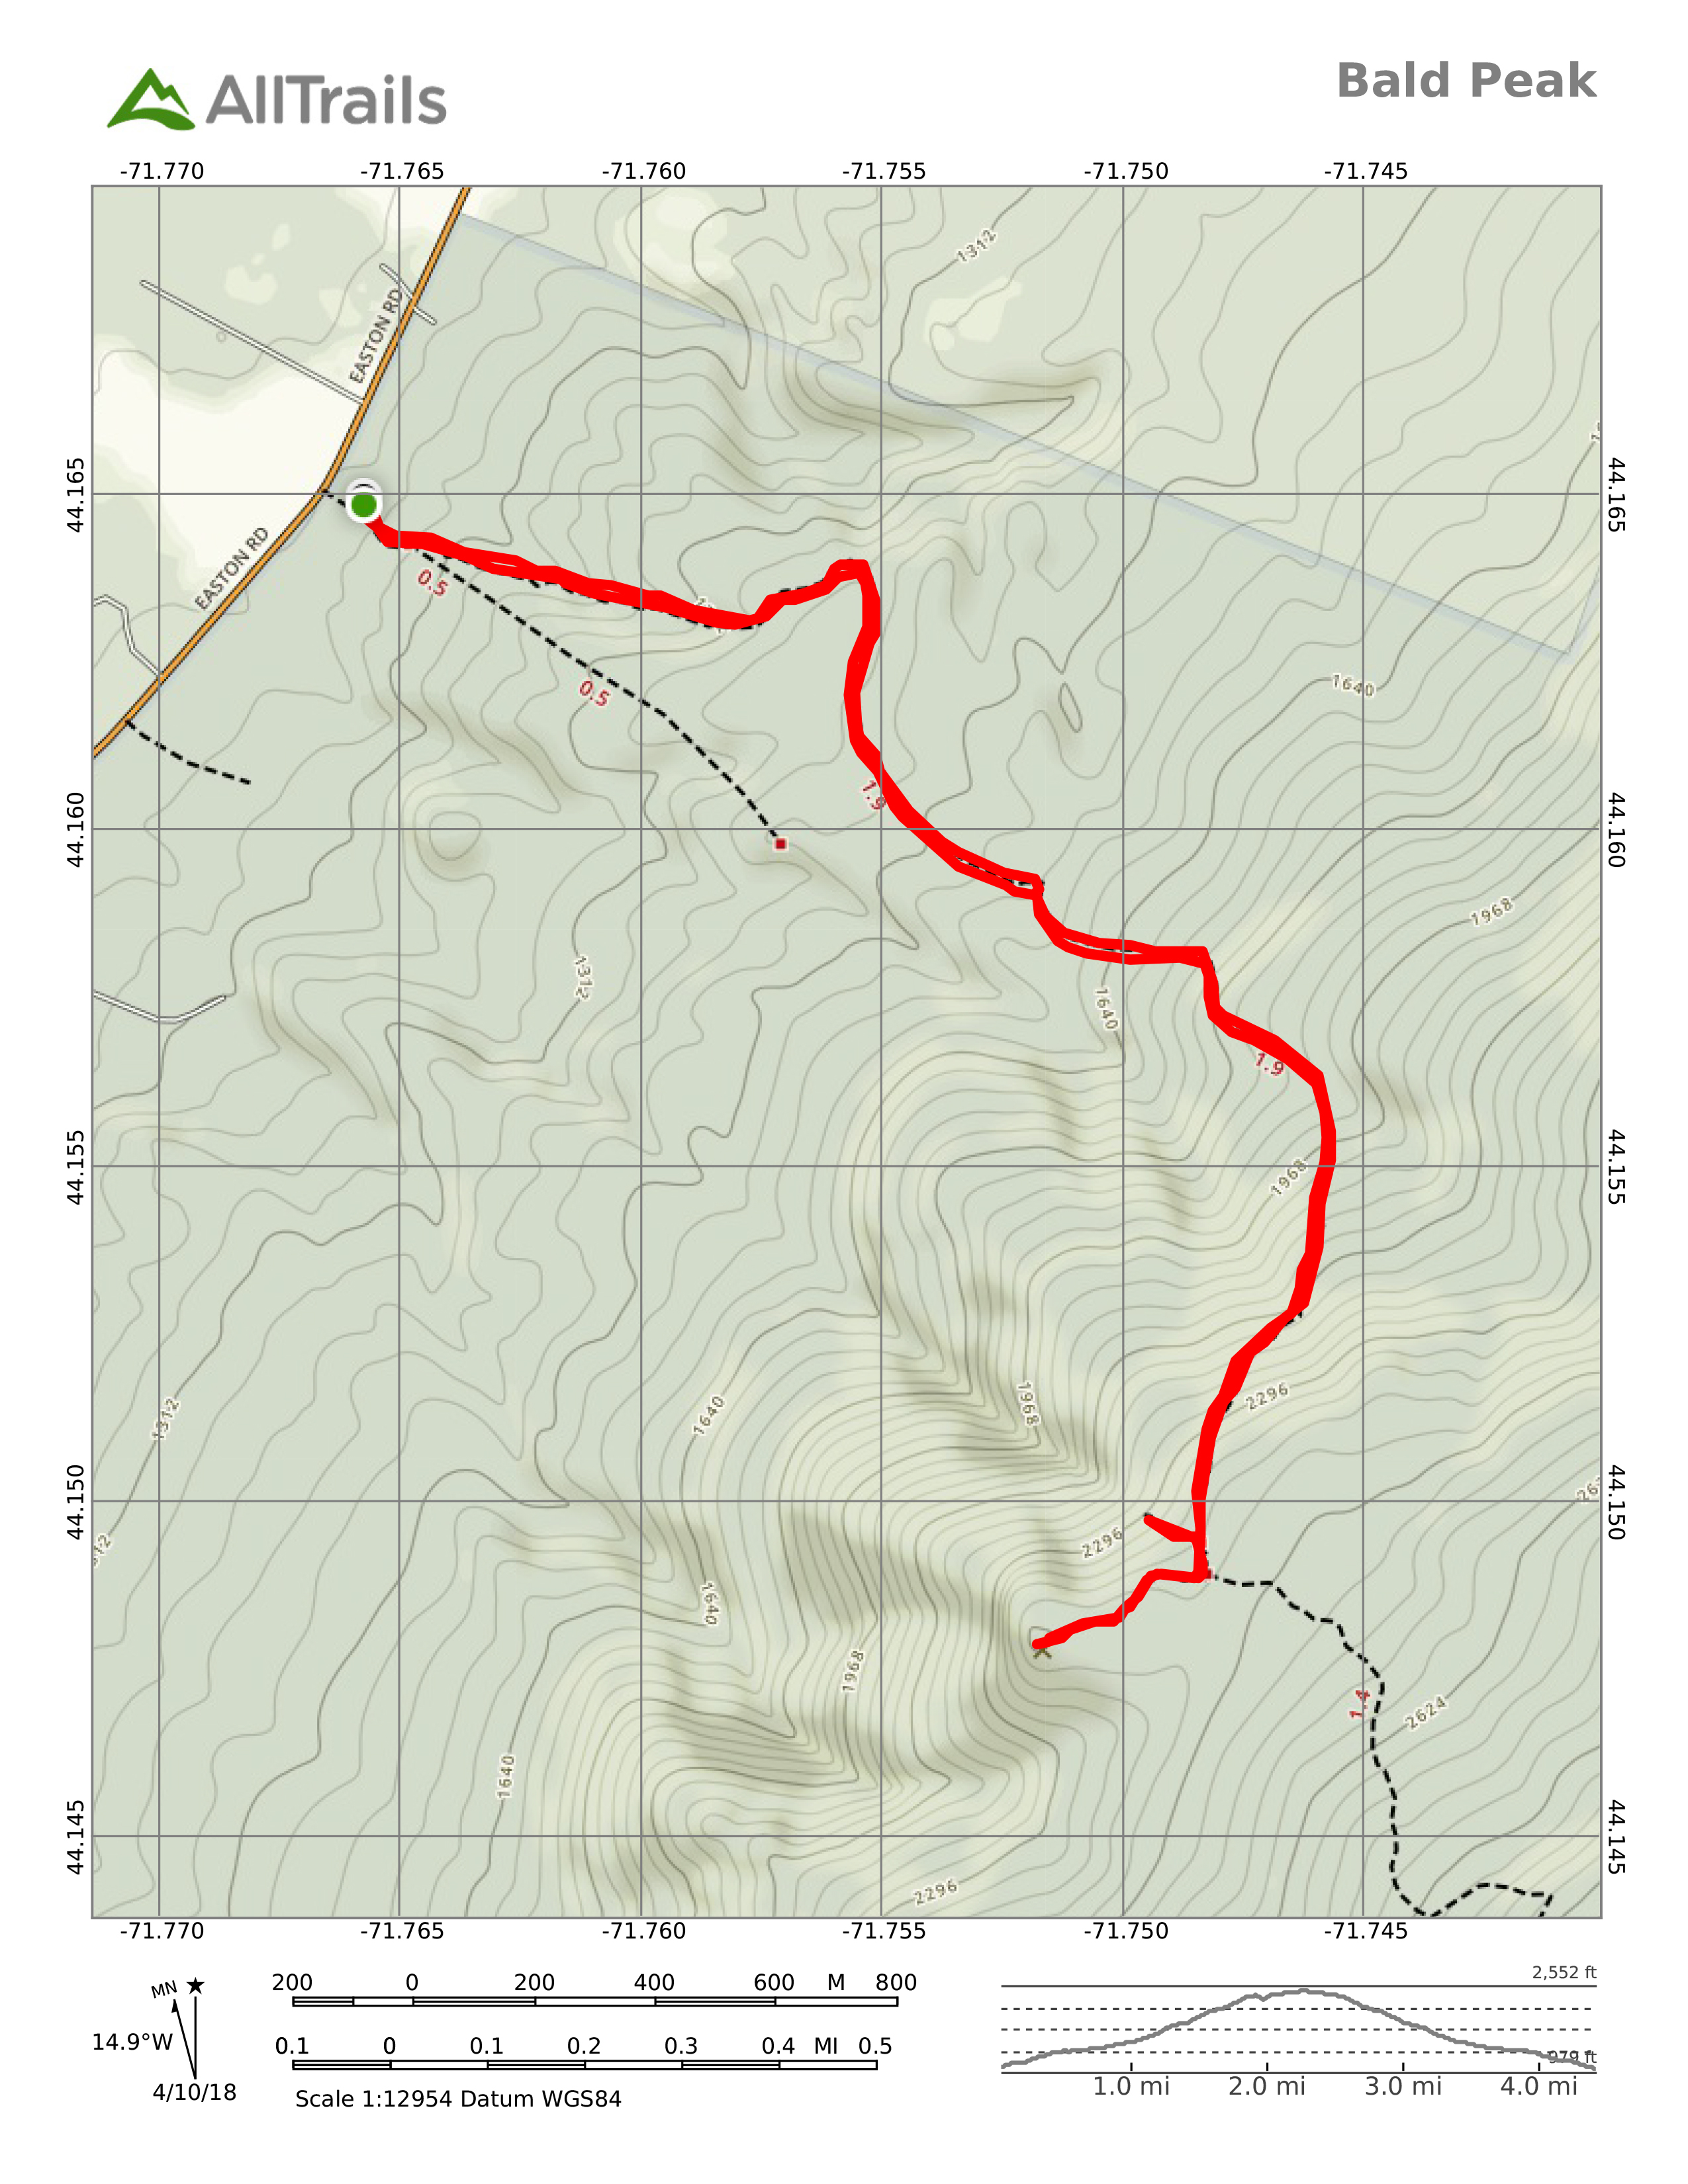