Mt. Cardigan (NH)

Special: New Hampshire Edition

Introductory Guide to Visiting the White Mountains

This moderate 3.3 mile hike takes you to the summit of a beautiful,  bare mountaintop complete with a fire tower.  Views from the summit look across three states.

View the Full Album of Photos From This Hike

Views from the Summit of Cardigan
Even though Cardigan is a small mountain by New Hampshire standards, it still offers dramatic views. Below:  Adam begins the ascent of the West Ridge Trail; Trees give way to open rock;  Cairns mark the way across the rocky mountain top.

Trailhead of Cardigan West Ridge Opening Views on Cardigan Cairns as Trail Markers

Christine Says…

Standing at just 3,155 feet, Cardigan is a diminutive mountain compared to many of its neighbors. Though it lacks in elevation, it still offers a bald, rocky summit and panoramic views that allow you to look across New Hampshire and into both Maine and Vermont.

We thought it would be a great first hike on our trip – kind of a White Mountain warm-up.   We were still pretty tired from the 12-hour drive up, but we set out early Sunday morning.  We arrived at the parking lot in Cardigan State Park and found only a few other cars, despite the day being sunny and pleasant.

There are several routes up Cardigan.  We chose the ascent recommended by the Darmouth Outing Club, the West Ridge Trail, which climbs 1200 feet over 1.5 miles to the summit.  The trail started out behind a small picnic shelter.  It climbed quickly uphill through classic New England forest – lots of pines and white birches.  As we climbed higher, we traversed several small streams and muddy areas on small footbridges and planks.  There was even one tiny waterfall cascading over a slide of smooth rock.

Rough Terrain on Cardigan
Most New Hampshire mountain trail require negotiating rocks, roots and mud. Below: Classic New England woods – pines and birches; Adam crosses a plank over a muddy area; Our first open views on the trail.

Birches and Pines Crossing Mud First Open Views on Cardigan

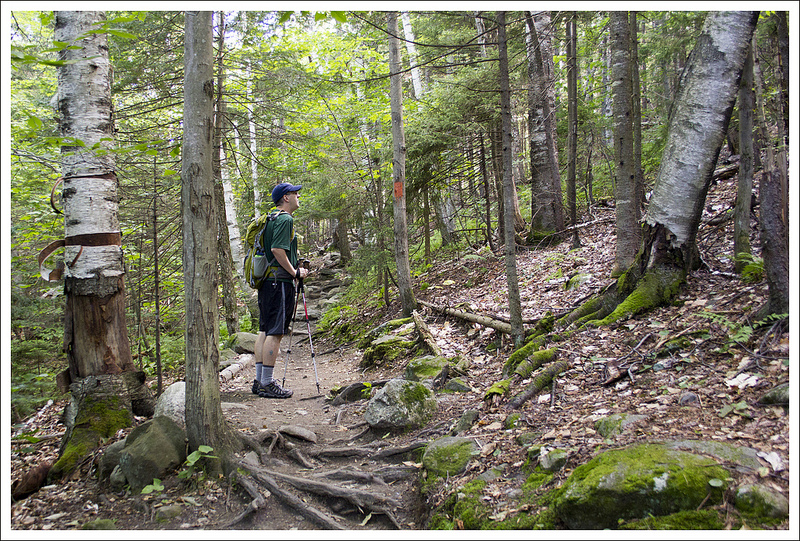
After the junction with the Skyland Trail, we continued up the West Ridge on increasingly steep and rocky terrain.  Soon the trees gave way to a smooth rock dome, and instead of orange blazes the route was marked by cairns (pyramid-shaped piles of rocks).  Every time we paused, we took a moment to gaze backwards – the view was growing more and more spectacular with every step.

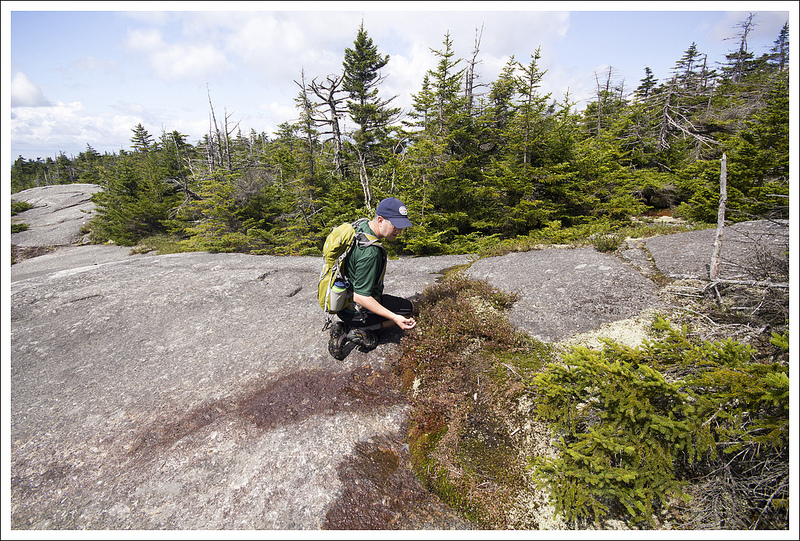
The last push to the fire tower was fairly steep, but once we reached the lookout the vista was open in every direction.  It was also a lot colder and windier.  Without the shelter of trees, the wind was whipping 25-30 mph. We explored the summit for a while – looking over toward the Presidentials, spotting the wind turbines on the ridge next to my parents’ house and guessing the names of lakes we could see from the top.  Cardigan is made of Kinsman Quartz Monzonite, a rock similar to granite.  It’s beautiful and almost shimmers and sparkles in the sun.

To make the hike a little more diverse, we decided to descend by the South Ridge Trail. This took us by the Fire Lookout Cabin and the South Peak and Rimrock summits.    We enjoyed a couple more beautiful views.  It was fun to look back up at the fire tower from the South Peak and marvel at the terrain we covered. This part of the trail also offered a bounty of wild blueberries.  The berries were perfectly ripe – the ideal combo of sweet and tart.  I know we have wild blueberries in Virginia, but I would swear the ones in New England taste better!

Mt. Cardigan Fire Tower
The Mount Cardigan Fire Tower. Below: Cairns mark the way as the fire tower comes into view,  the steep descent; the rock was steep and slick.

Approaching the Fire Tower Descending Cardigan Slick Rock

We didn’t expect the trail down to be so steep and rocky (especially the section after we crossed the Skyland Trail again), or to get caught in a pop-up rainsquall.  Weather really does change in an instant in New Hampshire! I had my rain jacket in my backpack, but we were so close to the end of the trail that we just picked up the pace and jogged the rest of the way back.   There’s a lack of photos for the portion of the trail that required us to run through the rain, but overall you get the gist of what this trail is all about.

When we got back to the car, the parking lot was jam-packed.  Several cars were circling like vultures to claim the spot we were about to vacate.  Soon, we were on our way, headed in the direction of Canaan, NH.  We decided to grab lunch at a little diner-like place called ‘Dishin’ It Out’.  As it turned out, Canaan was holding it’s Old Home Days weekend when we visited.  Old Home Days are a New England tradition, kind of a mix of a homecoming and a fair.  There were food stands, craft vendors, fresh produce, local maple syrup, softball games and even cow chip bingo.  It was a fun ending to our first hike of the trip!

Fire Tower
The summit is dominated by the fire tower. There are great views and lots of small pools on the summit.

Adam Says…

As Christine mentioned, this was a great introduction to hiking in the White Mountains.  As we were driving along to Mt. Cardigan State Park, moose crossing signs made us excited about the possibility of spotting one of these elusive creatures.  We weren’t lucky enough to spot any moose, but as we got closer and were driving into the wooded park area, we knew we were about to take on a classic New England hike.  You can download a trail map here.

The trail started off with a few stairs and then started a rather gradual uphill climb.  At .4 miles, the trail intersects with the South Ridge Trail, our return route.  We stayed on the West Ridge Trail and continued the climb.  At .9 miles, the trail intersects with the Skyland Trail.  Continuing on the trail begins to open up to more views and as you continue to climb, the trail rises above the treeline.   At this point, you follow carefully-placed cairns until you reach the summit.  We passed a sign that showed the intersection with the Clark Trail,  reaching the summit and fire tower at 1.4 miles where the wind was blowing strong and cold.  Even though the cold air had my nose running, I didn’t feel like getting out my jacket.  The fire tower was locked but one of the sides served as a good protector against the wind.

We shared the summit with a couple of guys that were using a mirror to signal someone down at the lodge where they were staying.  I never could tell if they were returning signals back to them.  We stayed at the summit before making our descent down.  We decided to make a little loop of our hike and descended back to the sign that showed the intersection with the Clark Trail.  We followed the yellow-blazed Clark Trail as we sharply descended the mountain to connect us to the South Ridge Trail, leading us past a locked building.  Passing the building, we started to spot blueberries all around.  At 1.75 miles, the trail intersected with the orange-blazed South Ridge trail.  We took the South Ridge Trail and it was fairly level and winded through a low-brush area until we reached the South Peak.  We continued along and met the summit of Rimrock at 2.1 miles.

Rimrock
From Rimrock, we could see a rainsquall approaching. Below: The fire lookout cabin; Adam picking blueberries; From South Peak you can look back toward the fire tower atop Cardigan.

Fire Lookout Cabin Picking Blueberries South Peak View

At this point, the South Ridge trail crosses the Skyland Trail and then changes its blaze color from orange to white.  This part of the trail was very steep and rocky, reminding us of some of the tough climbing down we did from Grandfather Mountain in North Carolina.  We pressed on down this tough section of trail, wishing we had taken the Skyland Trail back to the West Ridge Trail (which is what we would both recommend to save the strain on your knees).  At 2.9 miles, the South Ridge Trail finally ended and intersected back with the West Ridge Trail. We took a left here and made our way back to our car at 3.3 miles.

The downhill from Mt. Cardigan had Christine worrying about her knee, especially when the rain started.  We had to move quickly for the last .4 miles.  When we got to the parking lot, the lot was now overflowing with cars.  We were so glad that we started the hike early and that we had good views at the top.

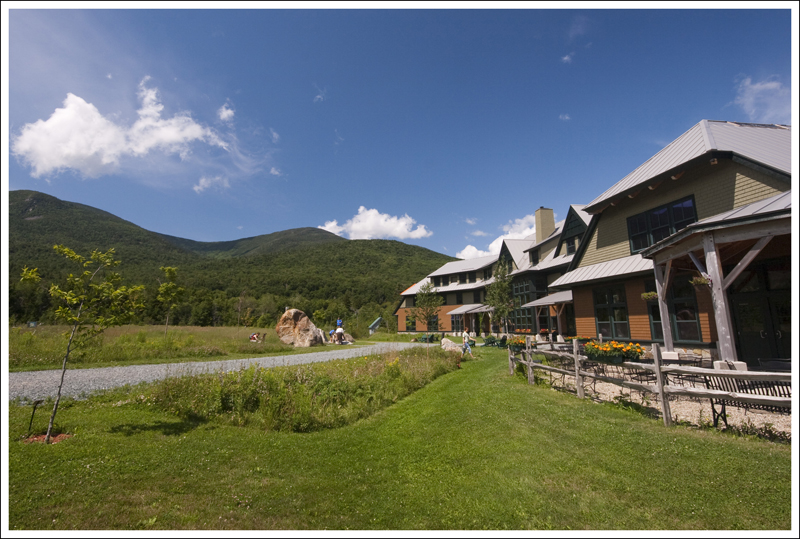
Mount Cardigan has been a popular place for hiking since the 1800s.  In 1855, a forest fire destroyed most of the trees at the top of the mountain, which has left it as the bald that you see today.  Because of the ability to see from the summit, a wooden fire tower was built here in 1904, to be soon replaced with a steel tower in 1924.  On a clear day, you can see Mount Washington and other peaks in the White Mountains of New Hampshire, Pleasant Mountain in Maine to the east, and Camel’s Hump in Vermont to the west.  Some people choose to stay at the nearby Cardigan Lodge, operated by the Appalachian Mountain Club, and hike an alternate route to the summit for 5.2 miles roundtrip.

Descent into the Woods
The descent into the woods was steep and rocky. Below: More steep descending.

Steep Cardigan

The panoramic scenery from the top was truly breathtaking.  Based on what we had hiked before in New Hampshire to this point, it was one of the best views we had seen up here.  Of course, we were just getting started for this trip and we ended up having some other hikes take the prize for best views here.  However, you won’t be disappointed in hiking up to Mt. Cardigan on a clear, summer day.

Trail Notes

  • Distance – 3.3 miles
    (Check out the stats from MapMyHike)*
  • Elevation Change – About 1250 ft.
  • Difficulty –  3.  By Virginia standards this is a moderate hike, but by New Hampshire standards it’s an easier hike that still offers great views.
  • Trail Conditions – 3.  Like most New Hampshire trails, this trail is a mix of smooth rock, roots and mud.  Trail builders have done a great job building bridge and planks to traverse muddy areas.
  • Views – 5. Spectacular… if you can see mountains in three different states, you know it’s good!
  • Waterfalls/streams 2.  There are small streams, but really nothing scenic or noteworthy.
  • Wildlife – 2. We saw a red squirrel and a variety of birds.
  • Ease to Navigate – 4. Trails are well marked and free trail maps are available at the trailhead.
  • Solitude – 1.  If you start early, you can avoid crowds, but this is a popular trail.

Download a trail map (PDF)

A friend of mine (and native New Englander), Ben Kimball, sent me some additional resources! Check out his brochure about the ecology of Mt. Cardigan.  The publication also includes an alternate hike route starting from the AMC Lodge. He’s also provided a link to a page with photos and more information about the mountain hosted by the New Hampshire Division of Forests and Lands. Thanks, Ben!

Directions to trailhead: From Route 4, head north on NH-118/Dorchester Road.  In .5 miles, turn right on to Cardigan Mountain Road.  Stay on this road for close to 4 miles until you reach the parking lot area.   The West Ridge Trail marker is on the northern end of the lot.

* MapMyHike is not necessarily accurate, as the GPS signal fades in and out – but it still provides some fun and interesting information.

West and East Rattlesnake (NH)

Special: New Hampshire Edition

Introductory Guide to Visiting the White Mountains

This fun, four-mile loop hike offers gorgeous scenery and amazing views with not much work.  The trail takes you across the summits of two small mountains – known as East and West Rattlesnake – overlooking the Squam Lakes.

Adam and the Rain Storm
Adam watches a rain storm pass over the Squam Lakes.  Below: The trail has many steps built into it.

Old Bridle Path

Adam Says…

Since we had already done a bunch of hikes to waterfalls over the last few days, we decided it was time to do a hike with some views.  We waited around in the morning due to rain and an overcast sky, but we caught a break shortly after lunch and decided to head out to the Rattlesnakes.  As Mark Twain said, “If you don’t like the weather in New England, wait a minute.”

We started the trail up the Old Bridle Path, which takes off from the marked parking lot for West Rattlesnake Mountain.  This area includes a lot of crossing trails that are all yellow-blazed, so you will need to pay attention to signs to be sure you are going the way you want.  The hike was a continual uphill with lots of steps built into the trail.  We found this part of the trail to be very well maintained and you will see lots of people on this section of your trip.  At .75 miles, you will come to a fork.  The right goes out to a nice overlook, but the left is where you will continue the trail.  At .9 miles, you will reach the summit of West Rattlesnake Mountain.  Look on the ground to find  a USGS marker to mark the elevation.

From the summit, we then took the Ridge Trail which leads to East Rattlesnake Mountain (one option is to take the Pasture Trail to the East Rattlesnake Trail, but that has a lot of elevation loss and gain.)  The Ridge Trail descends about 300 feet of elevation into a thick quiet wood.  Here is where the mosquitoes were unleashed on us since the breeze was non-existent to blow them away.  At 1.3 miles, you will reach a junction with the Col Trail, but continue on the Ridge Trail until 1.7 miles when you reach the East Rattlesnake Mountain summit.

First Viewpoint
The first viewpoint from high up comes along a small spur trail. Below: The Armstrong Natural Area sign provides some historical information about the area; Several trails intersect in this area; Watching the rain storm pass over the Squam Lakes.

Armstrong Natural Area SLA Sign West Rattlesnake

We headed back from the summit and at 2.1 miles, we took a right on the Col Trail.  The Col Trail descends a few hundred feet and was very overgrown and poorly maintained in several areas.  At 2.8 miles, it leads to a fire road.  Take a right on the fire road.  At 3.0 miles, you will reach Route 113.  Taking a left on the road, you will head back to your car to make this a four-mile loop.

Looking back, we might have decided to do this as an out-and-back hike and not ventured onto the Col Trail.  Walking on roads is never as fun as trails and it seems that the road goes on forever.

Both summits give you expansive views of the Squam Lakes and you can likely see several mountains surrounding you.  I was amazed at how many people were on West Rattlesnake Mountain and we only saw one other person at East Rattlesnake Mountain.  So, you can easily escape the crowds if you want with just a little longer hike.

There are a number of geocaches in the area for anyone interested:

Christine Says…

On this trip to New Hampshire, we spent far more time hiking to waterfalls and ponds than we did hiking to mountaintops.  We decided to save our summit hikes for days that offered clear views of the valleys below.  Unfortunately, we had a lot of hot, humid days that put the high peaks of the White Mountains into the clouds.  I know some people just like the workout and the act of hiking, regardless of whether or not there is a view.  I do too, but only to an extent. I can’t help but feel a little let down when a great view is covered in clouds and fog.

The morning we planned to hike the Rattlesnakes had been forecast to be sunny and pleasant.  However, in keeping with the theme for New Hampshire’s changeable weather, we woke to soggy clouds and pop-up showers.  The radar map indicated clearing as the day went on, so we sat and waited at the house.  When the sun finally broke through the clouds, we hopped in the car and raced off the trailhead.

The hike was easy and pleasant to the top of West Rattlesnake, and the views couldn’t have been nicer.  They reminded me a lot of the views we had from the Mt. Morgan – Mt. Percival hike.  (You can actually see the Rattlesnakes from above on that hike.) Both hikes overlook the Squam Lakes, but Mt. Morgan – Mt. Percival goes to higher mountains and offers a loftier view. If I were pressed to choose, I would say the Rattlesnakes view is nicer, but only because it’s a little closer to the lake.  The Squam Lakes Association does a fantastic job managing and maintaining the trails in this area.

East Rattlesnake
The view from East Rattlesnake is pretty and offers quite a bit more solitude. Below: The trails are nicely marked and expertly maintained by the Squam Lakes Association; Adam walks along the fireroad that joins the Col Trail to Route 113.

Col Trail Fire Road

Atop West Rattlesnake, we were able to sit on a sunny rock ledge and watch a leftover rain squall pass at a distance across Squam Lake.  The clouds were so dramatic and it was interesting to see the gray sheet of rain pass over the water.

We decided to continue along the trail and visit East Rattlesnake as well.  Although it’s less popular and has a smaller rock ledge, the other Rattlesnake offers views just as nice as its “sister”.  We had a couple options for hiking over to East Rattlesnake.  At first, we considered hiking the Pasture Trail so we could check out Five Finger Point.  A friend of mine from Flickr mentioned one of his favorite swimming spots was on the point, so I thought it might be fun to go check out the spot.  But, in the end, we decided to take the shorter route across the Ridge Trail.  The bugs ate me alive!  This trail was the one place in New Hampshire that my liberal application of DEET didn’t seem to deter the mosquitoes.  Two weeks after the hike, I still have a few marks leftover from bites I got on that hike.

On the return from East Rattlesnake, we wanted to get out of the woods and away from the bugs as quickly as possible.  Instead of doing the hike as an out-and-back, we followed the Col Trail back to the road and finished a loop with a mile of walking along Route 113.  The road walking wasn’t particularly fun or scenic, but at least I was away from most of the bugs.

Trail Notes

  • Distance – 4 mile, loop
  • Elevation Change – About 800 ft.
  • Difficulty –2.5. The walk up to West Rattlesnake is very easy.  The hike up East Rattlesnake is a little tougher.
  • Trail Conditions –3.5. The trail is very nicely maintained.
  • Views – 5. Stunning views of the Squam Lakes.
  • Waterfalls/streams 0. None to mention.
  • Wildlife –0. Unless you count mosquitoes and biting flies.
  • Ease to Navigate – 4. Although several trails cross in the area, everything is clearly marked.
  • Solitude – 1. On West Rattlesnake, you won’t get any solitude.  East Rattlesnake is quieter.  We saw only one other person there, while we saw close to 20 people atop West Rattlesnake.

Directions to trailhead:

From I-93, take Rt. 3 east to Holderness. From Holderness, follow Rt. 113 (a slow, curvy road) northeast for about 5.5 miles. Just past Pinehurst Road, park in the small lot on the right side of the road. The Old Bridle Path starts at the far end of the parking lot.

Arethusa Falls and Bemis Brook (NH)

Special: New Hampshire Edition

Introductory Guide to Visiting the White Mountains

Note – 10/11/10: In their October issue, Backpacker Magazine inaccurately listed Arethusa Falls as a Virginia destination. The falls are in New Hampshire.

This three mile hike leads to Arethusa Falls, which is (arguably) New Hampshire’s tallest single waterfall. The optional arm along Bemis Brook is challenging in spots, but offers more lovely stream scenery.

Arethusa Falls
Arethusa Falls might not be the most photogenic of New Hampshire’s many waterfalls, but it is likely the  tallest. Below: The optional side-loop trail along Bemis Brook takes you past Coliseum Falls.

Coliseum Falls

Christine Says…

We originally planned on combining these two trails with Frankenstein Cliffs to make a loop, but unfortunately we ran short on time and just did the three mile out-and-back.

The trail along Bemis Brook was extremely tough walking!  In addition to the roots, rocks and mud, we suffered a full-on mosquito assault.  I spent a lot of the walk along the trail cursing and flailing my arms wildly.  Even with DEET, the little buggers hovered right around my eyes, ears and nostrils, constantly buzzing in too close and getting caught in my eyelashes.

There were several very pretty small waterfalls along the Bemis trail.  Coliseum Falls were especially picturesque.  Since it was such a sunny day, I didn’t bother with a tripod.  Long exposures weren’t a possibility in the harsh sun, so I just took snapshots along the way.  The climb from Bemis Brook back up to the Arethusa Trail was practically vertical.  We had to climb, hand-over-hand, grabbing roots and rocks to drag our way up the mountainside.  There was one blown down tree that was particularly difficult to negotiate.  It was one of those fallen trees that was a little too high to climb over, but a little too low to scramble under.  I decided to clamber over it, and ended up getting my boot toe caught on the tree trunk.  I took a spectacular fall down onto the roots and rocks.  It absolutely left a big black and blue mark!  I was really glad when we finally saw the junction with the Arethusa Trail!

Frankenstein Cliffs
This trailhead for this hike offers beautiful views of Frankenstein Cliffs looming overhead. The trail has an option to lengthen the hike by a few miles to gain access to the top of the cliffs. We ran out of time and had to pass on that option. Below: Trails in the area are clear and well-marked.

Trail Sign

The rest of the way to the falls was much easier.  It was uphill and muddy in spots, but the trail was well-graded and nice to walk along.  The last stretch to Arethusa Falls led downhill into a chasm that opened to an amphitheater like setting.  The falls were very impressive!  The water falls like lace over the sheer rock face.

On the hike back, Adam and I waffled about whether or not to continue our hike up to Frankenstein Cliffs.  We even started down the Cliffs Trail, before turning back in less than a tenth of a mile.  We had plans to meet my parents in North Conway, and we just didn’t have time to finish the loop.

Instead, we visited the Appalachian Mountain Club’s Highland Center and got a few Cokes and relaxed in their lobby.  After we met up with my parents, we had an amazing lunch at Moat Mountain Brewery & Smokehouse.  If you’re ever in the area, don’t miss their barbecue and microbrews!

Adam Says…

Arethusa Falls is a gorgeous 160 foot waterfall that is very popular with families.  We started on the blue-blazed trail near the railroad tracks at the parking lot.  After about .1 miles, you come to a junction with the yellow-blazed Bemis Brook Trail.  We decided to do this side trail, since it goes partially along the water, guiding you to a few pools and smaller falls areas.  Once you come up to the Coliseum Falls area, you will need to climb up almost vertically up the trail to join back with the Arethusa Falls trail.  If you do want to do the Bemis Brook trail you should do this at the start of your trip rather than trying to descend it at the end.  This part of the trip was tough and takes a lot of strength out of you in a short distance, so plan appropriately.  Once we reached the junction at the top, we took a left to return to the Arethusa Falls trail.  The trail continues to go uphill until you reach a junction with the Cliffs Trail.  From this point, you continue downhill until you reach the falls in .2 miles.  You return the way you came, but you will avoid the Bemis Brook Trail on the way back and just stay on the Arethusa Falls trail to reach your vehicle.

Arethusa Falls was named after the poem, “Arethusa” by Percy Bysshe Shelley.  The falls were discovered by Edward Tuckerman, but named by Moses Sweetser and Professor Huntington in 1875.

Bemis Trail
The Bemis Brook Trail follows a beautiful stream for most of the way, until you get to the portion where it climbs, nearly vertically, back up to meet the Arethusa Trail. Below: The Arethusa Trail is much easier to walk – smooth and well-graded, compared to the Bemis Trail.

Arethusa Trail

While I was off hunting for a geocache and Christine was taking some photos, she struck up a conversation with a man hiking solo on the trail.  When I got back to them (after sliding down the hillside 20 feet on my butt), he wanted to take a look at my map.  He was thinking about doing the Frankenstein Cliffs trail and then looping back to make it to his car.  He was to meet up with his wife in less than two hours to take a ride up Mount Washington on the cog railroad.  We told him that it might be hard to make it in time.  He decided to go for it, but I don’t think there was any way he could have made it back in time for his trip up.  We both pictured his wife riding solo up the railroad, muttering to herself, and awaiting the moment she could give her husband a piece of her mind.

There are two geocaches you can get on the trail:

We wish we had more time to do the Frankenstein Cliffs trail (these are named after an artist, not the doctor who created a monster), because we have heard that it does give you some nice views from the top.  The trail is allegedly muddy and not as well maintained as the Arethusa Falls trail.

Trail Notes

  • Distance – 3 miles, out-and-back (2.8 if you leave the Bemis Brook Trail off and just stay on the Arethusa Trail the entire way)
  • Elevation Change – 650 ft to the falls.  There might be a bit more climbing if you do Bemis Brook.
  • Difficulty – 3. The Arethusa Trail is squarely moderate.  The Bemis Brook trail is more difficult with one killer climb uphill at the end.
  • Trail Conditions – 2.5 The Arethusa Trail is in nice condition most of the way.  There are some muddy spots and we encountered a flew blow downs.  The Bemis Trail is not easy walking.  There are numerous fallen trees, tricky footing and if it’s the slightest bit damp, the trail is very slippery.
  • Views –0. You’ll be in the woods the entire time.
  • Waterfalls/streams 4. The falls are large and impressive, but not terribly photogenic.
  • Wildlife – 0. The heavy human traffic probably scares any wildlife away.
  • Ease to Navigate – 5. Trails are marked and easy to follow.
  • Solitude – 2. Because the hiking is a little more challenging, you won’t see the same crowds as you do at Flume Gorge or Sabbaday Falls.

Directions to trailhead:
From I-93, follow New Hampshire Route 302 west through Crawford Notch State Park.  A few miles past Sawyer Rock Picnic area you will see the Arethusa Falls parking area on the right.

Sabbaday Falls (NH)

Special: New Hampshire Edition

Introductory Guide to Visiting the White Mountains

More of a pleasant stroll than an actual hike, this gentle path leads to one of New Hampshire’s most beautiful waterfalls.  The entire walk is only a mile (round-trip), so this waterfall is easily accessible by nearly anyone, regardless of age or fitness level.

Sabbaday Falls
Sabbaday Falls has two sections.  The top is a large, beautiful cascade. The bottom section takes almost a right angle through a slot in the rock. Below: A view looking downstream through the slot

A view looking downstream through the slot

Adam Says…

Sabbaday Falls has to be one of the prettiest waterfalls I have visited.  There is a reason it is on the current cover of the White Mountains Visitor Map & Guide – it is very photogenic.

The falls were once known as Church’s Falls, named after Frederic Church, who was a landscape painter.  The area is now known as Sabbaday Falls. The name was allegedly coined by some road builders who stashed their tools near the falls, so they wouldn’t have to carry them home at the end of the building season and could return to them the next year.  Before leaving on a Sunday morning they named the area for the “Sabbath Day” or shortened to “Sabbaday”.  Later, the Shackford family had a house nearby after the Civil War.  They housed guests visiting the White Mountains and ushered them to popular spots, such as these falls.

The Pool at the base of Sabbaday Falls
The pool at the bottom of Sabbaday Falls is lovely and green! Below: A wider view of the pool and lower half of the falls.

Wider view of the pool.

This is a fee area, so you will need to deposit $3 for a parking pass for the area.  The waterfall has an overall drop of 35 feet, but the main plunge is 22 feet.  The pathway up the stairs gives you very close looks along the entire waterfall.   Similar to much of the interesting geology in the area, this gorge was formed by a glacier carving through the rock.  You can see near the base of the falls, some clear lines of black basalt dikes mixed in with the granite.  These are formed from the rapid cooling of molten rock.

For those hoping to bag some geocaches, there are a few in the area:

This is a very easy “hike” that is very family-friendly and takes you to a great place to get some photos.  I highly recommend a trip next time you are in the White Mountains.

Christine Says…

This short one-mile walk can barely be considered a “hike” – it follows a smooth, well-graded path and several sets of wooden stairs to a view of spectacular Sabbaday Falls.

The wide, crushed stone trail runs parallel to crystal-clear Sabbaday Brook.  At .3 miles, you’ll arrive at a clear, green pool bottomed by round stones.   Water enters the pool through a narrow chute between two sheer rock walls.  At the top of the chute lies the lower half of the falls.  This section of the waterfall is the smaller of the two.   Even though it’s smaller, it’s no less pretty.  The rock formations are dramatic in this section.  There is even a perfect, round “pothole” in the stone.

Lower Sabbaday and the Slot in the Rock
Lower Sabbaday and the Slot in the Rock.  Below: The area includes several informational plaques about the area’s history.

Information About Sabbaday Falls

The top of the falls is about tenth of a mile beyond and is reached via a couple walkways and sets of steps.  The upper falls are quite a bit taller, and sit at almost a right angle to the lower falls.  Without a doubt, this is one of the prettiest waterfalls I’ve seen in the area so far.

The trail has a railing and staircases to make viewing safe and easy from almost any angle.  There are signs all up and down the trail indicating that swimming is prohibited in the falls.  However, when we visited, there was a group of four unsupervised kids that kept getting into the pool at the very top of the waterfall.  It was pretty dangerous.  They generally acted like idiots and were the main reason we didn’t hang around the falls for very long.

Sabbaday Falls is very popular, and you should expect thick crowds.

Trail Notes

  • Distance – 1 mile, out-and-back
  • Elevation Change – 125 ft
  • Difficulty – 1. Very easy!
  • Trail Conditions – 5. Smooth and well-graded with well-planned stairs and railings.
  • Views –0. You’ll be in the shady woods the entire time.
  • Waterfalls/streams 5. Simply gorgeous!
  • Wildlife – 0. The heavy human traffic probably scares any wildlife away.
  • Ease to Navigate – 5.  Impossible to get lost.
  • Solitude – 0. Prepare for heavy crowds. People love Sabbaday Falls!

Directions to trailhead:
From Conway, NH follow the Kancamagus Highway for about 15 miles.  The trail parking is well-marked.

Greeley Ponds (NH)

Special: New Hampshire Edition

Introductory Guide to Visiting the White Mountains

The Greeley Ponds trail is a popular hike that leads to a pair of beautiful ponds surrounded by the White Mountains.

Upper Greeley Pond
We didn’t have great weather for our hike to the Greeley Ponds. It was very muddy and overcast, but the ponds were still really pretty! Below: There were several small stream crossings along the hike; We saw Indian Pipes growing along the trail; the terrain in this area is very wet and dark, making it a perfect place for mosses and mushrooms.

Stream Crossing Indian Pipes Mushrooms

Christine Says…

We got up early to take a scenic drive and do some hiking along the Kancamagus Highway.  We decided to check out the trail leading to the Greeley Ponds.  This hike intrigued me, because it is so different from anything we have in Virginia.  Ponds and lakes are not terribly common in the Blue Ridge, so I thought a hike leading to two ponds surrounded by mountains sounded really perfect.

The trail did not disappoint!  The woods in New Hampshire are so thick and green and different.  I love the abundant evergreens in the New England woods. Everything is so fragrant, lush and moss-covered.  Old fallen trees become nurseries for tiny mushrooms and tree seedlings.  Streams trickle in seemingly every direction.  Even the birds are different – singing unfamiliar songs up in the trees.

The Greeley Ponds Trail is relatively easy – with only about 500 feet of elevation gain over 2.5 miles. The things that slow you down are the roots, rocks and mud.  You have to watch your feet with every step.  We found our trekking poles to be very helpful.  Many places along the trail are traversed using wooden planks and split logs. There are several small streams to cross along the way, hopping from rock to rock.  Some of the trail system is a little confusing because cross-country skiing trails cross the hiking trail in many places.  The key is to look for yellow blazes.

At the 1.7-mile mark, the Upper Greeley Pond comes into view.  There are several places to climb down to the shoreline and take in views of the pond.  Although Upper Greeley is the smaller of the two ponds, I found it the prettier of the two. I loved seeing the towering mountains all around the pond.

Lower Greeley Pond
Lower Greeley Pond has a lot of dead trees at one end, giving it a swamp-like appearance. Below: Trailhead sign along the Kancamagus Highway; New Hampshire’s “Hike Safe” Signs are posted at all trailheads. Hike Safe (http://www.hikesafe.com) was developed by the state to help hikers become safer in the outdoors; Adam checks out the trail map illustrating skiing and hiking trails.

Greeley Ponds Trail Sign Hike Safe Trail Maps

Lower Greeley Pond is just several tenths of a mile past the end of Upper Greeley.  There is a big stand of what appears to be dead hemlocks at the end of the pond.  It gives the pond a swamp-like appearance. The lower pond also has fewer places to enjoy a shoreline view.

We turned around for our return hike a little past the end of Lower Greeley Pond.  Although, if you want a longer hike, the trail continues, following the Mad River all the way to Livermore Road.

We didn’t see a soul on the hike out to the ponds, but passed numerous groups of hikers on the return trip.  Greeley Ponds is clearly a popular hike in this area.

Adam Says…

The Greeley Ponds Trail is close to the western side of the Kancamagus Highway, so it was our first stop along the way.  The trail has a small parking lot that tends to get crowded during the busy summer.  This is a fee area, so you’ll need to deposit $3 in an envelope and display your pass.

The trail wasn’t difficult, but due to the recent rain, it was a little muddy and slick in spots.  I also felt overwhelmed by mosquitoes and had to flail around and swat them at every step.  It reminded me of the quote from Lord of the Rings when Merry asks, “What do they eat when they can’t get hobbit?”.  Well, my answer to Merry is “me”.  The bug repellent held many off, but other than taking a DEET bath, you’ll likely find a bite or two without multiple applications along the hike.  Christine asked if I would rather have the flies and mosquitoes in New Hampshire or the gnats and ticks in Virginia.  Maybe it’s because of what I’m experiencing now, but give me some ticks and the threat of Lyme Disease over these pesky creatures.

Mossy Trail and Boardwalks
Much of the trail was traversed by boardwalks and planks. Below: The trail intersects a couple other trails; Adam enjoys the view from a small, sandy beach at Upper Greeley Pond.

Trail Marker Adam takes in the view at Upper Greeley

The yellow-blazed Greeley Ponds Trail goes for 1.3 miles until it reaches a junction with the East Osceola Trail (you could add this to your hike if you want for an additional three mile out-and-back hike). At this junction, you will see the sign stating you should reach the Lower Greeley Pond  at 1.7 miles.  The trail intersects several times with a blue-blazed trail, but this is a cross-country skiing trail to the ponds (Hikers stay off the ski trails in the winter, so they can avoid leaving footprints over the cross-country ski tracks).  Both will get you to the same place, but you’ll notice the yellow-blazed trail will be a shorter route.  Once the pond comes into view, you can see a short off-trail path to a beach-y area with good views of the pond.  Going back on the trail, you continue along the bank and can continue to get different views.  Staying on the main trail, you will reach the Upper Greeley Pond around the 2 mile marker.   There are a few good views of this longer pond for the next few tenths of a mile and then you can return the way you came.

There is no camping allowed within .25 mile of the Greeley Ponds, but we did see some illegal campsites around the area created by people that weren’t respectful of the ecosystems around the area.

The area around the ponds, especially the Upper Greeley Pond seems like a great area for birdwatchers.  We were treated with songs from warblers and the knocking of woodpeckers.

There are a few geocaches along the trail:

The hike exhibited a lot of different features of the area’s forests –  dense pines and birches, gorgeous ponds, and erratic boulders along the way.  The minimal elevation change makes this a good hike for families as long as you can maintain good footing on wet surfaces.  We saw a few groups with dogs along the trail, so it is even four-legged friendly. (Please note…dogs are not allowed on the ski trails in the winter)

Trail Notes

  • Distance – 5 miles
  • Elevation Change – 500 ft
  • Difficulty – 2. The hike has a very gradual uphill.
  • Trail Conditions – 2. Like most trails in New Hampshire, this one is rocky, muddy and covered with roots.
  • Views –2. Some nice views of the mountains at the ponds.
  • Waterfalls/streams 3.5. Ponds aren’t really lakes or streams, but they do qualify for a high rating for water features.
  • Wildlife – 2. Lots of bird species near the ponds.
  • Ease to Navigate – 3.  Pay attention to the yellow blazes and you won’t get lost.
  • Solitude – 2. This is a popular and well-traveled hike.

Directions to trailhead:
Take I-93 Exit 32 at Lincoln and go east on Route 112/Kancamagus Highway about 10.5 miles to the marked Greeley Ponds parking lot.

The Basin & Kinsman Falls (NH)

Special: New Hampshire Edition

Introductory Guide to Visiting the White Mountains

The Basin  and Kinsman Falls is a short 1.2 mile out-and-back walk to a lovely waterfall in Franconia Notch State Park.  The trail follows Cascade Brook and passes many beautiful (and popular) water features.  The falls are also called Tunnel Falls.

The Basin
The Basin is a beautiful glacial pothole at the base of this hike. Below: Kinsman Falls is a pretty 20 foot waterfall that plunges into a wide pool at the bottom; Many of the streambeds look sculpted.

Kinsman Falls Water Features along the Trail

Adam Says…

We had visited the Basin last year, but it is always worth a quick stop off I-93.  It takes only .1 mile to reach it from the parking lot.  You will see signs to lead you directly to the Basin.  The Basin was formed about 15,000 years ago as an ice sheet eroded the pathway.  According to the plaque at the site there, Henry David Thoreau wrote “this pothole is perhaps the most remarkable curiosity of its kind in New England.” Samuel Eastman called this area, “One of the most beautiful haunts of Nature, a luxurious and delicious bath fit for the ablutions of a goddess.”

There are several paths to walk along in this area to explore streams and small waterfalls.   If you go back the way you came, you will see a larger junction with a sign for Kinsman Falls being .5 miles away.  The path up to Kinsman Falls was filled with roots and rocks, so you do need to continually watch where you are stepping.  Shortly up the ascent, you will see several spots to your left along the way of the river.  These are good places to soak in the sun or to wade in a small pool.  Be careful about footing if you venture into the water, since the water does rush through these areas rapidly. Getting back on the trail, you have more of an ascent, but you will quickly come up to the sign pointing to Kinsman Falls.  The falls were very impressive as they plunged into a serene pool at the base.

View of the Mountain from Cascade Brook
View of the Mountain from Cascade Brook.  Below:  Colorful fungus on the trail;  Christine’s dad and Adam climb back up from the base of the falls.

Orange Mushrooms Along the Trail Climbing Back up from the base of the falls.

I definitely recommend checking out these areas if you are taking a trip through the White Mountains. Most people just view the Basin and some of the swimming holes along the way and don’t venture any further, but it is worth the hike up to Kinsman Falls and most families can easily make the trip.

There are several geocaches in the area:

Christine Says…

We planned to do lots of family hikes on this visit to New Hampshire, but about a week before the trip an MRI revealed that my dad had torn his meniscus.  His doctor told him to be careful and to limit activity that could extend the tear.  Sadly, this put most of his hiking plans on hold for the time being.  He did decide that he felt up to joining us on the short hike past the Basin and up to Kinsman Falls.

Like Flume Gorge, this little hike packs in a lot of impressive scenery over a very short distance.  Also, like the Flume, it is extremely popular and crowded.

The Basin is such a gorgeous spot.  I love how the water curls through the rock formation.  The rock walls of the Basin are smooth and sculpted – they almost look unnatural. The water is blue-green colored and crystal clear.  It’s one of those spots you’ll never forget!

After the Basin, the beautiful water features keep on coming!  There are so many small waterfalls and cascades along the trail, that you always hear the pleasant sound of rushing water.  A sign marks the way to Kinsman Falls, but honestly, we could say “just follow the water uphill” and you’d find your way there.

The trail was rocky and root-y.
The trail was rocky and root-y. Below:  The base of the falls was a nice place to stop and contemplate nature; Cascade Brook rushes over the rocks.

Dad on the rocks Water flowing along Cascade Brook

The trail followed alongside Cascade Brook for a half mile.  There were many little side-trails leading to scenic spots along the brook.  Dozens of people reclined on the rocks while kids used the streambed like a natural waterslide.  One mother remarked to us that her family had visited the spot two days in a row, and both her boys had worn through the backsides of two sets of swim trunks.

The trail is muddy, with a mix of gnarled roots and slick granite underfoot.  It’s all uphill, but it’s never steep.  It really is an ideal family hike.

A small sign announces Kinsman Falls.  From the trail, you get a view of the falls from above.  The twenty-foot waterfall crashes into a large, round pool in a chasm below.  There is a rough footpath down to the base of the falls – take care if you climb down – it’s slippery with numerous rocks to scramble over.

There are lots of big rocks to sit on around the edge of the pool.  It’s a nice place to relax and enjoy feeling the mist from the falls spray your face.  We were really surprised to have the falls all to ourselves.  Even though there were many people in the area, no one else was at the waterfall.  Odd – but very welcome!  On our return trip, we passed quite a few people hiking up, so I suppose we just had fortuitous timing.

Trail Notes

  • Distance – 1.2 miles out-and-back. Plus a couple additional tenths of a mile to get to and from your car.
  • Elevation Change –Around 300 feet
  • Difficulty 2. The hike is all uphill over slick granite and gnarled roots, but it is short and never steep.
  • Trail Conditions 2. The trail is extremely rocky, muddy and covered with gnarled tree roots.
  • Views –2. From the Cascade Brook streambed, you get a decent view of the mountains.
  • Waterfalls/streams 5. Nothing short of spectacular!
  • Wildlife 0. A few squirrels and chipmunks.
  • Ease to Navigate 4. After walking uphill from the Basin, look for the sign to Kinsman Falls and follow the blue blazes uphill.
  • Solitude0. This area is extremely popular.  We saw dozen of people along the way, but surprisingly had Kinsman Falls all to ourselves.

Directions to trailhead:
From I-93N. Once you enter the Franconia Notch area, take the Basin exit.  The area is well-marked and has ample parking.

Flume Gorge Loop (NH)


Special: New Hampshire Edition

Introductory Guide to Visiting the White Mountains

Located in Franconia Notch State Park, this two-mile path around the Flume Gorge showcases a lot of beautiful scenery on a short and easy walk.  If you crave solitude, this is not the place for you.  But if you don’t mind crowds and want to see some unique scenery, don’t miss a visit to this area.

Scenes from the Flume
The Flume is a beautiful and unique place. Below: Avalanche Falls is located inside the Flume; Liberty Gorge Cascade is also impressive; The trail is lined with large boulders called glacial erratics; The Sentinel Pine Covered Bridge is for pedestrians only.

Avalanche Falls Liberty Gorge Cascade Glacial Erratic Sentinel Pine Bridge

Christine Says…

Last year, when we visited New Hampshire for the first time, we went to Flume Gorge with my parents.  It was insanely crowded, unusually hot and glaringly sunny on that visit, so we decided to make a return visit on this trip – hoping that the clouds and cooler weather would keep the crowds at bay.  There were definitely fewer people this time, but that’s not to say we had solitude.  Flume Gorge is an extremely popular area. There will always be hordes of people, no matter the time of day, week or year you visit.

It’s no surprise the area draws such large crowds – it packs an amazing amount of unique scenery into an easy, two-mile loop.  For anyone who doesn’t want to walk the two miles, there is a bus that will take visitors to a drop-off point at the Boulder Cabin.  This option substantially shortens the distance and climbing necessary to see the gorge.  However, bus riders miss seeing a lot of the other impressive scenery along the loop.

The two-mile loop starts off along a shady, wooded path that climbs down to the Pemigawasset River.  In .25 miles, there is a bright, red covered bridge across the water – the bus goes through the bridge, but pedestrians cross a walkway attached to the side of the bridge.  After a short uphill, both the bus riders and the walkers arrive at the Boulder Cabin.  The building is full of exhibits – both historical and natural.

Covered Bridge
The first covered bridge in Flume Gorge is brilliant red. Below: Table Rock;  The path through the woods is peaceful and shady; Bear Cave is located near the top of the Flume; The side view of Avalanche Falls.

Table Rock Shady Trail Bear Cave Avalanche Falls

After passing the cabin, the path follows alongside an area called Table Rock.  The water in the river passes thinly over a wide, smooth expanse of granite.  A sign announces the beginning of the Flume.  The Flume is a fascinating geological area – a narrow slot canyon carved out from thousands of years of river flow over the rock.  Wooden walkways are attached to the sheer canyon walls and allow people to climb through the gorge using a series of ramps and steps.  Near the top of the Flume, visitors are treated to views of the crashing water of Avalanche Falls.  The falls take several directional turns through the Flume – each angle makes it look like a completely different waterfall. After passing the waterfall, be sure to take a quick peek inside Bear Cave.

At the top of the Flume, the trail has two options – one returns people to Boulder Cabin and the bus stop, the other follows a trail for a little over a mile back to the main entry.  If you’re able, it’s definitely worth following the longer route to see Liberty Gorge Cascade, the Pool, The Sentinel Pine Covered Bridge, the Wolf’s Den and several impressive erratics along the trail.

Water Under the Sentinel Pine Bridge
My favorite view along the trail came at the spot overlooking the Sentinel Bridge. Below:  The river under the bridge is very scenic; The Pool is a wide, still spot on the river.

River under the Sentinel Bridge The Pool

One of my favorite views along the trail was looking back at the Pool and the Sentinel Covered Bridge from a little spur trail to an overlook.  From this point, the walk back is steeply uphill for a short while.  Once you gain the ridge, the path levels off and you get a nice view of Liberty Mountain.  A short while later, you arrive back at the visitor’s center – where you can treat yourself to an ice cream cone.

Even though Flume Gorge is crowded and rather expensive to visit, it’s still very worthwhile.  Not many short two-mile loops pack in quite so much scenery into a pleasant, easy-to-walk package.

Adams Says…

After dropping off our thru-hiker friends, The Traveling Circus, we headed off to hike around Flume Gorge.  We did this trip last year with Christine’s parents, but thought it was worth a second trip.

This is a very popular attraction and is definitely one of the highlights of the Franconia Notch State Park.  Similar to many areas of New Hampshire, it requires a fee (in 2010, it was $13 for adults).  The visitor center has a theatre that shows an informational film throughout the day and a few exhibits around the entrance.  The snack bar is also fully equipped to provide enough refreshment and food for a lunch or snack.

Cascade near table rock
The entire Flume Gorge area is loaded with small waterfalls and cascades. Below: Tree roots grow over rocks; The crowds at Flume Gorge are always thick;  Ramps and stairs allow people to climb easily through the gorge; We saw lots of chipmunks and red squirrels.

Tree growing over rock The Flume
The top of Avalanche Falls Chipmunk

This hike packs a lot of features into one short hike.  The covered bridge was built in 1886.  While you can’t walk inside since it is for bus traffic, it does provide a nice photo opportunity.  Table Rock is a large rock outcropping where Flume Brook slowly glides over the water.  The rock is 500 feet long and 75 feet wide.  The Flume Gorge is quite impressive.  You walk along a boardwalk that clings to one side of the gorge.  The Conway granite walls rise on either side 70-90 feet as you see the brook rush out of Avalanche Falls and down the brook.  We were impressed to see all of the small trees and moss that grows amazingly out of the cliff walls.  The Flume was discovered in 1808 by a 93 year-old woman while she was fishing.  Signs describe a large boulder that was suspended between the walls of the gorge but a storm in 1883 swept it away and no signs of the boulder have been spotted since.  Avalanche Falls is an impressive 45-foot waterfall that you can see from several angles while along the boardwalk.

After walking another .5 miles from Avalanche Falls, Liberty Gorge is your next stop.  There is a nice overlook to see the water flow through this gorge.  After a few tenths of a mile past Liberty Gorge, you will come across the Pool overlook and another covered bridge.   Shortly after the covered bridge, you have an option to join go through the one-way Wolf’s Den, but it does require crawling on your hands and knees to make it through the cave.  We continued pass the Wolf’s Den, to catch the additional overlook of the Pool.  We thought this was a better view of the covered bridge and the Pool.  Continue from here to arrive at the Glacial Boulder garden to view some nice erratics.

While there aren’t any geocaches inside the gorge, there are a few outside the area:

Trail Notes

  • Distance – 2 miles
  • Elevation Change 400 feet
  • Difficulty 1.5. There are some steps and hills, but most people should be able to do this without too much effort.
  • Trail Conditions 4.5 The trail is covered in small crushed gravel, allowing for easy footing.
  • Views – 1. You do get one view of Liberty Mountain, but otherwise you won’t see many far-off views.
  • Waterfalls/streams 5. Great views of Avalanche Falls and much of the trip is in sight of water.
  • Wildlife 1.  We saw a few red squirrels and chipmunks, but this is so popular with tourists, you won’t see a lot of wildlife.
  • Ease to Navigate 5. The area is secluded from other areas, so you can’t get lost.  You just have options to cut distance off of the trail.
  • Solitude0. You will always find lots of people here.

Directions to trailhead:
From I-93, once you enter the Franconia Notch area, take the Flume Gorge exit.  The area is well-marked.  Park at the Visitor’s Center.  The trail starts from the Visitor’s Center.  Purchase tickets and proceed.

Traveling Circus in New Hampshire!

Special: New Hampshire Edition

Polly's Pancake Parlor with the Traveling Circus
Posing on the wooden horse outside Polly’s is somewhat of a tradition.

Back in May, we met and hosted a group of three Appalachian Trail thru-hikers collectively known as the Traveling Circus.  We’ve been reading their blog all summer long and following their progress.  As luck would have it, our paths crossed again in Lincoln, New Hampshire a few days ago.  It was exciting to see them again as they near the end of their journey.  We picked them up in Lincoln, and went for breakfast together at Polly’s Pancake Parlor in Sugar Hill, NH.  Polly’s is a local favorite.  They have amazing food and a lovely view.  After breakfast, we dropped them back off at the trail and wished them luck for the rest of their hike.

Kate (Ringleader), Emily (Lightning) and Brandon (Monkey) looked happy and healthy – although they all claimed to be exhausted.  They’re scheduled to summit Mt. Katahdin sometime between August 10-12.