The Buck Hollow – Buck Ridge Trail is a steep hike in the Central District of Shenandoah National Park. It takes a deep plunge along the Buck Hollow stream and a steep hike back up the Buck Ridge trail.
I’ve never seen so many different kinds of mushrooms/fungus along a trail in Shenandoah. Below: When we hiked Buck Hollow in August of 2008, we saw two yearling bear cubs; the stream running through Buck Hollow is rather small and overgrown.
Adam Says…
I have to be honest – we have been putting off doing this trail for a while. We first did this hike a few years ago and the memories of how tough a hike it was kept us from wanting to do it again. Christine and I both weren’t feeling well the day we attempted it last time, but we were more pleased doing this hike this time.
The trail starts off from the Meadow Springs parking area. After about 20 feet down the trail, you see a post marking the Buck Hollow trail. Take a left to go down this trail. The trail seems to constantly descend and is rather steep in many portions. There are loose rocks and if you attempt this after a heavy rain, you should expect some mud and slick soil on the trail. Along the side for much of the trail, you will see the Buck Hollow stream. Around mile 1.75, you will make a few rock-hops across the stream. The trail continues to descend and then finally seems to just parallel the stream. At mile 2.8, you will reach a cement post, pointing you to take a right on to the Buck Ridge Trail. You cross the stream again and then you will quickly come up to the dreaded stairs.
For any Lord of the Rings fans, these stairs remind me of the stairs of Cirith Ungol. “Up, up, up, up the stairs we go.” They are unrelenting and seem to last forever, but they last less than .3 miles. Of course, you do gain over 400 feet of elevation in this short distance. These stairs didn’t exist the last time we did the hike; the last time, we just had a steep section of loose soil to traverse. The stairs help make this hike more manageable, so I do thank the workers that accomplished this laborious task!
At the bottom of Buck Hollow, there is a beautiful camping spot with flat, open forest and easy access to water. Below: The trail starts out at the Meadow Springs Parking Area; A trail through a small slot in the rocks leads hikers to the only open view on the trail.
After the stairs, the trail continues to go uphill, but it is at a much more manageable grade. Once you are high enough on the ridge, you are treated with views of Skyline Drive and mountain views around you (including Mary’s Rock). We found a small crevasse bisecting a large rock formation that we were able to easily climb up to get some unobstructed views. After mile 5.2, you do come up to another concrete post. Take a right and you will reach the parking lot in a little over .3 miles.
One interesting note that I remember from our first hike of this loop trail was near the bottom of Buck Hollow. We were hiking along and all of a sudden we startled two yearling bears. One of them quickly climbed a tree and the other took off up the mountain. We kept our distance, and the one that climbed the tree climbed back down and took off in the opposite direction. As I looked to see where the bear went, I spotted a buck and a pileated woodpecker in the same direction. I felt that I could have taken a picture that would have looked like a wildlife mural that you often see on brochures or placemats.
We were tired after we finished the hike, but this trip we definitely felt that it was more enjoyable than the first time we attempted it.
Christine Says…
When we woke up to cool, pretty weather on Saturday morning, we decided to end our hiking hiatus a week earlier than initially planned. I had to be at an art show by 1:00, so we needed to find a hike that was relatively short and sort of close to home. We’ve pretty much hiked and blogged about everything in the central district of Shenandoah National Park already… with the exception of the dreaded Buck Hollow-Buck Ridge hike.
Why dreaded? As Adam mentioned, last time we did this hike we were both fighting colds and had zero energy. And while Buck Hollow is not the longest or hardest hike we’ve done, it certainly felt like it the last time we were there. We ran out of water, we were fatigued, the trail felt endless and daunting as soon as we started the uphill climb. Other than seeing the two yearling bears, the Buck Hollow hike didn’t carry a single pleasant memory. It just made me think of exhaustion, suffering and thirst. 🙂
When I mentioned to Adam that we should probably hike it again for the blog, he looked at me with incredulity and told me that he didn’t ever want to hike there again. Somehow he was convinced to relent, and off we went!
This time, the hike was a lot more fun! It was still a long, steep downhill – but I really enjoyed marveling at the huge variety of mushrooms and fungi growing along the trail. I don’t know if there is a name for people who collect/catalog fungus, but if such people exist – this is the trail for them. We also happened to notice a beautiful backcountry campsite at the bottom of the hollow, where the trail leveled out. Along with easy access to water, there was a wide, flat expanse under the shade of the trees. The forest floor in this area was open with very little undergrowth. There were also several huge piles of rocks – maybe from old stone walls or foundations in the area. It was a great place to take a break and have a snack.
Although the stairs don’t look steep in this photo, they ascend nearly 400 feet in just over two-tenths of a mile. Below: The Buck Ridge trail is lined with dense mountain laurel; The only (mostly) open view comes from atop a rock along Buck Ridge.
The flat terrain at the bottom of the hollow doesn’t last long. Shortly after passing the cement post marking the Buck Hollow – Buck Ridge junction, you’ll encounter what I think is the toughest, steepest section of climbing in all of Shenandoah National Park. Indeed, it’s a short climb – but wow… it’s STEEP. The terrain along this little section is the equivalent of gaining 2000 feet in elevation over a mile. I think most hikers will agree — that’s TOUGH climbing.
The Potomac Appalachian Trail Club published a review of this hike in their October 2010 newsletter. In it they say “Steep, does not begin to describe the trail ahead.” They also call it scary and compare it to a descent into hell. 🙂 We concur!
I was quite glad when the terrain moderated, because the steep stair climb really exhausted my legs!
Butterflies were everywhere along the trail. Below: The PATC trail overseer clearly loves this area.
We also noticed the nice view from atop the rock that we had missed last time we hiked. It’s funny how being fatigued and thirsty makes you miss the best things along a trail sometimes. The last section of the trail along Buck Ridge passes through dense mountain laurel and through patches of blueberry and raspberry bushes. I really thought we’d see more signs of bears (and maybe some actual bears!), but we really only saw one old pile of scat this time.
The Buck Ridge trail eventually meets up with Hazel Mountain Road for the last third of a mile. This section of trail was quite familiar, since we hiked it just a couple months ago on our backpacking trip to Catlett Mountain. When we arrived back at the parking lot, we noticed the PATC overseer’s car was in the lot – complete with a “BCKHLW” license plate. Clearly, the overseer loves this section of the park and does a great job maintaining the trail.
It was a fun hike – one I enjoyed far more than I expected to!
Trail Notes
Distance – 5.6 miles loop hike
Elevation Change – 1750 feet
Difficulty – 4. The trail is steep at the start going down and once you reach the halfway point includes a steep uphill. Not recommended for those with knee or ankle issues.
Trail Conditions –3. The Buck Hollow Trail is rocky and steep, so you have to watch your footing. The Buck Ridge Trail had better trail conditions.
Views – 2. The views you get are from the Buck Ridge Trail portion. While most of these are through the obstruction of trees, there is a nice place to climb on top of a rock for a view.
Waterfalls/streams – 1.5. You do walk along the Buck Hollow stream, but there aren’t a lot of nice views of falling water.
Wildlife –3.5. There are signs of bear scat around. The first time we went on this trail, we saw two yearling bears and a buck. Both times we have spotted pileated woodpeckers and many typical woodland birds.
Ease to Navigate –4. Not too many turns, just read the concrete posts.
Solitude–3.5. We did see a number of people on the trail that seemed to be in a group, but this isn’t overly popular. Some people will hike up from Rte 211 to Mary’s Rock, so you’re likely to only find people on the Buck Hollow portion of the trail.
Directions to trailhead:
At mile 33.5 on Skyline Drive. Park at the parking lot on the eastern side of the road and the trail starts from the southern end of the parking lot.
Note – 10/11/10: In their October issue, Backpacker Magazine inaccurately listed Arethusa Falls as a Virginia destination. The falls are in New Hampshire.
This three mile hike leads to Arethusa Falls, which is (arguably) New Hampshire’s tallest single waterfall. The optional arm along Bemis Brook is challenging in spots, but offers more lovely stream scenery.
Arethusa Falls might not be the most photogenic of New Hampshire’s many waterfalls, but it is likely the tallest. Below: The optional side-loop trail along Bemis Brook takes you past Coliseum Falls.
Christine Says…
We originally planned on combining these two trails with Frankenstein Cliffs to make a loop, but unfortunately we ran short on time and just did the three mile out-and-back.
The trail along Bemis Brook was extremely tough walking! In addition to the roots, rocks and mud, we suffered a full-on mosquito assault. I spent a lot of the walk along the trail cursing and flailing my arms wildly. Even with DEET, the little buggers hovered right around my eyes, ears and nostrils, constantly buzzing in too close and getting caught in my eyelashes.
There were several very pretty small waterfalls along the Bemis trail. Coliseum Falls were especially picturesque. Since it was such a sunny day, I didn’t bother with a tripod. Long exposures weren’t a possibility in the harsh sun, so I just took snapshots along the way. The climb from Bemis Brook back up to the Arethusa Trail was practically vertical. We had to climb, hand-over-hand, grabbing roots and rocks to drag our way up the mountainside. There was one blown down tree that was particularly difficult to negotiate. It was one of those fallen trees that was a little too high to climb over, but a little too low to scramble under. I decided to clamber over it, and ended up getting my boot toe caught on the tree trunk. I took a spectacular fall down onto the roots and rocks. It absolutely left a big black and blue mark! I was really glad when we finally saw the junction with the Arethusa Trail!
This trailhead for this hike offers beautiful views of Frankenstein Cliffs looming overhead. The trail has an option to lengthen the hike by a few miles to gain access to the top of the cliffs. We ran out of time and had to pass on that option. Below: Trails in the area are clear and well-marked.
The rest of the way to the falls was much easier. It was uphill and muddy in spots, but the trail was well-graded and nice to walk along. The last stretch to Arethusa Falls led downhill into a chasm that opened to an amphitheater like setting. The falls were very impressive! The water falls like lace over the sheer rock face.
On the hike back, Adam and I waffled about whether or not to continue our hike up to Frankenstein Cliffs. We even started down the Cliffs Trail, before turning back in less than a tenth of a mile. We had plans to meet my parents in North Conway, and we just didn’t have time to finish the loop.
Arethusa Falls is a gorgeous 160 foot waterfall that is very popular with families. We started on the blue-blazed trail near the railroad tracks at the parking lot. After about .1 miles, you come to a junction with the yellow-blazed Bemis Brook Trail. We decided to do this side trail, since it goes partially along the water, guiding you to a few pools and smaller falls areas. Once you come up to the Coliseum Falls area, you will need to climb up almost vertically up the trail to join back with the Arethusa Falls trail. If you do want to do the Bemis Brook trail you should do this at the start of your trip rather than trying to descend it at the end. This part of the trip was tough and takes a lot of strength out of you in a short distance, so plan appropriately. Once we reached the junction at the top, we took a left to return to the Arethusa Falls trail. The trail continues to go uphill until you reach a junction with the Cliffs Trail. From this point, you continue downhill until you reach the falls in .2 miles. You return the way you came, but you will avoid the Bemis Brook Trail on the way back and just stay on the Arethusa Falls trail to reach your vehicle.
Arethusa Falls was named after the poem, “Arethusa” by Percy Bysshe Shelley. The falls were discovered by Edward Tuckerman, but named by Moses Sweetser and Professor Huntington in 1875.
The Bemis Brook Trail follows a beautiful stream for most of the way, until you get to the portion where it climbs, nearly vertically, back up to meet the Arethusa Trail. Below: The Arethusa Trail is much easier to walk – smooth and well-graded, compared to the Bemis Trail.
While I was off hunting for a geocache and Christine was taking some photos, she struck up a conversation with a man hiking solo on the trail. When I got back to them (after sliding down the hillside 20 feet on my butt), he wanted to take a look at my map. He was thinking about doing the Frankenstein Cliffs trail and then looping back to make it to his car. He was to meet up with his wife in less than two hours to take a ride up Mount Washington on the cog railroad. We told him that it might be hard to make it in time. He decided to go for it, but I don’t think there was any way he could have made it back in time for his trip up. We both pictured his wife riding solo up the railroad, muttering to herself, and awaiting the moment she could give her husband a piece of her mind.
We wish we had more time to do the Frankenstein Cliffs trail (these are named after an artist, not the doctor who created a monster), because we have heard that it does give you some nice views from the top. The trail is allegedly muddy and not as well maintained as the Arethusa Falls trail.
Trail Notes
Distance – 3 miles, out-and-back (2.8 if you leave the Bemis Brook Trail off and just stay on the Arethusa Trail the entire way)
Elevation Change – 650 ft to the falls. There might be a bit more climbing if you do Bemis Brook.
Difficulty – 3. The Arethusa Trail is squarely moderate. The Bemis Brook trail is more difficult with one killer climb uphill at the end.
Trail Conditions – 2.5 The Arethusa Trail is in nice condition most of the way. There are some muddy spots and we encountered a flew blow downs. The Bemis Trail is not easy walking. There are numerous fallen trees, tricky footing and if it’s the slightest bit damp, the trail is very slippery.
Views –0. You’ll be in the woods the entire time.
Waterfalls/streams – 4. The falls are large and impressive, but not terribly photogenic.
Wildlife – 0. The heavy human traffic probably scares any wildlife away.
Ease to Navigate – 5. Trails are marked and easy to follow.
Solitude– 2. Because the hiking is a little more challenging, you won’t see the same crowds as you do at Flume Gorge or Sabbaday Falls.
Directions to trailhead:
From I-93, follow New Hampshire Route 302 west through Crawford Notch State Park. A few miles past Sawyer Rock Picnic area you will see the Arethusa Falls parking area on the right.
The Greeley Ponds trail is a popular hike that leads to a pair of beautiful ponds surrounded by the White Mountains.
We didn’t have great weather for our hike to the Greeley Ponds. It was very muddy and overcast, but the ponds were still really pretty! Below: There were several small stream crossings along the hike; We saw Indian Pipes growing along the trail; the terrain in this area is very wet and dark, making it a perfect place for mosses and mushrooms.
Christine Says…
We got up early to take a scenic drive and do some hiking along the Kancamagus Highway. We decided to check out the trail leading to the Greeley Ponds. This hike intrigued me, because it is so different from anything we have in Virginia. Ponds and lakes are not terribly common in the Blue Ridge, so I thought a hike leading to two ponds surrounded by mountains sounded really perfect.
The trail did not disappoint! The woods in New Hampshire are so thick and green and different. I love the abundant evergreens in the New England woods. Everything is so fragrant, lush and moss-covered. Old fallen trees become nurseries for tiny mushrooms and tree seedlings. Streams trickle in seemingly every direction. Even the birds are different – singing unfamiliar songs up in the trees.
The Greeley Ponds Trail is relatively easy – with only about 500 feet of elevation gain over 2.5 miles. The things that slow you down are the roots, rocks and mud. You have to watch your feet with every step. We found our trekking poles to be very helpful. Many places along the trail are traversed using wooden planks and split logs. There are several small streams to cross along the way, hopping from rock to rock. Some of the trail system is a little confusing because cross-country skiing trails cross the hiking trail in many places. The key is to look for yellow blazes.
At the 1.7-mile mark, the Upper Greeley Pond comes into view. There are several places to climb down to the shoreline and take in views of the pond. Although Upper Greeley is the smaller of the two ponds, I found it the prettier of the two. I loved seeing the towering mountains all around the pond.
Lower Greeley Pond has a lot of dead trees at one end, giving it a swamp-like appearance. Below: Trailhead sign along the Kancamagus Highway; New Hampshire’s “Hike Safe” Signs are posted at all trailheads. Hike Safe (http://www.hikesafe.com) was developed by the state to help hikers become safer in the outdoors; Adam checks out the trail map illustrating skiing and hiking trails.
Lower Greeley Pond is just several tenths of a mile past the end of Upper Greeley. There is a big stand of what appears to be dead hemlocks at the end of the pond. It gives the pond a swamp-like appearance. The lower pond also has fewer places to enjoy a shoreline view.
We turned around for our return hike a little past the end of Lower Greeley Pond. Although, if you want a longer hike, the trail continues, following the Mad River all the way to Livermore Road.
We didn’t see a soul on the hike out to the ponds, but passed numerous groups of hikers on the return trip. Greeley Ponds is clearly a popular hike in this area.
Adam Says…
The Greeley Ponds Trail is close to the western side of the Kancamagus Highway, so it was our first stop along the way. The trail has a small parking lot that tends to get crowded during the busy summer. This is a fee area, so you’ll need to deposit $3 in an envelope and display your pass.
The trail wasn’t difficult, but due to the recent rain, it was a little muddy and slick in spots. I also felt overwhelmed by mosquitoes and had to flail around and swat them at every step. It reminded me of the quote from Lord of the Rings when Merry asks, “What do they eat when they can’t get hobbit?”. Well, my answer to Merry is “me”. The bug repellent held many off, but other than taking a DEET bath, you’ll likely find a bite or two without multiple applications along the hike. Christine asked if I would rather have the flies and mosquitoes in New Hampshire or the gnats and ticks in Virginia. Maybe it’s because of what I’m experiencing now, but give me some ticks and the threat of Lyme Disease over these pesky creatures.
Much of the trail was traversed by boardwalks and planks. Below: The trail intersects a couple other trails; Adam enjoys the view from a small, sandy beach at Upper Greeley Pond.
The yellow-blazed Greeley Ponds Trail goes for 1.3 miles until it reaches a junction with the East Osceola Trail (you could add this to your hike if you want for an additional three mile out-and-back hike). At this junction, you will see the sign stating you should reach the Lower Greeley Pond at 1.7 miles. The trail intersects several times with a blue-blazed trail, but this is a cross-country skiing trail to the ponds (Hikers stay off the ski trails in the winter, so they can avoid leaving footprints over the cross-country ski tracks). Both will get you to the same place, but you’ll notice the yellow-blazed trail will be a shorter route. Once the pond comes into view, you can see a short off-trail path to a beach-y area with good views of the pond. Going back on the trail, you continue along the bank and can continue to get different views. Staying on the main trail, you will reach the Upper Greeley Pond around the 2 mile marker. There are a few good views of this longer pond for the next few tenths of a mile and then you can return the way you came.
There is no camping allowed within .25 mile of the Greeley Ponds, but we did see some illegal campsites around the area created by people that weren’t respectful of the ecosystems around the area.
The area around the ponds, especially the Upper Greeley Pond seems like a great area for birdwatchers. We were treated with songs from warblers and the knocking of woodpeckers.
The hike exhibited a lot of different features of the area’s forests – dense pines and birches, gorgeous ponds, and erratic boulders along the way. The minimal elevation change makes this a good hike for families as long as you can maintain good footing on wet surfaces. We saw a few groups with dogs along the trail, so it is even four-legged friendly. (Please note…dogs are not allowed on the ski trails in the winter)
Trail Notes
Distance – 5 miles
Elevation Change – 500 ft
Difficulty – 2. The hike has a very gradual uphill.
Trail Conditions – 2. Like most trails in New Hampshire, this one is rocky, muddy and covered with roots.
Views –2. Some nice views of the mountains at the ponds.
Waterfalls/streams – 3.5. Ponds aren’t really lakes or streams, but they do qualify for a high rating for water features.
Wildlife – 2. Lots of bird species near the ponds.
Ease to Navigate – 3. Pay attention to the yellow blazes and you won’t get lost.
Solitude– 2. This is a popular and well-traveled hike.
Directions to trailhead:
Take I-93 Exit 32 at Lincoln and go east on Route 112/Kancamagus Highway about 10.5 miles to the marked Greeley Ponds parking lot.
The Basin and Kinsman Falls is a short 1.2 mile out-and-back walk to a lovely waterfall in Franconia Notch State Park. The trail follows Cascade Brook and passes many beautiful (and popular) water features. The falls are also called Tunnel Falls.
The Basin is a beautiful glacial pothole at the base of this hike. Below: Kinsman Falls is a pretty 20 foot waterfall that plunges into a wide pool at the bottom; Many of the streambeds look sculpted.
Adam Says…
We had visited the Basin last year, but it is always worth a quick stop off I-93. It takes only .1 mile to reach it from the parking lot. You will see signs to lead you directly to the Basin. The Basin was formed about 15,000 years ago as an ice sheet eroded the pathway. According to the plaque at the site there, Henry David Thoreau wrote “this pothole is perhaps the most remarkable curiosity of its kind in New England.” Samuel Eastman called this area, “One of the most beautiful haunts of Nature, a luxurious and delicious bath fit for the ablutions of a goddess.”
There are several paths to walk along in this area to explore streams and small waterfalls. If you go back the way you came, you will see a larger junction with a sign for Kinsman Falls being .5 miles away. The path up to Kinsman Falls was filled with roots and rocks, so you do need to continually watch where you are stepping. Shortly up the ascent, you will see several spots to your left along the way of the river. These are good places to soak in the sun or to wade in a small pool. Be careful about footing if you venture into the water, since the water does rush through these areas rapidly. Getting back on the trail, you have more of an ascent, but you will quickly come up to the sign pointing to Kinsman Falls. The falls were very impressive as they plunged into a serene pool at the base.
View of the Mountain from Cascade Brook. Below: Colorful fungus on the trail; Christine’s dad and Adam climb back up from the base of the falls.
I definitely recommend checking out these areas if you are taking a trip through the White Mountains. Most people just view the Basin and some of the swimming holes along the way and don’t venture any further, but it is worth the hike up to Kinsman Falls and most families can easily make the trip.
We planned to do lots of family hikes on this visit to New Hampshire, but about a week before the trip an MRI revealed that my dad had torn his meniscus. His doctor told him to be careful and to limit activity that could extend the tear. Sadly, this put most of his hiking plans on hold for the time being. He did decide that he felt up to joining us on the short hike past the Basin and up to Kinsman Falls.
Like Flume Gorge, this little hike packs in a lot of impressive scenery over a very short distance. Also, like the Flume, it is extremely popular and crowded.
The Basin is such a gorgeous spot. I love how the water curls through the rock formation. The rock walls of the Basin are smooth and sculpted – they almost look unnatural. The water is blue-green colored and crystal clear. It’s one of those spots you’ll never forget!
After the Basin, the beautiful water features keep on coming! There are so many small waterfalls and cascades along the trail, that you always hear the pleasant sound of rushing water. A sign marks the way to Kinsman Falls, but honestly, we could say “just follow the water uphill” and you’d find your way there.
The trail was rocky and root-y. Below: The base of the falls was a nice place to stop and contemplate nature; Cascade Brook rushes over the rocks.
The trail followed alongside Cascade Brook for a half mile. There were many little side-trails leading to scenic spots along the brook. Dozens of people reclined on the rocks while kids used the streambed like a natural waterslide. One mother remarked to us that her family had visited the spot two days in a row, and both her boys had worn through the backsides of two sets of swim trunks.
The trail is muddy, with a mix of gnarled roots and slick granite underfoot. It’s all uphill, but it’s never steep. It really is an ideal family hike.
A small sign announces Kinsman Falls. From the trail, you get a view of the falls from above. The twenty-foot waterfall crashes into a large, round pool in a chasm below. There is a rough footpath down to the base of the falls – take care if you climb down – it’s slippery with numerous rocks to scramble over.
There are lots of big rocks to sit on around the edge of the pool. It’s a nice place to relax and enjoy feeling the mist from the falls spray your face. We were really surprised to have the falls all to ourselves. Even though there were many people in the area, no one else was at the waterfall. Odd – but very welcome! On our return trip, we passed quite a few people hiking up, so I suppose we just had fortuitous timing.
Trail Notes
Distance – 1.2 miles out-and-back. Plus a couple additional tenths of a mile to get to and from your car.
Elevation Change –Around 300 feet
Difficulty – 2. The hike is all uphill over slick granite and gnarled roots, but it is short and never steep.
Trail Conditions – 2. The trail is extremely rocky, muddy and covered with gnarled tree roots.
Views –2. From the Cascade Brook streambed, you get a decent view of the mountains.
Waterfalls/streams –5. Nothing short of spectacular!
Wildlife – 0. A few squirrels and chipmunks.
Ease to Navigate – 4. After walking uphill from the Basin, look for the sign to Kinsman Falls and follow the blue blazes uphill.
Solitude – 0. This area is extremely popular. We saw dozen of people along the way, but surprisingly had Kinsman Falls all to ourselves.
Directions to trailhead:
From I-93N. Once you enter the Franconia Notch area, take the Basin exit. The area is well-marked and has ample parking.
Located in Franconia Notch State Park, this two-mile path around the Flume Gorge showcases a lot of beautiful scenery on a short and easy walk. If you crave solitude, this is not the place for you. But if you don’t mind crowds and want to see some unique scenery, don’t miss a visit to this area.
The Flume is a beautiful and unique place. Below: Avalanche Falls is located inside the Flume; Liberty Gorge Cascade is also impressive; The trail is lined with large boulders called glacial erratics; The Sentinel Pine Covered Bridge is for pedestrians only.
Christine Says…
Last year, when we visited New Hampshire for the first time, we went to Flume Gorge with my parents. It was insanely crowded, unusually hot and glaringly sunny on that visit, so we decided to make a return visit on this trip – hoping that the clouds and cooler weather would keep the crowds at bay. There were definitely fewer people this time, but that’s not to say we had solitude. Flume Gorge is an extremely popular area. There will always be hordes of people, no matter the time of day, week or year you visit.
It’s no surprise the area draws such large crowds – it packs an amazing amount of unique scenery into an easy, two-mile loop. For anyone who doesn’t want to walk the two miles, there is a bus that will take visitors to a drop-off point at the Boulder Cabin. This option substantially shortens the distance and climbing necessary to see the gorge. However, bus riders miss seeing a lot of the other impressive scenery along the loop.
The two-mile loop starts off along a shady, wooded path that climbs down to the Pemigawasset River. In .25 miles, there is a bright, red covered bridge across the water – the bus goes through the bridge, but pedestrians cross a walkway attached to the side of the bridge. After a short uphill, both the bus riders and the walkers arrive at the Boulder Cabin. The building is full of exhibits – both historical and natural.
The first covered bridge in Flume Gorge is brilliant red. Below: Table Rock; The path through the woods is peaceful and shady; Bear Cave is located near the top of the Flume; The side view of Avalanche Falls.
After passing the cabin, the path follows alongside an area called Table Rock. The water in the river passes thinly over a wide, smooth expanse of granite. A sign announces the beginning of the Flume. The Flume is a fascinating geological area – a narrow slot canyon carved out from thousands of years of river flow over the rock. Wooden walkways are attached to the sheer canyon walls and allow people to climb through the gorge using a series of ramps and steps. Near the top of the Flume, visitors are treated to views of the crashing water of Avalanche Falls. The falls take several directional turns through the Flume – each angle makes it look like a completely different waterfall. After passing the waterfall, be sure to take a quick peek inside Bear Cave.
At the top of the Flume, the trail has two options – one returns people to Boulder Cabin and the bus stop, the other follows a trail for a little over a mile back to the main entry. If you’re able, it’s definitely worth following the longer route to see Liberty Gorge Cascade, the Pool, The Sentinel Pine Covered Bridge, the Wolf’s Den and several impressive erratics along the trail.
My favorite view along the trail came at the spot overlooking the Sentinel Bridge. Below: The river under the bridge is very scenic; The Pool is a wide, still spot on the river.
One of my favorite views along the trail was looking back at the Pool and the Sentinel Covered Bridge from a little spur trail to an overlook. From this point, the walk back is steeply uphill for a short while. Once you gain the ridge, the path levels off and you get a nice view of Liberty Mountain. A short while later, you arrive back at the visitor’s center – where you can treat yourself to an ice cream cone.
Even though Flume Gorge is crowded and rather expensive to visit, it’s still very worthwhile. Not many short two-mile loops pack in quite so much scenery into a pleasant, easy-to-walk package.
Adams Says…
After dropping off our thru-hiker friends, The Traveling Circus, we headed off to hike around Flume Gorge. We did this trip last year with Christine’s parents, but thought it was worth a second trip.
This is a very popular attraction and is definitely one of the highlights of the Franconia Notch State Park. Similar to many areas of New Hampshire, it requires a fee (in 2010, it was $13 for adults). The visitor center has a theatre that shows an informational film throughout the day and a few exhibits around the entrance. The snack bar is also fully equipped to provide enough refreshment and food for a lunch or snack.
The entire Flume Gorge area is loaded with small waterfalls and cascades. Below: Tree roots grow over rocks; The crowds at Flume Gorge are always thick; Ramps and stairs allow people to climb easily through the gorge; We saw lots of chipmunks and red squirrels.
This hike packs a lot of features into one short hike. The covered bridge was built in 1886. While you can’t walk inside since it is for bus traffic, it does provide a nice photo opportunity. Table Rock is a large rock outcropping where Flume Brook slowly glides over the water. The rock is 500 feet long and 75 feet wide. The Flume Gorge is quite impressive. You walk along a boardwalk that clings to one side of the gorge. The Conway granite walls rise on either side 70-90 feet as you see the brook rush out of Avalanche Falls and down the brook. We were impressed to see all of the small trees and moss that grows amazingly out of the cliff walls. The Flume was discovered in 1808 by a 93 year-old woman while she was fishing. Signs describe a large boulder that was suspended between the walls of the gorge but a storm in 1883 swept it away and no signs of the boulder have been spotted since. Avalanche Falls is an impressive 45-foot waterfall that you can see from several angles while along the boardwalk.
After walking another .5 miles from Avalanche Falls, Liberty Gorge is your next stop. There is a nice overlook to see the water flow through this gorge. After a few tenths of a mile past Liberty Gorge, you will come across the Pool overlook and another covered bridge. Shortly after the covered bridge, you have an option to join go through the one-way Wolf’s Den, but it does require crawling on your hands and knees to make it through the cave. We continued pass the Wolf’s Den, to catch the additional overlook of the Pool. We thought this was a better view of the covered bridge and the Pool. Continue from here to arrive at the Glacial Boulder garden to view some nice erratics.
While there aren’t any geocaches inside the gorge, there are a few outside the area:
Difficulty – 1.5. There are some steps and hills, but most people should be able to do this without too much effort.
Trail Conditions – 4.5 The trail is covered in small crushed gravel, allowing for easy footing.
Views – 1. You do get one view of Liberty Mountain, but otherwise you won’t see many far-off views.
Waterfalls/streams – 5. Great views of Avalanche Falls and much of the trip is in sight of water.
Wildlife – 1. We saw a few red squirrels and chipmunks, but this is so popular with tourists, you won’t see a lot of wildlife.
Ease to Navigate – 5. The area is secluded from other areas, so you can’t get lost. You just have options to cut distance off of the trail.
Solitude – 0. You will always find lots of people here.
Directions to trailhead:
From I-93, once you enter the Franconia Notch area, take the Flume Gorge exit. The area is well-marked. Park at the Visitor’s Center. The trail starts from the Visitor’s Center. Purchase tickets and proceed.
The Knob Mountain – Jeremy’s Run Loop takes hikers along a 12.4 mile route through one of Shenandoah’s most popular backcountry camping areas. This hike could be done as a long dayhike, but the campsites in the area are too inviting to pass up.
The Knob Mountain – Jeremy’s Run Loop offers beautiful stream scenery. Below: Mountain vistas can be seen along the descent on the Knob Mountain Trail; Blue Blazes mark the way across streams on the Jeremy’s Run Trail; Adam negotiates one of the many stream crossings.
Adam Says…
Since the weather looked like it was going to be a cooler, we decided to take off and go on an overnight backpacking trip. Our first overnight trip was the Hazel Mountain-Catlett Mountain trail which we did with a group from the PATC. This trip was our first non-group outing, so we felt it would be a good chance to put into practice what we learned from our Backpacking 101 course.
To do this trail as a loop, leave from the Elkwallow picnic grounds. You will see the entrance to the trail next to the pit toilet, which provides a last chance to “take care of business” before embarking on the hike. You will begin the trail on a short spur trail to the white-blazed Appalachian Trail. Turn left on the AT. In .2 miles, you will reach the junction with the blue-blazed Jeremy’s Run Trail. Continue straight on the Jeremy’s Run Trail. Around 1.2 miles, you will reach the junction with the Knob Mountain Connector Trail. Take a right at the post to join this trail. As soon as you cross Jeremy’s Run with a little rock-hopping, you will begin this steep connector trail. There are lots of switchbacks and this is definitely the steepest part of the entire trip. Around 1.7 miles, you will reach a junction with the yellow-blazed Knob Mountain Trail. Take a left at the trail junction and continue to follow this slowly ascending ridge trail. We would probably name this portion of the loop the Bear Scat Boulevard, because there was a ton of bear evidence in the area. You will see a few views through the trees, but nothing remarkable from the trail. At mile 3.9 you will reach the summit of Knob Mountain, marked by a concrete post. After the summit, you will begin your steep descent down the mountain. This is broken up by several switchbacks. The trail does open up at times to give you views of mountains along the way, including Strickler Knob and the Three Sisters. At 6.8 miles, you will cross Jeremy’s Run and reach the junction with the blue-blazed Jeremy’s Run Trail. Since we were fairly exhausted from our trip, we picked a campsite near the junction of the trail, which gave us great access to water. From the junction, you just continue on the Jeremy’s Run Trail until you reach the parking lot, crossing over Jeremy’s Run fourteen times. In some areas, it was necessary to rock hop across, but most of the time the traversing was quite easy. I imagine during heavy rain seasons, this would be more of a challenge.
The overnight trip started with a brief stop to fill out paperwork for our backcountry permit. Below: Adam makes his way down the Jeremy’s Run Trail; Snacks on the Knob Mountain summit; A view through the trees from the Knob Mountain Trail.
Jeremy’s Run truly provided a great opportunity for camping in the backcountry. We saw several previously-used campsite areas, so we decided to use our Leave No Trace principles and use an existing campsite rather than creating our own. The campsite was short walking distance to a reliable water source. After starting our trip around 9:30AM, we arrived at camp around 1:00PM. We were very hungry, so Christine worked on getting some lunch together and I began working on getting our tent set. The ground was very hard and rocky, so it took an effort to find a good place to get stakes into the ground. After lunch, we finished getting our sleeping pads/bags ready, hung our bear-bag rope, and prepared our kitchen area. We got some water to use for the trip at the nearby stream and I dug a few preemptive catholes. With every thing set, we decided to relax a little in our tents to stretch out our backs. I like to bring a book along the trip so we took turns reading aloud a few chapters from A Walk for Sunshine by Jeff Alt, an entertaining read about hiking the Appalachian Trail. We took a short nap and then played a few hands of the Monopoly card game we also brought. We then broke in our new JetBoil and prepared a great dinner. After cleaning up dishes, we went down to a place along Jeremy’s Run and stretched out on a large rock. We watched several brook trout jump out of the water, catching mosquitoes that were lightly dancing on top of the water. We retired to our tents to the sweet chorus of whippoorwills and the “who cooks for you” hoots of nearby barred owls.
On the hike down from the summit of Knob Mountain, hikers get a few decent views of adjacent Neighbor Mountain. Below: A scenic spot on Jeremy’s Run; Our campsite.
There were so many things I enjoyed about our trip. We saw tons of wildlife – three black bears, a wild turkey, scarlet tanagers in glorious color, and heard lots of birds at night. The temperature was perfect and the bugs were not out as much as we expected. The trip also helped affirm our ability to handle a backpacking trip by ourselves. I think we really learned a lot of great skills in the last few months to help us feel well-prepared. I was a little more apprehensive wondering if we could handle the 12+ mile hike with 35 pounds on my back, since our previous trip was about 8 miles total with a little less weight each. The hike was more strenuous the first day, but we were able to complete the hike without much trouble. I think we’re both looking forward to going on another backpacking trip, but we are now getting into the hot summer months. Hopefully, we’ll be able to find a cooler weekend in the near future.
Christine Says…
When Mother Nature gives you the gift of a sunny, dry, 70-degree day in the midst of a long string of 90+ degree scorchers, you must take advantage of that gift! We chose to make the most of the pleasant weather and go on an overnight backpacking trip. One of the leaders on our last trip recommended Jeremy’s Run as one of his favorite places in the park. As dayhikers (until recently), the Jeremy’s Run hike had always been a little out of reach. At 12.4 miles with well over 2,500 feet of elevation gain, it was always more than we were willing to tackle on a day hike. It seemed like a perfect candidate for this little weekend getaway.
After filling out all the requisite paperwork, we set out from the Elkwallow Picnic Area along the Appalachian Trail. Right away, I was struck by how much heavier my pack was compared to our last trip. On that trip, we had seven people to split the weight of group gear. But this time, we had to carry our own stove, fuel, collapsible bucket, water filter, food and rope. I also chose to carry my old dSLR camera, a couple card games, extra batteries, a fleece and my iPod. In the end, my pack weighed in about nine pound heavier than our last outing.
I brought my iPod along this time for a couple reasons 1) I wanted to be able to listen to my “workout mix” when climbing a couple of the big hills on the route and 2) my iPod is loaded with audio books, which I thought would be pleasant to listen to after sunset in the tent. The first big hill we hit was on the Knob Mountain Cut-Off Trail. It was really steep, so I put in my earbuds and started chugging up the hill. Listening to mindless pop music with a beat – anything from Tupac to Lady Gaga to Gnarls Barkley – makes climbing hills so much less painful. I had worked up a pretty good rhythm, listening to the early 90’s party song, “Rump Shaker”, when I rounded a curve a spotted two black bears about 50 yards up the hill. I’m not sure if they were a mom and a yearling or two adults. We looked at them, they looked at us, then they quickly decided to leave the area. I didn’t have time to free myself from my trekking poles and iPod cord to get a photo, but it was still a great treat to see the bears. Backpacking seems to involve an inordinate number of straps and buckles. Sometimes, it makes me feel like a horse pulling a cart.
After camp was set up, Christine spent some time relaxing on the rocks in Jeremy’s Run. Below: Adam collects water in a collapsible bucket to use for cooking later; Crocs and Socks – they might not be high fashion, but they’re functional; Playing Monopoly at camp.
After the cut-off trail met the Knob Mountain Trail, the tough climbing was over for the day. I listened to my iPod a bit more, but eventually put it away in favor of listening to the birds and the breeze in the trees. We took a snack break on the top of Knob Mountain. There weren’t any views at the summit – just shade and a ton of poison ivy. It felt really good to throw the pack off for a while and have a good stretch. I could really feel the heavier pack weight bruising my hip bones.
The downhill walk lasted a little over 3 miles. We soon arrived at the stream, where the Knob Mountain Trail converges with both the Neighbor Mountain and Jeremy’s Run Trails. We crossed the stream a couple times and decided it was high time to find a campsite. We were both completely knackered after walking about 7 miles with our packs. I honestly don’t know how thru-hikers cover 20-30 miles a day with even heavier packs. I’m convinced I wouldn’t last a week!
We found a beautiful place for camp under the shade of pines and hardwoods. It was clearly a place others have camped before. Stones were arranged like seats in a semi-circle in one of the clearings. It was also about 30 yards from a gorgeous spot along Jeremy’s Run – so we had great access to water.
We designated separate sleeping and kitchen areas right away. Adam pitched the tent while I fixed lunch. I made Buffalo Chicken Wraps – which were delicious. We found a place for our bear hang and dug a couple catholes for future use. With camp all set up, we settled into our tent for a nap.
Post-nap, we collected water for cooking in our collapsible bucket. On our water run, we also took some time to stretch out and lounge on one of enormous boulders in the middle of the stream. The sky above was so blue and it was very soothing to watch the trees swaying above in the breeze. I actually tried out my Crocs again, and found them more comfortable, albeit considerably dorkier, with socks. I may keep them as my camp shoes after all.
We filtered water for our dessert and boiled water for our entree. Below: We had Pad Thai for dinner; Dark Chocolate Cheesecake for dessert.
Around 5:30, we started getting things together for dinner. Because this trip was rather impromptu, we brought pre-packaged dehydrated meals instead of taking the time to make homemade food. But it was still delicious. The Backpacker’s Pantry Pad Thai was filling and tasty. It had a yummy, spicy peanut sauce with noodles and vegetables. For dessert, we ended up having Dark Chocolate Cheesecake (instead of Tiramisu, as originally planned). It was really tasty, too! I was stuffed from dinner, so we decided to take a short walk down to a deep pool I had seen along the trail a way back. We sat on a rock and just enjoyed the quiet of the evening.
It got dark quickly down in the hollow, so we retired to our tent a little before nine. I listened to a book on my iPod and Adam read. I started to doze off well before 10:00. All through the night, I could hear a couple barred owls hooting, over and over and over again. Pretty soon, a whippoorwill joined in and sang through almost the entire night. I haven’t heard a whippoorwill since I was a child, so it delighted me to hear the song in the night again. I slept pretty soundly, until the roar of a train whistle woke me up around 2:00 in the morning. I could hear the wheels on the track so clearly; it seemed like the train was rolling through camp. I guess some distant sounds really carry on the quiet night air. When I awoke, I found I was drenched with sweat in my sleeping bag. It was in the mid-50’s outside, so the down bag was a bit too warm. However, if I slept outside my bag, I got cold quickly. I want to get a blanket and sheet for my sleeping pad to make summer camping more comfortable. Despite being hot or cold, I eventually fell back to sleep and stayed so until 6:30 a.m.
I got up before Adam and got the bear bag down, so I could start breakfast. We ended up leaving the bacon home because we didn’t want to carry a pan. Instead we had oatmeal, boxes of apple juice and hot chocolate. It was a satisfying breakfast on the cool morning.
We saw three bears, including one on the Appalachian Trail. Below: Another scenic pool on Jeremy’s Run; We encountered this loose dog on the trail (one of many). He apparently lives on the border of the park and runs the trail often.; Rocks in the stream bed were covered with moss.
We broke camp down quickly and were back on the trail around 8:00. The second day of hiking was substantially shorter and easier than the first day. With about 5.5 miles to cover, we knew we’d be back at the car by mid-morning.
The trail climbs ever so gradually along Jeremy’s Run. We passed lots of fantastic campsites along the stream. It’s no wonder this area is so popular with backpackers! We crossed the stream 14 times over the course of the morning. Because of all the dry weather we’ve had lately, none of the crossings were challenging at all. Most of them were bone dry, and the ones with water were still easily rock-hopped.
We took a snack break where the Jeremy’s Run trail crosses the Knob Mountain Cut-Off. From this point, the trail follows the same route as we’d used hiking out the day before. The grade becomes steeper for the last mile and eventually meets back up with the Appalachian Trail. For this section, I put my iPod back on again to help endure the uphill. “Rump Shaker” came up in the shuffle again, and after the first few moments, I spotted another bear. There must be something about that song that conjures bears! I did manage to get a few distant photos of this bear before he disappeared deeper into the woods.
About ten minutes later, we were back at our car and on our way. We stopped by the Elkwallow wayside, where I rinsed my face and used a flushing toilet! Plumbing is so exciting after being without it. On our way home, we stopped at McDonald’s for lunch. Coke and salty French fries taste absolutely amazing after a long hike. As luck would have it, their credit card machine was broken and they gave us our lunch for free! It was a fitting bonus for a perfect trip.
Trail Notes
Distance – 12.4 miles
Elevation Change – 2600 ft
Difficulty – 3. If you were going to do this in one day without stopping, I would up the difficulty slightly due to the length.
Trail Conditions – 3.5. The trail was very well-maintained. We saw evidence that the Knob Mountain trail had been cut back, but I can imagine in late spring, much of the trail could have some overgrown areas. The ground was well-traveled and there were only a few rocky spots around the streams.
Views – 1.5. The best chance of views are on the descent from the Knob Mountain summit down to Jeremy’s Run. After leaves fall, this may be slightly better.
Waterfalls/streams –3.5. You do get lots of chances to cross Jeremy’s Run. There was only a small fall near the base. If you want to photograph streams, you should have plenty of opportunities. You’ll also have a reliable water source.
Wildlife – 4. We saw black bears, a turkey, and scarlet tanagers; we heard whippoorwills and barred owls at night.
Ease to Navigate – 4. The trails are well-marked and just stick to the signs on the cement posts.
Solitude –3. This is a popular spot for backpacking and trail running. However, we felt that we were able to find our own peace in the woods. We also came across a dog that belongs to a nearby family that evidently roams the trails frequently, so we had a companion during part of the hike up from Jeremy’s Run.
Directions to trailhead:
Located in the northern section of Shenandoah National Park. Park at the Elkwallow Gap picnic grounds around mile 24.3 of Skyline Drive. The Jeremy’s Run trail begins next to the pit toilet at the parking lot.
This nearly 8-mile loop takes hikers deep into a beautiful, remote section of Shenandoah National Park. The trail passes bubbling streams, stands of hemlocks that haven’t yet fallen and crumbling stone walls left behind by families that used to live in the park. This post could also be called part four of the Backpacking 101 series, because we did this trail as a backpacking trip with the great folks from the Potomac Appalachian Trail Club.
Walking the Hazel Mountain Trail was peaceful and green.
Adam Says…
This was our first overnight backpacking trip together and served as our graduation trip from the Backpacking 101 course we took through PATC. We were unable to go on our previously-scheduled trip due to Christine’s sprained ankle she suffered on our Buzzard Rock hike. We were thrilled that our instructors gave us the opportunity for a make-up trip. You can read our other sections of the review of this class in Part One, Part Two, and Part Three.
The outing leaders, John and Jeanne, chose the Hazel Mountain – Catlett Mountain loop for the trip. The hike winds around the mountains and through pretty forest, but doesn’t lead to any summit views. The trail starts off from the Meadow Spring parking lot around mile 33.7 on Skyline Drive. Like many trails in Shenandoah National Park, the Hazel Mountain trail descends from the road. You will stay on this trail until you reach the Catlett Mountain Trail. The Hazel Mountain Trail is also marked on maps as a horse trail, so you may encounter horses on many of the trails around this area.
Day One Hiking: Shortly after leaving the parking lot, you will see a junction with the Buck Hollow Trail (a tough loop hike). At .3 miles, you reach a trail junction with the Buck Ridge Trail (that is the loop back from the Buck Hollow Trail). At 1.6 miles, you come to the first junction with the White Rocks Trail (another loop trail). At 2.2 miles, you will see a post marking the junction with the Catlett Spur Trail, marking where you will rejoin the trail after you complete the loop. While you just descended about 1000 feet, the trail begins to ascend from this point, gaining about 400 feet over the next .6 miles. Around 2.8 miles, you will see the other junction with the White Rocks Trail. Around 3.1 miles, you will reach the top of the climb and take a right to continue on the Hazel Mountain trail. At mile 3.7, you will take a right on to the Catlett Mountain Trail. We picked a campsite near the top of this trail, as it does provide a close proximity below to a spur of Runyon Run, a reliable water source on the trail.
Day Two Hiking: Upon leaving camp, you descend down to the stream we used as the water source. Once you rockhop across Runyon Run, the trail ascends fairly steeply up 300 feet. At mile 4.7, you will take a right onto Catlett Spur Trail. The trail descends crossing over Runyon Run in a few spots. You will eventually pass an old stone perimeter wall, marking land that may have marked a boundary for a settler’s house or farm. At mile 5.6, you will come back to the junction with the Hazel Mountain Trail. Take a left on the trail and ascend for the final 2.2 miles back to the parking lot.
Our tent set-up at camp. Below: The backpacking group at the beginning of the trip; We took our packs off and enjoyed lunch at a boulder jumble near a stream; There were many different kinds of tents at camp… one of the group used a hammock.
Christine and I had a great time on the trip. We met up with our group at 9:30AM, reintroduced ourselves to each other, and got our packs ready for the trail. We divided up some group gear that we needed to share for the trip and weighed our packs for curiosity. I ended up with a little over 34 pounds in my pack and Christine had about 28 pounds. I would say that our average for the group was a little under 30 pounds, so it was manageable for an overnight trip. We hiked fairly fast, but we did take a few breaks to get a breather and eat some lunch. We hiked onto the Catlett Mountain trail and found our campsite around 12:30. We set up our tents and our kitchen area. We put up a tarp and brought all of our dishes, utensils and food to the kitchen site. Most of the group then decided to go down to Runyon Run, to load up some collapsible buckets for water for camp. This was a chance for us to try out our new Katadyn Hiker Pro water filter to refill some water bottles. When we hiked back up to the campsite, we happened to see an adult bear running from the direction of our campsite. Unfortunately (or maybe fortunately?), we never saw him again.
Shortly after getting back to camp, we experienced a scary moment. We thought two people had stayed back at camp when we went on the water run, but came back to see only John. We started to hear shouts from the woods, but we couldn’t distinguish if the voice was shouting “Help” or “Hello”. Our instructor grabbed his first aid kit and we continued to call back to the person. We shouted “Are you hurt?” and “What’s your name?”, but we couldn’t distinguish the response. We kept calling out and eventually we saw one of our group members emerge from the dense underbrush. He had spotted a timber rattler that rose up against him. He ran out of the way, but in his haste to get away from the snake, he got turned around and lost. He had lost his whistle along the way, so he resorted to shouting to try and find his way back to the group. It really shows that you can quickly get turned around and lost without your bearing in the woods.
We then learned how to hang a bear bag, tying a rock to a roop and throwing it over a branch (after dinner we substituted the rock with the actual bags to hang and tied the other end of the rope to a tree). Since we had some time to kill in camp, Christine and I decided to take a quick siesta in our tent before dinner. A storm quickly rolled in with loud thunder, high winds, and heavy rain. It rained for close to an hour. After it slowed to a light sprinkle, we made it back to the kitchen site, to find the rest of our group huddled under the tarp. Later, we ate an amazing dinner (which Christine will talk about) and cleaned up. After watching a nice sunset through the trees and hanging out with the group, Christine and I retired for the night.
This friendly buck visited our camp all weekend. Every time we were in our kitchen area, he came over to hang out. Below: Night falls at camp (notice all the rain on the tent!)
The next morning we got up early and worked on packing our gear. We ate a wonderful breakfast and then broke camp around 8:45AM. We finished our hike, arriving back at our cars shortly after noon. I think everyone was planning a victory meal after the trip, so we made a trip to McDonald’s in Luray.
We really enjoyed our first backpacking trip. It was great to have this experience with the Potomac Appalachian Trail Club. Our instructors were absolutely wonderful and really shared a lot of their experience with us. It was also great to meet a lot of nice people through the Backpacking 101 class that share a common interest and experience level. This trip really affirmed to us that we could handle doing an overnight backpacking trip and we are excited to try it again sometime in the very near future.
Christine Says…
On the eve of our backpacking trip, I was feeling exceedingly fretful. I wondered if I’d be able to bear the heat/humidity without passing out. I worried that I’d be such a sluggish hiker that I’d slow the whole group down. I had concerns about the storms forecast for the day. At one point when we were loading our backpacks. I looked and Adam and said “I don’t know if I’m cut out for this.”
But, wow… it turns out that I LOVE backpacking. It was simultaneously fun, challenging and relaxing. I was amazed at how comfortable my pack was – the 28 pounds felt balanced and easy on my back. I may have sweated like crazy in the heat, but I managed to stay hydrated and felt really strong the entire hike. I had such a sense of tranquility falling asleep in our tent after dinner, listening to the sounds of evening birds and the wind rustling in the trees.
I can’t say enough great things about our PATC (Potomac Appalachian Trail Club) trip leaders – John and Jeanne. Their expertise made me feel really safe and confident on my “maiden voyage” overnight in the woods. Actually, I have nothing but great things to say about our entire backpacking group. Our fellow adventurers, Anthony, Suzanne and Ed were all friendly and fun people.
Adam throws a rope over the fallen tree to create a bear hang. He used a rock to make the throw easier. Below: A lot of planning went into picking the right spot for the hang; three waterproof bags were hung. The bags contained anything with a scent.
Adam already did a thorough job describing the terrain and features along the route, so that leaves me to talk about FOOD (and maybe a few other things, too). When I think of backpacking, I think of tuna pouches, power bars, beef jerky and freeze-dried, pre-packaged meals. But, Jeanne is a true backcountry gourmand (she brought a lobster roll for her packed lunch!). For dinner, we feasted on Chicken with Thai Peanut Sauce and Rice and Curried Couscous with Peas and Cashews. We even had banana pudding, replete with fresh banana slices and Nilla Wafers for dessert. Cleaning up was super-easy, since we did most of the cooking using Ziploc freezer bags. You can pour boiling water right into the bags, and avoid dirtying a pot. Individual utensils and bowls were cleaned by thorough eating (not a crumb left behind) and then sanitized with more boiling water. People either drank the water or broadcast it into the woods – away from camp. Either method is acceptable for Leave No Trace practices. The main goal is not to send any food particles into the woods.
Breakfast the next morning exceeded all my expectations! Of course… there was instant oatmeal and hot chocolate, but there was also real BACON and cheesy hashbrowns! Jeanne brought Boar’s Head shelf-stable bacon, cheddar cheese, butter and dehydrated potatoes. I decreed to Adam that we shall always have bacon when we go backpacking. I’m totally spoiled for backcountry breakfast now!
How cool is this… nice, crispy bacon in the backcountry. Below: We also had cheesy hashbrowns for breakfast. Below: On the hike out we passed several sections of old, stone walls; The group post-hike… all a lot sweatier than when we started.
Over breakfast, Adam and I spent some time talking to our trip leader, John, about everything from gear to favorite backpacking spots. He’s like a walking encyclopedia of backpacking expertise.
I have so many fantastic memories from our first real backpacking trip… the outgoing buck that hung out with us all weekend, Adam sitting straight up in his sleeping bag (twice) to accuse me of being a bear, the feeling of being away from complications and civilization, but most of all, making new friends who might become future outing companions.
It was a rewarding experience, and I can’t wait to get out there again!
Trail Notes
Distance – 7.8 miles loop
Elevation Change – About 1000 feet, but there are also some ups and downs of about 400 feet on the Catlett Mountain-Catlett Spur Trail loop.
Difficulty – 3
Trail Conditions –3. The trail isn’t too rocky, but is overgrown, especially the Catlett Mountain-Catlett Spur Trails.
Views – 0. There were really no views of anything from this trail, since it is through a thick wooded area.
Waterfalls/streams –2. Good water sources, but nothing too scenic.
Wildlife –4. With people in our group seeing deer, a bear, and a timber rattler, there should be a decent chance to see wildlife here. We also saw an American Redstart and a few red-spotted newts on the trail.
Ease to Navigate –3. There are lots of spurs off of the trails, but everything loops back at some point. Pay attention to the cement posts and you shouldn’t have any difficulty.
Solitude – 2.5. The first section down to the White Rocks Trail seemed to include all the traffic that we saw. This is popular with many day-trippers, since it is one of the first parking lots in the northern portion of the Central District of Shenandoah National Park.
Directions to trailhead:
On Skyline Drive, park at the Meadow Spring parking lot between mile markers 33 and 34. The trail starts at the southern end of the parking lot.
This 9.8 mile circuit hike offers all the best of Shenandoah – panoramic views, bubbling streams, a swimming hole and even a nice final stretch along the Appalachian Trail. It comes close to our 10 mile limit for a day hike, but it’s definitely well worth the effort.
The view from Chimney Rock is very pretty on a clear day.
Christine Says…
The Riprap trail has long been on my list of hikes to tackle in Shenandoah National Park. Last Friday, we finally got around to it. I have to admit, the nearly ten-mile length and over 2,300 feet of elevation gain intimidated me just a little. The hikes we’ve completed that are close to that length (i.e. McAfee Knob or Mount Rogers) both have substantially less elevation gain. But, we had a free day and beautiful weather, so we decided to go for it. I’m so glad we went because the scenery on this trail showcased everything I love about Shenandoah. And, honestly… hiking 9.8 miles really wasn’t that hard.
We started the hike from the Riprap parking area at mile marker 90. We turned right at the end of the parking lot and followed the Appalachian Trail uphill for about a third of a mile. At the intersection with the Riprap trail, we turned left. The trail went alternately downhill and uphill for about three-quarters of a mile. We passed around a talus slope and came out to a viewpoint near Calvary Rocks. This was a great place to pause and take in the panoramic scene of the valley below. About a third of a mile downhill past Calvary Rocks, we arrived at Chimney Rock. I found this to be the prettier of the two views – but they were both very nice. The trail was especially pretty in late May because of all the blooming mountain laurel, wild azaleas and rhododendron. There were some sections that were so lush, I felt like I was walking through a tunnel of flowers.
Wild Azaleas, Rhododendron and Mountain Laurel. Below: The view near Calvary Rocks; Adam taking in the view from Chimney Rock.
From Chimney Rock, the trail follows a ridge for a while, with many nice views between the trees. There is still quite a bit of evidence of forest fire damage from the late 1990’s in this area. The mountainside is still rather barren and charred stumps are visible. Slowly, the trail descends into Cold Springs Hollow. We passed through some of the densest mountain laurel along this section. We saw and heard so many beautiful birds – everything from American Redstarts to Rose-Breasted Grosbeaks.
Near the bottom of the hollow, we started to pick up the stream. It started off as a trickle, gaining volume and speed as we climbed continually downward. There were a few small, unremarkable waterfalls in the gorge, but we didn’t stop walking until the first stream crossing. Adam and I sat on a couple big boulders in the middle of the stream and ate a few handfuls of trail mix.
The swimming hole displayed beautiful rhododendron reflections and was full of brook trout. Below: The trout were hard to photograph through the water, but you get the point.
We stopped again just a couple tenths of a mile later at my very favorite spot along the trail – a wide, green swimming hole shaded by the forest canopy. We sat along the pool for a long while. We watched colorful brook trout lolling in the water. Every now and then, one would splash up and break the quiet surface of the water. The water was so clear. We could see reflections of the rhododendron on the surface and big, round stones at the bottom of the pool. The spot is made even more beautiful by the gentle slide waterfall that cascades down and fills the pool.
After leaving the pool, we had almost about three-quarters of a mile of level walking and a couple more stream crossings. A post marks the intersection with the Wildcat Ridge Trail. We turned left, and enjoyed our last little bit of flat walking for a while. We decided to stop and eat lunch before the big uphill climb began. We had ham and cheese on crackers, chips and some candy – perfect to give us lots of energy!
Climbing along Wildcat Ridge is a steady uphill for almost three miles, but the grade is generally moderate. There were several more decent views through the trees along this section of trail. And of course, more mountain laurel! I think I must have said “This is SO PRETTY!” to Adam a dozen times as we walked through the flowers. This section is where we saw our only other hikers of the day – a young couple hiking the loop in the opposite direction. We got to the junction with the Appalachian Trail faster than we thought we would. We were anticipating another .7 miles of uphill climbing when we reached the marker post. It’s always such a pleasant surprise when an uphill climb ends earlier than you thought it would.
Adam and I both enjoyed the more level terrain along the Appalachian Trail.
We took a left onto the AT for the final 2.8 miles of the hike. This section was typical Appalachian Trail in Shenandoah – rolling hills, nothing too steep. We saw a brief glimpse of a bear diving into the mountain laurel about a mile into this stretch. After about an hour of walking on the AT, we arrived back at our car. My feet were a little sore and tired, but other than that I still felt pretty energetic. Riprap now claims the spot for the longest hike I’ve ever done in a day! The 9.8 mile circuit took us just under six hours – including our very frequent snack and photography stops. On the way home, we stopped and rewarded ourselves with Lime Cream Slushes from Sonic – my favorite post-hike treat.
Adam Says…
This may also be the longest hike I have done but it was well worth it! This hike really does have it all and we hit it at a great time of year. The mountain laurel and rhododendron were at peak on this trail and we often felt like we were in some type of fantasy land while being surrounded by pink flowers.
The views from Calvary Rocks and Chimney Rock give you some great 180 degree views to the north of the mountains. I was a little worried that the payoff for this hike was going to be over in the first couple of miles of the hike, but I was glad to be wrong. After we continued the descent from Chimney Rock, there were still some open views along the way. Once we reached the bottom of Cold Springs Hollow, we saw a glimpse of a waterfall along the way. Shortly after the falls and after crossing the stream you come to the beautiful swimming hole that Christine mentioned above. This was a great spot to relax and enjoy seeing the fish, or you could take a quick, refreshing dip.
View Along the Riprap Ridge. Below: The swimming hole is such a beautiful place – even though we constantly had to bat the bugs away. Note the slide falls coming down to the pool.
Once we were done with relaxing, we took the hike up the Wildcat Ridge Trail. This is a constant uphill for about three miles and does include a couple of switchbacks on the trail. However, we felt that the terrain wasn’t too steep. You continue to observe nice views as it hugs closely to the side of the mountain. Once we met up with the AT, the trail didn’t have a lot of elevation gain/loss. I do suffer from plantar fasciitis, so my feet were quite sore on the rocks of this section of the trail.
Butterfly on Mountain Laurel. Below: Adam hikes through the mountain laurel along the Appalachian Trail.
For those interested in geocaching, I did place an earthcache at the overlook for Calvary Rocks. This is a way to learn about the geology of the area and there are a few steps to get credit for the cache:
I definitely enjoyed my first trip of the Riprap trail, but I know it won’t be my last. This would also be a great place to do a backpacking trip, since there is a reliable water source at the bottom of the trail. We really felt like it was one of the prettiest trails we have done in all of Shenandoah National Park. Part of that largely is due to the abundance of blooming wildflowers, but another part was the views. The Riprap trail really has it all!
Trail Notes
Distance – 9.8 miles
Elevation Change – Around 2300 feet. The hike is a mix of uphill and downhill, with one long, steady uphill stretch of about three miles.
Difficulty – 4.5 While the elevation gain is substantial, the trail is rarely steep. Grades are moderate. We scored the hike a 4.5 mainly due to the length.
Trail Conditions – 4 Nice trail to walk along! The stream crossings are easy.
Views – 4. You get the best views from the Chimney Rocks and Calvary Rocks overlooks.
Waterfalls/streams –3 The stream was on the low side when we hiked, but was still pretty. The swimming hole at the bottom of the hollow is very beautiful.
Wildlife – 4 We saw lots of brook trout, a little toad, many bird species and we even caught a glimpse of a black bear’s rear end diving into the laurel thicket.
Ease to Navigate – 2 A few turns to make along the way. There are a few false trails leading away from the main trail and also one tricky turn after a creek crossing.
Solitude – 3 We saw only two other people on the entire loop. We hiked it on a beautiful Friday in late spring. I imagine the trail is much more crowded on weekends. It’s a very popular short backpack loop.
Directions to trailhead: From Skyline Drive, park on the western side at mile marker 90. There is a parking lot specifically for Riprap hikers.
Flat Run Trail is a short, fairly easy hiking and mountain bike trail in Douthat State Park.
A mountain bike works best on this trail. Below: The trail crosses the creek a couple times.
Adam Says…
After our hike up Beards Mountain, we decided to try out a short bike ride. Douthat State Park is known to many bikers for having some great mountain bike trails and is host to the Middle Mountain Momma Bike Race. We did see a couple mountain biking on our hike to Beards Mountain. The man was looking happy at the top of the trail and the woman was pushing her bike up the hill looking miserable (I’m sure they had an interesting car ride home).
The Flat Run Trail is only a five mile out-and-back trail. I would strongly suggest having a mountain bike for this trail. Christine started off on her hybrid bike, but she didn’t enjoy jumping over the rocks in the creek without suspension. I continued on the trip solo since I do have a mountain bike. I found the trail to be fairly easy for mountain bikers. There are a few large rocky creek beds to cross as the trail goes in between the main road and Wilson Creek.
After your first few creek crossings, you will come across a bridge pictured above at about the .5 mile point. At the 1 mile mark, you should be able to see some great fishing spots to your left of Wilson Creek. At 1.5 miles, you will see the swinging bridge that leads to the Brushy Hollow Trail. At 2.25 miles, you will see the beginning of the Stony Run trail. At mile 2.5, you will reach the end with a trail that connects to a parking lot a few feet ahead to the right. This marks the end of the trail, so you can return the way you came or bike along the road back to your vehicle.
While it was a short bike trail, I did enjoy seeing the creek along the way. The trail wasn’t too bumpy (except for crossing the creeks) compared to other mountain bike trails I have done.
Christine Says…
I don’t have a mountain bike, so after two seconds of jarring bumps, I cut through the woods and continued riding on the road. That’s all I have to say about that.
Trail Notes
Distance – 5 miles
Elevation Change – Negligible. Hardly any elevation change. It is called Flat Run for a reason.
Difficulty – 2. Hiking or mountain biking it should be fairly easy. Most mountain bikers would give this a 1.
Trail Conditions – 3.5 A few creek sections to cross, but other than that, it’s well maintained.
Views – 0. The trail is scenic in spots along the creek, but there isn’t anything very scenic on this trail.
Waterfalls/streams –2. The path does run along Wilson Creek for part of the trip.
Wildlife – 1. You may see fish and minnows in the creek if you stop by to look.
Ease to Navigate – 4.5
Solitude – 4. I didn’t see any people on the trail. I think for mountain biking, people do most of the more serious trails over this one.
Directions to trailhead: Take I-64 to exit 27 near Clifton Forge, VA heading north on state route 629. Continue on this road until you enter the park. In Douthat State Park, the trail begins about .25 miles south of the park office before the fee station. However, you do need to pay the fee before parking and using the trails. There is a parking lot and sign for the beginning of the trail.
This 4.2 mile hike leads you to a PATC cabin as well as a cabin once owned by a family from the mountain.
The Corbin Cabin sits alongside the Hughes River in what used to be known as Freestate Hollow.
Adam Says…
It was great to finally get out and do some hiking after the harsh winter! I think it had been since November since we were able to actually enjoy a hike. After some debating on which trail would be “less muddy”, we decided to try this hike. We were surprised that the ground was actually in good shape and not muddy like we were expecting. The hike’s main draw is the historical interest. The Corbins and Nicholsons were two families that lived in this area since the end of the Revolutionary War until the park authorities made them leave.
You begin the trail from the cement post across from the parking lot. You start the trail walking through an area of mountain laurel that will bloom nicely in the Spring. The trail descends through an elevation loss of 1500 feet over 1.4 miles. Around the first half of a mile, you will begin to see a stream off to your left. At .9 miles, you will come across some of the remnants of the families that inhabited this hollow through views of a rock wall to your right. Downhill to the left you will see ruins of John “Russ” Nicholson’s cabin. At 1.4 miles, you will hear the rushing of the Hughes River and see the ruins of an old cabin to the right that belonged to John T. Nicholson. You can walk over to this area and peek inside to see the small one-room dwelling. There is lots of glass and rusty metal, so be careful if you inspect this area. You will see the Corbin cabin across the river. You will need to rock-hop across the river, which is usually not too difficult. This time, the water was higher than normal and we only had to partially put our feet in the water to get across.
The Corbin cabin is available to rent from the Potomac Appalachian Trail Club. There are access points here to connect to Old Rag. We plan on trying that out in the future sometime for a weekend of living like mountain folk.
The Nicholson Cabin is across the river from Corbin Cabin. It’s slowly sinking back into the forest.
After you cross the creek to the cabin, take a right to join the Nicholson Hollow Trail. After a short distance, you will have to do a little more rock-hopping as it crosses Indian Run. You will start your steep ascent back up to Skyline Drive and at 3.6 miles you will reach the road. When you come to Skyline Drive, take a left, heading south for about 75 yards. You will cross the road and join a short spur trail. After less than .1 mile, you will come across an intersecting trail with a cement post. This is the Appalachian Trail. Take a right, heading North on the Appalachian trail, you will descend and ascend for another .6 miles until you reach the parking lot.
Christine Says…
While this hike doesn’t offer any waterfalls or sweeping views, it does provide one of the park’s best peeks into area history. The trail begins steeply downhill for about a mile until you reach the bottom of the hollow. It’s a big drainage area with many small streams that pour into the Hughes River.
I love seeing all the remnants of old homesteads tucked into the woods. The main homesite, which lies on both sides of the Hughes River is such a perfect and idyllic spot. If I were to choose anywhere in the park to build a home, I think it would be right here. I can understand why John Nicholson was so heartbroken to leave. I love to imagine what it would be like to go to bed each night listening to the bubbling sounds of the river and see the sun rise each morning between the mountain folds visible from the front porch.
We had the homesite to ourselves for a little while. Fifteen minutes later, a couple guys with fishing poles arrived and we were on our way. The long arm of the loop starts from Corbin Cabin and climbs steadily uphill for about two miles. Most of it is moderate uphill climbing, but one section that passes through a thicket of mountain laurel is quite steep. The final .6 miles of the hike follows the Appalachian Trail.
On the AT, we encountered a lost beagle. She leapt out of the woods at us, probably expecting to see her people. She had a collar, an identification tag and the remnants of a broken/frayed leash. As soon as she realized she didn’t know us, she darted back into the woods.
We love dogs, and there was no way we were going to leave the beagle behind. We tried to corral her in, using low voices and lots of “Good dog!” calls. However, she was obviously terrified of strangers and started howling pitifully. Bit by bit, we were able to get closer and closer to her. We were just about to catch her when heard voices shouting down the trail, and the dog sprinted away. Thankfully, this time she was running toward the call of her owners. They were all happily reunited. It turns out the dog broke her leash four hours earlier when she chased something away from camp.
I guess even when they’re leashed, dogs can get into trouble in the park. I’m always surprised how many dogs we see running free with hikers. It’s both good practice and park policy to keep dogs leashed on park trails.
Since this was our first real hike of the season, we were both pretty tired at the end. We’re definitely looking forward to hitting the trails more regularly now that the weather is turning warmer.
Trail Notes
Distance – 4.2 miles – loop.
Elevation Change –1500 feet.
Difficulty – 3.5 The hike descends and ascends fairly steeply.
Trail Conditions – 4. The trail is in good shape. There were a few blown-down trees covering the trail due to the winter. Leaves on the trail make for a slick surface when going downhill.
Views –0. You are deep in the woods for the entire hike.
Waterfalls/streams –2. Near the cabins, you have a nice opportunity to see the Hughes River.
Wildlife – 1. We didn’t see anything alive, but found remnants of deer that didn’t survive the winter. Expect to possibly see bear in the area. Heard pileated woodpeckers and saw juncos.
Ease to Navigate – 4. Trails are clearly marked.
Solitude – 3. This trail isn’t the most popular due to the steep terrain, so you should likely only encounter people around the cabin and river.
Directions to trailhead: From Skyline Drive, park on the western side at mile marker 37.9. Cross the road. The trailhead begins at the cement post across from the parking lot.


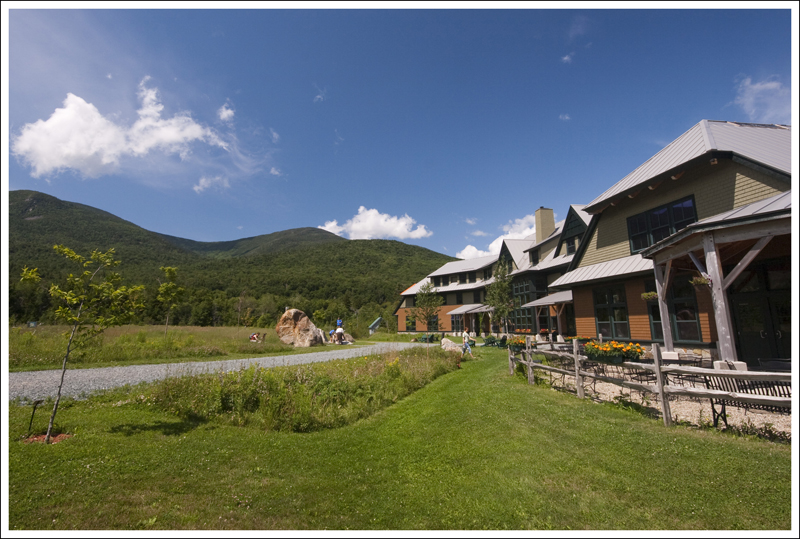