Spruce Knob – Seneca Creek (WV)

This 16.5 mile overnight backpacking trip has cooler temperatures in the summer, beautiful streams and waterfalls, high mountain meadows, abundant berry bushes, and even an old plane wreck to explore. It’s a great change of pace from hiking the Appalachian Trail.

View the Full Album of Photos From This Hike

Hiking Along the Huckleberry Trail
The high meadows along this hike were beautiful! Below: Backpacks in the car; Everyone checks out the information at the trailhead; Suzanne picks ripe blueberries along the Huckleberry Trail; The Huckleberry Trail passes through several small meadows; Spruce-shaded areas on the Huckleberry Trail; Signage along the way.

Backpacks in the Car Getting Started Blueberry Picking
Views from the Huckleberry Trail Spruce Trees in the Sun Trail Sign

Day One…

Initially, we  planned on doing very little hiking in July this year.  Our goal was to stay out of the heat and to rest up a bit so we wouldn’t overdo things before we tackle our trip to New Hampshire later this summer.  But the weather was too nice and we had lots of invitations to go hiking.  Over the 4th of July weekend, our friends Anthony and Suzanne suggested we go on a backpacking trip together.  We always enjoy hiking with them, so plans were made to hike in the Spruce Knob area.  This was actually the second 4th of July weekend we’ve spent on the trail with Anthony and Suzanne.  A couple years ago, we did a trip to Dolly Sods.

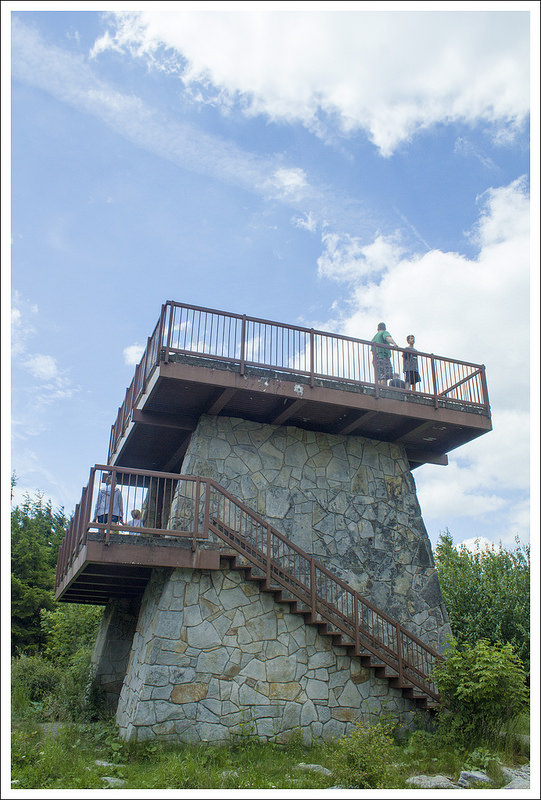
Our friends came down and spent the night before the trip at our house. We divided up some group gear and then packed the car and headed out fairly early to start our trip.  We arrived at the trailhead mid-morning.  We saw the short trail to the Spruce Knob summit fire tower, but we decided to visit that at the end of the loop the next day to feel like we had truly earned it.  Spruce Knob is the highest peak in West Virginia.

The printed maps we have found of this area are fairly outdated and online maps also don’t have the trails completely accurate.  The best map I have found of the entire area has been from Mid-Atlantic Hikes and it may be helpful to bring that along since there are lots of trail options here.

Descending to Junction
Adam descends to our junction with the Lumberjack Trail. Below:  Anthony makes his way along the Lumberjack Trail.  The trail has a reputation of being sloppy/muddy, but it wasn’t too bad when we visited; Someone moved a piece of the plane from the wreck site up to the trail – probably to mark the spot; Even after 4+ decades on the mountainside, the plane wreck is still mostly intact.

Walking the Lumberjack Trail Plane Window Fuselage
Mud Nettles First Large Meadow

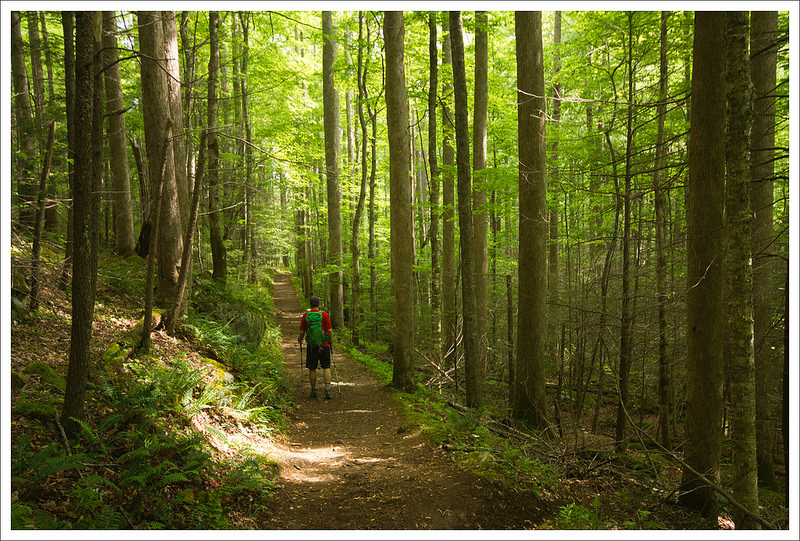
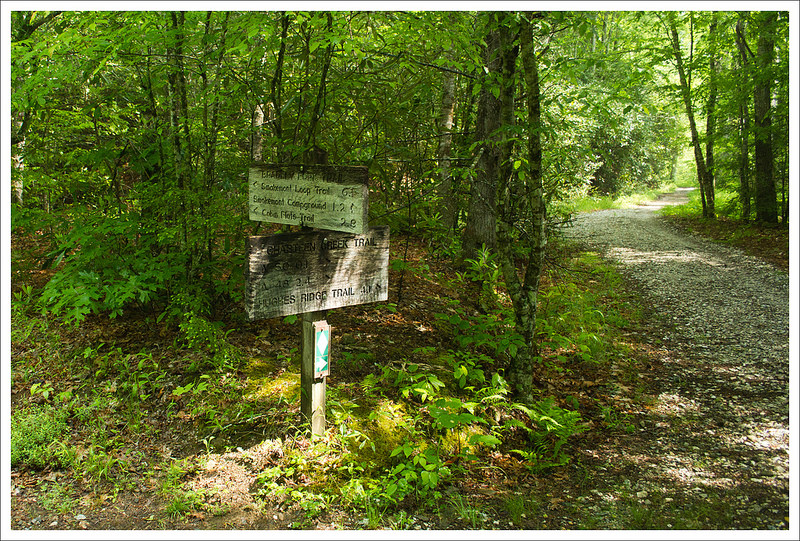
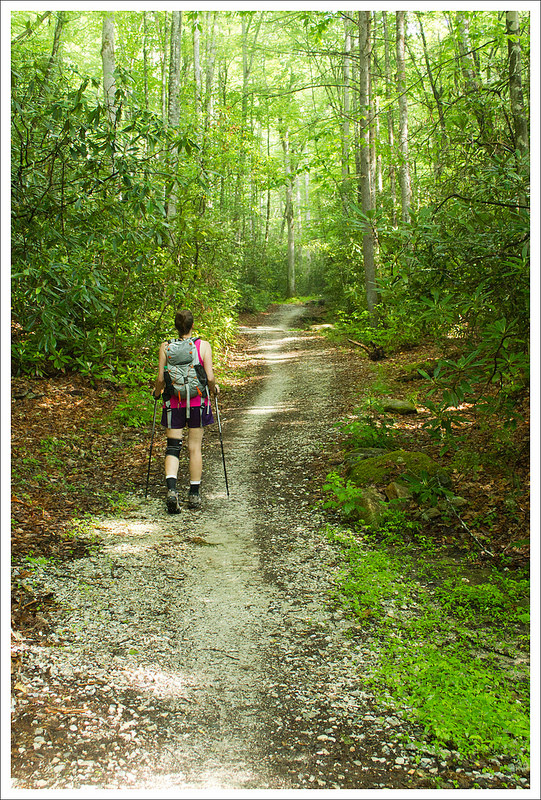
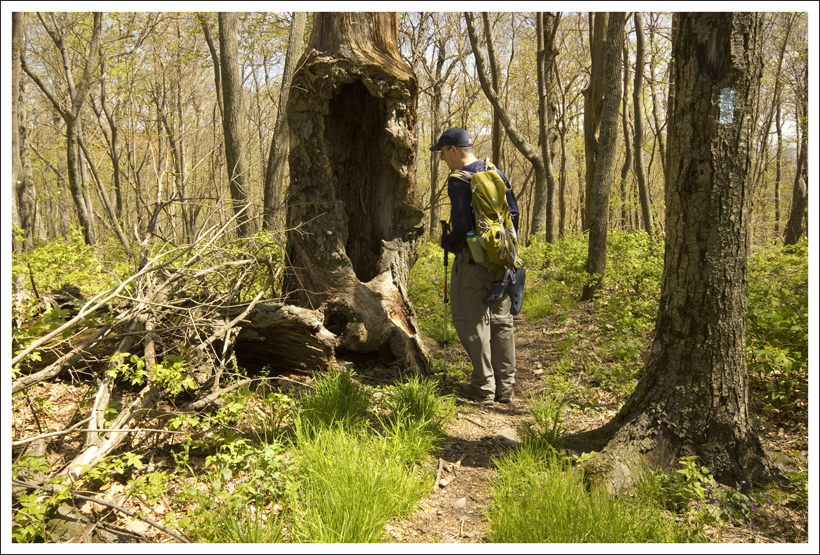
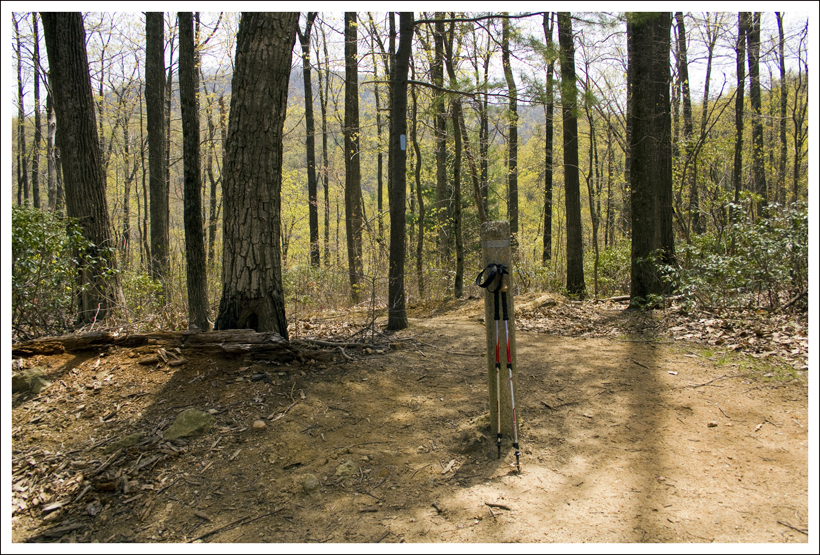
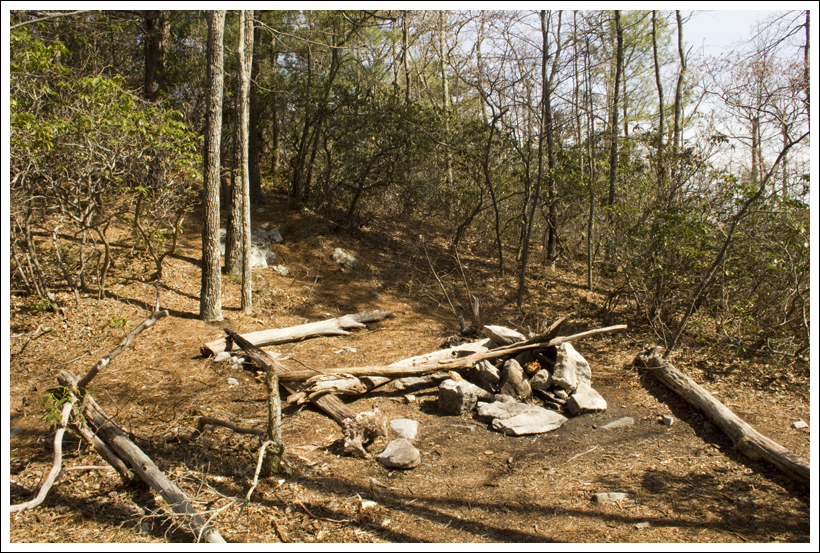
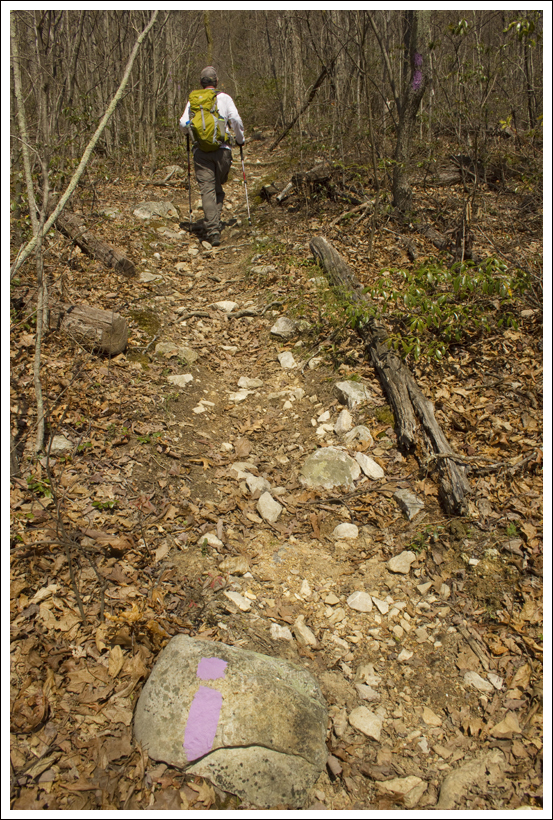
We started off our first day of the hike on the Huckleberry Trail (TR533).  The trail starts off with a little bit of crushed gravel on the trail, but that goes away in a short distance.  This first section of the trail was fairly flat or downhill and alternates from going from dense Spruce forests to more open fields. There are numerous dry campsites along the trail. In the fields, we found tons of blueberries that were just starting to ripen.  We stopped along the way for a few handfuls before pressing on.  At 3.4 miles, you will reach a campsite and a sign that points to the trail going right.  Follow this trail and in another short distance, you’ll come to another sign pointing you to go left as the trail winds around a dense forest area.  You’ll soon reach another sign that shows that the Lumberjack Trail is .4 miles away.  The last .4 miles of the Huckleberry trail drops rather steeply to the large trail junction at 4.7 miles.  Take a right at this junction to join the Lumberjack Trail (TR534).

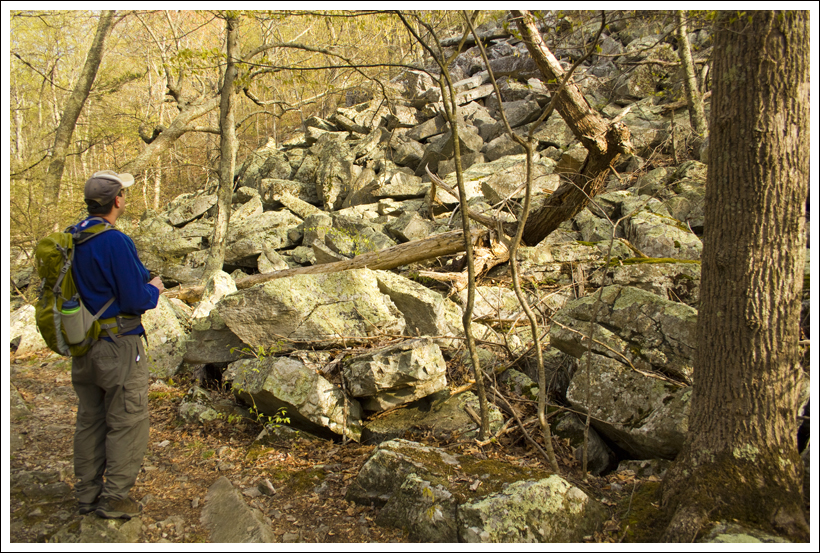
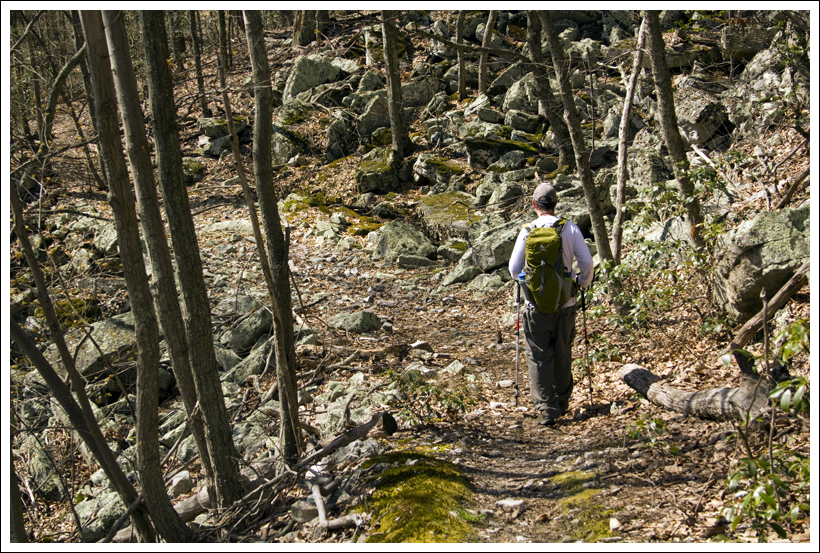
The Lumberjack Trail is a relatively flat trail.  We were warned that it can be very muddy and wet, but we found that even after some recent heavy rains there were only a few 20-foot sections that had mud to slog through.  Most of the trail had rocks or logs placed that saved us from having to get our shoes wet or muddy.  Around mile 5.8, we saw a plane door hung on a tree and a short, yet steep trail that led down to plane wreckage (a Piper PA-23 that crashed here in 1973 with two casualties).  Be respectful if you decide to visit this site.  We stayed on the Lumberjack Trail until it came to a junction with the High Meadows Trail at mile 6.7.  Take a left to join the High Meadows Trail (TR564).

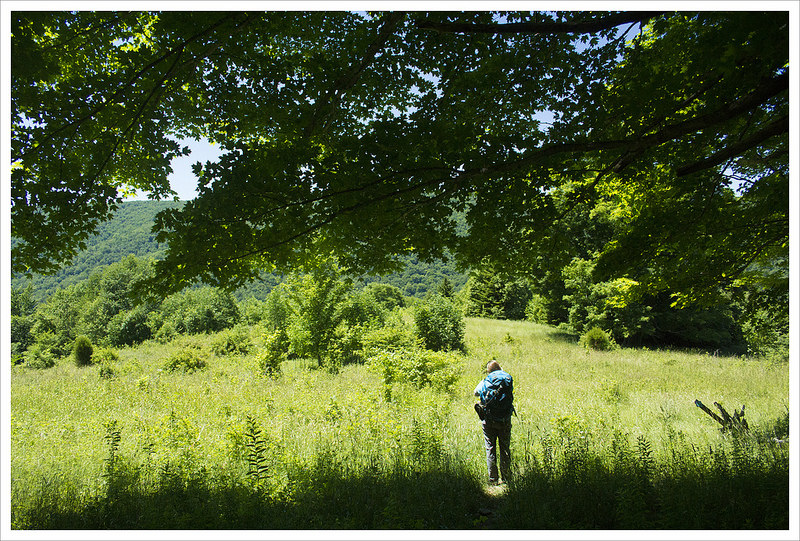
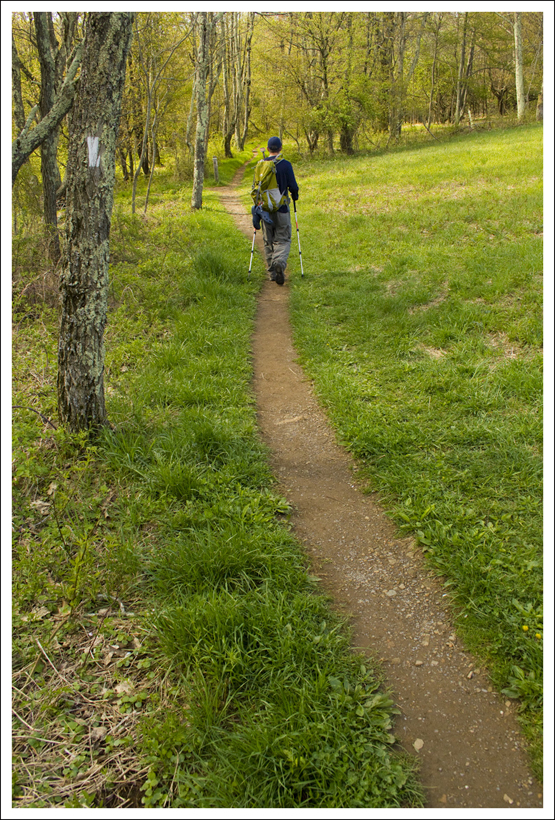
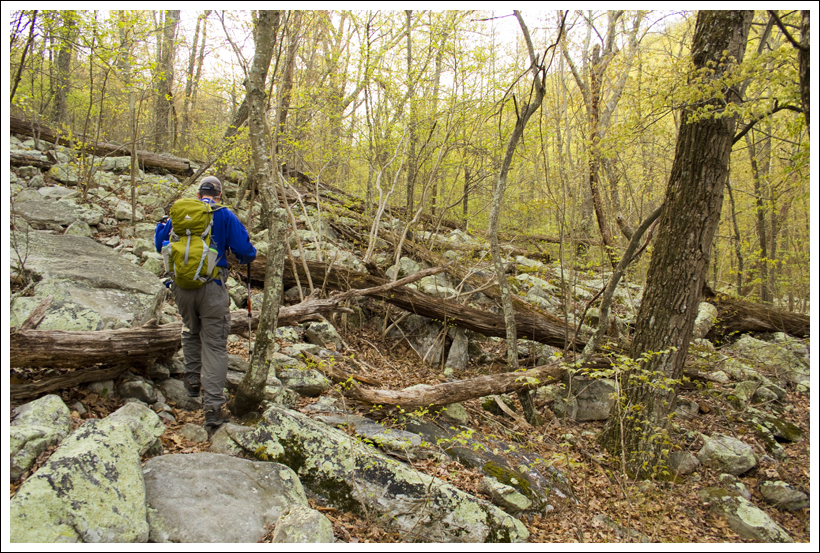
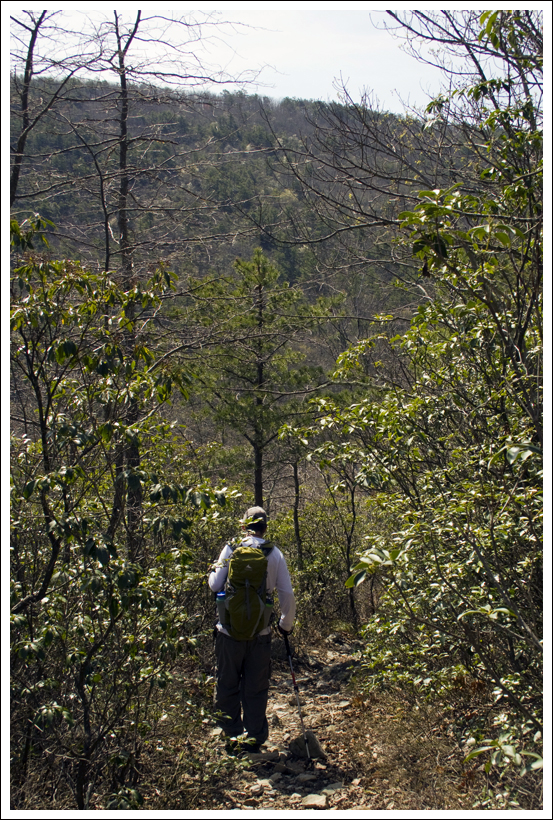
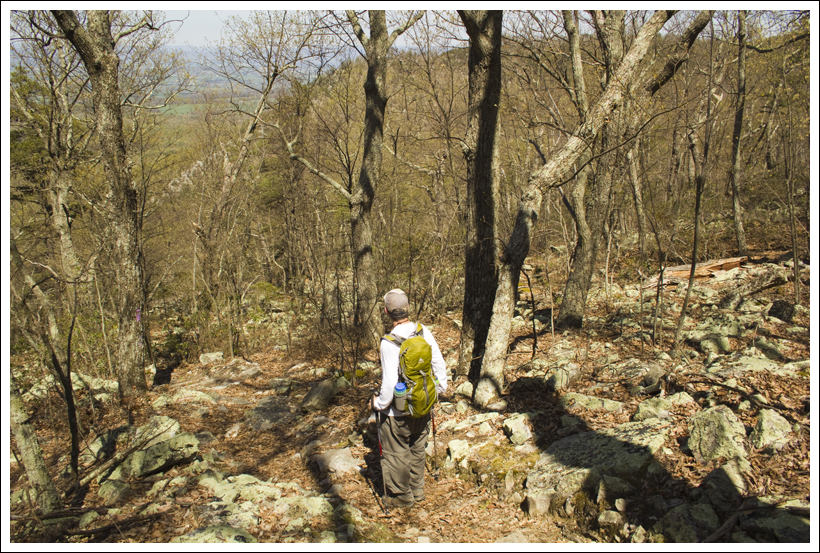
The High Meadows Trail was the most overgrown trail we came across.  There were times that it felt like we were bushwhacking.  There are stinging nettles everywhere along the trail and grass was up to our knees in some portions.  The High Meadows Trail also has alternating landscapes; you will go from dense forests to large open meadows several times.  Keep an eye out for blue blazes on posts or trees as you navigate through these high grass areas.  The trail descended through these gorgeous meadows and it is not surprising that we were thinking of the Sound of Music when we were walking through these fields surrounded by mountains.

High Meadows
The high meadows on this hike were so beautiful!  Below: Adam admires the high meadows; Grass in the meadows was tall;  There were several meadows separated by short sections of shade;  Most of the shady spots were densely overgrown with berry brambles; Black-eyed susans; Adam crosses out of the final meadow.

Adam in Meadow Meadow Walking Shade Between Meadows
Overgrown Susans Leaving the Meadows

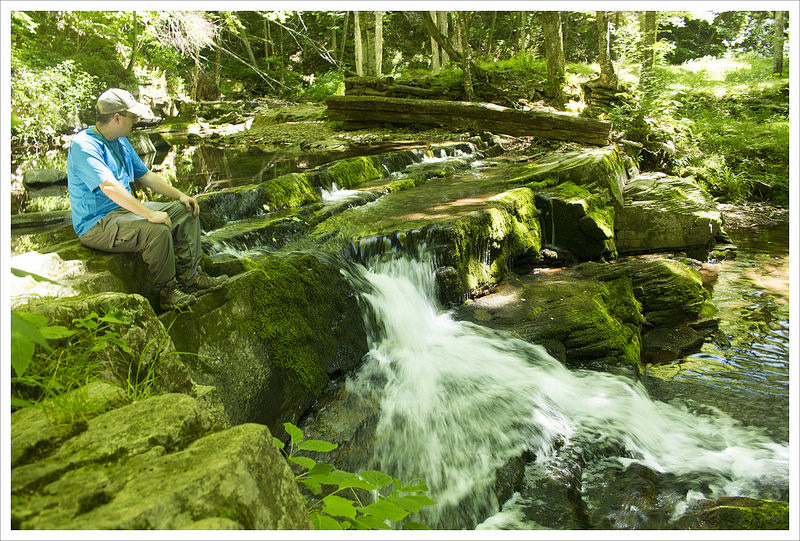
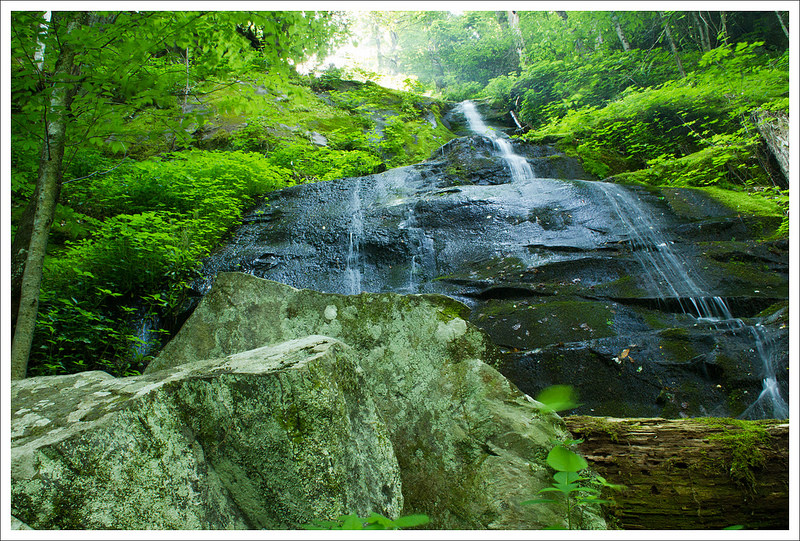
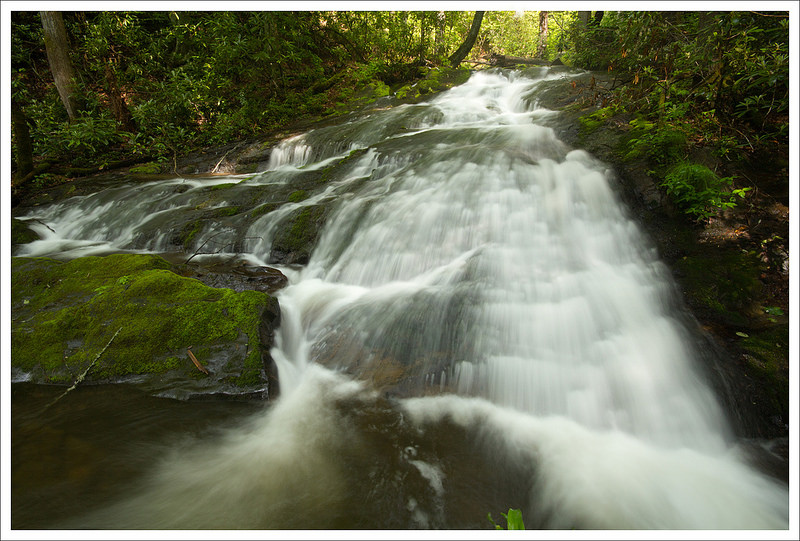
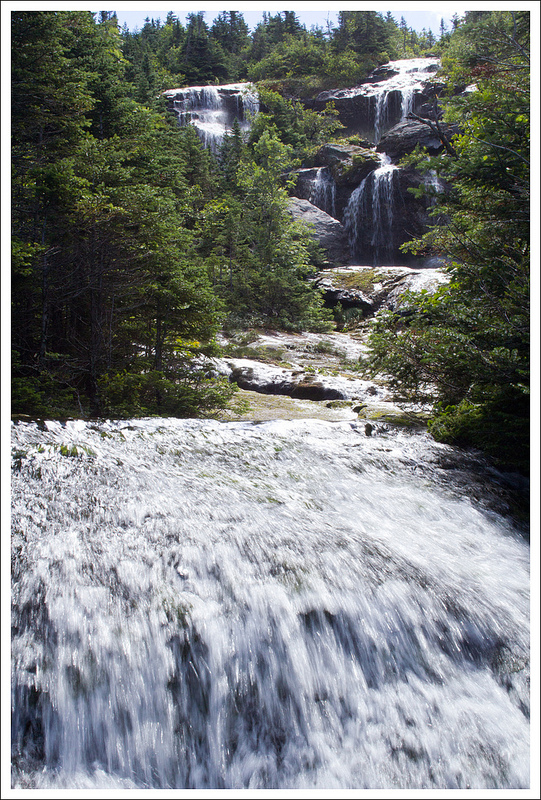
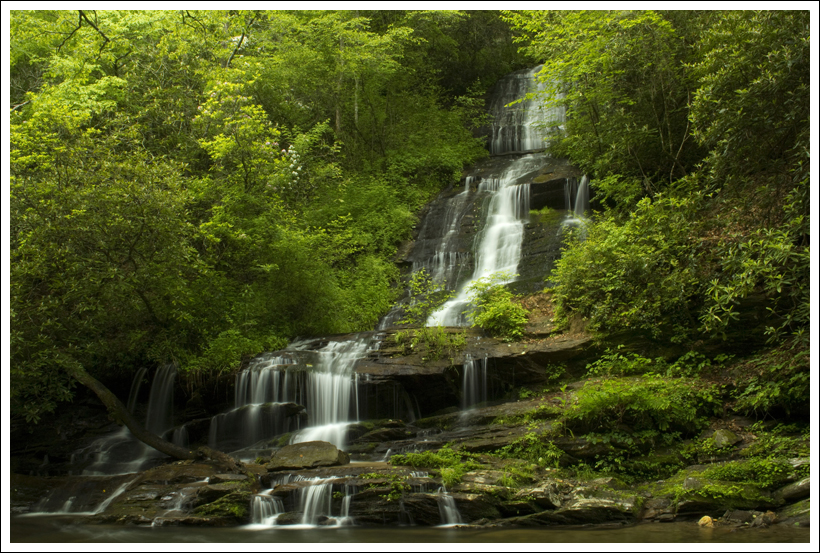
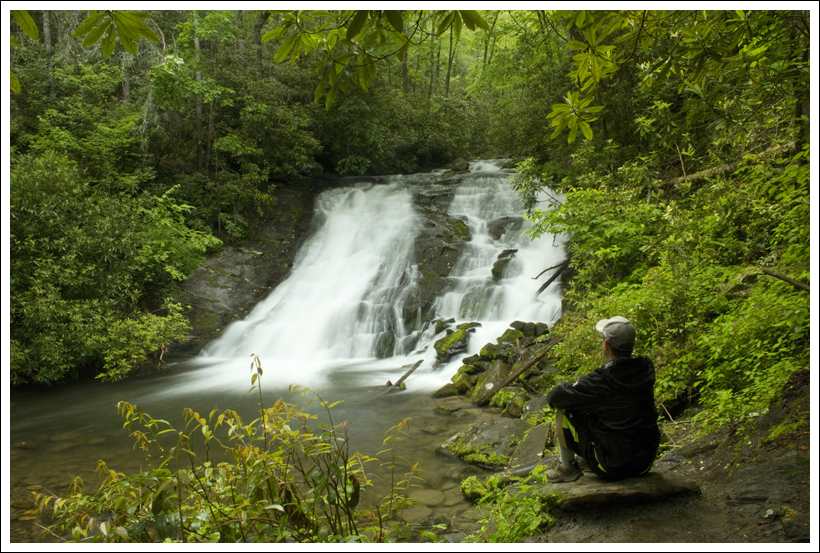
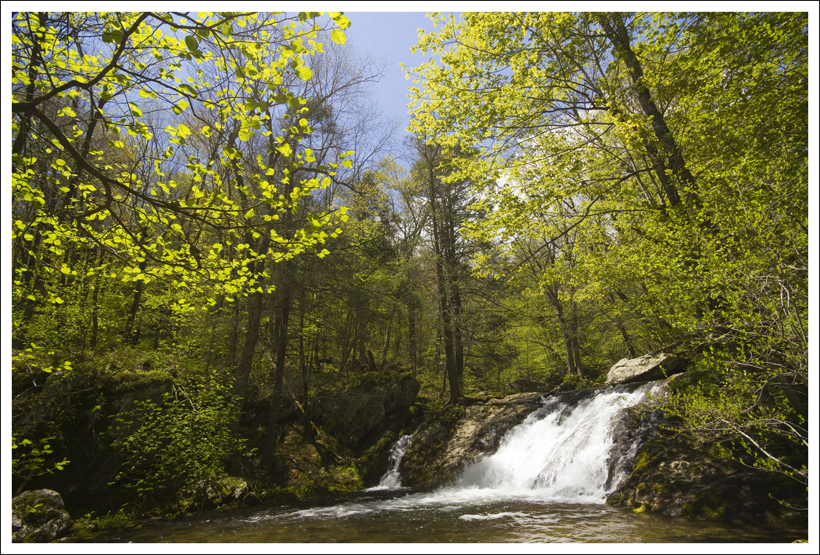
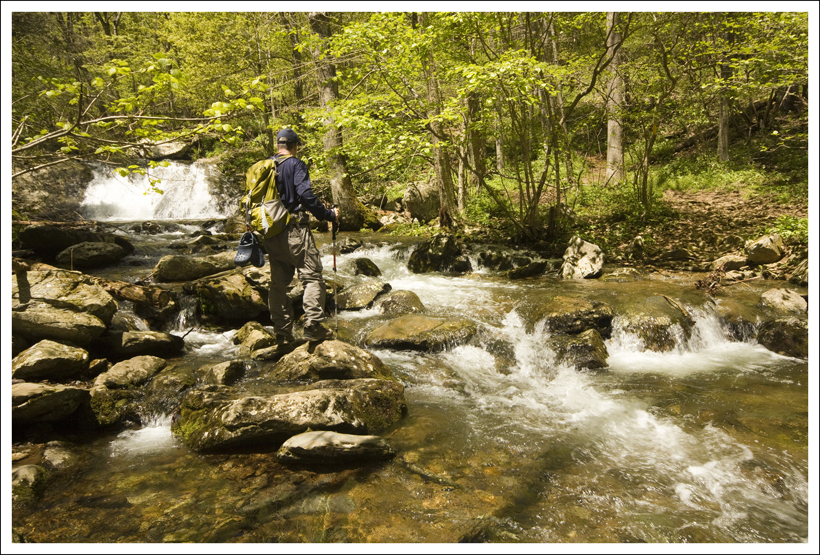
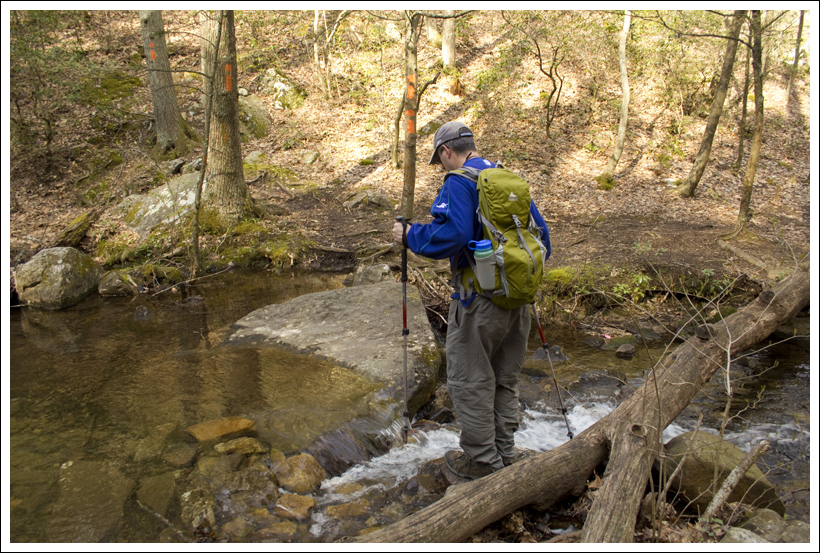
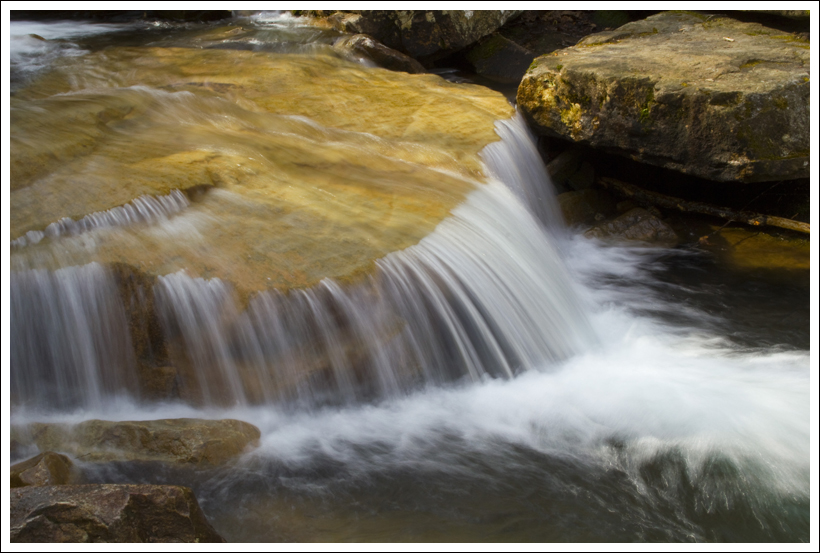
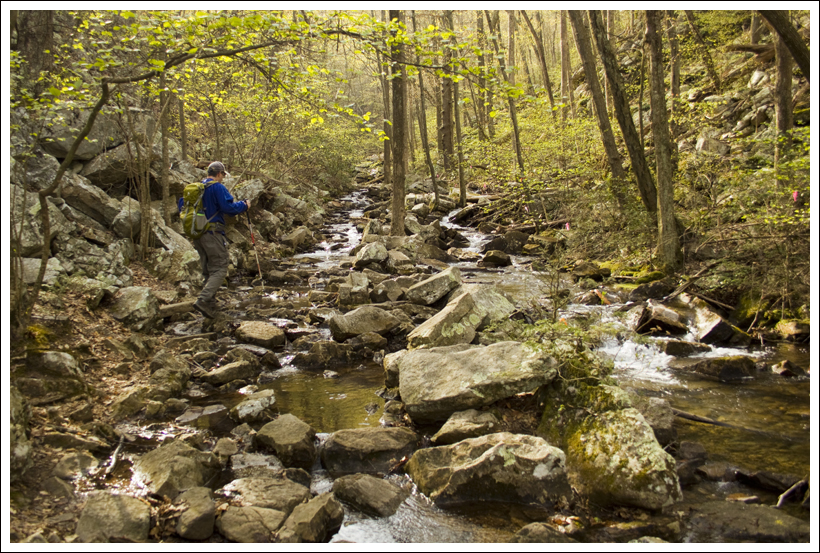
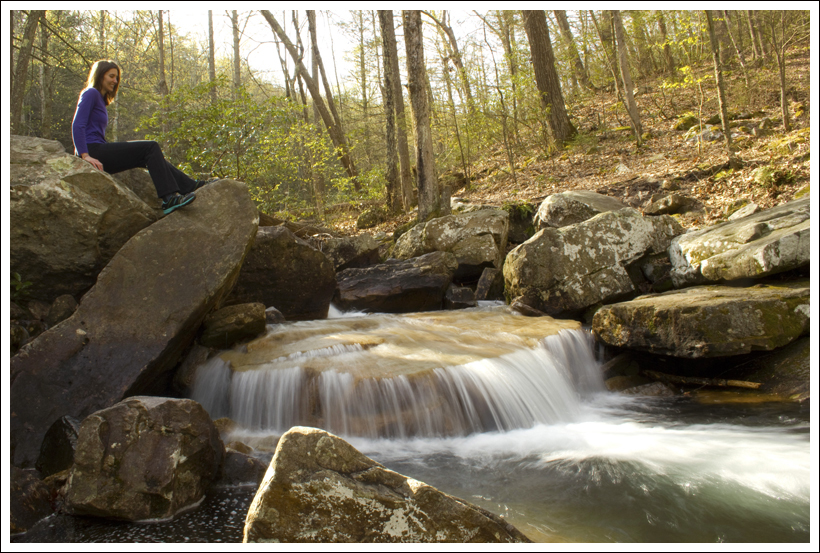
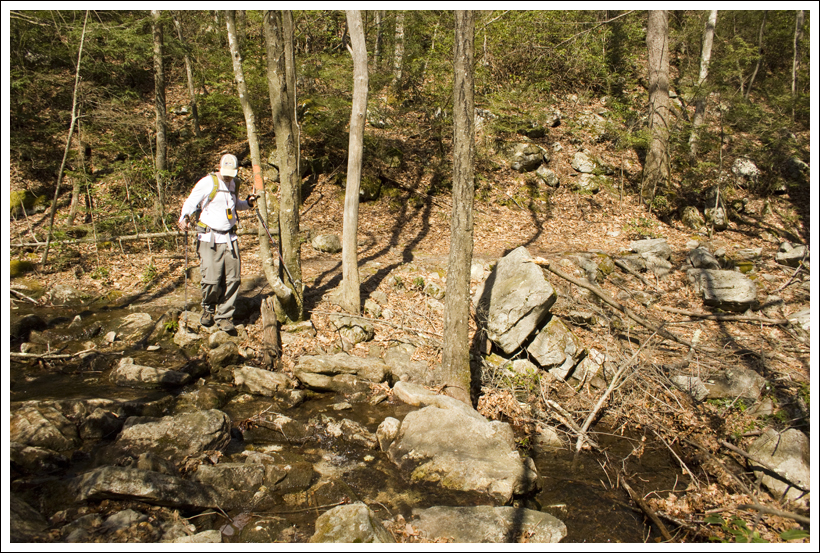
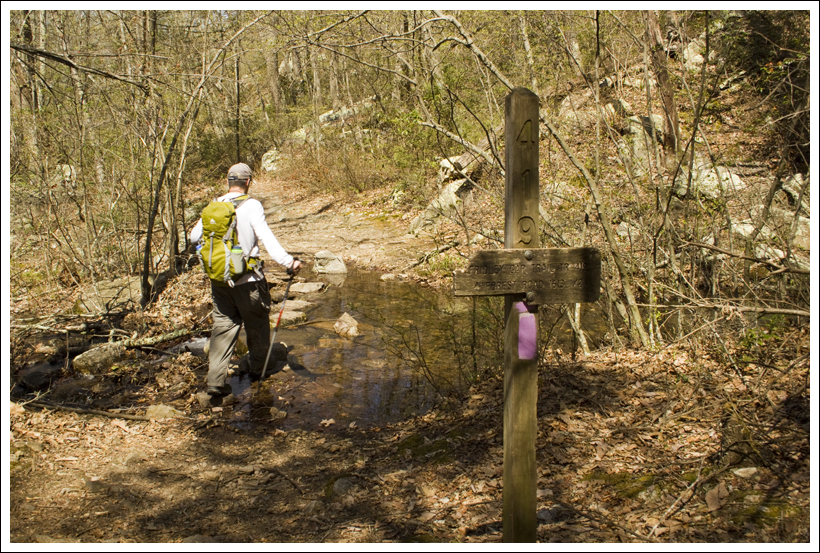
Eventually, you will enter into the woods again and cross a small creek.  At 8.6 miles, you will reach another trail junction. Take a right here and you will descend even more as you make your way through a scenic forest landscape.  You will soon hear water flowing from Seneca Creek below you.  The trail crosses the creek and comes to a junction with the Seneca Creek Trail at 9.1 miles.   At this point, you will cross Seneca Creek to reach the trail on the other side.  The water was flowing to make a nice small waterfall.  Before we crossed, we ventured just a short distance (about 75 yards) to the right down the Seneca Creek Trail and came across one of the most beautiful waterfalls/swimming holes I’ve seen – Seneca Falls.  We dropped our bags on the trail and scrambled down to reach the base of the falls.  There was a large cavernous rock overhang to the right of the falls.  In the water, we could see brook trout swimming around, occasionally breaching the water to catch flies that were dancing along the water surface.  Once we climbed back up from the basin, another group came down to the falls jumped into the swimming hole at the base of the falls.  From the screams when they jumped in, we could tell the water was extremely cold.  We made our way back to our original junction and then determined the best place to cross the creek was at the very top of the small waterfall.  We all made it across safely.

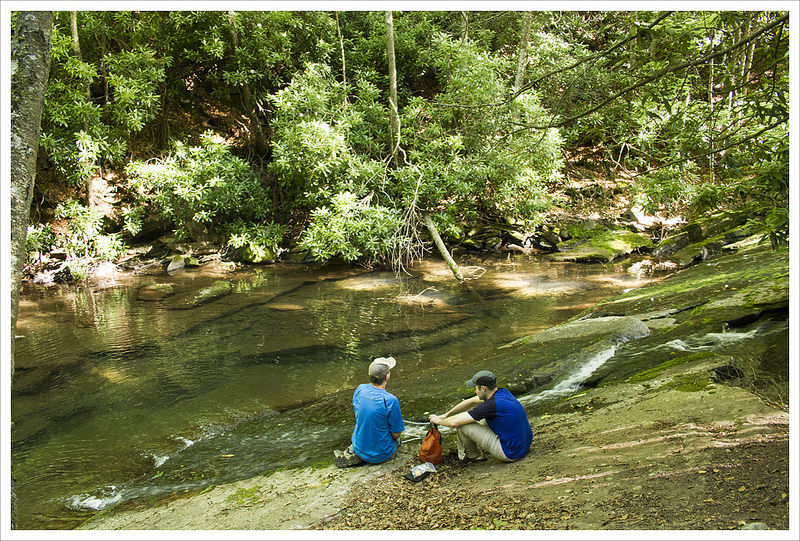
Christine hit a wall with her energy level, so we stopped a few minutes to eat a snack on the opposite side of the creek at a nice campsite.  Knowing we still had a distance to go, we pressed on further.  The Seneca Creek Trail went to the side of Seneca Creek for the entire way.  We crossed the creek in a couple of places.  Around mile 10.4, we began to see a ton of campsites.  We were surprised to see that there were so many people that were camped here overnight.  When we kept passing people on the trail, we felt that we would have our picks of campsites, but we didn’t realize how many people come here a different way (mostly from the lower Spruce Knob parking lot and taking the Seneca Creek Trail to these campsites).  Anthony and Suzanne hurried ahead, while I waited a while for Christine to try and regain her strength.

Seneca Falls
Seneca Falls is an impressive waterfall with an emerald green plunge pool. Below: Leaving the high meadows for Seneca Creek; A small waterfall above Seneca Falls; A side view of the falls; The trickiest of the stream crossings; Pretty wildflower; Lovely Seneca Creek.

Start of the Seneca Creek Trail Small Waterfall Seneca Falls
Crossing Wildflower Seneca Creek

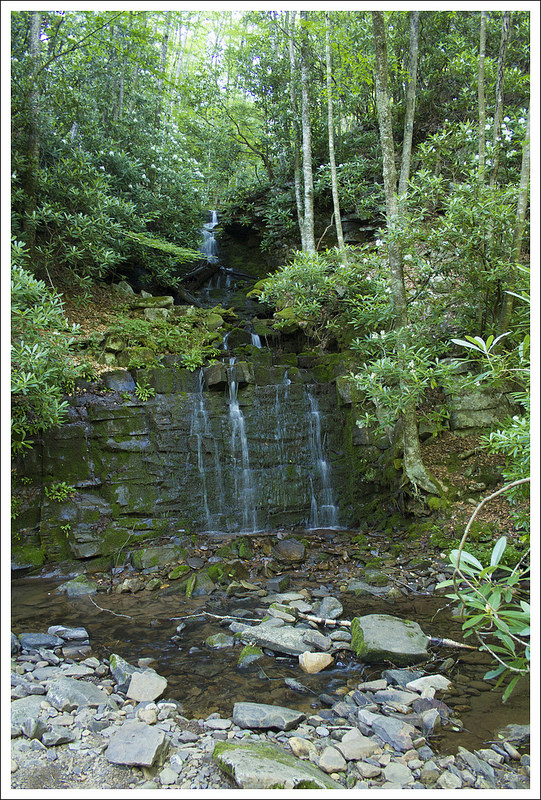
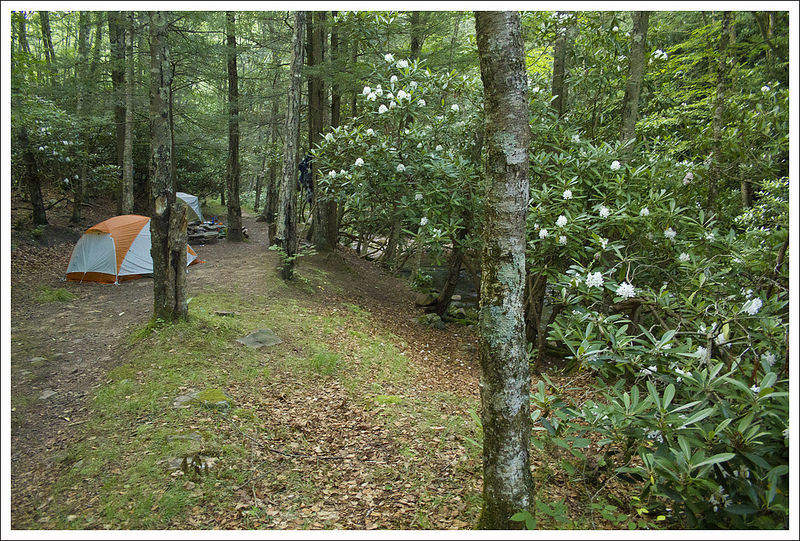
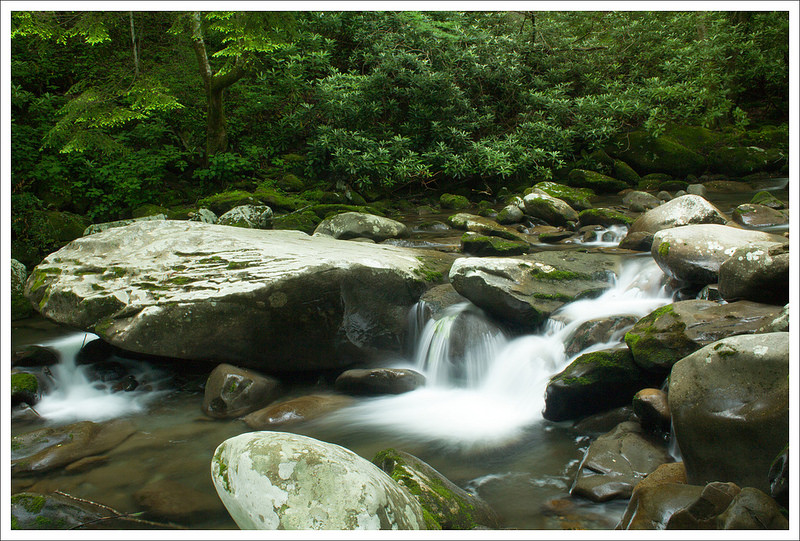
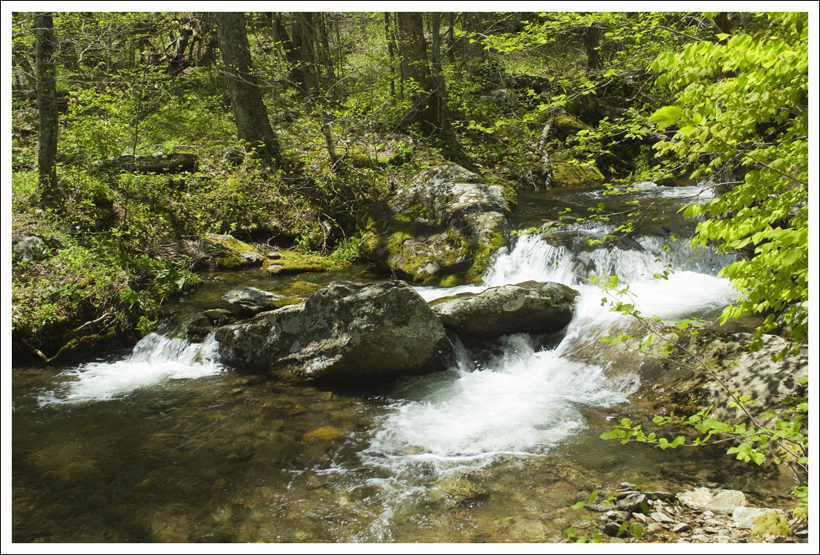
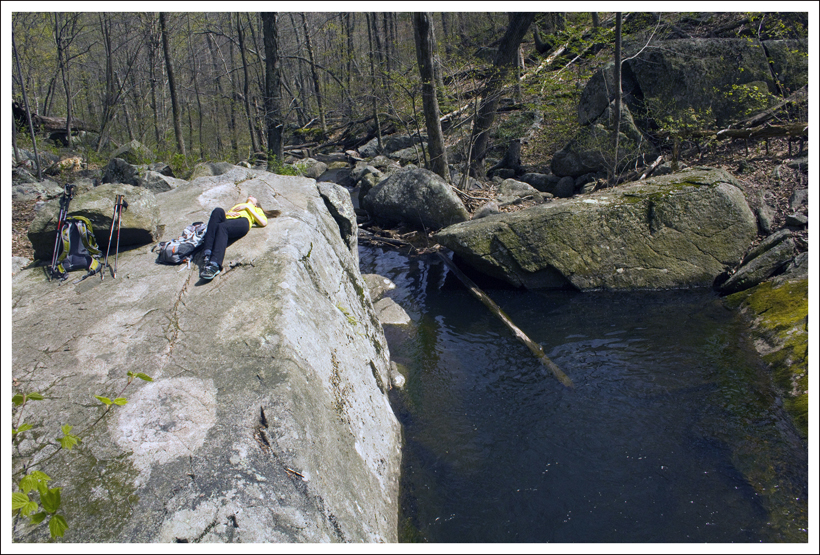
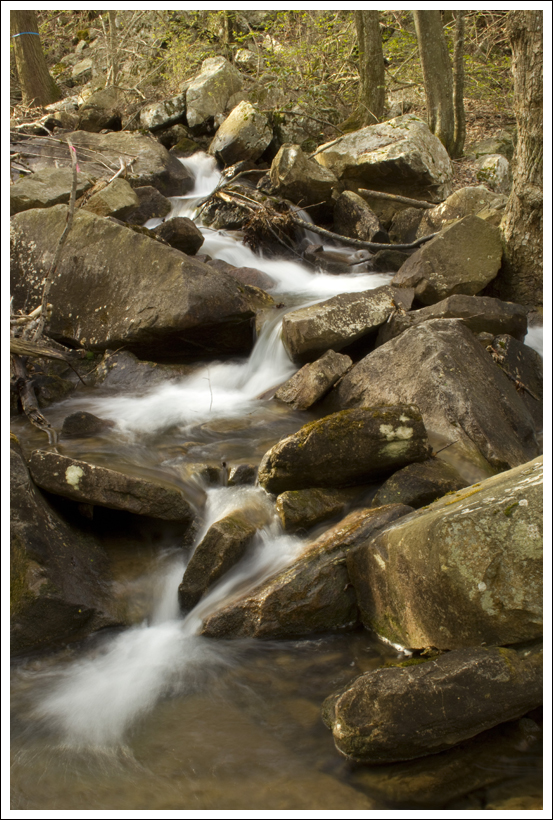
We caught back up with our friends soon and they had claimed a gorgeous campsite (even though it was hard to imagine a bad one here) at 10.6 miles that was near a waterfall that plunged into the creek.  While there were lots of larger groups out here, we found a nice, secluded campsite that had a nice waterslide that created a babbling brook sound throughout the night.  We set up camp and started to make some dinner.  I always enjoy bringing a card game with us when we do an overnight backpack and this time I brought the game Hike.  It was pretty brainless fun and plays similar to Uno with specialty cards that create twists in the game.  It was starting to get dark, so we created a small, but nice fire in the pit.  Once the sun set and the fire died out, we retired to our tents.  It may have been the sound of the brook, but I probably slept the best I have ever slept backpacking that night.  What a great first day!

Campfire
The evening concluded with dinner, card games and a great campfire. Below: There were abundant rosebay rhododendron all along the stream; Our campsite had nice, flat space enough for 2-3 tents; We also had a pretty waterfall and pool for our water source.

Rosebay Camp Filtering

Day Two…

As usual on backpacking trips, we both woke up right around first light. We spent a little while longer in our sleeping bags, chatting and stretching.  It was a chilly morning, so we weren’t quite ready to climb out into the cold.

Eventually we emerged from our tent to start the day.  I put on gloves and a light jacket and  headed downstream to take a few photos of the big waterfall at the next campsite over.  The folks camping there had packed up and departed very early.  Adam went to get the bear bags down while I took photos.

Campsite Falls
One lucky group gets to camp on a site right across from this pretty waterfall.  Below: Our campsite in the morning; You can see smoke from other campsites downriver; Crossing the footbridge across Seneca Creek before our big uphill climb.

Campsite in the Morning Downriver Footbridge

We got everything out for breakfast and started taking down our tent, rolling up sleeping pads and stuffing our sleeping bags back into compression sacks.  I decided that I was going to eat a huge breakfast, so I wouldn’t bonk again on our second day of hiking.  Adam didn’t go into much detail in his day one post, but right around mile ten of our hike the day before, I hit a wall – HARD! It was right after we visited Seneca Falls and crossed the stream.  I sat on the ground and told everyone that I was feeling really lightheaded and sick.  I didn’t feel hungry.  I had been drinking water all day.  Regardless, my legs just felt like jelly and I just didn’t want to walk another single step.  Adam, Suzanne and Anthony all told me that they thought I needed to eat.  Turns out they were right – I had been hiking for ten miles with a 25 lb. pack on under 700 calories.  I guess I just didn’t realize how little I had eaten until I did the calorie math.  My appetite always goes away when I’m doing strenuous activities.  Usually, it doesn’t cause problems and I just eat when I get to camp.  I guess this time I just expended all my short term energy before we finished for the day.  I need to do a better job forcing myself to eat enough.

Alright… off that tangent and back to breakfast!  As promised, I ate a large breakfast – oatmeal, cheese, a honeybun and coffee.   It was about 600 calories of food and much more in line with my energy needs for a tough uphill and 6 miles of hiking.  Everyone had eaten and packed up camp by around 9:45 and we were on our way again.

Final Meadow
Adam climbs steeply uphill across our final large meadow of the hike.  Below: Anthony and Suzanne take a look back toward Seneca Creek;  We had spectacular skies; Making progress back to our start point.

One Last Look Toward the Creek Beautiful Skies Trail Sign

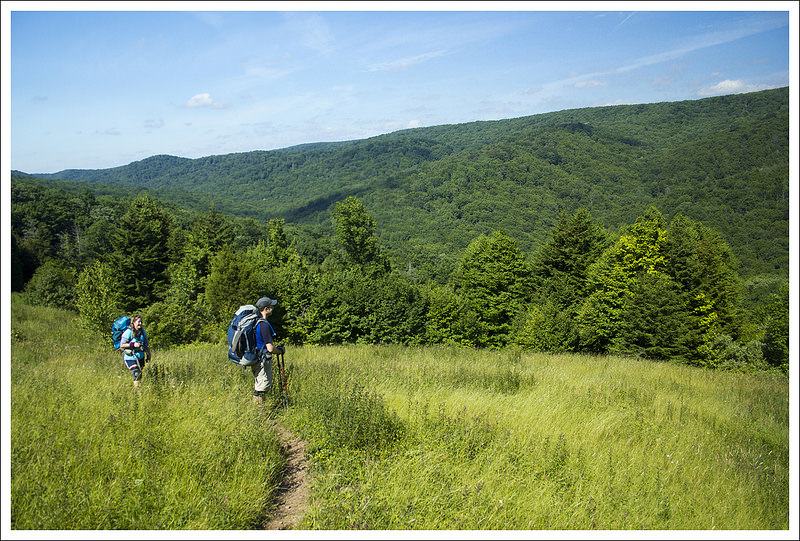
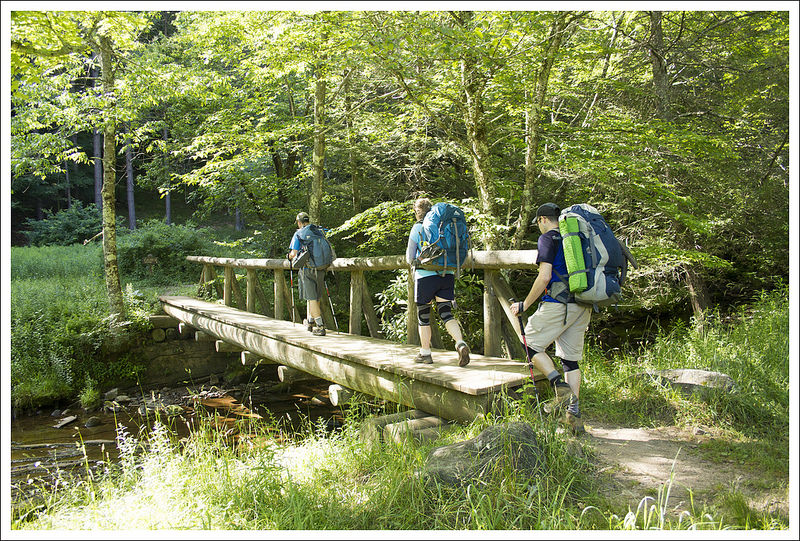
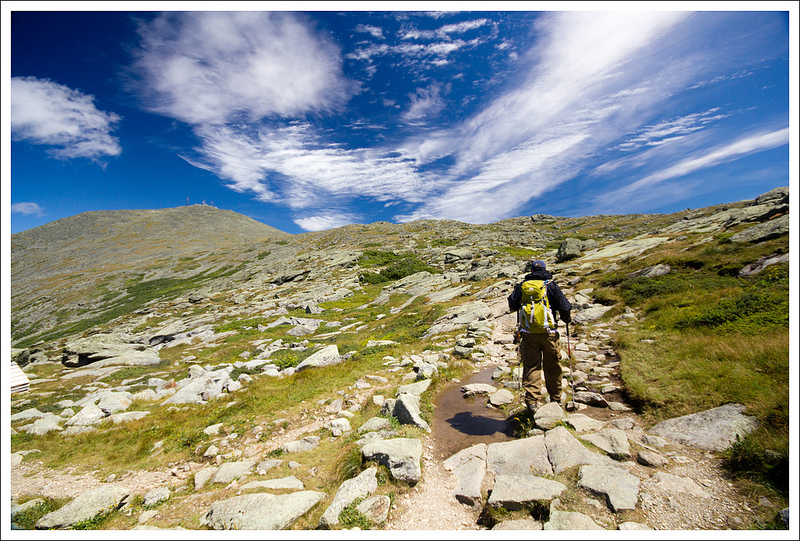
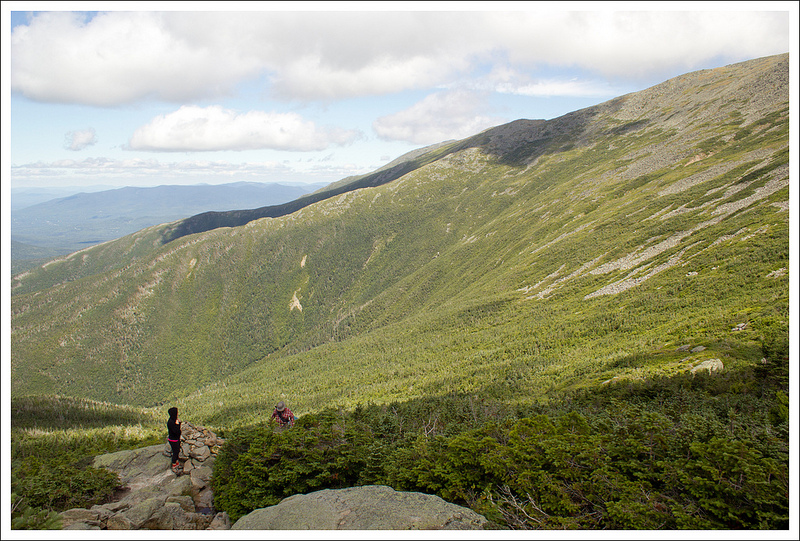
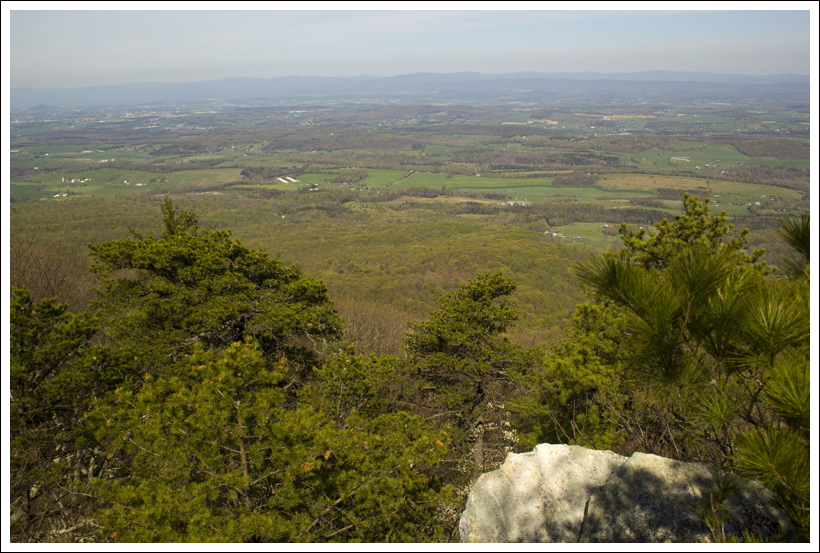
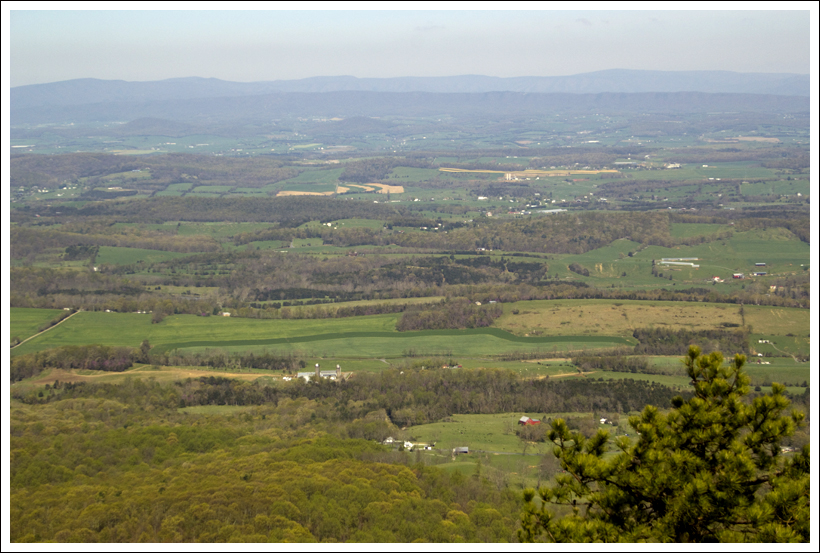
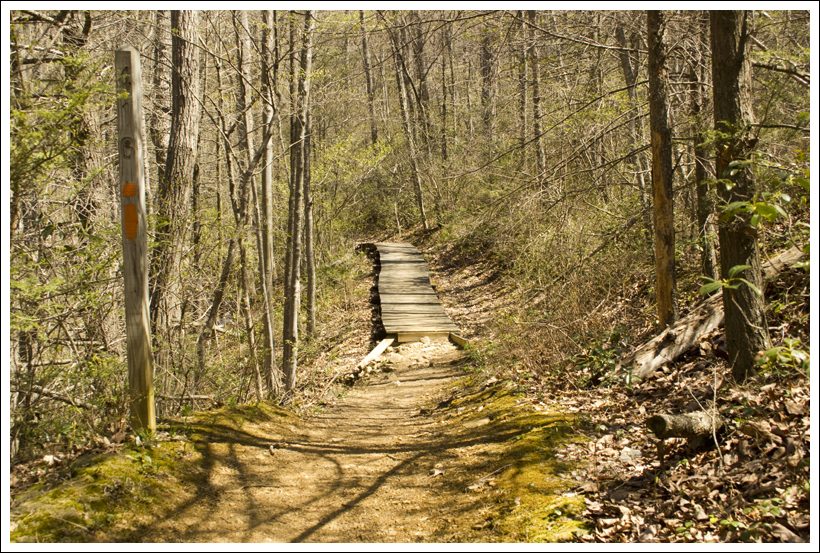
We had a short distance left to walk along Seneca Creek.  Within about a quarter mile, we reached a small wooden footbridge across the stream.  We crossed and continued uphill on the Seneca Creek Trail.  The steepest climbing was across a beautiful, expansive meadow.  We got great views of the valley and our last glimpse into the Seneca Creek watershed.  The high meadows on this hike are truly majestic and are definitely one of the trip’s highlights.

After crossing out of the meadow, we continued uphill through the woods back to the four-way junction of Seneca Creek/Lumberjack/Huckleberry.  Staying straight took us back onto the Huckleberry Trail.  From there, we retraced our steps from the day before.  It was a little slower going and felt longer on the second pass.  It was all uphill and everyone was a little tired.  It’s always funny how different the same four miles can feel under different circumstances.

Adam on the Huckleberry Trail
Hiking the Huckleberry Trail reminded us of hiking in New England.  Below: More lovely views from the Huckleberry Trail;  The trail was often paved with rock; A well-appointed campsite on the Huckleberry Trail; Ripe berries; A view from the talus slope.

Huckleberry Views Laurels Campsite
Ripe Berries Talus

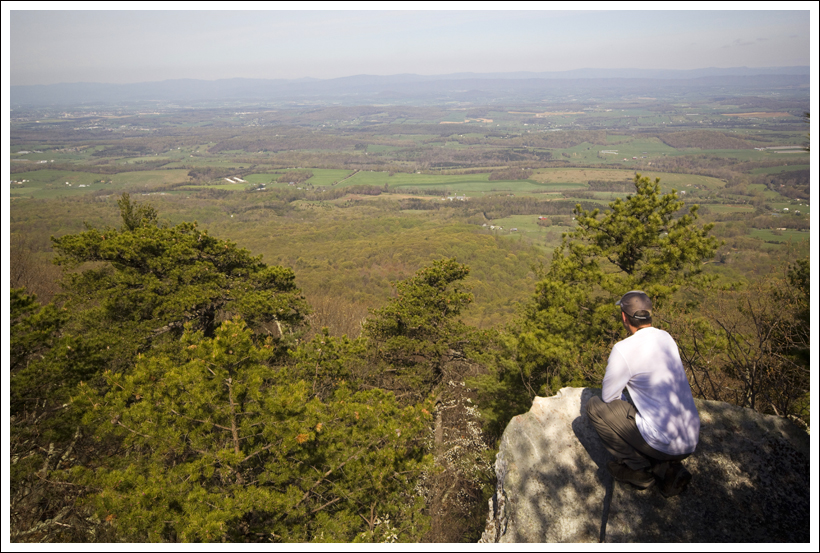
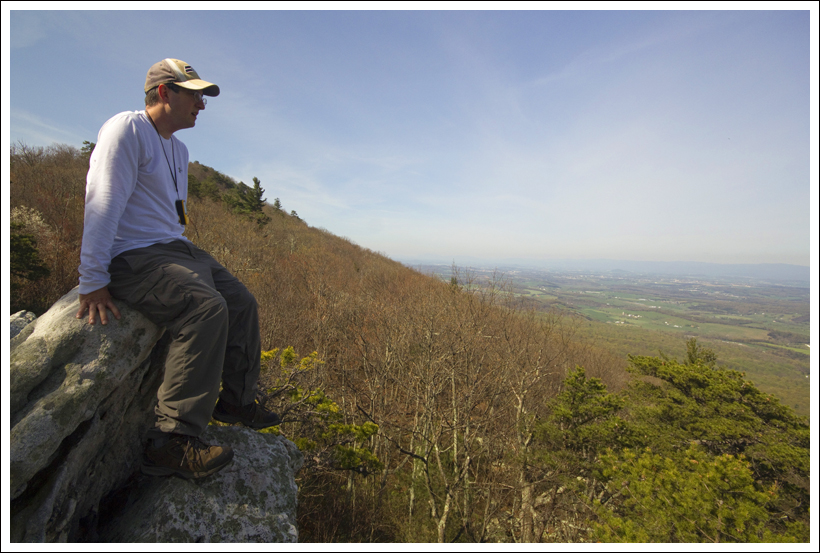
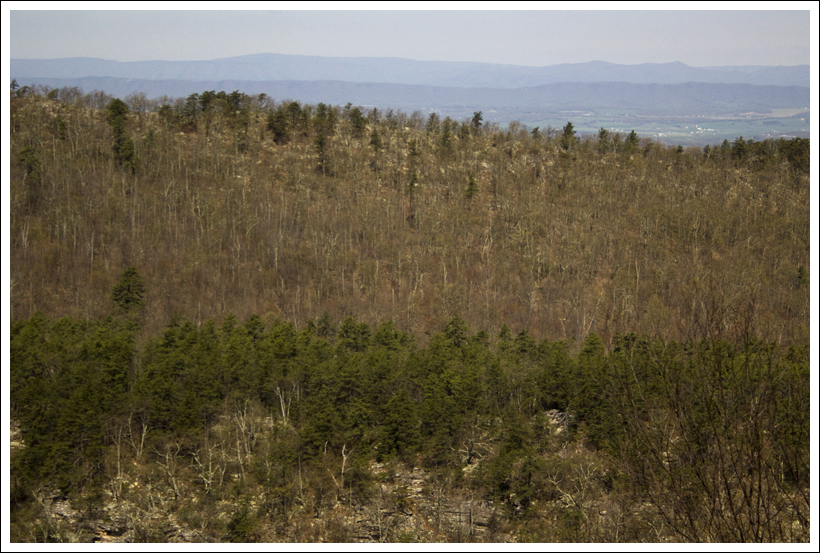
We enjoyed the sunny, unseasonably cool July weather.  We stopped and picked many blueberries along the walk back.  I also took a little side trail from one of the meadows and found a talus slope with nice views across the mountains.

We got back to the car around noon.  We threw our packs into the back of the car and took the short, flat walk to check out views from the observation tower atop Spruce Knob.  It’s just a short quarter mile walk and well-worth the extra time and steps.  We spent some time enjoying the lofty views and cool breezes.  Anthony, Adam and Suzanne decided to walk to one more nearby viewpoint on the Whispering Spruce Trail.  It was just a tenth of a mile down the trail and provided even more spectacular views.  I headed back to the car to eat some more candy and switch my trail shoes for flip flops.

Tower Views
Anthony and Adam take in views from the observation tower on Spruce Knob.  Below: Views from the tower; The hiking crew; Views from the Whispering Spruce Trail; The tower.

Views Hikers Whispering Spruce
Observation Tower

After a few minutes, everyone was back at the car and we were on our way back to Harrisonburg for a celebratory meal and beer.  We all decided that Jack Brown’s was the best spot for lunch.  They have fantastic gourmet burgers and a great beer list.  It’s a perfect post-hike indulgence.

We couldn’t have asked for better weather, scenery, or company for this 4th of July weekend backpacking trip.  After lunch, we bid farewell to Anthony and Suzanne.  They’re such great hiking buddies and we always feel lucky when we get to hit the trail together.

Trail Notes

  • Distance – 16.5 miles [Day One] [Day Two]
  • Elevation Change – About 2300 ft.
  • Difficulty –  4.  The distance makes it fairly tough and the second day has a lot of uphill on the trail. 
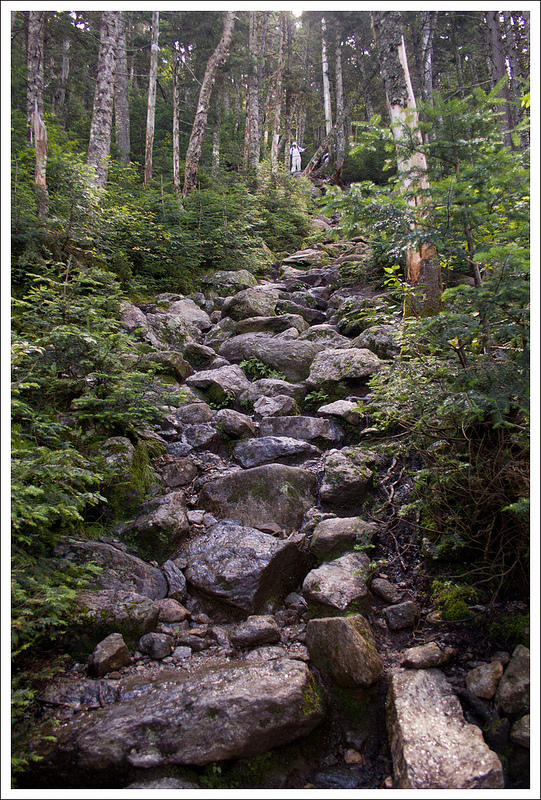
  • Trail Conditions – 3.  Most of the trail was well-maintained.  The High Meadows Trail was quite overgrown.  There are some rocky, loose sections on this trail too, which can be a little rough on the feet.
  • Views – 5.  The best views are from the Spruce Knob trail near the fire tower.  The fire tower has wonderful views, but once you take the .5 mile trail around the fire tower, you will have gorgeous, breathtaking views from the highest point in West Virginia.  The views along the main backpacking trip were mostly during the High Meadows Trail.  There are gorgeous mountain views and no sign of civilization. 
  • Wildlife – 3.  There were lots of birds to be found on the High Meadows Trail.  We did have a deer visit us several times at camp. 
  • Ease to Navigate – 2.  The Huckleberry Trail and High Meadows Trail could use more signage.  I would suggest printing out our step-by-step desciption and bringing the midatlantichikes map to help guide your way. 
  • Solitude – 2.  This is a popular spot for people to do overnight camping.   Expect to see lots at the campsites, but you will have more solitude until you get to Seneca Creek. 

Download a Trail Map (PDF)

Directions to trailhead:  Directions vary so greatly depending on the direction you’re coming from.  Please refer to the trailhead marked on the map below to determine your best route.

Porters Creek to Fern Branch Falls (TN)

Special: Smokies Edition

Introductory Guide to Visiting Great Smoky Mountains National Park

This 4 mile out-and-back follows beautiful Porter Creek to a small waterfall at Fern Branch.  The waterfall itself was barely a trickle when we visited, but the lush Smoky Mountain forest was especially beautiful here.  This hike also takes you by a historic barn and an old hiking club cabin.

View the Full Album of Photos From This Hike

Fern Branch Falls
Fern Branch Falls was running low, but it was still beautiful! Below: Pretty rapids on Porters Creek; Tall trees provided a wonderful canopy of shade; The Messer Barn.
Porters Creek
Tall Trees
Messer Barn

Christine Says…

With our week in the Smokies winding down, we wanted to hike something special and something we had never hiked before.  I found myself referring to the ‘Hiking In the Smokys‘ website again.  They have a list of their personal top 10 favorite hikes.  We didn’t want anything over 10 miles, so that ruled out Gregory Bald, Rocky Top and Mt. Cammerer.  We had already hiked six of the others (LeConte, Charlies Bunion, Andrews Bald, Chimney Tops, The Jump Off, and Alum Cave).  So that left just one from the favorites list – Porters Creek.  It sounded like a lovely trail – old growth forest, streams, a waterfall and lots of history.

Before setting out on our hike, we got donuts from The Donut Friar.  This made me exceedingly happy and was the perfect start to the day.  There is something magical about their chocolate crullers.  After donuts, we were on our way to the Greenbrier section of the Smokies.  We’d never hiked anything in that area before, so we were excited to try someplace new.

The road into Greenbrier is mostly gravel, but is well-maintained and easy to drive.  It’s also very scenic and follows the Little Pigeon River.  The trailhead is about 4 miles down the road.  It’s clearly marked and there is plenty of parking.

Lush Green Woods
Adam hikes along the early parts of the Porters Creek Trail. Below: Porters Creek Trailhead – it ties into the larger trail system in the park; Overhead view of Porters Creek; Old stone walls.
Trailhead
Porters Creek from Above
Old Stone Wall

The trail starts off as a wide, gravel road through the woods.  Porters Creek runs along the trail, offering plenty of scenic water views. About .6 of a mile along the way, you’ll see signs of old stone walls and stairs on the right side of the trail.   The remnants date back to the early 1900’s when Elbert Cantrell built a farm in this area.  Immediately past the farm, you’ll pass the Ownby cemetery.  Adam and I walked around the cemetery and noticed that most of the graves belonged to very young children.  Sad – it really makes one appreciate modern medicine and vaccinations.

About a mile into the hike, you’ll cross a log footbridge over the creek and come to a Y-junction in the gravel road.  The trail to the right goes to more historical structures, but we’ll cover those on the way back.   We took the trail to the left and arrived almost immediately to another trail junction – continue bearing left on the Porters Creek Trail.  At this point, the gravel road ends and becomes a ‘real’ trail.

This section of the hike is beautiful – lots of big old, trees.  It’s so green, shady and peaceful. At 1.6 miles we crossed another log footbridge.  This one was much longer and crossed the stream crookedly.  From there, the trail ascended gently until we reached Fern Branch falls at 2 miles.  The falls are on the left side of the trail and set back a bit in the woods.

Log Foot Bridge
The first log foot bridge you come to is short and easy to cross.  Below: The Ownby Cemetery; Adam at the trail junction before the path goes from old road to real trail; Little cascades on the creek.
Ownby Cemetery
Junction
Pretty Porters Creek

When we visited the falls were not flowing very heavily.  It was still a beautiful spot – especially with the sunlight filtering into the woods at the crest of the falls.  We took some photos and then headed back the way we came.

On the return arm of the trip, we stopped at the Y-junction and visited the John Messer farm site.  The cantilevered barn is in excellent condition.  Just past the barn, you can visit a springhouse and an old cabin built by the Smoky Mountain Hiking club.  Overnight stays at the cabin are no longer permitted.

After visiting the barn and cabin, we made our way back to the car and headed back into town for lunch.  We ended up at Hungry Bear Barbecue.  It was great and definitely deserves the top ratings it has online.

Porters Creek was definitely beautiful and we would recommend the hike for a low-key, easy day. It would also be our last new hike of our 2014 spring trip. The next day, we chose to re-hike an old favorite – Charlies Bunion.

Adam Says…

Staying in Gatlinburg, TN for a few days, we wanted to explore some different sections of the Great Smoky Mountains National Park.  We decided to check out the Porters Creek after reading about Fern Branch Falls and the wildflowers on the trail.  When we got out of our car, we could tell from the wetness of the area and the humidity that it would be a good idea to douse ourselves in bug spray.

We crossed the gate and started along the wide fire road.  As Christine mentioned, during the first mile you do get some stream views, ruins of an old farm, and a family cemetery.  The trail does ascend, but very slowly, so it is not very challenging.

Trail After Junction
After the trail junction, the path became narrower and steeper.  Everything was so green!  Below: The second log foot bridge was segmented and much longer; wildflowers; Adam at the base of Fern Branch Falls.
Crooked Foot Log
Wildflowers
Fern Branch Falls

At the .9 mile mark, there is a small footbridge you can use to cross a small stream (or you can rockhop across).  At the 1.0 mile marker, you reach a large junction.  There is a side trail to the Messer Barn and hiking club cabin and also a junction with the Brushy Mountain Trail.  Take the left Porters Creek Trail.  At 1.5 miles, you come to a large footbridge that crosses Porters Creek.  This footbridge was much longer and can be a little unsettling since it is fairly high above the creek in some points.  The railing for me was also below my hip in some spots, which didn’t give me the feeling that it would protect me if I did slip.  After you cross the footbridge, the trail seems to change environments as you walk through a large area of wildflowers and fern.  The forest floor was exploding in green!  The trail then becomes steeper, narrower, and rocky through this portion until you reach the falls.

As we were walking along, we could hear a waterfall off to our right and got a faint glimpse from a distance, but this was not Fern Branch Falls.  Instead, at 1.8 miles, we reached the large waterfall on our left.  The trickle from the waterfall wasn’t overly impressive, but it was a nice scenic spot.  We made our way back the way we came.

Hiking Club & Spring House
The Smoky Mountain Hiking Club used this cabin as an overnight camp until 1981.  Below: Crossing the bridge on the return trip; The Messer barn is well-preserved example of a cantilevered barn; Adam checks out the interior of the hiking club cabin.
Crossing
Messer Barn
Inside the Hiking Club

When we returned to the junction with the Brushy Mountain Trail, we took the short side trail that led to the barn.  Behind the barn, you cross a small stream and then can find the hiking cabin and springhouse.  Both the cabin and barn are open, so we enjoyed exploring the abandoned buildings.

We made our way back to our car and found several cars that were arriving to hike this trail.  With the cabin, farm, ruins, and graveyard, this hike really does give you a glimpse into the life and environment of families that lived in this area and used these facilities in the late 1800s through the early 1900s.  The hiking cabin actually permitted members to stay here until 1981.

Trail Notes

  • Distance – 4 miles
    MapMyHike Stats
  • Elevation Change – About 800 ft.
  • Difficulty – 2.  The climbing is gradual and gentle.
  • Trail Conditions –  3.5.  The section from the trailhead to the Messer farm is essentially a road.  The section from the farm to the falls is trail, but it’s in good shape.  The only part that may challenge some hikers are the two log footbridges.
  • Views – 0. None
  • Streams/Waterfalls – 3.5.  Porters Creek is lovely.  Fern Branch falls would probably be more impressive in wetter weather.  It was fairly small when we visited. 
  • Wildlife – 3.  We saw a couple salamanders and a big black snake.  There are bear sightings in all parts of the Smokies.
  • Ease to Navigate –  4.  Trails are well-marked and easy to follow.  You may miss some of the historical remnants if you’re not paying attention.
  • Solitude – 3.  We hiked on a pretty Thursday in late May and only saw a few other people.

Download a Trail Map (PDF)

Directions to trailhead:   From Gatlinburg, go east on 321 for 6 miles.  Take a right at the Greenbrier entrance to GSMNP.  The road will turn to gravel.  The road will fork at 3.1 miles, but continue straight at the fork to reach the Porters Creek parking area at about 4 miles.

Chasteen Creek Falls (NC)

Special: Smokies Edition

Introductory Guide to Visiting Great Smoky Mountains National Park

This 4 mile out-and-back is an easy hike to one of the Smokies’ lesser visited and under-appreciated waterfalls.  The walk begins from the Smokemont Campground and follows a lovely stream and eventually reaches a pretty 25′ waterfall.

View the Full Album of Photos From This Hike

Chasteen Creek Cascade
Pretty Chasteen Creek Cascade spills from the forest into a small pool below.  Below:  The trailhead at the end of Smokemont Campground.  Adam tucked his pant legs in to avoid ticks;  Mountain laurel along Bradley Fork; The trail is an old logging road.

Trailhead for Chasteen Creek Cascade Bradley Fork Lush and Green Bradley Fork Trail

Christine Says…

For the first few days of our trip, I wasn’t feeling great.  Even after easy hiking days on Mt. Pisgah and Wesser Bald, I still wasn’t myself.  Mentally, I had big hiking plans for every day of our trip, but in the end, my body dictated that we hike shorter, less strenuous trails.

On our second day in Bryson City, we woke up to lightning, rumbling thunder and torrential downpours.  The local weather said that the heavy rain would clear out and leave us with a hazy, mostly cloudy, unsettled day.  We decided that an easy waterfall hike would be perfect for those conditions.  After breakfast at Mountain Perks (probably my favorite breakfast spot in Bryson City), we drove into the park.

Our hike started at the far end (section D) of the Smokemont Campground.  For the first 1.2 miles, we followed the Bradley Fork Trail.   It went gently uphill along the stream.  The morning rain paired with the emerging sun made for a hot, muggy and buggy hike!  Whenever we stopped for photos or to take in the scenery, we were swarmed by gnats and mosquitoes.  Nonetheless, the trail was beautiful – so lush and green.

Adam Enjoys the Bradley Fork. Below: A marker for the Benton MacKaye trail along the shared portion of the hike; Someone built a ‘fairy house’ along the Bradley Fork; Trail junction with Chasteen Creek Trail; Campsite 50.

Benton MacKaye Trail Fairy House Junction with Chasteen Creek Campsite 50

The trail along Bradley Creek is popular with horseback riders.  In fact, the National Park Service concessionaire offers a trail ride from Smokemont Stables to the waterfall.  I bet it’s a wonderful, scenic ride!  The trail is also shared with the Benton MacKaye Trail – a 300 mile trail across the southern Appalachians.  Almost 100 miles of the Benton MacKaye Trail passes through the Smokies.  MacKaye, a forester from Massachusetts, is noteworthy because he came up with the idea for the Appalachian Trail… what a legacy to leave behind!

At 1.2 miles, the Bradley Fork Trail intersects with the Chasteen Creek Trail.  At this junction, take a right and follow the trail toward Chasteen Creek.  Almost immediately, on the right, you’ll pass Backcountry Campsite 50.  It’s a pretty streamside spot with a fire ring and bear cables.  The campsite can only be used if you have secured a paid permit. Evidently, permits in the Smokies can be hard to come by, so plan early!

After the campsite, walk another half mile along the Chasteen Creek Trail.  Shortly after crossing a footbridge, you’ll come to a split in the trail.   On the left side of the split, you should be able to see a hitching rail and mounting step for horseback riders – go in this direction.

From the clearing for horses, you’ll see a narrow footpath following the creek.  In just about a tenth of a mile, you’ll come out at Chasteen Creek Cascade.  It’s about a 25 foot waterfall.  It’s not the kind of waterfall that plunges dramatically; rather it slides over the rocks into a pretty pool below.  We had the waterfall all to ourselves and enjoyed the spot for about twenty minutes. Afterwards, we headed back the way we came and back into Bryson City for lunch at the Bar-B-Que Wagon.  They have great Carolina-style barbecue with all the expected sides.

Chasteen Creek Trail
Christine walks along the Chasteen Creek Trail.  Below: The split in the trail that leads to the falls; Hitching post and mounting block; Adam at the falls.

Trail Split Hitching Posts Chasteen Creek Cascade

Adam Says…

When we talk to people about the Smokies, they seem to be surprised that some of the best highlights of the park are the waterfalls.  In talking with the locals of the area, April and May tend to be very rainy seasons for the area.   Storms move in and out quickly through the park, but they typically expect a little rain most days during this season.  Rainy days are prime days for waterfall viewing and photography.

We started off our hike from the Smokemont Campground in the D section of the campground.  In the winter, this may be blocked off and you may have to park and leave from the C section.  The trailhead starts from a large gate near the designated parking area at the end of the campground.  We doused ourselves with bug spray and moved on.

Butterfly Swarm
We saw a swarm of butterflies on the trail. Below:  After lunch, we visited impressive Mingo Falls.  It’s probably the tallest waterfall in the area;  Nantahala Brewing Company and Anthony’s Pizza were the perfect way to end our time in Bryson City.

Mingo Falls Beers Anthony's

The trail was gradually uphill, but it mostly felt flat.  In fact, we were surprised to see the elevation gain on the hike afterwards.  The trail started off on a gravel road alongside Bradley Fork.  The forest was lush with green from all of the rain, so it was a pleasant stroll through the woods.  Because of the width of the trail, Christine and I could also walk side-by-side along the trail.  At 1.1 miles, we crossed a large footbridge and at 1.2 miles we came to the intersection with the Chasteen Creek Trail.  We took a right there and continued to walk on a wider trail, passing Campsite 50 at 1.3 miles.  At 1.9 miles, we reached the side trail to the left with the horse hitching area.  It was a short walk to get to the waterfall from there.  We headed back the way we came for an easy, scenic hike.

If you wanted to make this a longer hike, after you visit the waterfall, return back the way you came.  You could take a right at the junction with the Bradley Fork trail and connect to the Smokemont Loop Trail.  This would make the grand total of distance about 8 miles, but would loop back to a different section of the campground.

You may see people fishing for rainbow trout along the Bradley Fork or Chasteen Creek.  I can imagine many campers at the Smokemont Campground spend some time fishing in hopes of cooking some fish from the water.

After the hike, we had lunch then headed into Cherokee to check out the Qualla Arts & Crafts Mutual.  Their traditional work is fascinating and beautiful.  We always enjoy visiting.  After that, we stayed on the reservation and visited Mingo Falls, one of the tallest and most impressive waterfalls in the Appalachians.  It was a short walk, but there were many stairs!

Our wrap up for the day was a visit to Nantahala Brewery followed by pizza from Anthony’s.  We consider those two stops to be ‘must-do’ in Bryson City!  On to Gatlinburg tomorrow!

Trail Notes

  • Distance –  4 miles
    MapMyHike Stats
  • Elevation Change –  490 ft.
  • Difficulty – 1.5.  This is an easy walk along a very gently graded trail.
  • Trail Conditions –  4.5.  The trail is mostly wide and road-like.  It’s only narrow and muddy at the base of the falls.
  • Views – 0.  None.
  • Streams/Waterfalls – 4.5.  Bradley Fork, Chasteen Creek and the falls are all beautiful!
  • Wildlife – 3.  We didn’t see anything, but the Smokies have wildlife everywhere!
  • Ease to Navigate –  3.5.  The trail is easy to follow if you read the junction markers.  The shared/intersecting trails might be confusing if you’re not paying attention.
  • Solitude – 3.  Chasteen Creek Falls is not one of the park’s more popular trails.  You may see horses and occasional hikers from the campground, but generally this trail has less foot traffic than many others.

Download a Trail Map (PDF)

Directions to trailhead:   From Newfound Gap Road (Route 441), follow signs to Smokemont Campground.  The campground is located 3.5 miles north of the Oconaluftee Visitor Center and 26 miles south of the Sugarlands Visitor Center.  Park in the hiker parking area at the end of section D of the campground.

Mt. Washington via Ammonoosuc Ravine (NH)

Special: New Hampshire Edition

Introductory Guide to Visiting the White Mountains

This 4.5 mile ascent of Mt. Washington follows challenging, steep, slick terrain along a ravine that showcases waterfall after waterfall.  Once you clear the treeline, you are treated to a hut visit and some of the most dramatic alpine walking in the east.

View the Full Album of Photos From This Hike

Adam On Crawford Path
From Lakes of the Clouds Hut, you follow the Crawford Path (America’s oldest continually used hiking trail) to the summit of Mt. Washington. In this photo, you can see the summit and its weather towers looming in the distance.  Below: The trailhead begins near the cog railway on Basecamp Rd; The beginning of the trail is deceptively easy; There are many water crossings en route to the top – some easy, some not so easy.

Ammonoosuc Ravine Trailhead Deceptively Easy Water Crossing

Adam Says…

Hiking to the summit of Mount Washington (also known as ‘the most dangerous small mountain in the world‘) was definitely a bucket-list item for me.  Making it to the top of the highest peak in New England feels like an accomplishment and we definitely have memories from the hike that we will never forget.

Before you attempt to hike up Mount Washington, some planning needs to take place.  Mount Washington has been called the Home of the World’s Worst Weather due to the high winds, ice, and low visibility that can rear quickly.  In fact, in 1934, they recorded a wind gust of 231 mph.  Check out the funny video of someone trying to eat breakfast from the summit area during one of these high wind days.  Needless to say, I would strongly recommend checking out the weather from the Mount Washington Observatory to determine if a summit is possible and how different the weather and temperature will be at the top.

We  arranged for Christine’s parents to meet us at the top and shuttle us back to our car.  Many people descend by trail, but there is a hiker shuttle and a limited number of seats available on the Cog.  It’s important to note that you should always be prepared and have a plan for walking off the mountain.  Trains and shuttles book up quickly and the auto road closes from time to time.  Ultimately, you are responsible for your safety and the manner of your descent.  Visit New Hampshire’s Hike Safe site so you can learn more about mountain safety and the state’s expectation that every hiker be prepared.

Stream
The entire Ammonoosuc Ravine trail followed a stream which tumbled down the mountainside in waterfall after waterfall. Below: Lakes of the Clouds advertisement; The early parts of the trail are rocky, but only slightly uphill.

First Lake of Clouds Sign  Early on the Ammonoosuc Ravine

As we were driving along the road to the parking lot, the sky was completely cloudy.  The online forecast said it was going to be a perfect day, but the clouds were saying something different.  We hoped that the weather would push off and made it to the parking lot.  We packed some extra gear knowing that the temperature was going to be much cooler at the top.  We started off from the parking lot and filled out our parking permit, enclosing $3 in an envelope to allow us to park in the lot.  The parking lot was already getting full and we could tell that all the people getting ready to hike were in great shape.  We hoped we were ready for the challenge and started on the Ammonoosuc Ravine Trail from the end of the parking lot.  The trail started off relatively flat through a thickly forested area.  At .25 miles, we reached a stream crossing.  Because a heavy rain fell just the day before, the crossing, which is normally easy, presented a real challenge.  We saw a few others cross in different areas, but ultimately decided the best route was tightrope-walk across a thin log that spanned the creek.  This is always more unnerving when you are carrying expensive camera gear, but we made it across without a hitch.  We were worried how many other crossings we would have to make seeing the Ammonoosuc River on our trail map coming ahead.

At 1.0 miles, the trail reached the Ammonoosuc River, but the trail turned quickly to the right.  We saw the rushing water of the river and glimpsed up at the sky, which looked less foreboding than earlier.  The trail hugs the riverside and begins a steep ascent up a rocky slope.  At 2.1 miles, we reached the Gem Pool, a serene swimming hole created by a small waterfall.  We rock-hopped across to continue the path from the pool and stopped for a short rest in this peaceful area.   After leaving the Gem Pool, the trail becomes very steep as you climb up the rocky slope.  At 2.35 miles, a small trail to the right leads about .1 miles to The Gorge waterfall.  I highly recommend checking out this waterfall, which you can see plunging over 100 feet.   We returned from The Gorge and rejoined the trail.  The trail continues its steep ascent and you can only imagine that you are climbing up a slope that seems to be as steep as the slope of the waterfall you just saw.

Christine at Gem Poo
Christine crossing the water at Gem Pool. This is the point of the hike where the climbing starts getting serious. Below: Adam works his way uphill on the steepest part of the hike; It was seriously steep; One section had a little ladder to help you over the boulder.

Adam Climbing Seriously Steep Ladder

We continued to climb up the very steep slope until we reached a great viewpoint at 2.7 miles. Along with the view, there were also multiple waterfalls falling in dramatic cascades.  It was here that we were finally able to see that the clouds had moved off and we should have a gorgeous hike to the summit.  The unnerving thing was that in order to continue the trail we had to walk across the top of a waterfall with a very precipitous drop to one side  Due to the rain, there was no way to rock-hop across.  We knew we had to put our feet in the water to make it across, but we couldn’t tell how deep the water was or how fast it moved.  As we realized that a false step could have meant a long plummet down, it definitely gave us a gut-check to see if we could make it.  We tried to look around for the best way to cross and decided to wait and let a few other hikers attempt it first.  After learning what others had done, we followed suit and crossed without any difficulty.

The hike from this point continued to be steep as you climb along some areas of bare, slick rock.   Eventually, we began to rise above treeline and were able to see Lakes of the Clouds hut seated on the edge of the ravine.  The wind was already picking up and the cold wind had us switching into cold-weather clothes.  To the left of the hut was the summit hike to Mount Washington and we could clearly see the Observatory Tower in the distance.  We reached Lakes of the Clouds hut at 3.2 miles and decided to go inside to eat a snack.

Big Waterfall

One little spur trail on the steepest section of climbing led to this large and impressive waterfall called Gorge Falls. Below: Christine picks her way through boulders and across the water; Our first views into the Washington Valley; At the halfway point

Bouldering First Views Halfway There

Lakes of the Clouds Hut was built here over 100 years ago and has some interesting history.  Two AMC members, William Curtis and Allen Ormsbee, were hiking up the Crawford Path to go to an annual AMC meeting at the Summit House on the top of Mount Washington in 1900.   They reached what is now Mount Eisenhower and met 60 mph winds and cold temperatures.  By the time they reach Mount Monroe, the temperature had plummeted to freezing and the rain became ice.  Curtis died at Lakes of the Clouds and Ormsbee pushed on for help before perishing himself only a few hundred yards from the summit station.  The storm lasted for 60 hours and their bodies were discovered.  The AMC created a wooden shelter first near where Curtis had died.  In 1915, the wooden shelter was replaced with a stone shelter and it has since had several additions and improvements made.  It can accommodate up to 90 guests per night.

From the shelter, you can see a trail that leads up to Mount Monroe.  If you are interested in peak-bagging a few of “the Presidentials”, it is a short but steep hike.  We decided to save our energy and just tackle Mount Washington.  We continued along the trail and soon reached views of the Lakes of the Clouds, which are actually more like mountaintop ponds than full lakes.

Since we were now above treeline, the hike to the summit of Mount Washington was now just a series of steps across boulders for the remaining 1.3 miles.  The wind was incredibly strong and I believe gusts were at least 50 mph, which is considered more of a calm day on the mountain.  The wind was blowing up the ravine to the left of our bodies, so there were times that we had to angle ourselves to fight the winds as we pushed onward.  The views of the ravine and behind us were more breathtaking with each step.  Whenever we stopped to turn around, the wind had our noses running from the cold and it was hard to even talk to each other through the force of the gusts.

Waterfalls Near the Headwall
Near the top of the headwall, there is a series of several impressive waterfalls and the scariest water crossing we’ve ever done. Below: This trail had so many waterfalls; Our first view of the Mt. Washington summit; Hikers coming out of the ravine.

More Waterfalls First View of Summit Climbing Out of the Ravine

At 4.5 miles, we reached the summit area.  We followed the signs to the summit marker, that was crawling with people.  Most people reach Mount Washington by car or by the cog railroad.  When you pay to take the Mount Washington auto road, you receive a sticker that states “This Car Climbed Mt. Washington”.   We waited our turn to get a picture with the summit sign.  Some people were amazed that we had hiked up.  We made our way over to the visitor center and snack bar.  We had agreed to jokingly meet her parents by the “death plaque”, a plaque that shows a list of the names of  people who have died on the mountain.  When we arrived at the snack bar area, a group of hikers we had seen earlier on the trail whispered to us “there’s a hiker’s lounge downstairs”.  While the upstairs area was crawling with people, the hiker’s lounge was quiet and nearly empty.  We had a peaceful time to eat our lunch and then were able to meet her parents in about 30 minutes.  From here, we jumped in their vehicle and enjoyed the car ride down the narrow road that snakes down the mountain.  We stopped a few times along the way to catch some last views of the Presidential Range before we were back on the road.

The hike up Mount Washington was definitely something that Christine and I felt that we wouldn’t have been able to accomplish several years ago.  I can’t think of any other time that I have felt such a sense of accomplishment after reaching this summit.  We were so blessed with the great weather and we have already begun talking about how we could do an entire hut-to-hut Presidential traverse.

Christine Says…

With our days in New Hampshire running out and great weather in the forecast, we decided we had to tackle Mt. Washington.  With a reputation for fickle weather, ice storms that happen at the height of summer, and gusts of wind that can blow a grown-man sideways, I wasn’t quite sure what to expect.  The night before our hike, we were looking at maps and guidebooks and discussing our different route options.  Across the living room, my mother was Googling ‘deaths on Mt. Washington‘, ‘failed hikes of Mt. Washington‘ and ‘accidents on Mt. Washington’. Comforting, right?  She also told me to make sure I had the phone number for New Hampshire’s Fish and Game department on hand – they do most of the mountain rescues in the state.  Her worries and cautiousness got into my head, and I went to bed feeling really nervous about my ability to make it to the top.

Adam Approaches Lakes of the Clouds
Adam approaches Lakes of the Clouds Hut. Below: Inside Lakes of the Clouds; We ate cake!; Wooden racks for carrying supplies.

Inside Lakes Cake! Racks

On the drive to the trailhead, dark blackish clouds completely obscured the mountain.  I said to Adam, ‘This is probably a bad idea.’  He reassured me, telling me he was certain the clouds would blow off, the day would be beautiful, and that we would have a great time.  I let my worries non-verbally stew in the back of my mind.  We parked, geared up and made our way down the trail with several other groups of people.

Within the first mile, we came to a rain-swollen stream with no clear way to cross. The rocks normally used to rock hop were all under rushing water.  I tested a few spots, and ended up falling shin deep into water and wrenching my knee. I was feeling discouraged, because the only other potential crossing left was a thin, bouncy, moss-covered log that had fallen across the stream.  I have problems with vertigo and balance, so situations like this really push me outside my comfort zone.  Adam carried all the expensive camera gear, and I slowly and carefully stepped across that log.  Phew!  I told Adam if there were lots of crossings like this one, I didn’t think I could do the hike.  He offered to turn back, but I told him that I wanted to challenge myself and keep going.

Fortunately, most of the hike followed alongside the stream with only a few much easier crossings along the way.  Eventually we reached the Gem Pool. What a gorgeous spot!  It’s a crystal clear, green, pool; fed by a cascading waterfall.  It would be a great place to take a picnic and go for a swim. We did one more rock hop at the end of the pool and prepared ourselves to do some serious climbing!

Mount Monroe & Hut
Mt. Monroe looks like a small hill above the hut. Below: Mt. Monroe; The Lakes of the Clouds’ namesakes.

Mt Monroe Lakes Lakes of the Clouds

About 1600 feet of elevation gain comes in just about a mile of hiking after you pass the Gem Pool.  It’s grueling and steep, but both Adam and I were well-prepared with all the hiking and other cardio we’d done to prepare for this trip.  We were able to make the ascent without having to take a breather!  The only stop we made along the way was the side trail to check out the Gorge Waterfall.

On the climb up, we started seeing glimpses of the valley through the trees.  The majestic Mount Washington Hotel looked like a tiny red speck below.  We’d come a long way up already!  The remainder of the steep climb followed the Ammonoosuc River through the plunging ravine.  Even when we couldn’t see the water, we could hear it.

Eventually, the trail exited from the woods onto a wide rock plateau.  Above, we could see a waterfall falling in several distinct drops and below, we could see the water crashing over a steep, long drop.  We decided to take a break and enjoy the view from the rocks.  We sat for a minute taking it all in.  At that point, I noticed I didn’t see the trail continuing anywhere.  Horror dawned on me when I realized that the trail continued on the other side of the river. We saw two people cross it successfully, but I still wasn’t so sure.  The water was fast and a little deep from the rainfall the day before.  I had no idea how slick the rock under the water would be.   The crossing had just a couple feet of flat width on the downhill side before the water dropped over a 100 feet down into the ravine.  A slip at this crossing would almost surely be fatal.  I took a moment to hyperventilate and freak out, and then I plunged across.  This was followed by another ‘Phew – I’m still ALIVE’ moment.

Fighting the Wind
Adam fights the 50-60 mph winds.  Below: The hut grows increasingly tiny; Christine hikes along; There were several rock fields to cross.

Tiny Hut Christine Climbing Boulder Field

After that crossing, the hike was less steep but a lot rockier.  The trees were getting smaller and more stunted as we approached the treeline.  We could see the summits of both Mt. Washington and Mt. Monroe looming above. Lakes of the Clouds Hut was in view, but distances are so deceptive above treeline.  Everything looks so close, but it’s always further than you expect. I guess it’s a bit of an optical illusion when you don’t have trees to compare for scale.

As soon as we broke the treeline, just slightly below the hut, the wind was shockingly strong.  I was hiking in long pants and long sleeves, but I had to add my hooded jacket right away.  Even so, my face and hands were freezing!  I was sure I had packed gloves.  I usually keep a spare pair in all my backpacks, but I couldn’t find them anywhere.  I ended up paying the premium price to buy a cheap pair of gloves at the hut (only to find the spare pair of gloves in a side pocket that night when we got home).

We took a twenty minute break at the hut and enjoyed some of the baked goods made by the Croo.  Adam had pumpkin cake and I had chocolate cake.  I had my phone with me, so I decided to take a look at MapMyHike to see how we were progressing.  I found that Lakes of the Clouds actually has 3G service, so I posted an Instagram and a Facebook status from the hut.  Ah… technology! 🙂

Tough Climbing
Adam pushes uphill against wind, over rocky terrain. Below: Spectacular Presidential Views; Christine has made a lot of uphill progress;  Many cairns mark the way above treeline.

Beautiful Views Progress So Many Cairns

After our snack and rest, we were ready to tackle the last mile and a half of trail to reach the Mt. Washington summit.  I can’t even describe how much I enjoyed this portion of the hike!  The climb up the Ammonoosuc ravine had been moderately scary, physically challenging and really slippery, but the hike along the Crawford Path was pure, unadulterated hiking joy!

The Crawford Path was built in the 1800’s and originally used as a horse trail to the summit of Mt. Washington. The trail celebrated its 175th anniversary in 1994 and is the oldest, continuously maintained, hiking path in America.  I felt so privileged to be walking someplace so beautiful and historic.

We spent some time exploring and photographing the glacial ponds that give Lakes of the Clouds its name.  On this particular day, the pools were sapphire blue and covered with scalloped ripples from the brisk wind.  It was spectacular and gorgeous.

We toiled along, pushing our bodies against the 50 mph winds.  The alpine terrain was breathtaking and otherworldly.  I’ve never seen mountain views like the ones I saw in New Hampshire on this trip.  Between the walk along Franconia Ridge, and then the hike along the Crawford Path, I had my mind blown twice in one week. These places should be on every American hiker’s bucket list!

Summit
We made it to the top! Below: Adam makes the last push to the summit, The Crawford Path is also the Appalachian Trail; The summit was crawling with people who had driven or taken the cog to the summit.

Nearing the Summit crawford path Crawling with People

The stretch of trail between the hut and the summit is a rock field.  Sometimes the rocks are wide and flat, sometimes they are uneven, loose and pumpkin-sized.  The trail isn’t so much a path as it is a series of cairns that keep hikers on course.

At first, the trail between the hut and Mt. Washington was pretty flat, but the final push to the summit required a little more steep climbing.  The weather station towers looked so close you could almost touch them, but it turned out they were still about a half mile away.

We could tell we were getting really close when we started seeing more and more people in jeans, sneakers and sweatshirts milling about the trail.  These were the car and train people!  Eventually the trail emptied us out onto the summit.  We passed the historic hotel-turned-museum – Tip Top House – and made our way over to the summit marker.  We actually had to wait in line with all the car and train people to have our picture taken at the summit sign.  It’s always funny to finish a hike that has a summit that can also be reached by car – Clingmans Dome comes to mind (the high point on the Appalachian Trail).

Cog Railway
The cog makes a few daily ascents/descents of Mt. Washington. Below: The crowded summit building; The Mt. Washington Hotel sits below the mountain – what a beautiful day!

Summit Building Hotel

After taking our obligatory summit photo, we grabbed some drinks and hot dogs from the summit building’s snack bar and waited in the hiker’s lounge.  My parents still hadn’t arrived, so we had about a half hour to kill.  It made me wish we actually had taken the time to do the short side-trip climb to the summit of Mt. Monroe when we had been at Lakes of the Clouds.  I just didn’t want to leave my parents waiting in case we took longer than expected.  I didn’t want them to worry more than they had to.

Every 10 minutes or so, I ran up the stairs to look for my parents.  On the third trip up, I spotted my father and my (nervous-looking) mother waiting by the death sign.  I know it sounds kind of mean to have them meet us there, but honestly, it’s the easiest ‘landmark’ to find in the summit building.  The place is so crowded that you can’t really say ‘meet me by the snack bar, museum or gift shop’.  My parents were both relieved and impressed by how quickly we’d made it to the top.

Honestly, other than the two nerve-wracking water crossings, the hike up Mt. Washington was not nearly as difficult as I expected.  The elevation gain was challenging, but I think it would be doable for most reasonably fit people.  And the walk from Lakes of the Clouds to the summit was a pure pleasure, and definitely one of my most memorable hikes ever!

Trail Notes

  • Distance – 4.5 miles
    (Check out the stats from MapMyHike)*
  • Elevation Change – About 3800 ft.
  • Difficulty – 5.  The steepness of the hike is no joke.  The winds and weather possibilities just add to the difficulty.
  • Trail Conditions – 3.5.  The trail is well-maintained, but there were some stream crossings, loose and wet rock that made this tough in some parts.
  • Views – 5.  Once you rise above treeline you have great views of the ravine.  The view from the top of The Gorge is also nice.
  • Waterfalls/streams 5.  You get the rushing waters of the Ammonoosuc River, the Gem Pool, The Gorge waterfall, and Lakes of the Clouds.
  • Wildlife – 1. We didn’t see much other than squirrels.  Some moose have been spotted near the lower parts of the trail. 
  • Ease to Navigate – 4.  Junctions were clearly marked.  The hike from Lakes of the Clouds to the summit could be difficult on foggy/rainy days, but follow the cairns. 
  • Solitude – 2.  On a gorgeous day, there were lots of people.  But, due to the danger of hiking this trail, that is probably a good thing to have others nearby.  We were always able though to find our own space to enjoy views.

Download a trail map (PDF)

Directions to trailhead: From Interstate 93, take exit 35 to merge on to US-3.  Take US-3 for 10.4 miles and then take a right onto US-302 East.  In 4.4 miles, take a left on to Base Station Road.  Follow this about 5.7 miles until you reach a large gravel parking lot on the right.  The trailhead can be found as you entered on the lefthand side of the lot.

* MapMyHike is not necessarily accurate, as the GPS signal fades in and out – but it still provides some fun and interesting information.

Linville Falls (NC)

North Carolina Hikes

This wonderful little network of trails gives you the opportunity to view Linville Falls from every angle!  You can choose short/easy routes or longer/harder routes depending what you’re in the mood to do.  When all was said and done, we hiked a little over 3.5 miles and enjoyed several views of the falls.

View the full album of photo from this hike

Adam Enjoys a View of Linville Falls
Adam enjoys a bird’s eye view of Linville Falls. Below: The forest service information station; the trail network offers many options; beautiful blooming rhododendron.

Forest Service Info Station Trail Network Flame Azalea

Adam Says…

To finish our trip to North Carolina, we had to visit Linville Falls along the Blue Ridge Parkway.  While overcast days are better days for photographing waterfalls, we had to take what we were given.  The sun was high in the sky and it was quite hot on the hike, but we knew this wasn’t going to be too long of a hike.

We drove up the gravel Wiseman’s View Road and went first to the USFS Visitor’s Center.  Two women were inside and gave us some information on how to tackle the falls.  We were looking for a place to eat lunch before the hike and they recommended Famous Louise’s Rock House, especially for their pies.  We took their advice and refueled for the hike.  We ventured back up Wiseman’s View Road and parked in the large gravel lot at the to the left of the road.  The trail starts from the eastern side of the lot and begins with a steep descent.

At about .2 miles of a descent, we reached a junction.  We took a right here to make our way to the series of overlooks of the falls.  In a short distance, we reached another smaller junction with the trail to the Upper Falls, but we decided to approach that on the way back.  Since there are so many choices to make about the order in which you take in the views, I will not list all the distances; but you can tell from the downloaded map the distances to each.  We opted first to take a left for the trail to Chimney View, which provided a viewpoint to see the upper and lower falls.  From this point, we backtracked to the main trail and took a left.  Shortly, we came on to the side trail on the right for the Gorge View.  The views from here showed the canyon of the gorge but the views didn’t allow you to see the bottom of the canyon.  Next was the end of the main trail, which ended at Erwins View.  This view gave you the furthest view away from the falls, but it was still spectacular.  We backtracked and made our way back to the Upper Falls viewpoint.  From here, you could see the water plunge down the falls from a closer distance.

Upper Falls View
The upper falls view. Below: A view into the gorge; Adam hikes along.

Gorge View Linville Trails

From seeing people on the opposite side of the water and very close to the falls, we decided to take the trail down to the Linville Falls Visitor Center.  The trail was wide, road-like and going slightly downhill.  We eventually came to a bridge over the Linville River and the Visitor Center was on the opposite side.  We grabbed a few cold waters from the center and talked to the rangers about the trails on the other side.  We were fairly tired by this point, since we had done so much hiking during the week, but the temptation of the falls kept us pressing forward.  From the front of the Visitor Center, the trail headed into the woods on the eastern side of the building.  In a few feet, the trail branched and we took a right to head to the next overlook.  This trail branched off after about .3 miles.  We took a right at the junction, descending to reach the Plunge Basin overlook at .5 miles.  This point gave you a vantage point to see the water shoot through the gorge and down below.  We watched one man standing on the cliffside below, fishing from a precarious position.  We then made our way back to our car by returning to the Visitor Center, back across the bridge, and taking a right to the trail junction that led us back to our vehicle.

We had a great time visiting Linville Falls and this is definitely a hike that most people could do with their families.  A return trip in the peak of fall color with an overcast sky is something we will try to do.  While many waterfalls allow you to get very close to them, the trails here mostly keep you at a distance.  However, the view of the gorge with the waterfalls is breathtaking.

Christine Says…

Linville Falls was a perfect hike to end our trip through Tennessee and North Carolina – short and very easy! Ten hikes packed into eight days was pretty rigorous and I had the sore knees, bruises and sunburned arms to show for it!  Truth be told, I was secretly pleased that the ninth day of our voyage was stormy and rainy, because it meant we’d go home a day early instead of biking the 33+ miles of the Virginia Creeper.  Don’t get me wrong – I LOVE biking the Creeper, but I was exhausted from our whirlwind trip.  Maybe we ought to relax more on vacations – like normal people!  Nah…. probably not.  🙂

Linville Falls were a gift to the National Park Service from John D. Rockefeller.  So many of our favorite parks would not have existed without his generosity. Acadia, Shenandoah, Yosemite, the Grand Tetons, and the Smokies were all established, in part, due to his financial support.

Plunge View
The plunge view of the falls. Below: The Linville River; Beautiful desserts from Storie Street Grille.

Linville River Dessert

Adam did a thorough job describing all the different paths we took, so I don’t have a lot of details to add about the terrain. The only thing I would say is that you can walk to the bottom of the falls.  It’s about about .8 miles of hiking (some steep).  We opted to skip the view from the bottom on this trip, mainly because we were tired and could tell that the base of the falls was extremely crowded.

I enjoyed stopping in the visitors center and talking to the park ranger.  He was a pretty serious hiker and we enjoyed trading trail tips.  He suggested Crabtree Falls, NC for a future hike.  I was also fascinated by the cross section of an enormous tree hanging in the center. It fell when the Linville Gorge flooded in September of 2004. The hurricane-related flooding was so severe, that it washed away half of the visitor’s center and left many gigantic, toppled trees in its wake.  Water is such a powerful force!

Linville Falls has one of the highest water volumes of any waterfall in the Blue Ridge, so it’s not surprising that it floods so easily.  The high volume of water also makes the gorge perilous for people. Swimming is not allowed in the river near the falls, but numerous fatalities have still occurred in the area.

After finishing our hiking for the day, we retreated back to our cabin at the Pineola so we could get showered and dressed for dinner.  We decided to go fancy for our last evening in the area, and enjoyed a fabulous dinner at the Storie Street Grille in Blowing Rock, NC.  In addition to lovely outdoor patio seating, hey had a great wine line, beautifully prepared entrees, and amazing desserts.  Even though I’d already had pie a la mode earlier in the day, I could not pass up their dark chocolate – coconut bread pudding.  Adam’s banana creme brulee was equally delicious.  It was a fitting end to a fabulous trip!

Our next post will actually be a Virginia hike – shocking!  But then we’ll be going back to some more out-of-state posts.  We’re headed for the White Mountains of New Hampshire in a couple weeks, and are hoping to bring back at least a couple posts from that area.  Stay tuned!

Trail Notes

  • Distance – 3.65 miles
    (Check out the stats from Map My Hike)*
  • Elevation Change – 350 ft.
  • Difficulty –  1.  The trail does have a little climbing up and down on the trail, but most people should be able to do it without too much trouble.  We saw people of all ages and all levels of fitness on the trail, so it should be doable by anyone willing.  The options for different viewpoints allow for people to choose what they can handle and decide when to stop.
  • Trail Conditions – 4.5.  Most of the trail is either gravel or dirt and is well-worn.
  • Views – 4.  Great views of the gorge and waterfalls.
  • Streams/Waterfalls – 5.  There are many viewpoints to see the waterfalls.  The only challenge will be to enjoy it with few others around.
  • Wildlife – 1.  You may see squirrels and some birds flying around, but it would be unlikely to see much else.
  • Ease to Navigate – 4.   There is a large branching of side trails here, but using the map should guide you along.
  • Solitude – 0.  With such a close proximity to the Blue Ridge Parkway along with the ease of difficulty, this hike is crowded. 

Directions to trailhead:  From US 221, turn on to NC 183.  In .7 miles, turn right on to Wisemans View Road at the large curve.  The parking lot is a short distance on the left and the trail starts from the eastern side of the parking lot.

* MapMyHike is not necessarily accurate, as the GPS signal fades in and out – but it still provides some fun and interesting information.

Kephart Prong (NC)

Special: Smokies Edition

Introductory Guide to Visiting Great Smoky Mountains National Park

The 4-mile Kephart Prong hike ascends gently along a beautiful stream and end at the backcountry campsite – Kephart Shelter. This hike offers lovely cascades, wildflowers and history.

View the full album of photos from this hike

Adam Crossing Foot Log
Adam crosses one of several log bridges over Kephart Prong. Below: The trailhead is located on the side of Rt.441.  The first bridge takes you across the Oconaluftee River; The Oconaluftee is beautiful and cascading; So much of the Smokies seems to be wet, green and covered with moss.

Trailhead Oconaluftee River Mushrooms and Mosses

Christine Says…

Our second day in the Smokies was earmarked for a hike to the summit of Mount LeConte, but we woke to gloomy weather. We decided that we didn’t want to hike ten tough miles and not even get payoffs in terms of views, so we devised a new plan!  After redoing our Deep Creek Waterfall Loop Hike to get better photos, we were still ready for more hiking.

I perused our hiking guide and found a trail called Kephart Prong. It sounded interesting – remnants of an old railroad and a CCC camp, a backcountry camping shelter and the trail followed a (possibly pretty) stream. After redoing the earlier hike, the 4-mile length of the Kephart Prong was appealing, too – short and sweet! Also, it had the benefit of being closer to the Bryson City side of the park where we were staying for the early part of our trip.

It was still morning, so we grabbed a snack and made our way to the trail. What we found exceeded my expectations. The stream was incredibly beautiful – rapids and small waterfalls tumbling over mossy rocks and fallen hemlocks. In at least four places, rough, hewn log bridges traversed the stream. The sounds of running water carried through the entire hike. We saw lots of wildflowers – pink lady slippers, wild geranium, ragwort and many others I couldn’t name.

Wildflower
There were many kinds of wildflowers along the trail.  This might be a wild geranium?  Below: Adam explores the ruins of the old CCC camp in the area. This chimney was supposedly located in the barracks; There was once a railroad and a trout hatchery in this part of the Smokies, so look for abandoned rails, train parts and pipes from the hatchery. The item below appears to be an old pipe joint possibly; Another beautiful, mossy, log bridge over the stream.

CCC Camp Ruins Railroad Parts Mossy Bridge

The hike climbed gently the entire two miles until eventually arriving at the Kephart shelter – a sturdy stone and timber hut intended for backcountry camping. We chatted with other dayhikers using the hut for a lunch stop and one man who was there for an overnight stay.

Signs near the shelter showed that the Kephart Trail connects to the Sweat Heifer and Appalachian Trails. If we had continued to climb past the shelter, we would have arrived at Charlie’s Bunion in several miles.

Despite the draw of the Bunion, lunch was a higher calling, so we made our way back down the trail. It’s amazing how much faster the climb down always goes! We got back to the car around 1:00 and were back in Cherokee by 1:30. We couldn’t find anything that sounded good and was actually open on Sunday, so we pressed on back to Bryson City and ended up at a place we found on Yelp – The Bar-B-Que Wagon. They served great, traditional Carolina style pit barbecue with all the expected sides. We sat at a picnic table by the river and enjoyed an enormous, late lunch.

After lunch, we thought about going back to the hotel to shower, but instead we pushed on to visit the NOC (Nantahala Outdoor Center). The complex has a fantastic outdoor outfitter and a super cool riverside patio bar (Big Wesser BBQ + Brew). We got a few drinks and watched rafters and kayakers working the rapids. So relaxing! What a great day!

Adam Says…

The Kephart Prong Trail is one of the most definitive picturesque, riverside trails you’ll find.  The lush forests surround you in a sea of green in every direction you turn.

The trail starts off by crossing a large bridge, giving you great views of the Oconaluftee River. Once you cross the bridge, the trail starts off as wide and gravel-covered. At .2 miles, you will come across the remnants of the Civilian Conservation Corps camp that was here from 1933-1942.  You’ll see signs of a stone plaque and a tall chimney, among other partial walls.

At the .5 mile mark, you’ll reach your first footbridge over the stream.  As you continue further, the trail continues a slow, gradual ascent to the end. You’ll cross three other footbridges, but these consist of narrow, split logs with wood handrails. The last of these was the only one I was a little concerned with crossing, since the handrail required you to stoop to be able to touch it and the log bounced some in the middle.  The trail leads to the Kephart shelter, which was well-constructed.  From the shelter, you can proceed on the Sweet Heifer Creek Trail which joins the Appalachian Trail in 3.7 miles or take the Grassy Branch Trail to the Sluice Gap Trail for a total of 3.8 miles to reach Charlies Bunion.  Since this is a nice junction for an overnight trip, expect other people staying at the shelter in the nice summer-fall weekends.  Backcountry reservations for overnight campers is $4/night and is required to be made in advance.  See here for further regulations regarding backpacking permits.

Kephart Shelter
Kephart Shelter sits under the shady evergreens. You must have a permit to stay the night in this shelter.  The stream runs behind/left of the shelter.  There used to be a logging camp where the shelter now stands.  Below: Most of the trail follows the stream closely; Adam makes his way across the bridge; A trail sign near the shelter shows the directions to other trails higher up the mountain.

Walking Along the Stream Another Crossing of Kephart Prong Kephart Prong Trail Sign

The Kephart Prong is named after Horace Kephart, who was instrumental in the establishment of the Great Smoky Mountains National Park.  He was an extremely intelligent man, enrolling in graduate school at Cornell University at the age of 17.  He became the head of the St. Louis Mercantile Libray, but he lost his job.   He had turned to drinking and his wife and family left him for New York.  He decided he wanted to  re-establish himself in the wilderness of western North Carolina and Tennessee.  There he wrote the book Camping and Wildlife, which was considered the “bible” of camping.  When he became concerned that the Smoky Mountains were going to be heavily logged, he started writing letters to advocate for the establishment of this area as a national park.  He soon became friends with a photographer, George Masa and together they started photographing and mapping this area.  It was the partnering of Kephart’s words with Masa’s pictures that caught John D. Rockefeller Jr.’s attention, who donated $5 million to help purchase the lands to help secure the area to become a park.  Kephart died in a car crash before the park was to be established, but Mount Collins was renamed Mount Kephart in his honor.

The Nantahala Outdoor Center
Big Wesser BBQ + Brew at the Nantahala Outdoor Center is a great place to enjoy drinks after a day on the trails.  You can see the canoe/kayak course gates in the river.  It’s fun to watch people coming down the rapids.  Below: Carolina-style BBQ in Bryson City.

Carolina 'Cue

Another interesting spot almost immediately on the trail are the remnants of the site of the Civilian Conservation Corps (CCC) camp 411 here.  You can see the large chimney and camp signboard on the side of the trail.  This group of nearly 200 built rock walls, roads, trails, and footbridges that are still in use today.  There is an interesting history of this from one of the leaders, James William Biggs.

We enjoyed this beautiful trail and I can see incorporating this trail as part of a backpacking trip in the future.

Trail Notes

  • Distance4 miles
    (Check out the stats from MapMyHike)*
  • Elevation Change – About 770 ft.
  • Difficulty –  1.5. The ascent on this hike is very gradual and easy.
  • Trail Conditions – 4.  The trail is well-graded and in great condition.
  • Views – 0.  No scenic views.
  • Streams/Waterfalls – 5.  Very beautiful!
  • Wildlife – 2.  We didn’t see anything other than chipmunks and squirrels.
  • Ease to Navigate – 4.  The trail is very easy to follow to the shelter.  Once you reach the Kephart Shelter, you may decide to continue on.
  • Solitude – 2.  Because of the relatively short length and easiness of this hike, you will probably see a fair number of people.

Directions to trailhead:  Head north on US-441 N from Cherokee, NC.  Head 4 miles north of the Smokemont Campground.  Parking is available on the shoulder of the road and the trail starts after crossing the bridge over the Oconaluftee River.

* MapMyHike is not necessarily accurate, as the GPS signal fades in and out – but it still provides some fun and interesting information.

Deep Creek Area Waterfall Loop (NC)

Special: Smokies Edition

Introductory Guide to Visiting Great Smoky Mountains National Park

Deep Creek is an area of the Smokies popular with tubers, bikers, horseback riders and hikers. This (roughly) 5.4 mile hiking route provides spectacular views of three waterfalls and the beautiful streams that feed them. We ended up hiking this trail twice on our trip – the second time was mostly to get better photos. 🙂

View the full album of photos from this hike

Toms Branch Falls
Toms Branch Falls is the first waterfall you’ll come to on the loop. It’s only about a quarter mile from the parking area. Below: Another angle of Toms Branch Falls; Horseback riders love the Deep Creek area; Tubers on Deep Creek; Christine enjoys stream scenery.

Toms Branch Falls Horseback Riders
Tubers Christine on Deep Creek

Adam Says…

We rolled into Bryson City, NC around 2:15 and almost immediately headed out for a hike.  We were tired but our hotel wouldn’t let us check in even 45 minutes early. Evidently, the Microtel in Bryson City is very strict with their policies! We decided to do something close by, so we headed to Deep Creek campground for this hike with three waterfalls.

We knew we were getting close to the campground when we saw tons of “TUBES” signs. People were waving as we drove by, hoping that we would stop and rent tubes from them for floating down the river.

We arrived and got changed in the parking lot and made our way to the trailhead.  The parking lot was crowded, mainly for tubing people.  We followed the masses heading out carrying their inner tubes to their drop-in spots.

We started on the Deep Creek trail and soon passed the junction with the Juney Whank trail on the left. In just about .25 miles, we came across the first waterfall on the right, Toms Branch falls.  This is a gorgeous waterfall that drops about 60 feet over several different rock shelves before plummeting into Deep Creek.  We saw several people floating down the creek as we stopped for some photographs.

Indian Creek Falls
Adam enjoys beautiful Indian Creek Falls. Below: We spotted pink lady’s slippers along the trail. They were a little tattered at the end of their blooming season; Adam climbs the trail.

Pink Lady Slipper Climbing the Trail

At .75 miles, we reached the junction with the Indian Creek Trail. This is actually the last spot where people can drop their tubes into the creek, but we continued on the Deep Creek trail.  At 1.75 miles, this trail intersects with the Loop Trail.  We took a right on to the Loop Trail which starts a steep ascent.  At 2.4 miles, the trail reaches its peak and intersects with the Sunkota Ridge Trail. Continue on the Loop Trail which now descends at about the same rate as it ascended.  At 3.0 miles, you reach the junction with the Indian Creek Trail.  Take a right here.

At 3.8 miles, you’ll see a side trail that descends to  Indian Creek Falls.  Indian Creek Falls is a wide waterfall that has a gradual, sliding cascade into the water.  After taking in the sight, head back to the trail and continue to the right.  Shortly after passing the waterfall, you will reach the junction again with the Deep Creek Trail.  Take a left here to retrace your steps.  You could make this a shorter trip by initially taking a right at the junction, but we enjoyed putting a little extra effort to earn all three waterfalls.

Right before you reach the parking lot, you’ll see the junction trail again with the Juney Whank trail at 4.5 miles. Take the steep trail to the right up for .3 miles. Once you reach the top, you’ll see Asian which points you to the next waterfall. Descend down a short path and you’ll reach a footbridge and the waterfall.  Juney Whank Falls is another great waterfall that plunges down after about a 80 foot cascade.

Continue to the other side of the footbridge and continue on the trail, heading left at the first junction.  The trail descends rather steeply.  You’ll see signs that lead you to the parking lot and back to your car.

Deep Creek
The streams in the Smokies are so beautiful! Below: Since the trail is popular with horseback riders, there is a lot of manure along the way.  Butterflies apparently love manure!; Beautiful Deep Creek; Adam on the loop portion of the trail.

Butterflies on Manure Deep Creek Loop Trail

We had a great time on this trail that maximizes your waterfall experience.  The Deep Creek Trail and Indian Creek Trail both gave you great creek views almost the entire walk and it was fun to watch everyone float by us.  I can see why this is such a popular place to hike and tube for families.  We saw one person with a foot cast and met one woman with a pacemaker along the way, so most people should be able to handle this.  If you want to see some great Smokies waterfalls, this is a hike for you!

Christine Says…

We wanted to do this hike last year when we visited Bryson City, but with so much to do in the Smokies, we just ran out of time. This year, we knew the lay of the land a bit better, and we ready to hit the ground running (or hiking, so to speak!)

We arrived to the area mid-afternoon on the Saturday of Memorial Day weekend. We tried to get into our hotel one before official check-in, but the desk clerk turned us away. We decided to drive over to the Deep Creek Campground, and check out an easy loop hike that took us by a couple waterfalls – Toms Branch Falls and Indian Creek Falls.

I changed clothes in the crowded parking lot. Let me tell you… switching from jeans and a shirt into shorts, wicking shirt and sports bra without flashing anyone is quite a feat!

We started off along a wide, road-like trail that followed parallel to Indian Creek. It was packed with people out enjoying the warm, sunny weather. Apparently, the Smokies have had an exceedingly cold and wet spring, so the bright, 80-degree Memorial Day weekend was a great chance for everyone in eastern Tennessee to go outside. Deep Creek is very popular with tubers. All up and down the road leading to the campground, various vendors have set up shop renting tubes for roughly $5 a day. Once you have a tube, you walk about a mile up the trail, and then bob and bump along the shallow, but rapid-y river. It looks like a lot of fun! As hikers, we were in the definite minority.

Juney Whank Falls
Juney Whank may be the prettiest waterfall on the loop. Below: Adam enjoys the falls from the bridge; Juney Whank is beautiful from every angle; Below the falls.

Adam at Juney Whank Juney Whank Juney Whank

Walking along the Deep Creek Trail for about .25 miles, we came to the lovely Toms Branch Falls. It’s a tall waterfall that enters Deep Creek from the bank opposite the trail. Very impressive!

We walked along the creek until reaching a junction that makes a lollipop loop on the route. We decided to follow the longer arm of the loop so that we could visit Indian Creek Falls closer to the end of our hike. The trail mostly followed the stream before turning and climbing steadily uphill for about half a mile. At the highest point, the trail met the Sunkota Ridge Trail, which leads to higher elevations and a larger trail system. We remained on the loop and descended another half mile to meet another trail junction.

At this junction, we met a group of horseback riders. One rider was really struggling with her mule. She had dismounted because he had become so skittish. When we passed, he was bellowing and dancing around. She eventually got him under control and was able to ride on. He looked like quite a handful though!

In a few more tenths of a mile, we came upon Indian Creek Falls. These falls are not as steep, and are made up of a couple of small ‘shelf-drops’ before falling into one larger fall. Very beautiful!

About a tenth of a mile past the falls, you join back up with the beginning of the lollipop loop. From there, just follow the trail and the tubers back to the parking area.

Nantahala Brewing Company
The Nantahala Brewing Company – a good post-hike stop in Bryson City.

To be honest, I was really unhappy with my photos from this hike. Waterfalls, sunny conditions and photography simply don’t go together. So, I left this hike feeling a little disappointed with the photos I had to share. That regret quickly faded after a few beers at the Nantahala Brewing Company. What an awesome place! If you like craft beer, don’t miss a visit. After beers, we went for pizza at Anthony’s. It hit the spot and we loved our outdoor table facing the train depot.

I thought our experience with the waterfall hike was over, but the next morning we woke to gloomy, drizzly weather. Since it was such an easy hike, we went back and did it again so I could get better photos. And the second time, we added the .6 mile loop to visit Juney Whank Falls to the trip. These falls required a short, but steep climb, but may have been the prettiest of the three! And the better photos gained from a second trip around made this hike twice as nice!

Trail Notes

  • Distance5.4 miles
    (Check out the stats from MapMyHike)*
    These stats are from the first time we hiked the loop, so Juney Whank Falls are not included in the MapMyHike mileage or elevation.
  • Elevation Change – About 630 ft.
  • Difficulty –  2.  The only tough parts of this hike are the steep trail on the Loop Trail and the side trail to the Juney Whank falls
  • Trail Conditions – 4.  Most of the trail is gravel except for the Loop Trail.  This is a multi-use trail and you will see hikers, bikers, and horses on this trail.  The trails were in great shape with no blowdowns or rough footing.
  • Views – 0.  No scenic views from the trail, but this is more for the waterfalls.
  • Streams/Waterfalls – 5.  You’ll have the best stream views along Deep Creek and three gorgeous waterfalls.
  • Wildlife – 2.  Don’t expect larger wildlife due to the crowds of people on this trail.  We did hear lots of pretty warblers in the tree.
  • Ease to Navigate – 4.  Good signage at the trail junctions for the most part except for coming off the Juney Whank falls trail.
  • Solitude – 1.  Expect to see lots of people for most of the trail.  A lot of people choose not to do the Loop Trail.  

Directions to trailhead:  Take exit 67 off of NC-74 towards Veterans Blvd.  Go .6 miles and take a right on Main Street/NC-19.  Take the second left on to Everett Street.  You’ll see signs directing you to Deep Creek Campground.   Go .3 miles and take a right on Depot Street.  This road makes a quick left on Collins Street and then a quick right to continue on to Depot Street.   This becomes Deep Creek Road.  Go .3 miles and take a left on to West Deep Creek Road.   Continue 2.4 miles until you enter the Great Smoky Mountains National Park – Deep Creek campground.  A parking lot is on the left.  The trailhead starts near the drop-off roundabout next to this parking lot.

* MapMyHike is not necessarily accurate, as the GPS signal fades in and out – but it still provides some fun and interesting information.

Laurel Prong – Mill Prong Loop

This 7.3 mile loop has a bit of everything – views, waterfalls, history!  The route takes you over Hazeltop Mountain, along several streams and past President Hoover’s Rapidan Camp.

View the full album of photos from this hike
View a short video clip of Adam crossing the stream below Big Rock Falls

The Rapidan River
Camp Hoover sits where the Laurel Prong and Mill Prong spill together, forming the Rapidan River. Below:  Trillium was blooming everywhere when we hiked; The route had many stream crossings; Adam enjoys the view from Hazeltop.

Trillium Everywhere One of Many Stream Crossings Adam on Hazeltop

Christine Says…

We love hiking in this part of Shenandoah!  It’s the area we typically choose when we have out-of-town friends who want to visit Shenandoah National Park.  It’s also a likely choice when we’re hitting the trail with hiking newbies.  Why?  Well… we think it’s pretty much perfect.  The climbing isn’t difficult, so it helps convince non-hikers that hiking isn’t just torturous uphill climbing.  This area is great for spotting wildlife. (In his portion of the post, Adam will tell you more about the exciting wildlife experience he shared with his office.)  It’s also scenic, with lovely streams and a waterfall along the route.  There is even a significant piece of American history sitting in the middle of the forest – the Rapidan Camp, which served as Herbert Hoover’s presidential retreat.

Our normal route in the area is a relatively easy 4 mile out-and-back to ‘Camp Hoover’.  For this post, we decided to go the long way and make a 7.3 mile loop incorporating the Appalachian Trail, the Laurel Prong Trail and the Mill Prong Trail.   This longer route added a nice view, many stream crossings and a bit more elevation gain.

Apple Blossoms
Lots of trees were blooming in the park! Below: Adam walks along the Appalachian Trail.  Adam was like a wind sock on Hazeltop.

Adam on the AT Windy on Hazeltop

We parked at Milam Gap.  The hike started across Skyline Drive on the AT, headed southbound.  Almost immediately, the trail began a long, gentle ascent to the summit of Hazeltop Mountain.  The AT is so well-worn into the mountain that the path looked like a ribbon of dirt through the bright green of spring grass.  On this particular May morning, the trail was abundantly lined with my favorite wildflower – Trillium.  They were everywhere with big showy flowers in pink and white.  We also saw (and heard) many birds.  The prettiest songs came from the eastern towhees.  This type of towhee has striking orange, white and black markings, which makes them easy to spot.

After almost two miles of climbing, we reached the high point of the hike on Hazeltop Mountain.  There was one nice place to take in the view.  It was really windy on the rocky outcropping, but I enjoyed looking out over the spring-green valley. From the viewpoint, we hiked downhill for almost half a mile to reach the junction of the AT and the Laurel Prong Trail.

Views from the Laurel Prong
There are obstructed views from the Laurel Prong Trail. Below: Eastern Towhee; Huge boulders and rocks along the Laurel Prong Trail; A neat tree near the junction of the Cat Knob trail.

Eastern Towhee Rocks on Laurel Prong Neat Tree Near Cat Knob Junction

The Laurel Prong trail descends all the way to Camp Hoover.  Along the way, you’ll get some obstructed views from the trail, especially when trees are without their leaves.  There are lots of rocks and boulders lining the path, especially right at the beginning.  The lower parts of the Laurel Prong trail pass through a mix of open forest and mountain laurel thickets.  As you approach the low point of the hike, you should begin to hear the sounds of water.  Most of the time, streams along this trail will be shallow to non-existent.  When we hiked, it was after several days of heavy rain.   Single-step crossings became multi-rock hops and in many places the trail was under several inches of rain.  It was fun to cross so much water!

At around the 5.25 mile mark, we reached Camp Hoover.  It was a great spot to eat lunch, soak in the sunshine and enjoy the sound of rushing water.  The camp is built at the headwaters of the Rapidan River, making it an ideal fishing spot.  Most of the buildings that made up the camp have been lost to the ravages of time, but several cabins, including the president’s personal residence, have been renovated and preserved and are now open to the public (check park schedules for tour opportunities!).

While Adam napped in the sun, I went and did battle with my new carbon fiber tripod.  It’s really light and stable, but it’s like an engineering puzzle to get it initially set up!  I may have threatened to throw the tripod into the river.  I guess I should look at this hike as the tripod’s dress rehearsal. It can prove its true worth on another hike.  Besides, it really wasn’t a good day for taking photos of moving water (too sunny), but I think I was able to capture the impressive flow we witnessed on this day.  I’ve never seen the streams around Camp Hoover flowing so powerfully!  There were rapids and small waterfalls in places I’ve never seen them before.  It was beautiful!

Laurel Prong
The Laurel Prong joins with the Mill Prong to form the Rapidan River just a few hundred feet from this spot. Below: Adam cross the stream again; The Brown House has a great back porch; Another streamside view of the Brown House.

One of Many Stream Crossings The Brown House Streamside

After leaving Camp Hoover, we walked the trail along the Mill Prong.  There is one spot where the trail crosses the stream (right below Big Rock Falls).  We probably could have rock-hopped if we were careful, but both Adam and I decided to take off our boots and put on our Crocs to wade across the stream.  The water came over my knees, which is really high for this spot.

After crossing, we took a few minutes to enjoy Big Rock Falls and then made our way back toward Milam Gap.  For much of the way, the trail stayed close to the stream.  We had several more stream crossings to complete, but none that required a shoe swap.  The last couple miles of the hike went quickly, and we were back at the car by early afternoon.

We were surprised by how few people we ran into on the hike.  I would have expected big crowds on a perfect, sunny Mother’s Day, but we really only saw a handful of people – a few backpackers making a short overnight of the loop and a pair of birders at the camp.  I suppose we saw a few more people as we hiked back up the Mill Prong trail, but overall the crowds were light.

If I were to recommend a version of this hike – the 4 mile out and back or the 7.3 mile loop, I think I’d probably stick with the shorter version.  The longer version is nice, and great if you’re looking to pick up some mileage, but there’s really not a lot to see on the Laurel Prong and it can sometimes be really muddy.  The main reasons to hike in this area are Camp Hoover and beautiful stream scenery; and you get both of those on the shorter out-and-back.

Adam Says…

The hike down to the Rapidan Camp is always one of our favorites in Shenandoah National Park.  We have taken several groups of people down to this area.  When I talk to people about Shenandoah National Park, they have no idea that a Presidential retreat was once here and how this helped to establish a national park in Virginia.  This route adds a view to the hike for an extra bonus.

Big Rock Falls
Big Rock Falls was as big as we’ve ever seen it! Below: Adam crosses the stream right below Big Rock Falls; Lots of water in these little streams.

Crossing Mill Prong High Stream Flow

We’ve seen that on Hiking Upward and in our Hiking Shenandoah National Park Falcon Guide the hike was done in the reverse direction that we did the hike.  But, our way has less of a continuous elevation climb and it puts Camp Hoover in the last third of the route (save the best for last!).  We started off from the Milam Gap parking area and crossed Skyline Drive near the southern entrance to the lot to start on the Appalachian Trail.  Heading southbound on the white-blazed AT, we quickly came across the junction with the Mill Prong Trail.  This is your return route, so continue to go straight.  The trail gradually climbs up a total of 450 feet.  You reach a nice viewpoint to the right of the trail around 1.8 miles before you reach the Hazeltop summit in 1.9 miles.

The trail then begins to descend and at 2.6 miles, you reach the junction with the Laurel Prong Trail on the left.  Take this blue-blazed trail which continues to descend.  At the 3.6 mile, you will pass a junction with the Cat Knob Trail but stay on the Laurel Prong Trail.  At 4.9 miles, you reach another junction with the Fork Mountain Trail, but again stay on the Laurel Prong Trail.  The trail changes to yellow-blazed at this point, since it is now accessible to horses.  At 5.3 miles, you will pass by a fire road on the left and then come up to a side trail for Five Tents.  The Five Tents location was where some of the staff would stay at the Rapidan Camp, but there is no longer a building there.  Christine took this route, but I stayed straight and we met up shortly at the Rapidan Camp, entering near the Prime Minister’s Cabin.

Upon leaving the Brown House at Rapidan Camp, we caught the trail heading past the Creel Cabin.  Crossing the fire road, we picked up the yellow-blazed Mill Prong Trail which gradually ascends most of the way.  At 5.5 miles, you will cross Mill Prong (which may require you to wade across the water after heavy rainfall) and reach Big Rock Falls on the other side.   At 5.9 miles, you reach a junction with the Mill Prong Horse Trail.  Continue straight instead of taking this trail, but the blazes change to blue as it is no longer a horse trail.  The trail crosses Mill Prong again and then you will have a gradual climb back up.  At 7.3 miles, you reach the Appalachian Trail junction again.  Take a right and in a short distance you’ll reach the parking lot.

Abundant Trillium
Pretty pink trillium Below: Wild geranium (I think?); Ragwort; Adam finishes out the loop.

Wildflowers Ragwort End of the Loop

Last year, I brought a few of my co-workers down to the Rapidan camp for a team-building retreat.  I felt that if it was good enough for the President, it should be good enough for us.  When we arrived, a volunteer who stayed at the Creel Cabin, gave us a tour of the Brown House, where President Hoover stayed.  We learned a lot about Hoover, the problems he faced during his presidency, and his relationship to Franklin D. Roosevelt.  After the tour, we did some team-building and communication exercises to learn more about how to work best with each other.  While we were in the middle of making some breakthroughs, a small snake fell down off the roof just a few feet from where we were working.  One of my co-workers, who is not a hiker by any definition, jumped out of her seat and was constantly looking around for other animals.  After we made our way back up, we were talking along the way.  I heard some people say, “Adam, look out”.  I nearly walked right into a mama bear with three cubs.  The family of bears quickly took off up the hill.  I had told my co-workers that I’m usually pretty good at finding bears and we may see some.  They were thrilled to see the cubs, as a few of them had never seen a bear cub before.

Along with the possibilities of seeing bears, you can usually find this trail to be an excellent trail for birding.  The Laurel Prong and Mill Prong trails were filled with beautiful songs as we hiked along.  A couple that was hiking near us also recognized the song of a blackburnian warbler.

If you’re up for a longer hike to the Rapidan Camp, I would suggest this route.  The views from near Hazeltop summit were expansive, you get to see a nice waterfall, hear the songs of birds, and learn about the history of one of our Presidents and how it helped create a national park in Virginia.  This hike does have it all!

Trail Notes

  • Distance – 7.5 miles
    (Check out the stats from MapMyHike)*
  • Elevation Change –  1330 ft
  • Difficulty – 3.  This hike is not steep or difficult, but some hiking novices might find the 7+ mile distance a little challenging.
  • Trail Conditions – 4.  The trails were in great shape, despite being underwater in several place.  We didn’t see any blowdowns or sloppy areas.
  • Waterfalls/streams – 4.  Big Rock Falls, the Rapidan River, Mill Prong and Laurel Prong are all lovely and offer lots of water scenery along this hike!
  • Wildlife – 4. We didn’t see much on this particular day beyond birds, but we’ve seen lots of deer and bears on past trips.
  • Ease to Navigate – 4.  Trail directions are clearly marked at junctions with cement markers.
  • Solitude – 2. This is a popular hike, both as a day trip and a short overnight loop.

Directions to trailhead:

The hike starts at mile marker 53 on Skyline Drive.  Park in the Milam Gap lot, then cross the drive.  The trail picks up on the other side of the crosswalk.

* MapMyHike is not necessarily accurate, as the GPS signal fades in and out – but it still provides some fun and interesting information.

Hazel Falls

This easy 5.2-mile hike leads to a beautiful waterfall on the Hazel River.  The falls are surrounded by towering rock walls and a couple small caves.

View the full album of photos from this hike
View a short video clip of Hazel Falls

Wide View of Falls
Hazel Falls are not terribly high, but they sit in a beautiful gorge. Below: Adam at the Meadow Spring trailhead; Little wildflowers grew abundantly along the trail; A great place to enjoy the sun.

Trailhead at Meadow Springs Wildflowers Nice Place to Rest

Christine Says…

Every time I think we’re running out of nearby hikes to complete, we seem to stumble across something that has escaped our notice for one reason or another.  That was just the case with this beautiful, easy walk to Hazel Falls!  Typically, when you think of Shenandoah’s waterfalls, you think of Dark Hollow, White Oak Canyon or Doyles River-Jones Run.  It’s not very common to see photos or hear people talking about Hazel Falls.  After being there in person, I’m not really sure why.  It was a great hike!  Although the falls are not high, I found them to be nicer than some of the park’s more popular falls – I’m looking at you Lewis Springs Falls!  It’s probably spring’s higher water flow,  but this small waterfall was much more impressive than some of the park’s larger falls.

Christine Hiking
The trail was mostly wide and gentle. Below: Adam negotiates the largest blow down on the hike; The junction of the steep rock trail that leads down to the falls/caves; Rock walls tower above the falls.

Navigating Blowdowns Junction to Falls Trail Rock Walls

The hike mostly consisted of pleasant, gentle walking through pretty forest. The last time we hiked in this area was a few years ago when we went on our very first overnight backpacking trip with PATC.  That trip made a loop of Hazel Mountain and Catlett Mountain.  It’s funny – I remembered the trail being a lot steeper than it seemed this time.  I guess I had a heavier pack and wasn’t in very good condition on that trip.

On this particular spring day, I enjoyed seeing all the early season wildflowers blooming along the side of the trail. We had perfect weather – sunny, crisp blue skies and a nice breeze.  It was ideal for hiking, but not so ideal for waterfall photography.  When we finally got down to the falls, I did the best I could to capture a few decent shots under the bright mid-day sun.  It didn’t go that well.

I also really enjoyed the little caves adjacent to the falls and sunning on the big flat rock next to the smaller falls.  It was a gorgeous spot and I’ll look forward to visiting again.

After our hike, we decided to stop by Big Meadows for Shenandoah’s famous blackberry ice cream.  Even though the park has a new concessionaire for food/gift shops, the ice cream was just as good as it’s always been!

Adam Says…

The hike to Hazel Falls was a pleasant surprise.  When looking for hiking suggestions, we typically peruse our hiking guides, study maps, and explore the internet for ideas.  The 2000 edition of the Falcon Guide for Hiking Shenandoah National Park didn’t include Hazel Falls in the book, but the updated 2012 edition does cover it.  So, we have to give thanks to Bert & Jane Gildert, the authors, for including this one for us to explore.  As Christine said, I feel that this is a great waterfall that really allows you to sit down and take in the beauty of the setting around you.

Hazel Falls with Adam
Adam enjoys the falls. Below: Adam makes his way down the steepest part of the trail; Pretty cascades leading away from the falls; Christine at the lower falls, Another view of Hazel Falls.

Climb Down to Falls Smaller Hazel Falls Christine at the Small Lower Hazel Falls Another View of the Falls

The trail starts off from the Meadow Spring Trail parking lot.  This is a popular parking spot for many hikes and overnight backpackers; we have rarely seen this lot not packed with vehicles.  If you are going with a larger group, try to carpool to minimize the number of parking spots you may need.  The good news is that most of the cars will likely be heading down to Buck Hollow or doing larger loops around Hazel and Catlett Mountains.  The trail goes just a few feet before you reach a junction with the Buck Hollow Trail.  Instead of branching off, just stay straight on the trail and walk down the wide path.  The trail is mostly a slight downhill grade with some flatter sections.  At 1.5 miles, you will reach a junction with the White Rocks Trail on the left.  Take the White Rocks Trail.  At 2.4 miles, you will reach a junction post that will direct you to take the trail to the right for the falls.  Climb down the steep trail and you should reach the first, small waterfall at the bottom.  Continue along the path over the rocks and you will reach the larger Hazel Falls and see the cave to the right.  Make your way back the way you came to get back to your vehicle.

Cave Near Hazel Falls
Adam checks out the cave near Hazel Falls. Below: Making the steep climb back up; Blackberry ice cream at Big Meadows wayside

Steep Climb Uphill Shenandoah Blackberry Ice Cream

Because of the uncomplicated, mostly gentle terrain, this might be a great hike to do with older children.  The only strenuous part of the hike was hiking the last .2 miles (the climb down will challenge your knees and the climb back up will get the blood pumping).   You can tell a lot of great trail work has been done to create the stone steps that allow you to climb down without it being too slippery.  The picturesque setting of the falls will encourage you to take some time to relax, eat a snack, and enjoy the sound of rushing water.  The pool at the larger falls could also be one to wade into fairly easily if you like getting your feet wet.

While Christine was busy taking a lot of photos, I enjoyed peeking inside the larger cave near the falls.  Christine took some coaxing to go in, since she was worried that bats would fly out.  I didn’t see any bats inside or guano on the ground, but I wouldn’t be surprised if a couple of them took refuge in the top of the cave on occasion.  At the falls there is also a path that leads to a small rock opening that you can climb around to get closer to the falls.  As I was climbing around there, I saw a bird’s nest tucked in the top of the rocks.  Sure enough, within a few minutes, I saw a bird (I believe a sparrow of some sort) fly into the nest.  I hope too many people don’t disturb the nest and it is able to raise some cute chicks.

I imagine we will go back to Hazel Falls many times in the future.  If you haven’t been here before, this is a waterfall that is worth checking out.

Trail Notes

  • Distance – 5.2 miles
    (Check out the stats from MapMyHike)*
  • Elevation Change –  800 ft
  • Difficulty – 2.  The final .2 mile descent (and climb back out) into the stream gorge is very steep, but the rest of the hike is flat or very gently graded.
  • Trail Conditions – 3.5.  There were a few blow downs that required navigation, but most of the trail is smooth, easy footing.  The descent to the waterfall showcases the great work trail maintainers do in the park.  They turned a extremely steep piece of terrain into a giant staircase with a series of well-placed rocks.
  • Views0.  In the winter and early spring, you may catch some glimpses of mountainsides through the trees.  Otherwise, this walk takes place exclusively in the woods.
  • Waterfalls/streams – 4.  Though the waterfall is not tall, it’s it a lovely setting surrounded by towering rock walls and small caves.
  • Wildlife – 2. We didn’t see anything on this trip, but we have spotted bears and deer in the vicinity on past trips.
  • Ease to Navigate – 4.  Trail directions are clearly marked at junctions with cement markers.
  • Solitude – 2.5. The parking lot was jam-packed on a pretty, sunny Saturday afternoon, but there are lots of trail options in this area.  We saw about 15 people over the course of the hike.

Directions to trailhead:

From Skyline Drive proceed to mile 33.5.  Parking is on the east side of the drive at the Meadow Spring parking area.  The trail descends from the south end of the parking lot.

* MapMyHike is not necessarily accurate, as the GPS signal fades in and out – but it still provides some fun and interesting information.

Fridley Gap Loop

This six-mile loop hike in the Fridley Gap area of George Washington National Forest has everything – views, waterfalls, beautiful stream scenery, rugged climbing and great backcountry camping.  It’s a perfect hike to get away from the crowds in Shenandoah National Park.

View the full album of photos from this hike

Adam at the Overlook
If you miss spotting the faint side trail behind one of the many backcountry campsites along this loop, you’ll miss the best view of the hike! Below: Adam crosses the stream; A small waterfall on the stream; This loop has many choices for backcountry camp sites.

Adam Crossing Fridley Run Smal Waterfall Backcountry Site

Adam Says…

Last year, we made an attempt to do this Fridley Gap loop hike, but we had trouble finding one of the trails.  We bushwhacked for a while, but finally gave up.  This time when we returned, we had better directions and the blazes had recently been repainted on much of the loop.

From the top end of the parking lot, we started on the trail.  We saw both purple and blue blazes early on, and started to worry.  (Fortunately, it turned out that this was the only section of the trail that hadn’t been recently re-blazed.)  Early parts of the trail traverse large rocks, and it’s sometimes tough to see exactly which way the trail goes. We saw faded red Xs painted on the surface of some of the rocks which let us know that we were going the right way.  The trail is uphill but not too steep.  In .2 miles, you come to a fire road.  Take a right here and continue on the fire road.  You will pass by some small falls and Mountain Run to the right and a large boulder slide to the left.  The trail actually follows the streambed, and you will need to rock-hop to continue on.  At .45 miles, you will reach another falls area and you will cross over Mountain Run until you see the trail junction cement post.  This is also the point that Mountain Run and Fridley Run join.  It was at this point that we failed last time trying to find the orange-blazed Massanutten South trail.  Looking at the cement post as you approached it, look back around 4:00.  You will see the orange blazes on the Massanutten South trail as you will cross the water again (this time it is Fridley Run) and climb up the hillside.  These weren’t painted on the trees before (they look fresh now), so you should be able to find your way more easily.

Walking in the Streambed
Early in the hike, the trail traverses the streambed. There are plenty of rocks, so it’s fairly easy to hop from spot to spot and avoid getting your feet wet. Below: Adam climbs up the trail shortly after the parking lot; A rockslide early on the hike; Blooming redbuds.

Adam Hiking Fridley Gap Trail Rock Slide Redbuds Blooming

The climb up the Massanutten South trail is quite steep and you may need to stop a few times along the way to catch your breath.  This trail is also narrow and you may have to cross over a few blown-down trees, but the trail wasn’t too hard to navigate with the recent re-blazing.  At 1.85 miles, you will reach a campsite area.  Look closely and you will see a path that leads to a rock outcropping called Grubbs Knob Overlook.  Take this path up to the overlook to get the best views along the hike.   You will see the top of Grubbs Knob to the left from the overlook and views to the west.  After taking in the view, go back to the campsite and continue along the Massanutten South trail.  At 2.05 miles, the trail reaches its peak and then you will start to descend, as the trail takes a steep turn to the left.  You will make your way back down this very narrow path and cross Fridley Run at 2.70 miles.

After crossing Fridley Run, you will begin to ascend on the trail again (turning again into a wider fire road) until you reach a rocky slide that gives you views of Fridley Gap and North Mountain at 3.25 miles.  Continue to ascend as you walk around part of Third Mountain. The fire road stops ascending at 3.5 miles.  The trail then descends and you reach another cement junction post at 3.84 miles.  Take a left on the purple-blazed Fridley Gap trail, which follow another wide fire road.  You will likely see lots of burned trees from a fire in 2010 that covered a big portion of this area.  At 4.5 miles, you will reach another junction. The purple-blazed Fridley Gap trail ascends to the left and continues through the woods.  Take this trail and begin a steep ascent across some switchbacks.  At 4.85 miles, you will reach the top of your climb and there are a few stones that you can rest on for a few minutes if you need to catch your breath.

Christine at the Small Waterfall
This small waterfall feeds one of the most popular swimming holes in the area. Below: More pretty cascades.

Mountain Run

The trail now begins to descend very steeply.  We were so glad we had our trekking poles since the rocks under the leaves were often loose and it helped to lower ourselves down the steep steps.  We were also glad we did this hike this direction rather than the clockwise version of the loop.  At 5.5 miles, we reached another junction with the Massanutten South trail.  Take a left on the orange and purple-blazed fire road (don’t go the way that crosses the bridge) and you will reach the junction that closes the loop at 5.65 miles.  Take a right here, crossing Mountain Run again and make your way back down the fire road.  Be sure to catch the rocky path at 5.8 miles that leads back to the parking lot at 6 miles.

A funny moment happened along the hike.  Christine had programmed her phone to use the MapMyHike app.  In a recent upgrade, it now includes some vocal updates along the way, usually at the mile increments.  One time, we heard the voice say “Don’t stop now.  Walgreen’s is behind you.”  (Walgreen’s is now advertising on MapMyHike.)  While this is meant to be a word of encouragement to keep hiking strong, I was thinking of it as “Walgreen’s is chasing us.”  As I sometimes do, I started thinking of a parody song to the tune of the Road Runner Show TV theme song.  So for your enjoyment, here are my lyrics: “Fridley hiker, Walgreen’s is after you. Fridley hiker, if he catches you, you’re through.  That Walgreen’s is really a crazy store.  They have pharmaceuticals, toiletries, and so much more.  Fridley hiker, never, never, never slow down.  Fridley hiker. Walgreen’s is after you.  Fridley hiker.  If he catches you, you’re through.

There is one geocache along the trail, Fridley’s Cache, a normal-sized cache near the swimming hole.

It is always a good feeling to know that we redeemed ourselves by covering a hike that we had previously failed to navigate.  If you are looking for good views of streams or a swimming hole, along with a challenging hike to get some views, this may be a great hike to try out some time.

Rocks at Grubbs Overlook
The rocks at Grubbs Overlook might trick people into thinking there isn’t an open view. Below: Views from Grubbs Overlook and the campsite that sits adjacent to the overlook.

View from Grubbs Adam at Grubbs
A View Into the Valley
Campsite at the Grubbs Overlook

Christine Says…

Hallelujah for freshly painted blazes!  I was so frustrated last year when our attempt to hike the Fridley Gap Loop ended in failure.  The failure was mostly my fault.  I tried to map out the hike based on a course I saw on someone’s Runkeeper page.  There were no directions, just the route overlaid on a rudimentary map of the area.  I thought we’d be able to figure things out on our own with a NatGeo map of the area.  It turns out that faded blazes and a large group of people camping in the middle of the trail are insurmountable challenges to my ability to navigate.  We’ll let bygones be bygones and get on to the successful version of our Fridley Gap hike.

Let me start by saying, I loved this hike!  It was even better than I expected.  The stream was running beautifully, the views of the valley ‘greening up’ below were lovely and the weather was perfect (sunny, cool and breezy enough to keep the bugs away).  I really enjoyed the little rock-hop as the trail followed the stream bed.  The small waterfall and swimming hole were so pretty.

The climb up the Massanutten South trail to Grubbs Knob was steep enough to be challenging, but not so steep that we had to stop for a breather.  On the way up, we could see all the little signs of spring creeping back into the forest – tiny buds on trees, tightly curled ferns and the occasional early season wildflower poking up through the leaves.  The overlook at Grubbs Knob is rather easy to miss.  It lies at the top of a faint footpath above a campsite.  When you first climb to the top of the footpath, vertical, spine-like plates of rock obstruct any possibility for a view.  But if you climb along the rocks, eventually you come to a few footholds that allow you to scramble to the top of the rocks.  Once you’re there, the valley below spreads out as far as the eye can see – farms dotted with red barns; small country towns; and wide, green fields make up most of the vista.

Downhill Through Dense Laurel
The climb downhill after Grubbs Knob takes you through dense mountain laurel. The harsh light makes for an ugly photo… but you get the idea.  Below: Adam approaches the stream; Crossing Fridley Run.

Approaching Fridley Run Crossing the Stream Again

After leaving the Grubbs Overlook, we ascended a few more moments before taking a sharp downhill turn.  The trail passed through dense mountain laurel, with occasional peeks toward the next ridgeline.  Eventually, we heard the sound of water again.  For a short way, the trail followed Fridley Run.  But soon, we had to cross the stream and head back uphill along a wide fire road.  From the fire road, we caught our second open viewpoint of the hike.  It was a nice view, but nowhere nearly as lovely as the one from Grubbs Overlook.  It’s one thing to slog uphill and come to a magnificent rocky outcropping with a sweeping vista to appreciate.  It’s a little less stirring to stop along a roadside and take in a view of a couple mountain ridges.

Eventually, the fire road met up at a four-way trail junction.  One direction headed toward the Boones Run shelter, another toward Cub Run Road, another continued along the Fridley Gap trail in the direction of Martins Bottom, and of course the fourth headed back in the direction from which we arrived.  Seeing this junction made me think of all the different ways these trails cross and connect.  There are definitely multiple possibilities for overnight backpacking loops in this area.

Second Overlook
The second overlooks comes at a spot along the fire road. Below: Adam checks out the map at this four-way trail junction; Continuing along the fire road before our climb up Third Mountain; Charred trees from the 2010 fire.

Four-way Junction Hiking Along the Fire Road Charred Trees

We followed the fire road to another junction.  Heading straight would have taken us toward Martins Bottom, but to stay on course we turned left and started very steeply uphill along the purple-blazed Fridley Gap trail.   By this point of the hike, I was pretty hungry and my energy was starting to flag.  If I were smarter, I would have eaten a snack before tackling the climb.  But I’m not smart, so I spent most of the climb complaining that I was hungry!

After a short break (and snack) atop the tree-covered peak of Third Mountain, we began a crazy-steep descent.  For three-quarters of a mile, we carefully picked our way down the craggy, leaf covered mountainside.  Through the trees, we could see some really fascinating rock formations on the shoulder of the next mountain over.  I kept trying to appreciate the view, but every time I did, I lost my footing a bit.  This climb down definitely makes the case for paying attention and using your trekking poles.

Steep Uphill Over Third Mountain
The ascent of Third Mountain may not look steep in this photo, but it is!  Below: Descending Third Mountain – you can see rock formations through the trees; A bridge not taken on the Massanutten trail; Adam once again crosses the stream we crossed early in our hike.

Steep Descent of Third Mountain Bridge on Massanutten Trail Final Stream Crossing

At the bottom of Third Mountain, we had just a short walk back to our original junction – the one where everything went wrong when we tried to hike Fridley Gap last year!  I was quite pleased to see that marker again and be 100% certain that we had actually found our way successfully this time around.  From the last junction, we retraced our steps through the streambed, past the rockslide and back to our car.

Trail Notes

  • Distance – 6 miles
    (Check out the stats from MapMyHike)*
  • Elevation Change –  1850 ft
  • Difficulty – 3.5.  The trail goes up and down several times. 
  • Trail Conditions – 3.  The trail had blowdowns, loose conditions, and narrowness, but there were also sections that followed a fireroad.  It gets an overall average rating. 
  • Views3.  The views from the Grubbs Knob overlook are the best on the trail, but if you miss the path from the campsite you’ll miss the best view on the loop.  The views along the path at 3.25 miles are nice, but not remarkable.
  • Waterfalls/streams – 4. The trail goes along (and through) Mountain Run and Fridley Run on several occasions.  The small falls and swimming hole gives it a bonus. 
  • Wildlife – 2. This may be a good hike for bird watching.  We saw a peregrine falcon soaring above at the Grubbs Knob overlook and enjoyed hearing the song of the eastern towhee along the way.
  • Ease to Navigate2.  If we got lost before, we have to give this a low rating.  The path to start the trail from the parking lot could be better blazed and there are several turns to make.
  • Solitude – 4.  You may see some people at the swimming hole or camping alongside the junction with Mountain Run and Fridley Run.  However, we only saw one other group after this point on a nice spring weekend day. 

Directions to trailhead:

From Harrisonburg, VA, head east on 33.  Take a left onto VA-620 North/Indian trail Road and continue for 1.7 miles.  The road will turn into Rt. 717.  Go 3.4 miles and take a right on Minie Ball Ln.  Go 1.1 miles.  At this point, the road will turn back into Rt. 620.  Go 2.7 miles and take a right, continuing on 620 for about half a mile.  Take a right onto Armentrout Path.  Take the first left onto Airey Ln.  Parking is a lot at the end of this gravel lane.  If you pass the lot, you are on private property. The directions to this trailhead are a little confusing, and we recommend putting the coordinates on the map below into your phone/GPS.

* MapMyHike is not necessarily accurate, as the GPS signal fades in and out – but it still provides some fun and interesting information.