Appalachian Trail – Punchbowl Mountain to the James River

This 11-mile Appalachian Trail stretch had spectacular views of the valley and the James River!

View the Full Album of Photos From This Hike

View From Bluff Mountain
Adam takes in the view from Bluff Mountain. Below: The pond at Punchbowl Mountain Shelter; The shelter itself has seen better days; The Ottie Cline Memorial – put it place for a child lost in the mountains in the late 1800s.

Pond at Punchbowl Shelter Punchbowl Shelter Ottie Cline Memorial

Christine Says…

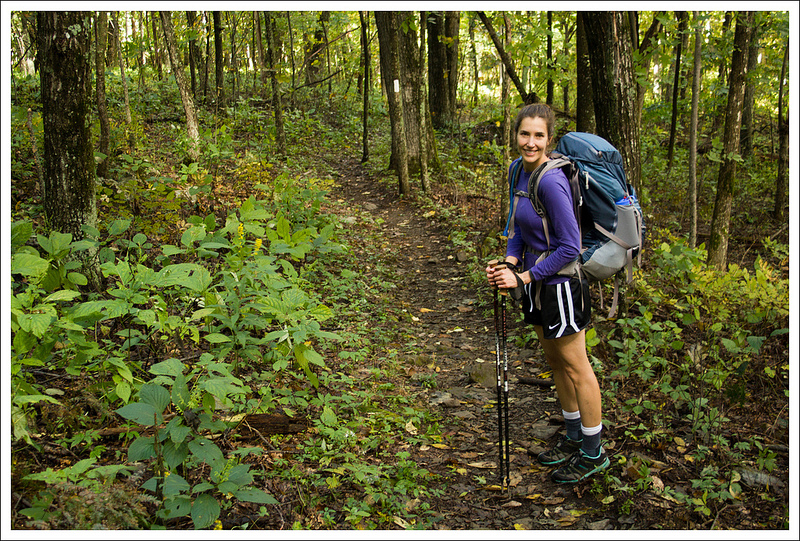
When Adam and I first started hiking sections of the Appalachian Trail, we focused on the trail through Shenandoah National Park.  The park is close to our home, making it easy for us to bring two cars for a shuttle.  We did short sections – most of our day hikes ranged from 6 to 8 miles.  We did a couple sections as overnights, covering 10-12 miles total over two days.  When we first started, those hikes really challenged me – but they also made me want more!

We’re now traveling further from home to complete sections, so we push to complete bigger miles to make the travel time more worthwhile.  We’ve also found friends and businesses to help us shuttle along the way.

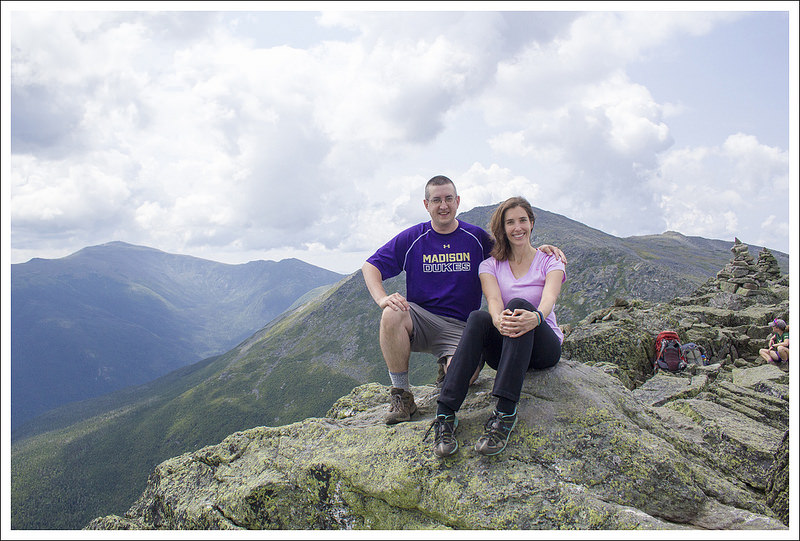
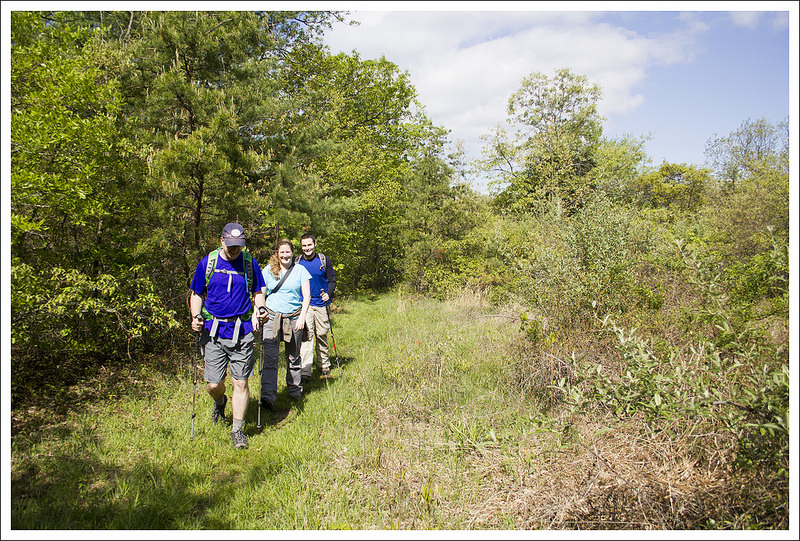
We met Lynchburg friends, Dennis and Tina to do this AT section from Punchbowl Mountain down to the James River.  We’d never met them in person, but we’d chatted online about hiking and the Appalachian Trail for almost a year.  We were really thankful for their good company on this hike!

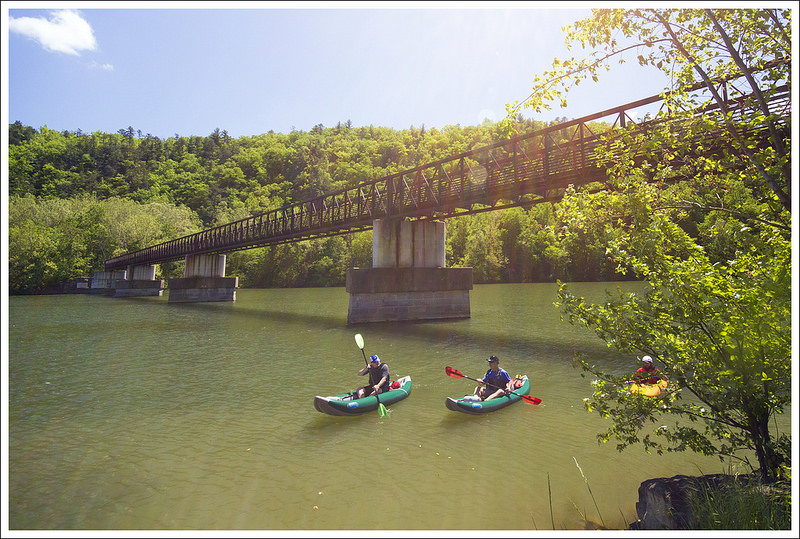
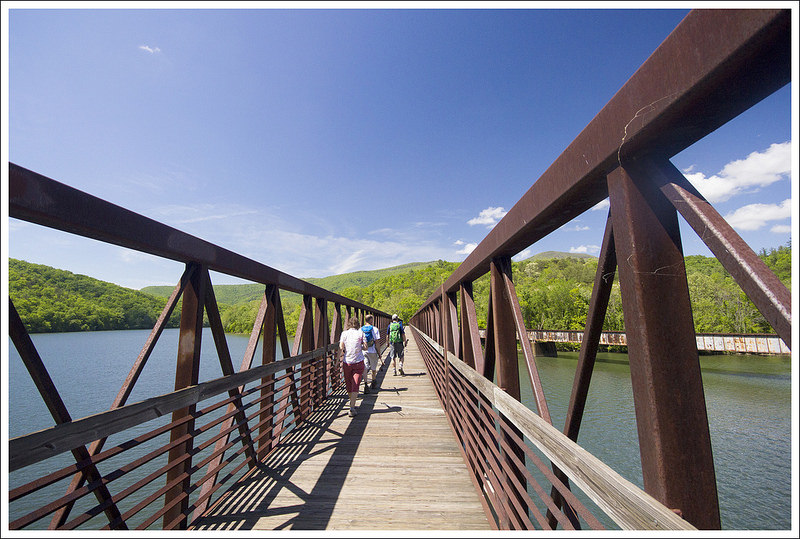
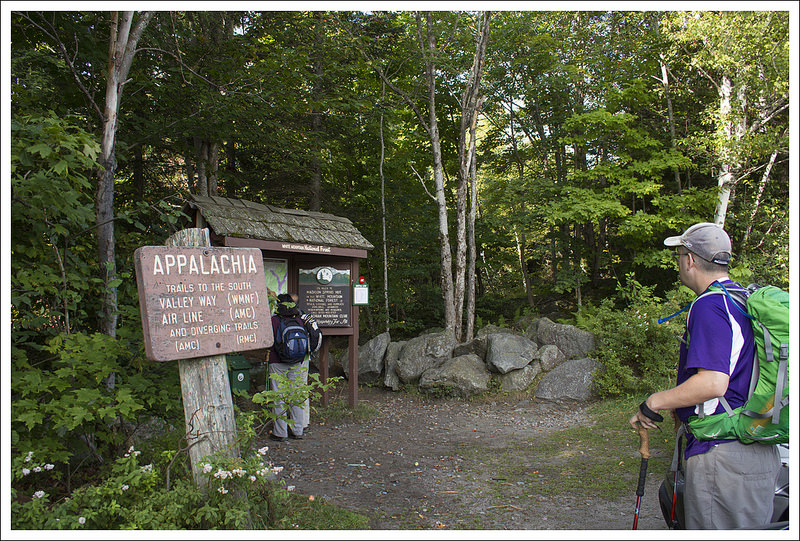
We met early Saturday morning at the Foot Footbridge across the James River.  ‘Foot Footbridge’ isn’t a typo.  The bridge is named after hiking enthusiast, Bill Foot, who worked tirelessly (while also fighting cancer) to see that the bridge was built.   It’s a beautiful and impressive bridge across the James River, and there is nothing else like it along the Appalachian Trail.

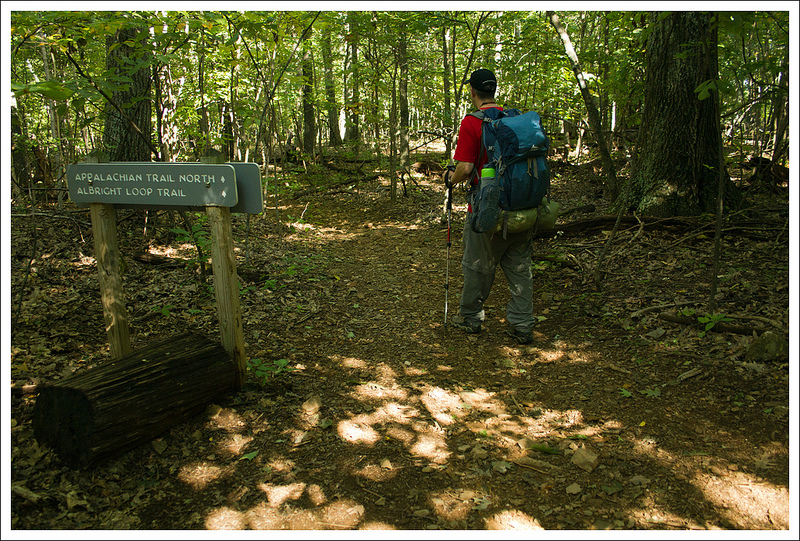
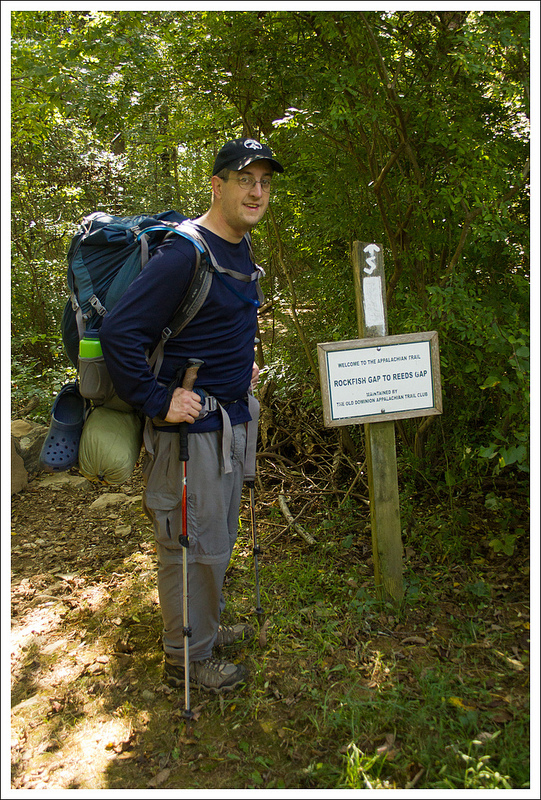
After Adam and I got acquainted with Dennis and Tina in the parking lot, we hopped in our car and made our way along the Blue Ridge Parkway to our start point – the Punchbowl Mountain Overlook.  We left off here last fall after completing a 17 mile section from Hog Camp Gap.

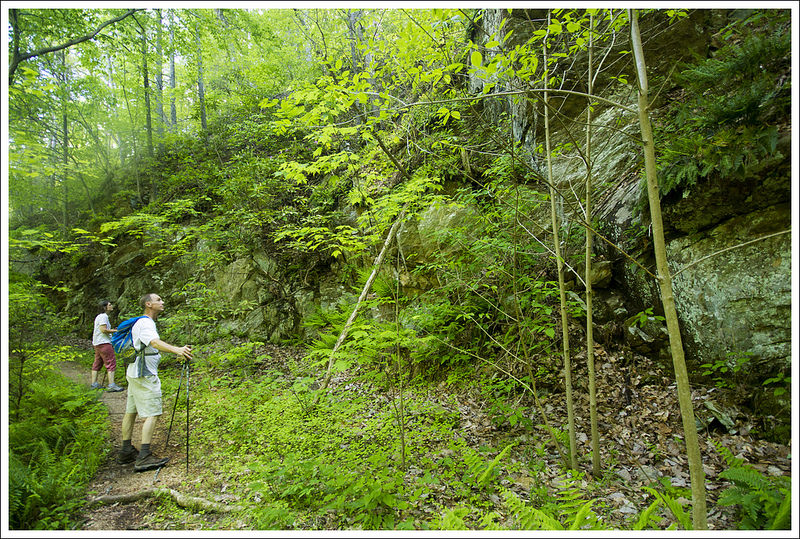
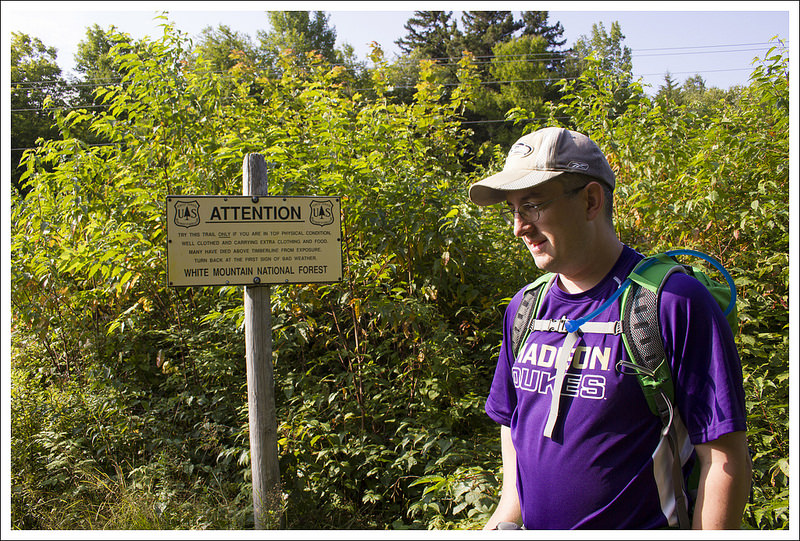
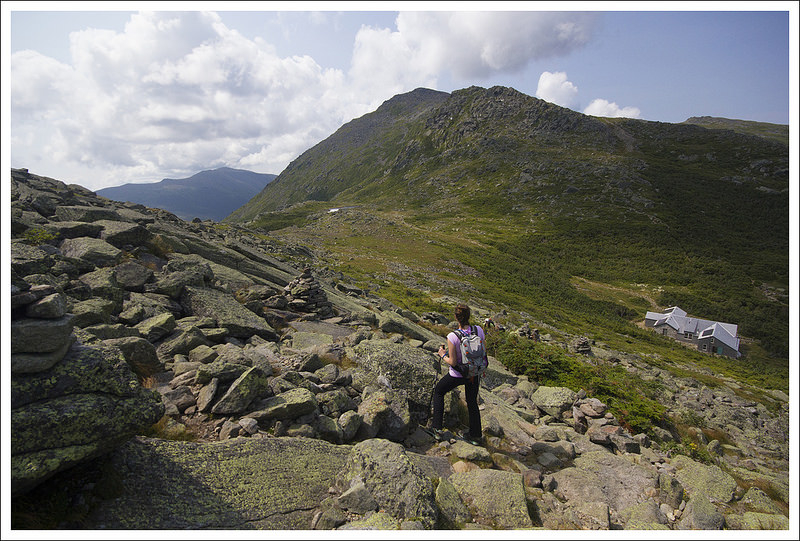
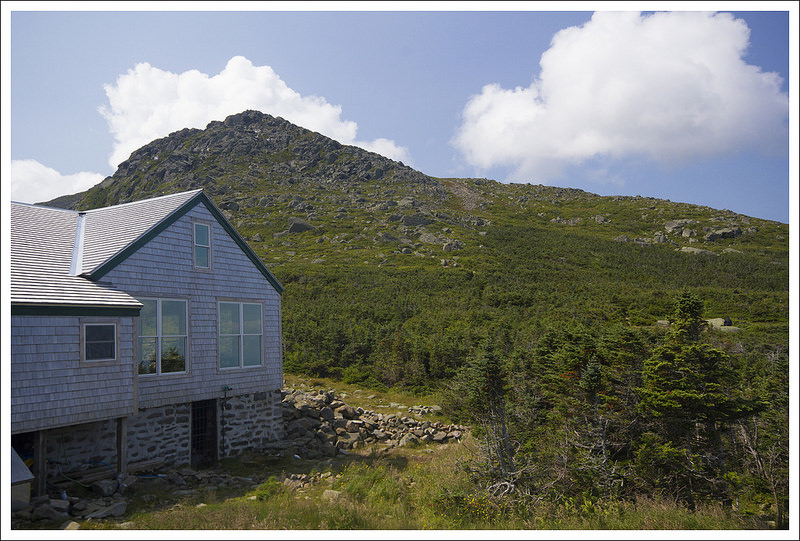
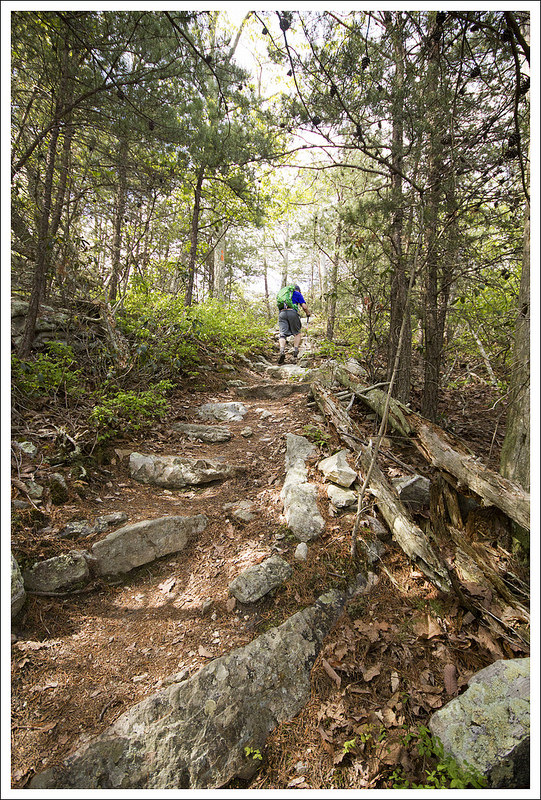
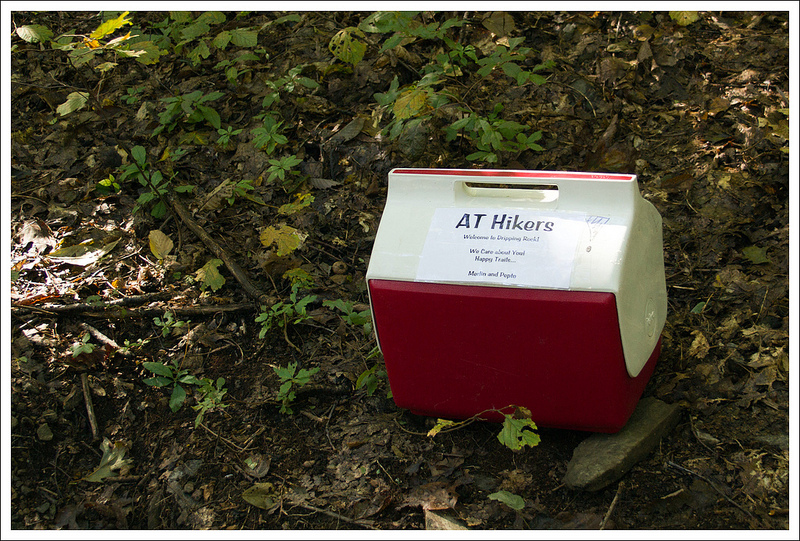
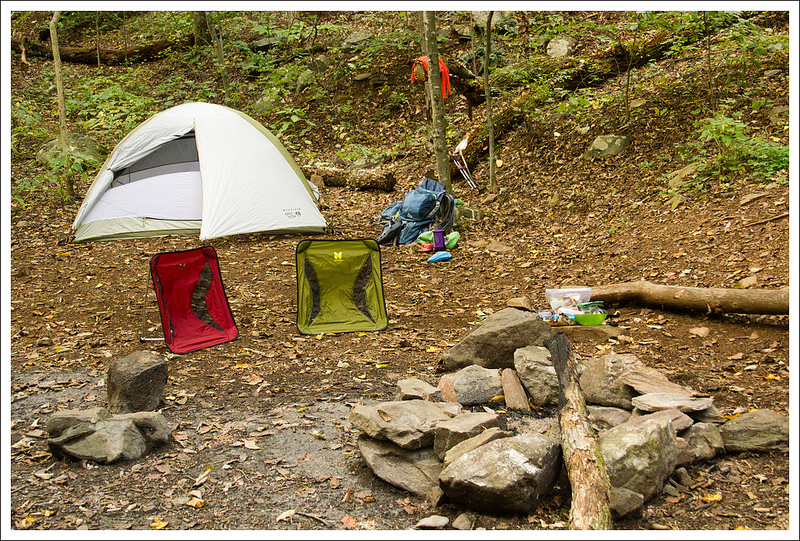
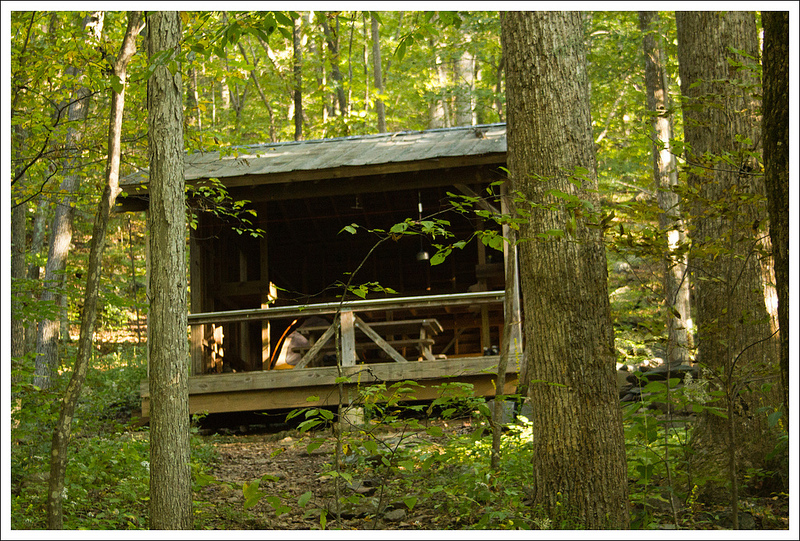
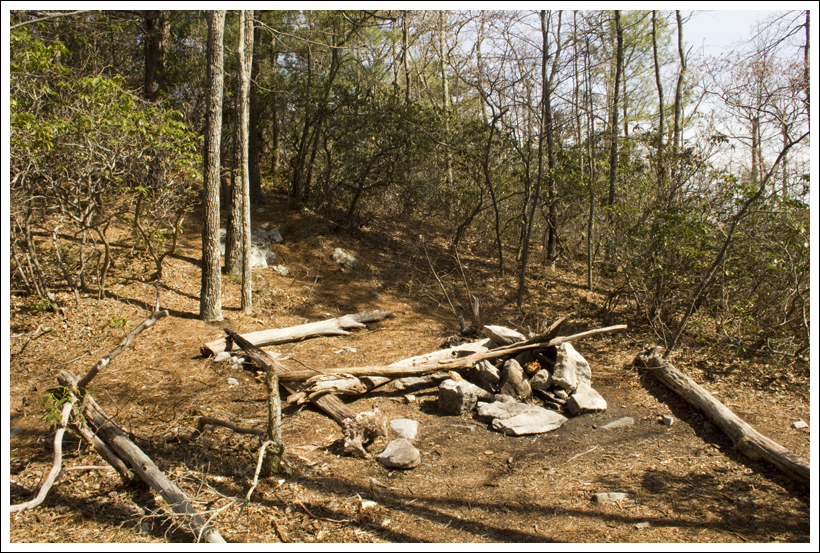
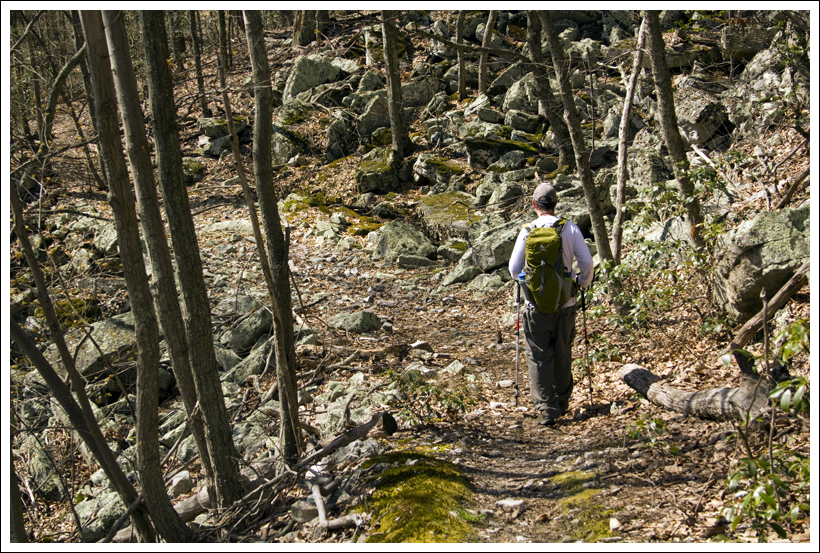
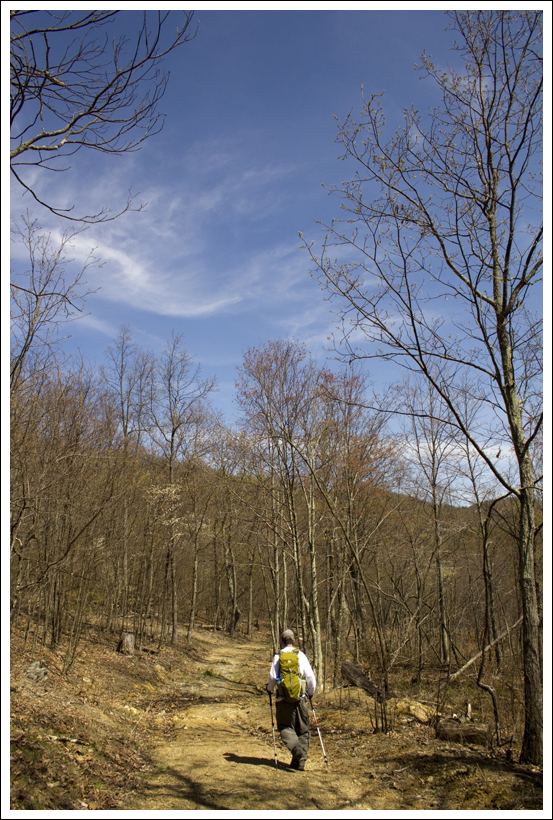
The morning began with our only significant climb of the day- about 1400 feet over two miles to the summit of Bluff Mountain.  About half a mile into our ascent, we detoured to visit the Punch Bowl Shelter. The shelter is a little bit run down and sits next to a murky, muddy, mosquito-haven of a pond.   The shelters to the north and south of Punch Bowl (Brown Mountain Creek and Johns Hollow) are both much nicer places to stay the night.

Dwarf Irises
The wildflower display was in full force when we hiked this section of trail.  We saw dwarf irises, pink lady’s slippers; native pinxter azaleas, wild geraniums, rhododendron, mountain laurel; wild bleeding hearts; scarlet flycatch (in the full album), and spiderwort (in the full album).  It was gorgeous!

Lady's Slipper Pinxter Azalea Wild Geranium
Catawba Rhododendron Mountain Laurel Wild Bleeding Hearts

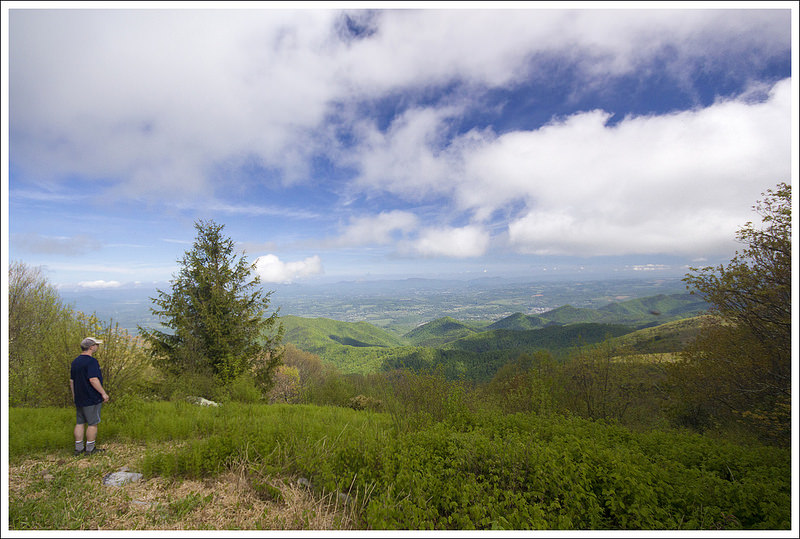
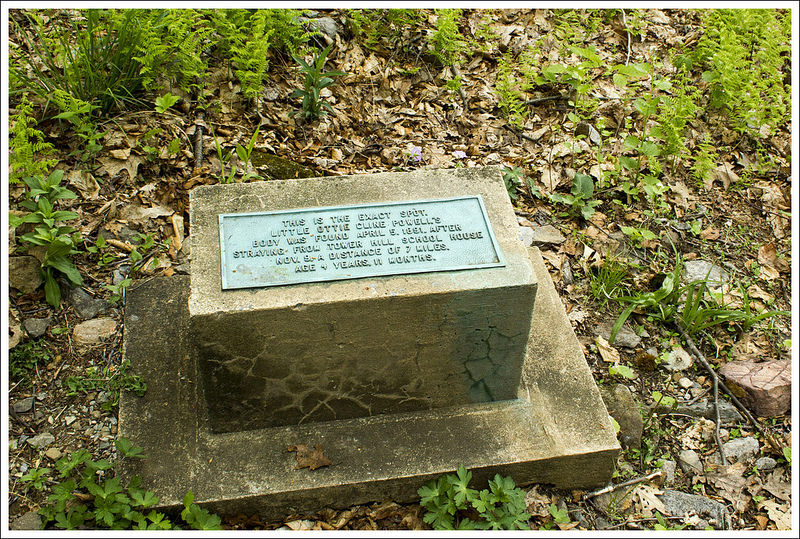
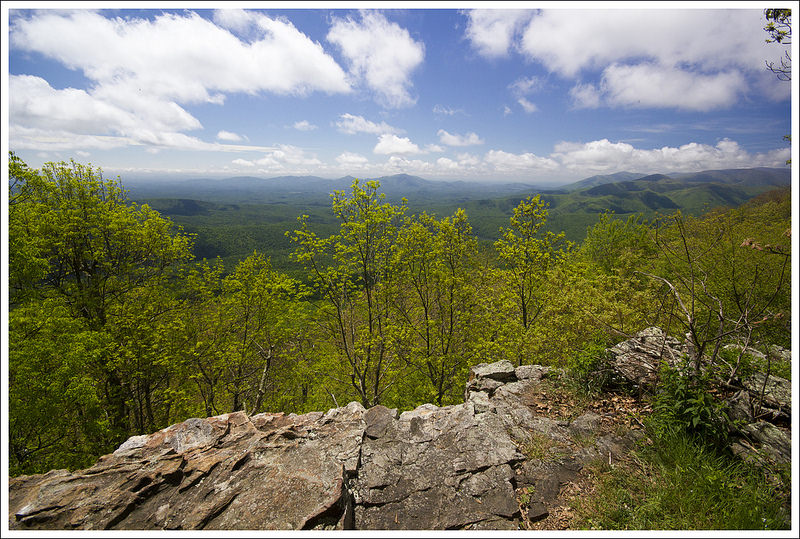
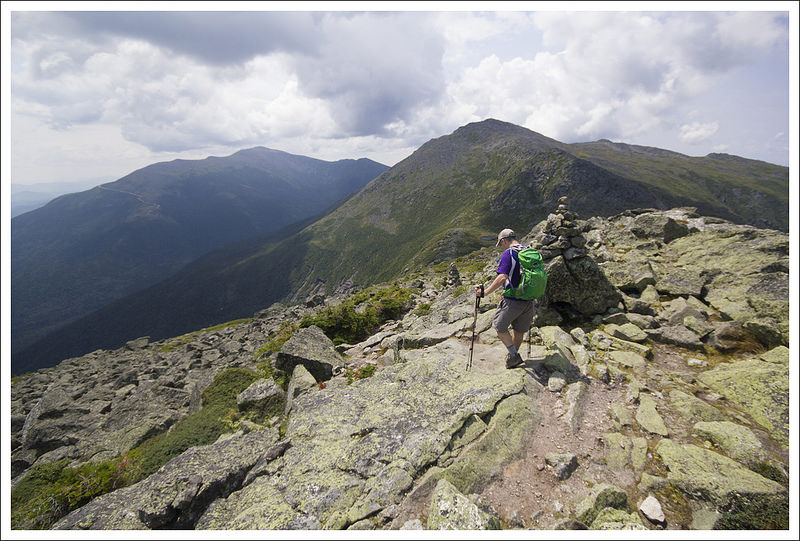
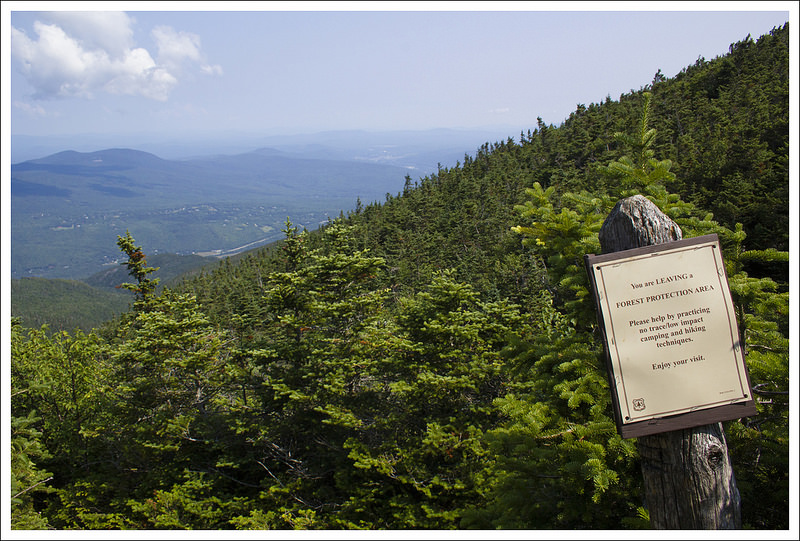
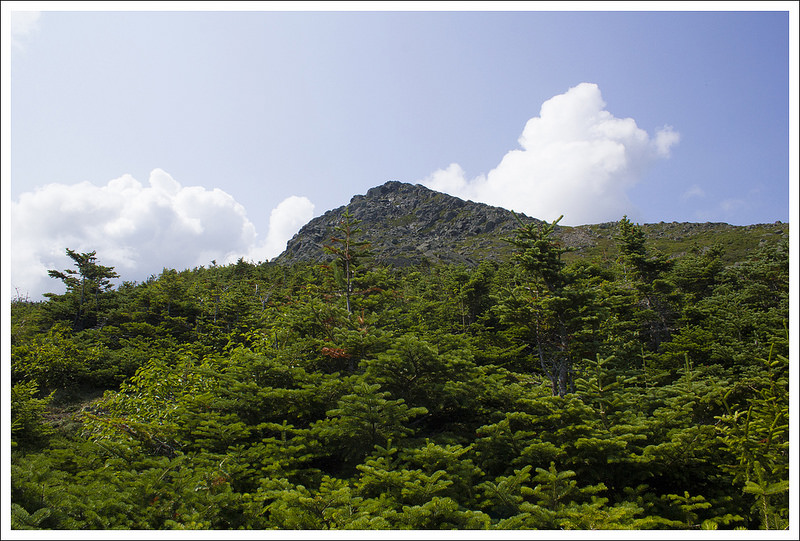
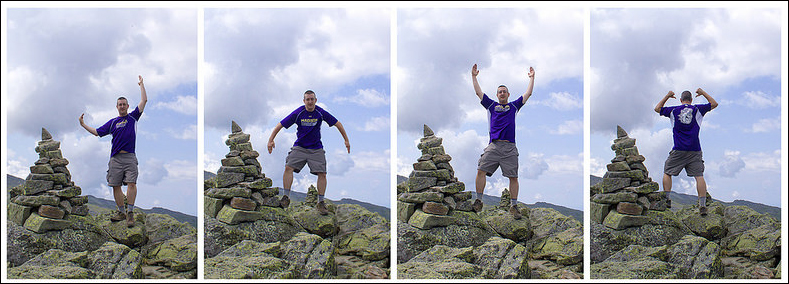
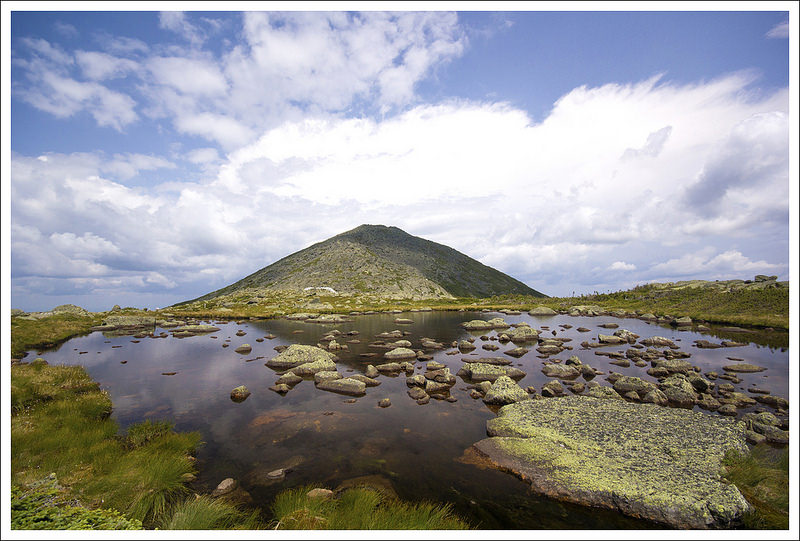
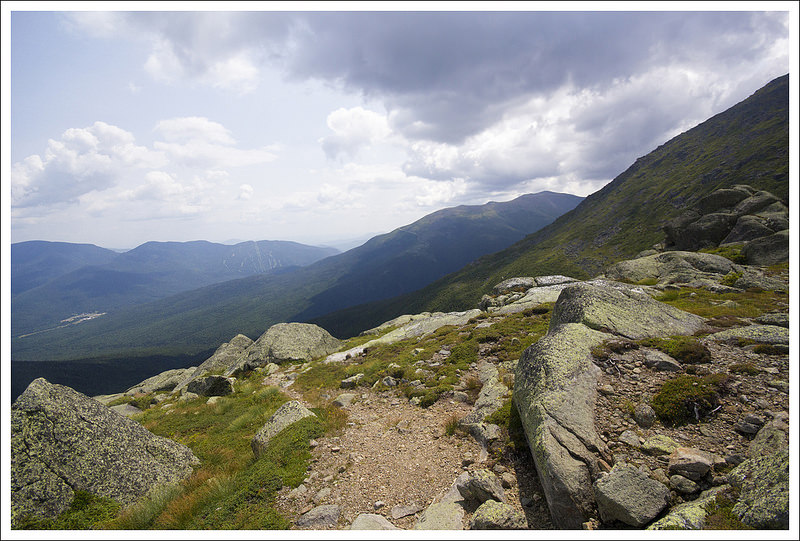
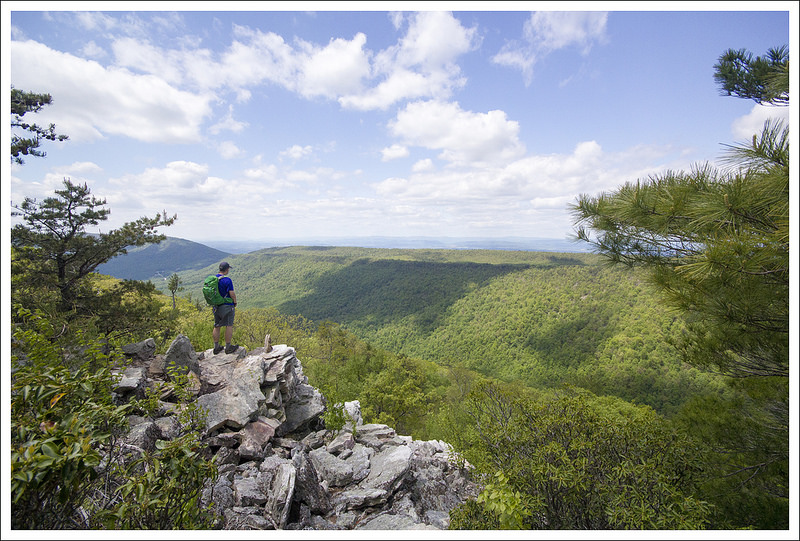
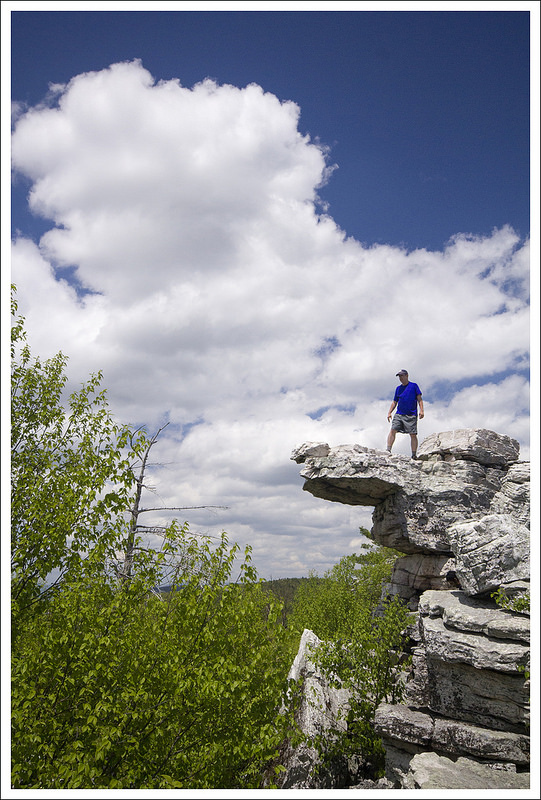
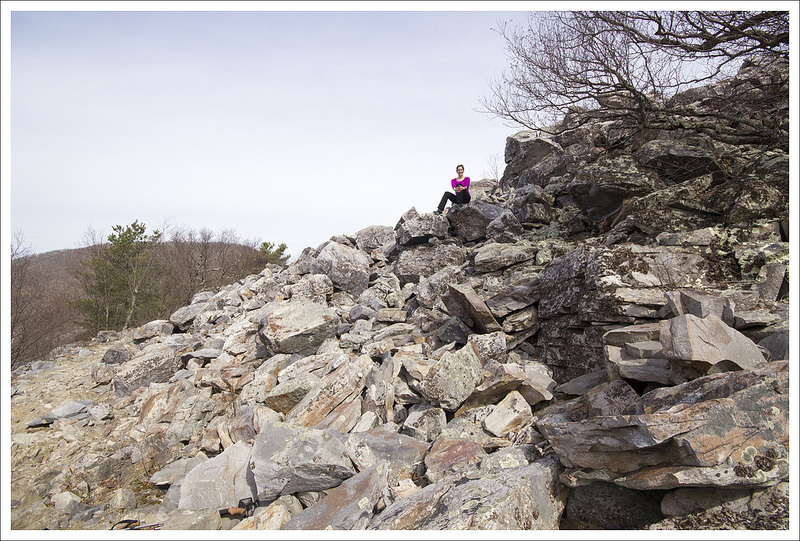
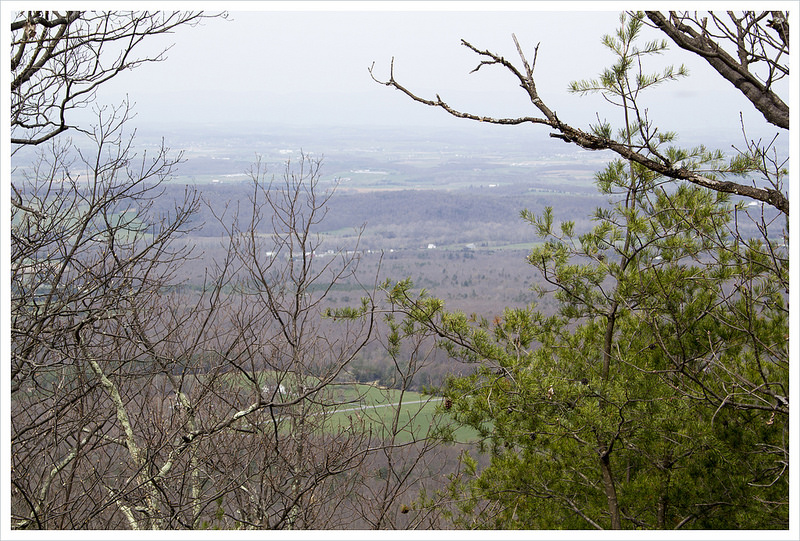
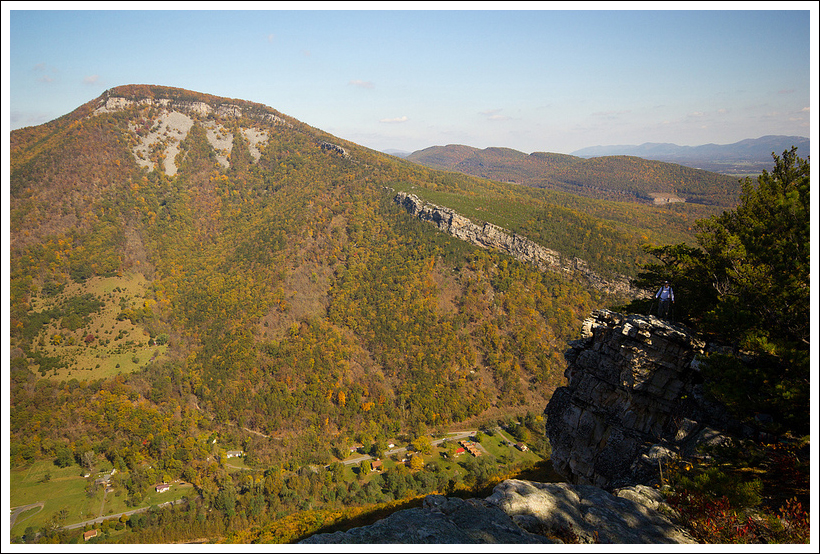
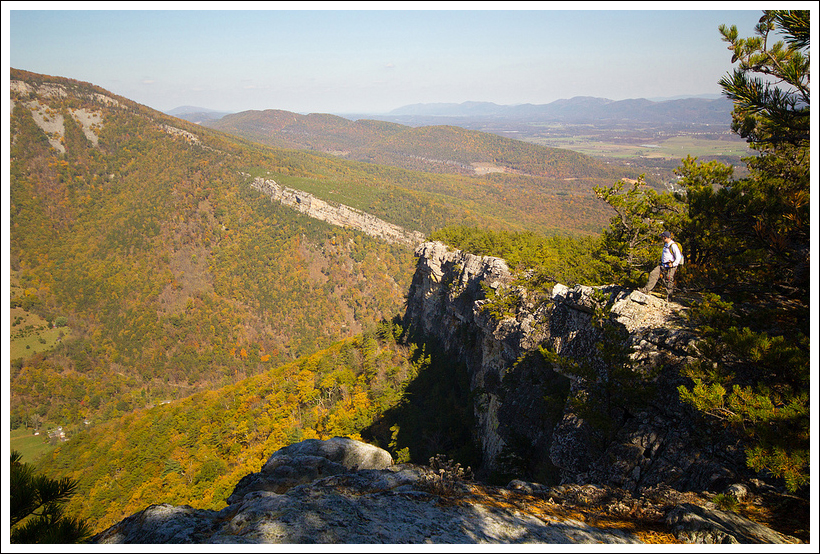
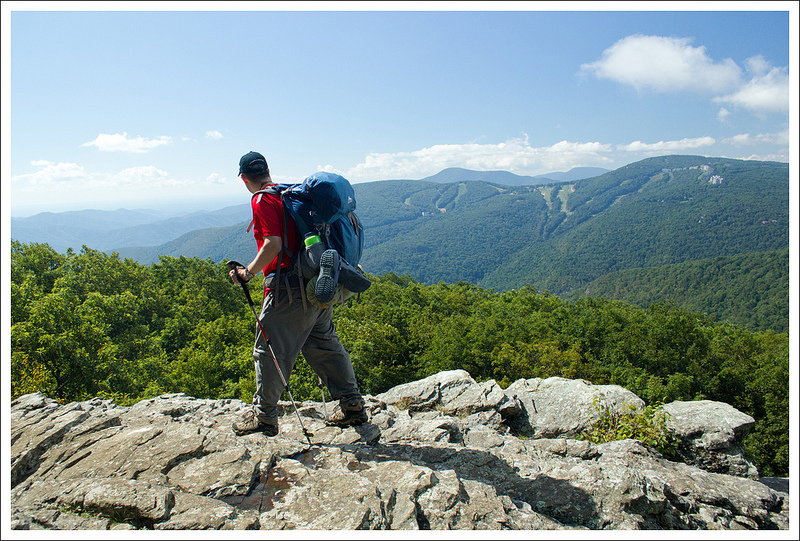
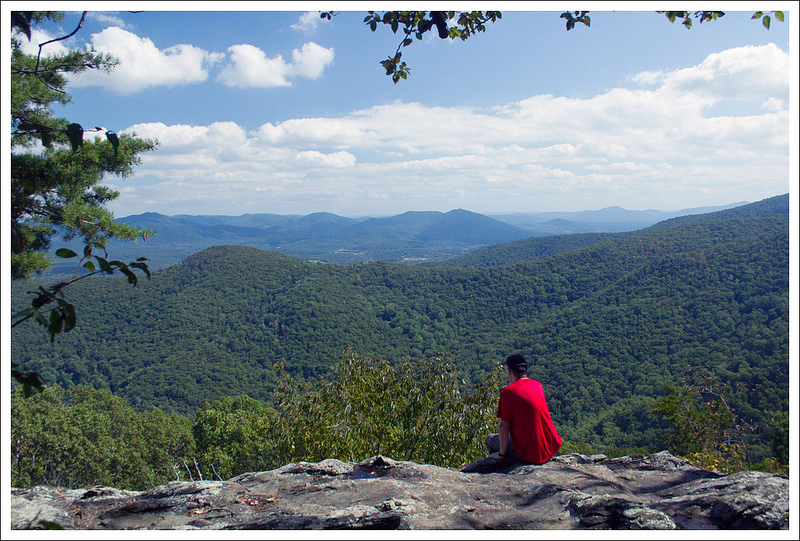
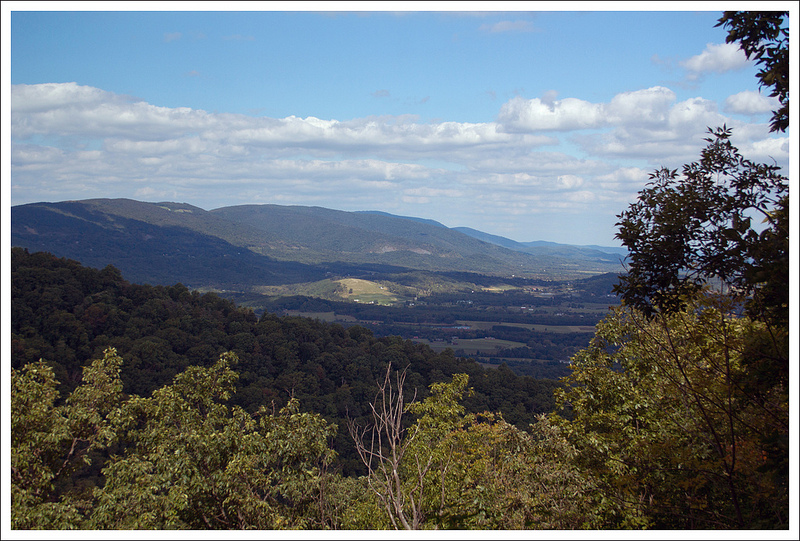
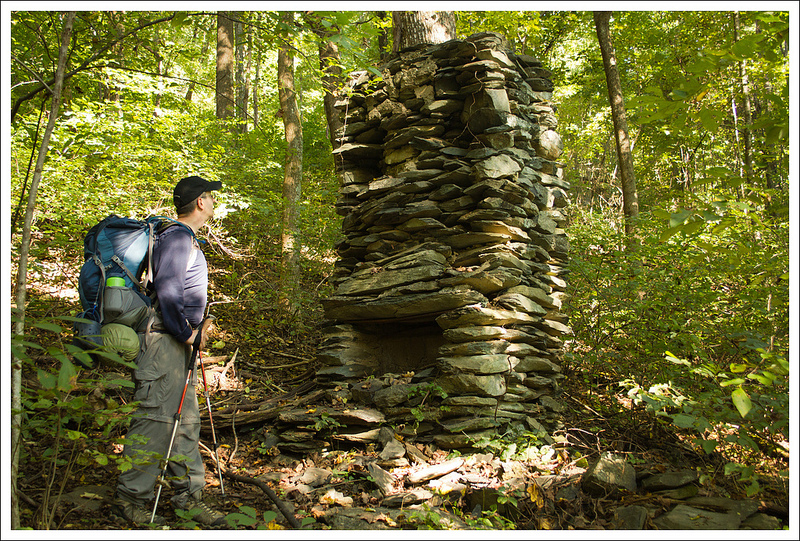
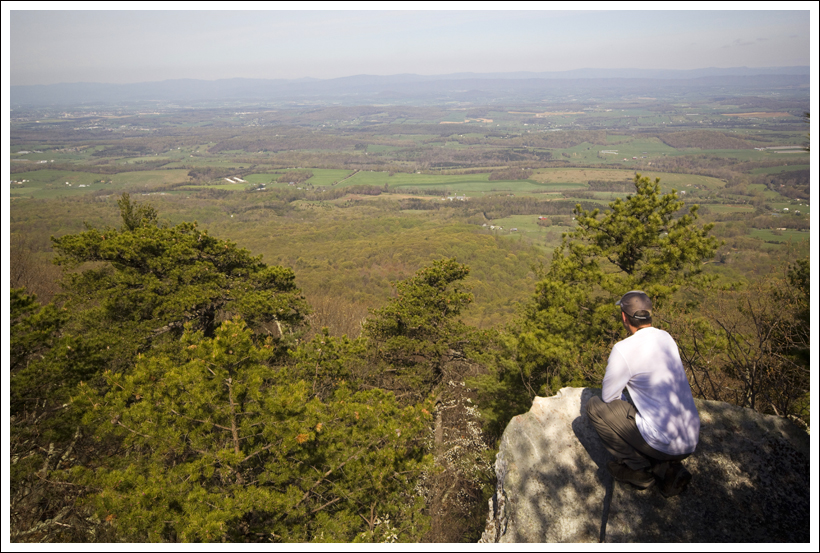
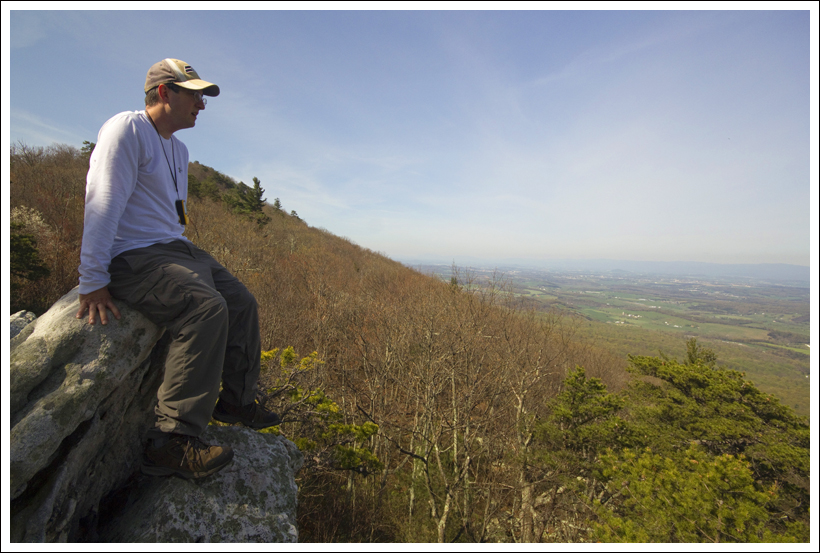
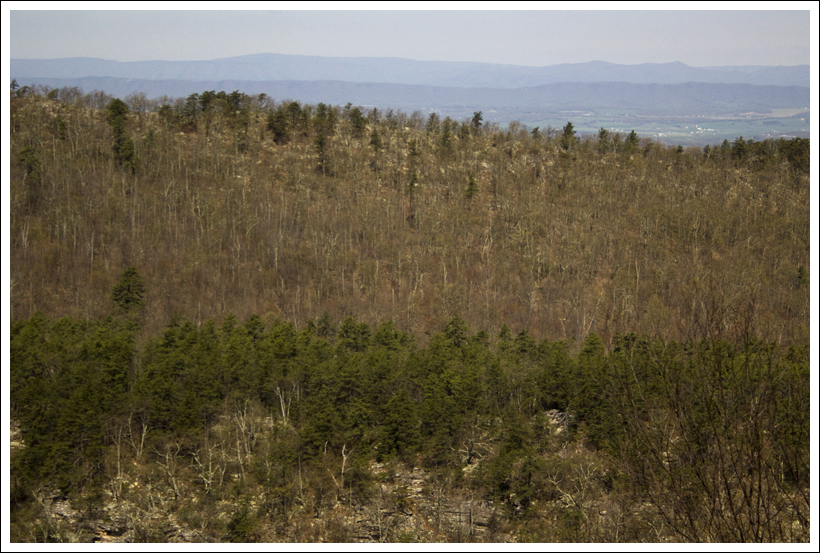
After our short stop, we continued our climb to the spectacular open top of Bluff Mountain.  We were swarmed by no-see-ums and gnats, but we still enjoyed the (almost) 360 views and watching the morning fog burn off the valley.  The remains of a fire tower foundation still sit on the summit. Immediately upon leaving the summit, we stopped at the Ottie Cline Powell memorial.  The marker tells the sad tale of a little 4-year old boy lost in the mountains in 1891.

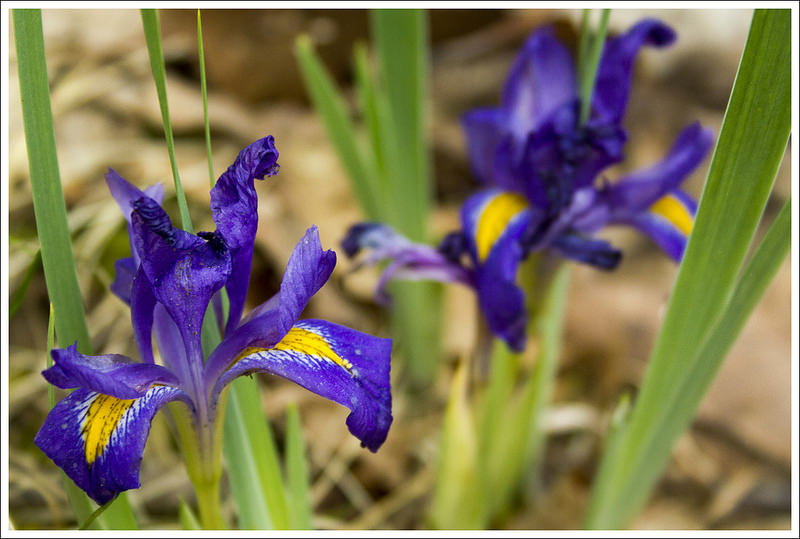
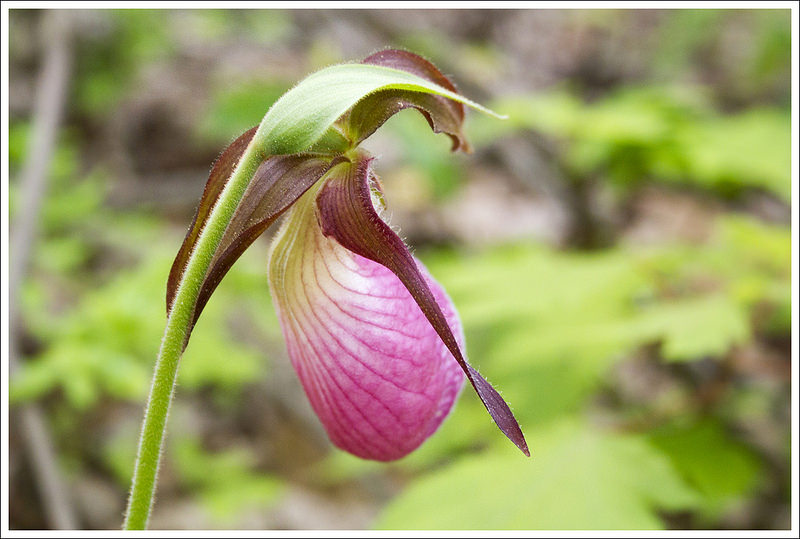
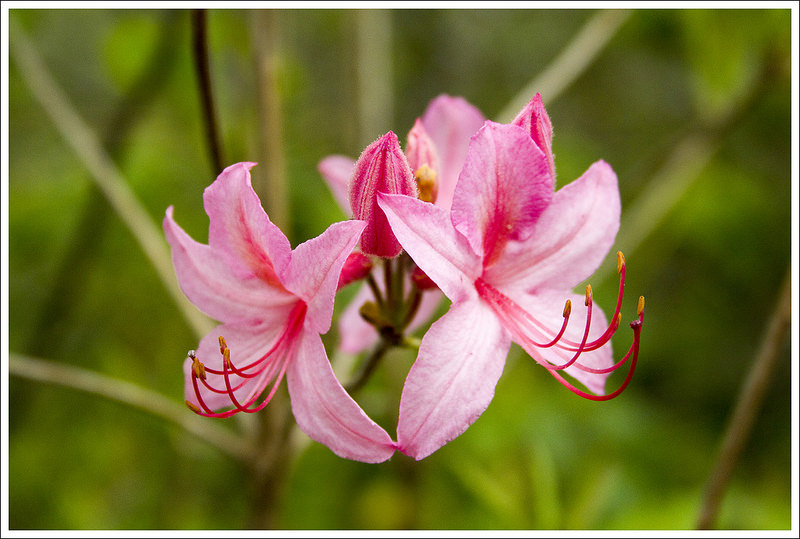
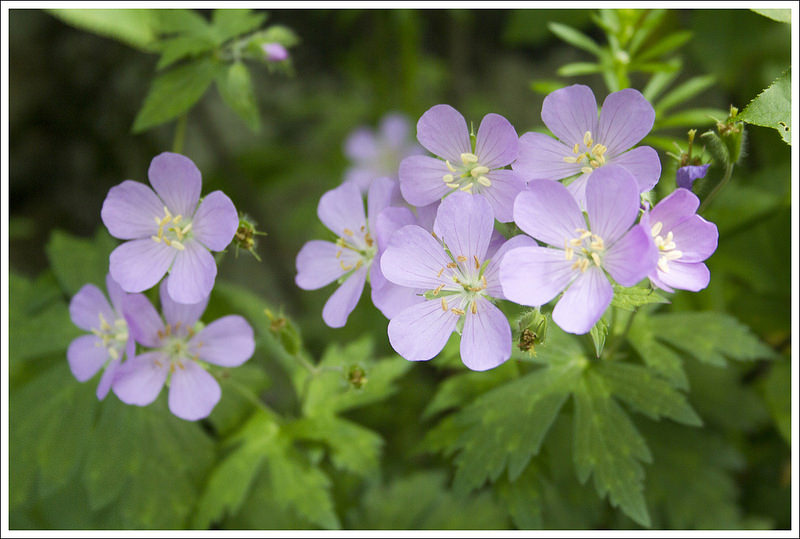
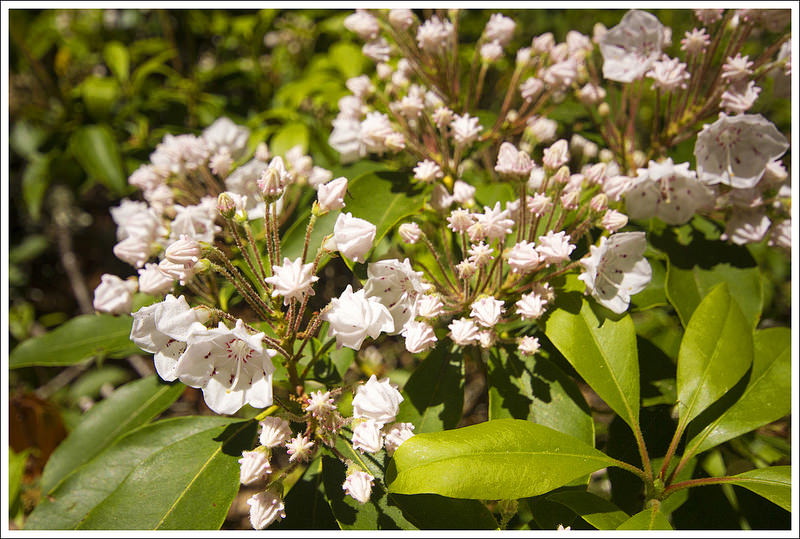
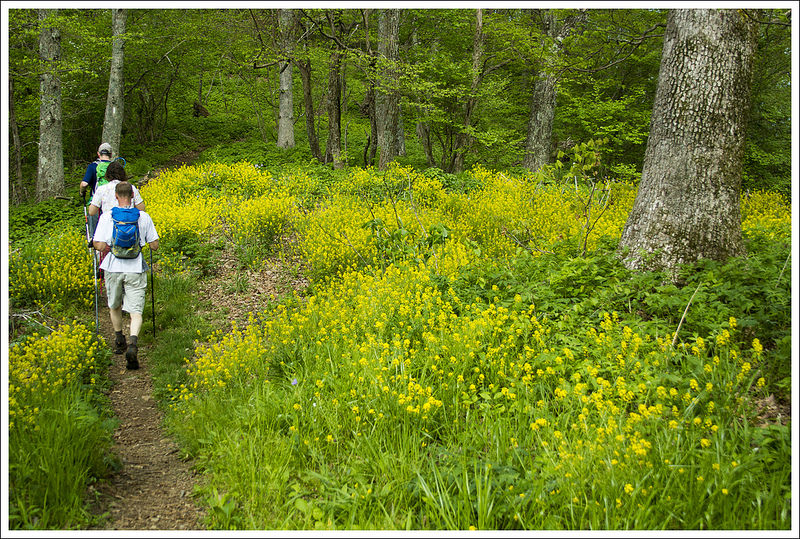
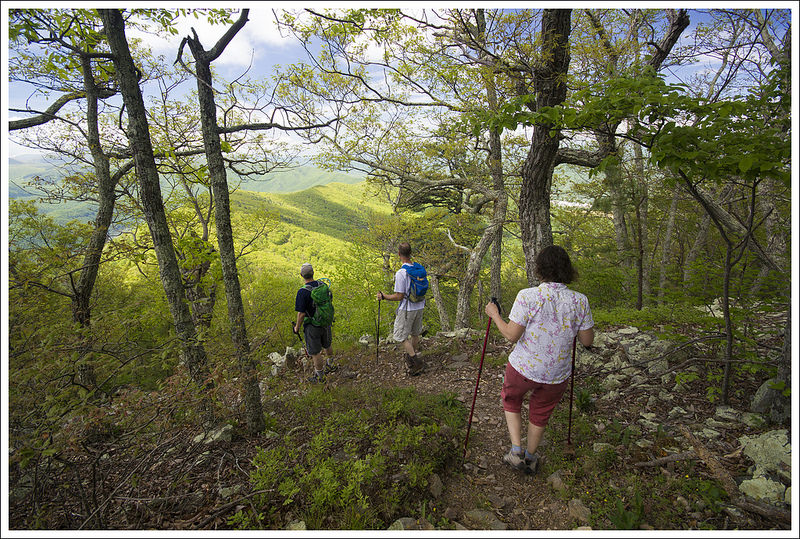
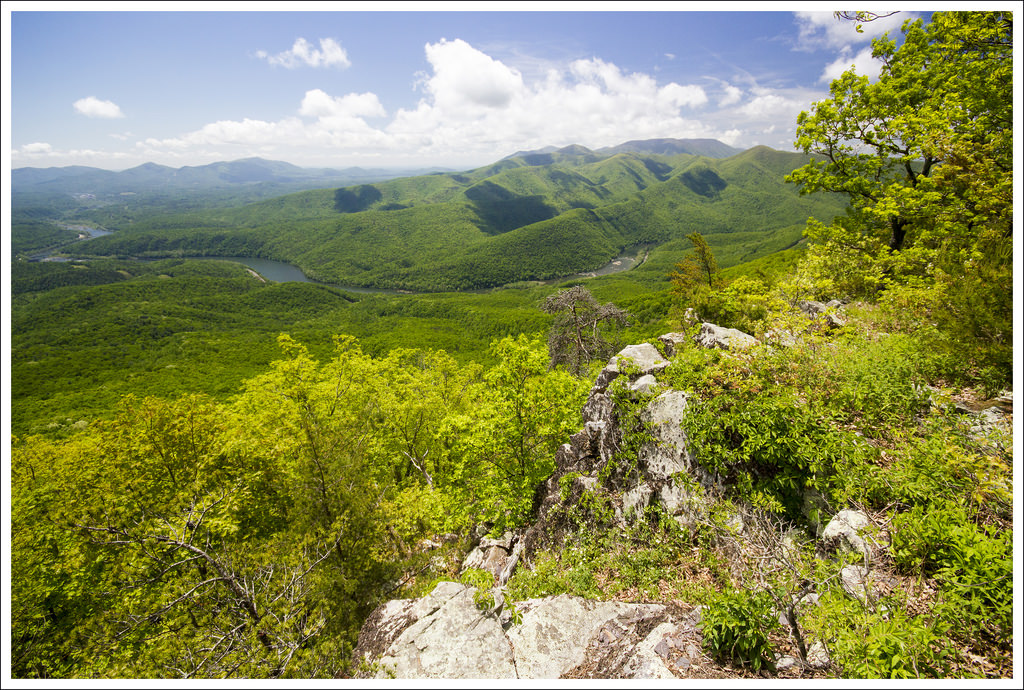
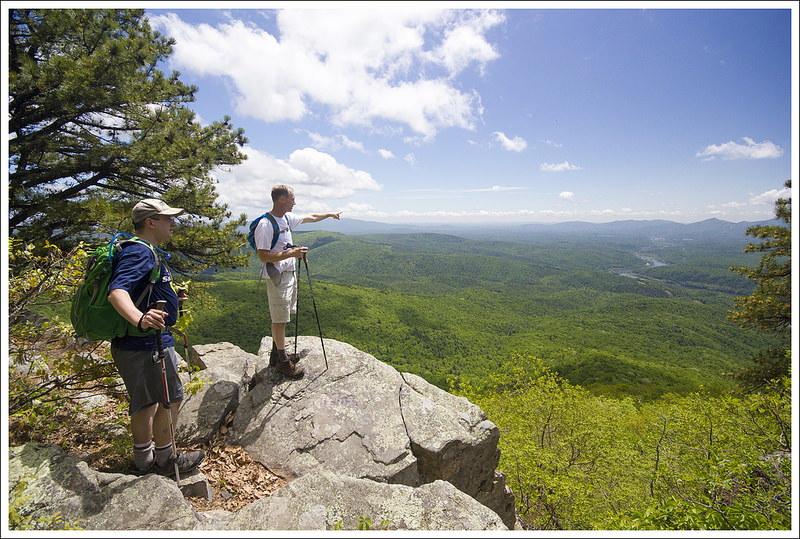
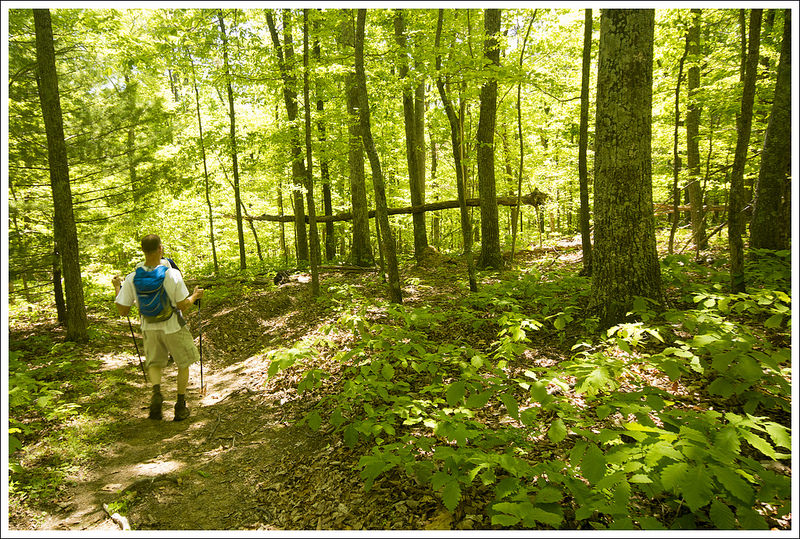
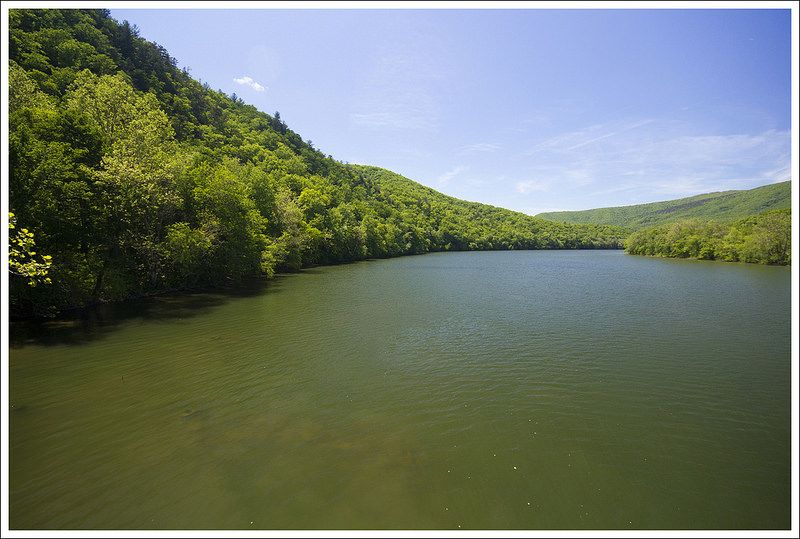
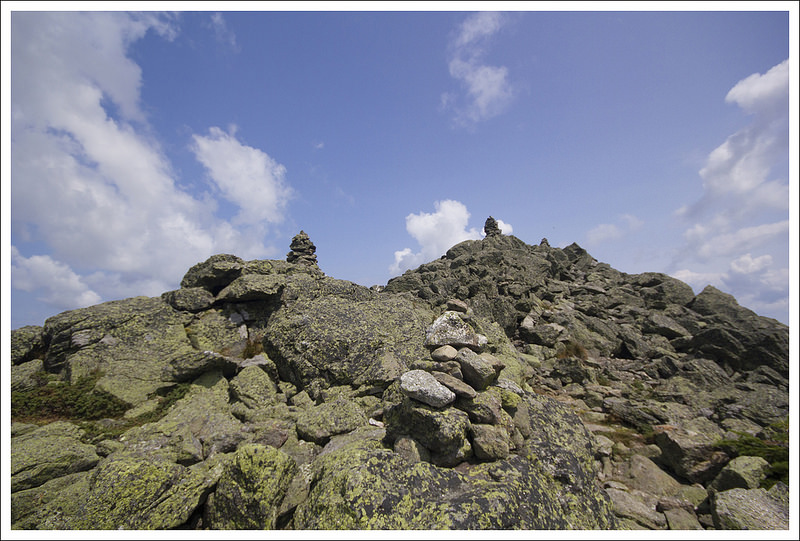
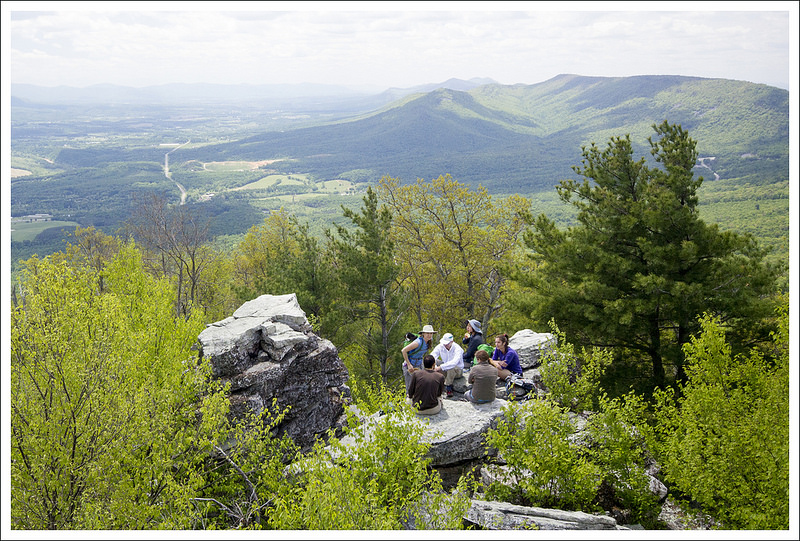
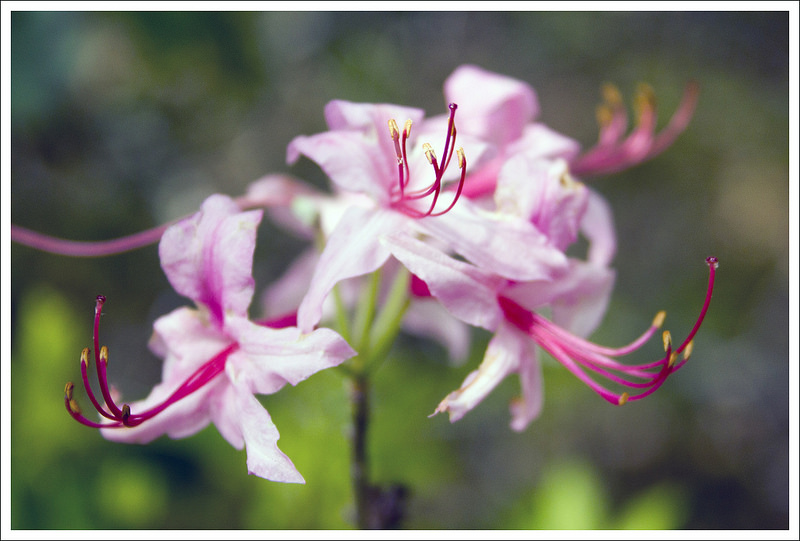
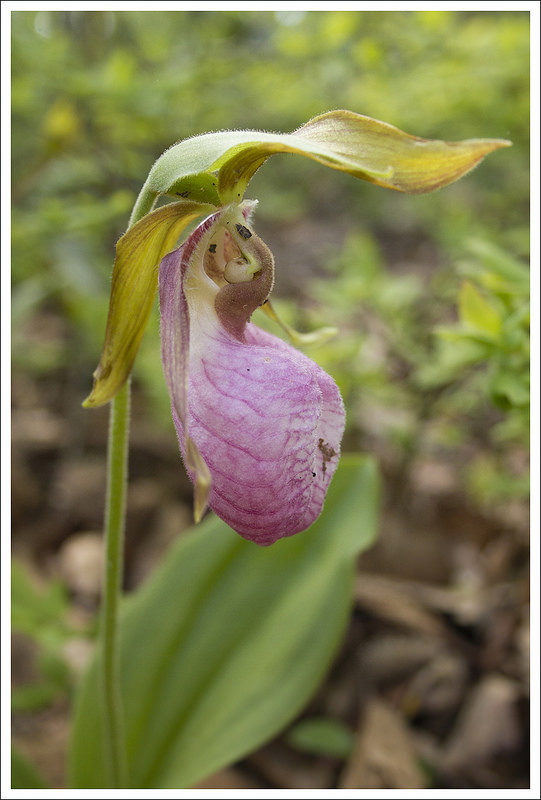
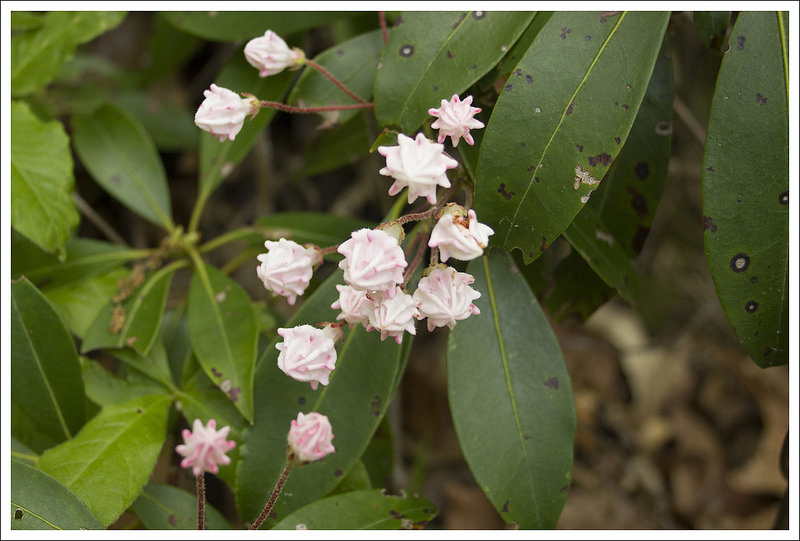
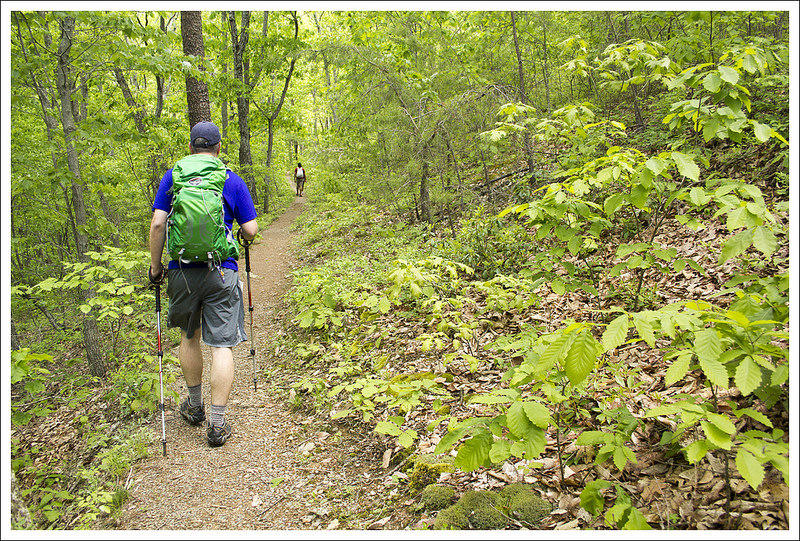
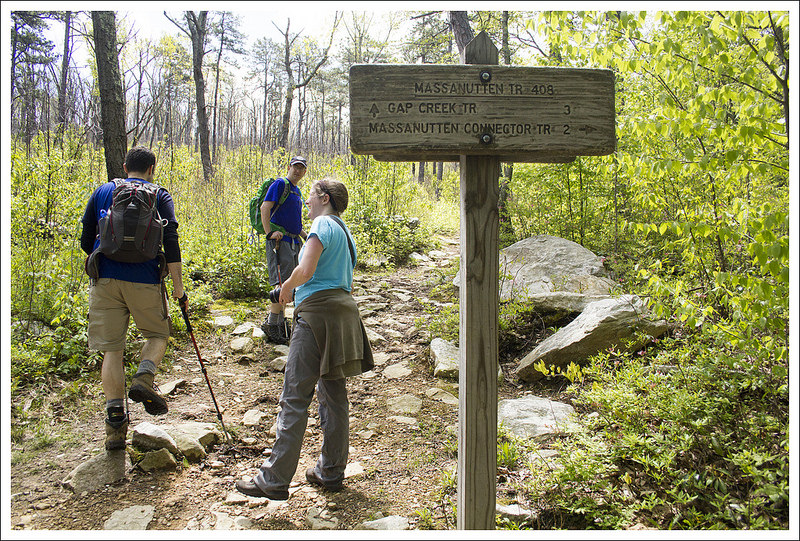
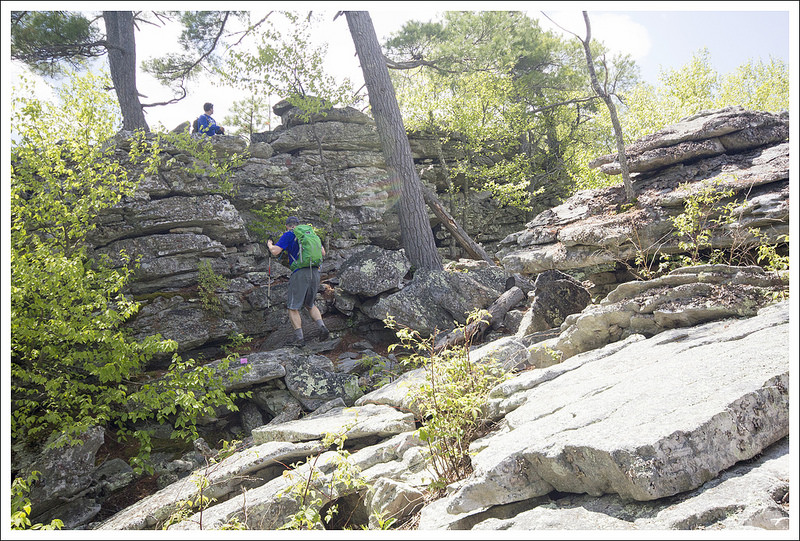
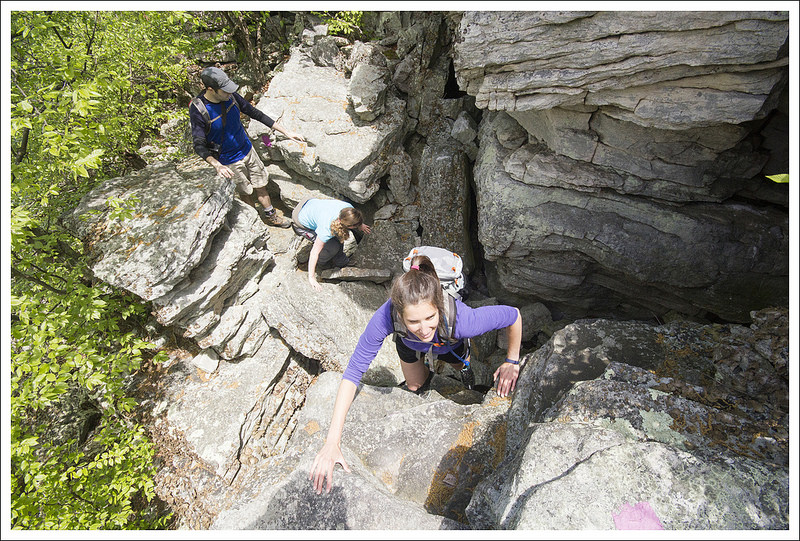
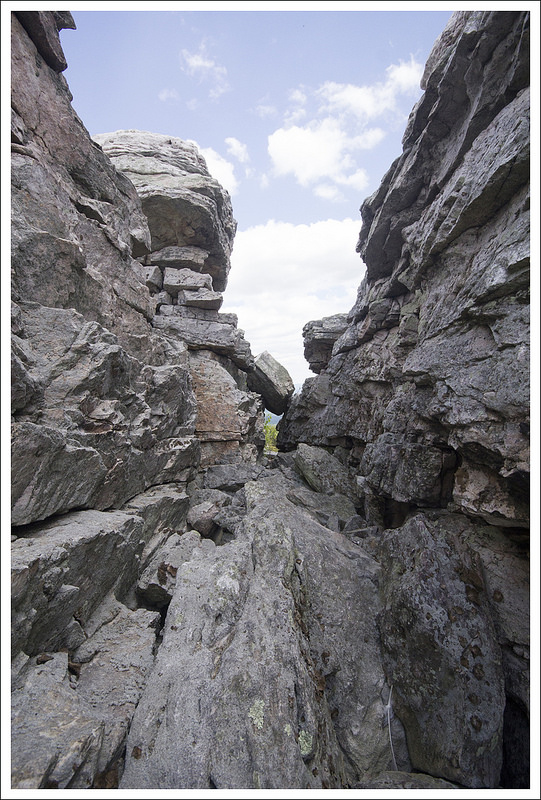
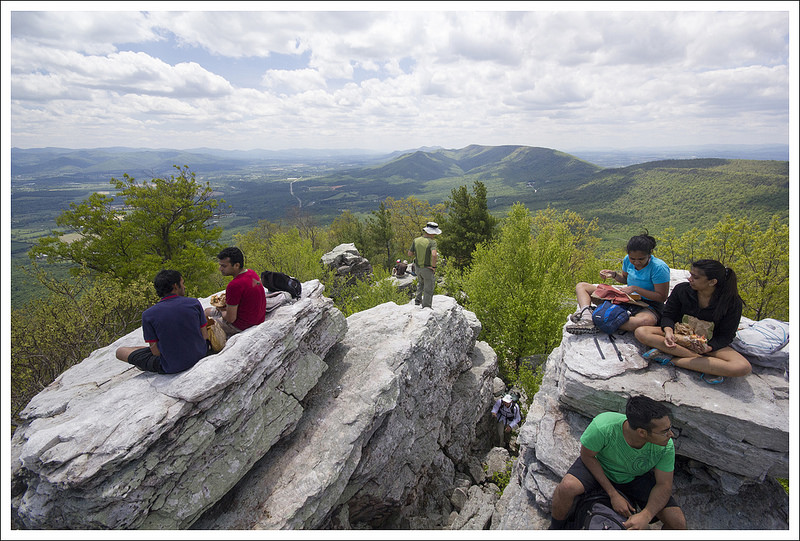
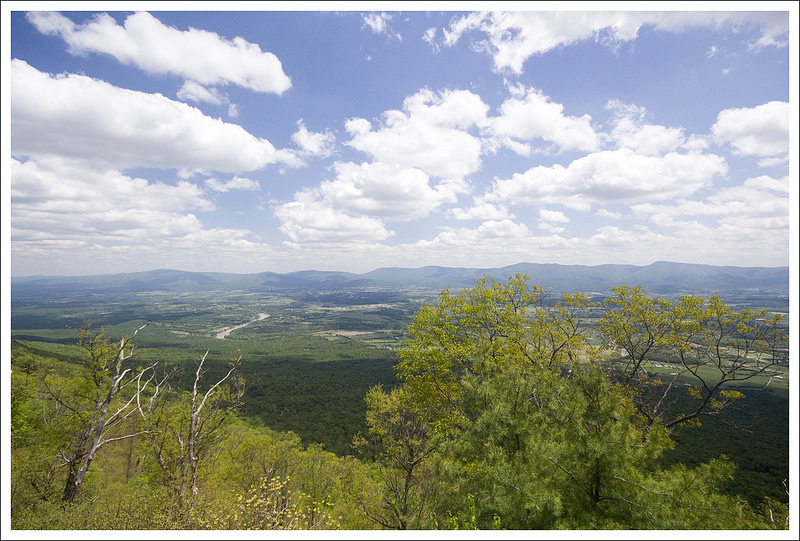
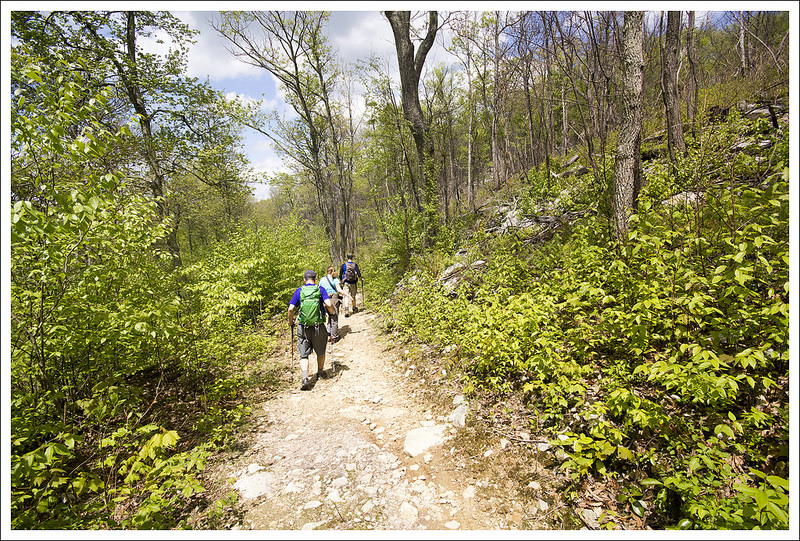
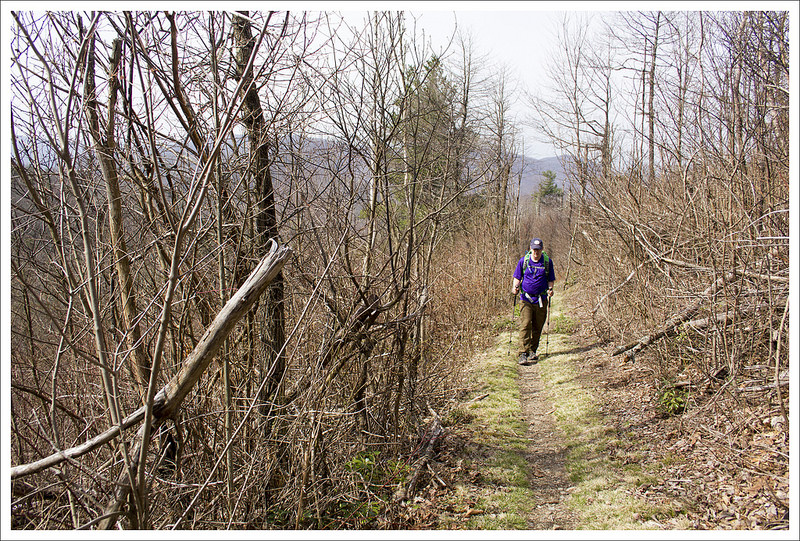
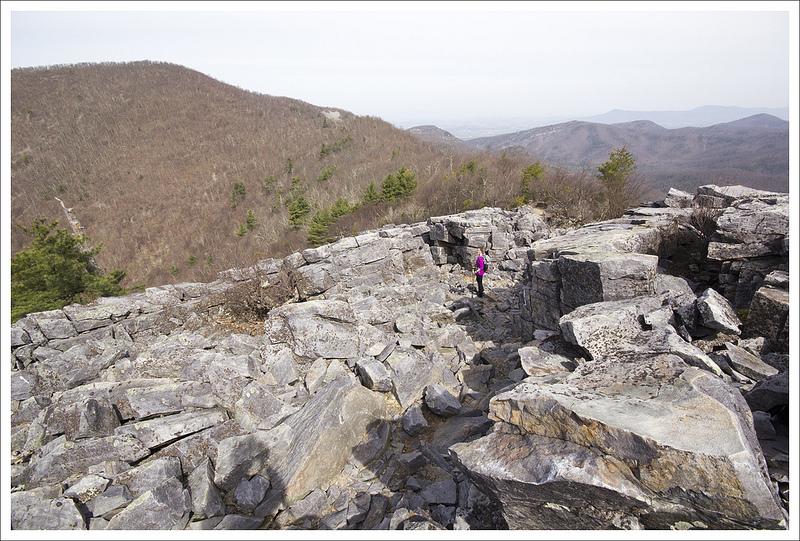
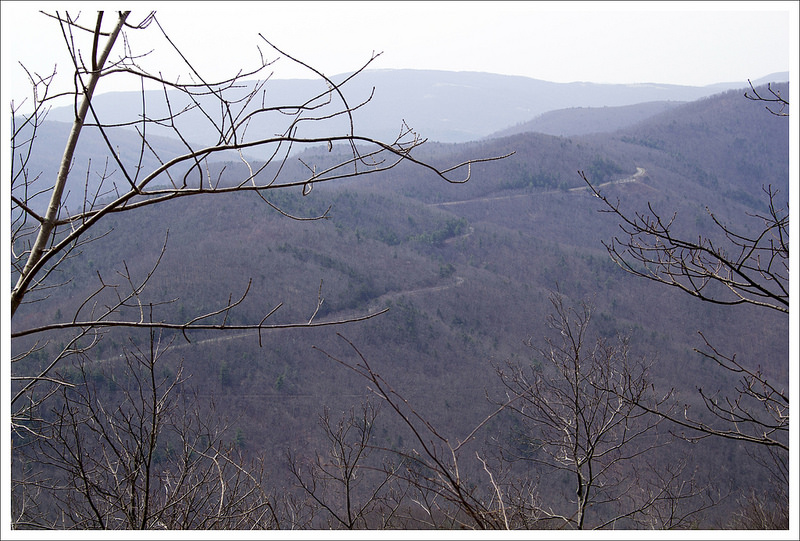
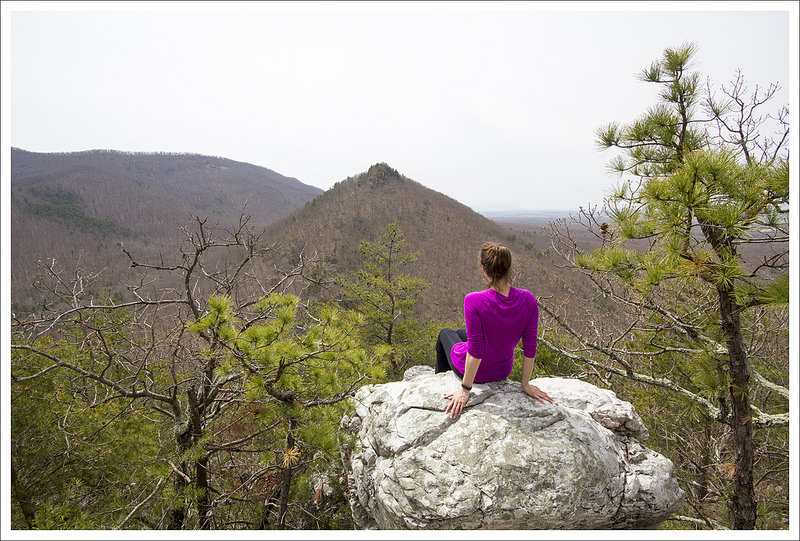
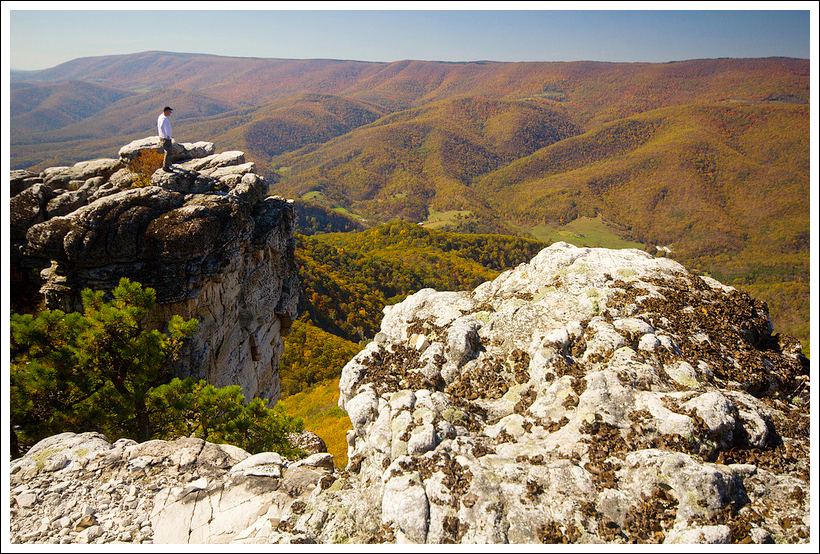
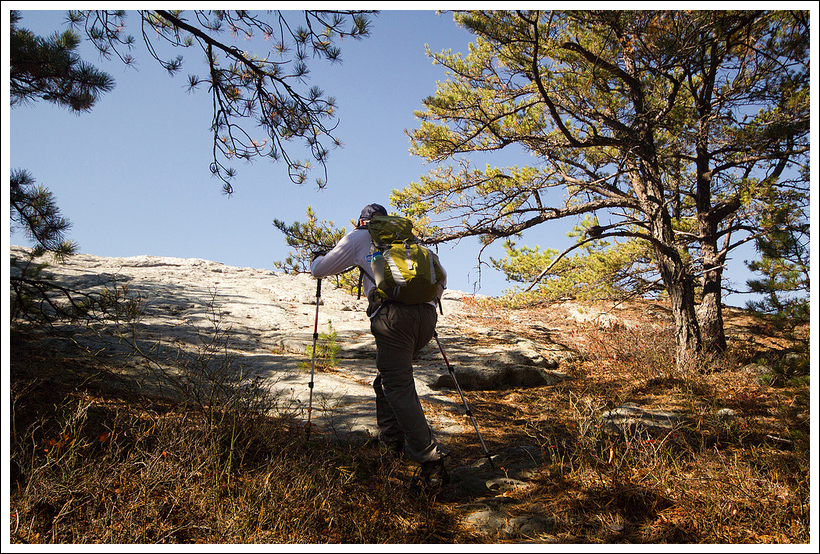
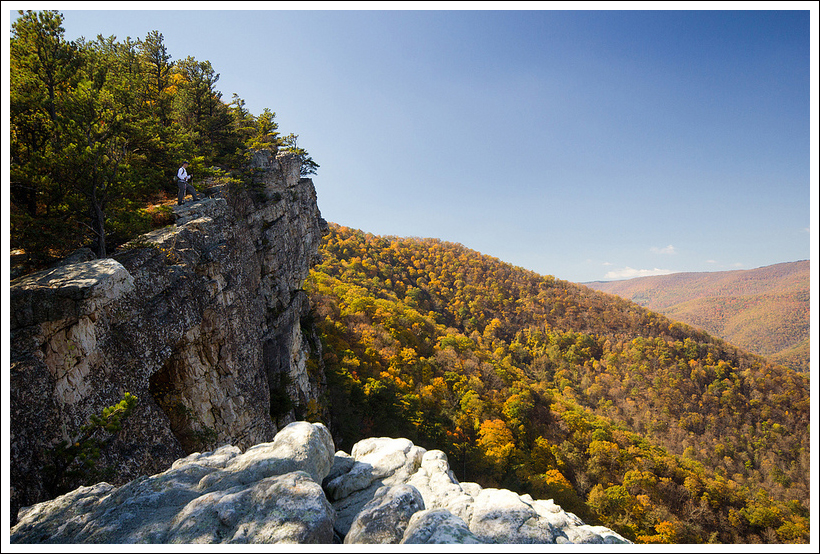
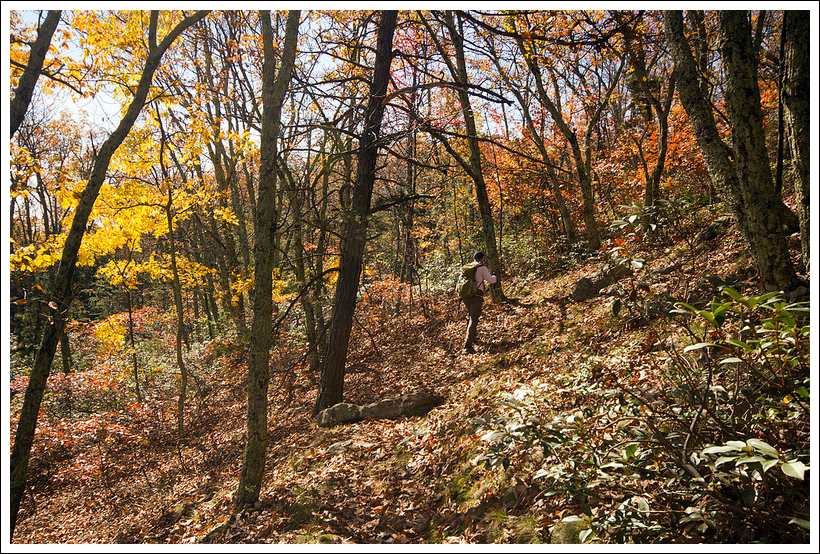
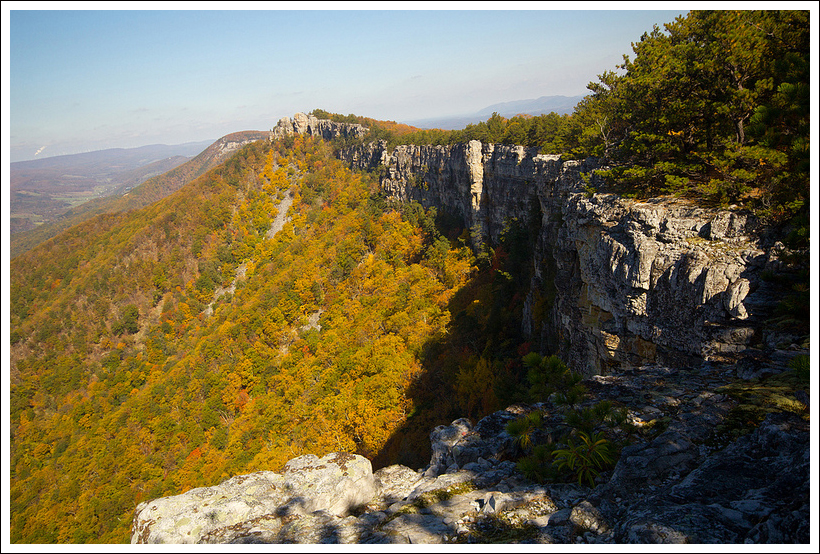
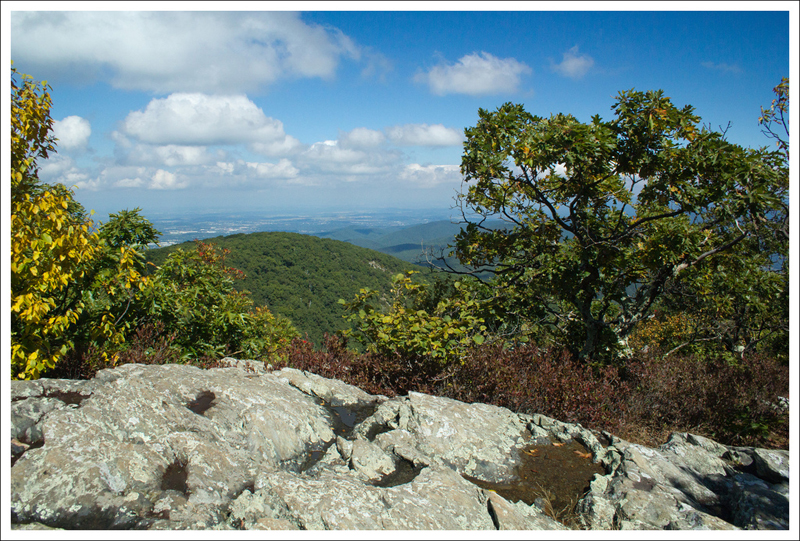
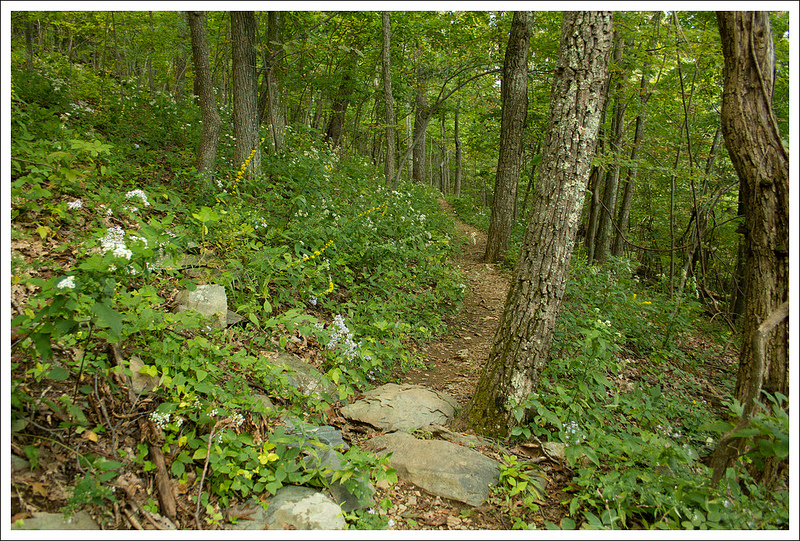
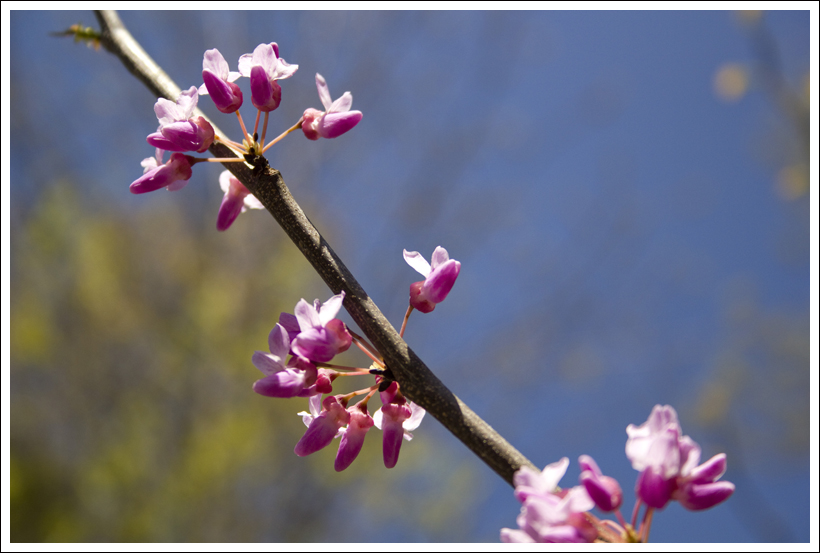
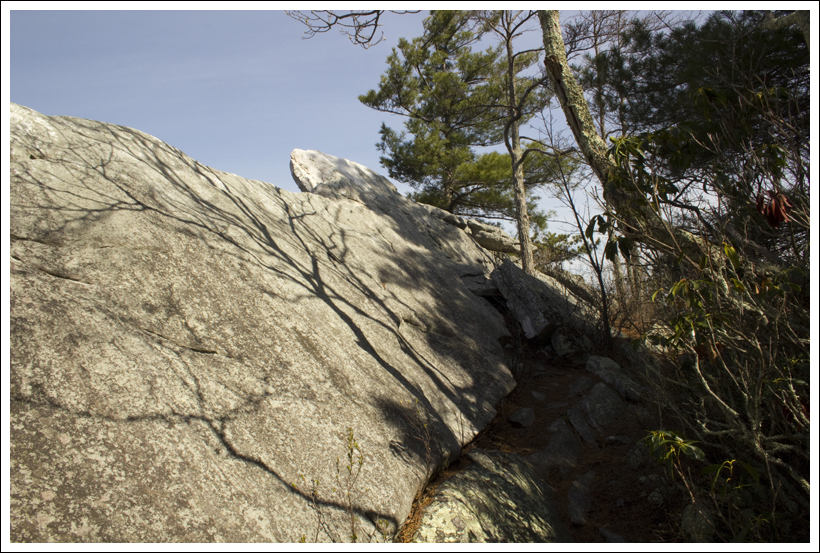
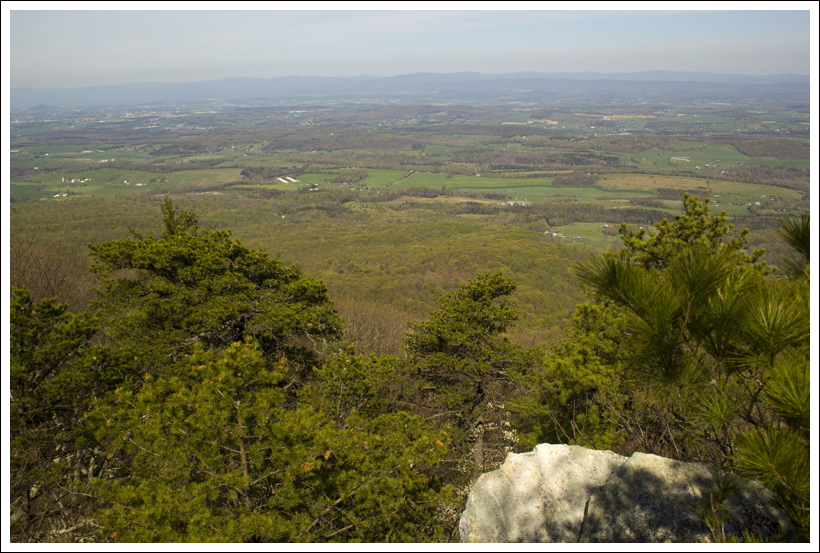
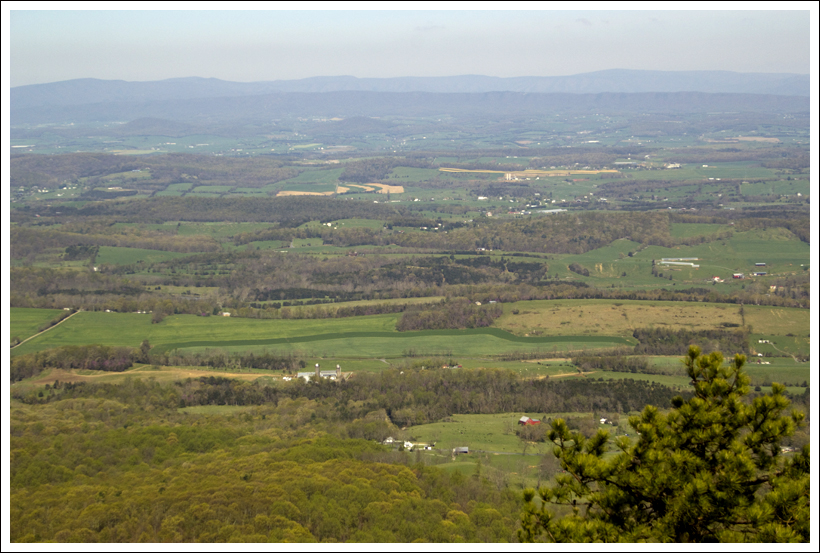
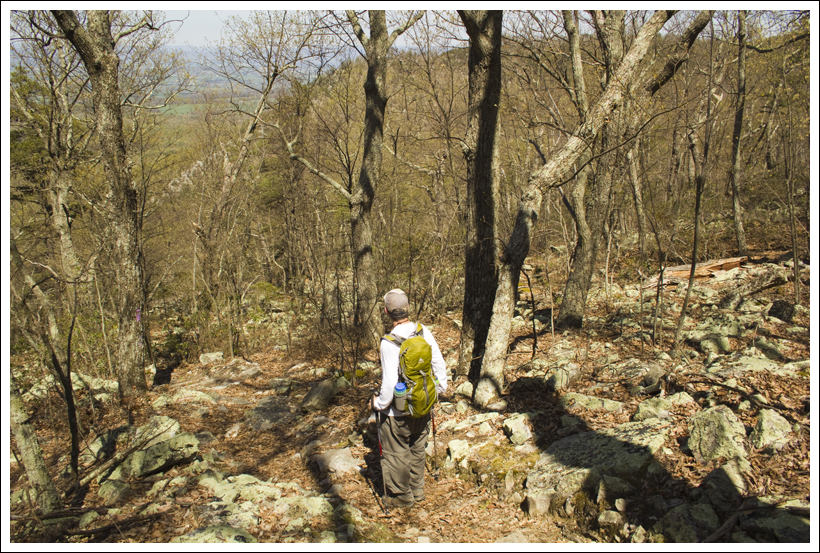
From there, we had four miles of gentle downhill or practically flat ridge walking.  It was delightful!  Wildflowers were blooming like crazy! The woods smelled fresh, green, and earthy.  Even though it was a warm, humid day, the cool mountain breezes made for perfect hiking weather.  Along the ridge, we passed junctions with a couple trails – Saltlog Gap and Saddle Gap. I’ve heard these trails are pretty overgrown and don’t know much about them.   From there, we enjoyed several great views along the ridge.  The views far exceeded my expectations for hike, and I really enjoyed the bird’s eye view of the James River.   About 7 miles into the hike, we passed the junction with the Little Rocky Row trail, and reached Fuller Rocks – another lovely view point.

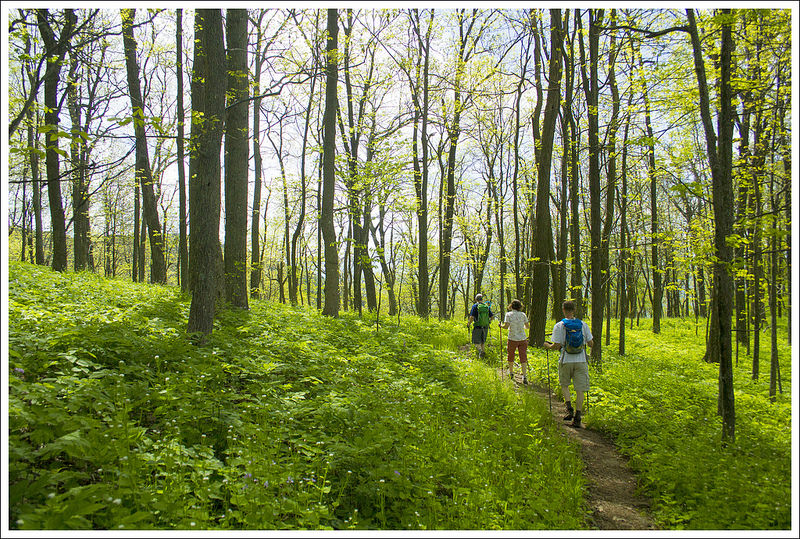
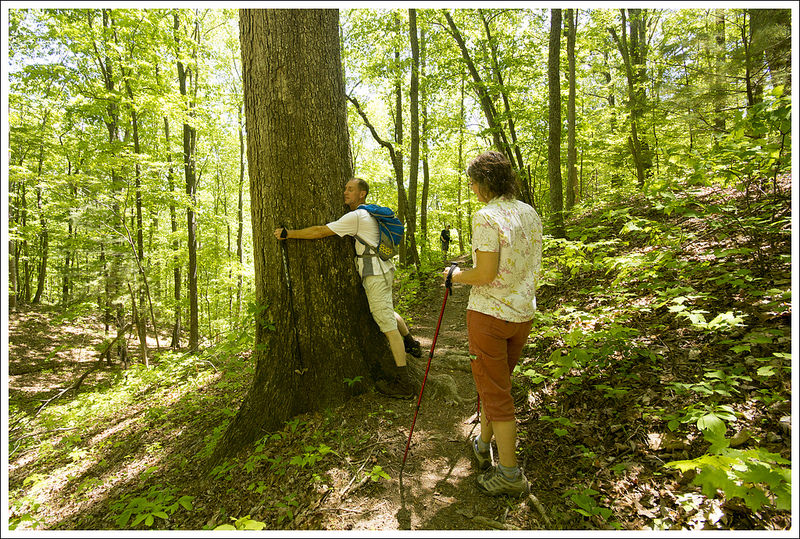
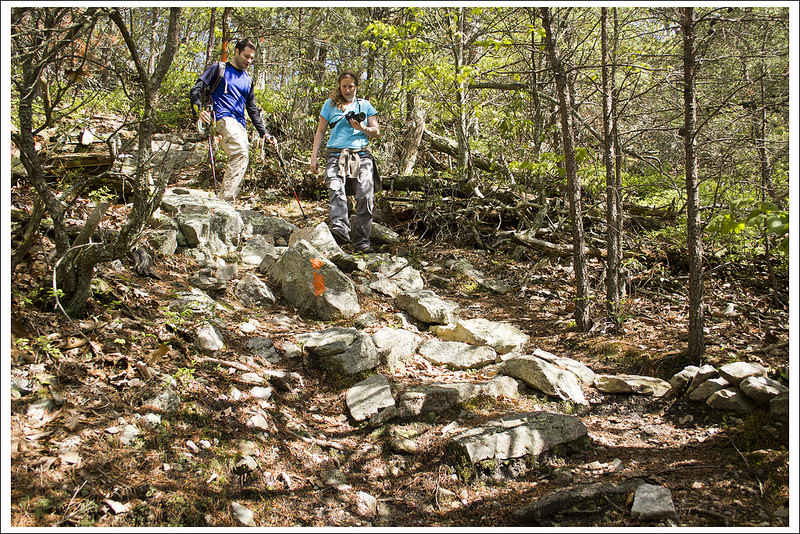
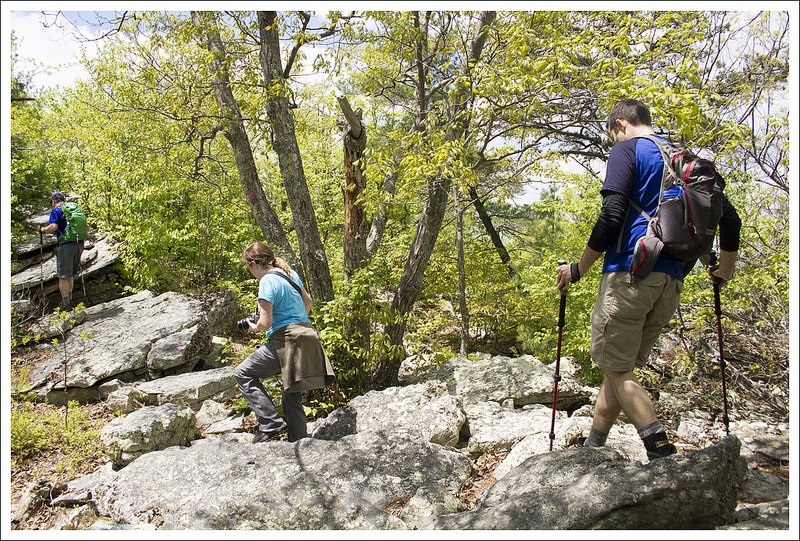
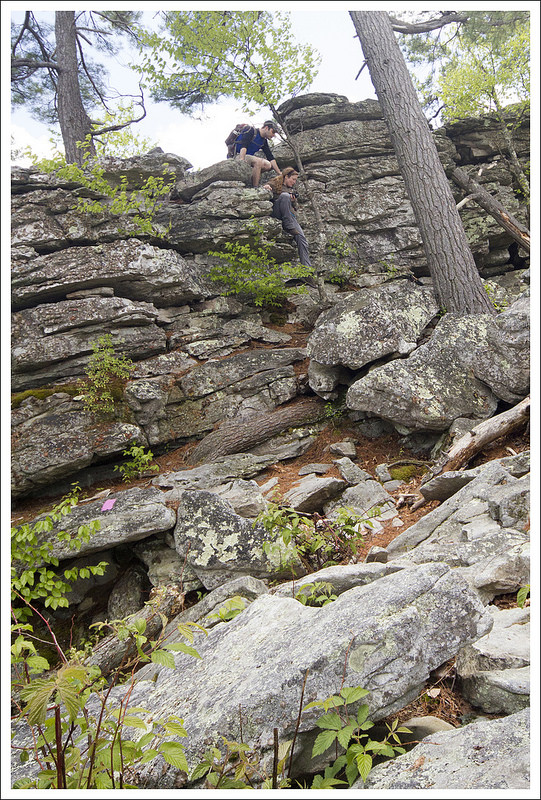
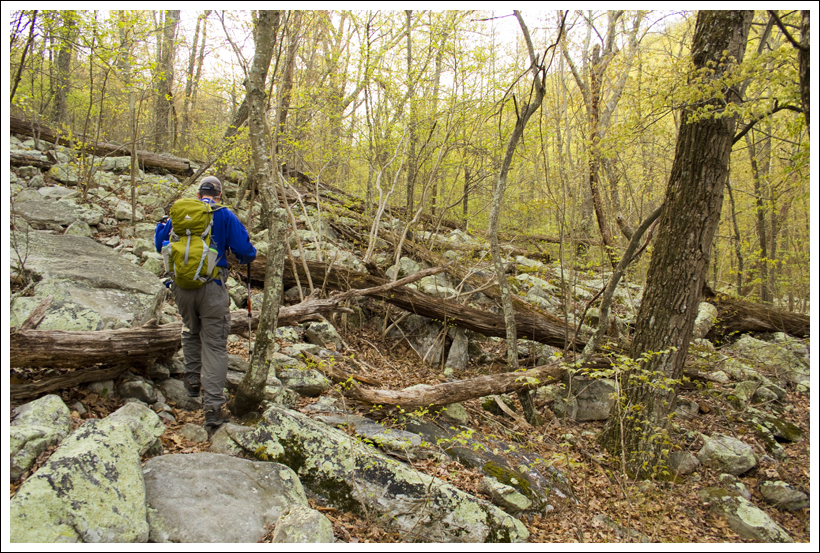
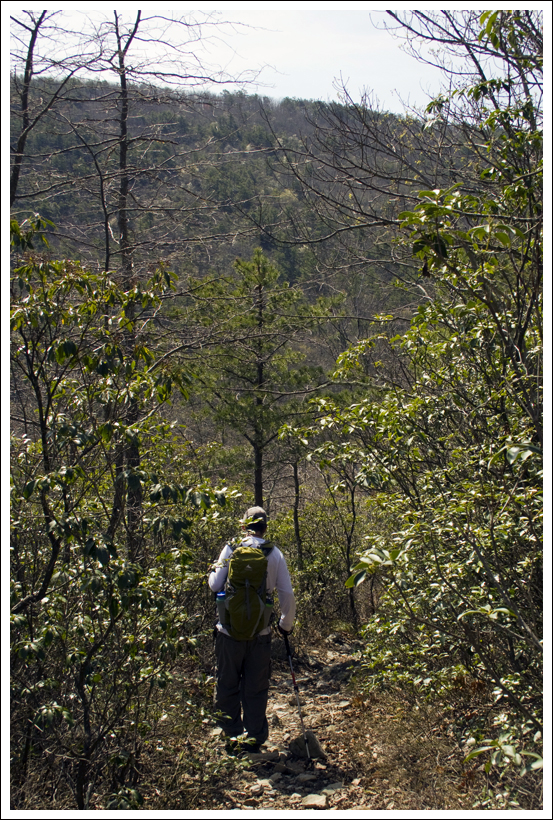
After that view, we descended the mountain along 21 switchbacks.  At first the descent was pretty steep, but eventually it moderated and entered a stand of enormous old trees.  Dennis even took the time to hug a couple of them.

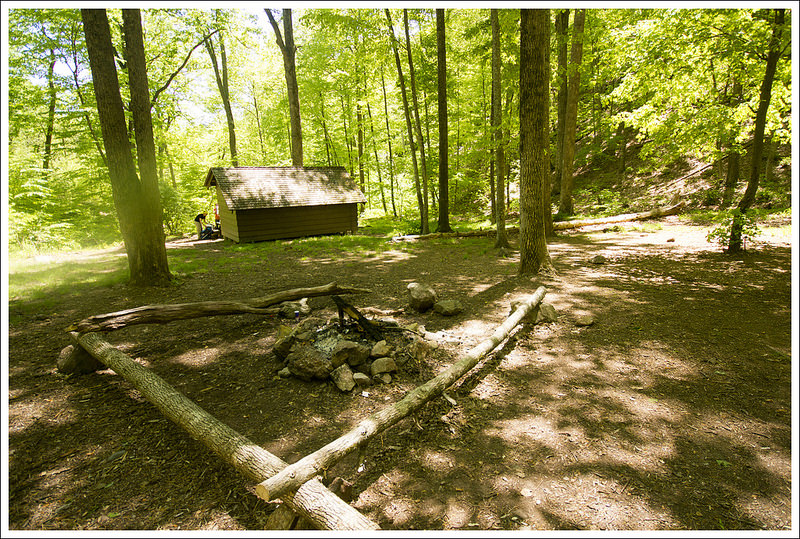
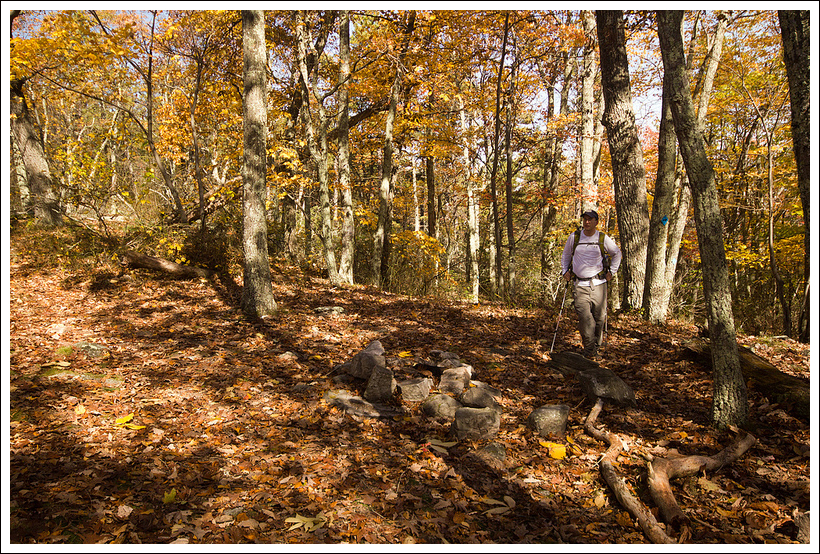
At 9.2 miles, we took the short side trail to visit Johns Hollow Shelter.  The camp is located in a peaceful, open spot in the woods.  The shelter is typical, but the tent area behind the shelter is especially nice.  There was lots of flat, grassy space to pitch

Hiking Along the Appalachian Trail
Walking along the trail lined with yellow flowers. Below: Everything was turning brilliant spring green,  Views from the ridge; Descending toward the James River.

Spring Along the Appalachian Trail Views from the Ridge Descending Along the AT

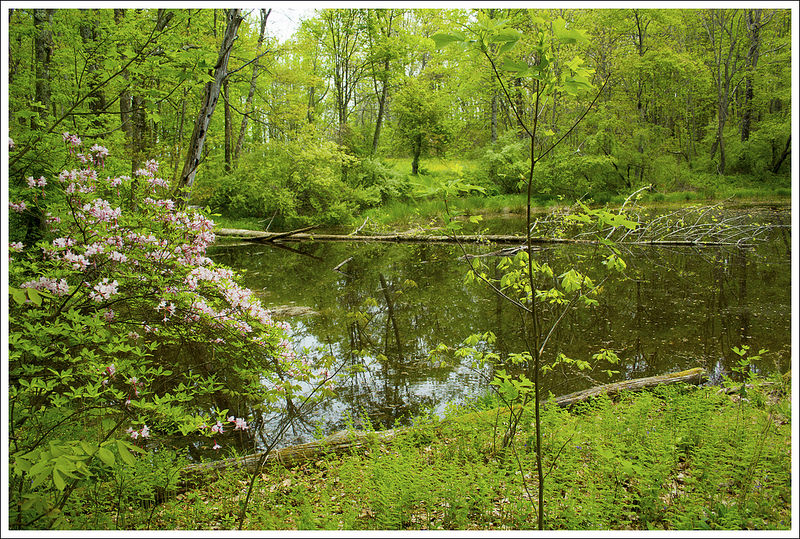
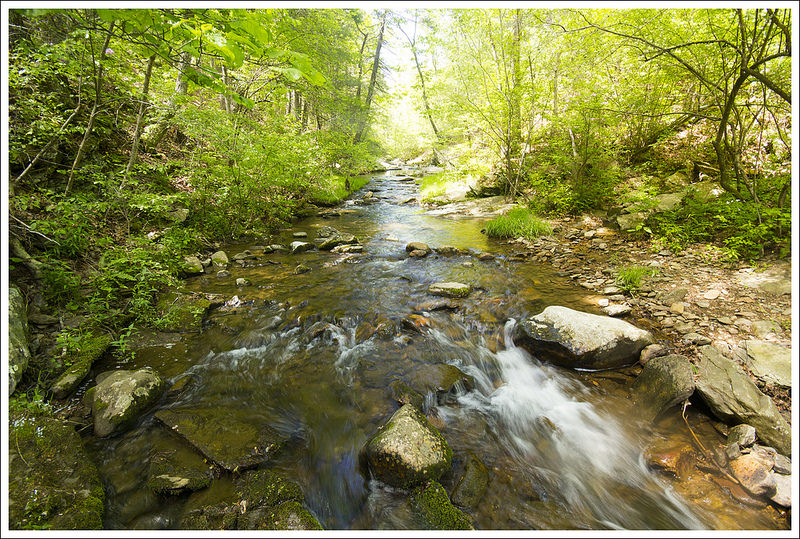
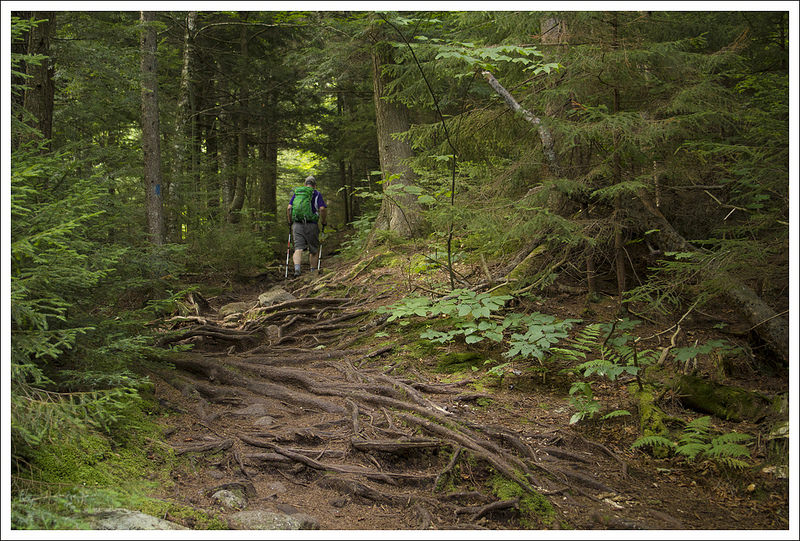
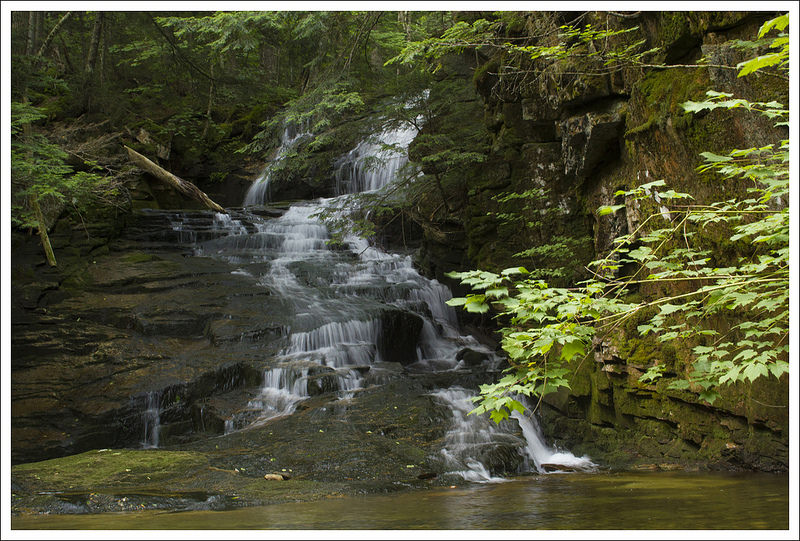
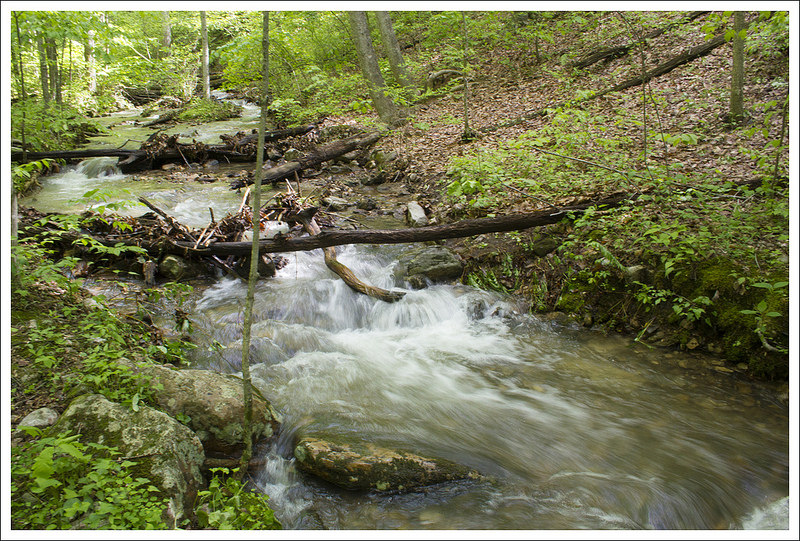
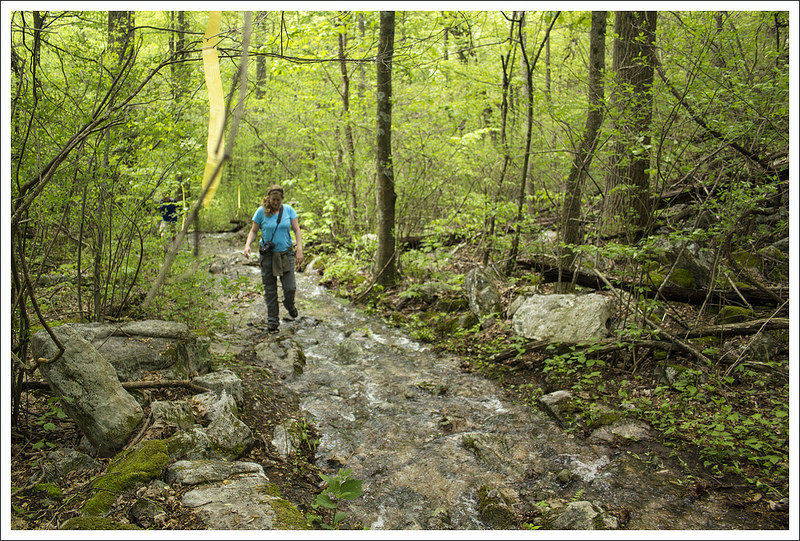
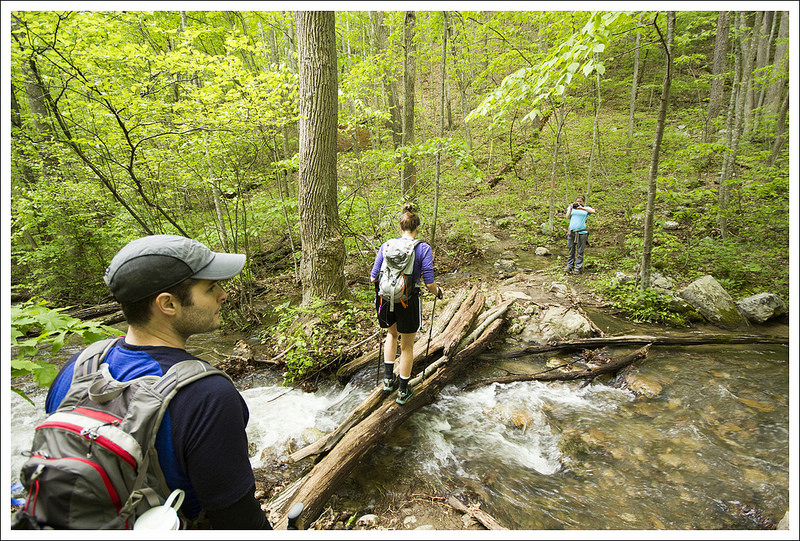
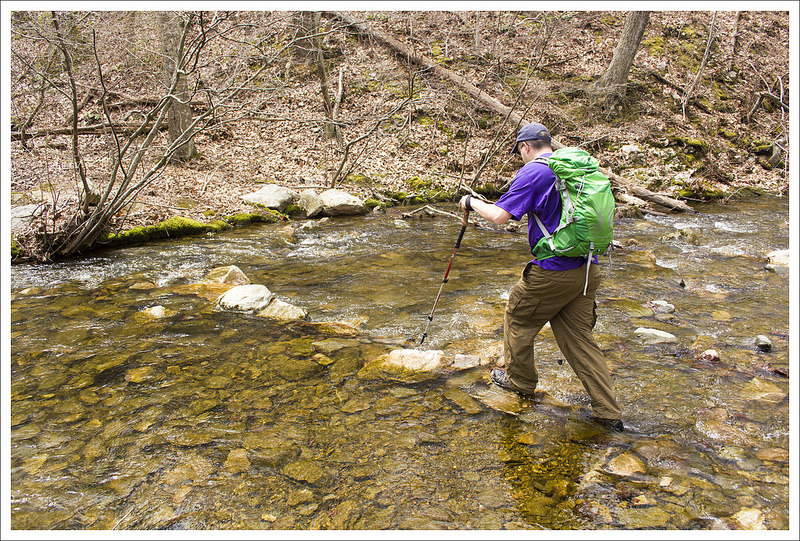
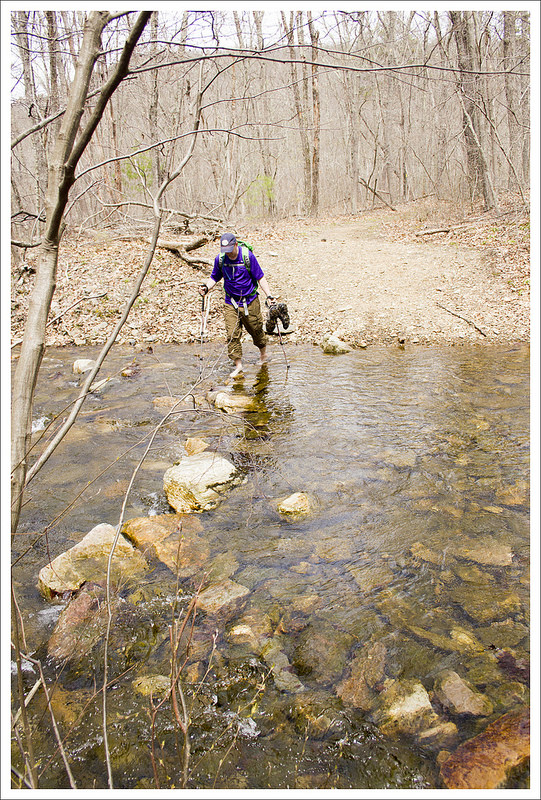
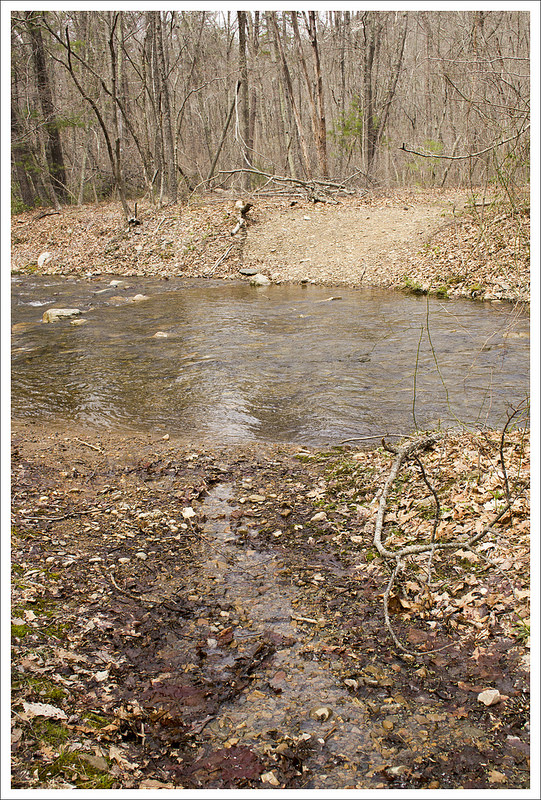
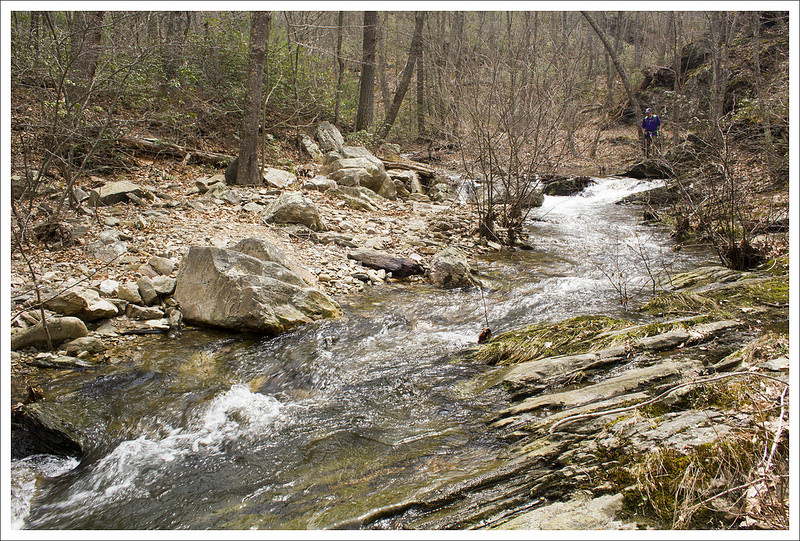
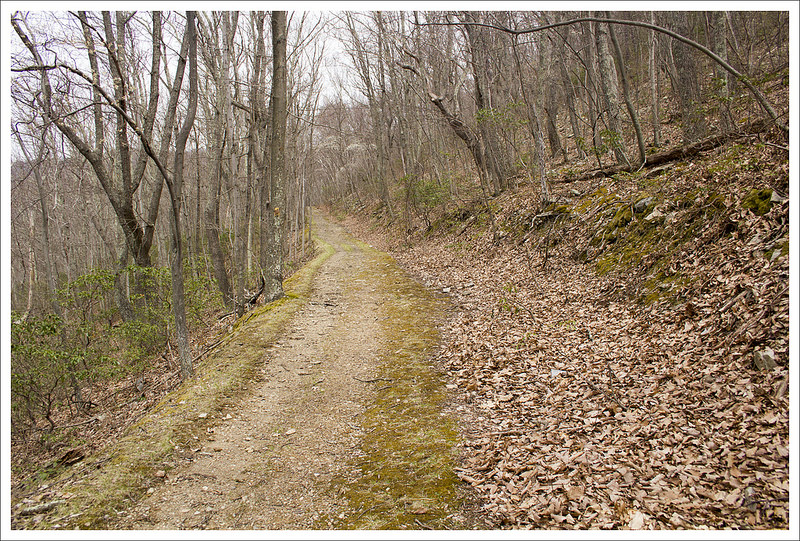
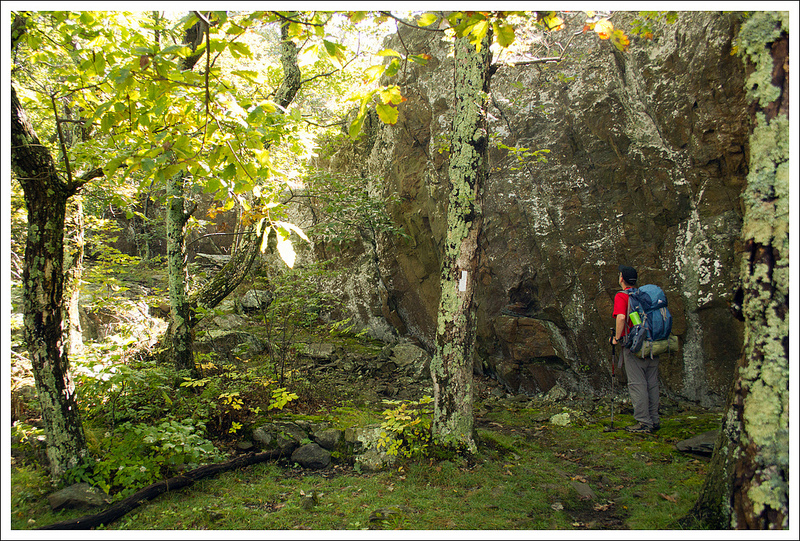
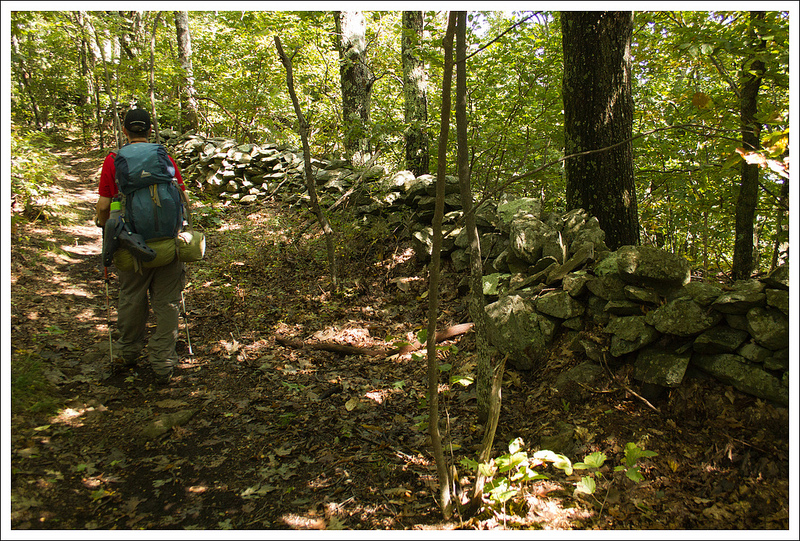
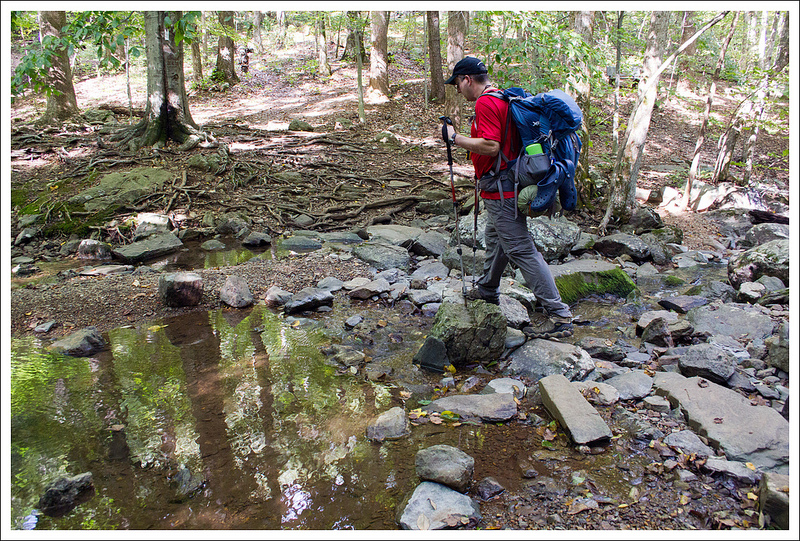
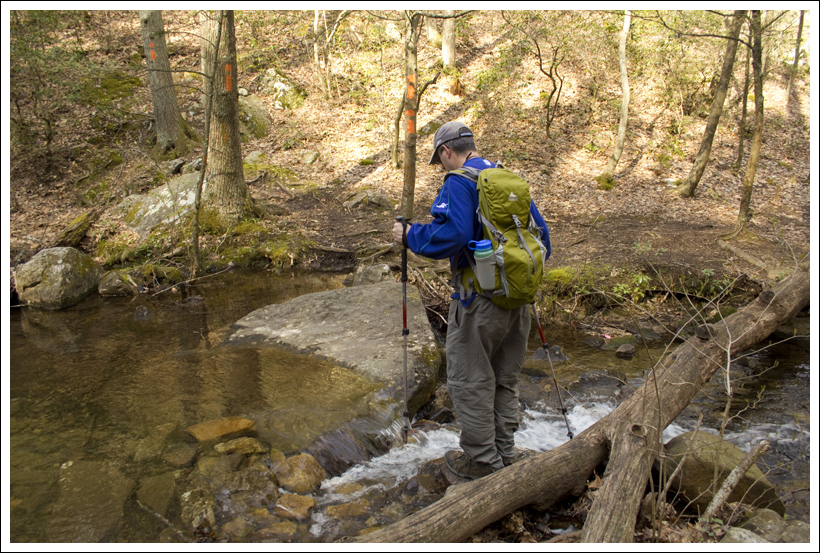
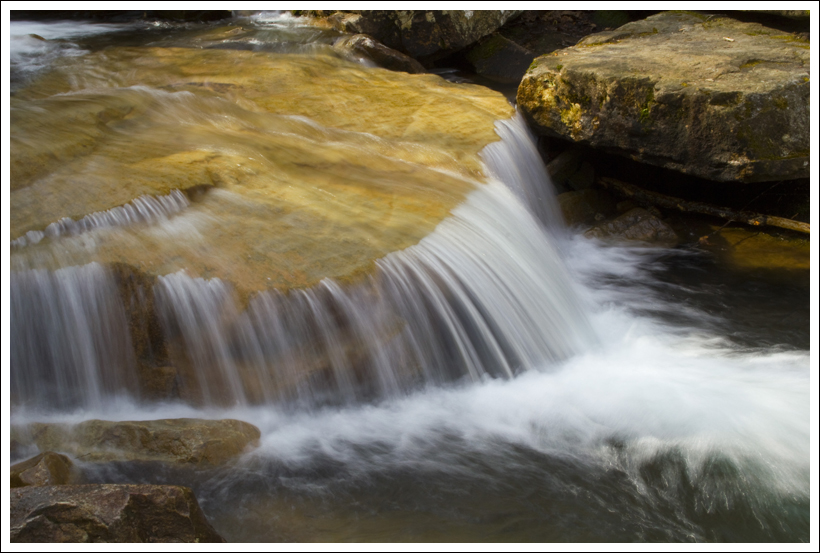
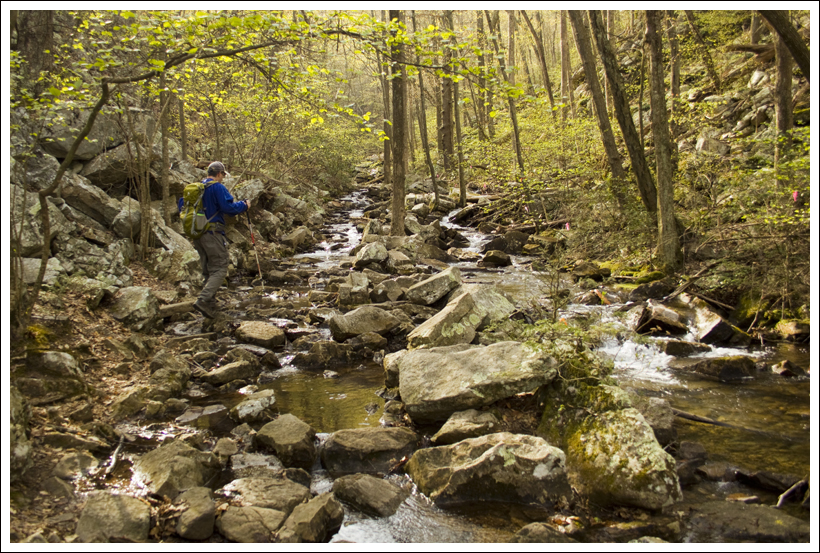
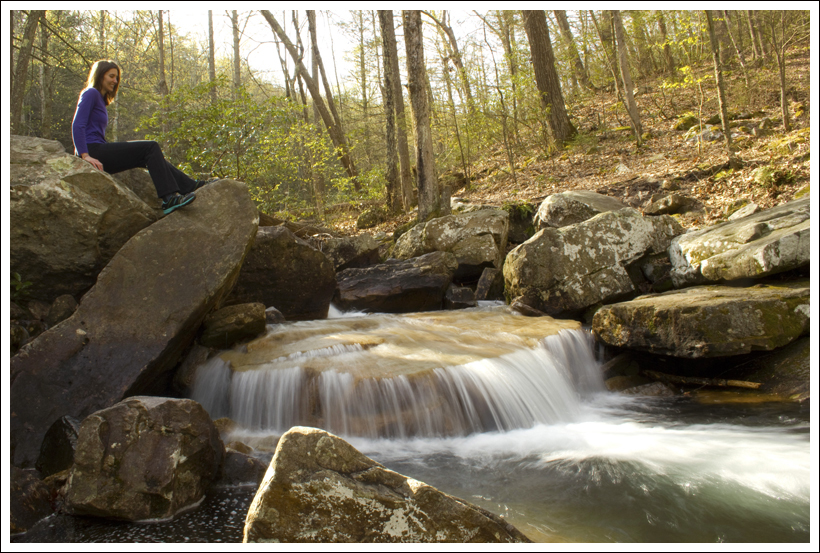
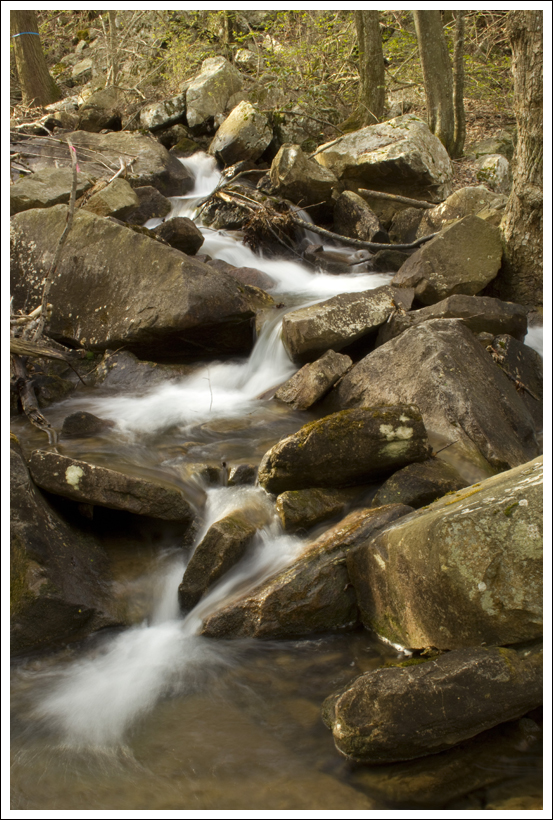
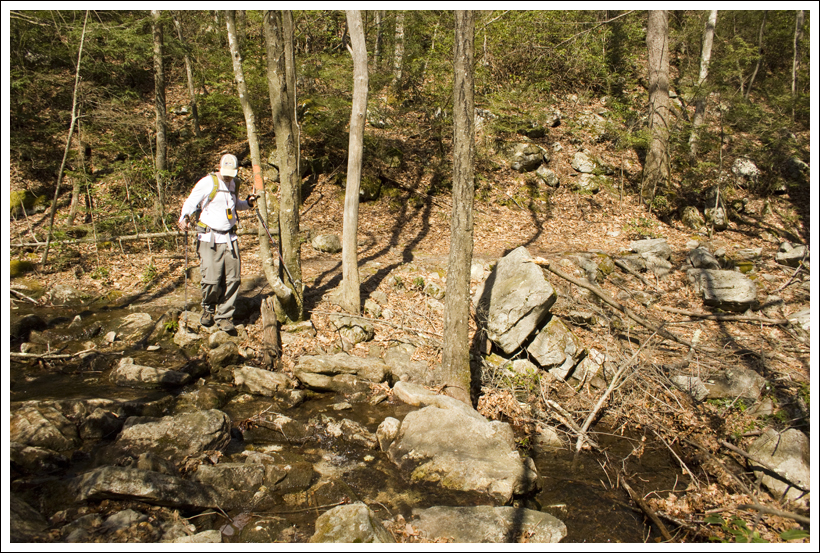
After leaving Johns Hollow, we hiked about another half mile in the woods before crossing a gravel forest road.  After the road, we quickly reached Rocky Row Run – a beautiful mountain stream that eventually feeds into the James.

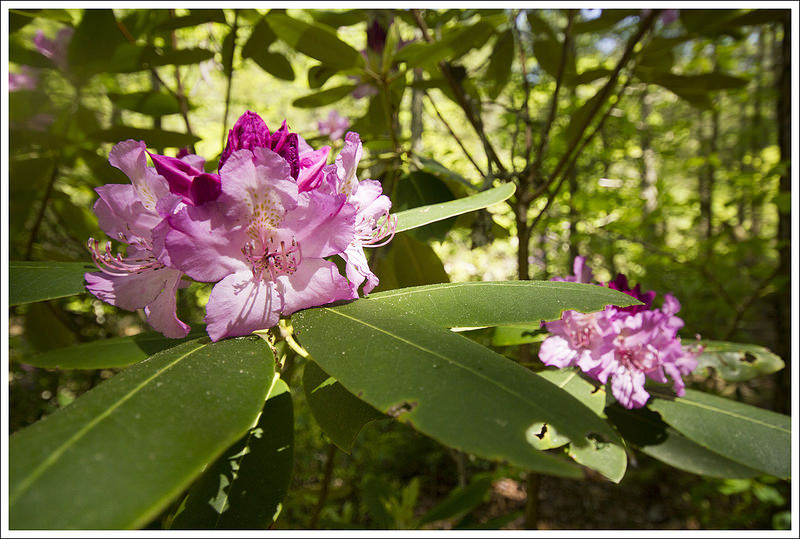
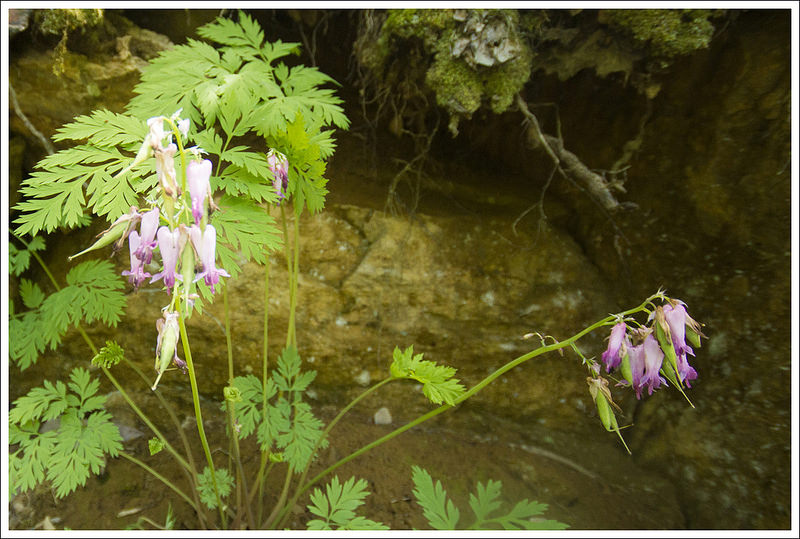
The stream was very scenic and we all enjoyed the sound of the flowing water.  There were lots of blooming wildflowers and rhododendron along the creek.  We crossed a couple small wooden bridges along the way, before popping out on the side of Route 501.  From there, we crossed the highway and returned back to the Foot Bridge and parking area at 10.6 miles (11 if you include mileage from shelter visits).

We all decided to walk across the bridge to check out views of the James!  It was a beautiful view – especially looking back to all the distant rocky outcroppings we had stood upon earlier in the day. Standing on the bridge, my mind drifted to the next section south – wondering what it would be like and what challenges and gifts would lie ahead on the trail.

Dennis and Tina – thanks for hiking with us!  Can’t wait to meet up again.

Adam Says…

This section of the Appalachian Trail was one we had contemplated doing for a while.  We have covered now a section of contiguous miles that includes from this point up to Front Royal.  It is easier to say, “We have walked from Front Royal to the James River” than to say “We have walked from Front Royal to a place off the Blue Ridge Parkway north of the James River”.

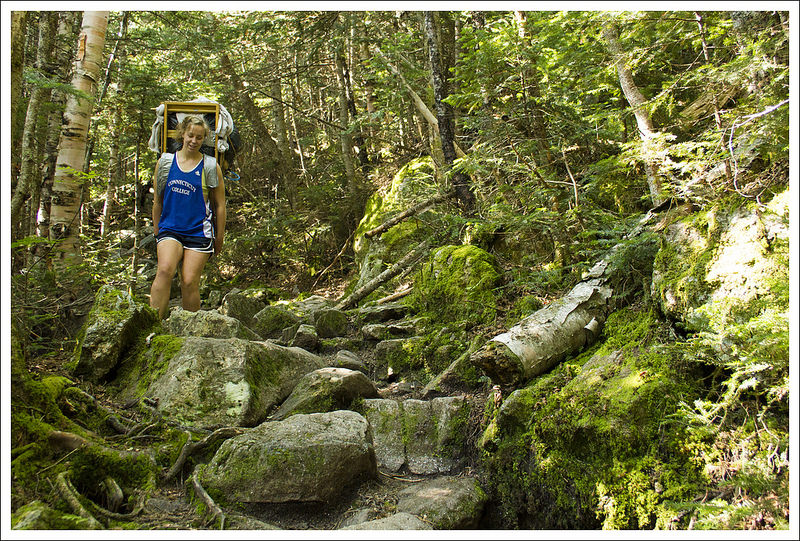
As Christine mentioned, when traveling further away from home the next concern is wondering if we need to bring two cars or figuring out if we can get someone to help us shuttle.  It can be hard to find some friends that want to go trekking in the woods for over 10 miles.  So, we were very glad to meet Dennis and Tina.  They have done this section a number of times before but were willing to do it again with us.

This section was a surprise to us.  We hadn’t seen enough nice pictures from these  overlooks to know if it would be worthwhile to check.  But, we hiked on a very clear day that made the scenery gorgeous.

View of the James River
A nice view of the James River looking in the direction of Apple Orchard Mountain. Below: Dennis points out landmarks from above; This fallen was perfectly balanced across several other standing trees. It looked like the mast of a ship; Tree hugger!

Dennis Points Out Landmarks Balanced Tree Tree Hugger

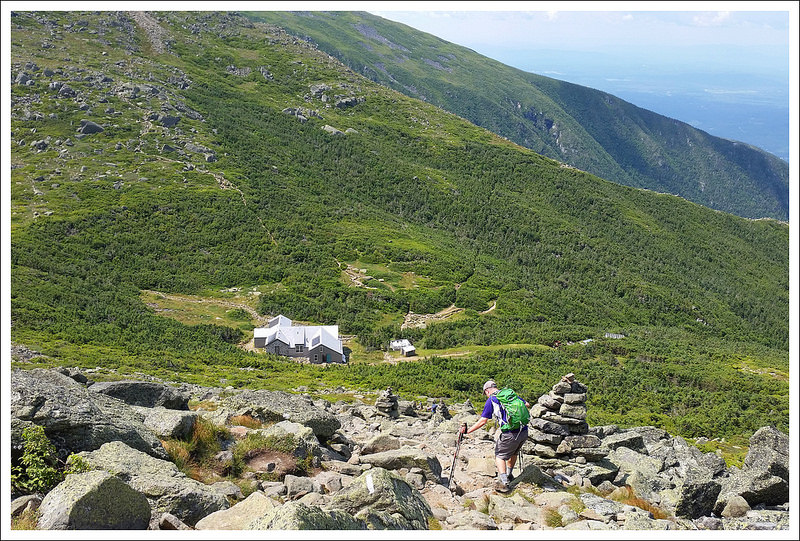
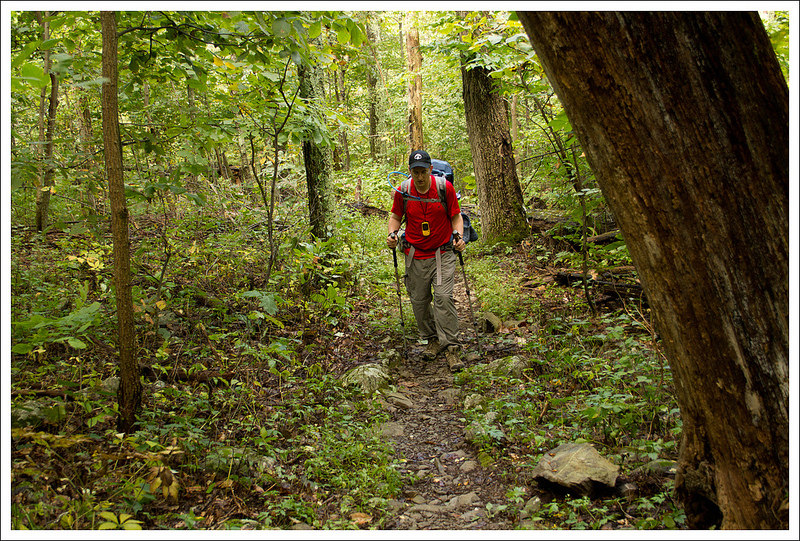
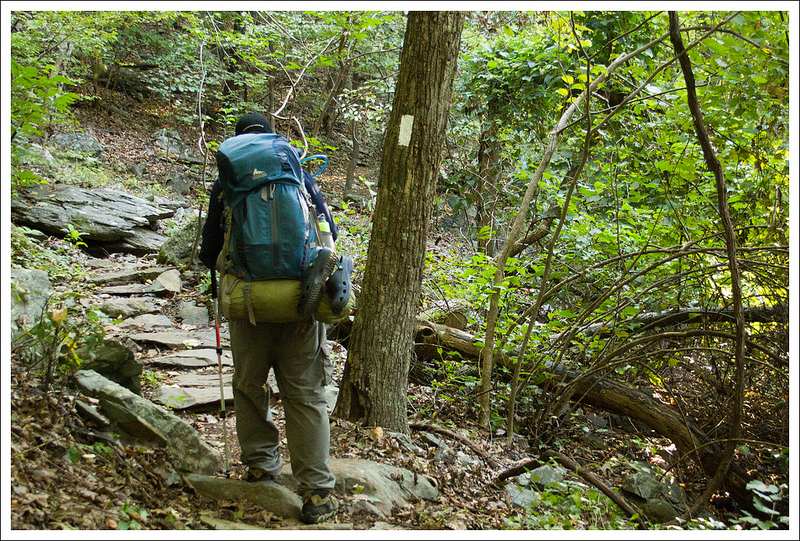
After meeting up, we drove to our starting point on the Blue Ridge Parkway.  We met a few guys in the parking lot that were doing a multi-day backpack as well.  We crossed the parkway and headed up the white-blazed Appalachian Trail, heading southbound.  The beginning of the trail started a steep ascent.  It was already a warm, muggy day, so with the extra work of going uphill I got sweaty very early in the hike.  In .4 miles, we reached the side trail to the Punchbowl Shelter.  The side trail was mostly downhill to the shelter.  When we arrived, there was nobody staying there.  The shelter is in a nice shady spot, but we could tell the insects were swarming near the pond.  We checked out the trail log in the shelter and then made our way back up to the Appalachian Trail.

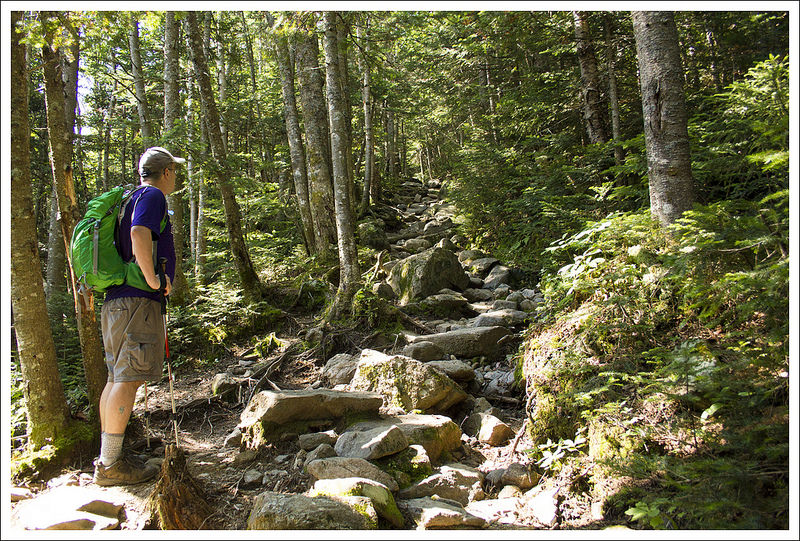
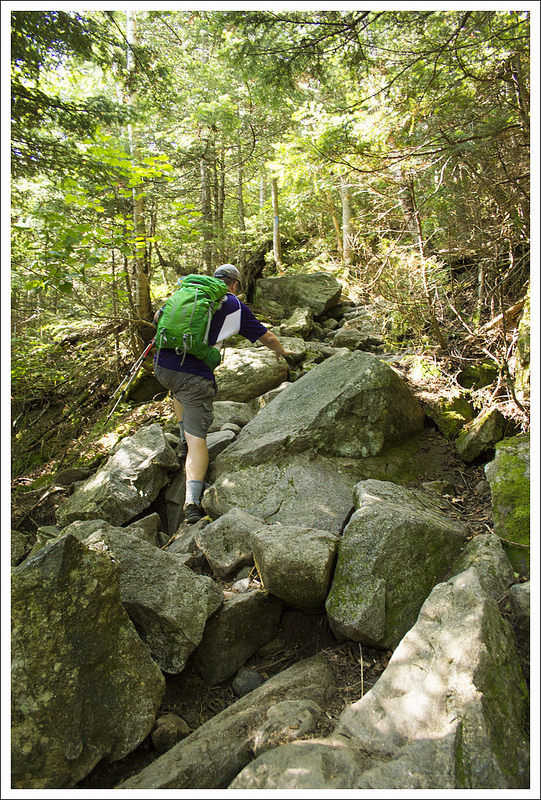
The trail continues to be mostly a steep climb until you reach the top of Bluff Mountain at 2.0 miles.  There were great views to the west from the trail.  The bugs were relentless (at least to me) from this open area, so while I would have liked to stay up there longer, I wanted to quickly get back into the woods and away from the bugs.  We saw a brilliant indigo bunting flying around the treetops from the overlook.  As soon as you get out of the clearing and back into the woods, you see the memorial for Ottie Cline Powell on the ground to the left.

Rocky Row Run
Lovely Rocky Row Run ran along the last mile of the trail. Below: Johns Hollow shelter has a large, grassy field suitable for pitching multiple tents; An interesting cliff face along the trail.

Johns Hollow Shelter Cliffside Along Trail

The trail then begins a steep, downward descent.  At 3.5 miles, you reach a junction with the Saltlog Gap Trail, but stay on the AT.  The trail mostly levels out as you walk along a ridge for a while.  At 4.6 miles, you reach a junction with the Saddle Gap Trail.  Staying on the AT, the trail begins to climb a more gradual ascent until you reach Big Rocky Row at 6.1 miles.  The views from this area were my favorite, as you got to see the James River below snaking through the landscape of mountains.

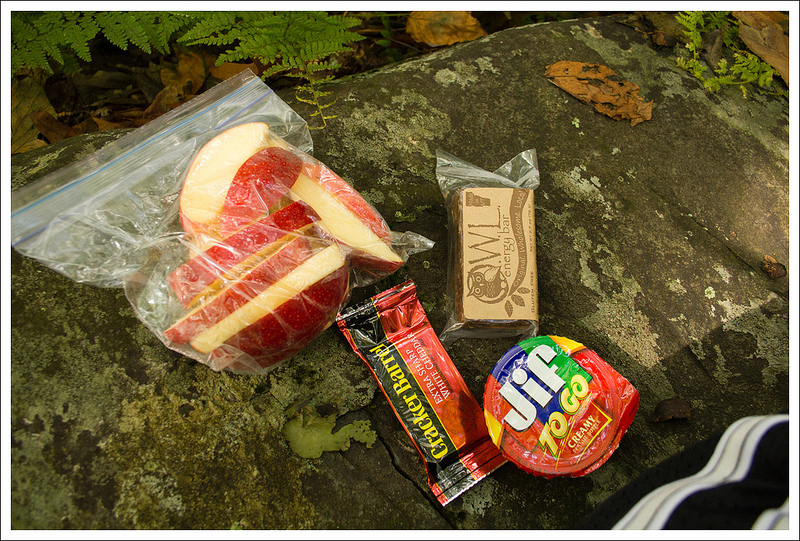
From here, the trail descends and you reach Little Rocky Row at 7.3 miles, also giving you nice views along the way as you walk down the ridge line. The rest of the hike is basically all downhill from this point until you reach the James River.  At 9.2 miles, we reached the a short side trail that took a very sharp turn to Johns Hollow Shelter.  We checked out this shelter and came across another two section hikers that were enjoying a week along the AT.  There was a nearby stream for replenishing water and a privy.  After eating a quick snack, we returned to join the AT again.

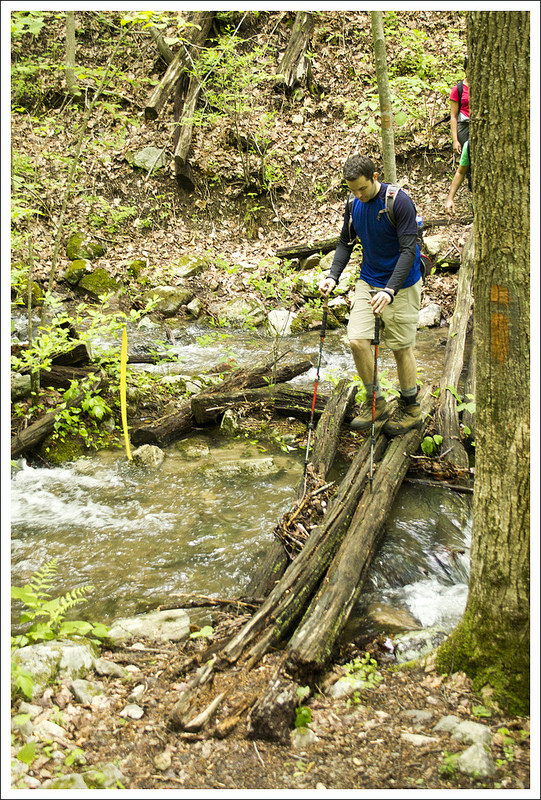
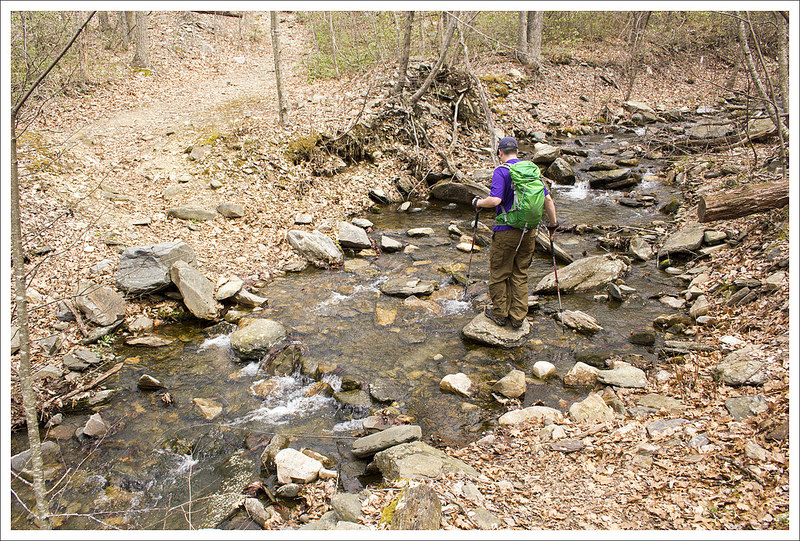
The trail again was mostly flat or downhill.  We crossed the stream at 9.4 miles and then crossed the gravel VA 812 road to continue on the AT.  As we were walking along, Dennis started talking about black snakes and within minutes we saw one directly on the trail as if he had summoned it.  The forest through this section had many larger trees along the way and then opened up to beautiful rhododendron plants that were aligning the stream on both sides.  It was such a serene setting.  At 10.3 miles, we reached the Lower Rocky Row Run bridge.  We crossed the run and then at 10.6 miles we were back at US 501.  We crossed the road which had the trail lead us right to the parking lot where we started.

We already plan to get back together sometime with Dennis and Tina for a backpack trip sometime in the near future.  It is always great to find like-minded people to experience the outdoors together!

The Mighty James
Our hike concluded on the northern side of the James River. Below: Kayakers on the river; The Appalachian Trail crosses the James on a long footbridge.

Kayakers on the James James River Footbridge

Trail Notes

  • Distance – 11 miles
    (Check out the stats from Map My Hike)*
  • Elevation Change – 2062 ft.
  • Difficulty – 3.5.  11 miles is a little on the long side, but after climbing to the summit of Bluff Mountain early in the hike, the rest of the terrain is easy to moderate.
  • Trail Conditions – 4.  Consistently well-maintained trail.  Some parts of the trail are narrow along a steep hillside, but still easily passable.
  • Views  5.  Super views from Bluff Mountain, nice views along the ridge, and then amazing views of the James River.
  • Streams/Waterfalls – 3.5.  The final stretch of this hike follows pretty Rocky Row Run, and of course – you end at the James!
  • Wildlife – 1. We saw a black snake.
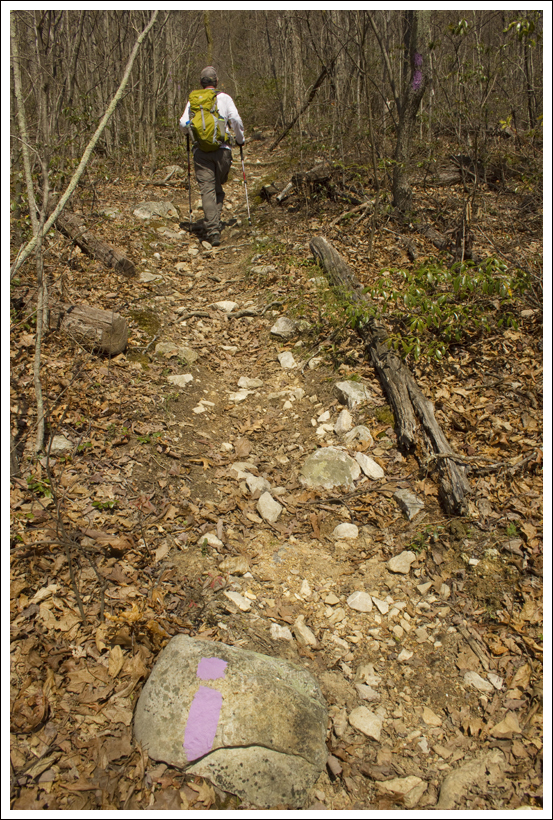
  • Ease to Navigate – 4.5.  Just keep following those white blazes south.  The trail is easy to follow and well-marked.
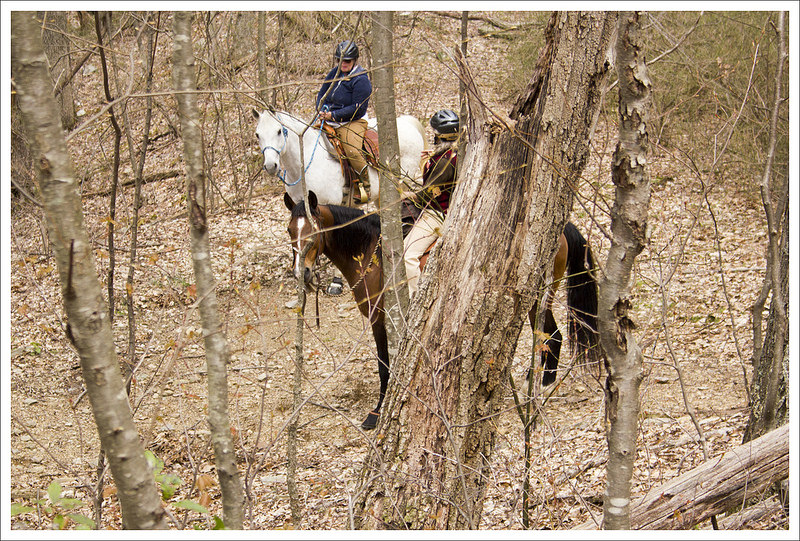
  • Solitude – 3.  We saw a fair number of hikers along the way, including quite a few northbound thru-hikers, but you never feel like the trail is crowded.

Download a Trail Map (PDF)

Directions to trailhead:  To drop off first car:  From I-81, take exit 188A to merge on to US-60E towards Buena Vista.  Go 3.9 miles and then take a right on to US-501S at the Hardee’s.  Follow 501S for 14.9 miles until you reach the parking lot on the right for the Appalachian Trial crossing.  To get to your start point:  Leaving the parking lot, turn right on to US-501S.  Go .8 miles and continue straight to take VA-130 E.  Go 2.8 miles and then turn left on to the Blue Ridge Parkway.  Turn right on to the Blue Ridge Parkway and go 9.8 miles until you reach the small parking lot for Punchbowl Mountain where the Appalachian Trail crosses the parkway.  Cross the road and you will see the Appalachian Trail marker which has the trail leading uphill.

Mt. Madison (NH)

Special: New Hampshire Edition

Introductory Guide to Visiting the White Mountains

This 8.8 mile hike takes you past Madison Spring Hut and up to the summit of majestic Mt. Madison.  The Valley Way Trail is known for being one of the safer, more protected routes into the heart of the White Mountains.  While the terrain is less extreme than other trails in the area, the hike still requires a little over 4,100 feet of climbing.  It’s a tough hike, but the views make it well worth the effort.

View the Full Album of Photos From This Hike

Hiking Mt. Madison
Adam makes his way across the summit ridge of Mt. Madison. The big mountain in the background is Mt. Washington.  If you look closely, you can see the Auto Road snaking down the peak.  Below:  Plenty of parking and access to many trailheads at the Appalachia Parking area;  Warning…. danger ahead – seriously, the White Mountains can be pretty extreme; The early part of the trail was fairly soft and gentle.

Appalachia Parking Death Awaits Early Terrain on the Valley Way Trail

Adam Says…

My top goal for our 2014 New Hampshire trip was to hike up Mt. Madison.  We both went to James Madison University and have worked there for years, so it only seemed fitting to take on the mountain that shared a name with our college.  I even wore JMU Dukes gear almost like the guy that goes to a concert wearing a t-shirt for the band’s previous tour to show his super-fandom.

We started out the day on a rough note.  Christine had put her hiking shoes and socks in the back of our car, so she could wear sandals on the car ride up.  When we pulled over at one point, we realized one of our Camelbak tubes had pressed open and leaked all over the car, soaking her shoes and socks.  We debated about if we would have been able to even do the hike in fear of blisters, but Christine decided to push forward.

There are a lot of ways up Mt. Madison, but in our research we found the most popular way was to make our approach by going up the Valley Way trail.  We parked at the large Appalachia parking lot (which was so full we needed to park on the road) directly on US-2.  We were worried there would be so many people on the trail, but this parking lot holds the beginnings of lots of trails that lead up to many peaks (including Mt. Adams and Mt. Quincy Adams).

Tama Falls
The early part trail follows Snyder Brook. By taking a short spur trial, you can visit beautiful 25′ Tama Falls.  Below: We saw a couple Croo members on their way down from the Madison Spring Hut; Adam checks out all the rocks on the ‘not as rocky’ New Hampshire trail;  The final push to the Madison Spring Hut was very steep and rugged.

Croo Getting Rockier Steep to the Top

The trail starts off from the back of the parking lot.  The trail branches off in different directions but follow the signs for the Valley Way trail.  The trail begins relatively flat and easy walking, as it runs along Snyder Brook.  There were a few places where we could get some nice stream views and even a glimpse at the picturesque Tama Falls at .4 miles.  At .7 miles, you reach another large junction, but continue to follow the signs to the Valley Way trail.  The trail then begins the steeper uphill climb.  Overall, I felt that the trail, while very rocky was not as steep and rocky as some of the other trails in the White Mountains.  There is a relentless amount of climbing and many rocks to navigate, but it wasn’t as grueling on my feet as some hikes in New Hampshire have felt to me.  At 3.0 miles, the trail gets very steep and rocky (often filled with larger small boulder-sized rocks to hoist onto) and will remain so until you reach the Madison Spring Hut at 3.8 miles. If you’re interested in camping on the mountain, but don’t want to stay at the hut, the Valley Way tentsite is at mile 3.1 on this hike.

Once we arrived at the hut, we saw there were a couple of ways up to the summit of Mt. Madison.  At this point, we were above treeline, so we saw the rocky summit up above us.  I went in and found one of the Croo members and she told me the Osgood Trail had the most direct route and was a little easier than making our way via the Watson Path.  The final ascent up to Mt. Madison was .5 miles along the Osgood Trail (which is also the Appalachian Trail in this area).  You basically needed to walk acrpss large boulders, following cairns along the way until you reached the summit.  When you are above treeline, the summits of mountains seem so close to reach, but it is very misleading.  As we climbed up, we looked back and saw the hut shrink with each step, finally giving us some perspective of how far we had come.  We stayed a while at the summit.  The views were breathtaking and you could see for miles all around.  It definitely was one of the most beautiful scenes I have witnessed hiking and to realize the work we had put in to attain the peak, made it feel even more worthwhile.

Looking Back to the Hut
Christine makes her way up the Osgood Trail to the summit of Mt. Madison.  Below: About to go above treeline; Even though the summits are far away, they always look close;  A view of Madison Spring Hut with Mt. Adams in the background.

Alpine Zone Looks Close Madison Spring Hut

While we were at the summit, we met a woman who had a sign pinned to her that had 48 over 50 written on it.  She was over 50 years old and she had a goal to do all 48 peaks over 4000 ft. in elevation in New Hampshire.  She had saved Mt. Madison as her last hike to meet her goal, so we were thrilled to be able to see her experience accomplishing her goal.  What an inspiration!  We also talked to a gentleman at the summit who was from Colorado that had done this same hike 30 years ago.  He was staying at the nearby Crag Camp, run by the Randolph Mountain Club, just as he had done when we was a teenager.  He wanted to see if this hike was just as amazing as he had remembered and he told us it definitely was.  It made me further realize that everyone likes to hike for their own reasons and it is always a privilege to get to hear people’s stories on the hike.

We made our way back down and ate some lunch at the Madison Spring Hut.  We then ventured .2 miles on the Parapet Trail to see Star Lake.  This is a spot you definitely shouldn’t miss.  The lake is more like a small pond, but it was so beautiful to view the summit of Mt. Madison, as it reflected into Star Lake.  We debated about tackling Mt. Adams to bag another peak, but we realized that the summit looked close, but it was still a steep 1 mile away.  Not wanting to add even more to our hike, we decided to make our way back down.  The trail seemed to be even rockier on the way back down.  While you can normally fly down some parts of downhill trails, you need to take your time on this one to navigate all the rocks.  On our way down, we came into a rain shower, making the rocks a little slick.   The last .8 miles were quite easy again and we did pick up some time at this point.  We made our way back to the parking lot to make the round trip 8.8 miles.

Christine Says…

The morning of our Mt. Madison hike started off cheerfully enough.  We stopped for breakfast at Dunkin Donuts.  I ate both a bagel with cream cheese and a Boston Cream donut.  If I’m going to hike almost nine miles with over 4,000 feet of climbing, I’m going to enjoy any and all the baked goods I want!  However, I was jolted out of my happy post-carb afterglow when I discovered my socks and sock liners completely soaked in the back of the car.  A tough hike with wet socks sounded like a really bad idea.  But, driving out of our way to find an outfitter with Thorlo socks seemed like an even worse idea.  I’m super picky about socks, and Thorlo’s thick-cushion hiker socks are the only ones that keep my feet happy.  I decided wet Thorlo socks were better than dry socks of another brand. (and they were … I hiked all day in wet socks and didn’t get a single blister!)

As Adam said in his post, the Valley Way trail is pretty moderate for White Mountain terrain.  The trail is not as rocky and stays under the shelter of trees until you get to Madison Spring Hut.  It’s a great choice if you want to visit the northern Presidentials, but stay largely sheltered from wind and other weather.  There is still plenty of climbing, but until the last mile, it’s all gradual and moderate.  Trails like the Valley Way exist due in part to people like J. Rayner Edmands.  He was an early volunteer for the Appalachian Mountain Club.  Starting in the 1880’s, he spent over 20 summers building trails in the White Mountains.  He believed trails to the high peaks should be passable without stumbles, even in the dark.  Backpacker Magazine did a neat article about Edmands in their October 2014 issue.  Check it out if you have a few free minutes.

JMU Dukes
We paid tribute to our alma mater (James Madison University) on the namesake mountain. Go Dukes!  Below: The trail was extremely rocky and rugged between the hut and the summit of Mt. Madison; Cairns mark the way; Christine and Adam enjoy a summit view; The descent.

Climbing Mt. Madison  Rocks on Mt. Madison
Summit of Mt. Madison  Descent

I very much enjoyed the little rapids and waterfalls along Snyder Brook early in the hike.  Tama Falls was especially impressive.  After we moved away from the stream, the hike was basically just a climb in the woods.  As we ascended the trail got rockier, bit by bit.  The last half mile to the hut was insanely steep and rocky.  In one spot, my shoe got so solidly wedged between two rocks that I had to unlace it and contort my ankle to free myself.  It took efforts from both of us to release my shoe from the rocks.  It’s a good thing trail runners are so soft and flexible, because my feet definitely needed both shoes on this hike!  I think the steepness of the terrain is actually what stopped me from getting hurt when my foot got caught.  We were moving very slowly, picking our way across the rocks. Had I been moving at any significant speed, I think I could have easily broken my ankle.

When we arrived at Madison Spring Hut, it was already starting to cloud up a little. It wasn’t really overcast, but the sky had that heavy, hazy look about it.  The weather was definitely changing and I wanted to make sure we enjoyed the best views possible.  We headed up the Osgood Trail toward the summit of Madison.  I don’t know if you can really call the path to the top a ‘trail’.  It’s more of a scramble across rocks, following cairns leading you to the summit.  The climb to the top is slow going, simply because there is never a simple place to put your feet. On our way up it was fun to look back and marvel at the towering peaks and the tiny hut tucked into the col.

Inside Madison Spring Hut
We decided to eat lunch at Madison Spring Hut.  Below: Even pretty dogs aren’t allowed inside AMC huts;  We always enjoy the baked goods for sale at huts; Compass on the hut porch.

No Dogs Allowed in AMC Huts Goodies Compass

At the top we enjoyed spectacular views of the Presidentials.  Seeing the Mt. Washington Auto Road snaking down the mountain was really impressive!  While the wind was a little brisk at the summit, it was really a warm, mild day for the White Mountain high peaks.  Lots of people were hiking in shorts and t-shirts.  Some people even basked shirtless in the summit sunshine.  My blood is a little thin for that, but I wasn’t cold like I had been on the summit of Mt. Washington in 2013.

After taking lots of photos and doing our JMU rituals, we climbed back down and enjoyed our packed lunch at Madison Spring Hut.  Of course, we supplemented our packed food with baked goods from the Croo.  I always hear people talking about how huts are packed with dayhikers all summer long. I’m not sure if it’s our timing (we hike early), but we’ve found almost every hut we’ve visited nearly empty.

Star Lake
Beautiful star lake sits near Madison Spring Hut. Below: As we were leaving the lake, clouds started to roll in and we heard distant rumbles of thunder… time to leave the peaks and head back to the valley below.

Walk to Lake Approaching Storms

After lunch, we walked out to Star Lake.  What a beautiful spot.  The lake itself is small and shallow, but it makes a gorgeous reflecting pool for Mt. Madison.  We were lucky to visit on a picture perfect day!  While we were admiring the lake and taking in our final peak views, we started to hear distant rumbles of thunder in the distance.

Being caught in a thunderstorm in the Whites is definitely something I’d be happy to NEVER experience.  Lightning strikes happen frequently, wet granite is very slick, and stream levels can change drastically in mere minutes.  In fact, just last week I read a harrowing account from a solo hiker caught by storms in the White Mountains.  Seriously scary!

We made our way down as quickly as we safely could.  With a couple miles of hiking left, the rain started to fall.  Fortunately, it was light rain and none of the thunder/lightning seemed close.  We got back to the car right before the skies opened up and poured!  What a great day with perfect timing. I’m really thankful that we had weather that allowed us to visit two more Presidentials on our 2014 trip!

Trail Notes

  • Distance – 8.8miles
    MapMyHike Stats *
  • Elevation Change –  4150 feet
  • Difficulty –  5.  The trail started off easier, but it is still a very tough, uphill climb.
  • Trail Conditions – 2.5.  The trail was well-maintained, but the rocky parts of the trail make this a challenge.  The final push to the summit on the Osgood Trail also took a lot of precision.  Bring trekking poles.
  • Views – 5.  It doesn’t get much better than this.  If you are lucky enough to catch this on a day where clouds are off the mountain summits, you will be able to see all around you for miles. 
  • Waterfalls/streams 3.  The Snyder Brook runs alongs the trail early on the hike and you can see a few smaller waterfalls along the trail. 
  • Wildlife – 1.  We didn’t really see any wildlife on the trail.  I wouldn’t expect much at all once you get above treeline. 
  • Ease to Navigate – 2.5.  There are a lot of junctions and side trails on the route because there are a lot of trails in this area.  Keep following the signs for the Valley Way Trail until you reach the hut and then follow the Osgood Path via the cairns to the summit. 
  • Solitude – 2.  We picked a gorgeous day in the summer to do this hike, so we weren’t surprised to see lots of people.  We saw the most at the summit and the hut, but there was still places to find our own bit of solitude. 

Download a trail map (PDF)

Directions to trailhead: From I-93: Take Exit 35 for Twin Mountain. Follow 3N for 12.4 miles. Turn right onto 115N for 9.7 miles. Turn tight onto 2E for 8 miles. The parking lot will be a large gravel area on the right.

* MapMyHike is not necessarily accurate, as the GPS signal fades in and out – but it still provides some fun and interesting information.

Strickler Knob – via Massanutten Trailhead

This 9.1 mile hike is challenging, but offers wonderful view payoffs and a fun rock scramble.  There is a shorter option for this hike for people wanting to skip the toughest part of the climb.

View the Full Album of Photos From This Hike

Crowds on Strickler Knob
Crowds gather on one of Strickler Knob’s perches. One person we met at the summit had a Cavalier King Charles spaniel in her backpack.  If you look closely at the photo, you can see the dog’s head sticking out of the pack.  Cute! Below: The Massanutten Trailhead on Crisman Hollow Rd.; Adam, Suzanne and Anthony begin the hike; Native pink azaleas.

Massanutten Trail Happy Hikers Pinkster

Christine Says…

Strickler Knob was the second hike we posted on Virginia Trail Guide… way back in May of 2009. In the years since we first did this hike, there was a bad forest fire in the vicinity, the Forest Service painted over the purple/pink blazes to the knob (and then someone put them back), and the trail became vastly more popular.

On this particularly beautiful morning, we were planning a hike in Shenandoah National Park, but at 7:45 a.m. a text popped up on my phone. It was from our friends, Suzanne and Anthony (we met them at PATC’s Backpacking 101 workshop several years ago). They had made a spur of the moment decision to drive down from Maryland to hike Strickler Knob and wondered if we might want to join them. We don’t see them often enough, so the answer was clearly YES!

However, I had a few concerns going into the hike. The first was the possibility of swift/deep streams and run off from the deluge of rain we had received a day earlier. Roads and bridges were washed out all over the area. The second was the fact that the MMT 100 was being run that weekend. I wasn’t sure if the trail would be crowded or have limited access due to the race. We decided to put those concerns aside and go for it.

We met our friends at the defunct Massanutten Visitor’s Center on Rt. 211 near Luray. From there, we proceeded in one car to the Massanutten Trailhead on Crisman Hollow Rd. Right as we arrived, a carload of six was also unloading at the trailhead. We ended up playing leap frog with them along the trail all day long.

Lady's Slipper
We spotted this beautiful pink lady’s slipper orchid along the trail. Below: Anthony and Suzanne make the steep descent of Waterfall Mountain; Mountain laurel is starting to bloom; Streams were running high.

Waterfall Mountain Descent Mountain Laurel Stream

The trail initially crossed a flat, open area and a view into the valley. But soon, the trail dropped very steeply downhill on Waterfall Mountain. I’m not really sure why it’s called Waterfall Mountain. We didn’t see any waterfalls along the way – maybe they’re someplace else, or maybe ‘waterfall’ just refers to the extremely quick drop in elevation. Along this section of trail, we all joked about what a tough climb uphill this would be at the end of the day. I enjoyed the flowers blooming along the trail. We spotted mountain laurel starting to bud and even a pink lady’s slipper!

Eventually the trail leveled out near a stream. We passed a large campsite near the water just before coming to our first stream crossing. The water was pretty high and fast, but some well-placed logs made the crossing doable. From there, the trail followed a series of ascents and descents with lots of little stream crossings along the way. Most of the small stream crossings are probably dry under normal circumstances. We soon came to a second large stream crossing. After that crossing, the trail followed the stream – literally. Due to the 4-5 inches of rain the area experienced, the trail was completely underwater. It didn’t even look like a trail, and the only way we were sure it was the trail was the presence of a blaze on a tree about 50 yards ahead. We walked for more than a mile in ankle deep water. It was fun, but it was also wet, sloppy and muddy!

We reached trail junction 408. This is where the folks coming up from Scothorn Gap join the trail. At this point, we turned right and followed the orange-blazed Massanutten Trail uphill in the direction of the Gap Creek Trail. This part of the trail is really easy – wide and very gently graded.  There were lots of pink native azaleas on one side of the trail. On the other side, the area burned out by a forest fire stood, charred – but slowly growing back.

Stream Crossing
Anthony makes his way across the logs traversing the stream. Below: Adam walks along one of the only flat sections of the trail.  It was a really short section; Suzanne walks along the under-water trail; This is the trail junction that trips a lot of people up.  Make sure you go uphill, remaining on the Massanutten trail, in the direction of Gap Creek.

Flat Stream Walking Tricky

When we reached the ridge, there was an obstructed view where the trail continues over the crest and then downhill. If you find yourself going downhill on the orange-blazed trail, you’ve passed the turn to Strickler Knob! At the top of the ridge, look carefully for purple/pink blazes on rocks and a reddish disk stapled to a tree. This is the way to Strickler Knob.

The walk to the knob starts off as a rocky but easily passable trail. But gradually the rocks become bigger, more jagged and trickier to traverse. It’s easy to lose the blazes as you pick your way along the rocks. You’ll come to one stunning viewpoint and think you’ve reached the end, but you still have the most intense part of the scramble to go! There are several steep, tall rock faces to negotiate before you finally come to a collection of towering rock stacks overlooking the Page Valley, Fort Valley and the Shenandoah River. The view from the knob is majestic!

On this particular day, Strickler Knob was packed. There were so many people at the overlook, it was hard to find a spot to sit. I think part of it was because the presence of two hiking clubs. But in addition to the clubs, there were also a number of couples and foursomes. Honestly, I’m shocked that this trail has become so popular! The crowds rivaled what I expect to see on a nice day on trails like Dark Hollow Falls or Hawksbill Mountain (in SNP).

We spent some time at the overlook eating lunch and taking photos. The hike back went really quickly. We walked in the water, we crossed the streams, we did all the little ascents and descents… and then we came to the base of Waterfall Mountain.

That climb was every bit as brutal as we all expected – gaining over 800 feet in about half a mile. The section isn’t climbed with mediating steps or switchbacks – it’s pretty much straight up the mountainside. We were all pretty glad when we got back to the flat, grassy section again!

When we got back to the car, the parking lot was much more crowded than when we had left it. We made the short drive back to the Massanutten Visitor’s Center and bid farewell to Anthony and Suzanne. It was a great hike and great to see them!

Burned Area
This area was burned by a forest fire several years ago. There is still a lot of black char, but new growth is starting to emerge. Below: The beginning of the Strickler Knob trail; Adam enjoys the first nice view; The scramble begins!

Strickler Trail First View Scrambling

Between the two routes to Strickler Knob, I would probably recommend the shorter route from Scothorn Gap to most hikers. You get all of the excellent scenery, and only miss the extremely challenging descent/ascent of Waterfall Mountain. The section on Waterfall Mountain doesn’t really offer any remarkable scenery, but it’s a great training hike if you’re looking for a cardio challenge or practice on elevation change. We probably benefited from the longer, tougher ascent to prepare for our upcoming Smokies Trip.

Adam Says…

Normally, when I describe the hike to Strickler Knob, I tell people that it’s an introductory rock-scrambling hike to see if you are ready for Old Rag.  While there is not as much rock-scrambling and navigating as Old Rag, there are a few spots towards the summit that will test you enough to see if you can pull yourself up some of the rocks and let you gauge your comfort-level with scrambling over some drops.  If you’ve already done Old Rag, this should be easy, but if you are intimidated by Old Rag from stories you’ve heard, try Strickler Knob first.  I would agree with Christine that this hike has become more popular over recent years.  When we had done the hike five years ago on a beautiful day, we only ran into one other couple on the entire trail; this time, it was crawling with people.

This is also a hike where people often get lost.  You won’t find the purple-blazed summit trail on any maps currently, so I would suggest bringing a copy of the map I’ve provided below.  I had a co-worker that tried to find the trail a few years ago (possibly when the blazes were still removed) to no luck.  We also came across a larger hiking group from Northern Virginia that had missed the trail completely.  When we gave them better directions, they turned around to attempt it again.  Part of this also has to do with what few blazes are actually on the trail.  You’ll know you are on a trail, you may just not be entirely sure which trail.

Scrambling
The group negotiates the rock scramble. Below: Adam makes his way through the rocks; Lots of rocks to climb; A nice perch on Strickler Knob.

Scrambling Rocks to Climb Adam on the Scramble

We started off the hike from the small parking area on Crisman Hollow Road.  The orange-blazed Massanutten trail starts off on nice, level terrain through a wooded area.  The trail soon opens up to more of a brushy, open field.  As the trail winds around through this area, there is even one spot that has a view into the valley below at .2 miles.  Shortly after this point as the trail winds around, the trail begins its very steep descent down Waterfall Mountain at .5 miles.  The entire time that we were hiking down, I was thinking this was going to be a pain to hike back up at the end of the hike.  The trail does have a few switchbacks, but the overall descent is tough on the knees as you descend about 800 feet in that half mile.  At the 1.0 mile marker, we finally reached the bottom of the descent and a junction with the Massanutten Connector Trail.  Take a left at this junction to stay on the main, orange-blazed Massanutten trail.  The trail begins to climb slightly at this point and at 1.2 miles, you will reach a nice back-country campsite along the side of the Big Run stream.  You’ll soon cross the stream (usually by balancing yourself along logs that have been laid across) and continue your climb.  After the second stream crossing, the trail begins a steeper climb with a large switchback to help ease the elevation gain.

Summit Crowd
The summit was very crowded, but the views were still fantastic!

Eventually the trail met the stream again and due to the heavy rains, the trail was completely submerged.  We ended up hiking what felt like almost a mile through a submerged trail by rock-hopping or just getting our feet wet and muddy.   The trail finally separated from the water and leveled out and we reached the junction with the yellow-blazed Scothorn Gap trail at 3.0 miles.  Take a right at this junction to stay on the orange-blazed Massanutten trail.  The trail feels more like a fire road at this point, as you’ll climb up slightly.  We were able to see a lot of the fire damage to the trees around, so there is little more than some lower brushy, understory on the trail at this point.  At 3.6 miles, you reach the crest of the trail and can see some obstructed views straight ahead.  At this point, look around to your right.  We found a small cairn on the ground and were able to see some red and purple blazes higher than eye-level on a few trees to mark the beginning of the purple-blazed trail to the summit of Strickler Knob.  The purple blazes at this point are typically marked on the rocks where you step.  The trail is very rocky at this point and you will be walking the ridgeline until you reach the summit.  The trail can also be a little hard to follow, but if you keep looking for the blazes and just remember you are walking the crest of the ridge, you should be fine.

At 4.2 miles, you reach a very nice viewpoint where you can get great views to the west.   Keep pressing forward and you’ll soon need to climb up a larger rock wall and then pass by a primitive campsite.  Just a few 100 feet away, you will reach the larger boulders of Strickler Knob at 4.5 miles.   You’ll see a large rock overhang that you’ll climb under.  There is a small area to take in a few views to the right.  For those that are most adventurous, the best views are to the left where the overhang is.  If you feel comfortable, you will need to navigate a crack between the two larger rock formations and hoist yourself up to the top of the rocks.  The views from both rock formations are absolutely breathtaking as you have 360-degree views from all around the valley.

Climbing Down
The climb down is as challenging as the climb up!  Below: More views from the top; The hike down; One final stream crossing.

View of the Valley Descent Stream Crossing

After eating a packed lunch, we made our way back the way we came.  We did have to face the waterlogged trail again.  We came across several groups on our way back that were also looking for directions.  One girl asked me if there was any other way back to the car other than going back up Waterfall Mountain.  I suggested that they make their way back through Scothorn Gap and then walk Crisman Hollow Road back.   We all definitely wished we didn’t have that steep trek back up Waterfall Mountain to do.  It is a very steep trail almost straight up the mountain and it takes quite an athlete to do this without taking a breather at some point on the return.  When we finally reached the top, we congratulated our success and then made the last .5 miles back to our car.

When we were hiking the trail, I kept thinking about the MMT 100 racers that were running this trail.  We had come across one of the race-workers and he told us that most of the fast runners were coming through this area near Waterfall Mountain around 8 p.m.  So, if you were a little slower than that you would be running this trail in the dark with a headlamp.  I can’t even imagine how tough this would be and how any of them would escape injury from running into a tree, twisting an ankle, or falling down the trail.

Brutal
The brutal ascent back up Waterfall Mountain at the end of the hike.

I would also recommend for most people to do the hike from Scothorn Gap instead of the route we took.  It is a lot of extra effort with nothing overly impressive to see along the way.

It was great to see our friends again.  We were all getting ready to head to the Great Smoky Mountains soon, so this was great training before we had to handle some of the tougher terrain that the park had to offer.

Trail Notes

  • Distance – 9.1 miles
  • Elevation Change – About 2250 ft.
  • Difficulty – 5. This rating is earned by both the hike length, the scramble to the knob, and the ascent of Waterfall Mountain that comes right at the end of the hike.  For an easier version of this hike, start at Scothorn Gap.
  • Trail Conditions –  2. No switchbacks, soggy streambeds, a couple crossings that can be challenging in wet weather, and a tough scramble.  This is not a beginner’s hike.
  • Views –  5.  Views from the knob are spectacular.
  • Streams/Waterfalls – 2.5.  The usually low streams were beautiful and running high when we visited, but they’re probably usually less impressive.
  • Wildlife – 0.  This trail is popular enough to scare away most wildlife.
  • Ease to Navigate –  2. Trails are sporadically blazed and can be hard to follow.  The junctions for trails leading to to the knob do not mention Strickler Knob.  We suggest bringing a map on this hike.
  • Solitude – 2.  This trail has become extremely popular!

Download a Trail Map (PDF)

Directions to trailhead:  From I-81, take exit 264 heading east through New Market.  Head east on West Old Cross Road for .2 miles.  Turn left on to US-11/N. Congress Street.  In .3 miles, turn right on to US-211/Lee Highway.  Go 3.6 miles and turn left on to Crisman Hollow Road (it is right before the green building on your right that is the Massanutten Visitors Center).  Follow Crisman Hollow Road for 2.2 miles (passing by the parking lot for the Massanutten Storybook Trail) until you reach where the orange-blazed Massanutten Mountain Trail crosses the road and the small parking area.  Park here, cross the road and start the trail.

Trayfoot Mountain – Paine Run Loop

This 9.5 mile loop in the southern district of Shenandoah National Park offers vistas, streams and quite a bit of solitude!  We think it would make a great short backpacking loop with a beautiful stream-side campsite along Paine Run.

View the Full Album of Photos From This Hike

Adam Enjoys the Blackrock Summit
Adam Enjoys Blackrock summit. Below: Adam hikes the Appalachian Trail just north of Blackrock Gap; Christine climbs on the rock pile; Adam spots the spur trail that leads to the Trayfoot Mountain Trail.

Adam Hikes the AT Christine on Blackrock Summit Spur Trail

Christine Says…

Every weekend this April has provided glorious hiking weather! I’m feeling so grateful that we’ve been able to get out so often and take full advantage of the warm, sunny days. On the Saturday before Easter, we chose to hike the challenging 9.5 mile Trayfoot Mountain – Paine Run loop.

This hike begins at the Blackrock Gap parking area (not to be confused with Blackrock summit parking). From the lot, cross to the eastern side of Skyline Drive and make your way north along the Appalachian Trail. After a couple tenths of a mile, the trail crosses back over the drive and heads steadily uphill for a little over a mile. As you climb, you’ll come to a junction – stay on the white-blazed AT, the turn to the right goes to the Blackrock shelter.

At 1.3 miles into the hike, you’ll reach a cement marker for the Trayfoot Mountain Trail. Do NOT take this turn unless you want to miss the splendor that is Blackrock Summit! Continue another tenth of a mile to the massive jumble of boulders and jagged rocks that makes up this impressive summit viewpoint. We took some time to enjoy the views and climb on the rocks. The views from this spot are probably the best on the entire hike, although there are a couple more nice spots yet to come.

Christine in the Maze
The trail passes through a corridor of rock. Below: Adam passes through the narrow opening; Climbing Trayfoot Mountain; From the ridgeline of Trayfoot there are several openings in the trees that give you views of a distant Skyline Drive.

Rock Corridor Climbing Trayfoot Skyline Drive

The Appalachian Trail skirts around the front edge of the summit before coming to a spur trail that leads down to the Trayfoot Mountain trail. The spur descends through a corridor of flat-sided slabs. When spur reaches the junction with the Trayfoot Mountain trail, turn right and follow the trail uphill along an old fire road.

The uphill climb along this section is steady going! Near the top, you’ll pass another marker pointing toward the Furnace Mountain trail. Pass this and continue on the Trayfoot Trail until you reach the cement post marking the summit and high point of your hike. There are no views from this summit, but this starts the beginning of a lovely, easy ridge walk.

The ridge rolls gently along, offering nice views of the Paine Run valley and a distant glimpse of Skyline Drive. The trail eventually begins a long gradual descent to Paine Run. Your last sweeping vista on this hike comes at a pretty outcropping of rocks overlooking pointy Buzzard Rock.

Switchbacks take you swiftly down to Paine Run.   Near the first stream crossing, a cement marker points you left onto the yellow-blazed Paine Run Trail, which is essentially an old roadbed. There were several stream crossings on this section of trail. All of them but the second crossing were easy. We found the stream wide and flush with water. Most of the stones people use to cross were underwater. Instead of trying to attempt the rock-hop, we took off our shoes and waded across. Refreshing!

Buzzard Rock View
You get a nice view of Buzzard Rock before descending to Paine Run. Below: Some interesting rock formations along the trail; Lunch stop; Glimpses of farm land.

Rock Walls Lunch Spot Farmland

The Paine Run trail is very pleasant for a couple miles – sounds of running water and mountain views through the trees. When we hiked, the stream was flowing with lots of rapids and tiny waterfalls. I imagine it will run low and dry later in the summer. The path climbs so gradually you hardly notice you’re ascending! Eventually, you leave the streamside and head back toward Skyline Drive. After one final sharp switchback, you have one more moderately steep ascent back to your car.

All in all, I was pleasantly surprised with both the views and streams on this route. We had a great time!  MapMyHike said this hike is only 9.3 miles, but all other sources put it at 9.7-9.8… so who knows!

Adam Says…

We feel like we have covered so much of Shenandoah National Park on our blog, but it seems there is always another trail or loop that you can try.  We talked about  a hike to Blackrock summit before in our coverage of an AT segment, but this is a longer loop version that offers a few additional views and a stream to enjoy.  Other than the Blackrock summit, you will likely not see a lot of people on this trail.  We only saw a few people the entire day, which was a little shocking for a beautiful weekend day that happened to also be a free National Park entry day.

As Christine mentioned, you could skip the Blackrock summit trying to follow the signage, but you don’t want to miss the best part of the hike.  When we hiked previously, our route bypassed the spur trail that leads to the Trayfoot Mountain Trail.  This spur immediately gives you some additional views and some interesting rocks to scramble around.  Most people that are doing an out-and-back just to the summit from the northern approach will miss this area also.

First Attempt
Adam makes a first attempt to cross (with shoes). The second (successful) attempt was barefoot. Below: Adam descending to Paine Run; The shoeless crossing attempt, The trail goes right through the middle of the stream.

Descent to Paine Run Shoeless Trail

One thing that Christine and I both mentioned throughout the day is how this would make for a great overnight backpacking loop.  If you choose to do so, I would tackle all of the tough uphill climbing the first night, making your way through the Trayfoot Mountain trail and camp somewhere near Paine Run.  This will provide a great water source and there were some nice campsites near the water.  The following day, you’ll just have a steady, but not too strenuous hike back uphill to your car.

When we started walking the ridgeline of the Trayfoot Mountain trail, I felt like we stumbled across the best place I’ve ever seen to spot grouse.  We encountered three along our walk.  A couple of years ago, while hiking in Great Smoky Mountains National Park, we encountered our first grouse on a trail.  The beating of its wings created a strange echoing syncopation in our chest which made us both wonder if our heartbeats were going haywire.  Seeking sources online, we found it was a common sound for mating grouse.  We actually spotted several on this trail and when they took off in flight, we could briefly hear that same noise that perplexed us before.  What a relief to actually spot the culprits this time.

Paine Run Trail
Christine walks the wide, gradually ascending Paine Run Trail. Below: We found several blown-down bird’s nests along the trail; Pretty Paine Run; Another stream crossing.

Birds Nest Paine Run Another Crossing

Further along the Trayfoot Mountain Trail, we climbed up on a few rocks to enjoy our lunch and get some views.  I managed to pick some rocks which were not in the least bit contoured to our bodies, which made for an uncomfortable sitting.  It reminded me of how fast food chains design their seating area so the chairs are only comfortable for a short amount of time to prevent loitering.  We quickly ate and moved on.

Around the 4.0 mile marker, the ridge line ends at a nice rock outcropping which gives you some last views before descending towards Paine Run.  Some local families like to park on the western outskirts of the park and hike up to this area for views.

When we reached Paine Run, the water was a little high from the recent rains.  There were a few places to rock-hop across.  In one spot, we did have to shed our shoes to make our way across.  Christine said I looked like a hobbit with my pantlegs pulled up halfway as I crossed.  I responded back in my geekiest way, “May the hair on my toes never fall off.”  I will say the water was very cold, but it felt so refreshing to my feet.  The sensation of the freezing water made me feel as if I had just received a nice massage on my feet.  After the refresher, I felt I could hike a lot longer.

Horses
The Paine Run Trail is popular with horseback riders. Below: The final ascent to the parking area; We spotted a bear on the drive home; Before we went home, we stopped for famous Shenandoah blackberry ice cream.

Final Ascent BearIce Cream

The stretch on the uphill Paine Run trail was very gradual.  While some people may think this was more of a boring stretch, I enjoyed the views of Paine Run along the side.  There were even a few very small waterfalls to enjoy since the water level was high.  We also came across a group horseback riding along the trail.  All yellow-blazed trails, like the Paine Run trail, in Shenandoah National Park allow horses on the trails.  This would be a great trip to take down to the water and let the horses rest and get a drink before returning.

We got back to our car and then heading north along Skyline Drive.  Within a few miles, I spotted a young black bear on the side of the road.   We were excited to have our first bear sighting of the year.  The bear quickly ran away once it knew it was spotted, but we hope we get to see many more this year.  We stopped at the Loft Mountain wayside to get our first blackberry milkshake of the year.  Appalachian Trail thru-hikers talk about these treats for days in advance of getting to Shenandoah and the hype is worth it.  However, their milkshake machine was broken and we had to settle for blackberry ice cream.  It was still a just reward for a long hike.

While we realize this hike is longer and not as popular as some of the others in the park, this hike really has some nice gems along the trail.  I was pleasantly surprised at what this had to offer!

Trail Notes

  • Distance – 9.5 miles
    (Check out the stats from Map My Hike)*
  • Elevation Change – About 2200 ft.
  • Difficulty – 3.5.  The climbs to Black Rock summit and Trayfoot Mountain can be a little steep, but the climb from Paine Run back to the parking area is very pleasant and gradual.  The length adds to the difficulty rating of this hike.
  • Trail Conditions – 4. The trail was clear and in great shape!
  • Views – 5.  The views from Black Rock summit are spectacular.  While the summit of Trayfoot Mountain has no view, there are other nice views from the Trayfoot Mountain trail – especially the outcropping that overlooks Buzzard Rock.
  • Streams/Waterfalls – 3.  Paine Run was surprisingly pretty and broad in the early spring.  As we hiked up the Paine Run trail, we had many stream crossings and nice views of the water.
  • Wildlife – 3.  We saw deer and lots of grouse on the trail.  We also saw a black bear shortly after leaving the parking area to come home!
  • Ease to Navigate – 4.  There are only a few, well-marked turns on this hike.
  • Solitude – 4.  We saw a few people near the stream that had come in from the western perimeter of the park, a few people on Black Rock Summit, and a trio of women on horses.  All-in-all, we enjoyed a lot of solitude for a long stretch of trail on a pretty ‘free park entry’ day!

Download a Trail Map (PDF)

Directions to trailhead: Located in the Southern Section of Shenandoah National Park.  Park at the Blackrock Gap parking lot around MM 87.3.  Cross the road and find the cement post for the Appalachian Trail.  Take a left, heading north, to start your hike.

MapMyHike is not necessarily accurate, as the GPS signal fades in and out – but it still provides some fun and interesting information.

North Fork Mountain to Chimney Top (WV)

This 6-mile hike is a bit challenging – tough climbing and a little hard to follow – but payoffs at the end make the effort well worth your while.  The views are spectacular – some of the best in the mid-Atlantic!

View the Full Album of Photos From This Hike

Amazing views from Chimney Top!
Amazing views from Chimney Top! Below: Adam checks out the trail information board; The spine of the mountain offers many magnificent views, if you’re willing to do a little climbing.

Trail Sign Scaling the Spine

Adam Says…

Our first experience hiking on North Fork Mountain was on my birthday in 2012 (birthday hikes are a tradition for us!) We decided tackle a little piece of the the trail from the base of the mountain to the well-known outcropping of Chimney Top.  This August day ended up being one of the hottest days of the year.  While hiking up the backside of this mountain, there was absolutely no breeze so the air was stifling.  We were quickly questioning why we chose this one, but we had to press on for tradition’s sake.  We reached the ridgeline and walked along for a while.  We eventually came across a few rocks that seemed to denote a path up.  We semi-bushwhacked up this trail and came to a rock column and climbed up to the top to enjoy the views.  We thought this may have been Chimney Top.  When we got back home and did more research, we realized we hadn’t found the true Chimney Top, so we vowed to return – and we did… on our sixteenth wedding anniversary in fall 2013.

First Outcropping
The first outcropping offers stunning views. Below: The view in the other direction from the first outcropping,

Views from Ridge

It was a perfect October day with the leaves just a shade past peak.  One of the difficulties about this trail is there are no solid online resources for maps and even using our mapping software (alltrails.com), the full trail doesn’t appear on any kind of topo maps.  We used our MapMyHike app on our phones to try and get accurate readings and I traced that outline on a topo map through alltrails.com to try and get a good resource if you want to attempt this hike.

We arrived at the small parking area and made our way up the trail.  The trail meanders for the first two miles through the woods with some slow switchbacks to help you gain elevation.  The thick canopy is high above you, but you will notice you will rarely feel much wind on this side of the mountain.  Around 1.5 miles, you make a steeper ascent up the mountain and reach the top of the ridgeline around 2.0 miles.  Once you reach the top, you can see down below to the North Fork of the South Branch of the Potomac River and WV-28/55 on the other side.  Both times we have been, you can see dots of people fishing in the river.  Across the way, you will see ridges of mountains with Canaan Valley hidden behind them.  Looking along the ridgeline, you’ll see sheer cliffs of rock, making this quite a remarkable scene.  From this ridgeline, we continued along the path.  The trail stays on the ridgeline allowing for several opportunities to check out the views for the next .5 mile.  Around 2.5 miles, the trail has been rerouted away from the ridgeline and you descend the mountain.  The signs say that it was to protect the nesting/hatching peregrine falcons, who have nested on the cliff faces. The signs are at least five years old, and October is not nesting season, so we’re not sure if the signs are still valid.

Fall Color
Fall color was pretty nice!  Below: The trail is often rocky and rough; Adam walks along the increasingly hidden trail.

Rocky Spine Tough Trail to Follow

The trail continues through this terrain for another .5 miles and then starts to gain elevation again.  At 3.0 miles, we came to a well-established campsite and could see the ridgeline just above it.  I walked over to the ridge, but the views were fairly obstructed.  I then saw a smaller campsite to the right of the trail.  Going to that campsite, I walked a short distance behind it on a small trail towards the ridgeline to discover the elusive Chimney Top.  The photos we will place should lead you to the proper campsite that leads to the correct trail.  We ate some lunch from the top of the cliffs near Chimney Top  Exploring a little around this area, you are able to see a most-impressive cliff face (where I’m assuming is the section protected for peregrine falcons).

After we ate our lunches and took in the scenery, I decided I wanted to try to climb up Chimney Top.  I had to find some good footholds, but I was able to get up without too much trouble, but please be careful if you try to do the same.  There are many sheer drops from here, so I wouldn’t advise any unsupervised children to be given free reign on this hike.  Head back the way you came to make this a 6 mile out-and-back.

I do believe that the scenery from this spot is one of the most dramatic and beautiful views you will get in Virginia and West Virginia.  The trail was called the best trail in West Virginia by Outside magazine in 1996 and I can see why.  Some people like to backpack the entire 34 miles of North Fork Mountain.  Since you are at the top of the ridgeline for this hike, there isn’t a reliable water source to be found so you would need to pack in a lot of water for this backpacking trip.  I would strongly recommend trying this hike on a beautiful spring or fall day.

Christine Says…

I’ll admit – I’m the reason it’s taken over three months to get this hike posted.   A foot injury, a lingering cold, and the unusually frigid temperatures have sent me into a state of lassitude.  I haven’t felt particularly motivated to hike or write.  I’m sure I’ll snap out of it completely sooner or later.  But today, I decided to give myself a little push and get this post live!

Fall foliage and amazing views.
Fall foliage and amazing views. Below: Adam checks out one of the campsites; A nice view of the cliff face along the mountainside.

Campsite The Cliff Wall

We were really excited to try this hike again.  Our trip on Adam’s birthday had been rewarding even though we missed out on the main view.  We started the morning with a big breakfast at Bright Morning Inn (Pumpkin Pancakes with Walnuts and Maple Butter Sauce!).   It’s one of our favorite places to eat in Canaan Valley/Davis – everything is always excellent there!

After parking, we started climbing the mountain, following the familiar ground we had covered the previous summer.  We spent a little time exploring the first of several impressive rock outcroppings on this hike.  While there, we took some time to chat with the only other two people we saw on the trail – a couple from Pennsylvania.  They were recent empty-nesters and were returning to backpacking for the first time in 20+ years.  They still had all their gear from the late 80’s/early 90’s – external frame packs, old fashioned sleeping pads, and I think I may have seen something cast iron!  It looked like a heavy load!

After leaving the first view, we pushed along the trail, passing the spur trail to our lunch spot from the 2012 attempt.  This spot is marked by a rock cairn and the worn footpath is well established.

I thought this rock formation near chimney rock looked like a tortoise.
I thought this rock formation near Chimney Top looked like a tortoise. Below: More views; Adam checking out another rock outcropping along the way.

More Views Another Outcropping

The route follows a series of rolling hills after passing the spur trail.  I thought the trail was pretty hard to follow along this section.  It’s a reroute, and vestiges of the old trail are still apparent.  It may have been because the trail was under so many leaves, but I still think the reroute isn’t fully established.  As we continued along, I asked Adam how much further we should go.  According to old information, we had hiked far enough to be well past Chimney Top. As it turns out, the reroute is just longer and follows a wide arc around the preserved cliff face.

Eventually, we reached a spot with numerous campsites.  That’s usually a good indicator that you’re near something desirable to hikers/campers.  In this case, spotting the campsites let us find yet another unmarked trail that led out to the spectacular view from Chimney Top.

We spent quite a while up there, enjoying the fall foliage and awesome views, eating our lunch and taking photos.  The hike back went very quickly… mostly downhill and along a route that felt a little more familiar.

Trail Notes

  • Distance – 6.0 miles
    (Check out the stats from Map My Hike)*
  • Elevation Change – 1725 ft.
  • Difficulty –  3.5.  The trail has some decent climbing on it.  Both times we’ve hiked it, there wasn’t any wind until the top, so the temperatures can be stifling. 
  • Trail Conditions – 1.5.  Trails are largely unmarked with reroutes not always clear.  Finding the actual viewpoint of Chimney Top can be a little challenging.  Watch out for loose rock on the ridgelines in case you go to check out any views.
  • Views – 5.  Absolutely stunning views and great ridgeline walking. 
  • Streams/Waterfalls – 1.  From way above, you’ll see North Fork Gap.  There isn’t a water source on this trail.
  • Wildlife – 1.  We barely saw squirrels, but you may have some views of preying birds.  Watch out for timber rattlesnakes on the rocky ridgeline.
  • Ease to Navigate – 2.5.   There is basically one trail to follow here, but it can be tricky finding Chimney Top.
  • Solitude – 4.5.  Typically, you’ll only see a few people on this trail.  Most will go to the first overlook and stop.

Download a Trail Map (PDF)

Directions to trailhead:  From Seneca Rocks, WV head northeast on WV-28N/WV-55E for 15.2 miles.  Take a right on to County Route 28/11/Smoke Hole Road.  You immediately cross a bridge where you may see people fishing in the stream.  In about .4 miles, there is a small parking lot on the right-hand side.  You’ll see the brown board which denotes the start of the trailhead.

MapMyHike is not necessarily accurate, as the GPS signal fades in and out – but it still provides some fun and interesting information.

Appalachian Trail – Dripping Rock to Rockfish Gap

This 14.5 mile section of the Appalachian Trail includes great views of Wintergreen Resort from Humpback Mountain.  The campsite for the evening is the Paul C. Wolfe Memorial Shelter, which is located on the bank of lovely, rushing Mill Creek.

View the Full Album of Photos From This Hike

Hiking Over Humpback Mountain
Adam traverses Humpback Mountain.  Below: We found trail magic right away on our hike; Adam climbing the southern side of Humpback Mountain; Rock walls along the trail.

Trail Magic Adam Hiking Rock Wall

Day One

For Christine’s birthday this year, we decided to do a quick overnight backpacking trip along the Appalachian Trail.  Following an all-day soaking rain and a cold front on Saturday, we had ideal weather for hiking and camping on Sunday into Monday – low humidity, clear skies, daytime highs in the 70s and a nighttime low near 45. It was perfect!

We started our morning with a big breakfast at Thunderbird Café and then made the 40 minute drive to the trailhead.  For this hike, we left one car parked in the small lot near where the Blue Ridge Parkway (BRP) crosses I-64 and Rt250.  From there, we drove our second vehicle to the Dripping Rock parking area at mile 9.6 on the BRP.  The name Dripping Rock refers to the small spring adjacent to the parking area.  Supposedly, it was a water source well-used by Monocan Indians en route to summer hunting grounds.

The AT crosses the parkway at this point, so it’s an easy place to hop on without using any access trails or spurs.  The hike starts out climbing gently uphill through the woods.  Almost immediately, we spotted a small cooler alongside the trail – trail magic!  We didn’t need (or take) any trail magic on our hike, but we were curious so we opened the cooler to see what was inside.  We found a log book, a camera, a small whiteboard, a bottle of ibuprofen and a nice supply of granola bars.  The camera and whiteboard were provided so that hikers could take photos with their trail names.

A couple tenths of a mile down the trail, we passed even more trail magic in the form of 2 liter-sized bottles of tap water from Wintergreen Resort.  Typically by September, streams and springs in the Shenandoah Valley are dry or running very low, so the free, clean water would be quite welcome.  The bottles were situated next to one of the trail’s spring-fed water sources.  We noticed the sign marking the spring indicated that water might be contaminated and should be filtered or boiled.  The sign included an outline drawing of a moose, and we both found it comical to think about the implausibility of Virginia water being contaminated by a moose.

Wintergreen View
Christine enjoys the outcropping overlooking Wintergreen.  Below: Hiking up Humpback Mountain; Adam checks out the view of Wintergreen; Pretty views.

Christine Hiking Wintergreen Views

The hike continued gradually uphill along the side of Humpback Mountain.  We saw several nice campsites along the trail.  Soon after that, the views started to open up.  We didn’t really have any expectations for great views on this hike.  We figured we might take the side trail to Humpback Rocks and eat lunch there.  We also knew from past hikes on Dobie Mountain that we’d be passing one decent overlook at Glass Hollow.  However, we were pleasantly surprised to find spectacular views along the rocky, spiny ridge of Humpback Mountain. These views are about 2.5 miles from the better known outcropping of Humpback Rocks, and we thought they were even nicer!  The crowds, graffiti and car noise always take away from the experience at Humpback Rocks. We had this lofty ridge all to ourselves.

We took some time to take off our heavy packs and enjoy the view.  We could see the Priest, Three Ridges and the slopes of Wintergreen Resort.  When we got home, we read more about this section of the trail and learned that the view is named Battery Cliff, because the condos on the slopes of Wintergreen look like fortifications from a distance.  The rocks on the cliffs are Catoctin greenstone formed in an ancient volcanic eruption.  When you sit on these rocks and look across to Wintergreen, you’re looking over to where the Appalachian Trail used to traverse the mountains.  Five miles of the trail used to cross the resort.  But in 1983, the resort sold the land to private developers – basically pulling the rug out from under the Appalachian Trail Conservancy.  Luckily, the organization was able to quickly pull funds together and preserve the land across Humpback Mountain – where the trail currently sits.

Leaving the open ridge, we dipped back into the woods and continued walking along a long, impressive stretch of stone ‘hog wall’.  People living in the area before the establishment of the parkway built these long walls to roughly mark property and attempt to contain livestock.  Eventually we arrived at a junction, one direction headed toward Humpback Rock and the other continued downhill along the Appalachian Trail.  We decided to skip the extra mileage it would take to visit the Rock and continue toward our destination.  We’ve seen the Rocks many times and didn’t really want to face the crowds that arrive with beautiful-weather Sundays.

Hog Wall
Adam walks along one of the many hog walls.

As we walked downhill, we started contemplating our lunch break.  We decided that the next spot with good ‘sitting rocks’ we’d stop for lunch.  As it turned out, the next rocks we found were just a few, big random flat boulders right alongside the trail. We had lunch of apples, peanut butter, cheese, and energy bars.  As we ate lunch, two groups of people passed us – a couple with their dog and a man who had just visited his daughter at JMU’s family weekend.  All in all, we only saw a total of eight people over the entire ten miles of hiking that day.  The solitude was nice!

After lunch, we continued the 5.5 mile descent toward our evening stop point.   The trail was in great shape and the downhill was easy going.  At the bottom of Humpback Mountain, the Appalachian Trail intersects with the Howardsville Turnpike – an old toll road that was heavily used to transport goods before the Civil War.  It’s long been reclaimed by the forest, but the wide, flatness of the trail still has the definite feel of a well-traveled road.  We continued along the Appalachian Trail until we spotted a small sign marking the Glass Hollow overlook. We followed the short access trail and spent a good twenty minutes relaxing on the beautiful rocky viewpoint.  The views this time were much clearer than they had been two years ago when we visited.

Glass Hollow
Taking in the view at Glass Hollow. Below: Trail lunch, AT logos carved on deadfall; Pretty trail with late season wildflowers.

Lunch AT Logo Pretty trail

After leaving the overlook, we continued along the Appalachian Trail, passing the junction with the Albright Loop Trail – a popular day hike in this area.  From this junction, you can follow the Albright Trail for two miles back to Humpback Rocks parking.  We continued northbound on the Appalachian Trail, descending Dobie Mountain.  The trail follows a series of gradual, well-graded switchbacks.  There is one nice view of the valley about halfway down the mountain.  Eventually, we started hearing the sounds of running water through the trees. After crossing Mill Creek, we arrived at our stop point for the evening – the Paul C. Wolfe shelter.  This shelter is one of the nicest we’ve seen. The location is beautiful, the picnic table is on the porch and the shelter has sidelights, so it’s bright and cheerful inside.  So many shelters are gloomy and dark.  We will caution you – the privy at Paul C. Wolfe shelter is kind of weird – the door is only a half-door.  When you sit on the toilet, you have a nice view – but people can also see you sitting there.

We were the first campers to arrive for the night, so we got a prime campsite near the banks of Mill Creek.  We had our own established fire pit and our own bear pole – fancy!  We immediately got started setting up camp and taking care of necessary chores.  Mill Creek was running beautifully, so we had a clear, cool water source to filter from.

Camp
Our nice campsite along Mill Creek. Below: Overlook on the descent of Dobie Mountain; Junction with the Albright Trail; Crossing Mill Creek

View from Dobie Albright Intersection Crossing Mill Creek

We decided to take our dinner up to the shelter so we could use the picnic table for meal prep.  Dinner consisted of pepper steak, wine and dark chocolate cheesecake.  As we were finishing up dinner, a southbound thru-hiker named Nightwalker arrived at camp.  He told us he had hiked almost 30 miles that day. He was from the Boston area and freshly out of high school.  We chatted with him a bit and marveled at him eating huge handfuls of candy corn mixed with Skittles.  He had the look of a true trail-weathered hiker – beard, tattered long-johns and feet held together by duct tape.

When the sun was going down, we headed back to our own camp.  Despite the heavy rains the night before, we were able to find enough old wood to have a small campfire for a while.  We heard another southbound hiker arrive sometime after sunset, but we never met him.  With the temperatures dropping with the darkness, we headed to bed around 9:00.  Both of us slept pretty well, but Christine woke up around 3:00 a.m., struggling to close both of the doors in the tent fly.  It was in the upper 30’s and she’s a cold sleeper.

Campfire
Our nice little campfire. Below: Adam filtering water; The Paul C. Wolfe Shelter; The steep climb that starts Day 2.

Filtering Water Shelter Climb Behind the Shelte

Day Two

We were up at first light, but noticed both the thru-hikers were still sleeping.  We didn’t want to disturb them, so we cooked our breakfast of oatmeal, cheese, coffee and hot chocolate near the fire pit at our campsite.  We were packed up and back on the trail within 45 minutes of waking up.

The morning’s hike consisted of a rather steep climb up Elk Mountain.  From the back of the shelter, the trail climbed almost straight up via a series of switchbacks.  We had about 1000 feet of climbing in just about a mile.  A8fter that, the remainder of the hike was more moderate or even gently downhill.

Mayo Cabin
The remnants of an old cabin sit right along the trail. Below: Approaching Rockfish Gap; We can see Rt. 250; Waynesboro’s great network of trail angels.

Done The Gap Trail Angels

The five miles of trail back to Rockfish Gap are largely unremarkable; just a nice walk through the woods.  There are a few small stream crossings, but no views along the way.  The one noteworthy feature would probably be the ruins of an old cabin, about 1.7 miles north of Paul C. Wolfe.  The chimney and hearth are still standing right alongside the trail.  Evidently, there is also a cemetery for the Lowe family and additional cabin ruins somewhere east of the trail, but we didn’t see it.  The trail exits onto Route 250 at Rockfish Gap through an opening in the guardrail.  Thru-hikers can find lists of trail angels at the guardrail opening.  Waynesboro has one of the best organized trail angel networks along the AT.  It’s easy to find a ride or shelter at this point on the trail.

We arrived back to our car around 10:30 in the morning.  By the time we shuttled back to our car parked at Dripping Rock, we were already thinking about lunch.  We realized how close we were to Devil’s Backbone Brewery and decided it was a perfect place to wrap up our backpacking weekend.  We had a huge lunch – beers, a big soft pretzel to share, and sandwiches (French Dip for Christine, BBQ for Adam). After lunch, we decided to take Rt. 151 back to Waynesboro.  This allowed us to also pass Bold Rock Cidery.  It’s definitely worth a stop if you enjoy hard cider.  Since it was a Monday, we were the only people there.  We got to go behind the scenes into the cider pressing room and the fermentation/bottling facility.  That was really neat!

Bold Rock
The tasting room at Bold Rock. Below: Enjoying a post-hike beer at Devil’s Backbone.

Devils Backbone

Trail Notes

  • Distance – 14.5 miles (9.5 miles on Day One, 5 miles on Day Two)
    (Check out the stats from Map My Hike – [Day One] [Day Two])*
  • Elevation Change – 1800 ft. on Day One, 1100 ft. on Day Two
  • Difficulty –  2.  This is an easy backpacking trip with moderate, well-graded climbing.
  • Trail Conditions – 4.5.  Trails are in excellent shape.
  • Views – 4.  Views from Humpback Mountain and Glass Hollow are beautiful!
  • Streams/Waterfalls – 3.  Mill Creek is pretty and a great water source.  There is a small waterfall and swimming hole downstream from the shelter.
  • Wildlife – 2.  We saw a few deer and heard owls at night.
  • Ease to Navigate – 4.   There are several intersections/junctions to pay attention to, but following the white blazes is pretty easy.
  • Solitude – 4.  Because we avoided Humpback Rock, we only saw a small handful of people on a beautiful Sunday.  

Download a Trail Map (PDF)

Directions to trailhead:  Follow the Blue Ridge Parkway to mile 9.6.  Park in the small Dripping Rock parking area.

MapMyHike is not necessarily accurate, as the GPS signal fades in and out – but it still provides some fun and interesting information.

Fridley Gap Loop

This six-mile loop hike in the Fridley Gap area of George Washington National Forest has everything – views, waterfalls, beautiful stream scenery, rugged climbing and great backcountry camping.  It’s a perfect hike to get away from the crowds in Shenandoah National Park.

View the full album of photos from this hike

Adam at the Overlook
If you miss spotting the faint side trail behind one of the many backcountry campsites along this loop, you’ll miss the best view of the hike! Below: Adam crosses the stream; A small waterfall on the stream; This loop has many choices for backcountry camp sites.

Adam Crossing Fridley Run Smal Waterfall Backcountry Site

Adam Says…

Last year, we made an attempt to do this Fridley Gap loop hike, but we had trouble finding one of the trails.  We bushwhacked for a while, but finally gave up.  This time when we returned, we had better directions and the blazes had recently been repainted on much of the loop.

From the top end of the parking lot, we started on the trail.  We saw both purple and blue blazes early on, and started to worry.  (Fortunately, it turned out that this was the only section of the trail that hadn’t been recently re-blazed.)  Early parts of the trail traverse large rocks, and it’s sometimes tough to see exactly which way the trail goes. We saw faded red Xs painted on the surface of some of the rocks which let us know that we were going the right way.  The trail is uphill but not too steep.  In .2 miles, you come to a fire road.  Take a right here and continue on the fire road.  You will pass by some small falls and Mountain Run to the right and a large boulder slide to the left.  The trail actually follows the streambed, and you will need to rock-hop to continue on.  At .45 miles, you will reach another falls area and you will cross over Mountain Run until you see the trail junction cement post.  This is also the point that Mountain Run and Fridley Run join.  It was at this point that we failed last time trying to find the orange-blazed Massanutten South trail.  Looking at the cement post as you approached it, look back around 4:00.  You will see the orange blazes on the Massanutten South trail as you will cross the water again (this time it is Fridley Run) and climb up the hillside.  These weren’t painted on the trees before (they look fresh now), so you should be able to find your way more easily.

Walking in the Streambed
Early in the hike, the trail traverses the streambed. There are plenty of rocks, so it’s fairly easy to hop from spot to spot and avoid getting your feet wet. Below: Adam climbs up the trail shortly after the parking lot; A rockslide early on the hike; Blooming redbuds.

Adam Hiking Fridley Gap Trail Rock Slide Redbuds Blooming

The climb up the Massanutten South trail is quite steep and you may need to stop a few times along the way to catch your breath.  This trail is also narrow and you may have to cross over a few blown-down trees, but the trail wasn’t too hard to navigate with the recent re-blazing.  At 1.85 miles, you will reach a campsite area.  Look closely and you will see a path that leads to a rock outcropping called Grubbs Knob Overlook.  Take this path up to the overlook to get the best views along the hike.   You will see the top of Grubbs Knob to the left from the overlook and views to the west.  After taking in the view, go back to the campsite and continue along the Massanutten South trail.  At 2.05 miles, the trail reaches its peak and then you will start to descend, as the trail takes a steep turn to the left.  You will make your way back down this very narrow path and cross Fridley Run at 2.70 miles.

After crossing Fridley Run, you will begin to ascend on the trail again (turning again into a wider fire road) until you reach a rocky slide that gives you views of Fridley Gap and North Mountain at 3.25 miles.  Continue to ascend as you walk around part of Third Mountain. The fire road stops ascending at 3.5 miles.  The trail then descends and you reach another cement junction post at 3.84 miles.  Take a left on the purple-blazed Fridley Gap trail, which follow another wide fire road.  You will likely see lots of burned trees from a fire in 2010 that covered a big portion of this area.  At 4.5 miles, you will reach another junction. The purple-blazed Fridley Gap trail ascends to the left and continues through the woods.  Take this trail and begin a steep ascent across some switchbacks.  At 4.85 miles, you will reach the top of your climb and there are a few stones that you can rest on for a few minutes if you need to catch your breath.

Christine at the Small Waterfall
This small waterfall feeds one of the most popular swimming holes in the area. Below: More pretty cascades.

Mountain Run

The trail now begins to descend very steeply.  We were so glad we had our trekking poles since the rocks under the leaves were often loose and it helped to lower ourselves down the steep steps.  We were also glad we did this hike this direction rather than the clockwise version of the loop.  At 5.5 miles, we reached another junction with the Massanutten South trail.  Take a left on the orange and purple-blazed fire road (don’t go the way that crosses the bridge) and you will reach the junction that closes the loop at 5.65 miles.  Take a right here, crossing Mountain Run again and make your way back down the fire road.  Be sure to catch the rocky path at 5.8 miles that leads back to the parking lot at 6 miles.

A funny moment happened along the hike.  Christine had programmed her phone to use the MapMyHike app.  In a recent upgrade, it now includes some vocal updates along the way, usually at the mile increments.  One time, we heard the voice say “Don’t stop now.  Walgreen’s is behind you.”  (Walgreen’s is now advertising on MapMyHike.)  While this is meant to be a word of encouragement to keep hiking strong, I was thinking of it as “Walgreen’s is chasing us.”  As I sometimes do, I started thinking of a parody song to the tune of the Road Runner Show TV theme song.  So for your enjoyment, here are my lyrics: “Fridley hiker, Walgreen’s is after you. Fridley hiker, if he catches you, you’re through.  That Walgreen’s is really a crazy store.  They have pharmaceuticals, toiletries, and so much more.  Fridley hiker, never, never, never slow down.  Fridley hiker. Walgreen’s is after you.  Fridley hiker.  If he catches you, you’re through.

There is one geocache along the trail, Fridley’s Cache, a normal-sized cache near the swimming hole.

It is always a good feeling to know that we redeemed ourselves by covering a hike that we had previously failed to navigate.  If you are looking for good views of streams or a swimming hole, along with a challenging hike to get some views, this may be a great hike to try out some time.

Rocks at Grubbs Overlook
The rocks at Grubbs Overlook might trick people into thinking there isn’t an open view. Below: Views from Grubbs Overlook and the campsite that sits adjacent to the overlook.

View from Grubbs Adam at Grubbs
A View Into the Valley
Campsite at the Grubbs Overlook

Christine Says…

Hallelujah for freshly painted blazes!  I was so frustrated last year when our attempt to hike the Fridley Gap Loop ended in failure.  The failure was mostly my fault.  I tried to map out the hike based on a course I saw on someone’s Runkeeper page.  There were no directions, just the route overlaid on a rudimentary map of the area.  I thought we’d be able to figure things out on our own with a NatGeo map of the area.  It turns out that faded blazes and a large group of people camping in the middle of the trail are insurmountable challenges to my ability to navigate.  We’ll let bygones be bygones and get on to the successful version of our Fridley Gap hike.

Let me start by saying, I loved this hike!  It was even better than I expected.  The stream was running beautifully, the views of the valley ‘greening up’ below were lovely and the weather was perfect (sunny, cool and breezy enough to keep the bugs away).  I really enjoyed the little rock-hop as the trail followed the stream bed.  The small waterfall and swimming hole were so pretty.

The climb up the Massanutten South trail to Grubbs Knob was steep enough to be challenging, but not so steep that we had to stop for a breather.  On the way up, we could see all the little signs of spring creeping back into the forest – tiny buds on trees, tightly curled ferns and the occasional early season wildflower poking up through the leaves.  The overlook at Grubbs Knob is rather easy to miss.  It lies at the top of a faint footpath above a campsite.  When you first climb to the top of the footpath, vertical, spine-like plates of rock obstruct any possibility for a view.  But if you climb along the rocks, eventually you come to a few footholds that allow you to scramble to the top of the rocks.  Once you’re there, the valley below spreads out as far as the eye can see – farms dotted with red barns; small country towns; and wide, green fields make up most of the vista.

Downhill Through Dense Laurel
The climb downhill after Grubbs Knob takes you through dense mountain laurel. The harsh light makes for an ugly photo… but you get the idea.  Below: Adam approaches the stream; Crossing Fridley Run.

Approaching Fridley Run Crossing the Stream Again

After leaving the Grubbs Overlook, we ascended a few more moments before taking a sharp downhill turn.  The trail passed through dense mountain laurel, with occasional peeks toward the next ridgeline.  Eventually, we heard the sound of water again.  For a short way, the trail followed Fridley Run.  But soon, we had to cross the stream and head back uphill along a wide fire road.  From the fire road, we caught our second open viewpoint of the hike.  It was a nice view, but nowhere nearly as lovely as the one from Grubbs Overlook.  It’s one thing to slog uphill and come to a magnificent rocky outcropping with a sweeping vista to appreciate.  It’s a little less stirring to stop along a roadside and take in a view of a couple mountain ridges.

Eventually, the fire road met up at a four-way trail junction.  One direction headed toward the Boones Run shelter, another toward Cub Run Road, another continued along the Fridley Gap trail in the direction of Martins Bottom, and of course the fourth headed back in the direction from which we arrived.  Seeing this junction made me think of all the different ways these trails cross and connect.  There are definitely multiple possibilities for overnight backpacking loops in this area.

Second Overlook
The second overlooks comes at a spot along the fire road. Below: Adam checks out the map at this four-way trail junction; Continuing along the fire road before our climb up Third Mountain; Charred trees from the 2010 fire.

Four-way Junction Hiking Along the Fire Road Charred Trees

We followed the fire road to another junction.  Heading straight would have taken us toward Martins Bottom, but to stay on course we turned left and started very steeply uphill along the purple-blazed Fridley Gap trail.   By this point of the hike, I was pretty hungry and my energy was starting to flag.  If I were smarter, I would have eaten a snack before tackling the climb.  But I’m not smart, so I spent most of the climb complaining that I was hungry!

After a short break (and snack) atop the tree-covered peak of Third Mountain, we began a crazy-steep descent.  For three-quarters of a mile, we carefully picked our way down the craggy, leaf covered mountainside.  Through the trees, we could see some really fascinating rock formations on the shoulder of the next mountain over.  I kept trying to appreciate the view, but every time I did, I lost my footing a bit.  This climb down definitely makes the case for paying attention and using your trekking poles.

Steep Uphill Over Third Mountain
The ascent of Third Mountain may not look steep in this photo, but it is!  Below: Descending Third Mountain – you can see rock formations through the trees; A bridge not taken on the Massanutten trail; Adam once again crosses the stream we crossed early in our hike.

Steep Descent of Third Mountain Bridge on Massanutten Trail Final Stream Crossing

At the bottom of Third Mountain, we had just a short walk back to our original junction – the one where everything went wrong when we tried to hike Fridley Gap last year!  I was quite pleased to see that marker again and be 100% certain that we had actually found our way successfully this time around.  From the last junction, we retraced our steps through the streambed, past the rockslide and back to our car.

Trail Notes

  • Distance – 6 miles
    (Check out the stats from MapMyHike)*
  • Elevation Change –  1850 ft
  • Difficulty – 3.5.  The trail goes up and down several times. 
  • Trail Conditions – 3.  The trail had blowdowns, loose conditions, and narrowness, but there were also sections that followed a fireroad.  It gets an overall average rating. 
  • Views3.  The views from the Grubbs Knob overlook are the best on the trail, but if you miss the path from the campsite you’ll miss the best view on the loop.  The views along the path at 3.25 miles are nice, but not remarkable.
  • Waterfalls/streams – 4. The trail goes along (and through) Mountain Run and Fridley Run on several occasions.  The small falls and swimming hole gives it a bonus. 
  • Wildlife – 2. This may be a good hike for bird watching.  We saw a peregrine falcon soaring above at the Grubbs Knob overlook and enjoyed hearing the song of the eastern towhee along the way.
  • Ease to Navigate2.  If we got lost before, we have to give this a low rating.  The path to start the trail from the parking lot could be better blazed and there are several turns to make.
  • Solitude – 4.  You may see some people at the swimming hole or camping alongside the junction with Mountain Run and Fridley Run.  However, we only saw one other group after this point on a nice spring weekend day. 

Directions to trailhead:

From Harrisonburg, VA, head east on 33.  Take a left onto VA-620 North/Indian trail Road and continue for 1.7 miles.  The road will turn into Rt. 717.  Go 3.4 miles and take a right on Minie Ball Ln.  Go 1.1 miles.  At this point, the road will turn back into Rt. 620.  Go 2.7 miles and take a right, continuing on 620 for about half a mile.  Take a right onto Armentrout Path.  Take the first left onto Airey Ln.  Parking is a lot at the end of this gravel lane.  If you pass the lot, you are on private property. The directions to this trailhead are a little confusing, and we recommend putting the coordinates on the map below into your phone/GPS.

* MapMyHike is not necessarily accurate, as the GPS signal fades in and out – but it still provides some fun and interesting information.

Appalachian Trail – Elkwallow to Jenkins Gap

This 12.6 mile hike gives you several breathtaking views to the west and a visit to an AT overnight shelter.  Instead of doing our normal ‘Adam Says‘ and ‘Christine Says‘ segments, Adam is going to cover the first day and Christine will cover the second.

Christine Taking in the View
Christine enjoys the view from one of the Marshalls on the second day of the trip. Below: The Gravel Springs Hut; Views on the first day; Adam relaxes by the campfire.

Views on Day One Beautiful Mountain Views
The Gravel Springs Hut
Relaxing by the Campfire

From the Elkwallow Wayside, follow the short spur trail at the northern parking lot for .1 miles until it reaches the junction with the white-blazed Appalachian Trail.  Turn right, heading north and you will almost immediately cross Skyline Drive.  The trail begins to climb.  At 1.4 miles, the trail crosses Skyline Drive again and continues to climb.  At 2.5 miles, the climbing reaches an end as you reach the junction with the Tuscarora Trail.  At mile 2.9 and mile 3.2 you will cross Skyline Drive a few more points crossing over Hogback Mountain.  At the cross at mile 3.2, you are on a fire road for a very short while (that is used for people bringing in hang gliders) and the AT goes into the woods.  At mile 3.4 you reach some nice views and where the hang gliders take off for a descent over the mountains.  At mile 3.6, you will reach a junction with a side trail that leads to a spring.  The trail begins to descend at this point.  At mile 4.3, the trail begins to slightly ascend until you reach a nice viewpoint at mile 4.4.  The trail descends again and crosses Skyline Drive again at mile 5.0.  At mile 6.0, you reach the side trail which leads .2 miles to the Gravel Springs Hut.  For the start of our second day, from the Gravel Springs Hut, rejoin the AT at 6.4 miles.  At mile 6.6, the trail crosses Skyline Drive again and continues to ascend.  At mile 7.4, you reach a great viewpoint on South Marshall Mountain.  The trail continues to climb up and crosses Skyline Drive at mile 8.2.  The trail then ascends steeply up North Marshall Mountain and leads to another nice view at 9.4.  The trail ascends for another quarter of a mile and then descends steeply down the trail. The trail crosses Skyline Drive again at mile 11.0.  The trail ascends over a short bubble of a hill and then reaches the Jenkins Gap Trail junction at mile 12.5.  Take a right at this junction and reach the Jenkins Gap Trail parking lot at mile 12.6.

Day One – Adam Says…

I noticed the weather forecast was saying that we had a 0% chance of rain on Friday and only a 10% chance of rain on Saturday.  Since we have opted to cancel a few backpacking trips recently due to rain, we felt we couldn’t resist these odds and decided to take the day off work to work on this section of the Appalachian Trail.  We had bought two annual park passes last year, with one expiring at the end of May.  We felt the pressure of getting this hike in since it required two vehicles for the shuttle.

Adam Climbing Up from Elkwallow
Adam climbs uphill from the Elkwallow Wayside. Below: A nice view of the valley below.  For some reason, Christine likes to wear backpacking clothes that don’t match; The Appalachian Trail in Shenandoah often runs within sight (or earshot) of Skyline Drive; The trail crosses and briefly follows fire roads in several spots.

Great View of the Valley Above Skyline Drive Crossing a Fire Road on Day One

It took us a while to get our act together to make sure we were ready for the trip.   We started loading our packs, made sure we had instructions for our dog sitter, and picked up some lunch along the way from Subway.  We drove up to drop a car off at the Jenkins Gap parking lot and then made our way back down to the Elkwallow Wayside.  We ate our lunch outside and saw a few thru-hikers that we wondered if we would see later that evening.  Christine was really cold sitting in the wind outside the wayside. Her legs were covered with goosebumps and she kept pulling her jacket tighter and tighter around her ribs.  She told me that she was really worried about the cooler temperatures, and hoped she would warm up once we started hiking.

We finally started off on our hike around 1:30PM.  We strapped on our 30 lb. packs on to our backs and started climbing up the hill.  While we had been hearing the loud screams of the seventeen-year cicadas near our house, we were pleasantly surprised to hear they were not out in Shenandoah National Park.  We stopped at a few points on the uphill climb to take in the views from Hogback Mountain.  One nice thing about this hike is that the views were mostly on the uphill climbs, so it gives you a reason to take off your heavy pack and enjoy the scenery.  A couple of thru-hikers we had seen at Elkwallow passed us near the hang glider launch.  We’re always amazed at how fast they hike.  I guess hiking every day has its pay-offs!

Hangglider Launch Site
The hang-glider launch site offers a beautiful view! Below: Adam hikes uphill again near Hogback Mountain; Wildflowers blooming along the trail; Our tent site at the hut.

Hiking Past Hogback Wildflowers Along the Trail Our Tent Site at Gravel Spring

We made our way down the mountain at this point.  Backpacking uphill seems to be where you feel the weight the most, but going downhill has its own challenges – you feel the weight differently in your legs and have to be extra careful of your footing.  We made it to the Gravel Springs Hut around 4:30PM and checked out the nearby area.  There weren’t any other hikers there yet, so we were wondering if we were going to have this all to ourselves that night.  We scouted out some of the campsites near the shelter.  There were five campsites.  We started to pitch our tent at the first campsite, but we realized we wouldn’t have enough of room to put up the fly.  And with the night forecast to go into the upper 30’s, we definitely wanted the extra layer of insulation on our tent.  We ending up moving to the largest of the sites, but this site was more sloped.  We pitched our tent so that our feet were on the lowest, downhill part of the slope.  We filtered some water and I began to work on cooking dinner while Christine gathered some kindling for a campfire.  In most places in Shenandoah National Park, you can’t set fires in the backcountry, but this shelter had a large stone fireplace.  We ate a dinner of Backpacker’s Pantry Sweet and Sour Chicken (which was delicious and definitely something we would have again) and Natural High’s Banana Cream Pie (which we didn’t like the taste or consistency).

One of the highlights of staying at an AT shelter, is the people that you get to meet.  Around 5:30, we met our first group of hikers that were planning on staying at the shelter.   There was a gentleman named Don from Indiana, who had suffered a knee injury from hiking the AT previously, but was returning for a hike through Shenandoah to Harper’s Ferry to test his knee on an extended trip.  He was accompanied by two brothers from Florida. The older brother, Adam had decided to introduce backpacking to his younger brother (who wasn’t enjoying it as much).  The original plan was to hike the AT through SNP and return back.  However, they had recently decided they would stop at Front Royal and then find a way back to Waynesboro that didn’t involve hiking.  Next, two women came along and set up tents at two more of the campsites.  They were out on a two night trip and had parked a car nearby so they could slackpack most of the trail.  Shortly afterwards, Standing Bear arrived.  Standing Bear was a thru-hiker that had started his trip from Georgia around the end of February.  He told us a lot that night about how he has been attracting a lot of recent trail magic, from margaritas at a campsite to meals and lodging along the way.  He told everyone that he was very good at  ‘Yogi-ing‘.  We then had another thru-hiker join us named Mountain Goat.  When you looked at Mountain Goat’s legs, he just looked like a tough beast and he was working on trying to do over 25 miles a day to finish the trail quickly.  As dusk approached, the last group of thru-hikers joined us – Rat Bucket and Sketch.  They had purchased a couple of bottles of wine and were making their 6-mile trip from Elkwallow to the hut drinking wine instead of water.  They were of course a little happier than most of the hikers when they arrived at the cabin.  We hung out for a while, sitting around the campfire and talking about what areas the hikers had enjoyed the most (Grayson Highlands was the unanimous vote) along the way and food (which seems to be a constant discussion with thru-hikers).

Christine Works on the Fire
Christine works on getting a fire going. She still hates her lime green Crocs. Below: Adam filters water from the spring at the shelter; Everyone congregates and cooks dinner at the picnic table in front of the shelter; Relaxing by the campfire after dinner.  Everyone is usually in bed by 9:00 or so.

Adam Filtering Water from Gravel Spring Hikers at the Shelter Relaxing by the Fire

Around 9:00, we headed back to our tent.  I continued to read my book that I have been only reading while backpacking – a book of John Muir’s writings and Christine listened to her iPod.  We fell asleep to the sound of nearby owls.  The slope really affected my sleeping as my fitted sheet for my air mattress kept coming off and I would wake up in fetal position at the bottom of the tent and would have to fight back up to the top.

Day Two – Christine Says…

I woke up as soon as the birds started chirping and the first hints of light filtered through the trees.  It was cold, so I pulled my sleeping bag tighter around me and cinched its hood around my head.  I had slept really well despite the fact I had repeatedly slid downhill to the bottom of the tent. I heard others nearby starting to stir as well – tent zippers sliding, the privy door slamming and the whoosh of camp stoves firing up.  I didn’t want to leave the warmth of the tent, but I did.  There’s always so much that needs done to break down camp before eating breakfast.

Breakfast Time
The table got really crowded at breakfast time, so we cooked on the little stone bench on the side of the shelter. Below: Adam checks out the trail sign showing hike options in the vicinity of Gravel Springs; Adam tucks his pants into his socks to avoid ticks; Christine and Adam on South Marshall Mountain.

Leaving Gravel Springs Tucking Socks Adam and Christine on South Marshall

Adam and I are usually pretty efficient and can have our whole campsite broken down and backpacks repacked within about half an hour.  The first step is always to shove our sleeping bags back into their stuff sacks.  Then we repack our sheets, crunch down our pillows and let the air out of the sleeping pads. Once the bedding is stowed away, we pack up the tent and any clothing that was left strewn about the site.  Yes… we really carry all this stuff!  As you might have guess, we are not lightweight backpackers.  We carry a lot of creature comforts and luxury items (pillows, sheets, chairs, books, card games, etc).   When we go on longer trips, we’re really going to have to reevaluate our gear and make some sacrifices. 🙂

When we walked down to breakfast, our backpacks were pretty much fully loaded and ready to go for the day.  The only things left to pack were our food, dishes, stove and water filter – and we always keep those items near the top of our packs.  When we got down to the hut, almost everyone was already up and working on breakfast.  We got our two bags (trash and food/other stuff that has a scent) down from the bear hang and joined the rest of the group at the picnic table. Breakfast was coffee and instant apple cinnamon oatmeal.  You see a lot of oatmeal and granola at backpacker breakfasts.  Clif bars and bagels are pretty popular too.  Although, this particular morning, one pair of hikers even had a container of fresh berries!

Adam and I were the first to leave the hut.  We climbed up the short, but steep, access trail back to the AT and headed north.  The early part of the morning’s hike took us past several gorgeous views from the Marshalls. We spent time at each of them, taking photos and enjoying the cool, crystal-clear morning.  While we were at the first view, Rat Bucket caught up with us.  We took a photo of him and he returned the favor for us before heading quickly down the trail.  Once again, I marveled at the speed and distance covered by thru-hikers.  Most of these folks are covering 20-28 miles a day through Shenandoah National Park.

Christine on North Marshall
Christine on North Marshall Mountain. Below: Views from both Marshalls were excellent;  You can see Skyline Drive off in the distance; Christine scrambling around on the cliffside; Another excellent view; Adam takes in the scenery from a high perch; Checking out mileage on the trail marker.

Another Great View Distant Skyline Drive Scrambling on the Cliffs
Great Views on Day 2 Adam Checks Out the View Consulting a Trail Marker

At the next view, Mountain Goat caught up and passed us.  He only briefly stopped to check out the vista.  I guess when you hike big miles, you don’t have time to meander and pause at every pretty spot along the trail. While we were stopped at this spot, we had a quick snack of PowerBar Energy Blasts.  They’re basically caffeinated gummy candy, but the website makes them sound like they magically give you Lance Armstrong-like endurance and help your muscles recover.  Maybe they don’t do all that, but they sure do taste good!  And they have sugar and caffeine – both of which seem to help me hike stronger.

At the third viewpoint, Standing Bear passed us, but we ended up leapfrogging him a little further down the trail and didn’t see him again.  Nor did we see any of the other folks from the hut.  All but two people staying at Gravel Springs had been northbound, so I suppose they just stayed at camp a bit later.

The trail was so beautiful and lush and green!  Even when there wasn’t a view to enjoy, the hike itself was so lovely.  The climbs were never too hard and the descents were never too steep.  We crossed Skyline Drive several times.  We saw lots of dayhikers… two of them were even dressed in their ‘Sunday Best’ clothing.  They were walking south along the trail, not in the vicinity of any views or special attractions.  Neither of them looked in the least bit happy and both of them looked hot and uncomfortable.  I see people like that and wonder if this hike was a spontaneous decision.  I wonder if they know where they’re going, or if they just set out on a trail thinking ‘Hmmm… if I walk on a trail, eventually I’ll see something!’

Dayhikers
We saw a lot of dayhikers as we approached Jenkins Gap. Below: An old foundation along the trail; The only bear we saw on this trip came in the form of Adam in a mask at the Skyland gift shop.

Old Foundation The Only Bear We Saw

We made it back to our car at Jenkins Gap around 10:30 or so.  We had plans to meet my parents at Skyland for a Mother’s Day lunch at noon, so I brushed my hair and changed into my less-dirty clothes.  We had plenty of time to kill, so we stopped by the Elkwallow wayside for more snacks and drinks.  When we got to Skyland, it wasn’t even 11:30, so we relaxed in the lobby until they arrived.  We had a nice lunch together and then headed home.  It was a fun trip, and I can’t believe we only have several more miles of Appalachian Trail to hike in Shenandoah!

Trail Notes

  • Distance 12.6 miles
  • Elevation Change – 1900 feet.
  • Difficulty – 3.  Despite the two big climbs of elevation, we didn’t feel that it was overly difficult.
  • Trail Conditions – 4.  The trail was in great condition and was well-maintained.  There were only a few rocky areas that you had to worry about footing.
  • Views – 4.5.  We were impressed with the views along this section.  The best views were from South Marshall Mountain, but there were probably 4-5 areas to take in the expansive views.
  • Streams/Waterfalls – 0.  There were no streams or rivers nearby, but there was a reliable water source at Gravel Springs Hut.
  • Wildlife – 3.  Someone had written in the hut trail journal they had seen a few bears on the way down to the hut that day.  We did see a deer and the woods were filled with pileated woodpeckers, owls, and other birds.
  • Ease to Navigate – 4.  There are some side trails, but just consult the cement posts to keep following the Appalachian Trail.
  • Solitude – 3.  We ran into most of the people around the Jenkins Gap to North Marshall mountain.  I would imagine this would be fairly popular since it is closer to the northern end of Shenandoah National Park.

Directions to trailhead:  Park one vehicle at the Jenkins Gap lot at mile 12 on Skyline Drive.  Then travel down south to mile 24 at Elkwallow Gap Wayside.  The spur trail to the Appalachian Trail starts from the northern parking lot.

Part 3: Backpacking 101 with the PATC

Christine Says…

I can’t think of any other class where it would be acceptable for an instructor to say “Now imagine me with my pants pulled down.”  But Backpacking 101 is quite different from other classes.

Prince William Forest Park
Prince William Forest Park was the location for Backpacking 101’s weekend-long field class.

The third day of instruction also took place at Prince William Forest Park.  Adam and I showed up for class freshly showered, warm and well-rested.  We were among the few students who opted out of the group camping experience.  We would have liked to camp, but my parents live too close to the park to not pay them a visit for the weekend.  It was probably good that we had a place to go escape the pollen.  It was the worst pollen I’d ever seen – you could see it raining down from the sky and everyone’s shoes and pant-legs were coated with a thick, yellow dust.

The morning started off with an explanation of the different brands and styles of tents used for backpacking.  We walked around the group campsite, looking at about ten different models owned by class participants.  I really liked a particular REI tent and also one from Sierra Designs.  We’ll likely be purchasing a three-person tent so we have room to keep little gear inside.  I was amazed by the miniscule size of most two-person tents.  They left me wondering… what two people?… Lilliputians, leprechauns, pygmies?

Camp was set up with a variety of tents.

Tents We liked this tent

After tents, we had a thorough discussion of water filtration/purification methods.  I found this to be the most fascinating part of the day.  Access to clean, safe water is probably one of the things I find most worrisome about backpacking.  We saw demonstrations of a Katadyn Filter system, iodine tablets, AquaMira and talked about boiling.  A couple of the instructors seemed to favor SteriPen systems, but we didn’t see a demo of one in action.   I think the pump filter system looked like the fastest and easiest of the methods, but I think I might use some AquaMira or Micropur as a second layer of protection for my personal drinking water.  I figure that an extra layer of prevention is a good idea, especially when the consequence could be explosive diarrhea.

After water, we moved on to campsite selection.   This included discussion of where to pitch tents, set up the “kitchen”, where to place your bear hang and how to designate a bathroom area.  This session provided the perfect segue to the other part of backpacking that I sort of dread… catholes.  In short, I simply do not want to poop in the woods.  I am a princess about these things … but I suppose I have to get over it because poop happens.  I think most of you will have figured out that the opening quote for this blog posted was pulled directly from the cathole session.  I won’t go into all the gory details, but I will share one prophetic term and leave the rest to your imagination – “Poop Soup”.  Beyond that, I am not going there.  As one person in the class put it “I don’t think I’ll be able to look any of you in the eyes again after this trip.”  I guess nobody really likes pooping in the woods.

The last sessions of the day covered personal hygiene, flora and fauna (poison ivy, ticks, bears and snakes) and Leave No Trace principles. At the conclusion of the class session, the class broke into outing groups.  We had the option of easier or moderate – with easier groups covering about four miles a day and the moderate groups covering six miles a day. We chose the easier group because at this point, I’m still not sure if my sprained ankle will be healed in time.

The class split just about in half between the moderate and easier groups.  Adam is one of only three males in the easier group.  I’m dragging him down to my level.  🙂

Honestly, we’re both THRILLED to be in the easier group, because we get to go to Dolly Sods for our outing.  Our group leaders (Dave, Jen and Dave) chose Dolly Sods because it’s an easier place to accommodate a large backpacking group than Shenandoah National Park.  There are eleven people in our group.  We’ll hike and have meals together, but split into two groups for camping. We love the people in our group.  Everyone seems to be nice and so many group members have a great sense of humor.

Now everyone needs to stay tuned for the actual post from the outing (coming sometime in May.)  I will say that we’re really excited about the trip.  The PATC Backpacking 101 Workshop gave us exactly the information we were looking for.  I feel like we’re kicking off our backpacking experience the right way, and that’s given me a lot of confidence and hope that I actually can do this.

Part 2: Backpacking 101 with the PATC

Adam Says…

I must admit that had some anxiety about the Backpacking 101 course through Potomac Appalachian Trail Club.  I was a little worried about the status of Christine’s ankle sprain, the dynamics of the group, and wondering if people would be a little too “hard-core” about backpacking in general.

TREC Center
Most of the classroom sessions took place in the Turkey Run Education Center (T.R.E.C.)

I think all the worry was quickly alleviated once we started the weekend course.  Christine and I are both so happy that we signed up.

The first session of the day started with Trip Planning.  We brainstormed ideas on what you need to think about to plan a good backpacking trip.  I felt our group came up with great ideas and covered all of the necessities.  One group seemed more like the “party group” because they were concerned with who was bringing the frisbee, harmonica, and alcohol.  I don’t think most serious backpackers would want to lug the extra weight or dehydrate themselves with a bottle of whiskey.

Backpackers
These backpackers did a good job planning.

We then had a “Bio-Break”.  I remember when I saw this on the agenda initially, I was wondering what this could be.  It turns out to mean just a bathroom break.  Christine and I have started using this and I think we’ll teach this phrase to our dogs.   They also know “Go outside” and “Drain your lizard”, so what’s one new phrase for them to learn?

The next session taught us about clothing.   We learned about layering and the purpose for each layer of clothing.  This should help minimize what needs to be packed and ensures that our clothing is keeping our bodies at the right temperature and keeping us dry.  All of the students in class learned the mantra of “No Cotton”, since it gets wet easily and takes a long time to dry.

Next, we learned some basic skills in map reading, which I found to be quite easy.  I think most of the class was fairly confident with map reading, but it was great to work on map skills as small groups.  We also learned some basics on reading a compass.  I typically use my hand-held GPS, but it was good to have a refresher.   Our instructor suggested that we take a compass for when we leave the trail/camp for the bathroom.  We found a spot to approach and then followed the compass to get us there and back.

We took a short lunch break and then learned about the Ten Essentials that everyone needed to have available in their packs.

The instructors demonstrated different types of backpacks and talked about the pros and cons of internal frame packs, external frame packs, and frameless packs.  We split into groups based on height and learned about the different packs the instructors had.  We tried on various packs, discussed how to adjust for your individual needs, and then looked at how each of them were packed.  I personally liked the Gregory brand packs best, because I feel they worked a little better with my back and they gave some breathing room between my back which tends to sweat.   I ordered a Gregory Z65 and I’m excited to try it out.

The next session involved discussing sleeping bags and pads.  It seems that most backpackers go with a mummy-style bag.  They tend to be a little lighter, but they are not for the claustrophobic.  I know Christine will definitely want something different since she likes to not feel confined when she is sleeping.  I can usually fall asleep easily anywhere, so I’m not as concerned.   The instructor also showed us some different styles of sleeping pads (foam and self-inflating).   Again, I’m not as concerned about the type I get, but Christine will probably want a self-inflating pad, like what is offered from Therm-a-Rest.

Stove Demon
We saw a demo of a variety of stoves. Below: We liked the JetBoil.

We loved the JetBoil

Many of the people in our class decided to stay in Prince William Forest Park for the night.  We were staying with family nearby, so we didn’t brave the cold with the others.  Those staying overnight were given time to pitch their tents before dark.  This was a great opportunity for us to look around initially at some of the different tent options there are.  We did an instructor-led tour of the different tent options the next morning.

The end of the first full day involved a demonstration of stoves, cooking, and clean up.  We looked at a variety of stoves and talked about the benefits of each.  Our favorite that we will likely purchase is an integrated stove system made by JetBoil.  We felt that based on what we will likely do in the future, this will serve our needs well.  A co-worker is loaning me one this weekend to try out and learn more about.   The instructors then did a skit, acting out a “good backpacking trip” vs. a “bad backpacking trip”.  It was quite funny and showed the importance of planning ahead, delegating duties, and what to pack.  We then started on preparing dinner.   We split into four groups, with each group preparing a different meal.  This gave us all some experience with using a camp stove and understanding how things could be prepared in advance to save weight and time.  We had plenty to eat between all of the groups and we were able to sample a few of the other meals.  The one we cooked was rice-based, but flavored with cheese and dehydrated hamburger.  I think it was my favorite.

We all enjoyed a great camp dinner
Cheesy Rice and Beef.

After everyone had enough to eat, we worked on cleaning the pots.  Cleanup is a necessity and does have to be done after each cooked meal.  We learned different techniques of Leave No Trace ethics to ensure that cleanup was done in a way that leaves little to no impact on the environment.

I really felt liked I learned a ton of information in this first day of class and we were looking forward to another full day.  I felt the PATC did a wonderful job of explaining all the different types of gear and how to prepare for a backpacking trip.  After the next day of sessions, I feel well-prepared and excited to go on our first trip.