Falls of Hills Creek (WV)

The Falls of Hills Creek is a popular trail that (should) give you views of three plunging waterfalls in a short distance.  The trail is in need of some serious maintenance, as the lower – and most impressive – falls are completely inaccessible due to a collapsed boardwalk (as of fall 2010).

Bridge Over Hills Creek
While the waterfalls were practically non-existent due to very little rain for the past few months, the trail was still pretty. Below: We climbed many stairs and saw very little waterfall action; the Middle Falls were practically dry – the Upper Falls were completely dry and we didn’t even bother with photos; The path was scattered with fall leaves.

Many Stairs Middle Falls Path

Adam Says…

In planning our trip down to West Virginia, we had seen great pictures of the Falls of Hills Creek and thought it would be worth checking out.

The trail starts from the parking lot on a paved path and begins to descend.  The trail winds around while it descends.  At .3 miles, you come to your first overlook of the 25 foot Upper Falls.  You can’t really get great looks of the falls from the overlook, but we could tell there was not a lot of water flowing.  After this overlook, the trail continues on crushed gravel.  At .5 miles, you will come to an overlook that gives you nice views of the 45 foot Middle Falls from above.

Metal Steps
Many metal stairs lead to the lower viewing point for the middle falls. Below: Benches are available along the way if you need a rest; We saw a newt on the damp pathway; BUMMER!  The trail is closed off before we even get a view of the waterfall.

Bench Newt Bummer!

After you leave the platform, you will descend a metal stairwell that goes down several flights.  At the bottom of the stairwell, the trail continues on a boardwalk.  To the right is a short boardwalk path that gives you nice views of the Middle Falls from the bottom of the falls.  Go back up the boardwalk and take the path straight ahead that leads to the view to the Lower Falls.  Unfortunately, there has been some damage from last year’s winter storm on this last section of the trail, so the boardwalk was closed.  Even though the Lower Falls are supposed to be the most impressive with a 63 feet drop, we weren’t able to get to a place to see them.  Return the way that you came to complete the 1.8 mile out-and-back.  The way back includes a lot of stair climbing, so you will get a workout.

There are two geocaches located here:

The dry summer for the last month really hurt our ability to see these falls at the most impressive.  I’m guessing that the work on the Lower Falls will not be completed until the spring/summer of 2011 (at the earliest), so I would wait until this is done to visit this series.  The Lower Falls are considered the second highest cataract falls in West Virginia.

Christine Says…

I’m a little ambivalent about including this hike on our blog because I don’t feel like we saw what the hike really has to offer. It’s hard to be enthusiastic and share information about a waterfall hike when the waterfalls are mostly dry, and one is not even accessible.  But, the Falls of Hills Creek seem to be perennially popular, even in its diminished state.

We did this hike the afternoon we arrived in Pocohontas County.  It was a cloudy, dreary, drizzly day.  I figured if there were any water left in the falls, this weather would be ideal for taking long exposure shots of the water.  Even though the photos didn’t work out, the trail was still quite pretty.  I enjoyed the cool, damp day and walking though the lush green of the woods.  We got some good exercise in climbing the many stairs along the trail.

Signs of Fall
Signs of fall were all along the trail. Below:  Tiny wildflowers along the trail; The foreboding sign that made us carry 40 pounds of camera gear.

Wildflowers Threatening Sign

The one thing I found mildly disconcerting were the “thief alert” signs we found along the trail.  When we walked down, I had all my camera gear and laptop in the car (unusual for me!)  After I saw the sign, I took the route of paranoia and decided to carry everything with us.  Adam carried the big backpack with the laptop and I carried the cameras and the tripod.  It was kind of a shame, because we hardly used any of the gear we carried.

I would love to see the Falls of Hills Creek again sometime when the water is flowing and the lower falls are open.  Until then, I’ll reserve final judgment on this hike.

Trail Notes

  • Distance – 1.8 miles out and back
  • Elevation Change – 600 feet
  • Difficulty 2.  Just due to the stair-master quality of the hike, it’s not for everyone.
  • Trail Conditions 4.5. The trail is paved, then crushed gravel, and some boardwalk areas.
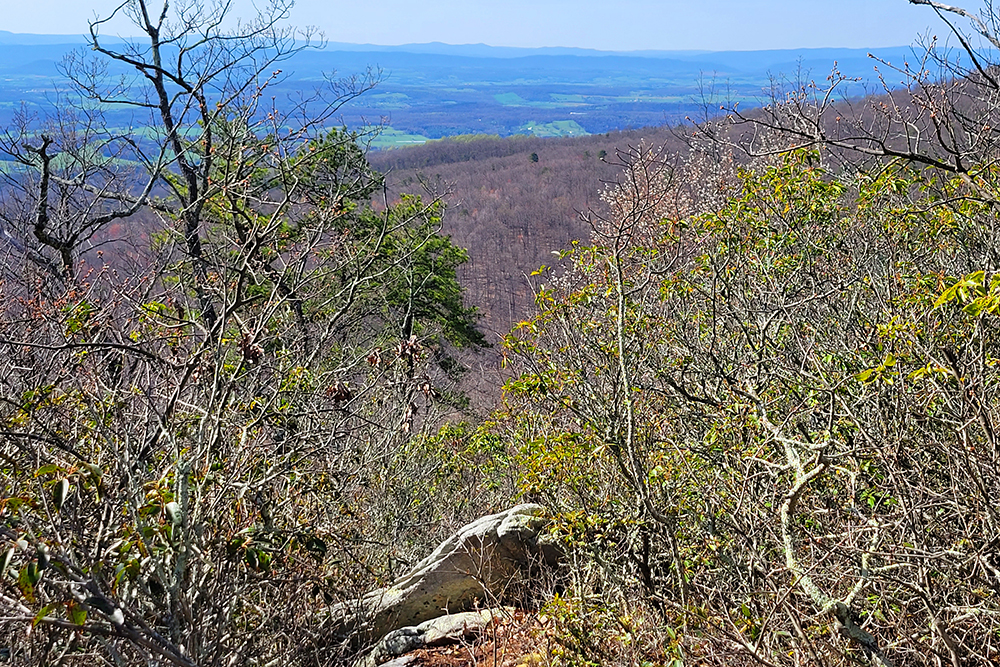
  • Views –0. Not really any views other than waterfalls.
  • Waterfalls/streams 3.5 There wasn’t any water in the falls, but normally this would be great for waterfalls.
  • Wildlife 0.  The trail is too populous to really attract wildlife.
  • Ease to Navigate 5.  Just straight down a paved path and back.
  • Solitude 1.  You should see people along this trail.

Directions to trailhead: From Mill Point, WV head west of WV 39/55.  After about 12 miles, you will find a sign for the Falls of Hills Creek scenic area on your left that leads to a parking lot.  The trail takes off from the left side of the parking lot.

Massanutten Story Book Trail

The view from the Massanutten Story Book Trail involves a short quarter-mile walk down a paved pathway.

Story Book View
The view from the Story Book trail overlooks 211 and the Page Valley. Below: The trailhead is marked by a large sign; Along the path, there is a series of interpretive signs that describe the geology and flora of the area.

Story Book Trailhead Interpretive Sign

Christine Says…

The Massanutten Story Book Trail is one of those ridiculously short path-walks that we personally wouldn’t consider a hike.  Nonetheless, it goes to one of the nicer viewpoints in the Shenandoah Valley. Sure… you can see the Battle Creek Landfill and a distant Walmart, but you can also see the mountains that make up Shenandoah National Park and pretty much all of the Page Valley.  It’s a beautiful spot.

To get to the view, just stroll down the level pathway for a quarter mile.  At the end of the paved trail, you’ll come to an observation platform.  It’s railed in and has several benches to rest upon.  But, for an even better view, don’t miss following a rocky footpath to the right of the platform.  It leads to a rock shelf overlooking the valley.  The rocks that make up the ledge have the most fascinating texture.

Curvy Walkway
One of the beautiful curved, wooden walkways.  Below:  At the end of the paved pathway, there is a platform from which to take in the view; Christine’s Mom and Dad take in the view (You can see our shadows, too!).

Observation Platform Taking in the View

It looks like a lot of work/money has gone into cleaning up the Story Book Trail recently.  The interpretive signs that had faded or been covered with graffiti have been replaced (although new graffiti is already showing up – seriously people, stop crapping up the outdoors… it’s disrespectful and stupid).  The path looked like it had been repaved not too long ago.  But, best of all, someone cleaned all the paint off the rock ledges that lie off the trail.

Adam Says…

Christine’s parents came down on a Sunday to meet up with us.  We decided to take them on a couple of short hikes with great views.  The first we did was Woodstock Tower and we finished it off with the Massanutten Story Book Trail.  This trail is one of the easiest you will find, since the path is paved most of the way, with some beautiful wooden walkways in a few parts.  Since it is also wheelchair accessible, just about anyone should be able to enjoy the views you will find here.

Adam on the Ledge
Adam enjoys the view from the ledge.  Below:  The path is paved; Some sections are traversed by beautiful curved bridges.

Paved Pathway Curved Pathways

The trail also works as an interpretive trail, with many plaques to read along the way that give a great description of the geologic forces that have created the mountains in this area.  There are two geocaches along this trail and one of these requires answers from the signs along the way.

Christine and I often say that some of the areas of George Washington National Forest lead to better views than you get through hikes in Shenandoah National Park and this trail is great evidence of this statement.  If you haven’t done this one before and enjoy great views with little effort, this is a trail for you.

Trail Notes

  • Distance – .5 miles out and back
  • Elevation Change – negligible
  • Difficulty 1.  This trail is for everyone – paved for strollers and handicap accessible.
  • Trail Conditions 5. The official trail is paved.  You can leave the trail and scramble on the rocks for another view.
  • Views –5. Amazing views!
  • Waterfalls/streams 0. No streams/waterfalls.
  • Wildlife 0.  The trail is too populous to really attract wildlife.
  • Ease to Navigate 5.  Just straight down a paved path and back.
  • Solitude 0.  You’ll see many people along this trail.

Directions to trailhead:
Reach the trailhead by turning on to Crisman Hollow Road (FD 274) off of 211 near Luray. Continue on this road for about a mile and park in a small lot off to the right.  A wooden footbridge and trail marker will signify the start of the trail.

Woodstock Tower

The Woodstock Tower hike is a fairly easy hike in the Lee Ranger District of George Washington National Forest that leads to a fire tower with 360-degree views of the surrounding area.

View from Woodstock Tower
The view from the Woodstock Tower is panoramic - offering views of the valley, river and distant mountains. Below: A wider view includes the mountains; It really wasn't the best time of day to photograph the actual tower -- I had to shoot right into the sun; The inside of the tower is covered with graffiti.

A wider view Tower Sunburst Inside the Tower

Adam Says…

After parking in the Little Fort Campground area, we headed up for our hike to Woodstock Tower.  The white-blazed Wagon Road/Nature Trail starts off as a rough fire road and after .1 mile, intersects with Peters Mill Run.  Peters Mill Run is an ATV/OHV trail, so look both ways before crossing this popular trail for ATVs and motorcycles.  Continue straight across Peters Mill Run to connect to the trail again.  The trail does go steadily up with a few switchbacks, but the switchbacks really make the trail easier of a climb.  The first switchback comes in around .25 miles and the second switchback comes around .5 miles.  After the second switchback, the trail does become steeper, but it ends after just a couple tenths of a mile.  At .7 miles, take a left on the pink-blazed Tower Trail.  It is only about .2 miles to reach the tower on a fairly level trail.

The Woodstock Tower
The Woodstock Tower. Below: A little bit of fall color was already showing; We took a break for water where the short trail meets up with the longer trail; Looking up through the Woodstock Tower.

A little fall foliage Water Stop Looking up through the tower

When we reached the tower, we climbed up the metal stairs to reach the top.  I’m not a big fan of heights, but I’m especially nervous when it involves man-made things.  The tower did seem quite sturdy, but it makes some noises when railings move slightly, so I was more eager to get down from the tower than the rest of Christine’s family.  The views are nice, but the area is quite crowded.  Unless you went up early in the morning, I fear that it would be hard to have a moment’s peace at the top.  There aren’t any signs posted for maximum number of people on the tower and you may have to hug the side of a platform as people pass in opposite directions.

There are a few geocaches in the nearby area:

Christine Says…

This was the second time I’ve been to the Woodstock Tower.  Last time I was there was several years ago in mid-October.  I remember the fall foliage being amazing from atop the tower. This time, the foliage had just the slightest hint of change, but the day was crystal clear and sunny – not a bit of haze – so the view was extra nice.

There are shorter ways to get to the view.  In fact, you can practically drive right up to it.  However, we chose to hike up from the Little Fort campground instead.   The slightly longer route gave my mom a chance to try out her new hiking boots.

Off Highway Vehicle
The area has lots of ATV and dirt bike trails. Below: All the roads and trails in this area are well-marked.

Wagon Road Campground Sign

Because the day was so beautiful, we had to share the tower with crowds of people.  At times, there was actually a line of people waiting to get to the top.  We even saw a person trying to coax their pit bull up the open, metal stairs.  That didn’t go so well, and they had to turn back about halfway to the top.  The inside of the tower is covered with graffiti and the area is littered with broken beer bottles and empty soda cans – a very unfortunate side effect of its popularity.

Despite the tower’s less-than-pristine nature, it still offers one of the best views of the mountains in the area.  It’s well worth the short walk.

Trail Notes

  • Distance – 2 miles
  • Elevation Change – about 500 feet
  • Difficulty –2. While you would think that going up 500 feet in one mile would be steep, the trail up seems to take off a lot of the steep terrain.
  • Trail Conditions – 3. The trail had some loose ground in a few areas (especially in the first .1 mile), but overall was well-maintained.
  • Views – 4.5. It does have 360-degree views, but we always enjoy views from natural surroundings like rock outcrops over man-made towers.
  • Waterfalls/streams 0. Non-existent.
  • Wildlife – 2. Too many people to see anything other than people.  May be good for hawk spotting or some other woodland birds.
  • Ease to Navigate – 4.  Not too many turns on this one and trails are well-labeled.
  • Solitude – 1. You will see lots of people on this trail during a nice day.

Directions to trailhead:
We approached this from I-81.  There are other ways to the east to approach this, but here is the most common way for anyone traveling via interstate.  Take exit 283 on I-81, heading east on 42.  Stay on 42 until it intersects with US 11.  Take a left on US 11, heading north through the town of Woodstock.  As soon as you pass the Woodstock Shopping Center, take a right on S.R. 665/Mill Road.  Take this until it ends at S.R. 758/Woodstock Tower Road.  Take a left here and continue to follow S.R. 758 up and down the mountain (this area can be scary when passing other vehicles – there are no guardrails in most spots).  Be sure to stay on S.R. 758 until you reach Little Fort Campground.  Turn into the campground area.  There are campsites and parking spots along the road here.  The trailhead is located on the right-hand side of the road near a campsite right before you reach the outdoor restrooms.

West and East Rattlesnake (NH)

Special: New Hampshire Edition

Introductory Guide to Visiting the White Mountains

This fun, four-mile loop hike offers gorgeous scenery and amazing views with not much work.  The trail takes you across the summits of two small mountains – known as East and West Rattlesnake – overlooking the Squam Lakes.

Adam and the Rain Storm
Adam watches a rain storm pass over the Squam Lakes.  Below: The trail has many steps built into it.

Old Bridle Path

Adam Says…

Since we had already done a bunch of hikes to waterfalls over the last few days, we decided it was time to do a hike with some views.  We waited around in the morning due to rain and an overcast sky, but we caught a break shortly after lunch and decided to head out to the Rattlesnakes.  As Mark Twain said, “If you don’t like the weather in New England, wait a minute.”

We started the trail up the Old Bridle Path, which takes off from the marked parking lot for West Rattlesnake Mountain.  This area includes a lot of crossing trails that are all yellow-blazed, so you will need to pay attention to signs to be sure you are going the way you want.  The hike was a continual uphill with lots of steps built into the trail.  We found this part of the trail to be very well maintained and you will see lots of people on this section of your trip.  At .75 miles, you will come to a fork.  The right goes out to a nice overlook, but the left is where you will continue the trail.  At .9 miles, you will reach the summit of West Rattlesnake Mountain.  Look on the ground to find  a USGS marker to mark the elevation.

From the summit, we then took the Ridge Trail which leads to East Rattlesnake Mountain (one option is to take the Pasture Trail to the East Rattlesnake Trail, but that has a lot of elevation loss and gain.)  The Ridge Trail descends about 300 feet of elevation into a thick quiet wood.  Here is where the mosquitoes were unleashed on us since the breeze was non-existent to blow them away.  At 1.3 miles, you will reach a junction with the Col Trail, but continue on the Ridge Trail until 1.7 miles when you reach the East Rattlesnake Mountain summit.

First Viewpoint
The first viewpoint from high up comes along a small spur trail. Below: The Armstrong Natural Area sign provides some historical information about the area; Several trails intersect in this area; Watching the rain storm pass over the Squam Lakes.

Armstrong Natural Area SLA Sign West Rattlesnake

We headed back from the summit and at 2.1 miles, we took a right on the Col Trail.  The Col Trail descends a few hundred feet and was very overgrown and poorly maintained in several areas.  At 2.8 miles, it leads to a fire road.  Take a right on the fire road.  At 3.0 miles, you will reach Route 113.  Taking a left on the road, you will head back to your car to make this a four-mile loop.

Looking back, we might have decided to do this as an out-and-back hike and not ventured onto the Col Trail.  Walking on roads is never as fun as trails and it seems that the road goes on forever.

Both summits give you expansive views of the Squam Lakes and you can likely see several mountains surrounding you.  I was amazed at how many people were on West Rattlesnake Mountain and we only saw one other person at East Rattlesnake Mountain.  So, you can easily escape the crowds if you want with just a little longer hike.

There are a number of geocaches in the area for anyone interested:

Christine Says…

On this trip to New Hampshire, we spent far more time hiking to waterfalls and ponds than we did hiking to mountaintops.  We decided to save our summit hikes for days that offered clear views of the valleys below.  Unfortunately, we had a lot of hot, humid days that put the high peaks of the White Mountains into the clouds.  I know some people just like the workout and the act of hiking, regardless of whether or not there is a view.  I do too, but only to an extent. I can’t help but feel a little let down when a great view is covered in clouds and fog.

The morning we planned to hike the Rattlesnakes had been forecast to be sunny and pleasant.  However, in keeping with the theme for New Hampshire’s changeable weather, we woke to soggy clouds and pop-up showers.  The radar map indicated clearing as the day went on, so we sat and waited at the house.  When the sun finally broke through the clouds, we hopped in the car and raced off the trailhead.

The hike was easy and pleasant to the top of West Rattlesnake, and the views couldn’t have been nicer.  They reminded me a lot of the views we had from the Mt. Morgan – Mt. Percival hike.  (You can actually see the Rattlesnakes from above on that hike.) Both hikes overlook the Squam Lakes, but Mt. Morgan – Mt. Percival goes to higher mountains and offers a loftier view. If I were pressed to choose, I would say the Rattlesnakes view is nicer, but only because it’s a little closer to the lake.  The Squam Lakes Association does a fantastic job managing and maintaining the trails in this area.

East Rattlesnake
The view from East Rattlesnake is pretty and offers quite a bit more solitude. Below: The trails are nicely marked and expertly maintained by the Squam Lakes Association; Adam walks along the fireroad that joins the Col Trail to Route 113.

Col Trail Fire Road

Atop West Rattlesnake, we were able to sit on a sunny rock ledge and watch a leftover rain squall pass at a distance across Squam Lake.  The clouds were so dramatic and it was interesting to see the gray sheet of rain pass over the water.

We decided to continue along the trail and visit East Rattlesnake as well.  Although it’s less popular and has a smaller rock ledge, the other Rattlesnake offers views just as nice as its “sister”.  We had a couple options for hiking over to East Rattlesnake.  At first, we considered hiking the Pasture Trail so we could check out Five Finger Point.  A friend of mine from Flickr mentioned one of his favorite swimming spots was on the point, so I thought it might be fun to go check out the spot.  But, in the end, we decided to take the shorter route across the Ridge Trail.  The bugs ate me alive!  This trail was the one place in New Hampshire that my liberal application of DEET didn’t seem to deter the mosquitoes.  Two weeks after the hike, I still have a few marks leftover from bites I got on that hike.

On the return from East Rattlesnake, we wanted to get out of the woods and away from the bugs as quickly as possible.  Instead of doing the hike as an out-and-back, we followed the Col Trail back to the road and finished a loop with a mile of walking along Route 113.  The road walking wasn’t particularly fun or scenic, but at least I was away from most of the bugs.

Trail Notes

  • Distance – 4 mile, loop
  • Elevation Change – About 800 ft.
  • Difficulty –2.5. The walk up to West Rattlesnake is very easy.  The hike up East Rattlesnake is a little tougher.
  • Trail Conditions –3.5. The trail is very nicely maintained.
  • Views – 5. Stunning views of the Squam Lakes.
  • Waterfalls/streams 0. None to mention.
  • Wildlife –0. Unless you count mosquitoes and biting flies.
  • Ease to Navigate – 4. Although several trails cross in the area, everything is clearly marked.
  • Solitude – 1. On West Rattlesnake, you won’t get any solitude.  East Rattlesnake is quieter.  We saw only one other person there, while we saw close to 20 people atop West Rattlesnake.

Directions to trailhead:

From I-93, take Rt. 3 east to Holderness. From Holderness, follow Rt. 113 (a slow, curvy road) northeast for about 5.5 miles. Just past Pinehurst Road, park in the small lot on the right side of the road. The Old Bridle Path starts at the far end of the parking lot.

Arethusa Falls and Bemis Brook (NH)

Special: New Hampshire Edition

Introductory Guide to Visiting the White Mountains

Note – 10/11/10: In their October issue, Backpacker Magazine inaccurately listed Arethusa Falls as a Virginia destination. The falls are in New Hampshire.

This three mile hike leads to Arethusa Falls, which is (arguably) New Hampshire’s tallest single waterfall. The optional arm along Bemis Brook is challenging in spots, but offers more lovely stream scenery.

Arethusa Falls
Arethusa Falls might not be the most photogenic of New Hampshire’s many waterfalls, but it is likely the  tallest. Below: The optional side-loop trail along Bemis Brook takes you past Coliseum Falls.

Coliseum Falls

Christine Says…

We originally planned on combining these two trails with Frankenstein Cliffs to make a loop, but unfortunately we ran short on time and just did the three mile out-and-back.

The trail along Bemis Brook was extremely tough walking!  In addition to the roots, rocks and mud, we suffered a full-on mosquito assault.  I spent a lot of the walk along the trail cursing and flailing my arms wildly.  Even with DEET, the little buggers hovered right around my eyes, ears and nostrils, constantly buzzing in too close and getting caught in my eyelashes.

There were several very pretty small waterfalls along the Bemis trail.  Coliseum Falls were especially picturesque.  Since it was such a sunny day, I didn’t bother with a tripod.  Long exposures weren’t a possibility in the harsh sun, so I just took snapshots along the way.  The climb from Bemis Brook back up to the Arethusa Trail was practically vertical.  We had to climb, hand-over-hand, grabbing roots and rocks to drag our way up the mountainside.  There was one blown down tree that was particularly difficult to negotiate.  It was one of those fallen trees that was a little too high to climb over, but a little too low to scramble under.  I decided to clamber over it, and ended up getting my boot toe caught on the tree trunk.  I took a spectacular fall down onto the roots and rocks.  It absolutely left a big black and blue mark!  I was really glad when we finally saw the junction with the Arethusa Trail!

Frankenstein Cliffs
This trailhead for this hike offers beautiful views of Frankenstein Cliffs looming overhead. The trail has an option to lengthen the hike by a few miles to gain access to the top of the cliffs. We ran out of time and had to pass on that option. Below: Trails in the area are clear and well-marked.

Trail Sign

The rest of the way to the falls was much easier.  It was uphill and muddy in spots, but the trail was well-graded and nice to walk along.  The last stretch to Arethusa Falls led downhill into a chasm that opened to an amphitheater like setting.  The falls were very impressive!  The water falls like lace over the sheer rock face.

On the hike back, Adam and I waffled about whether or not to continue our hike up to Frankenstein Cliffs.  We even started down the Cliffs Trail, before turning back in less than a tenth of a mile.  We had plans to meet my parents in North Conway, and we just didn’t have time to finish the loop.

Instead, we visited the Appalachian Mountain Club’s Highland Center and got a few Cokes and relaxed in their lobby.  After we met up with my parents, we had an amazing lunch at Moat Mountain Brewery & Smokehouse.  If you’re ever in the area, don’t miss their barbecue and microbrews!

Adam Says…

Arethusa Falls is a gorgeous 160 foot waterfall that is very popular with families.  We started on the blue-blazed trail near the railroad tracks at the parking lot.  After about .1 miles, you come to a junction with the yellow-blazed Bemis Brook Trail.  We decided to do this side trail, since it goes partially along the water, guiding you to a few pools and smaller falls areas.  Once you come up to the Coliseum Falls area, you will need to climb up almost vertically up the trail to join back with the Arethusa Falls trail.  If you do want to do the Bemis Brook trail you should do this at the start of your trip rather than trying to descend it at the end.  This part of the trip was tough and takes a lot of strength out of you in a short distance, so plan appropriately.  Once we reached the junction at the top, we took a left to return to the Arethusa Falls trail.  The trail continues to go uphill until you reach a junction with the Cliffs Trail.  From this point, you continue downhill until you reach the falls in .2 miles.  You return the way you came, but you will avoid the Bemis Brook Trail on the way back and just stay on the Arethusa Falls trail to reach your vehicle.

Arethusa Falls was named after the poem, “Arethusa” by Percy Bysshe Shelley.  The falls were discovered by Edward Tuckerman, but named by Moses Sweetser and Professor Huntington in 1875.

Bemis Trail
The Bemis Brook Trail follows a beautiful stream for most of the way, until you get to the portion where it climbs, nearly vertically, back up to meet the Arethusa Trail. Below: The Arethusa Trail is much easier to walk – smooth and well-graded, compared to the Bemis Trail.

Arethusa Trail

While I was off hunting for a geocache and Christine was taking some photos, she struck up a conversation with a man hiking solo on the trail.  When I got back to them (after sliding down the hillside 20 feet on my butt), he wanted to take a look at my map.  He was thinking about doing the Frankenstein Cliffs trail and then looping back to make it to his car.  He was to meet up with his wife in less than two hours to take a ride up Mount Washington on the cog railroad.  We told him that it might be hard to make it in time.  He decided to go for it, but I don’t think there was any way he could have made it back in time for his trip up.  We both pictured his wife riding solo up the railroad, muttering to herself, and awaiting the moment she could give her husband a piece of her mind.

There are two geocaches you can get on the trail:

We wish we had more time to do the Frankenstein Cliffs trail (these are named after an artist, not the doctor who created a monster), because we have heard that it does give you some nice views from the top.  The trail is allegedly muddy and not as well maintained as the Arethusa Falls trail.

Trail Notes

  • Distance – 3 miles, out-and-back (2.8 if you leave the Bemis Brook Trail off and just stay on the Arethusa Trail the entire way)
  • Elevation Change – 650 ft to the falls.  There might be a bit more climbing if you do Bemis Brook.
  • Difficulty – 3. The Arethusa Trail is squarely moderate.  The Bemis Brook trail is more difficult with one killer climb uphill at the end.
  • Trail Conditions – 2.5 The Arethusa Trail is in nice condition most of the way.  There are some muddy spots and we encountered a flew blow downs.  The Bemis Trail is not easy walking.  There are numerous fallen trees, tricky footing and if it’s the slightest bit damp, the trail is very slippery.
  • Views –0. You’ll be in the woods the entire time.
  • Waterfalls/streams 4. The falls are large and impressive, but not terribly photogenic.
  • Wildlife – 0. The heavy human traffic probably scares any wildlife away.
  • Ease to Navigate – 5. Trails are marked and easy to follow.
  • Solitude – 2. Because the hiking is a little more challenging, you won’t see the same crowds as you do at Flume Gorge or Sabbaday Falls.

Directions to trailhead:
From I-93, follow New Hampshire Route 302 west through Crawford Notch State Park.  A few miles past Sawyer Rock Picnic area you will see the Arethusa Falls parking area on the right.

Flume Gorge Loop (NH)


Special: New Hampshire Edition

Introductory Guide to Visiting the White Mountains

Located in Franconia Notch State Park, this two-mile path around the Flume Gorge showcases a lot of beautiful scenery on a short and easy walk.  If you crave solitude, this is not the place for you.  But if you don’t mind crowds and want to see some unique scenery, don’t miss a visit to this area.

Scenes from the Flume
The Flume is a beautiful and unique place. Below: Avalanche Falls is located inside the Flume; Liberty Gorge Cascade is also impressive; The trail is lined with large boulders called glacial erratics; The Sentinel Pine Covered Bridge is for pedestrians only.

Avalanche Falls Liberty Gorge Cascade Glacial Erratic Sentinel Pine Bridge

Christine Says…

Last year, when we visited New Hampshire for the first time, we went to Flume Gorge with my parents.  It was insanely crowded, unusually hot and glaringly sunny on that visit, so we decided to make a return visit on this trip – hoping that the clouds and cooler weather would keep the crowds at bay.  There were definitely fewer people this time, but that’s not to say we had solitude.  Flume Gorge is an extremely popular area. There will always be hordes of people, no matter the time of day, week or year you visit.

It’s no surprise the area draws such large crowds – it packs an amazing amount of unique scenery into an easy, two-mile loop.  For anyone who doesn’t want to walk the two miles, there is a bus that will take visitors to a drop-off point at the Boulder Cabin.  This option substantially shortens the distance and climbing necessary to see the gorge.  However, bus riders miss seeing a lot of the other impressive scenery along the loop.

The two-mile loop starts off along a shady, wooded path that climbs down to the Pemigawasset River.  In .25 miles, there is a bright, red covered bridge across the water – the bus goes through the bridge, but pedestrians cross a walkway attached to the side of the bridge.  After a short uphill, both the bus riders and the walkers arrive at the Boulder Cabin.  The building is full of exhibits – both historical and natural.

Covered Bridge
The first covered bridge in Flume Gorge is brilliant red. Below: Table Rock;  The path through the woods is peaceful and shady; Bear Cave is located near the top of the Flume; The side view of Avalanche Falls.

Table Rock Shady Trail Bear Cave Avalanche Falls

After passing the cabin, the path follows alongside an area called Table Rock.  The water in the river passes thinly over a wide, smooth expanse of granite.  A sign announces the beginning of the Flume.  The Flume is a fascinating geological area – a narrow slot canyon carved out from thousands of years of river flow over the rock.  Wooden walkways are attached to the sheer canyon walls and allow people to climb through the gorge using a series of ramps and steps.  Near the top of the Flume, visitors are treated to views of the crashing water of Avalanche Falls.  The falls take several directional turns through the Flume – each angle makes it look like a completely different waterfall. After passing the waterfall, be sure to take a quick peek inside Bear Cave.

At the top of the Flume, the trail has two options – one returns people to Boulder Cabin and the bus stop, the other follows a trail for a little over a mile back to the main entry.  If you’re able, it’s definitely worth following the longer route to see Liberty Gorge Cascade, the Pool, The Sentinel Pine Covered Bridge, the Wolf’s Den and several impressive erratics along the trail.

Water Under the Sentinel Pine Bridge
My favorite view along the trail came at the spot overlooking the Sentinel Bridge. Below:  The river under the bridge is very scenic; The Pool is a wide, still spot on the river.

River under the Sentinel Bridge The Pool

One of my favorite views along the trail was looking back at the Pool and the Sentinel Covered Bridge from a little spur trail to an overlook.  From this point, the walk back is steeply uphill for a short while.  Once you gain the ridge, the path levels off and you get a nice view of Liberty Mountain.  A short while later, you arrive back at the visitor’s center – where you can treat yourself to an ice cream cone.

Even though Flume Gorge is crowded and rather expensive to visit, it’s still very worthwhile.  Not many short two-mile loops pack in quite so much scenery into a pleasant, easy-to-walk package.

Adams Says…

After dropping off our thru-hiker friends, The Traveling Circus, we headed off to hike around Flume Gorge.  We did this trip last year with Christine’s parents, but thought it was worth a second trip.

This is a very popular attraction and is definitely one of the highlights of the Franconia Notch State Park.  Similar to many areas of New Hampshire, it requires a fee (in 2010, it was $13 for adults).  The visitor center has a theatre that shows an informational film throughout the day and a few exhibits around the entrance.  The snack bar is also fully equipped to provide enough refreshment and food for a lunch or snack.

Cascade near table rock
The entire Flume Gorge area is loaded with small waterfalls and cascades. Below: Tree roots grow over rocks; The crowds at Flume Gorge are always thick;  Ramps and stairs allow people to climb easily through the gorge; We saw lots of chipmunks and red squirrels.

Tree growing over rock The Flume
The top of Avalanche Falls Chipmunk

This hike packs a lot of features into one short hike.  The covered bridge was built in 1886.  While you can’t walk inside since it is for bus traffic, it does provide a nice photo opportunity.  Table Rock is a large rock outcropping where Flume Brook slowly glides over the water.  The rock is 500 feet long and 75 feet wide.  The Flume Gorge is quite impressive.  You walk along a boardwalk that clings to one side of the gorge.  The Conway granite walls rise on either side 70-90 feet as you see the brook rush out of Avalanche Falls and down the brook.  We were impressed to see all of the small trees and moss that grows amazingly out of the cliff walls.  The Flume was discovered in 1808 by a 93 year-old woman while she was fishing.  Signs describe a large boulder that was suspended between the walls of the gorge but a storm in 1883 swept it away and no signs of the boulder have been spotted since.  Avalanche Falls is an impressive 45-foot waterfall that you can see from several angles while along the boardwalk.

After walking another .5 miles from Avalanche Falls, Liberty Gorge is your next stop.  There is a nice overlook to see the water flow through this gorge.  After a few tenths of a mile past Liberty Gorge, you will come across the Pool overlook and another covered bridge.   Shortly after the covered bridge, you have an option to join go through the one-way Wolf’s Den, but it does require crawling on your hands and knees to make it through the cave.  We continued pass the Wolf’s Den, to catch the additional overlook of the Pool.  We thought this was a better view of the covered bridge and the Pool.  Continue from here to arrive at the Glacial Boulder garden to view some nice erratics.

While there aren’t any geocaches inside the gorge, there are a few outside the area:

Trail Notes

  • Distance – 2 miles
  • Elevation Change 400 feet
  • Difficulty 1.5. There are some steps and hills, but most people should be able to do this without too much effort.
  • Trail Conditions 4.5 The trail is covered in small crushed gravel, allowing for easy footing.
  • Views – 1. You do get one view of Liberty Mountain, but otherwise you won’t see many far-off views.
  • Waterfalls/streams 5. Great views of Avalanche Falls and much of the trip is in sight of water.
  • Wildlife 1.  We saw a few red squirrels and chipmunks, but this is so popular with tourists, you won’t see a lot of wildlife.
  • Ease to Navigate 5. The area is secluded from other areas, so you can’t get lost.  You just have options to cut distance off of the trail.
  • Solitude0. You will always find lots of people here.

Directions to trailhead:
From I-93, once you enter the Franconia Notch area, take the Flume Gorge exit.  The area is well-marked.  Park at the Visitor’s Center.  The trail starts from the Visitor’s Center.  Purchase tickets and proceed.

Tibbet Knob

Tibbet Knob is a short, but steep, hike that leads to a beautiful, rocky outcropping that overlooks both Virginia and West Virginia.  It’s considered the sister hike to Big Schloss.

Tibbet Knob Summit
The yellow-blazed Tibbet Knob trail offers spectacular views. Below: The first overlook on the trail comes within the first few tenths of a mile;  The footing along most of the trail is extremely rocky.

First View Hiking Over Rocks

Christine Says…

After a string of eight 90-100+ degree days, we finally got a break in the heat and humidity!  We picked a shorter, easier hike to celebrate the cooler weather – Tibbet Knob.  We’ve found we’re doing lots of longer hikes lately – partly because we’ve simply run out of shorter hikes.

I don’t know how Tibbet Knob escaped our notice for so long, because it’s a beautiful hike.  Tibbet seems to play second fiddle to its sister hike, Big Schloss – though I’m not really sure why.  The views are nearly as spectacular and the crowds are much thinner.  The terrain is definitely steeper and rockier, but not so much so it would scare hikers off.

We started our morning with breakfast at Cracker Barrel in Woodstock (worst/slowest service ever *and* they burned the bacon!)  We finally made it to the trailhead a little after 9:00 a.m.  At the very beginning, the trail passes through several lovely, primitive campsites.  One even has a picnic table that someone dragged a couple tenths of a mile into the woods.  The ascent starts almost immediately and follows a steady, but gradual, uphill to the first open view of the valley below.  This overlook is pretty, but pales in comparison to the summit of Tibbet Knob.

Looking Toward Big Schloss
You can see Big Schloss way off in the distance (circled in yellow).  Below:  Adam enjoys his perch on the summit; The trail was often open and out in the sun; There is a lovely (but dry) campsite about 10 yards from the rocky ledge at the summit.

Adam on the Summit Open Trail Campsite at the Summit

From the first vista, the trail drops gently into a saddle.  The footing becomes increasingly rocky from this point on.  Through some sections, it’s like walking on a dry riverbed of basketball-sized stones – some smooth, some pointy.  The last .8 of a mile is very steep and rocky.  There are two short rock scrambles.  At the first one, I abandoned my trekking poles because they were seriously getting in the way.  I can telescope them shorter, but I decided it was just as well to leave them stashed along the trail to retrieve on my way down.

Shortly after the second scramble, we arrived at the summit.  We stayed at the top for quite a long while.  Normally, we’re not the lingering type, but the morning was so pleasant that we spent at least half an hour sitting on the rocky outcropping.  It was cool and breezy.  The sky was crystal clear and blue and the scent of pine trees was all around.  There were several rocks to recline on, so I laid back and closed my eyes while Adam hunted for his geocache.  We didn’t see another soul on the entire hike.  I love having a beautiful summit all to myself.

The return trip was more downhill than uphill, so it went by quickly and we were back at the car within 45 minutes.

Adam Says…

We had been meaning to try out Tibbet Knob for some time now, since we’ve been several times to do the Big Schloss hike, but this was our first experience on this hike.  The hike takes off from Wolf Gap campground.  This campground is a great area for camping and has a lot of established campsites.  We always see plenty of cars in the campground and usually many of the sites are taken, but you should be able to find a spot for overnight camping.  We definitely plan on doing a camping trip in the future since this site provides access to some great hiking trails.

As soon as you begin the yellow-blazed trail, you will come across several other campsites alongside the trail – one even had a picnic table near the firepit.  At about .6 miles you come to a nice overlook with a decent viewpoint to the south.  If you look closely, you can even see cars on the road below you.  You descend from this overlook for a short distance, but then you begin your climb.  At some points along the ascent, the terrain opens up to larger grassland areas.  You will also pass by several blueberry bushes along the trail, which reminded us of our hikes in New England.  Due to the already hot and arid summer, the blueberries were already past their peak so we weren’t able to pick any on the trail.  The terrain does get quite steep towards the end of the trail.  You don’t have to quite crawl up the slope, but it is almost that steep.  Once you get pass the two steep areas, you are very close to the summit.  The views from the top were gorgeous and I believe give you a little better view than Big Schloss, since you get a better perspective of the valley with mountains around you.  To the east, you can see the side of the Big Schloss hike.   There is also a primitive campsite near the top of the overlook if you wanted to camp at the top, but there is no nearby water source.

Signs of Fall?
Signs of Fall?  Maybe… but more likely evidence of the drought we’ve been having lately.  We saw lots of patches of red trees in the distant mountains, too.  Below:  The only wildlife we saw was a toad; Adam looked for, but did not find, the geocache; It was a beautiful, breezy, blue-sky day; the trailhead starts across the road from the Wolf Gap campground.

Trail Toad Looking for the Geocache
Tibbet Knob Summit Trail Sign

The trail does continue on from the overlook, but it just leads to SR 671 after about .7 miles.  You can actually approach this hike from SR 671 for a shorter, less steep option to give you a 1.5 mile out-and-back hike.  We stayed up at the top for a while to soak in the views and for me to look for a geocache.  I wasn’t able to find this one, but there is an alleged geocache here:

We really enjoyed the peaceful hike for the day.  We had the entire hike to ourselves on a day that was in the 70s and we even had the bonus of not having any bugs buzzing around our face.  This is a great short hike that provides enough challenge to get the blood pumping and marvelous views at the top.

Trail Notes

  • Distance – 3.1 miles out-and-back. Add another .1 mile to get to your car.
  • Elevation Change –830 feet
  • Difficulty 3. There are two significant climbs on this hike.  The first ascent gains several hundred feet in elevation and is pretty easy.  After a short, gentle series of ups and downs, the second ascent is significantly steeper/longer and includes two short rock scrambles.
  • Trail Conditions 2. The trail is extremely rocky.
  • Views –4. The view are beautiful and expansive – a little more than 180 degrees of mountains and valleys.
  • Waterfalls/streams 0. Non-existent.
  • Wildlife 0. The only creature we saw was a toad.
  • Ease to Navigate 4. Just follow the yellow blazes. There are no turns or trail junctions.
  • Solitude4. Tibbet Knob is less popular than its sister hike, Big Schloss. You may see a few hikers, but you probably won’t see large groups.

Directions to trailhead:
From I-81, take exit 279. Follow Rte. 675 until it meets Route 42. Turn right on 42 and then take almost an immediate left on 675 (Wolf Gap Road). Follow Wolf Gap Road until you come to the Wolf Gap Campground (right on the Hardy County Line.) The trailhead is across the road from the campground.

Trimble Mountain

Trimble Mountain is a lovely, wooded trail through the North River Ranger District of George Washington National Forest.  The hike begins near Todd Lake. It climbs the mountain, follows the ridge across two summits and then descends back to the start point.

Trimble Mountain from the Todd Lake Dam
A View of Trimble Mountain from the Todd Lake Dam. Below: Todd Lake has a nice campground with flush toilets and hot showers. The lake is open to swimmers.

Todd Lake Trail Sign

Christine Says…

Well, this entry should have been part four in the Backpacking 101 series, but sadly my sprained ankle forced us to bail out on the trip.  The weight of a pack on my sore ankle is still too painful.  Fortunately, I was cleared to do some light day-hiking again. So, on Saturday morning, Adam and I headed out to George Washington National Forest.

Trimble Mountain fit the bill for a light and easy hike. The four-mile trail isn’t too rocky and follows a gentle grade both up and down the mountain.  We parked along the road near Todd Lake.  Before hitting the trail, we climbed up the backside of the dam and enjoyed the lake view.  The top of the dam also provides a great look at Trimble Mountain. The sky was absolutely gorgeous – a real photographer’s dream.  It was the prettiest I’ve ever seen Todd Lake look.

Shortly thereafter, we were on our way up the Trimble Mountain trail.  Within a tenth of a mile, we reached a “Y” in the trail.  We took the left branch, following Hiking Upward‘s advice that it was the gentler, more gradual grade.  For about a mile and a quarter, we climbed steadily upward.  It was never tough climbing, but it was consistent.  The trail was really narrow and carved into the mountainside.  A lot of places, one foot was always laterally uphill from the other, and there was barely room for placement of my trekking poles.  It was also an unusually warm day for early May, so the bugs were out in full force.

Trimble Mountain actually has two summits with a saddle between.  Once you gain the ridge, the terrain consists of both uphill and downhill hiking.  There really aren’t any views to speak of at the summit.  Every now and then, we could see glimpses of the mountains through the trees, but there was never a sweeping, panoramic view along this hike.

Wild Iris
There were so many different kinds of wildflowers growing along the trail.

Dogwood Wildflower

Wildflower Wildflower

The remainder of the hike went by quickly and was all downhill.  I stopped many times along the way to photograph the abundant wildflowers on the forest floor.  I also spotted a few little tree frogs.  They were so tiny and fast that I had a hard time getting photos.  They were the only wildlife we saw on the trail.

By the time we got back to the car, my ankle was quite sore again.  The downhill walking really seems to strain it.  I hope that little by little it will feel better and become stronger. Hopefully when it’s healed, we can make up that backpacking trip.

A tiny frog
This little frog was about the size of a fingernail.

Adam Says…

We had been to the Todd Lake area before of George Washington National Forest, but this was our first time hiking Trimble Mountain.  Todd Lake receives a lot of campers and local visitors that want to enjoy swimming and basking.  The Trimble Mountain trail that is nearby doesn’t seem to get a lot of traffic.  We had the entire hike to ourselves on a beautiful day outside.  The bugs helped us realize that the warm weather is here.  One thing that is different about hiking national forest trails is that there isn’t a lot of maintenance to the trails.  There were a couple of trees spread across the trail and the trail was becoming a little more overgrown in parts.  We had heard that there were good views on this trail, but we were disappointed to find that most of the views are obstructed.  The only views you will see is in break in the trees.  The winter would probably lead to more views of the mountainside, but after the leaves fall this will look a lot more dull.  We enjoyed getting out to hike and the wildflower variety was definitely a highlight of the trail.

One of the few openings in the trees
One of the few openings in the trees that provided a view. Below: Trees blocked most of the view; the trail is marked with double yellow blazes.

Adam takes in the view Double Yellow Blazes

There is one geocache on the trail and a few at the nearby Todd Lake area.  The first you can find along this hiking trail.  The other trail would involve hiking along the Todd Lake Trail which you can reach from the opposite side of the road from the Trimble Mountain trail.  The Todd Lake Trail is a little less than a mile and takes you around the entire Todd Lake area.  Since the day that we did the hike was the 10th Anniversary of geocaching, I felt I needed to do a couple of these to celebrate the hobby.

Trail Notes

  • Distance – 4 miles – loop
  • Elevation Change –around 1,050 feet
  • Difficulty – 2 This climb on this hike is about two miles, but is very moderate.
  • Trail Conditions – 3. The trail is narrow and little bit overgrown.
  • Views –1. There are some nice glimpses of the mountains through the trees, but nothing remarkable.  Views might be nicer in the winter when trees are bare.
  • Waterfalls/streams –1. In times of heavy rain, you’ll find several small streams along the trail.  Most of the year, these streams are dry.
  • Wildlife – 1. The national forest is used by hunters, so animals tend to stay hidden.  We saw quite a few frogs and toads along the trail.
  • Ease to Navigate – 5. The trail is well-marked and easy to follow.
  • Solitude – 4. We didn’t see a soul.

Directions to trailhead: From Bridgewater, Virginia head south on Rte. 42 for about three miles, following signs to Natural Chimneys regional park.  Take a right on 613 and in less than one mile, take a left on state route 747.   Take a right .75 miles after Natural Chimneys to the intersection with 731.  Take a right heading north.  In about a mile, take a left on to State Route 730/North River Road.  This comes to an end and take a right on to state route 718.  In another mile, you will take a left on to Forest Road 95, entering George Washington National Forest (you will see signs directing you to Todd Lake).   The trailhead is about 3.5 miles on the left.  You can park on the side of the road right near a trailer dump station.   The trailhead is on the opposite side.  (There is a trail on the same side of the dump station that leads to the top of Todd Lake if you are interested.)

Kaylor Knob

Kaylor Knob is a fairly easy 3.5 mile ridge hike offering nice (but slightly obstructed) views.  The summit is the highest point on Second Mountain.

Adam Says…

For those that regularly follow our blog, you may know that Christine sprained her ankle badly during our hike up Buzzard Rock.  While she was healing, we participated in a Backpacking 101 course through PATC. The workshop concludes with an overnight backpacking trip scheduled for the first weekend in May.  We decided to test out the ankle with some extra weight to see if going on the backpacking trip would even be possible.  So, we got our gear together and decided to do a short hike to Kaylor Knob after work last Friday.

While you can approach this summit from Cub Run, we decided to try the shorter approach,  taking off from the overlook at Massanutten Resort.  The hike starts across the road from the parking lot at the top of the overlook.  We have hiked this trail several times to the first overlook where a geocache is hidden, but this was the first time that we took the hike to the summit. 

Since the last time we did this hike, someone has improved the trail markings.  You simply follow the blue-blazed trail along the way (some points also have blue signs marked with a “K.K.” and the mileage).  At around .5 miles, you will come to a junction with another trail that is marked with pink blazes.  Just stay to the right and continue on the blue-blazed trail.  At .75 miles, you will come to a small rock outcropping that has a nice view to the west. 

If you continue up the hill past this outcropping, you will continue to walk along the ridge.  You will see views to the west and east through the trees that will open up at different spots.  At 1.75 miles, you will come to the summit, which is marked with a larger outcropping and nice views toward Shenandoah National Park. After taking some time to enjoy the views head back the way you came.

Adam tries out the backpack.

I do think the views to the east are better than the views to the west on this hike.  If you wanted to see a nice sunrise, you should get up early to make it to the summit by sunrise. 

This is a great short hike to do if you’re visiting the Massanutten area.

Christine Says…

Adam and I have a backpacking trip coming up, so I needed to get out there and give the ankle a good test drive.  Our original plan was to hike somewhere in Shenandoah on Saturday and then spend the night camping in our backyard.  However, the weather took a turn for the worse, and we ended up just squeezing in a quick hike to Kaylor Knob on Friday evening. (we also skipped the tent in the backyard  and slept in our nice, plush bed instead.)

I managed to load about 25 pounds of gear into our backpack for the “dress rehearsal”.  My ankle felt completely fine for the entire hike – stable and painless.  The pack was easy to carry and comfortable.  It did make the hills a little tougher, but I still felt really good.  I know our packs for the trip will be a little heavier, but this was still a decent test.

The Kaylor Knob hike is not particularly remarkable.  It’s pretty and peaceful and has two nice viewpoints along the way.  There are definitely more impressive trails in our area, but this one is a five minute drive from the house, so it was perfect for a quick after-work hike.

Note: If you have a couple days in the area, be sure to check out the Massanutten Ridge Trail!

Trail Notes

  • Distance – 3.5 miles out-and-back
    (Check out the stats from Map My Hike)*
  • Elevation Change – about 450 feet
  • Difficulty –1.5 Most people should be able to do this.
  • Trail Conditions – 3. While the trail is used often, it contains lots of pointy rocks.
  • Waterfalls/streams – 0. Non-existent.
  • Views – 2.5. Pretty, but not terribly open or panoramic.
  • Wildlife –1.5 There isn’t much room for wildlife on the top of this ridge.  Expect to see birds of prey soaring in view as well as many of the local birds in the thickets.
  • Ease to Navigate –4.5. If you stay on the blue-blazes, you’ll be fine.
  • Solitude –3. You may see some people due to its popularity with vacationers, but you should still have mostly solitude.

Download a trail map (PDF)

Directions to trailhead: From Harrisonburg, head east on US 33 for about 10 miles. Turn left at the Exxon on the left and head on SR 644, Resort Drive.  Follow this road and take a left on Massanutten Drive.  You will reach a guard house.  Let the guard know that you are here to hike and they will give you a guest pass.  After about 3 miles, take a right on Del Webb Drive. Follow Del Webb Drive for about two miles until you begin to drive up to the ridge, where there is a parking lot on the left.  After you park here, cross the road.  At the end of the guard rail you will begin the Kaylor Knob trail.

Buzzard Rock

This 4 mile out-and-back hike takes you to a ridge walk with views of Fort Valley below.

Adam on Buzzard Rock
From Buzzard Rock, you get a great view of Passage Creek and Fort Valley below. Below: The view below from this vantage point; Scrabbly pines are the predominant tree at the summit

View of Fort Valley

Adam Says…

This was the first time that we had done this hike.  The hike seems to be very popular for people from nearby Front Royal, Winchester and Northern Virginia.  It is not too difficult of a hike, which makes it a great hikes for families and newbie hikers.

You start the trail from the parking lot and you’ll follow the double white blazes for the entire trip.  You begin walking through a piney area that will smell nice if the area has been warmed up in the spring/summer sun.  The trail has some hills to go up and down and a few small streams to cross.  Around 1.0 miles, you will arrive at a frequently-used campsite.  Just cross the campsite and continue up the trail for about another .75 miles until you reach the first overlook.  You will continue up the hill to reach the ridgeline.  Continue to hike across the ridge to take in the views from different angles.  Once you feel that you have seen all that you would like, you can return the way you came.

Trail Sign
The trail is well-marked and connects to other local GWNF trails. Below: Lots of stuff along the trail is in bloom now; the rocks at the top are covered in lichen.

Blossoms Flowering Trees Lichen

For any of those people that are interested in geocaching, you can grab three easy ones along the trail.  All of them are normal-sized containers and have some things to trade.  One of these was placed by our inspiration for a lot of hikes, Hiking Upward.

Unfortunately, this trip was marred for us since my wife sprained her ankle very badly at the top of the ridge.  She somehow managed to hike back down under her own power despite my offerings to carry her down – quite a trooper!  We definitely will do this hike another time.

Christine Says…

Buzzard Rock was a beautiful hike for a beautiful spring day.   The summit offers a great scenic payoff with minimal effort.  The elevation gain of 650 feet is very gradual with the exception of one very short, steep climb to the ridgeline.

The early part of the hike passes close to civilization, so the sound of cars and glimpses of houses are always in sight.  However, within a half a mile, the trail leads away from everything and passes through a pretty stretch of open woods with very little undergrowth.  In early spring, the forest floor is covered with tiny wildflowers peeking out from under the brown leaves. The view from the trail eventually opens up and provides a nice view of the Front Royal Fish Hatchery and the surrounding valley below.

The view of the valley below is beautiful! Below: The Front Royal Fish Hatchery; A view of the Buzzard Rock “spine”

From this point on the trail is extremely uneven and rocky – big slabs of stone, angle up out of the ground like jagged teeth… more about that later.  The view from the top is not as dramatic as other Virginia hikes, mostly because you can’t see many distant layers of ridges.  What you do see is a deep, narrow valley below with Fort Valley Road and Passage Creek winding their way through.  Because of all the recent rain, we could hear creek’s roar even hundreds of feet above.

We enjoyed the view, had some trail mix and then headed back down the mountain.  I stopped along to way to photograph some flowering trees.  When I turned to rejoin Adam, I moved a bit too hastily and carelessly.  The toe of my boot got caught between two of the “jagged teeth” on the ridge.  My toe stopped dead, but my ankle kept moving.  It completely rolled to the side, resulting in a bad Grade 2 ankle sprain.

I was extremely glad to get back to parking lot so I could stop walking on my injured ankle. Below: My bruised and deformed ankle.

My ankle immediately started to bruise and swell, but I had no choice but to hike myself out.  Adam found a makeshift walking stick in the woods, and that helped offset weight on my injured foot.  Nonetheless, it was a long two miles back down to the car. I’ll be off the trails for several weeks to come while my ankle heals and rehabs.  I’m hoping it won’t take as long as the doctor predicted.  I hate to waste three (or more) weeks of this fantastic spring hiking weather.

Wookie Says...Wookie Says…

This was a great first hike of the year for me!  It wasn’t very steep, and I love to scramble on rocks.  What I liked less were all the small stream crossings on this trail.  I hate to get my paws wet and muddy, but that’s exactly what I ended up doing on this hike.  I actually acted quite brave, and on the return trip I crossed all the streams with confidence.  Maybe I’ll be a water loving dog yet!

Wookie on the Trail
Wookie had a great time on the hike.

I really enjoyed the breezy overlook atop Buzzard Rock.  I liked sniffing the air and feeling the sun on my back.  I even got to enjoy a few graham crackers from my masters’ trail mix.  I also got some water from my portable dog dish.

It was a great day, but I have a feeling I’m getting a bath when I get home.

Trail Notes

  • Distance – 4 miles – out-and-back
  • Elevation Change –around 650 feet
  • Difficulty – 2 This trail isn’t too steep and most people should be able to make it up to the top.
  • Trail Conditions – 3. The trail is in decent shape.  There are some muddy spots and a lot of jagged rocks on the ridge.
  • Views –3.5. There are great views along the entire ridge.  We would have liked it better if we couldn’t see a road below.
  • Waterfalls/streams –1. There are a few rock-hops across some streams, but nothing photo-worthy.
  • Wildlife – 1. This is a better bird-watching trip than a trip for spotting any mammals.  We were glad we saw a buzzard at the top since it is their rock.
  • Ease to Navigate – 4.5. The trail is well-marked with a white double blaze.
  • Solitude – 2 . This is a popular trail for local families and also rock climbers.

Directions to trailhead: From I-66, take 340 South Exit. Take a right on 55 – Strasburg Road. Take a left onto 678 – Fort Valley Road. Take a left onto Mountain Rd., Route 619, towards fish hatchery. Parking lot is on the right-hand side. If you are arriving from the south, go up 340 (following directions for Front Royal Airport) until you reach 619-Rivermont Drive. After a few miles, Rivermont Drive becomes Mountain Rd (At sharp right bend ~1/2 mile past Fire Dept.). Parking lot is on the left-hand side just past Massanutten Farms Rd. If you reach the fish hatchery or Fort Valley Road you have gone too far.