NOTE: Parking at Edith Gap was greatly restricted starting in fall 2020. If you attempt to park there, be sure to pay attention to the the new ‘No Parking, Tow Away’ signs. Unless you are very certain you are legally parked, we suggest following the updated route outlined below, starting from the horse trailer parking area for the Stephens Trail about a mile lower on the mountain.
Kennedy Peak is an beautiful seven-mile out-and-back hike in the Lee District of George Washington National Forest. It gives hikers gorgeous views of the bends in the Shenandoah River.
The view from atop the Kennedy Peak Tower
Christine Says…
I love this hike. We’ve hiked it in winter and fall before, but this was the first time we’ve hiked it in the spring. Sunday afternoon was the kind of day that is custom made for hiking. It was dry, sunny, breezy and in the low 70’s. The trail was lined with brilliant, pink rhododendrons. All the trees were covered with new, spring green leaves and/or blossoms. Butterflies were fluttering all around the trail, taking pauses on the blooming trees and wildflowers. It was, in a word, idyllic.
Box Turtle, Swallowtail on Rhododendron, Indigo Bunting
We began in the Stephens Trail/horse trailer parking area on VA675. The Stephens Trail departs from the back of the parking area. You should look for the orange-blazed Massanutten Trail at the head of the parking lot. The trail climbs moderately uphill for .9 miles. At the top of the climb, you’ll exit onto VA675 at Edith Gap (the old parking area). On the road, take a sharp left, staying on the orange-blazed Massanutten Trail.
Hiking uphill along the Massanutten Trail, headed to Edith Gap.
The part of the trail starts off as a wide, almost road-like track. This part of the hike is extremely easy – climbing just a couple hundred feet over the next 1.75 miles.
At around mile 2.65, the trail takes a sharp, hairpin turn and begins to climb more steeply over increasingly rocky terrain. At this sharp switchback, you may be tempted to continue straight along a visible path, but be careful to make the turn and follow the orange blazes uphill. This slightly tricky misdirection has been blocked off by logs and rocks, but enough people have missed the turn that the false path remains well-trodden. We once followed it out of curiosity and it doesn’t lead anywhere. It eventually fades out into the forest.
Don’t miss this switchback!
After the switchback, the trail continues uphill for another half mile. There is a small outcropping on the left with a obstructed views and a tiny campsite (room for a hammock or a one-person tent). After you pass this spot, continue a couple tenths of a mile to the junction with the Stephens Trail. (Note: If you want to make a longer day, adding about two more miles to your route, you can descend back to your car via the Stephens Trail. We’ve heard it’s not very scenic and is often muddy and manure-covered, so we chose the out-and-back.)
At the junction, you will turn right and follow the signs toward the fire tower. The tower is a little over .2 miles from the junction. The last stretch to the fire tower is steep and rocky. It’s really the only challenging section of the hike. The tower is a sturdy one-story structure with great views looking into the valley and Shenandoah National Park beyond.
When we got to the summit, we had the observation tower all to ourselves. We watched birds in the treetops, spotted lizards climbing around on the rocks and took in a fantastic view of the Shenandoah River and the Page Valley. It was one of the least hazy days we’ve had in a while, so we could clearly see Shenandoah National Park from this summit. Lots of vultures were soaring overhead, and even though they’re kind of creepy, they were casting cool bird-shaped shadows onto the mountain top. I always like it when they do that.
The trail is pretty rocky for the last half mile.
Sunday was the only time we’ve hiked Kennedy Peak in the afternoon. Adam and I tend to be morning hikers — it helps us avoid the crowds. But, the light is definitely prettier in the afternoon on Kennedy Peak. If you hike it in the morning, the sun shines right in your face at the summit. That makes it hard to appreciate the great view, and makes it nearly impossible to get any decent photos.
Adam Says…
This is one of our favorite hikes. This hike is not very steep and the payoff is wonderful. This is a good multi-use trail, since there are campsites and good footing for horses. There are a couple of campsites at the beginning of the trail, near the road. The nicest campsites are further up the trail. Once you are on the fire tower trail, you will find a couple of places where you can have some nice lookouts over the valley and the Shenandoah River. From some points, you can see several bends in the River. Once you reach the top, there is an observation tower where you can chill for a while before heading back down.
Views from the other side of the tower.
If you are into geocaching, look for the Presidential Peek Cache! After your hike, be sure to visit Camp Roosevelt – a great spot for a picnic.
Trail Notes
Distance – 7 miles round-trip
Elevation Change – 1300′
Difficulty – 3. The trail for the first miles is moderately uphill. The next two miles are either flat or gentle rolling terrain. The last third of a mile up to the observation tower is steeper, but very manageable.
Trail Conditions – 3. The trail is well-maintained, but there are a lot of rocks, so you’ll need to watch where you step.
Views – 4. You can really see some nice views close to the top.
Waterfalls/streams – 0. This trail is dry as a bone.
Wildlife – 2. Seems like a great bird-watching area. We saw an Indigo Bunting, Goldfinch, Wood Thrush, and Eastern Towhee. Also spotted a box turtle and Eastern fence lizard. We saw a bear when we hiked it in spring 2017.
Ease to Navigate – 4. Other than the one tricky spot at the switchback, it would be nearly impossible to get lost.
Solitude – 2. This trail is well-loved by a lot of locals, but the bulk of area tourists stick to the trails in Shenandoah National Park. You may see a few groups of hikers along the way, but it’s rarely a crowded trail.
All Photos
Directions to trailhead: The parking lot is the Stephens Trailhead on VA675. Coordinates: 38.72795, -78.51536
Adam takes in the view from the summit of Church Mountain.
On this eight-mile adventure, we visited a beautiful outcropping on Church Mountain. The hike had some steady climbing, a little bit of rock scrambling, some unfortunate bushwhacking, and a beautiful view at the top!
Christine Says:
We did this hike back in early April with our friends, Tony and Linda, of HikingUpward fame. (View their write-up for this hike) Tony noticed that this hike appeared for the first time on a recent edition of a PATC map and suggested we all go out and explore the relatively unknown area. He had heard rumor that there were two viewpoints to enjoy. We met them at a parking area along the forest service road (FR482). We could see the outcropping we were planning to hike to from the road below. Adam was still getting over an awful chest cold, so the distant view of the cliff-face made me worry for him. It looked very faraway and pretty high above us.
The first mile of walking followed the mile of FR482 that lies beyond a locked gate. During hunting season, you might find this gate open and be able to shave a couple miles off the total distance of the hike. At the end of a mile, you’ll find yourself at the start of the yellow-blazed Church Mountain Trail. There are no signs or trail markers – just blazes – so be careful to follow along. The trail crosses one shallow stream near the beginning of the trail. It also crosses several old road cuts (apparently there used to be TV towers on this mountain, or so I’ve heard). The climbing is fairly steady and unrelenting as you climb Church Mountain. The use of ten switchbacks makes the grade feel manageable, though I can see this feeling like a really tough climb on a hot day. There were some decent views of the rocky summit of Church Mountain from the trail.
A view of Church Rock from the trail below.
As you climb, the forest gets thinner and more open – almost meadow-like. When you reach the ridgeline at three miles, the trail is just a faint footpath through the grass. Look for a tree with a double set of white and yellow blazes. There should also be a small cairn slightly uphill of the two-blazed tree. This is the junction with the Talc Trail. From here, take a left and follow the white blazed Talc trail as it meanders over gentle terrain toward the summit of Church Mountain. This part of the trail was sparsely blazed and there were a couple significant blow-downs across the trail. I have a feeling that the vegetation along this stretch may get taller and thicker as the growing season progresses. I had permethrin-treated clothes and Repel spray on my exposed skin, but I still managed to pick up a tick somewhere along the Talc Trail. I noticed it already attached to my calf on the return leg of our hike. Gross!
The Talc Trail comes into a saddle about 3.6 miles into the hike. There is a large, very littered campsite in the saddle. There was an old tarp, several pots, old cans, shell casings, a satchel, and some other odds and ends laying around. It looked like hunters maybe used this spot as a base camp sometime in the last year or two. After passing the campsite, there’s a nice view of the valley off the left side of the trail. Once you pass this view, it’s time to start scrambling. The way to the top had a couple hard-to-see blazes and was pretty overgrown with brambles and thorns. I had capri length pants on, so my lower legs got scraped up quite a bit. Between the prickly vegetation and the ticks, I definitely suggest long pants for this hike.
Once at the top, there were lots of openings in the woods to explore different spots along the outcropping. There were several spots that offered beautiful, slightly obstructed views to the valley beyond. The slanted cliffside on the adjacent mountain was a unique feature to behold in the viewscape. I found two different geodetic markers on the outcropping – one with an arrow marking the direction of the true summit and another for the summit itself. We spent a bit of time enjoying and photographing the view, but I wouldn’t say this is a outcropping that would be good for a crowd or a lunch break. The space on the rocks is limited and most of the larger rock surfaces lie at precipitous angles. When I took photos of Adam standing on the pointy, blade-like rocks in the photo at the top of this post, my knees were knocking a bit. I don’t like looking through a camera lens when my feet are uneven ground – it gives me vertigo.
The ridge trail was through open, grassy forest.
After scrambling down from the summit of Church Mountain, we headed back along the Talc Trail. On this particular day, we decided to pass the junction for the trail down and continue to explore the other side of the white-blazed Talc Trail. It probably wasn’t a good idea. There was a tree with a mysterious blaze that sort of looked like it was trying to mark a campsite on a sidetrail, but we didn’t really find anything. Passing there, the trail dipped steeply down into an area that was badly overgrown with thorns and blocked by many blowdowns. There was clearly a trail there, but it was not maintained to the point it was worth following.
During the extra bit of exploration, my GPS said that we had come almost five miles. We were running low on snacks and water, so we opted to end our quest for a second vista and make our way back down. The return hike went by pretty quickly – all downhill, the same way we had hiked up. The beer and pizza at Swover Creek Farm Brewery were calling loudly. Refreshment was needed!
Adam Says:
As Christine mentioned, I was just getting over being sick. This was the fourth time I had been sick over the last 2.5 months (cold, sinus infections,etc.), so my cardio and ability to breathe well was still getting back to normal. Exploring a “new to us” trail when there isn’t any information about it online makes us feel like we are conquering uncharted territory. We had no idea how long the hike would be and we could vaguely guess at what elevation we would be climbing.
We did have a bit of a road walk through to get to the trailhead since the gate was closed. We walked on an open road that looks like had been heavily forested before. The scenery was open which made it more enjoyable than most fire road walks we have done. We eventually came to the upper parking lot and the trailhead. Once we started on the trailhead, we noticed the trail split after a few feet. There was an unblazed trail that went straight and then the yellow-blazed Church Mountain Trail took off to the right. Take this right and the trail starts a long gradual climb. Eventually, the switchbacks start and this is where you really begin to gain some elevation. There were a few times where we spotted the Church Rock cliff face through the trees and we were excited to see that the trail would eventually guide us to that impressive cliffside. The trail winds through several switchbacks until you eventually get to a part where the top of the hillside opens up into a grassy area and you follow sparse blazes up to the top of the hill.
Heading toward the Church Rock summit.
Eventually the trail comes to a junction with the white-blazed Talc trail. Take a left here to get to Church Rock. We paused at the junction for a bit to allow me to gain my breath and we ate some trail mix. Soon, a turkey hunter came up along the trail in full camo. This was the only person that we saw the entire day. Starting on the Talc Trail, we found the trail was very poorly blazed. You stay walking on this ridge for a bit and can see some views along the way. Eventually the Talc Trail descended and led us to an open meadow area where we saw the remains of a campsite with tarp and other items stowed here. We weren’t sure if these are things someone has just left behind to use the next time they camp up here or just someone that was littering heavily. Shortly after the campsite, the trail leads back up and you can see Church Rock sticking out. If I were to rename this rock jutting out, I would call it Young Man of the Mountain. It reminded me of Old Man of the Mountain that was a prominent rock feature in the White Mountains of New Hampshire that you may have seen prominently on New Hampshire license plates. The Old Man rock face fell off in 2003 which we regret never seeing. The profile of the rockface does look similar to it but it is much smaller. We got to the rock scramble just below Church Rock. Be very careful through here, because we commented how this would be a great place for snakes to hide in between all the cracks between the rocks or possibly sunning themselves on a warm day. There weren’t any clear blazes that really guided you up to the top, but we were able to find our way through the boulders and then were able to climb up a steep section to get to the top.
Summit of Church Mountain.
At the top, there were two areas where you could take in the view – and what an impressive view it was! On a clear day, you can see for miles at mountain ranges all around you. We found a couple of USGS markers at the top which named it Church Rock. If you do take in the view, be careful! There isn’t much space and the wind blowing at the top can make you feel uncomfortable. Falling from here would be deadly. When we left, I said that these may be some of the best views in Virginia and I will stick to that claim. The climb wasn’t terribly tough and we felt this is something that is probably best done during the year with fewer leaves as it opens up other views along the way. With this trail being fairly unknown (at least for now), the solitude made us feel like we had stumbled across a secret gem of Virginia. We headed back the way we came and explored a bit down the other side from the junction with the Talc Trail. That ended up being just a slog through the woods. There may be some views to be had with some heavy bushwhacking, but we didn’t feel like exploring that too long with all the blowdowns and briars on the trail.
When we got back to the car, we drove to Swover Creek Brewery for some great pizzas and beer. The owners have some dogs that roam around and beg a bit for pizza, but they were sweet companions. One of the owners was prepping to do a chain saw sculpture for the early evening, but we needed to head home so we missed out. The outdoor scenery at Swover Creek capped off a great day on the trail with friends.
More Photos
Trail Notes
Distance – 8 miles This hike could be shortened 7.5 miles if you skip exploring to the right after the junction on the ridge. It could also be shortened to 5.5-6 miles if the lower forest service gate it open.
Elevation Change – 1,800 – 2,100 ft (depending on how far you explore)
Difficulty – 4. This hike’s climbing is never terribly steep, but it’s still three miles of unrelenting climbing. The scramble at the end is a bit challenging.
Trail Conditions – 2. We hiked in early spring and found the first couple miles of the trail in relatively good shape. There was some overgrowth, but it was still easy going. On the ridge, the blazes are harder to follow and there isn’t much of a trail. Hikers will mostly meander blaze to blaze. I also think this area will become very overgrown as the growing season progresses.
Views – 4. These views were spectacular! They would warrant a five star rating, but there is no real place to sit and take in the view with a second person. The view rocks are narrow and precipitous. Adam and I were both nervous standing on them.
Streams/Waterfalls – 1. There is one small stream shortly after you come off the forest service road and start walking the actual Church Rock trail.
Wildlife – 3. There was so much scat from various animals along the trail. We didn’t see anything, but animals are definitely out there.
Ease to Navigate – 3. Generally, blazes and trail were easy to follow. The yellow blazed trail was in great shape, the white blazed ridge trail was less clear.
Solitude – 5. Until all the fine, adventurous readers of Hiking Upward and this site get out there, this trail is truly an unknown gem.
Directions to trailhead: Parking coordinates are 38.73325, -78.8732. The parking area is along a gravel forest service road. If you find the gate open, you can drive another mile closer to the actual trailhead. When we hiked in spring 2019, the lower gate was locked and the road beyond it was blocked by a large blowdown.
Download the full size PDF elevation profileDownload a full size PDF trail map.
This 10-mile loop could easily be a day hike, but we chose to do it as a short overnight backpacking trip. The route has some fairly nice vistas and there are a couple campsites near the summit.
Adam takes in the view from Halfmoon Mountain. Below: The trail started from the Bucktail Trail parking area – pass the locked forest service gate to begin; We hiked the loop counterclockwise – starting on the pinkish-purple blazed Bucktail Cutoff Trail; Walking along the Bucktail Cutoff.
Adam Says: Day One (4.7 miles)
This past year was not a good year for our backpacking hobby. The rain seemed endless and the amount of exceedingly heavy rain did a lot of damage to trails. We also got a new puppy in March. He needed a lot of training and we weren’t quite ready to trust him to someone else for long periods of time.
We did manage to get out for this one trip in August 2018. Halfmoon Mountain had been a trail we had looked at doing for many years. We heard there were great views and a sweet campsite with a view at the top. One thing that hurts this as a backpacking loop is the nearest water source to the top is about 1-1.5 miles away from the camp areas, so you have to haul what water you need to the top.
There is a nice campsite at the junction of the Halfmoon Mountain Trail and the Bucktail Cutoff Trail. Below: After the campsite, we followed the yellow-blazed Halfmoon Mountain Trail; The trail was steep and had some obstructed views; Junction of the Halfmoon Mountain Trail and the Halfmoon Lookout Trail.
We started the trip by parking along Trout Run Road (see GPS coordinates below). We started off on the Bucktail Trail and shortly walked through a gate blocking off the fire road. After a short distance, we came to a junction where the Bucktail Connector Trail branched off to the right while the Bucktail Trail takes a left (this is your return trip for the loop). We took the right Bucktail Connector Trail which has pinkish-purple blazes to follow this loop counter-clockwise. The trail began to climb up through forested terrain. Overall, this trail was well-maintained as it is a visible, narrow footpath cutting through the forest. There isn’t a ton to say about this section since there wasn’t a lot to see other than forest around you. The trail climbs for about the first 1.25 miles before descending slightly for about .5 miles and then there is another up and down until you reach another junction at 2.5 miles. There is a very nice campsite along the stream near this junction.
At the junction take a left on to the Halfmoon Trail (going right would take you to the Halfmoon parking area – where many hikers originate on a shorter out-and-back route to the summit). From here, the trail gets steeper and at the 3.5 mile mark, you reach the junction with the Halfmoon Lookout Trail, which takes off from the left. Take that left on to the Halfmoon Lookout Trail to reach the summit after another .8 miles. On our way up to the Halfmoon Lookout, we noticed a small footpath that branched off to the left which led to a larger camp area where we ultimately camped for the night. The last tenth of a mile is a steep rock scramble to the top. With crumbling rock underfoot, you really have to watch your step. At the top, there are two great viewpoints. The first you come across on the lefthand side of the trail and there is room for a few people at the top. There are remains of an old firetower at this lookout spot.
To visit second viewpoint, you descend through a campsite in a saddle and then over another rock scramble to to the view. This view spot will typically only work for about two people. It’s tight quarters.
One of the viewpoints from summit of Halfmoon Mountain. Below: The Halfmoon Lookout Trail is pretty flat until the last bit before the summit; The last hundred yards to the summit is a minor rock scramble (it’s steeper than it looks in the photos); Somebody chopped down numerous living trees at the summit to make the saddle campsite larger (jerks!); We thought about camping in the saddle at the summit, but didn’t like the tightness of the campsite.
We initially were going to camp at the top – we heard it was a great campsite. Some jerks had chopped down some live trees to build the frame of a lean-to (so much for Leave No Trace principles) on the campsite. We deconstructed the lean-to and tried to clear out the area a bit, but felt the campsite would have been a bit tight and we would have had people walking through our campsite all day to get to the second viewpoint. We decided to enjoy the views up here and then make our way back down. Investigating that side trail, we found a great spot to set up camp. Even better, the campsite below the saddle had its own little viewpoint for us to enjoy. We found a nice grassy spot to set up our tent on some flat ground. The bugs were a little hard to deal with at camp, but we made the best of it. We were later joined by another couple that shared our camping area.
We had a beautiful sunset on Halfmoon Mountain. Below: We chose this spacious, grassy site right below the summit; Our campsite had its own little viewpoint; There are remains of an old fire tower at the summit; Another camping part hung a hammock on the summit for sunset.
After we set up camp, we made our way back to the top to enjoy some late afternoon/sunset views. At the second view, another couple had set up a hammock somewhat precariously over the edge – a nice spot, but it did obstruct the views for anyone else. We had a nice dinner back at our campsite and settled down for the evening enjoying the sounds of the forest.
Christine Says: Day Two (5.3 miles)
I woke up early on the second day, so I could watch the sunrise. There were a couple decent places to catch the sun coming up – the small outcropping at our campsite and a spot about halfway up the scramble to the summit of Halfmoon. Both vistas were a bit obstructed, but I was still able to capture some pretty morning color in the sky. The day was already warming, so we ate breakfast and packed up quickly.
Sunrise on Halfmoon Mountain. Below: Our camp kitchen; Leaving camp in the morning along the German Wilson Trail; The German Wilson Trail is exceedingly rocky and steep in places.
We made our way back down the Halfmoon Lookout Trail for several tenths of a mile to its junction with the German Wilson Trail. I don’t know what color I’d call the blazes on German Wilson Trail – purplish? fuchsia? magenta? Something like that, I suppose. The German Wilson Trail descended very steeply over loose, rocky terrain. It wasn’t fun and I was very glad we had decided to hike the loop counter-clockwise and didn’t have to ascend this tough section of trail with full packs. The trail drops steadily for about a mile before coming to a grassy area with a shallow stream.
Look for a forest service gate to the left. You should see the orange blazes of the Bucktail Trail. The trail that continues toward the right is the Old Mine Trail – do not take this trail. Follow the Bucktail Trail, crossing the stream multiple times over the next .8 mile. When we hiked in August 2018, this section of the trail was in terrible shape. Big sections were washed out and we had to navigate by following sparse orange blazes. Lots of sections of footbed were completely disappeared by debris and erosion. Hopefully some trail maintenance has been done over the last eight months.
There were many stream crossings on Day 2. Below: Arriving at the junction of the German Wilson Trail with the Old Mine Trail and the Bucktail Trail; Following the Bucktail Trail; There were numerous stream crossings on the Bucktail Trail.
At 2.2 miles, you’ll come to a junction with the Cacapon Trail. That trail follows a small footbridge over the stream on the right. Stay to the left and continue following the orange blazed Bucktail Trail. At this point, the trail becomes wide and grassy. It also begins to ascend again. This climb wasn’t difficult, but the grass was pretty overgrown and there was a lot of direct sun/heat. I also saw a ton of poison ivy mixing in with the grass. The climb felt worse than the numbers make it look.
The trail was eroded and hard to follow in places. Below: Cliffs along the Bucktail Trail; This bridge takes you onto the Cacapon Trail; More scenes along the Bucktail Trail. Much of the Bucktail Trail was a grassy, overgrown road.
The last three miles on the Bucktail Trail were pretty dull. It was basically a trudge along a grassy roadbed back to the parking area. All in all, this hike didn’t really live up to my expectations. It was nice to get out after such a long backpacking drought, but this trail definitely is not destined to become a favorite. If I were to hike it again, I think I’d park at the Halfmoon Mountain parking area and just do this as a seven mile, out-and-back dayhike.
We got back to the car by late morning, so we decided to get some lunch and a cold beer before heading home.
Trail Notes
Distance – 10 miles
Elevation Change – Day One: 1545 feet, Day Two: 477 feet
Difficulty – 3. This was a fairly easy backpacking route. The first day has about a mile of serious climbing, but the rest is very gradual. The second day has a steep, rocky mile of downhill, followed by a bunch of stream crossings, and then a moderate climb along a forest road before gently descending back to the parking area.
Trail Conditions – 3. The trail was in decent condition for national forest. The first day along the Bucktail Cutoff and Halfmoon Mountain Trail was excellent. The second day had rougher trail conditions: the steep descent when you first turn onto the German Wilson trail had lots of loose softball to football sized rocks and was a bit challenging to walk on, there was a trail washout near the final stream crossing on the Bucktail Trail, and the road portion of the Bucktail Trail had loads of tall grass and poison ivy.
Views – 3. There are several vistas at and near the summit of Halfmoon Mountain, however they are all small and partially obstructed.
Streams/Waterfalls – 3. There are nice streams on both day one and two, but the closest water source to the summit campsites is about 1 – 1.5 miles downtrail. In drier times, I expect campers might have to walk up to 2.5 miles down from the summit for water.
Wildlife – 3. We saw several deer and had a whippoorwill at camp.
Ease to Navigate – 2.5. The trail has spotty blazing and intermittent trail signs. Blazes are not equally distributed for hikers headed in both directions, sometimes we had to look back to check for blazes to make sure we were on the same trail. There are some trail washouts on the Bucktail Trail that make navigating the stream crossings a little tricky. Also, many blazes are faded and painted in inconsistent colors (for example – the orange Bucktail Trail blazes were often closer to red).
Solitude – 2. There is one small campsite and one large campsite near the summit. We had to share the large campsite with another hiking party. There was also a steady stream of dayhikers visiting this peak.
Maps
Download a full size map for DAY ONE.
Download a full size elevation profile for DAY ONE.
Download a full size map for DAY TWO.
Download a full size elevation profile for DAY TWO.
Directions to trailhead: Parking coordinates are 39.01431, -78.66388. The parking area is at the top of a gravel loop right off Trout Run Rd. The sign along the road will be for the Bucktail Trail. Do not park at the lot labeled Halfmoon Trail – that is the 7-mile out-and-back route, rather than the loop outlined here.
This four mile hike offers lots of hiker solitude and some nice obstructed views. The area is popular for dirt-bikes and ATV use, and while they have their own trail system, you may find engine noise distracting at times on this hike.
Adam hikes the Massanutten Trail toward Waonaze Peak. Below: Park in the ATV lot at Edinburg Gap; Look for the orange-blazed Massanutten trail on the other side of 675; Mountain laurel was in full bloom when we did this hike.
Christine Says…
Near the end of May, we met up with our friends, Tony and Linda, to do a little hiking near Edinburg along the Massanutten Trail. Our original plan was to hike out to Opechee Peak, but the forecast had some pretty fierce thunderstorms, so we cut it short and did a four-mile out and back to Waonaze Peak. I think both of those peaks have really interesting names for our area. I did a little research into the name origins (probably Algonquian), but didn’t find anything. I also wonder if Waonaze rhymes with mayonnaise. Hmmm…
Overall, the hike was pretty basic. We started at the big ATV parking area at Edinburg Gap. ATV trail users must pay a fee to ride the trails, but hiking is free. There’s a informational kiosk at the parking lot that outlines the different trails in the area. From the parking lot, we crossed the road and picked up the orange-blazed Massanutten Trail. The trailhead is a little hidden in the trees, so look for blazes and a mileage sign to make sure you start in the right direction.
For the first mile, the trail meanders gradually uphill through dense stands of mountain laurel. We were lucky enough to hike during the peak bloom, so it was especially beautiful. At one mile in, we came to marked spring. Shortly after the spring, we passed a second trail mileage marker. Funnily, it was identical to the marker at the Edinburg Gap crossing. The Bear Trap Trail was 2 miles away at Edinburg Gap and still two miles away at a little over a mile into the hike. I guess sometimes trail signs should just be regarded as estimates!
We saw a big, fat timber rattlesnake along the trail. Below: Trail signage was kind of funny. Even after we had come a mile, the distances on the signs had not changed. Bear Trap Trail was two miles ahead at all times; We passed a spring with a broken sign warning people to treat the water before drinking; A full view of the rattlesnake.
After the mileage sign, the trail gets quite a bit rockier and steeper. We saw a big timber rattlesnake basking in the sun. This terrain is ideal for them, so be sure you’re on the lookout. Timber rattlers are typically non-aggressive and reclusive. Basically, if you ignore them, they’ll ignore you. Someone once told me this quote about timber rattlers — “Timber rattlers are first cowards, then bluffers, and last of all warriors.” I’ve found this to be true with my encounters.
The steeper, rockier section of the hike makes several big switchbacks and passes several big boulder jumbles. As you climb toward the high point of Waonaze Peak, the view toward Fort Valley and Kennedy Peak opens up. The overlook itself is nice, but partly obstructed. It would be much prettier in the winter when leaves are down. After we reached the high point, the trail quickly begins to descend into a saddle between Waonaze and Opechee peaks. We turned around at that point, but will tackle Opechee another day.
After the hike, we headed into Woodstock for beers and lunch at Woodstock Brewhouse — always a favorite!
Adam Says…
As Christine mentioned, this is a hike that we plan to do again and get all the way to Opechee. Seeing that the summit views were a bit overgrown, our plan is to try this one again when it is cooler and leaves are mostly down. We were the only hikers from this parking lot as this area is primarily used by ATVs on the trail systems nearby. There were a few times that we could see the ATV riders through the trees (and more occasions that we could hear their engines). When we started the hike, we had heard there were storms coming in the early afternoon. With the violent storms we have been getting over the summer, we didn’t want to risk doing too long of a hike on this day.
The obstructed viewpoint near the top of Waonaze Peak. It would be better in the winter. Below: A rocky descent; The trail has lots of rocky footing and boulder jumbles; More pretty mountain laurel.
The first mile of the hike was uphill but not terribly tough in terms of elevation or footing. The mountain laurel in full bloom made this a gorgeous early stretch of trail. The second mile was a bit more windy and rocky with lots of loose stones, so watch your footing especially on the downhill. Eventually, we came to an area of trail that gave us some obstructed views of Kennedy Peak. We thought about calling this hike Kennedy “Peek”, since you get obstructed views but we thought that would be just too confusing. Tony and Linda stopped at the overview here, but we decided to press on. We were first trying to see if there were better views at the top of the hill, but then the trail took off away from the view and was leading us through the saddle towards Opechee. Not wanting to leave our friends too long (and worried about clouds rolling in), we decided to turn back and make our descent.
Post hike refreshment at Woodstock Brewhouse. It’s one of our favorite post-hike hangouts.
We caught up with our friends and then continued downhill. I’m not a fan of any snakes, so I was especially cautious when we neared the area where the timber rattler had been spotted earlier. He had moved on (making me a tad nervous looking around for other spots he could be hiding) and we didn’t see any other snakes on the way back. When we got back to the cars, we then headed over to one of our favorite post-hike spots – Woodstock Brewhouse. We always enjoy talking about our hikes over great food and beverages here. While this peak didn’t lead to an amazing viewpoint, it was a good leg-stretcher that we had not explored before.
Trail Notes
Distance – 4 miles (Check out the stats from Map My Hike)*
Elevation Change – 1280 feet
Difficulty – 2. It does have just a bit of uphill, but fairly easy if you take your time.
Trail Conditions – 3. The trail isn’t well traveled, which makes it a little tougher on conditions. There are some rocky, steep sections with loose rock on the trail.
Views – 2. During the winter, it would probably rate higher. The views of mountains and farms below is nice, but obstructed.
Waterfalls/streams –0. Non-existent.
Wildlife – 3. We did see lots of small toads and saw the timber rattler. My guess is that a lot of the bigger animals like bears and deer are scared away by the noise of nearby ATVs. There were lots of pretty bird calls in the air.
Ease to Navigate – 3.5. Once you find the trail, it is fairly easy to stay on course. The signs showing that Bear Trap Trail is always two miles away was quite funny, so I don’t know how much you can trust these.
Solitude– 4.5. The trail you should mostly have to yourself, but you will hear some ATVs early on in the hike on nice weekend days.
Directions to trailhead: GPS Coordinates for this hike are 38.789125, -78.519384. Look for the ATV/OHV parking area at Edinburg Gap. Cross Rt. 675 and look for the orange-blazed Massanutten Trail across the road from the parking lot.
* MapMyHike is not necessarily accurate, as the GPS signal fades in and out – but it still provides some fun and interesting information.
This 13.7 mile stretch of Appalachian Trail is mostly a walk through ‘the green tunnel’. There isn’t any grand or memorable scenery, but as you approach Troutville, there are some pretty rolling meadows with mountain views.
Adam walks along the Appalachian Trail. Below: We had lunch and beers at the brand new east-coast Ballast Point before setting off on our hike; Amazing Trail Angel, Molly, met us for lunch and gave us a ride; Glimpses of views through the trees.
Christine Says: Day One – Blackhorse Gap to Trailside Campsite (4.2 miles)
For quite a while, we’ve had this 13.7 mile section of trail standing out as ‘unhiked’ in the almost 360 mile unbroken stretch of Appalachian Trail we’ve completed so far. The section between Black Horse Gap and Daleville doesn’t offer any great scenery, so we never felt rushed to get out there and tackle the miles. Doing it as a day hike would have required four hours of driving and a shuttle service. The logistics of hiking it seemed like a hassle, so we filed it under ‘later’.
In late June, Adam and I were driving into work together and making weekend plans. It went something like this…
Adam: What do we have planned for the weekend?
Me: Nothing. Want to hike?
Adam: What’s the weather like?
Me: Gorgeous!
Both: Hey… let’s backpack that odd section we have left to finish!
After making the decision to go, plans fell quickly into place. Our pet sitter was available. We had plenty of trail food left from our Maryland hike. Then, after a chat on Facebook, my friend Molly said she could shuttle us! The final icing on the cake was the fact that the new east coast Ballast Point brewery had just opened in Daleville. On Saturday, we met Molly at Ballast Point and had lunch before hitting the trail. People may go to the Ballast Point for the beer, but they’ll walk away remembering the great food. I had the best kale-quinoa-avocado chicken salad. I still daydream about it a month later.
After lunch, we left our car at Valley Cleaners in Daleville and Molly drove us to our start point at Black Horse Gap. I’ve been online friends with Molly for a while, but this was our first in-person meeting. She was just like I imagined she would be – friendly, enthusiastic, outdoorsy, and all-around awesome! I love all the people I’ve met through the Appalachian Trail community! We said our good-byes at the trailhead. Adam and I headed south, descending gradually but steadily.
We reached Wilson Creek shelter really quickly. It was too early to stop and make camp, so we decided to push on and find a trailside campsite. Below: Wilson Creek; We found a nice campsite along a small, unnamed stream; Cards at camp.
The trail was really narrow and built into the shoulder of the mountainside. In 2.4 miles, we reached Wilson Creek shelter. It was only 2:00, but there were already a few hikers at the shelter, settled in for the night. We asked a couple northbounders if they’d passed any nice trailside campsites in their last few miles. Everyone said they remembered sites, but not specifically how far away they might be. Adam and I decided to continue hiking and gamble on finding a place to camp somewhere in the next couple miles.
After the shelter we decended another half mile down to Wilson Creek. There was a campsite, but it was literally right on the trail, so we kept hiking. After crossing Wilson Creek, we had a bit of uphill for about a mile. It wasn’t tough uphill, but it was still tiring in the mid-afternoon heat and humidity. At 4.2 miles, we reached an unnamed stream marked in our AWOL guidebook. There was an established campsite a couple hundred feet off the trail. It was the perfect site for the night – flat and close to water.
We set up camp, collected water, and spent the afternoon playing cards. We cooked dinner and spent the evening talking and reading. Before it got too dark, we set off to find a perfect tree for our bear hang. it turned out to be the one thing our otherwise perfect site was lacking. We did the best we could with a branch that was a little bit low and flimsy. Sometimes you just have to settle for the best possible option and hope that determined bears stay away from your campsite.
We got into the tent around 8:30, just as the woods were getting dark. It was a warm and sticky night, so we left the vent and the rainfly wide open. We both left our sleeping bags home on this trip and used lightweight quilts instead. It was a good decision and we both stayed warm (maybe a bit too warm) during the night. We eventually drifted off to the sound of distant owls and whippoorwills.
Adam Says: Day Two – Trailside Campsite to Daleville (9.5 miles)
The next morning, we ate breakfast, packed up camp, and were back on the trail in under an hour. We had a very steep but short section of uphill to climb to start things off. We were breathing deep, but we quickly reached the apex of the hill just about .2 miles in. The trail descended just as steeply and we arrived at Curry Creek at .8 miles. At the creek, there was a Curry Creek Trail to the west of the trail, but stay on the white-blazed AT. From the reliable water source of Curry Creek, we began to climb again up another steep section of trail. At the 1.9 mile mark, we reached an area where the trail then began to descend again. The trail descended for about a mile and then rose up again with a steep climb to reach the junction with the Fullhardt Knob Shelter at 4.4 miles. We took the side trail for .1 miles to reach the shelter. We stopped and ate a snack here, knowing that most of the climbing was behind us.
The Appalachian Trail climbed the mountain on a series of curves and switchbacks. Below: We saw a lot of views through the trees; Crossing Curry Creek; A whitetail deer watching us from the woods.
While we were at the shelter, we were joined by a couple that was working on section hiking the AT and we enjoyed talking about some of the things we had both seen along sections of the trail. At the shelter, there is a privy and a cistern behind the shelter to get water (water should still be treated before drinking). We were good on water, so after relaxing a few minutes, we pushed on. We rejoined the AT at 4.6 miles and began our big descent. The trail had a few switchbacks on the way down and it was rather steep in sections. We came across a sign stating that the trail soon passes through private lands and to stay on the trail. At 6.5 miles, we passed through a fence, beginning the start of some of these private lands. We had a short bump to climb before we reached VA 652/Mountain Pass Road at 6.8 miles. This bump however was the prettiest part of the trail as you ascend over a large field and have nice mountain and farmland views all around you from the top. A few tenths of a mile later, we went through another fence stile. We then crossed over another road, over train tracks and then US 11. At 7.6 miles, we passed underneath I-81 by walking on VA 779 underneath the interstate.
There were a couple moderate climbs in the morning.
The sun was hot and beating down on us. We were desperately hoping to find some shade, but most of the hike from here on is out in the open. We were at least glad we got an early start. The trail ascended to the left after the overpass and led us through a grassy swath of land that cut through some of the brushy area around it. Around the 9.5 mile area, we finally arrived at US 220 and Daleville, Va. We crossed the road to get back to our car that we had left at Valley Cleaners. When we got back to the car, it was right around noon. Whenever we go through Daleville around lunch, we always stop at Three Li’l Pigs barbecue. We were hot, tired, and hungry so it was a great place to cool down and eat some amazing food. Our waitress could see that we were hikers and we talked to her about what we were doing. While we chatted, she brought us an endless stream of Diet Dr. Pepper refills. She said she was hoping to do some AT hiking, but hadn’t decided if she wanted to do a section or the entire thing. As we continued to stuff our faces, she came over with a bowl of banana pudding. She told us that AT hikers get a complimentary serving of banana pudding. While I think this is more intended for thru-hikers, we didn’t turn it down!
The open meadows near Troutville were beautiful. Below: Posing at the road crossing; Open views from the meadow’s high point; Crossing the train tracks.
We then decided to bookend the trip with another visit to Ballast Point. We got to sample a few beers before we had started, but since they had over 20 on tap, we decided to get sample pours of a couple of others. We then made our way back home. We were very glad to finish this section of elusive trail.
The home stretch into Daleville. Below: The I-81 underpass; More open meadows before Daleville; Piney woods.
Trail Notes
Distance – 13.7 miles
Elevation Change – 2810 ft.
Difficulty – 3. This was a pretty easy backpacking route. The switchbacks early on day two were pretty long and steep, but it was the only challenging part of the hike.
Trail Conditions – 4. The trail was in typical Appalachian Trail shape for this part of Virginia – well maintained and nicely graded.
Views – 2. The rolling meadows near Troutville were lovely.
Streams/Waterfalls – 0. This is a quite dry stretch of trail. There is a small, low-flow spring at Bobblets Gap and a seasonal stream at Bearwallow Gap. There is NO WATER SOURCE at the Cove Mountain Shelter, so plan ahead.
Wildlife – 3. We saw several deer. At night we heard a barred owl and several distant whippoorwills.
Ease to Navigate – 4. The trail is well marked and easy to follow. There are road crossings, but the white blazes are easy to follow in most places.
Solitude – 3. We actually saw very few people on this hike considering the beautiful weather and its proximity to the parkway.
* MapMyHike is not necessarily accurate, as the GPS signal fades in and out – but it still provides some fun and interesting information.
Directions to trailhead: We parked our end point car at Valley Cleaners in Daleville. It’s along Route 220 where the Appalachian Trail crosses. Please ask the cleaners for permission to park here and park where they tell you to. Parking here is a courtesy provided to hikers that can be rescinded at any time if people take advantage. Coordinates for the dry cleaners are: 37.393538, -79.906817. From there, we took a shuttle to Black Horse Gap on the Blue Ridge Parkway. Coordinates for the hike’s start point are: 37.424611, -79.757202. Head right and start on the trail.
This 2.5 mile hike passes a small waterfall and two beautiful rock crags. The views are pretty limited, but it’s still a worthwhile hike in the vicinity of Hone Quarry. If you visit in early July, the blooming Rosebay rhododendron is impressive!
Tony and Adam launched a drone from the top of Hidden Rocks. Below: Adam crosses Rocky Run – a small stream on the hike; The trail splits and makes a lariat loop near this pretty small waterfall; Blooming Rosebay Rhododendron.
Adam Says…
Hidden Rocks was truly trying to stay hidden from us. It took a while for us to find the location of this hike from another website, it was steering us about 35 minutes off course. We ultimately arrived at the correct parking area and met up with Tony and Linda from Hiking Upward to start our hike for the day. This hike is relatively easy and if you want to just do a quick, out-and-back hike to the main rock outcropping, you would be looking at around a two mile hike. We decided to make a loop out of this hike and at the time, there wasn’t a lot of information about this hike.
The hike started from the right of the parking area. The yellow-blazed trail starts fairly easily and consists of a few ups and downs, reminiscent of a roller coaster before finally descending down to Rocky Run which you will reach at .65 miles. Crossing the stream, you can see there is a smaller trail that branches to the right, but stick to the left. You will quickly come into a thick tunnel of rhododendron. You cross Rocky Run a couple of more times before reaching a small, scenic waterfall at .9 miles. Here, the trail splits as you will see yellow blazes that go to the left and right of the waterfall. Take the trail to the right of the waterfall (the left trail will be how you return on the loop) that leads steeply above the waterfall area.
A rock climber descending Hidden Rocks. Below: Christine and Adam atop Hidden Rocks; Ripening blueberries at the top of the crag; A sideview of Hidden Rocks.
In a short distance, we arrived at the base of the Hidden Rocks face where we came across a man rock climbing and rappelling off the structure. The trail skirts along the left of the rock base and then climbs steeply up some rocky steps. At the top of the trail, the trail splits. Head up to the right on some wooden steps to reach the top of the Hidden Rocks structure that you saw from the base a few moments ago. There was a campsite at the top and a couple of ledges that you could enjoy the view.
Tony set up his drone to take pictures and video of the area around us. We were hoping to get some shots of the rock climber, but he had just switched spots on where he wanted to climb, so it took him a long time to position ropes to start his rappel. Tony let me even steer the drone a bit which was a blast. Christine and I posed for a high elevation selfie before we packed up the drone and continued our hike.
We went back to where the trail split leading us to the rock outcropping and then continued on the trail. This part of the trail was less-traveled and narrow. After skirting along another large rock face, I found a break between two large rock areas and decided to explore. I had to climb by holding onto rocks and roots, making it not an easily accessible sidetrip that should only be done if you feel capable. I ventured out to the right and left areas of the rock. The rock to the right led to precarious footing and fearing I was going to look for a handhold and upset a timber rattler, I decided to not go any further on that rock. On the left rock, I found a way to climb to the very top and found a very small perch to enjoy some views that I thought were better than those on Hidden Rocks. I called back down to the rest of the group and Tony and Christine decided to climb up also. We then made our way down the steep decline and joined Linda back on the trail.
The trail descends rather steeply after this point, causing us to take our time make sure we had good footing. We reached another stream crossing at 1.4 miles and at 1.6 miles we were back at the small waterfall, completing the small lollipop loop of this hike. We retraced our steps and made it back to our car at 2.5 miles.
Christine Says…
We were thrilled to see Tony and Linda again for the second time in the span of just a few weeks! We were also pleased to have cooler, less humid weather for this hike (compared to the sauna-like conditions we had for our hike at Shrine Mont). The morning started off with a bit of chaos related to bad directions. We originally found the Hidden Rocks hike outlined on the Virginia Wilderness Committee website. Their write-up included GPS coordinates that took us to some random road – in the middle of nowhere – about 30 minutes from the actual trailhead. We arrived at their designated coordinates and found ourselves in the totally wrong place with no cell phone service. Fortunately, Tony and Linda were also running a few minutes late, and we all arrived at the trailhead parking around the same time.
The hike started off over a mini ‘roller coaster’ – with the trail steeply ascending and descending over a series of gullies and washes. Eventually, we descended a gentle hill down to Rocky Run – a shallow, winding stream. The trail was shaded by a tunnel of Rosebay Rhododendron that was just starting to bloom. At about a mile in, the route got a bit confusing when we reached a split in the trail near a small waterfall. The Virginia Wilderness directions said there was a loop trail, but added that the loop route was not on their map (it’s on ours – see below). We took a guess and headed steeply uphill on the trail on the right side of the split. In just a couple tenths of a mile, we arrived at the bottom of a towering rock wall – Hidden Rocks. There was a local guy rock climbing. He had a beautiful Vizsla dog – she barked a lot, but was very friendly and hung out with us the entire time we visited the rock.
The second crag on the hikes is known locally as Hidden Cracks. Below: The view from the top of Hidden Cracks; Christine scrambles down Hidden Cracks; We enjoyed beers and Grillizza Pizza after the hike.
To reach the summit of Hidden Rocks, we followed the trail along the left side of the crag, eventually climbing steeply to the top via a small set of constructed stairs. The top of Hidden Rocks has two outcroppings and a spacious campsite with a fire ring. The views are limited – all you really see is another hillside of trees across the ravine. If you’re looking for expansive views of mountains, distant valleys, or the lake in Hone Quarry – this is not the hike for you! Fortunately, the outcropping still gave Tony enough room to launch his drone. He was able to get a few cool shots looking back at Hidden Rocks.
From Hidden Rocks, we came back down the stairs and continued following the trail across the ridge. We passed another towering cliffside on the right – this one called Hidden Cracks. Adam found a split in the rocks with a jumble of boulders. We were able to climb to the top and get another view – this one included an obstructed peek at some distant mountains. Soon after Hidden Cracks, the trail descended, crossed the stream again. We arrived back to the split in the trail that made the loop, passing the small waterfall once again. From there, we retraced our steps back to the parking area.
After our hike, we headed back into Harrisonburg so that we could take Tony and Linda on a tour of Harrisonburg’s craft beer scene. We started off at Wolfe Street, then proceeded to Billy Jack’s for lunch. The day rounded out with stops at Pale Fire and Brothers (with dinner from the Grillizza food truck). It was a fun day and we really enjoyed exploring this little gem of a hike!
Trail Notes
Distance – 2.5 miles (Check out the stats from Map My Hike)*
Elevation Change – 390 feet
Difficulty – 2. This is doable by most people. If you do the entire loop, be careful climbing up to the top of the other rock outcropping. That short climb feels more like a 4-4.5.
Trail Conditions – 3.5. Overall the trail was in great condition, but the lollipop loop part of the trail was not as maintained.
Views – 2.5. The views were nice, but not as expansive as I would have liked since most of your views are blocked by the mountain directly in front.
Waterfalls/streams –2. Rocky Run was pretty with rhododendron nearby. The small waterfall creates a peaceful setting.
Wildlife – 0. We didn’t see anything.
Ease to Navigate – 2.5. There weren’t any signs for junctions which caused us to get confused about which way to go when we first crossed Rocky Run and again at the waterfall junction.
Solitude– 4. This isn’t heavily used, but you may see some people at the top of Hidden Rocks or rock climbing.
This 5.6 mile hike offers a great scenic viewpoint, a cool rock formation to explore, and a chance to stroll around historic Shrine Mont. While the hike is generally moderate, almost 1,150 feet of the the ascent occurs in just over a mile of trail.
The rocky outcropping on Great North Mountain offered spectacular views. Below: Orkney Springs – water pours from the rocks; The Shrine at Shrine Mont – a beautiful outdoor chapel; The Cross Trail included the Stations of the Cross.
Adam Says…
Tony and Linda from Hiking Upward had suggested we tackle this hike together from Shrine Mont. We met up on the porch of the Virginia House. Since Christine and I got there a little early, we went inside this main lodge building and found a copy of their trail map at the front lobby. Most of the people there were there for a church retreat. When we got together, we walked down the road and found a sign directing us to the shrine. We walked up to the shrine, which was a cute outdoor chapel made of stone, reminding me of an old historical spanish mission church where the congregation would meet up in an outdoor location to worship.
At the shrine, you will see a kiosk and sign pointing to the cross and north mountain, which will start the main hike. Along this part of the trail, you will pass by signs along the way that depict the Stations of the Cross. The trail leads along a side of a large hill. Once the trail switches back, you arrive at the large cross and Cross Observation Deck at 1.1 miles. You can climb up a few flights to an observation deck. We were hoping for a nice view at the top – maybe there was at one time, but the overgrown trees have taken away most of the view.
Shrine Mont has a large cross built atop an observation deck. Below: Views from the deck; The cross; Seventeen year cicadas were everywhere on the day we hiked.
Continuing along, the trail walked a ridgeline for a short time before descending again. At 1.75 miles, we reached a junction and took a left to start the trail up North Mountain. You quickly pass a forest road and at 1.85 miles, you will arrive at another junction (the Bradford Trail branches off to the left). Stay straight on the North Mountain Trail, which follows a gravel road for a short distance, before turning left to stay on the trail. The trail is a constant uphill from this point, with some of the trail being quite rocky and steep. Around the 2.6 mile mark, we reached a large cliff. I decided to explore a little further and found on the left side of the cliff, there was a way up that allowed me to walk along the shelf of the cliff as the rock sloped upward. Of course, I wasn’t the first to get this idea as I found a fire ring and lots of graffiti on the cliff shelf. I could see this being an interesting spot for rock climbers.
We jumped back on the trail and continued our climb up. The trail was very steep and rocky in some of these next sections, making for a slow pace to the summit. Eventually, you will skirt an edge where you get some obstructed views along the way and you won’t have much further. We eventually made it at 3.3 miles to a campsite and the summit. When you arrive, you will be at the back side of the views. Go around to the right of the rocks and you will find some rocky ledges that you can climb up about 15 feet to get to the shelf of rocks for an outstanding view. This climb up the rocks should only be done if you feel comfortable and I wouldn’t recommend this for families. Once you climb over the top, you are on a sloping downward piece of rock covered with some slippery lichen. There is a small area that you can sit and enjoy the views, but could be hard to accomplish if a lot of people are at the top at once.
Tony had brought along his drone to try and get some good photos of the scenery around us. I helped him launch it and it got some great shots of us and the views all around. When Tony was bringing it back in, he mixed up the controls and it came crashing down on the rockface and into the trees below. We both made a path along the side of the rockface and scrambled through a ton of briars to retrieve the drone. It turned out that it was still operational and we enjoyed watching the video of the crash and retrieval.
We made our way back down retracing our steps for most of the hike. At 4.85 miles, when we reached the junction that would have led us back to the Cross Observation Deck, we instead stayed straight and followed the signs back to Shrine Mont. The trail winds back down the mountain and goes behind some of the cabins of Shrine Mont. We got back to the main road and the parking area at 5.6 miles. We took a few minutes to explore the Shrine Mont area before making our way on to Woodstock Brewery for some food and drinks.
This rock formation was huge! Adam enjoyed climbing on it. Below: The hike had a few shallow, easy stream crossings; The trail was very rocky in many places; A nice campsite next to the summit.
Christine Says…
We always enjoy a chance to meet up with our friends from Hiking Upward. Tony and Linda suggested meeting at Shrine Mont and hiking to a rocky outcropping on Great North Mountain.
We thought we were doing an easy 3-4 mile hike, but it turned out to be a bit longer and much more challenging than expected. I think most of the challenge was due to two factors: 1)the heat/humidity and 2) most of the ascentwas stacked intojust a mile and a half of the hike.
I got my first hint that I wasn’t going to have an easy day on the trail when we started climbing to theCross Observation Tower. Thetrail to the cross is short but fairly steep. I trudged along, thinking to myself ‘I feel really hot. I’m sort of lightheaded. I hope I don’t barf!’ By the time we got to the cross, I had to sit down and cool off. This was one of the first really hot and sunny days we hiked this summer and I just wasn’t used to it. It didn’t help that my Camelbak was full of <gag> tepid tap water.
For a while after the tower, the way was easy going. The trail was moss-covered and followed a gentle grade. We heard millions of cicadas singing in the trees. It was a constant, other-worldly static sound. We saw a few of the large insects clinging to branches, dead on the ground, or buzzing lazily around in the air. One of them even flew right into my face and bounced off my forehead. I was too hot to care. I didn’t even manage a half-hearted swat.
Adam Launching the drone. Below: A look back at our group from Tony’s drone; Views from the rocks
Eventually the Ridge Trail intersected with the North Link Trail. We followed that for a short distance to the North Mountain Trail. At first the North Mountain trail was deceptively easy. I was feeling better and cooling off. Then the trail started getting rockier. We had to constantly watch our footing on the shifty rocks beneath our feet. After a couple tenths of a mile, the trail started to climb rather steeply uphill through stands of dense mountain laurel and rhododendron. It felt close – the air was sweltering with no hint of a breeze. I started to feel woozy again. Eventually, we reached the towering cliffside/cave in the middle of the woods. We all took a break, cooled off, and some time to explore the rock formation.
After the break, the climbing got even steeper. I’d hike a quarter mile and then need to rest. I almost never take breaks unless there is something interesting to see. In this case, I just thought it would be interesting not to pass out. I found myself sitting on the ground with my head between my knees. I was so hot – I felt like a furnace was stoked up in the core of my body. The lukewarm water in my pack wasn’t doing anything to cool me off. So, I took lots of breaks and trudged until we finally reached the ridgeline. At that point, the climbing moderated and we only had a few more tenths of a mile to go. But, we were also in more direct sun, so it was even hotter. Adam was really the only one of us hiking at a quick pace. Tony and Linda were behind me a bit, and I kept watching the space between Adam and I get bigger and bigger. I started seeing stars, and proclaimed to nobody in particular ‘I NEED TO SIT DOWN NOW OR I WILL PASS OUT!’ In a minute or two, Tony and Linda caught up and Linda poured ice water on my neck and head. They were both hiking with frozen bottles of water and Gatorade.
After another rest, I was able to make the final push to the summit and its rocky outcropping. I scrambled to the top of the rock and found a nice breezy spot to lie down and enjoy the magnificent view. I ate a Larabar and watched Adam and Tony play with (and crash!) the drone. After a pleasant stay at the top, we made our way down. The downhill hike was much faster and easier, and I felt completely normal again. I’m not sure why I struggled so much with this hike. Yes – it was hot and the climbing was stacked into one small section, but I’ve certainly done harder hikes on hotter days. The only thing I can guess is that I was fatigued from doing a lot of hiking in the days leading up to the Shrine Mont hike. I’d done a 16 mile, a 4 mile, and an 8 mile hike and was already pretty depleted. In the hikes since this one, I’ve started making gigantic ice cubes for my Camelbak. I have plastic mason jars that I fill and freeze. The jars are just small enough that they just fit through the circular opening in the bladder, but they’re big enough to not melt quickly.
The Virginia House at Shrine Mont. Below: Vegetation around the trail was dense; A nice place to sit by the Shrine Mont Pond; Post-hike goodness at Woodstock Brew House.
Our hike down followed the same route we came up for most of the way. We were planning on turning onto the Bradford Trail, which would have added another mile or two to our hike. But everyone was hot, tired, and thinking about beer – so we opted to follow the much shorter route down the North Link Trail back to Shrine Mont.
We got back to the cars, cleaned up, and made our way for an afternoon at Woodstock Brewery. They had excellent barbecue and we all enjoyed their vanilla porter.
Difficulty – 4. Some of this trail is quite rocky and steep making for a hard climb at the end.
Trail Conditions – 3.5. The trail was well-maintained and traveled with very few blow-downs, but the rocky terrain makes for some tough steps.
Views – 4. If you aren’t bold enough to climb up the rock outcropping, this score would be a lot lower. You are treated with a nice panoramic view if you do.
Streams/Waterfalls – 1. There are some small stream views, but nothing substantial.
Wildlife – 1. This is a popular trail, so wildlife tends to stay away.
Ease to Navigate – 2.5. The trail system is tricky. Some of the junctions are not well-marked and labeled on the printed map. Download both of the maps from this page and you should be fine. On our way back, there were several options leading down to Shrine Mont, which could bring some confusion as well.
Solitude – 3. We ran into some people that were staying for a retreat as well as locals.
* MapMyHike is not necessarily accurate, as the GPS signal fades in and out – but it still provides some fun and interesting information.
Directions to trailhead: Coordinates for parking are 38.795500, -78.815932
From Woodstock, VA, head southwest on VA-42 for 13.8 miles. Turn right on State Route 720 and in .7 miles, stay straight to join State Route 721. Go 1.5 miles and then stay straight (right fork) to join State Route 722. Go .5 miles and turn right on to VA-263West. Follow this for 3.7 miles and it will lead to Shrine Mont. Park in the parking lot behind the pavilion and the main Virginia house. Walking from the parking lot, take a left at the main road walking in front of the Virginia house and follow the road until you see signs directing you to the Shrine.
This 11 mile loop has everything – stunning views, scenic streams, a clear mountain pond, and even a small waterfall. You could hike it as a long(ish) day hike, but there is so much great camping along the way that it’s ideal for an easy overnight backpacking trip!
Views Along the Massanutten Trail. Below: The mountain laurel was just starting to bloom in mid-May; Christine and Adam attempt to fix Kris’s broken trekking pole with duct tape; Kris makes her way up the steepest, rockiest part of the hike.
Day One (4 miles)…
One thing that was true about May in 2016 was we had a TON of rain in Virginia. It was hard to find a time to actually go for a hike in good weather. We had been itching to try and do an overnight trip, but the threat of drenching downpours and storms was standing in the way. We had some very stressful days at work, so getting out and finding some peace away from the hustle of everyday life was just what the doctor ordered. In looking at the weather closely, we decided we may be able to get a short, overnight trip in if we timed it just right. We decided to do something very close by to our home to allow us to get on the trail quickly to get in a few miles before it started to get dark. We had called our friend, Kris, who was going to accompany us, and told her to be ready anytime during the Saturday afternoon. We felt like Doppler radar experts as we were tracking the storm movement and finally around 2:30PM, we felt the rain was going to stop to allow us to hike.
We got to the Massanutten Visitor Center and saw a lot of cars in the parking lot. We were thinking there was no way that others were on the trail at this same time due to all the rain we had in the last few days. A large camper was at the front and I talked to one gentleman out front. As it turns out, it was the Massanutten Mountain Trails 100 race that weekend, a 100-mile race along the Massanutten Mountain range that covers 16,200 feet of ascent. We were a little worried about the trail conditions and how many runners we may see along the way, but nothing was stopping us now.
Two nice views come in the first mile and a half of hiking. Below: The ascent along the orange-blazed Massanutten trail is fairly rocky and steep; Pink lady’s slippers were blooming everywhere; We hear rumbles of thunder!
From the parking lot, we took the white-blazed Wildflower trail (do not take the Nature trail at the end of the parking lot). This trail leads downhill and passes some comical information plaques along the way. At .3 miles, when you reach an intersection with the Massanutten South trail, take a right to start on the orange-blazed Massanutten South trail. The trail goes up a steep ascent and we found with the recent rain the footing was slippery and mucky in a few parts. On the ascent, we found that Kris’ new trekking poles weren’t locking properly, so we paused to get some duct tape to try and make a repair (not long after we realized that our fix didn’t hold up and she lost part of her pole somewhere along the trail). The uphill was quite steep and had us breathing heavily with our heavy packs, but this is the toughest part of the entire hike. We passed a hiker who was doing the reverse route and he told us right near the summit there were about 100 pink lady’s slippers along the trail. We decided to count what we had saw; while we didn’t see 100 of these rare wildflowers, we did count close to 60 over the weekend which may be the most we’ve ever seen on a trail. We came to the first overlook around the 1.6 mile mark (the second is just shortly ahead), took our packs off for a few minutes and enjoyed the panoramic views. The clouds after the recent storm blanketed the sky. We stopped at the second view also before continuing on. At 2.5 miles, the trail splits; head to the right to join the Bird Knob trail.
The Bird Knob trail is a ridge walk and is quite flat, which was a nice change from climbing. But, the sky began to get dark and we started hearing thunder in the near distance. Within five minutes, we started to feel rain. We decided to put on our pack covers and rain gear and it was just in the nick of time, as the clouds unleashed a downpour mixed with pea-sized hail. We kept marching through the hailstorm and within about 20 minutes, the storm had passed.
We wanted to camp by Emerald Pond, but the sites were taken early in the day. We found an equally nice spot in the meadow. Below: The rumbles of thunder turned into a downpour with hail – we were all prepared; Kris and Adam scout out the open meadow that would soon be our back-up campsite for the night; This grassy path departs the meadow. Shortly after this photo, we turned back and set up our camp at the top of the meadow.
At 3.8 miles, we reached a large open field with a campsite. We decided to press on to get a spot at Emerald Pond, so we skirted the left side of the field to stay on the trail. The trail then turns into an old logging road going downhill. About halfway down the road, we came across a couple of rain-soaked college-aged guys. They were asking if there were any campsites up ahead and they told us all the spots were taken at Emerald Pond. We mentioned the big field with lots of room and they left the way they came to go get the rest of their group and their packs. Since we heard there were no spots, we decided to turn around and get a nice spot in the open field. Christine scouted around and saw there were also sites in the woods next to a small hidden pond, but the bear scat around the site was a deterrent. We decided to camp near the fire pit we saw at the top of the field. One thing that was nice about camping in this grassy field was we knew we would have a comfortable floor bed to pitch our tent. We set up in a short amount of time and we were soon joined by about eight others in the field that night.
The wind had picked up as the storm front had moved through and I felt unprepared in terms of clothing. I switched out of my damp clothes, but I didn’t bring enough warmer clothes for that evening. We made a quick meal and were even able to start a fire at camp despite the wetness of the wood. After dinner, I was getting a little colder each minute, so I decided to call it an early night and get in my down sleeping bag while Kris and Christine talked until nightfall. It was a crazy day on the trail, but one thing I like about hiking is it is always an adventure.
Day Two (7 miles)…
The morning dawned sunny but frigid! Adam had been cold all night, so I let him stay curled up in his sleeping bag while I went to take down the bear hang. No one else who camped in the meadow was stirring, but the three of us quickly cooked breakfast and packed up camp. On our way out of the meadow, we all got a good chuckle over one of the tents set up nearby. It was technically pitched, but in no way like it was supposed to be. We’re guessing someone borrowed a tent and couldn’t figure out how to set it up. I love a backpacker’s ability to improvise!
After walking downhill to the bottom of the meadow, we picked up the old logging road for a few tenths of a mile until we reached an unmarked gravel road on the left. The gravel road led to Emerald Pond – a beautiful, spring-fed mountain pool. The last time we visited, we had the pond all to ourselves and very much enjoyed the peace and solitude. This time, the pond was crawling with other campers. They had big tents, tons of gear, and were dressed in jeans and work boots. We’re guessing that they parked on the nearby forest service road and walked the tenth of a mile to the prime campsite on the pond. I guess it’s worth noting that the early bird gets the worm when it comes to staking a claim on an Emerald Pond campsite! We didn’t want to intrude, so we just took a few photos from the near-side of the pond. The campsite side is prettier, so don’t miss visiting if the spot is open.
Emerald Pond is a much sought after campsite. It was full of people by mid-day. Below: Breaking down camp in the morning; Kris leaving camp; Adam passes the locked gate onto the forest service road.
We left the pond and continued a tenth of a mile to the forest service road. There was a locked gate where the trail met the road. At that point, we took a right and hiked downhill along the road (orange blazed) for a few tenths of a mile until we reached the junction with the Roaring Run Gap trail. The trail is on the left side of the forest road and is marked by a wooden post with two sets of blazes – light purple and pink. The climb up Big Mountain via the Roaring Run Gap trail (blazed purple) was our last big climb of the trip. For a little less than half a mile, the trail climbs steeply uphill over rocky terrain. At the top, we passed a small/dry campsite. On the descent, which came almost immediately, we glimpsed beautiful views through the trees. There were switchbacks and quite a few muddy spots along this stretch of trail. We cheered on the last few runners on the Massanutten 100 Miler race. Even if you’re finishing at the back of the pack in a race like that, you’re still tougher than we’ll ever be! We also met the sweeper who was jogging the course behind the last racer to pick up reflective hang-tags that helped keep runners on course during the night.
After about a mile of walking along the purple-blazed Roaring Run trail, we reached an unmarked junction with the pink-blazed Browns Hollow trail. The trail is a left turn from the Roaring Run Gap trail. Over four miles of the hike on day two follows this Browns Hollow trail – so look for the pink blazes.
We got nice glimpses through the trees on the Roaring Run Gap trail. Below: The route follows the forest service road for a short while. We shared much of our hike with runners competing in the Massnutten 100-miler; Roaring Run Gap trail is steep and rocky for a short while; Views through the trees.
The Browns Hollow trail starts off passing through pretty forest. There are stretches of trail that pass through impressive blueberry bushes. Eventually, you descend to Browns Run. Along the way, you’ll pass a couple nice campsites suitable for one or two small tents. Both sites had fire rings and easy access to water.
There are several beautiful rapids and a small, but lovely, waterfall on this section of trail. We all enjoyed walking through the verdant green forest, while listening to the sounds of bubbling water. It was gorgeous and peaceful. If you look around you’ll notice the stream runs through a pretty deep and dramatic gorge. The far side of the stream goes upward quickly and steeply. There were even a couple places that looked like there had been recent landslides. All the trees and dirt slid straight down the mountainside and ended in a jumble at the bottom. This part of the hike was gentle and easy, so we made great time and enjoyed chatting along the way. We counted more pink lady’s slippers and admired other spring blooms along the trail.
Small Waterfall on Browns Run. Below: Everything was lush and green from all the spring rain; One of several campsites along Browns Run; Walking the Browns Run Trail
At a little over the five mile mark of day two, you’ll cross Browns Run. I imagine most of the time this is a shallow, easy stream crossing. We hiked the trail after weeks of rain, and still found the crossing very doable. The stream was only 12-18 inches deep and there were enough large rocks to rock hop most of the way. There were a few places I had to submerge the toe of my boot on an underwater rock, but all three of us crossed without any trouble. Right after the crossing, there is a fantastic group campsite. The area is large and clear with space for multiple tents.
We continued to follow the Browns Hollow trail as it became a wide old road. We passed lots of blooming mountain laurel along this part of the hike. Eventually we came upon a picnic area with a shelter. At that point, we took a left onto the marked Wildflower Trail at this point. It passes a series of interpretive signs before eventually leading back to the Massanutten Visitors Center (closed) where we started out the prior morning.
Kris crosses Browns Run. Below: A large campsite right after the stream crossing; The trail turns into an old roadbed; Walking past blooming mountain laurel.
It was still before noon when we wrapped up, so we decided to drive back into Harrisonburg for lunch. We enjoyed burgers at Jack Brown’s and then headed over to Brothers Craft Brewing to enjoy their new Verdure series. They’ve done a tart Berliner-Weisse beer infused with all kinds of seasonal/summer fruits. They had Blackberry Verdure on tap. It was the perfect reward for a fun weekend of hiking.
Trail Notes
Distance – 11 miles Check out the stats from Map My Hike [Day 1] [Day 2]*
Elevation Change – 2290 ft.
Difficulty – 2.5. The toughest stretch is the initial push up to the viewpoints.
Trail Conditions – 3. There were a couple of blowdowns, some muddy patches due to the heavy rain, and a stream crossing, but footing was overall very good.
Views – 4. The two viewpoints provide some nice panoramic views.
Streams/Waterfalls – 3.5. Browns Run is a nice stream and a good water source. While not a stream or waterfall, Emerald Pond is extremely picturesque and would make a nice swimming hole.
Wildlife – 3. The start of the Wildflower Trail had us surrounded by birds. With bear scat spotted near our campsite, there is some bear activity here.
Ease to Navigate – 2. There are multiple trails that cross over between Bird Knob and the Massanutten trail. Take a map to make sure you are going the correct way.
Solitude – 2. While you won’t see many on the trail, we found a lot of locals like to drive in close and visit Emerald Pond.
* MapMyHike is not necessarily accurate, as the GPS signal fades in and out – but it still provides some fun and interesting information.
Directions to trailhead: GPS coordinates for this hike are 38°38’35.4″N 78°36’43.0″W. From I-81, take exit 264 for US-211 toward New Market/Timberville/Luray. Head east on US-211/W Old Cross Road and go .3 miles. Turn left onto N. Congress St. and go .3 miles. Turn right onto US-211 East and go 4.5 miles. Park at the old Massanutten Visitor Center parking lot on the right. The trail starts towards the front of the lot on the Wildflower Trail.
Our first overnight backpacking trip of the season allowed us to watch the green of spring creeping its way up the mountainsides.
Day One…
When you are gifted a sunny 75-degree weekend in April, you must snatch it up and go backpacking! At least, that is my belief on the matter. We had just such a weekend in mid-April this year, so we decided to get out there and work on completing some more Virginia Appalachian Trail miles.
We’ve already completed all the miles between Jennings Creek, VA and Harpers Ferry, WV, so we decided to pick up the next section south – Black Horse Gap northbound to Jennings Creek. It was a relatively short route for an overnighter – twelve miles the first day and just three miles the second day. We always try to do about 20 miles on a one-night trip, but access to road crossings for our shuttle drop-off made fifteen miles the best logistical option for this trip.
We looked up shuttle options in our AWOL Guide, and ended up hiring Homer Witcher to give us a ride to our start point. Homer is a great trail ambassador – he’s in his 70s and still finds the time and energy to run on the AT most days. He, his wife, and children are all avid, lifelong hikers – completing multiple section and thru hikes. He told us he and his wife are planning another thru in 2017. We greatly enjoyed talking to him on the ride over to Black Horse Gap.
The signage for the AT along the Blue Ridge Parkway is nice. Below: Our start point at Black Horse Gap; Adam hikes through a rhododendron thicket; We had nice views through the trees for most of this hike.
About a half hour later, we found ourselves standing along the Blue Ridge Parkway at Black Horse Gap. We found the trail easily and started our northbound walk. Over the first few miles of hiking, the AT crosses the Blue Ridge Parkway a couple times – at Taylors Mountain and Harveys Knob. Both crossings offer panoramic vistas of the valley below. Most of the views in this section include a nice look at Sharp Top, one of the areas most popular mountains for day hiking. The terrain along this stretch of trail could best be described as rolling – there were lots of ups and downs, none dramatic. We passed a large group of Boy Scouts hiking along the trail. They turned out to be pretty much the only people we saw on our hike.
By 12:30, we reached our lunch stop at Bobblets Gap shelter. We ate and assessed our water supply. We knew we’d have another chance to resupply water at around the 8 mile mark, but read that the water source at Bearwallow Gap was iffy and seasonal. I still had over two liters of water, some in my Camelbak and a full Smartwater bottle. Adam filled his Camelbak to three liters and also had a full Smartwater. Our planned campsite at the Cove Mountain Shelter is dry (no spring, no stream) and the closest water source to camp is three miles away in either direction, so we tried to guess how much water we would need to cook and hike the next day. It’s a delicate balance between carrying too much heavy water and not enough, risking dehydration.
After lunch, we leapfrogged the same group of scouts again. They had decided to skip the shelter since they had moms and lunch waiting for them at a road crossing ahead. The post-lunch hiking was decidedly more uphill than the morning hiking. We gradually climbed, crossing the parkway two more times at Peaks of Otter and Mills Gap. At Mills Gap, we were able to get rid of our lunch trash at a roadside trashcan – being able to get rid of garbage is a real treat for any backpacker! We took a rest at Mills Gap, reclining on a picnic table in dappled shade. The temperatures weren’t that hot – maybe high 60’s, but the sun was incredibly strong and relentless through the mostly leafless trees. We both got sunburned despite using sunscreen.
The trail crossed the parkway numerous times – usually near vistas. Below: One of many road crossings with a view; Blooming columbines; A huge retaining wall under the parkway; Bobblets Gap Shelter; Lunch and shelter log; A very dank water source.
After a little more climbing from Mills Gap, we started a nice descent to Bearwallow Gap and the VA43 road crossing. We passed a murky, dank wildlife pond along the way – maybe it’s the bear wallow! At the road crossing, we sat like a pair of hobos under the Blue Ridge Parkway road sign. People driving past looked at us like we were a novelty. There turned out to be plenty of water in the seasonal stream at the crossing, but neither of us had drunk much more water so we decided not to resupply again. That wasn’t the best idea – more about that later!
We crossed VA43 and immediately began the climb up Cove Mountain. Within the first hundred feet there was a sign reminding us about the dry conditions at Cove Mountain Shelter. We still were certain we had plenty of water. As we ascended, I said to Adam “This isn’t bad! The trail looked WAY steeper on the map!” Adam replied, “I hope you’re not jinxing us.” Well, I totally jinxed us. The trail got much steeper and due to past forest fires, we were climbing in direct, unrelenting sunshine at the hottest part of the day. We both went through much more water than we had planned for. I chewed gum to try and preserve what water I had left. We passed a couple small campsites along the ridge of Cove Mountain. We contemplated stopping for the day, but decided to press on to our planned stop.
Cove Mountain (one of several mountains by this name in the Blue Ridge) was the only tough part of the day. Below: Sitting like a hobo at the road crossing; It’s not nice to shoot at hikers; Beginning the climb up Cove Mountain; Campsites along the top of Cove Mountain; Adam gets nice views as we begin the descent to the shelter; Evidence of an old forest fire.
The descent of Cove Mountain was incredibly beautiful. I think the area burned in 2011 or 2012, leaving spectacular open views along the ridgeline. I was thankful for such beautiful, distracting views the last couple miles because my feet were killing me. In addition to not refilling water when we should have, I made the mistake of trying out new gear on a long(ish) hike. For many years, I have hiked in Thorlo thick-cushion hiker socks with a pair of silk sock liners. I don’t get blisters -ever- with that combo. This time, I decided to wear my Darn Tough wool socks. They’re super popular with hikers and were always comfortable for me on day hikes – even long day hikes, but apparently I do need the extra cushioning I get from Thorlos when I’m carrying a heavier pack. Lesson learned – don’t mess with the tried and true, especially when it comes to your feet!
We hobbled into camp around 3:30 – almost 12 miles in about 6 hours included stops for lunch, rest, and photography – not a bad pace for our first trip of the season. We set up camp and spent the remainder of the afternoon reading and napping. Despite being dry, Cove Mountain Shelter is an idyllic spot. The shelter is typical, the privy is new, and there was space for a good number of tents both around and on the ridge above the shelter. Recently, I learned an interesting piece of trivia about the Cove Mountain Shelter from my friend Jeff Monroe (of Wandering Virginia). Apparently, this shelter used to sit at Marble Springs (where we camped on the second night of our Jennings Creek to the James River section). When the area around Marble Springs became designated wilderness, the shelter was moved to its current location on Cove Mountain.
It was neat to see Rt. 43 wrapping around the mountain. Below: The Cove Mountain Shelter; Tents and bear bags.
Before dinner, Adam found a good tree and slung the rope for our bear hang. As we prepared dinner, we rationed out our water, so we’d have enough for breakfast and our second day of hiking. We were both pretty thirsty and wished we had filled up to the maximum at Bearwallow. We even ended up drinking our dishwashing water. Lots of ‘Leave No Trace’ folks always drink their wash water, but it’s also acceptable to broadcast water away from camp. We usually broadcast. But this time, we enjoyed a lovely ‘tea’ flecked with a mélange of buffalo chicken, macaroni and cheese, and crème brulee. Mmmm! Even after conserving water, we really didn’t have much left for both breakfast and tomorrow’s hiking.
As we were finishing dinner, Boy Scouts started rolling into camp – first two, then five more, then another four, then the final three an hour later. We were sure they had come off the trail at VA43. They’d been hiking since 9:30 a.m. – many of them were first time backpackers, a few were first time hikers! The troop was from Roanoke Rapids, NC. They were nice folks, but clearly new to backpacking, as they took the time to remove our bear hang from the tree, thinking it was litter! Adam was not happy about having to get the rope back over the precarious branch, but in the end he agreed it was a little bit funny.
We got to watch sunset from the hillside above the shelter. Below: The sun goes down over the Blue Ridge; Enjoying our view!
After dinner, we hiked up the hill behind the shelter to catch sunset. The view was lovely! As soon as the sun went down, it got cold pretty quickly. The dry, breezy conditions precluded a campfire, so we crawled into our tent a little after 8:00 p.m. I fell asleep but was woken several times during the night to sounds of foxes, whippoorwills, and owls! Despite the interruptions, it was a peaceful night and I was so glad to be out in the woods again!
Day Two…
We knew our next day on the trail was going to be quite easy. We woke up early before the Boy Scouts were even stirring. It was quite chilly, so we were probably moving a little faster in the morning to get the blood flowing. We packed away all of our stuff and enjoyed a breakfast of Little Debbie Peanut Butter Pies and coffee. The plan was to have hot granola with Nido, but we didn’t have enough water left to make both hot cereal and coffee, so coffee and cookies won. We left the shelter area and were on our way in a little over an hour. Just about .2 miles away from the shelter, we came to a nice western morning view from the top of Cove Mountain. The trail continued to ascend, but it was hardly noticeable. From camp, the trail ascends about 200 feet in .8 miles. At this point, the trail descends the rest of the way. We were impressed with the views through the trees along the way.
A couple tenths of a mile past camp, we got a nice view from Cove Mountain. Below: Tents in the morning sun; Adam hikes along the Appalachian Trail; Christine descends toward Jennings Creek.
The trail on the descent was easy walking for the most part. The trail had just a few longer switchbacks on it, but it was a nice, peaceful walk in the woods. It was just a short amount of time before we could hear the sound of water from Jennings Creek and around 3.2 miles we were back at Jennings Creek Road. We took a right and crossed over the creek for some picturesque creek scenes before getting to our car on the left side of the road.
Adam makes his way downhill through the evergreens. Below: Pretty Jennings Creek; The parking area at the AT crossing; We saw zebras on the way home.
We had previously planned to get to Sonic in Waynesboro for a celebratory lunch and a stop at Rockfish Gap Outfitter’s Anniversary Sale (where I got a new Osprey Atmos pack), but arriving at the car around 9 a.m., we knew we had some time to kill. We decided to stop on our way at the Virginia Safari Park near Lexington. If you are a fan of animals, this is a must-see place to visit. We drove through the loop (we could even see rhinos through the window) with a bucket of feed while zebras, emus, alpacas, elk, and yaks tried to rip it from our hands. After driving through the loop, we also walked through their other exhibits, where we could see giraffes at eye level, walk among kangaroos, and see other animals through cages – tigers, hyenas, and monkeys. I believe this was our third time visiting and there are always new additions every time we visit.
This section of the Appalachian Trail has some wonderful scenery on it. If you are looking for a shorter, overnight trip with lots of views along the way, this hike won’t disappoint – just plan for water.
Trail Notes
Distance – 14.6 miles Check out the stats from Map My Hike [Day 1] [Day 2]*
Elevation Change – 1650 ft.
Difficulty – 3. This was a pretty easy backpacking route. It was perfect for our first outing of the season and gentle injury recovery.
Trail Conditions – 4. The trail was in typical Appalachian Trail shape for this part of Virginia – well maintained and nicely graded.
Views – 5. There are many fantastic viewpoints along this route. Most of them come from overlooks along the Blue Ridge Parkway – which you’ll cross multiple times on this route.
Streams/Waterfalls – 0. This is a quite dry stretch of trail. There is a small, low-flow spring at Bobblets Gap and a seasonal stream at Bearwallow Gap. There is NO WATER SOURCE at the Cove Mountain Shelter, so plan ahead.
Wildlife – 3. We saw several deer and had a barred owl and a whippoorwill in camp.
Ease to Navigate – 4. The trail is well marked and easy to follow. There are road crossings and several other trail junctions, but the white blazes are easy to follow in most places.
Solitude – 3. We actually saw very few people on this hike considering the beautiful weather and its proximity to the parkway.
* MapMyHike is not necessarily accurate, as the GPS signal fades in and out – but it still provides some fun and interesting information.
Directions to trailhead: To drop off first car: Take exit 168 off of I-81 toward Arcadia, VA. Turn on to State Route 614/Arcadia Road off the exit. Arcadia Road becomes Jennings Creek Road. After 4.5 miles, you will see a large gravel parking lot after crossing Jennings Creek and you will see a sign for where the Appalachian Trail crosses. Park in this lot. Coordinates 37.529352, -79.622693 To drop off second car and start your hike: Continue down Jennings Creek Road from where you parked (not arriving the way you came). In 1.8 miles, turn right on to State Route 618/McFalls Creek Road. Go 4.1 miles and then turn right on to the Blue Ridge Parkway. Follow this for 8.6 miles until you reach the small pulloff on the right side for Black Horse Gap. With not much space here for a vehicle, you will likely want to park along the side of the road. Just a few feet on the fire road, you will see the sign for the Appalachian Trail junction. Coordinates: 37.424611, -79.757202. Head right and start on the trail.
Christine takes in the view on Signal Knob. Below: Adam checks out the GWNF information board; The stone cottage; Wild rose.
Christine Says…
Picking day hikes is getting challenging for us – we’ve done most of the popular ones in the area. Yet, somehow, Signal Knob had repeatedly escaped our notice. We figured a pleasant Sunday in early June was a perfect day to tackle something new!
We started our day early with a big breakfast in Harrisonburg. Then we stopped for donuts at Holy Moly in Strasburg. We decided to save the donuts for post-hike, but Holy Moly is so popular (especially on the weekend) that we didn’t want to take the risk of them selling out.
Parking at the Signal Knob trailhead is abundant and completely off-road. When we arrived there was a small handful of other cars there. We started out from the trail on the north side of the parking area – look for orange blazes (Massanutten Trail) and a GWNF information board. The trail climbed steadily right away. We passed a really neat stone cottage right along the trail very early in our hike. It was in great condition and still looked in-use. Right after the cottage, we stepped over a small stream and continued uphill. The lower parts of the trail were lined with wild roses and sweetpeas. As we climbed higher, mountain laurel became abundant. The trail was openly exposed to the sun and offered some nice views along the way.
There were some pretty views through the trees on the climb to Signal Knob. The higher we climbed, the prettier the mountain laurel became. Low elevation laurel had already gone to seed. Below: A neat tree before the Buzzard Rock Overlook; Buzzard Rock Overlook; Fort Valley Overlook.
At 1.5 miles, we reached an opening in the trees which gave a backlit view of Buzzard Rocks on the other side of the valley. I can’t look at Buzzard Rocks without recalling the horrible ankle sprain I suffered there several years ago! We chatted with an older gentleman at the overlook – he warned us that the trail was about to get rocky! He wasn’t kidding! For the next 1.25 miles, the trail was a loose jumble of pointy, shifting rock.
At about 2.5 miles, we passed the marked Fort Valley Overlook. The view was mostly overgrown, but I can imagine it lovely when the trees were smaller! Gradually the rockiness tapered off; and so did the climbing. The trail became a pleasant stroll through the woods. We passed several nice campsites and passed the junction of the Meneka Peak trail at about 3.5 miles. The last .8 of a mile to Signal Knob was ever-so-slightly downhill.
When we reached the WVPT building, we thought the open vista behind the building might be the view. We chatted with a pair of hikers there and asked ‘Is this the only view up here?’ Both of them said ‘Yes… it’s the only view we’ve ever seen and we’ve hiked here lots of times.’ We took them at their word and felt a little underwhelmed by the view – it was obstructed by powerlines and disrupted by a steady buzz from the broadcast tower. Not wanting to doubt them directly, I whispered to Adam ‘This can’t be it… there’s no view of Strasburg and there’s supposed to be one!’ We decided to explore further before hiking down the fireroad. I’m glad we did!
Leaving the WVPT tower, do not follow the fire road downhill. Go past the tower and look for a trail than runs parallel to the ridge. If you follow it a short distance, you’ll come to a marked overlook – Signal Knob. We spent some time at the knob relaxing and enjoying a bit of breeze. Signal Knob is a nice overlook, but not a spectacular one. It’s a bit closed in and overgrown. And, if I’m being 100% honest, looking down into Strasburg with its housing developments, water towers, and roads just isn’t as breathtaking as looking out into raw wilderness. I did also enjoy our ‘company’ at the summit – for whatever reason, Signal Knob was hopping with toads. We saw dozens of them! I’ve never seen so many together!
The trail up Signal Knob is extremely rocky. Below: Once you reach the ridge it’s a bit less rocky; WVPT broadcast; A view behind the tower.
After enjoying the view, we followed the trail slightly downhill past the overlook. A trail marker directed us toward the Tuscarora Trail. We soon merged onto the fire road we had seen near the broadcast tower. We followed it downhill for almost a mile before reaching another trail junction.
The turn onto the Tuscarora trail is marked with another national forest information board. There is also a nice bench at the junction – probably an Eagle Scout project! Turning onto the Tuscarora Trail, you’ll immediately cross Little Passage Creek. It was a very easy rock hop. From there the trail climbs uphill for a little less than a mile. This section was a bit steeper than what was required to reach Signal Knob, but still squarely moderate.
Along the ridge, we passed the other side of the Meneka Peak trail. Looking at how these trails interconnect is interesting and definitely opens up some longer loop options. At about 6.4 miles, the trail passed through a small grassy area and began to descend steadily. There really wasn’t anything remarkable about the rest of the hike. It was just a walk through the woods. We saw a big bird’s nest of some sort. We saw tons of ripening blueberries. We passed some boy scouts on a weekend backpacking trip. We passed the pink blazed Sidewinder trail at 8.1 miles. We crossed a stream. At around 9.5 miles we passed a spur trail to Elizabeth Furnace. At this point the blazes went back to orange.
We found this part of the hike a bit confusing. Our maps and GPS disagreed on distances for waypoints late in the hike. There was also a lot of trail construction and rerouting going on. New paths were cut into the woods all over the place. Fortunately they all went in the same general direction. We tried to follow the most established paths. A little over a half mile past our last trail marker, we spotted a parking lot through the trees. Adam thought it was a different one from where we started, but our MapMyHike app indicated we made a full loop and we popped out on the south side of the lot where we had started our hike several hours earlier.
The day had become hot, humid, and overcast, so we were glad to be back at the car! We shared just one of the donuts (Peach Bellini!) so we could save room for a big lunch at Spelunker’s in Front Royal. On the way to lunch, we talked about the hike a bit. We both agreed that it wasn’t one of our favorites. I think it’s popular because of its vicinity to northern Virginia, but of the knobs in the Massanutten/Fort Valley area – I like Strickler and Duncan quite a bit more!
Adam Says…
We have had many people recommend Strickler Knob to us over the years. Knowing of its popularity, we thought it would be a good idea to get an early start. When we arrived, there were not many cars there, but from the size of the parking lot we knew it was a matter of time.
We started out on the north (right) side of the parking lot. The orange-blazed Massanutten trail started off our loop hike. The trail starts uphill and soon passes a large stone cabin on the left, while you can see a stream below to the right. You cross over the stream and then loop back in a northerly direction. At 1.5 miles, we reached Buzzard Rocks overlook. We talked there to an older man who was out for some morning exercise. He warned us of about a mile of pointy rocks ahead. Since he was hiking solo, he told us he doesn’t want to risk hurting himself and just goes to this overlook and back.
The trail takes a sharp left turn and then within a few minutes, we found the rocky area we had been warned about. Wear comfortable shoes, as the rocks were pointy and you always had to look at your feet to navigate through safe footing.
You can see the town of Strasburg from Signal Knob. We weren’t terribly impressed with the view. Below: Toads everywhere; The fire road; The information board at the junction with the Tuscarora Trail; A glimpse of a view.
At 2.4 miles, we arrived at the sign for the Fort Valley overlook. The trees and leaves have this very obstructed now, but you can get a glimpse of the valley below. At 3.4 miles, we arrived at the junction with the white-blazed Maneka Peak trail, but continue on the orange-blazed Massanutten Trail. The trail leveled out at this point, giving us a nice forest walk until we reached the broadcast tower at 4.3 miles. We walked behind the building on a small path and saw nice views on the backside of the tower. We were feeling disappointed when the two girls had said this was the view. My idea of views doesn’t include power lines cutting through the landscape. There were lots of bugs flying around us, so we didn’t stay here long.
We pushed on from the tower and saw that there was a huge fire road leading down, but the trail blazes seemed to continue forward back into the woods. We decided to take this route and then within a short distance came to the real view. We both felt bad that these girls, who had been up here several times, had always missed the real view up here. The view here did give us nice views of Strasburg below. I noticed that one of the rocks had a plaque below it that was put in here for a couple that loved coming up here.
Adam walks along the Tuscarora Trail. Below: Stream crossing near the end of the hike; Pretty butterfly; Holy Moly!
The trail then loops back and does join the fire road very shortly. We walked down the steep fire road and came upon another hiker who had just hiked up the fire road to the summit. The fire road was a fairly steep descent and had nice wildflowers along both sides. At 5.5 miles, we came across a bench and a junction with the blue-blazed Tuscarora trail. We took this trail to start our return trip. The Tuscarora Trail was more overgrown and the climb up Meneka Peak was the steepest climb on this hike. We were finally finished with the uphill at 6.4 miles and then the trail descends on the other side of the ridgeline just as steeply.
The trail descends for a good distance. At 8.1 miles, we passed by the pink-blazed Sidewinder trail and the trail leveled out a little more. We continued on and the trail became orange-blazed again at 9.5 miles. We followed the orange-blazed trail through the tricky section mentioned above and then arrived back at a lower section of the parking lot at 10.2 miles.
Overall, I was underwhelmed on this hike. The views were nice, but I have seen a lot better view hikes. I can imagine that in a few years, the trees and bushes may obstruct the main view even further.
Because of the inner-connectivity of all the trails in this area, there are many options for backpacking loops through this trail system. The loop that we chose didn’t have a lot to offer after the summit. If I was doing this again, I would likely do just an out-and-back hike to the summit, making this an 8.6 hike.
Difficulty – 3. The climbing on this trail is all easy to moderate, but the distance and loose/rocky footing increase the difficulty rating.
Trail Conditions – 2.5. The trail is rocky and shifty – especially the middle part.
Views – 3. There are descent views from Signal Knob and the WVPT broadcast facility. While other reviews give the vistas on this hike top marks, we thought they were just OK. The WVPT view had powerlines and the Signal Knob view is starting to get a bit overgrown and looks out toward an suburban area.
Streams/Waterfalls – 2. There were a couple small streams that could be used as water sources. We believe they dry out pretty quickly based on the fact that they were already on the low side after a week of rainy days.
Wildlife – 3. We saw lots of cute toads hopping around, and supposedly this is a good place for a potential bear sighting.
Ease to Navigate – 2.5. The blazing in this area is very thorough, but trail junctions are inconsistently marked. As of June 2015, it appears the forest service is working on a reroute of the last .5-.75 miles of the hike. There are lots of unmarked trails that criss-cross the established, blazed trail.
Solitude – 3. We saw a good number of couples and solo hikers out for a day hike. We also saw a group of college students and a boy scout troop out backpacking.
Directions to trailhead: From I-66, take exit 6 for US-340/US-522 for Front Royal/Winchester. Turn on to US-340S/US-522S/Winchester Road. Go 1.2 miles and take a right on to VA-55W/W Strasburg Road. Go 5.1 miles and take a left on to State Route 678/Fort Valley Road. Go 3.4 miles until you reach the large parking lot on the right. Park here. The trail starts on the right side of the lot. You will see the wooden information board that will mark the beginning of your hike. Parking coordinates: 38.93503, -78.31956


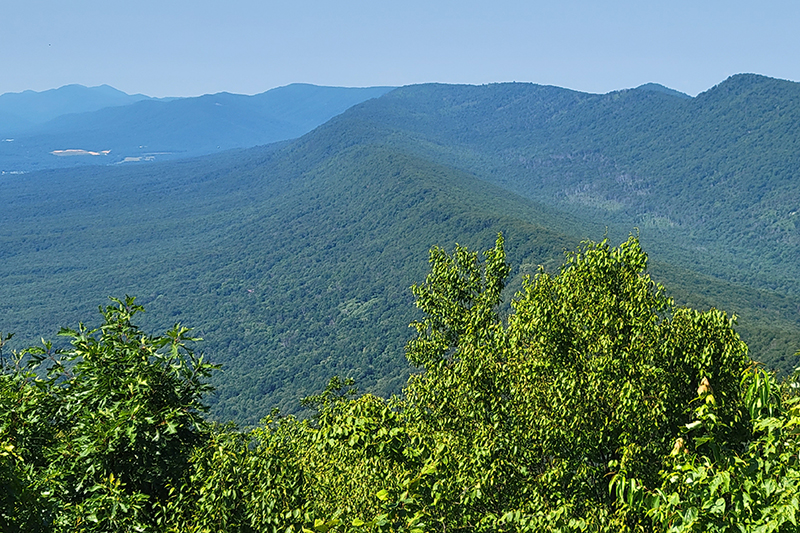
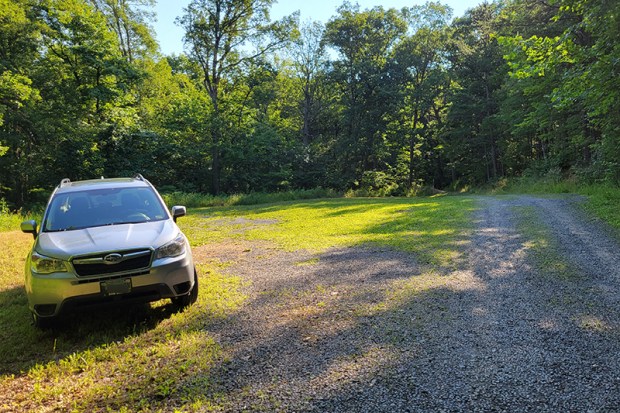

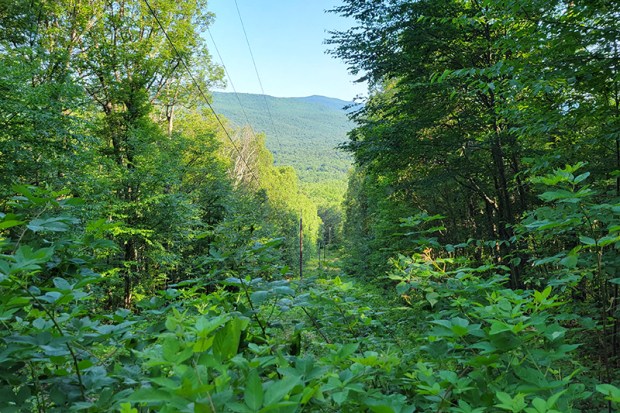
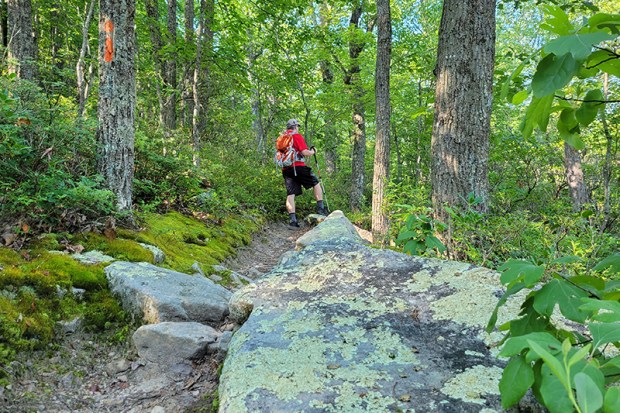


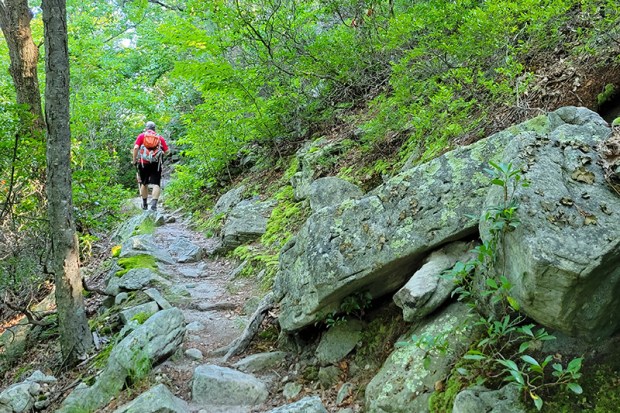

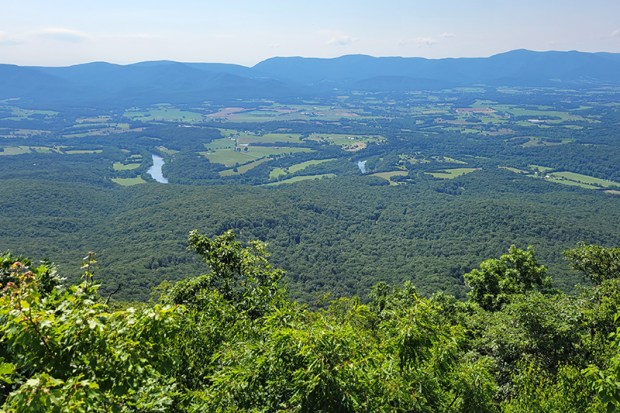


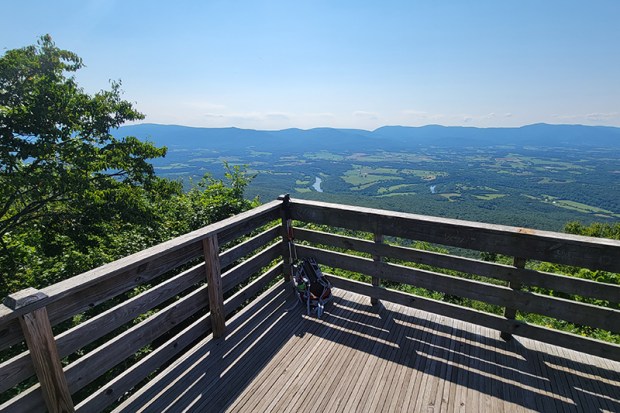
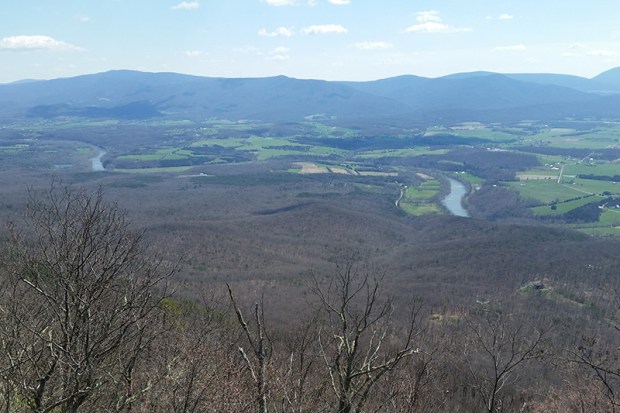

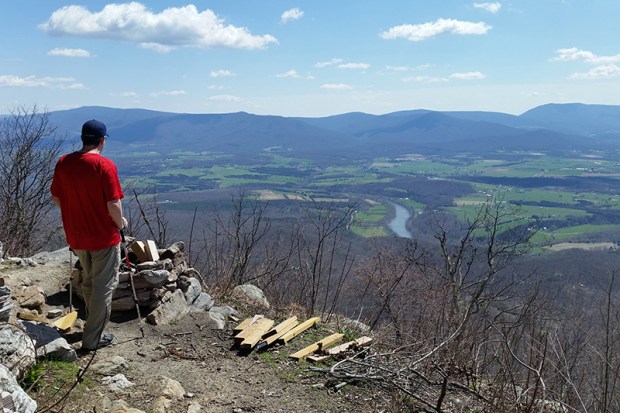
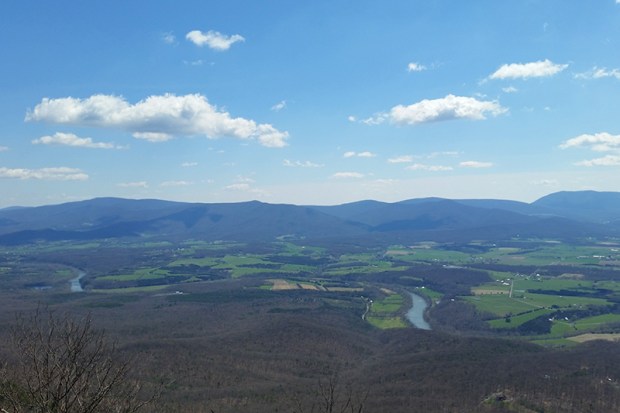
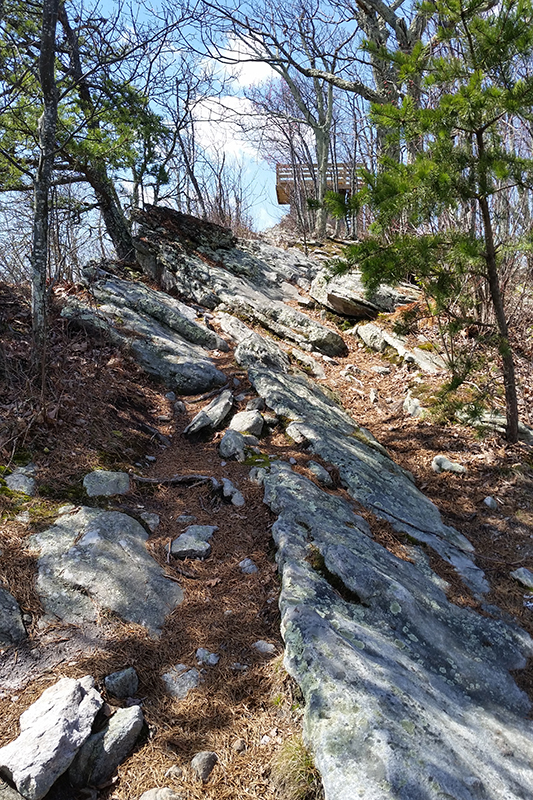
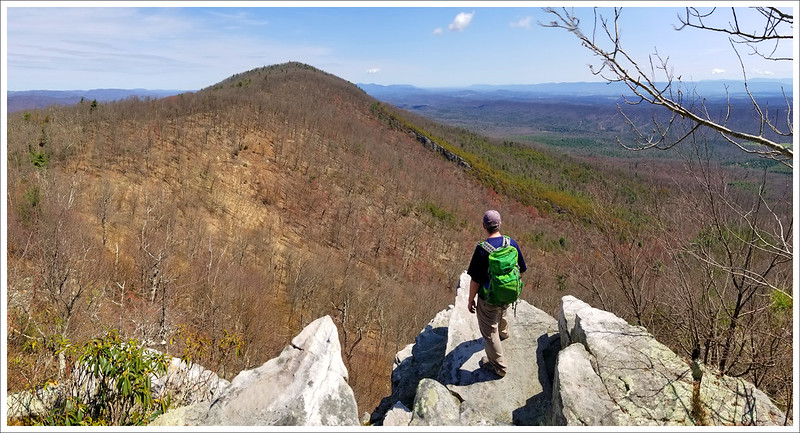

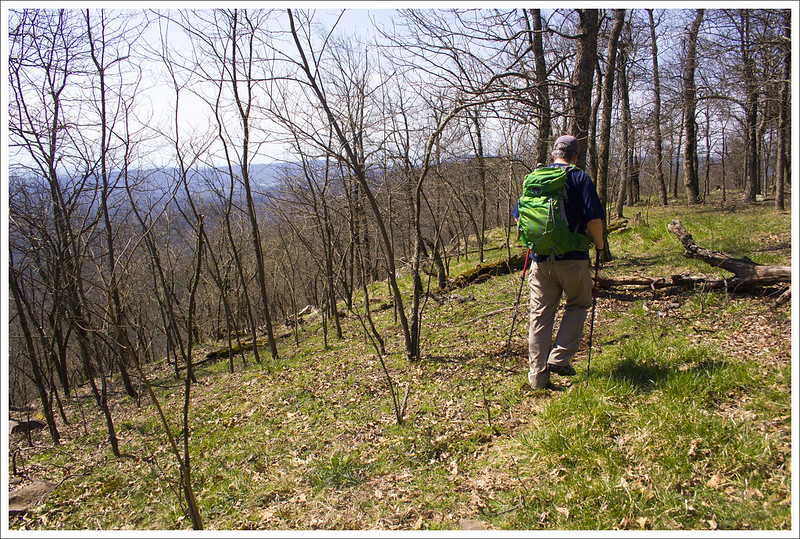
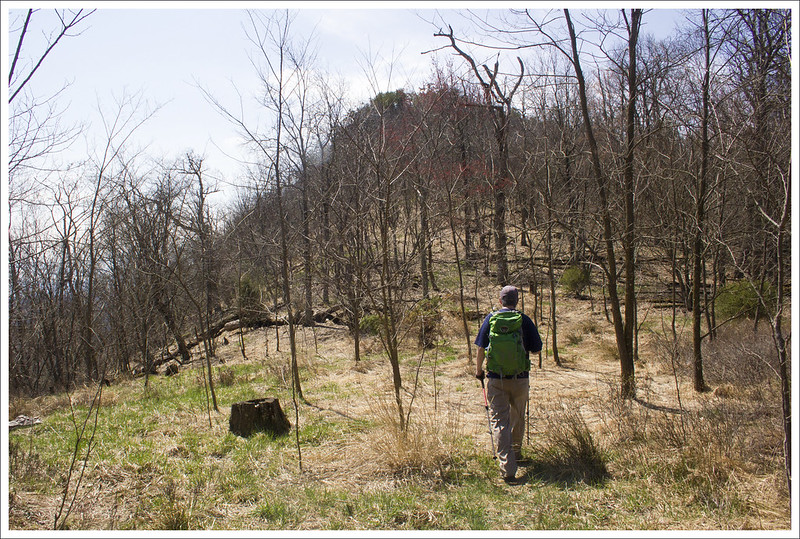
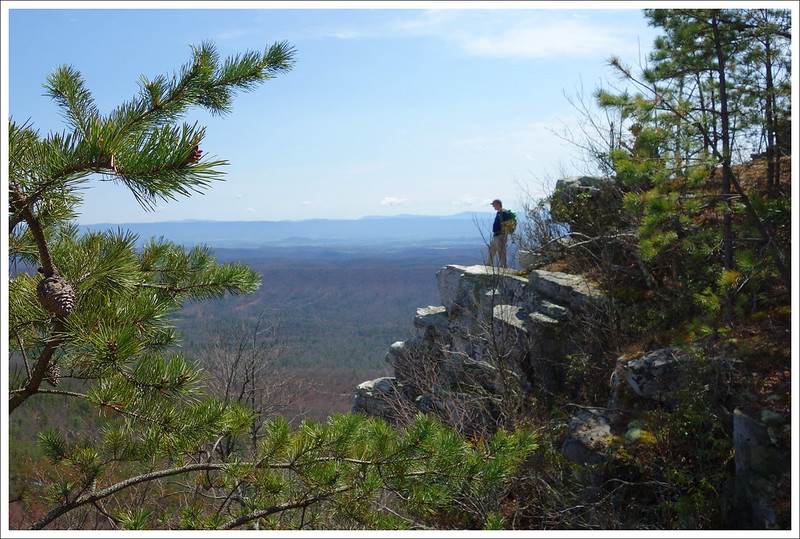
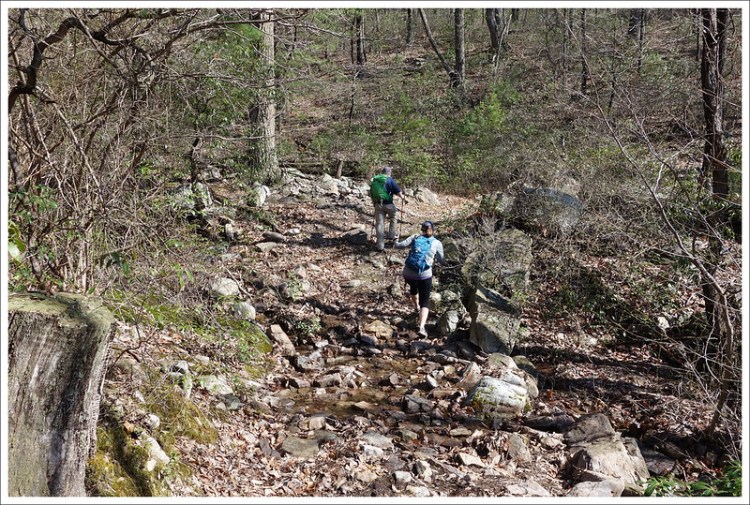

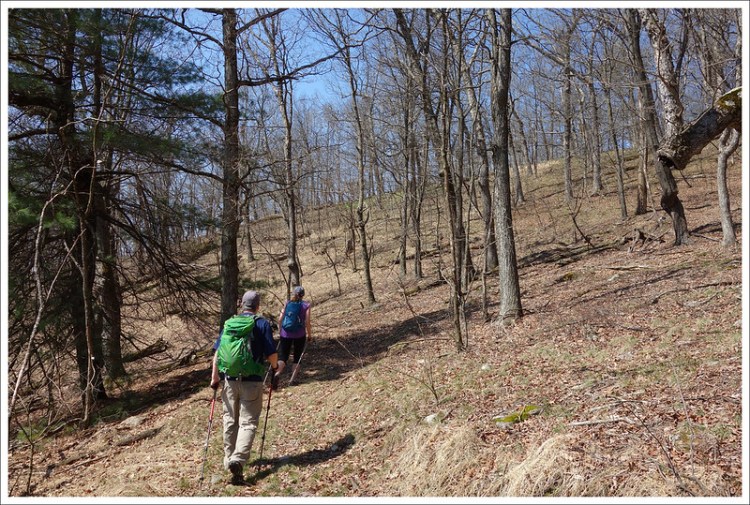


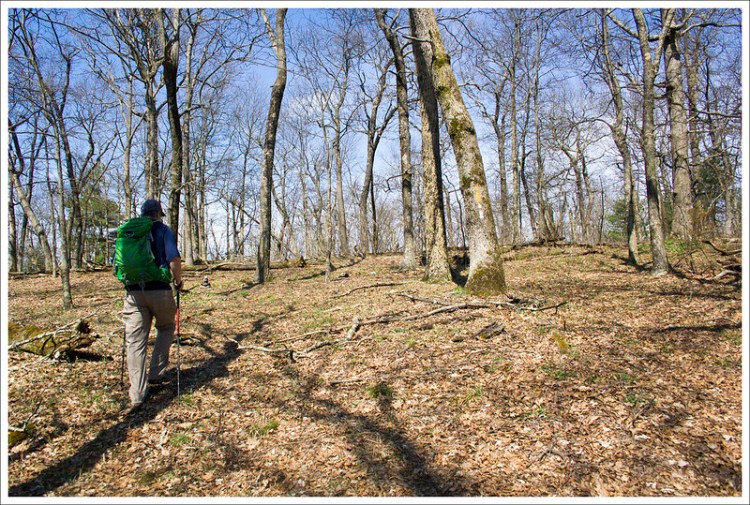

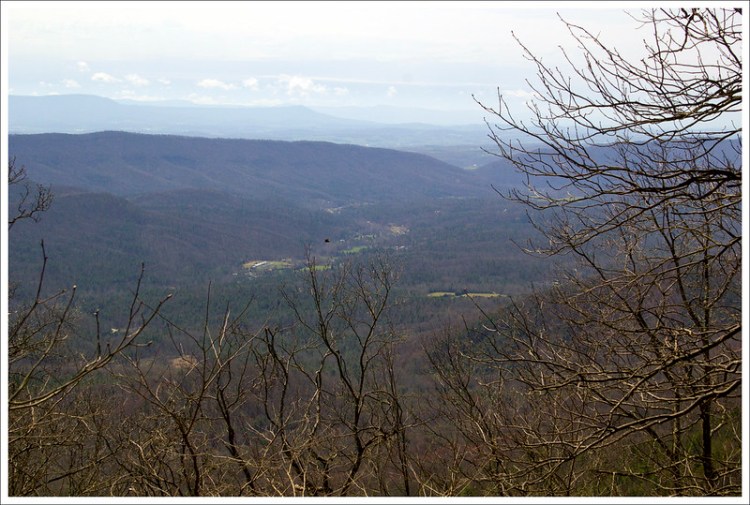
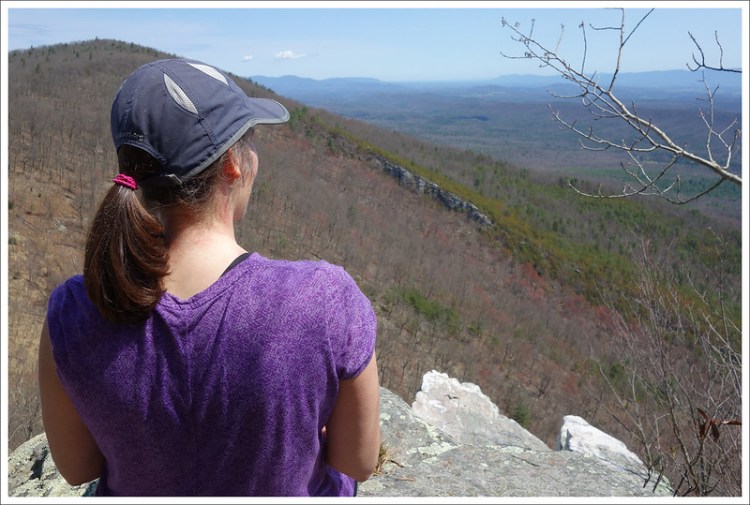

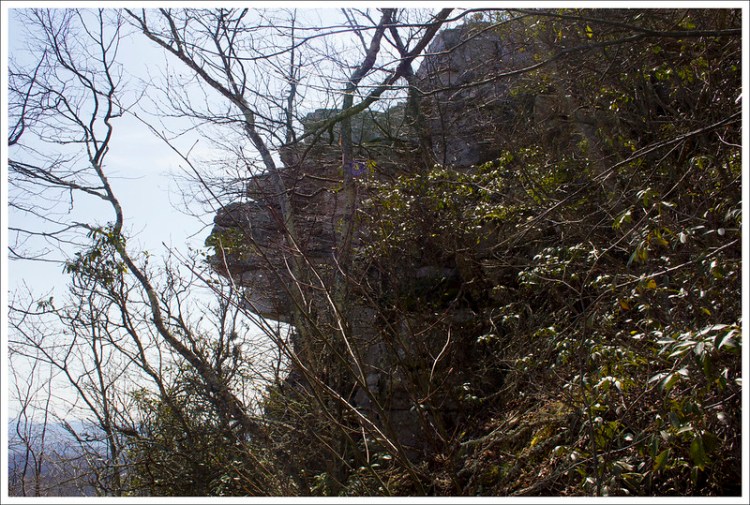
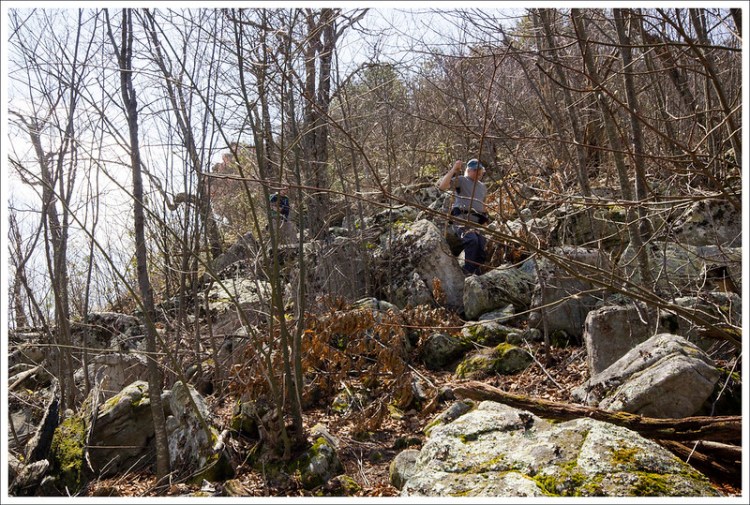
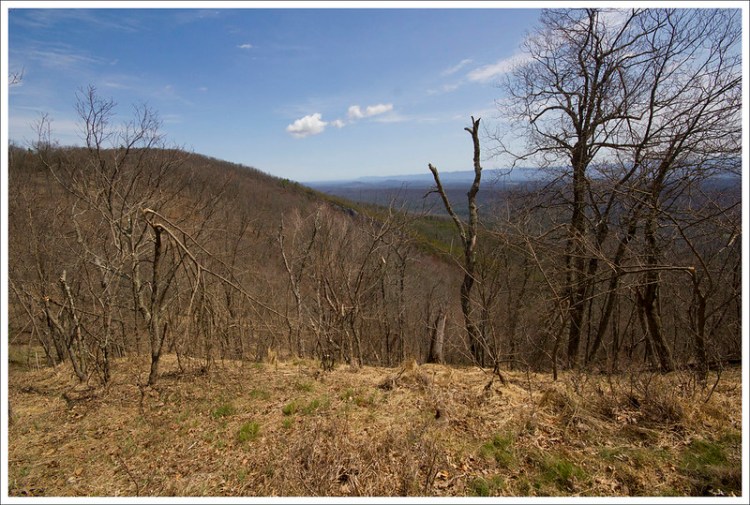

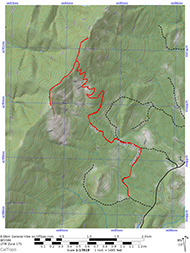
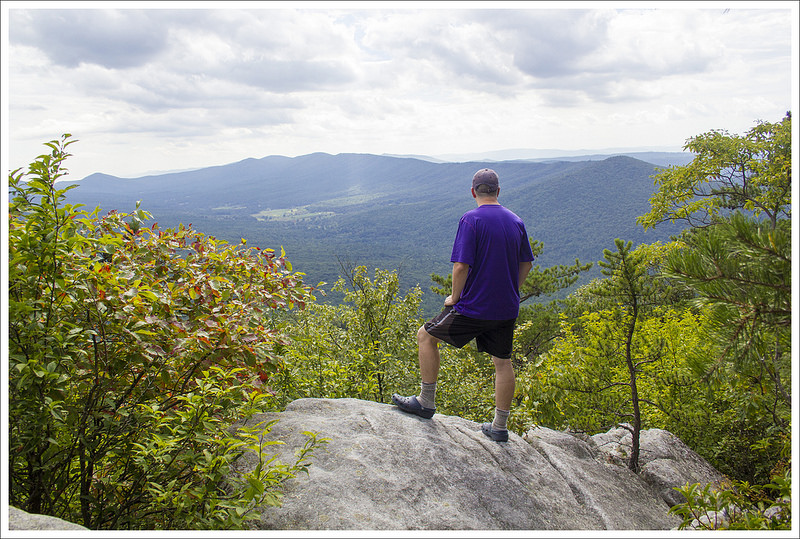
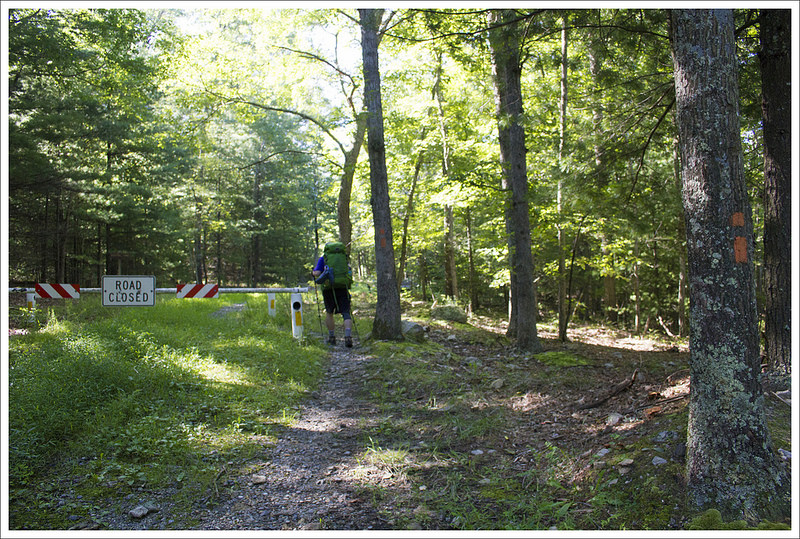
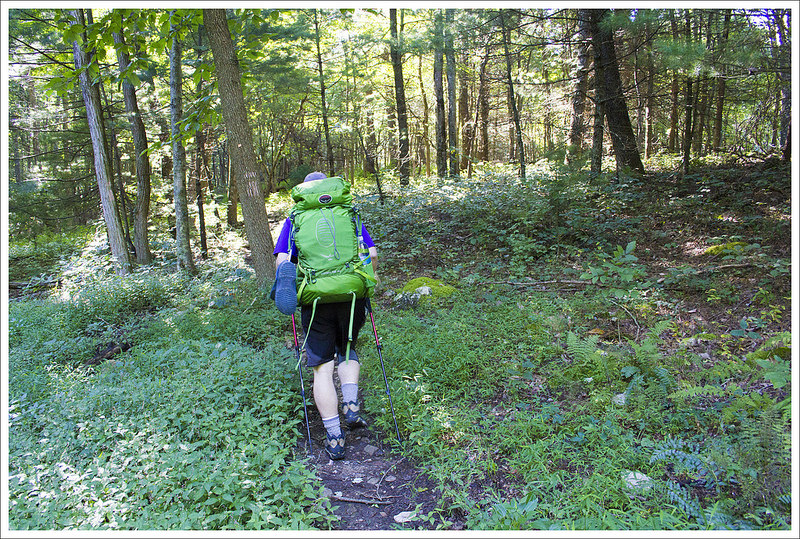


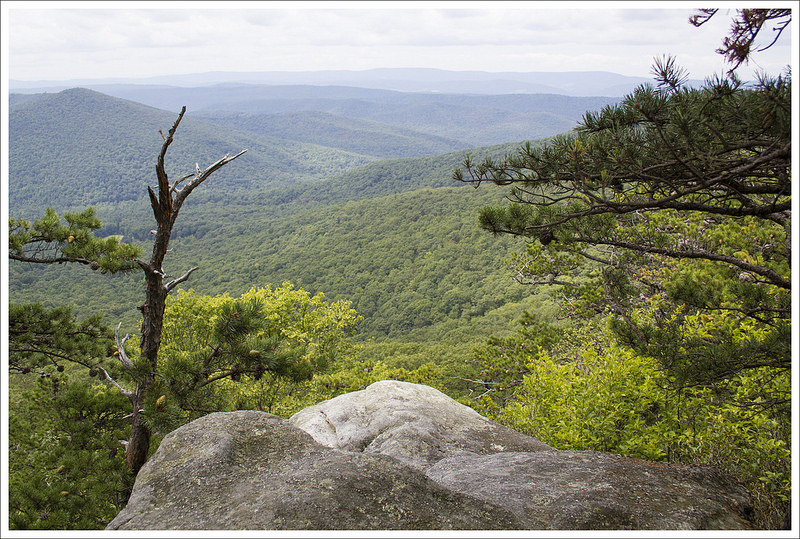

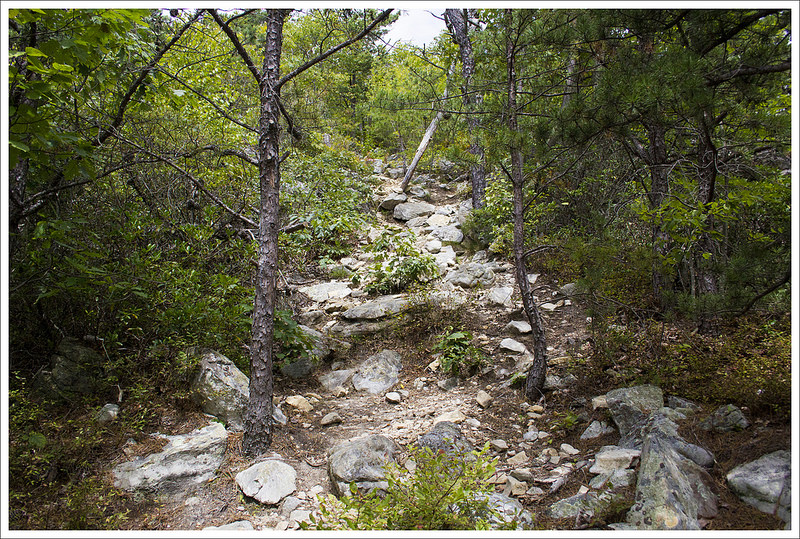
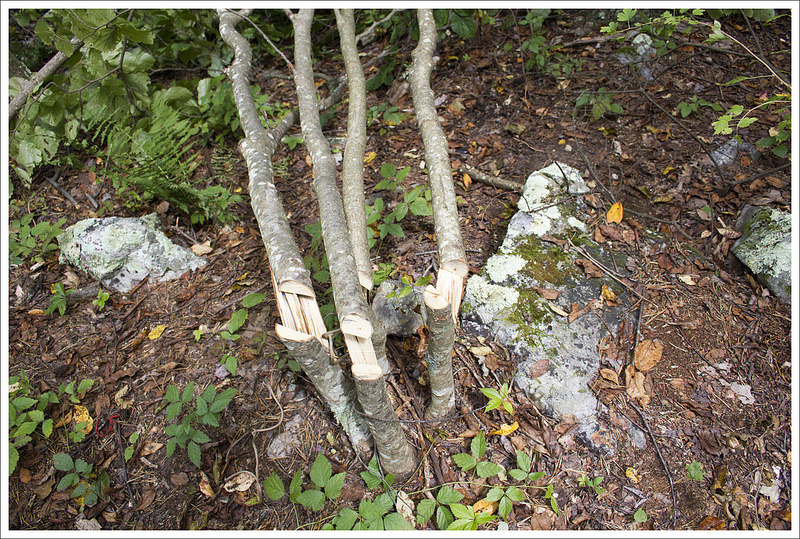


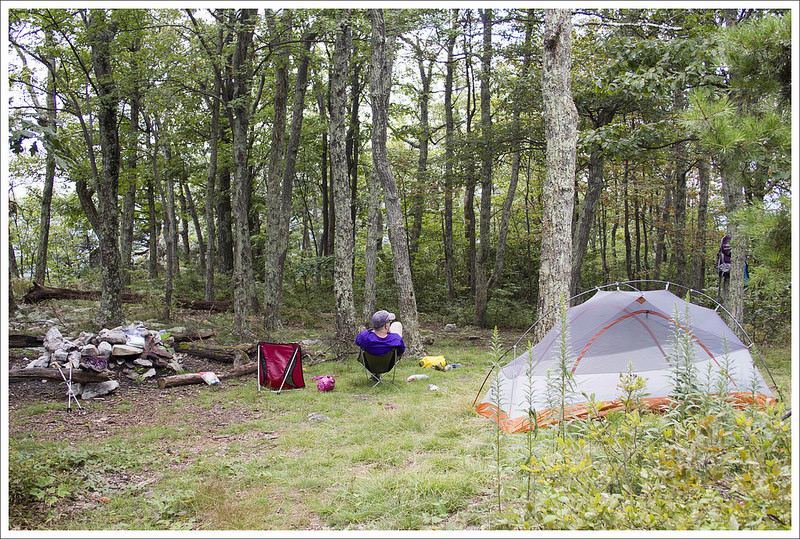
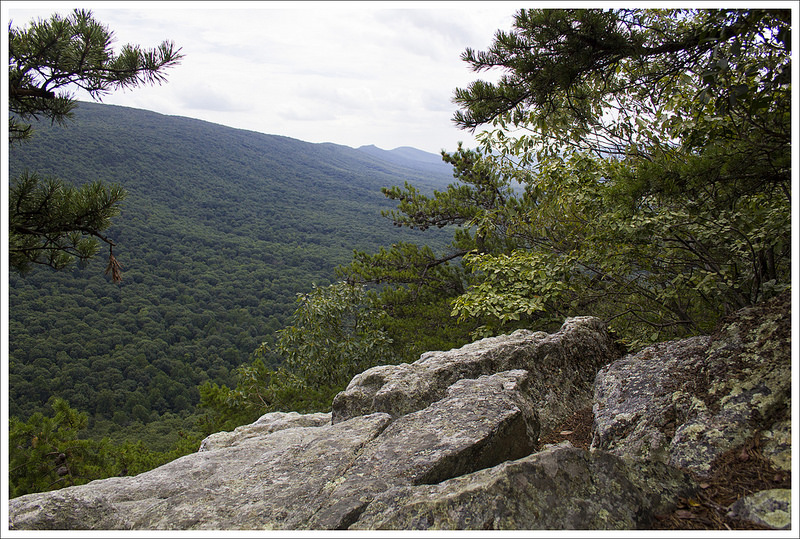

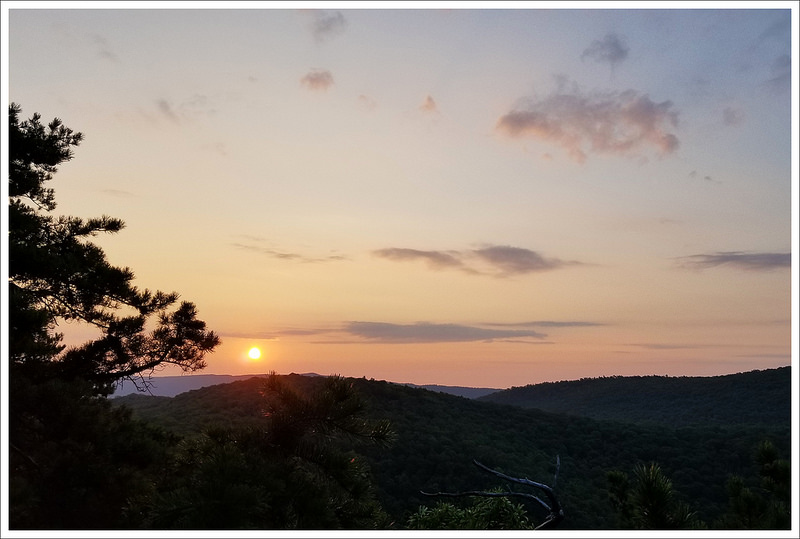
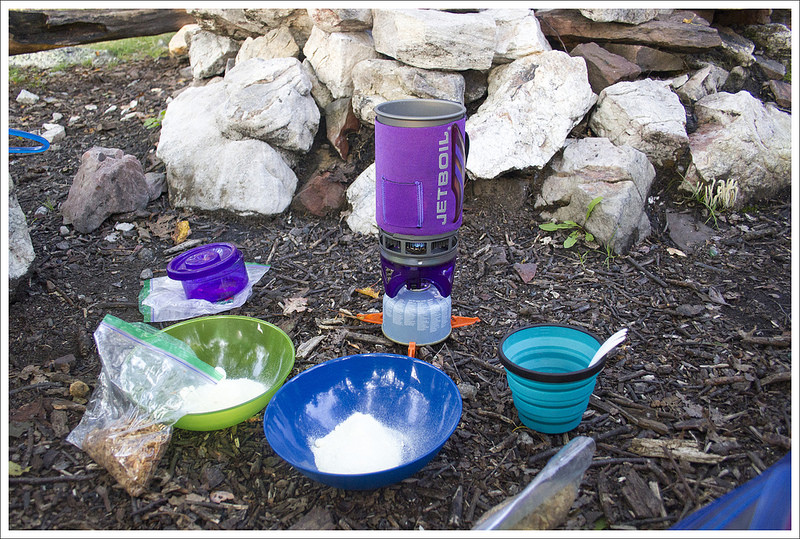


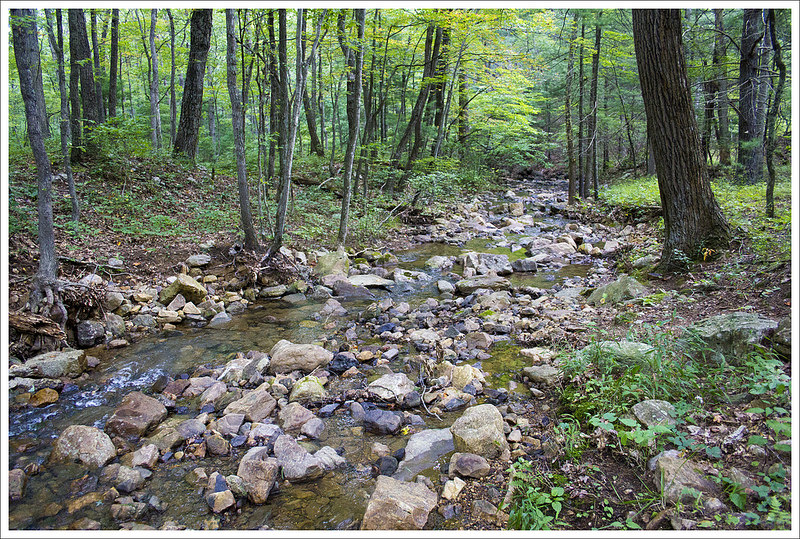


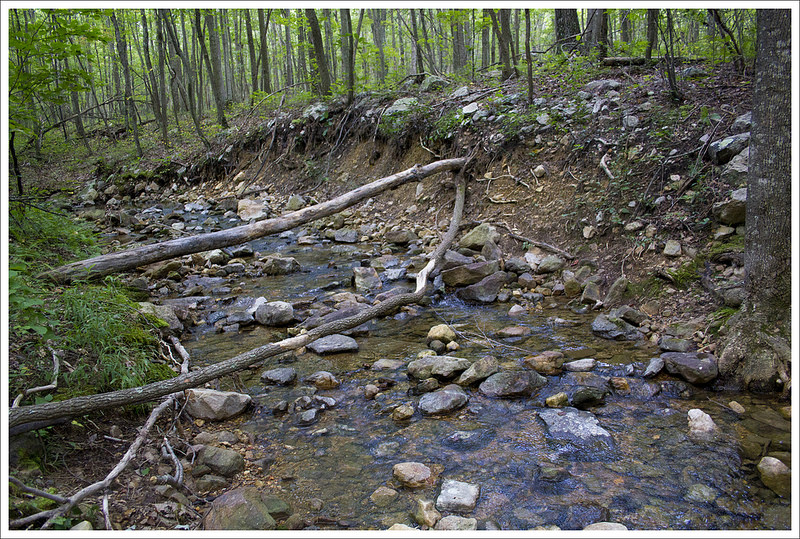

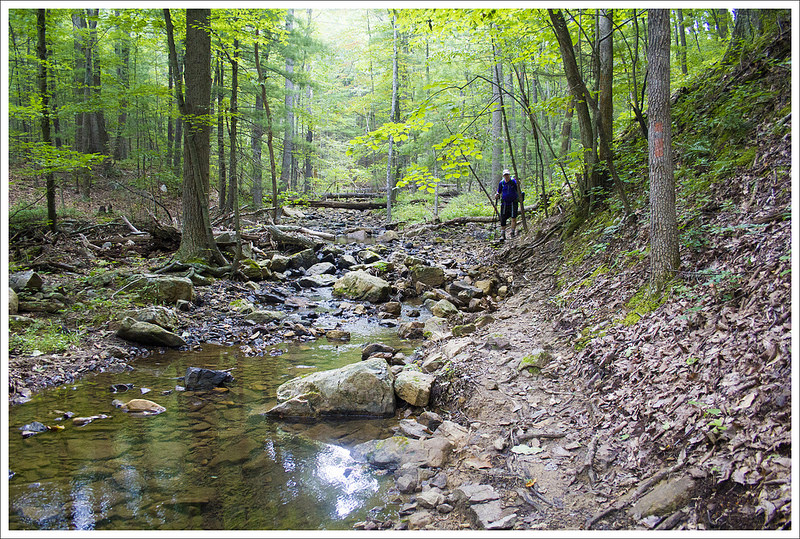
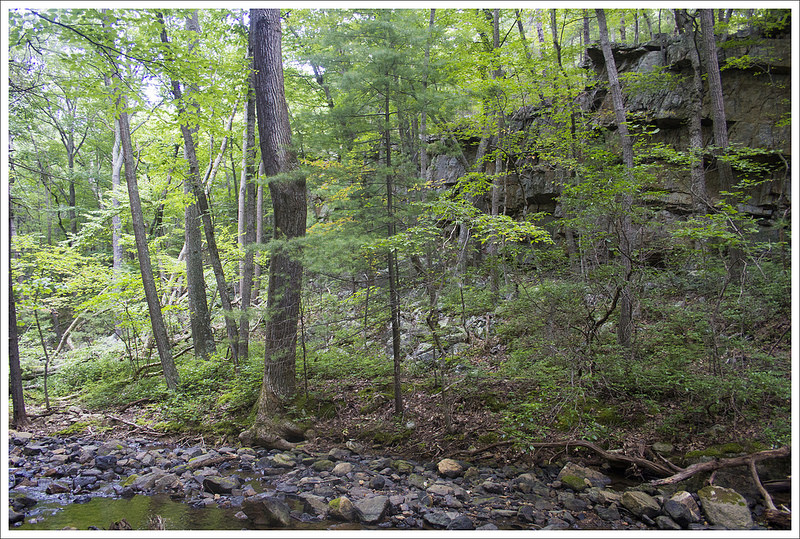
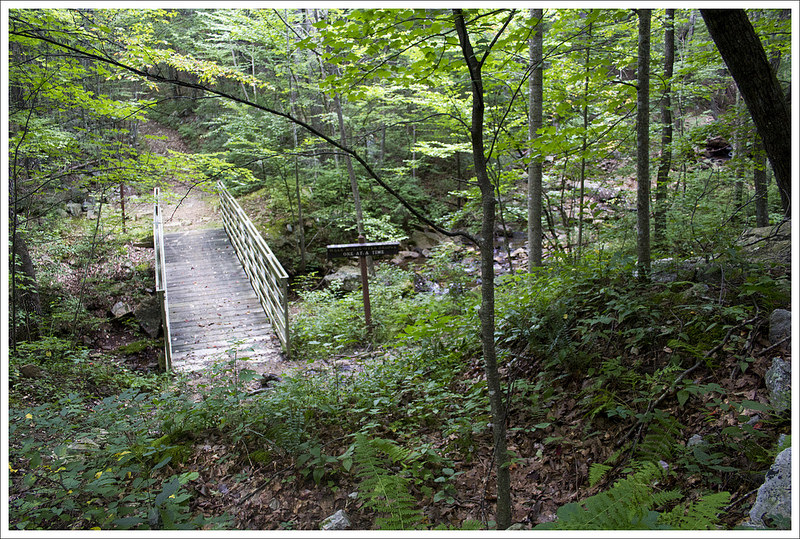
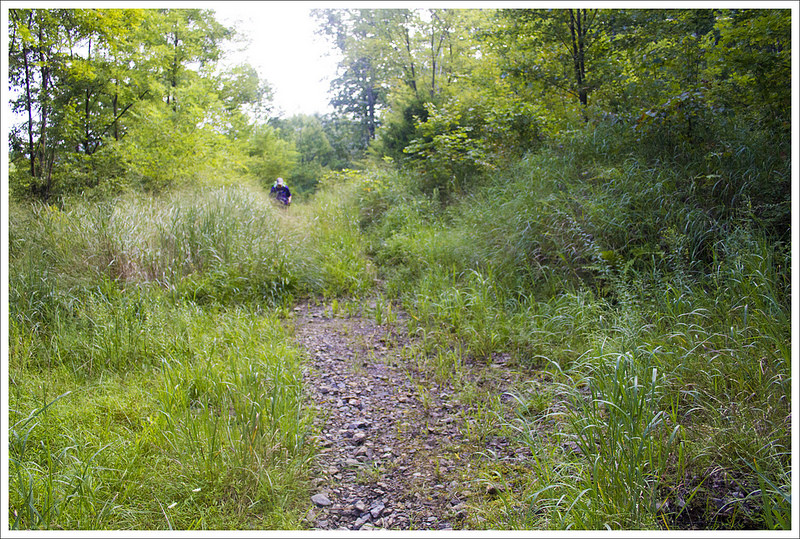
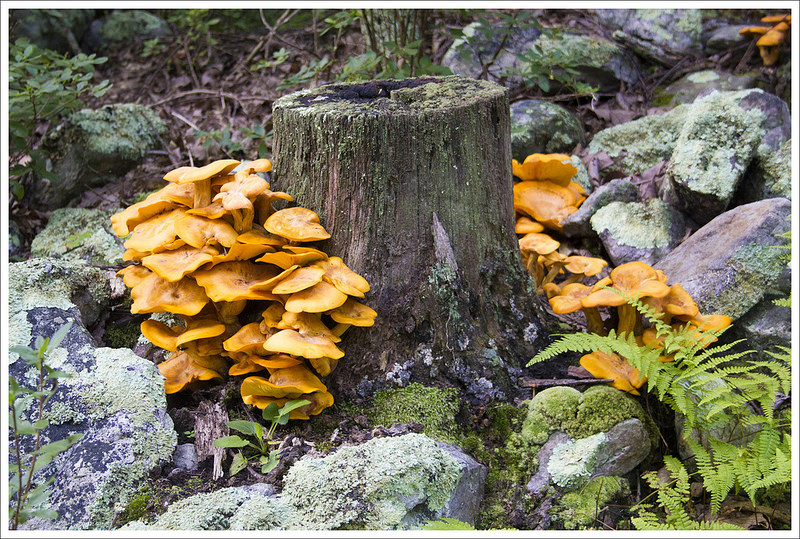
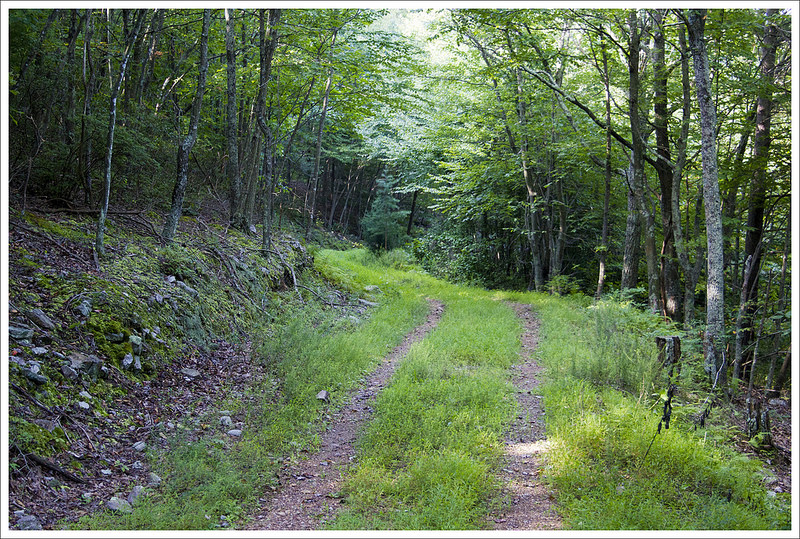
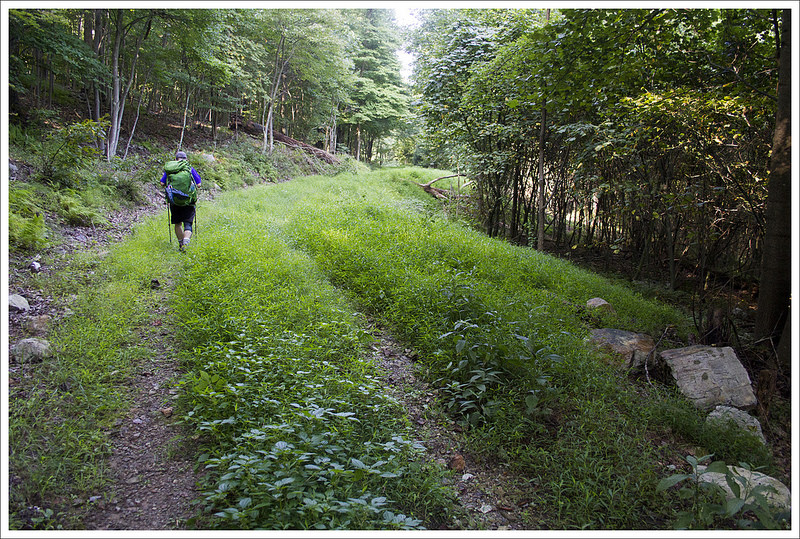


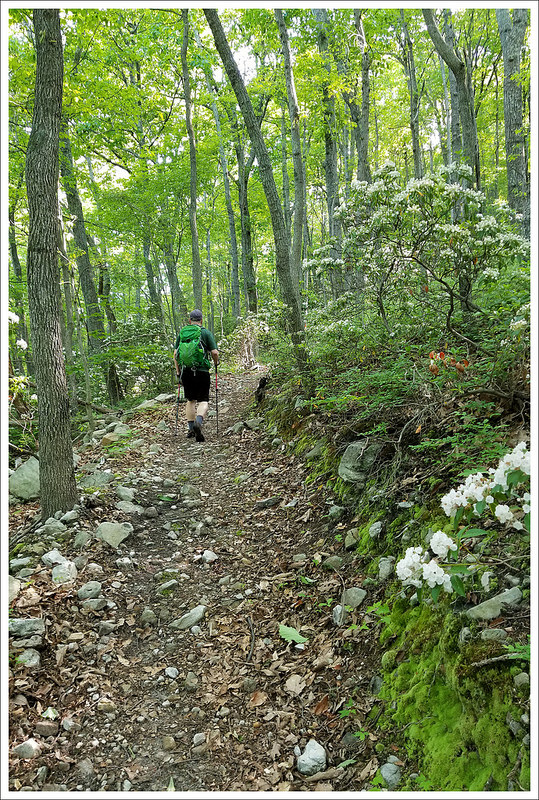

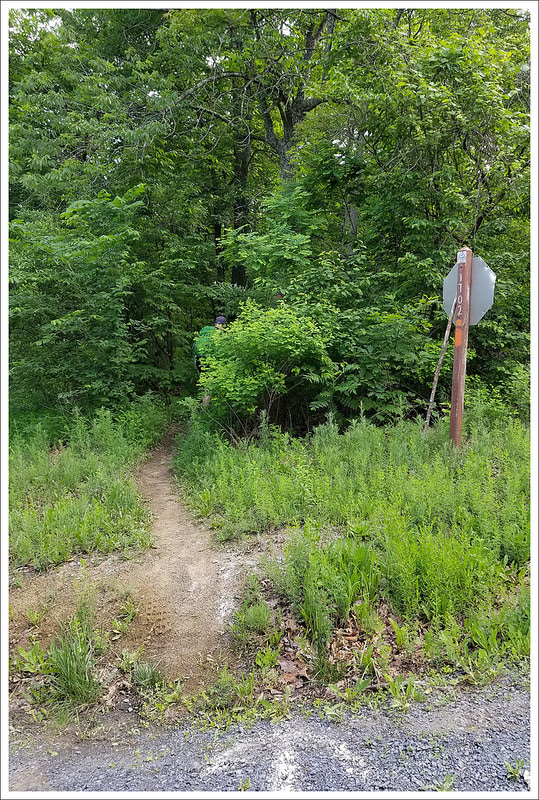
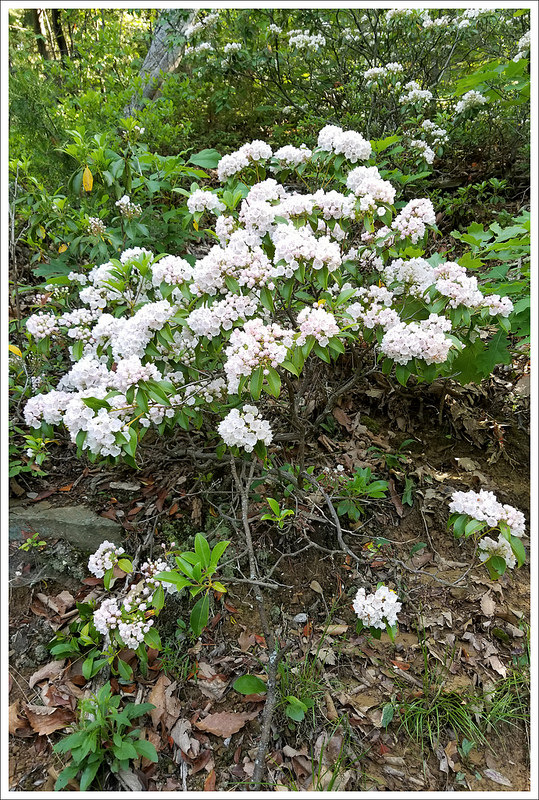


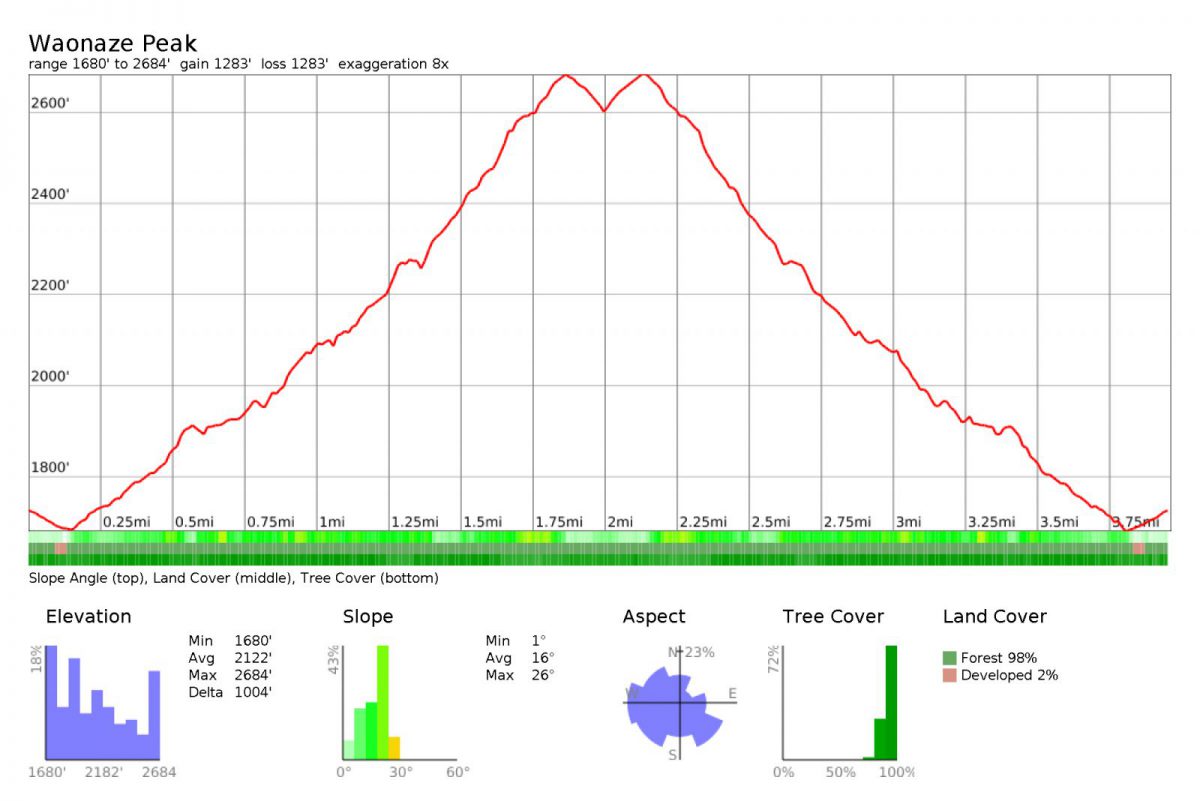

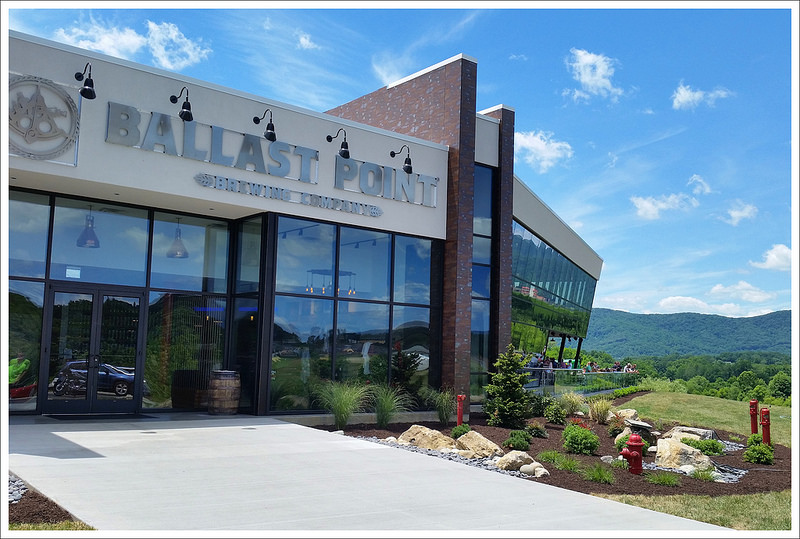
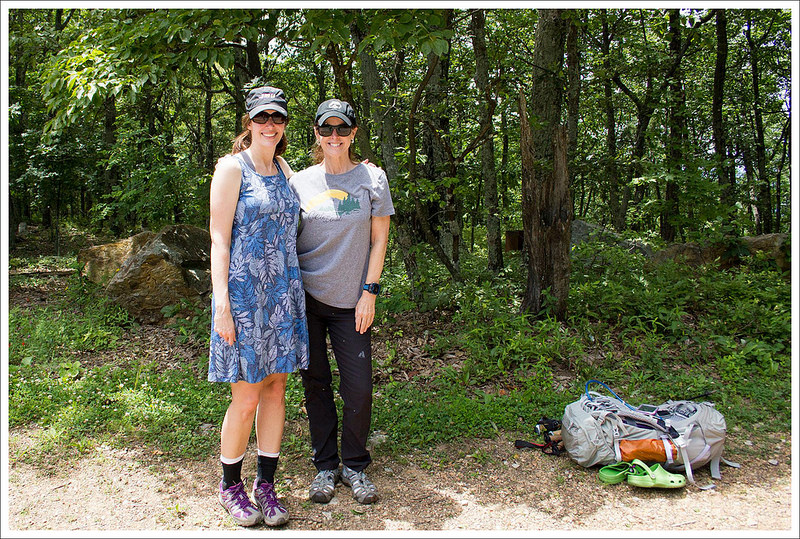
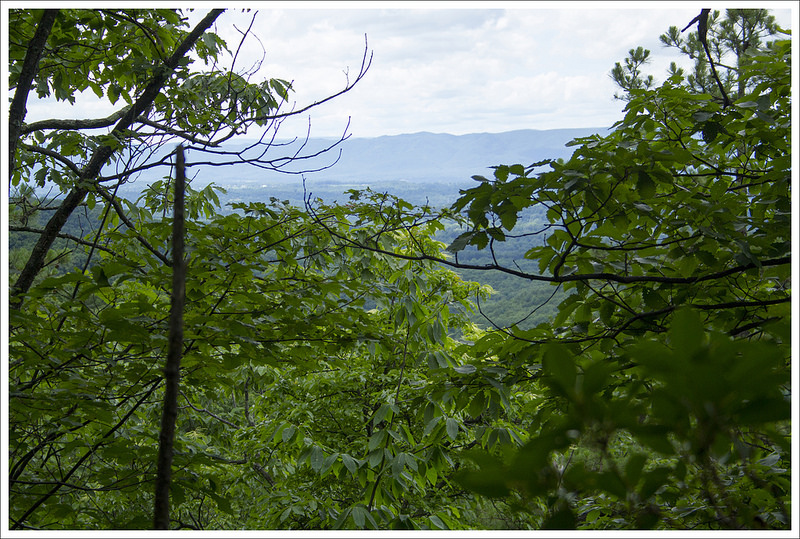

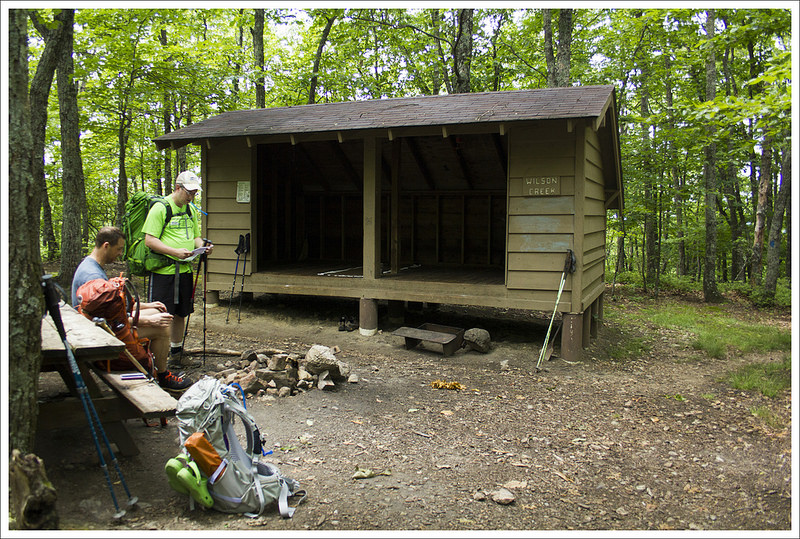
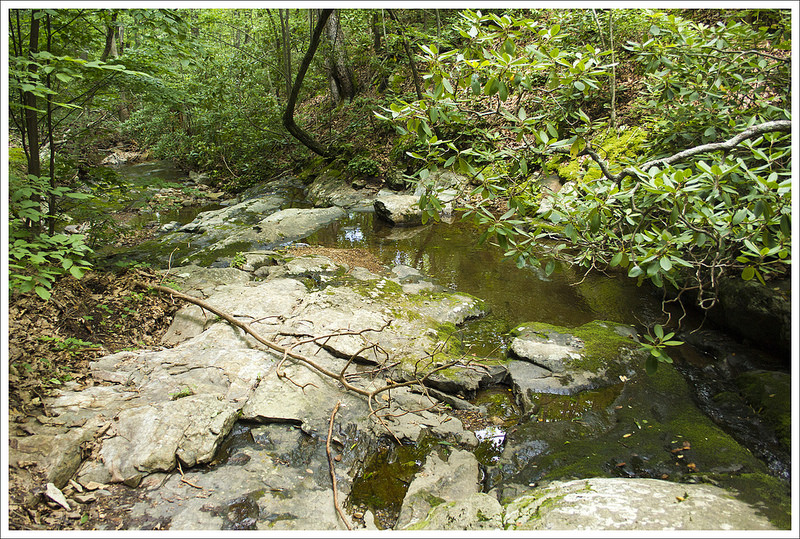
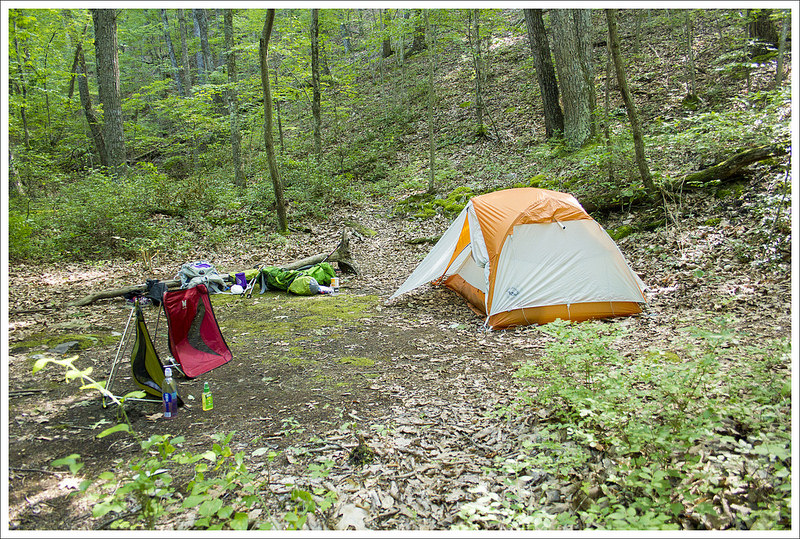
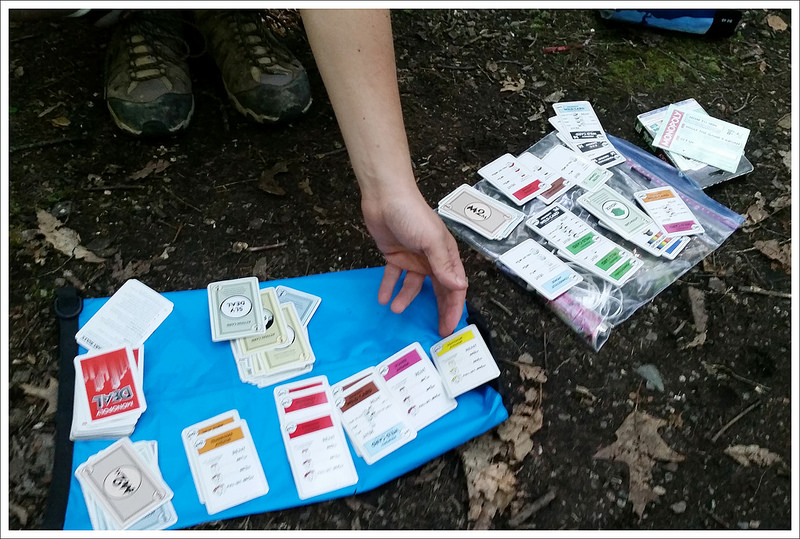

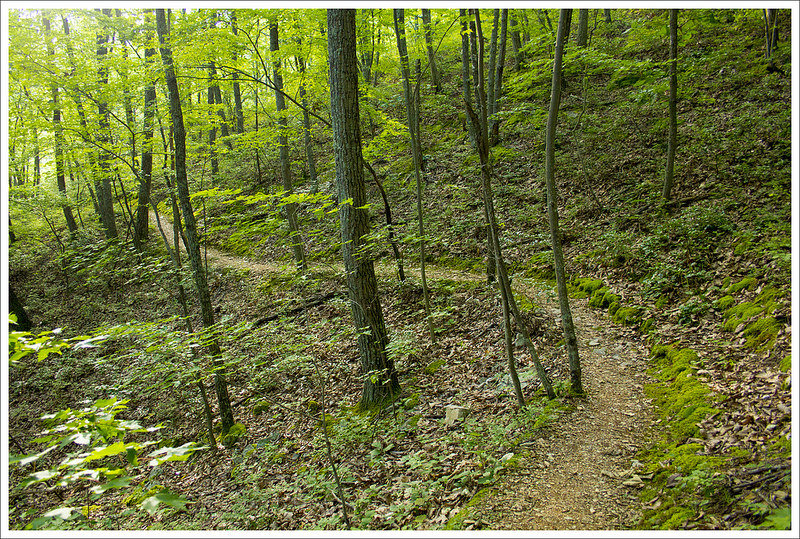
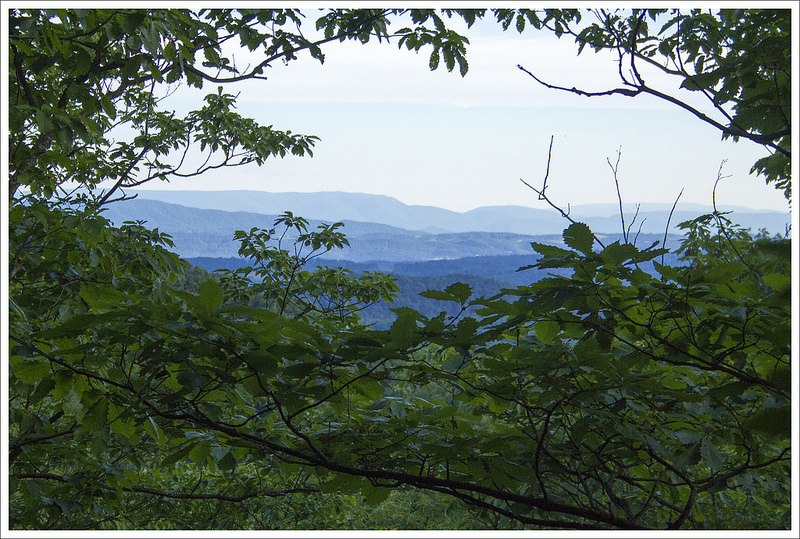
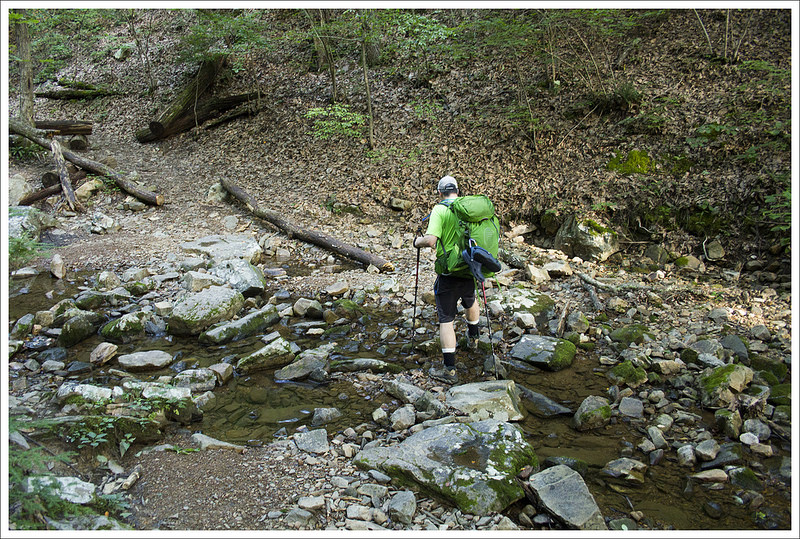


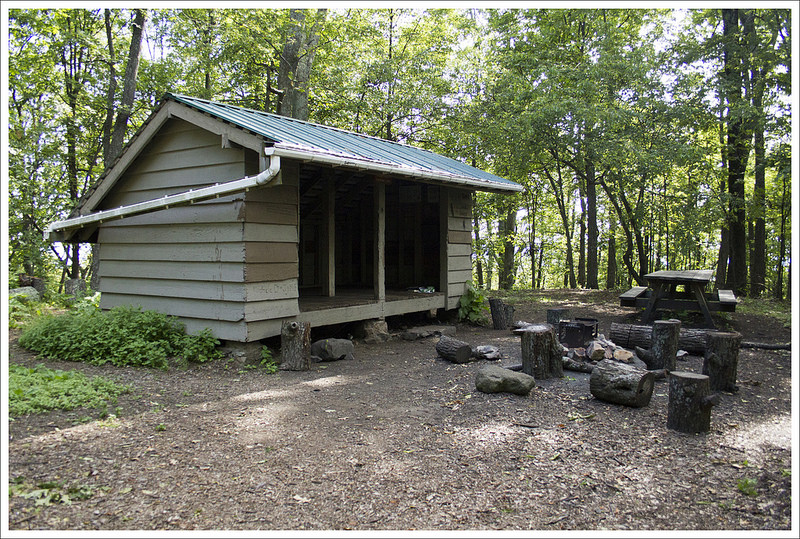

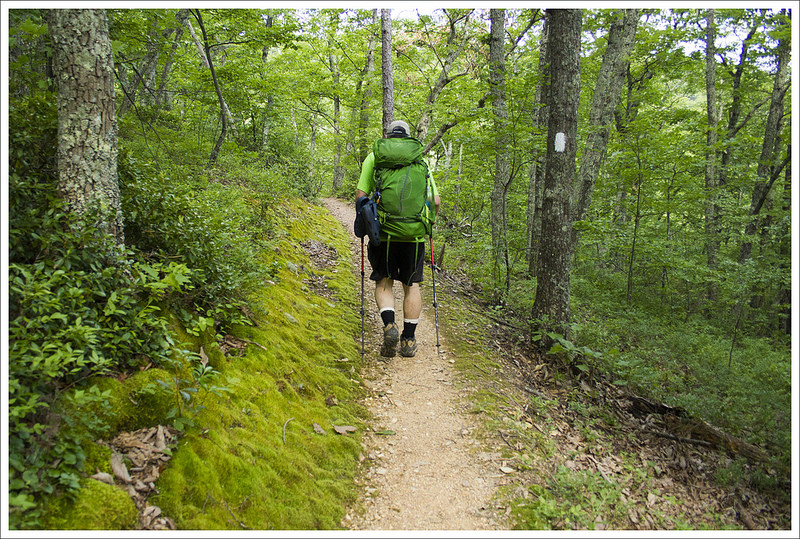
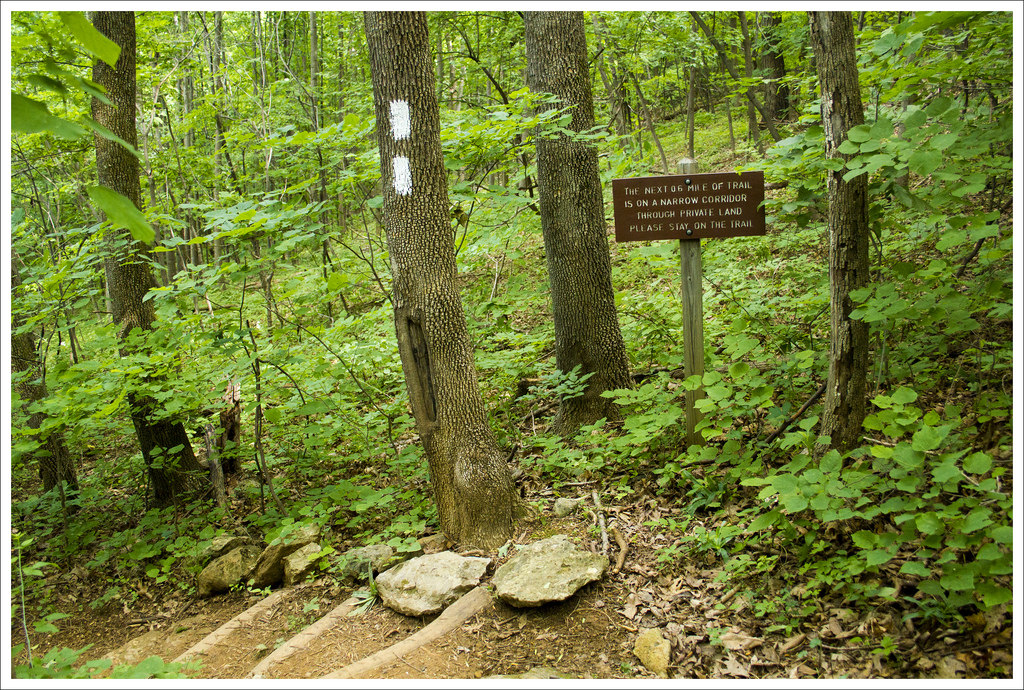
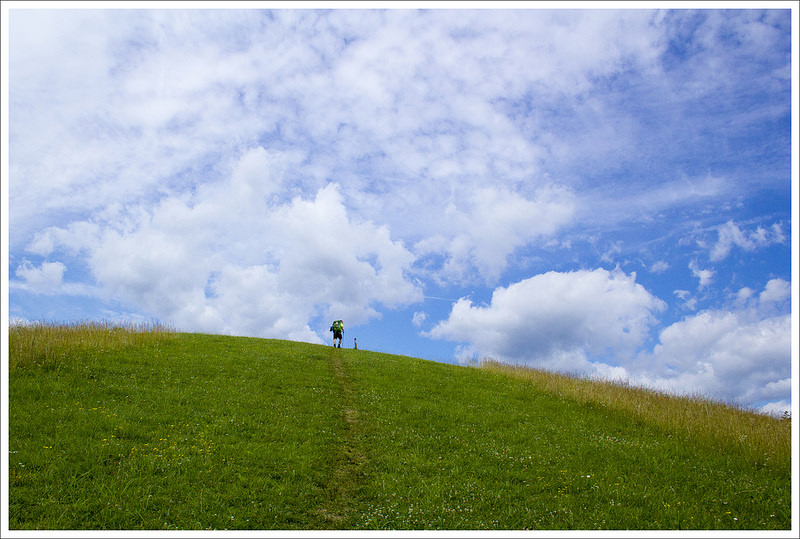

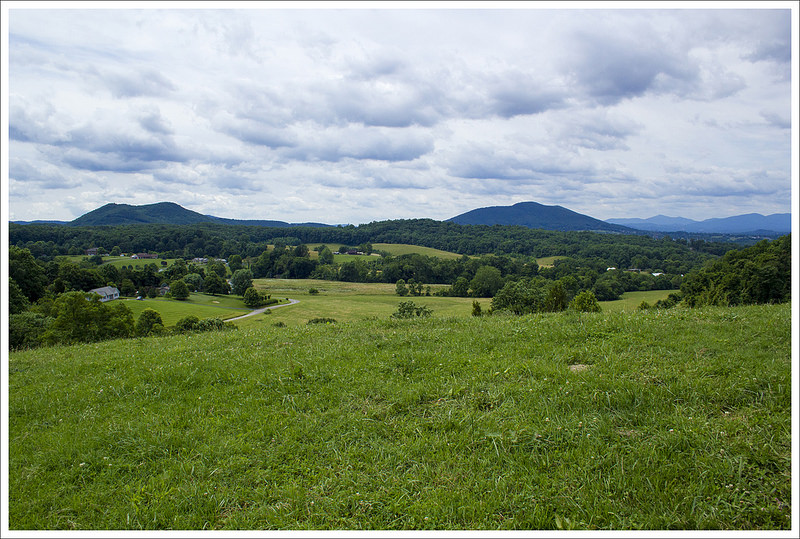


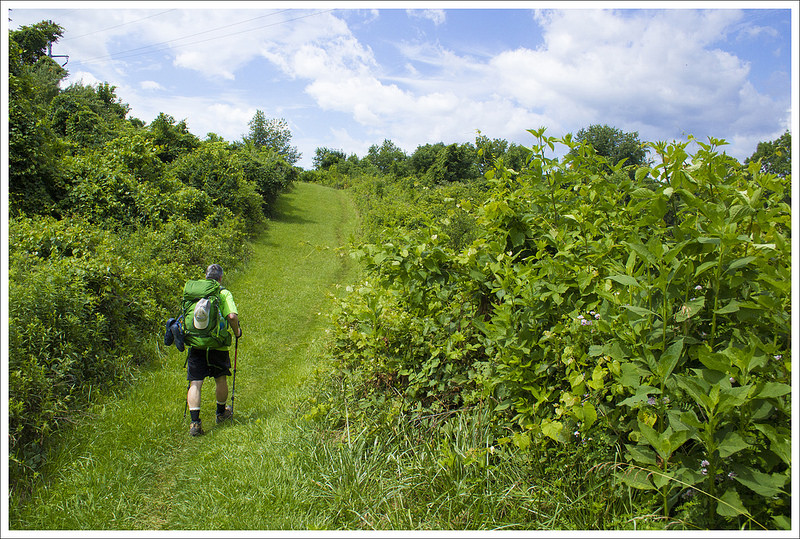


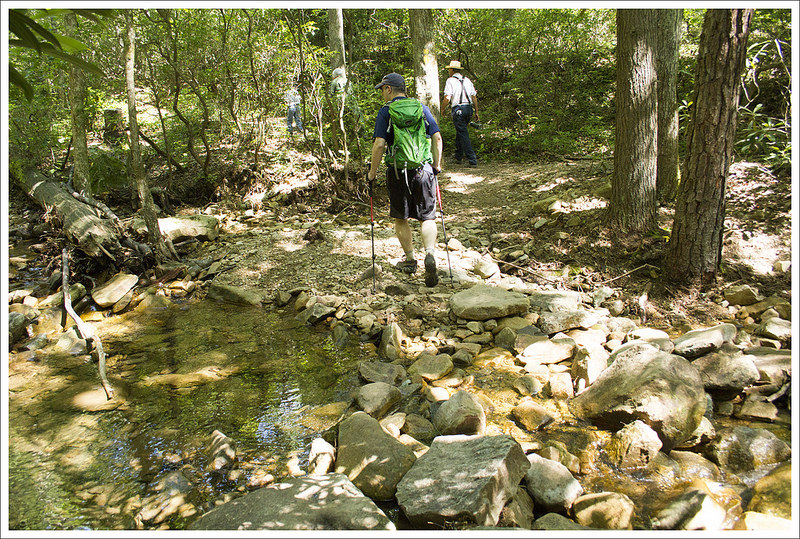


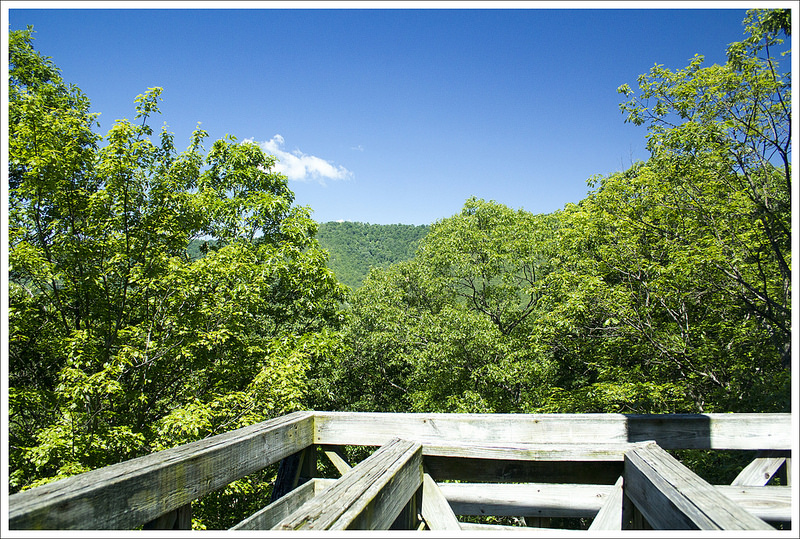


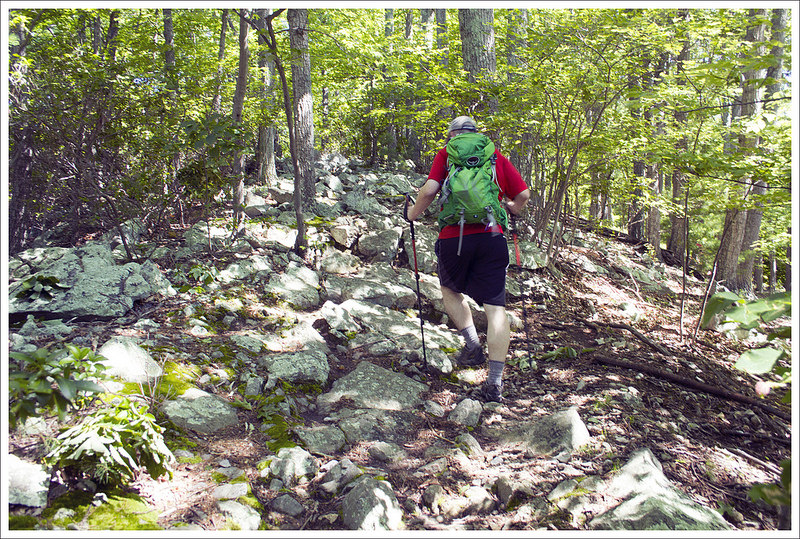
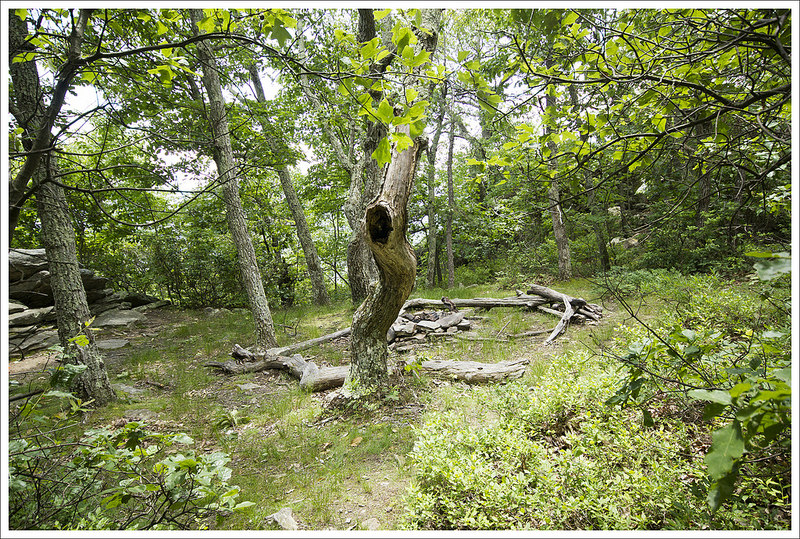

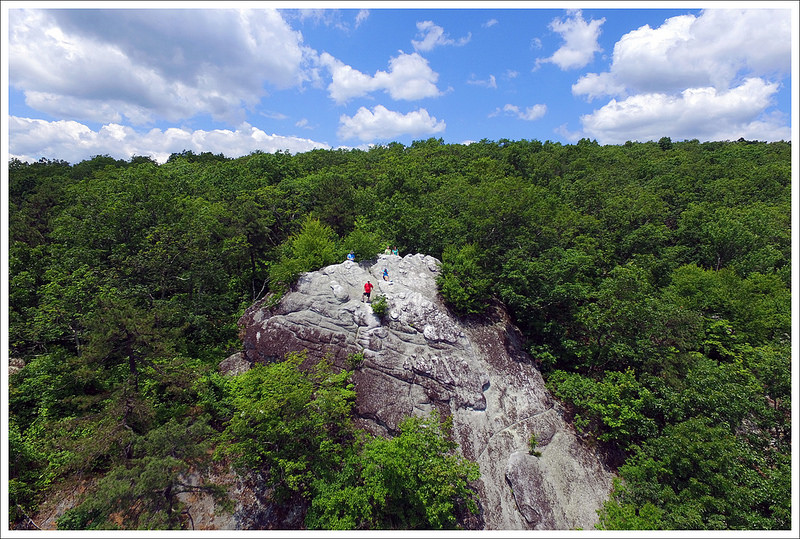
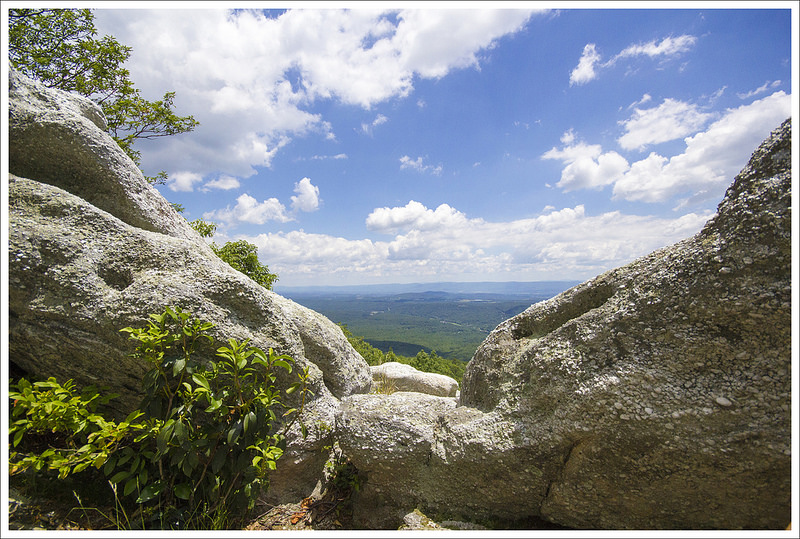

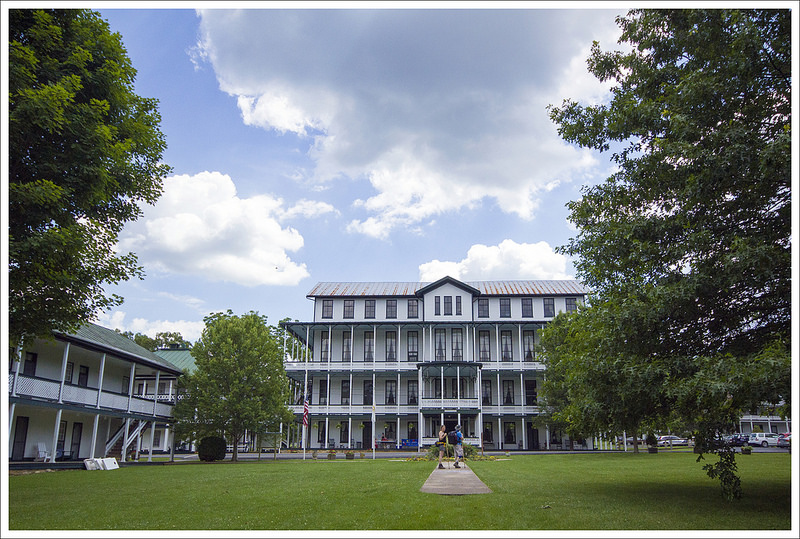


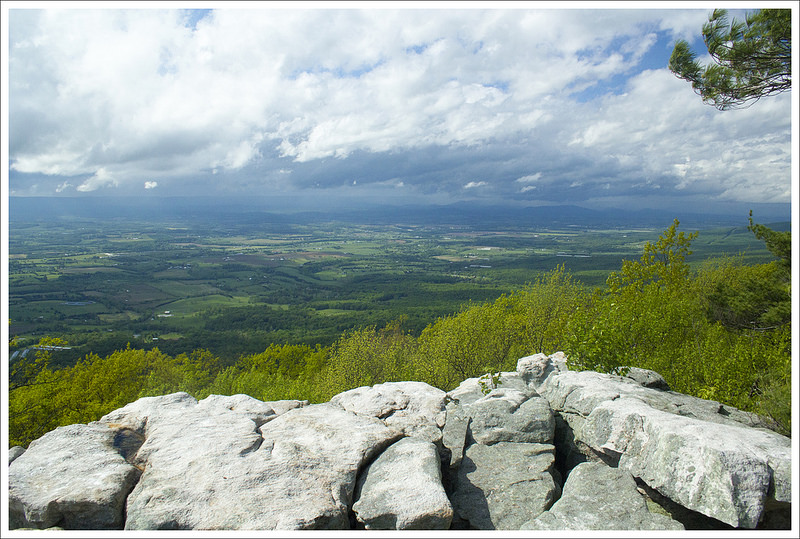


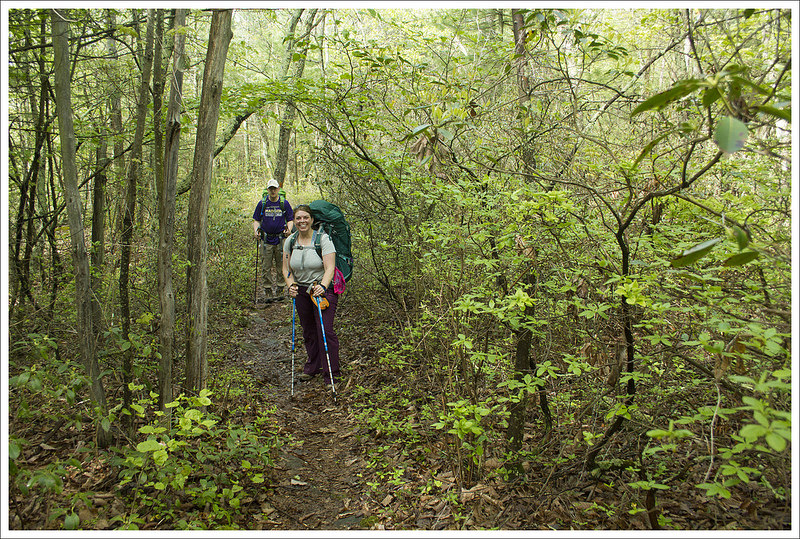
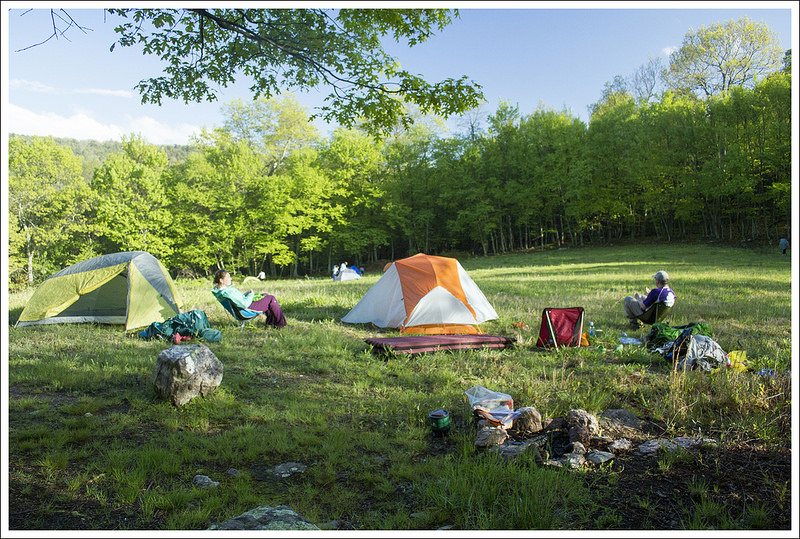


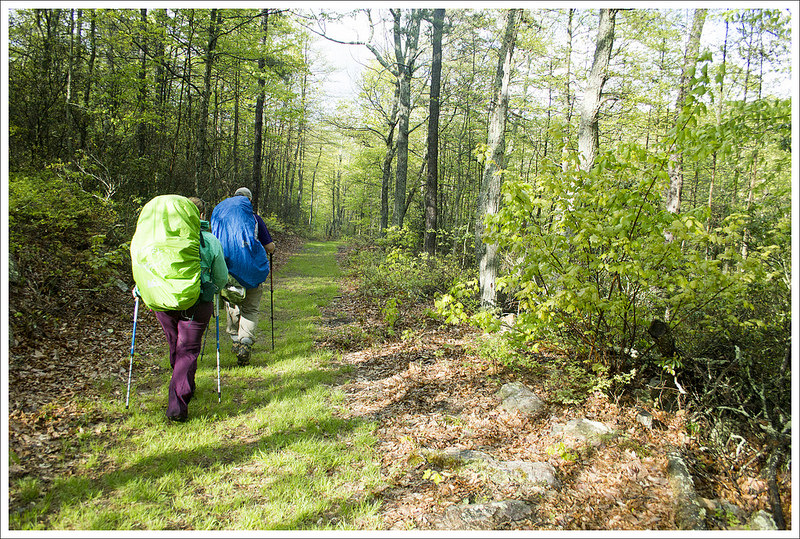
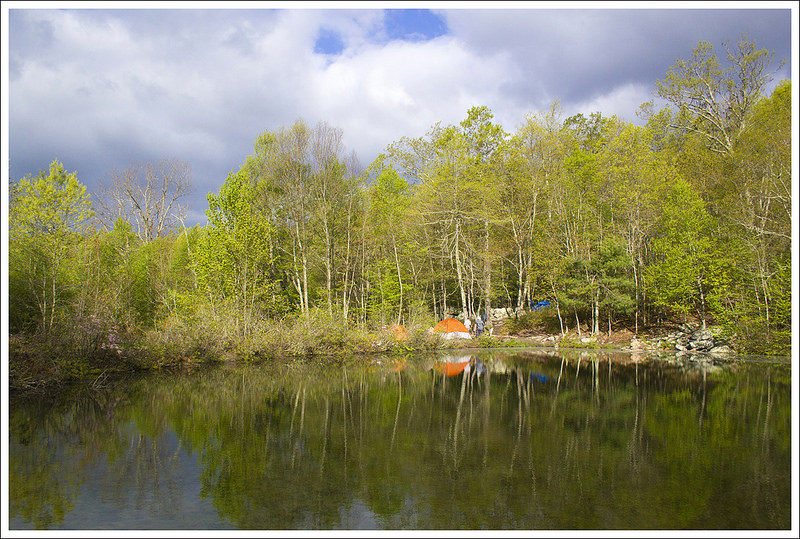
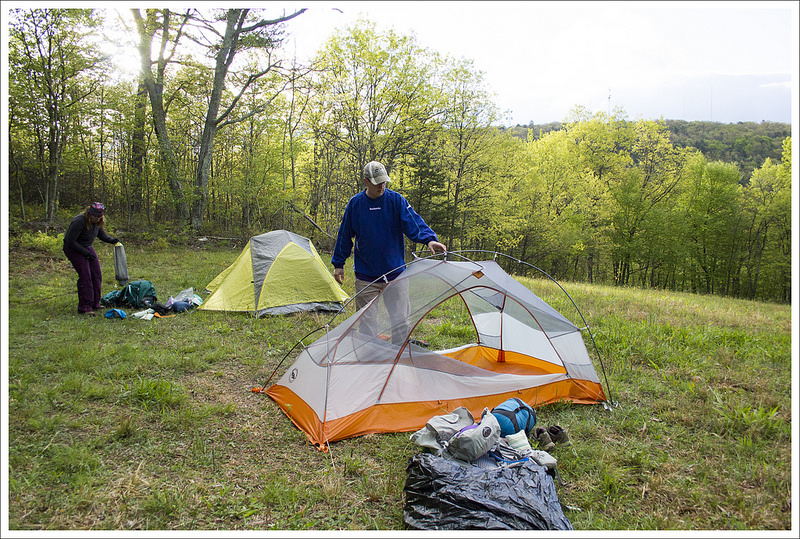

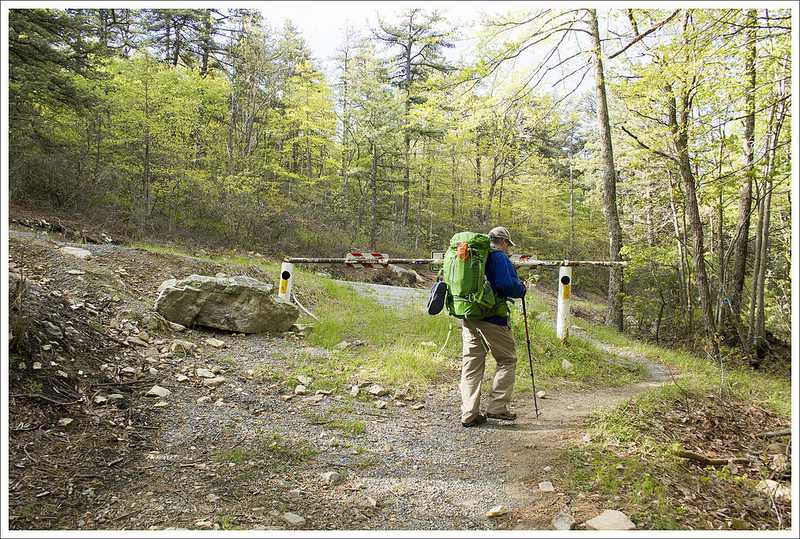

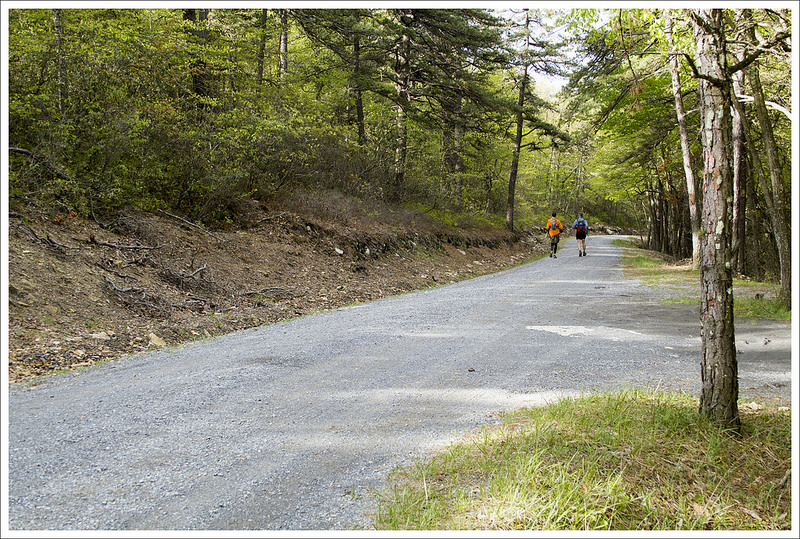

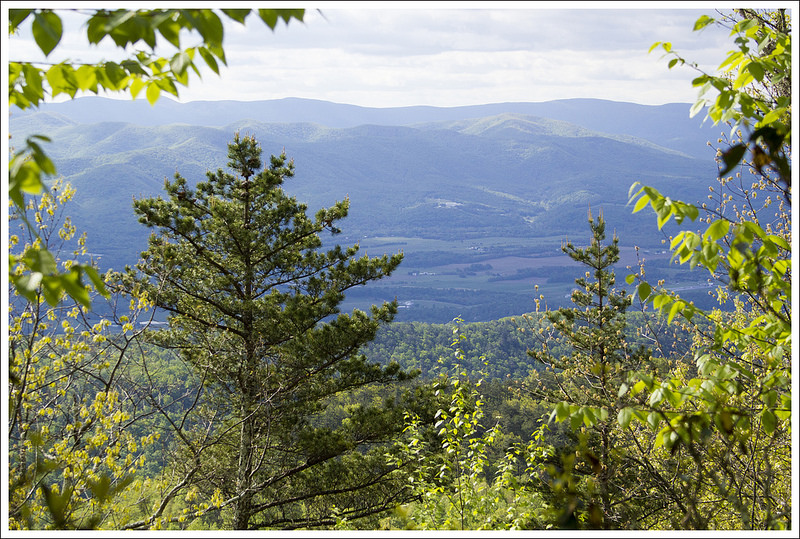


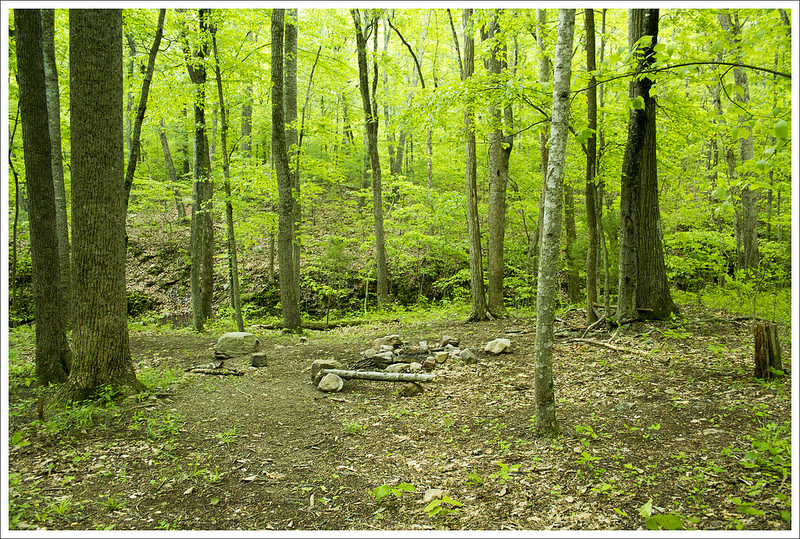
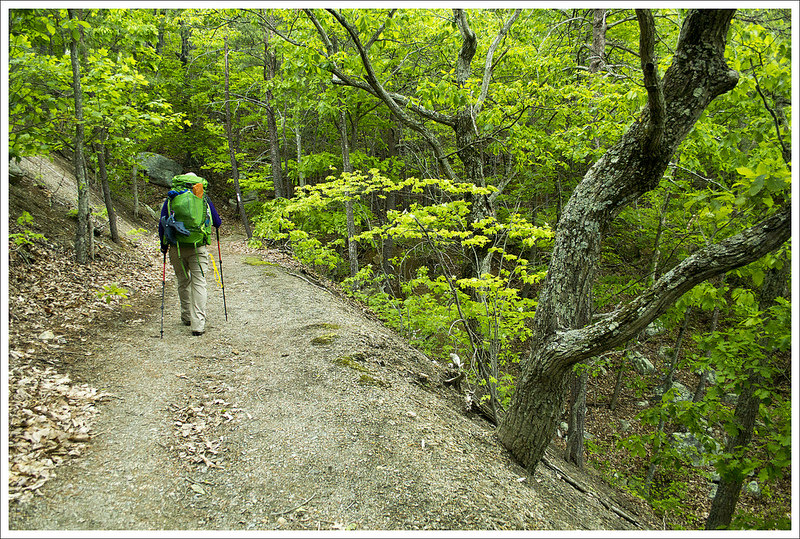
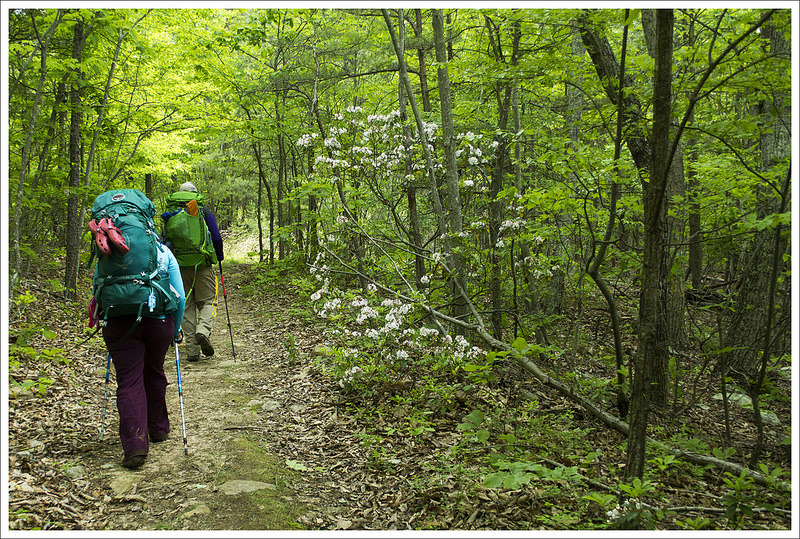
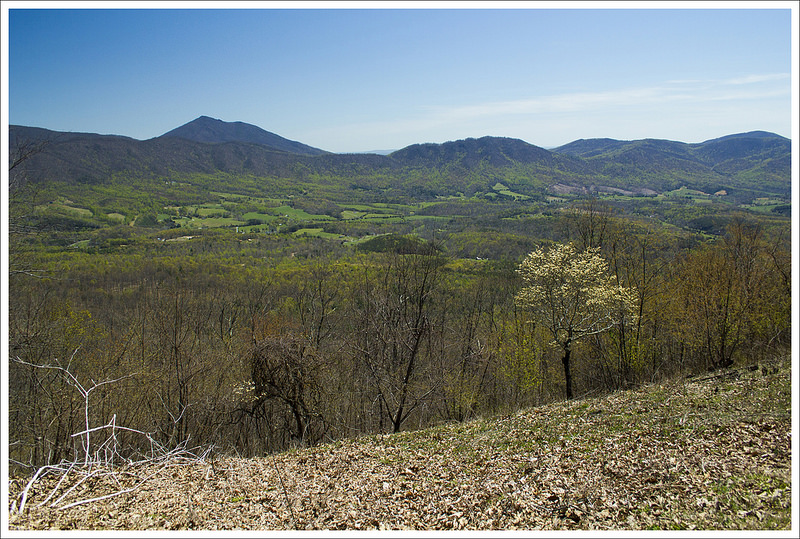


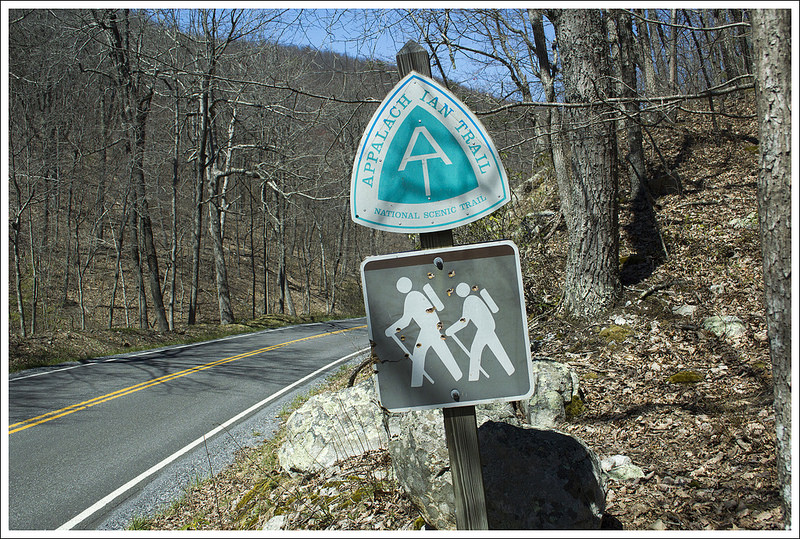


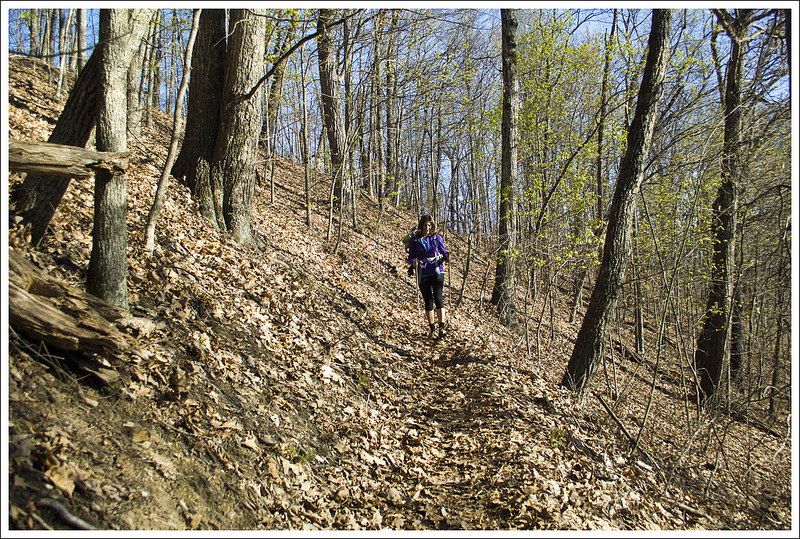
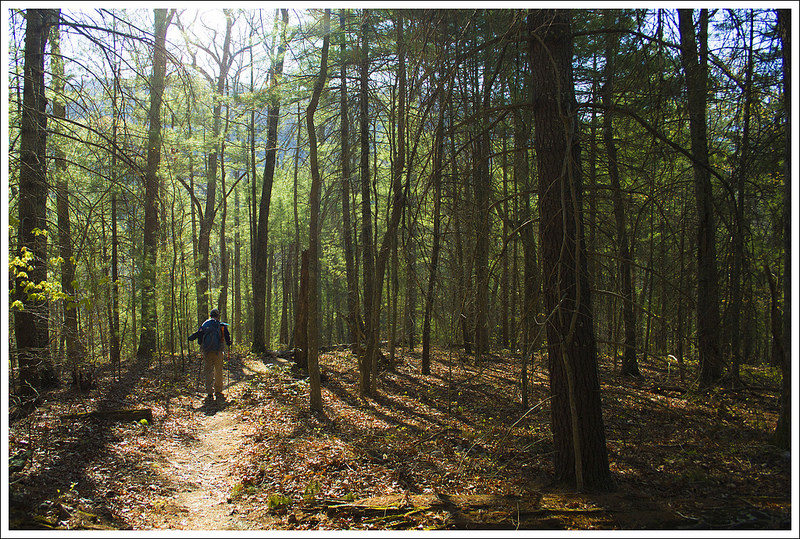


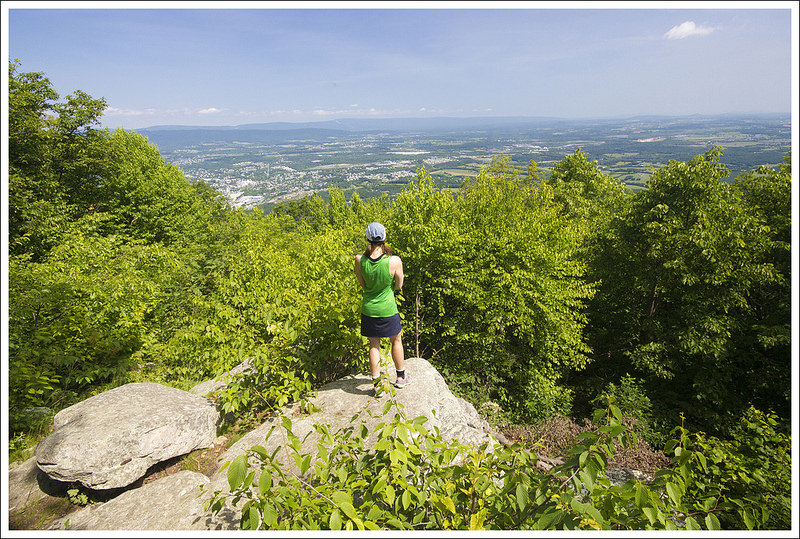


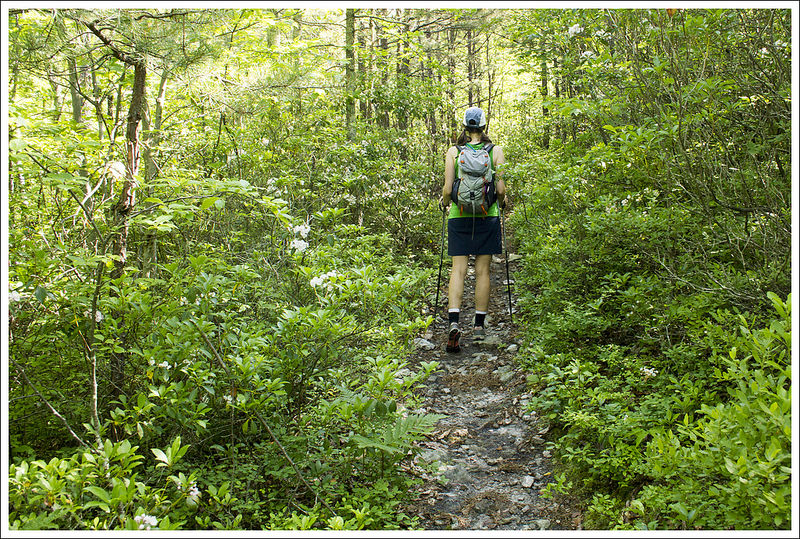


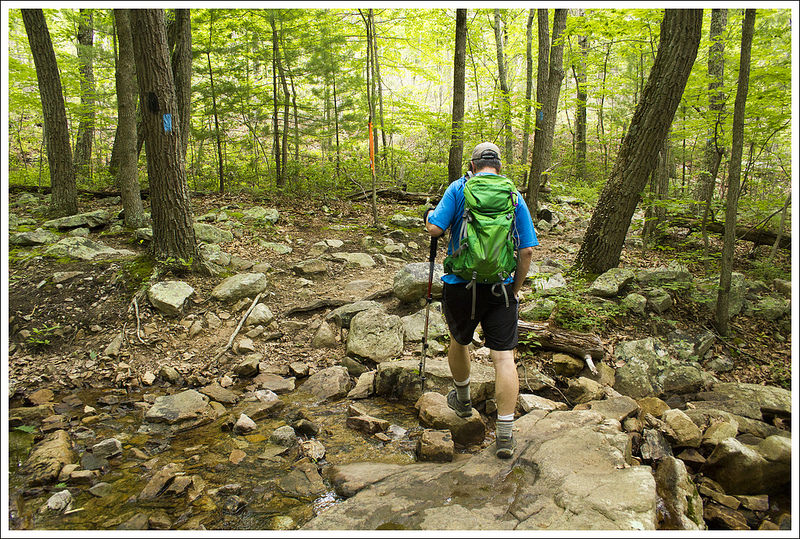


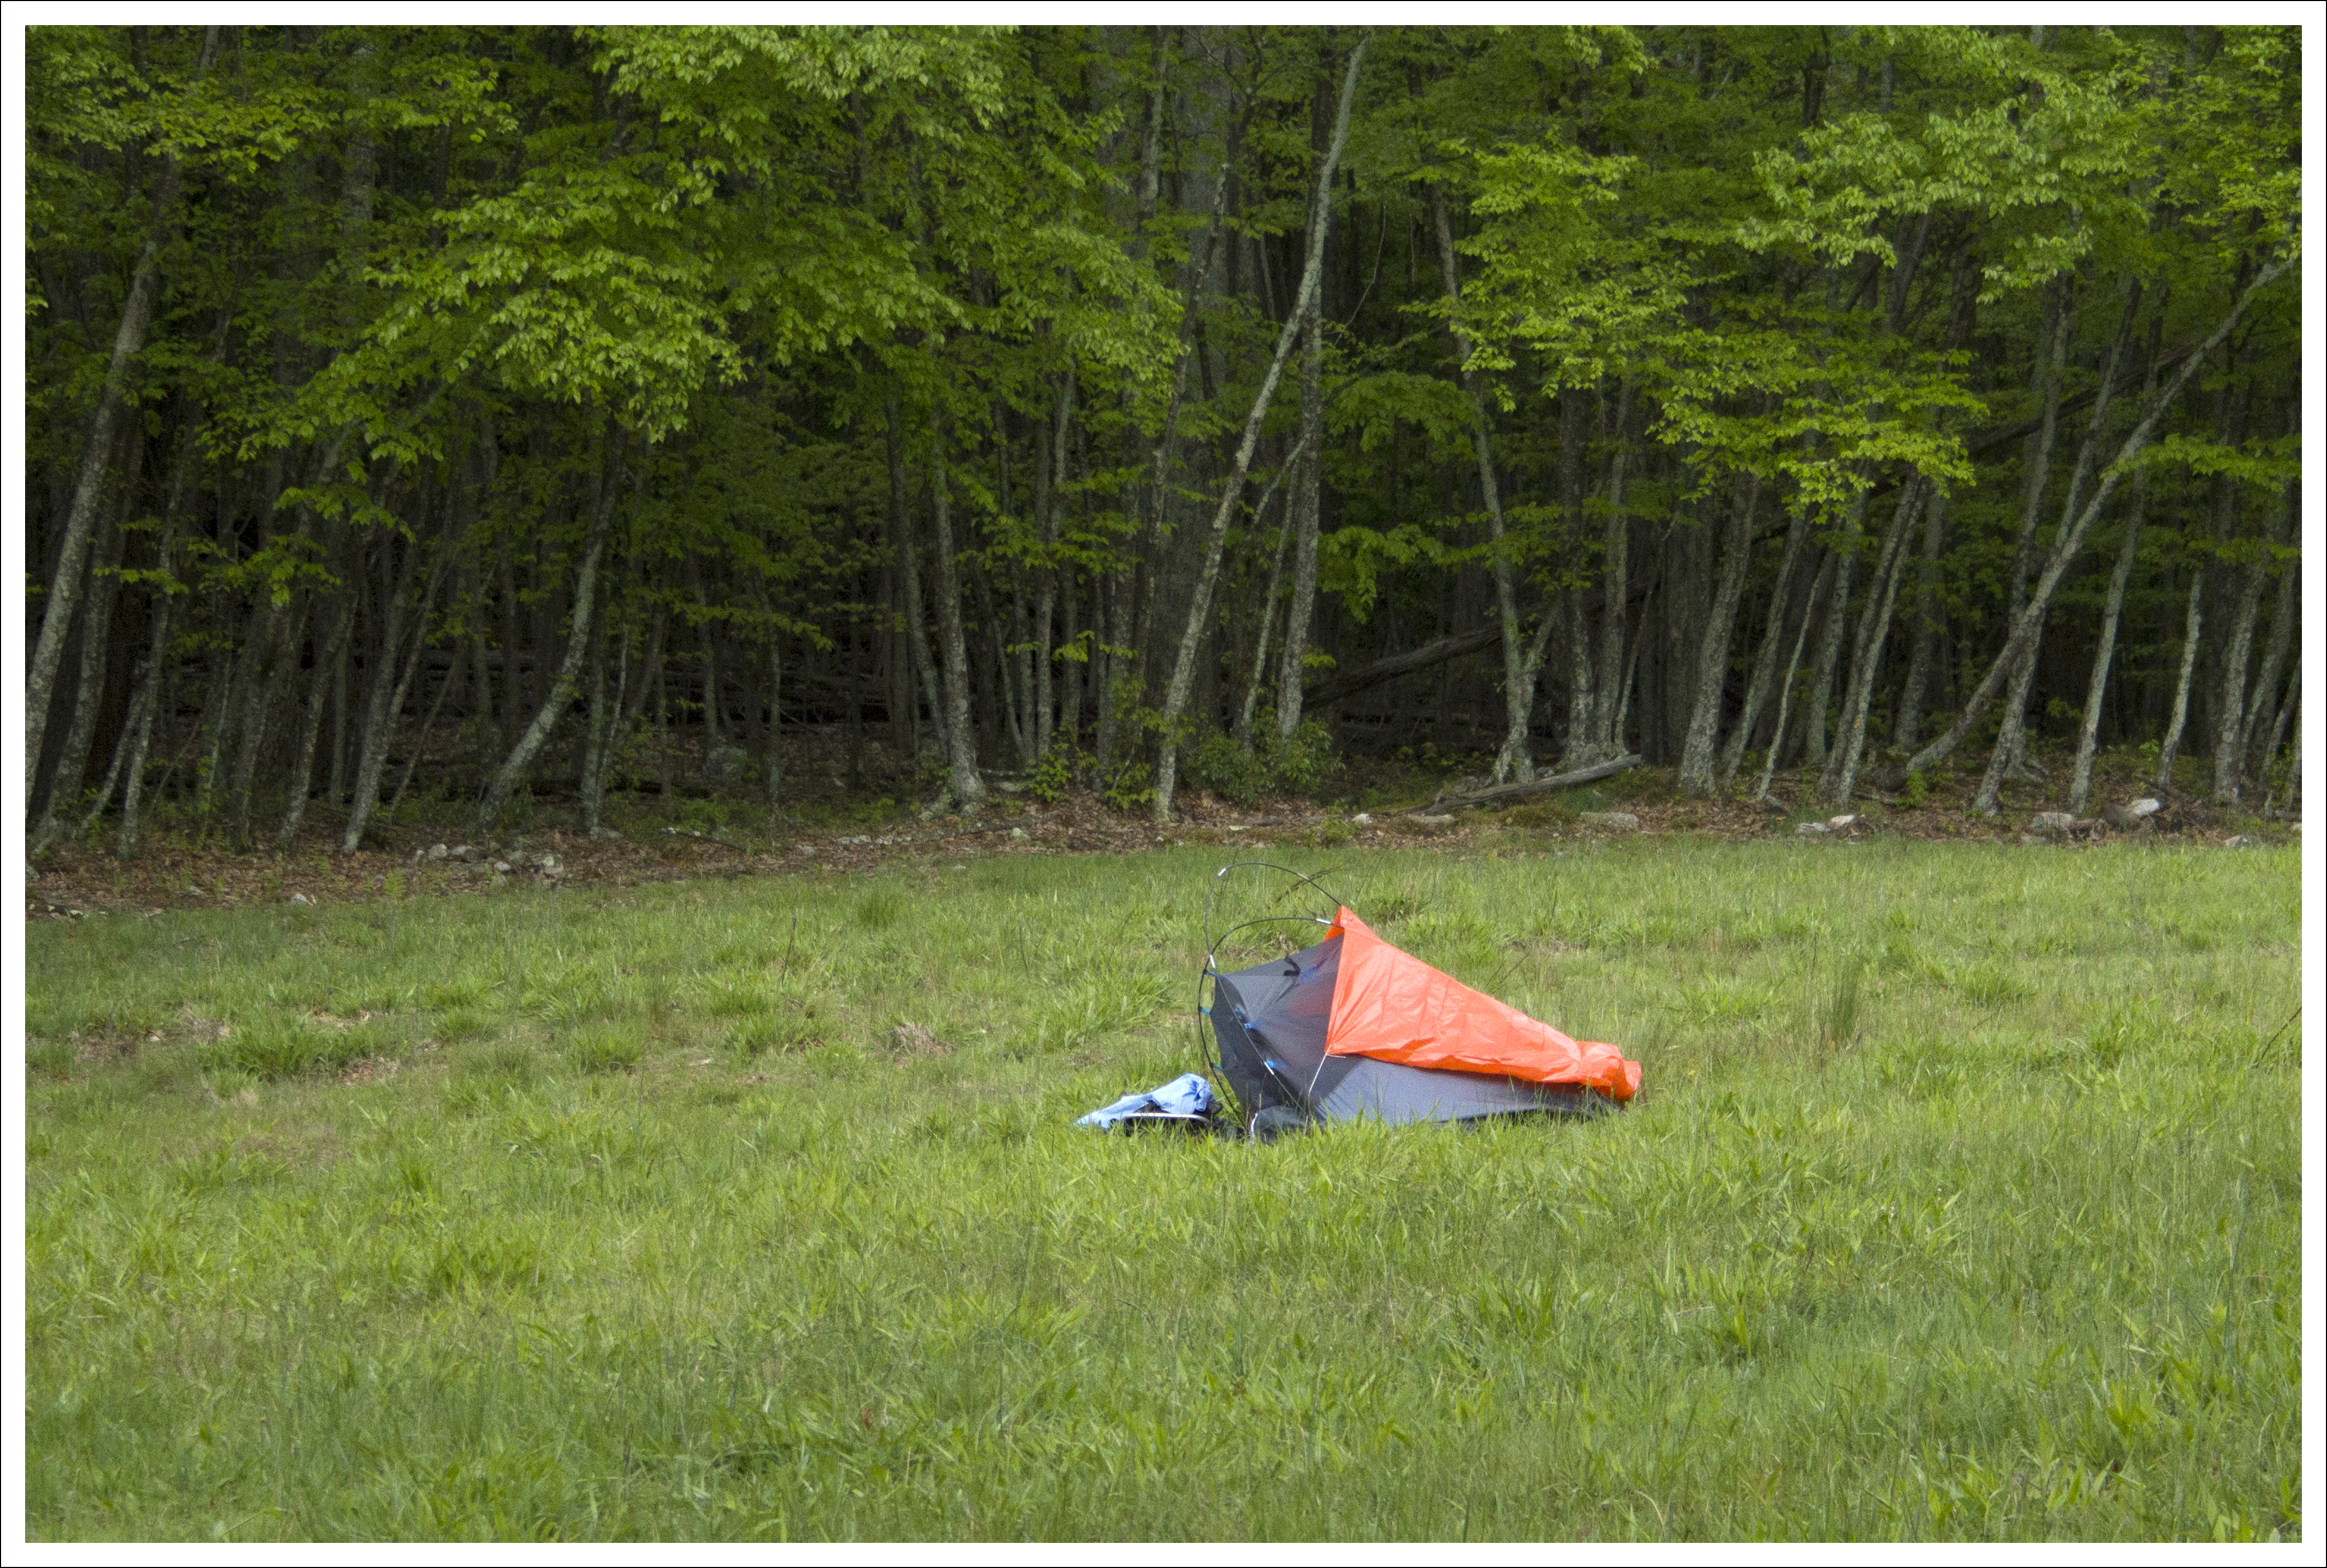