The 6-mile loop around Ragged Mountain Reservoir is a pleasant walk over rolling terrain. There are some nice views of the water along the way. Please note: DOGS ARE NOT ALLOWED IN THIS AREA
A view of the Ragged Mountain Reservoir. Fishing, kayaking, and canoeing are allowed – but no swimming or dogs! Below: The lower parking lot; Adam on the trail; Some, but not all of the trails have signage.
Christine Says:
Yes, we have been slacking at Virginia Trail Guide. We’ve been hiking a fair amount, but we’ve either been doing repeat trails that we’ve already posted on the site – or we’re hiking in faraway places (Wyoming, Idaho) that we have mixed feelings about sharing on Virginia Trail Guide. Also, both of our jobs have also been more demanding than usual, and we haven’t had as much time to hike or create new content. We’re really hoping to have a productive spring and have some more regular new content to share.
A couple weeks ago, we had a sunny and unusual warm Sunday, so we decided to head out toward Charlottesville for a field trip. We’ve never visited the Ragged Mountain Reservoir before and thought it would be a fun, easy hike. We started out at the lower parking area. If I were to do this hike again, I would skip this bit and just park at the upper lot. The spur from lower parking just added a pointless climb, with no extra scenery. The upper lot starts right on the reservoir’s edge and makes a true loop.
There are several neat wooden sculptures along the trail. Below: A woodpecker has been working at the bear sculpture; My favorite was the owl sculpture.
The loop itself was pretty and peaceful. There were rolling ups and downs the entire route, so while it was easy hiking, I still felt like I was getting a decent workout. Benches are posted roughly every mile and there are several neat wooden sculptures tucked into the woods. There are lots of unmarked side trails, but eventually they connect back to the main loop around the lake. So, while the trail system is a little bit confusing, it would be hard to get truly lost. You can download a full map of the trail network from the City of Charlottesville’s website.
The only real challenge of this hike was not slipping in the mud. The trail had some very slick and sloppy spots, so we were glad to have trekking poles for extra balance. All things considered, it was a nice walk on a perfect late winter day. We hiked the loop counter clockwise, so we ended the route crossing the dam.
After the hike, we stopped for lunch at Crozet Pizza and then grabbed a beer at Pro Re Nata.
Reflections on Ragged Mountain Reservoir. Below: The floating bridge; Adam crossing the floating bridge; View across the reservoir from the bridge.
Adam Says:
We have been having some unseasonably warmer winter days in 2020, so it has been a good year to get out and do some hiking in more pleasant and non-snowy conditions. We opted to check out the Ragged Mountain trail system, since it had been on our list of things to do for years. This trail system is very popular with local people from the Charlottesville area. You will likely see families with younger children walking around, trail runners, and maybe even a mountain biker. There are gradual ups and downs on the trail, but it makes for easy walking/running/hiking if you want to cover some miles without a ton of elevation changes. Prior to 2014, there used to be two reservoirs, a pump house, and a slightly different trail system.
As Christine said, we started from the lower parking area and headed to the right (counter-clockwise) from the kiosk to start the trail. We printed out the trail map that we have linked to above, which may be handy to see how all the side loops of the trail connect to make sure you are covering the terrain just the way that you would like. One thing to also note that you will see on the map is there are benches at the numbered locations on the map; on these benches are mile markers showing how far along the loop from the dam you are but we found these mile markings not to be completely accurate with mileage. The trail began to wind uphill rather steeply for the first .25 miles until we reached the top of the trail where it joins up with the dam and road to the upper parking lot. From the viewpoint that we had from the first picture below, we decided to do the Ragged Mountain Loop Trail counter-clockwise, which ended up starting sharply behind us and to the right. At .35 miles, we reached the first junction, which was the Roundtop Mountain Loop. We avoided taking that spur loop since it just looked like an unnecessary uphill climb. Continuing forward, we passed the other end of the Roundtop Mountain Loop and came to the carved Mountain Man marker at .65 miles. These wood-carved statues that are placed in a few places are well done and nice to serve as good markers where other trail junctions also occur. From this marker, we had an option to take a longer loop to the right that led to a water tower or just to push forward. We decided to skip the water tower and headed straight on the trail to reach the Bear marker at the 1 mile mark. From this point there are also other options to take different loops around (we told you the trail map would be handy), so we took the route that looped closest around the reservoir. We were glad we chose this, since we got some nice views of the reservoir and could see some nice reflections as we made our way around.
Ragged Mountain Reservoir dam. Below: The emergency spillway; Plaque dedicating the dam, The trail goes across the top of the dam.
After a bit further, we reached the Eagle marker and passed over a small bridge to continue our loop staying close to the reservoir. This part of the trail wound uphill slightly and we ended up on an elevated part of the trail that paralleled the reservoir. Parts of this section were a bit muddy and slick, so be careful following rainy days. Eventually, we reached the last wood carvings on the trail of owls. From here, there is a short trail down to the water’s edge. The trail takes a sharp right turn away from the reservoir, but does wind back to follow along the reservoir once again. After more walking, we soon came upon views of cars on the highway, but then the trail turned down and led to a floating bridge across the reservoir. On the other side, the trail climbed up steeply and then wound around an emergency spillway. It was only a short distance after we passed the spillway that we ended up reaching the dam. We saw lots of canoes and kayaks parked on the hillside near the dam. We passed over the dam and then crossed the road to join back to the spur trail to the lower parking lot and back to our car.
Overall, the trail system here is a nice place to go out and stretch your legs. It has some interesting features with views of the reservoir and the wood carvings provide a nice touch to the experience. It would be nice to see how this looks in the fall, as I can imagine the trees along the waterside could make for some nice colorful reflections in the water. Expect a lot of people on your walk during a nice day.
Pro Re Nata Brewery. We had a triple IPA called Buddha Kind and a really tasty Red Velvet Ale (on nitro!). Below: Lunch was at Crozet Pizza. Yum!
Trail Notes
Distance – 6.1 miles
Elevation Change – 1,000 ft
Difficulty – 2. There are rolling hills all along this hike, but generally it is easy terrain.
Trail Conditions – 3. The dirt trails were very slippery and muddy when we hiked.
Views – 3. The lake is pretty and blue.
Streams/Waterfalls – 1. There are just a few small feeder streams along the way.
Wildlife – 2. We saw lots of near bird species along the water.
Ease to Navigate – 3. The trail signage is adequate, but there are some unlabeled trails that could lead you temporarily off course.
Solitude – 1. When we arrived at 9 a.m. on a pretty Sunday, we had it all to ourselves, but by the time we finished a couple hours later, it was packed.
Maps
Directions to trailhead: The lower parking lot is located off County Rd 702. GPS coordinates: 38.02692, -78.55583
This 4.9 mile hike was such a pleasant surprise. Our hiking guide said there were views, but didn’t really mention how nice they were! The route had moderate grades and the most blueberries we’ve seen on any of our New England hikes.
While Mount Roberts is a small peak, it offers great views of Lake Winnipesaukee. Below: The hike sets out on the grounds of Castle in the Clouds; Trails are well marked; The early part of the trail is very rocky!
Adam Says…
Since we did our big backpacking trip earlier in Vermont, we decided we would do a lot of easier hikes for the remainder of our trip to New England. We had been to Castle in the Clouds on a previous trip and there are a good number of hiking trails there that are maintained by the Lakes Region Conservation Trust. We saw a write-up about this hike in one of our hiking books, 50 More Hikes in New Hampshire, and decided to give it a try. We parked near the stables at the Castle in the Clouds. Walking up the road past the stables, the sign for the Mt. Roberts Trail was clearly labeled. We followed the trail which led us quickly into the woods and leads along the back side of the fenced-in stable property. The trail takes a sharp left and then a sharp right before you feel like you are really on a trail that is leading up a mountain.
In 1.2 miles you reach a side path that leads you to an area that is called Sunset Hill. It provides a great panoramic view of the valley below you, Lake Winnipesaukee, and mountains that range from the Belknap Range, Mount Kearsarge, Mount Cardigan, Squam Range, and Mount Moosilauke among many others. We talked to an older couple that were taking in the view and were local to the area. The husband talked about how he had been visiting this view for many years – its nice to have this as a place you can revisit. If you want to take a short hike or have small children, this may be a perfect family short out-and-back to do. After enjoying the view, we pressed on to the summit.
Most of the hike up Mount Roberts follows a ridgeline. Below: Adam makes his way along the granite ridge; Near the summit the trail goes back into a pine canopy; The summit.
The trail from this point began to be a little more steep, but overall we found it quite moderate. There were many times that the hike was in the open as we walked along rocky ridgeline, so keep an eye on the orange blazes painted on rocks to point where to go next. On the climb up, we noticed that most of the views were behind us, so we thought we would just press on and then enjoy most of the open views on the way back.
We reached the summit at 2.4 miles, which was marked by a sign in a cairn. The views from the summit were limited due to overgrowth around, but stepping on to the rocks gets you more of a view. As soon as we got to the summit marker, a snake darted out from the rocks so be careful where you step and place your hands. The view wasn’t as spectacular as what we had passed, so we made our way back after a short stay at the summit.
We noticed on our climb up, the abundance of blueberry bushes that were on the trail. We decided we would pick some to eat as a snack on the way back. I have never seen so many ripe, wild blueberries in one place than here. Everywhere we looked, there were blueberries and they were at the perfect ripeness – there is nothing like eating a snack provided by nature in a setting like this. On the way back, we took many more pictures and enjoyed the lake views from nice outcroppings.
We got back to our car at 4.9 miles and thought this was a perfect, easy hike that was much better than what we thought was described. I can see us visiting this hike often and I understand why that older couple keeps coming back. To finish the perfect day, we stopped by the Squam Lakeside, which serves our favorite lobster rolls with tons of fresh lobster and lime cream slushes.
Christine Says…
Adam described the hike really thoroughly, so I’ll chime in with just a few of my memories from the hike. The best part of the hike was the spectacular views on the hike down. It was like a mountain theater and truly breathtaking.
Another note – this hike was really popular with DOGS! I think we saw as many dogs as we did people along the way. From big labradors to jack russell terriers to a dachshund. After seeing one of the dogs make a ‘pit stop’ on the blueberries, it made me choose bushes that were far from from the trail to snack on.
You get great views of the Presidentials and Mount Chocorua from the summit of Roberts. Below: A great look at the rocky cone of Chocorua; Trail markers back to the castle grounds; This hike had so many blueberries!
Another thing that struck me on the early section of the hike was how tough the footing was to traverse safely. Climbing to Sunset Hill was a little bit steep, but the footing was the challenge. The area had a drought-y summer, so the dirt was loose and gritty. On top of the loose soil, there were lots of round, softball-sized stones. It was definitely ankle-turning terrain.
After we passed Sunset Hill, we came across a large group of backpackers from a girls’ summer camp. The Lakes Region of New Hampshire is packed with sleep-away camps. I was really glad to see such a big group of girls, campers and counselors alike, being exposed to overnight backpacking. When I was growing up, backpacking was typically something meant for boys. My Girl Scout troop’s camping trips were limited to cabins and platform tents. We learned to cook, do dishes, clean latrines, and make crafts. My first exposure to backpacking was a single overnight when I attended summer camp with the National Wildlife Federation the summer after my fourth grade year. After that, I never had the opportunity to backpack again until I was an adult. It’s something I truly love and I wish I’d started years before. Seeing all these girls on the trail also made me wonder how this hike hooks into the larger trail network in the area… something I plan to research!
You get great views looking toward the lake on the way down. Below: A moment to enjoy the lake view; Shuttles and the castle’s stable grounds; Post hike lunch of lobster rolls!
I guess another favorite memory from this hike was the great view of Mt. Chocorua and the Presidentials from the summit of Roberts. Yes… the mountains were far off and the view wasn’t panoramic, but those mountains are super impressive even at a distance. Mt. Chocorua was especially breathtaking from this angle, as you could really see the sheer stone cone of its summit.
And finally… who can forget lobster rolls! Squam Lakeside finds a way to pack about two full lobsters’ worth of tender meat onto a hot dog roll for each of their sandwiches. They’re nothing short of glorious!
Trail Notes
Distance – 4.9 miles
(Check out the stats from Map My Hike)*
Elevation Change – 1320 ft.
Difficulty – 2.5. With a short elevation gain, we never found this trail to be very tough. There are a few rocky areas, but they are short-lived.
Trail Conditions – 4. The Lakes Region Conservation Trust does a great job maintaining this trail. We never experienced any blow-downs or overgrown areas on the trail.
Views – 4.5. The Lake Winnipesaukee views were outstanding. Views from the summit were a bit disappointing, but you have plenty of other spots to enjoy on the way up.
Waterfalls/streams – 0. Non-existent.
Wildlife – 3. Watch out for snakes on the exposed rocks. Lots of bird watching to be done from the rocky overlooks also.
Ease to Navigate – 3.5. The trail was mostly easy to follow, but we did have to watch for some of the blazes on the open areas.
Solitude– 3. This is a popular hike in the summer. With that being said, there is plenty of space at the views to carve out your personal space if needed.
While the Road to Nowhere is popular and well-known, the adjacent Goldmine Loop seems lightly traveled and mysterious. We had a hard time finding reliable information about the trail and did some guesswork along the route. As it turns out, it’s a beautiful, jungle-like trail that leads down to the shores of Fontana Lake. The total route ended up being 4.7 miles with a moderate amount of climbing.
At the end of our hike, we enjoyed a rainbow over Fontana Lake.
Adam Says…
In early July, we made our way down to the southern end of the Smokies for a couple day stay in Bryson City, NC. There was lots of rain on and off during our trip, so we had to be strategic about timing our hiking possibilities. Our rental cabin was near a place in the Smokies called The Road to Nowhere. This is not a Talking Heads song reference, but a road that has an interesting history. In the 1930s and 1940s, Swain County donated a lot of its private land to the federal government to help create the Fontana Lake area of Great Smoky Mountains National Park. Hundreds of people were displaced from their homes when Old Highway 288 was covered by water after the creation of Fontana Dam. The government promised to create a new road that would connect Bryson City to Fontana (30 miles away to the west). They began work on constructing Lakeview Drive, but came across numerous environmental issues – a study released stated that completing the road would have major, adverse, long-term impacts to topography, geology, and soils. Construction was stopped at the long, impressive tunnel that marks the beginning of this hike. The environmental issue was eventually resolved, but the road was never continued. Ultimately in 2010, the Department of the Interior paid Swain County $52 million in lieu of finishing construction of the road.
The road ends in the tunnel and you come out on trail. Below: The trailhead; Blooming Rosebay Rhododendron; The tunnel.
The road ends at a gate before the tunnel, but before the gate there is a large parking lot on the right hand side of the road. You will see trail signs along the side of the road. We parked there, walked down the road, went around the gate, and made our way toward the tunnel. When you enter the tunnel, it will be quite dark. We used headlamps so we could see where we were stepping but the tunnel floor was quite flat and smooth. On the other side of the tunnel, the true Lakeshore Trail begins. Continuing a bit further up the trail, we reached a junction at .6 miles that is the Tunnel Bypass Trail. We took this trail which skirted alongside the hillside. It was incredibly humid from the recent rains and my glasses were fogging up and the ground was wet in many places. It continued to drizzle on and off.
Graffiti in the tunnel. Below: The first trail junction; Wet trail.
As we walked along we could clearly hear the sound of a barred owl nearby. It remained out of sight but was moving up ahead of us on the trail. At 1.8 miles, we reached the junction with the Goldmine Loop Trail. We took a right to get on this trail. The Goldmine Loop Trail descends for the next mile. At 2.4 miles we came to where Tunnel Branch runs alongside the trail. It was a very picturesque stream with lots of blooming rhododendron all around. At 2.8 miles, we reached the lowest part of elevation as we came to Goldmine Branch, a larger stream that leads into the Tuckaseigee River, which is part of the larger Fontana Lake waterway. Even though this is a river, it feels very much like a lake due to the beaver dams and high water level. A short side path leads you to a serene place to enjoy a waterside view. We continued back along the trail and our slow ascent began. This area was very mucky from all the water near this low part of the elevation and we slogged through some mud in a few places.
Near the trail’s low point, we saw a large hog trap that was placed by the park service. Wild hogs are destructive to the environment and have been known to be aggressive to humans. Just a short tenth of a mile from seeing the hog trap, we noticed something crashing through the woods toward us, followed by a deep guttural sound of a wild hog. Knowing how dangerous they are, we decided to move along quickly to leave the hog alone. It was quite a rush and we have never heard such sounds. At 3.2 miles, we reached a junction that leads to Campsite 67 (a site you must reserve through the GSMNP overnight camping permit system). We passed on checking this out since it was a bit off the trail and just continued onward. Shortly after this campsite trail, we came upon an old chimney from a home foundation. The ground was mucky and the area was heavily overgrown so we decided against checking out the site further. The trail then really began to ascend very steeply and we reached the junction with the Lakeshore Trail again at 4.1 miles. From here, we took a right on the Lakeshore Trail and then passed by the original Tunnel Bypass Trail junction just .1 mile later. We continued back the way we came to reach the tunnel and then back to our car on the other side to make this about a 4.7 mile round trip.
The rhododendron thickets here are extremely dense. Below: Rhododendrons; Views of storm clouds; Pretty, lush trail.
Christine Says…
We planned several amazing hikes for our whirlwind three-day Smokies trip… and not a single one panned out! Stormy weather and low clouds forced us to revisit all of the high elevation hikes we considered doing. We are capableof hiking in bad weather, but when you have a trail blog you want to do your best to capture views and landmarks. We did a bit of logistical scrambling to find lower elevation hikes where views might be open beneath the cloud shelf.
The first one we settled on was the Road to Nowhere paired with the Goldmine Loop. They hike was just a few minutes from our rental cabin, so it was easy to tackle after the rain stopped in the late afternoon. We didn’t get on the trail until almost 4:00 p.m. Online and printed guides listed the trail anywhere from three to seven miles. With the long days of summer in effect, we knew we could finish a hike in that range before the sun set. We still packed headlamps… just in case! They turned out to be handy for walking through the long, dark tunnel.
Adam sits alongside the Tuckaseigee arm of Fontana Lake. Below: Another angle on the water view; A hog trap; An old homestead chimney.
I thought the tunnel itself was really cool. It looks relatively short to the naked eye, but when you’re inside you walk much longer than you expect. The tunnel is a full quarter mile long and produces the most excellent echoes! The amount of graffiti was disappointing and seriously – can’t people think of better things to draw than penises? There were more of those drawn than any other element of graffiti. After the tunnel, we proceeded a short way down the trail to its junction with the Tunnel Bypass Trail.
The Bypass Trail descended into ever thickening rhododendrons. By the time we reached the Goldmine Loop, I felt like we were in a veritable jungle. I would never want to get lost off-trail in an area like this. The denseness of the forest would be very disorienting. I think the mist, the solitude, the hooting owl, the lack of good trail information, the hog sounds, and the thickness of the forest lent an eerie feeling to the entire hike. We’ve never hiked in the Smokies and seen so few people! I’ll admit, I felt a little bit uneasy on this hike. I rarely describe a hike as creepy, but this one may have approached that feeling!
I was pretty glad when the trail rejoined familiar terrain coming off the Goldmine Loop. On the return trip through the tunnel, we left our headlamps off and enjoyed the almost complete darkness. We just kept walking toward the spot of light at the far end of the tunnel. Soon we were back in the car and headed back to our little cabin in Bryson City. On the way, we stopped at an overlook that peered down into the watershed we just hiked. There was a gorgeous rainbow above and everything looked so peaceful below. It definitely didn’t feel eerie from above!
Difficulty – 3. The ground conditions made it a little tough and there was a steep ascent before we rejoined the Lakeshore Trail.
Trail Conditions –2. The trail was fairly well maintained, but the mucky conditions made for some times where we slogged along the trail at the lower elevations.
Views – 1. We did get a few obstructed views alongside the Tunnel Bypass Trail, but nothing much mentioning. Along the road leading up to the trail, there is a nice view of Fontana Lake alongside the road.
Streams/Waterfalls – 4. There were some nice stream views along the way and the mountain laurel created some extra scenery.
Wildlife – 4. This particular loop isn’t particularly well traveled, so don’t be surprised to find some wildlife. The wild hog encounter definitely gives this a higher score for us.
Ease to Navigate – 3. We had a hard time due to the lack of knowledge out there about the trail system. Hopefully, the map we are providing will help.
Solitude – 4. After we went through the tunnel, we only saw a few other people on the hike. This could be due to the recent rains, but this isn’t a popular area of the Great Smoky Mountain National Park except for local populations.
Directions to trailhead: From the center of Bryson City, NC head north on Everett Street. Everett Street becomes Fontana Road. Fontana Road becomes Lakeview Drive. Follow Lakeview Drive until you arrive at the parking lot before the road that closes off this Road to Nowhere, about 8.5 miles away from the center of Bryson City. Park in the parking lot and continue on foot up the road leading to the tunnel.
* MapMyHike is not necessarily accurate, as the GPS signal fades in and out – but it still provides some fun and interesting information.
This 8.8 mile hike takes you past Madison Spring Hut and up to the summit of majestic Mt. Madison. The Valley Way Trail is known for being one of the safer, more protected routes into the heart of the White Mountains. While the terrain is less extreme than other trails in the area, the hike still requires a little over 4,100 feet of climbing. It’s a tough hike, but the views make it well worth the effort.
Adam makes his way across the summit ridge of Mt. Madison. The big mountain in the background is Mt. Washington. If you look closely, you can see the Auto Road snaking down the peak. Below: Plenty of parking and access to many trailheads at the Appalachia Parking area; Warning…. danger ahead – seriously, the White Mountains can be pretty extreme; The early part of the trail was fairly soft and gentle.
Adam Says…
My top goal for our 2014 New Hampshire trip was to hike up Mt. Madison. We both went to James Madison University and have worked there for years, so it only seemed fitting to take on the mountain that shared a name with our college. I even wore JMU Dukes gear almost like the guy that goes to a concert wearing a t-shirt for the band’s previous tour to show his super-fandom.
We started out the day on a rough note. Christine had put her hiking shoes and socks in the back of our car, so she could wear sandals on the car ride up. When we pulled over at one point, we realized one of our Camelbak tubes had pressed open and leaked all over the car, soaking her shoes and socks. We debated about if we would have been able to even do the hike in fear of blisters, but Christine decided to push forward.
There are a lot of ways up Mt. Madison, but in our research we found the most popular way was to make our approach by going up the Valley Way trail. We parked at the large Appalachia parking lot (which was so full we needed to park on the road) directly on US-2. We were worried there would be so many people on the trail, but this parking lot holds the beginnings of lots of trails that lead up to many peaks (including Mt. Adams and Mt. Quincy Adams).
The early part trail follows Snyder Brook. By taking a short spur trial, you can visit beautiful 25′ Tama Falls. Below: We saw a couple Croo members on their way down from the Madison Spring Hut; Adam checks out all the rocks on the ‘not as rocky’ New Hampshire trail; The final push to the Madison Spring Hut was very steep and rugged.
The trail starts off from the back of the parking lot. The trail branches off in different directions but follow the signs for the Valley Way trail. The trail begins relatively flat and easy walking, as it runs along Snyder Brook. There were a few places where we could get some nice stream views and even a glimpse at the picturesque Tama Falls at .4 miles. At .7 miles, you reach another large junction, but continue to follow the signs to the Valley Way trail. The trail then begins the steeper uphill climb. Overall, I felt that the trail, while very rocky was not as steep and rocky as some of the other trails in the White Mountains. There is a relentless amount of climbing and many rocks to navigate, but it wasn’t as grueling on my feet as some hikes in New Hampshire have felt to me. At 3.0 miles, the trail gets very steep and rocky (often filled with larger small boulder-sized rocks to hoist onto) and will remain so until you reach the Madison Spring Hut at 3.8 miles. If you’re interested in camping on the mountain, but don’t want to stay at the hut, the Valley Way tentsite is at mile 3.1 on this hike.
Once we arrived at the hut, we saw there were a couple of ways up to the summit of Mt. Madison. At this point, we were above treeline, so we saw the rocky summit up above us. I went in and found one of the Croo members and she told me the Osgood Trail had the most direct route and was a little easier than making our way via the Watson Path. The final ascent up to Mt. Madison was .5 miles along the Osgood Trail (which is also the Appalachian Trail in this area). You basically needed to walk acrpss large boulders, following cairns along the way until you reached the summit. When you are above treeline, the summits of mountains seem so close to reach, but it is very misleading. As we climbed up, we looked back and saw the hut shrink with each step, finally giving us some perspective of how far we had come. We stayed a while at the summit. The views were breathtaking and you could see for miles all around. It definitely was one of the most beautiful scenes I have witnessed hiking and to realize the work we had put in to attain the peak, made it feel even more worthwhile.
Christine makes her way up the Osgood Trail to the summit of Mt. Madison. Below: About to go above treeline; Even though the summits are far away, they always look close; A view of Madison Spring Hut with Mt. Adams in the background.
While we were at the summit, we met a woman who had a sign pinned to her that had 48 over 50 written on it. She was over 50 years old and she had a goal to do all 48 peaks over 4000 ft. in elevation in New Hampshire. She had saved Mt. Madison as her last hike to meet her goal, so we were thrilled to be able to see her experience accomplishing her goal. What an inspiration! We also talked to a gentleman at the summit who was from Colorado that had done this same hike 30 years ago. He was staying at the nearby Crag Camp, run by the Randolph Mountain Club, just as he had done when we was a teenager. He wanted to see if this hike was just as amazing as he had remembered and he told us it definitely was. It made me further realize that everyone likes to hike for their own reasons and it is always a privilege to get to hear people’s stories on the hike.
We made our way back down and ate some lunch at the Madison Spring Hut. We then ventured .2 miles on the Parapet Trail to see Star Lake. This is a spot you definitely shouldn’t miss. The lake is more like a small pond, but it was so beautiful to view the summit of Mt. Madison, as it reflected into Star Lake. We debated about tackling Mt. Adams to bag another peak, but we realized that the summit looked close, but it was still a steep 1 mile away. Not wanting to add even more to our hike, we decided to make our way back down. The trail seemed to be even rockier on the way back down. While you can normally fly down some parts of downhill trails, you need to take your time on this one to navigate all the rocks. On our way down, we came into a rain shower, making the rocks a little slick. The last .8 miles were quite easy again and we did pick up some time at this point. We made our way back to the parking lot to make the round trip 8.8 miles.
Christine Says…
The morning of our Mt. Madison hike started off cheerfully enough. We stopped for breakfast at Dunkin Donuts. I ate both a bagel with cream cheese and a Boston Cream donut. If I’m going to hike almost nine miles with over 4,000 feet of climbing, I’m going to enjoy any and all the baked goods I want! However, I was jolted out of my happy post-carb afterglow when I discovered my socks and sock liners completely soaked in the back of the car. A tough hike with wet socks sounded like a really bad idea. But, driving out of our way to find an outfitter with Thorlo socks seemed like an even worse idea. I’m super picky about socks, and Thorlo’s thick-cushion hiker socks are the only ones that keep my feet happy. I decided wet Thorlo socks were better than dry socks of another brand. (and they were … I hiked all day in wet socks and didn’t get a single blister!)
As Adam said in his post, the Valley Way trail is pretty moderate for White Mountain terrain. The trail is not as rocky and stays under the shelter of trees until you get to Madison Spring Hut. It’s a great choice if you want to visit the northern Presidentials, but stay largely sheltered from wind and other weather. There is still plenty of climbing, but until the last mile, it’s all gradual and moderate. Trails like the Valley Way exist due in part to people like J. Rayner Edmands. He was an early volunteer for the Appalachian Mountain Club. Starting in the 1880’s, he spent over 20 summers building trails in the White Mountains. He believed trails to the high peaks should be passable without stumbles, even in the dark. Backpacker Magazine did a neat article about Edmands in their October 2014 issue. Check it out if you have a few free minutes.
We paid tribute to our alma mater (James Madison University) on the namesake mountain. Go Dukes! Below: The trail was extremely rocky and rugged between the hut and the summit of Mt. Madison; Cairns mark the way; Christine and Adam enjoy a summit view; The descent.
I very much enjoyed the little rapids and waterfalls along Snyder Brook early in the hike. Tama Falls was especially impressive. After we moved away from the stream, the hike was basically just a climb in the woods. As we ascended the trail got rockier, bit by bit. The last half mile to the hut was insanely steep and rocky. In one spot, my shoe got so solidly wedged between two rocks that I had to unlace it and contort my ankle to free myself. It took efforts from both of us to release my shoe from the rocks. It’s a good thing trail runners are so soft and flexible, because my feet definitely needed both shoes on this hike! I think the steepness of the terrain is actually what stopped me from getting hurt when my foot got caught. We were moving very slowly, picking our way across the rocks. Had I been moving at any significant speed, I think I could have easily broken my ankle.
When we arrived at Madison Spring Hut, it was already starting to cloud up a little. It wasn’t really overcast, but the sky had that heavy, hazy look about it. The weather was definitely changing and I wanted to make sure we enjoyed the best views possible. We headed up the Osgood Trail toward the summit of Madison. I don’t know if you can really call the path to the top a ‘trail’. It’s more of a scramble across rocks, following cairns leading you to the summit. The climb to the top is slow going, simply because there is never a simple place to put your feet. On our way up it was fun to look back and marvel at the towering peaks and the tiny hut tucked into the col.
We decided to eat lunch at Madison Spring Hut. Below: Even pretty dogs aren’t allowed inside AMC huts; We always enjoy the baked goods for sale at huts; Compass on the hut porch.
At the top we enjoyed spectacular views of the Presidentials. Seeing the Mt. Washington Auto Road snaking down the mountain was really impressive! While the wind was a little brisk at the summit, it was really a warm, mild day for the White Mountain high peaks. Lots of people were hiking in shorts and t-shirts. Some people even basked shirtless in the summit sunshine. My blood is a little thin for that, but I wasn’t cold like I had been on the summit of Mt. Washington in 2013.
After taking lots of photos and doing our JMU rituals, we climbed back down and enjoyed our packed lunch at Madison Spring Hut. Of course, we supplemented our packed food with baked goods from the Croo. I always hear people talking about how huts are packed with dayhikers all summer long. I’m not sure if it’s our timing (we hike early), but we’ve found almost every hut we’ve visited nearly empty.
Beautiful star lake sits near Madison Spring Hut. Below: As we were leaving the lake, clouds started to roll in and we heard distant rumbles of thunder… time to leave the peaks and head back to the valley below.
After lunch, we walked out to Star Lake. What a beautiful spot. The lake itself is small and shallow, but it makes a gorgeous reflecting pool for Mt. Madison. We were lucky to visit on a picture perfect day! While we were admiring the lake and taking in our final peak views, we started to hear distant rumbles of thunder in the distance.
Being caught in a thunderstorm in the Whites is definitely something I’d be happy to NEVER experience. Lightning strikes happen frequently, wet granite is very slick, and stream levels can change drastically in mere minutes. In fact, just last week I read a harrowing account from a solo hiker caught by storms in the White Mountains. Seriously scary!
We made our way down as quickly as we safely could. With a couple miles of hiking left, the rain started to fall. Fortunately, it was light rain and none of the thunder/lightning seemed close. We got back to the car right before the skies opened up and poured! What a great day with perfect timing. I’m really thankful that we had weather that allowed us to visit two more Presidentials on our 2014 trip!
Difficulty – 5. The trail started off easier, but it is still a very tough, uphill climb.
Trail Conditions – 2.5. The trail was well-maintained, but the rocky parts of the trail make this a challenge. The final push to the summit on the Osgood Trail also took a lot of precision. Bring trekking poles.
Views – 5. It doesn’t get much better than this. If you are lucky enough to catch this on a day where clouds are off the mountain summits, you will be able to see all around you for miles.
Waterfalls/streams – 3. The Snyder Brook runs alongs the trail early on the hike and you can see a few smaller waterfalls along the trail.
Wildlife – 1. We didn’t really see any wildlife on the trail. I wouldn’t expect much at all once you get above treeline.
Ease to Navigate – 2.5. There are a lot of junctions and side trails on the route because there are a lot of trails in this area. Keep following the signs for the Valley Way Trail until you reach the hut and then follow the Osgood Path via the cairns to the summit.
Solitude– 2. We picked a gorgeous day in the summer to do this hike, so we weren’t surprised to see lots of people. We saw the most at the summit and the hut, but there was still places to find our own bit of solitude.
Directions to trailhead: From I-93: Take Exit 35 for Twin Mountain. Follow 3N for 12.4 miles. Turn right onto 115N for 9.7 miles. Turn tight onto 2E for 8 miles. The parking lot will be a large gravel area on the right.
* MapMyHike is not necessarily accurate, as the GPS signal fades in and out – but it still provides some fun and interesting information.
Sherando Lake is a popular camping/swimming area for locals. It’s just several miles off the Blue Ridge Parkway.
Adam Says…
This has been quite the harsh winter for snow and cold temperatures. And when it hasn’t been too cold, it seems to have been raining. So, we were glad to get out on a nice day to get a little exercise outdoors for a change.
Sherando Lake is a multi-purpose recreation area. In nice weather, you will see people swimming, fishing, camping, and hiking. To visit, there is a fee per vehicle – check out their fee schedule. The area is officially open from early April through October. The road gates are often closed during the off season based on weather. There is camping available if you wanted to make a nice weekend trip, but reservations should be made in advance.
We started off our hike from the Fisherman’s Parking Area. There were a few other vehicles there also, but they were all there for the fishing. The lake is stocked with trout throughout the year. Facing the lake, we started our hike on the left by heading up the Cliff Trail. This trail was a short gradual climb with a few switchbacks before the trail levels out. About .4 miles into the hike, there is a small outlook to the right from a rock that gives you a few obstructed views from the lake. Continuing on the trail, it begins to descend and the lake gets back into view. At .8 miles, you reach the lakeside and see the sign that shows the junction with the Lakeside Trail (a trail that wraps around the lake). We took a few minutes to go out onto the sand and enjoy the views of the lake. I saw a wood duck escorting a few ducklings on the far banks of the lake.
The fisherman’s parking lot is located at the dam end of the lake. It is where our hike begins. Below: The trail starts off rocky; Overlook View.
We walked back behind the large building/gift shop, crossed a couple of bridges and rejoined the trail on the northwestern side of the bank. We took the blue-blazed Blue Loop Trail, leading us past a few campsite areas before climbing up into the woods. The trail is rockier, especially in the beginning, than the Cliff Trail and is steeper. The trail climbed through a few switchbacks. At 1.5 miles, you reach a junction shortly after a switchback with the Dam Trail. This will be your return route. Continue up the Blue Loop Trail, which begins to take an uphill climb to the left up the mountain. At 1.75 miles, you reach Lookout Rock. We took some time there to enjoy the view and then went back the way we came until we reached the junction with the Dam Trail. We took this trail to the left, which leads steeply down the mountain. You begin to see the lake through the trees again and we reached the lakeside around 2.25 miles. We continued on the trail until it reached a small bridge that crossed over the dam stream and led back to the parking lot.
Adam takes in a beach/lake view. Below: Services are typically open April through October; Trails are well marked; Adam hikes the Blue Loop Trail.
One thing that was going through my mind during the hike is this would be great for a family outing. Grab your family for a quick hike followed by a picnic by the lake. Make a weekend of it if you want to do some camping, swimming, and fishing.
Christine Says…
I enjoy playing in the snow, but I’m very ready for warmer weather. I want to see flowers blooming. I want to feel warm sunshine on my face. I’m so ready to see a canopy of green across the mountaintops. I have spring fever. So, I was especially thankful for a particularly warm and sunny Saturday because it gave us a chance to get out and hike.
We chose Sherando Lake, mainly because it was nearby and easy. It would have been a great day to go on a longer hike, but Adam was still getting over a bad cold. And I was not willing to spend more than an hour in the car. I had spent the past two weekends in a 12-passenger van, making a 15 hour ride to and from the Florida panhandle and was still a bit road weary.
Lookout Rock provides a nice view of the valley, lake and mountains. Below: Adam climbs his way toward Lookout Rock; Checking out the view, Making the descent.
My trip to Florida was a service-learning trip with a group of nine JMU students. We traveled to a Nature Conservancy preserve – Apalachicola Bluffs & Ravines to do a week’s worth of environmental work. We camped, we hiked, we learned about the local ecosystem, and most importantly – we planted 90,000 plugs of native wiregrass seed that will be used to restore the natural habitat of that part of Florida. It was hard work, but I think we made a difference. We even had one free day on our trip. We chose to spend it spotting manatees, gators, and other wildlife at Wakulla Springs State Park. If you want to see more photos and read more about my service trip, I’ve uploaded a large set of captioned photos to my Flickr account.
Now, back to Sherando Lake! I had been to the lake a couple times before, but had never actually taken the time to hike any of the trails in the area. I was pleasantly surprised by the trail system. There is something for everyone – a practically flat trail that goes along the lake shore, a steeper trail around the lake that offers a couple nice views, and a connection into the larger, longer trail system along the Blue Ridge Parkway.
I liked sitting on the sand and enjoying the pretty lake view, and I really enjoyed climbing up to Lookout Rock on the Blue Loop Trail. The rocky outcropping provides a nice view of the lake and the mountains beyond. Although the snow was gone on the trails we walked, we could still see plenty of snow on the distant, higher ridges.
The hike ends after crossing a cement bridge over the spillway. Below: The stream leading away from the lake; Christine crossing the concrete bridge, Blue Mountain Brewery food and brewery.
The walk back down from Lookout Rock was really steep and slick, especially with the thick bed of dry, fallen leaves. Once we reached the bottom of the descent, we crossed a concrete bridge beneath the spillway and returned to our car. We finished hiking a little bit before noon, so we decided to make the short drive to have lunch at Blue Mountain Brewery (near Afton Mountain). They have great food and great beer. Adam enjoyed a flight of nine different beers and I tried their Daugava Baltic Porter. I think everyone in central Virginia had the same idea to visit the brewery for an outdoor lunch. The place was packed, but it was a perfect ending to the day.
Directions to trailhead: From I-64, take Exit 96 just east of Stuarts Draft. Go south on State Route 624, which becomes State Route 664 at Lyndhurst. Continue south on State Route 664 approximately 8 miles to the entrance to the Sherando Lake Recreation Area on the right. The gatehouse is approximately 0.5 miles ahead which will take the fee for your vehicle. Past the gatehouse, you’ll take a right to the fisherman’s parking lot. Park there and make your way to the left for the Cliff Trail.
* MapMyHike is not necessarily accurate, as the GPS signal fades in and out – but it still provides some fun and interesting information.
This 3.3 mile hike is one of the easiest and most accessible ‘hut hikes’ in the White Mountains. Lonesome Lake is beautiful and the hut provides a nice place to stop for a picnic lunch.
Lonesome Lake is beautiful and one of the easiest, most accessible ‘hut hikes’ in the White Mountains. Below: The trail for Lonesome Lake starts in the campground; Adam climbs the trail; As is the case with most New Hampshire trails, the path to Lonesome Lake is rocky and rooty.
Adam Says…
After our hike on Franconia Ridge, I had to take a day off to let my leg muscles recover. When we were ready to tackle another hike, we decided to do something on the easier side this time that didn’t have nearly as much elevation as our previous hikes. While we were hiking up the Franconia Ridge Trail, we noticed this serene lake in the far distance.
We started off our hike from the opposite side of I-93, so we walked underneath the interstate bridge and followed the signs for the Lonesome Lake hike. This led us into Lafayette Place campground, which has 98 campsites. With such nice weather we were having, it was no surprise that the campground was full. It always feels awkward to me to be walking by campsites while people are still sleeping, eating breakfast, or hanging out. We made our way along quietly and then reached the true trailhead next to campsite #93.
The Lonesome Lake trail consisted of a steady climb through sections that are covered with roots and steep rock steps. At 1.35 miles, we reached the ridge and came upon our first glimpse of Lonesome Lake at a junction point with several other trails. We stopped for a quick breather and to enjoy the view of the lake, a remnant of a glacier that had carved out the mountains. The uphill hiking was over, and we headed left on the Cascade Brook Trail, which winds around the side of the lake. The trail was boggy in many spots, but there were often footbridges, rock steps, or logs to walk on in the muck to make our way across easily. On our way, we passed a croo member from Lonesome Lake who was heading down the mountain with a wooden frame loaded with outgoing refuse from the hut.
The mountains reflect in Lonesome Lake. Below: There are lots of trail junctions when you reach the end of the lake; The trail around the lake is muddy and traversed by planks and stepping stones; Climbing the stairs to Lonesome Lake Hut.
At 1.6 miles, we reached the junction with the Fishin’ Jimmy Trail. We took a right on to this trail and in a short distance we came to a large dock on the lakeside. There were a ton of teenagers on the dock, so we decided to check this out later. Right above the dock was a series of steps that led to the Lonesome Lake Hut. When we arrived in the hut, there was nobody there except for a few croo members. One was cleaning up the kitchen and the other was packing her frame to take down the mountain. We talked to her for a while and found out that they make several trips a week down to the base of the mountain where they meet up with someone to help them resupply for their trip back to the hut.
We rested a while on the back porch of the hut and talked to a family that was visiting from the Netherlands. They were on their way to visit Shenandoah National Park soon, so we gave them some tips on where to stay in the park and some of the things we would recommend they do while in Virginia. The large group of teenagers had cleared out, so we went to the dock to enjoy views of the southern end of the lake (now occupied by several families with toddlers). We made our way back the way we came to finish the out-and-back hike.
The inside of Lonesome Lake Hut is cozy, bright and cheerful. Below: Adam enjoys a nice seat on the large porch overlooking the lake; Whoopie pies and mountain views; The Lonesome Lake dock gets crowded!
We could tell from the people that we saw climbing up that this is a highly-trafficked hike. We hope in the next few years to do a larger hut-to-hut traverse across this area. It was nice to see a possible overnight location in advance. This is an easier hike that most families should be able to do if they take their time.
Christine Says…
After hiking Franconia Ridge, we decided to take a day off and be restful tourists rather than ambitious hikers. We spent the day visiting Dartmouth College, sampling Long Trail Ale, gorging ourselves on Cabot Cheese and watching glassblowers at Simon Pearce. The next morning, we were ready to get back on the trail. Adam’s knees and calf muscles were still bothering him, so we went with the easy hike to Lonesome Lake.
Lonesome Lake is lovely glacial pool sitting between North Kinsman and Cannon Mountains. The initial ascent to the lake is a little steep – about 1000 feet over 1.3 miles, but compared to many other hikes in the area, it’s considered a very easy trail.
When we began our hike, the morning was cold and sort of grey. The forecast called for brilliantly sunny weather, but you just never know what you’re really going to get in the White Mountains. We meandered through the Lafayette Place campground to reach the trailhead. The smell of campfires and cooking bacon was heavy in the air. That smell always makes me so nostalgic for the camping trips of my youth. My mom was a great camp cook – there were always sausages, bacon, pancakes and eggs. Nice memories…
Each hut is run by a ‘Croo’ – mostly college students on summer break. They carry supplies for the hut on their backs using these wooden racks.
The hike up to the small plateau where the lake sits is uphill and pretty, but generally unremarkable. Like most New Hampshire trails, you can expect to see lots of rocks and roots along the way. As you climb, the woods change from predominantly hardwood to a heavier evergreen mix.
At the tail-end of the lake, there was a junction sign with different trail options headed in many different directions. We followed an almost completely flat trail around the perimeter of the lake. We caught lots of glimpses of the water through the trees, but the most memorable feature of this trail was the mud! Thankfully, the trail is well maintained and rocks and planks were strategically situated the entire way, and we never had to get our boots muddy.
At the head of the lake, we crossed a wooden footbridge that came out between a wooden staircase and a lakefront dock. Since the dock was packed with kids from a summer camp group, we decided to check out Lonesome Lake Hut before enjoying the water. We climbed the stairs and found a charming cluster of wooden buildings that make up the ‘hut’. Unlike Greenleaf Hut, which is in a single building, Lonesome Lake Hut is a collection of cabins and a main dining room.
A couple members of the Croo were still cleaning up from breakfast. And of course, Adam managed to snag more free leftover pancakes! If you have a spare minute, check out this fun video about the 2013 hut Croo. If I had known there was such a job opportunity as ‘AMC Croo Member’ when I was in college, I would have leapt at the opportunity. It sure would have been more fun than filing procurement paperwork for the Army Corps of Engineers! (no offense to ACoE).
Christine sports her new knee brace. Below: The beautiful lake; Beginning the climb down; The ranger station at the base of the mountain.
At Lonesome Lake, we met another croo member who was loading up her packboard with empty boxes and other outgoing items to carry down the mountain. She said the trip down is typically a lighter load than the trip up, which includes food and other supplies. The AMC has a fun article about Packboarding Legends. Can you believe some people have carried packboards weighing over 100 pounds? The average is more in the 40-80 pound range, which is still extremely impressive!
After looking around the hut for a few minutes, we found a couple pleasant Adirondack chairs to relax upon. The back porch of Lonesome Lake hut is a great place to idle away a pretty summer afternoon. While we relaxed, the sun came out, making it even nicer for sitting. I shared a whoopie pie with Adam. We also had a very nice conversation with a family visiting from the Netherlands. They were greatly enjoying the expansive, forested terrain of New Hampshire – something they said they have little of at home.
After a while, we made our way back down to the lakeside dock. We found it still crowded, so I took some photos and didn’t linger for long. The hike back went very quickly. We saw lots of families hiking up to spend a night at the hut. I hope we’ll have the opportunity to do a hut stay on our next New Hampshire trip.
Difficulty – 2.5. The climb up was fairly steep, but because of the short distance, you can take your time.
Trail Conditions – 3.5. The trail is well-traveled and in good condition. There are some steeper sections and some worn-out areas that do require careful footing.
Views – 2. You do get views from the lake of the mountains around you, but the height of the mountains around the lake keeps you from getting distant views.
Waterfalls/streams – 4. While you don’t have waterfalls and very limited stream views, you are rewarded with a massive lake on this trail.
Wildlife – 1. We didn’t see anything on this hike other than squirrels.
Ease to Navigate – 3. There are some confusing spots where you wonder where the trail is leaving the campground. Also, the junction at the ridge has a lot of different trails to follow. Read the signs and you should be fine.
Solitude– 1. On a clear day, this hike is likely crawling with people.
Download a trail map (PDF) – Coming soon!
Directions to trailhead: Head north on I-93 until it becomes Franconia Notch Parkway. Pass exit 1 and the exit for the Basin. Take the next exit (for trailhead parking). Park in this parking lot. Leave your car and head underneath the bridge that is I-93. Follow the signs for the Lonesome Lake trailhead, going into the Lafayette Place Campground. The trailhead leaves near campsite #93.
* MapMyHike is not necessarily accurate, as the GPS signal fades in and out – but it still provides some fun and interesting information.
This moderate hike includes two panoramic mountain summits and views along one of the most scenic ponds in Maine.
The summit of Sargent Mountain has a beautiful view. Below: The trail marker behind the Jordan Pond House; Adam enjoys the view from atop an erratic; Jordan Pond is beautiful!
Adam Says…
Hiking up Penobscot Mountain is one of our favorite hikes in Acadia National Park and we decided to save this hike for our last day there. We had hiked up Penobscot a few times before, but this was the first time that we added on Sargent Mountain.
This loop hike begins at the Jordan Pond House. Facing the house, if you walk behind the left side of the building, you will see the trailhead marker not far from the bathrooms. The trail goes into the woods, crossing Jordan Stream with a small footbridge. At .3 miles you come to an intersection with the Jordan Cliffs trail (another steep option for a loop from Penobscot), but continue on the trail. At .5 miles, you will cross over one of the gravel carriage roads. The trail continues up the Spring Trail at this point. The Spring Trail consists of climbing up some rocks and does require you to pull yourself up through some tight areas. There is also one area where you will likely need to squeeze your body between a few rocks. This is the most challenging part of the hike up the trail, but before you know it, you will reach a nice viewpoint (with a stone makeshift bench) to relax from your climb up. The tricky part from here is that your eyes are drawn to the viewpoint and you could miss the continuation of the trail. Sitting on the bench and looking out, the trail continues behind your right shoulder. There is a small path behind your left shoulder, but that leads to a dead-end.
Adam enjoys the stone bench overlooking Jordan Pond. Below: Christine makes her way up the Spring Trail.
After you soak in the views, continue on the trail. After a short climb, the trail begins to open up as you begin your hike above the treeline on the open mountain face. The hike up from this point consists of following cairns along the way. At 1.6 miles, you will reach the summit marker of Penobscot Mountain at 1194 feet. From the summit, you can see Sargent Mountain ahead, which is only a mile away. We took the path to the west, leading to Sargent Mountain. The trail descends rather quickly and you come across the scenic Sargent Pond at 1.75 miles. Take some time to enjoy the views from the pond and then continue on the trail. At 1.9 miles, you reach the junction with the Sargent Mountain South Ridge Trail. Take a right to join this trail and make your way to the peak. You will come out of the woods and hike on the open mountainside (passing by junctions with the Hadlock Brook Trail and Spring Trail) until you reach the summit at 2.6 miles. The summit of 1,373 foot Sargent Mountain provides panoramic views covering most of the areas to the north, which were not able to be viewed from Penobscot. We took a while to enjoy the views here and then followed the east trail down the mountain. This part of the trail reminded me of Scottish highlands as you hike through fields and rock. After a few tenths of a mile, the trail then begins a steep descent back into the woods. There were times that we scooted along our butts to make our way down the next section of rocks. At 3.4 miles, we reached the junction with the Deer Brook Trail. We took this left, continuing the steep descent down the rocky trail. At 3.55 miles, you cross over another carriage road, pass by one of the carriage road arches, and at 3.7 miles you will reach the junction with the Jordan Pond trail. You have a choice of going either way around the pond, but we took the right to view the western side of Jordan Pond. This trail follows closely around the pond and consists of a lot of wooden boardwalks to keep people from damaging the ground below. At 5.4 miles, you reach the Jordan Pond House again to complete your hike.
Christine tries to roll the erratic uphill. Below: Beautiful Maine terrain; Adam at the summit of Penobscot; Blueberries were abundant.
This is a perfect hike to include on your trip to Acadia. It has a combination of everything that I think this area of Maine has to offer – gorgeous panoramic views from the pink granite summits of the islands and ocean around; chances to take in some of the smaller ponds that are tucked between mountains; and challenging, rocky ascents that give you a grand sense of accomplishment. On our descent down Sargent Mountain, we came across a few different groups of hikers that were hiking up the east face of Sargent Mountain. We saw one family that was huffing and puffing their way in complete silence. I had a feeling they were regretting their decision to hike up this way. We saw another couple that were just beginning their hike up Sargent. They said they like doing the loop hike up Sargent and Penobscot in reverse of the way we went because they can enjoy views the entire way down. I think hiking up Sargent from the east face trail would be extremely steep and slow going, so I’m glad we hiked it this way.
One of the great things about doing this hike early in the day, is you can claim a prime parking spot for the Jordan Pond House. This place is packed in the summers around lunchtime and you will likely need to wait for a seat. But it was great to finish off the hike with a nice restaurant and enjoy a popover a la mode with peach ice cream and blueberry sauce.
We had a great week in Acadia and it always sad to leave. This has always been our favorite vacation spot and I think the hiking and biking we have done in this area show everyone why we love it so much.
Christine Says…
Remember how I was talking about perfect Maine days in our write-up of Gorham Mountain? Well, our last day of vacation this year was just one of those days. The weather was so perfect; I was practically swooning over it. At first, we were just going to do the 3.2-mile out-and-back to the summit of Penobscot Mountain. I told Adam that I didn’t want the day to end, that I wanted to use every single bit of it, enjoying the views and making the most of my time in Acadia. We decided to tack the summit of Sargent Mountain onto our hike (this included a climb down the East Cliff Trail, a short stretch of the Deer Brook Trail and a return walk to our starting point along the Jordan Pond Trail.
Sargent Pond is tucked between Penobscot and Sargent mountains. Below: Adam makes his way toward the Sargent summit; the Sargent summit marker; The view from Sargent
After an amazing pancake breakfast at Jeannie’s Great Maine Breakfast, we headed over to the Jordan Pond House. The trailhead lies in the woods behind the restaurant. The trail crosses Jordan Stream and immediately climbs steeply uphill to where it crosses the Carriage Road. You see a trail marker, but you really don’t see trail. That’s mostly because there isn’t trail, rather there is a steep scramble between boulders. This steep pass is known as the Spring Trail. It involves a few iron rungs and rails built into the cliff’s side. Parts of the climb are extremely narrow and require four-point contact with the rocks.
After clearing the cliff, you step out onto a beautiful opening overlooking Jordan Pond from above. The rock shelf even has a natural stone bench from which you can enjoy your view. After leaving the opening, the trail goes back into the woods for a short stretch. From there on out, it’s open walking along the granite to the summit of Penobscot. This is a mountain that has a couple false summits. You see a spot that looks like it’s the highest, but it never is (until you actually reach the rock pile an summit marker.) 🙂
At the summit of Penobscot, we stopped to take in the panoramic view of Mt. Desert Island. The view couldn’t have been more breathtaking and was made even more special by the ideal Maine summer weather. It was 70 degrees and breezy with deep blue skies. A solo hiker arrived at the summit a few minutes after we did and asked if we had any sunscreen for him to use. I loaned him my pink tube of SPF50 for sensitive skin. It was probably fortuitous that he came by when he did, because it reminded me to reapply sunscreen. It’s so easy to get sunburned when hiking in Maine because of all the open exposures along the mountaintops. Also, the cool, breezy weather keeps your skin from ever really feeling hot.
After the Penobscot summit, the trail climbs downward into a small wooded area between the two mountains. This is where you’ll find beautiful Sargent Pond. We stopped there for a short while and watched dragonflies whizzing about. We noticed a ‘No Camping’ sign posted right next to the pond. Not surprising – I bet many people have tried to stealth camp at spots like this in Acadia. Just for the record, Acadia has no real backcountry. You can’t camp freely in the park, but there are two organized campgrounds – Seawall and Blackwoods. Probably the closest you get to backcountry hiking and camping in Acadia is if you take a boat out to Isle au Haute where there are several oceanside primitive sites.
The trail climbs steeply uphill from Sargent Pond. Eventually you clear the trees once again and begin the climb up Sargent. Sargent’s granite surface is not quite as bare as other mountains in Acadia. There seems to be more evergreens and low shrubbery along the way, although I’m not sure why.
Hiking down Sargent. Below: This carriage road bridge passes over Deer Brook.
The summit of Sargent is marked the same way as Acadia’s other summits – a rock pile with a wooden sign in the middle. We really liked the view from Sargent. It was a little different from the other hikes we had done during this week. It’s the only place that offered views looking out toward Trenton and Ellsworth. The day was really clear, so we could see the airport and beyond.
At the summit, we looked at a trail map so we could decide how to make our return back to Jordan Pond House. One option would have been to retrace our steps and go back the same way we came. This would have been a perfectly nice option because we could have enjoyed the ocean views the entire walk down. Instead, we decided to try out some new trails and make a big loop.
The first trail on our return loop was the East Cliff Trail. It was one of the rougher, steeper trails I’ve been on in Acadia. Although there were occasional views of Jordan Pond, most of the way was scrambling down steeply across rocks and roots. The trail was pretty overgrown and I gather it’s not one of Acadia’s more heavily used trails. It was fine, though.
Eventually it met up with the Deer Brook Trail which was more gentle and followed a small stream downhill. After crossing the carriage road, we climbed downhill past one of Acadia’s famous stone bridges to the junction with the Jordan Pond Trail. We came out on that trail at the far end of the pond, almost directly across from the Jordan Pond House.
The shore of Jordan Pond looking toward the Bubbles. Below: Boardwalks along Jordan Pond; Lovely Jordan Pond.
For a mile and a half, the trail clings closely to the edge of the lake. There are a few places where you have to climb from rock to rock. There are also many boardwalks over swampy ground that only allow for single-hiker passage. But, the trail is completely flat so it’s fast hiking. We were speeding along this easy part of the hike with popovers on our minds.
When we finally got to the Pond House, we had to wait about 45 minutes for a table, but that was OK. I got some cold water, found a bench and listened to a book on my iPod until our buzzer went off. I was actually kind of cold at lunch – sweat and a brisk breeze can make even a nice summer day feel chilly. I warmed up with a big bowl of chicken-orzo soup and two huge, steaming popovers. For dessert, Adam and I shared a popover a la mode. It was heaven in a bowl and a fitting end to our wonderful week in Acadia.
Popover a la Mode! Peach ice cream and Maine blueberry sauce. Below: Another look at Jordan Pond; Lunch on the lawn; Popover and strawberry lemonade.
Trail Notes
Distance –5.4 miles
Elevation Change – about 1200 feet total.
Difficulty – 4. The ascent up the Spring Trail and the descent down Sargent Mountain can be steep and requires careful navigation.
Trail Conditions – 3.5. The trail is well-maintained, but there are plenty of places to turn your ankle on the descents.
Views– 5. There are amazing views throughout this hike as you make your way up to the summits of Penobscot and Sargent Mountains.
Wildlife – 1. There isn’t a lot of wildlife in Acadia, but we did see a red squirrel and smaller birds (juncos and other finches) along the hike. When birds of prey migrate through in the summer, you may see some different hawk varieties.
Ease to Navigate – 3. There are some tricky parts along this trail on the ascent up Penobscot and Sargent Mountains, but the trails are fairly-well marked.
Solitude –3. You will likely see people at the summits lingering, but you should be able to stake out your own spots for solitude. The Jordan Pond trail will likely have lots of people on it, so you won’t have much solitude on that section.
Directions to trailhead: Park at the Jordan Pond House, accessed from the Park Loop Road in Acadia National Park. While looking at the house, head around the left side and you will see the signs for the bathrooms. Across from the bathrooms, you will see the trail marker for the Penobscot Mountain trail.
This route combines one of our favorite short Acadia hikes to the summit of Gorham Mountain followed by a visit to a beautiful glacial pond called The Bowl, and a return walk along the Ocean Path, passing famous landmarks – Sand Beach and Thunder Hole.
Overlooking Sand Beach from Gorham Mountain. Below: Christine’s parents climb the Gorham Mountain Trail; Adam enjoys clearing skies and a view of the Bowl; Ocean scenery is spectacular along the Ocean Path.
Christine Says…
Even before I was an avid hiker, Gorham Mountain was always a hike I enjoyed. By itself, the hike to the summit and back is less than two miles, requires very little climbing and offers magnificent views of the ocean, the rocky Maine coast and Sand Beach below. If you walk the trail in late July or August, wild blueberries are abundant!
We decided to hike Gorham Mountain with my parents one morning during vacation. We ate breakfast early and got to the trailhead before the crowds. I really can’t stress enough how crowded Acadia trails get during the peak hours of 10:00 a.m. until 2:00 p.m. I always suggest that people hike early or late, or rely on the Island Explorer bus (it’s FREE!) for transportation around the island.
On this particular trip, we actually drove separately from my parents because we wanted to extend our hike beyond the Gorham summit, and they did not. The day before this hike had been overcast and a little drizzly and unfortunately, some of the gloomy weather was still lingering for our hike. I was a little disappointed, because the lack of sunshine and blue skies always makes the ocean vista a little less colorful and sparkly. I always prefer to hike Gorham on a ‘perfect Maine day’. I would define ‘perfect’ as a sunny, 75 degree day with wispy or puffy clouds sitting in a deep blue sky. There would be a light breeze and I would hear gulls crying and the sound of lobster boat motors in the distance. There is nothing I love more than hiking Gorham on a day like this.
Even with the heavy clouds, the hike was still lovely and I enjoyed the company. We hiked alongside my parents until we came to the junction of the Cadillac Cliffs trail. At this point, hikers can choose to stay on the easier Gorham trail, or take a little extra challenge and scramble along the boulder-strewn cliff trail. There aren’t any views from the Cadillac Cliffs trail, but climbing through caves and over enormous boulders is pretty fun.
Cadillac Cliffs. Below: Scenes along the Cadillac Cliffs Trail.
We met back up with my parents a few tenths of a mile later and made our final climb to the summit. The views are spectacular all along this section of trail. In fact, the views right before the summit are probably nicer than the actual summit.
We enjoyed the summit as a group for a while before Adam and I continued on our own. The Gorham Mountain trail climbs downward, passing some interesting cliffs, before eventually joining The Bowl trail. The Bowl trail climbs rather steeply uphill to a beautiful mountain lake. The lake is surrounded by boardwalks and benches, and is one of the few bodies of water in Acadia where you can swim. Many of the larger bodies of water are used for drinking water and swimming is prohibited.
There were a fair number of people sitting alongside the lake when we arrived. We sat on a bench and almost immediately heard a child cry “Ohhh… that’s an eagle!” Sure enough, we arrived just in time to see a bald eagle go gliding across the lake’s surface. Talk about great timing!
The Bowl is a beautiful glacial pond you’ll pass along this hike. Below: Christine checks out the interesting cliff face on the hike down from the Gorham Mountain summit; Trail marker at the junction for the Bowl trail; Thick crowds at Thunder Hole.
While we sat at the lake, the clouds really cleared off quickly and the day turned into that perfect Maine day I described a few paragraphs ago. So beautiful!
We hiked back down the Bowl Trail, past the junction to the Beehive trail and down to the Park Loop Road. The trail comes out right above Sand Beach, which is a great place to pick up the Ocean Path. The Ocean Path is a flat walking trail that runs between the ocean and the road. It’s very crowded almost all the time, and if you’re a faster hiker, you’ll have to dodge slowpokes.
From the Ocean Path, there are a ton of small side trails that lead down to the rocky coastline. There are so many places to sit and enjoy the view! The walk along the path goes on for about 1.3 miles and eventually passes by Thunder Hole.
When we passed Thunder Hole, it was so crowded we couldn’t even get down to the viewing platform without waiting in line. We’ve seen Thunder Hole so many times so we didn’t stay long. Besides, it wasn’t thundering at all. The tide was so high that the sea cave stayed full of water regardless of the wave action. There just wasn’t any force to create the sound the spot is named for.
The Gorham Mountain parking lot is just a tenth of a mile or so past Thunder Hole, so we were back at the car after a few more minutes of walking. We headed straight to lunch in town – lobster rolls at the Portside Grill!
Adam Says…
Whenever we talk about going to Maine, one of the things we plan on every trip is a hike up Gorham Mountain. In fact, a few years ago when we came up to the park and knew we had a whole week of rain ahead, we quickly got in a hike up Gorham. As Christine mentioned, just going up Gorham Mountain is a short hike, so it is easy to fit in when you have a break in the weather.
The View from the Gorham Summit looking toward Otter Point. Below: Christine’s parents enjoy the view; The rock pile marks the summit of Gorham Mountain.
You can find the parking lot to the trailhead on the right shortly after the Thunder Hole parking lot. The trail starts off with lots of roots and granite to navigate and can be a little slippery if a storm has recently come through. The trail consists of a gradual uphill climb and is a popular trail for people of all hiking levels. At .2 miles, you reach the junction with the southern part of the Cadillac Cliffs trail. This is definitely a more challenging side trail, that includes some rock scrambling. If you want to try the Cadillac Cliffs trail, do it on the way up since it could be more treacherous going down. The Cadillac Cliffs trail doesn’t really provide any great views, but it does have a small cave to go through and some interesting rocks to scramble. By the time you reach the northern junction at .5 miles, you will likely need to catch your breath. Rejoin the Gorham Mountain trail by taking a right at this junction. You will continue to climb upward and will see lots of places to take in the views along the way. At .9 miles, you will reach the 525 foot Gorham Mountain summit. On the way up the mountain, you typically get views of Sand Beach and Great Head, but from the summit, you can also see Otter Cove, Day Mountain, Pemetic Mountain, and Cadillac Mountain. We continued on the trail from the summit. At 1.5 miles, you reach a junction with The Bowl Trail. Take a left and climb up the steep terrain through the woods until you reach The Bowl at 2.0 miles. From The Bowl, you can also see close glimpses of the summit of The Beehive and there is a trail that connects with it. We took in the views around the lake and then went back down The Bowl Trail, towards the Park Loop Road. At 3.2 miles you will reach the Park Loop Road. Cross the road and proceed on the Ocean Path, heading past Sand Beach. You will likely see tons of cars and people along the road between this point and Thunder Hole. You should reach the Gorham Mountain parking lot around 4.4 miles.
Sand Beach from the Ocean Path. Below: If you look at the larger version of the Beehive photo below, you will see the long queue of people climbing the mountain; Adam enjoys the bench at the Bowl.
We had a funny moment when we first started the hike. A family was coming back from the summit and spotted us with their trekking poles. One little girl was asking why we were all using two ‘canes’ to walk. The parents had responded that we were “professional hikers”. We got a few laughs out of that. If only we could get paid to go hiking (or at least pay for some of our hiking gear).
There are many things about this hike that make it one of our favorites. The blueberries are ripe during July and August and are plentiful on this trail. I think I picked the largest, juiciest blueberry ever during this hike. We always enjoy looking over Sand Beach. You can see the dots of people on the beach, but not many in the water due to the temperature. Walking back on the Ocean Path, you could hear the screams of children as they were being hit by the freezing waves. You can also count on being able to see a lobster boats in the area, bringing up traps, or a large sailboat rounding the harbor. You may also be able to catch a little rumbling from Thunder Hole, but the largest rumblings typically occur in the fall after a storm.
This area has also been where two recent movies have been filmed. You can see Sand Beach in The Cider House Rules and nearby Otter Cliffs was used in Shutter Island.
Trail Notes
Distance – 4.4 miles
Elevation Change – 500 feet to the summit of Gorham and another shorter climb to the Bowl
Difficulty – 2. This is an easy family hike, suitable for most fitness levels.
Trail Conditions – 3. Trails in Acadia are always rocky and rooty and can be slick when wet.
Views– 5. Breathtaking!
Waterfalls/Streams/Lakes – 4. The Bowl is a beautiful glacial pond.
Wildlife – 3. We saw an eagle – that counts for something! We’ve heard that people occasionally see whales off in the distance, but we never have.
Ease to Navigate – 4. Pay attention to the cairns and markers at trail junctions, and it’s hard to get lost.
Solitude –0. This is an extremely popular area. No matter when you hike it, you will see people.
Directions to trailhead: The trailhead is located in the Gorham Mountain parking lot on the Park Loop Road in Acadia National Park. The parking lot is about .5 mile south of Thunder Hole.
The seven-mile South Ridge trail takes you to the highest mountain on the east coast – Cadillac Mountain. At over 1500 feet, it is also one of the first places sunlight hits the U.S. each morning, The views from this hike are panoramic and breathtaking!
A View of the Porcupine Islands from the Cadillac Summit. Below: The marker at the trailhead; A view of Cadillac Mountain from along the lower part of the trail; Geodetic Marker at the summit.
Christine Says…
We’ve driven to the top of Cadillac Mountain. We’ve also walked up the 4.4 mile North Ridge trail a few times. But this is the first time we’ve ever hiked to the summit via the South Ridge route. At seven miles (plus some additional length for the side trip to Eagles Crag and walking the summit path) this route probably qualifies as one of Acadia’s longest hikes. It’s also become one of our favorite Maine hikes. It was fantastic!
The trail starts off in the deep coolness of the evergreen forest. Everything is green – covered with moss and ferns. The thin island soil leaves gnarled roots and rocks exposed along the trail. You have to constantly watch where you’re stepping so you don’t catch a boot toe and trip. Planked boardwalks traverse the boggy, marshy places along the trail. This part of the trail is one face of Acadia, with the other being expansive, open domes of granite.
The lower trail is covered with roots and rocks. Below: The view from Eagles Crag; Abundant blueberries along the trail; The first open views on the climb up.
The first trail junction you come to marks a short side-loop across the Eagles Crag. The trail is quite a bit steeper here and leads out to an open rock ledge overlooking the ocean. We hiked early in the morning, so the view looked directly into the sun, rendering the ocean silver and shiny.
On the return arm of the side-loop, we reentered the woods for a short while. Near the trail junction where we met back up with the South Ridge trail, we found one of the densest patches of wild blueberries we’d ever seen! I stopped to pick and eat some berries before we pushed on. Yum! Blueberries are at their peak in late July and early August, so our trip was timed perfectly for enjoying the fruit.
Near this point of the trail, the forest started thinning out and becoming patchier. There were still trees, but they were broken up by open rocky sections. Eventually we left the shade of the trees completely and stepped out onto the pink granite that Acadia is so famous for. The trail was blazed blue, but we also had cairns guide our way. The granite was punctuated by abundant patches of blueberry bushes and water filled glacial potholes. The view behind and to the side of us was SPECTACULAR! We found ourselves stopping time and time again to take in the majestic views. I’ve been to a good number of national parks. They’re all beautiful in their own way, but there is something really special about Acadia.
There were some sections of rock that required climbing and scrambling, but the way was never really steep or difficult. We climbed one especially large rocky pass and found ourselves looking down into a small forested ravine tucked between two mountains. The trail climbed downward into the trees and past a lovely glacial pond called ‘The Featherbed’.
The Ocean and the Featherbed. Below: Another look at the Featherbed; Trails in Acadia are marked by cairns and blazes; Christine hikes up toward the summit.
After the pond, we began the climb up Cadillac in earnest. The first little bit after leaving the pond was quite steep with some mild rock scrambling. Once we regained the ridge, the trail became moderate again. The sun was bright. The sky was deep blue and painted with wispy clouds. The ocean below was sparkling and so beautiful. I must have said to Adam a couple dozen times “It’s so gorgeous! This is a perfect Maine day! We are so lucky!”
Along the ridge, we began to see distant glimpses of cars making their way up the auto road to the Cadillac summit. But we didn’t come close to the road at all until we were almost to the top of the mountain. Once drawback of the shorter 4.4 mile North Ridge is its proximity to the road for much of the hike. We really enjoyed staying away from the road this time.
Near the summit, we passed through one more section of forest and came out on a gravel road behind the gift shop located at the summit. It’s always kind of bizarre to hike several miles along pristine, quiet trail only to summit a mountain with auto access. More than a few people looked at us strangely with our Camelbaks and trekking poles.
Even though it was still pretty early, the summit was packed with people! Adam got cold drinks from the gift shop and I walked around the summit path to take a few photos. The view from Cadillac offers a great look at the town of Bar Harbor and the outlying Porcupine Islands in Frenchman Bay.
With the thick crowds and the notion of a big lunch, we didn’t linger too long at the summit. On the way down, we passed quite a few people heading up the trail. I was really glad we had started around 7:30 and had been able to enjoy a bit of solitude.
The hike down was bright and hot under the mid-morning sun! I had slathered myself with SPF 50, but I missed one spot between my ponytail and my backpack. I ended up with a strange sunburned triangle on my back. 😦
We really enjoyed the views the whole hike down! I was kind of bummed when the trail eventually descended back into the woods. The shade was nice, but losing the view was not!
When we got back to the car we debated whether we should go back to our room and shower, or head straight to lunch in town. In the end, hunger won out and we ate lunch covered with sweat and grime. We went to one of our favorite lunch spots in town – Rupununi. They have the best Buffalo Chicken sandwiches and clam chowder. We got a great seat out on the patio, the food was delicious and I didn’t even care that I was filthy!
Adam Says…
A trip to Acadia National Park almost requires you to visit Cadillac Mountain. However, most people drive to the top of it rather than try hiking up. Their are also some insane bikers that bike up the mountain, but we’re not in that kind of shape. Since Cadillac Mountain is the highest summit in the park, we used to feel intimidated about trying to hike up. Several years ago, we hiked up the north ridge since that seemed to be the easiest route. We remembered the north ridge hike being a great hike, so this time we decided to try a different route.
A view of Eagle Lake.
To start the hike, we parked on Route 3, almost directly across from the entrance to Blackwoods Campground. You take a few steps up and then the trail begins. This first section is just about the only part that is completely in the woods. At .8 miles, you reach a junction with the Eagles Crag trail. We took a right and went on the Eagles Crag trail, which joins back on to the South Ridge Trail at 1.2 miles. The Eagles Crag trail was probably the toughest climbing on the trail, but it does take you out of the woods to some nice views to the east of Otter Cove and Gorham Mountain. In retrospect, we feel that it really isn’t necessary to do Eagles Crag, since you will quickly see tons of views right after you rejoin the trail. But, if you want more views and/or some more challenge, go for it. When you rejoin the South Ridge Trail at 1.2 miles, the trail begins to open up to more views in a short distance. You will need to pay attention to the cairns on the trail since there are no tall trees to mark trail paths. The views on this trail are completely amazing! You have to turn around to see the great views on the way up. We found ourselves taking pictures from a gorgeous spot and then going another .1 mile and finding even better views behind us. At 2.4 miles, you reach a summit of a small hill where you can see the small pond, The Featherbed, below. You climb down this small hill and then reach The Featherbed and a junction with the Canon Brook Trail at 2.7 miles. Stay straight on the South Ridge trail as you begin your next ascent to reach the summit. At 3.2 miles, you reach a junction with the West Face Trail to the left, but stay straight. The trail is steeper up this last section of the trail. There are a few areas where you will climb up some rocks (even using one iron rung handrail), but we didn’t find it to be overly difficult. Through this section, you are likely to hear or see people along the Auto Road heading up Cadillac Mountain. At 3.7 miles, you will reach the summit of Cadillac Mountain. Go back the way you came.
Adam hiking along in the open. Below: Trail junctions are well-marked in Acadia; The building at the summit; Another view of the Porcupine Islands from the summit; Views on the hike down.
You feel like you are making an accomplishment when you hike up Cadillac Mountain. While many of these people are driving to the top, you feel like you really earned the views. The actual summit marker for Cadillac Mountain is not as easy to find. As you’re coming up the South Ridge trail, you may walk right past it. I like to get a picture of each summit we make. Unlike most of Acadia that marks the summit with a large wooden summit marker, Cadillac Mountain only has a USGS marker in the rock. To find it, walk behind the gift shop by about 100 steps where the gravel ends. To the right, you will see a greenish-looking marker on a rock. This marker has an arrow, that points about 20 feet to another marker on another rock. This is the true summit marker.
We took a little time to hit the bathrooms, buy some cold drinks (that is always welcome when you are finishing a hike), and take in the views. From Cadillac Mountain, you can see just about all of Mount Desert Island and on a clear day, the views are spectacular. Many people drive to the summit of Cadillac Mountain to see the sunrise. This is the second earliest place where you can see the sunrise on the east coast (only to be beaten slightly by Maine’s own Mount Katahdin). While Christine was off taking some photos, I relaxed and talked to a family that just arrived from New York. They were impressed that we hiked up it and I told them about some other things they should do during their week of vacation. I could tell the father of the family was ready to tackle it all, but I could see some of his family wasn’t as enthusiastic. After talking with me, they were going to try and hike up Cadillac Mountain that afternoon.
Cadillac Mountain does have some interesting history. The area was named after Antoine Laumet de La Mothe, sieur de Cadillac, a french explorer and trader. This area was well-explored and controlled by the French and Antoine was given this area (now known as Bar Harbor) with this mountain (then known as Mount Desert). When I was attending a ranger program while I was trying to achieve my rank as a “Acadia Senior Ranger”, I learned about how this man was much-hated and was basically run out of this area for misappropriation of money. He then left this area and founded what became Detroit. The Cadillac car is named after this man and the seal is his family crest. It is funny that this country holds the car in such high esteem, when the man was a criminal (once called “one of the worst scoundrels to set foot in New France”).
If you are interested in geocaching, you can find a geocache near the top of Cadillac Mountain that is located near the beginning of the north ridge trail: Cadillac Mountain Cache.
As Christine and I were reflecting on all of the hiking we have done in Acadia, I will say this is my favorite hike to do in the park. You truly don’t get any better views than on this hike up the south ridge of Cadillac. There were times that I even felt tears welling up due to the awe-inspiring, panoramic landscape. The north ridge trail also has great views along, but several times you are walking very close to the Auto Road and you are limited to views on one side of the trail. With the vast expanses on the south ridge trail, it can’t be beat. If you are up for doing a longer hike in Acadia, make this the one to do!
Trail Notes
Distance – 7.4 miles
Elevation Change – approximately 1300 feet
Difficulty – 3. The hike is steadily uphill but is quite moderate.
Trail Conditions – 3. The trail is occasionally root-covered and has a lot of open granite.
Views– 5. It doesn’t get any better than this!
Waterfalls/Lakes/Streams – 4. The Featherbed is beautiful and you get lots of distant views of the bay and ocean.
Wildlife – 1. Maybe some red squirrels and (if you’re lucky) hawks on Eagles Crag.
Ease to Navigate – 4. Just follow the markers, blazes and cairns, and you can’t go wrong.
Solitude –1. We started early and didn’t see many people on the trail, but the summit is always very crowded.
Directions to trailhead: Located on Route 3, about 5 miles south of the Jackson Lab. Look for the signs for Blackwoods Campground and park directly across the road from the entrance to the campground. You will see a break in the woods with a few steps that starts your trail.
The bike ride along this loop gives you beautiful lakeside views in the interior of Acadia National Park.
A view of Eagle Lake from the Carriage Roads. Below: The Duck Brook Bridge entrance to the Carriage Roads; There are lots of water lilies in Acadia’s ponds; Adam bikes along the shore of Jordan Pond. The rocks lining the trail are affectionately known as ‘Rockefeller’s Teeth’.
Adam Says…
This is truly one of our favorite places to bike! If you are ever near Acadia, I would recommend taking a bike ride around Eagle Lake. While there are 45 miles of carriage roads in Acadia National Park, the loop around Eagle Lake is by far the most popular.
The carriage roads were donated and built by John D. Rockefeller, Jr., emulating the carriage roads his father created in Ohio and New York. While the Park Loop Road provides access to much of the circumference of Acadia National Park and ocean views, the carriage roads provide great access to the interior, providing glimpses from the top of mountains and around the lakes and ponds.
I recently had a co-worker, Kristen, that was going to Maine to visit some family property. Having been to Acadia many times, I planned out an ambitious day for her and her sister to capture the things I enjoy up here. She wasn’t able to do everything I suggested, but she did the Eagle Lake/Jordan Pond section of the trail. They rented bikes in Bar Harbor and decided to bike from town to reach the carriage roads. There is a large hill from Bar Harbor to reach the entrance to the Eagle Lake parking lot. Her sister was yelling up ahead to her, “KRISTEN! I DON’T THINK I CAN MAKE IT!” I should have been explicit in telling her to rent a bike rack and park near the carriage road entrance. Some people bike to the carriage roads from town, but I think it is best to park closer or you’ll burn up all your energy before you get to enjoy the actual ride.
Adam on his rented comfort bike, passing under the Eagle Lake bridge. It was quite different from the mountain bike he normally rides. Below: Christine’s parents take a break after a long uphill stretch along Eagle Lake. This is the spot we took a wrong turn!
We started our ride, by parking on Duck Brook Road. Right before the roadside parking, you pass a beaver dam on New Mill Meadow. Park your vehicle near the bridge that begins your journey. The carriage road intersections are all numbered on wooden posts (that also serve as posts to provide you some overall direction) and have this trail started at Post #5. We took a right after crossing the bridge to make our way around Witch Hole Pond. The trail does tend to go uphill during this part of the section about 100 feet. In 1.1 miles you will take a left at Post #3. You will begin to see some up close views of Witch Hole Pond. At 1.3 miles, you take a left at Post #2. The trail continues to loop around Witch Hole Pond. At mile 2.3, you will reach Post #4, bearing right and seeing views of the small Halfmoon Pond. At mile 3.4, you will reach Post #6, going under a bridge and close access to the Eagle Lake parking lot. Most people start their bike ride here, so expect lots of people around this bridge. After going through the bridge, you will arrive at Post #9 at mile 3.5. The trail goes along the western side of Eagle Lake, but goes up during one of the tougher sections of this loop ascending over 200 feet. At mile 5.5, you will come to Post #8. Take a break if you would like here, for the toughest part of the first section is over. At Post #8, take a right (this is where I failed to follow the map closely which caused us to retrace our steps and made us go uphill). At mile 5.7, you will reach Post #10. Take a left at this junction to make your way. The trail does ascend slightly. At mile 7.0, the trail begins to open up to views of Jordan Pond and the Bubbles to your left. At mile 7.9, you reach the Jordan Pond House and Post #14. Bear left at this intersection for about .3 mile passing by Post #15 and Post #16. Cross the Park Loop Road carefully and then you will see the large Jordan Pond Gatehouse. Bike carefully through the gate. At mile 9.8, you reach Post #17, near Wildwood Stables. Take a left here and your climb begins again. Once the trail levels out, you will pass by Bubble Pond on your right. At mile 12.9, you reach Post #7. Take a right at this junction and you will begin to enjoy the best views of Eagle Lake. The trail continues along the eastern side of Eagle Lake. At mile 15.1, you will reach Post #6 again. Take a right and go under the bridge. At mile 16.2, you will reach Post #4. Take a right here and at mile 17.3, you will reach Post #5 to complete your loop.
As there are a lot of intersections, I would recommend picking up a map of the trails. While you can purchase them from many places in Bar Harbor or Acadia National Park, they do have some decent carriage road maps that are free. These are typically in some of the boxes attached to the post intersections near some of the entrances to the carriage roads. I did spot these boxes at Post #5 and Post #8.
Lunch on the lawn at Jordan Pond is not to be missed. Below: Views of Jordan Pond and the Bubbles.
If you do your planning well, you can include a stop near the halfway point at the Jordan Pond House Restaurant. This is a must-visit restaurant while in Acadia. Get a seat outside and enjoy popovers as you take in the scenes of Jordan Pond and the Bubbles. The menu has been expanded since the last time we had been here, so we were thrilled to try some new things. Christine really enjoys their lobster quiche and I like their cranberry walnut chicken salad sandwich. While the prices are a little high, you do have one of the best views for a restaurant. There are plenty of places nearby to lock your bike and there is a gift shop that sells everything from hiking gear to pottery to Gatorade. They even sell Jordan Pond coffee and popover mix.
I have two favorite sections of scenery along this trail – the view near the rock slide approaching Jordan Pond and the eastern side of Eagle Lake. This is a bike ride that almost invites you to take your time by soaking in the great views of the lake, taking your time to pick wild blueberries near Witch Hole Pond, or listening for the cry of loons on Eagle Lake or Jordan Pond.
Christine Says…
Biking Acadia’s Carriage Roads is always one of the Maine activities I look forward to most on our trips! It’s funny, when I visited Acadia as a child and teen, I never tried the carriage roads by bike. Instead I preferred to run. Looking back, I don’t know what I was thinking! Sure… the carriage roads are great for walking and running, but I can’t imagine a better way to see them than by bicycle (Unless I was given the option to go on horseback; but unless you arrive at Acadia with your own horse, the closest you can get is taking a chauffeured horse carriage ride.) The car-free carriage roads in Acadia meander through the woods, passing ponds and lakes. If you’re lucky, you’ll spot beavers or loons swimming. You get occasional glimpses of the ocean. You breathe in the clean, evergreen-scented air. And best of all… you can bike right up to the Jordan Pond House and indulge in popovers with butter, popovers with strawberry jam, popovers with soup, popovers with salad and even popovers a la mode! Don’t even get me started on how much I love popovers a la mode. They’re one of my raison d’êtres. I’m not even kidding – ask Adam!
Sometimes we bring our bikes on the long drive up to Maine, but this time we drove our small car to save gas money, and ended up renting bikes at the Bar Harbor Bicycle Shop. The folks there are really friendly and knowledgeable and their bikes are all expertly maintained. We tried renting a carrier for our car, but none of them worked with our particular hatchback. Thankfully, my parents were vacationing with us and were able to haul our bikes to the start point of our ride. Technically, you can ride your bike from the shop to the carriage road entrance, but it’s an arduous uphill ride along a very busy road. Biking the few extra miles from the shop to the trails takes a lot of the enjoyment out of the ride, so we avoid it any way we can.
On this particular day, we decided to follow one of our absolute favorite routes. Starting at Duck Brook Bridge, we biked around Witch Hole, then around Eagle Lake, past the north shore of Jordan Pond to the Jordan Pond House. After lunch, we continued the route past Wildwood Stables, along Bubble Pond and the opposite shore of Eagle Lake. A few final miles along the other side of Witch Hole returned us to our car.
Even though the Gatehouse sits in the park, it’s still privately owned. Below: A horse carriage on its way from Wildwood Stables to Jordan Pond.
It’s a fabulous route that shows off a little bit of all of Acadia’s best scenery. There are some substantial hills along the route, and it’s not uncommon to see people walking their bikes uphill instead of riding them. I remember the first time I biked the carriage roads many years ago, the first steep hill along the first side of Eagle Lake about killed me! Despite the fact I was beet red and out of breath, I was determined NOT to walk my bike. I did have to take a water break or two, but I never had to get off and push my bike uphill. Nowadays, I’m in much better shape (even though I’m almost 20 years older) and biking the hills is no sweat at all! In fact, I must brag that I biked easily past dozens of people headed uphill. 🙂
The trail marker at the far end of Eagle Lake is one of the only places that directions get confusing along the ride. The trail branches off in several different directions at this point. As (bad) luck would have it, we biked following our instinctive directions instead of looking at our detailed map. We ended up going the wrong way for almost two miles – mostly along a steep, beautiful downhill coaster of a descent. This meant we had a tough uphill slog once we finally realized we were going the wrong way.
I suppose we could have kept on going in the wrong direction – most of the trails eventually cross one another and we would have ultimately arrived at the Jordan Pond House. However, I really enjoy the ride along the north shore of the pond, so we decided to retrace our ride. My parents decided to stay the course (my mom didn’t want to bike back uphill) and meet us at the Pond House.
The uphill turned out to be less painful than I imagined and after about 15 minutes, we were coasting downhill along the edge of Jordan Pond. I enjoyed the sparkling water, the first glimpse of the Bubbles, passing the big rock slide and knowing I’d soon be eating popovers.
The ride along Jordan Pond goes really quickly. At Jordan Pond, the first thing we always do is get our name on the waiting list for a table on the lawn. If you visit the Pond House, you can almost always get an indoor table immediately, but you DO NOT want to do that. The best place to sit is outside on the lawn at one of the picnic tables overlooking the water and the Bubbles. I always start my meal off with lemonade. It’s fresh-squeezed and comes unsweetened with a tiny pitcher of simple syrup, so you can sweeten the drink to your personal taste. The regular lemonade is good, but the strawberry lemonade, loaded with fresh strawberry puree, is even better. As soon as you finish placing your order, a waiter will come around with a basket of piping hot popovers. They’re served with butter and homemade strawberry preserves. On this particular day, I ordered the lobster quiche, which has always been a favorite of mine. I also couldn’t refuse a second popover, even though it cost a little extra. Because we were biking and I didn’t want to feel over-full, I had to pass on the a la mode (for now).
After lunch, we refilled water bottles and took a few minutes to digest lunch while browsing the Acadia gift shop. We also stopped to chat with the Friends of Acadia who were working on fundraising and recruiting new members. We joined a few years ago and are happy to support our favorite National Park.
After leaving the Jordan Pond House, we crossed the Park Loop Road and passed by the privately owned gate house. We happened to time our departure perfectly to pass a team of draft horses pulling a buckboard up the hill. They’re such huge and beautiful creatures!
The ride along this section is wooded and doesn’t pass anything remarkable. You can take a side road to get down to Wildwood Stables and Day Mountain, but we continued on toward Bubble Pond.
A look at Bubble Pond from the Carriage Roads
Bubble Pond is a gorgeous spot. We’ve seen loons there and I’ve even taken a photo of the pond that was featured on the cover of Boston Magazine’s 2011 Summer Travel issue. This year, the view was as lovely as ever, but the experience was marred by a couple changing the diaper of their caterwauling toddler. They had the child laid out on a rock on the pond’s edge… the edge of the pond that is a source of public drinking water. Ewww! I know babies need changing, but for God’s sake… take the diaper-changing activities off the trail and away from the water source.
After passing the end of Bubble Pond, you go over a neat arched bridge, cross the Park Loop Road again and make the final push back toward the opposite shore of Eagle Lake. As the trail gets closer to the lake side, you get some really lovely lake and mountain views. You also pass one of the most popular kayak launch spots in the park.
Shortly after passing the launch, you arrive at the Eagle Lake parking area. This area is another parking option for accessing the Carriage Roads, but it’s usually horrible congested. We continued past this spot to bike the remainder of the trail along Witch Hole and back to our car.
Witch Hole is very pretty – full of lily pads and beaver dams.
It was a fantastic ride – one that I know I’ll want to do again and again! After we wrapped up the ride, we headed back to the hotel to get cleaned up before dinner. Sometime between the end of the ride and leaving for dinner a heavy fog rolled over the island. It’s really amazing how quickly clear blue skies can turn to thick, cottony fog in Maine! It’s part of the island’s charm, I suppose! We enjoyed the foggy evening at one of our favorite lobster pounds, Thurston’s (in Bernard). If you’re on MDI and want a classic Maine lobster experience, don’t miss Thurston’s!
Trail Notes
Distance – 17.3 miles. We added about another 4.4 miles due to our misdirection.
Elevation Change – Approximately 500 feet.
Difficulty – 2. There are some uphill sections which will have you switching to lower gears, but it is doable for most people. Take breaks whenever you need one or walk your bike up the steeper sections.
Trail Conditions – 4.5. The only thing better is pavement. The carriage roads have small crushed gravel, which is good for just about any type of bike. I would recommend a hybrid or mountain bike though due to the gravel.
Views– 3.5. Most of the views are of the lakes, so you can’t see for miles and miles in most parts, but the lakes and ponds are gorgeous.
Waterfalls/Streams – 4. You get great views of Witch Hole Pond, Eagle Lake, Jordan Pond, and Bubble Pond.
Wildlife – 1. You may see an occasional loon or gull in the lakes, but not much else other than a red squirrel.
Ease to Navigate – 3. There are lots of turns on this trail, but bring a map and follow the signposts and you should do well.
Solitude – 0. This is an extremely popular spot for bikers, walkers, runners, and even horses.
Directions to trailhead: Head west on 233 out of Bar Harbor. After about a mile outside of town, take a right on Duck Brook Road. Travel for about two miles until you reach the roadside parking near the park service building.
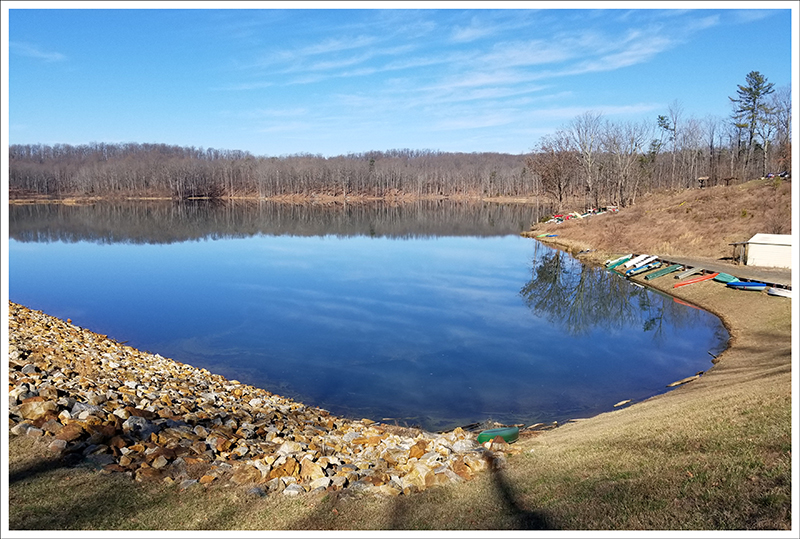

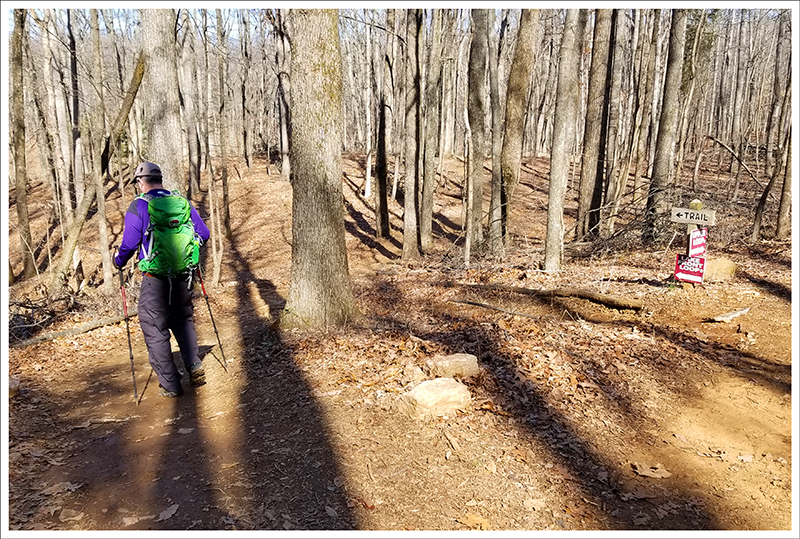

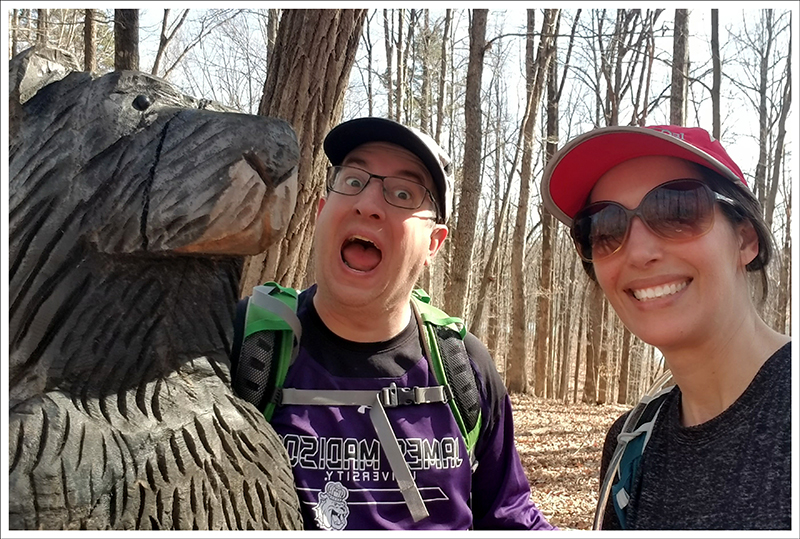


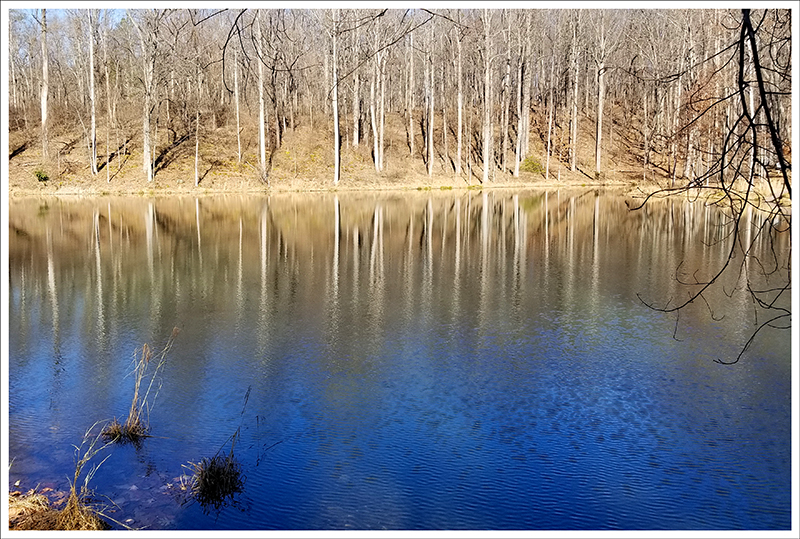
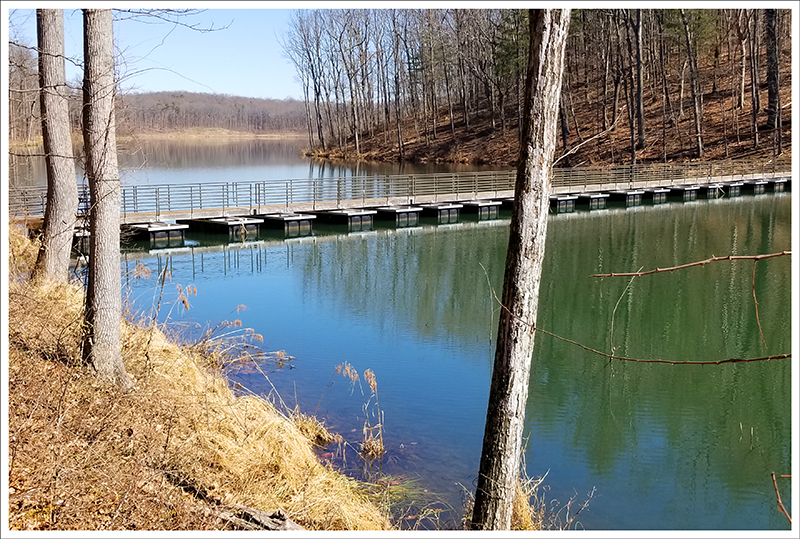
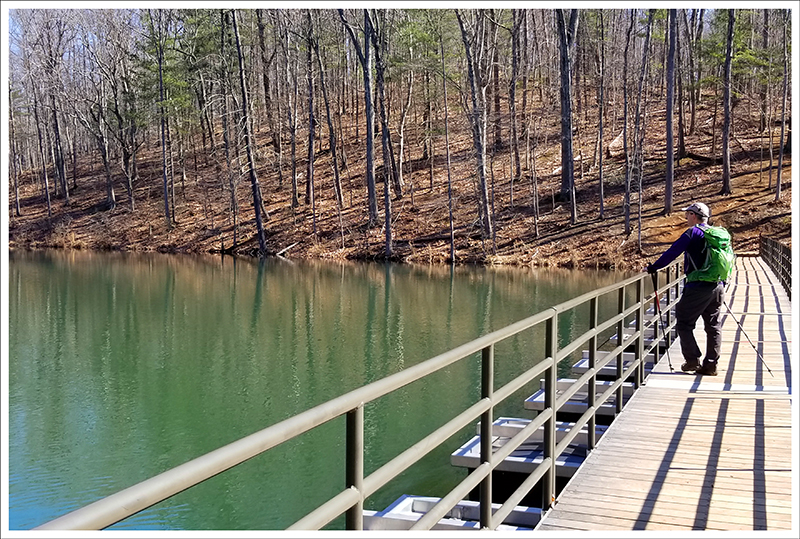

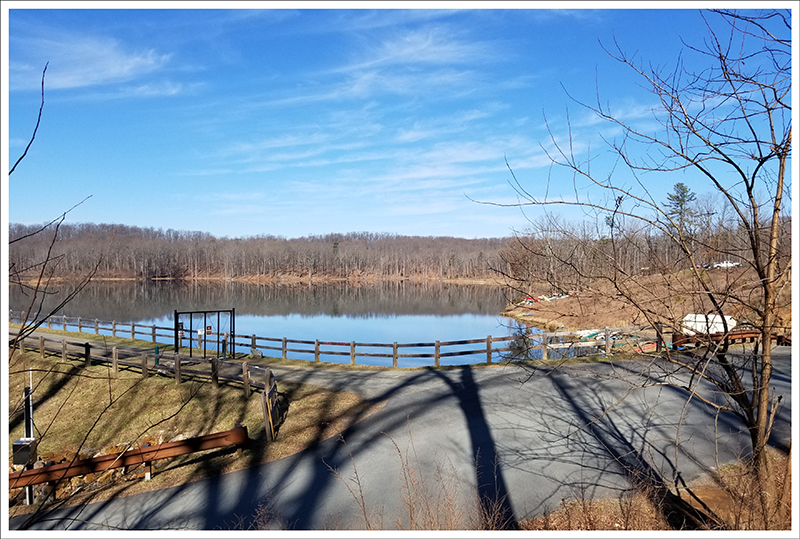
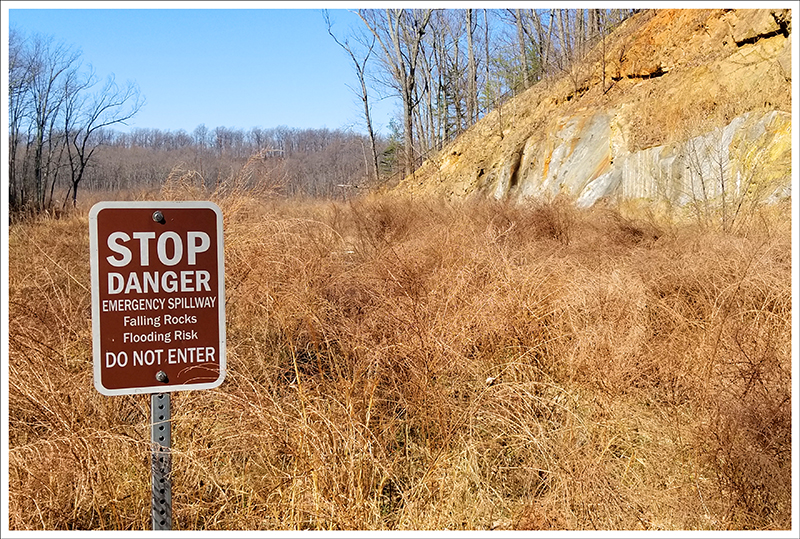
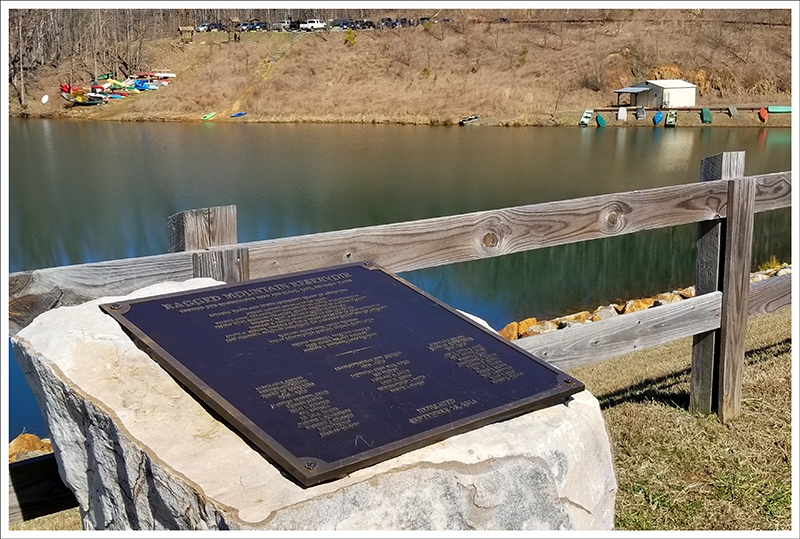


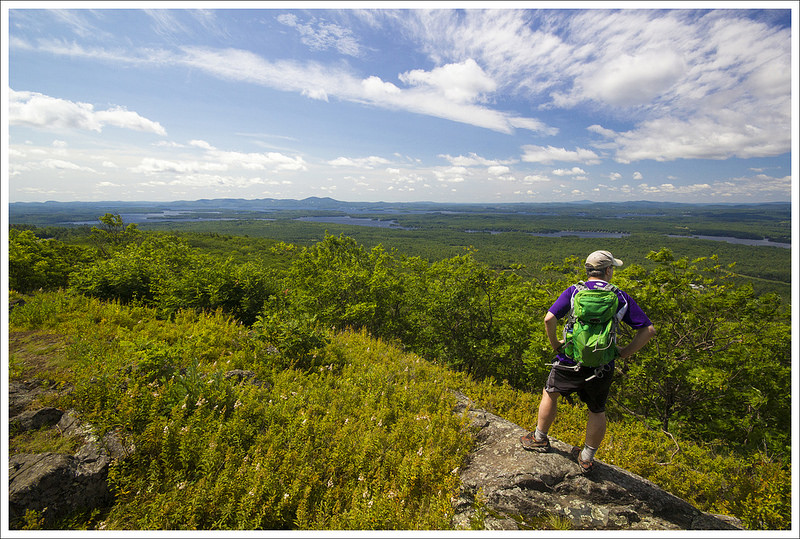


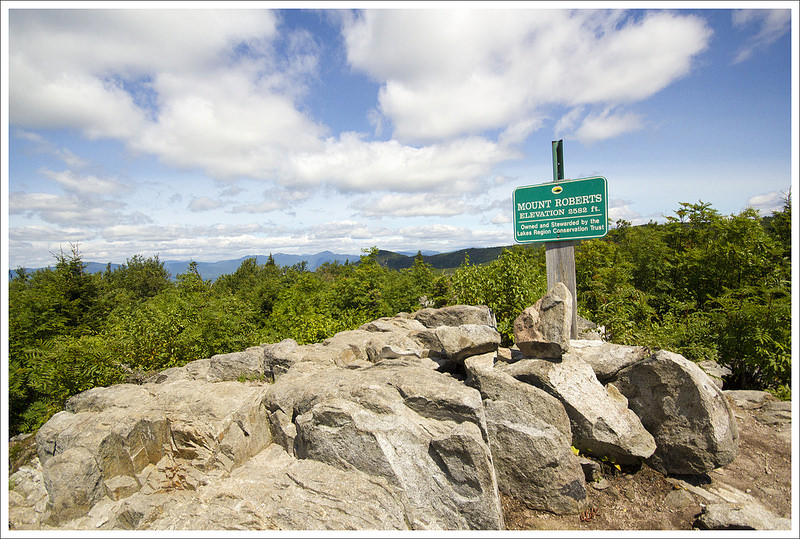


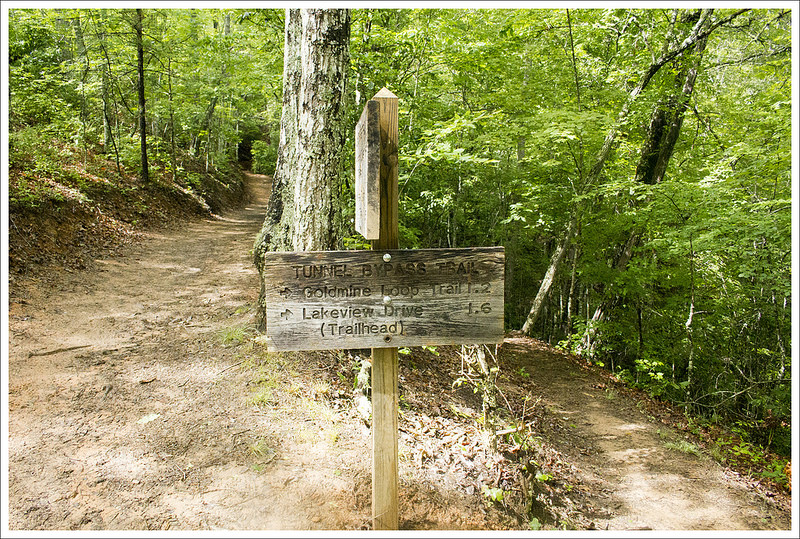


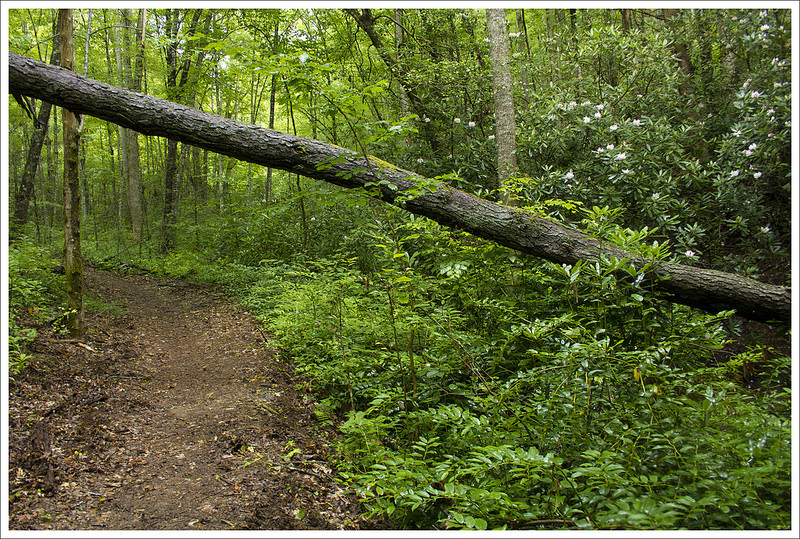
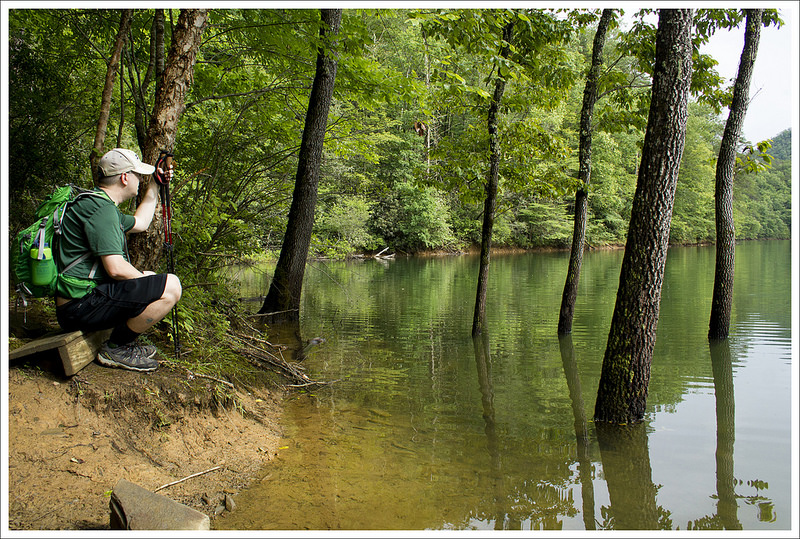

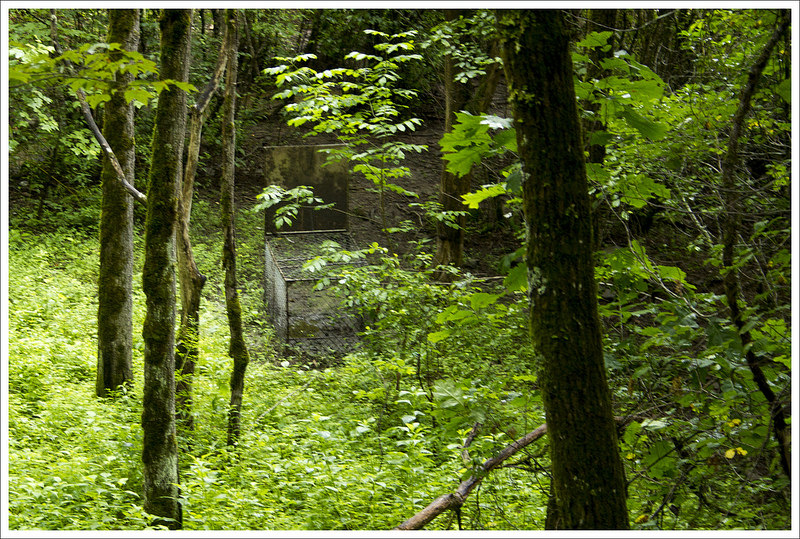


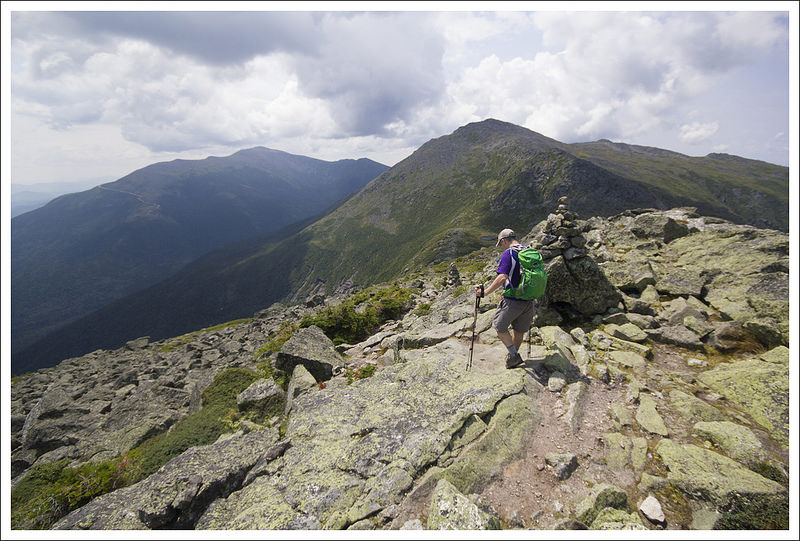
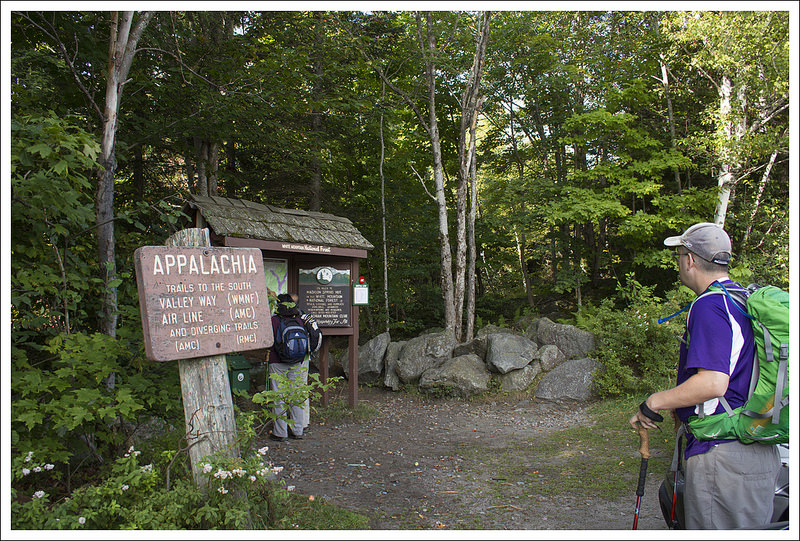
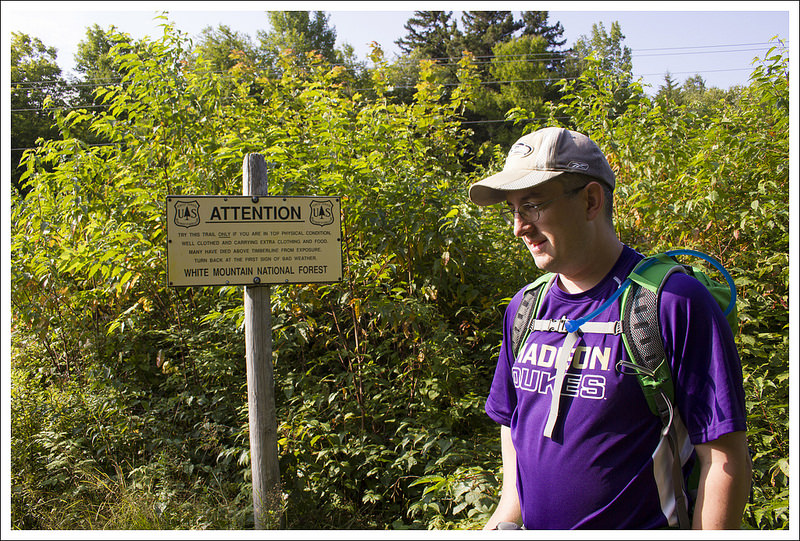
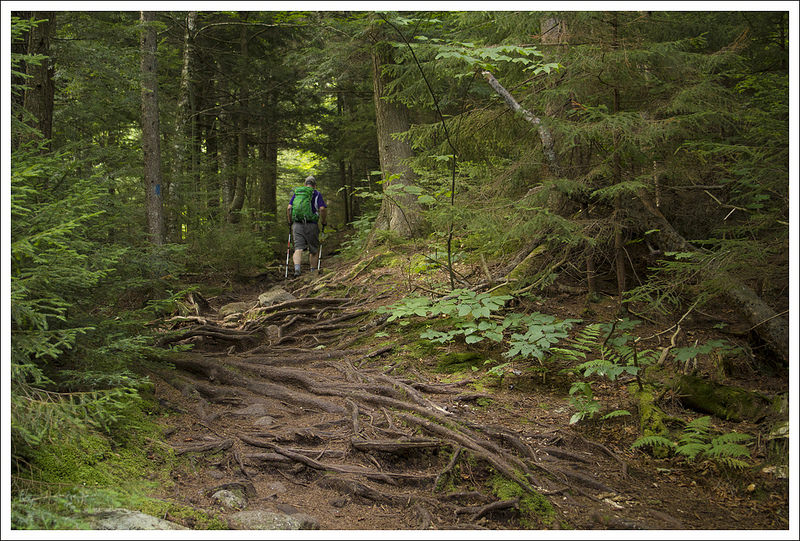
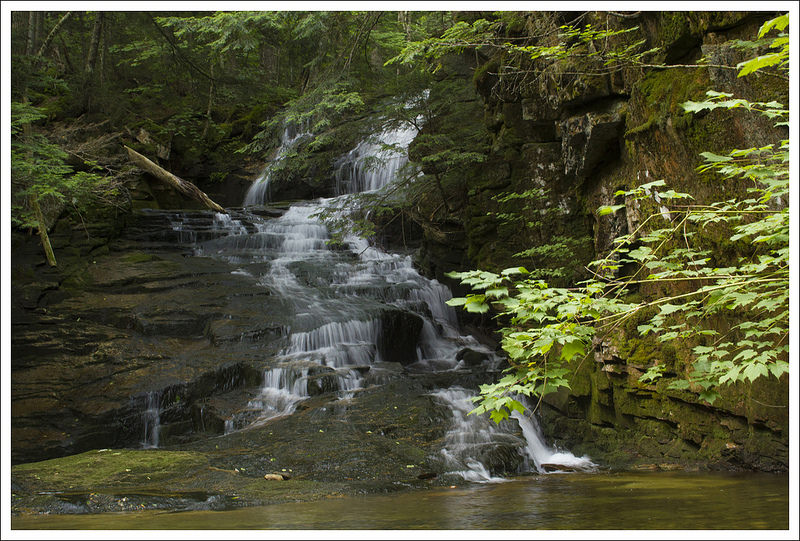
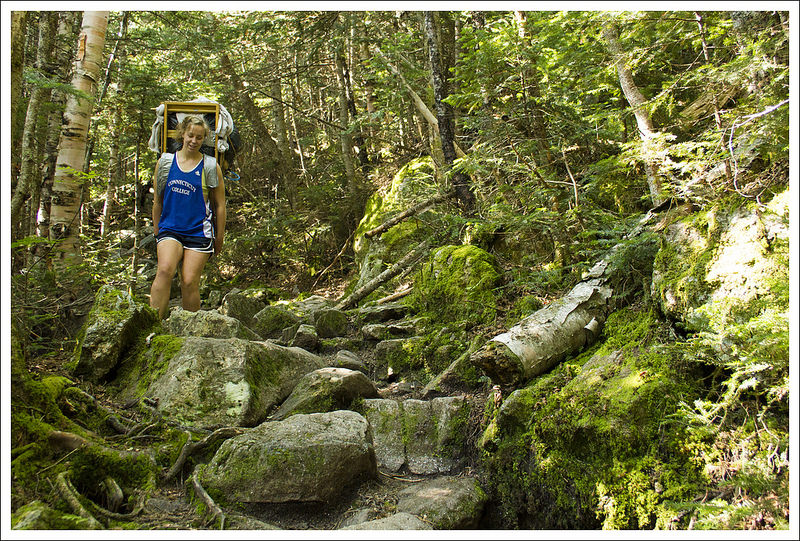
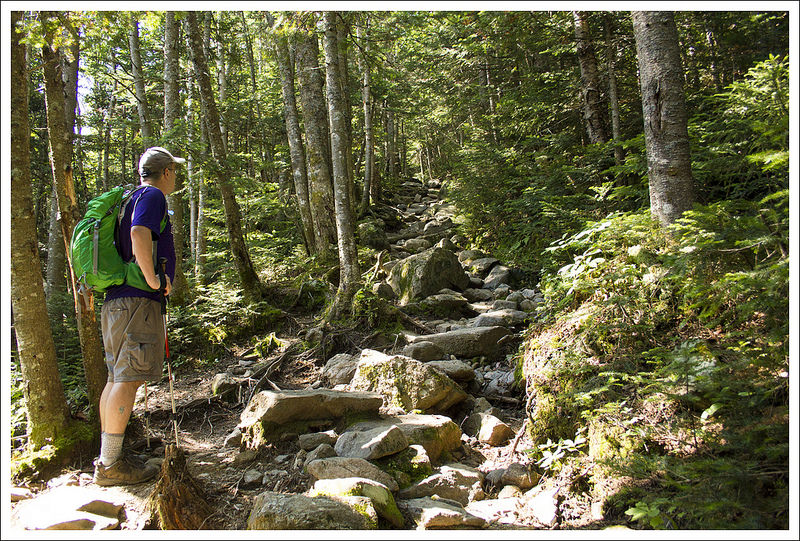
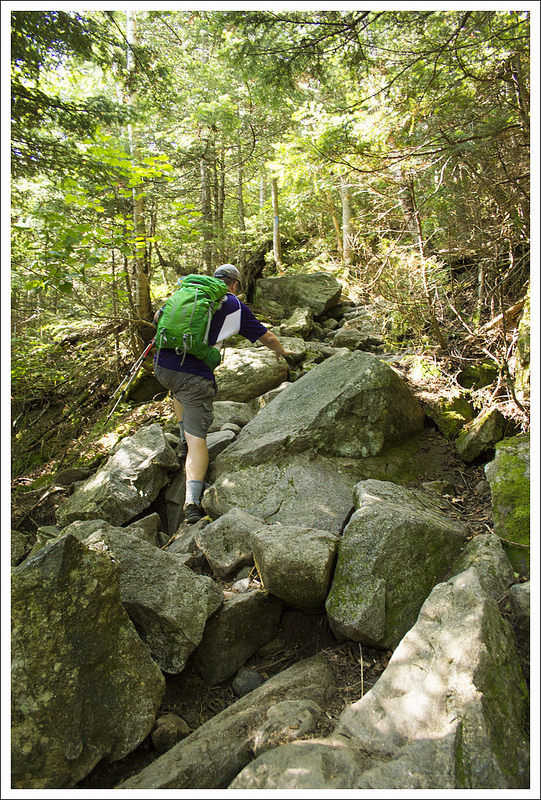
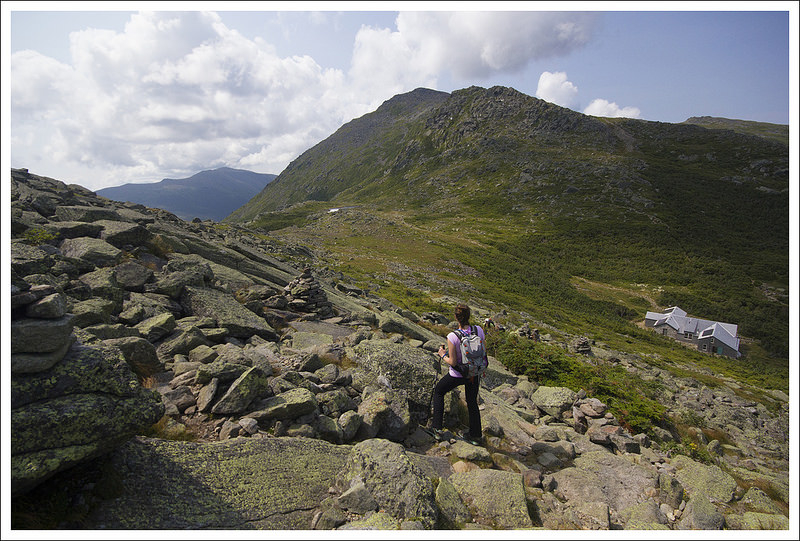
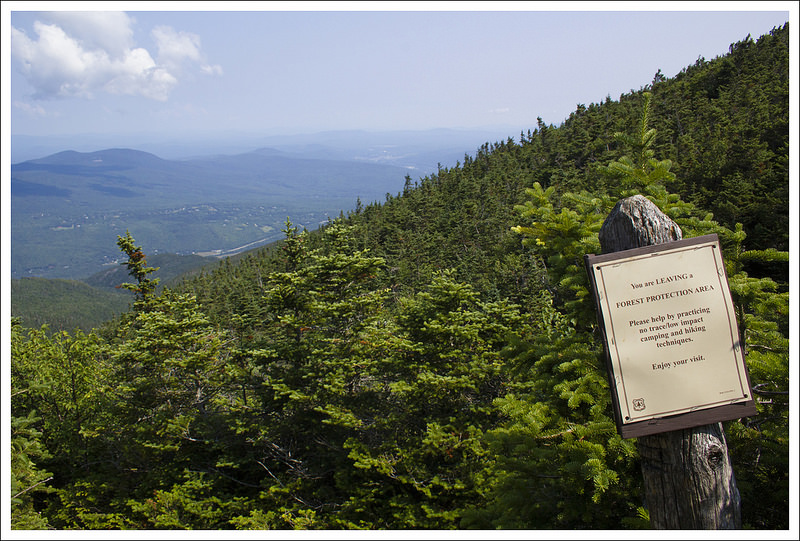
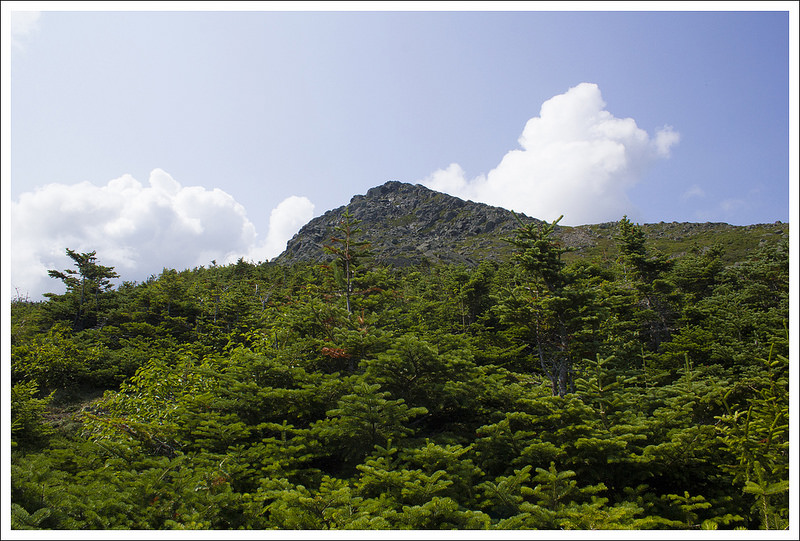
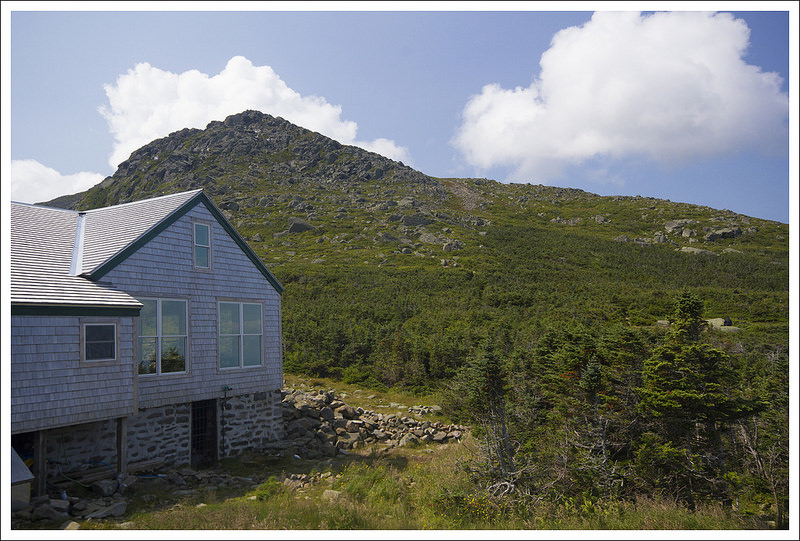
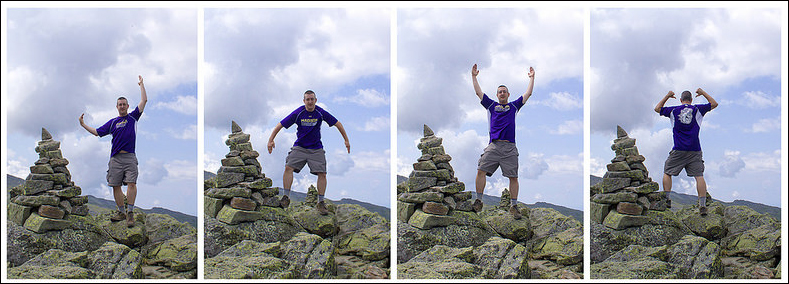

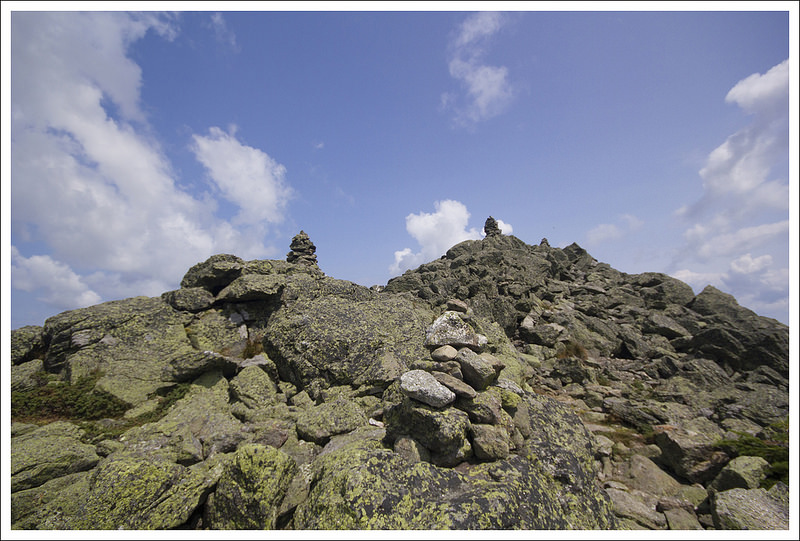
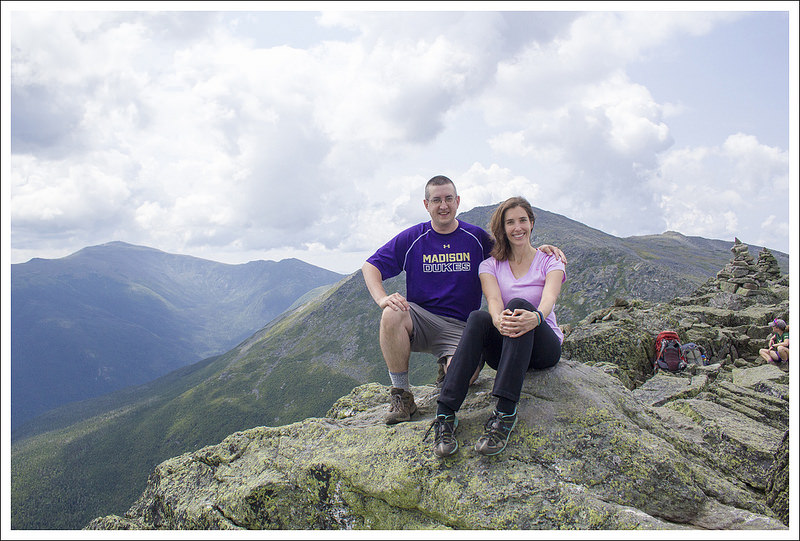
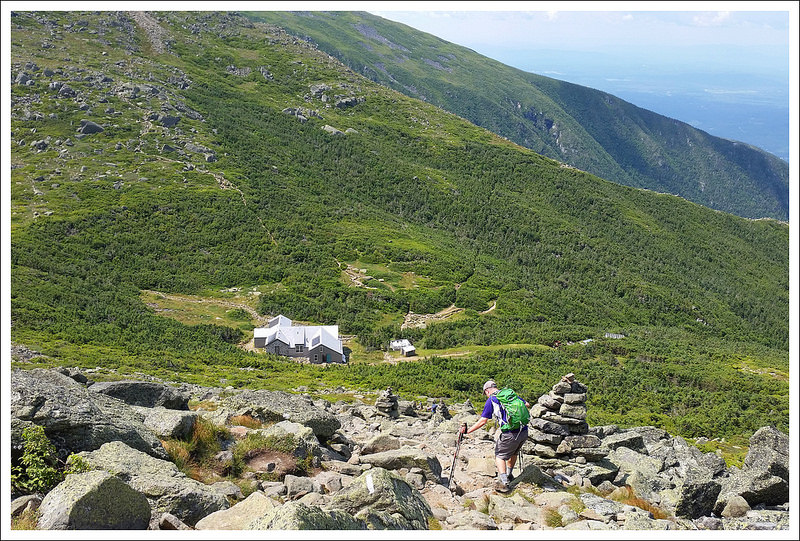

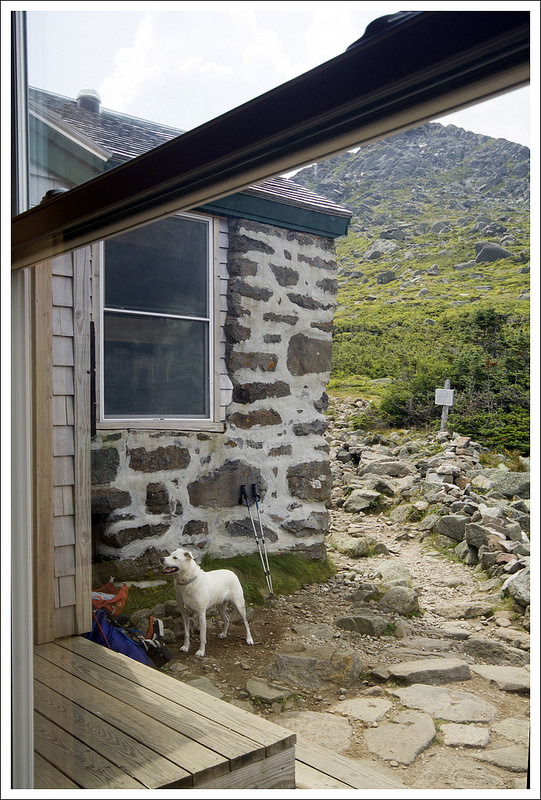
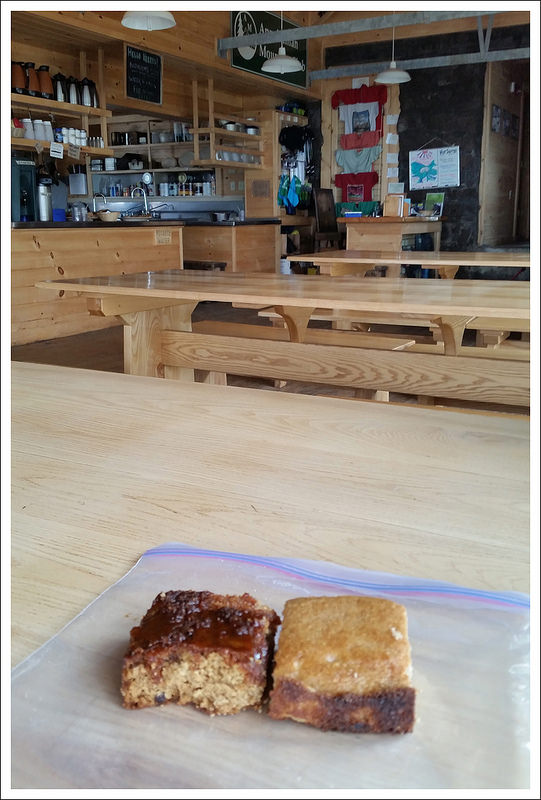
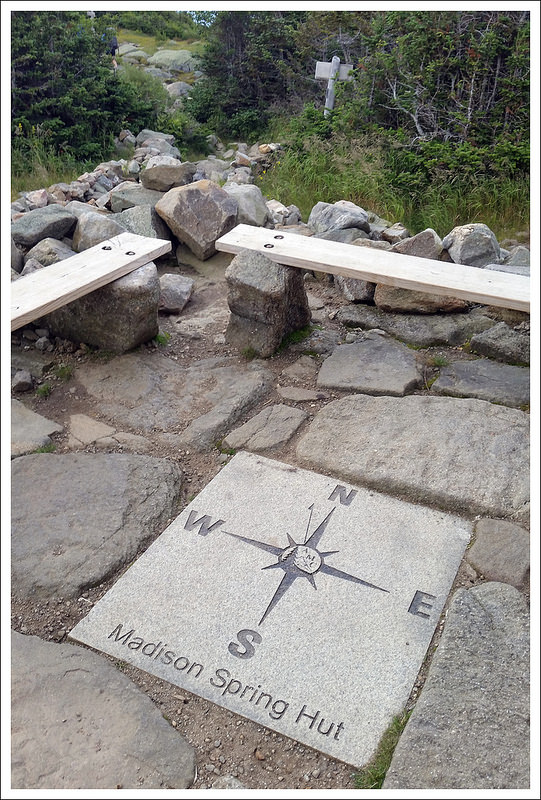
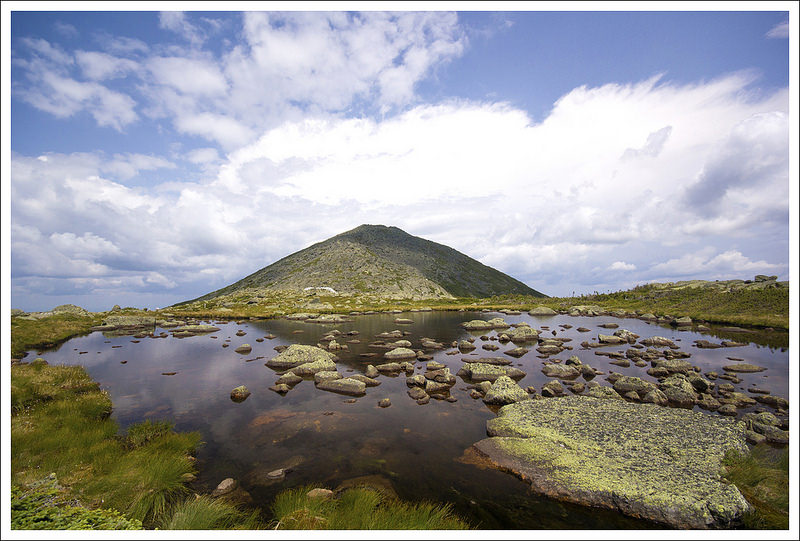
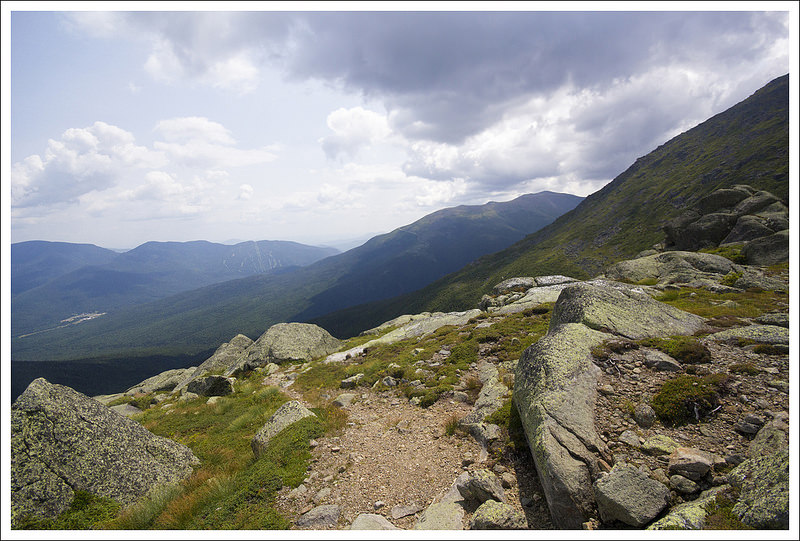
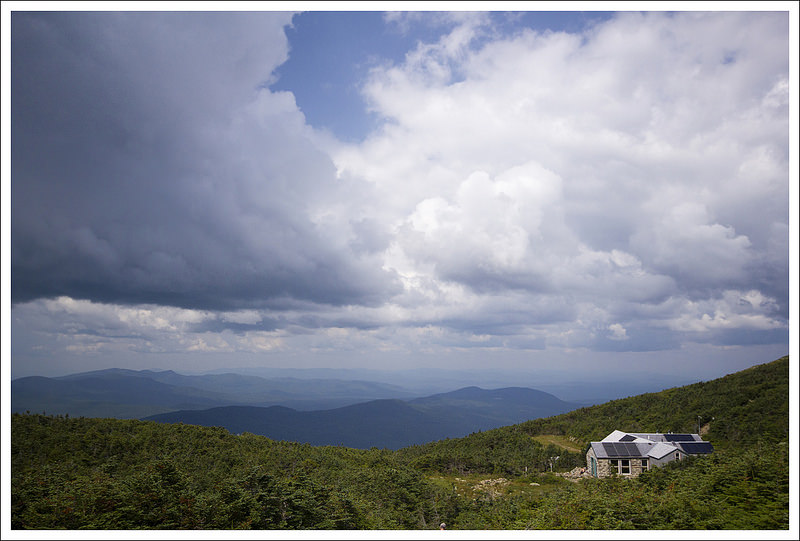
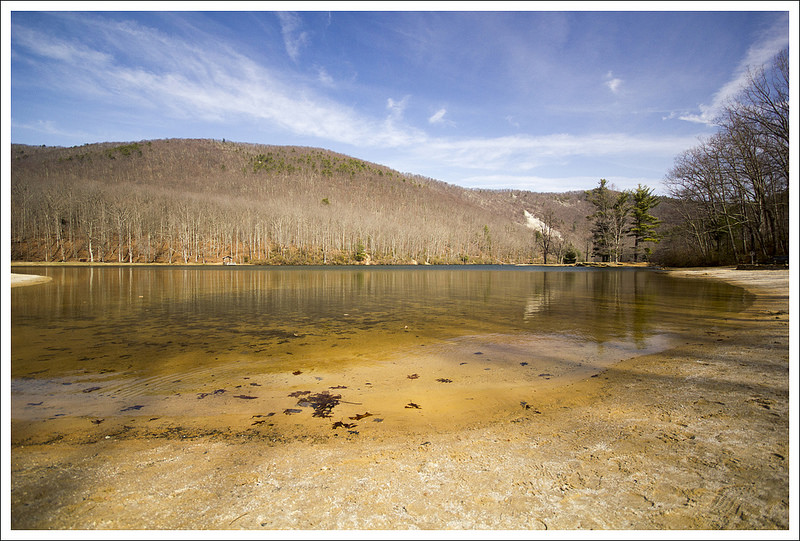
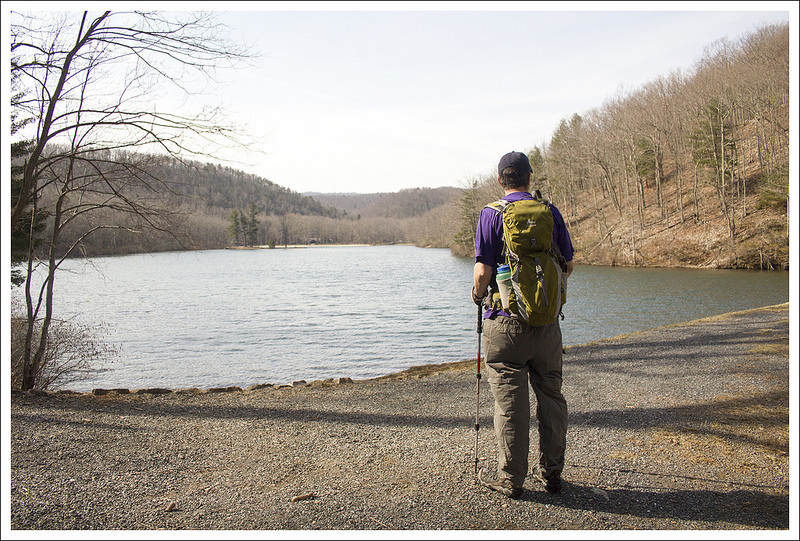
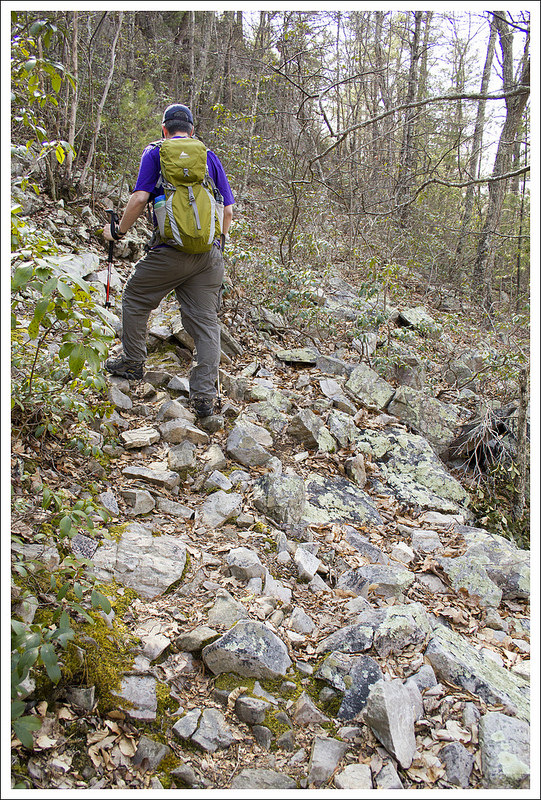
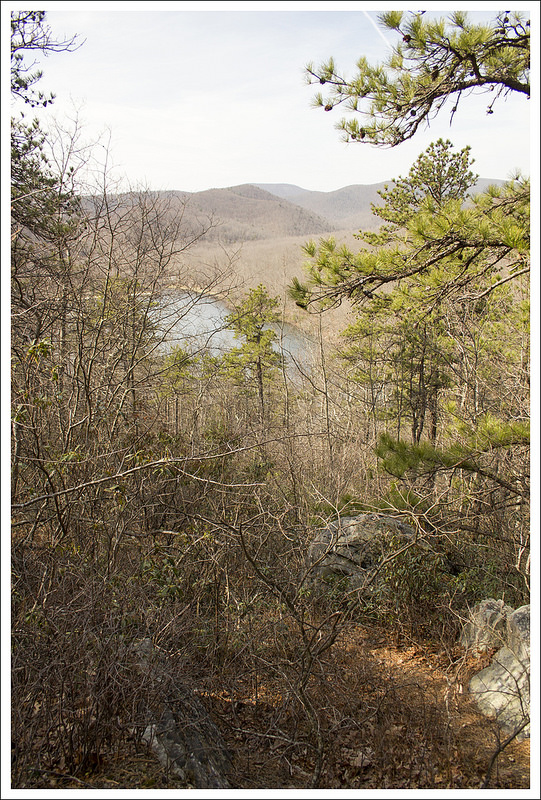
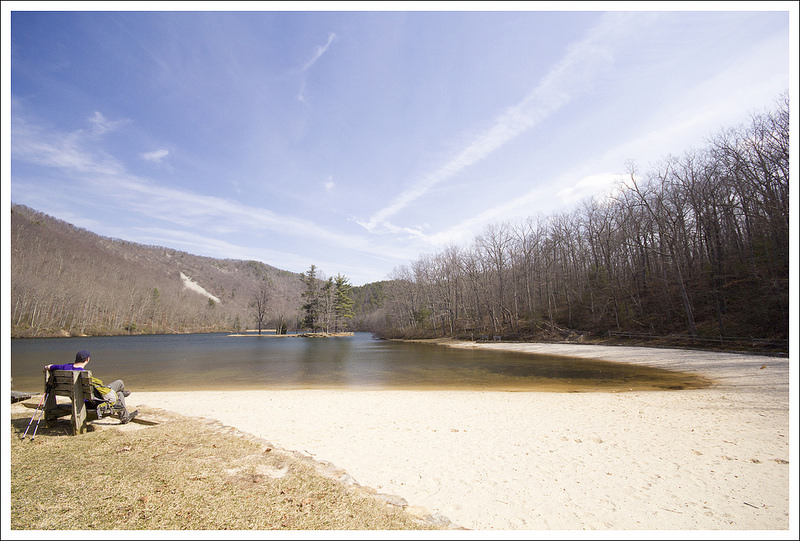

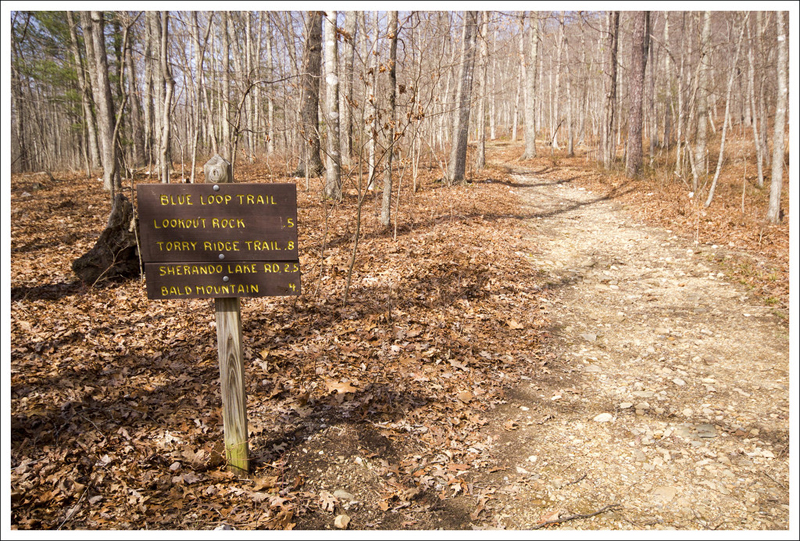
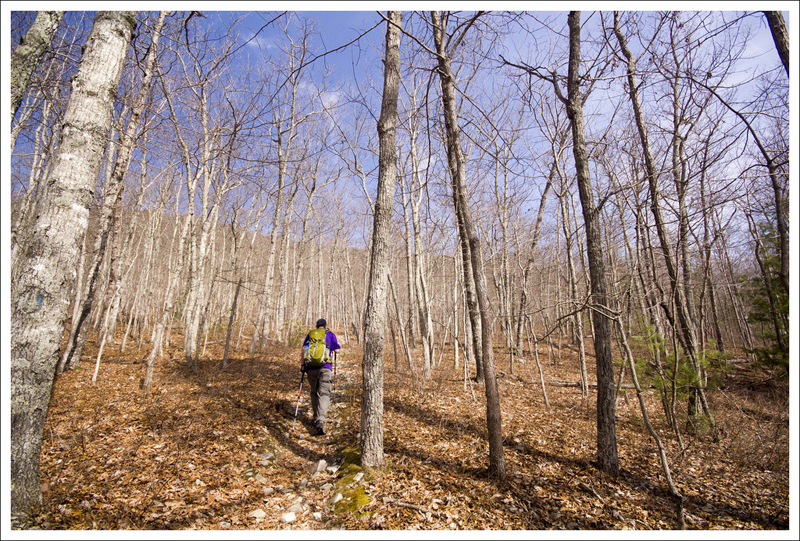
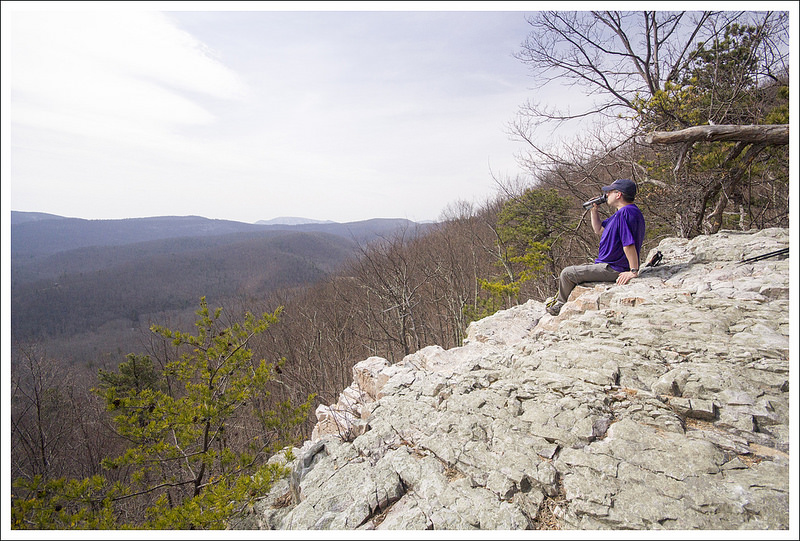
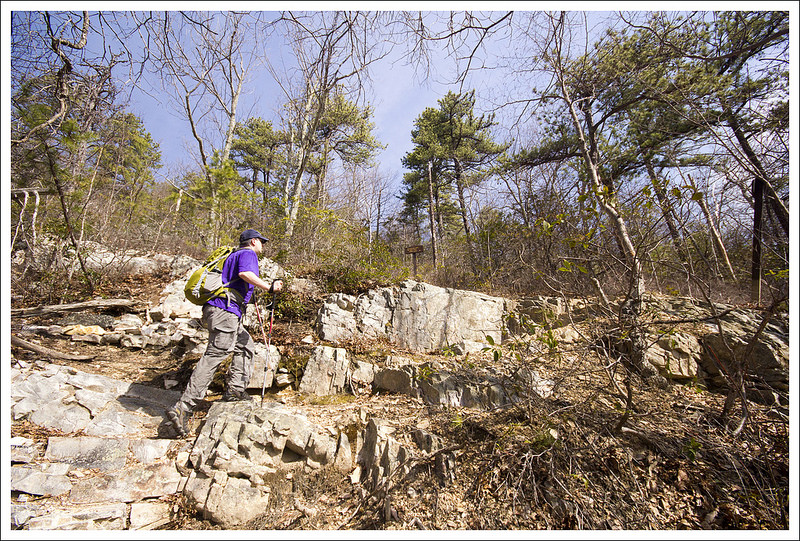

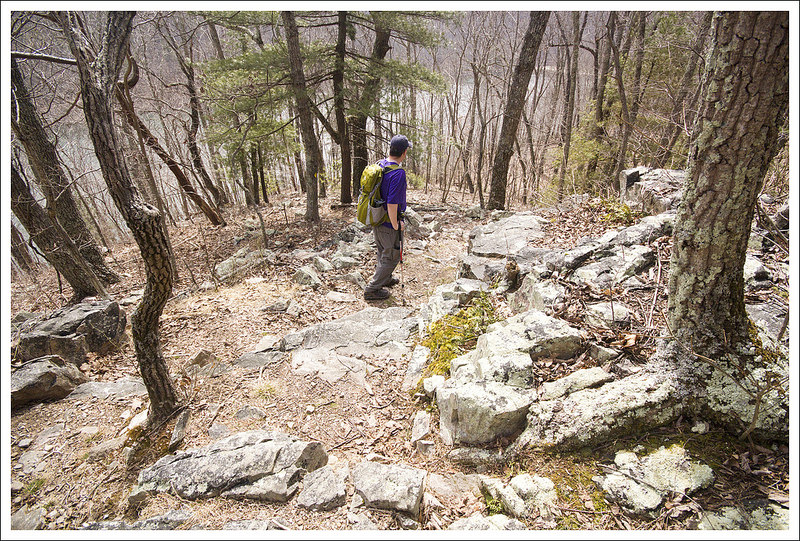

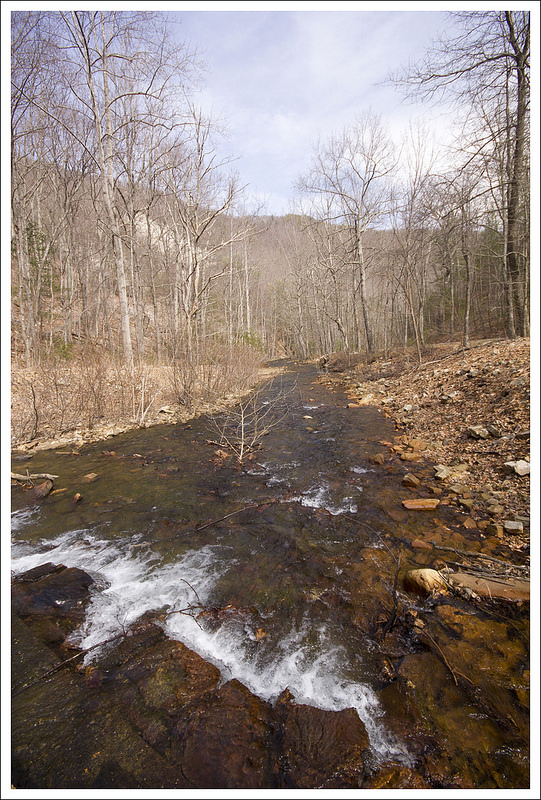

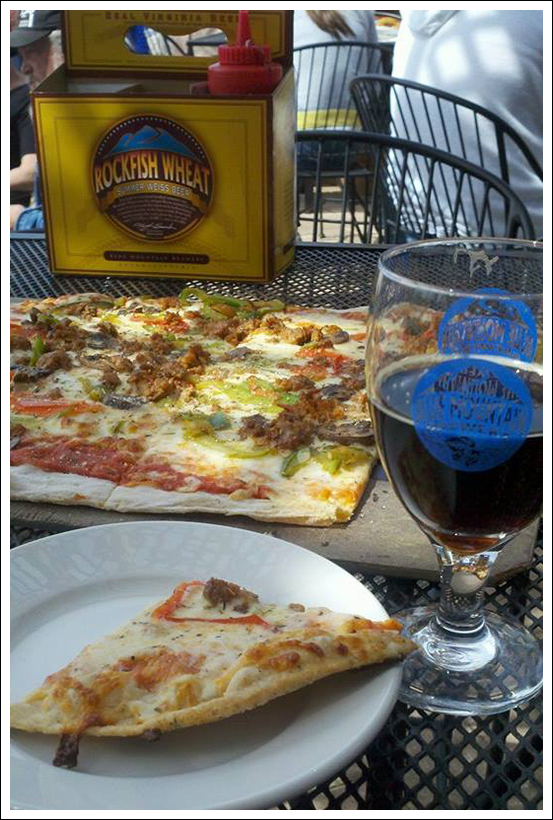
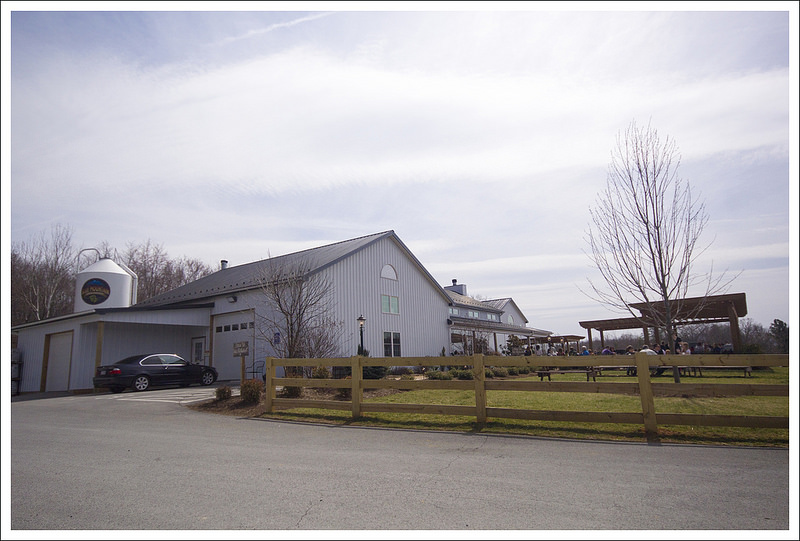

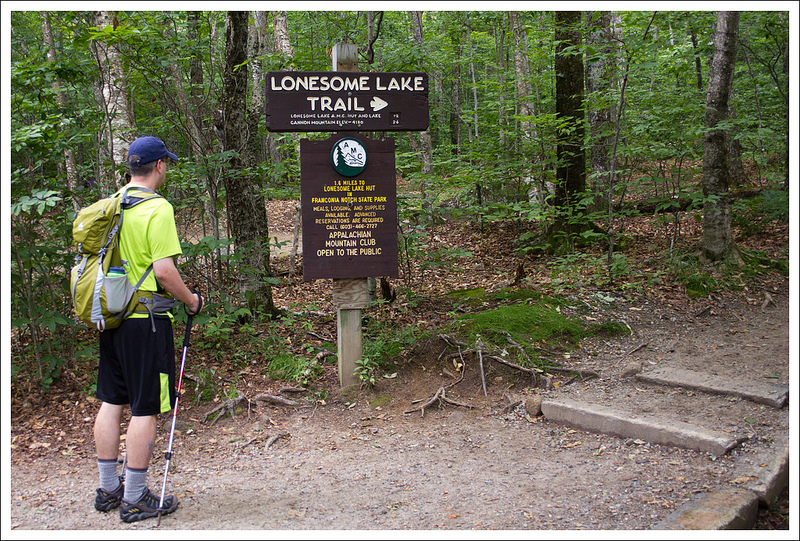


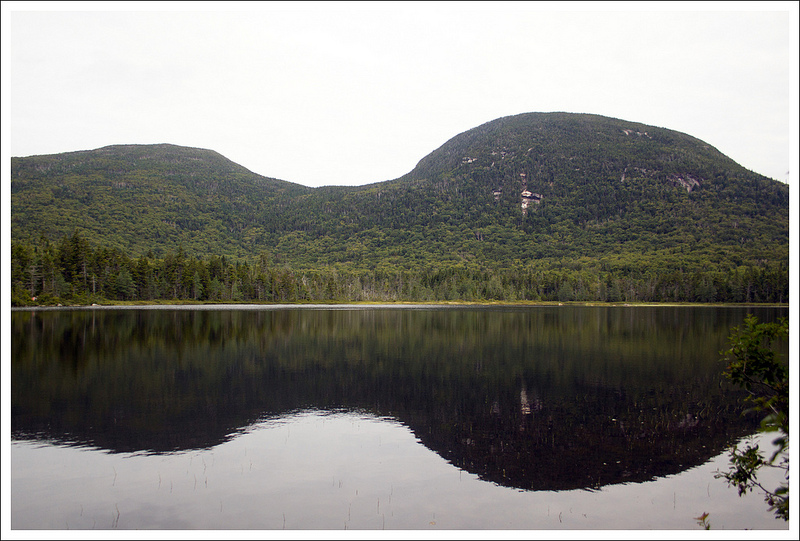


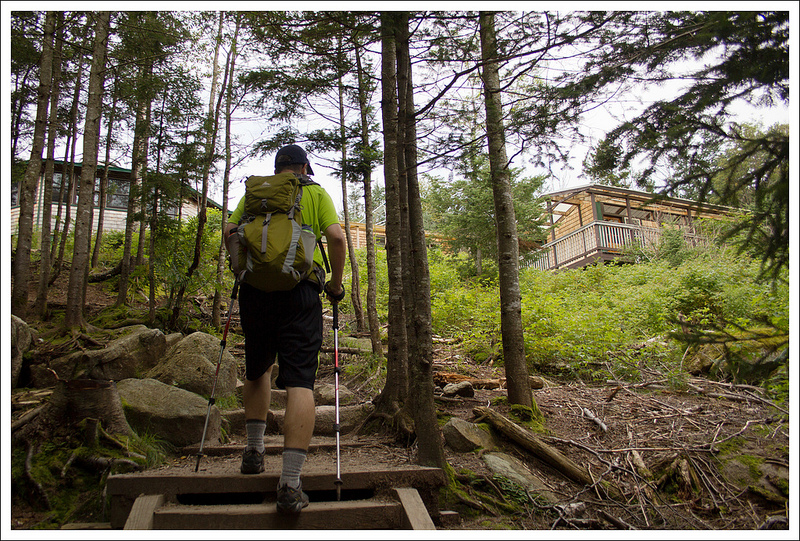


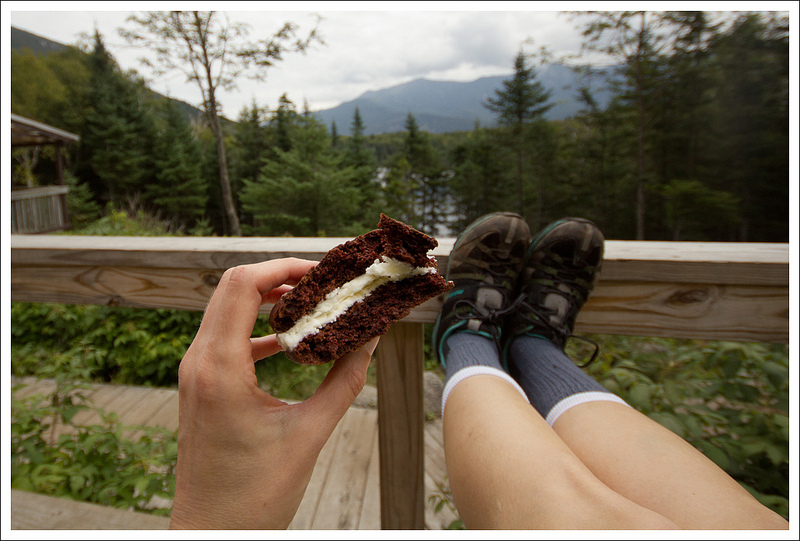

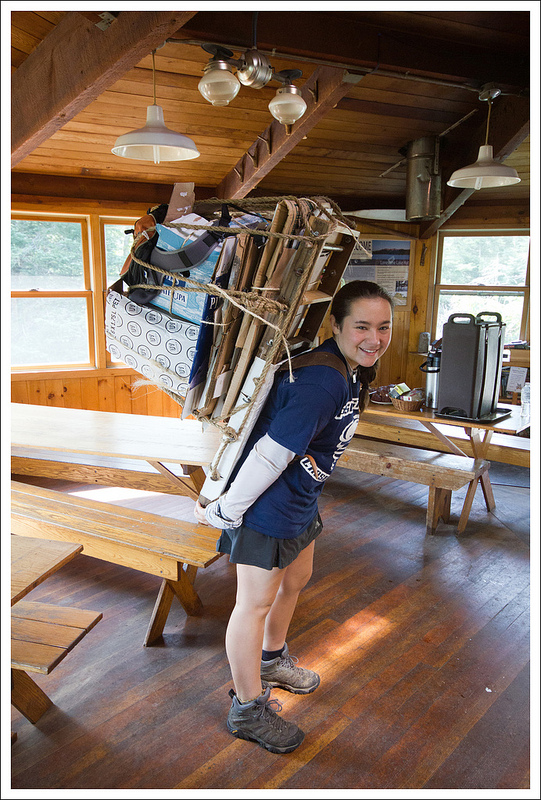

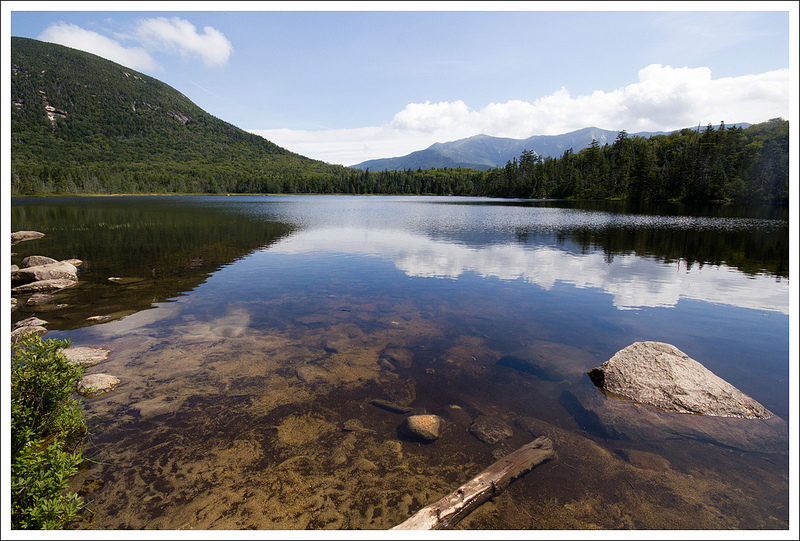


