Pamplin Historical Park Trails

Pamplin Historical Park, located in Petersburg, Va is a hike that demonstrates a pivotal piece of civil war history that takes you through battlefields that led to the folding of the Confederate troops.

View the Full Album of Photos From This Hike

Pamplin Historical Park
If you’re interested in history, but still want to get some vigorous walking in, Pamplin Historical Park is a great place to visit.

Adam Says…

We are always looking for new and interesting places to hike in Virginia.  We were contacted a couple of months ago by Diane Willard, Director of Administration, Marketing, & Membership Services for Pamplin Historical Park about visiting their park and telling others about the trails they had on their property.  As I was visiting the area in late March, I was able to squeeze in a visit.  Please note, there is an entrance fee -as of 2016 adults $12.50, seniors 62+ $11.50, and children (6-12) $7.50.  The park is open seven days a week from Spring to Fall from 9AM-5PM daily, so plan accordingly. 

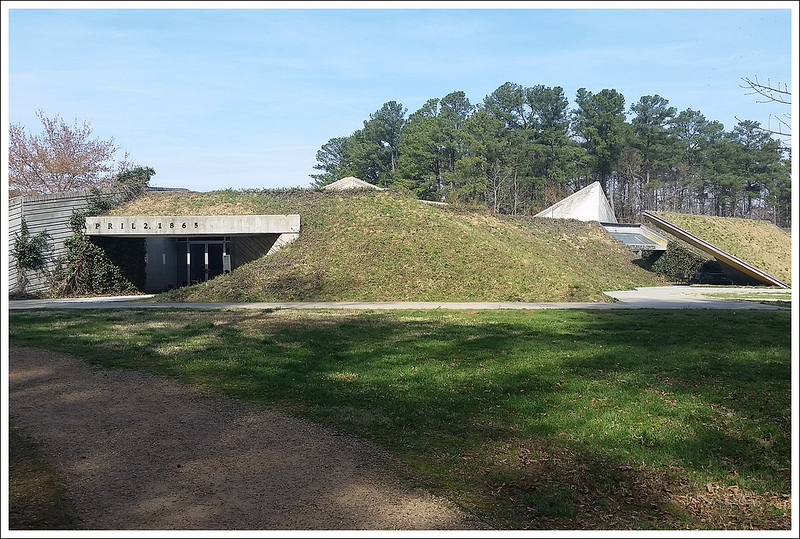
The focus of the park is to bring visitors into the history of the Civil War from one dramatic date – April 2, 1865.  On this day, the Sixth Corps Union troops under General Horatio Wright broke through the Confederate line at Petersburg.  The Confederate forces were working on maintaining a line of defense that stretched for 40 miles from north of Richmond, the Confederate capital, to southwest of Petersburg.   A rough winter and desertion had dwindled General Lee’s troops to 60,000 while Grant’s troops were double that size.  The day before, General Grant had cut through the Confederate supply lines and killed about 5,000 troops at Five Forks.  This line on April 2nd tried to hold off the Union troops, but in the early morning Union forces got to the Confederate trenches but nearly 4,000 Union troops were killed.   The battle raged on throughout the day, but by the end of the day, the Confederate troops decided to retreat and abandon the line.  Petersburg and Richmond were evacuated and a mere week later, General Lee surrendered to General Grant at the Appomattox Court House.

Pamplin Historical
Civil War Trench from the Fortification Exhibit; Below: National Museum of the Civil War Soldier, views of the battlefield, trail views go from woods to open fields

Pamplin Historical Park Pamplin Historical Park Pamplin Historical Park

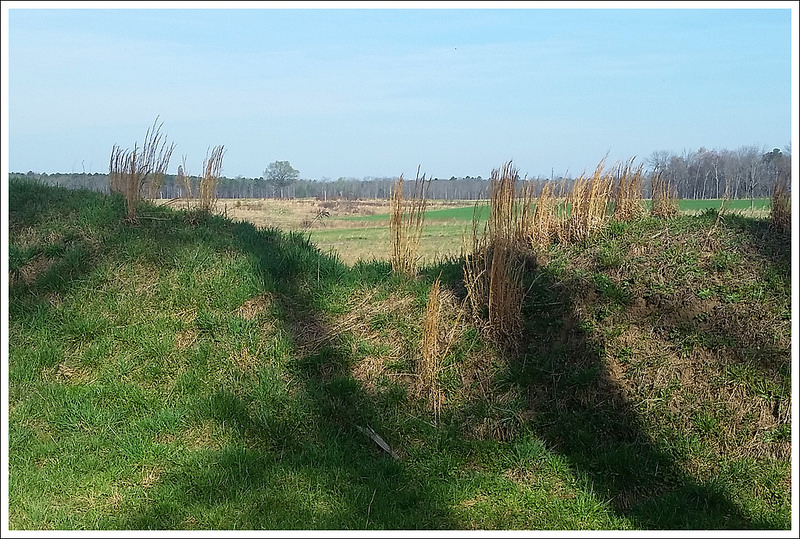
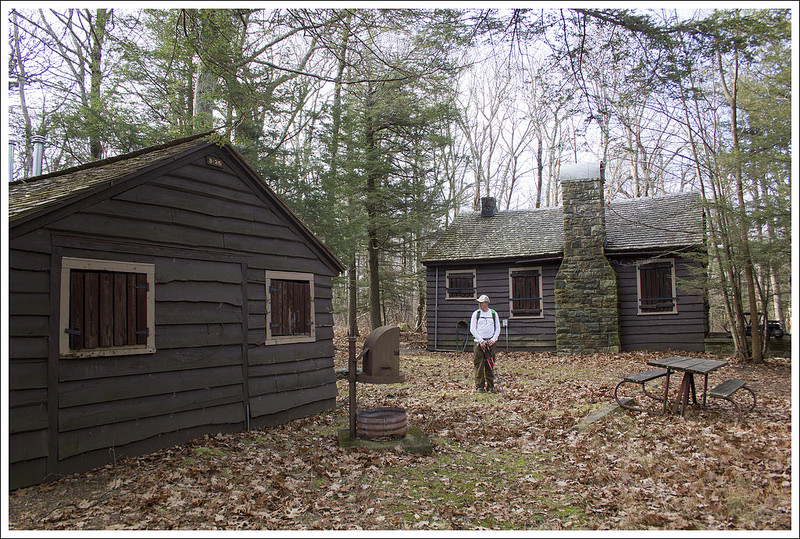
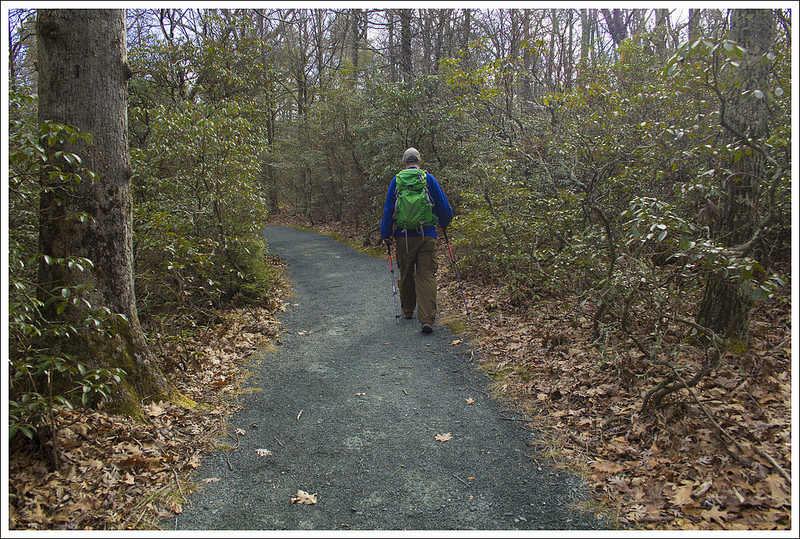
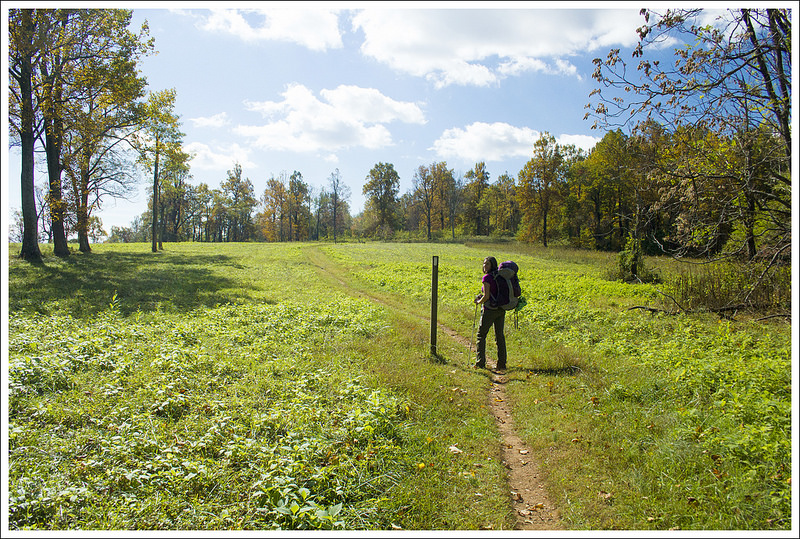
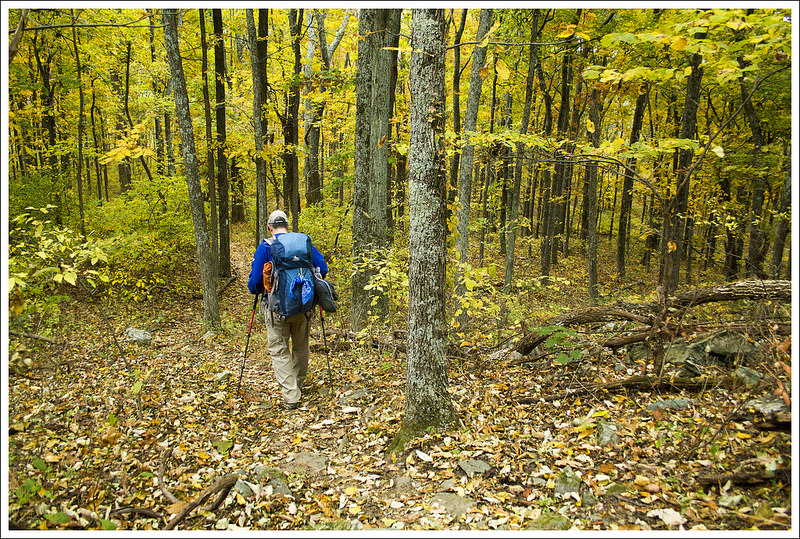
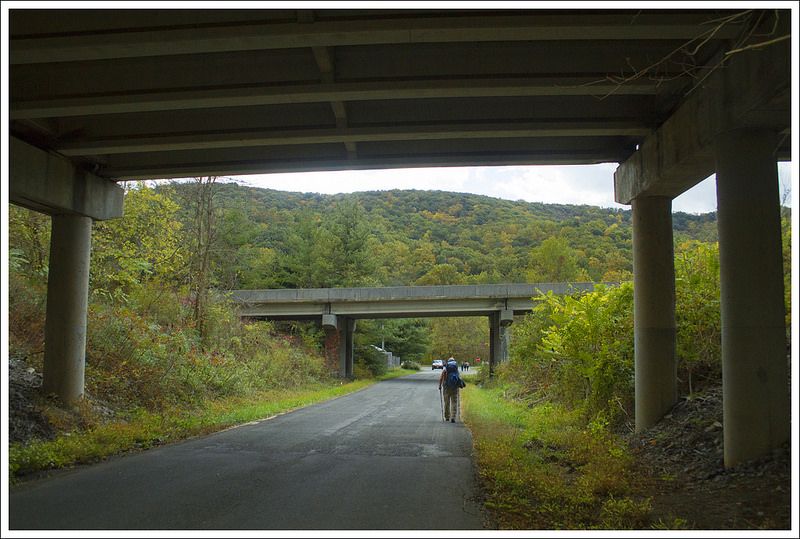
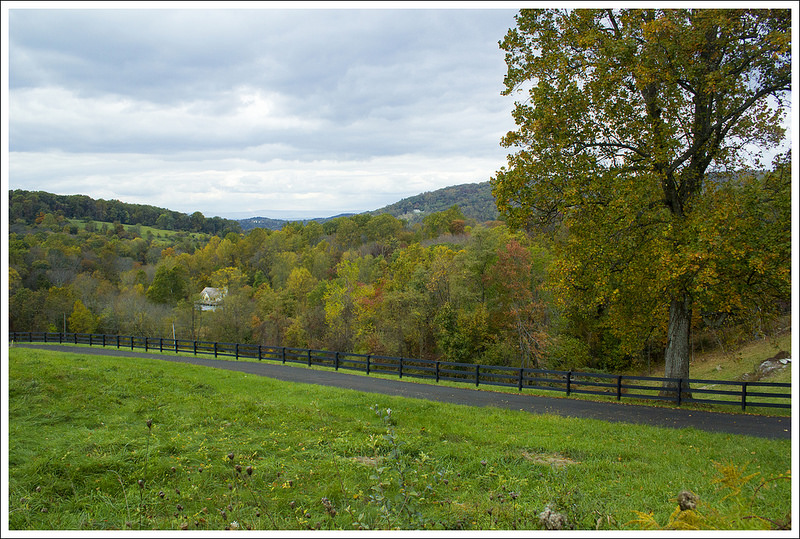
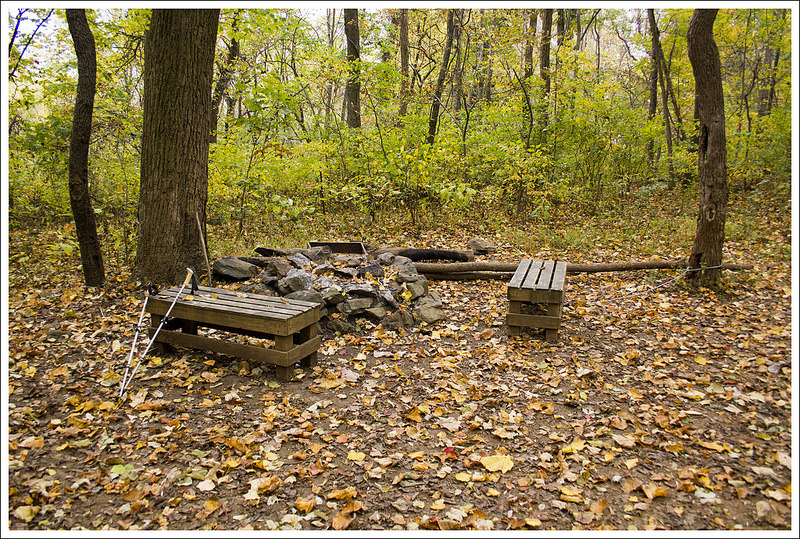
There are several miles of hiking trails through this park and it also connects to the Petersburg Battlefields Trail if you want a longer hike.  I would recommend printing this map of the area, so you can get an idea of the landscape to start the hike.  The main entrance is known as The National Museum of the Civil War Soldier.  Leaving the building through the side entrance, you walk past a demonstration and then pass by the Tudor Hall plantation on the right.  Continuing ahead, you walk past a Fortification Exhibit which gives you a closeup view of a trench and the defense systems around them.  You then pass the Battlefield Center on the left and and begin the real hike on the Breakthrough Trail.  The Breakthrough Trail has a Main Loop, Short Loop, and Intermediate Loop.  Knowing I was going on a bit further, I started in .2 miles on the Main Loop.  The main loop is mostly wooded as you go through an area known as Arthur’s Swamp.  At .4 miles, you reach a junction where you can break off and take the Short Loop, but I continued on the Main Loop.  At .85 miles, you come to a junction where you can continue on the Main Loop or begin the Headwaters Trail.  I picked up a brochure at the junction and saw that The Headwaters Trail would actually connect as a large loop, so I decided to take the longer Headwaters Loop.  Along the way, you get to see several Confederate rifle pits, small dugouts that formed strategic encampments.  At 1.35 miles, you reach a short path that has a sign explaining an original logging bridge.  From here you can break off the Headwaters Trail and make your way on to the Petersburg Battlefields Trail.  The idea of checking out how these trails connected intrigued me, so I took this trail.  From here, you are leaving the Pamplin Historical Park boundary.  You go through some woods but then are left with great farmland views where you can imagine the feelings of the soldiers that were crossing this field.  You can only begin to think about how many people lost their lives on that fateful day to stand up for their beliefs.

Pamplin Historical Park
Battlefield Center.  Below: historic placards along the trails, wooded walkways, school trips learning about trench warfare and getting into formations

Pamplin Historical Park Pamplin Historical Park Pamplin Historical Park

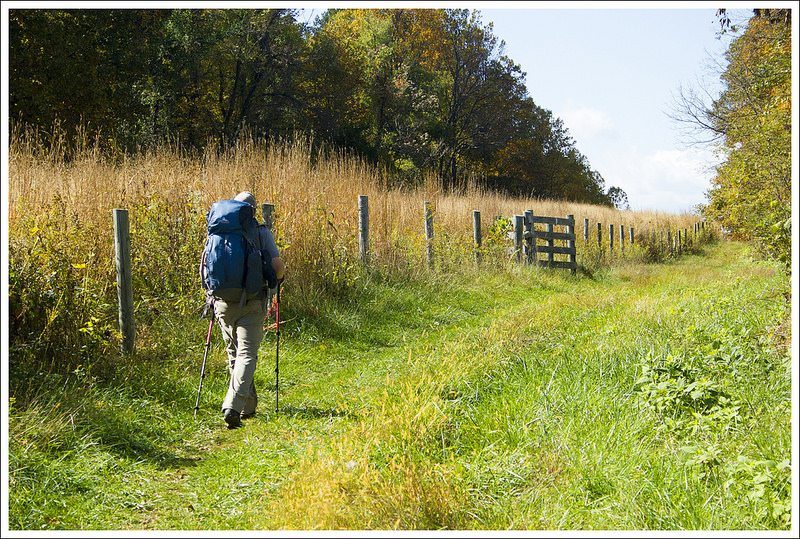
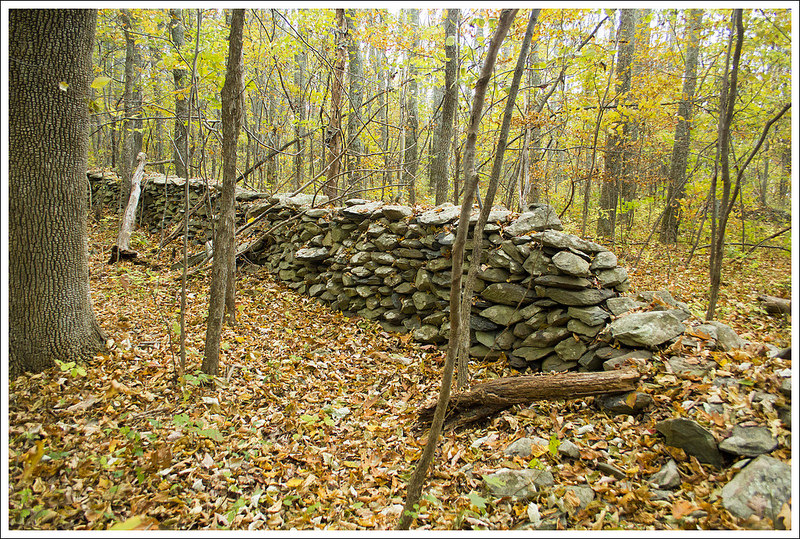
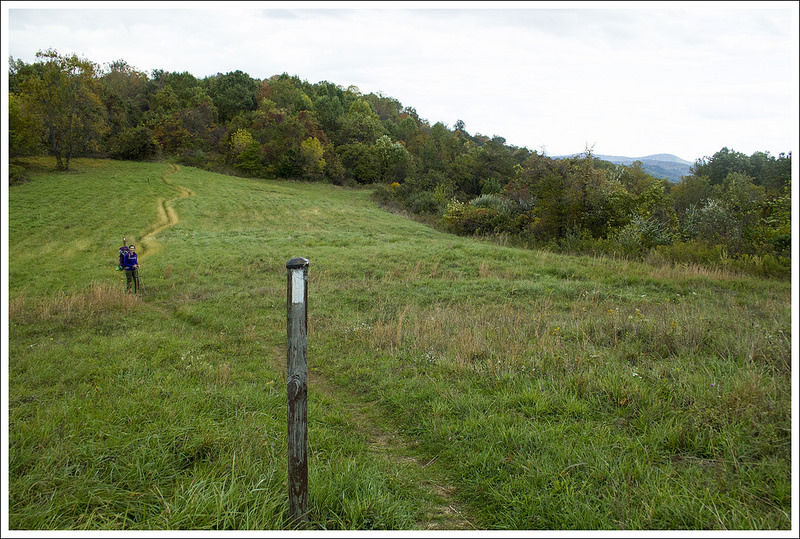
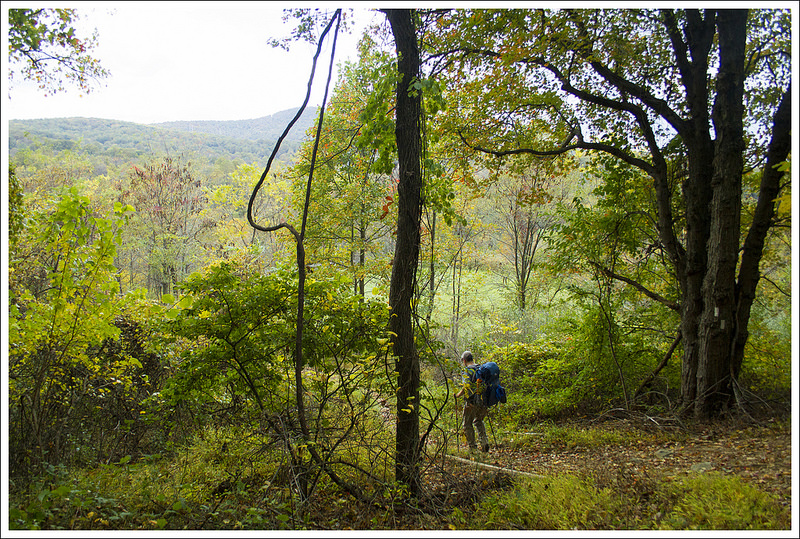
Continuing on this trail allows you to get some open scenery, which is great for spotting birds in the fields.  I walked on an open path and then at 1.65 miles, followed the sign pointing towards the parking lot.  This trail continued to skirt around some open fields of farmland.  At 2.4 miles, the trail takes a sharp turn to the left where you come across some large earthworks, serving as barriers protecting the Union line.  I walked along these for a short distance and saw the trail continued further, but decided to make my way back.  On my way back, at 3.25 miles, I came to the junction of the sign (one way leading to the parking lot, the other pointing to the Petersburg Battlefield Trail).  Instead of taking a right, I decided to take a left to walk along the farmland and get more views, but I turned around after just .2 miles to get back to the trail I knew.  From the junction sign follow the sign pointing to the Petersburg Battlefield Trail and at 3.6 miles, you finally rejoin the Headwaters Trail.  At 4.0 miles, you reach a junction with the Woodlands Trail, which also leads back to the start, but I continued on the main Headwaters Trail.  In a short distance, you begin to see the large Confederate Earthworks, forming that historic line the Confederates tried to maintain.  The trail crosses over a break in the earthworks and then takes a sharp left turn to parallel the earthworks.  At 4.4 miles, you reach another junction where you have an option on which side of the earthworks that you like to walk along the Intermediate Loop.  At 4.5 miles, you reach a junction with the Woodlands Trail again and at 4.6 miles, you meet a junction with the Main Loop.  Staying straight on the Intermediate Loop, it joins the Short Loop in a short distance.  I took a right here and reached the Battlefield Center at 4.8 miles.  I explored inside the Battlefield Center and then took in the Tudor Hall Plantation before returning to the main entrance at the National Museum of the Civil War Soldier.

If you are a civil war history buff, this would be a great place to hike and explore.  I was thoroughly impressed with how much has been put into the care of the trails and the exhibits themselves.  You could easily spend most of the day exploring the trails and grounds here.  This would be a great hike to go as a family to learn about the history and if you have children, they may enjoy reading about the civil war on the placards along the way.  I must say that I was pleasantly surprised at how great the trails were maintained here.  I went in expecting that I could walk along some short, easy trails, but with adding the spur to the Petersburg Battlefield Trail, you can get a more serious hike into your day.

Pamplin Historical Park
The Tudor Hall Plantation.  Below: Open field views, statue at the entrance station.

Pamplin Historical Park Pamplin Historical Park

Trail Notes

  • Distance –5.0 miles.
    (Check out the stats from Map My Hike)*
  • Elevation Change –  100 ft.
  • Difficulty –  1.  Very easy walking on this one with very little elevation gain. 
  • Trail Conditions – 4.5  Trails are well-maintained and easy footing. 
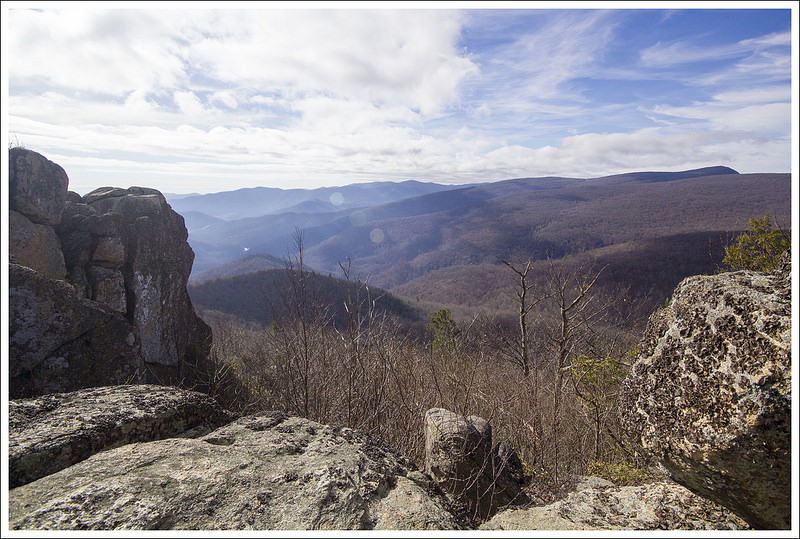
  • Views – 2.5.  Not high views, but vast views of open, picturesque fields.
  • Waterfalls/streams 0. Non-existent.
  • Wildlife – 2.  Some decent bird-watching over boggy areas and expansive fields.
  • Ease to Navigate – 3.  When you leave Pamplin, things can get a bit confusing.
  • Solitude –  3.5.  You will see people at Pamplin Historical Park, but hardly anyone on the trail system. 

MapMyHike is not necessarily accurate, as the GPS signal fades in and out – but it still provides some fun and interesting information.

Download a trail map (PDF)

Directions to trailhead: From Richmond, take I-95 south to I-85 south, to Exit 63-A (U.S. 1 south). Proceed one mile to Park entrance on the left. The Park is 30 minutes south of Richmond, VA. Coordinates: 37.182980, -77.480095

Robertson Mountain

This 6.0 mile hike follows fire roads and trails to the summit of Robertson Mountain – one of Shenandoah’s less visited, more interior peaks.  It’s a moderate hike with fantastic views!

View the Full Album of Photos From This Hike

Summit of Robertson Mountain
The summit of Robertson Mountain is less visited than many peaks in Shenandoah.

Christine Says…

Our traditional Thanksgiving day begins with a hike and ends with homemade pizza and beer.  I know it’s not the normal way to celebrate this holiday, but it’s what we’ve done for years now. Eating turkey would just be weird for us!  Last year, Skyline Drive was closed for weather, so we had a beautiful short hike along the Appalachian Trail in half a foot of fresh snow. I still remember losing the trail multiple times because branches were so heavily bowed over the path. Thanksgiving of 2015 was quite different! It was so warm and sunny that it felt more like early fall. Even with a brisk breeze, we were able to hike comfortably in t-shirts.

We wanted to hike something new, so we settled on Robertson Mountain. It’s not as well-known or popular as many other Shenandoah trail, but we heard it had nice views of Old Rag and the valley. The hike isn’t listed in any of our hiking guidebooks and most of the online information approaches Robertson Mountain from the Old Rag parking area. That route is known as one of the steepest climbs in the park.  We didn’t want to drive all the way around to Weakley Hollow, so we consulted our maps to find a route approaching the summit from Skyline Drive.

Buildings Along the Fire Road
This cluster of buildings is sometimes used for training events or ranger accommodations.  It was empty when we visited. Below: The hike started out on the Limberlost Trail; A pretty stream along the way; Most of this hike is walking on a fire road.

Limberlost Stream Along the Fire Road Old Rag Fire Road

We decided our best option was to park at Limberlost and follow that trail to the junction with the Old Rag fire road.  From there, we just followed the Old Rag fire road all the way down to its junction with the Robertson Mountain Trail.  At first, the route seemed a little confusing because the fire road and the Big Meadows Horse Trail shared course for a while.  Adam will give more specific details about benchmarks and distances in his portion of the post.  Most of the walking along the fire road was mundane.  We passed a pretty stream early on the route.  We also came across a cluster of backcountry cabins.  There wasn’t a sign marking them, but apparently they are used for training activities and ranger accommodations.   As we descended the fire road, eventually Robertson Mountain came into view.  Through the leafless trees, we could see it’s cone-like shape through branches.

We took a left onto the Robertson Mountain trail.  It’s the only ‘real’ section of trail on this hike – the majority is fire road and the graded path of Limberlost.  We climbed steadily for about three-quarters of a mile until we reached the top.  A side path made it’s way to a rocky outcropping.  We had the summit all to ourselves.  We enjoyed a light lunch and spectacular views of the mountains.  After leaving the summit, we explored a mountain-top campsite.  There was definitely enough room for a couple tents, but no water source.  Someone had recently put an illegal fire ring in at the site, so we dispersed the rocks before heading back down.

The hike back retraced our steps and was primarily an uphill climb back to Limberlost.  If you’re looking for the less steep, easier way to visit Robertson Mountain – this is your route!  The approach from Weakley Hollow is about the same total distance, but is a much steeper climb! All in all, this was a pleasant and moderate six mile hike.  The route wasn’t very exciting, but the great views more than made up for it. It was the perfect way to spend our Thanksgiving morning.

Approaching Robertson
We could see Robertson Mountain looming in the distance.  Below: Climbing the Robertson Mountain Trail; A campsite with remnants of an illegal fire near the summit; Arriving at the viewpoint.

Robertson Mountain Trail Campsite Near the Robertson Summit Arriving at Robertson Mountain Summit

Adam Says…

Robertson Mountain is one of those hikes that doesn’t get much publicity, but treats you with a serene view over a mountainous landscape with barely a glimpse of civilization.  Because of this, on most days, you will find that you can have this slice of serenity all to yourself.

We started our hike from the Limberlost Trail parking lot.  The Limberlost Trail is a small loop, but start heading on the left, clockwise from the parking lot.  There are several spurs that lead away from the Limberlost Trail and all of the junctions aren’t easily marked.  After going just a couple tenths of a mile, we came to a sign that states “Horse Trail” with arrows to Skyland and Big Meadows (the next trail that comes off the Limberlost Trail Loop is the White Oak Canyon Trail – this is not the trail you want).  Take this trail off the Limberlost Trail which is the Old Rag Fire Road.  The Old Rag Fire Road starts off mostly flat until the one mile mark.  At this point, it will start a steeper downhill.  At 1.7 miles, you reach a junction with the Indian Run trail, but stay on the Fire Road.  At 2.2 miles, you reach the bottom of the steep decline and reach another junction with the Corbin Hollow Trail. Stay on the Old Rag Fire Road and at 2.3 miles, you will see a small post on the left of the road that marks the beginning of the Robertson Mountain trail.

Robertson Mountain Summit
No one else to be seen on the trail on this day! Below: Gnarled trees near the summit; Descending Robertson Mountain; Returning to the junction of the Robertson Mountain Trail and the Fire Road.

Gnarled Trees Descending Robertson Mountain Back Up to Skyline Drive

Take this trail, which starts off through some thicker underbrush.  This trail is much steeper but it is a short climb of .6 miles.  The Robertson Mountain trail was very rocky and you think several times that you have reached a false summit, but the trail continues up.  At this 2.9 mile marker, there is a small side trail to the right that leads to the summit.   From the summit, you will see lots of nice rock outcroppings to enjoy the view.  Continue back the way you came to make this about a 6 mile out-and-back hike.

For those that want to bag a few different peaks from this hike, you can reach Old Rag from here also.  You could go back down the Robertson Mountain trail and then take a left at the Old Rag Fire Road.  Taking this and then joining the Saddle Trail would take another 4 miles to reach the summit of Old Rag.  This would give you about a 15-mile hike, so it could make a decent route for an overnight backpacking trip (but there isn’t really a water source) or a very long day hike for those that are very fit.  Shenandoah provides a nice, free trail map of this area on their website.

This was a great way to spend a day on a hidden gem of a hike.  While the fire road is not overly thrilling to see, it makes for some easy footing.  We feel we have done so much of Shenandoah National Park, so we were pleasantly surprised at how this tucked-away hike gave us some of the better views in the park.

Trail Notes

  • Distance – 6.0 miles roundtrip
    (Check out the stats from Map My Hike)*
  • Elevation Change – 1250 ft.
  • Difficulty –  2.5.  This was an easy to moderate hike.  The climbing was mostly gentle and well-graded.
  • Trail Conditions – 4.  Most of the hike was along accessible trail or fire road.  The Robertson Mountain trail was typical Shenandoah single-track.
  • Views  4.5.  Beautiful and fairly expansive!
  • Streams/Waterfalls – 2.  There was one pretty stream early in the hike.
  • Wildlife – 3.  We saw deer and birds.  I am sure some hikers cross paths with bears in this area too.  We saw some scat along the fire road.
  • Ease to Navigate – 4.  The junction of Limberlost and the Old Rag Fireroad is not well labeled, but it’s also hard to miss something as wide as a fire road.
  • Solitude – 4.  We saw some people around Limberlost, but nobody after that!

MapMyHike is not necessarily accurate, as the GPS signal fades in and out – but it still provides some fun and interesting information.

Download a Trail Map (PDF)

Directions to trailhead: Located in Shenandoah National Park (fees apply).  The Limberlost Parking lot is located around Mile Marker 43 on Skyline Drive.  Park in this lot.  Head left on the Limberlost Trail loop at the end of the parking lot.  Coordinates: 38.580055, -78.381473

Appalachian Trail – Ashby Gap to Bears Den Rocks (The Roller Coaster)

This 13.5 mile Appalachian Trail section includes quite a bit of the infamous AT ‘Roller Coaster’.  The trail is rocky and the ups and downs are pretty constant.  There are two nice viewpoints along the route, good camping spots/shelters, water sources, and a finish at Bears Den Hostel.

View the Full Album of Photos From This Hike

View from Bears Den Rocks
The view from Bears Den Rocks is a fitting finale for this section.

Adam Says…

The infamous “Roller Coaster”…. for years we have heard of how tough this stretch of the Appalachian Trail is and this was our chance to experience the grueling ups and downs that gives this section its epithet.  We have previously covered 3.9 miles of the northern section of the Roller Coaster in our coverage of the AT from Harper’s Ferry to Bear’s Den.  The distance between the southern and northern terminus signs marking the Roller Coaster covers 13.4 miles.  From looking at elevation maps, we realized that most of the ups and downs are in the section between Bears Den and the Rod Hollow Shelter.   There are about 10 significant climbs along the Roller Coaster that range from 250-450 feet of climbing (and typically over just about a quarter of a mile).  This is a great section of trail if you want to get in shape.  Since there aren’t a lot of views along the trail, you will find a lot of hikers on the trail are either trying to cover AT miles or are training for long-distance hikes or longer trail runs.

We dropped off our first car at Bears Den Hostel and paid our $3 day-use parking fee.  We had arranged for a shuttle to pick us up and he was there within a minute of us arriving.  Many times on the trail, you meet interesting people – he was a business consultant, counselor for people with drug addictions, and a school bus driver (and finds times to shuttle hikers).  When we heard about how he balanced everything in his life, we were truly amazed.  He dropped us off on the side of the road on US50 and we found the white blaze to head north on the Appalachian Trail.

Golden Woods
The woods were beautiful and golden along our route. Below: It would be nice if hikers didn’t leave hitch-hiking signs (trash) in the woods; Adam passes along an old stone wall; Some trees were still brilliantly colored – even at the end of October.

Litter on the AT Old Stone Walls Bursts of Color

We pushed into the woods and soon the sounds of speeding cars was behind us.  We started off with a gradual climb.  We were hiking near the end of the peak of fall color, so looking all around we saw brilliant colors of yellow and orange in the trees around us.  One of the challenges of hiking after many leaves have fallen is that it can make it difficult to ensure you are still on the trail.  We were able to navigate easily with all the white blazes on the trees marking the AT, but retrace your steps if you don’t see any for a while.   Early on this section, you come across a couple of streams at 1.4, 2.0, and 2.8 miles.  At 3.6 miles, we reached the side trail for the Rod Hollow Shelter (.1 miles west of the trail).  We wanted to eat a snack, so we made our way to the shelter to find the small shelter, as well as a covered picnic table for overnight campers to cook food away from where they sleep.  The shelter also has a privy and a piped spring left of the shelter if you need a reliable water source.

Heading back to the trail, we continued north and at 4.2 miles, we reached the sign marking the southern end of the Roller Coaster.  We knew we had some significant work ahead of us for the rest of the way.  The first hill rose up steeply and descended to a spring at Bolden Hollow.  At the bottom, I tweaked my knee – ugh!  This gave me shooting pains for the rest of the trail.  I knew I had to decide to push on to the end of the hike or turn around and bail.  I decided to put on a knee brace (I always keep one in my pack) to give it some support.  This helped for about half a mile, but the pain was almost unbearable.  Every step was filled with pain that was begging me to give up.  I just thought of all the amazing thru-hikers that fight through pain on most days of the trail and decided I wasn’t going to let myself surrender.  We pushed onward and upward, reaching the next peak at 6.3 miles.  At 7.1 miles, we reached a footbridge that goes over Morgan Mill Stream and also has a small campsite off to the side.  We stopped here for an extended break to eat some lunch.  At 7.6 miles, we reached the gravel road known as Morgan Mill Road.  Crossing the road, there is a slight up and down before reaching another stream at 8.3 miles.

Rocky Climbs on the Roller Coaster
Much of the roller coaster was quite rocky! Below: Rod Hollow Shelter; You are about to enter the Roller Coaster; Descending one of the roller coaster’s hills.

Rod Hollow Shelter Rollercoaster Entrance Downhill on the Roller Coaster

After a mostly level part of the trail (relatively speaking), we then began to ascend up Buzzard Hill.  Near the top, we took a small side trail that led us up to a nice viewpoint.  I rested a bit on a tree overlooking the valley and then we proceeded back to the main trail.  The trail descends steeply from Buzzard Hill and now for overcompensating for my one knee, my other started to hurt.  Time to put on another knee brace (from Christine’s pack this time).  We made it to another stream (yes, lots of water sources on this trail) and rose up another steep section to get to Sam Moore Shelter at 9.7 miles.  We stopped for a snack and another rest before making the final push.  I knew there was only one more major hill before the last push up to Bears Den, which gave me a small glimmer of hope.

We pushed up the next ascent, which then descends to another stream at 11.0 miles.  Another small bump of a climb was ahead and we came to another footbridge at 12.2 miles.  From here, it was just about .5 miles of a steep climb that led to Bears Den rocks.  We took some time to enjoy the views from the rocks.  So many people just drive to Bears Den and take the short trail to the rocks to enjoy the gorgeous views; but today, we truly earned it.  I took a little time to reflect on how I battled through this pain and  I can’t believe I made it.  We took the trail leading us off the AT and to the Bears Den hostel.  We went down the gravel road and made it back to our car.  It was an exhausting day.

Overall, if it wasn’t for my injury, I don’t think the Roller Coaster is as hard as most people make it out to be.  It does have lots of ups and downs and you may wonder why they didn’t make the trail go around some of these hills instead of up every one of them.  The ascents and descents are relatively short, so you don’t have to do a grueling 5 mile climb up one steep mountain.  If you are in good hiking shape, you should be able to handle the elevation.  I would also recommend going in the peak of fall color – while there aren’t a ton of views until the end, the forest through this area is pretty when filled with color.

Christine Says…

Our hike of this section is significant because it closed a gap in our continuous Appalachian Trail miles! We’ve now hiked an unbroken 265 miles from Harpers Ferry to a road crossing south of Bryant Ridge Shelter (near Lexington, VA).  We still have many, many miles to go, but 265 miles makes a noticeable mark on a trail map!  Our tentative plan is to start working on the miles in southern Virginia later this spring, but with an elderly pet we don’t like to leave behind and a case of ankle tendinitis, I’m not sure how far we’ll get this year.

The roller coaster terrain wasn’t as challenging as I expected it to be.  The hills were mostly small and short, and there is doubtlessly tougher terrain many places along the trail.  I think the section’s harsh reputation might come from a couple things.  First, climbing uphill feels like it should come with a reward in form of a vista; you climb uphill – you earn a view!  On the roller coaster, the ups and downs mostly happen a tunnel of forest with nothing particularly noteworthy to see.  Hikers call terrain like this PUDs – short for pointless ups and downs.  They can be a little demotivating.  I mean, honestly, if there is nothing to see at the top of a mountain, you may as well walk around it rather than over it! Second, I think most thru-hikers are ready to get out of Virginia by the time they reach the roller coaster.  After 500+ miles in the state some hikers are feeling emotional doldrums known as the Virginia Blues, and the ups and downs just add to the tedium.

Pretty Spot to Eat Lunch
A pretty spot to eat lunch along Morgan Mill Stream. Below: A nice campsite along the stream; Another stream crossing; A burned area provided some more open views.

Campsite Along Morgan Mill Stream Crossing Burned Area

But, we’re not thru-hikers, so the hike of the roller coaster was just another fun day on the trail for us.  I wish Adam hadn’t been in so much pain for most of the hike.  At a road crossing, I suggested he bail out. I offered to run ahead and come back with the car to get him.  I give him a ton of credit for gutting it out and hiking through the pain.  He really didn’t want to miss any of the miles. You never know what you’ll see along the AT – even the most mundane miles can bring unexpected sites and experiences. For example, on this section we passed the 1,000 mile marker!  It was just a plain sign stuck to an unremarkable tree, but still a memorable site to pass by.

The view from Buzzard Hill was a nice surprise on this hike.  Our AWOL guide marked Bears Den as the only view along the way.  (note: each vista worth seeing is typically marked with a camera icon in the guidebook).  According to AWOL’s opinion, Buzzard Hill didn’t warrant a camera icon. I would disagree – the view was definitely worth a stop and the big dead tree on the rocky outcropping was fun to climb on.  We took a long, restful break at the spot.

Another noteworthy thing we passed on the route was a glimpse through the trees of Mount Weather Emergency Operations Center.  We could see a firing range and several large buildings in the compound.  The center is a major relocation site for the highest level of civilian and military officials in case of national disaster.  On 9/11, many members of congress were evacuated to this spot. It’s interesting that such a key feature of our national security lies so close to the trail!

Old Tree on Buzzard Hill
Buzzard Hill had a nice view. Below: More views; Sam Moore shelter: Snacks and our AWOL page for this hike.

Nice Foliage Views Sam Moore Shelter Book Pages

By the time we got to Sam Moore shelter, both of us were vaguely wishing we had done this stretch as an overnight.  We had originally considered making it our last backpacking trip of the season, especially since there were so many nice camping spots and water sources along the route.  But the weather was chilly and there was rain in the forecast, so we opted for a hot meal and the comfort of our own bed.

We arrived at Bears Den around 3:00.  We took photos and spent some time enjoying the last weekend of peak fall color.  Eventually, we hobbled back to our car and headed back toward home. On the way, we stopped at Woodstock Brewery for beer and flatbread pizzas.  It was Halloween, and the brewery staff was dressed in elaborate costumes.  My favorite was probably the bartender dressed as a squirrel. One of their beers is called ‘Tipsy Squirrel’, so the costume was especially fitting.  I joked that we were dressed up as smelly, tired hikers — which was not far from the truth!

Bears Den Rocks
Christine climbing on Bears Den Rocks. Below: Our last big descent on the Roller Coaster before reaching Bears Den; The 1000 mile marker on the AT; One last stream crossing.

Last Big Descent on the Roller Coaster 1000 miles on the AT Final Stream Crossing

Trail Notes

  • Distance – 13.5 miles
    (Check out the stats from Map My Hike)*
  • Elevation Change – 3200 ft.
  • Difficulty –  4.5.  The trail has lots of ups and downs and this is a long distance, but is great for training for longer distance hikes. 
  • Trail Conditions – 4.  The trail was well-maintained.  A lot of the Roller Coaster is rocky, so it makes for some careful footing.
  • Views –   4.  The views from Buzzard Hill are decent, but the best views are from Bears Den rocks. 
  • Streams/Waterfalls –   3.5.  Most of the streams aren’t scenic, but there are lots of them which provides great water sources. 
  • Wildlife – 2.   There wasn’t a lot of larger wildlife on the trail, but we did see some deer and a fence lizard at Buzzard Hill. 
  • Ease to Navigate – 3.5. Leaves on the ground made this tougher.  The confusing parts of the trail were finding the trail leaving the summit of Buzzard Hill and finding the right path leaving Bears Den rocks back to the hostel. 
  • Solitude – 3.  For most of this section of trail, we rarely came across anyone.  Bears Den rocks should have lots of people enjoying the views. 

MapMyHike is not necessarily accurate, as the GPS signal fades in and out – but it still provides some fun and interesting information.

Download a Trail Map (PDF)

Directions to trailhead: First car: The Bears Den Hostel is located near VA-7, almost halfway between Berryville and Purcellville.  From Berryville, take VA-7 East for about 8 miles before turning right on SR-601.  Go .5 miles and turn right (you will see a sign on the right for Bears Den).  Go .5 miles down the gravel road until you reach the parking lot.  Leave one car here for your finish to your hike.  Coordinates: 39.110111, -77.853890. Second Car: From Bears Den, head from the parking lot back to SR-601.  Take a right and follow SR-601/Blue Ridge Mountain Road for 10.5 miles until you reach US-50.  Turn right and park the second car on the side of the road.  The AT crossing is just west of the “School Bus Stop 1000 feet” sign. Coordinates: 39.017014, -77.964454

Appalachian Trail – Ashby Gap to Front Royal

This 21.2 mile route along the Appalachian Trail crosses Sky Meadows State Park and the G. Richard Thompson Wildlife Management Area.  There are a couple nice vistas along the way, but it is mostly a quiet, wooded walk. This section of the trail has three shelters – one of the most luxurious (Jim & Molly Denton) and one of the oddest/smallest (Dicks Dome).  Christine is going to cover the first day and Adam will pick up the second.

View the Full Album of Photos From This Hike

The View from Sky Meadows
If you take the Ambassador Whitehead Trail off the Appalachian Trail in Sky Meadows, you will get some nice views of the Piedmont. Below: Adam crosses the four lanes of Route 50; Making our way uphill to the high point of Sky Meadows; Once you finish climbing, you clear the woods and come out into the open fields of Sky Meadows State Park.

Crossing Route 50 Uphill Climb Sky Meadows Opens Up

Day One (6 miles total – 4.8 on the Appalachian Trail and 1.2 walking around Sky Meadows State Park)…

Most typical couples want to spend their anniversary in a cozy bed & breakfast inn or possibly out for a fancy multi-course dinner.  Not us — we go backpacking — especially when we’re given a sunny weekend in the middle of peak fall color season!  We took a Friday off of work so we could have two nights out on the trail.  I was coming off a knee injury, so we picked a section with gentle terrain and several shelters/campsites spaced to allow for shorter mileage each day. The section between Ashby Gap and Front Royal fit the bill perfectly. It was also a good chunk of miles we hadn’t hiked before.

To make transportation easier, we hired a shuttle driver for this trip.  None of the recommended shuttle drivers listed in our AWOL Guide were available, so we turned to the Appalachian Trail Conservancy’s list of shuttles.  ‘Sharon’s Shuttles’ was prompt and affordable.  The mother-daughter team has been shuttling hikers for over a decade now.  We also arranged for a parking spot at the Mountain Home Bed & Breakfast in Front Royal.  For just a couple bucks a day, Mountain Home will give you safe, off-road parking spot at their inn. (There is a small AT lot on Rt. 522, but we don’t recommend leaving a car there overnight.) Mountain Home also has a clean, well-equipped hiker hostel! The proprietors are past thru-hikers, so they’re a great source of information for the trail and the local Front Royal area.

Views from Sky Meadows
Pretty views at our lunch spot. Below: It’s nice to have a table to sit at for lunch;  Leaving the high meadows area of the park; Hickory Tussock caterpillar.

Picnic Table at Sky Meadows Leaving the Meadows Hickory Tussock

We met our shuttle driver at the inn around 10 a.m.  She drove us the 20 miles to our start point at Ashby Gap.  As she pulled into the parking area above Ashby Gap, she said ‘I’m going to drop you off here because someone left a headless deer at the other end of the parking lot’.  Gross! I am glad she gave us the warning because that is not something I want to see! I imagine the headless deer had a nice set of antlers that somebody wanted to keep.  😦

By 11:00 a.m., we were on our way! We followed a short spur trail from the parking area downhill to its junction with the Appalachian Trail.  Headed south, we reached the busy road crossing of Rt. 50 after just several hundred feet. Cars were zipping by at 55+mph, so we made a run for it as soon as it was safe. After crossing the highway, we had a steady 1.75 mile climb up to the high point of Sky Meadows State Park.  Most AT hikers probably walk across the high meadows of the park without detouring, but we decided to turn onto the Ambassador Whitehead Trail and enjoy a scenic view while we ate our packed lunch.  At the viewpoint, there was a picnic table and a nice look down into a valley dotted with farm houses.  I had been warm enough hiking in short sleeves, but as soon as we  stopped I got cold really quickly.  The brisk wind across the open meadow was enough that I pulled out my down jacket!

After lunch, we hiked the remaining mile within Sky Meadows, crossing into the G. Richard Thompson Wildlife Management Area.  Near a trailside campsite, our paths crossed with two young guys hunting small game.  They came out of the thick woods, and totally startled us.  They were friendly enough, but it was pretty obvious they were mostly out to smoke pot and drink beer rather than actually hunt!  As we walked along, we passed thick tangle of old grape vines.  Some of the vines still had bunches of grapes.  I tried a couple – they were very sour!

Tangles of Vines and Weeds in the Wildlife Management Area
The G. Richard Thompson Wildlife Management area. You can probably make out some of the old grape vines in this photo. Below: Arriving at Dicks Dome; The rickety bridge across Whiskey Hollow stream; The shelter is small and oddly shaped.

Arriving at Dicks Dome Crossing the Rickety Bridge to Dicks Dome Dicks Dome Shelter

We descended from higher, more open areas back into the woods.  Over the last mile of trail before reaching our first campsite at Dicks Dome, we passed under power-lines and crossed a shallow spring.  A small sign marked the spur trail to the shelter.  The path was heavily covered with leaves and a little hard to follow.  It looked like no one had passed by in days.  Dicks Dome sits almost a third of a mile off the AT.  A rickety, sagging bridge takes hikers across across Whiskey Hollow stream to the front of Dicks Dome Shelter.  The shelter is a tiny, geodesic dome that might comfortably sleep three people.  It was built by a scout group in 1987 and has seen better days.  It’s so run down and small that the PATC is currently working on building a new shelter uphill from the dome.  When it’s complete, it will be called Whiskey Hollow Shelter.

When we’re out backpacking, we leave the shelter space for thru-hikers and sleep in a tent.  We spent some time looking around the shelter area for a decent tent site.  There was nothing – everything flat was mucky and wet and everything else was on a slope.  Because of the lack of tent sites, we ended up setting up camp on the completed deck of the unfinished shelter.  There were no signs saying ‘keep out’ or ‘do not use’, so we figured the deck would be the easiest and most comfortable place to pitch our tent.

It was still really early in the afternoon – maybe 2:30, so we set up camp and filtered water.  I took a nap while Adam read a book.  Around 4:30, we collected a stack of small firewood so we could have a campfire that evening.  The new shelter had a nice firepit with benches around it!  We relaxed, played cards, and made spaghetti for dinner. As the sun sank lower in the sky, the temperature dropped quickly. What had been a warm, pleasant day turned into a cold night. We started our campfire and tried to stay warm!

Campfire
Our little campfire next to the shelter. A nice fire ring and benches were already there.  Below: Our camping deck; The woods around the new shelter site were lovely; Cards at camp.

Our Campsite Around the Shelter Cards at Camp

We climbed into our tent around 8:30.  It was already completely dark, and we wanted to put the fire out completely before it got too late. We knew the nighttime lows on this trip were going to be unseasonably cold, so we had both borrowed 0 degree sleeping bags from the Adventure Program at JMU.  Isn’t that a great work perk?  I was able to rent a nice-quality Big Agnes bag for just a few dollars!  We normally don’t backpack when it’s cold, so we both just have summer bags rated for 32 degrees.  I’m a cold sleeper, so I knew it wouldn’t be enough to keep me warm on this trip.  I was thankful I had rented the bag… because it was COLD!  I slept in a hat, gloves, thick socks, and a silk baselayer.  I was comfortable and warm enough.  It took me a while to fall asleep, but I eventually did.  I think I ended up sleeping over ten hours that night.  I guess that’s what happens when you sleep and wake by the natural light!

Day Two (15.2 miles)…

We woke up in the cold at the first sign of daylight  and made a warm breakfast of granola, Nido, and hot drinks (coffee for Christine and cider for me).  We packed up everything quickly and made our way back on the trail.  Some people like to have a leisurely morning when backpacking, but we like to be up at sunrise and back on the trail as soon as possible.  The cold helped us get moving quickly since we knew we would warm up once the blood started flowing.

Golden Woods
The woods were beautiful in their golden leaves. Below: Manassas Gap Shelter; The spring is located downhill from the shelter; Hot lunch of buffalo chicken mac and cheese!

Manassas Gap Shelter The Spring at Manassas Gap Yum - Lunch

From Dicks Dome, we had only had a few tenths of a mile before we were back on the AT.  The hike started off with some ups and downs, enough to get my blood going enough that I wanted to take off my outer fleece.  After 2.5 miles, we reached a junction with the Trico Tower spur trail which leads to a communication tower.  From this junction the trail descended a bit and at 3.2 miles, we passed a reliable spring.  While a lot of the hiking in the morning was uneventful, we marveled at how beautiful the trees looked in the fall.  The ground was covered with color and the sun shining through the tree tapestry gave us a reminder that the hard work of carrying packs was worth it.

At 4.5 miles, we reached the Manassas Gap Shelter.  It was a little early for lunch, but we decided to stop and eat since we knew there was a reliable spring and a table to cook.  We combined a macaroni & cheese meal with a buffalo chicken meal and topped it with bacon to make a glorious warm lunch.  Once we had stopped, we could feel the chill of the wind, so it was back into our outer layers while we stopped.  After resting a bit at the shelter, we pushed on.

Barringer Point
A sign and a short spur trail led out to Barringer Point. The view was mostly obstructed. Below: Adam hikes along the trail; Old stone walls; Passing under I-66.

Hiking Along Old Stone Wall Passing Under 66

Descending from Manassas Gap, we came upon a large stone wall at 5.5 miles, which skirted the trail for a good distance.  The trail continued to descend and we reached Tuckers Lane at 6.8 miles, which had some parking for the trail.  Here, we hung a left and passed some houses with people doing yard work.  I’m sure they are used to seeing lots of hikers, but it would strike me funny to see people coming out of the woods often right across from my house.  You walk along the road for a while until you pass underneath I-66.  The loudness of all the traffic made me feel eager to escape back into the wilderness.  At 7 miles, you cross US-50 and continue on to a footbridge to stay on the AT.  You pass over some railroad tracks before your hike begins a steep ascent.

At the top of the ascent, the trail opens up to a beautiful grassy bald with a bench at the top of the hill.  The views were somewhat obstructed, but this is a nice stop for a picturesque scene.  My guess is that a lot of people park at Tuckers Lane and do this as a short out-and-back of about 2 miles, a nice spot for a picnic.  Due to the cold wind whipping along the bald, we didn’t stay but a minute.  At the top of the ascent, the AT enters the woods and descends again.  On the descent down, the trail did open up through some gorgeous farmland.  We walked along the trail and enjoyed the views – the scenery exemplifies Virginia mountains and farmland.  At 8.8 miles, we reached VA 638.  We crossed the road and rock-hopped a small stream at 8.9 miles.

A Meadow View
The nice view after Tuckers Lane. Below: Train tracks near I-66, Some color along the trail; Rolling landscape.

Train Tracks Colorful Woods Farmland Views

At 10 miles, we arrived at the Jim & Molly Denton Shelter around 2:30 p.m.  The temperatures were supposed to rise more that day, but the heavy cloud cover and brisk wind kept it from warming up at all during the day.  Our plan was to stop for the night here and we found a nice campsite away from the shelter.  This shelter is one of the plushest we’ve seen along the trail – it has a solar shower, separate cooking pavilion, nice Adirondack chairs, and even horseshoes to keep you entertained.  We stopped for a snack before working on setting up camp.  There, we met a very nice lady by the trailname of Puddles.  She had thru-hiked the trail several years ago.  We struck up a long conversation with her and loved her outlook on life; she has had a lot of trials in her life, but her positive attitude and love of nature keep her going.

The temperatures were dropping quickly while we ate our snack.  With the foreboding skies and whipping wind, we knew we were going to be in for an even colder night.  I really didn’t feel that the sleeping bags we rented were any warmer than what we personally owned (I know bags are often debated about how warm they stay with the gear-reviewing community).  We talked it through and felt it may be best to try and push on to see if we could make the rest of the trip before it got dark.  It was a shame to leave such a perfect spot, but we felt it was the best decision.  As we had lollygagged a bit, we knew we needed to get going right away.

Descending the AT
On our way to the third shelter along this section. Below: Passing through a fence opening; The Jim and Molly Denton shelter (check out the full photo album to see more photos of this luxurious stop!); The Mosby Campground.

Old Fence Jim & Molly Denton Shelter Mosby Campground

From the Denton Shelter, the trail was a gradual uphill.  We passed a powerline at 11.1 miles and then arrived at the spur trail for the Mosby campsite at 11.8 miles.  Christine checked out the campsite while I waited on the trail.  She came back and talked about how nice and spacious the campsite looked.  What I didn’t know was that Christine wanted to camp here for the night because her knee was hurting and she wasn’t sure she had any more miles left in her.  However, I didn’t pick up on her subtle signals and suggested we move along.  When we’re backpacking, we both reach a threshold somewhere between 10-12 miles when things start being less fun for both of us.  When you’re a weekend backpacker, you never really get the chance to build up the trail legs you need to easily carry a pack 15-20 miles a day.

At 12 miles, we crossed a forest service road.  The trail stayed level for a while before a long descent that leads to Bear Hollow Creek.  The sound of the creek was nice to hear and we soon came across a large fence to our right of the trail.  This serves as the boundary for the Smithsonian Conservation Biology Institute land, an area used to preserve and study animals.  We kept hoping to see elephants or cheetahs through the chain-link fence (not that they necessarily house any), but nothing was to be seen.  We knew we were at the end of the trail as we reached this fence area and at 15.2 miles for this day, we reached US 522.  We took a left on the road and reached Mountain Home in a short distance.  We shambled into our car totally drained.  We made our way to Spelunkers in Front Royal, our favorite place for a burger and shake after a long hike in the nearby area.  We knocked off another section of the AT in Virginia and that is something we were proud of as we slurped up the last remnant of shake from the bottom of our cups.

Smithsonian Conservation
Walking along the fenceline of the Smithsonian Conservation facility.  Below: Back at Mountain Home B&B; Their cute hiker hostel; The inside of the hostel is clean and well-equipped.

Mountain Home Mountain Home Mountain Home

Trail Notes

  • Distance – 21.2 miles
    (Check out the stats from Map My Hike [Day One] [Day Two – Part 1] [Day Two – Part 2])*
  • Elevation Change – 3717 ft.
  • Difficulty –  3.  The (unexpected) distance we covered on the second day was challenging, but overall this was a relatively easy backpacking trip.
  • Trail Conditions – 4.  The trail was in great shape with pleasant, non-rocky conditions.
  • Views  3.  We had nice views from Sky Meadows State Park and then some slightly obstructed field views on the second day.
  • Streams/Waterfalls – 2.  There were only a couple very small streams on this section.  They were sufficient as a water source, but not that scenic.
  • Wildlife – 2.  We saw one deer on the second day, but that’s about it!
  • Ease to Navigate – 4.  The White Blazes are frequent and easy to follow.
  • Solitude – 2.  We saw relatively few people along the section.  We saw two people hunting small game in the wildlife management area.  There were two weekenders and one SOBO thru-hiker at the shelter.

MapMyHike is not necessarily accurate, as the GPS signal fades in and out – but it still provides some fun and interesting information.

Download a Trail Map (PDF)

Directions to trailhead:  To get to Mountain Home, take exit 13 off I-66W to get on VA-55W.  Turn right on to VA-55W and follow it for 4.7 miles.  Turn left on to US-522S and go 3.5 miles until you turn on to Remount Avenue and reach Mountain Home.   To get to Ashby Gap from Mountain Home, head back on US-522 and now go north.  In 3.5 miles, take a right on to VA-55E and follow that back to I-66.  Head east on I-66 from 9.1 miles before taking exit 23/US-17N.  Turn left on 55-E and go .5 miles before turning left on US-17N.  Follow US-17N for 7.1 miles.  Turn left on to US-50W and go 1.1 miles.  Turn right on 601/Blue Ridge Mountain Road.  About 1 mile up the road, you will see a small gravel parking lot on the left to park.

Mount Osceola (NH)

Special: New Hampshire Edition

Introductory Guide to Visiting the White Mountains

This moderate 6.4 mile hike with take you to the top of 4,315′ Mount Osceola.  The trail is very rocky, but the ascent is moderate and non-technical.  It’s a great choice for newer hikers looking to bag their first 4,000-footer in New Hampshire.

View the Full Album of Photos From This Hike

Mount Osceola Summit
Mount Osceola is one of New Hampshire’s most accessible 4,000-footers.

Christine Says…

For our final hike of the week in New Hampshire, we wanted to do another 4,000 footer.  We settled on the 6.4 mile hike of Mount Osceola.  The mountain stands at 4,315 feet, but the hike only requires a little over 2,000 feet of vertical gain to reach the summit.  It’s a very moderate climb. We also read in our guidebook that it was also a rocky hike – even by New Hampshire standards.

Located off Tripoli Road, the hike was quite close to my parents’ house.  It was nice to have a short drive after spending so much time in the car on our Mt. Washington day.  We were also blessed with another beautiful weather day –sunny, warm, and a blue sky full of big, puffy clouds.

On the way to the trailhead, we passed so many fantastic backcountry campsites.  I think next time we visit New Hampshire, we’ll bring our overnight gear and do something multi-day.

The route up Mt. Osceola is about as straight-forward as you can get.  The trail goes all the way to the top without crossing a single trail junction.  It would be nearly impossible to get lost!

As our guidebook promised, the trail was rocky.  Personally, I didn’t think it was any rockier than other local trails.  I suppose the rocks were smaller and looser than a lot of the other area trails.  It would be easy to lose your balance or turn an ankle on this terrain.  In fact, I recently read on Facebook that a woman had to be carried off the Mount Osceola trail by local search and rescue after slipping and breaking her leg.  Still, I think I prefer this kind of rockiness to slippery slabs and boulder scrambles.

Hiking Mount Osceola
The hike up Osceola was quite rocky. Below: Trailhead signage;  Slabs of granite; Views of Tecumseh mountain skiing.

Mount Osceola Trailhead Granite Slabs on Mount Osceola View of Tecumseh Slopes

Generally, the climb up to the summit was very gradual and (dare I say) easy compared to other hikes we’d done recently.  We passed a forest service crew working on trail improvements.  We also passed quite a few slower hikers.  Mount Osceola and Mount Garfield are believed to be the easiest and most accessible of the 4,000 footers.  A lot of novice and not-regular hikers choose these mountains to garner experience before moving onto bigger things.

As we climbed, we got some nice views of the Mount Tecumseh ski area.  Near the top, the trail flattened out.  We passed remnants of an old fire tower and then came out on a wide, open ledge.  The view is first rate!  I read somewhere that you can see 41 of 48 of New Hampshire’s 4,000 footers from the summit.

We spent more time than usual at the summit.  We ate snacks and took photos.  We were both really grateful for having over two weeks of vacation time, beautiful weather, and the chance to hike lots of new places.  New Hampshire and New York are places we both want to visit again!

After a long stay at the summit, we hiked down the mountain.  It was over before we knew it!  I always feel a bit sad on final hikes of vacation weeks. We made the short drive back to my parents and spent the afternoon packing and getting ready for the long drive back to Virginia.  We decided to have one final celebratory meal out at the Six Burner Bistro in Plymouth.  The food there was creative and amazing.  It was the perfect end to our time in the Granite State.

Forest Near the Top of Mount Osceola
Tangled forest near the top of Mount Osceola. Below: First views from the trail; Passing the base of the first fire tower ruins; Views over the evergreens from a spur trail near the summit.

First Views from the Trail First Fire Tower Ruins View Over the Evergreens

Adam Says…

As Christine mentioned, the hike up Mt. Osceola is an accessible trail for those that want to try their hand (or feet) on a 4000-footer .  New Hampshire has 48 mountains that are 4000 feet above sea level and Osceola is the 24th highest of the 48 4000-footers, coming in at 4,340 feet.  This was named for the 19th century Seminole leader.   I’m not sure why they decided to name a mountain in New Hampshire after a Native American in Florida, but his name is also the name of cities in Missouri and Wisconsin.

The hike up Osceola was quite rocky.  This is one of those hikes where you do have to watch every step you take and your feet and knees will feel it after the hike, especially if you aren’t wearing good shoes and using trekking poles.

Nice View at the Top of Osceola
Christine takes in the nice summit view. Below: Muddy dog; View into Waterville Valley; Crowds atop the summit.

Muddy Dog on Osceola Waterville Valley View Popular Mount Osceola

The trail starts off in a lush forest area and continues a steady, uphill climb until you reach the summit.  The trail is fairly slow-going with the rockiness of the terrain.  We were one of the first of the day to start the trail, but we were passed by someone that was trying to get to his work-crew assignment.  The forest is so thick along the way.  I felt I should get some views earlier on in the hike, but the tall trees keep the scenery at bay.  Some of the rocky sections are larger flat rock faces that become very slick after heavy rains.

As Christine mentioned, there is just one straight trail here until you reach the summit.  At 3 miles, after ascending some larger rock face sections, the trail begins to rise as you reach the top of the tree line.   Right before the summit, there are a few side trails on both sides (one to an obstructed view and the other to a rough campsite), but the summit was absolutely gorgeous.

Hiking Down
Some scenes hiking down the mountain. Below: Whorled Asters (I think!)

Aster

As we got to the summit, we were amazed at the views of the ridgeline of mountains to the left.  This is scenery that pictures will never do justice.  We climbed down to a lower rock shelf to get some of the dramatic shots above.   This was one of those hikes that it was hard to convince ourselves to leave.    We made our way down with a faster pace and made it back to our car in under 1.5 hours.   It was a great finish to our vacation and covering a few new hikes in New Hampshire.

Trail Notes

  • Distance – 6.4 miles
  • Elevation Change –  2010 feet
  • Difficulty –  3.  This is a squarely moderate hike.
  • Trail Conditions – 3.5.  Everything in this area is rocky and challenging.
  • Views – 5.  Very beautiful and expansive!
  • Waterfalls/streams  0.  Other than a few trickles down the mountainside, this hike was dry.
  • Wildlife – 2.  Birds, chipmunks, and squirrels
  • Ease to Navigate – 4.5.  Very easy to follow – pretty much a straight shot on the one trail in the area.
  • Solitude – 2.  This is a popular hike due to it’s moderate climb.

Download a trail map (PDF)

Directions to trailhead: From I-93 North, take exit 28 for NH-49 toward NH-175/Campton/Waterville Valley.  Turn right and go 10.2 miles before turning left on Tripoli Road.  Tripoli Road is closed during the winters, so plan ahead.  Go 3.9 miles on the gravel Tripoli road until arriving at the parking lot on the left.  The trailhead is at the end of the parking lot.  There is a parking fee of $3 to park here at the Osceola trailhead. Coordinates: 43.983383, -71.559277

Mount Monroe (NH)

Special: New Hampshire Edition

Introductory Guide to Visiting the White Mountains

Mount Monroe is the fourth tallest peak in New Hampshire’s Presidential range.  You can hike to its summit from the valley floor – the Ammonoosuc Ravine trail is the most popular route – or you can make it an easy day hike by driving the auto road and starting from the summit of Mount Washington. This option makes a 3.8 mile hike with just 1,343 of climbing.  It’s a laid back way to visit this area with minimal effort.

View the Full Album of Photos From This Hike

Mount Monroe Summit
Clouds cleared as we stood on the Mount Monroe summit.  From the top of Monroe we could see the weather towers atop Washington.

Adam Says…

We hiked just about every day on our vacation, and hiking in the Adirondacks and the White Mountains usually involves tough climbs along granite-filled pathways.  We wanted to do one of the mountains in the Presidential Range in New Hampshire, but our bodies were asking something easy. So, we decided to drive up to Mount Washington and hike down and over to Mount Monroe.

We got an early start to try and beat the traffic and crowds on the slow-going Mount Washington Auto Road.  The drive up can be a harrowing experience.  As you are skirting the edges of precipitous drops, you are praying that another car isn’t coming down the mountain (another reason to get an early start).  The views are breathtaking on a clear day, but the driver may have to focus on the road more than the scenery.

Descending the Crawford Path
We made our way down the Crawford Path/AT from Mt. Washington.  You can see the area is extremely popular on pleasant summer days.  Below:  Adam at the Crawford Path;  One of the Lakes of the Clouds Croo members carries supplies; MWOBS equipment in the fog.

Crawford Path Sign Croo Observatory Towers

We found our way to the weather observatory building and found the white blaze which signified the Appalachian Trail (here called the Crawford Path).  The fog was thick on the mountain as it often is.  We made our way descending on the Crawford Path, following the cairns that guided us down a path off the summit.  There are people that have gotten lost and died on this mountain and I can understand why.  With limited visibility a person could easily miss a cairn.  Add the high winds and quick weather changes and this can truly be a dangerous place.  We had enough visibility to see the next cairn ahead and once we were off the highest parts of the mountains, we had better visibility of the trail.  At .2 miles, we came to a sign that showed that we had 1.4 miles to the Lakes of the Clouds hut, one of several huts maintained by the Appalachian Mountain Club.

The descent was very rocky and slow-going, but we managed to make it to Lakes of the Clouds fairly quickly.  The fog had us completely socked in and we couldn’t even see Mount Monroe when we arrived.  Lakes of the Clouds is probably our favorite of the huts in the White Mountains.  The remoteness of the hut, the serenity of the mountain-top lakes, and the views of the valley and Mount Washington make this such an amazing experience.  We ate some lunch inside the hut and decided to wait a while.  We eventually got some glimpses of Mount Monroe from inside the hut.  The clouds started to blow off somewhat.  At one point, I told Christine that I thought we should make an attempt to reach the summit.  My thought was if the clouds continued to blow, we may get a glimpse of views from the summit.   So, we gathered our gear and hiked up in the fog.  The wind had picked up, but we were hoping this was a good thing as it would carry some fog off with it.

Hut Comes into View
The hut comes into view. Below: Lakes of the Clouds Hut with Mount Monroe looming in the background; Christine arrives at the hut; Inside the hut… it was surprisingly uncrowded!

Lakes of the Clouds Arriving at the Hut Inside the Hut

The hike up Mount Monroe was steep but only a short few tenths of a mile.  We got to the top (the summit marker is only a small metal nub sticking up from a rock) and within minutes the clouds began to part and we got gorgeous views down below. We timed our trip perfectly and there was only two other people at the top.  Our ability to see views for a while seemed to rotate in patches around the mountain as clouds continued to pass.  It eventually opened up all around us and we were glad we made the break for it when we did.  After taking an ample number of photos, we descended back to Lakes of the Clouds and then back up to Mount Washington.  The fog got thicker again as we made our way back to the summit of Mount Washington.  We posed for our ceremonious summit photo and then got back to our car to descend back down the mountain.

Christine Says…

Many people think a hike only counts if you start from the bottom of the mountain. Call me a cheater, but I don’t care!  This summer, we took the auto road to the top of Mount Washington so we could enjoy exploring the alpine zone without doing all the work.  In 2013, we hiked up the Ammonoosuc Ravine and on to the summit of Washington.  On that trip, we skipped summiting Mount Monroe due to time constrictions. This trip gave us a chance to make up for what we missed!

Climbing Mt. Monroe
Adam makes his way up Mt. Monroe. Below: Climbing the mountainside; Tiny people perched on an outcropping; Christine near the summit.

Climbing Mt. Monroe Climbing Mt. Monroe Climbing Mt. Monroe

All week long, we had been checking the MWOBS higher summits forecast. Thursday, August 7 looked like it would be the best chance – with clearing skies, calm winds, and warm temperatures. We paid our toll and made our way to the top. The auto road has been open since 1861 and climbs 4,618 feet over 7.6 miles.  It’s a beautiful drive with great views for much of the way – only problem… we were in the clouds! Our clear day turned out to be not-so-clear at all!  Every now and then, the veil would thin enough that we could make out the hulking shapes of Clay, Adams and Madison across the gulf.

We were both a little disappointed with the clouds, but you never know how the weather is going to change on Mount Washington.  We pushed forward with hopes for clearing skies.

Climbing Mt. Monroe
Nice views from the summit.  The Appalachian trail is the ribbon of path in the distance.  Below: Descending the mountain; The lake comes back into view; View behind Lakes of the Clouds Hut.

Mt. Monroe Descending Monroe Passing Back by the Hut

From the summit buildings, we looked for white blazes and found our way to the marker for the Crawford Path (which is also the Appalachian Trail in this part of the state). From there, we hiked 1.5 miles to Lakes of the Clouds Hut.  The trail is all rocks and is marked with a combination of cairns and blazes.  The clouds were so thick it was almost like walking through white cotton candy.  The oddest part was the warmth and utter windlessness of the day.  I’ve never been in the Presidentials on a dead calm day.  I think the lack of a breeze was a big part of the reason the clouds were able to linger on the summits for such a long time.

Even in full cloud cover, the terrain of the mountain is incredibly beautiful!  It feels almost other-worldly.  Eventually, the clouds cleared enough that we could make out Lakes of the Clouds Hut in the distance.  There were many, many people scrambling both up and down the mountain.  It’s definitely earned the nickname ‘Lakes of the Crowds’.  Adam and I decided to hang out in the hut for a while and see if we could outlast the clouds -they did seem to be thinning.

Lakes of the Clouds
The lake was even prettier on the hike back. Below: Climbing back up Mount Washington with Monroe in the background; Christine takes a final look back;  The cog tracks at the Washington summit.

Hiking Back Up Hiking Back Up Cog Tracks

As we sat at one of the long tables, we saw the side of Mount Monroe emerge from the clouds.  If we were going to get a view, our time was now!  We made the short half-mile climb to the top of Monroe.  Although the mountain is a short, easy climb from Lakes of the Clouds, it’s still New Hampshire’s fourth tallest peak at 5,384 feet.  The summit was still in the clouds when we got to the top. But as we sat on the summit, a breeze picked up and within a matter of five minutes the view had completely opened.

We could see Mount Washington with the observatory towers on top. We saw Franklin and Pierce off in the distance.  We could see the cog station and the grand Mount Washington Hotel.  We could even see tiny hikers walking the Appalachian Trail below the summit.  It was breathtaking!

After a while, the clouds started to filter back in.  I was so grateful they opened for the briefest few minutes for us to enjoy!  We made our way back down to the hut, which had emptied out of the crowds from just 45 minutes earlier.  I guess everyone took advantage of the same opening in the weather!  We snacked on cake made by the Croo and then set out to climb back up Mt. Washington.

Summit of Mount Washington
Summit of Mount Washington.

On the way back up the mountain, the cotton candy clouds dropped over us once again.  By the time we reached the top of Washington, they had partially cleared off again.  We had our photo taken at the summit marker.  We spent a little time in the summit building, too.  Over the summer, they completely renovated the weather observatory museum.  It’s really nice and spacious, but they took away a few of our favorite exhibits – including the funny video of people trying to eat breakfast in famous Mount Washington winds.

The high summits went in and out of the clouds all day, but I still think we chose the best day of the week to visit.  Other days had thunderstorms and hail.  Compared to that, passing cloud cover is no problem!  All in all, we ended up hiking about 4 miles with 1,350 feet of climbing.  It was a fun and easy way to visit a challenging mountain.

Trail Notes

  • Distance – 3.8 miles
    (Check out the stats from Map My Hike)*
  • Elevation Change –  1343 feet
  • Difficulty –  3.  The elevation isn’t too tough, but the rockiness of the terrain adds to the difficulty.
  • Trail Conditions – 2.  Very rocky and many of the rocks are quite loose.  You have to always watch your feet.  
  • Views – 5.  On a clear day, they are quite spectacular.  
  • Waterfalls/streams  0.  Non-existent.
  • Wildlife – 1.  You won’t see any wildlife above treeline here other than a few birds.
  • Ease to Navigate – 2.5.  Marked down because you have to follow cairns and occasional blazes.  This can be extremely tough in foggy or bad weather.  On a clear day, this will be much easier.
  • Solitude – 2.  In the summer, you will always find people along the trail.  Mount Washington always attracts a lot of people.  You will likely also find many people in Lakes of the Clouds.  

Download a trail map (PDF)

Directions to trailhead: From Gorham, NH head south on NH-16 for 7.8 miles.  Take a right to get on to the Mount Washington Auto Road.  Pay at the gate (in 2015 was $28 per car and $8 for each additional passenger) and follow the road to the parking lot at the top. Coordinates: 44.269644, -71.302659

MapMyHike is not necessarily accurate, as the GPS signal fades in and out – but it still provides some fun and interesting information.


Hedgehog Mountain (NH)

Special: New Hampshire Edition

Introductory Guide to Visiting the White Mountains

Hedgehog Mountain is tiny compared to most of its neighbors, but this 5-mile hike still packs in tons of scenery and great views.  The ledges are also a super place to stuff your face with wild blueberries!

View the Full Album of Photos From This Hike

Hedgehog Mountain
The ledges along the side of Hedgehog Mountain offer great views of bigger mountains.

Christine Says…

After arriving in New Hampshire and hiking Mt. Major, we took a couple days off hiking to relax and spend time with family. The combination of daily hikes in New York paired with not sleeping or eating enough really wore me out.  So we took it easy and did other fun things like exploring Franconia Notch State Park, paddling kayaks across quiet ponds,  sampling craft beer at Schilling (Littleton, NH) and Long Trail (Bridgewater Corners, VT), and stuffing our faces with Cabot cheese and pastries from King Arthur Baking Company. By Wednesday, we were ready to hike again.  Our second hike in New Hampshire was a repeat trip to visit beautiful Lonesome Lake.  Our third hike was something entirely new – Hedgehog Mountain. It’s the most diminutive of New Hampshire’s ’52 With a View’ – a collection of the state’s nicest view hikes on mountains under 4,000 feet.

We started out the morning with a big breakfast at Polly’s Pancake Parlor.  Then I went for a short paddle with my dad across and around Echo Lake.  By 10:00 a.m., Adam and I were on our way across the mountains on the scenic Kancamagas Highway.  We parked at the Downes Brook parking area and paid our $3 parking fee.  The summit of Hedgehog is accessed by the UNH Loop Trail.  The trail gets its name from an old University of New Hampshire forestry camp that operated at the mountain’s base from the mid-1940s until 1964.

Old Railroad Grade
A railroad used to run along this section of wide, flat, open trail. Below: Early in the hike we passed this clearing.  The clearing work looked recent, but we’re not sure what’s planned for the land; Pretty forest along the trail; Everything was so shady and green.

Clearing Along the Trail Pretty Forest Along the UNH Loop Walking the UNH Loop

There were just a few cars in the lot, so we knew we would have a relatively quiet hike. We decided to hike the loop clockwise, allowing a more gradual ascent followed by views of the Presidentials on the way down.  The hike starts off along a lovely pine-shaded trail following the route of the old Swift River Railroad.  The hike climbs gradually, passes a clearing, and soon reaches a sign indicating the beginning of the loop portion.  We chose to turn left and cross the east ledges before reaching the summit.

For 1.2 miles we walked through a peaceful pine forest.  The climb was steady, but quite gentle.  There were roots and rocks, but they were always padded by fallen pine needles.  As we hiked on, the route became steeper and rockier and eventually opened onto bare cliffsides and ledges with magnificent views of so many big mountains – the Tripyramids, Carrigain, Chocorua, and Passaconaway.  Most of the ledges were wide and generous, but one section in particular was narrow and precipitous.  There were blueberries growing everywhere!  From the ledge, we could also see the last steep section of trail we had to climb to reach the summit.  The ledges were definitely my favorite part of the hike!

The last bit of climbing to the Hedgehog summit was steep – definitely more challenging than I expected on this loop!  At first we passed through a tangle of roots and boulders.  The higher we climbed, the roots gave way to smooth granite slabs and boulders that required scrambling.  I told Adam at one point that I was very tired of putting my knees down on granite!  Granite gives me so many bruises. The actual summit had nice views, but (in my opinion) the view from the lower ledges had been nicer.

UNH Trail Rocks and Roots
The trail became more covered with rocks and roots as it climbed. Below: Christine climbs toward the ledges; Towering pines; Adam finally clears the woods to get our first views of the day.

Climbing Toward the Hedgehog Mountain Ledges Pretty Pines First Views on the UNH Loop

Leaving the summit, we spied glimpses of the Presidentials off in the distance.  Evidently, on clear days one can even see the weather observatory atop Mount Washington.  We weren’t that lucky.  The descent was much rougher and steeper than the climb up.  I was really glad we had gone clockwise!  On the way down, we took the short spur trail to Allen’s Ledge.  The rocky outcropping offers a chance to take in a final sweeping view of many of the area’s bigger mountains. From Allen’s Ledge, the rest of the hike was a moderate descent back to the old railroad grade.

Over the course of the day, we only saw three small hiking groups.  That’s great solitude for a nice summer day in the White Mountains!  We would definitely recommend this hike if you’re looking for great views and don’t feel like tackling a 4,000-footer.

After the hike, we decided to drive into North Conway and look around the shops and have an early dinner at one of our favorite stops – Moat Mountain.  They brew a nice selection of beers and have fantastic food.  It was so tasty; I think I finished an entire half pound burger and all my fries!

Nice Views from the Ledges
Christine enjoys nice views from the ledges. Below: There were lots of slab of granite to traverse; In one place, the trail across the ledge was quite narrow; Walking across the ledges, you can see the rocky summit of Hedgehog Mountain.

Adam Crosses Slabs and Roots Traversing Narrow Ledges View of Hedgehog Summit

Adam Says…

As Christine mentioned, we started our day off a little later than normal.  It was a gloomy morning, with fog settled in.  Since Polly’s Pancake Parlor and Echo Lake were quite a distance from our home base, we decided to take a separate car from her parents and take off on our hike after we had done our morning activities with them.  When Christine and her dad went paddling earlier on Echo Lake, it was cold and there was a little bit of drizzle.  I can’t swim so I don’t like being on a canoe or kayak.  I was quite content to watch Christine and her dad go out paddling on the peaceful, yet foggy waters.

We were worried it wouldn’t warm up or be able to see the sun on our hike.  Two things that hiking in New England has taught me is to be patient and be an opportunist.  There have been a lot of hikes that we have done in the White Mountains that if you wait a few minutes, clouds may break.  So, we took our time that morning knowing that our best chance of seeing views would be a little later in the day.

Wild Blueberries
The ledges of Hedgehog Mountain were covered with wild blueberries. Below:  There was a wooded saddle between the ledges and the summit; The last bit of climbing to the summit was very steep and slick.

Saddle Between Ledges and Hedgehog Summit Granite to Climb

The trail started off very flat through a tunnel of pine trees.  After a short distance, it takes a sharp right and begins to ascend.  Within a few tenths of a mile, the trail crosses over with a clearing, but stay straight on the trail.  The trail continues on an ascent, but the terrain wasn’t too difficult.  With the morning activity of paddling, Christine bonked a bit so we paused to eat an energy bar before continuing onward.  The trail became a little steeper and more narrow as we navigated through some interesting terrain with pine trees and granite steps.  There were a few obstructed views along the way.  The woods were so quiet it was eerie – we felt a bear would jump out at any minute in this deep wilderness.  Eventually the trail became quite steep and rocky, leading to larger granite steps.  The trail soon popped up to some gorgeous cliffside panoramic views.  Not reading about this on trail reviews we found online we were quite surprised.  We navigated the cliffsides, going back into woods for a short time before coming out onto a large shelf of granite.  We spotted the summit above us, but below us were tons of blueberries.  We picked a few and enjoyed the gorgeous mountain and valley views around us.

View from the Hedgehog Mountain Summit
The summit view was not as nice as the view from the ledges. Below: On the way down, we could see a glimpse of the Presidentials.

Presidential View

The trail ducks back into the woods and descends a short bit through some thick forest.  There were blowdowns across the trail and the cobwebs were thick in places, making me think that many people don’t come on this section of trail to make it a loop.  The trail then began to ascend again through some very steep and rocky sections, requiring us to pull ourselves up with our hands in a few areas.  We finally reached the summit.  We ate a snack, talking with a woman who had done much hiking in the Whites while enjoying some obstructed views from the summit.  We both agreed that the views from below were more exceptional than the summit views.

As we were making a loop hike, we continued on and found another obstructed viewpoint to give you views of many of the Whites.  As Christine mentioned, we couldn’t see the summit of Mount Washington but we could spot a few of the Presidential range in the distance.   The return trip was quite steep and we were treated to a few views on the climb down, which you would likely miss if you did the loop in the opposite direction.  On our descent, we found a small side trail that led to Allen’s Ledge.  Allen’s Ledge also had some nicer views than the summit.  We relaxed at this spot for a few minutes before rejoining the UNH trail and making our way back down the mountain.  Before too long we had rejoined the loop where it split and returned to the parking area.

Steep Descent of Hedgehog Mountain
The descent of Hedgehog was quite a bit steeper than the climb up. Below: Allen’s Ledge; Eventually the descent leveled out.

Views from Allens Ledge More Gradual Descent of Hedgehog

While it isn’t as popular as some other hikes in the area, if you want some seclusion with great views, check out Hedgehog Mountain.   We were pleasantly surprised at how gorgeous the views were and the interesting terrain along the trail makes this a rewarding hike.

Trail Notes

  • Distance – 5 miles
  • Elevation Change –  1312 feet
  • Difficulty –  3.5.  There are a few steep, rocky sections, but most of the trail is gentle.
  • Trail Conditions – 3.5.  The trail is adequately maintained, but expect lots of rocks and roots.
  • Views – 4. In Virginia, these views would warrant a 5, but there are even grander views in this area.
  • Waterfalls/streams  0. None.
  • Wildlife – 2. Other than birds and squirrels, we didn’t see wildlife.
  • Ease to Navigate – 3.  There were a couple tricky spots, like the clearing early on the trail, but generally this was an easy route to follow.
  • Solitude – 4. By White Mountains standards on a nice summer day, we enjoyed quite a bit of solitude on this hike

Download a trail map (PDF)

Directions to trailhead: From Interstate 93, take exit 32 (NH-112E).  Follow NH-112E for 22 miles.  Parking is on the right in the Downes Brook – Mount Potash lot.  Parking Coordinates: 43.9960876,-71.3688126

Mount Major (NH)

Special: New Hampshire Edition

Introductory Guide to Visiting the White Mountains

Mount Major is a short, extremely popular hike in the Lakes Region of New Hampshire.  The summit offers excellent views of Lake Winnipesaukee.

View the Full Album of Photos From This Hike

Mount Major Summit
The summit has superb views of Lake WInnipesaukee. Below: Parking issues at the Mount Major Trailhead; The trail is well-marked and blazed blue; The lower part of the trail is very eroded.

Parking Issues at Mount Major Start of the Mount Major Trail Erosion on Mount Major Trail

Adam Says…

Hiking Mount Major seems to be a rite of passage for anyone that is visiting the lakes region of New Hampshire.  This has been a popular spot for hiking for a long time.  We had just hiked Mount Marcy two days before and our muscles were still recovering, but it was my 44th birthday and I wanted to celebrate with the views from a summit.

We got to the parking lot fairly close to 10:00 a.m. and the lot was completely full.   We began to see how popular this trail actually was.  We parked along the side of the road and then proceeded through the parking lot to the trailhead.  We noticed one car that was parked in a way that took up three spots.  Someone had left a note on their windshield letting them know just how they felt about their parking job.  New Englanders don’t mess around.

From the parking lot, we followed the main blue trail.  The trail was a wide, worn path through the woods.  When you are walking on a clear, dirt path you know this is a well-used trail.  The hike was uphill for the first few tenths of a mile, but levels out at .3 miles.  We enjoyed some flat walking through the trees.  At .7 miles, the trail reaches a junction.  Take a left to stay on the main, blue-blazed trail.  The trail begins to steepen at this point and becomes more rocky.  As we climbed up on our approach to the summit, you approach some more exposed large sections of rock that you can walk up or you can take a rugged trail up the side.  We opted to walk on the open rock surface on the way up, but chose the path on the way down.  As you walk on this open rock surfaces, you can look behind you to see the beginnings of some great views of Lake Winnipesaukee.    The trail was quite steep at this point and you have to be careful as you navigate up these large, rocky areas.

Wide Flat Mount Major Trail
For a time, the Mount Major trail is wide and flat. Below: The trail junction of Mount Major and the Brook Trail; The trail gets rockier; The trail went back and forth between open rockiness and shade.

Mount Major Trail Junction Rockier Trail Spots of Trees

Around the 1.6 mile mark, we reached the large open summit.  There were tons of people at the top, but because of the large area, you can always find a place to enjoy to yourself.  The wind was whipping across the summit.  We went to the summit marker that has a large rock foundation built around it.  We sheltered ourselves from the wind and ate a snack at the summit.  After eating, we walked around in all directions to enjoy the views around us.  While staring out at the gorgeous views, you can easily lose track of time.

We descended the way we came, but there are many options to make this a larger loop hike if you so desire.  Sometimes I feel that popular hikes are often over-hyped, but this hike didn’t disappoint.  We saw plenty of families hiking together on this hike of all skill levels.  Just take your time and most people should be able to make the hike that are in decent shape.   This was a great start to a birthday celebration and the views of Lake Winnipesaukee are some of the best you will get.

Christine Says…

Hey – it’s great to be back in New Hampshire! We had a spectacular, sparkling, bluebird day to hike Mt. Major.  It was a perfect hike for Adam’s birthday.

Mt. Major is probably the most popular dayhike in the Belknap Range – and no wonder, with its relatively short distance and commanding views of Lake Winnipesaukee.  We hiked on a Sunday morning.  Arriving by 10:00 a.m., we found the parking lot already jam-packed with cars. Adam and I had to park our car on the shoulder of the busy main road.

Opening Views on the Climb Up
The views got nicer the higher we climbed. Below: Rock piles on the summit; People gather around the Phippens’ cottage; Birthday photo!

On the Summit Summit of Mount Major Posing on the Summit

The Mount Major trail is blue blazed and begins climbing uphill on an extremely eroded fire road. The erosion is so deep it makes the trail look like a chute.  The trail eventually levels out and follows a pleasant, nearly flat path.  At around the .7 mile mark, the trail splits into two – the Mt. Major Trail is sharply to the left and the Brook Trail continues straight.  We continued on the Mt. Major Trail – this is when the real climbing began.  The entire 1.6 mile hike only has 1,150 feet of climbing – most of it packed into second half.

After about a quarter mile of climbing along rocky trail, we passed a family taking a breather on a large boulder jumble. The adult couple was bickering bitterly about turning around or continuing to the summit.  We could tell by their clothes and shoes that they were not regular hikers.  When the man made the decision to quit, we overheard his young son exclaim loudly ‘Daddy… you’re a FAILURE!’  Poor guy!

The last bit of climbing was tough, so it probably was for the best that the family turned around.  I think a lot of novice hikers see a short, popular hike and don’t realize how challenging it can be to ascend 1,000 feet in three-quarters of a mile. There were lots of steep rock ledges and smooth domes of rock, punctuated by short passes through trees.  There were two trail choices for the last quarter mile – ledges or ledge detour.  To be honest, the trails were both pretty haphazard with people blazing all kinds of different paths to the summit.  As we made our way up, we paused to look back and enjoy the ever improving view.

Phippens Cottage
George Phippens built a summit cottage in the early 1900s. Below: A view off the other side of the Mount Major summit; The rocky descent; Christine takes in one last view on the way down.

View off the Back Descent of Mount Major One Last View from Mount Major

At 1.6 miles, we reached the rocky summit of Mt. Major.  SUPERB!  Lake Winnipesaukee, framed by distant mountains, sparkled all across the horizon. As expected, the summit was very crowded. At the top of the mountain, there are remnants of an old stone cottage.  Later, I did some research into the history of the structure.  The summit of Mt. Major was once owned by a private citizen. New Hampshire resident, George Phippens, bought the mountain summit for $125 in 1914.  He loved the views and the blueberries, and kept the mountain open to all. He built a cottage at the top for hikers to use as shelter, but the roof kept blowing off in the winter.  Eventually, the Great Depression came along, and ownership of the summit reverted to the Town of Alton to cover Phippens’ taxes.  Read more about Mr. Phippens and his love of Mt. Major.

Adam and I spent some more time enjoying the views before making our way back down the mountain.  Many people descend via the Brook Trail, but we just went down the way we had come. By the time we got back to the car, we were starving!  We decided we would eat at the first restaurant we passed – which ended up being the Wise Owl Restaurant and Country Store in Alton, NH.  It was late for lunch, so we were the only diners there.  The food was good, but it took nearly an hour to get a simple lunch.  I almost passed out from hunger while we waited! Reminder to self: eat more snacks!

Trail Notes

  • Distance – 3.2 miles
  • Elevation Change –  1150 feet
  • Difficulty –  2.  There are some steep and rocky sections of the trail.  Most people can make it if they take their time.  Keep an eye on children along the trail. 
  • Trail Conditions – 4.  Most of the trail is open and easy to navigate.  Some of the rock surfaces are slick, so be careful especially on rainy days. 
  • Views – 4.5.  Panoramic views from both sides of the summit. 
  • Waterfalls/streams 0.  Non-existent. 
  • Wildlife – 1.  This is a popular trial so wildlife know to stay away. 
  • Ease to Navigate – 4.  There are a lot of paths to make it a loop.  Consult the map and pay attention to blazes along the way. 
  • Solitude – 0.  This is one of the most popular hikes in New Hampshire, so you will likely see lots of people.  Go during the weekday or early mornings to avoid crowds.

Download a trail map (PDF)

Directions to trailhead: From Laconia, NH, take NH-11A for 11.1 miles.  Turn right on to NH-11 and go 3.1 miles until you reach the parking lot on the right for Mount Major.  The trailhead is at the end of the parking lot.  Take the main, blue-blazed Mount Major trail using the trailhead at the back right of the parking lot.  Parking coordinates: 43.519676, -71.272813

Mount Marcy (NY)

adirondacks

This 14.5 mile hike follows a moderate route to the summit of New York’s tallest mountain. At 5,343 feet, Mt. Marcy offers commanding views of the region from her above-treeline summit.  This is definitely the crowning jewel of a hiking week in the Adirondacks!

View the Full Album of Photos From This Hike

Mount Marcy Summit
The summit of Mount Marcy offers a spectacular view of the High Peaks region.

Christine Says…

For our grand finale in the High Peaks, we decided we had to hike New York’s tallest mountain – Mount Marcy!  After a day of rain (that caused us to bail out a mile short of the summit of Mt. Van Hoevenberg), we woke to bluebird skies and crisp, cool temperatures.  After a week of hazy, muggy conditions, we were going to get the prettiest day of our entire vacation week to hike the big mountain.  Perfect!

The hike of Mt. Marcy is almost 15 miles round-trip with 3,200 feet of climbing.  The trail is never horribly steep, but it’s still a long, challenging day for most hikers.  We set out early with our backpacks stuffed with essentials – several liters of water, multiple snacks, and warm layers for the summit.  We (once again) parked at the Heart Lake Program Center.

Despite our early start, there were crowds of hikers setting out for the day.  We never really had the trail to ourselves or experienced much solitude – not that we were expecting it on such a popular trail.  It was also one of those hikes that made me feel guilty each time I paused to take photos. At every photo stop, the slightly slower hikers behind us would catch up and pass us; only to have us on their heels saying ‘excuse me… may we pass?’ ten minutes later.  Because the crowd situation was a little stressful, I didn’t take a ton of photos on the ascent.

Marcy Dam Stream
Even though the pond disappeared when Hurricane Irene washed the sluicegate away, Marcy Dam is still very scenic. Below: Early parts of the hike were gentle and easy; The footbridge across the Marcy Dam; The dam spillway.

Early Flat Trail to Marcy Marcy Dam Bridge Marcy Spillway

The first couple miles of the hike were easy going – it was mostly flat trail through lush mixed forest.   The first notable landmark we reached was Marcy Dam.  Until Hurricane Irene struck in 2011, the dam held back the waters of a scenic pond.  When the monster storm passed over, it washed away the sluice gate leaving behind a nothing but a mud flat with a stream passing through.  When we hiked by, I was unaware of the history and still found the dam extraordinarily beautiful!  Mount Colden, Avalanche Pass, and Wright Peak still stood tall over still water full of cloud reflections.  The New York DEC is planning on removing the dam completely over the next few years, so who knows how the vista will change. Read more about the dam.

On the far side of the dam, we signed the trail register and began the climb toward the summit of Marcy.  The terrain was extremely varied – there were stream crossings, boulders, cobblestones, root jumbles, muddy spots, plank bridges, logs pressed into mud, and basic dirt trail.  The climbing was steady, but gentle almost the entire way to the summit.  One odd thing about the hike was that it was not very well-marked.  There were several major trail junctions that simply did not list the Marcy summit on the signs.  We consulted our map and hiking guide and were able to find the right way, but we met confused hikers at each junction.

Stream Crossing on Marcy
This stream crossing came shortly after passing Marcy Dam. Below: It was odd to see big signs stating ‘TOILET’ in the woods; The check-in station after crossing Marcy Dam; There was a bit of smooth granite early in the hike.

Toilets in the Woods Marcy Sign In Granite on Marcy

After passing through a stretch of trail with big logs pressed into the mud for footing, we reached a saddle on the mountain’s shoulder.  Plank bridges passed across an open, grassy marsh, giving us our first clear view of the bald, granite summit of Mount Marcy.

From there, the climbing became a bit more intense and steep.  We scrambled across granite faces and over boulders, following blazes and cairns along the way.  I didn’t particularly enjoy climbing up this part of the mountain.  I always feel like I’m slipping on smooth granite.  Also, my legs were covered with bruises from all the other rocks I’d climbed earlier in the week.  I’m like a ripe peach when it comes to bruising! At one point, I looked back at Adam and said ‘Seriously… more rocks.  I already look like an accident victim’.  Of course, Adam caught my expression on camera.  I’m not including that photo in the post, but it’s in the Flickr album if you want a good laugh.  I was not a happy hiker at that moment!

Marcy Cobbles
Much of the hike to the summit of Mount Marcy is covered with cobbles. Below: But there are also planks; And root tangles; And a bit of smooth, dirt trail.

Marcy Planks Marcy Roots Marcy Dirt Trail

We slowly but surely made our way to the top – and it was so worth it! What a spectacular view!  The Adirondacks almost rival the White Mountains of NH for their terrain and views.  The wind was whipping across the summit, so I put on my jacket and found a place to eat lunch.  I had tired of PB&J, so I had pepperoni, cheese, and crackers and half of the biggest cookie I’ve ever seen.  The day before hiking Marcy, we had stopped for lunch at the Big Mountain Deli and Creperie.  In addition to amazing sandwiches (all named after the High Peaks) and crepes, they also sell giant cookies perfect for giant hikes.  I definitely recommend a stop there if you’re in Lake Placid!

After a while on top the world, it was time to climb down. We slithered and slid down the steepest parts, enjoying views all along the descent.  When we got back to the marshy saddle that had given us our first view of Marcy, I noticed that one of my trekking poles felt shorter than the other.  I figured that heavy use on the descent, had forced the pole to retract.  However, when I went to adjust it, I found the entire bottom third of my pole was GONE. It was too late and we had covered too much ground to go back for it.  I was able to extend the middle third and use the remnant of my pole the rest of the way down, but I was so bummed.  Those were great Komperdell poles and they carried me over many miles.

The rest of the descent was pretty easy and passed by quickly.  Sometime after Marcy Dam, my right foot decided it had enough for the day and started cramping.  It really hurt, but I was able to hobble my way back to the trailhead parking. We were both pretty happy to see the car!  What a great day and what a fitting end to our first week in the Adirondacks.  We can’t wait to visit again!

Marcy Log Trail
In the wetter, muddier areas, layers of logs were used to create a passable tread. Below: Signage was sometimes sporadic and incomplete;  As we climbed higher we started getting views of the mountains; Entering the Alpine Zone; From a marshy area, we got a nice view of the summit of Mount Marcy. (sorry for the hazy smears on the photos – the lens got wet!)

Marcy Signage Starting to Climb
 Marcy Alpine Zone Marsh on Marcy Flank

Adam Says…

When we first planned our trip to the Adirondacks, we both had put on our goals to hike Mount Marcy.  Being the tallest peak in New York, it is a big draw to people living or visiting the North Country of New York.  When we arrived in the parking lot early in the morning, we kept seeing groups upon groups of people hitting the start of the trail.  I felt pressure to try and get started as we knew more and more people were going to get on the trail as each minute passed.  This was a beautiful day, so we knew it would be a little more crowded than normal.

At the beginning of the trailhead there was a large stack of rocks with a sign asking to carry one to the top of Mount Marcy.  We didn’t realize the full purpose until we got to the summit, but the goal was to bring some small rocks up for preservation projects.  We both grabbed a rock, signed the registry at the kiosk, and started the hike.  The trail starts off mostly flat, with very little elevation gained.  The trail began as a beautiful path through thick woods.  We crossed a footbridge through a marshy area.  Further up the trail, we passed a sign that pointed towards Fangorn Forest.  As big Lord of the Rings fans, we quickly got the reference – I said to Christine, “What madness drove them in there?”, a quote from the movie The Two Towers and we both chuckled.  Staying on the main trail, we came to a large junction at the one mile marker.  There are a lot of trails that criss-cross through the hike up Mount Marcy.  We saw a lot of people consulting maps trying to decide what to do.  We did the same and I bore us left at the junction following the direction to the Marcy Dam lean-tos.  The trail begins to climb a bit here.

Scaling the Summit of Mount Marcy
More views of the summit above treeline. Even though it appears tree-covered, the trees are stunted and leaned to the side.  The remainder of the climb from this point traversed granite boulders and ledges. Below: Lots of granite to climb on – some of it was quite steep!

Climbing Mount Marcy Scaling the Granite on Marcy
Climbing Mount Marcy Almost to the Top of Mount Marcy

At 2.3 miles, we arrived at Marcy Dam, a very picturesque spot to enjoy some reflective water with mountains ahead.  The trail winds down and then crosses the water on a longer footbridge, before leading to the other side with another perspective view.  You will come across signs on this side of the water crossing that are pointing to several lean-tos, bathrooms, and campsites along the way.  We found it strange to have toilets this far off the main trail.  We didn’t realize until our return trip that a ton of people like to camp out here.  Many of the groups that we saw heading on the trail go no further than to one of these campsites, so numbers on the trail can be misleading.

From the other side of the dam, we found another kiosk which we signed again and followed the signs that pointed us to Mt. Marcy.  The trail starts off with a gradual climb here.  At 3.0 miles, we reached a junction with a side trail that led to Phelps Mountain.  Peakbaggers seeking all of the 46 mountains over 4000 feet would follow this side trail to summit Phelps Mountain, #32 on the list, in 1.2 miles (2.4 miles roundtrip from this point).  We skipped Phelps and continued up the trail.  The trail became steeper and rockier.

Looking Back at the View
Along the way, we took lots of opportunities to pause and take in the view behind us. Below: We deposited our small stones on the collection pile.  They’ll be used to build up the protected alpine environment; View from the summit; Adam is happy to be at the top!

Rock Collection on Mount Marcy Descent View Adam on Summit

At 4.2 miles, we reached another junction, which seemed to be the most confusing.  There were no signs stating which way went to Mt. Marcy.  The sign was weathered and half of the letters were hard to read, which only added to our confusion.  We saw several people at this junction trying to figure out the correct path.  Staying straight on the trail would lead you to Table Top Mountain, but we had to take a right on this trail and up a few rock stairs to stay on the trail to summit Mt. Marcy.  At about 4.4 miles, we came to another junction,  We bore to the left, which was the correct path.  The trail continued to be rocky and wet from recent rain.

At about 6.2 miles, we reached a large clearing, which gave us our first views of the summit.  At about 6.6 miles, we arrived at another junction, bore right, and the views above began to open up as we headed above treeline.  The last .6 miles were challenging, with some areas requiring you to scramble up using your hands as well as your feet.  There were also some sheer, slick granite faces, so you had to pay attention and take care.  We finally reached the top at 7.25 miles.  The wind was whipping around us fiercely, but the views were absolutely breathtaking.  I would say these views compare very similarly to some of the views we have seen in Mount Washington and Franconia Ridge in New Hampshire, two of our favorite all-time hikes.

Summit of Marcy
We made it to the summit! Below:  Summit scenery; A well-earned giant cookie!

Summit of Marcy Summit Descent giant cookie

At the summit, there was another sign asking for everyone that carried their rock to drop it here.  While we stopped to eat a snack, we were greeted by a summit steward.  The Adirondack Mountain Club has hired people to talk to others at Mt. Marcy and other summits to educate people about the ecosystems and fragile plants that live on the top of these mountains.  They explained to us how the rocks we brought up would be placed to form barriers to protect plants from the wind and people.  I was amazed the ADK has people that hike Mt. Marcy every day to keep counts of people and talk to people at the summit.  We told the summit steward we have always wanted to be paid to hike and she was getting that dream job of ours. Read more about summit stewards.

We knew we had a long way back down, so we eventually pulled ourselves from the summit to make our way back down.  The views were so stunning coming down also.  On the way back down, I slid and pulled a muscle in my shoulder trying to stop my fall.  The mountains are no joke up here.

Summit Descent 3
After a nice stay, it was time to head down. Below: Steep descent and the last confirmed sighting of the bottom third of Christine’s trekking pole, Adam enjoys one last lofty view; Back into the woods for the rest of the climb down.

Summit Descent 4 Summit Descent 2 Adam Descending Marcy

We finally got back to our car after a long hike downward at 14.5 miles.  After the hike, we were completely beat.  We drove to Lake Placid and stumbled into Johnny’s, a pizza place.  I hobbled in and we ate in a pure exhausted state.

The memories on Mt. Marcy will last with me for the rest of my life.  It is an iconic mountain that definitely won’t disappoint if you can handle the climbing and distance.

Trail Notes

  • Distance – 14.5 miles
  • Elevation Change – 3200 ft.
  • Difficulty – 4.5.  It’s hard to give this a 5, because while the hike is long, it’s never a difficult hike.
  • Trail Conditions – 3. Parts of the trail are fantastic, other parts are a mess.
  • Views  5.  Spectacular, panoramic, top-of-the-world.
  • Streams/Waterfalls – 3. There are a few pretty streams along the hike.
  • Wildlife – 3. Red squirrels and lots of birds.
  • Ease to Navigate – 1.5.  With several junctions not giving good directions on which way to Mt. Marcy, bring along our map below and consult at every junction. 
  • Solitude – 1. This is a popular trail and you’ll see lots of people.

Download a Trail Map (PDF)

Directions to trailhead: From Lake Placid, go east on Rt. 73 to Adirondac Loj Rd., which is the first right after the ski jumps. The parking lots are 5 miles from Rt. 73. There is a $10/day parking fee. Park in one of the large lots near the High Peaks Information Center.  The trailhead is on the far side of the parking lot directly across from the High Peaks Information Center. GPS coordinates for this hike are: 44.1830461,-73.9644678

Rocky Falls & Heart Lake (NY)

adirondacks

This practically flat 5-mile hike takes you to a small, but lovely, double waterfall.  The pool beneath the falls is a great place to take a dip on a hot summer day.  After visiting the falls, the hike continues around the perimeter of Heart Lake.

View the Full Album of Photos From This Hike

Rocky Falls Feature
Rocky Falls is a small double waterfall. It may only be about 10 feet tall, but it’t located in a beautiful setting with an inviting plunge pool for swimming. Below: The trail is well marked and starts near the Adirondack Loj at Heart Lake; Entering the High Peaks Wilderness; Segments of logs are pressed into the trail tread to help manage muddiness and erosion.

Rocky Falls Trail Signage Entering High Peaks Wilderness Hiking Along to Rocky Falls

Adam Says…

As we were trying to mix up some easy hikes with some tough hikes in the Adirondacks, we settled on picking this easy hike to a nice waterfall.  This hike starts on the same path that led to Mt. Jo, beginning at the Heart Lake Program Center (the main hub for the Adirondack Mountain Club).  The trailhead parking at Heart Lake was $10.00 a day for non-members (ADK member parking was $5 and all prices went down by half for parking arrivals after noon.)   We recommend arriving early if you want to set out on any trail from this popular spot.

Stream on Rocky Falls Trail
There were several shallow stream crossings on the way to Rocky Falls.  Below: Some stream crossings had plank bridges; Signage along the trail; Gnarled tree roots.

Stream Crossing on Rocky Falls Rocky Falls Trail Signage 2 Neat Old Trees on Rocky Falls Trail

The trailhead starts to the right of the entrance station.  The trail starts off on a flat, easy path through the woods.  You pass the Heart Lake Nature Museum and then pass the junction to the Mt. Jo trail at .25 miles.  The trail stays flat and skirts along the north side of Heart Lake.  There are a couple of paths that lead down to the lakeside for peaceful views.  At .6 miles, you reach the junction that leads around Heart Lake, but stay straight on the trail.  Most of the hike is relatively uneventful, as you walk through some dense forest areas, with just a couple of stream crossings along the way.  We found very few people on the trail and it was an enjoyable walk slightly downhill.   At 2.0 miles, we reached a junction that showed the side trail to Rocky Falls.  It was only .2 miles to reach the falls.

When I had seen pictures of the falls online, the falls reminded me of two eyes with cascading tears.  We hung out a while at the bottom of the falls and were soon joined by a man with his two dogs.  They enjoyed jumping in the swimming hole and fetching a stick.  We could really tell they were having a great time and it was fun to watch their relentless pursuit.  There is a small path that leads to the top of the falls, but the most picturesque view is of the bottom of the falls.

Rocky Falls Wide View
A wide view of Rocky Falls and its plunge pool. Below: A different viewpoint of the falls; The pool under the falls; Looking downstream from Rocky Falls.

Another View of Rocky Falls Rocky Falls Swimming Hole Looking Downstream from Rocky Falls

We made our way back the way we came, now taking a slight uphill route from the falls.  At 4.0 miles, we came back to the junction with the trail that led around Heart Lake.  We decided to take this route in hopes of seeing the lake from a different angle.  This route actually led away from the lake so it didn’t provide any great views along the side as the northside did.  We passed through a short, open field used for skiing, but then came back into the woods.  We passed a few cabins and campsites along the lake.  At 4.5 miles, the trail met the lake again.  I found a nice bench and sat and enjoyed the serenity of the lake.  We then moved further down to the Adirondack Loj, where we saw several families that were out in the lake swimming, kayaking, and paddleboarding.  We read books by the lake for a while, enjoying the sunny day and then made our way back to the car.

One thing I feel is really special about this area is the ability for families to enjoy the outdoors in many different ways.  This hike and the surrounding areas is a great destination for people that enjoy the water, the views, and the hiking.  While I have seen more impressive waterfalls, this would be an easy family outing if you are staying nearby.

Christine Says…

Adam and I planned to hike Mount Marcy as the grand finale of our Adirondack week, so for Wednesday’s hike, we decided to stick with another easy trail so we could save our energy for our big, 15-mile route a couple days later.  Once again, we found ourselves setting off from the Adirondack Loj – it really is the heart of outdoor activity in that area.

Dogs at Rocky Falls
We saw many dogs – especially Labradors – at the falls.  Below: We enjoyed watching them dive, swim, and compete for their stick.

Dogs Swimming at Rocky Falls Dogs Swimming at Rocky Falls 2 Dogs Swimming at Rocky Falls 3

The trail leading to Rocky Falls was surprisingly flat and soft.  I had come to believe that everything in the Adirondacks was either slick granite, boulders, cobbles, or a tangle of gnarled roots; so terrain like this was a welcome surprise. The wide dirt path passed through beautiful shady woods.  Many of the muddy places along the trail had small logs pressed into the tread to make the mucky parts more passable.   It’s a clever, easy way to manage areas prone to wetness.

Another nice thing about the easy terrain was that it gave us a chance to cover ground at greater speed.  I’m not saying I like to rush through hikes, but sometimes complicated terrain slows you to just a mile an hour.  It felt good to stretch our legs and cover ground!  We reached the falls pretty quickly.  When we first arrived, there were a couple people climbing on the rocks above the waterfall, but we had the lower pool all to ourselves.  I was able to take advantage of some passing clouds to get a couple long exposure photos of the waterfall.  It was small, but very pretty.  The pool beneath the falls was very inviting.  I would have loved to go for a swim, but didn’t bring a towel or clothes to change into.

Crossing the Ski Slope
On the return hike, we followed the trail around the other side of Heart Lake. This took us by the Alice Waterhouse Ski Slope. Below: The trail didn’t follow Heart Lake’s shore very closely; One of the lean-to’s available for rent along Heart Lake; Canvas tents are also available.

eturn Hke From Rocky Falls 2 ADK Lean To Canvas Tent

After a few minutes, more people began to arrive.  The two dogs Adam mentioned were fun to watch, but they also meant I had to put my tripod away.  I don’t know what it is, but I am a wet dog magnet as soon as I get my good camera gear out!  Every time I tried to take a shot, they would come bursting out of the water and running in my direction at a full, water-spraying shake!  Oh well… I had already managed to take a few decent photos and really enjoyed watching the dogs dive and swim. When we went into Lake Placid the later, we actually ran into the hiker who had brought the dogs.  It turned out that he worked at Eastern Mountain Sports.  Funny… usually the people you pass on a day hike, you never see again.

After leaving the falls, we took the lake loop trail back to the Loj.  It was mostly walking through the woods.  Eventually we reached a cross country ski hill named in honor of Alice Waterhouse. Alice was an Adirondack legend – she hiked all the high peaks, skied, worked on trail maintenance, and volunteered her time working to preserve the area’s wilderness.  You can read more about her on the ADK Blog.

Heart Lake
After we finished our hike, we sat along the shore of Heart Lake and ate lunch and read books. Below: The Adirondack Loj; Heart Lake is clear and cool – a perfect spot to dunk tired feet.

ADK Loj Wading

After passing the ski hill, we quickly reached the lakeside camping area.  The lean-tos were really cute.  They reminded me of the Appalachian Trail shelters we see through much of Virginia.  It would be nice to camp there someday!  Before we knew it, we were back at the Loj.  We had packed a picnic of peanut butter sandwiches, chips, and cookies.  I bought more cold drinks from the info center and staked out a nice spot with two Adirondack chairs overlooking Heart Lake.  We spent the afternoon relaxing and reading books.  We watched people paddling the lake and even spotted a loon diving.  What a nice place to watch the world pass by.

Trail Notes

  • Distance – 5 miles
    (Check out the stats from Map My Hike)*
  • Elevation Change – 377 ft.
  • Difficulty – 1.5.  This trail is a rarity by Adirondack standards – the trail was flat and mostly dirt.  We think most people could easily manage this hike.
  • Trail Conditions – 4. The trail was in great shape with only a few muddy spots.
  • Views  2.  Views of the mountains across Heart Lake are pretty, but there are no lofty vistas on this hike.
  • Streams/Waterfalls – 3.5. The small double waterfall is the main point of this hike.  It’s a pretty spot, but there are more impressive waterfalls in the area.
  • Wildlife – 2. The area is heavily traveled and popular with families and dogs.  I wouldn’t expect to see lots of wildlife. Although, we did see a loon on Heart Lake.
  • Ease to Navigate – 4. Trails are generally easy to follow and well marked.
  • Solitude – 2. This is a popular trail in a busy area.

Download a Trail Map (PDF)

Directions to trailhead: From Lake Placid, go east on Rt. 73 to Adirondac Loj Rd., which is the first right after the ski jumps. The parking lots are 5 miles from Rt. 73. There is a $10/day parking fee. From the parking lot at the High Peaks Information Center at the end of Adirondak Loj Rd. return to the entrance station and find the trail at the far corner of the snowplow turnaround. GPS coordinates for this hike are: 44.1830461,-73.9644678