The Virginia Creeper Trail is a picturesque rails-to-trails path that winds its way for thirty-four miles through the Mount Rogers recreational area. The trail starts in Whitetop and ends in Abingdon, with Damascus sitting right in the middle.
We biked the Creeper section from Whitetop to Damascus on a rainy day many years ago. We planned to do the whole thing that day, but the rain became a heavy downpour and it was too muddy to enjoy biking. We tried to come back a couple times to bike the second half, but were foiled by more rain and tornado damage. Last summer, we finally made it back to officially finish the remaining 16 miles between Abingdon and Damascus.
We have our own bikes, but they were badly in need of tune ups, so we left them home and rented from Blue Blaze Bike and Shuttle in Damascus, Va. Adam rented a mountain bike and I decided on a cool, purple cruiser. The trail’s terrain is generally smooth and covered with small gravel, so I decided to go with plush comfort rather than more rugged equipment. The rental shop was affordable and their bikes were impeccably maintained.
We booked seats on their first shuttle van of the day, and ended up being the only riders. Our driver was fun to talk to and was a regular hiker and biker. The shuttle took us from the shop back to mile zero in Abingdon, Va. From there, it was a mostly flat 16 mile ride back to their shop.
The section from Whitetop to Damascus is far more popular than the section we did this time – it’s a little more scenic and it’s all downhill, so it requires very little exertion. Our ride was still very easy, but we did have to pedal! The nice thing about biking the less popular half on a weekday was that we practically had the whole trail to ourselves. We saw just a handful of other runners and cyclists. The Creeper can get very crowded and congested, so this was a treat!
The main things to see along the Creeper Trail are beautiful waterways and railroad trestle bridges. The section we rode passed mostly through farmland, whereas the other half is more wooded. It was still really pretty, and the breeze from riding the bike made the heat bearable.
We stopped for a short snack and drink break at Alvarado Station about 8.5 miles into our ride. The station was once a railroad stop halfway between Abingdon and Damascus. It is the only stop for snacks and restrooms on this half of the trail. Across from the restroom building, there was a nice trailside park with a pavilion and porch swings. We sat by the river and enjoyed the view. We even saw a heron!
After our break we pedaled the remaining seven-ish miles into Damascus. The last mile or so follows the main road into town, so there are more road crossings and car noise. The nicest thing about trails like this is that the mostly keep car and bike traffic separated, so you always feel safe riding.
We got back into town, returned our rentals, got some lunch at Wicked Chicken Winghouse – another decent lunch stop in Damascus. Afterwards, we drove back to our AirBnB and picked up the dogs and took them for a two mile walk along the Creeper. After we got them nice and tired, we headed to Abingdon Vineyards to try some wine. The winery is dog friendly and has lots of outdoor tables along the stream. The day finished up with desserts from Anthony’s Desserts in Abingdon. If you’re in the area, this place has the most amazing sweets – don’t miss it!
More Photos
Trestle #1 on the Virginia Creeper
Biking on the Creeper
Crossing railroad trestles
Trestle #2 – they are all numbered and there are over 35!
Pretty farmland
Adam biking along
Taking a break in the shade
Alvarado Station park
Horses are welcome and common on the Creeper
My sweet purple cruiser
Some small rapids near Damascus
Pretty blooms along the trail
Bike selfie back in Damascus
Pugs on the Creeper!
Abingdon Vineyard
Wine flight
Don’t miss Anthony’s Desserts in Abingdon
Seriously – don’t miss Anthony’s Desserts! This is just half the case!
We did this 4.6 mile hike on an especially beautiful, misty summer morning. It was a moderate climb with lots of interesting things to see along the way – from an old sugar house to the headwaters of a flume gorge, to the lovely viewpoint.
Beautiful misty sunshine on the Kinsman Trail. Below: Trailhead sign; Early parts of the trail.
Christine Says…
This was the last hike of our 2017 trip up north. By the end of two weeks that involved five different dayhikes and a three-day overnight backpacking trip, we were both sore, bruised, and covered with bug bites and scratches. We were both pretty tired, but the weather was nice and we felt we should squeeze one more quick hike in before the long 12-hour drive home. The hike up the Kinsman Trail to Bald Peak was close to my parents’ house and didn’t look too grueling, so we decided it would be the perfect grace note on our wonderful summer vacation.
We parked in the lot for the Kinsman Trail on Route 116. We arrived early and there were plenty of open spots, however it was overflowing by the time we got back to the car around 11:00 a.m. The trailhead is popular as it provides access to the 4,000 footer, Mount Kinsman. Bald Peak isn’t a true summit, it’s a rocky outcropping on the shoulder of a mountain. While it might not be the pinnacle, it provides nice views and is well worth doing.
The first half mile of the hike meanders along single-track trail through the forest. The terrain is rolling and there are abundant ferns and shady hemlocks along the way. At .5 miles in, the trail will arrive a a junction with a wider, road-like trail. Take a right onto the wide trail. In a tenth of a mile, you’ll pass a neat, but overgrown, sugar house. It didn’t look like it had been used in many years. Follow the road/trail for another half mile before coming to another junction. Bear to the right, continuing to follow the steepening blue-blazed Kinsman Trail. Keep an eye out for the blue blazes to keep yourself on track.
This rundown, old sugar house is right along the trail. Below: Scenes along the Kinsman Trail
About .35 miles later, you’ll make your first stream crossing – there are several on this hike, along with several lovely (albeit small) waterfalls. The waterfall pictured below was at the second stream crossing. Continue following the Kinsman Trail for .65 miles to your third stream. This is Flume Brook. Once you cross the water, look for a small sign pointing to the right. Follow a spur trail steeply downhill along the gorge. The rock walls that make the flume are steep and deep, but you will hear water rushing in the gorge below. Be careful looking down into the gorge – the terrain around it is extremely steep and slippery. A fall here would necessitate a dangerous rescue operation if you even survived the initial plunge.
After enjoying the flume, backtrack up to the main Kinsman Trail. Hike a couple more short tenths of a mile uphill, and you’ll reach the next junction. Bearing to the left will take you up the Kinsmans, so stay to the right and head along the Bald Peak spur. The trail is blazed yellow and follows a short series of ups and downs for about a quarter mile. The spur was a beautiful mix of evergreens, moss, and granite. At the end of the spur, you’ll come out onto a wide rocky ledge. From the viewpoint, you should be able to see Mount Kinsman, Mount Moosilauke, and a great peek into Vermont. Once you’ve enjoyed the view, return to your car the same way you hiked up for a round trip of 4.6 miles.
Small waterfall on the Kinsman Trail to Bald Peak. Below: Mist in the forest; Small cascades; A look into the gorge.
Adam Says…
The Bald Peak hike had a lot of things that made us pick it – close by to where we were staying, waterfalls, plunging gorge, and view. This hike doesn’t get a lot of traffic except by locals since people will opt for bigger, grander views, but this one has a nice sampling of things to see.
The trail always seemed more of a gradual uphill and never felt too tough for us. In that first half mile, we came across the sugar house on the side of the trail. I peaked through the spaces in between the boards and saw some of the old materials used to collect maple sap inside.
Mosses on the Kinsman Trail. Below: The spur to Bald Peak; Hiking along the spur
We had picked a morning to hike this right after rain the previous day. The morning mist rising up through the trees caught the morning sunlight and the beams of light cast a mystical picture across the forest. The rain also made the hike slippery over some of the roots and rocks that you always have to step on in a hike in New Hampshire.
As Christine mentioned, when you pass over Flume Brook there is a small sign to view the gorge. We both started down this side trail, but it was incredibly slick. Christine stopped, but I decided I wanted to go further to see if I could actually be able to look down into the gorge. Christine was freaking out a bit that I was pushing on, but I did want to see if I could get some pictures. I went a bit further and actually slipped, sliding about 10 feet before I caught myself on the trail. One false step here could mean your death. The gorge was located just a few feet away from the trail and all I could see was that it went down quite a bit. There was never a good place to actually be able to see down into the gorge, so I would recommend skipping this feature – it’s too dangerous, anyway.
Bald Peak views. Below: More perspectives on the viewpoint.
When we reached the view at the top, I was impressed. It was a fairly clear morning so we could see all around us and far off to Vermont. We talked with a couple of women that loved to hike together that lived locally. They had been working on the 48 peaks above 4000 feet and had a lot of advice on places to hike in the future. We love picking the brains of local people for hiking suggestions. Many people that you may come across use this trail to go all the way to Mt. Kinsman without taking this spur trail to Bald Peak for an extra view. You will likely have solitude on this peak during most days. This was a nice final spot to take in some views of New England before heading back to Virginia.
Trail Notes
Distance – 4.6 miles
(Check out the stats from Map My Hike)*
Elevation Change – 1400 ft.
Difficulty – 3. Moderate and well-graded.
Trail Conditions – 3.5. The trail was nice, with some rocks and roots typical to the area.
Views – 4. Very nice, but not quite 360.
Waterfalls/streams – 4. The headwaters of the flume are pretty cool and there are several small waterfalls along the trail.
Wildlife – 3. Typical squirrels and birds.
Ease to Navigate – 4. The route was well-blazed/marked and easy to follow.
Solitude– 4. We only saw a handful of others along the way. This trail gets far less traffic than more popular hikes in the area.
This was a pleasant hike to a pretty waterfall located near a scenic backcountry campsite. At just under five miles with only 1100 feet of climbing, it’s one of the area’s easier hikes.
The water level was low from dry conditions, but the falls were still pretty. Below: Signage at the parking area; Early parts of the hike followed the road; The hike enters the woods.
Christine Says…
We stumbled across this hike in one of my parents’ hiking guide books. They had never done it, but the description sounded quite appealing for a quick morning hike. Trailhead parking is on Coppermine Road, a private gravel road off NH116. Be careful to park only in the designated area, so you don’t infringe on homeowner’s private property.
The first .4 mile of the hike follows the unpaved road. You’ll pass a number of private cabins as you walk. Look for yellow blazes and a hiker sign on the left side of the road. Follow the path into shady woods. The trees are a mix of evergreens, maples, and white birches. It’s a peaceful setting and a gentle uphill. At 1 mile in, Coppermine Brook meets the trail’s right side.
The remainder of the hike stays close to the brook’s path, so this is a great hike if you enjoy the sound of bubbling water. There are lots of places to leave the trail and explore the boulder-strewn streambed. When we visited, water was running low, so it was easy to hop rocks and stand in the middle of the stream without getting wet.
At 2.2 miles, the trail crosses the stream via a sturdy wooden footbridge. Another .2 miles beyond the bridge, you’ll reach Coppermine Shelter and the base of Bridal Veil Falls. The shelter is a three-sided lean to for overnight campers. The falls are behind the shelter, tucked into a small cliffside. The falls drop several times over granite shelves. To get to the prettiest view of the waterfall, you have to cross the bottom pool and climb up one of the granite shelves.
The Coppermine Trail climbs gently and is only moderately rocky. This small bridge crosses the stream just a couple tenths of a mile before the falls. Below: Typical terrain for this hike; Stream scenery.
When we visited, the granite was really slippery from a brief rain the night before. We scrambled up to a viewpoint and surveyed the area. Adam wanted to climb even further up to another higher pool at the point where the falls take their largest plunge. We discussed the best route, as it looked a bit perilous and tricky.
While we were talking about the scramble to the top, my parent’s hiking guidebook, which I had set next to my backpack, went sliding down the rocks and into the water. It careened down two drops of the stream before settling in a eddy in the pool at the very bottom of the falls. CRAP – the book was full of years’ worth of handwritten hiking notes! Adam scrambled quickly back down to the bottom of the falls and retrieved it. It was completely sodden and I felt awful about not being more careful with it.
Adam eventually made it to the higher pool and took some closer photos of the falls, but worrying about the book kind of took the luster off the rest of the hike. Eventually, we headed back the way we came in. The hike back was quick and all downhill. When we got in the car, I turned the air conditioning on full blast to dry out the book’s pages before they stuck together. It was pretty hopeless, though.
Despite the mishap with the book, we enjoyed the hike and highly recommend it.
Adam Says…
This hike was one of the easiest hikes we have done in the area. The hike to the falls is uphill, but very gradual. We never felt out of breath on this one, so it may be a good one for a family hike. The recent rain had left some of the trail quite slippery, especially near the final climb up to the falls. When Christine mentioned it was slippery, we had to scramble on all fours to be able to make it up, because our feet could not find purchase on the slick rock.
This trail has an interesting, yet mysterious, past to it. After hiking about 1.2 miles on the Coppermine Trail (a couple of tenths after the brook and trail meet), there is a plaque on a large boulder in the streambed. While we didn’t see the plaque on our trip, we read about it later. To find the plaque, look for an area that has a steep slope down to a flat area. The boulder sticks out into the stream about halfway along the flat area and the plaque is facing downstream. The plaque states, “In Memoriam to Arthur Farnsworth ‘The Keeper of Stray Ladies’ Pecketts 1939 Presented by a Grateful One”. According to a 1987 Magnetic North article, there is an answer to the meaning behind this mysterious message. Arthur Farnsworth worked at a resort called Pecketts, located in Sugar Hill. Farnsworth’s job at Pecketts was to make his guests feel most comfortable. The actress, Bette Davis stayed there in 1939 to relax after a tiring filming schedule. Bette Davis fell in love with the beauty and anonymity of this area, feeling she could escape the burden of her fame. The story to be told here is that she strayed away from a hiking party on this trail and Arthur Farnsworth was sent to find her. They fell in love and were married in 1940 and moved to California, but often came back to the White Mountains to visit. In 1943, Farnsworth died from a fall at their Sugar Hill home. Bette Davis continued to visit this area afterwards, but eventually sold her home on Sugar Hill in 1961. This plaque showed up during this time.
The last bit of climbing to the falls can be slippery. Below: Boulders along the trail; The Coppermine Shelter; The pool at the base of the falls.
As Christine mentioned, our hiking book fell into the water. To watch a book slowly go down the rocks and fall into the lower pool pictured above was worrisome. Knowing how long her parents had spent hand writing notes as a journal of all the hikes they had been on, we felt so terrible. Before we returned home with our soggy mess of a book, we stopped by the White Mountains Visitor Center and purchased two copies of the replacement book – AMC’s Best Day Hikes in the White Mountains. We bought two because we thought we would be permanently banned from borrowing books in the future. The book had been updated and now included a few more hikes. To try and make amends, I spent several hours that evening transferring all the notes from their previous book (miraculously still legible despite wet pages). Her parents were not upset, but I wanted to make sure we made it right.
We both highly recommend this hike if you want an easy day hike to do for a nice waterfall view. Just please keep your hiking book (or printouts from this website) in a safe place.
Trail Notes
Distance – 4.8 miles
(Check out the stats from Map My Hike)*
Elevation Change – 1100 ft.
Difficulty – 2. The climbing is gentle the whole way. The only challenge is scaling the rocks up to the base of the falls.
Trail Conditions – 4. This trail is only moderately rocky by New Hampshire standards.
Views – 0. There are no open views on this hike.
Waterfalls/streams – 4. The falls are small, but very pretty, The stream is also gorgeous. I wish we could have visited when there was more water running.
Wildlife – 2. Lots of birds and squirrels.
Ease to Navigate – 4. The trail is well-marked and easy to follow.
Solitude– 3. We saw a handful of people on our hike back, but had the falls to ourselves for almost half an hour.
Directions to trailhead: Parking coordinates are: 44.180903, -71.755717. Make sure you park in the designated parking area and nowhere else. This is a private road.
* MapMyHike is not necessarily accurate, as the GPS signal fades in and out – but it still provides some fun and interesting information.
This 2.5 mile hike passes a small waterfall and two beautiful rock crags. The views are pretty limited, but it’s still a worthwhile hike in the vicinity of Hone Quarry. If you visit in early July, the blooming Rosebay rhododendron is impressive!
Tony and Adam launched a drone from the top of Hidden Rocks. Below: Adam crosses Rocky Run – a small stream on the hike; The trail splits and makes a lariat loop near this pretty small waterfall; Blooming Rosebay Rhododendron.
Adam Says…
Hidden Rocks was truly trying to stay hidden from us. It took a while for us to find the location of this hike from another website, it was steering us about 35 minutes off course. We ultimately arrived at the correct parking area and met up with Tony and Linda from Hiking Upward to start our hike for the day. This hike is relatively easy and if you want to just do a quick, out-and-back hike to the main rock outcropping, you would be looking at around a two mile hike. We decided to make a loop out of this hike and at the time, there wasn’t a lot of information about this hike.
The hike started from the right of the parking area. The yellow-blazed trail starts fairly easily and consists of a few ups and downs, reminiscent of a roller coaster before finally descending down to Rocky Run which you will reach at .65 miles. Crossing the stream, you can see there is a smaller trail that branches to the right, but stick to the left. You will quickly come into a thick tunnel of rhododendron. You cross Rocky Run a couple of more times before reaching a small, scenic waterfall at .9 miles. Here, the trail splits as you will see yellow blazes that go to the left and right of the waterfall. Take the trail to the right of the waterfall (the left trail will be how you return on the loop) that leads steeply above the waterfall area.
A rock climber descending Hidden Rocks. Below: Christine and Adam atop Hidden Rocks; Ripening blueberries at the top of the crag; A sideview of Hidden Rocks.
In a short distance, we arrived at the base of the Hidden Rocks face where we came across a man rock climbing and rappelling off the structure. The trail skirts along the left of the rock base and then climbs steeply up some rocky steps. At the top of the trail, the trail splits. Head up to the right on some wooden steps to reach the top of the Hidden Rocks structure that you saw from the base a few moments ago. There was a campsite at the top and a couple of ledges that you could enjoy the view.
Tony set up his drone to take pictures and video of the area around us. We were hoping to get some shots of the rock climber, but he had just switched spots on where he wanted to climb, so it took him a long time to position ropes to start his rappel. Tony let me even steer the drone a bit which was a blast. Christine and I posed for a high elevation selfie before we packed up the drone and continued our hike.
We went back to where the trail split leading us to the rock outcropping and then continued on the trail. This part of the trail was less-traveled and narrow. After skirting along another large rock face, I found a break between two large rock areas and decided to explore. I had to climb by holding onto rocks and roots, making it not an easily accessible sidetrip that should only be done if you feel capable. I ventured out to the right and left areas of the rock. The rock to the right led to precarious footing and fearing I was going to look for a handhold and upset a timber rattler, I decided to not go any further on that rock. On the left rock, I found a way to climb to the very top and found a very small perch to enjoy some views that I thought were better than those on Hidden Rocks. I called back down to the rest of the group and Tony and Christine decided to climb up also. We then made our way down the steep decline and joined Linda back on the trail.
The trail descends rather steeply after this point, causing us to take our time make sure we had good footing. We reached another stream crossing at 1.4 miles and at 1.6 miles we were back at the small waterfall, completing the small lollipop loop of this hike. We retraced our steps and made it back to our car at 2.5 miles.
Christine Says…
We were thrilled to see Tony and Linda again for the second time in the span of just a few weeks! We were also pleased to have cooler, less humid weather for this hike (compared to the sauna-like conditions we had for our hike at Shrine Mont). The morning started off with a bit of chaos related to bad directions. We originally found the Hidden Rocks hike outlined on the Virginia Wilderness Committee website. Their write-up included GPS coordinates that took us to some random road – in the middle of nowhere – about 30 minutes from the actual trailhead. We arrived at their designated coordinates and found ourselves in the totally wrong place with no cell phone service. Fortunately, Tony and Linda were also running a few minutes late, and we all arrived at the trailhead parking around the same time.
The hike started off over a mini ‘roller coaster’ – with the trail steeply ascending and descending over a series of gullies and washes. Eventually, we descended a gentle hill down to Rocky Run – a shallow, winding stream. The trail was shaded by a tunnel of Rosebay Rhododendron that was just starting to bloom. At about a mile in, the route got a bit confusing when we reached a split in the trail near a small waterfall. The Virginia Wilderness directions said there was a loop trail, but added that the loop route was not on their map (it’s on ours – see below). We took a guess and headed steeply uphill on the trail on the right side of the split. In just a couple tenths of a mile, we arrived at the bottom of a towering rock wall – Hidden Rocks. There was a local guy rock climbing. He had a beautiful Vizsla dog – she barked a lot, but was very friendly and hung out with us the entire time we visited the rock.
The second crag on the hikes is known locally as Hidden Cracks. Below: The view from the top of Hidden Cracks; Christine scrambles down Hidden Cracks; We enjoyed beers and Grillizza Pizza after the hike.
To reach the summit of Hidden Rocks, we followed the trail along the left side of the crag, eventually climbing steeply to the top via a small set of constructed stairs. The top of Hidden Rocks has two outcroppings and a spacious campsite with a fire ring. The views are limited – all you really see is another hillside of trees across the ravine. If you’re looking for expansive views of mountains, distant valleys, or the lake in Hone Quarry – this is not the hike for you! Fortunately, the outcropping still gave Tony enough room to launch his drone. He was able to get a few cool shots looking back at Hidden Rocks.
From Hidden Rocks, we came back down the stairs and continued following the trail across the ridge. We passed another towering cliffside on the right – this one called Hidden Cracks. Adam found a split in the rocks with a jumble of boulders. We were able to climb to the top and get another view – this one included an obstructed peek at some distant mountains. Soon after Hidden Cracks, the trail descended, crossed the stream again. We arrived back to the split in the trail that made the loop, passing the small waterfall once again. From there, we retraced our steps back to the parking area.
After our hike, we headed back into Harrisonburg so that we could take Tony and Linda on a tour of Harrisonburg’s craft beer scene. We started off at Wolfe Street, then proceeded to Billy Jack’s for lunch. The day rounded out with stops at Pale Fire and Brothers (with dinner from the Grillizza food truck). It was a fun day and we really enjoyed exploring this little gem of a hike!
Trail Notes
Distance – 2.5 miles (Check out the stats from Map My Hike)*
Elevation Change – 390 feet
Difficulty – 2. This is doable by most people. If you do the entire loop, be careful climbing up to the top of the other rock outcropping. That short climb feels more like a 4-4.5.
Trail Conditions – 3.5. Overall the trail was in great condition, but the lollipop loop part of the trail was not as maintained.
Views – 2.5. The views were nice, but not as expansive as I would have liked since most of your views are blocked by the mountain directly in front.
Waterfalls/streams –2. Rocky Run was pretty with rhododendron nearby. The small waterfall creates a peaceful setting.
Wildlife – 0. We didn’t see anything.
Ease to Navigate – 2.5. There weren’t any signs for junctions which caused us to get confused about which way to go when we first crossed Rocky Run and again at the waterfall junction.
Solitude– 4. This isn’t heavily used, but you may see some people at the top of Hidden Rocks or rock climbing.
This is an easy 4.25 mile hike that take you to visit two special spots – a beautiful waterfall and one of the most popular swimming holes in the Smokies.
Mouse Creek Falls may not be the largest or most impressive of the waterfalls in the Smokies, but it is still a beautiful spot.
Christine Says…
On our third day of the trip, we decided to head into the national park and explore an area we hadn’t visited before – Big Creek in Cataloochee. This area is known for its population of elk, and for being much quieter than other parts of the park, like Cades Cove or Clingmans Dome.
The drive was a bit further than our previous two hike, but we had heard that Mouse Creek Falls and Midnight Hole were both beautiful, worthwhile destinations. As usual, we got an early start and beat the crowds to the trailhead.
Easy terrain makes this a popular family hike. Below: Trailhead sign for Mouse Creek Falls; Adam standing along the stream; Horse hitch near the falls.
The hike up Big Creek really couldn’t be much simpler or easier. It follows a wide, old road bed the entire way. At first, you can hear the rushing sounds of the creek in the distance, but within several tenths of a mile, the trail begins to closely follow the water.
Like most creeks in the Smokies, Big Creek is a jumble of big boulders that create lots of cascading rapids and small waterfalls – so beautiful! We saw a serious photographer hiking back from the falls with a large pack of gear and a heavy tripod. He visited the falls on a perfect day for waterfall photography. It was overcast and windless, which allows the opportunity for long exposure images. I always love the silky misty effect a slow shutter speed lends to the water, and I was pretty happy with the shots I got on this hike!
On the hike up, we skipped Midnight Hole. We figured we’d see the waterfall first, and then stop at other pretty spots on the hike back. The falls were indeed lovely, though the mosquitoes and biting flies were abundant and aggressive! This was the first and only time on the trip that I had to use bug spray. We took tons of waterfall photos, and then made our way back down the trail.
Christine enjoys Mouse Creek Falls. Below: Pretty stream scenery along Big Creek. Mouse Creek Falls are formed where smaller Mouse Creek pours into Big Creek.
On the way back, there were many more people out and about. Lots of them were dressed in swimsuits and had water-wings and innertubes. Apparently, this creek is one of the areas favorites for mountain swimming. When we reached Midnight Hole, there was a family of five there. The two youngest sons were taking turns plunging off rocks into the pool below. It was a cool, cloudy day, so they squealed each time they hit the icy water. The pool itself is deep and brilliant green – really an idyllic spot for a swim.
After leaving Midnight Hole, we stopped at a couple more pretty rapids along the stream for more photos. When we were on the trail, we jogged to outrun the mosquito assault! It was so buggy!
After this hike, we decided to drive into Asheville (yes… filthy and covered with bug spray) so we could visit a few breweries and get some lunch. We also managed stops at Vortex Donuts and French Broad Chocolates.
Adam Says…
Mouse Creek Falls is an easy family hike that everyone can enjoy. With the distance being only a little over two miles to the waterfall and very little change in elevation, it is a hike that even small kids won’t complain too much to do.
We started off early and had most of the trail to ourselves. We saw there were lots of places to step off the side of the trail to get views of rocky rapids down Mouse Creek, but we decided to make a beeline for the main waterfall. The trail had a slight incline, but never felt like a steep walk. We arrived at Mouse Creek Falls and made a climb down to near the base of the falls to get some photos of the stream and the falls together. If you don’t feel like climbing to the base, you can still get a distant, yet unobstructed view of the falls from the top. When another family arrived, we decided to leave to give them the solitude that we enjoyed, but we were equally pressured by all the mosquitoes at the water. We didn’t feel a ton of mosquitoes on the way up, but the entire trip back we were swarmed.
Midnight Hole is a popular swimming spot in the Smokies. Below: The water in Midnight Hole is clear and reflects the green of the trees around it; There is a picnic area along this lovely spot on Big Creek.
About .5 miles back on our return trip, we stopped to enjoy Midnight Hole. A pond is created here by two small waterfalls that dump water into this serene swimming hole. We lingered a bit at this spot before making our way back to our car, chased by a cloud of mosquitoes who seemed to not mind the bug spray we used. We made it back to our car quickly at a little over four miles and saw many people making their way up. I’m sure this is an extremely popular hike and swimming hole spot for many people. If you want to miss the crowds, go as early as possible.
On our way out, we passed by several buses that were unloading people for whitewater rafting along the Pigeon River. We saw probably a hundred people on the river in rafts and it looked like a great way to spend the day. We headed into Asheville, NC from our hike to sample some beers. It was Asheville Beer Week, so all of the breweries in the area were doing special events. We started off with lunch at Wicked Weed, where we enjoy the food as much as the beverages. From there, we stopped by a few more breweries to try one small sample at each – Green Man, Burial, and Hi-Wire. While we were there, there was a disc golf competition where event organizers moved a portable basket and the competitors threw their discs down the streets and alleyways as they moved from one brewery to the next. Luckily, the competitors were very accurate and I didn’t see any spectators beamed in the head.
Directions to trailhead: GPS coordinates for this trailhead are 35.751094, -83.109993. From Asheville, NC take I-40 West for 46 miles before taking exit 451 toward Waterville Road. Turn left onto Green Corner Road at the end of the exit ramp which merges onto Tobes Creek Road. Take the first left to cross a bridge and stay on Tobes Creek Road. Once you cross the bridge, take the first left onto Waterville Road. Follow this for two miles and you will then enter the Big Creek Entrance Road. Follow this for about a mile and you will reach the Big Creek Campground. You will find a large parking lot on the right and just before entering the parking lot, you will pass the trailhead for the Big Creek Trail, which is your starting point. This parking lot fills up quickly, so you may have to park along the roadside.
This 11 mile loop has everything – stunning views, scenic streams, a clear mountain pond, and even a small waterfall. You could hike it as a long(ish) day hike, but there is so much great camping along the way that it’s ideal for an easy overnight backpacking trip!
Views Along the Massanutten Trail. Below: The mountain laurel was just starting to bloom in mid-May; Christine and Adam attempt to fix Kris’s broken trekking pole with duct tape; Kris makes her way up the steepest, rockiest part of the hike.
Day One (4 miles)…
One thing that was true about May in 2016 was we had a TON of rain in Virginia. It was hard to find a time to actually go for a hike in good weather. We had been itching to try and do an overnight trip, but the threat of drenching downpours and storms was standing in the way. We had some very stressful days at work, so getting out and finding some peace away from the hustle of everyday life was just what the doctor ordered. In looking at the weather closely, we decided we may be able to get a short, overnight trip in if we timed it just right. We decided to do something very close by to our home to allow us to get on the trail quickly to get in a few miles before it started to get dark. We had called our friend, Kris, who was going to accompany us, and told her to be ready anytime during the Saturday afternoon. We felt like Doppler radar experts as we were tracking the storm movement and finally around 2:30PM, we felt the rain was going to stop to allow us to hike.
We got to the Massanutten Visitor Center and saw a lot of cars in the parking lot. We were thinking there was no way that others were on the trail at this same time due to all the rain we had in the last few days. A large camper was at the front and I talked to one gentleman out front. As it turns out, it was the Massanutten Mountain Trails 100 race that weekend, a 100-mile race along the Massanutten Mountain range that covers 16,200 feet of ascent. We were a little worried about the trail conditions and how many runners we may see along the way, but nothing was stopping us now.
Two nice views come in the first mile and a half of hiking. Below: The ascent along the orange-blazed Massanutten trail is fairly rocky and steep; Pink lady’s slippers were blooming everywhere; We hear rumbles of thunder!
From the parking lot, we took the white-blazed Wildflower trail (do not take the Nature trail at the end of the parking lot). This trail leads downhill and passes some comical information plaques along the way. At .3 miles, when you reach an intersection with the Massanutten South trail, take a right to start on the orange-blazed Massanutten South trail. The trail goes up a steep ascent and we found with the recent rain the footing was slippery and mucky in a few parts. On the ascent, we found that Kris’ new trekking poles weren’t locking properly, so we paused to get some duct tape to try and make a repair (not long after we realized that our fix didn’t hold up and she lost part of her pole somewhere along the trail). The uphill was quite steep and had us breathing heavily with our heavy packs, but this is the toughest part of the entire hike. We passed a hiker who was doing the reverse route and he told us right near the summit there were about 100 pink lady’s slippers along the trail. We decided to count what we had saw; while we didn’t see 100 of these rare wildflowers, we did count close to 60 over the weekend which may be the most we’ve ever seen on a trail. We came to the first overlook around the 1.6 mile mark (the second is just shortly ahead), took our packs off for a few minutes and enjoyed the panoramic views. The clouds after the recent storm blanketed the sky. We stopped at the second view also before continuing on. At 2.5 miles, the trail splits; head to the right to join the Bird Knob trail.
The Bird Knob trail is a ridge walk and is quite flat, which was a nice change from climbing. But, the sky began to get dark and we started hearing thunder in the near distance. Within five minutes, we started to feel rain. We decided to put on our pack covers and rain gear and it was just in the nick of time, as the clouds unleashed a downpour mixed with pea-sized hail. We kept marching through the hailstorm and within about 20 minutes, the storm had passed.
We wanted to camp by Emerald Pond, but the sites were taken early in the day. We found an equally nice spot in the meadow. Below: The rumbles of thunder turned into a downpour with hail – we were all prepared; Kris and Adam scout out the open meadow that would soon be our back-up campsite for the night; This grassy path departs the meadow. Shortly after this photo, we turned back and set up our camp at the top of the meadow.
At 3.8 miles, we reached a large open field with a campsite. We decided to press on to get a spot at Emerald Pond, so we skirted the left side of the field to stay on the trail. The trail then turns into an old logging road going downhill. About halfway down the road, we came across a couple of rain-soaked college-aged guys. They were asking if there were any campsites up ahead and they told us all the spots were taken at Emerald Pond. We mentioned the big field with lots of room and they left the way they came to go get the rest of their group and their packs. Since we heard there were no spots, we decided to turn around and get a nice spot in the open field. Christine scouted around and saw there were also sites in the woods next to a small hidden pond, but the bear scat around the site was a deterrent. We decided to camp near the fire pit we saw at the top of the field. One thing that was nice about camping in this grassy field was we knew we would have a comfortable floor bed to pitch our tent. We set up in a short amount of time and we were soon joined by about eight others in the field that night.
The wind had picked up as the storm front had moved through and I felt unprepared in terms of clothing. I switched out of my damp clothes, but I didn’t bring enough warmer clothes for that evening. We made a quick meal and were even able to start a fire at camp despite the wetness of the wood. After dinner, I was getting a little colder each minute, so I decided to call it an early night and get in my down sleeping bag while Kris and Christine talked until nightfall. It was a crazy day on the trail, but one thing I like about hiking is it is always an adventure.
Day Two (7 miles)…
The morning dawned sunny but frigid! Adam had been cold all night, so I let him stay curled up in his sleeping bag while I went to take down the bear hang. No one else who camped in the meadow was stirring, but the three of us quickly cooked breakfast and packed up camp. On our way out of the meadow, we all got a good chuckle over one of the tents set up nearby. It was technically pitched, but in no way like it was supposed to be. We’re guessing someone borrowed a tent and couldn’t figure out how to set it up. I love a backpacker’s ability to improvise!
After walking downhill to the bottom of the meadow, we picked up the old logging road for a few tenths of a mile until we reached an unmarked gravel road on the left. The gravel road led to Emerald Pond – a beautiful, spring-fed mountain pool. The last time we visited, we had the pond all to ourselves and very much enjoyed the peace and solitude. This time, the pond was crawling with other campers. They had big tents, tons of gear, and were dressed in jeans and work boots. We’re guessing that they parked on the nearby forest service road and walked the tenth of a mile to the prime campsite on the pond. I guess it’s worth noting that the early bird gets the worm when it comes to staking a claim on an Emerald Pond campsite! We didn’t want to intrude, so we just took a few photos from the near-side of the pond. The campsite side is prettier, so don’t miss visiting if the spot is open.
Emerald Pond is a much sought after campsite. It was full of people by mid-day. Below: Breaking down camp in the morning; Kris leaving camp; Adam passes the locked gate onto the forest service road.
We left the pond and continued a tenth of a mile to the forest service road. There was a locked gate where the trail met the road. At that point, we took a right and hiked downhill along the road (orange blazed) for a few tenths of a mile until we reached the junction with the Roaring Run Gap trail. The trail is on the left side of the forest road and is marked by a wooden post with two sets of blazes – light purple and pink. The climb up Big Mountain via the Roaring Run Gap trail (blazed purple) was our last big climb of the trip. For a little less than half a mile, the trail climbs steeply uphill over rocky terrain. At the top, we passed a small/dry campsite. On the descent, which came almost immediately, we glimpsed beautiful views through the trees. There were switchbacks and quite a few muddy spots along this stretch of trail. We cheered on the last few runners on the Massanutten 100 Miler race. Even if you’re finishing at the back of the pack in a race like that, you’re still tougher than we’ll ever be! We also met the sweeper who was jogging the course behind the last racer to pick up reflective hang-tags that helped keep runners on course during the night.
After about a mile of walking along the purple-blazed Roaring Run trail, we reached an unmarked junction with the pink-blazed Browns Hollow trail. The trail is a left turn from the Roaring Run Gap trail. Over four miles of the hike on day two follows this Browns Hollow trail – so look for the pink blazes.
We got nice glimpses through the trees on the Roaring Run Gap trail. Below: The route follows the forest service road for a short while. We shared much of our hike with runners competing in the Massnutten 100-miler; Roaring Run Gap trail is steep and rocky for a short while; Views through the trees.
The Browns Hollow trail starts off passing through pretty forest. There are stretches of trail that pass through impressive blueberry bushes. Eventually, you descend to Browns Run. Along the way, you’ll pass a couple nice campsites suitable for one or two small tents. Both sites had fire rings and easy access to water.
There are several beautiful rapids and a small, but lovely, waterfall on this section of trail. We all enjoyed walking through the verdant green forest, while listening to the sounds of bubbling water. It was gorgeous and peaceful. If you look around you’ll notice the stream runs through a pretty deep and dramatic gorge. The far side of the stream goes upward quickly and steeply. There were even a couple places that looked like there had been recent landslides. All the trees and dirt slid straight down the mountainside and ended in a jumble at the bottom. This part of the hike was gentle and easy, so we made great time and enjoyed chatting along the way. We counted more pink lady’s slippers and admired other spring blooms along the trail.
Small Waterfall on Browns Run. Below: Everything was lush and green from all the spring rain; One of several campsites along Browns Run; Walking the Browns Run Trail
At a little over the five mile mark of day two, you’ll cross Browns Run. I imagine most of the time this is a shallow, easy stream crossing. We hiked the trail after weeks of rain, and still found the crossing very doable. The stream was only 12-18 inches deep and there were enough large rocks to rock hop most of the way. There were a few places I had to submerge the toe of my boot on an underwater rock, but all three of us crossed without any trouble. Right after the crossing, there is a fantastic group campsite. The area is large and clear with space for multiple tents.
We continued to follow the Browns Hollow trail as it became a wide old road. We passed lots of blooming mountain laurel along this part of the hike. Eventually we came upon a picnic area with a shelter. At that point, we took a left onto the marked Wildflower Trail at this point. It passes a series of interpretive signs before eventually leading back to the Massanutten Visitors Center (closed) where we started out the prior morning.
Kris crosses Browns Run. Below: A large campsite right after the stream crossing; The trail turns into an old roadbed; Walking past blooming mountain laurel.
It was still before noon when we wrapped up, so we decided to drive back into Harrisonburg for lunch. We enjoyed burgers at Jack Brown’s and then headed over to Brothers Craft Brewing to enjoy their new Verdure series. They’ve done a tart Berliner-Weisse beer infused with all kinds of seasonal/summer fruits. They had Blackberry Verdure on tap. It was the perfect reward for a fun weekend of hiking.
Trail Notes
Distance – 11 miles Check out the stats from Map My Hike [Day 1] [Day 2]*
Elevation Change – 2290 ft.
Difficulty – 2.5. The toughest stretch is the initial push up to the viewpoints.
Trail Conditions – 3. There were a couple of blowdowns, some muddy patches due to the heavy rain, and a stream crossing, but footing was overall very good.
Views – 4. The two viewpoints provide some nice panoramic views.
Streams/Waterfalls – 3.5. Browns Run is a nice stream and a good water source. While not a stream or waterfall, Emerald Pond is extremely picturesque and would make a nice swimming hole.
Wildlife – 3. The start of the Wildflower Trail had us surrounded by birds. With bear scat spotted near our campsite, there is some bear activity here.
Ease to Navigate – 2. There are multiple trails that cross over between Bird Knob and the Massanutten trail. Take a map to make sure you are going the correct way.
Solitude – 2. While you won’t see many on the trail, we found a lot of locals like to drive in close and visit Emerald Pond.
* MapMyHike is not necessarily accurate, as the GPS signal fades in and out – but it still provides some fun and interesting information.
Directions to trailhead: GPS coordinates for this hike are 38°38’35.4″N 78°36’43.0″W. From I-81, take exit 264 for US-211 toward New Market/Timberville/Luray. Head east on US-211/W Old Cross Road and go .3 miles. Turn left onto N. Congress St. and go .3 miles. Turn right onto US-211 East and go 4.5 miles. Park at the old Massanutten Visitor Center parking lot on the right. The trail starts towards the front of the lot on the Wildflower Trail.
This four mile hike takes you by one of Virginia’s most beautiful waterfalls. The trail is engineered and mostly flat, so this hike is suitable for hikers of all levels.
Cascade Falls is one of those must-do hikes in Virginia, featuring one of the most picturesque scenes of a waterfall that you’ll get. We had been meaning to do this hike under more pleasant circumstances, but life doesn’t always work out that way. We were picking up our pug, Wookie (who many of you may remember has contributed his thoughts to some of our posts) from the Virginia Tech Veterinary Hospital. He has been suffering from chronic bronchitis – which is like COPD in humans – and had to have surgery to remove two of his lung lobes. We had a late afternoon pick-up for him, so we decided to go on a hike that morning while we were in the area.
There was tons of stream scenery along the hike. Below: The parking lot was packed; There were several wooden bridges along the hike; The trail was well-developed and engineered.
We arrived around 10:30 in the morning and found ourselves in a line of cars that were waiting for parking spaces. The tobacco-spitting parking lot attendant said it wasn’t like this a few years ago, but since Virginia Tech added this hike to a bucket-list during orientation for all of their incoming freshman, the place has been packed. Of course, we were doing this hike on the weekend before classes started at Virginia Tech, so there were students by the carload here. Only about eight cars back in line, we still had to wait about 45 minutes before we could park. I can only imagine that people that arrived around 11:00 would be waiting an eternity for a parking spot.
The trail starts at the end of the parking lot behind the information center and restrooms. Soon, you arrive at a bridge. The trail splits for an upper trail and lower trail. The attendant had suggested that we approach from the lower trail and then make a loop and return on the upper trail. We started on the lower trail, which hugs closely to Little Stony Creek the entire trip. Little Stony Creek has tons of spots to enjoy the views of the creek. You may even see a few paths that crossed the creek that were wiped out during a flood in 1996. The trail has been re-routed since then on the path you take now. There are some ups and downs as you go along the creek, but overall you are climbing along the trail.
Adam enjoys the stream.
At 2.0 miles, you will reach the large Cascade Falls. The water plunges 69 feet from the top over a large, wide wall making for an impressive scene. We saw probably over 100 Virginia Tech students at the falls, some were swimming in the always-cold water while others were climbing on the rocks (or the large rock slide to the right of the falls). It was nearly impossible to get any pictures without someone in it, but the shots do provide the sense of scale of the scene. We enjoyed watching the falls for a while and then proceeded up the stairs to the left. One path leads to another vantage point from next to the top of the falls, but this was more obstructed. We ended up taking the trail from the top of the steps, heading to the left, which came to a junction in a short distance. To the right, the trail continues on to Barney’s Wall, but we decided to just descend the upper trail since we were out of time. The upper trail consists of mostly a large fire road, making for much easier footing than the lower trail; however, you don’t get the views of Little Stony Creek like you did on the lower trail. The return trip was a nice walk through the woods on the trail until we reached our car back at 4.0 miles.
Adam makes the final approach. You can see the falls and the crowds if you look closely. Below: Some of the big trees from past flood damage still lay across the stream; Passing through dense mountain laurel and rhododendron; Virginia Tech students swimming in the plunge pool.
We hopped in our car quickly to allow for the next waiting person to be able to take our spot. The line of cars was quite long by this point.
Christine Says…
Cascade Falls – known better as ‘The Cascades’ – is a beautiful, easy hike to one of the nicest waterfalls I’ve seen! The parking lot and trail were both insanely crowded, but I think we were probably there on one of the year’s busiest days. It was a weekend, the weather was cool and sunny for August, and the new school year was about to start at nearby Virginia Tech.
I’ve never hiked anywhere that I’ve had to wait in line for a parking spot, but that was the case here! Fortunately, we had all day to wait before our dog was discharged from the hospital, so we weren’t in any rush.
People love to stand at the bottom on the falls. Below: Crowds at the falls.
We walked the lower trail on our way to the falls. It was more of an engineered pathway than a classic, dirt hiking trail. There were paved walkways, stone stairs, and bridges most of the way to the falls. All along the way, the trail followed a scenic stream. There were tons of small waterfalls and cascading rapids to enjoy along the route.
A couple tenths of a mile before we reached the main waterfall, the trail passed through a dense mountain laurel and rhododendron thicket. After that, the path opened up onto a lovely grotto like scene. The falls cascades over a cliff into a large plunge pool. There were MANY kids swimming and sunbathing around the falls. I think I still managed to get a couple decent photos.
A vertical view – without people! Below: The upper trail is accessed by a staircase above the falls; The hike back passed a cliff formation; Most of the hike back was on wide fire road.
On the way back, we took the upper trail. It was basically a wide, gentle fire road that led back to the parking area. After the hike, I cleaned up in the parking area restroom. It was nice! Instead of a pit toilet, it had flush toilets, running water, and soap! We stopped for beers and lunch at Bull & Bones Brewhaus, while we waited on the call to pick Wookie up from the vet.
I’d like to do this hike again sometime on a quieter day. I’d also like to hike it when my mind isn’t preoccupied with worrying about my dog. It was really a beautiful spot!
Trail Notes
Distance – 4.0 miles
(Check out the stats from Map My Hike)*
Elevation Change – 742 feet
Difficulty – 1.5 Not much climbing and most people can make this. This is a great family hike.
Trail Conditions – 3.5 There are spots where things can be quite rocky/muddy. Due to the traffic, some of the rocks are quite slick.
Views – 1.5 The one path to the top of the waterfall gives a nice view of the scene below, but not the best view of the waterfall.
Waterfalls/streams – 5 The waterfall is amazing and one of Virginia’s best. The views along Little Stony Creek are great also.
Wildlife – 1 Due to the popularity, you will likely only see birds in the trees.
Ease to Navigate – 3.5 There aren’t any blazes on the trail, but the trail is evident. We were a little confused trying to find our way to the upper trail since there are no signs marking the way.
Solitude– .5 Due to the popularity, you will likely see a lot of people on this trail and especially at the waterfall. Time your trip for a weekday, overcast or rainy day, or very early in the morning to beat the crowds.
Directions to trailhead: Take exit 118A-B-C on I-81. Take US-460W. After 25.9 miles turn right onto Mill Road. In .6 miles, take a right onto Cascade Dr (SR-T623) in Pembroke. The parking lot is in 2.9 miles. Parking is $3 and cash is required (they noted they do not give back change). Coordinates: 37.353523, -80.599566
* MapMyHike is not necessarily accurate, as the GPS signal fades in and out – but it still provides some fun and interesting information.
For our next five posts we’ll be sharing hikes in the Adirondacks High Peaks region. Up first… Flume Knob – this surprisingly tough 4-miler leads to a beautiful view looking toward Wilmington and the Jays.
On our Adirondacks trip, the area set heat records. Most of our week was hot, hazy and humid — just like Virginia. But really, a little summer misery can’t spoil a view like this!
Christine Says…
Well… here we are in New York’s Adirondacks! We’ve wanted to visit the High Peaks region for years, and finally got around to making it happen. We found a delightful cabin in the woods on VRBO.com and rented it for a full week. We arrived late on a Saturday evening, so Sunday was the first day we had to hike. We had seen signs along the way to our cabin saying ‘ALERT: Lake Placid Heavy Race Traffic Sunday’. What we didn’t know was that it was the day of the Lake Place Ironman and most roads in the area would be closed in at least one direction – some roads closed completely.
We had initially selected a nice 9-mile waterfall loop – away from Lake Placid, in hopes of avoiding the race traffic. With GPS coordinates set and maps in hand, we set out toward our trailhead. Our GPS kept re-routing us and the drive time to the trailhead fluctuated wildly from 20 minutes to an hour and 10 minutes. Finally, we came upon a police officer directing traffic. All the rerouting on the GPS was due to real-time road closures for the Ironman. Boooo! We were forced onto a very long, one-way, circuitous route around the race – a route that took us nowhere near our planned hike. At this point, cell service was gone and we didn’t have any way to select a new hike that we could actually get to. So we drove and drove. We watched racers passing by on their bicycle leg in the closed lane of traffic. We both agreed it was a pretty disappointing start to the trip – after spending 11 hours in the car on Saturday, we were ready to hit the trail!
Flume Falls is a beautiful rapid of water that passes through a gorge right at the trailhead. Below: Before climbing to Flume Knob, we hiked the network of engineered paths around High Gorge Falls. It was impressive; The sign that caught our attention; The trailhead for Flume Knob.
Eventually, we came upon a sign for High Gorge Falls. I told Adam ‘Go there – I remember reading about that place. It looked pretty!’ As it turned out, we had the entirety of this popular tourist stop all to ourselves. I guess no one else even tried to fight the Ironman traffic. We walked the network of trails and marveled at the impressive waterfall plunging through the chasm! After about an hour, we’d seen all there was to see and decided we’d try and figure out a way to get back to the house and spend the afternoon relaxing and enjoying our comfy little cabin. But as luck would have it, we passed a sign on the road labeled ‘Flume Trails’. Adam looked at me and we knew instantly that we were going to stop and check it out. The sign was brown and had little hiker stick figures – and that was good enough for us! Sure… it wasn’t the hike we planned. And yes – we had no idea how long the trail was, how difficult the trail was, or even where it led.
Fortunately, signage at the trailhead indicated that there was a 4-mile out-and-back to Flume Knob. We agreed that knobs usually have decent views and set off along the trail. The trail soon became a network of trails. Some signs indicated the way to Flume Knob, others made no mention of it. Trail names changed quickly from Corridor to Connector to Flume Knob. We just kept hiking uphill, following the path that looked most worn, and then verifying we were still on the right route any time Flume Knob was mentioned on a sign.
I took very few photos on the hike up, because my hands were being kept busy swatting at the army of mosquitoes unleashed in the forest. Bug spray didn’t slow them down – not even a little bit. What had become as an easy, gradual climb became steeper and steeper as we hiked along. I was hiking as fast as I could to outrun the mosquitoes, but the terrain slowed my pace. The trail climbed upward without the ameliorating effect of switchbacks. There were several sections of trail that were washed out and covered with loose, slippery scree. There was a small rock pass that had a rope to help hikers pull themselves upward. There were a couple small blow-downs to negotiate. It was pretty tough going for a little while. After the hike was over, I read a description of the terrain on the Lake Placid website – they used the word ‘aggressive’.
The first half of the climb to Flume Knob was gradual with smooth, easy footing. The second part was more like this. Below: The wayfinding and signage on this trail network was a little confusing. We probably would have fared better with a map or some prior research; Trails in the Adirondacks are blazed with metal disks instead of paint; Some of the easier climbing.
It was all worth it in the end! The view from Flume Knob was magnificent! We climbed around the side of a boulder and came out on a rocky outcropping with super views of the Adirondacks. We could even see tiny specks of triathletes on the road in the valley below. The viewpoint also had enough of a breeze to keep the insects at bay. We enjoyed the view for a while until we were finally joined by a large family group. They had been down in the valley cheering a family member along in the Ironman and decided to climb Flume Knob after he passed by.
The hike down was slow going until the terrain moderated. There were many places that were steep and covered with loose footing. We covered those parts with care and the added help of trekking poles. Once we descended a bit, we were able to complete the hike relatively quickly. When we got back to the trailhead, we took some time to explore Flume Falls. The falls are right next to the parking area and are definitely worth a look!
While it wasn’t the hike we planned, the day turned out really nicely overall! Sometimes it’s fun to let go of expectations and see where fate takes you. That said — I still don’t think I’m a fan of the Ironman!
Adam Says…
Christine did a great job with explaining the circumstances of doing this hike over other things we were considering for the day. What she didn’t mention was the day before on our drive up, we decided that it would be nice to stop at a brewery on our way up to stretch our legs and give our dogs a chance to get outside. We opted for Ommegang Brewery in Cooperstown, NY. I haven’t been a big baseball fan since I was a teenager, so I have been a little out of the loop for the timing of baseball events. When we arrived at Ommegang at 2:45PM, they said they were closing at 3PM for a private event (which wasn’t announced on their website). I started seeing lots of people arriving Red Sox gear (which I thought was odd for New York). It turns out they were closing things for a private party for Pedro Martinez for his induction into the Baseball Hall of Fame the next day. I was quite ticked and now have a little disdain for Pedro Martinez. Experiencing road closures this day that were keeping us doing the hike we wanted, I was not feeling the New York love.
The tough climbing on the hike and the incessant mosquitoes had me a little worried about how hiking would be overall in the Adirondacks. However, I will say that if you can just pull off the road, pick a random trail and find views like these, the Adirondacks are quite impressive. And luckily, those mosquitoes were the worst on this hike compared to the others we tried. What was looking to be an irritating day turned out to be great. It is amazing how a little bit of hiking and scenery can change your outlook quickly.
Climbing around the side of a boulder leads you to the viewpoint atop Flume Knob. Below: The lovely view from the top; By the time we left, we had a large family group sharing the viewpoint; We ate wild blueberries on the hike down.
When we first pulled into the small parking lot for this hike, we were quickly joined by several other cars filled with people. We thought they were just friends and families of Ironman participants and wouldn’t want to hike. When we started to see them get on the trail, we decided to get our stuff together quickly to possibly get ahead of them so we weren’t stuck amidst a large group. We were able to start ahead of most of the pack and made our way. As you can see from the map below, there are a lot of interconnecting trails on this hike. You may see people heading out for mountain biking, fishing, rock climbing, or hiking along these trails.
Our experiences with “knobs” typically means some rocky outcropping with decent views, so we decided to give Flume Knob a try. The path started off from the parking lot and we soon took a right to head uphill on the trail as the signs directed. As Christine mentioned, because of the interconnecting trails that happened early on the hike, they didn’t always post the direction to Flume Knob. We did keep pressing forward on the widest, well-traveled trail and we eventually came on to other signs that showed we were going the correct way.
Some of the downhill climbing was challenging. Thank goodness for the dignity of skorts!
We kept a fast pace as best we could, more for survival purposes. Stopping for a quick drink from a water bottle would mean you would be attacked instantly by the flying piranha-like mosquitoes. The grade of the trail was very tough, with extremely steep sections to climb, often requiring you to pull yourself up with your hands to reach the higher step. Christine got a good deal of sap on her hands from grabbing ahold of trees to help hoist herself up and down. We felt this was one of the hardest two miles with the steepness of terrain. We eventually made it to the top, which just required climbing up a large boulder to a nice view. The viewpoint was a large slab of rock and we took a few moments to take in the view before others arrived.
We had it all to ourselves for about 20 minutes before the other families started to arrive. It turns out all of them were family members or friends of those participating in the Ironman. Their goal was to do a hike for the day and then meet up with them later. When getting to the view, one man asked one of the children if the view was worth the climb and she said “No”. But they pointed out to her that when she reflects back, she would change her mind. I think we would both say the views were worth the climb. On a clear day, you have miles and miles of mountains with barely any sign of civilization around you.
The descent of Flume Knob was often steep and slick. Below: Boulders along the trail; Finally… some easier footing; Another look at the beautiful Ausable River – it feeds High Gorge Falls and Flume Falls.
We made our way back down and started to see even more families making the trek up. When we arrived back at our car, we took a side path from the parking lot which led down to a beautiful waterfall. The waterfall has several platforms where the water drops into the gorge and is worth seeing. If you cross the road from the parking lot, you can look down into the gorge to see even more impressive sights.
We felt we made the most of the day. Getting great views on a random hike made us more excited for future hikes in this area.
Trail Notes
Distance – 4 miles (There are no MapMyHike stats from this hike because we forgot to stop tracking at the end of our hike – oops!)
Elevation Change – 1326 ft.
Difficulty – 4. The climbing on this trail is mostly concentrated into a short, extremely steep section. There are no switchbacks to alleviate the climb – it is straight up the mountainside!
Trail Conditions – 3. The trail was nice easy footing for the first half of the ascent. The footing was trickier with loose dirt and some eroded spots on the climb. There was one section aided by a rope hand-pull.
Views – 4. Beautiful views over the valley and looking toward bigger peaks.
Streams/Waterfalls – 5. There is an impressive waterfall gorge right at the beginning of the trail. Don’t miss seeing it at either the beginning or end of your hike.
Wildlife – 2. We saw/heard red squirrels, chipmunks and birds.
Ease to Navigate – 1.5. The signage on this network of trails is quite confusing. There are many foot and bike trails that cross multiple times in the woods. Not every sign lists the destination of Flume Knob. We basically continued on whatever trail seemed most uphill and checked our progress with the signs that did list Flume Knob.
Solitude – 3. It’s hard for us to judge the popularity of this trail. We hiked it on a day that traffic was mostly impeded by the Lake Placid Ironman. Most people stayed away from the race course because the logistical issues it caused with traffic in the area. We saw a few other hikers, most of them knew someone racing and were hiking to pass the time until they could meet up with their racing friend.
Directions to trailhead: From the intersection of Route 73 and Route 86 in Lake Placid, follow Route 86 toward Wilmington. Continue for 10.5 miles to the Flume Parking on the left. Coordinates for the parking lot are 44.3701899,-73.8363359.
This 14.7 mile route offers wilderness, beautiful views, and stunning stream scenery (even a small waterfall!) It’s a wonderful, moderate overnight backpacking loop; or a really challenging day hike. We set out intending to camp along Jeremy’s Run, but it didn’t quite go as planned!
The views on this loop hike come along the descent of Neighbor Mountain. Below: The trailhead at Elkwallow Picnic Area; Hiking along in golden woods; Adam and Kris at the junction of the Appalachian Trail and Neighbor Mountain Trail.
Christine Says…
The final weekend of October 2014 was so beautiful – perfect, made-to-order backpacking weather. We decided to head out on one more overnighter before the weather turned cold. We invited our friend, Kris, to come along. She loves the outdoors as much as we do, and I was sure she’d enjoy this loop. Don’t miss her guest blogger entry later in this post! It had been several years since we last hiked in the vicinity of Jeremy’s Run, and I was really looking forward to camping along the beautiful stream.
After stocking up on some lunch provisions at Elkwallow Wayside, we finally hit the trail around 11:00. We figured we had a little over eight miles of hiking on our first day, so starting late morning would get us to camp before 3:00, with plenty of daylight left to pitch tents, cook dinner, and relax.
Hiking along the Neighbor Mountain Trail. Below: The fall color was still close to peak; Adam checks out a rock formation; At the summit of Neighbor Mountain.
We started out at the Elkwallow Picnic Area. A short spur trail leads downhill to the junction with the white-blazed Appalachian Trail. The AT descends for about .3 of a mile before coming to a junction with the blue-blazed Jeremy’s Run Trail. Follow the Appalachian Trail, veering to the left. The trail ascends for a little over a mile before coming to a more level ridge. You’ll pass the junction with the Thorton River trail, continuing south on the AT. At just over four miles into the hike, you’ll reach the junction with the yellow-blazed Neighbor Mountain trail.
We decided this junction would be a nice place to stop for lunch (hummus – my favorite trail lunch of late – easy to eat and lots of quality calories!). After a relaxing, thirty-minute break, we took the turn onto the Neighbor Mountain trail. The path meandered across the ridge. For the first couple miles, it was mostly walking in the woods. There was a nice breeze and gorgeous sparkling sunshine was filtering through golden leaves. It was everything you want fall to be!
Even though there is no view, the summit of Neighbor Mountain is marked with a cement post. At the summit, I noticed I had picked up a ‘hitchhiker’ along the way – a walking stick bug was clinging to my pants. I wonder how far he had come with me. I picked him off, and set him on a fallen log off the trail.
Between six and seven miles into the hike, there are a few excellent views of the Massanutten ridge and Three Sisters. There was a forest fire in this area several years ago, so the view was pretty open and expansive. We all paused a while to enjoy the fall foliage. It was so wonderful to see colorful mountains rolling our before us. We talked about how privileged and blessed we all felt to be out on such an amazing day!
Adam enjoys a view of the valley and mountains to the west. Below: This part of Neighbor Mountain burned in 2012. Alot of damage is still evident; Fall color; Adam descends Neighbor Mountain toward Jeremys Run.
The last mile and a half of the day was steady downhill, meandering across switchbacks until the Neighbor Mountain trail reached the bottom of the valley and Jeremy’s Run. As soon as you reach the stream, campsites are everywhere. The first few we passed were already taken, so we ended up returning to the hidden campsite we used several years earlier. It’s a flat spot under the trees shortly before the first water crossing.
And here’s where the story takes an unexpected turn…
Adam Says…
We all worked on pitching our tents and setting up camp. I set up our tent while Christine worked on inflating our sleeping pads. Kris was on the other side of the clearing working on setting up the one-person tent she had borrowed, when she suddenly she groaned, “Uh… guys – I think we might have a little problem.”
As it turned out, the tent bag only held the rain fly and the poles. The ground cloth and the actual tent were missing in action. She hadn’t checked the bag before hitting the trail. We spent the next 45 minutes trying to improvise a shelter with everything and anything we had. We tried piling three people in our Big Agnes Copper Spur UL2 (bad idea). We discussed whether or not the evening would be suitable for cowboy camping under the stars. We talked through a few different scenarios: 1) we all hike back immediately, 2) I sleep under the tarp while Kris and Christine sleep in the tent, or 3) I hike back to the car tonight and pick them up in the morning. I was least excited about the second option because the area felt tick-infested with the wet leaves. We debated the options for a few minutes, but ultimately, we decided the best choice was to keep the group together and make our backpacking trip into a very long day hike.
We tried to find a way to rig up shelter, but in the end we decided it was better to hike out. Below: Crossing the first stream and trying to eat something with enough calories to hike out happily; Adam doing one of many stream crossings; The best campsite along Jeremys Run sits above a waterfall.
We knew we only had a little over an hour of daylight left – the sun sets early behind the mountains surrounding Jeremy’s Run. We rushed to pack everything up as quickly as we could. Cooking a hot dinner would have required getting more water, so we opted to just eat a few snacks from our bags. We started off at a quick pace. I twisted my knee at the first major water crossing we had to make, which made the rest of the trip pretty painful. But sometimes, you just have to suck it up and hike.
We soon passed another great campsite next to a small waterfall. The trail meanders along and across Jeremy’s Run, requiring lots of rock-hopping across the stream. The sun was dipping down quickly and we soon found that we needed to put on our headlamps. Christine and Kris had legit headlamps, but I was using a small clip-on headlight that didn’t have the lumen output needed for a night hike. When it reached dusk a few miles from our campsite, we came across a couple with a dog. They asked us how far it was to the campsites and if they were all taken. The guy was carrying an outrageous amount of gear and the girl looked completely miserable. We knew they were going to be hiking to the campsites by nightfall and setting up camp in the dark. I’m not sure if this was her first venture into overnight camping, but based on the daggers she was shooting him with her eyes, it may be their last. They warned us they had seen a couple of bears just ahead of us, so we were on full alert.
We hiked by headlamp the last hour. Below: Jeremys Run in twilight; A large pool along the run; One of the last few stream crossings before it became too dark to take photos.
As it became fully dark, we still had a few stream crossings to make, which made it quite hazardous. I reminded myself that the water wasn’t that deep so if we stepped in the water, we would probably be OK. Another danger of night-hiking is the ability to lose the trail. We really had to pay attention to the ground and try to keep an eye out for occasional blazes to make sure we would stay on the trail. Hiking in the fall after most of the leaves have covered the trail provides an extra challenge. Because I had a weaker headlamp, it was hard for me to lead along the trail since the lights from Christine and Kris were blasting my shadow ahead of me on the ground. And then, I heard large noises in the woods, which I’m guessing was the bears that we had been warned about. We kept talking loudly and playing some games to keep our minds sharp (animals/foods/colors that start with each letter of the alphabet) as we hiked along.
At 4.25 miles from our intended campsite, we finally came across a concrete marker post. This post marked the junction with the Knob Mountain cutoff trail, so we knew were getting closer. We kept straight on the Jeremy’s Run Trail and at 5.15 miles, we reached our first junction with the Neighbor Mountain Trail. It was now just .3 miles straight ahead until we reached the parking lot where we started. We made the last climb with renewed energy and celebrated that we made it through this adventure.
It was definitely one of the longest hikes we have done in a day and with the extra weight on our back, was one of the toughest. We got back in the car and decided to go out to dinner to celebrate with drinks and food at Ciro’s in Elkton, VA. We were physically exhausted and hungry, but it was quite an adventure we will never forget.
One takeaway I had from this trip was that we were all great at hiking together. When we faced the challenge of not having two functional tents, we kept our wits about us, made a quick decision and went with it. There was no complaining and we just relied on each other to get through. If we had panicked or become overly upset, it could have led to a dangerous situation. It is through this challenge, that we learned that having good hiking partners that work well together is a great trait to have for survival. We all vowed to come back to this spot to camp together sometime in the spring to get the full experience through camping on Jeremy’s Run. After the hike, Kris bought her own tent and I bought a better headlamp.
Kris Says…
Backpacking 101- It doesn’t matter if you were up late celebrating your birthday and borrowing some equipment…ALWAYS double check your equipment or your trip will not be so fly!
I was excited to be hiking with friends on a beautiful fall day. We have always shared an appreciation of nature, lots of conversations and tons of laughter. I guess that is why we handled our little upset so calmly and reasonably. Although, I’m pretty sure I said “Adam, just because I am a girl doesn’t mean you have to give up your tent. I will cowboy up. Now, everyone hand over any booze or sleep aides you may have!” Of course that didn’t fly.
Ultimately we laughed at the situation, even as we crossed that creek 14 or so times and in the dark. And I learned a few things on this trip: I am capable of hiking 15 miles with a 25 lbs pack in a day, Little Debbie Peanut Butter pies are so tasty and 400 calories, it was time to purchase my own backpacking tent, a packing checklist is important and a good attitude goes a long way.
I vowed to return to Jeremy’s Run and hike early enough to snag the sweet waterfall camp spot, I also plan to cowboy camp sometime just to prove I can (my dog will protect me).
Christine and Adam- you two are SuperFly!
Trail Notes
Distance – 14.7 miles (We had issues with MapMyHike on this trip, so we have partial stats. We have the Neighbor Mountain segment and most of the Jeremys Run to Elkwallow segment. We’re missing the portion along the Appalachian Trail and a few early tenths of a mile along Jeremy’s Run. Technical issues!)*
Elevation Change – 2610 ft.
Difficulty – 4. The terrain is fairly moderate throughout the hike, but the length ups the difficulty rating.
Trail Conditions – 3. Sections along the Appalachian Trail and Neighbor Mountain are in great shape. The Jeremy’s Run trail is rocky and has at least 14 water crossings – some of them can be challenging!
Views – 3.5. The views descending Neighbor Mountain are beautiful, but never fully open/panoramic.
Streams/Waterfalls – 3.5. The stream is beautiful and scenic.
Wildlife – 5. We saw a bobcat! Hikers we passed at sunset told us there was a bear ahead, but we couldn’t see anything in the dark. But, the last time we hiked in this area, we saw three bears. We have also seen/heard owls, pileated woodpeckers, and whippoorwills.
Ease to Navigate – 4. The junctions are clearly marked and easy to follow — unless you’re hiking in the dark! 🙂
Solitude –1. It’s the most popular backpacking loop in the park’s northern district.
Directions to trailhead: From the US-211 entrance of Shenandoah National Park, head north for 9 miles on Skyline Drive. Take a left towards the Mathews Arm Campground. In .7 miles, you will reach a parking lot. The trail takes off next to the outdoor bathroom.
* MapMyHike is not necessarily accurate, as the GPS signal fades in and out – but it still provides some fun and interesting information.
This 8.8 mile hike takes you past Madison Spring Hut and up to the summit of majestic Mt. Madison. The Valley Way Trail is known for being one of the safer, more protected routes into the heart of the White Mountains. While the terrain is less extreme than other trails in the area, the hike still requires a little over 4,100 feet of climbing. It’s a tough hike, but the views make it well worth the effort.
Adam makes his way across the summit ridge of Mt. Madison. The big mountain in the background is Mt. Washington. If you look closely, you can see the Auto Road snaking down the peak. Below: Plenty of parking and access to many trailheads at the Appalachia Parking area; Warning…. danger ahead – seriously, the White Mountains can be pretty extreme; The early part of the trail was fairly soft and gentle.
Adam Says…
My top goal for our 2014 New Hampshire trip was to hike up Mt. Madison. We both went to James Madison University and have worked there for years, so it only seemed fitting to take on the mountain that shared a name with our college. I even wore JMU Dukes gear almost like the guy that goes to a concert wearing a t-shirt for the band’s previous tour to show his super-fandom.
We started out the day on a rough note. Christine had put her hiking shoes and socks in the back of our car, so she could wear sandals on the car ride up. When we pulled over at one point, we realized one of our Camelbak tubes had pressed open and leaked all over the car, soaking her shoes and socks. We debated about if we would have been able to even do the hike in fear of blisters, but Christine decided to push forward.
There are a lot of ways up Mt. Madison, but in our research we found the most popular way was to make our approach by going up the Valley Way trail. We parked at the large Appalachia parking lot (which was so full we needed to park on the road) directly on US-2. We were worried there would be so many people on the trail, but this parking lot holds the beginnings of lots of trails that lead up to many peaks (including Mt. Adams and Mt. Quincy Adams).
The early part trail follows Snyder Brook. By taking a short spur trial, you can visit beautiful 25′ Tama Falls. Below: We saw a couple Croo members on their way down from the Madison Spring Hut; Adam checks out all the rocks on the ‘not as rocky’ New Hampshire trail; The final push to the Madison Spring Hut was very steep and rugged.
The trail starts off from the back of the parking lot. The trail branches off in different directions but follow the signs for the Valley Way trail. The trail begins relatively flat and easy walking, as it runs along Snyder Brook. There were a few places where we could get some nice stream views and even a glimpse at the picturesque Tama Falls at .4 miles. At .7 miles, you reach another large junction, but continue to follow the signs to the Valley Way trail. The trail then begins the steeper uphill climb. Overall, I felt that the trail, while very rocky was not as steep and rocky as some of the other trails in the White Mountains. There is a relentless amount of climbing and many rocks to navigate, but it wasn’t as grueling on my feet as some hikes in New Hampshire have felt to me. At 3.0 miles, the trail gets very steep and rocky (often filled with larger small boulder-sized rocks to hoist onto) and will remain so until you reach the Madison Spring Hut at 3.8 miles. If you’re interested in camping on the mountain, but don’t want to stay at the hut, the Valley Way tentsite is at mile 3.1 on this hike.
Once we arrived at the hut, we saw there were a couple of ways up to the summit of Mt. Madison. At this point, we were above treeline, so we saw the rocky summit up above us. I went in and found one of the Croo members and she told me the Osgood Trail had the most direct route and was a little easier than making our way via the Watson Path. The final ascent up to Mt. Madison was .5 miles along the Osgood Trail (which is also the Appalachian Trail in this area). You basically needed to walk acrpss large boulders, following cairns along the way until you reached the summit. When you are above treeline, the summits of mountains seem so close to reach, but it is very misleading. As we climbed up, we looked back and saw the hut shrink with each step, finally giving us some perspective of how far we had come. We stayed a while at the summit. The views were breathtaking and you could see for miles all around. It definitely was one of the most beautiful scenes I have witnessed hiking and to realize the work we had put in to attain the peak, made it feel even more worthwhile.
Christine makes her way up the Osgood Trail to the summit of Mt. Madison. Below: About to go above treeline; Even though the summits are far away, they always look close; A view of Madison Spring Hut with Mt. Adams in the background.
While we were at the summit, we met a woman who had a sign pinned to her that had 48 over 50 written on it. She was over 50 years old and she had a goal to do all 48 peaks over 4000 ft. in elevation in New Hampshire. She had saved Mt. Madison as her last hike to meet her goal, so we were thrilled to be able to see her experience accomplishing her goal. What an inspiration! We also talked to a gentleman at the summit who was from Colorado that had done this same hike 30 years ago. He was staying at the nearby Crag Camp, run by the Randolph Mountain Club, just as he had done when we was a teenager. He wanted to see if this hike was just as amazing as he had remembered and he told us it definitely was. It made me further realize that everyone likes to hike for their own reasons and it is always a privilege to get to hear people’s stories on the hike.
We made our way back down and ate some lunch at the Madison Spring Hut. We then ventured .2 miles on the Parapet Trail to see Star Lake. This is a spot you definitely shouldn’t miss. The lake is more like a small pond, but it was so beautiful to view the summit of Mt. Madison, as it reflected into Star Lake. We debated about tackling Mt. Adams to bag another peak, but we realized that the summit looked close, but it was still a steep 1 mile away. Not wanting to add even more to our hike, we decided to make our way back down. The trail seemed to be even rockier on the way back down. While you can normally fly down some parts of downhill trails, you need to take your time on this one to navigate all the rocks. On our way down, we came into a rain shower, making the rocks a little slick. The last .8 miles were quite easy again and we did pick up some time at this point. We made our way back to the parking lot to make the round trip 8.8 miles.
Christine Says…
The morning of our Mt. Madison hike started off cheerfully enough. We stopped for breakfast at Dunkin Donuts. I ate both a bagel with cream cheese and a Boston Cream donut. If I’m going to hike almost nine miles with over 4,000 feet of climbing, I’m going to enjoy any and all the baked goods I want! However, I was jolted out of my happy post-carb afterglow when I discovered my socks and sock liners completely soaked in the back of the car. A tough hike with wet socks sounded like a really bad idea. But, driving out of our way to find an outfitter with Thorlo socks seemed like an even worse idea. I’m super picky about socks, and Thorlo’s thick-cushion hiker socks are the only ones that keep my feet happy. I decided wet Thorlo socks were better than dry socks of another brand. (and they were … I hiked all day in wet socks and didn’t get a single blister!)
As Adam said in his post, the Valley Way trail is pretty moderate for White Mountain terrain. The trail is not as rocky and stays under the shelter of trees until you get to Madison Spring Hut. It’s a great choice if you want to visit the northern Presidentials, but stay largely sheltered from wind and other weather. There is still plenty of climbing, but until the last mile, it’s all gradual and moderate. Trails like the Valley Way exist due in part to people like J. Rayner Edmands. He was an early volunteer for the Appalachian Mountain Club. Starting in the 1880’s, he spent over 20 summers building trails in the White Mountains. He believed trails to the high peaks should be passable without stumbles, even in the dark. Backpacker Magazine did a neat article about Edmands in their October 2014 issue. Check it out if you have a few free minutes.
We paid tribute to our alma mater (James Madison University) on the namesake mountain. Go Dukes! Below: The trail was extremely rocky and rugged between the hut and the summit of Mt. Madison; Cairns mark the way; Christine and Adam enjoy a summit view; The descent.
I very much enjoyed the little rapids and waterfalls along Snyder Brook early in the hike. Tama Falls was especially impressive. After we moved away from the stream, the hike was basically just a climb in the woods. As we ascended the trail got rockier, bit by bit. The last half mile to the hut was insanely steep and rocky. In one spot, my shoe got so solidly wedged between two rocks that I had to unlace it and contort my ankle to free myself. It took efforts from both of us to release my shoe from the rocks. It’s a good thing trail runners are so soft and flexible, because my feet definitely needed both shoes on this hike! I think the steepness of the terrain is actually what stopped me from getting hurt when my foot got caught. We were moving very slowly, picking our way across the rocks. Had I been moving at any significant speed, I think I could have easily broken my ankle.
When we arrived at Madison Spring Hut, it was already starting to cloud up a little. It wasn’t really overcast, but the sky had that heavy, hazy look about it. The weather was definitely changing and I wanted to make sure we enjoyed the best views possible. We headed up the Osgood Trail toward the summit of Madison. I don’t know if you can really call the path to the top a ‘trail’. It’s more of a scramble across rocks, following cairns leading you to the summit. The climb to the top is slow going, simply because there is never a simple place to put your feet. On our way up it was fun to look back and marvel at the towering peaks and the tiny hut tucked into the col.
We decided to eat lunch at Madison Spring Hut. Below: Even pretty dogs aren’t allowed inside AMC huts; We always enjoy the baked goods for sale at huts; Compass on the hut porch.
At the top we enjoyed spectacular views of the Presidentials. Seeing the Mt. Washington Auto Road snaking down the mountain was really impressive! While the wind was a little brisk at the summit, it was really a warm, mild day for the White Mountain high peaks. Lots of people were hiking in shorts and t-shirts. Some people even basked shirtless in the summit sunshine. My blood is a little thin for that, but I wasn’t cold like I had been on the summit of Mt. Washington in 2013.
After taking lots of photos and doing our JMU rituals, we climbed back down and enjoyed our packed lunch at Madison Spring Hut. Of course, we supplemented our packed food with baked goods from the Croo. I always hear people talking about how huts are packed with dayhikers all summer long. I’m not sure if it’s our timing (we hike early), but we’ve found almost every hut we’ve visited nearly empty.
Beautiful star lake sits near Madison Spring Hut. Below: As we were leaving the lake, clouds started to roll in and we heard distant rumbles of thunder… time to leave the peaks and head back to the valley below.
After lunch, we walked out to Star Lake. What a beautiful spot. The lake itself is small and shallow, but it makes a gorgeous reflecting pool for Mt. Madison. We were lucky to visit on a picture perfect day! While we were admiring the lake and taking in our final peak views, we started to hear distant rumbles of thunder in the distance.
Being caught in a thunderstorm in the Whites is definitely something I’d be happy to NEVER experience. Lightning strikes happen frequently, wet granite is very slick, and stream levels can change drastically in mere minutes. In fact, just last week I read a harrowing account from a solo hiker caught by storms in the White Mountains. Seriously scary!
We made our way down as quickly as we safely could. With a couple miles of hiking left, the rain started to fall. Fortunately, it was light rain and none of the thunder/lightning seemed close. We got back to the car right before the skies opened up and poured! What a great day with perfect timing. I’m really thankful that we had weather that allowed us to visit two more Presidentials on our 2014 trip!
Difficulty – 5. The trail started off easier, but it is still a very tough, uphill climb.
Trail Conditions – 2.5. The trail was well-maintained, but the rocky parts of the trail make this a challenge. The final push to the summit on the Osgood Trail also took a lot of precision. Bring trekking poles.
Views – 5. It doesn’t get much better than this. If you are lucky enough to catch this on a day where clouds are off the mountain summits, you will be able to see all around you for miles.
Waterfalls/streams – 3. The Snyder Brook runs alongs the trail early on the hike and you can see a few smaller waterfalls along the trail.
Wildlife – 1. We didn’t really see any wildlife on the trail. I wouldn’t expect much at all once you get above treeline.
Ease to Navigate – 2.5. There are a lot of junctions and side trails on the route because there are a lot of trails in this area. Keep following the signs for the Valley Way Trail until you reach the hut and then follow the Osgood Path via the cairns to the summit.
Solitude– 2. We picked a gorgeous day in the summer to do this hike, so we weren’t surprised to see lots of people. We saw the most at the summit and the hut, but there was still places to find our own bit of solitude.
Directions to trailhead: From I-93: Take Exit 35 for Twin Mountain. Follow 3N for 12.4 miles. Turn right onto 115N for 9.7 miles. Turn tight onto 2E for 8 miles. The parking lot will be a large gravel area on the right.
* MapMyHike is not necessarily accurate, as the GPS signal fades in and out – but it still provides some fun and interesting information.


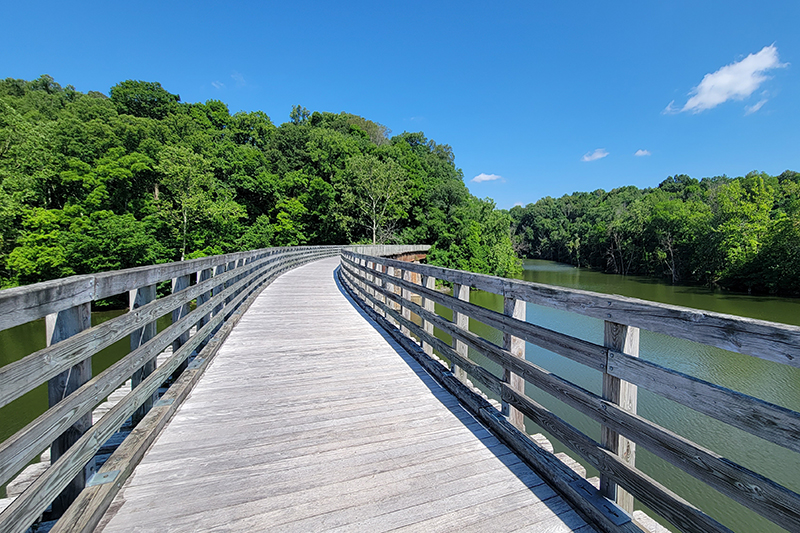
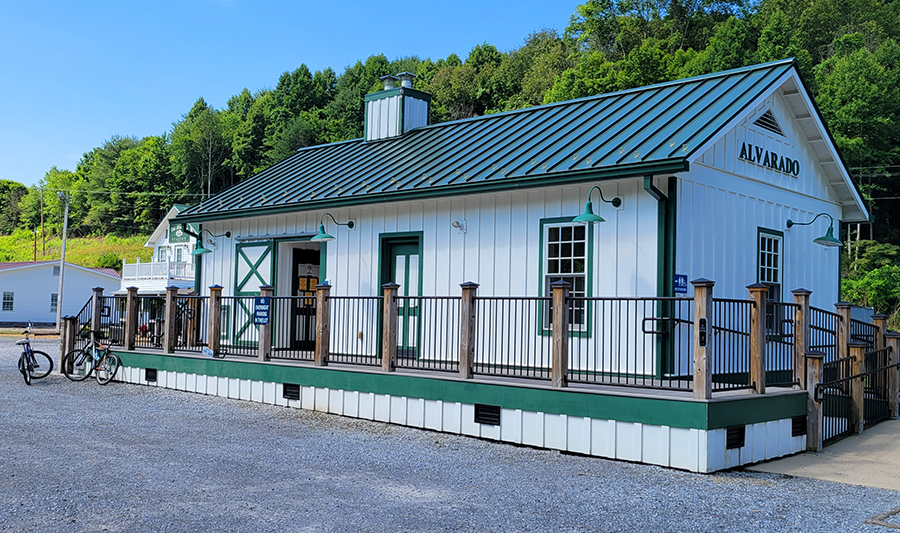

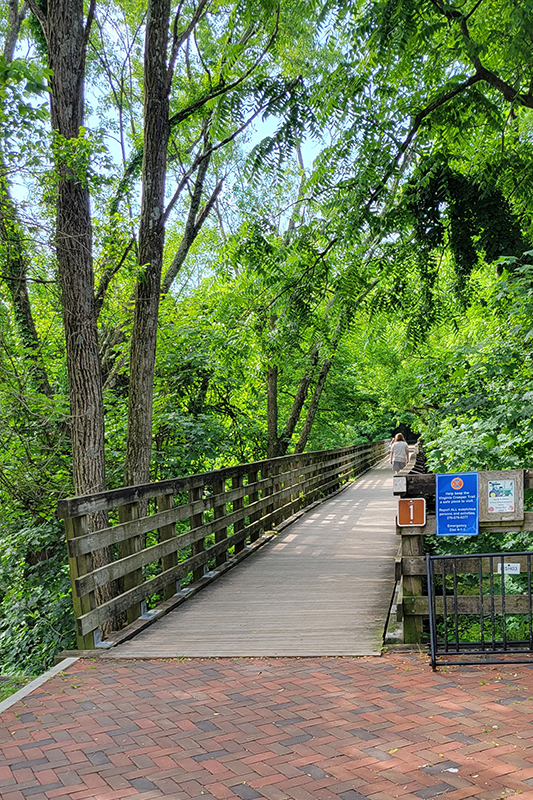
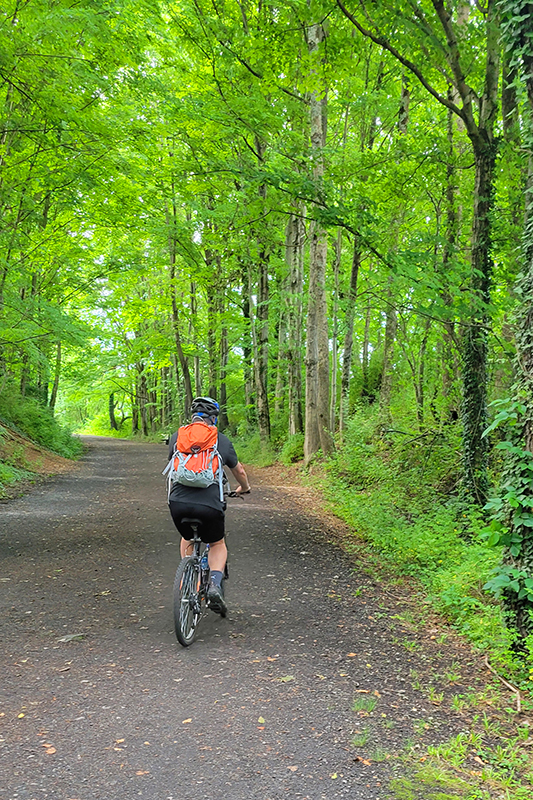
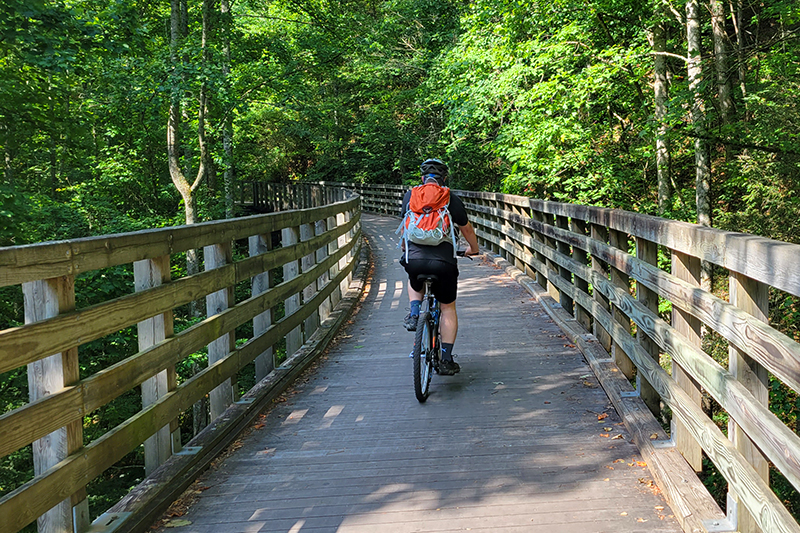
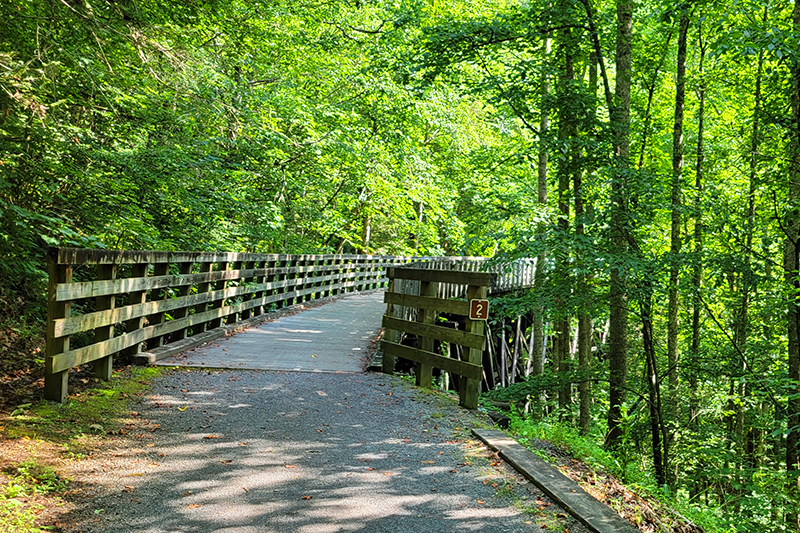
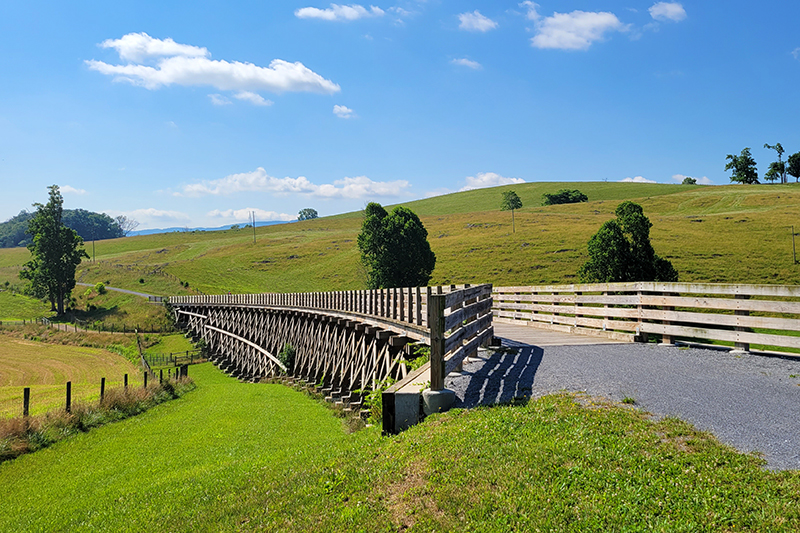
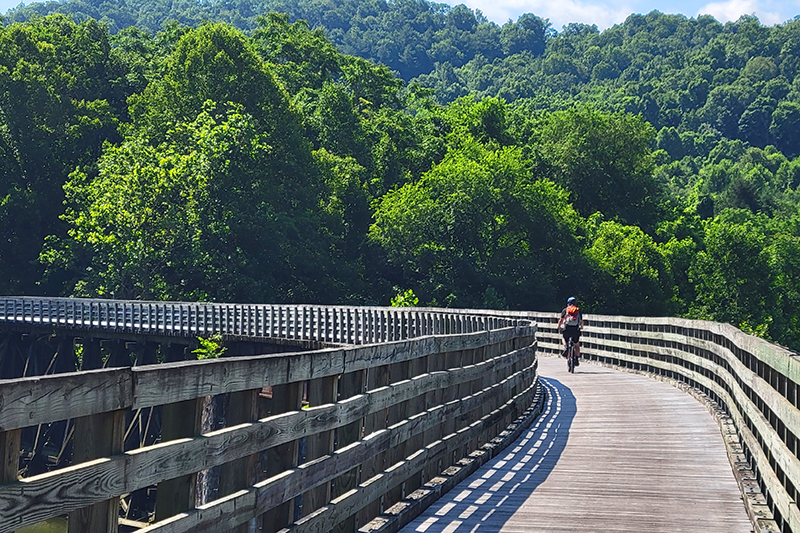
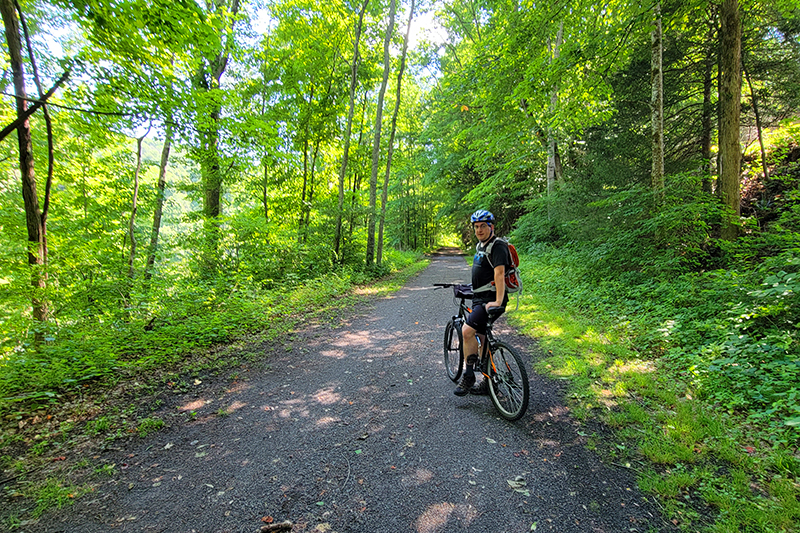
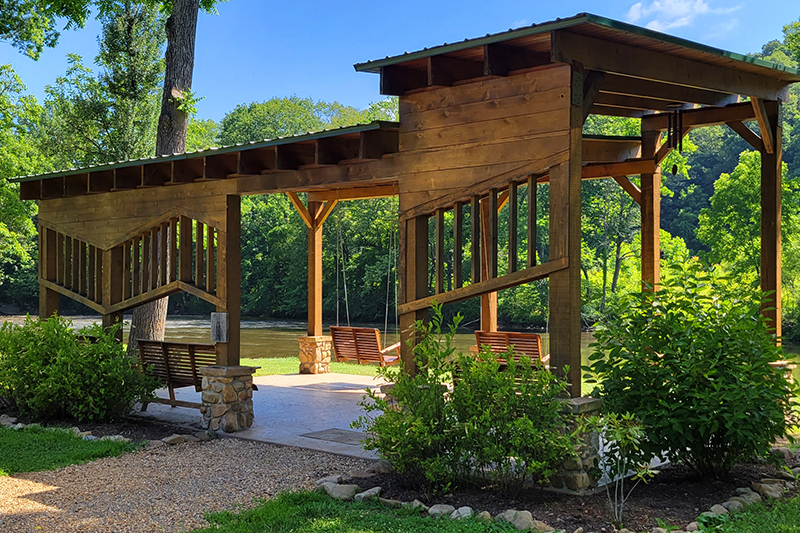
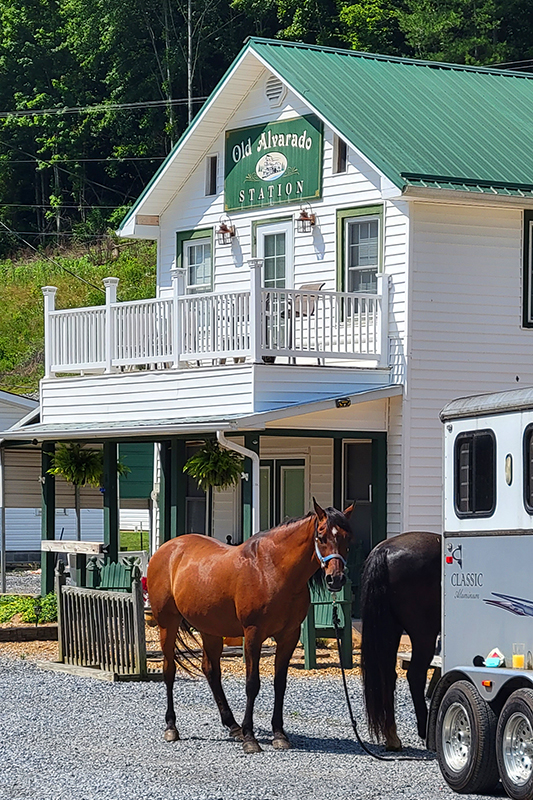
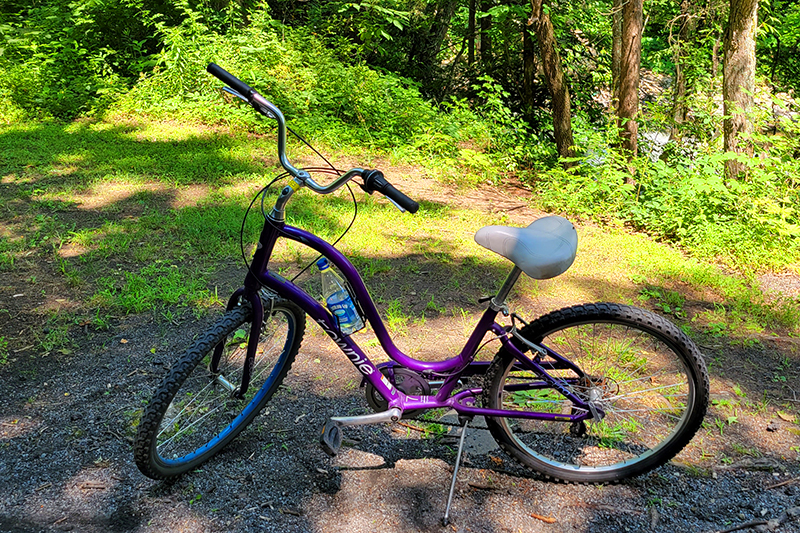
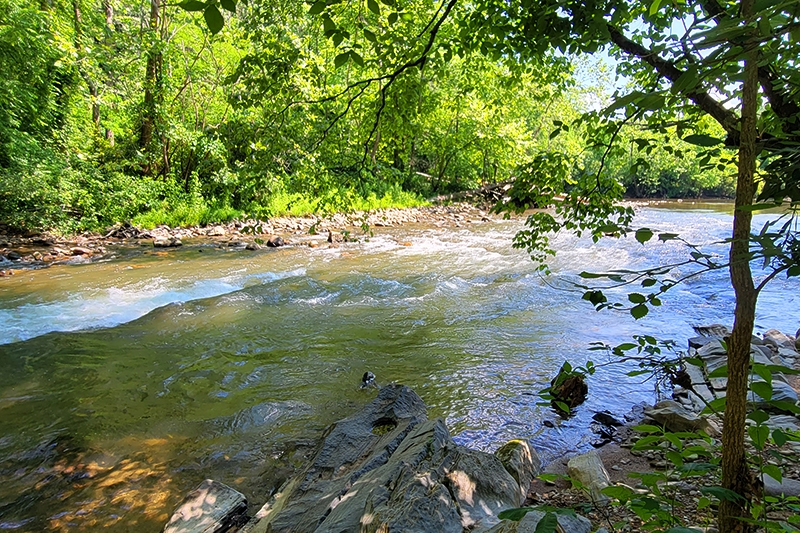
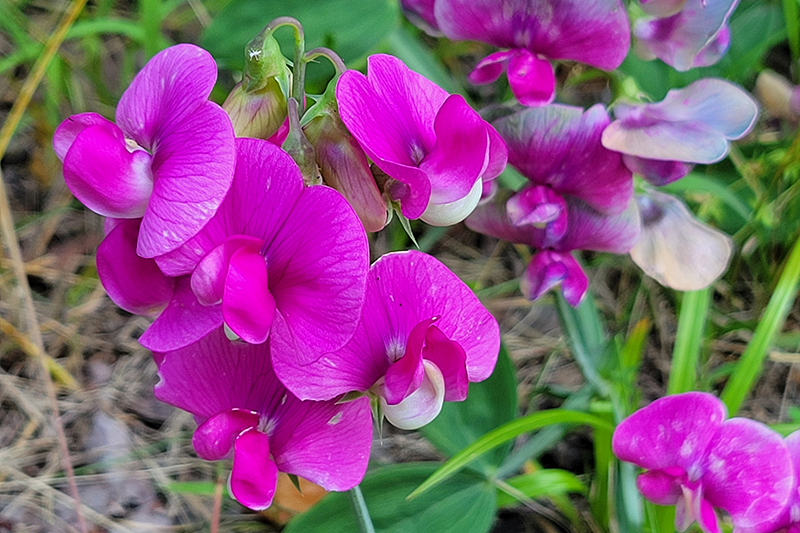
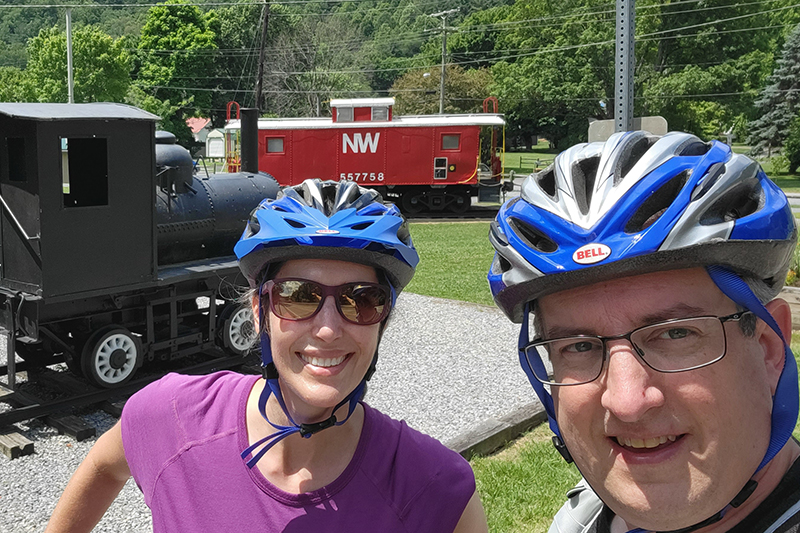
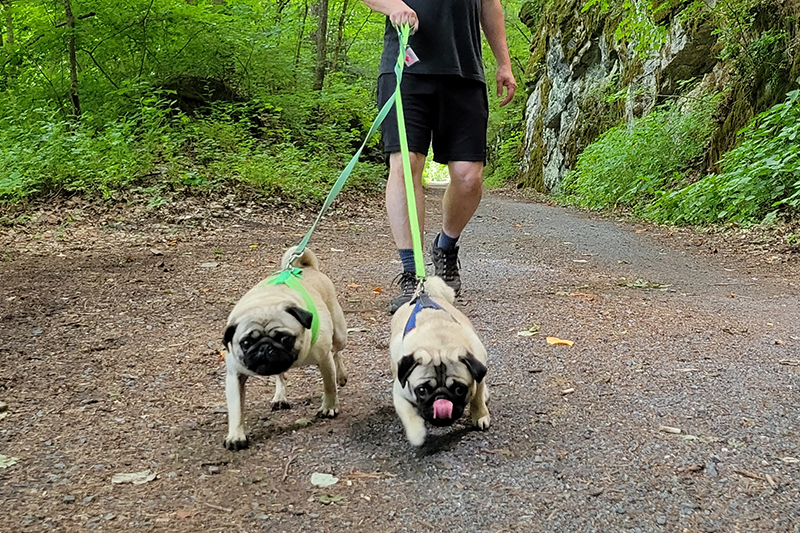
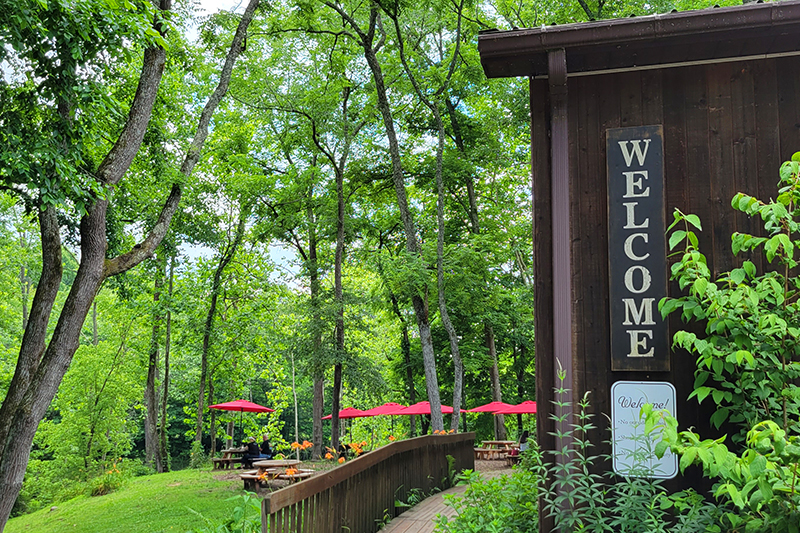


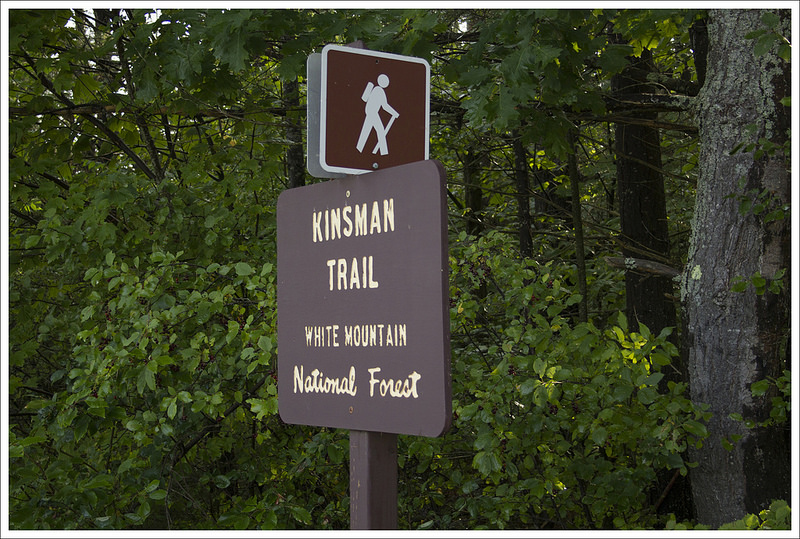


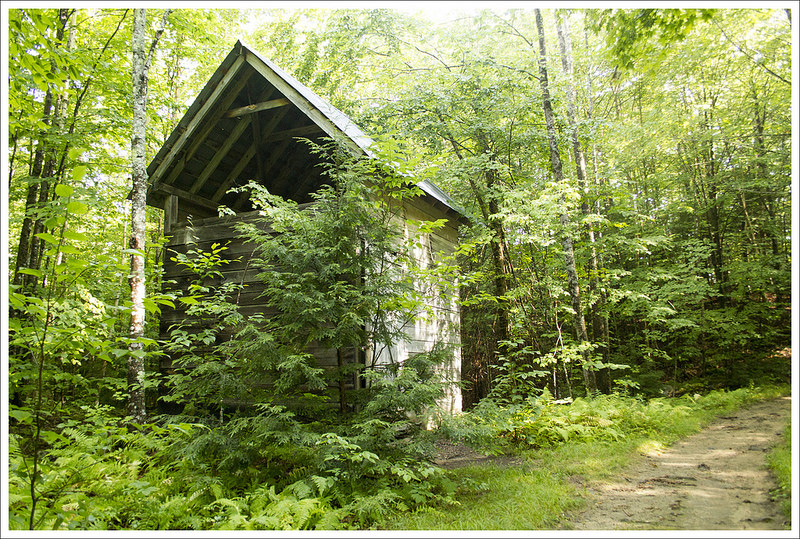


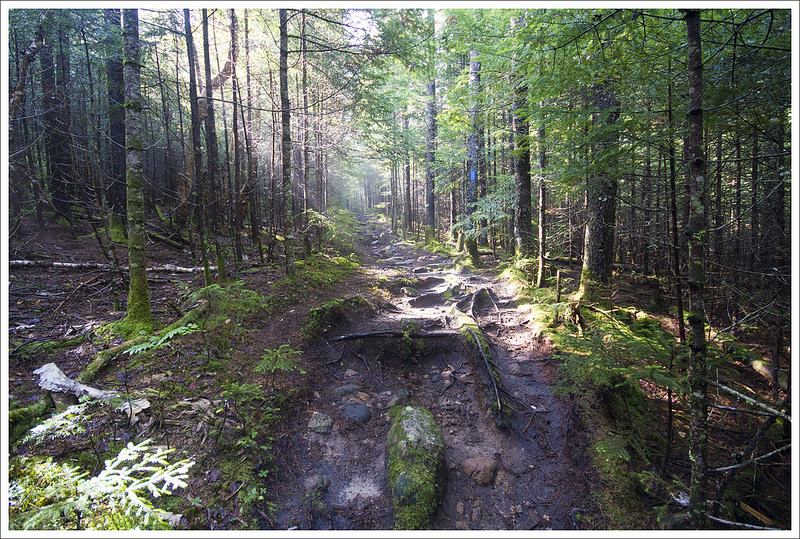
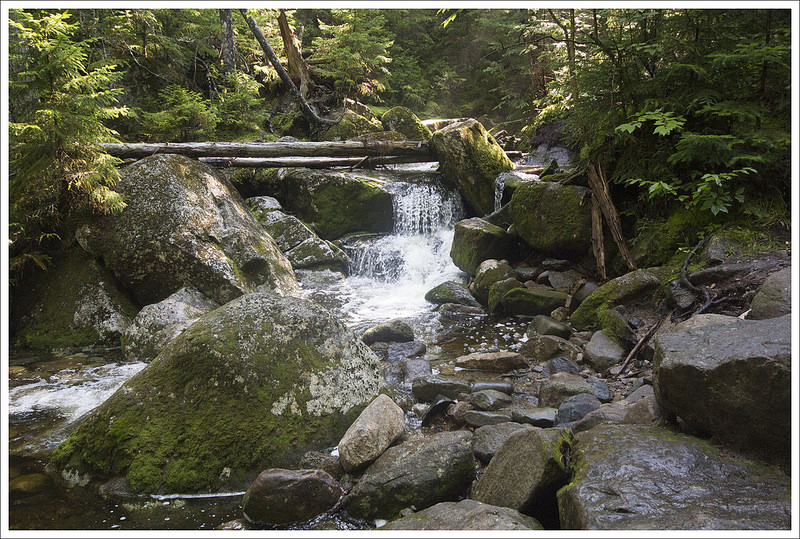


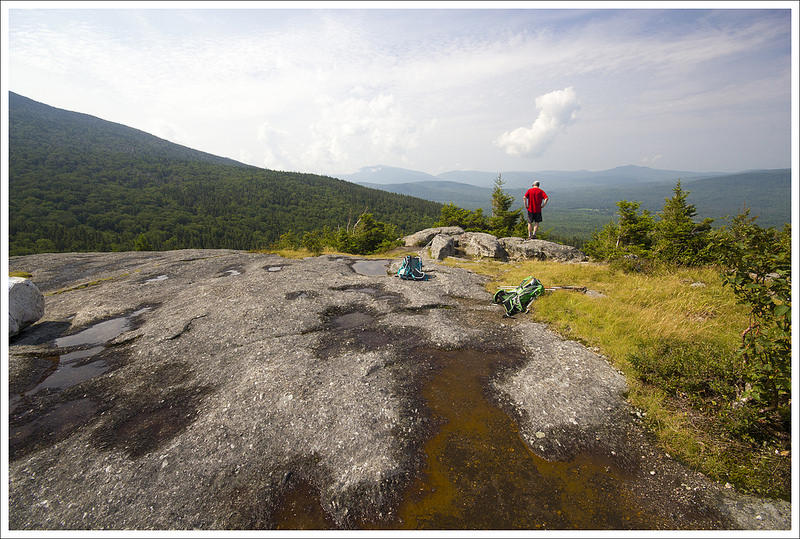


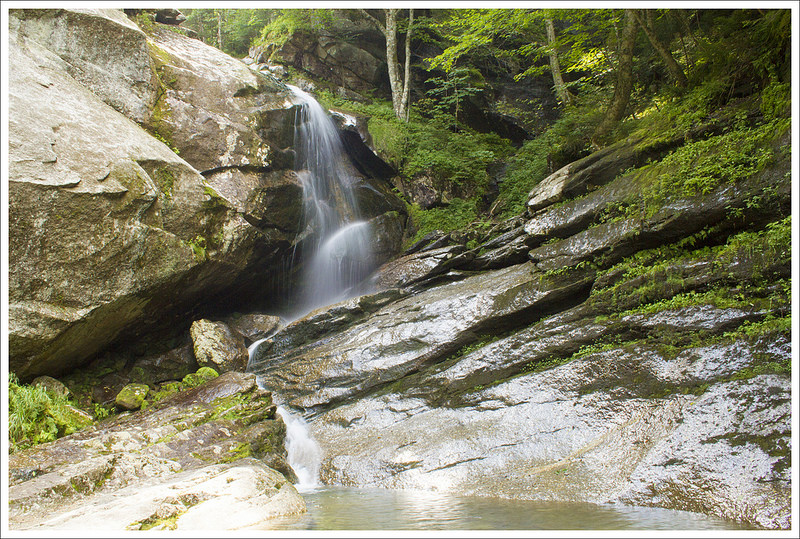
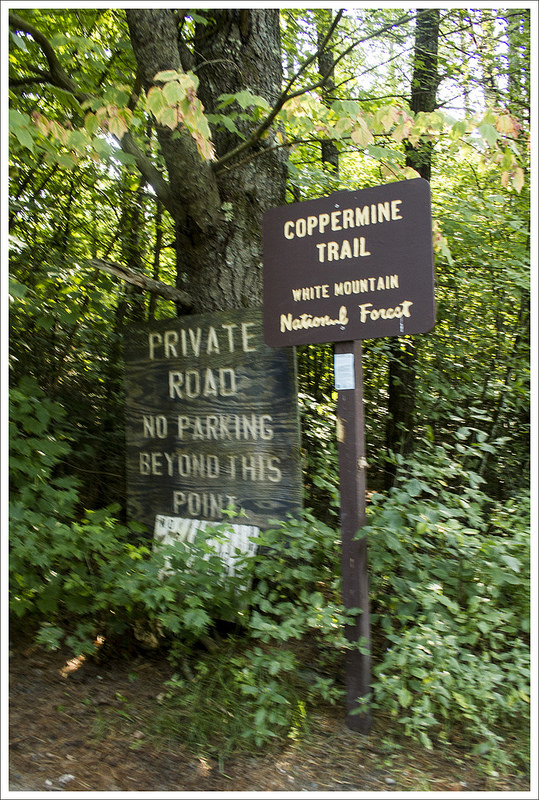
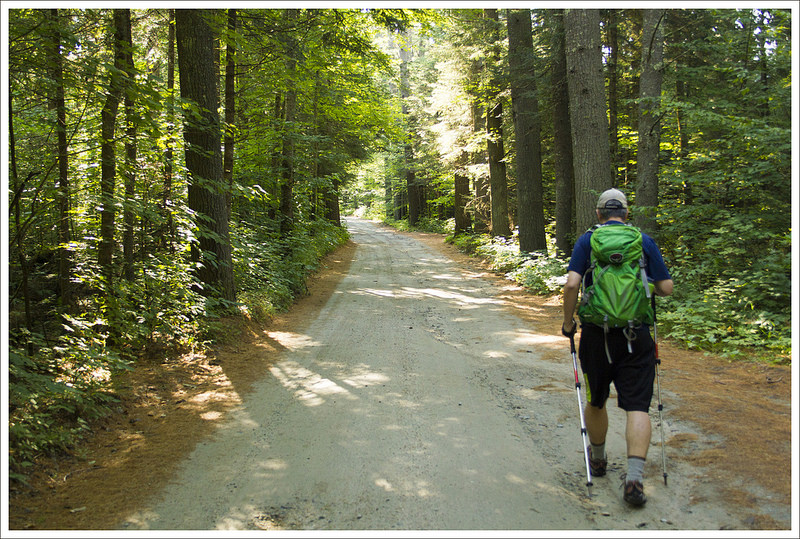
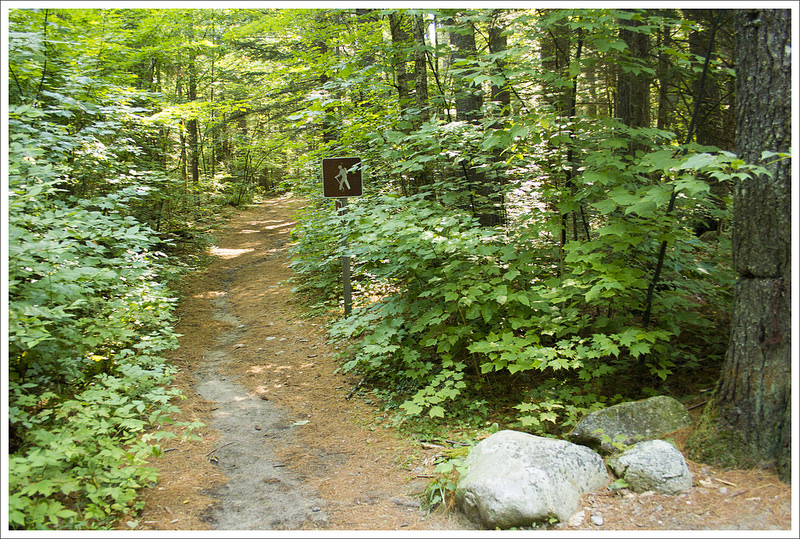
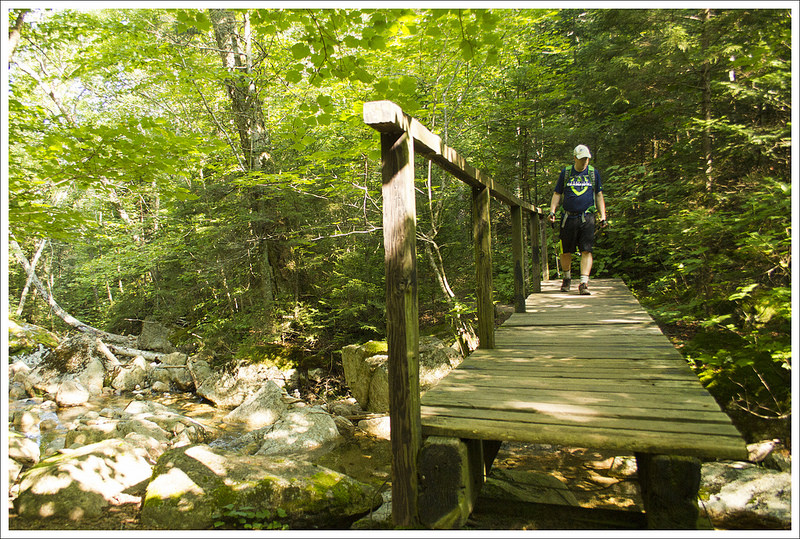
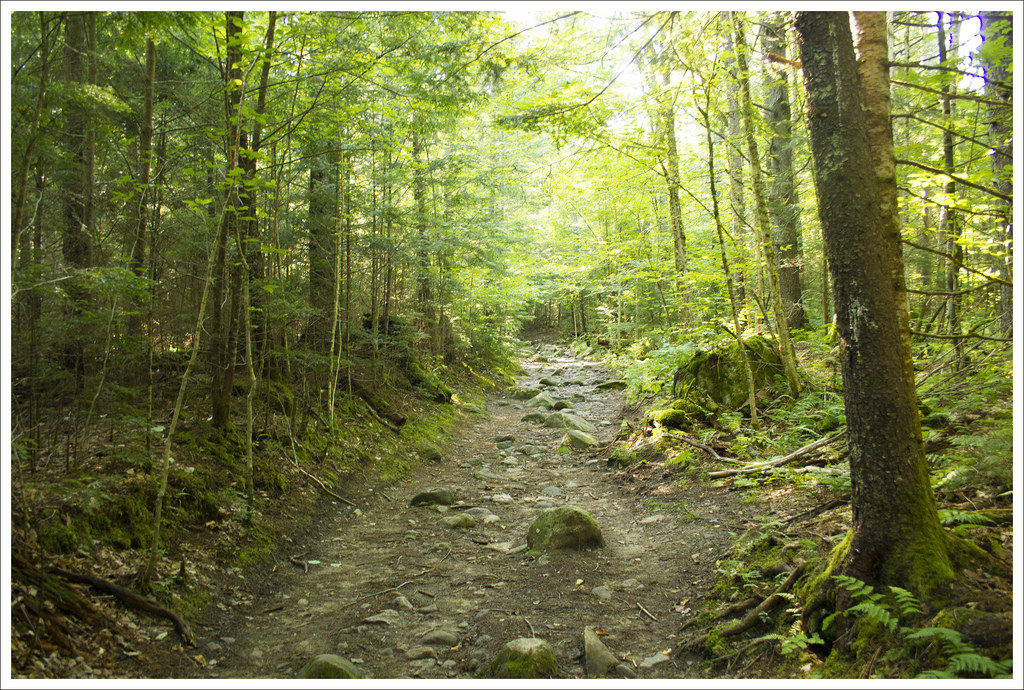
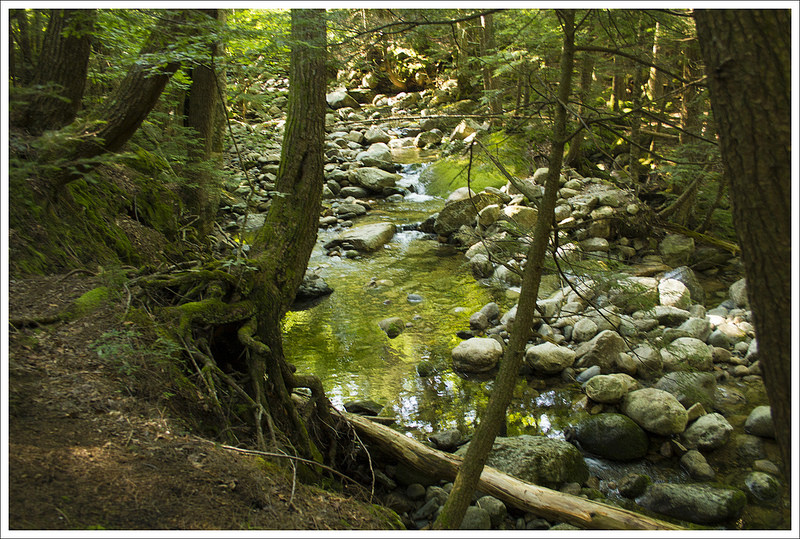
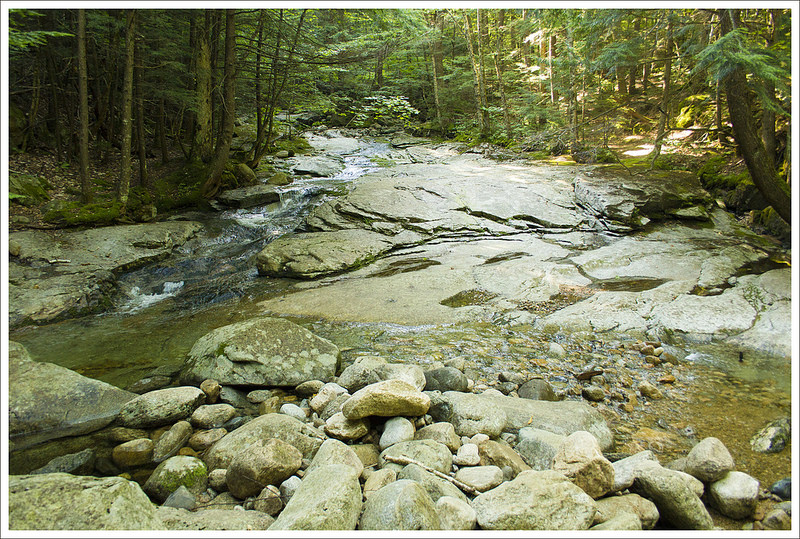
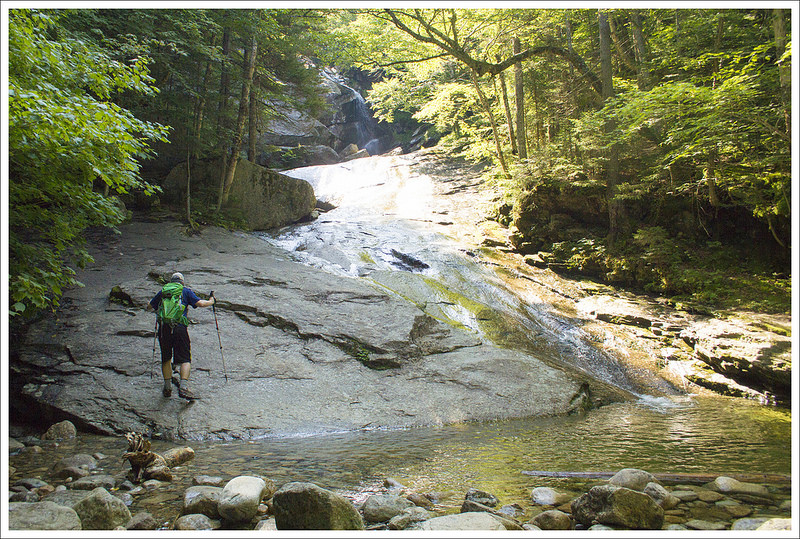
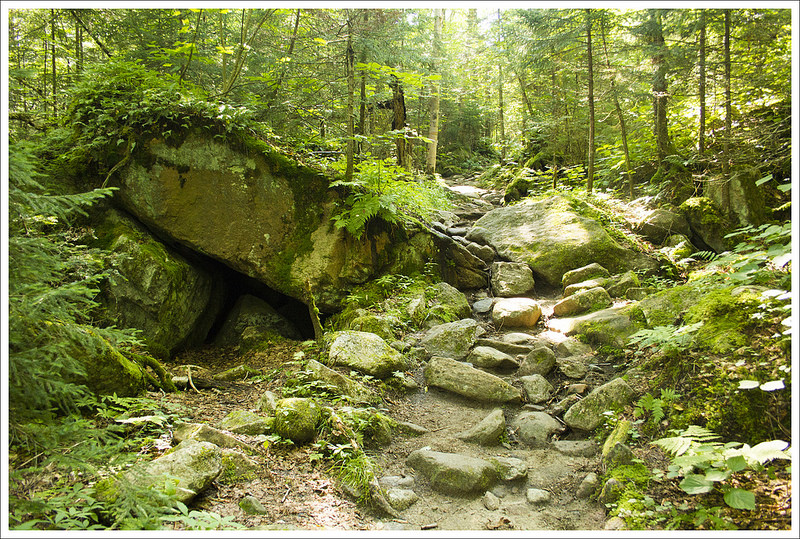

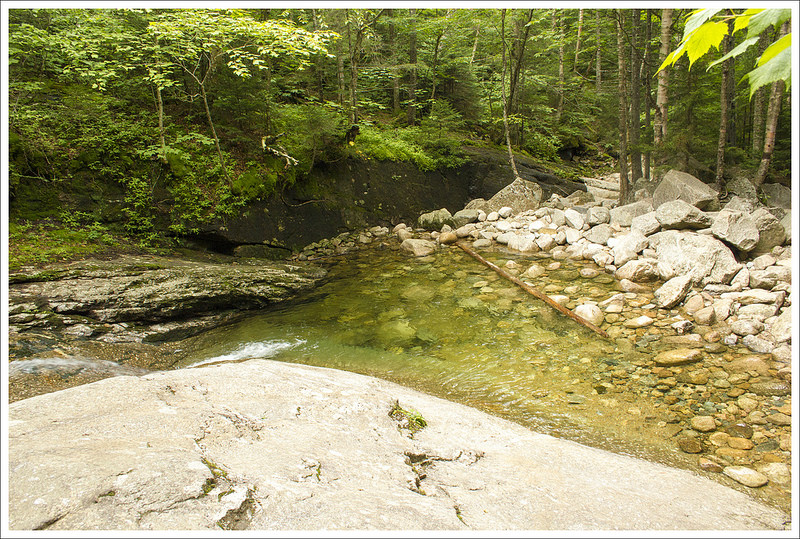
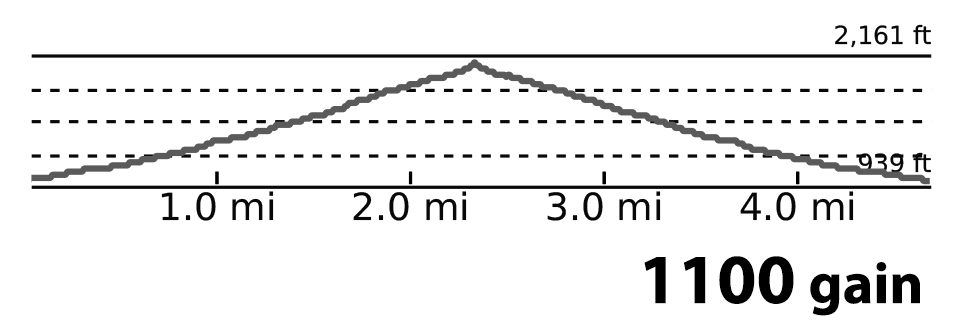

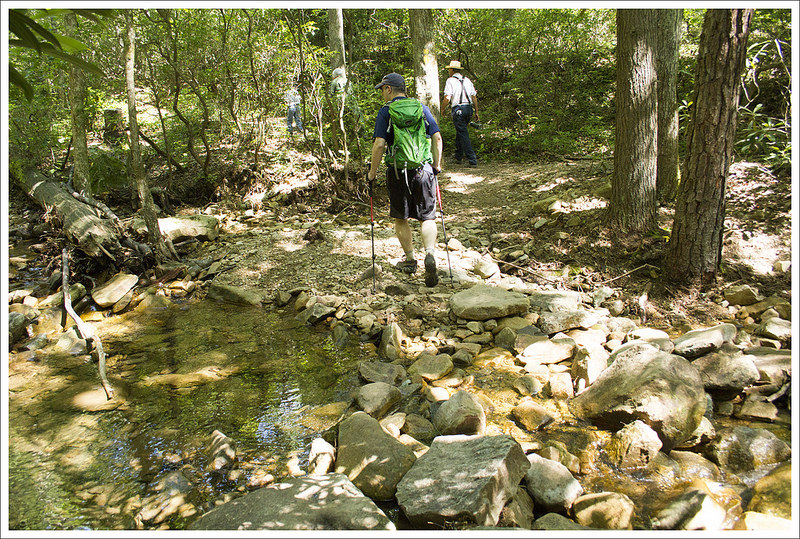


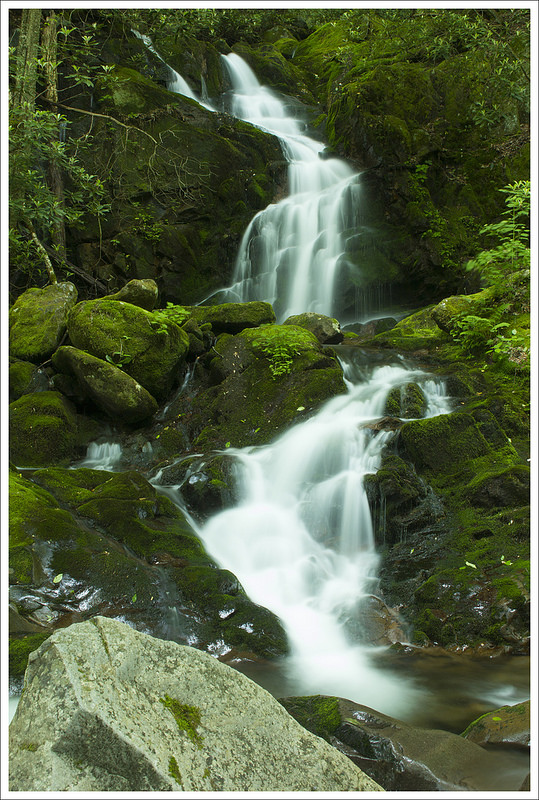
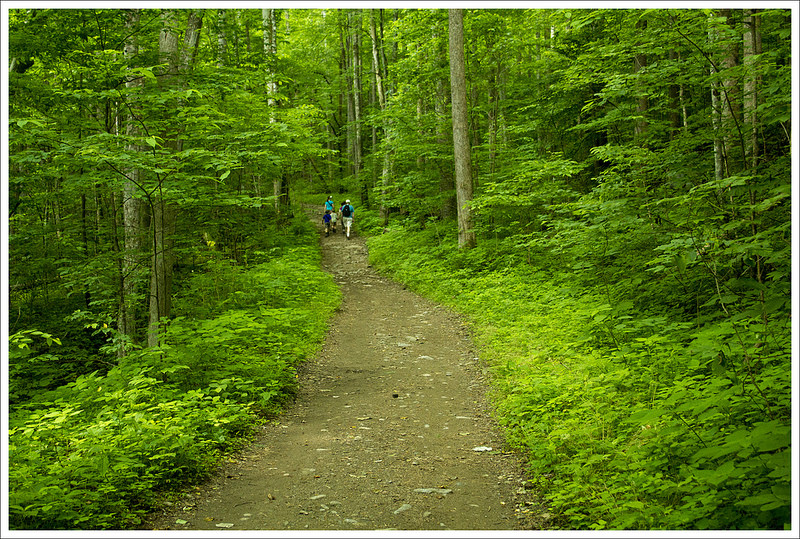


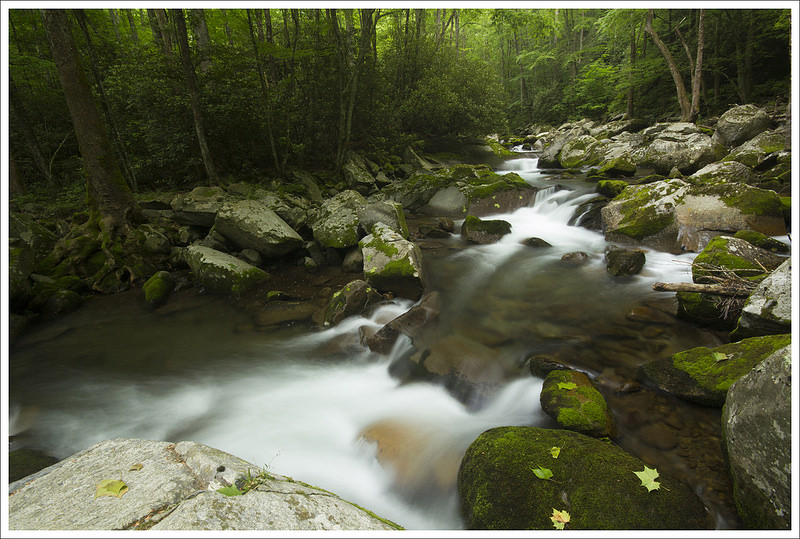


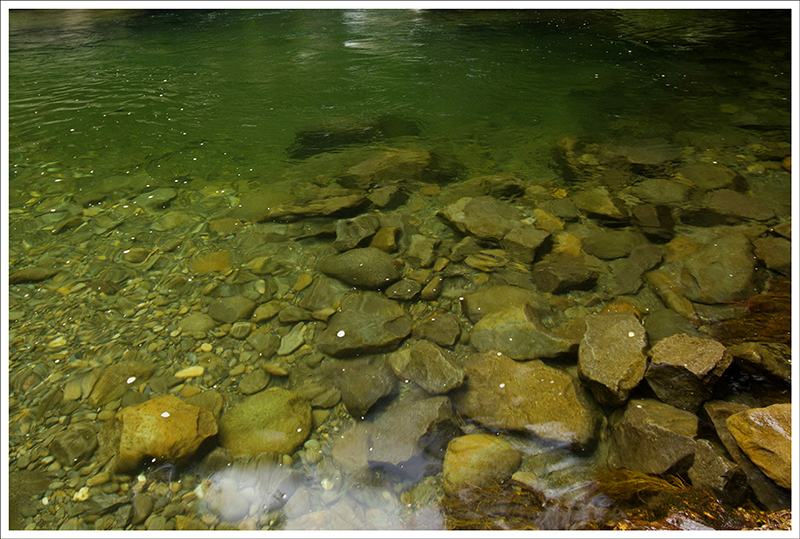


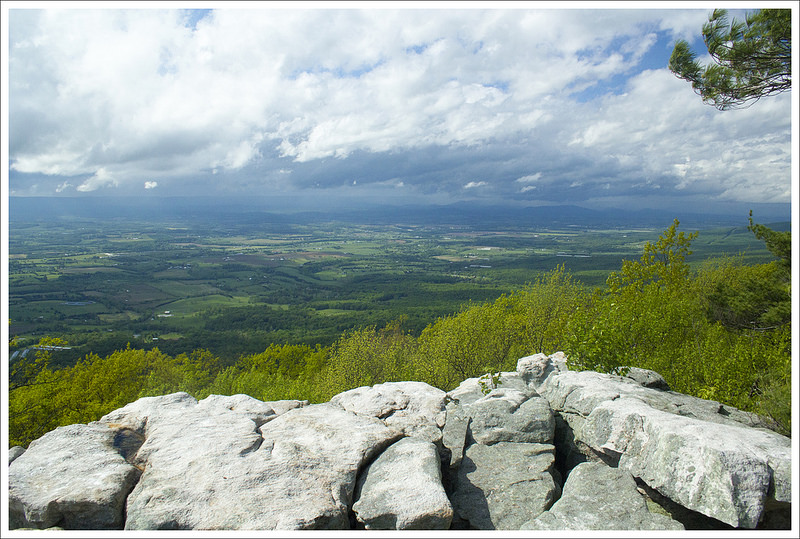


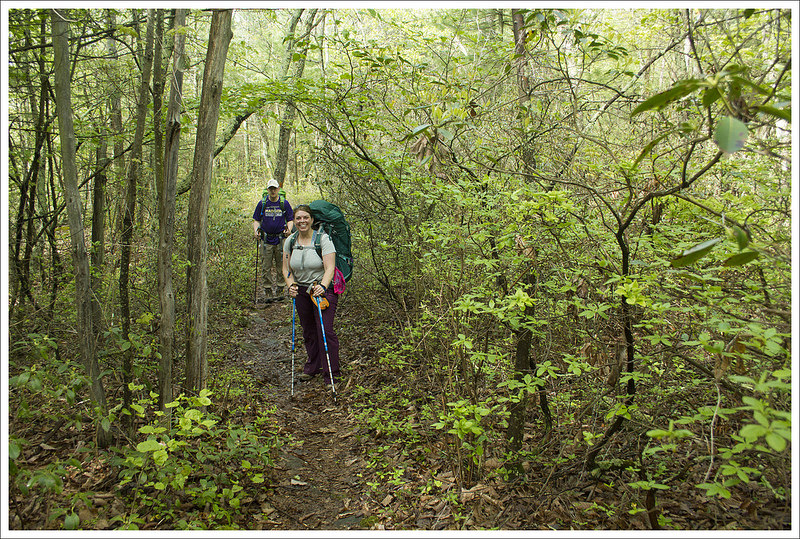
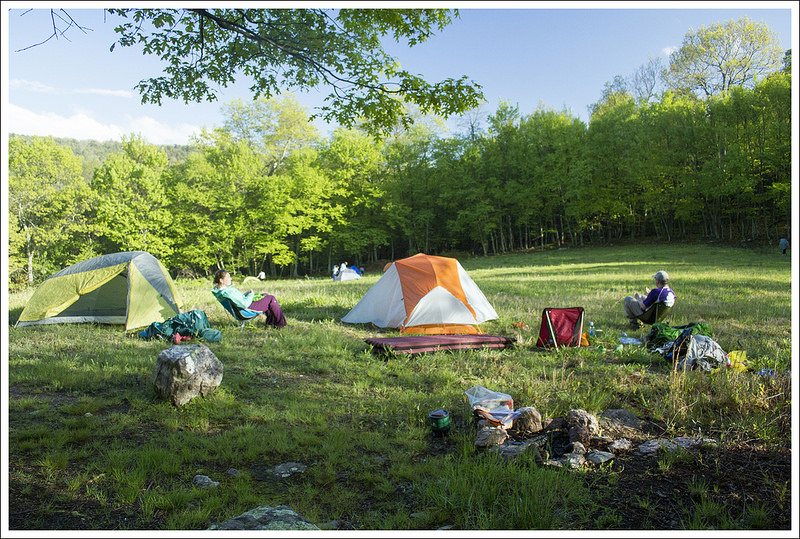


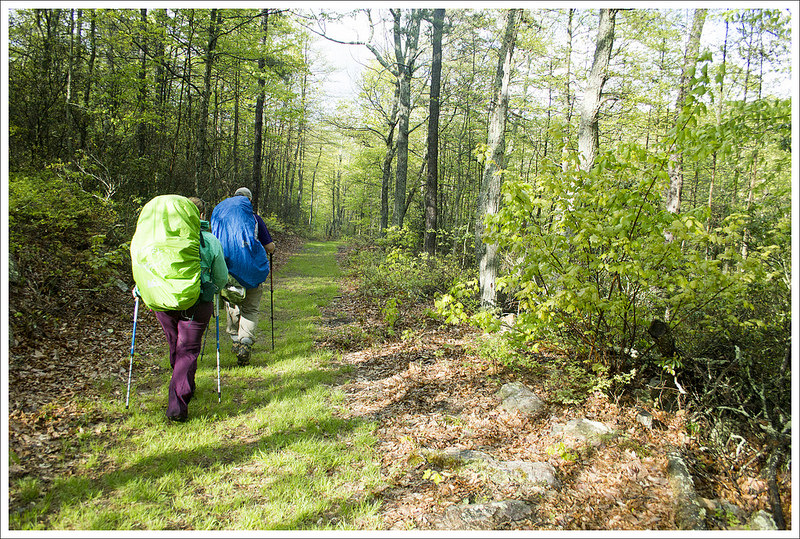
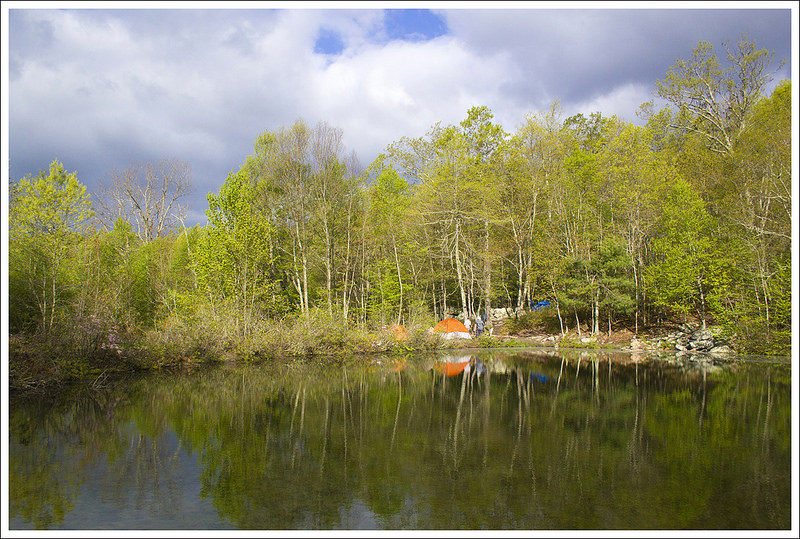
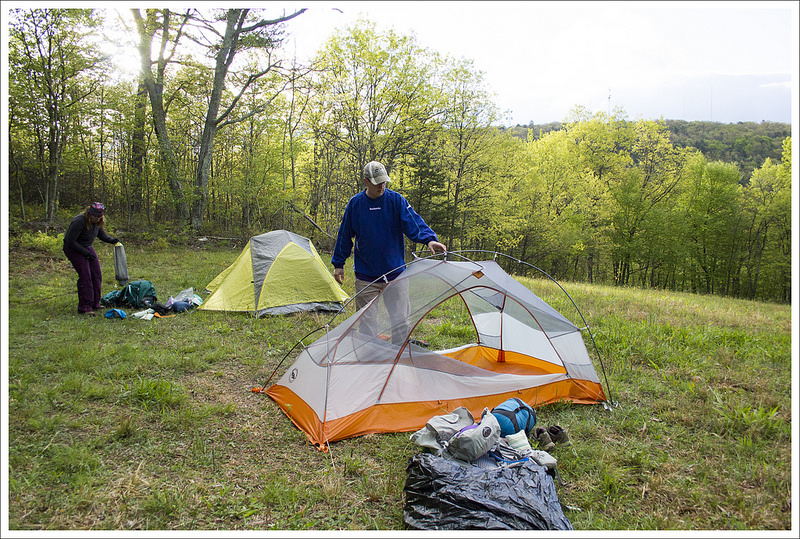

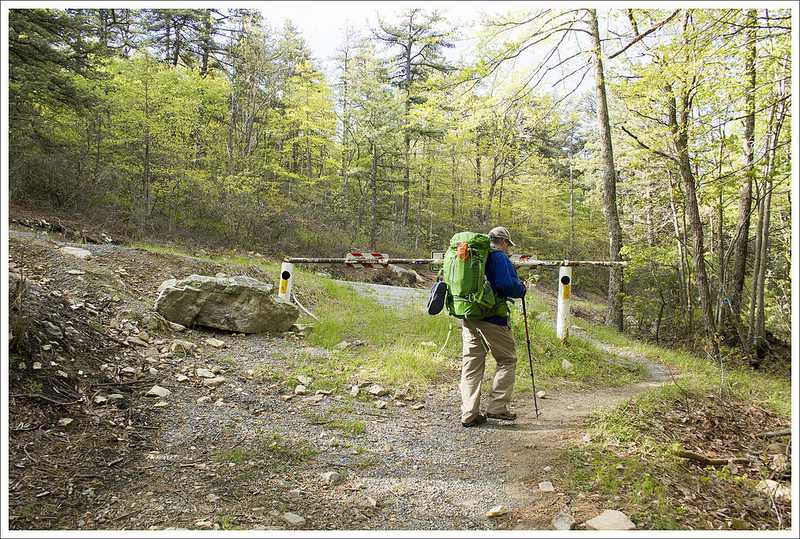

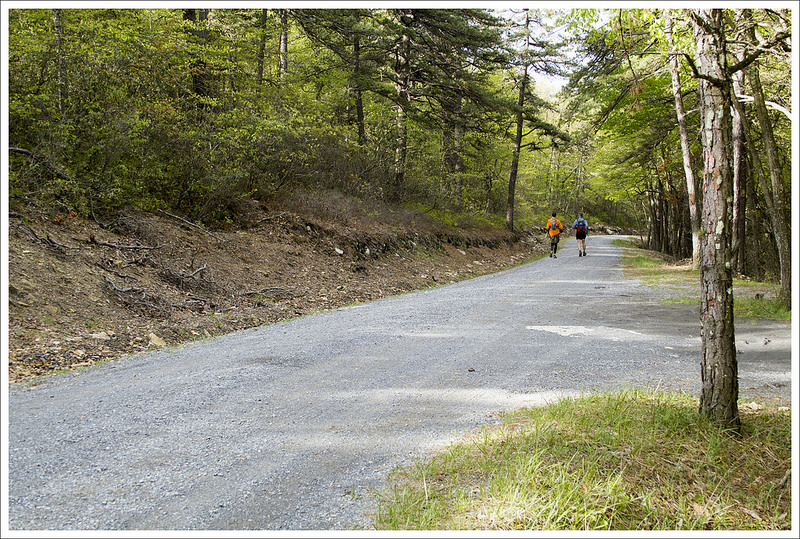

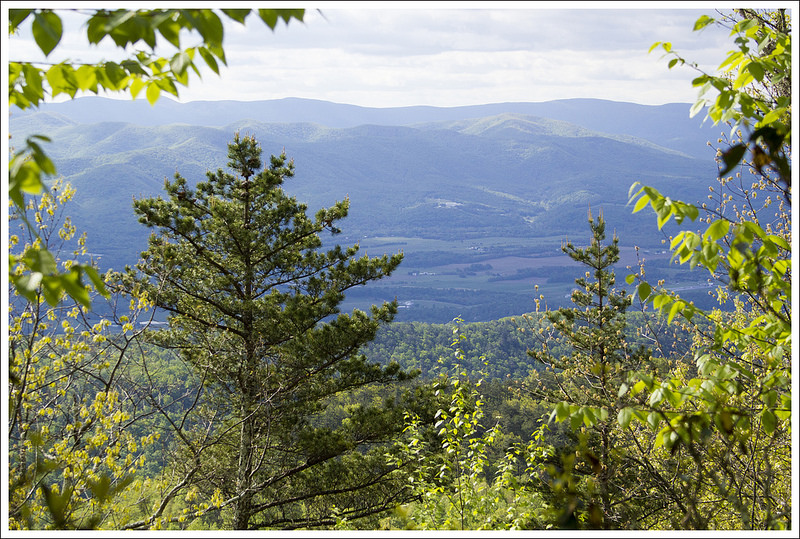


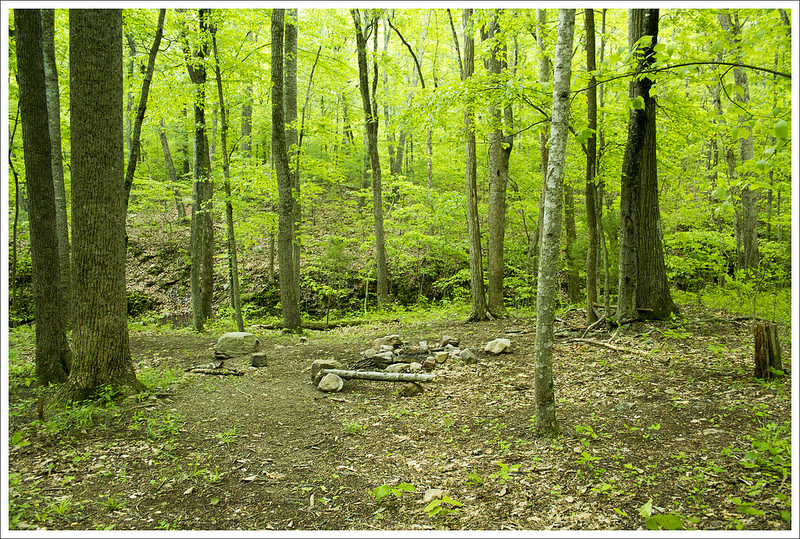
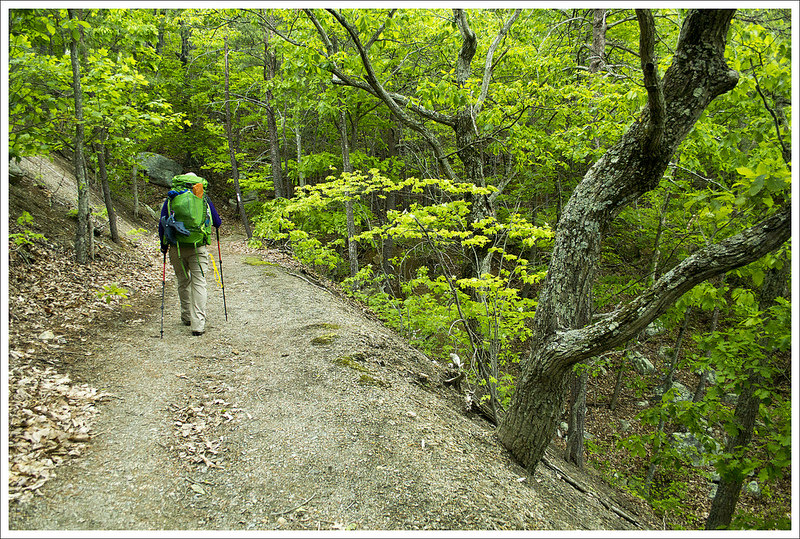
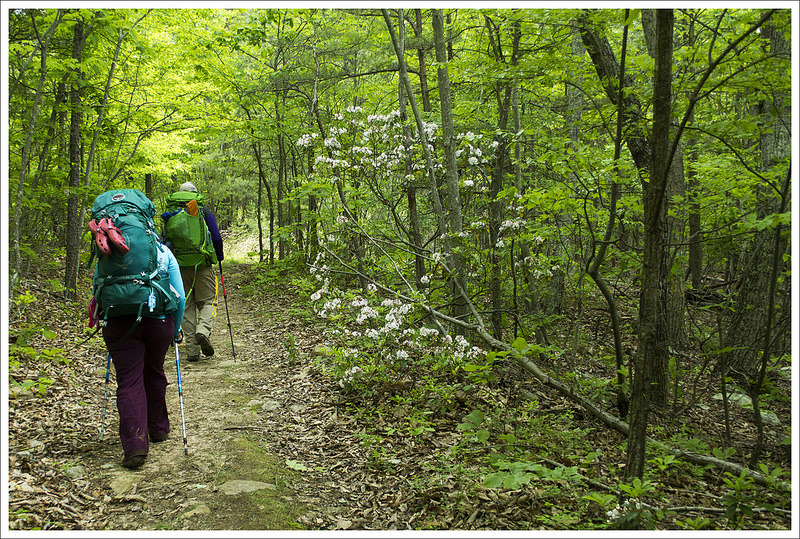


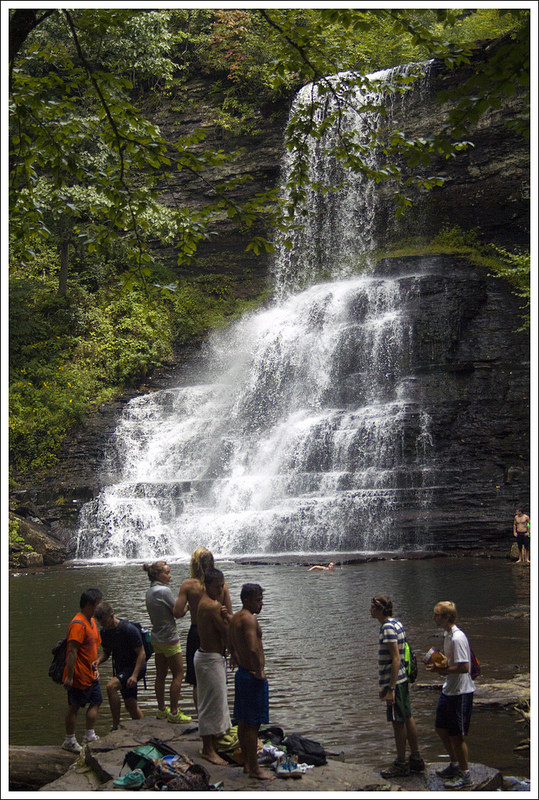
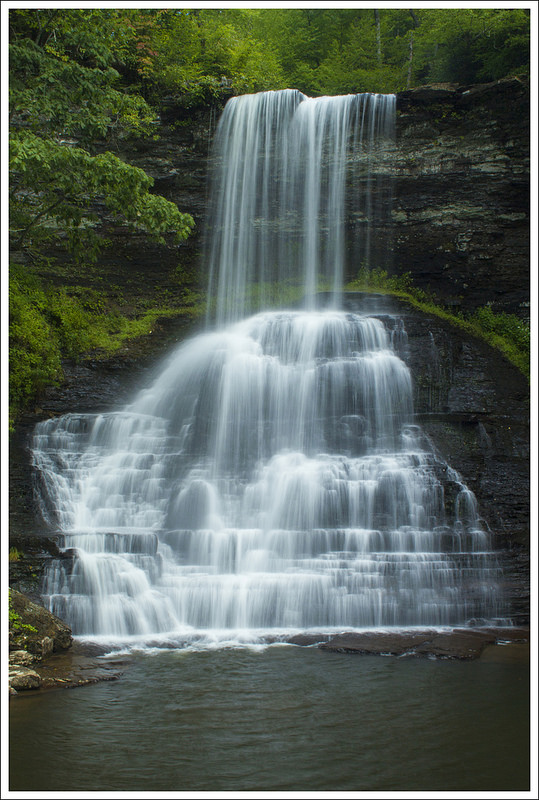


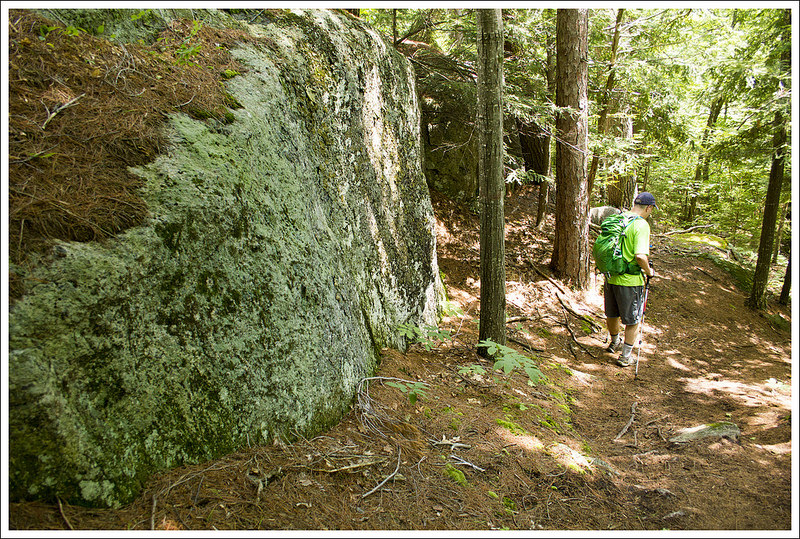


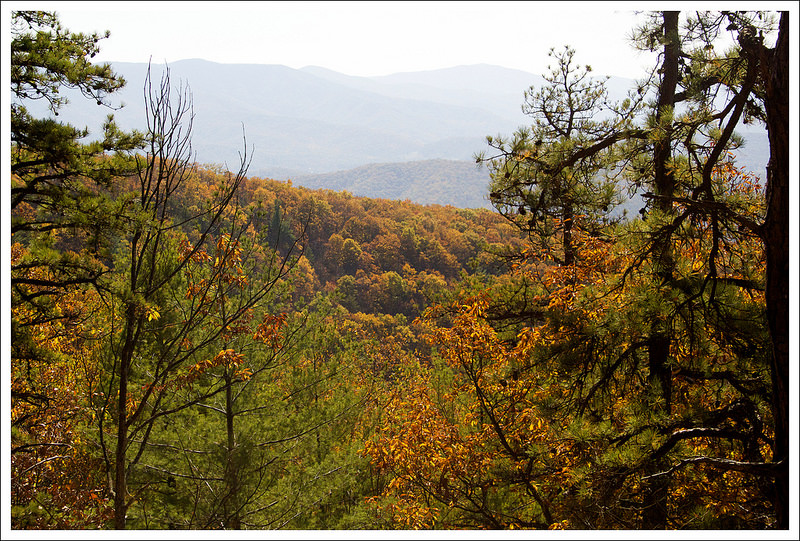

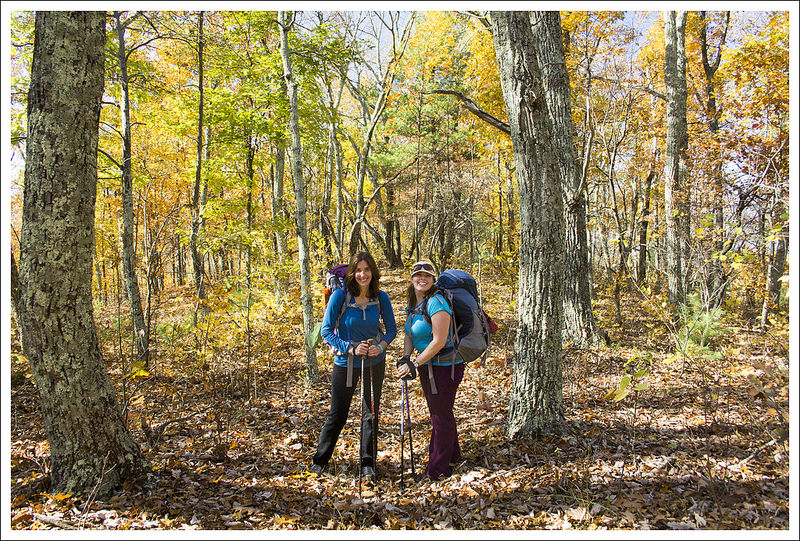
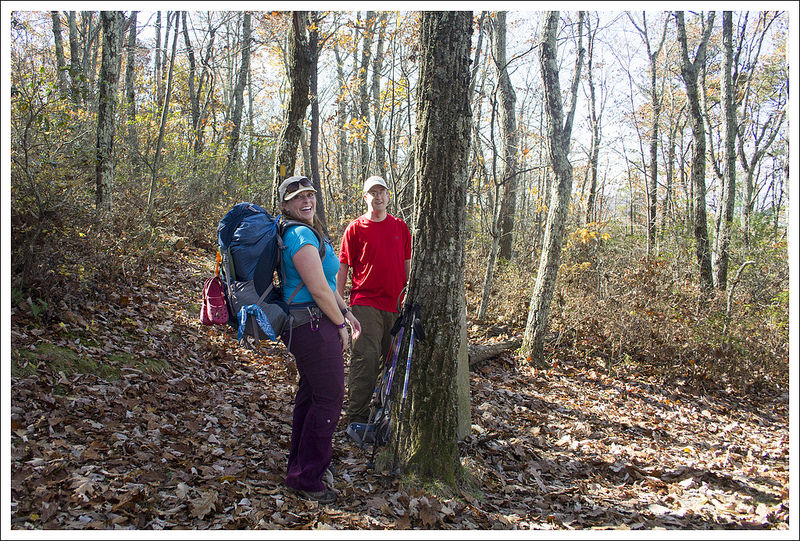
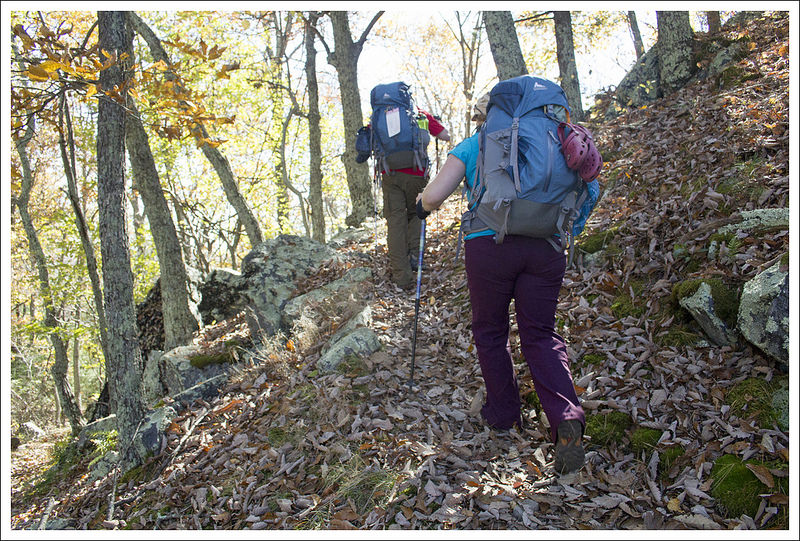
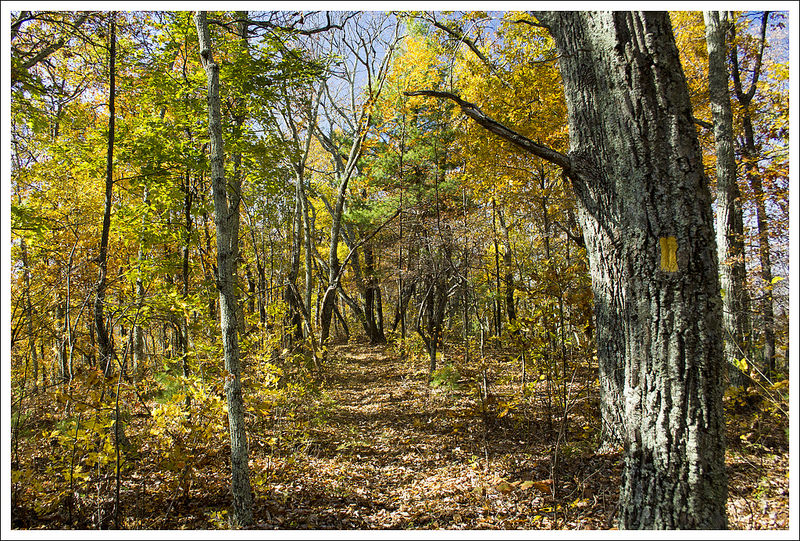
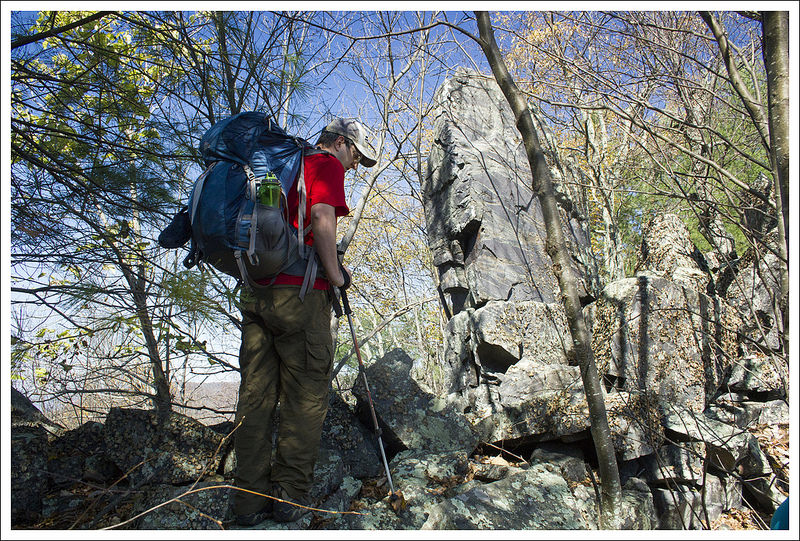
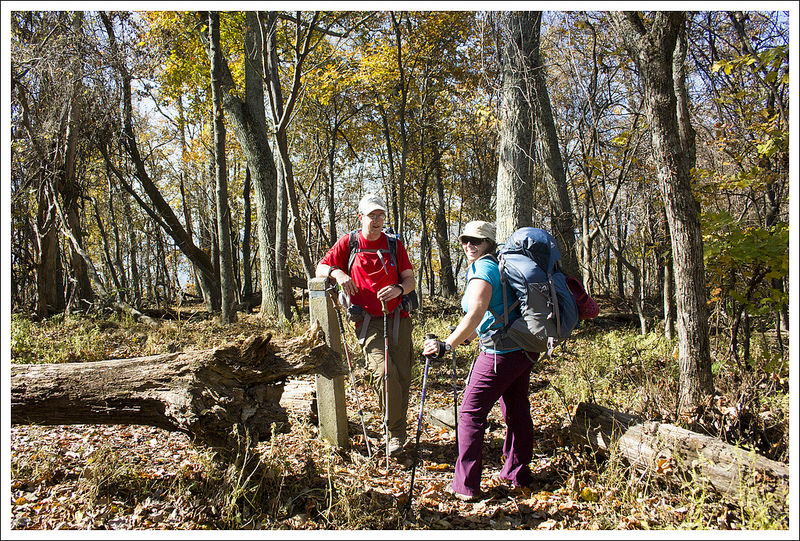
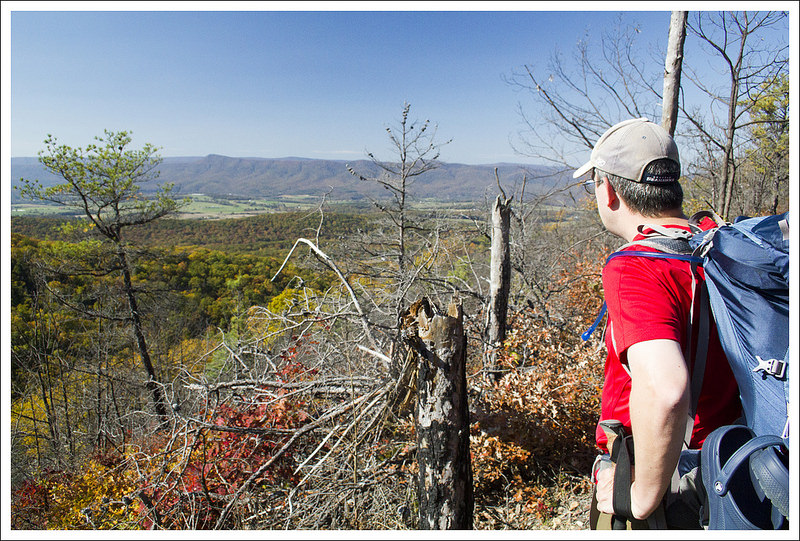

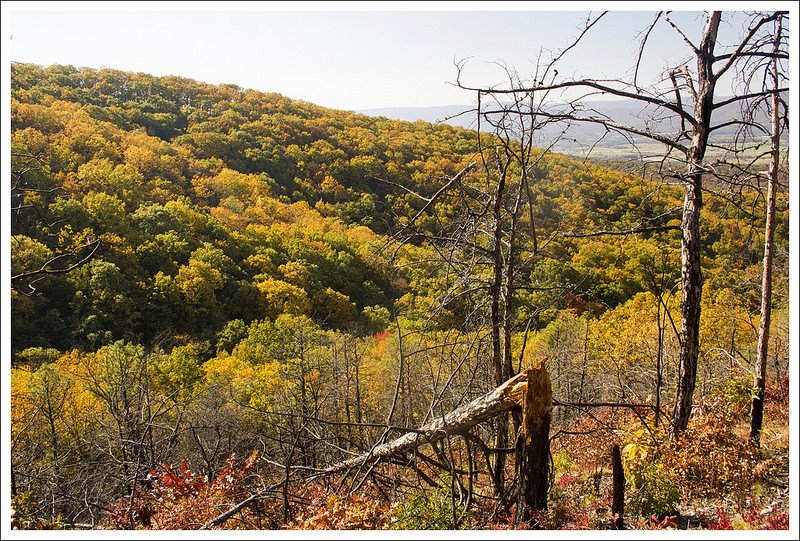

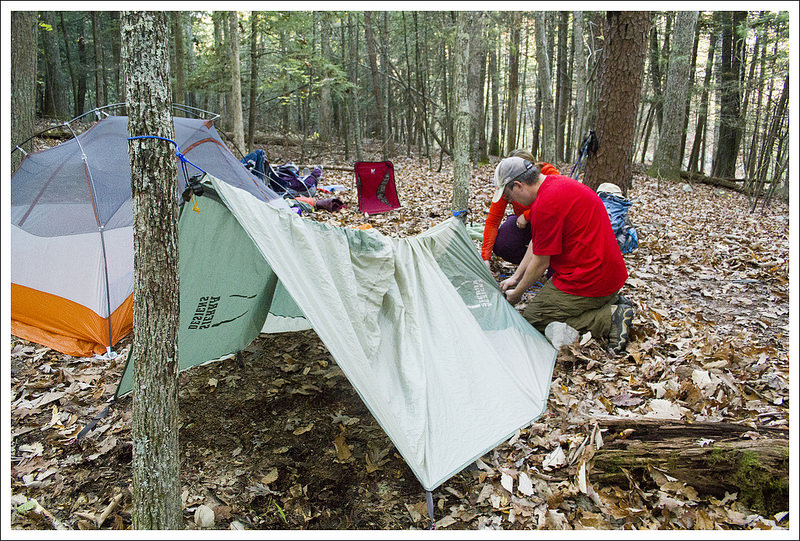
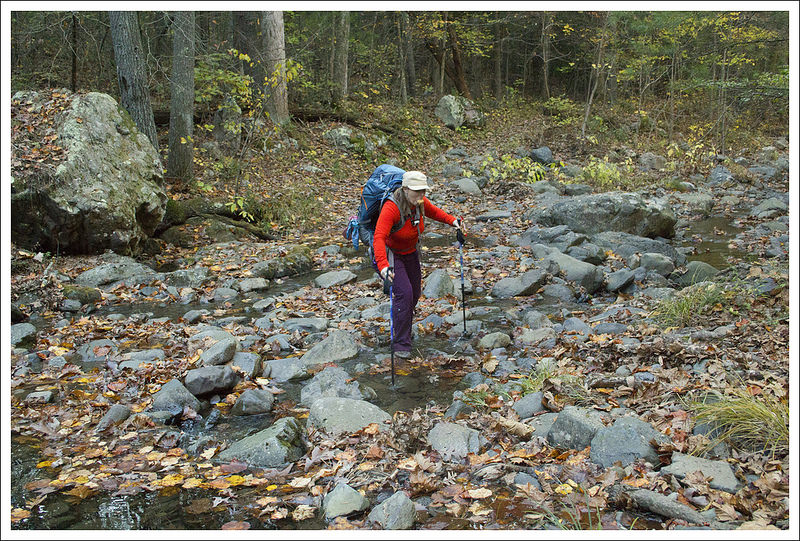
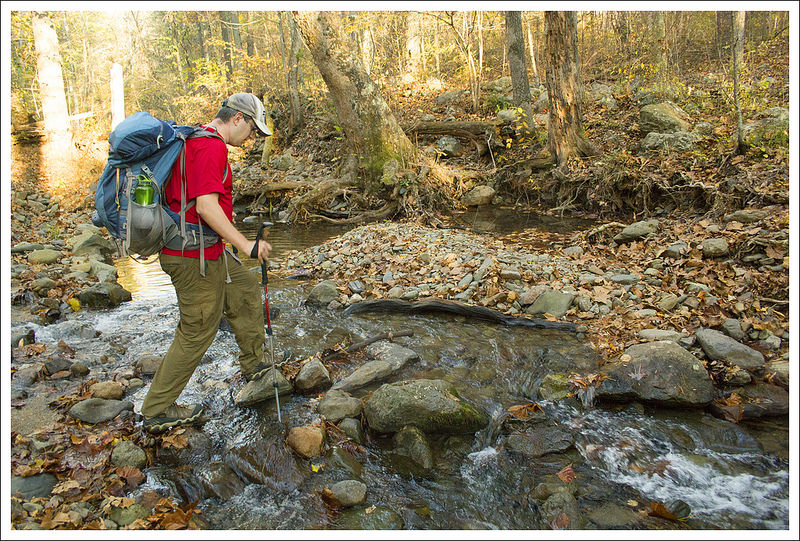
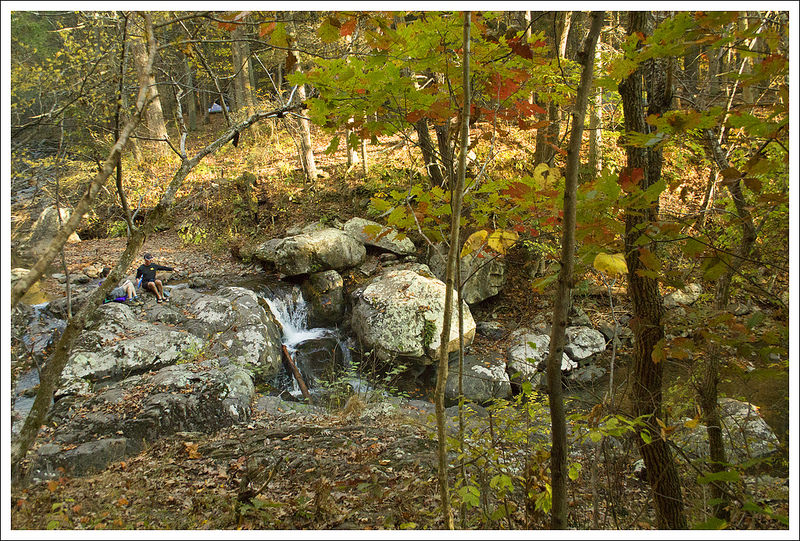

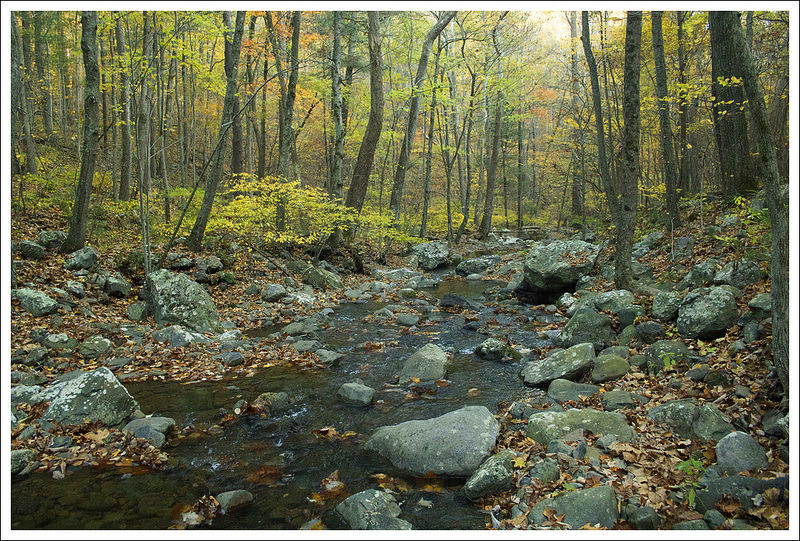


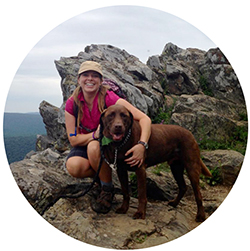
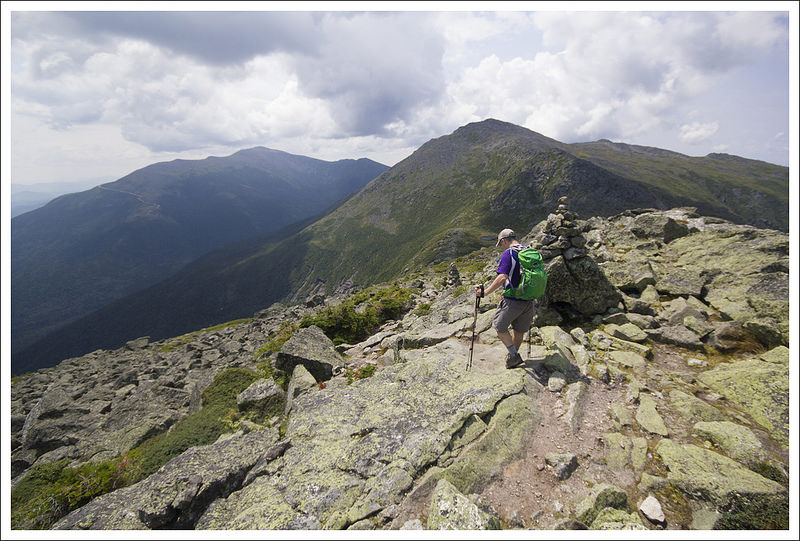
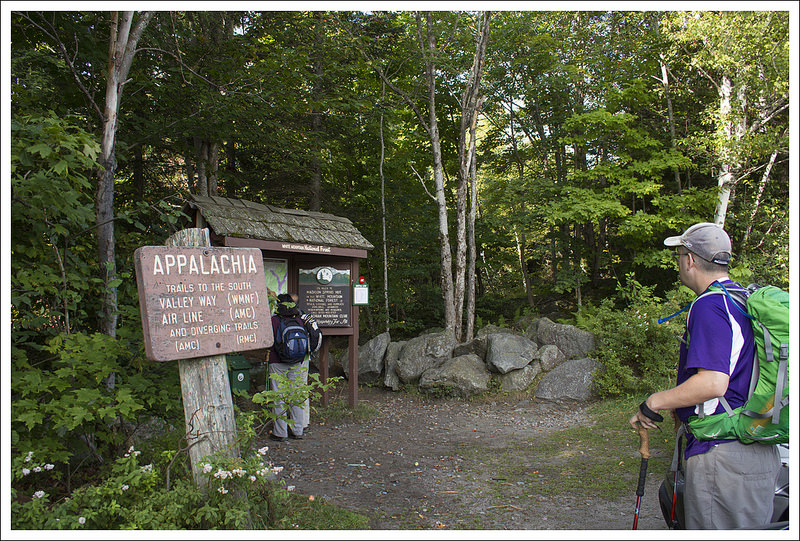
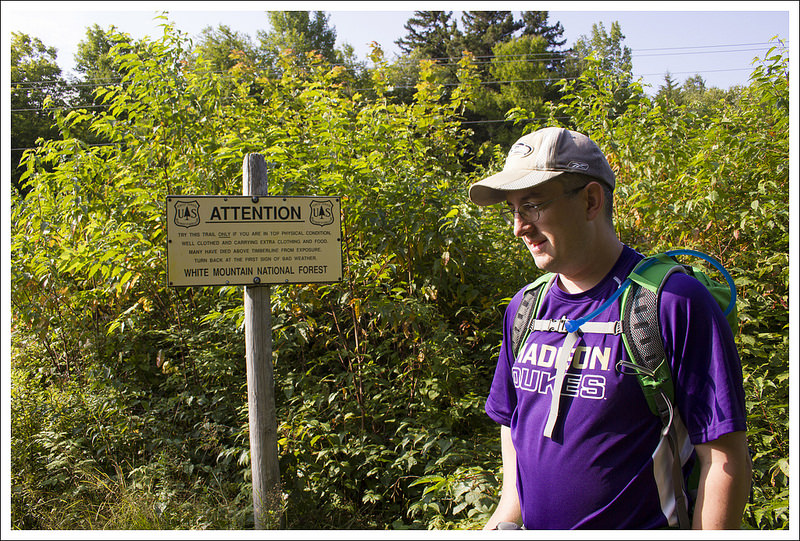
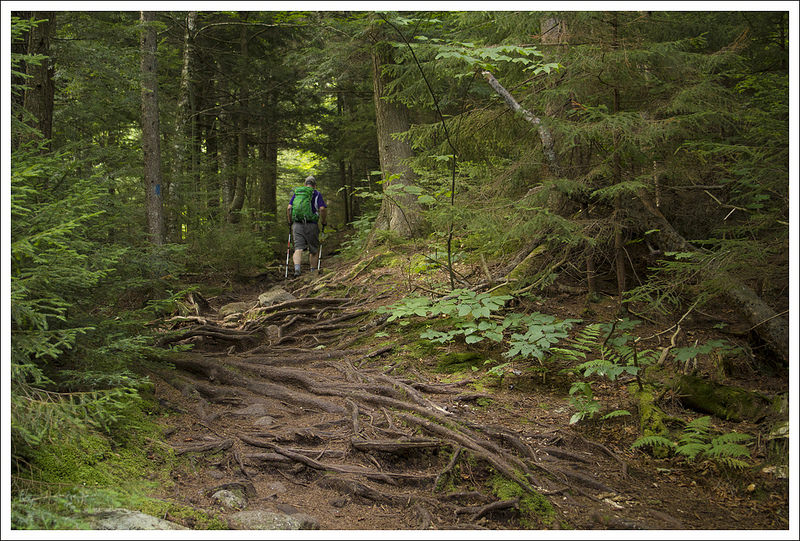
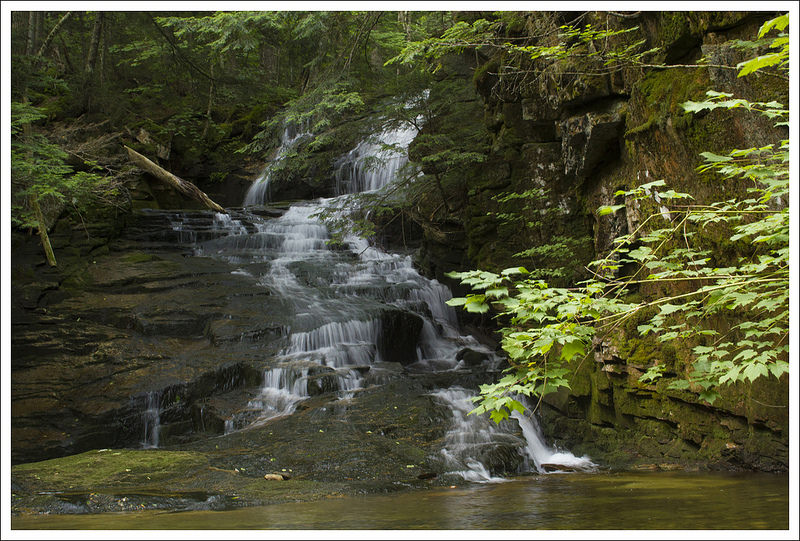
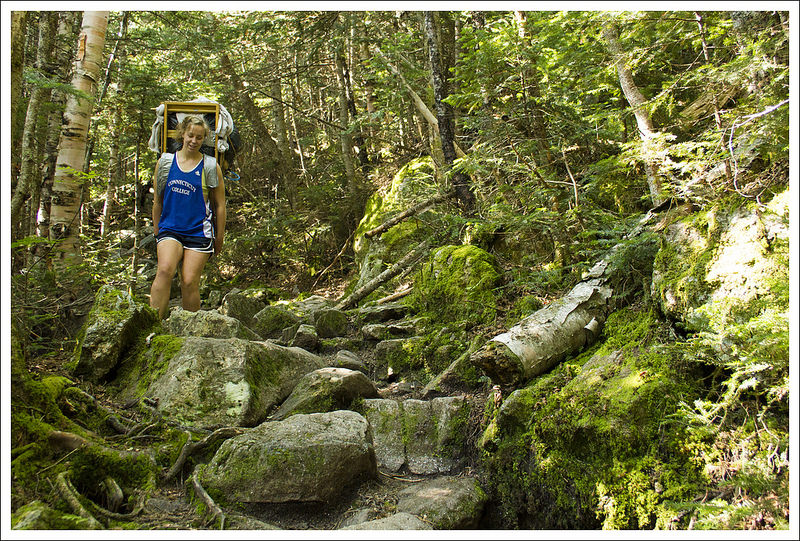
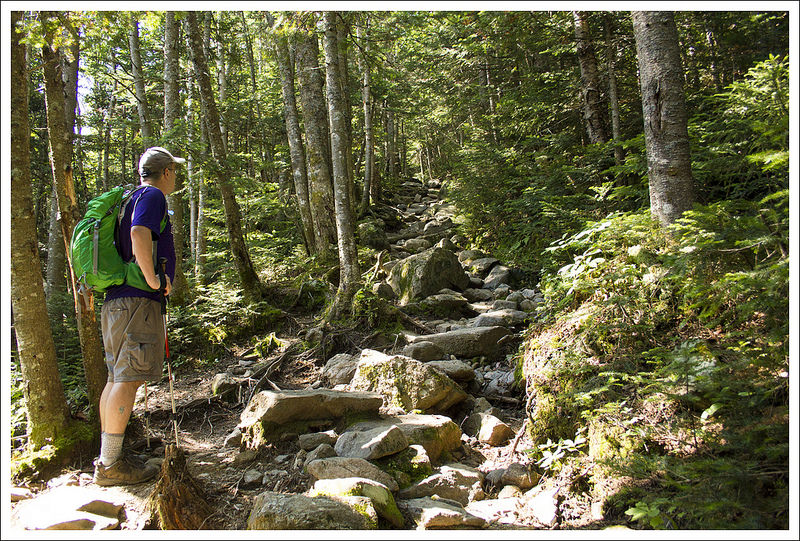
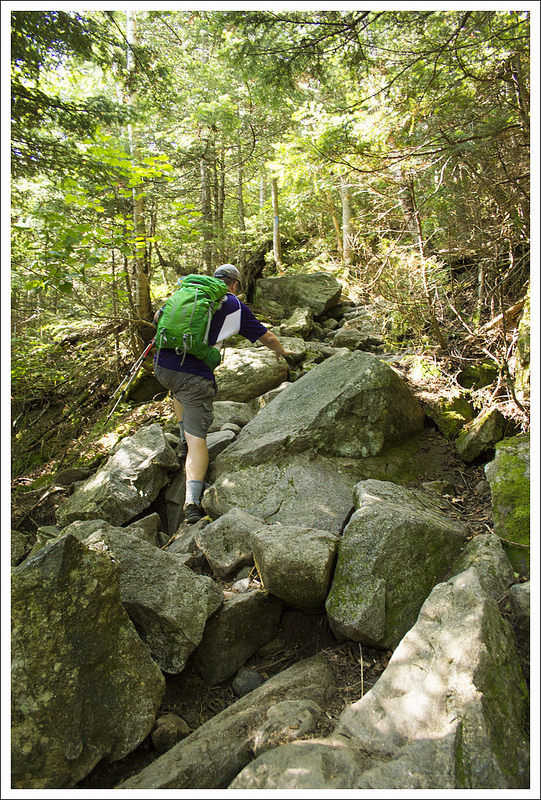
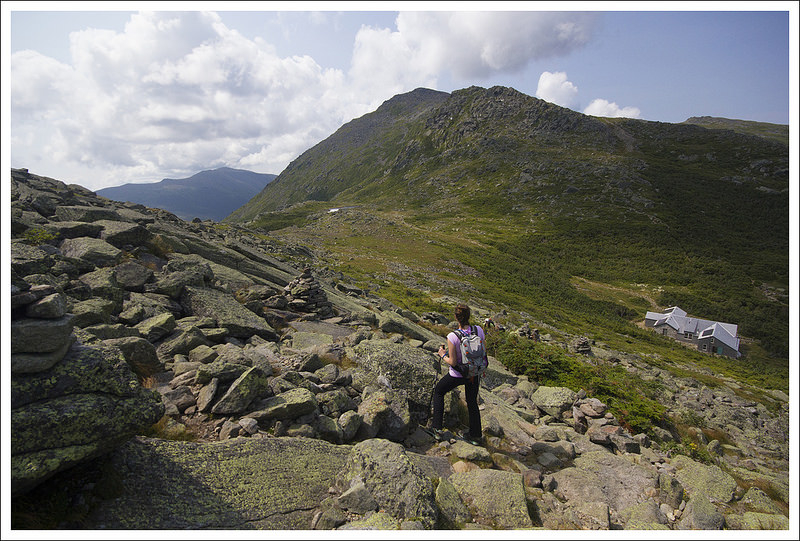
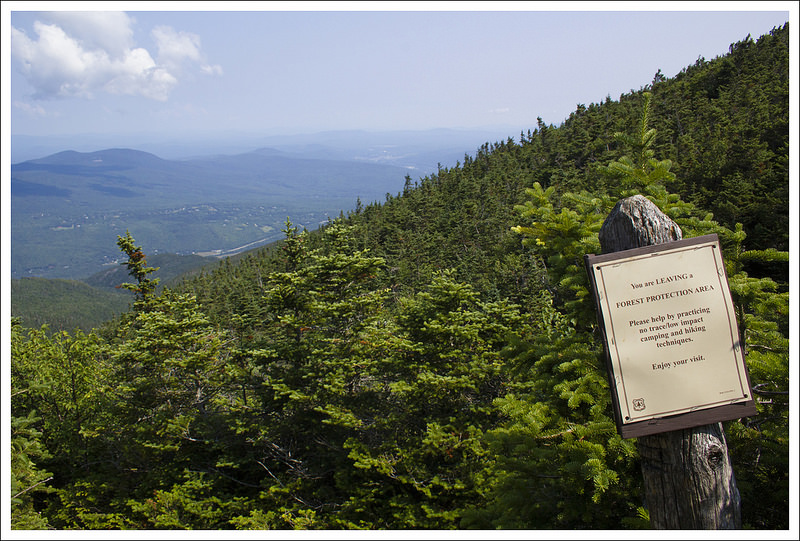
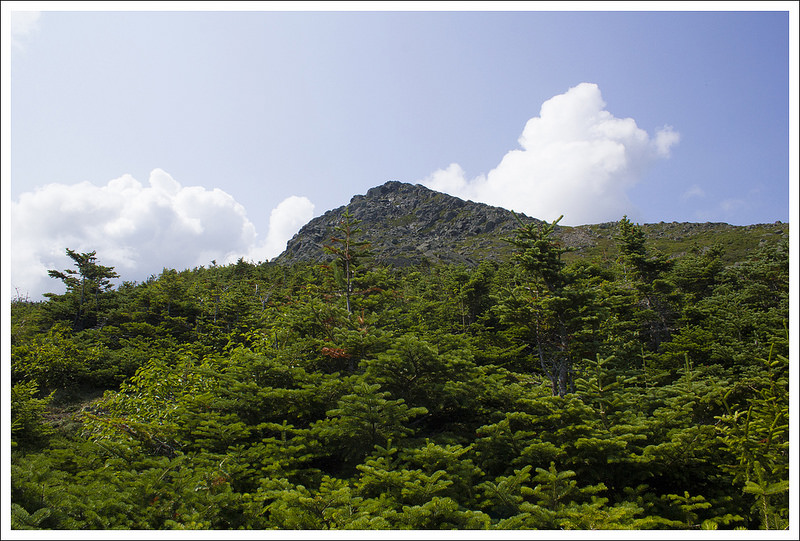
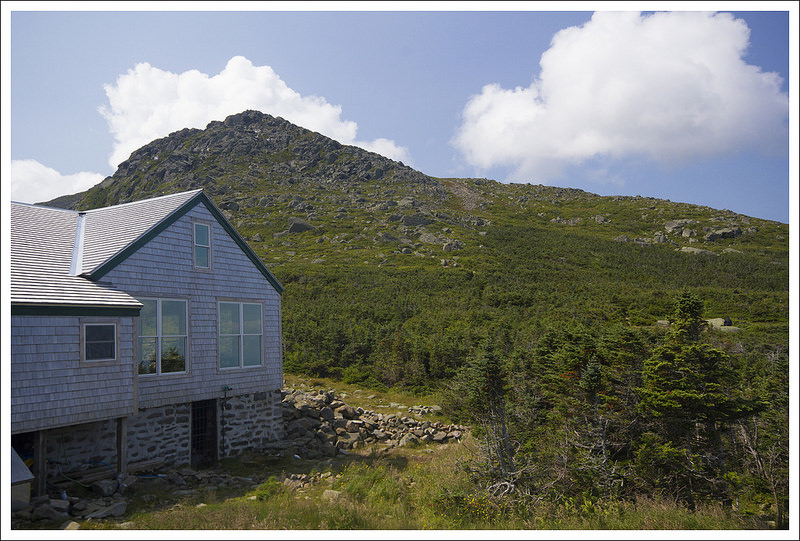
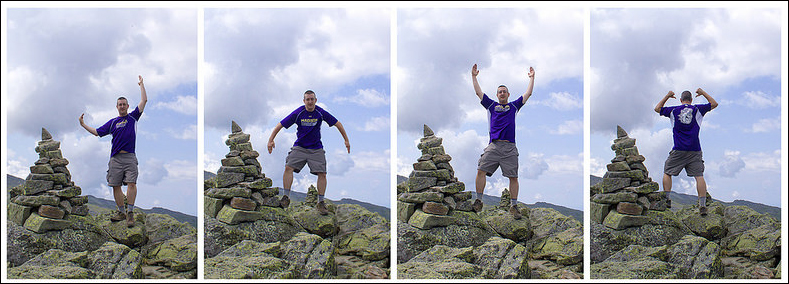

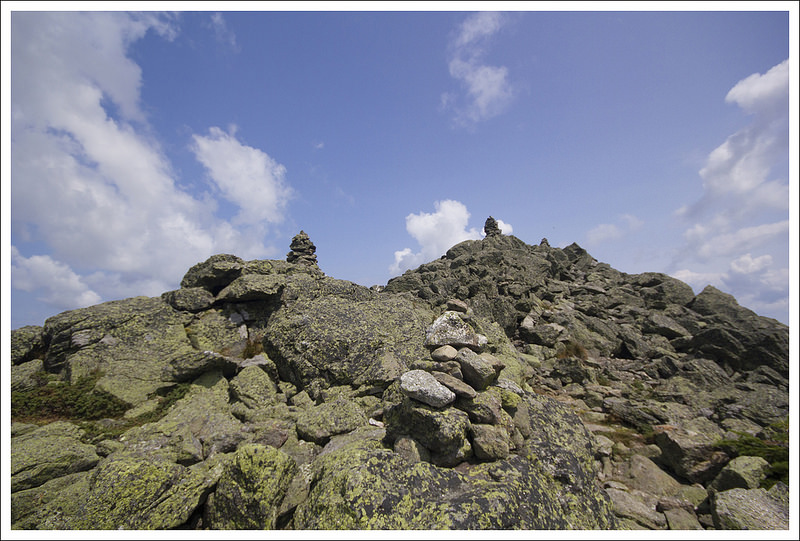
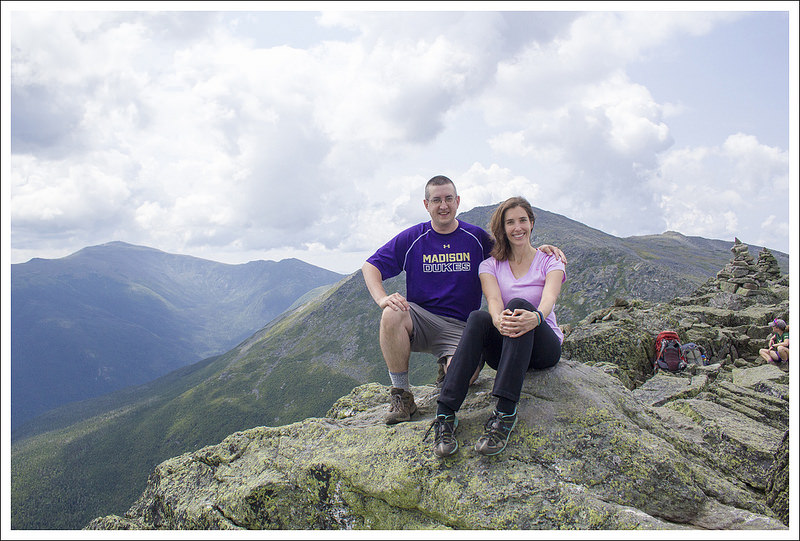
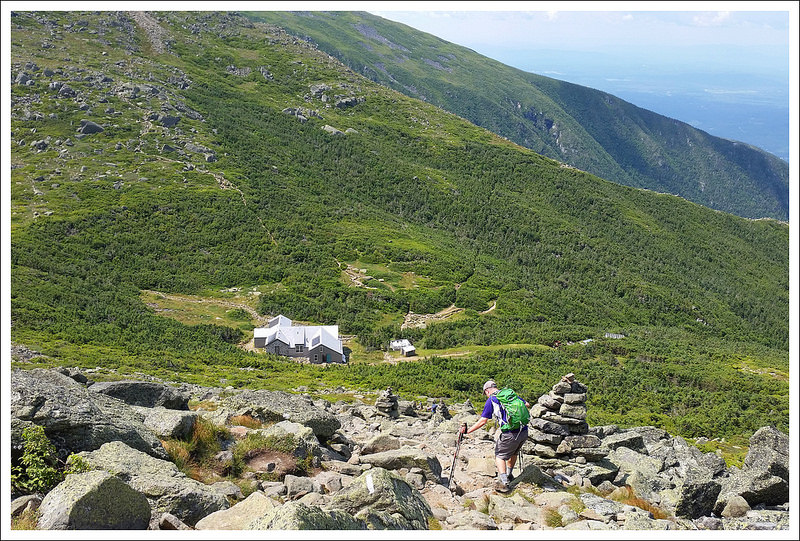

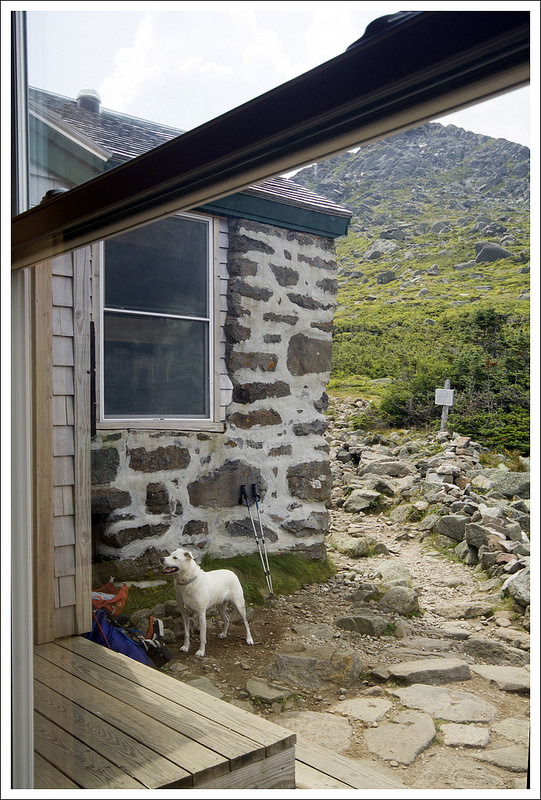
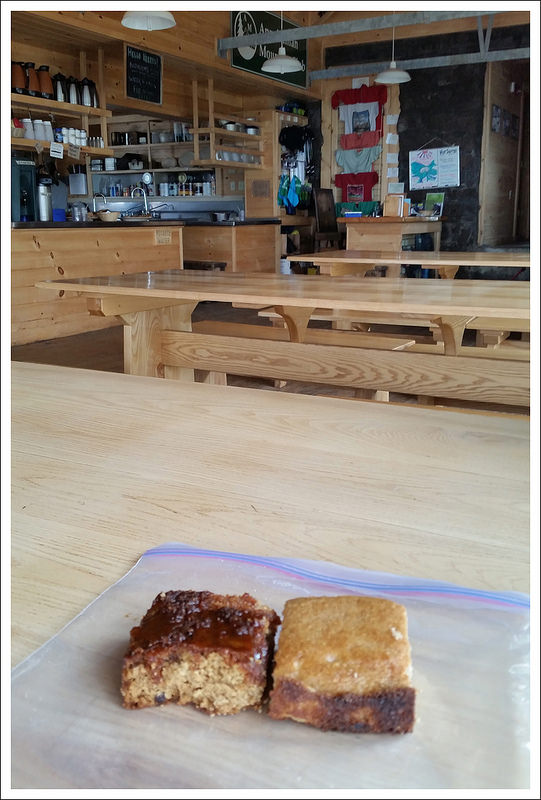
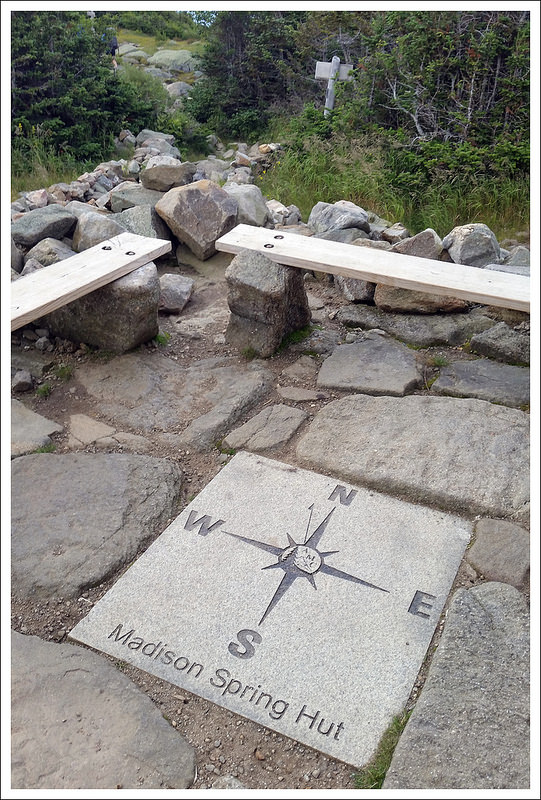
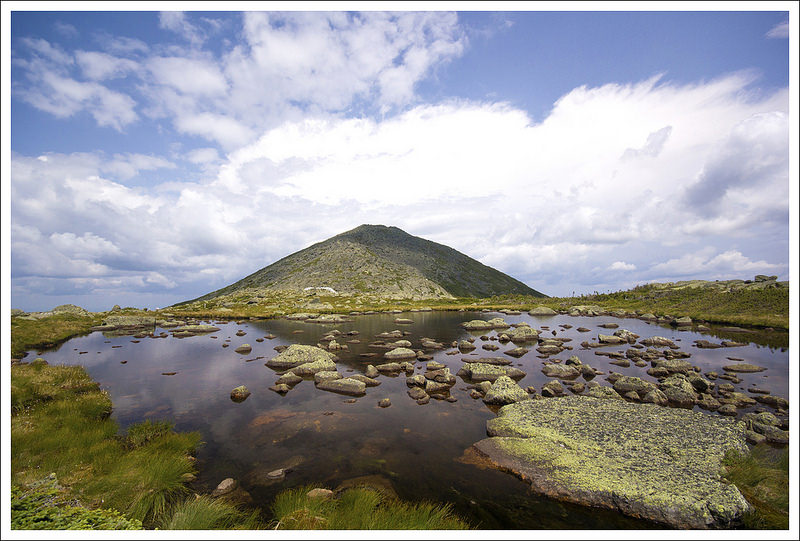
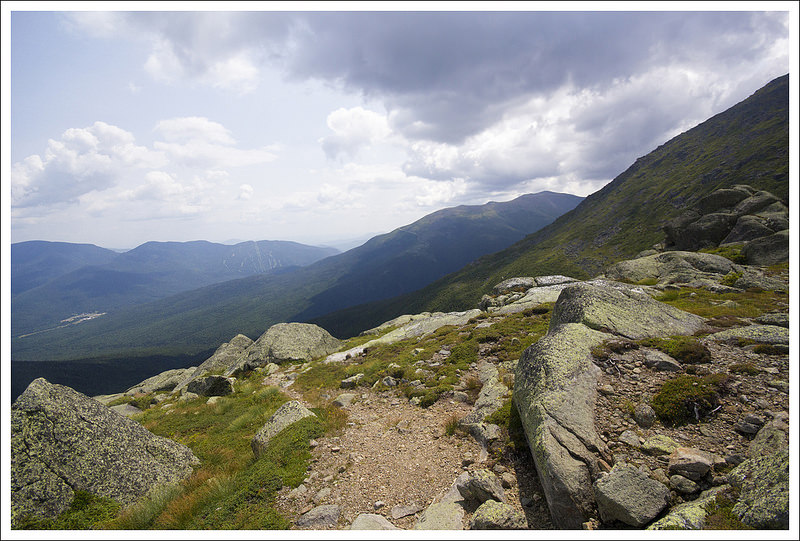
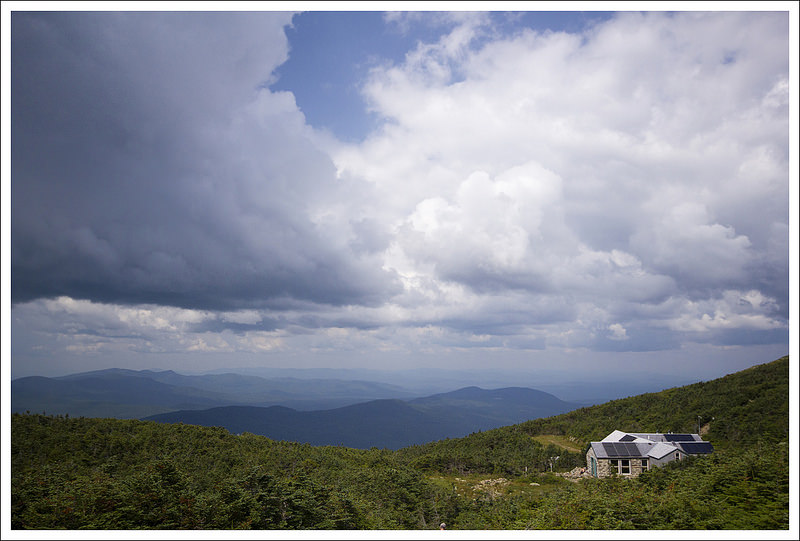

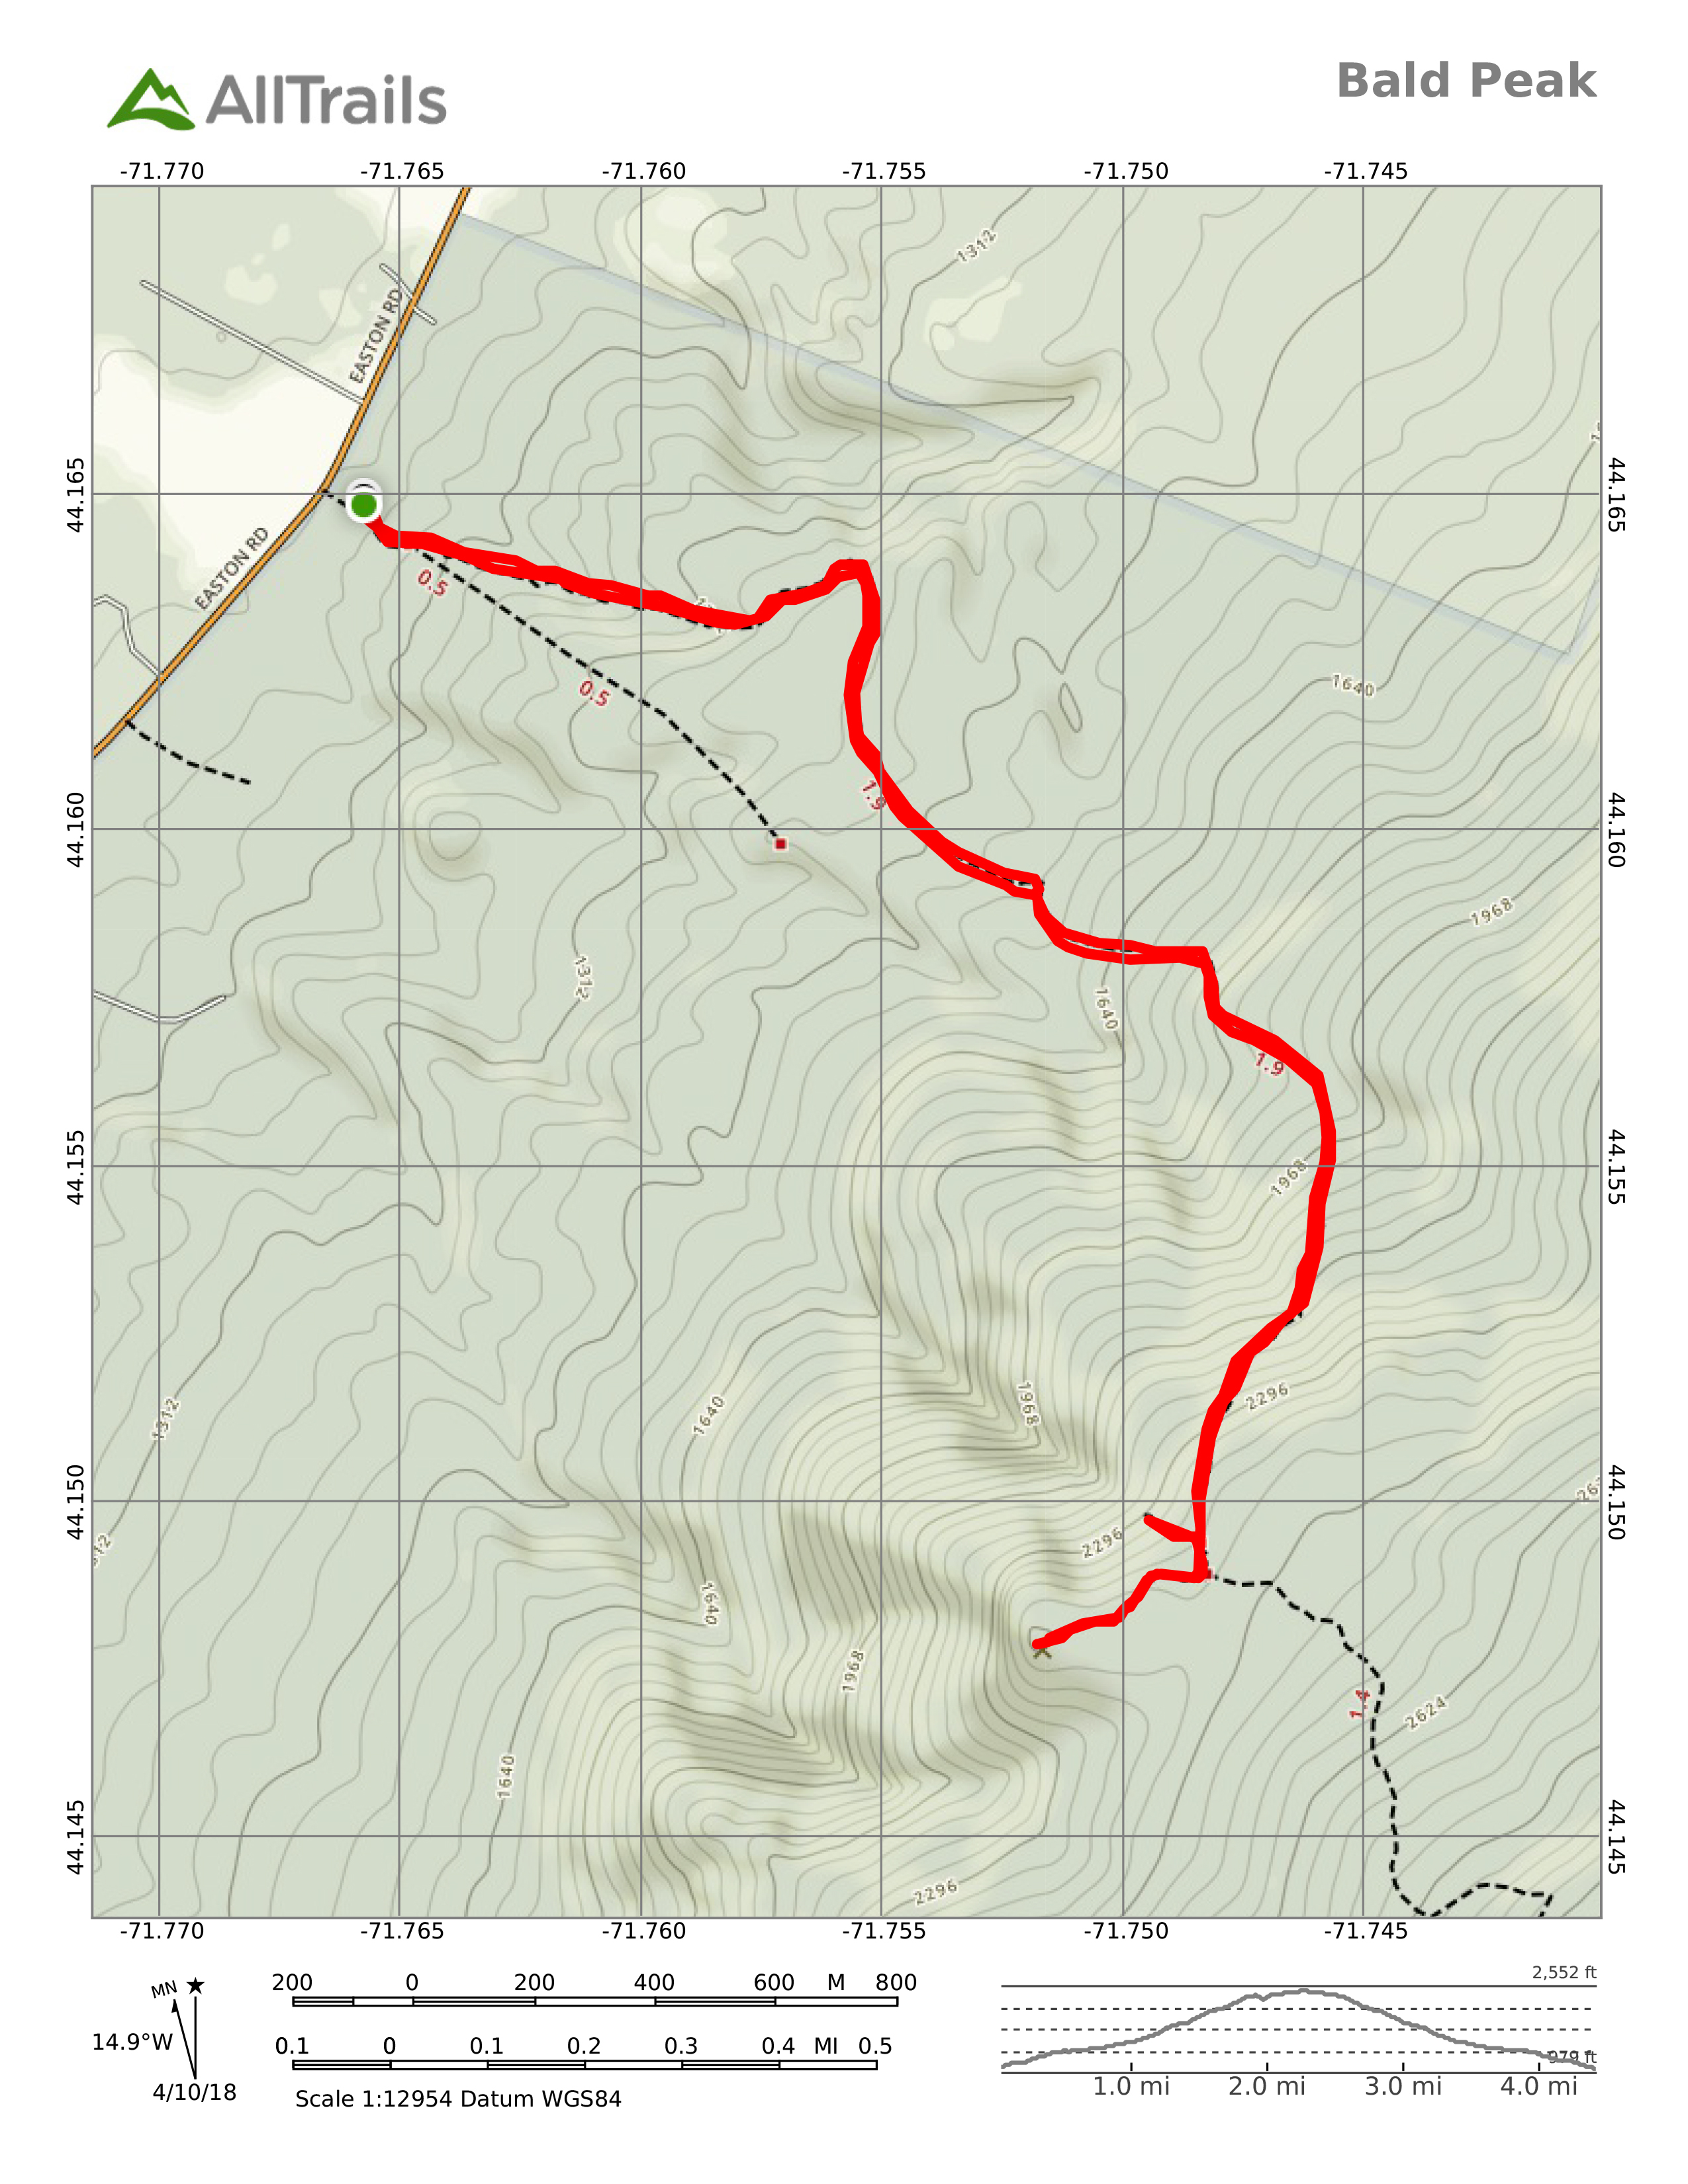
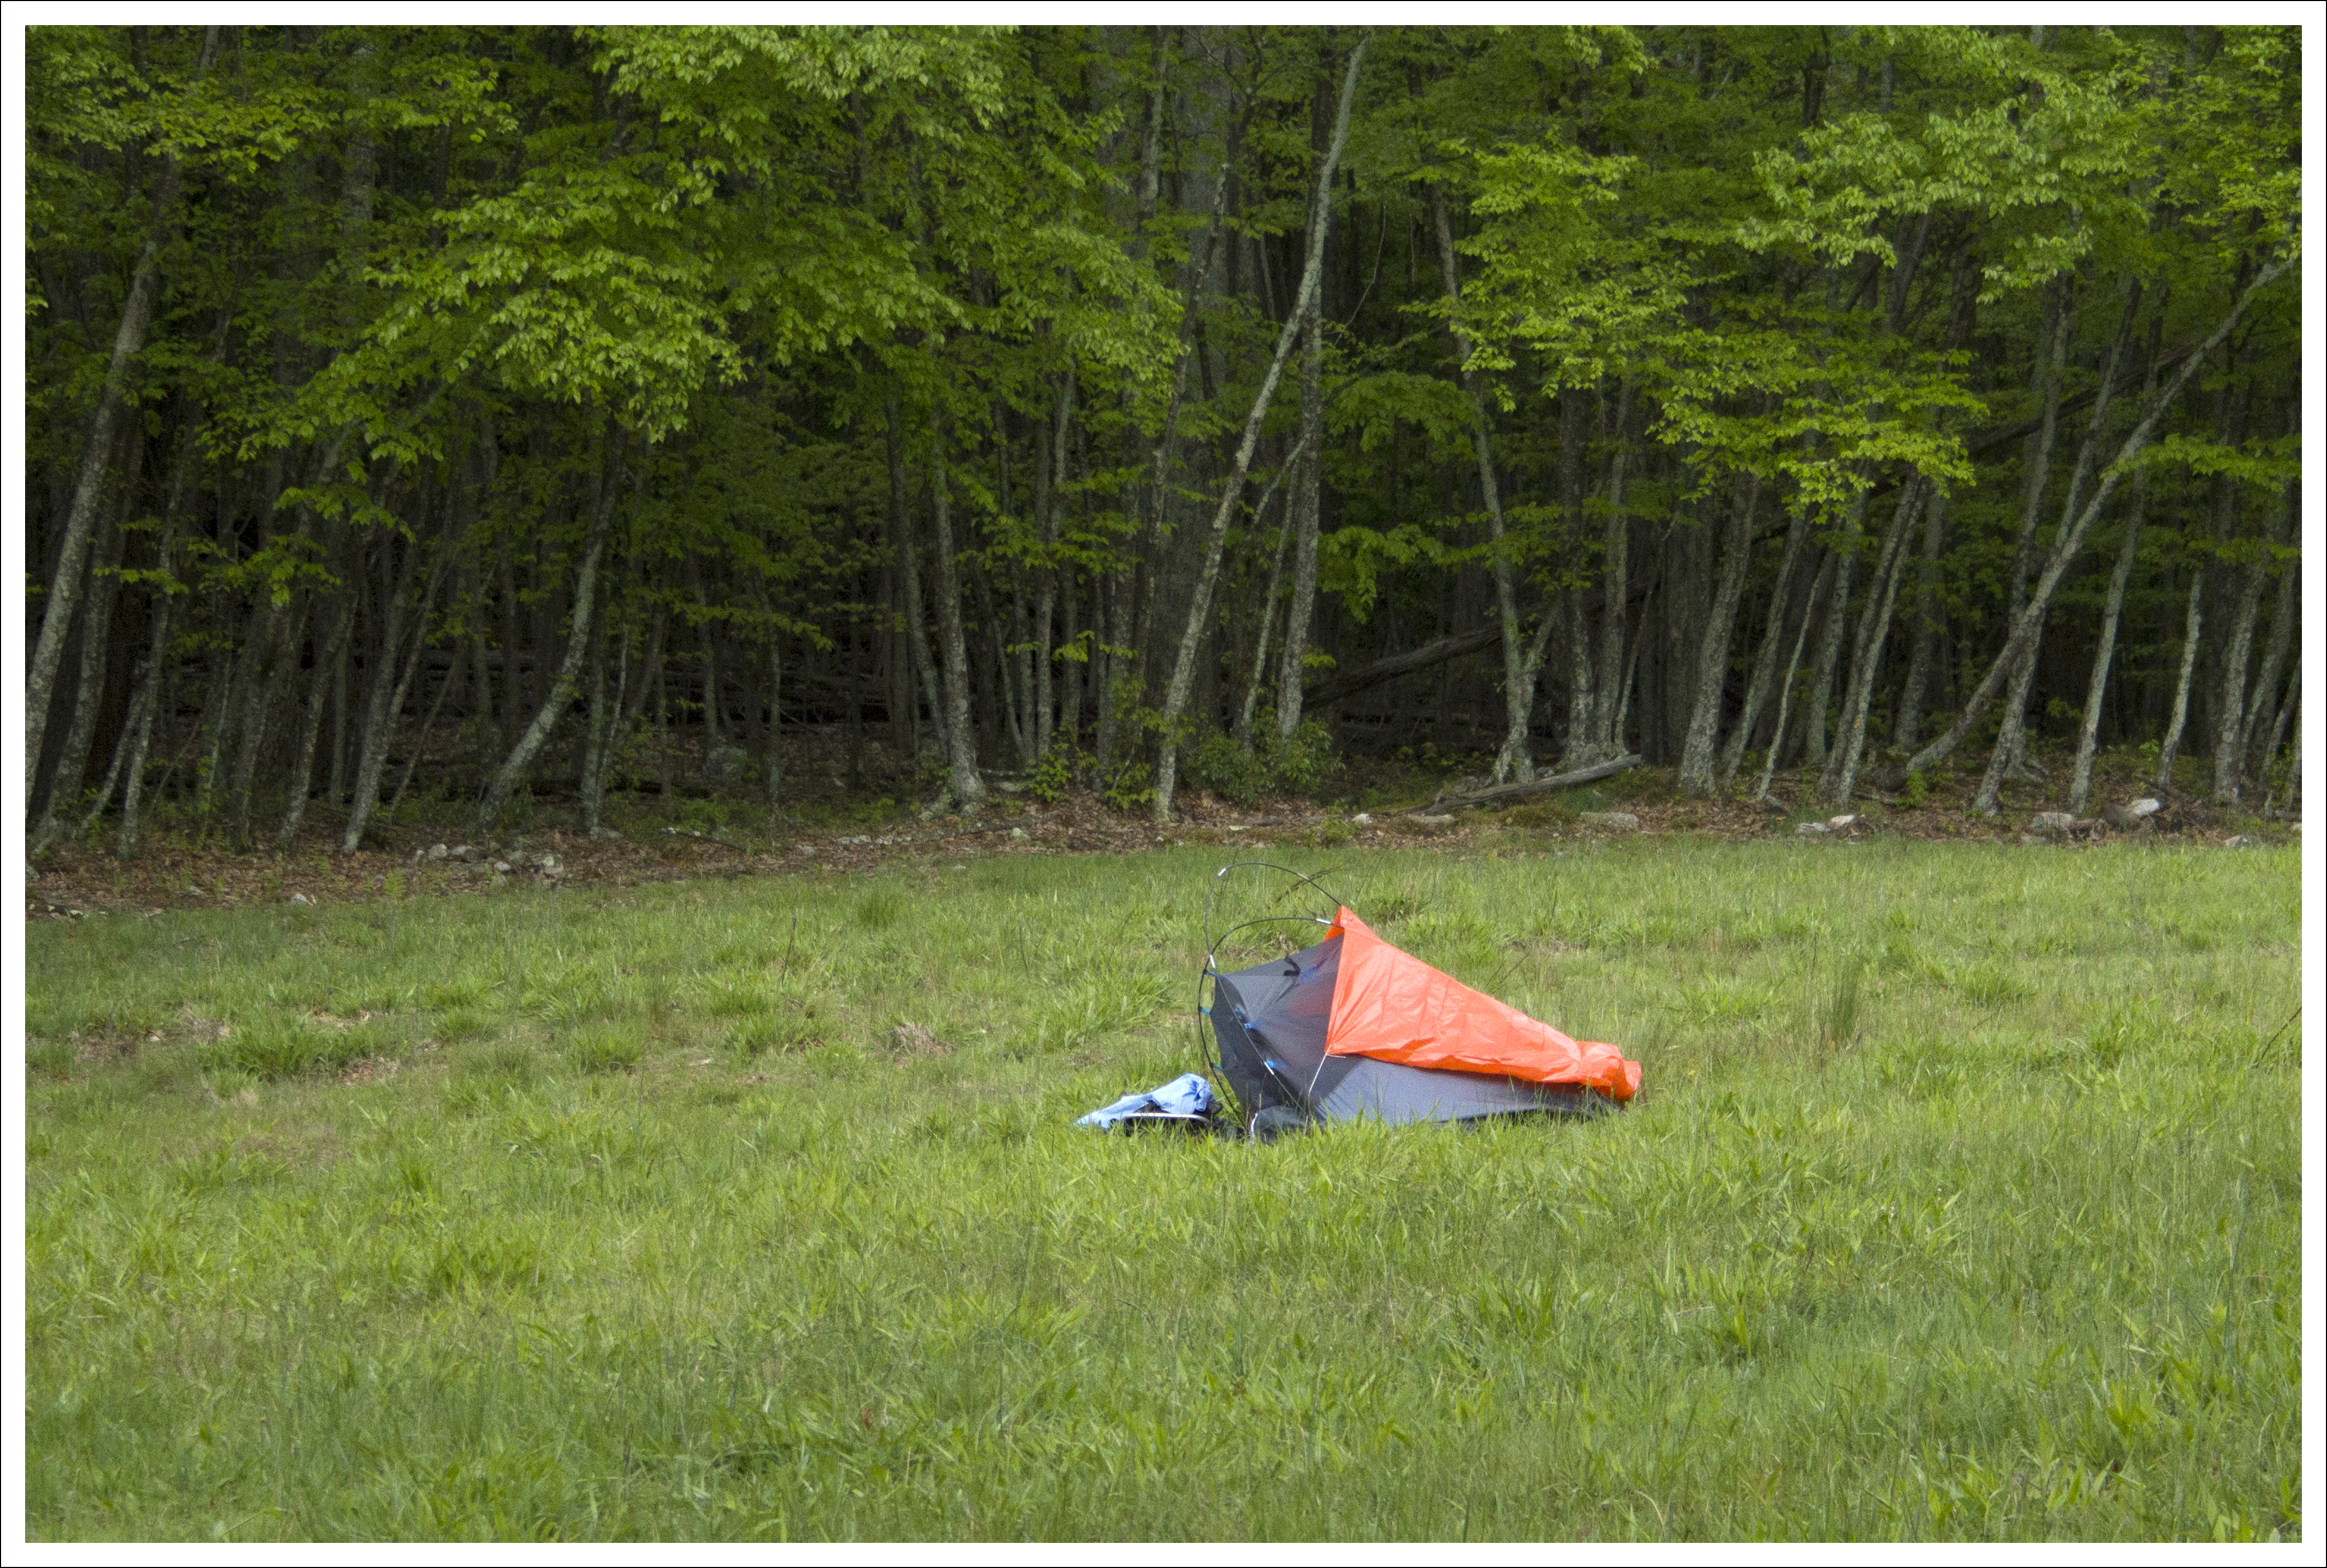