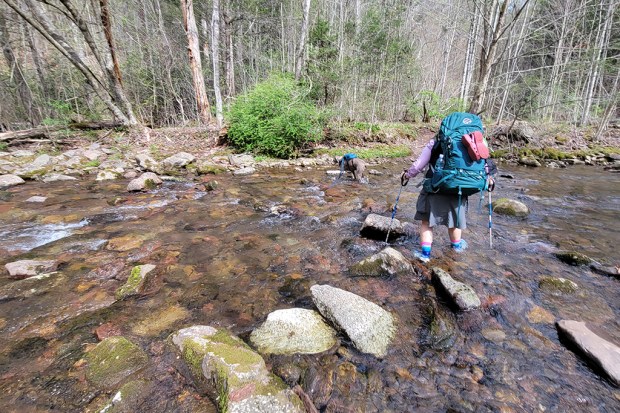
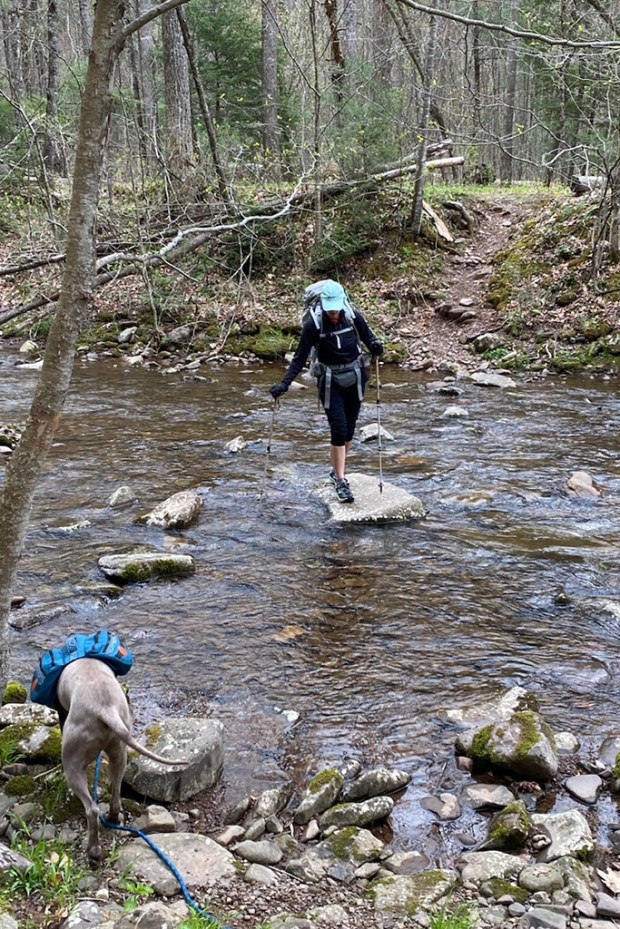
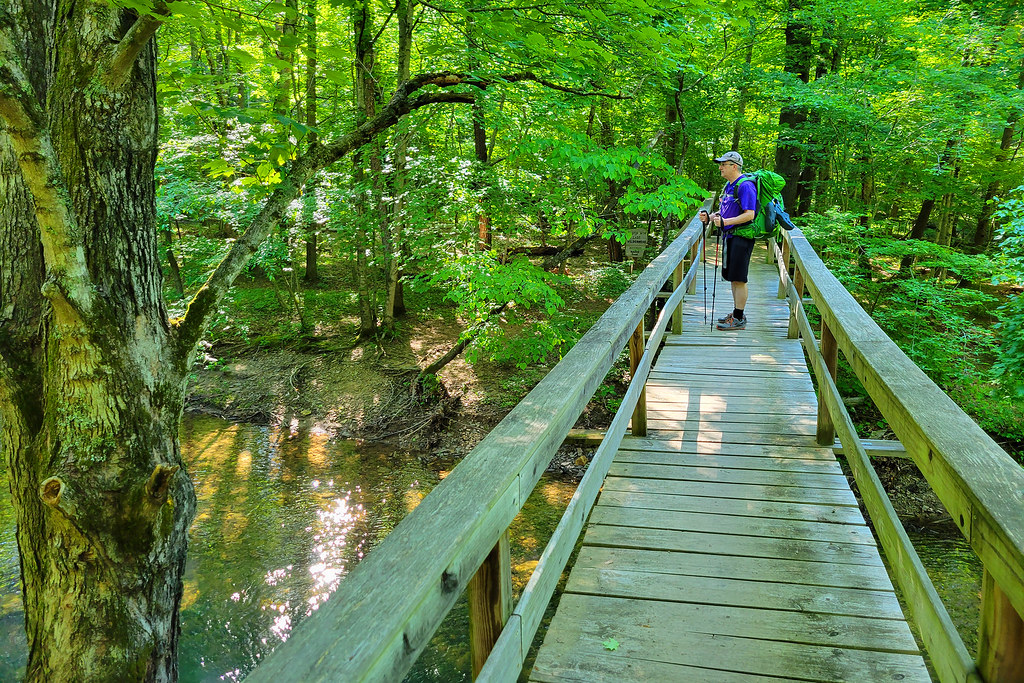
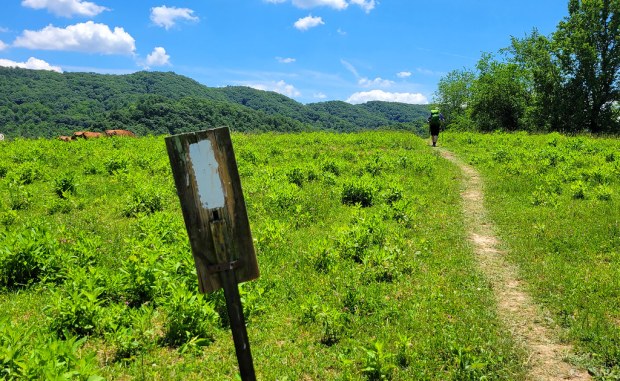
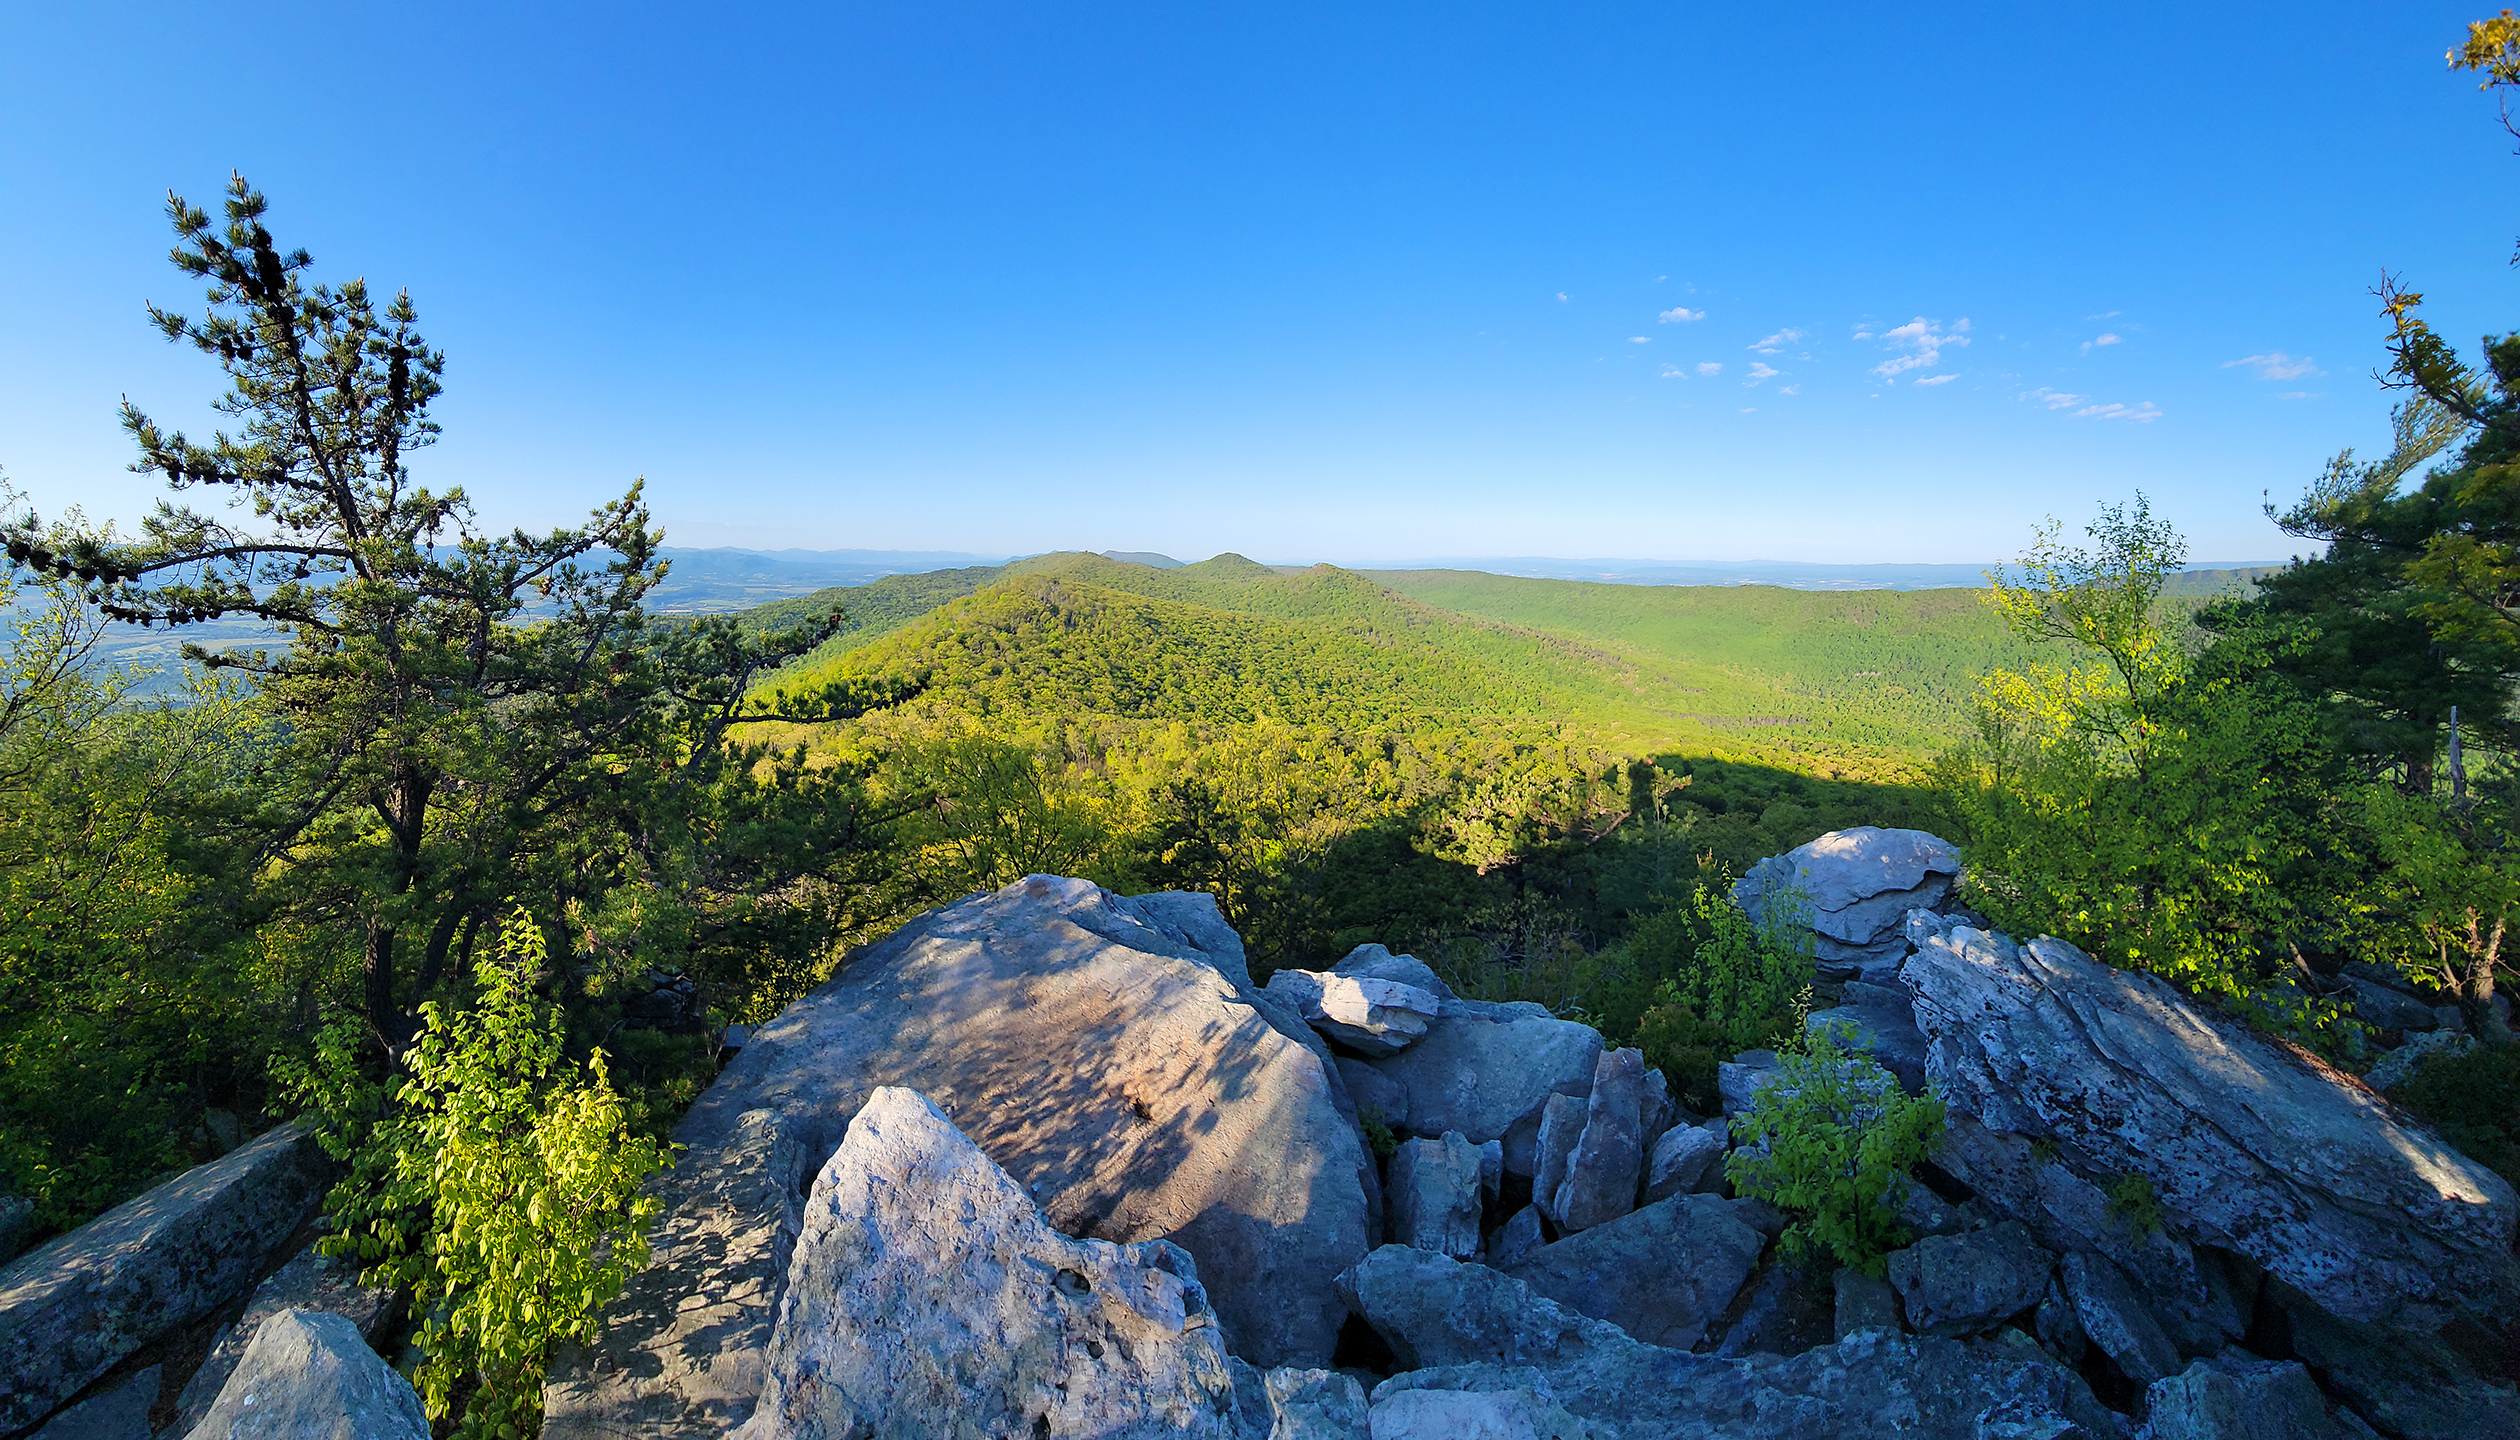
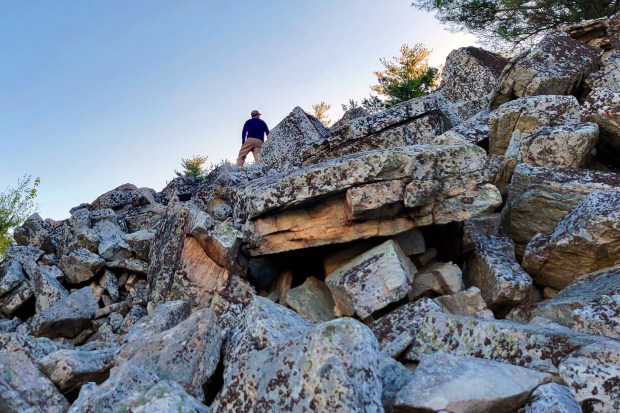
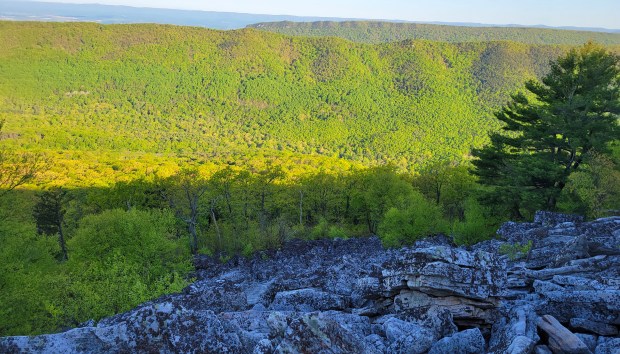
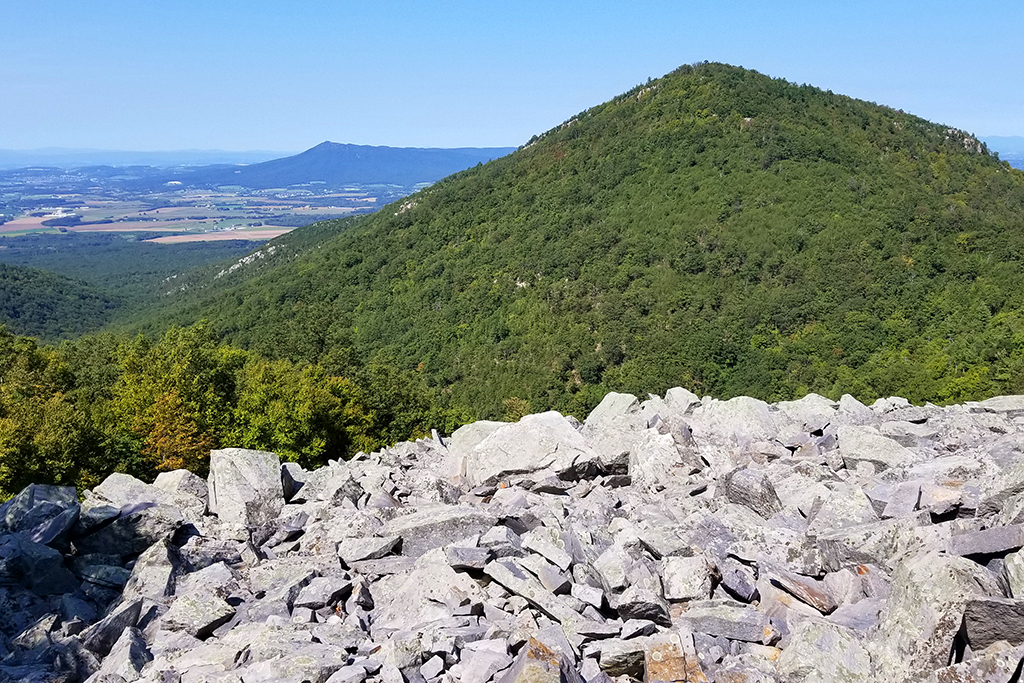
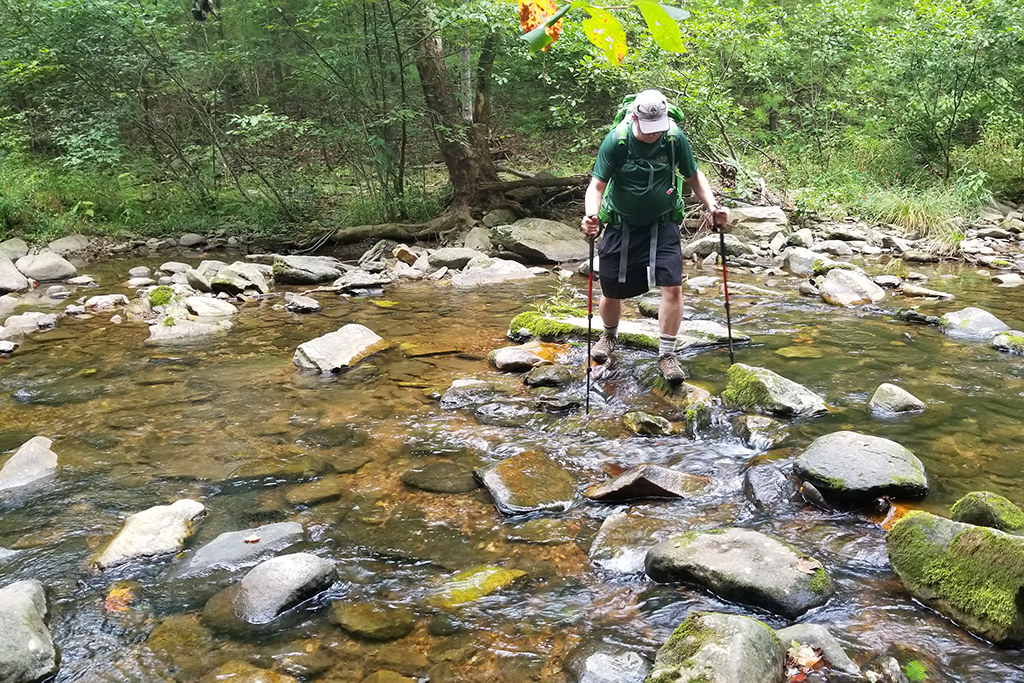
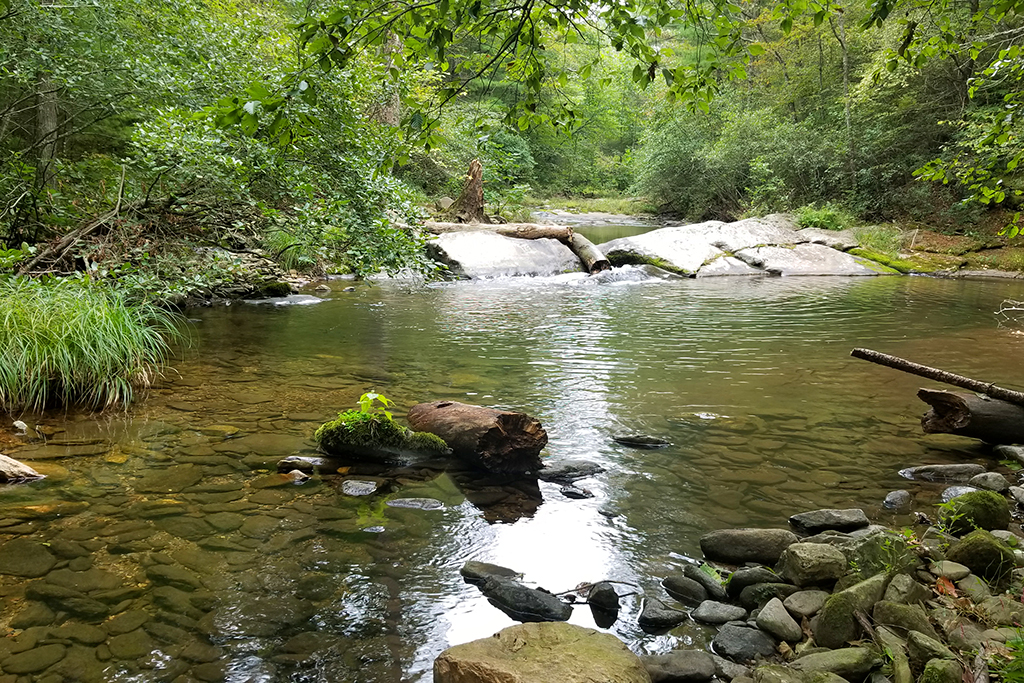
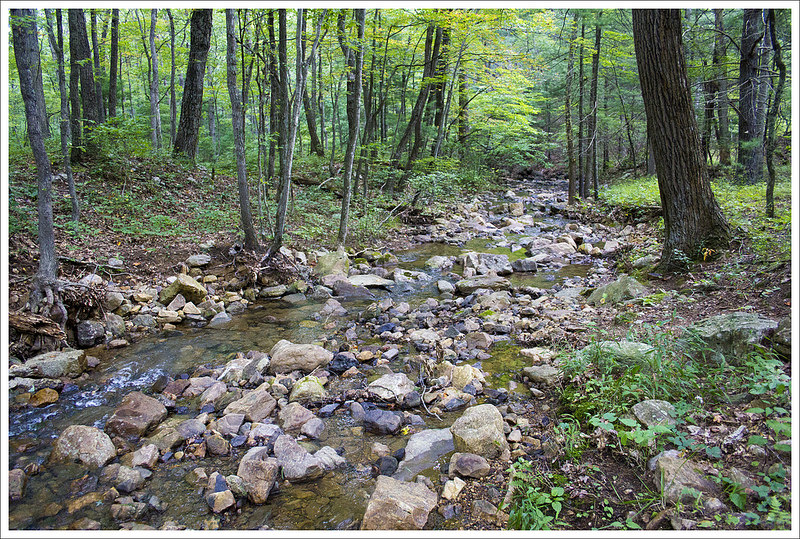
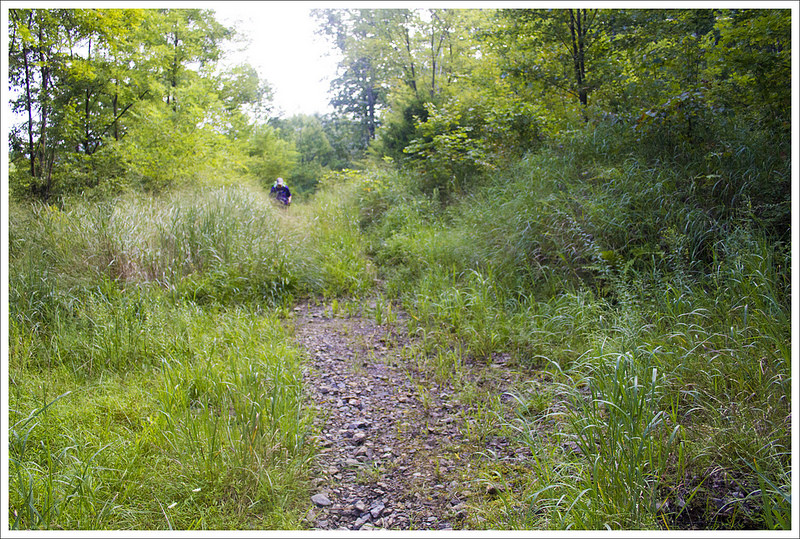
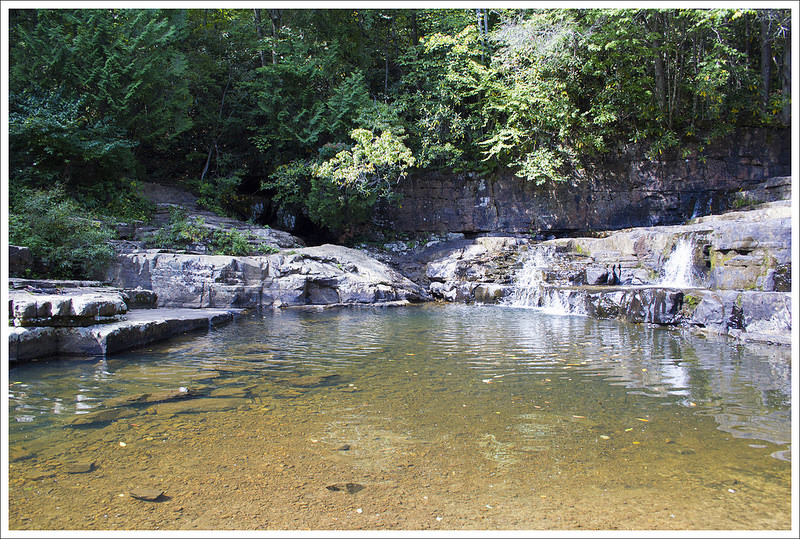
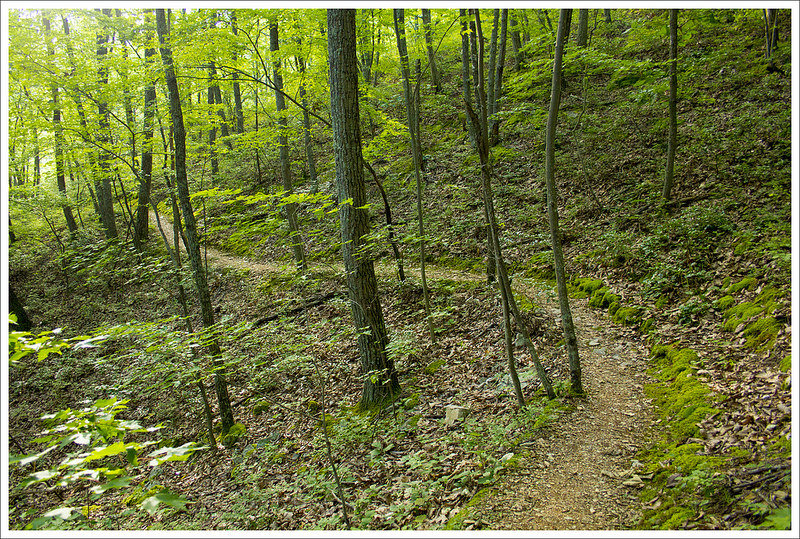
This 9.5 mile out-and-back is a relatively easy backpacking route with countless stream crossings. The full photo album is embedded at the bottom of this post!
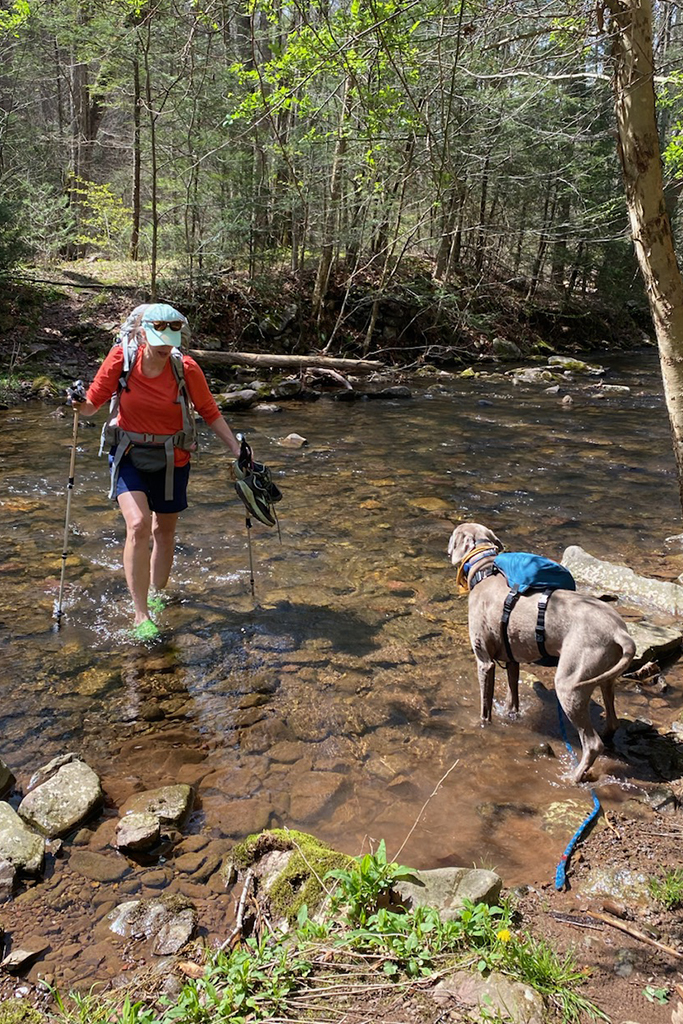
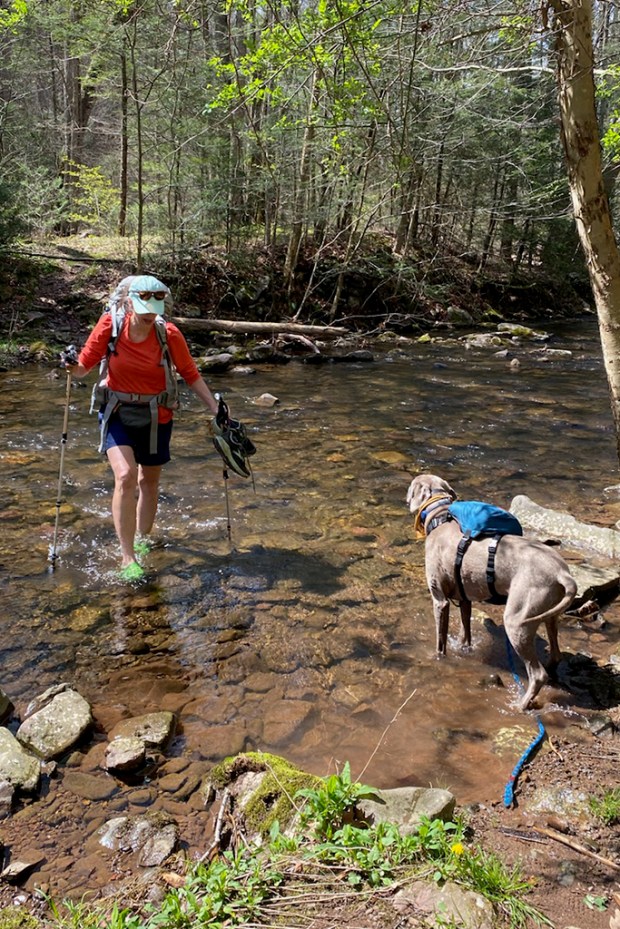
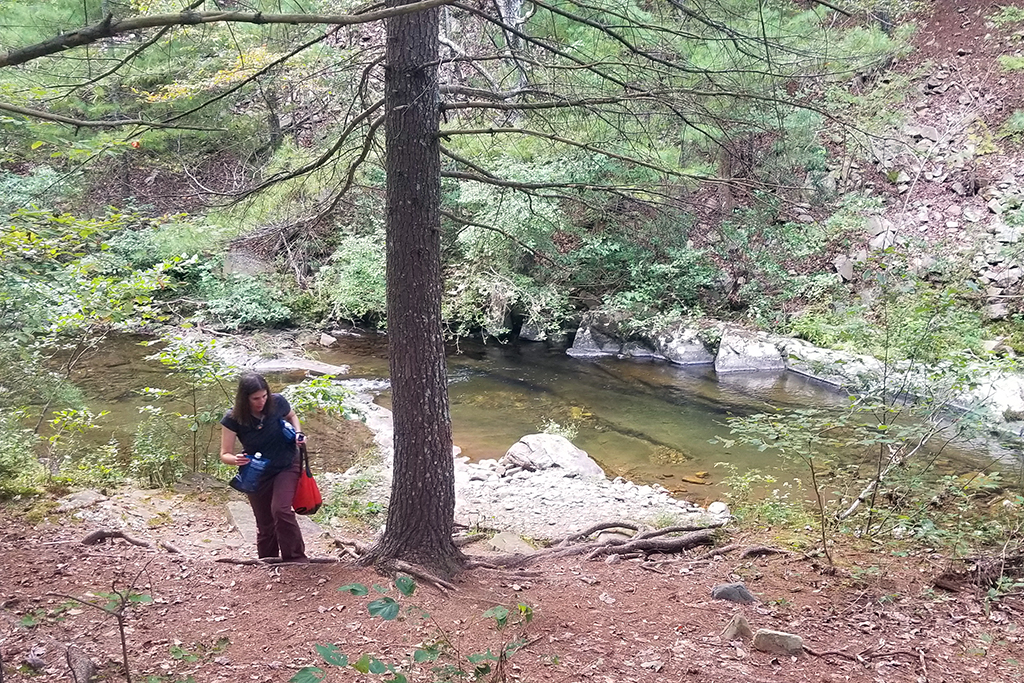
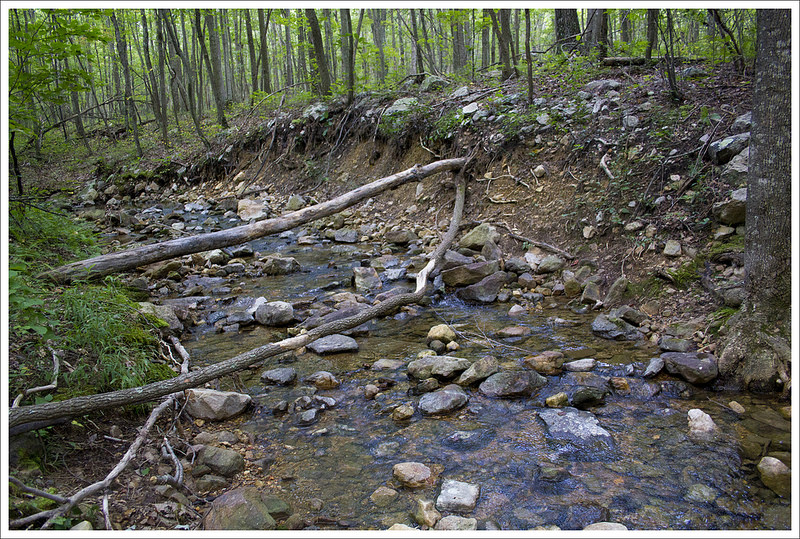
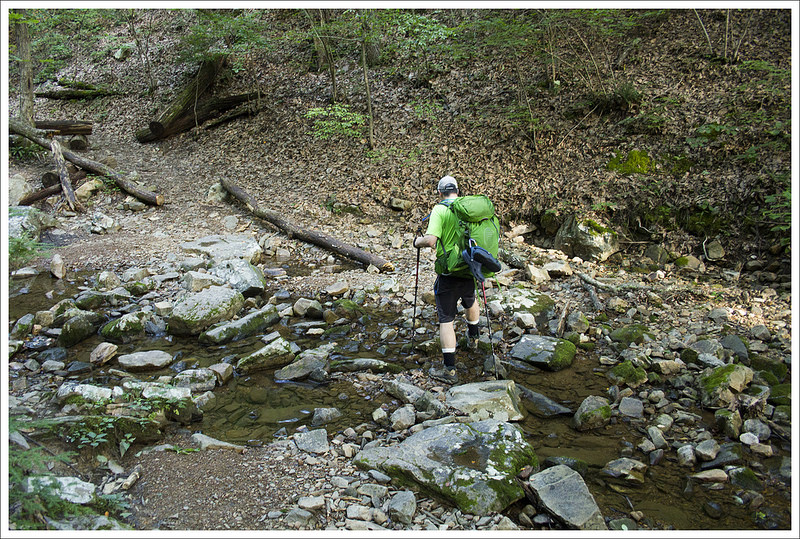
Crossing Ramsey’s Draft on Day One
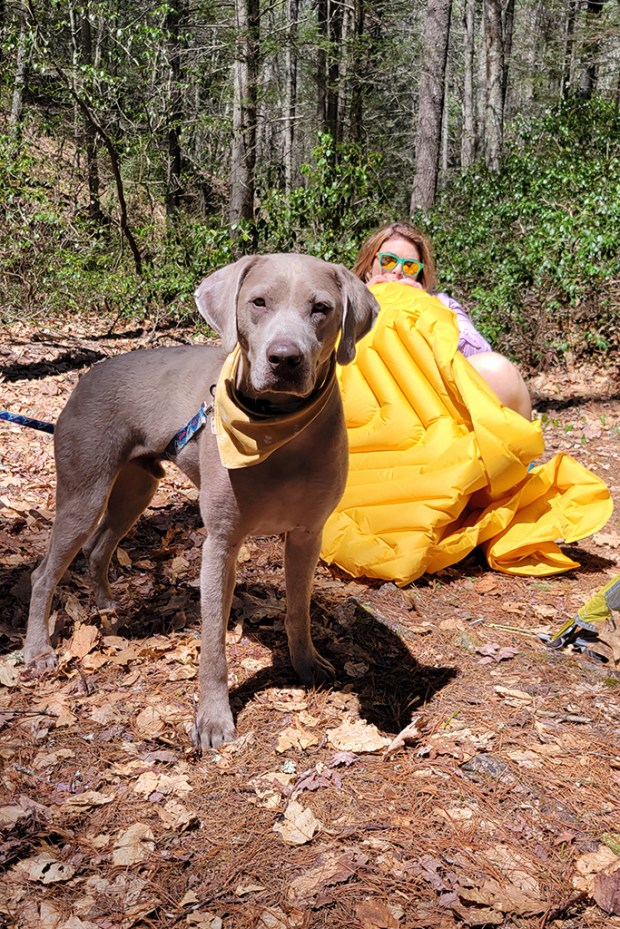
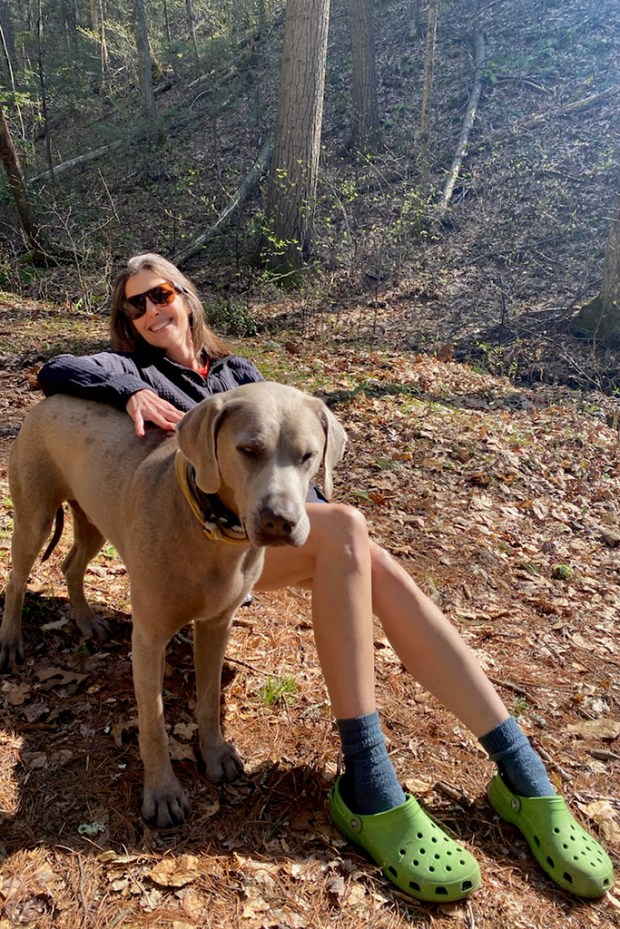
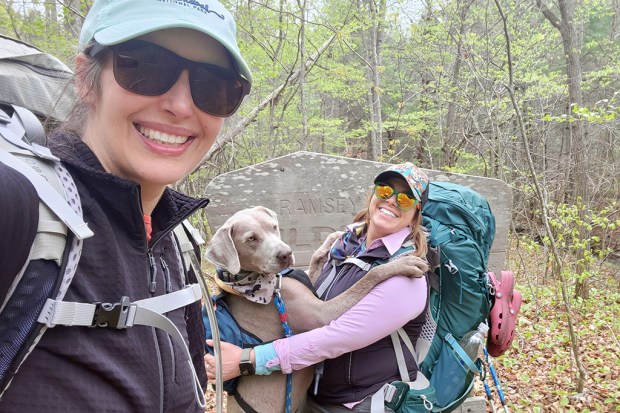
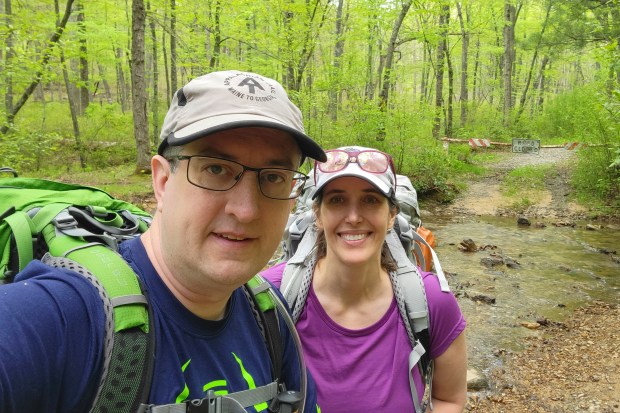
My friend Kris, her silver lab, Ridgley, and I wanted an easy overnight backpacking trip that didn’t require a long drive for a beautiful April weekend. We settled on a hike in Ramsey’s Draft Wilderness, following the Ramsey’s Draft and Jerry’s Run trails to the ruins of the old Sexton Cabin.
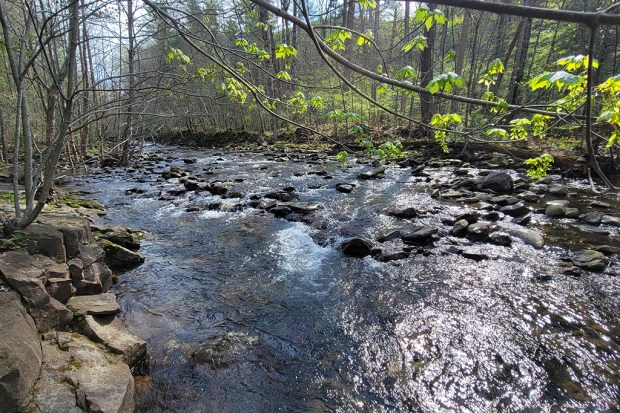
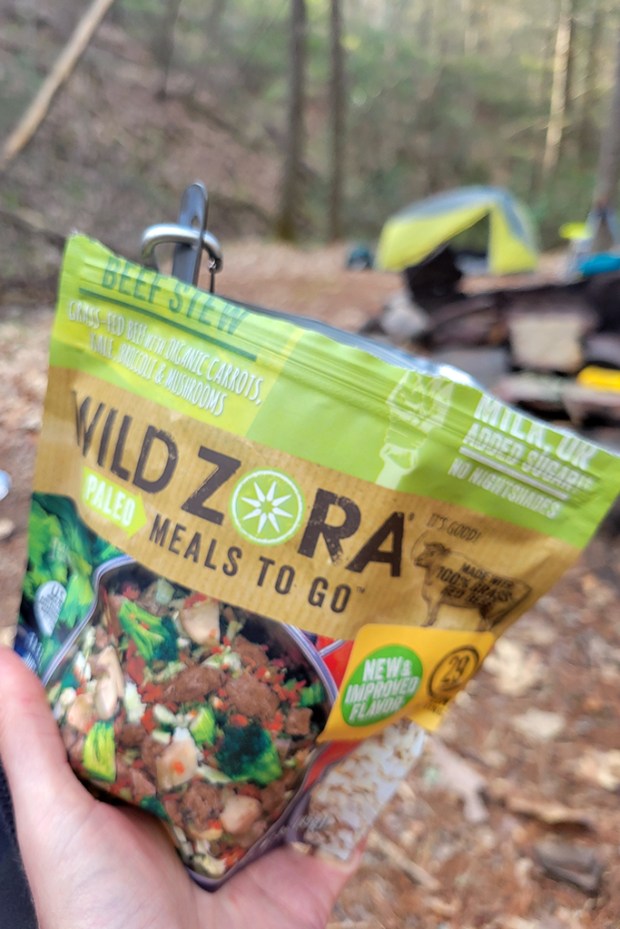
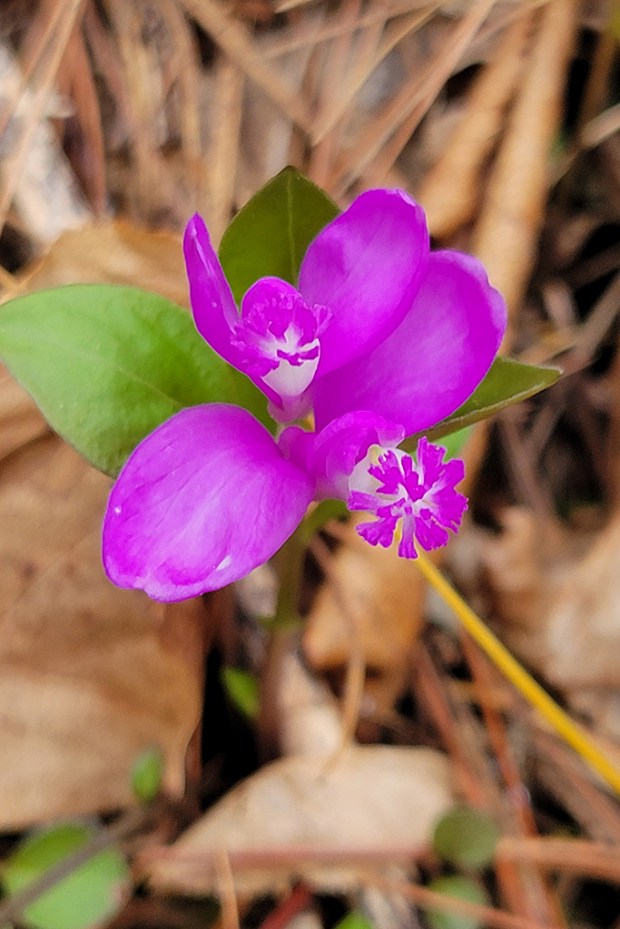
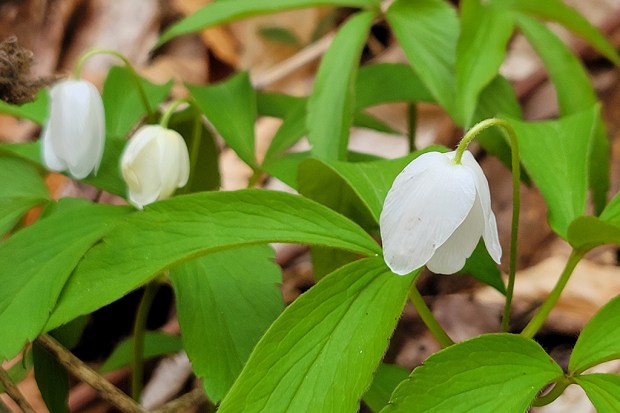
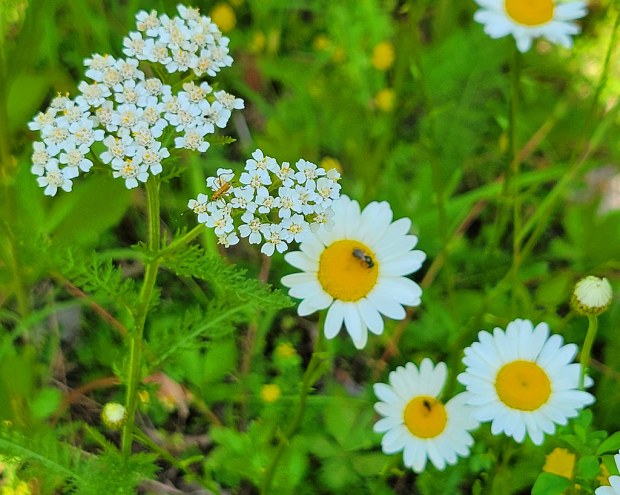
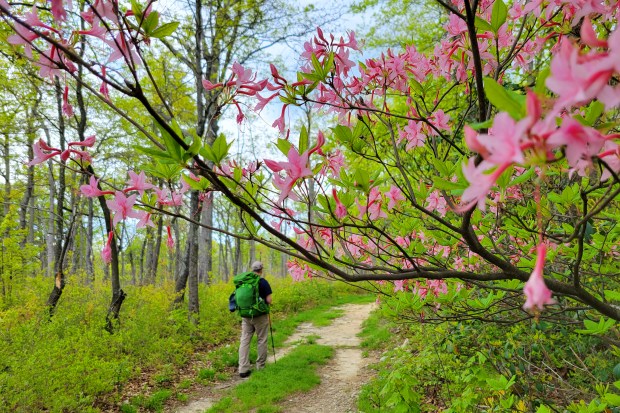
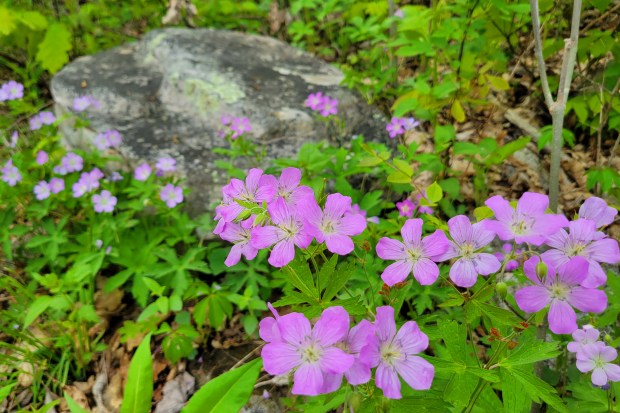
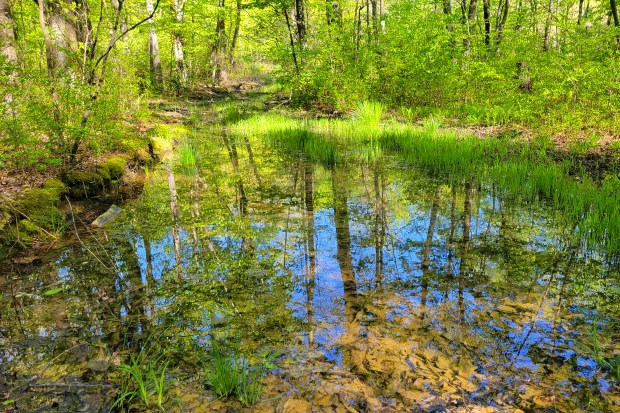
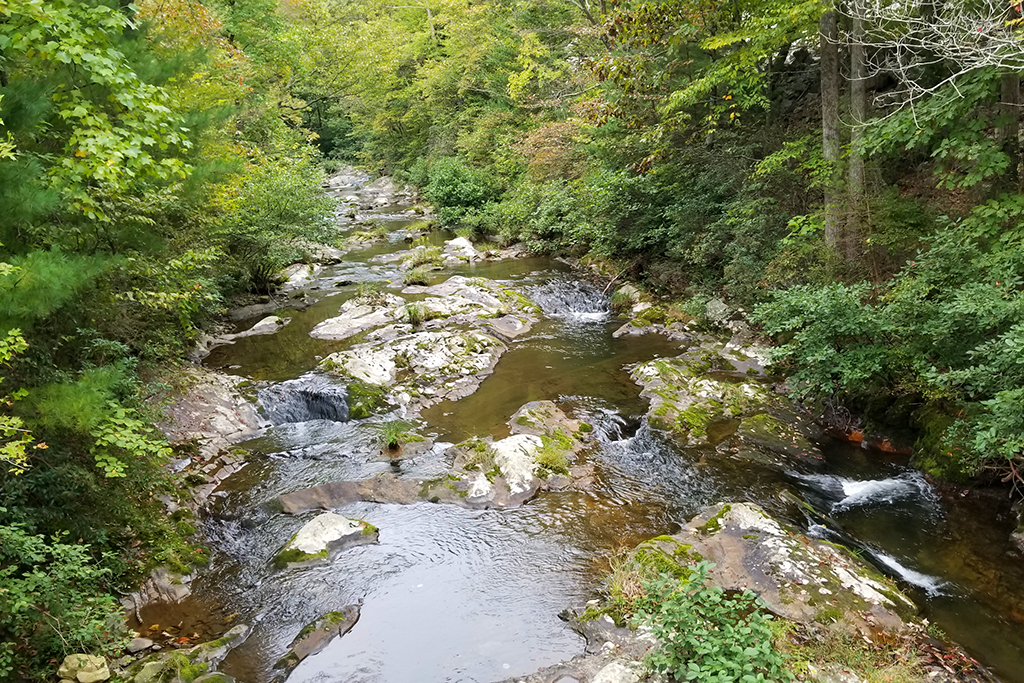
This route is well known for its flowing streams, abundant wildflowers, and dying hemlocks. When we visited, recent rains had the streams running high, and the countless water crossings were full. We came prepared to get wet, each of us carrying a pair of Crocs for wading.
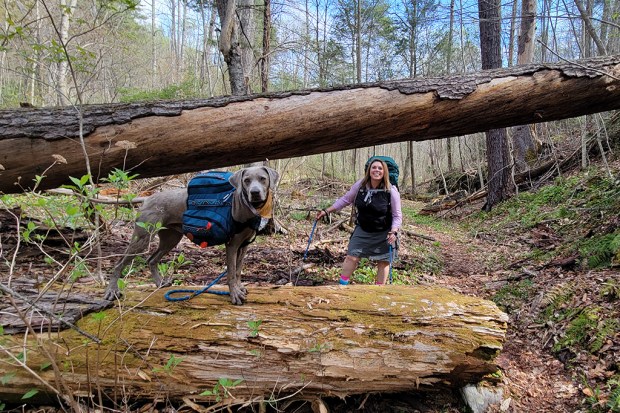
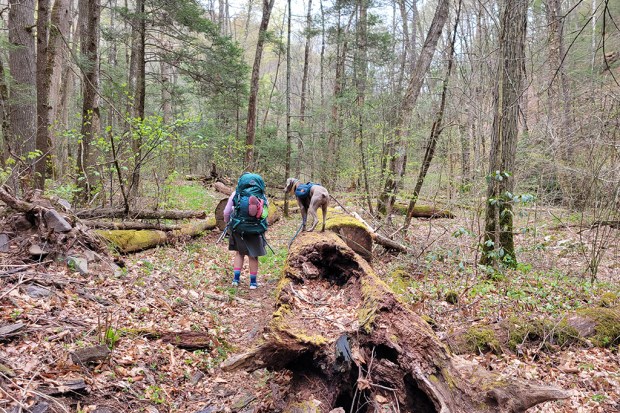
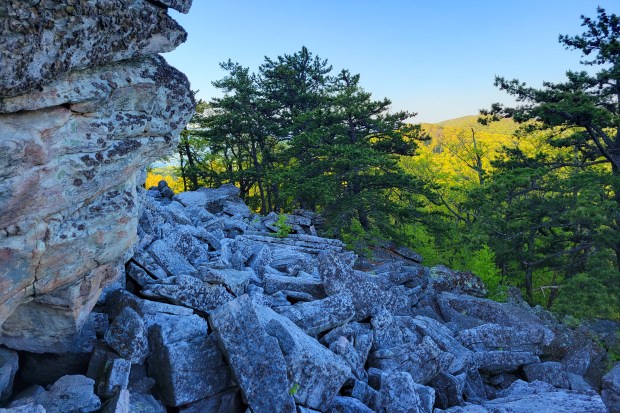
Fallen hemlocks
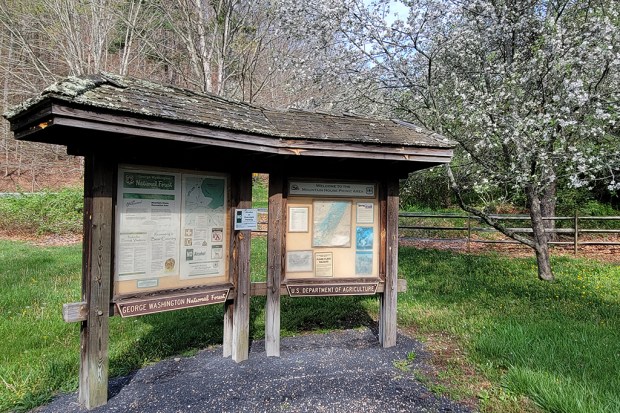
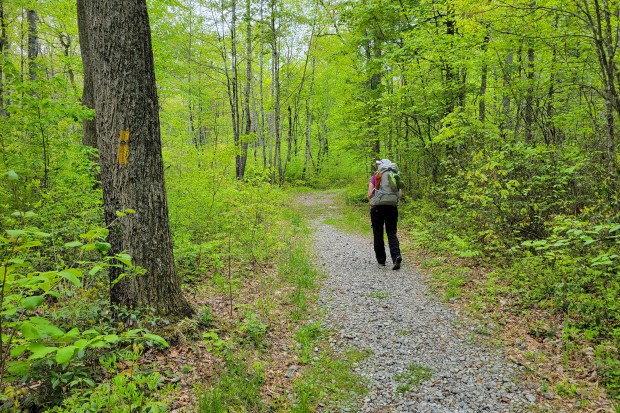
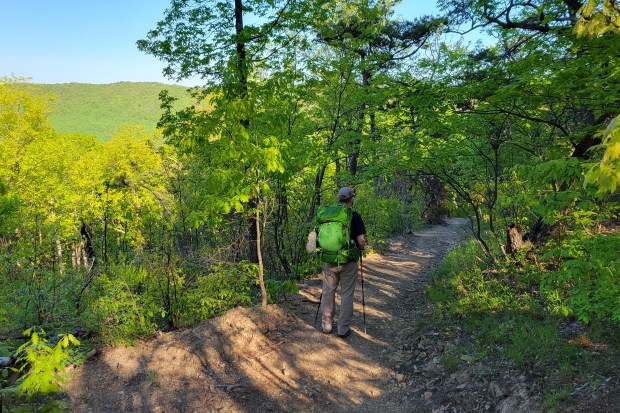
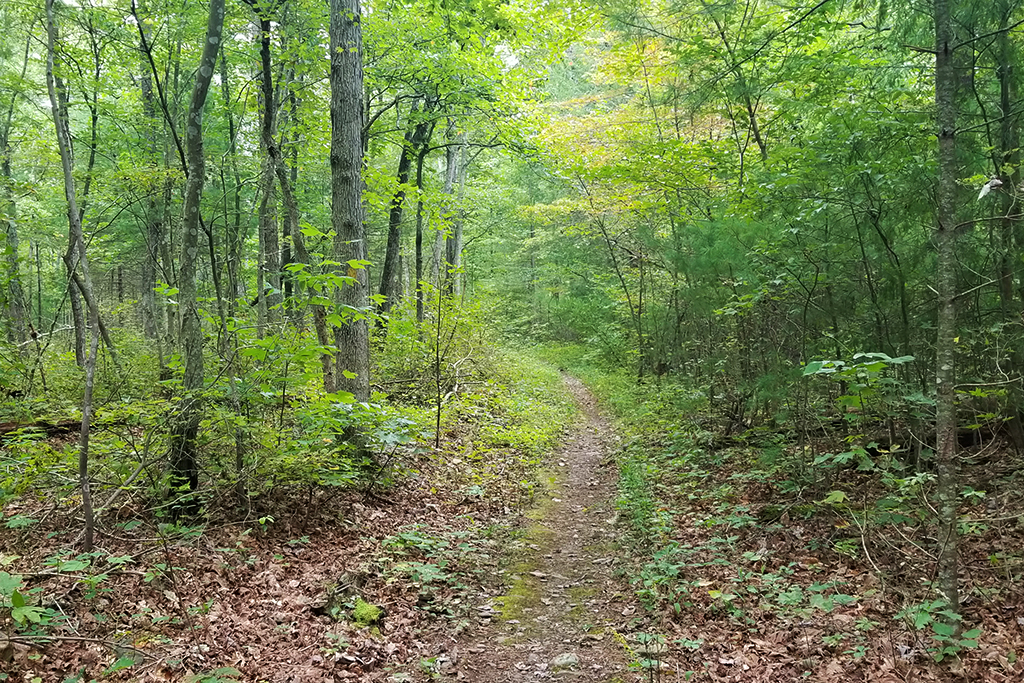
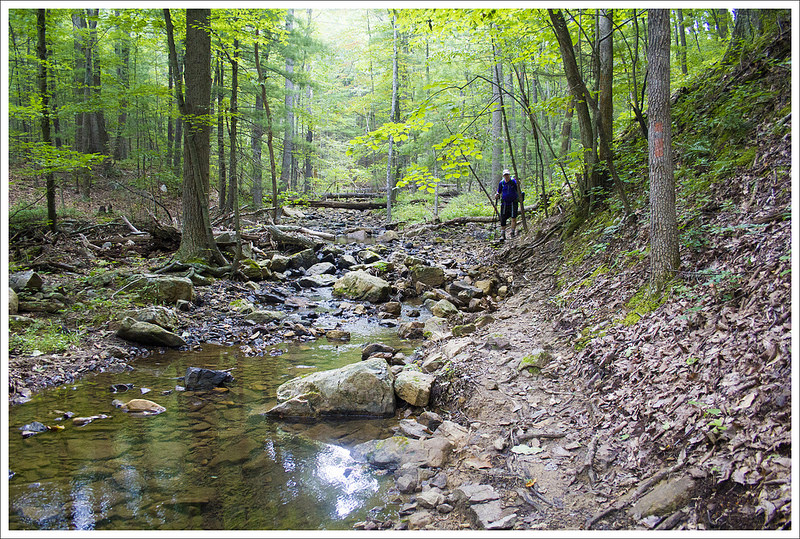
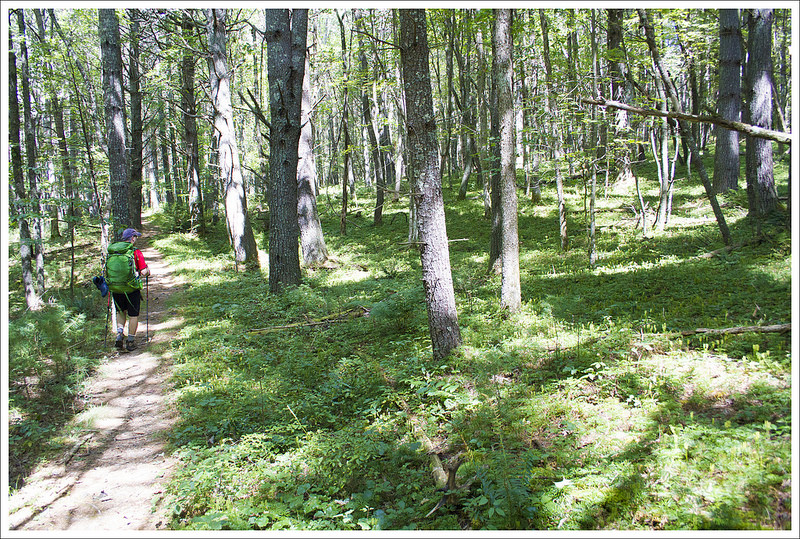
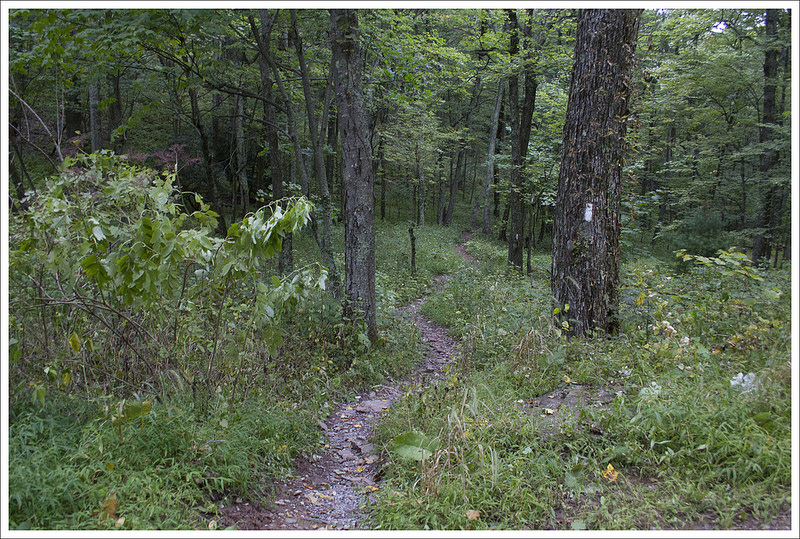
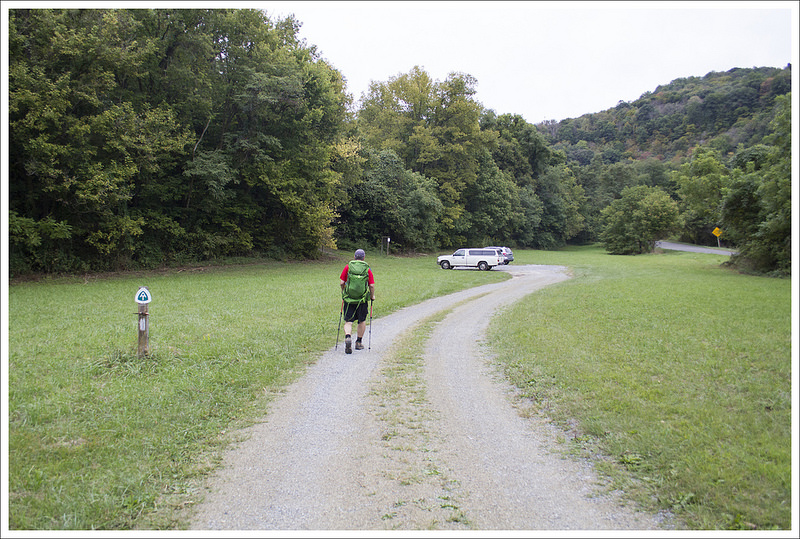
We parked at the Mountain House Picnic Area and hiked about a quarter mile to the official start of the Ramsey’s Draft Trail. At the beginning of the hike, you’ll see options for both the Bridge Hollow Trail and the Road Hollow Trail, but continue straight on Ramsey’s Draft. Follow it for about 2.5 miles until you reach the junction with the Jerry’s Run Trail.
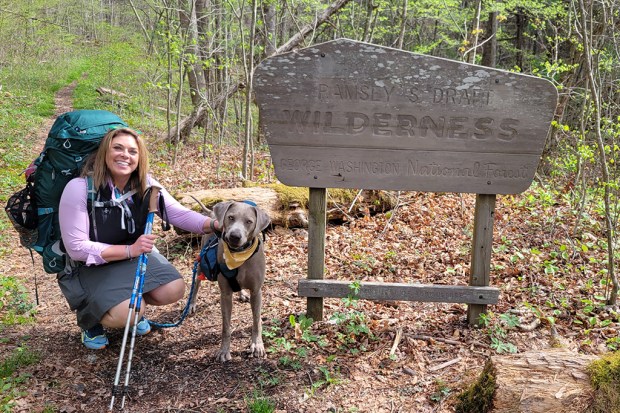
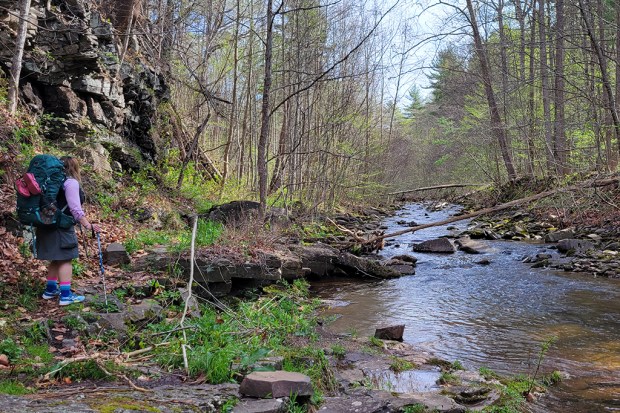
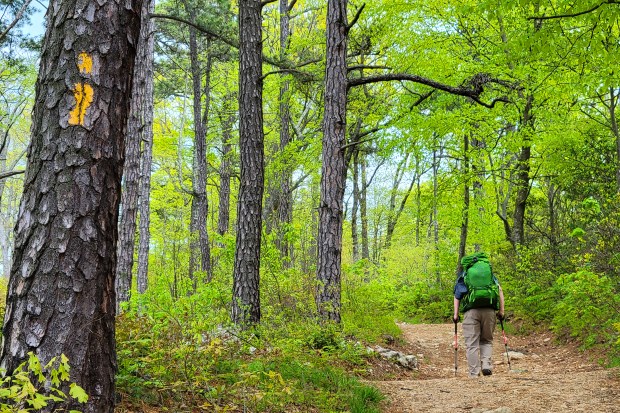
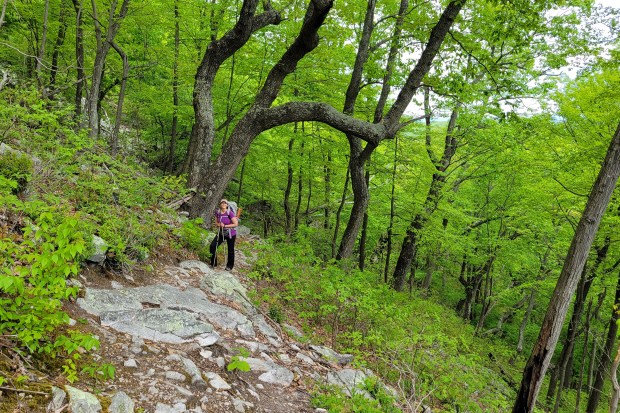
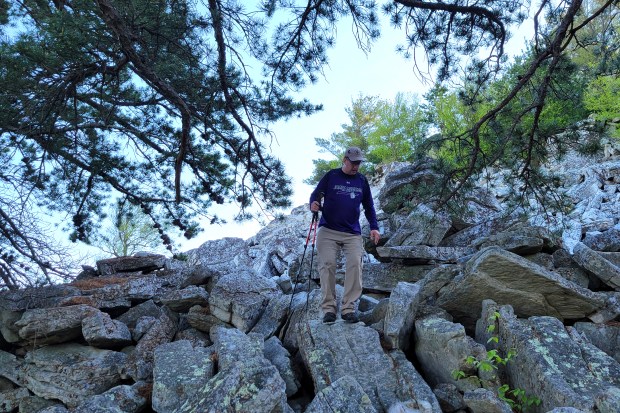
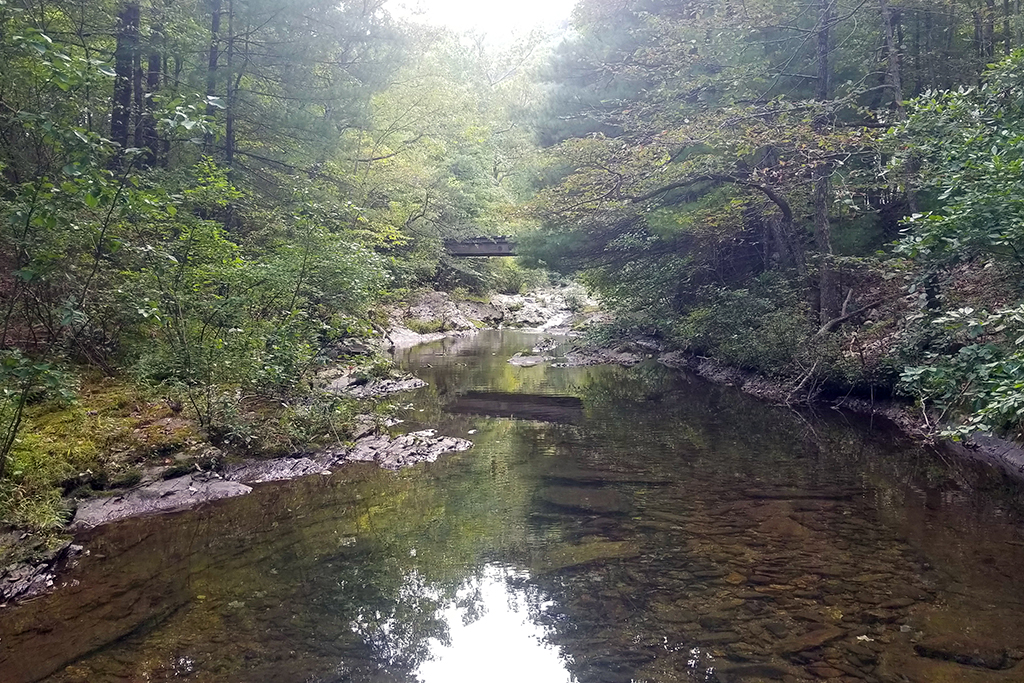
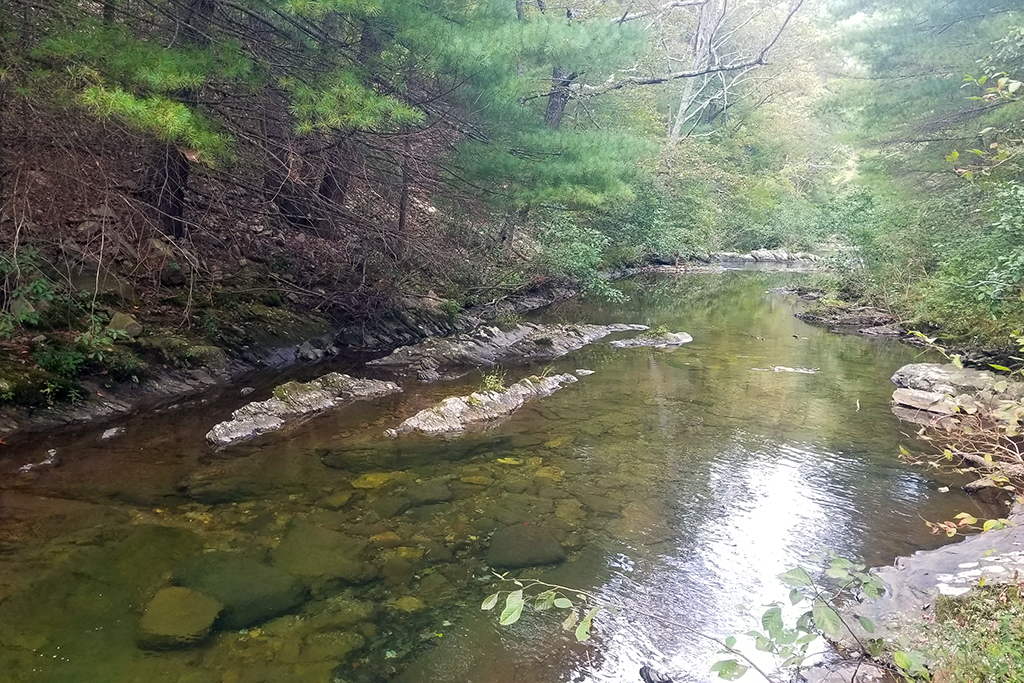
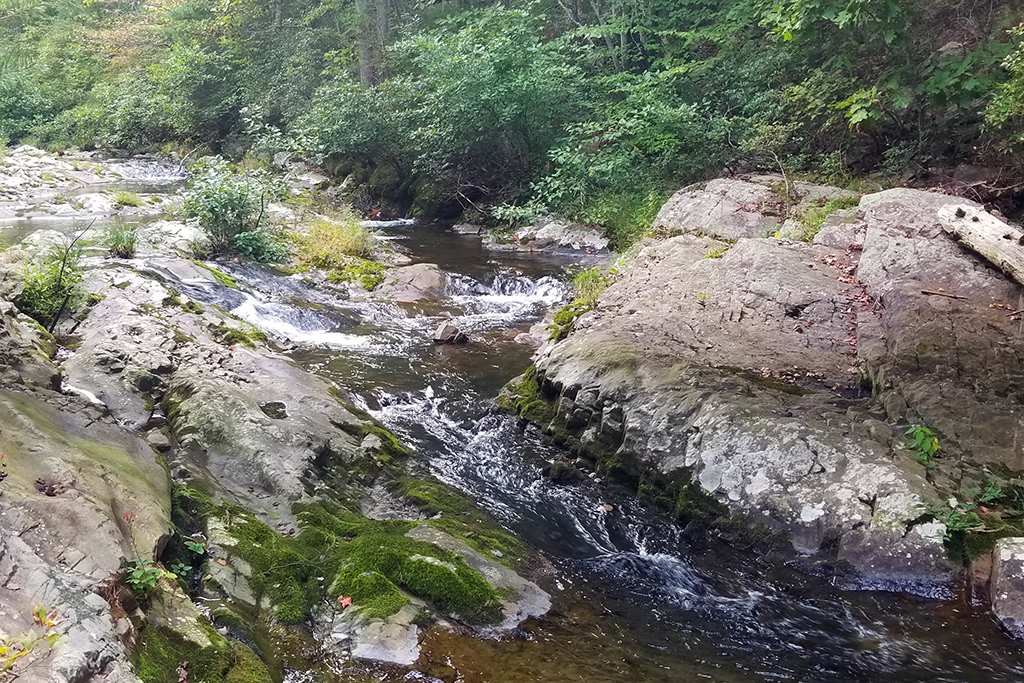
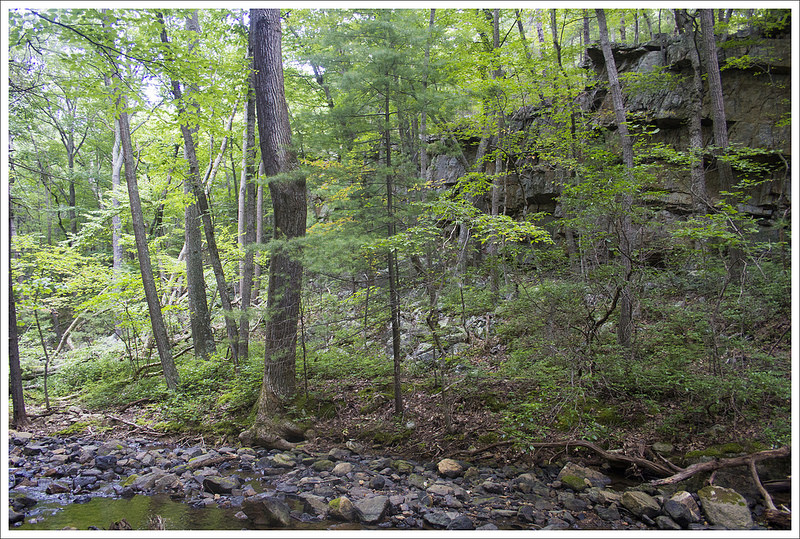
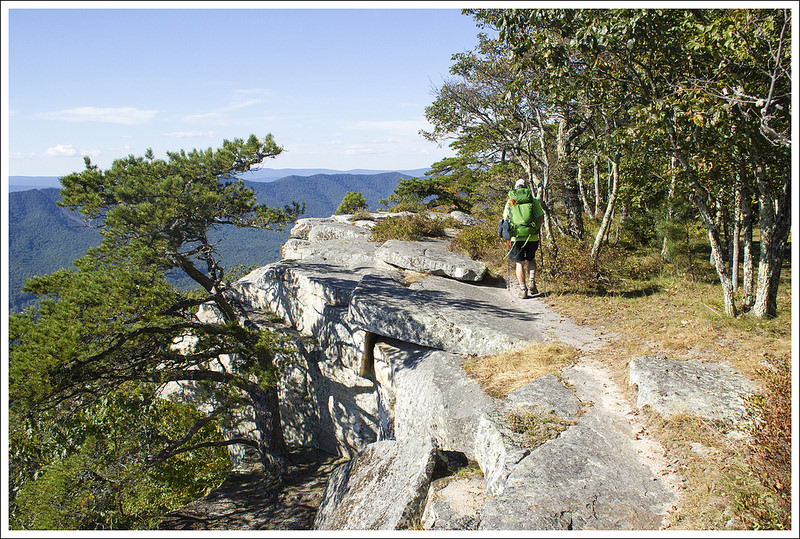
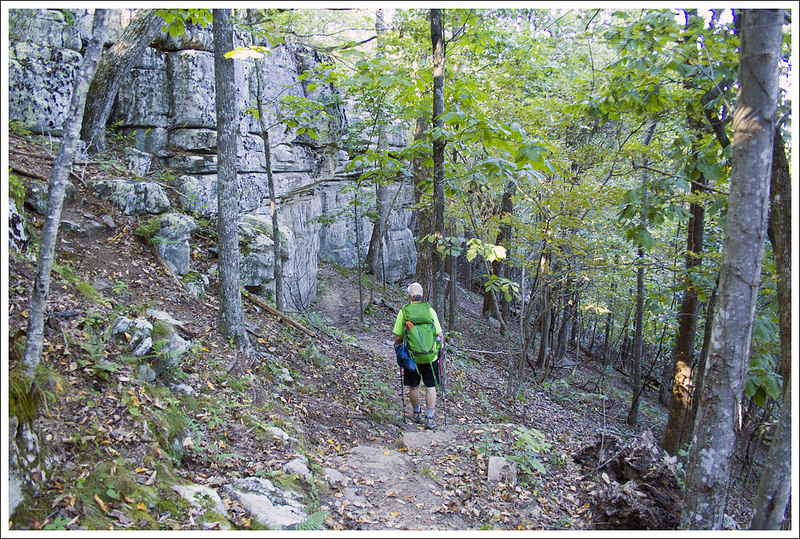
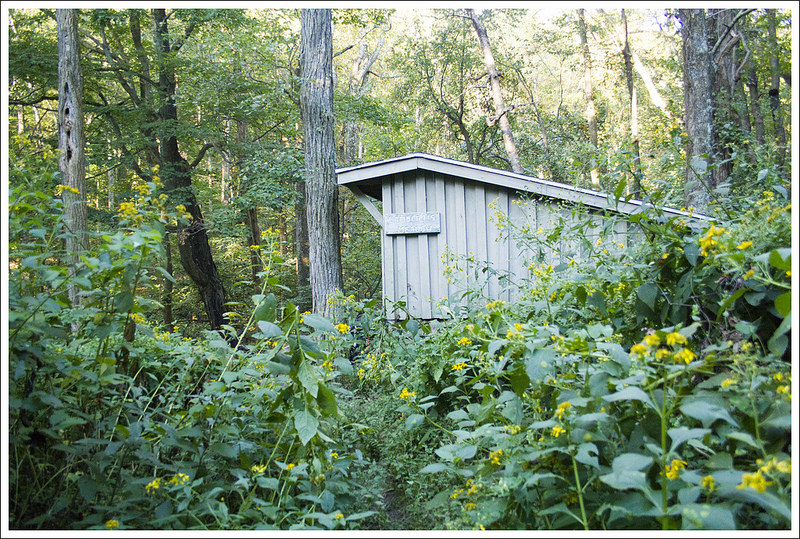
Not long after passing the wilderness boundary sign (and stopping for the obligatory photo), the trail settled alongside a beautiful, wide stream. We passed an old Forest Service shed and soon reached some impressive rock ledges at the first stream crossing. From there, the crossings just kept coming. We encountered at least four more major crossings, along with countless smaller ones.
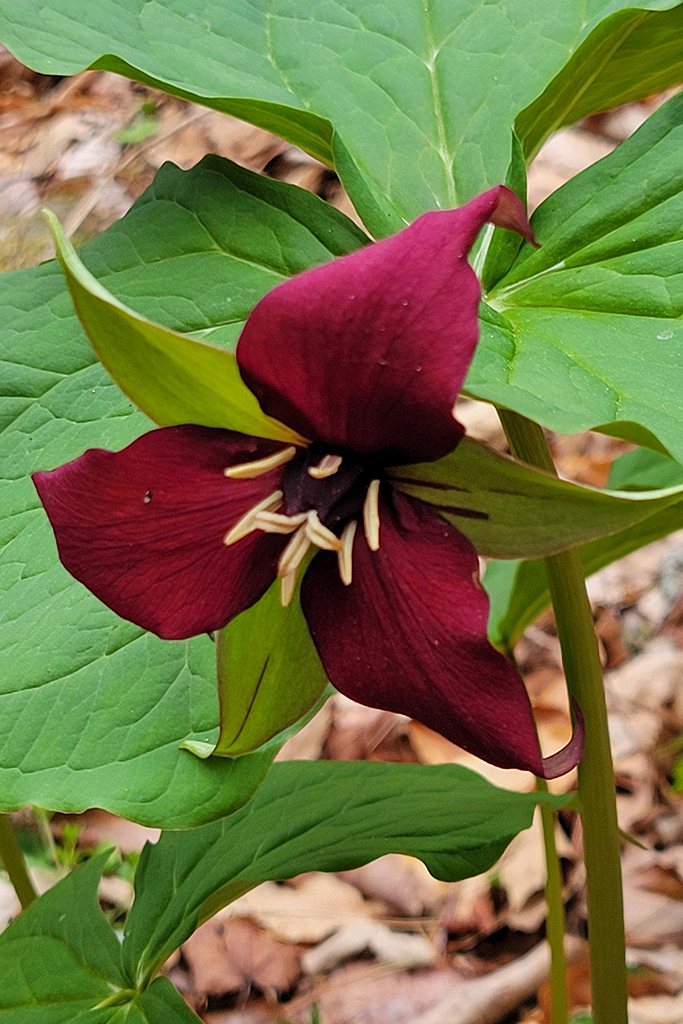
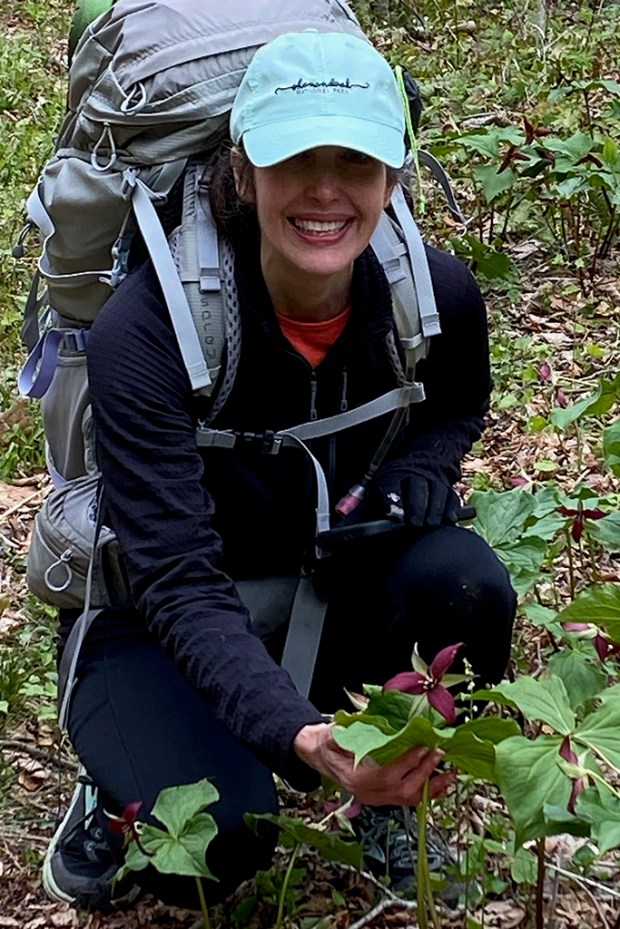
Red trillium
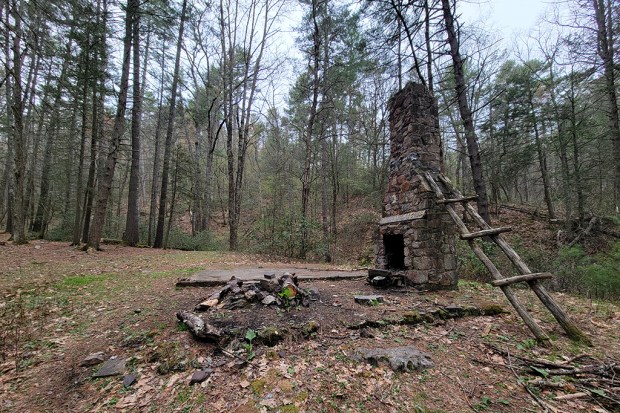
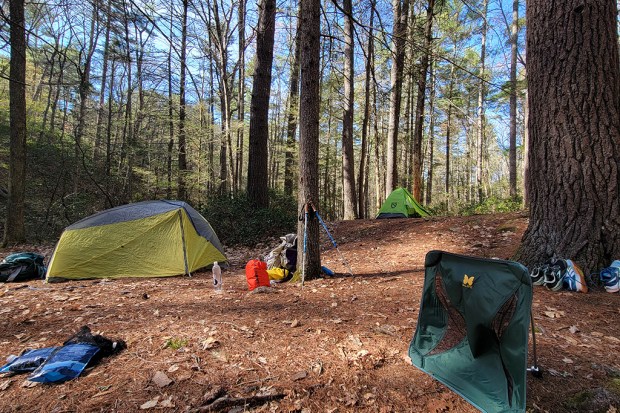
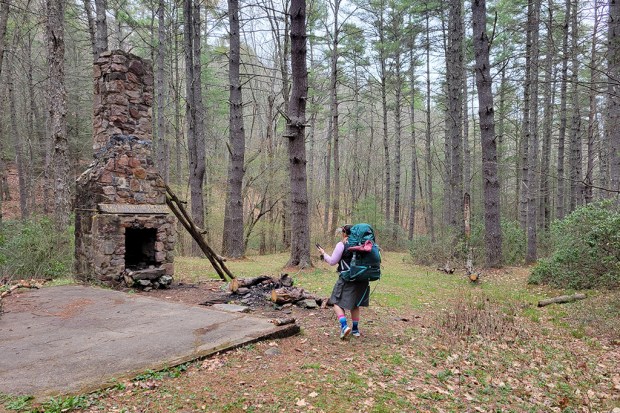
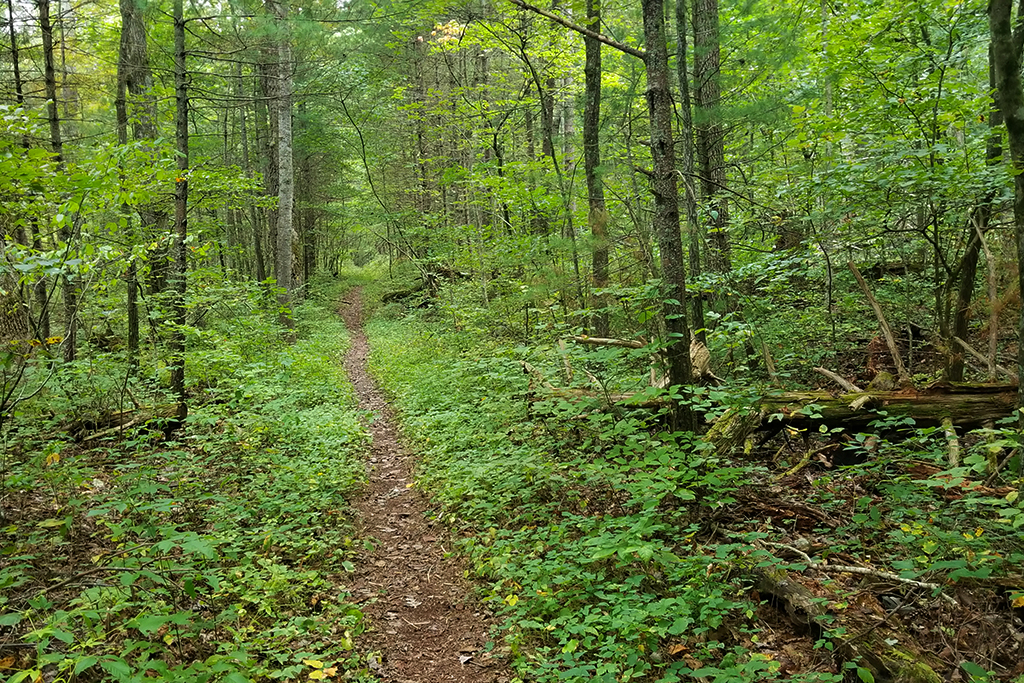
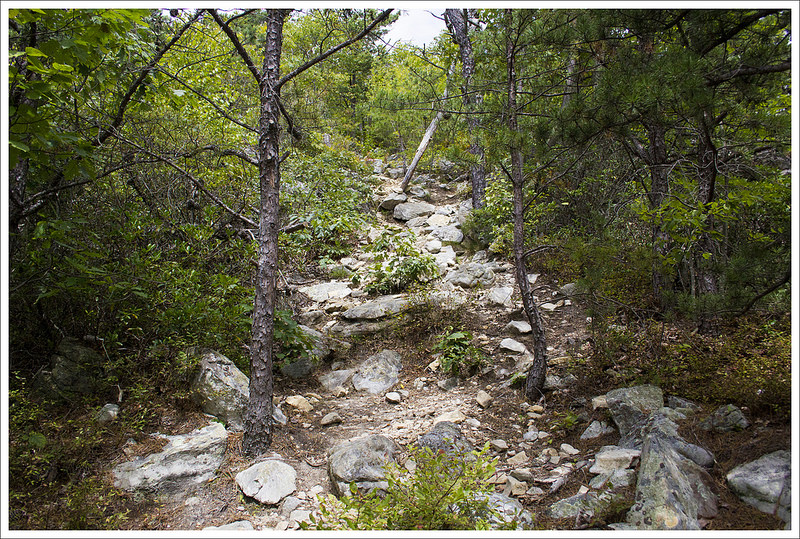
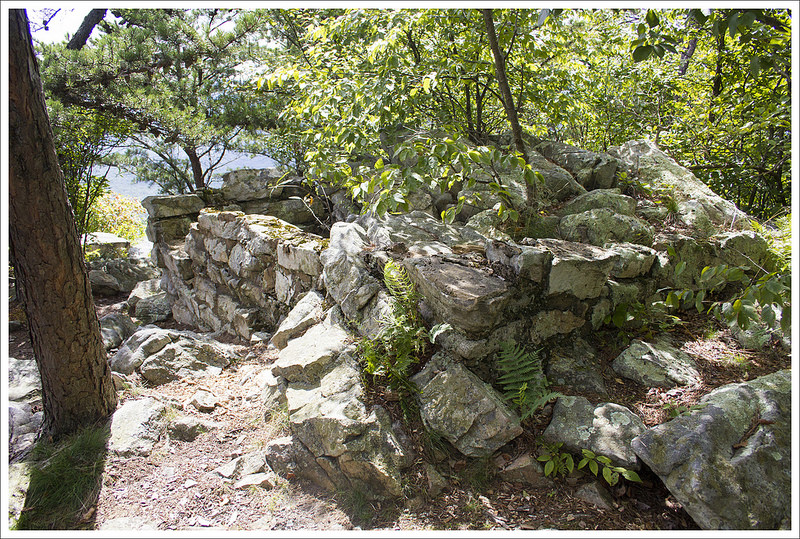
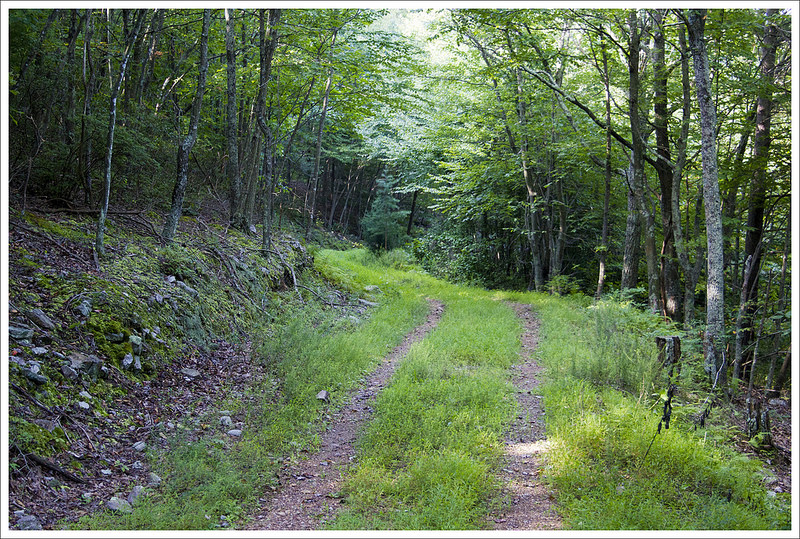
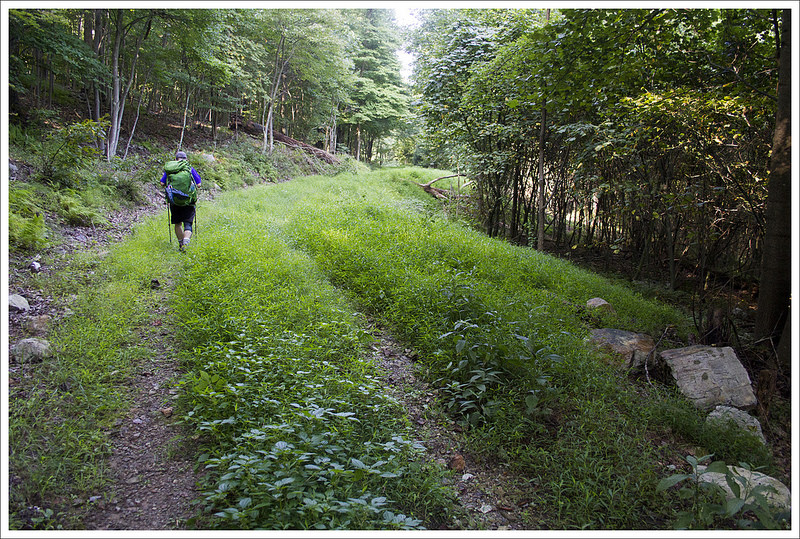
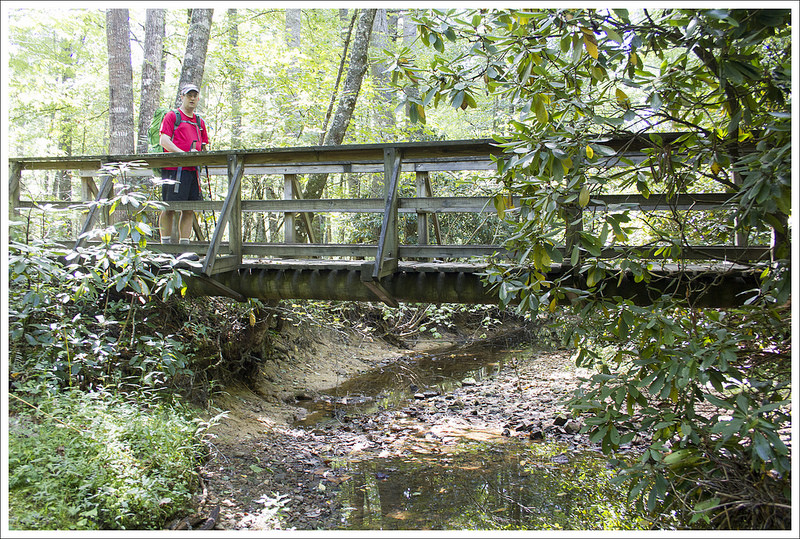
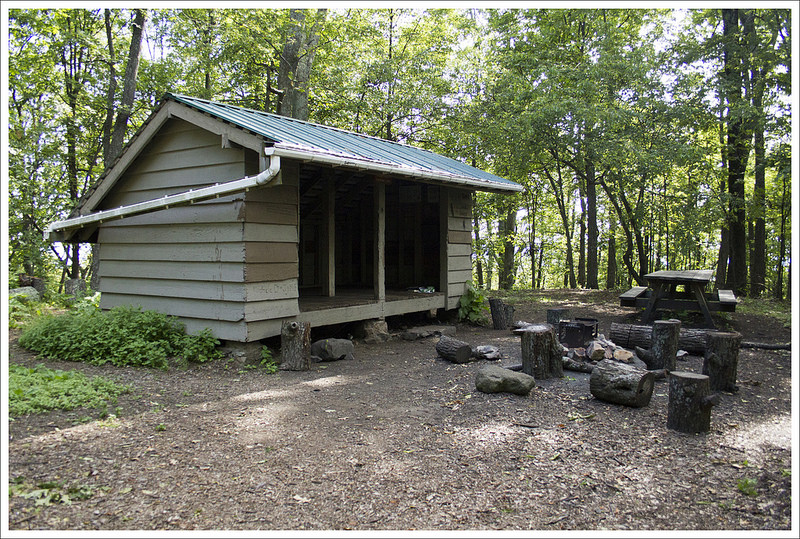
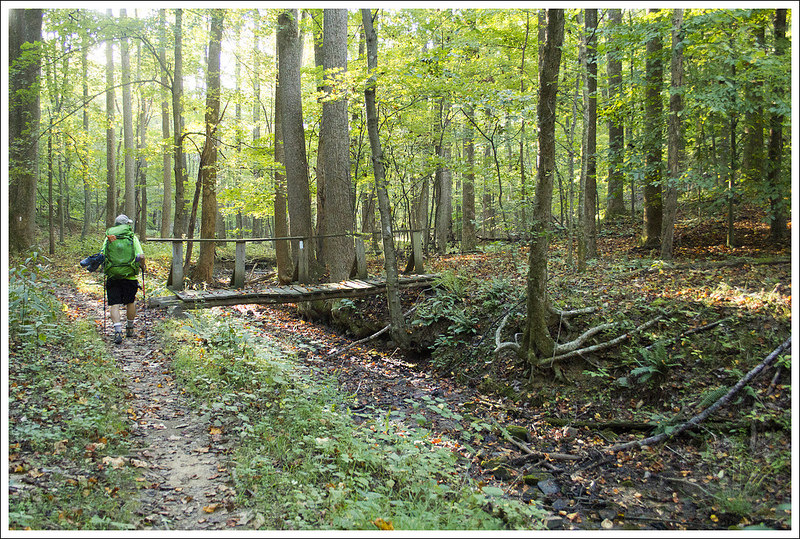
A little over 2.75 miles into the hike, you’ll reach the junction with the Jerry’s Run Trail on the left. From there, the trail climbs gently uphill as it follows the stream, with several more small crossings along the way. After another couple of miles, you’ll arrive at the large grassy clearing where the Sexton Cabin once stood. That’s where we made camp for the night.
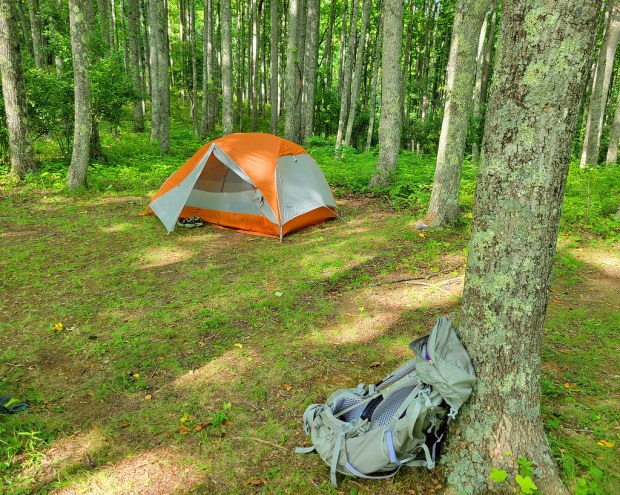
It turned out to be an ideal campsite. There was plenty of room for multiple groups to spread out without feeling crowded, a small stream with more than enough water for filtering and cooking, soft, level ground for tents, and several well-established fire rings.
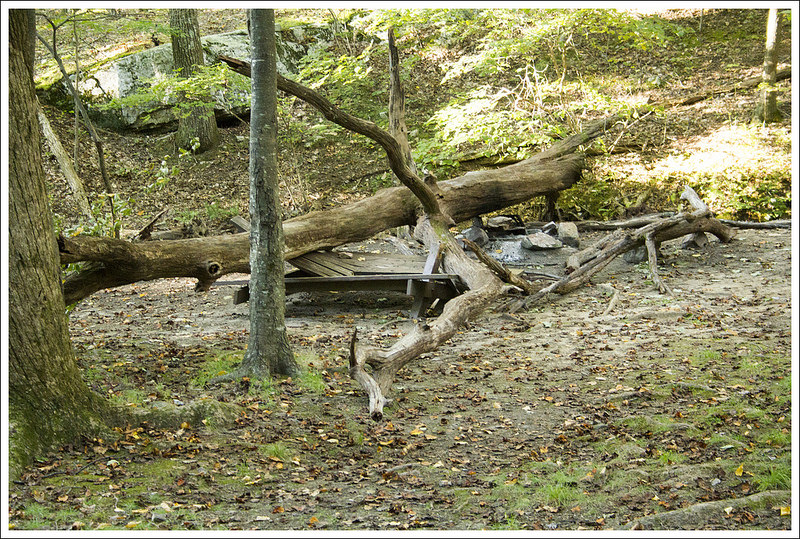
Old Sexton Cabin site
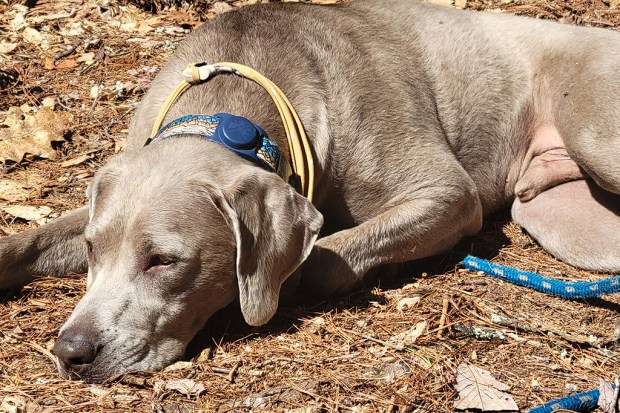
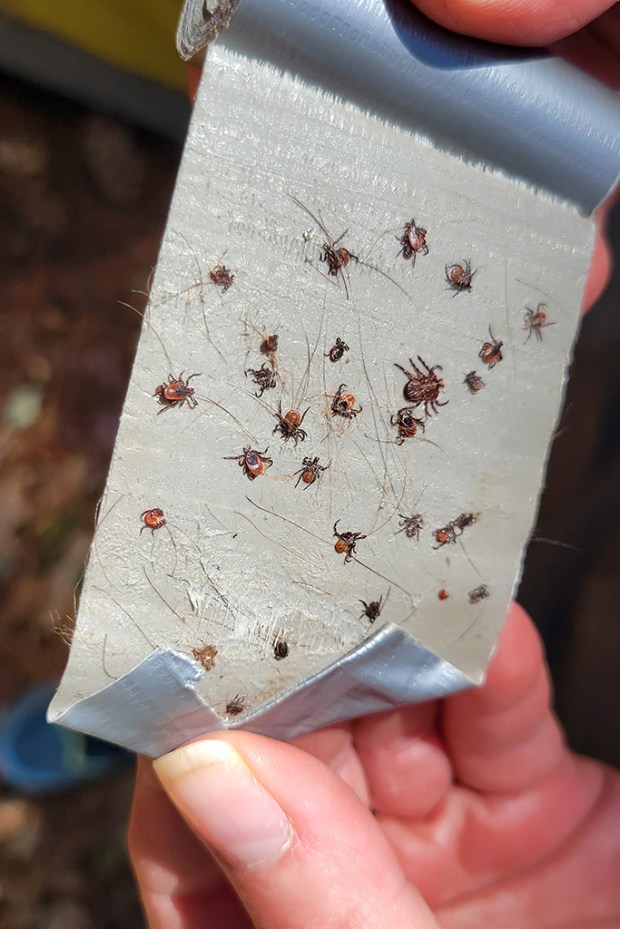
Once camp was set up, we collected firewood, relaxed in our camp chairs, and spent an alarming amount of time pulling ticks off Ridgley. (Yikes!) He had spent much of the hike happily bounding through the undergrowth off leash, and the warm, wet April weather had the ticks out in force. He made for a very appealing meal to those nasty ticks. Thankfully, I didn’t find a single tick on myself.
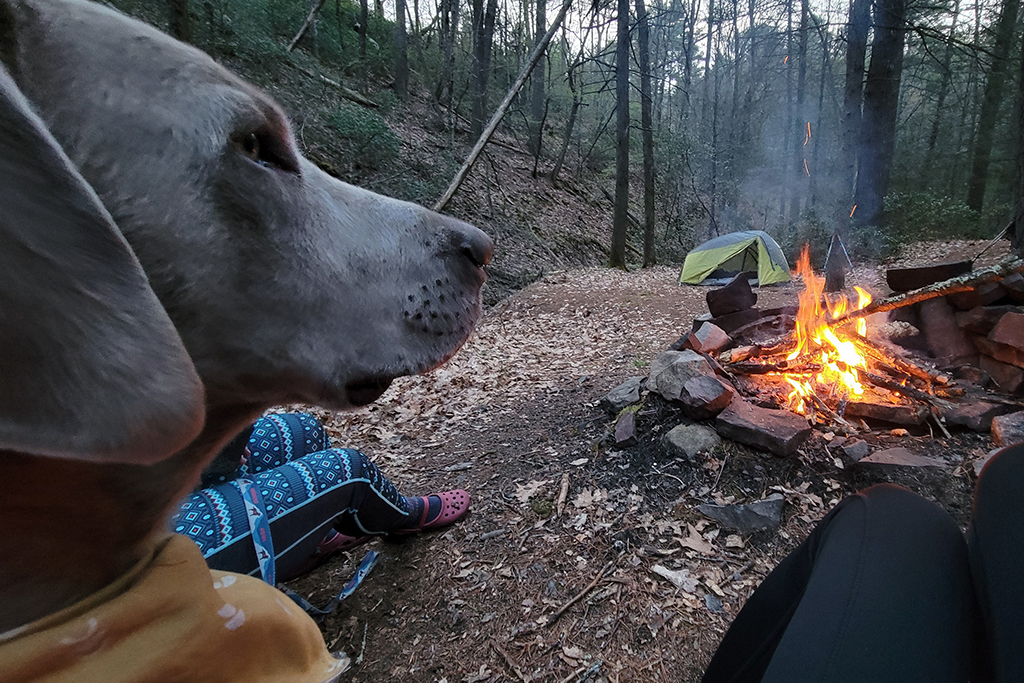
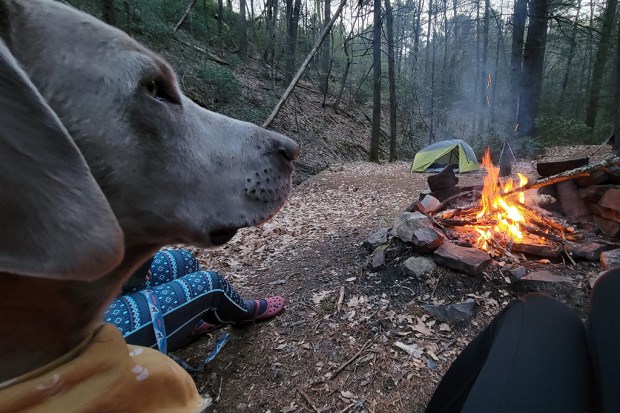
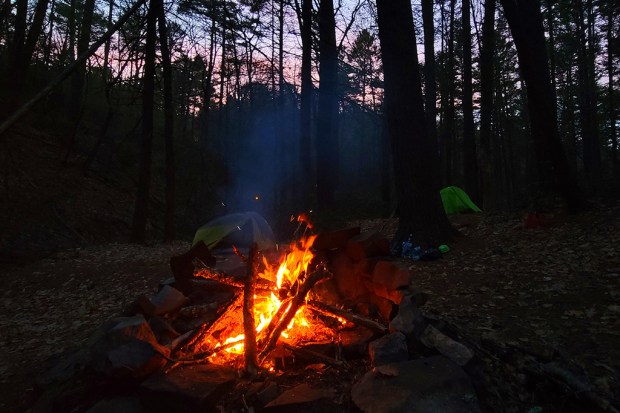
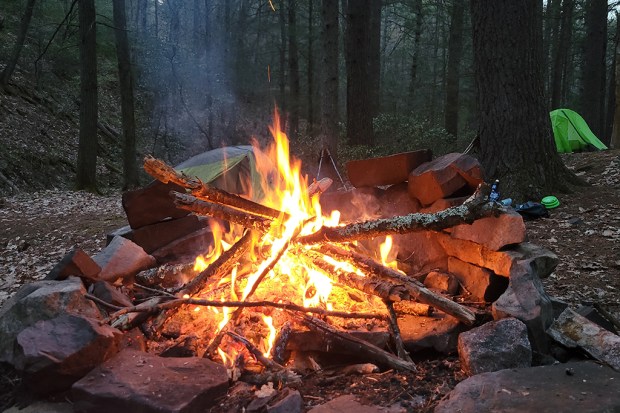
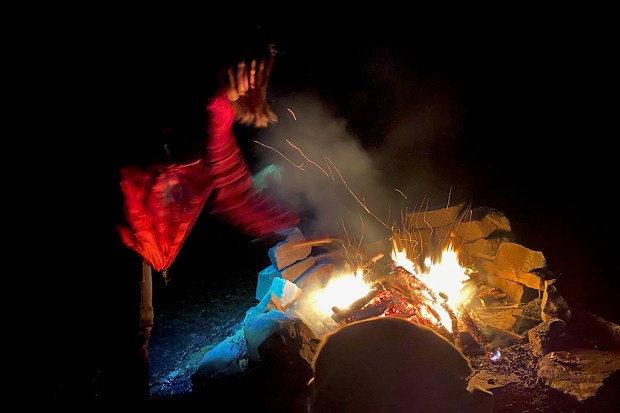
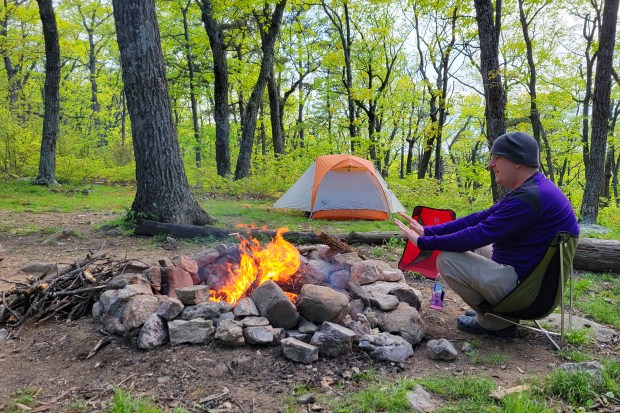
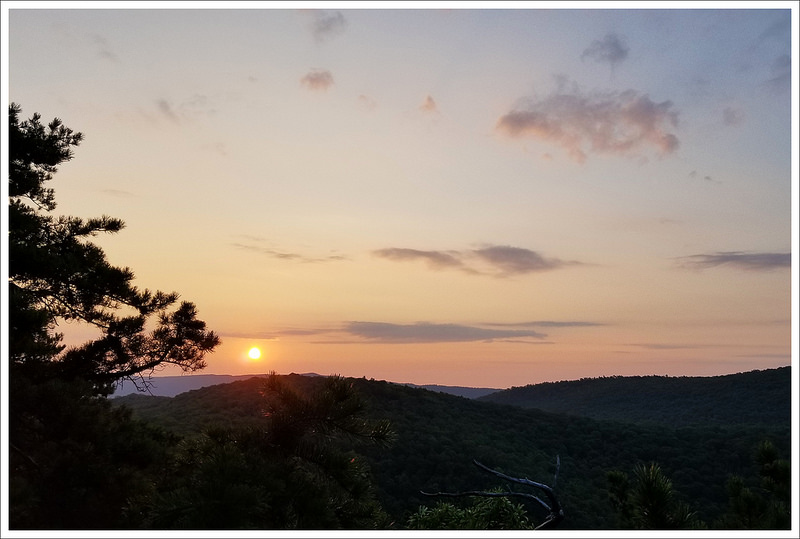
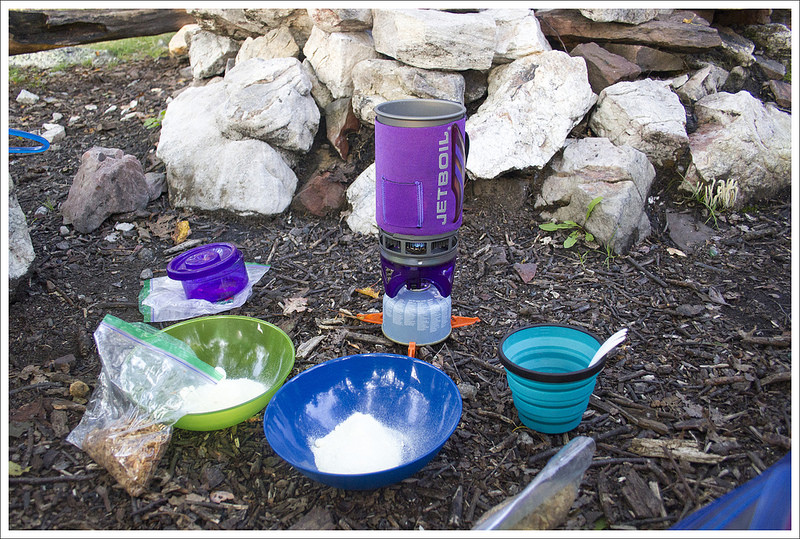
That evening we built a campfire, cooked dinner, and enjoyed several hours of good conversation before turning in for the night.
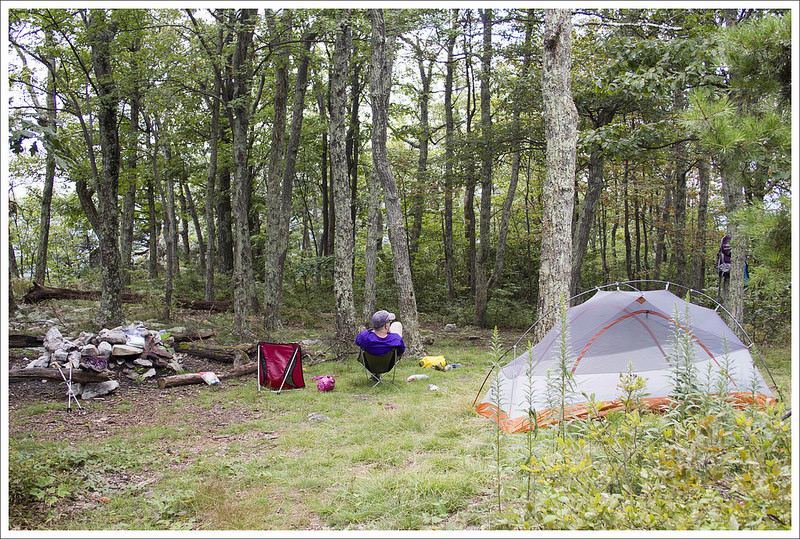
Our campsite and campfire
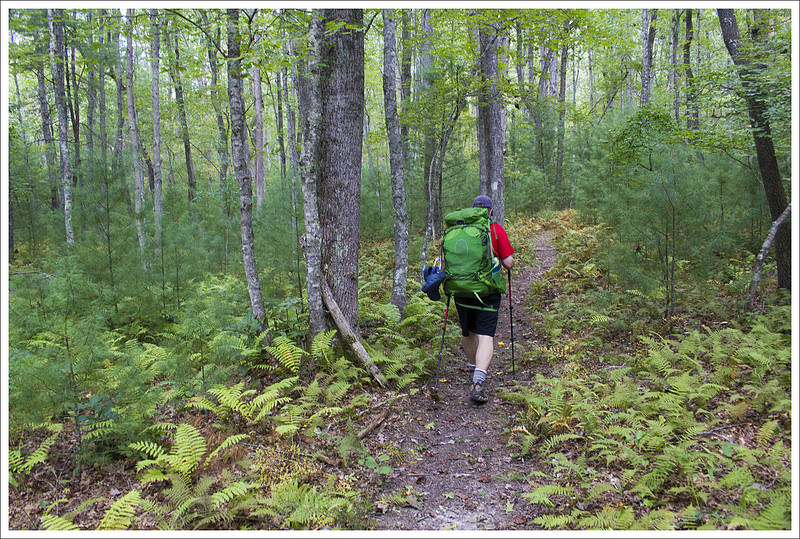
The next morning we packed up and retraced our steps. Without the pressure of reaching camp before others claimed the best campsites, we took more time to admire the wildflowers and the enormous fallen hemlocks. It was heartbreaking to see so many magnificent trees lost to the invasive hemlock woolly adelgid.
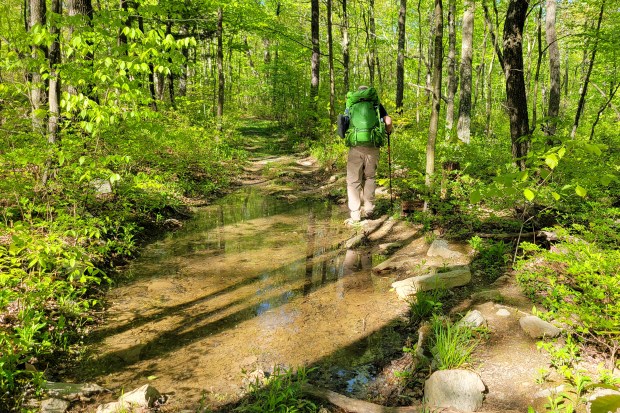
We also abandoned any attempt to keep our feet dry. Rather than changing into Crocs at every crossing, we simply walked straight through the streams and embraced the feeling of squishy hiking shoes.
Obligatory photo with the wilderness area sign
We reached the car just as clouds began rolling in—perfect timing. It was exactly the kind of backpacking trip we’d hoped for: beautiful, relaxing, and uncomplicated. I’d highly recommend this route to anyone looking for an easy overnight with lots of water crossings. If you’re hoping for something longer, there are also plenty of options in Ramsey’s Draft to turn this into a loop or extend the adventure.
Trail Notes
Distance – 9.5 miles (out-and-back, with 4.75 miles each day)
Elevation Change – 946 ft. (900′ on Day 1, 46′ on Day 2)
Difficulty – 2. This is an easy hike, but you should be confident with water crossings
Trail Conditions – 3. Some deadfall and potentially tricky water crossings
This two-day backpacking trip covered just over 23 miles and included a visit to the iconic Dragon’s Tooth, one of the three highlights that make up Virginia’s Triple Crown. We did this backpacking trip in June of 2022 and it’s been sitting unposted in our blog queue ever since. I decided to go ahead and share it… four years later!
You’ll find the full photo album at the bottom of this post.
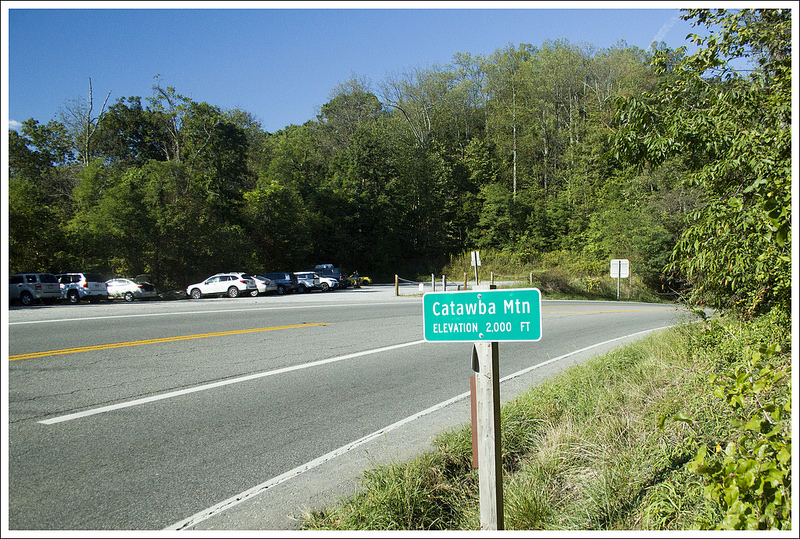
We started by parking a car at the McAfee Knob lot on VA 311, then caught a shuttle to Craig Creek. There used to be a footbridge spanning the creek, though I am not sure if it is still in place. It had washed out at one point, and I have not seen confirmation that it has been rebuilt.
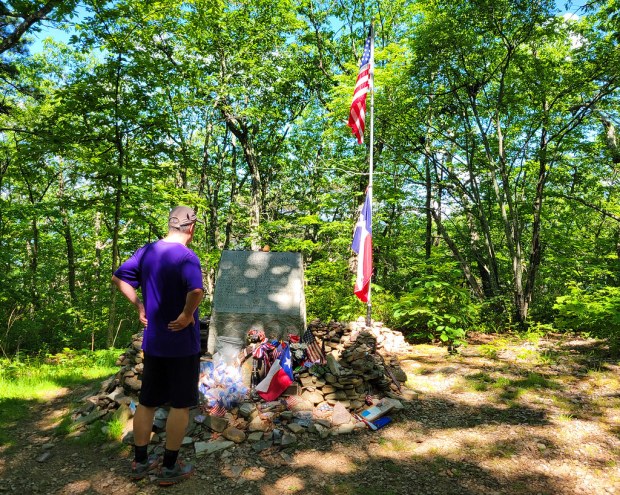
A few miles into the hike, we took a short spur trail to visit the Audie Murphy Monument. According to the inscription, Audie Murphy was World War II’s most decorated soldier. He died in a plane crash near this spot in 1971. It is a quiet, reflective place that is well worth the short detour. Check out this short video of the monument.
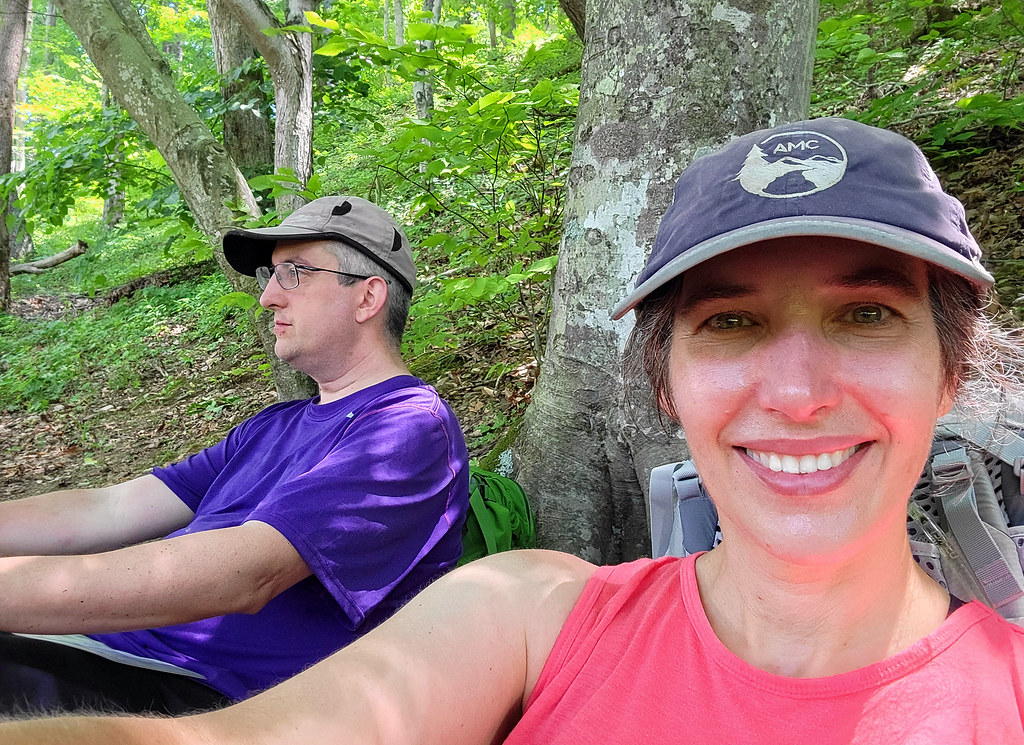
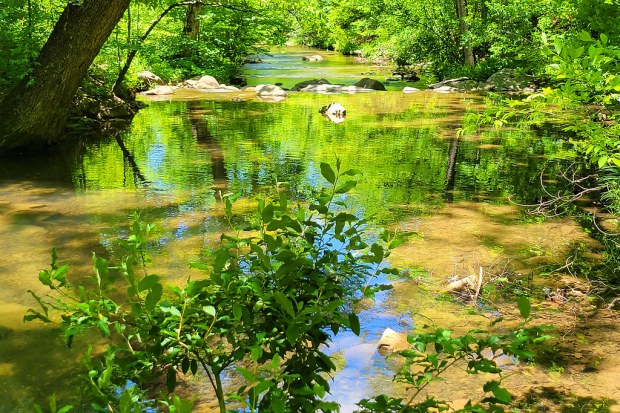
As the miles passed, we caught glimpses of views through the trees, a nice preview of what was to come. Late in the day, we descended to Trout Creek. Some kind folks relaxing by the water offered us cold beers, which was incredibly tempting, but we still had one more climb ahead before camp, so we kept moving.
We had planned to stay near Pickle Branch Shelter, but our hiking app suggested a campsite just a bit farther up the trail and closer to water. It turned out to be a great decision. The site sat in a beautiful spot, and while collecting water took a little creativity, the source was still flowing and reliable.
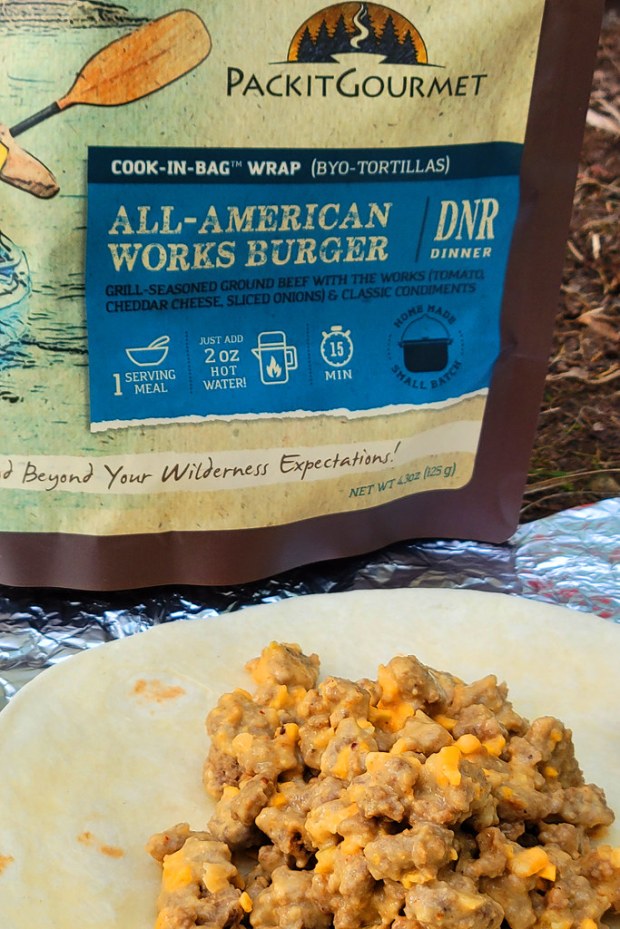
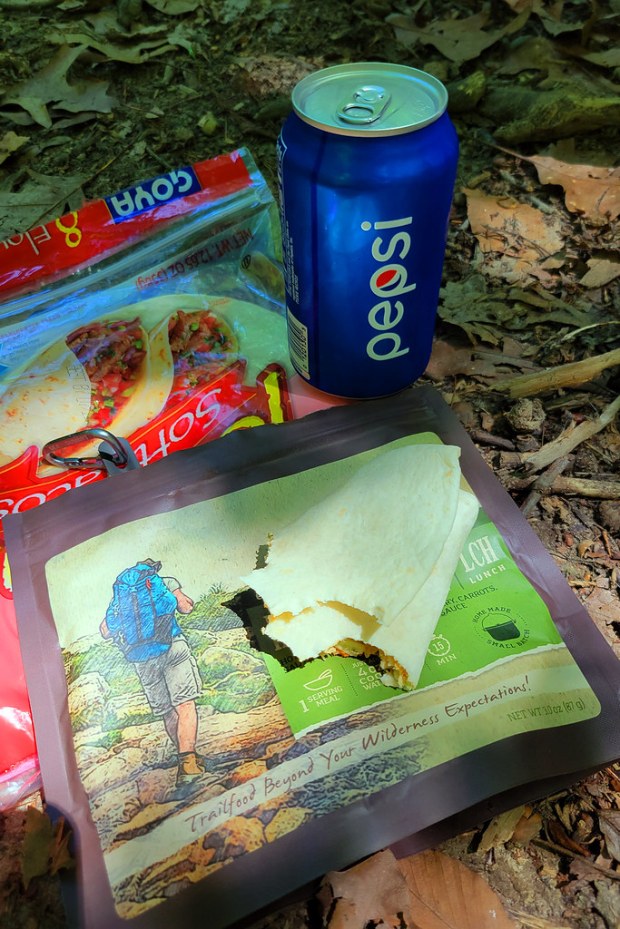
Our campsite was tucked into a poplar grove beside a meadow filled with wildflowers. After setting up, we settled in for dinner. That night’s meal was the All American Works Burger from PackIt Gourmet, one of our favorite brands for trail food. It comes together with just a small amount of hot water and, wrapped in tortillas, tastes remarkably like a fully loaded cheeseburger. It is one of those meals you genuinely look forward to at the end of a long day.
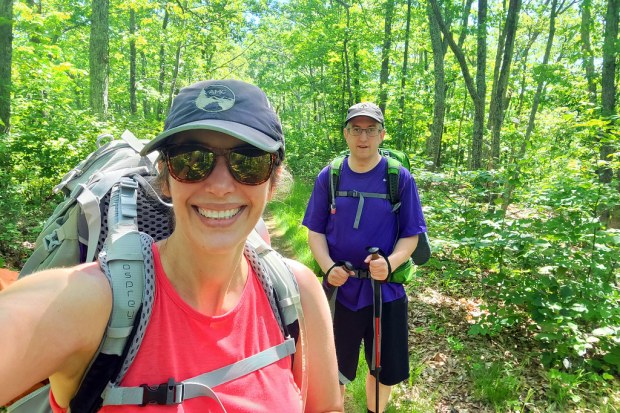
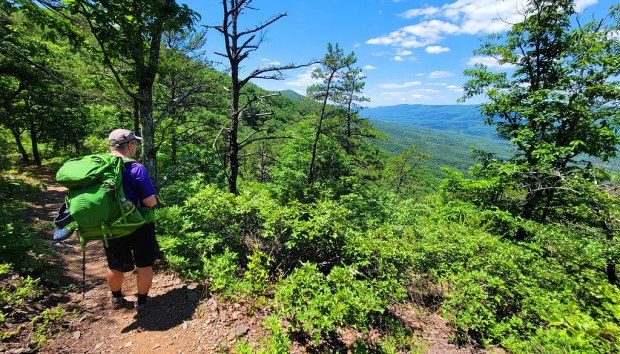
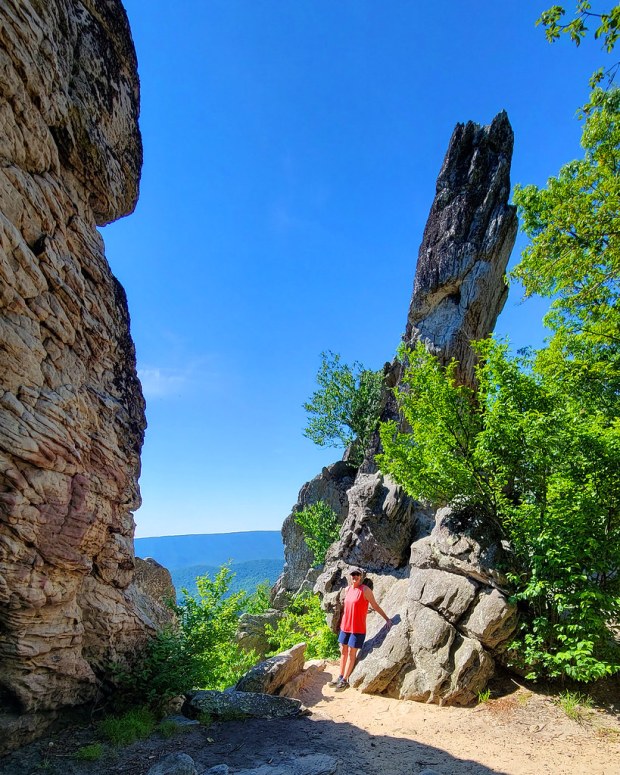
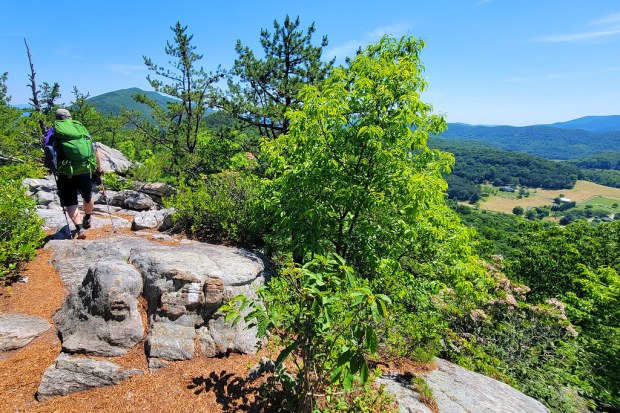
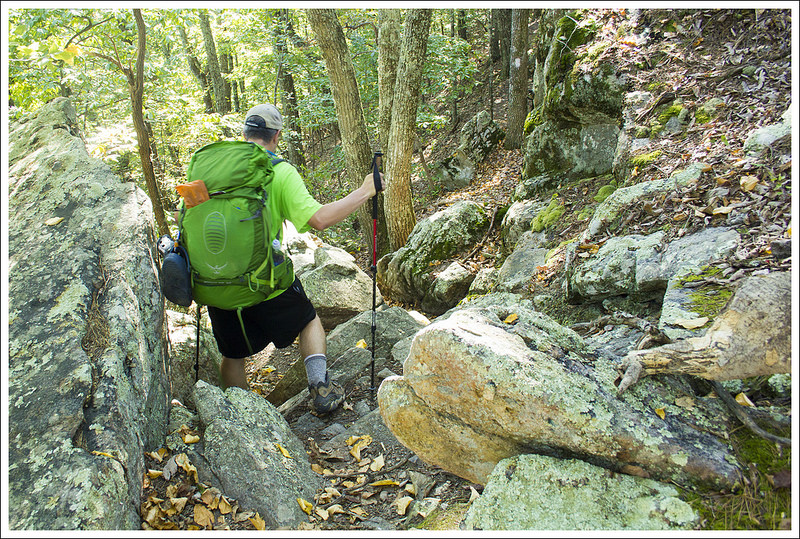
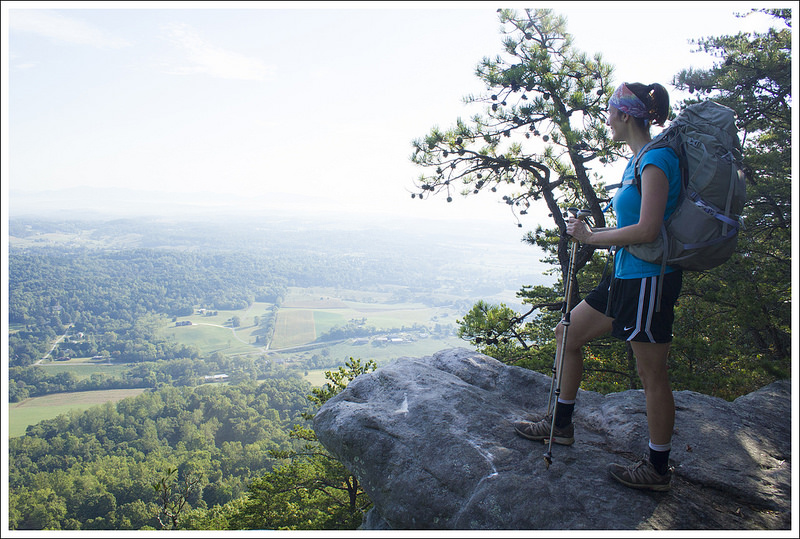
Day two brought more miles and more of a challenge, with around 2,500 feet of climbing and plenty of rocky terrain. The effort paid off with more frequent views and a pass by Dragon’s Tooth. We saw a few more people that day, including day hikers near the overlook and a handful of thru-hikers, but the trail still felt pleasantly uncrowded.
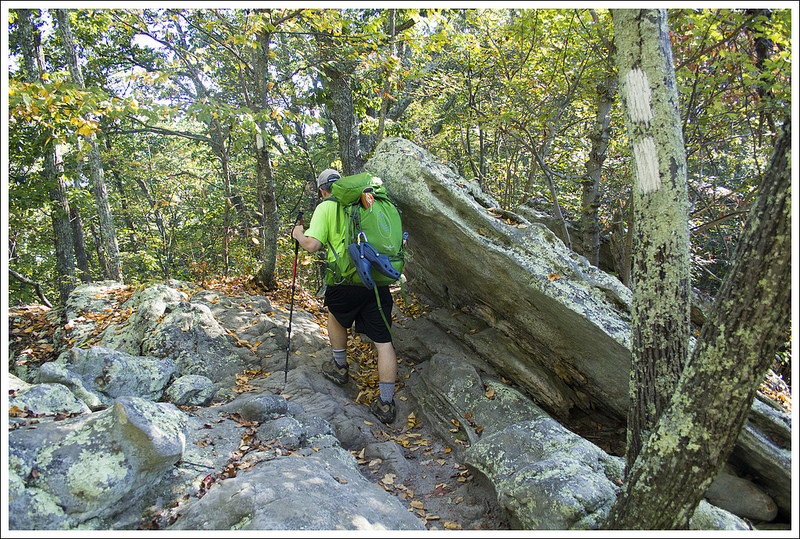
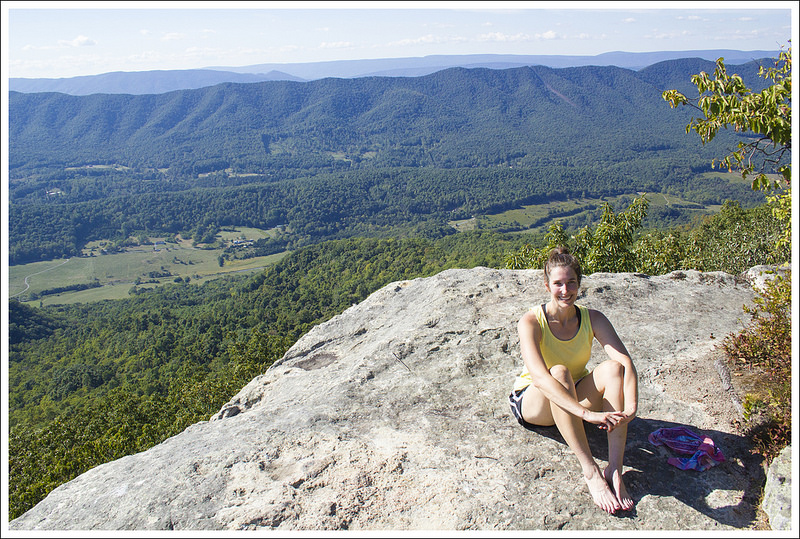
The first stretch of the morning was especially rocky, requiring careful footing. As we approached Dragon’s Tooth, the views began to open up. The formation itself is an impressive quartzite spire rising sharply from the ridge. It is possible to climb to the top if you are comfortable with heights, but we decided to skip it this time since we had done it before and still had a long day ahead.
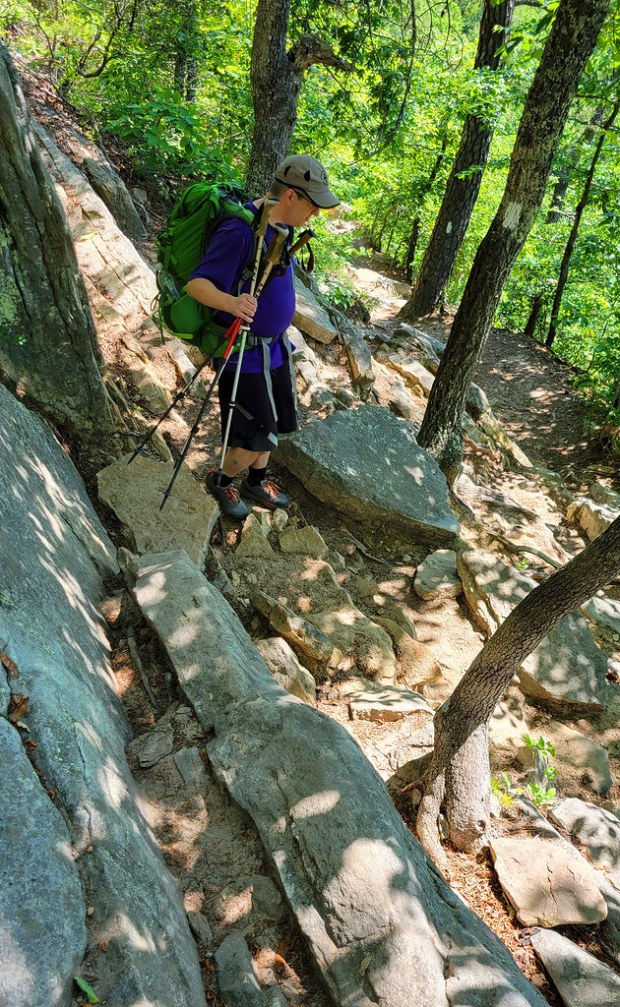
The descent heading north from Dragon’s Tooth is no joke. It is a steep, technical scramble over rocks and narrow ledges, made even trickier with overnight packs. We did not take many photos through this section since our focus was on staying upright.
The rocks continue for a while after the descent, easing only slightly but still demanding attention. Eventually, we reached a stream crossing near Newport Road and took a well-earned lunch break. Lunch was another PackIt Gourmet meal, a buffalo chicken wrap that rehydrates with cool water. We swapped the mayo for ranch dressing and wrapped it all in tortillas. It was another solid trail meal.
While we were eating, a mom pulled up to drop off her son, a thru-hiker heading back out after a weekend visit. She offered us ice-cold Pepsis, which felt like pure magic at that moment.
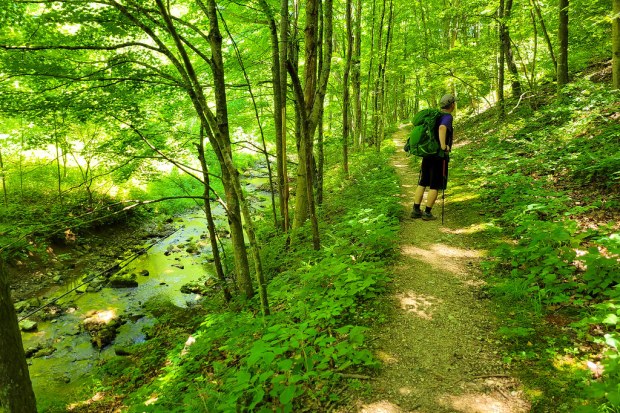
The trail eased up a bit after lunch. Along a quieter stretch, we spotted a mama deer and her fawn at a stream. Just moments later, a bear crossed the trail right in front of us, followed shortly by a large garter snake slipping through the grass. It was a memorable stretch packed with wildlife.
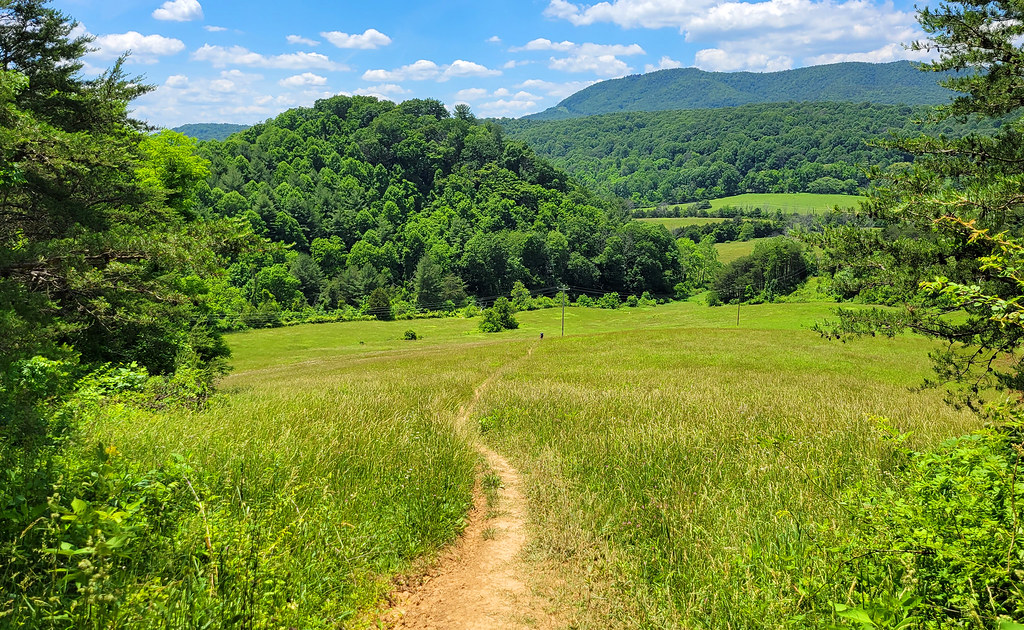
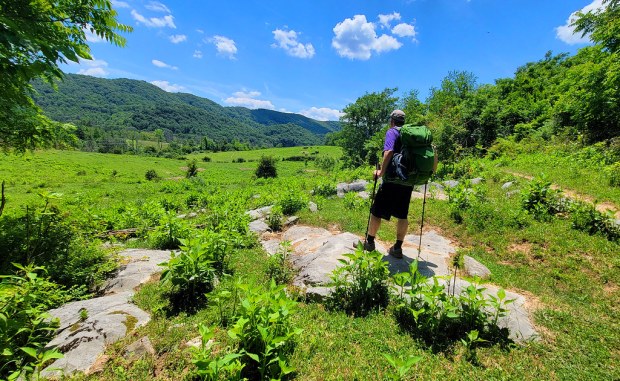
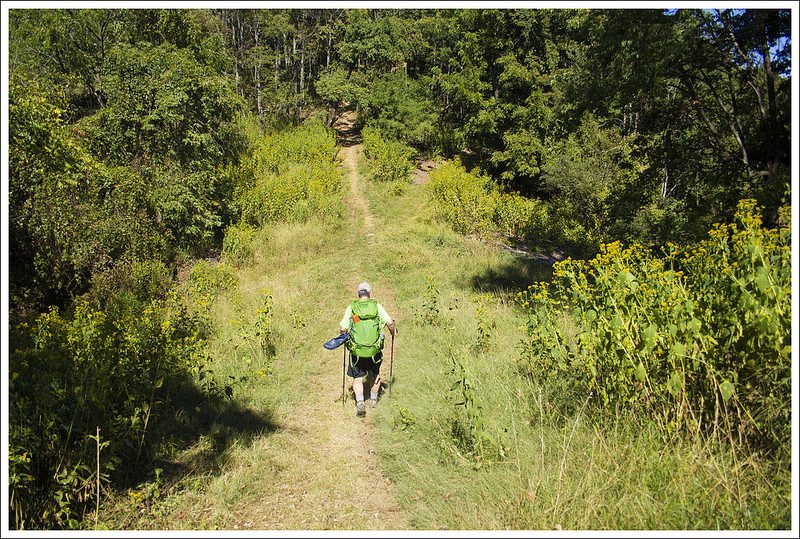
Soon after, we entered a long section of open pasture. The trail crossed several stiles and stretched for over a mile through sunny, exposed fields. It was hot, bright, and heavy with pollen.
By that point, Adam had already had a tough day. Earlier, he tripped on a root and took a hard fall, breaking his glasses and ending up with a swollen lip and a few cuts. Thankfully, it was not more serious. Later in the fields, the pollen triggered an asthma flare, and he needed his rescue inhaler. Even feeling worn down, he kept pushing forward and finished strong.
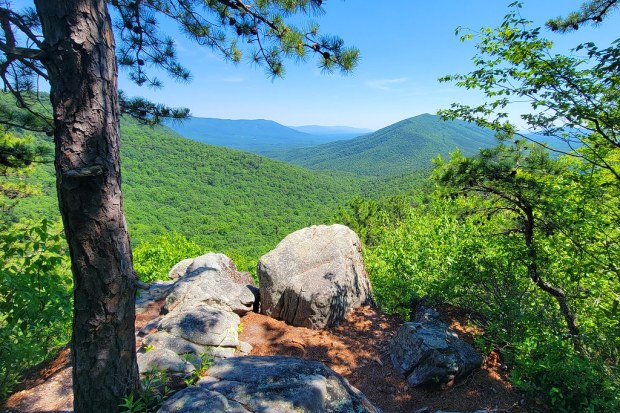
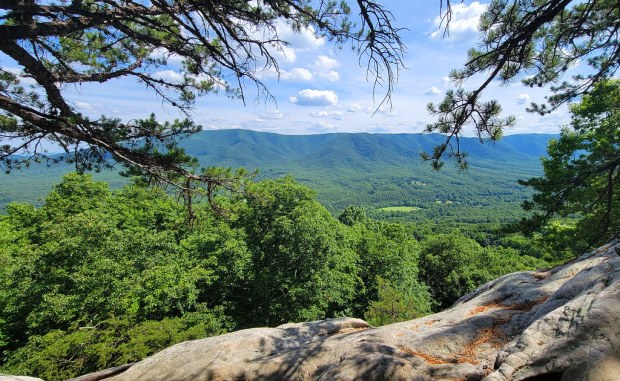
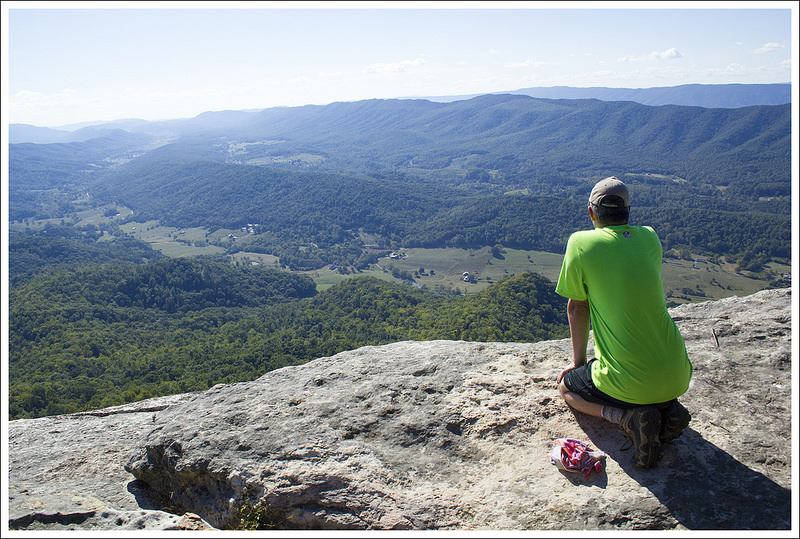
Not long before the end, we caught one last great view about a mile south of the McAfee Knob parking area where we had left our car. We made it back by mid-afternoon, grateful to be done with the miles as the day warmed up.
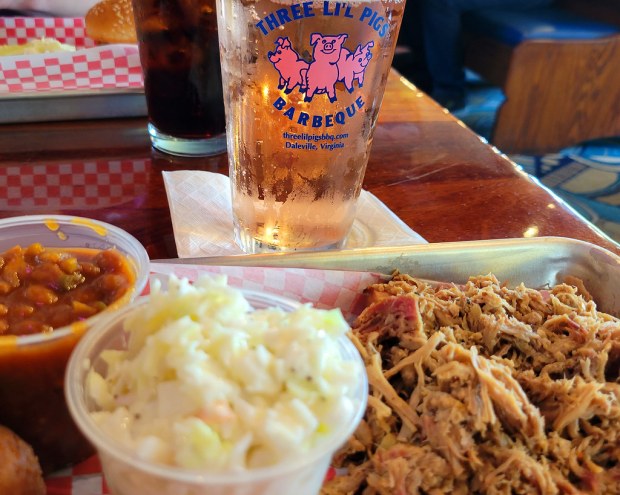
On the drive home, we made our usual stop at Three Li’l Pigs in Daleville for barbecue. It has become a bit of a tradition after hikes in the Roanoke area, and it was the perfect way to wrap up the trip.
Notes
Distance – 23.35 miles (10.2 on Day 1, 13.15 on Day 2)
Elevation Change – 4528 ft. (2182′ on Day 1, 2346′ on Day 2)
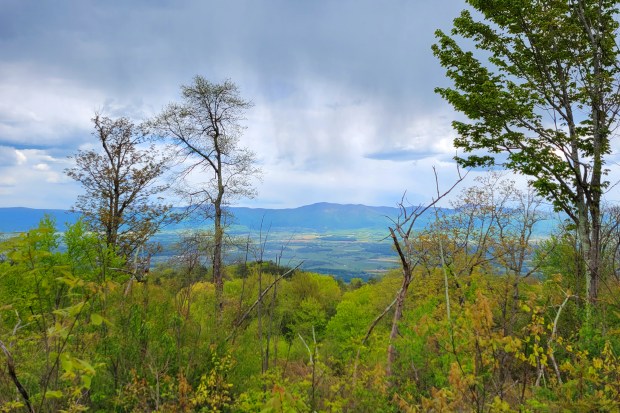
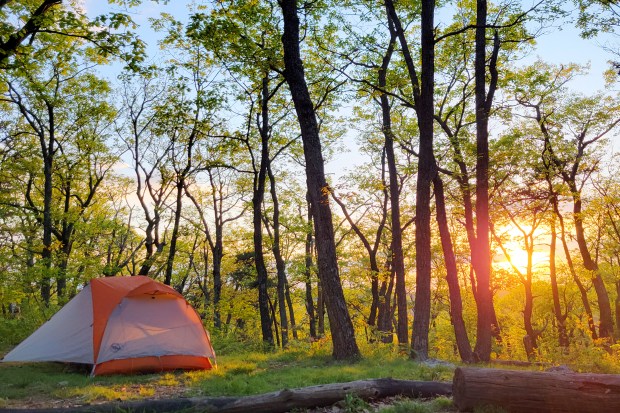
This nine-mile loop is perfect for a long day-hike or a quick overnight backpacking trip. We recommend backpacking, just to take advantage of the beautiful campsites near the summit. The rock scramble atop Duncan Knob is impressive and provides great views.
Full photo album is embedded at the bottom of the post!
Adam Says (Day 1)
When the weather forecast looked like it was setting up to be a great weekend, we decided on short notice to pack our bags and go for an overnight backpacking trip. We had originally planned to do some miles of the Appalachian Trail we still wanted to accomplish, but there was a potential gas shortage coming so we came up with an idea that was closer to us and also wouldn’t require us to drive two cars to shuttle.
Duncan Knob and Strickler Knob are some of the more adventurous hikes in George Washington National Forest, since they both require some rock scrambling to get to the summit views. We opted for this route since we have done both Strickler and Duncan Knob as day hikes and had missed part of the trail system that makes this a doable overnight loop.
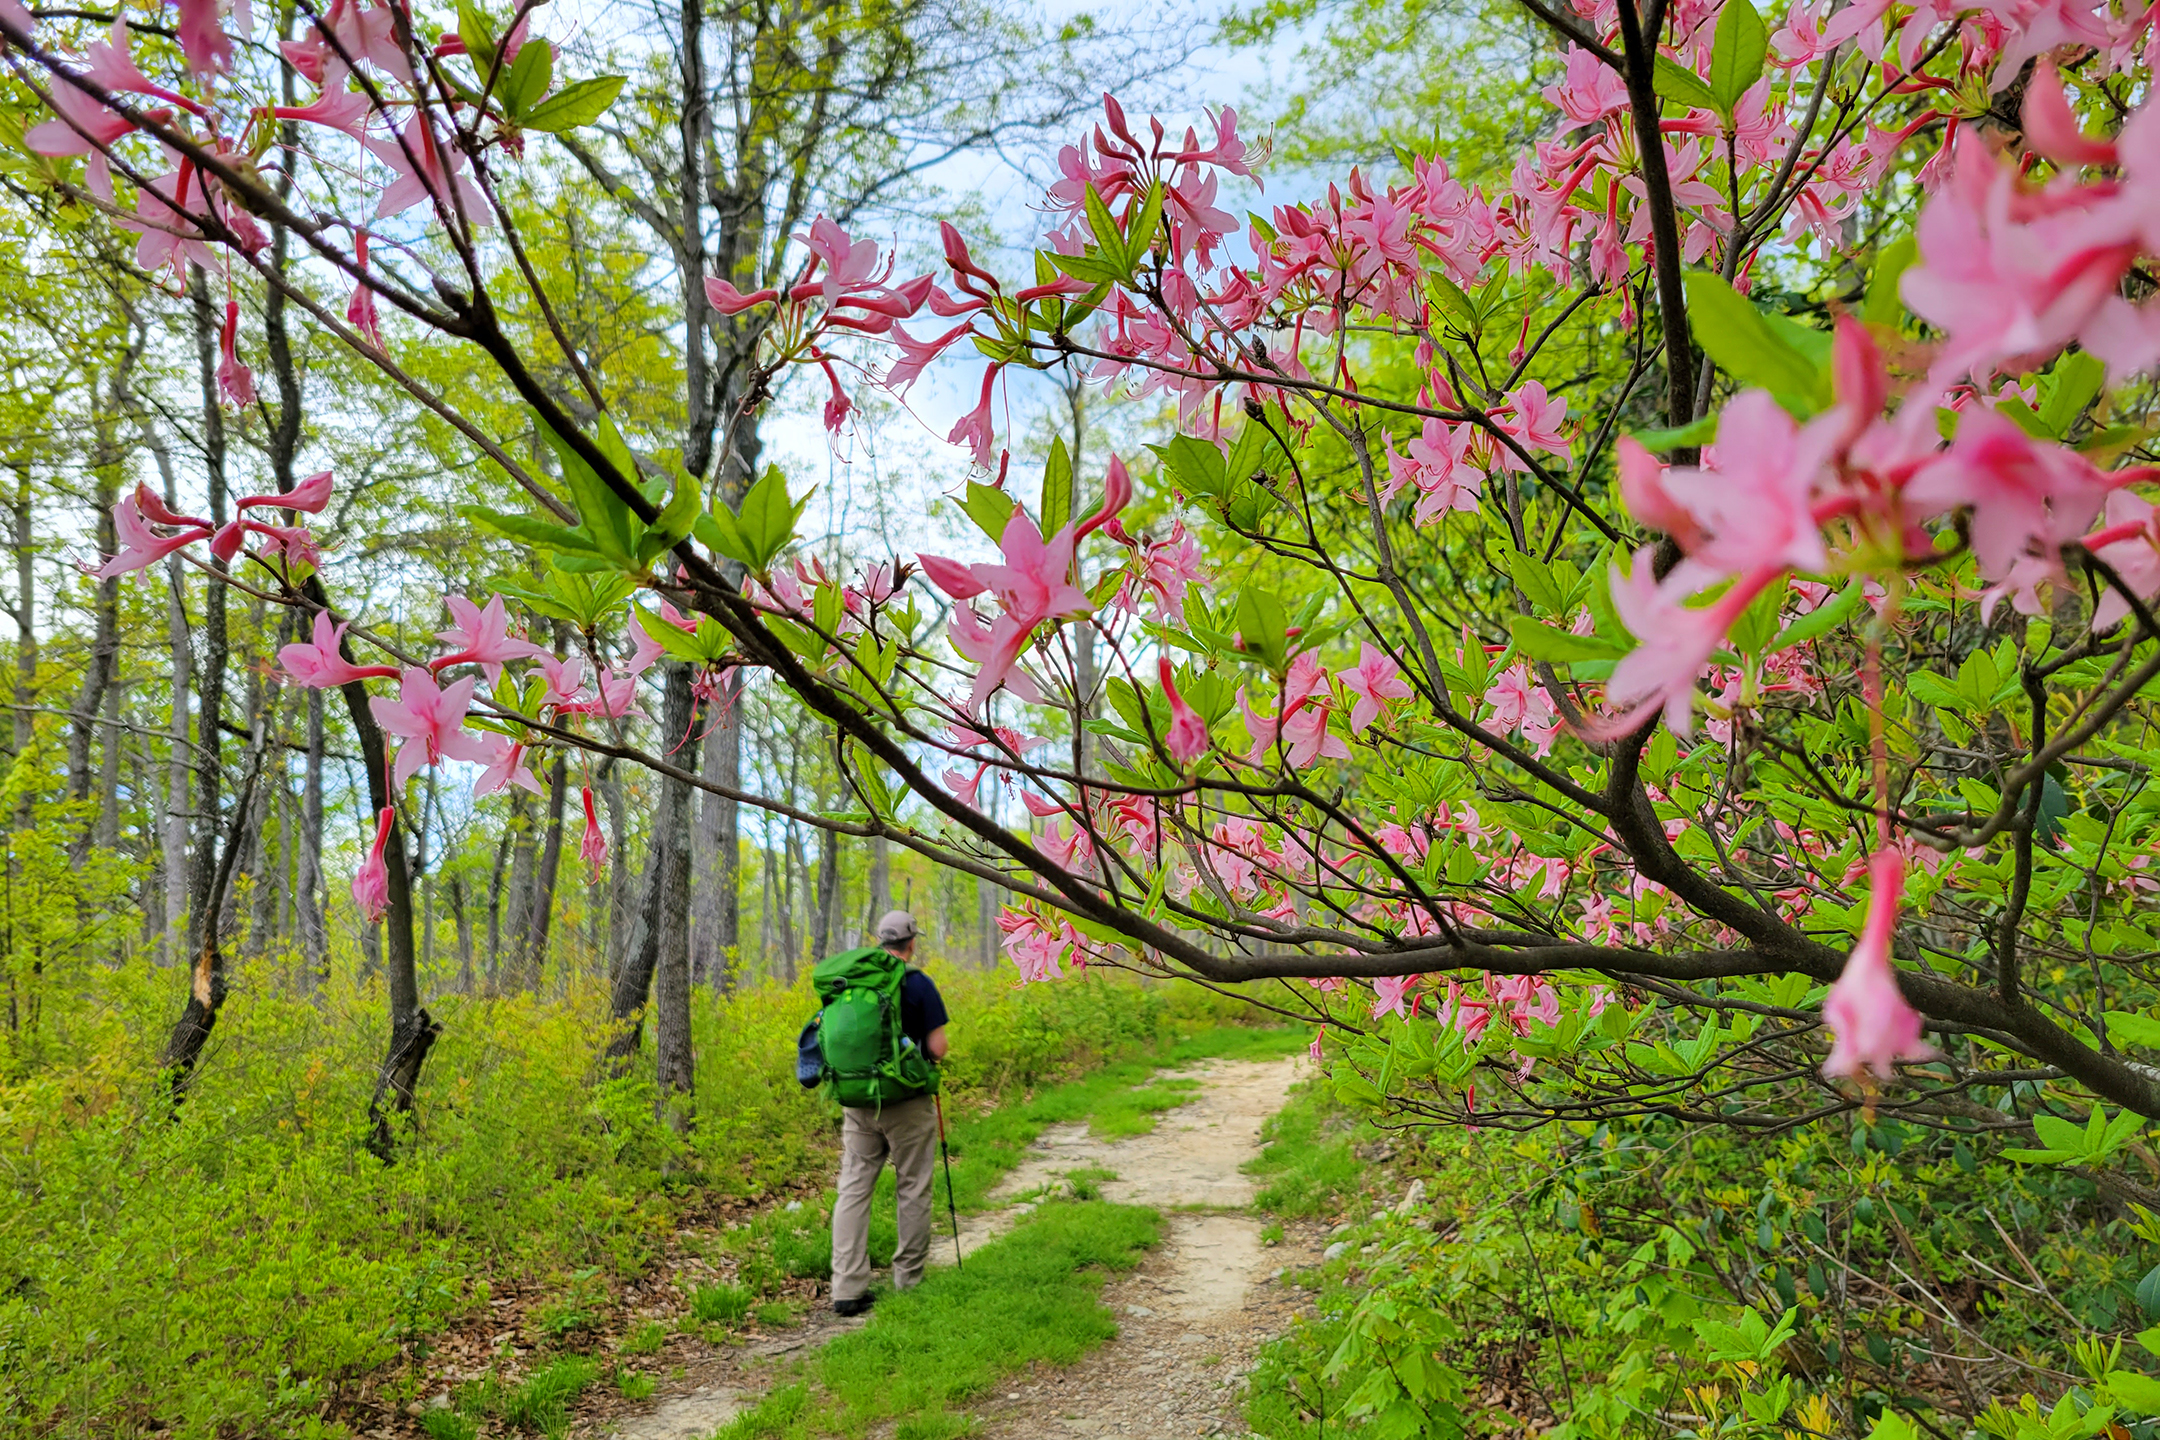
PHOTO: Blooming native pink azalea.
We started our hike from the Scothorn Gap parking area, quickly crossing the creek. The trail starts an uphill climb that is a bit steep in parts. We reached the junction with the Strickler Knob trail at the top of Middle Mountain. We ran into a few people that were doing that as a day hike. If you wanted to add Strickler Knob onto this loop of a trail, it would add another 1.4 miles to the trip – if you haven’t done Strickler Knob before, I would highly recommend it. We weren’t sure about camping and how far we wanted to go the first day, so we decided to skip Strickler Knob. The trail crests shortly after the junction with Strickler Knob and then descends. The descent at times was rocky and very muddy. We’ve read about the bugs on this trail and that can be largely from standing water.
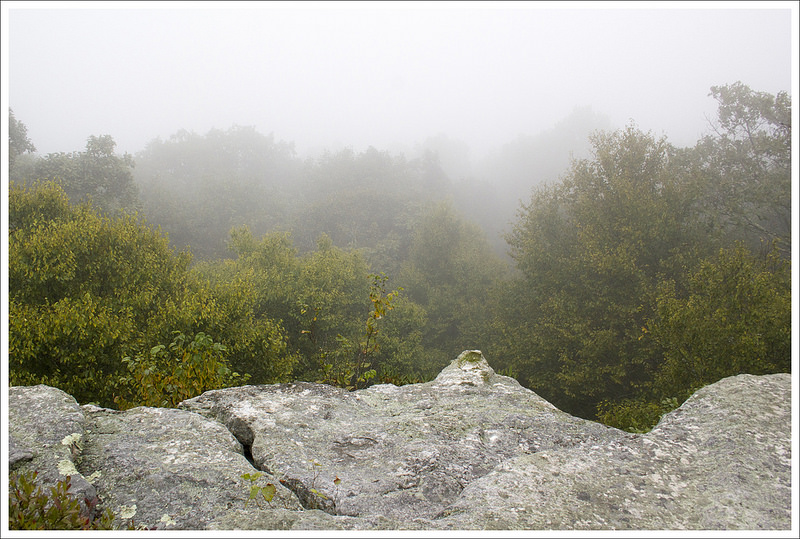
PHOTO: A view from the crest of Middle Mountain (near the Strickler Knob Trail Junction)
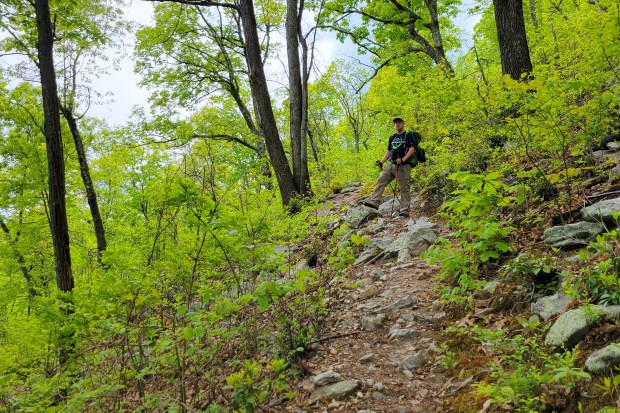
After descending for 2.2 miles, we came to another four-way junction with a campsite right next to a stream. There were already 4-5 guys there at the one spot that were setting up to camp, so we checked our water supply. Since we felt we had enough water to get us through the end of the hike and to cook with for dinner and breakfast, we decided to press on. The hike up from the creek was a very steep, narrow trail of .8 miles. With a full backpack, it made for slow work.
PHOTO: This was a tough uphill climb to camp!
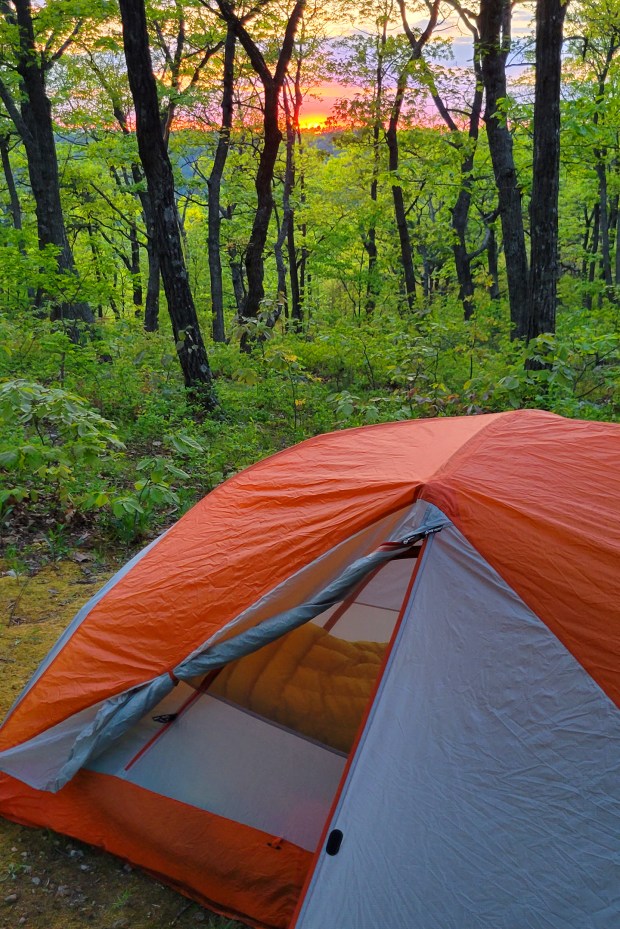
We decided to camp right at the saddle junction with the Duncan Knob trail. This area is called Peach Orchard Gap, and it has several awesome (but dry) campsites. We built a campfire and just relaxed for the rest of the afternoon and evening. Since we only did a bit over 5 miles that first day, it was a shorter trip that gave us a nice, relaxing time to enjoy our time in the woods. We decided to tackle the Duncan Knob peak the following morning where we didn’t have to haul our packs up the rock scramble.
PHOTO: This meal, by the British company Firepot, may have been one of the best freeze-dried meals we’ve ever had!
Turn-by-Turn for Day 1
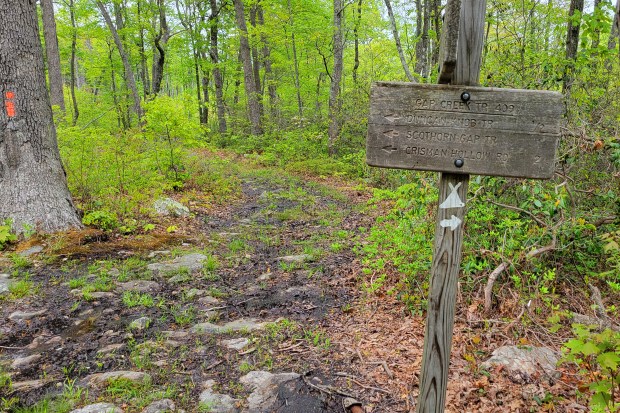
Cross Passage Creek and hike uphill on the yellow-blazed Scothorn Gap trail for 1.5 miles to a four-way trail intersection.
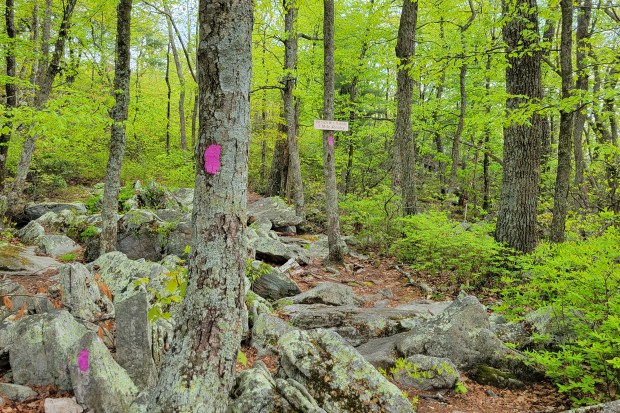
Stay straight at the intersection, heading uphill for .7 miles on the orange-blazed Massanutten Trail. At the top of Middle Mountain, you will see the pink-blazed Strickler Knob trail on the right.
Pass the Strickler Knob trail, and continue over the crest of Middle Mountain on the orange-blazed Massanutten Trail. Descend for 2.2 miles. Much of this section of the trail is muddy and boggy. Check yourself for ticks!
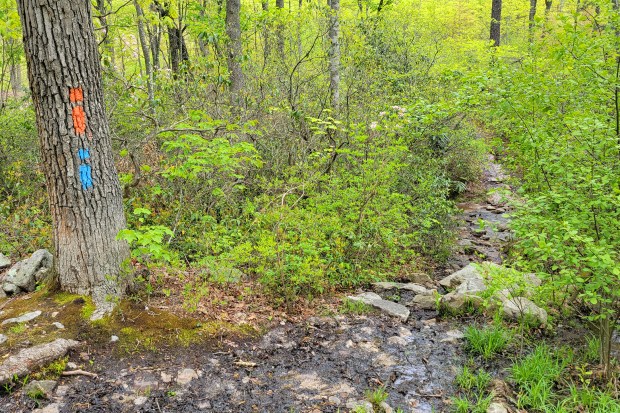
You will reach another junction near a streamside campground. The campsite will be on the right, turn left, heading very steeply uphill on the blue-blazed Gap Creek Trail. If you plan on camping at the top, this will be your last opportunity to refill your water supply. Campsites on the ridge are dry.
Ascend via the Gap Creek Trail for .8 miles before the trail levels out at Peach Orchard Gap. There are several nice, flat, open campsites along this ridge. This is where we chose to stop for the day.
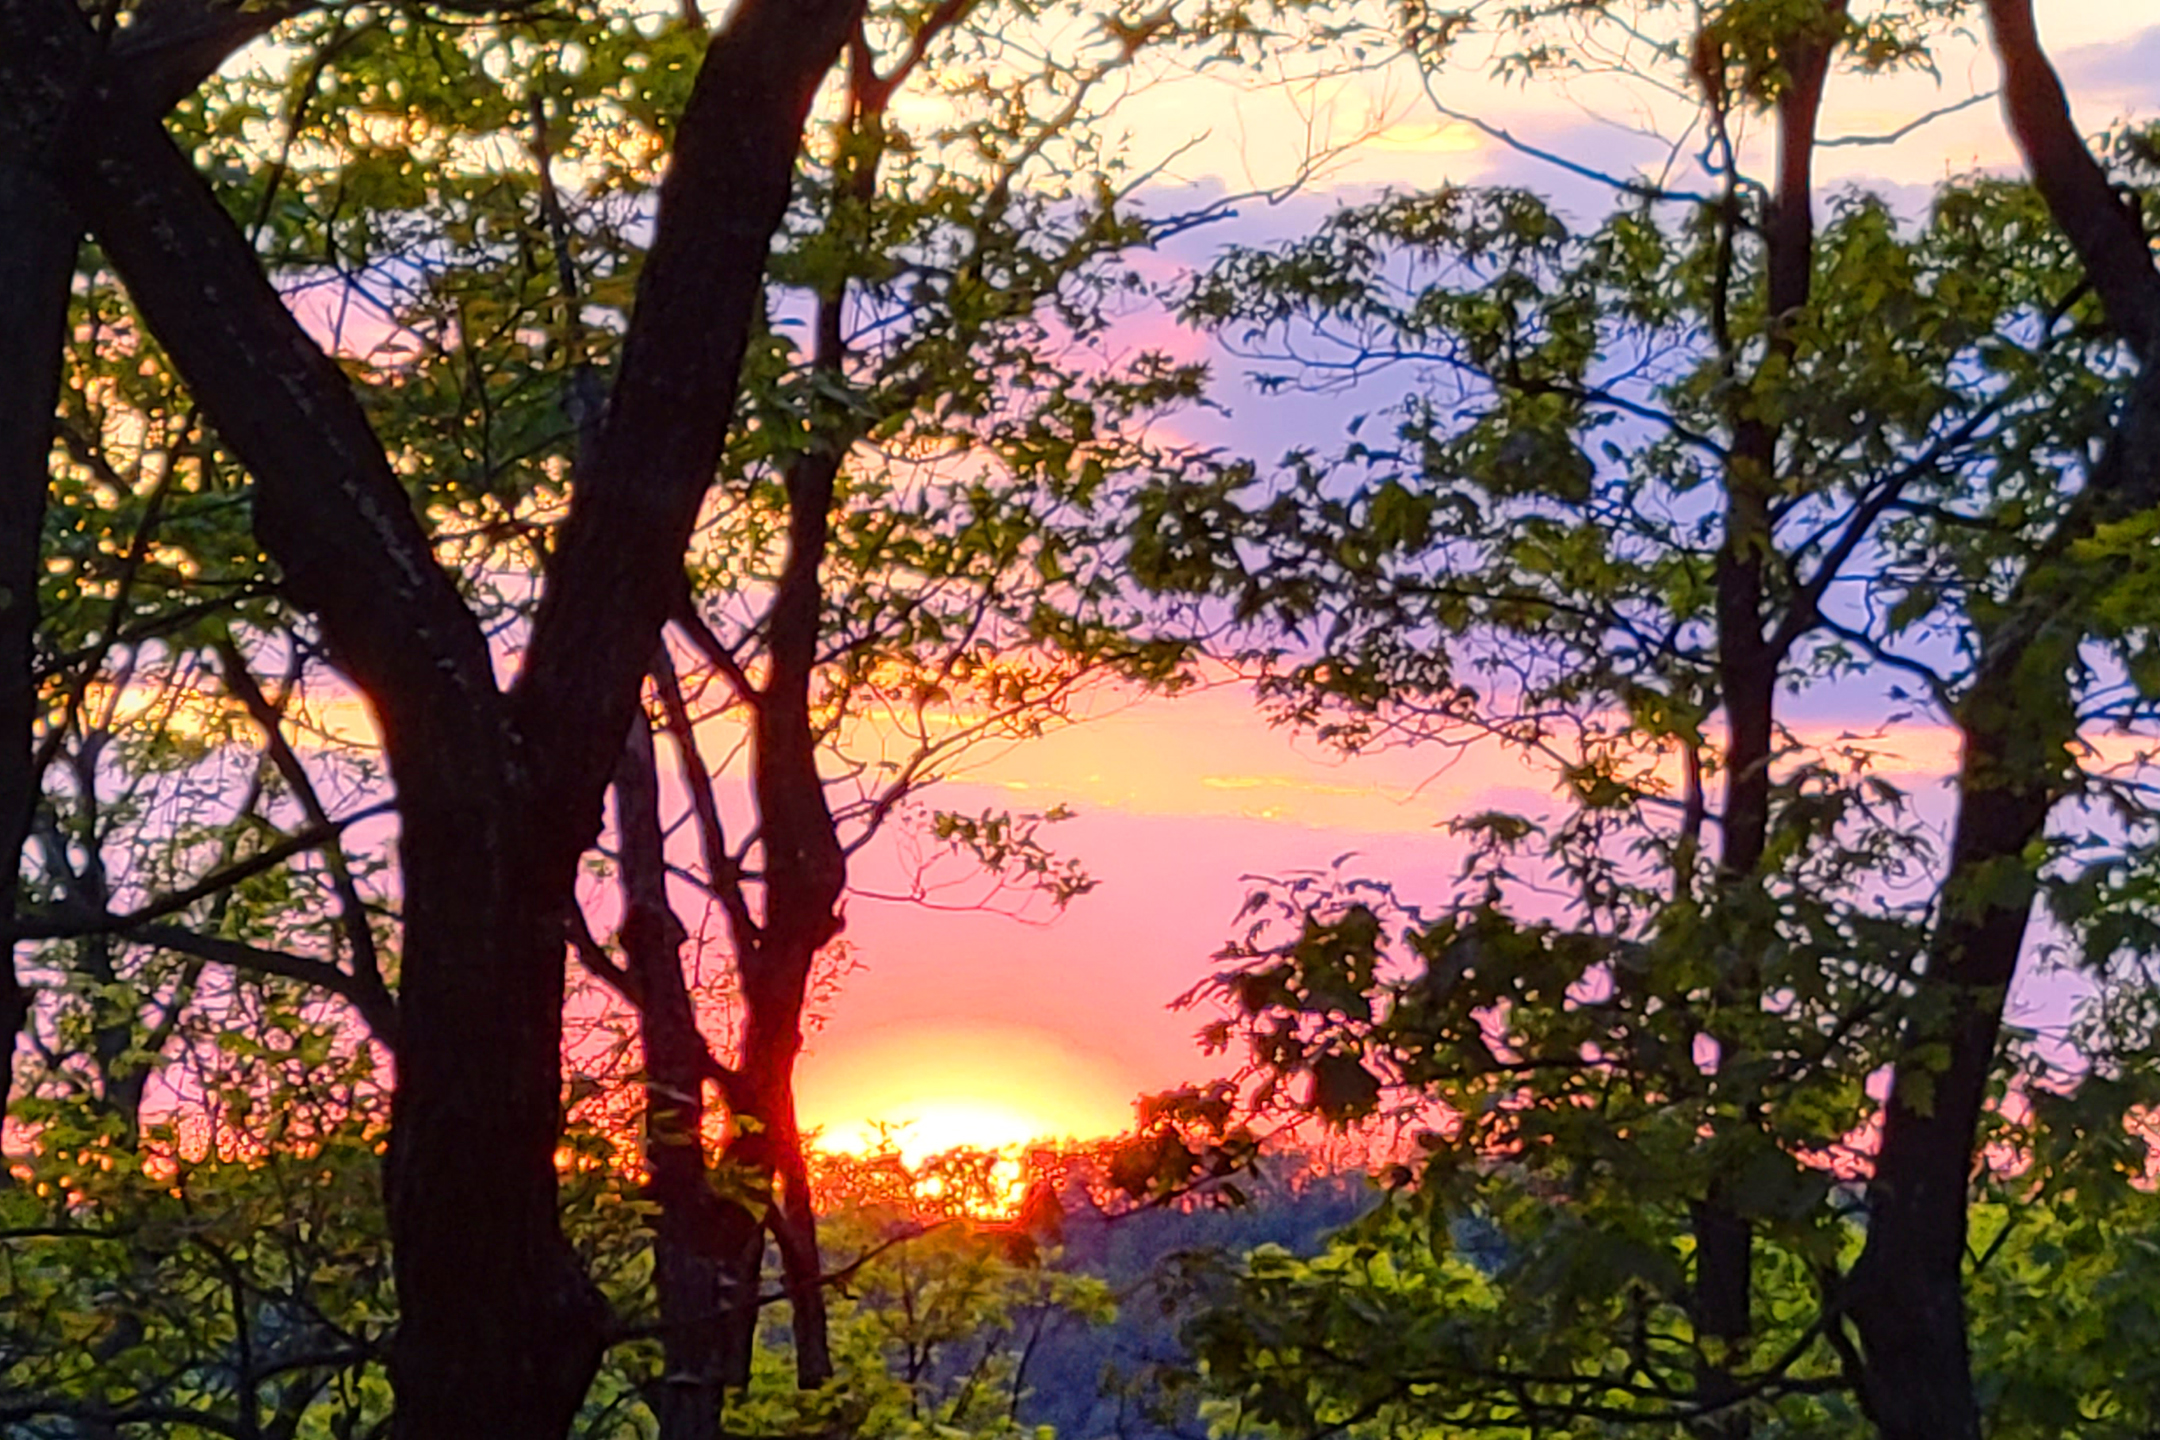
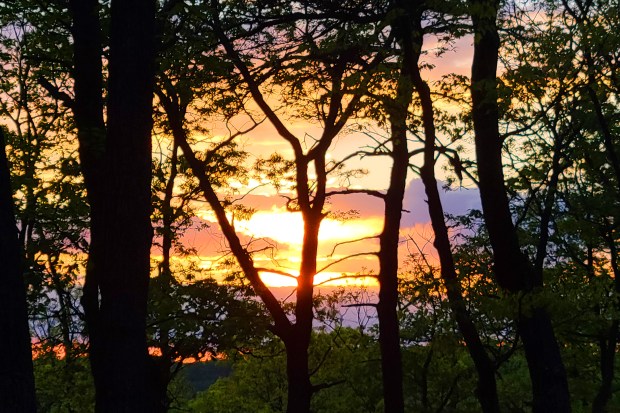
PHOTO: A pretty sunset.
Christine Says (Day 2)
We got up with the sunrise, and hiked up to Duncan Knob without packs. It’s just a short few tenths of a mile to the rock scramble, so it was nice to leave everything behind and hike up empty-handed. As many of our regular readers know, I have chronic vertigo and don’t do well with rock scrambles. I can do them if I must, but it’s pretty scary and disorienting. I climbed about halfway up Duncan Knob’s scramble and found a nice flat rock that was high enough to provide an open view. Adam continued to the top of the knob on his own.
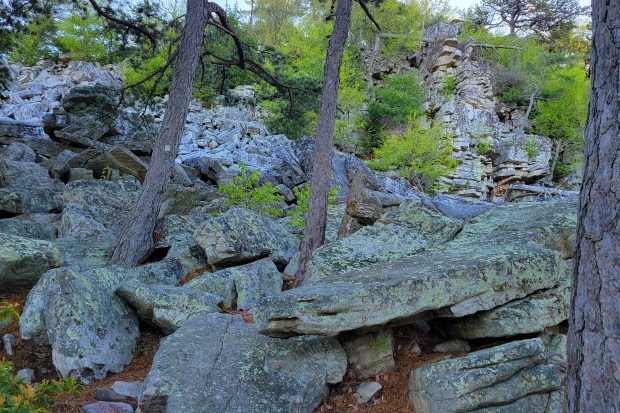
PHOTO: The rock scramble at Duncan.
After enjoying the morning view, we headed back to our campsite at Peach Orchard Gap. We ate breakfast and broke down camp. The hiking on day two was mostly downhill or flat(ish). There were more muddy, swampy spots along the Scothorn Gap trail, but generally it was easy walking. There were plenty of native pink azaleas along the trail, and a few mountain laurels starting to get buds. Wild geraniums and spiderwort were also abundant.
PHOTO: A view from Duncan Knob
When we reached the last bit of the loop. we retraced our steps from the day before. It was the only time we really saw many people along the trail – mostly day-hikers headed up Strickler Knob. The entire distance for the second day was under 4 miles, so we were back at the car by about 9:30 a.m. We had initially planned on going to Woodstock Brewhouse for lunch and beers after the hike, but it was so early that we just went home.
PHOTO: Wet trail
Turn-by-Turn for Day 2
Start out from camp, following the white-blazed Duncan Knob trail for .3 miles. The trail will become rockier before turning into a boulder jumble. Climb as far up the boulders as you wish. There are one or two small campsites at the very top.
After enjoying Duncan Knob, retrace your steps for .3 miles back to Peach Orchard Gap.
Turn right, heading downhill on the blue-blazed Gap Creek trail. After .3 miles, you will reach an intersection – take a left onto the yellow-blazed Scothorn Gap trail.
Follow the Scothorn Gap trail for 1.4 miles until you come to the four-way junction you passed on Day One
Take a right, and follow the trail 1.5 miles back to your vehicle.
Trail Notes
Distance – 9 miles (5.2 on Day 1, 3.8 on Day 2)
Elevation Change – 1780 ft. (1370′ on Day 1, 410′ on Day 2)
Difficulty – 3. This is an overall moderate hike with a couple steep sections. There is one section right before you reach camp on Day One that requires a steep 700′ climb in less than .75 miles.
Trail Conditions – 3. There are some sections that are very boggy/muddy and some parts with quite a bit of loose rock.
Views – 4. Duncan Knob is a pretty nice vista, but you have to climb all the way to the top of the scramble to get open views. Not all hikers will choose to climb the full scramble.
Streams/Waterfalls – 2. There are lots of small feeder streams along the route (may be dry certain times of the year). The beginning of the hike crosses Passage Creek. Camping near Duncan Knob is DRY. Fill up before climbing, or carry sufficient water if you plan to camp near the top.
Wildlife – 3. We saw several turkeys and saw coyote scat.
Ease to Navigate – 5. The trail is very well marked and easy to follow. When we hiked in 2021, there were fresh and abundant blazes.
Solitude – 4. We hiked on a beautiful Friday-Saturday and only saw a few people until we got close to the car on Day Two. On Day Two, we saw many people ascending the Scothorn Gap trail toward Strickler Knob.
We did this hike mid-week in September to celebrate my birthday! It was our only backpacking trip together in all of 2020. We did get out to car camp once earlier in the year, and I went backpacking in the fall with a girlfriend. But, overall 2020 was definitely the least I’ve hiked and backpacked in many, many years. The pandemic made traveling difficult and honestly… trails were so overcrowded with new hikers that it just wasn’t that enjoyable to hike most of the time.
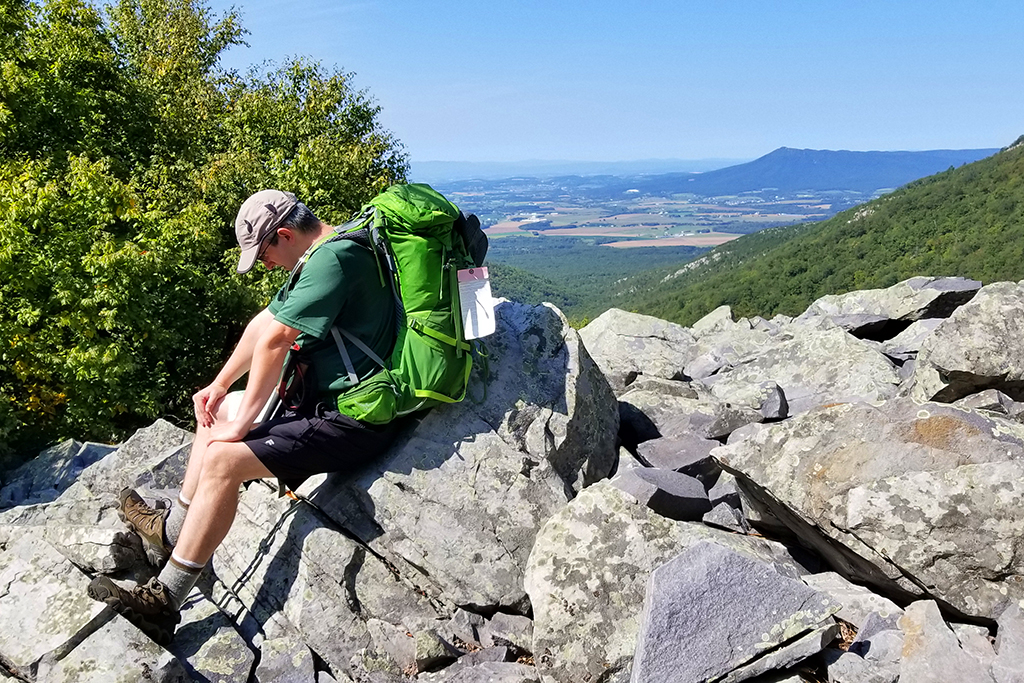
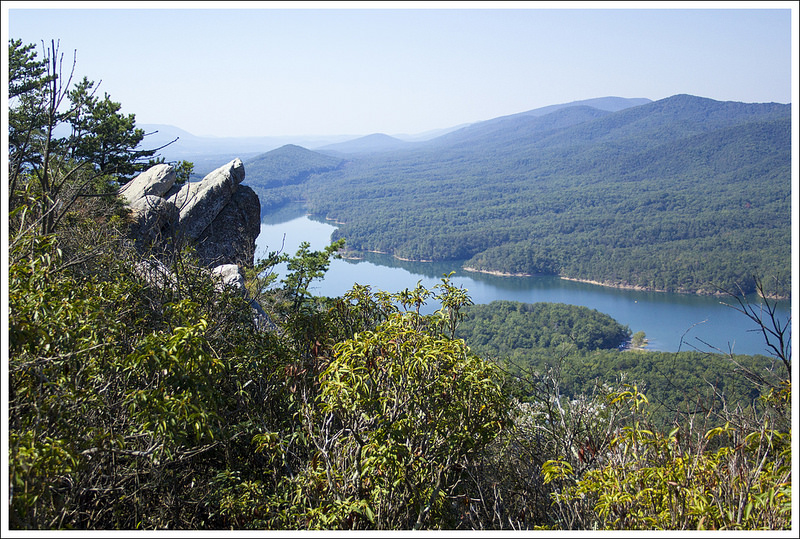
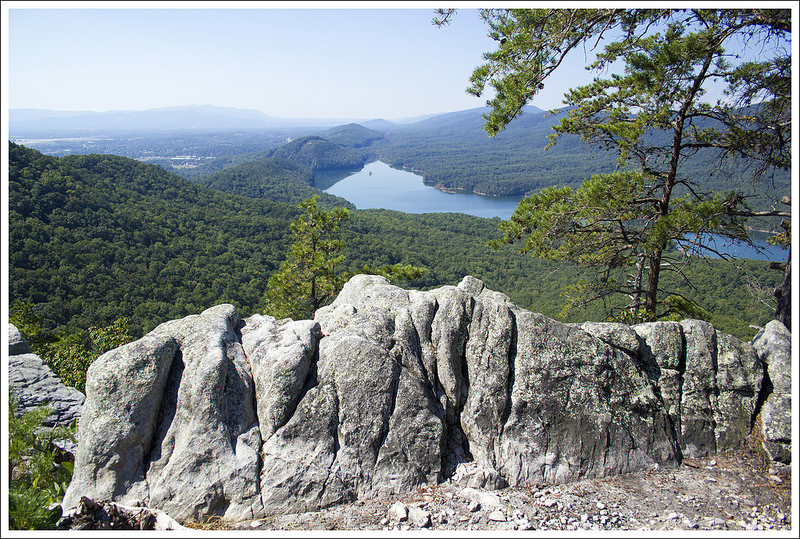
View from Rockytop – looking toward Lewis Peak and Massanutten.
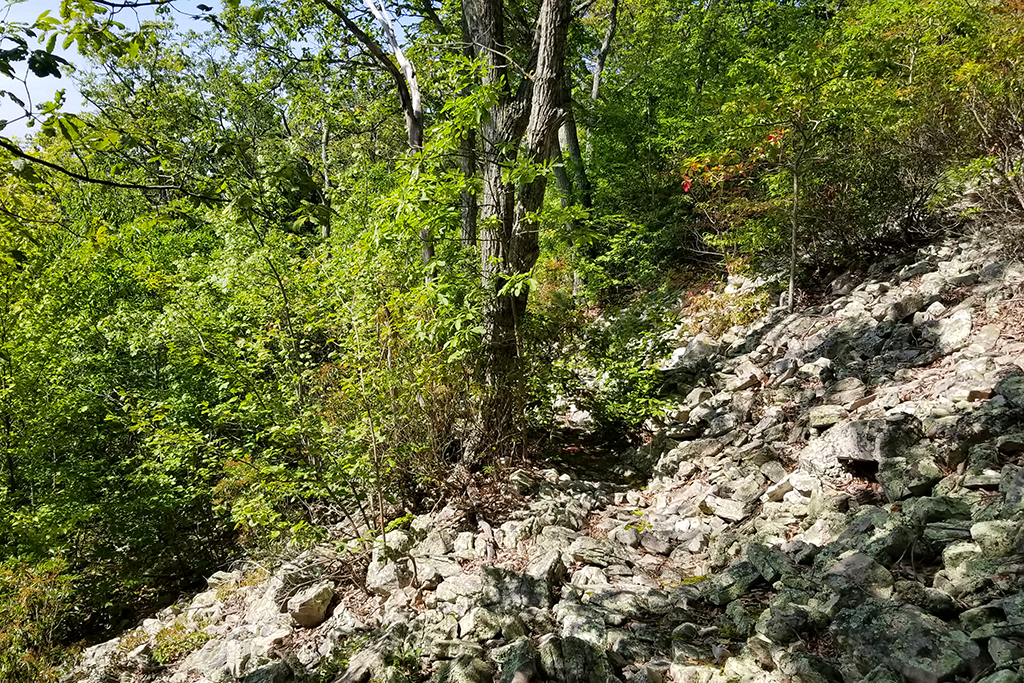
We picked this area because it’s less visited than most other parts of the park, and we had never done this particular loop before. The trail was relatively easy until we passed the junction with the Lewis Mountain Trail. From there until we reached the Big Run basin, the trail was extremely rocky and overgrown. Parts of the trail are not really even trail – it’s just blazes and talus slopes.
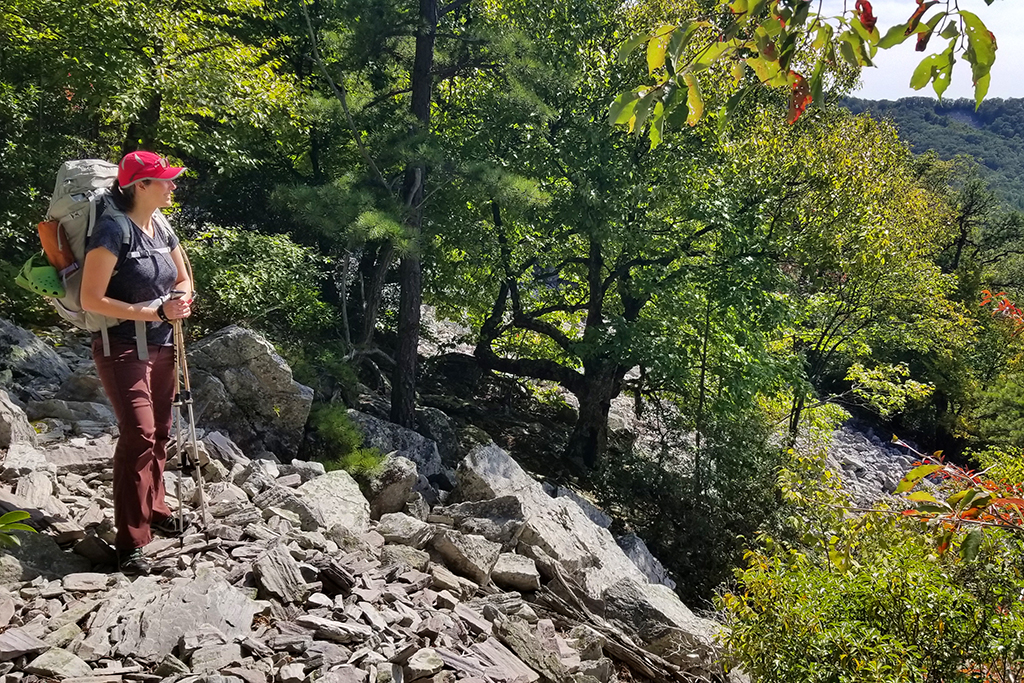
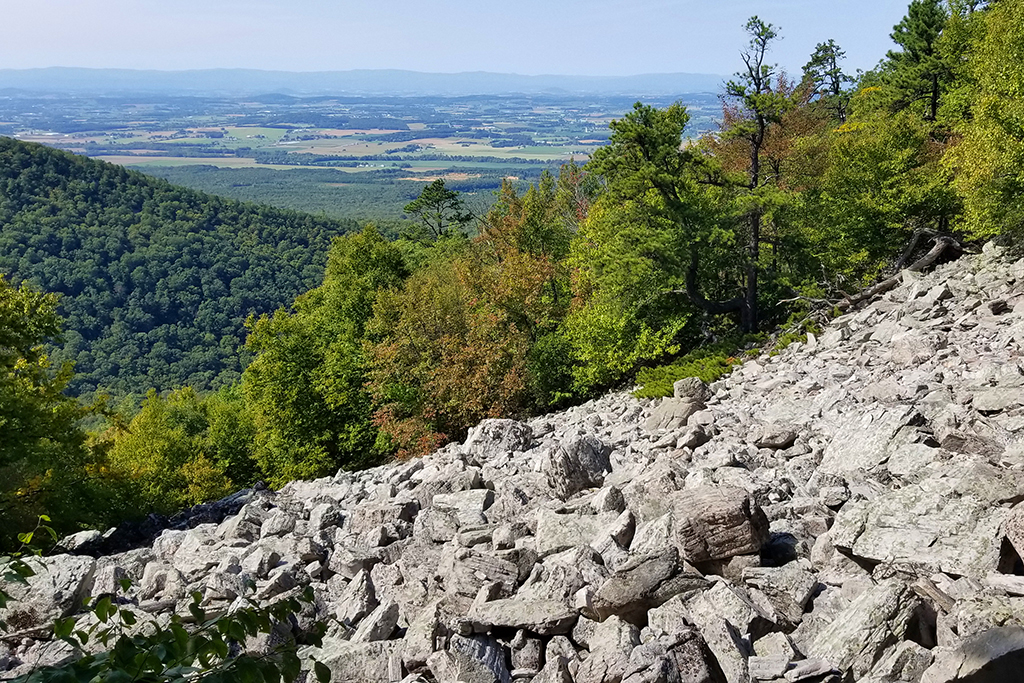
The trail across one of many talus slopes.
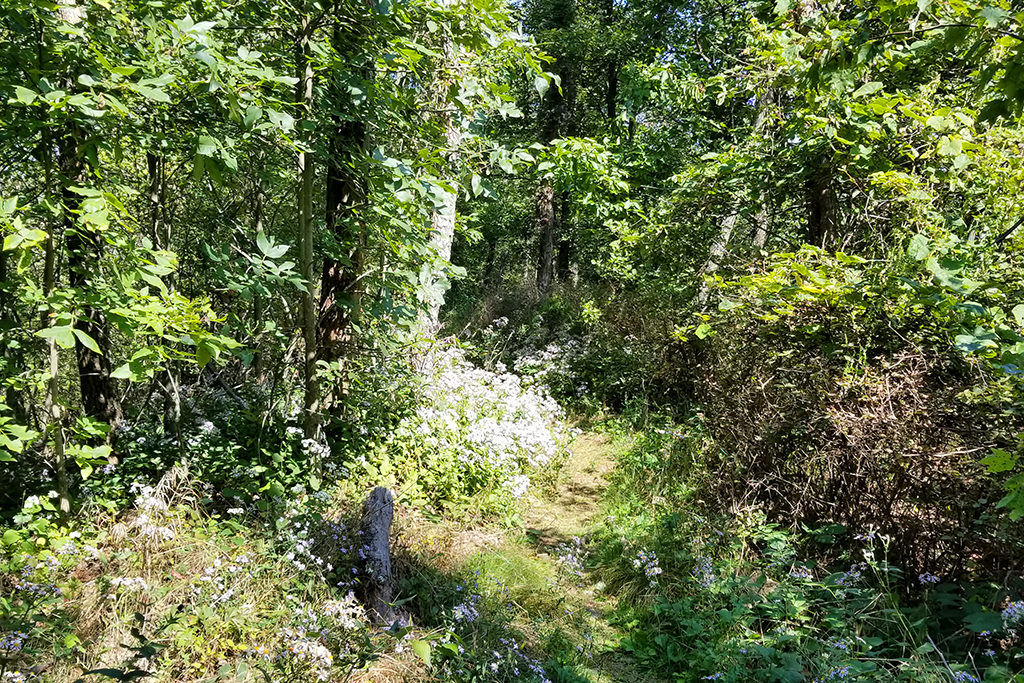
The low foot traffic on this trail meant that tree limbs and undergrowth impeded our progress. My clothes kept catching on thorns and branches, and I had to stay on high alert for back-swinging branches that Adam passed first. Despite the challenging and rugged terrain, there were excellent views along the trail. I especially liked the long descent toward Big Run. Forest fires over recent years have left open vistas from the trail. It’s like walking on a balcony affixed to the side of a mountain; with continual views as you go.
Overgrown Trail
We were both pretty tired of rocky footing by the time we got to the old road bed of the Big Run Portal. After crossing the metal bridge over Big Run, we explored an unmarked footpath paralleling the stream and found excellent campsites. The sites were clear and flat, and nicely distanced from the stream (backcountry regulations for Shenandoah dictate that you must be 10 yards from a stream.)
Our awesome tent site.
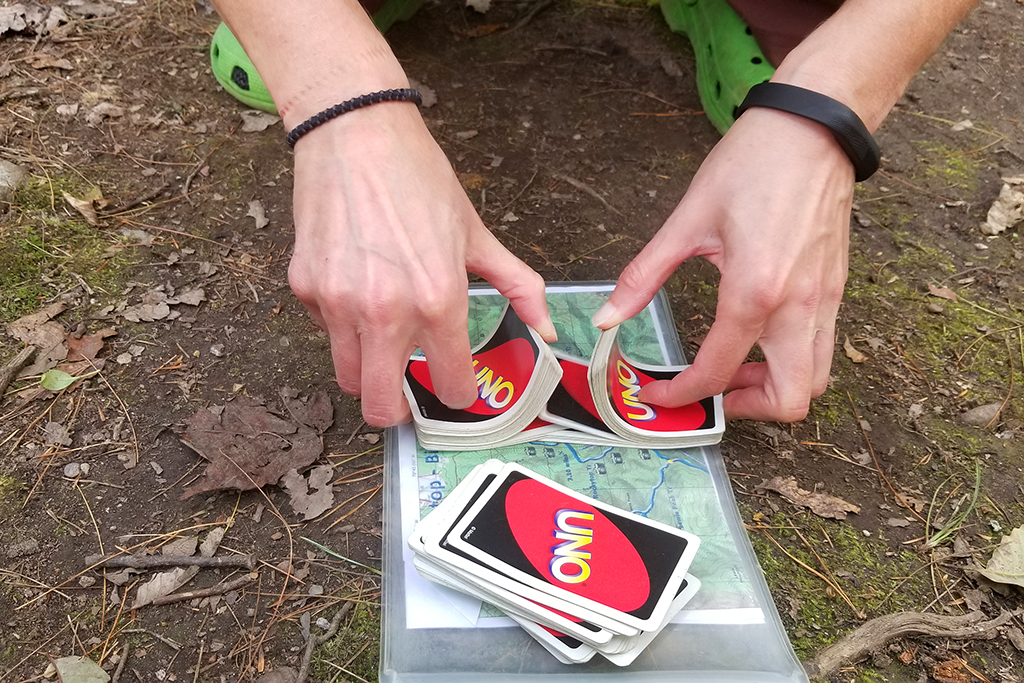
We set up camp. Adam got to try his UGQ quilt for the first time, and I got to test my Nemo Tensor pad. We collected water from the stream and found our Sawyer Squeeze completely clogged (probably leftover from silty water sources we used on our trip out west in 2019) We ended up having to treat our water with Aquamira. I always carry it as a backup in case my filter malfunctions. We had freeze-dried meals for dinner – sweet and sour chicken and risotto with chicken. They were both Backpackers Pantry, which I’ve decided is my least favorite brand of backpacking meal. For dessert, I had carefully packed two pieces of leftover birthday cake in a crush-proof container. Yum! We carried our small bear canister on this trip to save the hassle of doing a bear hang.
We played many rounds of Uno until the sun went down and then retired to the tent to read.
A great water source for camping and a nice place to sit after dinner.
Turn-by-Turn for Day 1
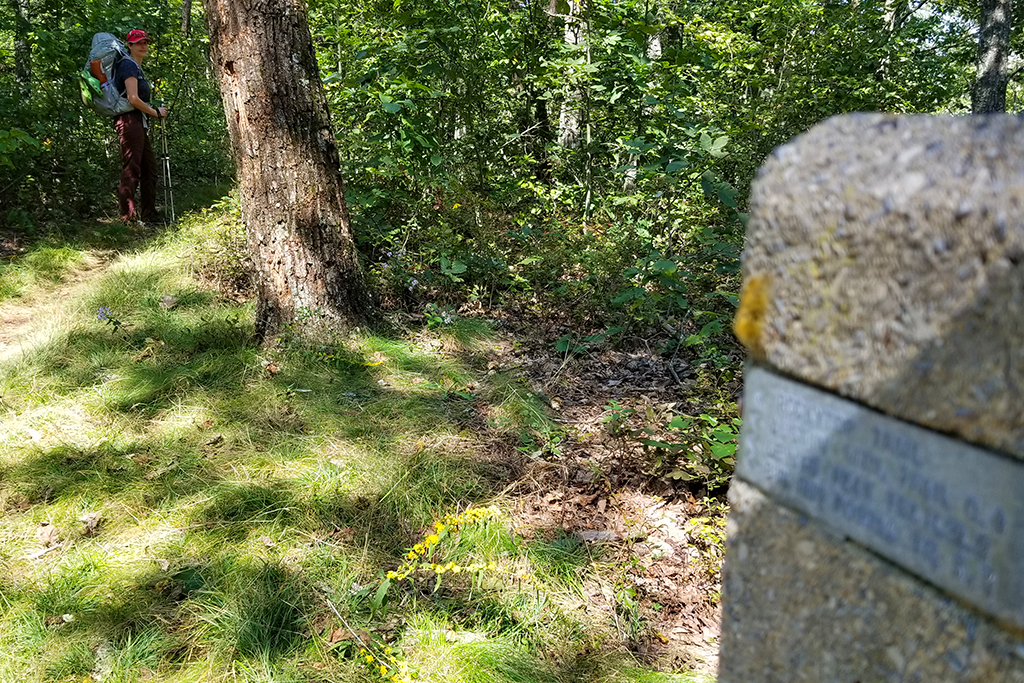
Follow the AT north from the parking lot at Browns Gap (around MM 83 of Skyline Drive) for about .6 miles.
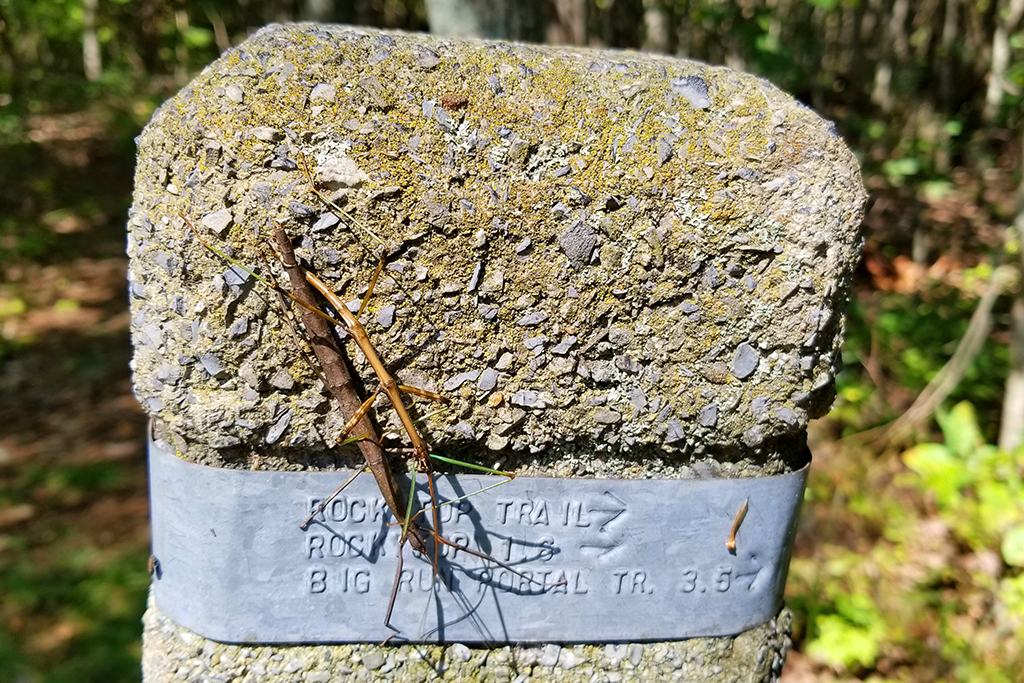
Look for the cement post marking the blue-blazed Big Run Trail, turn left.
Follow the Big Run Trail for .65 miles to a four-way intersection
Follow the trail straight onto the blue-blazed Rockytop Trail
Pass the junction of the Austin Mountain Trail in .4 miles (staying on Rockytop)
Pass the junction of the Lewis Mountain Trail in 1.8 miles (staying on Rockytop)
Follow the Rockytop Trail for another 3.5 miles, crossing many talus slopes with westward views showcasing Massanutten Mountain and Lewis Peak. The last two miles is a long (almost 1500′) descent into the Big Run basin.
At the bottom of the descent, turn right onto the yellow-blazed Big Run Portal Trail. It follows an old roadbed for about a half mile until you reach a large, sturdy metal bridge over Big Run.
Look for campsites after the bridge crossing – there are many and they’re all quite nice!
Adam Says (Day 2)
We had a good night of sleep and got up early to get breakfast started and continue our hike for the day. Rejoining the main Big Run Portal trail, we soon passed another large campsite to the right of the trail. The trail started off fairly flat as we were walking along the Big Run area. One difficult aspect about this section of the trail are all the water crossings.
One of many stream crossings you will encounter as the Big Run Portal Trail crosses over Big Run in several spots.
There were several water crossings that made it difficult to follow since it wasn’t very clear where the blazes were on the other side. In fact, on one stream crossing, we missed a blaze on the left on an “island” about halfway across the stream. Our map did not indicate the partial stream crossing. We went past this and fully crossed the stream, only to find no blazes. We bushwhacked and scouted around for about 20 minutes before going back across and then we saw the not-so-obvious blaze that we had missed the first time. This trail is really not a very popular trail, so foot traffic doesn’t create as obvious of a trail as you would see in more popular sections of the park. A few more trail blazes would definitely help navigate this Big Run Portal Trail.
More crossings and Big Run views along this section of the trail.
We continued along and passed the junctions with the Rocky Mountain Run Trail and Patterson Ridge Trail. When we reached the junction of the Big Run Portal and the Big Run Trail, we paused for a bit to gather some energy before the big climb up. This area used to have some established campsites, but these have been removed.
The climb up from here is brutal and relentless. Shortly after we started up this steep section of the Big Run Trail, a bear jumped off the trail and was booking it into the woods. The bear clearly had a lot more energy than we did and I’m sure my heavy-breathing up the trail had startled it. This uphill was quite a challenge for me, where my lack of hiking this year was showing. We paused for a bit at the four way junction.Taking a left here, we still had a little bit of climbing before getting back to the Appalachian Trail.
The climb up nearly broke Adam
Once we reached the AT junction, the trail was smooth and relatively flat or downhill until we reached our car. Overall, this backpacking trip was tough for an overnight trip. The terrain the first day was rough and overgrown and the second day was a feeling of worried we were lost, followed by an incredibly tough uphill climb. While we hadn’t done this loop before, I’m not sure if we would do it again due to the toughness. The campsite was the real bonus of the trip and we enjoyed the location and the times near the water. I would camp again at this spot, but I think there are better approach trails that aren’t as challenging.
Adam checks the map to make sure the climbing was finished at the top of the junction.
Turn-by-Turn for Day 2
Start out from camp, following the yellow-blazed Big Run Portal trail upstream. There will be many stream crossings. Pay close attention to blazes, they’re sometimes hard to find and the trail gets hard to follow at stream crossings
Pass a junction to the left with the Rocky Mountain Run Trail (staying on the Big Run Portal)
Soon after, pass the junction with the Patterson Ridge Trail, continue with several more stream crossings (staying on Big Run Portal). All told, you will remain on the Big Run Portal trail for about 4.5 miles.
Reach the junction of the Big Run Portal and Big Run trails. Take a right onto the Big Run Trail and climb steeply uphill for 1.2 miles. At the top of the climb, you will reach the 4-way junction you passed on Day 1.
At the junction, take a left and follow the Big Run trail for .65 miles back to the Appalachian Trail.
At the AT junction, take a right and follow the AT south back to your vehicle.
Trail Notes
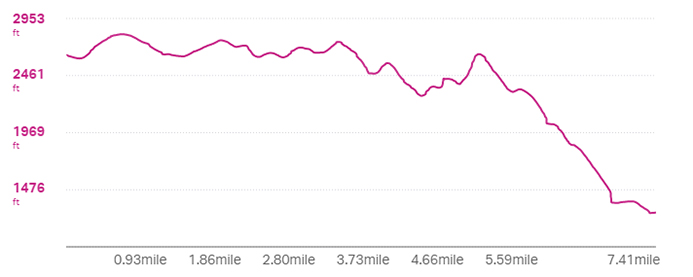
Distance – 14.3 miles (7.41 on Day 1, 6.89 on Day 2)
Elevation Change – 2881 ft. (1020′ on Day 1, 1861′ on Day 2)
Difficulty – 5. This is a tough hike with rugged terrain, water crossings, and steep climbs.
Trail Conditions – 2. The trail was extremely overgrown on Day 1 (crossing Rockytop) and water crossings can be challenging on Day 2.
Views – 4.5. Excellent views from Rockytop summit and all along the descent to Big Run.
Streams/Waterfalls – 5. Truly beautiful, rugged Shenandoah stream scenery and some of the nicest campsites near water in the park.
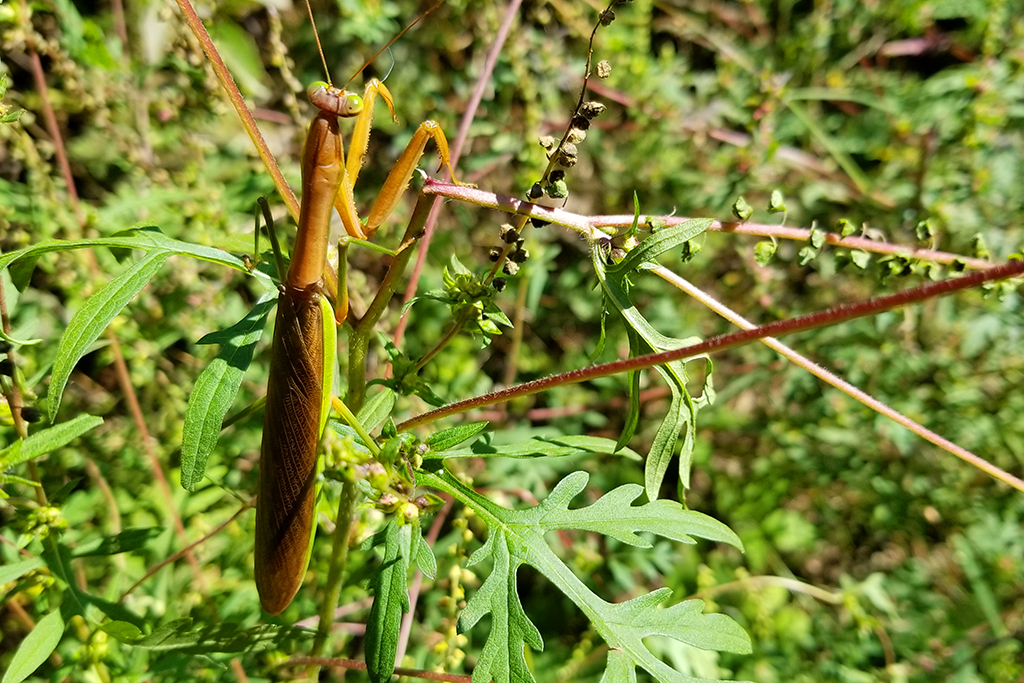
Wildlife – 4. We saw some deer and a yearling bear.
Ease to Navigate – 2. The overgrowth made the trail difficult to follow at times. The water crossings on Day 2 were poorly marked.
Solitude – 4.5. We did this trail midweek during a stretch of perfect September weather. We only saw a couple people on Day 1 and nobody on Day 2.
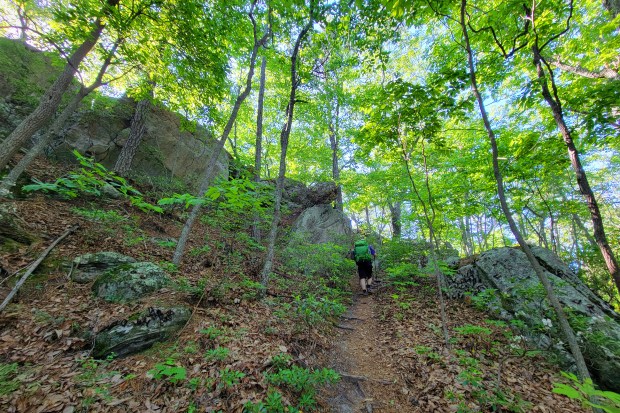
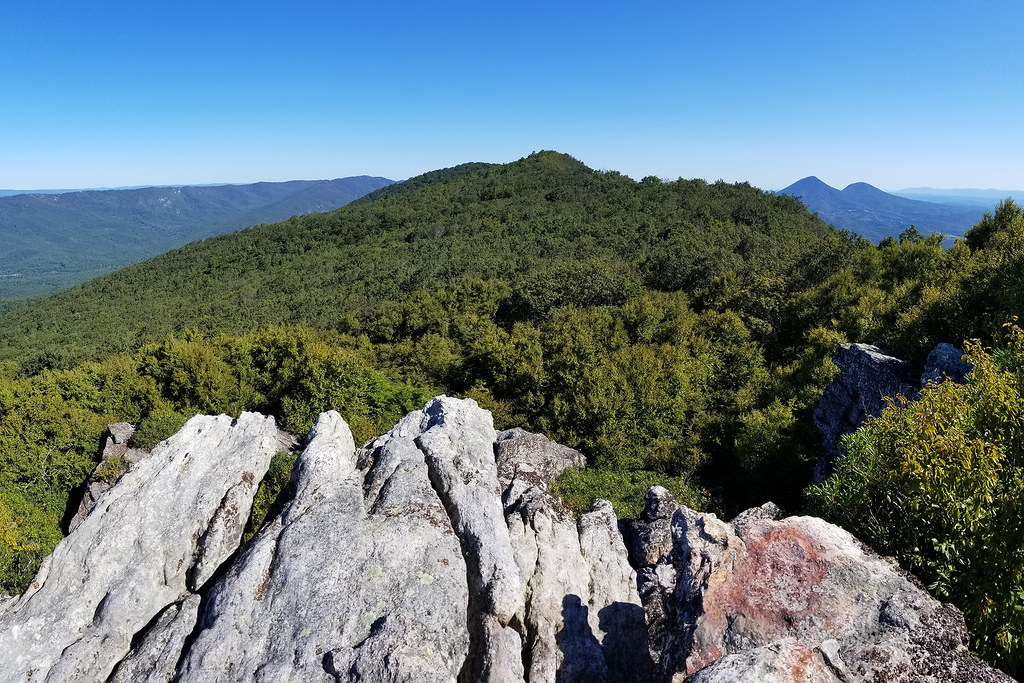
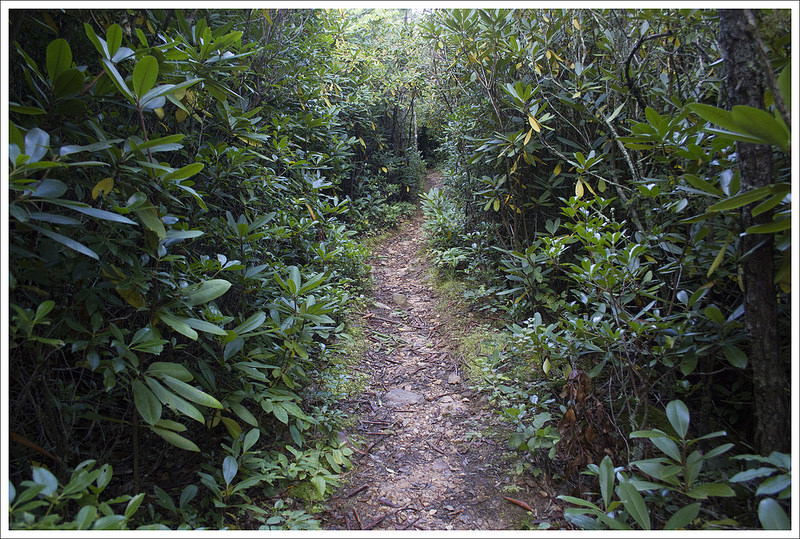
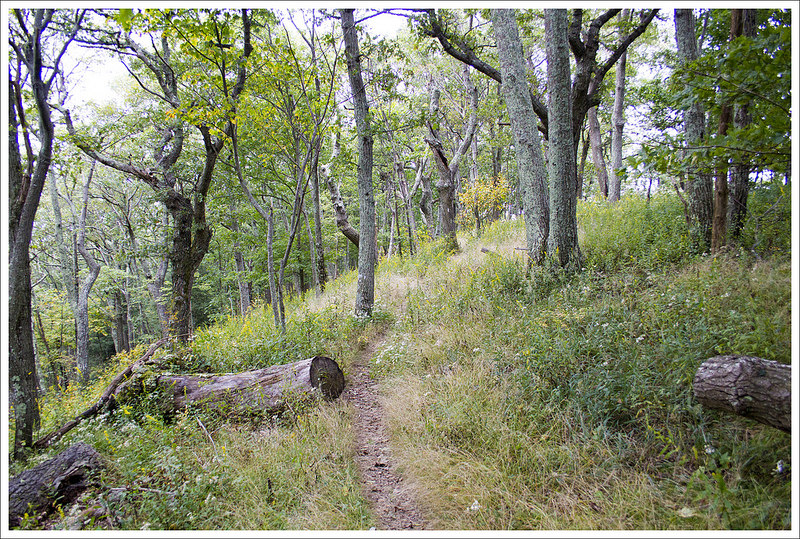
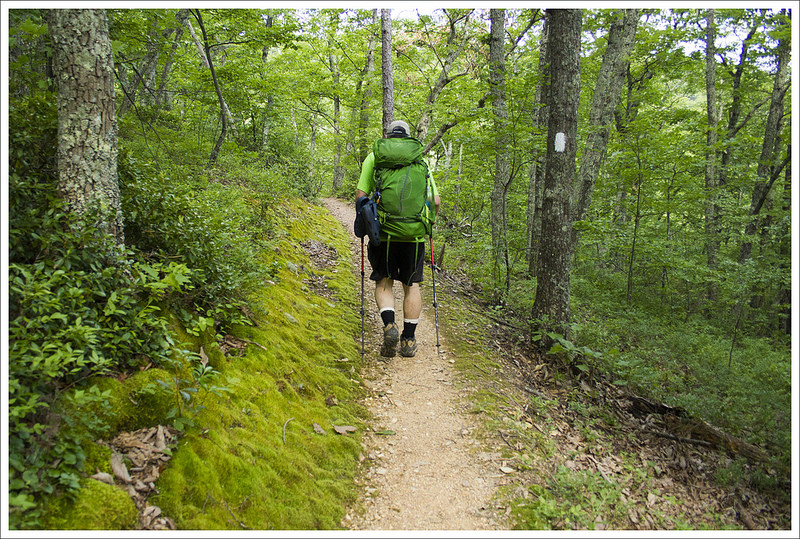
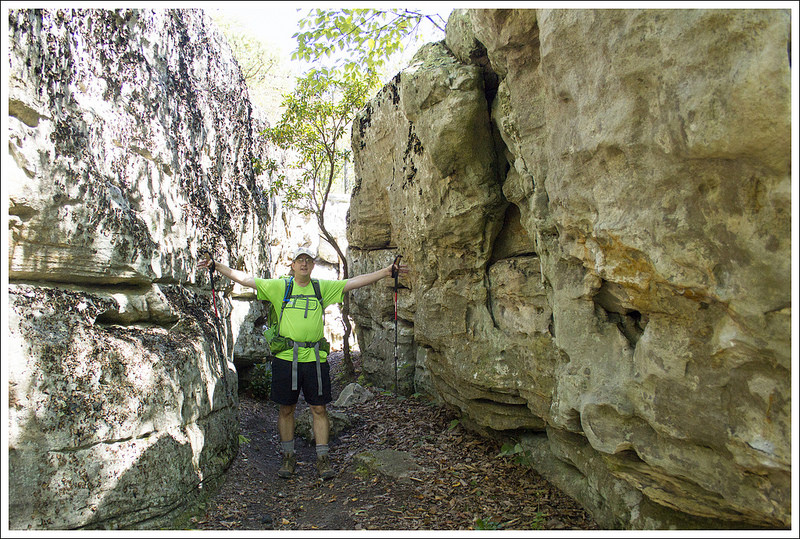
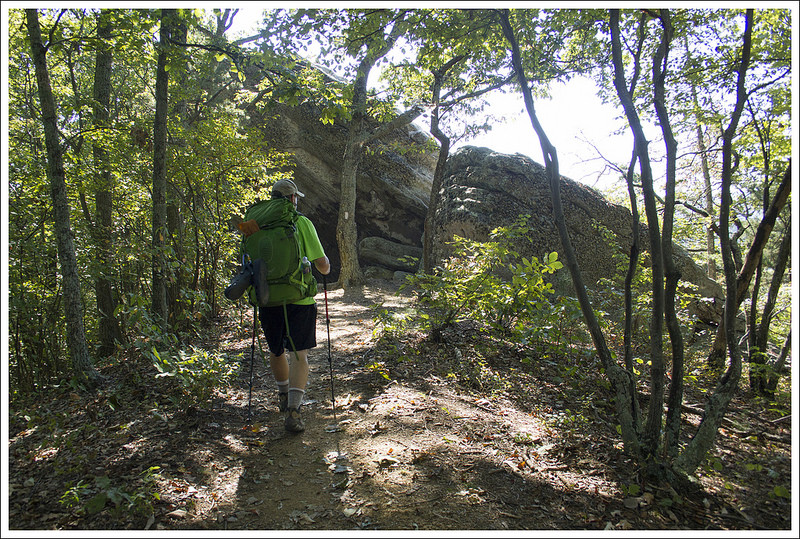
Adam Says… We were so pleased to find this hidden gem of a hike in Virginia! This hike has some jaw-dropping views, an interesting “cave” to explore, and great camping with not a lot of elevation difference.
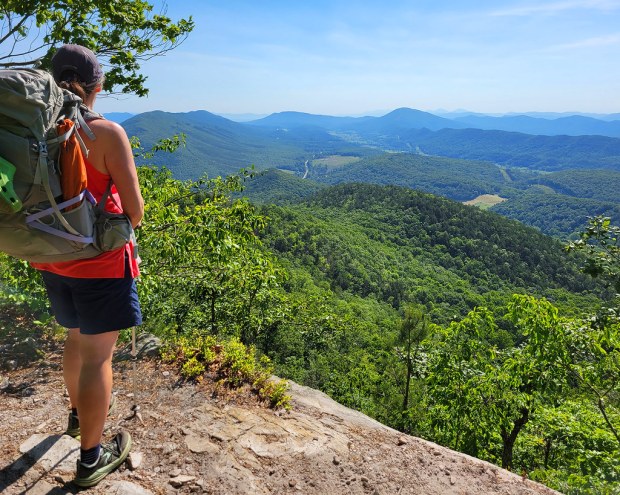
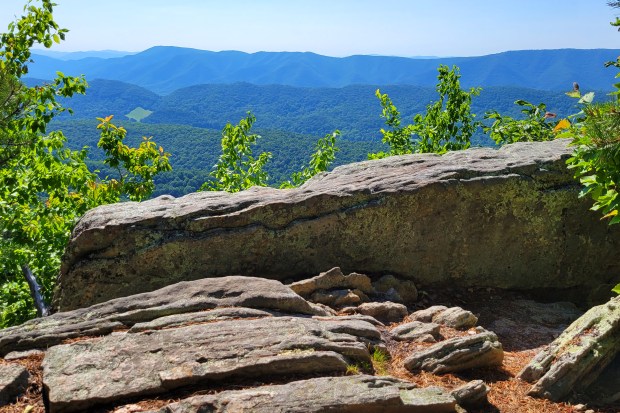
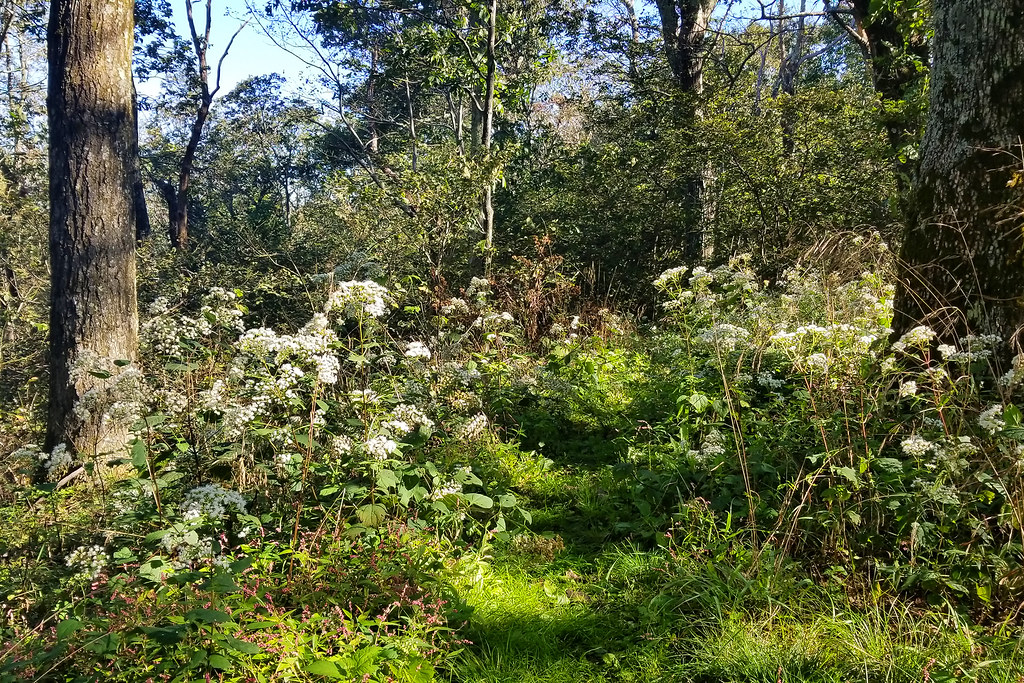
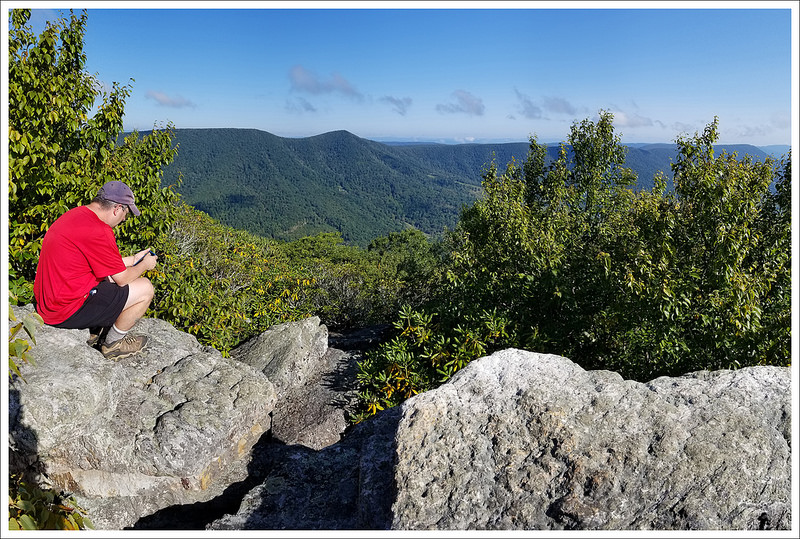
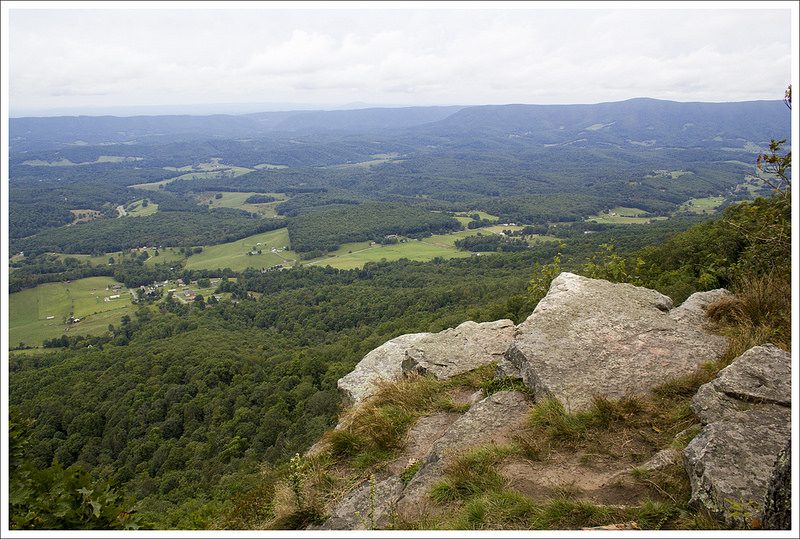
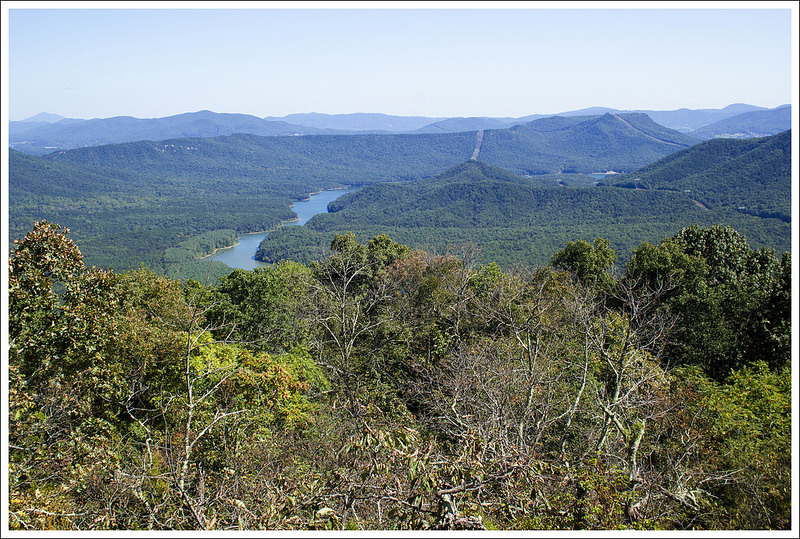
The parking area has space for about four cars to park. From the parking area, head down about 10 yards further down the road and you will see two trails on the opposite side of the road from where you park on the right. Both of these spur trails connect to each other, so it doesn’t matter which one you pick. Climb up the short spur and the trail goes off to the left. The trail starts off hiking on a ridgeline. From .2 miles to .4 miles, you will notice a few short spur trails to the left. Climbing up these short spur trails leads to some amazing views that shouldn’t be missed. We always enjoy views without many signs of civilization and you get that here as you can soak up views of Big and Little House Mountains. I imagine that a lot of people could come to this trail to get such an amazing view with so little effort – great place for a sunrise view! We soaked in the view for a short time but decided we would get better pictures when we weren’t looking into the sun, so we picked a favorite overlook to return to at the end of the hike to reward ourselves.
Taking in view from the first quarter mile of the hike.
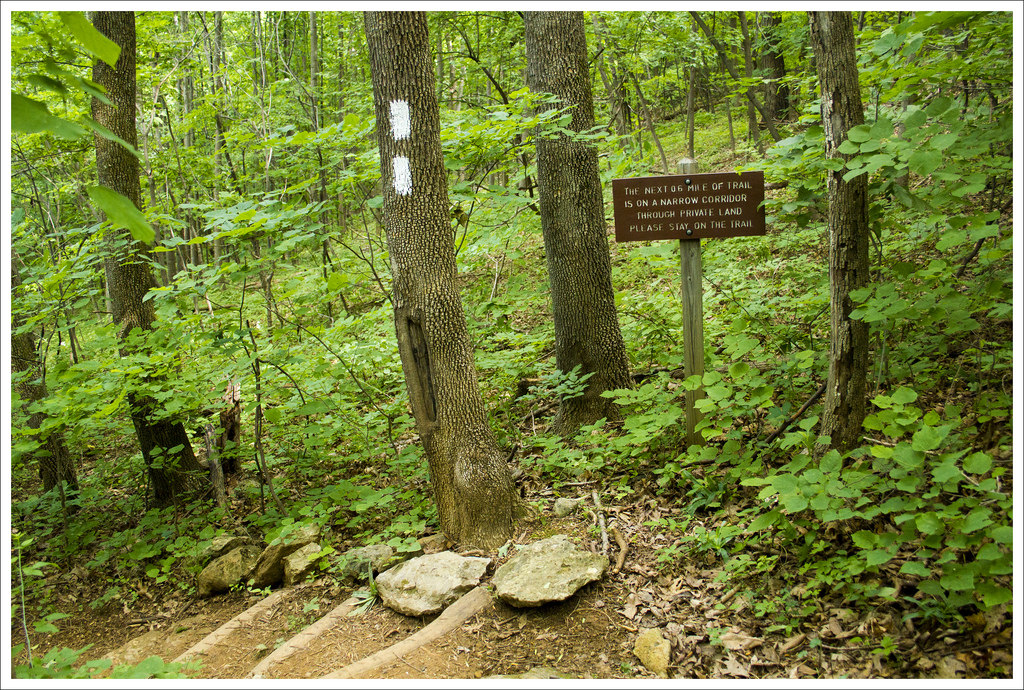
Once the section of views is done, the trail moves into a more wooded area. At .5 miles, you see the only trail sign for the hike at a trail intersection with a small fire road (maybe used by bikes or hunters?) through the woods. Continue on the main trail. Pay attention to red blazes marking private property.
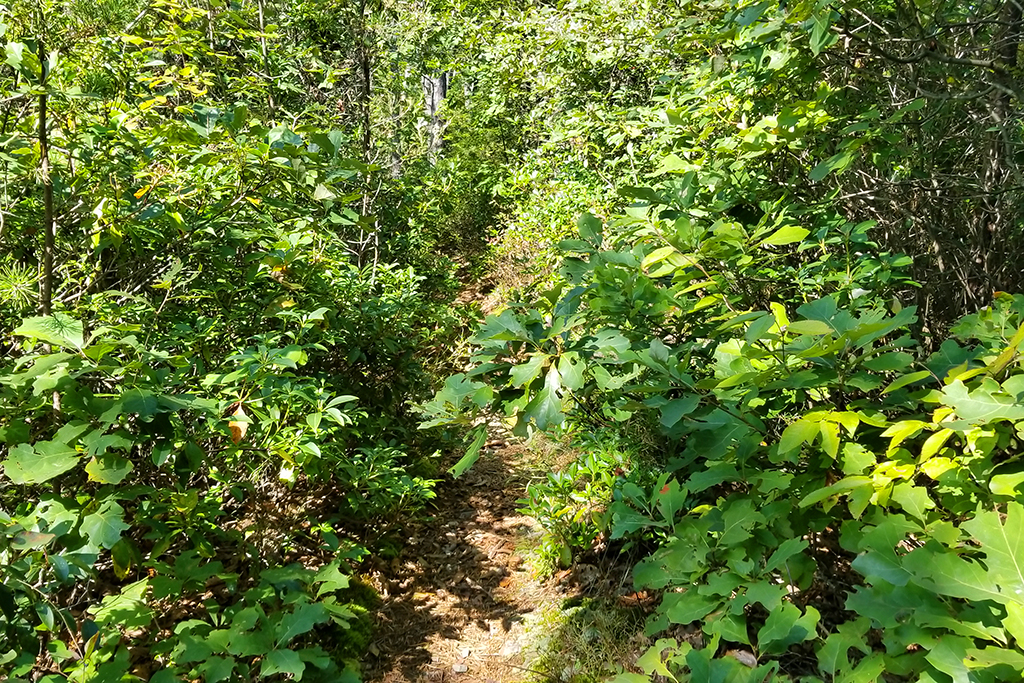
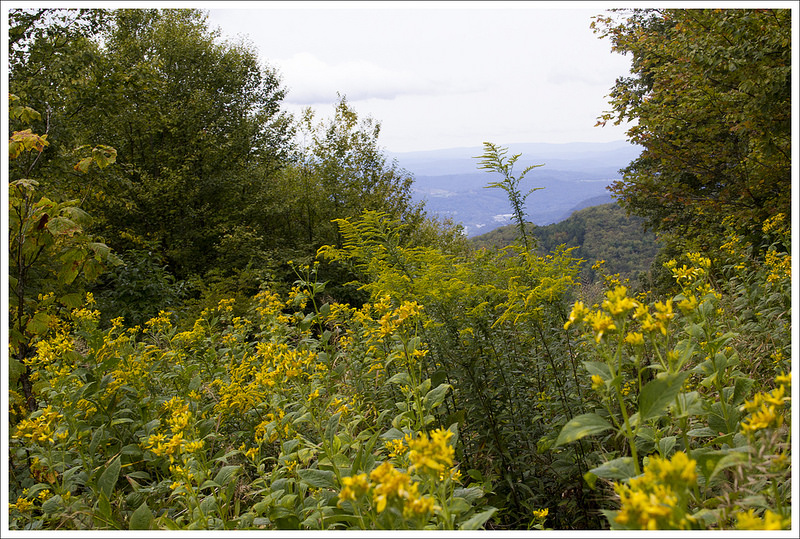
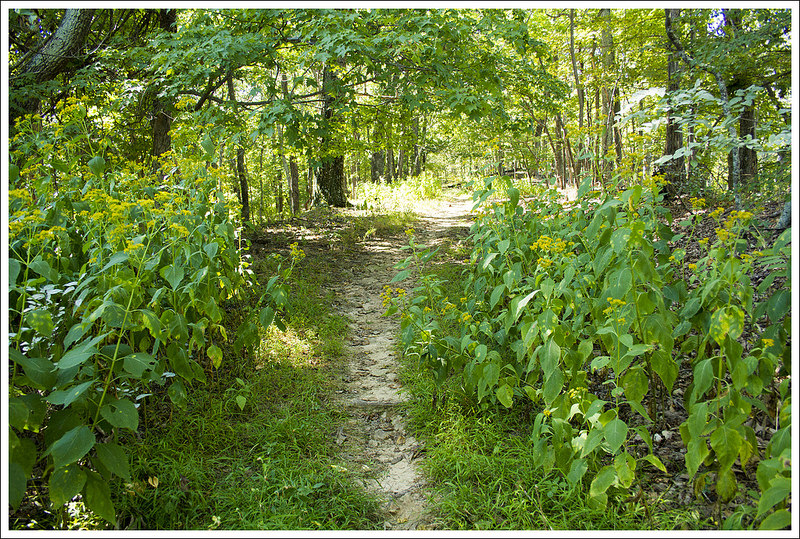
The trail from this point is mostly a flat walk through the woods with only some occasional rises or falls in elevation. The trail is not as well-blazed as many others, so we found it a bit difficult at times to make sure you were still on the trail. If you do this during the fall, this could be especially tricky if leaves have covered a lot of the trail. However, you are mostly walking on a ridgeline, so you likely won’t stray too far. There are a few stretches where we found the trail could use some maintenance since there were taller areas of knee-high brush that you were walking through. You do also get a few glimpses of obstructed views to the east.
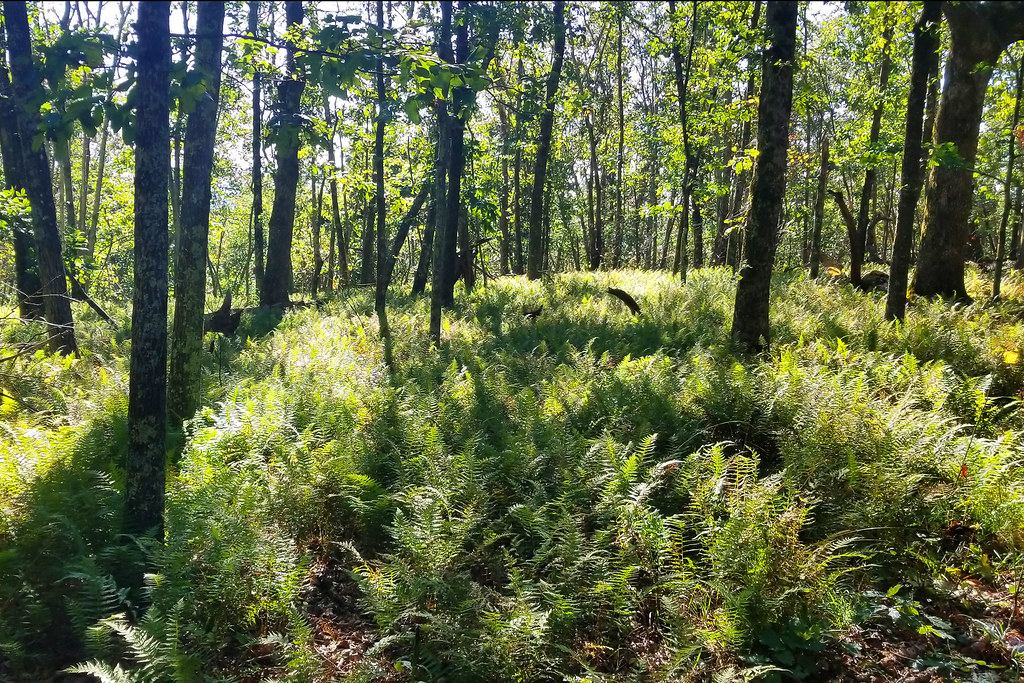
A lot of the trail passed through flat areas with abundant ferns.
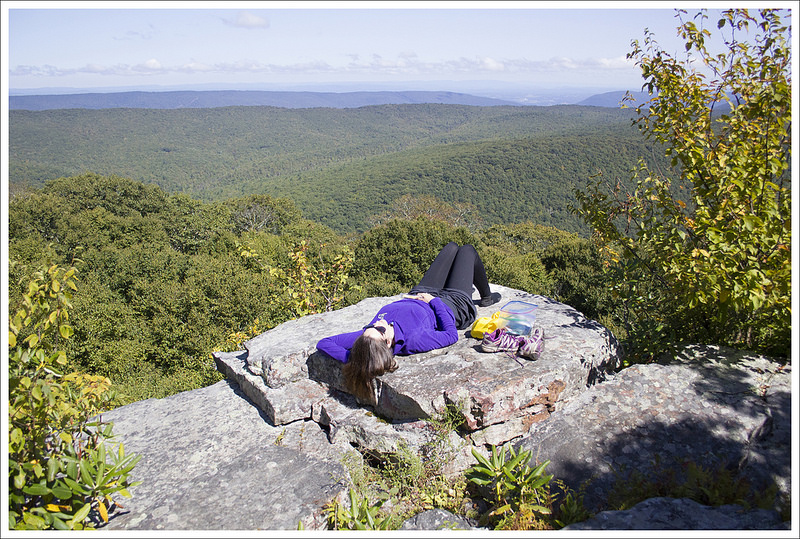
At 3.2 miles, you come to a great couple of campsites that have some open views to the east. While there isn’t a nearby water source, this would be a great campsite if you lug your own water in for an overnight trip.
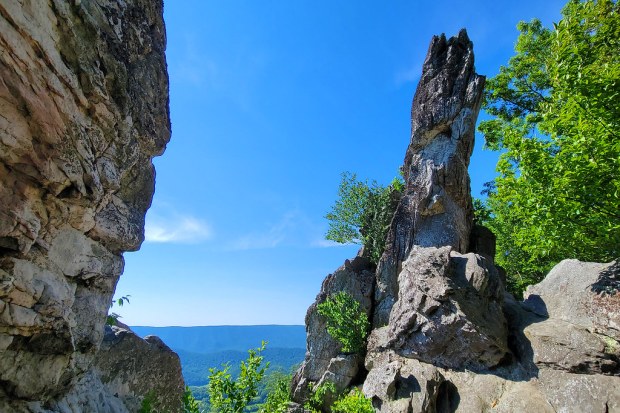
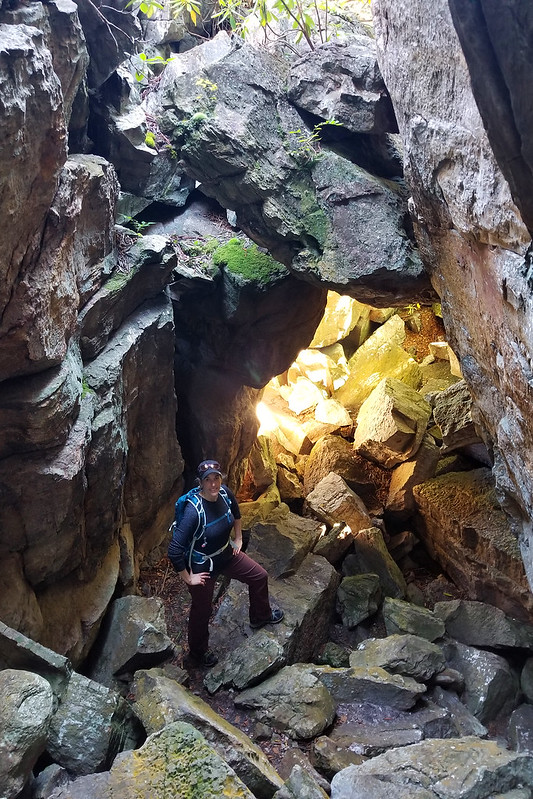
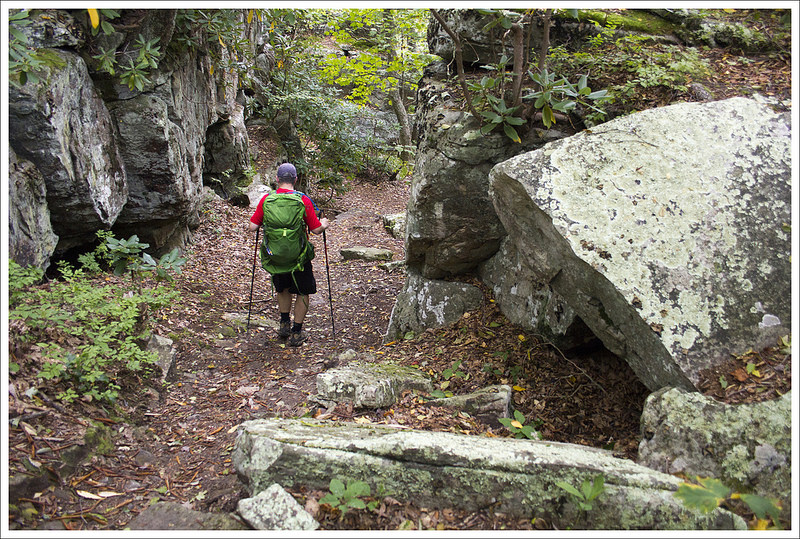
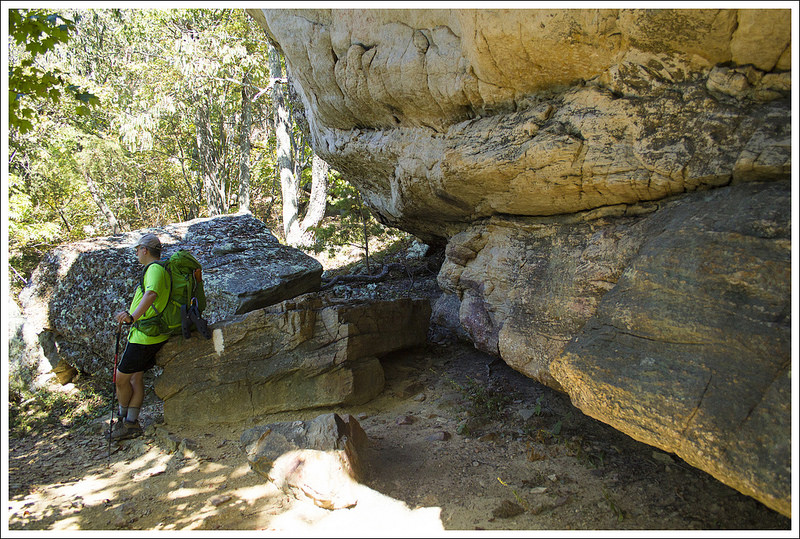
Continue on the trail past the campsite and at 3.4 miles you come to some stone steps that lead to the area known as Pete’s Cave. The rocks in this area remind me of rows of shark teeth that probably need to go to a dentist. This is an interesting area to explore, but please know your limits! This is a dangerous area with cracks and holes you could fall into or get an ankle stuck or hurt. We crawled through one area that had a cave-like feel to it, but there was a skylight that let some light in so you didn’t feel too claustrophobic. At the top of this “cave”, there was one area where I was able to scramble up to the top of a large boulder and got some incredible views to the west, but getting back down was a bit more sketchy. Again, be careful in this area if you choose to explore.
A nice (dry) campsite along the Pete’s Cave Trail
The trail climbs steeply up the other side which also leads to some nice views to the west. Go back the way you came to get back to your car and make sure to reward yourself with more of those views close to the finish line.
While Petes Cave is not a true cave, it’s still pretty fun to explore.
Christine Says… I really enjoyed this hike. The views were outstanding, there were very few people on the trail, and the “cave” at the end was fun to explore. There are several paths to the rocky outcroppings above the cave. Don’t miss checking those views out – they’re as nice as the views earlier in the hike. The trail continues beyond the caves, but apparently it’s just a walk in the woods – nothing noteworthy to see. It eventually descends back into the valley.
Trail Notes
Distance – 6.8 miles
Elevation Change – 1000 ft.
Difficulty – 2. There are rolling hills all along this hike, but generally it is easy terrain.
Trail Conditions – 3. The trail was overgrown in some parts, but overall easy to follow and walk.
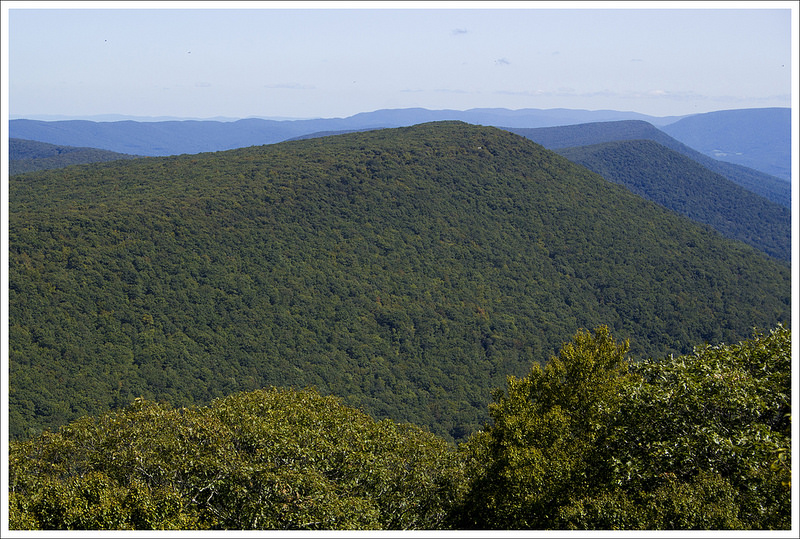
Views – 4.5. Spectacular panoramic views of Big House and Little House Mountains to the east and just past Pete’s Cave, there are views to the west.
Streams/Waterfalls – 0. Non-existent and no water sources.
Wildlife –3. We saw some deer and a few birds from the overlook.
Ease to Navigate – 3. We didn’t have a lot of difficulty, but needed to mark it down some due to the lack of blazing and some of the trail was overgrown which made it a bit more difficult.
Solitude – 4. We did this trail early and didn’t see many people, but I would expect it would be busier on most weekends. The viewpoints generally have a few places to spread out and soak in the scenery.
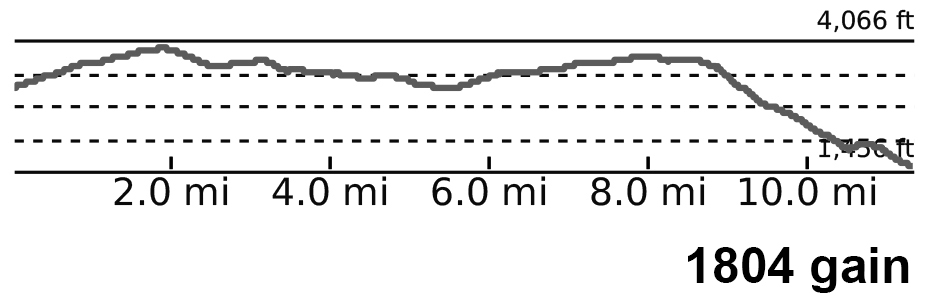
This 10-mile loop could easily be a day hike, but we chose to do it as a short overnight backpacking trip. The route has some fairly nice vistas and there are a couple campsites near the summit.
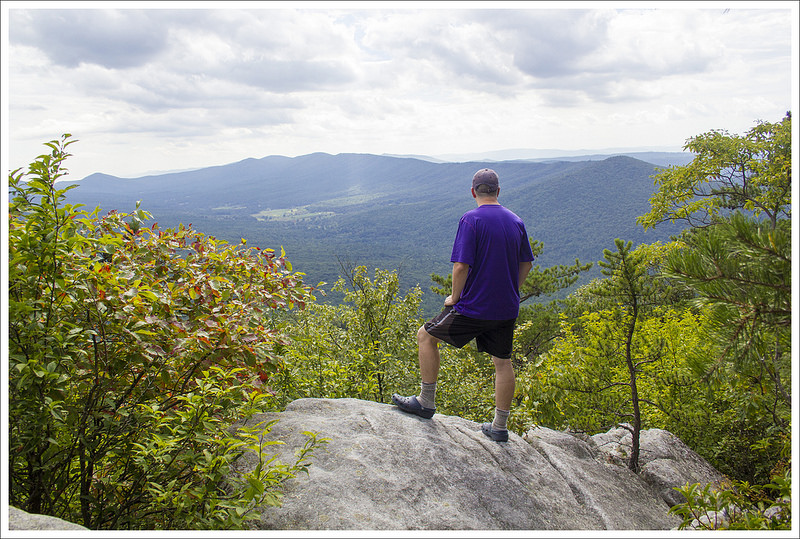
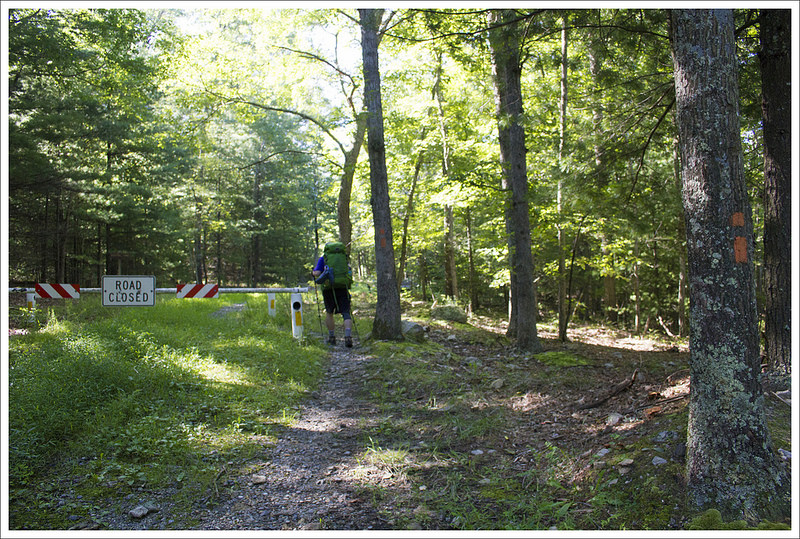
Adam takes in the view from Halfmoon Mountain. Below: The trail started from the Bucktail Trail parking area – pass the locked forest service gate to begin; We hiked the loop counterclockwise – starting on the pinkish-purple blazed Bucktail Cutoff Trail; Walking along the Bucktail Cutoff.
Adam Says: Day One (4.7 miles)
This past year was not a good year for our backpacking hobby. The rain seemed endless and the amount of exceedingly heavy rain did a lot of damage to trails. We also got a new puppy in March. He needed a lot of training and we weren’t quite ready to trust him to someone else for long periods of time.
We did manage to get out for this one trip in August 2018. Halfmoon Mountain had been a trail we had looked at doing for many years. We heard there were great views and a sweet campsite with a view at the top. One thing that hurts this as a backpacking loop is the nearest water source to the top is about 1-1.5 miles away from the camp areas, so you have to haul what water you need to the top.
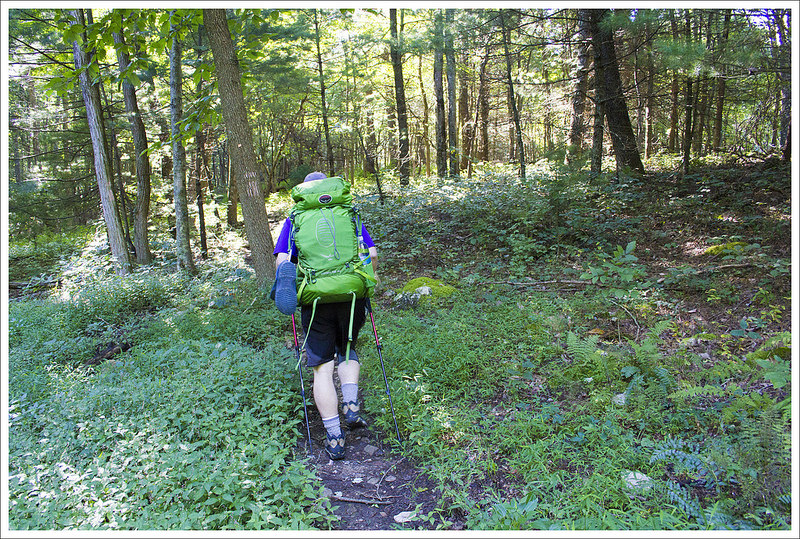
There is a nice campsite at the junction of the Halfmoon Mountain Trail and the Bucktail Cutoff Trail. Below: After the campsite, we followed the yellow-blazed Halfmoon Mountain Trail; The trail was steep and had some obstructed views; Junction of the Halfmoon Mountain Trail and the Halfmoon Lookout Trail.
We started the trip by parking along Trout Run Road (see GPS coordinates below). We started off on the Bucktail Trail and shortly walked through a gate blocking off the fire road. After a short distance, we came to a junction where the Bucktail Connector Trail branched off to the right while the Bucktail Trail takes a left (this is your return trip for the loop). We took the right Bucktail Connector Trail which has pinkish-purple blazes to follow this loop counter-clockwise. The trail began to climb up through forested terrain. Overall, this trail was well-maintained as it is a visible, narrow footpath cutting through the forest. There isn’t a ton to say about this section since there wasn’t a lot to see other than forest around you. The trail climbs for about the first 1.25 miles before descending slightly for about .5 miles and then there is another up and down until you reach another junction at 2.5 miles. There is a very nice campsite along the stream near this junction.
At the junction take a left on to the Halfmoon Trail (going right would take you to the Halfmoon parking area – where many hikers originate on a shorter out-and-back route to the summit). From here, the trail gets steeper and at the 3.5 mile mark, you reach the junction with the Halfmoon Lookout Trail, which takes off from the left. Take that left on to the Halfmoon Lookout Trail to reach the summit after another .8 miles. On our way up to the Halfmoon Lookout, we noticed a small footpath that branched off to the left which led to a larger camp area where we ultimately camped for the night. The last tenth of a mile is a steep rock scramble to the top. With crumbling rock underfoot, you really have to watch your step. At the top, there are two great viewpoints. The first you come across on the lefthand side of the trail and there is room for a few people at the top. There are remains of an old firetower at this lookout spot.
To visit second viewpoint, you descend through a campsite in a saddle and then over another rock scramble to to the view. This view spot will typically only work for about two people. It’s tight quarters.
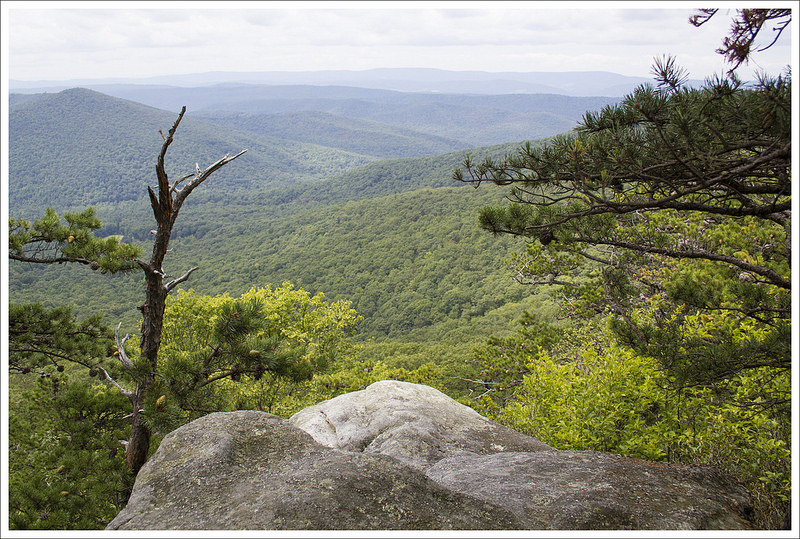
One of the viewpoints from summit of Halfmoon Mountain. Below: The Halfmoon Lookout Trail is pretty flat until the last bit before the summit; The last hundred yards to the summit is a minor rock scramble (it’s steeper than it looks in the photos); Somebody chopped down numerous living trees at the summit to make the saddle campsite larger (jerks!); We thought about camping in the saddle at the summit, but didn’t like the tightness of the campsite.
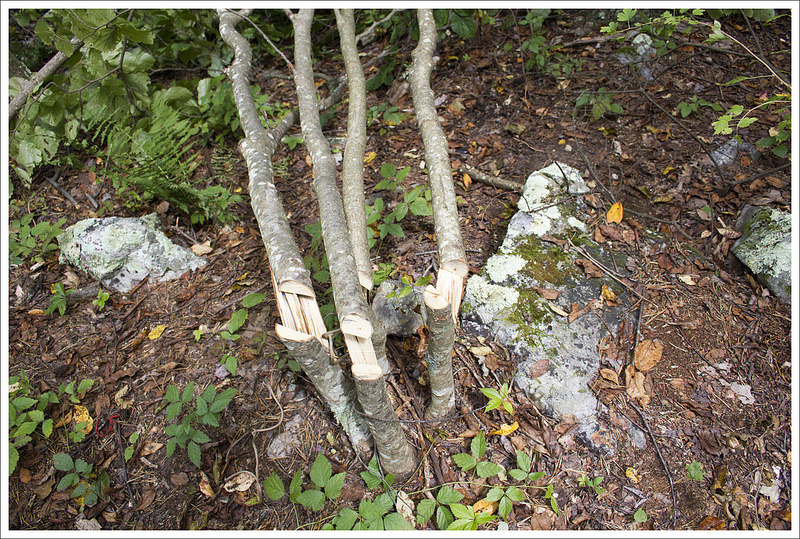
We initially were going to camp at the top – we heard it was a great campsite. Some jerks had chopped down some live trees to build the frame of a lean-to (so much for Leave No Trace principles) on the campsite. We deconstructed the lean-to and tried to clear out the area a bit, but felt the campsite would have been a bit tight and we would have had people walking through our campsite all day to get to the second viewpoint. We decided to enjoy the views up here and then make our way back down. Investigating that side trail, we found a great spot to set up camp. Even better, the campsite below the saddle had its own little viewpoint for us to enjoy. We found a nice grassy spot to set up our tent on some flat ground. The bugs were a little hard to deal with at camp, but we made the best of it. We were later joined by another couple that shared our camping area.
We had a beautiful sunset on Halfmoon Mountain. Below: We chose this spacious, grassy site right below the summit; Our campsite had its own little viewpoint; There are remains of an old fire tower at the summit; Another camping part hung a hammock on the summit for sunset.
After we set up camp, we made our way back to the top to enjoy some late afternoon/sunset views. At the second view, another couple had set up a hammock somewhat precariously over the edge – a nice spot, but it did obstruct the views for anyone else. We had a nice dinner back at our campsite and settled down for the evening enjoying the sounds of the forest.
Christine Says: Day Two (5.3 miles)
I woke up early on the second day, so I could watch the sunrise. There were a couple decent places to catch the sun coming up – the small outcropping at our campsite and a spot about halfway up the scramble to the summit of Halfmoon. Both vistas were a bit obstructed, but I was still able to capture some pretty morning color in the sky. The day was already warming, so we ate breakfast and packed up quickly.
Sunrise on Halfmoon Mountain. Below: Our camp kitchen; Leaving camp in the morning along the German Wilson Trail; The German Wilson Trail is exceedingly rocky and steep in places.
We made our way back down the Halfmoon Lookout Trail for several tenths of a mile to its junction with the German Wilson Trail. I don’t know what color I’d call the blazes on German Wilson Trail – purplish? fuchsia? magenta? Something like that, I suppose. The German Wilson Trail descended very steeply over loose, rocky terrain. It wasn’t fun and I was very glad we had decided to hike the loop counter-clockwise and didn’t have to ascend this tough section of trail with full packs. The trail drops steadily for about a mile before coming to a grassy area with a shallow stream.
Look for a forest service gate to the left. You should see the orange blazes of the Bucktail Trail. The trail that continues toward the right is the Old Mine Trail – do not take this trail. Follow the Bucktail Trail, crossing the stream multiple times over the next .8 mile. When we hiked in August 2018, this section of the trail was in terrible shape. Big sections were washed out and we had to navigate by following sparse orange blazes. Lots of sections of footbed were completely disappeared by debris and erosion. Hopefully some trail maintenance has been done over the last eight months.
There were many stream crossings on Day 2. Below: Arriving at the junction of the German Wilson Trail with the Old Mine Trail and the Bucktail Trail; Following the Bucktail Trail; There were numerous stream crossings on the Bucktail Trail.
At 2.2 miles, you’ll come to a junction with the Cacapon Trail. That trail follows a small footbridge over the stream on the right. Stay to the left and continue following the orange blazed Bucktail Trail. At this point, the trail becomes wide and grassy. It also begins to ascend again. This climb wasn’t difficult, but the grass was pretty overgrown and there was a lot of direct sun/heat. I also saw a ton of poison ivy mixing in with the grass. The climb felt worse than the numbers make it look.
The trail was eroded and hard to follow in places. Below: Cliffs along the Bucktail Trail; This bridge takes you onto the Cacapon Trail; More scenes along the Bucktail Trail. Much of the Bucktail Trail was a grassy, overgrown road.
The last three miles on the Bucktail Trail were pretty dull. It was basically a trudge along a grassy roadbed back to the parking area. All in all, this hike didn’t really live up to my expectations. It was nice to get out after such a long backpacking drought, but this trail definitely is not destined to become a favorite. If I were to hike it again, I think I’d park at the Halfmoon Mountain parking area and just do this as a seven mile, out-and-back dayhike.
We got back to the car by late morning, so we decided to get some lunch and a cold beer before heading home.
Trail Notes
Distance – 10 miles
Elevation Change – Day One: 1545 feet, Day Two: 477 feet
Difficulty – 3. This was a fairly easy backpacking route. The first day has about a mile of serious climbing, but the rest is very gradual. The second day has a steep, rocky mile of downhill, followed by a bunch of stream crossings, and then a moderate climb along a forest road before gently descending back to the parking area.
Trail Conditions – 3. The trail was in decent condition for national forest. The first day along the Bucktail Cutoff and Halfmoon Mountain Trail was excellent. The second day had rougher trail conditions: the steep descent when you first turn onto the German Wilson trail had lots of loose softball to football sized rocks and was a bit challenging to walk on, there was a trail washout near the final stream crossing on the Bucktail Trail, and the road portion of the Bucktail Trail had loads of tall grass and poison ivy.
Views – 3. There are several vistas at and near the summit of Halfmoon Mountain, however they are all small and partially obstructed.
Streams/Waterfalls – 3. There are nice streams on both day one and two, but the closest water source to the summit campsites is about 1 – 1.5 miles downtrail. In drier times, I expect campers might have to walk up to 2.5 miles down from the summit for water.
Wildlife – 3. We saw several deer and had a whippoorwill at camp.
Ease to Navigate – 2.5. The trail has spotty blazing and intermittent trail signs. Blazes are not equally distributed for hikers headed in both directions, sometimes we had to look back to check for blazes to make sure we were on the same trail. There are some trail washouts on the Bucktail Trail that make navigating the stream crossings a little tricky. Also, many blazes are faded and painted in inconsistent colors (for example – the orange Bucktail Trail blazes were often closer to red).
Solitude – 2. There is one small campsite and one large campsite near the summit. We had to share the large campsite with another hiking party. There was also a steady stream of dayhikers visiting this peak.
Maps
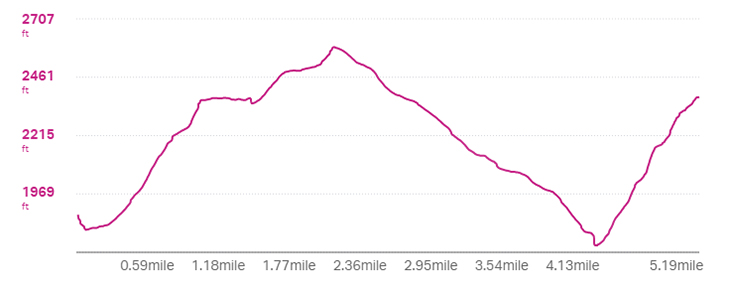
Download a full size map for DAY ONE.
Download a full size elevation profile for DAY ONE.
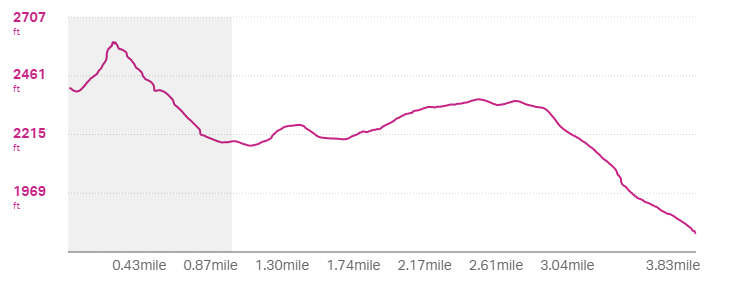
Download a full size map for DAY TWO.
Download a full size elevation profile for DAY TWO.
Directions to trailhead: Parking coordinates are 39.01431, -78.66388. The parking area is at the top of a gravel loop right off Trout Run Rd. The sign along the road will be for the Bucktail Trail. Do not park at the lot labeled Halfmoon Trail – that is the 7-mile out-and-back route, rather than the loop outlined here.
This 8.7 mile stretch of Appalachian Trail is pleasant but unremarkable. It’s a walk in the woods, over rolling terrain, that ends in downtown Hanover, NH (where you can eat gelato).
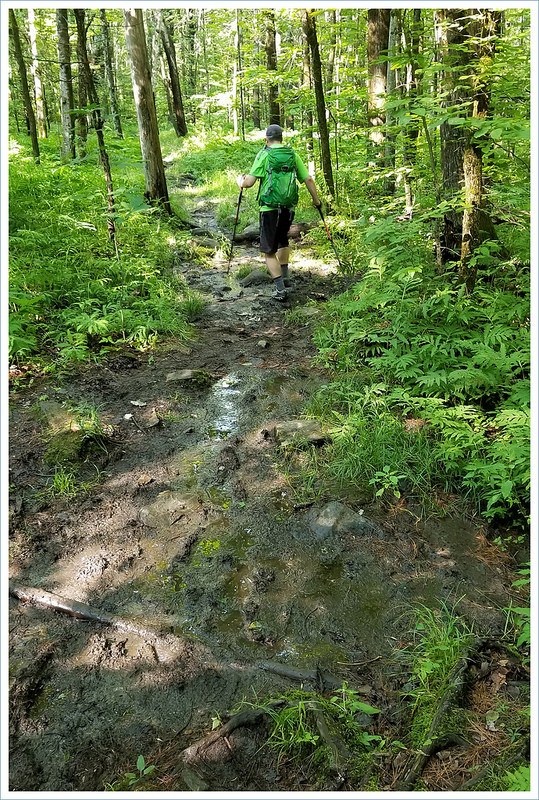
The hike begins in shady, muddy woods. Below: AT benchmark; Ewww… mud; There were lots of swampy, buggy spots along the trail.
Christine Says…
The summary above doesn’t make this hike sound very exciting – it wasn’t. You might ask, “Why bother to hike this piece of trail when there are so many other amazing hikes in the area?” Well – it was convenient, we had a shuttle ride from my parents, and it let us add to our mileage toward one day completing the entire trail. Not every mile of AT is sweeping vistas and babbling brooks. A lot of it (ok… most of it) is a long green tunnel. It’s not always thrilling to walk the trail, but it’s rewarding to take little steps toward completing a goal.
We hoped to get out on a three-day backpacking trip like we did in Vermont last year, but with a new puppy (Indy) to care for and a long run of unusually hot, stormy weather; we settled on just day hikes for our 2018 NH trip. Adam found this stretch of trail in our AWOL AT Guide and figured it would be easy to knock out on the same day my mom had an all-day baking class in Hanover. We left our car parked in a small lot along Three Mile Rd. near Etna, NH. From there, we walked south toward Hanover.
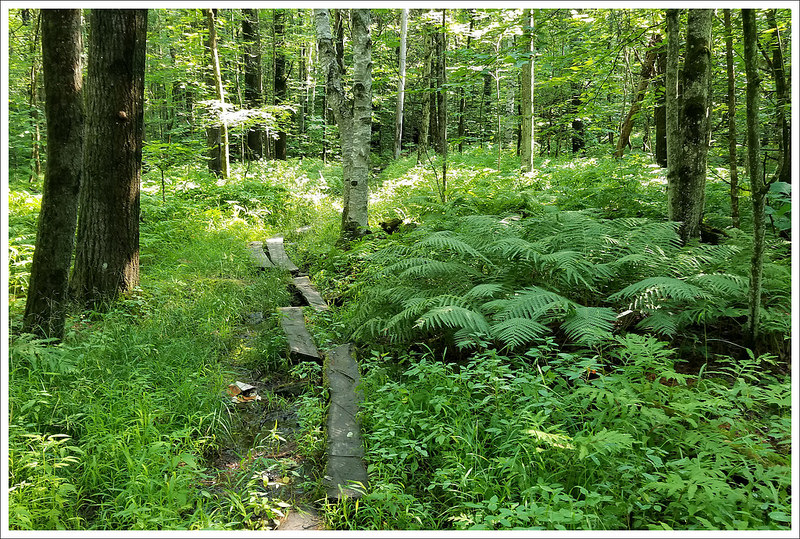
This section of trail was much easier than what you imagine when you think of typical Appalachian Trail in New Hampshire (granite slabs, boulder scrambles, 4,500 foot climbs, exposed cliffsides, and violent storms that blow up out of the blue). This piece of trail had soft footing, gentle hills, and barely more than 1,200 feet of climbing over the entire 8.7 miles. It was extremely muddy in places and there was one extremely steep but brief climb and descent near the midpoint, but the challenges were few and mild.
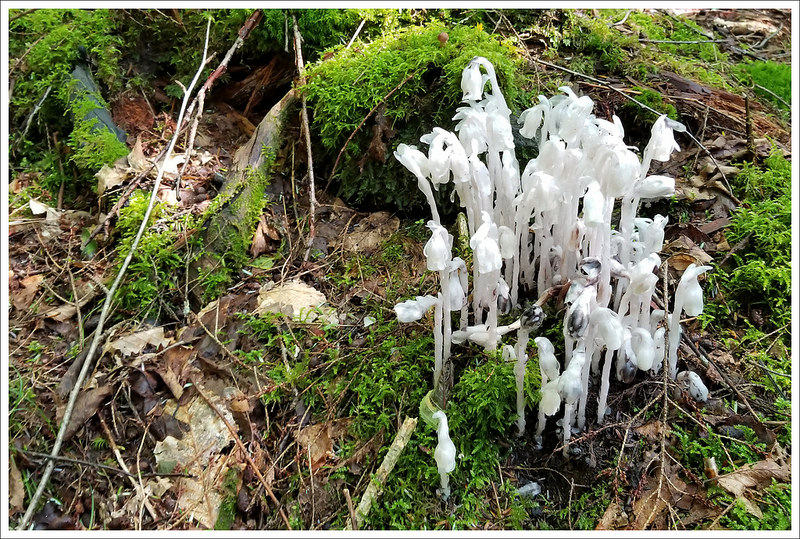
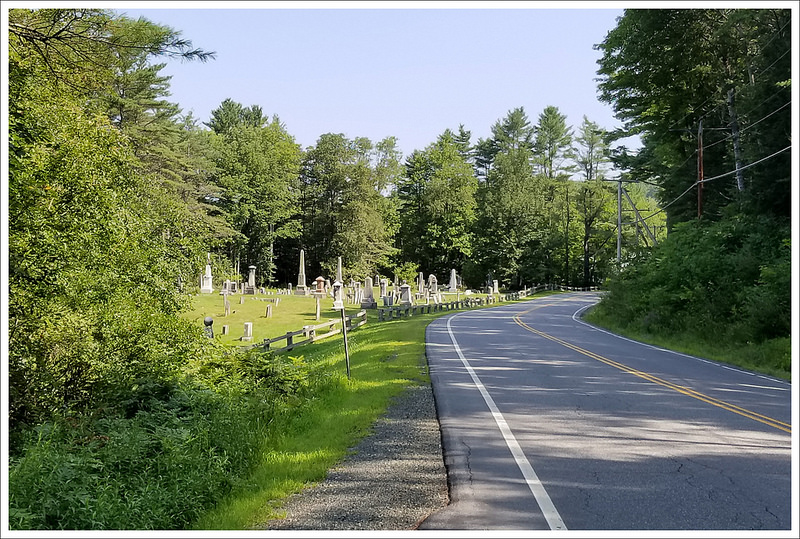
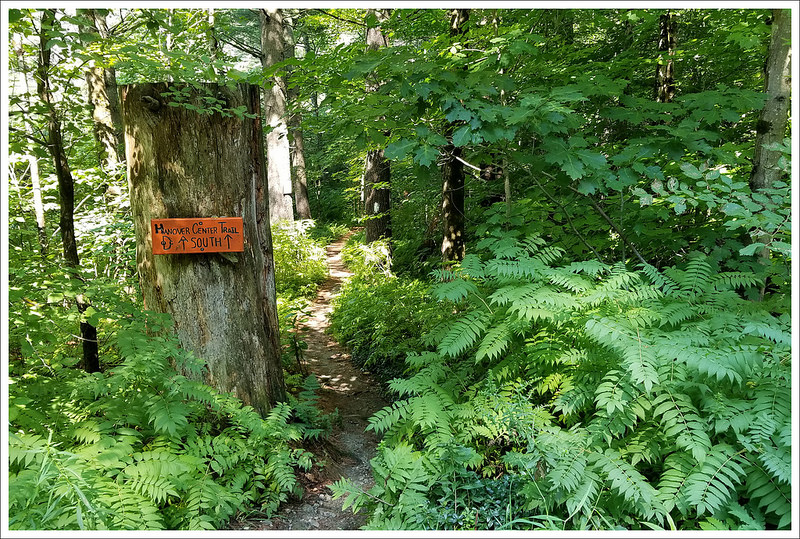
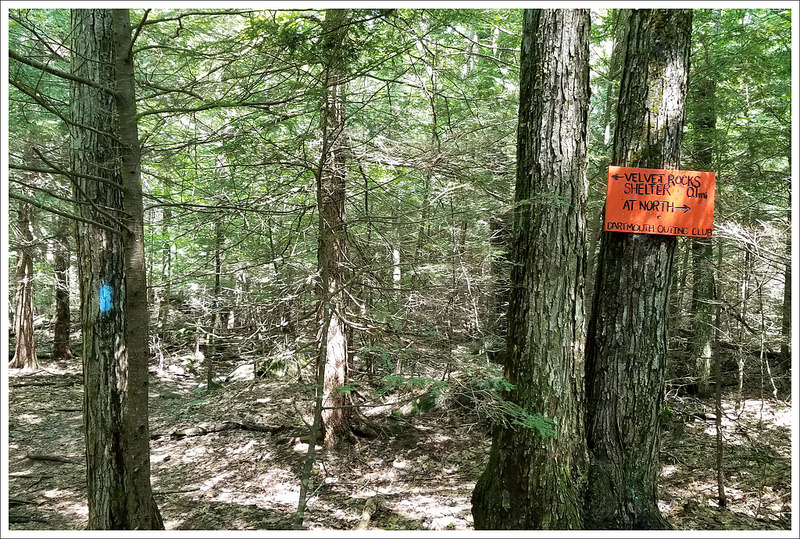
There are many meadows along the AT. Below; We saw so many indian pipes; the cemetary on Etna-Hanover Center Rd; Dartmouth Outing Club (DOC) signage.
There’s really nowhere to get lost on this section, either. There are some road crossings, junctions with other trails, and parts of the trail have two names. The Dartmouth Outing Club maintains the trail and shelters in this area, so they’ve given club names to parts of the AT. You’ll see bright orange signs with the DOC logo and names like the Hanover Center Trail and the Velvet Rocks Trail. They’re both still the Appalachian Trail, and as long as you keep following the white blazes, you’re going the right way.
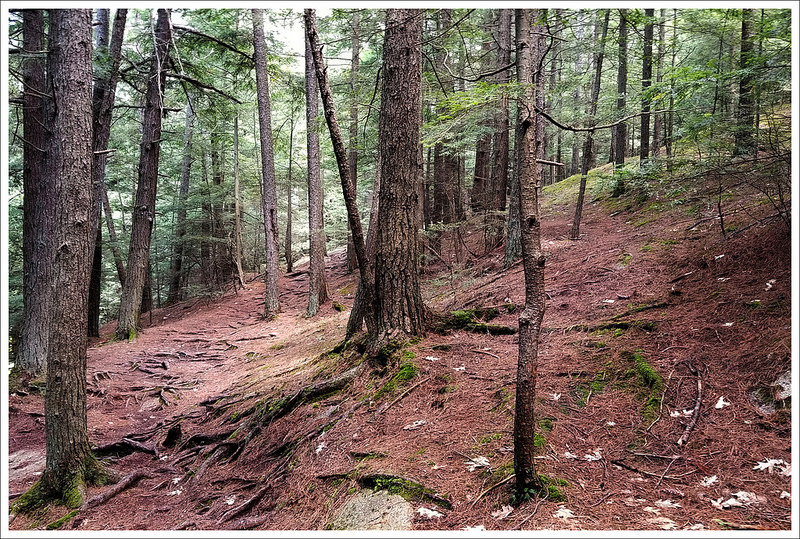
We stopped for lunch at the top of the only steep uphill climb of the hike. It was along part of the trail known as ‘velvet rocks’. I’m going to go out on a limb and guess that the name was given due to the abundance of huge, moss-covered boulders all along the trail. They really do look like rocks covered with plush green velvet. There was no view at the high point, so we settled for eating lunch on a big flat rock right along the trail. I had a poorly-chosen lunch of crackers, cheese, and pepperoni for lunch. I know sealed pepperoni stays fresh and safe even in hot weather, but there’s something so unappealing about sun-warmed meat. I ate it, but I also gagged a bit. I should have known better – I can’t even look at beef jerky without being nauseated, so pepperoni isn’t all that different. We also brought a HUGE lemon-blueberry whoopie pie from a local bakery to share. That was much more palatable than the slimy meat.
The descent from our lunch spot was really steep and muddy. There was even a rope tied between a few of the trees to act as an assist, but I was able to manage it by crab-walking downhill. About a three quarters of a mile past the lunch stop, we reached the blue-blazed northern access spur to Velvet Rocks Shelter. The spur trail to this particular shelter has both northern and southern arms. Hikers that use both arms of the spur miss a .6 miles the AT (missing any of the AT is a big deal to ‘purists’.) The sign at the northern spur said the shelter was .4 miles away. The northern spur also went straight up a very steep, rocky hillside, so we decided to continue south on the AT and access the shelter at the southern arm instead. The shelter was an easy .2 mile walk via the southern arm of the spur.
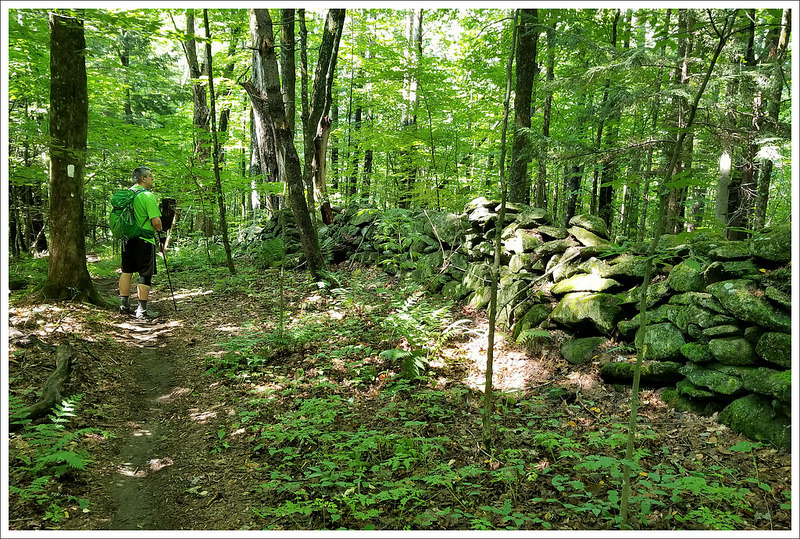
Much of the AT in this area is a narrow corridor through private land. You’ll see many old stone walls. Below: One of the many pretty small streams we passed; Pine forests are nice; Orange DOC signage.
Velvet Rocks shelter was very old and dingy-looking. There was an old tarp slung over the wall and lots of dumb graffiti. There was no sign of a shelter log, either. I think if I were thru-hiking or on a long section hike, I’d skip this shelter and just stay in Hanover. When we visited, there were a couple south-bound thru-hikers already stopped for the day around 1:00 p.m. They both said they were hot and fatigued and didn’t feel like hiking anymore. It really was a sweltering day, and we knew we only had about a mile and a half to go before we were in downtown Hanover.
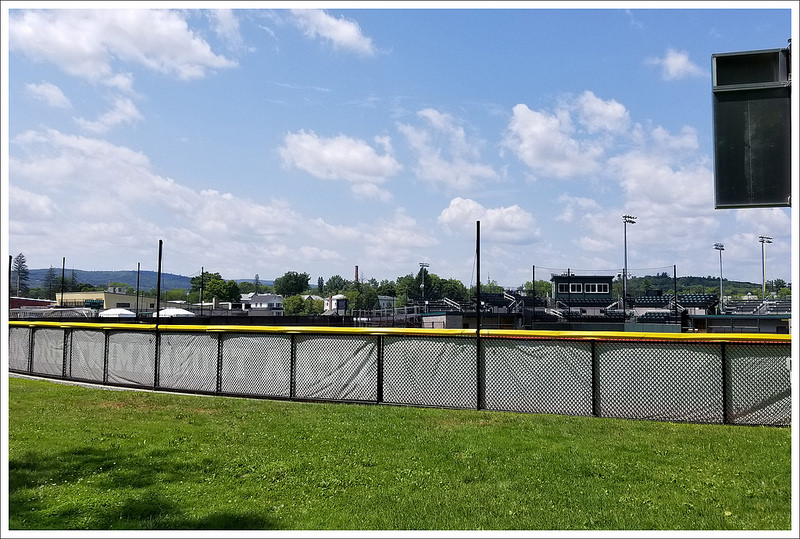
The next .75 miles was all downhill through shady forest. The trail exited the woods in Hanover right behind Dartmouth College athletic fields. We walked along the fenceline and turned right onto NH 120. There was a Co-op Grocery store right on the corner, so we got a couple cold drinks and sat in the shade. The last three quarters of a mile of ‘hiking’ were just a stroll through town. We had to pay close attention to find white blazes marked on lightposts along the road. There was no shade and the mid-day sun was beating down on us. Despite being completely flat, this was probably the hardest part of the hike because it was just so hot! We finally got to our meet-up spot. I had time to wash my face and wipe the mud off my legs in the Dartmouth bookstore. No one even looked at me funny – a sure sign that a town is used to hikers and backpackers.
My dad picked us up and took us to Morano Gelato – so good! After that, we went to the Cabot factory store and ate free cheese. Then we went to King Arthur Flour company and ate cookies while we waited for my mom’s baking class to end. And then we went out for a proper dinner. It’s a lot of eating, but I think we earned it. After dinner, my parents drove us back to where we had parked our car earlier in the day. Then it was home for showers and relaxing!
Adam Says…
Hiking is often about changing plans for us. As Christine mentioned, we had initially came up with some plans for doing a multiple day backpack of the Appalachian Trail. But, with a new puppy, we didn’t want to subject the babysitting grandparents to the attention he needed (he has been an extremely high-energy puppy). So, I looked up some possible day hikes we could do to still cover a tiny bit of New Hampshire AT miles. It is a goal of ours (we will see how attainable, ultimately) to hike the entirety of the Appalachian Trail in sections. Working full-time with limited time off, we have to do what we can for now. We will hopefully finish what we have left when we retire, so this hike was a way to knock off a very tiny percentage of the trail and connect to our trip last year with a few more contiguous miles. We coaxed Christine’s dad to pick us up in Hanover and drive us back to our car, so the change in plans worked well for us.
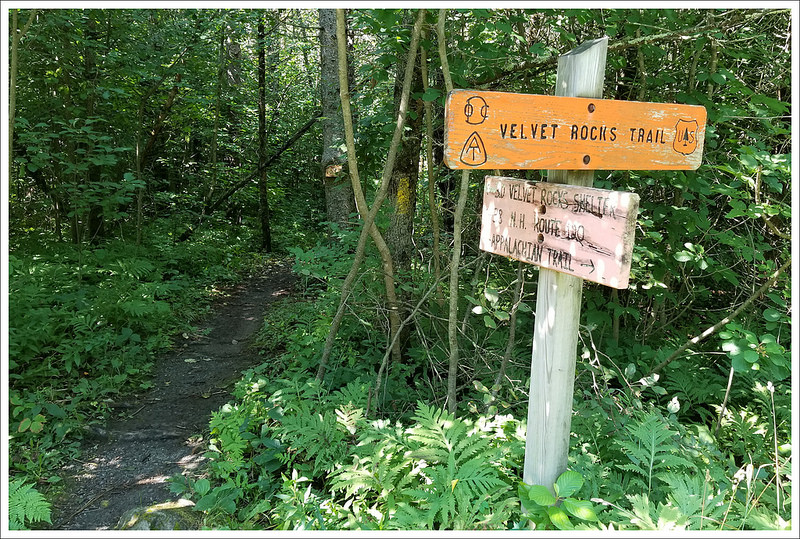
I’m pretty sure the Velvet Rocks area is named for these huge moss-covered boulders. Below: This pond was so full of cattails, we couldn’t even see the water; Our lunch spot at the top of the only big climb of the hike; Side trail to Velvet Rocks Shelter.
It took us a little while to find our start point for the trail on Three Mile Road with questionable GPS service that made it difficult to navigate some of these backroads. But, we ultimately got to the correct road and found the AT crossing and a place to park our car on the side of the road. We started off at the road crossing and headed south on the white-blazed Appalachian Trail. The initial trail marker showed we had 8.6 miles to reach Hanover, NH. The trail started off through the fern-covered woods heading slightly downhill through a muddy area. Green was all around us in this lush forest setting. At 2.5 miles, we crossed over the paved Etna-Hanover Center Road (heading east under a mile would lead you to Etna, NH), where there was a cemetery on the opposite side of the road. We crossed the road and continued on with this trail marked by the DOC signs Christine mentioned above.
Shortly after crossing the road, you walk over a couple of footbridges carrying you over a stream. The trail opens up a bit after this where you cross over a field before entering back into the woods. You cross over the paved Trescott Road at 3.9 miles and then pass over a boardwalk over a marshy pond at 4.6 miles. From here, the trail begins to climb up and does reach a very steep section that will reach its peak at 5.4 miles. At the peak, we took a break and ate some lunch before pushing on. The trail descended and then we reached the junction with the north shelter loop trail at 6.2 miles. At this point, we did start seeing some people that were hiking about on this loop trail to check out the Velvet Rocks area. We saw the many mossy boulders that give the area the name ‘Velvet Rocks’. We passed the northern spur to the shelter and decided to stay on the AT. At 6.8 miles, we reached the southern shelter sidetrail and took a break to go check it out. While the sign said it was only .2 miles away, that was the longest .2 miles we have ever seen (it felt more like .35 miles). When we got to the Velvet Rocks Shelter, we were able to talk with a few people that were staying there and doing some larger sections of the AT. We went back the way we came to rejoin the AT (I didn’t include this side trip in the mileage totals).
From the junction with the shelter sidetrail, it was a steep downhill climb until we came out of the woods near a Dartmouth sports field. The trail continues along the back wall of the field and comes out by a convenience store onto NH 120. We took a right at the road and walked by a Food Coop and got a fresh drink. It was just a short walk from here into town to meet up with Christine’s dad, but the exposure into the sun made for a hot walk back into town. We did cool off a bit with some nice gelato. This was a great hike to do if you can have two cars or a pickup plan like we did. The terrain was relatively easy and it is always good to end a hike at a town with lots of amenities.
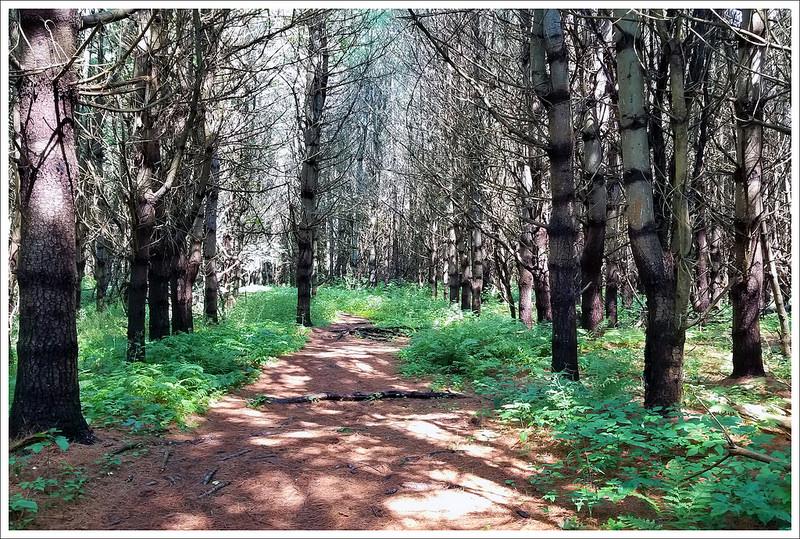
Velvet Rocks Shelter. Below: Pretty pine-needle forest floor; Some minor rocks on the final descent into Hanover; The trail comes out of the woods behind a Dartmouth Athletic Field.
Trail Notes
Distance – 8.7 miles
Elevation Change – 1204 feet
Difficulty – 2. This is a really easy stretch of Appalachian Trail – especially for New Hampshire. Our only real challenge was the heat.
Trail Conditions – 3. The trail is in nice shape, but was quite muddy when we hiked.
Views – 1. There are a few minor views in small meadows, but nothing grand.
Waterfalls/streams – 2. There are lots of small streams that provide adequate water sources.
Wildlife – 2. Squirrels, birds, and chipmunks!
Ease to Navigate – 4. Just follow the white blazes. The only misdirection might come from the dual-named DOC trails.
Solitude– 2. Expect to see a good number of people when you’re close to a large college town.
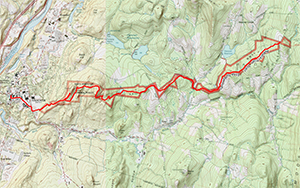
Trail Map:
Click to download full size trail map.
Click to download full size elevation profile.
Directions to trailhead:
Parking coordinates are 43.718 -72.176. There are two parking areas along Three Mile Road near the Appalachian Trail Crossing. This is a gravel road.
We did this 27-mile Appalachian Trail section over three days at the tail end of summer 2017. The trail was beautiful and quiet with lots of interesting things to see along the way. We camped one night and spent the other luxuriating at Woods Hole Hostel. This may have been one of Christine’s favorite sections yet!
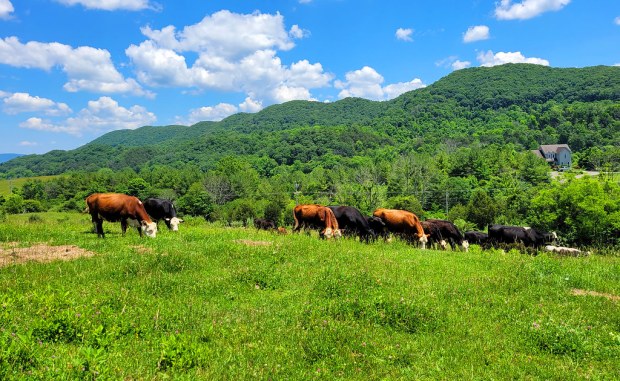
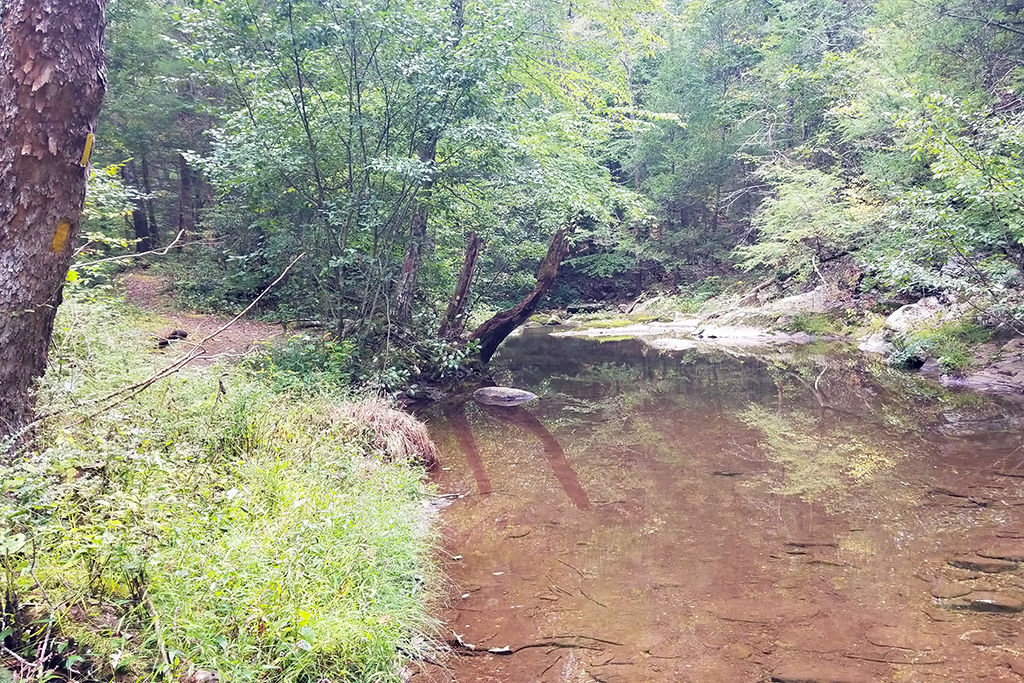
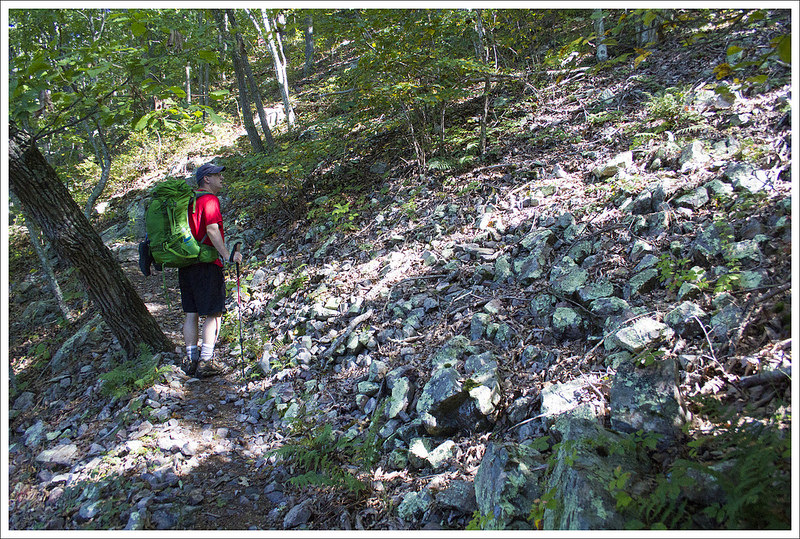
Kimberling Creek is beautiful, but not safe to drink from. There is a lot of cattle farming along the stream. Below: Some rocky slopes along the trail; The spur trail to Dismal Falls is well worth the detour; Shallow pools and flat rocks leading up to the falls.
We decided to celebrate Christine’s birthday by completing a section of the Appalachian Trail over a few days. I had a couple of surprises for her along the way which hopefully made it an even better trip for her. I arranged a shuttle driver to meet us at a parking lot off Narrows Road near Pearisburg, VA. We loaded up and he drove us on some beautiful back roads until we got to our dropoff point at Kimberling Creek. There was a small parking lot here and a suspension bridge that spanned the creek. We took a few pictures, crossed the road, and then started our trip north on the white-blazed Appalachian Trail on a two day trip back to our car. The trail started off with a bit of a steep climb, which is always a quick reminder of the weight you decided to pack in your backpack.
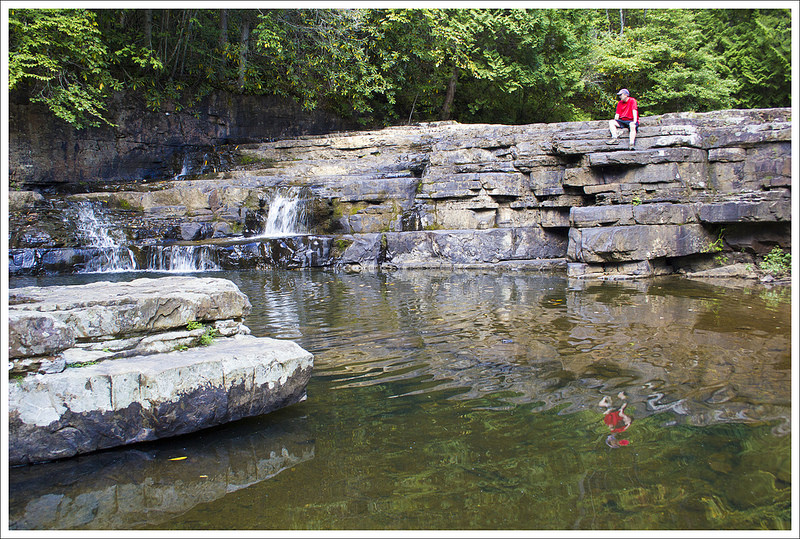
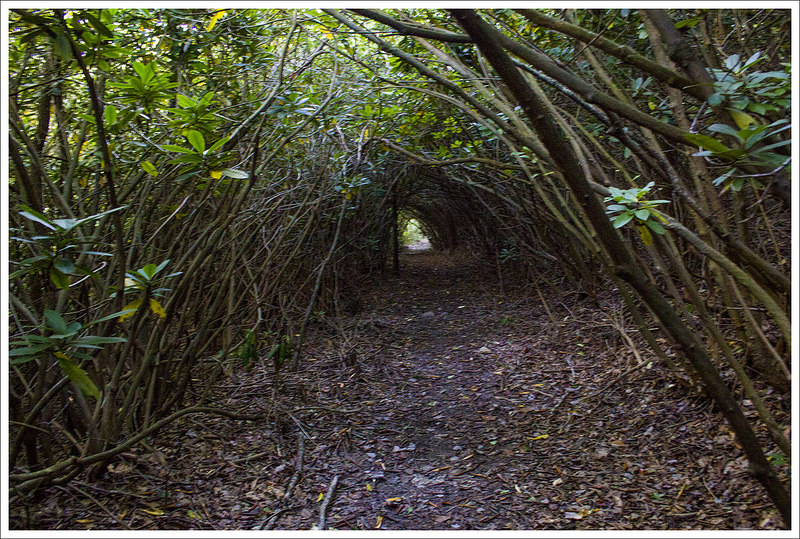
The water level was very low, but Dismal Falls was still beautiful. Below: Another angle on the falls; This area has tons of rhododendron tunnels; Walking through beautiful open forest.
The climb was short-lived and after about a mile, the trail started to slope back downhill. At 1.8 miles, we reached a side trail that showed that Dismal Falls was just .3 miles away. Since it was early in the day, we decided to check it out and we were so glad we did. Dismal Falls was one of the more picturesque waterfalls I have seen and the setting just invites you to waste some time there. Even with low amounts of water falling, it is a great swimming hole area with great places to perch above and watch the water. We ate some snacks, explored the nearby area, and took many pictures before deciding to head on. While we were there, we only had a few other people that came by and they all approached it from the roadside that we could see in the distance behind the waterfall. We were glad we put the effort to see such a beautiful place. We grabbed our stuff and then headed back to rejoin the AT, bringing our mileage to 2.4 miles.
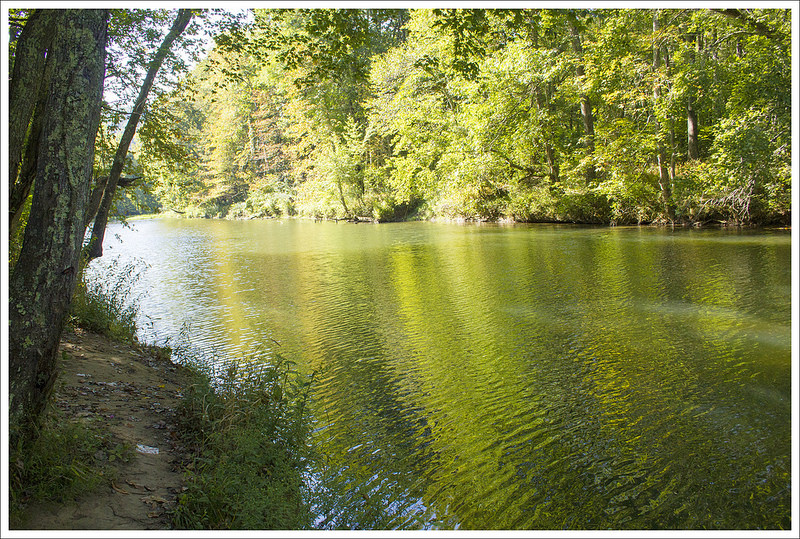
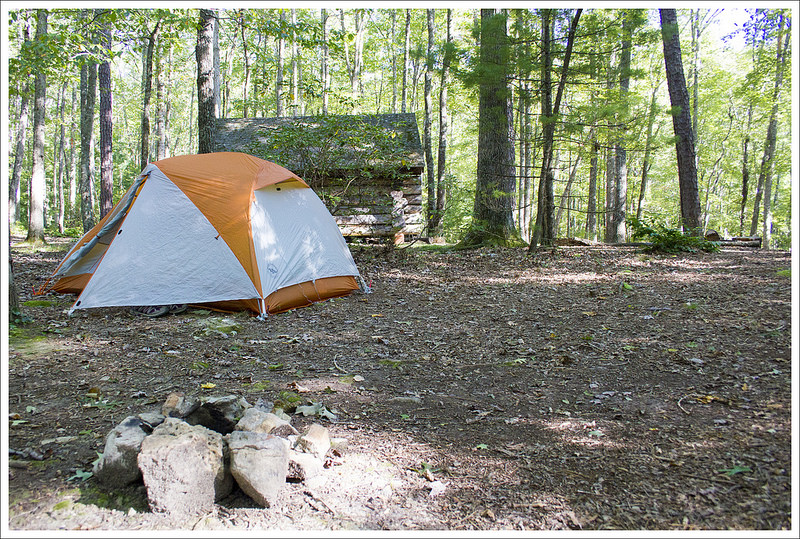
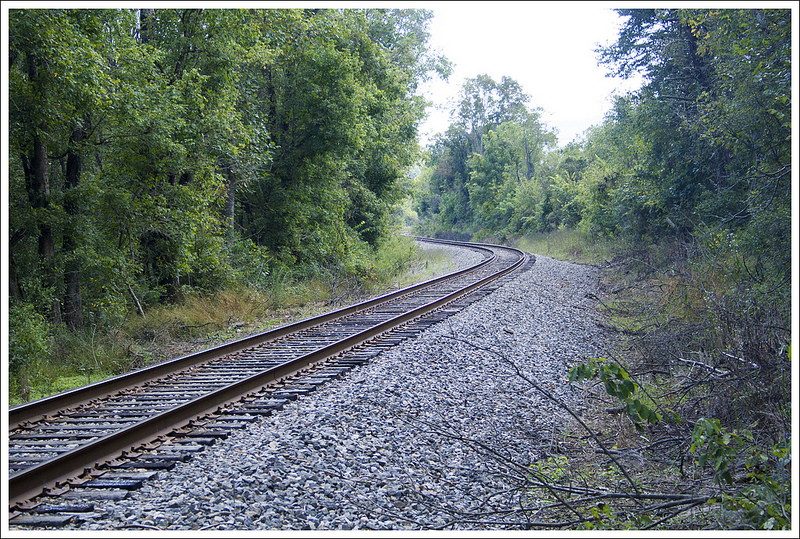
This pond was a scenic spot along the trail. Below: While the trail was very dry when we hiked, this stretch has lots of bridges and planks to cross wet areas; The Waipiti Shelter used to be along this fire road. It was demolished after a couple hikers were murdered. A new shelter was built a little ways north; More beautiful forest.
Continuing on, most of the hiking for this day was rather pleasant – there was a slight uphill climb but overall was not too tough. There were lots of footbridges and water crossings along the way, so this was not a day where we felt like we needed to carry much water since we weren’t terribly far from a water source. Eventually, we hiked next to a large, scenic pond that joined up to a dirt road at about 8.4 miles. From here, it was just a couple of tenths of a mile to our first stop on our trip, Wapiti Shelter.
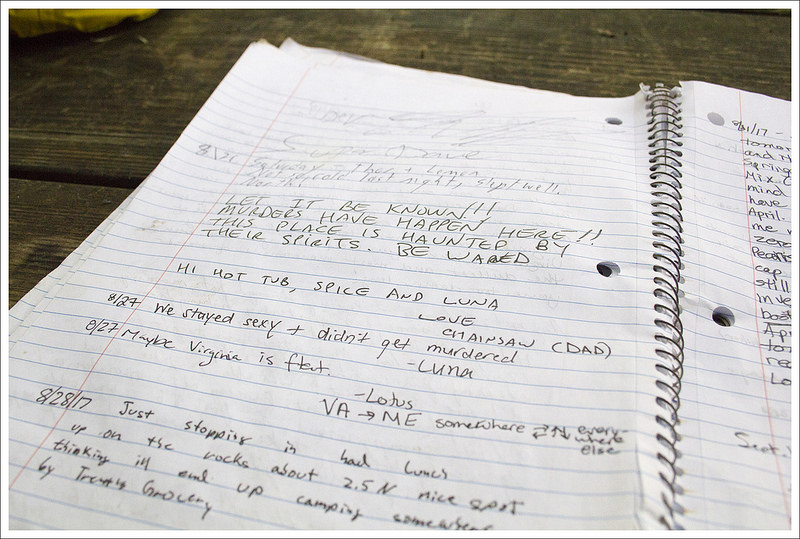
Our camp stop for the first night was the Waipiti Shelter. Below: The turn-off from the AT; Lots of entries in the log make mention of murders and hauntings, but this is not where the crime happened; Our tent site behind the shelter.
Wapiti Shelter has some dark history to it. Christine had already heard the story before, but she waited to tell me about it until we got there. The old Wapiti shelter was the place where a couple of murders had taken place in 1981. A man named Randall Lee Smith befriended a couple of hikers and then murdered them in their sleeping bags that night. Smith was captured and imprisoned, and then met parole to be released in 1996. In 2008, Smith returned just a few miles away and tried to kill two fisherman but wrecked his truck in the getaway and died from the injuries he sustained when he was taken to prison. If you want to read more about this story, check it out here. Keep in mind, that the shelter today is located a couple miles away from where the murder happened, so ghost stories that the trail journals would like you to believe are simply not true.
As we were setting up camp, I surprised Christine with an additional camp pillow for a birthday present. She had been complaining recently about how she wish she had multiple pillows when backpacking, because one inflatable pillow just wasn’t enough. She was thrilled when I brought the extra one out of my pack. We set up our tent not far from the shelter and a bit later, we were eventually joined by other hikers, including two from Australia and one from Germany. The best water source at this campsite was back the way we came at the bottom of the hill. We told the other campers about the murder story but only after they asked specifically about it after reading logbook entries. I think everyone slept well that night despite the ghost tale.
Christine Says: Day Two – Wapiti Shelter to Woods Hole Hostel (7.8 miles)
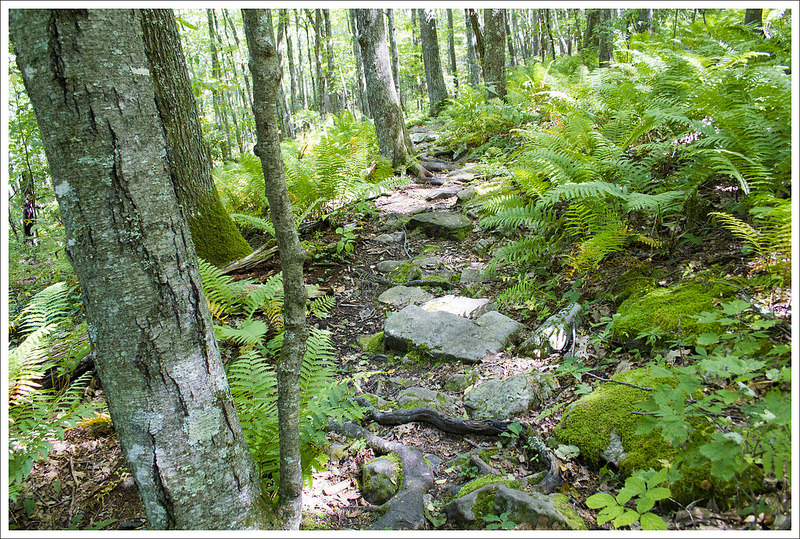
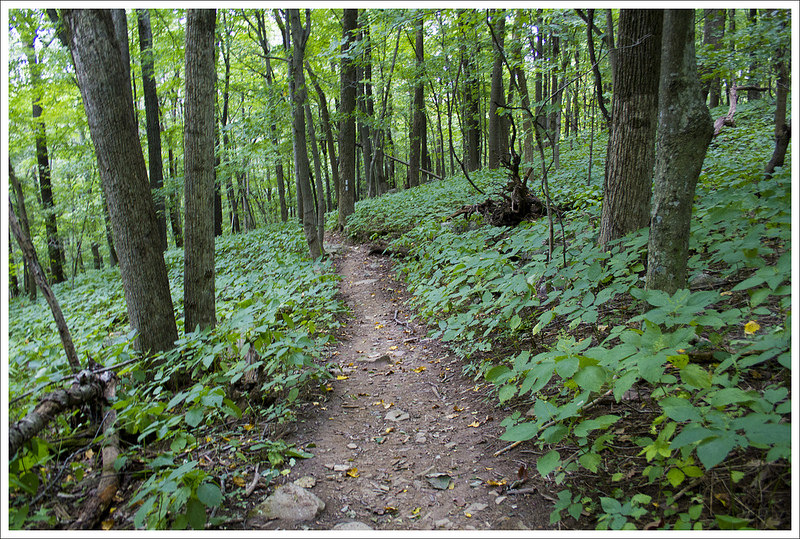
This section of Appalachian Trail had so many long, dark rhododendron tunnels. Below: Even when the rhododendron wasn’t a full tunnel, it was still very dense; The footbed was almost paved with flat, shale-like rock; I love trees with ‘arms’
Brrr – that was a cold night! I was glad to have spent it bundled up in my warmer sleeping bag with two pillows. Eventually we got moving, packed up, ate breakfast, and started our hiking for the day. We had all day to go eight miles, so we set out at a leisurely pace. We had about three straight miles of moderate uphill to our first view of the day. The trail was all green tunnel. We passed through thickets of mountain laurel and rhododendron and traversed lush beds of ferns.
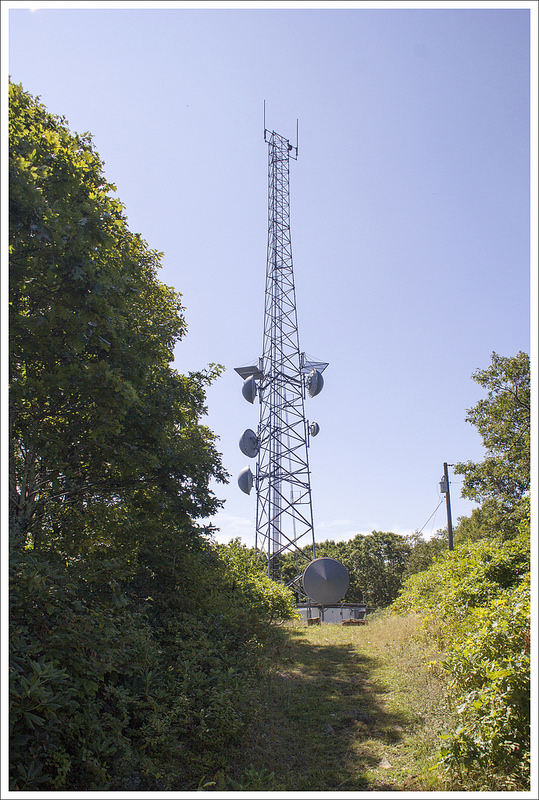
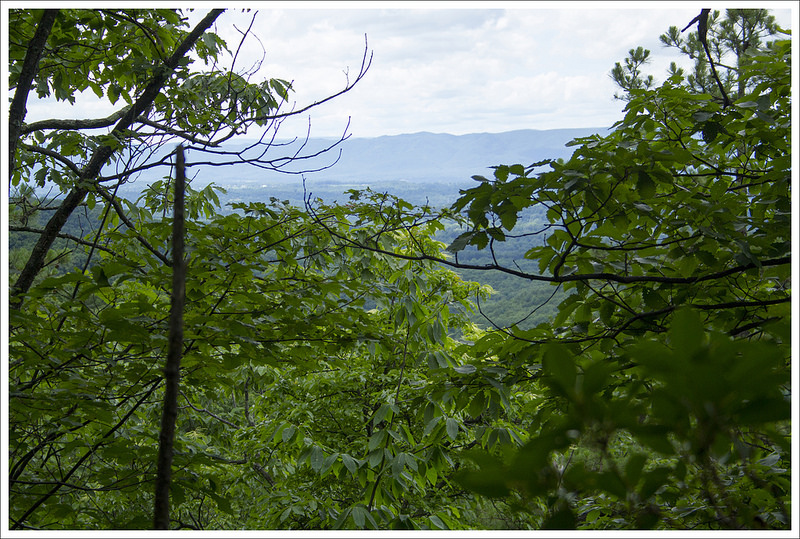
At 2.7 miles in we reached a pretty outcropping of rocks with a great view of the valley below. We stopped briefly to enjoy the vista, but weren’t ready for a snack or a long break. The next 2.3 miles covered rolling terrain with lots of small ups and downs. The trail was pretty, but not remarkable. At five miles into our day, we reached the radio tower on Flat Top mountain. The tower viewpoint is about .1 miles off the trail and worth making the small detour. Behind the tower, there is a series of small cliffs with a commanding view. It’s the perfect place to take a lunch break.
There were several nice views near between Waipiti and Woods Hole. Below: Views from the trail.
The day had warmed up a bit and we were both running really low on water. Thankfully, we had enough to make Pack-It Gourmet cheese spread for lunch. We had cheese and crackers with candy and dried fruit for our mid-day meal. We also took a good long break and rested atop the rocks. It was peaceful to watch hawks and buzzards soaring on the breeze.
After a full hour of resting, we packed back up and set out to cover our final 2.8 miles of the day. The rest of the route was mostly downhill with only a few brief bumps to climb. In about .7 miles, we crossed the Ribble Trail. The sign indicated that supplies (like propane) were available somewhere down the Ribble Trail, but I would think most people would just continue on to Woods Hole or even Pearisburg if they needed something. Apparently, there is also a nice AT-Ribble Trail loop that is popular with locals. If we were to have followed the Ribble Trail, it would have rejoined the AT near Waipiti shelter, where we spent the prior night. Maybe one day, we’ll go back and explore the area more.
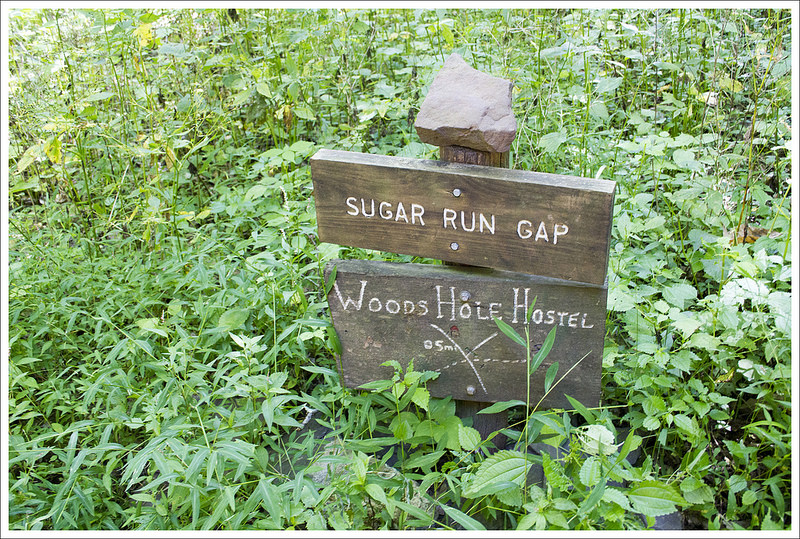
As long as you don’t look behind you, the view is pretty and pristine. Below: Descending toward Sugar Run Gap.
After crossing the junction with the Ribble Trail, we continued downhill; crossing Big Horse Gap/USFS 103 just a tenth of a mile later. In another 1.2 mile, we crossed another forest road. From this point, the last .5 miles of hiking went steeply downhill. The trail was a bit rocky and overgrown. At this point, I was starting to hit a wall. I was out of water and feeling really parched. We hadn’t passed a spring since first thing in the morning and the sun had been beating down on us all day. I told Adam I wanted to rest at the road crossing before we hiked down to Woods Hole Hostel – our destination for the evening. He said to me ‘But wouldn’t a massage be way more relaxing?’ It turned out he booked an hour long massage for me at the hostel. Say no more – I was up and ready to cover that last .5 miles of road walking to get to Woods Hole.
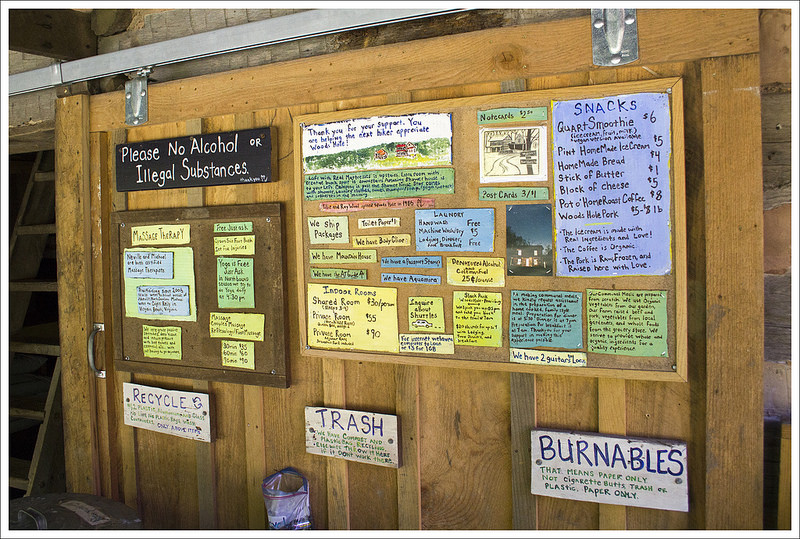
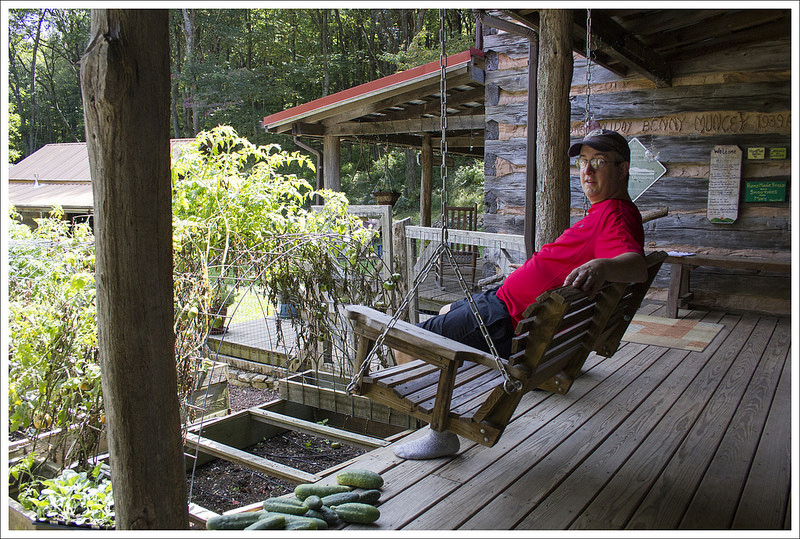
Normally, we wouldn’t stay at a hostel on a two-night backpacking trip, but Woods Hole is special. Family-run for decades, the quaint, old farmhouse is an Appalachian Trail legend and a beloved tradition for many hikers. The old farmhouse opened its doors to hikers in the 1980s. The hostel was originally run by Tillie and Roy Wood, but was taken over by their granddaughter Neville in 2007. Since then, she and her husband Michael have expanded on the hostel’s offerings, creating a mountain oasis that is simultaneously rugged and luxurious. There’s no television or cell phone signal, but there is beautiful organic food (that you get to help prepare!), massage services, and group yoga.
What a welcome site! Woods Hole Hostel was a luxurious stop on our backpacking trip. Below: Woods Hole scenes.
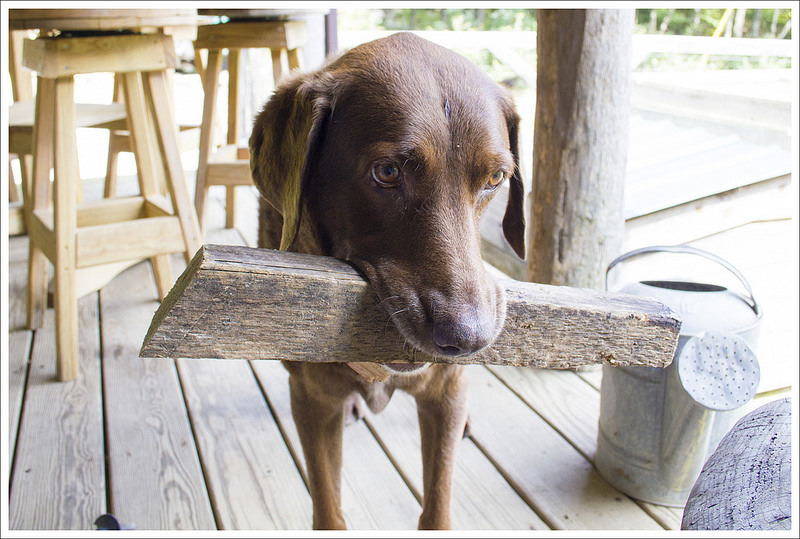
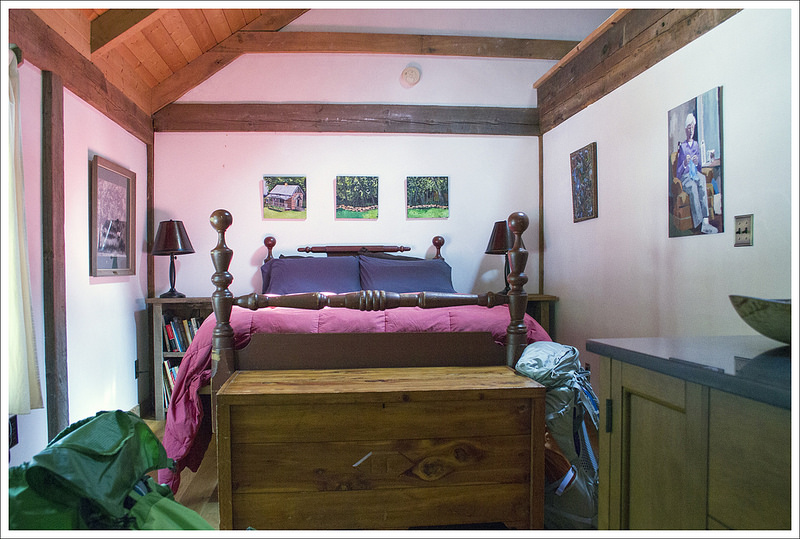
We arrived at the hostel around 2:00 p.m. Neville was still working on cleaning the house, so we bought a couple soda’s from the bunkhouse fridge, and settled into the swing on the front porch. We played with the dogs, said hello to the roaming duck, and peeked into the goat and pig sheds. The garden was still beautiful and abundant in late summer – tons of peppers, tomatoes, and squash. If you stay at the hostel, you can camp, stay in the bunkhouse, or stay in a private room inside the farmhouse. We chose to stay in ‘Tillie’s Room.’ It had a comfortable queen bed, private sink/vanity, and shared full bath. It was quite luxurious for trail accommodations. Even if you choose the more humble bunkhouse, it is still comfortable and neat as a pin. There are beds with fresh linens provided, a big common area with a couch, and a nice offering of snacks and supplies available for purchase. There are also shower and laundry facilities available for those staying in the bunkhouse.
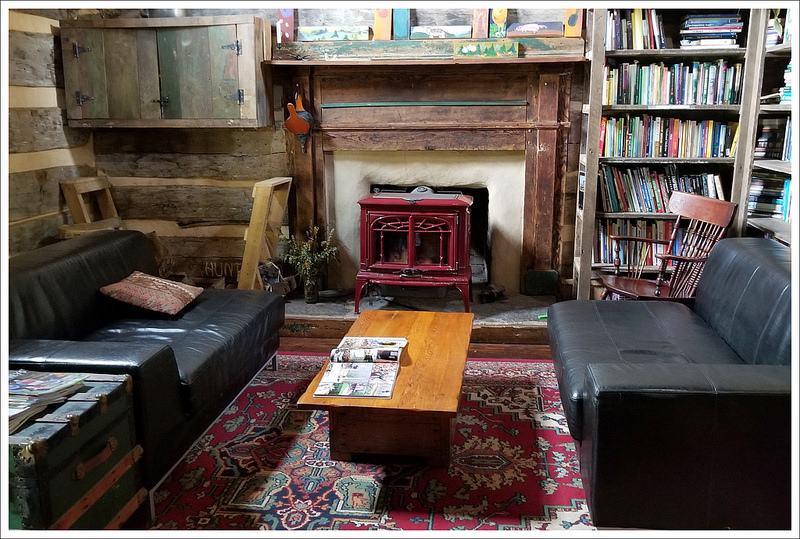
We visited during a really quiet time of year. There was a smattering of SoBo thru-hikers on the trail, but in mid-September we had the entire house to ourselves. Once we got checked in, I decided to shower and spend some time in the farmhouse’s library. It was full of all kinds of books and mementos. I especially enjoyed looking through scrapbooks chronicling the hostel’s history over the years. Around 5:00, Neville said she was ready to do my massage. It was a wonderful treat and felt fantastic on my tired shoulders and calves.
Aumakua – one of Woods Hole’s sweet dogs. Below: Our comfortable lodging.
After the massage, we started to think about dinner! In the meantime, one southbound thruhiker arrived and booked a bed in the bunkhouse. Neville’s husband had errands to run, so it was just four of us for dinner. Neville and Michael typically prepare community meals with the help of hikers staying for the night. Everyone has a task and chips in to prepare and clean up after the meal. We had an amazing tomato-pepper-cucumber salad, homemade bread with aioli, locally raised pork, and a flavorful yellow Thai vegetarian curry for dinner. Everything was delicious, but the salad was a favorite and is something I’ve made at home ever since. Dessert was Neville’s homemade vanilla ice cream.
After dinner, Adam and I relaxed in the library and read until it was time for bed. It was lovely being lulled to sleep by the sound of a breeze in the trees outside. We both slept great!
Adam Says: Day Three – Woods Hole Hostel to Narrows (11.8 miles)
Our last day of hiking started in a blanket of fog. Below: Hiking up Sugar Run Road; The Appalachian Trail; Foggy views
We had our longest day on the trail ahead of us with the third day. We got up, packed up our gear, and enjoyed a wonderful breakfast prepared by Neville. We had asked if we could leave most of our gear there during the day to be able to “slackpack” without the weight. We carried water, some lunch, and a few layers of clothes but we were able to dump out so much of the weight. With this extra added comfort, we started on our hike for the day. We climbed up the steep gravel road and we quickly were so thankful we had dropped off our weight. We rejoined the AT at .5 miles and began our hike.
As we climbed higher the view opened and the fog lifted. Below: Docs Knob Shelter; Views from the trail; Thick overgrowth.
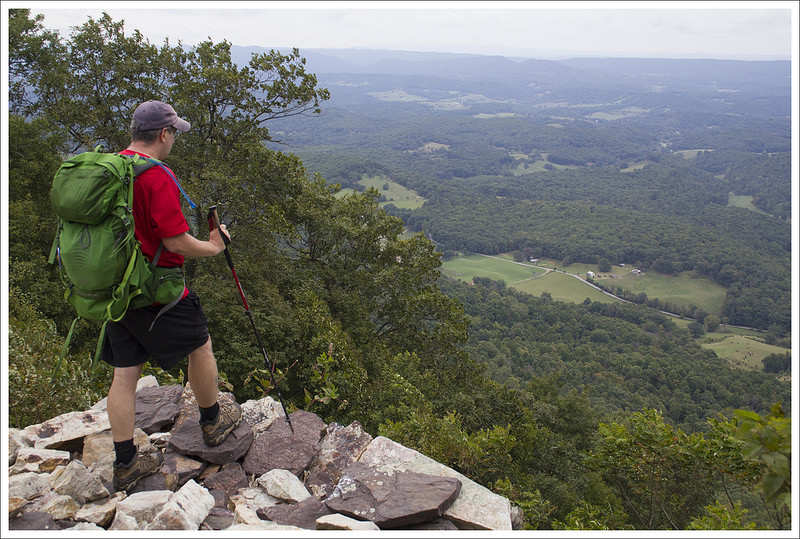
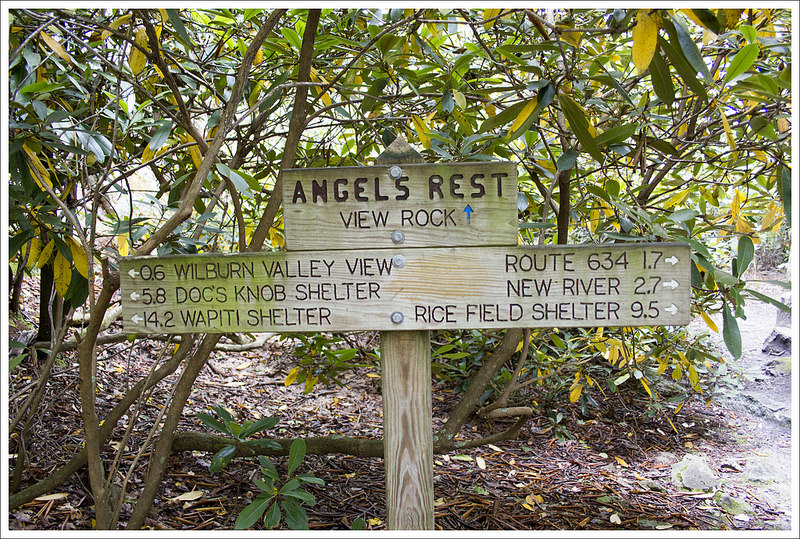
The morning started off foggy and cold and the section of AT started off uphill. At 1.9 miles, we reached a viewpoint, but it was completely socked in the fog so there was no point staying. The trail then took a descent and at 2.8 miles, we came upon Docs Knob Shelter. It was a nice shelter, but we were glad we had luxurious accommodations at Woods Hole Hostel the night before. The trail was up and down for a bit, before rising a bit to a nice viewpoint at 6.5 miles. The fog had lifted so we enjoyed nice views of the river cutting through a scenic mountain view. We stopped and ate some lunch here, but had to eat a bit away from the viewpoint since there were strong, cold winds. We pushed on as the trail became to climb very slowly and at 8.6 miles we reached another viewpoint. This was probably the nicest one in our opinion of the trip, since you had panoramic views of farmlands and mountains around you.
We had miles of easy walking along a ridge. Below: Late summer vegetation; Views from the trail; Descending to Angels Rest.
We continued the pleasant ridge walking and eventually the trail began to descend through an area that cut a path between very large rock boulders. We reached a sign that pointed to Angels Rest (a short .1 mile sidetrail) at 9.2 miles. Angels Rest is a large boulder that requires you to scale up it to get the view. We climbed up and the view is being combated by growing trees. The view in the distance is nice, but in my opinion the eyesore of looking down on a town (and correctional facility to boot) isn’t one that I particularly enjoy. I know lots of people hike up to this point from Pearisburg and return, but the better view would be if people would just continue a bit further. We climbed down disappointed this was the last view and then rejoined the trail.
Angels Rest and a view into Pearisburg. Below: New signage around Angels Rest; The rock at Angels Rest; Descending into Pearisburg.
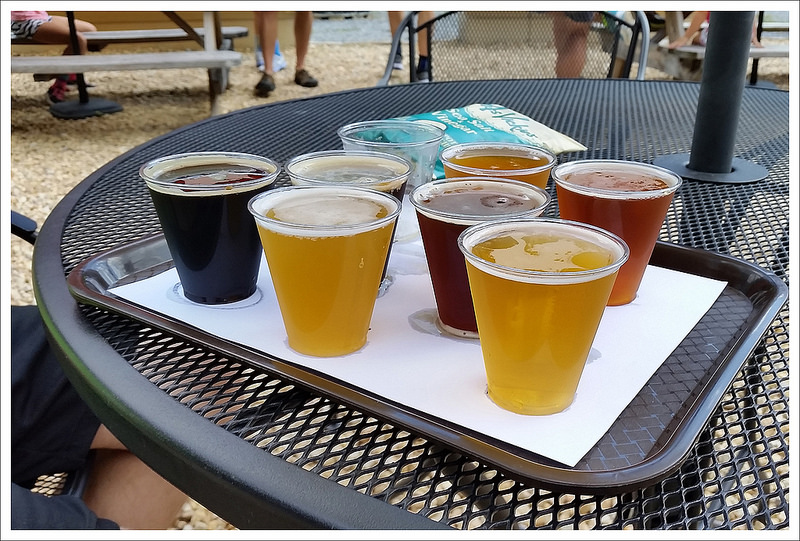
The hike down from Angels Rest was extremely steep. We made the downward trip the rest of the way fairly quickly. At 11 miles we crossed over Cross Avenue, VA 634. We then crossed over Lane Street at 11.4 miles and then made it to Narrows Road and our car at 11.8 miles. When we got back to our car, we drove back to pick up our gear at Woods Hole Hostel (and also bought a nice soup bowl crafted by the owner) and then made our way to Ballast Point for some post-hike dinner and flight of beers. It was such a great birthday celebration and we had a wonderful experience!
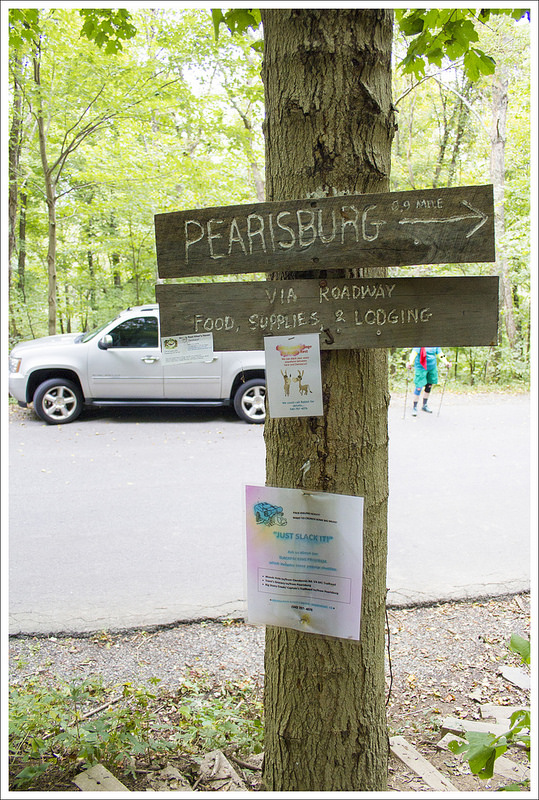
The road to Pearisburg. Below: The trail between Pearisburg and Narrows; Parking.
Trail Notes
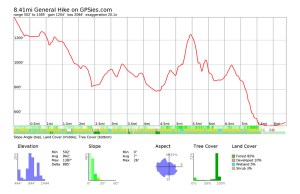
Distance – 27 miles (plus a couple extra miles to access views, shelters, and Woods Hole Hostel) (Check out the stats from Map My Hike* [Day One] [Day Two][Day Three])
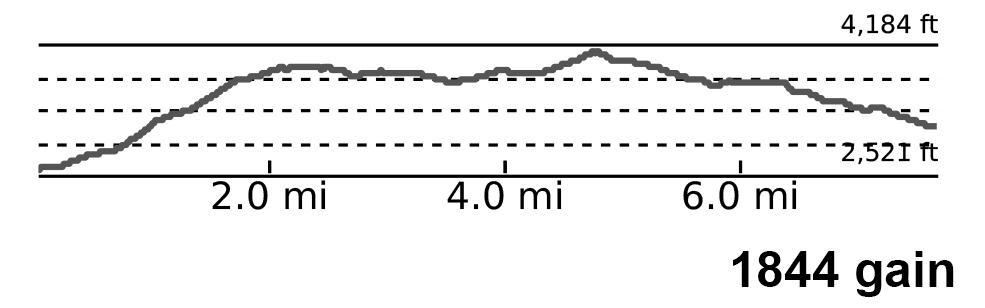
Elevation Change – 4,885 feet
Difficulty – 3.5. The second day was the toughest climbing. Overall, it wasn’t very tough, but it was 27 miles.
Trail Conditions – 3.5. Some of the trail was overgrown in parts, but overall was fairly maintained and footing was reliable through most of the hike.
Views – 4. The view leading up to Angels Rest was the best.
Streams/Waterfalls – 4. Lots of stream crossings, but the highlight was early in the hike with Dismal Falls.
Wildlife – 2. We didn’t run into many signs of wildlife on the trail, but did see an occasional deer.
Ease to Navigate – 4. Sticking to the AT, you just look for white blazes. The side trails we took were well marked.
Solitude – 4. We had most of the trail to ourselves. Expect people at Dismal Falls and Angels Rest and not much in between.
* MapMyHike is not necessarily accurate, as the GPS signal fades in and out – but it still provides some fun and interesting information.
Directions to trailhead: Coordinates to drop off car and meet shuttle: 37.3341, -80.7553 (Narrows AT Parking Lot Off road, room for quite a few cars.) Shuttle drop-off/hike start coordinates: 37.1757, -80.9083 (Kimberling Creek Suspension Bridge has a a small parking area along VA606)
This 13.7 mile stretch of Appalachian Trail is mostly a walk through ‘the green tunnel’. There isn’t any grand or memorable scenery, but as you approach Troutville, there are some pretty rolling meadows with mountain views.
Adam walks along the Appalachian Trail. Below: We had lunch and beers at the brand new east-coast Ballast Point before setting off on our hike; Amazing Trail Angel, Molly, met us for lunch and gave us a ride; Glimpses of views through the trees.
Christine Says: Day One – Blackhorse Gap to Trailside Campsite (4.2 miles)
For quite a while, we’ve had this 13.7 mile section of trail standing out as ‘unhiked’ in the almost 360 mile unbroken stretch of Appalachian Trail we’ve completed so far. The section between Black Horse Gap and Daleville doesn’t offer any great scenery, so we never felt rushed to get out there and tackle the miles. Doing it as a day hike would have required four hours of driving and a shuttle service. The logistics of hiking it seemed like a hassle, so we filed it under ‘later’.
In late June, Adam and I were driving into work together and making weekend plans. It went something like this…
Adam: What do we have planned for the weekend?
Me: Nothing. Want to hike?
Adam: What’s the weather like?
Me: Gorgeous!
Both: Hey… let’s backpack that odd section we have left to finish!
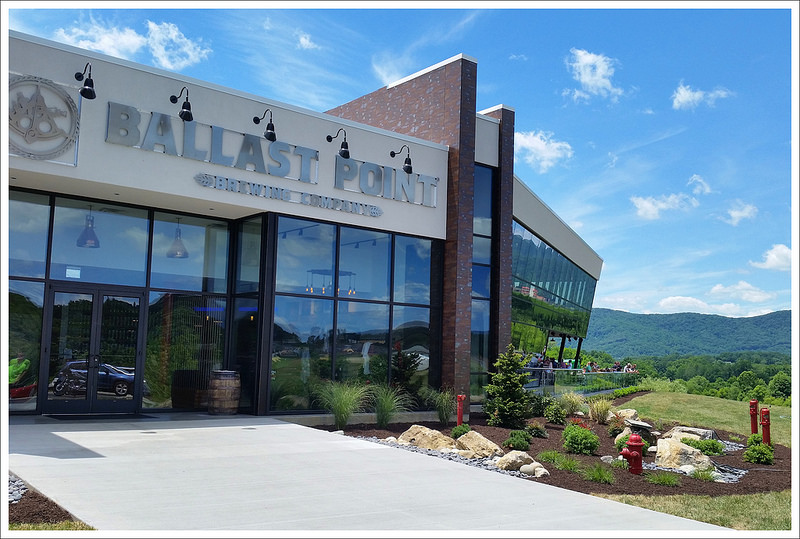
After making the decision to go, plans fell quickly into place. Our pet sitter was available. We had plenty of trail food left from our Maryland hike. Then, after a chat on Facebook, my friend Molly said she could shuttle us! The final icing on the cake was the fact that the new east coast Ballast Point brewery had just opened in Daleville. On Saturday, we met Molly at Ballast Point and had lunch before hitting the trail. People may go to the Ballast Point for the beer, but they’ll walk away remembering the great food. I had the best kale-quinoa-avocado chicken salad. I still daydream about it a month later.
After lunch, we left our car at Valley Cleaners in Daleville and Molly drove us to our start point at Black Horse Gap. I’ve been online friends with Molly for a while, but this was our first in-person meeting. She was just like I imagined she would be – friendly, enthusiastic, outdoorsy, and all-around awesome! I love all the people I’ve met through the Appalachian Trail community! We said our good-byes at the trailhead. Adam and I headed south, descending gradually but steadily.
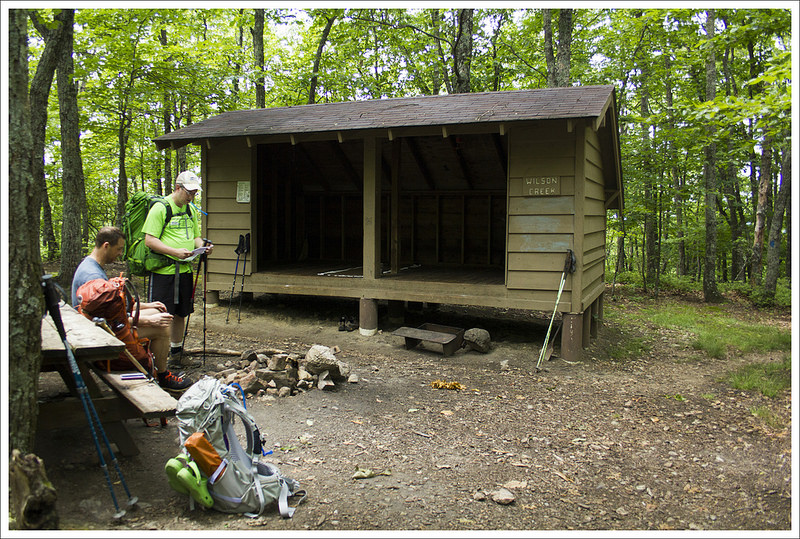
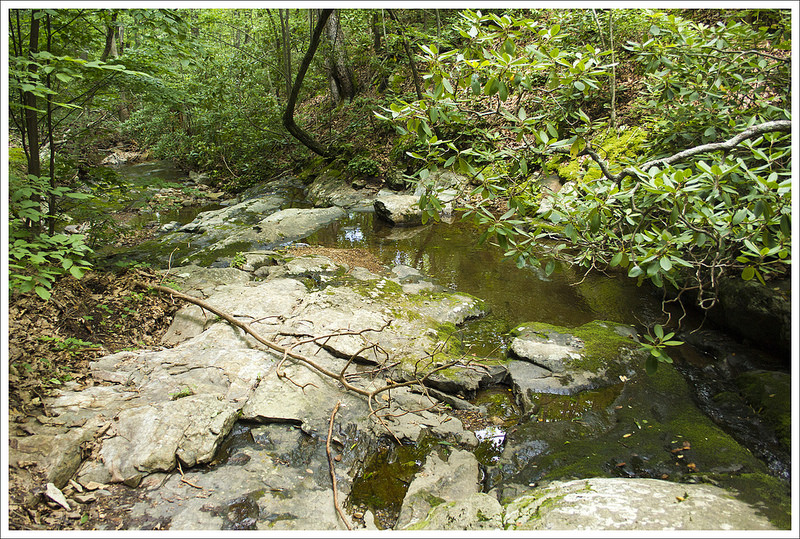
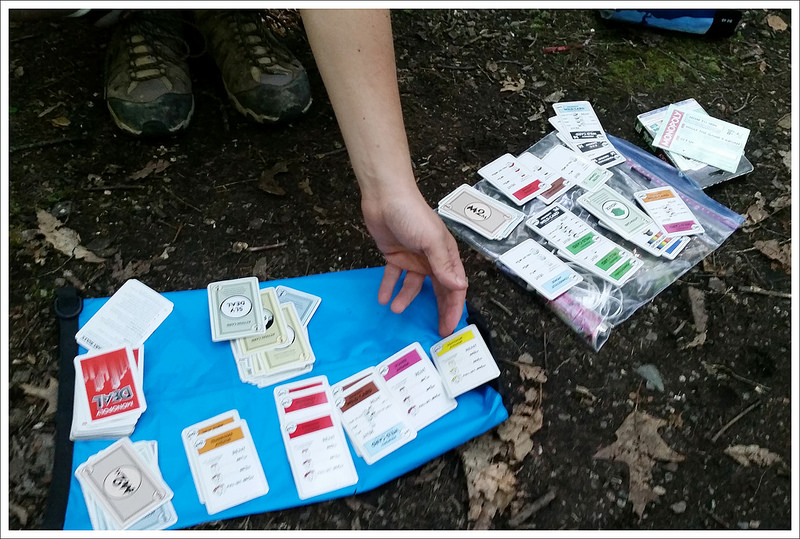
We reached Wilson Creek shelter really quickly. It was too early to stop and make camp, so we decided to push on and find a trailside campsite. Below: Wilson Creek; We found a nice campsite along a small, unnamed stream; Cards at camp.
The trail was really narrow and built into the shoulder of the mountainside. In 2.4 miles, we reached Wilson Creek shelter. It was only 2:00, but there were already a few hikers at the shelter, settled in for the night. We asked a couple northbounders if they’d passed any nice trailside campsites in their last few miles. Everyone said they remembered sites, but not specifically how far away they might be. Adam and I decided to continue hiking and gamble on finding a place to camp somewhere in the next couple miles.
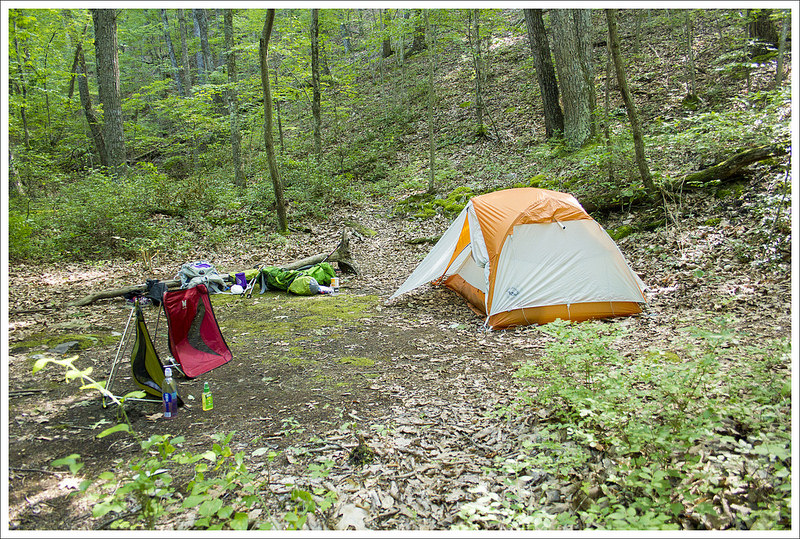
After the shelter we decended another half mile down to Wilson Creek. There was a campsite, but it was literally right on the trail, so we kept hiking. After crossing Wilson Creek, we had a bit of uphill for about a mile. It wasn’t tough uphill, but it was still tiring in the mid-afternoon heat and humidity. At 4.2 miles, we reached an unnamed stream marked in our AWOL guidebook. There was an established campsite a couple hundred feet off the trail. It was the perfect site for the night – flat and close to water.
We set up camp, collected water, and spent the afternoon playing cards. We cooked dinner and spent the evening talking and reading. Before it got too dark, we set off to find a perfect tree for our bear hang. it turned out to be the one thing our otherwise perfect site was lacking. We did the best we could with a branch that was a little bit low and flimsy. Sometimes you just have to settle for the best possible option and hope that determined bears stay away from your campsite.
We got into the tent around 8:30, just as the woods were getting dark. It was a warm and sticky night, so we left the vent and the rainfly wide open. We both left our sleeping bags home on this trip and used lightweight quilts instead. It was a good decision and we both stayed warm (maybe a bit too warm) during the night. We eventually drifted off to the sound of distant owls and whippoorwills.
Adam Says: Day Two – Trailside Campsite to Daleville (9.5 miles)
The next morning, we ate breakfast, packed up camp, and were back on the trail in under an hour. We had a very steep but short section of uphill to climb to start things off. We were breathing deep, but we quickly reached the apex of the hill just about .2 miles in. The trail descended just as steeply and we arrived at Curry Creek at .8 miles. At the creek, there was a Curry Creek Trail to the west of the trail, but stay on the white-blazed AT. From the reliable water source of Curry Creek, we began to climb again up another steep section of trail. At the 1.9 mile mark, we reached an area where the trail then began to descend again. The trail descended for about a mile and then rose up again with a steep climb to reach the junction with the Fullhardt Knob Shelter at 4.4 miles. We took the side trail for .1 miles to reach the shelter. We stopped and ate a snack here, knowing that most of the climbing was behind us.
The Appalachian Trail climbed the mountain on a series of curves and switchbacks. Below: We saw a lot of views through the trees; Crossing Curry Creek; A whitetail deer watching us from the woods.
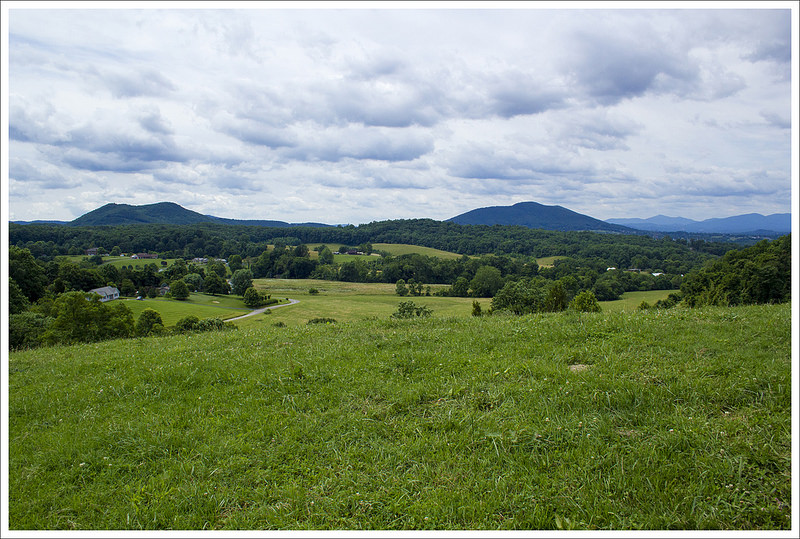
While we were at the shelter, we were joined by a couple that was working on section hiking the AT and we enjoyed talking about some of the things we had both seen along sections of the trail. At the shelter, there is a privy and a cistern behind the shelter to get water (water should still be treated before drinking). We were good on water, so after relaxing a few minutes, we pushed on. We rejoined the AT at 4.6 miles and began our big descent. The trail had a few switchbacks on the way down and it was rather steep in sections. We came across a sign stating that the trail soon passes through private lands and to stay on the trail. At 6.5 miles, we passed through a fence, beginning the start of some of these private lands. We had a short bump to climb before we reached VA 652/Mountain Pass Road at 6.8 miles. This bump however was the prettiest part of the trail as you ascend over a large field and have nice mountain and farmland views all around you from the top. A few tenths of a mile later, we went through another fence stile. We then crossed over another road, over train tracks and then US 11. At 7.6 miles, we passed underneath I-81 by walking on VA 779 underneath the interstate.
There were a couple moderate climbs in the morning.
The sun was hot and beating down on us. We were desperately hoping to find some shade, but most of the hike from here on is out in the open. We were at least glad we got an early start. The trail ascended to the left after the overpass and led us through a grassy swath of land that cut through some of the brushy area around it. Around the 9.5 mile area, we finally arrived at US 220 and Daleville, Va. We crossed the road to get back to our car that we had left at Valley Cleaners. When we got back to the car, it was right around noon. Whenever we go through Daleville around lunch, we always stop at Three Li’l Pigs barbecue. We were hot, tired, and hungry so it was a great place to cool down and eat some amazing food. Our waitress could see that we were hikers and we talked to her about what we were doing. While we chatted, she brought us an endless stream of Diet Dr. Pepper refills. She said she was hoping to do some AT hiking, but hadn’t decided if she wanted to do a section or the entire thing. As we continued to stuff our faces, she came over with a bowl of banana pudding. She told us that AT hikers get a complimentary serving of banana pudding. While I think this is more intended for thru-hikers, we didn’t turn it down!
The open meadows near Troutville were beautiful. Below: Posing at the road crossing; Open views from the meadow’s high point; Crossing the train tracks.
We then decided to bookend the trip with another visit to Ballast Point. We got to sample a few beers before we had started, but since they had over 20 on tap, we decided to get sample pours of a couple of others. We then made our way back home. We were very glad to finish this section of elusive trail.
The home stretch into Daleville. Below: The I-81 underpass; More open meadows before Daleville; Piney woods.
Trail Notes
Distance – 13.7 miles
Elevation Change – 2810 ft.
Difficulty – 3. This was a pretty easy backpacking route. The switchbacks early on day two were pretty long and steep, but it was the only challenging part of the hike.
Trail Conditions – 4. The trail was in typical Appalachian Trail shape for this part of Virginia – well maintained and nicely graded.
Views – 2. The rolling meadows near Troutville were lovely.
Streams/Waterfalls – 0. This is a quite dry stretch of trail. There is a small, low-flow spring at Bobblets Gap and a seasonal stream at Bearwallow Gap. There is NO WATER SOURCE at the Cove Mountain Shelter, so plan ahead.
Wildlife – 3. We saw several deer. At night we heard a barred owl and several distant whippoorwills.
Ease to Navigate – 4. The trail is well marked and easy to follow. There are road crossings, but the white blazes are easy to follow in most places.
Solitude – 3. We actually saw very few people on this hike considering the beautiful weather and its proximity to the parkway.
* MapMyHike is not necessarily accurate, as the GPS signal fades in and out – but it still provides some fun and interesting information.
Directions to trailhead: We parked our end point car at Valley Cleaners in Daleville. It’s along Route 220 where the Appalachian Trail crosses. Please ask the cleaners for permission to park here and park where they tell you to. Parking here is a courtesy provided to hikers that can be rescinded at any time if people take advantage. Coordinates for the dry cleaners are: 37.393538, -79.906817. From there, we took a shuttle to Black Horse Gap on the Blue Ridge Parkway. Coordinates for the hike’s start point are: 37.424611, -79.757202. Head right and start on the trail.
This 20.5 mile Appalachian Trail segment crosses the most photographed spot on the entire trail – McAfee Knob. Even though the view from McAfee is fantastic, there are great views all along the section. In fact, we think the view from Tinker Cliffs rivals the majesty of McAfee.
Last fall, I told Adam I wanted to backpack McAfee Knob and Tinker Cliffs for my birthday. We planned our mileage, picked our meals, and hired a shuttle driver. When the Friday of our hike arrived, it was forecast to be blazing hot. The area was also experiencing a prolonged drought. The water sources along this stretch are typically reliable and we thought being on a high mountain ridge would cool things off a bit, so we loaded up and headed out.
On the way to our start point at Catawba, our shuttle driver (Homer Witcher – we’ve used him before and he’s a fantastic part of the Appalachian Trail community) told us that just a few days earlier, a woman and her daughter were crushed under a falling tree at one of the campsites along the route. He had assisted EMTs with the rescue operation. Fortunately, the daughter escaped with minor injuries and the mother recovered after a hospital stay. Scary!
The climb was a little steep and rocky in the beginning. Below: Parking on Route 311; Johns Spring Shelter; Catawba Mountain Shelter.
Homer dropped us off at Catawba parking around 9:30 a.m. Despite it being early(ish) on a Friday, there were already numerous cars in the lot. This is an extremely popular area for hiking and the lot frequently fills and overflows by mid-morning, especially on the weekends. There are strict regulations for where you can park, and cars are frequently towed from this area. Take these rules seriously! You can read more about parking issues in the Roanoke Times article.
The northbound Appalachian Trail starts on the other side of route 311. We crossed and immediately began an ascent over dry, dusty terrain. Just a mile into the hike, we passed Johns Spring Shelter. It’s a typical AT shelter and has space for six people. There are a few tent sites and a privy nearby. The water source near this shelter is usually small, but it was bone dry on the day we hiked.
In another mile, we passed the Catawba Mountain Shelter. It’s a similar set-up to Johns Spring in terms of space. There are also several nice campsites with metal fire pits just north of this shelter. After passing this shelter, there is a steady 1.7 mile climb to the view at McAfee Knob. On the way to the top, you’ll cross a fire road. Stay on the white-blazed Appalachian Trail. Near the top, you’ll pass through an impressive jumble of truck to cabin sized boulders. The overlook is a couple hundred feet to the left of the trail and is marked by a small sign.
The view from McAfee Knob is gorgeous! Below: Before you reach the knob you pass under powerlines; Rock formations before McAfee Knob; It’s a tradition to sit on the edge of the overhanging rock.
Views from the overlook are majestic and expansive. The long ridge on the the right carries the Appalachian Trail over to Tinker Cliffs. On a clear day, you’ll see the cliffs shimmering in the distance. When you’re at McAfee, don’t miss the opportunity to sit on the ledge with your feet dangling into the abyss. It’s a tradition and isn’t as scary as it looks.
After leaving the viewpoint, you’ll descend steeply into a maze of giant boulders. There are narrow openings in the maze, making it a fun place to explore. A half mile later, there is an open meadow under powerlines and a nice view of the distant mountains. The descent continues for about 1.2 miles. At the bottom, you’ll reach the Pig Farm Campsite and shortly after that – Campbell Shelter. The shelter is on an elevated platform and there is a privy, picnic table, and bear locker at the site. The water source, located about 150 yards to the left of the shelter, was also dry!
After leaving McAfee, you descend through a maze of boulders. There are many interesting rock formations on this section. Below: An eastern fence lizard; Campbell Shelter; The weeds were hip to shoulder high along the trail; A nice shady spot to rest; We got one distant look at the reservoir on the first day; After descending into this grassy area, you begin the tough climb to Tinker Cliffs.
After the shelter, the trail follows rolling terrain for 3.1 miles until you reach a grassy opening at Brickeys Gap. There is a trail to the left, but you’ll stay on the white-blazed Appalachian Trail and begin a steep uphill climb toward Tinker Cliffs. The ascent goes on for 1.8 miles. On this particular day, the climb was especially rough. We were both tired from the heat and running low on water.
Navigating the trail as it heads up Tinker Cliffs is a bit tricky. Look carefully for white blazes and arrows. There will be openings in the rocks that look like trail, but they’re not. Most of these openings are blocked by branches dragged across the ground, but if you’re not paying attention you might head the wrong way. When we finally made it to the top of the cliffs, the views made all the effort worthwhile. We had the entire overlook all to ourselves! I thought the views from Tinker Cliffs were even better than McAfee Knob. I took off my shoes and socks and let myself bake for a few minutes in the late afternoon sun. It was probably still in the low 90s – such a hot day for late September!
It was clear that many people had camped at the top of Tinker Cliffs, camping is strictly prohibited on top Tinker Cliffs. We made our way along the open cliffside for about half a mile before descending back into the trees.
The view from Tinker Cliffs was as nice as McAfee. Below: On the climb up you get a nice meadow view; The trail is a little tricky so pay attention to signage and look for logs blocking the wrong way; It was still around 90 degrees when we got to the top of Tinker (notice the beet red face); Adam walks along the cliffside; Descending beneath Tinker Cliffs; the final mile into camp was easy terrain.
The trail passes beneath the cliffs and then rambles downhill for about a mile until it reaches Scorched Earth Gap and the junction with the Andy Layne Trail. From there, we had an easy .6 mile stroll to our campsite at Lamberts Meadow Shelter. When we arrived, there was one other section hiker already there. We picked a campsite across the ‘stream’ from the shelter. Note, I put stream in quotes because when we visited it was nothing but a series of shallow muddy pools.
We got the tent set up and changed into camp clothes. It took us a full hour to filter four liters of water! First, we had to scoop water into our bucket. It was full of mud, pebbles, mosquito larvae, and algae, so we had to filter that water through a bandanna into our Sawyer bags. The we squeezed the water through the Sawyer into our Camelbaks. It was the color of weak tea, so I chose to treat it with Aquamira on top of the filtering. It was nasty!
We made it to camp at Lamberts Meadow Shelter! Below: We set up camp on the opposite side of the stream; The lousy, dank water source.
We set aside a couple cups of the water to make dinner, leaving us each with just under two liters of water for the next day. It took so long to deal with water, that it was almost dark when we headed up to the shelter to cook. By then, a couple other section hikers had arrived at the shelter. They were former military and had done a lot of the trail. We chatted about gear and favorite spots along the AT. They told us a tale about finding a body near Tinker Cliffs on a hike fifteen years earlier. They had become lost on the trail headed up the cliffs and found a body from the 1940s or 50s in the woods under the cliffs. It was a crazy story!
After dinner, we headed back down to the tent. It was still too hot to make a fire and we were both pretty tired, so we turned in early. It was a stuffy, fitful night in the tent. It’s hard to get comfortable when you’re sweaty and stuck to your sleeping pad. Still… it had been a beautiful day with lots of amazing scenery.
Day Two (9.5 miles)…
We woke up at daybreak and knew it was going to be a hot day. The temperature was already in the mid-70s. We didn’t have much water to drink or cook with, so we opted to eat some Little Debbie Peanut Butter Pies for breakfast. They are good calorie bombs for some fast energy and didn’t require any water. This was definitely the scariest water source we have had to use, so conserving water until we found something else was our plan. We packed up camp quickly and then made our way back on the Appalachian Trail, heading north to make our way back to our car.
In .3 miles, we came across the Lamberts Meadow Campsite, which also had no water in the stream next to the campsite. We saw the fallen tree that had smashed through the picnic table. Homer had told us that if that picnic table hadn’t been there, it would have likely fallen directly on the tent. He was planning in another week to build and bring another table down there to replace the one that had been smashed. Since there isn’t great access to this area except for a long hike, I can’t imagine hauling a big table through the woods like this, especially at Homer’s age (in his 70’s). Homer is the true definition of a trail angel and has helped so many AT thru-hikers and others along the way.
We set off early. The morning was already hot and humid. Below: This huge tree fell and injured two hikers the weekend before we hiked; A beautiful farmland view on day two; There was not a lot of climbing on day two, but the terrain was rockier.
From the campsite, we continued on the AT. At 2.5 miles, we reached a junction with a blue-blazed trail that led to a nice viewpoint to the west. The trail began to slope downwards and at 4.3 miles we reached Angels Gap. The heat continued to increase and we were already extremely thirsty. We drank when we felt we needed to, but we both were already running low on water. The sun was beating down since the area was more open. At 4.7 miles, we first heard the buzzing of a powerline and soon it came into view. At 5.5 miles, we reached Hay Rock. We skipped climbing up the rock, since we were already getting good views of Carvins Cove Reservoir all along the trail. Many people do Hay Rock as a day hike coming from Daleville.
The trail stayed relatively flat, but was rocky and exposed us to the sun for a bit. We crossed over an open field with tiny little seed pods that were blowing in the hot wind. It looked like snow that was coming down, but the temperature told us otherwise. We had just watched Stranger Things on Netflix and it reminded us of something supernatural or alien that was happening in this area. We came to another powerline at 6.7 miles, but this one gave us wonderful views. We didn’t stay long since we wanted to get out of the direct sun. Christine had run out of water, but I had saved a bit for her to have.
Christine enjoys a view on day two. Below: Adam approaches Hay Rock. There’s a nice view of the reservoir from the top, but we skipped climbing it; More rocky terrain; Carvins Cove reservoir.
Shortly after we left these views from the power lines, the trail finally ducked back into the woods and began a descent. We ran into a Ridge Runner on the trail that was talking to hikers and seeing if they were alright with the heat and lack of water. Ridge Runners are paid to monitor the trail and assist hikers. I would have loved some water, but we knew we could make it just a few more miles. We told him about the lack of water on the trail, so hopefully they came across others that were in bigger need. We crossed powerlines again at 7.5 miles, 8.3 miles, and 8.9 miles. Shortly after this last powerline, we crossed over some railroad tracks and a bridge. It was only a few more tenths of a mile and at 9.5 miles we made it back to our car exhausted and thirsty.
A beautiful view of the Carvins Cove Reservoir. Below: A lot of day two was unshaded; We passed through a meadow with seed pods flying everywhere in the breeze – it was like being in a snowglobe; The descent was welcome as the day got hotter; We crossed railroad tracks; A pretty section of pines; We met this blacksnake.
When we got back to our car, our first order of business was to get something to drink. We hopped in our car and jumped into a gas station across the street and downed some Gatorades in record time. We decided we wanted to eat some barbecue and drink some beer to celebrate. Since we had made an early start to our day, it was just a little after noon when we got off the trail. We made our way to Flying Mouse Brewery (this brewery closed at the end of 2018) and our Maps app on our phones said that it would be closed when we arrived. We thought we would give it a shot anyway in the off chance it was open. As we were driving up, I saw signs for Virginia Momentum and saw runners. Virginia Momentum is a company started by a friend of mine that holds races across Virginia that helps support local charities. When we got to Flying Mouse Brewery, they were hosting a brewery-to-brewery race there, so it was open. We felt that someone was looking out for us and went inside to get a flight of beer samples and enjoyed talking to our friends that were participating. While running these long races is impressive, we did earn some props by just having come off the trail carrying some heavy weight. After some tasty beverages, we made our way to Three Li’l Pigs BBQ, which always has amazing food and is perfect for a post-hike stop.
This backpacking trip had some other significance to us as well. While it was Christine’s birthday, McAfee Knob was one of the first posts that started Virginia Trail Guide. We’ve learned a lot along the way about how to tell our story of the trails. If you’re looking for one of Virginia’s most famous hikes to serve as a backpacking route, try this one out. McAfee Knob is the most photographed spot on the entire Appalachian Trail. We enjoyed taking the ceremonial pictures at the top. We even mimicked the A Walk in the Woods movie poster shot of Robert Redford and Nick Nolte to show how the scale was wrong for that poster. While we had hiked McAfee Knob before, this was our first trip to Tinker Cliffs and we both thought this was something not to be missed. This route makes up two-thirds of Virginia’s Triple Crown (with the other third being nearby Dragon’s Tooth) and it is definitely worth the hype. Just go on a cooler day and pray for better water sources.
You have to finish with a cold beverage!
Trail Notes
Distance – 20.5 miles Check out the stats from Map My Hike [Day 1] [Day 2]*
Elevation Change – 3400 ft.
Difficulty – 4. Day one is the tougher day with about 2500 feet of climbing. Day two is significantly easier with just over 900 feet of elevation gain.
Trail Conditions – 4. The trail was in great shape and beautifully maintained by the RATC (Roanoke Appalachian Trail Club).
Views – 5. The views here are iconic, magnificent, and they just keep coming!
Streams/Waterfalls – 1. There are small springs and streams adequate for a water source for cooking/filtering, but there was nothing really scenic.
Wildlife – 4. A yearling bear hung out between Lamberts Meadow shelter and Lamberts Meadow campsite for much of the evening. We also saw fence lizards and deer in a couple places.
Ease to Navigate – 4. The trail is well-marked and easy to follow.
Solitude – 1. This is one of the most popular stretches of trail in the area, so expect to see many people – especially if you go in fair weather. Campsites can be crowded and parking is an issue on the Catawba side. Note: Parking regulations were recently changed. Do not park along the road, or you will be towed.
Special regulations for this area:
Maximum group size, day hikes: 25
Maximum group size, backpacking/camping: 10
No alcohol
Dogs must be kept on leash at all times
No camping or campfires outside of seven designated areas (north of Va 624/Newport Rd, the only legal campsites are Johns Spring Shelter, Catawba Shelter and campsites, Pig Farm campsite, Campbell Shelter and Lambert’s Meadow Shelter and campsites)
No camping or campfires on McAfee Knob or Tinker Cliffs
* MapMyHike is not necessarily accurate, as the GPS signal fades in and out – but it still provides some fun and interesting information.
Directions to trailhead: GPS coordinates for the parking area to start this hike are 37.380125, -80.089694. You will park at the McAfee Knob trailhead parking area on Rt. 311 in Catawba. You must park in the lot. Roadside parking is prohibited and cars will be towed.