Dolly Sods – Rohrbaugh Plains to Red Creek (WV)

This 10 mile (round-trip) hike takes you past some of Dolly Sods most beautiful scenery.  The dense rhododendron thickets, unblazed trails, and rugged terrain will have you feeling like you’re truly in the wild.  Camping along Red Creek is popular and can be crowded with weekend backpackers, but it’s still one of West Virginia’s most spectacular places.

View the Full Album of Photos From This Hike

Beautiful Red Creek
Beautiful Red Creek was our destination for this short overnighter. Below: Our excellent hiking crew (Maia the dog not included in the photo!);  Making our way onto the Rohrbaugh Plains Trail; The trail is only lightly maintained so you have to climb blowdowns and navigate without the help of blazes.

Our Hiking Crew Start of the Rohrbaugh Plains Trai Rohrbaugh Plains Trail

Day One…

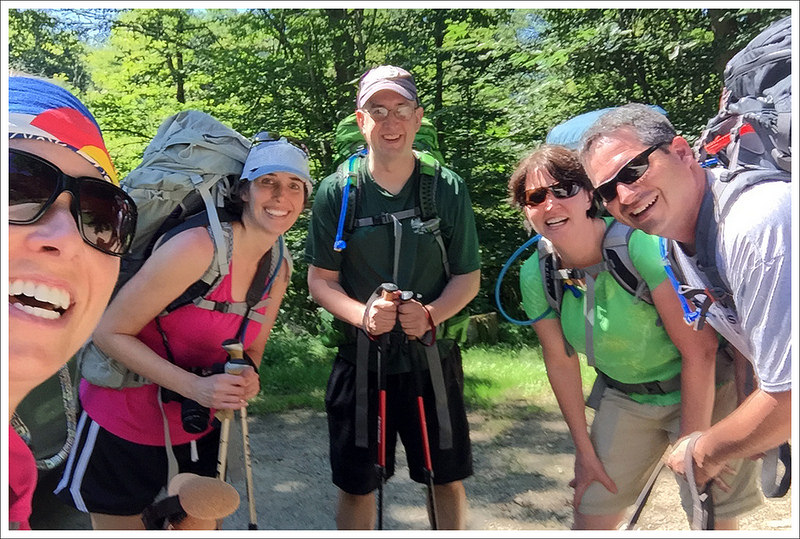
Back in early June, we were at happy hour with our friends Christy and Brian.  Over beers, we cooked up a vague plan for a weekend backpacking trip in late July.  In the weeks to come, we added our mutual friend, Kris, into the mix and settled on a route.  The plan was to take two cars, and do a trans-navigation of Dolly Sods starting at the picnic area and ending at Bear Rocks.  It was about a 16 mile route with tons of camping options along Red Creek.

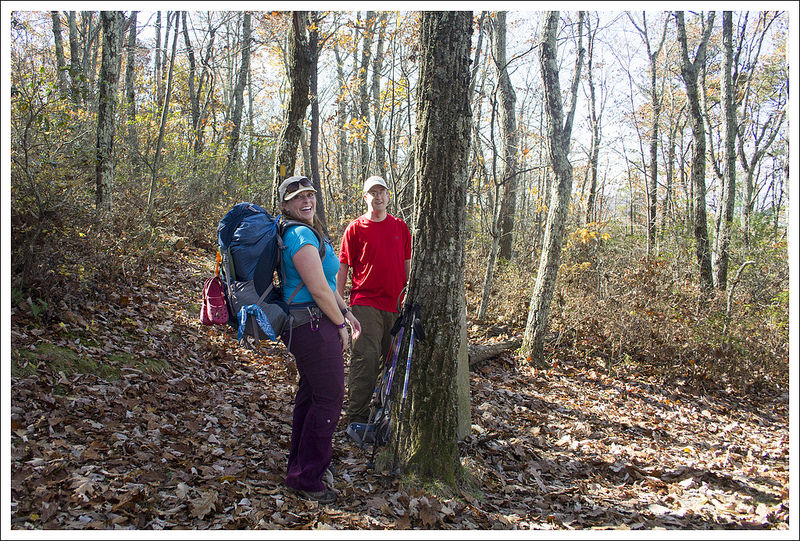
As it turned out, a heat wave settled over the mid-Atlantic that weekend.  It was the hottest, most humid weekend of the summer.  We still thought we could make the full 16 miles, so we met at Bear Rocks and shuttled in our car to the start point at the Dolly Sods Picnic area.  On the ride, we learned that you really can fit five adults, five big backpacks, and one German Shepherd in a Subaru Forester. It was like a clown car!

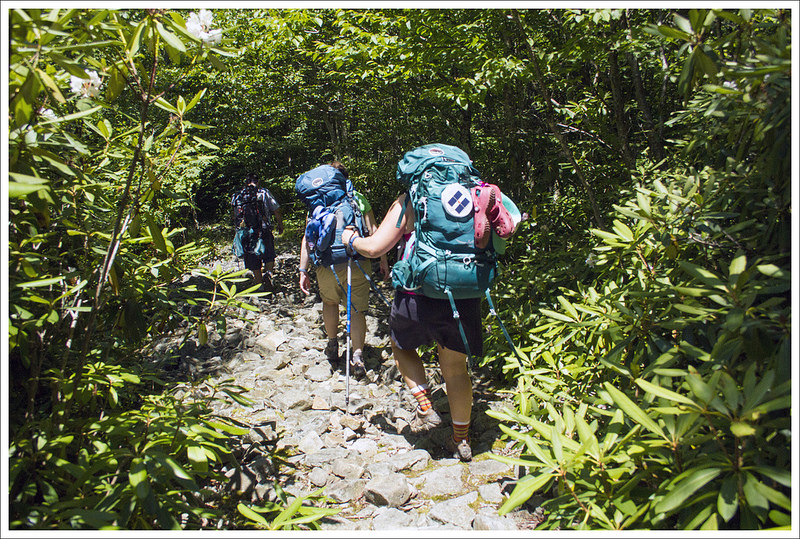
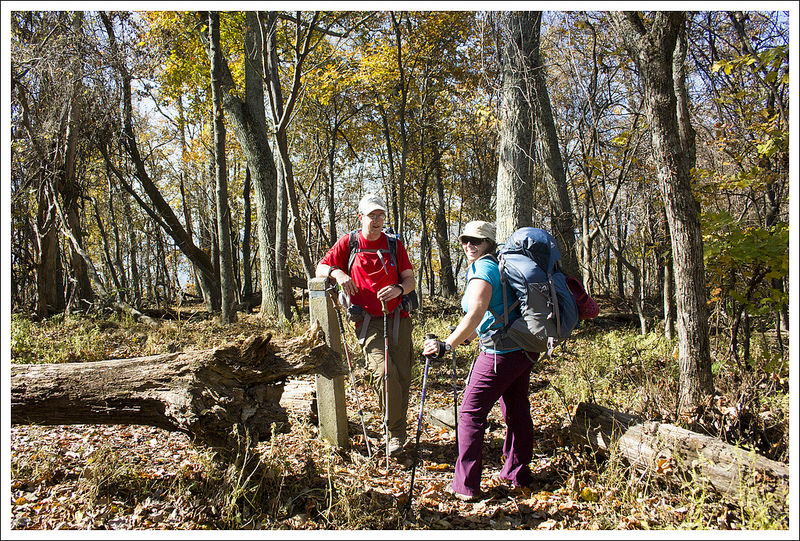
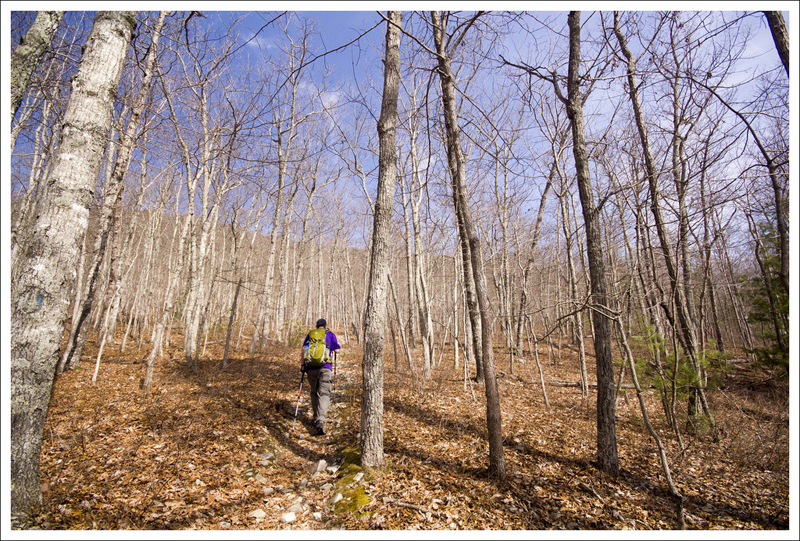
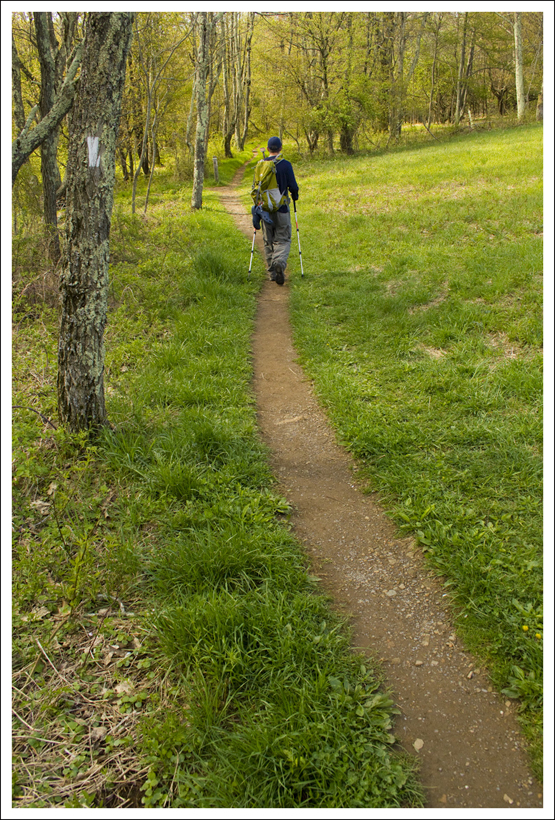
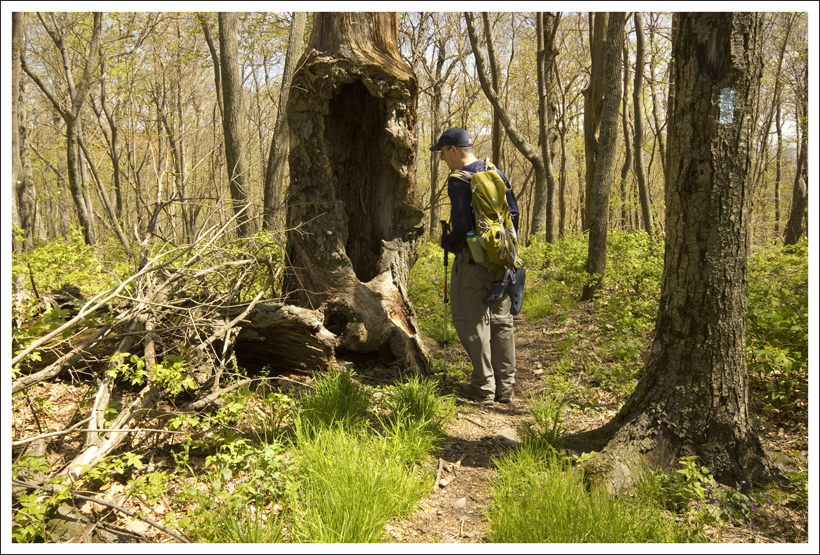
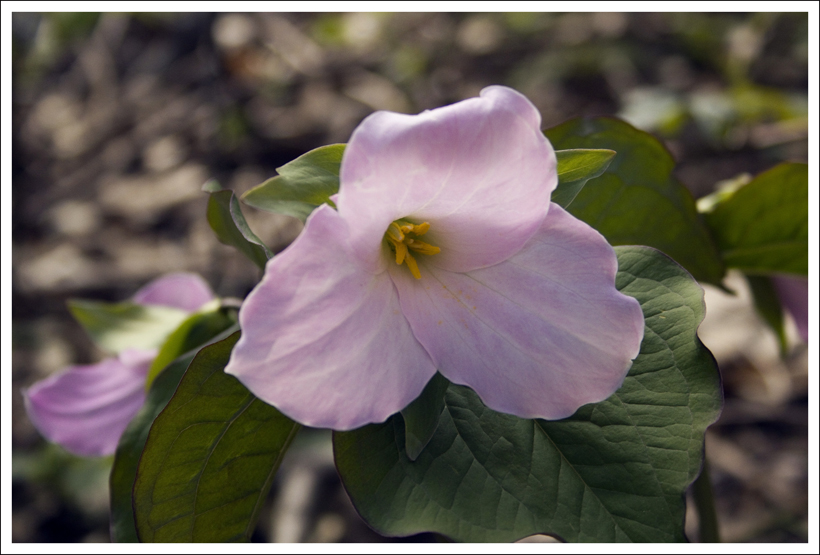
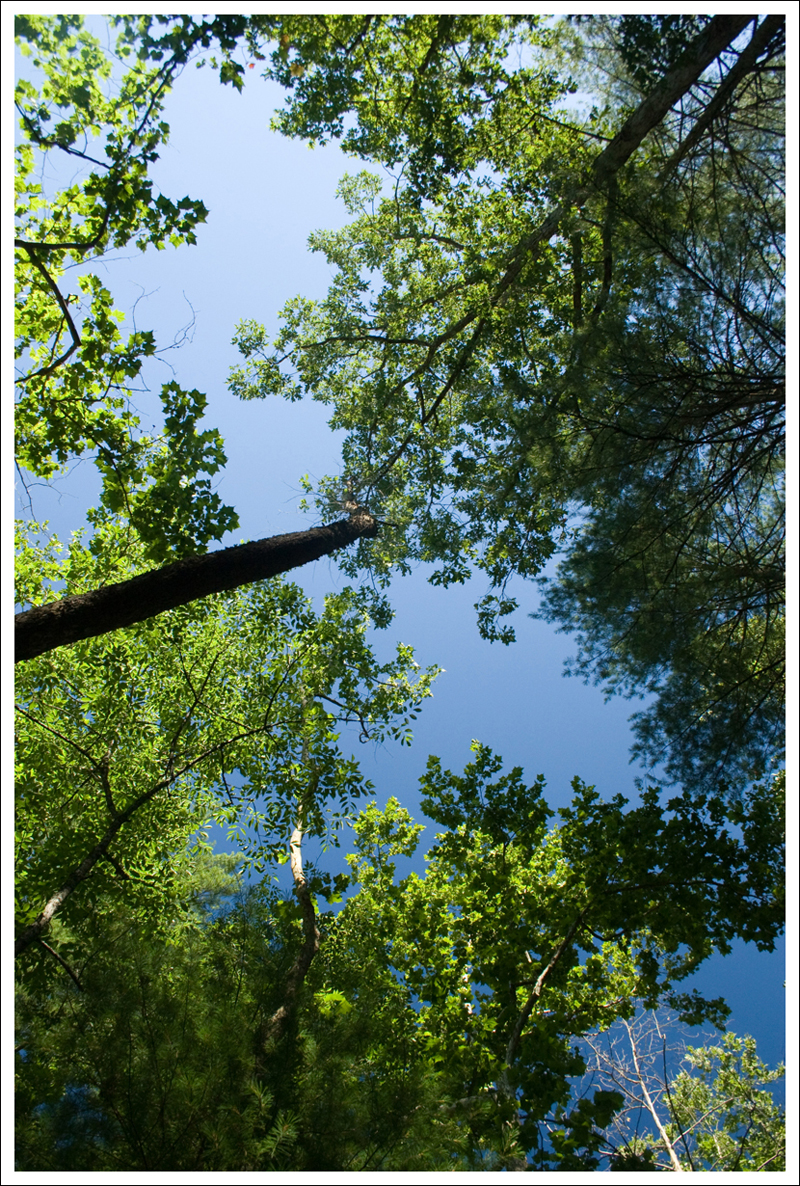
We parked at a small pullout near the picnic area, and picked up the Rohrbaugh Plains Trail on the opposite side of the road.  The trail meandered through dense rhododendron forest.  A lot of the rhododendron was Rosebay near the peak of its bloom.  So pretty! The air was thick, still, and heavy with humidity. It felt like walking through the jungle.  At one point, Kris said, “I feel like we might see monkeys!’

Meadows on the Rohrbaugh Trail
Walking through meadows. Below: Maia enjoys a shady pool under the rhododendrons; Walking across Rohrbaugh Cliffs; A nice spot for lunch!

Maia Enjoys a Shady Pool Arriving at Rohrbaugh Cliffs Lunch Stop

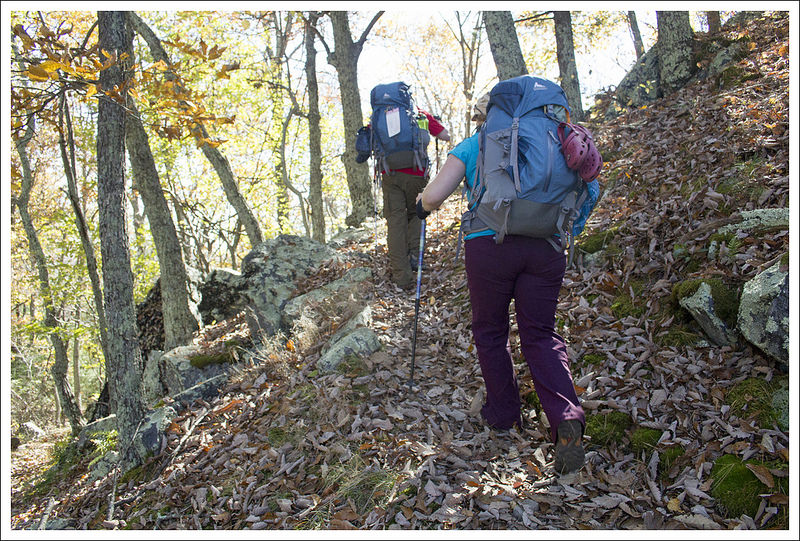
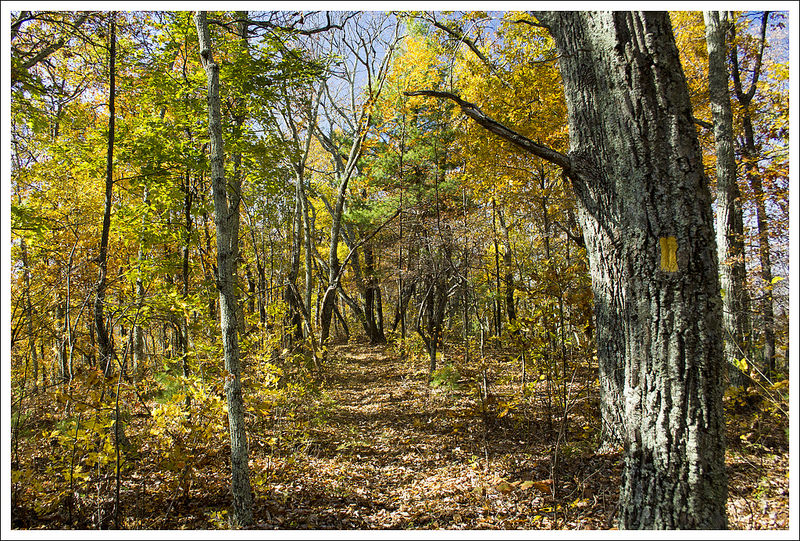
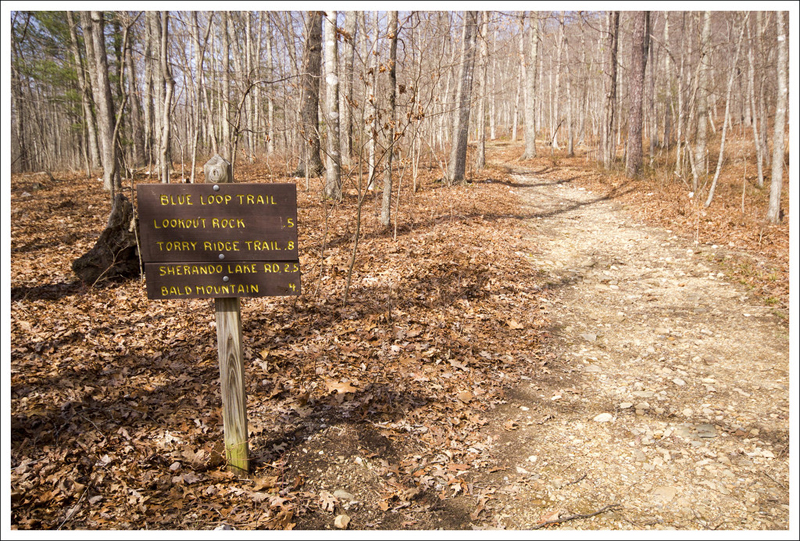
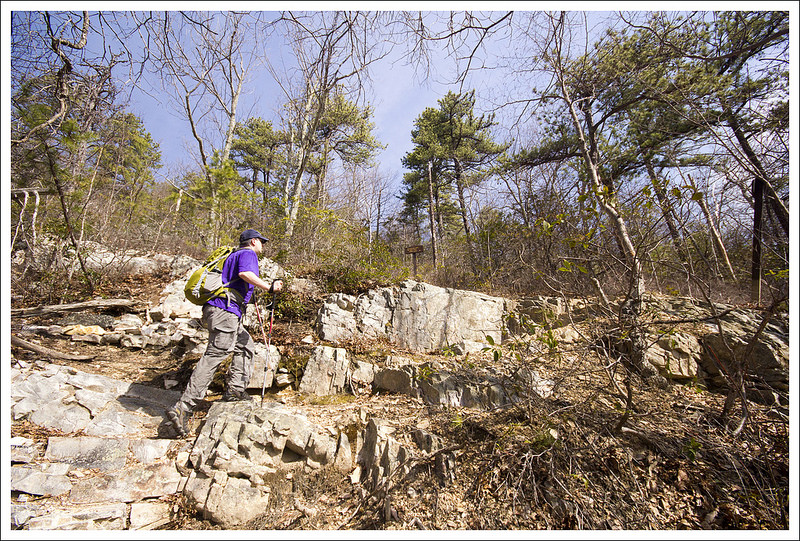
The trails in Dolly Sods are well-traveled but very lightly maintained.  There are no blazes.  The only wayfinding signs are at trail junctions.  There are lots of rocks, blowdowns, and mud pits to navigate. Even though the area is complete wilderness, the high traffic through the area keeps the trails apparent and fairly easy to follow.

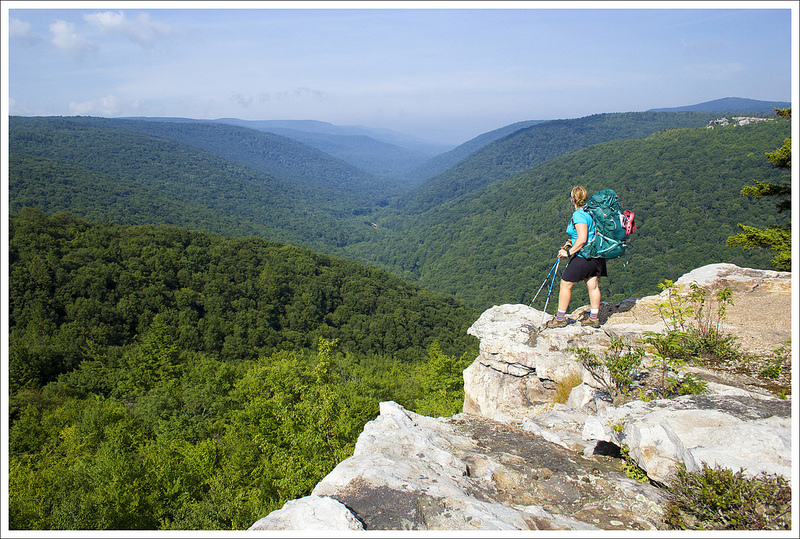
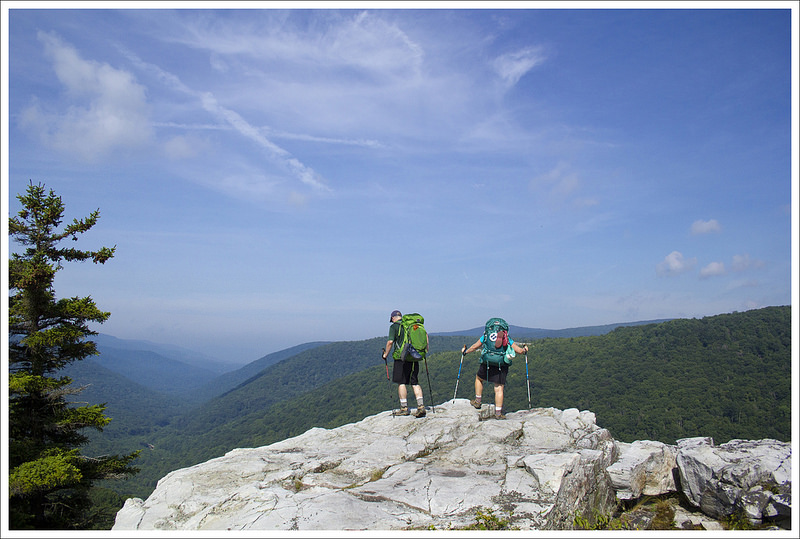
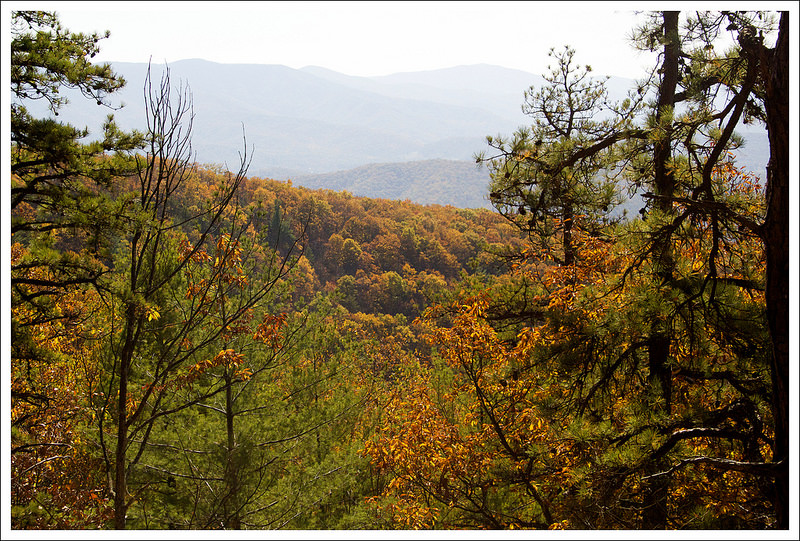
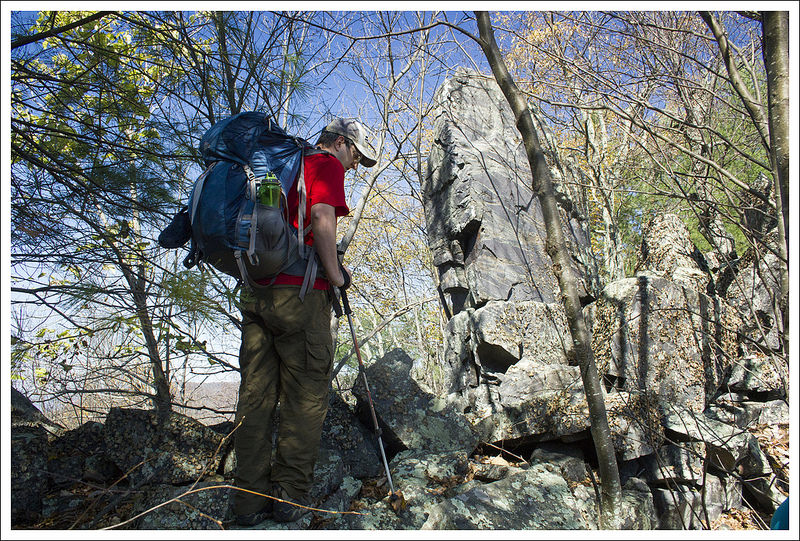
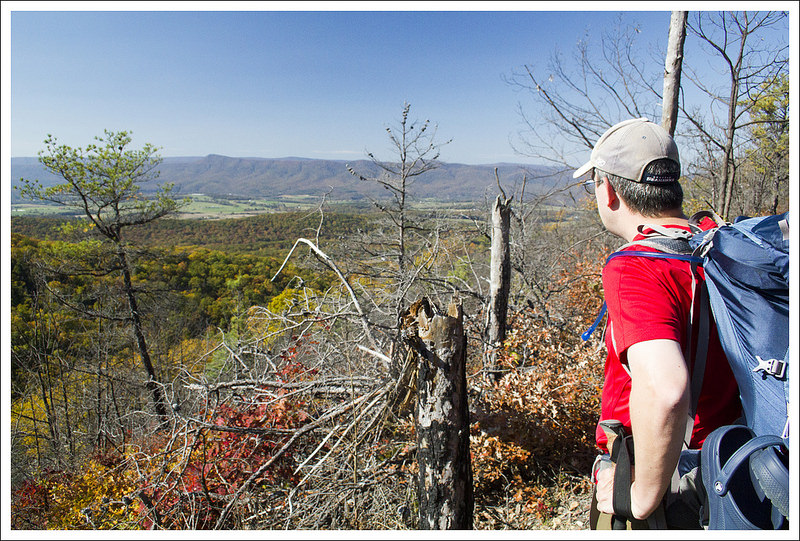
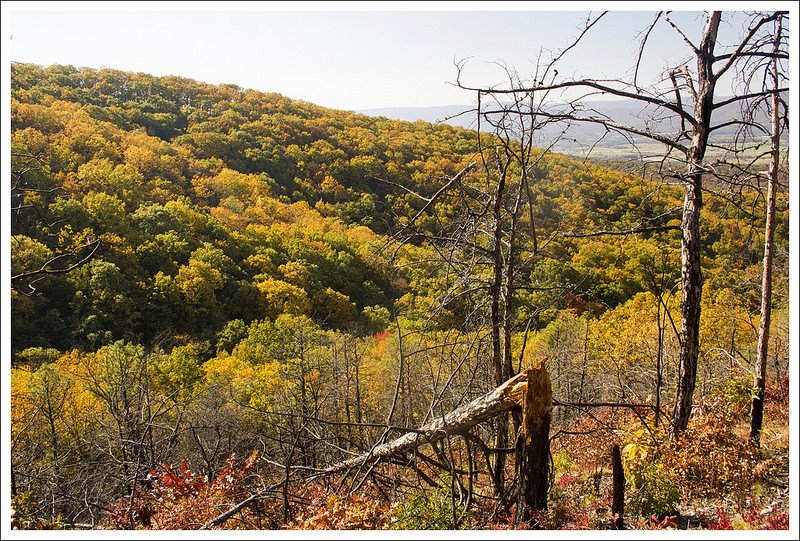
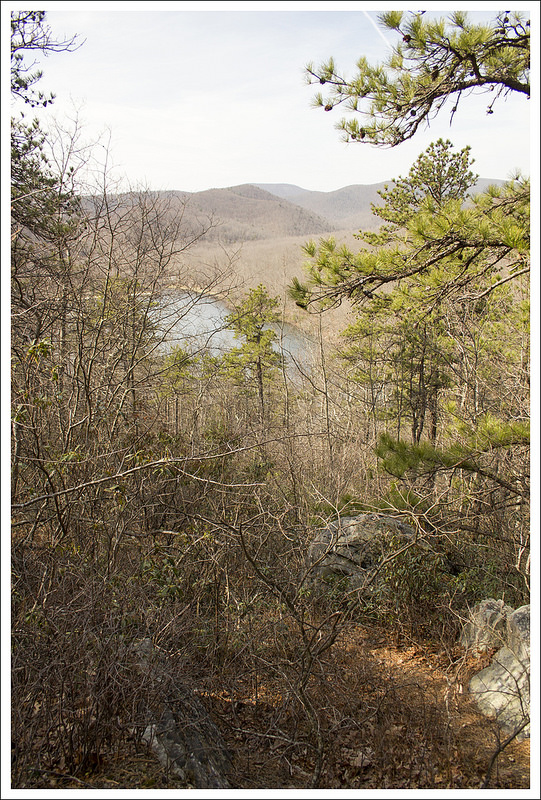
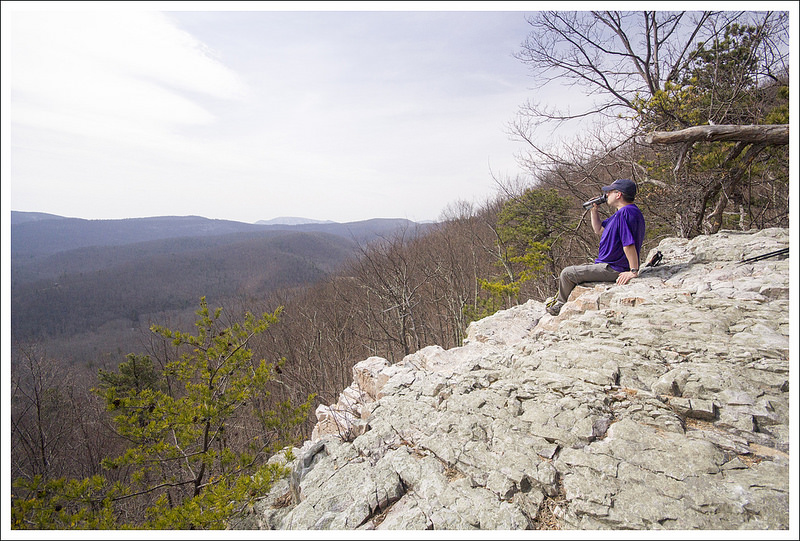
We walked the Rohrbaugh Plains trail for about 2.5 miles before reaching the spectacular viewpoint off Rohrbaugh Cliffs.  The area is near and dear to my heart because it was one of the first places I ever camped in the backcountry. The cliffs offer great views across the valley to the Lions Head (another popular rocky outcropping in Dolly Sods) and down into the Red Creek basin.  Just past the cliffs, there is a patch of open forest with space for many tents.  It’s still one of the most beautiful campsites I’ve ever had the pleasure of staying at.

We decided to take a lunch break at the cliffs.  At first, the breeze across the open terrain felt nice.  Maybe the heat wasn’t so bad?  But after a few minutes of sitting in the direct sun, we were all pretty hot.  I could feel my shoulders starting to burn.  After lunch, we packed up and continued another .6 mile down the Rohrbaugh Plains Trail.  At 3.1 miles, we passed the junction with the Wildlife Trail.  We stayed to the left, continuing on the Rohrbaugh Plains trail.

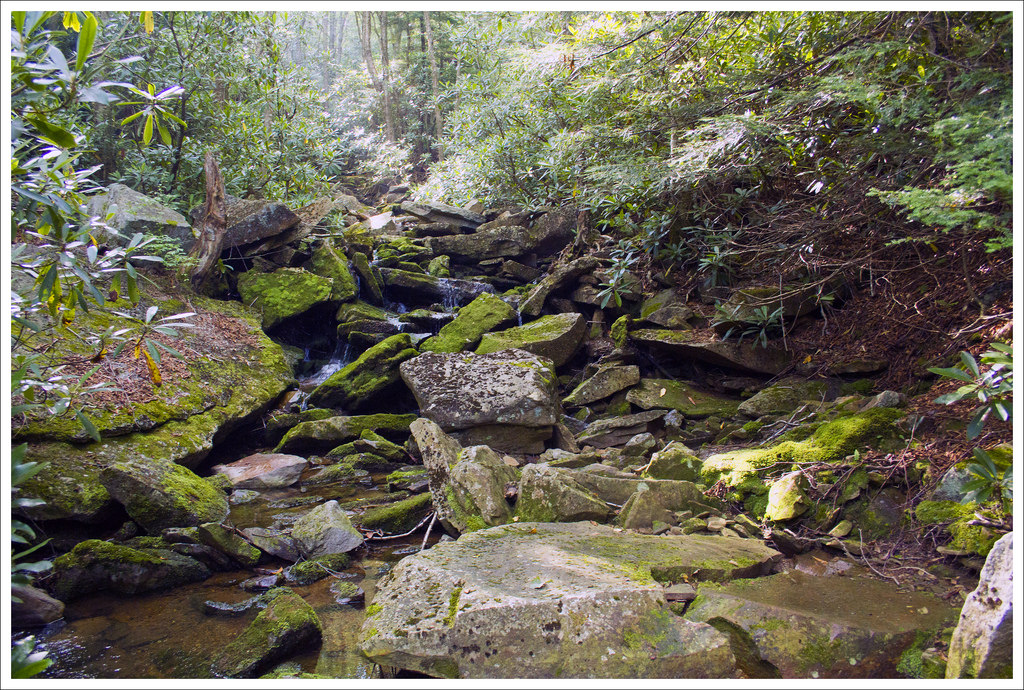
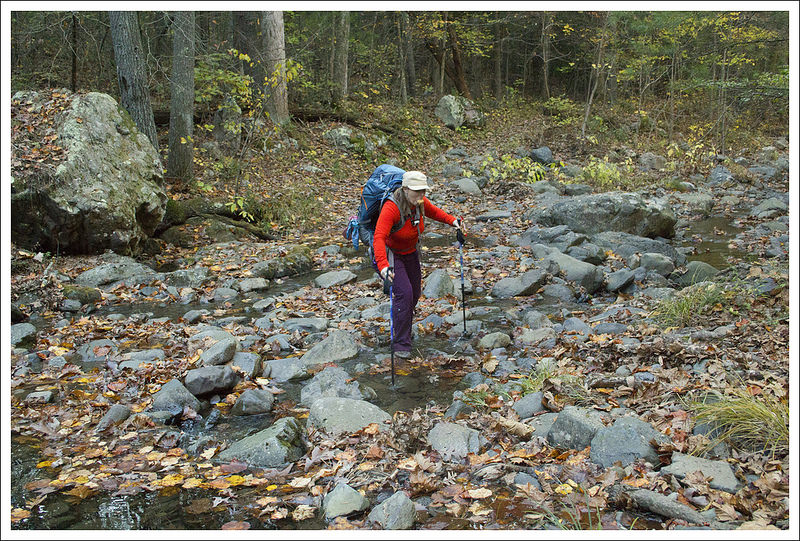
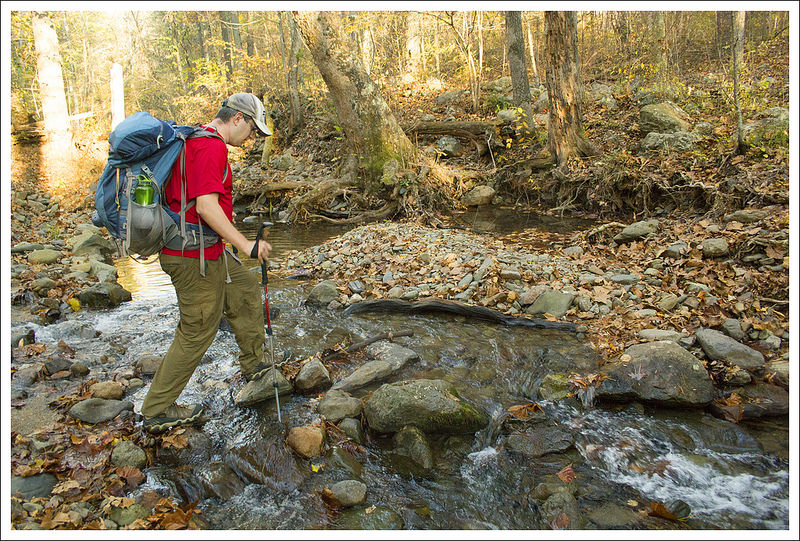
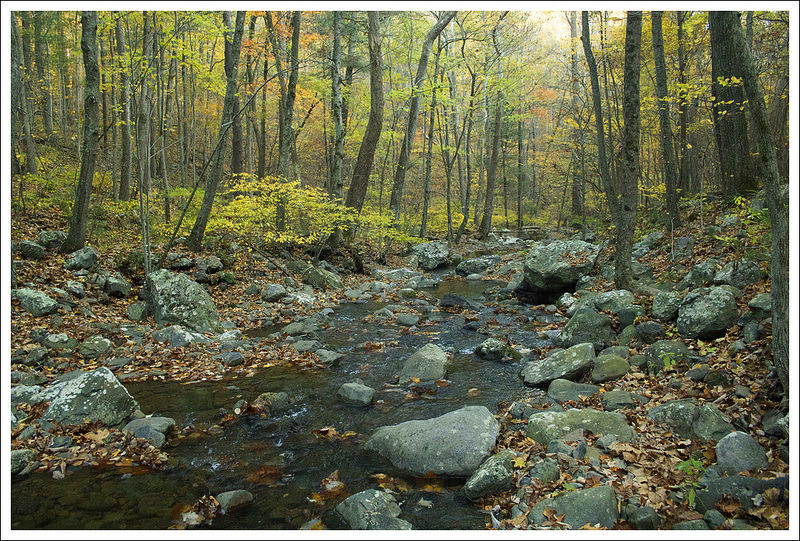
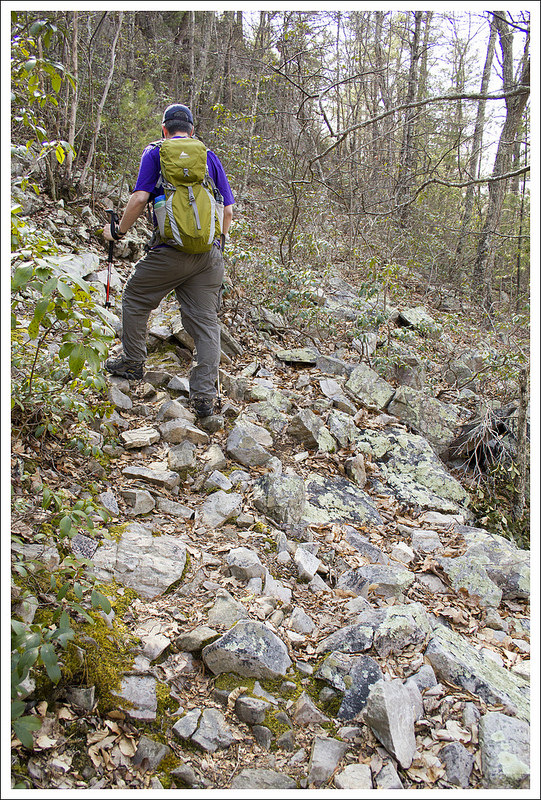
We passed a small (mostly dry) waterfall and crossed over some extremely rocky footing. At 3.5 miles the Rohrbaugh Trail meets the Fisher Spring Run Trail.  We followed the Fisher Spring Trail to the left, beginning to descend for 1.2 miles.  At first the descent is smooth a gradual, but it becomes steeper and follows a couple switchbacks down to a rocky crossing of Fisher Spring Run.

Setting Up Camp
We set up camp at a large site along Red Creek. Below: Most of the trails in Dolly Sods are rocky; Crossing Fisher Springs Run before arriving at camp; Our campsite had a private swimming hole nearby.

Rocky Trail Crossing Fisher Spring Run Our Private Swimming Hole

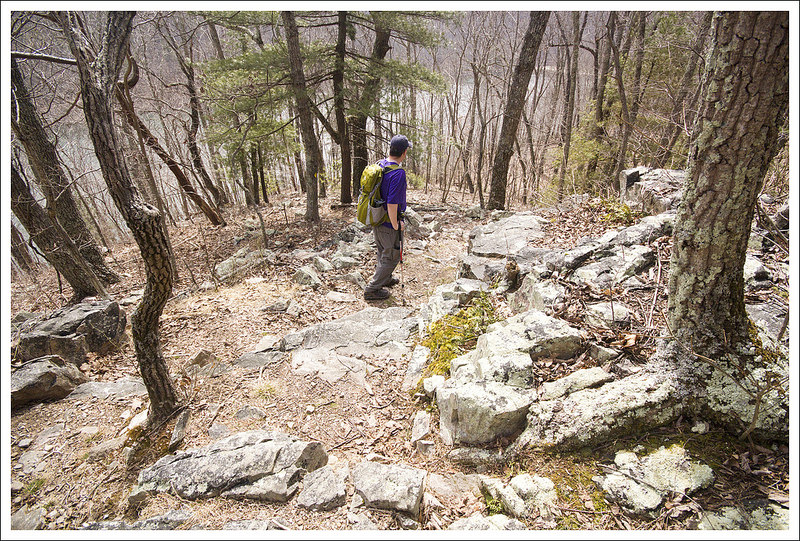
After the crossing , the trail follows the stream on high ground.  There are several nice campsites at the bottom of extremely steep spur trails.  A few sections of this trail are quite eroded, leaving the trail narrow and precipitous.  Take your time and watch your footing, especially if you’re carrying a heavy pack.

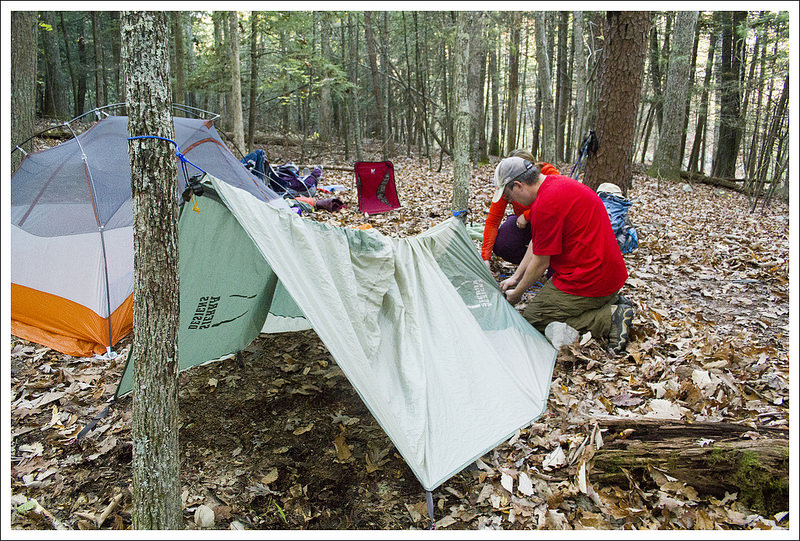
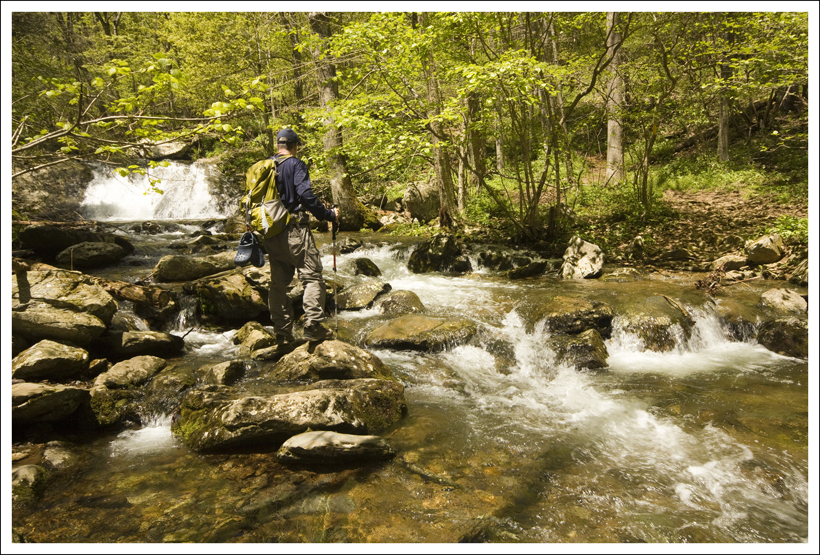
At 4.7 miles the Fisher Spring Run Trail ends at the Red Creek Trail.  We took a right, following the trail down toward Red Creek.  In about three tenths of a mile, we passed the first of many stellar campsites.  At the very first one, I thought to myself, “That’s a really sweet campsite.  I wouldn’t mind sleeping here!’

Our group decided to take a break and discuss camping plans and how much of the route we wanted to cover on day one of our trip.  We all agreed that we were pretty hot, the campsite was ideal, and Red Creek looked really inviting.  We figured on day two, we could either hike 11 miles or hike out the way we came in and make our trip a short 10-mile out-and-back.

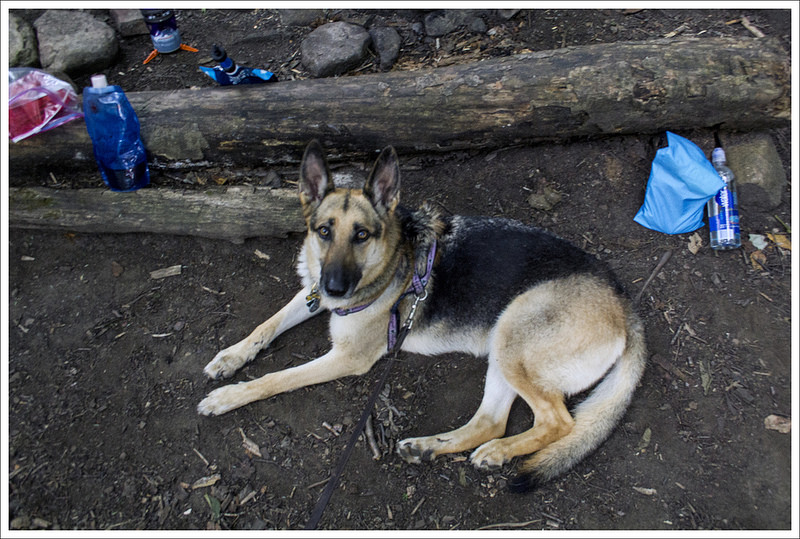
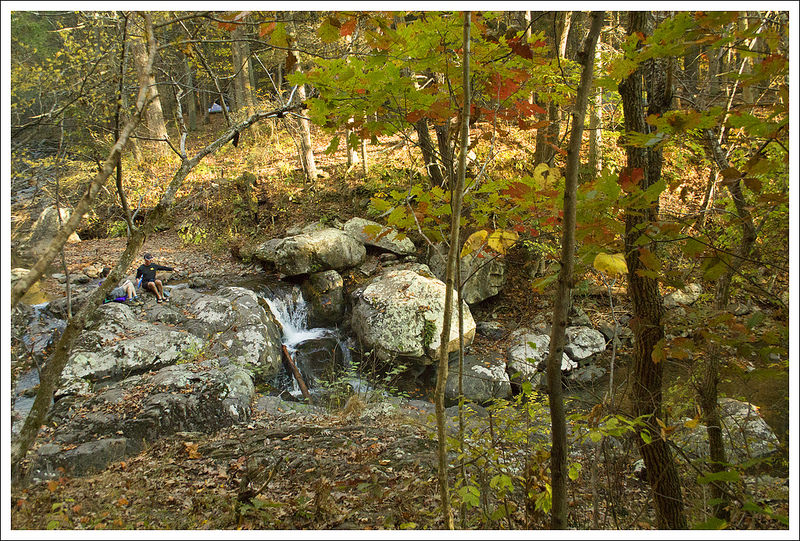
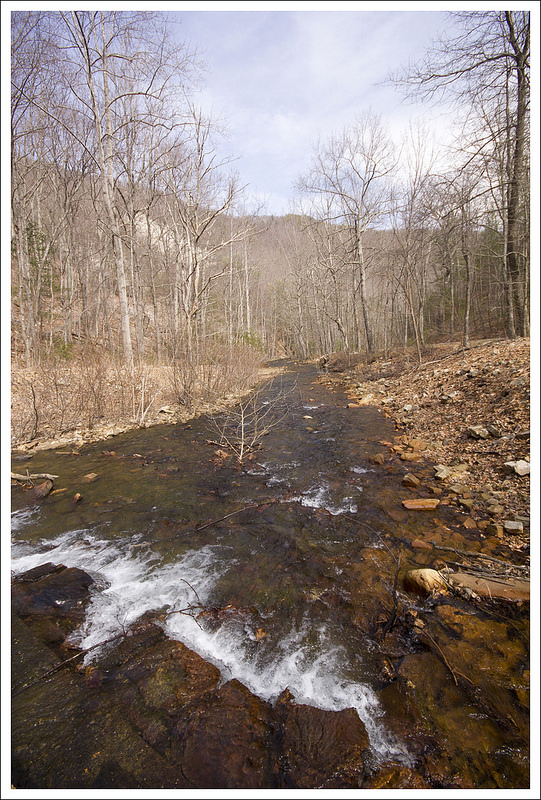
Adam and I explored several more campsites along the stream before agreeing that the very first site was the prettiest and most private.  There was easily space for four tents.  The ground was flat and clear.  We had easy access to water.  We even had a large fire pit with a stone couch someone had constructed. We all unpacked and set up camp. Maia, our friends’ German Shepherd, supervised the operations.  She was on her first backpacking trip ever, and she took to it like a pro!

Red Creek
Red Creek is a beautiful place to camp and swim.  Below:  Fun in the water and fun at camp!

Swimming in Red Creek Swimming in Red Creek Swimming in Red Creek
Swimming in Red Creek Enjoying Red Creek red creek 18

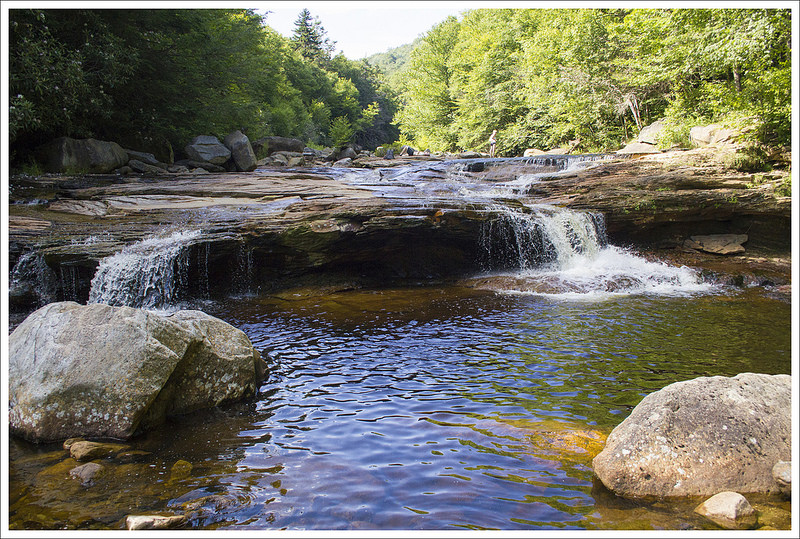
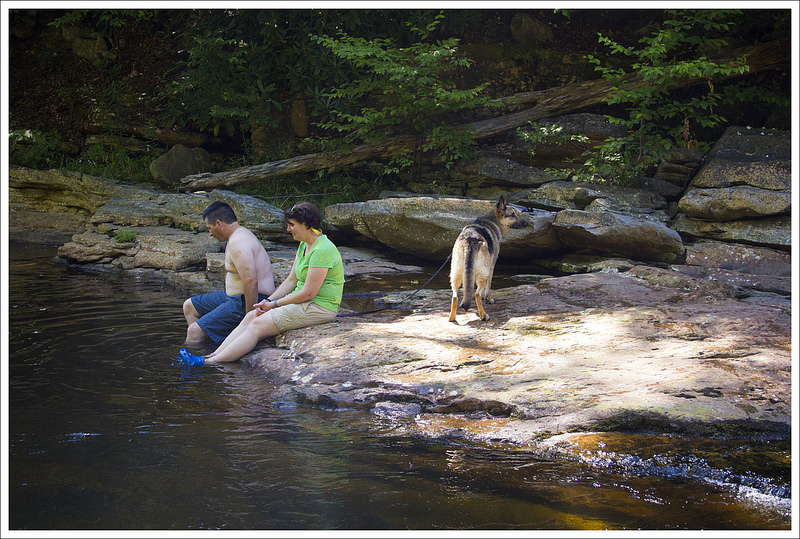
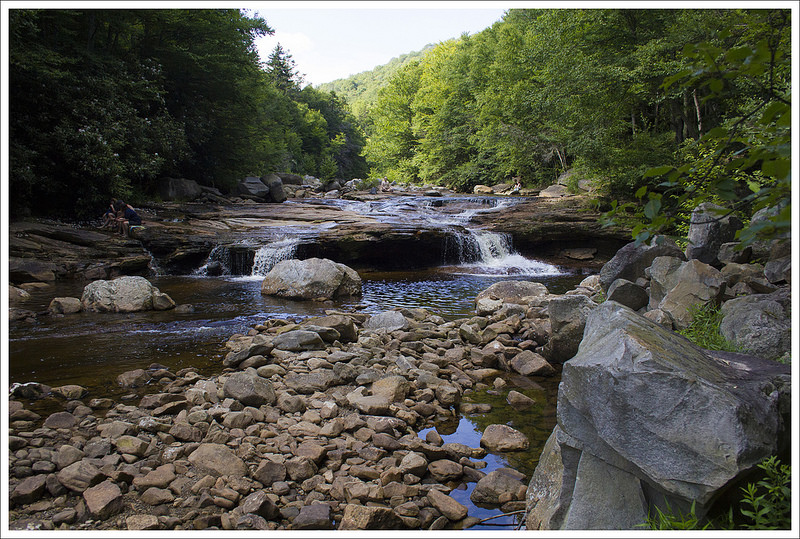
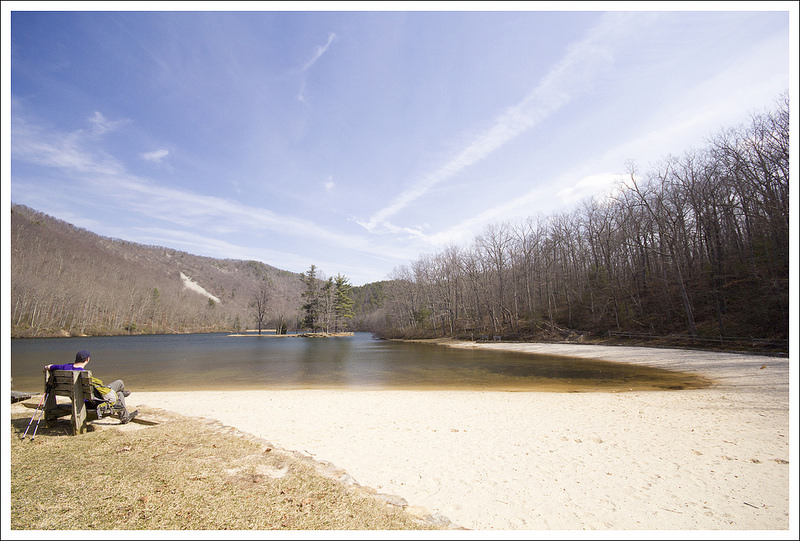
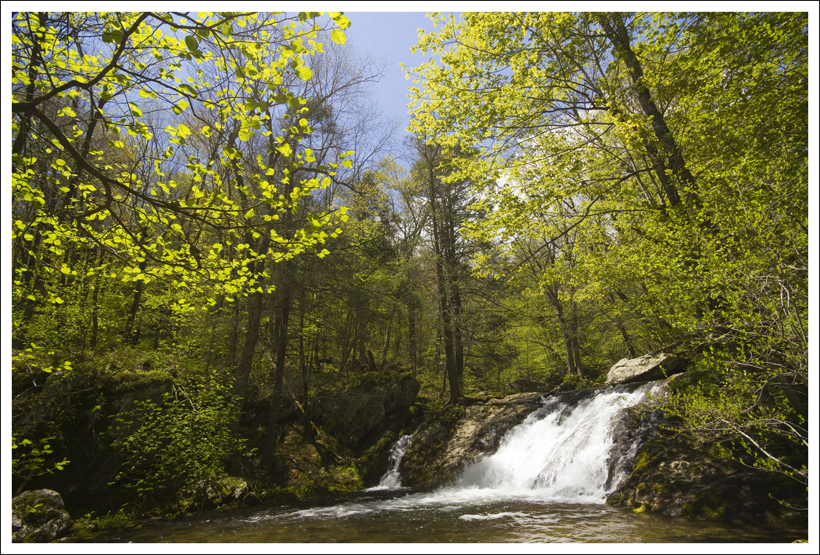
It was only around 2:30, so most of us spent the entire afternoon swimming and playing in Red Creek. The water was so cold and refreshing. The small rapids and waterfalls felt like hydrotherapy for our hot, tired muscles. Adam opted to restock everyone’s water and read a book at camp, but even he enjoyed splashing in the cold water near camp.

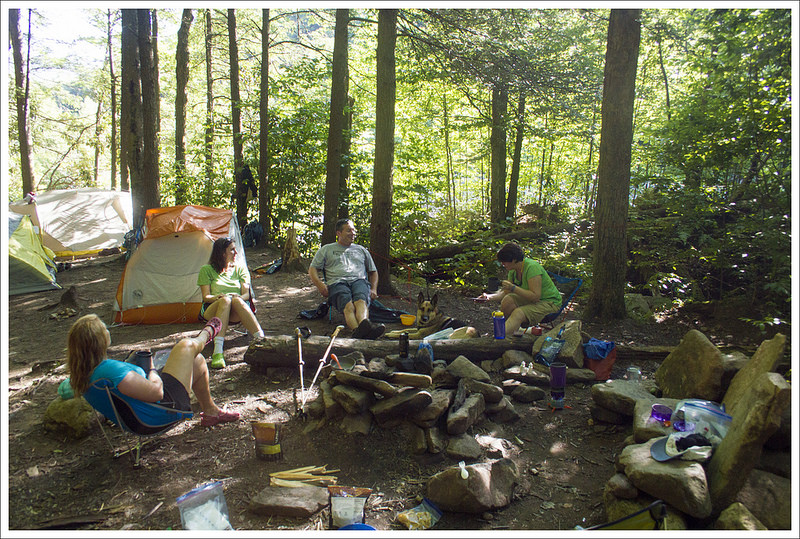
Around 5:00 we decided to get dinner started.  Everyone brought their own dinner, but Christy and Brian brought a shared dessert – Rocky Road pudding.  Kris contributed a two-bottle capacity bag of wine to the feast.  After dinner we played cards and sat around our campfire.  Even at 9:00 p.m., it was still 75 degrees.  That’s unusually warm for Dolly Sods at night!

Around 10:00 we let the fire die down, and everyone started retreating to their tents.  Adam and I opted to leave the rain fly off in hopes that it would keep us cooler.  Honestly, it didn’t really cool off until sometime around 3:00 a.m.  It was a steamy night and I was very glad to have left my sleeping bag home in favor of a light summer quilt.  I enjoyed falling asleep to the sound of the running stream.  Any time I woke up during the night, I took a moment to marvel at the brilliance and magnitude of the stars in the sky.  It’s such a gift to be able to visit places like this and have good friends to share the experience. I felt so fortunate that night in my tent.

Day Two…

The next morning we awoke at daybreak.  We thought Maia would have woken up the group, but she was a perfect camp companion and let us get up when we wanted.  We enjoyed some of Christine’s homemade granola with Nido and then made our way back to the car.  With a warm night and temperatures climbing quickly in the morning, we decided to get an early start to get back to our cars before the temperatures peaked in the afternoon.  It is always uncomfortable when you feel like you never had a chance to cool down, so everyone felt hot within a few minutes back on the trail.

Camp Dog
Maia did great on her first backpacking trip. Below: Hiking back out the way we came in!

Hiking Out Hot and Humid More Rocks to Cross

We climbed back up the steep Red Creek Trail and Fisher Spring Run trail very slowly as we were all quickly drenched with sweat.  We got back to the junction with the Rohrbaugh Trail in about 1.5 miles and we knew our toughest work was behind us.  In another .4 miles, we reached the junction with the Wildlife Trail and took a right to make our way to the Rohrbaugh Cliffs again.  We paused for a snack and some more pictures from Rohrbaugh Cliffs, which is probably my favorite spot in Dolly Sods.  Looking over the creek and seeing nothing but mountains around you is a scene that begs you to pause and appreciate nature.

Rohrbaugh Cliffs
Taking in the view from Rohrbaugh Cliffs. Below: The small waterfall along the Rohrbaugh Trail was running very low; Climbing on the rocks of Rohrbaugh Cliffs; Back to the Forest Road.

Small Waterfall Rohrbaugh Cliffs The End

With the strong sun beating down, we decided to press on and continue our journey back to the car.  We made our way back fairly quickly, passing by a group of about 10 women that were enjoying the weekend as well.  We got back to our car just a bit before lunch and carpooled Christy, Brian, and Maia back to their car.  We had a great adventure together and we were really glad to share this amazing piece of wilderness.  We parted ways with Christy and Brian, and Christine, Kris, and I headed to Lost River Brewing Company in Wardensville, WV for some celebratory beers and food.  It was a great trip, but we vowed to return when it isn’t the hottest weekend of the year to do the traverse across Dolly Sods like we originally planned.

If you are looking for a hike or overnight trip that combines majestic views, creeks with a waterfall and swimming possibilities, and great overnight camping, this may be a perfect one to experience.

Trail Notes

  • Distance – 10 miles
    (Check out the stats from Map My Hike [Day One] [Day Two])*
  • Elevation Change –  1480 feet
  • Difficulty – 3.  The elevation gain/loss is moderate, but the rugged nature of the footing adds difficulty to this route.
  • Trail Conditions –  2.  Trails are unblazed.  Be prepared for mud, blowdowns, and lots of rocks.
  • Views – 5.  The view from Rohrbaugh Cliffs is pretty spectacular!
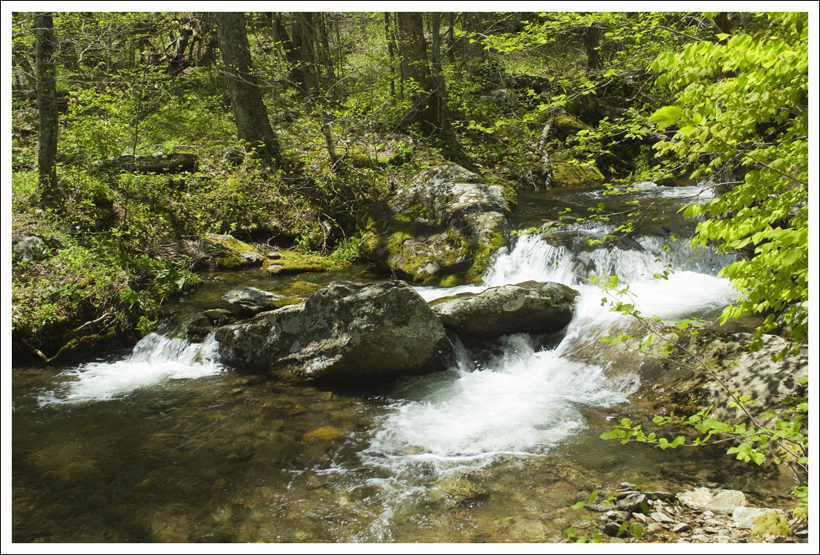
  • Waterfalls/streams – 5.  You will want to spend all day enjoying the beautiful rapids and waterfalls along Red Creek.  This is some of the best stream swimming in West Virginia.
  • Wildlife – 2.  We saw a white tail doe with two fawns on the drive in, but generally the woods were quiet and we didn’t feel like there was much wildlife in the camping area.
  • Ease to Navigate – 2.  There are no blazes, but junctions were marked, and the trail was generally easy to follow.  Navigation gets trickier near Red Creek where you depend on cairns to mark stream crossings.
  • Solitude – 3.  This is tough to call!  We saw almost nobody on the trail when we were hiking, but there were many people camped along Red Creek.

MapMyHike is not necessarily accurate, as the GPS signal fades in and out – but it still provides some fun and interesting information.

Download a trail map (PDF)

Directions to trailhead:  GPS Coordinates for Parking are 38.962019, -79.355024. From Seneca Rocks, go North on WV 28 for 12 miles.  Take a left on Jordan Run Road.  Go one mile up Jordan Run Road and take a left on to Forest Road 19.  In 6 miles, Forest Road 19 comes to a T on to Forest Road 75.  Take a right, heading north on Forest Road 75.  Drive for about eight miles until you reach the Dolly Sods Picnic Area. The Rohrbaugh Plains Trailhead will be across the road from the picnic area.

Neighbor Mountain – Jeremy’s Run Loop

This 14.7 mile route offers wilderness, beautiful views, and stunning stream scenery (even a small waterfall!)  It’s a wonderful, moderate overnight backpacking loop; or a really challenging day hike.  We set out intending to camp along Jeremy’s Run, but it didn’t quite go as planned!

View the Full Album of Photos From This Hike

Views from the Neighbor Mountain Trail
The views on this loop hike come along the descent of Neighbor Mountain. Below: The trailhead at Elkwallow Picnic Area;  Hiking along in golden woods; Adam and Kris at the junction of the Appalachian Trail and Neighbor Mountain Trail.

Neighbor Mountain - Jeremys Run Start Hiking Along Junction of AT and Neighbor Mountain Trail

Christine Says…

The final weekend of October 2014 was so beautiful – perfect, made-to-order backpacking weather. We decided to head out on one more overnighter before the weather turned cold. We invited our friend, Kris, to come along. She loves the outdoors as much as we do, and I was sure she’d enjoy this loop. Don’t miss her guest blogger entry later in this post! It had been several years since we last hiked in the vicinity of Jeremy’s Run, and I was really looking forward to camping along the beautiful stream.

After stocking up on some lunch provisions at Elkwallow Wayside, we finally hit the trail around 11:00. We figured we had a little over eight miles of hiking on our first day, so starting late morning would get us to camp before 3:00, with plenty of daylight left to pitch tents, cook dinner, and relax.

Neighbor Mountain Trail
Hiking along the Neighbor Mountain Trail. Below: The fall color was still close to peak; Adam checks out a rock formation; At the summit of Neighbor Mountain.

Golden Woods Rock Formation Summit of Neighbor Mountain

We started out at the Elkwallow Picnic Area. A short spur trail leads downhill to the junction with the white-blazed Appalachian Trail. The AT descends for about .3 of a mile before coming to a junction with the blue-blazed Jeremy’s Run Trail. Follow the Appalachian Trail, veering to the left. The trail ascends for a little over a mile before coming to a more level ridge. You’ll pass the junction with the Thorton River trail, continuing south on the AT. At just over four miles into the hike, you’ll reach the junction with the yellow-blazed Neighbor Mountain trail.

We decided this junction would be a nice place to stop for lunch (hummus – my favorite trail lunch of late – easy to eat and lots of quality calories!). After a relaxing, thirty-minute break, we took the turn onto the Neighbor Mountain trail. The path meandered across the ridge. For the first couple miles, it was mostly walking in the woods. There was a nice breeze and gorgeous sparkling sunshine was filtering through golden leaves. It was everything you want fall to be!

Even though there is no view, the summit of Neighbor Mountain is marked with a cement post. At the summit, I noticed I had picked up a ‘hitchhiker’ along the way – a walking stick bug was clinging to my pants. I wonder how far he had come with me. I picked him off, and set him on a fallen log off the trail.

Between six and seven miles into the hike, there are a few excellent views of the Massanutten ridge and Three Sisters. There was a forest fire in this area several years ago, so the view was pretty open and expansive. We all paused a while to enjoy the fall foliage.  It was so wonderful to see colorful mountains rolling our before us. We talked about how privileged and blessed we all felt to be out on such an amazing day!

View of Valley
Adam enjoys a view of the valley and mountains to the west. Below: This part of Neighbor Mountain burned in 2012.  Alot of damage is still evident; Fall color; Adam descends Neighbor Mountain toward Jeremys Run.

Neighbor Mountain Descent Neighbor Mountain Descent Neighbor Mountain Descent

The last mile and a half of the day was steady downhill, meandering across switchbacks until the Neighbor Mountain trail reached the bottom of the valley and Jeremy’s Run. As soon as you reach the stream, campsites are everywhere. The first few we passed were already taken, so we ended up returning to the hidden campsite we used several years earlier. It’s a flat spot under the trees shortly before the first water crossing.

And here’s where the story takes an unexpected turn…

Adam Says…

We all worked on pitching our tents and setting up camp. I set up our tent while Christine worked on inflating our sleeping pads. Kris was on the other side of the clearing working on setting up the one-person tent she had borrowed, when she suddenly she groaned, “Uh… guys – I think we might have a little problem.”

As it turned out, the tent bag only held the rain fly and the poles. The ground cloth and the actual tent were missing in action. She hadn’t checked the bag before hitting the trail.  We spent the next 45 minutes trying to improvise a shelter with everything and anything we had. We tried piling three people in our Big Agnes Copper Spur UL2 (bad idea). We discussed whether or not the evening would be suitable for cowboy camping under the stars. We talked through a few different scenarios: 1) we all hike back immediately, 2) I sleep under the tarp while Kris and Christine sleep in the tent, or 3) I hike back to the car tonight and pick them up in the morning.  I was least excited about the second option because the area felt tick-infested with the wet leaves.  We debated the options for a few minutes, but ultimately, we decided the best choice was to keep the group together and make our backpacking trip into a very long day hike.

Failed Camp
We tried to find a way to rig up shelter, but in the end we decided it was better to hike out. Below: Crossing the first stream and trying to eat something with enough calories to hike out happily; Adam doing one of many stream crossings; The best campsite along Jeremys Run sits above a waterfall.

Crossing Jeremys Run Crossing Jeremys Run Waterfall Campsite on Jeremy Run

We knew we only had a little over an hour of daylight left – the sun sets early behind the mountains surrounding Jeremy’s Run.  We rushed to pack everything up as quickly as we could. Cooking a hot dinner would have required getting more water, so we opted to just eat a few snacks from our bags.   We started off at a quick pace.  I twisted my knee at the first major water crossing we had to make, which made the rest of the trip pretty painful. But sometimes, you just have to suck it up and hike.

We soon passed another great campsite next to a small waterfall.  The trail meanders along and across Jeremy’s Run, requiring lots of rock-hopping across the stream.  The sun was dipping down quickly and we soon found that we needed to put on our headlamps.  Christine and Kris had legit headlamps, but I was using a small clip-on headlight that didn’t have the lumen output needed for a night hike.  When it reached dusk a few miles from our campsite, we came across a couple with a dog.  They asked us how far it was to the campsites and if they were all taken.  The guy was carrying an outrageous amount of gear and the girl looked completely miserable.  We knew they were going to be hiking to the campsites by nightfall and setting up camp in the dark.  I’m not sure if this was her first venture into overnight camping, but based on the daggers she was shooting him with her eyes, it may be their last.  They warned us they had seen a couple of bears just ahead of us, so we were on full alert.

Headlamps
We hiked by headlamp the last hour. Below: Jeremys Run in twilight; A large pool along the run; One of the last few stream crossings before it became too dark to take photos.

Jeremys Run Jeremys Run Jeremys Run

As it became fully dark, we still had a few stream crossings to make, which made it quite hazardous.  I reminded myself that the water wasn’t that deep so if we stepped in the water, we would probably be OK.  Another danger of night-hiking is the ability to lose the trail.  We really had to pay attention to the ground and try to keep an eye out for occasional blazes to make sure we would stay on the trail.  Hiking in the fall after most of the leaves have covered the trail provides an extra challenge.  Because I had a weaker headlamp, it was hard for me to lead along the trail since the lights from Christine and Kris were blasting my shadow ahead of me on the ground.  And then, I heard large noises in the woods, which I’m guessing was the bears that we had been warned about.  We kept talking loudly and playing some games to keep our minds sharp (animals/foods/colors that start with each letter of the alphabet) as we hiked along.

At 4.25 miles from our intended campsite, we finally came across a concrete marker post.  This post marked the junction with the Knob Mountain cutoff trail, so we knew were getting closer.  We kept straight on the Jeremy’s Run Trail and at 5.15 miles, we reached our first junction with the Neighbor Mountain Trail.  It was now just .3 miles straight ahead until we reached the parking lot where we started.  We made the last climb with renewed energy and celebrated that we made it through this adventure.

It was definitely one of the longest hikes we have done in a day and with the extra weight on our back, was one of the toughest.  We got back in the car and decided to go out to dinner to celebrate with drinks and food at Ciro’s in Elkton, VA.  We were physically exhausted and hungry, but it was quite an adventure we will never forget.

One takeaway I had from this trip was that we were all great at hiking together.  When we faced the challenge of not having two functional tents, we kept our wits about us, made a quick decision and went with it.  There was no complaining and we just relied on each other to get through.  If we had panicked or become overly upset, it could have led to a dangerous situation.  It is through this challenge, that we learned that having good hiking partners that work well together is a great trait to have for survival.  We all vowed to come back to this spot to camp together sometime in the spring to get the full experience through camping on Jeremy’s Run.  After the hike, Kris bought her own tent and I bought a better headlamp.

kris Kris Says…

Backpacking 101- It doesn’t matter if you were up late celebrating your birthday and borrowing some equipment…ALWAYS double check your equipment or your trip will not be so fly!

I was excited to be hiking with friends on a beautiful fall day.  We have always shared an appreciation of nature, lots of conversations and tons of laughter. I guess that is why we handled our little upset so calmly and reasonably. Although, I’m pretty sure I said  “Adam, just because I am a girl doesn’t mean you have to give up your tent.  I will cowboy up. Now, everyone hand over any booze or sleep aides you may have!” Of course that didn’t fly.

Ultimately we laughed at the situation, even as we crossed that creek 14 or so times and in the dark.  And I learned a few things on this trip: I am capable of hiking 15 miles with a 25 lbs pack in a day, Little Debbie Peanut Butter pies are so tasty and 400 calories, it was time to purchase my own backpacking tent, a packing checklist is important and a good attitude goes a long way.

I vowed to return to Jeremy’s Run and hike early enough to snag the sweet waterfall camp spot, I also plan to cowboy camp sometime just to prove I can (my dog will protect me).

Christine and Adam- you two are SuperFly!

Trail Notes

  • Distance – 14.7 miles
    (We had issues with MapMyHike on this trip, so we have partial stats. We have the Neighbor Mountain segment and most of the Jeremys Run to Elkwallow segment. We’re missing the portion along the Appalachian Trail and a few early tenths of a mile along Jeremy’s Run.  Technical issues!)*
  • Elevation Change – 2610 ft.
  • Difficulty –  4.  The terrain is fairly moderate throughout the hike, but the length ups the difficulty rating.
  • Trail Conditions – 3.  Sections along the Appalachian Trail and Neighbor Mountain are in great shape.  The Jeremy’s Run trail is rocky and has at least 14 water crossings – some of them can be challenging!
  • Views  3.5.  The views descending Neighbor Mountain are beautiful, but never fully open/panoramic.
  • Streams/Waterfalls – 3.5.  The stream is beautiful and scenic.
  • Wildlife – 5.  We saw a bobcat!  Hikers we passed at sunset told us there was a bear ahead, but we couldn’t see anything in the dark.  But, the last time we hiked in this area, we saw three bears.  We have also seen/heard owls, pileated woodpeckers, and whippoorwills.
  • Ease to Navigate – 4.  The junctions are clearly marked and easy to follow — unless you’re hiking in the dark!  🙂
  • Solitude –1.  It’s the most popular backpacking loop in the park’s northern district.

Download a Trail Map (PDF)

Directions to trailhead:  From the US-211 entrance of Shenandoah National Park, head north for 9 miles on Skyline Drive.  Take a left towards the Mathews Arm Campground.  In .7 miles, you will reach a parking lot.  The trail takes off next to the outdoor bathroom.

MapMyHike is not necessarily accurate, as the GPS signal fades in and out – but it still provides some fun and interesting information.

Sherando Lake Loop

This relatively easy 2.5 mile loop goes around Sherando Lake and follows a short spur to a great mountain view!

View the Full Album of Photos From This Hike

Sherando Lake
Sherando Lake is a popular camping/swimming area for locals. It’s just several miles off the Blue Ridge Parkway.

Adam Says…

This has been quite the harsh winter for snow and cold temperatures.  And when it hasn’t been too cold, it seems to have been raining.  So, we were glad to get out on a nice day to get a little exercise outdoors for a change.

Sherando Lake is a multi-purpose recreation area.  In nice weather, you will see people swimming, fishing, camping, and hiking.   To visit, there is a fee per vehicle – check out their fee schedule.   The area is officially open from early April through October.  The road gates are often closed during the off season based on weather.   There is camping available if you wanted to make a nice weekend trip, but reservations should be made in advance.

We started off our hike from the Fisherman’s Parking Area.  There were a few other vehicles there also, but they were all there for the fishing.  The lake is stocked with trout throughout the year.  Facing the lake, we started our hike on the left by heading up the Cliff Trail.  This trail was a short gradual climb with a few switchbacks before the trail levels out.  About .4 miles into the hike, there is a small outlook to the right from a rock that gives you a few obstructed views from the lake.  Continuing on the trail, it begins to descend and the lake gets back into view.  At .8 miles, you reach the lakeside and see the sign that shows the junction with the Lakeside Trail (a trail that wraps around the lake).   We took a few minutes to go out onto the sand and enjoy the views of the lake.   I saw a wood duck escorting a few ducklings on the far banks of the lake.

Dam End
The fisherman’s parking lot is located at the dam end of the lake. It is where our hike begins. Below: The trail starts off rocky; Overlook View.

Rocky Uphill Overlook Rock

We walked back behind the large building/gift shop, crossed a couple of bridges and rejoined the trail on the northwestern side of the bank.  We took the blue-blazed Blue Loop Trail, leading us past a few campsite areas before climbing up into the woods.  The trail is rockier, especially in the beginning, than the Cliff Trail and is steeper.  The trail climbed through a few switchbacks.  At 1.5 miles, you reach a junction shortly after a switchback with the Dam Trail.  This will be your return route.  Continue up the Blue Loop Trail, which begins to take an uphill climb to the left up the mountain.  At 1.75 miles, you reach Lookout Rock.  We took some time there to enjoy the view and then went back the way we came until we reached the junction with the Dam Trail.  We took this trail to the left, which leads steeply down the mountain.  You begin to see the lake through the trees again and we reached the lakeside around 2.25 miles.  We continued on the trail until it reached a small bridge that crossed over the dam stream and led back to the parking lot.

Enjoying the View
Adam takes in a beach/lake view. Below: Services are typically open April through October; Trails are well marked; Adam hikes the Blue Loop Trail.

Sherando Beach Area trailsystem uphill

One thing that was going through my mind during the hike is this would be great for a family outing.  Grab your family for a quick hike followed by a picnic by the lake.  Make a weekend of it if you want to do some camping, swimming, and fishing.

Christine Says…

I enjoy playing in the snow, but I’m very ready for warmer weather. I want to see flowers blooming. I want to feel warm sunshine on my face. I’m so ready to see a canopy of green across the mountaintops.  I have spring fever.  So, I was especially thankful for a particularly warm and sunny Saturday because it gave us a chance to get out and hike.

We chose Sherando Lake, mainly because it was nearby and easy. It would have been a great day to go on a longer hike, but Adam was still getting over a bad cold.  And I was not willing to spend more than an hour in the car. I had spent the past two weekends in a 12-passenger van, making a 15 hour ride to and from the Florida panhandle and was still a bit road weary.

Lookout Rock
Lookout Rock provides a nice view of the valley, lake and mountains. Below: Adam climbs his way toward Lookout Rock; Checking out the view, Making the descent.

Climb View descent

My trip to Florida was a service-learning trip with a group of nine JMU students.  We traveled to a Nature Conservancy preserve – Apalachicola Bluffs & Ravines to do a week’s worth of environmental work.  We camped, we hiked, we learned about the local ecosystem, and most importantly – we planted 90,000 plugs of native wiregrass seed that will be used to restore the natural habitat of that part of Florida.  It was hard work, but I think we made a difference. We even had one free day on our trip. We chose to spend it spotting manatees, gators, and other wildlife at Wakulla Springs State Park.  If you want to see more photos and read more about my service trip, I’ve uploaded a large set of captioned photos to my Flickr account.

Now, back to Sherando Lake!  I had been to the lake a couple times before, but had never actually taken the time to hike any of the trails in the area. I was pleasantly surprised by the trail system.  There is something for everyone – a practically flat trail that goes along the lake shore, a steeper trail around the lake that offers a couple nice views, and a connection into the larger, longer trail system along the Blue Ridge Parkway.

I liked sitting on the sand and enjoying the pretty lake view, and I really enjoyed climbing up to Lookout Rock on the Blue Loop Trail.  The rocky outcropping provides a nice view of the lake and the mountains beyond.  Although the snow was gone on the trails we walked, we could still see plenty of snow on the distant, higher ridges.

Spillway
The hike ends after crossing a cement bridge over the spillway. Below: The stream leading away from the lake; Christine crossing the concrete bridge, Blue Mountain Brewery food and brewery.

Stream Bridge Blue Mountain Brewey Blue Mountain

The walk back down from Lookout Rock was really steep and slick, especially with the thick bed of dry, fallen leaves.  Once we reached the bottom of the descent, we crossed a concrete bridge beneath the spillway and returned to our car.  We finished hiking a little bit before noon, so we decided to make the short drive to have lunch at Blue Mountain Brewery (near Afton Mountain).  They have great food and great beer.  Adam enjoyed a flight of nine different beers and I tried their Daugava Baltic Porter.  I think everyone in central Virginia had the same idea to visit the brewery for an outdoor lunch.  The place was packed, but it was a perfect ending to the day.

Trail Notes

  • Distance – 2.5 miles
    (Check out the stats from Map My Hike)*
  • Elevation Change – 998 ft.
  • Difficulty –  2.  The uphill to the Lookout Rock is a little steep, but overall most people should be able to do it.
  • Trail Conditions – 4.  This is well-traveled, so you should find the trail to be in good shape. 
  • Views  3.  Nice views of the lake from Lookout Rock and mountains around.  Some obstruction, but overall a decent view. 
  • Streams/Waterfalls – 2.  There is a small man-made water dam that creates a nice fall look.  The lake creates a picturesque setting. 
  • Wildlife – 2.  You shouldn’t expect a lot of larger wildlife.  We saw a pileated woodpecker swooping across our car when we arrived.
  • Ease to Navigate – 4.  The only place you may need to figure out is where to pick up the trail after going to the other side of the lake.
  • Solitude –1.  On a nice day, you’ll see plenty of people here.  Most will be near the lake, but expect some people at Lookout Rock. 

Download a Trail Map (PDF)

Directions to trailhead:  From I-64, take Exit 96 just east of Stuarts Draft. Go south on State Route 624, which becomes State Route 664 at Lyndhurst. Continue south on State Route 664 approximately 8 miles to the entrance to the Sherando Lake Recreation Area on the right. The gatehouse is approximately 0.5 miles ahead which will take the fee for your vehicle.  Past the gatehouse, you’ll take a right to the fisherman’s parking lot.  Park there and make your way to the left for the Cliff Trail.

MapMyHike is not necessarily accurate, as the GPS signal fades in and out – but it still provides some fun and interesting information.

Laurel Prong – Mill Prong Loop

This 7.3 mile loop has a bit of everything – views, waterfalls, history!  The route takes you over Hazeltop Mountain, along several streams and past President Hoover’s Rapidan Camp.

View the full album of photos from this hike
View a short video clip of Adam crossing the stream below Big Rock Falls

The Rapidan River
Camp Hoover sits where the Laurel Prong and Mill Prong spill together, forming the Rapidan River. Below:  Trillium was blooming everywhere when we hiked; The route had many stream crossings; Adam enjoys the view from Hazeltop.

Trillium Everywhere One of Many Stream Crossings Adam on Hazeltop

Christine Says…

We love hiking in this part of Shenandoah!  It’s the area we typically choose when we have out-of-town friends who want to visit Shenandoah National Park.  It’s also a likely choice when we’re hitting the trail with hiking newbies.  Why?  Well… we think it’s pretty much perfect.  The climbing isn’t difficult, so it helps convince non-hikers that hiking isn’t just torturous uphill climbing.  This area is great for spotting wildlife. (In his portion of the post, Adam will tell you more about the exciting wildlife experience he shared with his office.)  It’s also scenic, with lovely streams and a waterfall along the route.  There is even a significant piece of American history sitting in the middle of the forest – the Rapidan Camp, which served as Herbert Hoover’s presidential retreat.

Our normal route in the area is a relatively easy 4 mile out-and-back to ‘Camp Hoover’.  For this post, we decided to go the long way and make a 7.3 mile loop incorporating the Appalachian Trail, the Laurel Prong Trail and the Mill Prong Trail.   This longer route added a nice view, many stream crossings and a bit more elevation gain.

Apple Blossoms
Lots of trees were blooming in the park! Below: Adam walks along the Appalachian Trail.  Adam was like a wind sock on Hazeltop.

Adam on the AT Windy on Hazeltop

We parked at Milam Gap.  The hike started across Skyline Drive on the AT, headed southbound.  Almost immediately, the trail began a long, gentle ascent to the summit of Hazeltop Mountain.  The AT is so well-worn into the mountain that the path looked like a ribbon of dirt through the bright green of spring grass.  On this particular May morning, the trail was abundantly lined with my favorite wildflower – Trillium.  They were everywhere with big showy flowers in pink and white.  We also saw (and heard) many birds.  The prettiest songs came from the eastern towhees.  This type of towhee has striking orange, white and black markings, which makes them easy to spot.

After almost two miles of climbing, we reached the high point of the hike on Hazeltop Mountain.  There was one nice place to take in the view.  It was really windy on the rocky outcropping, but I enjoyed looking out over the spring-green valley. From the viewpoint, we hiked downhill for almost half a mile to reach the junction of the AT and the Laurel Prong Trail.

Views from the Laurel Prong
There are obstructed views from the Laurel Prong Trail. Below: Eastern Towhee; Huge boulders and rocks along the Laurel Prong Trail; A neat tree near the junction of the Cat Knob trail.

Eastern Towhee Rocks on Laurel Prong Neat Tree Near Cat Knob Junction

The Laurel Prong trail descends all the way to Camp Hoover.  Along the way, you’ll get some obstructed views from the trail, especially when trees are without their leaves.  There are lots of rocks and boulders lining the path, especially right at the beginning.  The lower parts of the Laurel Prong trail pass through a mix of open forest and mountain laurel thickets.  As you approach the low point of the hike, you should begin to hear the sounds of water.  Most of the time, streams along this trail will be shallow to non-existent.  When we hiked, it was after several days of heavy rain.   Single-step crossings became multi-rock hops and in many places the trail was under several inches of rain.  It was fun to cross so much water!

At around the 5.25 mile mark, we reached Camp Hoover.  It was a great spot to eat lunch, soak in the sunshine and enjoy the sound of rushing water.  The camp is built at the headwaters of the Rapidan River, making it an ideal fishing spot.  Most of the buildings that made up the camp have been lost to the ravages of time, but several cabins, including the president’s personal residence, have been renovated and preserved and are now open to the public (check park schedules for tour opportunities!).

While Adam napped in the sun, I went and did battle with my new carbon fiber tripod.  It’s really light and stable, but it’s like an engineering puzzle to get it initially set up!  I may have threatened to throw the tripod into the river.  I guess I should look at this hike as the tripod’s dress rehearsal. It can prove its true worth on another hike.  Besides, it really wasn’t a good day for taking photos of moving water (too sunny), but I think I was able to capture the impressive flow we witnessed on this day.  I’ve never seen the streams around Camp Hoover flowing so powerfully!  There were rapids and small waterfalls in places I’ve never seen them before.  It was beautiful!

Laurel Prong
The Laurel Prong joins with the Mill Prong to form the Rapidan River just a few hundred feet from this spot. Below: Adam cross the stream again; The Brown House has a great back porch; Another streamside view of the Brown House.

One of Many Stream Crossings The Brown House Streamside

After leaving Camp Hoover, we walked the trail along the Mill Prong.  There is one spot where the trail crosses the stream (right below Big Rock Falls).  We probably could have rock-hopped if we were careful, but both Adam and I decided to take off our boots and put on our Crocs to wade across the stream.  The water came over my knees, which is really high for this spot.

After crossing, we took a few minutes to enjoy Big Rock Falls and then made our way back toward Milam Gap.  For much of the way, the trail stayed close to the stream.  We had several more stream crossings to complete, but none that required a shoe swap.  The last couple miles of the hike went quickly, and we were back at the car by early afternoon.

We were surprised by how few people we ran into on the hike.  I would have expected big crowds on a perfect, sunny Mother’s Day, but we really only saw a handful of people – a few backpackers making a short overnight of the loop and a pair of birders at the camp.  I suppose we saw a few more people as we hiked back up the Mill Prong trail, but overall the crowds were light.

If I were to recommend a version of this hike – the 4 mile out and back or the 7.3 mile loop, I think I’d probably stick with the shorter version.  The longer version is nice, and great if you’re looking to pick up some mileage, but there’s really not a lot to see on the Laurel Prong and it can sometimes be really muddy.  The main reasons to hike in this area are Camp Hoover and beautiful stream scenery; and you get both of those on the shorter out-and-back.

Adam Says…

The hike down to the Rapidan Camp is always one of our favorites in Shenandoah National Park.  We have taken several groups of people down to this area.  When I talk to people about Shenandoah National Park, they have no idea that a Presidential retreat was once here and how this helped to establish a national park in Virginia.  This route adds a view to the hike for an extra bonus.

Big Rock Falls
Big Rock Falls was as big as we’ve ever seen it! Below: Adam crosses the stream right below Big Rock Falls; Lots of water in these little streams.

Crossing Mill Prong High Stream Flow

We’ve seen that on Hiking Upward and in our Hiking Shenandoah National Park Falcon Guide the hike was done in the reverse direction that we did the hike.  But, our way has less of a continuous elevation climb and it puts Camp Hoover in the last third of the route (save the best for last!).  We started off from the Milam Gap parking area and crossed Skyline Drive near the southern entrance to the lot to start on the Appalachian Trail.  Heading southbound on the white-blazed AT, we quickly came across the junction with the Mill Prong Trail.  This is your return route, so continue to go straight.  The trail gradually climbs up a total of 450 feet.  You reach a nice viewpoint to the right of the trail around 1.8 miles before you reach the Hazeltop summit in 1.9 miles.

The trail then begins to descend and at 2.6 miles, you reach the junction with the Laurel Prong Trail on the left.  Take this blue-blazed trail which continues to descend.  At the 3.6 mile, you will pass a junction with the Cat Knob Trail but stay on the Laurel Prong Trail.  At 4.9 miles, you reach another junction with the Fork Mountain Trail, but again stay on the Laurel Prong Trail.  The trail changes to yellow-blazed at this point, since it is now accessible to horses.  At 5.3 miles, you will pass by a fire road on the left and then come up to a side trail for Five Tents.  The Five Tents location was where some of the staff would stay at the Rapidan Camp, but there is no longer a building there.  Christine took this route, but I stayed straight and we met up shortly at the Rapidan Camp, entering near the Prime Minister’s Cabin.

Upon leaving the Brown House at Rapidan Camp, we caught the trail heading past the Creel Cabin.  Crossing the fire road, we picked up the yellow-blazed Mill Prong Trail which gradually ascends most of the way.  At 5.5 miles, you will cross Mill Prong (which may require you to wade across the water after heavy rainfall) and reach Big Rock Falls on the other side.   At 5.9 miles, you reach a junction with the Mill Prong Horse Trail.  Continue straight instead of taking this trail, but the blazes change to blue as it is no longer a horse trail.  The trail crosses Mill Prong again and then you will have a gradual climb back up.  At 7.3 miles, you reach the Appalachian Trail junction again.  Take a right and in a short distance you’ll reach the parking lot.

Abundant Trillium
Pretty pink trillium Below: Wild geranium (I think?); Ragwort; Adam finishes out the loop.

Wildflowers Ragwort End of the Loop

Last year, I brought a few of my co-workers down to the Rapidan camp for a team-building retreat.  I felt that if it was good enough for the President, it should be good enough for us.  When we arrived, a volunteer who stayed at the Creel Cabin, gave us a tour of the Brown House, where President Hoover stayed.  We learned a lot about Hoover, the problems he faced during his presidency, and his relationship to Franklin D. Roosevelt.  After the tour, we did some team-building and communication exercises to learn more about how to work best with each other.  While we were in the middle of making some breakthroughs, a small snake fell down off the roof just a few feet from where we were working.  One of my co-workers, who is not a hiker by any definition, jumped out of her seat and was constantly looking around for other animals.  After we made our way back up, we were talking along the way.  I heard some people say, “Adam, look out”.  I nearly walked right into a mama bear with three cubs.  The family of bears quickly took off up the hill.  I had told my co-workers that I’m usually pretty good at finding bears and we may see some.  They were thrilled to see the cubs, as a few of them had never seen a bear cub before.

Along with the possibilities of seeing bears, you can usually find this trail to be an excellent trail for birding.  The Laurel Prong and Mill Prong trails were filled with beautiful songs as we hiked along.  A couple that was hiking near us also recognized the song of a blackburnian warbler.

If you’re up for a longer hike to the Rapidan Camp, I would suggest this route.  The views from near Hazeltop summit were expansive, you get to see a nice waterfall, hear the songs of birds, and learn about the history of one of our Presidents and how it helped create a national park in Virginia.  This hike does have it all!

Trail Notes

  • Distance – 7.5 miles
    (Check out the stats from MapMyHike)*
  • Elevation Change –  1330 ft
  • Difficulty – 3.  This hike is not steep or difficult, but some hiking novices might find the 7+ mile distance a little challenging.
  • Trail Conditions – 4.  The trails were in great shape, despite being underwater in several place.  We didn’t see any blowdowns or sloppy areas.
  • Waterfalls/streams – 4.  Big Rock Falls, the Rapidan River, Mill Prong and Laurel Prong are all lovely and offer lots of water scenery along this hike!
  • Wildlife – 4. We didn’t see much on this particular day beyond birds, but we’ve seen lots of deer and bears on past trips.
  • Ease to Navigate – 4.  Trail directions are clearly marked at junctions with cement markers.
  • Solitude – 2. This is a popular hike, both as a day trip and a short overnight loop.

Directions to trailhead:

The hike starts at mile marker 53 on Skyline Drive.  Park in the Milam Gap lot, then cross the drive.  The trail picks up on the other side of the crosswalk.

* MapMyHike is not necessarily accurate, as the GPS signal fades in and out – but it still provides some fun and interesting information.

Abrams Falls (TN)

Special: Smokies Edition

Introductory Guide to Visiting Great Smoky Mountains National Park

This popular five mile hike follows a beautiful stream for most of the route and ends with a visit to lovely Abrams Falls.

Abrams Falls
Abrams Falls pours out into a large, rock-surrounded pool. Below:  Beautiful stream scenery was abundant on this hike.

Slide Falls Abrams Creek

Christine Says…

Tuesday morning dawned thick with clouds and fog… a perfect day for a waterfall hike.  Although there were plenty of waterfalls near the Cherokee side of the Smokies, we decided to take a ride over to Cades Cove to hike the exceedingly popular Abrams Falls trail.

The easy five-mile hike is one of the top five trafficked trails in the park.  Since we had an early start on the day, we decided we could probably beat the worst of the crowds and enjoy seeing the falls with some semblance of solitude.

Getting to the trailhead took longer than we expected.  The drive along the Little River into Cades Cove was so pretty, I had to stop and take lots of photos.  Once we got into the cove, grazing horses, wild turkeys showing off their plumage, and abundant whitetail deer distracted us.  I wanted to stop at a few of the old cabins, churches and farms, but we decided that would have to wait for another day.

Adam on the Abrams Falls Trail
Adam enjoys the green vista along the Abrams Falls Trail. Below: Trail marker at the start; Bridges cross the stream multiple times along the trail.  This was the only full bridge.  The rest were hewn logs with rails on one side; Trail conditions were mostly smooth and gentle.

Trail Marker Bridge Near Beginning of Abrams Hike Adam on the Abrams Falls Trail

The Abrams Falls trailhead was at the end of an unpaved, muddy road.  (restroom facilities were available) The trail marker at the beginning indicated that the trail was moderately strenuous and would take 4-5 hours.  The sign also warned that no water or restrooms would be found at the falls.  I suppose this is a clear indicator that hikers of all experience levels and abilities use the trail.  And indeed this turned out to be true – I even saw a hiker wearing black pantyhose under a pair of denim shorts. That was a first for me!

The hike began by crossing a bridge over Abrams Creek.  All along the river, we saw fly fishermen.  The stream looked ideal for brook trout.  The trail runs parallel to the creek for much of the hike – sometimes at stream level, sometimes high above.

The trail is mostly flat with several short, but steep, climbs.  It mostly passes through thick green forest, with one exception.  Near the top of the steepest climb, the trail becomes rocky and almost barren, with many dead and toppled trees.  Maybe a fire or storm damaged the trail in this area, because it was nothing else like the rest of the hike.

A steep downhill climb and a walk across two log bridges empties you out into a grotto with Abrams Falls at the end.  When we visited, the falls were gushing!  The water was so powerful; I couldn’t take a long exposure of the waterfall without the water turning into a solid wave of white.

As expected, many people were enjoying the falls. Families picnicked, couples posed for photos and kids caught tadpoles in the pools of water between the rocks.  One of the notable features near the waterfall was a large glacial pothole.  It looked really similar to features I’ve seen in New Hampshire.

Christine Crosses the Log Bridge
Christine crosses a log bridge. Below:  A perfect round ‘pothole’ formed by the forces of nature; Blooming rhododendron.

Pothole Blooming Rhododendron

We didn’t spend long at the falls because we wanted to get back before it started raining.  The return leg of the hike just retraced our steps. On the way back, we passed even more people on their way to the falls.  This is definitely one of the Smokies most popular spots.  Understandably – such beautiful falls, and so easily reached (by most)!

Adam Says…

When we were thinking of some hikes we wanted to accomplish in the Smokies, we wanted to hike to a bald, a nice hike with views, and some waterfalls.  After accomplishing the first two items the first two days, it was time to do a waterfall.  We started fairly early in the morning knowing that we would have a longer drive to get to Cades Cove from our takeoff point of Bryson City.  When we had been driving on 441 to Newfound Gap, we had heard about construction but had never quite reached it.  When we crossed over Newfound Gap, we quickly ran into some construction as they were working on repaving the road.  Bringing the two-way road to a one-way road required us to wait about 20 minutes before the lead car allowed us to go further.  We finally got through the construction and made our way towards Cades Cove.   When driving on the one-way Cades Cove road, you should also expect to go very slow on this 11 mile road.  Cars creep along, hoping to see wildlife.  We were shocked to see so many cars stopped to a halt to take a picture of a deer.  I guess we feel a little spoiled in Virginia with all the deer we see regularly.  We typically have a yard full of deer every morning.

The hike to Abrams Falls starts off with an informational sign.  Soon you will cross a bridge and begin to see fly fisherman in Abrams Creek.  Abrams Creek is a great spot for fishing brook trout.  Rainbow trout tend to be found in higher elevations in the Smokies.  The trail has a slight incline with a few areas of steep climbs.  At .8 miles, you cross over the Arbutus Ridge, which changes the hike from being largely uphill to being more downhill.  At 2.25 miles, the trail then begins to take a steeper descent until you reach Abrams Falls at 2.5 miles.

Adam at Abrams Falls
Adam enjoys Abrams Falls.  Below: More lovely views of the stream along the trail; Adam crosses another log bridge.  There were probably four or five like this on the trail.

Stream on the Hike Another log bridge

Abrams Creek and Abrams Falls were named after Chief Abram (previously known as Chief Oskuah and also known as Old Abraham), the Cherokee Chief of Chilhowie nearby.  Chief Abram and a war chief known as Dragging Canoe were aligned with the British during the outbreak of the Revolutionary War and led an attack on Fort Watauga.  In 1788, Chief Abram was killed by tomahawks by the son of John Kirk, seeking vengeance for his family that had been massacred by Cherokees on Nine Mile Creek.

This hike was a little humbling to me.  As I was hiking early on uphill, I started feeling very weak and hot.  I was carrying Christine’s heavy tripod for a while, but I was surprised if this was the reason I was feeling so fatigued.  I had to stop for about 15 minutes and ate several hand-fulls of trail mix.  My blood sugar was quite low from not eating a huge breakfast before hiking.  As we rested, I felt lame for having to take a break and let other people pass us, but I know we made the right decision.  Within about 25 minutes, I felt more like myself as we continued hiking.

There are a number of log bridges on the trail, which have handrails around thigh or waist level on one side.  I’m not a big fan of heights or water (since I can’t swim), so these log bridges can feel a little unnerving for people like me.

As soon as we reached the falls, we set up the tripod and took some nice photos of the falls.  You should expect to see a lot of people at the falls and you will likely have to wait to get pictures of the falls that don’t have strangers in them.  The water does come out in a powerful force as it plunges about 20 feet into the pool below.  We spotted some crayfish moving from rock to rock near the shoreline.   We refueled with some very disappointing Kashi granola bars to make our hike up the steep section and returned to our car.

Trail Notes

  • Distance5.0 miles
  • Elevation Change – about 600 feet
  • Difficulty –  2.  There is a little bit of climbing on this hike, but most people will find the terrain fairly easy.
  • Trail Conditions – 4. The trail is well maintained and easy to walk.  It’s much less rocky and rooty than other trails in the Smokies.
  • Views0.  None on this hike.
  • Streams/Waterfalls – 5.  The stream and the falls are both spectacularly pretty!
  • Wildlife – 2.  Because of the popularity of this hike, don’t expect to see too many animals hanging out.  Although… we did see a turkey and a deer.  Otters have been spotted in Abrams Creek.
  • Ease to Navigate – 5.   Very simple – just follow the path and you can’t get lost.  There is one trail junction near the falls, but if you read the trail marker, you’ll stay the course.
  • Solitude – 0.  Lots of hikers, lots of fly fishermen.

Directions to trailhead:  Past the Sugarlands Visitor Center, take the Little River Road until you reach the Cades Cove Loop Road.  The Cades Cove Loop Road is closed until 10AM on Wednesdays and Saturdays to car traffic.  Follow the Cades Cove Loop Road 4.9 miles.  Take a right on the gravel road that leads to the Abrams Falls parking lot.  The trail starts at the end of the lot.

Bear Church Rock – via Graves Mill

Bear Church Rock is a 8.5 mile hike that leads to gorgeous, mountain views.  The hike passes alongside two rivers, waterfalls, and a PATC cabin. You can also reach this beautiful overlook from Skyline Drive (Bootens Gap).

Taking in the View From Bear Church Rock
Adam enjoys the view from Bear Church Rock. Below: The tall, straight trees along the Staunton River trail were very beautiful; Azalea blooming near the top of Jones Mountain; The last push to the rock almost killed Adam.

Beautiful, Tall Straight Trees on the Staunton River Trail Blooming Azalea Adam Almost Died

Adam Says…

Bear Church Rock is a hike that has it all – nice trail alongside a stream, a few small waterfalls, a visit to a PATC cabin, and a great view at the top.  The views are completely of mountains with rarely a sign of civilization.  I always feel like I am truly getting away when I don’t have to see houses or roads dotted across the landscape.  You can easily see Fork Mountain and Doubletop Mountain nearby, but past that ridge, you can also get glimpses of the ridge that makes up Skyline Drive.

The hike starts off on the Graves Mill Trail, which is a flat walk that runs along the Rapidan River.  At .5 miles, you reach a junction with the Staunton River Trail.  Take a left at the junction to follow the Staunton River Trail, which runs along the Staunton River.  Shortly after you join the trail, you will come across a beaver dam on the river and you’ll notice several stumps of trees that have been gnawed by beavers.  At 1.1 miles, you will see a small waterfall leading into a small pool off the trail that is worth a stop.  At 1.8 miles, you will see on the left side of the trail some piles of stone and on the right you’ll be able to see another small waterfall through the trees.  At 2.7 miles, you reach the junction with the Jones Mountain Trail.  Take a left on this trail.  The trail becomes very steep at this point and will remain so until you reach the top.  At 3.1 miles, you reach the junction with the McDaniel Hollow trail.  Take a left here to follow the Jones Mountain Trail.  At mile 3.4, you reach a junction that leads to the available-to-rent PATC cabin.  If you stay relatively straight on the trail, it leads to the PATC Jones Mountain Cabin.  We took this trail which starts off flat, but then descends rather steeply.  After visiting the cabin, return to reach the junction with the Jones Mountain Trail and head up the steep incline until you reach Bear Church Rock.  Continue back the way you came, but your return trip will be shorter if you have already visited the Jones Mountain Cabin.  The total trip should be 8.5 miles.

You could also approach this hike from Skyline Drive for a longer hike, following the Laurel Prong Trail to Cat Knob Trail to Jones Mountain Trail.  My guess is it would be about a 10 to 12-mile round-trip to approach it from that direction.

Start of the Staunton River Trail
Adam pauses to look at distances marked on the Staunton River trail sign. Below: Parking for this hike is at Graves Mill; The lovely Rapidan River; Trillium were still blooming along the trail, but were nearing the end of their peak.

Graves Mill Sign The Rapidan River Trillium

On our way up the Jones Mountain Trail, we ran into a few PATC volunteers that were working on maintaining the trail.  Some PATC members volunteer to help maintain the trails that run through Shenandoah National Park, the Appalachian Trail, and other regional trails.  One of the workers has been working on improving this trail for the last five years.  At the time that we saw them, they were working on building in some water bars through the trail that helps pull the water off the trail to prevent erosion.   They were digging drainage ditches, placing some dead black locust tree logs across the trail they had cut, refilling with dirt, and then mounding the dirt in a way that it was unnoticeable to hikers.  We learned that the black locust trees were great trail logs because they don’t rot.  We thanked them for helping to improve the trails and we plan on getting in touch with them to help them some weekend in the future.  We both feel that as much as we enjoy hiking, it would be nice to give back.

First Waterfall on Staunton River Trail
This was the first of many small waterfalls we saw along the Staunton River trail. Below: Another waterfall; There were many remnants of stone walls and stone structures in the woods along the trail; Adam stops to consult the map at the junction of the Staunton River and Jones Mountain trails.

Another Small Waterfall on the Staunton River Trail Old Stone Wall in Shenandoah Junction of Staunton River and Jones Mountain Trails

At one moment when we were hiking up the Jones Mountain Trail, I decided to take a break from the climb and sat on a log on the side of the trail.  As I was relaxing, a piece of the log broke off, causing me to hit myself in the head with one of my trekking poles.  I felt like I was in the Subway commercial of fat people breaking things.  Embarrassing, but funny.

This was our first time hiking this trail, but Christine and I both think this is one of the best trails in Shenandoah National Park.  If you can handle the distance and the steep climb, this should be on your “must” list.  For further reading about this area, check out Lost Trails and Forgotten People: The Story of Jones Mountain.  I think I would like to pick up a copy and learn more about this area, since it was such an amazing hike.

Christine Says…

Another weekend, another backpacking trip cancelled due to rainy weather – what can I say?  When you’re a fair-weather backpacker, lots of spring trips end up delayed.  We were pretty glad we postponed again, because the thunderstorms that passed through overnight on Saturday were pretty fierce and torrential.  I would not have enjoyed being in our tent during those winds and rains!  Fortunately, Sunday morning dawned dry, but foggy with a forecast of dissipating clouds followed by brilliant sunshine.  We decided to tackle the 8.5 mile route up Jones Mountain to Bear Church Rock.  It’s a hike we’ve been meaning to do, especially after seeing it covered by PATC – Charlottesville Chapter and Hiking Upward.

The hike vastly exceeded my already high expectations. I had the BEST time! Without a doubt, this hike has cracked my top-five list of hikes in Shenandoah National Park (along with Riprap, Mary’s Rock from Pinnacles, Rapidan Camp and the Rose River Loop).  This hike had it all – gorgeous river scenery, waterfalls, fantastic trail conditions, a rustic cabin, spectacular views and plenty of opportunities to spot wildlife.

Beaver Dam on the Staunton River
We saw this impressive beaver dam on the Staunton River. There were lots of gnawed trees (inset) around the water. Below: Showy Orchis is a common wildflower seen blooming along the trail; Everything was so lush and green; You may notice Adam’s pants tucked into his socks to avoid ticks. Ticks are out in force this year!

Wildflowers Along the Trail Beautiful Spring Trail Downhill Hike

We started out around 10:00 a.m. from the Graves Mill parking area.  The lot is small; with room for about 8-12 cars at most.  It was already mostly full when we arrived.  The hike starts off on the Graves Mill trail – a flat section of trail running parallel to the Rapidan River.  Within a half mile, the Graves Mill trail meets the Staunton River trail.  This trail is a gentle uphill grade, following within sight or earshot of the water.  One of the first interesting things we passed was a series of several beaver dams spanning the river.  I don’t know if they’re active dams or long abandoned.  We saw plenty of gnawed tree stumps, but no sign of beavers or any fresh activity.  A little further upstream, we passed the first of a series of small waterfalls.  All of the falls and cascades along the Staunton River are beautiful!  If you’re a photographer and like shooting long exposures on moving water, this river is a goldmine.  I’d love to return on an overcast day after there has been plenty of rain.  I think this trail would also be popular with people in search of the perfect summertime swimming hole.  There were so many deep, quiet pools between the faster moving cascades.

After about a mile and a half along the Staunton River trail, we reached the junction with the Jones Mountain trail.  Adam took a brief break at this point to consult the map. We quickly figured out that we were about to start climbing.  Overall, the path to Bear Church Rock requires about 2200 feet of elevation gain.

PATC Work Crew
PATC volunteers have been working on the trails in this area for over five years, spending 1000+ hours of their time.

After just a few minutes of walking, we heard voices and the sound of tools coming through the woods.  Shortly later, our paths crossed with a PATC trail crew hard at work installing water bars.  We learned from the crew that they’ve done over 1000 hours of work on this particular section of trail over the past five years.  No wonder the trail is in such magnificent shape.  Everyone who hikes in Shenandoah and enjoys the fantastic trail conditions owes a debt of gratitude to volunteer trail workers.  They do mind-boggling amounts of backbreaking labor to make the trails nice for everyone else.

After chatting with the trail crew for a few minutes, a couple came down the trail.  They mentioned that they had seen a bear with two tiny cubs just a few minutes earlier.  We were excited and hopeful that we might spot them too.  Unfortunately, we weren’t that lucky!

Eventually we reached a ‘Y’ in the trail, with one arm leading .3 of a mile down to the Jones Mountain cabin and the other arm leading a half mile up to Bear Church Rock.  We decided to visit the cabin first, and then enjoy lunch atop Bear Church.

The trail to the cabin led rather sharply downhill, first passing through an ancient, gnarled stand of mountain laurel.  The curly branches practically formed a tunnel over the trail.  All along the final descent to the cabin were stacks of firewood – also courtesy of PATC trail crews.  Apparently, there is a significant problem with cabin renter chopping down live trees near the cabin to use as firewood.  I find that SHOCKING!  What is wrong with people?  Who goes to a National Park… and chops down living trees (especially when deadfall is so abundant in the park)?

The Jones Mountain Cabin
The Jones Mountain cabin sits in a peaceful opening in the woods. Below: Christine walks through a tunnel of ancient mountain laurel on the path down to the cabin; Christine has new hiking shoes – Montrail Mountain Masochists (very comfy!); Christine enjoys the wilderness views from the rock.

Christine Hikes Through Old Mountain Laurel Love My New Montrails Christine On Bear Church Rock

After rounding a final bend, the roof of the cabin comes into view.  The Jones Mountain cabin is adorable – two stories with a big front porch.  We peeked in through an opening in the shutters and saw a big fireplace, a rustic wooden dining table and a sunny loft on the top level.  A privy and a spring are both located near the cabin.  What a great place to hike in and camp for a couple nights!

We didn’t stay long at the cabin because we were hungry for lunch and wanted to enjoy Bear Church Rock before any other hikers arrived.  The climb back up to the trail junction was pretty steep, but didn’t take too long.

The toughest climbing of the day came along the final push up to the rock.  After a few switchbacks, the trail went straight up the mountainside.  At the top, a little unmarked (but highly visible) path cuts through the vegetation onto a large rocky outcropping.  The trail continues past the little spur trail to the rocks, so don’t miss it!  If you continued along the trail, you’d eventually come to trails in the vicinity of Camp Hoover.

The view from Bear Church Rock is fantastic!  Instead of looking down into a valley full of roads, farms and small towns, you look down into wilderness.  You see nothing but trees and a line where the river cuts through the forest.  If you have a map, you can identify some of Shenandoah’s other peaks from this spot.  We hit this spot on a perfect spring day.  We had bluebird skies with only occasional puffy clouds.  The progression of spring was evident in the mountains – vibrant green climbing its way up toward the still barren mountain tops.  We enjoyed our lunch and relaxing in the sunshine.

Spectacular View from Bear Church Rock
Just some more beauty shots from atop Bear Church Rock.

Christine on Bear Church The Rock Continues Adam and Hiking Gear on Bear Church

The hike back down went quickly – with a descent so steep it was easier to run than to walk! We made the return trip to the car in about half the time it took us to climb up.  In the end, the entire hike took us about four hours, including stops at the cabin and half an hour for lunch.

Bear Church Rock is definitely worth doing!  What a beautiful day!

Trail Notes

  • Distance8.5 miles
  • Elevation Change – 2210 feet
  • Difficulty – 4.  The parts near the Rapidan and Staunton Rivers are very flat, but the uphill climbs are very steep.
  • Trail Conditions – 4. The trail is wide during much of the trail where you could even walk side-by-side with someone if you wanted.  The trails are well-maintained thanks to our PATC volunteers and it is not very rocky through most of the hike.
  • Views– 4. The view from Bear Church Rock is amazing.  It’s not a 360-degree view, but you can see mountains for miles and little sign of civilization.
  • Streams/Waterfalls – 4.5.  The rivers are nice to walk alongside.  You also have a beaver dam and a few small waterfalls on this trail.
  • Wildlife – 4.  We saw some snakes by the river and on the trail.  We saw deer by the Jones Mountain Cabin.  People coming down the trail when we were coming up had just seen a mama bear with two cubs.
  • Ease to Navigate – 4.  While the trail does have a few turns, it is well marked with concrete posts to help give you direction.
  • Solitude – 3.5.  We had the view to ourselves by going early in the day, but this is a fairly popular hike.

Directions to trailhead:  From Route 230 near Wolftown, VA turn on to Route 662.  Continue to follow the signs for 662.  In about 6 miles until 662 ends at a parking lot.  The trailhead is visible from the parking lot.

Duncan Knob

Duncan Knob is a great 3.4 mile hike in George Washington National Forest, located near Kennedy Peak and Strickler Knob.  Reaching the summit requires negotiating a Class III rock scramble.

Wookie Enjoys the View from Duncan Knob
Wookie Enjoys the View from Duncan Knob.  Below: The foliage along the trail was pretty;  The scramble is a foreboding pile of boulders; Adam and Wookie make their way up the scramble.

Rocky Trail View of the Scramble from the Bottom Scrambling with Wookie

Christine Says…

On Friday, Adam and I both took a vacation day from work to get in some fall hiking. We decided Duncan Knob suited our plans perfectly.  We wanted to avoid hikes in the national park (the crowds are dreadful this time of year) and we didn’t want to drive more than an hour. We did a little online research to look at our route options, and found pretty much everyone did the hike as an 8.7 mile loop.  The common route passes by just one spot with a view and includes significant uphill climbs on both the outgoing and return arms of the loop.

We decided to look at our maps to see if there was a more direct route to Duncan Knob.  I know lots of people primarily hike for the exercise. They love anything that makes the trail longer, steeper and more challenging.  I am not one of those people.  I don’t mind distance or elevation as long as there is a payoff for it.  But if there’s a more direct route to get the same view, I usually opt to take it.  Needless to say, we were pleased to find a 3.4 mile, out-and-back route that involved just 900 feet of elevation gain.

Blue Blazed Trail Gap Creek Trail
The Blue Blazed Trail Gap Creek Trail.  Below: The Gap Creek trail is well-marked;  Near the beginning of the trail you cross a small stream; Wookie enjoyed running back and forth across the bridge.

Gap Creek Sign Trail Sign Small Stream Wookie Running Across Bridge

The hike starts at the Gap Creek trailhead on Crisman Hollow Road.  You’ll walk a short way up a blue-blazed fire road until you see a campsite on the left side of the road.  The road continues uphill from this point, but you’ll want to cut through the campsite and cross the small bridge over the stream.  After crossing the bridge, the trail climbs steadily uphill.  For the first mile, the elevation gain is very gentle and is punctuated by flat stretches.  The trail is extremely rocky the entire way.  At mile 1.2, the blue-blazed Gap Creek trail intersects the yellow-blazed Scothorn Gap trail.  Continue on the blue-blazed trail until you reach a level place near the top of the ridge at 1.5 miles.  There’s a great campsite at this spot.  It has a big stone fire pit ringed by log benches.  There are lots of flat places to pitch tents, too.

Directly across from the campsite, the Duncan Knob spur trail begins.  The trail is blazed white and climbs steeply uphill to the summit.  As you walk along, you’ll notice the rocks on the trail are getting larger and more abundant.  Eventually, you step out of the woods and find yourself facing an enormous pyramid-shaped summit of jumbled rocks and boulders.

More Scrambling
Wookie and Adam scramble upward.  Below: The trail becomes progressively rockier; Adam explore the boulders; Wookie spots Adam climbing back down from the geocache.

Trail gets even rockier Adam scrambles Wookie sees Adam

Climb the rock scramble any number of ways (we followed a rather informal series of cairns along the left side of the rock pile) and you’ll be treated to sweeping views in almost every direction.  The scrambling was fun and not difficult at all.  I found a nice rock “chair” to sit on while Adam found a geocache hidden at the summit.  It was freezing cold and blustery sitting on the rocks, so we didn’t stay too long.

On the way down, we stopped back by the campsite and had some water and a snack.  We even gave our dog, Wookie, some graham crackers and marshmallows from our trail mix.  He did a great job on the rock scramble – especially considering how small he is.  The hike back down was pretty uneventful and just retraced our steps.  What a great hike!  I told Adam it’s been one of my favorite recent hikes.

Adam Says…

Ever since we did the Strickler Knob hike (actually our very first post!), I had been hearing that Duncan Knob also had amazing views.  I believe we put off this hike for a while due to the long 8.7 mile length, combined with lots of elevation gain.  So, I pulled out my map of the area to see if there was a different way.  Sure enough, you can easily get up to Duncan Knob by just sticking to the Gap Creek Trail.  The hike may have a little steeper of an elevation than approaching it from the Scothorn Gap Trail, but the hike up the Gap Creek Trail is much shorter and you aren’t missing much scenery.

The trail does include a few switchbacks once you start the trail over the bridge which takes the pressure of the elevation off your leg muscles.  The hike is almost all uphill, but before you know it you’ve reached the ridge where the campsite is.  We took a break here to see if there was anything else to see along the ridge, before proceeding up the white-blazed trail to the summit of Duncan Knob.  This white-blazed trail is slightly overgrown and some of the white blazes are quite faded, but it wasn’t too hard to navigate.  After only about .2 miles on this trail, we saw the looming rock scramble in front of us.  We decided to approach the rock scramble on the left-hand side.  Once you begin to climb up a few rocks, the views really begin to open up around you.  The rocks weren’t too tough to navigate, but it was harder to help navigate a small dog on a leash.  From the top, you will have great views of Middle Mountain, Waterfall Mountain, Strickler Knob, and Kerns Mountain.  The color was very nice and we took some time to soak in the scenery.

Adam enjoys the view
Adam takes in the view from Duncan Knob.  Below: A nice campsite on the ridge; Adam and Wookie take a break on the climb down;  Wookie did surprisingly well on the scramble, but occasionally he had to be carried.

Nice Campsite View on the Way Down Climbing Down

I left Christine to keep climbing up to the summit of the rock scramble and found the Duncan Knob Geocache.  A few people before me were not able to find it before me, so the owner had taken the posting offline until he had time to investigate.  I’m glad I was able to save the owner a hike back.  This was my 499th find, so I need to do something special for my 500th geocache.

If you haven’t done any hiking off Crisman Hollow Road, I would highly recommend making this a stop in the near future.  With the Massanutten Story Book Trail, Strickler Knob, and Duncan Knob hikes all off this road, I feel this road leads to some amazing hiking gems that are unknown to many.

Wookie Says...Wookie Says…

I’m so glad that I finally got invited to go hiking again!  I really enjoyed most of this trail because there wasn’t any water for me to cross.  When we first started the trail, I did a few runs across the wooden bridge with my masters on both sides.  I was feeling frisky and I was ready to get moving.  We made our way up the trail and I felt it wasn’t as bad as I was expecting.  When we got to the final rock scramble, I was a little worried.  I really enjoy climbing up on rocks, but I wouldn’t recommend it to my less-agile canine friends.  There were a couple of moments where I had to perform an iron cross and pull myself up some rocks, but Adam helped navigate me the right way through the maze of boulders.

Begging for Treats
Wookie enjoys trailmix!

The way down was a little more challenging, so Adam tucked me under his arm for most of the way down to make sure I didn’t get hurt.  I really enjoyed the views from the top of Duncan Knob and I enjoyed sniffing the air around me.  After our hike back down, my masters even let me sample a few pieces of trail mix.  I really liked the marshmallows best!  One time I dropped a marshmallow and when I picked it up again the dirt from the ground made it look like cookies and cream.  I look forward to my next time hiking and I’ll be sure to put on my pitiful, pleading face the next time Adam and Christine get ready to head out for a hike.

Trail Notes

  • Distance – 3.4 miles
    (Check out the stats from Map My Hike)*
  • Elevation Change –  900 feet
  • Difficulty – 2.5. The hike is squarely moderate – even with the rock scramble.
  • Trail Conditions –3. The trail is in good shape.  The rock scramble is not formally marked and there are some unbalanced rocks.
  • Views5. Beautiful views of the Massanutten Mountain area. The view looking toward Strickler Knob is awesome!
  • Waterfalls/streams –2. The stream is seasonal and may be dry part of the year.  When the stream is running, the area is popular with fishers.
  • Wildlife – 1.5. The area is popular with hunters, so animals tend to be reclusive.  We’ve heard of people spotting bears and deer in the general area, but we’ve never seen larger animals.
  • Ease to Navigate – 3.5. Trails are clearly blazed, but turns are not labeled and signed like they are in the national park.  It’s a good idea to have a map for this hike.
  • Solitude – 4.5. On a beautiful fall day, we saw just one other couple of hikers.

Download a trail map (PDF)

Directions to trailhead: From New Market, take 211 east.  In about 3 miles, take a left on Crisman Hollow Road. The road starts off paved, but turns to gravel.  At about 4.5 miles, park on the right at the Gap Creek trail.  Follow the fire road until you reach the first campsite on the left.  The trail starts behind the campsite at a wooden bridge.

Knob Mountain – Jeremy’s Run Loop

The Knob Mountain – Jeremy’s Run Loop takes hikers along a 12.4 mile route through one of Shenandoah’s most popular backcountry camping areas.  This hike could be done as a long dayhike, but the campsites in the area are too inviting to pass up.

Pool on Jeremys Run
The Knob Mountain – Jeremy’s Run Loop offers beautiful stream scenery. Below: Mountain vistas can be seen along the descent on the Knob Mountain Trail; Blue Blazes mark the way across streams on the Jeremy’s Run Trail; Adam negotiates one of the many stream crossings.

View from the Knob Mountain Trail Water Crossing Adam Crossing the Stream

Adam Says…

Since the weather looked like it was going to be a cooler, we decided to take off and go on an overnight backpacking trip.  Our first overnight trip was the Hazel Mountain-Catlett Mountain trail which we did with a group from the PATC.  This trip was our first non-group outing, so we felt it would be a good chance to put into practice what we learned from our Backpacking 101 course.

To do this trail as a loop, leave from the Elkwallow picnic grounds.  You will see the entrance to the trail next to the pit toilet, which provides a last chance to “take care of business” before embarking on the hike.  You will begin the trail on a short spur trail to the white-blazed Appalachian Trail.  Turn left on the AT.  In .2 miles, you will reach the junction with the blue-blazed Jeremy’s Run Trail.  Continue straight on the Jeremy’s Run Trail.  Around 1.2 miles, you will reach the junction with the Knob Mountain Connector Trail.  Take a right at the post to join this trail.  As soon as you cross Jeremy’s Run with a little rock-hopping, you will begin this steep connector trail.   There are lots of switchbacks and this is definitely the steepest part of the entire trip.  Around 1.7 miles, you will reach a junction with the yellow-blazed Knob Mountain Trail.  Take a left at the trail junction and continue to follow this slowly ascending ridge trail.  We would probably name this portion of the loop the Bear Scat Boulevard, because there was a ton of bear evidence in the area.  You will see a few views through the trees, but nothing remarkable from the trail.  At mile 3.9 you will reach the summit of Knob Mountain, marked by a concrete post.  After the summit, you will begin your steep descent down the mountain.  This is broken up by several switchbacks.  The trail does open up at times to give you views of mountains along the way, including Strickler Knob and the Three Sisters.  At 6.8 miles, you will cross Jeremy’s Run and reach the junction with the blue-blazed Jeremy’s Run Trail.  Since we were fairly exhausted from our trip, we picked a campsite near the junction of the trail, which gave us great access to water.  From the junction, you just continue on the Jeremy’s Run Trail until you reach the parking lot, crossing over Jeremy’s Run fourteen times.   In some areas, it was necessary to rock hop across, but most of the time the traversing was quite easy.  I imagine during heavy rain seasons, this would be more of a challenge.

Filling Out Paperwork for a Backcountry Permit
The overnight trip started with a brief stop to fill out paperwork for our backcountry permit. Below:  Adam makes his way down the Jeremy’s Run Trail; Snacks on the Knob Mountain summit; A view through the trees from the Knob Mountain Trail.

Adam Hiking Snacks on the Knob Mountain Summit Views from Knob Mountain Trail

Jeremy’s Run truly provided a great opportunity for camping in the backcountry.  We saw several previously-used campsite areas, so we decided to use our Leave No Trace principles and use an existing campsite rather than creating our own.   The campsite was short walking distance to a reliable water source.  After starting our trip around 9:30AM, we arrived at camp around 1:00PM.  We were very hungry, so Christine worked on getting some lunch together and I began working on getting our tent set.  The ground was very hard and rocky, so it took an effort to find a good place to get stakes into the ground.  After lunch, we finished getting our sleeping pads/bags ready, hung our bear-bag rope, and prepared our kitchen area.  We got some water to use for the trip at the nearby stream and I dug a few preemptive catholes.  With every thing set, we decided to relax a little in our tents to stretch out our backs.  I like to bring a book along the trip so we took turns reading aloud a few chapters from A Walk for Sunshine by Jeff Alt, an entertaining read about hiking the Appalachian Trail.  We took a short nap and then played a few hands of the Monopoly card game we also brought.  We then broke in our new JetBoil and prepared a great dinner.  After cleaning up dishes, we went down to a place along Jeremy’s Run and stretched out on a large rock.   We watched several brook trout jump out of the water, catching mosquitoes that were lightly dancing on top of the water.  We retired to our tents to the sweet chorus of whippoorwills and the “who cooks for you” hoots of nearby barred owls.

Neighbor Mountain
On the hike down from the summit of Knob Mountain, hikers get a few decent views of adjacent Neighbor Mountain. Below: A scenic spot on Jeremy’s Run; Our campsite.

Jeremy's Run Camp

There were so many things I enjoyed about our trip.  We saw tons of wildlife – three black bears, a wild turkey, scarlet tanagers in glorious color, and heard lots of birds at night.  The temperature was perfect and the bugs were not out as much as we expected.  The trip also helped affirm our ability to handle a backpacking trip by ourselves. I think we really learned a lot of great skills in the last few months to help us feel well-prepared.   I was a little more apprehensive wondering if we could handle the 12+ mile hike with 35 pounds on my back, since our previous trip was about 8 miles total with a little less weight each.  The hike was more strenuous the first day, but we were able to complete the hike without much trouble.  I think we’re both looking forward to going on another backpacking trip, but we are now getting into the hot summer months.  Hopefully, we’ll be able to find a cooler weekend in the near future.

Christine Says…

When Mother Nature gives you the gift of a sunny, dry, 70-degree day in the midst of a long string of 90+ degree scorchers, you must take advantage of that gift!  We chose to make the most of the pleasant weather and go on an overnight backpacking trip.  One of the leaders on our last trip recommended Jeremy’s Run as one of his favorite places in the park.  As dayhikers (until recently), the Jeremy’s Run hike had always been a little out of reach.  At 12.4 miles with well over 2,500 feet of elevation gain, it was always more than we were willing to tackle on a day hike.  It seemed like a perfect candidate for this little weekend getaway.

After filling out all the requisite paperwork, we set out from the Elkwallow Picnic Area along the Appalachian Trail.  Right away, I was struck by how much heavier my pack was compared to our last trip.  On that trip, we had seven people to split the weight of group gear.  But this time, we had to carry our own stove, fuel, collapsible bucket, water filter, food and rope.  I also chose to carry my old dSLR camera, a couple card games, extra batteries, a fleece and my iPod.  In the end, my pack weighed in about nine pound heavier than our last outing.

I brought my iPod along this time for a couple reasons 1) I wanted to be able to listen to my “workout mix” when climbing a couple of the big hills on the route and 2) my iPod is loaded with audio books, which I thought would be pleasant to listen to after sunset in the tent.  The first big hill we hit was on the Knob Mountain Cut-Off Trail.  It was really steep, so I put in my earbuds and started chugging up the hill.  Listening to mindless pop music with a beat – anything from Tupac to Lady Gaga to Gnarls Barkley – makes climbing hills so much less painful.  I had worked up a pretty good rhythm, listening to the early 90’s party song, “Rump Shaker”, when I rounded a curve a spotted two black bears about 50 yards up the hill.  I’m not sure if they were a mom and a yearling or two adults.  We looked at them, they looked at us, then they quickly decided to leave the area.  I didn’t have time to free myself from my trekking poles and iPod cord to get a photo, but it was still a great treat to see the bears. Backpacking seems to involve an inordinate number of straps and buckles.  Sometimes, it makes me feel like a horse pulling a cart.

Christine On the Rocks
After camp was set up, Christine spent some time relaxing on the rocks in Jeremy’s Run. Below:  Adam collects water in a collapsible bucket to use for cooking later; Crocs and Socks – they might not be high fashion, but they’re functional; Playing Monopoly at camp.

Collecting Water Crocs and Socks Cards

After the cut-off trail met the Knob Mountain Trail, the tough climbing was over for the day.  I listened to my iPod a bit more, but eventually put it away in favor of listening to the birds and the breeze in the trees.  We took a snack break on the top of Knob Mountain.  There weren’t any views at the summit – just shade and a ton of poison ivy.  It felt really good to throw the pack off for a while and have a good stretch.  I could really feel the heavier pack weight bruising my hip bones.

The walk from the summit to Jeremy’s Run was all downhill.  The woods along the trail are pretty and occasionally open to views of the valley below.  You also get nice views of Neighbor Mountain, which lies parallel to Knob Mountain.  Another slightly longer loop hike option approaches Jeremy’s Run from Neighbor Mountain.

The downhill walk lasted a little over 3 miles.  We soon arrived at the stream, where the Knob Mountain Trail converges with both the Neighbor Mountain and Jeremy’s Run Trails.  We crossed the stream a couple times and decided it was high time to find a campsite.  We were both completely knackered after walking about 7 miles with our packs.  I honestly don’t know how thru-hikers cover 20-30 miles a day with even heavier packs.  I’m convinced I wouldn’t last a week!

We found a beautiful place for camp under the shade of pines and hardwoods.  It was clearly a place others have camped before.  Stones were arranged like seats in a semi-circle in one of the clearings.  It was also about 30 yards from a gorgeous spot along Jeremy’s Run – so we had great access to water.

We designated separate sleeping and kitchen areas right away.  Adam pitched the tent while I fixed lunch.  I made Buffalo Chicken Wraps – which were delicious. We found a place for our bear hang and dug a couple catholes for future use.  With camp all set up, we settled into our tent for a nap.

Post-nap, we collected water for cooking in our collapsible bucket.   On our water run, we also took some time to stretch out and lounge on one of enormous boulders in the middle of the stream.  The sky above was so blue and it was very soothing to watch the trees swaying above in the breeze. I actually tried out my Crocs again, and found them more comfortable, albeit considerably dorkier, with socks.  I may keep them as my camp shoes after all.

Filtering Water for Dinner
We filtered water for our dessert and boiled water for our entree. Below:  We had Pad Thai for dinner; Dark Chocolate Cheesecake for dessert.

Pad Thai Dark Chocolate Cheesecake

Around 5:30, we started getting things together for dinner.  Because this trip was rather impromptu, we brought pre-packaged dehydrated meals instead of taking the time to make homemade food.  But it was still delicious.  The Backpacker’s Pantry Pad Thai was filling and tasty.  It had a yummy, spicy peanut sauce with noodles and vegetables.  For dessert, we ended up having Dark Chocolate Cheesecake (instead of Tiramisu, as originally planned).  It was really tasty, too!  I was stuffed from dinner, so we decided to take a short walk down to a deep pool I had seen along the trail a way back.  We sat on a rock and just enjoyed the quiet of the evening.

It got dark quickly down in the hollow, so we retired to our tent a little before nine.  I listened to a book on my iPod and Adam read.  I started to doze off well before 10:00.  All through the night, I could hear a couple barred owls hooting, over and over and over again.  Pretty soon, a whippoorwill joined in and sang through almost the entire night.  I haven’t heard a whippoorwill since I was a child, so it delighted me to hear the song in the night again.  I slept pretty soundly, until the roar of a train whistle woke me up around 2:00 in the morning.  I could hear the wheels on the track so clearly; it seemed like the train was rolling through camp.  I guess some distant sounds really carry on the quiet night air.  When I awoke, I found I was drenched with sweat in my sleeping bag.  It was in the mid-50’s outside, so the down bag was a bit too warm.  However, if I slept outside my bag, I got cold quickly.  I want to get a blanket and sheet for my sleeping pad to make summer camping more comfortable.  Despite being hot or cold, I eventually fell back to sleep and stayed so until 6:30 a.m.

I got up before Adam and got the bear bag down, so I could start breakfast.  We ended up leaving the bacon home because we didn’t want to carry a pan.  Instead we had oatmeal, boxes of apple juice and hot chocolate.  It was a satisfying breakfast on the cool morning.

Bear on the Appalachian Trail
We saw three bears, including one on the Appalachian Trail.  Below: Another scenic pool on Jeremy’s Run; We encountered this loose dog on the trail (one of many).  He apparently lives on the border of the park and runs the trail often.;  Rocks in the stream bed were covered with moss.

Pool on Jeremys Run Loose Dog Mossy Rocks

We broke camp down quickly and were back on the trail around 8:00.  The second day of hiking was substantially shorter and easier than the first day.  With about 5.5 miles to cover, we knew we’d be back at the car by mid-morning.

The trail climbs ever so gradually along Jeremy’s Run.  We passed lots of fantastic campsites along the stream.  It’s no wonder this area is so popular with backpackers!  We crossed the stream 14 times over the course of the morning. Because of all the dry weather we’ve had lately, none of the crossings were challenging at all.  Most of them were bone dry, and the ones with water were still easily rock-hopped.

We took a snack break where the Jeremy’s Run trail crosses the Knob Mountain Cut-Off.  From this point, the trail follows the same route as we’d used hiking out the day before.  The grade becomes steeper for the last mile and eventually meets back up with the Appalachian Trail.  For this section, I put my iPod back on again to help endure the uphill.  “Rump Shaker” came up in the shuffle again, and after the first few moments, I spotted another bear.  There must be something about that song that conjures bears!  I did manage to get a few distant photos of this bear before he disappeared deeper into the woods.

About ten minutes later, we were back at our car and on our way.  We stopped by the Elkwallow wayside, where I rinsed my face and used  a flushing toilet!  Plumbing is so exciting after being without it.  On our way home, we stopped at McDonald’s for lunch.  Coke and salty French fries taste absolutely amazing after a long hike.  As luck would have it, their credit card machine was broken and they gave us our lunch for free!  It was a fitting bonus for a perfect trip.

Trail Notes

  • Distance – 12.4 miles
  • Elevation Change – 2600 ft
  • Difficulty – 3. If you were going to do this in one day without stopping, I would up the difficulty slightly due to the length.
  • Trail Conditions – 3.5. The trail was very well-maintained.  We saw evidence that the Knob Mountain trail had been cut back, but I can imagine in late spring, much of the trail could have some overgrown areas.  The ground was well-traveled and there were only a few rocky spots around the streams.
  • Views1.5. The best chance of views are on the descent from the Knob Mountain summit down to Jeremy’s Run.  After leaves fall, this may be slightly better.
  • Waterfalls/streams – 3.5. You do get lots of chances to cross Jeremy’s Run.  There was only a small fall near the base.  If you want to photograph streams, you should have plenty of opportunities.  You’ll also have a reliable water source.
  • Wildlife – 4. We saw black bears, a turkey, and scarlet tanagers; we heard whippoorwills and barred owls at night.
  • Ease to Navigate – 4. The trails are well-marked and just stick to the signs on the cement posts.
  • Solitude –3. This is a popular spot for backpacking and trail running.  However, we felt that we were able to find our own peace in the woods.  We also came across a dog that belongs to a nearby family that evidently roams the trails frequently, so we had a companion during part of the hike up from Jeremy’s Run.

Directions to trailhead:

Located in the northern section of Shenandoah National Park.  Park at the Elkwallow Gap picnic grounds around mile 24.3 of Skyline Drive.  The Jeremy’s Run trail begins next to the pit toilet at the parking lot.

Riprap Trail

This 9.8 mile circuit hike offers all the best of Shenandoah – panoramic views,  bubbling streams, a swimming hole and even a nice final stretch along the Appalachian Trail.  It comes close to our 10 mile limit for a day hike, but it’s definitely well worth the effort.

Chimney Rock View
The view from Chimney Rock is very pretty on a clear day.

Christine Says…

The Riprap trail has long been on my list of hikes to tackle in Shenandoah National Park.  Last Friday, we finally got around to it. I have to admit, the nearly ten-mile length and over 2,300 feet of elevation gain intimidated me just a little. The hikes we’ve completed that are close to that length (i.e. McAfee Knob or Mount Rogers) both have substantially less elevation gain. But, we had a free day and beautiful weather, so we decided to go for it. I’m so glad we went because the scenery on this trail showcased everything I love about Shenandoah. And, honestly… hiking 9.8 miles really wasn’t that hard.

We started the hike from the Riprap parking area at mile marker 90. We turned right at the end of the parking lot and followed the Appalachian Trail uphill for about a third of a mile. At the intersection with the Riprap trail, we turned left. The trail went alternately downhill and uphill for about three-quarters of a mile. We passed around a talus slope and came out to a viewpoint near Calvary Rocks. This was a great place to pause and take in the panoramic scene of the valley below. About a third of a mile downhill past Calvary Rocks, we arrived at Chimney Rock. I found this to be the prettier of the two views – but they were both very nice. The trail was especially pretty in late May because of all the blooming mountain laurel, wild azaleas and rhododendron. There were some sections that were so lush, I felt like I was walking through a tunnel of flowers.

Wild Azaleas, Rhododendron and Mountain Laurel
Wild Azaleas, Rhododendron and Mountain Laurel.  Below: The view near Calvary Rocks; Adam taking in the view from Chimney Rock.

View Near Calvary Rock Adam Takes in the Chimney Rock View

From Chimney Rock, the trail follows a ridge for a while, with many nice views between the trees. There is still quite a bit of evidence of forest fire damage from the late 1990’s in this area. The mountainside is still rather barren and charred stumps are visible. Slowly, the trail descends into Cold Springs Hollow. We passed through some of the densest mountain laurel along this section. We saw and heard so many beautiful birds – everything from American Redstarts to Rose-Breasted Grosbeaks.

Near the bottom of the hollow, we started to pick up the stream. It started off as a trickle, gaining volume and speed as we climbed continually downward. There were a few small, unremarkable waterfalls in the gorge, but we didn’t stop walking until the first stream crossing. Adam and I sat on a couple big boulders in the middle of the stream and ate a few handfuls of trail mix.

Swimming Hole with Fish and Rhododendron Reflection
The swimming hole displayed beautiful rhododendron reflections and was full of brook trout. Below: The trout were hard to photograph through the water, but you get the point.

Brook Trout

We stopped again just a couple tenths of a mile later at my very favorite spot along the trail – a wide, green swimming hole shaded by the forest canopy. We sat along the pool for a long while. We watched colorful brook trout lolling in the water. Every now and then, one would splash up and break the quiet surface of the water. The water was so clear. We could see reflections of the rhododendron on the surface and big, round stones at the bottom of the pool. The spot is made even more beautiful by the gentle slide waterfall that cascades down and fills the pool.

After leaving the pool, we had almost about three-quarters of a mile of level walking and a couple more stream crossings. A post marks the intersection with the Wildcat Ridge Trail. We turned left, and enjoyed our last little bit of flat walking for a while. We decided to stop and eat lunch before the big uphill climb began. We had ham and cheese on crackers, chips and some candy – perfect to give us lots of energy!

Climbing along Wildcat Ridge is a steady uphill for almost three miles, but the grade is generally moderate. There were several more decent views through the trees along this section of trail. And of course, more mountain laurel! I think I must have said “This is SO PRETTY!” to Adam a dozen times as we walked through the flowers. This section is where we saw our only other hikers of the day – a young couple hiking the loop in the opposite direction. We got to the junction with the Appalachian Trail faster than we thought we would. We were anticipating another .7 miles of uphill climbing when we reached the marker post. It’s always such a pleasant surprise when an uphill climb ends earlier than you thought it would.

Adam on the AT
Adam and I both enjoyed the more level terrain along the Appalachian Trail.

We took a left onto the AT for the final 2.8 miles of the hike. This section was typical Appalachian Trail in Shenandoah – rolling hills, nothing too steep. We saw a brief glimpse of a bear diving into the mountain laurel about a mile into this stretch. After about an hour of walking on the AT, we arrived back at our car. My feet were a little sore and tired, but other than that I still felt pretty energetic. Riprap now claims the spot for the longest hike I’ve ever done in a day! The 9.8 mile circuit took us just under six hours – including our very frequent snack and photography stops. On the way home, we stopped and rewarded ourselves with Lime Cream Slushes from Sonic – my favorite post-hike treat.

Adam Says…

This may also be the longest hike I have done but it was well worth it!  This hike really does have it all and we hit it at a great time of year.  The mountain laurel and rhododendron were at peak on this trail and we often felt like we were in some type of fantasy land while being surrounded by pink flowers.

The views from Calvary Rocks and Chimney Rock give you some great 180 degree views to the north of the mountains.  I was a little worried that the payoff for this hike was going to be over in the first couple of miles of the hike, but I was glad to be wrong.  After we continued the descent from Chimney Rock, there were still some open views along the way.  Once we reached the bottom of Cold Springs Hollow, we saw a glimpse of a waterfall along the way.  Shortly after the falls and after crossing the stream you come to the beautiful swimming hole that Christine mentioned above.  This was a great spot to relax and enjoy seeing the fish, or you could take a quick, refreshing dip.

View Along the Riprap Ridge
View Along the Riprap Ridge. Below:  The swimming hole is such a beautiful place – even though we constantly had to bat the bugs away.  Note the slide falls coming down to the pool.

Swimming Hole

Once we were done with relaxing, we took the hike up the Wildcat Ridge Trail.  This is a constant uphill for about three miles and does include a couple of switchbacks on the trail.  However, we felt that the terrain wasn’t too steep.  You continue to observe nice views as it hugs closely to the side of the mountain.  Once we met up with the AT, the trail didn’t have a lot of elevation gain/loss.  I do suffer from plantar fasciitis, so my feet were quite sore on the rocks of this section of the trail.

Butterfly on Mountain Laurel
Butterfly on Mountain Laurel.  Below: Adam hikes through the mountain laurel along the Appalachian Trail.

Adam hiking the AT

For those interested in geocaching, I did place an earthcache at the overlook for Calvary Rocks.  This is a way to learn about the geology of the area and there are a few steps to get credit for the cache:

I definitely enjoyed my first trip of the Riprap trail, but I know it won’t be my last.  This would also be a great place to do a backpacking trip, since there is a reliable water source at the bottom of the trail.  We really felt like it was one of the prettiest trails we have done in all of Shenandoah National Park.  Part of that largely is due to the abundance of blooming wildflowers, but another part was the views.  The Riprap trail really has it all!

Trail Notes

  • Distance – 9.8 miles
  • Elevation Change – Around 2300 feet.  The hike is a mix of uphill and downhill, with one long, steady uphill stretch of about three miles.
  • Difficulty – 4.5 While the elevation gain is substantial, the trail is rarely steep.  Grades are moderate.  We scored the hike a 4.5 mainly due to the length.
  • Trail Conditions – 4 Nice trail to walk along!  The stream crossings are easy.
  • Views4.  You get the best views from the Chimney Rocks and Calvary Rocks overlooks.
  • Waterfalls/streams – 3 The stream was on the low side when we hiked, but was still pretty.  The swimming hole at the bottom of the hollow is very beautiful.
  • Wildlife – 4 We saw lots of brook trout, a little toad, many bird species and we even caught a glimpse of a black bear’s rear end diving into the laurel thicket.
  • Ease to Navigate – 2 A few turns to make along the way.  There are a few false trails leading away from the main trail and also one tricky turn after a creek crossing.
  • Solitude – 3 We saw only two other people on the entire loop.  We hiked it on a beautiful Friday in late spring.  I imagine the trail is much more crowded on weekends.  It’s a very popular short backpack loop.

Directions to trailhead:
From Skyline Drive, park on the western side at mile marker 90.  There is a parking lot specifically for Riprap hikers.

Flat Run Trail

Flat Run Trail is a short, fairly easy hiking and mountain bike trail in Douthat State Park.

Mountain Bike
A mountain bike works best on this trail. Below: The trail crosses the creek a couple times.

Bridge on the Flat Run trail

Adam Says…

After our hike up Beards Mountain, we decided to try out a short bike ride.  Douthat State Park is known to many bikers for having some great mountain bike trails and is host to the Middle Mountain Momma Bike Race.  We did see a couple mountain biking on our hike to Beards Mountain.  The man was looking happy at the top of the trail and the woman was pushing her bike up the hill looking miserable (I’m sure they had an interesting car ride home).

The Flat Run Trail is only a five mile out-and-back trail.  I would strongly suggest having a mountain bike for this trail.  Christine started off on her hybrid bike, but she didn’t enjoy jumping over the rocks in the creek without suspension.  I continued on the trip solo since I do have a mountain bike.  I found the trail to be fairly easy for mountain bikers.  There are a few large rocky creek beds to cross as the trail goes in between the main road and Wilson Creek.

After your first few creek crossings, you will come across a bridge pictured above at about the .5 mile point.  At the 1 mile mark, you should be able to see some great fishing spots to your left of Wilson Creek.  At 1.5 miles, you will see the swinging bridge that leads to the Brushy Hollow Trail.  At 2.25 miles, you will see the beginning of the Stony Run trail. At mile 2.5, you will reach the end with a trail that connects to a parking lot a few feet ahead to the right.  This marks the end of the trail, so you can return the way you came or bike along the road back to your vehicle.

While it was a short bike trail, I did enjoy seeing the creek along the way.  The trail wasn’t too bumpy (except for crossing the creeks) compared to other mountain bike trails I have done.

Christine Says…

I don’t have a mountain bike, so after two seconds of jarring bumps, I cut through the woods and continued riding on the road. That’s all I have to say about that.

Trail Notes

  • Distance – 5 miles
  • Elevation Change – Negligible.  Hardly any elevation change.  It is called Flat Run for a reason.
  • Difficulty – 2. Hiking or mountain biking it should be fairly easy. Most mountain bikers would give this a 1.
  • Trail Conditions – 3.5 A few creek sections to cross, but other than that, it’s well maintained.
  • Views0.  The trail is scenic in spots along the creek, but there isn’t anything very scenic on this trail.
  • Waterfalls/streams – 2. The path does run along Wilson Creek for part of the trip.
  • Wildlife – 1. You may see fish and minnows in the creek if you stop by to look.
  • Ease to Navigate – 4.5
  • Solitude – 4.  I  didn’t see any people on the trail.  I think for mountain biking, people do most of the more serious trails over this one.

Directions to trailhead: Take I-64 to exit 27 near Clifton Forge, VA heading north on state route 629.  Continue on this road until you enter the park.  In Douthat State Park, the trail begins about .25 miles south of the park office before the fee station.  However, you do need to pay the fee before parking and using the trails.  There is a parking lot and sign for the beginning of the trail.