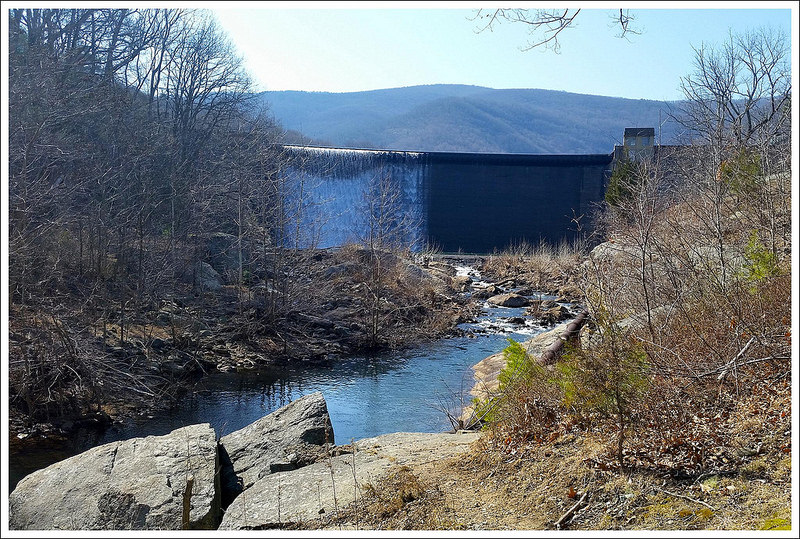
NOTE: Parking at Edith Gap was greatly restricted starting in fall 2020. If you attempt to park there, be sure to pay attention to the the new ‘No Parking, Tow Away’ signs. Unless you are very certain you are legally parked, we suggest following the updated route outlined below, starting from the horse trailer parking area for the Stephens Trail about a mile lower on the mountain.
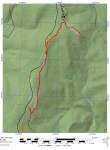
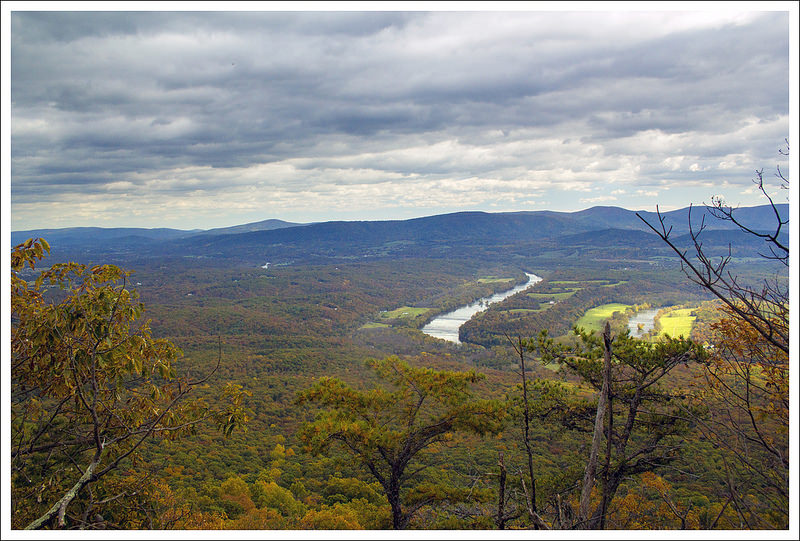
Kennedy Peak is an beautiful seven-mile out-and-back hike in the Lee District of George Washington National Forest. It gives hikers gorgeous views of the bends in the Shenandoah River.
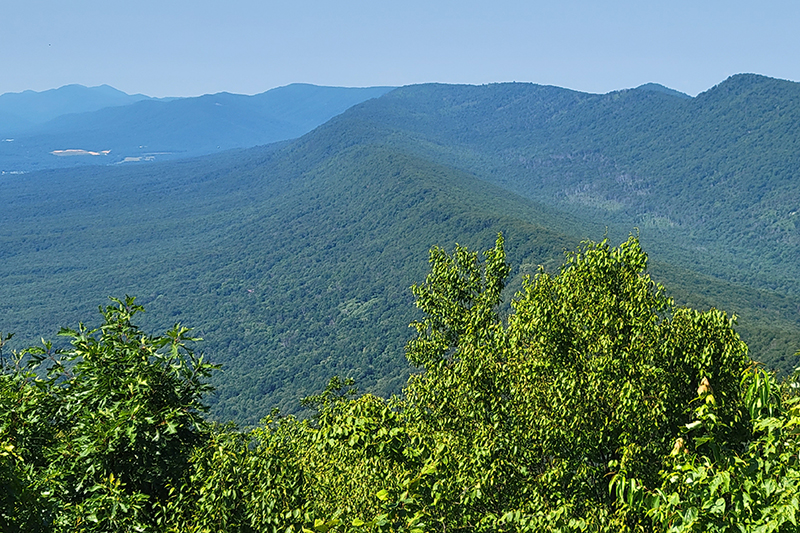
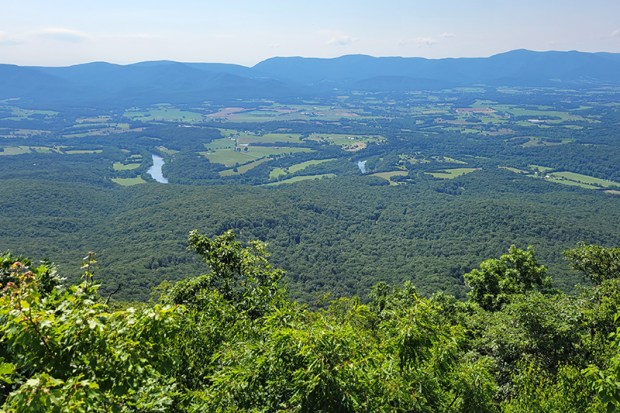
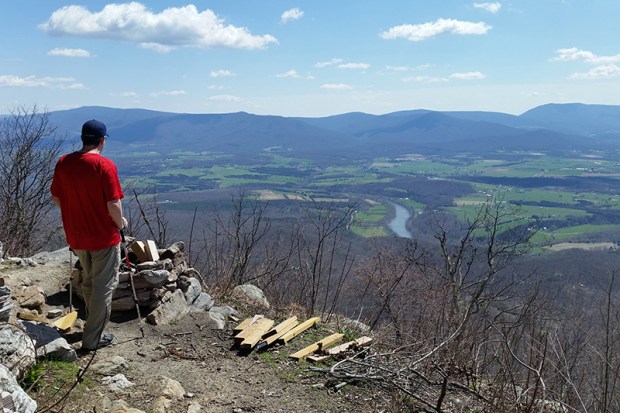
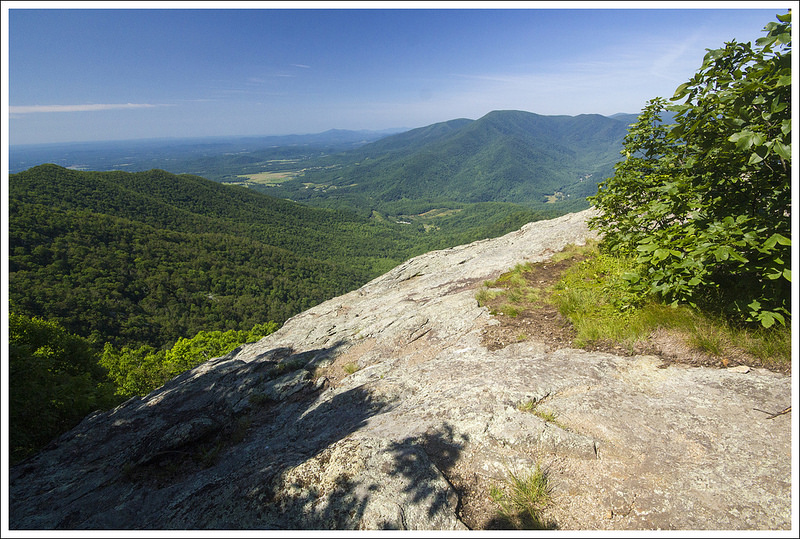
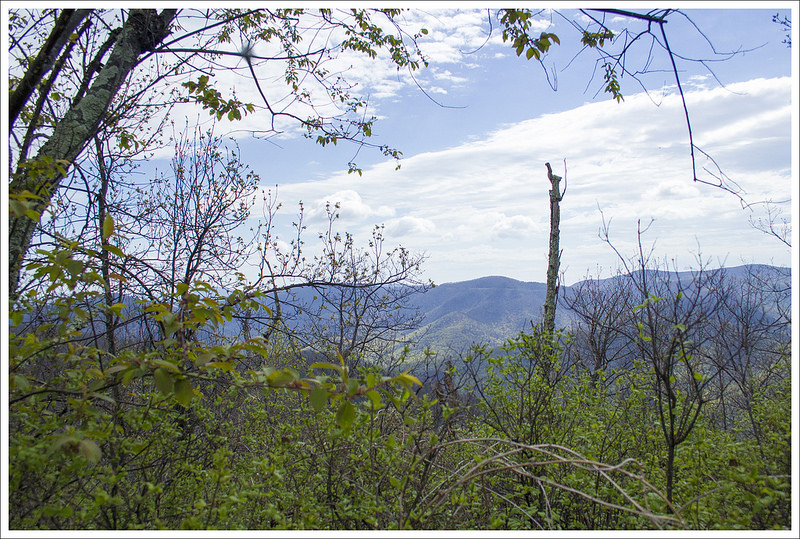
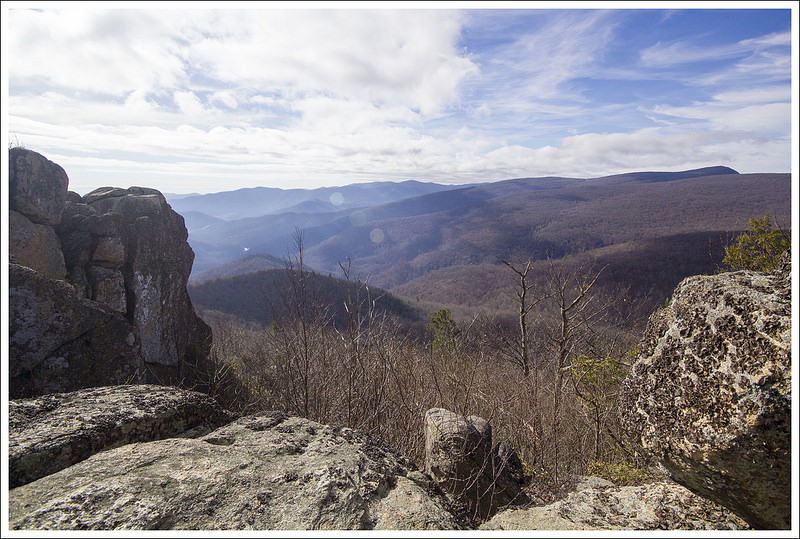
The view from atop the Kennedy Peak Tower
Christine Says…
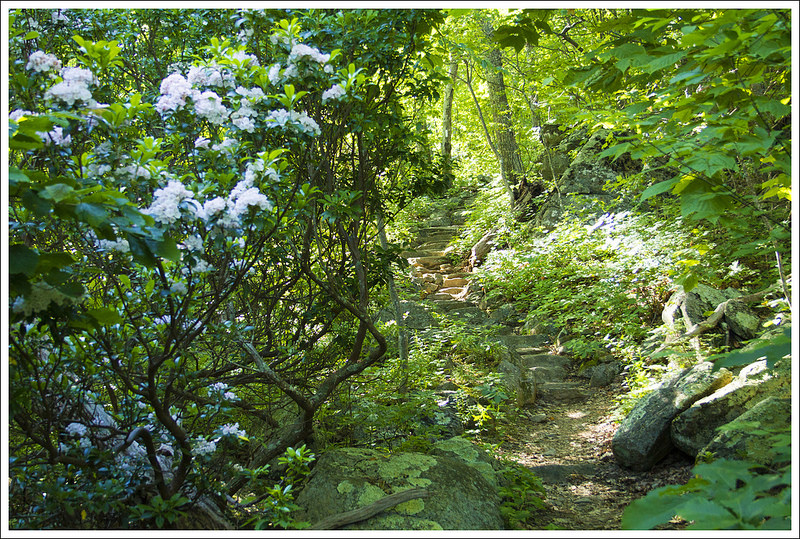
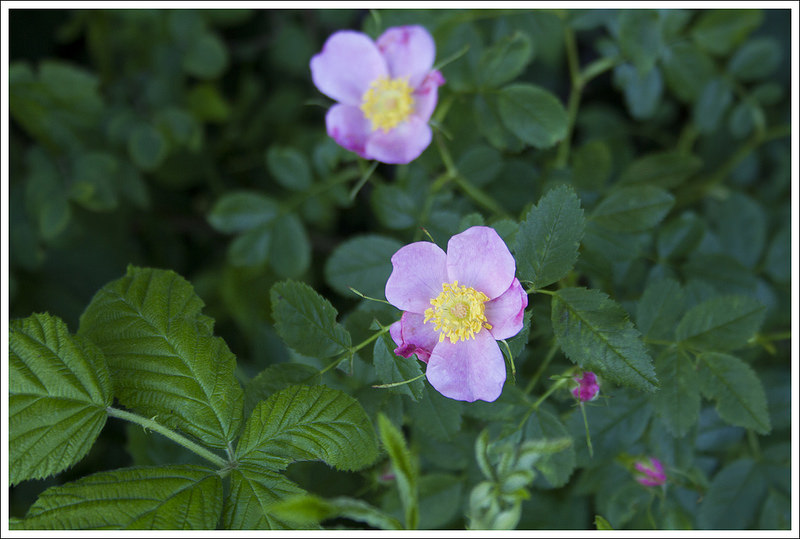
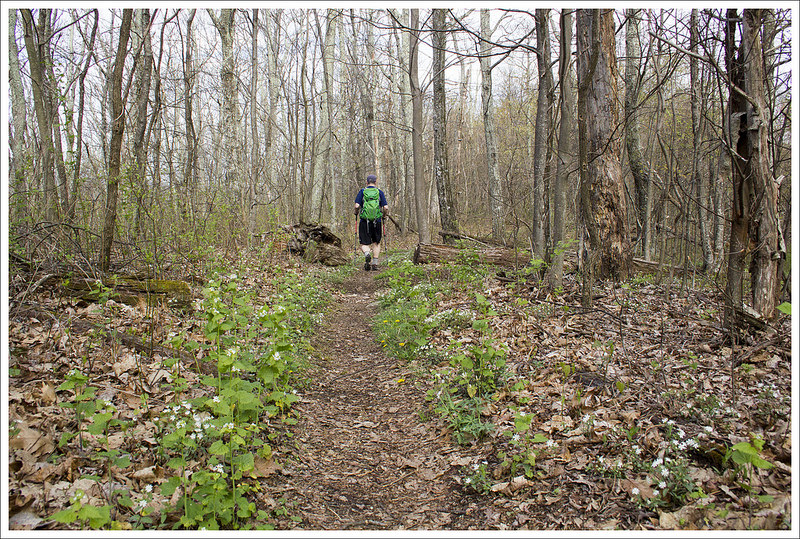
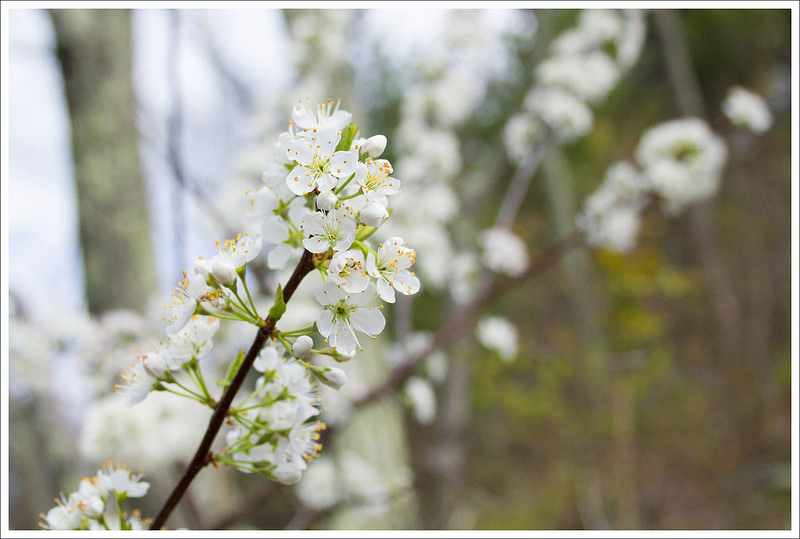
I love this hike. We’ve hiked it in winter and fall before, but this was the first time we’ve hiked it in the spring. Sunday afternoon was the kind of day that is custom made for hiking. It was dry, sunny, breezy and in the low 70’s. The trail was lined with brilliant, pink rhododendrons. All the trees were covered with new, spring green leaves and/or blossoms. Butterflies were fluttering all around the trail, taking pauses on the blooming trees and wildflowers. It was, in a word, idyllic.
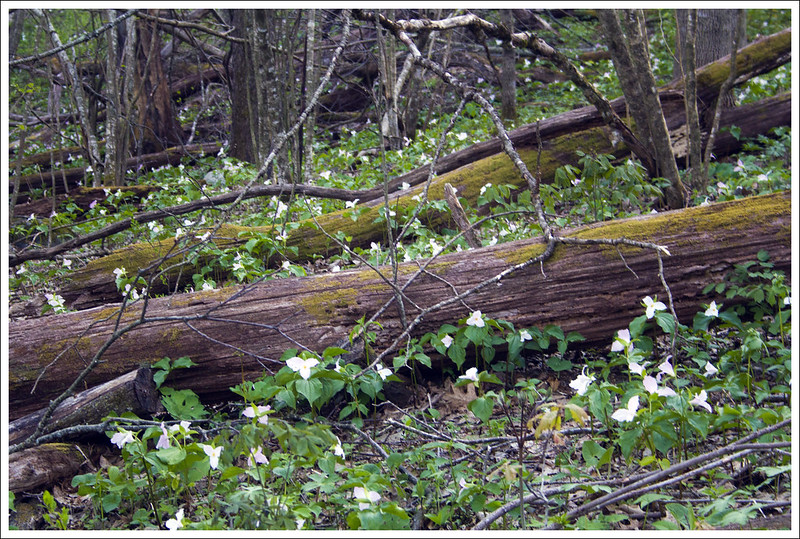
Box Turtle, Swallowtail on Rhododendron, Indigo Bunting
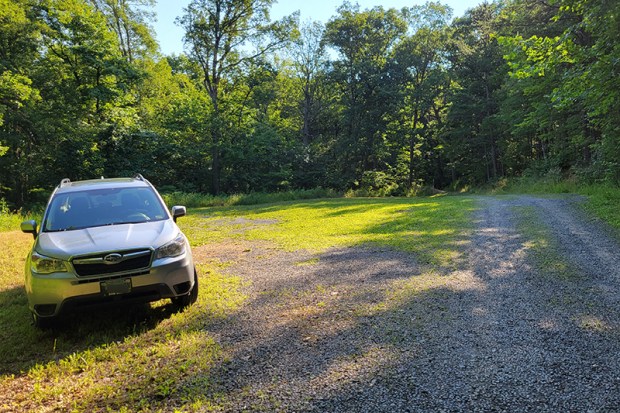
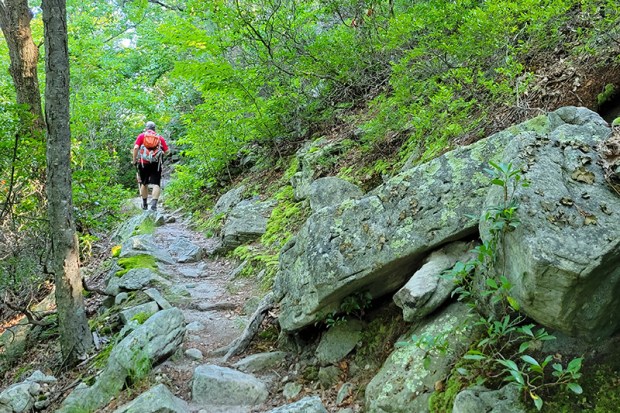
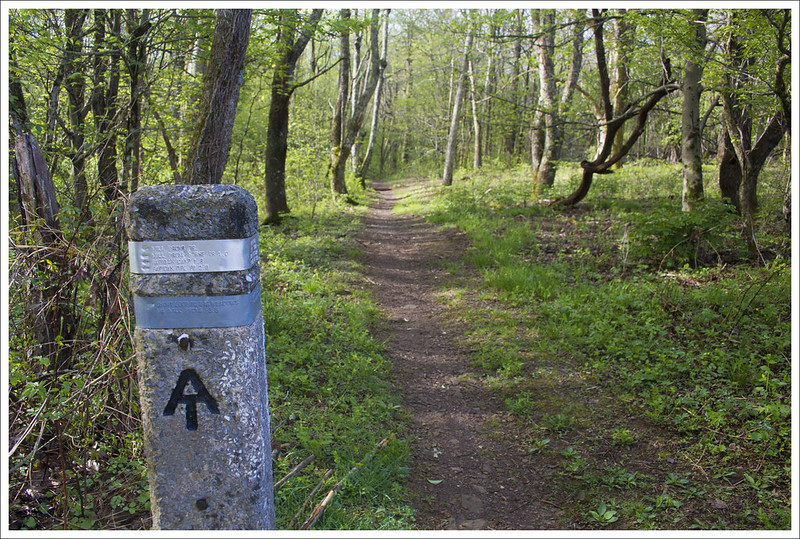
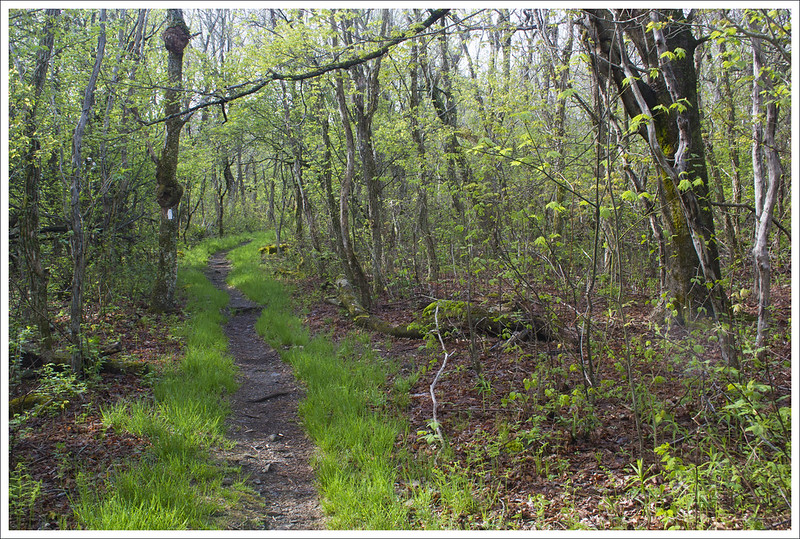
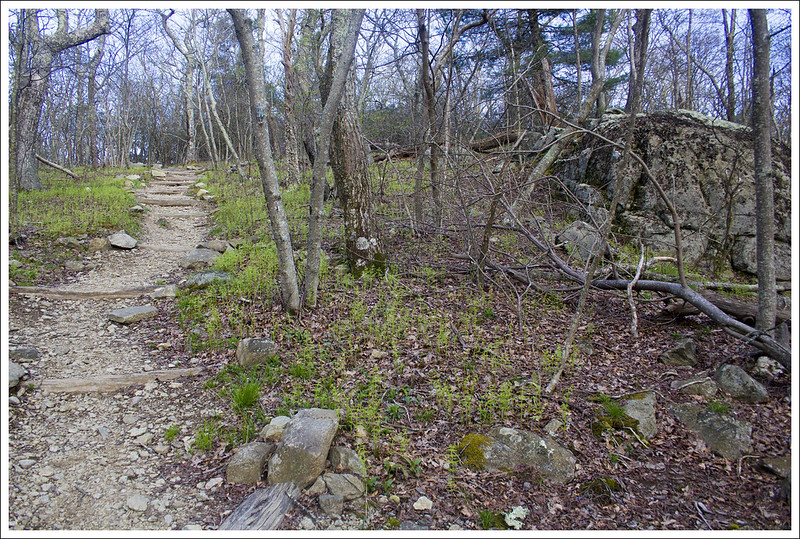
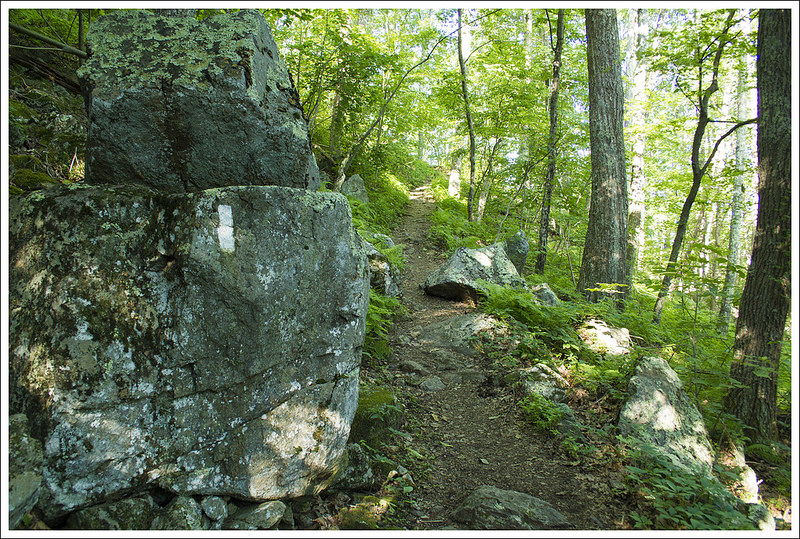
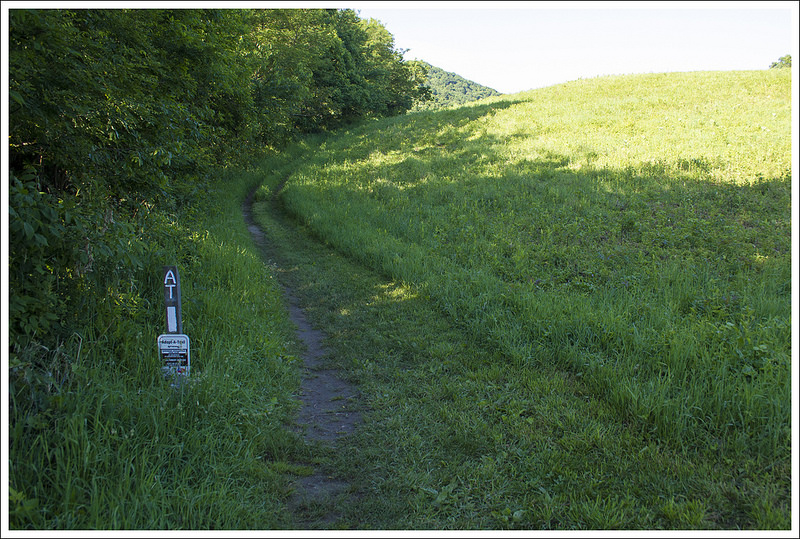
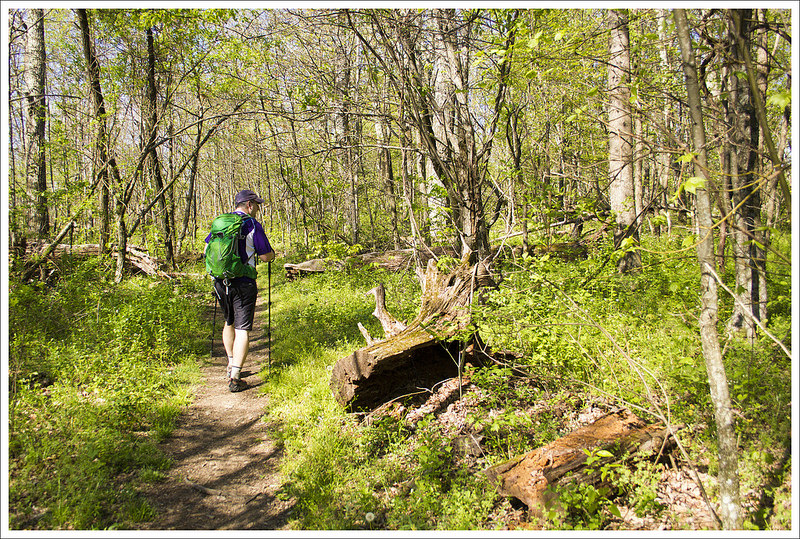
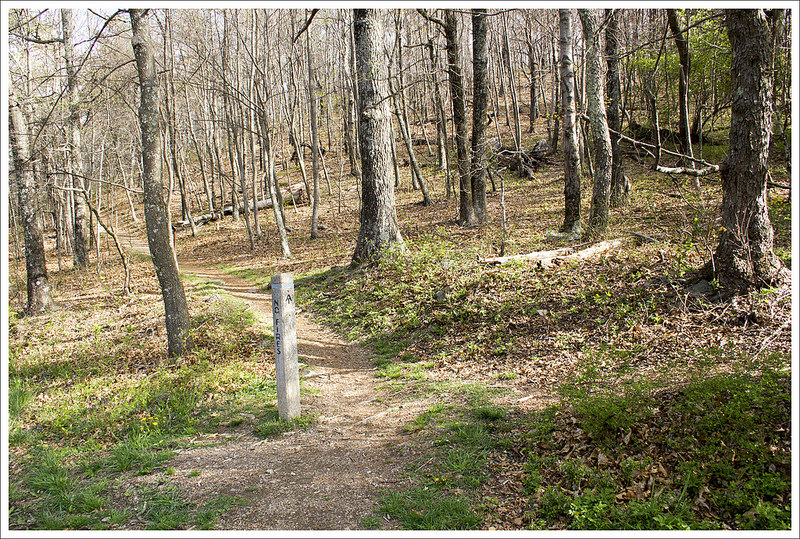
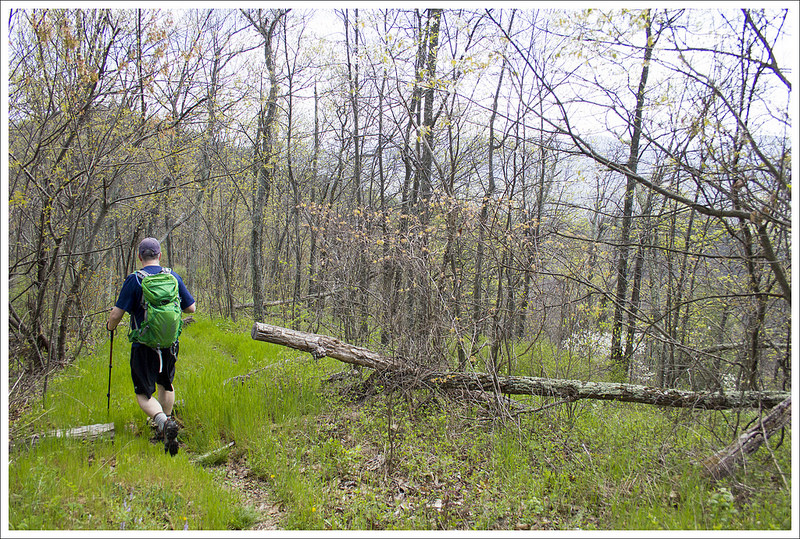
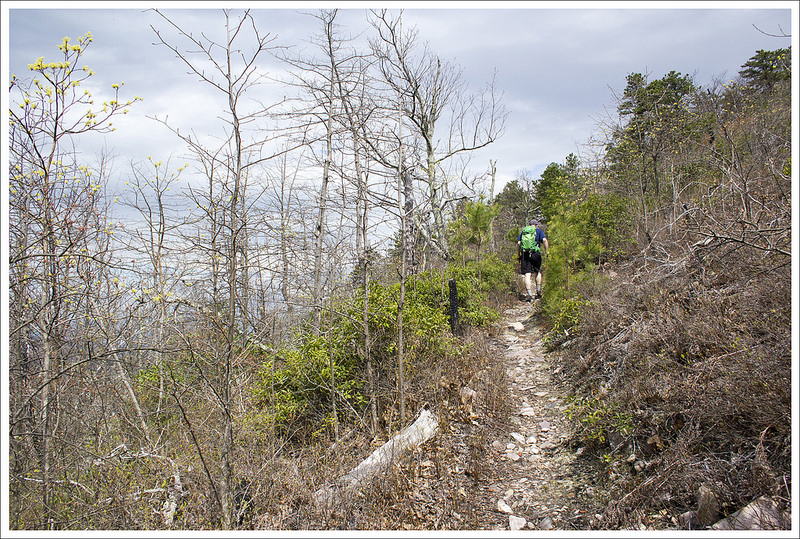
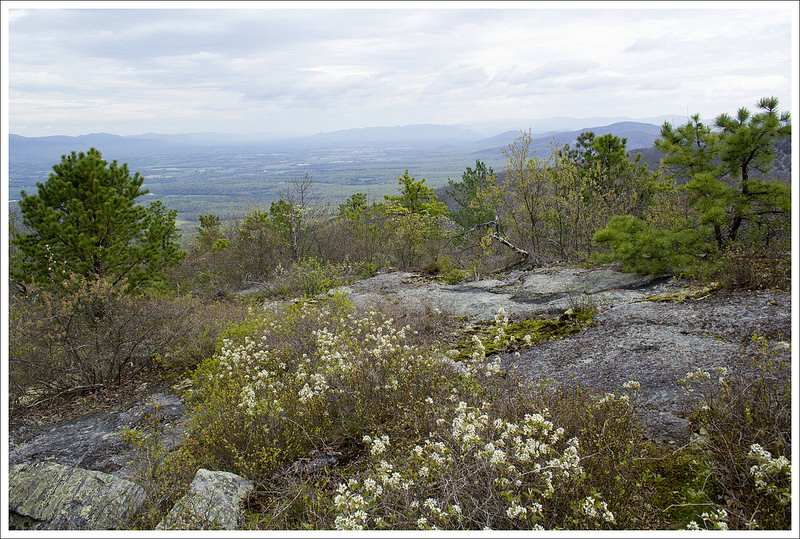
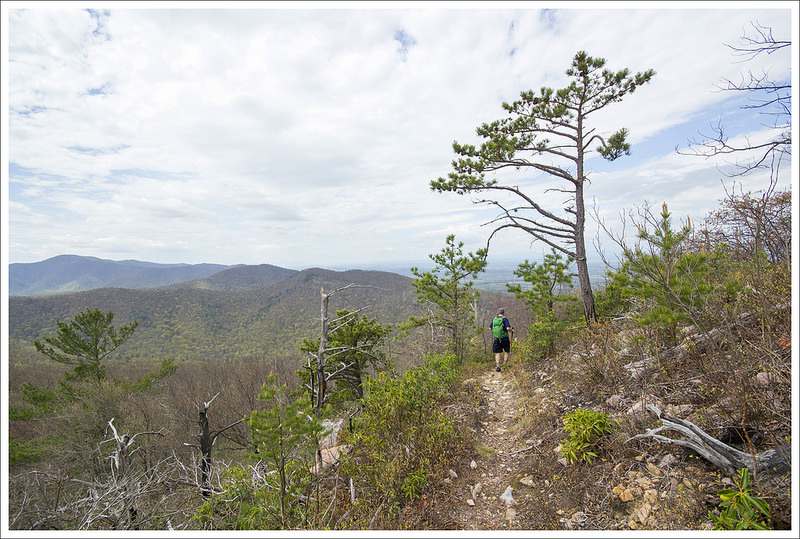
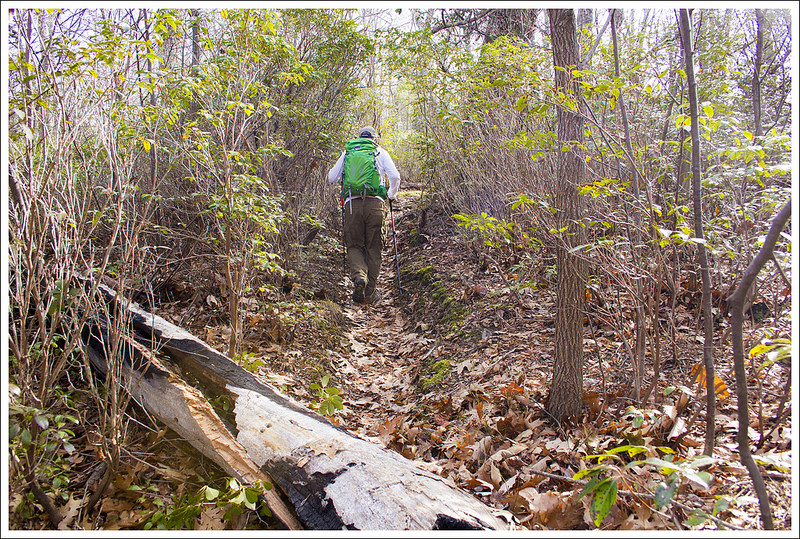
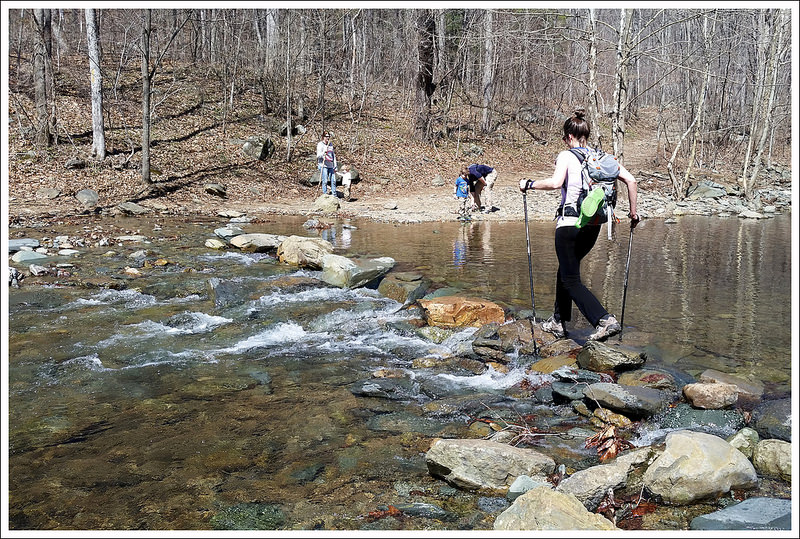
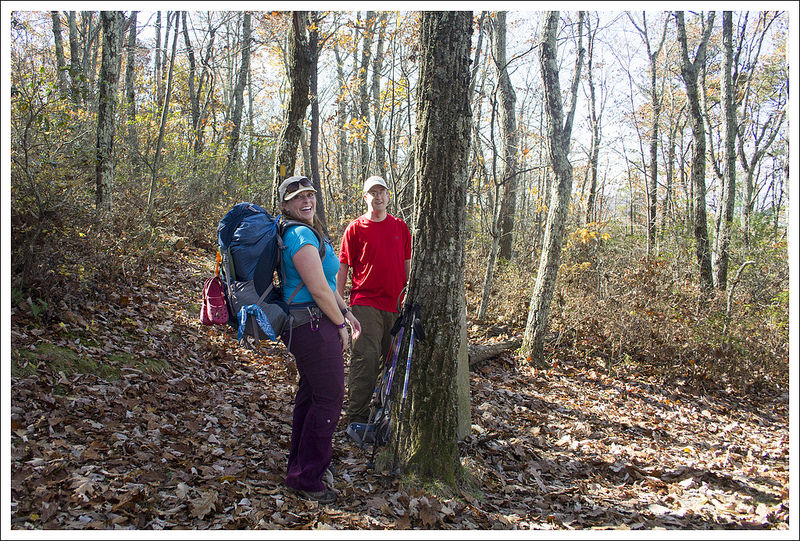
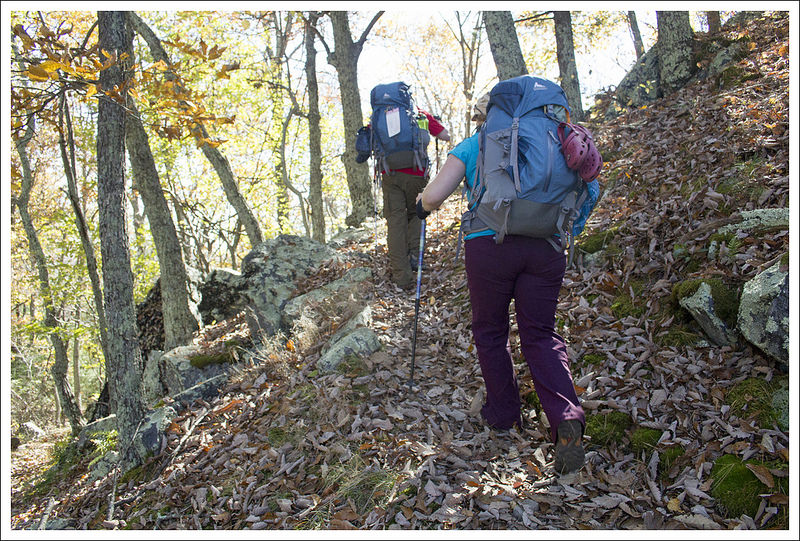
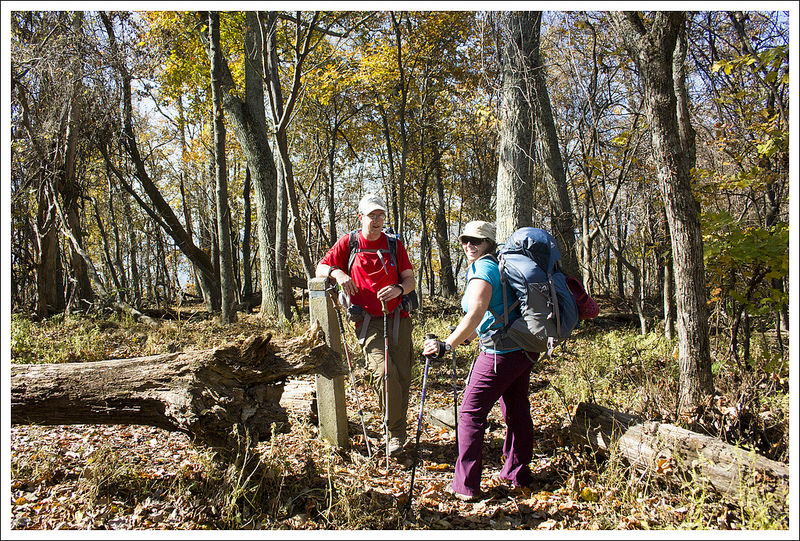
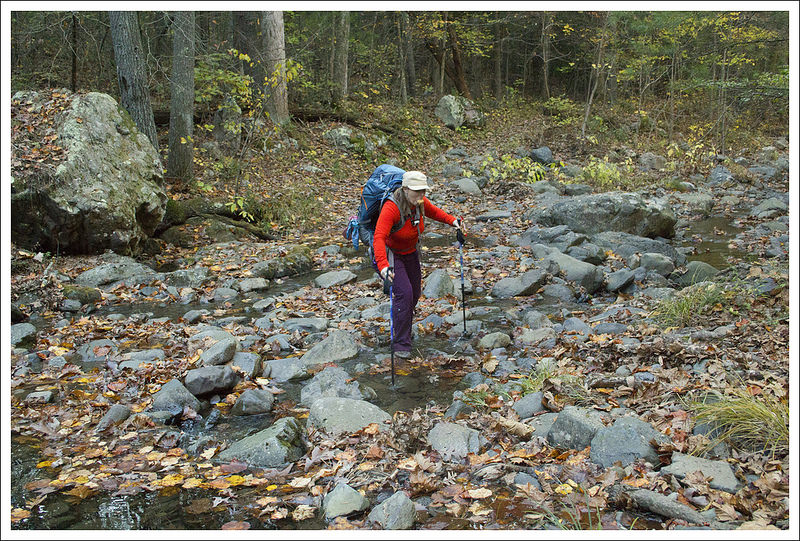
We began in the Stephens Trail/horse trailer parking area on VA675. The Stephens Trail departs from the back of the parking area. You should look for the orange-blazed Massanutten Trail at the head of the parking lot. The trail climbs moderately uphill for .9 miles. At the top of the climb, you’ll exit onto VA675 at Edith Gap (the old parking area). On the road, take a sharp left, staying on the orange-blazed Massanutten Trail.
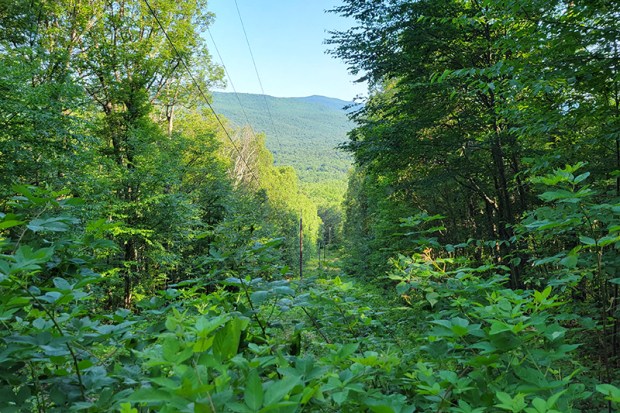
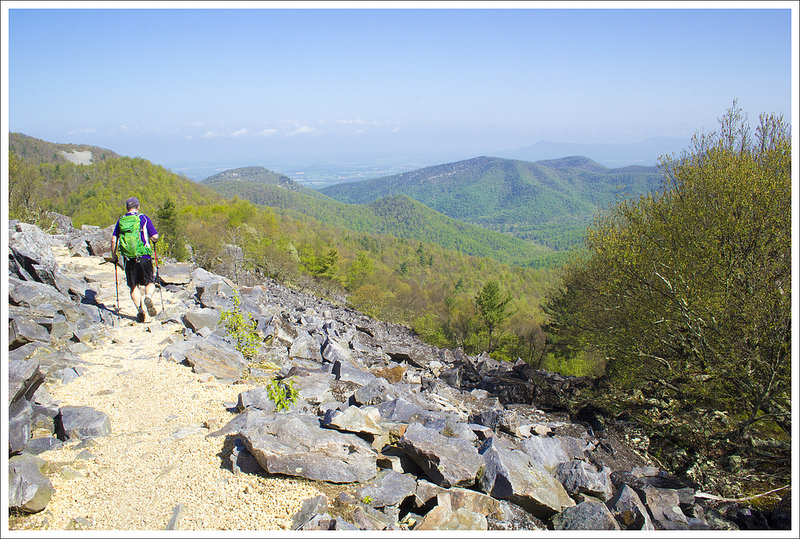
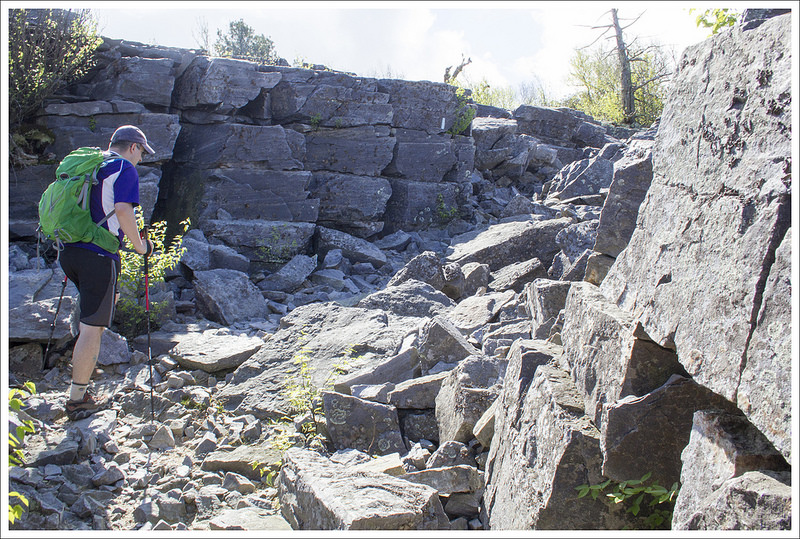
Hiking uphill along the Massanutten Trail, headed to Edith Gap.
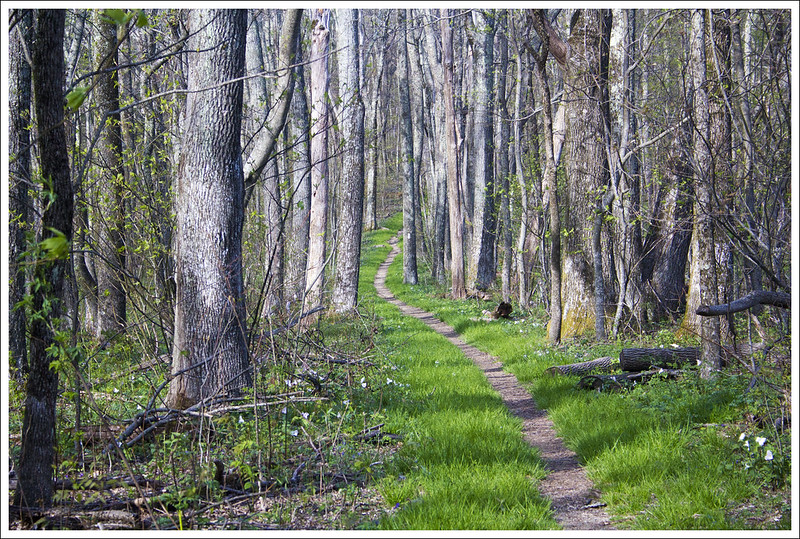
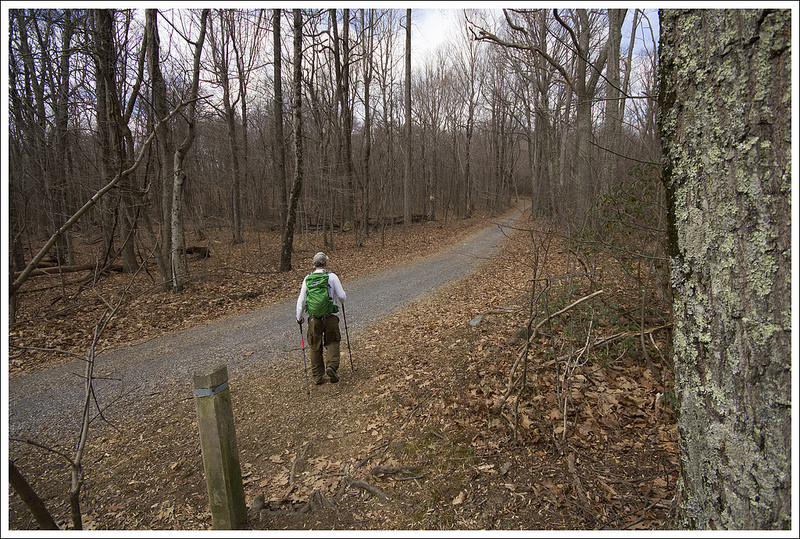
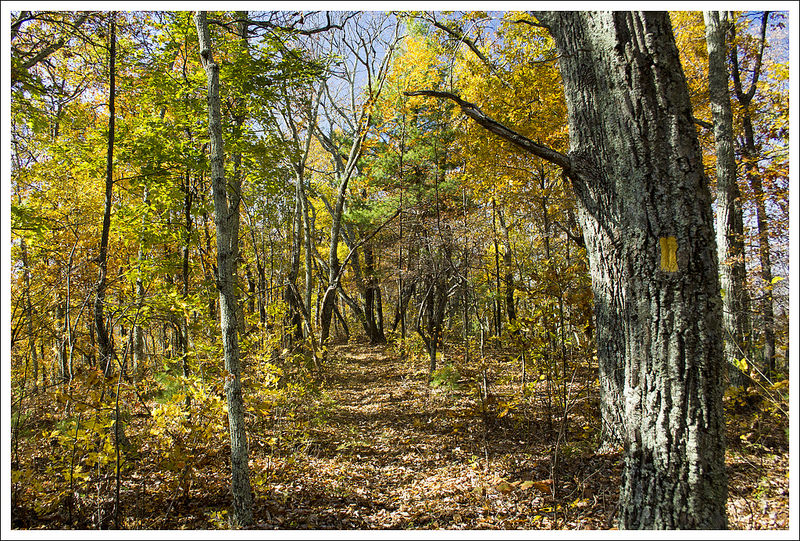
The part of the trail starts off as a wide, almost road-like track. This part of the hike is extremely easy – climbing just a couple hundred feet over the next 1.75 miles.
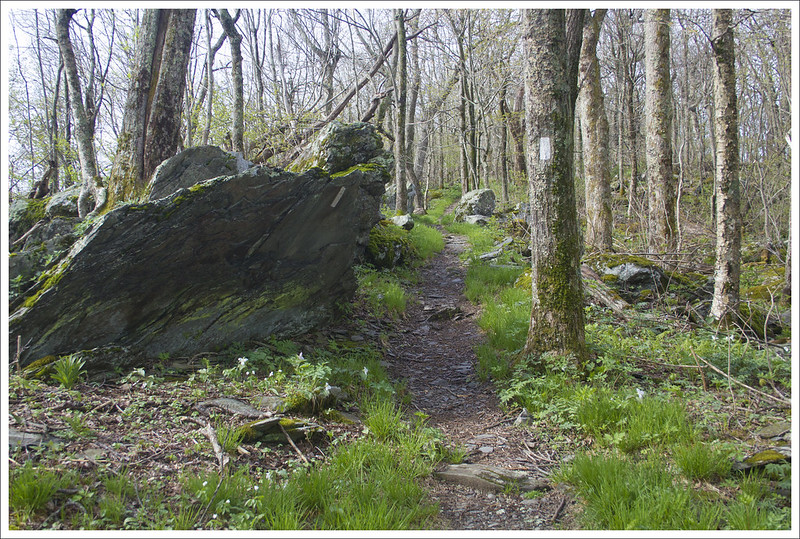
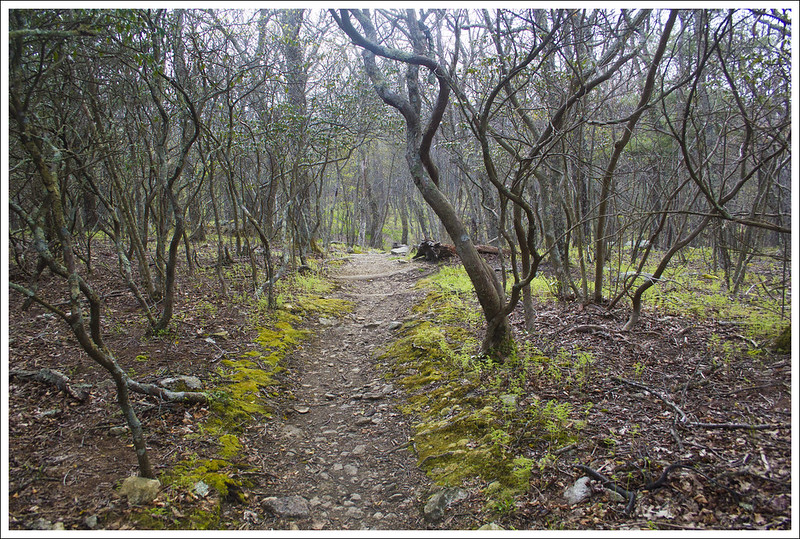
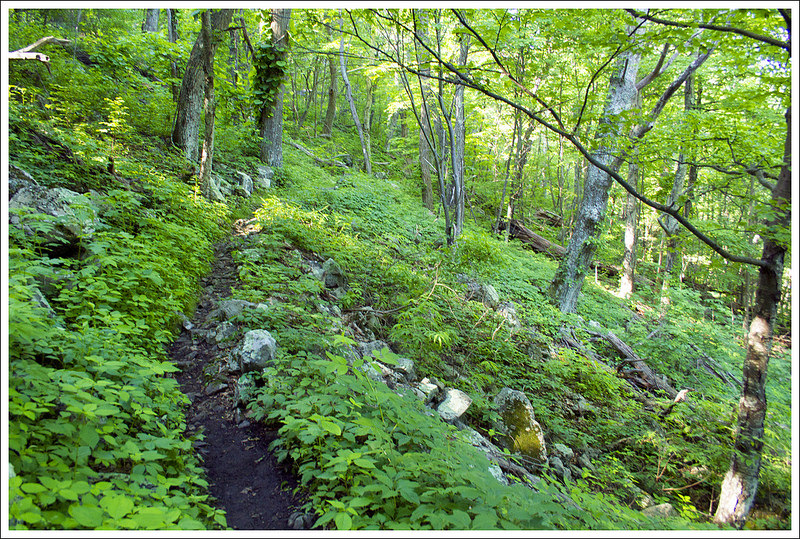
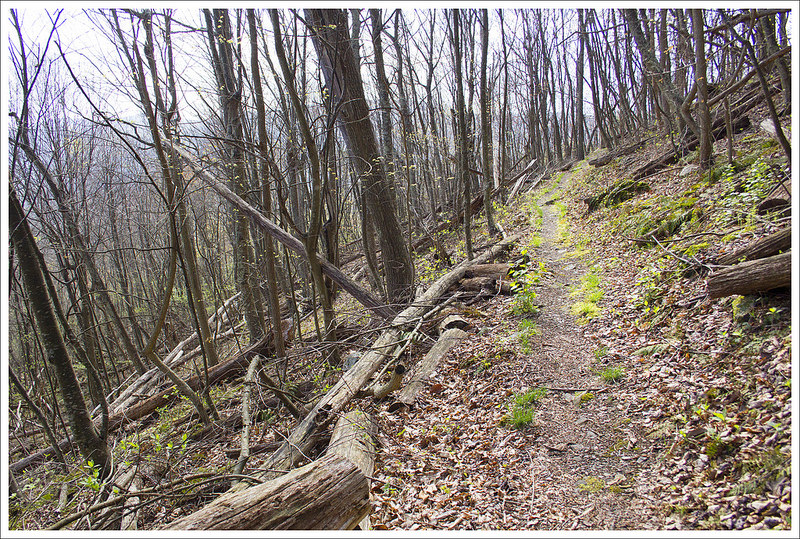
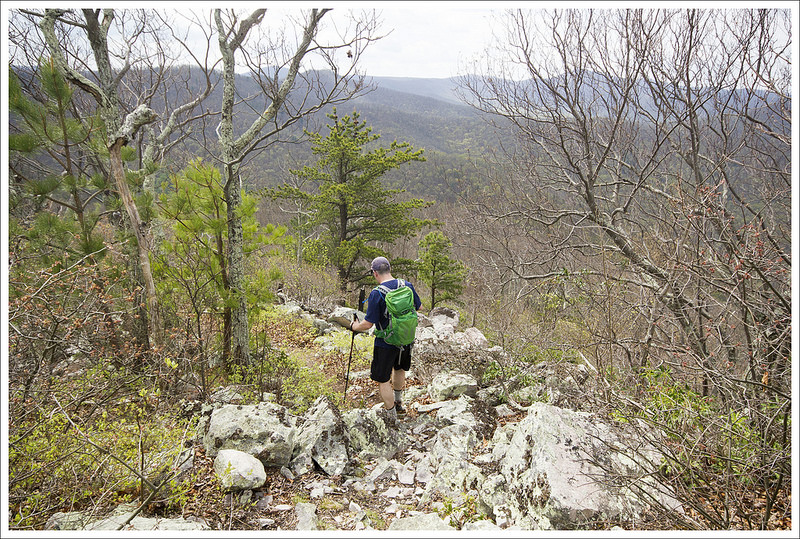
At around mile 2.65, the trail takes a sharp, hairpin turn and begins to climb more steeply over increasingly rocky terrain. At this sharp switchback, you may be tempted to continue straight along a visible path, but be careful to make the turn and follow the orange blazes uphill. This slightly tricky misdirection has been blocked off by logs and rocks, but enough people have missed the turn that the false path remains well-trodden. We once followed it out of curiosity and it doesn’t lead anywhere. It eventually fades out into the forest.
Don’t miss this switchback!
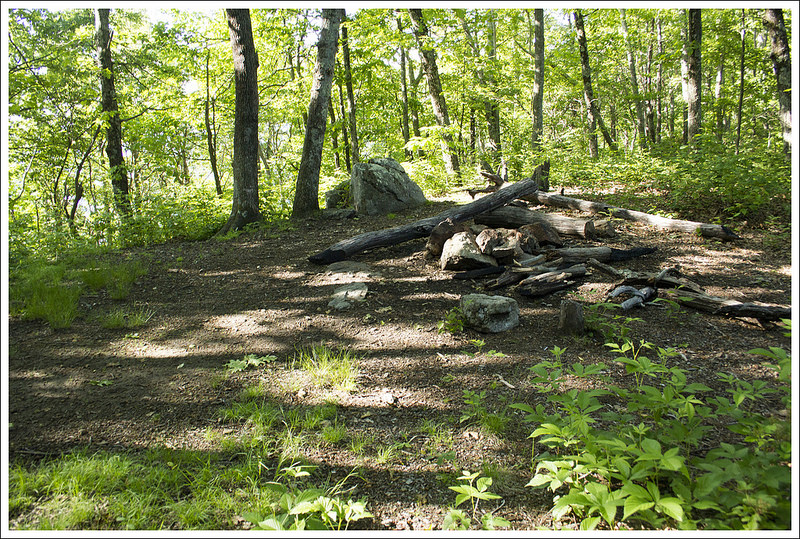
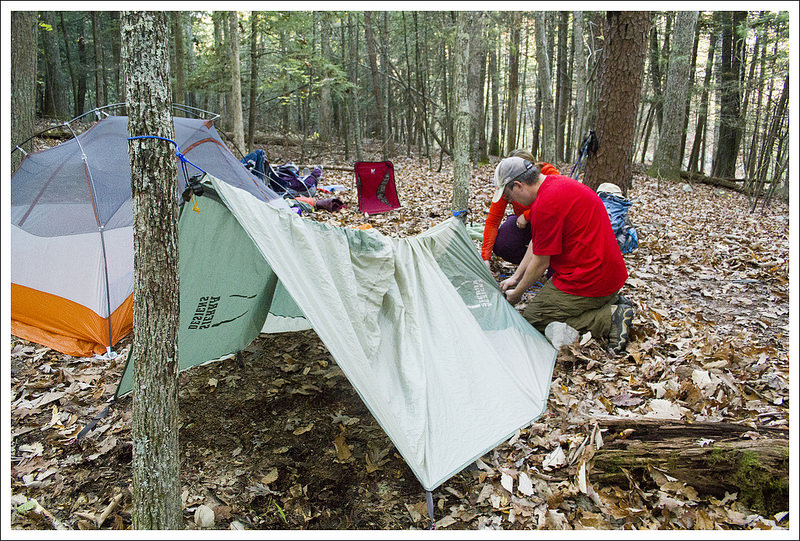
After the switchback, the trail continues uphill for another half mile. There is a small outcropping on the left with a obstructed views and a tiny campsite (room for a hammock or a one-person tent). After you pass this spot, continue a couple tenths of a mile to the junction with the Stephens Trail. (Note: If you want to make a longer day, adding about two more miles to your route, you can descend back to your car via the Stephens Trail. We’ve heard it’s not very scenic and is often muddy and manure-covered, so we chose the out-and-back.)
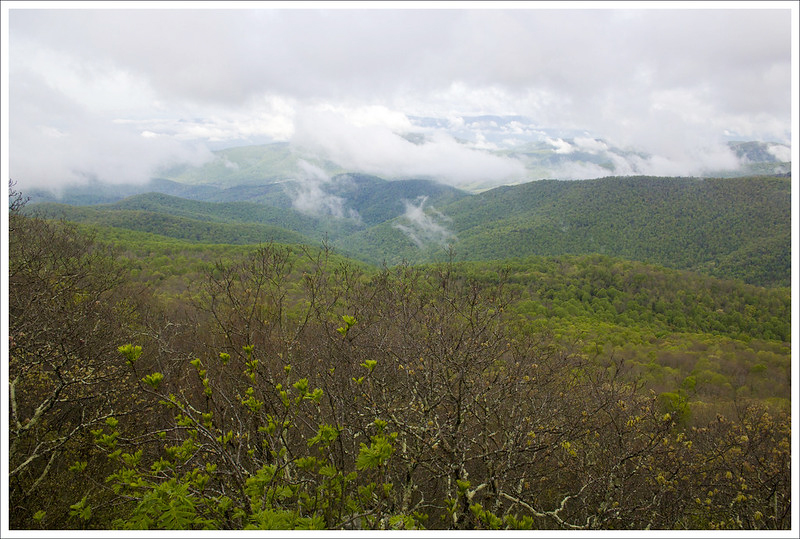
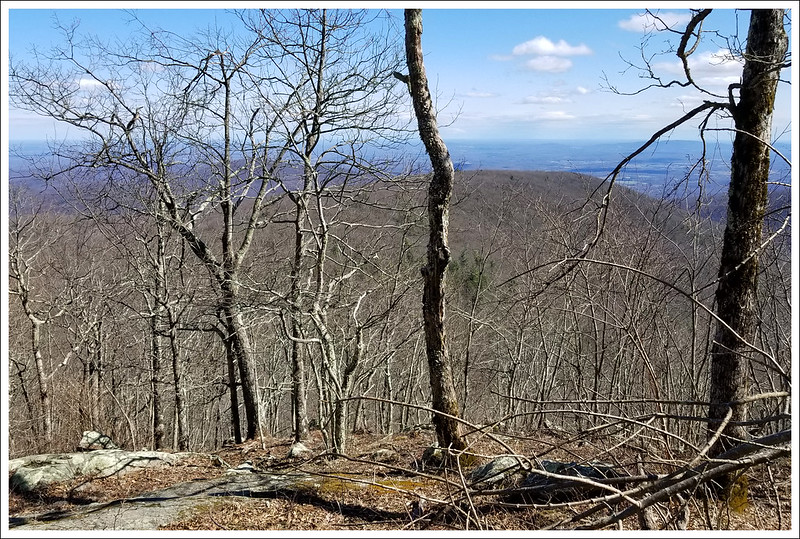
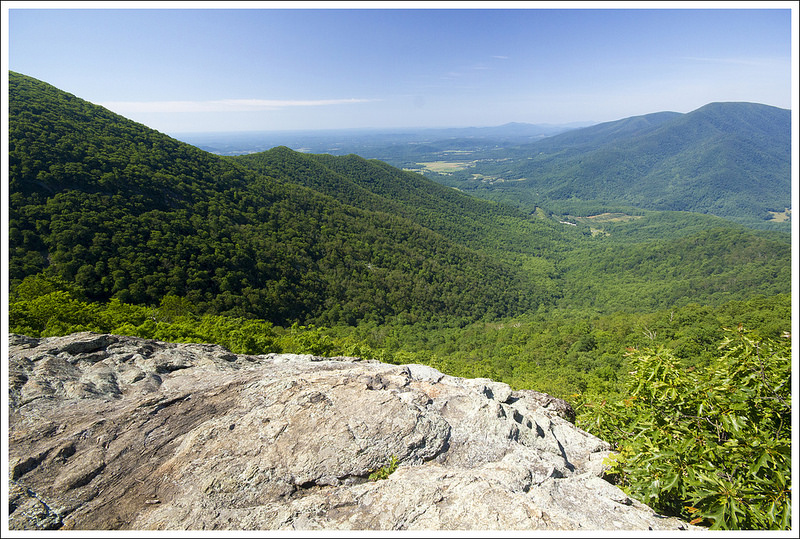
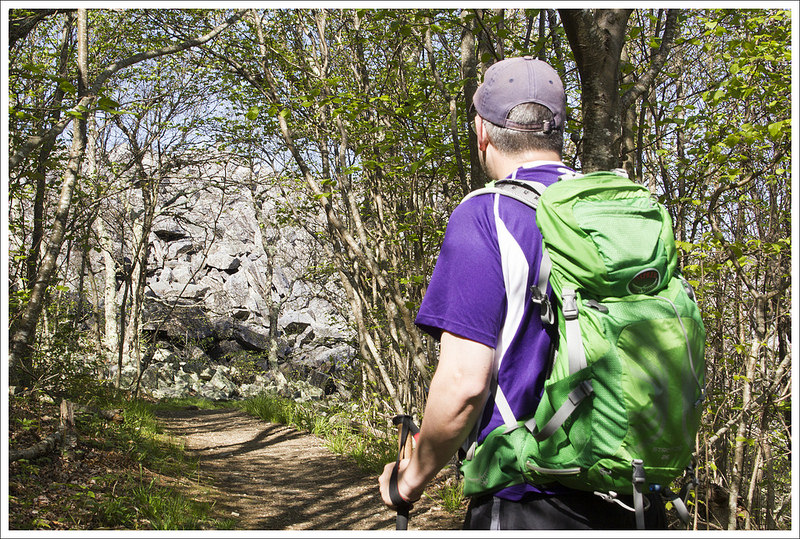
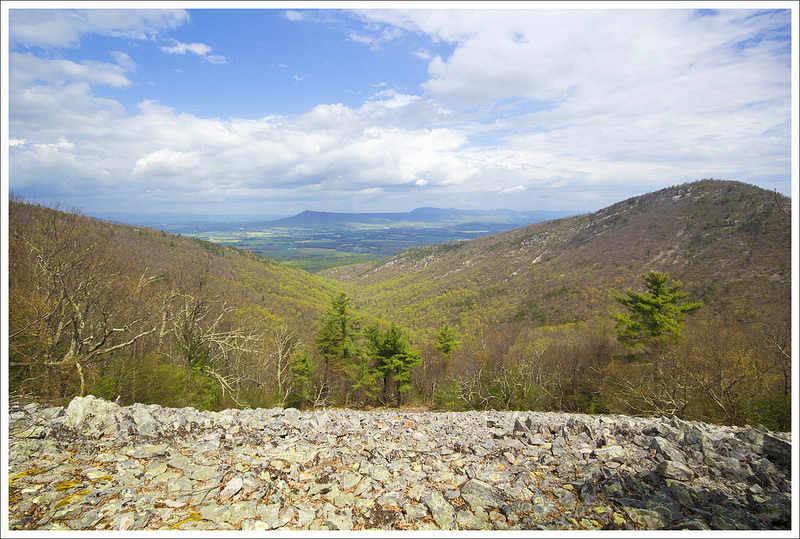
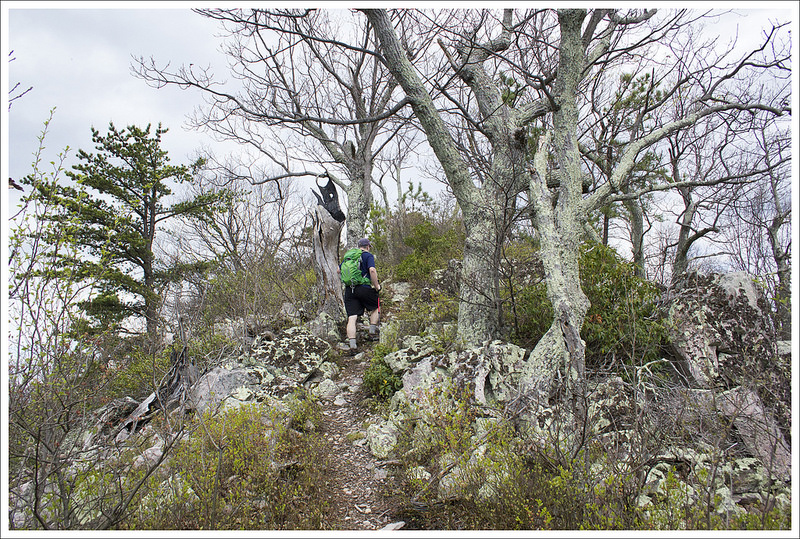
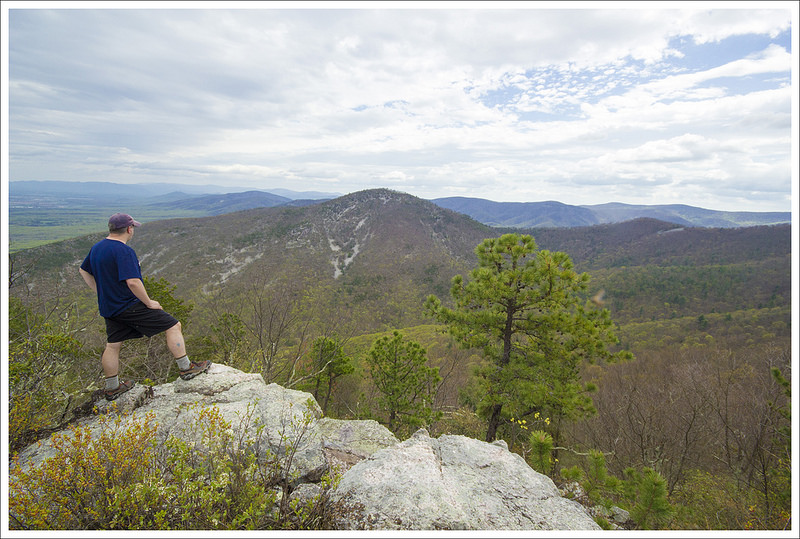
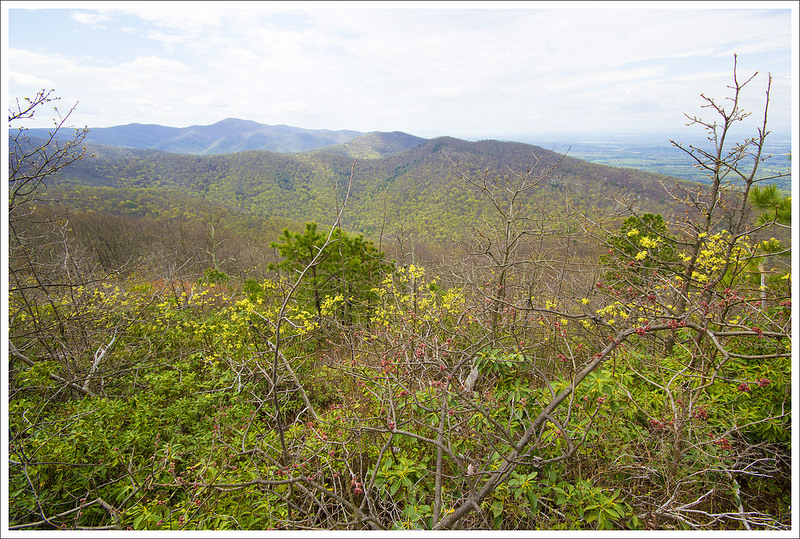
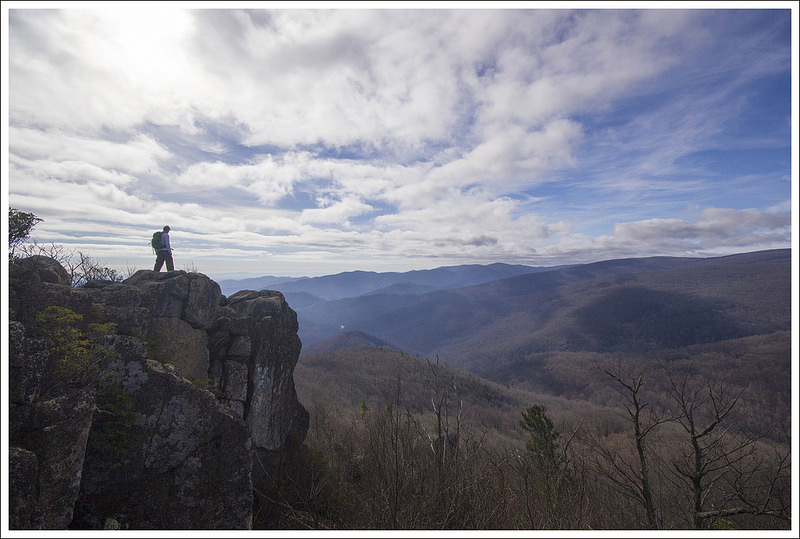
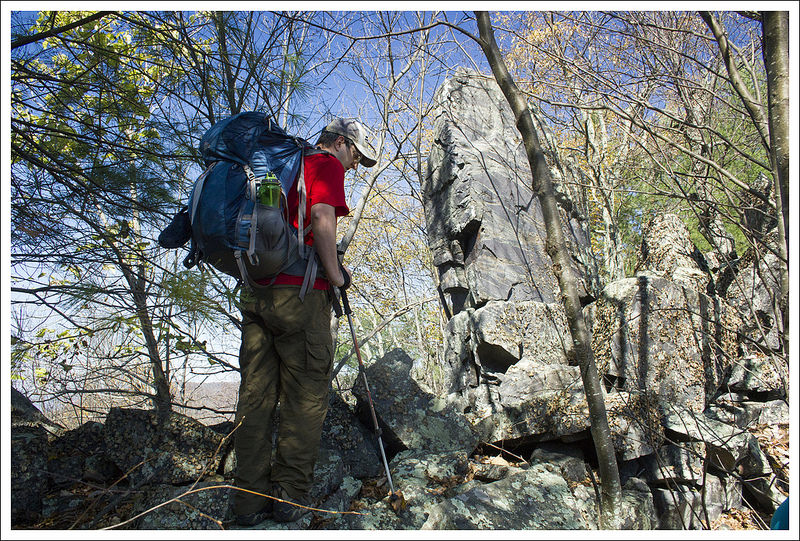
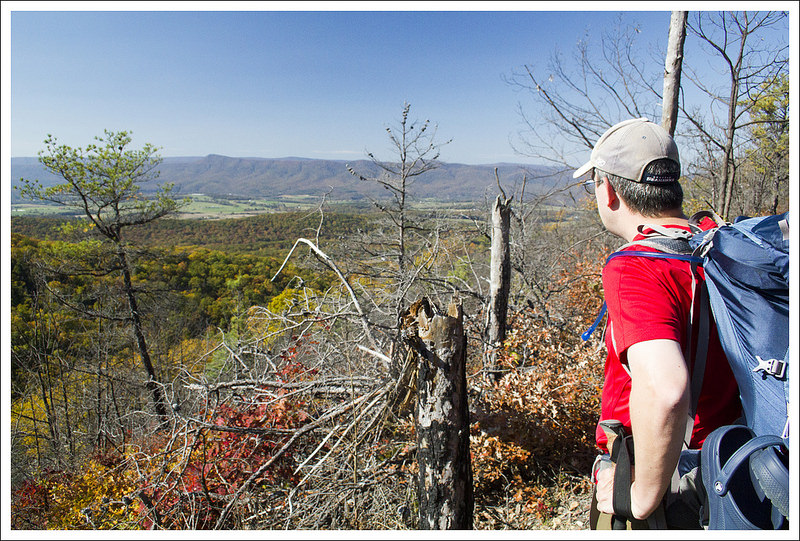
At the junction, you will turn right and follow the signs toward the fire tower. The tower is a little over .2 miles from the junction. The last stretch to the fire tower is steep and rocky. It’s really the only challenging section of the hike. The tower is a sturdy one-story structure with great views looking into the valley and Shenandoah National Park beyond.
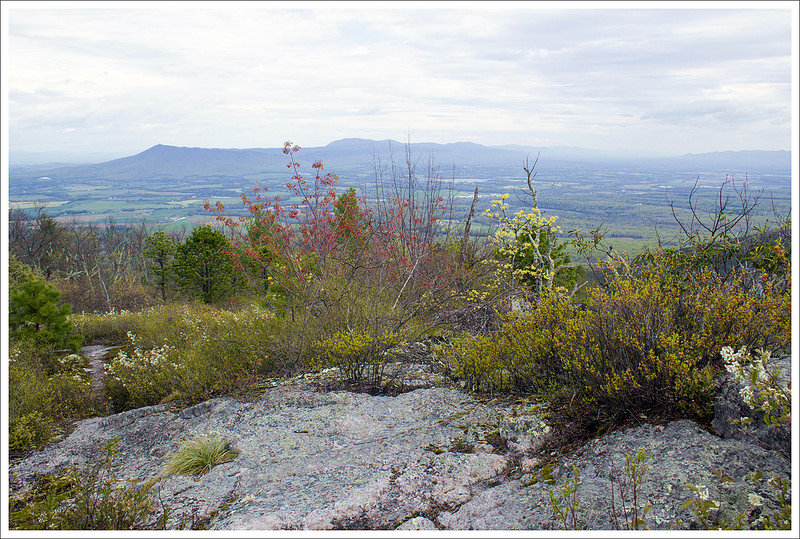
When we got to the summit, we had the observation tower all to ourselves. We watched birds in the treetops, spotted lizards climbing around on the rocks and took in a fantastic view of the Shenandoah River and the Page Valley. It was one of the least hazy days we’ve had in a while, so we could clearly see Shenandoah National Park from this summit. Lots of vultures were soaring overhead, and even though they’re kind of creepy, they were casting cool bird-shaped shadows onto the mountain top. I always like it when they do that.
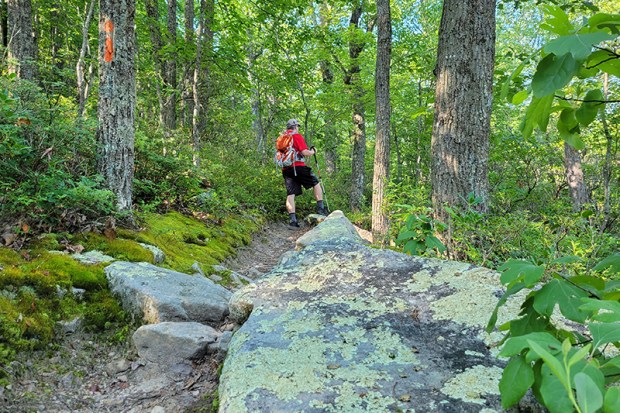
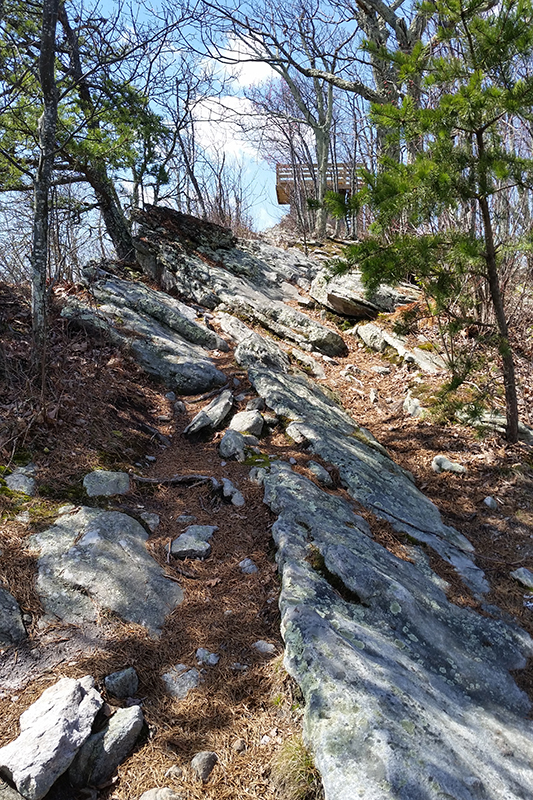
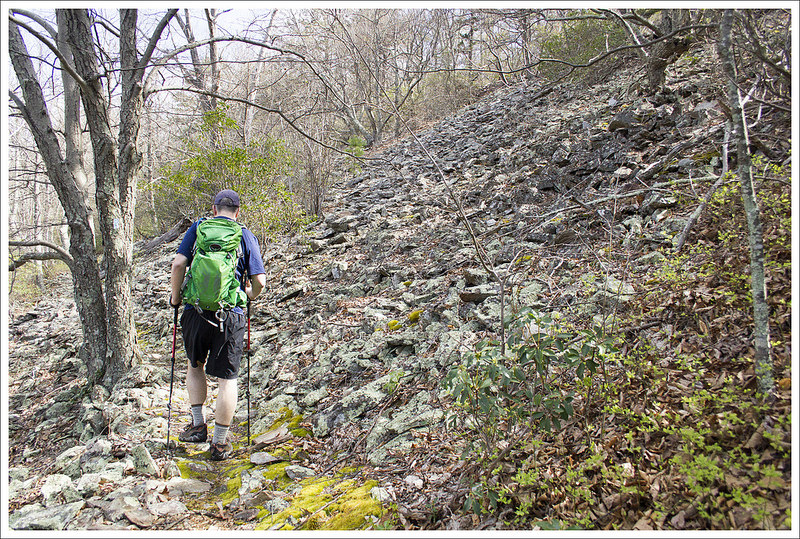
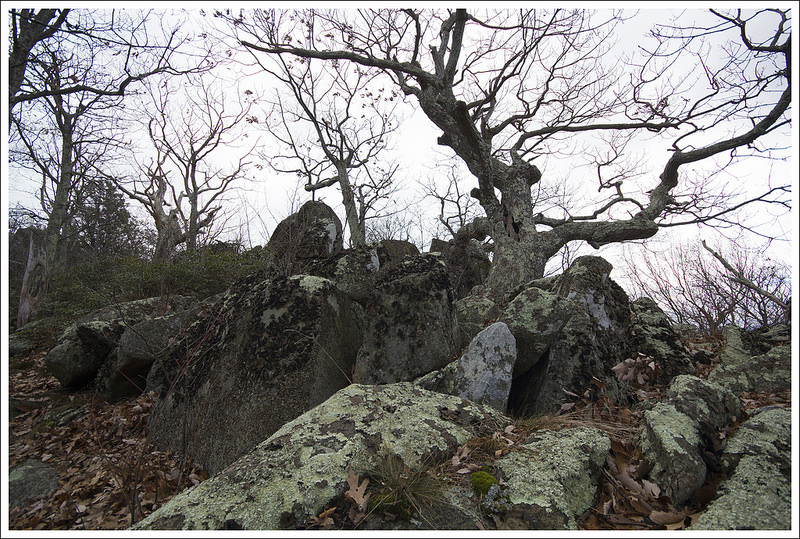
The trail is pretty rocky for the last half mile.
Sunday was the only time we’ve hiked Kennedy Peak in the afternoon. Adam and I tend to be morning hikers — it helps us avoid the crowds. But, the light is definitely prettier in the afternoon on Kennedy Peak. If you hike it in the morning, the sun shines right in your face at the summit. That makes it hard to appreciate the great view, and makes it nearly impossible to get any decent photos.
Adam Says…
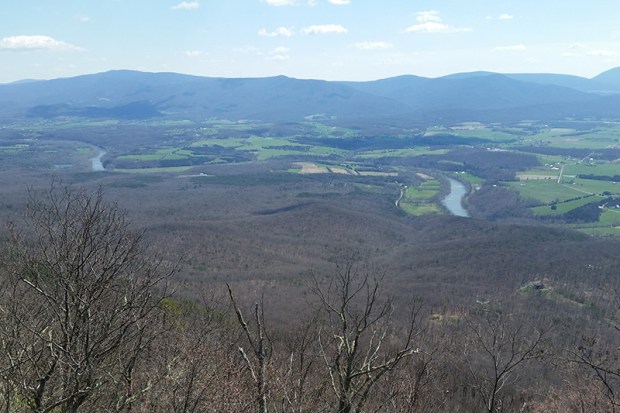
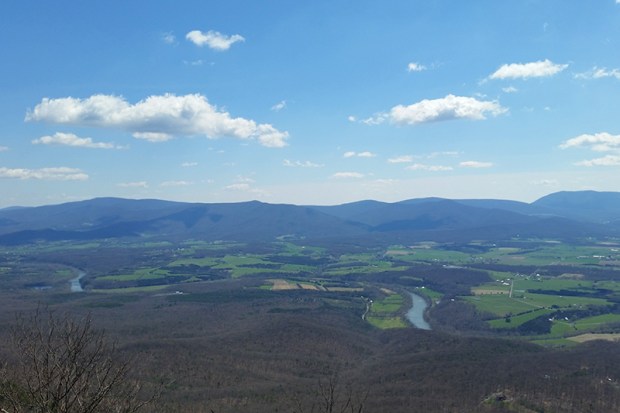
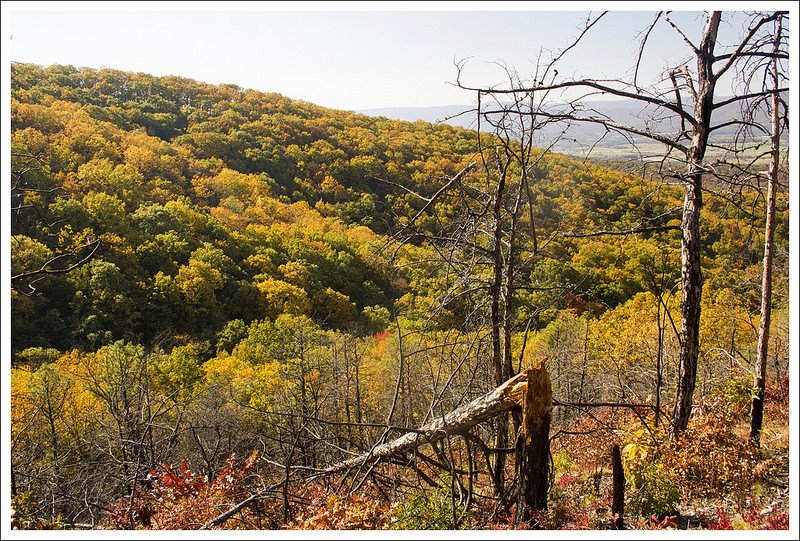
This is one of our favorite hikes. This hike is not very steep and the payoff is wonderful. This is a good multi-use trail, since there are campsites and good footing for horses. There are a couple of campsites at the beginning of the trail, near the road. The nicest campsites are further up the trail. Once you are on the fire tower trail, you will find a couple of places where you can have some nice lookouts over the valley and the Shenandoah River. From some points, you can see several bends in the River. Once you reach the top, there is an observation tower where you can chill for a while before heading back down.
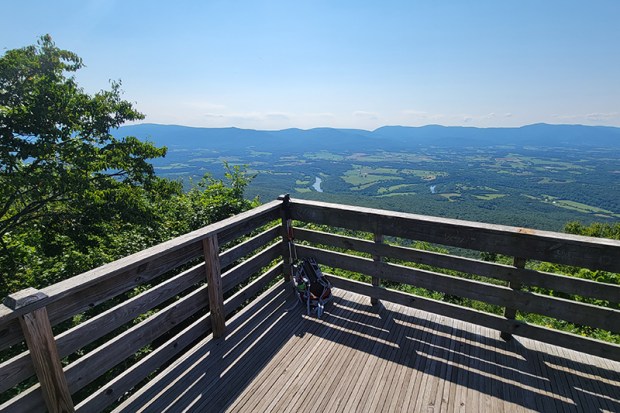
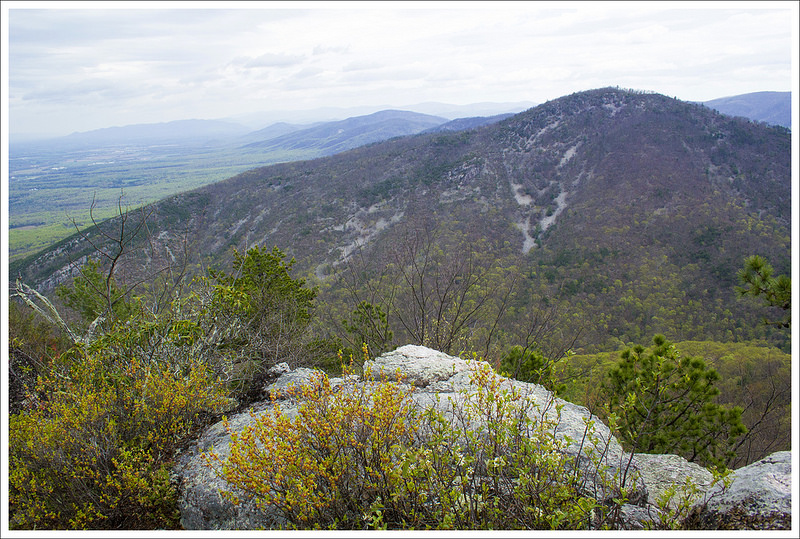
Views from the other side of the tower.
If you are into geocaching, look for the Presidential Peek Cache! After your hike, be sure to visit Camp Roosevelt – a great spot for a picnic.
Trail Notes
Distance – 7 miles round-trip
Elevation Change – 1300′
Difficulty – 3. The trail for the first miles is moderately uphill. The next two miles are either flat or gentle rolling terrain. The last third of a mile up to the observation tower is steeper, but very manageable.
Trail Conditions – 3. The trail is well-maintained, but there are a lot of rocks, so you’ll need to watch where you step.
Views – 4. You can really see some nice views close to the top.
Waterfalls/streams – 0. This trail is dry as a bone.
Wildlife – 2. Seems like a great bird-watching area. We saw an Indigo Bunting, Goldfinch, Wood Thrush, and Eastern Towhee. Also spotted a box turtle and Eastern fence lizard. We saw a bear when we hiked it in spring 2017.
Ease to Navigate – 4. Other than the one tricky spot at the switchback, it would be nearly impossible to get lost.
Solitude – 2. This trail is well-loved by a lot of locals, but the bulk of area tourists stick to the trails in Shenandoah National Park. You may see a few groups of hikers along the way, but it’s rarely a crowded trail.
All Photos
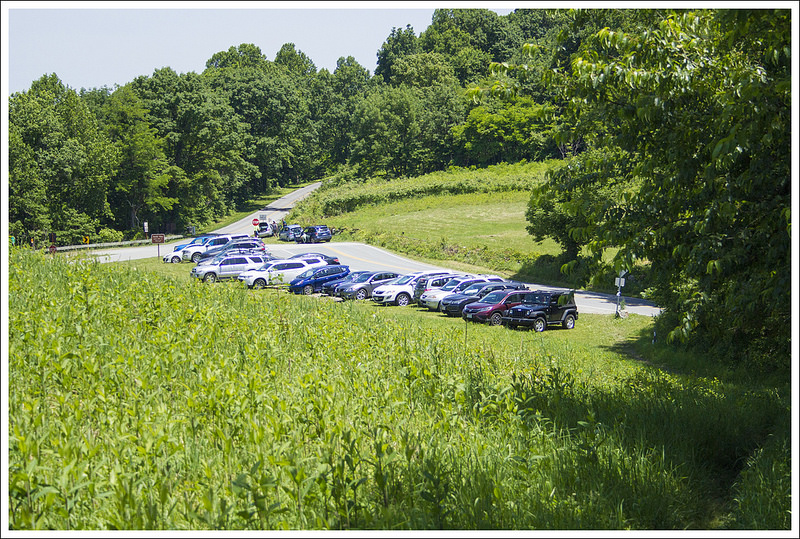
Directions to trailhead: The parking lot is the Stephens Trailhead on VA675. Coordinates: 38.72795, -78.51536
If you’ve hiked the Laurel Prong-Mill Prong Loop, you’ve hiked over Hazeltop and past this viewpoint. But Hazeltop is fantastic on its own as an out-and-back. At 3.9 miles, this route is an easy stroll to a gorgeous vista.
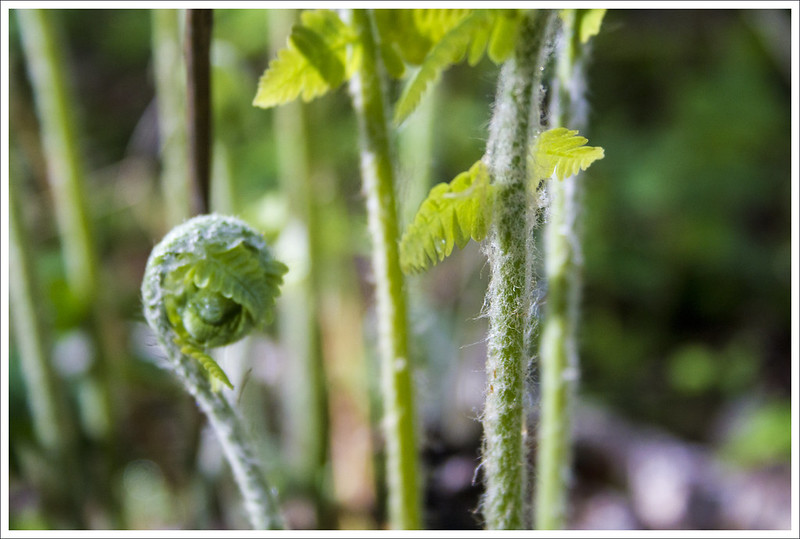
The pretty view from the summit of Hazeltop. Below: The Appalachian Trail at Milam Gap; The junction of the AT and the Mill Prong; Ferns unfurling.
Christine Says…
The day was supposed to be rainy and stormy, but I woke up to sunshine (and a dog with too much energy). I decided to hike Hazeltop Mountain in Shenandoah’s central section. It’s a beautiful, easy route with a nice viewpoint at the summit.
Park at Milam Gap on the western side of Skyline Drive. Follow the crosswalk across the Drive and pick up the Appalachian Trail headed south. At .1 mile, you’ll come to a cement marker. If you turn left, you’ll be on the Mill Prong Trail headed toward Hoover’s Rapidan Camp. Today, stay straight and continue on the white-blazed Appalachian Trail.
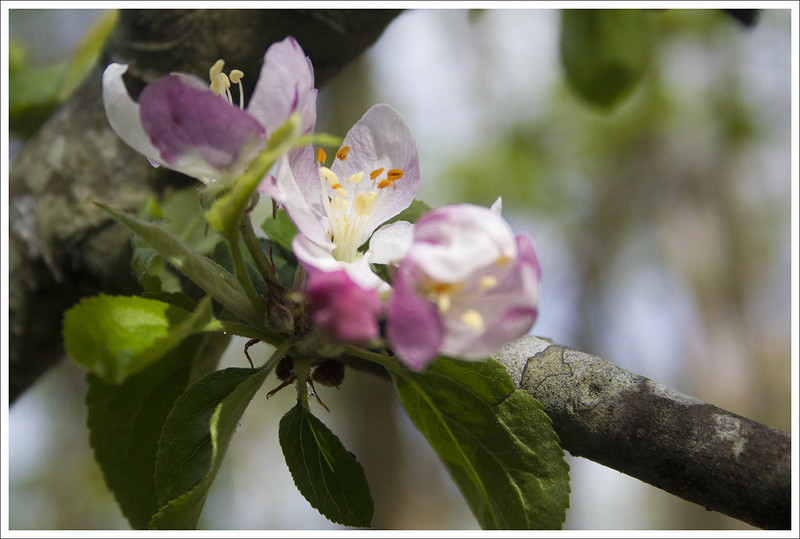
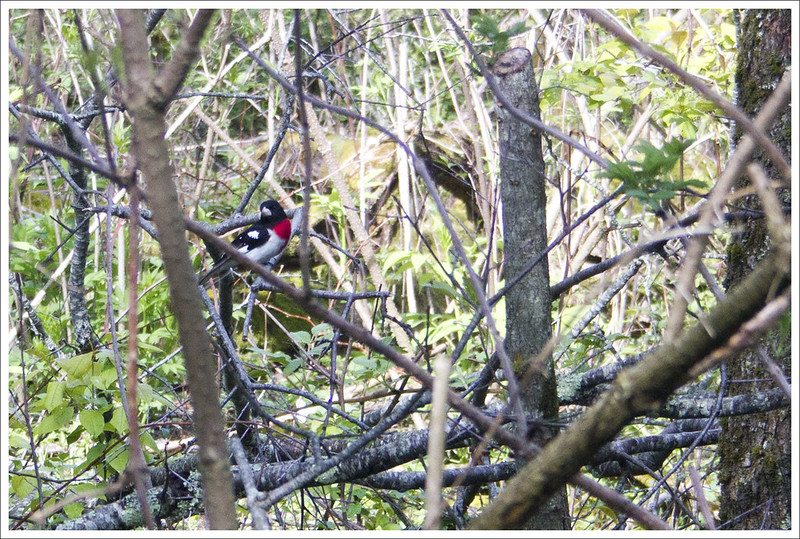
Pretty sure this is a blooming apple tree. Below: Rose-breasted Grosbeak; Appalachian Trail; Cool blazed rock along the trail.
The trail goes very gently uphill through an area that once was used as an orchard. Apple trees are mixed in with the rest of the typical forest. There’s really nothing terribly noteworthy about the trail – it’s a pretty dirt ribbon through forest.
There are tons of wildflowers in the spring and lush ferns in the summer. On this particular day, I had really great luck with birds – I saw a rose-breasted grosbeak, an American restart, and (briefly) a turkey puffed up and showing his plumage. Indy scared the turkey away – and in case you didn’t know… turkeys can fly. They look very awkward doing so.
Indy on the spur trail to the viewpoint. Below: Appalachian Trail Scenery; Ridgeline of Hazeltop; Trillium.
At 1.9 miles, look for an unmarked spur trail on the right side of the trail. Follow the spur for about 50 yards through a grassy area with a rocky outcrop overlooking the western valley. It’s really a lovely spot! It can be easy to miss the spur if you’re not paying attention. The summit is not marked in any way. If you start descending, you’ve gone too far and will need to turn around and find the spur trail.
After you’ve enjoyed the view, return the way you came, arriving back at Milam Gap at 3.9 miles.
Another summit view.
Trail Notes
Distance – 3.9 miles roundtrip
Elevation Change – 597 ft.
Difficulty – 1.5. I think this hike feels mostly flat, but the profile says it’s a gradual uphill.
Trail Conditions – 4. The trail is smooth and well-maintained. There were a few blowdowns blocking the trail in spring 2019.
Views – 4. The view from the summit is excellent. There is a nice outcropping to sit on and plenty of space to enjoy lunch or a snack.
Streams/Waterfalls – 0. The trail is dry.
Wildlife – 5. I saw lots of bird species and a flock of turkeys. On other hikes along the same stretch, I’ve seen lots of deer and a few bears.
Ease to Navigate – 3. The Appalachian Trail is well marked and easy to follow, but don’t miss the unmarked spur trail to the viewpoint.
Solitude – 3. I usually see people, but never many.
Maps
Download a full size map.
Download a full elevation profile
Directions to trailhead: Located in Shenandoah National Park (fees apply). Parking is at Milam Gap. There is a large lot with space for about 12-15 cars. GPS Coordinates for parking: 38.501969, -78.445705.
This 4.75 mile hike is probably one of the best places in the park to experience the spring trillium bloom. It’s nothing short of spectacular along this section of Appalachian Trail. This route also features two views – both are obstructed – so it’s best to hike this route before trees at higher elevations leaf out.
Abundant trillium along the Appalachian Trail. Below: Parking on the Pocosin Road; There thousands of blooming trillium along the trail; A view of the valley from the spring.
Christine Says…
When the days get longer, I find myself skipping the gym and hitting the trail instead. I like having an arsenal of short 3-5 mile hikes I can do on weeknights after I get off work. This route is one of my favorites, especially in the spring when the trillium are blooming in Shenandoah National Park. The flowers are so abundant along this stretch that they practically carpet the forest floor. It’s beautiful, but it’s also ephemeral. The trillium only last a couple of weeks each April into early May.
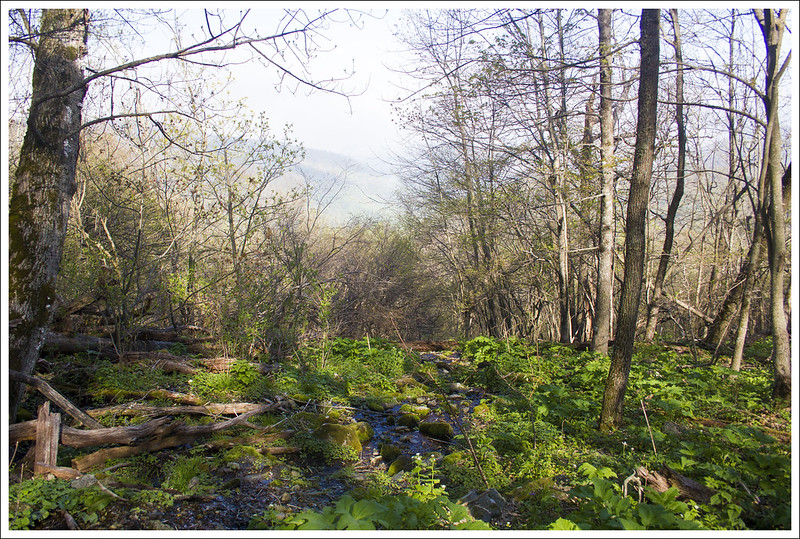
Last night, I loaded Indy the Hiker Pug into his crate and headed up to the park. Down in the valley, it was sunny and 87 degrees. When I parked along the Pocosin Fire Road – where the hike starts – it was a full 17 degrees cooler and delightfully breezy. We followed the fire road for .2 of a mile to its junction with the Appalachian Trail. If you continue straight down the road, you’ll pass the PATC’s Pocosin Cabin and eventually reach the old mission ruins. It’s a nice hike for another day. But for this route, take a left at the cement marker and head north on the Appalachian Trail. The trail meanders downhill for a couple tenths of a mile where you’ll cross a spring and get a pretty view of the valley to the east.
I like when the trail looks like a ribbon through the woods. Below: The slanted rock is visible from Skyline Drive as well – at this point of the hike, you’re very close to the road; The early part of Lewis Mountain Trail follows a utility road; Stairs on Lewis Mountain Trail.
From there, the trail levels out, allowing you to saunter along for about a mile. At about a mile and a half, the trail runs closely parallel to Skyline Drive. You’ll see cars passing – sometimes people wave. As the trail moves away from the road, you’ll begin to ascend gently but steadily uphill for about half a mile. At close to the two mile mark, you will reach a road and another cement marker at the southern end of Lewis Mountain Campground. If you need a snack or bathroom break, Lewis Mountain Campground has a camp store and restrooms open seasonally. Take a right, and follow the Lewis Mountain Trail. For the first tenth of a mile, the trail follows a utility road, but then it turns back into single track through the woods for the remaining few tenths of a mile. The forest around here is open and grassy. You’ll then climb some wooden stairs built into a hillside and pass through a small tunnel of mountain laurel. The trail hooks to the right and leads to the summit of Lewis Mountain – a small rocky spot with obstructed views to the east.
On this particular day, the weather was odd. Along the trail and to the west, skies were clear and sunny. But to the east, a dense bank of fog was lying against the side of the mountains. So, instead of an obstructed view, I got NO view. It was fine though, I think fog is pretty and I had some older photos of the view spot to share for this post. I gave Indy some water and rested for a few minutes before heading back. On the return hike, I chatted with a few section-hikers making their way to camp at Bearfence Hut. One of them was thrilled to see Indy on the trail. She also has a hiking pug named ‘Bronx’. She showed me a cute photo of Bronx hiking in Colorado. He wasn’t on this trip with her, but she was delighted to meet another pug that hikes.
I got back to the car pretty quickly – the return trip is mostly downhill or flat. When I got home, I had to remove THIRTEEN ticks from the dog. This is despite him being treated with Frontline regularly. I also spray his bed with permethrin. I think I got all the ticks off him, but if any were left hopefully the Frontline and permethrin will take care of killing them before they transmit any diseases. I know every year the media says ‘this is going to be a bad year for ticks’, but this year it’s the truth. In my four decades of hiking, I have never seen such issues with ticks. I want to remind everyone to take precautions. Tickborne diseases are nothing to mess with.
The view from Lewis Mountain on a clear day. Below: I got views of a fog bank this time; Passing through the mountain laurels; More ribbon trail.
One final note – starting at Pocosin is also a great way to hike Bearfence Mountain. I always feel like the Bearfence hike is too short, so I like parking at Pocosin and hiking north for about 3.5 miles to the Bearfence summit.
Trail Notes
Distance – 4.75 miles roundtrip
Elevation Change – 820 ft.
Difficulty – 2. This is an easy hike with gradual uphills.
Trail Conditions – 4. The trail is smooth and well-maintained.
Views – 2. There is a view of the valley along the trail early in the hike. There is also a view at the summit of Lewis Mountain, but it is quite grown in by larger trees.
Streams/Waterfalls – 1. You’ll cross one small spring.
Wildlife – 5. I’ve seen all kinds of birds, a bobcat, deer, and bears along this stretch.
Ease to Navigate – 4. The trail is well marked and easy to follow.
Solitude – 4. I guess because there are no grand vistas, you really don’t see many people dayhiking in this area. I usually only see backpackers making their way to Bearfence Hut.
Maps
Download a full size map.
Download a full elevation profile.
Directions to trailhead: Located in Shenandoah National Park (fees apply). Parking is located in several spots along the Pocosin Fire Road in the Central Section on Skyline Drive. The turn onto the road comes up quickly and is not marked, so pay attention. It’s near mile 59.5 on the Drive. GPS Coordinates for parking: 38.413585, -78.488959
This 7.25 mile hike is a great choice for anyone who wants to experience Three Ridges’ spectacular views without having to complete the challenging 13+ mile loop. The route climbs moderately along the Appalachian Trail until you reach Hanging Rock – the best vista on Three Ridges mountain.
Last fall, I went on a girls’ backpacking trip from Cole Mountain to Waynesboro. Near the end of the trip, we hiked up and over Three Ridges. While we were eating lunch and enjoying views on Hanging Rock, I thought ‘This spot is gorgeous and it would be a fantastic dayhike.‘
Many casual hikers take a pass on Three Ridges because the 13+ mile hike with more than 4,000 feet of climbing can be intimidating. The full traverse of the Three Ridges – MauHar loop has the deserved reputation for being one of the toughest hikes in the state. But 7.25 miles with under 2,000 feet of climbing – that’s right in the dayhike sweet spot.
In early June, I had a Saturday with absolutely zero obligations. Adam decided to stay home and work on some chores and projects around the house. I set out to hike from Reeds Gap to Hanging Rock. I was at the trailhead by 8:00 a.m. in hopes of beating the heat, humidity, and weekend backpacking crowds.
The Appalachian Trail ascending Three Ridges. Below: Parking at Reeds Gap can get crowded; The AT ascends from the parking lot through a meadow; There are dry campsites along the top of Meadow Mountain.
When I arrived, there were still a few spots in the Reeds Gap parking area. The lot fills quickly – especially on weekends. I started southbound on the Appalachian Trail, climbing gradually uphill across the edge of an open meadow. Wild hibiscus was blooming and butterflies were everywhere. When the trail first enters the woods, it’s flat and comprised of soft dirt. But within a couple tenths of a mile, the trail begins to ascend steadily up Meadow Mountain. Along the ridge of Meadow Mountain there are a couple small, dry campsites.
After a short ridge walk, the trail descends Meadow Mountain. At 1.6 miles, I reached a three way junction. The Appalachian Trail continues straight. To the right are a fire road leading back to the Blue Ridge Parkway and a spur trail leading to Maupin Field Shelter and the MauHar Trail. This area is well-marked with trail signs, blazes, and a kiosk describing the wilderness area. I decided to pass the shelter and continue on to Hanging Rock.
The mountain laurel was in full bloom. Below: The Appalachian Trail is nicknamed ‘the green tunnel’ for a good reason; Rose of Sharon/Wild Hibiscus (I think); I missed the peak bloom of the Catawba Rhododendron.
After passing the junction, the trail climbed steeply, but briefly, to the top of Bee Mountain at 2.2 miles. The trail becomes rockier along this stretch and remains so until the viewpoint. Along the top of Bee, there are several more dry campsites. After a short ridge walk, the trail descends Bee Mountain for .2 miles into a small saddle. This is where the climb up Three Ridges Mountain begins.
The climb continues gradually for 1.2 miles. I thought this stretch of trail was so beautiful. It was a classic example of why the Appalachian Trail is nicknamed ‘the green tunnel‘. There were lush ferns, blooming mountain laurel, thick trees, and green vines. The forest floor was carpeted with the bright purple petals from Catawba rhododendron.
At 3.6 miles I reached the viewpoint at Hanging Rock. The view is on the right side of the trail and is accessed by following a small path through an opening in the trees. The actual high point of Three Ridges Mountain is another .8 mile south, but Hanging Rock is a perfect stopping point.
Another angle on the view. Below: Blooming mountain laurel; I stopped by the Maupin Field Shelter on my way back; Near the shelter the trail splits into the AT and a fire road. Make sure you remain on the well-marked AT.
The outcropping at Hanging Rock is wide and spacious. The views include the southern slopes of Three Ridges, the Tye River Valley, and the Priest. The Priest is the large mountain on the other side of the valley. Even though this is a popular area, I magically had the viewpoint all to myself for almost forty minutes. Just as I was stowing my camera and getting ready to leave, northbound thruhiker Tengo Hambre arrived at the view. He didn’t have a camera and his phone was dead. I ended up taking a photo of him and emailing it to his wife. He agreed that the vista was breathtaking and worth remembering with a photo.
I hiked back the same way I came up. I stopped a while to chat with the Tidewater Appalachian Trail Club member who was doing trail maintenance. Because Three Ridges is designated wilderness, he has to use hand tools (gas-operated weed whackers are not allowed in wilderness!) I also stopped briefly at Maupin Field Shelter on my way back. I like to stop and pack out any trash I find. When I reached the parking lot, it was overflowing with cars and the day was sweltering. I had timed my walk perfectly and had a great day!
This easy 5.1 mile hike takes you to the magnificent viewpoint at Blackrock Summit. Most people access the view by a .5 mile walk from Blackrock parking area, but this route lets you spend a little more time enjoying the beautiful Appalachian Trail.
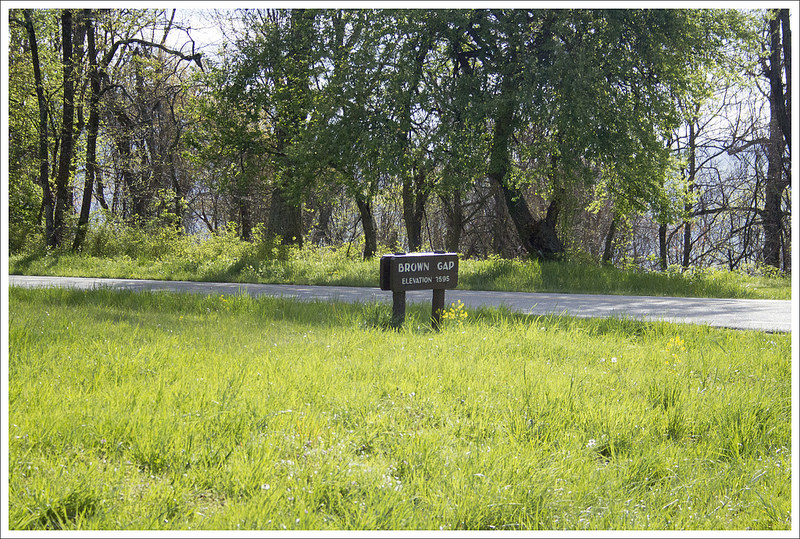
Most of the time, we opt to hike the shortest and most direct route to any nice viewpoint. However, in the case of Blackrock Summit, the traditional one-mile round trip route from the Blackrock parking area is not enough of a hike to make the drive into the park worthwhile. Without a doubt, Blackrock is one of the most expansive views in the park, and starting the hike at Brown Gap (a couple miles north) is one of the best ways to reach the vista!
We set out on this hike on a particularly hot and humid late April morning. We parked at Brown Gap (near mile marker 83 on Skyline Drive). From there, we crossed the road and followed the Appalachian Trail south. The first three tenths of a mile ascend gently uphill before reaching a mostly flat ridgeline. Everything in the park was bright, spring green and the native pink azaleas were just starting to bloom. At .7 miles, we passed the Dundo Group Campground. The campground has water and restrooms (seasonally).
This hike is essentially a pleasant, easy walk on the Appalachian Trail. Below: Parking at Brown Gap; Walking the AT; The boulder pile comes into view.
At 1.3 miles, we passed the parking area for Jones Run. Another tenth of a mile after that, we crossed Skyline Drive a second time, and began a gradual uphill climb toward Blackrock Summit. In April, the trees along this stretch of trail had not fully leafed out, so we were able to catch views of the valley to the west. At 1.9 miles into the hike, we passed Blackrock Parking area. After the parking area, the trail becomes a moderately steep uphill climb for .6 of a mile.
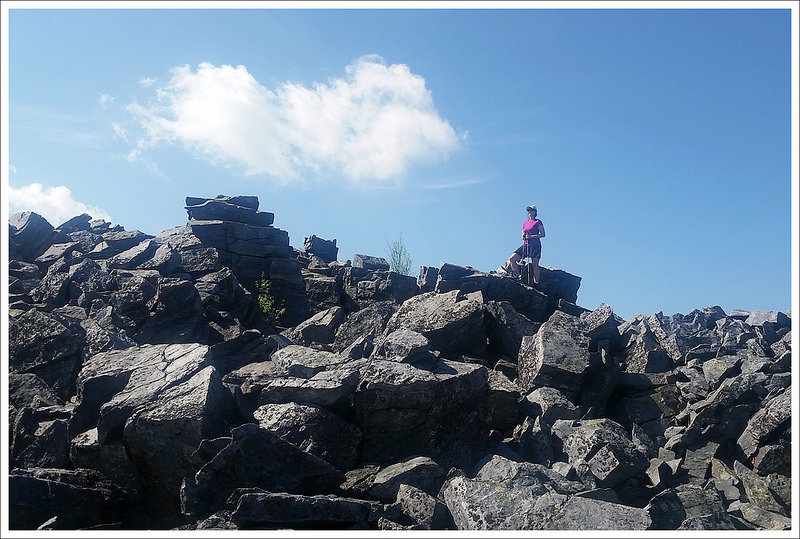
Near the top, the giant boulder pile comes into view through a tunnel of leaves. It’s impressive to see such a tall jumble of rocks! We took some time to climb up the pile for a loftier view. Even if you choose to skip the climb, the views from this summit are spectacular. The Appalachian Trail skirts the western edge of the summit. At the far end of the rock pile, we reached the spur to the Trayfoot trail. If you want even more views and a chance to explore some interesting rock formations, follow the spur downhill for a couple tenths of a mile. There are views in every direction and an interesting alley of boulders to pass through.
Once you’ve explored, head back the way you came for a hike of just over five miles. It’s really a great way to see this popular summit!
Adam Says…
On a clear day like we had, you just have to pick a hike with views. While we have done Blackrock many times, we decided to try a different approach that added a few miles and made it feel like we did something to earn the views. With very little elevation gain on this hike, it is an easy hike that most people could handle. This section of the AT is very well-maintained and traveled. We enjoyed walking through the tunnel of trees with just a small brown path dividing all the green around us.
Climbing the rock pile at Blackrock Summit is fun. Below: Adam passes through the boulders on the spur trail; More views of distant fog and clouds; Walking back on the Appalachian Trail.
Christine did a great job describing the path and turns above. We didn’t really see anyone on the trail since we started the trail fairly early in the morning. When we arrived at the summit, we had it all to ourselves. The summit gives you the opportunity to climb around on the large pile of boulders if you prefer (but watch out for timber rattlesnakes) or you can enjoy taking a moment to enjoy the views from down below. Our favorite spot is to travel down the Trayfoot trail because you get panoramic views on both sides of the trail. We paused for a quick snack before heading back. On our way back, we saw several others that had parked at the closest parking lot, but we were glad we had added a few extra miles. If you have a clear day in the forecast and are looking for an easy hike with a big payoff in the southern section of Shenandoah National Park, put this on your list.
Directions to trailhead: Located in Shenandoah National Park (fees apply). The Brown Gap Parking lot is located around Mile Marker 83 in the Southern Section on Skyline Drive. Park in this lot. Cross the road and come to the cement marker marking the trail. Head south on the Appalachian Trail. GPS Coordinates: 38.240676, -78.710687
This nine mile hike is not very well-known, but it’s truly one of the park’s most scenic summits. Past fire damage has left the summit open, with views in every direction. We hope sharing this post won’t spoil the solitude we enjoyed on this hike.
This beautiful view is about half a mile from the true summit, but it was too beautiful to pass up! Below: The hike starts northbound on the AT at Browns Gap; Pink azaleas were just starting to bloom; Adam hiking on the Big Run Trail.
Adam Says…
How has this hike escaped us before? We’ve covered most of what Shenandoah National Park has to offer, but this was a hidden gem that we are so glad we did. While this hike is about 9 miles, the elevation gain feels fairly minimal considering the distance you are covering. We were getting ready to do a multi-day backpacking trip in a couple of weeks and we wanted to get some training in before we hit some bigger miles with heavy packs. Christine had seen a few photos from the viewpoint and mapped out this possibility of a hike.
We saw a ton of these Dwarf Irises on the hike. Below: Early spring on the Rockytop Trail; Adam crossing talus slopes on Rockytop; Everything in bloom!
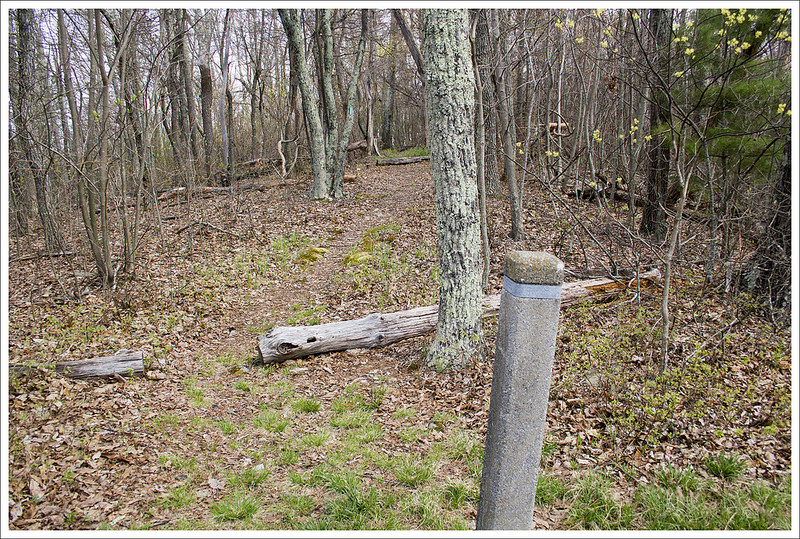
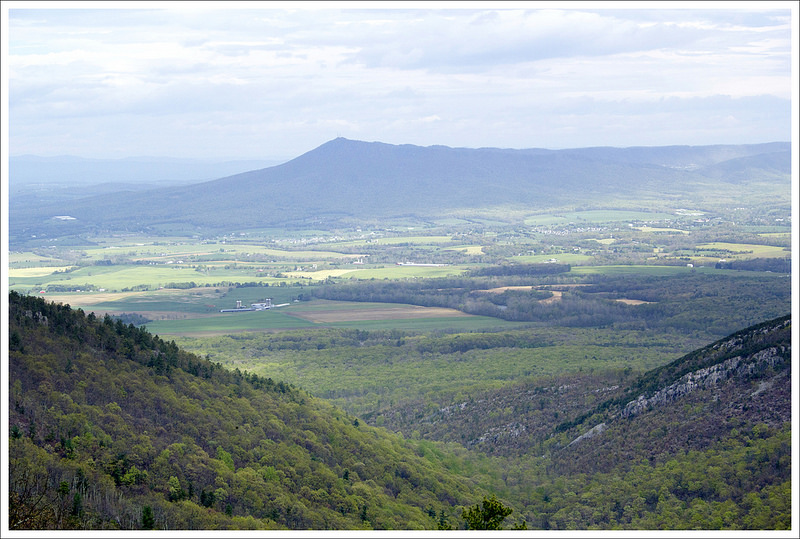
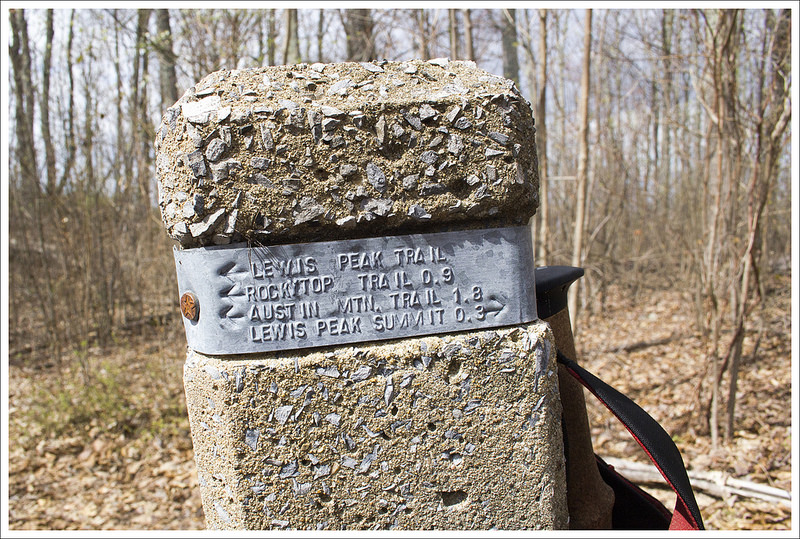
The hike starts at Browns Gap (the sign reads “Brown Gap”, but maps of the area show “Browns Gap”), at mile marker 83 of Skyline Drive. We parked our car and found the Appalachian Trail post from the parking lot and headed north on the white-blazed AT. The trail climbs a bit from the beginning and parallels Skyline Drive. At .5 miles, you come to the junction with the Big Run Loop Trail. Take a left here to join the blue-blazed Big Run Loop Trail. At 1.1 miles, you come to a four-way junction where the Big Run Loop Trail breaks off to the right and the Madison Run Spur Trail heads to the left. You will just stay straight. At 1.5 miles, the trail reaches another junction with the Austin Mountain trail bearing to the left; bear to the right to join the Rockytop Trail. Around 2.3 miles, you will pass along a rockier section of trail as it passes through some large talus slopes. At 3.4 miles, you reach the Lewis Peak Trail junction. Take a left at this junction to make your way to Lewis Peak. The trail descends at this point, At 3.6 miles, you reach a great viewpoint off the trail to the right. There is a large talus slope here that opens up into views of a valley between two mountains and Massanutten Mountain perfectly framed at the center in the distance.
The ridgeline on the Rockytop Trail provided nice views. Below: Mountain view from the ridgeline; Spring blooms; Junction of the Rockytop and Lewis Peak trails.
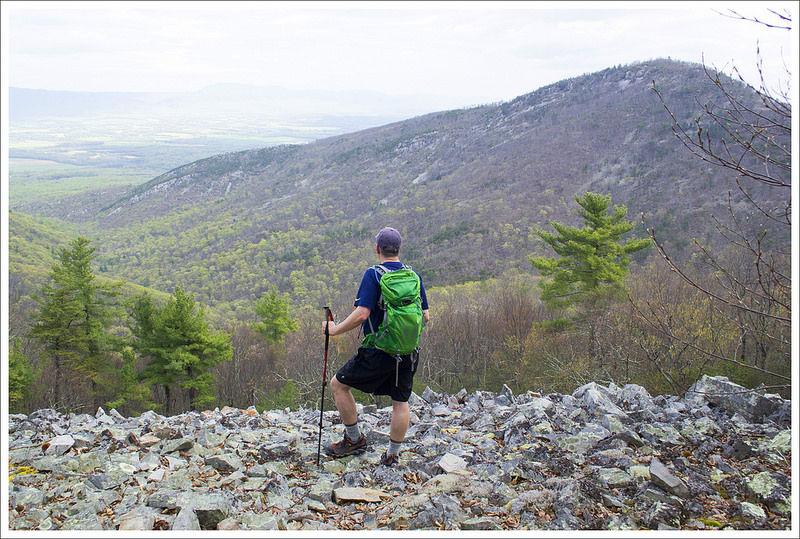
The trail continues to descend from this viewpoint until you reach 4.0 miles and then the trail begins to climb again. At 4.2 miles, you reach the junction with the Lewis Peak Summit Trail. Take this trail to the right and you will climb rather steeply to the summit through a series of switchbacks that will eventually wind around until the trail reaches its end and the summit at 4.5 miles. A forest fire from 2006 has destroyed a lot of the taller trees in the area, but it has created a very nice viewpoint from the summit.
We stopped here and ate a snack while enjoying the expansive views all around us. Clouds were starting to roll in, but we had the stunning panoramic views all to ourselves. When reflecting upon this hike, Christine and I both think that it may arguably have the best views from the southern district of Shenandoah National Park. We made our way back the way we came. There is some steep climbing on the way back, but most of the steep stretches are short-lived. If you can handle the distance, put this on your upcoming hiking agenda.
Christine Says…
For the last week of March and the first three weeks of April, I was bed-ridden from a severe allergic reaction to antibiotics. I burned with fever, my skin blistered and peeled, I itched all over, and struggled with excruciating nerve pain. As the weeks passed, I thought I would never be well enough to hike again. When I finally started feeling better, I went for short, easy walks around my neighborhood. But pretty soon, I felt a strong draw to get back to the ‘real’ trail. I don’t know what made me think a nine mile hike with 1500′ of climbing was a good idea for a ‘first hike back’.
This spectacular view is just a short distance from the junction of the Rockytop and Lewis Peak trails.
I’m not going to lie – I really struggled on this hike. My endurance definitely took a hit from spending a month in bed. On top of that, it was a hot, humid day. My doctor had directed me to fully cover up with long sleeved Capilene, long pants, a hat, and sunscreen to protect my healing skin. I felt like I was sealed in plastic wrap. I just couldn’t cool off. The whole hike, I had a mantra… ‘just take the next ten steps.’ Fortunately, taking ten steps over and over again eventually adds up to a nine mile hike.
Despite the physical challenge, there were some memorable high points on this hike. When we first set out we met a neat retired couple – Swallow and Blind Pig. They were section hiking Virginia’s Appalachian Trail. They were from Oregon and had previously finished hiking the Pacific Crest Trail. We talked to them about the park, the AT, gear, food, and wildlife. I hope when Adam and I are retired we’ll still be having adventures like Swallow and Blind Pig.
Lewis Peak is steeper, rockier, and pointier than most mountains in Shenandoah. This are was burned out by a forest fire in 2006. Below: Views from the Lewis Peak summit are amazing! Clouds moved in on our hike, but on a clear day, you can see for miles!
I also really enjoyed all the signs of spring emerging in the park. Most of the high elevation trees were still leafless, but we could see the brilliant green of emerging leaves creeping up the mountainsides. There were a few azaleas starting to bloom, spring beauties were abundant, and we passed several large patches of dwarf irises. Spring is my favorite season. I love seeing color and life waking back up after dull winter.
A significant part of this hike followed a ridge, so we enjoyed views through the trees. The open vista of Massanutten from the Lewis Peak trail was simply spectacular. The mountains in the foreground perfectly framed the distinct peak of Massanutten.
A great view from the Lewis Peak summit. Below: The views descending Lewis Peak were excellent, too! The area is so cleared out that you can see views in almost every direction.
When we started making switchbacks toward the summit of Lewis Peak, I knew we were going to have even more amazing views. The entire summit climb was open and there were wide open looks at mountains and the valley in every direction. The summit itself is sharper and pointier than almost any other peak in Shenandoah. The end of the trail has a wide sweep of rock to sit upon while you enjoy the view. There were berry bushes growing all over the place. In mid to late summer, this would be a good place to pick wild blueberries.
We enjoyed the view and a couple snacks before heading back the way we came. The hike back had a couple steep climbs that challenged me. I hadn’t remembered any of the downhills feeling steep on the outward hike, so the uphill climbs surprised me on the way back!
The hike back was beautiful!
I was quite glad when we got back to the Appalachian Trail and the final gentle descent back to the parking area. After our hike, we stopped for lunch at the Loft Mountain wayside – grilled cheese sandwiches and our first blackberry milkshakes of the season. It was great to be back on the trail!
Trail Notes
Distance – 9.1 miles roundtrip
Elevation Change – 1527 ft.
Difficulty – 3. The mileage is a little long for most people for a day hike, but with moderate climbs if you take your time it should be doable by most.
Trail Conditions – 4. The trail was in great shape. There was one larger blowdown on the Rockytop Trail we encountered, but otherwise was well maintained.
Views – 4.5. Amazing views from the summit and the viewpoint over the talus slopes just .5 miles from the summit.
Streams/Waterfalls – 0. non-existent.
Wildlife – 3.5. This area is a bit remote, so you may see some deer and bears on your hike. Watch out for rattlesnakes, especially if you venture onto any of the talus slopes.
Ease to Navigate – 3. There are a number of turns to get to Lewis Peak on this hike, but all of the junctions are marked with concrete posts.
Directions to trailhead: Located in Shenandoah National Park (fees apply). You will park at MM 83 on Skyline Drive at the parking lot marked “Brown Gap”. Parking coordinates are: 38.240652, -78.710379
This 6.0 mile hike follows fire roads and trails to the summit of Robertson Mountain – one of Shenandoah’s less visited, more interior peaks. It’s a moderate hike with fantastic views!
The summit of Robertson Mountain is less visited than many peaks in Shenandoah.
Christine Says…
Our traditional Thanksgiving day begins with a hike and ends with homemade pizza and beer. I know it’s not the normal way to celebrate this holiday, but it’s what we’ve done for years now. Eating turkey would just be weird for us! Last year, Skyline Drive was closed for weather, so we had a beautiful short hike along the Appalachian Trail in half a foot of fresh snow. I still remember losing the trail multiple times because branches were so heavily bowed over the path. Thanksgiving of 2015 was quite different! It was so warm and sunny that it felt more like early fall. Even with a brisk breeze, we were able to hike comfortably in t-shirts.
We wanted to hike something new, so we settled on Robertson Mountain. It’s not as well-known or popular as many other Shenandoah trail, but we heard it had nice views of Old Rag and the valley. The hike isn’t listed in any of our hiking guidebooks and most of the online information approaches Robertson Mountain from the Old Rag parking area. That route is known as one of the steepest climbs in the park. We didn’t want to drive all the way around to Weakley Hollow, so we consulted our maps to find a route approaching the summit from Skyline Drive.
This cluster of buildings is sometimes used for training events or ranger accommodations. It was empty when we visited. Below: The hike started out on the Limberlost Trail; A pretty stream along the way; Most of this hike is walking on a fire road.
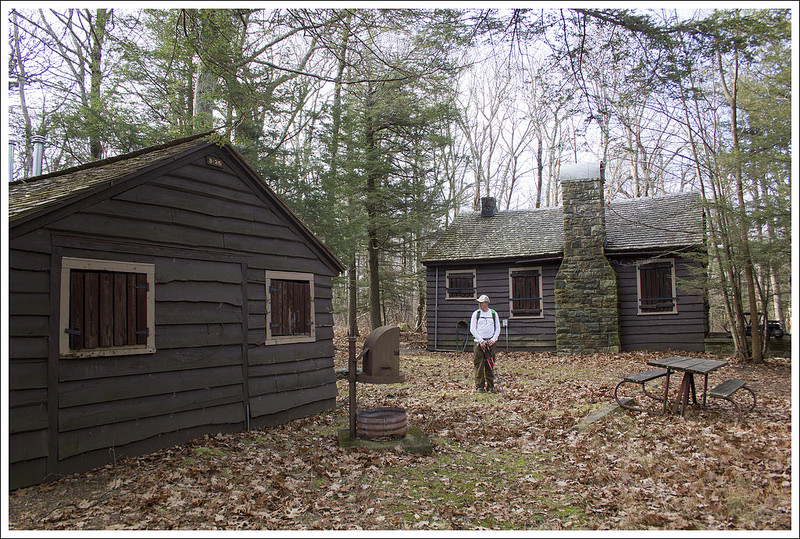
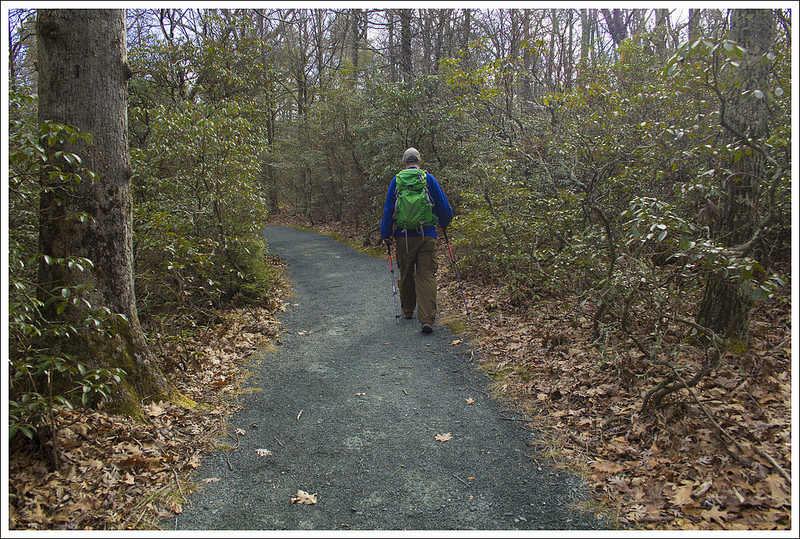
We decided our best option was to park at Limberlost and follow that trail to the junction with the Old Rag fire road. From there, we just followed the Old Rag fire road all the way down to its junction with the Robertson Mountain Trail. At first, the route seemed a little confusing because the fire road and the Big Meadows Horse Trail shared course for a while. Adam will give more specific details about benchmarks and distances in his portion of the post. Most of the walking along the fire road was mundane. We passed a pretty stream early on the route. We also came across a cluster of backcountry cabins. There wasn’t a sign marking them, but apparently they are used for training activities and ranger accommodations. As we descended the fire road, eventually Robertson Mountain came into view. Through the leafless trees, we could see it’s cone-like shape through branches.
We took a left onto the Robertson Mountain trail. It’s the only ‘real’ section of trail on this hike – the majority is fire road and the graded path of Limberlost. We climbed steadily for about three-quarters of a mile until we reached the top. A side path made it’s way to a rocky outcropping. We had the summit all to ourselves. We enjoyed a light lunch and spectacular views of the mountains. After leaving the summit, we explored a mountain-top campsite. There was definitely enough room for a couple tents, but no water source. Someone had recently put an illegal fire ring in at the site, so we dispersed the rocks before heading back down.
The hike back retraced our steps and was primarily an uphill climb back to Limberlost. If you’re looking for the less steep, easier way to visit Robertson Mountain – this is your route! The approach from Weakley Hollow is about the same total distance, but is a much steeper climb! All in all, this was a pleasant and moderate six mile hike. The route wasn’t very exciting, but the great views more than made up for it. It was the perfect way to spend our Thanksgiving morning.
We could see Robertson Mountain looming in the distance. Below: Climbing the Robertson Mountain Trail; A campsite with remnants of an illegal fire near the summit; Arriving at the viewpoint.
Adam Says…
Robertson Mountain is one of those hikes that doesn’t get much publicity, but treats you with a serene view over a mountainous landscape with barely a glimpse of civilization. Because of this, on most days, you will find that you can have this slice of serenity all to yourself.
We started our hike from the Limberlost Trail parking lot. The Limberlost Trail is a small loop, but start heading on the left, clockwise from the parking lot. There are several spurs that lead away from the Limberlost Trail and all of the junctions aren’t easily marked. After going just a couple tenths of a mile, we came to a sign that states “Horse Trail” with arrows to Skyland and Big Meadows (the next trail that comes off the Limberlost Trail Loop is the White Oak Canyon Trail – this is not the trail you want). Take this trail off the Limberlost Trail which is the Old Rag Fire Road. The Old Rag Fire Road starts off mostly flat until the one mile mark. At this point, it will start a steeper downhill. At 1.7 miles, you reach a junction with the Indian Run trail, but stay on the Fire Road. At 2.2 miles, you reach the bottom of the steep decline and reach another junction with the Corbin Hollow Trail. Stay on the Old Rag Fire Road and at 2.3 miles, you will see a small post on the left of the road that marks the beginning of the Robertson Mountain trail.
No one else to be seen on the trail on this day! Below: Gnarled trees near the summit; Descending Robertson Mountain; Returning to the junction of the Robertson Mountain Trail and the Fire Road.
Take this trail, which starts off through some thicker underbrush. This trail is much steeper but it is a short climb of .6 miles. The Robertson Mountain trail was very rocky and you think several times that you have reached a false summit, but the trail continues up. At this 2.9 mile marker, there is a small side trail to the right that leads to the summit. From the summit, you will see lots of nice rock outcroppings to enjoy the view. Continue back the way you came to make this about a 6 mile out-and-back hike.
For those that want to bag a few different peaks from this hike, you can reach Old Rag from here also. You could go back down the Robertson Mountain trail and then take a left at the Old Rag Fire Road. Taking this and then joining the Saddle Trail would take another 4 miles to reach the summit of Old Rag. This would give you about a 15-mile hike, so it could make a decent route for an overnight backpacking trip (but there isn’t really a water source) or a very long day hike for those that are very fit. Shenandoah provides a nice, free trail map of this area on their website.
This was a great way to spend a day on a hidden gem of a hike. While the fire road is not overly thrilling to see, it makes for some easy footing. We feel we have done so much of Shenandoah National Park, so we were pleasantly surprised at how this tucked-away hike gave us some of the better views in the park.
Difficulty – 2.5. This was an easy to moderate hike. The climbing was mostly gentle and well-graded.
Trail Conditions – 4. Most of the hike was along accessible trail or fire road. The Robertson Mountain trail was typical Shenandoah single-track.
Views – 4.5. Beautiful and fairly expansive!
Streams/Waterfalls – 2. There was one pretty stream early in the hike.
Wildlife – 3. We saw deer and birds. I am sure some hikers cross paths with bears in this area too. We saw some scat along the fire road.
Ease to Navigate – 4. The junction of Limberlost and the Old Rag Fireroad is not well labeled, but it’s also hard to miss something as wide as a fire road.
Solitude – 4. We saw some people around Limberlost, but nobody after that!
* MapMyHike is not necessarily accurate, as the GPS signal fades in and out – but it still provides some fun and interesting information.
Directions to trailhead: Located in Shenandoah National Park (fees apply). The Limberlost Parking lot is located around Mile Marker 43 on Skyline Drive. Park in this lot. Head left on the Limberlost Trail loop at the end of the parking lot. Coordinates: 38.580055, -78.381473
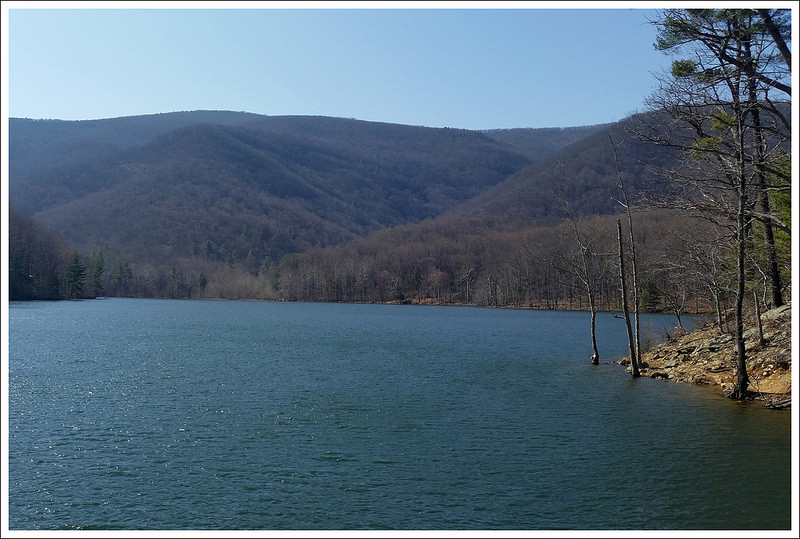
Adam at the Falls. Below: The beautiful Moormans River; Sugar Hollow Reservoir; Lunch stop after the hike.
Adam Says…
For people that are looking for a nice family-friendly waterfall near Charlottesville, look no further than this hike. In fact, it was rare to not see groups of people that weren’t hiking as a family. Most of the families with smaller children tended to stop along the river at some of the crossings to eat a snack or try and skip stones. And I can’t think of any hike that I’ve been on where I have as many dogs on a trail. So, if you want to take Fido for a walk (and a possible dip in the river) near Charlottesville, this would be a great spot as long as your dog is friendly with other dogs. We saw a couple of dogs that were running full speed chasing each other and crashing into the water. The park requires all dogs to be leashed, but we saw many (most!) people breaking this rule.
When we arrived at the trailhead, there were a ton of other cars here. There are two parking lots on this hike – the first being the larger lot and the second being a half-mile further up a rough road, but I would recommend having a four-wheel drive due to the uneven ground (even though we did see a convertible BMW driving on here with reckless abandon). The first, main parking lot was full, so we ended up parking along the roadside just a short distance prior to the first large parking lot. From the parking lot, there are two trails. You want to take the one that continues up the gravel road heading north (North Fork Trail). Walking up the gravel road, we came to the second parking area at .5 miles. There is a large closed gate directly behind the lot where the trail continues.
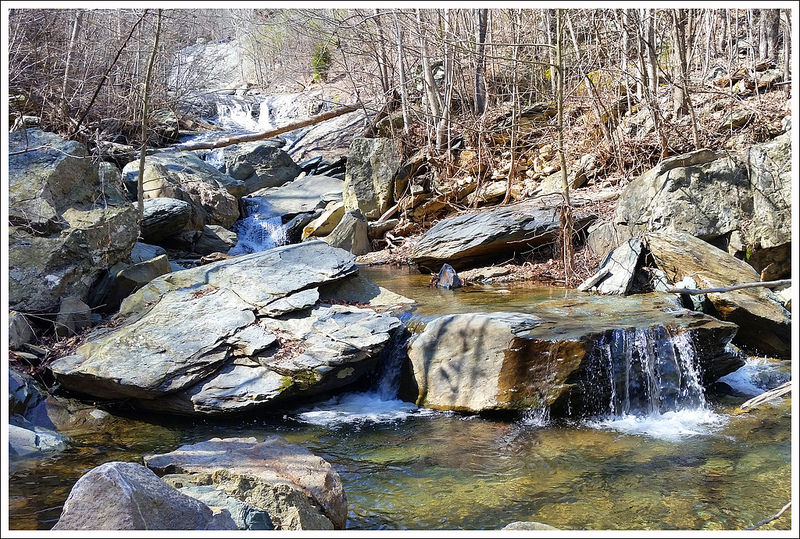
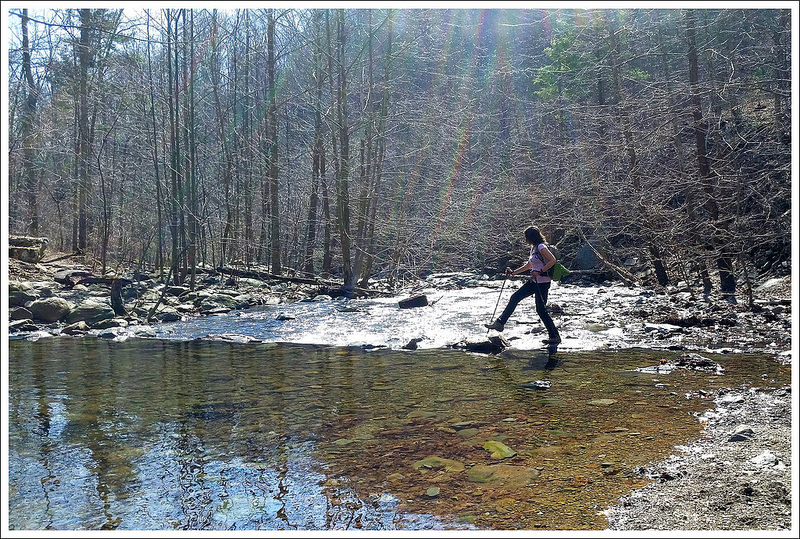
Christine rock hops across the stream. Below: The river was beautiful and clear; Adam checks out the rock wall at one of the crossings; Rapids from above.
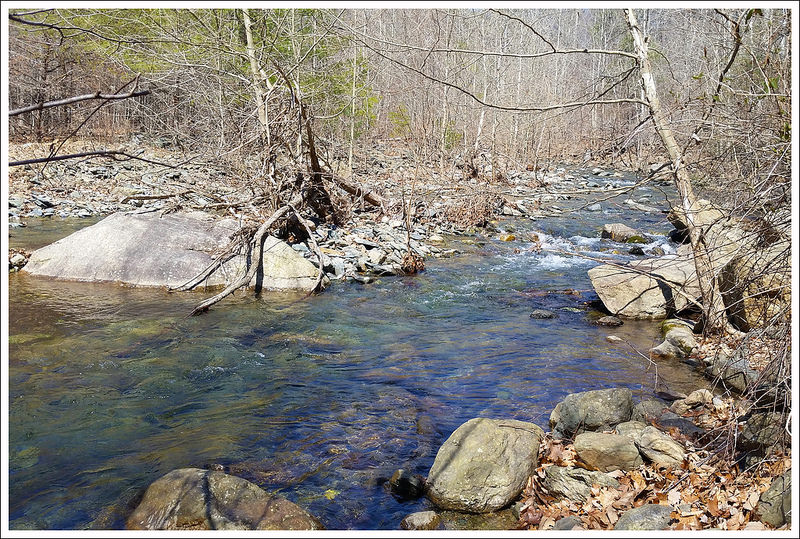
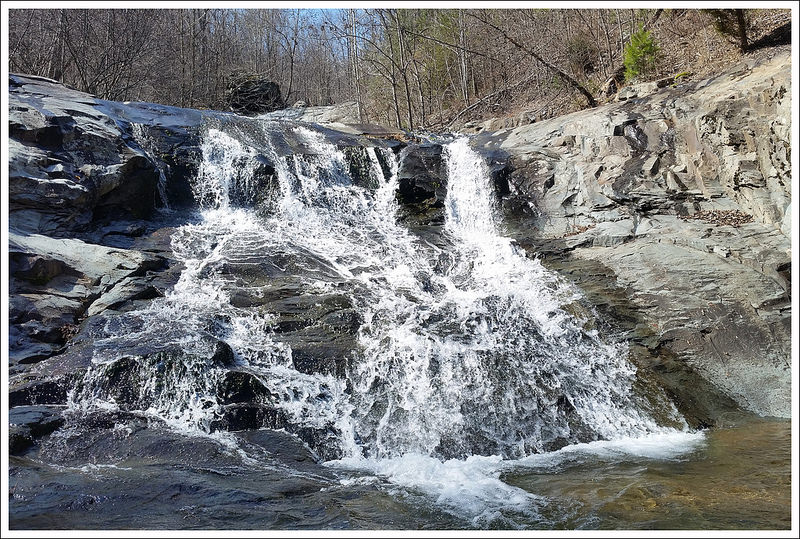
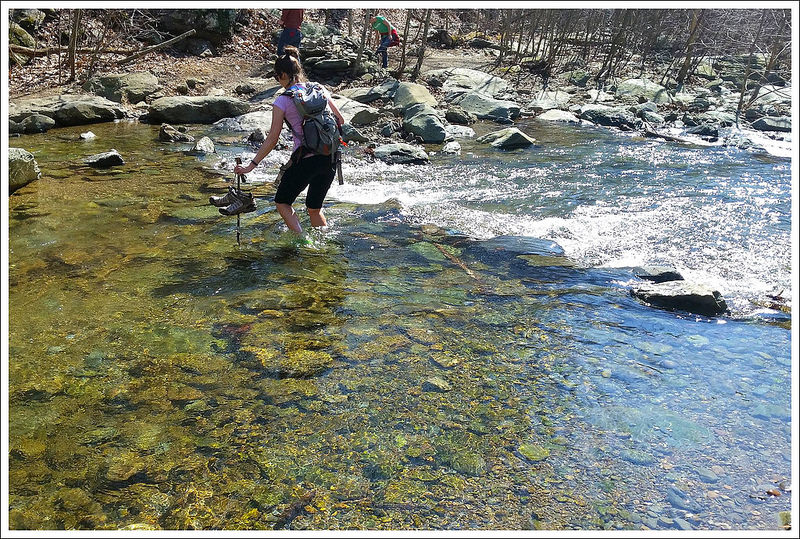
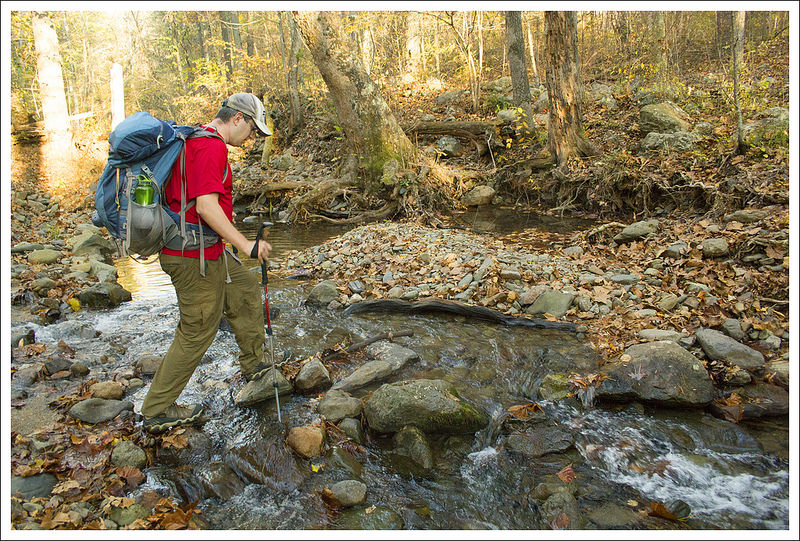
Most of the trail gives you nice views of the Moormans River as you are walking by. In .75 miles, you reach your first of four river crossings. There had been a recent, heavy rain so we were expecting these to be a little challenging. The first three of the rock crossings were fairly easy to rockhop across. The fourth crossing however required us to get our feet wet in the fast-flowing current. We brought our crocs to change into for just this occasion and the cold water was refreshing. It always makes us a little nervous carrying camera equipment though when the water is moving fast and you are not 100% sure of how deep the water is or if the rock you are putting your foot on is stable. The water ended up halfway up my calf at one point, so if there has been a lot of rain, be careful.
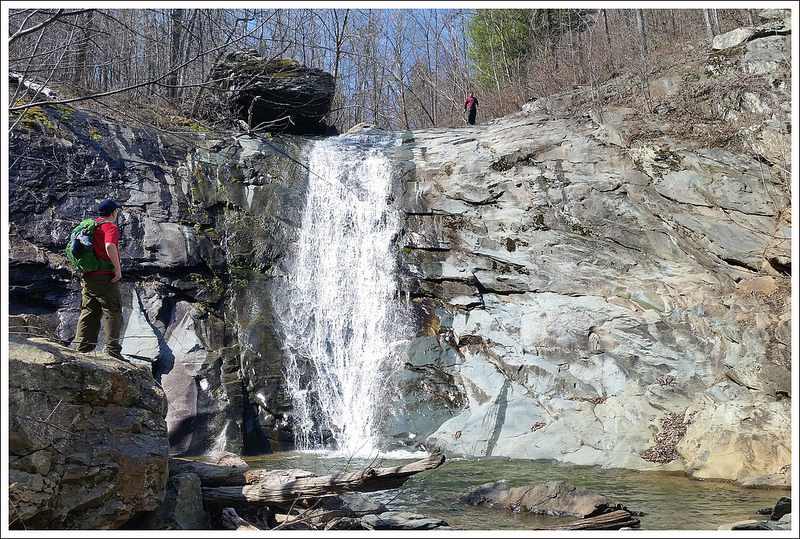
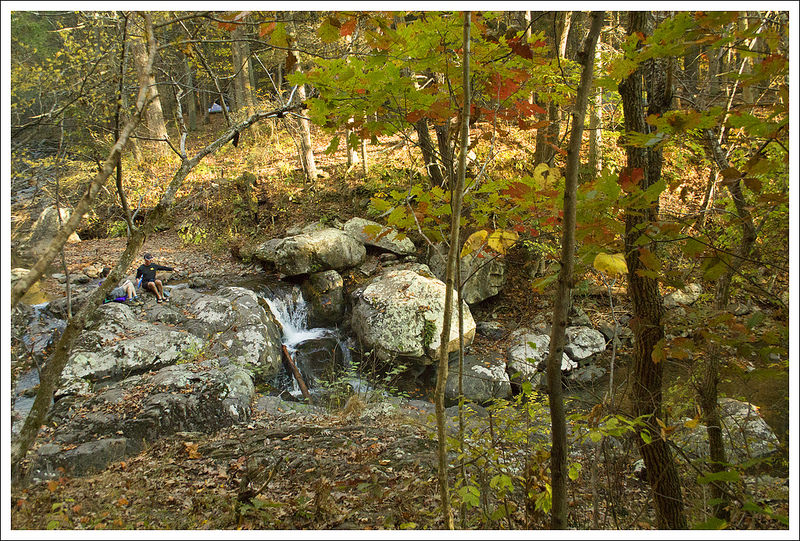
At the 2.0 mile marker, the trail starts to gain some elevation. At 2.15 miles, we took the side trail to Big Branch Falls. You arrive at the lower falls fairly quickly, but continue further and you will see the larger Big Branch Falls at 2.25 miles. Because of the recent rains, the water was flowing nicely over the top, but probably during the dry summer months, this would be less impressive. After we took some time to enjoy the falls, we headed back the way we came to get back to our car at 4.5 miles.
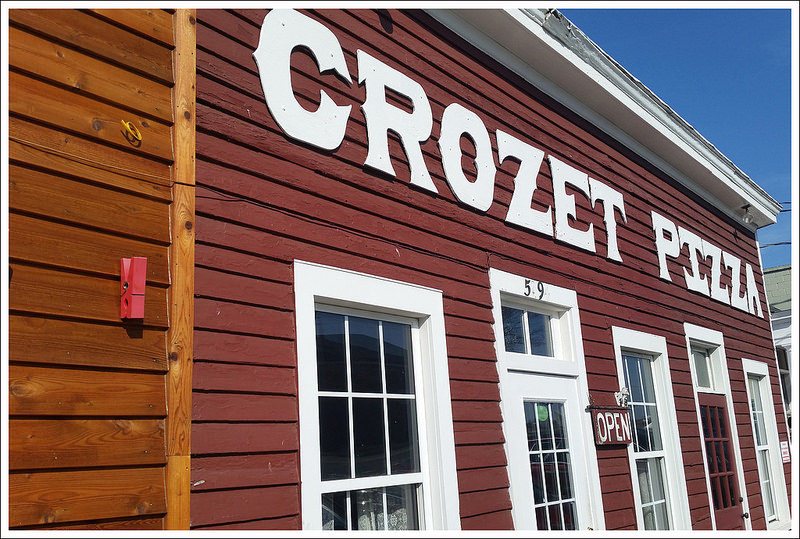
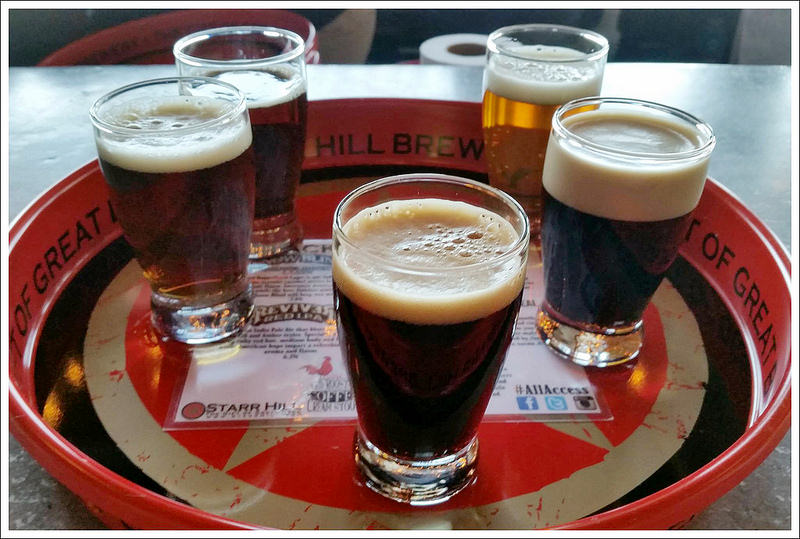
After our trip, we headed to nearby Crozet, VA to try Crozet Pizza. We had heard about how wonderful their pizza was for about 25 years now and I’m glad to say that we finally got to try it. Then, we stopped right down the road at Starr Hill brewery to sample a few post-hike beers.
Christine Says…
What a beautiful March day we had to hike Moormans River! It was the first day in a long time that actually felt warm. Early wildflowers were starting to bloom and the sunshine felt great. We started out pretty early, but found the parking lot already completely full at the trailhead. We had to find a place alongside the gravel road with enough room to park our car. After we were situated, I started MapMyHike, grabbed my camera, and started hiking.
I pointed my camera up to take a shot of the first trail marker, and the camera wouldn’t even turn on! Hmm… I had recently charged the battery, so it didn’t really make sense. I pulled out the battery and memory card to reset everything, and still no power. I figured that I had finally killed my Canon Rebel T2i. That camera has accompanied me on countless hikes. It’s been rained on, bumped against rocks, left sitting out overnight in the damp. I’m not careful with it at all, because I find I just don’t take photos when my camera is safely packed away in its padded, waterproof bag. I knew it would eventually meet this end. So… today, you get photography from my cell phone! Honestly, my phone takes decent photos – just not quite as nice as my dSLR. (Fortunately, when I got home, I found that the battery was drained after all. I guess I stored it accidentally with the power button depressed. The Rebel lives to fight another day!)
The lower falls are really pretty. Below: A view of the upper and lower falls; Rock hopping; One crossing was too deep to rock hop – so we waded.
The water was flowing beautifully and we really enjoyed the sights and sounds of running water all through our hike. The trail was one of the easiest we’ve hiked in a long time. It’s relatively level and not too rocky. The stream crossings were all moderate to easy, with the exception of the final one. The last crossing required us to put on water shoes and wade across. We saw several people attempt to rock hop, but they all ended up with wet boots.
When we reached the spur trail to the falls, there were several groups of people at each viewing point. We waited our turn and spent a few minutes enjoying and taking photos of the upper falls. One group had climbed up to the top of the falls and was picnicking on the rocks alongside the cascade. A man with the group walked out to the precipitous, domed edge of the falls several times. We were worried he might slip and have a nasty fall to the rocks below. Thankfully that didn’t happen!
On our way back down, we scrambled off the trail to a rock shelf beneath the lower falls. On the climb back up, I stuck my trekking pole in a hidden hole. When the pole suddenly dropped and vanished under the weight of me climbing up, I slipped and smashed the bridge of my nose into the trekking pole handle. Wow – did that hurt! I thought I hit hard enough to break the skin open, but thankfully it was just swollen and lightly bruised. Between that and the broken camera, it was not one of my luckier days on the trail!
The dam and reservoir. Below: Yum – Crozet Pizza; Flight at Starr Hill.
The hike back went very quickly. After we got back to the car, we made our way to a great lunch at Crozet Pizza and a flight of beers at Starr Hill. It was a fun day! I would definitely recommend this hike when there has been significant, recent rain. The falls dry up pretty quickly.
Difficulty – 2. The hike is not difficult with the distance and elevation, but the stream crossings could be a challenge.
Trail Conditions – 4. The trail is heavily-used and well-maintained.
Views – 1.5. You do get some elevated views of the river. Views from the top of the dam (after the hike) are really nice too, but don’t count in the score because they’re not technically part of the hike!
Streams/Waterfalls – 4. The waterfalls are nice to see (but could be disappointing in dryer months), but the highlight is probably walking along Moormans River.
Wildlife – 0. Due to the location and popularity, I wouldn’t expect to see much.
Ease to Navigate – 4. Once we knew where to go from the parking lot, it was easy to navigate.
Solitude – 1.5. I would expect on a nice day, you should see lots of people. Go early to beat the crowds and to get parking. But, there weren’t as many people going all the way to Big Branch Falls.
Directions to trailhead: From I-64 near Charlottesville, take exit 124 for US-250W. Turn right on 250-W and go 5 miles. Take the Country Road 654/Barracks Road exit. Turn right on Barracks Road and go 2 miles. Continue on SR 601/Garth Road for 9 miles. Continue straight on to Sugar Hollow Road for 5.5 miles. When you pass the Sugar Hollow Reservoir on the left, you are getting close. The road turns into gravel and you will eventually arrive at the first large parking area. Park here and walk further up the road for .5 miles until you reach the second parking area and closed gate.
This 14.7 mile route offers wilderness, beautiful views, and stunning stream scenery (even a small waterfall!) It’s a wonderful, moderate overnight backpacking loop; or a really challenging day hike. We set out intending to camp along Jeremy’s Run, but it didn’t quite go as planned!
The views on this loop hike come along the descent of Neighbor Mountain. Below: The trailhead at Elkwallow Picnic Area; Hiking along in golden woods; Adam and Kris at the junction of the Appalachian Trail and Neighbor Mountain Trail.
Christine Says…
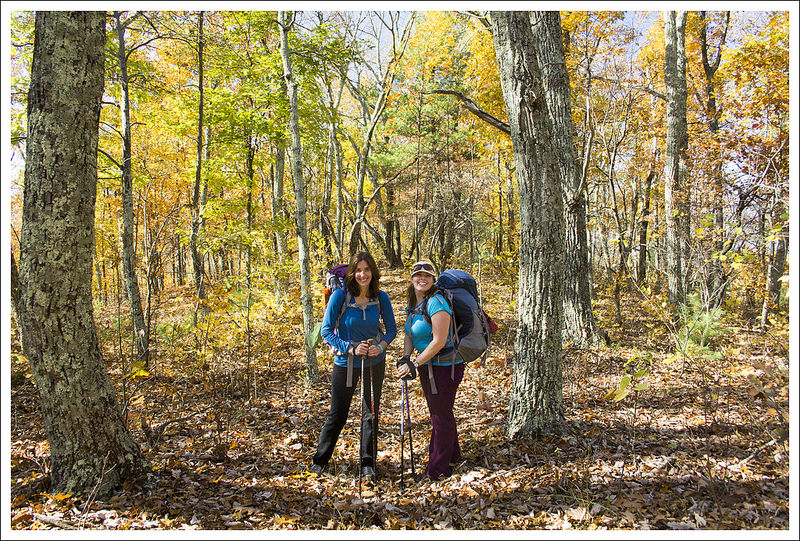
The final weekend of October 2014 was so beautiful – perfect, made-to-order backpacking weather. We decided to head out on one more overnighter before the weather turned cold. We invited our friend, Kris, to come along. She loves the outdoors as much as we do, and I was sure she’d enjoy this loop. Don’t miss her guest blogger entry later in this post! It had been several years since we last hiked in the vicinity of Jeremy’s Run, and I was really looking forward to camping along the beautiful stream.
After stocking up on some lunch provisions at Elkwallow Wayside, we finally hit the trail around 11:00. We figured we had a little over eight miles of hiking on our first day, so starting late morning would get us to camp before 3:00, with plenty of daylight left to pitch tents, cook dinner, and relax.
Hiking along the Neighbor Mountain Trail. Below: The fall color was still close to peak; Adam checks out a rock formation; At the summit of Neighbor Mountain.
We started out at the Elkwallow Picnic Area. A short spur trail leads downhill to the junction with the white-blazed Appalachian Trail. The AT descends for about .3 of a mile before coming to a junction with the blue-blazed Jeremy’s Run Trail. Follow the Appalachian Trail, veering to the left. The trail ascends for a little over a mile before coming to a more level ridge. You’ll pass the junction with the Thorton River trail, continuing south on the AT. At just over four miles into the hike, you’ll reach the junction with the yellow-blazed Neighbor Mountain trail.
We decided this junction would be a nice place to stop for lunch (hummus – my favorite trail lunch of late – easy to eat and lots of quality calories!). After a relaxing, thirty-minute break, we took the turn onto the Neighbor Mountain trail. The path meandered across the ridge. For the first couple miles, it was mostly walking in the woods. There was a nice breeze and gorgeous sparkling sunshine was filtering through golden leaves. It was everything you want fall to be!
Even though there is no view, the summit of Neighbor Mountain is marked with a cement post. At the summit, I noticed I had picked up a ‘hitchhiker’ along the way – a walking stick bug was clinging to my pants. I wonder how far he had come with me. I picked him off, and set him on a fallen log off the trail.
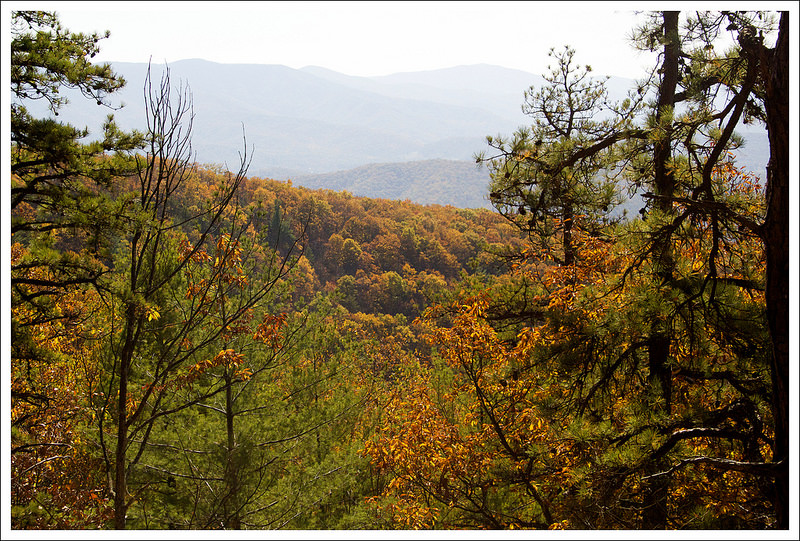
Between six and seven miles into the hike, there are a few excellent views of the Massanutten ridge and Three Sisters. There was a forest fire in this area several years ago, so the view was pretty open and expansive. We all paused a while to enjoy the fall foliage. It was so wonderful to see colorful mountains rolling our before us. We talked about how privileged and blessed we all felt to be out on such an amazing day!
Adam enjoys a view of the valley and mountains to the west. Below: This part of Neighbor Mountain burned in 2012. Alot of damage is still evident; Fall color; Adam descends Neighbor Mountain toward Jeremys Run.
The last mile and a half of the day was steady downhill, meandering across switchbacks until the Neighbor Mountain trail reached the bottom of the valley and Jeremy’s Run. As soon as you reach the stream, campsites are everywhere. The first few we passed were already taken, so we ended up returning to the hidden campsite we used several years earlier. It’s a flat spot under the trees shortly before the first water crossing.
And here’s where the story takes an unexpected turn…
Adam Says…
We all worked on pitching our tents and setting up camp. I set up our tent while Christine worked on inflating our sleeping pads. Kris was on the other side of the clearing working on setting up the one-person tent she had borrowed, when she suddenly she groaned, “Uh… guys – I think we might have a little problem.”
As it turned out, the tent bag only held the rain fly and the poles. The ground cloth and the actual tent were missing in action. She hadn’t checked the bag before hitting the trail. We spent the next 45 minutes trying to improvise a shelter with everything and anything we had. We tried piling three people in our Big Agnes Copper Spur UL2 (bad idea). We discussed whether or not the evening would be suitable for cowboy camping under the stars. We talked through a few different scenarios: 1) we all hike back immediately, 2) I sleep under the tarp while Kris and Christine sleep in the tent, or 3) I hike back to the car tonight and pick them up in the morning. I was least excited about the second option because the area felt tick-infested with the wet leaves. We debated the options for a few minutes, but ultimately, we decided the best choice was to keep the group together and make our backpacking trip into a very long day hike.
We tried to find a way to rig up shelter, but in the end we decided it was better to hike out. Below: Crossing the first stream and trying to eat something with enough calories to hike out happily; Adam doing one of many stream crossings; The best campsite along Jeremys Run sits above a waterfall.
We knew we only had a little over an hour of daylight left – the sun sets early behind the mountains surrounding Jeremy’s Run. We rushed to pack everything up as quickly as we could. Cooking a hot dinner would have required getting more water, so we opted to just eat a few snacks from our bags. We started off at a quick pace. I twisted my knee at the first major water crossing we had to make, which made the rest of the trip pretty painful. But sometimes, you just have to suck it up and hike.
We soon passed another great campsite next to a small waterfall. The trail meanders along and across Jeremy’s Run, requiring lots of rock-hopping across the stream. The sun was dipping down quickly and we soon found that we needed to put on our headlamps. Christine and Kris had legit headlamps, but I was using a small clip-on headlight that didn’t have the lumen output needed for a night hike. When it reached dusk a few miles from our campsite, we came across a couple with a dog. They asked us how far it was to the campsites and if they were all taken. The guy was carrying an outrageous amount of gear and the girl looked completely miserable. We knew they were going to be hiking to the campsites by nightfall and setting up camp in the dark. I’m not sure if this was her first venture into overnight camping, but based on the daggers she was shooting him with her eyes, it may be their last. They warned us they had seen a couple of bears just ahead of us, so we were on full alert.
We hiked by headlamp the last hour. Below: Jeremys Run in twilight; A large pool along the run; One of the last few stream crossings before it became too dark to take photos.
As it became fully dark, we still had a few stream crossings to make, which made it quite hazardous. I reminded myself that the water wasn’t that deep so if we stepped in the water, we would probably be OK. Another danger of night-hiking is the ability to lose the trail. We really had to pay attention to the ground and try to keep an eye out for occasional blazes to make sure we would stay on the trail. Hiking in the fall after most of the leaves have covered the trail provides an extra challenge. Because I had a weaker headlamp, it was hard for me to lead along the trail since the lights from Christine and Kris were blasting my shadow ahead of me on the ground. And then, I heard large noises in the woods, which I’m guessing was the bears that we had been warned about. We kept talking loudly and playing some games to keep our minds sharp (animals/foods/colors that start with each letter of the alphabet) as we hiked along.
At 4.25 miles from our intended campsite, we finally came across a concrete marker post. This post marked the junction with the Knob Mountain cutoff trail, so we knew were getting closer. We kept straight on the Jeremy’s Run Trail and at 5.15 miles, we reached our first junction with the Neighbor Mountain Trail. It was now just .3 miles straight ahead until we reached the parking lot where we started. We made the last climb with renewed energy and celebrated that we made it through this adventure.
It was definitely one of the longest hikes we have done in a day and with the extra weight on our back, was one of the toughest. We got back in the car and decided to go out to dinner to celebrate with drinks and food at Ciro’s in Elkton, VA. We were physically exhausted and hungry, but it was quite an adventure we will never forget.
One takeaway I had from this trip was that we were all great at hiking together. When we faced the challenge of not having two functional tents, we kept our wits about us, made a quick decision and went with it. There was no complaining and we just relied on each other to get through. If we had panicked or become overly upset, it could have led to a dangerous situation. It is through this challenge, that we learned that having good hiking partners that work well together is a great trait to have for survival. We all vowed to come back to this spot to camp together sometime in the spring to get the full experience through camping on Jeremy’s Run. After the hike, Kris bought her own tent and I bought a better headlamp.
Kris Says…
Backpacking 101- It doesn’t matter if you were up late celebrating your birthday and borrowing some equipment…ALWAYS double check your equipment or your trip will not be so fly!
I was excited to be hiking with friends on a beautiful fall day. We have always shared an appreciation of nature, lots of conversations and tons of laughter. I guess that is why we handled our little upset so calmly and reasonably. Although, I’m pretty sure I said “Adam, just because I am a girl doesn’t mean you have to give up your tent. I will cowboy up. Now, everyone hand over any booze or sleep aides you may have!” Of course that didn’t fly.
Ultimately we laughed at the situation, even as we crossed that creek 14 or so times and in the dark. And I learned a few things on this trip: I am capable of hiking 15 miles with a 25 lbs pack in a day, Little Debbie Peanut Butter pies are so tasty and 400 calories, it was time to purchase my own backpacking tent, a packing checklist is important and a good attitude goes a long way.
I vowed to return to Jeremy’s Run and hike early enough to snag the sweet waterfall camp spot, I also plan to cowboy camp sometime just to prove I can (my dog will protect me).
Christine and Adam- you two are SuperFly!
Trail Notes
Distance – 14.7 miles (We had issues with MapMyHike on this trip, so we have partial stats. We have the Neighbor Mountain segment and most of the Jeremys Run to Elkwallow segment. We’re missing the portion along the Appalachian Trail and a few early tenths of a mile along Jeremy’s Run. Technical issues!)*
Elevation Change – 2610 ft.
Difficulty – 4. The terrain is fairly moderate throughout the hike, but the length ups the difficulty rating.
Trail Conditions – 3. Sections along the Appalachian Trail and Neighbor Mountain are in great shape. The Jeremy’s Run trail is rocky and has at least 14 water crossings – some of them can be challenging!
Views – 3.5. The views descending Neighbor Mountain are beautiful, but never fully open/panoramic.
Streams/Waterfalls – 3.5. The stream is beautiful and scenic.
Wildlife – 5. We saw a bobcat! Hikers we passed at sunset told us there was a bear ahead, but we couldn’t see anything in the dark. But, the last time we hiked in this area, we saw three bears. We have also seen/heard owls, pileated woodpeckers, and whippoorwills.
Ease to Navigate – 4. The junctions are clearly marked and easy to follow — unless you’re hiking in the dark! 🙂
Solitude –1. It’s the most popular backpacking loop in the park’s northern district.
Directions to trailhead: From the US-211 entrance of Shenandoah National Park, head north for 9 miles on Skyline Drive. Take a left towards the Mathews Arm Campground. In .7 miles, you will reach a parking lot. The trail takes off next to the outdoor bathroom.
* MapMyHike is not necessarily accurate, as the GPS signal fades in and out – but it still provides some fun and interesting information.
The Point overlook on the Veach Gap hike offers nice views of the bends of the Shenandoah River and the mountains of the national park beyond. Below: Adam crosses the closed gate at the beginning of the trail; Christine hikes the Veach Gap trail; The main trail junction on this hike.
Christine Says…
Throughout fall 2014, our employer (and alma mater), James Madison University, participated in the Outdoor Nation Campus Challenge. Basically, students and employees accrued points for outdoor activities. The school that compiled the most points in the end won a prize of cash and outdoor gear. One component of the competition was completing a collection of eight local hikes. The list included many hikes we had already done (Old Rag, Humpback Rock, Fridley Gap, High Knob Fire Tower). Veach Gap was one of the only hikes on the list we hadn’t done, so we decided to check it out.
From the end of Veach Gap Rd. in Fort Valley, the hike begins along the Veach Gap Trail (blazed in gold), which is an old road bed. Supposedly, this trail is what remains of the historical Morgan’s Road. General George Washington requisitioned the road during the Revolutionary War. It was built to be used as a path of retreat from Yorktown. As we all know from history, the war went America’s way, and the retreat route was never needed. The road was still used locally for many years before falling into disuse and transitioning into a trail.
At one mile in, the Veach Gap trail crosses Mill Run. This is really the only potentially confusing spot to navigate on the hike. The trail crosses at a diagonal, so look carefully for the gold blazes on a tree slightly upstream. Shortly after crossing the stream, you may notice a rock formation in the shape of an upside down ‘U’. This is called an anticline, and it’s a very unusual geological feature in our area. I’m kind of ashamed to admit this, but we didn’t even stop to look at the anticline. I forgot it was there, and my mind was more focused on fall colors, lofty views, and potential wildlife sightings. But, if you’re a geology buff – don’t miss this feature!
Crossing Mill Run. You can see the blaze on the tree on the opposite bank. Below: Pretty fall leaves on the water; Blazes for Veach Gap, Tuscarora, and the Massanutten Trails; After the main trail junction, the Massanutten Trail became a little steeper and rockier.
A short distance after crossing the stream, the Veach Gap trail merges and becomes jointly blazed with the orange-blazed Massanutten Trail and the blue-blazed Tuscarora Trail. The three trails share the route for (at most) a couple tenths of a mile. AT 1.2 miles, you’ll come to another trail sign. To the right, the trail heads in the direction of the Little Crease Shelter. Stay to the left (blazed orange and blue), headed up Little Crease Mountain and toward Sherman Gap. About a half mile after this intersection, you’ll pass a marked group campsite on the right.
Continue meandering uphill along a gentle grade. At three miles, the trail becomes a bit steeper with switchbacks. There was a significant forest fire here in 2012, so the canopy is thin and allows nice views along the climb. We saw lots of charred stumps and blueberry bushes along the increasingly rocky trail. Eventually, the trail leveled out along the ridge. We soon reached The Point Overlook – a small outcropping of rocks overlooking a sweeping bend on the Shenandoah River.
We had a snack, took a few photos, and spent some time chatting with a fellow hiker (Hi, DJ!) before heading back down the way we came. Veach Gap was really a lovely hike to enjoy at the peak of fall foliage season. After getting back to our car, we made the short drive into Front Royal so we could enjoy burgers and shakes at Spelunkers. Great day!
Adam Says…
When we were reviewing the peakbagging hikes that were listed for JMU students/faculty to try for the Outdoor Nation competition, we were surprised to see this one on there. My guess is the coordinators looked up hikes that were close to Harrisonburg without thinking of what would be seen on the hike. We initially thought this wouldn’t be that nice of a hike, since we hadn’t heard anyone mention it before to us, but the views made this a pleasant surprise.
When we pulled up to the parking lot, we saw a few cars already in the parking lot and a group getting ready to hit the trail when we did. Of course, we saw vehicles for hunters, so we were a little worried about how this trail was being used overall. We were glad that we had brighter clothes on, which is always a precaution to consider during hunting season. We started off on the gold-blazed Veach Gap trail by crossing through the gate and walking on the fire road. The trail was very flat and passed through some younger forest. We were greeted with sights and sounds of Mill Run to the left of the trail.
The higher we hiked, the more views we got through the trees. Below: Adam takes in the view; The ridge was burned by a forest fire in 2012. The damage is still fresh and evident; Adam descends.
We soon came across two bow hunters, that seemed to be milling around, more about enjoying the outdoors than they were about hunting. At .35 miles, the fire road turns into trail. At 1.2 miles, take a left at the junction and join the blue and orange-blazed Massanutten Trail. The trail continued a slow, gradual climb heading northeast. At 3.0 miles, the trail takes a sharp, southern route and at 3.2 miles, it switches back to the normal northeastern direction. On our climb up, we passed by a large group of boy scouts that were covering some miles over the weekend, but were looking to camp near the crossing at Mill Run. The slightly-obstructed views of the mountains beside us were so colorful in this peak fall setting.
As you climb up to the ridge, you start seeing a lot of the forest fire damage. Since this happened in 2012, you start seeing some of the plants starting to grow in place of those that burned. We reached the ridge and followed it for about .15 miles. At 3.5 miles, we found a pile of rocks marking a short climb to the overlook where we stopped. The true highlight of the view is seeing the bends of the Shenandoah River from this rocky perch. There wasn’t a ton of room at the top that was unobstructed, but it was enough for a few people to take in the view.
If you feel like you would like a view hike with a good amount of solitude, this may be a great selection.
Trail Notes
Distance – 7 miles (Check out the stats from Map My Hike)*
Elevation Change – 1100 ft.
Difficulty – 2. This is an easy hike to a nice viewpoint.
Trail Conditions – 4. The trail was in great shape in most places. Dry, fallen leaves made some of the descents slippery.
Views – 3.5. The view of the bends of the Shenandoah River is nice, but slightly obstructed.
Streams/Waterfalls – 2. The stream along the early part of the trail is really pretty.
Wildlife – 2. We didn’t see anything but a few birds and squirrels.
Ease to Navigate – 3. There are a few junctions and a few unmarked trails that cross the route, but you should be fine if you follow the blazes.
Solitude –4. We did see a troop of Boy Scouts and a handful of others hiking in this area on a perfect fall weekend near peak foliage color, but generally this area is very quiet.
Directions to trailhead: From Luray, VA, take SR 675/Camp Roosevelt Road. Go .8 miles and take a left to stay on SR 675. In 2.2 miles, take a right to stay on SR 675. In 7.8 miles, take a right on to SR 678/Fort Valley Road. Follow this for 9.7 miles and then take a right onto SR 774/Veach Gap Road. Follow this about .75 miles to the end of the road, where you arrive at a parking area. The trail starts after you walk around the gate.
* MapMyHike is not necessarily accurate, as the GPS signal fades in and out – but it still provides some fun and interesting information.