This 9.5 mile loop in the southern district of Shenandoah National Park offers vistas, streams and quite a bit of solitude! We think it would make a great short backpacking loop with a beautiful stream-side campsite along Paine Run.
Adam Enjoys Blackrock summit. Below: Adam hikes the Appalachian Trail just north of Blackrock Gap; Christine climbs on the rock pile; Adam spots the spur trail that leads to the Trayfoot Mountain Trail.
Christine Says…
Every weekend this April has provided glorious hiking weather! I’m feeling so grateful that we’ve been able to get out so often and take full advantage of the warm, sunny days. On the Saturday before Easter, we chose to hike the challenging 9.5 mile Trayfoot Mountain – Paine Run loop.
This hike begins at the Blackrock Gap parking area (not to be confused with Blackrock summit parking). From the lot, cross to the eastern side of Skyline Drive and make your way north along the Appalachian Trail. After a couple tenths of a mile, the trail crosses back over the drive and heads steadily uphill for a little over a mile. As you climb, you’ll come to a junction – stay on the white-blazed AT, the turn to the right goes to the Blackrock shelter.
At 1.3 miles into the hike, you’ll reach a cement marker for the Trayfoot Mountain Trail. Do NOT take this turn unless you want to miss the splendor that is Blackrock Summit! Continue another tenth of a mile to the massive jumble of boulders and jagged rocks that makes up this impressive summit viewpoint. We took some time to enjoy the views and climb on the rocks. The views from this spot are probably the best on the entire hike, although there are a couple more nice spots yet to come.
The trail passes through a corridor of rock. Below: Adam passes through the narrow opening; Climbing Trayfoot Mountain; From the ridgeline of Trayfoot there are several openings in the trees that give you views of a distant Skyline Drive.
The Appalachian Trail skirts around the front edge of the summit before coming to a spur trail that leads down to the Trayfoot Mountain trail. The spur descends through a corridor of flat-sided slabs. When spur reaches the junction with the Trayfoot Mountain trail, turn right and follow the trail uphill along an old fire road.
The uphill climb along this section is steady going! Near the top, you’ll pass another marker pointing toward the Furnace Mountain trail. Pass this and continue on the Trayfoot Trail until you reach the cement post marking the summit and high point of your hike. There are no views from this summit, but this starts the beginning of a lovely, easy ridge walk.
The ridge rolls gently along, offering nice views of the Paine Run valley and a distant glimpse of Skyline Drive. The trail eventually begins a long gradual descent to Paine Run. Your last sweeping vista on this hike comes at a pretty outcropping of rocks overlooking pointy Buzzard Rock.
Switchbacks take you swiftly down to Paine Run. Near the first stream crossing, a cement marker points you left onto the yellow-blazed Paine Run Trail, which is essentially an old roadbed. There were several stream crossings on this section of trail. All of them but the second crossing were easy. We found the stream wide and flush with water. Most of the stones people use to cross were underwater. Instead of trying to attempt the rock-hop, we took off our shoes and waded across. Refreshing!
You get a nice view of Buzzard Rock before descending to Paine Run. Below: Some interesting rock formations along the trail; Lunch stop; Glimpses of farm land.
The Paine Run trail is very pleasant for a couple miles – sounds of running water and mountain views through the trees. When we hiked, the stream was flowing with lots of rapids and tiny waterfalls. I imagine it will run low and dry later in the summer. The path climbs so gradually you hardly notice you’re ascending! Eventually, you leave the streamside and head back toward Skyline Drive. After one final sharp switchback, you have one more moderately steep ascent back to your car.
All in all, I was pleasantly surprised with both the views and streams on this route. We had a great time! MapMyHike said this hike is only 9.3 miles, but all other sources put it at 9.7-9.8… so who knows!
Adam Says…
We feel like we have covered so much of Shenandoah National Park on our blog, but it seems there is always another trail or loop that you can try. We talked about a hike to Blackrock summit before in our coverage of an AT segment, but this is a longer loop version that offers a few additional views and a stream to enjoy. Other than the Blackrock summit, you will likely not see a lot of people on this trail. We only saw a few people the entire day, which was a little shocking for a beautiful weekend day that happened to also be a free National Park entry day.
As Christine mentioned, you could skip the Blackrock summit trying to follow the signage, but you don’t want to miss the best part of the hike. When we hiked previously, our route bypassed the spur trail that leads to the Trayfoot Mountain Trail. This spur immediately gives you some additional views and some interesting rocks to scramble around. Most people that are doing an out-and-back just to the summit from the northern approach will miss this area also.
Adam makes a first attempt to cross (with shoes). The second (successful) attempt was barefoot. Below: Adam descending to Paine Run; The shoeless crossing attempt, The trail goes right through the middle of the stream.
One thing that Christine and I both mentioned throughout the day is how this would make for a great overnight backpacking loop. If you choose to do so, I would tackle all of the tough uphill climbing the first night, making your way through the Trayfoot Mountain trail and camp somewhere near Paine Run. This will provide a great water source and there were some nice campsites near the water. The following day, you’ll just have a steady, but not too strenuous hike back uphill to your car.
When we started walking the ridgeline of the Trayfoot Mountain trail, I felt like we stumbled across the best place I’ve ever seen to spot grouse. We encountered three along our walk. A couple of years ago, while hiking in Great Smoky Mountains National Park, we encountered our first grouse on a trail. The beating of its wings created a strange echoing syncopation in our chest which made us both wonder if our heartbeats were going haywire. Seeking sources online, we found it was a common sound for mating grouse. We actually spotted several on this trail and when they took off in flight, we could briefly hear that same noise that perplexed us before. What a relief to actually spot the culprits this time.
Christine walks the wide, gradually ascending Paine Run Trail. Below: We found several blown-down bird’s nests along the trail; Pretty Paine Run; Another stream crossing.
Further along the Trayfoot Mountain Trail, we climbed up on a few rocks to enjoy our lunch and get some views. I managed to pick some rocks which were not in the least bit contoured to our bodies, which made for an uncomfortable sitting. It reminded me of how fast food chains design their seating area so the chairs are only comfortable for a short amount of time to prevent loitering. We quickly ate and moved on.
Around the 4.0 mile marker, the ridge line ends at a nice rock outcropping which gives you some last views before descending towards Paine Run. Some local families like to park on the western outskirts of the park and hike up to this area for views.
When we reached Paine Run, the water was a little high from the recent rains. There were a few places to rock-hop across. In one spot, we did have to shed our shoes to make our way across. Christine said I looked like a hobbit with my pantlegs pulled up halfway as I crossed. I responded back in my geekiest way, “May the hair on my toes never fall off.” I will say the water was very cold, but it felt so refreshing to my feet. The sensation of the freezing water made me feel as if I had just received a nice massage on my feet. After the refresher, I felt I could hike a lot longer.
The Paine Run Trail is popular with horseback riders. Below: The final ascent to the parking area; We spotted a bear on the drive home; Before we went home, we stopped for famous Shenandoah blackberry ice cream.
The stretch on the uphill Paine Run trail was very gradual. While some people may think this was more of a boring stretch, I enjoyed the views of Paine Run along the side. There were even a few very small waterfalls to enjoy since the water level was high. We also came across a group horseback riding along the trail. All yellow-blazed trails, like the Paine Run trail, in Shenandoah National Park allow horses on the trails. This would be a great trip to take down to the water and let the horses rest and get a drink before returning.
We got back to our car and then heading north along Skyline Drive. Within a few miles, I spotted a young black bear on the side of the road. We were excited to have our first bear sighting of the year. The bear quickly ran away once it knew it was spotted, but we hope we get to see many more this year. We stopped at the Loft Mountain wayside to get our first blackberry milkshake of the year. Appalachian Trail thru-hikers talk about these treats for days in advance of getting to Shenandoah and the hype is worth it. However, their milkshake machine was broken and we had to settle for blackberry ice cream. It was still a just reward for a long hike.
While we realize this hike is longer and not as popular as some of the others in the park, this hike really has some nice gems along the trail. I was pleasantly surprised at what this had to offer!
Difficulty – 3.5. The climbs to Black Rock summit and Trayfoot Mountain can be a little steep, but the climb from Paine Run back to the parking area is very pleasant and gradual. The length adds to the difficulty rating of this hike.
Trail Conditions – 4. The trail was clear and in great shape!
Views – 5. The views from Black Rock summit are spectacular. While the summit of Trayfoot Mountain has no view, there are other nice views from the Trayfoot Mountain trail – especially the outcropping that overlooks Buzzard Rock.
Streams/Waterfalls – 3. Paine Run was surprisingly pretty and broad in the early spring. As we hiked up the Paine Run trail, we had many stream crossings and nice views of the water.
Wildlife – 3. We saw deer and lots of grouse on the trail. We also saw a black bear shortly after leaving the parking area to come home!
Ease to Navigate – 4. There are only a few, well-marked turns on this hike.
Solitude – 4. We saw a few people near the stream that had come in from the western perimeter of the park, a few people on Black Rock Summit, and a trio of women on horses. All-in-all, we enjoyed a lot of solitude for a long stretch of trail on a pretty ‘free park entry’ day!
Directions to trailhead: Located in the Southern Section of Shenandoah National Park. Park at the Blackrock Gap parking lot around MM 87.3. Cross the road and find the cement post for the Appalachian Trail. Take a left, heading north, to start your hike.
* MapMyHike is not necessarily accurate, as the GPS signal fades in and out – but it still provides some fun and interesting information.
Sherando Lake is a popular camping/swimming area for locals. It’s just several miles off the Blue Ridge Parkway.
Adam Says…
This has been quite the harsh winter for snow and cold temperatures. And when it hasn’t been too cold, it seems to have been raining. So, we were glad to get out on a nice day to get a little exercise outdoors for a change.
Sherando Lake is a multi-purpose recreation area. In nice weather, you will see people swimming, fishing, camping, and hiking. To visit, there is a fee per vehicle – check out their fee schedule. The area is officially open from early April through October. The road gates are often closed during the off season based on weather. There is camping available if you wanted to make a nice weekend trip, but reservations should be made in advance.
We started off our hike from the Fisherman’s Parking Area. There were a few other vehicles there also, but they were all there for the fishing. The lake is stocked with trout throughout the year. Facing the lake, we started our hike on the left by heading up the Cliff Trail. This trail was a short gradual climb with a few switchbacks before the trail levels out. About .4 miles into the hike, there is a small outlook to the right from a rock that gives you a few obstructed views from the lake. Continuing on the trail, it begins to descend and the lake gets back into view. At .8 miles, you reach the lakeside and see the sign that shows the junction with the Lakeside Trail (a trail that wraps around the lake). We took a few minutes to go out onto the sand and enjoy the views of the lake. I saw a wood duck escorting a few ducklings on the far banks of the lake.
The fisherman’s parking lot is located at the dam end of the lake. It is where our hike begins. Below: The trail starts off rocky; Overlook View.
We walked back behind the large building/gift shop, crossed a couple of bridges and rejoined the trail on the northwestern side of the bank. We took the blue-blazed Blue Loop Trail, leading us past a few campsite areas before climbing up into the woods. The trail is rockier, especially in the beginning, than the Cliff Trail and is steeper. The trail climbed through a few switchbacks. At 1.5 miles, you reach a junction shortly after a switchback with the Dam Trail. This will be your return route. Continue up the Blue Loop Trail, which begins to take an uphill climb to the left up the mountain. At 1.75 miles, you reach Lookout Rock. We took some time there to enjoy the view and then went back the way we came until we reached the junction with the Dam Trail. We took this trail to the left, which leads steeply down the mountain. You begin to see the lake through the trees again and we reached the lakeside around 2.25 miles. We continued on the trail until it reached a small bridge that crossed over the dam stream and led back to the parking lot.
Adam takes in a beach/lake view. Below: Services are typically open April through October; Trails are well marked; Adam hikes the Blue Loop Trail.
One thing that was going through my mind during the hike is this would be great for a family outing. Grab your family for a quick hike followed by a picnic by the lake. Make a weekend of it if you want to do some camping, swimming, and fishing.
Christine Says…
I enjoy playing in the snow, but I’m very ready for warmer weather. I want to see flowers blooming. I want to feel warm sunshine on my face. I’m so ready to see a canopy of green across the mountaintops. I have spring fever. So, I was especially thankful for a particularly warm and sunny Saturday because it gave us a chance to get out and hike.
We chose Sherando Lake, mainly because it was nearby and easy. It would have been a great day to go on a longer hike, but Adam was still getting over a bad cold. And I was not willing to spend more than an hour in the car. I had spent the past two weekends in a 12-passenger van, making a 15 hour ride to and from the Florida panhandle and was still a bit road weary.
Lookout Rock provides a nice view of the valley, lake and mountains. Below: Adam climbs his way toward Lookout Rock; Checking out the view, Making the descent.
My trip to Florida was a service-learning trip with a group of nine JMU students. We traveled to a Nature Conservancy preserve – Apalachicola Bluffs & Ravines to do a week’s worth of environmental work. We camped, we hiked, we learned about the local ecosystem, and most importantly – we planted 90,000 plugs of native wiregrass seed that will be used to restore the natural habitat of that part of Florida. It was hard work, but I think we made a difference. We even had one free day on our trip. We chose to spend it spotting manatees, gators, and other wildlife at Wakulla Springs State Park. If you want to see more photos and read more about my service trip, I’ve uploaded a large set of captioned photos to my Flickr account.
Now, back to Sherando Lake! I had been to the lake a couple times before, but had never actually taken the time to hike any of the trails in the area. I was pleasantly surprised by the trail system. There is something for everyone – a practically flat trail that goes along the lake shore, a steeper trail around the lake that offers a couple nice views, and a connection into the larger, longer trail system along the Blue Ridge Parkway.
I liked sitting on the sand and enjoying the pretty lake view, and I really enjoyed climbing up to Lookout Rock on the Blue Loop Trail. The rocky outcropping provides a nice view of the lake and the mountains beyond. Although the snow was gone on the trails we walked, we could still see plenty of snow on the distant, higher ridges.
The hike ends after crossing a cement bridge over the spillway. Below: The stream leading away from the lake; Christine crossing the concrete bridge, Blue Mountain Brewery food and brewery.
The walk back down from Lookout Rock was really steep and slick, especially with the thick bed of dry, fallen leaves. Once we reached the bottom of the descent, we crossed a concrete bridge beneath the spillway and returned to our car. We finished hiking a little bit before noon, so we decided to make the short drive to have lunch at Blue Mountain Brewery (near Afton Mountain). They have great food and great beer. Adam enjoyed a flight of nine different beers and I tried their Daugava Baltic Porter. I think everyone in central Virginia had the same idea to visit the brewery for an outdoor lunch. The place was packed, but it was a perfect ending to the day.
Directions to trailhead: From I-64, take Exit 96 just east of Stuarts Draft. Go south on State Route 624, which becomes State Route 664 at Lyndhurst. Continue south on State Route 664 approximately 8 miles to the entrance to the Sherando Lake Recreation Area on the right. The gatehouse is approximately 0.5 miles ahead which will take the fee for your vehicle. Past the gatehouse, you’ll take a right to the fisherman’s parking lot. Park there and make your way to the left for the Cliff Trail.
* MapMyHike is not necessarily accurate, as the GPS signal fades in and out – but it still provides some fun and interesting information.
We finally got a significant snowfall! The first day of the storm, we were snowbound at home. We spent the day digging out and hanging out. But early the next morning, after the snowfall stopped, we headed over to the Elk Run Trails. The trails, maintained by the Hurricane Running Club, are primarily intended for cross country running and walking. However, under a heavy bed of snow, they’re simply perfect for snowshoeing.
We parked our car at the Elkton Community Center and set out from the trailhead on the west side of the center. For much of the first mile, the trail follows parallel to Elk Run Stream. While you can see houses on the far bed of the stream, the trail still offers a lovely wooded setting. On this particular day; the deep, soft snow made for slow, arduous progress.
The only climbing on the walk comes as you approach the back side of the Kite Mansion. One short climb takes you past an old spring house. Then a shorter, but steeper, ascent brings you up to the east side of the house. We walked across the columned front of the house and picked the trail back up on the other side.
Adam makes his way across the meadow behind the community center.
A brief descent brings you back to a dirt road that parallels Route 33. The trail is completely flat and passes through a tunnel of hemlocks and pines. Eventually you come out on the road, just east of the community center. From there, we popped off our snowshoes and walked the brief 10th of a mile back to our car.
It was a wonderful morning in the snow!
Adam Says…
When the weather wants to dump a lot of snow on the ground and you feel like you couldn’t hike anytime soon, grab some snowshoes and hit the trail. We have been on this Elk Run trail system before in dry conditions, but this trail seems made for snowshoeing.
The only map you can find of this trail system is on the photo link above. You can pick up a copy yourself at the Elkton Community Center during normal business hours. Our trip consisted of doing the entire orange trail starting from the west end, but included the green loop trail that takes you up to the Kite house. We parked at the Elkton Community Center and went behind the building.
We spotted the orange blaze across the field behind the building that denoted the start of the trail system. The trail was untouched (minus a few squirrel tracks) when we hit the trail and we quickly realized how tough snowshoeing over a foot of fresh snow could truly be. After a short time, we decided to shed some layers since we were working up a sweat from the effort. The trail started off with a long scenic walk alongside the Elk Run.
The Kite Mansion.
At about .9 miles, the trail begins to start up an ascent and you can then join the green-blazed trail. Take this up a steep but short hill and at the top of the hill take a right. This will lead you to the front of the Kite House.
Continue to cross in front of the Kite House and you will see the trail pick up again, going steeply downhill. At the bottom, you come to a larger trail junction. We took the orange-blazed trail again, which takes you through a wooded section behind Elkton Middle School. After about .5 miles, the trail widens and then eventually leads to a road. Take a right here and follow this back to Elkton Community Center, where you parked.
Difficulty – 1. The trail is almost completely flat. However, in deep, unbroken snow, you should expect more of a challenge.
Trail Conditions – 4.5. Wide, flat and well groomed – may be muddy.
Views – 0. You’re in the woods the whole time.
Streams/Waterfalls – 2. Elk Run is pretty, but is often obscured by brush.
Wildlife – 1. You’ll likely see a variety of birds and possibly deer. We saw a beautiful red fox when we walked the trail on Thanksgiving day.
Ease to Navigate – 3.5. There are tons of inter-connected trails. They’re blazed but unnamed. Everything loops back, so it would be hard to get lost.
Solitude – 4. Typically, you’ll only see a few people on this trail.
Directions to trailhead: From I-81, take exit 247 towards US-33E heading towards Elkton, VA. Follow this 15.6 miles before taking the ramp to the right to US-340N. Take the first right and you will see the Dairy Queen to the right. Directly across the road from Dairy Queen is the Elkton Community Center. Park your car here. Behind the building, you will see the orange blaze which signifies the start of the orange-blazed trail.
* MapMyHike is not necessarily accurate, as the GPS signal fades in and out – but it still provides some fun and interesting information.
This 7.2 mile hike takes you to the summit of Mt. Moosilauke – Dartmouth College’s ‘home mountain’. It’s also the first place in New Hampshire where Appalachian Trail hikers walk above treeline in the alpine zone.
Adam enjoys the summit of Mt. Moosilauke. Below: Damage from Hurricane Irene forced the rerouting of trails; Adam climbs the Gorge Brook Trail; Open views along the ‘balcony’ section of the hike; The area right below treeline was thickly forested with evergreens.
Christine Says…
For the final hike of our granite-state adventure, Adam and I chose to hike the western-most of New Hampshire’s 4,000-footers – Mount Moosilauke. At 4,802 feet, Moosilauke is the first spot northbound Appalachian Trail thru-hikers truly walk above the treeline. Yes… there are balds and high grassy meadows in the south, but those are not created by the unforgiving alpine climate it takes to truly create areas above the treeline.
There are several different routes up Moosilauke. We chose a 7.2 mile loop following the Gorge Book Trail, the old Carriage Road and the Snapper trail. It’s probably the most popular route for dayhikers.
We started off from the Moosilauke Ravine Lodge. Before I get started talking about the actual hike, I wanted to take a moment to talk about how much I enjoyed visiting the Ravine Lodge. The lodge and several surrounding bunkhouses were built in the late 1930’s and were originally used as a hub for competitive skiers. Nowadays, the lodge is owned by Dartmouth College and run by students. You can stay the night or just come in to enjoy a hearty home-style dinner. The lodge is everything you would imagine a rustic mountain cabin to be – antique skis, old trail signs and mooseheads adorn the walls. There’s a big stone fireplace (yes… a fire was necessary and burning cheerfully on this chilly August morning) and an old piano along one wall of the dining room. There’s even a cozy library on the lower level! The lodge windows and back porches also offer stunning views of its namesake mountain.
Dartmouth College owns and runs the Moosilauke Ravine Lodge. Below: The lodge is very rustic and comfortable. It was even cool enough in August to have a fire in the fireplace; The food at the Ravine Lodge is supposed to be pretty good!; Adam checks out out route.
Now back to the hike… our route started off behind the lodge. We almost immediately crossed the Baker River on a nice, sturdy bridge. The Gorge Brook trail climbs uphill gradually over rocky terrain. We soon came to a sign announcing a reroute of the Gorge Brook Trail. Evidently, the heavy rains from Tropical Storm Irene caused rock slides and irreparable damage to part of the original route. A group of Dartmouth students built the Wales Carter Connection, a short section of trail that bypasses the damage. The connection eventually came back out on the Gorge Brook trail near it’s junction with the Snapper Trail. We continued gradually uphill on Gorge Brook. Much of this section of trail followed a pretty stream. After passing a memorial plaque and a sign for ‘last sure water’ we moved away from the stream and into forest increasingly made up of evergreens.
At 2.3 miles, we got our first open views of the hike. Through a wide opening in the trees, we could look across the valley in the direction of Mount Cardigan – our first hike of the trip! Around this part of the hike, we came across our first human company! One group of three was carrying on a loud and detailed conversation about the best spots to get clear 3G service in the wilderness. Another group, maybe a father/daughter, was arguing about the nature of God – whether he’s benign and quietly observes suffering or if he’s like a menacing boy who enjoys pulling the legs off of bugs to watch them struggle. I think we overheard them talking about Shakespeare, too, but I can’t be certain. Usually when Adam and I talk on the trail, we talk about the scenery/wildlife or we just walk in companionable silence. It made me curious… are you a chatty hiker? What are your typical trail topics?
Adam climbs the rocky Gorge Brook Trail. Below: Beautiful stream scenery; The Gorge Brook trail was very rocky; Our first views along the way.
After the first view, the trail got a bit steeper and the trees a bit sparser. We enjoyed several nice views from a section of the trail called ‘The Balcony’. After climbing the massive stone steps along the Balcony, we dipped in and out of thick stands of evergreens. It was almost like walking through an overcrowded Christmas tree farm.
We soon stepped out into the alpine zone – the barren rocky expanse that exists above the treeline. We could see the rocky path winding across the bare terrain toward a copse of rocks a top the summit of Moosilauke.
As soon as we were in the open, I had to dig my fleece out of my backpack. It was a good 15-20 degrees colder (and much windier) on the summit. We enjoyed a snack, took our photos at the summit sign and marveled at the views. I especially liked looking across and seeing the Kinsmans, Franconia Ridge and the distant Presidentials.
Mt. Moosilauke is the first New Hampshire peak on the Appalachian Trail that includes an alpine zone. Below: Coming out of the trees; The final push to the summit; At the summit marker.
Leaving the summit, we briefly followed the white-blazed Glencliff trail (which is also the Appalachian Trail across this mountain) to its junction with the Carriage Road. This section of trail was almost perfectly flat and went through more areas that resembled large groupings of Christmas trees. We could have taken a detour to visit the South Peak of Moosilauke, but we decided to skip it.
The Carriage Road was wide and graveled, but a little steep. I can’t imagine people coming up this route in horse-drawn carriages! This part of the hike was pretty uneventful, and we were glad to finally reach the Snapper Trail.
The Snapper Trail descended gradually through stunningly beautiful New England woods. There were thick beds of moss, peeling white birches and several small bubbling streams. It was a lovely way to bid farewell to New Hampshire trails. Before we knew it, we were back at the Ravine Lodge and finished with a productive week of hiking!
Adam Says…
Mt. Moosilauke was one of the three hikes we most wanted to do in New Hampshire. Having hiked Mt. Washington and Franconia Ridge earlier that week, we were feeling a little tired and sore but we decided to press on to cover Mt. Moosilauke. We try to get a lot accomplished on our vacations, so we didn’t want to have any regrets of not doing a certain hike. We always say that we can be tired when we go back to work, so we run ourselves ragged on our vacations.
Parking at Mt. Moosilauke can at times be a challenge. There is one long gravel road and during the summer, you will likely see cars lining one side of the road, parallel parked. We had to drive to the end of the road and then turn around and backtrack, but we were able to find a decent spot since we left so early in the morning.
We first visited the lodge and you can just imagine the history here. The lodge is rustic but has that snuggle-by-the-fire cozy feel to it. Since this is maintained by an Ivy League school, my mind began to wonder if there were academic secret society meetings held here or if famous alumnus, Robert Frost penned any of his poetry here. All I witnessed were a few students playing Magic: The Gathering in the basement.
The first trail we used for our descent was the Appalachian Trail, also called the Glencliff trail in this area. Below: Christine makes the descent; Looking back through the pines toward the summit; Alpine zone marker.
The trail had us a little confused to start off on the right path. My recommendation would be to go to the back of the lodge and as you are looking into the backyard, head down the lawn towards the right. You will soon come to a path that will lead you to the Baker River. In a short distance, you will cross the bridge over the river. The Gorge Brook Trail starts off to the left. The trail takes a right turn in a short distance and you begin a moderate ascent through a very rocky trail. You’ll hear the sounds of the Gorge Brook to the left of the trail at times as it carries water to the Baker River. As you keep climbing, at .6 miles you will reach the junction with the Snapper Trail, your return route. The trail has been rerouted at this point with the Wales Carter Connection. Follow the signs through this .5 mile connection to continue along the Gorge River Trail. The trail continues to ascend through a steeper section of trail through the woods.
At 2.3 miles you reach a break in the trees and can see your first views of Mount Carr, Mount Cardigan, and Mount Kearsarge. The trail continues to ascend and then loops back around to the northwest as you gain some more views from the area known as The Balcony at 3.0 miles. The views were quite delightful and gave us something else to focus on as we labored up more rocky steps. The trail then ducks away from the views and you find yourself soon immersed into a dense forest of spruce and fir as the trail snakes through. You will see signs reminding you to stay on the trail to protect the fragile vegetation. At about 3.25 miles, you will come out of the trees and into the open alpine area. Large cairns are placed on the side of the trail. The summit looks misleadingly close, but due to the open nature it still takes about 10 minutes to reach the summit at 3.5 miles.
At the summit, the wind had picked up quite a bit across this vast, open area. We found lots of people huddled up against rocks, trying to protect themselves from the wind. We ate some lunch on the trail, snapped a few photos from the summit, and made our way back on a different set of trails.
The Snapper Trail was delightfully green and shady. Below: Adam descends the Old Carriage Road; The Snapper trail was mossy; Water crossing on the Snapper Trail.
From the summit marker, we followed the signs for the Glencliff Trail (also known as the Appalachian Trail) southwest of the summit. This trail started off as a ridgeline hike which gave us even more views along the way to start our hike. At 4.4 miles, the Appalachian Trail ducks off to the right to take you to the South Peak summit. We stayed on the main trail which is the Moosilauke Carriage Trail, which drops steeply down the rocky “road”. The trail was fairly uneventful, but the downward climb can be hard on the knees. At 5.7 miles, we reached a junction and took the Snapper Trail. This trail was thickly wooded and had lots of beautiful fern along the trail. At 6.4 miles, we rejoined the Gorge Brook Trail and made our way back to the lodge, which we reached at 7.2 miles.
The trail returns to the Ravine Lodge. Below: Looking back toward Mt. Moosilauke; A pleasant patio spot to take in views of the summit; Lodge decor
One thing that amazed me about this hike is how Dartmouth College has integrated with and adopted this mountain. They maintain and run the lodge and the network of trails is maintained by students in the Dartmouth Outing Club. We had the opportunity on our visit to New Hampshire to step on the campus and actually walked into the Dartmouth Outing Club building. Yes, this college has a building designated for this club and they even post information for Appalachian Trail thru-hikers to get them connected to where they could stay for the night. I was amazed at how the students have made this a strong tradition of caring for the mountain and environment. They even hold freshman pre-orientation trips where they all meet up at the Ravine Lodge. I wish more colleges and universities had more intentional connectivity with the outdoors.
What a great last hike for our trip to New Hampshire! We felt so blessed to have great weather for the entire week and our hiking adventures whetted our appetites for more trips in the future.
Directions to trailhead: From Interstate 93, take exit 32 for NH-112 toward North Woodstock/Lincoln. Follow NH-112 West for 3.2 miles. Take a slight left onto NH-118 S/Sawyer Highway. Follow this for 7.1 miles. Take a right on to Ravine Road. Follow this gravel road for 1.5 miles. The entrance to the lodge is on the left. Go behind the lodge across the lawn to the right to start the hike.
* MapMyHike is not necessarily accurate, as the GPS signal fades in and out – but it still provides some fun and interesting information.
If you’re looking for a short, easy hike in the vicinity of the Riprap trail (southern district – Shenandoah National Park), the 3.4 mile walk to Calvary Rocks and Chimney Rock is a great option. It follows the same route as the 10-mile Riprap circuit, but turns around right after two excellent viewpoints.
The view from the second viewpoint along this short, pleasant hike. Below: Adam at the trailhead; Hiking the AT; along the AT
Christine Says…
After our long hiking trip to North Caroline and Tennessee, I came home with a really sore knee. Every step I took, it felt like someone was sticking an ice pick into the soft tissue under my kneecap. Even after a week’s rest, it didn’t feel better, so I reluctantly made an appointment with an orthopedist. He couldn’t find anything obviously wrong, so he diagnosed it as a bit of IT-band syndrome, a bit of inflamed cartilage and maybe the beginnings of arthritis. I was given orders to cross-train… which is essentially code-speak for ‘do something other than hiking‘. Bah! So, I spent most of June and July in the gym, doing cardio equipment and weights. I only managed to hit the trail a few times – all short and easy hikes. This walk to Calvary Rocks and Chimney Rock was one of those hikes.
It was a beautiful, sunny, crisp day for midsummer. We set out in the morning and had the trail almost completely to ourselves. The hike started off in the same parking lot as the longer Riprap loop hike. The hike follows the Appalachian Trail uphill for almost a half mile before intersecting with the Riprap trail.
At the junction, turn left onto the Riprap trail. The first viewpoint, Calvary Rocks comes shortly after passing a small talus slope. There are two small outcroppings of rocks at this viewpoint. It’s pretty, but in my opinion, the second view from Chimney Rock is the nicer of the two.
Taking in the view. Below: Flowers blooming along the trail; A bug finds shelter; Ripening blueberries; Indian pipes.
The second view comes several tenths of a mile past Calvary Rocks. The view is great and this outcropping is a bit more expansive. There are lots of places to scramble around. There were also a ton of blueberries growing around Chimney Rock. Most of them weren’t ripe, but I found a few that were dark purplish-blue and sweet-tart!
We lingered on the rocks for a while before heading back the way we came. It was great to be out on the trail after so many days of doing indoor workouts, and (thankfully) my knee held up pretty well!
Adam Says…
This truly hasn’t been a typical summer in Virginia. I remember brutal, hot, muggy summers in which we never could feel we could escape the heat. Luckily, this summer has been much cooler. The bugs have also not been as bad this year, which has made hiking much more pleasant.
This was a test for Christine’s knee to see if she could take another hike after just a little rest. The amount of hiking we did in the Smokies demanded for some time off, but I was glad her knee was cooperative on this hike.
Calvary Rocks are geologically different looking than most of Shenandoah’s rocks. Below: Views!
We started from the parking lot and began our hike uphill on the white-blazed Appalachian Trail. In about .4 miles, you reach the junction with the Riprap Trail. Take a left here and the trail goes down steeply before ascending. Around 1.2 miles, you will reach your first viewpoint of Calvary Rocks. There are some very nice views here, but not a lot of room to spread out if there are others on the trail. Continue from here along the trail and around 1.7 miles, you will reach Chimney Rock. Chimney Rock has great views and a little more room to enjoy the views with others or stop to eat a snack.
Along the trail, Christine was complimenting me on my ability to be able to find indian pipes. She is definitely the wildflower expert between the two of us, but for some reason I tend to spot indian pipes before she does. We found a few nice specimens along the trail.
Handsome buck near the trailhead.
We lingered for a short while to enjoy the views on such a nice summer day. We made our way back the same way on the return trip. If you would like some nice views with little effort, this is hike in the south district of Shenandoah National Park that shouldn’t be missed.
This six-mile loop hike in the Fridley Gap area of George Washington National Forest has everything – views, waterfalls, beautiful stream scenery, rugged climbing and great backcountry camping. It’s a perfect hike to get away from the crowds in Shenandoah National Park.
If you miss spotting the faint side trail behind one of the many backcountry campsites along this loop, you’ll miss the best view of the hike! Below: Adam crosses the stream; A small waterfall on the stream; This loop has many choices for backcountry camp sites.
Adam Says…
Last year, we made an attempt to do this Fridley Gap loop hike, but we had trouble finding one of the trails. We bushwhacked for a while, but finally gave up. This time when we returned, we had better directions and the blazes had recently been repainted on much of the loop.
From the top end of the parking lot, we started on the trail. We saw both purple and blue blazes early on, and started to worry. (Fortunately, it turned out that this was the only section of the trail that hadn’t been recently re-blazed.) Early parts of the trail traverse large rocks, and it’s sometimes tough to see exactly which way the trail goes. We saw faded red Xs painted on the surface of some of the rocks which let us know that we were going the right way. The trail is uphill but not too steep. In .2 miles, you come to a fire road. Take a right here and continue on the fire road. You will pass by some small falls and Mountain Run to the right and a large boulder slide to the left. The trail actually follows the streambed, and you will need to rock-hop to continue on. At .45 miles, you will reach another falls area and you will cross over Mountain Run until you see the trail junction cement post. This is also the point that Mountain Run and Fridley Run join. It was at this point that we failed last time trying to find the orange-blazed Massanutten South trail. Looking at the cement post as you approached it, look back around 4:00. You will see the orange blazes on the Massanutten South trail as you will cross the water again (this time it is Fridley Run) and climb up the hillside. These weren’t painted on the trees before (they look fresh now), so you should be able to find your way more easily.
Early in the hike, the trail traverses the streambed. There are plenty of rocks, so it’s fairly easy to hop from spot to spot and avoid getting your feet wet. Below: Adam climbs up the trail shortly after the parking lot; A rockslide early on the hike; Blooming redbuds.
The climb up the Massanutten South trail is quite steep and you may need to stop a few times along the way to catch your breath. This trail is also narrow and you may have to cross over a few blown-down trees, but the trail wasn’t too hard to navigate with the recent re-blazing. At 1.85 miles, you will reach a campsite area. Look closely and you will see a path that leads to a rock outcropping called Grubbs Knob Overlook. Take this path up to the overlook to get the best views along the hike. You will see the top of Grubbs Knob to the left from the overlook and views to the west. After taking in the view, go back to the campsite and continue along the Massanutten South trail. At 2.05 miles, the trail reaches its peak and then you will start to descend, as the trail takes a steep turn to the left. You will make your way back down this very narrow path and cross Fridley Run at 2.70 miles.
After crossing Fridley Run, you will begin to ascend on the trail again (turning again into a wider fire road) until you reach a rocky slide that gives you views of Fridley Gap and North Mountain at 3.25 miles. Continue to ascend as you walk around part of Third Mountain. The fire road stops ascending at 3.5 miles. The trail then descends and you reach another cement junction post at 3.84 miles. Take a left on the purple-blazed Fridley Gap trail, which follow another wide fire road. You will likely see lots of burned trees from a fire in 2010 that covered a big portion of this area. At 4.5 miles, you will reach another junction. The purple-blazed Fridley Gap trail ascends to the left and continues through the woods. Take this trail and begin a steep ascent across some switchbacks. At 4.85 miles, you will reach the top of your climb and there are a few stones that you can rest on for a few minutes if you need to catch your breath.
This small waterfall feeds one of the most popular swimming holes in the area. Below: More pretty cascades.
The trail now begins to descend very steeply. We were so glad we had our trekking poles since the rocks under the leaves were often loose and it helped to lower ourselves down the steep steps. We were also glad we did this hike this direction rather than the clockwise version of the loop. At 5.5 miles, we reached another junction with the Massanutten South trail. Take a left on the orange and purple-blazed fire road (don’t go the way that crosses the bridge) and you will reach the junction that closes the loop at 5.65 miles. Take a right here, crossing Mountain Run again and make your way back down the fire road. Be sure to catch the rocky path at 5.8 miles that leads back to the parking lot at 6 miles.
A funny moment happened along the hike. Christine had programmed her phone to use the MapMyHike app. In a recent upgrade, it now includes some vocal updates along the way, usually at the mile increments. One time, we heard the voice say “Don’t stop now. Walgreen’s is behind you.” (Walgreen’s is now advertising on MapMyHike.) While this is meant to be a word of encouragement to keep hiking strong, I was thinking of it as “Walgreen’s is chasing us.” As I sometimes do, I started thinking of a parody song to the tune of the Road Runner Show TV theme song. So for your enjoyment, here are my lyrics: “Fridley hiker, Walgreen’s is after you. Fridley hiker, if he catches you, you’re through. That Walgreen’s is really a crazy store. They have pharmaceuticals, toiletries, and so much more. Fridley hiker, never, never, never slow down. Fridley hiker. Walgreen’s is after you. Fridley hiker. If he catches you, you’re through.”
There is one geocache along the trail, Fridley’s Cache, a normal-sized cache near the swimming hole.
It is always a good feeling to know that we redeemed ourselves by covering a hike that we had previously failed to navigate. If you are looking for good views of streams or a swimming hole, along with a challenging hike to get some views, this may be a great hike to try out some time.
The rocks at Grubbs Overlook might trick people into thinking there isn’t an open view. Below: Views from Grubbs Overlook and the campsite that sits adjacent to the overlook.
Christine Says…
Hallelujah for freshly painted blazes! I was so frustrated last year when our attempt to hike the Fridley Gap Loop ended in failure. The failure was mostly my fault. I tried to map out the hike based on a course I saw on someone’s Runkeeper page. There were no directions, just the route overlaid on a rudimentary map of the area. I thought we’d be able to figure things out on our own with a NatGeo map of the area. It turns out that faded blazes and a large group of people camping in the middle of the trail are insurmountable challenges to my ability to navigate. We’ll let bygones be bygones and get on to the successful version of our Fridley Gap hike.
Let me start by saying, I loved this hike! It was even better than I expected. The stream was running beautifully, the views of the valley ‘greening up’ below were lovely and the weather was perfect (sunny, cool and breezy enough to keep the bugs away). I really enjoyed the little rock-hop as the trail followed the stream bed. The small waterfall and swimming hole were so pretty.
The climb up the Massanutten South trail to Grubbs Knob was steep enough to be challenging, but not so steep that we had to stop for a breather. On the way up, we could see all the little signs of spring creeping back into the forest – tiny buds on trees, tightly curled ferns and the occasional early season wildflower poking up through the leaves. The overlook at Grubbs Knob is rather easy to miss. It lies at the top of a faint footpath above a campsite. When you first climb to the top of the footpath, vertical, spine-like plates of rock obstruct any possibility for a view. But if you climb along the rocks, eventually you come to a few footholds that allow you to scramble to the top of the rocks. Once you’re there, the valley below spreads out as far as the eye can see – farms dotted with red barns; small country towns; and wide, green fields make up most of the vista.
The climb downhill after Grubbs Knob takes you through dense mountain laurel. The harsh light makes for an ugly photo… but you get the idea. Below: Adam approaches the stream; Crossing Fridley Run.
After leaving the Grubbs Overlook, we ascended a few more moments before taking a sharp downhill turn. The trail passed through dense mountain laurel, with occasional peeks toward the next ridgeline. Eventually, we heard the sound of water again. For a short way, the trail followed Fridley Run. But soon, we had to cross the stream and head back uphill along a wide fire road. From the fire road, we caught our second open viewpoint of the hike. It was a nice view, but nowhere nearly as lovely as the one from Grubbs Overlook. It’s one thing to slog uphill and come to a magnificent rocky outcropping with a sweeping vista to appreciate. It’s a little less stirring to stop along a roadside and take in a view of a couple mountain ridges.
Eventually, the fire road met up at a four-way trail junction. One direction headed toward the Boones Run shelter, another toward Cub Run Road, another continued along the Fridley Gap trail in the direction of Martins Bottom, and of course the fourth headed back in the direction from which we arrived. Seeing this junction made me think of all the different ways these trails cross and connect. There are definitely multiple possibilities for overnight backpacking loops in this area.
The second overlooks comes at a spot along the fire road. Below: Adam checks out the map at this four-way trail junction; Continuing along the fire road before our climb up Third Mountain; Charred trees from the 2010 fire.
We followed the fire road to another junction. Heading straight would have taken us toward Martins Bottom, but to stay on course we turned left and started very steeply uphill along the purple-blazed Fridley Gap trail. By this point of the hike, I was pretty hungry and my energy was starting to flag. If I were smarter, I would have eaten a snack before tackling the climb. But I’m not smart, so I spent most of the climb complaining that I was hungry!
After a short break (and snack) atop the tree-covered peak of Third Mountain, we began a crazy-steep descent. For three-quarters of a mile, we carefully picked our way down the craggy, leaf covered mountainside. Through the trees, we could see some really fascinating rock formations on the shoulder of the next mountain over. I kept trying to appreciate the view, but every time I did, I lost my footing a bit. This climb down definitely makes the case for paying attention and using your trekking poles.
The ascent of Third Mountain may not look steep in this photo, but it is! Below: Descending Third Mountain – you can see rock formations through the trees; A bridge not taken on the Massanutten trail; Adam once again crosses the stream we crossed early in our hike.
At the bottom of Third Mountain, we had just a short walk back to our original junction – the one where everything went wrong when we tried to hike Fridley Gap last year! I was quite pleased to see that marker again and be 100% certain that we had actually found our way successfully this time around. From the last junction, we retraced our steps through the streambed, past the rockslide and back to our car.
Difficulty – 3.5. The trail goes up and down several times.
Trail Conditions – 3. The trail had blowdowns, loose conditions, and narrowness, but there were also sections that followed a fireroad. It gets an overall average rating.
Views – 3. The views from the Grubbs Knob overlook are the best on the trail, but if you miss the path from the campsite you’ll miss the best view on the loop. The views along the path at 3.25 miles are nice, but not remarkable.
Waterfalls/streams – 4. The trail goes along (and through) Mountain Run and Fridley Run on several occasions. The small falls and swimming hole gives it a bonus.
Wildlife – 2. This may be a good hike for bird watching. We saw a peregrine falcon soaring above at the Grubbs Knob overlook and enjoyed hearing the song of the eastern towhee along the way.
Ease to Navigate – 2. If we got lost before, we have to give this a low rating. The path to start the trail from the parking lot could be better blazed and there are several turns to make.
Solitude – 4. You may see some people at the swimming hole or camping alongside the junction with Mountain Run and Fridley Run. However, we only saw one other group after this point on a nice spring weekend day.
Directions to trailhead:
From Harrisonburg, VA, head east on 33. Take a left onto VA-620 North/Indian trail Road and continue for 1.7 miles. The road will turn into Rt. 717. Go 3.4 miles and take a right on Minie Ball Ln. Go 1.1 miles. At this point, the road will turn back into Rt. 620. Go 2.7 miles and take a right, continuing on 620 for about half a mile. Take a right onto Armentrout Path. Take the first left onto Airey Ln. Parking is a lot at the end of this gravel lane. If you pass the lot, you are on private property. The directions to this trailhead are a little confusing, and we recommend putting the coordinates on the map below into your phone/GPS.
* MapMyHike is not necessarily accurate, as the GPS signal fades in and out – but it still provides some fun and interesting information.
This 5.75 mile hike takes you to an old fire tower sitting atop a high peak on the border of West Virginia and Virginia. After visiting the tower, you can either head back to the parking area (which would cut the distance and make this a 3 mile total round-trip hike), or continue to explore the Shenandoah Mountain trail with a walk over to Hoover Ridge.
SPECIAL NOTES: Please be conscientious and respectful when hiking in this area. Hiking trails near High Knob are adjacent to private land. Please honor posted ‘no trespassing’ signs and stay on official forest service trails. Please do not tamper with posted private land signage.
The High Knob Fire Tower provides panoramic views into both Virginia and West Virginia. Below: Adam looks at trail information in the kiosk in the parking area; The Shenandoah Mountain Trail is often lined with dense mountain laurel; Trail junction – one way climbs up the fire tower, another continues on the Shenandoah Mountain trail, and the third descends to the Brandywine Recreation area.
First of all, I’m not sure whether to call this a Virginia hike or a West Virginia hike. While you park in West Virginia, the Shenandoah Mountain trail meanders right along the states’ borderline. I believe the High Knob fire tower sits on the Virginia side of the line, but views look out into both states. This is definitely a hike worth doing!
Our first attempt to hike High Knob was on April 7th, 2013. That hike started off well enough, but within the first half mile the trail turned into a veritable luge track. It was a smooth, slick, well-polished chute of ice! Had we planned more extensively, we would have packed Yaktrax, but after a week of warm, sunny weather, we simply didn’t expect to see so much ice! We watched a couple on the trail ahead of us falling down, over and over and over again. The girl literally fell ten times in about two minutes. She couldn’t make a single step of forward progress. Adam and I looked at each other and said ‘Nah… we’ll come back and do this some other time.”
Fetterbush is blooming! Below: Trails are marked with a double yellow blaze; Occasionally views opened up through the trees.
The very next weekend, we headed back and ended up with much better hiking conditions. The trail to High Knob is pretty basic – it follows the Shenandoah Mountain trail until a junction with a spur trail that leads directly to the tower. The way is well marked with double yellow blazes and has nice footing. The path passes through dense stands of mountain laurel. From the number of flower buds on the laurel, it looks like it’s going to be a spectacular bloom this year!
About .8 mile into the hike, we reached the junction – hikers can turn uphill and take the spur trail to the fire tower, continue on the Shenandoah Mountain trail, or head downhill to the Brandywine Recreation Area. We decided to visit the fire tower first, mainly because it was early and we wanted to avoid Sunday afternoon hiking crowds. The spur to the High Knob tower is probably the steepest climbing of the entire hike. While the section is steep, it’s also fairly short. At the top of the climb, the trail comes out on a fire road that leads pretty much the rest of the way up to the tower. We were surprised how heavily the area was marked with ‘Private Land – No Trespassing’ warnings. There were dozens of signs and trees spray-painted red. I’m guessing the public land abuts private land that is heavily used for hunting, and the landowners are trying to protect hikers/bikers from getting shot. Regardless, the area is very thoroughly and clearly marked – you shall not pass!
As we arrived at the fire tower, we passed a foursome of hikers headed down. We had the tower all to ourselves for about twenty minutes. We enjoyed the views in every direction! I especially enjoyed looking down on Switzer Lake. It brought back lots of memories from my days as a college student at JMU. On warm spring days, my sorority would load up in cars and make the drive to Switzer for an afternoon of swimming (and perhaps some beverage consumption). Swimming is no longer allowed in the lake (maybe it was never allowed?), as it’s used as a public water source. Even though you can’t swim in the lake, it’s still a great place for scenery and birding. A friend of mine has even seen bald eagles at Switzer!
Adam makes the steep climb between the Shenandoah Mountain trail and the fire road that leads to the High Knob Fire Tower. Below: Private land in the area is very thoroughly and clearly marked. A bird’s eye view of the private land from the fire tower. I think those might be hunting camps/blinds.
After enjoying the views and eating a snack, we climbed back down to the junction. It was around 11:15 a.m. and we were torn – do we continue to explore Shenandoah Mountain or do we call it a day and get a nice lunch in Harrisonburg? We didn’t have a coin, so Adam flipped his pass-case – card side up, we hike on – card side down, we go home. The pass-case dictated a longer hike.
We followed the Shenandoah Mountain trail over to Hoover Ridge. If I were to make a recommendation, I would tell people to skip this part of the hike. In the end, the views weren’t worth the climb. The trail is narrow – too narrow to ever be level. You hike most of the way with your uphill foot much higher than your downhill foot. It’s also covered with tons of loose stone and slate that shifts under every step. On the early spring day we hiked, the trail was still under a foot of dry leaves. The footing was treacherous. I was so glad for my trekking poles.
There are several steep climbs on the way to Hoover Ridge. Once the trail meets the ridge walking along is pretty pleasant. The terrain is open and grassy and there are obstructed views of mountains in every direction. You can even catch a glimpse of the fire tower off in the distance. On Hoover Ridge, we decided we’d hiked enough for the day and turned back to make our return to the parking area.
Since it was mostly downhill, the walk went quickly. We were back at our car by 1:15 and back in Harrisonburg for lunch a half hour later. It was a great day to be out hiking after such a cold and snowy March! We’ll definitely make a return hike to the fire tower… Hoover Ridge, not so much.
Adam Says…
As Christine mentioned, this was a second attempt at High Knob, since it was too ice-covered to walk up previously. We hate having to bail on a hike, but we want to feel that it is something we can accomplish and still enjoy. We’re glad that we waited for the snow to melt to enjoy this trek up to the fire tower. Our friends at Hiking Upward covered this hike from the Brandywine Recreation Area, but this is a shorter way to accomplish the hike up to the top. If you’ve purchased National Geographic’s Staunton/Shenandoah Mountain Trails Illustrated Map 791, you will see High Knob Fire Tower on the cover.
Views from the fire tower look out in every direction. Below: You can see Switzer Lake from the fire tower; More views; Adam enjoys a snack (Trader Joe’s Monkey Business trail mix) on the fire tower.
From the parking lot on 33, we took off down the stone steps. The parking lot and surrounding areas has a lot of trash thrown around, so if you can, bring a trashbag and help to carry out some of the litter. Once you join the Shenandoah Mountain trail at the bottom of the stone steps, the trail will be clear of litter. The trail starts off fairly level and then gradually ascends up the mountain. In .85 miles, you do reach a large junction that includes the spur trail to the High Knob Tower. Take this spur trail up the mountain. At about 1.1 miles, you will reach a forest road. Take a right on the road (taking a left will put you on private land) and continue to follow the signs to the High Knob Tower. Continue your ascent up the fire road until you reach the High Knob Tower at 1.4 miles.
We retraced our steps until we returned back to the junction of the Shenandoah Mountain Trail and High Knob Trail at 2.0 miles. At this point, we took a left to get back on the Shenandoah Mountain trail. This part of the trail was not well-maintained and we were constantly worried about turning our ankles on loose rocks that were hidden underneath the leaf-covered trail, crossing over tree blowdowns, or catching ourselves from falling off the narrow trail with our trekking poles. The trail in most places along this section felt more like a narrow animal path than an actual trail. The rough trail and the steepness in some sections really made us question how far we were going and if it was worth it. We made our way a little further uphill but we weren’t fighting rough terrain the whole way. We reached the crest of Hoover Ridge at 3.5 miles, which gave us some obstructed views of the areas to the south. After taking a few minutes to explore the open fields and campsites on Hoover Ridge, we made our way back.
One of the few tricky spots on the Shenandoah Mountain trail. The cairn indicates that hikers should take the lower trail, and not follow the trail partially blocked by branches. Below: Sign on Hoover Ridge
As Christine stated, I would agree that I probably wouldn’t add on Hoover Ridge to this hike unless you would like to get some extra hiking accomplished. However, this was also the area that we saw the best wildlife. We saw a deer in the distance take off when we were spotted and a grouse jumped out of some brush when we were walking by that caused us both to nearly jump out of our hiking shoes.
The hike up to High Knob is one that I think would be a perfect hike if your goal was to see great views from all directions. On a clear day, you should be able to see several layers of mountain ranges. I’m sure the foliage scenery in the fall is breathtaking. I can see this being a great hike to take some out-of-town visitors to show the splendor of the rolling Virginia and West Virginia mountains.
Trail Notes
Distance – About 5.75 miles
Elevation Change – 1168 ft
Difficulty – 3.5. This is a moderate hike in terms of elevation change. On the day we hiked, the Shenandoah Mountain trail was still covered with deep, slick leaves and quite a few fallen trees. These challenges increased the difficulty level somewhat.
Trail Conditions – 3. The trail to High Knob is in great shape, but the Shenandoah Mountain trail is narrow and rocky.
Views – 5. Views from the High Knob fire tower are spectacular and panoramic. Views from Hoover Ridge are obstructed.
Waterfalls/streams – 0. There are no streams on this hike.
Wildlife – 2. We saw a deer and a grouse, but I think hunters scare off most wildlife in this area.
Ease to Navigate –3. Trails are generally well-marked/blazed, but there are a few mildly confusing spots on the walk to Hoover Ridge. There were a few worn paths in the woods that looked like old trails or animal paths. As long as you still to the most well-worn pathway, you should be fine. Take care to observe posted signs for private land.
Solitude –2. You will likely see quite a few people on the walk to the fire tower, but few along the way to Hoover Ridge.
Directions to trailhead:
Head on 33 West from Harrisonburg, VA. In about 10 miles, you will enter into George Washington National Forest. In 12 more miles, you will reach the parking lot on the left right after you see the “Welcome to West Virginia” sign. A large kiosk with a map of the area gives some general information and you will see a break in the girders that will lead down to start your hike.
* MapMyHike is not necessarily accurate, as the GPS signal fades in and out – but it still provides some fun and interesting information.
This 5.8 mile out-and-back hike along the Blackbird Knob trail gives you a sampling of many of the beauties offered by the Dolly Sods Wilderness area. While you don’t get any high-up, panoramic vistas, you still get amazing views across the high plateau.
Dolly Sods is spectacular in the Fall. Below: Trailhead along the forest road; Off to a chilly start! The morning was breezy and in the 30s; Dolly Sods is famous for turning crimson in the fall.
Adam Says…
Fall is here! At least it has arrived in Dolly Sods. For those that haven’t been to visit out this wilderness area on the eastern side of West Virginia, you will be impressed by the terrain. I have read many times that the terrain and climate up here is more similar to Canada than the surrounding areas of West Virginia and Virginia. You will quickly notice that the vegetation is just different here – you’ll see spruce and conifers in one direction and blueberry bushes and boggy areas in another.
After hyper-extending my knee on our last backpacking trip, I was thinking another trip the next weekend would be a little too much of a re-injury risk. But, we wanted to do something fun since it was Christine’s birthday, so I suggested that we spend the weekend in Canaan Valley to enjoy some of the early fall color. The last weekend of September is usually the Leaf Peepers Festival in Canaan Valley, but we were hoping for some fall color the week before and we weren’t disappointed.
Wookie rests on a warm rock in the sun. Below: Christine checks out a trail marker. There are very few signs and no blazes in Dolly Sods; Fall color is starting to pop; Walking past a colorful maple.
I feel it is necessary to put out a few warnings about Dolly Sods. First, the trails are not well-marked. They typically will have some trails marked at intersections, but there are no blazes on the trails and if you wander off on something that looks like a trail, you could become lost. Second, the road to get to and through Dolly Sods is very rough. You won’t see many Toyota Prius-like cars on this road. We approached it from Canaan Valley and there are some scary roads to drive up. You are on a road barely able to fit two cars with a large drop-off on the side. We were almost hit by some locals barreling down a blind curve on the road and they only missed hitting us by a couple of inches. The road through Dolly Sods is also extremely rough and filled with potholes. We’ve gotten a flat tire up here before and hope to never experience that again. You’ll need to drive very slowly and steer away from any potholes or sharp rocks sticking up. Four-wheel drive is not completely necessary, but it may give you ease of mind. Third, good maps are hard to find. As I mentioned on our Rohrbaugh Plains post, probably the best maps are available online. If you are looking for printed maps, we’ve bought quadrant maps of the Dolly Sods area from the nearby Seneca Rocks Discovery Center, but I’ve found some flaws with these marking trails properly (the quad for Blackbird Knob showed the knob on the wrong side of the trail). The online maps area also from 2006 and the quads are mostly from 1995.
For the hike to Blackbird Knob, we parked on the eastern side of the road just north of the Red Creek Campground area. You should see the large trailhead sign on the western side of the road just past the campground area. You quickly cross a boardwalk over a boggy area and then you will pass a large open area of pine forest to the right. In .3 miles, you will come to a grey sign that shows the trail goes to the left deeper into the woods. You may not see a trail to the left, but follow the sign and you will begin to see cairns that will lead you back to where the trail is more apparent. At .5 miles, the trail opens up to a larger field with nice views around you. The trail begins to descend at this point, but you will still see some views as you are walking through an open field. At mile 1.1, you reach Alder Run, which requires a small rock-hop to get across. You will then go slightly uphill through the forest again, but it will soon open up to more views. The trail then goes back into the woods and you will arrive at Red Creek at 1.6 miles. You will need to do more substantial rock-hopping to get across, but we didn’t have any trouble. The trail goes steeply uphill at this point. At 1.8 miles, the trail again opens up to spectacular views. You will shortly come across a junction with the Upper Red Creek Trail at 1.9 miles. Stay straight on the trail and you’ll duck back into forest. At 2.1 miles, you’ll reach another junction with the Red Creek Trail, which leads back to the campground. Stay straight again and it will finally open up to spectacular views. You are then making your way along the circumference of Blackbird Knob. Gorgeous fields with ridge views to the left give you many options to take in the sites. There are boulders on the hillside that seem to be placed by nature as auditorium seats to enjoy this area of wilderness. We continued along the trail until about 2.9 miles, when the trail was going to continue back into the woods. We turned back and returned the way we came.
Color everywhere! Below: Fall foliage scenery along the Blackbird Knob Trail. Below: Enjoying the fall color.
Time for a few confessions. We had packed our bags fairly quickly to head out for our hike. I forgot to pack the lunch that we were going to eat on the hike. All that I brought with us was a small bag of nut-heavy trail mix. Christine has a mild nut allergy, so we were a little concerned about food. I remembered that I left some Combos in the car, so we were saved with that. But, I need to learn to be a little better prepared when going into this area. As I mentioned before, maps of Dolly Sods are hard to find and trails are not marked very well. We were surprised how many people just came out here and were hiking without maps. We ran into a few guys that were unsure of where they were going. I showed them where we were on our map and they said they would just go on ahead and hope they can catch a trail that will eventually loop them back to where they were. Not the smartest strategy.
We really enjoyed our trip to Dolly Sods to explore this area. Since we hadn’t received much fall color yet in Virginia, it felt like we had a private advanced screening of the color that we’ll experience here in a few weeks.
Christine Says…
Dolly Sods is somewhat of a phoenix that has risen from the ashes. Its rugged beauty is actually a mask that belies years of abuse and damage. Until 1930, Dolly Sods was heavily logged. Entire mountainsides were stripped bare of their pristine, old-growth forest. The largest tree ever harvested in West Virginia came from this area – a magnificent white oak – about 1000 years old and nearly as big as a Giant Sequoia. Once the hillsides were barren, woodchips, fallen pine needles and small trees dried in the sun and became perfect fodder for catastrophic fires. Flames consumed more than 24,000 acres, scorching the earth down to bare rock. After the logging industry closed up, the government purchased the land. In the 1940s, Dolly Sods was used as a training range for the military. As recently as 2006, a significant amount of unexploded ordnance was still being found along trails.
Red Creek gets its red color from tannins. Below: Adam and Wookie cross; Fall color and a rocky stream bed; Trail marker in Dolly Sods.
Despite all the damage the land has endured, it is still one of the most breathtaking places in the entire mid-Atlantic. I don’t think it’s hyperbole to say that there is nothing else like it. We were lucky enough to visit this fall on one of those perfect, technicolor, early fall days. The sunshine was sparkling, the sky was crystal clear and deep blue. Already, maples were turning to flame-color and entire hillsides of fern were glowing and golden. While Dolly Sods is rugged as a whole, the Blackbird Knob Trail is gentle and without much change in elevation. Because it was an easy hike, we decided to bring Wookie along. He was so excited to finally be on a hike!
We started out along a clear path through the woods, but at the first trail sign, we became a little confused. The obvious, worn path led in the opposite direction of the directional marker on the trail sign. We sat and pondered for a moment. We consulted a map. We didn’t see any sign at all of a trail leading in the arrow’s direction, so we assumed a prankster had turned the sign. We took the trail a short way uphill before it dead-ended in a thicket of laurels. We backtracked and followed the arrow’s direction. For a short while, we were just walking through the woods, but eventually we spotted the cairn and then finally we were back on worn trail. This is very typical of Dolly Sods!
The first open view came shortly after our brief detour. From a pile of rocks, we could see all across the high plateau. Distant hillsides were already covered with red foliage. The open meadows were covered with crimson berry bushes and tall, tawny grass. We all stopped to enjoy the perfect fall day – I snapped photos and Wookie stretched out on a warm rock. After a brief stop, we continued along. A few minutes later, we passed a pair of backpackers. Then we passed three more. Then we passed five more. Passing backpackers became pretty much the ‘norm’ for the rest of the hike. All in all, I’m sure we saw thirty or more people out for the weekend. Typically, I think of Dolly Sods as being rather remote and isolated. On this particular weekend, it was not the case. People were everywhere!
It was a technicolor day in Dolly Sods. Below: Adam hikes across the open terrain; Fall color all along the hillside; Christine enjoys the fall color.
Throughout the hike, the trail passed in and out of trees and open spaces. We crossed Alder Creek and Red Creek. Both were running, but on the low side. I’ve heard that streams are often uncrossable in Dolly Sods in the spring. It’s hard to imagine that when you see them running so meagerly in the early fall. Red Creek was especially lovely. Tannins give the water a rich, reddish color. I suppose the name ‘Red Creek’ is very well-suited for this body of water!
When we reached the end-point of the hike, we stopped for a snack. As Adam mentioned, he forgot our lunches. So, he ate peanuts and cashews, while I picked all of the remaining M&Ms out of the trail mix. It was enough to tide me over for the walk back to the car. Honestly, it was such an easy hike that it really didn’t require that much energy. It also left me nice and hungry for an early dinner at Hellbender Burritos. For a tiny town, Davis, WV has two very good restaurants (the other is Sirianni’s Pizza Cafe). At Hellbender, I got my favorite Gendarme burrito. It’s basically a steak and cheese in a bowl – medium rare chunks of steak, smothered with grilled onions and peppers and then doused with queso. Yum! And even better (or worse… depends on how I look at it), I discovered Harpoon Pumpkin Cider. I’m a very picky beer person, but I really like most hard cider, and this seasonal pumpkin cider might be the best thing I’ve ever had to drink! Sadly, it’s very, very hard to find in our area. Even the local beverage shop can’t special order it and it’s nowhere to be found in stores.
Wookie Says…
Sometimes the tail says it all. What I mean by that is that on this hike for most of the way, my tail stayed nice and curled. When I get tired, it tends to start drooping like a flag slowly being brought down the pole. But I really enjoyed myself in Dolly Sods Wilderness. This was my first trip out there. Christine and Adam often call me, “Wilderness Wookie”, but this was the first time I have been in true designated wilderness area.
Wookie crosses the stream. Below: Adam and Wookie hike on the return leg of the out-and-back; Adam enjoys fall color; Don’t miss a visit to Bear Rocks when you’re in Dolly Sods.
My highlights of the trip were when first reached the open field around .5 miles. I spread out on a nice rock, sniffed the brisk, fall air and enjoyed the views. I also really enjoyed eating a few cashews from the base of Blackbird Knob. Christine poured a little rock in a natural bowl in the rock and Adam gave me some nuts to help me re-energize for the return trip.
My lowlights of the trip were crossing Red Creek and the initial boardwalk. The boardwalk made me a little uncomfortable since there were spaces where my paws could have slipped through. Crossing Red Creek was a little more troublesome. I really don’t like getting my feet wet. But, I took a wrong step and got my front paws wet. I jumped back away from the water and then made a successful second pass. My tail immediately went down to let Adam and Christine know that I didn’t like getting wet. I don’t mind mud as much and my feet did get quite muddy along the trail. But by the time that we got back to the car, most of the mud had come off.
Going almost six miles is a little taxing for a pug. For some reason, I don’t see a lot of other hiking pugs out there. When we got to the car, I immediately fell asleep and was snoring loudly by the time that we got moving. Of course, when we got back home I had to strut my stuff and tell my brothers, Yoda and Mojo, that I went on a great hike. I’m glad it’s finally getting a little cooler again so I can get back on the trails. Wilderness Wookie is ready to do some more fall hiking!
Difficulty – 1.5. The trail is not that steep at all, so most people should be able to handle it.
Trail Conditions – 3. The trail was in decent condition and was not overly rocky or muddy today. I do think mud could be a problem after larger rainfalls though.
Views – 3. While you don’t get views from a big overlook, the scenery along the way is quite gorgeous. Open fields and views of mountain ridges in the distance give you a lot to see.
Waterfalls/streams – 4. Red Creek gives you a reliable water source and picturesque stream views. There are plenty of backcountry campsites near the stream if you are planning an overnight backpack trip.
Wildlife – 3. While we didn’t see any large wildlife on this trip, the area has plenty of wildlife.
Ease to Navigate –2.5. As we’ve mentioned, trails are not blazed and only some junctions are marked with signage.
Solitude –2. We saw over 30 people on the trail. Most of these were backpacking groups. If you go on a nice weekend from Spring-Fall, expect to see others.
Directions to trailhead: From Seneca Rocks, go North on WV 28 for 12 miles. Take a left on Jordan Run Road. Go one mile up Jordan Run Road and take a left on to Forest Road 19. In 6 miles, Forest Road 19 comes to a T on to Forest Road 75. Take a right, heading north on the gravel Forest Road 75. Drive for five miles until you pass the Red Creek Campground parking on the left. Park on the opposite side of the road where the grey trailhead marker is located.
* MapMyHike is not necessarily accurate, as the GPS signal fades in and out – but it still provides some fun and interesting information.
This 13.2 mile circuit can be done as a day-hike, but we recommend extending the beauty and wildness into an overnight backpacking loop. Take your time, and you’ll be treated to panoramic views, lovely mountain streams, demanding climbs and peaceful campsites.
Christine takes in a a view of The Priest from Three Ridges mountain. Below: Welcome to the Three Ridges Wilderness; Over half of the circuit follows the Appalachian Trail; Nothing beats a campfire in the evening.
We had long been planning a three-day backpacking trip across Mt. Rogers, but as the day of the trip drew closer, we started seeing the term ‘Appalachian soaker’ thrown around in weather forecasts. We’re fine with passing showers and fleeting thunderstorms, but we didn’t want to get pinned down on Mt. Rogers on a wet and stormy night.
Fortunately, the weather in central Virginia was far more favorable, so we ditched our Mt. Rogers plan, and decided to hit another backpacking circuit on our list – Three Ridges. This route, which makes use of the Appalachian Trail and the Mau-Har Trail, is known as one of Virginia’s most rugged hikes. Everything we read about the circuit in advance of our trip emphasized the hike’s strenuous nature. With roughly 6,800 feet of elevation change, you’re almost never walking on flat trail. It’s a constant onslaught of heart-pounding climbs and knee-grinding descents. But along with the challenging terrain, you get spectacular views, beautiful streams and lovely campsites.
We started out early Saturday morning. The first stop was fuel… for ourselves. We had a huge breakfast at The Chuckwagon in Harrisonburg. If you have a chance, stop by and indulge in one of their homemade 4-inch biscuits (Adam’s favorite is ‘The Round-Up’) or a stack of their amazingly fluffy pancakes. (Sadly… Chuckwagon closed in January 2013) With full stomachs, we made our way to Reed’s Gap at mile marker 13.7 on the Blue Ridge Parkway.
When we got to the parking area, the lot was already jam-packed, mostly with heavy-duty construction vehicles left idle for the weekend. Just as we were about to give up and find a parking spot further down the parkway, one car pulled out and left an opening for us!
Adam makes the initial climb up Meadow Mountain. The climbing was occasionally rocky, but never terribly steep.
We started the Map My Hike app on Christine’s phone, hoisted our packs, and headed south along the Appalachian Trail. From the parking area, the trail hugs the edge of a meadow, which was full of blooming yellow ragweed and purple thistle. It was such perfect weather for backpacking – sunny skies, low humidity and a crisp breeze. The trail almost immediately began to climb uphill over Meadow Mountain. The climbing was steady, but never difficult, for about .8 of a mile.
At the top of the ridge, there was a small dry campsite with obstructed views. Department of the Interior boundary markers were all along the ridge. We spotted at least three or four right next to the trail. After walking briefly along level ridge, the trail descended to Maupin Field Shelter. The shelter site had tons of space for tents (many of the tent sites were flat, soft and grassy), a typical AT three-sided hut, a metal bear-hang post and a picnic table. The area also had an informational kiosk with trail notes and wilderness-usage policies. There was also a child’s orthodontic retainer tucked into a Ziploc and pinned to the board. We’re guessing there is now one retainer-less Boy Scout and a less than happy mother!
Christine climbs the stone steps up Bee Mountain.
After Maupin Field Shelter we began climbing again, over Bee Mountain. The climbing was slightly more strenuous, but definitely manageable. In several places, rock steps were set into the trail to make the climbing easier. Along the way, we started playing ‘Categories’. It’s pretty basic – each player designates a category, then players take turns naming items that fit within that category. For example, categories might include Movies Based on Comic Books or Items You Need on a Backpacking Trip. It’s pretty mindless, but it kills time. Whoever successfully names the last item for the given category wins the round. The best category of the day was Complaints Uttered When Hills Are Steep. We won’t share the specifics of our trail talk here, but it was pretty funny to reflect on this topic! Bee Mountain didn’t offer any views and was followed by a short descent before tackling the more serious climb up Three Ridges Mountain.
The climb up Three Ridges consisted of several steep pushes, with nice stops for views all along the way. The first view, Hanging Rock, was very impressive, so we decided to break for lunch and enjoy the amazing vista. As we ate our Panera bagels (Cherry-Vanilla with Justin’s Chocolate Hazelnut Butter for Christine and French Toast with Peanut Butter for Adam), we noticed two dogs fitted with radio collars – doubtlessly bear hunting dogs set loose in the woods for pre-season practice. Both dogs were female; both were emaciated and showed signs of over-breeding. We hate to cast aspersions or generalizations on any group of people, but we are not fans of hunters that use this type of technology to hunt bears. Both of the dogs were pretty persistent about trying to steal our food. The bolder dog, who was heavily perfumed by a skunk encounter, came within inches of snatching Christine’s bagel right out of her hand.
One of the bear hunting dogs we encountered seemed to be enjoying a view of the Priest from the Hanging Rock Overlook. Below: Adam climbing the first uphill section of Three Ridges Mountain; Southbounders (BeeSting, Fats and Happy) contemplate the Priest and their upcoming climb; The view from Hanging Rock.
While we sat at the overlook, we had a chance to chat with three Southbound AT hikers – Happy, Fats and BeeSting. All three had started in Pennsylvania in August and were making their way toward Georgia. Happy was already there when we arrived, so we got to talk with him for a good bit while he waited for his companions to show up. He was from Las Vegas and on his first long-distance hike. He told tales of his shoes breaking down on the Pennsylvania rocks, getting caught in a vicious cold-front driven storm on Bearfence Mountain, and his epic weight loss (40 pounds in less than a month!). He was a nice kid and we enjoyed talking to him and telling him about some of the things he has to look forward along the trail in Virginia – The Priest, Spy Rock, Cove Mountain, McAfee Knob the Grayson Highlands. He told us the friendliest place he’d stopped on the trail was the town of Waynesboro.
After a while, Fats and BeeSting came along. They were a young couple from Montgomery County, Pennsylvania. We didn’t talk to them as much, because we wanted to press on and make our way to camp by mid-afternoon. Happy left a few minutes ahead of us, and we were sure we wouldn’t see him again. Thru-hikers are known for keeping a blistering pace!
Upon leaving the vista, there was quite a bit more uphill climbing before we finally reached the true summit/highpoint of Three Ridges Mountain. At the highpoint, we ran into a group of three women out on the same circuit we were hiking. We chatted briefly about the great weather before leaving them to enjoy their lunch.
Christine enjoys the view on a perfect late-summer day. Below: The actual high point of Three Ridges is in the trees; Adam walking through ferns along the trail.
After the high point, the long, seemingly endless descent to Harper’s Creek began. It wasn’t always super-steep. Sometimes it almost leveled off. As we were walking along, we saw a bear dash off through the brush. We were both glad that the bear hunting dogs hadn’t pestered the bear into a tree. A few steps later, we heard an exuberant voice shouting into the wind – ‘Woooooo!’ ‘Yeaaaaaah’! ‘Echo Echo Echo’ and ‘I’m on TOP of the WORLD’. As the voice drew nearer, we guessed it was Happy having a ‘mountain moment’. Sure enough, he called to us through the trees so we could share the nice view spot he had found a little ways off the trail.
We left the spot before he did, knowing that there would be more views along the way. One unnamed view on the left side of the trail was especially beautiful. We stopped for photos and a pack-less rest. A bit further along, we saw a huge flat, upright rock that looked just like a tombstone. Immediately past that, we noticed a faint trail that climbed up steeply through the woods to a jumble of rock. We guessed correctly that we had found Chimney Rock. It was a great place to sit, and every bit as scenic as the very first overlook on Three Ridges. We enjoyed looking down into the valley, dotted with homes, streams and a large Christmas tree farm. The Priest, one of Virginia’s most beautiful and distinct mountains, loomed impressively across the way.
Adam enjoys one of the many spectacular views from Three Ridges Mountain. This particular stop came at a rocky outcropping known as Chimney Rock. Below: Views, views and more views!
After Chimney Rock, the last real vista was a wide flat shelf of rock overlooking the scene below. After that, the downhill got pretty bad. It was the bone-jarring, steep, type of downhill that makes your knees beg for mercy! We both slipped a couple times on the descent. It was probably all the fallen acorns – if your boot hits them just right, they sort of function like tiny roller-skate wheels. Adam managed to hyperextend his knee on one slip, and hiked in a significant amount of pain the rest of the day. Christine hit a loose flat rock and rode it like a surfboard until she finally landed hard, but unharmed, on her rear end.
Honestly, the uphill on this hike is moderately hard, but the downhill is brutal. Anyone in reasonable condition should be able to handle the physical demands of the ascents along the trail, but if you have bad knees, the descents are nothing short of punishing. We both tried to keep our packs on the light side for this trip. Christine’s pack was 22 pounds and Adam’s was 29… but that was before water. After a dry week, we weren’t sure if Harpers Creek would be flowing, so we both carried quite a bit of extra water – 3.5 liters for Christine and 4 for Adam. We knew there was a chance we wouldn’t need it, but when it comes to water it’s always better to be safe than sorry.
The climb down from the summit of Three Ridges was grueling and rocky! Below: The trail went over many large boulders; It passed thick stands of rhododendron and mountain laurel; We were thrilled when the Harpers Creek shelter site came into view.
After over two miles of switchbacks, dangerous acorns and tricky rocks, the colorful domes of tents came into sight. We had reached Harpers Creek Shelter – our stop for the evening. We found the shelter itself empty, but most of the tent sites adjacent to the shelter had already been claimed by a large group of Boy Scouts from Fluvanna County.
We found a mostly flat and smooth tent site across the creek, about 50 yards south of the shelter. We figured it was a perfect spot – we were close to the shelter and could use it for a ‘kitchen’. Also, the privy was on our side of the stream, but far enough from the tent that it wouldn’t be annoying when people went to use it.
For the most part, Harpers Creek wasn’t flowing. There were several shallow pools in the streambed, which gave us plenty of access to water, but also provided a perfect breeding ground for mosquitoes. Christine immediately noticed bites forming welts on her legs, so she quickly changed out of her shorts and into long pants. She tried to change behind a large boulder, but she’s pretty sure the Boy Scouts saw her in her underpants, but hey… modesty sort of goes out the window in the backcountry.
Within twenty minutes, the tent was up, the sleeping pads were inflated, and sleeping bags were in place. We set aside all the food, cooking implements, water filter and bear bags to take over to the picnic table at the shelter. The Harpers Creek shelter was small and kind of dingy. There was no shelter log. Actually, the only thing in the shelter was a sodden pair of ‘tighty-whiteys’.
Adam set about collecting water. We recently picked up a very handy collapsible bucket made by Sea to Summit. It folds down to about the size of a deck of cards and weighs just a few ounces. But, it allows us to collect up to nine liters of water at once. Typically, we pump water through our Katadyn straight into the bucket. Then we cover the bucket with a bandanna and usually have plenty for dinner, breakfast and bottle refills.
While Adam filtered water, Christine worked on collecting wood for a campfire. It was already starting to get chilly, so it was a perfect night for a fire. As is the case at most shelters, good firewood is hard to find. There is always plenty of tinder/kindling, but the larger, long-burning pieces of wood are at a premium. In the backcountry, we only use downed wood that we can break by hand.
Our camp on Harpers Creek. Below: Setting up our ‘kitchen’ at the Harpers Creek shelter; On the menu for dinner; Adam feeds the fire.
Christine made a teepee-style campfire with larger pieces of wood on the outside, and a tinder-packed center. All of the wood collected from the forest floor was cold and damp, so the fire had a hard time catching at first. A little squirt of alcohol-based hand sanitizer took care of that problem, and within a few minutes a small fire had sprung to life.
With the campfire going, water collected and the campsite set, it was time for dinner! We keep saying we’re going to prepare our own fancy homemade backpacking meals, but when the time comes we always seem to find ourselves reaching for Mountain House or Backpacker’s Pantry. It’s just easier, and for the most part, the packaged food is really tasty (notable exception – Natural High’s Banana Cream Pie – worst dessert EVER.) Our menu for the evening included Chili Mac with Beef as the entrée and Cheesecake for dessert. Christine brought several sticks of cheddar cheese to mix into the chili and single-serving plastic bottles of Merlot. It was quite the feast!
After dinner, we put up our bear hang. Oddly, this shelter did not have a metal post like most AT shelters in this part of Virginia. We had to find a tree with a free branch. After the food was secured, we settled into our camp chairs and enjoyed the fire. Some people we’ve met along the trail think the camp chairs are a waste of pack space, but they fold down to about the size of a water bottle and weigh just about a pound. We find them well worth the extra weight for the back-resting comfort they provide. We might not carry them on a long multi-day trip when every bit of pack space counts, but for a weekend trip, we like having creature comforts.
Entertainment unfolds by the campfire. Below: Our tent at night.
As we sat by the fire, we watched a little piece of comedy unfold on the other side of the stream. A couple of the older Scouts had been assigned the task of hanging the group’s food. We watched as they missed getting the rock and rope over the tree branch, dozens and dozens of times. The boys took turns making fun of one another for their off aim. Eventually, they got the rope over a branch. They celebrated with a high-five and a ‘Woot!’. But, the branch snapped off the tree as soon as they tried to hoist the weight of many food bags. Eventually they went for help and settled on a less-than-perfect, but still functional tree. All in all, it took them over an hour to get their food hung.
Our campfire died around 9:00, so we headed back to the tent. Adam read by headlamp and Christine listened to a book on her iPod. For one of the first times ever, we both fell asleep quickly and slept soundly through the night. We were actually awoken by voices and headlamps at what seemed like the middle of the night. Christine rolled over and asked Adam ‘Is it around midnight and these kids are up late or is it morning already?’ It turned out that the Scouts were awake and cooking/packing up at 5:30 a.m. We lazed around in the tent for another hour until the sun came up.
The Scouts actually hiked out around 7:00, just as we were getting breakfast together. Usually, we’re the early risers and the first out of camp! We made maple-brown sugar oatmeal with freeze-dried bananas and coffee and hot chocolate for breakfast. We both ate two packs, knowing that we had a tough day of hiking on the Mau-Har Trail.
After a good night of sleep, Christine is ready to tackle day two! Below: Adam changes out of his Crocs and back into boots; The Appalachian Trail departing Harpers Creek.
After breakfast, we broke down camp. Adam’s hyperextended knee was still pretty sore, so Christine stowed some of his gear in her pack to make his load a little lighter. While she was transferring gear, she noticed that a mouse had chewed through the little mesh compartment on the hipbelt of Adam’s pack! The only thing in the compartment was a set of car keys, so we’re really not sure why it was appealing to a mouse. It reminded Adam of one of his favorite books as a kid – The Mouse and the Motorcycle. He thought this mouse was trying to make a sequel with their car.
We left Harpers Creek around 8:00. On our way out, we passed four or five other groups that had been tenting near the shelter. All told, there were probably somewhere between 25 and 30 people camped along the creek that night. Quite a tent city!
After leaving the shelter site, we followed the Appalachian Trail for almost a mile, largely uphill, to its junction with the Mau-Har Trail. The odd trail name is a combination of Maupin and Harpers – the names of the two shelters the trail runs between. The Mau-Har was designed by a man named Angelo Filippi. One funny review we read of the hike evidently thinks ‘designed’ is too kind a word for the trail. The review states:
“We started from Reeds Gap and heading down the Mau-Har, cussing Angelo Philippe [sic] the whole dang way. I swear he unfolded a map, put it on the ground, pulled out a piece of string, dropped the string onto the map and said “There! That is where the trail should go!” What a jerk!”
The start of the Mau-Har Trail. Below: The Mau-Har trail starts innocently enough; Then it starts to climb more steeply downhill; And then it gets even steeper than it already was!
To be fair, the trail was clearly designed to follow scenic Campbell Creek as closely as possible and following a creek that goes tumbling through a deep gorge is going to require some rugged climbing. The Mau-Har trail descended very steeply to the creek. Adam grimaced in pain from his knee injury on every downhill step. The weight of his pack, combined with the steep trail was almost more than he could bear. This was some of the gnarliest downhill we’ve ever done.
Eventually, we got to the spur trail that leads to a series of small waterfalls. Adam decided to stay put and rest his knee while Christine explored the falls. She took off with the camera, hoping to get a few documentary shots for the blog. A few minutes later, Adam decided to follow. He had heard there was a geocache hidden by the falls (known as “firedogs fishbowl”), but he had forgotten to input coordinates into his GPS. He looked for it, but without coordinates it was pretty close to impossible to find. The waterfalls were all very small due to low water flow. In spring, with snowmelt and heavier rain, the creek is probably spectacular!
Water volume in Campbell Creek was fairly low. Below: The section of the Mau-Har that follows Campbell Creek is very steep; Some sections require you to pull yourself over the rocks; Christine is happy for a more moderate grade.
From the waterfall spur trail to the Maupin Field shelter, the Mau-Har climbs very steeply uphill. At first, the trail is very rocky as it passes through the canyon. You wind your way between and over boulders. Sometimes you have to stow your trekking poles in one hand to pull yourself up over a big step. It reminded us very much of hiking the gorge at Little Devils Stairs. The terrain was very similar. After leaving the canyon, the trail becomes less rocky, but no less steep. A series of sweeping switchbacks carry you relentlessly uphill. Eventually the grade becomes more moderate in the last half mile before you arrive at the Maupin Field shelter.
Near the end of the climb, Adam announced that he was going to stop at the shelter and ‘eat every single bit of anything edible left in his snack bag’. Two packs of oatmeal, bananas and hot chocolate burn off pretty fast when the climbing is tough! He proceeded to eat a Luna Bar, ShotBlox, a bag of cashews and a bunch of mini candy bars. He reined himself in and skipped eating a dry packet of cocoa mix.
At Maupin Field, we read the shelter log. Entries talked about the skunky, food-nabbing bear dogs (someone had named them Bagels and Muffins). A southbounder left a warning to northbounders about 20-30 miles of dry hiking. Someone even left a really nice pair of ladies LaSportiva for someone to claim.
Adam relaxes at the Maupin Field Shelter. Below: One of the stream crossings near Maupin Field Shelter; Adam checks out the shelter log; The Mau-Har’s end point at the shelter.
The last 1.6 miles retraced our route from the morning before. We had a gradual climb up and over Meadow Mountain and then back to our car at Reeds Gap. We drove back toward home along the Blue Ridge Parkway, stopping at Humpback Rocks to wash our hands with soap and running water. Our last stop was the Sonic in Waynesboro for more ‘refueling’. We definitely earned some tater tots and CreamSlushes!
Three Ridges turned out to be a great alternative to our planned Mt. Rogers trip! While the terrain was challenging, we think most people accustomed to backpacking/hiking would be up for the challenge and would enjoy the beautiful and wild scenery offered by this loop.
The one issue we would like to bring up is a discrepancy about the length of this hike. Most sources list the loop at 14.4 miles. Based on our information (maps, GPS, trailer marker posts), here is how we would break down the segment distances on the trail.
0.0 miles – Start from parking lot on Reeds Gap, heading south on the Appalachian Trail and begin your ascent. .8 miles – The trail reaches the first ridge and shortly begins to descend through some switchbacks 1.6 miles – Reach the junction with the Fire Road (which heads to Love Gap). Take a left to stay on the Appalachian Trail and pass a few side trails that lead to campsites at the Maupin Field Shelter. The trail begins to climb again. 2.0 miles – Reach the summit of Bee Mountain 3.7 miles – Reach some great views from Hanging Rock. Continue to climb further up through the woods. 4.2 miles – Reach the summit of Three Ridges 5.8 miles – Great viewpoint of the eastern ridge 5.9 miles – Reach the tombstone and take an immediate right up the path to reach Chimney Rock and the best views on the trail. Rejoin the trail and descend steeply. 7.5 miles – Arrive at Harpers Creek Shelter across the creek and your stay for the night. The next morning, cross back over the creek and continue on the Appalachian Trail. 7.6 miles – Cross Harpers Creek and the trail begins to ascend very steeply. 8.5 miles – Reach the junction with the blue-blazed Mau-Har trail. Turn right and follow the trail that parallels Campbell Creek. 10.0 miles – Reach a sign designating a short yellow-blazed trail to a few waterfalls. The waterfalls are only a few hundred feet off the Mau-Har trail. Retrace your steps and continue on the Mau-Har trail. 11.5 miles – Reach the Maupin Field Shelter. Continue straight past the shelter to rejoin the Appalachian Trail. 11.6 miles – Take a left on the Appalachian Trail to retrace your steps back to your vehicle. 13.2 miles – Return to the Reeds Gap parking lot.
Returning to Reeds Gap. At this point, Adam said he was 90% sure he was going to survive the trip. Below: Christine had a great time!
Trail Notes
Distance – 13.2 miles (Check out the stats from MapMyHike [Day One] [Day Two])*
Elevation Change – About 3900 feet
Difficulty – 5. This hike is no joke. The downhill areas are steepest on the Appalachian Trail coming down from Chimney Rock and the uphill on the Mau-Har trail is equally brutal.
Trail Conditions – 2.5. The trail starts off quite nicely, but once you reach Three Ridges, expect a rocky slide downhill and loose footing uphill for much of the hike. The Mau-Har Trail was pretty overgrown in places.
Views– 5. Absolutely amazing. Chimney Rock and Hanging Rock provide some of the nicest views.
Streams/Waterfalls – 3. You’ll be near a stream most of the second day and there are a few small waterfalls. The water wasn’t flowing too strongly though.
Wildlife –3. We did see a bear. Oh yeah, and the mouse ate through part of Adam’s backpack, so there is some wildlife out there.
Ease to Navigate – 4. The trails were fairly well marked and signs were at the junctions.
Solitude – 2. This is a tough hike, but it is popular for backpackers, trail runners, and day visitors to the shelters.
Directions to trailhead: On Blue Ridge Parkway, south of Humpback Rocks. Park at mile marker 13.7 at Reeds Gap in the large lot. Head south on the Appalachian Trail, marked with white blazes on a tree near the left of the open field.
There are longer loops that include Overall Run, but this 4.8 mile route hits the key notes with fairly minimal effort. Overall Run Falls is the tallest waterfall in Shenandoah National Park (93 feet), but the best part of this hike is actually the spectacular view overlooking a gorge with open vistas facing west.
Adam enjoys the western view from Overall Run. Below: Adam walks along the Tuscarora Trail; The first waterfall on Overall Run was pretty much non-existent; The return route on the hike took us through Mathews Arm Campground.
Christine Says…
Well… here we are – finally back to Virginia hiking! For a website that focuses on Virginia hikes, we really haven’t done many ‘home-state’ hikes lately. Part of it was finding time to hike with a busy schedule, but even more at fault was the dreadfully hot and stormy summer. I’ll admit, I’m not a summer person. I wither in the heat and humidity. I loathe bugs, especially mosquitoes and ticks. There were so many days that we passed on hiking just because we didn’t want to endure the heat.
Fortunately, over the last few weeks, summer seems to be fading away. There’s been a snap of fall in the air. Summer haze is evaporating, leaving skies crisper and clearer. Nights are dipping down into the fifties (we hit the forties a couple times last week). Even the ridgelines atop the taller peaks are started to fade to a rusty green. Autumn is just around the corner, and I couldn’t be happier!
On one of the first ‘fall-ish’ days in September, we decided to hike down to see the tallest waterfall in Shenandoah National Park. I’ve hiked just about every trail in the park, but somehow I’ve never gotten around to hiking Overall Run. It’s one of those hikes that’s been on our to-do list forever, but keeps getting bumped for other hikes. Overall Run is notorious for slowing to a trickle during dry periods, but we were coming off a very rainy/stormy week, so we figured it was a good time to see the falls with a decent volume of water.
Adam climbs down the one steep section of the hike. Below: This gorge is home to Shenandoah’s tallest waterfall – Overall Run. When we visited, there was almost no water running; Christine enjoys the view; We enjoyed the view with LOTS of other people.
We started out at Mathews Arm, in the parking lot adjacent to the campsite check-in station. We followed the Traces Trail for a short distance until it met the Tuscarora/Overall Run trail. The trail descended gently through the woods. There was nothing exceptional along the way – just pretty, quiet forest scenery.
Eventually, the trail dropped steeply down a set of log steps set into the trail. Right before the descent, we saw a shirtless guy sitting in a tent, about ten feet off the trail. Seriously… if you camp in the park, shouldn’t you be far enough off the trail that everyone passing by can’t see you? At the bottom of the initial descent, we came to the first (and smaller) of the falls. It was just a thin ribbon of water through the canyon, so we quickly moved along. After one more short descent, we reached the large falls on Overall Run. It was barely a trickle, just a sheer film of water running down the canyon wall. While the waterfalls were seriously disappointing, the view was not! It was spectacular and expansive, offering gorgeous views to the west.
We shared the view with lots of other people. Besides Dark Hollow Falls, I’ve never seen so many people at a Shenandoah waterfall at once. It was a little surprising. I had no idea Overall Run was so popular! We stayed for a while, enjoying the beautiful day and the wonderful view.
On the way back, we intended to return the same way we arrived, but at the top of the climb after the falls, we saw a trail junction that pointed 1.5 miles to Mathews Arm Campground, so we decided to go that way. The trail took us over to Beecher Ridge, which turned into a fire road, then back into a trail, which eventually led to the back side of Mathews Arm campground. We walked through the campground and back to our car.
All in all, it was a pretty hike made worthwhile by the awesome view! I’d like to see Overall Run falls running generously someday, but after doing a little digging on a couple photo sites, it seems to take seriously heavy rain or snowmelt to make the falls truly impressive. If we do this hike again, we’ll do it in the spring after there has been lots of rain!
Adam Says…
Overall Run was definitely a pleasant surprise to me. I knew about the large waterfall here, but I had no idea that the views would be so impressive.
We started off our day with a big breakfast at Skyland Resort. I hit the breakfast buffet, which had eggs, bacon, sausage, french toast, fresh fruit, oatmeal, and biscuits. It was a good way to get some energy in my system for a hike, but I did feel the need to do some exercise to “earn my bacon”. After leaving breakfast, we made our way to the trailhead at the Mathews Arm campground, seeing a coyote and bobcat on the way there. We didn’t get any pictures, since both of these animals are typically very skittish and darted off Skyline Drive as soon as we spotted them.
We pulled into the Mathews Arms campground, passing the fee station for overnight camping and taking a right to the large parking lot. From the parking lot, we began our hike on the Traces Trail, which led into the woods. We stayed on the Traces Trail until we reached the junction with the Tuscarora/Overall Run trail at .6 miles. Take a left on this trail. At 2.0 miles, you reach a junction with the Mathews Arm trail, which will be your return route for the loop. We continued on the Tuscarora Trail until we reached the overlook area at 2.5 miles. For the return, we went back the way we came. At 3.0 miles, we took a right on the Mathews Arm trail towards the campground. At 3.5 miles, we reached a junction with the yellow-blazed Beecher Ridge trail (more like a fire road) and took a left towards the campground. At 3.9 miles, you will reach a junction with the Weddlewood Trail, but stay straight. You will reach the campground around 4.5 miles near a restroom. Follow the road to the right making your way back to the amphitheater and parking area for your vehicle at 4.8 miles.
Adam walks the trail toward Mathews Arm. Below: We came to a trail junction that pointed us back toward Mathews Arm – we decided to take it; Adam crosses a rocky section of trail near the start of the stream that feeds Overall Run; A pretty clearing along the Beecher Ridge trail.
The definite highlight of the hike was the views from the overlook and I wasn’t the only one to think so. We would see people that would say, “Oh, that’s the waterfall?”, but then camp themselves on the rocks to soak in the views. There are a few different spots to enjoy the views from the overlook, but not a ton of room. The northern district in the park tends to get a lot of visitors from the northern Virginia area and since this trail is accessible from the northern most campground, you will likely see lots of people on your hike. I climbed up some precipitous rocks and sat looking out into the canyon with views of mountain ridges for miles.
Of interesting note about this hike is when you start your hike from the Traces Trail and reach the intersection with the Tuscarora Trail, the trail splits into two. If you head to the right, you will reach the eastern terminus of the Tuscarora Trail in just a few tenths of a mile. The other terminus of the trail is 252 miles away. The area in Virginia and West Virginia was once known as the Big Blue trail. Originally designed as an alternative to the Appalachian Trail (since it connects to the Appalachian Trail at both ends), it will one day become a part of the Great Eastern Trail, connecting Alabama to New York.
Difficulty – 2 This hike has only one steep section leading down to the waterfalls, the rest of the trail is flat or requires only moderate climbing/descending.
Trail Conditions – 4. The trail is well-maintained and relatively easy to walk.
Views– 4. The view at the gorge next to the waterfall is spectacular!
Streams/Waterfalls – 2. There are two primary falls on Overall Run. The second waterfall is the largest in the park, measuring 93′, however, it’s not terribly impressive in volume. We started this hike to see the waterfalls, but found the view far more rewarding.
Wildlife –2. We didn’t see anything on the hike, probably because the heavy hiker volume, but we did see a coyote and a bobcat on the drive to the trailhead.
Ease to Navigate – 4. There are few trail options to take, but most of them lead back to the start point. As long as you pay attention, you shouldn’t get lost.
Solitude – 1. We were on the trail before 9:00 a.m., but still found the trail exceedingly crowded. The overlook at the point of the largest falls had about a dozen people when we arrived. We saw many more people on the way back. We even saw one group camped less than ten feet off the trail.
Directions to trailhead: Follow Skyline Drive to the Mathews Arm Campground at mile marker 22. Park at the amphitheater and follow the blue-blazed Traces Trail that departs from the east end of the parking lot.
* MapMyHike is not necessarily accurate, as the GPS signal fades in and out – but it still provides some fun and interesting information.

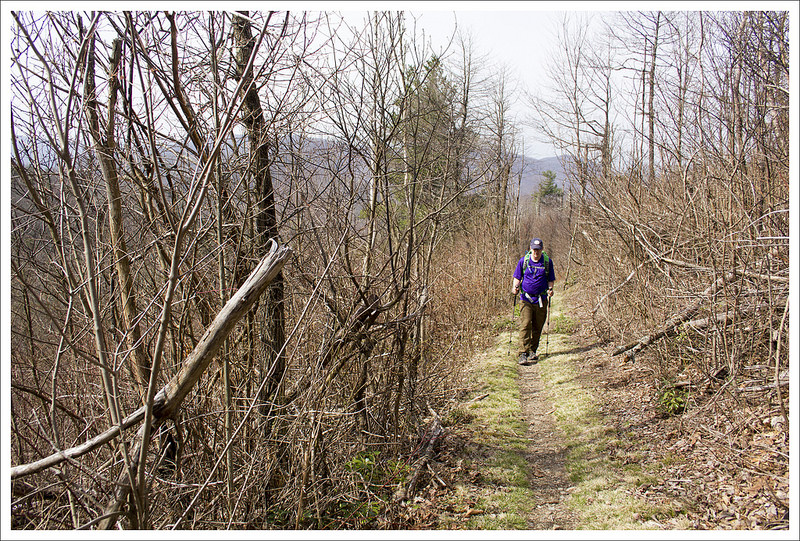
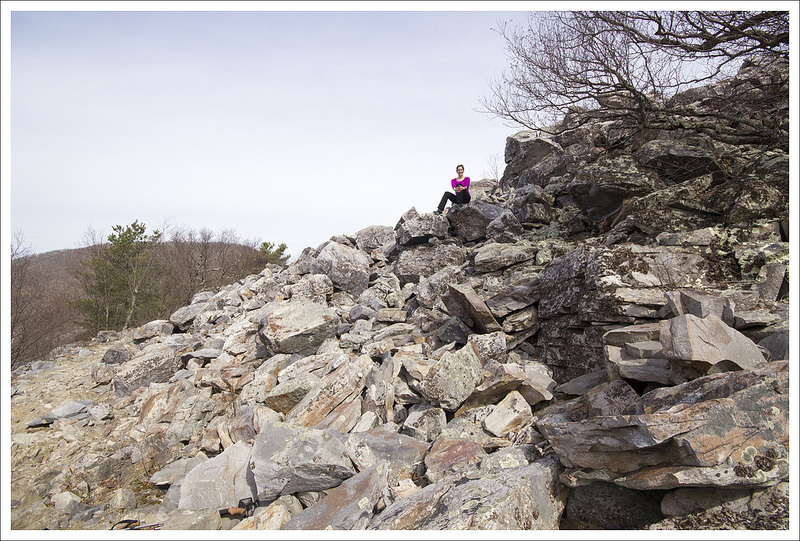

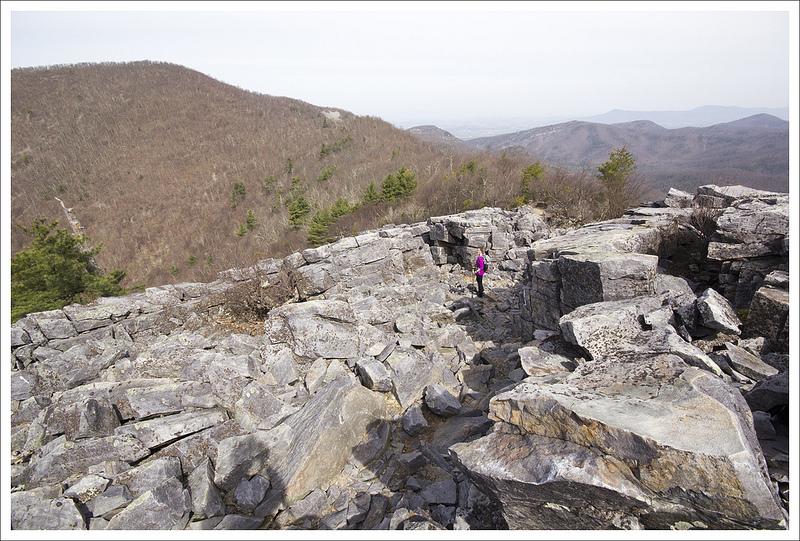


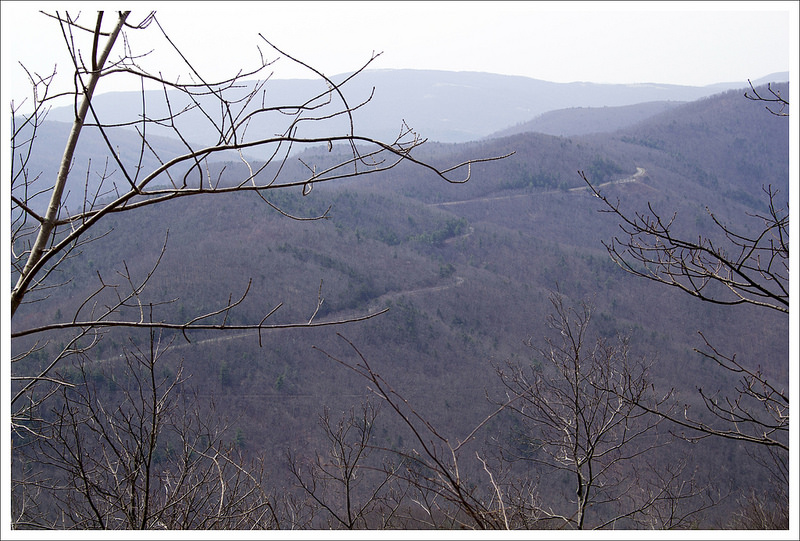
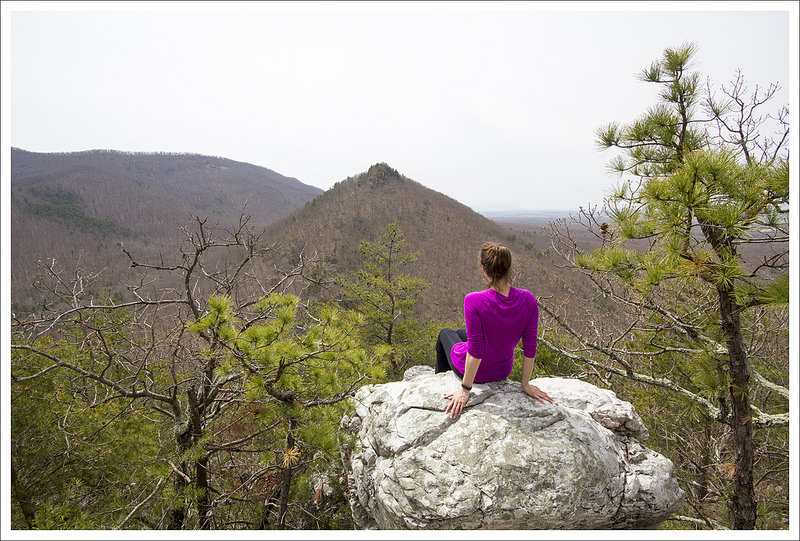


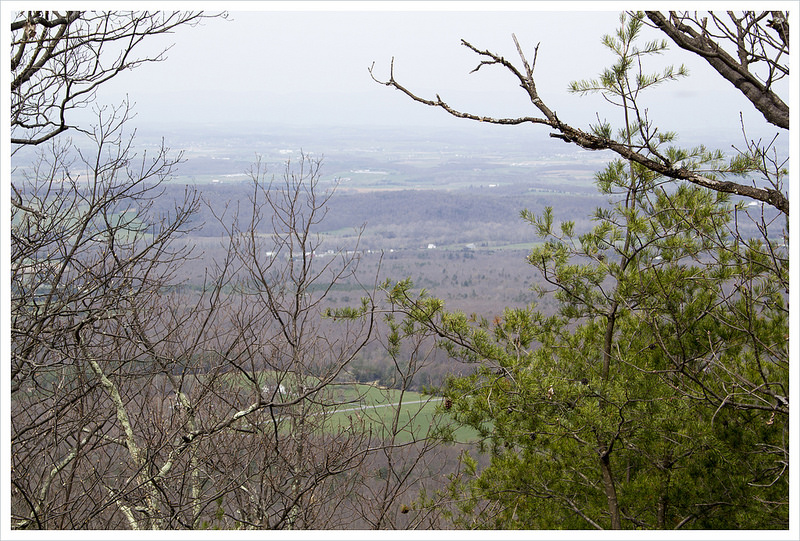
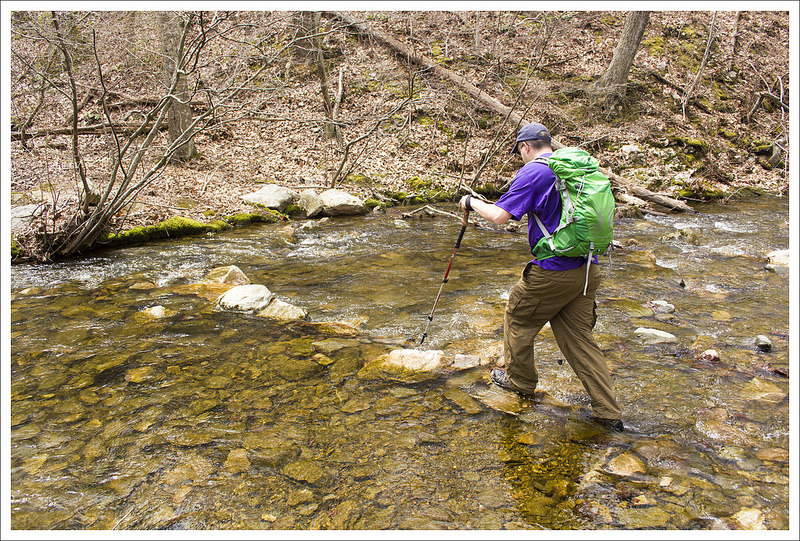

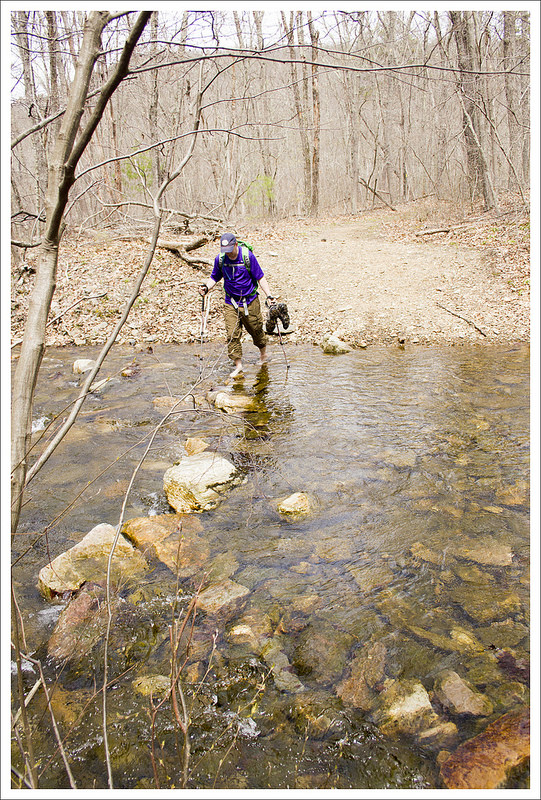
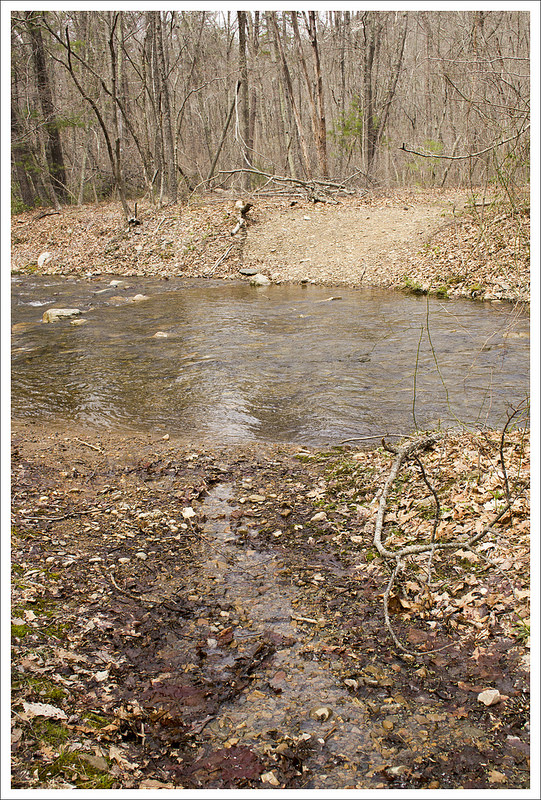

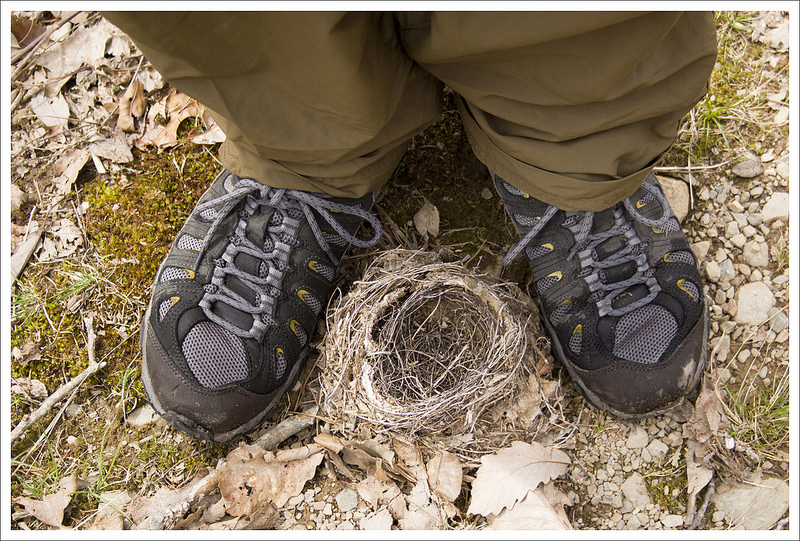
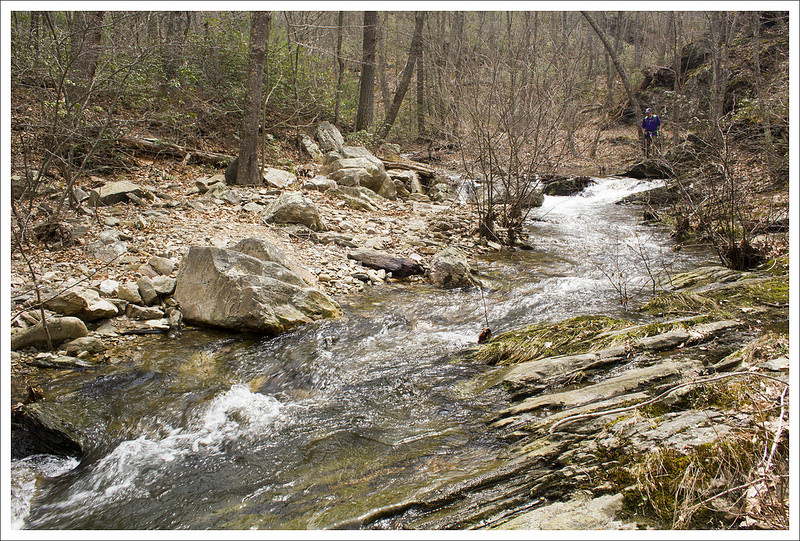
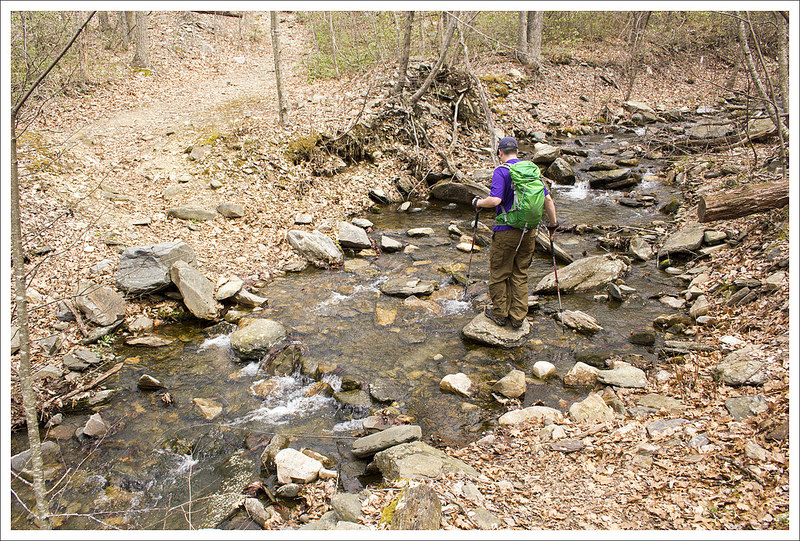
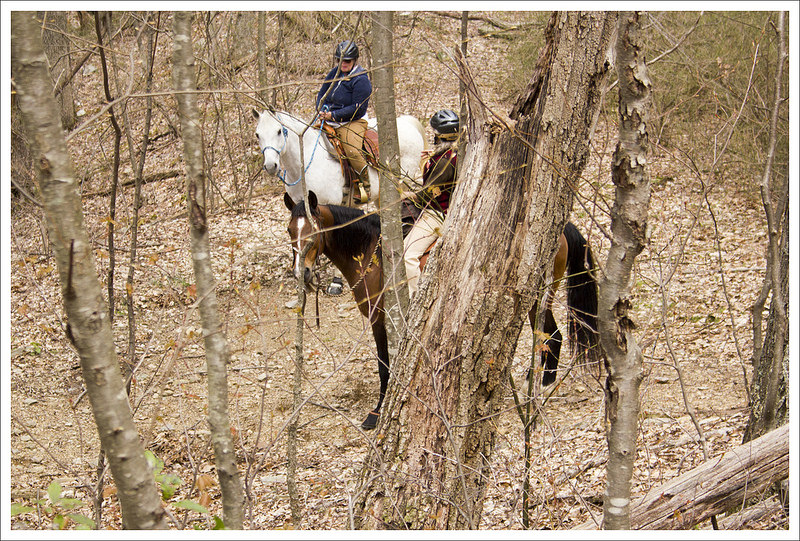
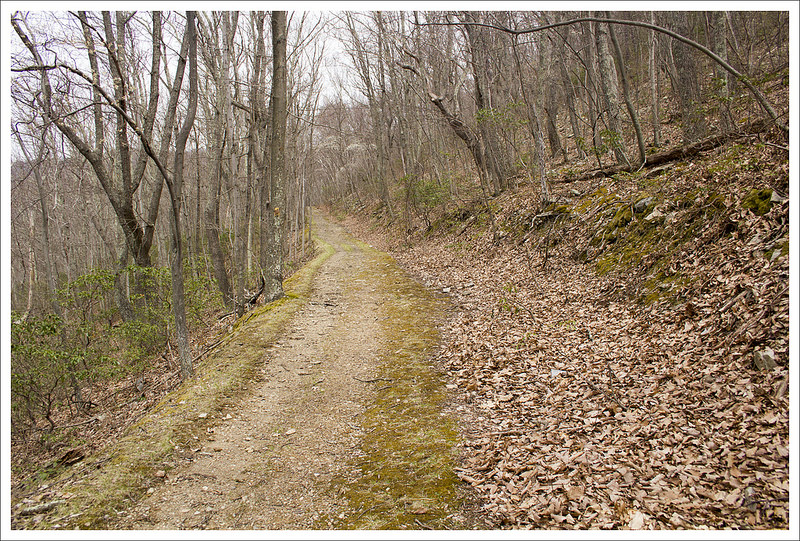


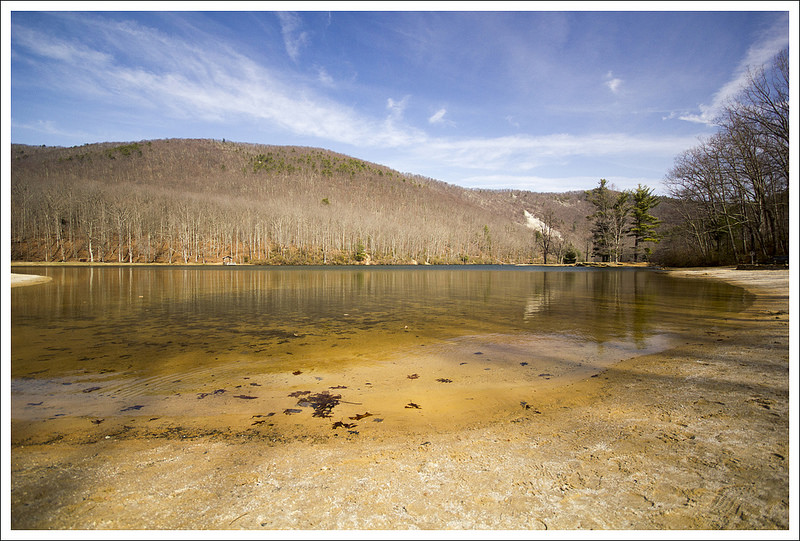
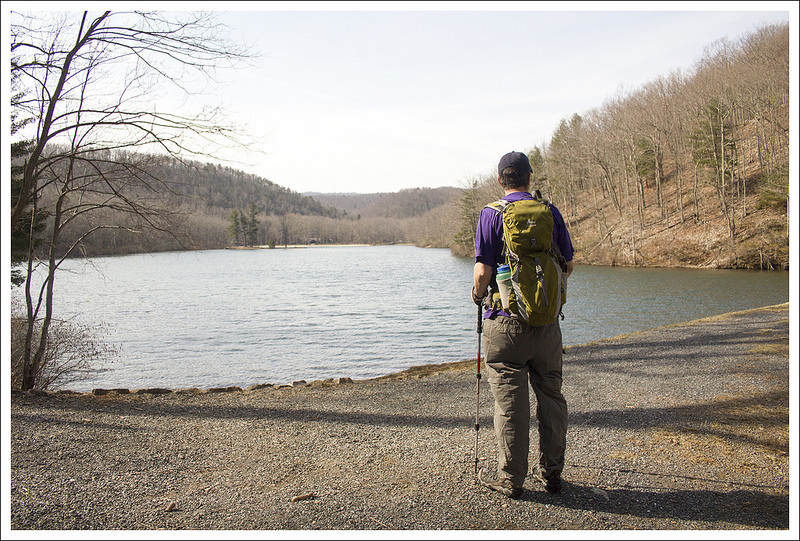
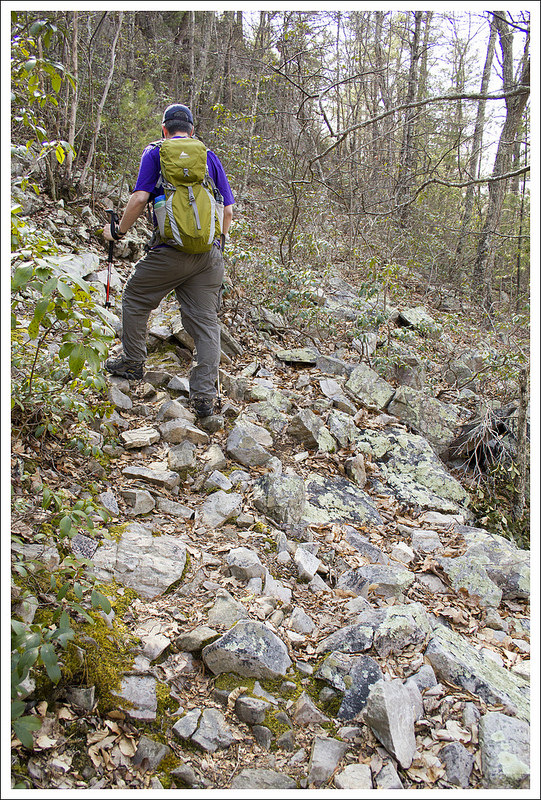
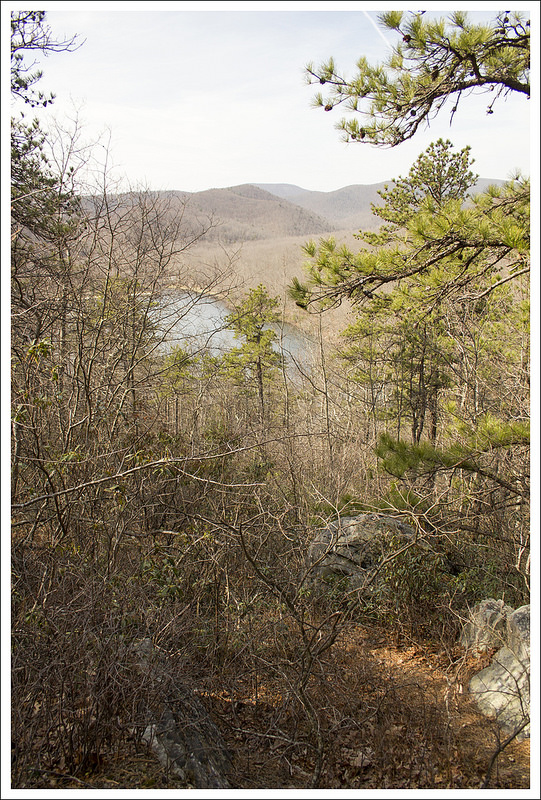
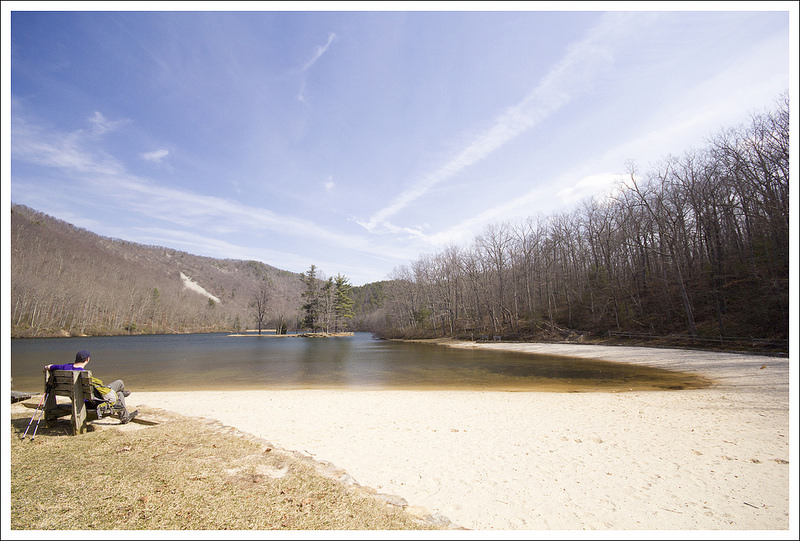

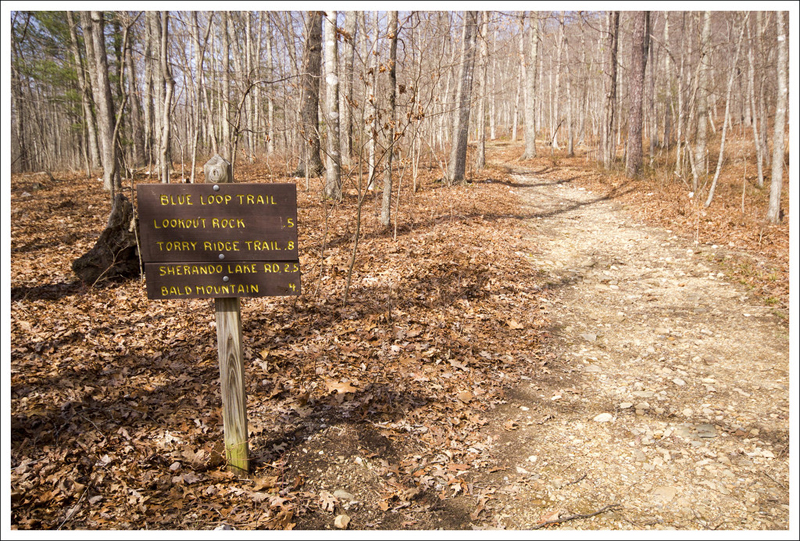
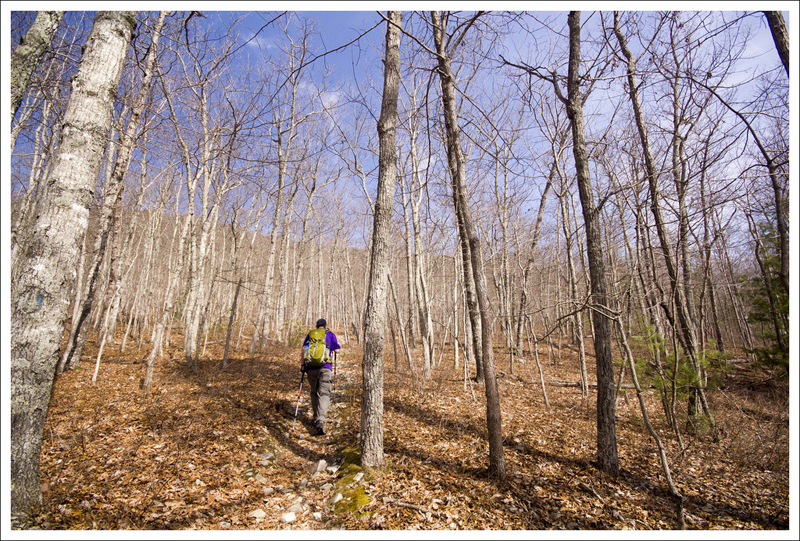
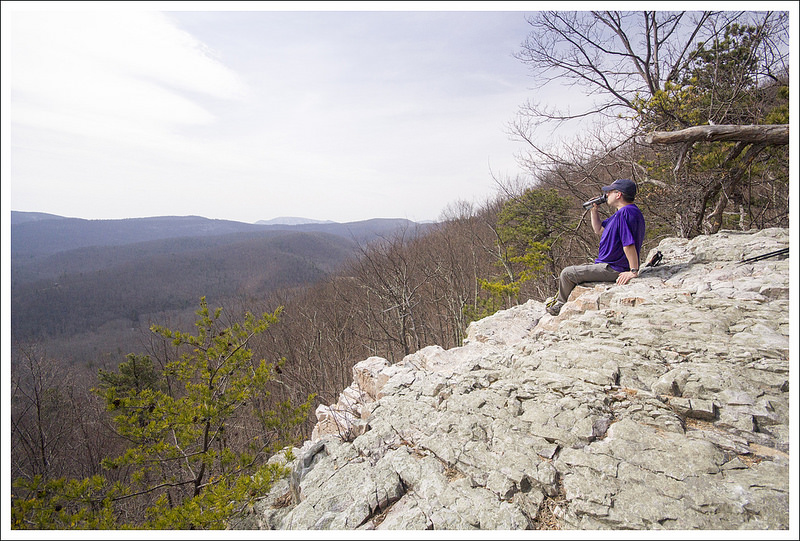
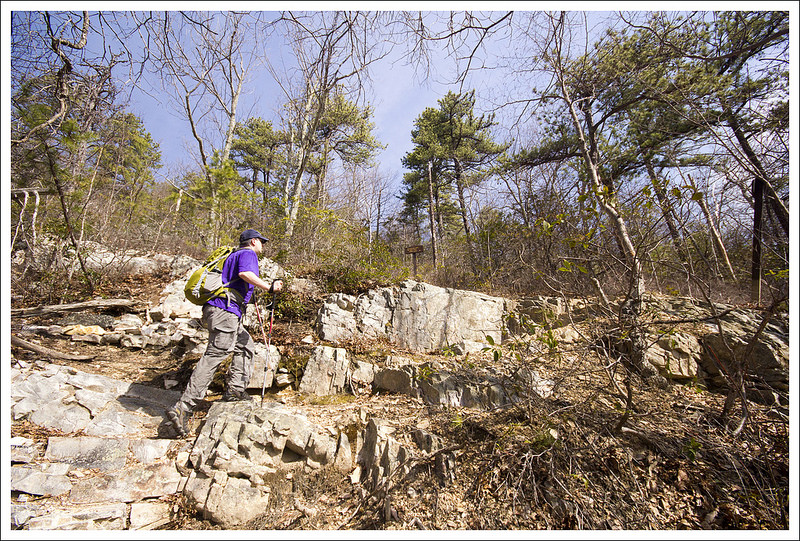

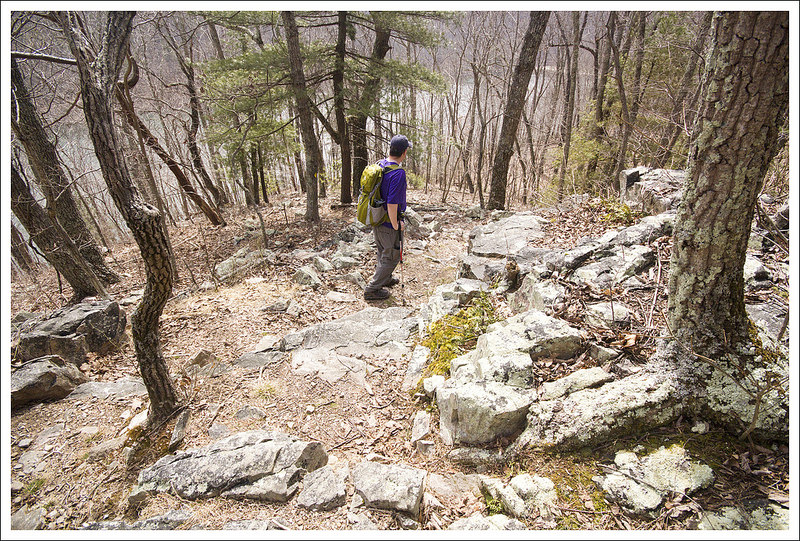

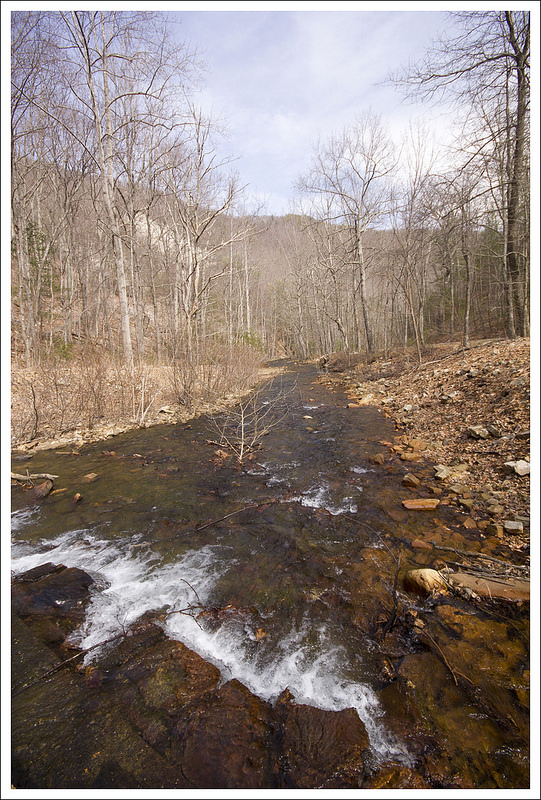

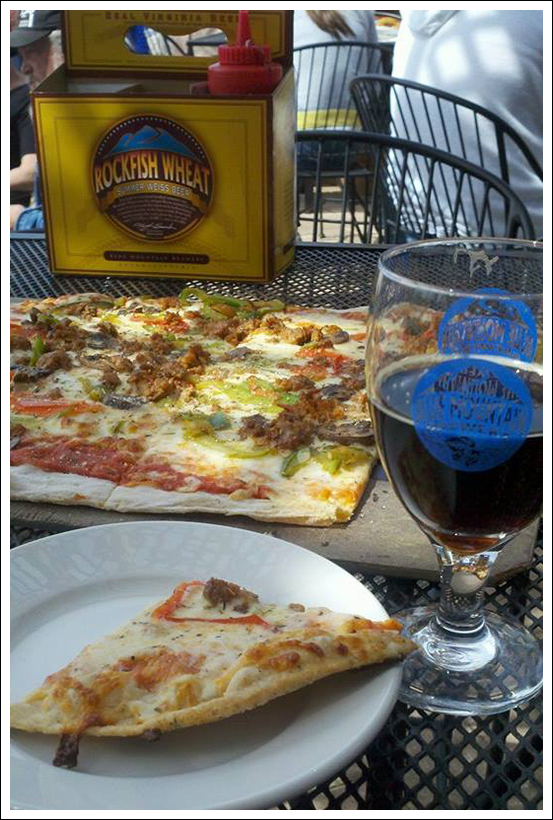
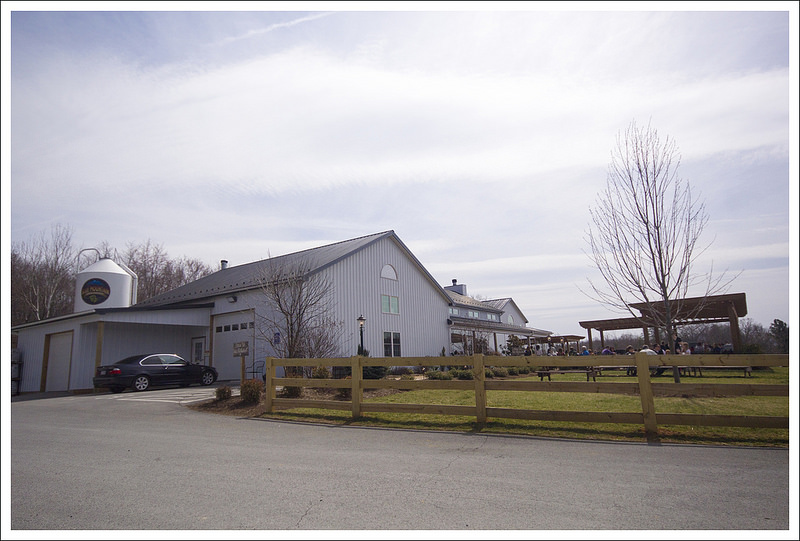


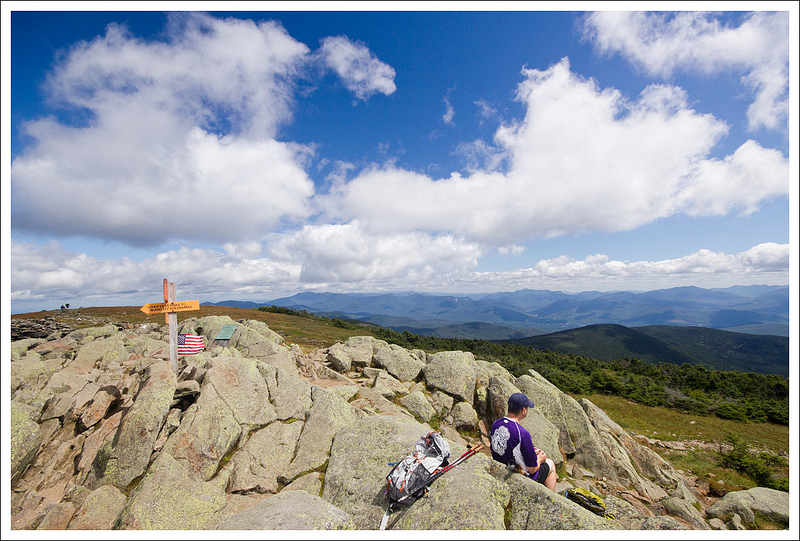

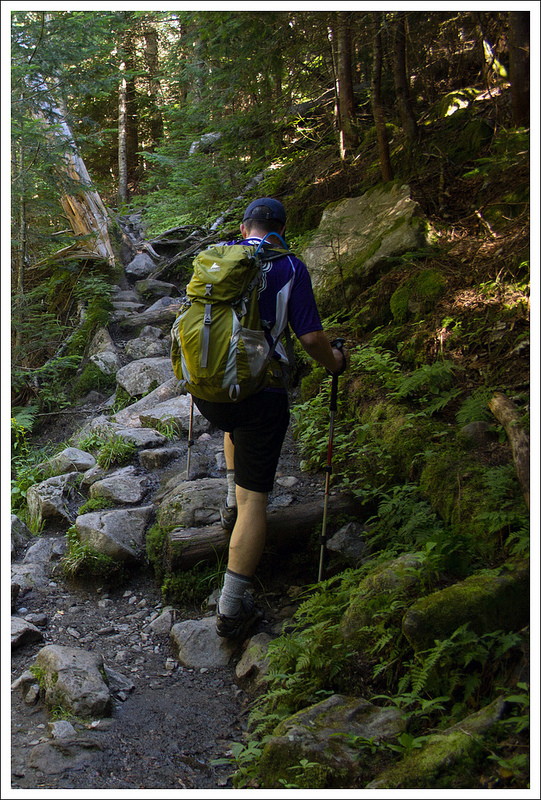


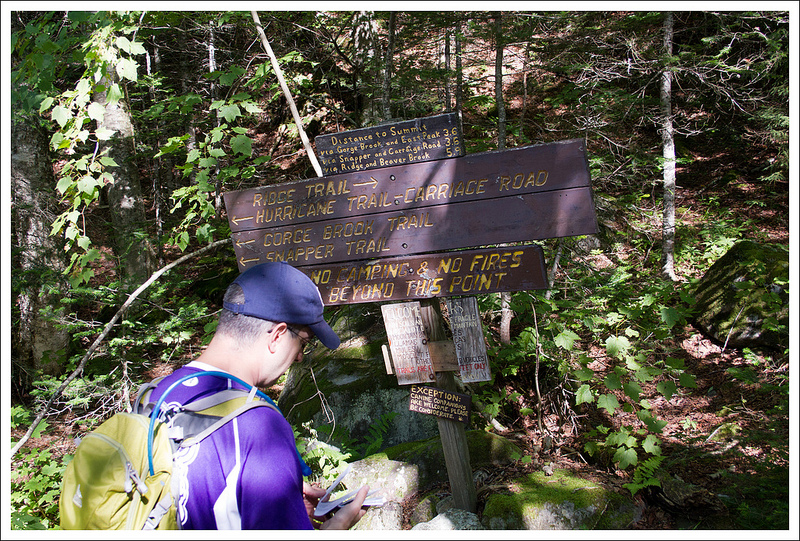


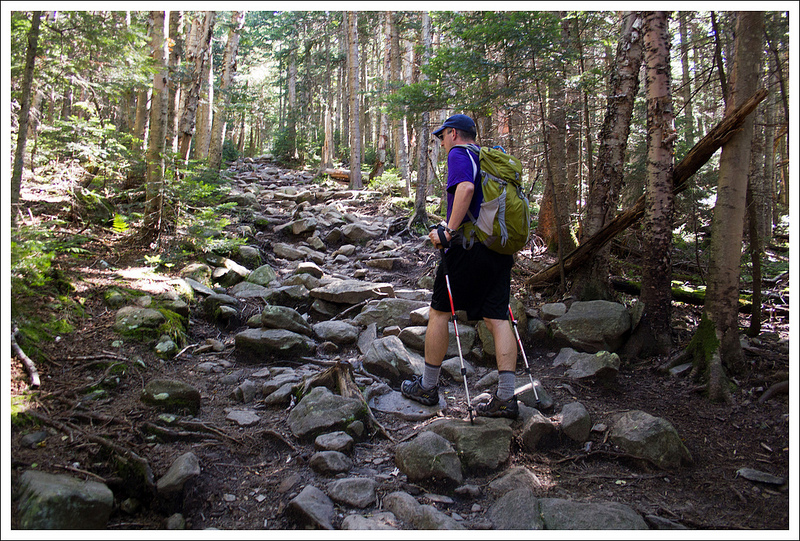


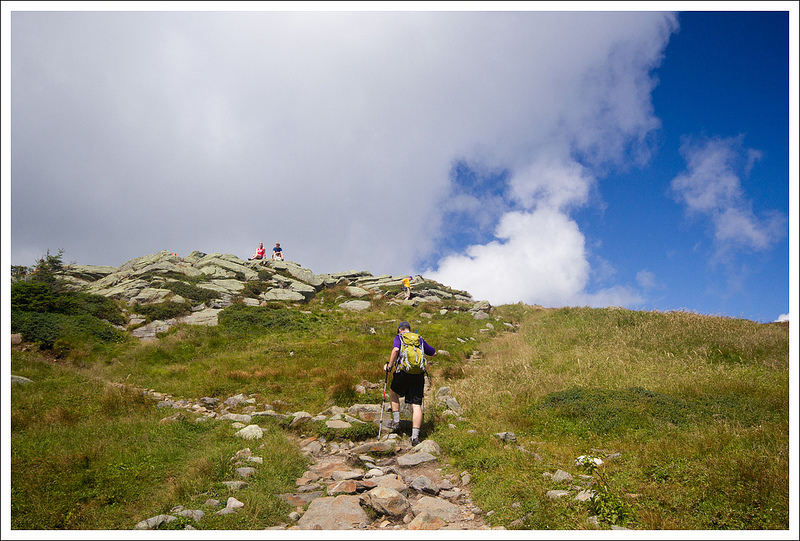

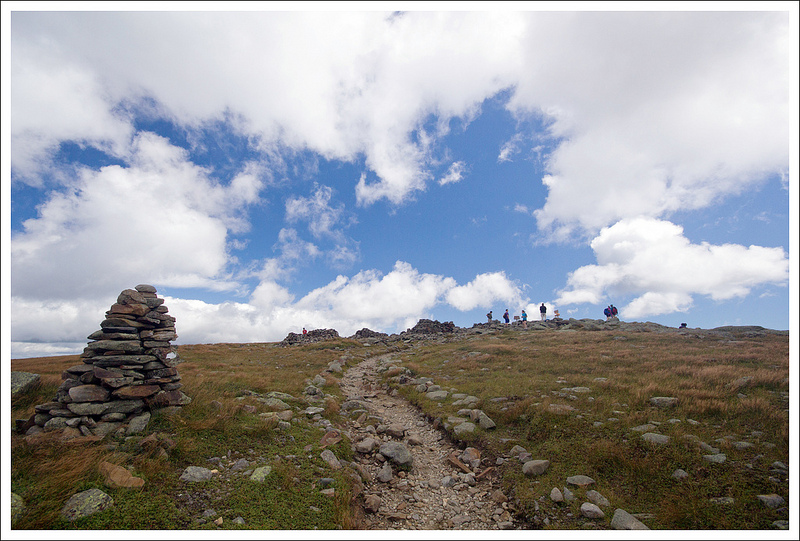


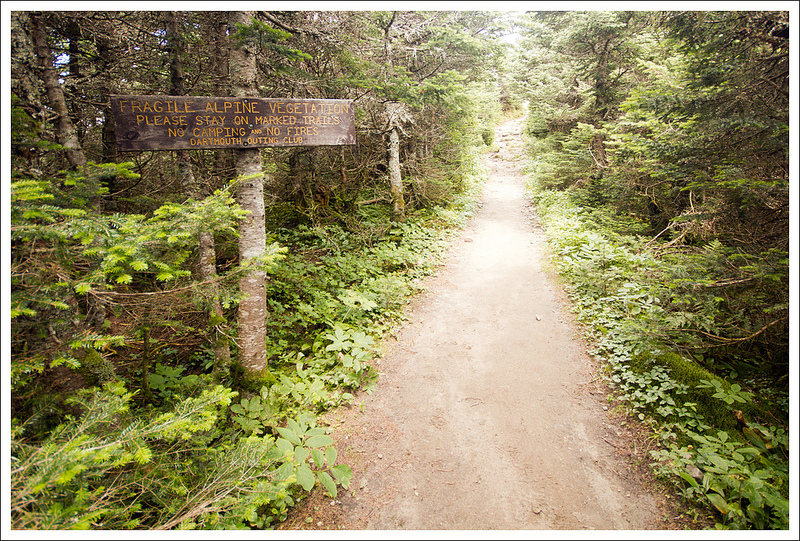


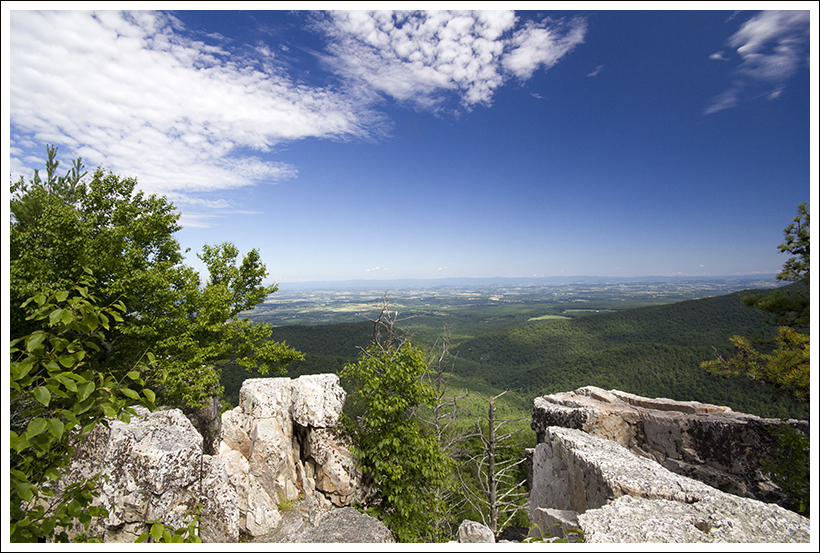

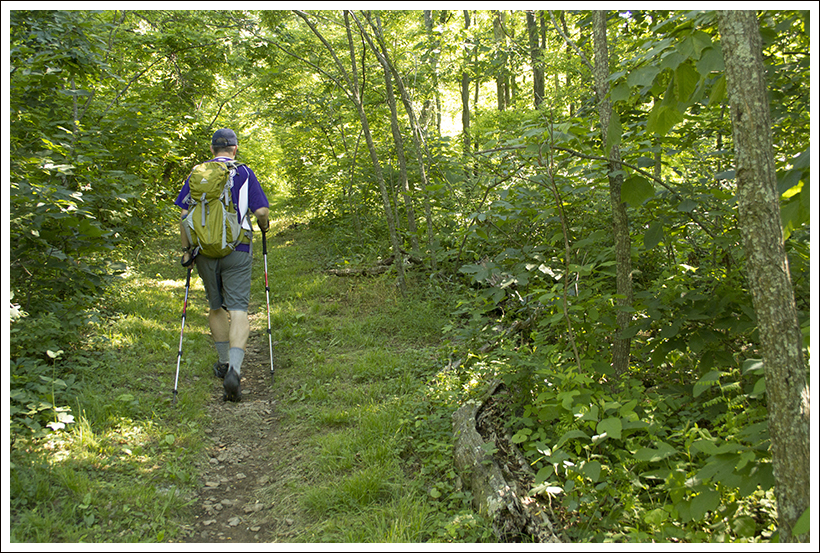
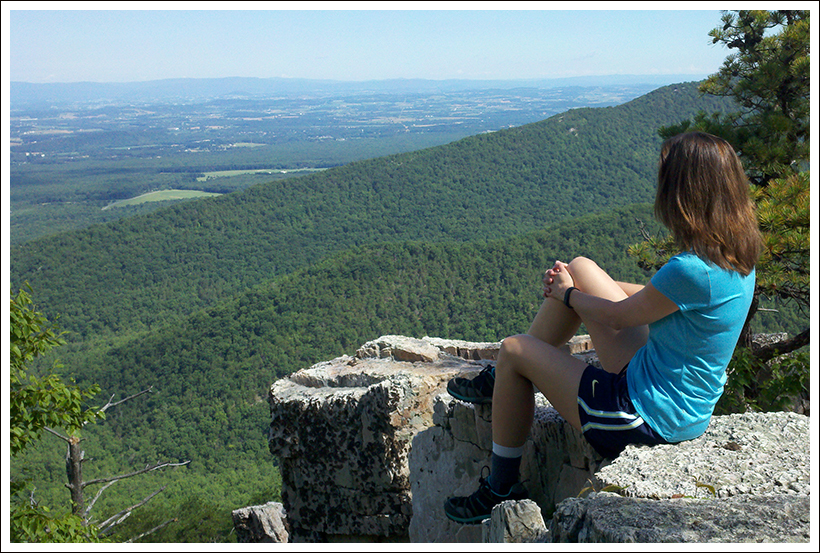


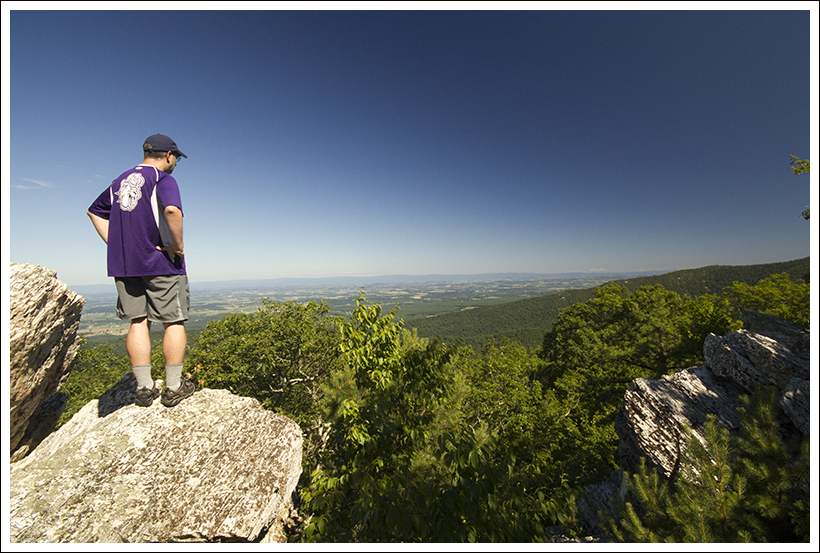


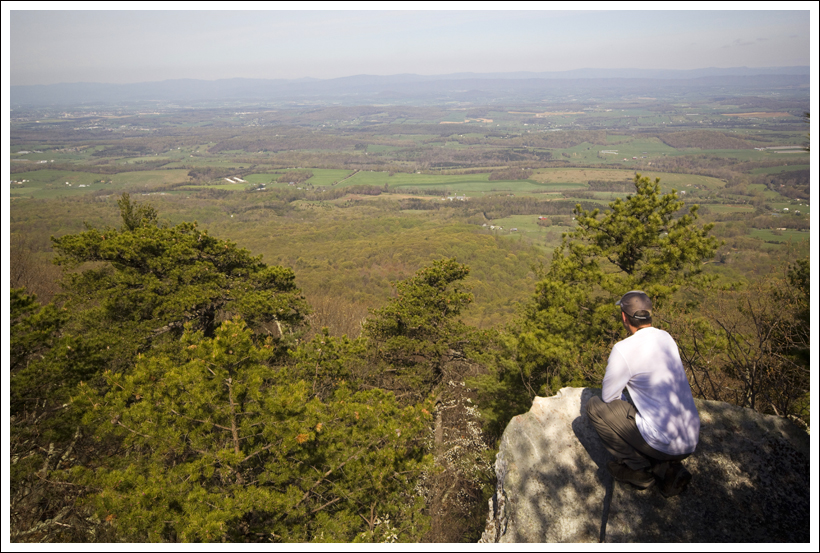
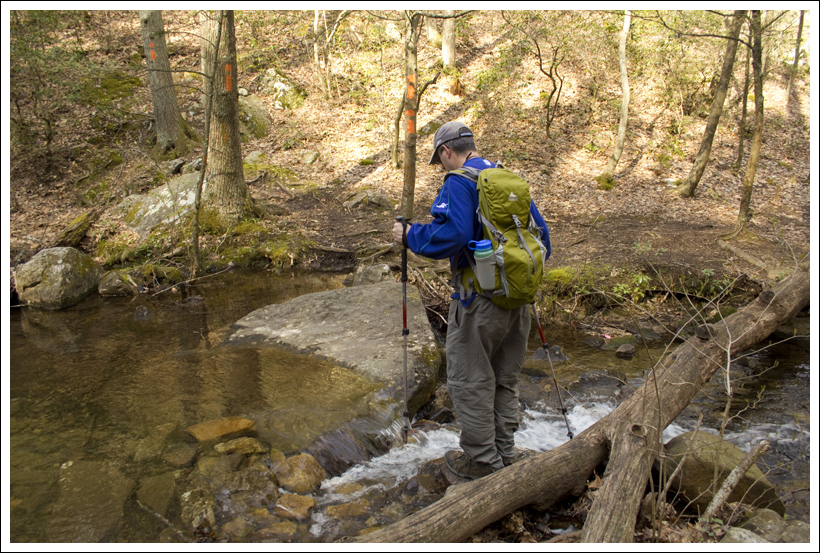
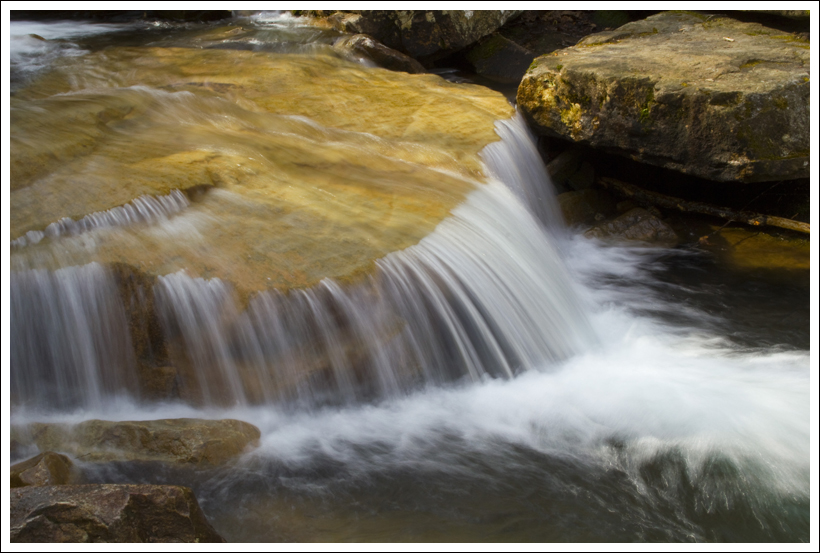
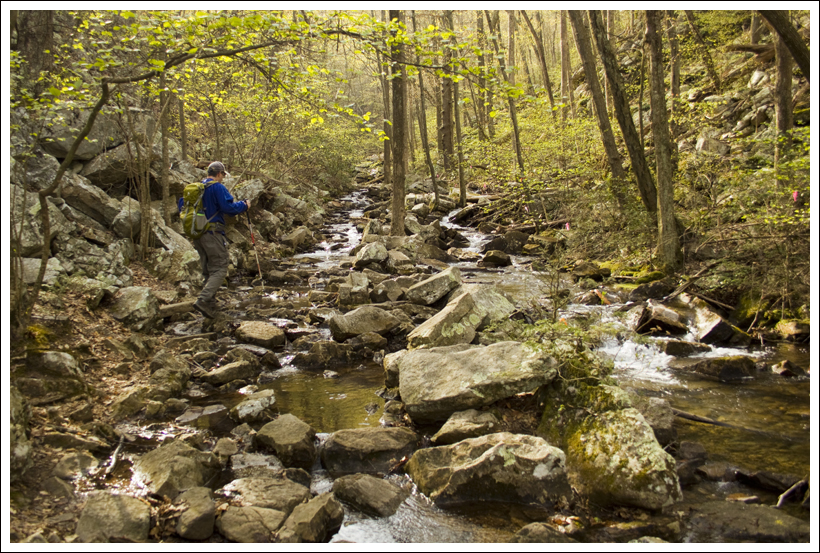
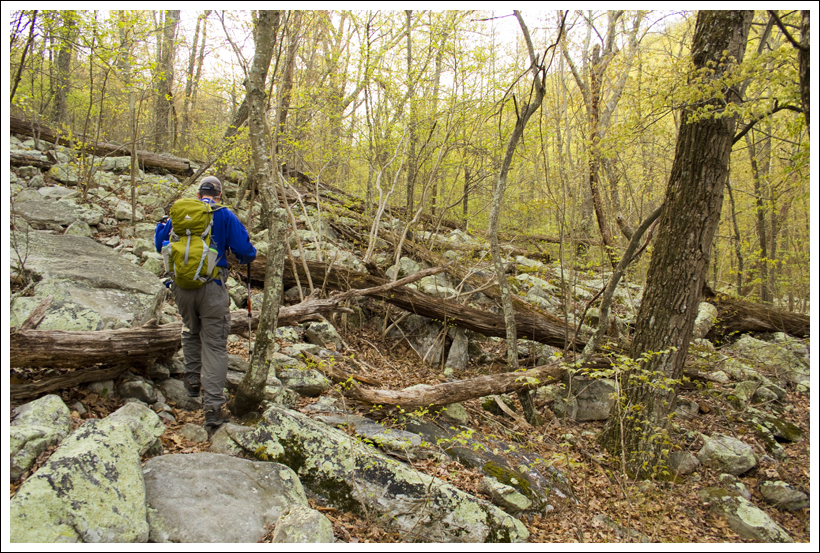
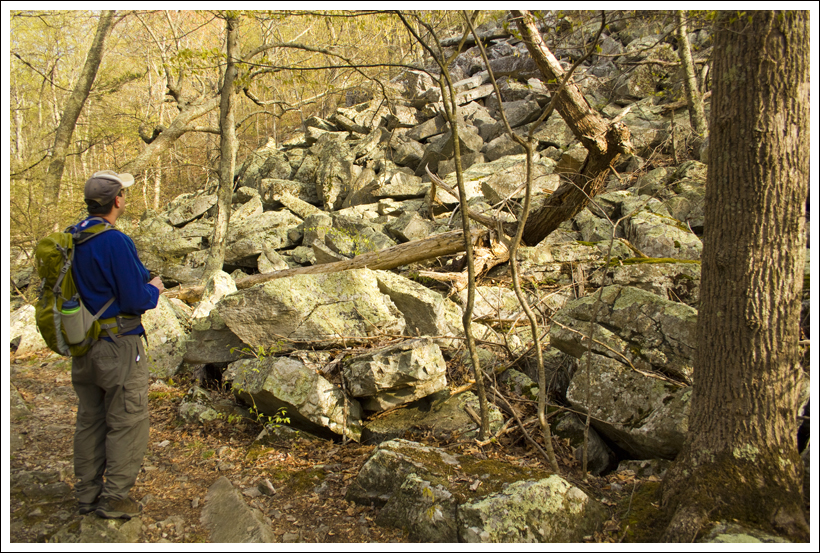
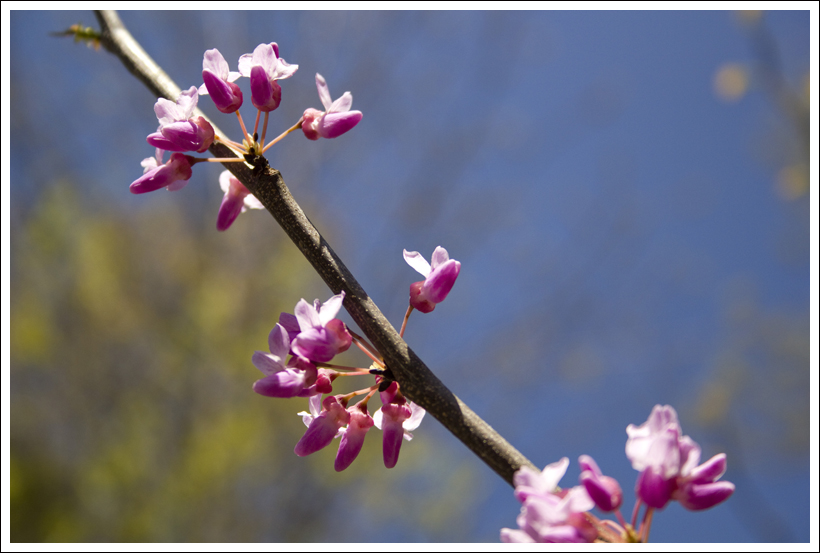
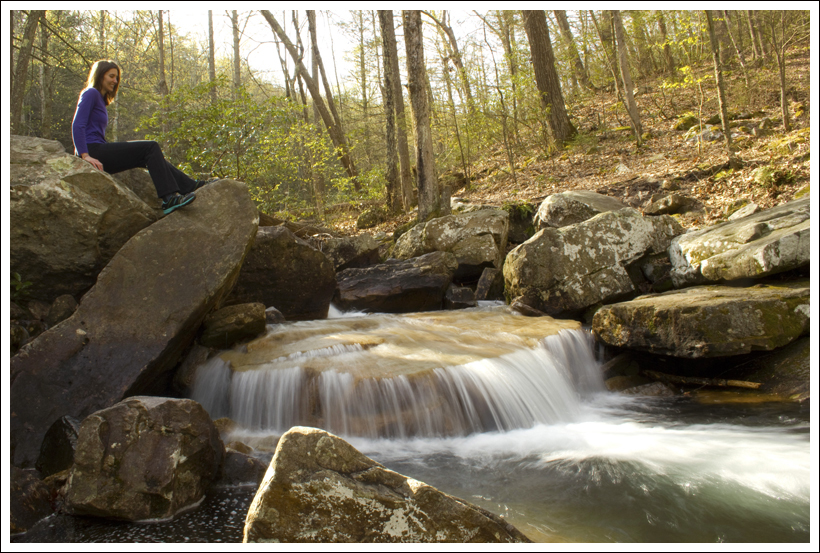
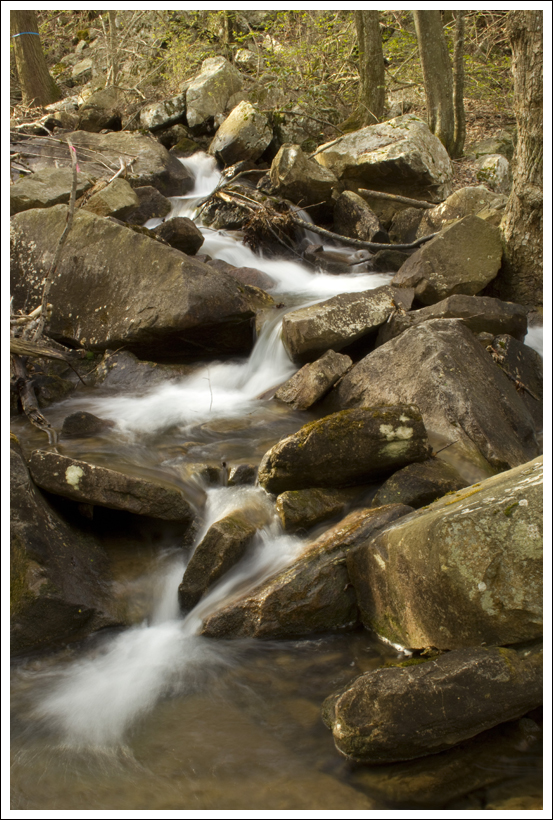
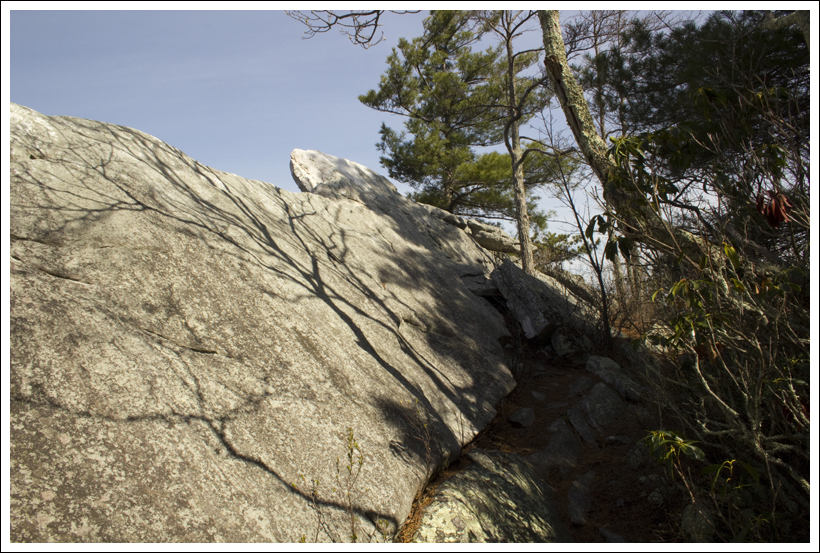
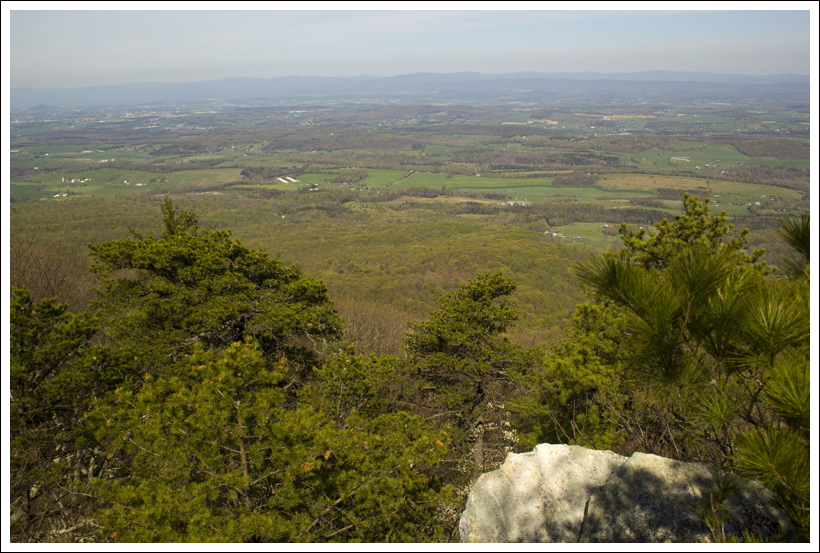
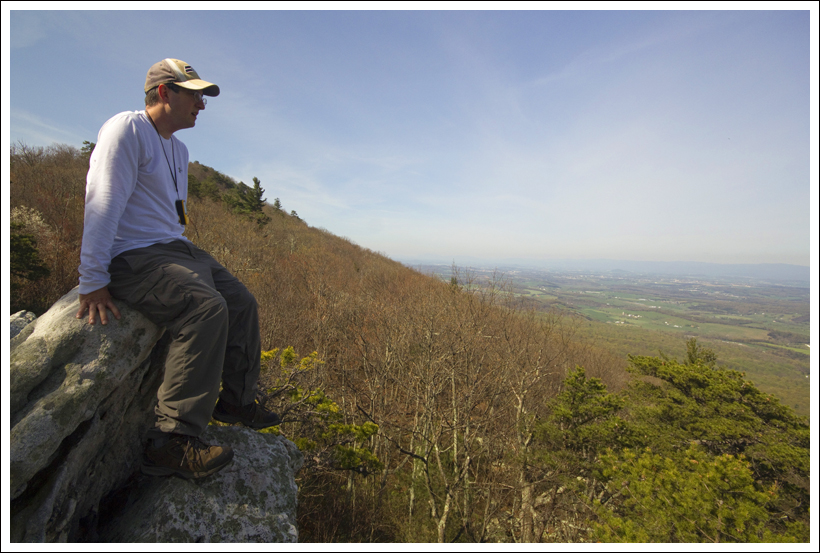
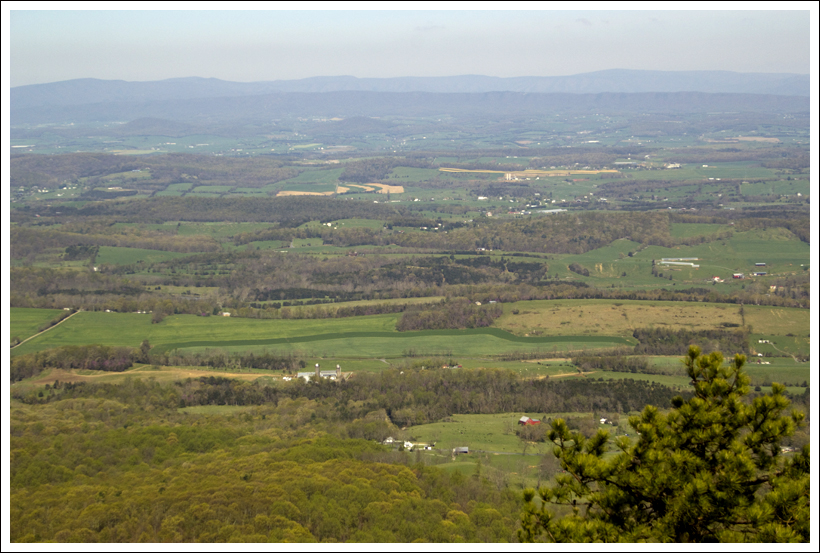
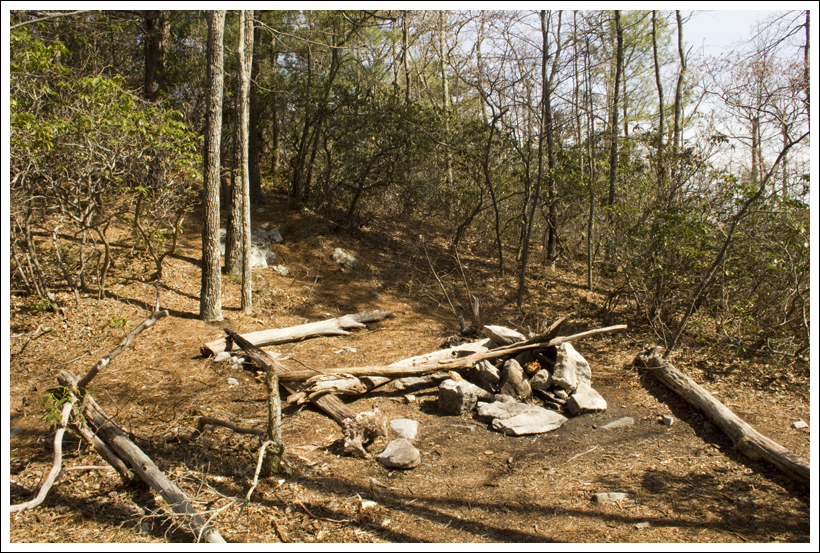
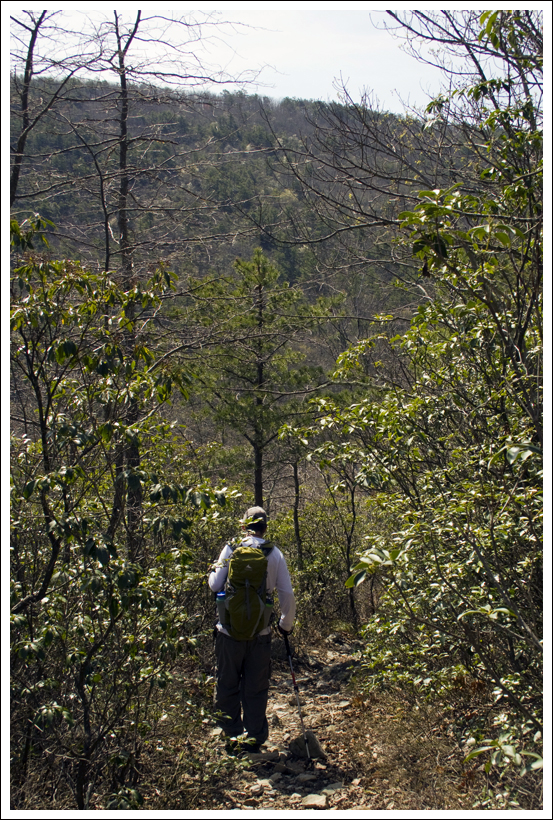
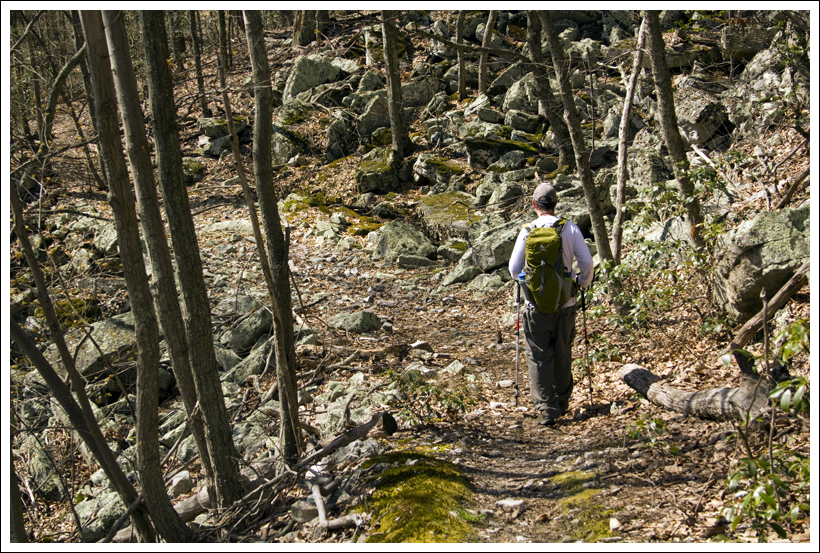
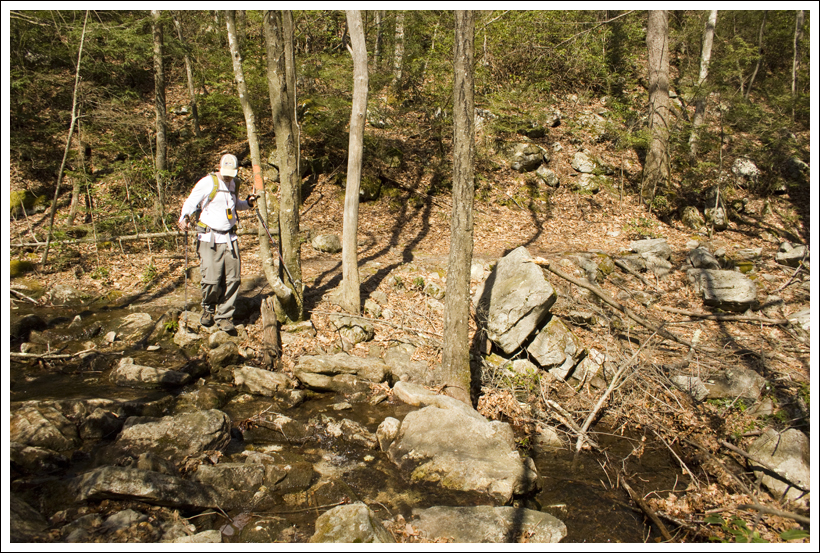
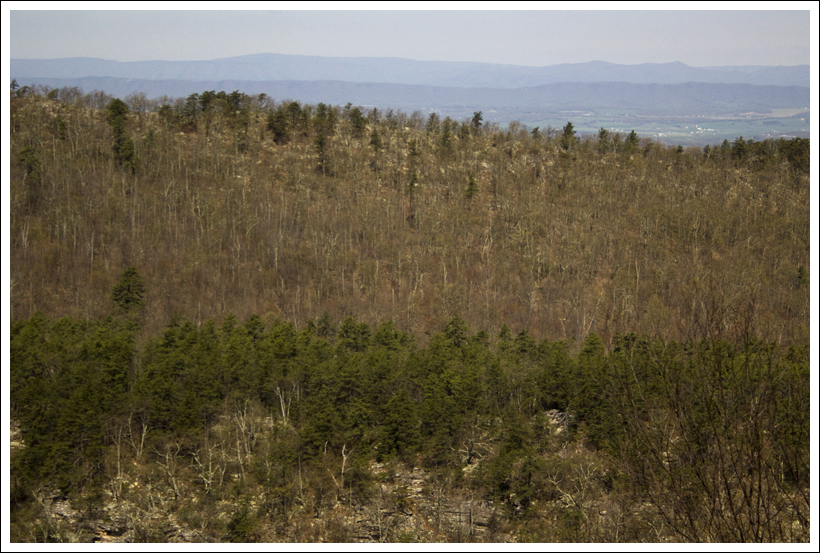
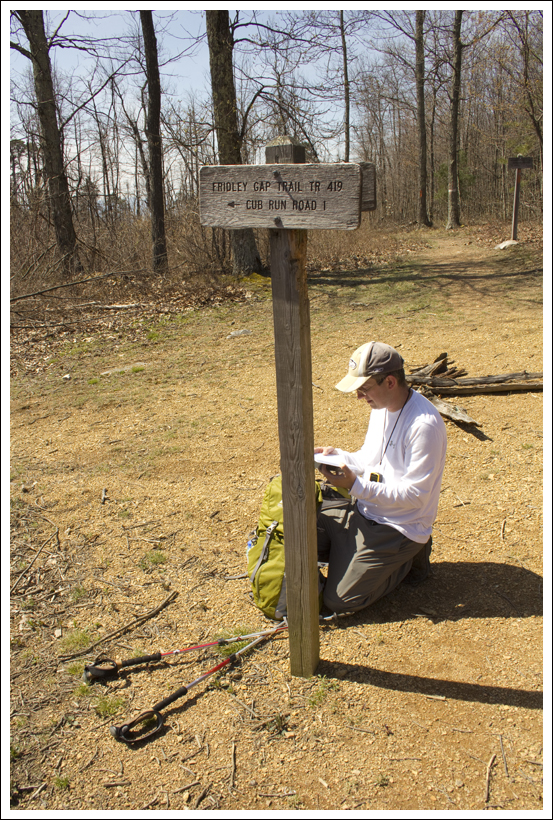
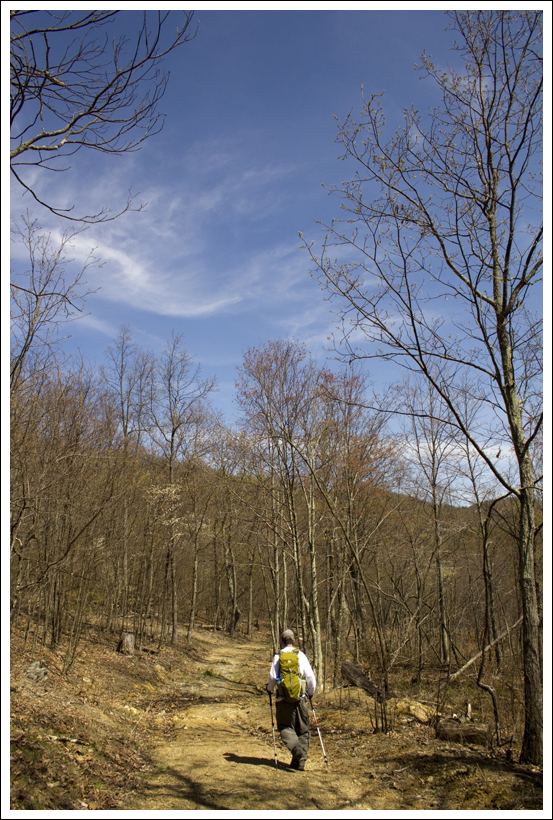
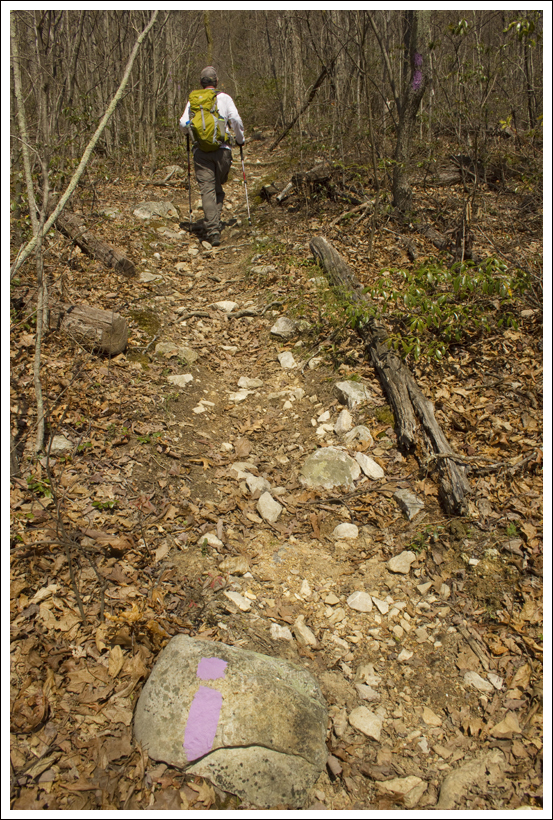
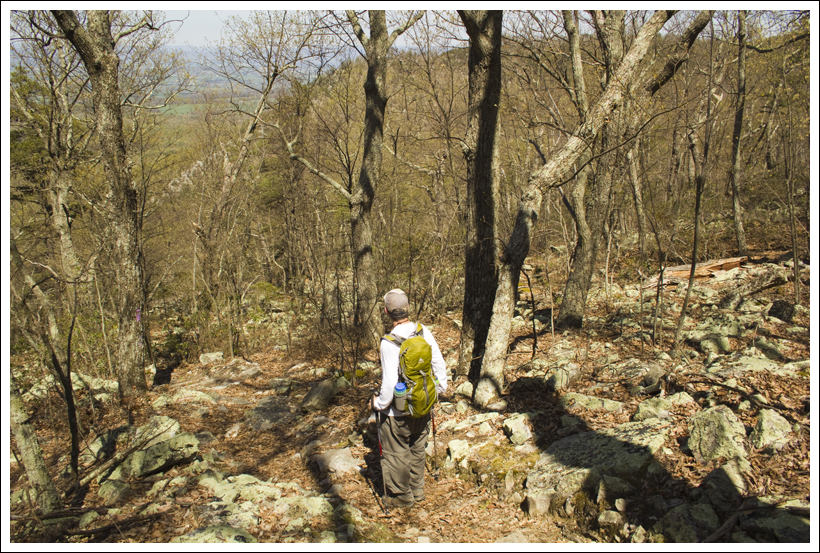
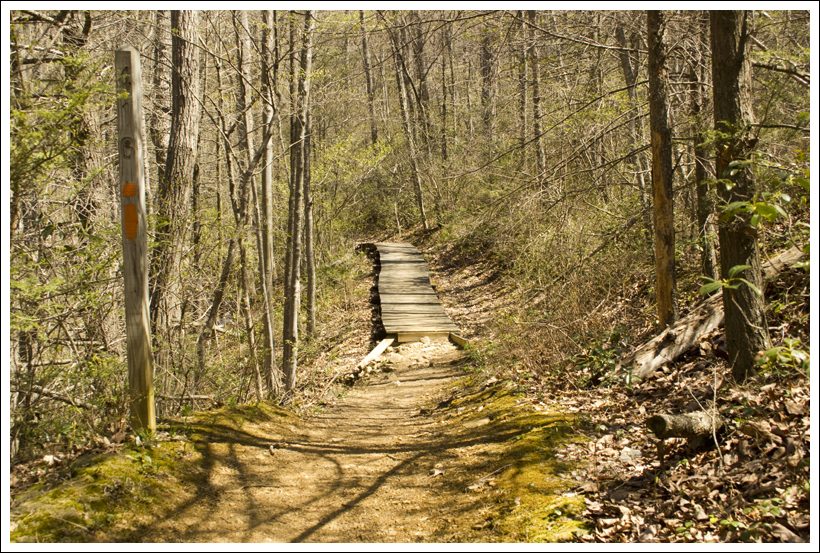
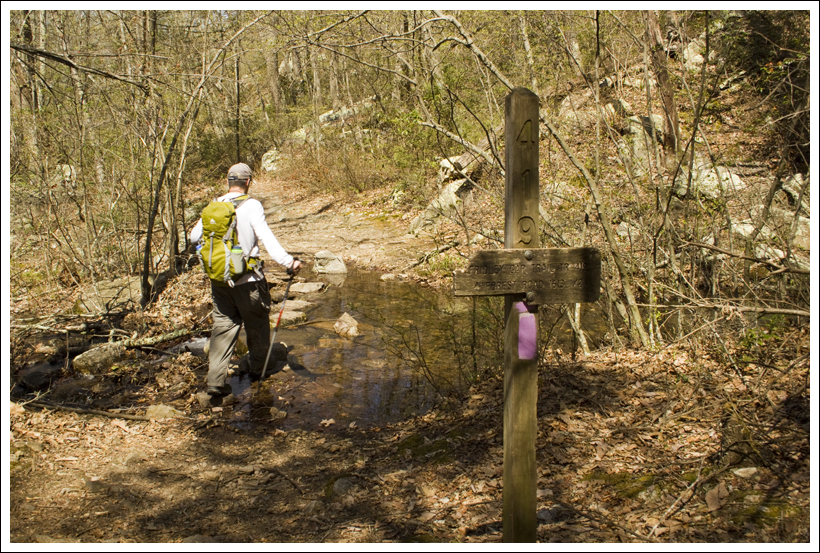
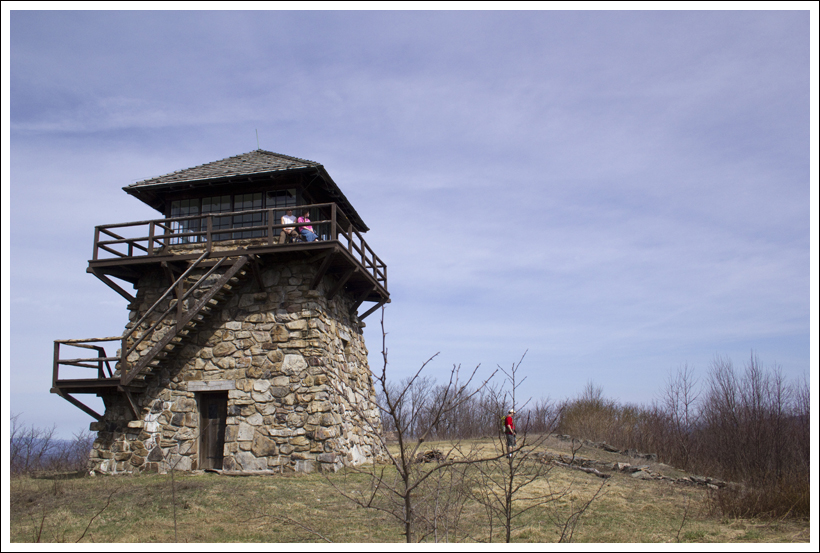


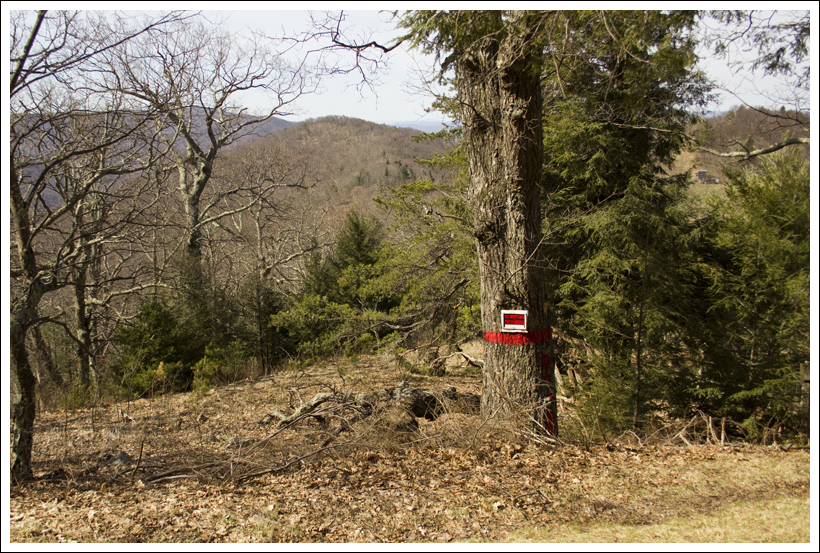


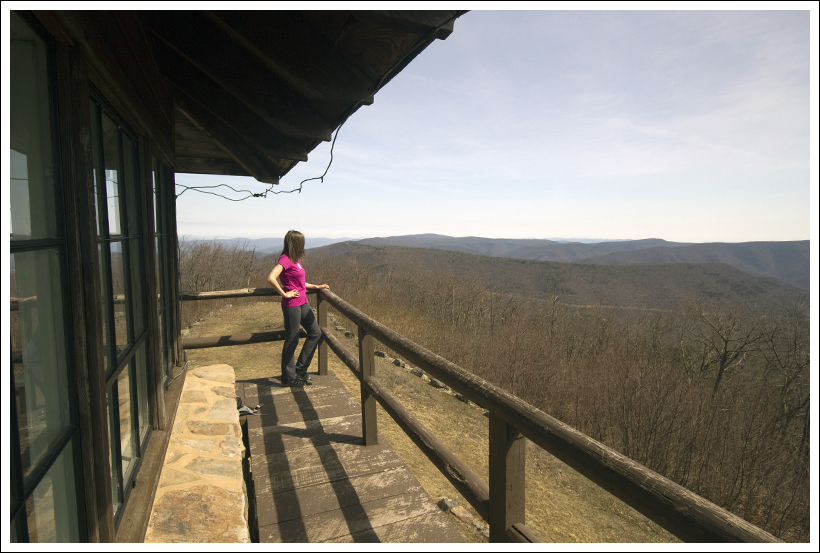


 Wookie Says…


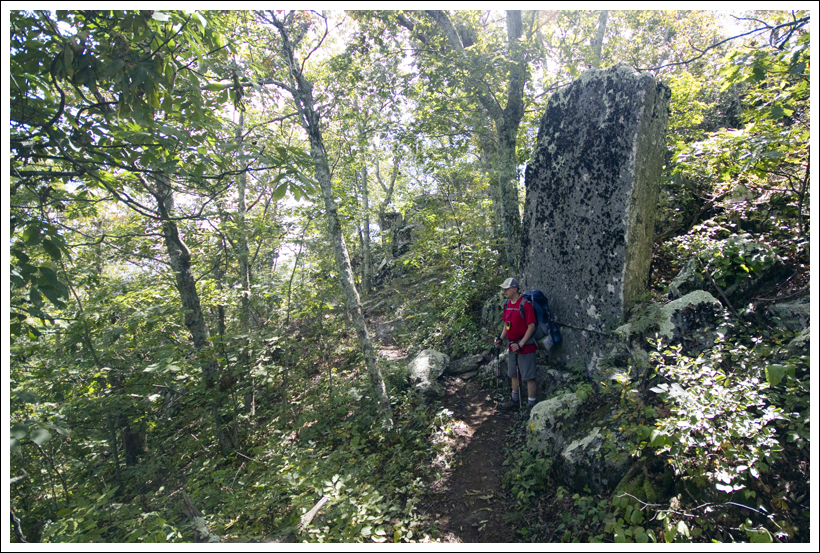