Neighbor Mountain – Jeremy’s Run Loop

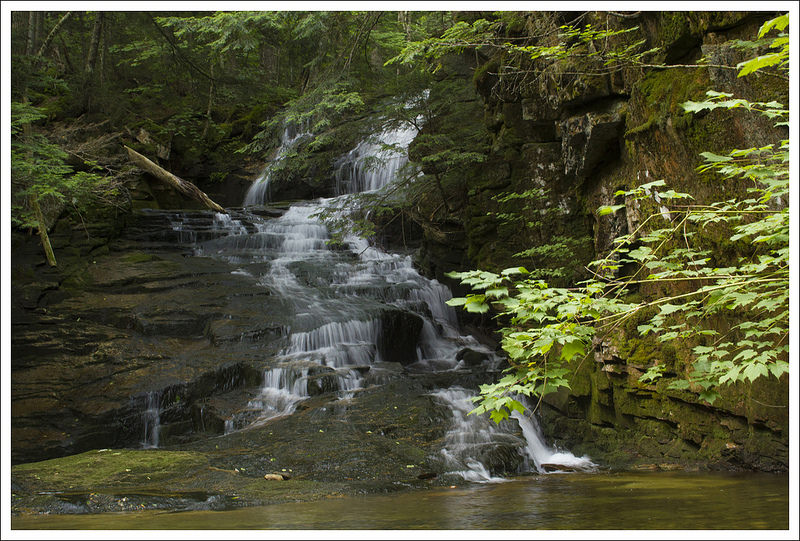
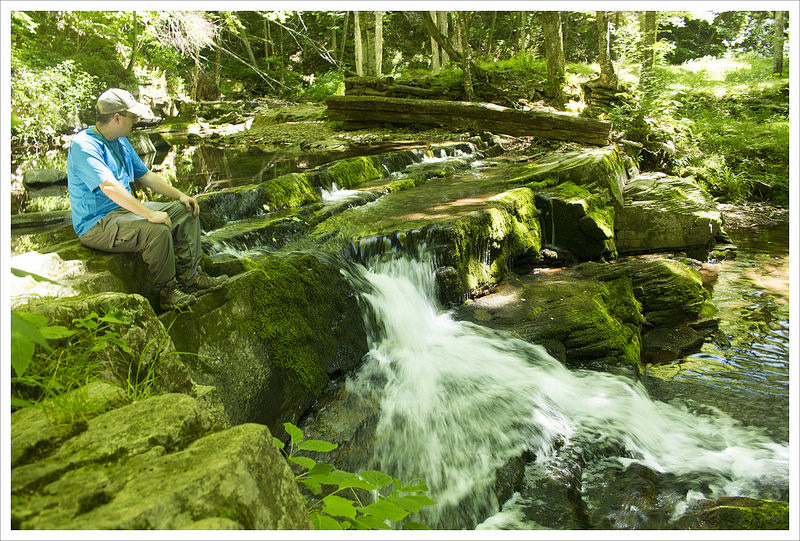
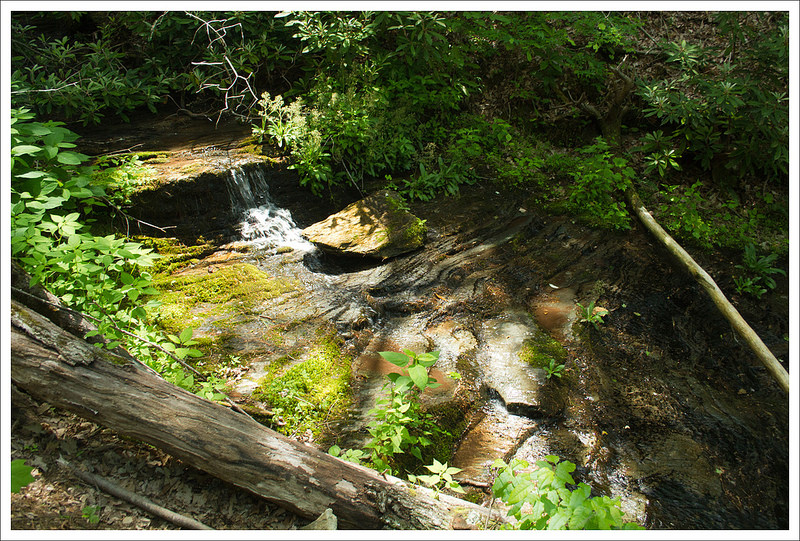
This 14.7 mile route offers wilderness, beautiful views, and stunning stream scenery (even a small waterfall!)  It’s a wonderful, moderate overnight backpacking loop; or a really challenging day hike.  We set out intending to camp along Jeremy’s Run, but it didn’t quite go as planned!

View the Full Album of Photos From This Hike

Views from the Neighbor Mountain Trail
The views on this loop hike come along the descent of Neighbor Mountain. Below: The trailhead at Elkwallow Picnic Area;  Hiking along in golden woods; Adam and Kris at the junction of the Appalachian Trail and Neighbor Mountain Trail.

Neighbor Mountain - Jeremys Run Start Hiking Along Junction of AT and Neighbor Mountain Trail

Christine Says…

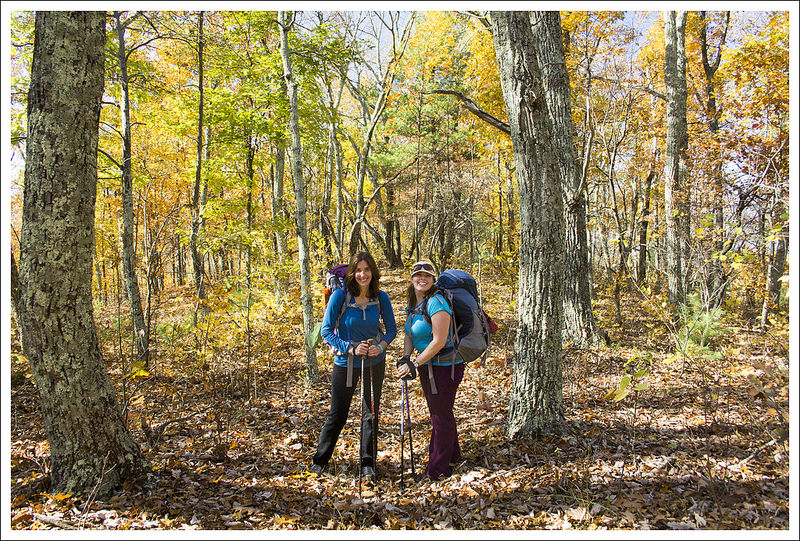
The final weekend of October 2014 was so beautiful – perfect, made-to-order backpacking weather. We decided to head out on one more overnighter before the weather turned cold. We invited our friend, Kris, to come along. She loves the outdoors as much as we do, and I was sure she’d enjoy this loop. Don’t miss her guest blogger entry later in this post! It had been several years since we last hiked in the vicinity of Jeremy’s Run, and I was really looking forward to camping along the beautiful stream.

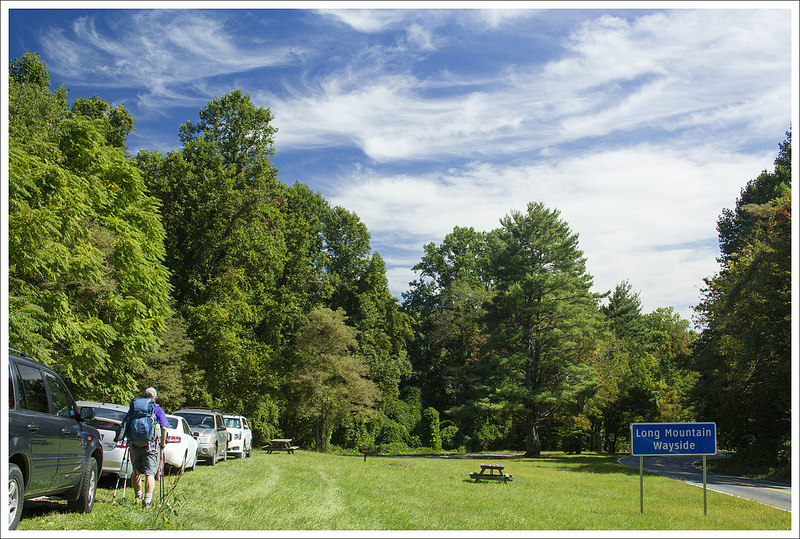
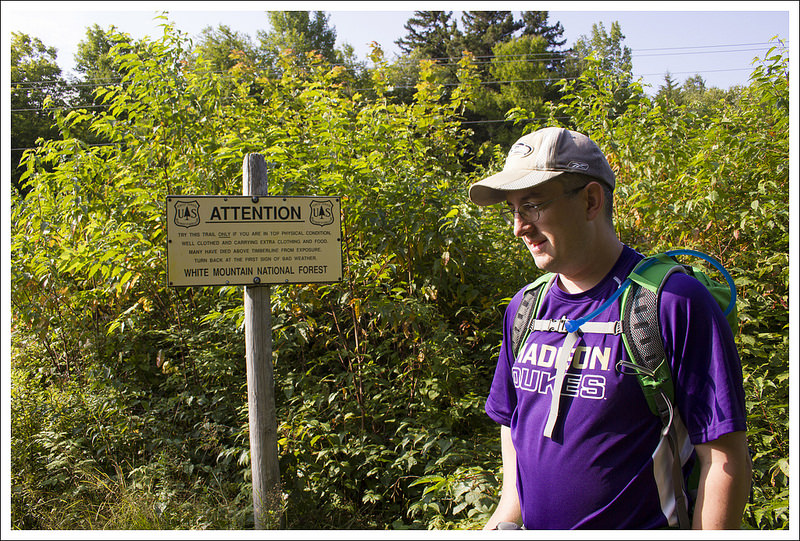
After stocking up on some lunch provisions at Elkwallow Wayside, we finally hit the trail around 11:00. We figured we had a little over eight miles of hiking on our first day, so starting late morning would get us to camp before 3:00, with plenty of daylight left to pitch tents, cook dinner, and relax.

Neighbor Mountain Trail
Hiking along the Neighbor Mountain Trail. Below: The fall color was still close to peak; Adam checks out a rock formation; At the summit of Neighbor Mountain.

Golden Woods Rock Formation Summit of Neighbor Mountain

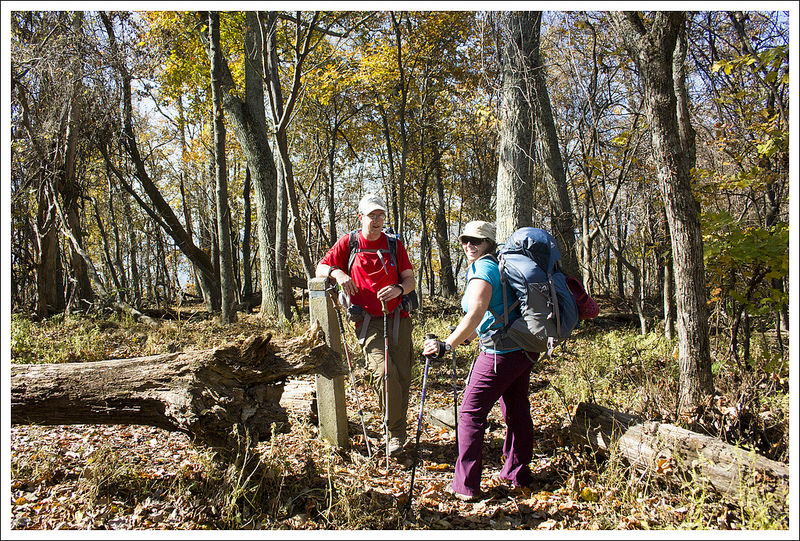
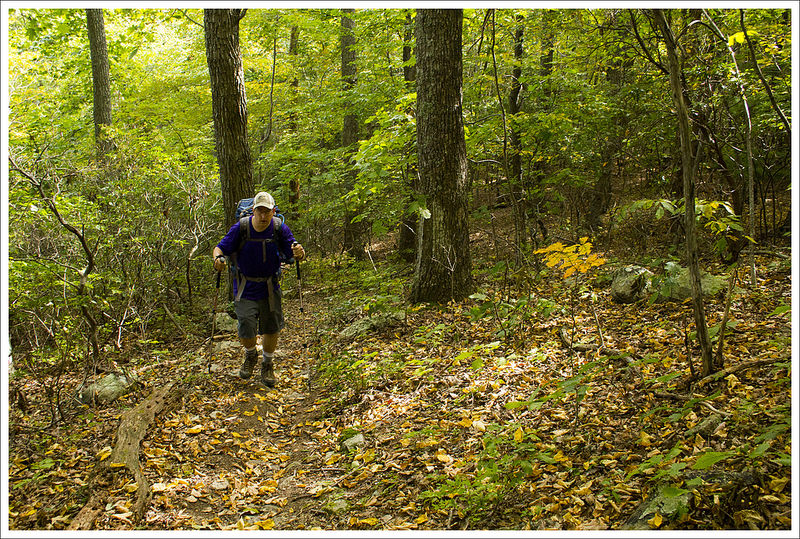
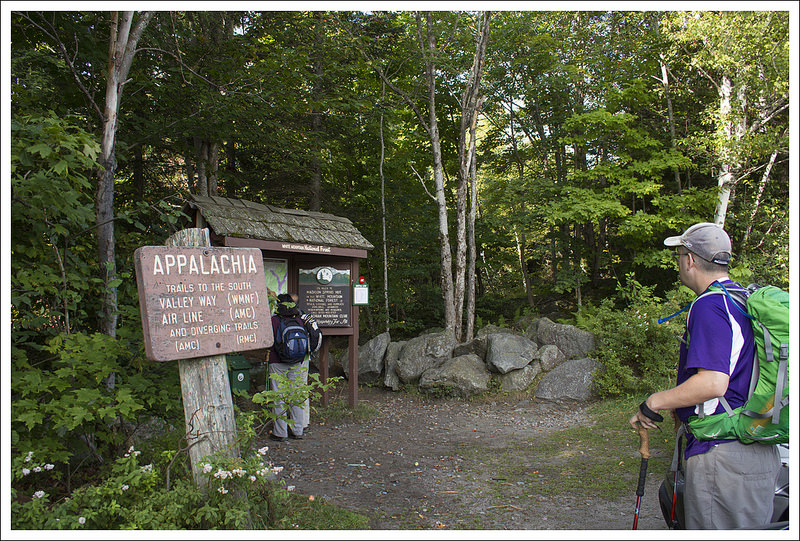
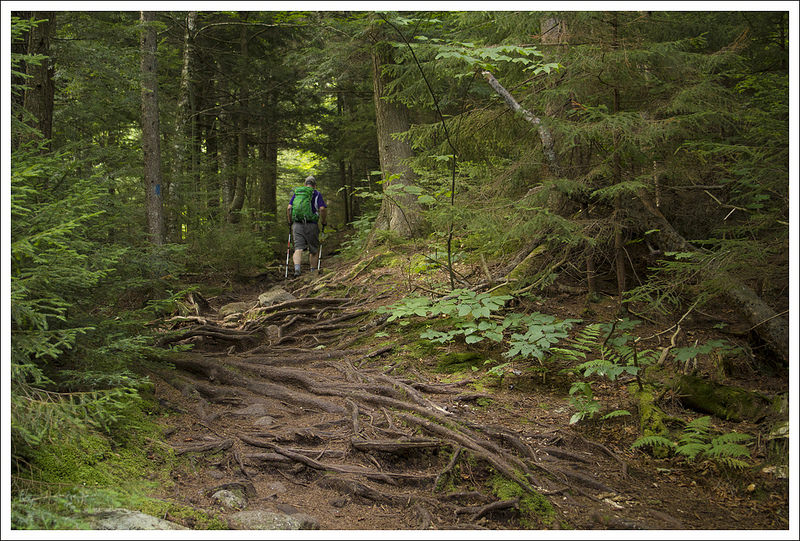
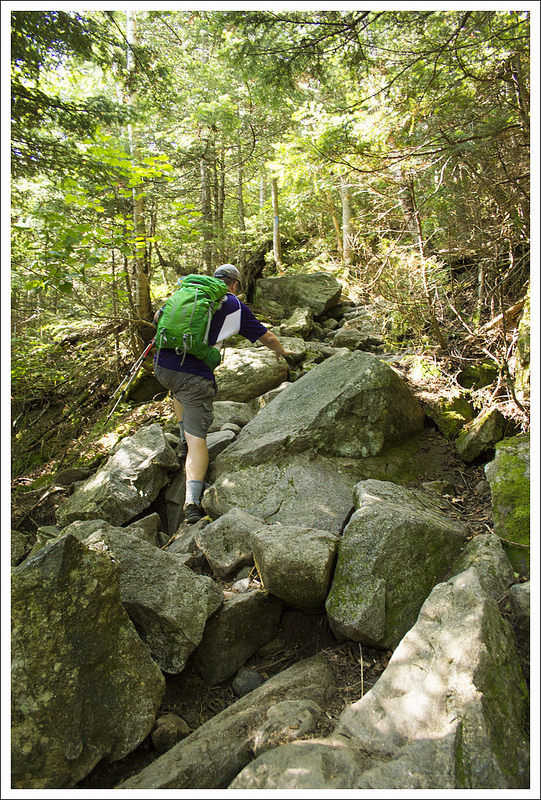
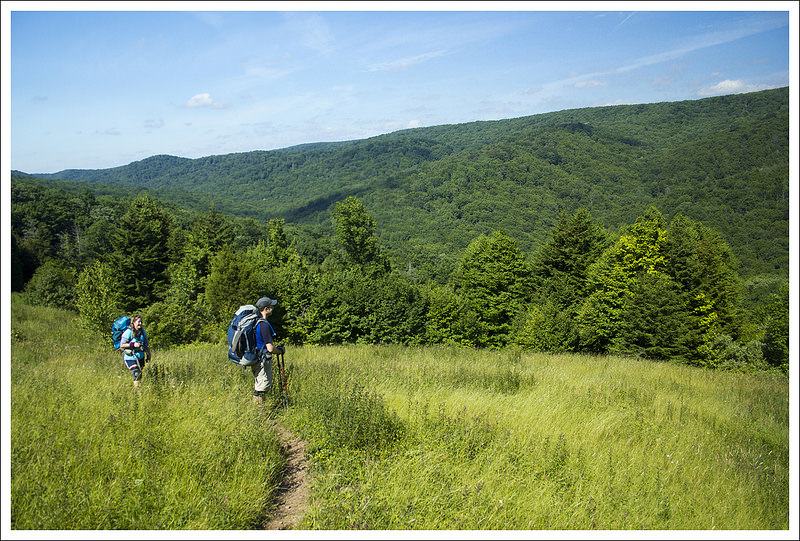
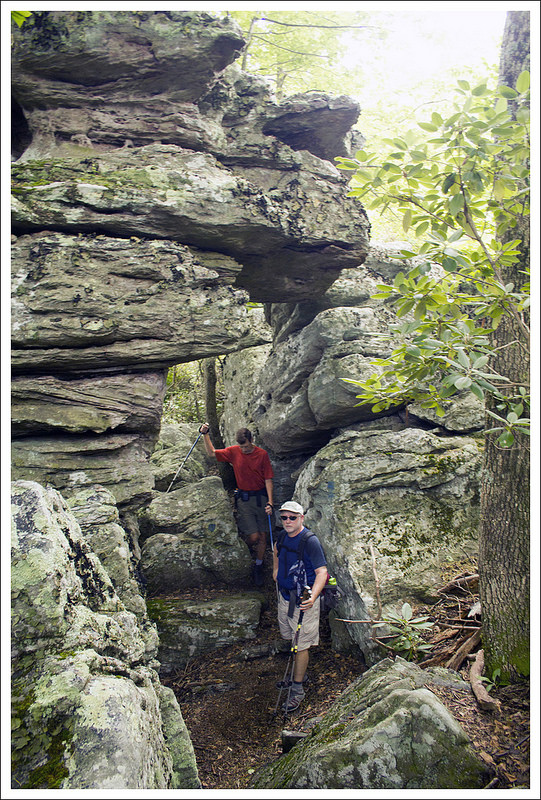
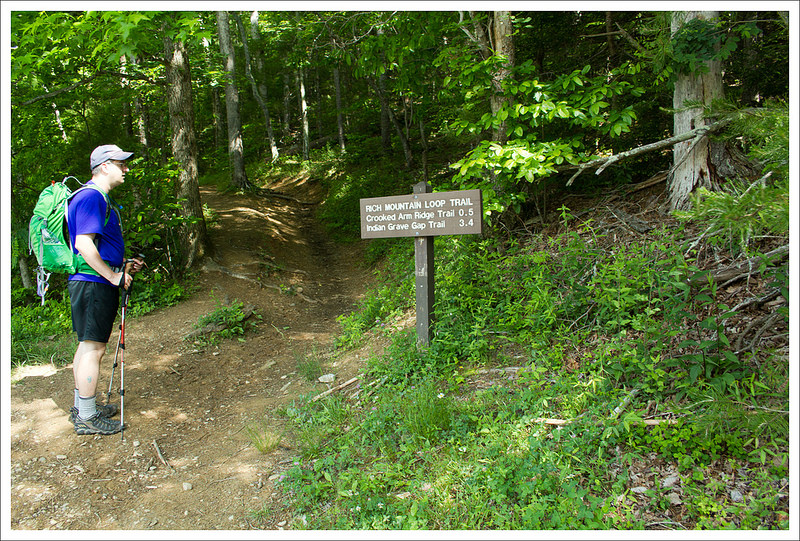
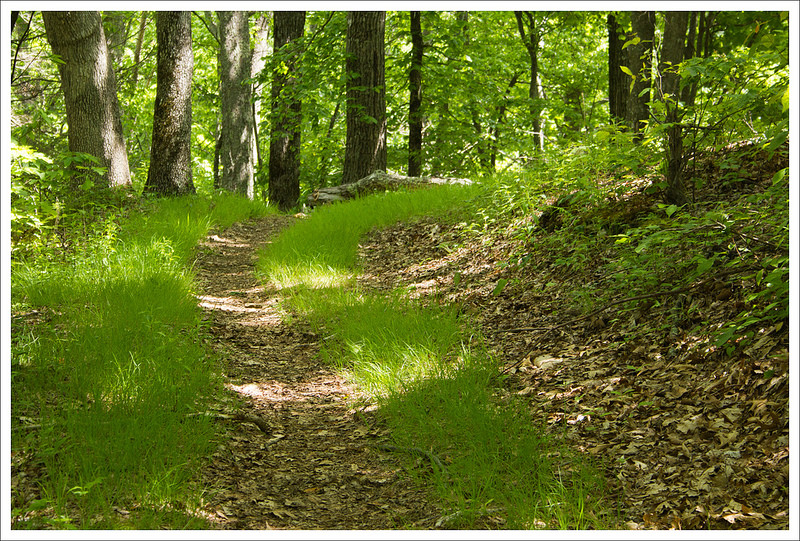
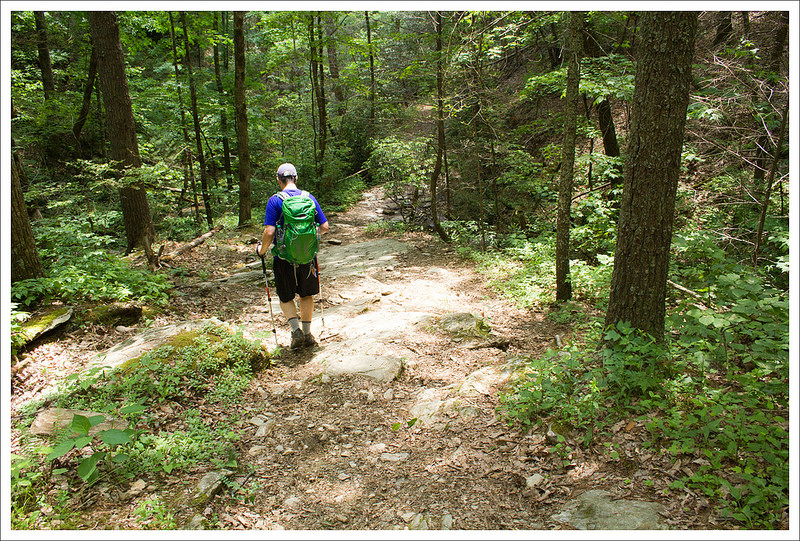
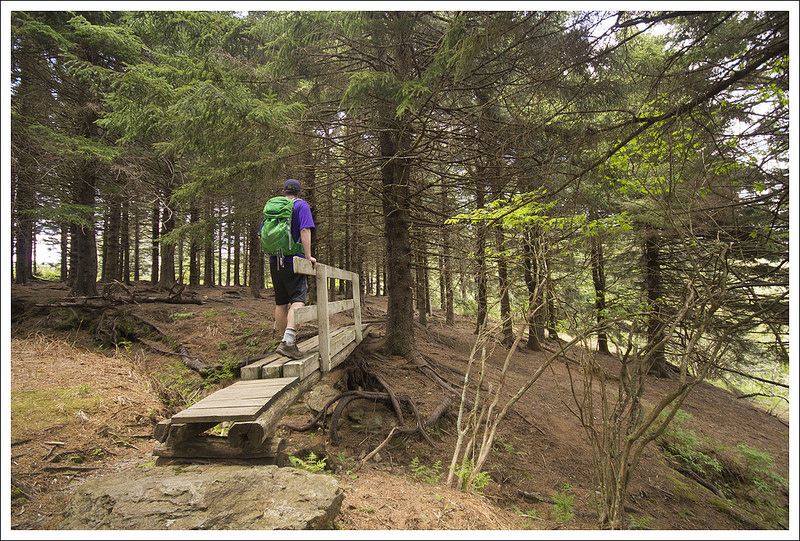
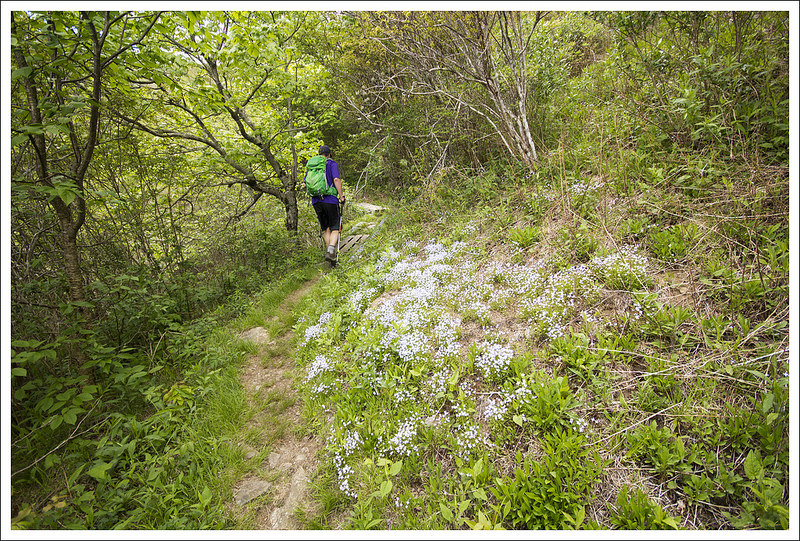
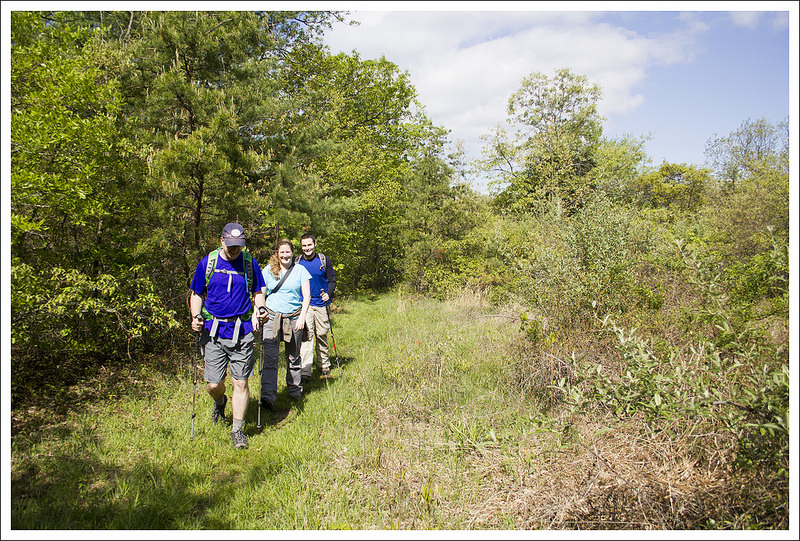
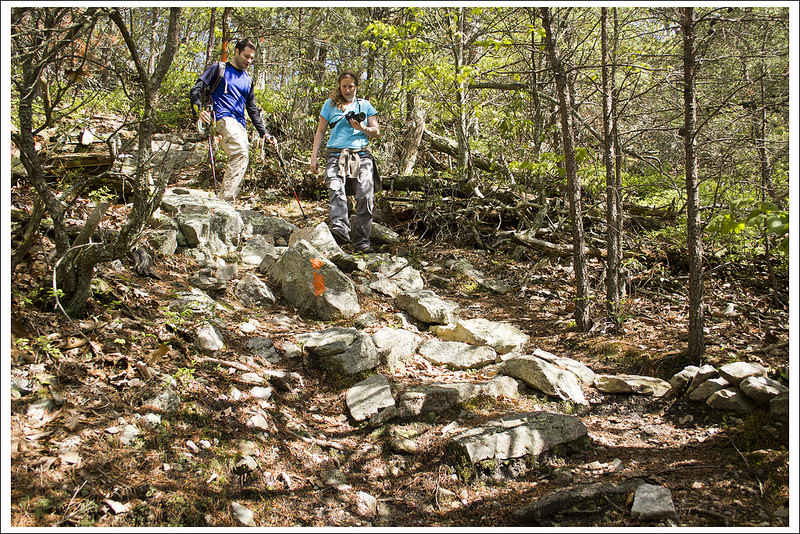
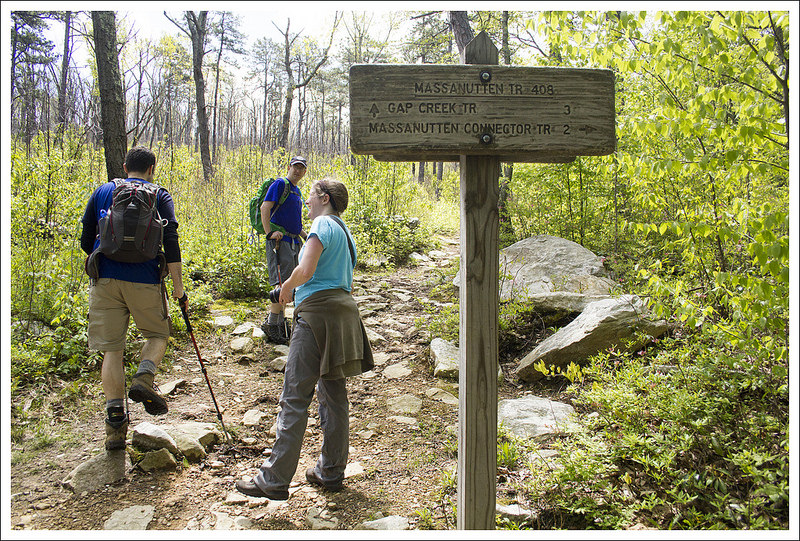
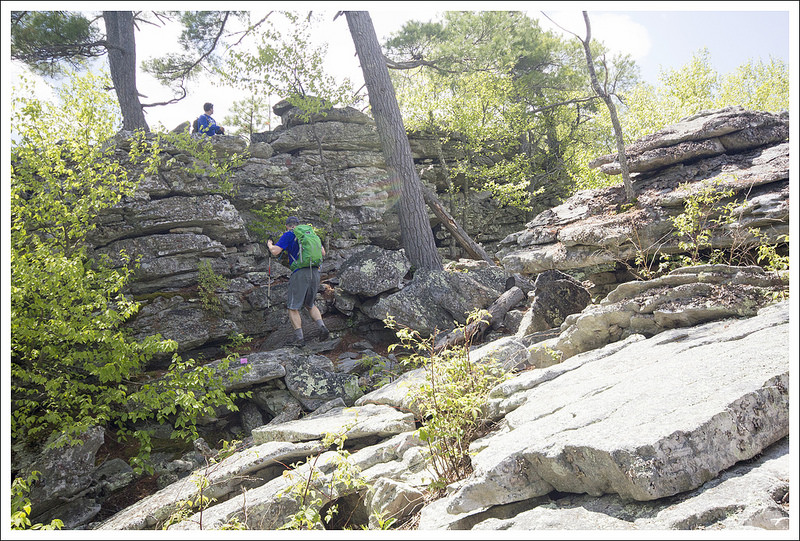
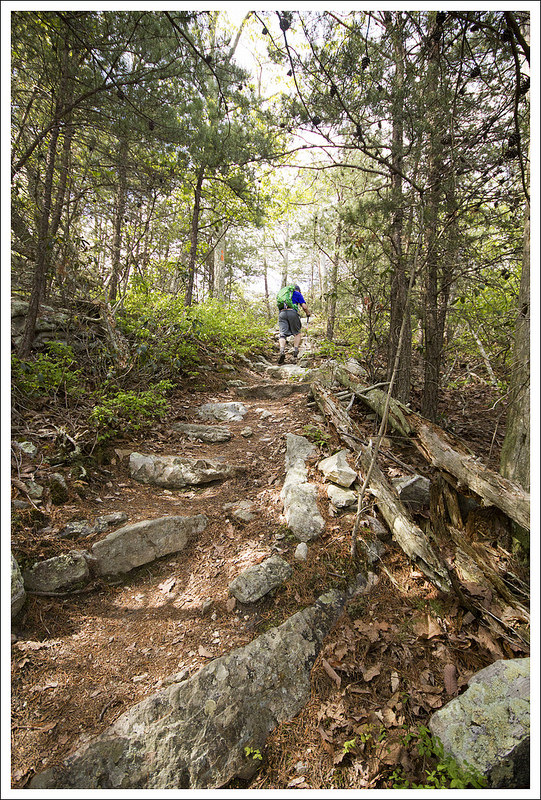
We started out at the Elkwallow Picnic Area. A short spur trail leads downhill to the junction with the white-blazed Appalachian Trail. The AT descends for about .3 of a mile before coming to a junction with the blue-blazed Jeremy’s Run Trail. Follow the Appalachian Trail, veering to the left. The trail ascends for a little over a mile before coming to a more level ridge. You’ll pass the junction with the Thorton River trail, continuing south on the AT. At just over four miles into the hike, you’ll reach the junction with the yellow-blazed Neighbor Mountain trail.

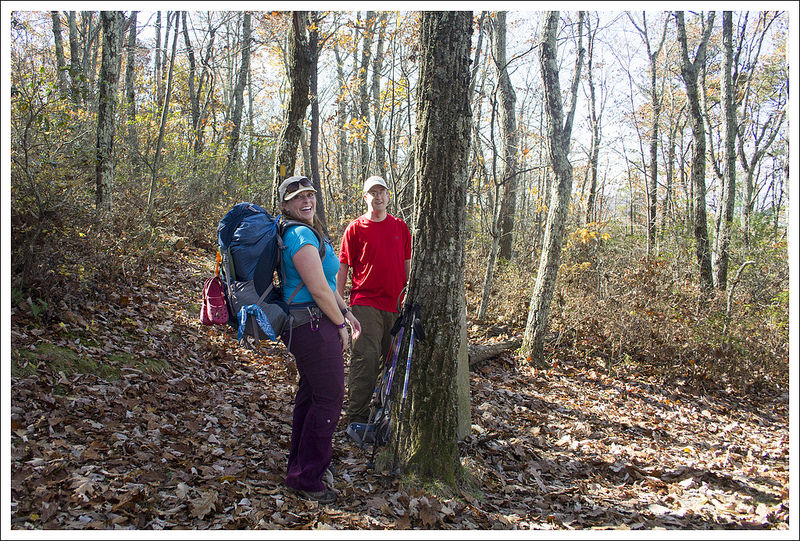
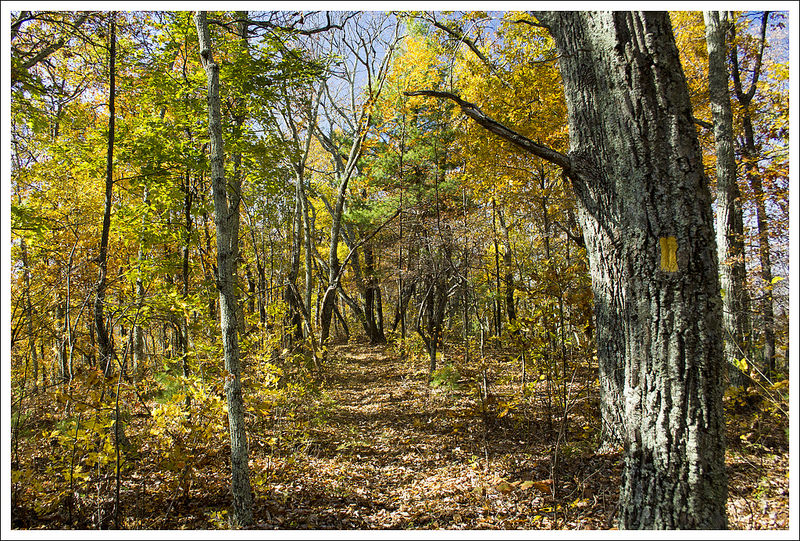
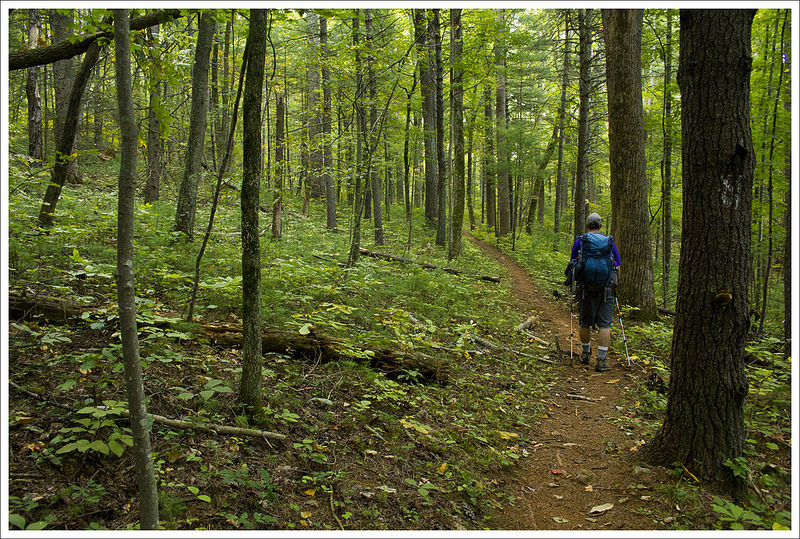
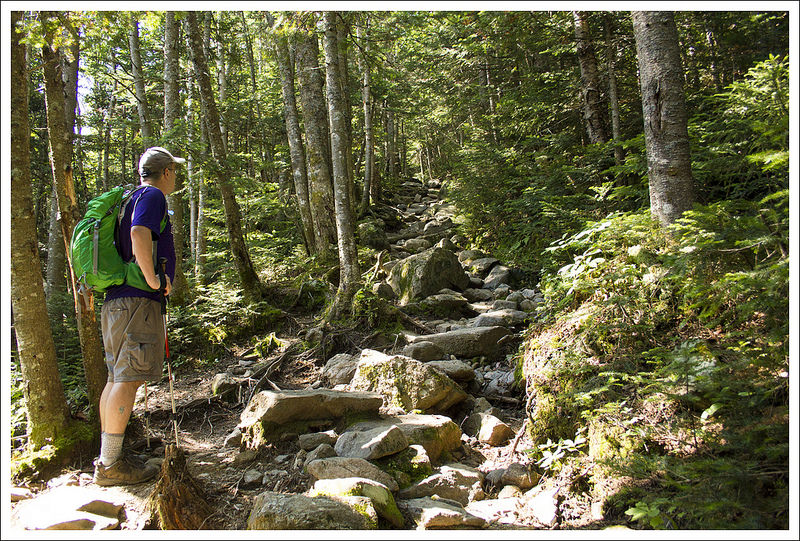
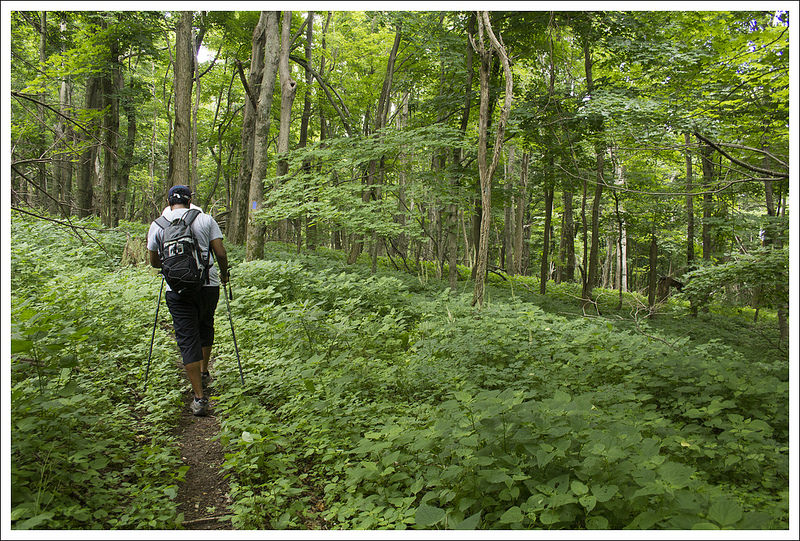
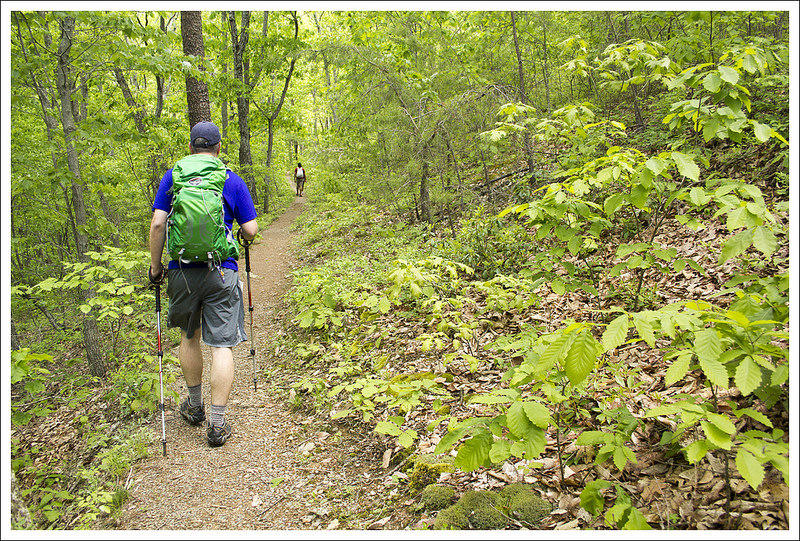
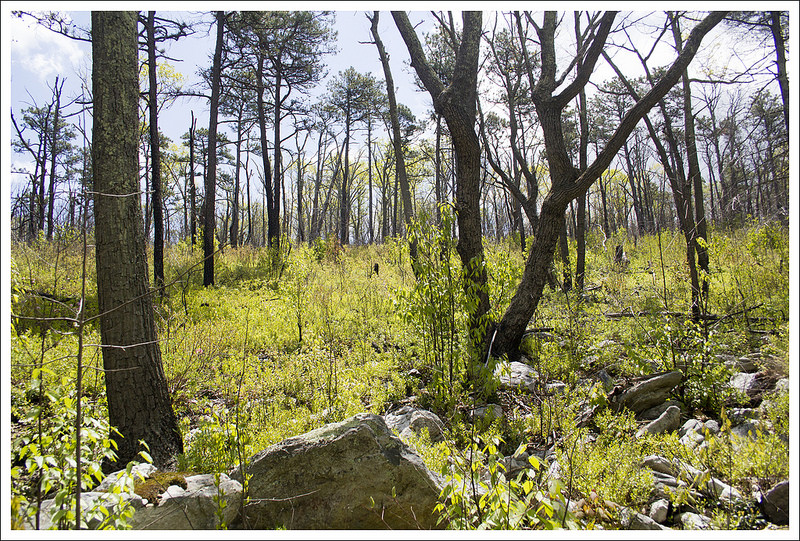
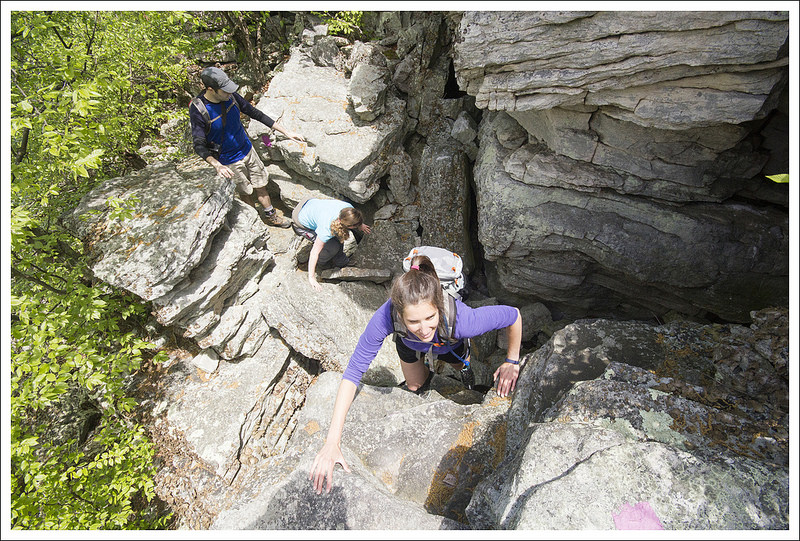
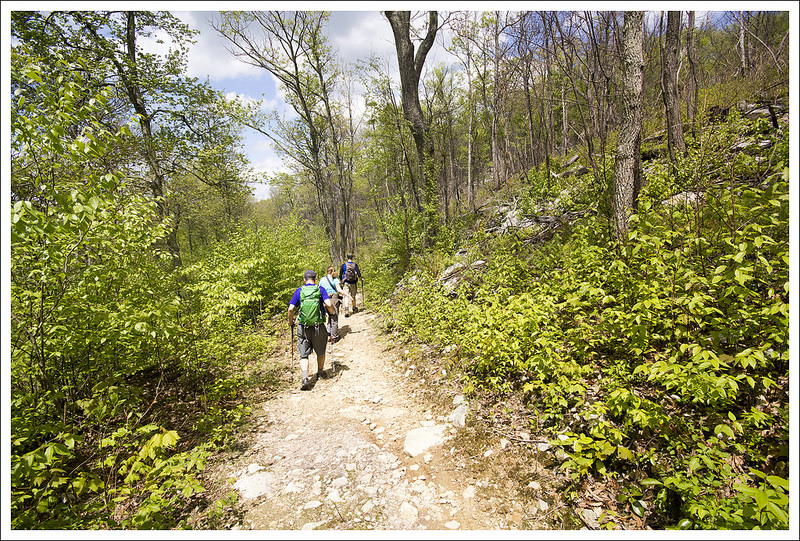
We decided this junction would be a nice place to stop for lunch (hummus – my favorite trail lunch of late – easy to eat and lots of quality calories!). After a relaxing, thirty-minute break, we took the turn onto the Neighbor Mountain trail. The path meandered across the ridge. For the first couple miles, it was mostly walking in the woods. There was a nice breeze and gorgeous sparkling sunshine was filtering through golden leaves. It was everything you want fall to be!

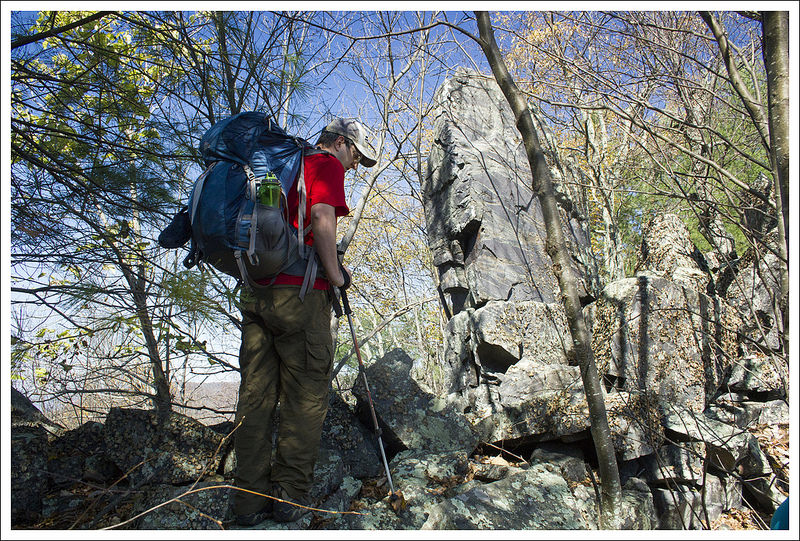
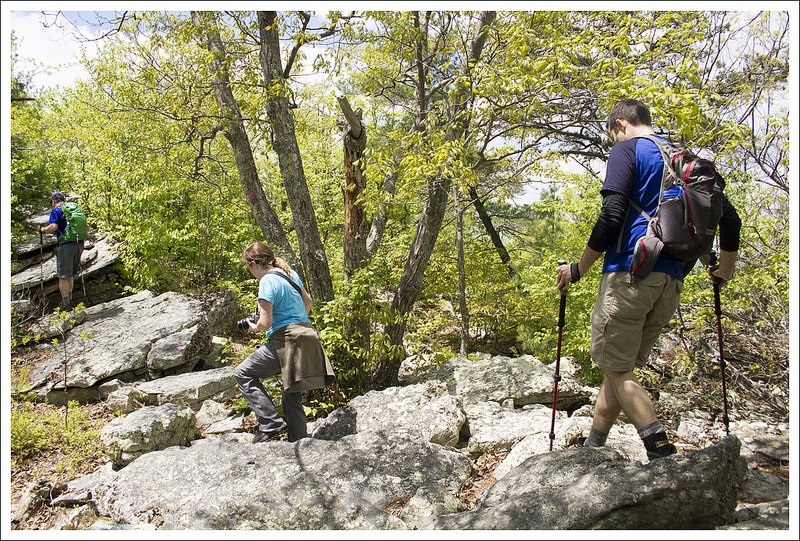
Even though there is no view, the summit of Neighbor Mountain is marked with a cement post. At the summit, I noticed I had picked up a ‘hitchhiker’ along the way – a walking stick bug was clinging to my pants. I wonder how far he had come with me. I picked him off, and set him on a fallen log off the trail.

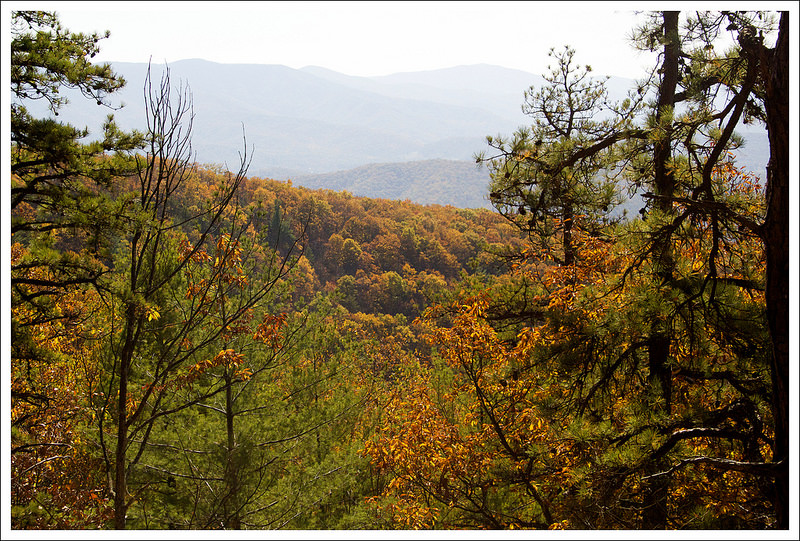
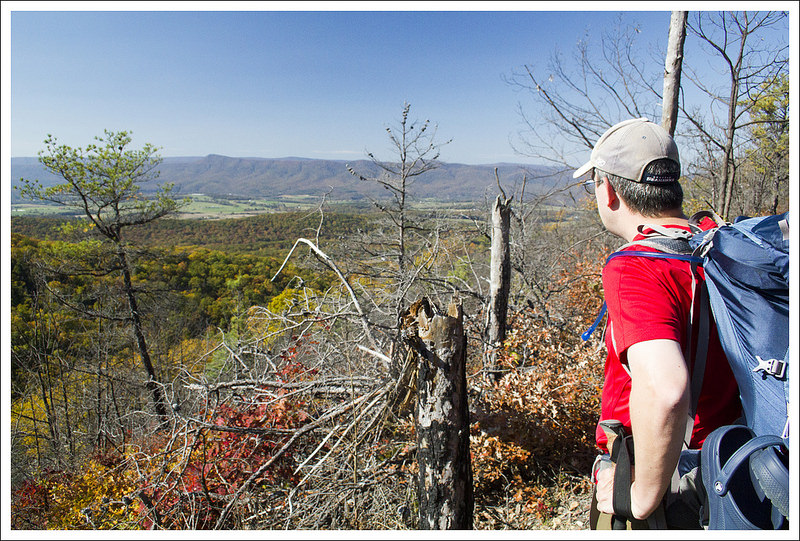
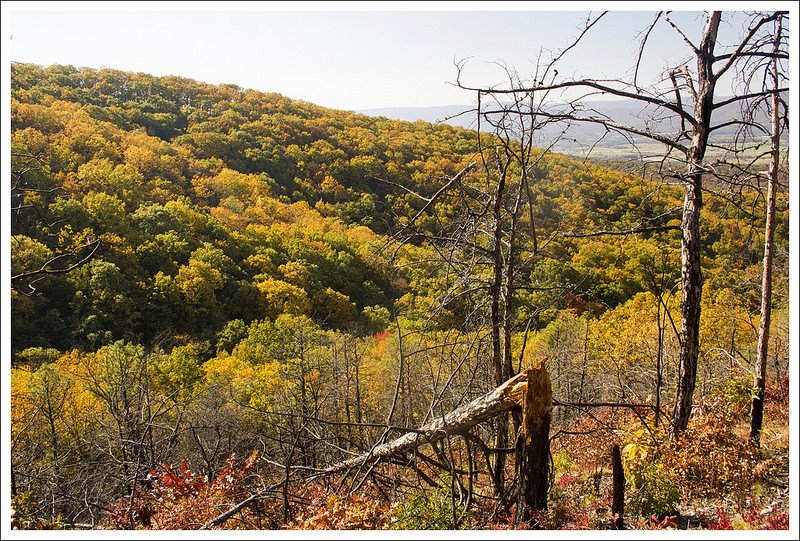
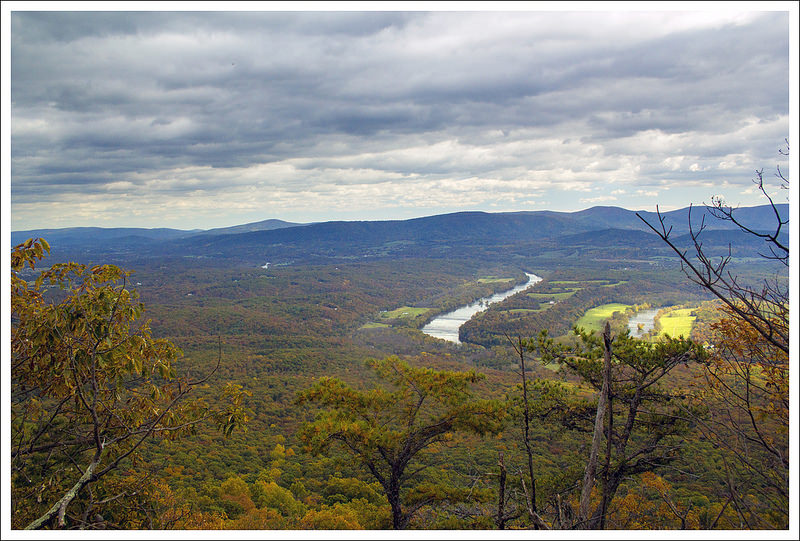
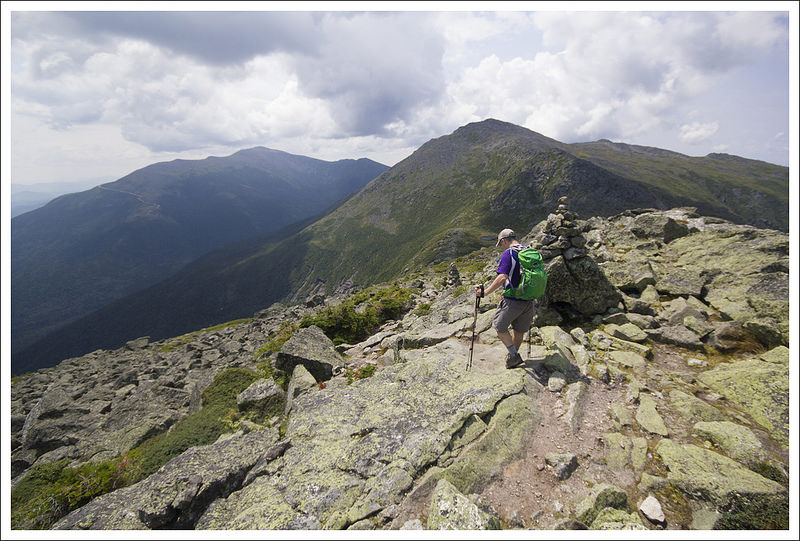
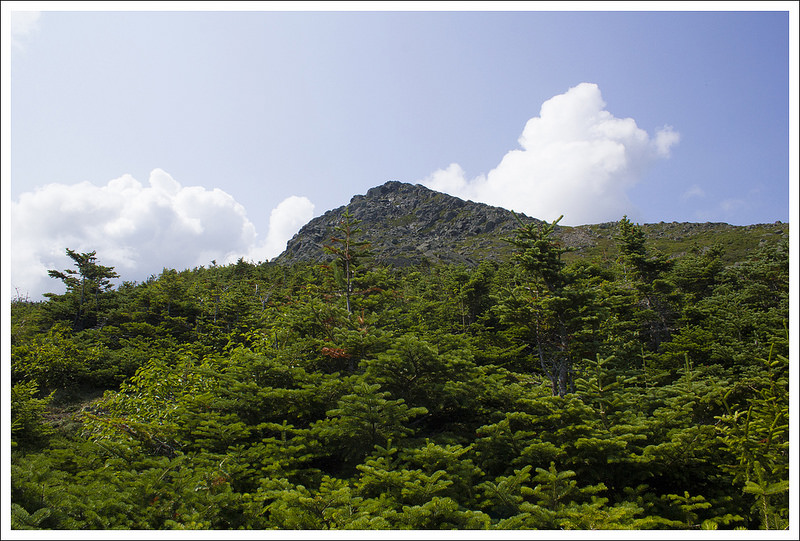
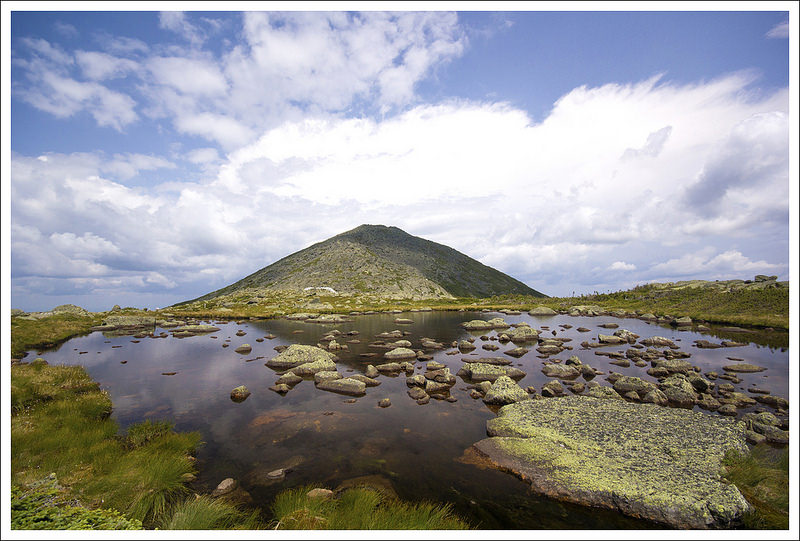
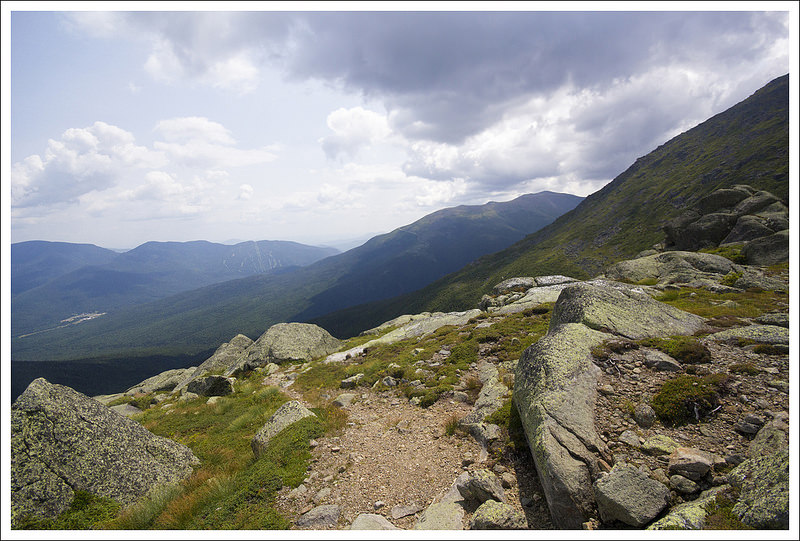
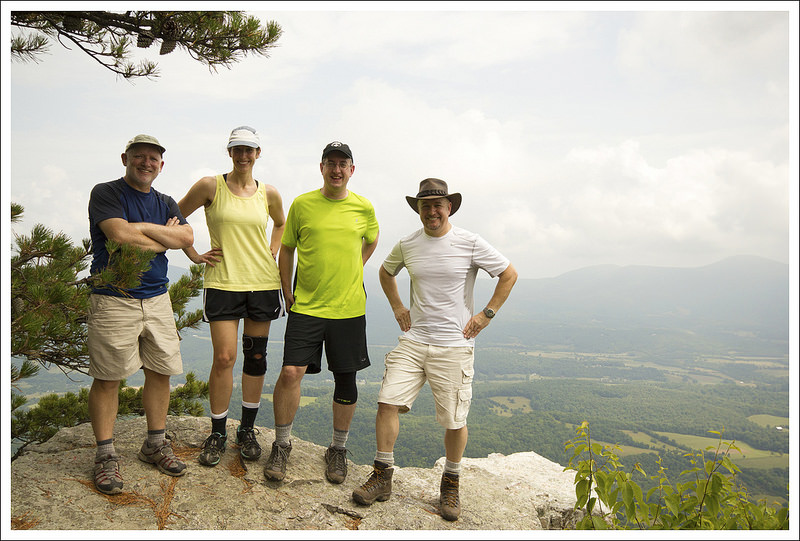
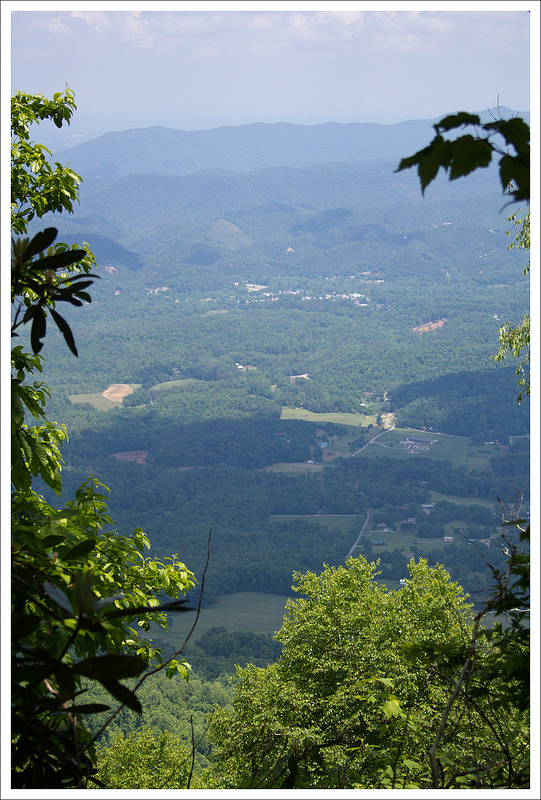
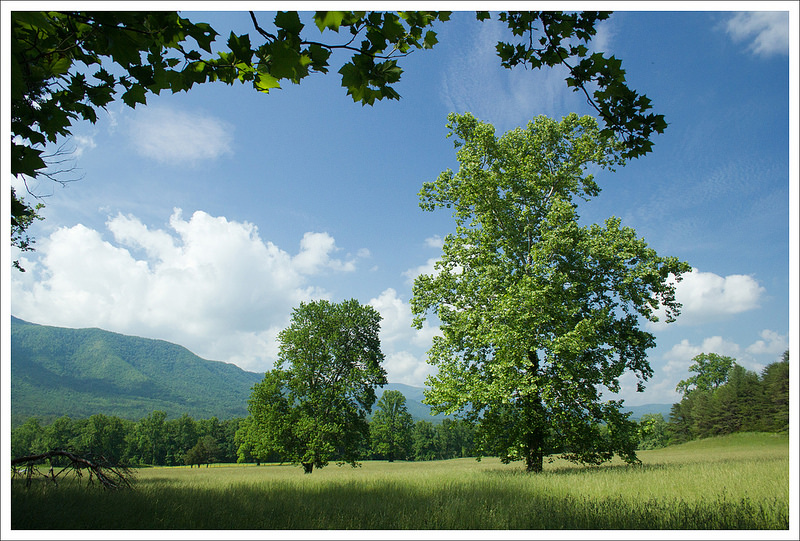
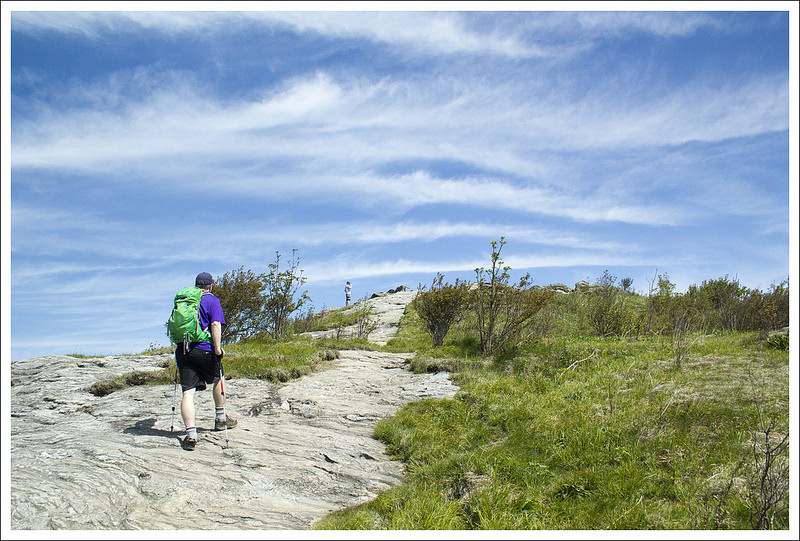
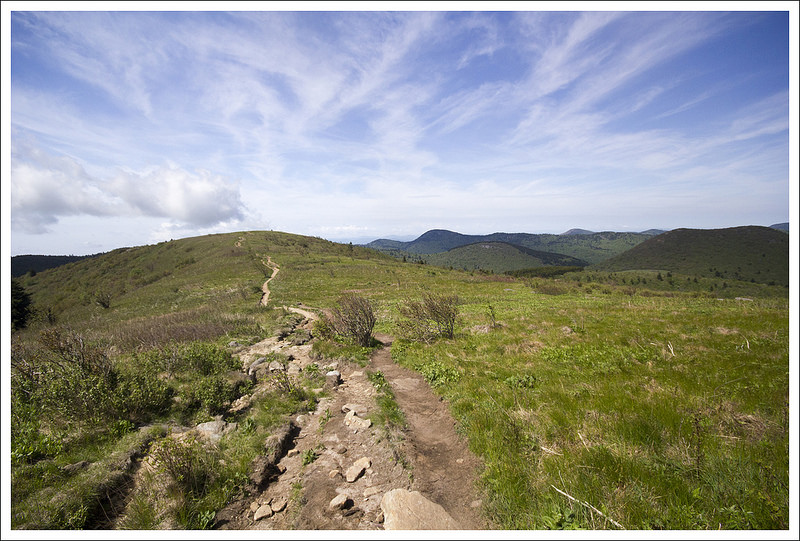
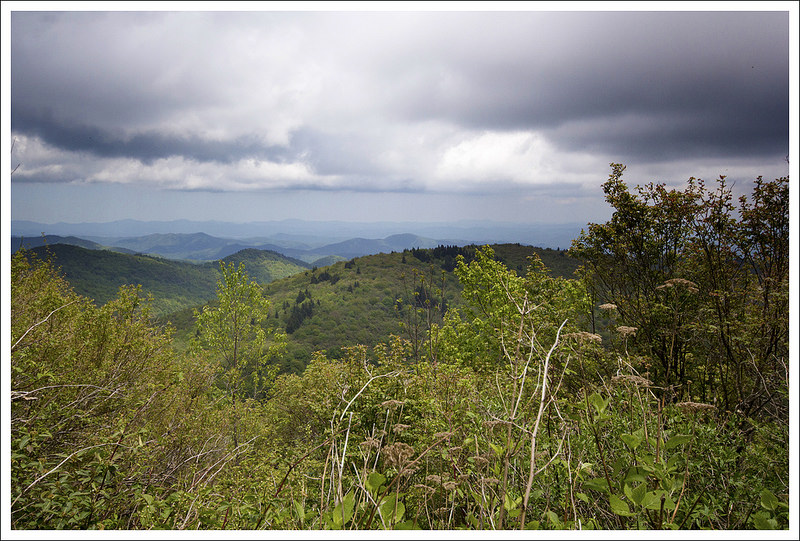
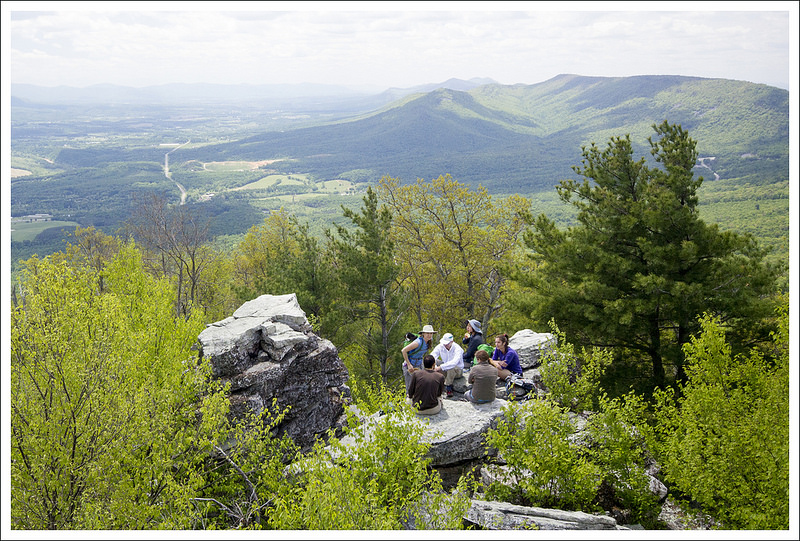
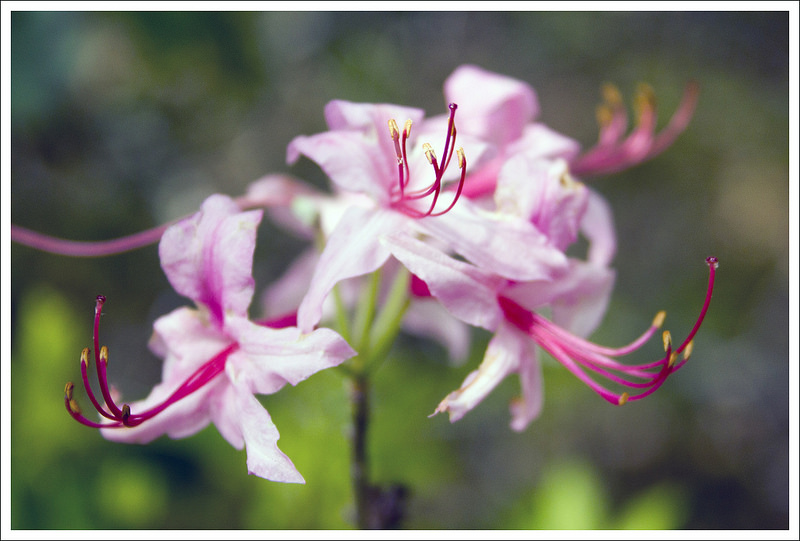
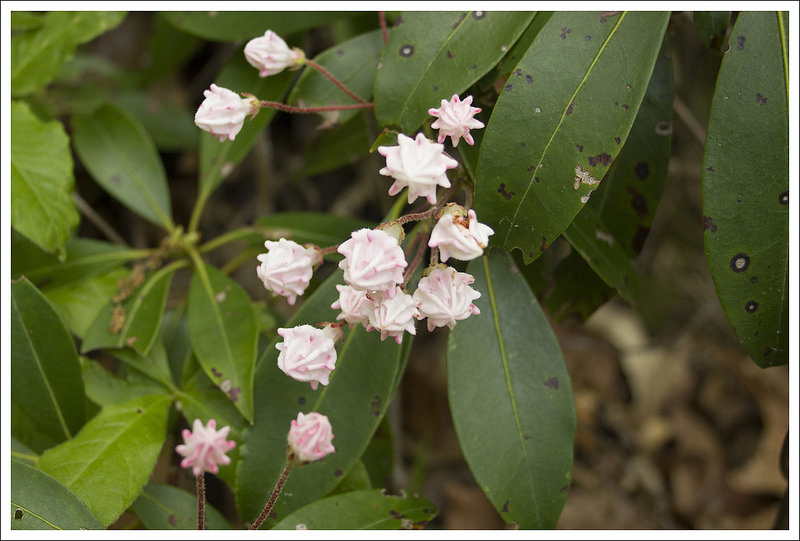
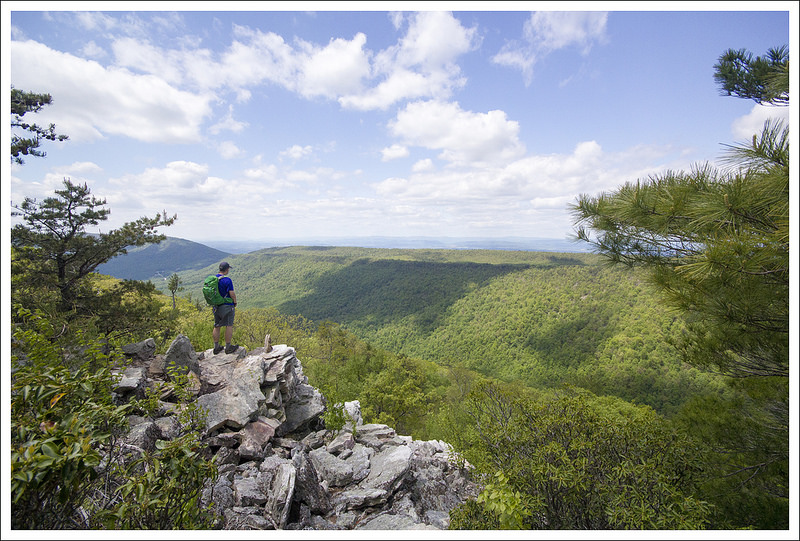
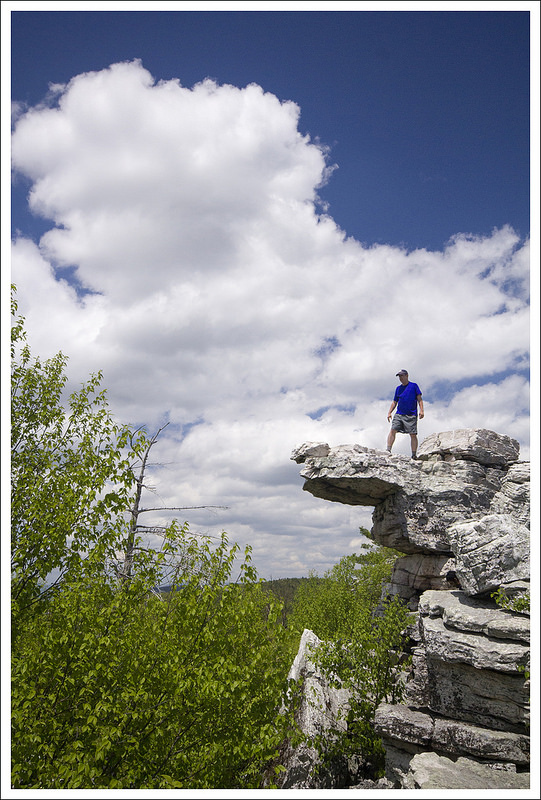
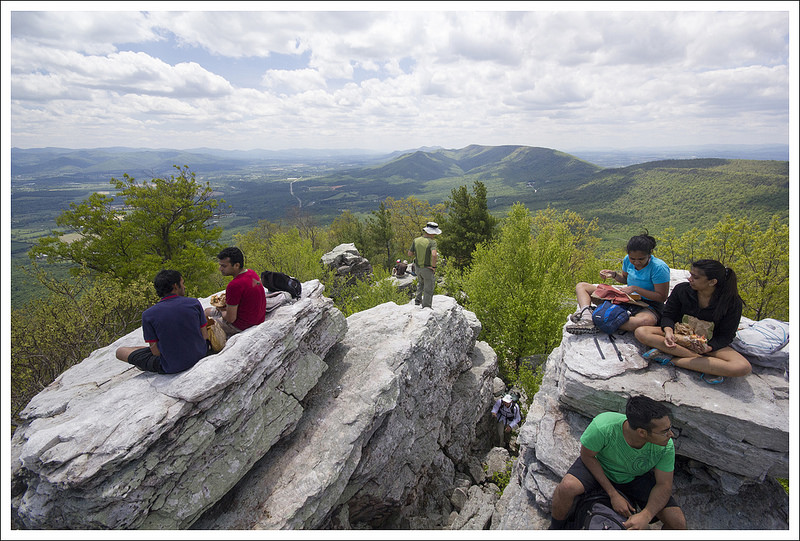
Between six and seven miles into the hike, there are a few excellent views of the Massanutten ridge and Three Sisters. There was a forest fire in this area several years ago, so the view was pretty open and expansive. We all paused a while to enjoy the fall foliage.  It was so wonderful to see colorful mountains rolling our before us. We talked about how privileged and blessed we all felt to be out on such an amazing day!

View of Valley
Adam enjoys a view of the valley and mountains to the west. Below: This part of Neighbor Mountain burned in 2012.  Alot of damage is still evident; Fall color; Adam descends Neighbor Mountain toward Jeremys Run.

Neighbor Mountain Descent Neighbor Mountain Descent Neighbor Mountain Descent

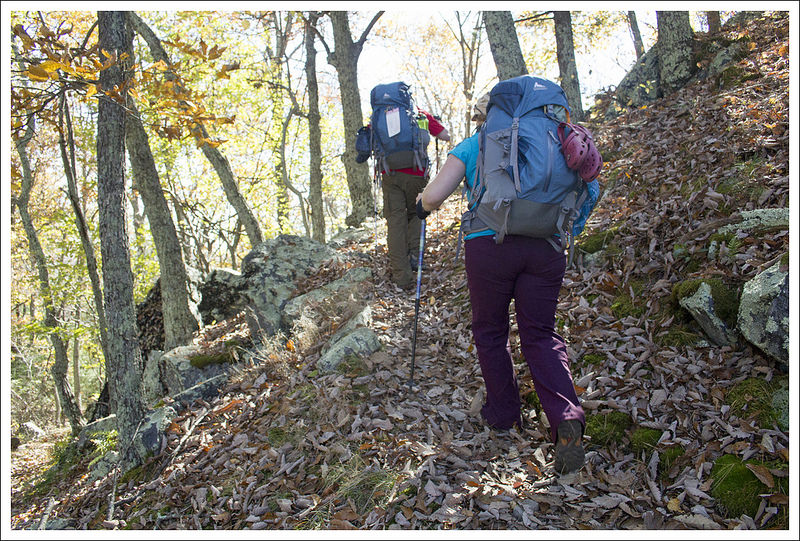
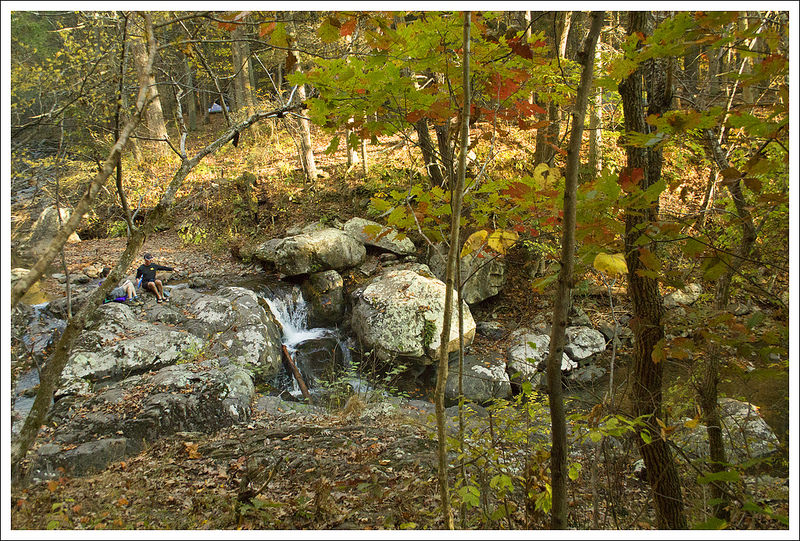
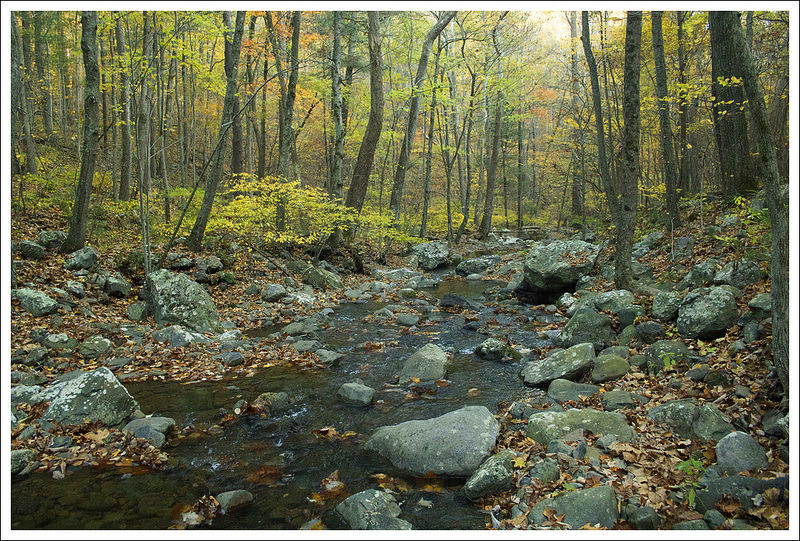
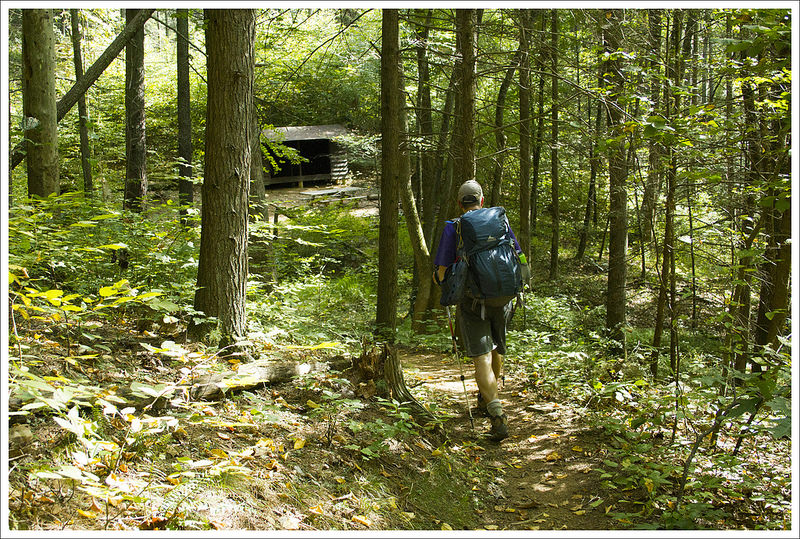
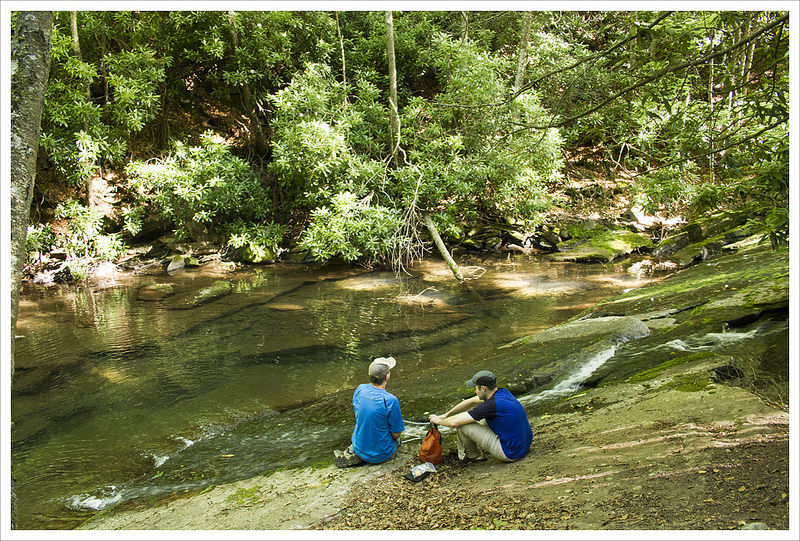
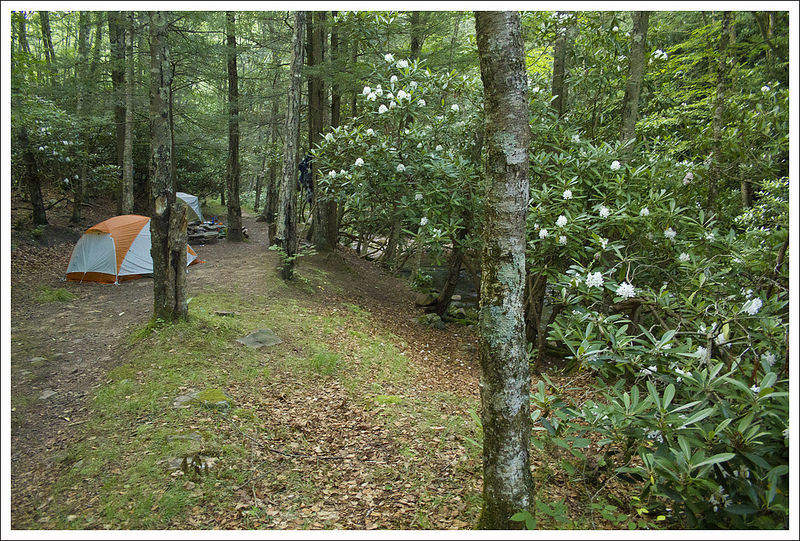
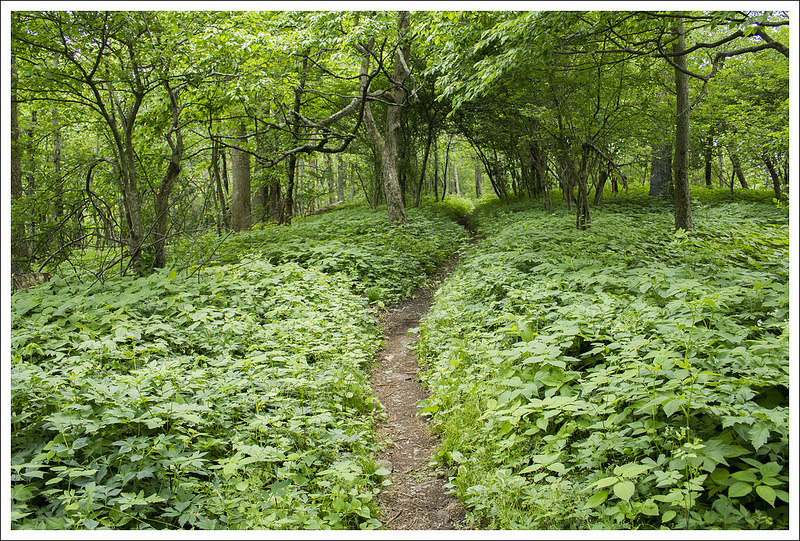
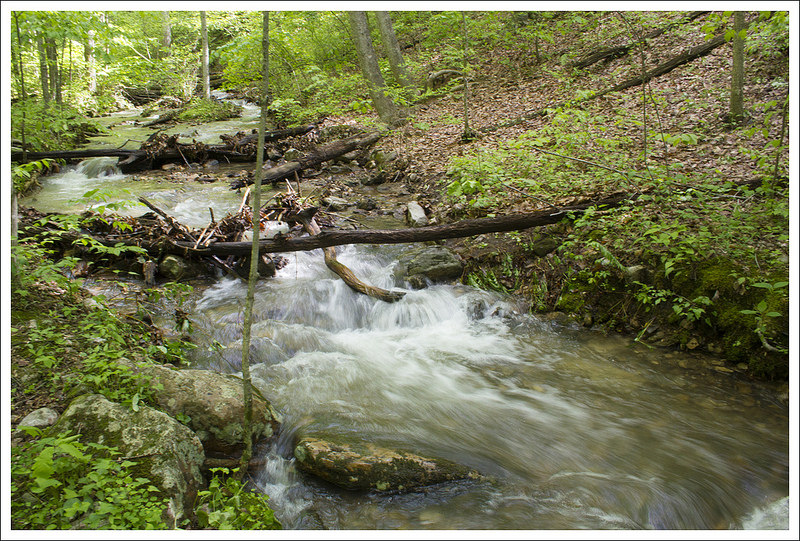
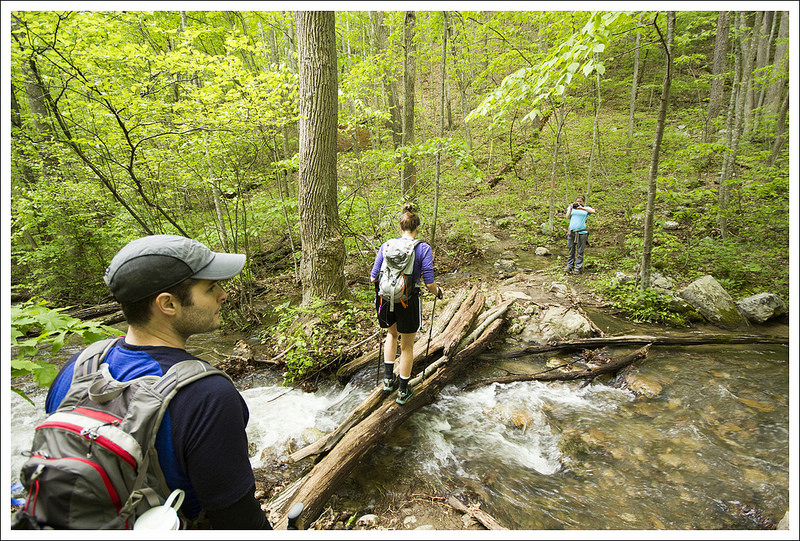
The last mile and a half of the day was steady downhill, meandering across switchbacks until the Neighbor Mountain trail reached the bottom of the valley and Jeremy’s Run. As soon as you reach the stream, campsites are everywhere. The first few we passed were already taken, so we ended up returning to the hidden campsite we used several years earlier. It’s a flat spot under the trees shortly before the first water crossing.

And here’s where the story takes an unexpected turn…

Adam Says…

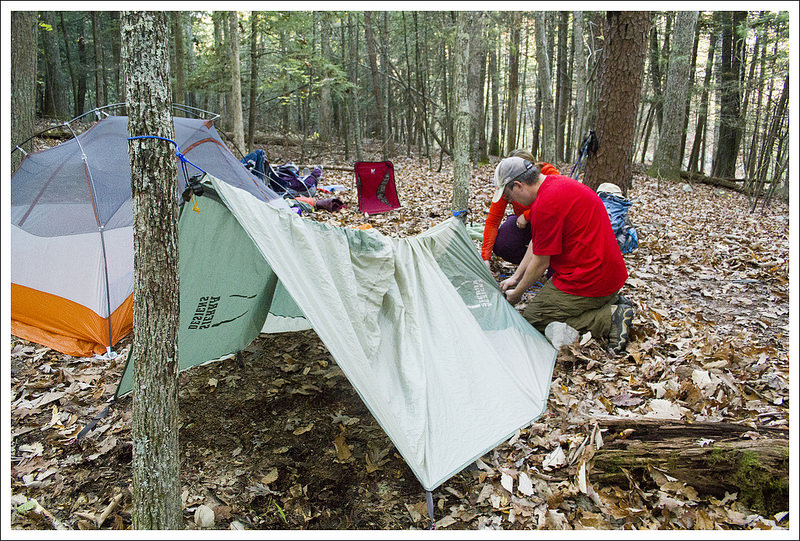
We all worked on pitching our tents and setting up camp. I set up our tent while Christine worked on inflating our sleeping pads. Kris was on the other side of the clearing working on setting up the one-person tent she had borrowed, when she suddenly she groaned, “Uh… guys – I think we might have a little problem.”

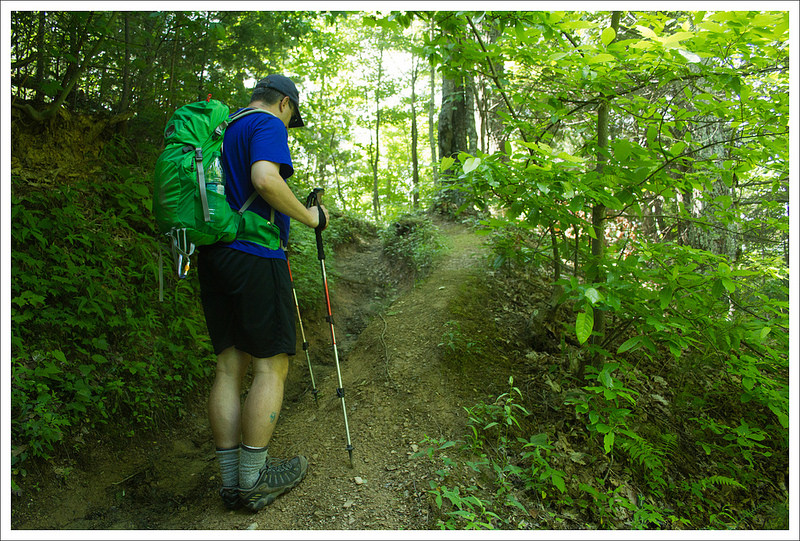
As it turned out, the tent bag only held the rain fly and the poles. The ground cloth and the actual tent were missing in action. She hadn’t checked the bag before hitting the trail.  We spent the next 45 minutes trying to improvise a shelter with everything and anything we had. We tried piling three people in our Big Agnes Copper Spur UL2 (bad idea). We discussed whether or not the evening would be suitable for cowboy camping under the stars. We talked through a few different scenarios: 1) we all hike back immediately, 2) I sleep under the tarp while Kris and Christine sleep in the tent, or 3) I hike back to the car tonight and pick them up in the morning.  I was least excited about the second option because the area felt tick-infested with the wet leaves.  We debated the options for a few minutes, but ultimately, we decided the best choice was to keep the group together and make our backpacking trip into a very long day hike.

Failed Camp
We tried to find a way to rig up shelter, but in the end we decided it was better to hike out. Below: Crossing the first stream and trying to eat something with enough calories to hike out happily; Adam doing one of many stream crossings; The best campsite along Jeremys Run sits above a waterfall.

Crossing Jeremys Run Crossing Jeremys Run Waterfall Campsite on Jeremy Run

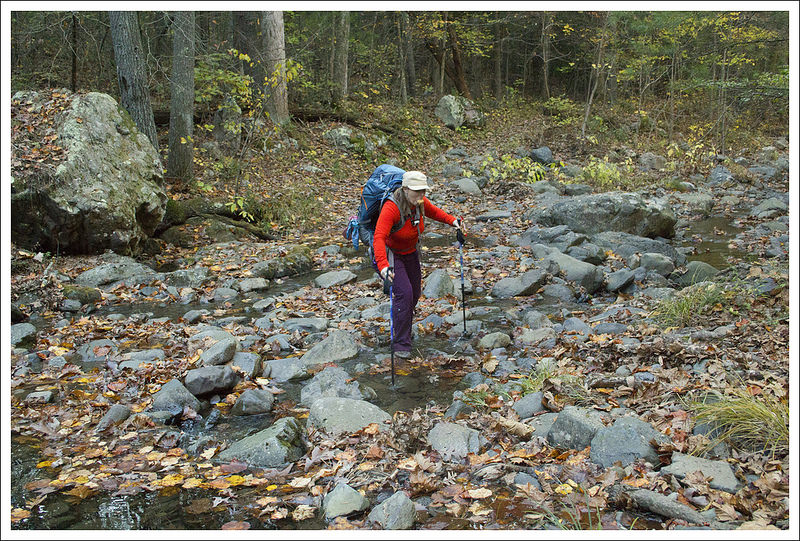
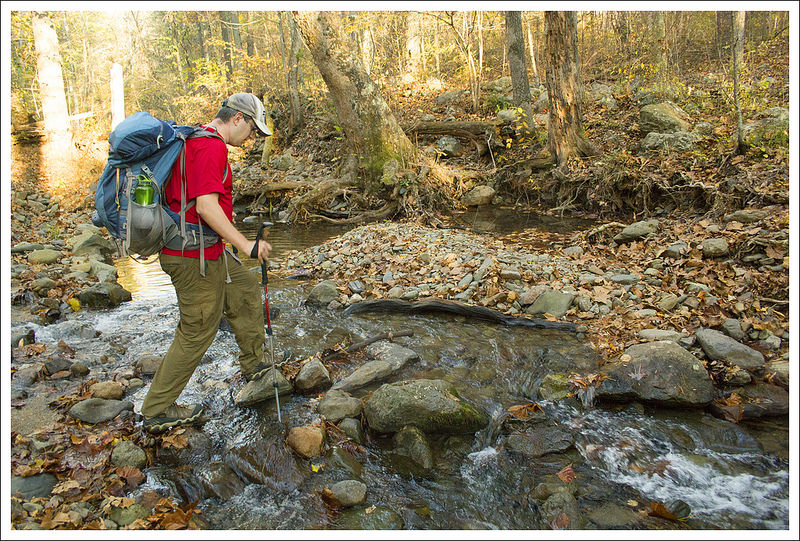
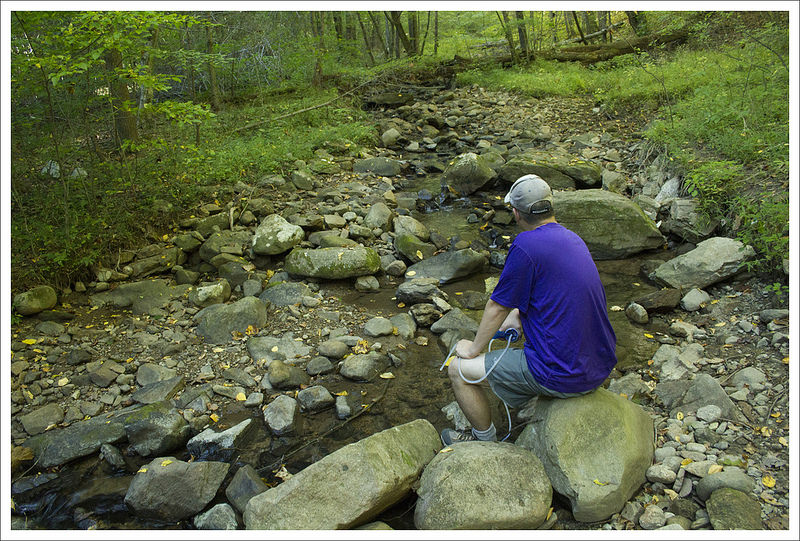
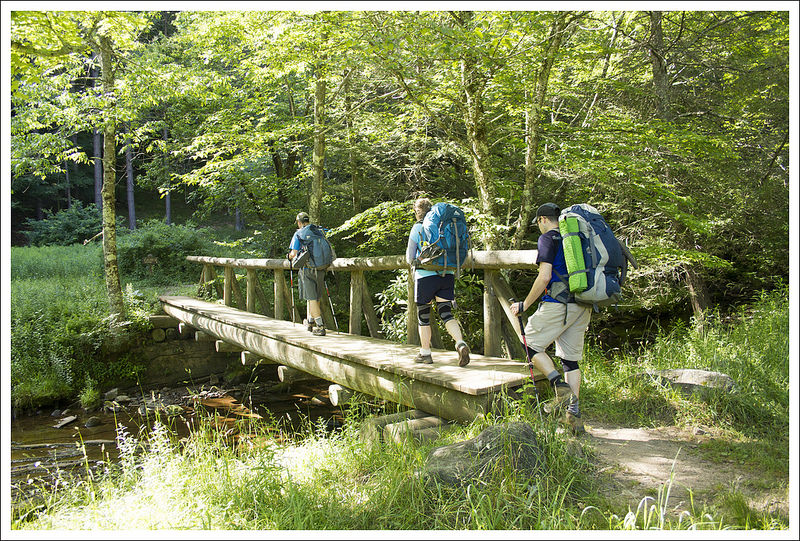
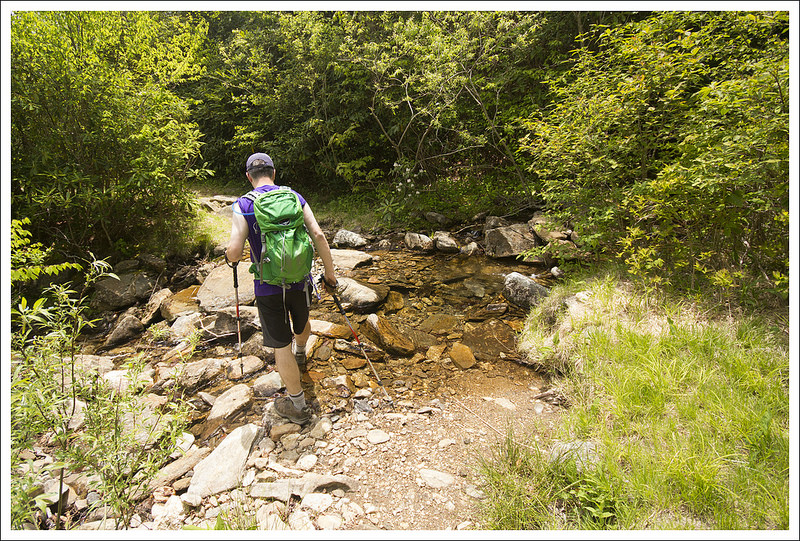
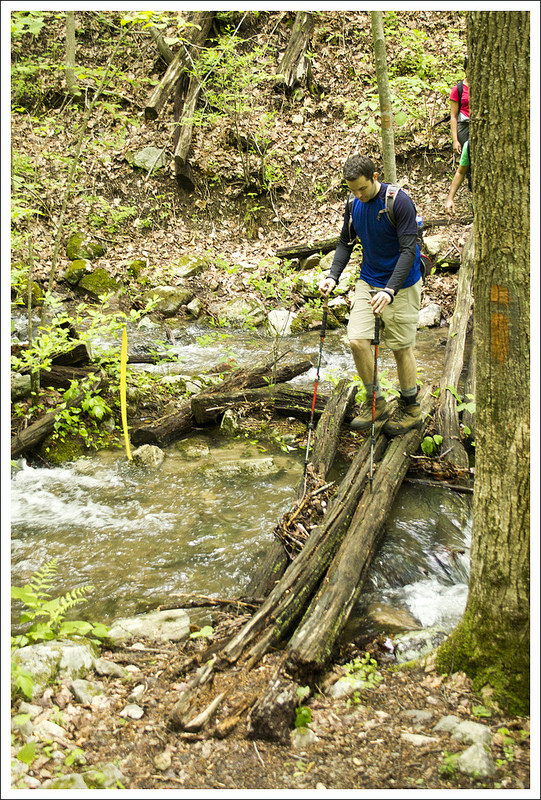
We knew we only had a little over an hour of daylight left – the sun sets early behind the mountains surrounding Jeremy’s Run.  We rushed to pack everything up as quickly as we could. Cooking a hot dinner would have required getting more water, so we opted to just eat a few snacks from our bags.   We started off at a quick pace.  I twisted my knee at the first major water crossing we had to make, which made the rest of the trip pretty painful. But sometimes, you just have to suck it up and hike.

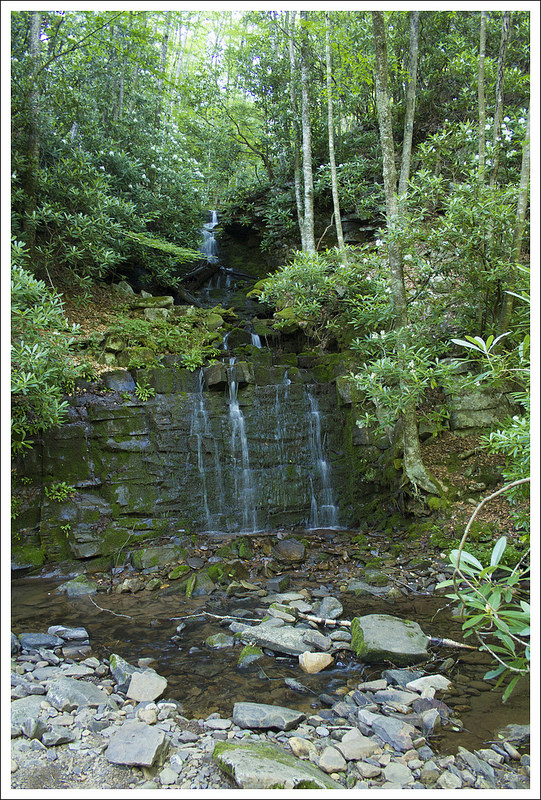
We soon passed another great campsite next to a small waterfall.  The trail meanders along and across Jeremy’s Run, requiring lots of rock-hopping across the stream.  The sun was dipping down quickly and we soon found that we needed to put on our headlamps.  Christine and Kris had legit headlamps, but I was using a small clip-on headlight that didn’t have the lumen output needed for a night hike.  When it reached dusk a few miles from our campsite, we came across a couple with a dog.  They asked us how far it was to the campsites and if they were all taken.  The guy was carrying an outrageous amount of gear and the girl looked completely miserable.  We knew they were going to be hiking to the campsites by nightfall and setting up camp in the dark.  I’m not sure if this was her first venture into overnight camping, but based on the daggers she was shooting him with her eyes, it may be their last.  They warned us they had seen a couple of bears just ahead of us, so we were on full alert.

Headlamps
We hiked by headlamp the last hour. Below: Jeremys Run in twilight; A large pool along the run; One of the last few stream crossings before it became too dark to take photos.

Jeremys Run Jeremys Run Jeremys Run

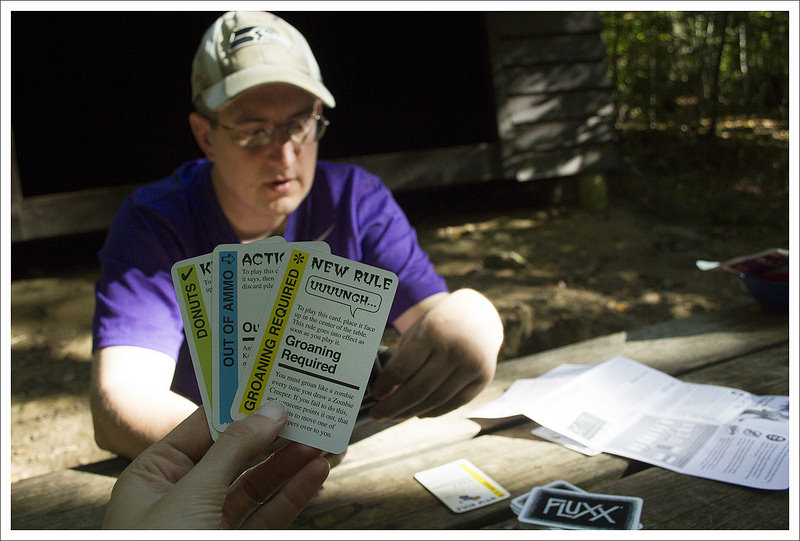
As it became fully dark, we still had a few stream crossings to make, which made it quite hazardous.  I reminded myself that the water wasn’t that deep so if we stepped in the water, we would probably be OK.  Another danger of night-hiking is the ability to lose the trail.  We really had to pay attention to the ground and try to keep an eye out for occasional blazes to make sure we would stay on the trail.  Hiking in the fall after most of the leaves have covered the trail provides an extra challenge.  Because I had a weaker headlamp, it was hard for me to lead along the trail since the lights from Christine and Kris were blasting my shadow ahead of me on the ground.  And then, I heard large noises in the woods, which I’m guessing was the bears that we had been warned about.  We kept talking loudly and playing some games to keep our minds sharp (animals/foods/colors that start with each letter of the alphabet) as we hiked along.

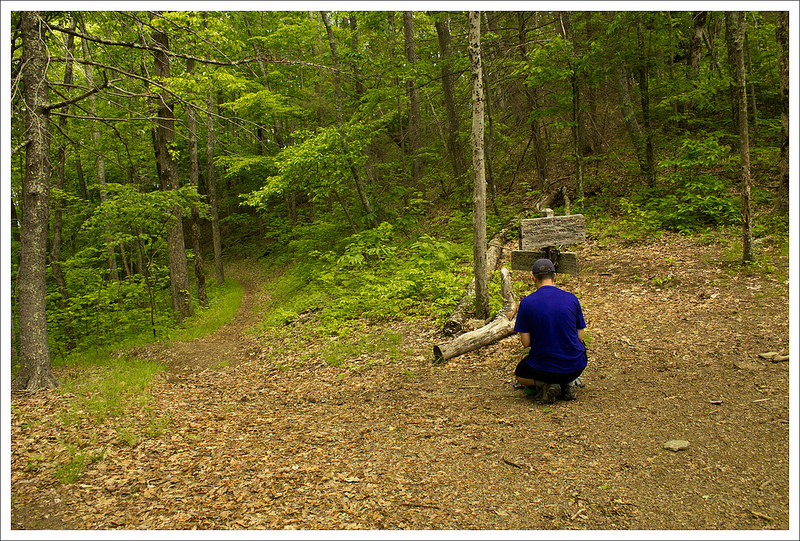
At 4.25 miles from our intended campsite, we finally came across a concrete marker post.  This post marked the junction with the Knob Mountain cutoff trail, so we knew were getting closer.  We kept straight on the Jeremy’s Run Trail and at 5.15 miles, we reached our first junction with the Neighbor Mountain Trail.  It was now just .3 miles straight ahead until we reached the parking lot where we started.  We made the last climb with renewed energy and celebrated that we made it through this adventure.

It was definitely one of the longest hikes we have done in a day and with the extra weight on our back, was one of the toughest.  We got back in the car and decided to go out to dinner to celebrate with drinks and food at Ciro’s in Elkton, VA.  We were physically exhausted and hungry, but it was quite an adventure we will never forget.

One takeaway I had from this trip was that we were all great at hiking together.  When we faced the challenge of not having two functional tents, we kept our wits about us, made a quick decision and went with it.  There was no complaining and we just relied on each other to get through.  If we had panicked or become overly upset, it could have led to a dangerous situation.  It is through this challenge, that we learned that having good hiking partners that work well together is a great trait to have for survival.  We all vowed to come back to this spot to camp together sometime in the spring to get the full experience through camping on Jeremy’s Run.  After the hike, Kris bought her own tent and I bought a better headlamp.

kris Kris Says…

Backpacking 101- It doesn’t matter if you were up late celebrating your birthday and borrowing some equipment…ALWAYS double check your equipment or your trip will not be so fly!

I was excited to be hiking with friends on a beautiful fall day.  We have always shared an appreciation of nature, lots of conversations and tons of laughter. I guess that is why we handled our little upset so calmly and reasonably. Although, I’m pretty sure I said  “Adam, just because I am a girl doesn’t mean you have to give up your tent.  I will cowboy up. Now, everyone hand over any booze or sleep aides you may have!” Of course that didn’t fly.

Ultimately we laughed at the situation, even as we crossed that creek 14 or so times and in the dark.  And I learned a few things on this trip: I am capable of hiking 15 miles with a 25 lbs pack in a day, Little Debbie Peanut Butter pies are so tasty and 400 calories, it was time to purchase my own backpacking tent, a packing checklist is important and a good attitude goes a long way.

I vowed to return to Jeremy’s Run and hike early enough to snag the sweet waterfall camp spot, I also plan to cowboy camp sometime just to prove I can (my dog will protect me).

Christine and Adam- you two are SuperFly!

Trail Notes

  • Distance – 14.7 miles
    (We had issues with MapMyHike on this trip, so we have partial stats. We have the Neighbor Mountain segment and most of the Jeremys Run to Elkwallow segment. We’re missing the portion along the Appalachian Trail and a few early tenths of a mile along Jeremy’s Run.  Technical issues!)*
  • Elevation Change – 2610 ft.
  • Difficulty –  4.  The terrain is fairly moderate throughout the hike, but the length ups the difficulty rating.
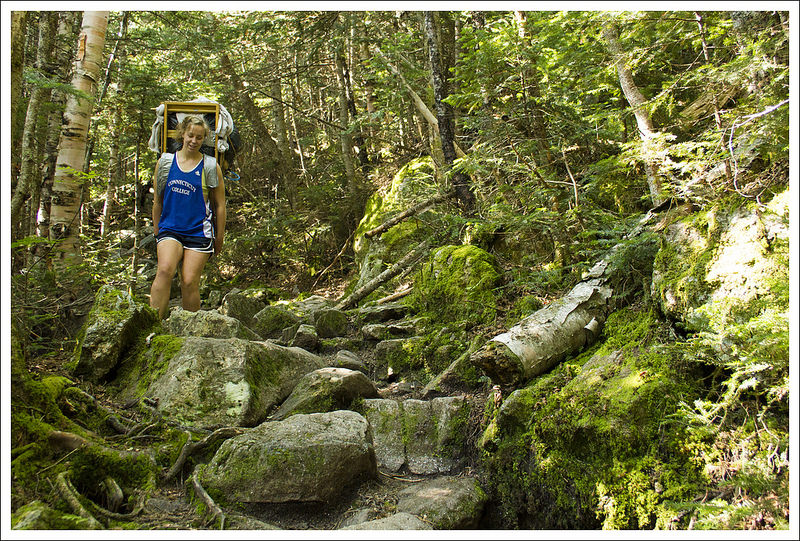
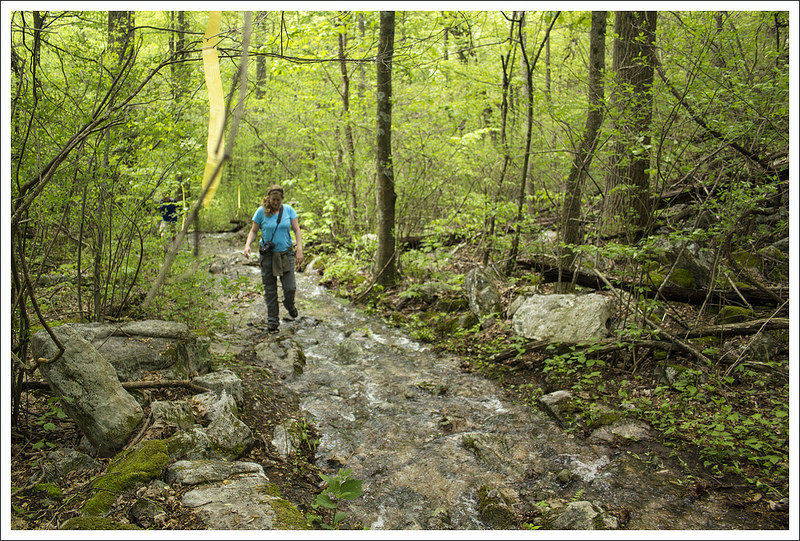
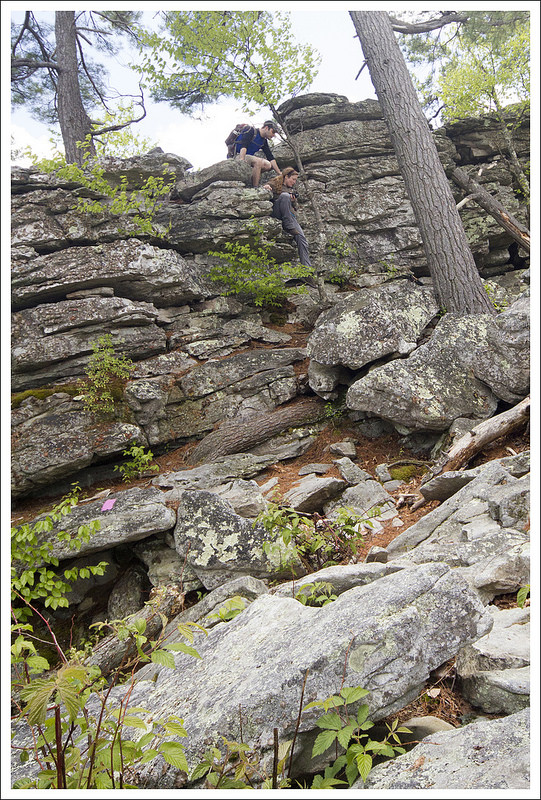
  • Trail Conditions – 3.  Sections along the Appalachian Trail and Neighbor Mountain are in great shape.  The Jeremy’s Run trail is rocky and has at least 14 water crossings – some of them can be challenging!
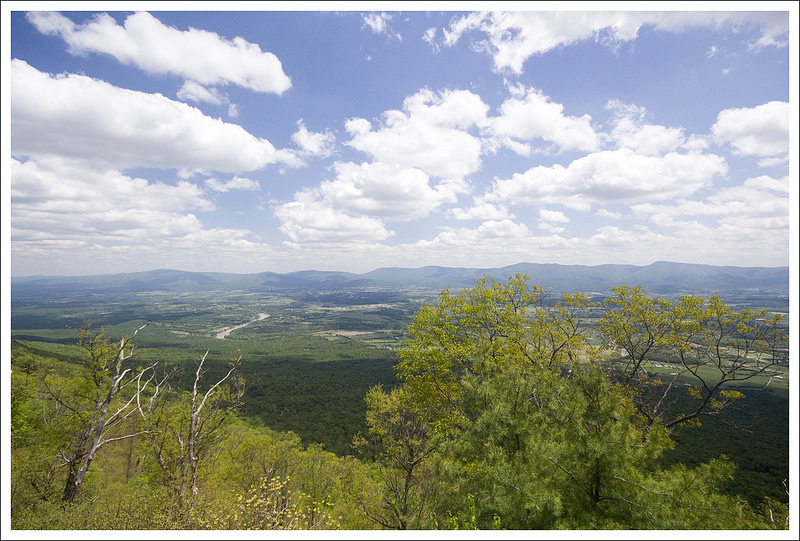
  • Views  3.5.  The views descending Neighbor Mountain are beautiful, but never fully open/panoramic.
  • Streams/Waterfalls – 3.5.  The stream is beautiful and scenic.
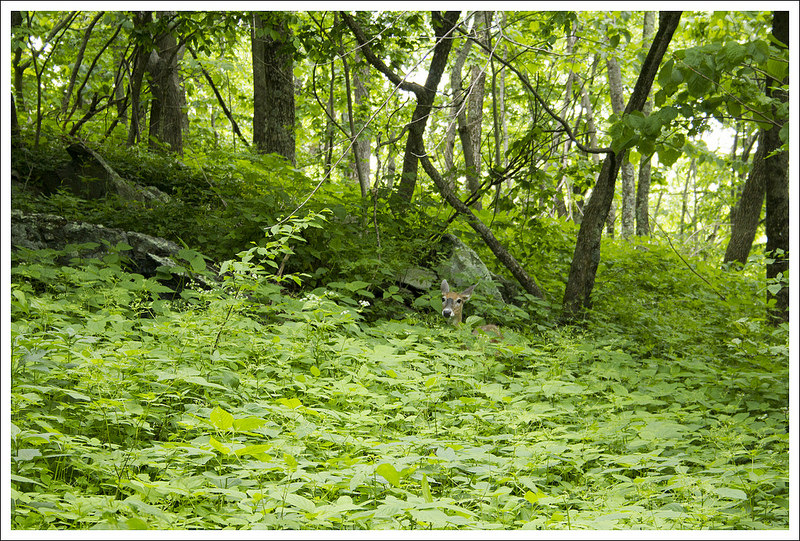
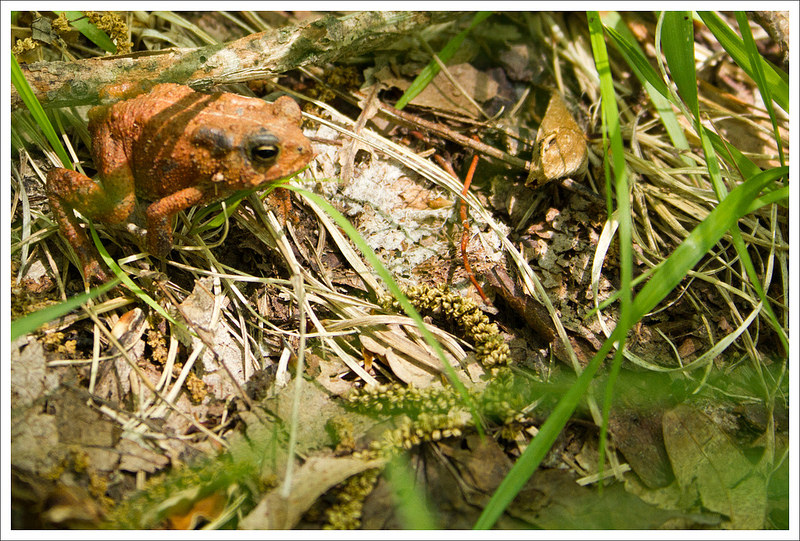
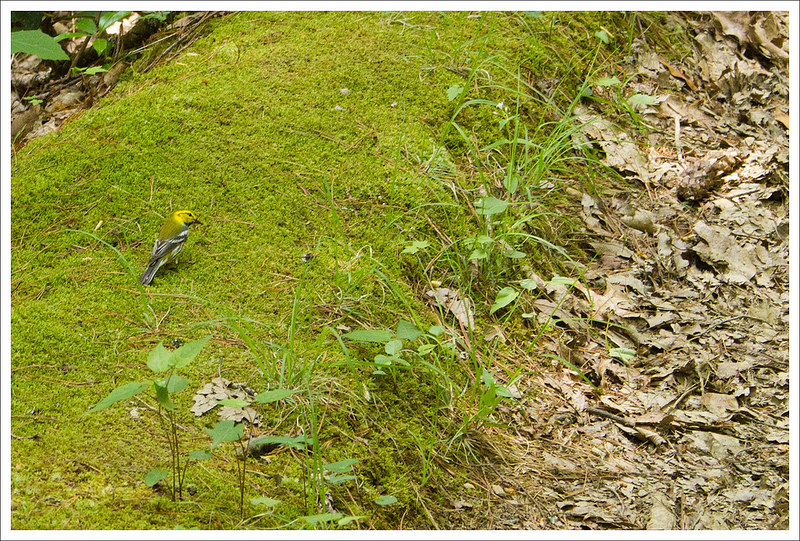
  • Wildlife – 5.  We saw a bobcat!  Hikers we passed at sunset told us there was a bear ahead, but we couldn’t see anything in the dark.  But, the last time we hiked in this area, we saw three bears.  We have also seen/heard owls, pileated woodpeckers, and whippoorwills.
  • Ease to Navigate – 4.  The junctions are clearly marked and easy to follow — unless you’re hiking in the dark!  🙂
  • Solitude –1.  It’s the most popular backpacking loop in the park’s northern district.

Download a Trail Map (PDF)

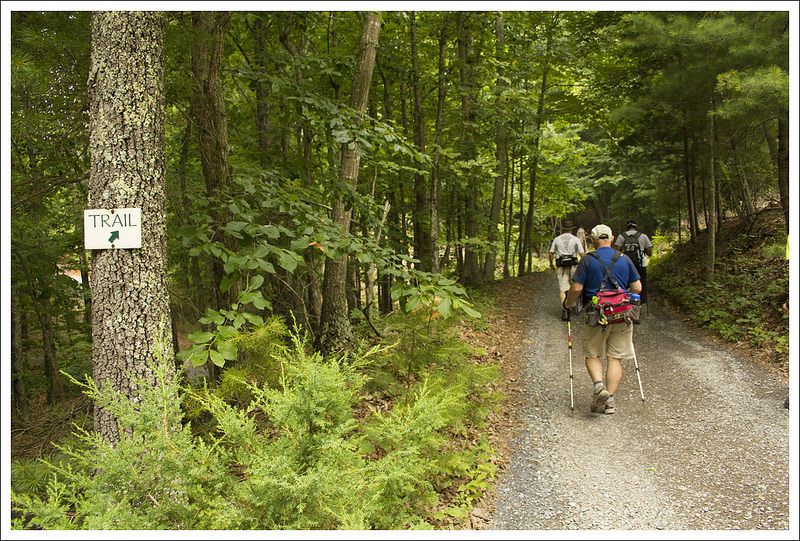
Directions to trailhead:  From the US-211 entrance of Shenandoah National Park, head north for 9 miles on Skyline Drive.  Take a left towards the Mathews Arm Campground.  In .7 miles, you will reach a parking lot.  The trail takes off next to the outdoor bathroom.

MapMyHike is not necessarily accurate, as the GPS signal fades in and out – but it still provides some fun and interesting information.

Veach Gap – Morgan’s Road

This hike is easy for a 7-miler!  Gentle grades along an old roadbed take you to a lovely view of the Shenandoah River and mountains beyond!

View the Full Album of Photos From This Hike

Veach Gap Hike
The Point overlook on the Veach Gap hike offers nice views of the bends of the Shenandoah River and the mountains of the national park beyond. Below: Adam crosses the closed gate at the beginning of the trail;  Christine hikes the Veach Gap trail; The main trail junction on this hike.

Start of Hike Veach Gap Hike Signs

Christine Says…

Throughout fall 2014, our employer (and alma mater), James Madison University, participated in the Outdoor Nation Campus Challenge.  Basically, students and employees accrued points for outdoor activities. The school that compiled the most points in the end won a prize of cash and outdoor gear. One component of the competition was completing a collection of eight local hikes.  The list included many hikes we had already done (Old Rag, Humpback Rock, Fridley Gap, High Knob Fire Tower).  Veach Gap was one of the only hikes on the list we hadn’t done, so we decided to check it out.

From the end of Veach Gap Rd. in Fort Valley, the hike begins along the Veach Gap Trail (blazed in gold), which is an old road bed.  Supposedly, this trail is what remains of the historical Morgan’s Road.  General George Washington requisitioned the road during the Revolutionary War.  It was built to be used as a path of retreat from Yorktown.  As we all know from history, the war went America’s way, and the retreat route was never needed. The road was still used locally for many years before falling into disuse and transitioning into a trail.

At one mile in, the Veach Gap trail crosses Mill Run.  This is really the only potentially confusing spot to navigate on the hike.  The trail crosses at a diagonal, so look carefully for the gold blazes on a tree slightly upstream.  Shortly after crossing the stream, you may notice a rock formation in the shape of an upside down ‘U’.  This is called an anticline, and it’s a very unusual geological feature in our area. I’m kind of ashamed to admit this, but we didn’t even stop to look at the anticline.  I forgot it was there, and my mind was more focused on fall colors, lofty views, and potential wildlife sightings.  But, if you’re a geology buff – don’t miss this feature!

Crossing Mill Run
Crossing Mill Run. You can see the blaze on the tree on the opposite bank. Below: Pretty fall leaves on the water; Blazes for Veach Gap, Tuscarora, and the Massanutten Trails; After the main trail junction, the Massanutten Trail became a little steeper and rockier.

Fall Leaves on Water Blazes Rockier Massanutten Trail

A short distance after crossing the stream, the Veach Gap trail merges and becomes jointly blazed with the orange-blazed Massanutten Trail and the blue-blazed Tuscarora Trail. The three trails share the route for (at most) a couple tenths of a mile. AT 1.2 miles,  you’ll come to another trail sign.  To the right, the trail heads in the direction of the Little Crease Shelter.  Stay to the left (blazed orange and blue), headed up Little Crease Mountain and toward Sherman Gap.  About a half mile after this intersection, you’ll pass a marked group campsite on the right.

Continue meandering uphill along a gentle grade.  At three miles, the trail becomes a bit steeper with switchbacks.  There was a significant forest fire here in 2012, so the canopy is thin and allows nice views along the climb.  We saw lots of charred stumps and blueberry bushes along the increasingly rocky trail.  Eventually, the trail leveled out along the ridge.  We soon reached The Point Overlook – a small outcropping of rocks overlooking a sweeping bend on the Shenandoah River.

We had a snack, took a few photos, and spent some time chatting with a fellow hiker (Hi, DJ!) before heading back down the way we came. Veach Gap was really a lovely hike to enjoy at the peak of fall foliage season.  After getting back to our car, we made the short drive into Front Royal so we could enjoy burgers and shakes at Spelunkers.  Great day!

Adam Says…

When we were reviewing the peakbagging hikes that were listed for JMU students/faculty to try for the Outdoor Nation competition, we were surprised to see this one on there.  My guess is the coordinators looked up hikes that were close to Harrisonburg without thinking of what would be seen on the hike.  We initially thought this wouldn’t be that nice of a hike, since we hadn’t heard anyone mention it before to us, but the views made this a pleasant surprise.

When we pulled up to the parking lot, we saw a few cars already in the parking lot and a group getting ready to hit the trail when we did.  Of course, we saw vehicles for hunters, so we were a little worried about how this trail was being used overall.  We were glad that we had brighter clothes on, which is always a precaution to consider during hunting season.  We started off on the gold-blazed Veach Gap trail by crossing through the gate and walking on the fire road.  The trail was very flat and passed through some younger forest.  We were greeted with sights and sounds of Mill Run to the left of the trail.

Opening Views
The higher we hiked, the more views we got through the trees. Below: Adam takes in the view; The ridge was burned by a forest fire in 2012.  The damage is still fresh and evident; Adam descends.

Another Take on the View Rocky Ridge Descending

We soon came across two bow hunters, that seemed to be milling around, more about enjoying the outdoors than they were about hunting.  At .35 miles, the fire road turns into trail.  At 1.2 miles, take a left at the junction and join the blue and orange-blazed Massanutten Trail.  The trail continued a slow, gradual climb heading northeast.  At 3.0 miles, the trail takes a sharp, southern route and at 3.2 miles, it switches back to the normal northeastern direction.  On our climb up, we passed by a large group of boy scouts that were covering some miles over the weekend, but were looking to camp near the crossing at Mill Run.  The slightly-obstructed views of the mountains beside us were so colorful in this peak fall setting.

As you climb up to the ridge, you start seeing a lot of the forest fire damage.  Since this happened in 2012, you start seeing some of the plants starting to grow in place of those that burned.  We reached the ridge and followed it for about .15 miles.  At 3.5 miles, we found a pile of rocks marking a short climb to the overlook where we stopped.  The true highlight of the view is seeing the bends of the Shenandoah River from this rocky perch.  There wasn’t a ton of room at the top that was unobstructed, but it was enough for a few people to take in the view.

If you feel like you would like a view hike with a good amount of solitude, this may be a great selection.

Trail Notes

  • Distance – 7 miles
    (Check out the stats from Map My Hike)*
  • Elevation Change – 1100 ft.
  • Difficulty –  2.  This is an easy hike to a nice viewpoint.
  • Trail Conditions – 4.  The trail was in great shape in most places.  Dry, fallen leaves made some of the descents slippery.
  • Views  3.5.  The view of the bends of the Shenandoah River is nice, but slightly obstructed.
  • Streams/Waterfalls – 2.  The stream along the early part of the trail is really pretty.
  • Wildlife – 2.  We didn’t see anything but a few birds and squirrels.
  • Ease to Navigate – 3.  There are a few junctions and a few unmarked trails that cross the route, but you should be fine if you follow the blazes.
  • Solitude –4.  We did see a troop of Boy Scouts and a handful of others hiking in this area on a perfect fall weekend near peak foliage color, but generally this area is very quiet.

Download a Trail Map (PDF)

Directions to trailhead:  From Luray, VA, take SR 675/Camp Roosevelt Road.  Go .8 miles and take a left to stay on SR 675.  In 2.2 miles, take a right to stay on SR 675.  In 7.8 miles, take a right on to SR 678/Fort Valley Road.  Follow this for 9.7 miles and then take a right onto SR 774/Veach Gap Road.  Follow this about .75 miles to the end of the road, where you arrive at a parking area.  The trail starts after you walk around the gate.

MapMyHike is not necessarily accurate, as the GPS signal fades in and out – but it still provides some fun and interesting information.

Appalachian Trail – Hog Camp Gap to Punchbowl Mountain

This 17 mile overnight backpacking trip had beautiful views from Cole Mountain within the first two miles of the hike.  The rest of the hike was less scenic – mostly walking through quiet woods and along seasonally low streams.  The Lynchburg Reservoir and the swinging bridge over the Pedlar River were noteworthy features on the second day.  Adam will cover day one and Christine will take over with day two!

View the Full Album of Photos From This Hike

Adam Takes in the View from the Summit of Cole Mountain
Adam takes in the view from the summit of Cole Mountain.  Below: Coming out of the woods onto the grassy meadow is always breathtaking;  Great views from the top of Cole Mountain; Hints of fall color near the summit.

Breaking Out of the Trees Cole Mountain Summit Coming Fall Color on Cole Mountain

Day One (8.1 miles)…

We started off our trip by leaving one car where the AT crossed the Blue Ridge Parkway at the Punchbowl Mountain overlook.  From the lot, we could see the AT  southbound, but we didn’t see where we would return to our car from the north. It turns out it was just below us on the other side of the parking lot, but the morning fog made it a little hard to spot.  We dropped our car off and then headed to Hog Camp Rd, to start our journey.

From Hog Camp Gap, we headed south on the Appalachian Trail.  The trail started off through a wooded section uphill, fairly steeply in some parts.  Around 1.1 miles, the trail opened up to the beautiful, wide-open bald clearing that is Cole Mountain.  We have hiked Cole Mountain before as a loop and I do think it is one of the more under-appreciated hikes in Virginia.   The panoramic vistas make this look like something you would picture in an outdoors magazine.  You can’t help but want to stop and take a look at the scenery around you.  The way we split this section might not have been the best plan for enjoying vistas.  We knew we had the best views of the trip done in the first 1.5 miles of the hike.  But that is one of the biggest lessons I learned from hiking this section – you have to hold on to what you may have just seen, because there is no certainty about what is to come ahead.

Climbing Bald Mountain
The climb of Bald Mountain wasn’t terribly long or difficult. Bald Mountain also is not Bald!  Below: Adam checks out the map at our lunch stop – a clearing near the top of Bald Mountain; A little snip of a view through the trees along the top of Bald Mountain; Huge tree!

Lunch Stop Snip of a View Huge Tree

After reaching the summit of Cole Mountain, the trail descends and again enters the forest.  Around 2.5 miles, we reached a junction with a spur trail that led to the Cow Camp Gap overnight shelter and a water source.  We continued on the trail which starts an ascent up Bald Mountain.  We reached the summit at 3.5 miles and were hoping for some nice views at the top, but found that Bald Mountain wasn’t very bald (there were a few obstructed views through the trees).  We found a clearing and camp spot and had our lunch there before continuing on.  The rest of the day, the trail was a descent so our climbing was done (at least until tomorrow).

We crossed over USFS 507 at 5.5 miles and eventually came to US 60 and the Long Mountain wayside at mile 6.3.  We stopped at one of the picnic tables and took a break to eat a snack and give our backs a relief from the weight.  Local people just park on the roadside here and have a picnic at this spot.  It is also a way to do a longer out-and-back to Cole Mountain without parking or driving on a rough, gravel road.  After resting, we crossed US 60, spotting a sign for the continuation of the Appalachian trail to the right.  We continued our descent and at 7.1 miles, we reached Browns Creek, a reliable water source for a good stretch of trail.  At 8.2 miles, we reached the Brown Mountain Creek Shelter, our stop for the night.

The Brown Mountain Creek area is interesting from a historical/archaeological standpoint.  Much of the land along the creek was part of a large plantation predating the Civil War.  After the war, the land was primarily a settlement for freed African-Americans.  Houses, farms, orchards and even a gristmill could be found along the creek.  You can still see stone walls/stairs, pieces of metal, and other artifacts along the creek.

Long Mountain Wayside
The trail crosses US 60 at the Long Mountain Wayside.  Below: Information at the wayside: Descending to Brown Mountain Creek; Arriving at Brown Mountain Creek Shelter.

Wayside on Rt. 60 Descending to Brown Mountain Creek Arriving at Brown Mountain Creek Shelter

When we first got to the shelter, there was still a smoldering fire in the fire pit, so we realized someone had been there recently.  We also noticed a large pile of fresh bear scat next to the shelter.  While we didn’t think a bear had been roasting marshmallows by the fire, we felt it may be wise to not set up camp directly at the shelter.  We found a nice campsite right by the creek and decided that would be a better spot.  There was a boy scout troop that was camping on the other side of the creek.  We worried about them being too loud over the course of the night, but they were fairly well-behaved (except for trashing the privy – but that’s another story).  We set up our tent, filtered water for tonight and tomorrow, and began to unwind.

We cooked dinner up at the shelter (Good To-Go Herbed Mushroom Risotto)* and played Zombie Fluxx, a card game where the rules and objectives for winning constantly changed.  I always enjoy bringing a card game along the trail – the weight isn’t too bad for the entertainment it can provide.  We played a few hands (I recall Christine being better at killing zombies than I was) and then went back to our campsite after I hung our bear bag.  We started off reading books by headlamp outside our tent (continuing with the zombie trend I was reading Night of the Living Trekkies), but the bugs were awful.  We retired to our tent probably around 7:30, read for a little while longer, and went to bed very early.  We always typically go to bed around nightfall when backpacking, but hiking with the extra weight always makes you feel a little more physically exhausted.

* Good to Go is a new backpacking food manufacturer.  They use healthy ingredients and much less sodium.  We thought it was one of the best dehydrated meals we’ve had on the trail!  We added a foil packet of chicken breast to our dinner.

Games
We arrived at camp fairly early, so after the tent was pitched and water collected, we spent some time playing Zombie Fluxx. Below: A group of 14 Boy Scouts camped along the opposite bank; Collecting water for cooking and drinking; We tried a new brand of dehydrated meal – Good to Go (tasty!)

Scouts Water Source Good to Go Risotto

Day Two (9.1 miles)…

Day two started earlier than expected (and with the added bonus of a huge, swollen mosquito bite on my eyelid – I looked like I’d been punched!) Like most Boy Scout troops we’ve met along the trail, the one camping near us on this trip was awake, packed up, and on their way before sun-up. This had pros and cons.  One con was all the crunching boots and headlamps moving around our tent in the dark.  A pro was the opportunity we had to enjoy the creekside in peace and solitude before starting our hike for the day. The solitude also meant I could find a place to dig a cat hole in complete privacy without having to worry about Boy Scouts spotting me!  I would have used the privy near the shelter, but let’s just say the privy turned out to be another con of camping near a big scout group. One of them had completely defiled the privy and there was no way I was going in there!

Breakfast was instant oatmeal, honey buns and coffee.  I’ve learned the hard way after running out of gas on past backpacking trips that one packet of instant oatmeal (140 calories) is not enough to fuel me across nine miles.  The Little Debbie Honey Bun has been a revelation for me.  I think it has the magical balance of fat and sugar I need to power through my morning miles.  They also hold up great in my pack – no smushing and no crumbling.  Some people like a healthier, protein-packed breakfast, but give me a honey bun!

Morning on Brown Mountain Creek
The morning was beautiful and quiet (after the Scouts left). Below: When water is running higher, this is probably a pretty little waterfall; Adam hikes along the Appalachian Trail: One of several small stream crossings.

Plunge Pool Walking Along the AT Stream Crossing

The first five miles of our second day were easy. The terrain was a very gradual overall descent with a couple brief uphill climbs.  The first mile or so followed Brown Mountain Creek.  The trail followed roughly parallel to the stream for much of the way.  I kept thinking how beautiful this area would be when water levels were higher.  We eventually crossed the creek via a wooden footbridge.  At this spot there was a small, but pretty, waterfall cascading into a plunge pool.  The flow was down to a trickle, but it was still a lovely spot.

Departing Brown Mountain Creek, we walked through serene, quiet forest for a couple more miles.  There were two small stream crossings along the way.  The first didn’t seem to have a name, but the second was Swapping Camp Creek.  Both of these creeks end up flowing into the Lynchburg Reservoir.  At around 3 miles into our hike, we started seeing glimpses of the reservoir through the trees.  We followed an off-trail footpath steeply down to the shores of the water for a couple photos.  We saw several herons hunting in the mud.  There were ‘no camping’ signs posted everywhere, but there were also several well-used fire rings.  I’m guessing there are quite a few people that ignore the regulations and attempt to stealth camp in this area.

Lynchburg Reservoir
The trail skirts around the Lynchburg Reservoir. Below: The dam at the south end of the reservoir; The Pedlar River; The Pedlar River footbridge.

Dam Pedlar River Pedlar River Bridge

We climbed back up to the Appalachian Trail and continued south, skirting the eastern side of the reservoir.  At around 4.8 miles we came to the lowest elevation point of our hike – the Pedlar River crossing.  The trail crosses the river on a picturesque, bouncy suspension bridge.  From the middle of the bridge, we could see early fall colors reflecting from the trees onto the water’s surface.  After crossing the bridge, we came out on gravel-surfaced Reservoir Road.  We followed that briefly until we spotted another white blaze for the Appalachian Trail.

At this point, we began our toughest climb of the whole 17 miles.  The 2-mile ascent of Rice Mountain begins pleasantly enough.  The trail follows parallel to Little Irish Creek (which was running low and barely noticeable) and passes through a small plot of old growth forest.  There is an extremely weather-beaten sign explaining tree sizes in the area and how the area is used to study the local watershed.  Early parts of the climb are well-graded and moderate, but about .75 mile in, the trail pretty much goes straight up the mountain without the moderating benefit of switchbacks.  I wanted to push through the climbing and put it behind me, but Adam was ready for a snack.  We found some big rocks about 1.5 miles up the mountain and took a candy break.  After a half mile more climbing, we reached the ridge of Rice Mountain.  The forest was especially pretty along the top of the mountain – very open with lots of nice shade trees.

Climbing Rice Mountain
Climbing Rice Mountain was tougher than it looked on the topo map. Below: Another little peek at a view through the trees; A curly laurel thicket; The finish line!

Peek of a View Laurel Thicket The End

On the descent of Rice, we had one nice view through the trees.  We also saw more brilliant red fall colors and a lot more thickets of rhododendron and mountain laurel.  There really wasn’t anything remarkable to see or say about our last couple miles of hiking.  The terrain was rolling – there was a general uphill trend, but with small downhills as well.  There were no views or streams to speak off.  The lack of scenery gave me lots of time to fret over my feet. Two toes on my right foot had dislocated earlier in the day and were becoming increasingly painful.  With each step, it got a little harder to bear my weight plus the weight of my pack. I think if there had been waterfalls or great views, I would have been more easily able to distract myself.  But on this particular day, all I could think was ‘Ouch – when will this hike be over?’

At almost the end, we had one final road crossing at the junction of Robinson Gap Rd. and Panther Falls Rd.  After just another third of mile, we came up a small hill and found ourselves back at the parking area for Punchbowl Mountain on the Blue Ridge Parkway.  I don’t think I’d ever been so happy to end a hike. It felt great to take my boots off and change into a pair of Oofos.  While I enjoyed the great weather, the opportunity to be out, and the nice views from Cole Mountain, this wasn’t one of my favorite backpacking trips.

Trail Notes

  • Distance – 17.2 miles [Day One] [Day Two]
  • Elevation Change – About 2900 ft.
  • Difficulty – 4.  Mostly for distance, but the descent of Bald Mountain is a real knee-grinder and  the climb up Rice Mountain  (Day 2) is surprisingly challenging.  
  • Trail Conditions –  4.  The trail is in nice condition all across this stretch of AT.
  • Views – 5 (for Day 1) The views from Cole Mountain are indisputably spectacular.  Enjoy them early in your hike… they’ll be the last real views of the trip.
  • Streams/Waterfalls – 3.  This was hard to judge because of the unusually dry late summer/early fall.  I think under normal circumstances, Brown Mountain Creek would be beautiful with lots of small cascades and rapids.
  • Wildlife – 2.  We didn’t see any wildlife beyond a cute bullfrog in the creek.  But, there was LOTS of bear scat around Brown Mountain Creek Shelter.
  • Ease to Navigate – 4.  Just keep following the white-blazes and pay attention at road crossings/trail junctions to stay on the Appalachian Trail. 
  • Solitude – 3.  We saw quite a few people around Cole Mountain and spent the night at Brown Mountain Creek with a Boy Scout Troop.  We saw only one person along the trail on the second day.

Directions to trailhead:  Requires a shuttle.  We parked one car where the AT crosses the Blue Ridge Parkway near Punchbowl Mountain.  This is mile 51.7 on the Blue Ridge Parkway, about 6 miles south of where the Blue Ridge Parkway meets with US 60.  From this point, we drove our other car back north on the Blue Ridge Parkway for 6.0 miles and took the exit leading us to US-60 East.  We headed 4.3 miles on US 60 E before taking a left on SR 634/Coffeytown Road.  Follow this for 1.6 miles before taking a right on SR 755/Wiggins Spring Road.  Follow this gravel, bumpy road for 2.7 miles until you reach the parking area where the AT crosses the road.  Follow the white-blazed Appalachian trail heading south.

Mt. Madison (NH)

Special: New Hampshire Edition

Introductory Guide to Visiting the White Mountains

This 8.8 mile hike takes you past Madison Spring Hut and up to the summit of majestic Mt. Madison.  The Valley Way Trail is known for being one of the safer, more protected routes into the heart of the White Mountains.  While the terrain is less extreme than other trails in the area, the hike still requires a little over 4,100 feet of climbing.  It’s a tough hike, but the views make it well worth the effort.

View the Full Album of Photos From This Hike

Hiking Mt. Madison
Adam makes his way across the summit ridge of Mt. Madison. The big mountain in the background is Mt. Washington.  If you look closely, you can see the Auto Road snaking down the peak.  Below:  Plenty of parking and access to many trailheads at the Appalachia Parking area;  Warning…. danger ahead – seriously, the White Mountains can be pretty extreme; The early part of the trail was fairly soft and gentle.

Appalachia Parking Death Awaits Early Terrain on the Valley Way Trail

Adam Says…

My top goal for our 2014 New Hampshire trip was to hike up Mt. Madison.  We both went to James Madison University and have worked there for years, so it only seemed fitting to take on the mountain that shared a name with our college.  I even wore JMU Dukes gear almost like the guy that goes to a concert wearing a t-shirt for the band’s previous tour to show his super-fandom.

We started out the day on a rough note.  Christine had put her hiking shoes and socks in the back of our car, so she could wear sandals on the car ride up.  When we pulled over at one point, we realized one of our Camelbak tubes had pressed open and leaked all over the car, soaking her shoes and socks.  We debated about if we would have been able to even do the hike in fear of blisters, but Christine decided to push forward.

There are a lot of ways up Mt. Madison, but in our research we found the most popular way was to make our approach by going up the Valley Way trail.  We parked at the large Appalachia parking lot (which was so full we needed to park on the road) directly on US-2.  We were worried there would be so many people on the trail, but this parking lot holds the beginnings of lots of trails that lead up to many peaks (including Mt. Adams and Mt. Quincy Adams).

Tama Falls
The early part trail follows Snyder Brook. By taking a short spur trial, you can visit beautiful 25′ Tama Falls.  Below: We saw a couple Croo members on their way down from the Madison Spring Hut; Adam checks out all the rocks on the ‘not as rocky’ New Hampshire trail;  The final push to the Madison Spring Hut was very steep and rugged.

Croo Getting Rockier Steep to the Top

The trail starts off from the back of the parking lot.  The trail branches off in different directions but follow the signs for the Valley Way trail.  The trail begins relatively flat and easy walking, as it runs along Snyder Brook.  There were a few places where we could get some nice stream views and even a glimpse at the picturesque Tama Falls at .4 miles.  At .7 miles, you reach another large junction, but continue to follow the signs to the Valley Way trail.  The trail then begins the steeper uphill climb.  Overall, I felt that the trail, while very rocky was not as steep and rocky as some of the other trails in the White Mountains.  There is a relentless amount of climbing and many rocks to navigate, but it wasn’t as grueling on my feet as some hikes in New Hampshire have felt to me.  At 3.0 miles, the trail gets very steep and rocky (often filled with larger small boulder-sized rocks to hoist onto) and will remain so until you reach the Madison Spring Hut at 3.8 miles. If you’re interested in camping on the mountain, but don’t want to stay at the hut, the Valley Way tentsite is at mile 3.1 on this hike.

Once we arrived at the hut, we saw there were a couple of ways up to the summit of Mt. Madison.  At this point, we were above treeline, so we saw the rocky summit up above us.  I went in and found one of the Croo members and she told me the Osgood Trail had the most direct route and was a little easier than making our way via the Watson Path.  The final ascent up to Mt. Madison was .5 miles along the Osgood Trail (which is also the Appalachian Trail in this area).  You basically needed to walk acrpss large boulders, following cairns along the way until you reached the summit.  When you are above treeline, the summits of mountains seem so close to reach, but it is very misleading.  As we climbed up, we looked back and saw the hut shrink with each step, finally giving us some perspective of how far we had come.  We stayed a while at the summit.  The views were breathtaking and you could see for miles all around.  It definitely was one of the most beautiful scenes I have witnessed hiking and to realize the work we had put in to attain the peak, made it feel even more worthwhile.

Looking Back to the Hut
Christine makes her way up the Osgood Trail to the summit of Mt. Madison.  Below: About to go above treeline; Even though the summits are far away, they always look close;  A view of Madison Spring Hut with Mt. Adams in the background.

Alpine Zone Looks Close Madison Spring Hut

While we were at the summit, we met a woman who had a sign pinned to her that had 48 over 50 written on it.  She was over 50 years old and she had a goal to do all 48 peaks over 4000 ft. in elevation in New Hampshire.  She had saved Mt. Madison as her last hike to meet her goal, so we were thrilled to be able to see her experience accomplishing her goal.  What an inspiration!  We also talked to a gentleman at the summit who was from Colorado that had done this same hike 30 years ago.  He was staying at the nearby Crag Camp, run by the Randolph Mountain Club, just as he had done when we was a teenager.  He wanted to see if this hike was just as amazing as he had remembered and he told us it definitely was.  It made me further realize that everyone likes to hike for their own reasons and it is always a privilege to get to hear people’s stories on the hike.

We made our way back down and ate some lunch at the Madison Spring Hut.  We then ventured .2 miles on the Parapet Trail to see Star Lake.  This is a spot you definitely shouldn’t miss.  The lake is more like a small pond, but it was so beautiful to view the summit of Mt. Madison, as it reflected into Star Lake.  We debated about tackling Mt. Adams to bag another peak, but we realized that the summit looked close, but it was still a steep 1 mile away.  Not wanting to add even more to our hike, we decided to make our way back down.  The trail seemed to be even rockier on the way back down.  While you can normally fly down some parts of downhill trails, you need to take your time on this one to navigate all the rocks.  On our way down, we came into a rain shower, making the rocks a little slick.   The last .8 miles were quite easy again and we did pick up some time at this point.  We made our way back to the parking lot to make the round trip 8.8 miles.

Christine Says…

The morning of our Mt. Madison hike started off cheerfully enough.  We stopped for breakfast at Dunkin Donuts.  I ate both a bagel with cream cheese and a Boston Cream donut.  If I’m going to hike almost nine miles with over 4,000 feet of climbing, I’m going to enjoy any and all the baked goods I want!  However, I was jolted out of my happy post-carb afterglow when I discovered my socks and sock liners completely soaked in the back of the car.  A tough hike with wet socks sounded like a really bad idea.  But, driving out of our way to find an outfitter with Thorlo socks seemed like an even worse idea.  I’m super picky about socks, and Thorlo’s thick-cushion hiker socks are the only ones that keep my feet happy.  I decided wet Thorlo socks were better than dry socks of another brand. (and they were … I hiked all day in wet socks and didn’t get a single blister!)

As Adam said in his post, the Valley Way trail is pretty moderate for White Mountain terrain.  The trail is not as rocky and stays under the shelter of trees until you get to Madison Spring Hut.  It’s a great choice if you want to visit the northern Presidentials, but stay largely sheltered from wind and other weather.  There is still plenty of climbing, but until the last mile, it’s all gradual and moderate.  Trails like the Valley Way exist due in part to people like J. Rayner Edmands.  He was an early volunteer for the Appalachian Mountain Club.  Starting in the 1880’s, he spent over 20 summers building trails in the White Mountains.  He believed trails to the high peaks should be passable without stumbles, even in the dark.  Backpacker Magazine did a neat article about Edmands in their October 2014 issue.  Check it out if you have a few free minutes.

JMU Dukes
We paid tribute to our alma mater (James Madison University) on the namesake mountain. Go Dukes!  Below: The trail was extremely rocky and rugged between the hut and the summit of Mt. Madison; Cairns mark the way; Christine and Adam enjoy a summit view; The descent.

Climbing Mt. Madison  Rocks on Mt. Madison
Summit of Mt. Madison  Descent

I very much enjoyed the little rapids and waterfalls along Snyder Brook early in the hike.  Tama Falls was especially impressive.  After we moved away from the stream, the hike was basically just a climb in the woods.  As we ascended the trail got rockier, bit by bit.  The last half mile to the hut was insanely steep and rocky.  In one spot, my shoe got so solidly wedged between two rocks that I had to unlace it and contort my ankle to free myself.  It took efforts from both of us to release my shoe from the rocks.  It’s a good thing trail runners are so soft and flexible, because my feet definitely needed both shoes on this hike!  I think the steepness of the terrain is actually what stopped me from getting hurt when my foot got caught.  We were moving very slowly, picking our way across the rocks. Had I been moving at any significant speed, I think I could have easily broken my ankle.

When we arrived at Madison Spring Hut, it was already starting to cloud up a little. It wasn’t really overcast, but the sky had that heavy, hazy look about it.  The weather was definitely changing and I wanted to make sure we enjoyed the best views possible.  We headed up the Osgood Trail toward the summit of Madison.  I don’t know if you can really call the path to the top a ‘trail’.  It’s more of a scramble across rocks, following cairns leading you to the summit.  The climb to the top is slow going, simply because there is never a simple place to put your feet. On our way up it was fun to look back and marvel at the towering peaks and the tiny hut tucked into the col.

Inside Madison Spring Hut
We decided to eat lunch at Madison Spring Hut.  Below: Even pretty dogs aren’t allowed inside AMC huts;  We always enjoy the baked goods for sale at huts; Compass on the hut porch.

No Dogs Allowed in AMC Huts Goodies Compass

At the top we enjoyed spectacular views of the Presidentials.  Seeing the Mt. Washington Auto Road snaking down the mountain was really impressive!  While the wind was a little brisk at the summit, it was really a warm, mild day for the White Mountain high peaks.  Lots of people were hiking in shorts and t-shirts.  Some people even basked shirtless in the summit sunshine.  My blood is a little thin for that, but I wasn’t cold like I had been on the summit of Mt. Washington in 2013.

After taking lots of photos and doing our JMU rituals, we climbed back down and enjoyed our packed lunch at Madison Spring Hut.  Of course, we supplemented our packed food with baked goods from the Croo.  I always hear people talking about how huts are packed with dayhikers all summer long. I’m not sure if it’s our timing (we hike early), but we’ve found almost every hut we’ve visited nearly empty.

Star Lake
Beautiful star lake sits near Madison Spring Hut. Below: As we were leaving the lake, clouds started to roll in and we heard distant rumbles of thunder… time to leave the peaks and head back to the valley below.

Walk to Lake Approaching Storms

After lunch, we walked out to Star Lake.  What a beautiful spot.  The lake itself is small and shallow, but it makes a gorgeous reflecting pool for Mt. Madison.  We were lucky to visit on a picture perfect day!  While we were admiring the lake and taking in our final peak views, we started to hear distant rumbles of thunder in the distance.

Being caught in a thunderstorm in the Whites is definitely something I’d be happy to NEVER experience.  Lightning strikes happen frequently, wet granite is very slick, and stream levels can change drastically in mere minutes.  In fact, just last week I read a harrowing account from a solo hiker caught by storms in the White Mountains.  Seriously scary!

We made our way down as quickly as we safely could.  With a couple miles of hiking left, the rain started to fall.  Fortunately, it was light rain and none of the thunder/lightning seemed close.  We got back to the car right before the skies opened up and poured!  What a great day with perfect timing. I’m really thankful that we had weather that allowed us to visit two more Presidentials on our 2014 trip!

Trail Notes

  • Distance – 8.8miles
    MapMyHike Stats *
  • Elevation Change –  4150 feet
  • Difficulty –  5.  The trail started off easier, but it is still a very tough, uphill climb.
  • Trail Conditions – 2.5.  The trail was well-maintained, but the rocky parts of the trail make this a challenge.  The final push to the summit on the Osgood Trail also took a lot of precision.  Bring trekking poles.
  • Views – 5.  It doesn’t get much better than this.  If you are lucky enough to catch this on a day where clouds are off the mountain summits, you will be able to see all around you for miles. 
  • Waterfalls/streams 3.  The Snyder Brook runs alongs the trail early on the hike and you can see a few smaller waterfalls along the trail. 
  • Wildlife – 1.  We didn’t really see any wildlife on the trail.  I wouldn’t expect much at all once you get above treeline. 
  • Ease to Navigate – 2.5.  There are a lot of junctions and side trails on the route because there are a lot of trails in this area.  Keep following the signs for the Valley Way Trail until you reach the hut and then follow the Osgood Path via the cairns to the summit. 
  • Solitude – 2.  We picked a gorgeous day in the summer to do this hike, so we weren’t surprised to see lots of people.  We saw the most at the summit and the hut, but there was still places to find our own bit of solitude. 

Download a trail map (PDF)

Directions to trailhead: From I-93: Take Exit 35 for Twin Mountain. Follow 3N for 12.4 miles. Turn right onto 115N for 9.7 miles. Turn tight onto 2E for 8 miles. The parking lot will be a large gravel area on the right.

* MapMyHike is not necessarily accurate, as the GPS signal fades in and out – but it still provides some fun and interesting information.

Spruce Knob – Seneca Creek (WV)

This 16.5 mile overnight backpacking trip has cooler temperatures in the summer, beautiful streams and waterfalls, high mountain meadows, abundant berry bushes, and even an old plane wreck to explore. It’s a great change of pace from hiking the Appalachian Trail.

View the Full Album of Photos From This Hike

Hiking Along the Huckleberry Trail
The high meadows along this hike were beautiful! Below: Backpacks in the car; Everyone checks out the information at the trailhead; Suzanne picks ripe blueberries along the Huckleberry Trail; The Huckleberry Trail passes through several small meadows; Spruce-shaded areas on the Huckleberry Trail; Signage along the way.

Backpacks in the Car Getting Started Blueberry Picking
Views from the Huckleberry Trail Spruce Trees in the Sun Trail Sign

Day One…

Initially, we  planned on doing very little hiking in July this year.  Our goal was to stay out of the heat and to rest up a bit so we wouldn’t overdo things before we tackle our trip to New Hampshire later this summer.  But the weather was too nice and we had lots of invitations to go hiking.  Over the 4th of July weekend, our friends Anthony and Suzanne suggested we go on a backpacking trip together.  We always enjoy hiking with them, so plans were made to hike in the Spruce Knob area.  This was actually the second 4th of July weekend we’ve spent on the trail with Anthony and Suzanne.  A couple years ago, we did a trip to Dolly Sods.

Our friends came down and spent the night before the trip at our house. We divided up some group gear and then packed the car and headed out fairly early to start our trip.  We arrived at the trailhead mid-morning.  We saw the short trail to the Spruce Knob summit fire tower, but we decided to visit that at the end of the loop the next day to feel like we had truly earned it.  Spruce Knob is the highest peak in West Virginia.

The printed maps we have found of this area are fairly outdated and online maps also don’t have the trails completely accurate.  The best map I have found of the entire area has been from Mid-Atlantic Hikes and it may be helpful to bring that along since there are lots of trail options here.

Descending to Junction
Adam descends to our junction with the Lumberjack Trail. Below:  Anthony makes his way along the Lumberjack Trail.  The trail has a reputation of being sloppy/muddy, but it wasn’t too bad when we visited; Someone moved a piece of the plane from the wreck site up to the trail – probably to mark the spot; Even after 4+ decades on the mountainside, the plane wreck is still mostly intact.

Walking the Lumberjack Trail Plane Window Fuselage
Mud Nettles First Large Meadow

We started off our first day of the hike on the Huckleberry Trail (TR533).  The trail starts off with a little bit of crushed gravel on the trail, but that goes away in a short distance.  This first section of the trail was fairly flat or downhill and alternates from going from dense Spruce forests to more open fields. There are numerous dry campsites along the trail. In the fields, we found tons of blueberries that were just starting to ripen.  We stopped along the way for a few handfuls before pressing on.  At 3.4 miles, you will reach a campsite and a sign that points to the trail going right.  Follow this trail and in another short distance, you’ll come to another sign pointing you to go left as the trail winds around a dense forest area.  You’ll soon reach another sign that shows that the Lumberjack Trail is .4 miles away.  The last .4 miles of the Huckleberry trail drops rather steeply to the large trail junction at 4.7 miles.  Take a right at this junction to join the Lumberjack Trail (TR534).

The Lumberjack Trail is a relatively flat trail.  We were warned that it can be very muddy and wet, but we found that even after some recent heavy rains there were only a few 20-foot sections that had mud to slog through.  Most of the trail had rocks or logs placed that saved us from having to get our shoes wet or muddy.  Around mile 5.8, we saw a plane door hung on a tree and a short, yet steep trail that led down to plane wreckage (a Piper PA-23 that crashed here in 1973 with two casualties).  Be respectful if you decide to visit this site.  We stayed on the Lumberjack Trail until it came to a junction with the High Meadows Trail at mile 6.7.  Take a left to join the High Meadows Trail (TR564).

The High Meadows Trail was the most overgrown trail we came across.  There were times that it felt like we were bushwhacking.  There are stinging nettles everywhere along the trail and grass was up to our knees in some portions.  The High Meadows Trail also has alternating landscapes; you will go from dense forests to large open meadows several times.  Keep an eye out for blue blazes on posts or trees as you navigate through these high grass areas.  The trail descended through these gorgeous meadows and it is not surprising that we were thinking of the Sound of Music when we were walking through these fields surrounded by mountains.

High Meadows
The high meadows on this hike were so beautiful!  Below: Adam admires the high meadows; Grass in the meadows was tall;  There were several meadows separated by short sections of shade;  Most of the shady spots were densely overgrown with berry brambles; Black-eyed susans; Adam crosses out of the final meadow.

Adam in Meadow Meadow Walking Shade Between Meadows
Overgrown Susans Leaving the Meadows

Eventually, you will enter into the woods again and cross a small creek.  At 8.6 miles, you will reach another trail junction. Take a right here and you will descend even more as you make your way through a scenic forest landscape.  You will soon hear water flowing from Seneca Creek below you.  The trail crosses the creek and comes to a junction with the Seneca Creek Trail at 9.1 miles.   At this point, you will cross Seneca Creek to reach the trail on the other side.  The water was flowing to make a nice small waterfall.  Before we crossed, we ventured just a short distance (about 75 yards) to the right down the Seneca Creek Trail and came across one of the most beautiful waterfalls/swimming holes I’ve seen – Seneca Falls.  We dropped our bags on the trail and scrambled down to reach the base of the falls.  There was a large cavernous rock overhang to the right of the falls.  In the water, we could see brook trout swimming around, occasionally breaching the water to catch flies that were dancing along the water surface.  Once we climbed back up from the basin, another group came down to the falls jumped into the swimming hole at the base of the falls.  From the screams when they jumped in, we could tell the water was extremely cold.  We made our way back to our original junction and then determined the best place to cross the creek was at the very top of the small waterfall.  We all made it across safely.

Christine hit a wall with her energy level, so we stopped a few minutes to eat a snack on the opposite side of the creek at a nice campsite.  Knowing we still had a distance to go, we pressed on further.  The Seneca Creek Trail went to the side of Seneca Creek for the entire way.  We crossed the creek in a couple of places.  Around mile 10.4, we began to see a ton of campsites.  We were surprised to see that there were so many people that were camped here overnight.  When we kept passing people on the trail, we felt that we would have our picks of campsites, but we didn’t realize how many people come here a different way (mostly from the lower Spruce Knob parking lot and taking the Seneca Creek Trail to these campsites).  Anthony and Suzanne hurried ahead, while I waited a while for Christine to try and regain her strength.

Seneca Falls
Seneca Falls is an impressive waterfall with an emerald green plunge pool. Below: Leaving the high meadows for Seneca Creek; A small waterfall above Seneca Falls; A side view of the falls; The trickiest of the stream crossings; Pretty wildflower; Lovely Seneca Creek.

Start of the Seneca Creek Trail Small Waterfall Seneca Falls
Crossing Wildflower Seneca Creek

We caught back up with our friends soon and they had claimed a gorgeous campsite (even though it was hard to imagine a bad one here) at 10.6 miles that was near a waterfall that plunged into the creek.  While there were lots of larger groups out here, we found a nice, secluded campsite that had a nice waterslide that created a babbling brook sound throughout the night.  We set up camp and started to make some dinner.  I always enjoy bringing a card game with us when we do an overnight backpack and this time I brought the game Hike.  It was pretty brainless fun and plays similar to Uno with specialty cards that create twists in the game.  It was starting to get dark, so we created a small, but nice fire in the pit.  Once the sun set and the fire died out, we retired to our tents.  It may have been the sound of the brook, but I probably slept the best I have ever slept backpacking that night.  What a great first day!

Campfire
The evening concluded with dinner, card games and a great campfire. Below: There were abundant rosebay rhododendron all along the stream; Our campsite had nice, flat space enough for 2-3 tents; We also had a pretty waterfall and pool for our water source.

Rosebay Camp Filtering

Day Two…

As usual on backpacking trips, we both woke up right around first light. We spent a little while longer in our sleeping bags, chatting and stretching.  It was a chilly morning, so we weren’t quite ready to climb out into the cold.

Eventually we emerged from our tent to start the day.  I put on gloves and a light jacket and  headed downstream to take a few photos of the big waterfall at the next campsite over.  The folks camping there had packed up and departed very early.  Adam went to get the bear bags down while I took photos.

Campsite Falls
One lucky group gets to camp on a site right across from this pretty waterfall.  Below: Our campsite in the morning; You can see smoke from other campsites downriver; Crossing the footbridge across Seneca Creek before our big uphill climb.

Campsite in the Morning Downriver Footbridge

We got everything out for breakfast and started taking down our tent, rolling up sleeping pads and stuffing our sleeping bags back into compression sacks.  I decided that I was going to eat a huge breakfast, so I wouldn’t bonk again on our second day of hiking.  Adam didn’t go into much detail in his day one post, but right around mile ten of our hike the day before, I hit a wall – HARD! It was right after we visited Seneca Falls and crossed the stream.  I sat on the ground and told everyone that I was feeling really lightheaded and sick.  I didn’t feel hungry.  I had been drinking water all day.  Regardless, my legs just felt like jelly and I just didn’t want to walk another single step.  Adam, Suzanne and Anthony all told me that they thought I needed to eat.  Turns out they were right – I had been hiking for ten miles with a 25 lb. pack on under 700 calories.  I guess I just didn’t realize how little I had eaten until I did the calorie math.  My appetite always goes away when I’m doing strenuous activities.  Usually, it doesn’t cause problems and I just eat when I get to camp.  I guess this time I just expended all my short term energy before we finished for the day.  I need to do a better job forcing myself to eat enough.

Alright… off that tangent and back to breakfast!  As promised, I ate a large breakfast – oatmeal, cheese, a honeybun and coffee.   It was about 600 calories of food and much more in line with my energy needs for a tough uphill and 6 miles of hiking.  Everyone had eaten and packed up camp by around 9:45 and we were on our way again.

Final Meadow
Adam climbs steeply uphill across our final large meadow of the hike.  Below: Anthony and Suzanne take a look back toward Seneca Creek;  We had spectacular skies; Making progress back to our start point.

One Last Look Toward the Creek Beautiful Skies Trail Sign

We had a short distance left to walk along Seneca Creek.  Within about a quarter mile, we reached a small wooden footbridge across the stream.  We crossed and continued uphill on the Seneca Creek Trail.  The steepest climbing was across a beautiful, expansive meadow.  We got great views of the valley and our last glimpse into the Seneca Creek watershed.  The high meadows on this hike are truly majestic and are definitely one of the trip’s highlights.

After crossing out of the meadow, we continued uphill through the woods back to the four-way junction of Seneca Creek/Lumberjack/Huckleberry.  Staying straight took us back onto the Huckleberry Trail.  From there, we retraced our steps from the day before.  It was a little slower going and felt longer on the second pass.  It was all uphill and everyone was a little tired.  It’s always funny how different the same four miles can feel under different circumstances.

Adam on the Huckleberry Trail
Hiking the Huckleberry Trail reminded us of hiking in New England.  Below: More lovely views from the Huckleberry Trail;  The trail was often paved with rock; A well-appointed campsite on the Huckleberry Trail; Ripe berries; A view from the talus slope.

Huckleberry Views Laurels Campsite
Ripe Berries Talus

We enjoyed the sunny, unseasonably cool July weather.  We stopped and picked many blueberries along the walk back.  I also took a little side trail from one of the meadows and found a talus slope with nice views across the mountains.

We got back to the car around noon.  We threw our packs into the back of the car and took the short, flat walk to check out views from the observation tower atop Spruce Knob.  It’s just a short quarter mile walk and well-worth the extra time and steps.  We spent some time enjoying the lofty views and cool breezes.  Anthony, Adam and Suzanne decided to walk to one more nearby viewpoint on the Whispering Spruce Trail.  It was just a tenth of a mile down the trail and provided even more spectacular views.  I headed back to the car to eat some more candy and switch my trail shoes for flip flops.

Tower Views
Anthony and Adam take in views from the observation tower on Spruce Knob.  Below: Views from the tower; The hiking crew; Views from the Whispering Spruce Trail; The tower.

Views Hikers Whispering Spruce
Observation Tower

After a few minutes, everyone was back at the car and we were on our way back to Harrisonburg for a celebratory meal and beer.  We all decided that Jack Brown’s was the best spot for lunch.  They have fantastic gourmet burgers and a great beer list.  It’s a perfect post-hike indulgence.

We couldn’t have asked for better weather, scenery, or company for this 4th of July weekend backpacking trip.  After lunch, we bid farewell to Anthony and Suzanne.  They’re such great hiking buddies and we always feel lucky when we get to hit the trail together.

Trail Notes

  • Distance – 16.5 miles [Day One] [Day Two]
  • Elevation Change – About 2300 ft.
  • Difficulty –  4.  The distance makes it fairly tough and the second day has a lot of uphill on the trail. 
  • Trail Conditions – 3.  Most of the trail was well-maintained.  The High Meadows Trail was quite overgrown.  There are some rocky, loose sections on this trail too, which can be a little rough on the feet.
  • Views – 5.  The best views are from the Spruce Knob trail near the fire tower.  The fire tower has wonderful views, but once you take the .5 mile trail around the fire tower, you will have gorgeous, breathtaking views from the highest point in West Virginia.  The views along the main backpacking trip were mostly during the High Meadows Trail.  There are gorgeous mountain views and no sign of civilization. 
  • Wildlife – 3.  There were lots of birds to be found on the High Meadows Trail.  We did have a deer visit us several times at camp. 
  • Ease to Navigate – 2.  The Huckleberry Trail and High Meadows Trail could use more signage.  I would suggest printing out our step-by-step desciption and bringing the midatlantichikes map to help guide your way. 
  • Solitude – 2.  This is a popular spot for people to do overnight camping.   Expect to see lots at the campsites, but you will have more solitude until you get to Seneca Creek. 

Download a Trail Map (PDF)

Directions to trailhead:  Directions vary so greatly depending on the direction you’re coming from.  Please refer to the trailhead marked on the map below to determine your best route.

House Mountain

This tough 8.75 mile hike follows a vaguely Y-shaped route to two outstanding viewpoints.  There are ample opportunities for backcountry camping on this route.  If you’re lucky, you may be joined on part of your hike by the famous House Mountain hiking goat!

View the Full Album of Photos From This Hike

The view from Goat Point on Big House Mountain
The view from Goat Point on Big House Mountain.  Below: Parking on this hike is limited and clearly marked; Early portions of the hike take place along a fire road through private property; Some nice views from the fire road.

Parking Fire Road View from Fire Road

Christine Says…

Like most hikers in Virginia, Adam and I are fans of Hiking Upward.  It’s one of our primary resources for route information.  We’ve been in touch with Bryce and Tony (the creators of HU) off and on the past few years.  We had casually tossed around the idea of meeting up for a hike or backpacking trip, but our schedules never seemed to work out.  Finally, in June, we found a date that suited everyone and made plans to meet up for a hike of House Mountain.  The HU guys were working on updating information for the re-routed trail up Little House Mountain and we were hiking the area for the first time.

The morning started off gloomy and gray.  I was a bit worried about missing out on views, but we got in the car and hoped for clearing skies.  Everyone got to the trailhead around 8:30 a.m.  We made our formal introductions and started the hike right away.  Our hiking party was made up of Adam and me, Tony and Bryce (HU team), and two of Bryce’s friends from work – Wayne and Bharath.  It was a great group to hike with and we all fell into easy conversation on the hike up.

The first couple miles of this route follow the Saddle Ridge Trail.  This portion of the hike starts off as a gravel road and passes a number of private residences.  After the first half mile, the route becomes more trail-ish and passes through shady woods.  There is one decent view of rolling hills and field on the right side of the trail.

At about two miles in, you reach the saddle between the Big House and Little House summits.  The saddle was historically a homestead and a fruit orchard before being turned over to public use.  There is still plenty of open pasture space for tent camping in the saddle.  Take a few minutes to read the informational signs about the area while you’re at the saddle. They provide information about the area’s history and the conservation efforts that made these trails possible.

Little House Trail
The Little House trail was recently re-routed to make the climb more gradual.  Below: Christine and Adam at the trail board for the new route up Little House; Adam checks out the other informational board in the saddle between Big & Little House. You can see Big House in the background; The ascent of Little House is still pretty steep.

Start of the Little House Trail View of Big House Climbing Little House Mountain

When we visited, we decided to hike Little House first.  The trail to the summit is a recent re-route.  The old trail was extremely steep, climbing straight up the mountainside without the amelioration of switchbacks.  The new trail is still quite steep, but the switchbacks definitely ease the climbing.  The trail was just blazed in spring of 2014, so if you hike anytime soon you’ll see plenty of fresh blue blazes marking the way.

We caught some nice views through the trees on the way up before finally gaining the ridge.  The ridge made for more moderate walking and included lots of interesting rock formations.  There were several small campsites along the ridge walk, too.

Eventually, we reached the end of the trail and a beautiful viewpoint.  It was still pretty overcast, but the low clouds had lifted enough to give us a view of the valley below and surrounding mountains.  We took time for a snack and a few photos before making our way back down to the saddle.  On the return trip, Tony and Bharath decided to take the old trail back down.  They beat us back to the saddle by a few minutes.

With everyone regrouped, we headed up the trail to the Big House summit.  Within the first couple tenths of a mile, we passed the House Mountain backcountry shelter.  It was a nice spot with a new privy and a side trail leading to a spring.  We found the shelter stocked with lighter fluid, plastic silverware and other often-forgotten necessities.  This hike would make a great beginner backpacking trip!  You’d have a couple miles of hiking with a pack.  But then you could set up camp and visit the two summits pack-free.

Most of the climb to Big House is along a rugged ATV trail.  It’s straight up the mountainside until you reach one large switchback.  At the switchback, look carefully for a very rocky, less-worn footpath departing the trail.  Depending on the vegetation, this might be an easy spot to miss.  If you take the switchback and continue the trail in that direction, you’ll just have a longer walk in the woods and no views.

View from Little House Mountain
Nice views from the summit of Little House Mountain.  Below: Walking along the ridge was rocky; There were some interesting rock formations; We saw a small eastern box turtle.

Rocky Little House Trail Rock Formations Box Turtle

We started scrambling up the rocks when all of a sudden a black and white animal wearing a red collar bounded out of the woods.  At first,  I thought it was another random hunting hound that was lost in the mountains.  But no… it was a GOAT!  She hiked with us the rest of the way to the viewpoint.

At the summit, she followed us around – begging for food and vigorously licking the salty sweat off our arms and legs.  It was a hoot and we really enjoyed such a friendly and novel companion on the trail.  We ate more snacks, took more photos and spent time hanging out with our new goat buddy.

On the hike down, the goat left us shortly after the switchback.  She gave us several loud farewell bleats before she bounded back into the woods.   The return hike to our car was all downhill, passing the saddle one last time before retracing our steps on the Saddle Ridge Trail.  Near the end of the hike, we had the privilege of meeting Brian.  He lives in one of the houses along the trail and is one of the primary people who works on building/maintaining the trails on these mountains.  If you see him, be sure to say thanks!

At our cars, we decided to head into downtown Lexington for some post-hike food and beers!  As Bryce put it ‘Every good hike should end in a pub!’  We had a good meal and more fun conversation at ‘The Palms’.  It was mid-afternoon and not very crowded when we visited – probably a good thing to not subject too many fellow diners to the smell of dirty hikers.  🙂  After lunch, we made our farewells and parted ways.  We had a great day and can’t wait to hit the trail with these guys again.

Adam Says…

It was great to finally meet up with Hiking Upward.  We do most of our hiking with just the two of us, so there is always a little anxiety about hiking with new people.  Because of all the miles they have covered, I wondered if we would be able to keep up or were going to get left in the dust of their hiking boots.  Along with our pace, I also wondered what we’d talk about.  However, within a few minutes, I knew we were quite the kindred spirits.  We talked about many things from hiking experiences to favorite microbrews.  As we were sharing some of our favorite trails, we were bringing up names of trails as if we were consulting maps.  I guess when we all write these hiking entries, that knowledge sticks with us.  I know this was the first of many adventures we will share together.

We started off from the parking lot (pay attention to the sign to know where to park and respect the boundaries).  We made our way up the road and at .3 miles, you reach a gate that begins the official trailhead.  Past the gate, you start a gradual ascent up a fire road, passing by a residence to the left.  At 2.25 miles, you reach the saddle between Big and Little House Mountain and the junction between the two trails.

The Group on the Summit of Little House Mountain
It was great to meet the guys from Hiking Upward. Below: Another nice view from a different rocky outcropping on Little House; The old route up Little House was blocked by a bramble of sticks; Making the steep descent; A view through the trees along the trail.

Another Little House View Old Route
Steep Descent View on Descent of Little House

We started off by hitting Little House Mountain first, taking a right at the information signs and following the blue-blazed trail.  The trail starts off relatively flat, but as you round the mountain the trail is very narrow and requires you to be mindful of where you step.  At 2.5 miles, the trail then begins to climb up the ridge very steeply and you begin a series of switchbacks until you gain the ridge at 3.1 miles.  The trail at this point goes through a thick area of rhododendron and remains slightly flat or downhill until you reach the viewpoint.  Along the way, you pass through some areas of larger rocks.  At 3.6 miles, the trail opened up to breathtaking views.  We paused here for a while to eat a snack and take some photos.  There are a few different places to get views from the rocks nearby.

We made our way back to the junction and saddle area, which we reached at 5.0 miles.  Now, it was time to take on Big House Mountain.  We took the opposite trail at the junction (as you were originally climbing up the trail, it is the trail to the left), making our way through some grassy areas before the trail opened up.  Within a short distance, we passed a nice overnight shelter to the right.  This shelter had it all – there was a sleeping bag someone left behind and even some cans of Yuengling for someone else to enjoy (if warm beer is your thing).  There was a privy building a short distance away.  We noticed another blue-blazed trail, which we were told later (by Brian, the trail maintainer) leads to a water source.

Shelter
There is a backcountry shelter a short distance up the Big House Mountain Trail. Below: The saddle is open and grassy – perfect for camping; The shelter was well-stocked with lighter fluid and various other items; Most of the climb up Big House was along an ATV trail.

Saddle Meadow Inside Shelter Ascending Big House

After we passed the shelter, the trail opened up to a larger fire road again which kept up a steady, tough climb gaining 400 feet in .4 miles.  The trail came to a junction with a switchback trail to the right that leads to the true summit of Big House Mountain, but the views are gained by staying straight on the trail.  The trail becomes very rocky at this point and we were soon joined by our goat friend.  Her nimbleness on the rocks amazed us and she led us to the rocky Goat Point viewpoint at 5.9 miles.  There was an upper perch and a lower perch for taking in some of the gorgeous views.  As I was heading to the lower outcropping, I spotted a geocache behind one of the rocks.  As I was signing the log, the goat jumped down from the high perch, scaring me and almost making me fall down the mountainside.  Be careful out there, especially when there are salt-craving goats waiting to pounce.

We Met a Goat
This cute goat joined us on the final climb to the summit of Big House Mountain. Below: The goat was a strong and agile climber; In the end, she mostly wanted food.

Strong Climber Begging

We headed back after taking in the views for a while (and being thoroughly licked by the goat).  I will say that I think I was the favorite of the goat.  This wasn’t the first time I had been amply licked by a goat while hiking – the other time was when we hiked the Massanutten Ridge trail.  Maybe the salt from my sweat tasted the best or I was the most agreeable to being licked – I’m not sure.  But, as we headed back down the goat followed us until we reached the rocky junction with the switchback to the summit.  She stared at us from the top as if to beg us to come back to his place for more licking.  We said our goodbyes to the goat and then made our way back.  We reached the saddle junction again at 6.6 miles and made it back to our car at 8.75 miles.

Friendly Goat
She was a friendly goat!  Below: More nice views from Big House summit;  It was a hazy, mostly cloudy day; The goat liked the salt in Adam’s sweat.

Nice Views from Big House Vertical View Goat Lick

If you are interested in geocaching, there are 17 different geocaches to find on the Little House Mountain and Big House Mountain trails.  I won’t list them all here, but here are the two at the summits:

After we arrived back at our vehicles, we decided to hit The Palms in Lexington for some great food and a few beers.  We had such a great day with our new friends!  I can’t believe that we had not heard much about this hike before.  This is a true gem of a hike with so many panoramic views!

Trail Notes

  • Distance – 8.75 miles
    MapMyHike Stats*
  • Elevation Change – 2850 ft.
  • Difficulty –  4.5.  There is some pretty serious climbing on this hike.  Not many hikes of this length in Virginia have quite so much elevation gain.
  • Trail Conditions – 4.  The trail was in great shape and the hard work put into maintaining this trail is evident.  The newer trail to the summit of Little House Mountain is narrow and steep with some loose sections.  We recommend a hiking stick or trekking poles to help keep yourself upright!
  • Views  4.5.  Gorgeous!  I’d love to visit on a crystal clear fall day sometime!
  • Streams/Waterfalls – 0.  None – but there is a small piped spring near the camping shelter.
  • Wildlife – 3.  Any trail that has a wild(ish) goat gets a few wildlife bonus points!
  • Ease to Navigate – 4.  The trails in this area are very well-marked.  The one tricky spot might be finding the viewpoint on Big House Mountain.  If you miss the rocky path departing the trail at the hairpin turn, you might miss the views altogether.
  • Solitude –3.  We saw a fair number of hiking groups along the trail, but had both overlooks to ourselves.

Download a Trail Map (PDF)

Directions to trailhead:  From I-81, take the I-64 exit 191 toward Lexington/Charleston.  Follow I-64 for six miles to exit 50 (US 60 East).  Follow US 60 East for 2.2 miles, turn right on Route 639.  Go .8 miles and bear left onto Route 638.  Follow 638 for 1.1 miles.  Turn right on Route 641, go 1.1 miles.  Turn right onto Route 643.  Parking is on the left side of the road in .3 miles.  Make sure you follow the parking signs on private property.

MapMyHike is not necessarily accurate, as the GPS signal fades in and out – but it still provides some fun and interesting information.

Bear Church Rock – via Bootens Gap

This 10.2 mile hike to Bear Church Rock from Bootens Gap (on Skyline Drive) is a great alternative to the route that begins down in the valley at Graves Mill.  While this route doesn’t include the scenic Staunton River or the Jones Mountain Cabin, it crosses some of the deepest, least traveled parts of Shenandoah National Park.  And in the end, you reach the same great viewpoint.  While this route is a little longer than the alternative, it has less climbing and feels a little more moderate.

View the Full Album of Photos From This Hike

View from Bear Church Rock
The view from Bear Church Rock reveals nothing but wilderness. The Staunton River flows through the valley below.  Below:  The hike begins on the AT northbound at Bootens Gap;  Christine passing large boulders on the Laurel Prong trail; Mountain laurel starting to bloom.

The AT at Bootens Gap Boulders on Laurel Prong TrailBoulders on Laurel Prong Trail Mountain Laurel Starting to Bloom

Adam Says…

Bear Church Rock really impressed us when we hiked it a few years ago, approaching it from Graves Mill.  However, we were thinking it would be nice to take a different route that would be more accessible from Skyline Drive.  This approach is a bit longer, but it has 400 fewer feet of elevation gain, making this an overall easier climb.

We started off from the Bootens Gap parking lot at Mile Marker 55 on Skyline Drive in the Central District of Shenandoah National Park.  We took the Appalachian Trail from the parking lot, heading north.  In .5 miles, we reached the junction with the Laurel Prong Trail.  We took a right to join this trail.  The Laurel Prong Trail ends up going through a relatively steep decline through a loose, rocky section.  The trail eventually bottoms out and you reach a junction with the Cat Knob Trail at 1.5 miles.  We took the Cat Knob Trail and began a steep incline.  The trail hits another junction with the Jones Mountain Trail at 2.2 miles.  Take a right on the Jones Mountain Trail.  At this point, the trail is relatively flat or downhill for most of the way to Bear Church Rock.  As you near your goal, you’ll see some pretty amazing standalone boulders along the trail. You will know you’re getting close to the viewpoint when the trail takes a sudden, precipitous downhill drop.  At 5.1 miles, you will reached an unmarked side trail that takes you up a about ten feet through the laurels onto a large rock outcrop with majestic, wilderness views.  Return the way you came to make this a 10.2 mile out-and-back.

Adam Hiking the Jones Mountain Trail
The Jones Mountain Trail traversed an expansive bed of lush, green ferns.  Below: Adam climbs Cat Knob – one of the few steep portions of the trail;  Park boundaries were well marked; One of many pink ladys slippers along the trail.

Climbing Cat Knob NPS Boundary Marking Pink Lady's Slipper

One thing to note on the trail is you do come across several times where the National Park crosses back and forth across boundary lines with the Rapidan Wildlife Management Area.  You may see some US Boundary markers in several places that marks the portion that is under National Park control versus Virginia control.

When we reached the highest point of the Cat Knob Trail, we found the largest concentration of pink lady slippers I have ever seen.  Everywhere we turned, we kept seeing more and more and they were at the peak of their bloom.  That was such a nice reward by coming this route.

Many Lady's Slippers
Usually photos of lady’s slippers are close-ups. This wider shot gives a better idea how these wildflowers are situated in the forest.  Below:  The portion of the trail outside the park is blazed differently;  The Rapidan Wildlife Management area; Adam makes the last final, steep descent to Bear Church Rock.

Blazes Wildlife Management Descent to Rock

Somewhere along the Jones Mountain Trail as we were making our approach to Bear Church Rock, my knee buckled and gave me a lot of pain for the rest of the day.  One hard part about hiking is if you get injured, you don’t have a lot of choice but to keep going.  I stopped about .25 mile before we reached the summit and rested.  I wasn’t sure if I would be able to make it all the way.  Christine went ahead to scout the way and see how much further.  Not wanting to be separated too long, I pushed myself onward and found her at the rock overlook.  We stayed there to rest for a while and we had the rock all to ourselves.  We were joined in about 20 minutes from a man from China who had come up the route from Graves Mill.  He didn’t speak English and we heard him on his walkie-talkie talking to someone that we presumed to be his wife.  We were guessing she was farther behind and he was assuring her he made it.  The climb the other way is quite steep, so I wouldn’t be surprised if she had either turned around or was just taking longer to get to the rock.

The views were spectacular.  While we had a bit of a cloudy day, it was nice to see the shadows from the clouds creeping along the mountain ridges in the distance.

We decided to make our way back.  I felt like the time at the viewpoint allowed me to rest my knee enough to make the return trip. I was hobbling slowly, but I had to keep pushing forward.  We got back to the car and I was glad to not have to take any more steps.

Christine Says…

It was National Trails Day, the weather was great – and even though neither of us was in the mood to go on a long car ride to a distant trailhead, we had to get out and hike! We settled on the hike from Skyline Drive to Bear Church Rock – mostly because it was close to home, but also because we’d never hiked it before. A few years ago, we hiked from the valley bottom in Graves Mill up to Bear Church Rock. That was a challenging and beautiful hike, so we thought it would be fun to visit the rock from the other approach.

From the parking lot at Bootens Gap, we headed north on the Appalachian Trail, gradually ascending Hazeltop Mountain. I was amazed by how lush and green everything in the park looked. It almost looked as green as the Smokies! Our last hike in the park had been in late April, before the leaves fully emerged. Spring always take a long time to fully arrive in the mountains.

After a short, easy stretch on the AT, we reached the junction with the Laurel Prong Trail. We turned right onto the trail and followed it downhill, over many rock jumbles along the shoulder of the mountain. In a saddle between two mountains, we reached the junction with the Cat Knob Trail.

Taking in the View at Bear Church
Adam takes in the view at Bear Church Rock.  Below: You’ll pass these rock formations on the final descent to Bear Church;  The rocks were covered with blooming mountain laurel;  There were also lots of ripening blueberries.

Rock Formations Mountain Laurels Blueberries

That trail climbed steeply over Cat Knob before reaching the junction with the Jones Mountain Trail. The Jones Mountain trail bears to the right. This section of trail actually departs Shenandoah National Park and enters the Rapidan Wildlife Management Area. You’ll notice park boundary signs and different orange/red blazes (as opposed to Shenandoah’s blue blazes) when you’re on this part of the hike.

This section of trail is incredibly beautiful! We enjoyed the expansive understory of ferns and countless pink lady’s slippers. The mountain laurel was just starting to bloom. The terrain along the Jones Mountain trail was rolling – lots of ups and downs, none of them too steep.   This route to Bear Church is probably less popular than the route from Graves Mill, so the trail was narrow and overgrown. Tall grasses brushed our legs all along the way. Adam said, “All I can think of is ticks. I feel like I’m crawling with them!’ Luckily, the permethrin we’ve been using on our clothes and gear really seems to be working. Neither of us found any ticks during a thorough post-hike check.

Around 4.9 miles into the hike, the trail took an incredibly steep downward turn. We lost about 200 feet of elevation in just over a couple tenths of a mile. We passed a few rocky outcroppings that looked like they might potentially have views, but they all turned out to be obscured by trees. Watch carefully for the spur trail to Bear Church Rock. It’s not a marked spur, so one could easily miss it.

On the hike, Adam had begun to wonder if we passed the view or if maybe it had been closed in by trees. I told him that it was a really open, spectacular view and that it had to be nearby. I told him I’d scout ahead and shout back if I found it. I ended up walking almost another half mile before I reached the spur trail! The distances in our guidebook were way off on describing the last mile of the hike to the viewpoint. Other sources I checked afterwards all put the distance anywhere between 9.5 and 11 (rather than the 8.5 miles indicated by our book).

Lush Green
Everything was so abundant and green on this pretty June day.  Below: Adam makes the steep ascent on the return from Bear Church Rock.  Fortunately it is only this steep for a short time; Coming off Cat Knob; We spotted a doe and fawn in the understory.  The fawn was pretty well hidden.

Steep Climb Coming Off Cat Knob Doe

There was a large hiking group on the rock, so I felt weird about shouting for Adam. They told me they were headed out the way we came and would send Adam down when they passed him. But, just as the final hiker departed, Adam arrived.

We had lunch on the rock and enjoyed the unspoiled, pristine views of the park. One of the nice things about Bear Church is that you really don’t see civilization from the viewpoint. You get great views of Fork Mountain, Cat Knob and the Staunton River Valley – but no roads or houses or farms. It’s beautiful! The mountain laurel around the rocky viewpoint were in full bloom and quite spectacular!

After a nice rest, we hiked back the way we came. Most of the return trip was uphill, but other than a short section of climbing right after leaving Bear Church it was very moderate, gradual climbing. The last little bit along the AT was smooth downhill. We saw a doe and fawn hiding in the ferns right before we got back to the car. Once we were back in the car, we decided to head up to Big Meadows for blackberry milkshakes (yay!) and to say hello to our PATC friends. We were glad to catch up with the pair of PATC volunteers who led our Backpacking 101 course several years ago. Good day!

Trail Notes

  • Distance10.2 miles
  • Elevation Change – About 1800 feet
  • Difficulty – 4.  The climb down and back up are not overly tough, but the distance gives it an above average difficulty. 
  • Trail Conditions – 2.5.  The rocky slope climbing down the Laurel Prong trail did have some loose rock.  The Jones Mountain Trail was quite overgrown along the way and we were walking through a lot of knee-high grassy areas.  Wear bug spray and check for ticks afterwards.
  • Views– 5.  Great mountain views from Bear Church Rock. 
  • Streams/Waterfalls – 0.  Non-existent. 
  • Wildlife – 2.  We didn’t really see much wildlife on this trail.  We thought much of it would be a great place to spot a bear since it is in a very wide part of Shenandoah National Park and not as well-traveled. 
  • Ease to Navigate – 3.  You do take four different trails to get to Bear Church Rock, so pay attention at the junction markers.
  • Solitude – 3.  Most of the people we saw on the trail were on the Laurel Prong portion (typically making their way to the Rapidan Camp).  I would expect that you would see someone at Bear Church Rock.

Download a Trail Map (PDF)

Directions to trailhead:  Follow Skyline Drive to mile marker 55.  Park at the Bootens Gap parking area on the east side of the drive.  The AT departs from the end of the parking lot.

Rich Mountain Loop (TN)

Special: Smokies Edition

Introductory Guide to Visiting Great Smoky Mountains National Park

This 8.7 mile loop didn’t offer much in the way of natural scenery – no great views, no plunging waterfalls, but we did see a bear!  Apparently, this is a great trail to spot bears, as all ten hikers we spoke to on the loop saw at least one bear over the course of their hike.  This trail also passes the historic John Oliver cabin.

View the Full Album of Photos From This Hike

View Into Cades Cove
There was one decent view into Cades Cove on the Rich Mountain Loop. Most views were obscured by trees.

Adam Says…

The Cades Cove section of Great Smoky Mountains National Park has a lot to offer – camping, drives around the loop to view wildlife, biking (covered in a previous post), and a historic view into the way people lived and farmed in this area.  Honestly, I have a little love/hate relationship with this section.  The biking and wildlife viewing can’t be beat around this area.  However, the traffic is so incredibly slow through this area.  Expect people to go WAY below the posted speed limit, so getting to Cades Cove can take a lot longer than expected.  I think most of the way traveling from the Sugarlands Visitors Center, multiple people were driving about 10-15 mph for the entire 17 miles, so it was a drag getting there.  Christine and I typically like to get out early in the morning to beat traffic and heat through the day, so I would recommend the same if visiting Cades Cove.

Since we had biked the loop and hiked Abrams Falls (also on the Cades Cove loop) before, we looked for some other options for hikes.  Our book Day Hikes in the Smokies (by Carson Brewer) had this listed as a nice option for a hike.  According to the description, there was a waterfall, some views, and a historic homestead so we felt this would be a nice option to take.

The open meadows and mountain backdrops define Cades Cove.
The open meadows and mountain backdrops define Cades Cove.  Below: Adam at the trailhead; A meadow view early in the hike; Stream crossings were shallow and easy when we hiked.

Trailhead Meadow View Stream Crossing

We parked in the lot past the information kiosk as you enter the Cades Cove loop.  There was plenty of parking in the lot, as most people either park their car to bike the loop or just ask the rangers at the kiosk some questions about the area.  We parked at one of the furthest parking spots and then crossed the road.  In a short distance, the trailhead appeared and we started off on the Rich Mountain Loop trail.  This trail was relatively flat.  It was mostly wooded, but there were a few spots where it opened up to views of meadows.  In .5 miles, the trail reached a junction with the Crooked Arm Ridge trail.  We took a right here to start the Crooked Arm Ridge trail.  At .8 miles, you reach the Crooked Arm Cascade, which was no more than a small trickle when we viewed it.  This trail is the steepest section of the hike, as you are climbing up the entire trail gaining close to 1800 feet by the time you reach the end of the trail at mile 2.7.  The humidity this day was very high and there was no breeze, so we felt like we were pouring buckets of sweat on our relentless climb through many switchbacks along the trail.

At 2.7 miles, we passed the junction with the Scott Mountain Trail, but the junction wasn’t clearly marked to let you know it was the Scott Mountain Trail (Note: This might be because the Scott Mountain Trail is closed from campsite #6 to Schoolhouse Gap.  However, Campsite #6 is still open.  Check park information for the latest updates on trail closures.)  Staying straight, the trail turns into the Indian Grave Gap Trail.  It continues to climb gradually, and there are some occasional obstructed views from the ridge.  You finally reach the peak of climbing around mile four,  near Cerulean Knob (3686 ft. – no views).  We continued walking the ridge for a while, then the trail then starts its descent.   At 5.3 miles, the Indian Grave Gap Trail reaches a junction.  Continue on the Rich Mountain Loop trail.

Crooked Arm Falls
Our hiking guide said that Crooked Arm Falls ‘was no Niagara’. They really weren’t kidding!  Below: The trail was eroded and had a deep chute in the middle; The ridge walking was pleasant and breezy; We saw several of these cute toads.

Eroded Trail Ridgewalking Cute Toad

The trail continues to descend and you do get some nice views along the way of a branch that leads to Abrams Creek.  Around 7.2 miles, the trail leads to the John Oliver Place, a historic cabin.  If you are interested in learning more about the Oliver family and life in the 1800’s in Cades Cove, I would recommend checking out the history of the Olivers and the cabin and what pioneer life was like in Cades Cove.  We paused to check out the cabin and as you face the house, take the rightmost trail behind the house (there are several small paths here) to continue on to the Rich Mountain Loop.  You will have a few stream crossings (minor rock hopping is required) until you reach the first junction you met at mile 8.2.  Continue straight to take the Rich Mountain Loop trail to arrive back at your car at mile 8.7.

As mentioned in the short description at the top, we kept coming across people that had seen bears along the trail.  Until we started the descent from Cerulean Knob, everyone we crossed told us they had seen various bears across the trail.   Of course everyone also said they watched the bears and then they ran off.  Always excited to see bears, we felt like everyone else had chased them away.  As we were descending we were convinced that we probably wouldn’t see anything, but as soon as we voiced this doubt, Christine spotted a bear right off the side of the trail.  The bear just watched us indifferently while it ate some leaves.  Then it took a slow walk and then squatted to do what bears do in the woods.  As soon as it was done, it shot through the woods at a breakneck pace like its poop had scared him.  I guess that is why they call it “bear scat”, because he really did scat after doing his business.

One lesson that I quickly learned on this trail was that humidity is relative.  While we were doing the tough climb up to the ridgeline, we came across another couple (who of course were telling us about a bear they saw).   Feeling that I was quite the sight from all the sweat coming off my body, I commented on how hot and humid it was.  They said, “Wow.  We haven’t been sweating at all today.”  They then explained they were from Mississippi so they were more accustomed to the heat and humidity and thought it was quite comfortable.  Of course this reminded me on some of our trips to Maine and talking to people that couldn’t handle the heat of 85 degrees without humidity and we thought it was quite pleasant.

While we felt the hike wasn’t overly impressive based on the description we originally read, we felt grateful that we saw a bear in the Smokies.  If you’re looking for a bit of a challenge and some variety of terrain in this area of the Smokies, this is a hike to consider.

Christine Says…

After a third day of shorter, easier hikes, I was finally feeling better and we were on the move from Bryson City to Gatlinburg for the remainder of our week in the Smokies. We decided it was time to hike something a little longer/tougher. We considered a few trails on the northern side of the park, including Gregory Bald, Ramsey Cascades, and Rich Mountain. In the end, we settled on Rich Mountain because our guidebook said it had views, a waterfall and a historic cabin. I like trails with a variety of attractions, so it seemed like the perfect choice for the day.

Another perk of the Rich Mountain loop is that the trailhead can be accessed at the head of Cades Cove, before the start of one-way traffic.   The Cades Cove loop is something every GSMNP visitor should drive (or bike) at least once. It’s a great place to spot wildlife and it showcases the park’s fascinating human history. But, if I’m being fully honest, the traffic in Cades Cove can be insufferable when you just want to get to a trailhead and start your hike. On this particular day, I was very happy to be avoiding the gridlock!

We followed the Rich Mountain Loop trail for about half a mile to our first junction. At the marker, we took a right onto the Crooked Arm Ridge Trail. Most people seem to hike the trail clockwise, but we decided to go the other way for to get the climbing done a little earlier and a little faster in the loop.

One of the first landmarks we passed was Crooked Arm Falls, which our hiking guidebook described as ‘not Niagara, but still very nice’. That turned out to be quite the understatement! The ‘waterfall’ was barely a trickle of water over a short rock shelf. Maybe it’s more impressive when there has been a ton of rain!

Bear
We spotted an adolescent bear along the trail!  Below: Adam checking out trail distances at one of the junctions; Flame azalea; Mountain laurel.

Trail Junction Flame Azalea Mountain Laurel

After passing the waterfall, our climb began in earnest. Neither of us was used to hiking in the heat and humidity. Virginia had been having lots of cool, pleasant days that spring, so it was very tough going. When we got back to the car and had smartphone access again, I checked the temperatures and real feel estimates – it had been about 88 degrees with a real feel of 95. Honestly, that’s kind of the outer limit of heat in which I’m willing to hike.

We slogged along uphill for a couple miles. The air was really still and steamy, with any chance of a breeze blocked by the shoulder of the mountain. The trail was deeply eroded in several sections, with the middle of the footpath looking like a chute in the ground. The views promised by our guidebook were mostly closed in by the leaves on the trees and we started to think we may have picked a dud of a hike. I was feeling really overheated and crabby.

Eventually we reached the junction with the Indian Grave Gap Trail. At this point, the climbing became easier and we felt a breeze across the ridge. We started to see more wildflowers – mountain laurel and flame azalea. We spotted several cute toads hopping across the trail. We stopped for a snack near an opening in the trees. We had a decent view into Cades Cove. Along this section of trail, we passed two other hiking parties – both mentioned that they’d had bear sightings before the junction with the Rich Mountain Loop. One group had spotted an adolescent bear and the other a mother bear with two cubs.   Between the breeze, the wildflowers, and the likelihood of a bear spotting; my attitude turned a little more positive. Adam was more skeptical than I was, saying ‘If all these people already saw bears, we’ll probably be the only ones who don’t!’

We walked along, trying to stay quiet for the wildlife. We reached the junction of the Indian Grave Gap Trail and the Rich Mountain Loop Trail without spotting a bear. I figured that we were out of luck, and started chatting with Adam again. As we were descending toward a stream bed, I caught a shuffle of movement through the trees. I stopped abruptly, waved my hand up to stop Adam behind me and whispered ‘BEAR!’ Ten feet from the edge of the trail, we spotted a handsome yearling bear foraging for food. He knew we were there, but continued to move along at a normal pace. Other than once upward glance, he completely ignored us. Suddenly, he broke into a full gallop and went crashing deeper into the woods and out of view. It was a GREAT sighting and made the hike totally worthwhile.

John Oliver Cabin
The John Oliver Place is the oldest cabin in Cades Cove. Below: A friendly yellow warbler we spotted along the trail; Adam descends the Rich Mountain Loop Trail; The woods shortly before reaching the Oliver cabin were very pretty.

Warbler Descent Woods

The rest of the hike between the bear and the John Oliver cabin was downhill, steeply at times. For a couple hundred yards, we were followed by a cute yellow warbler. The bird hopped from tree to tree right alongside us before finally flying off. We had a couple easy, shallow stream crossings on the section of trail.

We reached the Oliver cabin and were met with crowds of Cades Cove tourists. Most people visiting the cabin park along the loop road and then walk a short distance up to the house. I think this cabin is the oldest structure in the Cove.   After spending a little time exploring the cabin, we headed back onto the Rich Mountain Loop trail.

After the cabin there wasn’t anything remarkable left on the trail to see. I don’t think I took a single photo! It was just an easy walk for about a mile back to our first junction of the day, followed by a half mile stretch back to the parking area on the loop road. It felt great to be back in the air-conditioned car!

On our way out of Cades Cove, we stopped by the snack bar at the campground. I got a gigantic Gatorade and a bag of generic Cheetos. The Gatorade tasted miraculous after miles of drinking lukewarm Camelbak water! About an hour later, we were checking into our hotel in Gatlinburg. After showering, we headed out to the Smoky Mountain Brewery. On the way, we got caught in one of the biggest downpours I’ve ever experienced. We ate dinner soaked, but the beer and steak were so good I didn’t care.

So, I guess in closing… would I recommend the Rich Mountain Loop? Probably – it seems like a great place to hike if you want good odds of seeing a bear in the wild, but don’t go expecting great views and waterfalls.

Trail Notes

  • Distance – 8.7 miles
  • Elevation Change – 1800 ft.
  • Difficulty – 3.5  The hike up the Crooked Arm Ridge trail was tough.
  • Trail Conditions –  3.  The trail was clear, but there were some eroded parts on the climb up the Crooked Arm Ridge Trail.  On the hike down, there was some loose rock also.
  • Views – 2.  There were some obstructed views from the ridgeline.
  • Streams/Waterfalls – 2.  The Crooked Arm Cascade was a disappointment with little water, but the streams on the back end of the loop were nice. 
  • Wildlife – 4.5.  We did see a bear and it looked and sounded like a lot of bear activity here.  We also saw some deer along the way.
  • Ease to Navigate –  1.5.  Trails were not marked very clearly, especially at junctions.  Also, there is confusion around the John Oliver place on which way to go to complete the loop back.
  • Solitude – 2.5.  Cades Cove is a very popular area.  I would expect to see some people on the trail most days, but less in the upper elevations.  There will also be lots of people that will park on the main road to check out the John Oliver Place. 

Download a Trail Map (PDF)

Directions to trailhead:   From the Sugarlands Visitor Center in GSMNP, follow signs towards Cades Cove. Follow Little River Road for about 17 miles.  At the intersection near Townsend, the road will become Laurel Creek Road.  Follow Laurel Creek road for 7.4 miles to the parking area at the head of Cades Cove.  Park in the lot on the left hand side of the road right before the traffic becomes one way.  The trail starts about 25 yards ahead on the opposite side of the road from parking.

Black Balsam & Tennent Mountain (NC)

North Carolina Hikes

This 6.6 mile loop offers some of the area’s most amazing high-elevation, Appalachian bald scenery!  It was right up there with Roan Mountain. The views are 360 degrees and showcase mountains in every direction.  If we were to hike it again, we’d do it as an out-and-back and skip the return arm of the loop along Graveyard Ridge and Mountains to the Sea.

View the Full Album of Photos From This Hike

Black Balsam Knob
Hiking Black Balsam and Tennent reminded us of both the Whites (in New Hampshire) and Roan Mountain (in Tennessee). Such spectacular, wide-open views! Below: The most scenic parts of the hike followed the Art Loeb Trail; The Graveyard Ridge section was wet and had a stream crossing; The end of the hike took us across numerous boardwalks/bridges.

Art Loeb Stream Boardwalk

Adam Says…

When we were planning our trip to the Smokies, we decided we wanted to spend the first few days near the Asheville, NC area and check out a few hikes along the Blue Ridge Parkway.  We had set out in the morning to check out the Graveyard Fields waterfalls.  On a trip here many years ago, we remembered how beautiful the series of waterfalls were.  We brought a book with a description of the hike that would include a visit to Black Balsam and Tennent Knob on the loop.  However, we didn’t have a map of the area other than what our book had provided.  After driving along the parkway for some time, we pulled up to where the parking lot would be (mile marker 418.8) and it was all blocked off by fencing.  It appears they are doing some major renovations of the parking area and stairs down to the Second Falls.  They had blocked off any access to the trail and instead had signs saying that you could access the trail from many miles away.  We were very disappointed, but decided to drive up further along the Parkway.  We took a right on the gravel road 816 (mile marker 420.2) and followed that until we saw a trail marker to the right that led up to Black Balsam Knob.  We were relieved we were going to be able to see the balds and I realized we were picking up our loop trail but just a little differently than we had originally intended.

From the road, you start on the Art Loeb trail.  In a few hundred feet, you will see a side trail to the right.  This is the Mountains to Sea Trail that will be your return from the loop.  Stay straight to continue on the Art Loeb Trail as it ascends past amazing vistas.  You will reach the summit of the Black Balsam Knob at .9 miles and will see many campsites at the top.  On a clear day from here you will have 360-degree views all around with the Smokies to the west and Mt. Mitchell to the north.  The trail took a sharp left at this point as you continue on the Art Loeb trail.  On Black Balsam Knob, there are many other trails cut-in over the years along the balds which makes it tricky to know if you are on the right trail.  As we left the summit area, we came to a junction between two trails that both looked legitimate.  One seemed to go over a hillside and the other went to the left and around.  We took the one to the left and saw a very worn sign that read “Art Loeb” so we knew we made the correct choice.  The trail wrapped around the hillside and went through a narrow path with waist-high shrubbery growing along the trail.  Our legs got a little scratched along the way, but we pressed on.  After a while the trail went through a few switchbacks while descending and then flattened out.  At this point, we could see Tennent Mountain ahead of us, so we felt comfortable that we were going the right way.  Soon, the shrubbery opened up into a clearing and we climbed up the rocky path and reached the summit of Tennent Mountain at 2.5 miles.

Approaching Black Balsam
Hiking across open, grassy balds at 6,000 ft. is such a treat!  Below:  The trail looks like a ribbon across the mountain tops; Lots of colorful tents on Black Balsam Knob; You can see a glimpse of the parking lot at the trailhead.

Trail Across the Summits Tents Parking Area

The summit of Tennent Mountain was just as scenic with more views in every direction.  From here we could also see Looking Glass Rock, one of the most iconic images along the Blue Ridge Parkway, in the distance.  We had our lunch on the top of this spot and then made the decision to do the full loop instead of just the out-and-back to the summits.  We continued forward on the Art Loeb Trail.  From here, there were a few more nice views but then the trail descended into a more wooded trail.  The trail passed a few more campsite options before we reached the area known as Ivestor Gap at 3.1 miles.  Ivestor Gap is a large open junction point where many trails converge.  There was a map that showed where we were, but none of the trails were marked to let us know which was the right one to take.  When you reach Ivestor Gap, take the larger trail to the right that looks like an old road.  This was the Graveyard Ridge Trail.   We were on this for only .3 miles, before passing a small spring in the rocks on the lefthand side of the trail, and took a sharp right to stay on to the Graveyard Ridge Trail, another unmarked junction [staying straight on the trail would begin the Greasy Cove Trail].   The Graveyard Ridge Trail was very rocky and had a lot of water on the trail, so there was some times of rock-hopping and getting your shoes wet.  While on this trail, you may have a few glimpses at Tennent Mountain above to see where you came from and there are a couple of spots for viewpoints.

At 5.1 miles, we reached another junction.  Deciding to forego the trip to see the waterfalls to Graveyard Fields (which would have probably added another 4.5 miles roundtrip to our hike), we took a sharp right up the Mountains to Sea Trail.  This trail was extremely steep and at times felt like a bushwhack as the trail was very overgrown.   In about .5 miles, you’ll gain over 500 feet of elevation, so it is a slow effort.  Eventually at 5.75 miles, the trail reached the top of the bubble and you got a few more views from a rocky outcropping.  Blazes were painted on the rock that led the way as the trail descends below.  The trail moves away from the ridgeline before switching back – it feels like the wrong direction, but it’s not.  The trail descends for a few hundred feet before climbing up again.  You’ll pass over several wooden footbridges along this section of the trail.  At about the 6.5 mile mark, the trail goes into a deep wooded area again and you reach the junction again with the Art Loeb Trail.  Turn left and you head back to 816 in a short distance.

Open Hiking
Spectacular views with every step!  Below: In the saddles between the high points, the trail was narrow and lined by dense shrubs;  Adam stands atop Tennent Mountain; Summit of Tennent Mountain.

Narrow Tennent Summit Tennent Mountain

At the top of Tennent Mountain, there is a plaque on the rocks dedicated to Gaillard Stoney Tennent (1872-1953) who “established organized hiking in North Carolina.”  I couldn’t find any more connections or information about Tennent online, but this sounds quite impressive.

If you are interested in Geocaching, there are several you could find along the trail (and it wouldn’t hurt to have a GPS handy):

While we tried to cover some extra ground on this trail by making it a loop (and leaving the option to inspect the waterfalls), I would recommend doing this trip as an out-and-back to Tennent Mountain.  The trail system is very confusing here since trails are rarely marked and junctions are not labeled (we’re a little spoiled here in Virginia).  We had to ask several people along the way if we were going in the right direction, so I can imagine a lot of people will feel lost at some point along this trail.   All that being said, the views from Black Balsam Knob and Tennent Mountain are breathtaking.  On a clear day, you can see for hundreds of miles and can see ridgeline after ridgeline of mountains around you with few glimpses of anything resembling civilization.  Don’t miss this one if you are looking for a hike along the Blue Ridge Parkway!

Christine Says…

Our first full day in Asheville, we got up early and had an amazing breakfast at Biscuit Head.  Seriously – if you’re in Asheville, go eat those biscuits! We had planned a 5.2 mile hike starting near Graveyard Fields on the Blue Ridge Parkway.  We drove the hour from Asheville to the trailhead to find the area completely closed off with an 8-foot tall chain link fence and orange plastic mesh.  Even the wooden stairs leading to the entire larger trail system were blocked off.  So, we grabbed our Falcon Guide for Hiking the Blue Ridge Parkway and started scrambling for alternatives.  We settled on a different hike that would still let us see Black Balsam Knob, and give us the option to visit the waterfalls (if we had energy to spare).

Christine Enjoys the View
Who wouldn’t want to spend all day enjoying views like these! Below: Views from the ridge after crossing the summit of Tennent Mountain; Adam approaching Ivestor Gap;  Shining Rock Wilderness sign at Ivestor Gap.

Looking Glass Approaching Ivestor Gap Ivestor Gap

The Falcon Guide offered vague (at best) descriptions of the hikes along the parkway, so we weren’t really sure how long the hike would be, what kind of elevation change we’d experience, what the terrain would be like or even the names of all the trails we would traverse.  We had a rough map of the area in the book, so we could make some educated guesses, but we definitely went into this hike with a lot less information than we normally do.

We found the trailhead parking area packed – the lot was full and cars lined both sides of the rough, potholed road.  We started off on a white blazed trail that climbed gently to sweeping views from bald Black Balsam Knob.  The first great views are less than a mile of relatively easy hiking from the trailhead, so we saw tons of people.    There were at least 3-4 tents sent up atop the bald.  It was gorgeous – but it was a zoo!

From there, the trail got a little confusing.  There are so many social paths to campsites worn into the mountain.  We had a hard time knowing for sure that we were still on the white-blazed Art Loeb trail.  There weren’t any blazes to be seen, and the only sign was so weathered that it looked like a blank piece of wood on a post.  We stood pondering our book/map for a few minutes, when a foursome passed and confirmed that they had hiked this area many times and we were indeed on the correct trail. A little later, we passed an actual Art Loeb trail sign.

Graveyard Ridge
Adam hikes in the stream that was the footbed on the Graveyard Ridge Trail. Below: Adam at the junction of the Graveyard Ridge and Mountains to Sea trails; Painted trillium; The early part of the Mountains to Sea trail was essentially a bushwhack.

Mountains to Sea Painted Trillium Bushwhack

The trail descended through thick, dense scrub – lots of berry bushes and rhododendron.   Eventually the trail opened back up and we began another ascent to the summit of 6,000 ft.+ Tennent Knob.  This outlook was even more spectacular than Black Balsam.  We could see for miles in every direction.  We stopped at this point and had lunch on the trail.  I had packed an apple, a Kind bar and some cookies from a bakery in the top of my pack. The strong sunshine had warmed the cookies to the point that they tasted like they had just come out of the oven.  So good!

After the summit of Tennent Knob, we descended again before reaching Ivestor Gap.  At the Gap, there was a troop of Boy Scouts at the information station.  We consulted our map again before heading down another unmarked trail that we believed to be correct.

The trail at this point became wet and streamlike.  We came across another hiker and his backpacking beagle!  The beagle was really sweet and apparently a good hiker – able to do 12 mile days!  The man was filling up his water bottles at a spring along the trail.  Right after the spring, the there was a trail junction. We took the sharp hairpin turn onto the unmarked Graveyard Ridge Trail.  It was a mostly flat, but very sloppy trail.  It was wet and muddy for most of the way.

Green
The Mountains to Sea trail eventually became less of a bushwhack, but it was still tricky to follow in places.  Below: Near the end of our hike, storm clouds filled the sky over the high peaks;  One of the trickier spots along the Mountains to Sea trail – the blazes were not readily visible and the trail went the opposite way it seemed it should; Pretty wildflowers along the trail.

Stormy Trail Descends Flowers

We eventually reached one of the only marked junctions on the hike, with a sign pointing toward the waterfalls and parkway one way and the Black Balsam Parking area the other way.  This is where we picked up the Mountains to the Sea trail.  This trail was also white blazed.  The trail was more of a bushwack than anything for a while.  It was very narrow and overgrown and headed steeply uphill.  We soon came to a rocky ledge with more nice views… and no sign of the trail continuing.  Again… we got the book out and were getting ready to make another guess.  The trail we needed to follow seemed to go in completely the wrong direction.  Adam looked at me and said ‘I’m just not confident this is the right trail!’  Fortunately, a couple hikers came up behind us.  They told us they were following the same loop we were, had done it before and had gotten lost before!  However, this time they were confident and able to point us in the right direction.  The trail that looked totally wrong turned out to be exactly correct!

From the ledge, we descended into dark woods, traversed numerous wooden footbridges across swampy areas and made one final ascent back to the parking area along the road.  All in all, we hiked 6.6 miles.  It was a great hike with spectacular scenery from Black Balsam and Tennent.  If I were to recommend the hike to others, I’d also suggest doing it as an out-and-back to see just the two bald summits.  The loop option was poorly marked and didn’t offer much in way of scenery.

Boardwalks
The last section of the hike had lots of planks, bridges and boardwalks that crossed swampy areas. Below: After the hike, we drove back to Asheville via Waynesville and stopped at Frog Level Brewery – nice stream-side setting and good beer!

Frog Level

After our hike, we decided to drive back to Asheville through Waynesville.  We heard it was a cute town and that Frog Level Brewing was worth a visit.  We were able to easily find the Brewery, and ended up enjoying samples at a nice picnic table by the river.  Nice finish to the day!

Trail Notes

  • Distance – 6.6 miles
    MapMyHike Stats
  • Elevation Change – about 1300 feet
  • Difficulty – 3.  The real difficulty is the Mountains-to-Sea Trail as it goes brutally up the mountain in some points. 
  • Trail Conditions –  2.  The trail up to Black Balsam was the best maintained.  The Art Loeb Trail around Black Balsam to Tennent Mountain was very brushy and overgrown.  The Graveyard Ridge Trail had a ton of water on the trail and The Mountains-to-Sea Trail was also very overgrown. 
  • Views – 5.  Amazing views from Black Balsam and Tennent Knob. 
  • Streams/Waterfalls – 1.  Just a couple of small crossings through some water on the trail, but nothing scenic. 
  • Wildlife – 1. We didn’t see anything other than a few birds on this trail. 
  • Ease to Navigate –  1.  You may often feel unsure if you are going the right way.  Trails are not blazed well and junctions are not marked.  The connection to the Graveyard Ridge trail is not marked.  There are also lots of other trails that have been cut through by hikers, but they aren’t labeled, especially near the top of Black Balsam Knob on the Art Loeb trail.
  • Solitude – 2.  On a nice day like we had, there were lots of others on the trail. 

Download a Trail Map (PDF)

Directions to trailhead:   At Mile Marker 420.3 on the Blue Ridge Parkway, turn onto 816.  Stay on that road for about 1 mile.  Park on the side of the road and you’ll see the trailhead on the right side of the road.

Strickler Knob – via Massanutten Trailhead

This 9.1 mile hike is challenging, but offers wonderful view payoffs and a fun rock scramble.  There is a shorter option for this hike for people wanting to skip the toughest part of the climb.

View the Full Album of Photos From This Hike

Crowds on Strickler Knob
Crowds gather on one of Strickler Knob’s perches. One person we met at the summit had a Cavalier King Charles spaniel in her backpack.  If you look closely at the photo, you can see the dog’s head sticking out of the pack.  Cute! Below: The Massanutten Trailhead on Crisman Hollow Rd.; Adam, Suzanne and Anthony begin the hike; Native pink azaleas.

Massanutten Trail Happy Hikers Pinkster

Christine Says…

Strickler Knob was the second hike we posted on Virginia Trail Guide… way back in May of 2009. In the years since we first did this hike, there was a bad forest fire in the vicinity, the Forest Service painted over the purple/pink blazes to the knob (and then someone put them back), and the trail became vastly more popular.

On this particularly beautiful morning, we were planning a hike in Shenandoah National Park, but at 7:45 a.m. a text popped up on my phone. It was from our friends, Suzanne and Anthony (we met them at PATC’s Backpacking 101 workshop several years ago). They had made a spur of the moment decision to drive down from Maryland to hike Strickler Knob and wondered if we might want to join them. We don’t see them often enough, so the answer was clearly YES!

However, I had a few concerns going into the hike. The first was the possibility of swift/deep streams and run off from the deluge of rain we had received a day earlier. Roads and bridges were washed out all over the area. The second was the fact that the MMT 100 was being run that weekend. I wasn’t sure if the trail would be crowded or have limited access due to the race. We decided to put those concerns aside and go for it.

We met our friends at the defunct Massanutten Visitor’s Center on Rt. 211 near Luray. From there, we proceeded in one car to the Massanutten Trailhead on Crisman Hollow Rd. Right as we arrived, a carload of six was also unloading at the trailhead. We ended up playing leap frog with them along the trail all day long.

Lady's Slipper
We spotted this beautiful pink lady’s slipper orchid along the trail. Below: Anthony and Suzanne make the steep descent of Waterfall Mountain; Mountain laurel is starting to bloom; Streams were running high.

Waterfall Mountain Descent Mountain Laurel Stream

The trail initially crossed a flat, open area and a view into the valley. But soon, the trail dropped very steeply downhill on Waterfall Mountain. I’m not really sure why it’s called Waterfall Mountain. We didn’t see any waterfalls along the way – maybe they’re someplace else, or maybe ‘waterfall’ just refers to the extremely quick drop in elevation. Along this section of trail, we all joked about what a tough climb uphill this would be at the end of the day. I enjoyed the flowers blooming along the trail. We spotted mountain laurel starting to bud and even a pink lady’s slipper!

Eventually the trail leveled out near a stream. We passed a large campsite near the water just before coming to our first stream crossing. The water was pretty high and fast, but some well-placed logs made the crossing doable. From there, the trail followed a series of ascents and descents with lots of little stream crossings along the way. Most of the small stream crossings are probably dry under normal circumstances. We soon came to a second large stream crossing. After that crossing, the trail followed the stream – literally. Due to the 4-5 inches of rain the area experienced, the trail was completely underwater. It didn’t even look like a trail, and the only way we were sure it was the trail was the presence of a blaze on a tree about 50 yards ahead. We walked for more than a mile in ankle deep water. It was fun, but it was also wet, sloppy and muddy!

We reached trail junction 408. This is where the folks coming up from Scothorn Gap join the trail. At this point, we turned right and followed the orange-blazed Massanutten Trail uphill in the direction of the Gap Creek Trail. This part of the trail is really easy – wide and very gently graded.  There were lots of pink native azaleas on one side of the trail. On the other side, the area burned out by a forest fire stood, charred – but slowly growing back.

Stream Crossing
Anthony makes his way across the logs traversing the stream. Below: Adam walks along one of the only flat sections of the trail.  It was a really short section; Suzanne walks along the under-water trail; This is the trail junction that trips a lot of people up.  Make sure you go uphill, remaining on the Massanutten trail, in the direction of Gap Creek.

Flat Stream Walking Tricky

When we reached the ridge, there was an obstructed view where the trail continues over the crest and then downhill. If you find yourself going downhill on the orange-blazed trail, you’ve passed the turn to Strickler Knob! At the top of the ridge, look carefully for purple/pink blazes on rocks and a reddish disk stapled to a tree. This is the way to Strickler Knob.

The walk to the knob starts off as a rocky but easily passable trail. But gradually the rocks become bigger, more jagged and trickier to traverse. It’s easy to lose the blazes as you pick your way along the rocks. You’ll come to one stunning viewpoint and think you’ve reached the end, but you still have the most intense part of the scramble to go! There are several steep, tall rock faces to negotiate before you finally come to a collection of towering rock stacks overlooking the Page Valley, Fort Valley and the Shenandoah River. The view from the knob is majestic!

On this particular day, Strickler Knob was packed. There were so many people at the overlook, it was hard to find a spot to sit. I think part of it was because the presence of two hiking clubs. But in addition to the clubs, there were also a number of couples and foursomes. Honestly, I’m shocked that this trail has become so popular! The crowds rivaled what I expect to see on a nice day on trails like Dark Hollow Falls or Hawksbill Mountain (in SNP).

We spent some time at the overlook eating lunch and taking photos. The hike back went really quickly. We walked in the water, we crossed the streams, we did all the little ascents and descents… and then we came to the base of Waterfall Mountain.

That climb was every bit as brutal as we all expected – gaining over 800 feet in about half a mile. The section isn’t climbed with mediating steps or switchbacks – it’s pretty much straight up the mountainside. We were all pretty glad when we got back to the flat, grassy section again!

When we got back to the car, the parking lot was much more crowded than when we had left it. We made the short drive back to the Massanutten Visitor’s Center and bid farewell to Anthony and Suzanne. It was a great hike and great to see them!

Burned Area
This area was burned by a forest fire several years ago. There is still a lot of black char, but new growth is starting to emerge. Below: The beginning of the Strickler Knob trail; Adam enjoys the first nice view; The scramble begins!

Strickler Trail First View Scrambling

Between the two routes to Strickler Knob, I would probably recommend the shorter route from Scothorn Gap to most hikers. You get all of the excellent scenery, and only miss the extremely challenging descent/ascent of Waterfall Mountain. The section on Waterfall Mountain doesn’t really offer any remarkable scenery, but it’s a great training hike if you’re looking for a cardio challenge or practice on elevation change. We probably benefited from the longer, tougher ascent to prepare for our upcoming Smokies Trip.

Adam Says…

Normally, when I describe the hike to Strickler Knob, I tell people that it’s an introductory rock-scrambling hike to see if you are ready for Old Rag.  While there is not as much rock-scrambling and navigating as Old Rag, there are a few spots towards the summit that will test you enough to see if you can pull yourself up some of the rocks and let you gauge your comfort-level with scrambling over some drops.  If you’ve already done Old Rag, this should be easy, but if you are intimidated by Old Rag from stories you’ve heard, try Strickler Knob first.  I would agree with Christine that this hike has become more popular over recent years.  When we had done the hike five years ago on a beautiful day, we only ran into one other couple on the entire trail; this time, it was crawling with people.

This is also a hike where people often get lost.  You won’t find the purple-blazed summit trail on any maps currently, so I would suggest bringing a copy of the map I’ve provided below.  I had a co-worker that tried to find the trail a few years ago (possibly when the blazes were still removed) to no luck.  We also came across a larger hiking group from Northern Virginia that had missed the trail completely.  When we gave them better directions, they turned around to attempt it again.  Part of this also has to do with what few blazes are actually on the trail.  You’ll know you are on a trail, you may just not be entirely sure which trail.

Scrambling
The group negotiates the rock scramble. Below: Adam makes his way through the rocks; Lots of rocks to climb; A nice perch on Strickler Knob.

Scrambling Rocks to Climb Adam on the Scramble

We started off the hike from the small parking area on Crisman Hollow Road.  The orange-blazed Massanutten trail starts off on nice, level terrain through a wooded area.  The trail soon opens up to more of a brushy, open field.  As the trail winds around through this area, there is even one spot that has a view into the valley below at .2 miles.  Shortly after this point as the trail winds around, the trail begins its very steep descent down Waterfall Mountain at .5 miles.  The entire time that we were hiking down, I was thinking this was going to be a pain to hike back up at the end of the hike.  The trail does have a few switchbacks, but the overall descent is tough on the knees as you descend about 800 feet in that half mile.  At the 1.0 mile marker, we finally reached the bottom of the descent and a junction with the Massanutten Connector Trail.  Take a left at this junction to stay on the main, orange-blazed Massanutten trail.  The trail begins to climb slightly at this point and at 1.2 miles, you will reach a nice back-country campsite along the side of the Big Run stream.  You’ll soon cross the stream (usually by balancing yourself along logs that have been laid across) and continue your climb.  After the second stream crossing, the trail begins a steeper climb with a large switchback to help ease the elevation gain.

Summit Crowd
The summit was very crowded, but the views were still fantastic!

Eventually the trail met the stream again and due to the heavy rains, the trail was completely submerged.  We ended up hiking what felt like almost a mile through a submerged trail by rock-hopping or just getting our feet wet and muddy.   The trail finally separated from the water and leveled out and we reached the junction with the yellow-blazed Scothorn Gap trail at 3.0 miles.  Take a right at this junction to stay on the orange-blazed Massanutten trail.  The trail feels more like a fire road at this point, as you’ll climb up slightly.  We were able to see a lot of the fire damage to the trees around, so there is little more than some lower brushy, understory on the trail at this point.  At 3.6 miles, you reach the crest of the trail and can see some obstructed views straight ahead.  At this point, look around to your right.  We found a small cairn on the ground and were able to see some red and purple blazes higher than eye-level on a few trees to mark the beginning of the purple-blazed trail to the summit of Strickler Knob.  The purple blazes at this point are typically marked on the rocks where you step.  The trail is very rocky at this point and you will be walking the ridgeline until you reach the summit.  The trail can also be a little hard to follow, but if you keep looking for the blazes and just remember you are walking the crest of the ridge, you should be fine.

At 4.2 miles, you reach a very nice viewpoint where you can get great views to the west.   Keep pressing forward and you’ll soon need to climb up a larger rock wall and then pass by a primitive campsite.  Just a few 100 feet away, you will reach the larger boulders of Strickler Knob at 4.5 miles.   You’ll see a large rock overhang that you’ll climb under.  There is a small area to take in a few views to the right.  For those that are most adventurous, the best views are to the left where the overhang is.  If you feel comfortable, you will need to navigate a crack between the two larger rock formations and hoist yourself up to the top of the rocks.  The views from both rock formations are absolutely breathtaking as you have 360-degree views from all around the valley.

Climbing Down
The climb down is as challenging as the climb up!  Below: More views from the top; The hike down; One final stream crossing.

View of the Valley Descent Stream Crossing

After eating a packed lunch, we made our way back the way we came.  We did have to face the waterlogged trail again.  We came across several groups on our way back that were also looking for directions.  One girl asked me if there was any other way back to the car other than going back up Waterfall Mountain.  I suggested that they make their way back through Scothorn Gap and then walk Crisman Hollow Road back.   We all definitely wished we didn’t have that steep trek back up Waterfall Mountain to do.  It is a very steep trail almost straight up the mountain and it takes quite an athlete to do this without taking a breather at some point on the return.  When we finally reached the top, we congratulated our success and then made the last .5 miles back to our car.

When we were hiking the trail, I kept thinking about the MMT 100 racers that were running this trail.  We had come across one of the race-workers and he told us that most of the fast runners were coming through this area near Waterfall Mountain around 8 p.m.  So, if you were a little slower than that you would be running this trail in the dark with a headlamp.  I can’t even imagine how tough this would be and how any of them would escape injury from running into a tree, twisting an ankle, or falling down the trail.

Brutal
The brutal ascent back up Waterfall Mountain at the end of the hike.

I would also recommend for most people to do the hike from Scothorn Gap instead of the route we took.  It is a lot of extra effort with nothing overly impressive to see along the way.

It was great to see our friends again.  We were all getting ready to head to the Great Smoky Mountains soon, so this was great training before we had to handle some of the tougher terrain that the park had to offer.

Trail Notes

  • Distance – 9.1 miles
  • Elevation Change – About 2250 ft.
  • Difficulty – 5. This rating is earned by both the hike length, the scramble to the knob, and the ascent of Waterfall Mountain that comes right at the end of the hike.  For an easier version of this hike, start at Scothorn Gap.
  • Trail Conditions –  2. No switchbacks, soggy streambeds, a couple crossings that can be challenging in wet weather, and a tough scramble.  This is not a beginner’s hike.
  • Views –  5.  Views from the knob are spectacular.
  • Streams/Waterfalls – 2.5.  The usually low streams were beautiful and running high when we visited, but they’re probably usually less impressive.
  • Wildlife – 0.  This trail is popular enough to scare away most wildlife.
  • Ease to Navigate –  2. Trails are sporadically blazed and can be hard to follow.  The junctions for trails leading to to the knob do not mention Strickler Knob.  We suggest bringing a map on this hike.
  • Solitude – 2.  This trail has become extremely popular!

Download a Trail Map (PDF)

Directions to trailhead:  From I-81, take exit 264 heading east through New Market.  Head east on West Old Cross Road for .2 miles.  Turn left on to US-11/N. Congress Street.  In .3 miles, turn right on to US-211/Lee Highway.  Go 3.6 miles and turn left on to Crisman Hollow Road (it is right before the green building on your right that is the Massanutten Visitors Center).  Follow Crisman Hollow Road for 2.2 miles (passing by the parking lot for the Massanutten Storybook Trail) until you reach where the orange-blazed Massanutten Mountain Trail crosses the road and the small parking area.  Park here, cross the road and start the trail.