Adam Says… We were so pleased to find this hidden gem of a hike in Virginia! This hike has some jaw-dropping views, an interesting “cave” to explore, and great camping with not a lot of elevation difference.
The parking area has space for about four cars to park. From the parking area, head down about 10 yards further down the road and you will see two trails on the opposite side of the road from where you park on the right. Both of these spur trails connect to each other, so it doesn’t matter which one you pick. Climb up the short spur and the trail goes off to the left. The trail starts off hiking on a ridgeline. From .2 miles to .4 miles, you will notice a few short spur trails to the left. Climbing up these short spur trails leads to some amazing views that shouldn’t be missed. We always enjoy views without many signs of civilization and you get that here as you can soak up views of Big and Little House Mountains. I imagine that a lot of people could come to this trail to get such an amazing view with so little effort – great place for a sunrise view! We soaked in the view for a short time but decided we would get better pictures when we weren’t looking into the sun, so we picked a favorite overlook to return to at the end of the hike to reward ourselves.
Taking in view from the first quarter mile of the hike.
Once the section of views is done, the trail moves into a more wooded area. At .5 miles, you see the only trail sign for the hike at a trail intersection with a small fire road (maybe used by bikes or hunters?) through the woods. Continue on the main trail. Pay attention to red blazes marking private property.
The trail from this point is mostly a flat walk through the woods with only some occasional rises or falls in elevation. The trail is not as well-blazed as many others, so we found it a bit difficult at times to make sure you were still on the trail. If you do this during the fall, this could be especially tricky if leaves have covered a lot of the trail. However, you are mostly walking on a ridgeline, so you likely won’t stray too far. There are a few stretches where we found the trail could use some maintenance since there were taller areas of knee-high brush that you were walking through. You do also get a few glimpses of obstructed views to the east.
A lot of the trail passed through flat areas with abundant ferns.
At 3.2 miles, you come to a great couple of campsites that have some open views to the east. While there isn’t a nearby water source, this would be a great campsite if you lug your own water in for an overnight trip.
Continue on the trail past the campsite and at 3.4 miles you come to some stone steps that lead to the area known as Pete’s Cave. The rocks in this area remind me of rows of shark teeth that probably need to go to a dentist. This is an interesting area to explore, but please know your limits! This is a dangerous area with cracks and holes you could fall into or get an ankle stuck or hurt. We crawled through one area that had a cave-like feel to it, but there was a skylight that let some light in so you didn’t feel too claustrophobic. At the top of this “cave”, there was one area where I was able to scramble up to the top of a large boulder and got some incredible views to the west, but getting back down was a bit more sketchy. Again, be careful in this area if you choose to explore.
A nice (dry) campsite along the Pete’s Cave Trail
The trail climbs steeply up the other side which also leads to some nice views to the west. Go back the way you came to get back to your car and make sure to reward yourself with more of those views close to the finish line.
While Petes Cave is not a true cave, it’s still pretty fun to explore.
Christine Says… I really enjoyed this hike. The views were outstanding, there were very few people on the trail, and the “cave” at the end was fun to explore. There are several paths to the rocky outcroppings above the cave. Don’t miss checking those views out – they’re as nice as the views earlier in the hike. The trail continues beyond the caves, but apparently it’s just a walk in the woods – nothing noteworthy to see. It eventually descends back into the valley.
Trail Notes
Distance – 6.8 miles
Elevation Change – 1000 ft.
Difficulty – 2. There are rolling hills all along this hike, but generally it is easy terrain.
Trail Conditions – 3. The trail was overgrown in some parts, but overall easy to follow and walk.
Views – 4.5. Spectacular panoramic views of Big House and Little House Mountains to the east and just past Pete’s Cave, there are views to the west.
Streams/Waterfalls – 0. Non-existent and no water sources.
Wildlife –3. We saw some deer and a few birds from the overlook.
Ease to Navigate – 3. We didn’t have a lot of difficulty, but needed to mark it down some due to the lack of blazing and some of the trail was overgrown which made it a bit more difficult.
Solitude – 4. We did this trail early and didn’t see many people, but I would expect it would be busier on most weekends. The viewpoints generally have a few places to spread out and soak in the scenery.
This easy 1.6 mile hike is a great beginner’s sample of what it’s like to hike in the White Mountains region. You get great views, rocky summits, and a little bit of rock scrambling. It’s a popular family hike, so expect a crowd! We enjoyed the scenery so much, that we returned a second time to hike just the Artists Bluff portion with our little pug, Wookie!
Wookie and Adam take in a great view of Franconia Notch from the viewpoint at Artists Bluff.
Christine Says…
When compared to all the surrounding mountains, Artists Bluff and Bald Mountain are downright tiny – topping out at around 2,300 feet. However, both summits offer outstanding views and the trail is just rugged enough to provide a fun little challenge. We thought it was a perfect recovery hike after our Vermont backpacking trip just a couple days earlier. We started off by parking in the Echo Lake lot. Exiting the lot, we took a right and walked east along the road (back toward the interstate) for a short distance. Across the road there is a clearly marked path with a sign pointing the direction toward Artists Bluff.
There are some short but steep climbs en route to Artists Bluff. Below: The beginning of the hike has a trailhead marker; Adam makes his way through the boulders; The trail is very rocky.
As you enter the woods, bear to the right. The return arm of the loop trail is to the left. The trail immediately begins a steep climb over rocky terrain. You’ll pass boulders and climb up stone stairs for a couple tenths of a mile. At .25 miles, you’ll reach a large boulder marked with red directional arrows and labels. Follow the marked spur trail to the right out to Artists Bluff. Enjoy the fantastic view of Echo Lake and Cannon Mountain Ski Area. You can see I-93 trailing its way through Franconia Notch. On the eastern side of the highway, you can see towering Mount Lafayette and Eagle Cliff. If you’re feeling adventurous and energetic, use another day to hike to the summit of Mt. Lafayette and take in the splendor of Franconia Ridge.
After enjoying the views from Artists Bluff, follow the spur trail back to the marked boulder at the junction. Follow the red blazes in the direction of Bald Mountain. The trail will meander up and down hills, crossing a saddle and climbing a small knob before reaching the Bald Mountain spur. This junction is about .65 miles into the loop. The spur trail circles around the shoulder of Bald Mountain, climbing gently until you reach the ledges directly beneath the summit.
A nice view of Cannon Mountain ski slopes, Echo Lake, and Franconia Notch. Below: The loop junction is well marked; A view across Franconia Notch looking toward the Lincoln and Lafayette; The saddle between Artists Bluff and Bald Mountain.
From here, there is a little over a tenth of a mile of steep boulder scrambling. Near the top, you will pass through a brief pine-covered area before stepping out onto an expansive dome of bare rock. Pay attention to where the trail exits the trees and steps out to the view. We kind of lost the way and had to backtrack to find the trail again. It wasn’t a big backtrack, but still worth noting. The view from the summit of Bald Mountain includes the ski area and a little bit of the lake, but it also includes views of mountain ranges to north and glimpses west into Vermont. It’s really an excellent vista!
After we spent some time enjoying the view all to ourselves – Artists Bluff is infinitely more popular than Bald Mountain – we made our way back down the spur trail. After returning to the junction with the loop follow the trail downhill for about .3 miles. At this point, you should see the road and alternate parking through the trees. Turn left, continuing on the loop for .4 miles. The last .4 miles parallels the road and returns you to where you started at the Echo Lake parking area.
Adam Says…
As Christine mentioned, we hiked this one twice. It’s an easy hike to fit in just about any day you have some extra energy while in the White Mountains. The first time we hiked it, we wanted to make sure it would be OK for Wookie to join us on a future hike. We always like to get him out for a hike or two on our vacations.
We knew there was rain coming later in the first day we hiked it, so we wanted to tackle it early. The trail up to Artists Bluff is short but steep. There are lots of boulders to scramble up, but if you take your time, most people should be able to handle it. On the first day, we came across two girls at the summit that were celebrating the view with morning mimosas. I could tell it was a nice moment for their friendship. We left the summit and backtracked until we veered off to the trail to head towards the Bald Mountain summit. On our way to the second summit, we came across a large family group from New Jersey. They had decided to do the full loop but skipped the summit of Bald Mountain. We could tell this was a family that didn’t do much planning for hiking, because they had a lot of questions about distance, directions, and terrain. It wasn’t long before we came to the junction where the Bald Mountain summit side trail is marked by a sign. It was a short, tough scramble up, but once we got to the top the views were great. The wind was incredibly strong that first day, so it was hard to stand straight and actually take a picture. We could only imagine how strong the wind was on the summit of Mt. Washington, just about an hour’s drive away.
The scramble to the summit of Bald Mountain is brief, but intense. Notice the red blaze way at the top? Below: The view from Bald Mountain looking toward Cannon Mountain ski area; The view off the back of Bald Mountain looks into Vermont; Christine scrambling down; Back at the parking area.
The views from Artists Bluff are a bit more picturesque with the lake below, but you get a highway view also. From the summit of Bald Mountain, the views are mostly of mountains beyond. You also will find that most people only hike to Artists Bluff and don’t take in nearby Bald Mountain, so there is more solitude on that summit.
We made our way back down to the junction and bore right to continue the loop and head back to the car. When we were almost back, we came across the same family that we had seen earlier. They were exhausted from the hike and were dreading their walk back to the car at the alternate parking lot. We offered to give them a ride, but they politely declined. One of the family members was then going to hike to the car and come back and pick them up.
On the second trip to do this hike, we just did the short trip to Artists Bluff. We were very proud of Wookie tackling the hike without any trouble. It was so cute to watch him navigate the boulders climbing up and down. On the ascent, his tail was down sometimes as he does when he is feeling less confident, but it was curled tightly on the way down as he was confident he knew the way back. He truly enjoyed himself up on the top and took in the scenery. We often wonder what is going through his mind at times, but we could tell that the view made him happy. We love our little hiking buddy!
Wookie Says…
It had been quite a while since I’ve been on a new hike. Whenever I see Adam and Christine put on their hiking clothes and grab their trekking poles, I’m hoping that I can come along. They usually leave me behind since a lot of hikes are tough on a short-legged pug like me, but this time my luck turned.
I enjoyed the hike up Artists Bluff but some of the boulders were huge. You can always see my quick brain working to find the easiest path up, but there were some steps that were just too large for me. Adam had to lift me up a few of them and on the return had to carry me down a couple. I mean, there is no need to overdo things when you have a perfectly capable human to take some of the danger out of it.
At the top, I did look out quite a bit and enjoyed the view. I was startled to see cars on the highway. This was my first hike ever where I could see and hear cars below, so it had me cock my head to the side as I was trying to figure it all out. We sat at the top for a good while and enjoyed the view. It was quite windy at the top, but the scenery was beautiful. I made my way quickly down in hopes that there would be an extra bowl of food at the end for all of my efforts. Instead of dog food, Christine surprised me with a glazed munchkin from Dunkin Donuts. I gulped it down and settled into a goof nap on the car ride back to grandma’s house.
I love a beautiful view! Below: But hiking makes me so tired!
Trail Notes
Distance – 1.6 miles
(Check out the stats from Map My Hike)*
Elevation Change – 433 ft.
Difficulty – 2. Most of this hike is very simple with easy terrain, however the ascent to the summit of Bald Mountain will require scrambling over bare rock. There are a couple steep, but short, climbs.
Trail Conditions – 3. The trail is generally well maintained and traveled. There will be some rocky areas and muddy areas.
Views – 5. Excellent views from both Artists Bluff and Bald Mountain. The Bald Mountain view is especially panoramic.
Waterfalls/streams – 0. You will see water in the viewshed, but there is none along the trail.
Wildlife – 2. You will likely see birds, chipmunks, and squirrels.
Ease to Navigate – 3. There are several junctions where trails intersect. There are also two places you can begin your hike. However, everything loops back, so you should find the trail system easy to follow. Pay attention to where the trail enters/exits the summit area of Bald Mountain. It is not clearly marked and is easy to lose if you’re not paying attention.
Directions to trailhead: Parking coordinates are: 44.178537, -71.696247. There is a large parking area near the entrance to Echo Beach. To begin the hike, park in the lot. On foot, take a right onto Profile Road and walk about a tenth of a mile along the road. The trail begins on the north side of Profile Road. You will see a sign marking the loop.
* MapMyHike is not necessarily accurate, as the GPS signal fades in and out – but it still provides some fun and interesting information.
This 6.6 mile route is one of the fastest, easiest ways to get above treeline in the Presidentials. The trail is rocky (like everything in this area), but the climb is very moderate by White Mountain standards. Trivia: This peak was named Mt. Pleasant until after President Eisenhower’s death in 1969.
The Summit of Mt. Eisenhower. You can see Mt. Monroe and Mt. Washington off in the distance.
Adam Says…
We have made it up to New Hampshire the last several years. Each year we try to do at least one of the Presidential peaks – big, granite mountains named after our country’s past presidents. This year, we decided to tackle Mt. Eisenhower by way of the Edmands and Crawford Paths. We read in our Falcon Guide to Hiking New Hampshire that this trail route had a moderate grade and the footing was “pleasant”
We have learned to not trust New Hampshirite descriptions with regard to grade or footing. From a Virginian’s standpoint, most of the hiking in the White Mountains is so much tougher than anything we experience in our state. Your body will pay a price and you may end up cursing the granite you walk upon.
So, they said the grades were moderate and called the footing pleasant. The rock jumble pictured above is the actual trail. Below: Adam makes his way along the easy old road grade seen early in the hike; The climbing got much rockier and steeper as we went along.
Over the first 1.4 miles of the Edmands Path, you gain about 650 feet of elevation, but in the last 1.5 miles, you gain 1750 feet. The first half of the outgoing hike is a steady climb, but the steeper grade and bigger steps on rock and gnarled roots take over pretty quickly!
As we huffed and puffed up the mountain, we eventually got some views through the trees and knew that our hard work was going to pay off. Through some of the openings we could see the red roof of the grand Mount Washington Resort below, which gave some perspective of how far we had come.
It’s always fun to get your first views from the trail. You can see the red roof of the Mt. Washington Omni between the trees. Below: Scenery as we reached the treeline.
We eventually came across a U.S. Forest Service Alpine Zone sign warning us that we were entering an area with some of the worst weather in the world. This is definitely a sign to heed on rough weather days, but we had a gorgeous day of mostly clear skies above us. We arrived above treeline and were soon on a rocky path that skirted the shoulder of Mt. Eisenhower. At 2.9 miles, we reached the junction with the Crawford Path (the name given to the Appalachian Trail through these parts) and took the first right on the Eisenhower Loop Trail, which leads to the summit. The views from the junction were phenomenal as we were looking right at Mt. Monroe with Mt. Washington in the distance behind it. The path to the summit zig-zagged up some switchbacks on a skinny path that mostly had nice footing and in about .4 miles we had reached the summit.
Climbing to the junction with the Crawford Path. Below: The junction of the Edmands Path and the Crawford Path; More open views.
When we got to the top, we found lots of people that had hiked over from Lakes of the Clouds Hut or Mizpah Spring Hut. We ate our snack while taking in views in all directions. We took a ton of photos to capture the vast landscapes and beautiful partial cloud coverage.
We made our way back down the same way we came up, reaching the Crawford Path junction quickly. We then took the Edmands Path back down to our car. We paused for a few moments before ducking back in below treeline to soak up some last views of the majesty of mountains and valleys below us. It is moments like this that we revisit in our minds to help us get through the stress of work and life through the rest of the year.
On our way up Mt. Eisenhower. The Eisenhower loop trail branches off the Crawford Path to give you an opportunity to see the summit. Below: Scenery climbing up to the summit of Mt. Eisenhower.
If you’re interested in visiting these high peaks, you can do a multi-day backpacking trip that is called a “Presidential Traverse”. The route connects Mt. Jackson, Mt. Pierce, Mt. Eisenhower, Mt. Monroe, Mt. Washington, Mt. Jefferson, Mt. Adams, Mt. Quincy Adams, and Mt. Madison. Hikers typically stay at the AMC huts along the way. This route is nice, because you only have to climb up from the valley floor once! The rest of the traverse is tough, but the bulk of the big climbing is done on the first day. The Presidential Traverse entails additional perils because the constantly changing weather can put you at risk for getting lost in the fog or pinned down by storms. We hope to do a Presidential traverse someday to take in the full experience, but for now we have settled for day hikes. We’ve enjoyed the majestic views, but we have had to work a little harder for each one (climbing all the way from the bottom to reach each summit).
Christine Says…
Mt. Eisenhower was a great choice for our 2016 Presidental climb! We had gorgeous, clear views and the mountain’s lofty elevation gave us a little bit of relief from the brutally hot summer day in the valley below. The area broke a heat record on August 11 – close to 100 degrees at the base of the mountain. The normal high is usually closer to 80.
We got an early start and arrived at the Edmands Path parking area before the crowds. We paid $3.00 for our WMNF one-day parking pass and set out on our way up the mountain. (There is a self-service parking fee station at one end of the lot.)
Like Adam said, nothing in Virginia really compares to the rigors of a New Hampshire climb, but this route was definitely a more moderate climb than others we’ve tackled. Today’s hikers can thank revolutionary trailbuilder J. Rayner Edmands for many of the gradual, meandering trails in the White Mountains. Edmands, one of the founding members of the Appalachian Mountain Club, modeled his eastern trails after the livestock trails he had climbed as a young man in the Rockies. He believed in the philosophy of “always climbing, never steeply” when it came to trail design.
There were a lot of people on the summit of Mt. Eisenhower. Below: Summit scenery.
He spent time surveying each mountain to find the best grades and the most favorable terrain to reach the summit. He built each trail like a puzzle; using large boulders, extensive cribbing, and selective tree clearing. His philosophy differed greatly from other well-known New Hampshire trail builders of the time; most of them opting for the shortest routes, regardless of steepness or terrain. Built in 1909, the Edmands Path was one of the last trails Edmands built before dying of a stroke at the age of 60 in 1910.
If we’re being completely honest, we have to say that there’s no truly easy way to hike to mountain summits in the Presidentials. Even with Edmands’ thoughtful design, you’re going to get a solid cardio workout climbing to the summit of Mt. Eisenhower.
Great views occur everywhere above treeline. Below: Making our way back down the mountain.
Since it was a hot day, we took many water breaks as we worked our way uphill. Despite the effort, I still thought the tough climbing over boulders and roots went by quickly. I was actually surprised when we reached the alpine zone sign… “Here? Already?” The last bit of the Edmands Path before we reached the junction with the Crawford Path was almost flat and passed through a lush bed of alpine mosses and wildflowers. After we cleared that last swath of green, the view gave way to a theater of bare granite mountains.
The last tenth of a mile before the junction with the Crawford Path was a jumble of football-sized rocks along an exposed cliffside. When it’s wet, a stream flows over these rocks, but on this day it was thankfully bone dry. In the winter, this particular spot is known for being treacherously icy and windy. I’m glad we only visit New Hampshire in the summer. Virginia winters are tough enough for me!
We saw interesting Alpine plants. Below: More scenery on the descent: Lunch afterwards at Moat Mountain Brewery & Smokehouse.
The last .4 miles of trail from the Crawford Path junction to the summit of Eisenhower follows the Eisenhower loop – essentially a spur trail that detours people from the Crawford Path over the summit. Most of the mountains in this area have an “over or around” option. No matter which option you pick, you’re going to have SPECTACULAR views if you hike on a clear day. The majesty of the Presidentials is without compare – so much rugged beauty. It takes my breath away every time!
The hike down simply retraced our steps. As we descended, we could feel the heat and humidity of the lower elevations closing in around us. I was glad we finished hiking rather early in the afternoon, as it gave us time to make a couple more stops before heading back to my parents’ house. First we detoured into Jackson. We stopped at a great bakery for cold drinks and cookies and paid a visit to the White Mountain Puzzle Company. If you enjoy working jigsaw puzzles, they make a great variety! After Jackson, we hit one of our favorite lunch spots in the area – Moat Mountain Brewery and Smokehouse. A tasty lunch and cold craft beer made the perfect ending to another excellent New Hampshire day.
Trail Notes
Distance – 6.6 miles
(Check out the stats from Map My Hike)*
Elevation Change – 2800 ft
Difficulty – 4.5. The hiking may be moderate by New Hampshire standards, but it is a tough hike and you should be in decent hiking shape to tackle it.
Trail Conditions – 2. While the trail was well maintained, the boulders of rock that you have to climb in the last 1.5 miles of the Edmands Path makes it tough climbing.
Views – 5. The 360-degree views from the Presidential Range is hard to beat anywhere on a clear day.
Waterfalls/streams – 1. You cross over a small stream early in the hike, but otherwise there wasn’t much water to see. However, we visited in drought conditions. In a normal to wet year, stream crossings may be more numerous and/or more difficult.
Wildlife – 1.5 Squirrels scampering and birds chirping will give you sounds along the way, but don’t expect anything once you go above treeline.
Ease to Navigate – 4.5. There is just one turn from the Edmands Path to reach the summit, so it should be very easy to follow.
Solitude– 3. We didn’t come across many on the Edmands Path, but on a beautiful summer day, the summit had a lot of people.
Directions to trailhead: Parking Coordinates: 44.248988, -71.391665. The trailhead is on Mt. Clinton Road, off U.S. 302 near the AMC Highlands Center. The parking area requires a White Mountain National Forest parking pass. You can buy an annual pass or use the self service station to pay the $3 day fee. For more information about parking passes, visit the national forest website.
* MapMyHike is not necessarily accurate, as the GPS signal fades in and out – but it still provides some fun and interesting information
This 7.2 mile hike takes you to a rocky summit with a 360 degree view of New Hampshire’s mountains and lakes. Chocorua is the easternmost peak in the Sandwich Range and stands at just 3,490 feet. It’s not one of New Hampshire’s famous 4,000-footers, but we found the views were spectacular and the summit offered unique terrain. The trail is mostly moderate but requires some trickier rock scrambling near the summit.
When we visited New Hampshire in August 2016, we got to chatting with a couple locals on the summit of Mt. Cube. They were surprised that we’d hiked so many lesser-known trails in the area, but had somehow overlooked popular Mt. Chocorua. We’d passed the trailhead many times, but had no idea it offered such spectacular views. Adam had taken to calling it Mt. Cocoa Puffs, which is significantly cheerier than the legend of how the mountain got its name.
Supposedly, in the 1720’s a Native American man named Chocorua had a son who was accidentally killed after drinking poison on a white settler’s farm. He took vengeance and killed the farmer’s wife and children. The farmer shot and wounded Chocorua, but he escaped up the mountainside. From the summit, he cursed all white settlers, their livestock, and their crops; and then leapt to his death. Like most legends, there are no records to authenticate the tale, but Wikipedia listed a couple different versions of the curse he made.
“May the Great Spirit curse you when he speaks in the clouds and his words are fire! Lightning blast your crops! Wind and fire destroy your homes! The Evil One breathe death on your cattle! Panthers howl and wolves fatten on your bones!”
We hiked this peak on a hot, humid day during an extremely droughty New Hampshire summer. The trail started off at the Champney Brook – Bolles Trail parking lot along the Kancamagus Highway. During fair weather, the parking lots fills by lunchtime so plan to get an earlier start. There is also a small recreational use fee ($3 in 2016) for parking. Payments are made at a self-service envelope station, so you will need small bills/cash to pay for parking.
The White Mountains are in drought conditions. Twin Brook was completely dry where it crossed the trail. Below: The early trail was a mix of roots and dirt; Constructed stairs on the trail at the junction to visit Champney Falls and Pitcher Falls (we skipped the falls, assuming they’d be dry); The trail crew working that day was hoping for tips!
The hike begins on the Champney Brook Trail. You’ll almost immediately cross Twin Brook. There used to be a wooden footbridge over the brook, but it washed away in March of 2013 during heavy rains and snowmelt. Crossing was no problem when we visited – the brook was bone dry and nothing but a bed of cobblestones. At .1 miles, you’ll pass the junction with the Bolles Trail. Pass this and continue following the Champney Brook trail. At .25 miles, the trail will meet up with the brook. The trail and brook run parallel for about a mile. At 1.3 miles, you will reach a junction with the Champney Falls/Pitcher Falls spur. The spur trail departs to the left and follows the water more closely before rejoining the main Champney Brook trail once again about .3 miles later. Since everything was so dry, we decided to bypass the two waterfalls and continue our climb up the mountain.
Once you pass the waterfall spur trail, the climbing becomes significantly steeper and rockier. The terrain is made up of a mix of boulders, cobbles, and slabs of granite. At around the 2.4 mile mark there is a good view to the north on the right side of the trail. If it’s clear, you’ll have nice views looking toward the Presidentials. We spent some time relaxing and enjoying the sun on this ledge. After leaving this view, you’ll ascend seven steep switchbacks over about half a mile up to the junction of the Champney Brook trail and the Middle Sister Trail. Bear to the right, staying on the Champney Brook trail for .1 mile where you’ll reach its terminus at the junction with the Piper Trail.
Our first views through the trees. We’re pretty sure the tallest peak is Mt. Washington. Below: As we ascended the trail became significantly rockier. The terrain was a mix of cobbles and slabs.
Follow the yellow-blazed Piper Trail for .6 miles over open rock ledges and crags. Some parts will require scrambling on your hands and knees to negotiate the climb. The view keeps getting better and better as you go. I personally found some of the rock scrambling to be a bit frightening. I have some vertigo issues and there were several places I felt like I might fall backwards and go tumbling down a cliffside. My hands were shaking and I felt panicky. But, Adam (and most of the other normal people) seemed to have a fun time climbing, so clearly this is a ‘me issue’.
At the top, we enjoyed a fantastic view of what seemed like all of New Hampshire. We could see many lakes and peaks in every directions. The day we hiked was pretty clear, so we even had a great view of distant Mount Washington. The hike down came a lot easier for me and I enjoyed the wide, theatrical presentation of mountain scenery on the descent. We soon dipped back into the woods and made quick time climbing down to the parking area. On the ride home, we passed through Holderness where we stopped at Squam Lakeside for lime cream slushes and lobster rolls – a treat well-earned by a couple of tired hikers!
A View of Middle Sister. Below: Nice views from a ledge below Middle Sister Mountain; Making our way up to the summit of Chocorua.
Adam Says…
We love hiking in New Hampshire! There are so many amazing hikes to do up there and this one has to be one of my favorites for views in the “Live Free or Die” state. We picked a perfect summer day to hike this which gave us clear skies to take in the sprawling majestic landscape around us.
Climbing Mt. Chocorua. Below: More scenes from the rocky climb to the top.
As Christine mentioned, the trail had a moderate climb through the bulk of the hike. As with most hikes in New Hampshire, you can’t escape the roots and rocks on hikes in this area which make for tougher climbing than what we are used to in Virginia mountains. It was a bit of a slog uphill, but quite manageable. When we got to the view below the Middle Sister, we were impressed with how high we had come up and the views from the open ledge were already magnificent. Within a short distance from this overview, we reached the junction with the Piper Trail and made our way to summit Mt. Chocorua. The hike up to the summit is quite tricky. While Christine talked about how it was scary to her, it was a challenge to get to the summit. The blazes at times were a little tricky to follow and you had to use handholds and footholds to navigate up some of the tricky rock scrambles to get to the summit. When we were able to first see the rocky slabs of the climb up, we thought it was a short distance to the summit, but it was a false summit – you get to the top of this first outcropping and then you can see the true summit further up. This would fall in the category of hikes that you hear those warnings of not being for the “faint of heart”. But I will say that if you can muster up the courage, you will be rewarded. From the north, on a clear day you can see Mount Washington sitting atop the Presidential range and from the west, you can see the Tripyramid, Mount Tecumseh, and Mount Whiteface.
The 360 Degree View from Mt. Chocorua. Below: Summit scenery; A look back at the summit from below; Making the descent.
Another thing I discovered when researching this hike was there used to be a three-story hotel called the Peak House that sat at the base of the summit. It was built in the late 1800s and served meals and provided lodging for those that were hiking Mt. Chocorua. It was, quite literally, blown off the mountain in September of 1915 from heavy winds (keep in mind this isn’t far from Mt. Washington which is known for some of the highest recorded winds in the world ever). Supplies for the Peak House were brought up by oxen, horses, or manpower and the blueberry pies made from blueberries picked on the mountain, were legendary to visitors. Nobody was staying in the house when it was blown over. The Chocorua Mountain Club then built a structure to replace it in 1924, but that was also blown over by wind in 1932. The U.S. Forest Service built the Liberty Cabin there in 1934, a smaller structure, that remains today (access is on the Liberty Trail) and can sleep 6 people on a first-come basis. The roof of the Liberty Cabin is draped by heavy chains to keep it from blowing away, similar to what you see in structures at Mt. Washington. This story reminded me of Monty Python and the Holy Grail, where the father is telling his son about the castle that was built on a swamp and kept getting destroyed. I guess there is some stubbornness that sets in when people want to keep some semblance of the past.
I had to do some encouraging to Christine to make her want to fight through her vertigo and reach the summit, but I think she felt the journey was worth it and I was so proud of her for fighting through to make it to the summit. Once she made it to the top, we enjoyed taking in the views and the climb back down was even more spectacular. For hikers like us, it doesn’t get any better than spending a day in this scenery.
The hike down was just as beautiful. Below: Scenes from the descent; Post-hike lunch of lobster rolls!
Trail Notes
Distance – 7.2 miles
(Check out the stats from Map My Hike)*
Elevation Change – 2100 ft
Difficulty – 4.5. Much of the trail is moderate, but the scramble at the top increases the difficulty factor a little.
Trail Conditions – 3.5. The trail is well maintained, but rocky like most of New Hampshire. Crews were out doing maintenance on the day we hiked.
Views – 5. One of the nicest views from a smaller mountain. It’s truly a 360 degree view.
Waterfalls/streams – 2. This score may very well have been higher, but we visited during a period of severe drought. The streams and falls were dry. Champney Falls has a reputation for being pretty during spring snow-melt, but is generally considered underwhelming compared to other falls in the area.
Wildlife – 3. We saw lots of birds and red squirrels.
Ease to Navigate – 3. There are a few turns to pay attention to, also the scramble to the top is not well marked and it can be tricky to find the best hand and foot holds.
Directions to trailhead: Parking coordinates are: 43.990146, -71.299888.The trailhead is on the Kancamagus Highway near Albany, NH. Look for the sign marking the Champney Brook Trail – Bolles Trail parking area.
* MapMyHike is not necessarily accurate, as the GPS signal fades in and out – but it still provides some fun and interesting information.
This 4.5 mile loop is a classic New England hike. Even though Welch and Dickey mountains are diminutive compared to other mountains in the region, they provide stunning views from open ledges and ample opportunities to pick berries in late summer.
When my parents moved to New Hampshire several years ago, they immediately began exploring local trails. The Welch-Dickey Loop kept popping up on lists of local ‘must do’ hikes. Their guidebook described it as a great, moderate, family-friendly hike. One summer morning they set out to hike the loop.
They made it around the loop, but my mom described it as one of the most harrowing hiking experiences of her life. She said she spent much of the hike scooting on her rear end along the trail so she wouldn’t fall on the steep, slick granite. She described the hike as extremely difficult and in ‘no way suitable for a family’.
Her words stuck with me, and we avoided hiking Welch-Dickey for years. Steep granite scrambles are doubtlessly the type of terrain that make me the most uncomfortable.
Adam hikes through classic New Hampshire forest. Below: Streams along the trail were low due to drought conditions; All New Hampshire trails are rocky – it seems; Log bridges to cross marshy areas; Impressive trail building; A lot of work goes into maintaining Welch-Dickey; Cobbles give way to smooth slabs of granite as you climb upward.
On a sunny summer day, we finally decided to give the hike a shot, and it turned out the hike was just about perfect. We hiked the loop counter-clockwise, reaching the Welch Ledges below the summit in less than an hour. The ledges are expansive, flat, and wide open. They provide a theater-like view of Mt. Tripyramid, the Sandwich Range, and the Mad River Valley.
From the ledges, we climbed steeply uphill to the summit of Welch Mountain. From the ledges below, the climb to the summit looked like it would be steep, but it was easier than it looked. Most of the climb was over bare granite. We took lots of opportunities to look back and enjoy the views.
From the summit of Welch, we enjoyed a magnificent view Mt. Moosilauke, the Pemigewasset Valley, and the impressive cliffsides along Dickey Mountain. It looked like all of New Hampshire was rolling out beneath us. Reaching the summit of Dickey mountain required a steep climb down into a col between the two mountains. The low point was marked with a giant cairn.
The First Ledges on Welch Mountain. Below: Barriers in place to preserve fragile plants on Welch Ledges; The actual summit of Welch looms above the ledges; Climbing toward the summit of Welch.
The climb up Dickey was a little steeper and required following yellow blazes and arrows carefully. At the top, we took a faint spur trail through the bushes to enjoy another spectacular view of Franconia Ridge. From there, we walked along the cliffsides we had seen from the summit of Welch Mountain. The view remained spectacular for much of the descent. Eventually, we dipped back into the forest for the remainder of the hike.
It was a great hike! It offered superb views for a reasonable amount of climbing. I would agree that it’s moderate and good for families – but only on a dry day. If the granite had been wet or icy, even these small peaks could be perilous.
Adam Says…
This hike is often recommended by people that we have talked to when exploring central New Hampshire and it is worth the hype. This may be one of my favorite below 4000 feet hikes in New Hampshire. If you can do this hike on a clear, dry day in late September, you will probably see fall foliage you will remember for a lifetime.
Just a few yards from the parking lot, the trail splits. The trail to the right is the one we chose, making a counter-clockwise loop of the Welch-Dickey trail, but you do have the option to do it the opposite direction. Both paths have a two mile climb to the summit of either Welch or Dickey Mountain and there is a half mile connector trail in between the two summits. The trail to the right started off with a rocky trail which is no surprise to us with all the hiking we have done in New England. The trail stays in the woods, climbing gradually through rocky steps until it opens up at about 1.4 miles to the Welch ledges. As you approach, you will see areas blocked off to protect the vegetation so stay on the actual trail. To the left, you will see the summit of Welch mountain looming above you but take some time to enjoy the dramatic views from the expansive open granite ledges. Many families will just go to this point and back for a beautiful hike fit for people of most ages/abilities. We spent quite a bit of time here thinking this could be the summit of Welch, but we were wrong.
Views in Every Direction on Welch Mountain. Below: Views of the climb from Welch Ledges to the summit of Welch Mountain.
Many of the blazes on Welch and Dickey are on open ledges, so look for yellow blazes painted on the rocks or small cairns to find your way. From the ledges, the trail takes a left, cuts into a wooded area before it climbs steeply and opens up into some of the largest rock faces we have hiked. The views are expansive all around you. The footing was fine, but we imagined this would feel very slick and dangerous after a recent rainstorm. It was hard take a few steps and not turn around and see the scenery behind you; the pictures we have don’t do the magnificence of the panoramic views proper justice. At 2.0 miles, we reached the 2605 foot summit crown of Welch Mountain. You will have gorgeous views of Waterville Valley below you.
Enjoying the View from Welch. Below: A view of Dickey Mountain from the summit of Welch; Descending into the col between Welch and Dickey; Cairn in the col; Terrain looking back on the climb up Dickey.
The connector trail continues further and descends down the steep rock face of Welch on ledges that serve as steps. You will really want to secure your footing here as you are lowering your body down a steep section with nothing to grab onto in front of you. Take your time and lower yourself on all fours if that helps. The trail reaches bottom and then climbs back up as you approach Dickey Mountain. You will reach the 2734 foot summit at 2.5 miles and will be treated with views of Franconia Notch. Continue along the trail to complete the loop. Your hike down from Dickey is dramatic as you will be walking on the top of what feels like a bowl below you which gives you dramatic views. At about 3.2 miles, the trail finally goes back into the woods and you continue your descent along some rocky footing which eventually leads you back into more pleasant footing in the flatter woods. You reach your initial junction and the parking lot at 4.5 miles.
Looking Back At Welch. Below: Climbing to the summit of Dickey; Views from Dickey; Descending Dickey.
If you are planning to do this hike, account for some extra time. The views of this area will make you take your time to enjoy them and some of the climbing is tougher. While it was only 4.5 miles, it took us longer than normal just from the pure enjoyment of being here. This is a New England classic for a reason. The Presidential range in the White Mountains will always have a special place in my heart when I think of hiking in New Hampshire, but this will go down as one of my favorites in the state.
Welch-Dickey Cliffs. Below: Back into the woods.
Trail Notes
Distance – 4.5 miles
(Check out the stats from Map My Hike)*
Elevation Change – 1650 ft
Difficulty – 3. By New England standards, this is a solidly moderate hike. In Virginia, it would probably rate a 4.
Trail Conditions – 4. The trail is expertly maintained, but the nature of New Hampshire terrain (rocks, roots, slick granite) will challenge anyone used to dirt trails.
Views – 5. Amazing, spectacular, and panoramic (in multiple places)
Waterfalls/streams – 1. There is a stream, but it was nearly dry when we visited.
Wildlife – 2. Lots of red squirrels and birds.
Ease to Navigate – 4. The main loop is well-blazed and easy to follow. The spur to the view of Franconia Ridge is the only tricky part. It’s unblazed.
Solitude– 1. This is an extremely popular trail. Expect to see many other hikers. We hiked early on a weekday, and still saw quite a few people.
Directions to trailhead: Parking coordinates: 43.904207, -71.588824. A parking permit is required for White Mountain National Forest hikes and you can purchase a permit at a green box in the lot (as of 2016 was $3 per day).
* MapMyHike is not necessarily accurate, as the GPS signal fades in and out – but it still provides some fun and interesting information.
Mount Monroe is the fourth tallest peak in New Hampshire’s Presidential range. You can hike to its summit from the valley floor – the Ammonoosuc Ravine trail is the most popular route – or you can make it an easy day hike by driving the auto road and starting from the summit of Mount Washington. This option makes a 3.8 mile hike with just 1,343 of climbing. It’s a laid back way to visit this area with minimal effort.
Clouds cleared as we stood on the Mount Monroe summit. From the top of Monroe we could see the weather towers atop Washington.
Adam Says…
We hiked just about every day on our vacation, and hiking in the Adirondacks and the White Mountains usually involves tough climbs along granite-filled pathways. We wanted to do one of the mountains in the Presidential Range in New Hampshire, but our bodies were asking something easy. So, we decided to drive up to Mount Washington and hike down and over to Mount Monroe.
We got an early start to try and beat the traffic and crowds on the slow-going Mount Washington Auto Road. The drive up can be a harrowing experience. As you are skirting the edges of precipitous drops, you are praying that another car isn’t coming down the mountain (another reason to get an early start). The views are breathtaking on a clear day, but the driver may have to focus on the road more than the scenery.
We made our way down the Crawford Path/AT from Mt. Washington. You can see the area is extremely popular on pleasant summer days. Below: Adam at the Crawford Path; One of the Lakes of the Clouds Croo members carries supplies; MWOBS equipment in the fog.
We found our way to the weather observatory building and found the white blaze which signified the Appalachian Trail (here called the Crawford Path). The fog was thick on the mountain as it often is. We made our way descending on the Crawford Path, following the cairns that guided us down a path off the summit. There are people that have gotten lost and died on this mountain and I can understand why. With limited visibility a person could easily miss a cairn. Add the high winds and quick weather changes and this can truly be a dangerous place. We had enough visibility to see the next cairn ahead and once we were off the highest parts of the mountains, we had better visibility of the trail. At .2 miles, we came to a sign that showed that we had 1.4 miles to the Lakes of the Clouds hut, one of several huts maintained by the Appalachian Mountain Club.
The descent was very rocky and slow-going, but we managed to make it to Lakes of the Clouds fairly quickly. The fog had us completely socked in and we couldn’t even see Mount Monroe when we arrived. Lakes of the Clouds is probably our favorite of the huts in the White Mountains. The remoteness of the hut, the serenity of the mountain-top lakes, and the views of the valley and Mount Washington make this such an amazing experience. We ate some lunch inside the hut and decided to wait a while. We eventually got some glimpses of Mount Monroe from inside the hut. The clouds started to blow off somewhat. At one point, I told Christine that I thought we should make an attempt to reach the summit. My thought was if the clouds continued to blow, we may get a glimpse of views from the summit. So, we gathered our gear and hiked up in the fog. The wind had picked up, but we were hoping this was a good thing as it would carry some fog off with it.
The hut comes into view. Below: Lakes of the Clouds Hut with Mount Monroe looming in the background; Christine arrives at the hut; Inside the hut… it was surprisingly uncrowded!
The hike up Mount Monroe was steep but only a short few tenths of a mile. We got to the top (the summit marker is only a small metal nub sticking up from a rock) and within minutes the clouds began to part and we got gorgeous views down below. We timed our trip perfectly and there was only two other people at the top. Our ability to see views for a while seemed to rotate in patches around the mountain as clouds continued to pass. It eventually opened up all around us and we were glad we made the break for it when we did. After taking an ample number of photos, we descended back to Lakes of the Clouds and then back up to Mount Washington. The fog got thicker again as we made our way back to the summit of Mount Washington. We posed for our ceremonious summit photo and then got back to our car to descend back down the mountain.
Christine Says…
Many people think a hike only counts if you start from the bottom of the mountain. Call me a cheater, but I don’t care! This summer, we took the auto road to the top of Mount Washington so we could enjoy exploring the alpine zone without doing all the work. In 2013, we hiked up the Ammonoosuc Ravine and on to the summit of Washington. On that trip, we skipped summiting Mount Monroe due to time constrictions. This trip gave us a chance to make up for what we missed!
Adam makes his way up Mt. Monroe. Below: Climbing the mountainside; Tiny people perched on an outcropping; Christine near the summit.
All week long, we had been checking the MWOBS higher summits forecast. Thursday, August 7 looked like it would be the best chance – with clearing skies, calm winds, and warm temperatures. We paid our toll and made our way to the top. The auto road has been open since 1861 and climbs 4,618 feet over 7.6 miles. It’s a beautiful drive with great views for much of the way – only problem… we were in the clouds! Our clear day turned out to be not-so-clear at all! Every now and then, the veil would thin enough that we could make out the hulking shapes of Clay, Adams and Madison across the gulf.
We were both a little disappointed with the clouds, but you never know how the weather is going to change on Mount Washington. We pushed forward with hopes for clearing skies.
Nice views from the summit. The Appalachian trail is the ribbon of path in the distance. Below: Descending the mountain; The lake comes back into view; View behind Lakes of the Clouds Hut.
From the summit buildings, we looked for white blazes and found our way to the marker for the Crawford Path (which is also the Appalachian Trail in this part of the state). From there, we hiked 1.5 miles to Lakes of the Clouds Hut. The trail is all rocks and is marked with a combination of cairns and blazes. The clouds were so thick it was almost like walking through white cotton candy. The oddest part was the warmth and utter windlessness of the day. I’ve never been in the Presidentials on a dead calm day. I think the lack of a breeze was a big part of the reason the clouds were able to linger on the summits for such a long time.
Even in full cloud cover, the terrain of the mountain is incredibly beautiful! It feels almost other-worldly. Eventually, the clouds cleared enough that we could make out Lakes of the Clouds Hut in the distance. There were many, many people scrambling both up and down the mountain. It’s definitely earned the nickname ‘Lakes of the Crowds’. Adam and I decided to hang out in the hut for a while and see if we could outlast the clouds -they did seem to be thinning.
The lake was even prettier on the hike back. Below: Climbing back up Mount Washington with Monroe in the background; Christine takes a final look back; The cog tracks at the Washington summit.
As we sat at one of the long tables, we saw the side of Mount Monroe emerge from the clouds. If we were going to get a view, our time was now! We made the short half-mile climb to the top of Monroe. Although the mountain is a short, easy climb from Lakes of the Clouds, it’s still New Hampshire’s fourth tallest peak at 5,384 feet. The summit was still in the clouds when we got to the top. But as we sat on the summit, a breeze picked up and within a matter of five minutes the view had completely opened.
We could see Mount Washington with the observatory towers on top. We saw Franklin and Pierce off in the distance. We could see the cog station and the grand Mount Washington Hotel. We could even see tiny hikers walking the Appalachian Trail below the summit. It was breathtaking!
After a while, the clouds started to filter back in. I was so grateful they opened for the briefest few minutes for us to enjoy! We made our way back down to the hut, which had emptied out of the crowds from just 45 minutes earlier. I guess everyone took advantage of the same opening in the weather! We snacked on cake made by the Croo and then set out to climb back up Mt. Washington.
Summit of Mount Washington.
On the way back up the mountain, the cotton candy clouds dropped over us once again. By the time we reached the top of Washington, they had partially cleared off again. We had our photo taken at the summit marker. We spent a little time in the summit building, too. Over the summer, they completely renovated the weather observatory museum. It’s really nice and spacious, but they took away a few of our favorite exhibits – including the funny video of people trying to eat breakfast in famous Mount Washington winds.
The high summits went in and out of the clouds all day, but I still think we chose the best day of the week to visit. Other days had thunderstorms and hail. Compared to that, passing cloud cover is no problem! All in all, we ended up hiking about 4 miles with 1,350 feet of climbing. It was a fun and easy way to visit a challenging mountain.
Trail Notes
Distance – 3.8 miles
(Check out the stats from Map My Hike)*
Elevation Change – 1343 feet
Difficulty – 3. The elevation isn’t too tough, but the rockiness of the terrain adds to the difficulty.
Trail Conditions – 2. Very rocky and many of the rocks are quite loose. You have to always watch your feet.
Views – 5. On a clear day, they are quite spectacular.
Waterfalls/streams – 0. Non-existent.
Wildlife – 1. You won’t see any wildlife above treeline here other than a few birds.
Ease to Navigate – 2.5. Marked down because you have to follow cairns and occasional blazes. This can be extremely tough in foggy or bad weather. On a clear day, this will be much easier.
Solitude– 2. In the summer, you will always find people along the trail. Mount Washington always attracts a lot of people. You will likely also find many people in Lakes of the Clouds.
Directions to trailhead: From Gorham, NH head south on NH-16 for 7.8 miles. Take a right to get on to the Mount Washington Auto Road. Pay at the gate (in 2015 was $28 per car and $8 for each additional passenger) and follow the road to the parking lot at the top. Coordinates: 44.269644, -71.302659
* MapMyHike is not necessarily accurate, as the GPS signal fades in and out – but it still provides some fun and interesting information.
Hedgehog Mountain is tiny compared to most of its neighbors, but this 5-mile hike still packs in tons of scenery and great views. The ledges are also a super place to stuff your face with wild blueberries!
The ledges along the side of Hedgehog Mountain offer great views of bigger mountains.
Christine Says…
After arriving in New Hampshire and hiking Mt. Major, we took a couple days off hiking to relax and spend time with family. The combination of daily hikes in New York paired with not sleeping or eating enough really wore me out. So we took it easy and did other fun things like exploring Franconia Notch State Park, paddling kayaks across quiet ponds, sampling craft beer at Schilling (Littleton, NH) and Long Trail (Bridgewater Corners, VT), and stuffing our faces with Cabot cheese and pastries from King Arthur Baking Company. By Wednesday, we were ready to hike again. Our second hike in New Hampshire was a repeat trip to visit beautiful Lonesome Lake. Our third hike was something entirely new – Hedgehog Mountain. It’s the most diminutive of New Hampshire’s ’52 With a View’ – a collection of the state’s nicest view hikes on mountains under 4,000 feet.
We started out the morning with a big breakfast at Polly’s Pancake Parlor. Then I went for a short paddle with my dad across and around Echo Lake. By 10:00 a.m., Adam and I were on our way across the mountains on the scenic Kancamagas Highway. We parked at the Downes Brook parking area and paid our $3 parking fee. The summit of Hedgehog is accessed by the UNH Loop Trail. The trail gets its name from an old University of New Hampshire forestry camp that operated at the mountain’s base from the mid-1940s until 1964.
A railroad used to run along this section of wide, flat, open trail. Below: Early in the hike we passed this clearing. The clearing work looked recent, but we’re not sure what’s planned for the land; Pretty forest along the trail; Everything was so shady and green.
There were just a few cars in the lot, so we knew we would have a relatively quiet hike. We decided to hike the loop clockwise, allowing a more gradual ascent followed by views of the Presidentials on the way down. The hike starts off along a lovely pine-shaded trail following the route of the old Swift River Railroad. The hike climbs gradually, passes a clearing, and soon reaches a sign indicating the beginning of the loop portion. We chose to turn left and cross the east ledges before reaching the summit.
For 1.2 miles we walked through a peaceful pine forest. The climb was steady, but quite gentle. There were roots and rocks, but they were always padded by fallen pine needles. As we hiked on, the route became steeper and rockier and eventually opened onto bare cliffsides and ledges with magnificent views of so many big mountains – the Tripyramids, Carrigain, Chocorua, and Passaconaway. Most of the ledges were wide and generous, but one section in particular was narrow and precipitous. There were blueberries growing everywhere! From the ledge, we could also see the last steep section of trail we had to climb to reach the summit. The ledges were definitely my favorite part of the hike!
The last bit of climbing to the Hedgehog summit was steep – definitely more challenging than I expected on this loop! At first we passed through a tangle of roots and boulders. The higher we climbed, the roots gave way to smooth granite slabs and boulders that required scrambling. I told Adam at one point that I was very tired of putting my knees down on granite! Granite gives me so many bruises. The actual summit had nice views, but (in my opinion) the view from the lower ledges had been nicer.
The trail became more covered with rocks and roots as it climbed. Below: Christine climbs toward the ledges; Towering pines; Adam finally clears the woods to get our first views of the day.
Leaving the summit, we spied glimpses of the Presidentials off in the distance. Evidently, on clear days one can even see the weather observatory atop Mount Washington. We weren’t that lucky. The descent was much rougher and steeper than the climb up. I was really glad we had gone clockwise! On the way down, we took the short spur trail to Allen’s Ledge. The rocky outcropping offers a chance to take in a final sweeping view of many of the area’s bigger mountains. From Allen’s Ledge, the rest of the hike was a moderate descent back to the old railroad grade.
Over the course of the day, we only saw three small hiking groups. That’s great solitude for a nice summer day in the White Mountains! We would definitely recommend this hike if you’re looking for great views and don’t feel like tackling a 4,000-footer.
After the hike, we decided to drive into North Conway and look around the shops and have an early dinner at one of our favorite stops – Moat Mountain. They brew a nice selection of beers and have fantastic food. It was so tasty; I think I finished an entire half pound burger and all my fries!
Christine enjoys nice views from the ledges. Below: There were lots of slab of granite to traverse; In one place, the trail across the ledge was quite narrow; Walking across the ledges, you can see the rocky summit of Hedgehog Mountain.
Adam Says…
As Christine mentioned, we started our day off a little later than normal. It was a gloomy morning, with fog settled in. Since Polly’s Pancake Parlor and Echo Lake were quite a distance from our home base, we decided to take a separate car from her parents and take off on our hike after we had done our morning activities with them. When Christine and her dad went paddling earlier on Echo Lake, it was cold and there was a little bit of drizzle. I can’t swim so I don’t like being on a canoe or kayak. I was quite content to watch Christine and her dad go out paddling on the peaceful, yet foggy waters.
We were worried it wouldn’t warm up or be able to see the sun on our hike. Two things that hiking in New England has taught me is to be patient and be an opportunist. There have been a lot of hikes that we have done in the White Mountains that if you wait a few minutes, clouds may break. So, we took our time that morning knowing that our best chance of seeing views would be a little later in the day.
The ledges of Hedgehog Mountain were covered with wild blueberries. Below: There was a wooded saddle between the ledges and the summit; The last bit of climbing to the summit was very steep and slick.
The trail started off very flat through a tunnel of pine trees. After a short distance, it takes a sharp right and begins to ascend. Within a few tenths of a mile, the trail crosses over with a clearing, but stay straight on the trail. The trail continues on an ascent, but the terrain wasn’t too difficult. With the morning activity of paddling, Christine bonked a bit so we paused to eat an energy bar before continuing onward. The trail became a little steeper and more narrow as we navigated through some interesting terrain with pine trees and granite steps. There were a few obstructed views along the way. The woods were so quiet it was eerie – we felt a bear would jump out at any minute in this deep wilderness. Eventually the trail became quite steep and rocky, leading to larger granite steps. The trail soon popped up to some gorgeous cliffside panoramic views. Not reading about this on trail reviews we found online we were quite surprised. We navigated the cliffsides, going back into woods for a short time before coming out onto a large shelf of granite. We spotted the summit above us, but below us were tons of blueberries. We picked a few and enjoyed the gorgeous mountain and valley views around us.
The summit view was not as nice as the view from the ledges. Below: On the way down, we could see a glimpse of the Presidentials.
The trail ducks back into the woods and descends a short bit through some thick forest. There were blowdowns across the trail and the cobwebs were thick in places, making me think that many people don’t come on this section of trail to make it a loop. The trail then began to ascend again through some very steep and rocky sections, requiring us to pull ourselves up with our hands in a few areas. We finally reached the summit. We ate a snack, talking with a woman who had done much hiking in the Whites while enjoying some obstructed views from the summit. We both agreed that the views from below were more exceptional than the summit views.
As we were making a loop hike, we continued on and found another obstructed viewpoint to give you views of many of the Whites. As Christine mentioned, we couldn’t see the summit of Mount Washington but we could spot a few of the Presidential range in the distance. The return trip was quite steep and we were treated to a few views on the climb down, which you would likely miss if you did the loop in the opposite direction. On our descent, we found a small side trail that led to Allen’s Ledge. Allen’s Ledge also had some nicer views than the summit. We relaxed at this spot for a few minutes before rejoining the UNH trail and making our way back down the mountain. Before too long we had rejoined the loop where it split and returned to the parking area.
The descent of Hedgehog was quite a bit steeper than the climb up. Below: Allen’s Ledge; Eventually the descent leveled out.
While it isn’t as popular as some other hikes in the area, if you want some seclusion with great views, check out Hedgehog Mountain. We were pleasantly surprised at how gorgeous the views were and the interesting terrain along the trail makes this a rewarding hike.
Trail Notes
Distance – 5 miles
Elevation Change – 1312 feet
Difficulty – 3.5. There are a few steep, rocky sections, but most of the trail is gentle.
Trail Conditions – 3.5. The trail is adequately maintained, but expect lots of rocks and roots.
Views – 4. In Virginia, these views would warrant a 5, but there are even grander views in this area.
Waterfalls/streams – 0. None.
Wildlife – 2. Other than birds and squirrels, we didn’t see wildlife.
Ease to Navigate – 3. There were a couple tricky spots, like the clearing early on the trail, but generally this was an easy route to follow.
Solitude– 4. By White Mountains standards on a nice summer day, we enjoyed quite a bit of solitude on this hike
Directions to trailhead: From Interstate 93, take exit 32 (NH-112E). Follow NH-112E for 22 miles. Parking is on the right in the Downes Brook – Mount Potash lot. Parking Coordinates: 43.9960876,-71.3688126
The summit has superb views of Lake WInnipesaukee. Below: Parking issues at the Mount Major Trailhead; The trail is well-marked and blazed blue; The lower part of the trail is very eroded.
Adam Says…
Hiking Mount Major seems to be a rite of passage for anyone that is visiting the lakes region of New Hampshire. This has been a popular spot for hiking for a long time. We had just hiked Mount Marcy two days before and our muscles were still recovering, but it was my 44th birthday and I wanted to celebrate with the views from a summit.
We got to the parking lot fairly close to 10:00 a.m. and the lot was completely full. We began to see how popular this trail actually was. We parked along the side of the road and then proceeded through the parking lot to the trailhead. We noticed one car that was parked in a way that took up three spots. Someone had left a note on their windshield letting them know just how they felt about their parking job. New Englanders don’t mess around.
From the parking lot, we followed the main blue trail. The trail was a wide, worn path through the woods. When you are walking on a clear, dirt path you know this is a well-used trail. The hike was uphill for the first few tenths of a mile, but levels out at .3 miles. We enjoyed some flat walking through the trees. At .7 miles, the trail reaches a junction. Take a left to stay on the main, blue-blazed trail. The trail begins to steepen at this point and becomes more rocky. As we climbed up on our approach to the summit, you approach some more exposed large sections of rock that you can walk up or you can take a rugged trail up the side. We opted to walk on the open rock surface on the way up, but chose the path on the way down. As you walk on this open rock surfaces, you can look behind you to see the beginnings of some great views of Lake Winnipesaukee. The trail was quite steep at this point and you have to be careful as you navigate up these large, rocky areas.
For a time, the Mount Major trail is wide and flat. Below: The trail junction of Mount Major and the Brook Trail; The trail gets rockier; The trail went back and forth between open rockiness and shade.
Around the 1.6 mile mark, we reached the large open summit. There were tons of people at the top, but because of the large area, you can always find a place to enjoy to yourself. The wind was whipping across the summit. We went to the summit marker that has a large rock foundation built around it. We sheltered ourselves from the wind and ate a snack at the summit. After eating, we walked around in all directions to enjoy the views around us. While staring out at the gorgeous views, you can easily lose track of time.
We descended the way we came, but there are many options to make this a larger loop hike if you so desire. Sometimes I feel that popular hikes are often over-hyped, but this hike didn’t disappoint. We saw plenty of families hiking together on this hike of all skill levels. Just take your time and most people should be able to make the hike that are in decent shape. This was a great start to a birthday celebration and the views of Lake Winnipesaukee are some of the best you will get.
Christine Says…
Hey – it’s great to be back in New Hampshire! We had a spectacular, sparkling, bluebird day to hike Mt. Major. It was a perfect hike for Adam’s birthday.
Mt. Major is probably the most popular dayhike in the Belknap Range – and no wonder, with its relatively short distance and commanding views of Lake Winnipesaukee. We hiked on a Sunday morning. Arriving by 10:00 a.m., we found the parking lot already jam-packed with cars. Adam and I had to park our car on the shoulder of the busy main road.
The views got nicer the higher we climbed. Below: Rock piles on the summit; People gather around the Phippens’ cottage; Birthday photo!
The Mount Major trail is blue blazed and begins climbing uphill on an extremely eroded fire road. The erosion is so deep it makes the trail look like a chute. The trail eventually levels out and follows a pleasant, nearly flat path. At around the .7 mile mark, the trail splits into two – the Mt. Major Trail is sharply to the left and the Brook Trail continues straight. We continued on the Mt. Major Trail – this is when the real climbing began. The entire 1.6 mile hike only has 1,150 feet of climbing – most of it packed into second half.
After about a quarter mile of climbing along rocky trail, we passed a family taking a breather on a large boulder jumble. The adult couple was bickering bitterly about turning around or continuing to the summit. We could tell by their clothes and shoes that they were not regular hikers. When the man made the decision to quit, we overheard his young son exclaim loudly ‘Daddy… you’re a FAILURE!’ Poor guy!
The last bit of climbing was tough, so it probably was for the best that the family turned around. I think a lot of novice hikers see a short, popular hike and don’t realize how challenging it can be to ascend 1,000 feet in three-quarters of a mile. There were lots of steep rock ledges and smooth domes of rock, punctuated by short passes through trees. There were two trail choices for the last quarter mile – ledges or ledge detour. To be honest, the trails were both pretty haphazard with people blazing all kinds of different paths to the summit. As we made our way up, we paused to look back and enjoy the ever improving view.
George Phippens built a summit cottage in the early 1900s. Below: A view off the other side of the Mount Major summit; The rocky descent; Christine takes in one last view on the way down.
At 1.6 miles, we reached the rocky summit of Mt. Major. SUPERB! Lake Winnipesaukee, framed by distant mountains, sparkled all across the horizon. As expected, the summit was very crowded. At the top of the mountain, there are remnants of an old stone cottage. Later, I did some research into the history of the structure. The summit of Mt. Major was once owned by a private citizen. New Hampshire resident, George Phippens, bought the mountain summit for $125 in 1914. He loved the views and the blueberries, and kept the mountain open to all. He built a cottage at the top for hikers to use as shelter, but the roof kept blowing off in the winter. Eventually, the Great Depression came along, and ownership of the summit reverted to the Town of Alton to cover Phippens’ taxes. Read more about Mr. Phippens and his love of Mt. Major.
Adam and I spent some more time enjoying the views before making our way back down the mountain. Many people descend via the Brook Trail, but we just went down the way we had come. By the time we got back to the car, we were starving! We decided we would eat at the first restaurant we passed – which ended up being the Wise Owl Restaurant and Country Store in Alton, NH. It was late for lunch, so we were the only diners there. The food was good, but it took nearly an hour to get a simple lunch. I almost passed out from hunger while we waited! Reminder to self: eat more snacks!
Trail Notes
Distance – 3.2 miles
Elevation Change – 1150 feet
Difficulty – 2. There are some steep and rocky sections of the trail. Most people can make it if they take their time. Keep an eye on children along the trail.
Trail Conditions – 4. Most of the trail is open and easy to navigate. Some of the rock surfaces are slick, so be careful especially on rainy days.
Views – 4.5. Panoramic views from both sides of the summit.
Waterfalls/streams – 0. Non-existent.
Wildlife – 1. This is a popular trial so wildlife know to stay away.
Ease to Navigate – 4. There are a lot of paths to make it a loop. Consult the map and pay attention to blazes along the way.
Solitude– 0. This is one of the most popular hikes in New Hampshire, so you will likely see lots of people. Go during the weekday or early mornings to avoid crowds.
Directions to trailhead: From Laconia, NH, take NH-11A for 11.1 miles. Turn right on to NH-11 and go 3.1 miles until you reach the parking lot on the right for Mount Major. The trailhead is at the end of the parking lot. Take the main, blue-blazed Mount Major trail using the trailhead at the back right of the parking lot. Parking coordinates: 43.519676, -71.272813
This 14.5 mile hike follows a moderate route to the summit of New York’s tallest mountain. At 5,343 feet, Mt. Marcy offers commanding views of the region from her above-treeline summit. This is definitely the crowning jewel of a hiking week in the Adirondacks!
The summit of Mount Marcy offers a spectacular view of the High Peaks region.
Christine Says…
For our grand finale in the High Peaks, we decided we had to hike New York’s tallest mountain – Mount Marcy! After a day of rain (that caused us to bail out a mile short of the summit of Mt. Van Hoevenberg), we woke to bluebird skies and crisp, cool temperatures. After a week of hazy, muggy conditions, we were going to get the prettiest day of our entire vacation week to hike the big mountain. Perfect!
The hike of Mt. Marcy is almost 15 miles round-trip with 3,200 feet of climbing. The trail is never horribly steep, but it’s still a long, challenging day for most hikers. We set out early with our backpacks stuffed with essentials – several liters of water, multiple snacks, and warm layers for the summit. We (once again) parked at the Heart Lake Program Center.
Despite our early start, there were crowds of hikers setting out for the day. We never really had the trail to ourselves or experienced much solitude – not that we were expecting it on such a popular trail. It was also one of those hikes that made me feel guilty each time I paused to take photos. At every photo stop, the slightly slower hikers behind us would catch up and pass us; only to have us on their heels saying ‘excuse me… may we pass?’ ten minutes later. Because the crowd situation was a little stressful, I didn’t take a ton of photos on the ascent.
Even though the pond disappeared when Hurricane Irene washed the sluicegate away, Marcy Dam is still very scenic. Below: Early parts of the hike were gentle and easy; The footbridge across the Marcy Dam; The dam spillway.
The first couple miles of the hike were easy going – it was mostly flat trail through lush mixed forest. The first notable landmark we reached was Marcy Dam. Until Hurricane Irene struck in 2011, the dam held back the waters of a scenic pond. When the monster storm passed over, it washed away the sluice gate leaving behind a nothing but a mud flat with a stream passing through. When we hiked by, I was unaware of the history and still found the dam extraordinarily beautiful! Mount Colden, Avalanche Pass, and Wright Peak still stood tall over still water full of cloud reflections. The New York DEC is planning on removing the dam completely over the next few years, so who knows how the vista will change. Read more about the dam.
On the far side of the dam, we signed the trail register and began the climb toward the summit of Marcy. The terrain was extremely varied – there were stream crossings, boulders, cobblestones, root jumbles, muddy spots, plank bridges, logs pressed into mud, and basic dirt trail. The climbing was steady, but gentle almost the entire way to the summit. One odd thing about the hike was that it was not very well-marked. There were several major trail junctions that simply did not list the Marcy summit on the signs. We consulted our map and hiking guide and were able to find the right way, but we met confused hikers at each junction.
This stream crossing came shortly after passing Marcy Dam. Below: It was odd to see big signs stating ‘TOILET’ in the woods; The check-in station after crossing Marcy Dam; There was a bit of smooth granite early in the hike.
After passing through a stretch of trail with big logs pressed into the mud for footing, we reached a saddle on the mountain’s shoulder. Plank bridges passed across an open, grassy marsh, giving us our first clear view of the bald, granite summit of Mount Marcy.
From there, the climbing became a bit more intense and steep. We scrambled across granite faces and over boulders, following blazes and cairns along the way. I didn’t particularly enjoy climbing up this part of the mountain. I always feel like I’m slipping on smooth granite. Also, my legs were covered with bruises from all the other rocks I’d climbed earlier in the week. I’m like a ripe peach when it comes to bruising! At one point, I looked back at Adam and said ‘Seriously… more rocks. I already look like an accident victim’. Of course, Adam caught my expression on camera. I’m not including that photo in the post, but it’s in the Flickr album if you want a good laugh. I was not a happy hiker at that moment!
Much of the hike to the summit of Mount Marcy is covered with cobbles. Below: But there are also planks; And root tangles; And a bit of smooth, dirt trail.
We slowly but surely made our way to the top – and it was so worth it! What a spectacular view! The Adirondacks almost rival the White Mountains of NH for their terrain and views. The wind was whipping across the summit, so I put on my jacket and found a place to eat lunch. I had tired of PB&J, so I had pepperoni, cheese, and crackers and half of the biggest cookie I’ve ever seen. The day before hiking Marcy, we had stopped for lunch at the Big Mountain Deli and Creperie. In addition to amazing sandwiches (all named after the High Peaks) and crepes, they also sell giant cookies perfect for giant hikes. I definitely recommend a stop there if you’re in Lake Placid!
After a while on top the world, it was time to climb down. We slithered and slid down the steepest parts, enjoying views all along the descent. When we got back to the marshy saddle that had given us our first view of Marcy, I noticed that one of my trekking poles felt shorter than the other. I figured that heavy use on the descent, had forced the pole to retract. However, when I went to adjust it, I found the entire bottom third of my pole was GONE. It was too late and we had covered too much ground to go back for it. I was able to extend the middle third and use the remnant of my pole the rest of the way down, but I was so bummed. Those were great Komperdell poles and they carried me over many miles.
The rest of the descent was pretty easy and passed by quickly. Sometime after Marcy Dam, my right foot decided it had enough for the day and started cramping. It really hurt, but I was able to hobble my way back to the trailhead parking. We were both pretty happy to see the car! What a great day and what a fitting end to our first week in the Adirondacks. We can’t wait to visit again!
In the wetter, muddier areas, layers of logs were used to create a passable tread. Below: Signage was sometimes sporadic and incomplete; As we climbed higher we started getting views of the mountains; Entering the Alpine Zone; From a marshy area, we got a nice view of the summit of Mount Marcy. (sorry for the hazy smears on the photos – the lens got wet!)
Adam Says…
When we first planned our trip to the Adirondacks, we both had put on our goals to hike Mount Marcy. Being the tallest peak in New York, it is a big draw to people living or visiting the North Country of New York. When we arrived in the parking lot early in the morning, we kept seeing groups upon groups of people hitting the start of the trail. I felt pressure to try and get started as we knew more and more people were going to get on the trail as each minute passed. This was a beautiful day, so we knew it would be a little more crowded than normal.
At the beginning of the trailhead there was a large stack of rocks with a sign asking to carry one to the top of Mount Marcy. We didn’t realize the full purpose until we got to the summit, but the goal was to bring some small rocks up for preservation projects. We both grabbed a rock, signed the registry at the kiosk, and started the hike. The trail starts off mostly flat, with very little elevation gained. The trail began as a beautiful path through thick woods. We crossed a footbridge through a marshy area. Further up the trail, we passed a sign that pointed towards Fangorn Forest. As big Lord of the Rings fans, we quickly got the reference – I said to Christine, “What madness drove them in there?”, a quote from the movie The Two Towers and we both chuckled. Staying on the main trail, we came to a large junction at the one mile marker. There are a lot of trails that criss-cross through the hike up Mount Marcy. We saw a lot of people consulting maps trying to decide what to do. We did the same and I bore us left at the junction following the direction to the Marcy Dam lean-tos. The trail begins to climb a bit here.
More views of the summit above treeline. Even though it appears tree-covered, the trees are stunted and leaned to the side. The remainder of the climb from this point traversed granite boulders and ledges. Below: Lots of granite to climb on – some of it was quite steep!
At 2.3 miles, we arrived at Marcy Dam, a very picturesque spot to enjoy some reflective water with mountains ahead. The trail winds down and then crosses the water on a longer footbridge, before leading to the other side with another perspective view. You will come across signs on this side of the water crossing that are pointing to several lean-tos, bathrooms, and campsites along the way. We found it strange to have toilets this far off the main trail. We didn’t realize until our return trip that a ton of people like to camp out here. Many of the groups that we saw heading on the trail go no further than to one of these campsites, so numbers on the trail can be misleading.
From the other side of the dam, we found another kiosk which we signed again and followed the signs that pointed us to Mt. Marcy. The trail starts off with a gradual climb here. At 3.0 miles, we reached a junction with a side trail that led to Phelps Mountain. Peakbaggers seeking all of the 46 mountains over 4000 feet would follow this side trail to summit Phelps Mountain, #32 on the list, in 1.2 miles (2.4 miles roundtrip from this point). We skipped Phelps and continued up the trail. The trail became steeper and rockier.
Along the way, we took lots of opportunities to pause and take in the view behind us. Below: We deposited our small stones on the collection pile. They’ll be used to build up the protected alpine environment; View from the summit; Adam is happy to be at the top!
At 4.2 miles, we reached another junction, which seemed to be the most confusing. There were no signs stating which way went to Mt. Marcy. The sign was weathered and half of the letters were hard to read, which only added to our confusion. We saw several people at this junction trying to figure out the correct path. Staying straight on the trail would lead you to Table Top Mountain, but we had to take a right on this trail and up a few rock stairs to stay on the trail to summit Mt. Marcy. At about 4.4 miles, we came to another junction, We bore to the left, which was the correct path. The trail continued to be rocky and wet from recent rain.
At about 6.2 miles, we reached a large clearing, which gave us our first views of the summit. At about 6.6 miles, we arrived at another junction, bore right, and the views above began to open up as we headed above treeline. The last .6 miles were challenging, with some areas requiring you to scramble up using your hands as well as your feet. There were also some sheer, slick granite faces, so you had to pay attention and take care. We finally reached the top at 7.25 miles. The wind was whipping around us fiercely, but the views were absolutely breathtaking. I would say these views compare very similarly to some of the views we have seen in Mount Washington and Franconia Ridge in New Hampshire, two of our favorite all-time hikes.
We made it to the summit! Below: Summit scenery; A well-earned giant cookie!
At the summit, there was another sign asking for everyone that carried their rock to drop it here. While we stopped to eat a snack, we were greeted by a summit steward. The Adirondack Mountain Club has hired people to talk to others at Mt. Marcy and other summits to educate people about the ecosystems and fragile plants that live on the top of these mountains. They explained to us how the rocks we brought up would be placed to form barriers to protect plants from the wind and people. I was amazed the ADK has people that hike Mt. Marcy every day to keep counts of people and talk to people at the summit. We told the summit steward we have always wanted to be paid to hike and she was getting that dream job of ours. Read more about summit stewards.
We knew we had a long way back down, so we eventually pulled ourselves from the summit to make our way back down. The views were so stunning coming down also. On the way back down, I slid and pulled a muscle in my shoulder trying to stop my fall. The mountains are no joke up here.
After a nice stay, it was time to head down. Below: Steep descent and the last confirmed sighting of the bottom third of Christine’s trekking pole, Adam enjoys one last lofty view; Back into the woods for the rest of the climb down.
We finally got back to our car after a long hike downward at 14.5 miles. After the hike, we were completely beat. We drove to Lake Placid and stumbled into Johnny’s, a pizza place. I hobbled in and we ate in a pure exhausted state.
The memories on Mt. Marcy will last with me for the rest of my life. It is an iconic mountain that definitely won’t disappoint if you can handle the climbing and distance.
Trail Notes
Distance – 14.5 miles
Elevation Change – 3200 ft.
Difficulty – 4.5. It’s hard to give this a 5, because while the hike is long, it’s never a difficult hike.
Trail Conditions – 3. Parts of the trail are fantastic, other parts are a mess.
Streams/Waterfalls – 3. There are a few pretty streams along the hike.
Wildlife – 3. Red squirrels and lots of birds.
Ease to Navigate – 1.5. With several junctions not giving good directions on which way to Mt. Marcy, bring along our map below and consult at every junction.
Solitude – 1. This is a popular trail and you’ll see lots of people.
Directions to trailhead: From Lake Placid, go east on Rt. 73 to Adirondac Loj Rd., which is the first right after the ski jumps. The parking lots are 5 miles from Rt. 73. There is a $10/day parking fee. Park in one of the large lots near the High Peaks Information Center. The trailhead is on the far side of the parking lot directly across from the High Peaks Information Center. GPS coordinates for this hike are: 44.1830461,-73.9644678
Giant Mountain is New York’s 12th tallest peak and the hike to the top is no joke! With about 3,400 feet of elevation gain in just 3.4 miles, lots of slick granite and tangled roots to negotiate, and several short rock scrambles, this is not a beginner’s hike. The views at the top and along the descent make the effort worthwhile, though. The hike winds down with a visit to a lovely glacial pond called the Giant Washbowl.
Crowd gathered on the summit of Giant Mountain. Most of the people were part of one very oversized hiking group. Below: Trailhead information; There was fog catching the sunlight early in our hike; The steady climb begins early on the route.
Adam Says…
Giant Mountain is one of the Adirondack High Peaks, a collective name given to the 46 mountains that rise above 4000 feet. A survey later showed that four of these peaks are actually slightly below 4000 feet (and one other should have been included), however the ADK is keeping all of the original 46 peaks in this club. Giant Mountain stands as the 12th highest mountain in New York at 4,627 feet. One thing we quickly discovered on our trip to this area is that there are lots of people trying to peakbag all 46 peaks – kind of a rite of passage for serious NY hikers. So, you will likely find fellow hikers on the trail. Giant also has several different ways to approach the summit, but this path would be the most popular, mostly because of the length and the access to see the Giant Washbowl and Nubble. Some peakbaggers will approach this hike from another trail to the east to bag Rocky Peak Ridge, #20 on the Adirondack High Peak list.
We found the parking lot without much trouble and began our hike on the Roaring Brook Trail. Within the first couple of tenths of a mile, the trail branches off to the left (the trail to the right leads to the base of Roaring Brook Falls) up a steady incline. The trail starts off with a lot of roots, but these are soon replaced with lots of large rocks to navigate. At about .5 miles, you reach a side trail while leads to a nice large campsite and the top of Roaring Brook Falls. Be very careful if you check out the stream at the top, since people have fallen over the falls and died. Backtrack your steps and rejoin the trail to continue the uphill climb. At 1.2 miles, you reach a junction that leads to the Giant Washbowl and Nubble (your return trip on this loop).
The terrain ascending Giant Mountain is varied with rock scrambles, smooth granite, cobbles, roots, stream crossings and more! Below: The top of Roaring Brook Falls; A stream crossing; Trail Junctions were well marked.
Continue uphill on the Roaring Brook Trail. Keep an eye on where you place your feet as you have to navigate along rocky steps through most of the rest of the hike. At 2.9 miles, you reach another junction. Turn left to head to the summit of Giant. This part of the trail had some extremely slick granite slabs to walk up. We had just had rain a couple of days ago, so some of these giant slabs were very tricky to climb. Eventually, you will reach the summit at 3.6 miles. Views at the top are truly breathtaking.
On our descent, we returned back the way we hiked up. Christine was worried about the descent over the slick granite, but we took our time and even scooted down some surfaces on our butts to be extra safe. At 4.4 miles, we reached the junction of the Ridge Trail (also known as the Zander Scott trail) and Roaring Brook Trail. Instead of taking the Roaring Brook Trail back the way we came, we decided we wanted to see the Giant Washbowl. The descent was steep this way down, but there weren’t as many slick granite rocks – the area is more exposed and the sun dries the rock off more quickly. The way back on this trail gave us more incredible panoramic views, so we instantly knew we made the right choice. I would recommend to descend on this trail rather than trying to ascend, because by descending you get the views in front of you instead of having to turn around constantly to enjoy the views. We went at a slow pace through this section since it kept opening up to views. At 5.5 miles, we reached another trail junction. The trail that branches off to the right leads to the Giant Nubble. We opted not to take this route, but from what I have read there are some great views that overlook the Washbowl and surrounding mountains.
There was even a ladder to climb on the hike up. Below: Some of the climb involved clambering over big rounded rocks; Other parts were across smooth (often slippery) granite, Sometimes you had to drag yourself along the brush at the bottom of a granite slide.
Continuing down the Ridge Trail, we came to the Giant Washbowl. The Washbowl is a large pond, serving as a picturesque spot begging you to reflect along the calm waterside. We crossed over a long, but low to the ground, log bridge that stretched over part of the creek. On the other side of the log bridge was another junction and trail sign. We took a right and followed this Giants Washbowl Trail that skirted the edge of the Washbowl. On the other side of the Washbowl, we saw a huge beaver dam and tree stumps marked with gnawing beaver teeth. The trail was mostly level, but did go slightly up and down at minimal climbs and descents. I found this part of the trail to be more wet and slick with some rocks and almost had a bad fall, but was saved by my trekking poles.
At 6.3 miles, this section of the trail rejoined the opposite side of the Nubble Trail. We kept straight on the trail and at 6.7 miles, we reached the junction with the Roaring Brook Trail. We took a left here at this junction and followed the trail back to our car, which should bring you back around the 8 mile mark.
This hike was intimidating and a bit of a challenge. I remember we had read this was a great family hike. We were thinking they would never describe this as a family hike in Virginia, but I guess New York Adirondack hikers are a stronger breed than we are used to in Virginia. We found that to be the case for most of the people we met up here. People in the Adirondacks look healthier, seem to be in better shape, and have a close connection to the outdoors. If you enjoy a bit of a challenge, the views are definitely worth it on this hike. Pictures can’t do the views justice. Be sure to add this one to your agenda if you are looking for a great hike in the High Peaks area.
Christine Says…
Adam did a great job doing all our pre-trip hike research for our Adirondacks vacation! Over the course of the week, we hiked a mix of big mountains and small mountains. We saw quiet ponds and cascading waterfalls. Some days were easy strolls and other days were grueling climbs. The hike of Giant Mountain was not our longest hike of the week, but I think it was definitely our toughest. It had a monster elevation gain and I found the terrain physically challenging and a bit frightening in spots.
Near the summit, the climbing was tough and traversed large boulders. Below: First glimpses of the view; Before reaching the top, the trail offered a brief reprieve from relentless climbing as we walked across a saddle between peaks; Giant Mountain Summit
The climb started off through lovely, shady forest. The trail was cris-crossed with roots, but the footing was generally soft dirt. The climb was steady and relatively steep. As we climbed higher, the dirt trail gave way to increasing rocks. At first, it was jumbles of boulders and cobbles. We made our way, stepping carefully from stone to stone – making sure each was level and anchored before committing our full weight to the step.
Eventually, we started seeing fewer round boulders, and started seeing mostly smooth, slanted granite faces. The granite was wet from storms the night before. It was also covered with a coating of incredibly slick granite sand. The climbing was very mentally challenging for me. I get really nervous when I have to cover slippery terrain that lacks anything to grab onto in case of a slip or slide. My vertigo makes me more prone to the sensation of losing my footing.
There were several spots on the climb of Giant that paralyzed me with panic and fear. On one especially smooth, steep pass; I actually burst into tears because I was so certain I was going to fall off the mountain and die. I gripped the tiny hand and foot holds, took deep breath, focused on the rock face in front of me, and climbed. It sounds silly, but confronting and prevailing over fear like that makes me feel proud. Of course, just when I’m feeling my proudest – some wiry, lean 22-year old guy trots up the same rock face with the agility of a mountain goat. 🙂 I just remind myself that my vertigo is an extra challenge and I still did it!!!
Super views from the summit of Giant Mountain. Below: We had fantastic views on the hike down the Ridge Trail; Sometimes the trail disappeared; Our first view of the Giants Washbowl.
Before reaching the summit, we crossed a nice saddle between knobs. The trail was fairly level and soft and it was a great reprieve before one final scary rock scale to the summit. It took me a few minutes of deep breathing and positive thinking to climb the one last steep spot to the summit. And the summit was MAGNIFICENT! Of course, some of the beauty was stolen from me because I was already thinking ‘How the heck am I going to get down from here?’ I need to remember to stay in the moment and wish I had taken more time just to enjoy being at the top of Giant.
We chatted with other hikers at the top. We took photos. And then it was time to climb down! As luck would have it, the descent turned out to be no big deal for me. I took my time, scooted on my rear end, and used my trekking poles and tree branches to brace myself. One of the hikers we chatted with at the summit took a hard fall on slick rocks climbing down. It looked like he hit his head, so I shouted to him to stay put and not try to get back up. I started climbing back up toward him to make sure he was OK. Fortunately, he was fine – just bruised and stunned. It’s so easy for one misstep to become a serious injury on terrain like this. In fact, there is a website that lists search and rescue missions for the Adirondacks. Typically, crews go on anywhere from 5-15 missions a week to help injured, sick, and lost hikers.
The descent on the ridge trail offered great views. It was like a theater with the mountains up on stage. Below: Some steep descents along the granite; So much granite; Really… there was a lot of granite.
At the junction of the Roaring Brook and Ridge Trail, we stopped to review our map. We started chatting with another couple we had met on the summit. They didn’t have a map or a plan, so we shared information with them. They decided to hike with us down the Ridge Trail to see the Giant Washbowl. They had an adorable Jack Russell mix dog named Judy! She was an agile and energetic hiker.
The views coming down the Ridge Trail were as nice as the summit. It was like walking into a theater of mountains. There were lots of granite faces and cobbles to negotiate on the way down. Sometimes the trail was so rugged you were left wondering if it really was the trail!
We started seeing glimpses of the Washbowl from above. It was even more beautiful up close. I loved seeing the reflections of clouds and mountains in the water. From there, the rest of the hike was pretty easy and the terrain was much more moderate. We passed (and greatly angered) a couple red squirrels. They’re pretty cute when they’re mad – chattering at you from tree branches.
The Giants Washbowl is a beautiful mountain pond. Below: Seriously, these rocks are the trail; A bridge over the end of the pond; A dam at the top of the pond.
When we were almost back to the car, we passed a large family group. There were two women and about ten kids under the age of ten – all dressed in swimsuits and sandals. They were considering walking to the top of the waterfall and asked what the terrain was like. Fortunately, we were able to dissuade them from hiking the steeper rockier terrain by telling them that there was nothing really to see – which was true. The top of the falls was really low and unimpressive.
We reached our car and decided ice cream was in order! We definitely earned a treat after a hike like that!
Trail Notes
Distance – 8.1 miles
Elevation Change – 3408 ft.
Difficulty – 5. The hiking up here is tough.
Trail Conditions – 2. While the trail is well-maintained, there are a lot of rocks that make for very tricky footing. There is also a few sections that require you to go up slick granite rocks that can be especially dangerous after recent rainstorms.
Views – 5. Outstanding panoramic views. Great views of many other high peaks in the area.
Streams/Waterfalls – 2.5 The first mile of the trail gives you some occasional views of Roaring Brook. A small side trail leads to the top of the Roaring Brook Falls. The Giant Washbowl is also impressive to see.
Wildlife – 2. This is a popular trail so I wouldn’t expect to see much more than birds.
Ease to Navigate – 4. Signs gave good information at the junctions. There are different options to include trips to Giant Nubble and also to connect to Hopkins Moutain and Owl Head Lookout from the summit.
Solitude – 2. Expect to see plenty of people on a nice day at the summit. The summit has a lot of space to spread out and enjoy your own view.
Directions to trailhead: From Keene, NY head southeast on NY-73E/NY-9 S. Continue on NY-73E for about 6.1 miles. There is a small parking lot on the left, which is shortly after you pass through St. Huberts. The trailhead is at the end of the lot. Coordinates for trailhead parking are 44.1502704,-73.7676257.
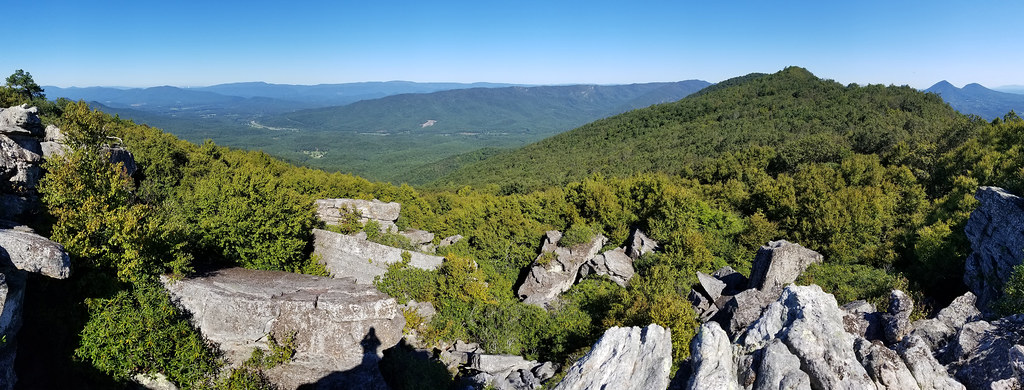

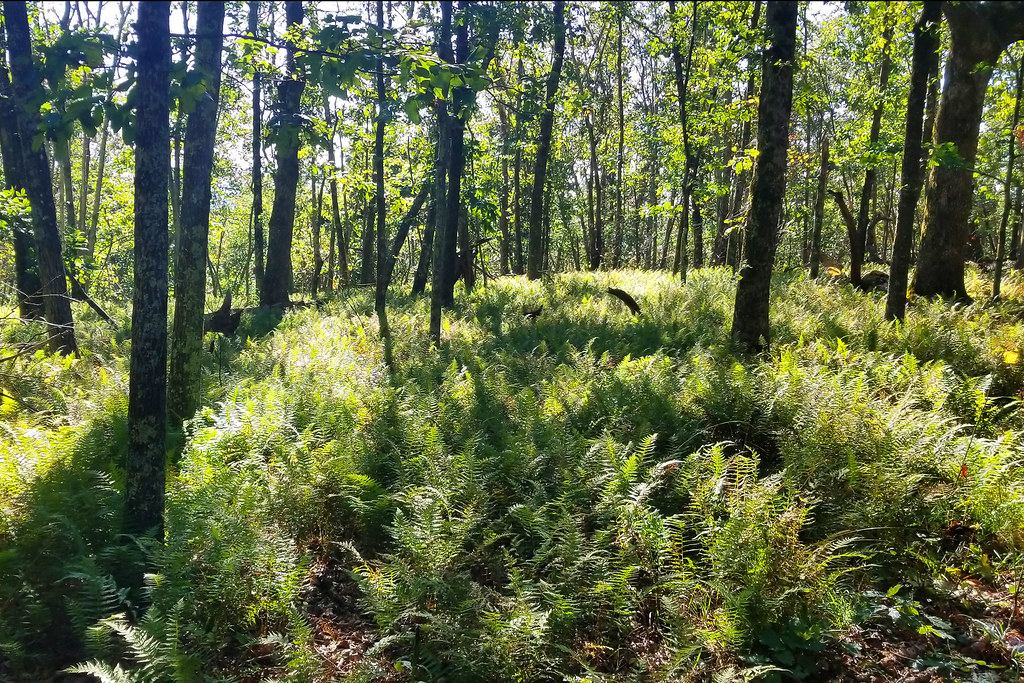

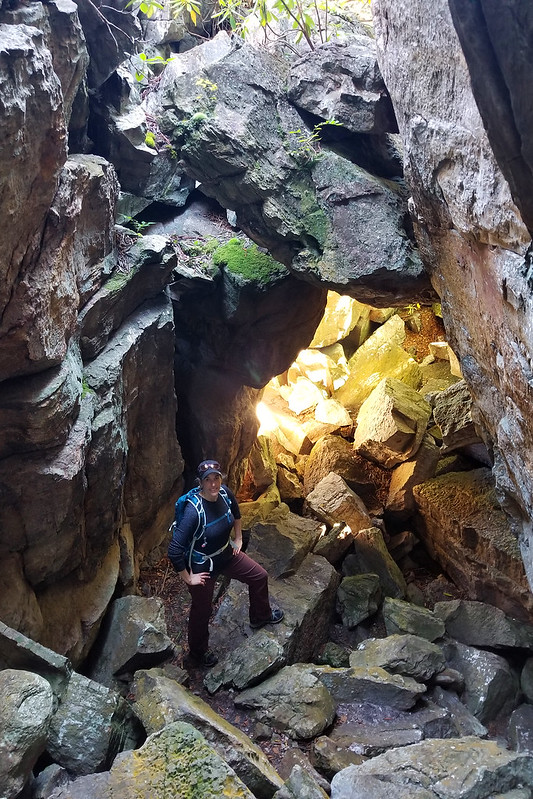
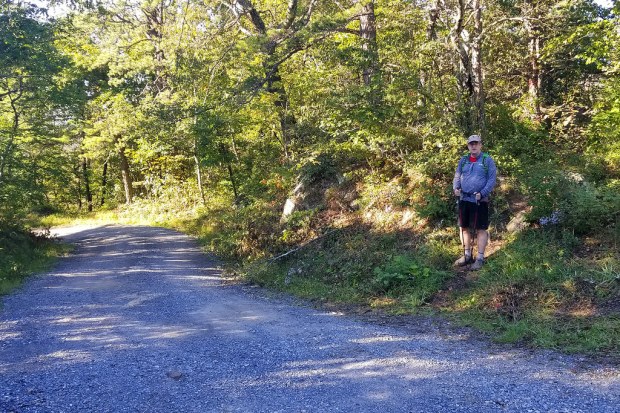

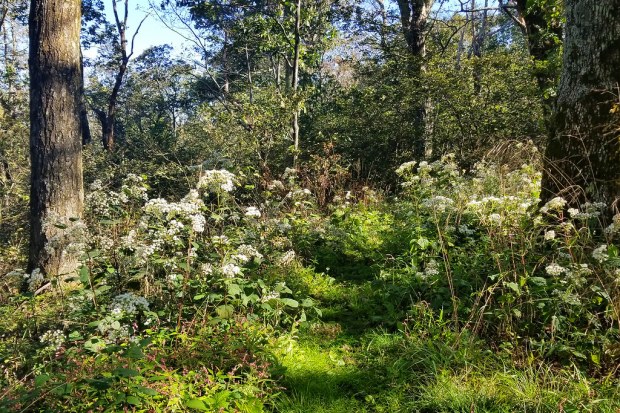
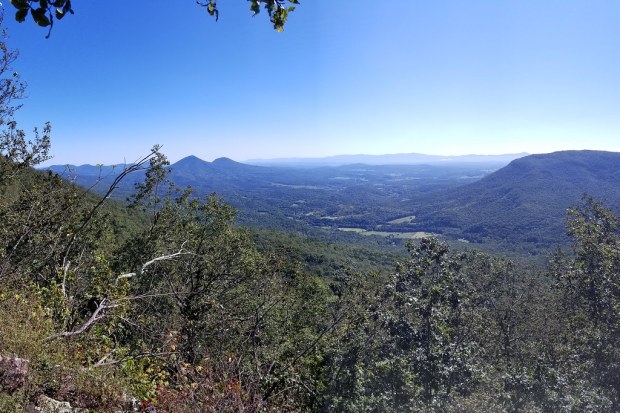


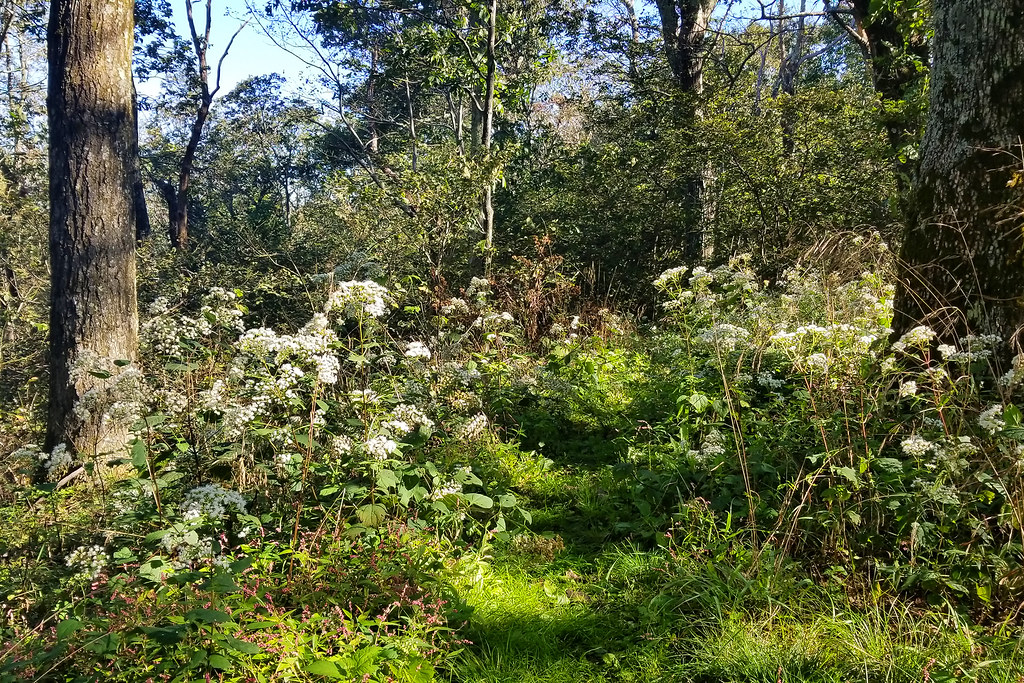

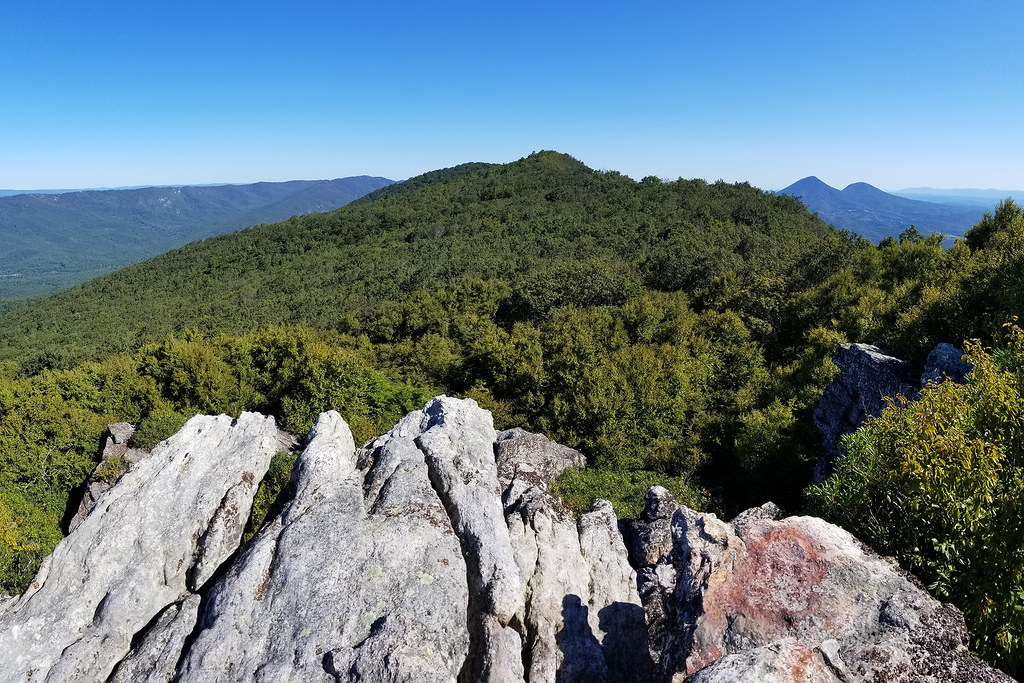

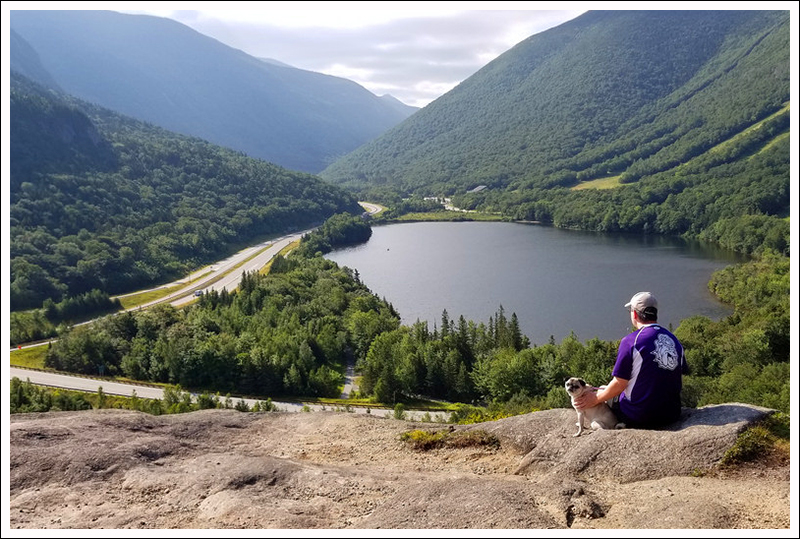


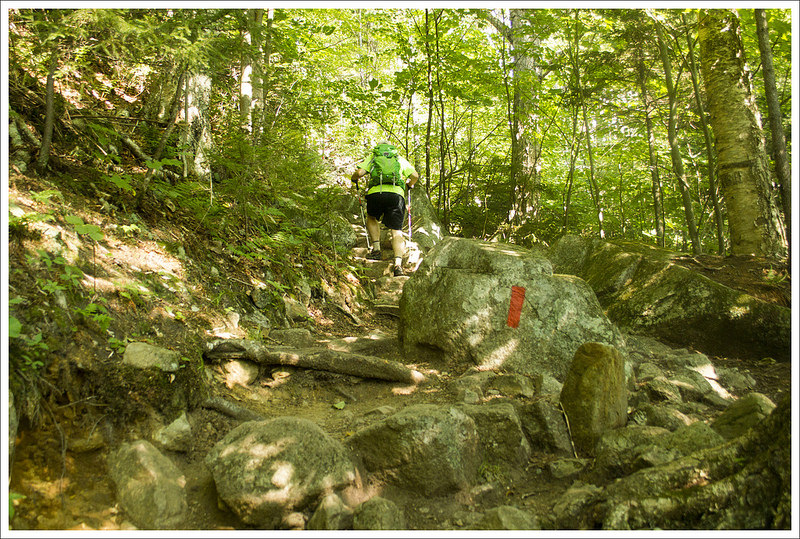
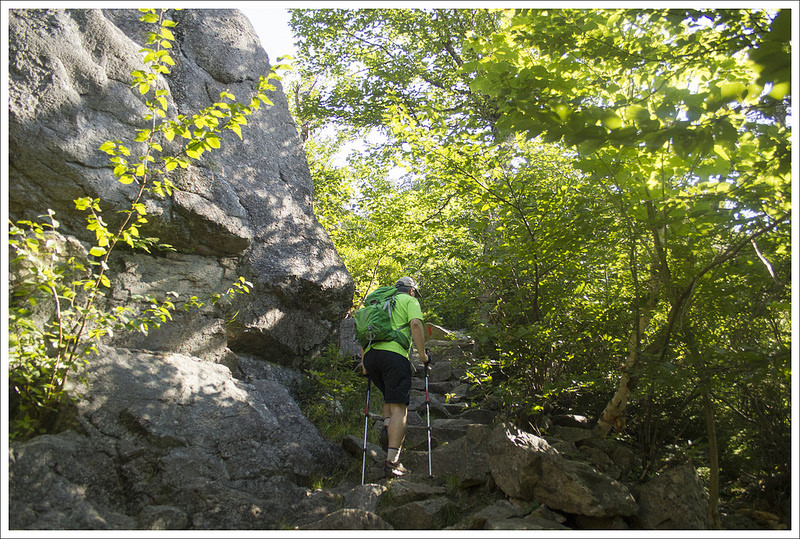


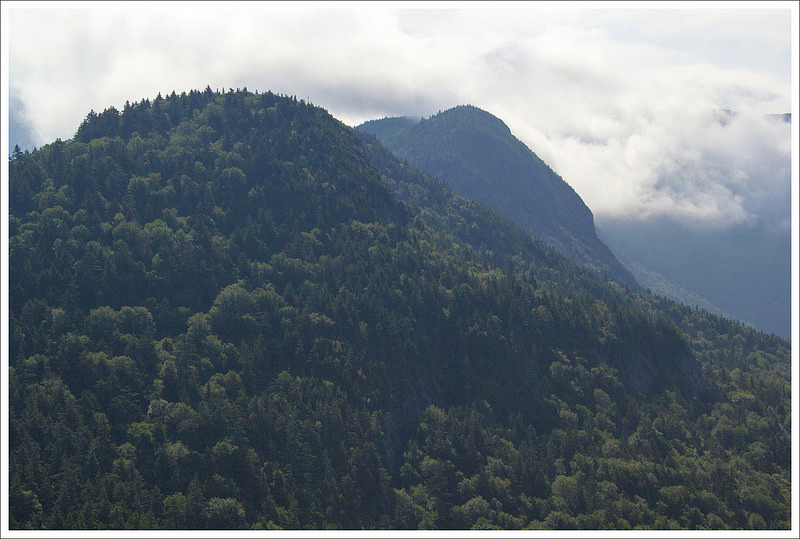

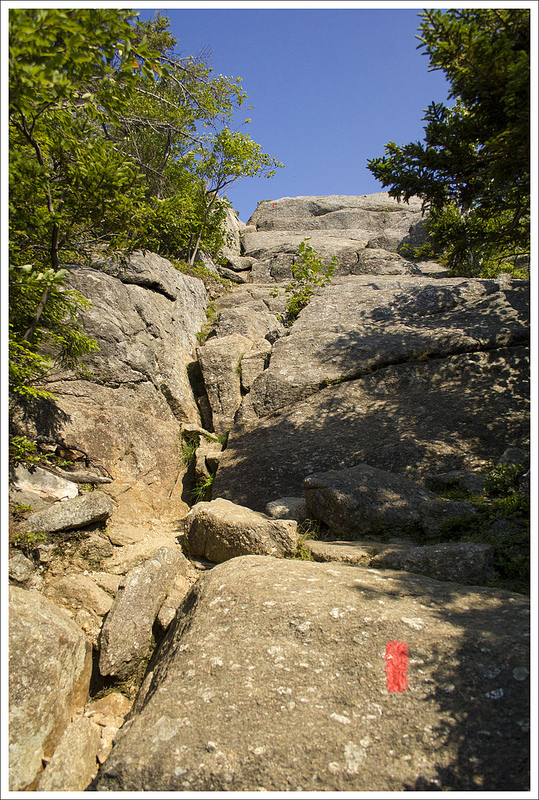


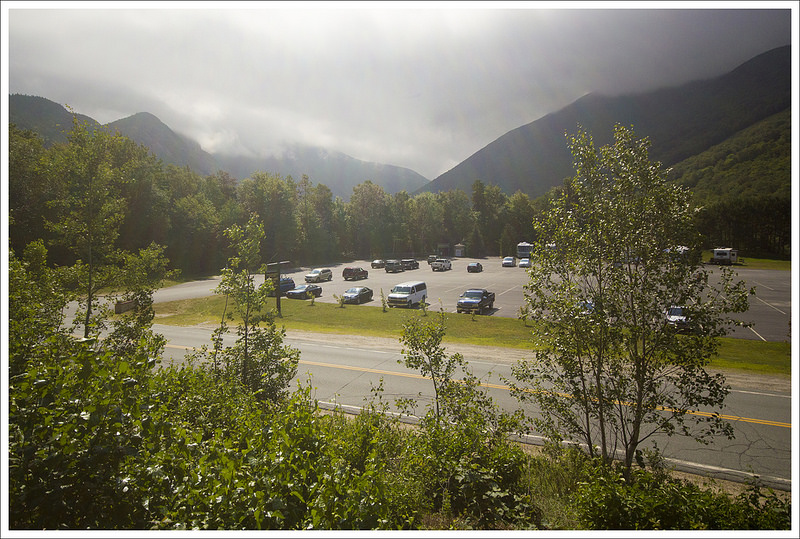
 Wookie Says…


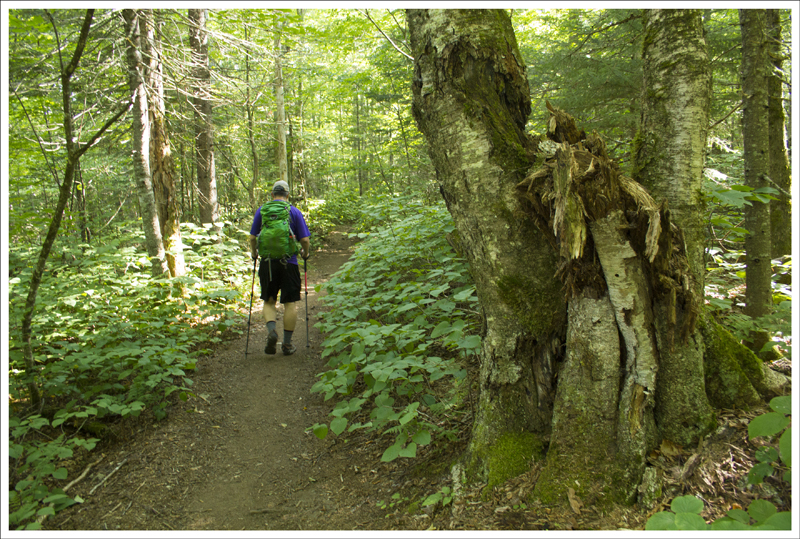


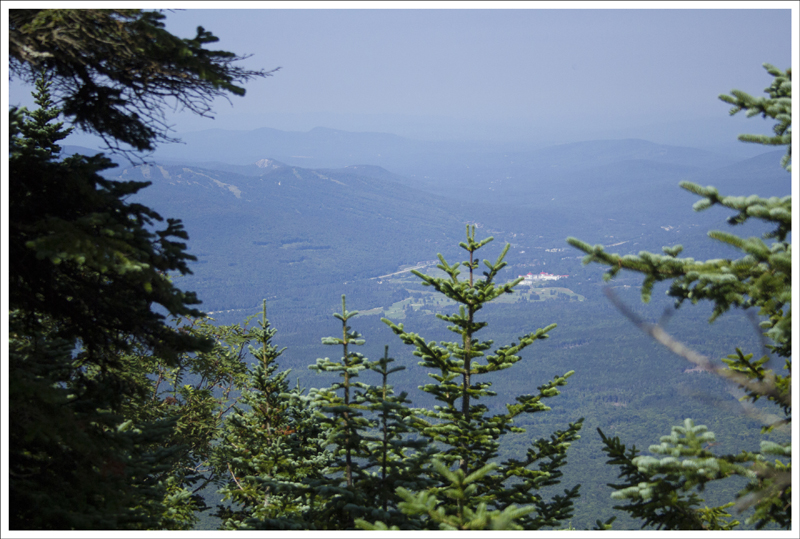


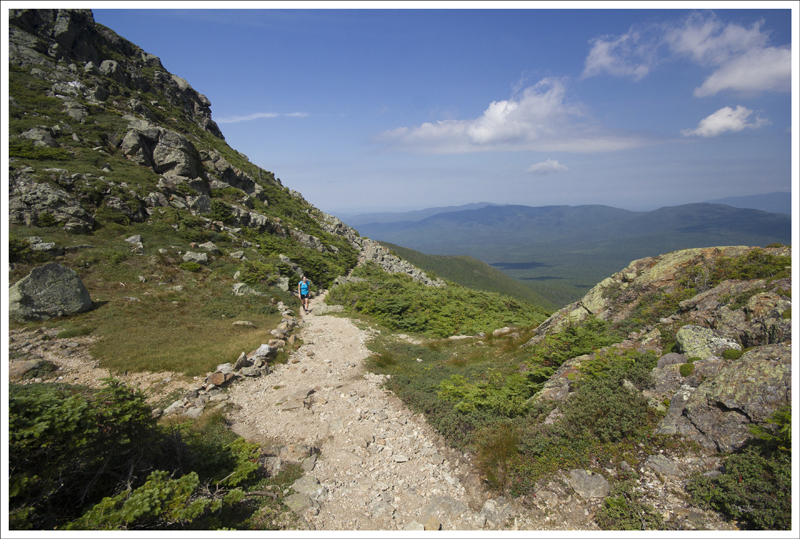


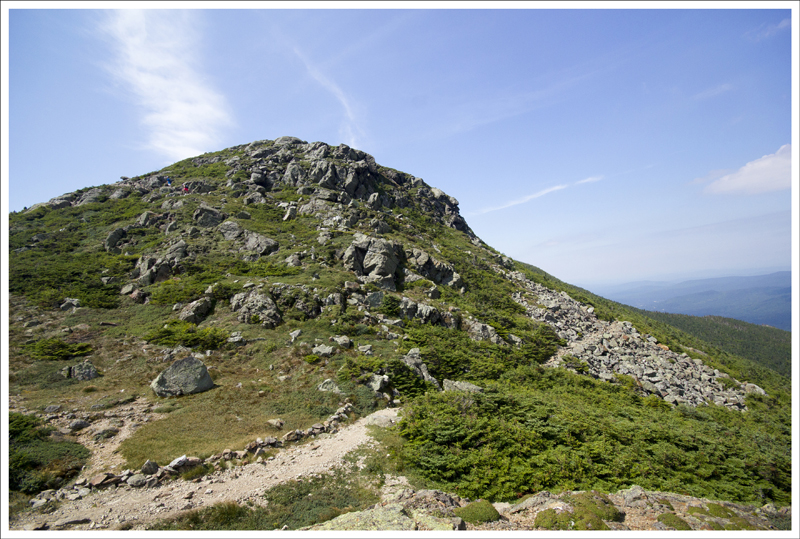
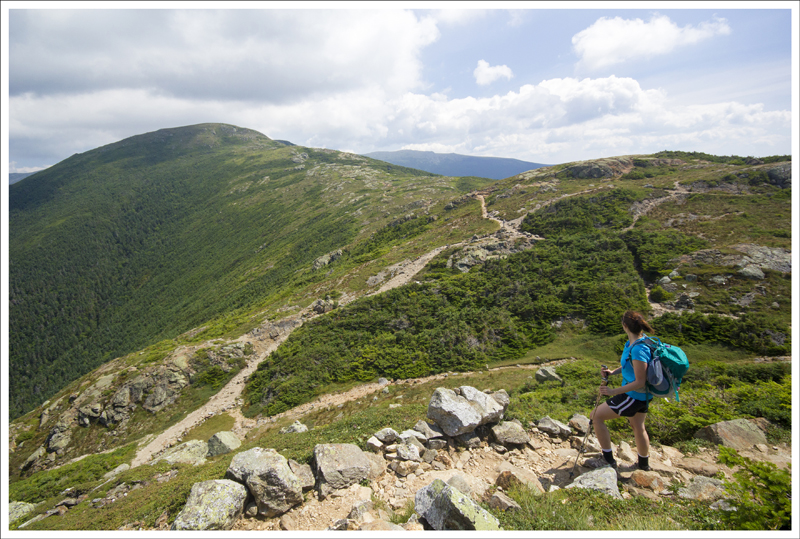


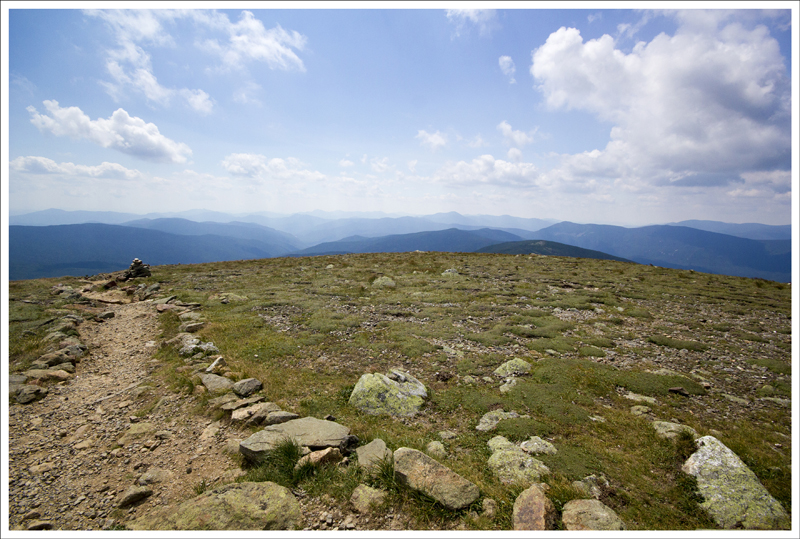
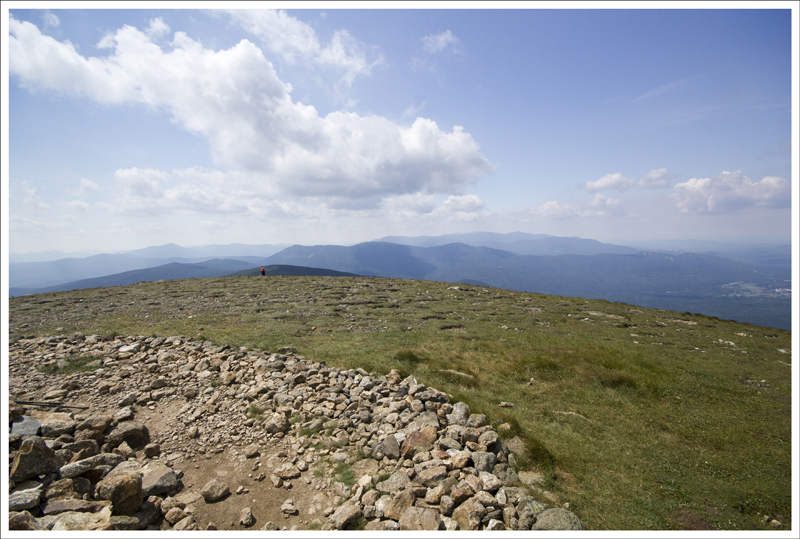

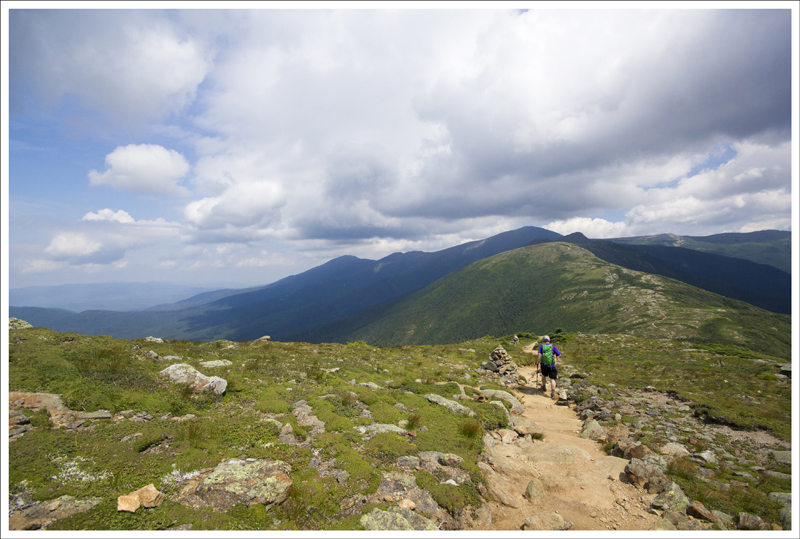
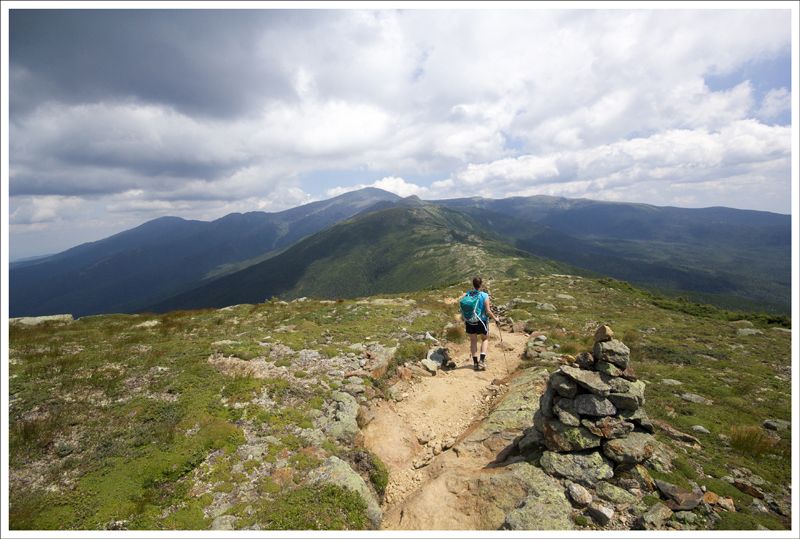
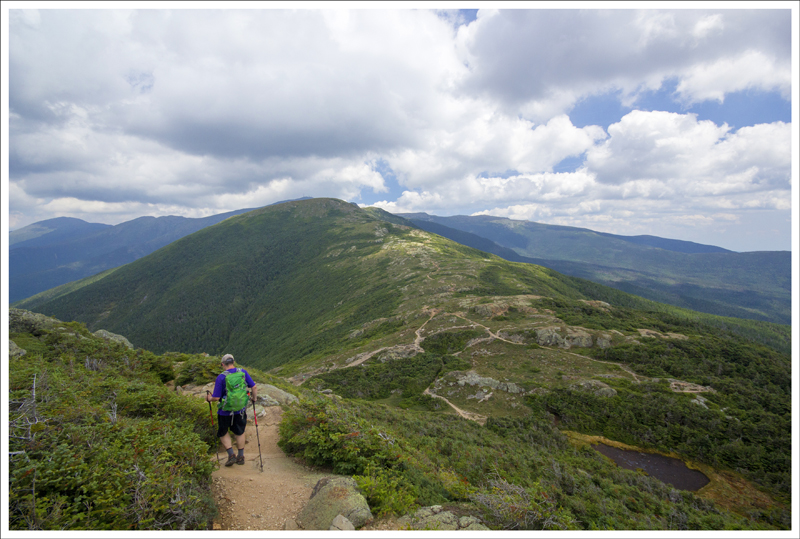


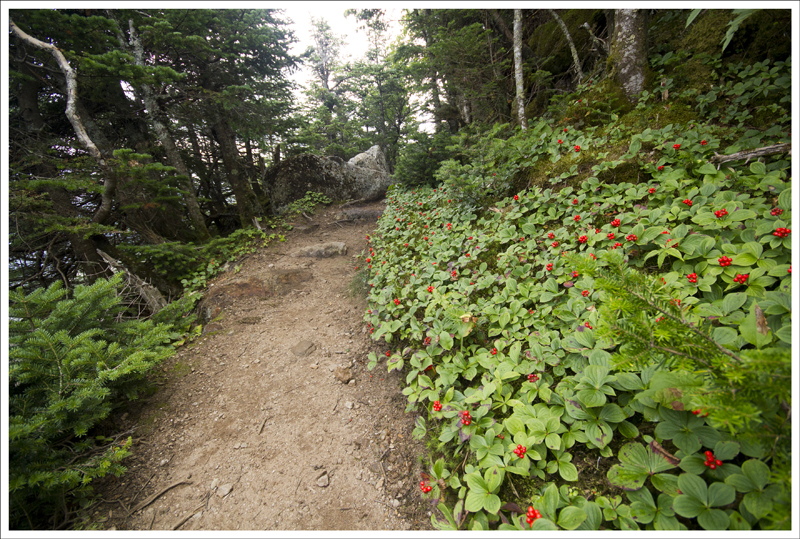


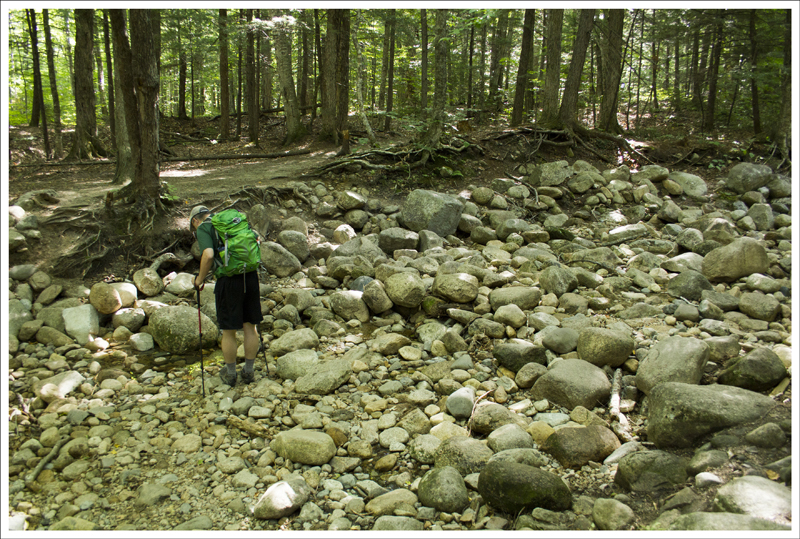


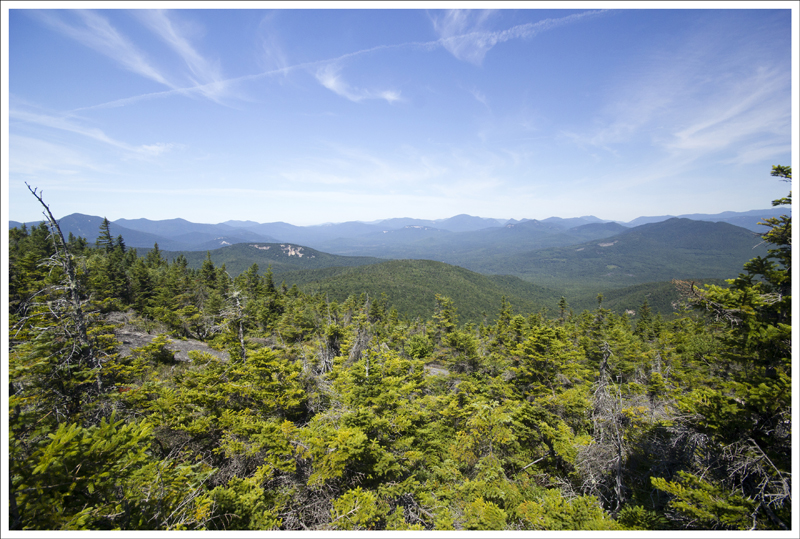

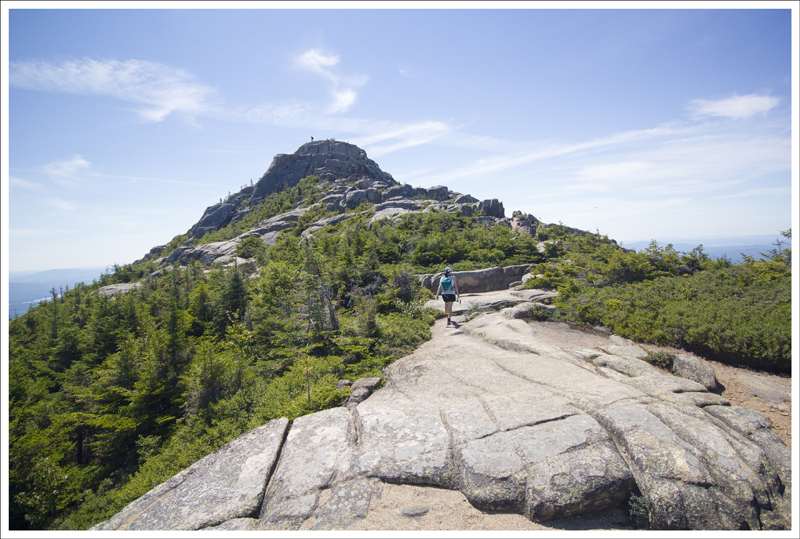


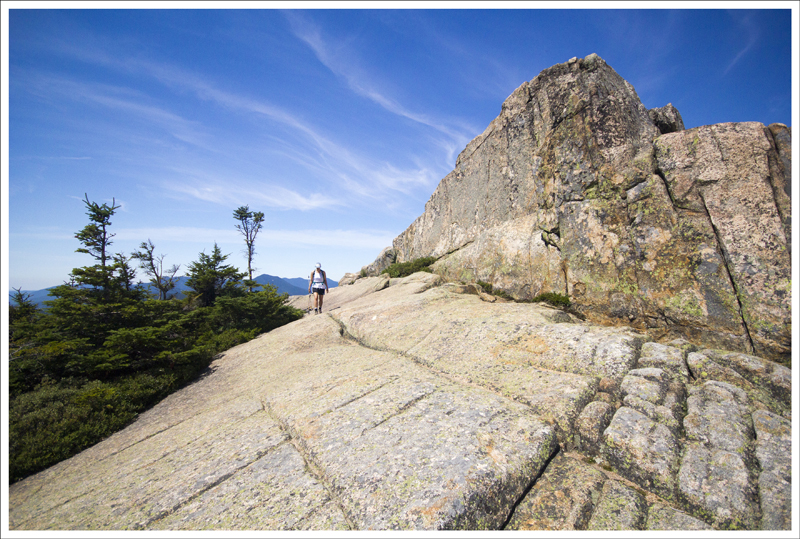
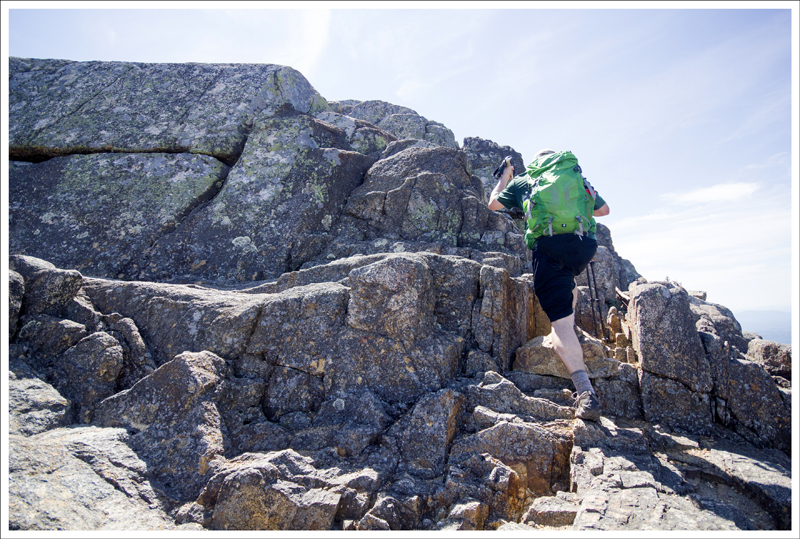


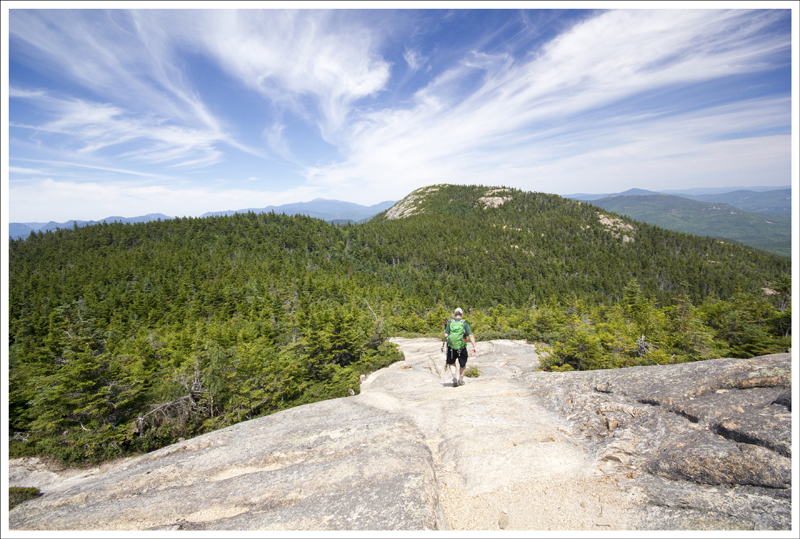


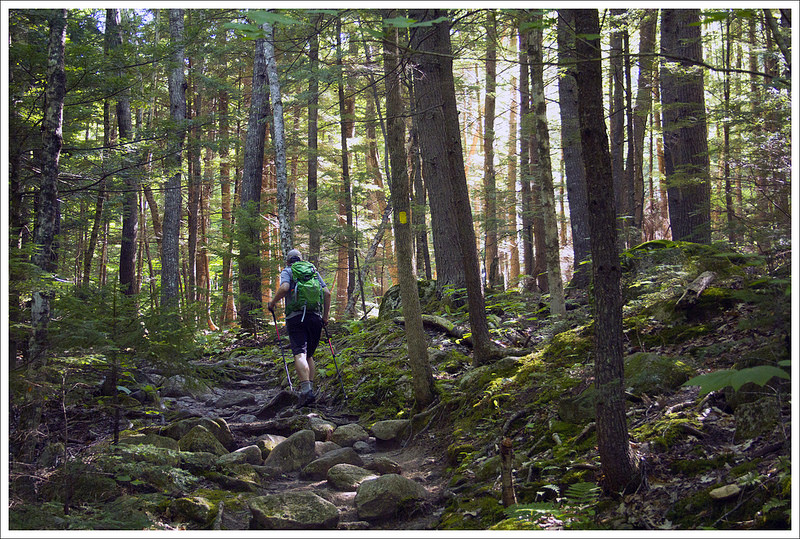
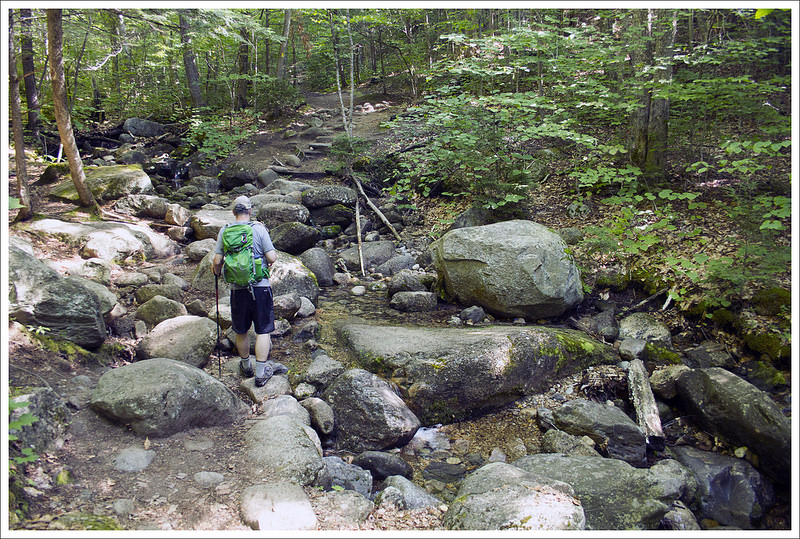


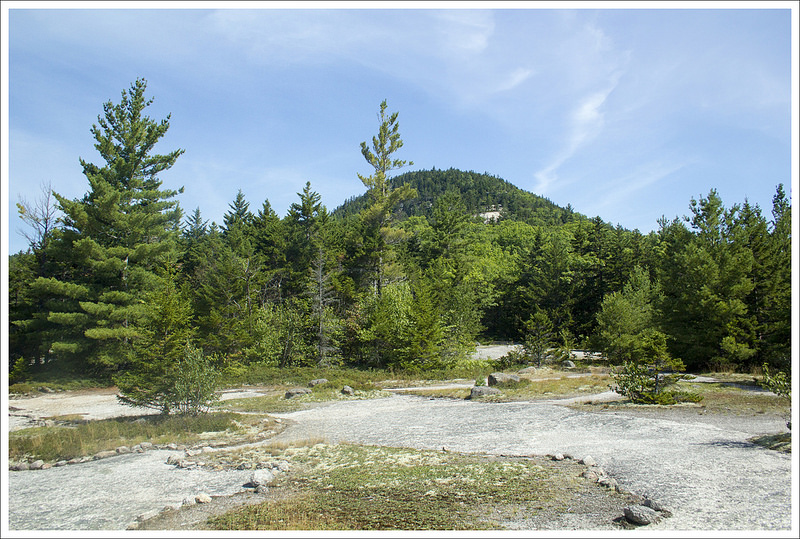


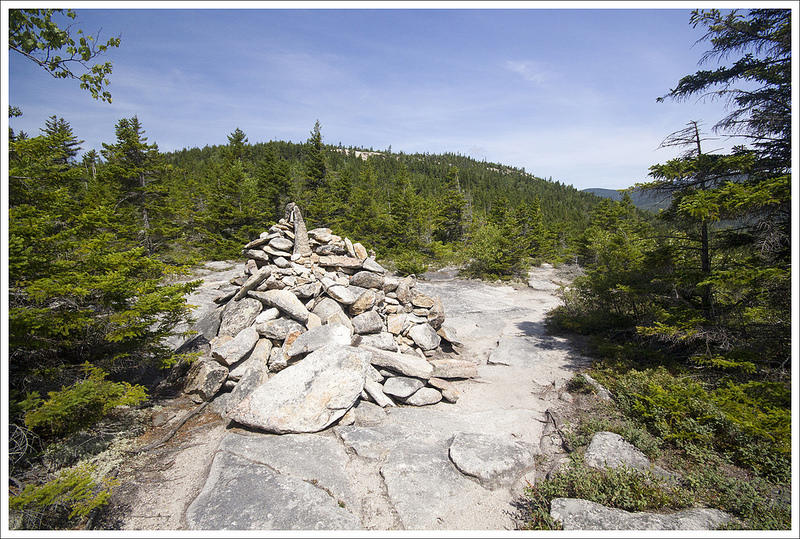


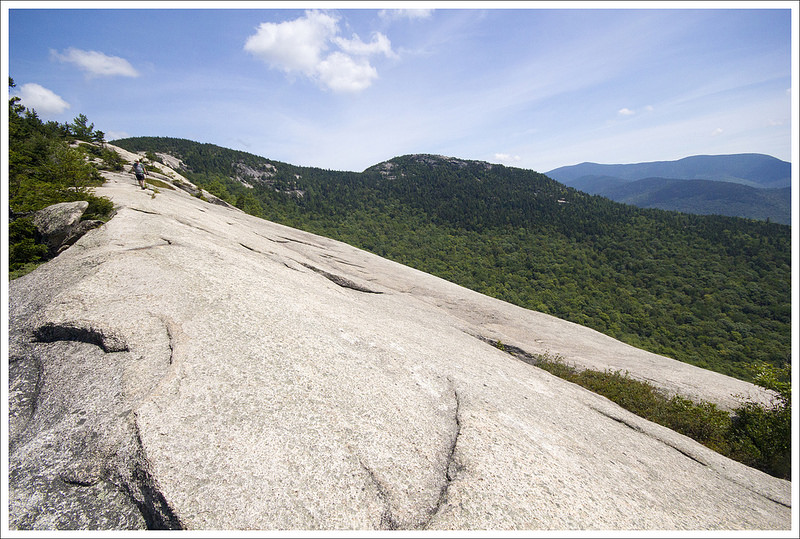


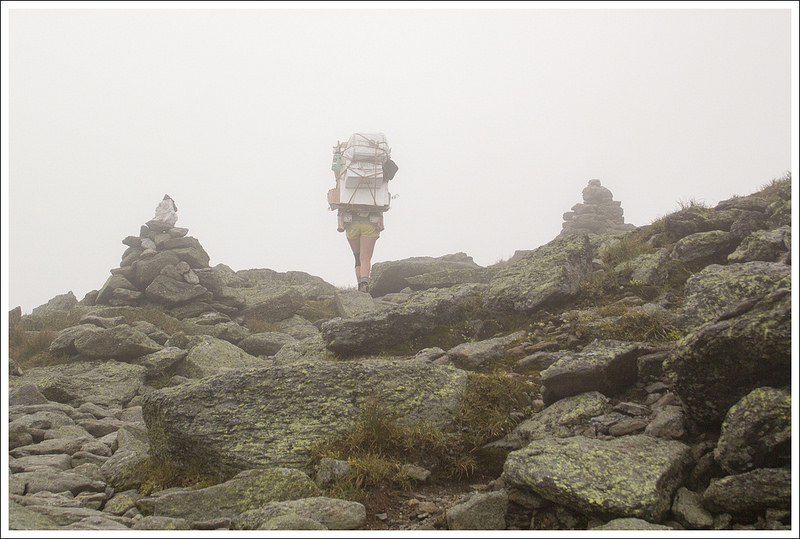


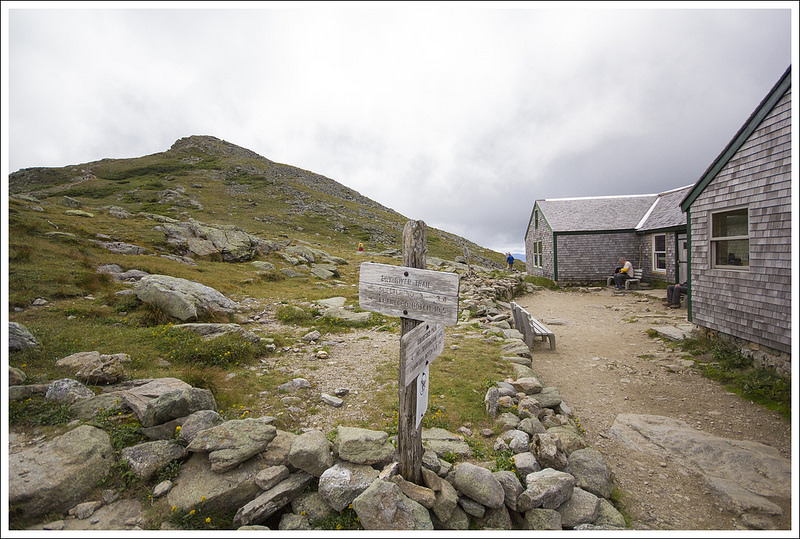


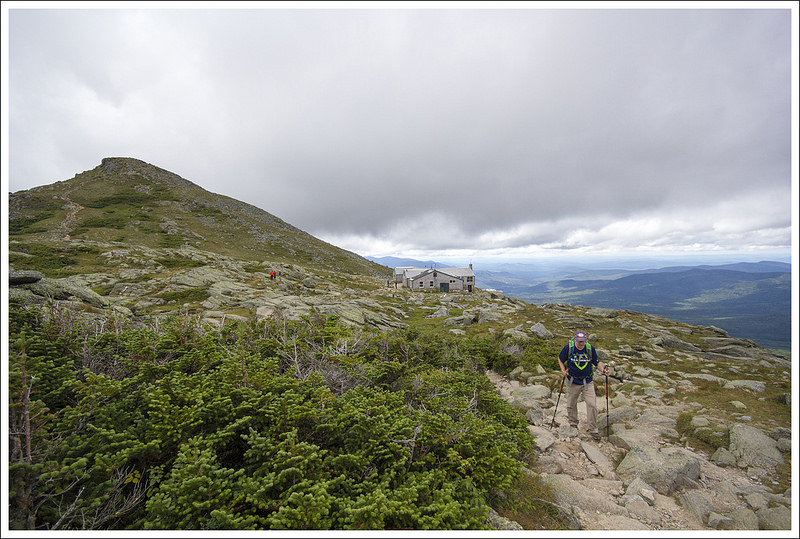


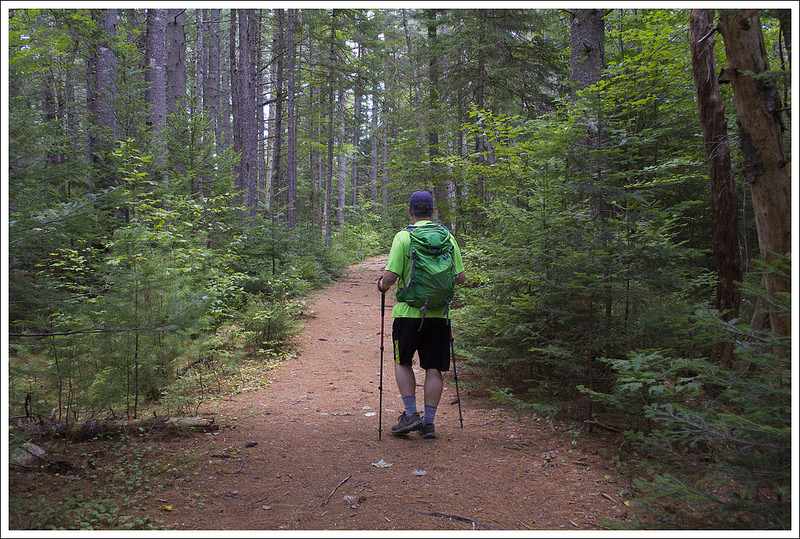
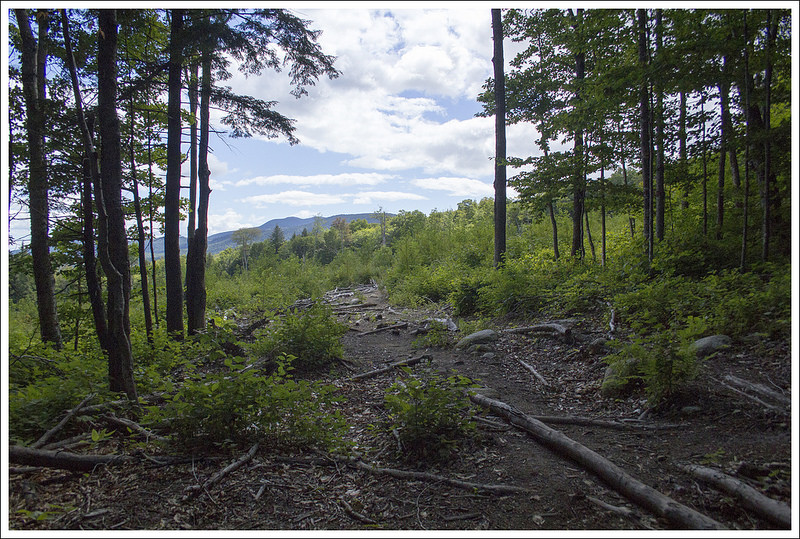
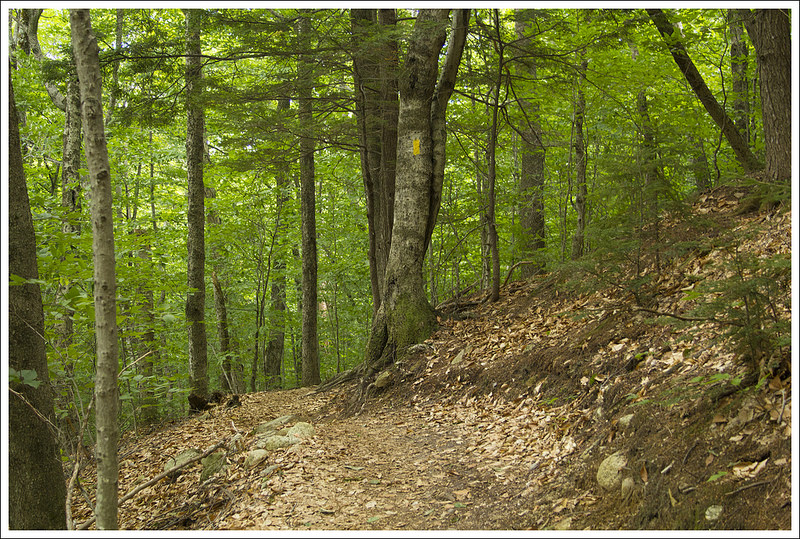

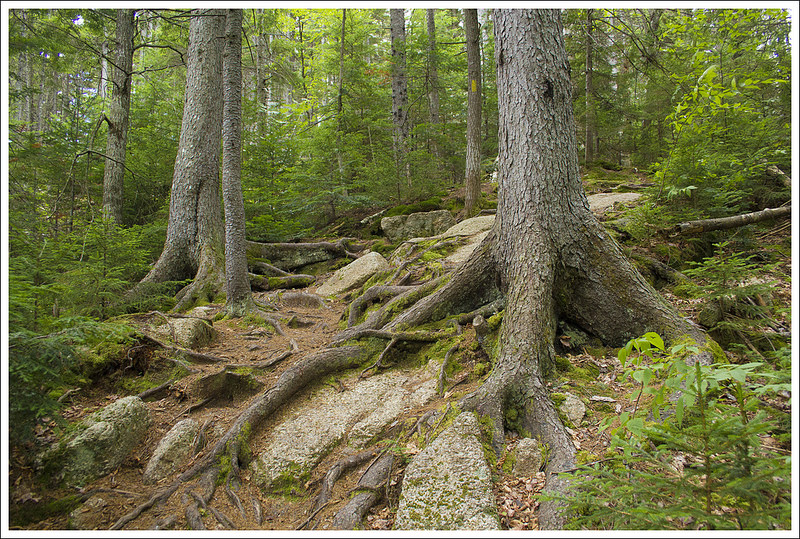
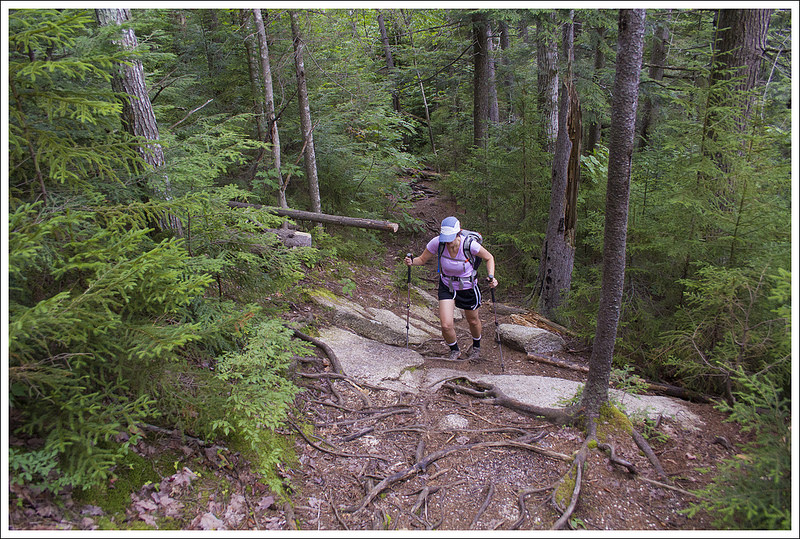


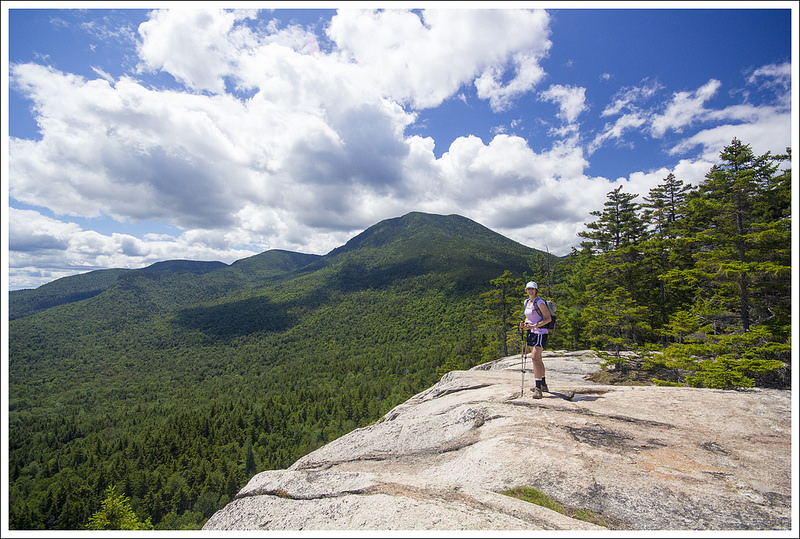


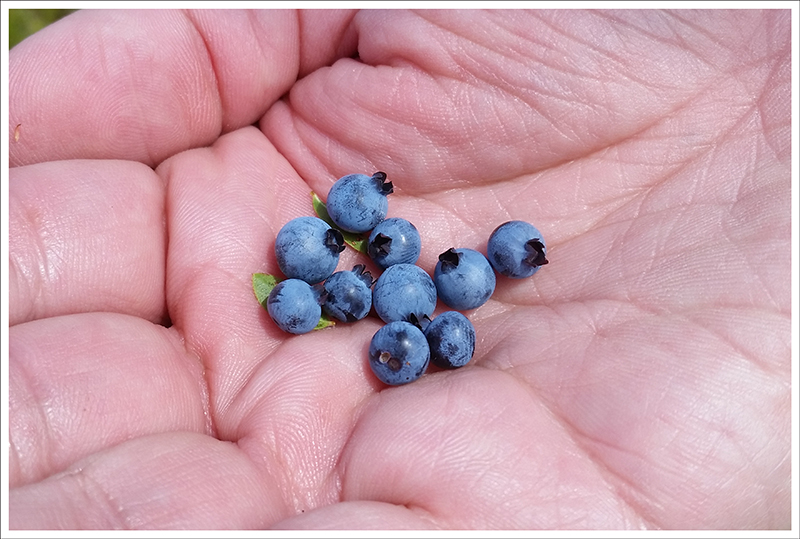


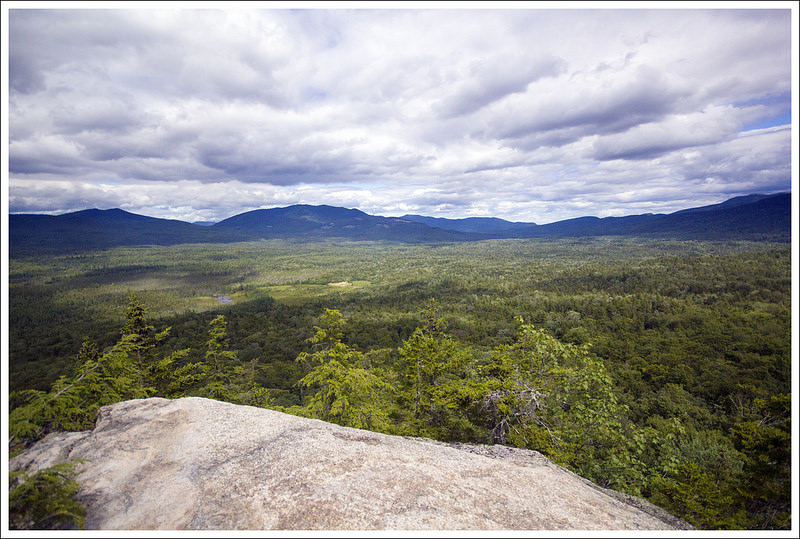
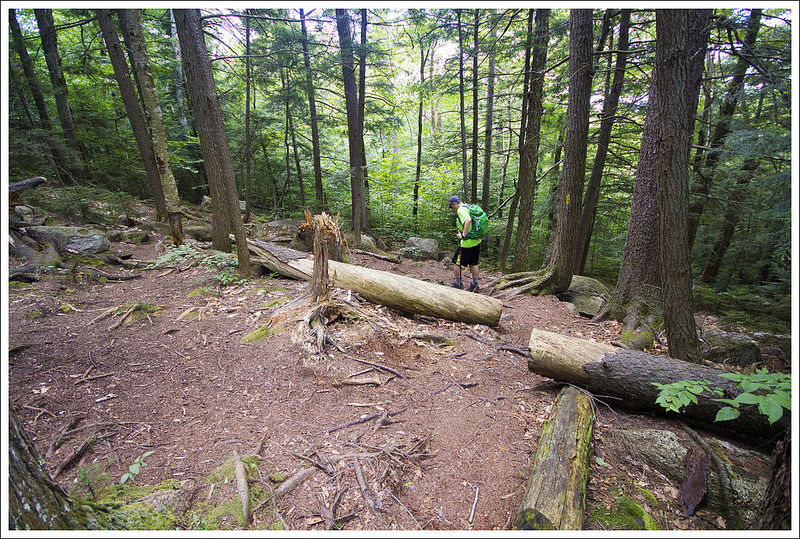


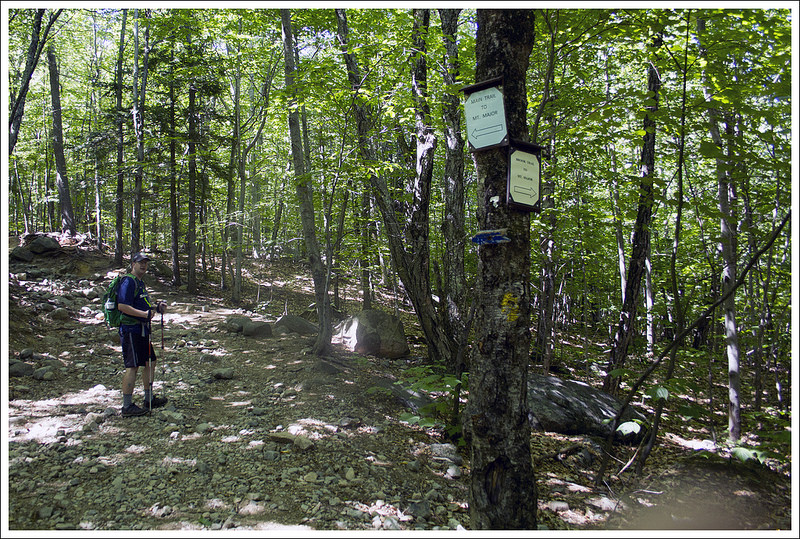


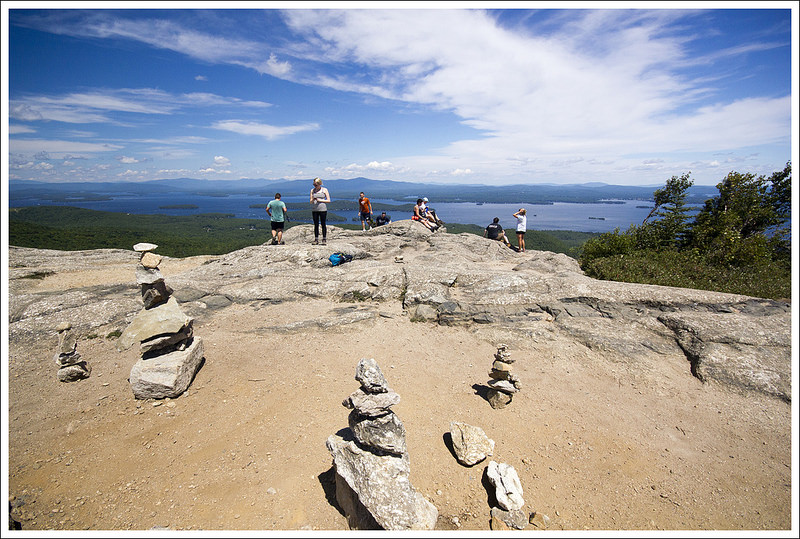


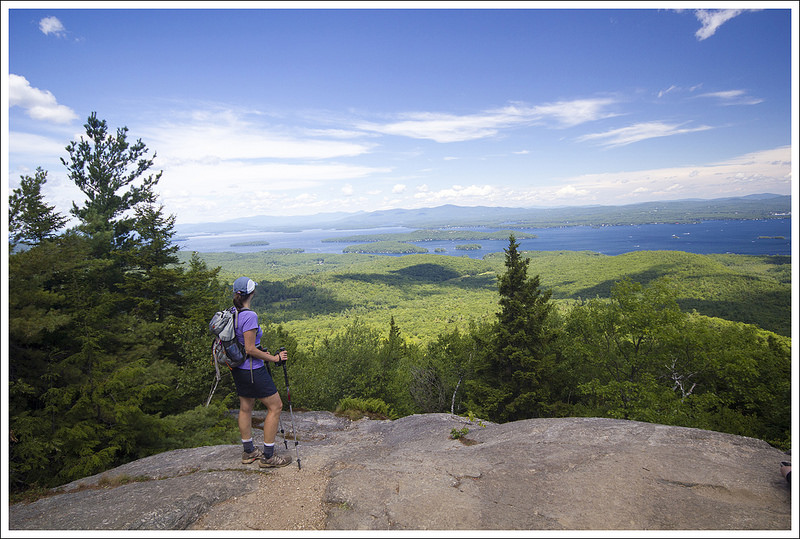


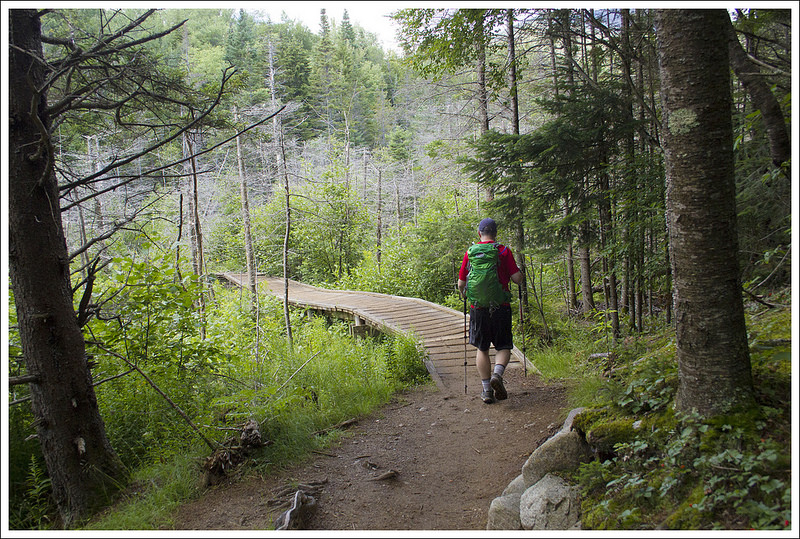


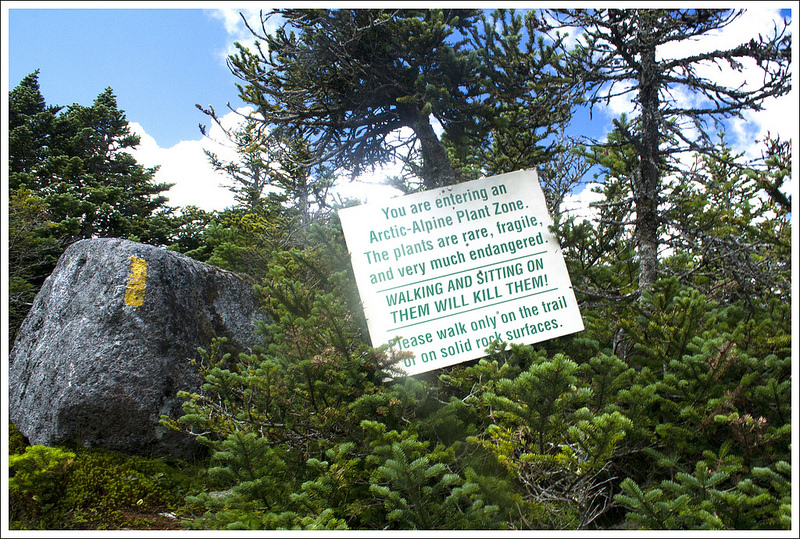
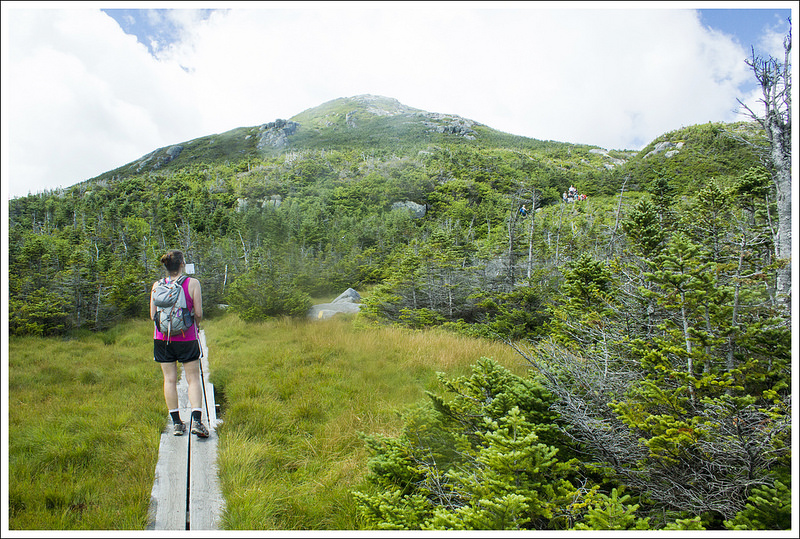


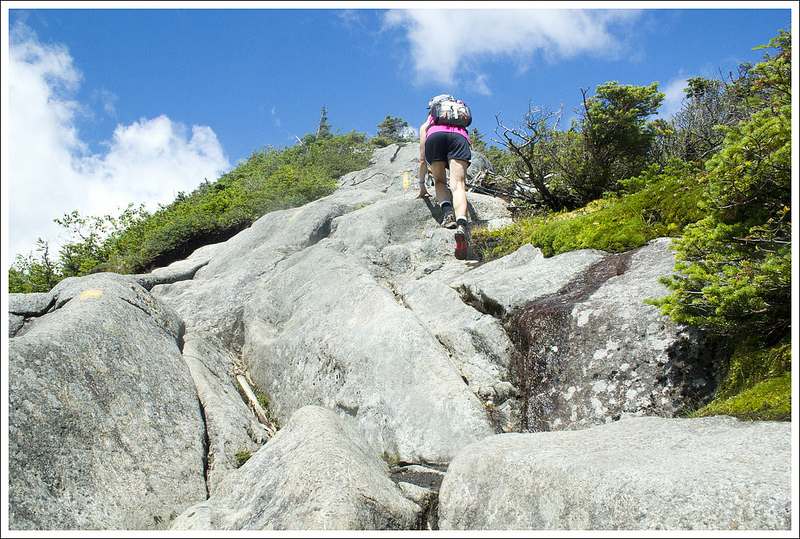


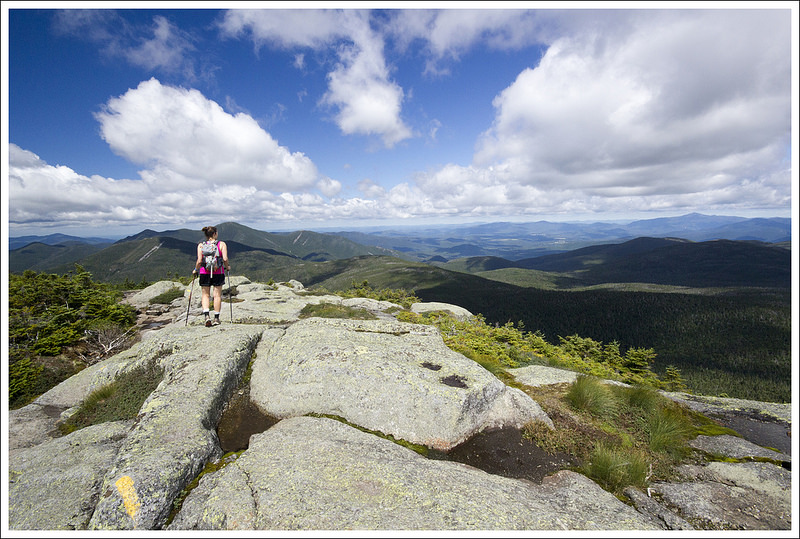


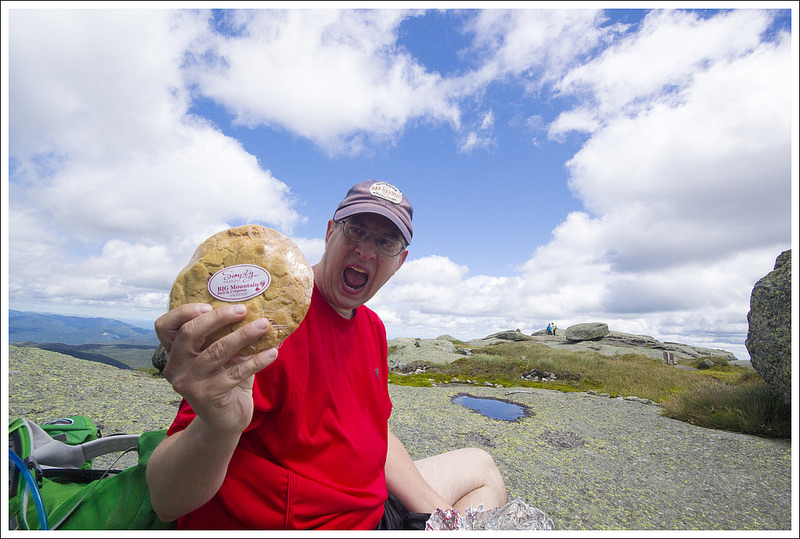


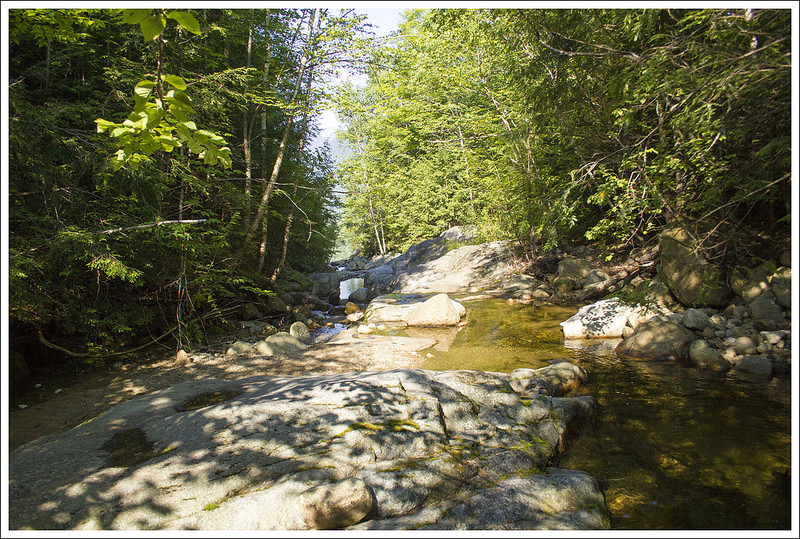
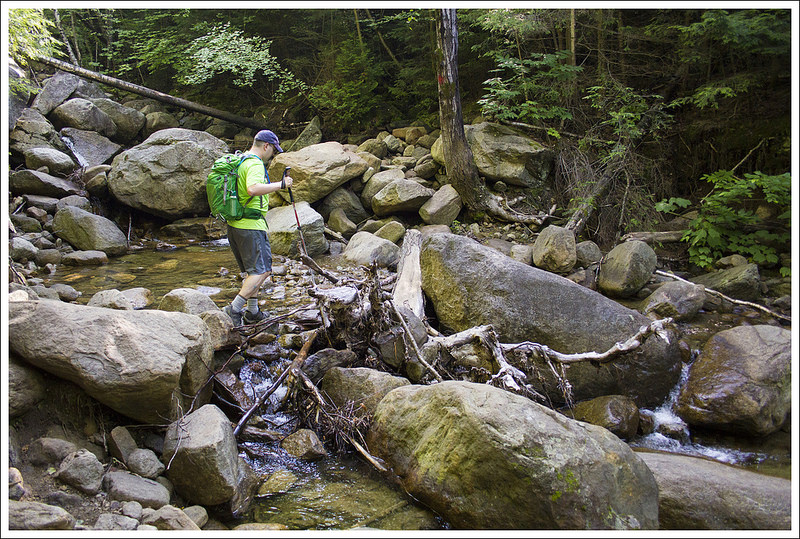


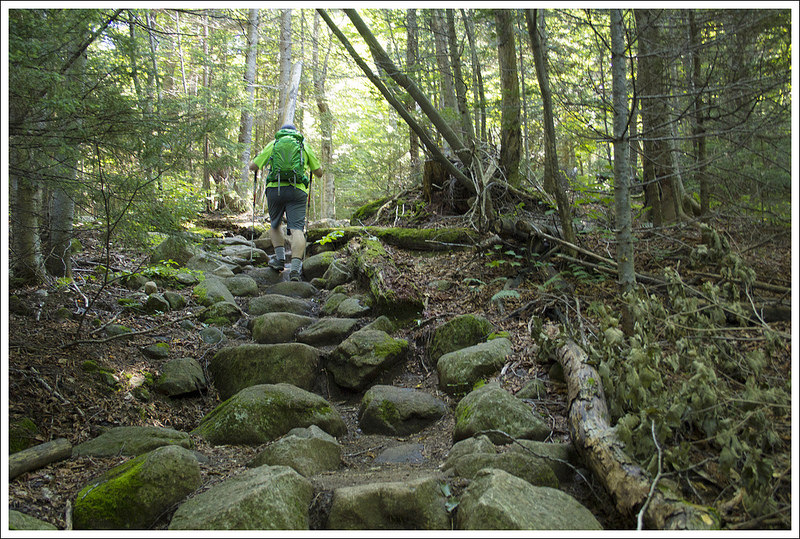
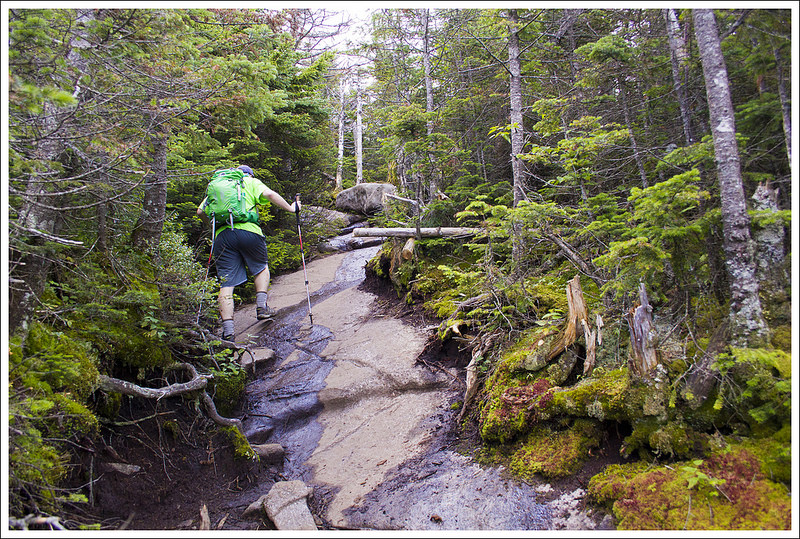

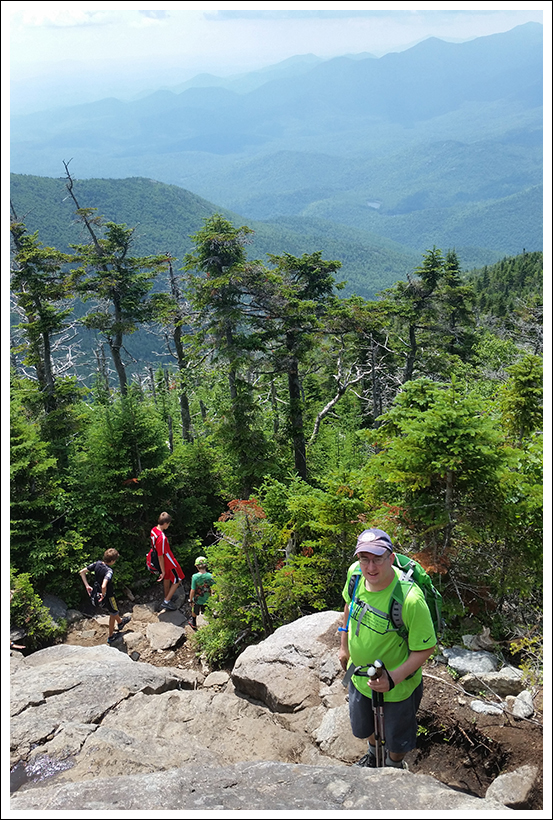


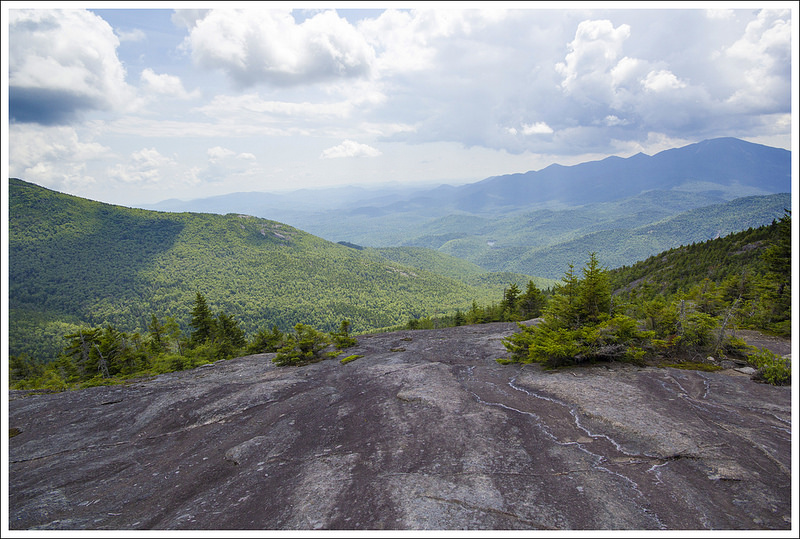


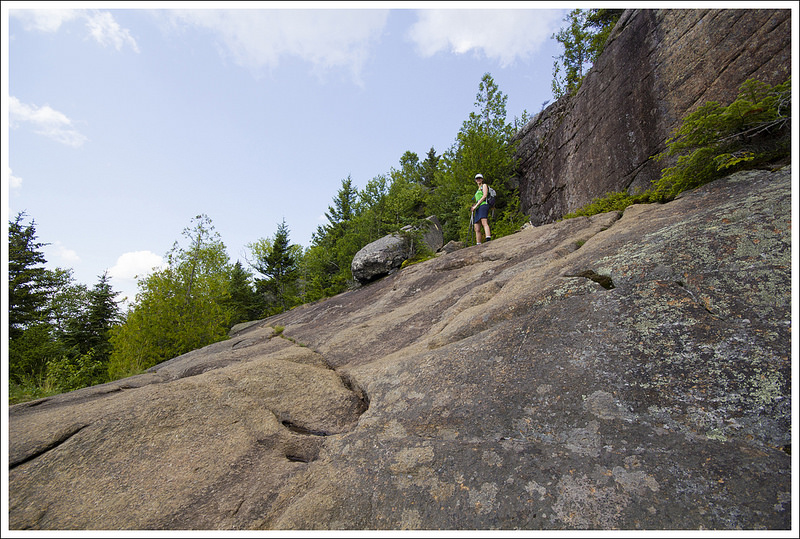


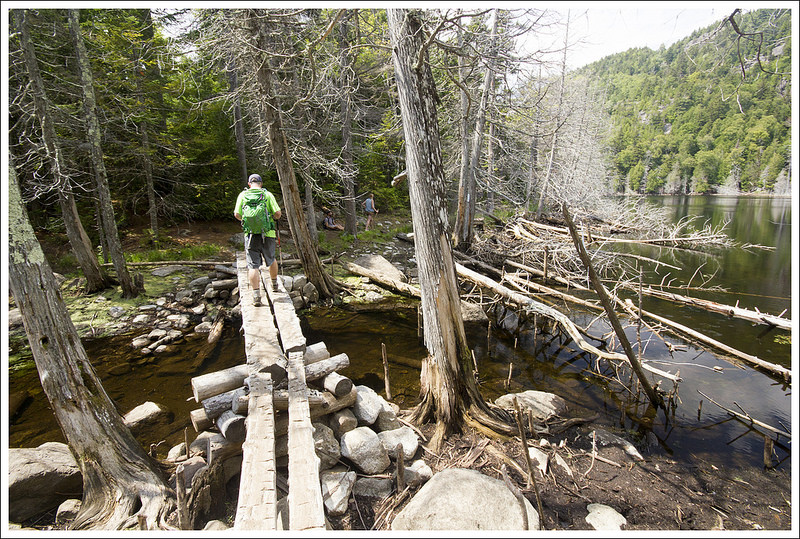
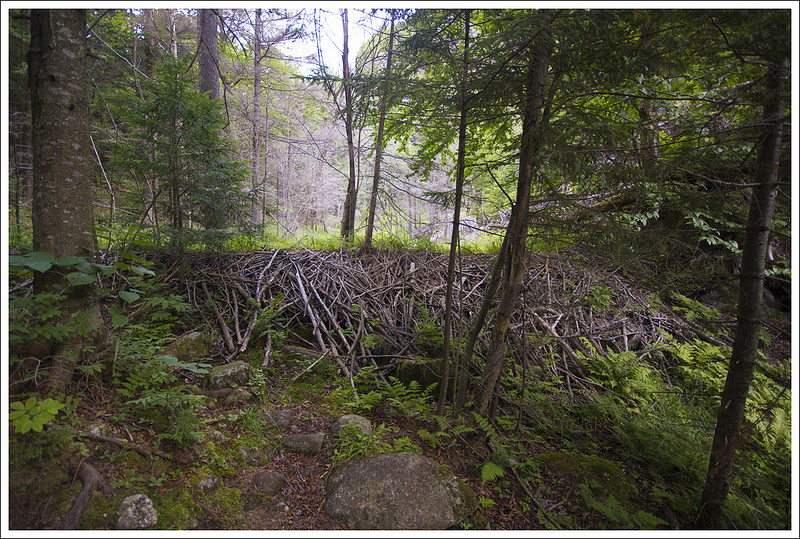
