Ramsey Cascades (TN)

Special: Smokies Edition

Introductory Guide to Visiting Great Smoky Mountains National Park Area

We’re back in the Smokies region for the next three hikes! Ramsey Cascades is the tallest waterfall in the park.  It’s also one of the most popular – despite the fact that the hike is a strenuous 8-miler!

View the Full Album of Photos From This Hike

Beautiful Ramsey Cascades
We’ve seen a number of the big waterfalls in the Smokies. Ramsey Cascades might be one of the prettiest. Below: Adam at the trailhead; The first part of the trail was along an old road; You could see and hear water for most of the hike.

Ramsey Cascades Trailhead Easy Start to Ramsey Cascades Hike Pretty Stream Along the Trail

Adam Says…

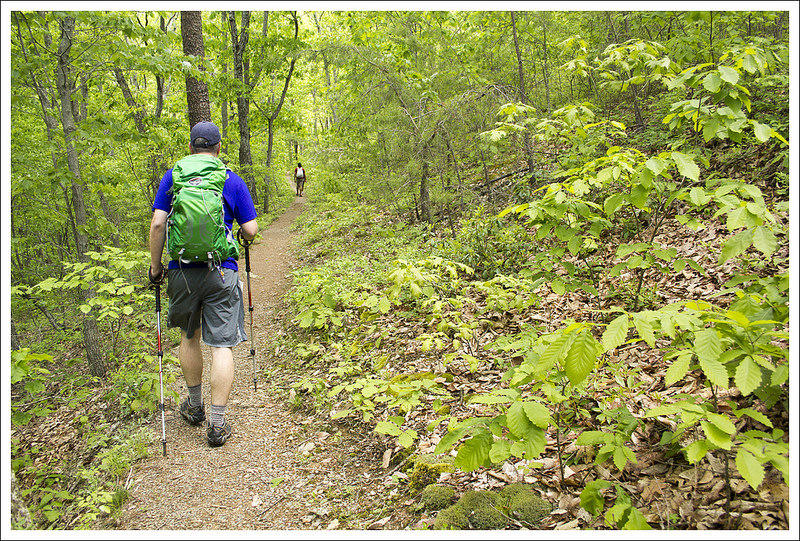
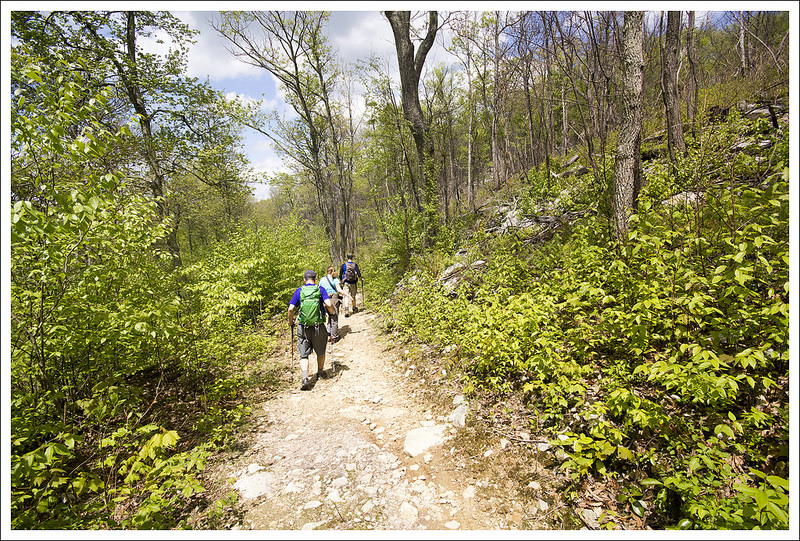
Our May vacation plans fell through due to a sick pet, but we were fortunate enough to slip away on a last-minute four day trip to the Smokies in mid-June. When we vacation, we tend to go hard.  We try to pack in as much as we can during every waking moment of the day. While it may not be as relaxing as some people like on vacation, we feel we want as many experiences as possible.  We like to tell each other that we can be tired and act like zombies at work for the first day back, so we stay “on the go” during vacation.  So, to maximize our time, we woke up around 4:30 a.m., packed up the car, and headed out to the Smokies.  When we got to the trailhead, it was a little after noon and the temperature and humidity made it feel like over 100 degrees.  We typically like to start hiking (especially in the warmer months) early in the morning before you can feel the height of the day’s heat.  This time, we were stuck with it.  The small parking lot for the trail was packed with cars, so we ended up having to park a little down the road.  So, we quickly got on the trail and pushed on.  Most of the trail was fairly shady, so not being in direct sunlight helped.

Scary Bridge
The foot log across this chasm was narrow and long. Below:  The chasm beneath the log bridge; Another view of the bridge’s narrowness; Christine under the giant tulip poplar.

Stream Below the Bridge Almost Across Tulip Poplar

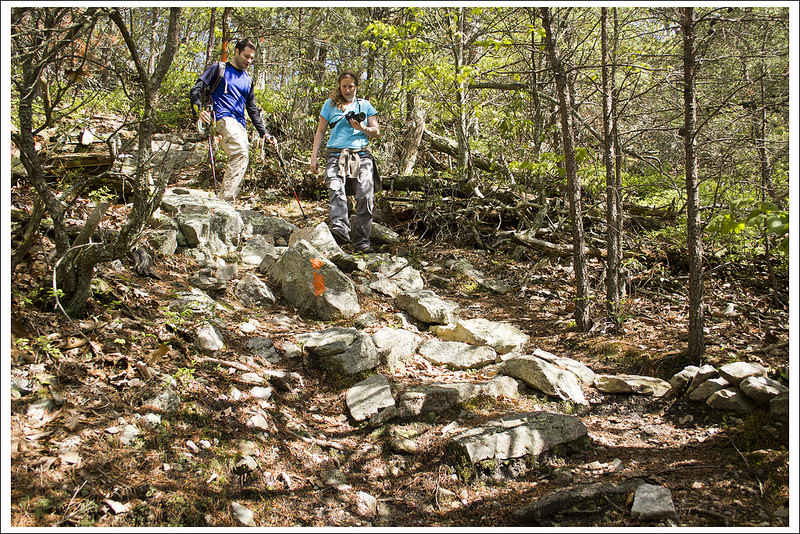
The trail starts on a wide gravel fire road which made for easy footing.  One family had ventured out before us when we were trying to find parking. We saw the mother of the family doubling back along the trail, looking for the rubber foot that was lost on one of her children’s trekking poles.  When we came upon the rest of the family, it looks like they sent the mom off about a mile to look for it.  We felt bad that the mom was spending all of this time searching while the rest of the group was just relaxing.  At 1.5 miles, you reach an area that comes to edge of the stream.  To the left, the trail goes through a deep tunnel of rhododendron.  It is here the trail begins to climb and the trail becomes narrower.

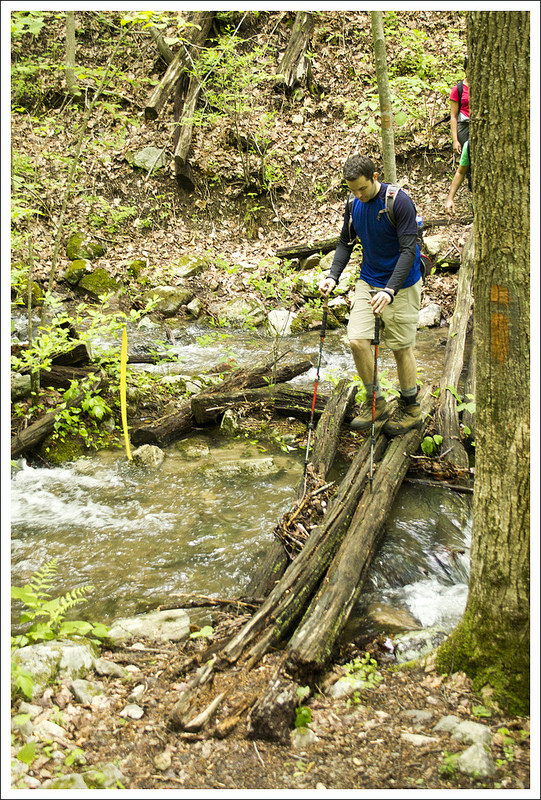
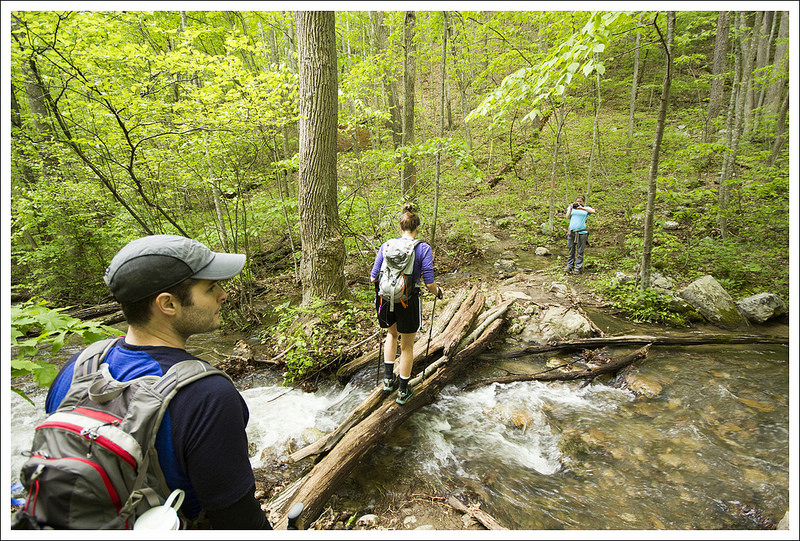
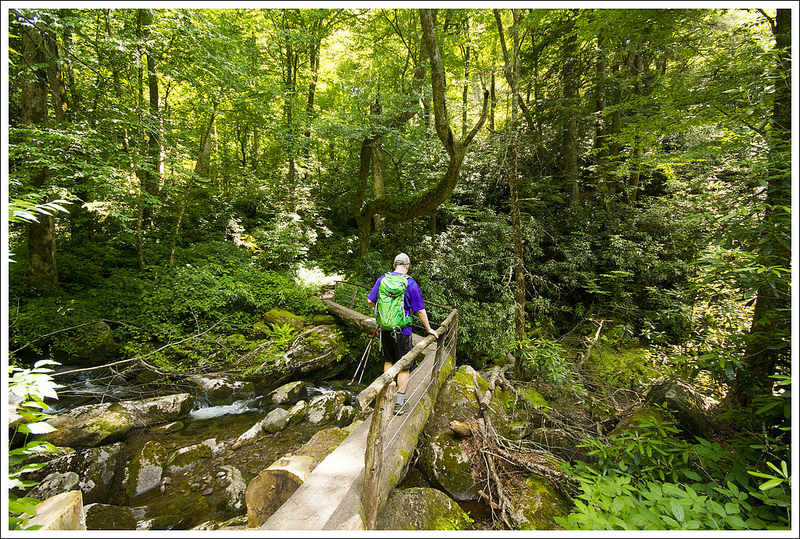
At 2.1 miles, we reached a long foot log bridge.  As I’ve stated before, I hate man-made things when it comes to heights.  We had just passed another family on the hike, so I thought I would try to cross before they got there.  I got a little ways along, chickened out, and returned to the start of the bridge.  I knew it would take me a while to muster the strength to do it and I didn’t want to feel the pressure of judging eyes as I made my way across.  I debated internally if I should just wait here and let Christine continue on, but I knew I would regret not making it to the falls.  We let two families go by, one boldly taking selfies on the log.  After they were out of sight, I decided to give it another try.  As you can tell from the picture above, the bridge is only wide enough for an average person’s feet.  I’m not sure how far the drop would be if you fell off, but I would guess you would likely break something if you fell.  I decided to shuffle my feet side-by-side, while gripping the handrail white-knuckled.  During half of the traverse, I could feel the bridge bounce slightly up and down with each step, not easing my comfort-level at all.  I finally made it across and double-checked my map.  I was hoping there was a loop on this hike, but since this is a straight out-and-back hike, I’d have to face this beast again.  I rested on the other side a while, because I felt like I had just burned 2000 calories through the stress and adrenaline used crossing the log.

Stone Stairs
After crossing the narrow log bridge, the trail became increasingly steep and rugged. Below: Hiking along the rocky part of the trail; The second L-shaped log footbridge; Rocky trail; Arriving at the falls.

Rocky Trail Another Easier Log Bridge
Steep and Rocky Warning Sign

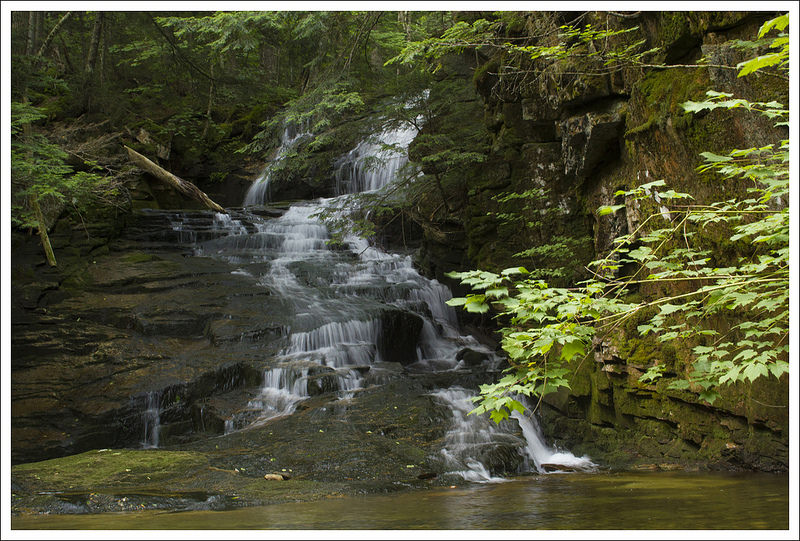
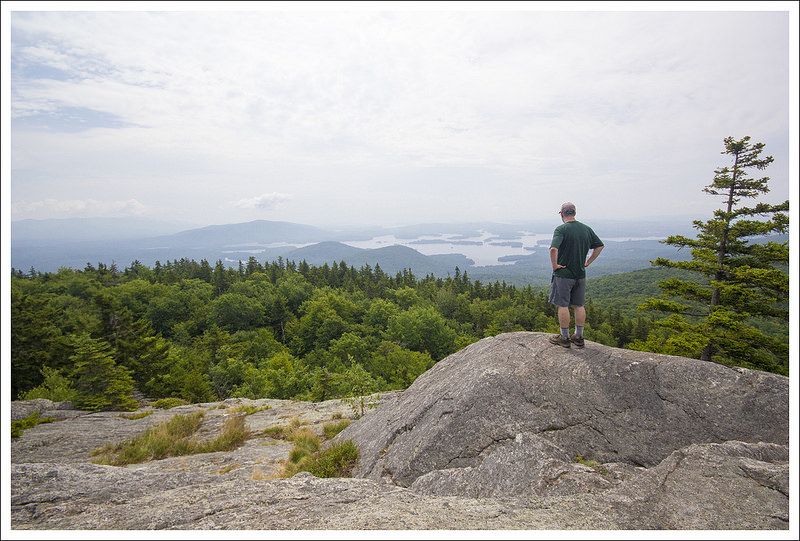
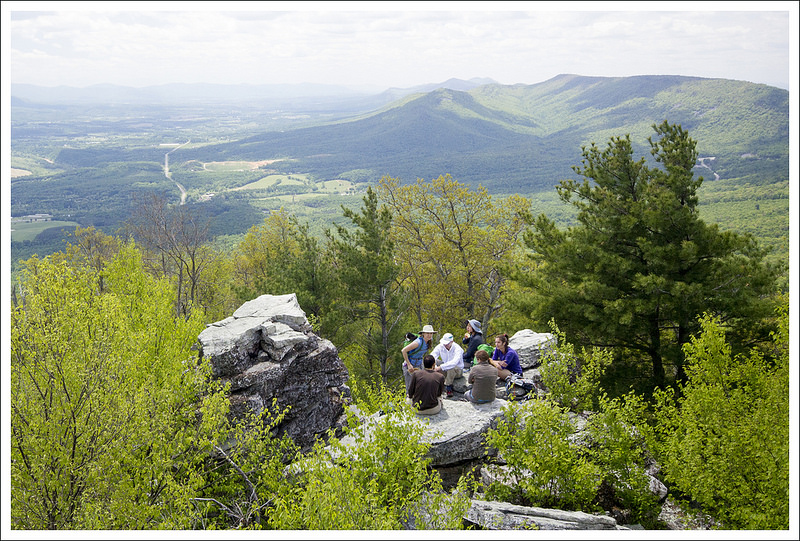
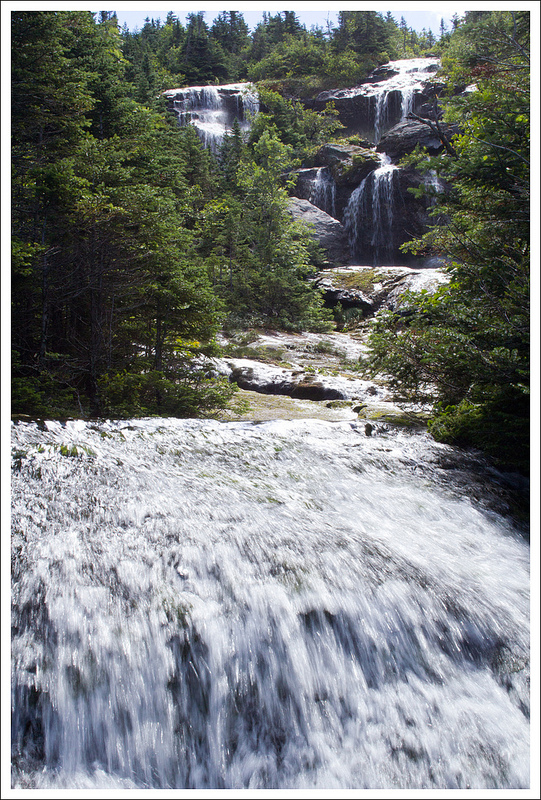
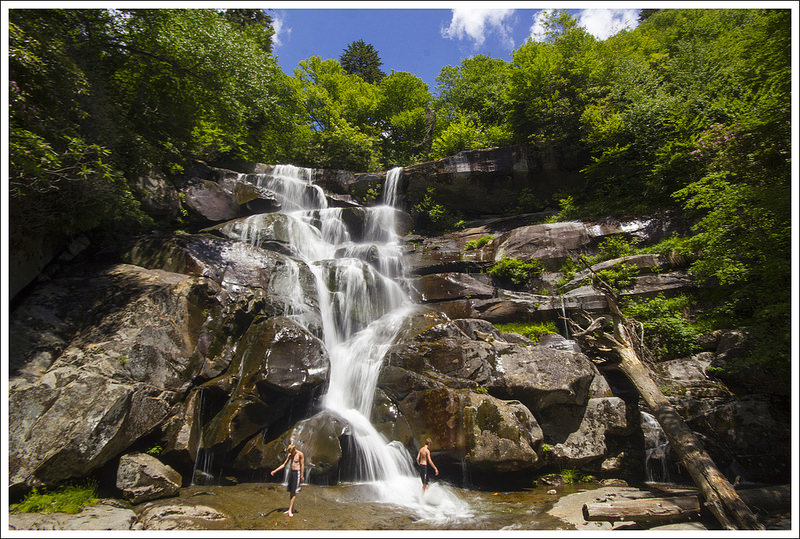
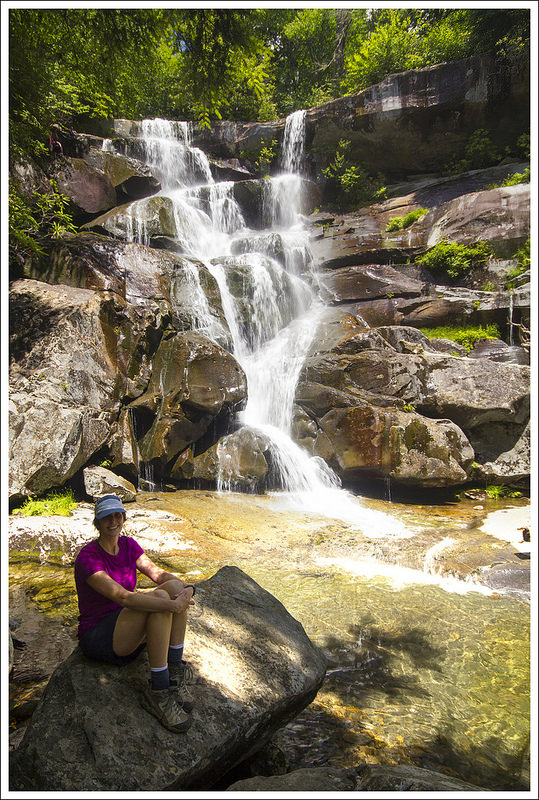
At 2.6 miles, we came across the three large tulip poplars.  The size of these trees was truly impressive!  There was a large group of high school JROTC students stopping here, so we decided to take time to appreciate them more on the way back.  We continued up the steep trail, which was very tough in this muggy, hot weather.   Eventually, at 4.0 miles, we arrived at Ramsey Cascades.  The waterfall is probably 90 feet across and plunges down through cascading rocks over 100 feet.  The rock outcropping to view the falls was packed with people, but we waited a while and eventually most of them left.  This is one of the prettiest waterfalls in the Smokies, so it was worth the sweat and effort (and maybe even crossing that log bridge).

We made our way back fairly quickly since the hike was mostly downhill.  We stopped to enjoy the large tulip trees along the way.  When I got to the bridge this time, I folded up my trekking poles (which I didn’t do on the way across initially) and immediately went across.  I was much quicker this time across, but it still took a toll on me.  I rested again, ate some jelly beans to replenish my sapped energy, and continued back.  The rest of the trip was easy and we made quick time back to our car.

We cranked up the AC in the car and drove to our hotel in Gatlinburg.  Gatlinburg was even hotter than the trail, so it was hard to get cooled down for the rest of the day.  But, we were so glad we made the trip out to view Ramsey Cascades.

Christine Says…

It was a little nuts to hop into the car at five in the morning just so we could pack one more day of hiking into our whirlwind, too-short, almost-completely-unplanned trip to the Smokies.  We’ve visited the area for three consecutive years, but there are still so many mountains and streams for us to explore.  We love coming back to this area!

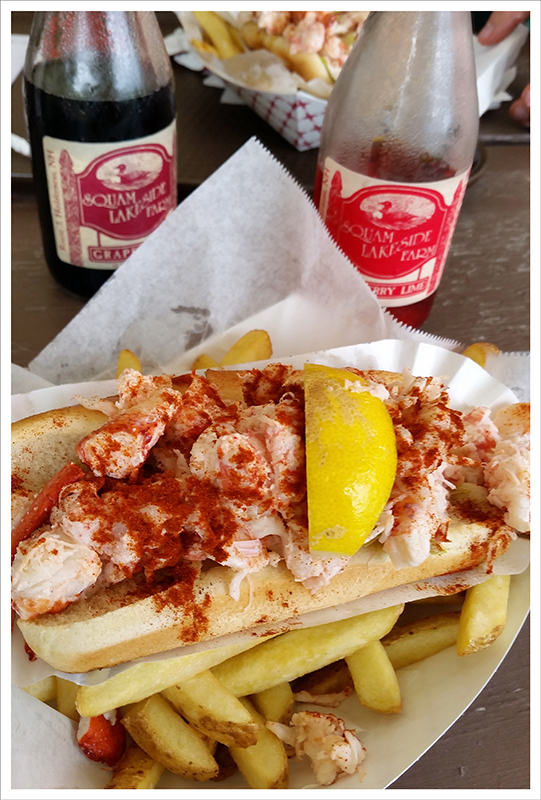
The first hike on deck was Ramsey Cascades.  It’s one of the park’s most popular and impressive waterfalls, and we’ve wanted to hike it for a while now.  We arrived to the area a little before mid-day, so we decided to fuel up with a quick lunch at The Sub Station.  It had great reviews on Yelp and it was right along our route.  We scarfed down pulled pork sandwiches and then made our way to the Greenbrier section of the Smokies.

Arriving right at noon, the parking lot was already jam-packed with cars, so we had to find a pull off further down the road.  As soon as I stepped out of the car, the heat and humidity hit me like a sucker punch. I looked at Adam and said, “We’re not used to this heat… this is going to be a brutal hike!”  The area went on to set several heat records during our visit.

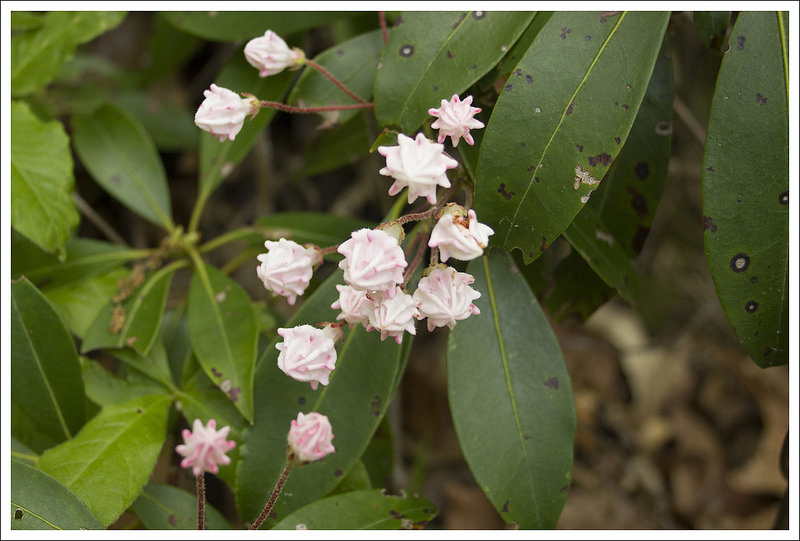
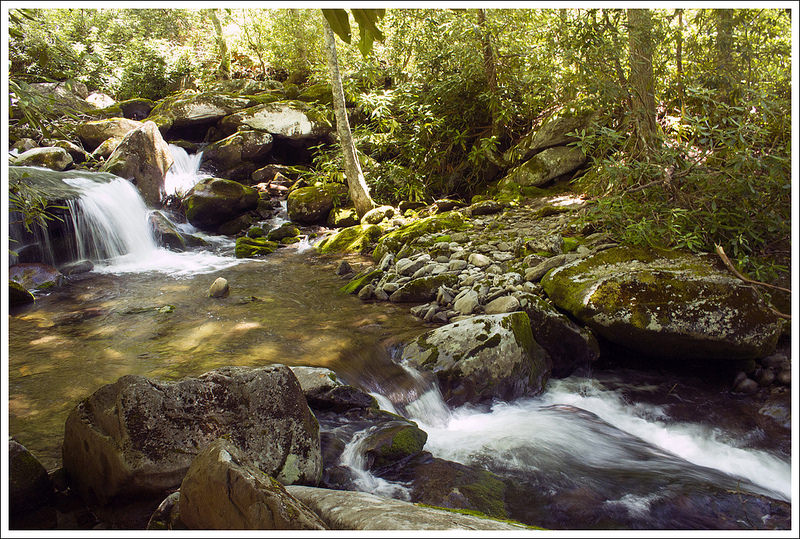
The first part of the hike followed an old gravel road.  It climbed steadily uphill, but was nicely graded and easy to traverse.  We saw lots of rosebay rhododendron starting to bloom along the trail.  We also enjoyed the constant sound of running water from the Little Pigeon River.

Swimmers at Ramsey Cascades
Some people opted to swim in the basin beneath the falls.  Below: A vertical version.

Christine at the Falls

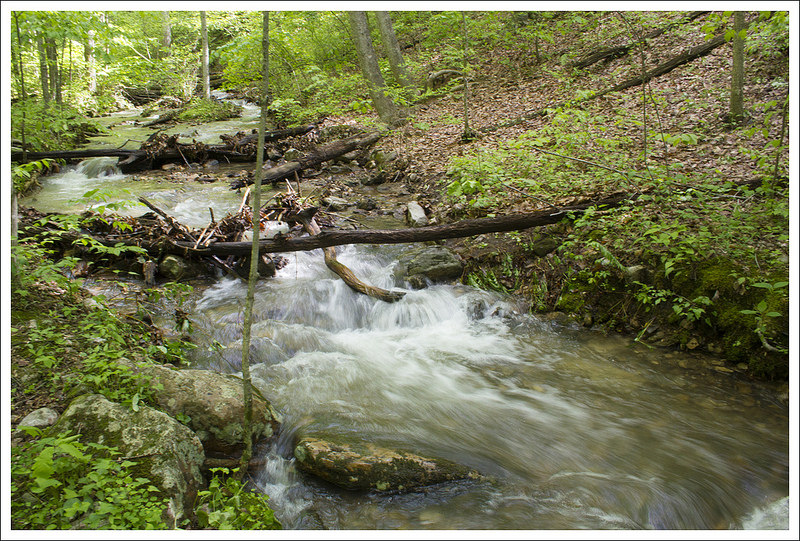
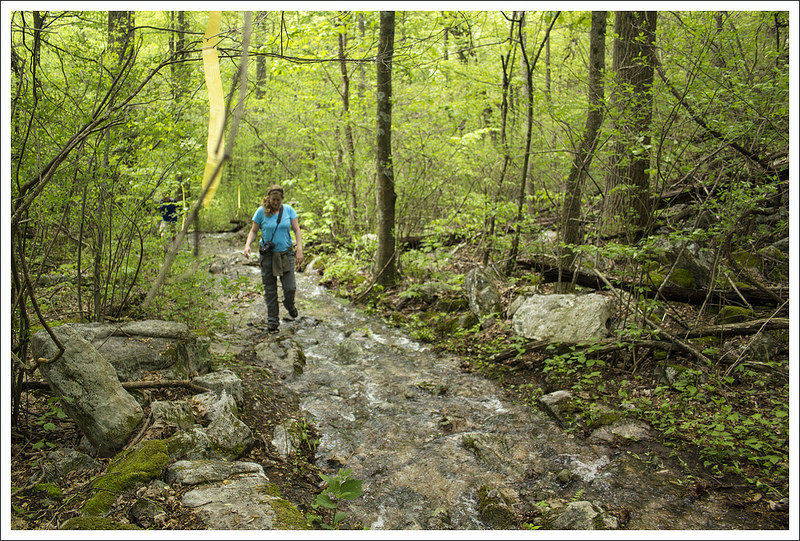
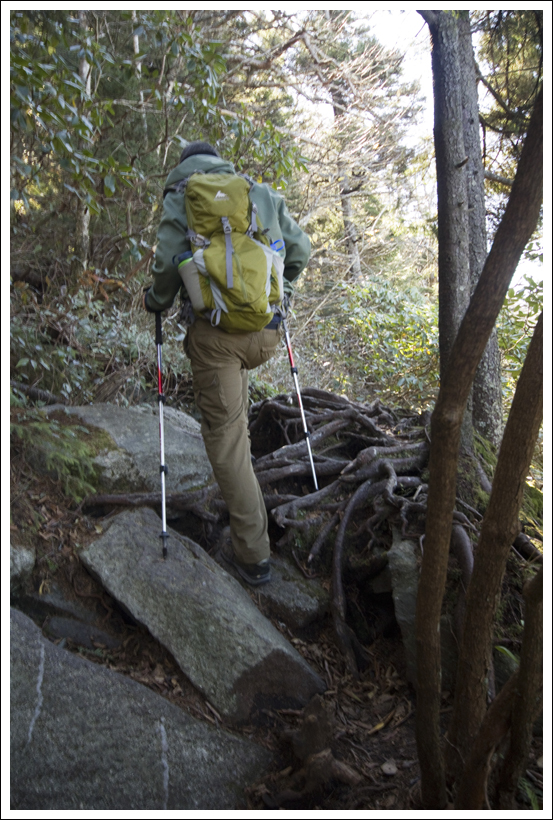
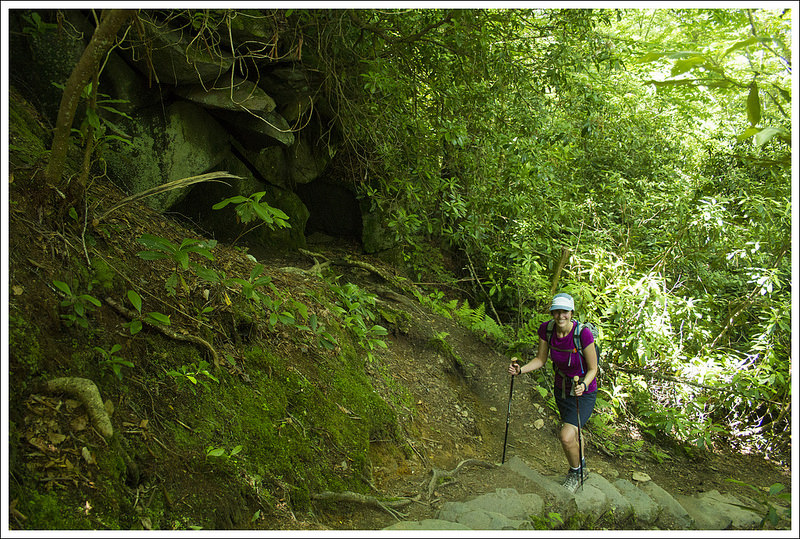
About a mile and a half in, the gravel road ended and the route became a narrow footpath through the lush green forest.  This section of the hike followed alongside the Ramsey Prong which drains down the side of 6621-foot Mt. Guyot – the second tallest mountain in the park.   As we walked, I tried to focus on the loveliness of the trail instead of how I was feeling.  I was utterly gassed.  The heat was getting to me and making me feel weak and lightheaded. I kept drinking water, but it just made the sandwich I’d had for lunch churn in my stomach. Maybe eating had been a bad idea.  I kept pushing my physical discomfort to the back of my mind and focusing on putting one foot in front of the other.  Sometimes, it just what you have to do!

At 2.1 miles, we reached the narrow log bridge that Adam described so thoroughly.  The Smokies are full of these split log bridges, but this was the longest and highest one we’ve seen!  I suppose these log bridges keep streams cross-able when water is high (as opposed to a rock hop) and are less expensive than real bridges to build/maintain.  I like the way they blend into the natural scenery so nicely.

After crossing the bridge, we soon reached a grove of giant, old growth trees.  There are three tulip poplars that you’ll notice immediately.  They rise, straight and proud, from the forest floor – all of them dwarfing the other trees around them.  They were such impressive trees!

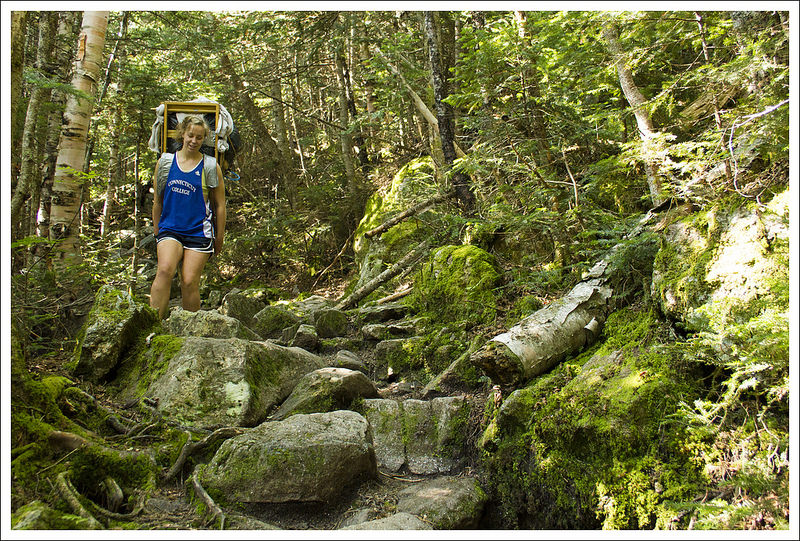
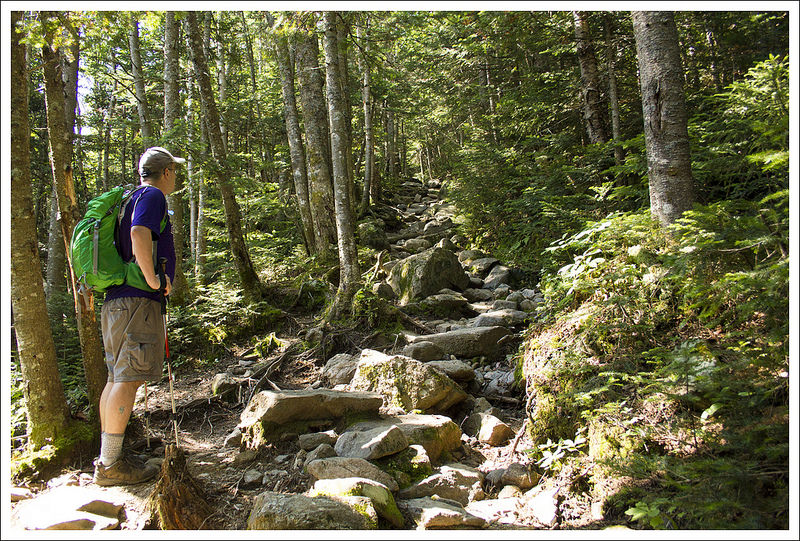
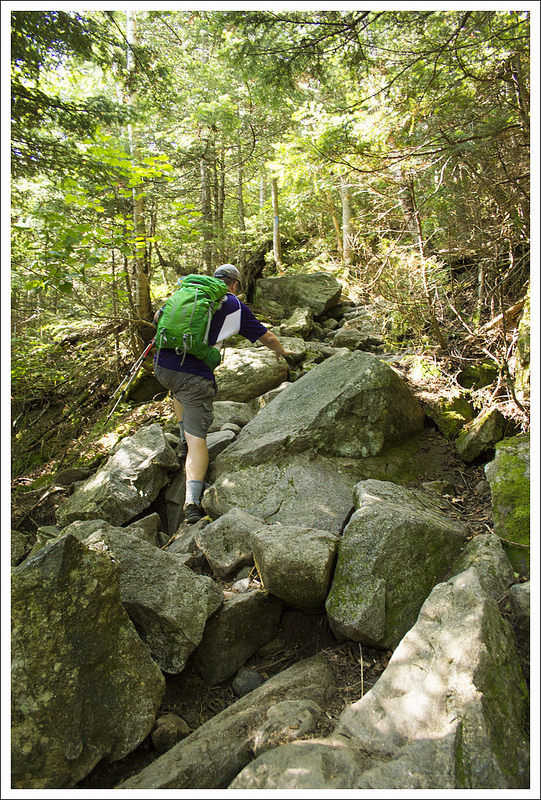
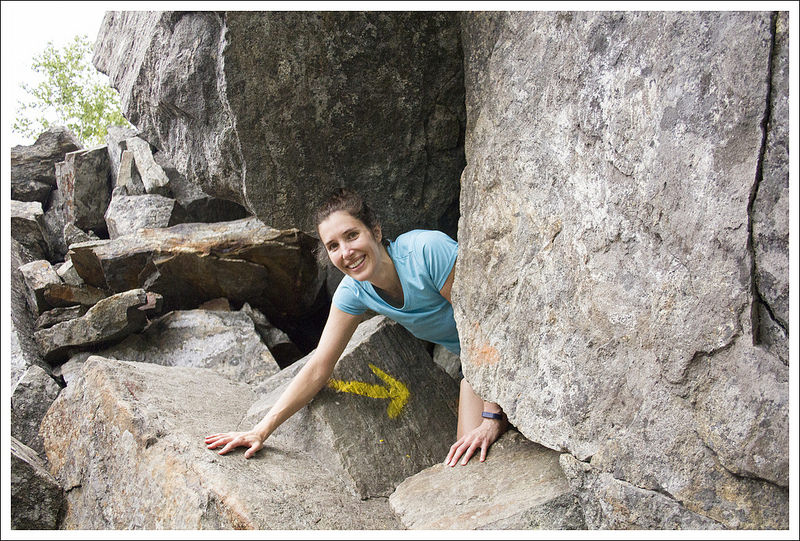
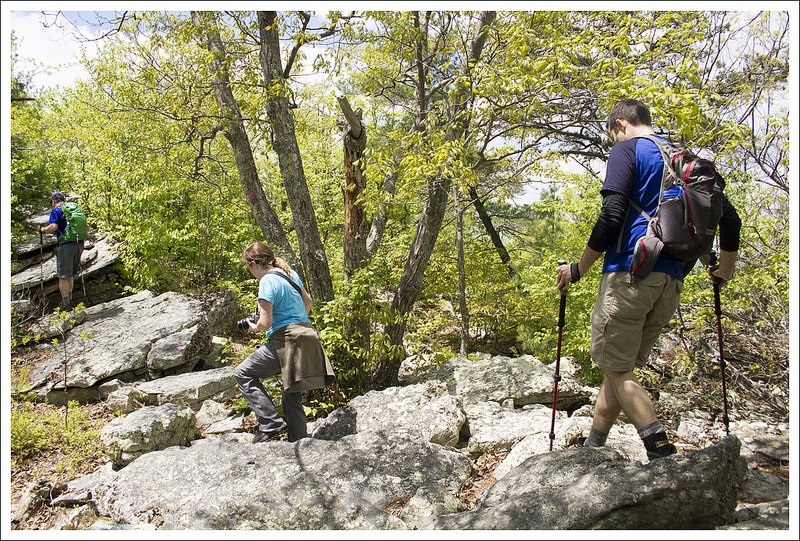
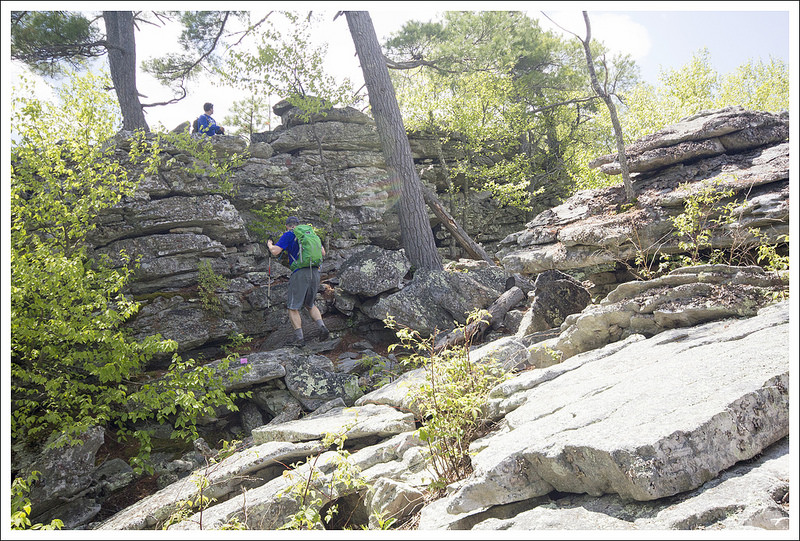
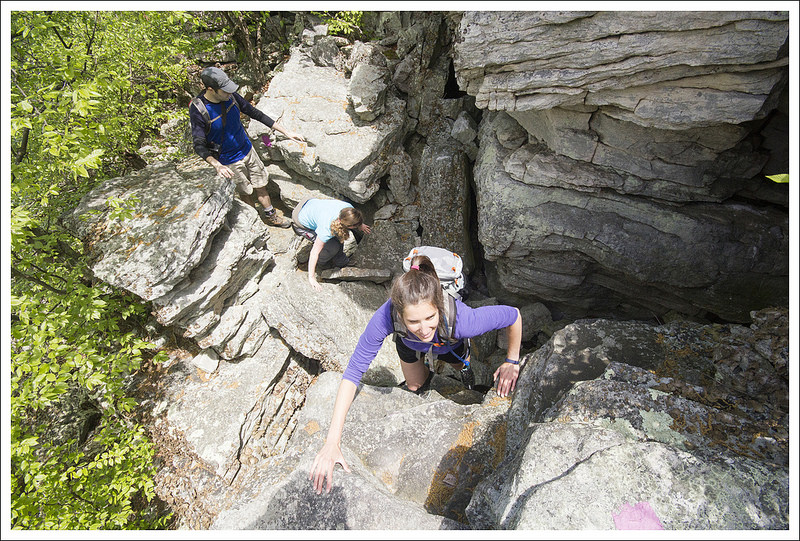
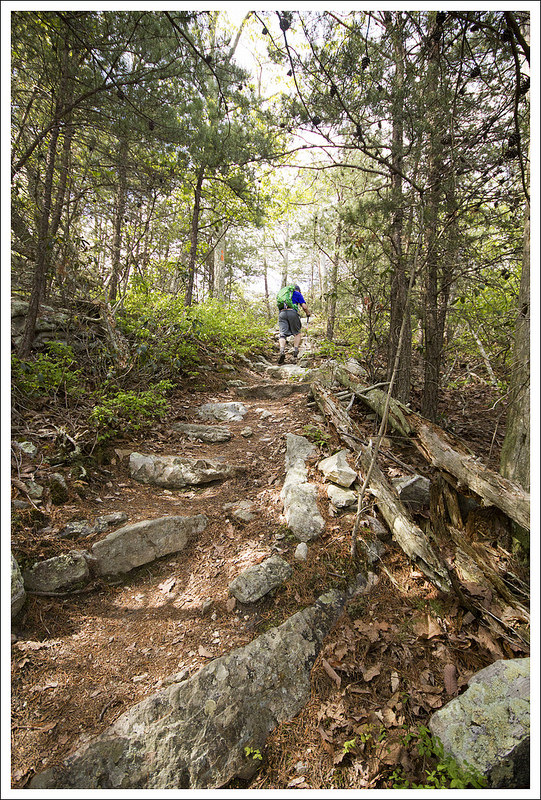
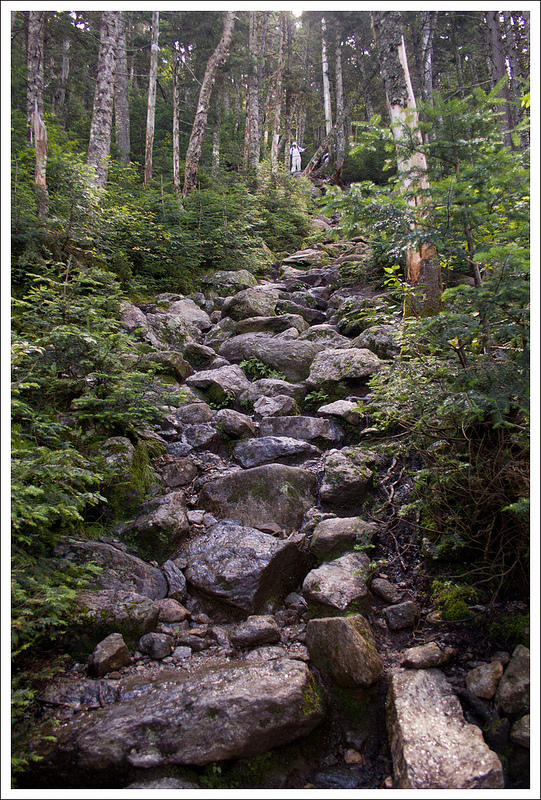
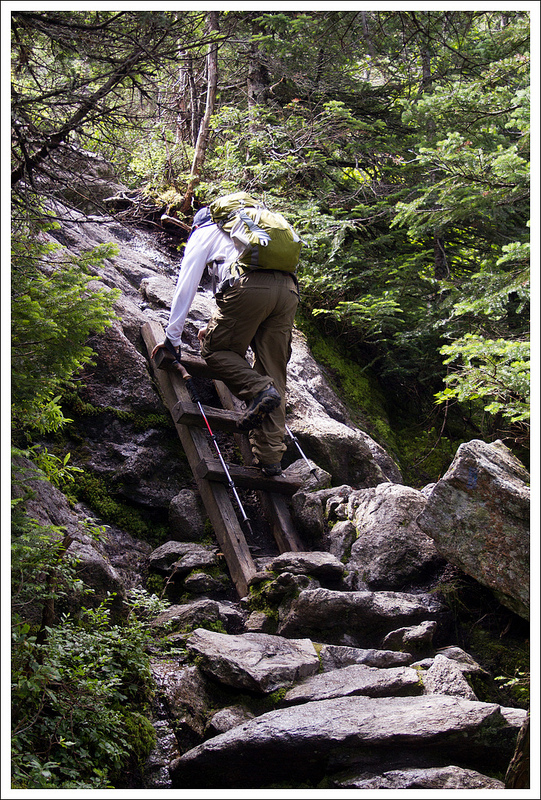
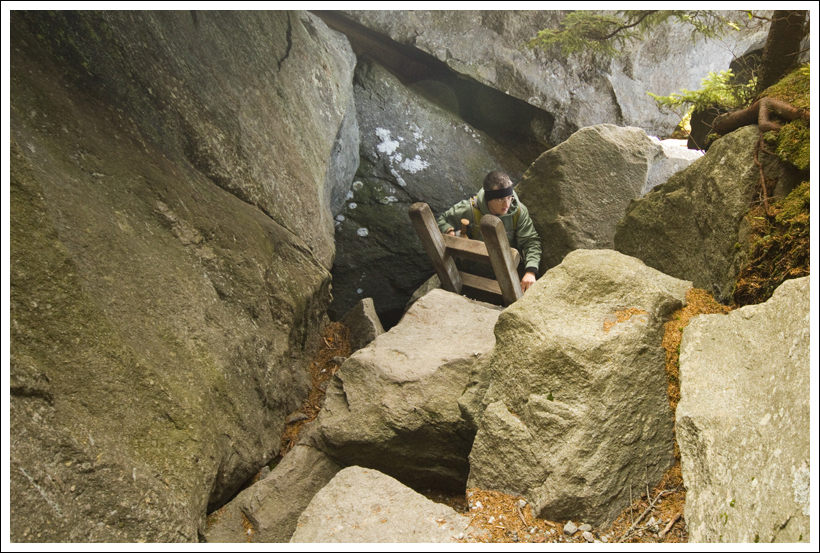
The last mile to the falls was increasingly steep and rocky.  We climbed stone steps, crossed another L-shaped log bridge, scrambled over boulders, and stepped over a couple shallow streams before reaching the falls.  At first, we could just see it through the woods, but after climbing over one last large boulder, we came to a big clearing.

Giant Tulip Poplar
We stopped by the three giant tulip poplars again on the hike back. Below: Adam crossing one of the small streams; Back across the scary footbridge; Pretty green Smokies forest.

Hike Back Hike Back green smokies

The falls were so impressive, plunging over 100 feet down the mountainside into a beautiful pool.  There were tons of people gathered on the rocks.  It was hard to find a place to sit and relax, but we eventually did.   Despite warning about treacherous conditions, people were still swimming, wading, and climbing on rocks around the falls.  We saw one young teenager come very close to taking a terrible fall onto the rocks.  He was lucky that he caught himself at the last minute.

We stayed and enjoyed the falls for quite a while. This gave me a chance to cool off and eat a little sugary snack.  That definitely made me feel better and helped my dizziness and fatigue.  Eventually, the crowd thinned and we had the falls to ourselves.  Or I should say mostly to ourselves with the exception of bees!  I don’t know why it is, but there are massive numbers of bees living in hives around the falls.  There are hundreds of them and they’re constantly buzzing around.  Fortunately, they’re not aggressive and seemed happy to share the falls.   Just be careful about sitting or putting your hands down. I’m sure they’d sting if someone tried to squish them!

After taking a bunch more photos, we made our way back down the trail.  The downhill hiking went really quickly.  Adam crossed the scary log bridge boldly on the return trip. We were back at the parking lot in half the time it took us to climb up!

Post Hike Dinner
Great steak dinner at Smoky Mountain Brewery post-hike. Below: Smoky Mountain Brewery flight; Pretzels and beer cheese!

Beers pretzels

Before we got in the car, I was very tempted to jump into the Little Pigeon River.  The spot where we parked was right next to a deep, cool swimming hole.  Adam told me it was a bad idea and that I’d be soaking wet in the car – so phooey – I passed on my chance to plunge in!

We had a short drive into Gatlinburg from the hike.  Because we didn’t plan ahead for this trip, our choices for lodging were fairly limited – but we picked a winner.  We ended up stayed at the Mountain House Motor Inn.  It was clean and comfortable, with a super-strong air conditioner.  It was also located within walking distance of all the downtown restaurants and shops.

We checked in, showered, and headed out for a great dinner at the Smoky Mountain Brewery!  What a great first day of this mini vacation.

Trail Notes

  • Distance – 8 miles
    (Check out the stats from Map My Hike)*
  • Elevation Change – 2240 ft.
  • Difficulty – 4.5.  The trail starts off fairly easy and gradual, but becomes steeper and rockier after the first 1.5 miles.  The last few tenths of a mile to the falls are a scramble over boulders.
  • Trail Conditions – 3.  The trail is rocky in places.  There is also a long, narrow log bridge that might intimidate some hikers.  It crosses a chasm over a stream and feels precipitous to anyone afraid of heights.
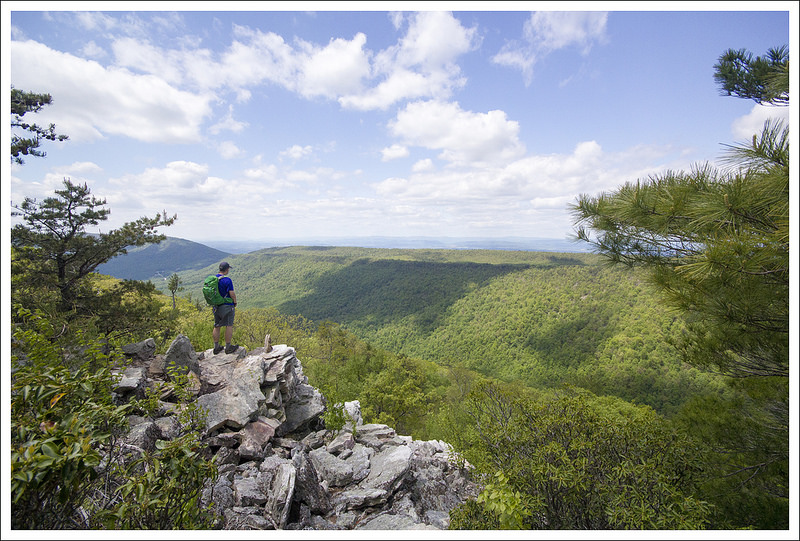
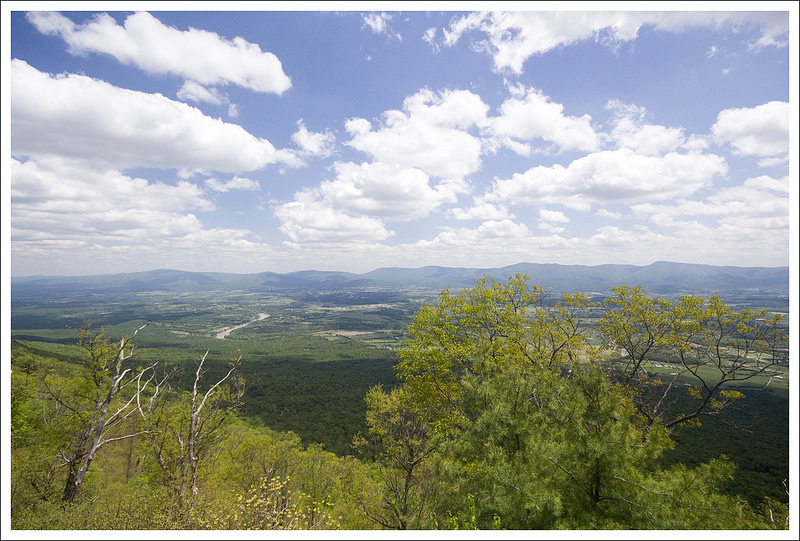
  • Views  0.  No views here – it’s all about the stream scenery!
  • Streams/Waterfalls – 5.  The stream is beautiful and Ramsey Cascades is one of the park’s prettiest waterfalls.
  • Wildlife – 0. There were so many people on the trail we didn’t see any animals.
  • Ease to Navigate – 4. The trail is simple to follow. There aren’t any turns or junctions.
  • Solitude – 1.  The trail is one of the park’s most popular.

Download a Trail Map (PDF)

Directions to trailhead: From Gatlinburg, TN, take US-321 N/East Parkway for about 5.5 miles.  Turn right onto Greenbriar Road.  Follow this for 3.1 miles before turning left onto Ramsey Prong Road.  Go 1.5 miles and you should reach the parking lot for the trailhead.  The trailhead starts at the end of the parking area. Coordinates: 35.702730, -83.357599

Mt. Madison (NH)

Special: New Hampshire Edition

Introductory Guide to Visiting the White Mountains

This 8.8 mile hike takes you past Madison Spring Hut and up to the summit of majestic Mt. Madison.  The Valley Way Trail is known for being one of the safer, more protected routes into the heart of the White Mountains.  While the terrain is less extreme than other trails in the area, the hike still requires a little over 4,100 feet of climbing.  It’s a tough hike, but the views make it well worth the effort.

View the Full Album of Photos From This Hike

Hiking Mt. Madison
Adam makes his way across the summit ridge of Mt. Madison. The big mountain in the background is Mt. Washington.  If you look closely, you can see the Auto Road snaking down the peak.  Below:  Plenty of parking and access to many trailheads at the Appalachia Parking area;  Warning…. danger ahead – seriously, the White Mountains can be pretty extreme; The early part of the trail was fairly soft and gentle.

Appalachia Parking Death Awaits Early Terrain on the Valley Way Trail

Adam Says…

My top goal for our 2014 New Hampshire trip was to hike up Mt. Madison.  We both went to James Madison University and have worked there for years, so it only seemed fitting to take on the mountain that shared a name with our college.  I even wore JMU Dukes gear almost like the guy that goes to a concert wearing a t-shirt for the band’s previous tour to show his super-fandom.

We started out the day on a rough note.  Christine had put her hiking shoes and socks in the back of our car, so she could wear sandals on the car ride up.  When we pulled over at one point, we realized one of our Camelbak tubes had pressed open and leaked all over the car, soaking her shoes and socks.  We debated about if we would have been able to even do the hike in fear of blisters, but Christine decided to push forward.

There are a lot of ways up Mt. Madison, but in our research we found the most popular way was to make our approach by going up the Valley Way trail.  We parked at the large Appalachia parking lot (which was so full we needed to park on the road) directly on US-2.  We were worried there would be so many people on the trail, but this parking lot holds the beginnings of lots of trails that lead up to many peaks (including Mt. Adams and Mt. Quincy Adams).

Tama Falls
The early part trail follows Snyder Brook. By taking a short spur trial, you can visit beautiful 25′ Tama Falls.  Below: We saw a couple Croo members on their way down from the Madison Spring Hut; Adam checks out all the rocks on the ‘not as rocky’ New Hampshire trail;  The final push to the Madison Spring Hut was very steep and rugged.

Croo Getting Rockier Steep to the Top

The trail starts off from the back of the parking lot.  The trail branches off in different directions but follow the signs for the Valley Way trail.  The trail begins relatively flat and easy walking, as it runs along Snyder Brook.  There were a few places where we could get some nice stream views and even a glimpse at the picturesque Tama Falls at .4 miles.  At .7 miles, you reach another large junction, but continue to follow the signs to the Valley Way trail.  The trail then begins the steeper uphill climb.  Overall, I felt that the trail, while very rocky was not as steep and rocky as some of the other trails in the White Mountains.  There is a relentless amount of climbing and many rocks to navigate, but it wasn’t as grueling on my feet as some hikes in New Hampshire have felt to me.  At 3.0 miles, the trail gets very steep and rocky (often filled with larger small boulder-sized rocks to hoist onto) and will remain so until you reach the Madison Spring Hut at 3.8 miles. If you’re interested in camping on the mountain, but don’t want to stay at the hut, the Valley Way tentsite is at mile 3.1 on this hike.

Once we arrived at the hut, we saw there were a couple of ways up to the summit of Mt. Madison.  At this point, we were above treeline, so we saw the rocky summit up above us.  I went in and found one of the Croo members and she told me the Osgood Trail had the most direct route and was a little easier than making our way via the Watson Path.  The final ascent up to Mt. Madison was .5 miles along the Osgood Trail (which is also the Appalachian Trail in this area).  You basically needed to walk acrpss large boulders, following cairns along the way until you reached the summit.  When you are above treeline, the summits of mountains seem so close to reach, but it is very misleading.  As we climbed up, we looked back and saw the hut shrink with each step, finally giving us some perspective of how far we had come.  We stayed a while at the summit.  The views were breathtaking and you could see for miles all around.  It definitely was one of the most beautiful scenes I have witnessed hiking and to realize the work we had put in to attain the peak, made it feel even more worthwhile.

Looking Back to the Hut
Christine makes her way up the Osgood Trail to the summit of Mt. Madison.  Below: About to go above treeline; Even though the summits are far away, they always look close;  A view of Madison Spring Hut with Mt. Adams in the background.

Alpine Zone Looks Close Madison Spring Hut

While we were at the summit, we met a woman who had a sign pinned to her that had 48 over 50 written on it.  She was over 50 years old and she had a goal to do all 48 peaks over 4000 ft. in elevation in New Hampshire.  She had saved Mt. Madison as her last hike to meet her goal, so we were thrilled to be able to see her experience accomplishing her goal.  What an inspiration!  We also talked to a gentleman at the summit who was from Colorado that had done this same hike 30 years ago.  He was staying at the nearby Crag Camp, run by the Randolph Mountain Club, just as he had done when we was a teenager.  He wanted to see if this hike was just as amazing as he had remembered and he told us it definitely was.  It made me further realize that everyone likes to hike for their own reasons and it is always a privilege to get to hear people’s stories on the hike.

We made our way back down and ate some lunch at the Madison Spring Hut.  We then ventured .2 miles on the Parapet Trail to see Star Lake.  This is a spot you definitely shouldn’t miss.  The lake is more like a small pond, but it was so beautiful to view the summit of Mt. Madison, as it reflected into Star Lake.  We debated about tackling Mt. Adams to bag another peak, but we realized that the summit looked close, but it was still a steep 1 mile away.  Not wanting to add even more to our hike, we decided to make our way back down.  The trail seemed to be even rockier on the way back down.  While you can normally fly down some parts of downhill trails, you need to take your time on this one to navigate all the rocks.  On our way down, we came into a rain shower, making the rocks a little slick.   The last .8 miles were quite easy again and we did pick up some time at this point.  We made our way back to the parking lot to make the round trip 8.8 miles.

Christine Says…

The morning of our Mt. Madison hike started off cheerfully enough.  We stopped for breakfast at Dunkin Donuts.  I ate both a bagel with cream cheese and a Boston Cream donut.  If I’m going to hike almost nine miles with over 4,000 feet of climbing, I’m going to enjoy any and all the baked goods I want!  However, I was jolted out of my happy post-carb afterglow when I discovered my socks and sock liners completely soaked in the back of the car.  A tough hike with wet socks sounded like a really bad idea.  But, driving out of our way to find an outfitter with Thorlo socks seemed like an even worse idea.  I’m super picky about socks, and Thorlo’s thick-cushion hiker socks are the only ones that keep my feet happy.  I decided wet Thorlo socks were better than dry socks of another brand. (and they were … I hiked all day in wet socks and didn’t get a single blister!)

As Adam said in his post, the Valley Way trail is pretty moderate for White Mountain terrain.  The trail is not as rocky and stays under the shelter of trees until you get to Madison Spring Hut.  It’s a great choice if you want to visit the northern Presidentials, but stay largely sheltered from wind and other weather.  There is still plenty of climbing, but until the last mile, it’s all gradual and moderate.  Trails like the Valley Way exist due in part to people like J. Rayner Edmands.  He was an early volunteer for the Appalachian Mountain Club.  Starting in the 1880’s, he spent over 20 summers building trails in the White Mountains.  He believed trails to the high peaks should be passable without stumbles, even in the dark.  Backpacker Magazine did a neat article about Edmands in their October 2014 issue.  Check it out if you have a few free minutes.

JMU Dukes
We paid tribute to our alma mater (James Madison University) on the namesake mountain. Go Dukes!  Below: The trail was extremely rocky and rugged between the hut and the summit of Mt. Madison; Cairns mark the way; Christine and Adam enjoy a summit view; The descent.

Climbing Mt. Madison  Rocks on Mt. Madison
Summit of Mt. Madison  Descent

I very much enjoyed the little rapids and waterfalls along Snyder Brook early in the hike.  Tama Falls was especially impressive.  After we moved away from the stream, the hike was basically just a climb in the woods.  As we ascended the trail got rockier, bit by bit.  The last half mile to the hut was insanely steep and rocky.  In one spot, my shoe got so solidly wedged between two rocks that I had to unlace it and contort my ankle to free myself.  It took efforts from both of us to release my shoe from the rocks.  It’s a good thing trail runners are so soft and flexible, because my feet definitely needed both shoes on this hike!  I think the steepness of the terrain is actually what stopped me from getting hurt when my foot got caught.  We were moving very slowly, picking our way across the rocks. Had I been moving at any significant speed, I think I could have easily broken my ankle.

When we arrived at Madison Spring Hut, it was already starting to cloud up a little. It wasn’t really overcast, but the sky had that heavy, hazy look about it.  The weather was definitely changing and I wanted to make sure we enjoyed the best views possible.  We headed up the Osgood Trail toward the summit of Madison.  I don’t know if you can really call the path to the top a ‘trail’.  It’s more of a scramble across rocks, following cairns leading you to the summit.  The climb to the top is slow going, simply because there is never a simple place to put your feet. On our way up it was fun to look back and marvel at the towering peaks and the tiny hut tucked into the col.

Inside Madison Spring Hut
We decided to eat lunch at Madison Spring Hut.  Below: Even pretty dogs aren’t allowed inside AMC huts;  We always enjoy the baked goods for sale at huts; Compass on the hut porch.

No Dogs Allowed in AMC Huts Goodies Compass

At the top we enjoyed spectacular views of the Presidentials.  Seeing the Mt. Washington Auto Road snaking down the mountain was really impressive!  While the wind was a little brisk at the summit, it was really a warm, mild day for the White Mountain high peaks.  Lots of people were hiking in shorts and t-shirts.  Some people even basked shirtless in the summit sunshine.  My blood is a little thin for that, but I wasn’t cold like I had been on the summit of Mt. Washington in 2013.

After taking lots of photos and doing our JMU rituals, we climbed back down and enjoyed our packed lunch at Madison Spring Hut.  Of course, we supplemented our packed food with baked goods from the Croo.  I always hear people talking about how huts are packed with dayhikers all summer long. I’m not sure if it’s our timing (we hike early), but we’ve found almost every hut we’ve visited nearly empty.

Star Lake
Beautiful star lake sits near Madison Spring Hut. Below: As we were leaving the lake, clouds started to roll in and we heard distant rumbles of thunder… time to leave the peaks and head back to the valley below.

Walk to Lake Approaching Storms

After lunch, we walked out to Star Lake.  What a beautiful spot.  The lake itself is small and shallow, but it makes a gorgeous reflecting pool for Mt. Madison.  We were lucky to visit on a picture perfect day!  While we were admiring the lake and taking in our final peak views, we started to hear distant rumbles of thunder in the distance.

Being caught in a thunderstorm in the Whites is definitely something I’d be happy to NEVER experience.  Lightning strikes happen frequently, wet granite is very slick, and stream levels can change drastically in mere minutes.  In fact, just last week I read a harrowing account from a solo hiker caught by storms in the White Mountains.  Seriously scary!

We made our way down as quickly as we safely could.  With a couple miles of hiking left, the rain started to fall.  Fortunately, it was light rain and none of the thunder/lightning seemed close.  We got back to the car right before the skies opened up and poured!  What a great day with perfect timing. I’m really thankful that we had weather that allowed us to visit two more Presidentials on our 2014 trip!

Trail Notes

  • Distance – 8.8miles
    MapMyHike Stats *
  • Elevation Change –  4150 feet
  • Difficulty –  5.  The trail started off easier, but it is still a very tough, uphill climb.
  • Trail Conditions – 2.5.  The trail was well-maintained, but the rocky parts of the trail make this a challenge.  The final push to the summit on the Osgood Trail also took a lot of precision.  Bring trekking poles.
  • Views – 5.  It doesn’t get much better than this.  If you are lucky enough to catch this on a day where clouds are off the mountain summits, you will be able to see all around you for miles. 
  • Waterfalls/streams 3.  The Snyder Brook runs alongs the trail early on the hike and you can see a few smaller waterfalls along the trail. 
  • Wildlife – 1.  We didn’t really see any wildlife on the trail.  I wouldn’t expect much at all once you get above treeline. 
  • Ease to Navigate – 2.5.  There are a lot of junctions and side trails on the route because there are a lot of trails in this area.  Keep following the signs for the Valley Way Trail until you reach the hut and then follow the Osgood Path via the cairns to the summit. 
  • Solitude – 2.  We picked a gorgeous day in the summer to do this hike, so we weren’t surprised to see lots of people.  We saw the most at the summit and the hut, but there was still places to find our own bit of solitude. 

Download a trail map (PDF)

Directions to trailhead: From I-93: Take Exit 35 for Twin Mountain. Follow 3N for 12.4 miles. Turn right onto 115N for 9.7 miles. Turn tight onto 2E for 8 miles. The parking lot will be a large gravel area on the right.

* MapMyHike is not necessarily accurate, as the GPS signal fades in and out – but it still provides some fun and interesting information.

Mt. Morgan – Mt. Percival Loop (NH)

Special: New Hampshire Edition

Introductory Guide to Visiting the White Mountains

Note: We’ll be taking you to New Hampshire for our next seven hikes!  Enjoy the north country! 

This 5.3 mile hike includes open ledges, ladders up cliff faces, caves, tight squeezes, and rock scrambling.  At the summits of both Morgan and Percival, you get great views of Squam Lake.  Look for blueberries along the way!

View the Full Album of Photos From This Hike

Squam Lake View
A view of Squam Lake from the summit.  Below: Papery, white birches are iconic in New England; Eastern red-spotted newt at eft/juvenile stage; Adam slogs across wet trail.  It was more like a stream in places.

Birch Eft Wet Mt. Morgan Trail

Christine Says…

After two lengthy days of travel from Virginia to New Hampshire, the last thing we wanted to do was get back into the car for more than a short drive. So, for our first hike in the area, we chose the Mt. Morgan – Mt. Percival Loop. The 5.3 mile hike is just a few minutes from my parents’ house and offers great views of Squam Lake.

We hiked this loop in 2009, before we started including out-of-state hikes on Virginia Trail Guide. I remembered only a few generalities about this hike: challenging, exceedingly buggy, nice views, tons of blueberries. It definitely seemed worth another look!

By New Hampshire standards, this trail is rated moderate. On paper, that seems fair – 5.3 miles and 1,575 feet of climbing. But, by Virginia standards we probably would rate this hike more toward difficult due to the terrain. If you follow the route as we hiked it, there are ladders, exposed ledges, steep rock scrambles, and a tight-squeeze section that passes through a series of caves. It’s also very muddy, rocky and rooty. I would equate the skill-level/fitness needed for this hike to be similar to what you need to hike Old Rag.

Ladders on Morgan Trail
We reach the ladder portion of the Mt. Morgan Trail.

We started off early in the morning, but the parking lot was already full when we arrived.  We managed to wedge into one small space still remaining in the corner of the lot. I think most of the cars parked in the Mt. Morgan lot belonged to people hiking the Rattlesnakes on the other side of the road, because we saw relatively few people on our hike.

The Mt. Morgan trail started off at the end of the parking lot. The path was wide, gradually ascending, and covered with pine needles. There were beautiful, papery white birch trees all through the woods. As the trail continued, the climbing got rockier and steeper. We passed sections of old stone wall half buried in the forest. There were also several muddy stream-bed areas to traverse. At 1.7 miles, the Mt. Morgan trail and the Crawford-Ridgepole trails joined ways for about .4 miles before reaching a series of ladders affixed to a cliffside.

If you’re not into height and ladders, you can continue on the Mt. Morgan trail for several tenths of a mile to reach the summit. We chose the ladders. I did fine until there was a horizontal move from one ladder to another, followed by a step onto a large metal screw in the rock. I kind of panicked at that point because I couldn’t span the space with my arms.  I could get my feet where they needed to be, but I couldn’t reach any solid handhold to pull myself up the rock face. Adam ended up giving me a hand up. We both passed through a small cave onto a steep, exposed ledge with views of Squam Lake. After enjoying the view for a moment, there was still a little more steep, scary boulder scaling we had to do to get to the summit of Mt. Morgan. I stood on the ledge and pondered whether I wanted to go back down the ladders and go around, or figure out a way up the rest of the rocks. I ended up opting for directly up the rock face, but I paid a price for it. I got several huge bruises and two gashes on my legs from the sharp, hard granite. What can I say… I never go home from New Hampshire unbranded!

Scrambling Up Morgan
Even after you reach the top of the ladders, you still have some challenging, steep scrambling to complete.  Below: Adam navigates the ladders; At the top of the ladder, you’ll pass through a small cave; The scramble is scary because the granite is so smooth and steep.

Adam on the Ladders Cave Ladder Scrambling

The view from Morgan was lovely, albeit misty and hazy on the day we visited. There also weren’t as many blueberries as I remembered. We had a snack, took a few photos and pressed on to the next summit – Mt. Percival.

We followed the Crawford-Ridgepole trail for about .9 of a mile to the summit of Percival. The trail across the saddle between the two mountains was alternately rocky, boggy and piney. There were a few steep spots, by this section of trail was one of the easier parts of the hike.

Right at 3 miles, we reached the summit of Percival. The view was similar to that of Morgan – Squam Lake’s asymmetrical, island-dotted expanse. At the summit of Percival, there are two sets of blazes – one to the side and another that plunges steeply right of the front of the mountain. When we visited, there was no sign indicating where each trail headed, so we used our guidebook and map to make a guess. If you take the trail on the side, you’ll have steep (but normal) climb down the Mt. Percival trail. If you follow the blazes over the cliff, you’ll find yourself wedging your body through a series of caves and opening in boulder tumbles. The cliff route is fun and a little bit unnerving.

There were several places that Adam and I looked at each other and thought NO WAY! We had to pass backpacks and trekking poles through openings. There was even one place I thought I’d make it, but my backpack got hung up and left me stuck! After several squeezes, we came to the junction of the Mt. Percival Cliff Trail and Cave Trail.

After this point, the rest of the climb down Mt. Percival was just a steep, rocky, rooty, slippery, muddy knee grinder. I didn’t particularly enjoy this part of the hike. My knees and feet were hurting and I was being relentlessly menaced by bugs. It’s hard to pay attention to your footing when you’re flailing your hands to swat flies away from your face. I definitely slipped and slid several times.

Mt. Morgan Summit
Adam enjoys the summit of Mt. Morgan.  Below: Scenes from the Crawford-Ridgepole Trail between the summits of Mt. Morgan and Percival.  The terrain was rolling and varied.

Crawford-Ridgepole Trail Crawford-Ridgepole Trail Crawford-Ridgepole Trail

I was pretty happy when, at 4.7 miles, we reached the junction with the Morse Trail, because it meant the hard hiking was behind us and we were almost back to the car. We flew along the Morse Trail, enjoying pretty streams and easier footing. We made one final left turn back onto the Mt. Morgan trail for the final tenth of a mile.

After wiping off the mud and doing a little minor first aid, we were on our way to a well-deserved lunch at Squam Lakeside. They have enormous lobster rolls and sherbet freezes. It’s a great place to eat outside and enjoy a view of the lake.

Adam Says…

This was one of those trails that I first discovered five years ago when I was researching nearby geocaches when we were visiting the White Mountains for the first time.  I was also drawn to Mt. Percival due to my love for reading Arthurian legends when I was younger (Percival accompanied Sir Galahad on his quest for the Holy Grail).  I remember this being a challenging hike, yet unlike anything we have in Virginia.  As a hiking couple, we sometimes find that one of us enjoys a hike more than the other; we also face days where one of us is not having a strong hiking day.  This hike was one that I enjoyed more than Christine.  For me, if I experience something unusual on a hike (a rock scramble, ladders, exposed cliffside walks, a stream crossing where we have to wade across),  I find that I really have fond memories of it.  As I’m reflecting, I realize I enjoy the challenge of trying to figure out how to overcome an obstacle.  This loop definitely has some of those memorable abnormalities on it.

Mt Percival Summit
The summit of Mt. Percival offers a similar view.

We were looking for a decent hike to start off our trip to the White Mountains. Since we had about a 12 hour drive from our home in Virginia to New Hampshire, we were looking forward to doing something active.  We found the parking lot and trailhead along Rte. 113.  The trail starts off level and at .1 miles, you reach the junction with the Morse Trail, your return route for the loop.  Stay straight on the Mount Morgan Trail.  The trail starts off with a gradual uphill, but the trail begins to get steeper and rockier as you continue.  There wasn’t a lot to note on the hike up, but the sight of white-barked birch trees always makes me happy to be in New England.  At 1.7 miles, you reach a junction with the Crawford Ridgepole Trail.  Stay on the right to continue your hike up to Mt. Morgan.  At 2.1 miles, we reached a sign that shows that you can reach the summit of Mt. Morgan through the ladders or circumvent and reach the summit by continuing on the trail.

During our first visit in 2009, I had decided to go up the ladders and Christine went the other way.  In 2009, never having experienced ladders attached to large rocks before, I was very apprehensive and worried about climbing up that way.  But when I saw an older man climb the ladders without any difficulty, I dug deep and forced my way up them.  This time, I didn’t have any trepidation, most likely from the combination of climbing these ladders before and experiencing more harrowing ladder climbs at Grandfather Mountain in North Carolina.  Once we reached the top of the ladders this time, we had some rock scrambling to do up some exposed rocks until we reached the summit of Mt. Morgan.  I was proud of Christine tackling the ladders and the rock scramble, because these are definitely things she doesn’t usually enjoy.

Cave Trail
Adam expresses disbelief at the way forward. Below:  Different sections and tight squeezes on the cave trail.

Cave Trail Cave Trail Cave Trail

We had a hazy day from the summit of Mt. Morgan, but the view over Squam Lake always amazes me with the small islands scattered through the lake.  We climbed down from the summit and shortly reached the sign which pointed out the other option for reaching the Mt. Morgan summit.  We continued on the rocky trail, which is fairly flat on the ridge, but does have some ups and downs as you are climbing over rocky areas of the ridgeline.  At 3.0 miles, we reached the summit of Mt. Percival.     The summit of Mt. Percival was very hazy and cloudy, which didn’t give us great views this day, but we remember the great views we had from here in 2009.  The signage at the summit of Mt. Percival didn’t help us too much.  We saw two sets of blazes leading down the mountain, but there was no signage stating where they headed.  After consulting my map, we took the rightmost trail (facing the view) that seemed to lead straight down the rocks.  It turns out this is the option to go down via the caves (the next trailhead down to the left of this one would be more of a cliffside trail but they join ahead).  We climbed down this very steep section and then at one point, I said “You’ve got to be kidding me.  How are we getting through that?”  The trailblazes led down into a hole that wasn’t much bigger than my body.

This turns out to be the entrance to the cave on this trail.  You can still see light shining through in spaces between the rocks, but it is fairly closed off and not a route for any claustrophobic people.  We rock scrambled through the cave and then eventually the blazes lead you out of the cave through another hole not much larger than my body.  When I peered through this opening, I couldn’t see what was ahead, but I plunged my body through and I felt like I was getting reborn through a rocky birth canal.  On the other side was a family heading up, so we had to exit before they could try to enter.  We made our way through and then had a little more downhill rock scrambling to do until we reached another sign.  This one pointed the way to the summit via the cliffside trail or through the caves.  This would have been helpful from the summit.

Cave Exit
Christine exits the cave portion of the hike.  Below: The descent of Percival was nothing but rock, roots and more rocks; We were glad to finally hit pine-needle covered trail again;  Adam crosses one of the streams on the Morse Trail.

Mt. Percival Trail Mt. Percival Trail Morse Trail

The trail at this point continued its rocky climb down and you can hear the sounds of Smith Creek at times.  Eventually at 4.7 miles, we reached the junction with the Morse Trail, that ducks to the right.  We took the Morse Trail, which was mostly flat but more overgrown and less traveled than the other trails.  This trail joins the Mt. Morgan again at 5.2 miles.  We took a right and made our way back to our car in just another .1 mile.

At the summit of Mt. Percival, we met a girl hiking with her dog.  She was also trying to figure out which way led down Mt. Percival and she took the cave trail as well.  I can’t even imagine how she navigated her dog through the caves, but we saw her at the junction with the Morse Trail.  She told us how tough it was for her dog.  She was training for  her goal of trying to hike the 48 peaks of New Hampshire that are above 4000 feet with her dog.  This goal has been most popularized by the book Following Atticus by Tom Ryan and you can read more about their adventures on his blog.

There are several geocaches along this trail:

Lunch at Squam Lakeside

As we are always trying to cover new ground whenever possible, I’m not sure how often on our return trips to the White Mountains we will revisit this loop, but this is definitely a hike that you will remember.  The interesting features and scenic views give you an introductory glimpse into what hiking is about in New Hampshire.

 Trail Notes

  • Distance – 5.3 miles
    MapMyHike Stats *
  • Elevation Change –  1575 feet
  • Difficulty –  4.5.  Even with a moderate elevation gain and distance, the terrain of this trail warrants a higher difficulty rating.
  • Trail Conditions – 3.  The trail was a muddy, slippery mess when we hiked, but generally the trail is well maintained and passable.
  • Views – 4.  On a clear day, the view of Squam Lake is beautiful.
  • Waterfalls/streams 2.  There are lots of small streams and springs on this trail.  Nothing mind-blowing (and a lot them just make mud), but a couple crossings along the Morse Trail are pretty.
  • Wildlife – 1.  We saw red squirrels and a salamander.
  • Ease to Navigate – 2. There are multiple trails that lead the same place.  Also, there isn’t a sign differentiating the cave and cliff trails on Mt. Percival.
  • Solitude – 3. This trail is not as popular as the nearby Rattlesnakes, but you’ll probably still see a number of hiking parties along the way.

Download a trail map (PDF)

Directions to trailhead: From I-93: Take Exit 24 and follow Rt. 3 South to Holderness. From the town Holderness, get on Rt. 113 and follow it northeast for about 5.5 miles. Parking will be in a gravel lot on the left.  The large parking lot on the right is for the Rattlesnakes hike.  If there is no space left in the Morgan lot, it is fine to park at Rattlesnakes.

* MapMyHike is not necessarily accurate, as the GPS signal fades in and out – but it still provides some fun and interesting information.

Strickler Knob – via Massanutten Trailhead

This 9.1 mile hike is challenging, but offers wonderful view payoffs and a fun rock scramble.  There is a shorter option for this hike for people wanting to skip the toughest part of the climb.

View the Full Album of Photos From This Hike

Crowds on Strickler Knob
Crowds gather on one of Strickler Knob’s perches. One person we met at the summit had a Cavalier King Charles spaniel in her backpack.  If you look closely at the photo, you can see the dog’s head sticking out of the pack.  Cute! Below: The Massanutten Trailhead on Crisman Hollow Rd.; Adam, Suzanne and Anthony begin the hike; Native pink azaleas.

Massanutten Trail Happy Hikers Pinkster

Christine Says…

Strickler Knob was the second hike we posted on Virginia Trail Guide… way back in May of 2009. In the years since we first did this hike, there was a bad forest fire in the vicinity, the Forest Service painted over the purple/pink blazes to the knob (and then someone put them back), and the trail became vastly more popular.

On this particularly beautiful morning, we were planning a hike in Shenandoah National Park, but at 7:45 a.m. a text popped up on my phone. It was from our friends, Suzanne and Anthony (we met them at PATC’s Backpacking 101 workshop several years ago). They had made a spur of the moment decision to drive down from Maryland to hike Strickler Knob and wondered if we might want to join them. We don’t see them often enough, so the answer was clearly YES!

However, I had a few concerns going into the hike. The first was the possibility of swift/deep streams and run off from the deluge of rain we had received a day earlier. Roads and bridges were washed out all over the area. The second was the fact that the MMT 100 was being run that weekend. I wasn’t sure if the trail would be crowded or have limited access due to the race. We decided to put those concerns aside and go for it.

We met our friends at the defunct Massanutten Visitor’s Center on Rt. 211 near Luray. From there, we proceeded in one car to the Massanutten Trailhead on Crisman Hollow Rd. Right as we arrived, a carload of six was also unloading at the trailhead. We ended up playing leap frog with them along the trail all day long.

Lady's Slipper
We spotted this beautiful pink lady’s slipper orchid along the trail. Below: Anthony and Suzanne make the steep descent of Waterfall Mountain; Mountain laurel is starting to bloom; Streams were running high.

Waterfall Mountain Descent Mountain Laurel Stream

The trail initially crossed a flat, open area and a view into the valley. But soon, the trail dropped very steeply downhill on Waterfall Mountain. I’m not really sure why it’s called Waterfall Mountain. We didn’t see any waterfalls along the way – maybe they’re someplace else, or maybe ‘waterfall’ just refers to the extremely quick drop in elevation. Along this section of trail, we all joked about what a tough climb uphill this would be at the end of the day. I enjoyed the flowers blooming along the trail. We spotted mountain laurel starting to bud and even a pink lady’s slipper!

Eventually the trail leveled out near a stream. We passed a large campsite near the water just before coming to our first stream crossing. The water was pretty high and fast, but some well-placed logs made the crossing doable. From there, the trail followed a series of ascents and descents with lots of little stream crossings along the way. Most of the small stream crossings are probably dry under normal circumstances. We soon came to a second large stream crossing. After that crossing, the trail followed the stream – literally. Due to the 4-5 inches of rain the area experienced, the trail was completely underwater. It didn’t even look like a trail, and the only way we were sure it was the trail was the presence of a blaze on a tree about 50 yards ahead. We walked for more than a mile in ankle deep water. It was fun, but it was also wet, sloppy and muddy!

We reached trail junction 408. This is where the folks coming up from Scothorn Gap join the trail. At this point, we turned right and followed the orange-blazed Massanutten Trail uphill in the direction of the Gap Creek Trail. This part of the trail is really easy – wide and very gently graded.  There were lots of pink native azaleas on one side of the trail. On the other side, the area burned out by a forest fire stood, charred – but slowly growing back.

Stream Crossing
Anthony makes his way across the logs traversing the stream. Below: Adam walks along one of the only flat sections of the trail.  It was a really short section; Suzanne walks along the under-water trail; This is the trail junction that trips a lot of people up.  Make sure you go uphill, remaining on the Massanutten trail, in the direction of Gap Creek.

Flat Stream Walking Tricky

When we reached the ridge, there was an obstructed view where the trail continues over the crest and then downhill. If you find yourself going downhill on the orange-blazed trail, you’ve passed the turn to Strickler Knob! At the top of the ridge, look carefully for purple/pink blazes on rocks and a reddish disk stapled to a tree. This is the way to Strickler Knob.

The walk to the knob starts off as a rocky but easily passable trail. But gradually the rocks become bigger, more jagged and trickier to traverse. It’s easy to lose the blazes as you pick your way along the rocks. You’ll come to one stunning viewpoint and think you’ve reached the end, but you still have the most intense part of the scramble to go! There are several steep, tall rock faces to negotiate before you finally come to a collection of towering rock stacks overlooking the Page Valley, Fort Valley and the Shenandoah River. The view from the knob is majestic!

On this particular day, Strickler Knob was packed. There were so many people at the overlook, it was hard to find a spot to sit. I think part of it was because the presence of two hiking clubs. But in addition to the clubs, there were also a number of couples and foursomes. Honestly, I’m shocked that this trail has become so popular! The crowds rivaled what I expect to see on a nice day on trails like Dark Hollow Falls or Hawksbill Mountain (in SNP).

We spent some time at the overlook eating lunch and taking photos. The hike back went really quickly. We walked in the water, we crossed the streams, we did all the little ascents and descents… and then we came to the base of Waterfall Mountain.

That climb was every bit as brutal as we all expected – gaining over 800 feet in about half a mile. The section isn’t climbed with mediating steps or switchbacks – it’s pretty much straight up the mountainside. We were all pretty glad when we got back to the flat, grassy section again!

When we got back to the car, the parking lot was much more crowded than when we had left it. We made the short drive back to the Massanutten Visitor’s Center and bid farewell to Anthony and Suzanne. It was a great hike and great to see them!

Burned Area
This area was burned by a forest fire several years ago. There is still a lot of black char, but new growth is starting to emerge. Below: The beginning of the Strickler Knob trail; Adam enjoys the first nice view; The scramble begins!

Strickler Trail First View Scrambling

Between the two routes to Strickler Knob, I would probably recommend the shorter route from Scothorn Gap to most hikers. You get all of the excellent scenery, and only miss the extremely challenging descent/ascent of Waterfall Mountain. The section on Waterfall Mountain doesn’t really offer any remarkable scenery, but it’s a great training hike if you’re looking for a cardio challenge or practice on elevation change. We probably benefited from the longer, tougher ascent to prepare for our upcoming Smokies Trip.

Adam Says…

Normally, when I describe the hike to Strickler Knob, I tell people that it’s an introductory rock-scrambling hike to see if you are ready for Old Rag.  While there is not as much rock-scrambling and navigating as Old Rag, there are a few spots towards the summit that will test you enough to see if you can pull yourself up some of the rocks and let you gauge your comfort-level with scrambling over some drops.  If you’ve already done Old Rag, this should be easy, but if you are intimidated by Old Rag from stories you’ve heard, try Strickler Knob first.  I would agree with Christine that this hike has become more popular over recent years.  When we had done the hike five years ago on a beautiful day, we only ran into one other couple on the entire trail; this time, it was crawling with people.

This is also a hike where people often get lost.  You won’t find the purple-blazed summit trail on any maps currently, so I would suggest bringing a copy of the map I’ve provided below.  I had a co-worker that tried to find the trail a few years ago (possibly when the blazes were still removed) to no luck.  We also came across a larger hiking group from Northern Virginia that had missed the trail completely.  When we gave them better directions, they turned around to attempt it again.  Part of this also has to do with what few blazes are actually on the trail.  You’ll know you are on a trail, you may just not be entirely sure which trail.

Scrambling
The group negotiates the rock scramble. Below: Adam makes his way through the rocks; Lots of rocks to climb; A nice perch on Strickler Knob.

Scrambling Rocks to Climb Adam on the Scramble

We started off the hike from the small parking area on Crisman Hollow Road.  The orange-blazed Massanutten trail starts off on nice, level terrain through a wooded area.  The trail soon opens up to more of a brushy, open field.  As the trail winds around through this area, there is even one spot that has a view into the valley below at .2 miles.  Shortly after this point as the trail winds around, the trail begins its very steep descent down Waterfall Mountain at .5 miles.  The entire time that we were hiking down, I was thinking this was going to be a pain to hike back up at the end of the hike.  The trail does have a few switchbacks, but the overall descent is tough on the knees as you descend about 800 feet in that half mile.  At the 1.0 mile marker, we finally reached the bottom of the descent and a junction with the Massanutten Connector Trail.  Take a left at this junction to stay on the main, orange-blazed Massanutten trail.  The trail begins to climb slightly at this point and at 1.2 miles, you will reach a nice back-country campsite along the side of the Big Run stream.  You’ll soon cross the stream (usually by balancing yourself along logs that have been laid across) and continue your climb.  After the second stream crossing, the trail begins a steeper climb with a large switchback to help ease the elevation gain.

Summit Crowd
The summit was very crowded, but the views were still fantastic!

Eventually the trail met the stream again and due to the heavy rains, the trail was completely submerged.  We ended up hiking what felt like almost a mile through a submerged trail by rock-hopping or just getting our feet wet and muddy.   The trail finally separated from the water and leveled out and we reached the junction with the yellow-blazed Scothorn Gap trail at 3.0 miles.  Take a right at this junction to stay on the orange-blazed Massanutten trail.  The trail feels more like a fire road at this point, as you’ll climb up slightly.  We were able to see a lot of the fire damage to the trees around, so there is little more than some lower brushy, understory on the trail at this point.  At 3.6 miles, you reach the crest of the trail and can see some obstructed views straight ahead.  At this point, look around to your right.  We found a small cairn on the ground and were able to see some red and purple blazes higher than eye-level on a few trees to mark the beginning of the purple-blazed trail to the summit of Strickler Knob.  The purple blazes at this point are typically marked on the rocks where you step.  The trail is very rocky at this point and you will be walking the ridgeline until you reach the summit.  The trail can also be a little hard to follow, but if you keep looking for the blazes and just remember you are walking the crest of the ridge, you should be fine.

At 4.2 miles, you reach a very nice viewpoint where you can get great views to the west.   Keep pressing forward and you’ll soon need to climb up a larger rock wall and then pass by a primitive campsite.  Just a few 100 feet away, you will reach the larger boulders of Strickler Knob at 4.5 miles.   You’ll see a large rock overhang that you’ll climb under.  There is a small area to take in a few views to the right.  For those that are most adventurous, the best views are to the left where the overhang is.  If you feel comfortable, you will need to navigate a crack between the two larger rock formations and hoist yourself up to the top of the rocks.  The views from both rock formations are absolutely breathtaking as you have 360-degree views from all around the valley.

Climbing Down
The climb down is as challenging as the climb up!  Below: More views from the top; The hike down; One final stream crossing.

View of the Valley Descent Stream Crossing

After eating a packed lunch, we made our way back the way we came.  We did have to face the waterlogged trail again.  We came across several groups on our way back that were also looking for directions.  One girl asked me if there was any other way back to the car other than going back up Waterfall Mountain.  I suggested that they make their way back through Scothorn Gap and then walk Crisman Hollow Road back.   We all definitely wished we didn’t have that steep trek back up Waterfall Mountain to do.  It is a very steep trail almost straight up the mountain and it takes quite an athlete to do this without taking a breather at some point on the return.  When we finally reached the top, we congratulated our success and then made the last .5 miles back to our car.

When we were hiking the trail, I kept thinking about the MMT 100 racers that were running this trail.  We had come across one of the race-workers and he told us that most of the fast runners were coming through this area near Waterfall Mountain around 8 p.m.  So, if you were a little slower than that you would be running this trail in the dark with a headlamp.  I can’t even imagine how tough this would be and how any of them would escape injury from running into a tree, twisting an ankle, or falling down the trail.

Brutal
The brutal ascent back up Waterfall Mountain at the end of the hike.

I would also recommend for most people to do the hike from Scothorn Gap instead of the route we took.  It is a lot of extra effort with nothing overly impressive to see along the way.

It was great to see our friends again.  We were all getting ready to head to the Great Smoky Mountains soon, so this was great training before we had to handle some of the tougher terrain that the park had to offer.

Trail Notes

  • Distance – 9.1 miles
  • Elevation Change – About 2250 ft.
  • Difficulty – 5. This rating is earned by both the hike length, the scramble to the knob, and the ascent of Waterfall Mountain that comes right at the end of the hike.  For an easier version of this hike, start at Scothorn Gap.
  • Trail Conditions –  2. No switchbacks, soggy streambeds, a couple crossings that can be challenging in wet weather, and a tough scramble.  This is not a beginner’s hike.
  • Views –  5.  Views from the knob are spectacular.
  • Streams/Waterfalls – 2.5.  The usually low streams were beautiful and running high when we visited, but they’re probably usually less impressive.
  • Wildlife – 0.  This trail is popular enough to scare away most wildlife.
  • Ease to Navigate –  2. Trails are sporadically blazed and can be hard to follow.  The junctions for trails leading to to the knob do not mention Strickler Knob.  We suggest bringing a map on this hike.
  • Solitude – 2.  This trail has become extremely popular!

Download a Trail Map (PDF)

Directions to trailhead:  From I-81, take exit 264 heading east through New Market.  Head east on West Old Cross Road for .2 miles.  Turn left on to US-11/N. Congress Street.  In .3 miles, turn right on to US-211/Lee Highway.  Go 3.6 miles and turn left on to Crisman Hollow Road (it is right before the green building on your right that is the Massanutten Visitors Center).  Follow Crisman Hollow Road for 2.2 miles (passing by the parking lot for the Massanutten Storybook Trail) until you reach where the orange-blazed Massanutten Mountain Trail crosses the road and the small parking area.  Park here, cross the road and start the trail.

Mt. Washington via Ammonoosuc Ravine (NH)

Special: New Hampshire Edition

Introductory Guide to Visiting the White Mountains

This 4.5 mile ascent of Mt. Washington follows challenging, steep, slick terrain along a ravine that showcases waterfall after waterfall.  Once you clear the treeline, you are treated to a hut visit and some of the most dramatic alpine walking in the east.

View the Full Album of Photos From This Hike

Adam On Crawford Path
From Lakes of the Clouds Hut, you follow the Crawford Path (America’s oldest continually used hiking trail) to the summit of Mt. Washington. In this photo, you can see the summit and its weather towers looming in the distance.  Below: The trailhead begins near the cog railway on Basecamp Rd; The beginning of the trail is deceptively easy; There are many water crossings en route to the top – some easy, some not so easy.

Ammonoosuc Ravine Trailhead Deceptively Easy Water Crossing

Adam Says…

Hiking to the summit of Mount Washington (also known as ‘the most dangerous small mountain in the world‘) was definitely a bucket-list item for me.  Making it to the top of the highest peak in New England feels like an accomplishment and we definitely have memories from the hike that we will never forget.

Before you attempt to hike up Mount Washington, some planning needs to take place.  Mount Washington has been called the Home of the World’s Worst Weather due to the high winds, ice, and low visibility that can rear quickly.  In fact, in 1934, they recorded a wind gust of 231 mph.  Check out the funny video of someone trying to eat breakfast from the summit area during one of these high wind days.  Needless to say, I would strongly recommend checking out the weather from the Mount Washington Observatory to determine if a summit is possible and how different the weather and temperature will be at the top.

We  arranged for Christine’s parents to meet us at the top and shuttle us back to our car.  Many people descend by trail, but there is a hiker shuttle and a limited number of seats available on the Cog.  It’s important to note that you should always be prepared and have a plan for walking off the mountain.  Trains and shuttles book up quickly and the auto road closes from time to time.  Ultimately, you are responsible for your safety and the manner of your descent.  Visit New Hampshire’s Hike Safe site so you can learn more about mountain safety and the state’s expectation that every hiker be prepared.

Stream
The entire Ammonoosuc Ravine trail followed a stream which tumbled down the mountainside in waterfall after waterfall. Below: Lakes of the Clouds advertisement; The early parts of the trail are rocky, but only slightly uphill.

First Lake of Clouds Sign  Early on the Ammonoosuc Ravine

As we were driving along the road to the parking lot, the sky was completely cloudy.  The online forecast said it was going to be a perfect day, but the clouds were saying something different.  We hoped that the weather would push off and made it to the parking lot.  We packed some extra gear knowing that the temperature was going to be much cooler at the top.  We started off from the parking lot and filled out our parking permit, enclosing $3 in an envelope to allow us to park in the lot.  The parking lot was already getting full and we could tell that all the people getting ready to hike were in great shape.  We hoped we were ready for the challenge and started on the Ammonoosuc Ravine Trail from the end of the parking lot.  The trail started off relatively flat through a thickly forested area.  At .25 miles, we reached a stream crossing.  Because a heavy rain fell just the day before, the crossing, which is normally easy, presented a real challenge.  We saw a few others cross in different areas, but ultimately decided the best route was tightrope-walk across a thin log that spanned the creek.  This is always more unnerving when you are carrying expensive camera gear, but we made it across without a hitch.  We were worried how many other crossings we would have to make seeing the Ammonoosuc River on our trail map coming ahead.

At 1.0 miles, the trail reached the Ammonoosuc River, but the trail turned quickly to the right.  We saw the rushing water of the river and glimpsed up at the sky, which looked less foreboding than earlier.  The trail hugs the riverside and begins a steep ascent up a rocky slope.  At 2.1 miles, we reached the Gem Pool, a serene swimming hole created by a small waterfall.  We rock-hopped across to continue the path from the pool and stopped for a short rest in this peaceful area.   After leaving the Gem Pool, the trail becomes very steep as you climb up the rocky slope.  At 2.35 miles, a small trail to the right leads about .1 miles to The Gorge waterfall.  I highly recommend checking out this waterfall, which you can see plunging over 100 feet.   We returned from The Gorge and rejoined the trail.  The trail continues its steep ascent and you can only imagine that you are climbing up a slope that seems to be as steep as the slope of the waterfall you just saw.

Christine at Gem Poo
Christine crossing the water at Gem Pool. This is the point of the hike where the climbing starts getting serious. Below: Adam works his way uphill on the steepest part of the hike; It was seriously steep; One section had a little ladder to help you over the boulder.

Adam Climbing Seriously Steep Ladder

We continued to climb up the very steep slope until we reached a great viewpoint at 2.7 miles. Along with the view, there were also multiple waterfalls falling in dramatic cascades.  It was here that we were finally able to see that the clouds had moved off and we should have a gorgeous hike to the summit.  The unnerving thing was that in order to continue the trail we had to walk across the top of a waterfall with a very precipitous drop to one side  Due to the rain, there was no way to rock-hop across.  We knew we had to put our feet in the water to make it across, but we couldn’t tell how deep the water was or how fast it moved.  As we realized that a false step could have meant a long plummet down, it definitely gave us a gut-check to see if we could make it.  We tried to look around for the best way to cross and decided to wait and let a few other hikers attempt it first.  After learning what others had done, we followed suit and crossed without any difficulty.

The hike from this point continued to be steep as you climb along some areas of bare, slick rock.   Eventually, we began to rise above treeline and were able to see Lakes of the Clouds hut seated on the edge of the ravine.  The wind was already picking up and the cold wind had us switching into cold-weather clothes.  To the left of the hut was the summit hike to Mount Washington and we could clearly see the Observatory Tower in the distance.  We reached Lakes of the Clouds hut at 3.2 miles and decided to go inside to eat a snack.

Big Waterfall

One little spur trail on the steepest section of climbing led to this large and impressive waterfall called Gorge Falls. Below: Christine picks her way through boulders and across the water; Our first views into the Washington Valley; At the halfway point

Bouldering First Views Halfway There

Lakes of the Clouds Hut was built here over 100 years ago and has some interesting history.  Two AMC members, William Curtis and Allen Ormsbee, were hiking up the Crawford Path to go to an annual AMC meeting at the Summit House on the top of Mount Washington in 1900.   They reached what is now Mount Eisenhower and met 60 mph winds and cold temperatures.  By the time they reach Mount Monroe, the temperature had plummeted to freezing and the rain became ice.  Curtis died at Lakes of the Clouds and Ormsbee pushed on for help before perishing himself only a few hundred yards from the summit station.  The storm lasted for 60 hours and their bodies were discovered.  The AMC created a wooden shelter first near where Curtis had died.  In 1915, the wooden shelter was replaced with a stone shelter and it has since had several additions and improvements made.  It can accommodate up to 90 guests per night.

From the shelter, you can see a trail that leads up to Mount Monroe.  If you are interested in peak-bagging a few of “the Presidentials”, it is a short but steep hike.  We decided to save our energy and just tackle Mount Washington.  We continued along the trail and soon reached views of the Lakes of the Clouds, which are actually more like mountaintop ponds than full lakes.

Since we were now above treeline, the hike to the summit of Mount Washington was now just a series of steps across boulders for the remaining 1.3 miles.  The wind was incredibly strong and I believe gusts were at least 50 mph, which is considered more of a calm day on the mountain.  The wind was blowing up the ravine to the left of our bodies, so there were times that we had to angle ourselves to fight the winds as we pushed onward.  The views of the ravine and behind us were more breathtaking with each step.  Whenever we stopped to turn around, the wind had our noses running from the cold and it was hard to even talk to each other through the force of the gusts.

Waterfalls Near the Headwall
Near the top of the headwall, there is a series of several impressive waterfalls and the scariest water crossing we’ve ever done. Below: This trail had so many waterfalls; Our first view of the Mt. Washington summit; Hikers coming out of the ravine.

More Waterfalls First View of Summit Climbing Out of the Ravine

At 4.5 miles, we reached the summit area.  We followed the signs to the summit marker, that was crawling with people.  Most people reach Mount Washington by car or by the cog railroad.  When you pay to take the Mount Washington auto road, you receive a sticker that states “This Car Climbed Mt. Washington”.   We waited our turn to get a picture with the summit sign.  Some people were amazed that we had hiked up.  We made our way over to the visitor center and snack bar.  We had agreed to jokingly meet her parents by the “death plaque”, a plaque that shows a list of the names of  people who have died on the mountain.  When we arrived at the snack bar area, a group of hikers we had seen earlier on the trail whispered to us “there’s a hiker’s lounge downstairs”.  While the upstairs area was crawling with people, the hiker’s lounge was quiet and nearly empty.  We had a peaceful time to eat our lunch and then were able to meet her parents in about 30 minutes.  From here, we jumped in their vehicle and enjoyed the car ride down the narrow road that snakes down the mountain.  We stopped a few times along the way to catch some last views of the Presidential Range before we were back on the road.

The hike up Mount Washington was definitely something that Christine and I felt that we wouldn’t have been able to accomplish several years ago.  I can’t think of any other time that I have felt such a sense of accomplishment after reaching this summit.  We were so blessed with the great weather and we have already begun talking about how we could do an entire hut-to-hut Presidential traverse.

Christine Says…

With our days in New Hampshire running out and great weather in the forecast, we decided we had to tackle Mt. Washington.  With a reputation for fickle weather, ice storms that happen at the height of summer, and gusts of wind that can blow a grown-man sideways, I wasn’t quite sure what to expect.  The night before our hike, we were looking at maps and guidebooks and discussing our different route options.  Across the living room, my mother was Googling ‘deaths on Mt. Washington‘, ‘failed hikes of Mt. Washington‘ and ‘accidents on Mt. Washington’. Comforting, right?  She also told me to make sure I had the phone number for New Hampshire’s Fish and Game department on hand – they do most of the mountain rescues in the state.  Her worries and cautiousness got into my head, and I went to bed feeling really nervous about my ability to make it to the top.

Adam Approaches Lakes of the Clouds
Adam approaches Lakes of the Clouds Hut. Below: Inside Lakes of the Clouds; We ate cake!; Wooden racks for carrying supplies.

Inside Lakes Cake! Racks

On the drive to the trailhead, dark blackish clouds completely obscured the mountain.  I said to Adam, ‘This is probably a bad idea.’  He reassured me, telling me he was certain the clouds would blow off, the day would be beautiful, and that we would have a great time.  I let my worries non-verbally stew in the back of my mind.  We parked, geared up and made our way down the trail with several other groups of people.

Within the first mile, we came to a rain-swollen stream with no clear way to cross. The rocks normally used to rock hop were all under rushing water.  I tested a few spots, and ended up falling shin deep into water and wrenching my knee. I was feeling discouraged, because the only other potential crossing left was a thin, bouncy, moss-covered log that had fallen across the stream.  I have problems with vertigo and balance, so situations like this really push me outside my comfort zone.  Adam carried all the expensive camera gear, and I slowly and carefully stepped across that log.  Phew!  I told Adam if there were lots of crossings like this one, I didn’t think I could do the hike.  He offered to turn back, but I told him that I wanted to challenge myself and keep going.

Fortunately, most of the hike followed alongside the stream with only a few much easier crossings along the way.  Eventually we reached the Gem Pool. What a gorgeous spot!  It’s a crystal clear, green, pool; fed by a cascading waterfall.  It would be a great place to take a picnic and go for a swim. We did one more rock hop at the end of the pool and prepared ourselves to do some serious climbing!

Mount Monroe & Hut
Mt. Monroe looks like a small hill above the hut. Below: Mt. Monroe; The Lakes of the Clouds’ namesakes.

Mt Monroe Lakes Lakes of the Clouds

About 1600 feet of elevation gain comes in just about a mile of hiking after you pass the Gem Pool.  It’s grueling and steep, but both Adam and I were well-prepared with all the hiking and other cardio we’d done to prepare for this trip.  We were able to make the ascent without having to take a breather!  The only stop we made along the way was the side trail to check out the Gorge Waterfall.

On the climb up, we started seeing glimpses of the valley through the trees.  The majestic Mount Washington Hotel looked like a tiny red speck below.  We’d come a long way up already!  The remainder of the steep climb followed the Ammonoosuc River through the plunging ravine.  Even when we couldn’t see the water, we could hear it.

Eventually, the trail exited from the woods onto a wide rock plateau.  Above, we could see a waterfall falling in several distinct drops and below, we could see the water crashing over a steep, long drop.  We decided to take a break and enjoy the view from the rocks.  We sat for a minute taking it all in.  At that point, I noticed I didn’t see the trail continuing anywhere.  Horror dawned on me when I realized that the trail continued on the other side of the river. We saw two people cross it successfully, but I still wasn’t so sure.  The water was fast and a little deep from the rainfall the day before.  I had no idea how slick the rock under the water would be.   The crossing had just a couple feet of flat width on the downhill side before the water dropped over a 100 feet down into the ravine.  A slip at this crossing would almost surely be fatal.  I took a moment to hyperventilate and freak out, and then I plunged across.  This was followed by another ‘Phew – I’m still ALIVE’ moment.

Fighting the Wind
Adam fights the 50-60 mph winds.  Below: The hut grows increasingly tiny; Christine hikes along; There were several rock fields to cross.

Tiny Hut Christine Climbing Boulder Field

After that crossing, the hike was less steep but a lot rockier.  The trees were getting smaller and more stunted as we approached the treeline.  We could see the summits of both Mt. Washington and Mt. Monroe looming above. Lakes of the Clouds Hut was in view, but distances are so deceptive above treeline.  Everything looks so close, but it’s always further than you expect. I guess it’s a bit of an optical illusion when you don’t have trees to compare for scale.

As soon as we broke the treeline, just slightly below the hut, the wind was shockingly strong.  I was hiking in long pants and long sleeves, but I had to add my hooded jacket right away.  Even so, my face and hands were freezing!  I was sure I had packed gloves.  I usually keep a spare pair in all my backpacks, but I couldn’t find them anywhere.  I ended up paying the premium price to buy a cheap pair of gloves at the hut (only to find the spare pair of gloves in a side pocket that night when we got home).

We took a twenty minute break at the hut and enjoyed some of the baked goods made by the Croo.  Adam had pumpkin cake and I had chocolate cake.  I had my phone with me, so I decided to take a look at MapMyHike to see how we were progressing.  I found that Lakes of the Clouds actually has 3G service, so I posted an Instagram and a Facebook status from the hut.  Ah… technology! 🙂

Tough Climbing
Adam pushes uphill against wind, over rocky terrain. Below: Spectacular Presidential Views; Christine has made a lot of uphill progress;  Many cairns mark the way above treeline.

Beautiful Views Progress So Many Cairns

After our snack and rest, we were ready to tackle the last mile and a half of trail to reach the Mt. Washington summit.  I can’t even describe how much I enjoyed this portion of the hike!  The climb up the Ammonoosuc ravine had been moderately scary, physically challenging and really slippery, but the hike along the Crawford Path was pure, unadulterated hiking joy!

The Crawford Path was built in the 1800’s and originally used as a horse trail to the summit of Mt. Washington. The trail celebrated its 175th anniversary in 1994 and is the oldest, continuously maintained, hiking path in America.  I felt so privileged to be walking someplace so beautiful and historic.

We spent some time exploring and photographing the glacial ponds that give Lakes of the Clouds its name.  On this particular day, the pools were sapphire blue and covered with scalloped ripples from the brisk wind.  It was spectacular and gorgeous.

We toiled along, pushing our bodies against the 50 mph winds.  The alpine terrain was breathtaking and otherworldly.  I’ve never seen mountain views like the ones I saw in New Hampshire on this trip.  Between the walk along Franconia Ridge, and then the hike along the Crawford Path, I had my mind blown twice in one week. These places should be on every American hiker’s bucket list!

Summit
We made it to the top! Below: Adam makes the last push to the summit, The Crawford Path is also the Appalachian Trail; The summit was crawling with people who had driven or taken the cog to the summit.

Nearing the Summit crawford path Crawling with People

The stretch of trail between the hut and the summit is a rock field.  Sometimes the rocks are wide and flat, sometimes they are uneven, loose and pumpkin-sized.  The trail isn’t so much a path as it is a series of cairns that keep hikers on course.

At first, the trail between the hut and Mt. Washington was pretty flat, but the final push to the summit required a little more steep climbing.  The weather station towers looked so close you could almost touch them, but it turned out they were still about a half mile away.

We could tell we were getting really close when we started seeing more and more people in jeans, sneakers and sweatshirts milling about the trail.  These were the car and train people!  Eventually the trail emptied us out onto the summit.  We passed the historic hotel-turned-museum – Tip Top House – and made our way over to the summit marker.  We actually had to wait in line with all the car and train people to have our picture taken at the summit sign.  It’s always funny to finish a hike that has a summit that can also be reached by car – Clingmans Dome comes to mind (the high point on the Appalachian Trail).

Cog Railway
The cog makes a few daily ascents/descents of Mt. Washington. Below: The crowded summit building; The Mt. Washington Hotel sits below the mountain – what a beautiful day!

Summit Building Hotel

After taking our obligatory summit photo, we grabbed some drinks and hot dogs from the summit building’s snack bar and waited in the hiker’s lounge.  My parents still hadn’t arrived, so we had about a half hour to kill.  It made me wish we actually had taken the time to do the short side-trip climb to the summit of Mt. Monroe when we had been at Lakes of the Clouds.  I just didn’t want to leave my parents waiting in case we took longer than expected.  I didn’t want them to worry more than they had to.

Every 10 minutes or so, I ran up the stairs to look for my parents.  On the third trip up, I spotted my father and my (nervous-looking) mother waiting by the death sign.  I know it sounds kind of mean to have them meet us there, but honestly, it’s the easiest ‘landmark’ to find in the summit building.  The place is so crowded that you can’t really say ‘meet me by the snack bar, museum or gift shop’.  My parents were both relieved and impressed by how quickly we’d made it to the top.

Honestly, other than the two nerve-wracking water crossings, the hike up Mt. Washington was not nearly as difficult as I expected.  The elevation gain was challenging, but I think it would be doable for most reasonably fit people.  And the walk from Lakes of the Clouds to the summit was a pure pleasure, and definitely one of my most memorable hikes ever!

Trail Notes

  • Distance – 4.5 miles
    (Check out the stats from MapMyHike)*
  • Elevation Change – About 3800 ft.
  • Difficulty – 5.  The steepness of the hike is no joke.  The winds and weather possibilities just add to the difficulty.
  • Trail Conditions – 3.5.  The trail is well-maintained, but there were some stream crossings, loose and wet rock that made this tough in some parts.
  • Views – 5.  Once you rise above treeline you have great views of the ravine.  The view from the top of The Gorge is also nice.
  • Waterfalls/streams 5.  You get the rushing waters of the Ammonoosuc River, the Gem Pool, The Gorge waterfall, and Lakes of the Clouds.
  • Wildlife – 1. We didn’t see much other than squirrels.  Some moose have been spotted near the lower parts of the trail. 
  • Ease to Navigate – 4.  Junctions were clearly marked.  The hike from Lakes of the Clouds to the summit could be difficult on foggy/rainy days, but follow the cairns. 
  • Solitude – 2.  On a gorgeous day, there were lots of people.  But, due to the danger of hiking this trail, that is probably a good thing to have others nearby.  We were always able though to find our own space to enjoy views.

Download a trail map (PDF)

Directions to trailhead: From Interstate 93, take exit 35 to merge on to US-3.  Take US-3 for 10.4 miles and then take a right onto US-302 East.  In 4.4 miles, take a left on to Base Station Road.  Follow this about 5.7 miles until you reach a large gravel parking lot on the right.  The trailhead can be found as you entered on the lefthand side of the lot.

* MapMyHike is not necessarily accurate, as the GPS signal fades in and out – but it still provides some fun and interesting information.

MacRae Peak – Grandfather Mountain (NC)

North Carolina Hikes

This hike follows the Grandfather Trail across series of ladders and cables to the summit of MacRae Peak.  After climbing MacRae peak, we continued a little way along the trail before turning back right after Attic Window Peak. It’s a truly amazing hike with phenomenal views.

View the full photo album from this hike on Flickr

Top of MacRae Peak
Christine and Adam enjoy the view atop MacRae Peak. Below: Adam checks out the sign at the beginning of the Swinging Bridge Trail; A view of the bridge from the trail; the valley from the bridge.

Start of Bridge Trail Swinging Bridge View from the Swinging Bridge

Adam Says…

Hiking up Grandfather Mountain is nothing short of an adventure and one that I will not forget.  This will challenge you as much mentally as it will physically as you have to decide how far you can go.   Choosing to navigate up ladders on the side of a mountainside with nothing to save you from a nasty fall makes this hike one not for the faint of heart.  I have a fear of heights, but especially when it comes to trusting in man-made things that tested me a few times on this hike.  But  Christine and I kept saying, “I can’t believe we just did that” when we passed through these obstacles and the adrenaline kept us going.

We drove into Grandfather Mountain through the main entrance off 221.  If you are planning on doing any hiking on Grandfather Mountain, I would recommend starting as early as possible.  Starting later than when the park opens could lead to an extremely long line of cars waiting to enter on a weekend or pretty summer/fall day.  There is an admissions fee to get into the park ($18/adult with discounts for seniors and children at press time).  Another reason to start early is this hike does take a while.  While it is only a relatively short distance, you will want to take time to enjoy the numerous views and you will need to take time going up the ladders.  With a lot of people on the trail, there could be a bottleneck through some of these passes.  The park closes before nightfall and they do have rangers hiking along the trail to make sure that people get off the mountain in time.  If you don’t get back to your car by nightfall, they post they will send out a search.

Adam Crosses the Swinging Bridge
Adam crosses the Swinging Bridge. Below: A look back at the Top Shop from the beginning of the Grandfather Trail; Adam looks at MacRae Peak

Looking Back at the Bridge Complex Adam Looks at MacRae

At the entrance to the park, the ranger warned us that the winds were between over 30 mph at the top.  We made our way up the drive and stopped by Split Rock, a picnic spot and witnessed the drop in temperatures and wind firsthand.  We then made our way to the Nature Museum and wildlife habitat.  We walked around briefly and picked up a hiking trail map from the Nature Museum cashier.  We continued our drive along the curvy road up until we reached a parking lot attendant.  Since we were hiking, he instructed us to park in the lower lot to begin our hike.

From the parking lot, we took the Bridge Trail, a non-blazed trail that includes switchbacks through a hardwood forest.  After a short distance, we started hearing a mechanical, whistling sound.  This was the sound of wind whipping through the Mile High Swinging Bridge that lay above us.  At .4 miles, we reached the Mile High Swinging Bridge and visitor center.  The wind was blowing so hard up here.  I felt that I didn’t have warm enough clothes, so we went inside the visitor center to buy a hat and gloves to replace the ones I’d forgotten back at our hotel.  The wind was blowing much harder than 30-40mph.  I would guess that it was closer to 60mph.  My pants sounded like flags beaten by high winds and it was hard to even take a step ahead of you.  From the visitor center, we went up the stairs to reach the bridge.  Christine was eager to go across, but I had a lot of trepidation.  The bridge was “singing” more than “swinging”, but I was wondering if it was safe to cross.  Christine made her way across and per an earlier agreement,  if I was going to make her hike up Grandfather Mountain, I had to hold my end of the bargain and  walk across this 228 foot bridge.  Being 6 feet tall, the side railings barely reached my hips and I was worried that a strong enough wind would have blown me off.  The bridge has its name because the elevation here is 5280 feet above sea level making it a mile high.  The bridge actually only spans two rock formations that has an 80 foot drop, but it is still unnerving.  After making it across the bridge and back, we continued the hike.

Climbing Up the Grandfather Trail
Most of the way was steep and rocky.

Christine was having a difficult time making her way across the parking lot to the trailhead.  I would see her take one step forward and the wind blew her two steps to the side.  We made it to the other side and debated on if we could do this hike with such high winds.  I convinced Christine to go a little further, hoping that the brush would slow the wind and after a short distance we didn’t feel the affect of the wind.  We began the hike up using the Grandfather Trail, a blue diamond-blazed trail.  At .8 miles (including the hike from the parking lot), we reached a junction with the Grandfather Extension trail.  We kept going forward on the Grandfather Trail and at .9 miles, we reached Grandfather Gap, an open area that gives you great views.  Continuing on at 1.4 miles, we reached a junction with the Underwood Trail.  We stayed again on the Grandfather Trail and in a short distance the first ladder appeared.  This was a long ladder (the first of nine total) that helped you navigate through a tight gorge between two rocks, but was not that scary.  Shortly after this ladder, the real fun started where we had to do some rock scrambling, sometimes with the assistance of cables before coming up to a series of ladders.  These ladders were definitely more frightening as you had to often climb up one ladder and then take a step to the left and climb up another ladder.   We saw several people that got to the ladders and then wisely turned around as they didn’t think they can handle it.   Knowing your limitations is definitely important.  These ladders eventually led up to to one area that you were climbing up ladders on the side of the mountain with an insane drop to the side.  We made it up this final ladder and took a moment to reflect on what we did and take in the views from the side of the mountain.  We continued on the trail for a short distance and at  1.4 miles we reached a ladder on the side of the rock leading to the summit of MacRae Peak at 5845 feet.  You climb up this 20 foot ladder and then grab a cable at the top of the ladder to pull yourself up the rock.  You can find the benchmark for the peak at the top of the rock, giving you 360 degree views all around you, including the bridge to the southwest.

Christine Climbs a Ladder
Christine climbs a ladder on the Grandfather Trail. Below: One ladder went between two giant slabs of rock; Adam pulls himself up a sheer rock face; More ladders along steep, cliffside terrain.

Climbing Between Slabs Cable Pull Ladder Climb

We climbed back down the ladder and then continued on the Grandfather Trail to the next peak.  At 1.5 miles, we reached another junction with the Underwood trail.  Continuing on the Grandfather Trail, we went up to The Chute, a rock scramble that leads to the top of Attic Window Peak.  The scramble wasn’t too tough, but did require you to climb up on all fours at some points.  We reached the top at 1.7 miles and passed the overnight Attic Window campsite.  Continuing on the trail, we reached a junction with the Indian House Cave, a short but steep side trail that leads to a cave wall that was a shelter to Native Americans back in the day as artifacts were found here when it was first discovered.  We continued back on the Grandfather Trail and the trail here begins to be more of a ridge walk.  We took some time to find some nice spots to take in the views, eat some snacks, and then made our way back.  At the junction with the Underwood Trail at 2.2 miles, we ended up taking this Yellow Diamond blazed trail to avoid the ladders on the return.  This was a steep and rocky trail back without much to see and there is still one large ladder to climb down on the way, but it feels safer than the ones leading to MacRae Peak.  At 2.7 miles, we reached the opposite end of the Underwood Trail, rejoining the Grandfather Trail, by taking a right.  At 2.9 miles, we reached the junction with the Grandfather Extension trail and then took this Red Diamond blazed trail downhill through some switchbacks for .6 miles (with some more views along the way) until we reached our car at 3.5. miles.

Many people just drive to the upper parking lot to experience the Mile High Swinging Bridge and then return.  It is definitely a highlight of Grandfather Mountain, but we were so glad that we hiked past this feature.  The bridge used to be a wooden suspension bridge (erected in 1952) and used to sway more in the wind, but the side rails and floorboards were replaced with steel in 1999.

Adam Enjoying the View Near the Top of MacRae
Adam enjoys the view near the top of MacRae.  Below: The Blue Ridge Parkway winds its way through forest below Grandfather Mountain; the last ladder to the top of MacRae; Beautiful rugged scenery on Grandfather Mountain.

View From MacRae summit ladder Landscape on Grandfather Mountain

Grandfather Mountain was originally named Tanawha Mountain by the Cherokee, meaning “glorious hawk or eagle”.  It was named Grandfather Mountain by pioneers as one view of the mountain does look like an old man’s face staring up into the sky.  Daniel Boone once hunted in this area and John Muir after climbing Grandfather Mountain in 1898 proclaimed that the air during his climb had healed him of a bronchial cough.

Overall, I will say this has been one of my favorite and most memorable hikes that I have ever done.  The views are absolutely gorgeous around you, as you can see for miles around on a clear day.  Once you reached a viewpoint, you thought that it couldn’t get any better; but then you would take a few more steps and be even more impressed.  We definitely plan on returning to tackle the hike all the way to Calloway Peak, the tallest peak at 5946 feet.

Christine Says…

It’s kind of ironic that John Muir proclaimed that Grandfather Mountain’s air cured him of bronchitis. I was sick as a dog when I hiked this trail, and the air did not have any magical curative properties for me!  In fact, I think it may have helped precipitate my garden-variety bronchitis into a full-blown, month-long battle with pneumonia.

Some readers might wonder why I didn’t do the sensible thing and actually rest while I was sick.  I wish I had been smarter, but we had planned this trip several months earlier and were there to celebrate our 15th wedding anniversary.  There was no way I was going to miss it.  So… stupidly, I pushed myself mercilessly so that I could see and do all the things we had planned.  I had a great time on the trip, and especially this hike – but I definitely paid a high price for all that fun.

More Ladders Near the Chute
Adam approaches the rock scramble known as The Chute.  Below: The Chute

The Chute

Illness aside, this hike is probably near the top of my list of all-time favorite hikes.  The scenery was breathtaking.  Every boulder I rounded, every opening I stepped into; I practically gasped with disbelief at how truly beautiful nature can be.  The ladders and cables were a perfect balance of scary and fun. I felt challenged and rewarded in equal measures.

Our adventure started off in the hiker parking area on Grandfather Mountain.  The trail from the parking lot to the bridge was short and easy.  Almost immediately, we could hear the harmonic hum of the wind whipping through the bridge.  Evidently, the ‘singing bridge’ is a more accurate moniker than ‘swinging bridge’.  We spent a little time at the ‘Top Shop’.  We both crossed the bridge.  I was very proud of Adam for crossing.  He does not like heights and the bridge was not a happy place for him!

The bridge didn’t scare me at all, but the wind’s strength did!  The main trail system on Grandfather Mountain starts directly above the parking area.  The sign marking the trailhead is loaded with many, many warnings and cautionary tales.  On the way over the the trailhead, the wind literally blew me off my feet!  I rolled like a tumbleweed across the parking area – pretty remarkable for a full-grown, adult woman!  It was the strongest wind I’ve ever encountered — even topping the weather we experienced on Mt. Washington.  I told Adam that I thought it was stupid to hike in such strong wind, but he encouraged me to hike a little along the trail, in hopes that the trees and other obstacles would shelter us from the wind. Thankfully, he was right and the wind wasn’t bad for most of the hike.  

All of the ladders and cables were sturdy and securely fixed to the rock, so I never felt like I was in any real danger.  They greatly aided us in traversing some very steep terrain.  When you look at MacRae peak from a distance, it looks so steep and practically unscalable.  When you finally climb the last ladder to the highest point of the peak, you truly feel on top of the world!  We shared the peak with a group of Boy Scouts and a group of Amish men.  Quite an interesting mix of folks!

Beautiful views from Attic Window Peak
Beautiful views from Attic Window Peak.  Below: Tent site on Attic Window Peak; More gorgeous vistas

Tent Site More Views on Grandfather Mountain

After leaving MacRae, we continued along the Grandfather Trail in the direction of Calloway peak.  The trail took us through a fun and challenging rock scramble called ‘The Chute’.  Near there, we met one of the Grandfather Mountain rangers.  He was out hiking the trail to sweep for hikers in trouble and for people who might be cutting time short to make it back to the parking area by 5:00.

After the Chute, we passed the Attic Window Peak backcountry tent site.  After that, we walked a short way along an open, razorback ridge or rock.  We had more spectacular views looking toward Banner Elk and in the direction of Calloway Peak.  Along this ridge, we stopped for a snack.  While I was eating my Luna bar, I measured up the distance to Calloway peak.  I wasn’t feeling any better.  I was cold, stuffy, achy and exhausted.  As much as I wanted to reach Calloway peak, I wanted some soup and a hot bath even more.  I apologetically told Adam that I couldn’t go any further.  I could tell he was disappointed, but he willingly turned back.

Cliffside View
Adam enjoys cliffside views. Below:  Fall foliage from Grandfather Mountain; Our last ladder down the Underwood Trail, Fall Foliage; Rocky and rooty footing on the Underwood Trail.

Fall Color Final Ladder Grandfather Extension
Underwood Trail Adam Climbs Down the Underwood Trail

On the return, we took the Underwood Trail.  It was quite steep and rocky, but only required one downward ladder climb.  Eventually, we reached the junction of the Grandfather Trail and the Grandfather Extension.  The extension led us back down to the hiker parking area without having to cross the Swinging Bridge parking lot again.  That little section of trail had one pretty view from a bridge and lots of fall color.  We got back to the car and made our way back down the mountain.  I could not believe the line of cars waiting to get into Grandfather Mountain.  It stretched for several miles!  Insane!  I guess it’s a good idea to get an early start when you visit Grandfather.  All in all, it was a super day and a great hike.  I can’t wait to go back sometime when I’m not sick!

Trail Notes

  • Distance – about 3.5 miles
  • Elevation Change – about 1600 feet
  • Difficulty – 4.5.  The ladders and cables make this a tough hike.  The climbs over the mountains make this hike take a lot longer than you would normally on this distance.
  • Trail Conditions – 4.  The trail was in good condition.  Ladders and cables were sturdy and secure, but rainy/icy/snowy weather will make the rock climbing treacherous.  If you have a fear of heights, ladders or precipitous edges, this hike might not be for you.
  • Views5.  AMAZING!
  • Waterfalls/streams – 0. There are no streams on this hike.
  • Wildlife – 0. This area is heavily traveled, so it’s unlikely you’ll see wildlife.
  • Ease to Navigate –4. The junctions at all the trails are well-marked.  We got a little turned around through one of the rock scrambles.
  • Solitude – 1.5.  Expect to see lots of people on this trail unless you go at an off time.  But we never felt too crowded where we couldn’t enjoy things by ourselves.

Directions to trailhead:  The entrance to Grandfather Mountain is located on US 221, two miles north of Linville, North Carolina, and one mile south of the Blue Ridge Parkway at milepost 305.  Signs for the entrance are well-marked and an entrance station is right off the road with large gates.  Travel up the road by car until you reach the parking lot designated for hiking trails.  The trailhead for the Bridge Trail is on the left side of the parking lot as you are driving up. Coordinates for the hiker parking area are 36.096145, -81.831802.

Chimney Tops (TN)

Special: Smokies Edition

Introductory Guide to Visiting Great Smoky Mountains National Park

Chimney Tops is a steep four-mile hike that leads to great views from a pinnacle.  Rock scrambling and climbing are required to reach the view.

The Climb Up Chimney Tops
Photos don’t do the steepness of Chimney Tops justice. If you look closely, you’ll see tiny people about two-thirds of the way up. Below: The parking lots was overflowing. We had to park at an overlook further up Newfound Gap Road and walk back to the trail; When we visited, the trail up Chimney Tops was undergoing rehabilitation; A bridge over the river -much of this hike followed flowing water.

Crowded Lot Trails Forever Initiative Bridge Over the River

Adam Says…

After we made our hike to Laurel Falls, we decided to add another hike to Chimney Tops.  There were signs up on both sides of the park stating that the Chimney Tops trail was closed on Monday-Thursday for trail maintenance from late April through Mid October.  The Trails Forever crew (which is a partnership of the park and Friends of the Smokies)  is working on improving the trail conditions. Since it was a Friday and the first day that week the trail was open, we expected a lot of people on this trail.

The parking lot for the trail was full, so we had to drive further up the road until we reached an overlook that provided space to park.  We made it back down to the trailhead and began our hike.  At the entrance, there is a large sign that shows a description of the trail and also demonstrates the steepness of the climb at the top and that it will require rock scrambling.  The sign is not a joke at all and should deter people that aren’t able to handle the steep incline of the trail.

The hike starts off going downhill and quickly comes to a wooden bridge over the West Prong of the Little Pigeon River.  The first half mile of the trail gives you many spots to view the rapidly flowing waters of the Road Prong of the Little Pigeon River.  The trail continues to ascend steadily and leads away from the Road Prong.   At .9 miles, the trail intersects with the Road Prong trail.  Take a right and head up the Chimney Tops trail.  The trail will become very steep at this point and not stop until you are near the top.  You will witness some very tough climbing for the next 1.1 miles that will have you taking regular breaks to keep your heart from pounding out of your chest as you navigate up a rocky slope up the mountain.    You gain about 1000 feet of elevation in this distance.  Eventually, the trail flattens at 1.8 miles and even goes slightly downhill before rising again to reach the slate pinnacles of Chimney Tops in 2.0 miles.

Pretty Cascades
There were lots of pretty cascades to view along the hike. Below: Another pretty, tiny waterfall; Adam spotted this newt/salamander on the bridge.  We nudged him to safety so he wouldn’t get stepped on; The trail was very rocky and steep (although this photo doesn’t look it)

Tiny Waterfall A Newt Rocky Trail to Chimney Tops

Signs warn visitors again to be cautious and not venture past the first pinnacle. You can only imagine how hazardous this rock scramble is, since it is a sheer drop if you make a mistake.  The slate had a lot of handholds and footholds to grab onto and help propel yourself up the rock face.  In the mid-day sun, the black surface was quite hot and I didn’t want to keep my hands in one place too long.  We made our way up about 75% of the way and then felt that we didn’t want to risk things any further.  The views were simply astounding though.  We scooted back down on our butts very carefully.  Most people decided on not going all the way to the top but there were a few brave souls that pushed themselves up to the peak.

I will say that this hike did have wonderful views and a fun rock scramble at the end.  However, the Chimney Tops trail climb was quite brutal.  I’m sure a lot of people are not able to make it all the way up due to the steep incline.

Christine Says…

Chimney Tops is another trail that seemingly everyone visiting the Smokies wants to hike.  Although it’s only four miles, the route to the top is deceptively steep and challenging.

The four-days-a-week closure of the trail definitely causes more people to queue up for the hike on Friday through Sunday.  The parking lot was completely full when we arrived around 10:15.  But it was well worth the wait and facing the crowds. The trail rehabilitation being done in the Smokies is amazing!  We had seen the work done recently on Forney Ridge, and are sure Chimney Tops will be just as nice when it’s completed. Friends of the Smokies is a large part of the effort to maintain and rebuild trails.  They are a non-profit organization to help protect and maintain the Great Smoky Mountains National Park.

The trail starts off crossing a number of small bridges over rushing streams.  The water in the Smokies is truly spectacular!  I’ve never seen a place with so many cascades, rapids and waterfalls.  I enjoyed stopping and photographing a few spots along the water.  Whenever I found a spot in the shade, I got out my mini-tripod and played around with long exposures.  We even spotted a newt/salamander on one of the footbridges. That was neat to see!

The View from Chimney Tops
The view from the pinnacle on Chimney Tops. Below: We saw a few red squirrels in the Smokies.  They are way cuter than our grey squirrels; Adam carefully climbs the pinnacle;  People scoot back down on their rear ends.  Falling here could possibly be fatal.

A Boomer or Red Squirrel Adam Climbs the Pinnacle at Chimney Tops People Carefully Climb Down Chimney Tops

After a short descent from the parking lot, the first bit of the trail is uphill, but for the large part is gradual with decent trail conditions.  The middle mile of the hike is pretty tough!  Although this was one of the shortest hikes we did during our week in the Smokies, this section of climbing was doubtlessly the steepest.  Much of it traversed wet, slick, muddy, rocky, rooty terrain and it was relentlessly uphill.  Terrain like this is the reason I became a dedicated trekking pole user.  Poles take so much strain off your knees and make traversing trail like this much safer and easier.

After a short section of tough climbing, the trail became more moderate and continued to climb uphill via a series of switchbacks.  At the top of the ridge, the trail became nearly level and passed through gorgeous stands of blooming Catawba rhododendron.  A warning sign threatening injury and/or death let us know that we had arrived at the pinnacles on Chimney Tops.  This sign is 100% serious.  The pinnacle of Chimney Tops is steep, slick and long enough for a fall to result in death.

We stashed our trekking poles behind a tree because we knew we’d need all four limbs free and available to climb the rock face.  I looked at the pinnacle for a while, debating on whether or not I was going to climb up to the top.  I knew if I didn’t climb up, I would miss the views and would have done all that uphill hiking for nothing.  But, a view isn’t worth getting hurt (or worse).  Some long-time readers of this blog might remember that I have vertigo and really struggle with maintaining my sense of balance and equilibrium on terrain like this.

In the end, I decided I was feeling pretty secure.  The rock face, while steep and precipitous, had plenty of solid toe and hand holds.  I climbed up the rocks, sticking close to the ground and testing every single toe and handhold before committing to my next move.  Eventually, I reached a perch that offered a beautiful view of distant mountains and decided that I had climbed high enough.  I probably stopped about three quarters of the way up.

I snapped a few photos and told Adam it was time for me to climb down.  I was starting to feel dizzy and a little uneasy.  I had been sitting facing downwards on the rock, and I think looking at the sheerness of the descent made my head spin a bit.

A View of Chimney Tops from the Road
A view of Chimney Tops from the road.

I sort of crab-crawled and slid down the pinnacle on my rear end, carefully placing my toes and hands into sturdy grips.  After a minute, I realized that the downward going was actually pretty easy and secure.  That allowed me to pick up my pace a bit.

At the bottom, we saw quite a few people who hiked up and then decided not to tackle the pinnacle.  While they missed a spectacular view, it’s definitely smart to not push beyond what you feel is safe.

The hike downhill went pretty quickly – again, thanks to the trekking poles’ added support and balance.  We saw so many people hiking up that were clearly not regular hikers – skinny jeans, sandals, no water, etc.  A lot of people stopped us to ask ‘How much farther?’ I salute all of the hiking newbies who make it to the summit of Chimney Tops.  While the hike is on the shorter side, it definitely provides some more technical terrain and some serious elevation gain over a short distance.  If I were to recommend hikes for beginners, Chimney Tops would probably not be one of them.

Don’t get me wrong, it was a fun, rewarding hike with excellent views and beautiful streams and cascades, but I think there are probably better hikes for people just starting out.  I think that newcomers often look at total distance and think ‘Oh… I can walk four miles’, when in reality an eight mile hike with easier terrain and less climbing would probably be more suitable and enjoyable.

Trail Notes

  • Distance4.0 miles
  • Elevation Change – 1300 feet
  • Difficulty –  4.  The second mile of the hike is very steep.
  • Trail Conditions – 3. There is some loose rock on the steep climb.  Use caution on how secure your footing is going up and down.  The trail is very worn due to its popularity.
  • Views– 4.  From the peak of Chimney Tops, you will get great views of mountains for miles.
  • Streams/Waterfalls – 3.5.  The prongs of the Little Pigeon River give you lots of opportunities to watch the water flow rapidly.
  • Wildlife – 2.5.  You will not see larger fauna up here normally due to the popularity of the trail, but we did see a cute red squirrel, heard the cackling of a pileated woodpecker, and many other birds.
  • Ease to Navigate – 4. There is only one trail junction to turn, so this should be very easy to follow.
  • Solitude – 0.  One of the most popular trails in the Smokies.  In 2012, with a limitation on the days it is open, it will likely be even more crowded. 

Directions to trailhead:  The parking lot is 6.7 miles south of the Sugarlands Visitor Center on Newfound Gap Road.  Park in the large parking lot and you should see the opening to start the hike.

The Devil’s Marbleyard

This 8.1 mile hike passes an impressive boulder field then climbs along the Gunter Ridge trail for some nice (but obstructed) views.

Devil's Marbleyard Scramble
Adam scrambles around the Marbleyard. Below: The hike begins on the Belfast Trail; Entrance to the National Forest is marked by a placard. The two stone pillars mark an old Boy Scout camp that used to be located in this area. You can still see the footprint of the swimming pool and a few building foundations along the Belfast Trail. The camp was named after Chief Powhatan; Catawba Rhododendron were in bloom everywhere!

Start of the Belfast Trail National Forest Marker Rhododendron on Gunter Ridge

Christine Says…

We keep a list of hikes we want to do stuck with a magnet to the side of our refrigerator. The Devil’s Marbleyard hike had been on that list for nearly three years. It kept getting delayed for closer hikes or hikes with better views or taller waterfalls.  We finally decided it was time to knock it off the list.

We got up early Sunday morning, grabbed donuts, bagels and coffee en route and made our way down the Blue Ridge Parkway. We got to the trailhead parking area around 10:00 and thankfully found only a couple other cars there.  Evidently, cars that overflow the official parking lot are frequently towed.  So, if you hike this trail, make sure your car is in the lot or that all four wheels are off the road and not on private property.

Belfast Creek
The beginning of the trail takes you over Belfast Creek. Below: The bridge over the creek;  Adam crossing a small stream early in the hike; All the recent rainy weather made conditions ideal for snails.

Belfast Trail Bridge Second Stream Crossing Snail

After crossing a small bridge over a stream, the trail passes through an old stone gateway that used to mark entry to a Boy Scout camp called ‘Camp Powhatan’.  You immediately come to a National Forest/Wilderness placard.  At this point, you’re only a little over a mile from the Devil’s Marbleyard.   (The sign says one mile, but our GPS and most trail guides seem to say it’s about 1.4 miles to reach the Marbleyard).  The trail meanders through the woods, crossing shallow spots on the creek a couple times.

I really enjoyed seeing the blooming azaleas, Catawba rhododendron and mountain laurel.  The laurel bloomed so early this year!  What I did not enjoy were the locusts!  The Blue Ridge Brood of the seventeen-year cicada is currently emerging in our area, and they were everywhere along the Belfast Creek trail. They were screaming overhead in the trees — I likened the sound to the one made by a failing belt tensioner on our SUV a few years ago.  It’s a squeal mixed with an undertone of hiss.  Not only are the locusts noisy – they’re CREEPY!  Sometimes they fly into you.  They have red eyes.  And worst of all, they leave yellowish-clear, crunchy, empty husks everywhere when they molt.  I will be very glad when locust season is over and I can have seventeen years of peace again!

Blooming Along the Trail
So much stuff was blooming along the trail.  Below: Christine checks out the large boulders that make up the Devil’s Marbleyard;  Adam climbs back down the Marbleyard to rejoin the trail; A creepy locust husk.

Christine on the Marbleyard  Adam Climbing Down Gross Locust Husk

As we came upon the Marbleyard, we crossed paths with the hikers from the two other cars we had seen in the lot.  The first was a nice guy from Virginia Beach who was at the tail end of a week-long hiking vacation along the Blue Ridge Parkway.  We enjoyed chatting with him and sharing information and tips about favorite hikes.  The second was a pair of local kids who warned us of muddy/slippery conditions on the trail ahead.  Adam had a little incident there, but I’ll let him share that tale in his portion of the post.

Before proceeding up the trail, we took some time to explore the Marbleyard.  Basically, it looks like an immense stone mountain exploded and collapsed into thousands of boulders of every shape and size.  If you want to climb to the top of the Marbleyard, you have to do so by scrambling up the rocks. It looks like the trail alongside the Marbleyard reaches the top, but in reality the trail turns slightly away from the boulder field and climbs upward to the Gunter Ridge trail. I imagine most hikers visit the Marbleyard and then head back to their car, making this a short 2.8 out and back.  We considered doing this, but since we had already driven so far, we decided to do the full 8.3 mile loop.

After playing on the rocks for a while, we headed along… climbing uphill for a while until we reached the junction of the Belfast trail and the Gunter Ridge trail. At this spot there is a spacious (but dry) campsite.

Steep Trail Alongside the Marbleyard
Christine climbs the steep trail that runs alongside the Marbleyard. Below: The junction of the Belfast and Gunter Ridge trails;  Adam spotted a black widow spider along the trail; Christine walks past an especially pretty stand of mountain laurel.

Top of the Ridge Black Widow Christine Walking Through the Laurels

The Gunter Ridge trail was easy walking, but was quite overgrown.  Because of the heat and humidity, I had decided to hike in shorts and a t-shirt, so I started to worry about ticks climbing onto my legs from the tall grass.  Adam, on the other hand, hiked in long pants tucked into his socks.  I’m getting ahead of myself, but guess who came home with six ticks crawling on his clothes – and guess who came home with none crawling on her.  I always joke that my husband is a real ‘tick magnet’.

The trail along this section really opens up and provides some nice, but slightly obstructed, views.  A forest fire that swept through this area about a decade ago is still very evident.  There are no tall trees and charred stumps can be seen peeking up through the brushy vegetation in many places.

After walking along the ridge for a while, you come to a seemingly endless series of switchbacks climbing down the mountain. Eventually you reach a wooden horse gate, and cross out of designated wilderness into standard National Forest.  Almost immediately after passing through the gate,  you will encounter a stream.  We stopped here for lunch.  I had been wanting to eat for almost an hour, but this was the first place that really had an opening to sit and eat since the campsite at the junction of the Gunter Ridge and Belfast trails.

Mountain View on Gunter Ridge Trail
A hazy mountain view from the Gunter Ridge Trail.  Below: Damage from a forest fire about ten years ago is still very evident;  A view of mountains and clouds along the trail.

Old Forest Fire Damage on Gunter Ridge Mountains and Clouds on Gunter Ridge

After lunch, we still had a couple miles of walking along the Glenmont Horse trail.  It was easy hiking, but also really boring.  It’s the part of the hike where you know you’ve seen all the cool stuff, but you still have several miles of walking along a featureless road/path.  It reminded me a lot of all the fire road/paved road walking at the end of the Old Rag hike.

All in all, the hike to Devil’s Marbleyard made for a pleasant day. But, if I were to recommend the hike to others, I’d suggest just hiking to the Marbleyard as an out-and-back.  If the rhododendron, laurel and azaleas hadn’t been blooming, I don’t think there was much to see on the rest of the loop.

Adam Says…

It has been about 20 years since I last hiked the Devil’s Marbleyard trail.  Those that know me personally or have read this blog for a while know I grew up in Lynchburg.  Some of the hikes that are most popular with people around there are Sharp Top, Flat Top, and Devil’s Marbleyard.  The first two have great views and are close to Peaks of Otter, a popular picnic area.  The last time I did this hike I was with with a group of friends from home.  I remember the boulder field seemed so impressive.  While there are similar slopes of rock along Furnace Mountain and Hawksbill summit (among others), these boulders are much larger.  My friends and I climbed up the boulders from the bottom of the field.  One of my friends almost stepped on a rattlesnake that was sunning itself on the rocks.  I’m sure a number of rattlesnakes make their home in the cracks between the rocks, so be careful.  The climb up to the top takes longer than you would expect and requires a lot of energy to navigate the scramble.  Since we planned on hiking a long loop, we opted to just climb around a while on the bottom.

Beautiful Mountain Laurel
Beautiful mountain laurel along the ridge hike.  Below: Stopping to enjoy the mountain laurel; Passing out of the designated wilderness area; Lunch by the stream.

Christine and Mountain Laurel Leaving the Wilderness Area Lunch by the Stream

With every interesting geological feature, there seems to be a legend that has been passed down over the years and Devil’s Marbleyard is no different.  In the local tale, this area was occupied by Native Americans and the land was supposedly very green and lush.  There was a large stone altar at the top of this hill that was used for worship on full-moon nights.  A white couple met the Native Americans and they were thought to be spirits since they looked so different than the local tribes.  The couple said they were not spirits but they worshiped a higher power.  They converted the Native Americans to Christianity.  However, the next year brought about a great drought and the Native Americans felt the new God and the missionaries were to be held responsible.  They burned the couple alive on the altar.  As the flames reached high into the sky, a storm formed.  Lightning struck down upon the altar and exploded the rock over the mountainside.

Christine and I talked about this legend on the hike.  I guess there can be a few different morals to the story depending on your perspective.  From the perspective of the white missionaries, it may be best to not spread your religion to others if you want to stay alive.  From the perspective of the Native Americans, it may be to either believe your own gods or keep faith in your new God.  It is an interesting thing to think about on this hike, even if there may not be much truth to the origin of the boulder slope.

The Glenmont Horse Trail
Walking along the Glenmont Horse Trail gets tedious.

To complete the full loop hike, begin in the parking lot and cross the bridge and take the blue-blazed Belfast Trail.  At .2 miles, the trail splits.  Bear right to stay on the blue-blazed trail.  The trail is a rocky, uphill climb that leads to the Devil’s Marbleyard boulder field at 1.4 miles.  Continue up the trail which follows parallel to the right of the boulders up a steep section (which can also be very slippery if there has been recent rain – as I found out with a hard fall onto slick rock).  After you near the summit of the boulder field, the steepness of the trail lessens.  At 2.5 miles, you reach a junction with the Gunter Ridge Trail and a small campsite.  The Gunter Ridge Trail heads off to the left heading down the mountain slightly, but you are mostly following along a ridge line.  Eventually, this trail begins to open up to some obstructed but nice views on the ridge.  The trail then descends quickly through a series of switchbacks.  At 5.8 miles, you will exit the James River Face Wilderness boundary through a gate and cross Little Hellgate Creek.  At the 6.0 mile mark, you will reach the orange-blazed Glenwood Horse Trail, a large fire road.  Follow this to the left and make your way along this trail that does go slightly uphill until reaching the junction with the Belfast Trail at 7.9 miles.  Take a right on the Belfast Trail to reach the parking lot at 8.1 miles.

If you are interested in geocaching, there is one geocache that can be found on the scramble up the boulders at the Devil’s Marbleyard – Devils Marble Yard Cache.

Like Christine, I would probably recommend that if you were coming here to see the best features of the trail, I would just do this as a 2.8 mile out-and-back to the Marbleyard and back.  The views from the top of the Gunter Ridge Trail are more obstructed and doesn’t seem necessary when there are many other nice view hikes nearby on the Blue Ridge Parkway.

Trail Notes

  • Distance8.1 miles
  • Elevation Change – 1510 feet
  • Difficulty – 3.  The climb up past the Marbleyard to the Gunter Ridge trail is steep, but once you gain the ridge it’s most level or downhill.  The Glenmont horse trail is wide open and slightly uphill.
  • Trail Conditions – 3The trail is in decent shape in most places.  It was very slick, steep and muddy climbing alongside the Marbleyard.  The Gunter Ridge trail was easy to follow, but very overgrown with tall grasses and brush.
  • Views– 2. There are plenty of obstructed views on the Gunter Ridge Trail, but nothing spectacular.
  • Streams/Waterfalls – 2.5.  The stream running along the Belfast Trail is small but lovely.
  • Wildlife – 2.  We saw a ton of fence lizards but not much else (unless you want to count the seventeen year locusts)
  • Ease to Navigate – 3.  There are a few turns and trails here are not as well marked as trails in the national park, but if you pay attention, finding your way should be easy.
  • Solitude – 3  You will likely share the Marbleyard with other hikers, but the rest of the loop does not seem heavily traveled.

Directions to trailhead:  From the Blue Ridge Parkway at mile 71, you will see a small road (FSR 35) that is on the western side of the road at a curve.  Take this road which leads past the Petites Gap AT parking area.  At 4.2 miles, you will see the parking area on the right (just after you start seeing more houses on the road).  Make sure you either park in the lot or make sure you park completely off the road or your vehicle may be towed.

Old Rag – via Weakley Hollow

We hope you enjoyed our Acadia series… but now it’s time to get back to Virginia hiking.  We decided resume our normal posts with an exceedingly well-known mountain – Old Rag.  This 8.8 mile loop hike is Shenandoah’s most popular hike.  It’s so well-loved and traveled that the official Shenandoah website has a whole section dedicated to hiking this mountain.  [View NPS Map for this hike]

Note: Some of the NPS website details (and mileage markers along the actual trail) were a little outdated as of summer 2011, as they refer to the hike distance before the park service closed the upper parking lot in April of 2010.

Nearing the Summit of Old Rag
Large boulders near the summit of Old Rag.  Below: Adam walking along the road headed toward the Ridge Trail’s start; Views from the summit of Old Rag; Adam drops down into a narrow passage between the rocks.

Lots of Road Walking  Views at Summit Dipping Into a Narrow Slot

Christine Says…

After two and a half years, we’re finally getting around to covering Virginia’s most popular, most well-known hike – Old Rag. I’ll make an outright confession.  Old Rag, as beloved as it might be by (seemingly) everyone else, is not my favorite hike.   But, when you have a Virginia hiking website, you’re practically obligated to have a write up about this mountain.  So, on to the post!

We’d been tossing around the idea of hiking Old Rag for the blog for well over a year.  Adam would suggest it and I’d invariably tell him that it was too hot, too cold, possibly wet and slippery, I heard there was ice, my feet hurt, I don’t feel like driving that far, etc.  Basically, I floated every excuse in the book to delay the hike.  But then I went and did something incredibly stupid and it really blew up in my face!  I had a day off work coming up.  It was going to be a beautiful August day – crisp and unseasonably cool!  I had visions of getting up early, doing a photo shoot in the park, maybe eating some donuts and then taking myself to a matinee movie.  But before I could stop myself, I found that I had blurted out “Tomorrow would be a GREAT day to hike Old Rag!”  I assumed this was purely hypothetical because Adam had to work.  But he immediately responded “Yeah!  Let’s go!  I’m taking tomorrow off too!”  Ugh – I didn’t see that one coming!  I don’t like to back out on plans, so the next morning we were up before dawn, snacks stashed and Camelbaks filled.

We got to the parking lot before 8:00 a.m..  Getting to Old Rag early is something I consider to be a necessity.  The trail is always crowded – even on weekdays.  The Old Rag parking lot is actually my first point of contention with the hike.  It used to be if you got up early, you could always get a parking spot in the small upper parking area located right at the trailhead.  In April of 2010, a couple years after our last hike up Old Rag (fall of 2008 – see photos), the park service closed the upper lot to all vehicles.  Now, all vehicles must park in the lower lot, which is just a shade under a mile from the trailhead.  The added mile follows a paved road uphill to the beginning of the Ridge Trail. I’m not going to make any apologies; I just don’t like road walking on outings that are supposed to be hikes.

The Scrambling Begins
The first section of rock scramble is just a little sampling of what is ahead.  Below: Giant boulders along the trail; Christine climbing up the Ridge Trail; Christine taking in the view; A view of the valley; A dog who has panhandling all figured out!

Giant Boulders Along the Trail Christine Hiking Up the Trail First Views
Wider View Before starting Major Scramble
Beggar on the Mountain

Once we got to the Ridge Trail, things improved a bit.  The trail climbed upward for about two miles. It’s not terribly steep or difficult climbing, but it is steady uphill.  There are occasional switchbacks, lots of gigantic boulders along the trail and even some glimpses of views through the trees.

The higher you climb, the better and more open the views become.  After the first real panoramic view, you get your first little sample of the extensive rock scrambling you’re about to encounter.  The first pass is short, but requires hoisting yourself up through a small opening, then across a flat pancake of rock.  At this point, my boot slipped and I almost toppled over backwards.  Luckily, I was able to hang on long enough for Adam to give me a hand up.

Shortly after that little scramble, you’ll come to what I think is the nicest view on the hike.  Instead of overlooking mountains with a distant peek at Skyline Drive, this viewpoint overlooks the valley below.  The vista is dotted with little farms and winding country roads.  It’s really pretty!  At this point of our hike, we encountered an emaciated, but super-friendly dog.  He had a collar but there didn’t seem to be any human to claim him.  Dogs are not allowed on Old Rag’s hiking trails, so we figured someone brought a dog up anyhow, and then abandoned him when he could no longer follow along the rock scramble.  The dog looked so pitiful and hungry that we ended up sharing some cashews and half a Luna Bar.

The dog followed us along until the scramble began in earnest.  He looked sad to see us go, so we decided to report him to park rangers at the end of our hike, in hopes that they could send someone up to retrieve him and lead him back down to the base of the mountain.

After saying goodbye to the dog, we began nearly one-mile of rock scrambling required to reach the summit of Old Rag via the Ridge Trail.  Anyone wishing to reach the summit without the scramble can follow the Saddle Trail (accessed by either the Weakley Hollow or Old Rag fire roads).  The scramble is the part of this hike that I enjoy most, but also simultaneously fear.  I have vertigo, so there are a couple passes that play tricks on my visual and balance centers.  Otherwise, the scramble is a lot of fun!  It’s almost like a hiking puzzle.  You have to look at each obstacle and plan the best strategy for traversing it.  The scramble is tough – it’s not so much a cardio challenge as it is a strength challenge.  There are lots of places where you’ll rely on  both your upper and lower body strength to carry you across the rocks.  It’s nice to have at least one hiking buddy to help you along.  One particularly steep place, I had to shove Adam up (one hand on each butt cheek) and then he had to tow me up behind him.

Narrow Passage
Near the beginning of the scramble, you have to drop down into this narrow passage. Below: A variety of obstacles along the rock scramble. Below: Adam shinnies down into the narrow passage pictured above (note the blaze is numbered R22.  Each blaze on the scramble is numbered to help rescuers find injured people more quickly); More scenes along the scramble.

Dropping Down More Scrambling Stairs Climb Up That

The summit of Old Rag is beautiful and decorated with many large and interesting boulders.  It’s the perfect place to enjoy a snack while taking in the view.  We watched the clouds clearing away, ate cheese and trail mix and watched falcon soaring on the breeze.  It may have been a peregrine, as they are known to nest on Old Rag, but we’re really not sure.

After leaving the summit, the hike becomes sort of tedious.  Yes, it’s all downhill, and you’ll pass a couple interesting trail shelters (Byrd’s Nest and Old Rag).  Both are available for day use only.  There is one more decent view.  But right after passing the Old Rag Shelter, you’ll reach the Berry Hollow fire road.  You’re only on that for a short while, until you meet the Weakley Hollow fire road.  You’re on that road for the remainder of the loop until you come back to the paved road at the trailhead.  Honestly, everything after the scramble on this hike is just not fun to me – too many miles of featureless road walking.   All in all, the Old Rag hike has close to 4.5 miles of road walking (over half the hike).  Adam and I were eager to finish up our hike, so we jogged most of the way back along the fire road and paved road.

Adam Pretends to Balance a Giant Boulder
Adam pretends to balance a giant boulder. Below: More scenes along the scramble.

A Cave Adam Passing Through the Cave Another Narrow Pass

When we got back to the car, we told the ranger at the check-in station about the skinny dog.  She laughed and said “Oh, him!  He’s our resident Old Rag beggar!”  Apparently the dog belongs to a local family.  He likes to take daily hikes to solicit treats from people climbing the mountain.  He sure tricked us!

The parking lot had really filled up since we arrived!  We were glad to be done, and on out way to get some lunch (fried chicken – yay!).

When I reflect back on hiking Old Rag, and what could be done to improve the experience, I can think of a few things.  One idea I think would work well is to issue a finite number of permits per day to hike the mountain.  Perhaps limiting numbers on weekends would be enough.  I think if they could limit hikers, they could reopen the upper lot and eliminate almost two miles of road walking.  Another thought is to limit the number of people allowed per hiking party.  So many church youth groups and college clubs hike Old Rag in huge crowds.  This causes massive ‘traffic jams’ along the scramble.  No fun!  I also think that limiting hikers would go along way toward alleviating the trail damage and erosion on Old Rag.  The trail is crumbling, lots of rocks on the scramble have been worn to a smooth polish under years’ of boot traffic, and sadly there is garbage everywhere.  It’s a trail that would benefit greatly from being enjoyed by fewer people.

That said, I think every lover of the outdoors in Virginia should hike Old Rag at least once!  The scramble is truly without compare.

Adam Says…

Well, Christine summed it up nicely describing the pressure that I have been putting on her to tackle Old Rag.  We last did this hike together shortly before we started this blog.  The logo that we use for the website is actually taken from a photo of Old Rag, so it was a must do.  About every year, I put together a list of hikes that we have talked about doing in Virginia and we hang it on our refrigerator.  After we finish the hike, we have a ceremonial highlighter that we use to highlight the hikes we’ve finished.  For the last few years of printing a new list, Old Rag has been one of the few that has not been highlighted before the latest version is posted.  I let Christine do the honors of marking Old Rag off the list – and she was happy to do so.

Adam on the Summit
Adam on the Summit. Below: Summit scenery; Some kind of bird of prey.

More Summit Views Another Summit View Falcon

I would also agree with Christine that Old Rag is very overused.  One thing that makes this hike particularly challenging during the rock scramble is that the rocks are so smooth, you could easily slip.  When it has just rained, you know you will have no footing whatsoever.  Many of these boulders have no handholds or footholds, so you do have to be creative with how you will get through the scramble.  I would recommend that you do this hike with someone else to help you through the scramble.  I think Christine especially enjoyed the opportunity of putting both of her hands on my butt and shoving with all of her might.  It’s not very often that she gets to do that.

Old Rag Shelter
The Old Rag day-use shelter. Below: Adam takes in the last nice view on the way down; The Byrd’s Nest day-use shelter; The crowded Old Rag parking lot.

View on the Way Down Byrd's Nest Shelter Crowded Old Rag Lot

The hike begins from the parking lot and consists of walking up a paved and then gravel road for about .9 miles until you reach a smaller blocked off gravel lot (with a portable toilet) and a sign for the trailhead to the left.  This begins the Ridge Trail.  The trail starts off as a gradual ascent through the forest.  At about 2.3 miles, you reach the first of several switchbacks.  There isn’t a lot of note on the main portion of the trail as you are just walking uphill through the woods, without any notable views.  At about 3.2 miles, you reach a nice overlook.  As soon as you leave this spot, the rock scrambling will begin.  You have about .8 of a mile of rock scrambling until you reach the summit.  This path is quite dangerous as you have to navigate down tight crevasses, around boulders open to large drop-offs, and up other boulders with slick surfaces.  The summit marker will indicate the end of the tough climbing.  There are several places to take in the panoramic views at the top and some of the more adventurous will climb up some of the large boulders at the top.  Once you are done taking in the views backtrack to the trail and then take a right on to the Saddle Trail.  At about 4 miles you reach, the Byrds Nest Shelter No. 1, a day-use only shelter.  Continue down the steep trail and at 4.5 miles, you will reach another day-use Old Rag shelter.  Continue down the trail and at 4.9 miles, you reach the junction with the Weakley Hollow fire road.  Take a right on this fire road and you have about 3 miles of this fire road to walk down before you reach a few bridges and finally the smaller blocked-off Old Rag gravel lot.  Go back the way you came and you should reach your vehicle around 8.8 miles.

I do think we have put a lot of warnings about this hike, but the reason that this hike is likely so popular is due to the challenge and the amazing views.  The summit of Old Rag does provide some of the best views in Virginia.  Some people even do rock climbing at the top to rappel over the edge and make their way back up.  On a clear day, you can see for miles of countryside and layers of mountains.  I know most people do put this on their list of must-hikes in Virginia.  I recommend to tackle this hike as early in the morning as possible to beat the crowds.  If you wait until the middle of the day, you will likely face people-jams as the navigating through the rock scramble takes a while.

For any of those interested in geocaching, there are two geocaches nearby the trail:

For further reading about Old Rag and its history, check out the Climber’s Guide to Old Rag Mountain with some interesting information about the history of the area and the USGS’ Hiker’s Guide to the Geology of Old Rag.

I really have to hand it to Christine for confronting her vertigo and facing Old Rag.  I told her I wouldn’t bother her again to do the hike since we now officially have it on the blog, but I will probably do it again sometime.  I think this hike does have about 1.5 miles of very exciting climbing and wonderful views, but the rest of the hike (especially the way back on the fire roads) seems a little boring and you will look forward to seeing your car in the parking lot after the long hike back.  The last time we did this hike was on a fall day at the peak of fall color.  If you can find a day like that to tackle this hike, you won’t regret it.

Trail Notes

  • Distance8.8 miles
  • Elevation Change – about 2600 feet total.
  • Difficulty – 4.  The uphill climbing is gradual and never terribly steep, but the scramble requires good upper and lower body strength.
  • Trail Conditions – 2.  I think the trail is eroded and worn smooth in many places due to years of overuse.
  • Views – 5.  The views are wonderful and include both mountain and valley views.
  • Wildlife – 3.  There have been a fair number of bear sightings on Old Rag.  You also have a good chance of seeing birds of prey on the summit.
  • Ease to Navigate – 4.  Follow the signs.  This well-traveled trail is well-marked. Distances on the markers are out-of-date and refer to mileage when the upper lot was still open.
  • Solitude – 0.  Can I give this a negative score?

Download a trail map (PDF)

Directions to trailhead:  From Sperryville, Route 211, turn onto Route 522 and follow it south for .8 mile. Turn right on Route 231, follow 8 miles, turn right onto Route 601 and follow signs to the parking area, approximately 3 miles.
From Madison, Route 29 Business,  turn onto Route 231 and follow it for 12.8 miles. Turn left onto Route 602.
Follow signs for the parking area. Old Rag parking is approximately 3 miles from the turn onto Route 602.

Cadillac Mountain South Ridge – Acadia National Park (ME)

Special: Acadia Edition

The seven-mile South Ridge trail takes you to the highest mountain on the east coast – Cadillac Mountain.  At over 1500 feet, it is also one of the first places sunlight hits the U.S. each morning,  The views from this hike are panoramic and breathtaking!

A View of the Porcupines from the Cadillac Summit
A View of the Porcupine Islands from the Cadillac Summit. Below:  The marker at the trailhead; A view of Cadillac Mountain from along the lower part of the trail; Geodetic Marker at the summit.

Trailhead Marker Cadillac Mountain Along the Route Geodetic Marker

Christine Says…

We’ve driven to the top of Cadillac Mountain.  We’ve also walked up the 4.4 mile North Ridge trail a few times.  But this is the first time we’ve ever hiked to the summit via the South Ridge route.  At seven miles (plus some additional length for the side trip to Eagles Crag and walking the summit path) this route probably qualifies as one of Acadia’s longest hikes.  It’s also become one of our favorite Maine hikes.  It was fantastic!

The trail starts off in the deep coolness of the evergreen forest.  Everything is green – covered with moss and ferns.  The thin island soil leaves gnarled roots and rocks exposed along the trail.  You have to constantly watch where you’re stepping so you don’t catch a boot toe and trip.  Planked boardwalks traverse the boggy, marshy places along the trail.   This part of the trail is one face of Acadia, with the other being expansive, open domes of granite.

Root-Covered Trail
The lower trail is covered with roots and rocks. Below: The view from Eagles Crag; Abundant blueberries along the trail; The first open views on the climb up.

View from Eagles Crag Abundant Blueberries First Open Views

The first trail junction you come to marks a short side-loop across the Eagles Crag.  The trail is quite a bit steeper here and leads out to an open rock ledge overlooking the ocean.  We hiked early in the morning, so the view looked directly into the sun, rendering the ocean silver and shiny.

On the return arm of the side-loop, we reentered the woods for a short while.  Near the trail junction where we met back up with the South Ridge trail, we found one of the densest patches of wild blueberries we’d ever seen!  I stopped to pick and eat some berries before we pushed on.  Yum!  Blueberries are at their peak in late July and early August, so our trip was timed perfectly for enjoying the fruit.

Near this point of the trail, the forest started thinning out and becoming patchier.  There were still trees, but they were broken up by open rocky sections.  Eventually we left the shade of the trees completely and stepped out onto the pink granite that Acadia is so famous for.  The trail was blazed blue, but we also had cairns guide our way.  The granite was punctuated by abundant patches of blueberry bushes and water filled glacial potholes.  The view behind and to the side of us was SPECTACULAR!  We found ourselves stopping time and time again to take in the majestic views.  I’ve been to a good number of national parks.  They’re all beautiful in their own way, but there is something really special about Acadia.

There were some sections of rock that required climbing and scrambling, but the way was never really steep or difficult.  We climbed one especially large rocky pass and found ourselves looking down into a small forested ravine tucked between two mountains.  The trail climbed downward into the trees and past a lovely glacial pond called ‘The Featherbed’.

The Ocean and the Featherbed
The Ocean and the Featherbed. Below: Another look at the Featherbed; Trails in Acadia are marked by cairns and blazes; Christine hikes up toward the summit.

The Featherbed Cairns and Clouds Christine Climbing

After the pond, we began the climb up Cadillac in earnest.  The first little bit after leaving the pond was quite steep with some mild rock scrambling.  Once we regained the ridge, the trail became moderate again.  The sun was bright.  The sky was deep blue and painted with wispy clouds.  The ocean below was sparkling and so beautiful.  I must have said to Adam a couple dozen times “It’s so gorgeous! This is a perfect Maine day!  We are so lucky!”

Along the ridge, we began to see distant glimpses of cars making their way up the auto road to the Cadillac summit.  But we didn’t come close to the road at all until we were almost to the top of the mountain.  Once drawback of the shorter 4.4 mile North Ridge is its proximity to the road for much of the hike.  We really enjoyed staying away from the road this time.

Near the summit, we passed through one more section of forest and came out on a gravel road behind the gift shop located at the summit.  It’s always kind of bizarre to hike several miles along pristine, quiet trail only to summit a mountain with auto access.  More than a few people looked at us strangely with our Camelbaks and trekking poles.

Even though it was still pretty early, the summit was packed with people!  Adam got cold drinks from the gift shop and I walked around the summit path to take a few photos.  The view from Cadillac offers a great look at the town of Bar Harbor and the outlying Porcupine Islands in Frenchman Bay.

With the thick crowds and the notion of a big lunch, we didn’t linger too long at the summit.  On the way down, we passed quite a few people heading up the trail.  I was really glad we had started around 7:30 and had been able to enjoy a bit of solitude.

The hike down was bright and hot under the mid-morning sun!  I had slathered myself with SPF 50, but I missed one spot between my ponytail and my backpack.  I ended up with a strange sunburned triangle on my back. 😦

We really enjoyed the views the whole hike down!  I was kind of bummed when the trail eventually descended back into the woods.  The shade was nice, but losing the view was not!

When we got back to the car we debated whether we should go back to our room and shower, or head straight to lunch in town.  In the end, hunger won out and we ate lunch covered with sweat and grime.  We went to one of our favorite lunch spots in town – Rupununi.  They have the best Buffalo Chicken sandwiches and clam chowder.  We got a great seat out on the patio, the food was delicious and I didn’t even care that I was filthy!

Adam Says…

A trip to Acadia National Park almost requires you to visit Cadillac Mountain.  However, most people drive to the top of it rather than try hiking up.  Their are also some insane bikers that bike up the mountain, but we’re not in that kind of shape.  Since Cadillac Mountain is the highest summit in the park, we used to feel intimidated about trying to hike up.  Several years ago, we hiked up the north ridge since that seemed to be the easiest route.  We remembered the north ridge hike being a great hike, so this time we decided to try a different route.

View of Eagle Lake
A view of Eagle Lake.

To start the hike, we parked on Route 3, almost directly across from the entrance to Blackwoods Campground.  You take a few steps up and then the trail begins.  This first section is just about the only part that is completely in the woods.  At .8 miles, you reach a junction with the Eagles Crag trail.  We took a right and went on the Eagles Crag trail, which joins back on to the South Ridge Trail at 1.2 miles.  The Eagles Crag trail was probably the toughest climbing on the trail, but it does take you out of the woods to some nice views to the east of Otter Cove and Gorham Mountain.  In retrospect, we feel that it really isn’t necessary to do Eagles Crag, since you will quickly see tons of views right after you rejoin the trail.  But, if you want more views and/or some more challenge, go for it.  When you rejoin the South Ridge Trail at 1.2 miles, the trail begins to open up to more views in a short distance.  You will need to pay attention to the cairns on the trail since there are no tall trees to mark trail paths.  The views on this trail are completely amazing!  You have to turn around to see the great views on the way up.  We found ourselves taking pictures from a gorgeous spot and then going another .1 mile and finding even better views behind us.  At 2.4 miles, you reach a summit of a small hill where you can see the small pond, The Featherbed, below.  You climb down this small hill and then reach The Featherbed and a junction with the Canon Brook Trail at 2.7 miles.  Stay straight on the South Ridge trail as you begin your next ascent to reach the summit.  At 3.2 miles, you reach a junction with the West Face Trail to the left, but stay straight.  The trail is steeper up this last section of the trail.  There are a few areas where you will climb up some rocks (even using one iron rung handrail), but we didn’t find it to be overly difficult.  Through this section, you are likely to hear or see people along the Auto Road heading up Cadillac Mountain.  At 3.7 miles, you will reach the summit of Cadillac Mountain.  Go back the way you came.

Hiking in the Open
Adam hiking along in the open.  Below: Trail junctions are well-marked in Acadia; The building at the summit; Another view of the Porcupine Islands from the summit;  Views on the hike down.

Trail Markers Summit Building
Cadillac Summit and Porcupines View Hiking Down

You feel like you are making an accomplishment when you hike up Cadillac Mountain.  While many of these people are driving to the top, you feel like you really earned the views.  The actual summit marker for Cadillac Mountain is not as easy to find.  As you’re coming up the South Ridge trail, you may walk right past it.  I like to get a picture of each summit we make.  Unlike most of Acadia that marks the summit with a large wooden summit marker, Cadillac Mountain only has a USGS marker in the rock.  To find it, walk behind the gift shop by about 100 steps where the gravel ends.  To the right, you will see a greenish-looking marker on a rock.  This marker has an arrow, that points about 20 feet to another marker on another rock.  This is the true summit marker.

We took a little time to hit the bathrooms, buy some cold drinks (that is always welcome when you are finishing a hike), and take in the views.  From Cadillac Mountain, you can see just about all of Mount Desert Island and on a clear day, the views are spectacular.  Many people drive to the summit of Cadillac Mountain to see the sunrise.  This is the second earliest place where you can see the sunrise on the east coast (only to be beaten slightly by Maine’s own Mount Katahdin).  While Christine was off taking some photos, I relaxed and talked to a family that just arrived from New York.  They were impressed that we hiked up it and I told them about some other things they should do during their week of vacation.  I could tell the father of the family was ready to tackle it all, but I could see some of his family wasn’t as enthusiastic.  After talking with me, they were going to try and hike up Cadillac Mountain that afternoon.

Cadillac Mountain does have some interesting history.   The area was named after Antoine Laumet de La Mothe, sieur de Cadillac, a french explorer and trader.  This area was well-explored and controlled by the French and Antoine was given this area (now known as Bar Harbor) with this mountain (then known as Mount Desert).  When I was attending a ranger program while I was trying to achieve my rank as a “Acadia Senior Ranger”, I learned about how this man was much-hated and was basically run out of this area for misappropriation of money.  He then left this area and founded what became Detroit.  The Cadillac car is named after this man and the seal is his family crest.  It is funny that this country holds the car in such high esteem, when the man was a criminal (once called “one of the worst scoundrels to set foot in New France”).

If you are interested in geocaching, you can find a geocache near the top of Cadillac Mountain that is located near the beginning of the north ridge trail: Cadillac Mountain Cache.

As Christine and I were reflecting on all of the hiking we have done in Acadia, I will say this is my favorite hike to do in the park.  You truly don’t get any better views than on this hike up the south ridge of Cadillac.  There were times that I even felt tears welling up due to the awe-inspiring, panoramic landscape.  The north ridge trail also has great views along, but several times you are walking very close to the Auto Road and you are limited to views on one side of the trail.  With the vast expanses on the south ridge trail, it can’t be beat.  If you are up for doing a longer hike in Acadia, make this the one to do!

Trail Notes

  • Distance7.4 miles
  • Elevation Change – approximately 1300 feet
  • Difficulty – 3.  The hike is steadily uphill but is quite moderate.
  • Trail Conditions – 3. The trail is occasionally root-covered and has a lot of open granite.
  • Views 5.  It doesn’t get any better than this!
  • Waterfalls/Lakes/Streams – 4.  The Featherbed is beautiful and you get lots of distant views of the bay and ocean.
  • Wildlife – 1.  Maybe some red squirrels and (if you’re lucky) hawks on Eagles Crag.
  • Ease to Navigate – 4.  Just follow the markers, blazes and cairns, and you can’t go wrong.
  • Solitude – 1.  We started early and didn’t see many people on the trail, but the summit is always very crowded.

Directions to trailhead:  Located on Route 3, about 5 miles south of the Jackson Lab.  Look for the signs for Blackwoods Campground and park directly across the road from the entrance to the campground.  You will see a break in the woods with a few steps that starts your trail.