Duncan Knob

Duncan Knob is a great 3.4 mile hike in George Washington National Forest, located near Kennedy Peak and Strickler Knob.  Reaching the summit requires negotiating a Class III rock scramble.

Wookie Enjoys the View from Duncan Knob
Wookie Enjoys the View from Duncan Knob.  Below: The foliage along the trail was pretty;  The scramble is a foreboding pile of boulders; Adam and Wookie make their way up the scramble.

Rocky Trail View of the Scramble from the Bottom Scrambling with Wookie

Christine Says…

On Friday, Adam and I both took a vacation day from work to get in some fall hiking. We decided Duncan Knob suited our plans perfectly.  We wanted to avoid hikes in the national park (the crowds are dreadful this time of year) and we didn’t want to drive more than an hour. We did a little online research to look at our route options, and found pretty much everyone did the hike as an 8.7 mile loop.  The common route passes by just one spot with a view and includes significant uphill climbs on both the outgoing and return arms of the loop.

We decided to look at our maps to see if there was a more direct route to Duncan Knob.  I know lots of people primarily hike for the exercise. They love anything that makes the trail longer, steeper and more challenging.  I am not one of those people.  I don’t mind distance or elevation as long as there is a payoff for it.  But if there’s a more direct route to get the same view, I usually opt to take it.  Needless to say, we were pleased to find a 3.4 mile, out-and-back route that involved just 900 feet of elevation gain.

Blue Blazed Trail Gap Creek Trail
The Blue Blazed Trail Gap Creek Trail.  Below: The Gap Creek trail is well-marked;  Near the beginning of the trail you cross a small stream; Wookie enjoyed running back and forth across the bridge.

Gap Creek Sign Trail Sign Small Stream Wookie Running Across Bridge

The hike starts at the Gap Creek trailhead on Crisman Hollow Road.  You’ll walk a short way up a blue-blazed fire road until you see a campsite on the left side of the road.  The road continues uphill from this point, but you’ll want to cut through the campsite and cross the small bridge over the stream.  After crossing the bridge, the trail climbs steadily uphill.  For the first mile, the elevation gain is very gentle and is punctuated by flat stretches.  The trail is extremely rocky the entire way.  At mile 1.2, the blue-blazed Gap Creek trail intersects the yellow-blazed Scothorn Gap trail.  Continue on the blue-blazed trail until you reach a level place near the top of the ridge at 1.5 miles.  There’s a great campsite at this spot.  It has a big stone fire pit ringed by log benches.  There are lots of flat places to pitch tents, too.

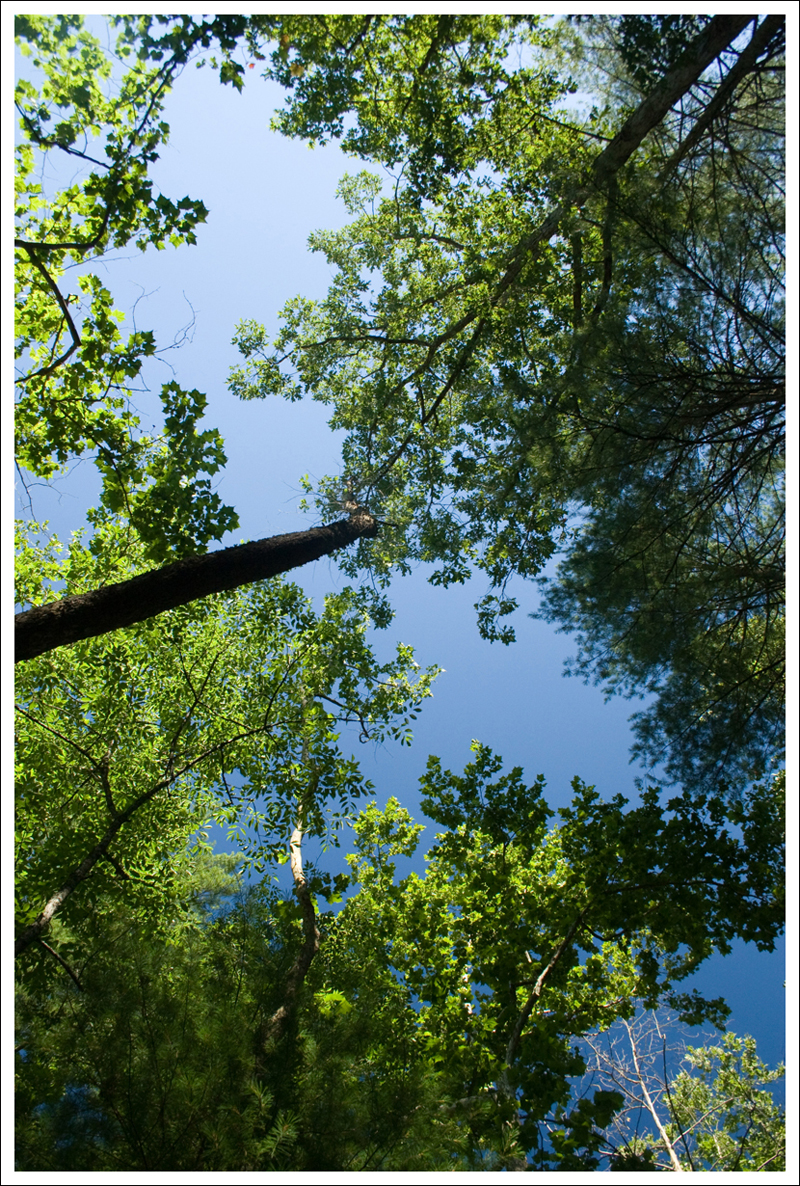
Directly across from the campsite, the Duncan Knob spur trail begins.  The trail is blazed white and climbs steeply uphill to the summit.  As you walk along, you’ll notice the rocks on the trail are getting larger and more abundant.  Eventually, you step out of the woods and find yourself facing an enormous pyramid-shaped summit of jumbled rocks and boulders.

More Scrambling
Wookie and Adam scramble upward.  Below: The trail becomes progressively rockier; Adam explore the boulders; Wookie spots Adam climbing back down from the geocache.

Trail gets even rockier Adam scrambles Wookie sees Adam

Climb the rock scramble any number of ways (we followed a rather informal series of cairns along the left side of the rock pile) and you’ll be treated to sweeping views in almost every direction.  The scrambling was fun and not difficult at all.  I found a nice rock “chair” to sit on while Adam found a geocache hidden at the summit.  It was freezing cold and blustery sitting on the rocks, so we didn’t stay too long.

On the way down, we stopped back by the campsite and had some water and a snack.  We even gave our dog, Wookie, some graham crackers and marshmallows from our trail mix.  He did a great job on the rock scramble – especially considering how small he is.  The hike back down was pretty uneventful and just retraced our steps.  What a great hike!  I told Adam it’s been one of my favorite recent hikes.

Adam Says…

Ever since we did the Strickler Knob hike (actually our very first post!), I had been hearing that Duncan Knob also had amazing views.  I believe we put off this hike for a while due to the long 8.7 mile length, combined with lots of elevation gain.  So, I pulled out my map of the area to see if there was a different way.  Sure enough, you can easily get up to Duncan Knob by just sticking to the Gap Creek Trail.  The hike may have a little steeper of an elevation than approaching it from the Scothorn Gap Trail, but the hike up the Gap Creek Trail is much shorter and you aren’t missing much scenery.

The trail does include a few switchbacks once you start the trail over the bridge which takes the pressure of the elevation off your leg muscles.  The hike is almost all uphill, but before you know it you’ve reached the ridge where the campsite is.  We took a break here to see if there was anything else to see along the ridge, before proceeding up the white-blazed trail to the summit of Duncan Knob.  This white-blazed trail is slightly overgrown and some of the white blazes are quite faded, but it wasn’t too hard to navigate.  After only about .2 miles on this trail, we saw the looming rock scramble in front of us.  We decided to approach the rock scramble on the left-hand side.  Once you begin to climb up a few rocks, the views really begin to open up around you.  The rocks weren’t too tough to navigate, but it was harder to help navigate a small dog on a leash.  From the top, you will have great views of Middle Mountain, Waterfall Mountain, Strickler Knob, and Kerns Mountain.  The color was very nice and we took some time to soak in the scenery.

Adam enjoys the view
Adam takes in the view from Duncan Knob.  Below: A nice campsite on the ridge; Adam and Wookie take a break on the climb down;  Wookie did surprisingly well on the scramble, but occasionally he had to be carried.

Nice Campsite View on the Way Down Climbing Down

I left Christine to keep climbing up to the summit of the rock scramble and found the Duncan Knob Geocache.  A few people before me were not able to find it before me, so the owner had taken the posting offline until he had time to investigate.  I’m glad I was able to save the owner a hike back.  This was my 499th find, so I need to do something special for my 500th geocache.

If you haven’t done any hiking off Crisman Hollow Road, I would highly recommend making this a stop in the near future.  With the Massanutten Story Book Trail, Strickler Knob, and Duncan Knob hikes all off this road, I feel this road leads to some amazing hiking gems that are unknown to many.

Wookie Says...Wookie Says…

I’m so glad that I finally got invited to go hiking again!  I really enjoyed most of this trail because there wasn’t any water for me to cross.  When we first started the trail, I did a few runs across the wooden bridge with my masters on both sides.  I was feeling frisky and I was ready to get moving.  We made our way up the trail and I felt it wasn’t as bad as I was expecting.  When we got to the final rock scramble, I was a little worried.  I really enjoy climbing up on rocks, but I wouldn’t recommend it to my less-agile canine friends.  There were a couple of moments where I had to perform an iron cross and pull myself up some rocks, but Adam helped navigate me the right way through the maze of boulders.

Begging for Treats
Wookie enjoys trailmix!

The way down was a little more challenging, so Adam tucked me under his arm for most of the way down to make sure I didn’t get hurt.  I really enjoyed the views from the top of Duncan Knob and I enjoyed sniffing the air around me.  After our hike back down, my masters even let me sample a few pieces of trail mix.  I really liked the marshmallows best!  One time I dropped a marshmallow and when I picked it up again the dirt from the ground made it look like cookies and cream.  I look forward to my next time hiking and I’ll be sure to put on my pitiful, pleading face the next time Adam and Christine get ready to head out for a hike.

Trail Notes

  • Distance – 3.4 miles
    (Check out the stats from Map My Hike)*
  • Elevation Change –  900 feet
  • Difficulty – 2.5. The hike is squarely moderate – even with the rock scramble.
  • Trail Conditions –3. The trail is in good shape.  The rock scramble is not formally marked and there are some unbalanced rocks.
  • Views5. Beautiful views of the Massanutten Mountain area. The view looking toward Strickler Knob is awesome!
  • Waterfalls/streams –2. The stream is seasonal and may be dry part of the year.  When the stream is running, the area is popular with fishers.
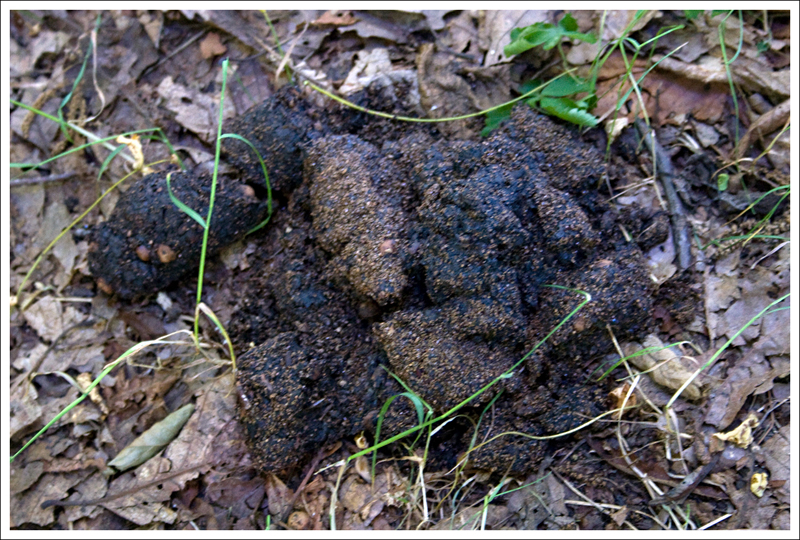
  • Wildlife – 1.5. The area is popular with hunters, so animals tend to be reclusive.  We’ve heard of people spotting bears and deer in the general area, but we’ve never seen larger animals.
  • Ease to Navigate – 3.5. Trails are clearly blazed, but turns are not labeled and signed like they are in the national park.  It’s a good idea to have a map for this hike.
  • Solitude – 4.5. On a beautiful fall day, we saw just one other couple of hikers.

Download a trail map (PDF)

Directions to trailhead: From New Market, take 211 east.  In about 3 miles, take a left on Crisman Hollow Road. The road starts off paved, but turns to gravel.  At about 4.5 miles, park on the right at the Gap Creek trail.  Follow the fire road until you reach the first campsite on the left.  The trail starts behind the campsite at a wooden bridge.

Sharp Top

This 3.4-mile hike leads to gorgeous views from the summit of Sharp Top.  You will be treated with gorgeous views of the area around you.

View of Abbot Lake from Sharp Top Summit
The view from the Sharp Top Summit is gorgeous!  Below:  Adam walks by some of the huge boulders along the Sharp Top trail; The trail is very rocky; A set of stone steps leads you to the summit; Looking back on Sharp Top mountain from Buzzard’s Roost.

Adam Walking by Giant Boulders The trail is rocky Arriving at the summit Looking back on Sharp Top from Buzzards Roost

Adam Says…

Sharp Top has such a special place in my heart.  I grew up in nearby Lynchburg and I couldn’t even tell you the number of times I have hiked this trail.  I went with family, friends, church groups, and scouts.  My family used to regularly have picnic lunches at Peaks of Otter, so this is a place I’ve been visiting all of my life.  On one hike with a friend I had growing up, we spotted some trail runners.  Trail runners are common on Sharp Top most mornings.  My friend had said he wanted to try and be in that good of shape, so we took weekly hikes up during one summer.  We never made it up to the intensity of running the mountain, but it was some good exercise.  Lately, Christine and I have made this hike a nearly annual fall tradition.  I’ve brought my older brother a few times over the last few years.  Each year, he seems proud to know that he can still “climb up that hill.”  He was working the day we hiked it this year, so he didn’t get to make the trip.  I’ll try to get him to haul his cookies up the mountain again next year.

Peaks of Otter Nature Center
The Peaks of Otter Nature Center is the start point for this hike.  Below: The trailhead sign; The Sharp Top bus takes riders close to the summit and is a great option for those not physically able to do the full hike; The trail starts off smooth and gentle – things soon change!

Trailhead Sign The Sharp Top Bus Lower Trail

You start up the trail near the nature center.  There is a plaque there that mentions that Sharp Top was once believed to be the tallest mountain in Virginia and that a stone from this mountain was used to build the Washington Monument.  On the stone in the monument, it is inscribed “From Otter’s Summit, Virginia’s Loftiest Peak, To Crown a Monument to Virginia’s Noblest Son.”  It is hard to believe that this was thought to be the highest summit.  According to official elevations, this Sharp Top doesn’t even make the top 50 list. (another mountain, also named Sharp Top, is #42)

For those that don’t feel the need to hike all the way to the summit, you can take a bus ride that brings you closer to the summit.  More information is available on the Peaks website (http://www.peaksofotter.com/Sharp-Top-Shuttle.aspx)

This is an extremely popular hike for families and larger groups, but it definitely has some steep sections.  However, most people should be able to accomplish this hike since it is only a three-mile round trip (the side trip to Buzzards Roost adds .4 miles).  The trail starts off with a slow but steady climb and then crosses the bus summit road at .25 miles.  Continue to climb up the trail which includes some sections of stairs.  At 1.2 miles, you reach a junction.  Continue left on the trail to the summit.  The remaining .3 miles to the summit starts off relatively flat, but there are more sections of rock stairs along the way.  You will see a day-use only cabin at the summit and stairs to different platforms to soak in the views.  You will see the Peaks of Otter Lodge and Abbott Lake to the North.  To the South, you will see Turtle Rock (which some of the adventurous will find a way to climb up it) near the roof of the cabin.  Go back the way you came.  When you reach the junction .3 miles from the summit, I would highly recommend adding .2 miles (.4 miles round trip) to check out Buzzard’s Roost.  The trail is relatively flat with minimal elevation difference.  You will get more great views from here and can actually get some nice views of the summit of Sharp Top.  Buzzards Roost does require some rock scrambling and carefully navigating around large rocks, so it isn’t for the faint of heart.  Once you leave the Roost, go back to the junction and take a left down the trail to make your way back to the car.

There are lots of places to perch on Sharp Top
There are lots of places to perch on Sharp Top.  Below: Adam makes his way up the trail; The trail has many stairs built into the rock; Adam on Turtle Rock.

Adam making his way up the trail The trail has quite a few stairs Adam on Turtle Rock

As I mentioned above, there are a lot of great places nearby for a picnic or you can dine at the Peaks of Otter Lodge.  There is also a gift shop that sells sweatshirts inside that say “I Survived Sharp Top”.  While I personally don’t think it is that difficult, I can understand some people feeling that way.  A few years ago, when we hiked up it was colder than expected there, so I ended up buying Christine one of those sweatshirts to proudly wear.

Christine Says…

I’m so glad Adam introduced me to this hike.  It’s a tough little climb, but the summit is spectacular.  It’s covered with boulders the size of houses and has a view that rivals any Virginia hike.  The one downside to Sharp Top is the crowd of people you’ll be almost guaranteed to see.  It is indeed a popular place!

View of Sharp Top from Abbot Lake
A view of the mountain from the lodge at the bottom. Below: A sign lets you know you’ve arrived at the summit; At this point you can turn and go to Buzzard’s Roost or continue to the Sharp Top Summit; Another beautiful summit view.

Arriving at the Summit Trail Junction Another Summit View

I always thought Peaks of Otter was an odd name for a place, so I did a little research and found some information about the origin of the name on the nearby lodge’s website:

There are three opinions on how the Peaks of Otter got their name. The name may come from the Cherokee Indian word, “ottari,” which means “high places.” The Peaks may have been named after the Otter River, which has its headwaters in the area. Finally, Scottish settlers may have named the Peaks after Ben Otter, a mountain in their homeland that resembles Sharp Top.

We got a really early start on our morning, and were headed up the trail by 9:30 or so.  It was cool and brilliantly sunny.  Even though it was the second weekend of October, the leaves were still mostly green.  That was a little disappointing – I had hoped to hike Sharp Top at the peak of fall color.  We’ve done that in past years, and the foliage makes the view even nicer!  As we hiked up the trail, we passed several downhill hikers on their way back from watching sunrise atop the summit.  Other than that, we had the trail mostly to ourselves.

The uphill grade starts of gently, on a mostly smooth and wide trail.  For some reason, this is always the only part of the Sharp Top trail I remember.  I don’t know why, but I always seem to block the steep and rocky parts out of my mind.  After you cross the bus road, the path gets a lot tougher.  It’s fairly relentless uphill for a while.  Periodically, there are reprieves where the grade moderates and you get a chance to catch your breath.  But after each little flat spot, you’re guaranteed to have more climbing.  As the summit draws near, you’ll find yourself hiking between and around gigantic boulders.  The rock formations on this mountain are impressive!  Near the end of the trail, there are quite a few stone stairs to climb.  Almost immediately upon reaching the summit, you’ll pass the cabin.  The inside is an empty room – concrete floor, fireplace and small windows that look out to the view beyond.  It apparently used to be a concession stand.  I’m glad someone thought better of the idea and closed the place down – do we really need hot dogs and ice cream for sale on mountain summits?

Adam looking out the building window
The empty building on the Sharp Top summit. Below: Inside the summit house; A boulder jumble at the summit; View of mountains in the distance.

Inside the Building Boulder jumble Another Summit View

After passing the building, the path winds between the stones up to the highest spot.  All over the summit, there are small alcoves and large rocks to perch upon to take in the view.  Unless you started very early, the mountain will be crawling with people who took the bus ride to the top.  You can usually spot the bus crowd easily – they’re never sweaty and are often wearing dressier clothing and insensible shoes.  🙂 Hikers seem to enjoy quietly referring to the bus riders as “cheaters”.  I think it’s great that a bus ride is available for people who aren’t physically able to hike up, but I see lots of young families that I wish would give hiking a chance.

On the way down, Adam and I took the side trail to visit the Buzzard’s Roost.  For some reason, this was the first time I’ve taken the option.  The roost had amazing views, but I did not enjoy climbing up the rock.  I had an inner ear virus a few years ago, and have suffered serious bouts of vertigo ever since.  Anytime I climb places with uneven footing and precipitous, open drops I get an awful spinning sensation. It’s like the feel of my feet doesn’t match what my eyes are seeing.  It’s a very strange sensation.  Sometimes I start to panic, but I’ve found that if I stay low to the ground and go very slow, I can always manage to get where I want to go.  But needless to say… you’ll never find me doing any serious rock climbing!

Adam on Buzzard's Roost
Adam takes in the view from Buzzard’s Roost. Below: Another view from Buzzard’s Roost.

Another view from Buzzard's Roost

After the stop at Buzzard’s Roost, we started our final climb down.  I was so glad to have my trekking poles on the steep, uneven ground.  So many upwards hikers commented on them!  Everything from “We thought you were skiing down!” to “Why do you have two hiking sticks?” to “Darn… I wish I remembered to bring my trekking poles!”.  I was surprised so many people had never seen trekking poles before, but I suppose Sharp Top has a very high percentage of people who aren’t regular hikers.  Personally, after using trekking poles for a while now, I don’t know how I ever hiked without them!

The hike down was over pretty quickly and we were off to lunch!  Typically, we pack a picnic – but this time we decided to try the restaurant at the Peaks of Otter Lodge.  They had a buffet option, but it was really expensive and there was no way I could have eaten my money’s worth.  But I have to admit… that mountain of fried chicken on the buffet table looked very compelling! We settled for sandwiches instead.

After lunch, we walked along the water and did a bit of people watching.  I even saw (allegedly) an otter swimming across the lake.

Trail Notes

  • Distance – 3.4 miles.  You can make it just 3.0 miles if you don’t do the Buzzards Roost side hike.
  • Elevation Change –  1340 feet
  • Difficulty – 3. The hike is fairly steep most of the way, with a number of stairs to climb towards the middle and end of the trail.  The hike to Buzzards Roast does not have much elevation change.
  • Trail Conditions –3. The trail is well-maintained, but there are a number of sharp rocks that can make footing tricky.
  • Views5. Amazing 360 degree views from the summit give you some of the best views in Virginia.  Go up on a clear day and you will see for miles.
  • Waterfalls/streams – 0. Non-existent.
  • Wildlife –1.5. Due to the popularity, you will likely only see birds.  You may spot soaring hawks at the top.
  • Ease to Navigate – 5. Trails are well-labeled, so you shouldn’t have much difficulty navigating the area.
  • Solitude – 0. This is one of the most popular hikes in Virginia.  To escape the crowds, go up early in the morning.

Directions to trailhead: The trail begins near mile marker 86 on the Blue Ridge Parkway.  The trailhead is to the left of the nature center, which is directly across from the Peaks of Otter Visitor Center.

Thomas Reserve – Cowpasture – Cranberry Glades Loop (WV)

This nine-mile loop offers glimpses of area history, great views of the tundra and peeks at distant mountains.

Meadow on the Cowpasture Trail
The trail offered many beautiful meadow views.  Below: Adam checks out the sign at the entry to the Cranberry Glades boardwalk; The old Mill Point Federal Prison used to sit along the present-day Cowpasture Trail; The Thomas Reserve Trail is lined with ferns; A view of the Glades boardwalk.

Entry to the Cranberry Glades Boardwalk
Thomas Reserve Trail The Glades Boardwalk

Christine Says…

The morning did not start well.  We drove into Marlinton, WV before our hike to make some reservations for a bike shuttle.  Once we were in town, we learned that Verizon wireless was not available anywhere in the area (and I really needed to check in on a family emergency).  We couldn’t find anyone that sold pre-paid phone cards in all of Marlinton.  When we did find a phone card, we couldn’t find a pay phone that worked. Apparently, the only pay phone that works in all of Pocahontas County is at the hospital.  After filling up at a BP station, the “service engine” light came on in our car and the gas gauge stopped working.  (Can I blame BP for that?)  Finally, to top everything off, we couldn’t find the trailhead for this hike.  In the end, it all turned out OK, as it usually does.  We ended up hiking a couple extra miles, but on a beautiful, cool, blue-sky day… that’s not a bad thing!

Our original plan was to hike the 7.1 mile Cowpasture Loop which encircles the entire Cranberry Glades Botanical Area and crosses into the beautiful, wild Cranberry Wilderness.  But, the trailhead was not marked and the map we had did have enough detail to indicate the exact location.  We ended up parking at the Thomas Reserve trailhead, instead.  We knew this trail would intersect the Cowpasture Loop after about a mile or so.

This rock ledge along the Thomas Reserve Trail is probably a pretty waterfall when the stream isn’t dry. Below: The trailhead for the Thomas Reserve trail; Trails were adequately marked.

Thomas Reserve Trail Trail Sign

I’m really glad we went this way, because the Thomas Reserve Trail took us past some beautiful and interesting scenery.  There were ruins that looked like some kind of old pool or water treatment facility.  The concrete basin and pillars were still intact, along with several large pipes with wheels attached.  I did a quick Google search to try and figure out exactly what the ruins are, but I didn’t have much luck.  From that point, the trail passes through beautiful fern-carpeted forest and past a dry stream.  The stream has an interesting rock ledge/cave that I think probably makes a lovely, small waterfall when water is actually running.  Eventually, the path intersects an old road that is part of the Cowpasture Loop.

After a short walk along the old road, the trail opens up into a gorgeous open meadow with views of the mountains in the distance.  This is the site of the old Mill Point Federal Prison.  Even though the buildings were all torn down in the late 1950s and early 1960s, you can still see some leftover signs of the site – there are bits of road left, abandoned stairs to nowhere, an old well.   There is also a series of informational signs that include old photos and talk about life at the prison.  Apparently, it was a prison without walls or gates.  Prisoners were treated to weekly movies and could spend their afternoons hiking in the area.  I guess you could say it was very low security! We stayed at the prison site long enough to read the signs and enjoy the meadow view.

After the meadow, the trail climbed back into the forest, following rolling ups and downs for a couple miles.  We saw lots of bear scat and several deer leaping across the trail.  We crossed a small dry stream shortly before passing out into another wide open area.  The meadows along this trail were really overgrown.  The ragweed and other plants were shoulder-height and constantly batted me in the face as I walked the trail.  Even so, the meadow areas of this hike were spectacular!  This section in particular offered beautiful views of Kennison Mountain.

Beaver Dam on the Cranberry River
We got a nice view of a beaver dam on the Cranberry River. Below; The bridge over the Cranberry River.

Bridge over the Cranberry River

The trail dips down to the South Fork of the Cranberry River.  This crossing had a pretty arched bridge and a great look at an active beaver dam.  There were crabapple trees everywhere – so I was really wondering if we’d eventually see a bear.  We never did – just the deer and a very angry red squirrel.

From the river, the trail ascends to a ridge and follows a series of gentle ups and downs.  We passed several beaver ponds and got nice looks at the bogs and glades the area is known for.  One pond even has an elevated wooden platform to view the area.  Because of the dry months we’ve had lately, the ground was much dryer than it should be.  The ponds were so low, I wondered if the resident beavers were able to swim at all.  While we were passing one of the ponds, we heard a huge tree come crashing to the ground someplace nearby.  It must have been a monster tree – it sounded like gunshots as it splintered and fell to the ground with a huge KABOOM.

Just before coming out on FS Road 102, the trail passes over another pretty arched bridge.  The walk along 102 is completely level and pretty uneventful.  You’ll pass a gate and the board marking the entry to Cranberry Wilderness.  The area looks fantastic for backpacking – lots of loops and shelter options.  We’re already talking about making a three day trip sometime in the spring.

After crossing the chain gate, the walk is along the developed portion of 102.  Cars passed by and the walking was really boring.  When we got to the Cranberry Glades Boardwalk, we decided to add the .6 mile loop onto our larger loop.  The boardwalks pass through a beautiful open bog area.  If you visit the right time of year, you can even see carnivorous pitcher plants.

After the quick turn along the boardwalk, we walked the last mile along the paved road back to our car. By the time we got back, I was pretty tired and hungry and was looking forward to making homemade pizza for dinner back at our Watoga State Park cabin.  Although the day got off to an inauspicious start, it really turned out to be perfect.

Adam says…

Christine had suggested this hike to me when we were planning our trip to Watoga State Park and I’m so glad that she suggested it.  This hike is one of my favorites that we’ve done this year.  It has some interesting history and the open views of tundra are nothing short of beautiful.

Ruins on the Thomas Reserve Trail
We saw these mysterious ruins along the Thomas Reserve Trail.  Below: The Thomas Reserve trail begins; An old well at the prison ruins site.

Thomas Reserve trailsign Old well at the prison ruins

We had trouble finding the start of the hike, since the trailhead for the start of the Cowpasture Loop was not marked.  We saw a sign for the Thomas Reserve trail and I could tell from our map that it hooked up with the Cowpasture Loop.  The Thomas Reserve Trail starts bisecting a field, but quickly moves into woods.  At about .6 miles, we saw the pillars of the old “pool” that Christine mentioned off to the right of the trail.  The trail continues for another .4 miles through the woods until it comes to a sign.

Take a right here to get on to the Cowpasture Loop.  The trail is quite level at this point as you move through a field with great views of the tundra around you.  Here, and in some places throughout the entire loop, there may be tall plants that you have to push aside, but you shouldn’t need to bushwhack.  As you’re passing through the tundra area, you may notice several bluebird boxes.  The trail begins to turn towards the left and then opens up to more of a clearing.  You will see posts that give information about the Mill Point Federal Prison camp and life for the inmates.  You will then come to a sign around mile 1.5.  Take a left here to stay on the Cowpasture Loop.  This will loop back around the tundra, paralleling Charlies Creek, and then goes back into the woods.    You will start to reach some footbridges around the two mile mark that take you above some marshy areas.

A view of the Glades Boardwalk
The glades boardwalk is a pleasant .6 mile walk around the bog. Below: The walk along the forest road wasn’t that exciting; Once we got back to the paved portion of 102, there were some pretty scenes along the road.

Forest Service Road 102 The walk back to the car

After this point, you will begin to climb slightly up.  At the height of this gradual hill, you will begin to see views of Kennison Mountain.  At mile 3.5, the trail then takes a sharp left (marked by an arrow on a sign) and descends again.  This area was quite overgrown, but the trail was still clearly visible.  The trail tends to alternate at this point from going through areas of marshy glades to trails through the woods with slight ups and downs in elevation.  At mile 5.7, you will see a destroyed sign where there is a side path of about 100 yards to an observation deck.  This would be an excellent spot for birding.  At mile 6.4, the trail connects again to FS 102.  Take a left on the fire road until you reach the gate at mile 6.6.  At mile 7.3, you will reach the parking lot for the Cranberry Glades Boardwalk loop.  This loop is only about .5 miles and I would highly recommend it.  There are interpretive signs along the boardwalk and it does give some more wonderful views throughout the loop.  Once you complete the loop, just walk back up FS 102 to reach your car.

There are also a few geocaches along this loop:

Trail Notes

  • Distance –9 mile loop
  • Elevation Change – 200 feet
  • Difficulty 3. This is really an easy hike, but we’ll give it a 3 due to the longer length.
  • Trail Conditions 2.5. The trail was largely passable, but very overgrown.  Several bridges over streams were broken and rotted through.
  • Views –3. You get some nice views of the mountains and great views of the glades/tundra.
  • Waterfalls/streams 3. In times with normal to higher precipitation, this trail has great views of streams, ponds and the Cranberry River.
  • Wildlife 4.  We saw deer, signs of bears, active beaver dams, red squirrels and many kinds of birds.
  • Ease to Navigate 3.  Once you find the trailhead, the trail is relatively easy to follow.
  • Solitude 4.  Outside the popular boardwalk area, you probably won’t see a soul!

Directions to trailhead: From Mill Point, WV head west of WV 39/55.  After about 7 miles, you will find a sign for the Cranberry Glades area on your right (FS 102).  Head down this road for one mile until you reach the trailhead for the Thomas Reserve trailhead.

Massanutten Story Book Trail

The view from the Massanutten Story Book Trail involves a short quarter-mile walk down a paved pathway.

Story Book View
The view from the Story Book trail overlooks 211 and the Page Valley. Below: The trailhead is marked by a large sign; Along the path, there is a series of interpretive signs that describe the geology and flora of the area.

Story Book Trailhead Interpretive Sign

Christine Says…

The Massanutten Story Book Trail is one of those ridiculously short path-walks that we personally wouldn’t consider a hike.  Nonetheless, it goes to one of the nicer viewpoints in the Shenandoah Valley. Sure… you can see the Battle Creek Landfill and a distant Walmart, but you can also see the mountains that make up Shenandoah National Park and pretty much all of the Page Valley.  It’s a beautiful spot.

To get to the view, just stroll down the level pathway for a quarter mile.  At the end of the paved trail, you’ll come to an observation platform.  It’s railed in and has several benches to rest upon.  But, for an even better view, don’t miss following a rocky footpath to the right of the platform.  It leads to a rock shelf overlooking the valley.  The rocks that make up the ledge have the most fascinating texture.

Curvy Walkway
One of the beautiful curved, wooden walkways.  Below:  At the end of the paved pathway, there is a platform from which to take in the view; Christine’s Mom and Dad take in the view (You can see our shadows, too!).

Observation Platform Taking in the View

It looks like a lot of work/money has gone into cleaning up the Story Book Trail recently.  The interpretive signs that had faded or been covered with graffiti have been replaced (although new graffiti is already showing up – seriously people, stop crapping up the outdoors… it’s disrespectful and stupid).  The path looked like it had been repaved not too long ago.  But, best of all, someone cleaned all the paint off the rock ledges that lie off the trail.

Adam Says…

Christine’s parents came down on a Sunday to meet up with us.  We decided to take them on a couple of short hikes with great views.  The first we did was Woodstock Tower and we finished it off with the Massanutten Story Book Trail.  This trail is one of the easiest you will find, since the path is paved most of the way, with some beautiful wooden walkways in a few parts.  Since it is also wheelchair accessible, just about anyone should be able to enjoy the views you will find here.

Adam on the Ledge
Adam enjoys the view from the ledge.  Below:  The path is paved; Some sections are traversed by beautiful curved bridges.

Paved Pathway Curved Pathways

The trail also works as an interpretive trail, with many plaques to read along the way that give a great description of the geologic forces that have created the mountains in this area.  There are two geocaches along this trail and one of these requires answers from the signs along the way.

Christine and I often say that some of the areas of George Washington National Forest lead to better views than you get through hikes in Shenandoah National Park and this trail is great evidence of this statement.  If you haven’t done this one before and enjoy great views with little effort, this is a trail for you.

Trail Notes

  • Distance – .5 miles out and back
  • Elevation Change – negligible
  • Difficulty 1.  This trail is for everyone – paved for strollers and handicap accessible.
  • Trail Conditions 5. The official trail is paved.  You can leave the trail and scramble on the rocks for another view.
  • Views –5. Amazing views!
  • Waterfalls/streams 0. No streams/waterfalls.
  • Wildlife 0.  The trail is too populous to really attract wildlife.
  • Ease to Navigate 5.  Just straight down a paved path and back.
  • Solitude 0.  You’ll see many people along this trail.

Directions to trailhead:
Reach the trailhead by turning on to Crisman Hollow Road (FD 274) off of 211 near Luray. Continue on this road for about a mile and park in a small lot off to the right.  A wooden footbridge and trail marker will signify the start of the trail.

Woodstock Tower

The Woodstock Tower hike is a fairly easy hike in the Lee Ranger District of George Washington National Forest that leads to a fire tower with 360-degree views of the surrounding area.

View from Woodstock Tower
The view from the Woodstock Tower is panoramic - offering views of the valley, river and distant mountains. Below: A wider view includes the mountains; It really wasn't the best time of day to photograph the actual tower -- I had to shoot right into the sun; The inside of the tower is covered with graffiti.

A wider view Tower Sunburst Inside the Tower

Adam Says…

After parking in the Little Fort Campground area, we headed up for our hike to Woodstock Tower.  The white-blazed Wagon Road/Nature Trail starts off as a rough fire road and after .1 mile, intersects with Peters Mill Run.  Peters Mill Run is an ATV/OHV trail, so look both ways before crossing this popular trail for ATVs and motorcycles.  Continue straight across Peters Mill Run to connect to the trail again.  The trail does go steadily up with a few switchbacks, but the switchbacks really make the trail easier of a climb.  The first switchback comes in around .25 miles and the second switchback comes around .5 miles.  After the second switchback, the trail does become steeper, but it ends after just a couple tenths of a mile.  At .7 miles, take a left on the pink-blazed Tower Trail.  It is only about .2 miles to reach the tower on a fairly level trail.

The Woodstock Tower
The Woodstock Tower. Below: A little bit of fall color was already showing; We took a break for water where the short trail meets up with the longer trail; Looking up through the Woodstock Tower.

A little fall foliage Water Stop Looking up through the tower

When we reached the tower, we climbed up the metal stairs to reach the top.  I’m not a big fan of heights, but I’m especially nervous when it involves man-made things.  The tower did seem quite sturdy, but it makes some noises when railings move slightly, so I was more eager to get down from the tower than the rest of Christine’s family.  The views are nice, but the area is quite crowded.  Unless you went up early in the morning, I fear that it would be hard to have a moment’s peace at the top.  There aren’t any signs posted for maximum number of people on the tower and you may have to hug the side of a platform as people pass in opposite directions.

There are a few geocaches in the nearby area:

Christine Says…

This was the second time I’ve been to the Woodstock Tower.  Last time I was there was several years ago in mid-October.  I remember the fall foliage being amazing from atop the tower. This time, the foliage had just the slightest hint of change, but the day was crystal clear and sunny – not a bit of haze – so the view was extra nice.

There are shorter ways to get to the view.  In fact, you can practically drive right up to it.  However, we chose to hike up from the Little Fort campground instead.   The slightly longer route gave my mom a chance to try out her new hiking boots.

Off Highway Vehicle
The area has lots of ATV and dirt bike trails. Below: All the roads and trails in this area are well-marked.

Wagon Road Campground Sign

Because the day was so beautiful, we had to share the tower with crowds of people.  At times, there was actually a line of people waiting to get to the top.  We even saw a person trying to coax their pit bull up the open, metal stairs.  That didn’t go so well, and they had to turn back about halfway to the top.  The inside of the tower is covered with graffiti and the area is littered with broken beer bottles and empty soda cans – a very unfortunate side effect of its popularity.

Despite the tower’s less-than-pristine nature, it still offers one of the best views of the mountains in the area.  It’s well worth the short walk.

Trail Notes

  • Distance – 2 miles
  • Elevation Change – about 500 feet
  • Difficulty –2. While you would think that going up 500 feet in one mile would be steep, the trail up seems to take off a lot of the steep terrain.
  • Trail Conditions – 3. The trail had some loose ground in a few areas (especially in the first .1 mile), but overall was well-maintained.
  • Views – 4.5. It does have 360-degree views, but we always enjoy views from natural surroundings like rock outcrops over man-made towers.
  • Waterfalls/streams 0. Non-existent.
  • Wildlife – 2. Too many people to see anything other than people.  May be good for hawk spotting or some other woodland birds.
  • Ease to Navigate – 4.  Not too many turns on this one and trails are well-labeled.
  • Solitude – 1. You will see lots of people on this trail during a nice day.

Directions to trailhead:
We approached this from I-81.  There are other ways to the east to approach this, but here is the most common way for anyone traveling via interstate.  Take exit 283 on I-81, heading east on 42.  Stay on 42 until it intersects with US 11.  Take a left on US 11, heading north through the town of Woodstock.  As soon as you pass the Woodstock Shopping Center, take a right on S.R. 665/Mill Road.  Take this until it ends at S.R. 758/Woodstock Tower Road.  Take a left here and continue to follow S.R. 758 up and down the mountain (this area can be scary when passing other vehicles – there are no guardrails in most spots).  Be sure to stay on S.R. 758 until you reach Little Fort Campground.  Turn into the campground area.  There are campsites and parking spots along the road here.  The trailhead is located on the right-hand side of the road near a campsite right before you reach the outdoor restrooms.

Powell Gap

Powell Gap is a fantastic short hike to a beautiful view of the eastern valley.  Even if you’re not a regular hiker, this walk can be done by nearly anyone. The rock ledge on the ridge provides better views than many of the scenic pull-outs along Skyline Drive.

Adam Enjoys the View of Powell Gap
Adam Enjoys the View of Powell Gap.  Below: Parking for this hike is right along the road.  There is not a lot or pull-off.

Parking

Christine Says…

For the final leg in our mini-hike trio, we chose the short walk up to a rocky ledge overlooking Powell Gap.  The hike follows the Appalachian Trail the entire way – which is only a brief half mile.  The trail goes rather steeply uphill the entire way.  And although it’s short, our Falcon Guide still rates this trail as “moderately strenuous”.  I would agree with that assessment if this hike was longer, but due to the shortness, I think this trail would be quite easy for anyone to do.

The overlook along the ridge-line comes atop a beautiful, little rocky ledge.  Views face eastward, and include a wonderful look at the rolling mountains and the valley below.  If you look to the north, you can even see a little snip of Skyline Drive winding its way through the forest below.

Appalachian Trail to Powell Gap
The viewpoint is accessed via the Appalachian Trail.

We spent a good twenty minutes on the rock ledge.  Adam covered his face with his cap and took a brief nap.  He exclaimed “That was the most comfortable rock I’ve ever laid on!” when he woke up.  Apparently, it was smooth and the shape cradled his back perfectly.  While he dozed, I enjoyed the nice summer breeze and watched butterflies fluttering about in the trees right below the overlook.

I could have happily stayed longer, but we were both hungry and wanted to squeeze in a picnic lunch on the beautiful summer day.  We ended up having our picnic back in Harrisonburg – at Lake Shenandoah.  Even at high noon, it never got hotter than 81.  It was such a perfect day!

Trail Notes

  • Distance – 1 mile out and back
  • Elevation Change – 300 feet
  • Difficulty – 2. Although the trail is a bit steep, the route is so short that the hike qualifies as easy.
  • Trail Conditions – 3. The trail is typical of this section of the AT – well graded, but some rocks and uneven footing.
  • Views – 3.5. A very nice view of the mountains and the eastern valley.
  • Waterfalls/streams 0. None.
  • Wildlife – 2. We didn’t see anything, but in the park it is always possible to see deer, bears and other wildlife.
  • Ease to Navigate – 5. There is only one trail in the area, so it’s nearly impossible to get lost as long as you head south on the Appalachian Trail
  • Solitude – 4. This section of the AT is not heavily traveled.  We did come across two section hikers.

Directions to trailhead:
At Mile 69.9 on Skyline Drive.  Park on the eastern side of the road along the meadow.  The trail begins just near the Powell Gap sign on the eastern side of Skyline Drive.

West and East Rattlesnake (NH)

Special: New Hampshire Edition

Introductory Guide to Visiting the White Mountains

This fun, four-mile loop hike offers gorgeous scenery and amazing views with not much work.  The trail takes you across the summits of two small mountains – known as East and West Rattlesnake – overlooking the Squam Lakes.

Adam and the Rain Storm
Adam watches a rain storm pass over the Squam Lakes.  Below: The trail has many steps built into it.

Old Bridle Path

Adam Says…

Since we had already done a bunch of hikes to waterfalls over the last few days, we decided it was time to do a hike with some views.  We waited around in the morning due to rain and an overcast sky, but we caught a break shortly after lunch and decided to head out to the Rattlesnakes.  As Mark Twain said, “If you don’t like the weather in New England, wait a minute.”

We started the trail up the Old Bridle Path, which takes off from the marked parking lot for West Rattlesnake Mountain.  This area includes a lot of crossing trails that are all yellow-blazed, so you will need to pay attention to signs to be sure you are going the way you want.  The hike was a continual uphill with lots of steps built into the trail.  We found this part of the trail to be very well maintained and you will see lots of people on this section of your trip.  At .75 miles, you will come to a fork.  The right goes out to a nice overlook, but the left is where you will continue the trail.  At .9 miles, you will reach the summit of West Rattlesnake Mountain.  Look on the ground to find  a USGS marker to mark the elevation.

From the summit, we then took the Ridge Trail which leads to East Rattlesnake Mountain (one option is to take the Pasture Trail to the East Rattlesnake Trail, but that has a lot of elevation loss and gain.)  The Ridge Trail descends about 300 feet of elevation into a thick quiet wood.  Here is where the mosquitoes were unleashed on us since the breeze was non-existent to blow them away.  At 1.3 miles, you will reach a junction with the Col Trail, but continue on the Ridge Trail until 1.7 miles when you reach the East Rattlesnake Mountain summit.

First Viewpoint
The first viewpoint from high up comes along a small spur trail. Below: The Armstrong Natural Area sign provides some historical information about the area; Several trails intersect in this area; Watching the rain storm pass over the Squam Lakes.

Armstrong Natural Area SLA Sign West Rattlesnake

We headed back from the summit and at 2.1 miles, we took a right on the Col Trail.  The Col Trail descends a few hundred feet and was very overgrown and poorly maintained in several areas.  At 2.8 miles, it leads to a fire road.  Take a right on the fire road.  At 3.0 miles, you will reach Route 113.  Taking a left on the road, you will head back to your car to make this a four-mile loop.

Looking back, we might have decided to do this as an out-and-back hike and not ventured onto the Col Trail.  Walking on roads is never as fun as trails and it seems that the road goes on forever.

Both summits give you expansive views of the Squam Lakes and you can likely see several mountains surrounding you.  I was amazed at how many people were on West Rattlesnake Mountain and we only saw one other person at East Rattlesnake Mountain.  So, you can easily escape the crowds if you want with just a little longer hike.

There are a number of geocaches in the area for anyone interested:

Christine Says…

On this trip to New Hampshire, we spent far more time hiking to waterfalls and ponds than we did hiking to mountaintops.  We decided to save our summit hikes for days that offered clear views of the valleys below.  Unfortunately, we had a lot of hot, humid days that put the high peaks of the White Mountains into the clouds.  I know some people just like the workout and the act of hiking, regardless of whether or not there is a view.  I do too, but only to an extent. I can’t help but feel a little let down when a great view is covered in clouds and fog.

The morning we planned to hike the Rattlesnakes had been forecast to be sunny and pleasant.  However, in keeping with the theme for New Hampshire’s changeable weather, we woke to soggy clouds and pop-up showers.  The radar map indicated clearing as the day went on, so we sat and waited at the house.  When the sun finally broke through the clouds, we hopped in the car and raced off the trailhead.

The hike was easy and pleasant to the top of West Rattlesnake, and the views couldn’t have been nicer.  They reminded me a lot of the views we had from the Mt. Morgan – Mt. Percival hike.  (You can actually see the Rattlesnakes from above on that hike.) Both hikes overlook the Squam Lakes, but Mt. Morgan – Mt. Percival goes to higher mountains and offers a loftier view. If I were pressed to choose, I would say the Rattlesnakes view is nicer, but only because it’s a little closer to the lake.  The Squam Lakes Association does a fantastic job managing and maintaining the trails in this area.

East Rattlesnake
The view from East Rattlesnake is pretty and offers quite a bit more solitude. Below: The trails are nicely marked and expertly maintained by the Squam Lakes Association; Adam walks along the fireroad that joins the Col Trail to Route 113.

Col Trail Fire Road

Atop West Rattlesnake, we were able to sit on a sunny rock ledge and watch a leftover rain squall pass at a distance across Squam Lake.  The clouds were so dramatic and it was interesting to see the gray sheet of rain pass over the water.

We decided to continue along the trail and visit East Rattlesnake as well.  Although it’s less popular and has a smaller rock ledge, the other Rattlesnake offers views just as nice as its “sister”.  We had a couple options for hiking over to East Rattlesnake.  At first, we considered hiking the Pasture Trail so we could check out Five Finger Point.  A friend of mine from Flickr mentioned one of his favorite swimming spots was on the point, so I thought it might be fun to go check out the spot.  But, in the end, we decided to take the shorter route across the Ridge Trail.  The bugs ate me alive!  This trail was the one place in New Hampshire that my liberal application of DEET didn’t seem to deter the mosquitoes.  Two weeks after the hike, I still have a few marks leftover from bites I got on that hike.

On the return from East Rattlesnake, we wanted to get out of the woods and away from the bugs as quickly as possible.  Instead of doing the hike as an out-and-back, we followed the Col Trail back to the road and finished a loop with a mile of walking along Route 113.  The road walking wasn’t particularly fun or scenic, but at least I was away from most of the bugs.

Trail Notes

  • Distance – 4 mile, loop
  • Elevation Change – About 800 ft.
  • Difficulty –2.5. The walk up to West Rattlesnake is very easy.  The hike up East Rattlesnake is a little tougher.
  • Trail Conditions –3.5. The trail is very nicely maintained.
  • Views – 5. Stunning views of the Squam Lakes.
  • Waterfalls/streams 0. None to mention.
  • Wildlife –0. Unless you count mosquitoes and biting flies.
  • Ease to Navigate – 4. Although several trails cross in the area, everything is clearly marked.
  • Solitude – 1. On West Rattlesnake, you won’t get any solitude.  East Rattlesnake is quieter.  We saw only one other person there, while we saw close to 20 people atop West Rattlesnake.

Directions to trailhead:

From I-93, take Rt. 3 east to Holderness. From Holderness, follow Rt. 113 (a slow, curvy road) northeast for about 5.5 miles. Just past Pinehurst Road, park in the small lot on the right side of the road. The Old Bridle Path starts at the far end of the parking lot.

Greeley Ponds (NH)

Special: New Hampshire Edition

Introductory Guide to Visiting the White Mountains

The Greeley Ponds trail is a popular hike that leads to a pair of beautiful ponds surrounded by the White Mountains.

Upper Greeley Pond
We didn’t have great weather for our hike to the Greeley Ponds. It was very muddy and overcast, but the ponds were still really pretty! Below: There were several small stream crossings along the hike; We saw Indian Pipes growing along the trail; the terrain in this area is very wet and dark, making it a perfect place for mosses and mushrooms.

Stream Crossing Indian Pipes Mushrooms

Christine Says…

We got up early to take a scenic drive and do some hiking along the Kancamagus Highway.  We decided to check out the trail leading to the Greeley Ponds.  This hike intrigued me, because it is so different from anything we have in Virginia.  Ponds and lakes are not terribly common in the Blue Ridge, so I thought a hike leading to two ponds surrounded by mountains sounded really perfect.

The trail did not disappoint!  The woods in New Hampshire are so thick and green and different.  I love the abundant evergreens in the New England woods. Everything is so fragrant, lush and moss-covered.  Old fallen trees become nurseries for tiny mushrooms and tree seedlings.  Streams trickle in seemingly every direction.  Even the birds are different – singing unfamiliar songs up in the trees.

The Greeley Ponds Trail is relatively easy – with only about 500 feet of elevation gain over 2.5 miles. The things that slow you down are the roots, rocks and mud.  You have to watch your feet with every step.  We found our trekking poles to be very helpful.  Many places along the trail are traversed using wooden planks and split logs. There are several small streams to cross along the way, hopping from rock to rock.  Some of the trail system is a little confusing because cross-country skiing trails cross the hiking trail in many places.  The key is to look for yellow blazes.

At the 1.7-mile mark, the Upper Greeley Pond comes into view.  There are several places to climb down to the shoreline and take in views of the pond.  Although Upper Greeley is the smaller of the two ponds, I found it the prettier of the two. I loved seeing the towering mountains all around the pond.

Lower Greeley Pond
Lower Greeley Pond has a lot of dead trees at one end, giving it a swamp-like appearance. Below: Trailhead sign along the Kancamagus Highway; New Hampshire’s “Hike Safe” Signs are posted at all trailheads. Hike Safe (http://www.hikesafe.com) was developed by the state to help hikers become safer in the outdoors; Adam checks out the trail map illustrating skiing and hiking trails.

Greeley Ponds Trail Sign Hike Safe Trail Maps

Lower Greeley Pond is just several tenths of a mile past the end of Upper Greeley.  There is a big stand of what appears to be dead hemlocks at the end of the pond.  It gives the pond a swamp-like appearance. The lower pond also has fewer places to enjoy a shoreline view.

We turned around for our return hike a little past the end of Lower Greeley Pond.  Although, if you want a longer hike, the trail continues, following the Mad River all the way to Livermore Road.

We didn’t see a soul on the hike out to the ponds, but passed numerous groups of hikers on the return trip.  Greeley Ponds is clearly a popular hike in this area.

Adam Says…

The Greeley Ponds Trail is close to the western side of the Kancamagus Highway, so it was our first stop along the way.  The trail has a small parking lot that tends to get crowded during the busy summer.  This is a fee area, so you’ll need to deposit $3 in an envelope and display your pass.

The trail wasn’t difficult, but due to the recent rain, it was a little muddy and slick in spots.  I also felt overwhelmed by mosquitoes and had to flail around and swat them at every step.  It reminded me of the quote from Lord of the Rings when Merry asks, “What do they eat when they can’t get hobbit?”.  Well, my answer to Merry is “me”.  The bug repellent held many off, but other than taking a DEET bath, you’ll likely find a bite or two without multiple applications along the hike.  Christine asked if I would rather have the flies and mosquitoes in New Hampshire or the gnats and ticks in Virginia.  Maybe it’s because of what I’m experiencing now, but give me some ticks and the threat of Lyme Disease over these pesky creatures.

Mossy Trail and Boardwalks
Much of the trail was traversed by boardwalks and planks. Below: The trail intersects a couple other trails; Adam enjoys the view from a small, sandy beach at Upper Greeley Pond.

Trail Marker Adam takes in the view at Upper Greeley

The yellow-blazed Greeley Ponds Trail goes for 1.3 miles until it reaches a junction with the East Osceola Trail (you could add this to your hike if you want for an additional three mile out-and-back hike). At this junction, you will see the sign stating you should reach the Lower Greeley Pond  at 1.7 miles.  The trail intersects several times with a blue-blazed trail, but this is a cross-country skiing trail to the ponds (Hikers stay off the ski trails in the winter, so they can avoid leaving footprints over the cross-country ski tracks).  Both will get you to the same place, but you’ll notice the yellow-blazed trail will be a shorter route.  Once the pond comes into view, you can see a short off-trail path to a beach-y area with good views of the pond.  Going back on the trail, you continue along the bank and can continue to get different views.  Staying on the main trail, you will reach the Upper Greeley Pond around the 2 mile marker.   There are a few good views of this longer pond for the next few tenths of a mile and then you can return the way you came.

There is no camping allowed within .25 mile of the Greeley Ponds, but we did see some illegal campsites around the area created by people that weren’t respectful of the ecosystems around the area.

The area around the ponds, especially the Upper Greeley Pond seems like a great area for birdwatchers.  We were treated with songs from warblers and the knocking of woodpeckers.

There are a few geocaches along the trail:

The hike exhibited a lot of different features of the area’s forests –  dense pines and birches, gorgeous ponds, and erratic boulders along the way.  The minimal elevation change makes this a good hike for families as long as you can maintain good footing on wet surfaces.  We saw a few groups with dogs along the trail, so it is even four-legged friendly. (Please note…dogs are not allowed on the ski trails in the winter)

Trail Notes

  • Distance – 5 miles
  • Elevation Change – 500 ft
  • Difficulty – 2. The hike has a very gradual uphill.
  • Trail Conditions – 2. Like most trails in New Hampshire, this one is rocky, muddy and covered with roots.
  • Views –2. Some nice views of the mountains at the ponds.
  • Waterfalls/streams 3.5. Ponds aren’t really lakes or streams, but they do qualify for a high rating for water features.
  • Wildlife – 2. Lots of bird species near the ponds.
  • Ease to Navigate – 3.  Pay attention to the yellow blazes and you won’t get lost.
  • Solitude – 2. This is a popular and well-traveled hike.

Directions to trailhead:
Take I-93 Exit 32 at Lincoln and go east on Route 112/Kancamagus Highway about 10.5 miles to the marked Greeley Ponds parking lot.

Tibbet Knob

Tibbet Knob is a short, but steep, hike that leads to a beautiful, rocky outcropping that overlooks both Virginia and West Virginia.  It’s considered the sister hike to Big Schloss.

Tibbet Knob Summit
The yellow-blazed Tibbet Knob trail offers spectacular views. Below: The first overlook on the trail comes within the first few tenths of a mile;  The footing along most of the trail is extremely rocky.

First View Hiking Over Rocks

Christine Says…

After a string of eight 90-100+ degree days, we finally got a break in the heat and humidity!  We picked a shorter, easier hike to celebrate the cooler weather – Tibbet Knob.  We’ve found we’re doing lots of longer hikes lately – partly because we’ve simply run out of shorter hikes.

I don’t know how Tibbet Knob escaped our notice for so long, because it’s a beautiful hike.  Tibbet seems to play second fiddle to its sister hike, Big Schloss – though I’m not really sure why.  The views are nearly as spectacular and the crowds are much thinner.  The terrain is definitely steeper and rockier, but not so much so it would scare hikers off.

We started our morning with breakfast at Cracker Barrel in Woodstock (worst/slowest service ever *and* they burned the bacon!)  We finally made it to the trailhead a little after 9:00 a.m.  At the very beginning, the trail passes through several lovely, primitive campsites.  One even has a picnic table that someone dragged a couple tenths of a mile into the woods.  The ascent starts almost immediately and follows a steady, but gradual, uphill to the first open view of the valley below.  This overlook is pretty, but pales in comparison to the summit of Tibbet Knob.

Looking Toward Big Schloss
You can see Big Schloss way off in the distance (circled in yellow).  Below:  Adam enjoys his perch on the summit; The trail was often open and out in the sun; There is a lovely (but dry) campsite about 10 yards from the rocky ledge at the summit.

Adam on the Summit Open Trail Campsite at the Summit

From the first vista, the trail drops gently into a saddle.  The footing becomes increasingly rocky from this point on.  Through some sections, it’s like walking on a dry riverbed of basketball-sized stones – some smooth, some pointy.  The last .8 of a mile is very steep and rocky.  There are two short rock scrambles.  At the first one, I abandoned my trekking poles because they were seriously getting in the way.  I can telescope them shorter, but I decided it was just as well to leave them stashed along the trail to retrieve on my way down.

Shortly after the second scramble, we arrived at the summit.  We stayed at the top for quite a long while.  Normally, we’re not the lingering type, but the morning was so pleasant that we spent at least half an hour sitting on the rocky outcropping.  It was cool and breezy.  The sky was crystal clear and blue and the scent of pine trees was all around.  There were several rocks to recline on, so I laid back and closed my eyes while Adam hunted for his geocache.  We didn’t see another soul on the entire hike.  I love having a beautiful summit all to myself.

The return trip was more downhill than uphill, so it went by quickly and we were back at the car within 45 minutes.

Adam Says…

We had been meaning to try out Tibbet Knob for some time now, since we’ve been several times to do the Big Schloss hike, but this was our first experience on this hike.  The hike takes off from Wolf Gap campground.  This campground is a great area for camping and has a lot of established campsites.  We always see plenty of cars in the campground and usually many of the sites are taken, but you should be able to find a spot for overnight camping.  We definitely plan on doing a camping trip in the future since this site provides access to some great hiking trails.

As soon as you begin the yellow-blazed trail, you will come across several other campsites alongside the trail – one even had a picnic table near the firepit.  At about .6 miles you come to a nice overlook with a decent viewpoint to the south.  If you look closely, you can even see cars on the road below you.  You descend from this overlook for a short distance, but then you begin your climb.  At some points along the ascent, the terrain opens up to larger grassland areas.  You will also pass by several blueberry bushes along the trail, which reminded us of our hikes in New England.  Due to the already hot and arid summer, the blueberries were already past their peak so we weren’t able to pick any on the trail.  The terrain does get quite steep towards the end of the trail.  You don’t have to quite crawl up the slope, but it is almost that steep.  Once you get pass the two steep areas, you are very close to the summit.  The views from the top were gorgeous and I believe give you a little better view than Big Schloss, since you get a better perspective of the valley with mountains around you.  To the east, you can see the side of the Big Schloss hike.   There is also a primitive campsite near the top of the overlook if you wanted to camp at the top, but there is no nearby water source.

Signs of Fall?
Signs of Fall?  Maybe… but more likely evidence of the drought we’ve been having lately.  We saw lots of patches of red trees in the distant mountains, too.  Below:  The only wildlife we saw was a toad; Adam looked for, but did not find, the geocache; It was a beautiful, breezy, blue-sky day; the trailhead starts across the road from the Wolf Gap campground.

Trail Toad Looking for the Geocache
Tibbet Knob Summit Trail Sign

The trail does continue on from the overlook, but it just leads to SR 671 after about .7 miles.  You can actually approach this hike from SR 671 for a shorter, less steep option to give you a 1.5 mile out-and-back hike.  We stayed up at the top for a while to soak in the views and for me to look for a geocache.  I wasn’t able to find this one, but there is an alleged geocache here:

We really enjoyed the peaceful hike for the day.  We had the entire hike to ourselves on a day that was in the 70s and we even had the bonus of not having any bugs buzzing around our face.  This is a great short hike that provides enough challenge to get the blood pumping and marvelous views at the top.

Trail Notes

  • Distance – 3.1 miles out-and-back. Add another .1 mile to get to your car.
  • Elevation Change –830 feet
  • Difficulty 3. There are two significant climbs on this hike.  The first ascent gains several hundred feet in elevation and is pretty easy.  After a short, gentle series of ups and downs, the second ascent is significantly steeper/longer and includes two short rock scrambles.
  • Trail Conditions 2. The trail is extremely rocky.
  • Views –4. The view are beautiful and expansive – a little more than 180 degrees of mountains and valleys.
  • Waterfalls/streams 0. Non-existent.
  • Wildlife 0. The only creature we saw was a toad.
  • Ease to Navigate 4. Just follow the yellow blazes. There are no turns or trail junctions.
  • Solitude4. Tibbet Knob is less popular than its sister hike, Big Schloss. You may see a few hikers, but you probably won’t see large groups.

Directions to trailhead:
From I-81, take exit 279. Follow Rte. 675 until it meets Route 42. Turn right on 42 and then take almost an immediate left on 675 (Wolf Gap Road). Follow Wolf Gap Road until you come to the Wolf Gap Campground (right on the Hardy County Line.) The trailhead is across the road from the campground.

Knob Mountain – Jeremy’s Run Loop

The Knob Mountain – Jeremy’s Run Loop takes hikers along a 12.4 mile route through one of Shenandoah’s most popular backcountry camping areas.  This hike could be done as a long dayhike, but the campsites in the area are too inviting to pass up.

Pool on Jeremys Run
The Knob Mountain – Jeremy’s Run Loop offers beautiful stream scenery. Below: Mountain vistas can be seen along the descent on the Knob Mountain Trail; Blue Blazes mark the way across streams on the Jeremy’s Run Trail; Adam negotiates one of the many stream crossings.

View from the Knob Mountain Trail Water Crossing Adam Crossing the Stream

Adam Says…

Since the weather looked like it was going to be a cooler, we decided to take off and go on an overnight backpacking trip.  Our first overnight trip was the Hazel Mountain-Catlett Mountain trail which we did with a group from the PATC.  This trip was our first non-group outing, so we felt it would be a good chance to put into practice what we learned from our Backpacking 101 course.

To do this trail as a loop, leave from the Elkwallow picnic grounds.  You will see the entrance to the trail next to the pit toilet, which provides a last chance to “take care of business” before embarking on the hike.  You will begin the trail on a short spur trail to the white-blazed Appalachian Trail.  Turn left on the AT.  In .2 miles, you will reach the junction with the blue-blazed Jeremy’s Run Trail.  Continue straight on the Jeremy’s Run Trail.  Around 1.2 miles, you will reach the junction with the Knob Mountain Connector Trail.  Take a right at the post to join this trail.  As soon as you cross Jeremy’s Run with a little rock-hopping, you will begin this steep connector trail.   There are lots of switchbacks and this is definitely the steepest part of the entire trip.  Around 1.7 miles, you will reach a junction with the yellow-blazed Knob Mountain Trail.  Take a left at the trail junction and continue to follow this slowly ascending ridge trail.  We would probably name this portion of the loop the Bear Scat Boulevard, because there was a ton of bear evidence in the area.  You will see a few views through the trees, but nothing remarkable from the trail.  At mile 3.9 you will reach the summit of Knob Mountain, marked by a concrete post.  After the summit, you will begin your steep descent down the mountain.  This is broken up by several switchbacks.  The trail does open up at times to give you views of mountains along the way, including Strickler Knob and the Three Sisters.  At 6.8 miles, you will cross Jeremy’s Run and reach the junction with the blue-blazed Jeremy’s Run Trail.  Since we were fairly exhausted from our trip, we picked a campsite near the junction of the trail, which gave us great access to water.  From the junction, you just continue on the Jeremy’s Run Trail until you reach the parking lot, crossing over Jeremy’s Run fourteen times.   In some areas, it was necessary to rock hop across, but most of the time the traversing was quite easy.  I imagine during heavy rain seasons, this would be more of a challenge.

Filling Out Paperwork for a Backcountry Permit
The overnight trip started with a brief stop to fill out paperwork for our backcountry permit. Below:  Adam makes his way down the Jeremy’s Run Trail; Snacks on the Knob Mountain summit; A view through the trees from the Knob Mountain Trail.

Adam Hiking Snacks on the Knob Mountain Summit Views from Knob Mountain Trail

Jeremy’s Run truly provided a great opportunity for camping in the backcountry.  We saw several previously-used campsite areas, so we decided to use our Leave No Trace principles and use an existing campsite rather than creating our own.   The campsite was short walking distance to a reliable water source.  After starting our trip around 9:30AM, we arrived at camp around 1:00PM.  We were very hungry, so Christine worked on getting some lunch together and I began working on getting our tent set.  The ground was very hard and rocky, so it took an effort to find a good place to get stakes into the ground.  After lunch, we finished getting our sleeping pads/bags ready, hung our bear-bag rope, and prepared our kitchen area.  We got some water to use for the trip at the nearby stream and I dug a few preemptive catholes.  With every thing set, we decided to relax a little in our tents to stretch out our backs.  I like to bring a book along the trip so we took turns reading aloud a few chapters from A Walk for Sunshine by Jeff Alt, an entertaining read about hiking the Appalachian Trail.  We took a short nap and then played a few hands of the Monopoly card game we also brought.  We then broke in our new JetBoil and prepared a great dinner.  After cleaning up dishes, we went down to a place along Jeremy’s Run and stretched out on a large rock.   We watched several brook trout jump out of the water, catching mosquitoes that were lightly dancing on top of the water.  We retired to our tents to the sweet chorus of whippoorwills and the “who cooks for you” hoots of nearby barred owls.

Neighbor Mountain
On the hike down from the summit of Knob Mountain, hikers get a few decent views of adjacent Neighbor Mountain. Below: A scenic spot on Jeremy’s Run; Our campsite.

Jeremy's Run Camp

There were so many things I enjoyed about our trip.  We saw tons of wildlife – three black bears, a wild turkey, scarlet tanagers in glorious color, and heard lots of birds at night.  The temperature was perfect and the bugs were not out as much as we expected.  The trip also helped affirm our ability to handle a backpacking trip by ourselves. I think we really learned a lot of great skills in the last few months to help us feel well-prepared.   I was a little more apprehensive wondering if we could handle the 12+ mile hike with 35 pounds on my back, since our previous trip was about 8 miles total with a little less weight each.  The hike was more strenuous the first day, but we were able to complete the hike without much trouble.  I think we’re both looking forward to going on another backpacking trip, but we are now getting into the hot summer months.  Hopefully, we’ll be able to find a cooler weekend in the near future.

Christine Says…

When Mother Nature gives you the gift of a sunny, dry, 70-degree day in the midst of a long string of 90+ degree scorchers, you must take advantage of that gift!  We chose to make the most of the pleasant weather and go on an overnight backpacking trip.  One of the leaders on our last trip recommended Jeremy’s Run as one of his favorite places in the park.  As dayhikers (until recently), the Jeremy’s Run hike had always been a little out of reach.  At 12.4 miles with well over 2,500 feet of elevation gain, it was always more than we were willing to tackle on a day hike.  It seemed like a perfect candidate for this little weekend getaway.

After filling out all the requisite paperwork, we set out from the Elkwallow Picnic Area along the Appalachian Trail.  Right away, I was struck by how much heavier my pack was compared to our last trip.  On that trip, we had seven people to split the weight of group gear.  But this time, we had to carry our own stove, fuel, collapsible bucket, water filter, food and rope.  I also chose to carry my old dSLR camera, a couple card games, extra batteries, a fleece and my iPod.  In the end, my pack weighed in about nine pound heavier than our last outing.

I brought my iPod along this time for a couple reasons 1) I wanted to be able to listen to my “workout mix” when climbing a couple of the big hills on the route and 2) my iPod is loaded with audio books, which I thought would be pleasant to listen to after sunset in the tent.  The first big hill we hit was on the Knob Mountain Cut-Off Trail.  It was really steep, so I put in my earbuds and started chugging up the hill.  Listening to mindless pop music with a beat – anything from Tupac to Lady Gaga to Gnarls Barkley – makes climbing hills so much less painful.  I had worked up a pretty good rhythm, listening to the early 90’s party song, “Rump Shaker”, when I rounded a curve a spotted two black bears about 50 yards up the hill.  I’m not sure if they were a mom and a yearling or two adults.  We looked at them, they looked at us, then they quickly decided to leave the area.  I didn’t have time to free myself from my trekking poles and iPod cord to get a photo, but it was still a great treat to see the bears. Backpacking seems to involve an inordinate number of straps and buckles.  Sometimes, it makes me feel like a horse pulling a cart.

Christine On the Rocks
After camp was set up, Christine spent some time relaxing on the rocks in Jeremy’s Run. Below:  Adam collects water in a collapsible bucket to use for cooking later; Crocs and Socks – they might not be high fashion, but they’re functional; Playing Monopoly at camp.

Collecting Water Crocs and Socks Cards

After the cut-off trail met the Knob Mountain Trail, the tough climbing was over for the day.  I listened to my iPod a bit more, but eventually put it away in favor of listening to the birds and the breeze in the trees.  We took a snack break on the top of Knob Mountain.  There weren’t any views at the summit – just shade and a ton of poison ivy.  It felt really good to throw the pack off for a while and have a good stretch.  I could really feel the heavier pack weight bruising my hip bones.

The walk from the summit to Jeremy’s Run was all downhill.  The woods along the trail are pretty and occasionally open to views of the valley below.  You also get nice views of Neighbor Mountain, which lies parallel to Knob Mountain.  Another slightly longer loop hike option approaches Jeremy’s Run from Neighbor Mountain.

The downhill walk lasted a little over 3 miles.  We soon arrived at the stream, where the Knob Mountain Trail converges with both the Neighbor Mountain and Jeremy’s Run Trails.  We crossed the stream a couple times and decided it was high time to find a campsite.  We were both completely knackered after walking about 7 miles with our packs.  I honestly don’t know how thru-hikers cover 20-30 miles a day with even heavier packs.  I’m convinced I wouldn’t last a week!

We found a beautiful place for camp under the shade of pines and hardwoods.  It was clearly a place others have camped before.  Stones were arranged like seats in a semi-circle in one of the clearings.  It was also about 30 yards from a gorgeous spot along Jeremy’s Run – so we had great access to water.

We designated separate sleeping and kitchen areas right away.  Adam pitched the tent while I fixed lunch.  I made Buffalo Chicken Wraps – which were delicious. We found a place for our bear hang and dug a couple catholes for future use.  With camp all set up, we settled into our tent for a nap.

Post-nap, we collected water for cooking in our collapsible bucket.   On our water run, we also took some time to stretch out and lounge on one of enormous boulders in the middle of the stream.  The sky above was so blue and it was very soothing to watch the trees swaying above in the breeze. I actually tried out my Crocs again, and found them more comfortable, albeit considerably dorkier, with socks.  I may keep them as my camp shoes after all.

Filtering Water for Dinner
We filtered water for our dessert and boiled water for our entree. Below:  We had Pad Thai for dinner; Dark Chocolate Cheesecake for dessert.

Pad Thai Dark Chocolate Cheesecake

Around 5:30, we started getting things together for dinner.  Because this trip was rather impromptu, we brought pre-packaged dehydrated meals instead of taking the time to make homemade food.  But it was still delicious.  The Backpacker’s Pantry Pad Thai was filling and tasty.  It had a yummy, spicy peanut sauce with noodles and vegetables.  For dessert, we ended up having Dark Chocolate Cheesecake (instead of Tiramisu, as originally planned).  It was really tasty, too!  I was stuffed from dinner, so we decided to take a short walk down to a deep pool I had seen along the trail a way back.  We sat on a rock and just enjoyed the quiet of the evening.

It got dark quickly down in the hollow, so we retired to our tent a little before nine.  I listened to a book on my iPod and Adam read.  I started to doze off well before 10:00.  All through the night, I could hear a couple barred owls hooting, over and over and over again.  Pretty soon, a whippoorwill joined in and sang through almost the entire night.  I haven’t heard a whippoorwill since I was a child, so it delighted me to hear the song in the night again.  I slept pretty soundly, until the roar of a train whistle woke me up around 2:00 in the morning.  I could hear the wheels on the track so clearly; it seemed like the train was rolling through camp.  I guess some distant sounds really carry on the quiet night air.  When I awoke, I found I was drenched with sweat in my sleeping bag.  It was in the mid-50’s outside, so the down bag was a bit too warm.  However, if I slept outside my bag, I got cold quickly.  I want to get a blanket and sheet for my sleeping pad to make summer camping more comfortable.  Despite being hot or cold, I eventually fell back to sleep and stayed so until 6:30 a.m.

I got up before Adam and got the bear bag down, so I could start breakfast.  We ended up leaving the bacon home because we didn’t want to carry a pan.  Instead we had oatmeal, boxes of apple juice and hot chocolate.  It was a satisfying breakfast on the cool morning.

Bear on the Appalachian Trail
We saw three bears, including one on the Appalachian Trail.  Below: Another scenic pool on Jeremy’s Run; We encountered this loose dog on the trail (one of many).  He apparently lives on the border of the park and runs the trail often.;  Rocks in the stream bed were covered with moss.

Pool on Jeremys Run Loose Dog Mossy Rocks

We broke camp down quickly and were back on the trail around 8:00.  The second day of hiking was substantially shorter and easier than the first day.  With about 5.5 miles to cover, we knew we’d be back at the car by mid-morning.

The trail climbs ever so gradually along Jeremy’s Run.  We passed lots of fantastic campsites along the stream.  It’s no wonder this area is so popular with backpackers!  We crossed the stream 14 times over the course of the morning. Because of all the dry weather we’ve had lately, none of the crossings were challenging at all.  Most of them were bone dry, and the ones with water were still easily rock-hopped.

We took a snack break where the Jeremy’s Run trail crosses the Knob Mountain Cut-Off.  From this point, the trail follows the same route as we’d used hiking out the day before.  The grade becomes steeper for the last mile and eventually meets back up with the Appalachian Trail.  For this section, I put my iPod back on again to help endure the uphill.  “Rump Shaker” came up in the shuffle again, and after the first few moments, I spotted another bear.  There must be something about that song that conjures bears!  I did manage to get a few distant photos of this bear before he disappeared deeper into the woods.

About ten minutes later, we were back at our car and on our way.  We stopped by the Elkwallow wayside, where I rinsed my face and used  a flushing toilet!  Plumbing is so exciting after being without it.  On our way home, we stopped at McDonald’s for lunch.  Coke and salty French fries taste absolutely amazing after a long hike.  As luck would have it, their credit card machine was broken and they gave us our lunch for free!  It was a fitting bonus for a perfect trip.

Trail Notes

  • Distance – 12.4 miles
  • Elevation Change – 2600 ft
  • Difficulty – 3. If you were going to do this in one day without stopping, I would up the difficulty slightly due to the length.
  • Trail Conditions – 3.5. The trail was very well-maintained.  We saw evidence that the Knob Mountain trail had been cut back, but I can imagine in late spring, much of the trail could have some overgrown areas.  The ground was well-traveled and there were only a few rocky spots around the streams.
  • Views1.5. The best chance of views are on the descent from the Knob Mountain summit down to Jeremy’s Run.  After leaves fall, this may be slightly better.
  • Waterfalls/streams – 3.5. You do get lots of chances to cross Jeremy’s Run.  There was only a small fall near the base.  If you want to photograph streams, you should have plenty of opportunities.  You’ll also have a reliable water source.
  • Wildlife – 4. We saw black bears, a turkey, and scarlet tanagers; we heard whippoorwills and barred owls at night.
  • Ease to Navigate – 4. The trails are well-marked and just stick to the signs on the cement posts.
  • Solitude –3. This is a popular spot for backpacking and trail running.  However, we felt that we were able to find our own peace in the woods.  We also came across a dog that belongs to a nearby family that evidently roams the trails frequently, so we had a companion during part of the hike up from Jeremy’s Run.

Directions to trailhead:

Located in the northern section of Shenandoah National Park.  Park at the Elkwallow Gap picnic grounds around mile 24.3 of Skyline Drive.  The Jeremy’s Run trail begins next to the pit toilet at the parking lot.