Appalachian Trail – Harpers Ferry to Bears Den Rocks

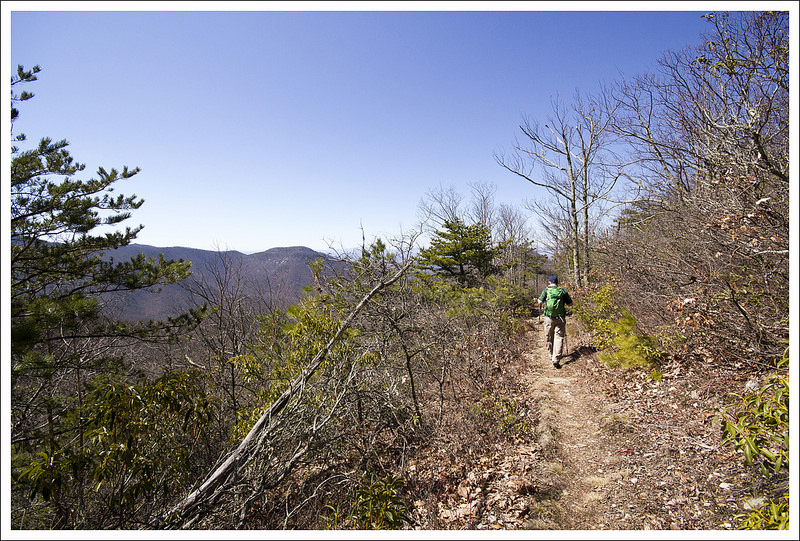
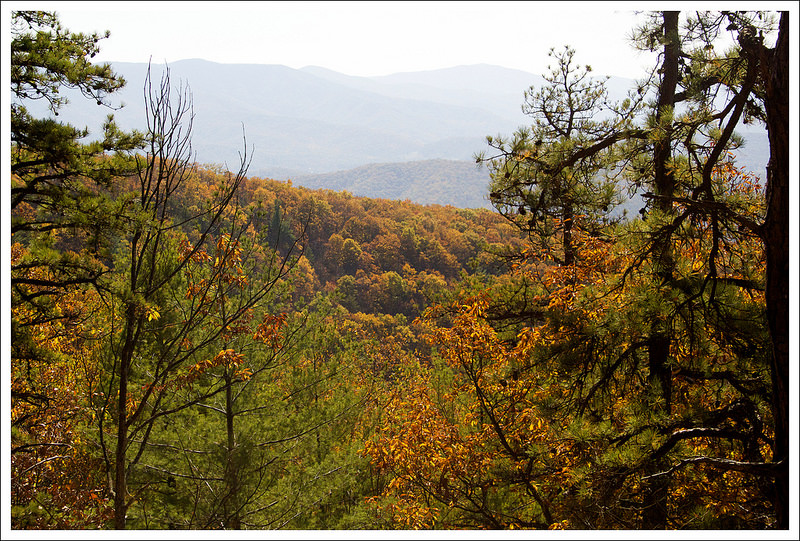
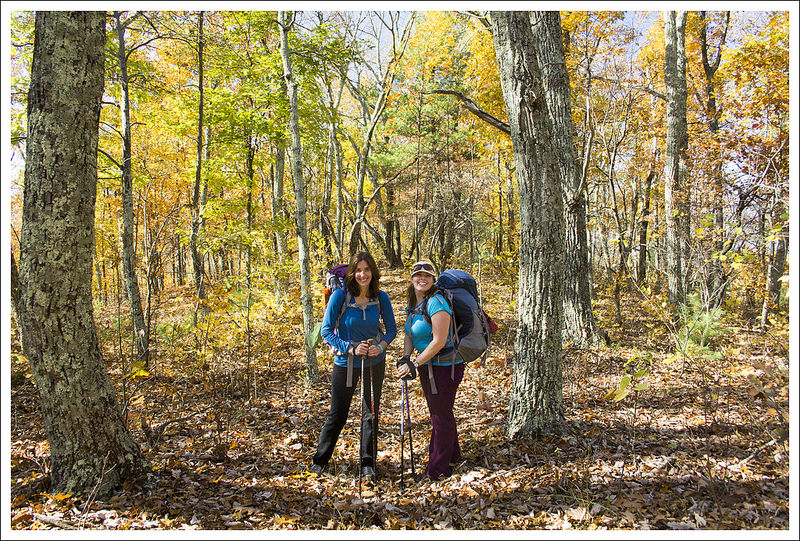
This 20.5 mile Appalachian Trail section had some views and a ton of pleasant ridge walking!  We joined up with our friend, Kris, and tackled it on an unseasonably hot spring weekend.  Adam will cover day one and Christine will take over with day two!

View the Full Album of Photos From This Hike

Potomac River in Harpers Ferry
We crossed the Potomac River at the beginning of our hike out of Harpers Ferry.  Below: When we parked at Bears Den, we got to play with this adorable puppy while waiting for our shuttle driver; We had our official ATC section hiker photo made; It was Flip-Flop Kick Off when we visited; The ATC had vendors and information tents set up; Someone brought a hawk; Finally getting our hike underway!

Puppy at Bears Den ATC Photos Flip Flop Kickoff Day
Flip Flop Kick-Off Day Hawk En Route

Day One (12.3 miles)…

This section of the Appalachian Trail had us doing something we had not done before – arranging a shuttle.  We have covered most of the AT within an hour or two of where we live using our own two cars to shuttle. But as we hike further from home, self-shuttling has become inconvenient and costly.  If you are thinking of covering any sections of the AT, I would strongly recommend picking up the latest version of The A.T. Guide by David “AWOL” Miller (often referred as the AWOL Guide).   It’s a must-have for planning purposes.  Included in the book are elevation profiles, things to see along the trail, road junctions, as well as information on nearby towns, where to find the post office, grocery stores for resupplies, laundromats, hostels, and shuttle providers.  This book is updated yearly, so the information provided is very current and helpful.  Many thru-hikers carry these books along and they will often rip out pages of the AT once they have covered them, hopefully finishing the trek with nothing more than the binding.  I will admit that it felt a little odd to call a number of an individual that I found in a book to find a ride, but these shuttle providers are some of the unsung heroes of the trail, helping to make the logistics of the trip much easier along the way.  We worked out a pick up time and agreed on a price.

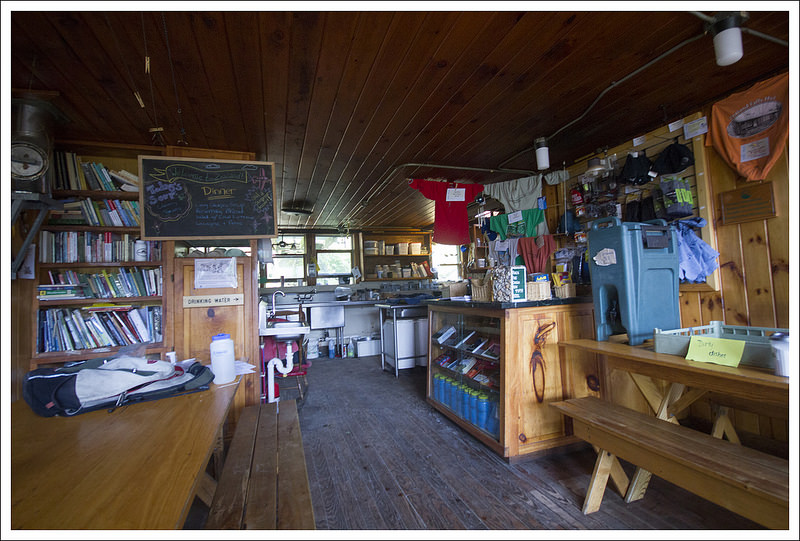
I arranged for our shuttle driver to meet us at Bears Den.  We got there early, so we were able to explore a bit before our shuttle arrived.  Bears Den is a hiker hostel, providing showers, lodging, and mail drops for long-distance AT hikers.  Day-use hikers pay $3 to park in the lot.  Bears Den looked like a stone cottage you would find in Europe.  The grounds were kept up nicely and we were excited that this would be the endpoint on the trip.  We met up with our shuttle driver, who took us on a scenic, horse-country drive to Harpers Ferry.  The shuttle driver used to be the manager of Bears Den, but now just lives nearby.  In addition to being a shuttle driver, he’s also a former thru-hiker (as many of these shuttle drivers are – after hiking, shuttling is one way they give back and keep in touch with the AT community.) On the ride, he told us about his favorite parts of the trail, what we would see, and even some tales about other shuttles he had provided.  He explained that he had gotten one call in the wee hours of the morning recently to pick up a hiker that had been bitten and sprayed by a rabid skunk.  Too say the least, these trail angels really go the extra mile for the hiking community.

Leaving Harpers Ferry
Leaving Harpers Ferry on a tree-lined path.  Below: Red columbine – a favorite wildflower; The climb out of Harpers Ferry is steep and has very few switchbacks; Leaving the National Park area.

Red Columbine Steep Climb Out of Harpers Ferry Leaving the National Park

We asked to be dropped off at the Appalachian Trail Conservancy & Visitor Center in Harpers Ferry, WV.  Thru-hikers and section hikers typically stop by the ATC Visitor Center and have a photo taken in front of the building.  ATC staffers take a photo, assign you a hiker number, and have you write information about yourself on the border before adding it to a photo album.  You can go back years later and check out all the people that have made it this far along the trail.  Since this was the section that brought us through Harpers Ferry, it was time for us to have our photo done. Our trail names are “12th Man” (for my love of the Seattle Seahawks) and “Sugar Rush” (for Christine’s love of candy before tackling a big climb).  It was fun to finally be officially added to the hiker album.

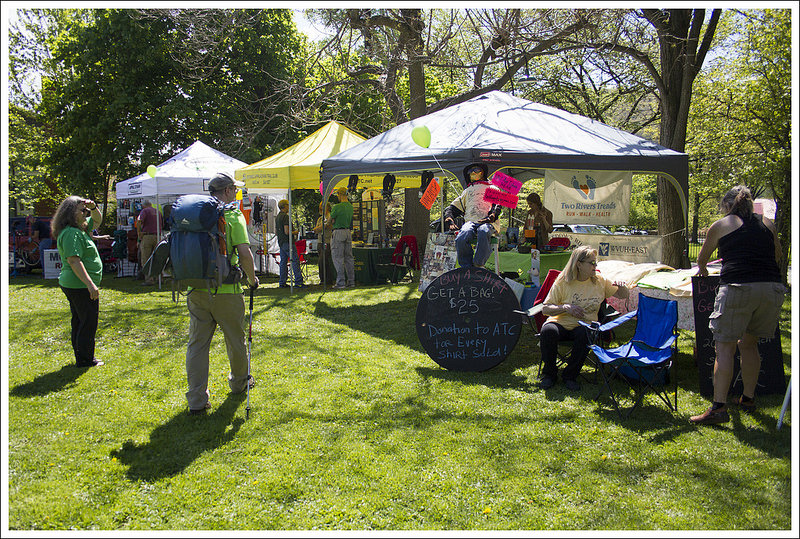
We had looked in advance and had seen the ATC was having the Flip Flop Kick Off weekend event.  The hope was to have the hikers split their trip at this halfway point in WV to keep hikers from clustering together too much.  One example would be north-bounders going from Georgia to Maine to stop here at this midway point and then go up to Maine and hike back down to WV.  They had a cookout, vendors, games, and wildlife exhibits along the back lawn (throughout the weekend they were hosting pack shakedowns, talks, and bands).  When we walked through with our backpacks, we heard a few people getting excited that ‘hikers were coming’. I didn’t have the heart to tell them we were just out for the weekend, but based on how clean and fresh-smelling we were, I’m sure most of them could have guessed we weren’t out for the long haul.  We didn’t stay long at the event, since it was getting close to 11AM and we hadn’t even started our hike yet.

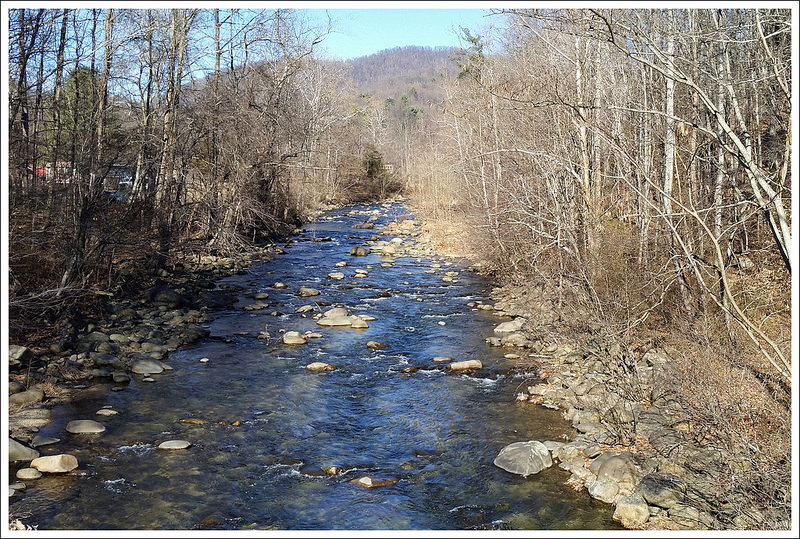
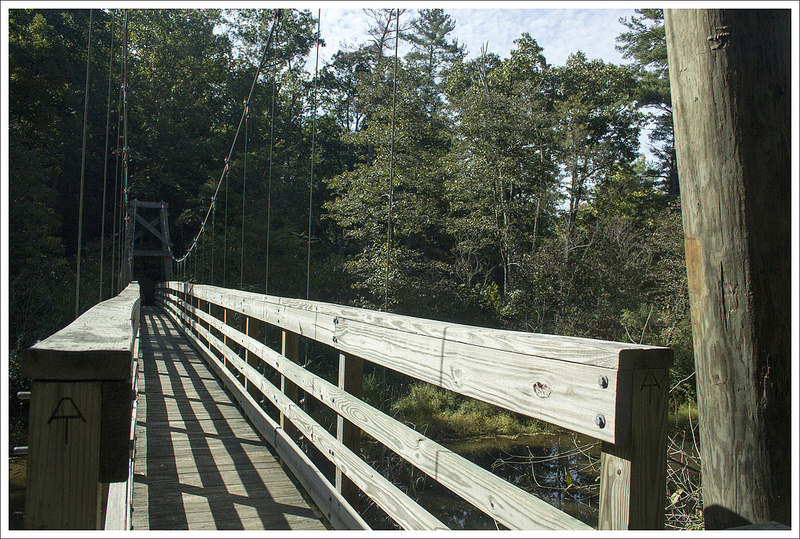
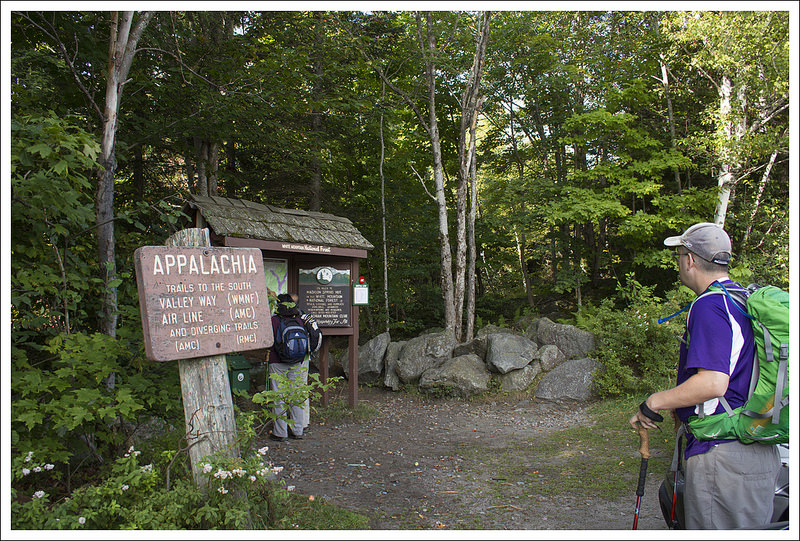
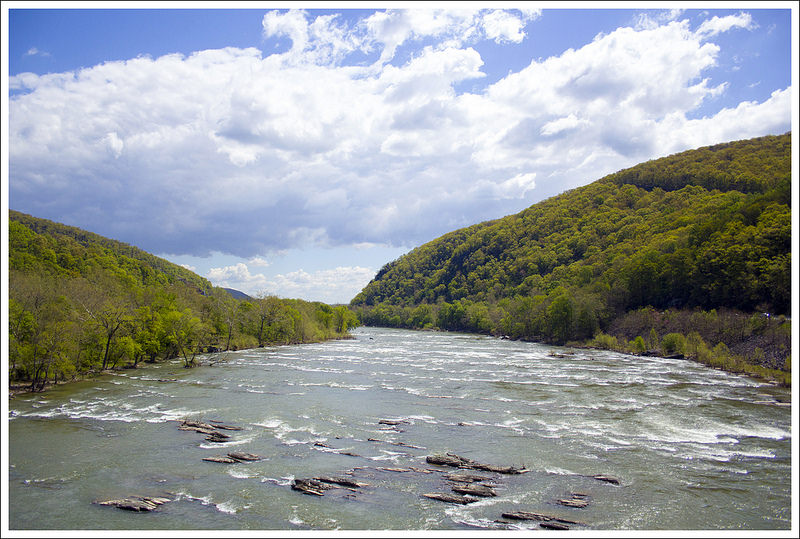
One of the volunteers pointed us to a blue-blazed trail that led to the Appalachian Trail.  On our way to meet the AT, we walked across the grounds of former Storer College, a historically black college that opened its doors as a school to educate freed slaves.  Open for 88 years, Storer’s funding was cut in 1955 after the Brown v. Board of Education ruling came in to desegregate public schools.  The school was forced to close. The blue blazes continued down a series of steps and before we knew it we were on the Appalachian Trail.  We turned right to head south along the trail, heading downhill.  The trail came to a quick road crossing and then headed up to the large bridge along US-340 that crosses the Shenandoah River.  We walked along the roadside on the bridge with cars whizzing by, but the view off the side of the bridge was breathtaking.  This river is dotted with large and small boulders in the rapid-infused river, causing this to be a hotspot for kayakers.

So Many Redbuds
The woods were brilliantly colored with blooming redbuds. Below: Crossing powerlines gave us an open view; Taking a rest at Keys Gap on the VA/WV border; Christine does blister first-aid for Kris.

Crossing the Powerlines Resting at Keys Gap Blister Surgery

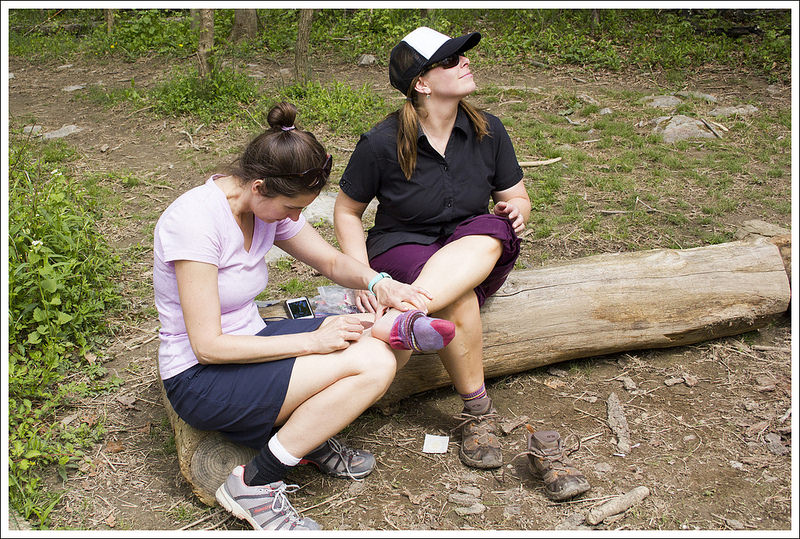
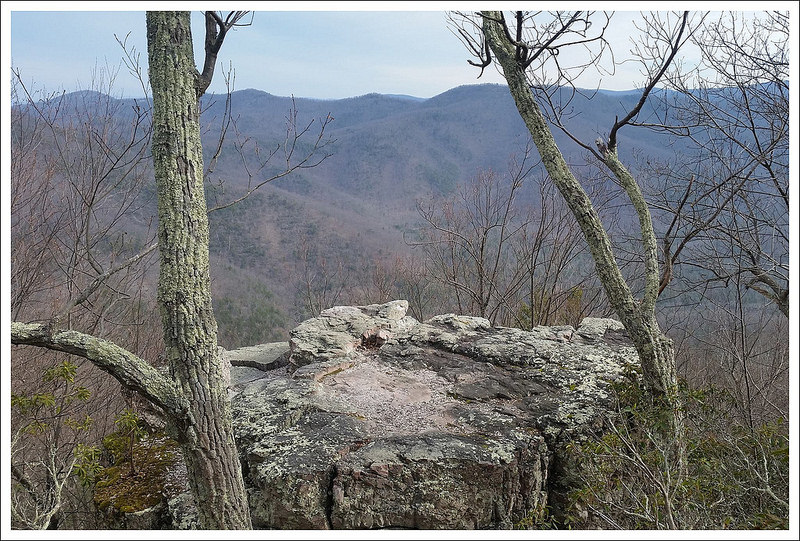
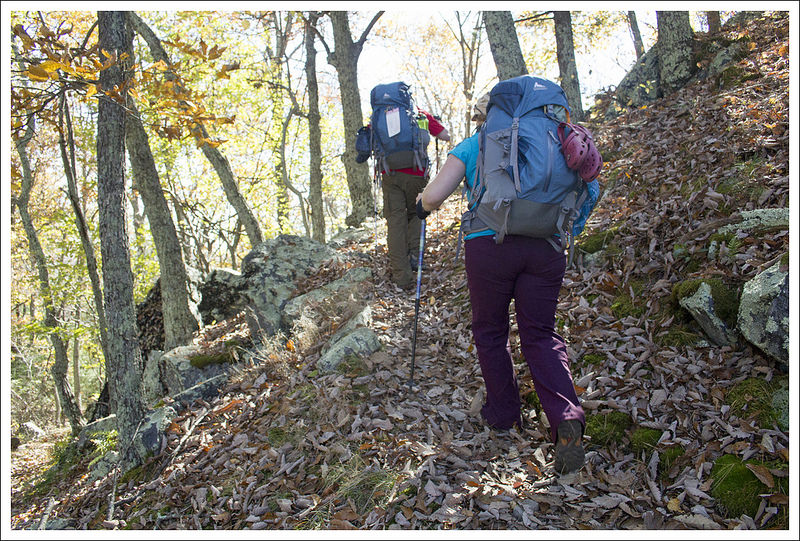
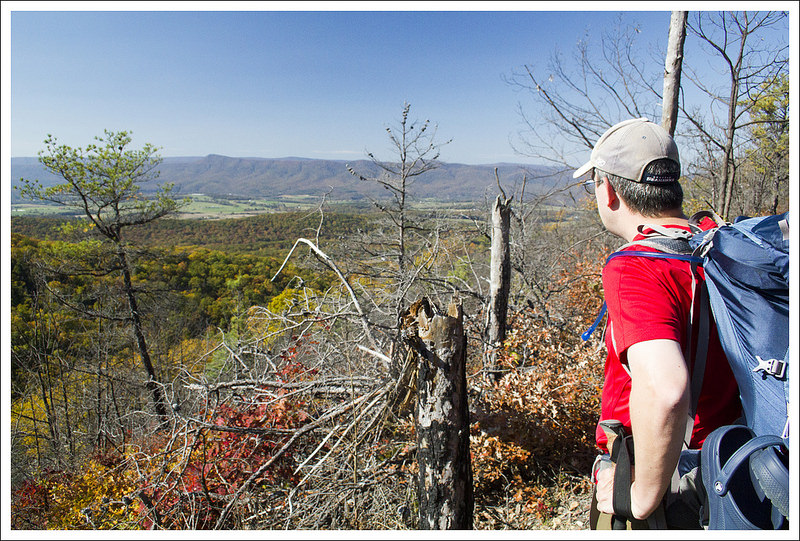
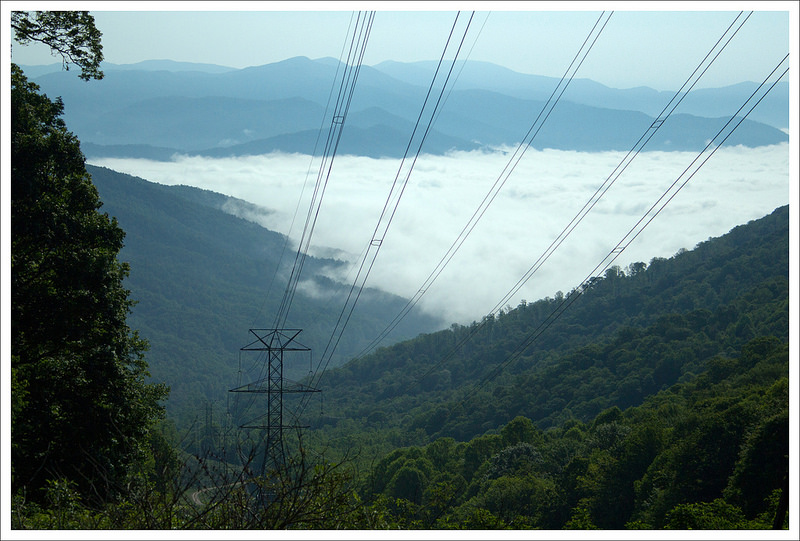
At the end of the bridge, the trail leads down stairs and goes under US-340 to the other side.  The trail then begins its steepest climb in this section as you ascend towards Loudoun Heights.  At 1.4 miles, you cross over WV 32 and at 2.0 miles, we reached the top of Loudoun Heights and a sign for the VA-WV border.  Take a right to stay on the Appalachian Trail.  The trail goes downhill and levels out for an easy walk and we had our lunch along the side of the trail.  At 4.4 miles, we came to some power lines, which created some open views to the side.  The trail begins to climb slowly.  At 5.9 miles, we arrived at Keys Gap parking lot and took a short break to fix a blister forming on Kris’ foot.  We crossed over WV 9 and continued our slow ascent.  At 8.9 miles, we reached the side trail that led to the David Lesser Memorial Shelter.  This shelter was a nice stop and there was even a swing to kick our feet up and enjoy a snack.  We were tempted to stay here for the evening, but decided to push onward.  At 9.4 miles, we reached a small side trail that led uphill a short distance to a view at Buzzard Rocks.

Signing the Shelter Log
Christine signs the shelter log at David Lesser. Below: David Lesser is a fantastic shelter with a covered dining area, sleeping shelter and porch swing; Buzzards Rock is about a half mile south of the shelter; Laurel Springs boardwalk.

Porch Swing Buzzard Rocks Laurel Spring Boardwalk

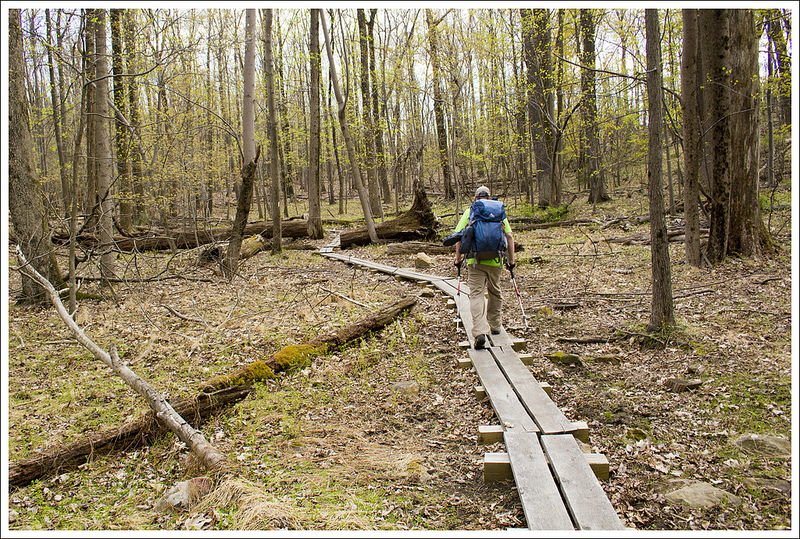
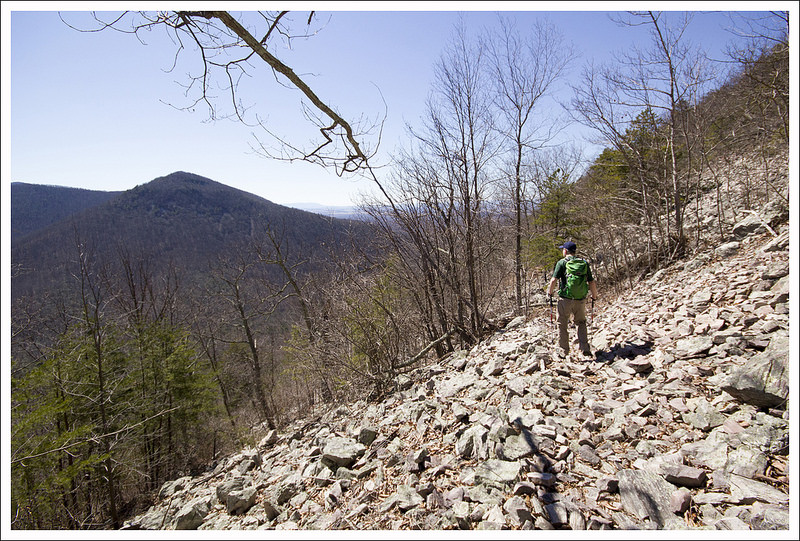
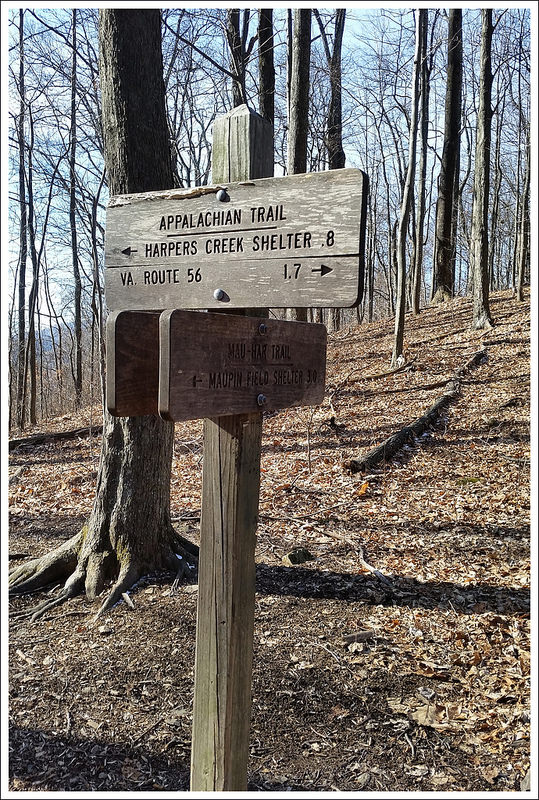
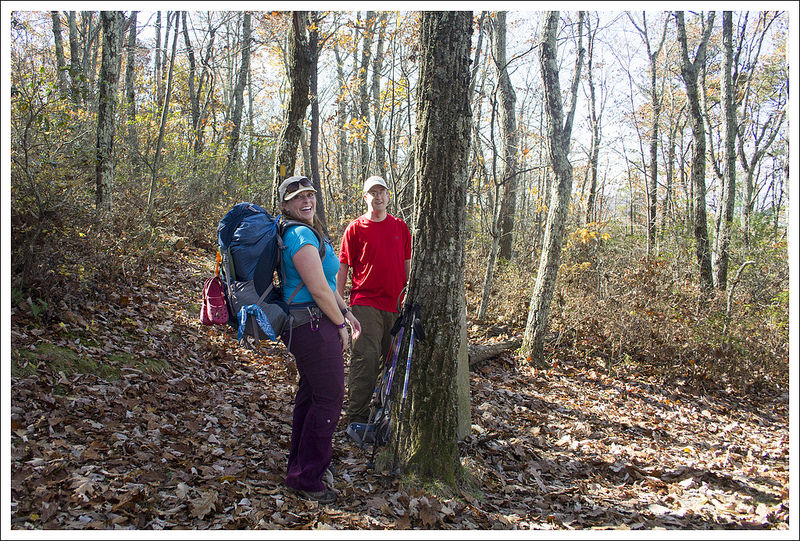
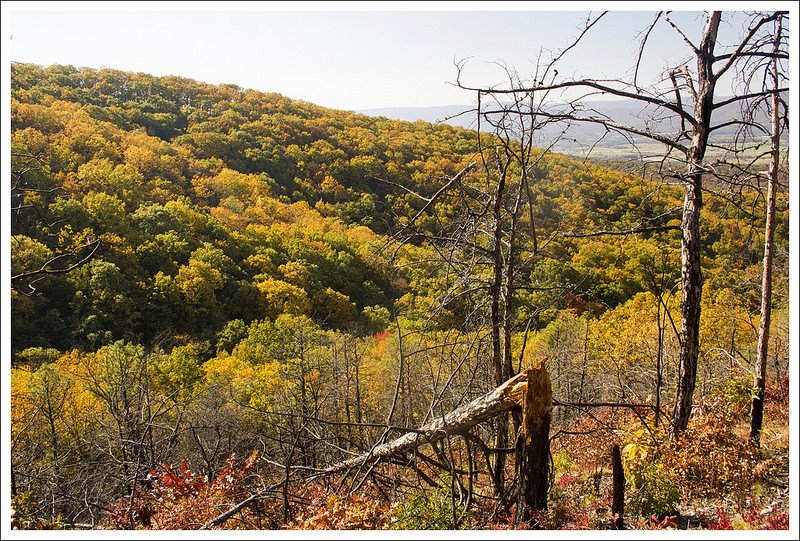
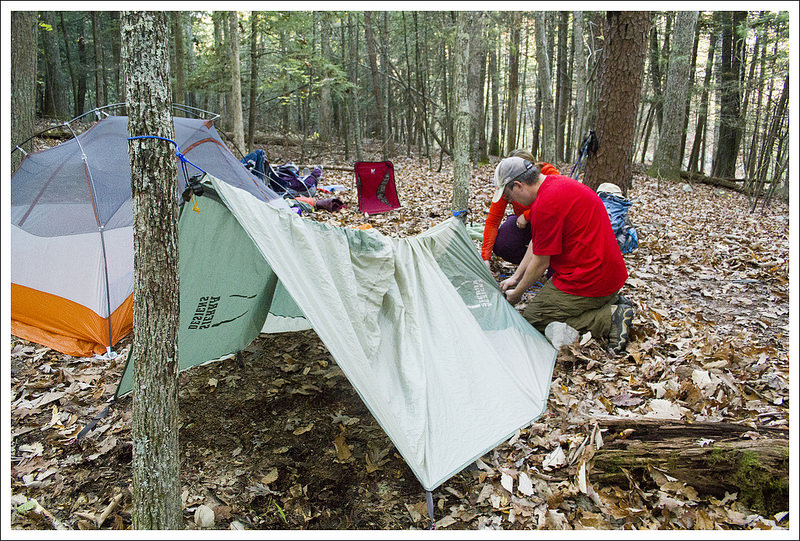
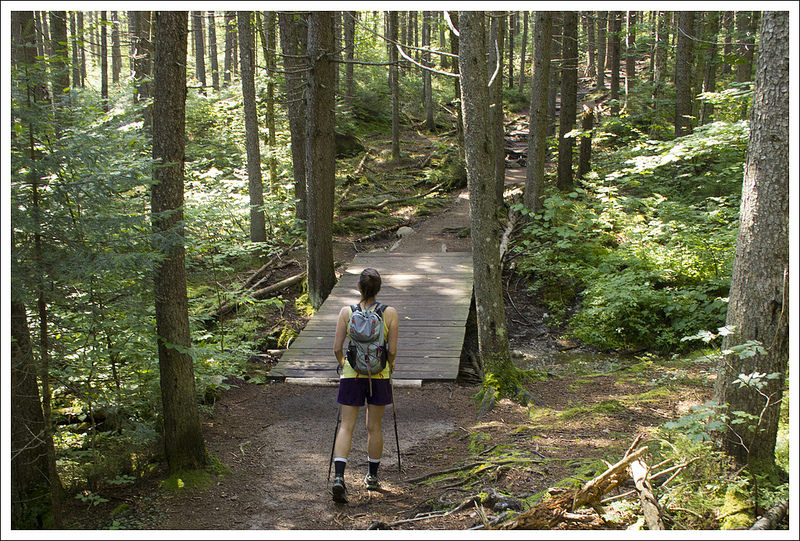
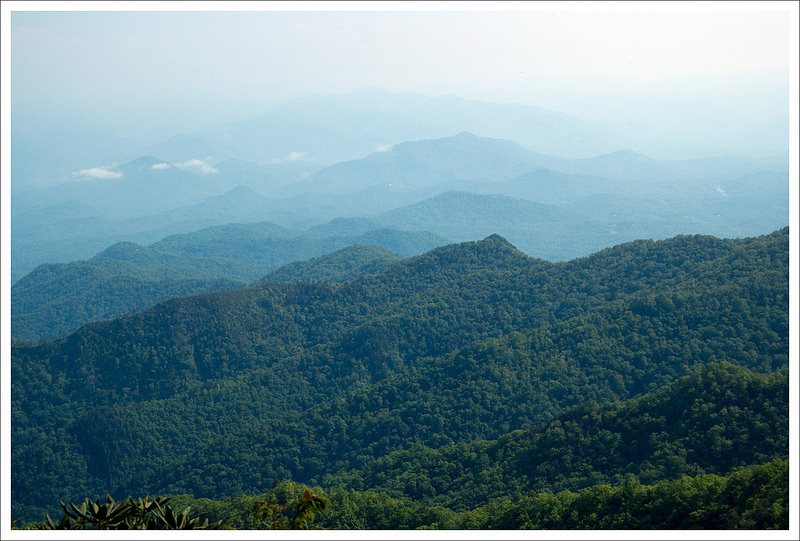
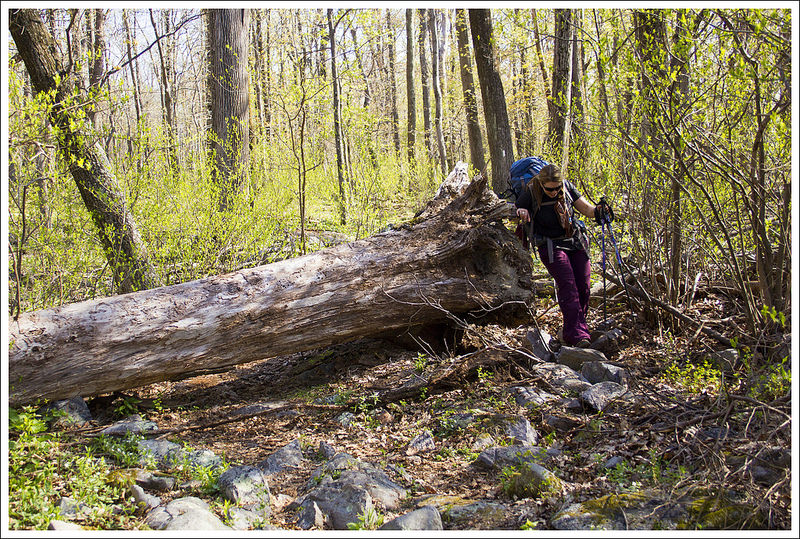
Getting back to the trail and pushing on, we came to the Laurel Springs boardwalk at 10.4 miles. This was a long stretch of planks to walk on, which protects the trail from getting too harmed during wetter times.  After the boardwalk, the trail continues to climb.  Around 12 miles, there is a small trail to the right which gives you the best views of the day.  At 12.1 miles, we reached the junction sign that pointed us to the Blackburn AT Center.  As we descended the steep trail, we became worried as we saw lots of tents along the hillside (most belonging to a large group of Boy Scouts), wondering if we would have a place to camp.  We found the last open site and set up our camp.

Campfire
We had a prime campsite on the ridge above the Blackburn Trail Center. Below: There was one nice view from the AT on the ridge just before the spur trail to the Blackburn Trail Center; Our little campsite; The Blackburn Trail Center was a welcome respite – cold sodas, clean well water, comfy chairs, and friendly people.

View Above Blackburn Trail Center Campsite Blackburn Trail Center

I struggled a lot this day.  About four weeks earlier, I had pulled a muscle in my back.  My doctor said it could take a few months to heal. I had been taking muscle relaxers and alternating ice and heat on my back for weeks. While I felt I could do this trip, I was dealing with a pinching pain with every step and it hurt even worse whenever I was going uphill.  This challenge took a lot out of me and by the end, I had enough and wasn’t enjoying myself.  Sometimes you just hit rock bottom.

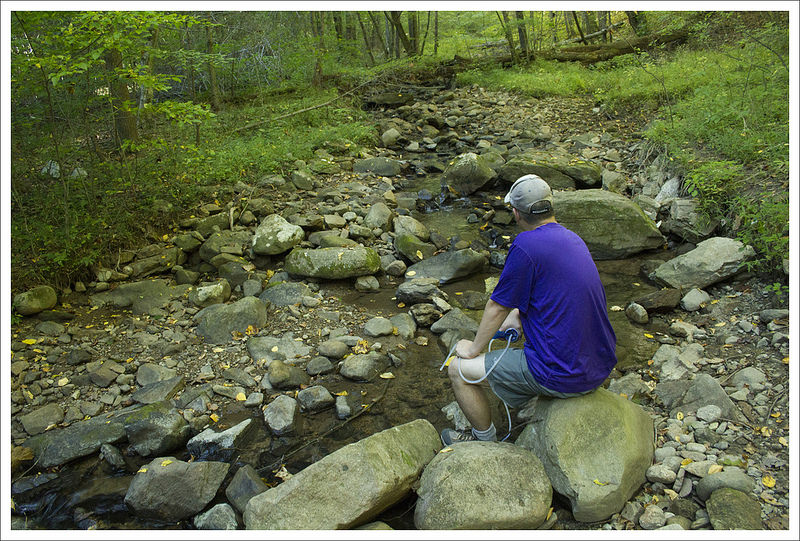
Kris had told us a story about five miles into the trip about how after an extremely long bike ride how she had gone into a store and drank a soda and how great it tasted.  Well, that thought of a refreshing, cold soda lasted with me for the rest of the day.  After we set up camp, we walked steeply down to the Blackburn AT Center to get water.  We talked to the caretakers, Chris and Sandra, for a while and they pointed out where we could fill up our water from their well.   Sandra then went into her kitchen and said, “Can I get you a cold soda?”  I can only imagine what my face would have looked like at that moment, but I felt such euphoria.  The soda tasted like sweet ambrosia to me and their kindness had fully restored my faith in humanity.  The caretakers were so nice to us and great conversationalists.  They maintain a lot of the trails throughout this area also.  The Blackburn AT Center is definitely a place I would like to visit and possibly stay again.

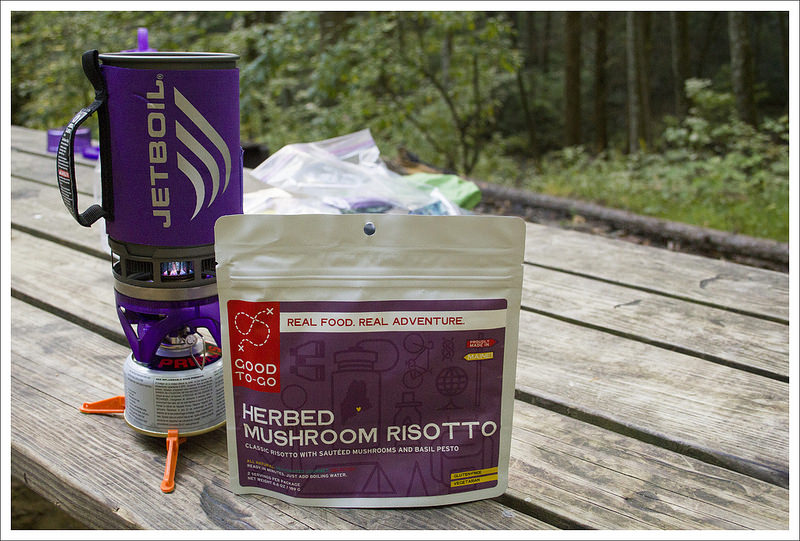
We made our way back up to our campsite for the evening and cooked our meals.  We set up a small fire and talked until it got dark.  We retreated to our tents, sleeping under a full moon.  It was a tough day, but we made it.

Day Two (8.4 miles)…

I love the feeling of being naturally awoken by the rising sun and sound of singing birds.  When morning came on this trip, I peeked out the mesh of our tent door and saw the pinks, purples, and golds of dawn spreading across the valley below our campsite. It was gorgeous! The Boy Scouts camped nearby were starting to stir – lots of muffled voices and tent zippers unzipping.

Sunrise
Sunrise over the Blackburn Trail Center. Below: We decided to cook breakfast at the Trail Center instead of at our campsite; Oatmeal, coffee, cheese, honeybuns; Trillium on our way out of the Trail Center.

Breakfast Yum? Trillium

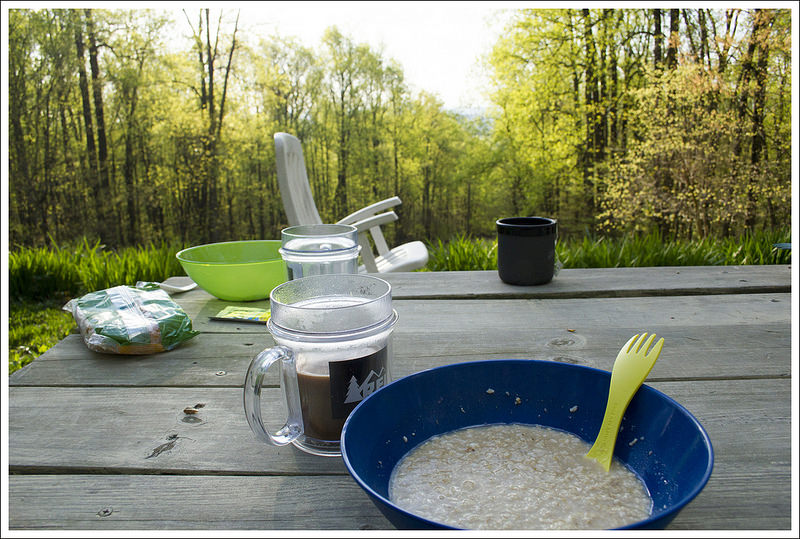
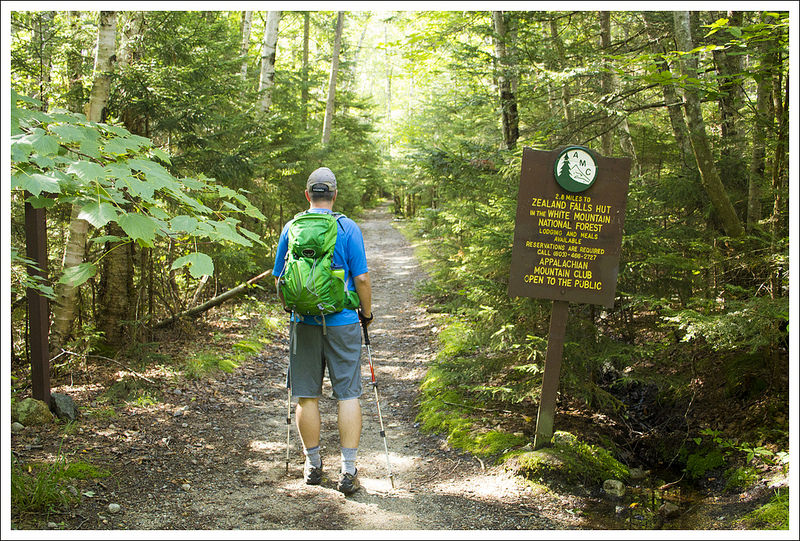
Adam, Kris, and I were all awake and out of our tents a little before 7:00.  I went and got our bear hang down and started deflating my sleeping pad and pillow. We collectively decided to pack everything up and take our stove and food bags down to the Blackburn Trail Center for a civilized breakfast.  The picnic table and comfortable seating were more inviting than sitting in the dirt near our fire pit.

Adam had oatmeal and a jumbo honeybun.  I had oatmeal, coffee, and cheese sticks.  Kris tried a Mountain House egg dish and declared it ‘odd and spongey’ – most of it ended up in the compost pile.  After finishing our meal, we said a regretful goodbye to Blackburn.  What a great place to camp for a night!

Hiking Along the AT
The first few miles of our morning were easy and pleasant ridge walking. Below: Negotiating a big blowdown; Now entering the roller coaster; Native azalea in bloom.

Blowdown Entering the Roller Coaster Pinxter Azalea

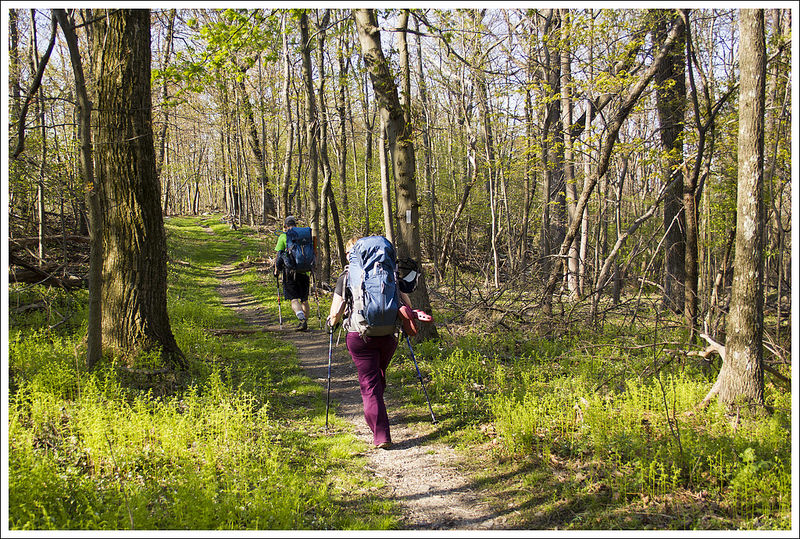
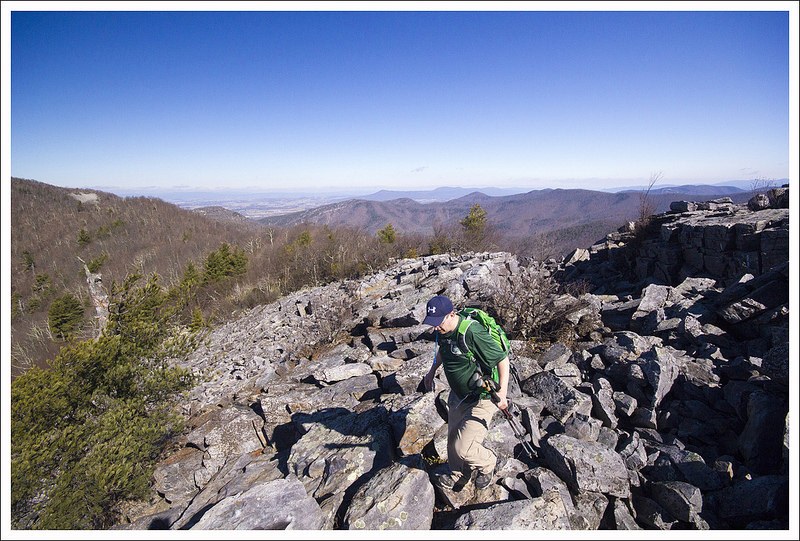
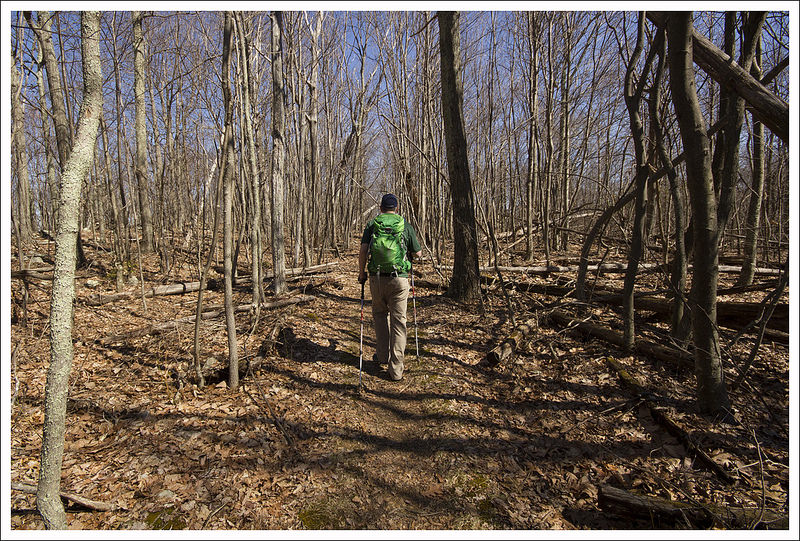
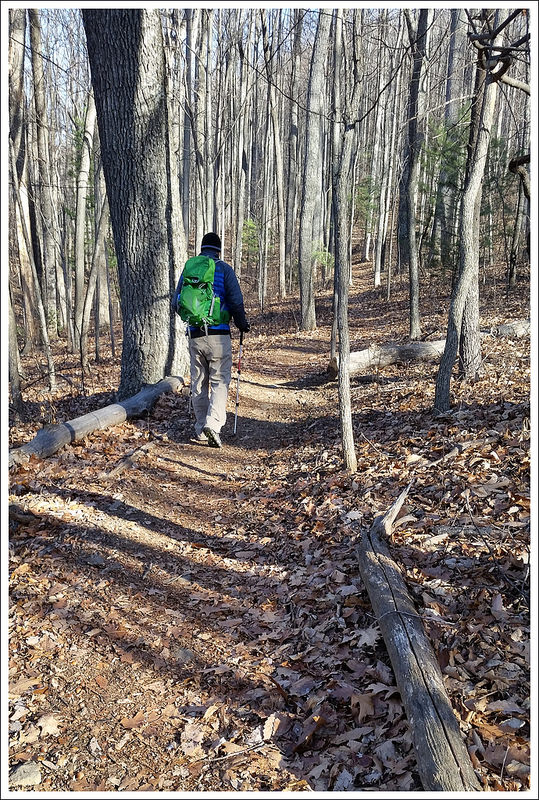
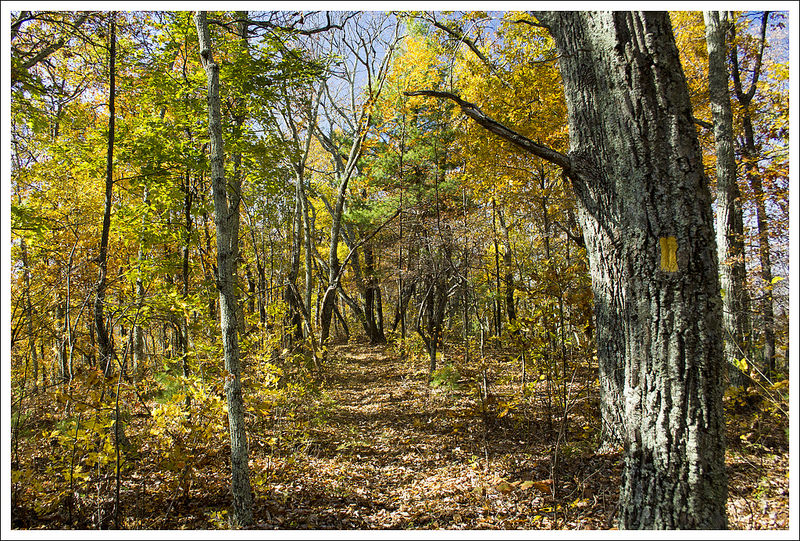
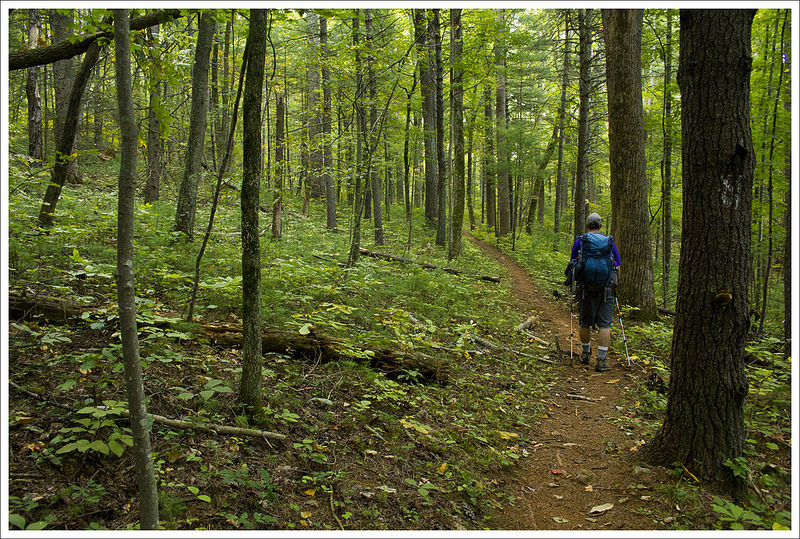
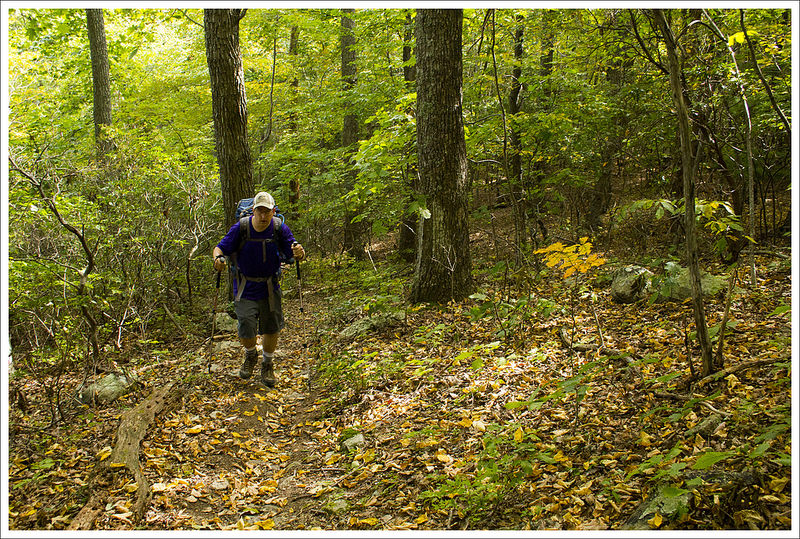
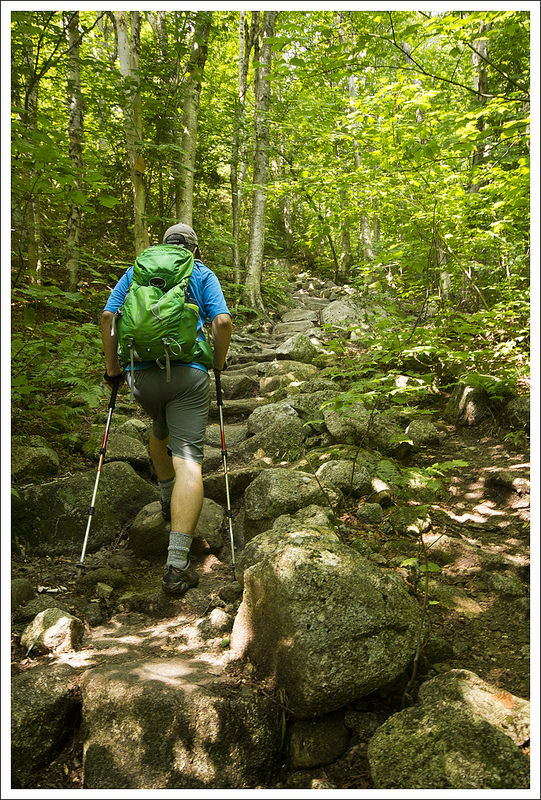
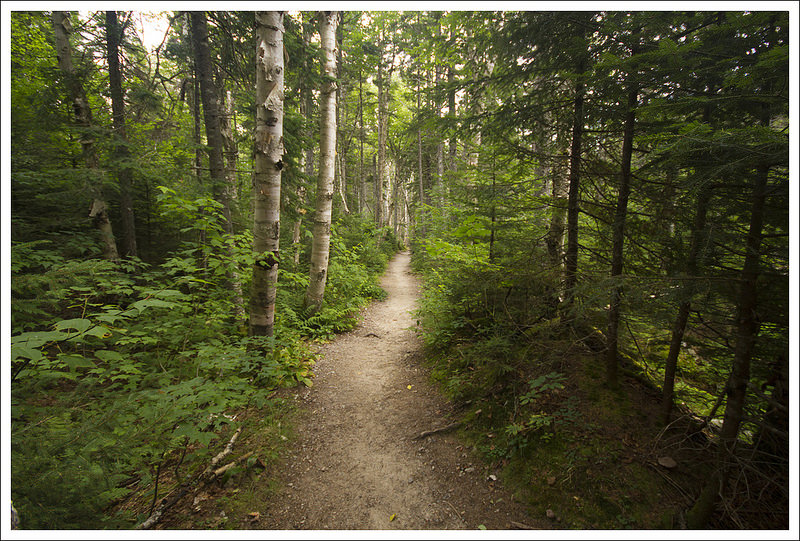
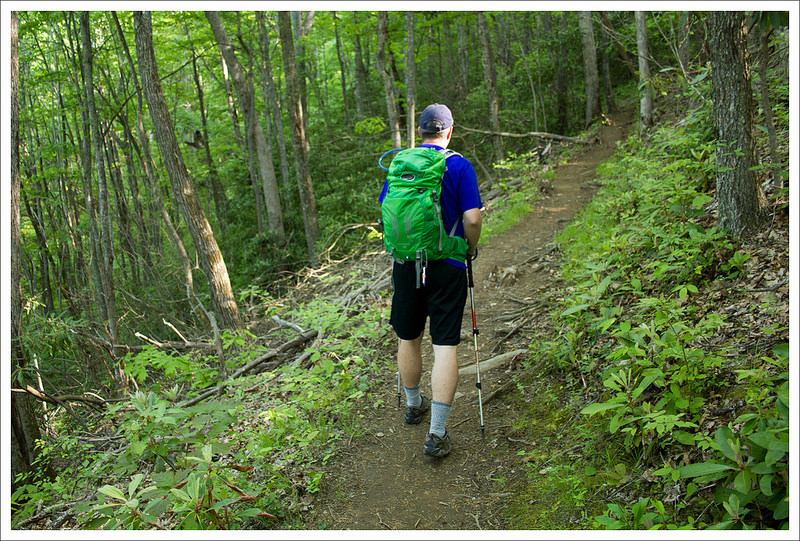
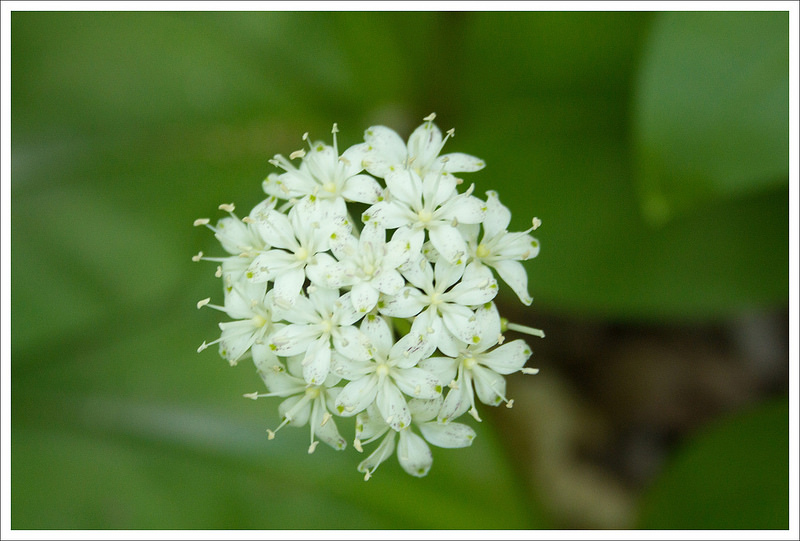
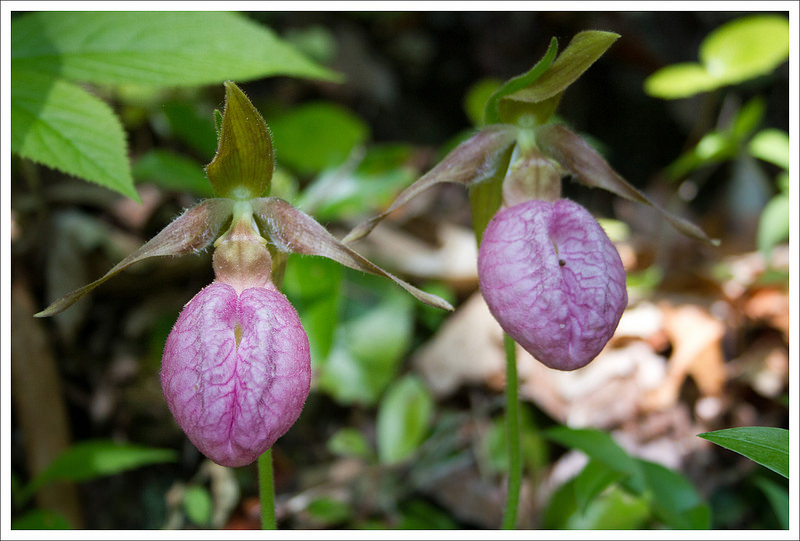
After the short, steep climb from the trail center back to the Appalachian Trail, the first few miles of hiking for the day were pleasant and fairly flat.  We made quick progress – enjoying abundant wildflowers and blooming trees.  We passed through Wilson Gap before reaching the northern end of the ‘Roller Coaster’ four miles into our hike for the day.  The Roller Coaster is 13.5 miles of steep, closely-spaced, rocky ups and downs. (we just did the northern portion of the roller coaster on this section… more to come on our next section south.)

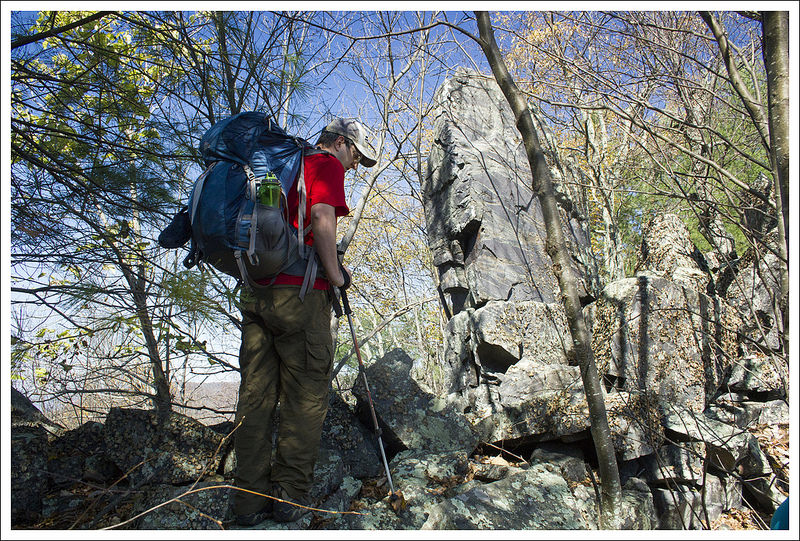
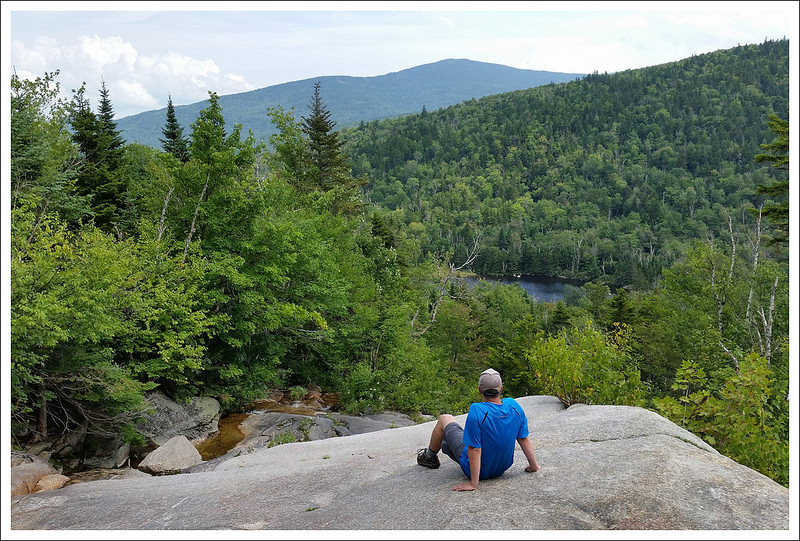
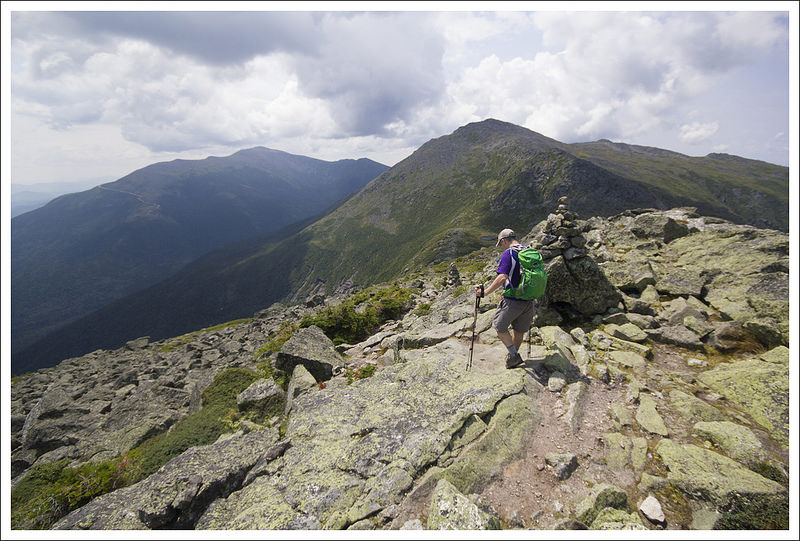
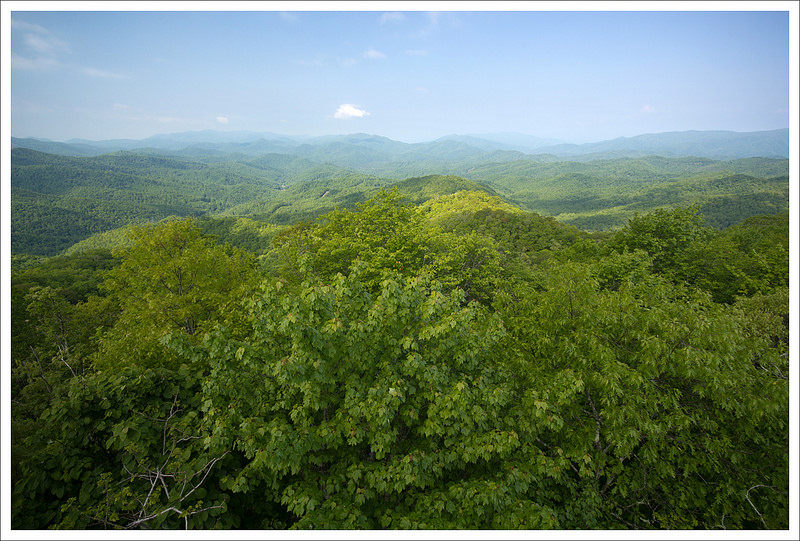
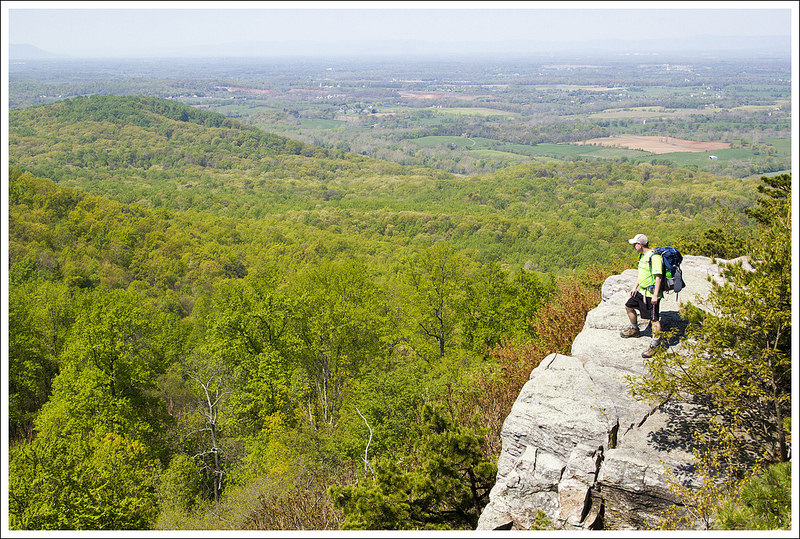
A little over a half mile into the Roller Coaster we reached the spectacular viewpoint of Raven Rocks.  There were already plenty of dayhikers enjoying the view, but we found our own little spot to rest.  We all took our packs off and reclined on the rocks.  It was a beautiful spot with panoramic views.  We were lucky enough to visit when the native Pinxter azaleas were in bloom.

Ravens Rock
Adam takes in the spectacular view from Raven Rocks. Below: Kris rests in the shade; We saw a big black snake; The roller coaster is very rocky set of steep, closely spaced ups and downs.

Kris Rests Black Snake Roller Coaster Rocks

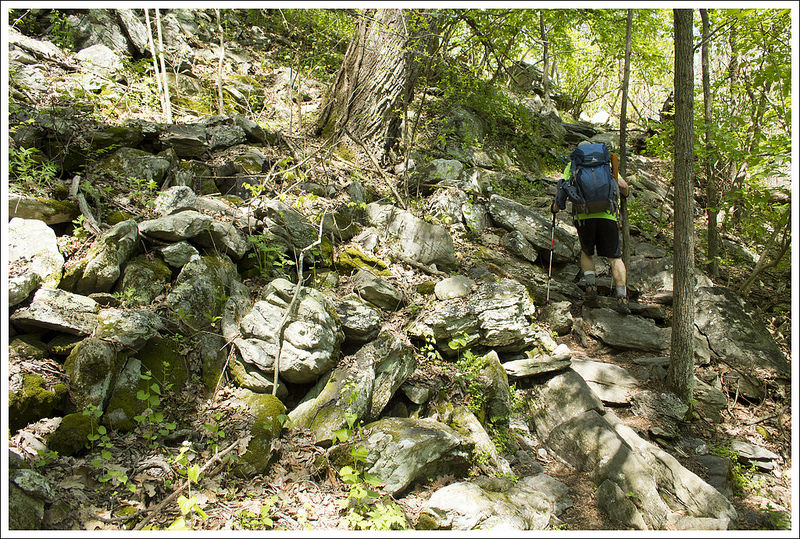
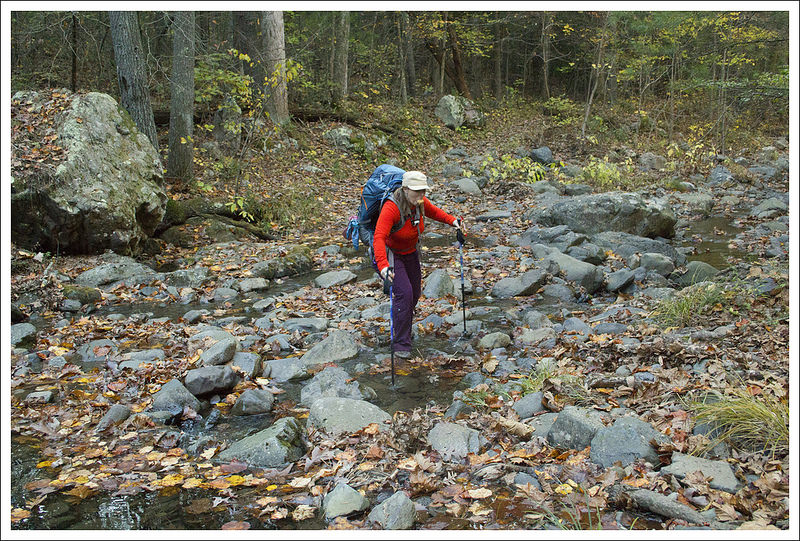
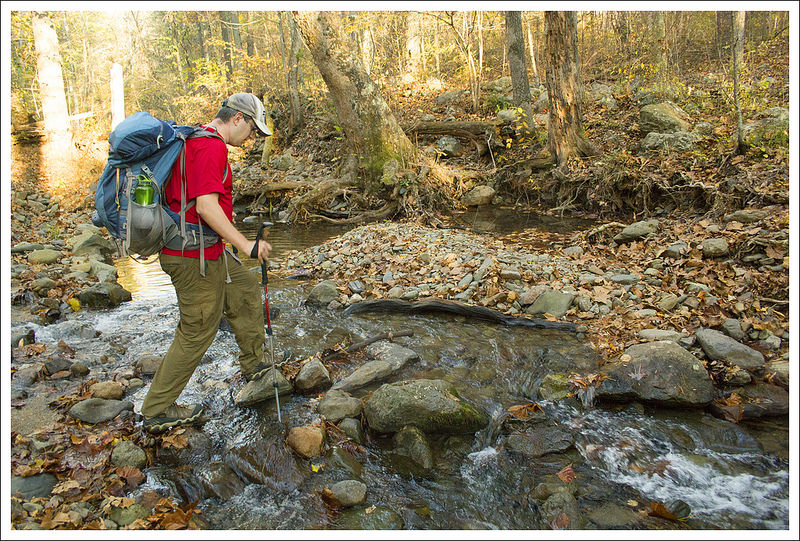
After leaving Raven Rocks, we had a steep rocky descent that led to a shallow stream crossing.  After the stream, there was another steep climb and another steep descent to another shallow stream.  I guess it’s called a roller coaster for good reason!  Ups and downs, followed by mores ups and downs. By the time we got to this part of the trail, the day had already become fairly hot and humid, and we all felt pretty tired on the climbs.  It’s always a little surprising how much tougher climbing can be in the direct sun and heat with a large pack.  The oddest part of this section was all the blood we saw on the trail.  For about 2-3 miles there were fresh droplets of blood on the ground every 5-6 feet.  I guess someone really had a bad day on the roller coaster!

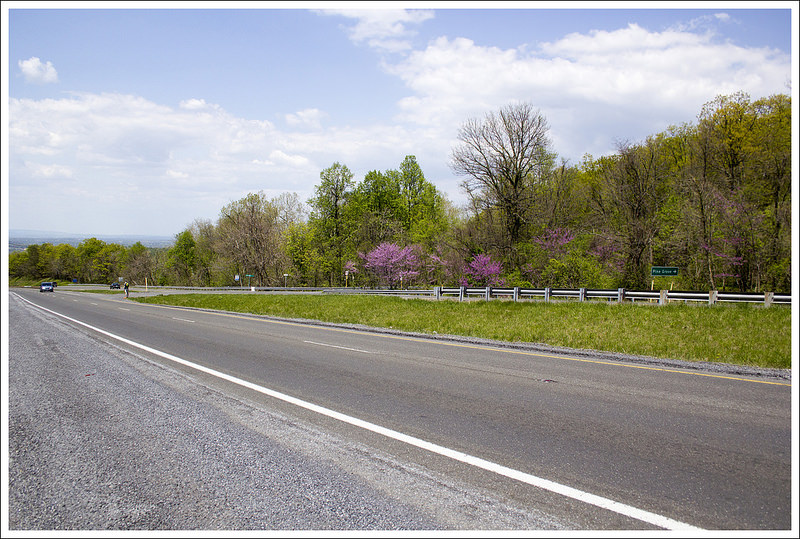
At about 7.5 miles into our hike we descended to Snickers Gap.  We stepped out of the woods onto busy Route 7.  Cars were flying by at 55-65 mph.  We had to cross the road and then walk up the shoulder of the road until reaching the trail again.  When your legs are fatigued, it’s hard to run fast across a four lane highway.  It was like Frogger with backpacks!

Bears Den Rocks
One last view at the end of our hike. Below: The crossing of Rt. 7 at Snickers Gap is sketchy with lots of fast cars flying by; Smiles for our final big uphill;  The end of the line at Bears Den Hostel!

Snickers Gap Last Big Uphill We Survived

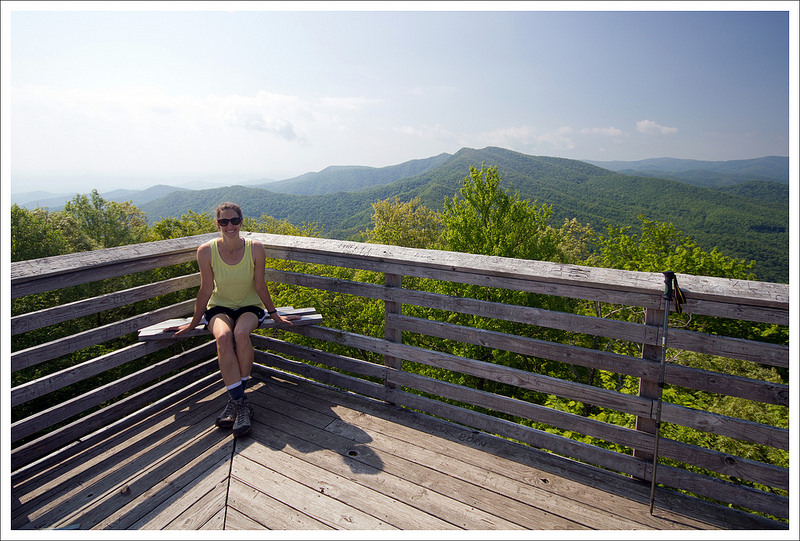
On the other side of Route 7 was our last climb of the day!  We walked uphill for another .6 miles to the rocky outcropping of Bears Den Rocks.  We spent some time relaxing and enjoying the view before walking a few more tenths of a mile to the Bears Den hostel where we had left our car parked.  We posed for a group victory photo in front of the hostel, took off our boots and packs, and sunk into the wonderful air-conditioning of the vehicle.

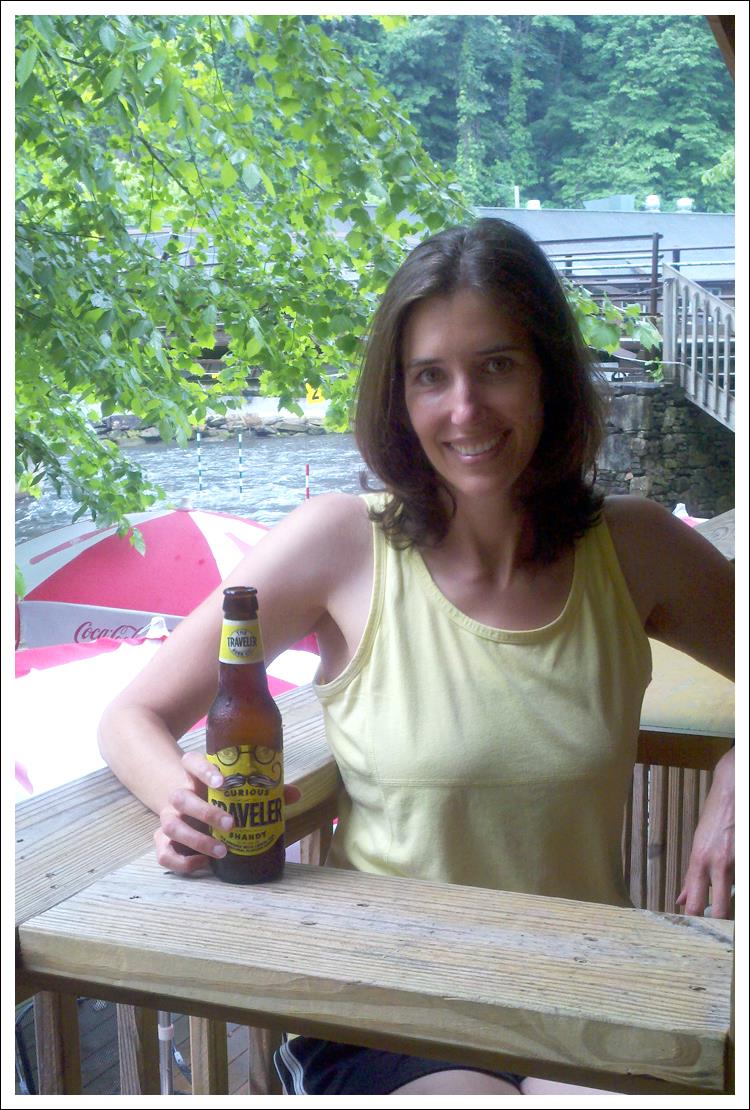
We were all starving, so we stopped for a quick lunch at the Horseshoe Curve Restaurant right out on Route 7.  The  restaurant had been advertised in our AWOL Guide and on the back of the trail information kiosk at the road crossing, so we decided to give it a go. Sandwiches, french fries, and cold drinks definitely hit the spot! Even though we were all filthy and tired, we also decided to make a stop at Veramar Vineyard to share some wine and toast our hike.  We got a bottle of their Seyval Blanc and found a few Adirondack chairs with a view of the ridge we had just traversed.

It was a great weekend for our first backpacking trip of the season.  Honestly, the more I backpack, the more I WANT to backpack!  I love being out on the trail!

Trail Notes

  • Distance – 20.5 miles
    (Check out the stats from Map My Hike [Day One] [Day Two])*
  • Elevation Change – 3882 ft.
  • Difficulty –  3.5.  The distance makes this tough, but overall is manageable.  
  • Trail Conditions – 4.  The trail was in great shape.  We only came across one tree blowdown the entire trip.
  • Views  3.  The best views of the trip were from Bears Den rocks at the end of the trip.  
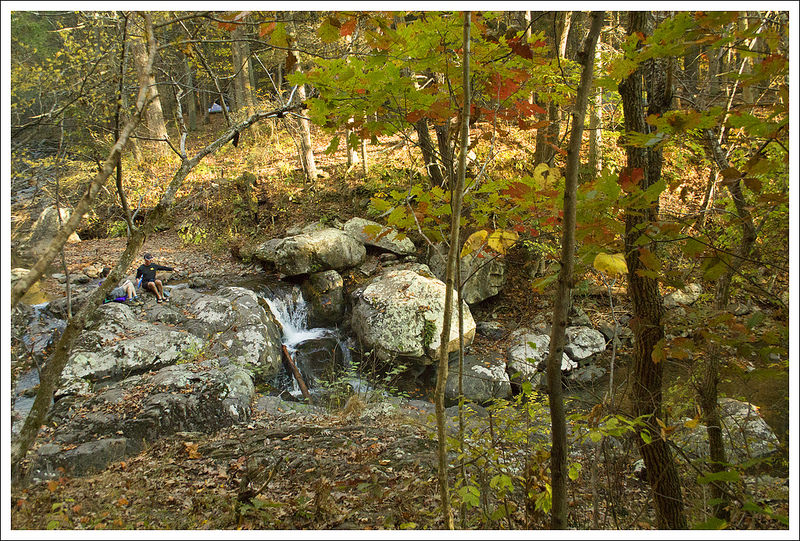
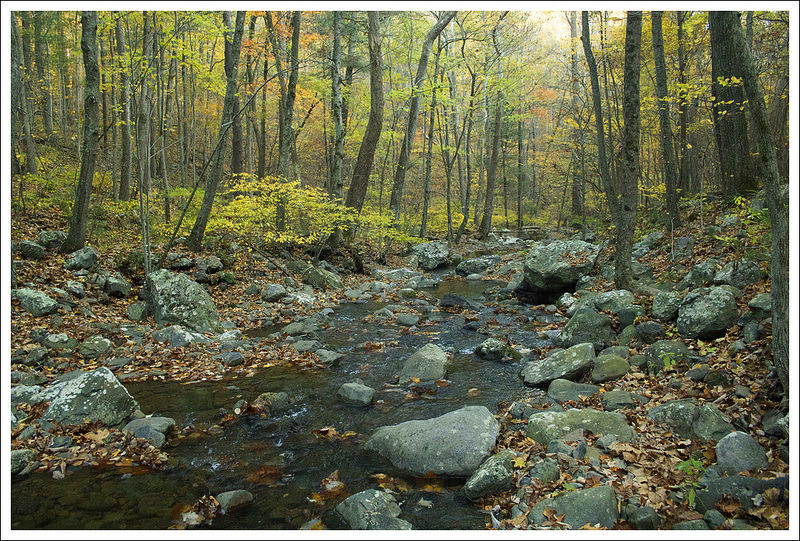
  • Streams/Waterfalls – 2.  There weren’t any streams and only one reliable water source on the first day (at the Blackburn AT Center).  The second day, there were several streams through the area of the Roller Coaster.  
  • Wildlife – 2.  We didn’t see much wildlife on this section.  There were lots of pretty songbirds at the Blackburn AT Center.
  • Ease to Navigate – 3.5.  Pay attention to signs for the AT.  It should be fairly easy to follow.
  • Solitude – 2.  We saw a good number of people throughout the trail, but most were where you would have expected them – the shelters, hiking a short distance from Harpers Ferry, and at Bears Den Rocks.  We also saw several trail runners on the Roller Coaster.

MapMyHike is not necessarily accurate, as the GPS signal fades in and out – but it still provides some fun and interesting information.

Download a Trail Map (PDF)

Directions to trailhead:  To get to Bears Den to leave one car, from I-81, take exit 315 for VA-7 E toward Berryville.  Turn left on VA-7 E and go 17 miles.  Turn right on State Route 601 and go .4 miles.  A sign shows you are entering Bears Den.  Go to the second parking lot and leave a car there.  Be sure to pay for your day-use fee.
For the second vehicle:  
Head out of Bears Den and turn left on State Route 601.  In .4 miles, take a left on VA-7 W.  In about 4 miles, take a right on to State Route 612/Shepherds Mill Road.  Follow this for 4.3 miles until it ends at US 340.  Take a right here and continue to follow US 340 N for 14.6 miles through Charles Town and approaching Harpers Ferry.  At the Econo Lodge, take a left on to Union Street.  Follow that .4 miles and take a right on to Washington Street.  Follow that .2 miles to reach the ATC Center.  If someone is not dropping you off, you should ask inside where you could leave a car overnight, since there are parking restrictions near the center.

Furnace Mountain – Austin Mountain Loop

This 12-mile loop combines numerous park trails into one great route!  You’ll pass by several gorgeous viewpoints, walk along pretty Madison Run, and cross massive talus slopes.  It’s a challenging hike with about 3,000 feet of climbing.

View the Full Album of Photos From This Hike

On the Shoulder of Austin Mountain
Adam crosses one of the large talus slopes on the side of Austin Mountain.

Christine Says…

The Austin Mountain – Furnace Mountain Loop has the reputation of being one of the park’s toughest and longest day hikes.  Not only is the terrain rocky and rugged, there is also a serious amount of climbing involved.  Essentially, you climb up from the valley floor, traversing several mountains along the way – Furnace, Trayfoot, Blackrock, and Austin. While you don’t technically reach the summits of Austin or Trayfoot, you come within a couple hundred feet of these viewless/inaccessible summits.

Most sources begin this hike from the Browns Gap parking area on Skyline Drive.  For us, it’s a much shorter drive to start down in the valley, at the park perimeter near Grottoes.  We parked along the roadside where Browns Gap Rd meets the Madison Run fire road.  This is a popular park entry point for hikers and equestrians alike.  It can get crowded if you don’t get an early start on the day.

Crossing Madison Run
Adam crosses Madison Run. Below: Pretty sun rays on the fire road; Walking up Furnace Mountain; Small talus slopes and views on the Furnace Mountain trail.

Browns Gap Fireroad Climbing Furnace View from the Furnace Mountain Trail

After walking up the Madison Run fire road for a short distance, the Furnace Mountain trail begins on the right with a rock-hop crossing of Madison Run.  For a little over a mile, you’ll ascend Furnace Mountain before coming to a cement post that marks the spur trail to the summit of Furnace Mountain.  The spur trail is about half a mile and leads to a fantastic viewpoint.  You can see Skyline Drive if you look carefully.  If you look across the gorge, you’ll see the huge talus slopes of Austin Mountain that you’ll cross later in the hike.  On this particular day, we skipped the side trail to the summit of Furnace.  We had hiked Furnace Mountain just a few weeks earlier and knew we had many miles to go and other views to enjoy along the way.

The ascent continues in earnest along the Furnace Mountain Trail.  Eventually, you’ll come to a junction with the Trayfoot Mountain trail.  Take a left and descend.  This trail is an old road bed, so it’s wide and nicely graded.  After a few tenths of a mile, you’ll come to another cement marker post.  Follow the trail to the right in the direction of Blackrock Summit.  This rocky jumble will be your best view on the hike!  We chose to eat lunch at this spot.  That probably wasn’t the best of ideas, because the strong wind made the summit bitterly cold.  It’s no fun to eat PB&J with your teeth chattering and while you’re wearing gloves.  Needless to say, we ate quickly!

Overlook on Furnace Mountain
The view from Furnace Mountain. Below:  From Furnace Mountain you can see the massive talus slopes on Austin Mountain; Looking back at Furnace Mountain; Junction of Furnace Mountain and Trayfoot Mountain trails.

View of Austin Mountain from Furnace Mountain Looking Back at Furnace Mountain Furnace-Trayfoot Junction

Rounding Blackrock Summit leads you to the Appalachian Trail.  To continue this route, head north on the AT for a couple miles until you reach the Browns Gap parking area on Skyline Drive.  This section of AT is fast going – it’s practically flat and uncomplicated.  You’ll pass the Dundo picnic area along the way.  If you run out of water, there is a clean tap at the picnic area.

From the Browns Gap parking area, follow the fire road downhill for .8 of a mile.  A cement post on the right marks the Madison Run Spur Trail.  This trail will go steeply uphill to a junction with the Rockytop and Big Run trails.  Bear to the left on the Rockytop trail.  Follow the Rockytop trail for several tenths of a mile until you reach another cement marker for the Austin Mountain trail. If you hike when leaves are off the trees, you’ll get some great ridge views in this area.

Once you turn left onto the Austin Mountain trail, you’ll have a little over 3 miles to go before you hit fire road again.  The terrain starts off easily enough, following a lovely ridge overlooking Dundo Hollow and Furnace Mountain (from earlier in your hike).   The views are really nice, and it’s impressive to look back on all the distance you’ve traversed!

Adam on Blackrock Summit
Adam takes in the view from Blackrock Summit.  Below: View from the Trayfoot Mountain trail; Arriving at Blackrock summit; Playing on the rocks.

View from Trayfoot Trail Blackrock Summit Blackrock Summit

But a little over a mile along the Austin Mountain trail, the talus slopes begin.  From there, it’s an endless field of loose rocks for nearly a mile.  When you think you’re done with rocks, surprise… there are more rocks!  Don’t miss looking up and behind you – the cliff-like wall of Austin Mountain looks like a crenulated castle wall. After you cross the last talus slope, you have a steep, knee-grinding descent back to the Madison Run fire road.

Once you reach the fire road, you just have a easy .6 mile road-walk back to your start point.  The stream is especially scenic along this stretch.  After getting back to the car, we decided we had earned milkshakes!  It was a fun day and a great challenge!

Adam Says…

We decided to try and tackle this loop since we wanted to get some good training for some longer hikes.  While we were able to get out and do a few good hikes over the winter months, this was definitely a challenging hike to do before we (or at least I) had gotten my “summer trail legs”.  This particular hike did a toll on me, especially the last couple of miles.

Junction of Trayfoot with the Appalachian Trail
The junction of the Trayfoot Mountain Trail and the Appalachian Trail. Below: Hiking the AT; Arriving at Browns Gap and the fire road; The junction with the Austin Mountain Trail.

Appalachian Trail Spur Trail Junction of Big Run & Austin Mountain Trails

The water across Madison Run was running a little higher and faster than normal, but we were able to rockhop across and begin our hike.  The hike up Furnace Mountain is a steady uphill, but does lead to some nice views along the way.  There is one section that has a small talus slope that we thought was impressive, but little did we know what Austin Mountain would bring later in the day.  At the junction of the spur trail, we met a couple that was doing the same loop but camped along Madison Run that morning.  They had started from the Browns Gap parking area in Shenandoah National Park, but had a day of mostly uphill climbing this day.  As Christine mentioned, we decided to skip the overlook and made our way to Blackrock Summit.

Talus Slopes
Huge talus slopes on Austin Mountain.  Below: Views from the Austin Mountain Trail; Talus slopes and a view of Furnace Mountain; Descending Austin Mountain.

Walking the Austin Mountain Trail Looking at Furnace Mountain from Austin Mountain Steep Descent of Austin Mountain

At Blackrock, the wind was incredibly strong and cold.  There was still ice in the crevices between the rocks in most places.  We sat out to eat some lunch, but our hands were trembling in the cold, which made for challenging and rushed eating.  We quickly got out of there and joined the Appalachian Trail, heading north.  We made quick time on this flatter section of trail and crossed Skyline Drive.  The trail stays close to Skyline Drive until you reach the Dundo picnic area (which does have bathrooms if you need it).

Passing the picnic area, we crossed Skyline Drive again after 6.5 miles.  After crossing the road, we made our way through the parking lot and crossed the gate blocking the fire road.  Heading down the fire road was easy walking.  At mile 7.3, we spotted the cement post on the side of the road, leading up the Madison Run Spur Trail.  This section was steep but short as we reached the crest and junction with the Rockytop Trail.  We took a left here which continues uphill and reaches the junction with the Austin Mountain Trail around 8.2 miles.  Bear to the left and the trail begins to go downhill finally.

Madison Run
Pretty Madison Run.  Below: Crenulations on Austin Mountain; Adam coming down to the fire road; Walking the fire road back to the car.

Spires on Austin Mountain Return to Fire Road Walking the Fire Road

Right before this junction, my IT bands near my right knee began to hurt.  Sometimes when one knee begins to hurt, you tend to overcompensate with the other.  We came across a hiker that was hiking up and he warned us there was a mile of loose rock to walk on.  We soon reached the huge talus slopes.  When you have one leg giving you pain, the last thing you want to see is loose rock footing for as long as you can see.  The views of the slope were impressive, as well as looking across the mountainous valley to see Furnace Mountain, but the pain was keeping me from having the best of times.  With vultures ominously circling above my head, I felt they didn’t have much faith I would make it.  Just when we thought we had reached across the slopes, the trail turns back and works it way down the mountain, giving us lower parts of the slopes and more rocks.  We finally reached the bottom of the trail and joined the Madison Run Road at 11.2 miles.  It was a flat walk along the side of a picturesque creek until we made our way back to the car in .8 miles.

While this was a tough hike, it was rewarding.  This hike has great views, unique geology, and a picturesque creek.  If you don’t want to tackle it in one day, it would make a nice backpacking loop, but I would recommend starting at Brown’s Gap to split the hike and leave you camping by the water source of Madison Run.

Trail Notes

  • Distance – 12 miles  Add .5 mile, each way, if you take the spur trail out to the overlook atop Furnace Mountain.  You can make a shorter, easier loop if you descend via the fire road and skip Austin Mountain)
    (Check out the stats from Map My Hike)*
  • Elevation Change – 2900 ft.
  • Difficulty –  4.5.  The length and amount of climbing make this tough.
  • Trail Conditions – 2.  While the trail was well-maintained, the footing on the talus slopes brings this score down due to the challenge of walking on loose rock for over a mile of the trail.   
  • Views  4.  You have nice views from Furnace Mountain if you add that spur, but Blackrock Summit and views along the Austin Mountain Trail make it worthwhile.
  • Streams/Waterfalls – 3.  Madison Run is a nice wide stream and reliable water source year-round.
  • Wildlife –2.  We didn’t see much, but there have been bear sightings along the Austin Mountain portion of the trail.
  • Ease to Navigate – 2.5.  There are lots of trails that cross, so pay attention to the signs.  The trickiest is around the Blackrock Summit area.
  • Solitude – 3.  You will likely see people at Blackrock summit, but not a lot of activity elsewhere. 

Download a Trail Map (PDF)

Directions to trailhead:  From I-81, take exit 256 heading east towards Weyers Cave.  Go 6.6 miles and take a left on US-340/Augusta Avenue.  Go .1 miles and take a right on Cary Street.  In .2 miles, continue on to VA-663/Brown’s Gap Road.  In 1.9 miles, turn right on to the dirt fire road.  Follow this 1.1 miles and you will reach the parking area.  Look for the concrete post for Furnace Mountain which will have you instantly rock-hopping across Madison Run to start your hike.

MapMyHike is not necessarily accurate, as the GPS signal fades in and out – but it still provides some fun and interesting information.

Appalachian Trail – Reeds Gap to Dripping Rock

This 9 mile hike’s distance could be cut in half if you have a car shuttle.  When we hiked it, the Blue Ridge Parkway was closed for ice/snow, so we ended up parking at Reeds Gap, walking 4.8 miles on the Appalachian Trail and then walking 4.2 miles back along the closed parkway. Typically, this would be an easy hike with a couple nice views.  In our case, it was a challenging icy hike in (occasional) white out conditions!

View the Full Album of Photos From This Hike

Snow Along the Blue Ridge Parkway
It’s a real treat to walk the Blue Ridge Parkway when it’s closed to vehicular traffic. Fresh snow made the view spectacular. Below: The parking area at Reeds Gap was icy when we arrived; Adam walked along the iced Appalachian Trail; Everything was fully coated with a glaze of ice.

Reids Gap Parking Icy Appalachian Trail Coating of Ice

Adam Says…

As we slowly work on completing the entire Appalachian Trail through Virginia, we sometimes end up with small gaps in our contiguous miles.  This 4.8 mile section was one of those and it was proving to be our nemesis.  We had tried to share a shuttle with friends and park at both ends, but a closure of the parkway made those plans fall through.

Over our Christmas break from work, we tried to hike it by dropping Christine at one end and I would park at the other, passing in the middle, and then Christine hiking to the car and driving back to pick me up.  It wasn’t preferable to do it this way because we like hiking together, but we really wanted to cover these miles.  But on our way to the drop point, we saw several cars slide off the road (not far from a precipitous, cliff-side drop).  Rain from the day before had left a thin sheen of ice on all the shady, curvy spots in the road.

One of the couples in a car that slid off the road was having a heated argument – he wanted to press on through the icy danger, but she wanted to call AAA and have the car towed off the mountain.  We decided to backtrack and not risk it (especially not knowing the road conditions ahead), choosing to hike near Humpback Rocks instead.   On our way to Humpback Rocks, we saw a park ranger making his way to the slippery road patch. They ended up closing the parkway just south of Humpback Rocks that day.  The parkway closes quite often in the winter. Rangers would rather close the roads than risk having to come up and save people on the trails/roads when weather conditions could make it difficult.

Ice Falls
There were several rock face covered with snow melt and re-frozen run-off. They made pretty ice formations. Below: Christine cross the Blue Ridge Parkway at the Three Ridges Overlook.  The pavement was like a skating rink; Adam makes his way downhill; In many places branches were bowed across the trail.

Christine Crosses the BRP Walking the AT in Ice Through the Branches

After those failed attempts, we decided to try this section again.  The weather forecast suggested a warming, clearing day, no snow in the near future. There had been a short bout of freezing rain the night before, so we were a little concerned about roads, but we knew we could at least make it to Reeds Gap and hike from there. When we arrived at Reeds Gap, we found a few other cars there, but it looked like they were attempting to hike Three Ridges.  We found the sign for the Appalachian Trail and crossed SR 664 to head north on the white-blazed Appalachian Trail.  I was amazed at how icy the ground still was.  It was manageable in normal hiking shoes, but still slippery in parts.  Every step that I took left an icy footprint behind me, which made the trail look like an old Family Circus comic strip.  At the least, they were good breadcrumbs left in case we needed to backtrack on the trail.  Some of the branches from nearby trees were iced over and bowed over the trail, causing us to have to lift them over the trail.   Some broken off pieces looked like broken antlers littering the ground.

After going about .5 miles, the Appalachian Trail crosses the Blue Ridge Parkway.  At this point, the trail descended through some slippery areas, so we decided to put on our Yaktrax to provide some traction.  I don’t know how we would have made progress without them.  After going just another mile or so, it started to snow. At first, it was just a few flurries, but it was picking up.  At 3.5 miles, we came to a sign pointing out a short trail to the Rock Point Overlook.  The snow was coming down so fast at this point, visibility was at a minimum.  We ate a quick snack and then proceeded.  At 4.35 miles, we arrived at the Cedar Cliffs overlook.  The snow had been falling so hard, it was hard to find the trail.  It was at this point, I realized that hiking along the AT in the snow wasn’t the best idea – all the trees were covered with snow, covering up any white blazes that would have been on the trees.  We were so close to finishing this section and didn’t want to turn back at this point.  I had Christine stand in one area that we knew was close to the trail and within eyesight while I scouted ahead to try and find a semblance of trail under our feet.  Eventually, I found the trail again and we proceeded.

Overlook
Views from the first overlook were practically lost to the swirling snow. Below: Sign pointing the way to the overlook;  Snow started coming down harder while we were stopped at the overlook; Within 15 minutes, the icy ground was covered with a generous dusting of snow.

Sign to Overlook Snow Getting Snowier

I started to worry at this point about being able to drive back down from the mountain if the roads were going to be bad.  We made a decision that when we reached the road, we would hike back along the Blue Ridge Parkway to hopefully save time and get us back to our car more quickly.  At 4.85 miles, we arrived back at the Blue Ridge Parkway.  We took a right and headed south along the parkway and we were soon very glad we had made this decision.  We came across some great views at overlooks along the road that we didn’t have along the trail.  And then the snow stopped and the sun came out to start melting the snow, which eased my nerves.  The views were outstanding on the way back as we could see a defining line of snow that had hit the mountains and clear fields at the lower elevations.

While this hike had a little bit of danger due to the weather, it was a visual winter wonderland.  This is the definition of winter hiking.  We arrived back at the gate that was blocking the parkway at 9.0 miles and got back in our car.  We decided to hit Devil’s Backbone on our return trip home and then also stopped at some other Nelson County 151 highlights – Bold Rock Cider’s new tasting room and Silverback Distillery.  It really was a great adventure and it made me feel very lucky to have a wife that will go on such crazy undertakings with me.

NOTE: From research we have done, the starting point is called “Reeds Gap” in some sources and “Reids Gap” in others.  We went with the first spelling since that was how it was listed on PATC and NatGeo maps.

Christine Says…

Finishing this little 4.9 section of AT turned out to be more elusive than I ever would have believed possible. After a few attempts failed due to snow/ice, closed roads, and transportation problems, we finally successfully hiked from Reeds Gap to Dripping Rock!

On the day we accomplished this minor feat, conditions weren’t quite ideal.  There had been a bit of freezing rain the night before, but the weather was forecast to warm and clear over the course of the morning. The Blue Ridge Parkway was still closed, so we couldn’t leave a shuttle-back car at Dripping Rock.  This wasn’t a big deal – instead of hiking 4.9 miles once, we’d have to hike those same miles twice, making a total hike of almost ten miles.  We left our car in the roadside parking on Route 664,  next to the Appalachian Trail crossing. Route 664 (Reed’s Gap Rd.) crosses the Blue Ridge Parkway and is kept open year-round.

At Reeds Gap, everything upright was coated with a thick glaze of ice.  It was foggy and gray and raw.  We headed north on the AT, our feet crunching though the crust of ice.  It was so peaceful and beautiful.

We're nuts
Adam questioned how wise it was for us to hike on a day with such rapidly changing weather. Below: There were some broken trees along the parkway; Adam takes in Ravens Roost;  A little ‘Christmas Story’ reenactment.

Back on the BRP First Views from the BRP Stuck

The Appalachian Trail soon crossed the Blue Ridge Parkway at the Three Ridges Overlook.  The asphalt was like a skating rink!  It looked like regular pavement, but it was as slick as a slip-and-slide.  I could totally understand why the park service closed the road!

After crossing, there was a slight descent and the terrain became a little rockier.  I started to lose my footing, so Adam helped me into my traction.  The ice wasn’t thick enough or hard enough for Microspikes, so we went with Yaktrax.  Mine are a touch too small for my boots, so getting them on is a two person effort.  I brace on a rock and Adam yanks the Yaktrax with all his might until they snap into place!  One day, I’ll buy some bigger ones.  🙂  Fitted with traction, we moved swiftly along with sure, confident footing.  Snow started falling – flurries at first, then in earnest.  It wasn’t supposed to snow, so we trekked on hoping the skies would soon clear up (like they were supposed to!) Ah… mountain weather at its unpredictable best!

We reached a small sign pointing us to the Rock Point Overlook.  As we looked off the rocky outcropping, all we could see was clouds and swirling snow.  Every now and then the clouds moved enough that we could see mountains on the other side of the gap.  We ate a quick snack and moved on.  The snow just kept coming down faster and faster.  We started feeling a little worried about getting back to our car and finding Route 664 impassable.

Blue Ridge Parkway
There were many beautiful views along the parkway. Below:  It was neat to see the snowless valley below; During the last few miles of walking, the sun came out and melted the snow off the road; Another pretty valley view.

Views along the BRP Almost Melted Starting to Clear

In fair weather, there are more nice views along this stretch of the Appalachian Trail, but by the time we reached the vistas at Cedar Cliffs, we were practically in whiteout conditions.  The white snow even camouflaged the white blazes on the trees. It was too bad, Cedar Cliffs had large rock ledges and would have been beautiful in clear conditions.  About a half mile past the cliffs, we reached the Blue Ridge Parkway and the pullout for Dripping Rock Spring.  We made it – we finished our section!  At that point, the snow was still coming down hard and fast.  To save time, we had decided to hike the parkway back to our car.  It’s easy to move at speed when the terrain is uncomplicated.  We still needed traction because the road was extremely slippery and treacherous.

It turned out that the road was the better choice for scenery, too!  We saw some of the most spectacular winter vistas from Rock Point, Ravens Roost, and other openings along the way.  I felt really privileged to see this scenery that most people don’t get to see when the road is closed to vehicles.  As we hiked along, the promised clearing conditions finally happened.  The ice on the road melted quickly and we were treated to a stunning display of sunshine and ice – it was like walking through a shimmering crystal forest.

Sunny Skies and Snow
Sunshine and snow make for a beautiful combination!  Below: Once the sun came out the snow melted really quickly.

Almost Melted

We got back to our car pretty quickly and found the car and the road both free of ice!  We headed down the other side of Route 664 (past Wintergreen Resort) to go to Devil’s Backbone for lunch.  The brewery was packed!  All the other women there were wearing makeup, skinny jeans, and tall boots.  I was sweaty, disheveled, and dressed sort of like Rainbow Brite.  But whatever… they had (after an hour’s wait) beer and good food.

We decided to take the 151 route home so we could pass Bold Rock and Silverback.  Bold Rock recently finished their new tasting room.  It’s rustic and elegant – with fireplaces and wonderful farmland views.  After beers at Devils Backbone, we skipped drinking cider, but I’m glad we took the time to check out their new facilities.

Silverback is the area’s new distillery.  They’ll eventually have whiskey made using local grains.  But for now, they have moonshine, gin, and vodka.  You can  do a flight of tastings of their three spirits – a half ounce of each, either straight or mixed into signature cocktails.  We ended up sharing a flight of three mini cocktails – a Moscow Mule, a Gin and Ginger, and Monkey Tea.  I’m not much of a liquor/cocktail fan, but the drinks were fun and tasty.  I definitely recommend checking these two spots out if you happen to be in the area!

Devil's Backbone
We stopped for lunch at Devil’s Backbone. Below: We checked out the new taproom for Bold Rock.  It’s very cozy and elegant.  We didn’t stay for cider on this trip; We also stopped by Silverback distillery and shared a flight of miniature cocktails.

Bold Rock Silverback

Trail Notes

  • Distance – 9 miles
    (Check out the stats from Map My Hike)*
  • Elevation Change – 1050 ft.
  • Difficulty –  2.  The icy conditions made it more of a challenge, but overall this would be a fairly easy hike with not as much elevation gain.  The distance may make it a little more difficult for those that are not used to going this far.
  • Trail Conditions – 3.5.  Again, the ice made this a bit more challenging, but this section of the AT was very well-maintained. There were a few loose, rocky sections.
  • Views  4.5.  Most of what we were able to see was from the parkway, but I know the other overlooks would lead to panoramic views.
  • Streams/Waterfalls – 1.  There was one small, frozen over stream that might work as a water source. 
  • Wildlife – 1.  We saw lots of deer leaping into the woods, but I wouldn’t expect a lot of other wildlife, especially since this is a well-traveled section.
  • Ease to Navigate – 4.  Just follow signs at the posts for the Appalachian Trail.  Of course, since we lost the trail at one of the overlooks, we couldn’t give this a perfect score. 
  • Solitude – 3.  Due to the nearby parking lot, I would expect this would be a place where people would explore the trail.  Of course, most of the cars in the nearby parking lot are likely heading up Three Ridges from Reeds Gap instead.

Download a Trail Map (PDF)

Directions to trailhead:  From I-64, take exit 96 for SR 624 toward Waynesboro/Lyndhurst.  Turn on to S. Delphine Avenue and go 1.2 miles.  The road becomes Mt. Torrey Road/SR 664.  In 9.3 miles, turn left to stay on SR 664.  Once you reach the top of the road in .8 miles, you will cross the Blue Ridge Parkway.  Park at the large parking lot on the other side of the road.  Across from the parking lot (and across SR 664), you will see the post and sign for the Appalachian Trail.  Head north on the white-blazed trail.

MapMyHike is not necessarily accurate, as the GPS signal fades in and out – but it still provides some fun and interesting information.

Appalachian Trail – Tye River to Mau-Har Junction

This 3.8 mile hike on the Appalachian Trail completed a short 1.9 mile gap in unbroken Appalachian Trail mileage we left after hiking the Three Ridges circuit in 2012.  After you cross the scenic Tye River footbridge, the hike doesn’t boast any views or unique scenery.  It’s a moderate uphill climb to a junction marker in the woods.

View the Full Album of Photos From This Hike

Tye River Footbridge
Our hike started off headed northbound over the Tye River footbridge. Below: White Blaze painted on the bridge; Adam and Christine on the bridge.

White Blaze Adam and Christine on the footbridge

Adam Says…

We have been working on section hiking some of the Appalachian Trail through Virginia.  Hopefully one day, we will have the entire section that crosses Virginia on here.  In doing it in sections, we have ended up with a few small gaps between sections.  This gap was created when we hiked Three Ridges and did it as a loop trail that included a return trip on the Mau-Har trail.  I got a text from my friend Bryce from Hiking Upward that mentioned he was going to try and hike Spy Rock the next day.  I mentioned that we were trying to get this section done as well, so he agreed to accompany us on this section also.  It was January 1st and we wanted to start the year off right with a great day of hiking.

We parked our cars at the lot on 56 where the Appalachian Trail crosses the Tye River.  We crossed the road and almost immediately you come upon a large suspension bridge that crosses the Tye River.  We knew this was probably the highlight of the trip, so we took some time to get some pictures across the bridge and of the Tye River from under the bridge.

View Through the Trees
Looking through the trees toward the Priest. Below: Adam on the trail; Our stop point for this hike was just a sign at the junction of the AT and the Mau-Har trail.

Adam Hiking End Point

After crossing the bridge, the trail takes a few switchbacks and then starts a fairly steep uphill through the woods.  Looking back from the trail, we were able to see some obstructed views of Pinnacle Ridge and The Priest, but when spring hits these views will likely be more obstructed.  On our climb up, we saw a dog come racing towards us.  As it turns out, it was a bear-hunting dog, as it had a large radio collar around his neck.  The dog barely stopped at all and barreled past on a mission to try and find a bear.  We continued our hike up and came up to the sign post that marked the trail junction with the Mau-Har trail.  From this point, you could continue on the Appalachian Trail to the right to reach Chimney Rock and Three Ridges or take a left on to the Mau-Har Trail, to reach the Maupin Field Shelter.  We tapped the post to mark that we had completed this section and made our way back.

After our hike, we got in our cars and stopped by Crabtree Falls, which had frozen water on the sides.  This iconic waterfall is always a nice place to visit any time of year.  Our next stop was to hike up to Spy Rock.  When we first arrived, the parking lot was full of cars and vans.  We felt defeated and were about to make the decision to not do the hike, when someone came down the trail and mentioned that a few car loads were getting ready to leave.  We waited just a couple of minutes and two parking spaces opened up.  We hiked up to Spy Rock, which was covered in snow in some parts.  At the top of the trail, Bryce decided he wanted to bushwhack to another rock outcropping that would look back on Spy Rock.  So, we set a plan to try and take pictures of each other from the different summits.  The climb up Spy Rock was pretty dangerous, since the water that falls into the cracks that your normally use to help pull yourself up was frozen, making it very treacherous.  When we got up to the top of Spy Rock, the wind was blowing so hard and the temperatures from the wind chill put it way below freezing.  We waited for a few minutes at the top.  We eventually saw Bryce making his way to the rock outcropping.  We took a quick photo of him and then made our way off Spy Rock, since we felt we could get frostbite fairly quickly up there.  We reconvened where we had split up and then made our way back down the mountain.  We got back to our cars and headed to Staunton for lunch.

This area where we hiked is a real sweet spot for Virginia hiking.  You have The Priest, Three Ridges, Crabtree Falls, and Spy Rock all within a few miles.  If you want a place to get a few great days of Virginia hiking, this is a great destination.  We were glad to reconnect again with Bryce and getting another AT section checked off our to-do list.

Tye River
The lovely, scenic Tye River.  Below: Adam and Bryce crossing the footbridge at the end of the hike.

Adam Crossing the Tye River Footbridge

Christine Says…

I don’t really have anything to add about the hike!  It was just a pleasant walk in the woods that finished a hole in our continuous AT miles.  It was great to see Bryce (Hiking Upward) and spend the first day of 2015 on the trail!

After a couple little hikes, we all went for a decadent lunch and beers at Byers St. Bistro in Staunton.  They have great sandwiches and a nice variety of beers on tap.  Check it out if you’re in the area.

Trail Notes

  • Distance – 3.8 miles
    (Check out the stats from Map My Hike)*
  • Elevation Change – 1100 ft.
  • Difficulty –  3.  The climbing is steady and moderate the entire way up.
  • Trail Conditions – 4.5.  Well maintained, smooth trail.
  • Views  0.  No views other than a few glimpses through bare winter trees.
  • Streams/Waterfalls – 0.  The stream and waterfalls are a little further up trail from this spot.
  • Wildlife – 0.  We did see a hunting dog – that probably scares wildlife away.
  • Ease to Navigate – 4.  There’s really no place to go wrong here.
  • Solitude –2.  This trail leads up from a very popular AT access point.  You can expect to see a good number of people.

Download a Trail Map (PDF)

Directions to trailhead:  From I-81, take exit 213A to head on to US-11 South towards Greenville.  Go 8.2 miles and take a left on to US-56.  Go 16.6 miles down US-56 and you will come to a parking lot for the Appalachian Trail on the right-hand side of the road.  Park here and then cross the road to start hiking on the Appalachian Trail heading north.

MapMyHike is not necessarily accurate, as the GPS signal fades in and out – but it still provides some fun and interesting information.

Neighbor Mountain – Jeremy’s Run Loop

This 14.7 mile route offers wilderness, beautiful views, and stunning stream scenery (even a small waterfall!)  It’s a wonderful, moderate overnight backpacking loop; or a really challenging day hike.  We set out intending to camp along Jeremy’s Run, but it didn’t quite go as planned!

View the Full Album of Photos From This Hike

Views from the Neighbor Mountain Trail
The views on this loop hike come along the descent of Neighbor Mountain. Below: The trailhead at Elkwallow Picnic Area;  Hiking along in golden woods; Adam and Kris at the junction of the Appalachian Trail and Neighbor Mountain Trail.

Neighbor Mountain - Jeremys Run Start Hiking Along Junction of AT and Neighbor Mountain Trail

Christine Says…

The final weekend of October 2014 was so beautiful – perfect, made-to-order backpacking weather. We decided to head out on one more overnighter before the weather turned cold. We invited our friend, Kris, to come along. She loves the outdoors as much as we do, and I was sure she’d enjoy this loop. Don’t miss her guest blogger entry later in this post! It had been several years since we last hiked in the vicinity of Jeremy’s Run, and I was really looking forward to camping along the beautiful stream.

After stocking up on some lunch provisions at Elkwallow Wayside, we finally hit the trail around 11:00. We figured we had a little over eight miles of hiking on our first day, so starting late morning would get us to camp before 3:00, with plenty of daylight left to pitch tents, cook dinner, and relax.

Neighbor Mountain Trail
Hiking along the Neighbor Mountain Trail. Below: The fall color was still close to peak; Adam checks out a rock formation; At the summit of Neighbor Mountain.

Golden Woods Rock Formation Summit of Neighbor Mountain

We started out at the Elkwallow Picnic Area. A short spur trail leads downhill to the junction with the white-blazed Appalachian Trail. The AT descends for about .3 of a mile before coming to a junction with the blue-blazed Jeremy’s Run Trail. Follow the Appalachian Trail, veering to the left. The trail ascends for a little over a mile before coming to a more level ridge. You’ll pass the junction with the Thorton River trail, continuing south on the AT. At just over four miles into the hike, you’ll reach the junction with the yellow-blazed Neighbor Mountain trail.

We decided this junction would be a nice place to stop for lunch (hummus – my favorite trail lunch of late – easy to eat and lots of quality calories!). After a relaxing, thirty-minute break, we took the turn onto the Neighbor Mountain trail. The path meandered across the ridge. For the first couple miles, it was mostly walking in the woods. There was a nice breeze and gorgeous sparkling sunshine was filtering through golden leaves. It was everything you want fall to be!

Even though there is no view, the summit of Neighbor Mountain is marked with a cement post. At the summit, I noticed I had picked up a ‘hitchhiker’ along the way – a walking stick bug was clinging to my pants. I wonder how far he had come with me. I picked him off, and set him on a fallen log off the trail.

Between six and seven miles into the hike, there are a few excellent views of the Massanutten ridge and Three Sisters. There was a forest fire in this area several years ago, so the view was pretty open and expansive. We all paused a while to enjoy the fall foliage.  It was so wonderful to see colorful mountains rolling our before us. We talked about how privileged and blessed we all felt to be out on such an amazing day!

View of Valley
Adam enjoys a view of the valley and mountains to the west. Below: This part of Neighbor Mountain burned in 2012.  Alot of damage is still evident; Fall color; Adam descends Neighbor Mountain toward Jeremys Run.

Neighbor Mountain Descent Neighbor Mountain Descent Neighbor Mountain Descent

The last mile and a half of the day was steady downhill, meandering across switchbacks until the Neighbor Mountain trail reached the bottom of the valley and Jeremy’s Run. As soon as you reach the stream, campsites are everywhere. The first few we passed were already taken, so we ended up returning to the hidden campsite we used several years earlier. It’s a flat spot under the trees shortly before the first water crossing.

And here’s where the story takes an unexpected turn…

Adam Says…

We all worked on pitching our tents and setting up camp. I set up our tent while Christine worked on inflating our sleeping pads. Kris was on the other side of the clearing working on setting up the one-person tent she had borrowed, when she suddenly she groaned, “Uh… guys – I think we might have a little problem.”

As it turned out, the tent bag only held the rain fly and the poles. The ground cloth and the actual tent were missing in action. She hadn’t checked the bag before hitting the trail.  We spent the next 45 minutes trying to improvise a shelter with everything and anything we had. We tried piling three people in our Big Agnes Copper Spur UL2 (bad idea). We discussed whether or not the evening would be suitable for cowboy camping under the stars. We talked through a few different scenarios: 1) we all hike back immediately, 2) I sleep under the tarp while Kris and Christine sleep in the tent, or 3) I hike back to the car tonight and pick them up in the morning.  I was least excited about the second option because the area felt tick-infested with the wet leaves.  We debated the options for a few minutes, but ultimately, we decided the best choice was to keep the group together and make our backpacking trip into a very long day hike.

Failed Camp
We tried to find a way to rig up shelter, but in the end we decided it was better to hike out. Below: Crossing the first stream and trying to eat something with enough calories to hike out happily; Adam doing one of many stream crossings; The best campsite along Jeremys Run sits above a waterfall.

Crossing Jeremys Run Crossing Jeremys Run Waterfall Campsite on Jeremy Run

We knew we only had a little over an hour of daylight left – the sun sets early behind the mountains surrounding Jeremy’s Run.  We rushed to pack everything up as quickly as we could. Cooking a hot dinner would have required getting more water, so we opted to just eat a few snacks from our bags.   We started off at a quick pace.  I twisted my knee at the first major water crossing we had to make, which made the rest of the trip pretty painful. But sometimes, you just have to suck it up and hike.

We soon passed another great campsite next to a small waterfall.  The trail meanders along and across Jeremy’s Run, requiring lots of rock-hopping across the stream.  The sun was dipping down quickly and we soon found that we needed to put on our headlamps.  Christine and Kris had legit headlamps, but I was using a small clip-on headlight that didn’t have the lumen output needed for a night hike.  When it reached dusk a few miles from our campsite, we came across a couple with a dog.  They asked us how far it was to the campsites and if they were all taken.  The guy was carrying an outrageous amount of gear and the girl looked completely miserable.  We knew they were going to be hiking to the campsites by nightfall and setting up camp in the dark.  I’m not sure if this was her first venture into overnight camping, but based on the daggers she was shooting him with her eyes, it may be their last.  They warned us they had seen a couple of bears just ahead of us, so we were on full alert.

Headlamps
We hiked by headlamp the last hour. Below: Jeremys Run in twilight; A large pool along the run; One of the last few stream crossings before it became too dark to take photos.

Jeremys Run Jeremys Run Jeremys Run

As it became fully dark, we still had a few stream crossings to make, which made it quite hazardous.  I reminded myself that the water wasn’t that deep so if we stepped in the water, we would probably be OK.  Another danger of night-hiking is the ability to lose the trail.  We really had to pay attention to the ground and try to keep an eye out for occasional blazes to make sure we would stay on the trail.  Hiking in the fall after most of the leaves have covered the trail provides an extra challenge.  Because I had a weaker headlamp, it was hard for me to lead along the trail since the lights from Christine and Kris were blasting my shadow ahead of me on the ground.  And then, I heard large noises in the woods, which I’m guessing was the bears that we had been warned about.  We kept talking loudly and playing some games to keep our minds sharp (animals/foods/colors that start with each letter of the alphabet) as we hiked along.

At 4.25 miles from our intended campsite, we finally came across a concrete marker post.  This post marked the junction with the Knob Mountain cutoff trail, so we knew were getting closer.  We kept straight on the Jeremy’s Run Trail and at 5.15 miles, we reached our first junction with the Neighbor Mountain Trail.  It was now just .3 miles straight ahead until we reached the parking lot where we started.  We made the last climb with renewed energy and celebrated that we made it through this adventure.

It was definitely one of the longest hikes we have done in a day and with the extra weight on our back, was one of the toughest.  We got back in the car and decided to go out to dinner to celebrate with drinks and food at Ciro’s in Elkton, VA.  We were physically exhausted and hungry, but it was quite an adventure we will never forget.

One takeaway I had from this trip was that we were all great at hiking together.  When we faced the challenge of not having two functional tents, we kept our wits about us, made a quick decision and went with it.  There was no complaining and we just relied on each other to get through.  If we had panicked or become overly upset, it could have led to a dangerous situation.  It is through this challenge, that we learned that having good hiking partners that work well together is a great trait to have for survival.  We all vowed to come back to this spot to camp together sometime in the spring to get the full experience through camping on Jeremy’s Run.  After the hike, Kris bought her own tent and I bought a better headlamp.

kris Kris Says…

Backpacking 101- It doesn’t matter if you were up late celebrating your birthday and borrowing some equipment…ALWAYS double check your equipment or your trip will not be so fly!

I was excited to be hiking with friends on a beautiful fall day.  We have always shared an appreciation of nature, lots of conversations and tons of laughter. I guess that is why we handled our little upset so calmly and reasonably. Although, I’m pretty sure I said  “Adam, just because I am a girl doesn’t mean you have to give up your tent.  I will cowboy up. Now, everyone hand over any booze or sleep aides you may have!” Of course that didn’t fly.

Ultimately we laughed at the situation, even as we crossed that creek 14 or so times and in the dark.  And I learned a few things on this trip: I am capable of hiking 15 miles with a 25 lbs pack in a day, Little Debbie Peanut Butter pies are so tasty and 400 calories, it was time to purchase my own backpacking tent, a packing checklist is important and a good attitude goes a long way.

I vowed to return to Jeremy’s Run and hike early enough to snag the sweet waterfall camp spot, I also plan to cowboy camp sometime just to prove I can (my dog will protect me).

Christine and Adam- you two are SuperFly!

Trail Notes

  • Distance – 14.7 miles
    (We had issues with MapMyHike on this trip, so we have partial stats. We have the Neighbor Mountain segment and most of the Jeremys Run to Elkwallow segment. We’re missing the portion along the Appalachian Trail and a few early tenths of a mile along Jeremy’s Run.  Technical issues!)*
  • Elevation Change – 2610 ft.
  • Difficulty –  4.  The terrain is fairly moderate throughout the hike, but the length ups the difficulty rating.
  • Trail Conditions – 3.  Sections along the Appalachian Trail and Neighbor Mountain are in great shape.  The Jeremy’s Run trail is rocky and has at least 14 water crossings – some of them can be challenging!
  • Views  3.5.  The views descending Neighbor Mountain are beautiful, but never fully open/panoramic.
  • Streams/Waterfalls – 3.5.  The stream is beautiful and scenic.
  • Wildlife – 5.  We saw a bobcat!  Hikers we passed at sunset told us there was a bear ahead, but we couldn’t see anything in the dark.  But, the last time we hiked in this area, we saw three bears.  We have also seen/heard owls, pileated woodpeckers, and whippoorwills.
  • Ease to Navigate – 4.  The junctions are clearly marked and easy to follow — unless you’re hiking in the dark!  🙂
  • Solitude –1.  It’s the most popular backpacking loop in the park’s northern district.

Download a Trail Map (PDF)

Directions to trailhead:  From the US-211 entrance of Shenandoah National Park, head north for 9 miles on Skyline Drive.  Take a left towards the Mathews Arm Campground.  In .7 miles, you will reach a parking lot.  The trail takes off next to the outdoor bathroom.

MapMyHike is not necessarily accurate, as the GPS signal fades in and out – but it still provides some fun and interesting information.

Appalachian Trail – Hog Camp Gap to Punchbowl Mountain

This 17 mile overnight backpacking trip had beautiful views from Cole Mountain within the first two miles of the hike.  The rest of the hike was less scenic – mostly walking through quiet woods and along seasonally low streams.  The Lynchburg Reservoir and the swinging bridge over the Pedlar River were noteworthy features on the second day.  Adam will cover day one and Christine will take over with day two!

View the Full Album of Photos From This Hike

Adam Takes in the View from the Summit of Cole Mountain
Adam takes in the view from the summit of Cole Mountain.  Below: Coming out of the woods onto the grassy meadow is always breathtaking;  Great views from the top of Cole Mountain; Hints of fall color near the summit.

Breaking Out of the Trees Cole Mountain Summit Coming Fall Color on Cole Mountain

Day One (8.1 miles)…

We started off our trip by leaving one car where the AT crossed the Blue Ridge Parkway at the Punchbowl Mountain overlook.  From the lot, we could see the AT  southbound, but we didn’t see where we would return to our car from the north. It turns out it was just below us on the other side of the parking lot, but the morning fog made it a little hard to spot.  We dropped our car off and then headed to Hog Camp Rd, to start our journey.

From Hog Camp Gap, we headed south on the Appalachian Trail.  The trail started off through a wooded section uphill, fairly steeply in some parts.  Around 1.1 miles, the trail opened up to the beautiful, wide-open bald clearing that is Cole Mountain.  We have hiked Cole Mountain before as a loop and I do think it is one of the more under-appreciated hikes in Virginia.   The panoramic vistas make this look like something you would picture in an outdoors magazine.  You can’t help but want to stop and take a look at the scenery around you.  The way we split this section might not have been the best plan for enjoying vistas.  We knew we had the best views of the trip done in the first 1.5 miles of the hike.  But that is one of the biggest lessons I learned from hiking this section – you have to hold on to what you may have just seen, because there is no certainty about what is to come ahead.

Climbing Bald Mountain
The climb of Bald Mountain wasn’t terribly long or difficult. Bald Mountain also is not Bald!  Below: Adam checks out the map at our lunch stop – a clearing near the top of Bald Mountain; A little snip of a view through the trees along the top of Bald Mountain; Huge tree!

Lunch Stop Snip of a View Huge Tree

After reaching the summit of Cole Mountain, the trail descends and again enters the forest.  Around 2.5 miles, we reached a junction with a spur trail that led to the Cow Camp Gap overnight shelter and a water source.  We continued on the trail which starts an ascent up Bald Mountain.  We reached the summit at 3.5 miles and were hoping for some nice views at the top, but found that Bald Mountain wasn’t very bald (there were a few obstructed views through the trees).  We found a clearing and camp spot and had our lunch there before continuing on.  The rest of the day, the trail was a descent so our climbing was done (at least until tomorrow).

We crossed over USFS 507 at 5.5 miles and eventually came to US 60 and the Long Mountain wayside at mile 6.3.  We stopped at one of the picnic tables and took a break to eat a snack and give our backs a relief from the weight.  Local people just park on the roadside here and have a picnic at this spot.  It is also a way to do a longer out-and-back to Cole Mountain without parking or driving on a rough, gravel road.  After resting, we crossed US 60, spotting a sign for the continuation of the Appalachian trail to the right.  We continued our descent and at 7.1 miles, we reached Browns Creek, a reliable water source for a good stretch of trail.  At 8.2 miles, we reached the Brown Mountain Creek Shelter, our stop for the night.

The Brown Mountain Creek area is interesting from a historical/archaeological standpoint.  Much of the land along the creek was part of a large plantation predating the Civil War.  After the war, the land was primarily a settlement for freed African-Americans.  Houses, farms, orchards and even a gristmill could be found along the creek.  You can still see stone walls/stairs, pieces of metal, and other artifacts along the creek.

Long Mountain Wayside
The trail crosses US 60 at the Long Mountain Wayside.  Below: Information at the wayside: Descending to Brown Mountain Creek; Arriving at Brown Mountain Creek Shelter.

Wayside on Rt. 60 Descending to Brown Mountain Creek Arriving at Brown Mountain Creek Shelter

When we first got to the shelter, there was still a smoldering fire in the fire pit, so we realized someone had been there recently.  We also noticed a large pile of fresh bear scat next to the shelter.  While we didn’t think a bear had been roasting marshmallows by the fire, we felt it may be wise to not set up camp directly at the shelter.  We found a nice campsite right by the creek and decided that would be a better spot.  There was a boy scout troop that was camping on the other side of the creek.  We worried about them being too loud over the course of the night, but they were fairly well-behaved (except for trashing the privy – but that’s another story).  We set up our tent, filtered water for tonight and tomorrow, and began to unwind.

We cooked dinner up at the shelter (Good To-Go Herbed Mushroom Risotto)* and played Zombie Fluxx, a card game where the rules and objectives for winning constantly changed.  I always enjoy bringing a card game along the trail – the weight isn’t too bad for the entertainment it can provide.  We played a few hands (I recall Christine being better at killing zombies than I was) and then went back to our campsite after I hung our bear bag.  We started off reading books by headlamp outside our tent (continuing with the zombie trend I was reading Night of the Living Trekkies), but the bugs were awful.  We retired to our tent probably around 7:30, read for a little while longer, and went to bed very early.  We always typically go to bed around nightfall when backpacking, but hiking with the extra weight always makes you feel a little more physically exhausted.

* Good to Go is a new backpacking food manufacturer.  They use healthy ingredients and much less sodium.  We thought it was one of the best dehydrated meals we’ve had on the trail!  We added a foil packet of chicken breast to our dinner.

Games
We arrived at camp fairly early, so after the tent was pitched and water collected, we spent some time playing Zombie Fluxx. Below: A group of 14 Boy Scouts camped along the opposite bank; Collecting water for cooking and drinking; We tried a new brand of dehydrated meal – Good to Go (tasty!)

Scouts Water Source Good to Go Risotto

Day Two (9.1 miles)…

Day two started earlier than expected (and with the added bonus of a huge, swollen mosquito bite on my eyelid – I looked like I’d been punched!) Like most Boy Scout troops we’ve met along the trail, the one camping near us on this trip was awake, packed up, and on their way before sun-up. This had pros and cons.  One con was all the crunching boots and headlamps moving around our tent in the dark.  A pro was the opportunity we had to enjoy the creekside in peace and solitude before starting our hike for the day. The solitude also meant I could find a place to dig a cat hole in complete privacy without having to worry about Boy Scouts spotting me!  I would have used the privy near the shelter, but let’s just say the privy turned out to be another con of camping near a big scout group. One of them had completely defiled the privy and there was no way I was going in there!

Breakfast was instant oatmeal, honey buns and coffee.  I’ve learned the hard way after running out of gas on past backpacking trips that one packet of instant oatmeal (140 calories) is not enough to fuel me across nine miles.  The Little Debbie Honey Bun has been a revelation for me.  I think it has the magical balance of fat and sugar I need to power through my morning miles.  They also hold up great in my pack – no smushing and no crumbling.  Some people like a healthier, protein-packed breakfast, but give me a honey bun!

Morning on Brown Mountain Creek
The morning was beautiful and quiet (after the Scouts left). Below: When water is running higher, this is probably a pretty little waterfall; Adam hikes along the Appalachian Trail: One of several small stream crossings.

Plunge Pool Walking Along the AT Stream Crossing

The first five miles of our second day were easy. The terrain was a very gradual overall descent with a couple brief uphill climbs.  The first mile or so followed Brown Mountain Creek.  The trail followed roughly parallel to the stream for much of the way.  I kept thinking how beautiful this area would be when water levels were higher.  We eventually crossed the creek via a wooden footbridge.  At this spot there was a small, but pretty, waterfall cascading into a plunge pool.  The flow was down to a trickle, but it was still a lovely spot.

Departing Brown Mountain Creek, we walked through serene, quiet forest for a couple more miles.  There were two small stream crossings along the way.  The first didn’t seem to have a name, but the second was Swapping Camp Creek.  Both of these creeks end up flowing into the Lynchburg Reservoir.  At around 3 miles into our hike, we started seeing glimpses of the reservoir through the trees.  We followed an off-trail footpath steeply down to the shores of the water for a couple photos.  We saw several herons hunting in the mud.  There were ‘no camping’ signs posted everywhere, but there were also several well-used fire rings.  I’m guessing there are quite a few people that ignore the regulations and attempt to stealth camp in this area.

Lynchburg Reservoir
The trail skirts around the Lynchburg Reservoir. Below: The dam at the south end of the reservoir; The Pedlar River; The Pedlar River footbridge.

Dam Pedlar River Pedlar River Bridge

We climbed back up to the Appalachian Trail and continued south, skirting the eastern side of the reservoir.  At around 4.8 miles we came to the lowest elevation point of our hike – the Pedlar River crossing.  The trail crosses the river on a picturesque, bouncy suspension bridge.  From the middle of the bridge, we could see early fall colors reflecting from the trees onto the water’s surface.  After crossing the bridge, we came out on gravel-surfaced Reservoir Road.  We followed that briefly until we spotted another white blaze for the Appalachian Trail.

At this point, we began our toughest climb of the whole 17 miles.  The 2-mile ascent of Rice Mountain begins pleasantly enough.  The trail follows parallel to Little Irish Creek (which was running low and barely noticeable) and passes through a small plot of old growth forest.  There is an extremely weather-beaten sign explaining tree sizes in the area and how the area is used to study the local watershed.  Early parts of the climb are well-graded and moderate, but about .75 mile in, the trail pretty much goes straight up the mountain without the moderating benefit of switchbacks.  I wanted to push through the climbing and put it behind me, but Adam was ready for a snack.  We found some big rocks about 1.5 miles up the mountain and took a candy break.  After a half mile more climbing, we reached the ridge of Rice Mountain.  The forest was especially pretty along the top of the mountain – very open with lots of nice shade trees.

Climbing Rice Mountain
Climbing Rice Mountain was tougher than it looked on the topo map. Below: Another little peek at a view through the trees; A curly laurel thicket; The finish line!

Peek of a View Laurel Thicket The End

On the descent of Rice, we had one nice view through the trees.  We also saw more brilliant red fall colors and a lot more thickets of rhododendron and mountain laurel.  There really wasn’t anything remarkable to see or say about our last couple miles of hiking.  The terrain was rolling – there was a general uphill trend, but with small downhills as well.  There were no views or streams to speak off.  The lack of scenery gave me lots of time to fret over my feet. Two toes on my right foot had dislocated earlier in the day and were becoming increasingly painful.  With each step, it got a little harder to bear my weight plus the weight of my pack. I think if there had been waterfalls or great views, I would have been more easily able to distract myself.  But on this particular day, all I could think was ‘Ouch – when will this hike be over?’

At almost the end, we had one final road crossing at the junction of Robinson Gap Rd. and Panther Falls Rd.  After just another third of mile, we came up a small hill and found ourselves back at the parking area for Punchbowl Mountain on the Blue Ridge Parkway.  I don’t think I’d ever been so happy to end a hike. It felt great to take my boots off and change into a pair of Oofos.  While I enjoyed the great weather, the opportunity to be out, and the nice views from Cole Mountain, this wasn’t one of my favorite backpacking trips.

Trail Notes

  • Distance – 17.2 miles [Day One] [Day Two]
  • Elevation Change – About 2900 ft.
  • Difficulty – 4.  Mostly for distance, but the descent of Bald Mountain is a real knee-grinder and  the climb up Rice Mountain  (Day 2) is surprisingly challenging.  
  • Trail Conditions –  4.  The trail is in nice condition all across this stretch of AT.
  • Views – 5 (for Day 1) The views from Cole Mountain are indisputably spectacular.  Enjoy them early in your hike… they’ll be the last real views of the trip.
  • Streams/Waterfalls – 3.  This was hard to judge because of the unusually dry late summer/early fall.  I think under normal circumstances, Brown Mountain Creek would be beautiful with lots of small cascades and rapids.
  • Wildlife – 2.  We didn’t see any wildlife beyond a cute bullfrog in the creek.  But, there was LOTS of bear scat around Brown Mountain Creek Shelter.
  • Ease to Navigate – 4.  Just keep following the white-blazes and pay attention at road crossings/trail junctions to stay on the Appalachian Trail. 
  • Solitude – 3.  We saw quite a few people around Cole Mountain and spent the night at Brown Mountain Creek with a Boy Scout Troop.  We saw only one person along the trail on the second day.

Directions to trailhead:  Requires a shuttle.  We parked one car where the AT crosses the Blue Ridge Parkway near Punchbowl Mountain.  This is mile 51.7 on the Blue Ridge Parkway, about 6 miles south of where the Blue Ridge Parkway meets with US 60.  From this point, we drove our other car back north on the Blue Ridge Parkway for 6.0 miles and took the exit leading us to US-60 East.  We headed 4.3 miles on US 60 E before taking a left on SR 634/Coffeytown Road.  Follow this for 1.6 miles before taking a right on SR 755/Wiggins Spring Road.  Follow this gravel, bumpy road for 2.7 miles until you reach the parking area where the AT crosses the road.  Follow the white-blazed Appalachian trail heading south.

Zealand Falls (NH)

Special: New Hampshire Edition

Introductory Guide to Visiting the White Mountains

This 5.6 mile route to Zealand Falls is one of the easiest hikes we’ve done in New Hampshire.  Most of the footing is smooth, soft, and flat!  It was a real treat after climbing Pierce and Madison.

View the Full Album of Photos From This Hike

Adam on Zealand Falls
Adam sits at the top of Zealand Falls and takes in the view of mountains beyond and wetlands below.  Below:  Zealand Falls Hut is a popular hut for people who want to stay at an AMC Hut, but don’t want a tough hike;  Christine hikes along; While the trail was generally flat and smooth, there were occasional roots and rocks to negotiate.

Zealand Trail Boardwalk Roots

Christine Says…

The hike to Zealand Falls is doubtlessly the easiest ‘hut hike’ in the White Mountains.  The elevation gain is barely discernible until the last couple tenths of a mile.  The route offers mountain views, waterfalls, stream scenery, and lovely ponds.  Guidebooks say it’s a great place to bird-watch and spot a moose (though I have my doubts about the actual likelihood of seeing a moose!)

The hike starts out at a parking area at the end of Zealand Road.   It’s a fee area, so make sure you bring cash to pay at the self-service parking station.

We made our way along the trail, marveling at how smooth and soft the footing felt.  There were certainly some spots with roots and rocks, but generally the trail was level and covered with a bed of pine needles.  We could hear the Zealand River, but didn’t reach a close view of the water until .8 miles into the hike.  When we hiked (early August), the water was low, clear and running quietly along. Almost all of the water crossings we encountered on this trail were assisted by wooden footbridges – no wading and very little rock hopping necessary!

Christine Checks out the Wetlands
The Zealand Falls trail passes many ponds and marshes.  Below: Several views of the ponds and marshes along the Zealand trail.

Wetlands Wetlands Wetlands

As we walked along, the terrain became marshier.  At about 1.8 miles in we passed a lovely beaver pond.  We could see the dam from the trail, but didn’t see any beavers.  The reflections of trees and mountains in the water were especially beautiful!  With all the wetlands, I expected biting flies, mosquitoes and gnats to be a major issue, but we didn’t have any trouble at all. Maybe there was just enough of a breeze to keep the bugs at bay.

At 2.3 miles we passed the junction with the A-Z trail, where we continued on the Zealand Trail.  A couple tenths of a mile later, we passed Zealand Pond and reached the junction with the Twinway (which is also the Appalachian Trail in this area) and Etlan Pond Trails. The last couple tenths of a mile to the hut follow the Twinway Trail.

Almost immediately after the junction, we reached the bottom of Zealand Falls.  The water was running low, but it was still beautiful.  There are two places to stop and admire the falls on the way up.  The first stop is a view of the gradual, slide-like lower falls.  The view of the upper falls is a bit more dramatic. The rocks around the falls are blocky and reddish-orange in color. The water comes plunging steeply over a cliff-side. The last tenth of a mile up to the hut is steep and rocky – honestly, it’s the only challenging part of the hike.

Zealand Falls
Zealand Falls make a couple distinct drops.  Below: New signs were recently posted to mark trails in the area; Adam checks out the falls; The final ascent to the hut was the only steep part of the hike.

New Signs Zealand Falls Final Climb to Hut

Zealand Falls Hut enjoys a lofty perch looking out across two notches.  You can see the Bonds and Mt. Carrigain. There’s even a bench available for anyone who wants a nice seat to enjoy the view.  We spent some time poking around the hut.  The Croo had just made cinnamon rolls and purple frosted blueberry cake, but we weren’t quite ready for a snack.  Instead, we decided to take the little side trail to the ledges of Whitewall Brook.  It’s just a 25-30 foot walk through the trees.  The brook passes over immense slabs of rock.  It’s a nice place to sit, soak in the sun, and enjoy the view of the pond below and distant mountains beyond.

After spending some time enjoying the hut, we returned the way we came.  The walk back was all downhill, so we made quick work of it.  I would highly recommend Zealand Falls to anyone looking for a low-key hike without much climbing.  In fact, we gave it such glowing reviews that my parents tried the hike a few weeks later.  They enjoyed it and felt it was very approachable for hikers of any level.

Adam Says…

When we go about trying to cover a lot of hiking mileage on our vacation trips, we like to alternate some easier hikes with the tougher ones.  Since we had just climbed Mt. Madison, our feet and joints were happy that we chose this easier leg-stretcher.

Christine and I do like to hike with goals in mind.  Since we have climbed a few of the 4000-footers in New Hampshire (there are 48), we have thought about possibly trying to bag all of those peaks.  Last year on our visit, I picked up AMC’s Passport to AMC’s High Huts in the White Mountains.   That book describes each of AMC’s huts through the White Mountains and details the history, features, and interesting stories about each of the huts.  It also serves as a passport that you can have stamped at each location to mark that you have been there (you can even earn a patch when you’ve visited them all).  This was definitely enough of an incentive to try and reach all the huts.

Zealand Hut
Zealand Falls Hut sits at the top of a waterfall.  A short trail from the side of the hut leads to the streambed; Inside the hut; View from the hut; Christine at the top of the falls.

Inside Zealand Hut View from Hut Christine at the Top of Falls

As Christine mentioned, this trail had nice footing compared to what we were used to in the White Mountains.  The trail was fairly smooth as it started through the woods mixed with pine and birch.  The trail eventually opened up into some great views over marshy ponds.  There was a large boardwalk to walk across that I thought would be a perfect vantage point for spotting a moose.  There were such nice views over the dammed-up ponds and it reminded me that we were in a state filled with lots of lakes, ponds, and streams.  We took a while to enjoy the scenery around us.  The trail continued to give us lots of similar views and short step-offs to pond views.  The trail eventually goes back into the woods as you get closer to Zealand Falls Hut.

At 2.3 miles, we reached the junction with the A-Z trail, which I came to realize after looking at our map that it connects the Avalon and Zealand trail, hence the A-Z name.  At 2.5 miles, we reached a short side trail to check out Zealand Falls.  The falls here were a nice place to get sidetracked.  We crossed a few rocks and enjoyed climbing around the rocks at the base of the falls.  Looking up towards the top of the fall is where this hike ends, but you should stick to the trail rather than trying to climb up the falls.

We continued our last piece of the hike, which was a steep and rocky .2 miles until we reached the Zealand Falls Hut at 2.8 miles.  There were a few day-hikers at the hut, recounting tales of all the places they had visited around the world.  We decided to take the short trail from the hut to the streambed of Whitewall Brook, which is the top of the falls we had seen below.  Christine got a lot of pictures while I walked around climbing on some of the rocks and collecting a few blueberries from the nearby bushes.  We then found a picturesque spot on the large rocks to take in the view of mountains ahead and the waterways below.

Beautiful Forest
The woods along the trail were so beautiful! Below: Adam rock hops; Beautiful, tall, straight trees; A beaver dam.

Adam Rock Hops Beautiful Trees Beaver Dam

We stopped back in to the hut to talk to the Croo members who were cleaning up breakfast and starting to prepare some food for lunch.  I know they have some busy days, preparing meals, cleaning the hut, and transporting supplies on their backs to and from the hut.  I talked to one of the members about how this hut was so much easier to reach than most of the others we had seen.  I wondered if there was a selection process that was made to match up Croo members to the huts or if they even had a choice.  It seems like maintaining this hut and transporting supplies would be made for those that wanted or needed an easier experience.  We made our way back to our car the same way we came up.

I would recommend this hike to anyone that would like to see what one of the AMC huts looks like.  It is the easiest one to reach, so people of most abilities should be able to attain the top.  This is one I could see us doing many times in the future due to the ease and the serenity that the scenery of the marshes and waterfall evokes.

Trail Notes

  • Distance – 5.6 miles
    MapMyHike Stats *
  • Elevation Change –  650 feet
  • Difficulty –  2.  This is a pleasant, easy walk until the last couple tenths of a mile.  The last push to hut is short but steep.
  • Trail Conditions – 4.  The trail is so nicely built and easy to walk.  Most of the water crossings and marshy areas are traversed by sturdy bridges and boardwalks.
  • Views –3.5.  Views from the hut and Whitewall Brook are nice, as are several views across the wetlands, but generally the views here are less dramatic than other spots in the White Mountains.
  • Waterfalls/streams 4.5.  The river, pond, wetlands, brook and waterfalls are all lovely!
  • Wildlife – 3.  It’s supposed to be a nice area to spot wildlife, but we just saw birds and squirrels.
  • Ease to Navigate – 4.  Trail junctions are clearly marked and easy to follow.
  • Solitude – 3. We saw relatively few people, but we hiked on a weekday in August. I think this is generally a popular trail.

Download a trail map (PDF)

Directions to trailhead: From I-93: Take Exit 35 for Twin Mountain. Follow 3N for 10.4 miles. Turn right onto 302E for 2.2 miles.  Turn right onto Zealand Rd. and drive about four miles.  The road will turn to gravel.  The parking area is at the dead end of the road.  There is a $3/day fee to park at the trailhead.

* MapMyHike is not necessarily accurate, as the GPS signal fades in and out – but it still provides some fun and interesting information.

Mt. Madison (NH)

Special: New Hampshire Edition

Introductory Guide to Visiting the White Mountains

This 8.8 mile hike takes you past Madison Spring Hut and up to the summit of majestic Mt. Madison.  The Valley Way Trail is known for being one of the safer, more protected routes into the heart of the White Mountains.  While the terrain is less extreme than other trails in the area, the hike still requires a little over 4,100 feet of climbing.  It’s a tough hike, but the views make it well worth the effort.

View the Full Album of Photos From This Hike

Hiking Mt. Madison
Adam makes his way across the summit ridge of Mt. Madison. The big mountain in the background is Mt. Washington.  If you look closely, you can see the Auto Road snaking down the peak.  Below:  Plenty of parking and access to many trailheads at the Appalachia Parking area;  Warning…. danger ahead – seriously, the White Mountains can be pretty extreme; The early part of the trail was fairly soft and gentle.

Appalachia Parking Death Awaits Early Terrain on the Valley Way Trail

Adam Says…

My top goal for our 2014 New Hampshire trip was to hike up Mt. Madison.  We both went to James Madison University and have worked there for years, so it only seemed fitting to take on the mountain that shared a name with our college.  I even wore JMU Dukes gear almost like the guy that goes to a concert wearing a t-shirt for the band’s previous tour to show his super-fandom.

We started out the day on a rough note.  Christine had put her hiking shoes and socks in the back of our car, so she could wear sandals on the car ride up.  When we pulled over at one point, we realized one of our Camelbak tubes had pressed open and leaked all over the car, soaking her shoes and socks.  We debated about if we would have been able to even do the hike in fear of blisters, but Christine decided to push forward.

There are a lot of ways up Mt. Madison, but in our research we found the most popular way was to make our approach by going up the Valley Way trail.  We parked at the large Appalachia parking lot (which was so full we needed to park on the road) directly on US-2.  We were worried there would be so many people on the trail, but this parking lot holds the beginnings of lots of trails that lead up to many peaks (including Mt. Adams and Mt. Quincy Adams).

Tama Falls
The early part trail follows Snyder Brook. By taking a short spur trial, you can visit beautiful 25′ Tama Falls.  Below: We saw a couple Croo members on their way down from the Madison Spring Hut; Adam checks out all the rocks on the ‘not as rocky’ New Hampshire trail;  The final push to the Madison Spring Hut was very steep and rugged.

Croo Getting Rockier Steep to the Top

The trail starts off from the back of the parking lot.  The trail branches off in different directions but follow the signs for the Valley Way trail.  The trail begins relatively flat and easy walking, as it runs along Snyder Brook.  There were a few places where we could get some nice stream views and even a glimpse at the picturesque Tama Falls at .4 miles.  At .7 miles, you reach another large junction, but continue to follow the signs to the Valley Way trail.  The trail then begins the steeper uphill climb.  Overall, I felt that the trail, while very rocky was not as steep and rocky as some of the other trails in the White Mountains.  There is a relentless amount of climbing and many rocks to navigate, but it wasn’t as grueling on my feet as some hikes in New Hampshire have felt to me.  At 3.0 miles, the trail gets very steep and rocky (often filled with larger small boulder-sized rocks to hoist onto) and will remain so until you reach the Madison Spring Hut at 3.8 miles. If you’re interested in camping on the mountain, but don’t want to stay at the hut, the Valley Way tentsite is at mile 3.1 on this hike.

Once we arrived at the hut, we saw there were a couple of ways up to the summit of Mt. Madison.  At this point, we were above treeline, so we saw the rocky summit up above us.  I went in and found one of the Croo members and she told me the Osgood Trail had the most direct route and was a little easier than making our way via the Watson Path.  The final ascent up to Mt. Madison was .5 miles along the Osgood Trail (which is also the Appalachian Trail in this area).  You basically needed to walk acrpss large boulders, following cairns along the way until you reached the summit.  When you are above treeline, the summits of mountains seem so close to reach, but it is very misleading.  As we climbed up, we looked back and saw the hut shrink with each step, finally giving us some perspective of how far we had come.  We stayed a while at the summit.  The views were breathtaking and you could see for miles all around.  It definitely was one of the most beautiful scenes I have witnessed hiking and to realize the work we had put in to attain the peak, made it feel even more worthwhile.

Looking Back to the Hut
Christine makes her way up the Osgood Trail to the summit of Mt. Madison.  Below: About to go above treeline; Even though the summits are far away, they always look close;  A view of Madison Spring Hut with Mt. Adams in the background.

Alpine Zone Looks Close Madison Spring Hut

While we were at the summit, we met a woman who had a sign pinned to her that had 48 over 50 written on it.  She was over 50 years old and she had a goal to do all 48 peaks over 4000 ft. in elevation in New Hampshire.  She had saved Mt. Madison as her last hike to meet her goal, so we were thrilled to be able to see her experience accomplishing her goal.  What an inspiration!  We also talked to a gentleman at the summit who was from Colorado that had done this same hike 30 years ago.  He was staying at the nearby Crag Camp, run by the Randolph Mountain Club, just as he had done when we was a teenager.  He wanted to see if this hike was just as amazing as he had remembered and he told us it definitely was.  It made me further realize that everyone likes to hike for their own reasons and it is always a privilege to get to hear people’s stories on the hike.

We made our way back down and ate some lunch at the Madison Spring Hut.  We then ventured .2 miles on the Parapet Trail to see Star Lake.  This is a spot you definitely shouldn’t miss.  The lake is more like a small pond, but it was so beautiful to view the summit of Mt. Madison, as it reflected into Star Lake.  We debated about tackling Mt. Adams to bag another peak, but we realized that the summit looked close, but it was still a steep 1 mile away.  Not wanting to add even more to our hike, we decided to make our way back down.  The trail seemed to be even rockier on the way back down.  While you can normally fly down some parts of downhill trails, you need to take your time on this one to navigate all the rocks.  On our way down, we came into a rain shower, making the rocks a little slick.   The last .8 miles were quite easy again and we did pick up some time at this point.  We made our way back to the parking lot to make the round trip 8.8 miles.

Christine Says…

The morning of our Mt. Madison hike started off cheerfully enough.  We stopped for breakfast at Dunkin Donuts.  I ate both a bagel with cream cheese and a Boston Cream donut.  If I’m going to hike almost nine miles with over 4,000 feet of climbing, I’m going to enjoy any and all the baked goods I want!  However, I was jolted out of my happy post-carb afterglow when I discovered my socks and sock liners completely soaked in the back of the car.  A tough hike with wet socks sounded like a really bad idea.  But, driving out of our way to find an outfitter with Thorlo socks seemed like an even worse idea.  I’m super picky about socks, and Thorlo’s thick-cushion hiker socks are the only ones that keep my feet happy.  I decided wet Thorlo socks were better than dry socks of another brand. (and they were … I hiked all day in wet socks and didn’t get a single blister!)

As Adam said in his post, the Valley Way trail is pretty moderate for White Mountain terrain.  The trail is not as rocky and stays under the shelter of trees until you get to Madison Spring Hut.  It’s a great choice if you want to visit the northern Presidentials, but stay largely sheltered from wind and other weather.  There is still plenty of climbing, but until the last mile, it’s all gradual and moderate.  Trails like the Valley Way exist due in part to people like J. Rayner Edmands.  He was an early volunteer for the Appalachian Mountain Club.  Starting in the 1880’s, he spent over 20 summers building trails in the White Mountains.  He believed trails to the high peaks should be passable without stumbles, even in the dark.  Backpacker Magazine did a neat article about Edmands in their October 2014 issue.  Check it out if you have a few free minutes.

JMU Dukes
We paid tribute to our alma mater (James Madison University) on the namesake mountain. Go Dukes!  Below: The trail was extremely rocky and rugged between the hut and the summit of Mt. Madison; Cairns mark the way; Christine and Adam enjoy a summit view; The descent.

Climbing Mt. Madison  Rocks on Mt. Madison
Summit of Mt. Madison  Descent

I very much enjoyed the little rapids and waterfalls along Snyder Brook early in the hike.  Tama Falls was especially impressive.  After we moved away from the stream, the hike was basically just a climb in the woods.  As we ascended the trail got rockier, bit by bit.  The last half mile to the hut was insanely steep and rocky.  In one spot, my shoe got so solidly wedged between two rocks that I had to unlace it and contort my ankle to free myself.  It took efforts from both of us to release my shoe from the rocks.  It’s a good thing trail runners are so soft and flexible, because my feet definitely needed both shoes on this hike!  I think the steepness of the terrain is actually what stopped me from getting hurt when my foot got caught.  We were moving very slowly, picking our way across the rocks. Had I been moving at any significant speed, I think I could have easily broken my ankle.

When we arrived at Madison Spring Hut, it was already starting to cloud up a little. It wasn’t really overcast, but the sky had that heavy, hazy look about it.  The weather was definitely changing and I wanted to make sure we enjoyed the best views possible.  We headed up the Osgood Trail toward the summit of Madison.  I don’t know if you can really call the path to the top a ‘trail’.  It’s more of a scramble across rocks, following cairns leading you to the summit.  The climb to the top is slow going, simply because there is never a simple place to put your feet. On our way up it was fun to look back and marvel at the towering peaks and the tiny hut tucked into the col.

Inside Madison Spring Hut
We decided to eat lunch at Madison Spring Hut.  Below: Even pretty dogs aren’t allowed inside AMC huts;  We always enjoy the baked goods for sale at huts; Compass on the hut porch.

No Dogs Allowed in AMC Huts Goodies Compass

At the top we enjoyed spectacular views of the Presidentials.  Seeing the Mt. Washington Auto Road snaking down the mountain was really impressive!  While the wind was a little brisk at the summit, it was really a warm, mild day for the White Mountain high peaks.  Lots of people were hiking in shorts and t-shirts.  Some people even basked shirtless in the summit sunshine.  My blood is a little thin for that, but I wasn’t cold like I had been on the summit of Mt. Washington in 2013.

After taking lots of photos and doing our JMU rituals, we climbed back down and enjoyed our packed lunch at Madison Spring Hut.  Of course, we supplemented our packed food with baked goods from the Croo.  I always hear people talking about how huts are packed with dayhikers all summer long. I’m not sure if it’s our timing (we hike early), but we’ve found almost every hut we’ve visited nearly empty.

Star Lake
Beautiful star lake sits near Madison Spring Hut. Below: As we were leaving the lake, clouds started to roll in and we heard distant rumbles of thunder… time to leave the peaks and head back to the valley below.

Walk to Lake Approaching Storms

After lunch, we walked out to Star Lake.  What a beautiful spot.  The lake itself is small and shallow, but it makes a gorgeous reflecting pool for Mt. Madison.  We were lucky to visit on a picture perfect day!  While we were admiring the lake and taking in our final peak views, we started to hear distant rumbles of thunder in the distance.

Being caught in a thunderstorm in the Whites is definitely something I’d be happy to NEVER experience.  Lightning strikes happen frequently, wet granite is very slick, and stream levels can change drastically in mere minutes.  In fact, just last week I read a harrowing account from a solo hiker caught by storms in the White Mountains.  Seriously scary!

We made our way down as quickly as we safely could.  With a couple miles of hiking left, the rain started to fall.  Fortunately, it was light rain and none of the thunder/lightning seemed close.  We got back to the car right before the skies opened up and poured!  What a great day with perfect timing. I’m really thankful that we had weather that allowed us to visit two more Presidentials on our 2014 trip!

Trail Notes

  • Distance – 8.8miles
    MapMyHike Stats *
  • Elevation Change –  4150 feet
  • Difficulty –  5.  The trail started off easier, but it is still a very tough, uphill climb.
  • Trail Conditions – 2.5.  The trail was well-maintained, but the rocky parts of the trail make this a challenge.  The final push to the summit on the Osgood Trail also took a lot of precision.  Bring trekking poles.
  • Views – 5.  It doesn’t get much better than this.  If you are lucky enough to catch this on a day where clouds are off the mountain summits, you will be able to see all around you for miles. 
  • Waterfalls/streams 3.  The Snyder Brook runs alongs the trail early on the hike and you can see a few smaller waterfalls along the trail. 
  • Wildlife – 1.  We didn’t really see any wildlife on the trail.  I wouldn’t expect much at all once you get above treeline. 
  • Ease to Navigate – 2.5.  There are a lot of junctions and side trails on the route because there are a lot of trails in this area.  Keep following the signs for the Valley Way Trail until you reach the hut and then follow the Osgood Path via the cairns to the summit. 
  • Solitude – 2.  We picked a gorgeous day in the summer to do this hike, so we weren’t surprised to see lots of people.  We saw the most at the summit and the hut, but there was still places to find our own bit of solitude. 

Download a trail map (PDF)

Directions to trailhead: From I-93: Take Exit 35 for Twin Mountain. Follow 3N for 12.4 miles. Turn right onto 115N for 9.7 miles. Turn tight onto 2E for 8 miles. The parking lot will be a large gravel area on the right.

* MapMyHike is not necessarily accurate, as the GPS signal fades in and out – but it still provides some fun and interesting information.

Mt. Pierce (NH)

Special: New Hampshire Edition

Introductory Guide to Visiting the White Mountains

This hike is one of the shorter, more moderate approaches into the Presidential range of New Hampshire.  While the hike is only about 6.5 miles, we hiked an extra 2.4 miles for the chance to enjoy some views!

View the Full Album of Photos From This Hike

Mt. Pierce Summit
On our second pass-by, we were lucky to hit the summit with mostly clear views!  Below: Adam makes his way up the Crawford Connector – a short spur trail from the parking lot to the Crawford Path; Trail signs and a sign for Mizpah Spring Hut; Gibbs Falls.

Crawford Connector Trail AMC and Trail Sign Gibbs Falls

Adam Says…

Charles Dickens started off A Tale of Two Cities with the line, “It was the worst of times, it was the best of times.”  When I was thinking about starting to write about Mt. Pierce, I was thinking, it was A Tale of Two Hikes with the worst and best of times.  All of us have good days and bad days on the trail and this was a bad one for me.  I wasn’t really feeling the hike deep down and I felt like I was just going through the motions rather than taking a moment to enjoy what I was able to do.  The morning started off with a lot of fog around, which didn’t really help my mood.  I was thinking it may burn off by the time we got to the top, but we weren’t so lucky.

The first .4 miles along the trail were relatively flat as it meandered through a wooded area.  We crossed a footbridge at the base of a small waterfall and at .4 miles, we reached a junction with the Crawford Path.  Taking a left at the junction, we began our ascent.  The ascent begins while paralleling the Gibbs Brook on the left of the trail.  The trail was extremely rocky which was making each step a challenge, as I felt like I was doing a demented, granite-laden version of a StairMaster.  Most of the trail to the summit consists of having to step on rocks, so there is little evidence of soft ground to place your feet.  I would recommend shoes with good padding, thick comfortable socks, ankle support, and trekking poles to help yourself along.

Rocky Trail
Even though the Crawford Path to the summit of Pierce is one of the least steep trails in the Whites, it is still very rocky and slick.  Below: As we climbed, the woods got foggier and foggier; By the time we made it to the junction with the Mizpah Cutoff Trail we started to worry that we wouldn’t have a view at all; The Mizpah Cut-Off Trail departs the Crawford Path a little over a mile from the summit of Mt. Pierce.

Into the Clouds Fog Mizpah Cutoff

At 1.9 miles, we reached a junction that led to the Mizpah Spring Hut, which is the return trip for this lollipop loop.  Stay left and continue to climb up to the summit.  The trail continued to be rocky and the fog was just sticking to the mountaintop as we progressed.  I was feeling hopeless about being able to spot any views.  As we got higher, we could tell the views would have opened up to the left of the trail but all we could see was a sea of gray.  At 3.1 miles, we reached a large rocky, outcropping and waited a while for the views to open up.  While the wind was picking up, we felt there was no end to the fog.  At the outcropping, another sign for a junction pointed us to the summit and the Webster Cliff trail to the Mizpah Spring Hut (continuing on the Crawford Path would lead to the summit of Mt. Eisenhower in 1.6 miles).  We took that sharp right and headed up to the top, where we reached the summit of Mt. Pierce in a short distance.

At this point the trail began to descend.  The first part of the trail was a gradual descent, but eventually the trail was some of the steepest, rockiest downhill my feet and knees have witnessed.  At 4.0 miles, we reached the Mizpah Spring Hut, maintained by the AMC and beds can be reserved in advance.  We stopped for a while here and ate lunch.  The croo (yes, that is how they spell it) that maintains the hut and cooks dinner and breakfast for overnight guests, had baked some cookies which we purchased and supplemented our lunch.  As we were enjoying our lunch, we could see that the fog was finally lifting.

From the hut, we explored the nearby Nauman tent area (also able to be reserved for outside camping) and then proceeded on to the Mizpah Cutoff Trail to complete the lollipop section of the hike.   The Cutoff Trail starts off flat, but is a relatively easier descent.  We reached the junction with the Crawford Path at 4.7 miles.  A return trip to your car by taking a left would make this a 6.6 mile hike.  However, we had a debate about what to do.  Going back up to the summit would be adding another grueling, rocky 2.4 miles, but the views could finally be opening up.  What we had researched before told us how great the views were, so the temptation was hard to resist.  I felt like I owed it to myself (and our readers) to change my attitude and fight through to see these views.  I could tell Christine wanted to see the views as well, so we decided to hike up to the summit again.

Cairns in Fog Boardwalks on Webster Cliffs Starting to Clear

As we climbed, we saw people descending that we had seen earlier on our hikes.  I stopped to ask everyone if they had seen views, thinking if there was still little hope we could turn back around.  Early on, some were saying that we may get lucky to see things, but as we got closer, we were told the views had opened up.  As people were descending, we ran into several people that we had seen before near the summit and they had wondered if we were hiking the summit again.  We got looks of admiration, which made us feel like we fit in with New Hampshire hikers – we weren’t just some normal, Virginia couple that isn’t used to hiking the tough, challenging White Mountains.  When we reached the rocky outcropping near the summit, the views were spectacular.  There were still clouds in the distance that was stuck to Mt. Washington and some of the other high peaks, but we could still see miles of beautiful mountain ranges around us.

We hiked again up to the summit and the views got more amazing as we looked behind us each step.  We stayed up here a little longer to take in the views.  After getting our fill, we went back down the Crawford Path and made our way back to the car.  When we reached the end, we were a little more tired and had covered more miles than we had planned, but it was a rewarding day.  At the parking lot, we saw a fox standing next to our car, but it quickly darted off into the woods.

One thing to note about Mt. Pierce is that it was once named Mt. Clinton.  When hearing some people refer to it as Mt. Clinton, my initial thought was that Mt. Pierce had been renamed for President Clinton.  I thought that would be odd, since Franklin Pierce was the only President born in New Hampshire and I couldn’t see them changing the name for a President from Arkansas.  But the original name was from DeWitt Clinton, a governor of New York and U.S. Senator, also known for being largely responsible for the construction of the Erie Canal.  Even though the name was changed in 1913, some people have still held onto the original name of Mt. Clinton.

Christine Says…

Summiting Mt. Pierce has been on our New Hampshire ‘To Do’ list for several years now.  I’m sad Adam didn’t have a better day on the trail, because I really enjoyed myself and had a strong hiking day.  It’s always tough when your hiking partner is in pain or having a hard time with terrain, because there’s really nothing you can do beyond cheer them on (which is sometimes annoying) or stay quiet and let them work through the challenge.

We chose to hike Pierce on a day forecast to be clear and beautiful.  As typical in the Whites, the clouds and drizzle stuck to the mountains far longer than the valley.  It was sunny and pleasant at the AMC Highlands Center, but the peaks loomed in the clouds.  We decided to start our hike on good faith that the clouds would blow off before we reached the summit.

Mizpah Spring Hut
By the time we arrived at Mizpah Spring Hut, the sun was fully out.  Below: The Webster Cliffs trail is steep in places and is traversed by ladders and wooden stairs; Inside Mizpah Spring Hut; Cookies!

Webster Cliffs Trail Inside Mizpah Cookies at Mizpah

Hiking along the stream early in the hike was pretty and pleasant.  Gibbs falls were lovely and I always enjoy the sound of water running through the woods!  As we continued to climb uphill, the fog did the opposite of what we hoped/expected – it just got thicker!  In fact, every time I paused to take a photo I had to wipe the lens with my shirt to get the droplets and mist off the glass.

Between the Mizpah Cut-Off trail and the summit, we were passed by a pair of trail runners.  Running on mid-Atlantic mountain trails is challenging enough.  I can’t even imagine keeping that pace over the rocks and roots of New Hampshire!

As we ascended, the fog enveloped the mountain even more.  We debated taking the Mizpah Cut-Off trail, and visiting the hut first, but decided to chance the summit so that we’d hit the hut closer to lunchtime. That turned out to be the wrong call.  At the summit of Pierce, we sat on the rocky outcropping looking into a sea of clouds.  We couldn’t even tell which direction held the spectacular view we’d heard described in our hiking guide.

Christine on the Summit of Pierce
We hiked back up to the summit of Pierce to enjoy clear views.  Below: The Nauman Tentsite is a short distance from the hut; A typical tent platform in the Whites; More views from the summit.

Nauman Tentsite Tent Pad More Views from Pierce

We sat in the clouds for a few minutes before deciding to push on to the hut.  The Webster Cliff trail crossed a ridge for a while, using boardwalks and traditional trail.  We stopped at one last high point and checked out the movement of the clouds.  Every now and then, the clouds would blow off enough that we could see the shoulder of a mountain or the faint shape of a peak through the mist.  We again discussed waiting/going back to the summit versus heading down to the hut.  We agreed that it would still be a while before the view would clear, and proceeded to Mizpah Spring.

The Webster Cliff trail got steeper and slippery, using wooden stairs and ladders in a couple places.  We eventually reached the hut.  While we ate our lunch, the last of the clouds blew off, leaving bright bluebird skies above the White Mountains.  We discussed climbing back up to the summit.  Neither of us wanted to ascend via Webster Cliff, so we decided to delay our summit decision until after we walked the Mizpah Cut-Off back to its junction with the Crawford Path.

At the junction, we agreed that you don’t climb a presidential peak and pass on the opportunity to take in a spectacular view.  We hiked the extra 1.2 miles (2.4 miles round trip)  with 1,000 feet of elevation gain a second time.  And you know what… it was SO WORTH IT.  The views were spectacular, expansive, breathtaking.  Even with Mt. Washington still in the clouds, it was a stunning view.

The hike down was long and slippery.  We were passed again by the trail runners we had seen earlier.  They had been all the way to the summit of Mt. Washington and back.  Wow! We didn’t go that far, but we still felt our hike was worthy of celebration with a huge meal at The Italian Farmhouse in Plymouth.  It’s always such a gift to have a great view day in the White Mountains!

Trail Notes

  • Distance – 6.5 miles
    MapMyHike Stats *
  • Elevation Change –  2500 feet
  • Difficulty –  4.  While there are steeper, more challenging trails in the White Mountains, this one is still challenging. 
  • Trail Conditions – 2.  The trail is mostly rock, requiring big steps and unsteady footing. 
  • Views – 4.5.  From the summit of Mt. Pierce on a clear day, you can see miles of the Presidential range. 
  • Waterfalls/streams 3.5.  Early in the hike, you can see Gibbs Falls and the start of the Crawford Path part of the hike goes along the scenic Gibbs Brook. 
  • Wildlife – 2.  We weren’t expecting to see much, but we were lucky enough to see the fox at the end of our hike.  Keep a lookout for the rare Bicknell’s Thrush. 
  • Ease to Navigate – 3.5.  Signage was fairly good at the junctions, but we were a little confused on how to get to the Mizpah Cutoff Trail from the hut. 
  • Solitude – 2.  This is a popular trail since the Mizpah Spring Hut is one of the easiest of the AMC huts to access.  Expect to see people at the summit of Mt. Pierce and the hut mostly.  Clear days in the summer could make this quite popular. 

Download a trail map (PDF)

Directions to trailhead: From I-93: Take Exit 35 for Twin Mountain. Follow 3N for 10.4 miles. Turn right onto 302E and proceed for 8.2 miles.  Turn left onto Mt. Clinton Road.  There will be a large gravel parking lot at the trailhead ($3 fee applies).

* MapMyHike is not necessarily accurate, as the GPS signal fades in and out – but it still provides some fun and interesting information.

Wesser Bald (NC)

Special: Smokies Edition

Introductory Guide to Visiting Great Smoky Mountains National Park
(while Wesser Bald is technically outside GSMNP, it’s still part of the greater Smokies region)

This 2.8 mile out-and-back is an easy hike to one of the area’s best viewpoints.  The platform atop the defunct firetower on Wesser Bald offers panoramic views of the spectacular Smokies (and all the other mountains in the area).

View the Full Album of Photos From This Hike

Smokies View from Wesser View
You get classic Smoky Mountain views from the tower atop Wesser Bald.  Below: A sign points the way to Wesser Bald:  The parking area at Tellico Gap provided a view of powerlines and a ‘cloud sea’; The drive into Tellico Gap follows the extremely scenic Otter Creek.  It’s worth stopping to enjoy the rapids and small waterfalls.

Wesser Sign Tellico Gap Stream

Adam Says…

It is nice when you find a hike that the locals rave about.  During our trip to North Carolina, I heard three different people mentioning that we needed to hike Wesser Bald.  After getting to the top, I can see why this is so revered.

When we started off in the morning, it had been storming the night before.  A fog had settled on the lower elevations.  While we were driving, we were curious if we were going to get any views at all.  On our drive there, the cloudy conditions gave us great views along the Nantahala River as we passed several scenic spots and chances to catch some roadside waterfalls and rapids.  We made our way up Otter Creek Road and parked at Tellico Gap, where the Appalachian Trail crossed the road.

When we first parked, we noticed the sign that designated the start of the trail, but we noticed there was a white-blazed trail and a fire road to the left.  We knew our hike was on the white-blazed Appalachian Trail, so we took the trail to the left.   The fire road trail to the right also leads to the tower.  I’m not sure how the conditions are on it, but it did seem to be shorter, since we found a family with kids that left after us beat us back to the parking lot (and they didn’t seem like fast hikers).  The trail passed through a thick brushy area fairly quickly, but most of the trail was in a more opened-up wooded area.  The hike was fairly uphill as it skirted the mountainside, but I didn’t find any of the trail to be incredibly steep.  Instead, it winds There were a few switchbacks towards the end of the hike where it was a little steeper, but the switchbacks save you from going straight up the mountain.

Wesser Bald Trail
Adam walks along the Appalachian Trail en route to Wesser Bald.  Below: A cool, bent tree along the trail; Mountain laurel were just starting to bloom; In fact, there were many wildflowers blooming.

Bent Tree Mountain Laurels Wildflowers

When we reached the top of the spur trail at 1.3 miles, there was a great viewpoint that gives you a small sample.  If you are not willing to climb the fire tower, this would be the best views you would get on this hike.  As you reach the top, take a right and you’ll reach the fire tower in a short distance.  Make your way back to complete the out-and-back or you could press pass the fire tower to take the fire road back to make it a loop.

When we reached the fire tower, we could hear a couple people at the top of the tower.  Christine quickly made her way up.  I, on the other hand, needed to psych myself up.  As you’ve probably seen in many pictures, I don’t mind getting out on rocks that are on the edge of a huge precipice; however, I don’t trust man-made structures when it comes to heights.  I trust nature over man.  I went up halfway and then I could start to see the sky through the gaps in the stairs and I just turned back around.  But from the bottom, I could hear Christine and the others at the top of how beautiful everything was and I knew I needed to force myself to get up there.  So, I took a second attempt and made it up.  Christine and the others at the top applauded my efforts for overcoming my fear.  I’m so glad I made it to the top, because the scenery was breathtaking and some of the best mountain views I’ve ever seen.   We stayed up there a while and talked to a few different groups of people that made it up after we did.

After we made it back, we decided to head to the Nantahala Outdoor Center.  We had a nice lunch at the River’s End and then we enjoyed a beer at Big Wesser BBQ & Brew, while watching kayakers and whitewater rafts go down the river.  This is always one of our favorite spots while visiting near the Smokies and it is definitely a place you can spend hours during the afternoon.   You can also hike from Tellico Gap to the Nantahala Outdoor Center on the Appalachian Trail for a one-way total of 7.5 miles if you want to do a shuttle option.

If you are interested in geocaching, there are three you can find on the trail:

Christine Says…

The forecast for our week in the Smokies didn’t look good – stormy, rainy and unsettled every single day from Sunday to the next Saturday. So, when we woke up to dense fog on Monday morning, we weren’t completely surprised. However, the hourly forecast on weather.com made it look like the fog might burn off. We hoped that the odds would be in our favor, and headed off to hike a trail we’d been eying for a while. Wesser Bald is a short, moderate 1.4 mile hike along the AT to an old fire tower overlooking the southern Appalachians. It’s a spectacular view if you’re lucky enough to hit the spot on a clear day.

From Tellico Gap, we followed the AT as it made gradual, sweeping switchbacks through beautiful, lush forest. The trail was lined with wildflowers and blooming azaleas/rhododendron. I think I saw more pink lady slippers on this hike than I’ve ever seen anywhere else. It was gorgeous. The azaleas came in white, pink and orange and the rhododendron bloomed in their classic bright pinkish-purple color. I also spotted wild strawberries and some gorgeous purple spiderwort.

First View
Christine enjoys the first view along the trail. This spot is at the head of the spur trail to the tower.  Below: The fire tower is two stories high;  The stairs are open and a little rickety; Christine atop the fire tower.

Fire Tower Climbing On Top the Tower

The humidity took some getting used to! Even though it wasn’t particularly hot, the day was windless and the air was completely saturated. By the time we got to the top, I looked like I’d been dunked in a pool! Just before reaching the tower, we passed a nice view looking toward the Smokies and Fontana Dam. Near the overlook, a short spur trail took us to the top of Wesser Bald. This bald is no longer actually a bald – it’s been let go and returned to the natural forest environment. So while the view has closed in from the base of the tower, the view from the two-story viewing platform is superb!

I climbed up to the top and said WOW! Adam didn’t feel comfortable with the open, rattling stairs, so he hung out at the bottom while I chatted with a couple at the top. They had hiked up earlier from the NOC and were waiting to meet up with their son, who was on a solo backpacking trip. They were really fun to talk to – both were veteran AT thru-hikers and REI employees. We talked about favorite spots on the AT and chatted a bit about gear. I always love meeting people like them on the trail!

View from the Tower
Views from the Wesser Bald fire tower are majestic. Below: There were many pink lady’s slippers along the trail; Spiderwort: Christine enjoys a post-hike shandy at the Big Wesser Brew & BBQ at the Nantahala Outdoor Center.

Lady's Slippers Spiderwort Nantahala Outdoor Center

While we were chatting, Adam mustered the courage to climb to the top of the tower. He was so glad he did, too! The views really blew both of us away! Even though it was hazy, we could still see for miles in every direction. We spent a long while atop the tower, enjoying the views and the fresh mountain air.

After a while, we decided it was time to make our way down and seek out some lunch. One of our repeat stops ever time we visit the Smokies is the Nantahala Outdoor Center. We enjoy lunch at the Riverside Cafe, browsing the nice outdoor gear store, and (of course) drinking a few beers by the river at Big Wesser. It’s so fun to sit at an umbrella table, drink a nice craft beer and watch kayakers shooting through the rapids. It’s also a great place to people-watch in general. While we were sitting and enjoying our drinks, the skies opened up and dumped a huge amount of rain in just a few minutes. I’m sure glad we had the rain at the NOC instead of on top Wesser Bald!

Trail Notes

  • Distance – 2.8 miles out-and-back
  • Elevation Change – 777 feet.
  • Difficulty – 2.  The trail is mostly uphill, but not too steep.
  • Trail Conditions –  4.  The trail was in great shape and the footing was fairly solid.
  • Views – 5.  Absolutely spectacular views from the fire tower and another nice view right before the tower.
  • Streams/Waterfalls – 0.  Non-existent. 
  • Wildlife – 1.  We only saw some birds along the way. 
  • Ease to Navigate –  3.  The confusion of the fire road at the beginning gives it a lower score, but other than that you should be fine.  Follow the white-blazed AT. 
  • Solitude – 2.5.  Popular with locals, but this wouldn’t get the traffic that a hike in the nearby Smokies would. 

Download a Trail Map (PDF)

Directions to trailhead:   From Bryson City, follow US 19/74 for 20 miles.  Turn left on Wayah Road and follow it for five miles. Turn left on Otter Creek Road and drive 4.1 miles to Tellico Gap. The road is paved for the first 2.8 miles. At the crest of the hill, you will see the AT crossing and several parking spots.  Follow the signs to Wesser Bald.