Mt. Madison (NH)

Special: New Hampshire Edition

Introductory Guide to Visiting the White Mountains

This 8.8 mile hike takes you past Madison Spring Hut and up to the summit of majestic Mt. Madison.  The Valley Way Trail is known for being one of the safer, more protected routes into the heart of the White Mountains.  While the terrain is less extreme than other trails in the area, the hike still requires a little over 4,100 feet of climbing.  It’s a tough hike, but the views make it well worth the effort.

View the Full Album of Photos From This Hike

Hiking Mt. Madison
Adam makes his way across the summit ridge of Mt. Madison. The big mountain in the background is Mt. Washington.  If you look closely, you can see the Auto Road snaking down the peak.  Below:  Plenty of parking and access to many trailheads at the Appalachia Parking area;  Warning…. danger ahead – seriously, the White Mountains can be pretty extreme; The early part of the trail was fairly soft and gentle.

Appalachia Parking Death Awaits Early Terrain on the Valley Way Trail

Adam Says…

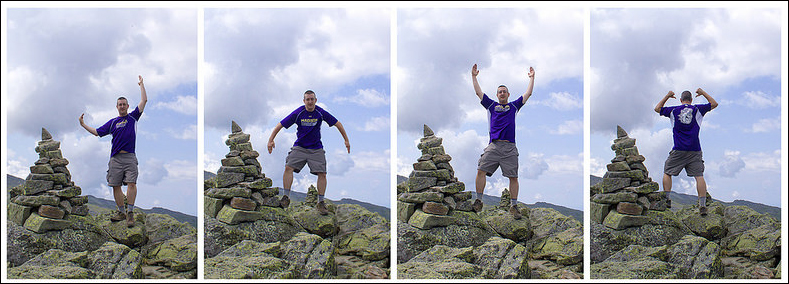
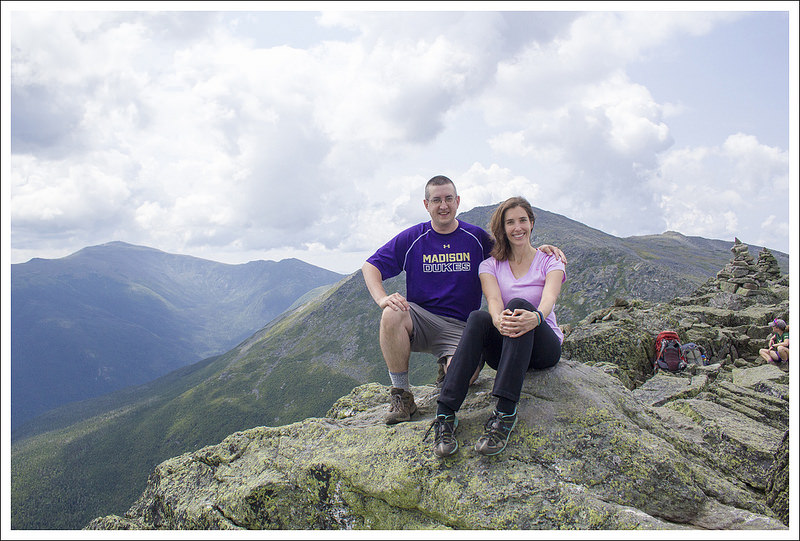
My top goal for our 2014 New Hampshire trip was to hike up Mt. Madison.  We both went to James Madison University and have worked there for years, so it only seemed fitting to take on the mountain that shared a name with our college.  I even wore JMU Dukes gear almost like the guy that goes to a concert wearing a t-shirt for the band’s previous tour to show his super-fandom.

We started out the day on a rough note.  Christine had put her hiking shoes and socks in the back of our car, so she could wear sandals on the car ride up.  When we pulled over at one point, we realized one of our Camelbak tubes had pressed open and leaked all over the car, soaking her shoes and socks.  We debated about if we would have been able to even do the hike in fear of blisters, but Christine decided to push forward.

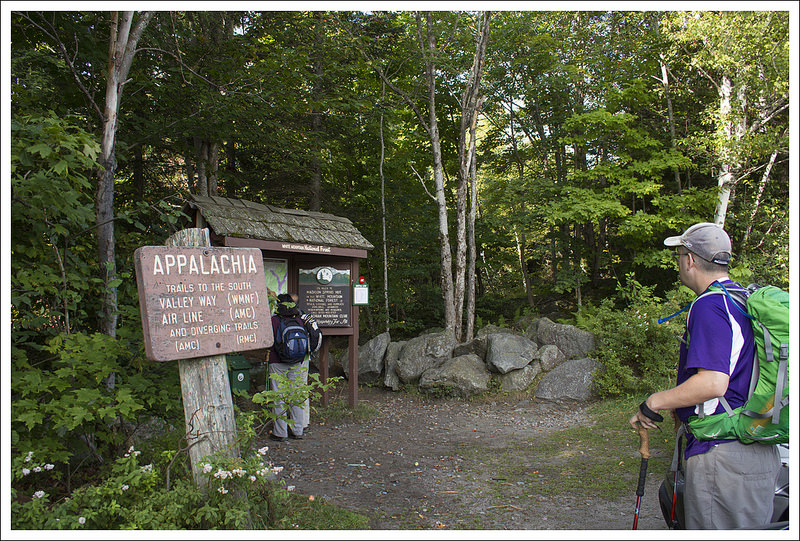
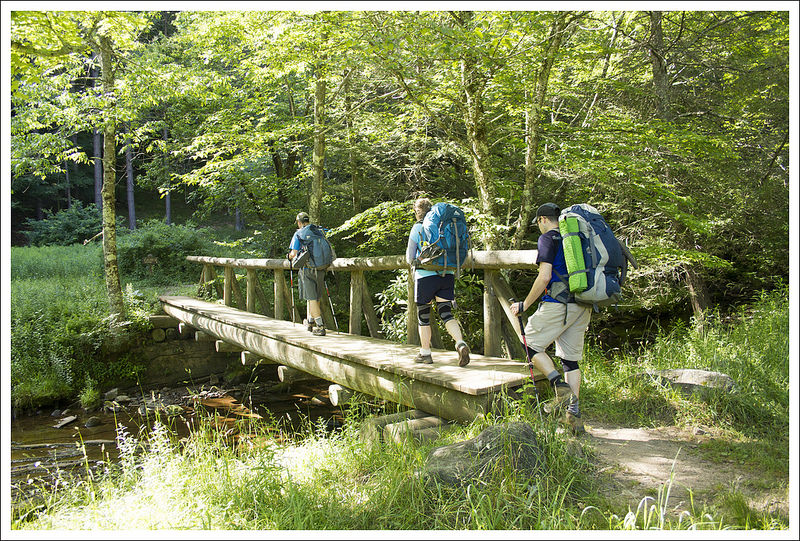
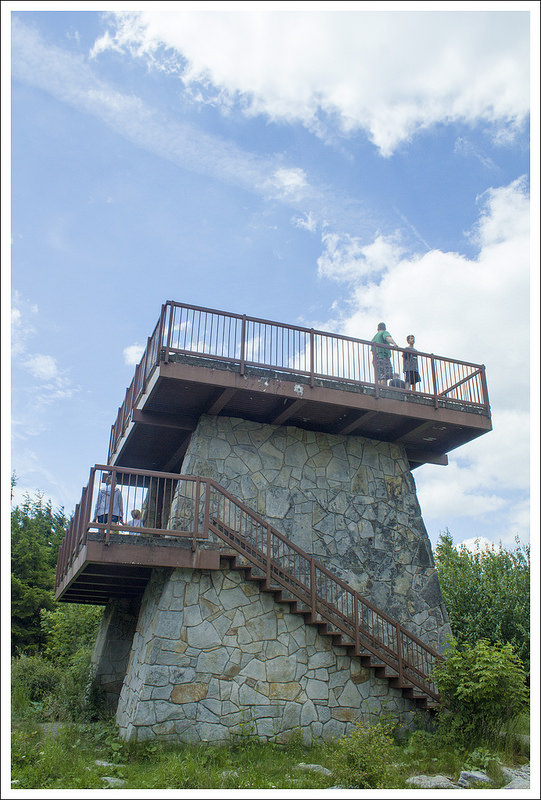
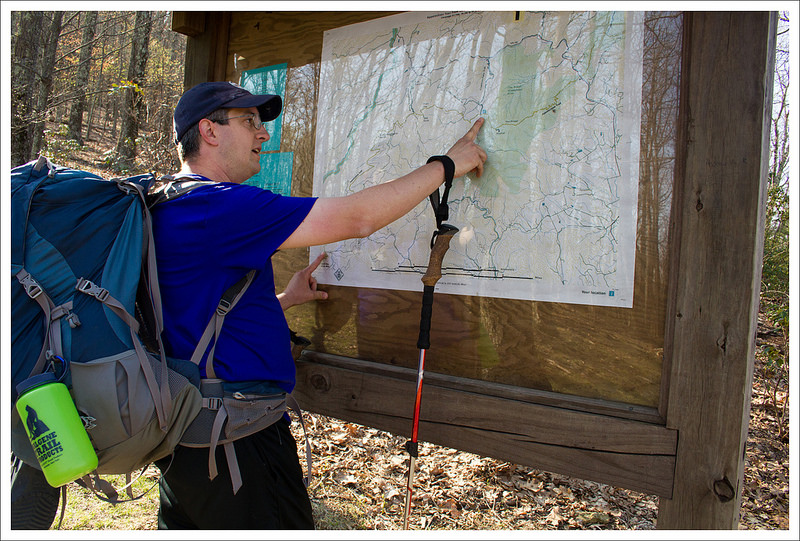
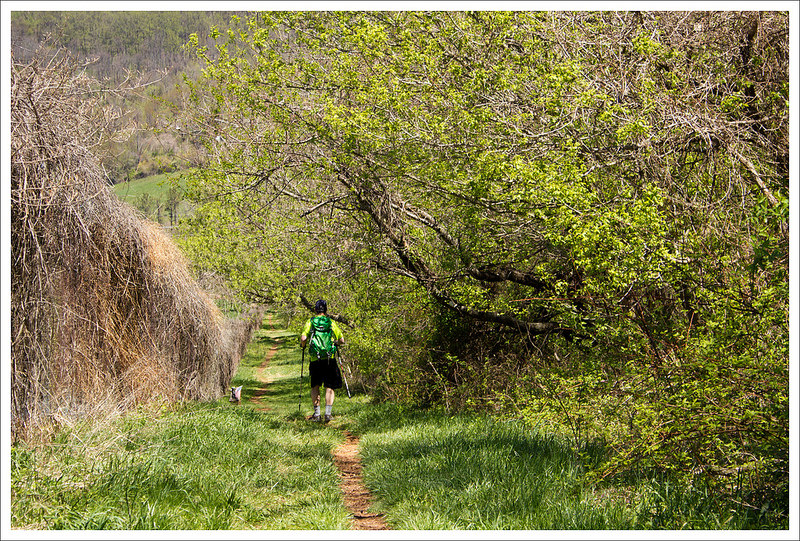
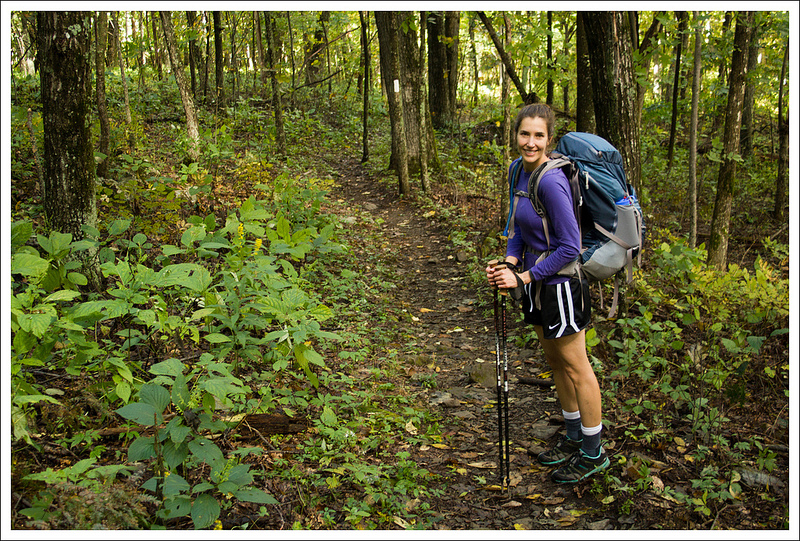
There are a lot of ways up Mt. Madison, but in our research we found the most popular way was to make our approach by going up the Valley Way trail.  We parked at the large Appalachia parking lot (which was so full we needed to park on the road) directly on US-2.  We were worried there would be so many people on the trail, but this parking lot holds the beginnings of lots of trails that lead up to many peaks (including Mt. Adams and Mt. Quincy Adams).

Tama Falls
The early part trail follows Snyder Brook. By taking a short spur trial, you can visit beautiful 25′ Tama Falls.  Below: We saw a couple Croo members on their way down from the Madison Spring Hut; Adam checks out all the rocks on the ‘not as rocky’ New Hampshire trail;  The final push to the Madison Spring Hut was very steep and rugged.

Croo Getting Rockier Steep to the Top

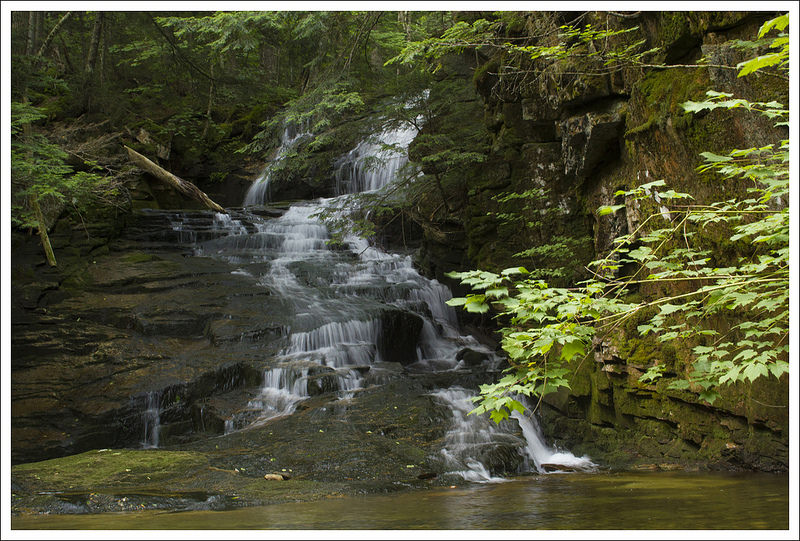
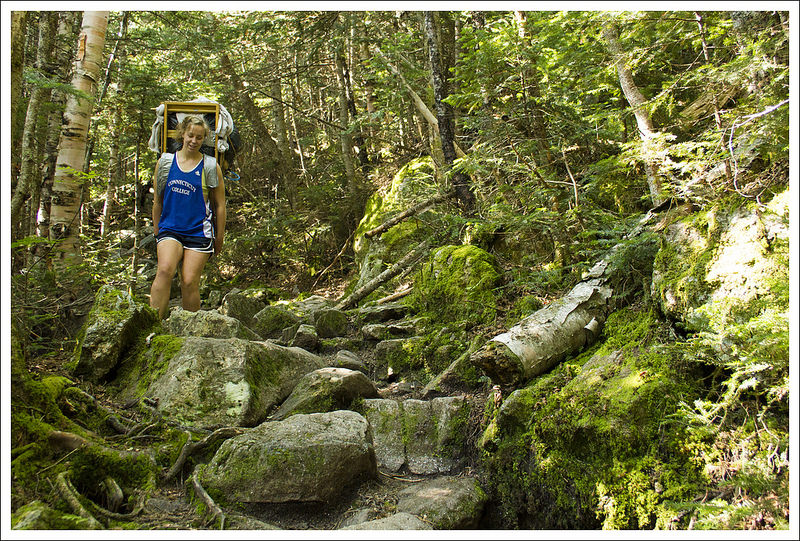
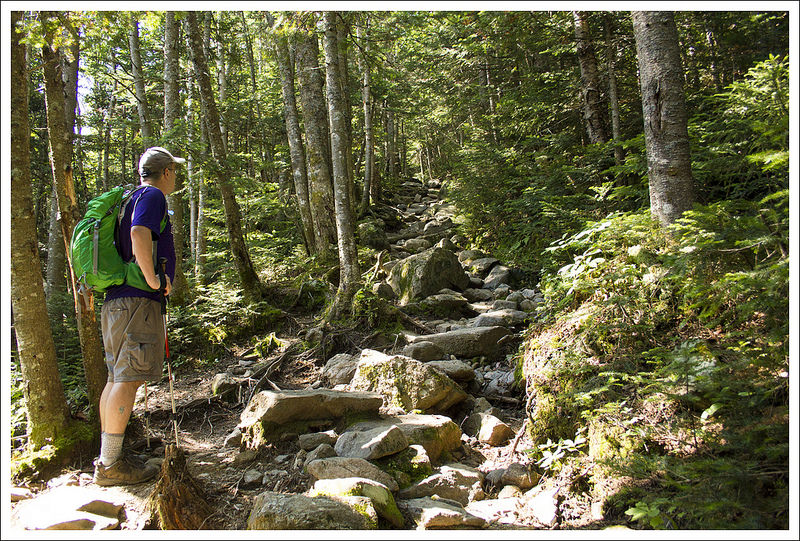
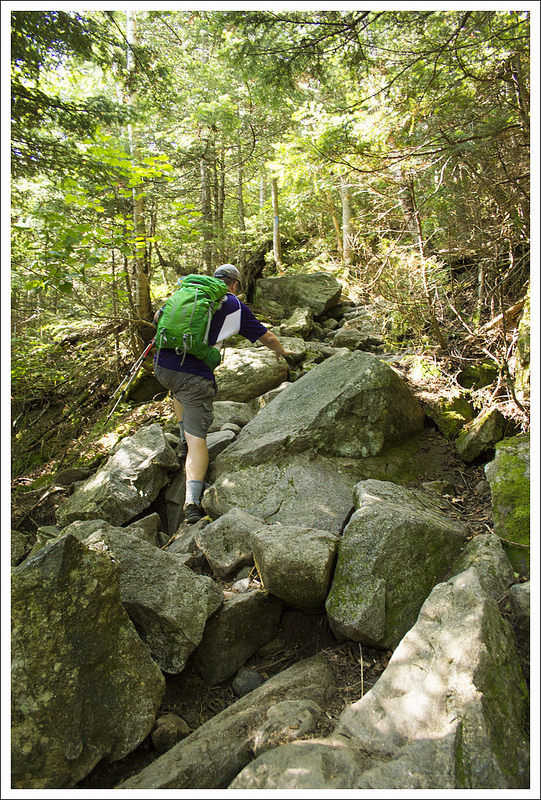
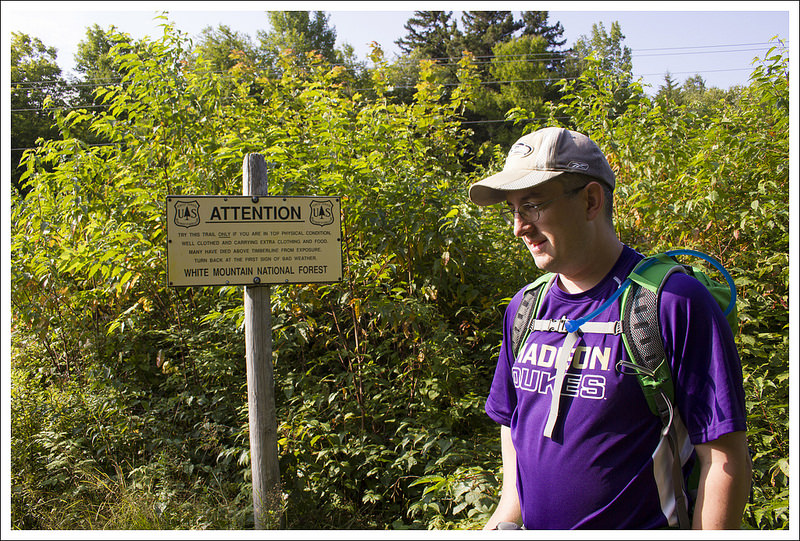
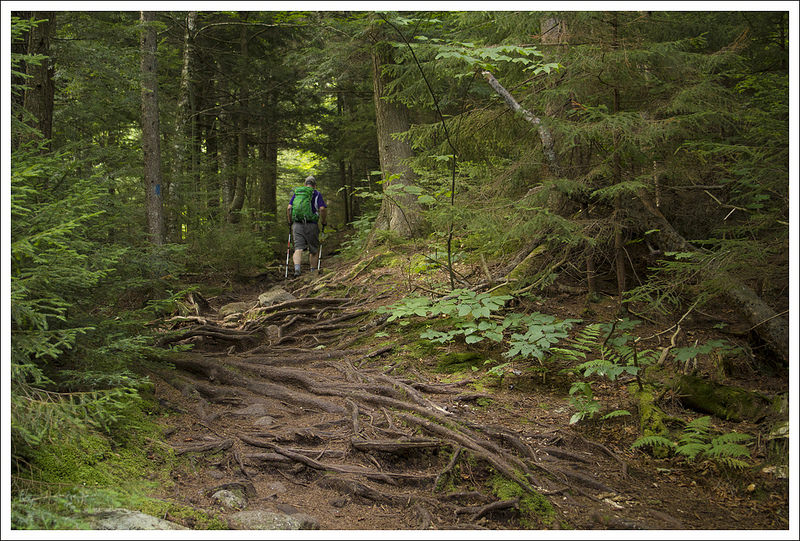
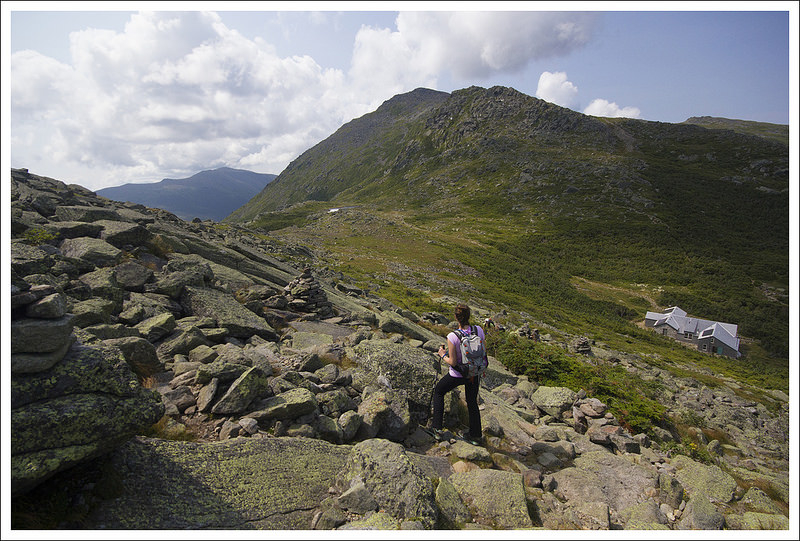
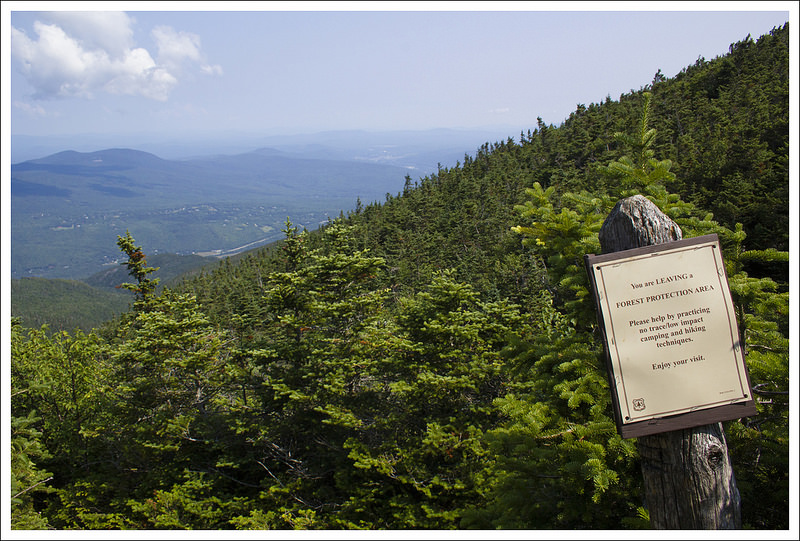
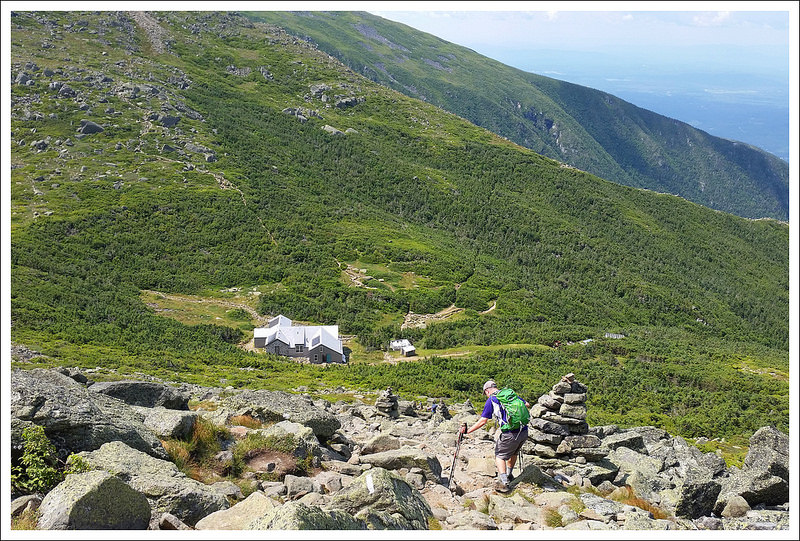
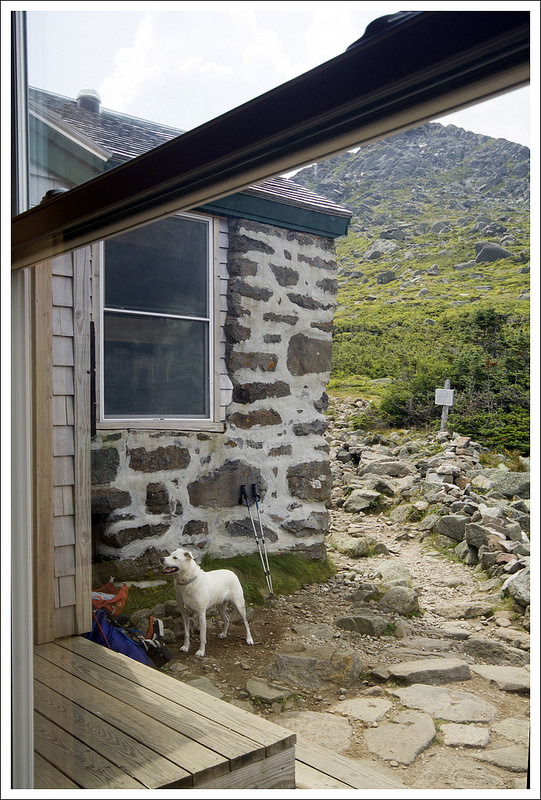
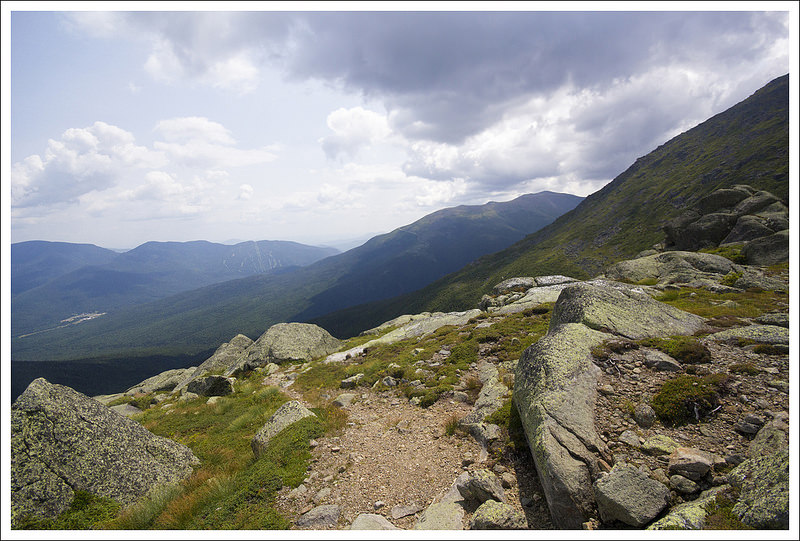
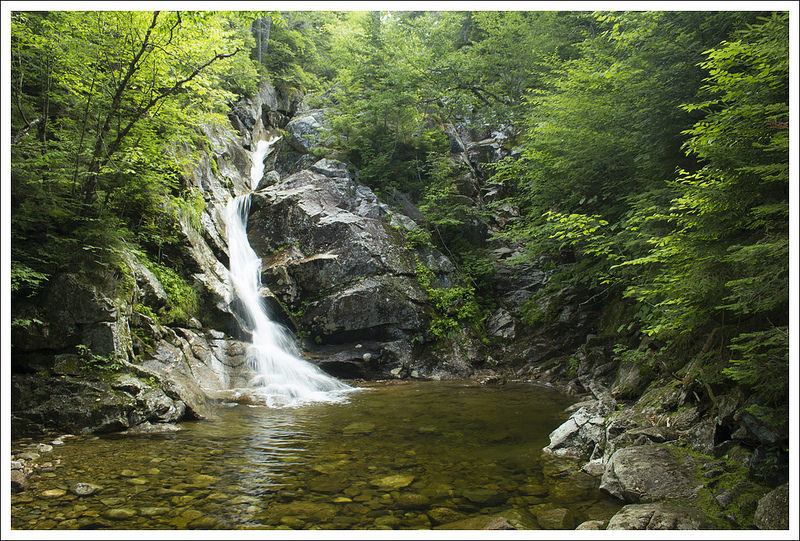
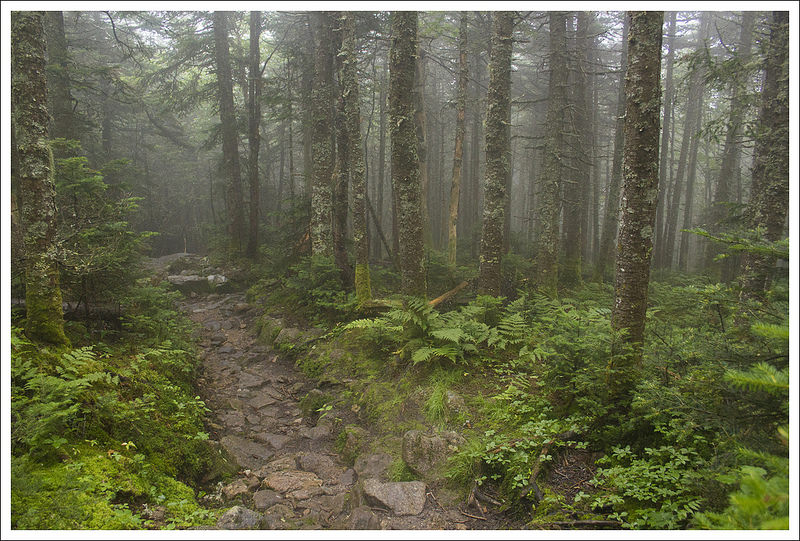
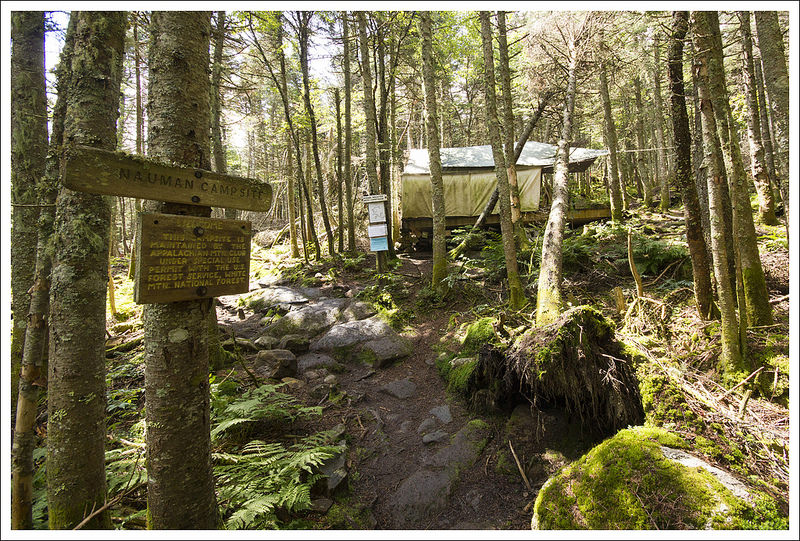
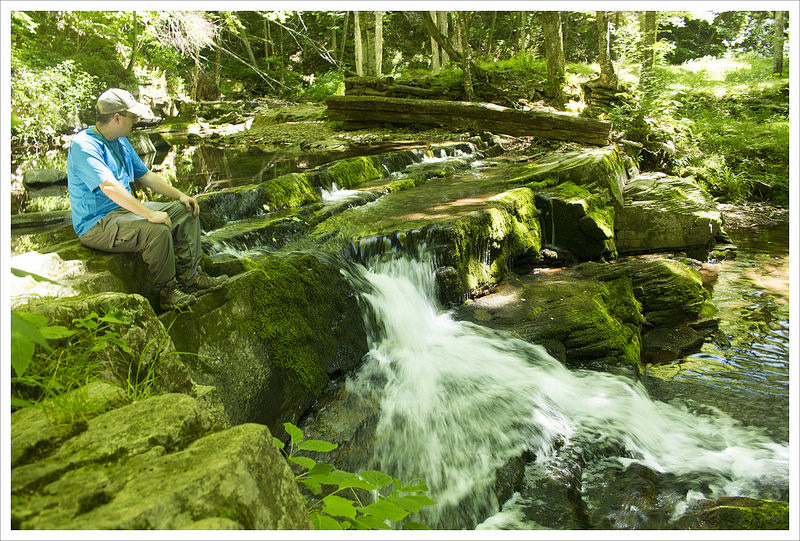
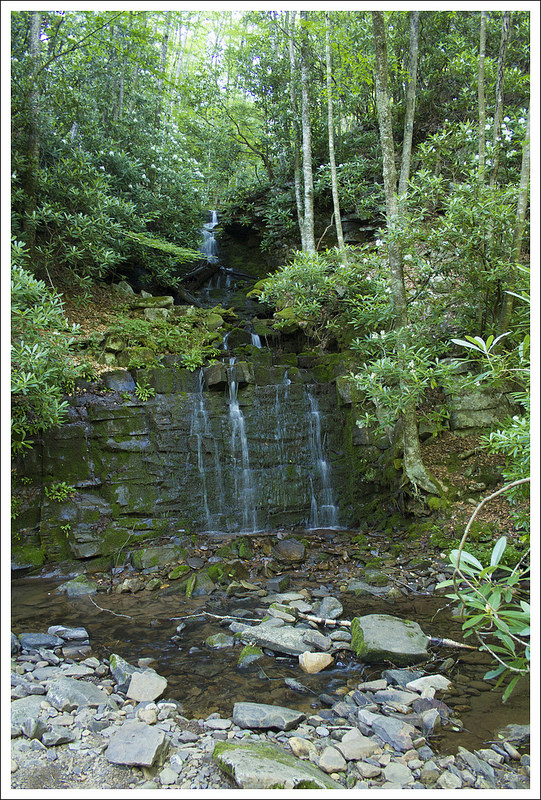
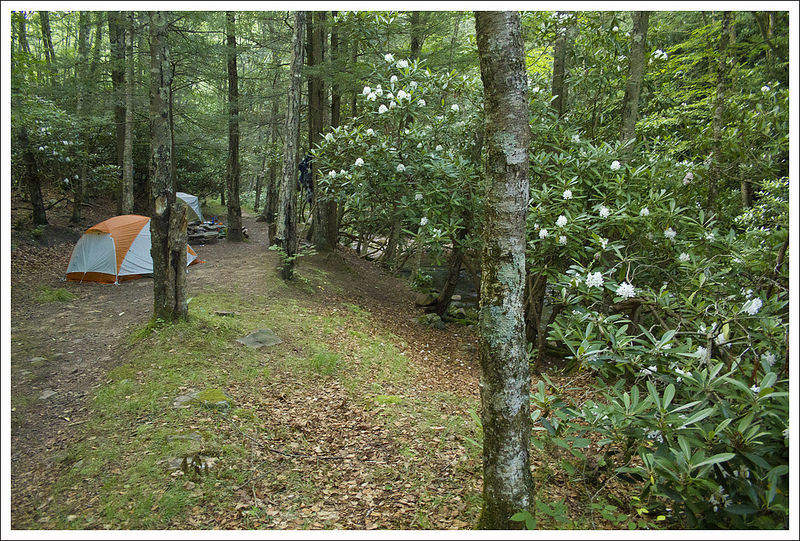
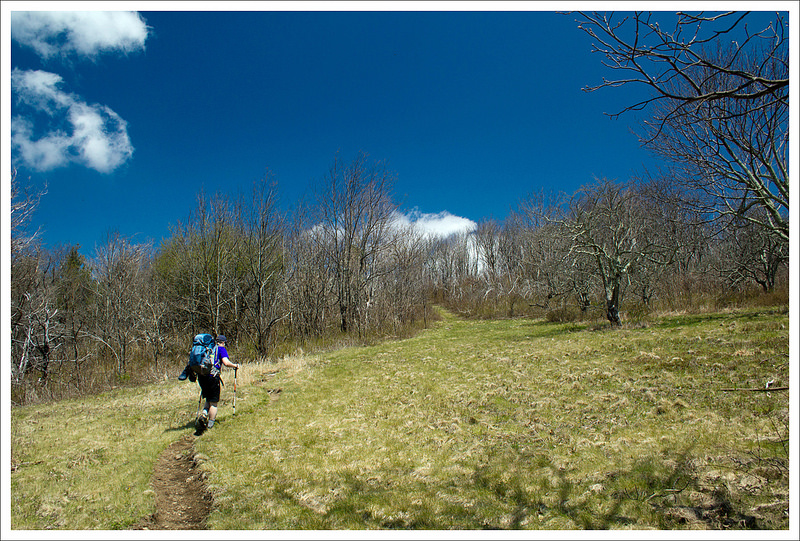
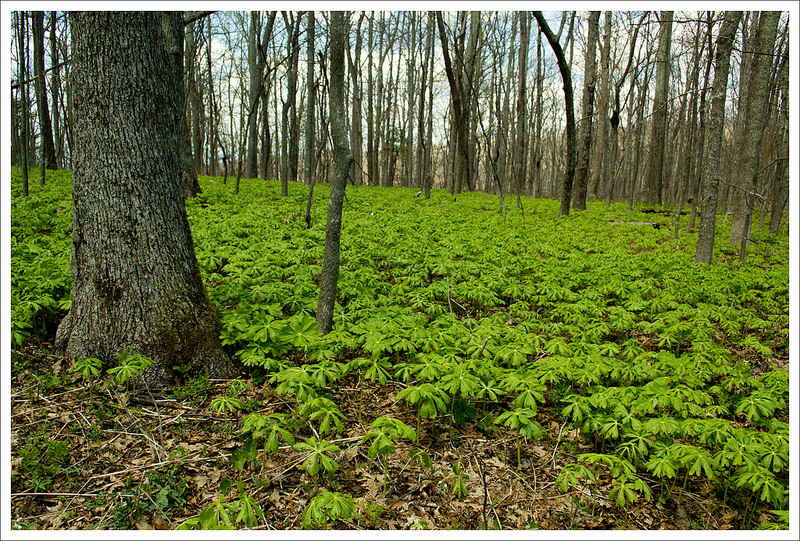
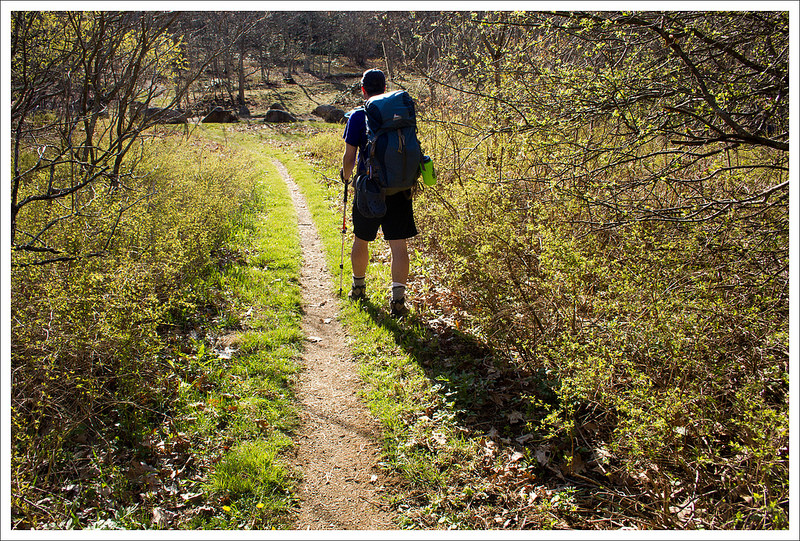
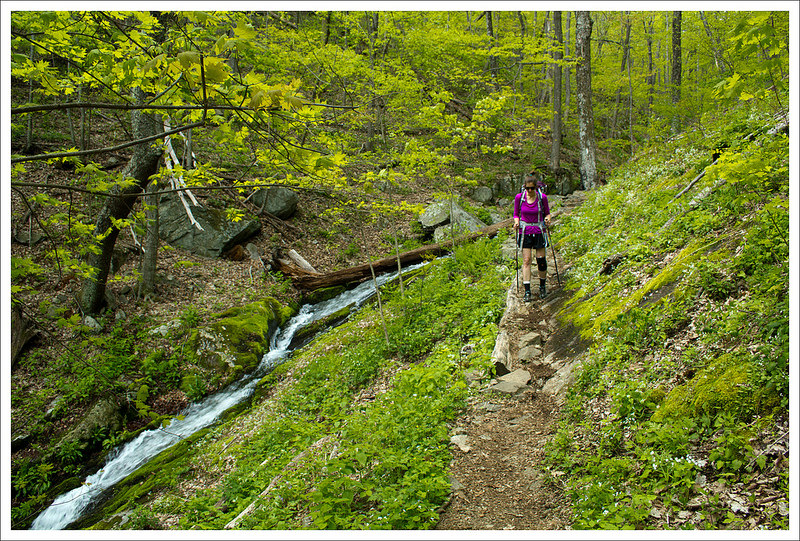
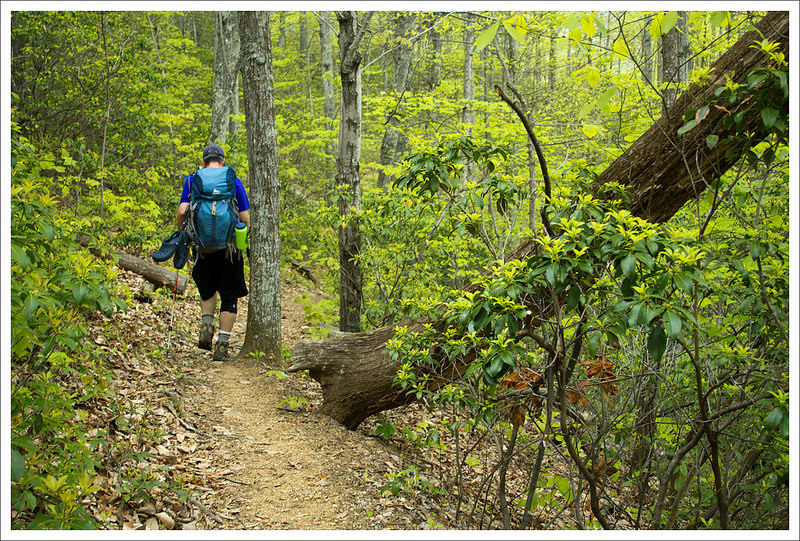
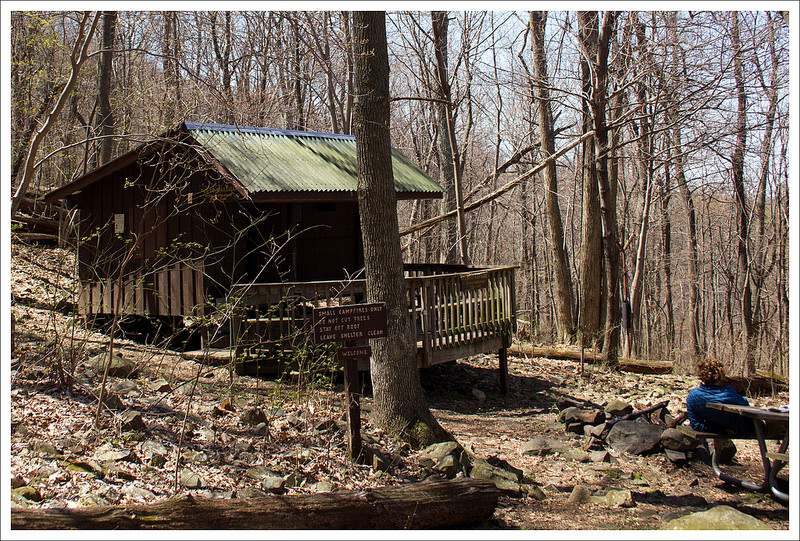
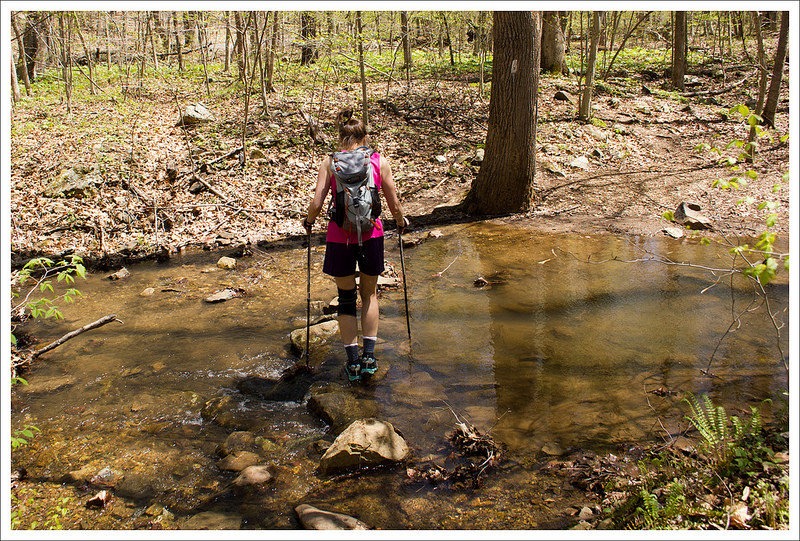
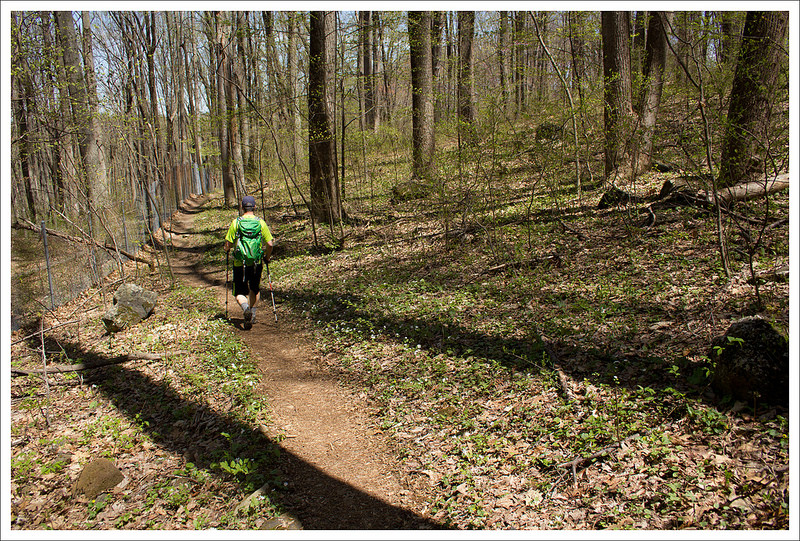
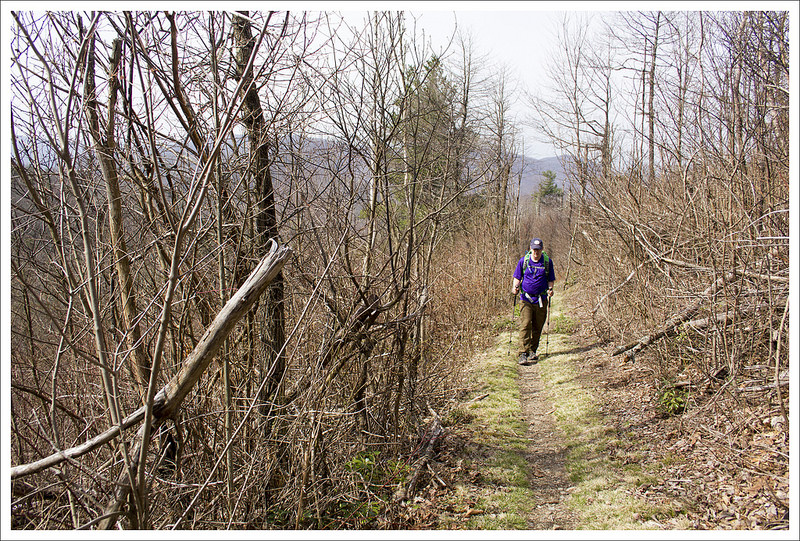
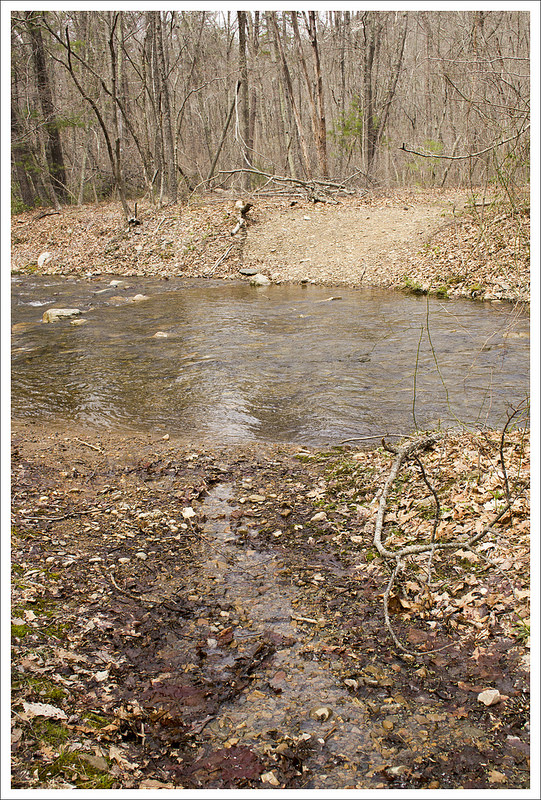
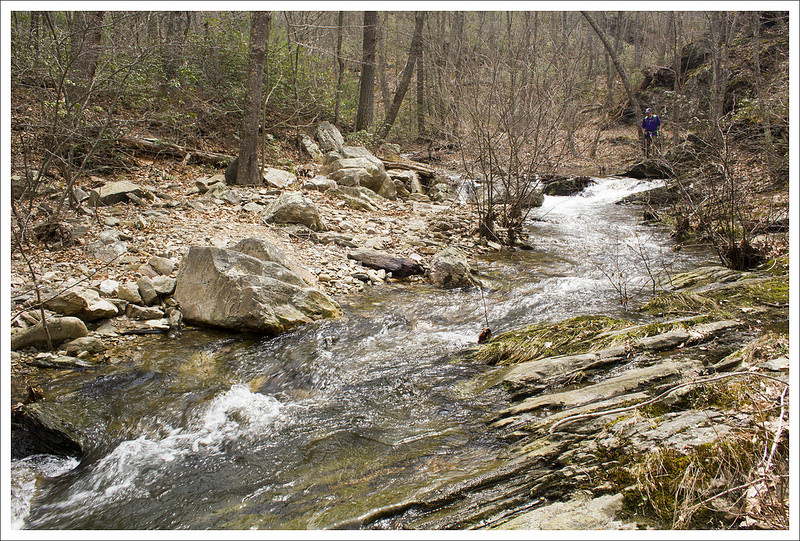
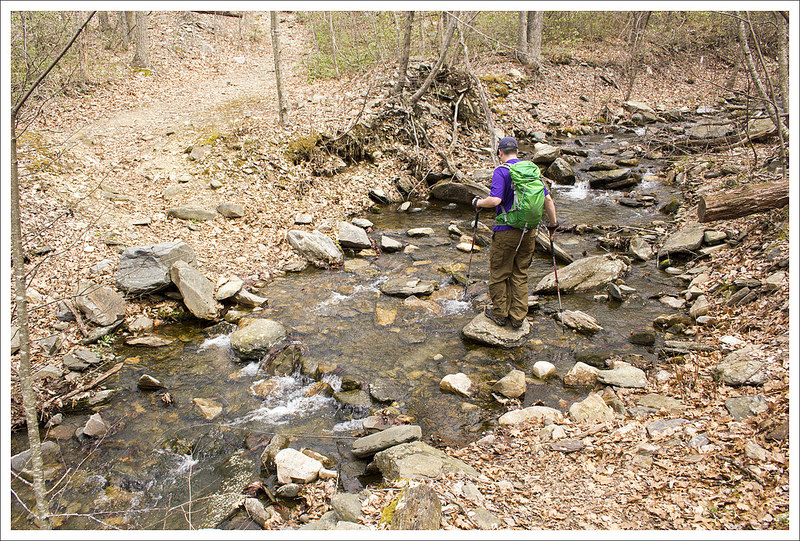
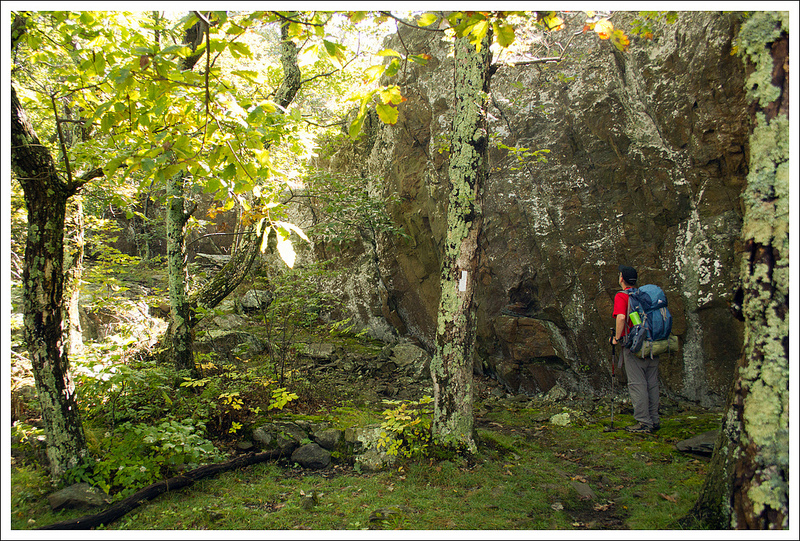
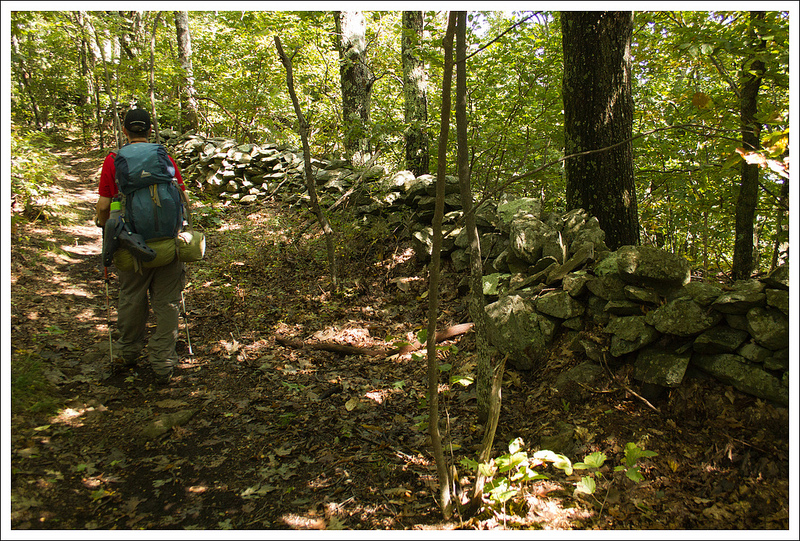
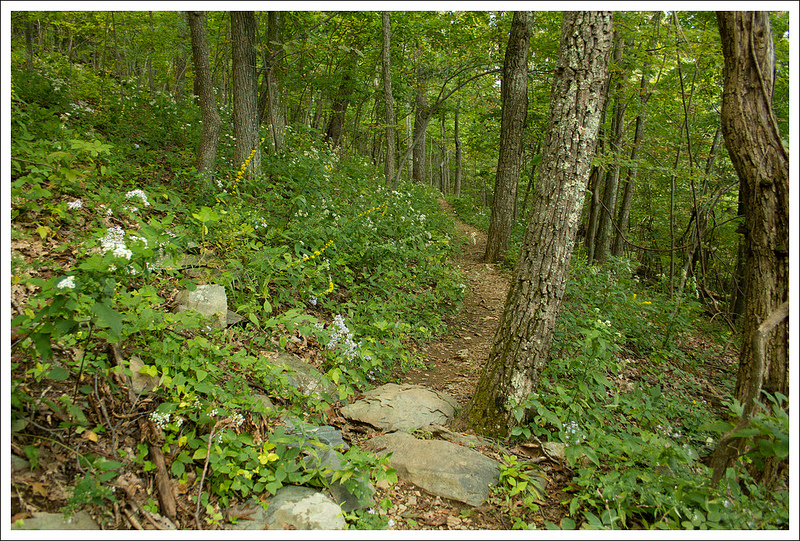
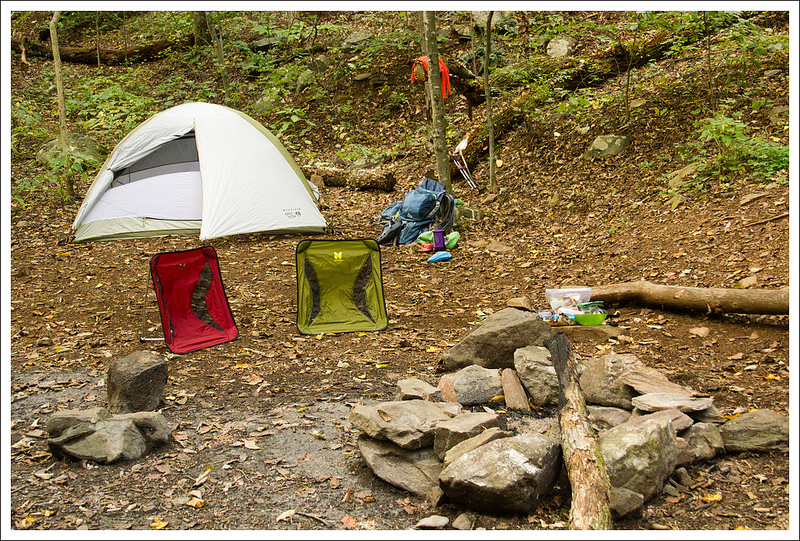
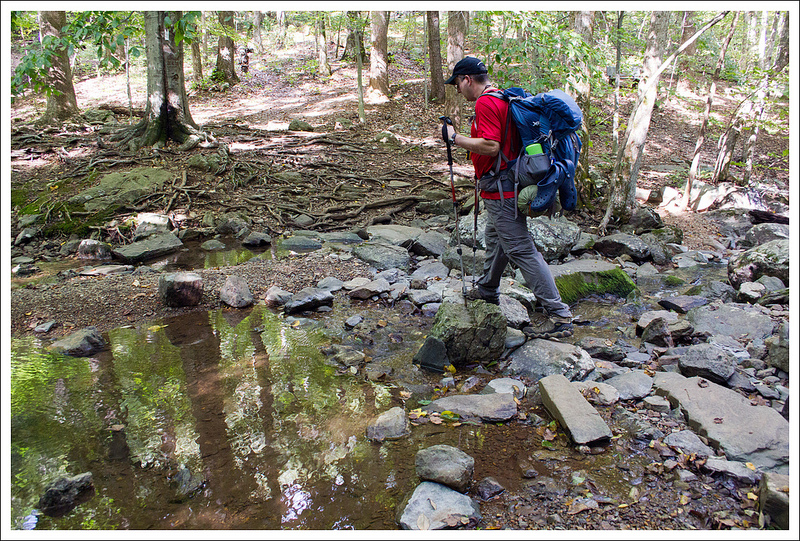
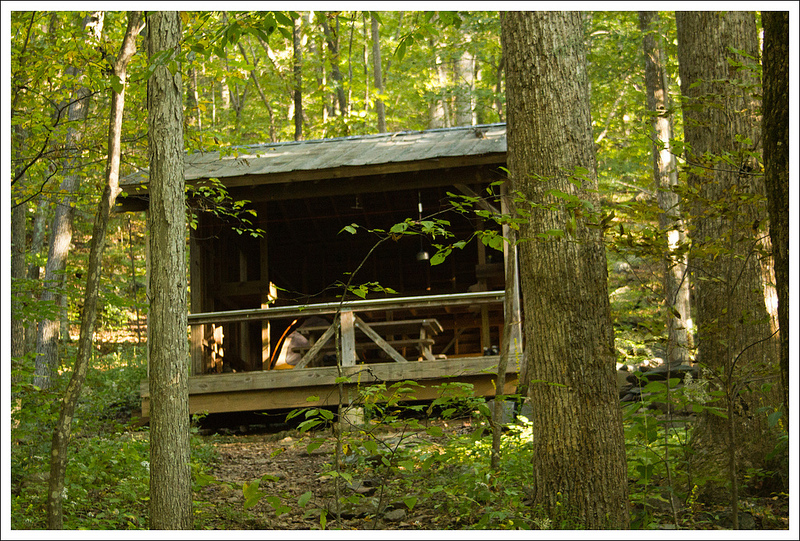
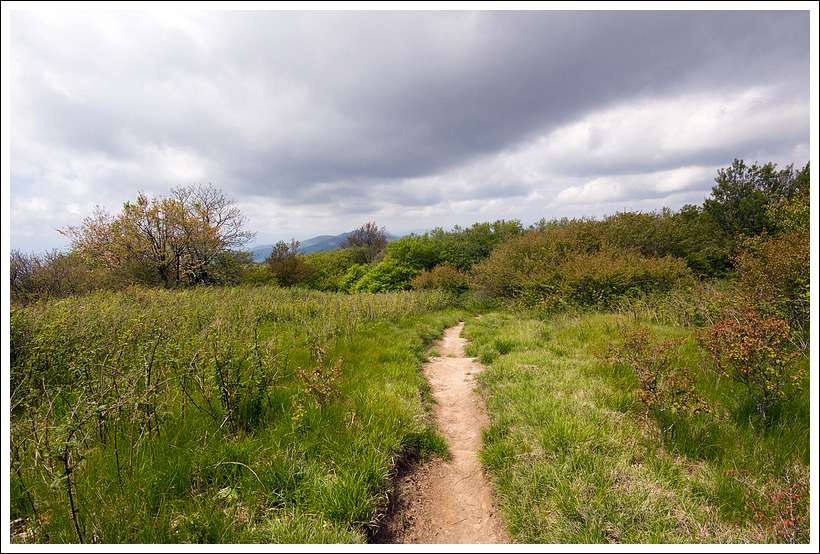
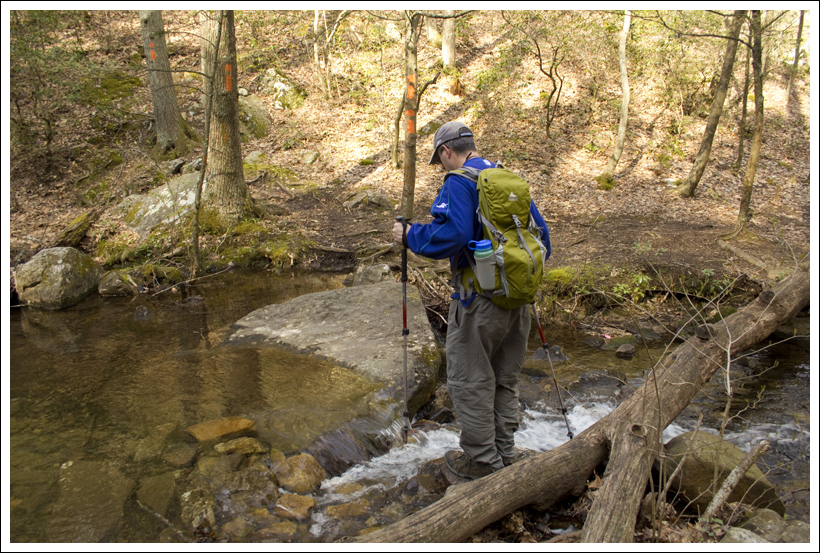
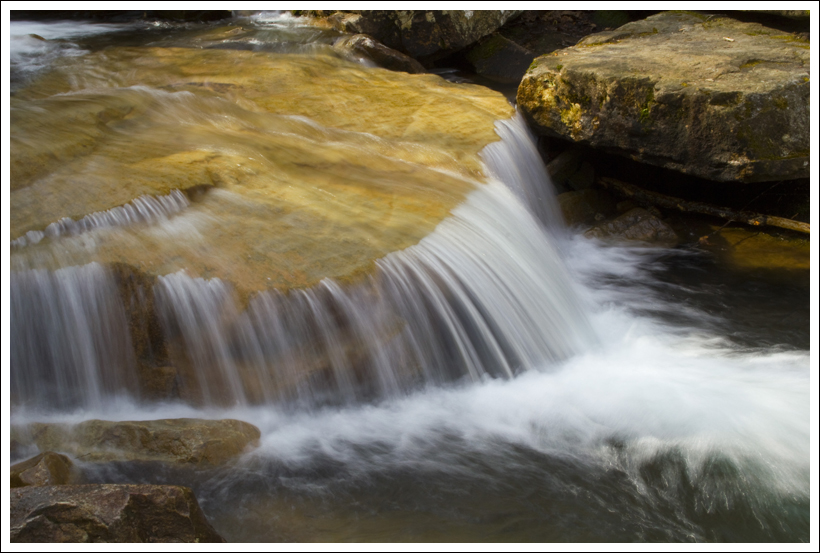
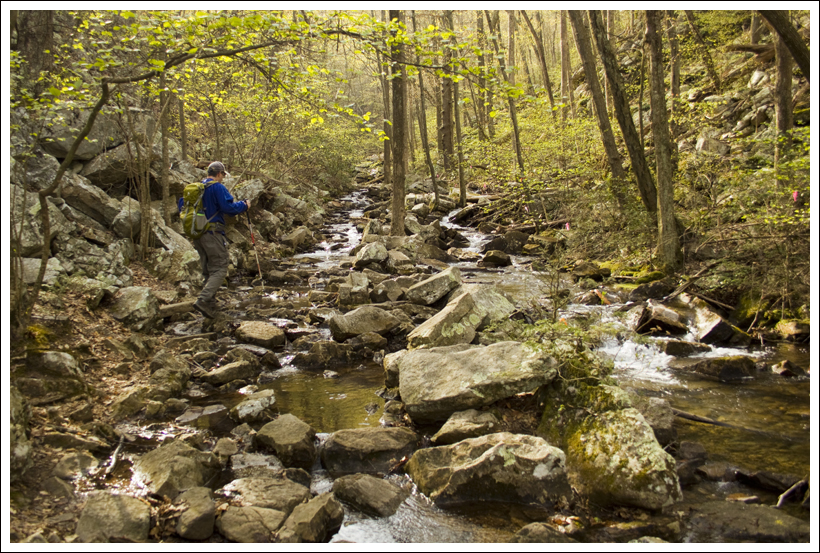
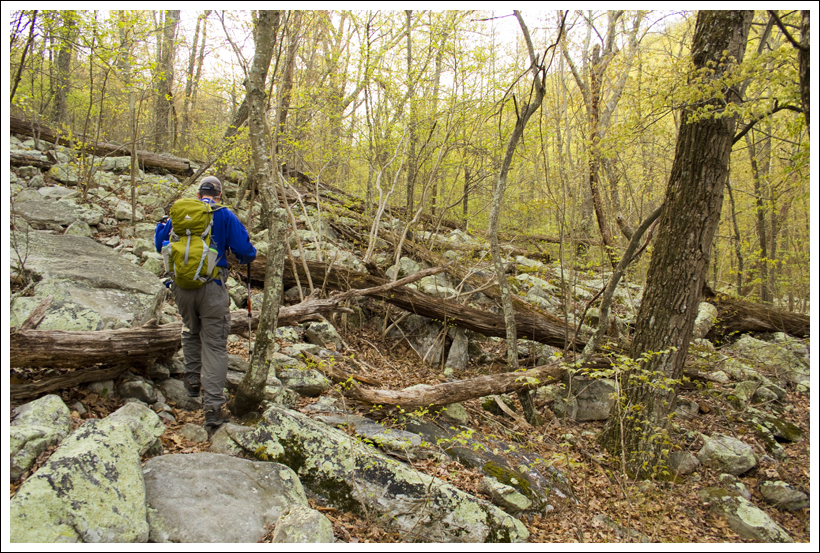
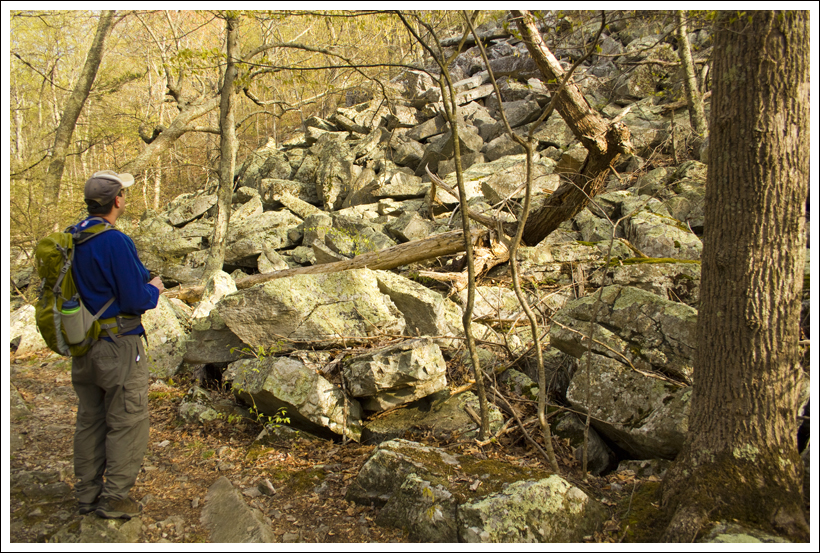
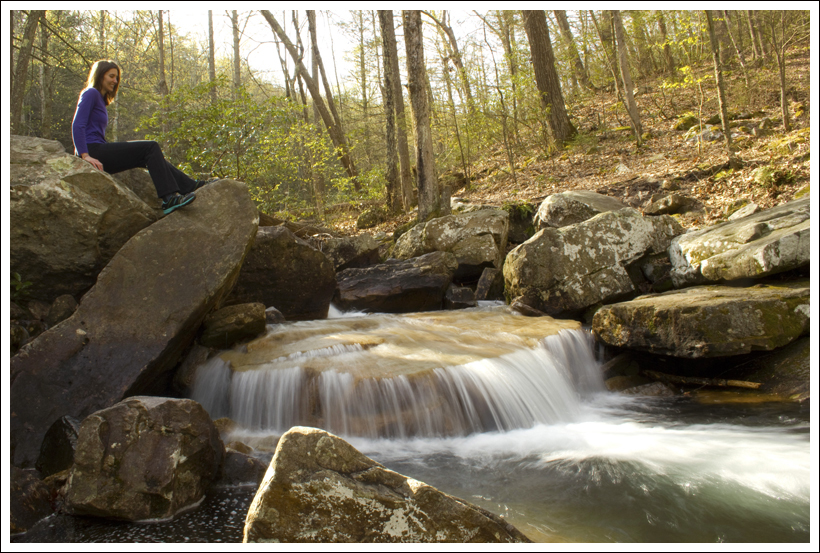
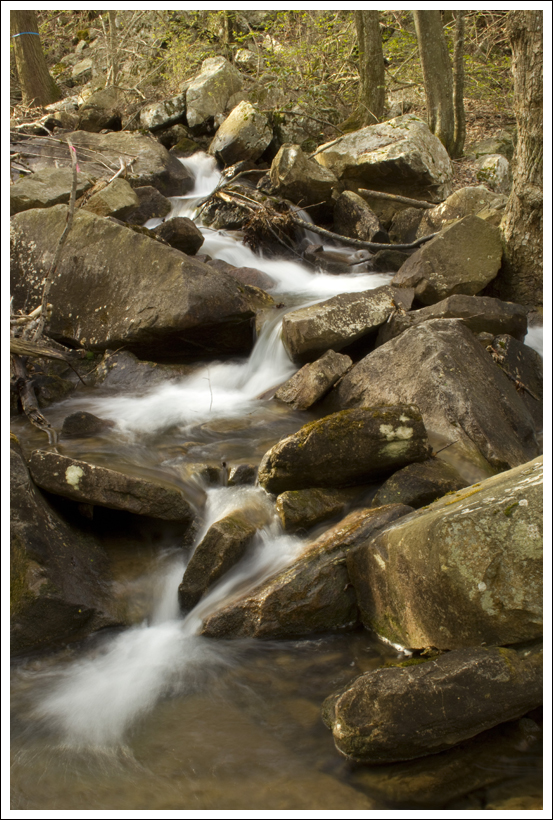
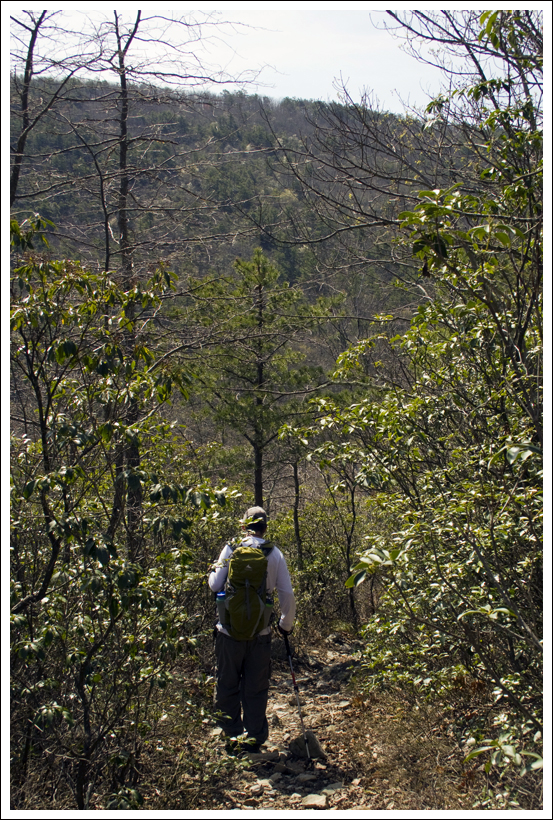
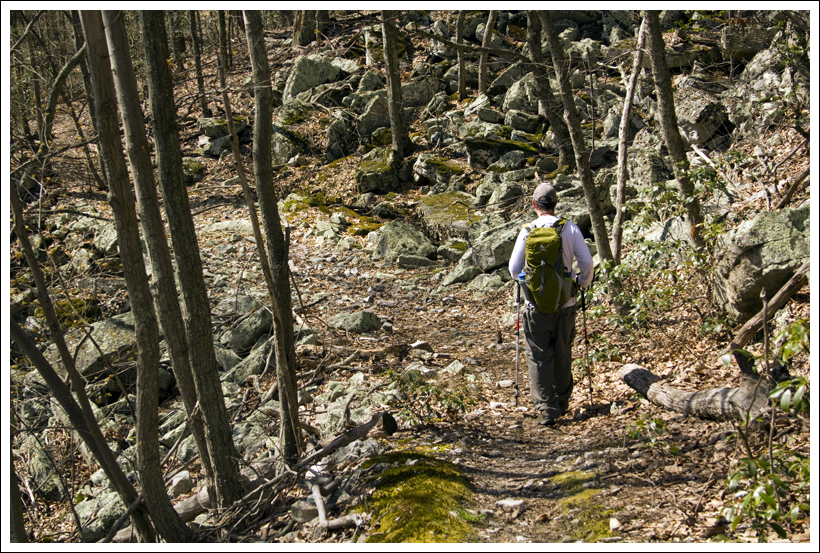
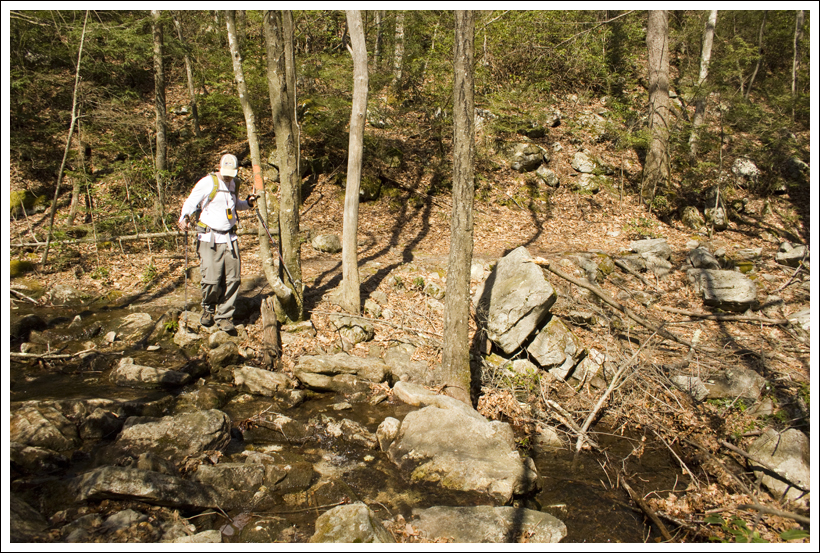
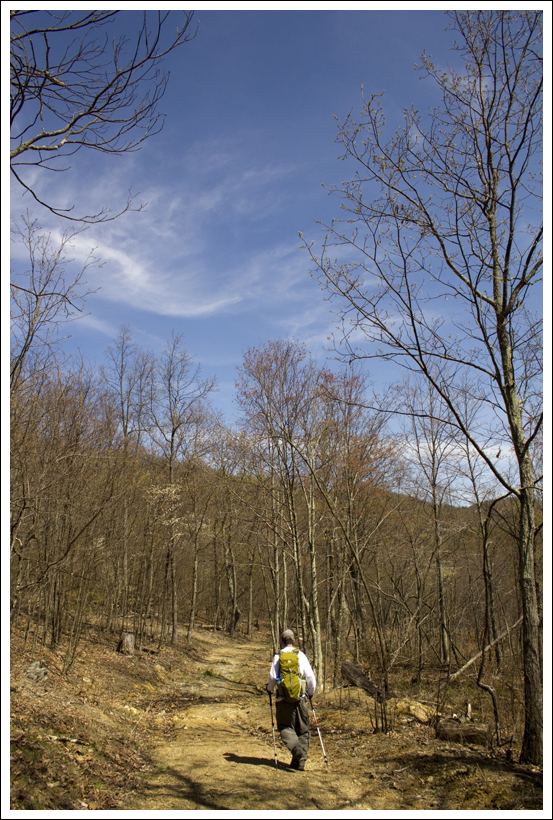
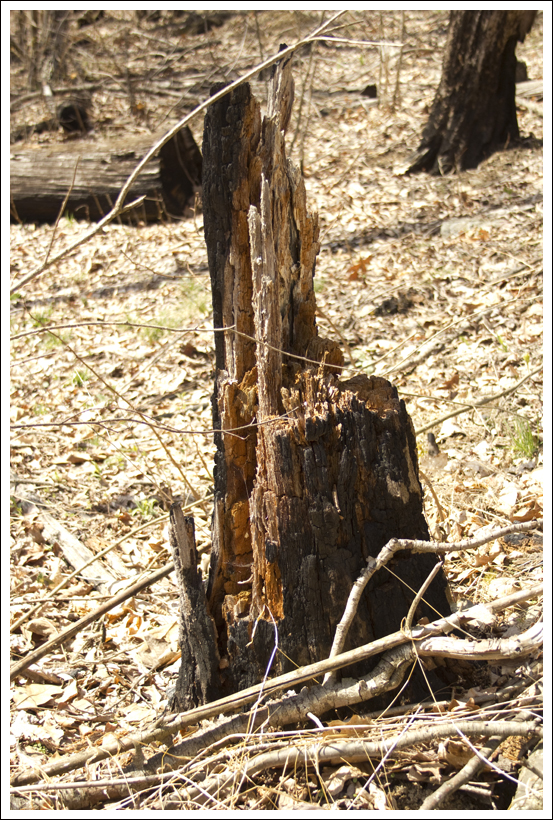
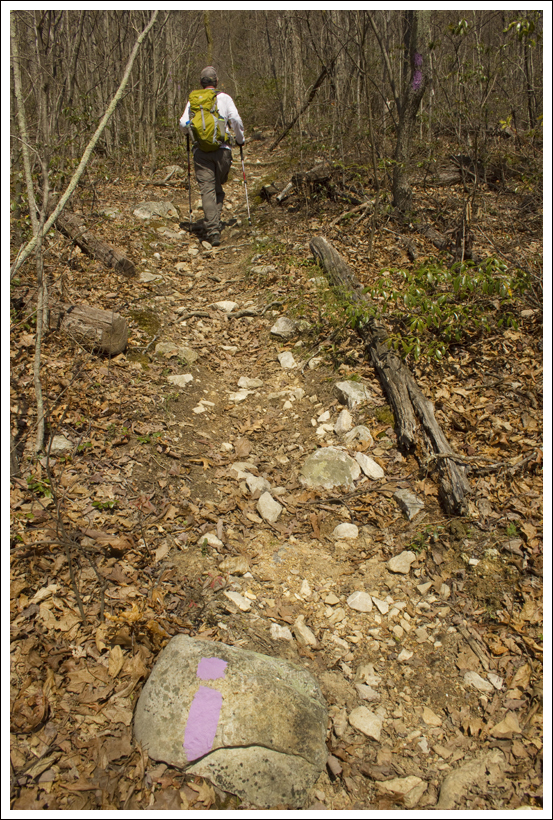
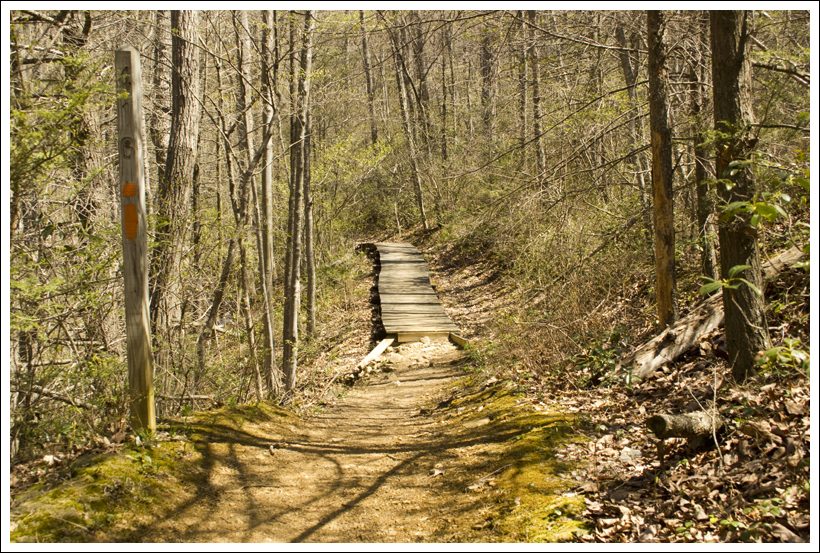
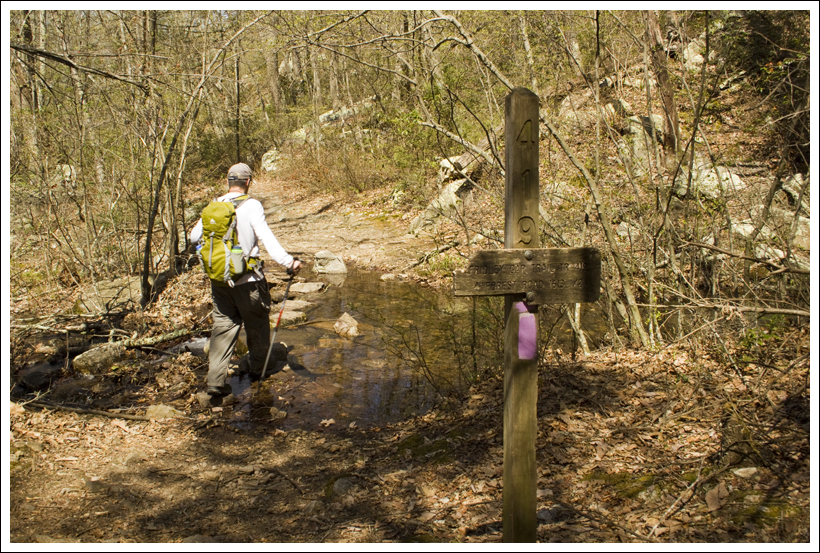
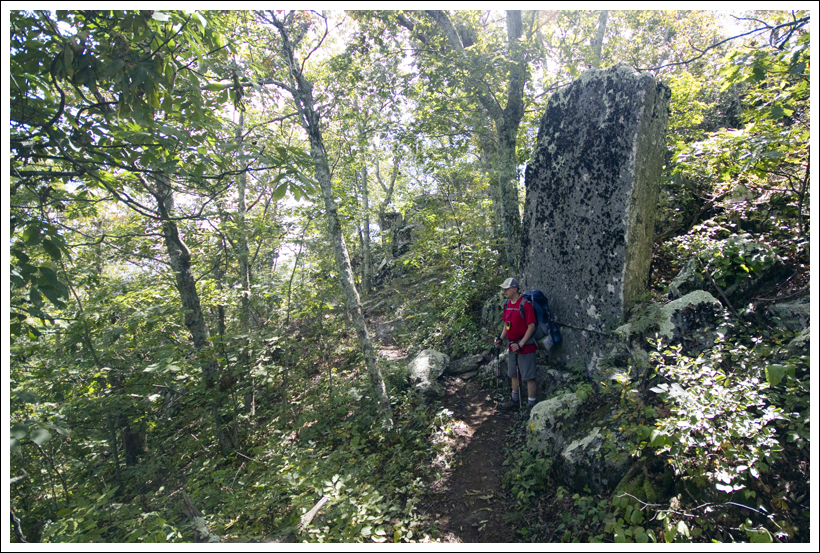
The trail starts off from the back of the parking lot.  The trail branches off in different directions but follow the signs for the Valley Way trail.  The trail begins relatively flat and easy walking, as it runs along Snyder Brook.  There were a few places where we could get some nice stream views and even a glimpse at the picturesque Tama Falls at .4 miles.  At .7 miles, you reach another large junction, but continue to follow the signs to the Valley Way trail.  The trail then begins the steeper uphill climb.  Overall, I felt that the trail, while very rocky was not as steep and rocky as some of the other trails in the White Mountains.  There is a relentless amount of climbing and many rocks to navigate, but it wasn’t as grueling on my feet as some hikes in New Hampshire have felt to me.  At 3.0 miles, the trail gets very steep and rocky (often filled with larger small boulder-sized rocks to hoist onto) and will remain so until you reach the Madison Spring Hut at 3.8 miles. If you’re interested in camping on the mountain, but don’t want to stay at the hut, the Valley Way tentsite is at mile 3.1 on this hike.

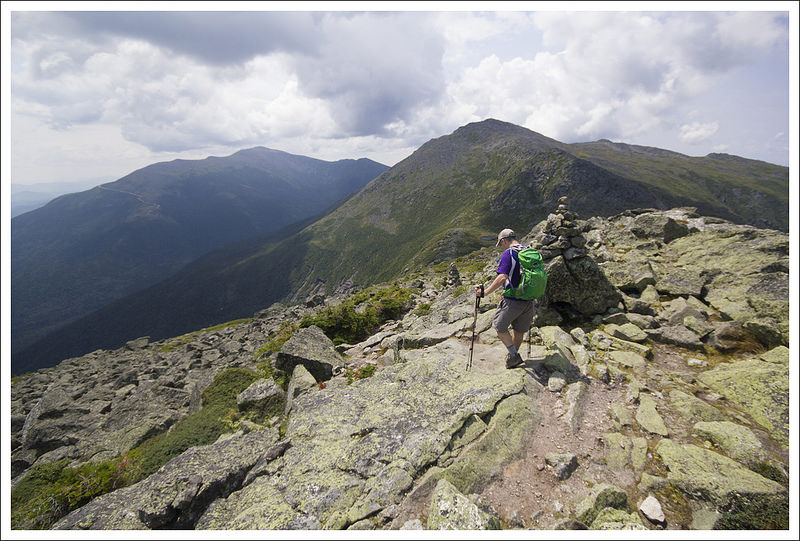
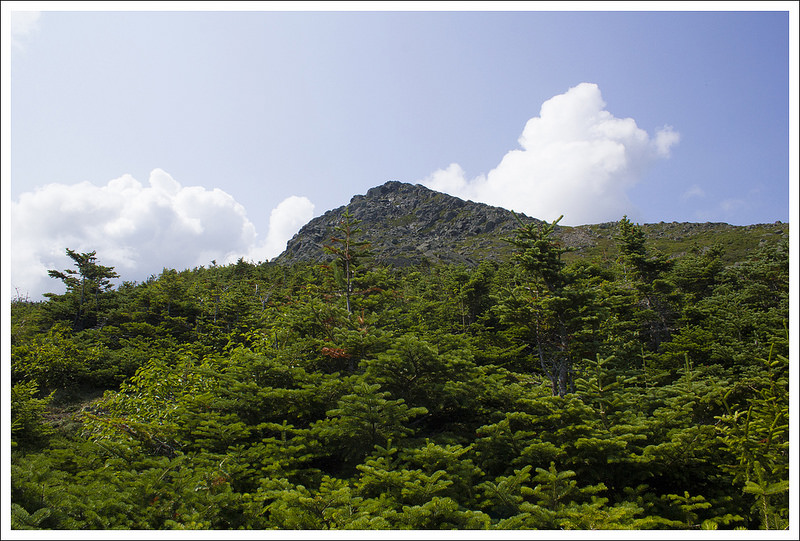
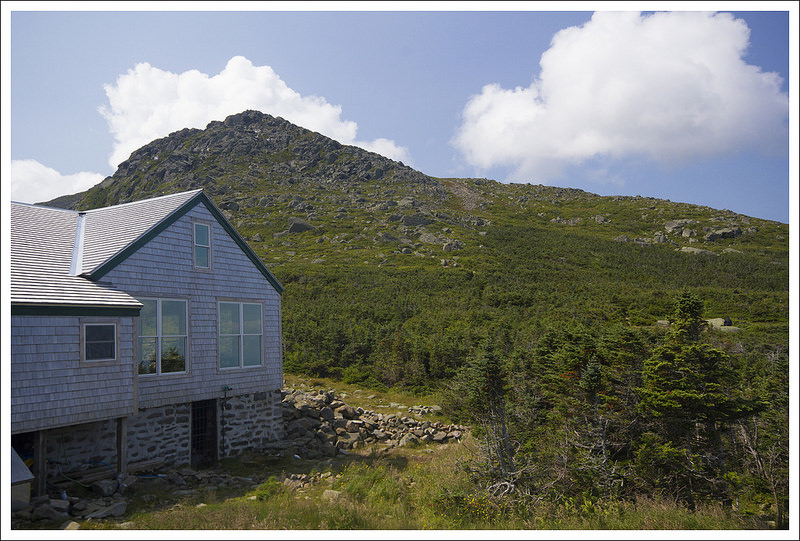
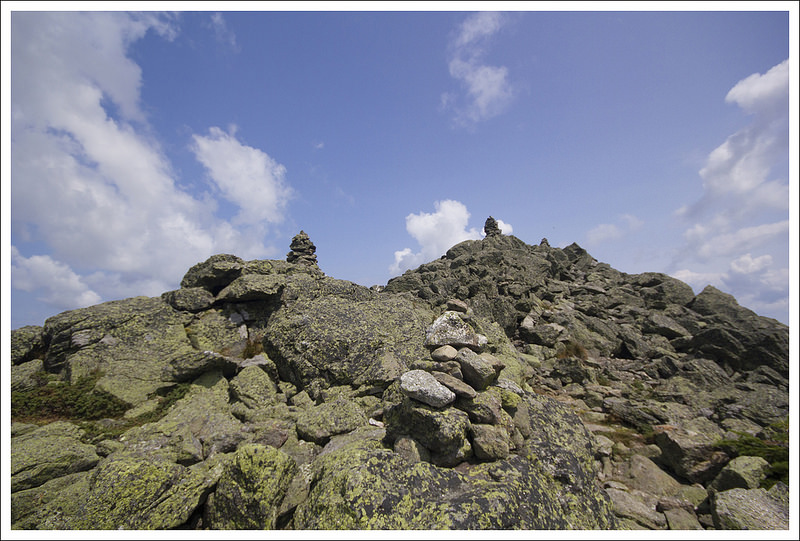
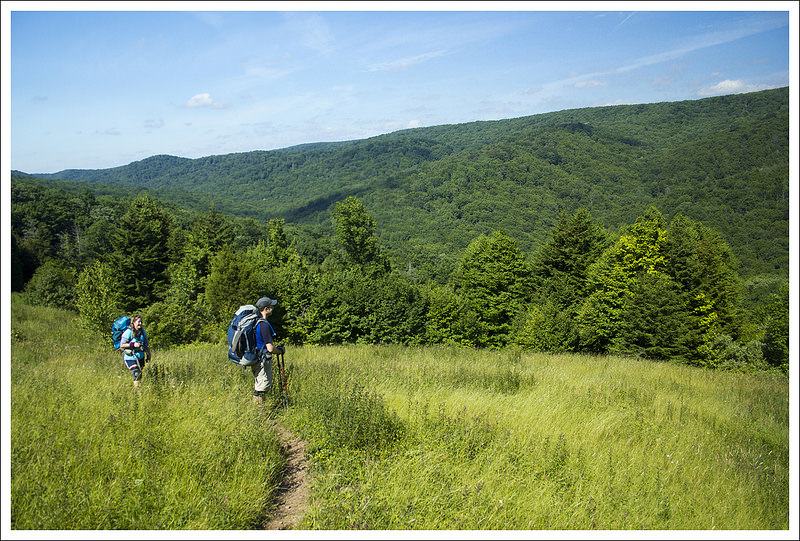
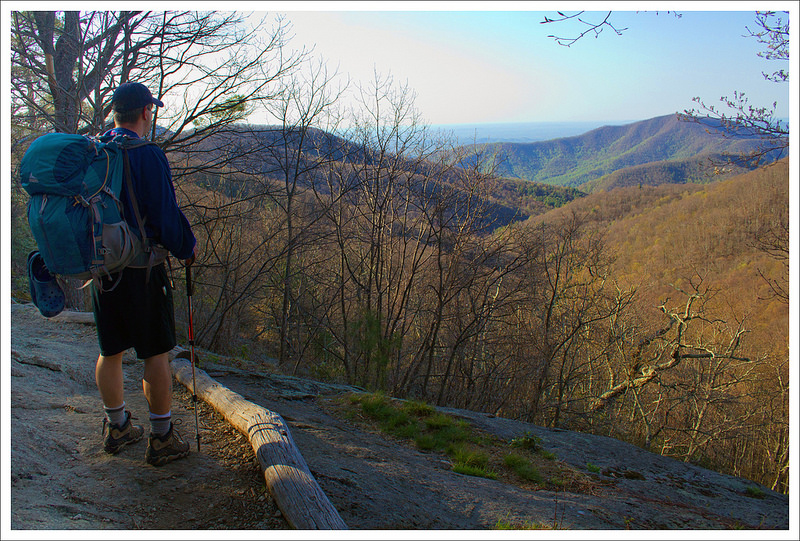
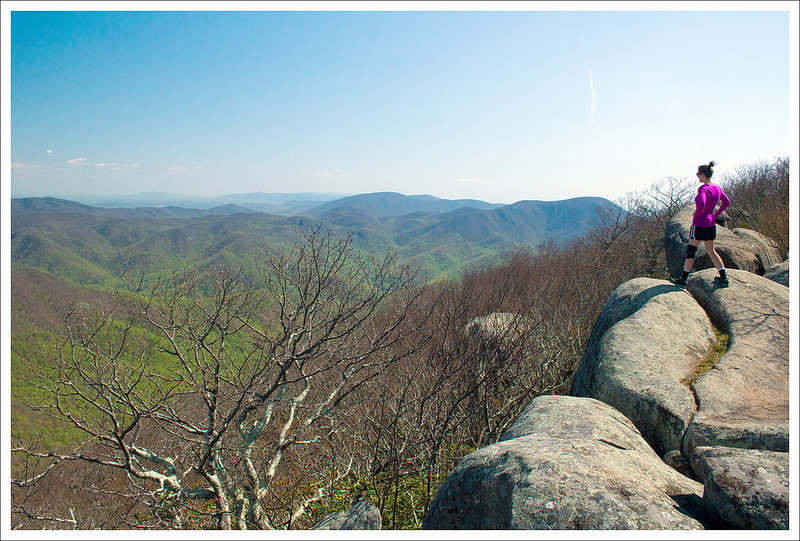
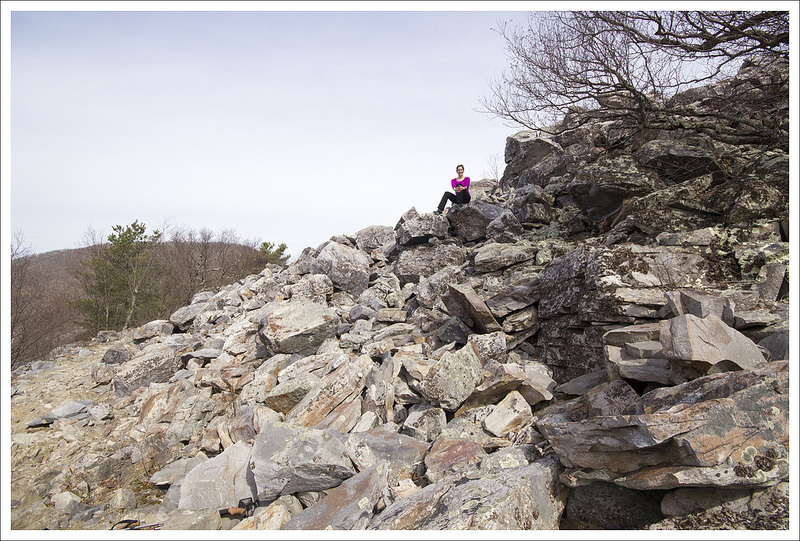
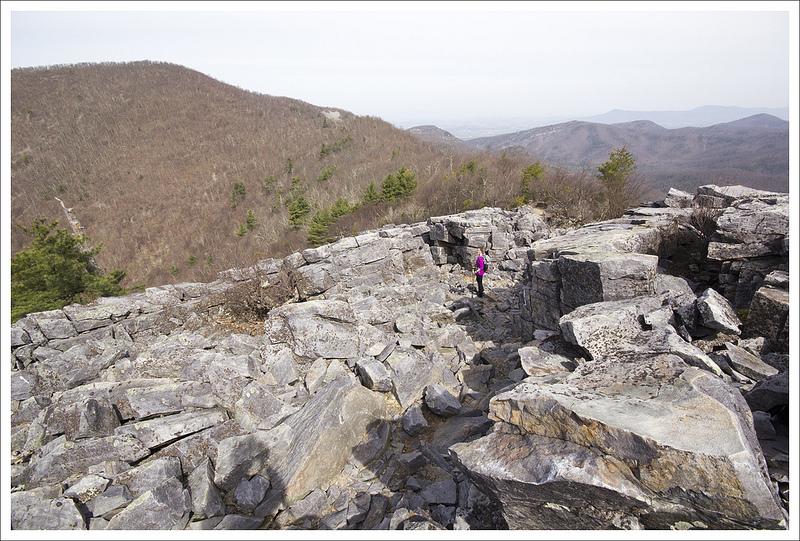
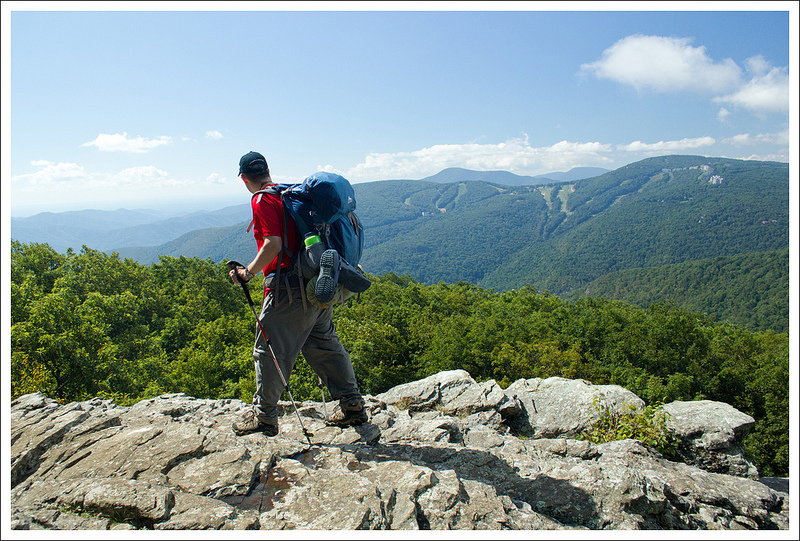
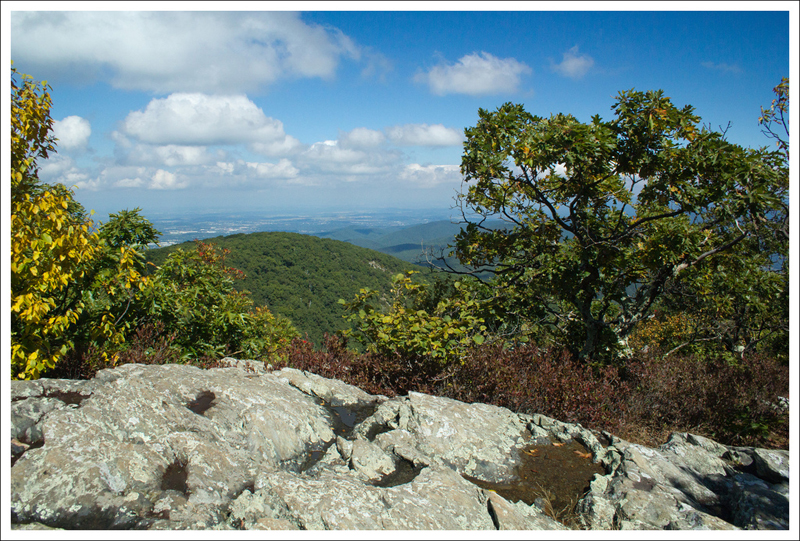
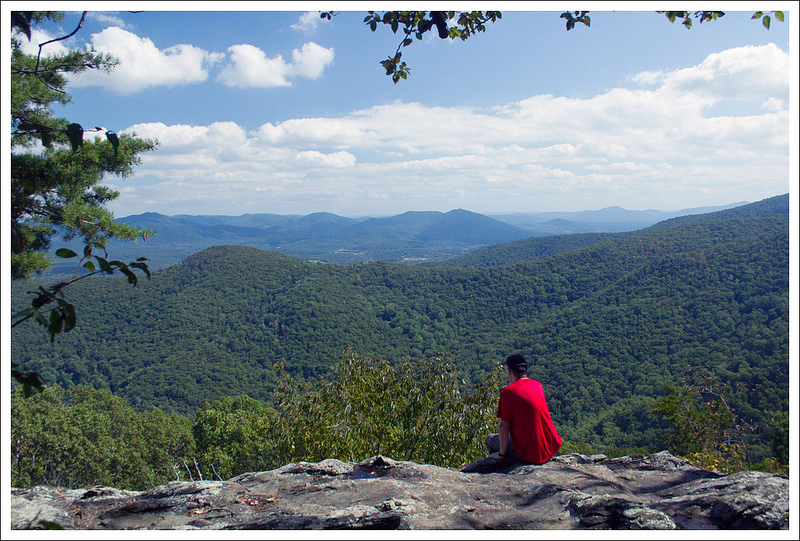
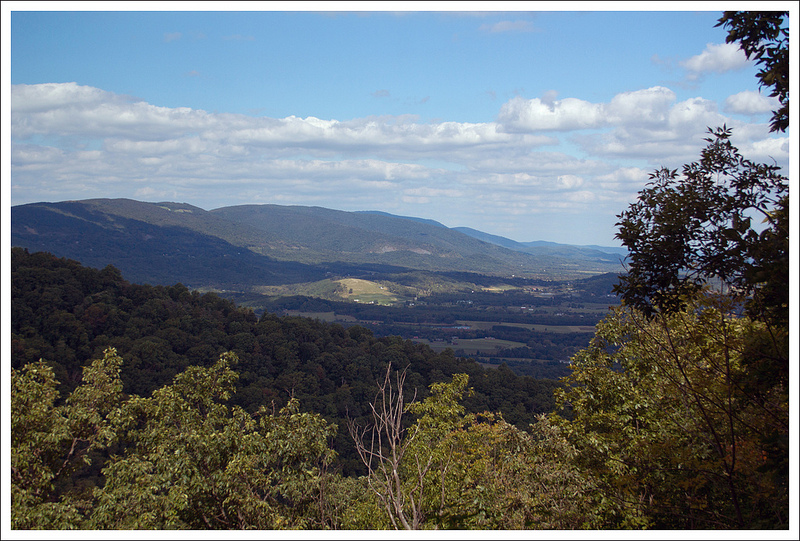
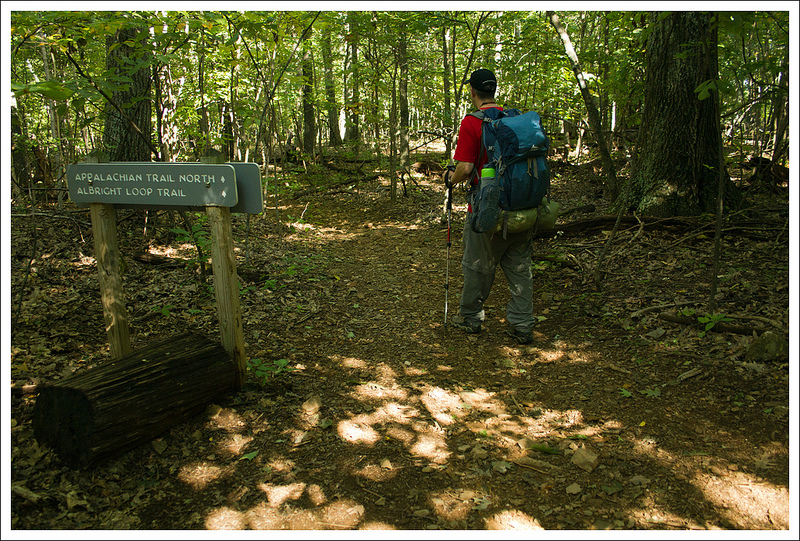
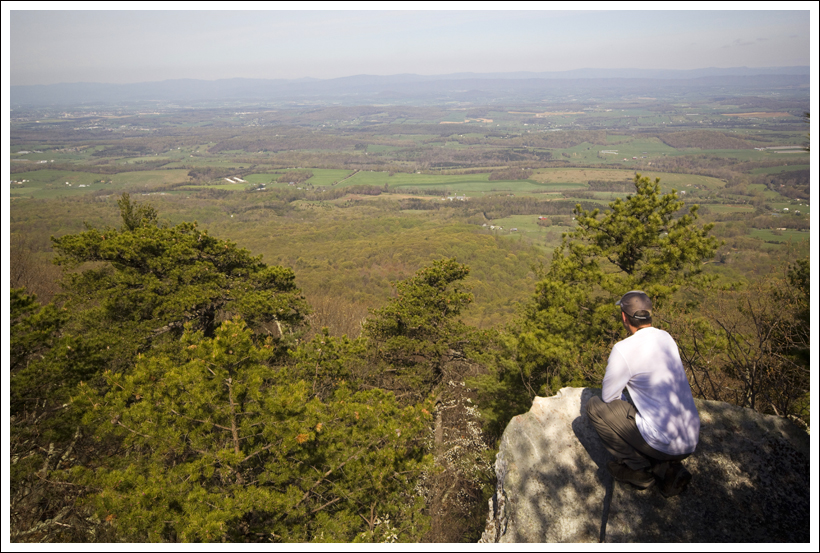
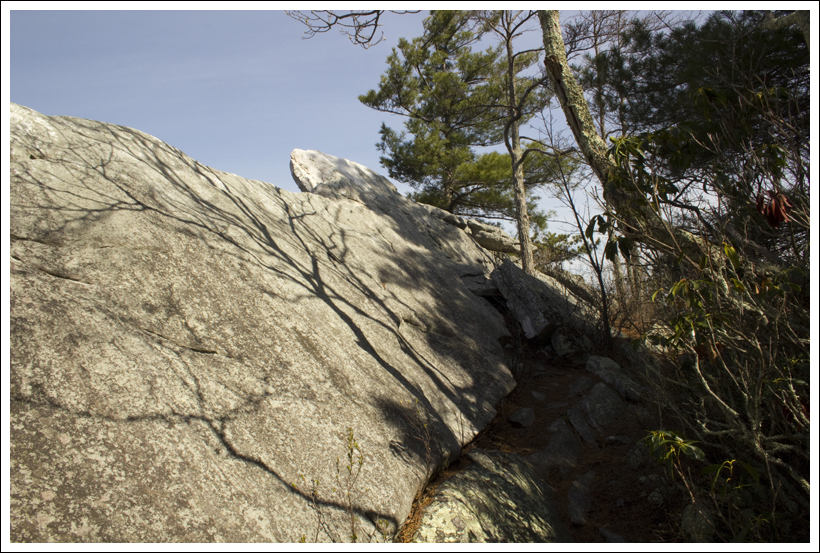
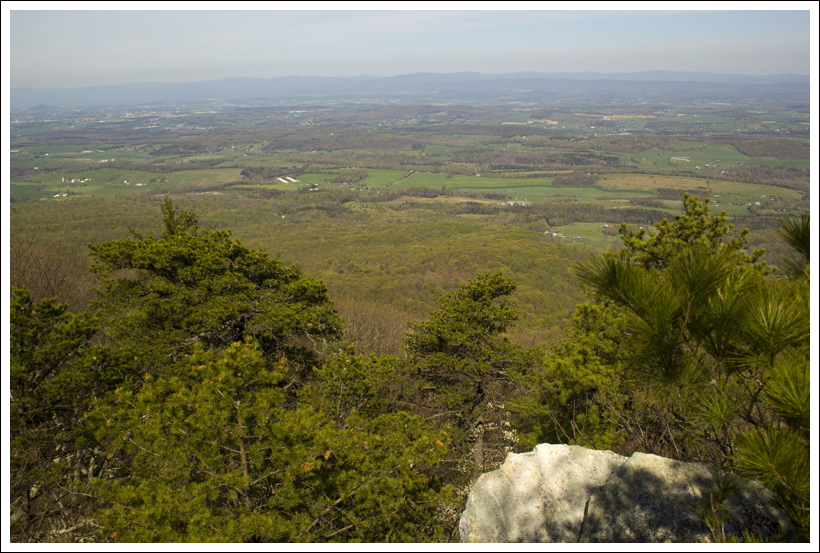
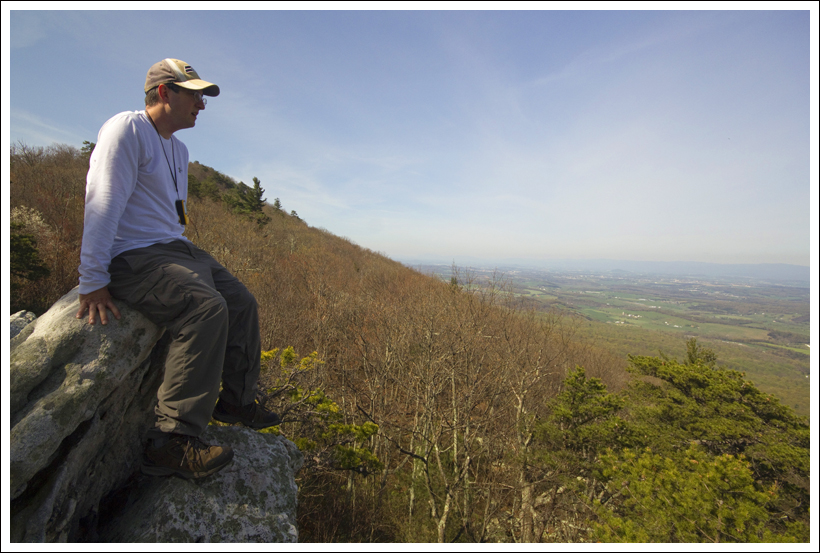
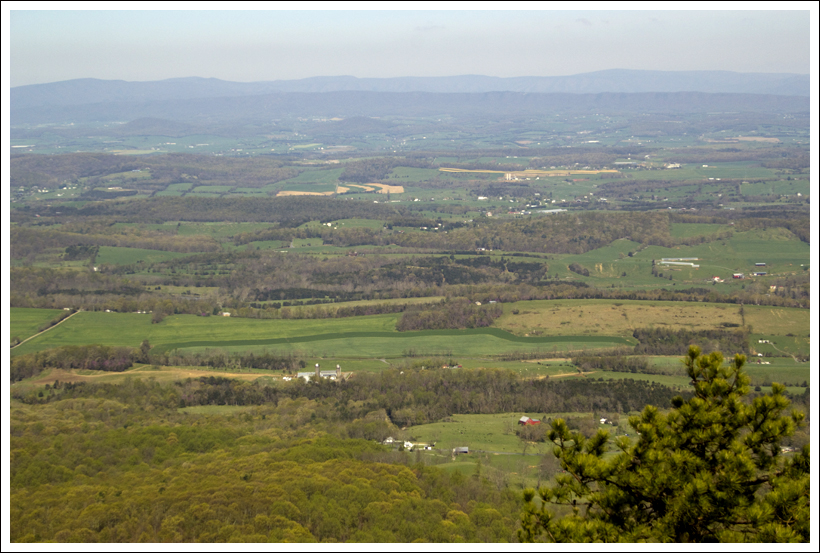
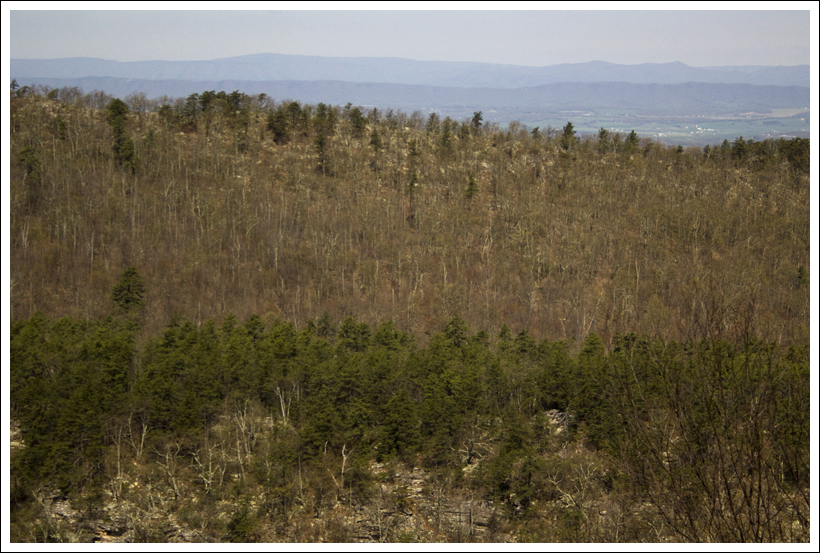
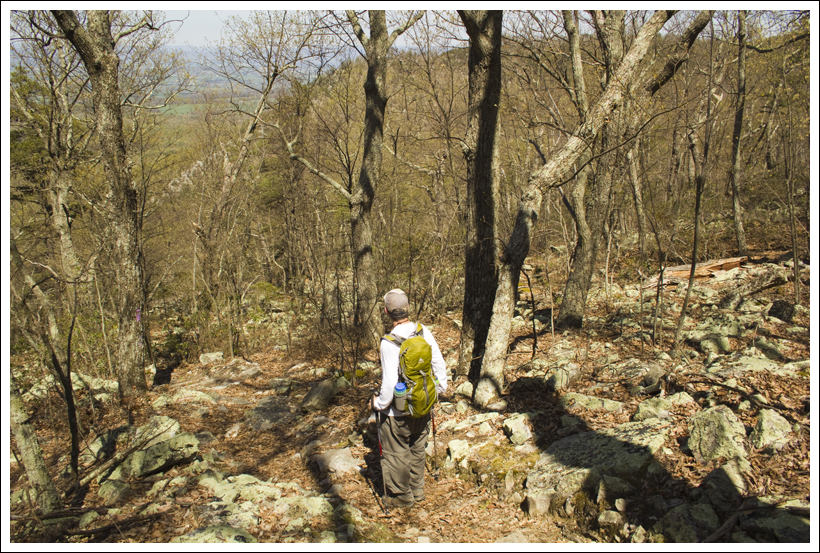
Once we arrived at the hut, we saw there were a couple of ways up to the summit of Mt. Madison.  At this point, we were above treeline, so we saw the rocky summit up above us.  I went in and found one of the Croo members and she told me the Osgood Trail had the most direct route and was a little easier than making our way via the Watson Path.  The final ascent up to Mt. Madison was .5 miles along the Osgood Trail (which is also the Appalachian Trail in this area).  You basically needed to walk acrpss large boulders, following cairns along the way until you reached the summit.  When you are above treeline, the summits of mountains seem so close to reach, but it is very misleading.  As we climbed up, we looked back and saw the hut shrink with each step, finally giving us some perspective of how far we had come.  We stayed a while at the summit.  The views were breathtaking and you could see for miles all around.  It definitely was one of the most beautiful scenes I have witnessed hiking and to realize the work we had put in to attain the peak, made it feel even more worthwhile.

Looking Back to the Hut
Christine makes her way up the Osgood Trail to the summit of Mt. Madison.  Below: About to go above treeline; Even though the summits are far away, they always look close;  A view of Madison Spring Hut with Mt. Adams in the background.

Alpine Zone Looks Close Madison Spring Hut

While we were at the summit, we met a woman who had a sign pinned to her that had 48 over 50 written on it.  She was over 50 years old and she had a goal to do all 48 peaks over 4000 ft. in elevation in New Hampshire.  She had saved Mt. Madison as her last hike to meet her goal, so we were thrilled to be able to see her experience accomplishing her goal.  What an inspiration!  We also talked to a gentleman at the summit who was from Colorado that had done this same hike 30 years ago.  He was staying at the nearby Crag Camp, run by the Randolph Mountain Club, just as he had done when we was a teenager.  He wanted to see if this hike was just as amazing as he had remembered and he told us it definitely was.  It made me further realize that everyone likes to hike for their own reasons and it is always a privilege to get to hear people’s stories on the hike.

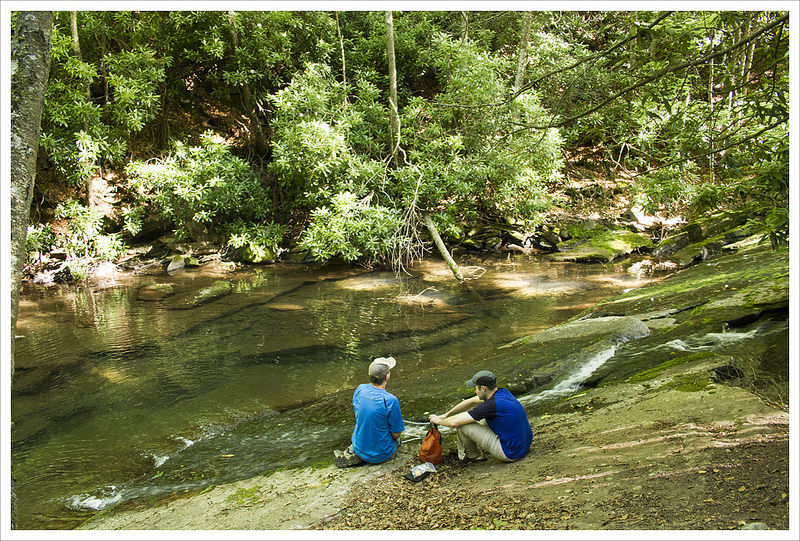
We made our way back down and ate some lunch at the Madison Spring Hut.  We then ventured .2 miles on the Parapet Trail to see Star Lake.  This is a spot you definitely shouldn’t miss.  The lake is more like a small pond, but it was so beautiful to view the summit of Mt. Madison, as it reflected into Star Lake.  We debated about tackling Mt. Adams to bag another peak, but we realized that the summit looked close, but it was still a steep 1 mile away.  Not wanting to add even more to our hike, we decided to make our way back down.  The trail seemed to be even rockier on the way back down.  While you can normally fly down some parts of downhill trails, you need to take your time on this one to navigate all the rocks.  On our way down, we came into a rain shower, making the rocks a little slick.   The last .8 miles were quite easy again and we did pick up some time at this point.  We made our way back to the parking lot to make the round trip 8.8 miles.

Christine Says…

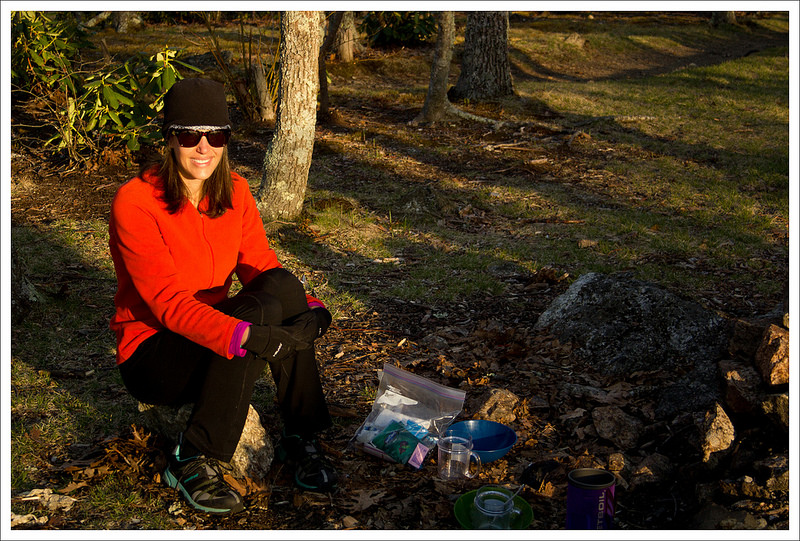
The morning of our Mt. Madison hike started off cheerfully enough.  We stopped for breakfast at Dunkin Donuts.  I ate both a bagel with cream cheese and a Boston Cream donut.  If I’m going to hike almost nine miles with over 4,000 feet of climbing, I’m going to enjoy any and all the baked goods I want!  However, I was jolted out of my happy post-carb afterglow when I discovered my socks and sock liners completely soaked in the back of the car.  A tough hike with wet socks sounded like a really bad idea.  But, driving out of our way to find an outfitter with Thorlo socks seemed like an even worse idea.  I’m super picky about socks, and Thorlo’s thick-cushion hiker socks are the only ones that keep my feet happy.  I decided wet Thorlo socks were better than dry socks of another brand. (and they were … I hiked all day in wet socks and didn’t get a single blister!)

As Adam said in his post, the Valley Way trail is pretty moderate for White Mountain terrain.  The trail is not as rocky and stays under the shelter of trees until you get to Madison Spring Hut.  It’s a great choice if you want to visit the northern Presidentials, but stay largely sheltered from wind and other weather.  There is still plenty of climbing, but until the last mile, it’s all gradual and moderate.  Trails like the Valley Way exist due in part to people like J. Rayner Edmands.  He was an early volunteer for the Appalachian Mountain Club.  Starting in the 1880’s, he spent over 20 summers building trails in the White Mountains.  He believed trails to the high peaks should be passable without stumbles, even in the dark.  Backpacker Magazine did a neat article about Edmands in their October 2014 issue.  Check it out if you have a few free minutes.

JMU Dukes
We paid tribute to our alma mater (James Madison University) on the namesake mountain. Go Dukes!  Below: The trail was extremely rocky and rugged between the hut and the summit of Mt. Madison; Cairns mark the way; Christine and Adam enjoy a summit view; The descent.

Climbing Mt. Madison  Rocks on Mt. Madison
Summit of Mt. Madison  Descent

I very much enjoyed the little rapids and waterfalls along Snyder Brook early in the hike.  Tama Falls was especially impressive.  After we moved away from the stream, the hike was basically just a climb in the woods.  As we ascended the trail got rockier, bit by bit.  The last half mile to the hut was insanely steep and rocky.  In one spot, my shoe got so solidly wedged between two rocks that I had to unlace it and contort my ankle to free myself.  It took efforts from both of us to release my shoe from the rocks.  It’s a good thing trail runners are so soft and flexible, because my feet definitely needed both shoes on this hike!  I think the steepness of the terrain is actually what stopped me from getting hurt when my foot got caught.  We were moving very slowly, picking our way across the rocks. Had I been moving at any significant speed, I think I could have easily broken my ankle.

When we arrived at Madison Spring Hut, it was already starting to cloud up a little. It wasn’t really overcast, but the sky had that heavy, hazy look about it.  The weather was definitely changing and I wanted to make sure we enjoyed the best views possible.  We headed up the Osgood Trail toward the summit of Madison.  I don’t know if you can really call the path to the top a ‘trail’.  It’s more of a scramble across rocks, following cairns leading you to the summit.  The climb to the top is slow going, simply because there is never a simple place to put your feet. On our way up it was fun to look back and marvel at the towering peaks and the tiny hut tucked into the col.

Inside Madison Spring Hut
We decided to eat lunch at Madison Spring Hut.  Below: Even pretty dogs aren’t allowed inside AMC huts;  We always enjoy the baked goods for sale at huts; Compass on the hut porch.

No Dogs Allowed in AMC Huts Goodies Compass

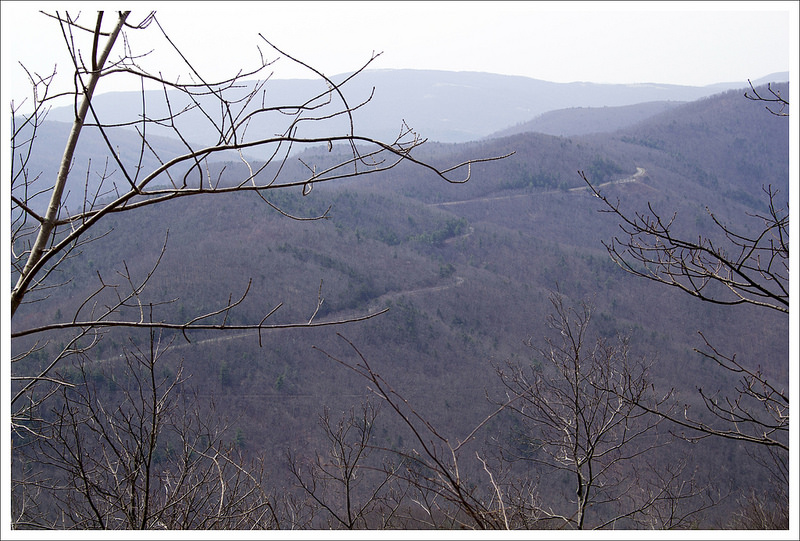
At the top we enjoyed spectacular views of the Presidentials.  Seeing the Mt. Washington Auto Road snaking down the mountain was really impressive!  While the wind was a little brisk at the summit, it was really a warm, mild day for the White Mountain high peaks.  Lots of people were hiking in shorts and t-shirts.  Some people even basked shirtless in the summit sunshine.  My blood is a little thin for that, but I wasn’t cold like I had been on the summit of Mt. Washington in 2013.

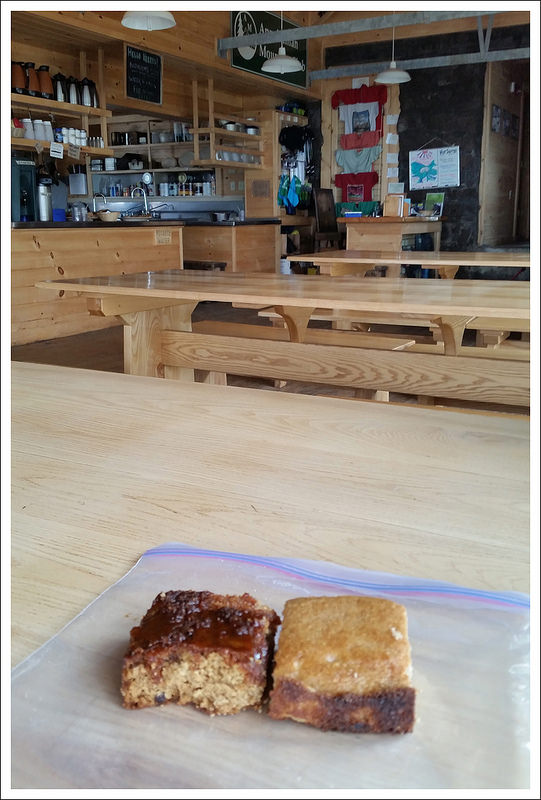
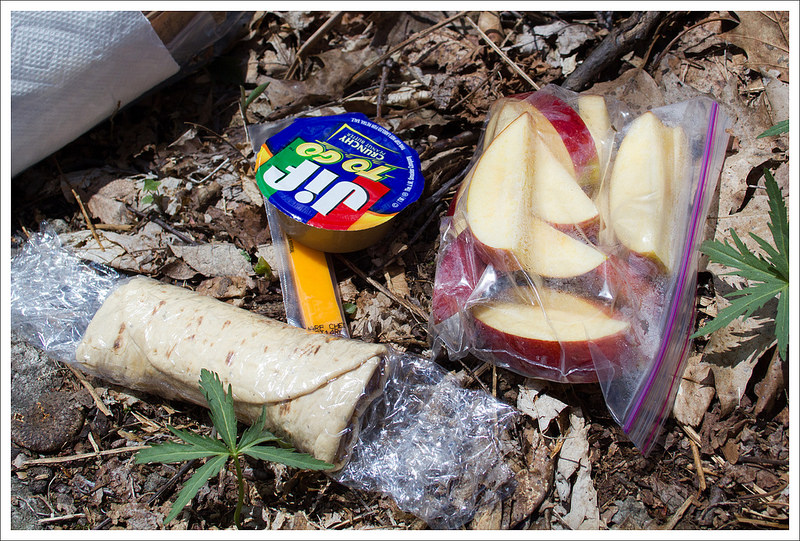
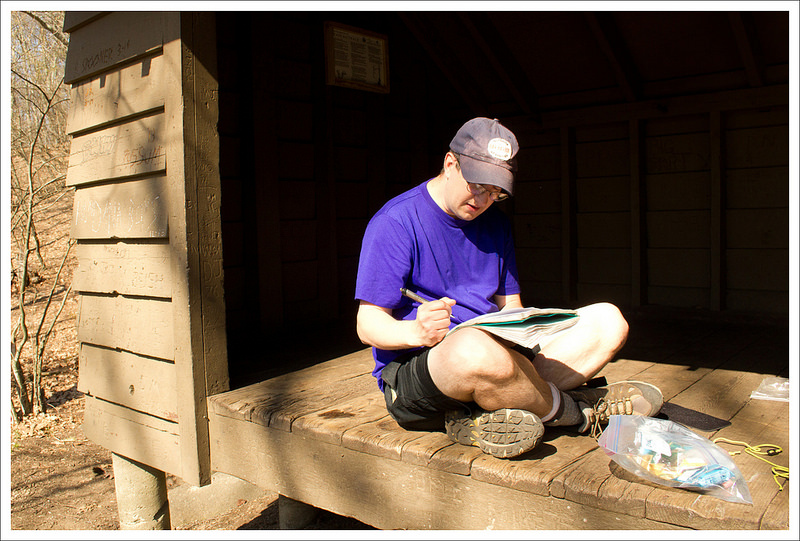
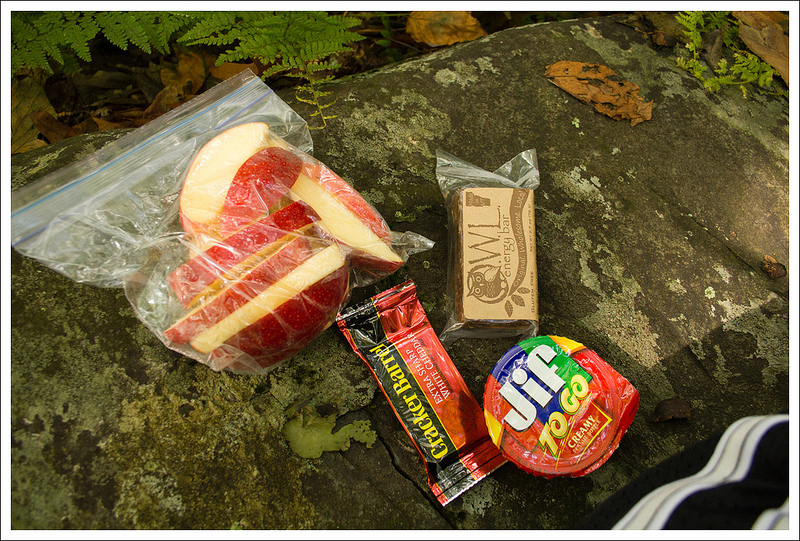
After taking lots of photos and doing our JMU rituals, we climbed back down and enjoyed our packed lunch at Madison Spring Hut.  Of course, we supplemented our packed food with baked goods from the Croo.  I always hear people talking about how huts are packed with dayhikers all summer long. I’m not sure if it’s our timing (we hike early), but we’ve found almost every hut we’ve visited nearly empty.

Star Lake
Beautiful star lake sits near Madison Spring Hut. Below: As we were leaving the lake, clouds started to roll in and we heard distant rumbles of thunder… time to leave the peaks and head back to the valley below.

Walk to Lake Approaching Storms

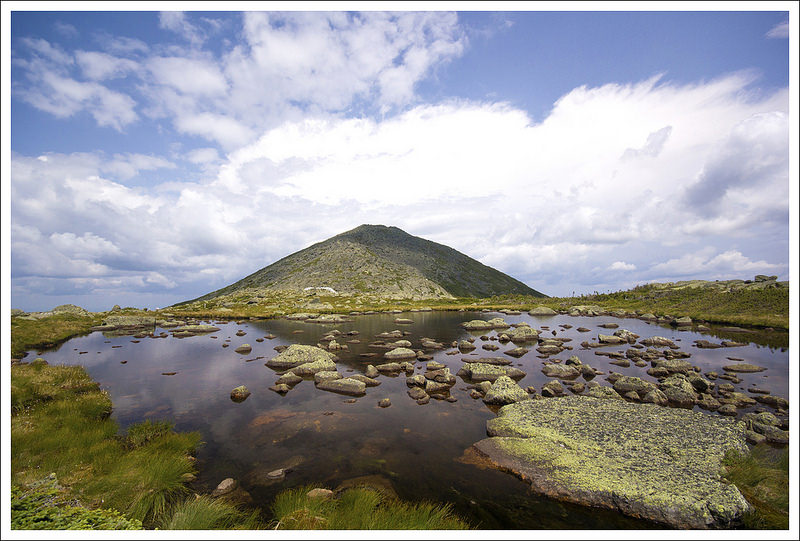
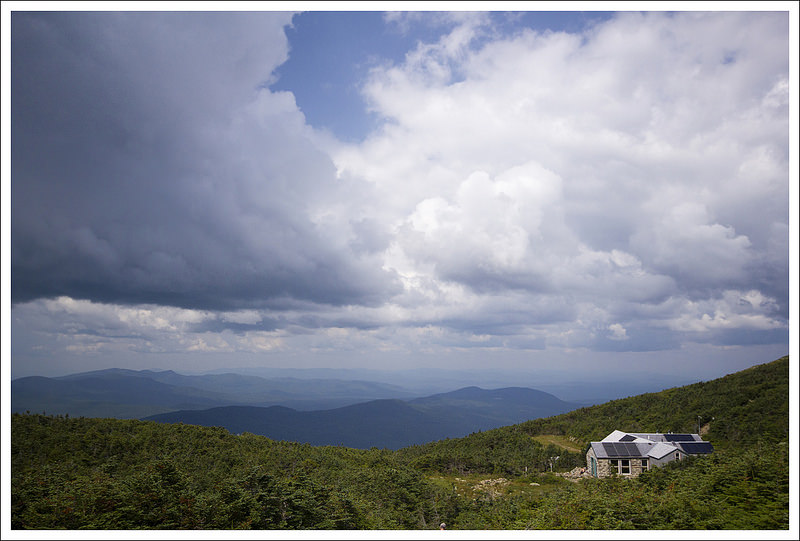
After lunch, we walked out to Star Lake.  What a beautiful spot.  The lake itself is small and shallow, but it makes a gorgeous reflecting pool for Mt. Madison.  We were lucky to visit on a picture perfect day!  While we were admiring the lake and taking in our final peak views, we started to hear distant rumbles of thunder in the distance.

Being caught in a thunderstorm in the Whites is definitely something I’d be happy to NEVER experience.  Lightning strikes happen frequently, wet granite is very slick, and stream levels can change drastically in mere minutes.  In fact, just last week I read a harrowing account from a solo hiker caught by storms in the White Mountains.  Seriously scary!

We made our way down as quickly as we safely could.  With a couple miles of hiking left, the rain started to fall.  Fortunately, it was light rain and none of the thunder/lightning seemed close.  We got back to the car right before the skies opened up and poured!  What a great day with perfect timing. I’m really thankful that we had weather that allowed us to visit two more Presidentials on our 2014 trip!

Trail Notes

  • Distance – 8.8miles
    MapMyHike Stats *
  • Elevation Change –  4150 feet
  • Difficulty –  5.  The trail started off easier, but it is still a very tough, uphill climb.
  • Trail Conditions – 2.5.  The trail was well-maintained, but the rocky parts of the trail make this a challenge.  The final push to the summit on the Osgood Trail also took a lot of precision.  Bring trekking poles.
  • Views – 5.  It doesn’t get much better than this.  If you are lucky enough to catch this on a day where clouds are off the mountain summits, you will be able to see all around you for miles. 
  • Waterfalls/streams 3.  The Snyder Brook runs alongs the trail early on the hike and you can see a few smaller waterfalls along the trail. 
  • Wildlife – 1.  We didn’t really see any wildlife on the trail.  I wouldn’t expect much at all once you get above treeline. 
  • Ease to Navigate – 2.5.  There are a lot of junctions and side trails on the route because there are a lot of trails in this area.  Keep following the signs for the Valley Way Trail until you reach the hut and then follow the Osgood Path via the cairns to the summit. 
  • Solitude – 2.  We picked a gorgeous day in the summer to do this hike, so we weren’t surprised to see lots of people.  We saw the most at the summit and the hut, but there was still places to find our own bit of solitude. 

Download a trail map (PDF)

Directions to trailhead: From I-93: Take Exit 35 for Twin Mountain. Follow 3N for 12.4 miles. Turn right onto 115N for 9.7 miles. Turn tight onto 2E for 8 miles. The parking lot will be a large gravel area on the right.

* MapMyHike is not necessarily accurate, as the GPS signal fades in and out – but it still provides some fun and interesting information.

Mt. Pierce (NH)

Special: New Hampshire Edition

Introductory Guide to Visiting the White Mountains

This hike is one of the shorter, more moderate approaches into the Presidential range of New Hampshire.  While the hike is only about 6.5 miles, we hiked an extra 2.4 miles for the chance to enjoy some views!

View the Full Album of Photos From This Hike

Mt. Pierce Summit
On our second pass-by, we were lucky to hit the summit with mostly clear views!  Below: Adam makes his way up the Crawford Connector – a short spur trail from the parking lot to the Crawford Path; Trail signs and a sign for Mizpah Spring Hut; Gibbs Falls.

Crawford Connector Trail AMC and Trail Sign Gibbs Falls

Adam Says…

Charles Dickens started off A Tale of Two Cities with the line, “It was the worst of times, it was the best of times.”  When I was thinking about starting to write about Mt. Pierce, I was thinking, it was A Tale of Two Hikes with the worst and best of times.  All of us have good days and bad days on the trail and this was a bad one for me.  I wasn’t really feeling the hike deep down and I felt like I was just going through the motions rather than taking a moment to enjoy what I was able to do.  The morning started off with a lot of fog around, which didn’t really help my mood.  I was thinking it may burn off by the time we got to the top, but we weren’t so lucky.

The first .4 miles along the trail were relatively flat as it meandered through a wooded area.  We crossed a footbridge at the base of a small waterfall and at .4 miles, we reached a junction with the Crawford Path.  Taking a left at the junction, we began our ascent.  The ascent begins while paralleling the Gibbs Brook on the left of the trail.  The trail was extremely rocky which was making each step a challenge, as I felt like I was doing a demented, granite-laden version of a StairMaster.  Most of the trail to the summit consists of having to step on rocks, so there is little evidence of soft ground to place your feet.  I would recommend shoes with good padding, thick comfortable socks, ankle support, and trekking poles to help yourself along.

Rocky Trail
Even though the Crawford Path to the summit of Pierce is one of the least steep trails in the Whites, it is still very rocky and slick.  Below: As we climbed, the woods got foggier and foggier; By the time we made it to the junction with the Mizpah Cutoff Trail we started to worry that we wouldn’t have a view at all; The Mizpah Cut-Off Trail departs the Crawford Path a little over a mile from the summit of Mt. Pierce.

Into the Clouds Fog Mizpah Cutoff

At 1.9 miles, we reached a junction that led to the Mizpah Spring Hut, which is the return trip for this lollipop loop.  Stay left and continue to climb up to the summit.  The trail continued to be rocky and the fog was just sticking to the mountaintop as we progressed.  I was feeling hopeless about being able to spot any views.  As we got higher, we could tell the views would have opened up to the left of the trail but all we could see was a sea of gray.  At 3.1 miles, we reached a large rocky, outcropping and waited a while for the views to open up.  While the wind was picking up, we felt there was no end to the fog.  At the outcropping, another sign for a junction pointed us to the summit and the Webster Cliff trail to the Mizpah Spring Hut (continuing on the Crawford Path would lead to the summit of Mt. Eisenhower in 1.6 miles).  We took that sharp right and headed up to the top, where we reached the summit of Mt. Pierce in a short distance.

At this point the trail began to descend.  The first part of the trail was a gradual descent, but eventually the trail was some of the steepest, rockiest downhill my feet and knees have witnessed.  At 4.0 miles, we reached the Mizpah Spring Hut, maintained by the AMC and beds can be reserved in advance.  We stopped for a while here and ate lunch.  The croo (yes, that is how they spell it) that maintains the hut and cooks dinner and breakfast for overnight guests, had baked some cookies which we purchased and supplemented our lunch.  As we were enjoying our lunch, we could see that the fog was finally lifting.

From the hut, we explored the nearby Nauman tent area (also able to be reserved for outside camping) and then proceeded on to the Mizpah Cutoff Trail to complete the lollipop section of the hike.   The Cutoff Trail starts off flat, but is a relatively easier descent.  We reached the junction with the Crawford Path at 4.7 miles.  A return trip to your car by taking a left would make this a 6.6 mile hike.  However, we had a debate about what to do.  Going back up to the summit would be adding another grueling, rocky 2.4 miles, but the views could finally be opening up.  What we had researched before told us how great the views were, so the temptation was hard to resist.  I felt like I owed it to myself (and our readers) to change my attitude and fight through to see these views.  I could tell Christine wanted to see the views as well, so we decided to hike up to the summit again.

Cairns in Fog Boardwalks on Webster Cliffs Starting to Clear

As we climbed, we saw people descending that we had seen earlier on our hikes.  I stopped to ask everyone if they had seen views, thinking if there was still little hope we could turn back around.  Early on, some were saying that we may get lucky to see things, but as we got closer, we were told the views had opened up.  As people were descending, we ran into several people that we had seen before near the summit and they had wondered if we were hiking the summit again.  We got looks of admiration, which made us feel like we fit in with New Hampshire hikers – we weren’t just some normal, Virginia couple that isn’t used to hiking the tough, challenging White Mountains.  When we reached the rocky outcropping near the summit, the views were spectacular.  There were still clouds in the distance that was stuck to Mt. Washington and some of the other high peaks, but we could still see miles of beautiful mountain ranges around us.

We hiked again up to the summit and the views got more amazing as we looked behind us each step.  We stayed up here a little longer to take in the views.  After getting our fill, we went back down the Crawford Path and made our way back to the car.  When we reached the end, we were a little more tired and had covered more miles than we had planned, but it was a rewarding day.  At the parking lot, we saw a fox standing next to our car, but it quickly darted off into the woods.

One thing to note about Mt. Pierce is that it was once named Mt. Clinton.  When hearing some people refer to it as Mt. Clinton, my initial thought was that Mt. Pierce had been renamed for President Clinton.  I thought that would be odd, since Franklin Pierce was the only President born in New Hampshire and I couldn’t see them changing the name for a President from Arkansas.  But the original name was from DeWitt Clinton, a governor of New York and U.S. Senator, also known for being largely responsible for the construction of the Erie Canal.  Even though the name was changed in 1913, some people have still held onto the original name of Mt. Clinton.

Christine Says…

Summiting Mt. Pierce has been on our New Hampshire ‘To Do’ list for several years now.  I’m sad Adam didn’t have a better day on the trail, because I really enjoyed myself and had a strong hiking day.  It’s always tough when your hiking partner is in pain or having a hard time with terrain, because there’s really nothing you can do beyond cheer them on (which is sometimes annoying) or stay quiet and let them work through the challenge.

We chose to hike Pierce on a day forecast to be clear and beautiful.  As typical in the Whites, the clouds and drizzle stuck to the mountains far longer than the valley.  It was sunny and pleasant at the AMC Highlands Center, but the peaks loomed in the clouds.  We decided to start our hike on good faith that the clouds would blow off before we reached the summit.

Mizpah Spring Hut
By the time we arrived at Mizpah Spring Hut, the sun was fully out.  Below: The Webster Cliffs trail is steep in places and is traversed by ladders and wooden stairs; Inside Mizpah Spring Hut; Cookies!

Webster Cliffs Trail Inside Mizpah Cookies at Mizpah

Hiking along the stream early in the hike was pretty and pleasant.  Gibbs falls were lovely and I always enjoy the sound of water running through the woods!  As we continued to climb uphill, the fog did the opposite of what we hoped/expected – it just got thicker!  In fact, every time I paused to take a photo I had to wipe the lens with my shirt to get the droplets and mist off the glass.

Between the Mizpah Cut-Off trail and the summit, we were passed by a pair of trail runners.  Running on mid-Atlantic mountain trails is challenging enough.  I can’t even imagine keeping that pace over the rocks and roots of New Hampshire!

As we ascended, the fog enveloped the mountain even more.  We debated taking the Mizpah Cut-Off trail, and visiting the hut first, but decided to chance the summit so that we’d hit the hut closer to lunchtime. That turned out to be the wrong call.  At the summit of Pierce, we sat on the rocky outcropping looking into a sea of clouds.  We couldn’t even tell which direction held the spectacular view we’d heard described in our hiking guide.

Christine on the Summit of Pierce
We hiked back up to the summit of Pierce to enjoy clear views.  Below: The Nauman Tentsite is a short distance from the hut; A typical tent platform in the Whites; More views from the summit.

Nauman Tentsite Tent Pad More Views from Pierce

We sat in the clouds for a few minutes before deciding to push on to the hut.  The Webster Cliff trail crossed a ridge for a while, using boardwalks and traditional trail.  We stopped at one last high point and checked out the movement of the clouds.  Every now and then, the clouds would blow off enough that we could see the shoulder of a mountain or the faint shape of a peak through the mist.  We again discussed waiting/going back to the summit versus heading down to the hut.  We agreed that it would still be a while before the view would clear, and proceeded to Mizpah Spring.

The Webster Cliff trail got steeper and slippery, using wooden stairs and ladders in a couple places.  We eventually reached the hut.  While we ate our lunch, the last of the clouds blew off, leaving bright bluebird skies above the White Mountains.  We discussed climbing back up to the summit.  Neither of us wanted to ascend via Webster Cliff, so we decided to delay our summit decision until after we walked the Mizpah Cut-Off back to its junction with the Crawford Path.

At the junction, we agreed that you don’t climb a presidential peak and pass on the opportunity to take in a spectacular view.  We hiked the extra 1.2 miles (2.4 miles round trip)  with 1,000 feet of elevation gain a second time.  And you know what… it was SO WORTH IT.  The views were spectacular, expansive, breathtaking.  Even with Mt. Washington still in the clouds, it was a stunning view.

The hike down was long and slippery.  We were passed again by the trail runners we had seen earlier.  They had been all the way to the summit of Mt. Washington and back.  Wow! We didn’t go that far, but we still felt our hike was worthy of celebration with a huge meal at The Italian Farmhouse in Plymouth.  It’s always such a gift to have a great view day in the White Mountains!

Trail Notes

  • Distance – 6.5 miles
    MapMyHike Stats *
  • Elevation Change –  2500 feet
  • Difficulty –  4.  While there are steeper, more challenging trails in the White Mountains, this one is still challenging. 
  • Trail Conditions – 2.  The trail is mostly rock, requiring big steps and unsteady footing. 
  • Views – 4.5.  From the summit of Mt. Pierce on a clear day, you can see miles of the Presidential range. 
  • Waterfalls/streams 3.5.  Early in the hike, you can see Gibbs Falls and the start of the Crawford Path part of the hike goes along the scenic Gibbs Brook. 
  • Wildlife – 2.  We weren’t expecting to see much, but we were lucky enough to see the fox at the end of our hike.  Keep a lookout for the rare Bicknell’s Thrush. 
  • Ease to Navigate – 3.5.  Signage was fairly good at the junctions, but we were a little confused on how to get to the Mizpah Cutoff Trail from the hut. 
  • Solitude – 2.  This is a popular trail since the Mizpah Spring Hut is one of the easiest of the AMC huts to access.  Expect to see people at the summit of Mt. Pierce and the hut mostly.  Clear days in the summer could make this quite popular. 

Download a trail map (PDF)

Directions to trailhead: From I-93: Take Exit 35 for Twin Mountain. Follow 3N for 10.4 miles. Turn right onto 302E and proceed for 8.2 miles.  Turn left onto Mt. Clinton Road.  There will be a large gravel parking lot at the trailhead ($3 fee applies).

* MapMyHike is not necessarily accurate, as the GPS signal fades in and out – but it still provides some fun and interesting information.

Spruce Knob – Seneca Creek (WV)

This 16.5 mile overnight backpacking trip has cooler temperatures in the summer, beautiful streams and waterfalls, high mountain meadows, abundant berry bushes, and even an old plane wreck to explore. It’s a great change of pace from hiking the Appalachian Trail.

View the Full Album of Photos From This Hike

Hiking Along the Huckleberry Trail
The high meadows along this hike were beautiful! Below: Backpacks in the car; Everyone checks out the information at the trailhead; Suzanne picks ripe blueberries along the Huckleberry Trail; The Huckleberry Trail passes through several small meadows; Spruce-shaded areas on the Huckleberry Trail; Signage along the way.

Backpacks in the Car Getting Started Blueberry Picking
Views from the Huckleberry Trail Spruce Trees in the Sun Trail Sign

Day One…

Initially, we  planned on doing very little hiking in July this year.  Our goal was to stay out of the heat and to rest up a bit so we wouldn’t overdo things before we tackle our trip to New Hampshire later this summer.  But the weather was too nice and we had lots of invitations to go hiking.  Over the 4th of July weekend, our friends Anthony and Suzanne suggested we go on a backpacking trip together.  We always enjoy hiking with them, so plans were made to hike in the Spruce Knob area.  This was actually the second 4th of July weekend we’ve spent on the trail with Anthony and Suzanne.  A couple years ago, we did a trip to Dolly Sods.

Our friends came down and spent the night before the trip at our house. We divided up some group gear and then packed the car and headed out fairly early to start our trip.  We arrived at the trailhead mid-morning.  We saw the short trail to the Spruce Knob summit fire tower, but we decided to visit that at the end of the loop the next day to feel like we had truly earned it.  Spruce Knob is the highest peak in West Virginia.

The printed maps we have found of this area are fairly outdated and online maps also don’t have the trails completely accurate.  The best map I have found of the entire area has been from Mid-Atlantic Hikes and it may be helpful to bring that along since there are lots of trail options here.

Descending to Junction
Adam descends to our junction with the Lumberjack Trail. Below:  Anthony makes his way along the Lumberjack Trail.  The trail has a reputation of being sloppy/muddy, but it wasn’t too bad when we visited; Someone moved a piece of the plane from the wreck site up to the trail – probably to mark the spot; Even after 4+ decades on the mountainside, the plane wreck is still mostly intact.

Walking the Lumberjack Trail Plane Window Fuselage
Mud Nettles First Large Meadow

We started off our first day of the hike on the Huckleberry Trail (TR533).  The trail starts off with a little bit of crushed gravel on the trail, but that goes away in a short distance.  This first section of the trail was fairly flat or downhill and alternates from going from dense Spruce forests to more open fields. There are numerous dry campsites along the trail. In the fields, we found tons of blueberries that were just starting to ripen.  We stopped along the way for a few handfuls before pressing on.  At 3.4 miles, you will reach a campsite and a sign that points to the trail going right.  Follow this trail and in another short distance, you’ll come to another sign pointing you to go left as the trail winds around a dense forest area.  You’ll soon reach another sign that shows that the Lumberjack Trail is .4 miles away.  The last .4 miles of the Huckleberry trail drops rather steeply to the large trail junction at 4.7 miles.  Take a right at this junction to join the Lumberjack Trail (TR534).

The Lumberjack Trail is a relatively flat trail.  We were warned that it can be very muddy and wet, but we found that even after some recent heavy rains there were only a few 20-foot sections that had mud to slog through.  Most of the trail had rocks or logs placed that saved us from having to get our shoes wet or muddy.  Around mile 5.8, we saw a plane door hung on a tree and a short, yet steep trail that led down to plane wreckage (a Piper PA-23 that crashed here in 1973 with two casualties).  Be respectful if you decide to visit this site.  We stayed on the Lumberjack Trail until it came to a junction with the High Meadows Trail at mile 6.7.  Take a left to join the High Meadows Trail (TR564).

The High Meadows Trail was the most overgrown trail we came across.  There were times that it felt like we were bushwhacking.  There are stinging nettles everywhere along the trail and grass was up to our knees in some portions.  The High Meadows Trail also has alternating landscapes; you will go from dense forests to large open meadows several times.  Keep an eye out for blue blazes on posts or trees as you navigate through these high grass areas.  The trail descended through these gorgeous meadows and it is not surprising that we were thinking of the Sound of Music when we were walking through these fields surrounded by mountains.

High Meadows
The high meadows on this hike were so beautiful!  Below: Adam admires the high meadows; Grass in the meadows was tall;  There were several meadows separated by short sections of shade;  Most of the shady spots were densely overgrown with berry brambles; Black-eyed susans; Adam crosses out of the final meadow.

Adam in Meadow Meadow Walking Shade Between Meadows
Overgrown Susans Leaving the Meadows

Eventually, you will enter into the woods again and cross a small creek.  At 8.6 miles, you will reach another trail junction. Take a right here and you will descend even more as you make your way through a scenic forest landscape.  You will soon hear water flowing from Seneca Creek below you.  The trail crosses the creek and comes to a junction with the Seneca Creek Trail at 9.1 miles.   At this point, you will cross Seneca Creek to reach the trail on the other side.  The water was flowing to make a nice small waterfall.  Before we crossed, we ventured just a short distance (about 75 yards) to the right down the Seneca Creek Trail and came across one of the most beautiful waterfalls/swimming holes I’ve seen – Seneca Falls.  We dropped our bags on the trail and scrambled down to reach the base of the falls.  There was a large cavernous rock overhang to the right of the falls.  In the water, we could see brook trout swimming around, occasionally breaching the water to catch flies that were dancing along the water surface.  Once we climbed back up from the basin, another group came down to the falls jumped into the swimming hole at the base of the falls.  From the screams when they jumped in, we could tell the water was extremely cold.  We made our way back to our original junction and then determined the best place to cross the creek was at the very top of the small waterfall.  We all made it across safely.

Christine hit a wall with her energy level, so we stopped a few minutes to eat a snack on the opposite side of the creek at a nice campsite.  Knowing we still had a distance to go, we pressed on further.  The Seneca Creek Trail went to the side of Seneca Creek for the entire way.  We crossed the creek in a couple of places.  Around mile 10.4, we began to see a ton of campsites.  We were surprised to see that there were so many people that were camped here overnight.  When we kept passing people on the trail, we felt that we would have our picks of campsites, but we didn’t realize how many people come here a different way (mostly from the lower Spruce Knob parking lot and taking the Seneca Creek Trail to these campsites).  Anthony and Suzanne hurried ahead, while I waited a while for Christine to try and regain her strength.

Seneca Falls
Seneca Falls is an impressive waterfall with an emerald green plunge pool. Below: Leaving the high meadows for Seneca Creek; A small waterfall above Seneca Falls; A side view of the falls; The trickiest of the stream crossings; Pretty wildflower; Lovely Seneca Creek.

Start of the Seneca Creek Trail Small Waterfall Seneca Falls
Crossing Wildflower Seneca Creek

We caught back up with our friends soon and they had claimed a gorgeous campsite (even though it was hard to imagine a bad one here) at 10.6 miles that was near a waterfall that plunged into the creek.  While there were lots of larger groups out here, we found a nice, secluded campsite that had a nice waterslide that created a babbling brook sound throughout the night.  We set up camp and started to make some dinner.  I always enjoy bringing a card game with us when we do an overnight backpack and this time I brought the game Hike.  It was pretty brainless fun and plays similar to Uno with specialty cards that create twists in the game.  It was starting to get dark, so we created a small, but nice fire in the pit.  Once the sun set and the fire died out, we retired to our tents.  It may have been the sound of the brook, but I probably slept the best I have ever slept backpacking that night.  What a great first day!

Campfire
The evening concluded with dinner, card games and a great campfire. Below: There were abundant rosebay rhododendron all along the stream; Our campsite had nice, flat space enough for 2-3 tents; We also had a pretty waterfall and pool for our water source.

Rosebay Camp Filtering

Day Two…

As usual on backpacking trips, we both woke up right around first light. We spent a little while longer in our sleeping bags, chatting and stretching.  It was a chilly morning, so we weren’t quite ready to climb out into the cold.

Eventually we emerged from our tent to start the day.  I put on gloves and a light jacket and  headed downstream to take a few photos of the big waterfall at the next campsite over.  The folks camping there had packed up and departed very early.  Adam went to get the bear bags down while I took photos.

Campsite Falls
One lucky group gets to camp on a site right across from this pretty waterfall.  Below: Our campsite in the morning; You can see smoke from other campsites downriver; Crossing the footbridge across Seneca Creek before our big uphill climb.

Campsite in the Morning Downriver Footbridge

We got everything out for breakfast and started taking down our tent, rolling up sleeping pads and stuffing our sleeping bags back into compression sacks.  I decided that I was going to eat a huge breakfast, so I wouldn’t bonk again on our second day of hiking.  Adam didn’t go into much detail in his day one post, but right around mile ten of our hike the day before, I hit a wall – HARD! It was right after we visited Seneca Falls and crossed the stream.  I sat on the ground and told everyone that I was feeling really lightheaded and sick.  I didn’t feel hungry.  I had been drinking water all day.  Regardless, my legs just felt like jelly and I just didn’t want to walk another single step.  Adam, Suzanne and Anthony all told me that they thought I needed to eat.  Turns out they were right – I had been hiking for ten miles with a 25 lb. pack on under 700 calories.  I guess I just didn’t realize how little I had eaten until I did the calorie math.  My appetite always goes away when I’m doing strenuous activities.  Usually, it doesn’t cause problems and I just eat when I get to camp.  I guess this time I just expended all my short term energy before we finished for the day.  I need to do a better job forcing myself to eat enough.

Alright… off that tangent and back to breakfast!  As promised, I ate a large breakfast – oatmeal, cheese, a honeybun and coffee.   It was about 600 calories of food and much more in line with my energy needs for a tough uphill and 6 miles of hiking.  Everyone had eaten and packed up camp by around 9:45 and we were on our way again.

Final Meadow
Adam climbs steeply uphill across our final large meadow of the hike.  Below: Anthony and Suzanne take a look back toward Seneca Creek;  We had spectacular skies; Making progress back to our start point.

One Last Look Toward the Creek Beautiful Skies Trail Sign

We had a short distance left to walk along Seneca Creek.  Within about a quarter mile, we reached a small wooden footbridge across the stream.  We crossed and continued uphill on the Seneca Creek Trail.  The steepest climbing was across a beautiful, expansive meadow.  We got great views of the valley and our last glimpse into the Seneca Creek watershed.  The high meadows on this hike are truly majestic and are definitely one of the trip’s highlights.

After crossing out of the meadow, we continued uphill through the woods back to the four-way junction of Seneca Creek/Lumberjack/Huckleberry.  Staying straight took us back onto the Huckleberry Trail.  From there, we retraced our steps from the day before.  It was a little slower going and felt longer on the second pass.  It was all uphill and everyone was a little tired.  It’s always funny how different the same four miles can feel under different circumstances.

Adam on the Huckleberry Trail
Hiking the Huckleberry Trail reminded us of hiking in New England.  Below: More lovely views from the Huckleberry Trail;  The trail was often paved with rock; A well-appointed campsite on the Huckleberry Trail; Ripe berries; A view from the talus slope.

Huckleberry Views Laurels Campsite
Ripe Berries Talus

We enjoyed the sunny, unseasonably cool July weather.  We stopped and picked many blueberries along the walk back.  I also took a little side trail from one of the meadows and found a talus slope with nice views across the mountains.

We got back to the car around noon.  We threw our packs into the back of the car and took the short, flat walk to check out views from the observation tower atop Spruce Knob.  It’s just a short quarter mile walk and well-worth the extra time and steps.  We spent some time enjoying the lofty views and cool breezes.  Anthony, Adam and Suzanne decided to walk to one more nearby viewpoint on the Whispering Spruce Trail.  It was just a tenth of a mile down the trail and provided even more spectacular views.  I headed back to the car to eat some more candy and switch my trail shoes for flip flops.

Tower Views
Anthony and Adam take in views from the observation tower on Spruce Knob.  Below: Views from the tower; The hiking crew; Views from the Whispering Spruce Trail; The tower.

Views Hikers Whispering Spruce
Observation Tower

After a few minutes, everyone was back at the car and we were on our way back to Harrisonburg for a celebratory meal and beer.  We all decided that Jack Brown’s was the best spot for lunch.  They have fantastic gourmet burgers and a great beer list.  It’s a perfect post-hike indulgence.

We couldn’t have asked for better weather, scenery, or company for this 4th of July weekend backpacking trip.  After lunch, we bid farewell to Anthony and Suzanne.  They’re such great hiking buddies and we always feel lucky when we get to hit the trail together.

Trail Notes

  • Distance – 16.5 miles [Day One] [Day Two]
  • Elevation Change – About 2300 ft.
  • Difficulty –  4.  The distance makes it fairly tough and the second day has a lot of uphill on the trail. 
  • Trail Conditions – 3.  Most of the trail was well-maintained.  The High Meadows Trail was quite overgrown.  There are some rocky, loose sections on this trail too, which can be a little rough on the feet.
  • Views – 5.  The best views are from the Spruce Knob trail near the fire tower.  The fire tower has wonderful views, but once you take the .5 mile trail around the fire tower, you will have gorgeous, breathtaking views from the highest point in West Virginia.  The views along the main backpacking trip were mostly during the High Meadows Trail.  There are gorgeous mountain views and no sign of civilization. 
  • Wildlife – 3.  There were lots of birds to be found on the High Meadows Trail.  We did have a deer visit us several times at camp. 
  • Ease to Navigate – 2.  The Huckleberry Trail and High Meadows Trail could use more signage.  I would suggest printing out our step-by-step desciption and bringing the midatlantichikes map to help guide your way. 
  • Solitude – 2.  This is a popular spot for people to do overnight camping.   Expect to see lots at the campsites, but you will have more solitude until you get to Seneca Creek. 

Download a Trail Map (PDF)

Directions to trailhead:  Directions vary so greatly depending on the direction you’re coming from.  Please refer to the trailhead marked on the map below to determine your best route.

Appalachian Trail – Hog Camp Gap to the Tye River

This 19.1 mile overnight backpacking trip has amazing views and pretty stream scenery.  The terrain is relatively easy, so it’s a great stretch if you’re looking to cover higher miles without a ton of uphill climbing. Since this is a longer post, Adam is going to cover day one, and Christine will cover day two.

View the Full Album of Photos From This Hike

First Views
The first views on our hike came within about a mile! Notice Christine’s new purple backpack! She upgraded from her Gregory Z55 to an Osprey Viva 65. It has a lot of useful features – her favorite: the hydration sleeve is on the outside of the pack, which is very convenient!  Below: Parking at Hog Camp Gap; Adam climbs out of the gap; Old stone walls.

Parking at Hog Camp Gap Climbing Out of the Gap Old Farm Wall

Day One (10.4 miles)…

This hike had a very rough start and almost became the hike that never happened.  The morning of our trip, we loaded up our cars and headed out.  We needed to take two cars since we were doing a shuttle.  About ten minutes into the drive, I looked in the rearview mirror and saw Christine turning back around and heading home.  She had forgotten her hiking shoes and was only wearing flip-flops in the car – not the best idea for a backpacking trip.  We made a quick return home. When I pulled into the driveway, black metallic smoke started rolling out from underneath our hood.  Not good at all!  But we didn’t want to throw in the towel yet.  We took the smoking car to Bob Wade Auto World (the Subaru dealership where we bought the car), but found they weren’t open yet.  So, we decided to fill up on a big breakfast at Cracker Barrel and stop by again when they opened at 9:00.  We got to the dealership and explained the problem.  They have great customer service! We ended up with a free loaner car to use while our Outback was in the shop. They were so quick with the paperwork and processing that we were back on the road in less than 15 minutes. Saved!!

Mayapples
Beautiful green mayapples! Spring is finally here!  Below: Trillium along the trail;  Lunch stop!; A perfect swallowtail.

Trillium Lunch Butterfly

We dropped our first car at our finish line where the Appalachian Trail crosses VA Route 56.   We then headed to the starting point.  It took us about 50 minutes to get to Hog Camp Gap, since there is no direct road that parallels the AT.  The last piece of road to get to Hog Camp Gap is very rocky and filled with potholes, but we made it there safely.  The parking lot was already crowded as this is a great starting point for many hikes, whether you’re going to Mt. Pleasant, Cole Mountain, Spy Rock, or camping near Cow Camp Gap shelter.  We got all of our gear together quickly and walked through the large break in the fence to start our hike on the white-blazed Appalachian Trail, heading north.   The trail began to climb up a hillside and within 1 mile, we were blessed with astonishing views, looking over the Tar Jacket Ridge to catch views of the bald on Cole Mountain, Mount Pleasant, and Pompey Mountain.  I knew at this point our luck was turning for the best.  I found it hard to pry myself away from the views, but knowing that we had a lot of distance to cover,  we pressed on.  The trail then begins to gradually descend from the ridgeline and we crossed USFS 62 and Salt Log Gap at 2.2 miles.

Stream Crossing
One of the few, small stream crossings on the hike.  Below: Seely-Woodworth Shelter; Christine filters water at Porters Field; Porters Field has space for lots of tents; Through the trees, we could see the ascent still ahead of us after dinner; Christine ascends the trail near Spy Rock; Finally at camp!

Seely Woodworth Shelter Filtering Water Porters Field
Mountain Ahead Spyrock Trail Camp

The trail was relatively flat for a good stretch of the trail going forward.  There were some views through the trees occasionally as we walked on, but the true treat was all the trillium that was on the trail.  This is by far Christine’s favorite wildflower.  She was hoping to see some along the trail and we were pleased to find entire hillsides filled with these flowers in perfect bloom.  We crossed USFS 246 at mile 3.6, Greasy Spring/USFS 1176A at mile 4.1 and reached the crossing of the North Fork of Piney River at mile 5.9.  We stopped and ate our lunch on the side of the trail.  The only excitement along this piece of trail was Christine swore she saw a bear, but it was just a person (dressed all in black) taking a lunch break far uphill from the trail (which we thought was an odd place to stop).  We pressed on along the trail and finally reached the Seely-Woodworth Shelter at mile 7.4.  When we arrived at the shelter there were several backpacks at the shelter, but no sign of people anywhere.  We took a long break and rested our feet.  We were joined shortly by Christine’s “bear man” who was doing a longer section hike and covering a lot of Virginia.  We shared some hiking stories (like how he never purifies water but has only got sick once).  Knowing that we had more miles to cover today, we strapped our heavy packs back on and continued.

We reached a junction with Porters Field (a fire road that used to be a railroad trail) at mile 8.4.  We had read on the hiking blog of a friend (thanks, Wandering Virginia), about a water source near this junction.  We took this short side trail past a campsite and then headed downhill towards the sound of water.  Water was coming out steadily from under a large rock.  We decided to cook some dinner here.  While we both weren’t overly starving since we had eaten lunch not too long ago, this seemed like the best place to cook some dinner and refill water.  We were shooting to camp at Spy Rock, which is a dry camp, so we needed to carry enough water for breakfast After dinner, we made our way back to the AT.  Christine typically doesn’t like hiking with a full stomach, but because we needed to get to our camp site for the night, we pushed on.  We crossed over the Fish Hatchery Road at Montebello at 9.6 miles.  On the other side of the road, we saw the steep ascent up to Spy Rock.  The trail climbed up about 400 feet in .5 miles, but when we reached the top of the hill, we found our perfect campsite at the base of Spy Rock.

NOTE:  Hikers are no longer allowed to camp at the base of Spy Rock. Usage rules for this area were changed in 2019.  We camped there long before the rule change, and we’re thankful we had that opportunity!

Spy Rock View
Spectacular views from Spy Rock. Below: Getting to the top takes some scrambling; Christine reaches the dome; Beautiful evening light on Spy Rock.

Climbing Climbing Beautiful Spot

We took off our packs and began to set up camp.  There were already a few campsites already claimed, but we found a nice flat spot with no rocks or protruding roots.  We had just bought a new two-person tent, the Big Agnes Copper Spur UL2, which was much lighter than our 3-person tent, and we were excited to try it out.  We set the tent and fly up and then made our way to check out the views from the summit of Spy Rock.  There is a little rock scramble up to the top of Spy Rock, but the 360-degree views from this spot are not to be missed.  We stayed up there a while to soak in as many views as we could, before making our way back to camp.  We had a long, tiring, day that started off stressful, so we were ready to go to sleep before the sun fully set.  We both read books for a while and then went to sleep.  Or rather, tried to go to sleep.  Right after sunset, the wind started to pick up.  At first it was an occasional rustle across the treetops, but by midnight it was moaning and howling over the mountains.

Beautiful Spot
Adam enjoying a beautiful spot! Below: Reflecting pools on Spy Rock;  Sunset is ‘hiker midnight’.  By the time the sun went down, it was already cold and windy.  Christine was glad for the hood on her sleeping bag!

Spy Rock Bedtime

Day Two (8.7 miles)…

That was a rough night to spend in a tent!  Even with it staked and guylined, it rattled and shook all night long.  The wind continually caught under the fly and funneled through the tent’s mesh.  Even in long pants, a hat, and layers of fleece, I was cold in my 35 degree bag.  It wasn’t even that cold outside – the wind was just really brutal!  Neither Adam nor I got much sleep.  I found myself wide awake when the first hints of dawn light started to brighten the tent.

NOTE:  Hikers are no longer allowed to camp at the base of Spy Rock. Usage rules for this area were changed in 2019.  We camped there long before the rule change, and we’re thankful we had that opportunity!

Sunrise on Spy Rock
I had some canine companionship at sunrise. This beautiful dog is half German shepherd, quarter Malamute and a quarter wolf! Below: Day Two got off to a very cold start; Spy Rock has several spacious, flat campsites; Adam checks out the few from Maintop Mountain.

Cold Camp Maintop

I told Adam I wanted to climb Spy Rock again to watch the sun come up.  He decided to stay back.  I grabbed my camera, scaled the rock and found a perch facing east.  It was a beautiful, though cloudless, sunrise.  I thought I was alone on the top of the rock, but suddenly a huge white dog we had met the night before came bounding across the rock and decked me.  He was friendly, and I was fine, but his owner was embarrassed and came chasing after the dog.   I stayed on Spy Rock watching the sun come up until I couldn’t take the wind and cold anymore.

When I came down, Adam was already in the process of breaking down camp.  We had a quick breakfast of oatmeal and coffee, and were back on the trail by around 7:30.   Day two of this trip had a bit more climbing than the first day.  Our first ascent was that of Maintop Mountain.  It was a moderate ascent with one nice view near the summit. I started the morning in a fleece jacket and gloves.  By the time we reached the summit, I had stripped them off.  Climbing really warms you up!

Confessions
Adam writes his confession in the Priest Shelter journal.  Below: Adam approaches FR826; Adam checks out the distance covered at the information board marking the beginning of the Priest Wilderness; The Priest Shelter.

Approaching the Fire Road Priest Wilderness Priest Shelter

From there, we descended into Cash Hollow.  We passed a southbound section hiker and a group of Boy Scouts.  We crossed a couple gravel roads – 826 and 526.  Off-roaders really enjoy these roads – they’re very rugged and tough to drive unless you have a serious 4WD vehicle.   After the second road crossing, signs and an informational board informed us that we had just entered The Priest Wilderness.

We had about a mile of climbing to reach the Priest shelter and the ridgeline of the mountain.  The climbing is really pretty moderate, but it seemed tough to my tired legs and sleepy mind.  We stopped at The Priest shelter for a snack and rest.  I changed into shorts – the day was warming very quickly!  Adam and I both made our ‘confessions’ in the Priest journal.  It’s one of the funniest we’ve seen along the AT – reading everyone’s confessions is definitely worth a stop!

Priest Summit
Christine enjoys the view near the Priest summit. Below: Spring slowly creeps up the mountainsides; Trillium were everywhere; Adam approaches a nice view from the Priest.

Priest Trillium Descending

From there, we completed our last couple hundred feet of ascent to the top of the Priest.  Near the top, we enjoyed amazing views of the valley and had a chance to see an adult bald eagle soar by on the wind.  The rest of our hike was a long, 4-mile, 4,000 foot descent to the Tye River.

We took it slowly, enjoying wildflowers along the way! The trail was abundantly lined with trillium, wild violets, and wild geraniums. Both of us remarked that we were glad to not be climbing up this side of the mountain! Southbound AT hikers experience one of Virginia’s toughest climbs when they encounter the Priest!

The first mile of the descent was the steepest.  As the grade moderated, we came to another outstanding overlook.  The opening in the trees revealed lush Virginia countryside – farms and ponds.  At this elevation, the trail was much greener.  Leaves were opening in the canopy and the ground cover was brilliant green.  We crossed Cripple Creek in several places.  The rain a couple days earlier had filled the stream and created several beautiful waterfalls.  We enjoyed walking through the woods and listening to the sounds of falling water.  We saw even more wild flowers – a hillside of scarlet catchfly was especially beautiful!

Priest Views
Classic Virginia terrain! Below: Walking alongside Cripple Creek; The latter part of the descent was smooth and gentle; Scarlet Catchfly wildflowers; Post-hike at Devil’s Backbone.  Is it totally horrifying that we go out to eat without showering?  Nah!

Cripple Creek Descent
Scarlet Catchfly Devil's Backbone

Eventually, we could see the sunlight catching on car windshields through the trees.  We were both pretty tired and happy to be back at the car!  We had covered almost 20 miles in roughly 24 hours.  It’s the furthest we’ve ever hiked in that time period, so we felt pretty accomplished.

We had a long car shuttle to get back to Hog Camp Gap.  After picking up the other car, we drove along the Blue Ridge Parkway to Reed’s Gap so we could have lunch at Devil’s Backbone.  It’s always great to eat a HUGE plate of food after a big hike – fries, a grilled brat and beer for me!

Trail Notes

  • Distance – 19.1 miles [Day One] [Day Two]
  • Elevation Change – About 3172 ft.
  • Difficulty – 4.  Mostly for distance.  This section of the AT has little climbing uphill overall, but the hike down The Priest is quite steep. 
  • Trail Conditions –  3.5.  The trail is well maintained and in good shape.  We did feel the hike down from The Priest was really rocky and hard on the feet and ankles. 
  • Views – 5.  This hike has AMAZING views from Tar Jacket Ridge, Spy Rock, and The Priest.
  • Streams/Waterfalls – 3.5.  The best views are along Cripple Creek, near the end of the hike, where you can see a small waterfall and a scenic creek surrounded by wildflowers.   There are options for filling up water near Greasy Spring, Porters Field, the Seeley-Woodworth Shelter, and Cripple Creek.
  • Wildlife – 2.  We didn’t see much wildlife other than birds along the trail.  We did have a great encounter with a male black-headed grosbeak, who was singing beautifully along the side of trail.
  • Ease to Navigate – 4.  Just keep following the white-blazes and pay attention to junctions to stay on the Appalachian Trail. 
  • Solitude – 3.  We didn’t run into too many people on our trip.  Spy Rock had a decent number camping at the top.

Download a Trail Map (PDF)

Directions to trailhead:  Requires a shuttle.  Park one car at the finish.  From the Blue Ridge Parkway, head east on VA-56/Crabtree Falls Highway for 11.2 miles.  Park car in large parking lot where the AT crosses the road.  From this point to reach Hog Camp Gap with your second car to start the route, continue east on VA-56/Crabtree Falls Highway for 6.9 miles.  Turn right on to VA-151S/VA-56E.  In 10.5 miles, take a right on to US-29 South.  In 3.1 miles, take the US-60 exit towards Amherst.  Take a right at the exit ramp to go on US-60 heading west.  In 18 miles, take a right on to State Route 634.  In 1.6 miles, take a right on to State Route 755/Wiggins Spring Road.  This road turns to gravel with large pot holes.  Follow this for 2.7 miles until you reach the parking lot where the Appalachian Trail crosses.  Park your second car here.  Go through the wooden fence and pick up the Appalachian Trail, heading north.

Appalachian Trail – Jenkins Gap to Front Royal (Route 522)

This 8-mile hike completes our Appalachian Trail mileage in Shenandoah National Park.   There isn’t much to see along this section of trail – the views aren’t great and the stream is fairly run-of-the-mill, but we’re still happy to say we’ve walked every step of the AT in Shenandoah!

View the Full Album of Photos From This Hike

Adam Finishes
Adam coming off the trail on Route 522 in Front Royal.

Christine Says…

We finally finished hiking the Appalachian Trail through Shenandoah!  For two years, less than 5 trail miles were keeping us from that distinction.  It’s really quite silly, but this final stretch of trail has been somewhat of a mental burden for me! The reason was sort of two-fold.  The first sticking point – in order to most efficiently cover the miles, we needed to do a car shuttle. I didn’t want to spend the gas money, and honestly, I just don’t like to drive by myself.  Shuttles are just a pain when both cars are yours! The second problem was that this stretch of trail just seemed… boring. I will admit that a bad day hiking is still better than a good day doing many other things, but I had a hard time getting myself psyched-up to hike this stretch.

Finally, faced with a beautiful spring day and a lack of plans, I acquiesced.  We dropped our first car off in a small AT parking lot on the side of 522.  Then we headed into the park and left a second car at Jenkins Gap –where we came off the trail after our last section of the AT in SNP.

From Jenkins Gap, we had a steady uphill to the summit of Compton Peak.  At the summit of Compton, there are blue-blazed trails leading to viewpoints on both the east and west sides of the mountain.  Each viewpoint lies .2 miles off the AT.  We decided to only visit the west summit (it has better views.)  The east summit has some interesting columnar rock formations.  If you’re into geology, they’re definitely worth a peek!

Compton Peak
The summit of Compton Peak offers two viewpoints – each about .2 miles off the AT. We went to to just the western view. Below: Ascending Compton Peak on the Appalachian Trail; Adam passes one of several large boulders on the trail; After Compton Gap, the trail is blazed both white (AT) and yellow (horse trail) for a while as it follows a fire road.

Ascending Compton Descending Compton Appalachian Trail at Compton Gap

After the summit, we descended for almost a mile into Compton Gap.  After Compton Gap, the AT is shared with the yellow-blazed Compton Gap trail for about 1.7 miles.  The hiking is along this section is wooded trail without many distinguishing features – no streams or overlooks to speak of.  The trail is wide, flat and very easy to walk.  You’ll likely pick up a lot of speed along this stretch!

At roughly 4.9 miles into the hike, we reached the park boundary.  There is a sign marking the beginning of private land.  Just south of the park boundary, there is also a backcountry permit station.  Permits are free and self-service in Shenandoah.  If you’re going to camp in Shenandoah’s backcountry, all you need to do  is fill out a tag and tether a copy to your pack.  It’s really easy!

Right after we departed the park, we came to the one viewpoint from this stretch of Appalachian Trail.  Possums Rest has a decent, but slightly obstructed view, of rolling foothills.  It’s worth a stop, but there are definitely many better views along the AT in Shenandoah.

From Possums Rest, the trail descended briefly but steeply through a jumble of rocks.  In about another .7 miles, we reached the Tom Floyd Wayside – the first backcountry shelter located north of the park.  It’s a nice spot with a nearby water source.  We chatted with a section hiker from Washington, DC.  He had completed a thru-hike the year before, but evidently the trail called him back!

Possums Rest
There is one obstructed viewpoint, called Possums Rest, shortly after passing out of the park boundary. Below: Just inside the boundary, there is a backcountry permit registration station; Park boundary; Descending a short, rocky section after Possums Rest.

Permit Station Park Boundary Descent from Possums Rest

After Tom Floyd, the trail continued very gradually downhill.  As we walked along, we could see the advance of spring on the lower elevations.  Redbuds were blooming, tiny green leaves were opening in the canopy and the grass along the trail was growing quickly.  We crossed Rt. 601, and a little over a mile later, Moore Run and then Rt. 602.   The stream was crossing was just an easy rock-hop.

After crossing 602, we had a short uphill before one final descent to Rt. 522 in Front Royal.  The last part of the hike followed a chain link fence for over a mile.  I’m not sure if the fence was just marking private land, or if it was part of the Smithsonian Conservation Biology Institute.  Either way, it is one of the less scenic parts of the AT.

The last quarter mile of the hike passed between fenced pasture land and a residential neighborhood.  After crossing a small wooden footbridge, we found ourselves back at the car.  On our way out, we saw a few of the Smithsonian’s animals walking down a hillside.  They appeared to be some type of antelope – kind of neat!  Before going back to pick up our second car, we stopped at Spelunker’s in Front Royal for lunch.  They make fantastic burgers and milkshakes!  I was thrilled to see gingersnap was their shake flavor of the day!

While this hike didn’t provide much reward with views or waterfalls, I’m still really glad we did it.  I’m happy to be officially and technically finished with Shenandoah’s AT miles!

Adam Says…

It was great to finally finish the AT section through Shenandoah National Park!  With the entire trail being 2180 miles from Georgia to Maine, the section through Shenandoah National Park is less than 5% of the entire trail.  Daunting to say the least, but we still feel we have accomplished something measurable.  There are about 550 miles of the AT through Virginia, making it the longest section through any one state.  Virginia is also a state where a lot of thru-hikers quit, feeling that they will never get through the state (often called the “Virginia Blues”).  The section through Shenandoah is more like 19% of the AT through Virginia.  Most of the thru-hikers fly through Shenandoah National Park, averaging over 20 miles per day.  The climbs are not as tough as in many sections and they have worked into their “trail legs”, gaining the strength to cover many miles per day.

Tom Floyd Wayside
Tom Floyd Wayside is outside the park boundary and is the last shelter before reaching Front Royal.  Below: Redbuds blooming at the lower elevations; Christine crossing Moore Run; The last mile or so of the trail followed a long, chain link fence.

Redbuds Moore Run
Fenceline Fenceline

After we dropped our car off at the trail crossing of Route 522, we made our way into the park and parked at Jenkins Gap.  While you will drive about 12.4 miles on Skyline Drive, the trail through the park and out is a lot shorter.  From the parking lot, you join the Jenkins Gap Trail for just about 100 feet and then take a right to join the white-blazed Appalachian Trail, heading north.  The trail took us through some storm-damaged areas of trees, leading us through one of the two ascents on this trail.  We gained about 500 feet up to Compton Peak.  At 1.4 miles, we reached a post which pointed out to two short blue-blazed trails that lead to views from Compton Peak.  Since we knew there wasn’t going to be many views on this trail, we decided to take a left and check out the West Compton Peak view.  This side trail of .2 miles was a rocky uphill trail that led to a small, but scenic viewpoint.  We made our way back the way we came to reach the post and then took a left to continue on the Appalachian Trail heading north.  The trail descended again, as we dropped 500 feet in about .8 miles.  If you did the side trail to Compton Peak, add another .3 miles to any of the distances given from this point forward.  At 2.2 miles on the AT, you cross over Skyline Drive at Compton Gap.  At 2.4 miles, you reach a junction with the Dickey Ridge Trail and at 2.7 miles, you reach a junction with the Springhouse Trail.  The Springhouse Trail allows for horses and actually shares the next section of the AT, which is why you will see both yellow and white blazes.  The trail is fairly level at this point.

At 3.8 miles, you reach a junction with the Compton Gap Trail.  This is where horse-riders would come off the AT, since they are not allowed further on the trail.  Take a left here to stay on the white-blazed AT.  You will soon come across an area where backpackers can fill out paperwork for backcountry camping permits and continuing further, you will reach the Shenandoah National Park boundary at 4.0 miles.  Within a short distance, you reach the area known as Possums Rest, a very small overlook that has some views.  The trail at this point goes down a very steep and rocky area as you go below Possums Rest.  The trail descends for most of the rest of the way At 4.7 miles, you reach the Tom Floyd Wayside shelter, which also has tent sites, a privy, and a nearby spring.  Continuing from the Tom Floyd Wayside, you descend further, passing by other signs for the spring.  At 5.1 miles, you reach a junction with a side trail to VA-601.  From here, you have a couple of stream crossings over Moore Run and at 6.5 miles, the trail crosses VA-602.  The trail at this point goes up a steep upgrade, as you gain over 300 feet in .4 miles.  Once you reach the crest of the hill at 6.9 miles, the trail descends again as you go through a grassy area.  You walk along a long fenceline and behind some people’s houses before reaching the boardwalk which takes you back to your car at 7.7 miles.

Spelunkers
Decadent lunch at Spelunker’s in Front Royal – cheeseburger and a gingersnap milkshake!  Below: The Smithsonian National Zoo has a conservation facility in Front Royal; If you’re lucky, you might catch a glimpse of the animal – we saw some kind of antelopes; A sweaty selfie at the finish line.

Smithsonian Antelope Selfie

Once we made our way back to the car, we stopped at Spelunkers.  There was a large bike ride being conducted nearby, so the place was quite crowded.  One of the great things about hiking for us is that it allows us to eat whatever we want after a hike and not worry about the calories.  We made our way from there back to our first car and then headed out of the park.  It was a gorgeous day for a hike with perfect temperatures.

While this hike isn’t the most scenic, this was definitely one I will remember since it was our “finish line” though SNP.  I’m so grateful to have a wonderful hiking partner to share all of these experiences.

Trail Notes

  • Distance – 8 miles (includes a visit to the Compton Peak viewpoint)
  • Elevation Change – About 1900 ft. but mostly downhill.
  • Difficulty – 2.5.  There are really only two climbs on this hike – one up Compton Peak and one shorter one near the end of the hike.  All in all, it’s a moderate, mostly downhill hike.
  • Trail Conditions –  4.  Nicely maintained section of the Appalachian Trail.  In fact, we saw a crew member trimming grass back when we hiked.
  • Views – 2. The view from Compton Peak is decent, but it’s not actually on the trail.  Possums rest is small and a bit obstructed.
  • Streams/Waterfalls – 2.  Moore Run was flowing nicely when we visited.
  • Wildlife – 2.  You may get to catch a glimpse of zoo animals at the Smithsonian facility at the end of this hike!
  • Ease to Navigate – 3.  There are lots of trail junctions and shared paths.  Just make sure you follow the white blazes and you’ll be fine.
  • Solitude – 2.  We saw many dayhikers and backpackers on this stretch of trail.

Download a Trail Map (PDF)

Directions to trailhead:  We parked one car at the parking lot on US-522 in Front Royal, which is 4.7 miles from where US-340 intersects with US-522.  We then drove to northwest on US-522 for 2.8 miles.  Take a left on E. Criser Road.  In .7 miles, take a left on US-340.  In .2 miles, take a left to enter Shenandoah National Park.  Drive 12.3 miles to park at the Jenkins Gap parking lot on the right.  Join the Jenkins Gap Trail from the parking lot for a short distance, before taking a right on to the Appalachian Trail, heading north.

Trayfoot Mountain – Paine Run Loop

This 9.5 mile loop in the southern district of Shenandoah National Park offers vistas, streams and quite a bit of solitude!  We think it would make a great short backpacking loop with a beautiful stream-side campsite along Paine Run.

View the Full Album of Photos From This Hike

Adam Enjoys the Blackrock Summit
Adam Enjoys Blackrock summit. Below: Adam hikes the Appalachian Trail just north of Blackrock Gap; Christine climbs on the rock pile; Adam spots the spur trail that leads to the Trayfoot Mountain Trail.

Adam Hikes the AT Christine on Blackrock Summit Spur Trail

Christine Says…

Every weekend this April has provided glorious hiking weather! I’m feeling so grateful that we’ve been able to get out so often and take full advantage of the warm, sunny days. On the Saturday before Easter, we chose to hike the challenging 9.5 mile Trayfoot Mountain – Paine Run loop.

This hike begins at the Blackrock Gap parking area (not to be confused with Blackrock summit parking). From the lot, cross to the eastern side of Skyline Drive and make your way north along the Appalachian Trail. After a couple tenths of a mile, the trail crosses back over the drive and heads steadily uphill for a little over a mile. As you climb, you’ll come to a junction – stay on the white-blazed AT, the turn to the right goes to the Blackrock shelter.

At 1.3 miles into the hike, you’ll reach a cement marker for the Trayfoot Mountain Trail. Do NOT take this turn unless you want to miss the splendor that is Blackrock Summit! Continue another tenth of a mile to the massive jumble of boulders and jagged rocks that makes up this impressive summit viewpoint. We took some time to enjoy the views and climb on the rocks. The views from this spot are probably the best on the entire hike, although there are a couple more nice spots yet to come.

Christine in the Maze
The trail passes through a corridor of rock. Below: Adam passes through the narrow opening; Climbing Trayfoot Mountain; From the ridgeline of Trayfoot there are several openings in the trees that give you views of a distant Skyline Drive.

Rock Corridor Climbing Trayfoot Skyline Drive

The Appalachian Trail skirts around the front edge of the summit before coming to a spur trail that leads down to the Trayfoot Mountain trail. The spur descends through a corridor of flat-sided slabs. When spur reaches the junction with the Trayfoot Mountain trail, turn right and follow the trail uphill along an old fire road.

The uphill climb along this section is steady going! Near the top, you’ll pass another marker pointing toward the Furnace Mountain trail. Pass this and continue on the Trayfoot Trail until you reach the cement post marking the summit and high point of your hike. There are no views from this summit, but this starts the beginning of a lovely, easy ridge walk.

The ridge rolls gently along, offering nice views of the Paine Run valley and a distant glimpse of Skyline Drive. The trail eventually begins a long gradual descent to Paine Run. Your last sweeping vista on this hike comes at a pretty outcropping of rocks overlooking pointy Buzzard Rock.

Switchbacks take you swiftly down to Paine Run.   Near the first stream crossing, a cement marker points you left onto the yellow-blazed Paine Run Trail, which is essentially an old roadbed. There were several stream crossings on this section of trail. All of them but the second crossing were easy. We found the stream wide and flush with water. Most of the stones people use to cross were underwater. Instead of trying to attempt the rock-hop, we took off our shoes and waded across. Refreshing!

Buzzard Rock View
You get a nice view of Buzzard Rock before descending to Paine Run. Below: Some interesting rock formations along the trail; Lunch stop; Glimpses of farm land.

Rock Walls Lunch Spot Farmland

The Paine Run trail is very pleasant for a couple miles – sounds of running water and mountain views through the trees. When we hiked, the stream was flowing with lots of rapids and tiny waterfalls. I imagine it will run low and dry later in the summer. The path climbs so gradually you hardly notice you’re ascending! Eventually, you leave the streamside and head back toward Skyline Drive. After one final sharp switchback, you have one more moderately steep ascent back to your car.

All in all, I was pleasantly surprised with both the views and streams on this route. We had a great time!  MapMyHike said this hike is only 9.3 miles, but all other sources put it at 9.7-9.8… so who knows!

Adam Says…

We feel like we have covered so much of Shenandoah National Park on our blog, but it seems there is always another trail or loop that you can try.  We talked about  a hike to Blackrock summit before in our coverage of an AT segment, but this is a longer loop version that offers a few additional views and a stream to enjoy.  Other than the Blackrock summit, you will likely not see a lot of people on this trail.  We only saw a few people the entire day, which was a little shocking for a beautiful weekend day that happened to also be a free National Park entry day.

As Christine mentioned, you could skip the Blackrock summit trying to follow the signage, but you don’t want to miss the best part of the hike.  When we hiked previously, our route bypassed the spur trail that leads to the Trayfoot Mountain Trail.  This spur immediately gives you some additional views and some interesting rocks to scramble around.  Most people that are doing an out-and-back just to the summit from the northern approach will miss this area also.

First Attempt
Adam makes a first attempt to cross (with shoes). The second (successful) attempt was barefoot. Below: Adam descending to Paine Run; The shoeless crossing attempt, The trail goes right through the middle of the stream.

Descent to Paine Run Shoeless Trail

One thing that Christine and I both mentioned throughout the day is how this would make for a great overnight backpacking loop.  If you choose to do so, I would tackle all of the tough uphill climbing the first night, making your way through the Trayfoot Mountain trail and camp somewhere near Paine Run.  This will provide a great water source and there were some nice campsites near the water.  The following day, you’ll just have a steady, but not too strenuous hike back uphill to your car.

When we started walking the ridgeline of the Trayfoot Mountain trail, I felt like we stumbled across the best place I’ve ever seen to spot grouse.  We encountered three along our walk.  A couple of years ago, while hiking in Great Smoky Mountains National Park, we encountered our first grouse on a trail.  The beating of its wings created a strange echoing syncopation in our chest which made us both wonder if our heartbeats were going haywire.  Seeking sources online, we found it was a common sound for mating grouse.  We actually spotted several on this trail and when they took off in flight, we could briefly hear that same noise that perplexed us before.  What a relief to actually spot the culprits this time.

Paine Run Trail
Christine walks the wide, gradually ascending Paine Run Trail. Below: We found several blown-down bird’s nests along the trail; Pretty Paine Run; Another stream crossing.

Birds Nest Paine Run Another Crossing

Further along the Trayfoot Mountain Trail, we climbed up on a few rocks to enjoy our lunch and get some views.  I managed to pick some rocks which were not in the least bit contoured to our bodies, which made for an uncomfortable sitting.  It reminded me of how fast food chains design their seating area so the chairs are only comfortable for a short amount of time to prevent loitering.  We quickly ate and moved on.

Around the 4.0 mile marker, the ridge line ends at a nice rock outcropping which gives you some last views before descending towards Paine Run.  Some local families like to park on the western outskirts of the park and hike up to this area for views.

When we reached Paine Run, the water was a little high from the recent rains.  There were a few places to rock-hop across.  In one spot, we did have to shed our shoes to make our way across.  Christine said I looked like a hobbit with my pantlegs pulled up halfway as I crossed.  I responded back in my geekiest way, “May the hair on my toes never fall off.”  I will say the water was very cold, but it felt so refreshing to my feet.  The sensation of the freezing water made me feel as if I had just received a nice massage on my feet.  After the refresher, I felt I could hike a lot longer.

Horses
The Paine Run Trail is popular with horseback riders. Below: The final ascent to the parking area; We spotted a bear on the drive home; Before we went home, we stopped for famous Shenandoah blackberry ice cream.

Final Ascent BearIce Cream

The stretch on the uphill Paine Run trail was very gradual.  While some people may think this was more of a boring stretch, I enjoyed the views of Paine Run along the side.  There were even a few very small waterfalls to enjoy since the water level was high.  We also came across a group horseback riding along the trail.  All yellow-blazed trails, like the Paine Run trail, in Shenandoah National Park allow horses on the trails.  This would be a great trip to take down to the water and let the horses rest and get a drink before returning.

We got back to our car and then heading north along Skyline Drive.  Within a few miles, I spotted a young black bear on the side of the road.   We were excited to have our first bear sighting of the year.  The bear quickly ran away once it knew it was spotted, but we hope we get to see many more this year.  We stopped at the Loft Mountain wayside to get our first blackberry milkshake of the year.  Appalachian Trail thru-hikers talk about these treats for days in advance of getting to Shenandoah and the hype is worth it.  However, their milkshake machine was broken and we had to settle for blackberry ice cream.  It was still a just reward for a long hike.

While we realize this hike is longer and not as popular as some of the others in the park, this hike really has some nice gems along the trail.  I was pleasantly surprised at what this had to offer!

Trail Notes

  • Distance – 9.5 miles
    (Check out the stats from Map My Hike)*
  • Elevation Change – About 2200 ft.
  • Difficulty – 3.5.  The climbs to Black Rock summit and Trayfoot Mountain can be a little steep, but the climb from Paine Run back to the parking area is very pleasant and gradual.  The length adds to the difficulty rating of this hike.
  • Trail Conditions – 4. The trail was clear and in great shape!
  • Views – 5.  The views from Black Rock summit are spectacular.  While the summit of Trayfoot Mountain has no view, there are other nice views from the Trayfoot Mountain trail – especially the outcropping that overlooks Buzzard Rock.
  • Streams/Waterfalls – 3.  Paine Run was surprisingly pretty and broad in the early spring.  As we hiked up the Paine Run trail, we had many stream crossings and nice views of the water.
  • Wildlife – 3.  We saw deer and lots of grouse on the trail.  We also saw a black bear shortly after leaving the parking area to come home!
  • Ease to Navigate – 4.  There are only a few, well-marked turns on this hike.
  • Solitude – 4.  We saw a few people near the stream that had come in from the western perimeter of the park, a few people on Black Rock Summit, and a trio of women on horses.  All-in-all, we enjoyed a lot of solitude for a long stretch of trail on a pretty ‘free park entry’ day!

Download a Trail Map (PDF)

Directions to trailhead: Located in the Southern Section of Shenandoah National Park.  Park at the Blackrock Gap parking lot around MM 87.3.  Cross the road and find the cement post for the Appalachian Trail.  Take a left, heading north, to start your hike.

MapMyHike is not necessarily accurate, as the GPS signal fades in and out – but it still provides some fun and interesting information.

Appalachian Trail – Dripping Rock to Rockfish Gap

This 14.5 mile section of the Appalachian Trail includes great views of Wintergreen Resort from Humpback Mountain.  The campsite for the evening is the Paul C. Wolfe Memorial Shelter, which is located on the bank of lovely, rushing Mill Creek.

View the Full Album of Photos From This Hike

Hiking Over Humpback Mountain
Adam traverses Humpback Mountain.  Below: We found trail magic right away on our hike; Adam climbing the southern side of Humpback Mountain; Rock walls along the trail.

Trail Magic Adam Hiking Rock Wall

Day One

For Christine’s birthday this year, we decided to do a quick overnight backpacking trip along the Appalachian Trail.  Following an all-day soaking rain and a cold front on Saturday, we had ideal weather for hiking and camping on Sunday into Monday – low humidity, clear skies, daytime highs in the 70s and a nighttime low near 45. It was perfect!

We started our morning with a big breakfast at Thunderbird Café and then made the 40 minute drive to the trailhead.  For this hike, we left one car parked in the small lot near where the Blue Ridge Parkway (BRP) crosses I-64 and Rt250.  From there, we drove our second vehicle to the Dripping Rock parking area at mile 9.6 on the BRP.  The name Dripping Rock refers to the small spring adjacent to the parking area.  Supposedly, it was a water source well-used by Monocan Indians en route to summer hunting grounds.

The AT crosses the parkway at this point, so it’s an easy place to hop on without using any access trails or spurs.  The hike starts out climbing gently uphill through the woods.  Almost immediately, we spotted a small cooler alongside the trail – trail magic!  We didn’t need (or take) any trail magic on our hike, but we were curious so we opened the cooler to see what was inside.  We found a log book, a camera, a small whiteboard, a bottle of ibuprofen and a nice supply of granola bars.  The camera and whiteboard were provided so that hikers could take photos with their trail names.

A couple tenths of a mile down the trail, we passed even more trail magic in the form of 2 liter-sized bottles of tap water from Wintergreen Resort.  Typically by September, streams and springs in the Shenandoah Valley are dry or running very low, so the free, clean water would be quite welcome.  The bottles were situated next to one of the trail’s spring-fed water sources.  We noticed the sign marking the spring indicated that water might be contaminated and should be filtered or boiled.  The sign included an outline drawing of a moose, and we both found it comical to think about the implausibility of Virginia water being contaminated by a moose.

Wintergreen View
Christine enjoys the outcropping overlooking Wintergreen.  Below: Hiking up Humpback Mountain; Adam checks out the view of Wintergreen; Pretty views.

Christine Hiking Wintergreen Views

The hike continued gradually uphill along the side of Humpback Mountain.  We saw several nice campsites along the trail.  Soon after that, the views started to open up.  We didn’t really have any expectations for great views on this hike.  We figured we might take the side trail to Humpback Rocks and eat lunch there.  We also knew from past hikes on Dobie Mountain that we’d be passing one decent overlook at Glass Hollow.  However, we were pleasantly surprised to find spectacular views along the rocky, spiny ridge of Humpback Mountain. These views are about 2.5 miles from the better known outcropping of Humpback Rocks, and we thought they were even nicer!  The crowds, graffiti and car noise always take away from the experience at Humpback Rocks. We had this lofty ridge all to ourselves.

We took some time to take off our heavy packs and enjoy the view.  We could see the Priest, Three Ridges and the slopes of Wintergreen Resort.  When we got home, we read more about this section of the trail and learned that the view is named Battery Cliff, because the condos on the slopes of Wintergreen look like fortifications from a distance.  The rocks on the cliffs are Catoctin greenstone formed in an ancient volcanic eruption.  When you sit on these rocks and look across to Wintergreen, you’re looking over to where the Appalachian Trail used to traverse the mountains.  Five miles of the trail used to cross the resort.  But in 1983, the resort sold the land to private developers – basically pulling the rug out from under the Appalachian Trail Conservancy.  Luckily, the organization was able to quickly pull funds together and preserve the land across Humpback Mountain – where the trail currently sits.

Leaving the open ridge, we dipped back into the woods and continued walking along a long, impressive stretch of stone ‘hog wall’.  People living in the area before the establishment of the parkway built these long walls to roughly mark property and attempt to contain livestock.  Eventually we arrived at a junction, one direction headed toward Humpback Rock and the other continued downhill along the Appalachian Trail.  We decided to skip the extra mileage it would take to visit the Rock and continue toward our destination.  We’ve seen the Rocks many times and didn’t really want to face the crowds that arrive with beautiful-weather Sundays.

Hog Wall
Adam walks along one of the many hog walls.

As we walked downhill, we started contemplating our lunch break.  We decided that the next spot with good ‘sitting rocks’ we’d stop for lunch.  As it turned out, the next rocks we found were just a few, big random flat boulders right alongside the trail. We had lunch of apples, peanut butter, cheese, and energy bars.  As we ate lunch, two groups of people passed us – a couple with their dog and a man who had just visited his daughter at JMU’s family weekend.  All in all, we only saw a total of eight people over the entire ten miles of hiking that day.  The solitude was nice!

After lunch, we continued the 5.5 mile descent toward our evening stop point.   The trail was in great shape and the downhill was easy going.  At the bottom of Humpback Mountain, the Appalachian Trail intersects with the Howardsville Turnpike – an old toll road that was heavily used to transport goods before the Civil War.  It’s long been reclaimed by the forest, but the wide, flatness of the trail still has the definite feel of a well-traveled road.  We continued along the Appalachian Trail until we spotted a small sign marking the Glass Hollow overlook. We followed the short access trail and spent a good twenty minutes relaxing on the beautiful rocky viewpoint.  The views this time were much clearer than they had been two years ago when we visited.

Glass Hollow
Taking in the view at Glass Hollow. Below: Trail lunch, AT logos carved on deadfall; Pretty trail with late season wildflowers.

Lunch AT Logo Pretty trail

After leaving the overlook, we continued along the Appalachian Trail, passing the junction with the Albright Loop Trail – a popular day hike in this area.  From this junction, you can follow the Albright Trail for two miles back to Humpback Rocks parking.  We continued northbound on the Appalachian Trail, descending Dobie Mountain.  The trail follows a series of gradual, well-graded switchbacks.  There is one nice view of the valley about halfway down the mountain.  Eventually, we started hearing the sounds of running water through the trees. After crossing Mill Creek, we arrived at our stop point for the evening – the Paul C. Wolfe shelter.  This shelter is one of the nicest we’ve seen. The location is beautiful, the picnic table is on the porch and the shelter has sidelights, so it’s bright and cheerful inside.  So many shelters are gloomy and dark.  We will caution you – the privy at Paul C. Wolfe shelter is kind of weird – the door is only a half-door.  When you sit on the toilet, you have a nice view – but people can also see you sitting there.

We were the first campers to arrive for the night, so we got a prime campsite near the banks of Mill Creek.  We had our own established fire pit and our own bear pole – fancy!  We immediately got started setting up camp and taking care of necessary chores.  Mill Creek was running beautifully, so we had a clear, cool water source to filter from.

Camp
Our nice campsite along Mill Creek. Below: Overlook on the descent of Dobie Mountain; Junction with the Albright Trail; Crossing Mill Creek

View from Dobie Albright Intersection Crossing Mill Creek

We decided to take our dinner up to the shelter so we could use the picnic table for meal prep.  Dinner consisted of pepper steak, wine and dark chocolate cheesecake.  As we were finishing up dinner, a southbound thru-hiker named Nightwalker arrived at camp.  He told us he had hiked almost 30 miles that day. He was from the Boston area and freshly out of high school.  We chatted with him a bit and marveled at him eating huge handfuls of candy corn mixed with Skittles.  He had the look of a true trail-weathered hiker – beard, tattered long-johns and feet held together by duct tape.

When the sun was going down, we headed back to our own camp.  Despite the heavy rains the night before, we were able to find enough old wood to have a small campfire for a while.  We heard another southbound hiker arrive sometime after sunset, but we never met him.  With the temperatures dropping with the darkness, we headed to bed around 9:00.  Both of us slept pretty well, but Christine woke up around 3:00 a.m., struggling to close both of the doors in the tent fly.  It was in the upper 30’s and she’s a cold sleeper.

Campfire
Our nice little campfire. Below: Adam filtering water; The Paul C. Wolfe Shelter; The steep climb that starts Day 2.

Filtering Water Shelter Climb Behind the Shelte

Day Two

We were up at first light, but noticed both the thru-hikers were still sleeping.  We didn’t want to disturb them, so we cooked our breakfast of oatmeal, cheese, coffee and hot chocolate near the fire pit at our campsite.  We were packed up and back on the trail within 45 minutes of waking up.

The morning’s hike consisted of a rather steep climb up Elk Mountain.  From the back of the shelter, the trail climbed almost straight up via a series of switchbacks.  We had about 1000 feet of climbing in just about a mile.  A8fter that, the remainder of the hike was more moderate or even gently downhill.

Mayo Cabin
The remnants of an old cabin sit right along the trail. Below: Approaching Rockfish Gap; We can see Rt. 250; Waynesboro’s great network of trail angels.

Done The Gap Trail Angels

The five miles of trail back to Rockfish Gap are largely unremarkable; just a nice walk through the woods.  There are a few small stream crossings, but no views along the way.  The one noteworthy feature would probably be the ruins of an old cabin, about 1.7 miles north of Paul C. Wolfe.  The chimney and hearth are still standing right alongside the trail.  Evidently, there is also a cemetery for the Lowe family and additional cabin ruins somewhere east of the trail, but we didn’t see it.  The trail exits onto Route 250 at Rockfish Gap through an opening in the guardrail.  Thru-hikers can find lists of trail angels at the guardrail opening.  Waynesboro has one of the best organized trail angel networks along the AT.  It’s easy to find a ride or shelter at this point on the trail.

We arrived back to our car around 10:30 in the morning.  By the time we shuttled back to our car parked at Dripping Rock, we were already thinking about lunch.  We realized how close we were to Devil’s Backbone Brewery and decided it was a perfect place to wrap up our backpacking weekend.  We had a huge lunch – beers, a big soft pretzel to share, and sandwiches (French Dip for Christine, BBQ for Adam). After lunch, we decided to take Rt. 151 back to Waynesboro.  This allowed us to also pass Bold Rock Cidery.  It’s definitely worth a stop if you enjoy hard cider.  Since it was a Monday, we were the only people there.  We got to go behind the scenes into the cider pressing room and the fermentation/bottling facility.  That was really neat!

Bold Rock
The tasting room at Bold Rock. Below: Enjoying a post-hike beer at Devil’s Backbone.

Devils Backbone

Trail Notes

  • Distance – 14.5 miles (9.5 miles on Day One, 5 miles on Day Two)
    (Check out the stats from Map My Hike – [Day One] [Day Two])*
  • Elevation Change – 1800 ft. on Day One, 1100 ft. on Day Two
  • Difficulty –  2.  This is an easy backpacking trip with moderate, well-graded climbing.
  • Trail Conditions – 4.5.  Trails are in excellent shape.
  • Views – 4.  Views from Humpback Mountain and Glass Hollow are beautiful!
  • Streams/Waterfalls – 3.  Mill Creek is pretty and a great water source.  There is a small waterfall and swimming hole downstream from the shelter.
  • Wildlife – 2.  We saw a few deer and heard owls at night.
  • Ease to Navigate – 4.   There are several intersections/junctions to pay attention to, but following the white blazes is pretty easy.
  • Solitude – 4.  Because we avoided Humpback Rock, we only saw a small handful of people on a beautiful Sunday.  

Download a Trail Map (PDF)

Directions to trailhead:  Follow the Blue Ridge Parkway to mile 9.6.  Park in the small Dripping Rock parking area.

MapMyHike is not necessarily accurate, as the GPS signal fades in and out – but it still provides some fun and interesting information.

Silers Bald (NC)

Special: Smokies Edition

Introductory Guide to Visiting Great Smoky Mountains National Park

This ten-mile hike follows the Appalachian Trail along the Tennessee-North Carolina border.  Most of the hike is above a mile high, so in open spots you get some very impressive views of the Smokies.  The bald itself is rather disappointing, as it’s been mostly reclaimed by the forest, but we did enjoy the vistas and visiting two Appalachian Trail shelters.

View the full album of photos from this hike

Views from High
Since much of the hike is along a mile-high ridge, views can be spectacular (when you’re not in the clouds). Below: Adam climbs the foggy path to the Clingmans Dome Observation Tower, The tower looks kind of like a space ship; The Appalachian Trail in the fog.

Walking the Path to Clingmans Dome Clingmans Dome Observation Tower in the Fog Appalachian Trail in the Fog

Christine Says…

This is a hike we planned on doing on our Spring 2012 Smokies trip, but we had so much stormy weather that we didn’t want to risk a long, mostly unprotected hike along mile-high ridgeline. So, we settled for the shorter trip to Andrews Bald. In the end, it actually turned out that Andrews Bald was a larger, more scenic bald than Silers. But, we still found many reasons beyond the slightly disappointing bald to enjoy this hike.

We started pretty early on Tuesday morning, after a lavish breakfast at The Pancake Pantry (Swedish Crepes with lingonberries!!). It was sunny in Gatlinburg, but as we made the drive toward the summit of Clingmans Dome, clouds began to envelop the mountain. At the very top, we were completely socked in. We knew it would burn off over the course of the morning, so we started the climb up the paved road to the observation tower.

From there, we picked up the Appalachian Trail. We followed it, descending downhill, sometimes steeply and sometimes gently. There were some sections of descent that caused Adam and I to look at each other and say ‘This is not going to be a fun climb back up!’

Since we were completely in the fog, we had no idea what views or scenery the trail would have to offer on the return hike. It was almost like doing one hike in the morning, and a completely different hike in the afternoon. I kind of like that!  Also, the fog made the woods extremely beautiful and mysterious.  There’s just something about mist and evergreens!

Red Trillium
Because of the high elevation, a lot of earlier season wildflowers were still blooming. This red trillium was especially pretty! Below: Many different kinds of moss grow abundantly in the high country here; Flowering tree; Wildflowers along the trail.

Moss Flowering Tree Wildflowers

We saw lots of wildflowers, including some spectacular red trillium that Adam spotted. We listened to birds singing in the fog and watched the sky become increasingly brighter.

When we came to the first vista that wasn’t covered by fog, I got out my wide angle lens. Unfortunately, it had been sitting too close to my icy cold CamelBak water bag, so as soon as I got it out, it fogged up so badly I couldn’t take a single photo until it acclimated and dried out.

By the time we got to Double Springs Shelter, larger patches of blue were already opening in the sky. We took some time to read the shelter journal – lots of fun entries.

From Double Springs, the trail seemed to ascend and descend repeatedly. We watched the mileage on our GPS and thought that it was about time that we should be approaching the bald. Honestly, we could have passed it without notice. It wasn’t really much of a bald. It had been described in our guide as ‘a large, mostly grassy bald with a few heathers and berry bushes’. What we found was a small clearing with no grass, covered completely by tall bushes.

Mossy Woods
The forest is so beautiful, dense and ethereal.

We thought ‘This can’t possibly be it!?’ But, it was – as confirmed by GPS data and our imminent arrival at the second shelter – Silers Bald Shelter. We ate lunch at the shelter – Subway and these awesome locally-made trail bars by Granola Naturals (Toffee and Chocolate Granola Crunch Bar – YUM!) that we picked up at the NOC.

Right after lunch, we headed back the way we came. The hike back was tough, hiking ten miles after climbing LeConte the day before was probably not the best plan. But when we’re in the Smokies – we hike ‘til we drop.

Most of the way was hard, but not unbearably tough. However, the last push to Clingmans Dome was about a mile of very steep climbing. My legs were screaming and all I could think was ‘put one foot in front of the other, repeat, repeat, repeat’. The only thing that softened the pain of the climb were the spectacular views! These views made me oooh and ahhh repeatedly. Despite my exhaustion, I kept thinking ‘This is so darn gorgeous – worth every sore muscle and drop of sweat!’

There is nothing like hiking a mile-high ridge that offers views of the Smokies rolling out beneath you.

Inside the Double Springs Shelter
Adam checks out the shelter log at the Double Springs shelter.  Below: Arriving at the shelter; It was interesting to read entries.  Many thru-hikers struggled through deep snow in the Smokies.

Double Springs Log Book

Back at the Clingmans Dome observation tower, we were met by massive crowds. Lots of people had questions and made comments about our trekking poles. An older guy called us ‘show-offs’ – not really sure why, but it was done jokingly. Adam and I really enjoyed seeing our first clear view from the tower. The two previous visits had both been low visibility/cloudy, so this visit was a real treat!

After the hike, we headed back into town for a massive feast on Mellow Mushroom pizza followed by Kilwins Ice Cream and free samples of just about every wine, whiskey and moonshine offered in Gatlinburg. I think the town offers so many free alcohol samples to loosen tourists’ purse-strings. After 14 moonshine samples, who knows – you may just wake up owning a new airbrushed t-shirt that says ‘Sexy and I Know It’ (not that I did that).

Adam Says…

Christine and I had tried to get into good hiking shape for our trip to the Smokies.  We had grand ideas of all we wanted to accomplish – Christine had picked about 120 miles of hiking trails she wanted to do.  Christine did a much better job than I of getting in to shape.  Accomplishing this 10 mile hike after finishing about 11.5 miles of hiking through steep terrain up Mount LeConte the previous day, took a toll on me.  Since this hike is almost all downhill until you reach the bald and the shelter, I was dreading the return trip.

We enjoyed our trip last year to Andrews Bald where we were able to relax at a scenic spot from the bald area.  Silers Bald is not very “bald” at all.  In fact, I would say it doesn’t even show much of a receding hairline.  But, there were some nice views along the trail elsewhere.

Silers Bald
Silers Bald was less impressive than we expected.  Evidently, 100 years ago, balds stretched from Clingman’s Dome all the way over to Gregory Bald (which is hiked from Cades Cove).  The land was used for grazing.  Since becoming a park, nature had filled most of the bald terrain back in.  Below: One of our first views of the day not covered by clouds; As we approached Silers Bald, the forest changed from pines to grass and deciduous trees; Another view of Silers Bald.

First Views Forest Change Another Look at the Bald

As Christine mentioned, we started off the hike in the thick fog.   Visibility was minimal.  We were hoping that the hike would be similar to our first hike up Mount Rogers, where it felt like a different hike on the return trip.  Luckily, the fog lifted to give us this same experience.  It also made us feel that we were continuing to hike to get the best views; otherwise, this hike would have been more of a disappointment if we had the best views early.

We started off by hiking from the Clingman’s Dome parking lot up the steep hill for .5 miles.  The walk on the paved road is short, but very steep.  There is a reason there are benches on the side of the paved trail. – it can be a challenge for those out of shape.  Most of the people that are visiting Clingman’s Dome will just walk up the paved trail and return without venturing further.  Expect to see a ton of people on this part of the trail, but you’ll have a lot of seclusion for the rest of the trail.  After you near the winding tower of Clingman’s Dome, take the trail to the left that begins your hike on the Appalachian Trail.   You’ll stay on the Appalachian Trail throughout your hike.  At .75 miles, the trail opens up into an area filled with views along the trail.  Continue to go downhill (you’ll descend about 1100 feet over a little over the next two miles).  At 2.75 miles, you’ll reach a junction with the Goshen Prong Trail.  Continue to go downhill and at 3.25 miles, you’ll reach the Double Spring Gap Shelter.  The trail goes up and down slightly over this next section and at 3.75 miles, you’ll reach a smaller bald area known as Jenkins Knob.

Hiking Back
By the time we hiked back, skies had cleared and we had better views.  Below: Silers Shelter – our lunch stop; The return hike had some tough climbing.

Silers Shelter Lots of Clumbing

We found Jenkins Knob to be a little more impressive than Silers Bald in terms of views and openness.  The trail continues to mostly go downhill until it finally bottoms out around 4.5 miles.  At this point, the trail begins an uphill climb to Silers Bald.  At 4.7 miles, you pass the junction with the Welch Ridge Trail.  The trail becomes quite steep at this point until you reach the top of Silers Bald.  We found a USGS benchmark on the ground to signify the top of Silers Bald.  The trail begins to descend from the benchmark and opens up to the area that is Silers Bald.  The trail goes through the small bald area and reaches the Silers Bald overnight shelter at 5.1 miles.  Retrace your steps, largely uphill, to make your way back.

Back to Clingmans Dome
The views were much better from the tower on the return leg of our hike. Below: Adam at the end of the hike; Views from the observation tower.

Back at the Tower Views from the Tower

We were dreading the climb back up, especially after hiking up Mount LeConte the day before, but we were rewarded with great views as the fog and clouds lifted.  As we reached the paved trail to Clingman’s Dome, we climbed up to the top of the tower and we really felt like we earned the 360-degree views.  The elevation is 6643 feet (the tower adds another 45 feet) and you can stand at the top of the tower knowing you are at the highest part of the Great Smoky Mountains.  This spot is actually the third highest peak east of the Mississippi, to only be beaten by Mount Mitchell and Mount Craig.  We enjoyed spotting Mount LeConte from the tower, since it is the sixth highest peak east of the Mississippi.  We were ecstatic to see views from Clingman’s Dome, since the last two times we had visited we had clouds hanging on the mountain.  The clouds were still taking up a lot of the skies, but it didn’t prevent us from seeing miles of mountain ranges around us.

Christine mentioned that we enjoyed going back to Gatlinburg, TN and eating some pizza and drinking some free moonshine and whiskey samples.  While we didn’t feel the need to buy cheesy T-shirts, I definitely felt the need to visit the Hollywood Star Cars Museum.  While Christine waited for me, I toured around quickly but the highlight for me was to sit in the Batmobile from the 1966 TV show with Adam West.  I grew up watching re-runs of that show and it was my older brother’s favorite show as a child, so it was great to have something to make him jealous.  You can pay a little extra on the tour to have your photo taken within some of the cars.  I also got to see Ecto-1 from Ghostbusters,  a DeLorean from Back to the Future, KITT from Knight Rider, and the General Lee from the Dukes of Hazzard.  It’s a neat place to check out if you’re into Hollywood cars.

Trail Notes

  • Distance10 miles
    (Check out the stats from MapMyHike)*
  • Elevation Change – About 2200 ft. – it looks like closer to 1500 ft on GPS, but with all the rolling climbs it adds up to quite a bit more!
  • Difficulty – 4. The climbing and descending never seem to end on this hike.
  • Trail Conditions – 4.  This was mostly nice, well-worn Appalachian Trail walking.  The climb to the observation tower in paved.
  • Views – 3.5.  Very nice, but not quite panoramic.
  • Streams/Waterfalls – 0. None on the hike.
  • Wildlife – 2. We saw a lot of fresh bear scat on the hike, but no bears.  Clearly, they frequent the area.
  • Ease to Navigate – 4.  The trail is well-marked with white blazes and signed at each junction.
  • Solitude – 3.  Expect thick crowds at the observation tower, thinning toward Double Spring Shelter.  After Double Spring, we only saw a couple people.

Directions to trailhead:  From US-441, head south a short distance from Newfound Gap.  Take a right on to Clingmans Dome Road.  Go 6.4 miles until you reach the large parking lot area.  The paved trail up to Clingmans Dome starts at the end of the parking lot, passing a visitors center/gift shop.

* MapMyHike is not necessarily accurate, as the GPS signal fades in and out – but it still provides some fun and interesting information.

Fridley Gap Loop

This six-mile loop hike in the Fridley Gap area of George Washington National Forest has everything – views, waterfalls, beautiful stream scenery, rugged climbing and great backcountry camping.  It’s a perfect hike to get away from the crowds in Shenandoah National Park.

View the full album of photos from this hike

Adam at the Overlook
If you miss spotting the faint side trail behind one of the many backcountry campsites along this loop, you’ll miss the best view of the hike! Below: Adam crosses the stream; A small waterfall on the stream; This loop has many choices for backcountry camp sites.

Adam Crossing Fridley Run Smal Waterfall Backcountry Site

Adam Says…

Last year, we made an attempt to do this Fridley Gap loop hike, but we had trouble finding one of the trails.  We bushwhacked for a while, but finally gave up.  This time when we returned, we had better directions and the blazes had recently been repainted on much of the loop.

From the top end of the parking lot, we started on the trail.  We saw both purple and blue blazes early on, and started to worry.  (Fortunately, it turned out that this was the only section of the trail that hadn’t been recently re-blazed.)  Early parts of the trail traverse large rocks, and it’s sometimes tough to see exactly which way the trail goes. We saw faded red Xs painted on the surface of some of the rocks which let us know that we were going the right way.  The trail is uphill but not too steep.  In .2 miles, you come to a fire road.  Take a right here and continue on the fire road.  You will pass by some small falls and Mountain Run to the right and a large boulder slide to the left.  The trail actually follows the streambed, and you will need to rock-hop to continue on.  At .45 miles, you will reach another falls area and you will cross over Mountain Run until you see the trail junction cement post.  This is also the point that Mountain Run and Fridley Run join.  It was at this point that we failed last time trying to find the orange-blazed Massanutten South trail.  Looking at the cement post as you approached it, look back around 4:00.  You will see the orange blazes on the Massanutten South trail as you will cross the water again (this time it is Fridley Run) and climb up the hillside.  These weren’t painted on the trees before (they look fresh now), so you should be able to find your way more easily.

Walking in the Streambed
Early in the hike, the trail traverses the streambed. There are plenty of rocks, so it’s fairly easy to hop from spot to spot and avoid getting your feet wet. Below: Adam climbs up the trail shortly after the parking lot; A rockslide early on the hike; Blooming redbuds.

Adam Hiking Fridley Gap Trail Rock Slide Redbuds Blooming

The climb up the Massanutten South trail is quite steep and you may need to stop a few times along the way to catch your breath.  This trail is also narrow and you may have to cross over a few blown-down trees, but the trail wasn’t too hard to navigate with the recent re-blazing.  At 1.85 miles, you will reach a campsite area.  Look closely and you will see a path that leads to a rock outcropping called Grubbs Knob Overlook.  Take this path up to the overlook to get the best views along the hike.   You will see the top of Grubbs Knob to the left from the overlook and views to the west.  After taking in the view, go back to the campsite and continue along the Massanutten South trail.  At 2.05 miles, the trail reaches its peak and then you will start to descend, as the trail takes a steep turn to the left.  You will make your way back down this very narrow path and cross Fridley Run at 2.70 miles.

After crossing Fridley Run, you will begin to ascend on the trail again (turning again into a wider fire road) until you reach a rocky slide that gives you views of Fridley Gap and North Mountain at 3.25 miles.  Continue to ascend as you walk around part of Third Mountain. The fire road stops ascending at 3.5 miles.  The trail then descends and you reach another cement junction post at 3.84 miles.  Take a left on the purple-blazed Fridley Gap trail, which follow another wide fire road.  You will likely see lots of burned trees from a fire in 2010 that covered a big portion of this area.  At 4.5 miles, you will reach another junction. The purple-blazed Fridley Gap trail ascends to the left and continues through the woods.  Take this trail and begin a steep ascent across some switchbacks.  At 4.85 miles, you will reach the top of your climb and there are a few stones that you can rest on for a few minutes if you need to catch your breath.

Christine at the Small Waterfall
This small waterfall feeds one of the most popular swimming holes in the area. Below: More pretty cascades.

Mountain Run

The trail now begins to descend very steeply.  We were so glad we had our trekking poles since the rocks under the leaves were often loose and it helped to lower ourselves down the steep steps.  We were also glad we did this hike this direction rather than the clockwise version of the loop.  At 5.5 miles, we reached another junction with the Massanutten South trail.  Take a left on the orange and purple-blazed fire road (don’t go the way that crosses the bridge) and you will reach the junction that closes the loop at 5.65 miles.  Take a right here, crossing Mountain Run again and make your way back down the fire road.  Be sure to catch the rocky path at 5.8 miles that leads back to the parking lot at 6 miles.

A funny moment happened along the hike.  Christine had programmed her phone to use the MapMyHike app.  In a recent upgrade, it now includes some vocal updates along the way, usually at the mile increments.  One time, we heard the voice say “Don’t stop now.  Walgreen’s is behind you.”  (Walgreen’s is now advertising on MapMyHike.)  While this is meant to be a word of encouragement to keep hiking strong, I was thinking of it as “Walgreen’s is chasing us.”  As I sometimes do, I started thinking of a parody song to the tune of the Road Runner Show TV theme song.  So for your enjoyment, here are my lyrics: “Fridley hiker, Walgreen’s is after you. Fridley hiker, if he catches you, you’re through.  That Walgreen’s is really a crazy store.  They have pharmaceuticals, toiletries, and so much more.  Fridley hiker, never, never, never slow down.  Fridley hiker. Walgreen’s is after you.  Fridley hiker.  If he catches you, you’re through.

There is one geocache along the trail, Fridley’s Cache, a normal-sized cache near the swimming hole.

It is always a good feeling to know that we redeemed ourselves by covering a hike that we had previously failed to navigate.  If you are looking for good views of streams or a swimming hole, along with a challenging hike to get some views, this may be a great hike to try out some time.

Rocks at Grubbs Overlook
The rocks at Grubbs Overlook might trick people into thinking there isn’t an open view. Below: Views from Grubbs Overlook and the campsite that sits adjacent to the overlook.

View from Grubbs Adam at Grubbs
A View Into the Valley
Campsite at the Grubbs Overlook

Christine Says…

Hallelujah for freshly painted blazes!  I was so frustrated last year when our attempt to hike the Fridley Gap Loop ended in failure.  The failure was mostly my fault.  I tried to map out the hike based on a course I saw on someone’s Runkeeper page.  There were no directions, just the route overlaid on a rudimentary map of the area.  I thought we’d be able to figure things out on our own with a NatGeo map of the area.  It turns out that faded blazes and a large group of people camping in the middle of the trail are insurmountable challenges to my ability to navigate.  We’ll let bygones be bygones and get on to the successful version of our Fridley Gap hike.

Let me start by saying, I loved this hike!  It was even better than I expected.  The stream was running beautifully, the views of the valley ‘greening up’ below were lovely and the weather was perfect (sunny, cool and breezy enough to keep the bugs away).  I really enjoyed the little rock-hop as the trail followed the stream bed.  The small waterfall and swimming hole were so pretty.

The climb up the Massanutten South trail to Grubbs Knob was steep enough to be challenging, but not so steep that we had to stop for a breather.  On the way up, we could see all the little signs of spring creeping back into the forest – tiny buds on trees, tightly curled ferns and the occasional early season wildflower poking up through the leaves.  The overlook at Grubbs Knob is rather easy to miss.  It lies at the top of a faint footpath above a campsite.  When you first climb to the top of the footpath, vertical, spine-like plates of rock obstruct any possibility for a view.  But if you climb along the rocks, eventually you come to a few footholds that allow you to scramble to the top of the rocks.  Once you’re there, the valley below spreads out as far as the eye can see – farms dotted with red barns; small country towns; and wide, green fields make up most of the vista.

Downhill Through Dense Laurel
The climb downhill after Grubbs Knob takes you through dense mountain laurel. The harsh light makes for an ugly photo… but you get the idea.  Below: Adam approaches the stream; Crossing Fridley Run.

Approaching Fridley Run Crossing the Stream Again

After leaving the Grubbs Overlook, we ascended a few more moments before taking a sharp downhill turn.  The trail passed through dense mountain laurel, with occasional peeks toward the next ridgeline.  Eventually, we heard the sound of water again.  For a short way, the trail followed Fridley Run.  But soon, we had to cross the stream and head back uphill along a wide fire road.  From the fire road, we caught our second open viewpoint of the hike.  It was a nice view, but nowhere nearly as lovely as the one from Grubbs Overlook.  It’s one thing to slog uphill and come to a magnificent rocky outcropping with a sweeping vista to appreciate.  It’s a little less stirring to stop along a roadside and take in a view of a couple mountain ridges.

Eventually, the fire road met up at a four-way trail junction.  One direction headed toward the Boones Run shelter, another toward Cub Run Road, another continued along the Fridley Gap trail in the direction of Martins Bottom, and of course the fourth headed back in the direction from which we arrived.  Seeing this junction made me think of all the different ways these trails cross and connect.  There are definitely multiple possibilities for overnight backpacking loops in this area.

Second Overlook
The second overlooks comes at a spot along the fire road. Below: Adam checks out the map at this four-way trail junction; Continuing along the fire road before our climb up Third Mountain; Charred trees from the 2010 fire.

Four-way Junction Hiking Along the Fire Road Charred Trees

We followed the fire road to another junction.  Heading straight would have taken us toward Martins Bottom, but to stay on course we turned left and started very steeply uphill along the purple-blazed Fridley Gap trail.   By this point of the hike, I was pretty hungry and my energy was starting to flag.  If I were smarter, I would have eaten a snack before tackling the climb.  But I’m not smart, so I spent most of the climb complaining that I was hungry!

After a short break (and snack) atop the tree-covered peak of Third Mountain, we began a crazy-steep descent.  For three-quarters of a mile, we carefully picked our way down the craggy, leaf covered mountainside.  Through the trees, we could see some really fascinating rock formations on the shoulder of the next mountain over.  I kept trying to appreciate the view, but every time I did, I lost my footing a bit.  This climb down definitely makes the case for paying attention and using your trekking poles.

Steep Uphill Over Third Mountain
The ascent of Third Mountain may not look steep in this photo, but it is!  Below: Descending Third Mountain – you can see rock formations through the trees; A bridge not taken on the Massanutten trail; Adam once again crosses the stream we crossed early in our hike.

Steep Descent of Third Mountain Bridge on Massanutten Trail Final Stream Crossing

At the bottom of Third Mountain, we had just a short walk back to our original junction – the one where everything went wrong when we tried to hike Fridley Gap last year!  I was quite pleased to see that marker again and be 100% certain that we had actually found our way successfully this time around.  From the last junction, we retraced our steps through the streambed, past the rockslide and back to our car.

Trail Notes

  • Distance – 6 miles
    (Check out the stats from MapMyHike)*
  • Elevation Change –  1850 ft
  • Difficulty – 3.5.  The trail goes up and down several times. 
  • Trail Conditions – 3.  The trail had blowdowns, loose conditions, and narrowness, but there were also sections that followed a fireroad.  It gets an overall average rating. 
  • Views3.  The views from the Grubbs Knob overlook are the best on the trail, but if you miss the path from the campsite you’ll miss the best view on the loop.  The views along the path at 3.25 miles are nice, but not remarkable.
  • Waterfalls/streams – 4. The trail goes along (and through) Mountain Run and Fridley Run on several occasions.  The small falls and swimming hole gives it a bonus. 
  • Wildlife – 2. This may be a good hike for bird watching.  We saw a peregrine falcon soaring above at the Grubbs Knob overlook and enjoyed hearing the song of the eastern towhee along the way.
  • Ease to Navigate2.  If we got lost before, we have to give this a low rating.  The path to start the trail from the parking lot could be better blazed and there are several turns to make.
  • Solitude – 4.  You may see some people at the swimming hole or camping alongside the junction with Mountain Run and Fridley Run.  However, we only saw one other group after this point on a nice spring weekend day. 

Directions to trailhead:

From Harrisonburg, VA, head east on 33.  Take a left onto VA-620 North/Indian trail Road and continue for 1.7 miles.  The road will turn into Rt. 717.  Go 3.4 miles and take a right on Minie Ball Ln.  Go 1.1 miles.  At this point, the road will turn back into Rt. 620.  Go 2.7 miles and take a right, continuing on 620 for about half a mile.  Take a right onto Armentrout Path.  Take the first left onto Airey Ln.  Parking is a lot at the end of this gravel lane.  If you pass the lot, you are on private property. The directions to this trailhead are a little confusing, and we recommend putting the coordinates on the map below into your phone/GPS.

* MapMyHike is not necessarily accurate, as the GPS signal fades in and out – but it still provides some fun and interesting information.

Three Ridges Wilderness

This 13.2 mile circuit can be done as a day-hike, but we recommend extending the beauty and wildness into an overnight backpacking loop. Take your time, and you’ll be treated to panoramic views, lovely mountain streams, demanding climbs and peaceful campsites.

View the full photo album from this backpacking trip on Flickr.

Christine Takes in a View of the Priest from Three Ridges Mountain
Christine takes in a a view of The Priest from Three Ridges mountain. Below: Welcome to the Three Ridges Wilderness;  Over half of the circuit follows the Appalachian Trail; Nothing beats a campfire in the evening.

Welcome to Three Ridges Wilderness Adam Hikes the Appalachian Trail Great Campfire

We had long been planning a three-day backpacking trip across Mt. Rogers, but as the day of the trip drew closer, we started seeing the term ‘Appalachian soaker’ thrown around in weather forecasts.  We’re fine with passing showers and fleeting thunderstorms, but we didn’t want to get pinned down on Mt. Rogers on a wet and stormy night.

Fortunately, the weather in central Virginia was far more favorable, so we ditched our Mt. Rogers plan, and decided to hit another backpacking circuit on our list – Three Ridges.   This route, which makes use of the Appalachian Trail and the Mau-Har Trail, is known as one of Virginia’s most rugged hikes.  Everything we read about the circuit in advance of our trip emphasized the hike’s strenuous nature. With roughly 6,800 feet of elevation change, you’re almost never walking on flat trail.  It’s a constant onslaught of heart-pounding climbs and knee-grinding descents. But along with the challenging terrain, you get spectacular views, beautiful streams and lovely campsites.

We started out early Saturday morning.  The first stop was fuel… for ourselves.  We had a huge breakfast at The Chuckwagon in Harrisonburg.  If you have a chance, stop by and indulge in one of their homemade 4-inch biscuits  (Adam’s favorite is ‘The Round-Up’) or a stack of their amazingly fluffy pancakes.  (Sadly… Chuckwagon closed in January 2013) With full stomachs, we made our way to Reed’s Gap at mile marker 13.7 on the Blue Ridge Parkway.

When we got to the parking area, the lot was already jam-packed, mostly with heavy-duty construction vehicles left idle for the weekend.  Just as we were about to give up and find a parking spot further down the parkway, one car pulled out and left an opening for us!

Some of the Meadow Mountain Climb was Rocky
Adam makes the initial climb up Meadow Mountain. The climbing was occasionally rocky, but never terribly steep.

We started the Map My Hike app on Christine’s phone, hoisted our packs, and headed south along the Appalachian Trail.  From the parking area, the trail hugs the edge of a meadow, which was full of blooming yellow ragweed and purple thistle.  It was such perfect weather for backpacking – sunny skies, low humidity and a crisp breeze.  The trail almost immediately began to climb uphill over Meadow Mountain.   The climbing was steady, but never difficult, for about .8 of a mile.

At the top of the ridge, there was a small dry campsite with obstructed views.  Department of the Interior boundary markers were all along the ridge.  We spotted at least three or four right next to the trail.  After walking briefly along level ridge, the trail descended to Maupin Field Shelter.  The shelter site had tons of space for tents (many of the tent sites were flat, soft and grassy), a typical AT three-sided hut, a metal bear-hang post and a picnic table.  The area also had an informational kiosk with trail notes and wilderness-usage policies.  There was also a child’s orthodontic retainer tucked into a Ziploc and pinned to the board.  We’re guessing there is now one retainer-less Boy Scout and a less than happy mother!

Christine Climbing Bee Mountain
Christine climbs the stone steps up Bee Mountain.

After Maupin Field Shelter we began climbing again, over Bee Mountain.  The climbing was slightly more strenuous, but definitely manageable.  In several places, rock steps were set into the trail to make the climbing easier.  Along the way, we started playing ‘Categories’.  It’s pretty basic – each player designates a category, then players take turns naming items that fit within that category.  For example, categories might include Movies Based on Comic Books or Items You Need on a Backpacking Trip. It’s pretty mindless, but it kills time.  Whoever successfully names the last item for the given category wins the round. The best category of the day was Complaints Uttered When Hills Are Steep. We won’t share the specifics of our trail talk here, but it was pretty funny to reflect on this topic!  Bee Mountain didn’t offer any views and was followed by a short descent before tackling the more serious climb up Three Ridges Mountain.

The climb up Three Ridges consisted of several steep pushes, with nice stops for views all along the way.  The first view, Hanging Rock, was very impressive, so we decided to break for lunch and enjoy the amazing vista.  As we ate our Panera bagels (Cherry-Vanilla with Justin’s Chocolate Hazelnut Butter for Christine and French Toast with Peanut Butter for Adam), we noticed two dogs fitted with radio collars – doubtlessly bear hunting dogs set loose in the woods for pre-season practice.  Both dogs were female; both were emaciated and showed signs of over-breeding.  We hate to cast aspersions or generalizations on any group of people, but we are not fans of hunters that use this type of technology to hunt bears.  Both of the dogs were pretty persistent about trying to steal our food.  The bolder dog, who was heavily perfumed by a skunk encounter, came within inches of snatching Christine’s bagel right out of her hand.

Bear Hunting Dog Looking at The Priest from Hanging Rock
One of the bear hunting dogs we encountered seemed to be enjoying a view of the Priest from the Hanging Rock Overlook. Below: Adam climbing the first uphill section of Three Ridges Mountain; Southbounders (BeeSting, Fats and Happy) contemplate the Priest and their upcoming climb;  The view from Hanging Rock.

Climbing Three Ridges Mountain Sobos and Adam on Hanging Rock Hanging Rock

While we sat at the overlook, we had a chance to chat with three Southbound AT hikers – Happy, Fats and BeeSting.  All three had started in Pennsylvania in August and were making their way toward Georgia.  Happy was already there when we arrived, so we got to talk with him for a good bit while he waited for his companions to show up.  He was from Las Vegas and on his first long-distance hike.  He told tales of his shoes breaking down on the Pennsylvania rocks, getting caught in a vicious cold-front driven storm on Bearfence Mountain, and his epic weight loss (40 pounds in less than a month!).  He was a nice kid and we enjoyed talking to him and telling him about some of the things he has to look forward along the trail in Virginia – The Priest, Spy Rock, Cove Mountain, McAfee Knob the Grayson Highlands.  He told us the friendliest place he’d stopped on the trail was the town of Waynesboro.

After a while, Fats and BeeSting came along.  They were a young couple from Montgomery County, Pennsylvania.  We didn’t talk to them as much, because we wanted to press on and make our way to camp by mid-afternoon.  Happy left a few minutes ahead of us, and we were sure we wouldn’t see him again.  Thru-hikers are known for keeping a blistering pace!

Upon leaving the vista, there was quite a bit more uphill climbing before we finally reached the true summit/highpoint of Three Ridges Mountain.  At the highpoint, we ran into a group of three women out on the same circuit we were hiking.  We chatted briefly about the great weather before leaving them to enjoy their lunch.

Christine and a Nice Three Ridges View
Christine enjoys the view on a perfect late-summer day.  Below: The actual high point of Three Ridges is in the trees; Adam walking through ferns along the trail.

Three Ridges Highpoint Adam Walking Through the Ferns

After the high point, the long, seemingly endless descent to Harper’s Creek began.  It wasn’t always super-steep.  Sometimes it almost leveled off.  As we were walking along,  we saw a bear dash off through the brush.  We were both glad that the bear hunting dogs hadn’t pestered the bear into a tree.  A few steps later, we heard an exuberant voice shouting into the wind  – ‘Woooooo!’  ‘Yeaaaaaah’!  ‘Echo Echo Echo’ and ‘I’m on TOP of the WORLD’.  As the voice drew nearer, we guessed it was Happy having a ‘mountain moment’.  Sure enough, he called to us through the trees so we could share the nice view spot he had found a little ways off the trail.

We left the spot before he did, knowing that there would be more views along the way. One unnamed view on the left side of the trail was especially beautiful.  We stopped for photos and a pack-less rest. A bit further along, we saw a huge flat, upright rock that looked just like a tombstone.  Immediately past that, we noticed a faint trail that climbed up steeply through the woods to a jumble of rock.  We guessed correctly that we had found Chimney Rock.  It was a great place to sit, and every bit as scenic as the very first overlook on Three Ridges.  We enjoyed looking down into the valley, dotted with homes, streams and a large Christmas tree farm.  The Priest, one of Virginia’s most beautiful and distinct mountains, loomed impressively across the way.

Adam Enjoys the View of the Priest from Chimney Rock
Adam enjoys one of the many spectacular views from Three Ridges Mountain. This particular stop came at a rocky outcropping known as Chimney Rock. Below: Views, views and more views!

Chimney Rock, No People Adam and his Backpack

After Chimney Rock, the last real vista was a wide flat shelf of rock overlooking the scene below.  After that, the downhill got pretty bad.  It was the bone-jarring, steep, type of downhill that makes your knees beg for mercy!  We both slipped a couple times on the descent.  It was probably all the fallen acorns – if your boot hits them just right, they sort of function like tiny roller-skate wheels.  Adam managed to hyperextend his knee on one slip, and hiked in a significant amount of pain the rest of the day.  Christine hit a loose flat rock and rode it like a surfboard until she finally landed hard, but unharmed, on her rear end.

Honestly, the uphill on this hike is moderately hard, but the downhill is brutal.  Anyone in reasonable condition should be able to handle the physical demands of the ascents along the trail, but if you have bad knees, the descents are nothing short of punishing. We both tried to keep our packs on the light side for this trip.  Christine’s pack was 22 pounds and Adam’s was 29… but that was before water.  After a dry week, we weren’t sure if Harpers Creek would be flowing, so we both carried quite a bit of extra water – 3.5 liters for Christine and 4 for Adam.  We knew there was a chance we wouldn’t need it, but when it comes to water it’s always better to be safe than sorry.

The Downhill Trail Was Rocky
The climb down from the summit of Three Ridges was grueling and rocky! Below: The trail went over many large boulders; It passed thick stands of rhododendron and mountain laurel; We were thrilled when the Harpers Creek shelter site came into view.

The Downhill was Punishing Climbing Downhill from Three Ridges Scout Camp

After over two miles of switchbacks, dangerous acorns and tricky rocks, the colorful domes of tents came into sight.  We had reached Harpers Creek Shelter – our stop for the evening. We found the shelter itself empty, but most of the tent sites adjacent to the shelter had already been claimed by a large group of Boy Scouts from Fluvanna County.

We found a mostly flat and smooth tent site across the creek, about 50 yards south of the shelter.  We figured it was a perfect spot – we were close to the shelter and could use it for a ‘kitchen’.  Also, the privy was on our side of the stream, but far enough from the tent that it wouldn’t be annoying when people went to use it.

For the most part, Harpers Creek wasn’t flowing.  There were several shallow pools in the streambed, which gave us plenty of access to water, but also provided a perfect breeding ground for mosquitoes.  Christine immediately noticed bites forming welts on her legs, so she quickly changed out of her shorts and into long pants.  She tried to change behind a large boulder, but she’s pretty sure the Boy Scouts saw her in her underpants, but hey… modesty sort of goes out the window in the backcountry.

Within twenty minutes, the tent was up, the sleeping pads were inflated, and sleeping bags were in place.  We set aside all the food, cooking implements, water filter and bear bags to take over to the picnic table at the shelter.  The Harpers Creek shelter was small and kind of dingy.  There was no shelter log.  Actually, the only thing in the shelter was a sodden pair of ‘tighty-whiteys’.

Adam set about collecting water.  We recently picked up a very handy collapsible bucket made by Sea to Summit.  It folds down to about the size of a deck of cards and weighs just a few ounces.  But, it allows us to collect up to nine liters of water at once.  Typically, we pump water through our Katadyn straight into the bucket.  Then we cover the bucket with a bandanna and usually have plenty for dinner, breakfast and bottle refills.

While Adam filtered water, Christine worked on collecting wood for a campfire.  It was already starting to get chilly, so it was a perfect night for a fire.  As is the case at most shelters, good firewood is hard to find.  There is always plenty of tinder/kindling, but the larger, long-burning pieces of wood are at a premium.  In the backcountry, we only use downed wood that we can break by hand.

Our Camp on Harpers Creek
Our camp on Harpers Creek. Below: Setting up our ‘kitchen’ at the Harpers Creek shelter; On the menu for dinner; Adam feeds the fire.

Setting Up Our Kitchen at the Shelter On the Menu Adam Fuels the Campfire

Christine made a teepee-style campfire with larger pieces of wood on the outside, and a tinder-packed center.  All of the wood collected from the forest floor was cold and damp, so the fire had a hard time catching at first.  A little squirt of alcohol-based hand sanitizer took care of that problem, and within a few minutes a small fire had sprung to life.

With the campfire going, water collected and the campsite set, it was time for dinner!  We keep saying we’re going to prepare our own fancy homemade backpacking meals, but when the time comes we always seem to find ourselves reaching for Mountain House or Backpacker’s Pantry.  It’s just easier, and for the most part, the packaged food is really tasty (notable exception – Natural High’s Banana Cream Pie – worst dessert EVER.) Our menu for the evening included Chili Mac with Beef as the entrée and Cheesecake for dessert.  Christine brought several sticks of cheddar cheese to mix into the chili and single-serving plastic bottles of Merlot. It was quite the feast!

After dinner, we put up our bear hang.  Oddly, this shelter did not have a metal post like most AT shelters in this part of Virginia.  We had to find a tree with a free branch.  After the food was secured, we settled into our camp chairs and enjoyed the fire.  Some people we’ve met along the trail think the camp chairs are a waste of pack space, but they fold down to about the size of a water bottle and weigh just about a pound.  We find them well worth the extra weight for the back-resting comfort they provide. We might not carry them on a long multi-day trip when every bit of pack space counts, but for a weekend trip, we like having creature comforts.

Adam Told Ghost Stories
Entertainment unfolds by the campfire. Below: Our tent at night.

Our Tent at Night

As we sat by the fire, we watched a little piece of comedy unfold on the other side of the stream.  A couple of the older Scouts had been assigned the task of hanging the group’s food.  We watched as they missed getting the rock and rope over the tree branch, dozens and dozens of times.  The boys took turns making fun of one another for their off aim.  Eventually, they got the rope over a branch.  They celebrated with a high-five and a ‘Woot!’.  But, the branch snapped off the tree as soon as they tried to hoist the weight of many food bags. Eventually they went for help and settled on a less-than-perfect, but still functional tree.  All in all, it took them over an hour to get their food hung.

Our campfire died around 9:00, so we headed back to the tent.  Adam read by headlamp and Christine listened to a book on her iPod.  For one of the first times ever, we both fell asleep quickly and slept soundly through the night.  We were actually awoken by voices and headlamps at what seemed like the middle of the night.  Christine rolled over and asked Adam ‘Is it around midnight and these kids are up late or is it morning already?’  It turned out that the Scouts were awake and cooking/packing up at 5:30 a.m.  We lazed around in the tent for another hour until the sun came up.

The Scouts actually hiked out around 7:00, just as we were getting breakfast together.  Usually, we’re the early risers and the first out of camp!  We made maple-brown sugar oatmeal with freeze-dried bananas and coffee and hot chocolate for breakfast.  We both ate two packs, knowing that we had a tough day of hiking on the Mau-Har Trail.

Christine is Ready to Tackle Day 2
After a good night of sleep, Christine is ready to tackle day two! Below: Adam changes out of his Crocs and back into boots; The Appalachian Trail departing Harpers Creek.

Changing Back Into Boots The Appalachian Trail Leaving Harpers Creek

After breakfast, we broke down camp.  Adam’s hyperextended knee was still pretty sore, so Christine stowed some of his gear in her pack to make his load a little lighter.  While she was transferring gear, she noticed that a mouse had chewed through the little mesh compartment on the hipbelt of Adam’s pack!  The only thing in the compartment was a set of car keys, so we’re really not sure why it was appealing to a mouse.  It reminded Adam of one of his favorite books as a kid – The Mouse and the Motorcycle.  He thought this mouse was trying to make a sequel with their car.

We left Harpers Creek around 8:00.  On our way out, we passed four or five other groups that had been tenting near the shelter.  All told, there were probably somewhere between 25 and 30 people camped along the creek that night. Quite a tent city!

After leaving the shelter site, we followed the Appalachian Trail for almost a mile, largely uphill, to its junction with the Mau-Har Trail.  The odd trail name is a combination of Maupin and Harpers – the names of the two shelters the trail runs between.  The Mau-Har was designed by a man named Angelo Filippi.  One funny review we read of the hike evidently thinks ‘designed’ is too kind a word for the trail.  The review states:

“We started from Reeds Gap and heading down the Mau-Har, cussing Angelo Philippe [sic] the whole dang way. I swear he unfolded a map, put it on the ground, pulled out a piece of string, dropped the string onto the map and said “There! That is where the trail should go!” What a jerk!”

Start of the Mau-Har Trail
The start of the Mau-Har Trail. Below: The Mau-Har trail starts innocently enough; Then it starts to climb more steeply downhill; And then it gets even steeper than it already was!

Mau-Har Starts Pleasantly The Mau-Har Gets Steep Then the Mau-Har Gets Even Steeper

To be fair, the trail was clearly designed to follow scenic Campbell Creek as closely as possible and following a creek that goes tumbling through a deep gorge is going to require some rugged climbing.  The Mau-Har trail descended very steeply to the creek.    Adam grimaced in pain from his knee injury on every downhill step.  The weight of his pack, combined with the steep trail was almost more than he could bear.  This was some of the gnarliest downhill we’ve ever done.

Eventually, we got to the spur trail that leads to a series of small waterfalls. Adam decided to stay put and rest his knee while Christine explored the falls. She took off with the camera, hoping to get a few documentary shots for the blog.  A few minutes later, Adam decided to follow.  He had heard there was a geocache hidden by the falls (known as “firedogs fishbowl”), but he had forgotten to input coordinates into his GPS.  He looked for it, but without coordinates it was pretty close to impossible to find.  The waterfalls were all very small due to low water flow.  In spring, with snowmelt and heavier rain, the creek is probably spectacular!

Christine at the Waterfall
Water volume in Campbell Creek was fairly low. Below: The section of the Mau-Har that follows Campbell Creek is very steep; Some sections require you to pull yourself over the rocks; Christine is happy for a more moderate grade.

Uphill on the Mau-Har Struggling Up the Mau-Har Happy for More Moderate Climbing

From the waterfall spur trail to the Maupin Field shelter, the Mau-Har climbs very steeply uphill.  At first, the trail is very rocky as it passes through the canyon.  You wind your way between and over boulders.  Sometimes you have to stow your trekking poles in one hand to pull yourself up over a big step.  It reminded us very much of hiking the gorge at Little Devils Stairs.  The terrain was very similar.  After leaving the canyon, the trail becomes less rocky, but no less steep.  A series of sweeping switchbacks carry you relentlessly uphill.  Eventually the grade becomes more moderate in the last half mile before you arrive at the Maupin Field shelter.

Near the end of the climb, Adam announced that he was going to stop at the shelter and ‘eat every single bit of anything edible left in his snack bag’.   Two packs of oatmeal, bananas and hot chocolate burn off pretty fast when the climbing is tough!  He proceeded to eat a Luna Bar, ShotBlox, a bag of cashews and a bunch of mini candy bars.  He reined himself in and skipped eating a dry packet of cocoa mix.

At Maupin Field, we read the shelter log.  Entries talked about the skunky, food-nabbing bear dogs (someone had named them Bagels and Muffins). A southbounder left a warning to northbounders about 20-30 miles of dry hiking.   Someone even left a really nice pair of ladies LaSportiva for someone to claim.

Maupin Field Shelter
Adam relaxes at the Maupin Field Shelter. Below: One of the stream crossings near Maupin Field Shelter; Adam checks out the shelter log; The Mau-Har’s end point at the shelter.

Stream Near Shelter Checking Out the Shelter Log The Mau-Har Starts Next to Maupin Field Shelter

The last 1.6 miles retraced our route from the morning before.  We had a gradual climb up and over Meadow Mountain and then back to our car at Reeds Gap.  We drove back toward home along the Blue Ridge Parkway, stopping at Humpback Rocks to wash our hands with soap and running water.  Our last stop was the Sonic in Waynesboro for more ‘refueling’.  We definitely earned some tater tots and CreamSlushes!

Three Ridges turned out to be a great alternative to our planned Mt. Rogers trip!  While the terrain was challenging, we think most people accustomed to backpacking/hiking would be up for the challenge and would enjoy the beautiful and wild scenery offered by this loop.

The one issue we would like to bring up is a discrepancy about the length of this hike.  Most sources list the loop at 14.4 miles.   Based on our information (maps, GPS, trailer marker posts), here is how we would break down the segment distances on the trail.

0.0 miles – Start from parking lot on Reeds Gap, heading south on the Appalachian Trail and begin your ascent.
.8 miles – The trail reaches the first ridge and shortly begins to descend through some switchbacks
1.6 miles – Reach the junction with the Fire Road (which heads to Love Gap).  Take a left to stay on the Appalachian Trail and pass a few side trails that lead to campsites at the Maupin Field Shelter.  The trail begins to climb again.
2.0 miles – Reach the summit of Bee Mountain
3.7 miles – Reach some great views from Hanging Rock.  Continue to climb further up through the woods.
4.2 miles – Reach the summit of Three Ridges
5.8 miles – Great viewpoint of the eastern ridge
5.9 miles – Reach the tombstone and take an immediate right up the path to reach Chimney Rock and the best views on the trail.  Rejoin the trail and descend steeply.
7.5 miles – Arrive at Harpers Creek Shelter across the creek and your stay for the night.  The next morning, cross back over the creek and continue on the Appalachian Trail.
7.6 miles – Cross Harpers Creek and the trail begins to ascend very steeply.
8.5 miles – Reach the junction with the blue-blazed Mau-Har trail.   Turn right and follow the trail that parallels Campbell Creek.
10.0 miles – Reach a sign designating a short yellow-blazed trail to a few waterfalls.  The waterfalls are only a  few hundred feet off the Mau-Har trail.  Retrace your steps and continue on the Mau-Har trail.
11.5 miles – Reach the Maupin Field Shelter.  Continue straight past the shelter to rejoin the Appalachian Trail.
11.6 miles – Take a left on the Appalachian Trail to retrace your steps back to your vehicle.
13.2 miles – Return to the Reeds Gap parking lot.

Returning to Reeds Gap
Returning to Reeds Gap. At this point, Adam said he was 90% sure he was going to survive the trip. Below: Christine had a great time!

She Survived

Trail Notes

  • Distance 13.2  miles
    (Check out the stats from MapMyHike [Day One] [Day Two])*
  • Elevation Change – About 3900 feet
  • Difficulty – 5.  This hike is no joke.  The downhill areas are steepest on the Appalachian Trail coming down from Chimney Rock and the uphill on the Mau-Har trail is equally brutal.
  • Trail Conditions – 2.5.  The trail starts off quite nicely, but once you reach Three Ridges, expect a rocky slide downhill and loose footing uphill for much of the hike. The Mau-Har Trail was pretty overgrown in places.
  • Views– 5.  Absolutely amazing.  Chimney Rock and Hanging Rock provide some of the nicest views.
  • Streams/Waterfalls – 3.  You’ll be near a stream most of the second day and there are a few small waterfalls.  The water wasn’t flowing too strongly though.
  • Wildlife –3.   We did see a bear.  Oh yeah, and the mouse ate through part of Adam’s backpack, so there is some wildlife out there.
  • Ease to Navigate – 4.  The trails were fairly well marked and signs were at the junctions.
  • Solitude – 2.  This is a tough hike, but it is popular for backpackers, trail runners, and day visitors to the shelters.

Directions to trailhead: On Blue Ridge Parkway, south of Humpback Rocks.  Park at mile marker 13.7 at Reeds Gap in the large lot.  Head south on the Appalachian Trail, marked with white blazes on a tree near the left of the open field.