This is a 5.25 mile hike with 1237′ of elevation gain. The trail has LOTS of constructed stairs and a couple very steep climbs. Point Misery, which has no view, is the high elevation of the hike. The best view is from Little Butt, where you can enjoy vistas of Mt. Mitchell and the Black Mountains from a slab of rock. You can hike on an extra half mile to Big Butt, but there are no additional great views. This hike starts at Walker Knob overlook on the Blue Ridge Parkway.
Adam Says…
Last May, we stayed a week with our friends, Tony and Linda, who rented a cabin in North Carolina near the Blue Ridge Parkway. Fellow hiker, Zach, joined for several days as well (all members of the Hiking Upward team). As is common on a vacation with friends, we had a first night of celebrating being away and probably had a few too many beers among us.
The next day was hot, and we were definitely feeling a bit tired from the night before, so we decided to try something moderate. Eventually we landed on the Little Butt hike. You have to laugh at a hike with a name like that!
The trail started off with a gentle descent into a scenic forest landscape with lots of trillium along the way. The trail was worn through, but we could tell the spring growth would likely necessitate some maintenance as things get overgrown as the season goes on.
After we hit the bottom of the small gap, the trail starts to ascend steeply. It was tougher than we expected, even brutal at times. The climb topped out at Point Misery – about a mile and a half into the hike. From there, the trail dropped steeply for about half a mile, before going right back up for .4 miles. This section had many, many stairs constructed into the mountainside. I don’t know about you, but I typically hate to see stairs on a hike, because I know I’m in for a steep climb, since stairs are necessary to keep the trail in shape.
Once we got up through the forest staircase, the trail reaches more of a ridgeline and it was a short distance to get to the Little Butt overlook, a slab of rock where you can take in views of Mt. Mitchell and the Black Mountains.
At this point, Christine and I decided to stop and just enjoy the view. Big Butt is only half a mile from here, but we had read that it really didn’t have any views and was just another peak to bag. Zach and pressed on to Big Butt. We ate a quick snack at the overlook and then decided to hike back. Zach said he would catch up to us. We descended the stairs, climbed steeply back up to Point Misery, and were enjoying the easy downhill back to the car when we saw Zach running along to catch up. We were amazed at how much energy he had compared to us.
That night, we got back to our rental place and enjoyed a beautiful sunset and campfire. It was a great first day of adventure in North Carolina!
This 4.5 mile hike in North Carolina’s Plott Balsams had some great views, but the trail was in such poor shape that the hike was not that enjoyable. There were parts that were unpleasant (tall grass, blowdowns, and thick overgrowth), confusing (relatively few blazes), and even dangerous (slippery erosion and steep dropoffs).
All the unsettled weather and fog made for pretty sunrays in the woods. Below: Parking along the shoulder of the road; Park along the road way just beneath the turn-off to the visitors center; Lush ferns as you enter the trail.
Christine Says…
This hike started off along the Blue Ridge Parkway near the Waterrock Knob Visitors Center at BRP mile 451. There is parking right along the shoulder of the road (as pictured above). The entrance to the trail is unmarked, so you’ll need to search along the forest line to find where the trail begins. When you see this old, broken-down kiosk just inside the woods, you’ll know you’re on the right path. The trail has occasional purple/yellow blazes, but don’t count on seeing many along the way to guide you! This area is tricky – even for experienced hikers. Meanderthals hiking blog did a good write-up where they describe getting a bit lost along this stretch of trail.
The trail begins a gradual, easy, uphill climb through evergreen forest. There are ferns and mosses draping the ground everywhere. When we hiked in June, there was a ton of blooming Clintonia borealis – a lily found frequently in woodlands around the world. The initial climb goes on for just a couple tenths of a mile before opening up to a nice view to the southeast, including a look at Yellow Face mountain. After the view, the trail descends into a brief saddle. Fog from the unsettled weather seemed to sit in every dip in the trail along the way.
There were nice views from the trail in several spots. Below: Blooming Clintonia borealis; Adam negotiating the terrain; Tons of fog and moving clouds.
At just under three quarters of a mile, we reached the summit of Yellow Face. This mountain stands at just over 6,000 feet and was donated by the Eastern Band of the Cherokee Indians to the National Park Service around 2001 or 2002. In fact, the entire trail is cobbled together across land owned the the Nature Conservancy, the NPS, and the town of Sylva, NC. Some sources say the trail itself has existed (in varying forms) for hundreds of years and was used historically by the Cherokee people. It’s currently maintained completely by volunteers – the NPS and the forest service are not involved.
When we hiked, the ‘bald’ at the summit of Yellow Face was really overgrown with tall grasses and bramble bushes. The view was nice, but definitely closing in. Near the summit, there’s a memorial plaque to Stephen Andrew Canada. I tried finding more information about him, but came up empty. Maybe he died on this peak or maybe he just loved this peak.
After the summit of Yellow Face, the trail descends again into another saddle. You’ll encounter some blowdowns, a pretty spruce forest, and some more open terrain. Near the low point of the saddle, at 1.3 miles, there are campsites on the right side of the trail. The open grassy area is littered with remnant mechanical parts from old logging equipment. We didn’t see a water source near the campsites, so if you were to overnight at this spot, you would need to carry enough water to cook and drink.
This was just one of the many blowdowns across the trail. This was one of the easier ones to navigate. Below: Trail scenery; Campsites in the saddle; More blowdowns.
After passing the campsites, the trail climbed again for a few tenths of a mile. We passed over and through a couple more blowdowns. At 1.7 miles, things got tricky. We began walking along a very narrow ridgeline decorated with enormous boulders. The trail was so slippery and eroded that I put my camera away to fully focus on footing and safety. There are more photos of this section included on the return hike below. I don’t think any of the photos truly do justice to the trail conditions along this stretch. It was far sketchier than it appears. The tough terrain went on for about half a mile, where we reached an opening in a dense rhododendron tunnel at 2.2 miles.
I chose this point to stop. The climb after this point was described by another website as ‘a steep climb up roots and rocks requiring hands and feet‘. On a dry day, I would probably have no problem tackling that climb, but on this particular day I’d been slipping, stumbling, and sliding so much that I decided to stop 100 yards short of the summit. It’s always a tough decision to miss the final destination of a hike, but I think the phrase ‘discretion is the better part of valor’ exists for a reason. Adam went on without me to take photos of the final vista. When he eventually came back he told me that I made the right decision and that the final climb was really slippery and precipitous. I was relieved he made it back safely!
The foggy trail was beautiful. Below: Giant boulder; A view from the trail right before the final summit; The rhododendron tunnel right before the summit.
We slowly made our way back across all the terrain we had covered on our hike out. Very rarely do I feel this way, but the whole way back I kept thinking, “I can’t wait to get off this STUPID TRAIL!” We trekked through the overgrowth, slithered back through blowdowns, and slid down rocks and mud. It was a slog. It was a death march. It was not fun at all. We chatted with a couple other hikers who were hiking just to Yellow Face and back (good call!) We crossed paths with a naturalist group looking at plant life along the trail. But, generally, we had the hike entirely to ourselves for most of the day.
I was very grateful to get back to the car! Afterwards, we paid a quick visit to the Waterrock Knob Visitors Center and then made our way back toward Bryson City for lunch at Nantahala Outdoor Center’s River’s End Restaurant. I had fun counting all my new bruises and scrapes on the drive back to the valley. Maybe this hike would have been more fun on a clear day after a stretch of dry weather. But overall, it’s not a hike I enjoyed. If you’re picking a hike in this area, I recommend The Pinnacle instead. It had much more vertical gain, but the trail was in vastly better shape, and I thought the vista was much more accessible (and just as beautiful!)
Adam Says…
We had attempted to do this Blackrock hike last year. We drove along the Blue Ridge Parkway but the fog was so heavy, we couldn’t even find the trailhead. We hunted around, but with so little visibility, we decided to try this another time. This year, we had a much clearer morning and we were able to find the trailhead somewhat easily.The Blue Ridge Parkway has actually taken down the parking trailhead marker and it isn’t very well blazed (my guess is because of the danger). But, we were able to see an opening in the trees and once we were about 25 yards into the woods, we soon came to a sign that we knew we were on the right path.
Christine described the overall hike well. While the elevation gain wasn’t crazy for much of the hike, the footing was fairly horrendous. The overall hike to Yellow Face was not too bad, but the view isn’t that impressive since it is getting sucked away from overgrown flora. Once you arrive at the saddle, the footing gets very treacherous.
It was mostly in the clouds, but the views opened enough to take in the mountain majesty. Below: Another photo Adam captured at the Black Rock Summit.
At one point, you climb in a three or four-point stance to go up a very steep terrain on the ridgeline. While we were expecting a nice view from here, it was only a bit of an overgrown one. The trail then takes a precipitous drop down a sheer rock area. Christine decided to stop before descending. I knew the view had to be just ahead, so I pushed forward but it was not something I felt very safe doing. I had to climb down the side of a rock, hanging on to handholds on the rock on the left of me while the width of my foot wasn’t able to fully fit on a step down the rock. A wrong step here, means that you could easily fall about a hundred feet down to the right. We didn’t get pictures of this area because it wasn’t safe. Once I got to the bottom, there was another treacherous climb back up where I had to hang onto roots and pull myself up. Once I got to the summit rock, there is also no easy way to get up. I had to ultimately launch my body up like a wounded sea lion on to the rock and then pull the rest of my weight up with my upper body. Christine was very worried about me making it, so I texted her to let her know that I made it and took some photos, which reduced my heart rate a bit. The views from the summit were impressive, but I could see clouds moving in and it looked like rain was coming. I texted Christine again to let her know I was leaving again, but that text never went through so my goal of easing her mind didn’t really help.
We took more photos of the boulder section on the hike back. Below: Some scenes from the slippery, narrow ridge walk.
The hike back down and up was equally treacherous, but I was very glad to get reunited. On our way back, we came across an older couple, who we warned to just turn back (they were planning on it). We also came across a large group of naturalists (one was even walking the trail barefoot – crazy). We warned them also, but they said they would likely not make it all the way there since, as one told us, they “get easily distracted by every plant they walk by”. We were very glad when we got back to our car. While we thought this would have been a beautiful, fun hike, the danger really didn’t provide much enjoyment. So, if you attempt this hike, be very careful and feel free to turn around. I won’t be offended if you steal my pictures of the summit and say they were yours to show your family the summit.
Some more examples of trail overgrowth. Below: The memorial placque; One final blowdown before reaching the car!
Trail Notes
Distance – 4.5 miles
Elevation Change – 1800 ft
Difficulty – 4.5 While the climbing is never terribly strenuous, this hike is a series of constant ups and downs (some steep), punctuated by flat stretches. The trail isn’t in great shape, so this adds to the challenge factor you’ll experience on this hike.
Trail Conditions – 1.5. The trail was quite overgrown and eroded. The grass and bramble bushes were tall in sunny places. The steeper parts of the trail were eroded with loose soil. There were also many blows to negotiate along the route.
Views – 5 – We visited on a day with lots of fog and moving clouds, but on clear days the views would be magnificent. There are views to enjoy along the trail and at the vista.
Streams/Waterfalls – 0. None
Wildlife – 1. The trail was oddly devoid of animals – we heard a few birds, but we didn’t even see pedestrian wildlife like squirrels and chipmunks.
Ease to Navigate – 2.5. There is only one trail to follow, but it is overgrown in many places. Blowdowns may also take you off course. There are relatively few blazes along the route.
Solitude – 2. We saw a few people along the way (most turning around at Yellow Face), but generally this trail seems lightly traveled.
This 13.7 mile stretch of Appalachian Trail is mostly a walk through ‘the green tunnel’. There isn’t any grand or memorable scenery, but as you approach Troutville, there are some pretty rolling meadows with mountain views.
Adam walks along the Appalachian Trail. Below: We had lunch and beers at the brand new east-coast Ballast Point before setting off on our hike; Amazing Trail Angel, Molly, met us for lunch and gave us a ride; Glimpses of views through the trees.
Christine Says: Day One – Blackhorse Gap to Trailside Campsite (4.2 miles)
For quite a while, we’ve had this 13.7 mile section of trail standing out as ‘unhiked’ in the almost 360 mile unbroken stretch of Appalachian Trail we’ve completed so far. The section between Black Horse Gap and Daleville doesn’t offer any great scenery, so we never felt rushed to get out there and tackle the miles. Doing it as a day hike would have required four hours of driving and a shuttle service. The logistics of hiking it seemed like a hassle, so we filed it under ‘later’.
In late June, Adam and I were driving into work together and making weekend plans. It went something like this…
Adam: What do we have planned for the weekend?
Me: Nothing. Want to hike?
Adam: What’s the weather like?
Me: Gorgeous!
Both: Hey… let’s backpack that odd section we have left to finish!
After making the decision to go, plans fell quickly into place. Our pet sitter was available. We had plenty of trail food left from our Maryland hike. Then, after a chat on Facebook, my friend Molly said she could shuttle us! The final icing on the cake was the fact that the new east coast Ballast Point brewery had just opened in Daleville. On Saturday, we met Molly at Ballast Point and had lunch before hitting the trail. People may go to the Ballast Point for the beer, but they’ll walk away remembering the great food. I had the best kale-quinoa-avocado chicken salad. I still daydream about it a month later.
After lunch, we left our car at Valley Cleaners in Daleville and Molly drove us to our start point at Black Horse Gap. I’ve been online friends with Molly for a while, but this was our first in-person meeting. She was just like I imagined she would be – friendly, enthusiastic, outdoorsy, and all-around awesome! I love all the people I’ve met through the Appalachian Trail community! We said our good-byes at the trailhead. Adam and I headed south, descending gradually but steadily.
We reached Wilson Creek shelter really quickly. It was too early to stop and make camp, so we decided to push on and find a trailside campsite. Below: Wilson Creek; We found a nice campsite along a small, unnamed stream; Cards at camp.
The trail was really narrow and built into the shoulder of the mountainside. In 2.4 miles, we reached Wilson Creek shelter. It was only 2:00, but there were already a few hikers at the shelter, settled in for the night. We asked a couple northbounders if they’d passed any nice trailside campsites in their last few miles. Everyone said they remembered sites, but not specifically how far away they might be. Adam and I decided to continue hiking and gamble on finding a place to camp somewhere in the next couple miles.
After the shelter we decended another half mile down to Wilson Creek. There was a campsite, but it was literally right on the trail, so we kept hiking. After crossing Wilson Creek, we had a bit of uphill for about a mile. It wasn’t tough uphill, but it was still tiring in the mid-afternoon heat and humidity. At 4.2 miles, we reached an unnamed stream marked in our AWOL guidebook. There was an established campsite a couple hundred feet off the trail. It was the perfect site for the night – flat and close to water.
We set up camp, collected water, and spent the afternoon playing cards. We cooked dinner and spent the evening talking and reading. Before it got too dark, we set off to find a perfect tree for our bear hang. it turned out to be the one thing our otherwise perfect site was lacking. We did the best we could with a branch that was a little bit low and flimsy. Sometimes you just have to settle for the best possible option and hope that determined bears stay away from your campsite.
We got into the tent around 8:30, just as the woods were getting dark. It was a warm and sticky night, so we left the vent and the rainfly wide open. We both left our sleeping bags home on this trip and used lightweight quilts instead. It was a good decision and we both stayed warm (maybe a bit too warm) during the night. We eventually drifted off to the sound of distant owls and whippoorwills.
Adam Says: Day Two – Trailside Campsite to Daleville (9.5 miles)
The next morning, we ate breakfast, packed up camp, and were back on the trail in under an hour. We had a very steep but short section of uphill to climb to start things off. We were breathing deep, but we quickly reached the apex of the hill just about .2 miles in. The trail descended just as steeply and we arrived at Curry Creek at .8 miles. At the creek, there was a Curry Creek Trail to the west of the trail, but stay on the white-blazed AT. From the reliable water source of Curry Creek, we began to climb again up another steep section of trail. At the 1.9 mile mark, we reached an area where the trail then began to descend again. The trail descended for about a mile and then rose up again with a steep climb to reach the junction with the Fullhardt Knob Shelter at 4.4 miles. We took the side trail for .1 miles to reach the shelter. We stopped and ate a snack here, knowing that most of the climbing was behind us.
The Appalachian Trail climbed the mountain on a series of curves and switchbacks. Below: We saw a lot of views through the trees; Crossing Curry Creek; A whitetail deer watching us from the woods.
While we were at the shelter, we were joined by a couple that was working on section hiking the AT and we enjoyed talking about some of the things we had both seen along sections of the trail. At the shelter, there is a privy and a cistern behind the shelter to get water (water should still be treated before drinking). We were good on water, so after relaxing a few minutes, we pushed on. We rejoined the AT at 4.6 miles and began our big descent. The trail had a few switchbacks on the way down and it was rather steep in sections. We came across a sign stating that the trail soon passes through private lands and to stay on the trail. At 6.5 miles, we passed through a fence, beginning the start of some of these private lands. We had a short bump to climb before we reached VA 652/Mountain Pass Road at 6.8 miles. This bump however was the prettiest part of the trail as you ascend over a large field and have nice mountain and farmland views all around you from the top. A few tenths of a mile later, we went through another fence stile. We then crossed over another road, over train tracks and then US 11. At 7.6 miles, we passed underneath I-81 by walking on VA 779 underneath the interstate.
There were a couple moderate climbs in the morning.
The sun was hot and beating down on us. We were desperately hoping to find some shade, but most of the hike from here on is out in the open. We were at least glad we got an early start. The trail ascended to the left after the overpass and led us through a grassy swath of land that cut through some of the brushy area around it. Around the 9.5 mile area, we finally arrived at US 220 and Daleville, Va. We crossed the road to get back to our car that we had left at Valley Cleaners. When we got back to the car, it was right around noon. Whenever we go through Daleville around lunch, we always stop at Three Li’l Pigs barbecue. We were hot, tired, and hungry so it was a great place to cool down and eat some amazing food. Our waitress could see that we were hikers and we talked to her about what we were doing. While we chatted, she brought us an endless stream of Diet Dr. Pepper refills. She said she was hoping to do some AT hiking, but hadn’t decided if she wanted to do a section or the entire thing. As we continued to stuff our faces, she came over with a bowl of banana pudding. She told us that AT hikers get a complimentary serving of banana pudding. While I think this is more intended for thru-hikers, we didn’t turn it down!
The open meadows near Troutville were beautiful. Below: Posing at the road crossing; Open views from the meadow’s high point; Crossing the train tracks.
We then decided to bookend the trip with another visit to Ballast Point. We got to sample a few beers before we had started, but since they had over 20 on tap, we decided to get sample pours of a couple of others. We then made our way back home. We were very glad to finish this section of elusive trail.
The home stretch into Daleville. Below: The I-81 underpass; More open meadows before Daleville; Piney woods.
Trail Notes
Distance – 13.7 miles
Elevation Change – 2810 ft.
Difficulty – 3. This was a pretty easy backpacking route. The switchbacks early on day two were pretty long and steep, but it was the only challenging part of the hike.
Trail Conditions – 4. The trail was in typical Appalachian Trail shape for this part of Virginia – well maintained and nicely graded.
Views – 2. The rolling meadows near Troutville were lovely.
Streams/Waterfalls – 0. This is a quite dry stretch of trail. There is a small, low-flow spring at Bobblets Gap and a seasonal stream at Bearwallow Gap. There is NO WATER SOURCE at the Cove Mountain Shelter, so plan ahead.
Wildlife – 3. We saw several deer. At night we heard a barred owl and several distant whippoorwills.
Ease to Navigate – 4. The trail is well marked and easy to follow. There are road crossings, but the white blazes are easy to follow in most places.
Solitude – 3. We actually saw very few people on this hike considering the beautiful weather and its proximity to the parkway.
* MapMyHike is not necessarily accurate, as the GPS signal fades in and out – but it still provides some fun and interesting information.
Directions to trailhead: We parked our end point car at Valley Cleaners in Daleville. It’s along Route 220 where the Appalachian Trail crosses. Please ask the cleaners for permission to park here and park where they tell you to. Parking here is a courtesy provided to hikers that can be rescinded at any time if people take advantage. Coordinates for the dry cleaners are: 37.393538, -79.906817. From there, we took a shuttle to Black Horse Gap on the Blue Ridge Parkway. Coordinates for the hike’s start point are: 37.424611, -79.757202. Head right and start on the trail.
This 7.25 mile hike is a great choice for anyone who wants to experience Three Ridges’ spectacular views without having to complete the challenging 13+ mile loop. The route climbs moderately along the Appalachian Trail until you reach Hanging Rock – the best vista on Three Ridges mountain.
Last fall, I went on a girls’ backpacking trip from Cole Mountain to Waynesboro. Near the end of the trip, we hiked up and over Three Ridges. While we were eating lunch and enjoying views on Hanging Rock, I thought ‘This spot is gorgeous and it would be a fantastic dayhike.‘
Many casual hikers take a pass on Three Ridges because the 13+ mile hike with more than 4,000 feet of climbing can be intimidating. The full traverse of the Three Ridges – MauHar loop has the deserved reputation for being one of the toughest hikes in the state. But 7.25 miles with under 2,000 feet of climbing – that’s right in the dayhike sweet spot.
In early June, I had a Saturday with absolutely zero obligations. Adam decided to stay home and work on some chores and projects around the house. I set out to hike from Reeds Gap to Hanging Rock. I was at the trailhead by 8:00 a.m. in hopes of beating the heat, humidity, and weekend backpacking crowds.
The Appalachian Trail ascending Three Ridges. Below: Parking at Reeds Gap can get crowded; The AT ascends from the parking lot through a meadow; There are dry campsites along the top of Meadow Mountain.
When I arrived, there were still a few spots in the Reeds Gap parking area. The lot fills quickly – especially on weekends. I started southbound on the Appalachian Trail, climbing gradually uphill across the edge of an open meadow. Wild hibiscus was blooming and butterflies were everywhere. When the trail first enters the woods, it’s flat and comprised of soft dirt. But within a couple tenths of a mile, the trail begins to ascend steadily up Meadow Mountain. Along the ridge of Meadow Mountain there are a couple small, dry campsites.
After a short ridge walk, the trail descends Meadow Mountain. At 1.6 miles, I reached a three way junction. The Appalachian Trail continues straight. To the right are a fire road leading back to the Blue Ridge Parkway and a spur trail leading to Maupin Field Shelter and the MauHar Trail. This area is well-marked with trail signs, blazes, and a kiosk describing the wilderness area. I decided to pass the shelter and continue on to Hanging Rock.
The mountain laurel was in full bloom. Below: The Appalachian Trail is nicknamed ‘the green tunnel’ for a good reason; Rose of Sharon/Wild Hibiscus (I think); I missed the peak bloom of the Catawba Rhododendron.
After passing the junction, the trail climbed steeply, but briefly, to the top of Bee Mountain at 2.2 miles. The trail becomes rockier along this stretch and remains so until the viewpoint. Along the top of Bee, there are several more dry campsites. After a short ridge walk, the trail descends Bee Mountain for .2 miles into a small saddle. This is where the climb up Three Ridges Mountain begins.
The climb continues gradually for 1.2 miles. I thought this stretch of trail was so beautiful. It was a classic example of why the Appalachian Trail is nicknamed ‘the green tunnel‘. There were lush ferns, blooming mountain laurel, thick trees, and green vines. The forest floor was carpeted with the bright purple petals from Catawba rhododendron.
At 3.6 miles I reached the viewpoint at Hanging Rock. The view is on the right side of the trail and is accessed by following a small path through an opening in the trees. The actual high point of Three Ridges Mountain is another .8 mile south, but Hanging Rock is a perfect stopping point.
Another angle on the view. Below: Blooming mountain laurel; I stopped by the Maupin Field Shelter on my way back; Near the shelter the trail splits into the AT and a fire road. Make sure you remain on the well-marked AT.
The outcropping at Hanging Rock is wide and spacious. The views include the southern slopes of Three Ridges, the Tye River Valley, and the Priest. The Priest is the large mountain on the other side of the valley. Even though this is a popular area, I magically had the viewpoint all to myself for almost forty minutes. Just as I was stowing my camera and getting ready to leave, northbound thruhiker Tengo Hambre arrived at the view. He didn’t have a camera and his phone was dead. I ended up taking a photo of him and emailing it to his wife. He agreed that the vista was breathtaking and worth remembering with a photo.
I hiked back the same way I came up. I stopped a while to chat with the Tidewater Appalachian Trail Club member who was doing trail maintenance. Because Three Ridges is designated wilderness, he has to use hand tools (gas-operated weed whackers are not allowed in wilderness!) I also stopped briefly at Maupin Field Shelter on my way back. I like to stop and pack out any trash I find. When I reached the parking lot, it was overflowing with cars and the day was sweltering. I had timed my walk perfectly and had a great day!
Our first overnight backpacking trip of the season allowed us to watch the green of spring creeping its way up the mountainsides.
Day One…
When you are gifted a sunny 75-degree weekend in April, you must snatch it up and go backpacking! At least, that is my belief on the matter. We had just such a weekend in mid-April this year, so we decided to get out there and work on completing some more Virginia Appalachian Trail miles.
We’ve already completed all the miles between Jennings Creek, VA and Harpers Ferry, WV, so we decided to pick up the next section south – Black Horse Gap northbound to Jennings Creek. It was a relatively short route for an overnighter – twelve miles the first day and just three miles the second day. We always try to do about 20 miles on a one-night trip, but access to road crossings for our shuttle drop-off made fifteen miles the best logistical option for this trip.
We looked up shuttle options in our AWOL Guide, and ended up hiring Homer Witcher to give us a ride to our start point. Homer is a great trail ambassador – he’s in his 70s and still finds the time and energy to run on the AT most days. He, his wife, and children are all avid, lifelong hikers – completing multiple section and thru hikes. He told us he and his wife are planning another thru in 2017. We greatly enjoyed talking to him on the ride over to Black Horse Gap.
The signage for the AT along the Blue Ridge Parkway is nice. Below: Our start point at Black Horse Gap; Adam hikes through a rhododendron thicket; We had nice views through the trees for most of this hike.
About a half hour later, we found ourselves standing along the Blue Ridge Parkway at Black Horse Gap. We found the trail easily and started our northbound walk. Over the first few miles of hiking, the AT crosses the Blue Ridge Parkway a couple times – at Taylors Mountain and Harveys Knob. Both crossings offer panoramic vistas of the valley below. Most of the views in this section include a nice look at Sharp Top, one of the areas most popular mountains for day hiking. The terrain along this stretch of trail could best be described as rolling – there were lots of ups and downs, none dramatic. We passed a large group of Boy Scouts hiking along the trail. They turned out to be pretty much the only people we saw on our hike.
By 12:30, we reached our lunch stop at Bobblets Gap shelter. We ate and assessed our water supply. We knew we’d have another chance to resupply water at around the 8 mile mark, but read that the water source at Bearwallow Gap was iffy and seasonal. I still had over two liters of water, some in my Camelbak and a full Smartwater bottle. Adam filled his Camelbak to three liters and also had a full Smartwater. Our planned campsite at the Cove Mountain Shelter is dry (no spring, no stream) and the closest water source to camp is three miles away in either direction, so we tried to guess how much water we would need to cook and hike the next day. It’s a delicate balance between carrying too much heavy water and not enough, risking dehydration.
After lunch, we leapfrogged the same group of scouts again. They had decided to skip the shelter since they had moms and lunch waiting for them at a road crossing ahead. The post-lunch hiking was decidedly more uphill than the morning hiking. We gradually climbed, crossing the parkway two more times at Peaks of Otter and Mills Gap. At Mills Gap, we were able to get rid of our lunch trash at a roadside trashcan – being able to get rid of garbage is a real treat for any backpacker! We took a rest at Mills Gap, reclining on a picnic table in dappled shade. The temperatures weren’t that hot – maybe high 60’s, but the sun was incredibly strong and relentless through the mostly leafless trees. We both got sunburned despite using sunscreen.
The trail crossed the parkway numerous times – usually near vistas. Below: One of many road crossings with a view; Blooming columbines; A huge retaining wall under the parkway; Bobblets Gap Shelter; Lunch and shelter log; A very dank water source.
After a little more climbing from Mills Gap, we started a nice descent to Bearwallow Gap and the VA43 road crossing. We passed a murky, dank wildlife pond along the way – maybe it’s the bear wallow! At the road crossing, we sat like a pair of hobos under the Blue Ridge Parkway road sign. People driving past looked at us like we were a novelty. There turned out to be plenty of water in the seasonal stream at the crossing, but neither of us had drunk much more water so we decided not to resupply again. That wasn’t the best idea – more about that later!
We crossed VA43 and immediately began the climb up Cove Mountain. Within the first hundred feet there was a sign reminding us about the dry conditions at Cove Mountain Shelter. We still were certain we had plenty of water. As we ascended, I said to Adam “This isn’t bad! The trail looked WAY steeper on the map!” Adam replied, “I hope you’re not jinxing us.” Well, I totally jinxed us. The trail got much steeper and due to past forest fires, we were climbing in direct, unrelenting sunshine at the hottest part of the day. We both went through much more water than we had planned for. I chewed gum to try and preserve what water I had left. We passed a couple small campsites along the ridge of Cove Mountain. We contemplated stopping for the day, but decided to press on to our planned stop.
Cove Mountain (one of several mountains by this name in the Blue Ridge) was the only tough part of the day. Below: Sitting like a hobo at the road crossing; It’s not nice to shoot at hikers; Beginning the climb up Cove Mountain; Campsites along the top of Cove Mountain; Adam gets nice views as we begin the descent to the shelter; Evidence of an old forest fire.
The descent of Cove Mountain was incredibly beautiful. I think the area burned in 2011 or 2012, leaving spectacular open views along the ridgeline. I was thankful for such beautiful, distracting views the last couple miles because my feet were killing me. In addition to not refilling water when we should have, I made the mistake of trying out new gear on a long(ish) hike. For many years, I have hiked in Thorlo thick-cushion hiker socks with a pair of silk sock liners. I don’t get blisters -ever- with that combo. This time, I decided to wear my Darn Tough wool socks. They’re super popular with hikers and were always comfortable for me on day hikes – even long day hikes, but apparently I do need the extra cushioning I get from Thorlos when I’m carrying a heavier pack. Lesson learned – don’t mess with the tried and true, especially when it comes to your feet!
We hobbled into camp around 3:30 – almost 12 miles in about 6 hours included stops for lunch, rest, and photography – not a bad pace for our first trip of the season. We set up camp and spent the remainder of the afternoon reading and napping. Despite being dry, Cove Mountain Shelter is an idyllic spot. The shelter is typical, the privy is new, and there was space for a good number of tents both around and on the ridge above the shelter. Recently, I learned an interesting piece of trivia about the Cove Mountain Shelter from my friend Jeff Monroe (of Wandering Virginia). Apparently, this shelter used to sit at Marble Springs (where we camped on the second night of our Jennings Creek to the James River section). When the area around Marble Springs became designated wilderness, the shelter was moved to its current location on Cove Mountain.
It was neat to see Rt. 43 wrapping around the mountain. Below: The Cove Mountain Shelter; Tents and bear bags.
Before dinner, Adam found a good tree and slung the rope for our bear hang. As we prepared dinner, we rationed out our water, so we’d have enough for breakfast and our second day of hiking. We were both pretty thirsty and wished we had filled up to the maximum at Bearwallow. We even ended up drinking our dishwashing water. Lots of ‘Leave No Trace’ folks always drink their wash water, but it’s also acceptable to broadcast water away from camp. We usually broadcast. But this time, we enjoyed a lovely ‘tea’ flecked with a mélange of buffalo chicken, macaroni and cheese, and crème brulee. Mmmm! Even after conserving water, we really didn’t have much left for both breakfast and tomorrow’s hiking.
As we were finishing dinner, Boy Scouts started rolling into camp – first two, then five more, then another four, then the final three an hour later. We were sure they had come off the trail at VA43. They’d been hiking since 9:30 a.m. – many of them were first time backpackers, a few were first time hikers! The troop was from Roanoke Rapids, NC. They were nice folks, but clearly new to backpacking, as they took the time to remove our bear hang from the tree, thinking it was litter! Adam was not happy about having to get the rope back over the precarious branch, but in the end he agreed it was a little bit funny.
We got to watch sunset from the hillside above the shelter. Below: The sun goes down over the Blue Ridge; Enjoying our view!
After dinner, we hiked up the hill behind the shelter to catch sunset. The view was lovely! As soon as the sun went down, it got cold pretty quickly. The dry, breezy conditions precluded a campfire, so we crawled into our tent a little after 8:00 p.m. I fell asleep but was woken several times during the night to sounds of foxes, whippoorwills, and owls! Despite the interruptions, it was a peaceful night and I was so glad to be out in the woods again!
Day Two…
We knew our next day on the trail was going to be quite easy. We woke up early before the Boy Scouts were even stirring. It was quite chilly, so we were probably moving a little faster in the morning to get the blood flowing. We packed away all of our stuff and enjoyed a breakfast of Little Debbie Peanut Butter Pies and coffee. The plan was to have hot granola with Nido, but we didn’t have enough water left to make both hot cereal and coffee, so coffee and cookies won. We left the shelter area and were on our way in a little over an hour. Just about .2 miles away from the shelter, we came to a nice western morning view from the top of Cove Mountain. The trail continued to ascend, but it was hardly noticeable. From camp, the trail ascends about 200 feet in .8 miles. At this point, the trail descends the rest of the way. We were impressed with the views through the trees along the way.
A couple tenths of a mile past camp, we got a nice view from Cove Mountain. Below: Tents in the morning sun; Adam hikes along the Appalachian Trail; Christine descends toward Jennings Creek.
The trail on the descent was easy walking for the most part. The trail had just a few longer switchbacks on it, but it was a nice, peaceful walk in the woods. It was just a short amount of time before we could hear the sound of water from Jennings Creek and around 3.2 miles we were back at Jennings Creek Road. We took a right and crossed over the creek for some picturesque creek scenes before getting to our car on the left side of the road.
Adam makes his way downhill through the evergreens. Below: Pretty Jennings Creek; The parking area at the AT crossing; We saw zebras on the way home.
We had previously planned to get to Sonic in Waynesboro for a celebratory lunch and a stop at Rockfish Gap Outfitter’s Anniversary Sale (where I got a new Osprey Atmos pack), but arriving at the car around 9 a.m., we knew we had some time to kill. We decided to stop on our way at the Virginia Safari Park near Lexington. If you are a fan of animals, this is a must-see place to visit. We drove through the loop (we could even see rhinos through the window) with a bucket of feed while zebras, emus, alpacas, elk, and yaks tried to rip it from our hands. After driving through the loop, we also walked through their other exhibits, where we could see giraffes at eye level, walk among kangaroos, and see other animals through cages – tigers, hyenas, and monkeys. I believe this was our third time visiting and there are always new additions every time we visit.
This section of the Appalachian Trail has some wonderful scenery on it. If you are looking for a shorter, overnight trip with lots of views along the way, this hike won’t disappoint – just plan for water.
Trail Notes
Distance – 14.6 miles Check out the stats from Map My Hike [Day 1] [Day 2]*
Elevation Change – 1650 ft.
Difficulty – 3. This was a pretty easy backpacking route. It was perfect for our first outing of the season and gentle injury recovery.
Trail Conditions – 4. The trail was in typical Appalachian Trail shape for this part of Virginia – well maintained and nicely graded.
Views – 5. There are many fantastic viewpoints along this route. Most of them come from overlooks along the Blue Ridge Parkway – which you’ll cross multiple times on this route.
Streams/Waterfalls – 0. This is a quite dry stretch of trail. There is a small, low-flow spring at Bobblets Gap and a seasonal stream at Bearwallow Gap. There is NO WATER SOURCE at the Cove Mountain Shelter, so plan ahead.
Wildlife – 3. We saw several deer and had a barred owl and a whippoorwill in camp.
Ease to Navigate – 4. The trail is well marked and easy to follow. There are road crossings and several other trail junctions, but the white blazes are easy to follow in most places.
Solitude – 3. We actually saw very few people on this hike considering the beautiful weather and its proximity to the parkway.
* MapMyHike is not necessarily accurate, as the GPS signal fades in and out – but it still provides some fun and interesting information.
Directions to trailhead: To drop off first car: Take exit 168 off of I-81 toward Arcadia, VA. Turn on to State Route 614/Arcadia Road off the exit. Arcadia Road becomes Jennings Creek Road. After 4.5 miles, you will see a large gravel parking lot after crossing Jennings Creek and you will see a sign for where the Appalachian Trail crosses. Park in this lot. Coordinates 37.529352, -79.622693 To drop off second car and start your hike: Continue down Jennings Creek Road from where you parked (not arriving the way you came). In 1.8 miles, turn right on to State Route 618/McFalls Creek Road. Go 4.1 miles and then turn right on to the Blue Ridge Parkway. Follow this for 8.6 miles until you reach the small pulloff on the right side for Black Horse Gap. With not much space here for a vehicle, you will likely want to park along the side of the road. Just a few feet on the fire road, you will see the sign for the Appalachian Trail junction. Coordinates: 37.424611, -79.757202. Head right and start on the trail.
Beautiful Apple Orchard Falls plunges about 200 feet down the mountainside. Below: Even the fire roads were scenic on this hike; Abundant wildflowers including Dutchmans Breeches; There were several stream crossings to negotiate.
Christine Says…
Apple Orchard Falls has been on our ‘must hike’ list for years now, and I’m so glad we finally got out there and did it! It’s a bit of a drive from our home-base of the central Shenandoah valley, but it was well worth the trip! We hiked it on a cool, rainy day in mid-April. We thought we’d have the trail all to ourselves, but as our car bumped along the forest road nearing the parking area, a runner went by. Then three more runners… and then a cluster of ten. Pretty soon we realized that there was some kind of race going on in the vicinity. It turns out we picked the same day as the Promise Land 50K for our hike. We ended up sharing the first half of our six-mile route with 300+ trail runners.
They were all friendly folks, but it was a little stressful to constantly be looking over my shoulder, watching to make sure there wasn’t a racer on my heels, needing to pass. I certainly didn’t want to get in anyone’s way as they cruised toward victory or a personal record! I still enjoyed the gorgeous stream scenery as we ascended alongside North Creek. The sound of the water was soothing. The hillsides along the trail were covered with trillium and purple wild geraniums. The air was filled with a light misty rain and all the trees were unfurling their brilliant spring green leaves. With all these pleasures along the trail, I tried my best not to let the constant stream of passing racers disrupt the zen-like peace.
Christine checks out the creek early in the hike. Below: We hike the loop on the same day the Promised Land 50K was running. It made for a crowded trail; Trillium was blooming everywhere; Pretty little rapids on the creek.
The trail was in great shape and ascended steadily and moderately uphill. There were several sturdy footbridges across the creek on our hike up. Around 1.3 miles into the hike, the climb became a little steeper and rockier. Right before reaching the base of the falls, we passed through a jumble of huge boulders. At first, we could only see the falls through the trees. They were majestic, but obscured by the foliage. We continued uphill, making a wide switchback before coming to a curved wooden bridge and a viewing platform at the base of the fall’s largest plunge.
Adam set up my tripod and I spent some time photographing the waterfall from a variety of angles. I wish the trees around the falls had been a little more ‘leafed out’. The green would have made an even more attractive frame for the falls, but it was still very nice. I was challenged by the rain – which was beginning to fall at a steadier pace. Droplets kept landing on my lens, and making blurry bubbles on each of my photos. I used a hat as an umbrella as much as I could. While we were enjoying the waterfall, the bulk of the racers passed us by.
After leaving the falls, we climbed the 175 stairs above the falls. About halfway up the stairs, we caught our one open view of the hike – a pretty peek out over a spring green valley. Shortly after the top of the stairs, we passed another small waterfall. There was a nice established campsite near the smaller fall. What a idyllic place to spend a night! In fact, we saw many great campsites all along this loop. I think it would make a great beginner backpacking trip or short gear shakedown route.
There were several sturdy, well-constructed bridges on the trail toward the falls. Below: Just before reaching the falls you climb through an opening between huge boulders; The viewing deck for the falls is very nice; Adam checks out the falls.
About a third of a mile past the small waterfall, we reached Apple Orchard Road, which is a grassy fire road that connects to the Cornelius Creek trail. The racers all continued uphill toward the Blue Ridge Parkway. We turned right and followed the fire road for about a mile to its intersection with the Cornelius Creek Trail. Fire roads are typically sort of dull, but this one was actually quite nice – lush green, curvy, and decorated with wildflowers – more trillium, geraniums, violets, and enormous dense patches of Dutchman’s Breeches.
The Cornelius Creek trail was probably my favorite part of the hike. The racers were off our tail, and I could fully focus on the spring forest and sound of flowing water. The rain was coming down steadily, so my photo opportunities were a bit limited. Hopefully, I captured enough to adequately convey the feel of Cornelius Creek. It was lovely with so many small cascades and swimming holes. The only real challenge on this part of the hike were the two significant stream crossings. The first (pictured at the top of the post) was wide, but not very deep. Our toes got a little wet. But the second was quite deep, wide, and fast-moving. We packed all of our camera gear and electronics away in dry bags and plunged in. Even rock-hopping, the water came halfway up to my knees. The footing was small, shifty, and slick! Thankfully, we made it across without falling completely into the water! The last bit of walking was done with sodden shoes and socks – that squishy feeling is always so weird!
When we got back to the car the first thing I did was take off my soaked shoes and socks and put on flip flops! Then we were off on our way for a well-deserved lunch at Peaks of Otter!
Adam Says…
We got up early to hit the road and beat the crowds on this hike. With a gloomy day with some rain scheduled around the early afternoon, we wanted to make the best use of our day. When we first saw the runners on the gravel road, I thought well at least they are going in the opposite way. We parked our car at the end of the road and there was a race stop set up for people to check in, get some snacks and water and keep running. Little did we know we would see most of them all again on the trail.
We got out of our car and found out that there were going to be runners on the trail. We thought we would at least try to get a head start, so we jumped on the trail right away. We took the blue-blazed Apple Orchard Falls trail left of the kiosk that came to a wooden bridge almost immediately. We soon came across the first runner of the day on the trail, who we heard ended up coming in 2nd in the race. Along the trail, there were funny signs to try and inspire the runners along the way (and most were done with Game of Thrones references). At .2 miles, take a right at the intersection to stay on the trail.
A view into the valley on our way up the stairs. Below: Adam takes in a side view of the falls; Climbing the famous stairs, the smaller waterfall above Apple Orchard Falls.
The trail continues along North Creek for a steady uphill. At 1.2 miles, you reach a couple of bridges and a small creekside campsite. Crossing over the second bridge, the trail becomes steeper uphill. Eventually, you get some views of the falls to the right as you make the climb up. But don’t worry, the trail leads right up to the falls. The climb up to the falls is also very steep. But, as you reach the falls at 2.0 miles, there is a nice bench and platform, inviting you to take your time to enjoy the views. We stayed here for a while and saw a ton of runners pass by. Some of them just took a quick glance, some walked slowly by, but one guy stopped to take a picture. I guess the runners had different levels of competitiveness and different levels of exhaustion at this stage of the race.
The trail continues on and winds around the hillside before beginning a series of stairs. Along the climb, there was a nice viewpoint that gave you glimpses of mountains to the west. We continued uphill along the trail until we reached another waterfall around 2.3 miles. There was a nice campsite by this waterfall also and we thought it would be a great overnight stop for a backpacking trip. At 2.5 miles, we reached a junction with a fire road. We took this fire road to the right. At 3.7 miles, the trail meets a junction with the Cornelius Creek Trail. We headed straight to start the Cornelius Creek Trail. This trail descends quite steeply. As we had seen the runners on this trail when we first arrived at the parking lot, I felt that I too was having to run down the steepness of this trail in the beginning. Be careful where you step, since the trail is incredibly steep and filled with loose rock, begging for a twisted ankle or fall. At 4.2 miles, the trail runs along Cornelius Creek.
Christine walks along in the rain. Below: Most of the hike closely follows water; A lovely little cascade on the Cornelius Creek Trail; Post hike beers at Apocalypse Ale Works.
Cornelius Creek was a long exposure photographer’s dream. There were so many spots where you saw small waterfalls and swimming holes along the way. Contrasted with the lush green forest, it was truly beautiful to see. We did have to cross Cornelius Creek a couple of times and with any recent rain, you are likely going to get your feet wet. Be careful as there are some deep holes along the creek crossings that could have you up to your waist if you don’t step carefully. We made it across and continued our hike. The rain was coming down fairly steadily, so we didn’t stop a lot for fear of ruining camera gear, but it was one of the most beautiful creekside hikes you will see in Virginia. Right before you return to the parking lot, you’ll see a large campsite (with even a rope swing put in). We got back to the parking lot at the 6 mile marker.
On our way back home, we took a detour and drove along the Blue Ridge Parkway to have lunch at Peaks of Otter. My family used to picnic here yearly, so this spot always holds a near and dear place in my heart. We had a nice lunch with music from a local singer. We decided also to stop by Apocalypse Ale Works brewery for one of our favorite post-hike things to do – beer sampling. The drive back home was rainy most of the day, but we felt like we had accomplished a lot on a dreary day.
Trail Conditions – 4. The trail is very pleasant to walk. Sturdy bridges and a wide viewing platform are available so the walk up to the falls along North Creek is pleasant and safe. There are a couple crossings on the Cornelius Creek descent that can be tricky when there has been recent rain.
Views – 2. There is one nice view when you’re climbing the stairs after visiting Apple Orchard Falls.
Streams/Waterfalls – 5. Spectacular – you are within view of the stream for most of the hike.
Wildlife – 1. Too many people to see much wildlife!
Ease to Navigate – 4. The signs make this route pretty easy to follow. There are several places where trails go in multiple directions, but this route is well marked.
Solitude – 0. It’s supposedly the most popular hike in Jefferson National Forest. It was cool and rainy when we hiked it, so there weren’t many other day hikers. But there were 300+ racers on the trail with us.
Directions to trailhead: From I-81, take exit 168 for VA-614 toward Arcadia. Turn on to VA-614 heading east and go 3.3 miles. Turn left on to North Creek Road. Go 2.8 miles and turn right on to an unnamed road*. This road is a gravel road. Follow it for 2.2 miles until you reach the large parking lot. The trail starts left of the kiosk. Right of the kiosk, the trail going uphill is your return route. *Since this unnamed road can’t be found on GoogleMaps, I would suggest printing the trail map above to have a way to find this road.
This 9 mile hike’s distance could be cut in half if you have a car shuttle. When we hiked it, the Blue Ridge Parkway was closed for ice/snow, so we ended up parking at Reeds Gap, walking 4.8 miles on the Appalachian Trail and then walking 4.2 miles back along the closed parkway. Typically, this would be an easy hike with a couple nice views. In our case, it was a challenging icy hike in (occasional) white out conditions!
It’s a real treat to walk the Blue Ridge Parkway when it’s closed to vehicular traffic. Fresh snow made the view spectacular. Below: The parking area at Reeds Gap was icy when we arrived; Adam walked along the iced Appalachian Trail; Everything was fully coated with a glaze of ice.
Adam Says…
As we slowly work on completing the entire Appalachian Trail through Virginia, we sometimes end up with small gaps in our contiguous miles. This 4.8 mile section was one of those and it was proving to be our nemesis. We had tried to share a shuttle with friends and park at both ends, but a closure of the parkway made those plans fall through.
Over our Christmas break from work, we tried to hike it by dropping Christine at one end and I would park at the other, passing in the middle, and then Christine hiking to the car and driving back to pick me up. It wasn’t preferable to do it this way because we like hiking together, but we really wanted to cover these miles. But on our way to the drop point, we saw several cars slide off the road (not far from a precipitous, cliff-side drop). Rain from the day before had left a thin sheen of ice on all the shady, curvy spots in the road.
One of the couples in a car that slid off the road was having a heated argument – he wanted to press on through the icy danger, but she wanted to call AAA and have the car towed off the mountain. We decided to backtrack and not risk it (especially not knowing the road conditions ahead), choosing to hike near Humpback Rocks instead. On our way to Humpback Rocks, we saw a park ranger making his way to the slippery road patch. They ended up closing the parkway just south of Humpback Rocks that day. The parkway closes quite often in the winter. Rangers would rather close the roads than risk having to come up and save people on the trails/roads when weather conditions could make it difficult.
There were several rock face covered with snow melt and re-frozen run-off. They made pretty ice formations. Below: Christine cross the Blue Ridge Parkway at the Three Ridges Overlook. The pavement was like a skating rink; Adam makes his way downhill; In many places branches were bowed across the trail.
After those failed attempts, we decided to try this section again. The weather forecast suggested a warming, clearing day, no snow in the near future. There had been a short bout of freezing rain the night before, so we were a little concerned about roads, but we knew we could at least make it to Reeds Gap and hike from there. When we arrived at Reeds Gap, we found a few other cars there, but it looked like they were attempting to hike Three Ridges. We found the sign for the Appalachian Trail and crossed SR 664 to head north on the white-blazed Appalachian Trail. I was amazed at how icy the ground still was. It was manageable in normal hiking shoes, but still slippery in parts. Every step that I took left an icy footprint behind me, which made the trail look like an old Family Circus comic strip. At the least, they were good breadcrumbs left in case we needed to backtrack on the trail. Some of the branches from nearby trees were iced over and bowed over the trail, causing us to have to lift them over the trail. Some broken off pieces looked like broken antlers littering the ground.
After going about .5 miles, the Appalachian Trail crosses the Blue Ridge Parkway. At this point, the trail descended through some slippery areas, so we decided to put on our Yaktrax to provide some traction. I don’t know how we would have made progress without them. After going just another mile or so, it started to snow. At first, it was just a few flurries, but it was picking up. At 3.5 miles, we came to a sign pointing out a short trail to the Rock Point Overlook. The snow was coming down so fast at this point, visibility was at a minimum. We ate a quick snack and then proceeded. At 4.35 miles, we arrived at the Cedar Cliffs overlook. The snow had been falling so hard, it was hard to find the trail. It was at this point, I realized that hiking along the AT in the snow wasn’t the best idea – all the trees were covered with snow, covering up any white blazes that would have been on the trees. We were so close to finishing this section and didn’t want to turn back at this point. I had Christine stand in one area that we knew was close to the trail and within eyesight while I scouted ahead to try and find a semblance of trail under our feet. Eventually, I found the trail again and we proceeded.
Views from the first overlook were practically lost to the swirling snow. Below: Sign pointing the way to the overlook; Snow started coming down harder while we were stopped at the overlook; Within 15 minutes, the icy ground was covered with a generous dusting of snow.
I started to worry at this point about being able to drive back down from the mountain if the roads were going to be bad. We made a decision that when we reached the road, we would hike back along the Blue Ridge Parkway to hopefully save time and get us back to our car more quickly. At 4.85 miles, we arrived back at the Blue Ridge Parkway. We took a right and headed south along the parkway and we were soon very glad we had made this decision. We came across some great views at overlooks along the road that we didn’t have along the trail. And then the snow stopped and the sun came out to start melting the snow, which eased my nerves. The views were outstanding on the way back as we could see a defining line of snow that had hit the mountains and clear fields at the lower elevations.
While this hike had a little bit of danger due to the weather, it was a visual winter wonderland. This is the definition of winter hiking. We arrived back at the gate that was blocking the parkway at 9.0 miles and got back in our car. We decided to hit Devil’s Backbone on our return trip home and then also stopped at some other Nelson County 151 highlights – Bold Rock Cider’s new tasting room and Silverback Distillery. It really was a great adventure and it made me feel very lucky to have a wife that will go on such crazy undertakings with me.
NOTE: From research we have done, the starting point is called “Reeds Gap” in some sources and “Reids Gap” in others. We went with the first spelling since that was how it was listed on PATC and NatGeo maps.
Christine Says…
Finishing this little 4.9 section of AT turned out to be more elusive than I ever would have believed possible. After a few attempts failed due to snow/ice, closed roads, and transportation problems, we finally successfully hiked from Reeds Gap to Dripping Rock!
On the day we accomplished this minor feat, conditions weren’t quite ideal. There had been a bit of freezing rain the night before, but the weather was forecast to warm and clear over the course of the morning. The Blue Ridge Parkway was still closed, so we couldn’t leave a shuttle-back car at Dripping Rock. This wasn’t a big deal – instead of hiking 4.9 miles once, we’d have to hike those same miles twice, making a total hike of almost ten miles. We left our car in the roadside parking on Route 664, next to the Appalachian Trail crossing. Route 664 (Reed’s Gap Rd.) crosses the Blue Ridge Parkway and is kept open year-round.
At Reeds Gap, everything upright was coated with a thick glaze of ice. It was foggy and gray and raw. We headed north on the AT, our feet crunching though the crust of ice. It was so peaceful and beautiful.
Adam questioned how wise it was for us to hike on a day with such rapidly changing weather. Below: There were some broken trees along the parkway; Adam takes in Ravens Roost; A little ‘Christmas Story’ reenactment.
The Appalachian Trail soon crossed the Blue Ridge Parkway at the Three Ridges Overlook. The asphalt was like a skating rink! It looked like regular pavement, but it was as slick as a slip-and-slide. I could totally understand why the park service closed the road!
After crossing, there was a slight descent and the terrain became a little rockier. I started to lose my footing, so Adam helped me into my traction. The ice wasn’t thick enough or hard enough for Microspikes, so we went with Yaktrax. Mine are a touch too small for my boots, so getting them on is a two person effort. I brace on a rock and Adam yanks the Yaktrax with all his might until they snap into place! One day, I’ll buy some bigger ones. 🙂 Fitted with traction, we moved swiftly along with sure, confident footing. Snow started falling – flurries at first, then in earnest. It wasn’t supposed to snow, so we trekked on hoping the skies would soon clear up (like they were supposed to!) Ah… mountain weather at its unpredictable best!
We reached a small sign pointing us to the Rock Point Overlook. As we looked off the rocky outcropping, all we could see was clouds and swirling snow. Every now and then the clouds moved enough that we could see mountains on the other side of the gap. We ate a quick snack and moved on. The snow just kept coming down faster and faster. We started feeling a little worried about getting back to our car and finding Route 664 impassable.
There were many beautiful views along the parkway. Below: It was neat to see the snowless valley below; During the last few miles of walking, the sun came out and melted the snow off the road; Another pretty valley view.
In fair weather, there are more nice views along this stretch of the Appalachian Trail, but by the time we reached the vistas at Cedar Cliffs, we were practically in whiteout conditions. The white snow even camouflaged the white blazes on the trees. It was too bad, Cedar Cliffs had large rock ledges and would have been beautiful in clear conditions. About a half mile past the cliffs, we reached the Blue Ridge Parkway and the pullout for Dripping Rock Spring. We made it – we finished our section! At that point, the snow was still coming down hard and fast. To save time, we had decided to hike the parkway back to our car. It’s easy to move at speed when the terrain is uncomplicated. We still needed traction because the road was extremely slippery and treacherous.
It turned out that the road was the better choice for scenery, too! We saw some of the most spectacular winter vistas from Rock Point, Ravens Roost, and other openings along the way. I felt really privileged to see this scenery that most people don’t get to see when the road is closed to vehicles. As we hiked along, the promised clearing conditions finally happened. The ice on the road melted quickly and we were treated to a stunning display of sunshine and ice – it was like walking through a shimmering crystal forest.
Sunshine and snow make for a beautiful combination! Below: Once the sun came out the snow melted really quickly.
We got back to our car pretty quickly and found the car and the road both free of ice! We headed down the other side of Route 664 (past Wintergreen Resort) to go to Devil’s Backbone for lunch. The brewery was packed! All the other women there were wearing makeup, skinny jeans, and tall boots. I was sweaty, disheveled, and dressed sort of like Rainbow Brite. But whatever… they had (after an hour’s wait) beer and good food.
We decided to take the 151 route home so we could pass Bold Rock and Silverback. Bold Rock recently finished their new tasting room. It’s rustic and elegant – with fireplaces and wonderful farmland views. After beers at Devils Backbone, we skipped drinking cider, but I’m glad we took the time to check out their new facilities.
Silverback is the area’s new distillery. They’ll eventually have whiskey made using local grains. But for now, they have moonshine, gin, and vodka. You can do a flight of tastings of their three spirits – a half ounce of each, either straight or mixed into signature cocktails. We ended up sharing a flight of three mini cocktails – a Moscow Mule, a Gin and Ginger, and Monkey Tea. I’m not much of a liquor/cocktail fan, but the drinks were fun and tasty. I definitely recommend checking these two spots out if you happen to be in the area!
We stopped for lunch at Devil’s Backbone. Below: We checked out the new taproom for Bold Rock. It’s very cozy and elegant. We didn’t stay for cider on this trip; We also stopped by Silverback distillery and shared a flight of miniature cocktails.
Trail Notes
Distance – 9 miles (Check out the stats from Map My Hike)*
Elevation Change – 1050 ft.
Difficulty – 2. The icy conditions made it more of a challenge, but overall this would be a fairly easy hike with not as much elevation gain. The distance may make it a little more difficult for those that are not used to going this far.
Trail Conditions – 3.5. Again, the ice made this a bit more challenging, but this section of the AT was very well-maintained. There were a few loose, rocky sections.
Views – 4.5. Most of what we were able to see was from the parkway, but I know the other overlooks would lead to panoramic views.
Streams/Waterfalls – 1. There was one small, frozen over stream that might work as a water source.
Wildlife – 1. We saw lots of deer leaping into the woods, but I wouldn’t expect a lot of other wildlife, especially since this is a well-traveled section.
Ease to Navigate – 4. Just follow signs at the posts for the Appalachian Trail. Of course, since we lost the trail at one of the overlooks, we couldn’t give this a perfect score.
Solitude – 3. Due to the nearby parking lot, I would expect this would be a place where people would explore the trail. Of course, most of the cars in the nearby parking lot are likely heading up Three Ridges from Reeds Gap instead.
Directions to trailhead: From I-64, take exit 96 for SR 624 toward Waynesboro/Lyndhurst. Turn on to S. Delphine Avenue and go 1.2 miles. The road becomes Mt. Torrey Road/SR 664. In 9.3 miles, turn left to stay on SR 664. Once you reach the top of the road in .8 miles, you will cross the Blue Ridge Parkway. Park at the large parking lot on the other side of the road. Across from the parking lot (and across SR 664), you will see the post and sign for the Appalachian Trail. Head north on the white-blazed trail.
* MapMyHike is not necessarily accurate, as the GPS signal fades in and out – but it still provides some fun and interesting information.
This 3 mile out-and-back leads to the towering (literally) summit of 5,721 ft Mt. Pisgah. Due to the short length and proximity to lodging, a camp store, and a picnic area, this trail is exceedingly popular with families. The summit offers some nice views, but the presence of a huge television tower detracts from the natural beauty of the area.
The TV tower definitely detracts from the scenic beauty of Mt. Pisgah. Below: The trail to the top is short, but it gets steep and rocky in places; Not the prettiest of summits.
Christine Says…
Our second day in Asheville was just a half day, but we wanted to get a little more hiking in along the Blue Ridge Parkway before making our way down to Bryson City and the Smokies. Breakfast was at the popular Sunny Point Cafe. We got there just a couple minutes before they opened and were able to snag the last open table for two! It’s a very popular spot, so be prepared to get there early or have a long wait.
After breakfast, we headed up to the parkway to climb Mount Pisgah. Our book talked about great views, but described the hike as ‘strenuous’. In fact, there was a warning sign at the trailhead indicating that the hike was tough and steep. It actually only climbs about 700 feet, but it does so in a short distance. I suppose the warning is necessary for novice hikers or people who think they’re just out for a casual stroll.
The hike started out from a parking lot atop the Buck Springs Tunnel. There are actually a couple trailheads in that area – Mt. Pisgah, Shut-In Trail and the Buck Springs Trail. To get to the Pisgah Trail, drive to the far end of the parking lot.
The rhododendrons and azaleas were blooming when we visited. Below: The Mt. Pisgah trailhead; Hiking along the flatter, easier part of the trail; Spring blooms!
The hike started off gentle and flat – just a pleasant walk through the woods. We could see the conical summit of Pisgah, replete with its television tower, looming through the trees. The trail made a sweeping turn at around .4 miles and began a steady uphill climb. It was rocky and rough at times, but overall a moderate ascent. A couple tenths of a mile before the summit, we came across one nice view across the mountains.
After the nice view, we made the final push to the top. The summit has a wooden viewing platform and a serious eyesore of a television tower. I know they’re necessary, but I wish they could have put it on a less scenic, more remote peak! All that metal really ruins the scenic beauty of such an impressive summit.
We sat on the summit for a while. The views would have been pretty nice, but the day was overcast and hazy, so that took away some of the majesty from the experience. I think we were also the only people on the summit without kids! Mt. Pisgah is clearly a very popular family hike! There were more three-year-olds on that mountain top than any other demographic. I guess it makes sense – the hike is short, moderate and doesn’t have any steep drop-offs — perfect for a family with small children.
We hiked down the way we came, making speedy work of the descent. Now… on to the Smokies!
There was one nice view from the trail before we reached the summit of Pisgah.
Adam Says…
When we’re on vacation, we like to alternate longer hikes with shorter hikes to make sure we still have energy at the end of our trip. When we were researching different hikes to do near Asheville, NC, we came across Mt. Pisgah. With it being such a short hike and the trailhead being sort of en route to our next town stop, we thought this was a winner. We also read about wonderful views from the top so we figured it would be a high payoff for minimal effort.
The trail started off following a slight incline for the first few tenths of a mile. Then the trail went up more steeply in elevation and can be challenging at times. But, since the hike is pretty short, it is attainable by most people. We saw more families hiking on this trail with little children than anywhere else. While many of the kids were walking the trail in the beginning, we found most of them were being carried by the time they reached the summit.
Yes… the summit is a little disappointing. Below: A steeper, rockier section of the trail; The viewing platform atop Mt. Pisgah; Hazy views from the summit.
We arrived at the top in well under an hour. The tower was such an eyesore and we both were thinking this would be so much nicer of a hike without the 339-foot tower there. The wooden platform allowed for about 270-degree views (90 degrees taken up by the tower). While it was hazy, I could tell that on a clear day you would be able to see for quite a distance.
The origin of the name of the mountain comes from the Bible. The Reverend James Hall is attributed to being the first to call this area as “Pisgah”, taken from the biblical reference to the peak where Moses viewed the promised land. The Pisgah National Forest was historically owned by the Vanderbilts (who built the nearby Biltmore House in Asheville). 500,000 acres were sold to the government by the Vanderbilts as an effort to help preserve this land.
If you are interested in geocaching, there are several to find on this trail:
You can see the parking area and the Blue Ridge Parkway from the summit of Mt. Pisgah.
While this hike does have some nice views from the top, we were a little disappointed by the size of the tower and the popularity of the trail. As Christine mentioned, it would have been nice to have this on a more remote mountain (and also not the namesake for the entire National Forest).
Trail Notes
Distance – 3 miles
Elevation Change – 700 ft
Difficulty – 1.5. This trail is short with a moderate ascent.
Trail Conditions – 4. The trail was generally in good condition.
Views – 3.5 – Typically views from a peak like this would get higher marks, but the tower is such a distraction.
Streams/Waterfalls – 0. None
Wildlife – 1. Maybe some birds and squirrels.
Ease to Navigate – 5. There is only one trail to the top, and it’s very easy to follow.
Solitude – 1. This trail is popular and heavily traveled.
Directions to trailhead: From Asheville, take the Blue Ridge Parkway south to the Mount Pisgah Parking Area, on the left, at milepost 407.6. Park at the second parking area.
This 6.6 mile loop offers some of the area’s most amazing high-elevation, Appalachian bald scenery! It was right up there with Roan Mountain. The views are 360 degrees and showcase mountains in every direction. If we were to hike it again, we’d do it as an out-and-back and skip the return arm of the loop along Graveyard Ridge and Mountains to the Sea.
Hiking Black Balsam and Tennent reminded us of both the Whites (in New Hampshire) and Roan Mountain (in Tennessee). Such spectacular, wide-open views! Below: The most scenic parts of the hike followed the Art Loeb Trail; The Graveyard Ridge section was wet and had a stream crossing; The end of the hike took us across numerous boardwalks/bridges.
Adam Says…
When we were planning our trip to the Smokies, we decided we wanted to spend the first few days near the Asheville, NC area and check out a few hikes along the Blue Ridge Parkway. We had set out in the morning to check out the Graveyard Fields waterfalls. On a trip here many years ago, we remembered how beautiful the series of waterfalls were. We brought a book with a description of the hike that would include a visit to Black Balsam and Tennent Knob on the loop. However, we didn’t have a map of the area other than what our book had provided. After driving along the parkway for some time, we pulled up to where the parking lot would be (mile marker 418.8) and it was all blocked off by fencing. It appears they are doing some major renovations of the parking area and stairs down to the Second Falls. They had blocked off any access to the trail and instead had signs saying that you could access the trail from many miles away. We were very disappointed, but decided to drive up further along the Parkway. We took a right on the gravel road 816 (mile marker 420.2) and followed that until we saw a trail marker to the right that led up to Black Balsam Knob. We were relieved we were going to be able to see the balds and I realized we were picking up our loop trail but just a little differently than we had originally intended.
From the road, you start on the Art Loeb trail. In a few hundred feet, you will see a side trail to the right. This is the Mountains to Sea Trail that will be your return from the loop. Stay straight to continue on the Art Loeb Trail as it ascends past amazing vistas. You will reach the summit of the Black Balsam Knob at .9 miles and will see many campsites at the top. On a clear day from here you will have 360-degree views all around with the Smokies to the west and Mt. Mitchell to the north. The trail took a sharp left at this point as you continue on the Art Loeb trail. On Black Balsam Knob, there are many other trails cut-in over the years along the balds which makes it tricky to know if you are on the right trail. As we left the summit area, we came to a junction between two trails that both looked legitimate. One seemed to go over a hillside and the other went to the left and around. We took the one to the left and saw a very worn sign that read “Art Loeb” so we knew we made the correct choice. The trail wrapped around the hillside and went through a narrow path with waist-high shrubbery growing along the trail. Our legs got a little scratched along the way, but we pressed on. After a while the trail went through a few switchbacks while descending and then flattened out. At this point, we could see Tennent Mountain ahead of us, so we felt comfortable that we were going the right way. Soon, the shrubbery opened up into a clearing and we climbed up the rocky path and reached the summit of Tennent Mountain at 2.5 miles.
Hiking across open, grassy balds at 6,000 ft. is such a treat! Below: The trail looks like a ribbon across the mountain tops; Lots of colorful tents on Black Balsam Knob; You can see a glimpse of the parking lot at the trailhead.
The summit of Tennent Mountain was just as scenic with more views in every direction. From here we could also see Looking Glass Rock, one of the most iconic images along the Blue Ridge Parkway, in the distance. We had our lunch on the top of this spot and then made the decision to do the full loop instead of just the out-and-back to the summits. We continued forward on the Art Loeb Trail. From here, there were a few more nice views but then the trail descended into a more wooded trail. The trail passed a few more campsite options before we reached the area known as Ivestor Gap at 3.1 miles. Ivestor Gap is a large open junction point where many trails converge. There was a map that showed where we were, but none of the trails were marked to let us know which was the right one to take. When you reach Ivestor Gap, take the larger trail to the right that looks like an old road. This was the Graveyard Ridge Trail. We were on this for only .3 miles, before passing a small spring in the rocks on the lefthand side of the trail, and took a sharp right to stay on to the Graveyard Ridge Trail, another unmarked junction [staying straight on the trail would begin the Greasy Cove Trail]. The Graveyard Ridge Trail was very rocky and had a lot of water on the trail, so there was some times of rock-hopping and getting your shoes wet. While on this trail, you may have a few glimpses at Tennent Mountain above to see where you came from and there are a couple of spots for viewpoints.
At 5.1 miles, we reached another junction. Deciding to forego the trip to see the waterfalls to Graveyard Fields (which would have probably added another 4.5 miles roundtrip to our hike), we took a sharp right up the Mountains to Sea Trail. This trail was extremely steep and at times felt like a bushwhack as the trail was very overgrown. In about .5 miles, you’ll gain over 500 feet of elevation, so it is a slow effort. Eventually at 5.75 miles, the trail reached the top of the bubble and you got a few more views from a rocky outcropping. Blazes were painted on the rock that led the way as the trail descends below. The trail moves away from the ridgeline before switching back – it feels like the wrong direction, but it’s not. The trail descends for a few hundred feet before climbing up again. You’ll pass over several wooden footbridges along this section of the trail. At about the 6.5 mile mark, the trail goes into a deep wooded area again and you reach the junction again with the Art Loeb Trail. Turn left and you head back to 816 in a short distance.
Spectacular views with every step! Below: In the saddles between the high points, the trail was narrow and lined by dense shrubs; Adam stands atop Tennent Mountain; Summit of Tennent Mountain.
At the top of Tennent Mountain, there is a plaque on the rocks dedicated to Gaillard Stoney Tennent (1872-1953) who “established organized hiking in North Carolina.” I couldn’t find any more connections or information about Tennent online, but this sounds quite impressive.
If you are interested in Geocaching, there are several you could find along the trail (and it wouldn’t hurt to have a GPS handy):
While we tried to cover some extra ground on this trail by making it a loop (and leaving the option to inspect the waterfalls), I would recommend doing this trip as an out-and-back to Tennent Mountain. The trail system is very confusing here since trails are rarely marked and junctions are not labeled (we’re a little spoiled here in Virginia). We had to ask several people along the way if we were going in the right direction, so I can imagine a lot of people will feel lost at some point along this trail. All that being said, the views from Black Balsam Knob and Tennent Mountain are breathtaking. On a clear day, you can see for hundreds of miles and can see ridgeline after ridgeline of mountains around you with few glimpses of anything resembling civilization. Don’t miss this one if you are looking for a hike along the Blue Ridge Parkway!
Christine Says…
Our first full day in Asheville, we got up early and had an amazing breakfast at Biscuit Head. Seriously – if you’re in Asheville, go eat those biscuits! We had planned a 5.2 mile hike starting near Graveyard Fields on the Blue Ridge Parkway. We drove the hour from Asheville to the trailhead to find the area completely closed off with an 8-foot tall chain link fence and orange plastic mesh. Even the wooden stairs leading to the entire larger trail system were blocked off. So, we grabbed our Falcon Guide for Hiking the Blue Ridge Parkway and started scrambling for alternatives. We settled on a different hike that would still let us see Black Balsam Knob, and give us the option to visit the waterfalls (if we had energy to spare).
Who wouldn’t want to spend all day enjoying views like these! Below: Views from the ridge after crossing the summit of Tennent Mountain; Adam approaching Ivestor Gap; Shining Rock Wilderness sign at Ivestor Gap.
The Falcon Guide offered vague (at best) descriptions of the hikes along the parkway, so we weren’t really sure how long the hike would be, what kind of elevation change we’d experience, what the terrain would be like or even the names of all the trails we would traverse. We had a rough map of the area in the book, so we could make some educated guesses, but we definitely went into this hike with a lot less information than we normally do.
We found the trailhead parking area packed – the lot was full and cars lined both sides of the rough, potholed road. We started off on a white blazed trail that climbed gently to sweeping views from bald Black Balsam Knob. The first great views are less than a mile of relatively easy hiking from the trailhead, so we saw tons of people. There were at least 3-4 tents sent up atop the bald. It was gorgeous – but it was a zoo!
From there, the trail got a little confusing. There are so many social paths to campsites worn into the mountain. We had a hard time knowing for sure that we were still on the white-blazed Art Loeb trail. There weren’t any blazes to be seen, and the only sign was so weathered that it looked like a blank piece of wood on a post. We stood pondering our book/map for a few minutes, when a foursome passed and confirmed that they had hiked this area many times and we were indeed on the correct trail. A little later, we passed an actual Art Loeb trail sign.
Adam hikes in the stream that was the footbed on the Graveyard Ridge Trail. Below: Adam at the junction of the Graveyard Ridge and Mountains to Sea trails; Painted trillium; The early part of the Mountains to Sea trail was essentially a bushwhack.
The trail descended through thick, dense scrub – lots of berry bushes and rhododendron. Eventually the trail opened back up and we began another ascent to the summit of 6,000 ft.+ Tennent Knob. This outlook was even more spectacular than Black Balsam. We could see for miles in every direction. We stopped at this point and had lunch on the trail. I had packed an apple, a Kind bar and some cookies from a bakery in the top of my pack. The strong sunshine had warmed the cookies to the point that they tasted like they had just come out of the oven. So good!
After the summit of Tennent Knob, we descended again before reaching Ivestor Gap. At the Gap, there was a troop of Boy Scouts at the information station. We consulted our map again before heading down another unmarked trail that we believed to be correct.
The trail at this point became wet and streamlike. We came across another hiker and his backpacking beagle! The beagle was really sweet and apparently a good hiker – able to do 12 mile days! The man was filling up his water bottles at a spring along the trail. Right after the spring, the there was a trail junction. We took the sharp hairpin turn onto the unmarked Graveyard Ridge Trail. It was a mostly flat, but very sloppy trail. It was wet and muddy for most of the way.
The Mountains to Sea trail eventually became less of a bushwhack, but it was still tricky to follow in places. Below: Near the end of our hike, storm clouds filled the sky over the high peaks; One of the trickier spots along the Mountains to Sea trail – the blazes were not readily visible and the trail went the opposite way it seemed it should; Pretty wildflowers along the trail.
We eventually reached one of the only marked junctions on the hike, with a sign pointing toward the waterfalls and parkway one way and the Black Balsam Parking area the other way. This is where we picked up the Mountains to the Sea trail. This trail was also white blazed. The trail was more of a bushwack than anything for a while. It was very narrow and overgrown and headed steeply uphill. We soon came to a rocky ledge with more nice views… and no sign of the trail continuing. Again… we got the book out and were getting ready to make another guess. The trail we needed to follow seemed to go in completely the wrong direction. Adam looked at me and said ‘I’m just not confident this is the right trail!’ Fortunately, a couple hikers came up behind us. They told us they were following the same loop we were, had done it before and had gotten lost before! However, this time they were confident and able to point us in the right direction. The trail that looked totally wrong turned out to be exactly correct!
From the ledge, we descended into dark woods, traversed numerous wooden footbridges across swampy areas and made one final ascent back to the parking area along the road. All in all, we hiked 6.6 miles. It was a great hike with spectacular scenery from Black Balsam and Tennent. If I were to recommend the hike to others, I’d also suggest doing it as an out-and-back to see just the two bald summits. The loop option was poorly marked and didn’t offer much in way of scenery.
The last section of the hike had lots of planks, bridges and boardwalks that crossed swampy areas. Below: After the hike, we drove back to Asheville via Waynesville and stopped at Frog Level Brewery – nice stream-side setting and good beer!
After our hike, we decided to drive back to Asheville through Waynesville. We heard it was a cute town and that Frog Level Brewing was worth a visit. We were able to easily find the Brewery, and ended up enjoying samples at a nice picnic table by the river. Nice finish to the day!
Difficulty – 3. The real difficulty is the Mountains-to-Sea Trail as it goes brutally up the mountain in some points.
Trail Conditions – 2. The trail up to Black Balsam was the best maintained. The Art Loeb Trail around Black Balsam to Tennent Mountain was very brushy and overgrown. The Graveyard Ridge Trail had a ton of water on the trail and The Mountains-to-Sea Trail was also very overgrown.
Views – 5. Amazing views from Black Balsam and Tennent Knob.
Streams/Waterfalls – 1. Just a couple of small crossings through some water on the trail, but nothing scenic.
Wildlife – 1. We didn’t see anything other than a few birds on this trail.
Ease to Navigate – 1. You may often feel unsure if you are going the right way. Trails are not blazed well and junctions are not marked. The connection to the Graveyard Ridge trail is not marked. There are also lots of other trails that have been cut through by hikers, but they aren’t labeled, especially near the top of Black Balsam Knob on the Art Loeb trail.
Solitude – 2. On a nice day like we had, there were lots of others on the trail.
Directions to trailhead: At Mile Marker 420.3 on the Blue Ridge Parkway, turn onto 816. Stay on that road for about 1 mile. Park on the side of the road and you’ll see the trailhead on the right side of the road.
This 14.5 mile section of the Appalachian Trail includes great views of Wintergreen Resort from Humpback Mountain. The campsite for the evening is the Paul C. Wolfe Memorial Shelter, which is located on the bank of lovely, rushing Mill Creek.
Adam traverses Humpback Mountain. Below: We found trail magic right away on our hike; Adam climbing the southern side of Humpback Mountain; Rock walls along the trail.
Day One
For Christine’s birthday this year, we decided to do a quick overnight backpacking trip along the Appalachian Trail. Following an all-day soaking rain and a cold front on Saturday, we had ideal weather for hiking and camping on Sunday into Monday – low humidity, clear skies, daytime highs in the 70s and a nighttime low near 45. It was perfect!
We started our morning with a big breakfast at Thunderbird Café and then made the 40 minute drive to the trailhead. For this hike, we left one car parked in the small lot near where the Blue Ridge Parkway (BRP) crosses I-64 and Rt250. From there, we drove our second vehicle to the Dripping Rock parking area at mile 9.6 on the BRP. The name Dripping Rock refers to the small spring adjacent to the parking area. Supposedly, it was a water source well-used by Monocan Indians en route to summer hunting grounds.
The AT crosses the parkway at this point, so it’s an easy place to hop on without using any access trails or spurs. The hike starts out climbing gently uphill through the woods. Almost immediately, we spotted a small cooler alongside the trail – trail magic! We didn’t need (or take) any trail magic on our hike, but we were curious so we opened the cooler to see what was inside. We found a log book, a camera, a small whiteboard, a bottle of ibuprofen and a nice supply of granola bars. The camera and whiteboard were provided so that hikers could take photos with their trail names.
A couple tenths of a mile down the trail, we passed even more trail magic in the form of 2 liter-sized bottles of tap water from Wintergreen Resort. Typically by September, streams and springs in the Shenandoah Valley are dry or running very low, so the free, clean water would be quite welcome. The bottles were situated next to one of the trail’s spring-fed water sources. We noticed the sign marking the spring indicated that water might be contaminated and should be filtered or boiled. The sign included an outline drawing of a moose, and we both found it comical to think about the implausibility of Virginia water being contaminated by a moose.
Christine enjoys the outcropping overlooking Wintergreen. Below: Hiking up Humpback Mountain; Adam checks out the view of Wintergreen; Pretty views.
The hike continued gradually uphill along the side of Humpback Mountain. We saw several nice campsites along the trail. Soon after that, the views started to open up. We didn’t really have any expectations for great views on this hike. We figured we might take the side trail to Humpback Rocks and eat lunch there. We also knew from past hikes on Dobie Mountain that we’d be passing one decent overlook at Glass Hollow. However, we were pleasantly surprised to find spectacular views along the rocky, spiny ridge of Humpback Mountain. These views are about 2.5 miles from the better known outcropping of Humpback Rocks, and we thought they were even nicer! The crowds, graffiti and car noise always take away from the experience at Humpback Rocks. We had this lofty ridge all to ourselves.
We took some time to take off our heavy packs and enjoy the view. We could see the Priest, Three Ridges and the slopes of Wintergreen Resort. When we got home, we read more about this section of the trail and learned that the view is named Battery Cliff, because the condos on the slopes of Wintergreen look like fortifications from a distance. The rocks on the cliffs are Catoctin greenstone formed in an ancient volcanic eruption. When you sit on these rocks and look across to Wintergreen, you’re looking over to where the Appalachian Trail used to traverse the mountains. Five miles of the trail used to cross the resort. But in 1983, the resort sold the land to private developers – basically pulling the rug out from under the Appalachian Trail Conservancy. Luckily, the organization was able to quickly pull funds together and preserve the land across Humpback Mountain – where the trail currently sits.
Leaving the open ridge, we dipped back into the woods and continued walking along a long, impressive stretch of stone ‘hog wall’. People living in the area before the establishment of the parkway built these long walls to roughly mark property and attempt to contain livestock. Eventually we arrived at a junction, one direction headed toward Humpback Rock and the other continued downhill along the Appalachian Trail. We decided to skip the extra mileage it would take to visit the Rock and continue toward our destination. We’ve seen the Rocks many times and didn’t really want to face the crowds that arrive with beautiful-weather Sundays.
Adam walks along one of the many hog walls.
As we walked downhill, we started contemplating our lunch break. We decided that the next spot with good ‘sitting rocks’ we’d stop for lunch. As it turned out, the next rocks we found were just a few, big random flat boulders right alongside the trail. We had lunch of apples, peanut butter, cheese, and energy bars. As we ate lunch, two groups of people passed us – a couple with their dog and a man who had just visited his daughter at JMU’s family weekend. All in all, we only saw a total of eight people over the entire ten miles of hiking that day. The solitude was nice!
After lunch, we continued the 5.5 mile descent toward our evening stop point. The trail was in great shape and the downhill was easy going. At the bottom of Humpback Mountain, the Appalachian Trail intersects with the Howardsville Turnpike – an old toll road that was heavily used to transport goods before the Civil War. It’s long been reclaimed by the forest, but the wide, flatness of the trail still has the definite feel of a well-traveled road. We continued along the Appalachian Trail until we spotted a small sign marking the Glass Hollow overlook. We followed the short access trail and spent a good twenty minutes relaxing on the beautiful rocky viewpoint. The views this time were much clearer than they had been two years ago when we visited.
Taking in the view at Glass Hollow. Below: Trail lunch, AT logos carved on deadfall; Pretty trail with late season wildflowers.
After leaving the overlook, we continued along the Appalachian Trail, passing the junction with the Albright Loop Trail – a popular day hike in this area. From this junction, you can follow the Albright Trail for two miles back to Humpback Rocks parking. We continued northbound on the Appalachian Trail, descending Dobie Mountain. The trail follows a series of gradual, well-graded switchbacks. There is one nice view of the valley about halfway down the mountain. Eventually, we started hearing the sounds of running water through the trees. After crossing Mill Creek, we arrived at our stop point for the evening – the Paul C. Wolfe shelter. This shelter is one of the nicest we’ve seen. The location is beautiful, the picnic table is on the porch and the shelter has sidelights, so it’s bright and cheerful inside. So many shelters are gloomy and dark. We will caution you – the privy at Paul C. Wolfe shelter is kind of weird – the door is only a half-door. When you sit on the toilet, you have a nice view – but people can also see you sitting there.
We were the first campers to arrive for the night, so we got a prime campsite near the banks of Mill Creek. We had our own established fire pit and our own bear pole – fancy! We immediately got started setting up camp and taking care of necessary chores. Mill Creek was running beautifully, so we had a clear, cool water source to filter from.
Our nice campsite along Mill Creek. Below: Overlook on the descent of Dobie Mountain; Junction with the Albright Trail; Crossing Mill Creek
We decided to take our dinner up to the shelter so we could use the picnic table for meal prep. Dinner consisted of pepper steak, wine and dark chocolate cheesecake. As we were finishing up dinner, a southbound thru-hiker named Nightwalker arrived at camp. He told us he had hiked almost 30 miles that day. He was from the Boston area and freshly out of high school. We chatted with him a bit and marveled at him eating huge handfuls of candy corn mixed with Skittles. He had the look of a true trail-weathered hiker – beard, tattered long-johns and feet held together by duct tape.
When the sun was going down, we headed back to our own camp. Despite the heavy rains the night before, we were able to find enough old wood to have a small campfire for a while. We heard another southbound hiker arrive sometime after sunset, but we never met him. With the temperatures dropping with the darkness, we headed to bed around 9:00. Both of us slept pretty well, but Christine woke up around 3:00 a.m., struggling to close both of the doors in the tent fly. It was in the upper 30’s and she’s a cold sleeper.
Our nice little campfire. Below: Adam filtering water; The Paul C. Wolfe Shelter; The steep climb that starts Day 2.
Day Two
We were up at first light, but noticed both the thru-hikers were still sleeping. We didn’t want to disturb them, so we cooked our breakfast of oatmeal, cheese, coffee and hot chocolate near the fire pit at our campsite. We were packed up and back on the trail within 45 minutes of waking up.
The morning’s hike consisted of a rather steep climb up Elk Mountain. From the back of the shelter, the trail climbed almost straight up via a series of switchbacks. We had about 1000 feet of climbing in just about a mile. A8fter that, the remainder of the hike was more moderate or even gently downhill.
The remnants of an old cabin sit right along the trail. Below: Approaching Rockfish Gap; We can see Rt. 250; Waynesboro’s great network of trail angels.
The five miles of trail back to Rockfish Gap are largely unremarkable; just a nice walk through the woods. There are a few small stream crossings, but no views along the way. The one noteworthy feature would probably be the ruins of an old cabin, about 1.7 miles north of Paul C. Wolfe. The chimney and hearth are still standing right alongside the trail. Evidently, there is also a cemetery for the Lowe family and additional cabin ruins somewhere east of the trail, but we didn’t see it. The trail exits onto Route 250 at Rockfish Gap through an opening in the guardrail. Thru-hikers can find lists of trail angels at the guardrail opening. Waynesboro has one of the best organized trail angel networks along the AT. It’s easy to find a ride or shelter at this point on the trail.
We arrived back to our car around 10:30 in the morning. By the time we shuttled back to our car parked at Dripping Rock, we were already thinking about lunch. We realized how close we were to Devil’s Backbone Brewery and decided it was a perfect place to wrap up our backpacking weekend. We had a huge lunch – beers, a big soft pretzel to share, and sandwiches (French Dip for Christine, BBQ for Adam). After lunch, we decided to take Rt. 151 back to Waynesboro. This allowed us to also pass Bold Rock Cidery. It’s definitely worth a stop if you enjoy hard cider. Since it was a Monday, we were the only people there. We got to go behind the scenes into the cider pressing room and the fermentation/bottling facility. That was really neat!
The tasting room at Bold Rock. Below: Enjoying a post-hike beer at Devil’s Backbone.
Trail Notes
Distance – 14.5 miles (9.5 miles on Day One, 5 miles on Day Two) (Check out the stats from Map My Hike – [Day One] [Day Two])*
Elevation Change – 1800 ft. on Day One, 1100 ft. on Day Two
Difficulty – 2. This is an easy backpacking trip with moderate, well-graded climbing.
Trail Conditions – 4.5. Trails are in excellent shape.
Views – 4. Views from Humpback Mountain and Glass Hollow are beautiful!
Streams/Waterfalls – 3. Mill Creek is pretty and a great water source. There is a small waterfall and swimming hole downstream from the shelter.
Wildlife – 2. We saw a few deer and heard owls at night.
Ease to Navigate – 4. There are several intersections/junctions to pay attention to, but following the white blazes is pretty easy.
Solitude – 4. Because we avoided Humpback Rock, we only saw a small handful of people on a beautiful Sunday.


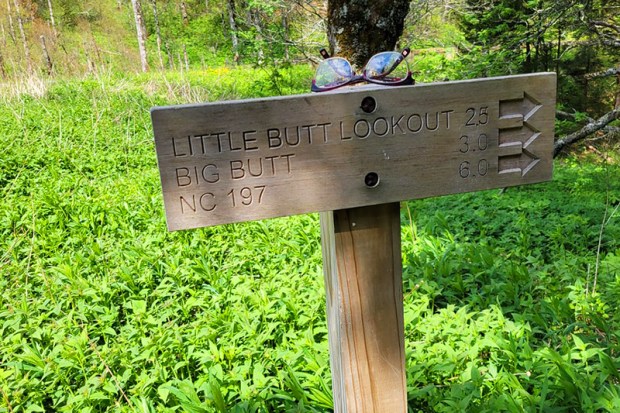
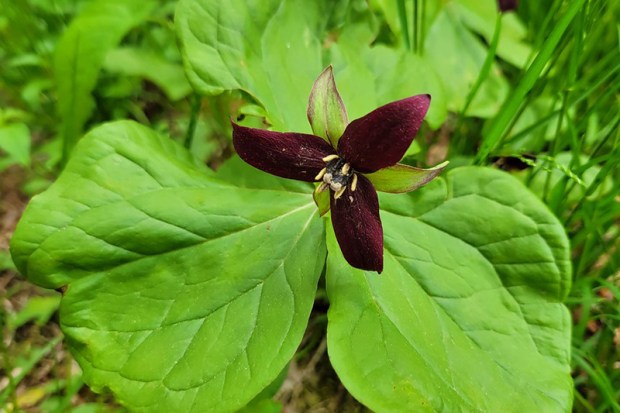
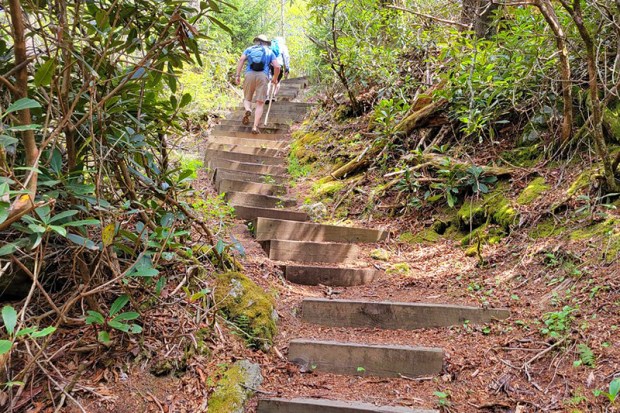

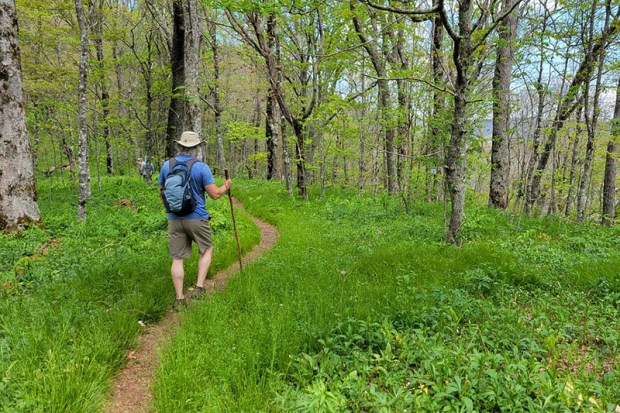
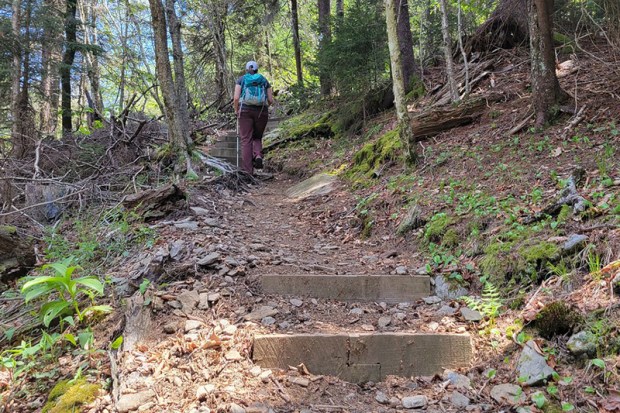
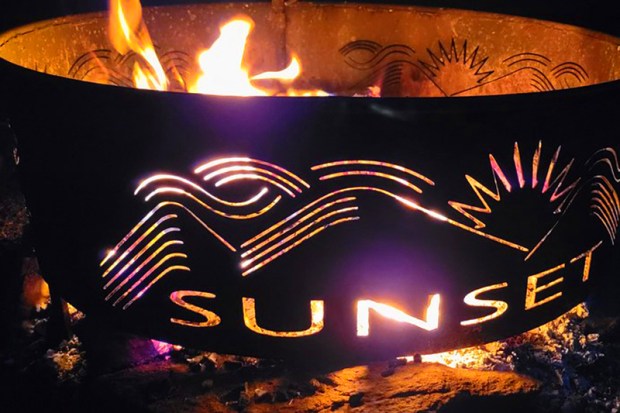
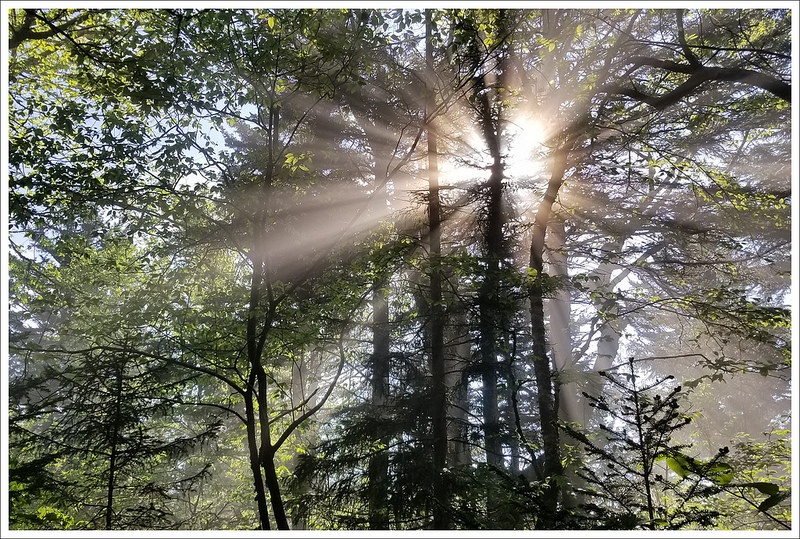


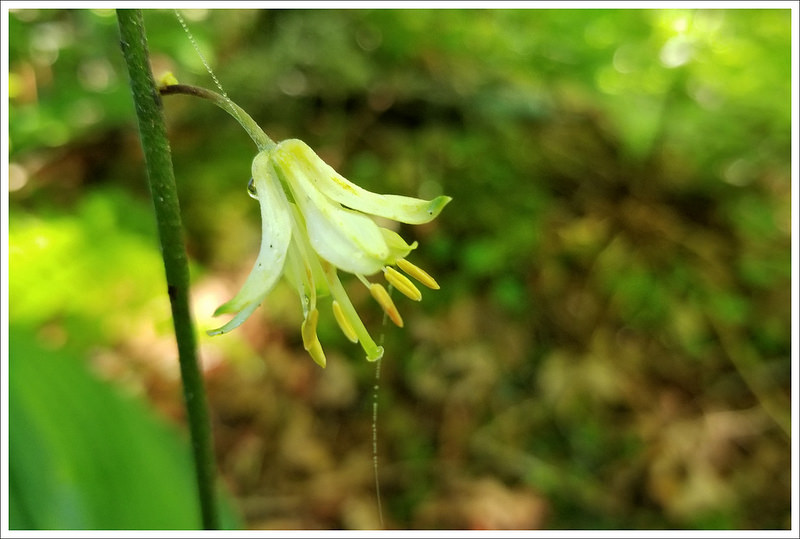


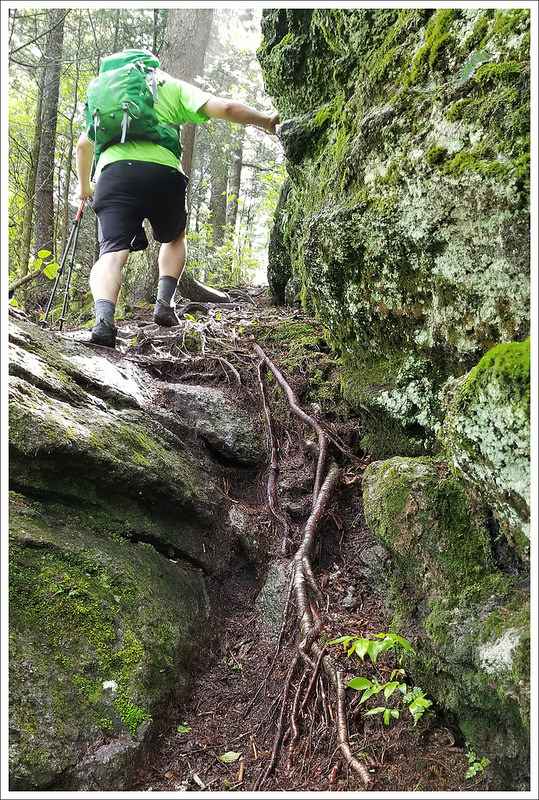


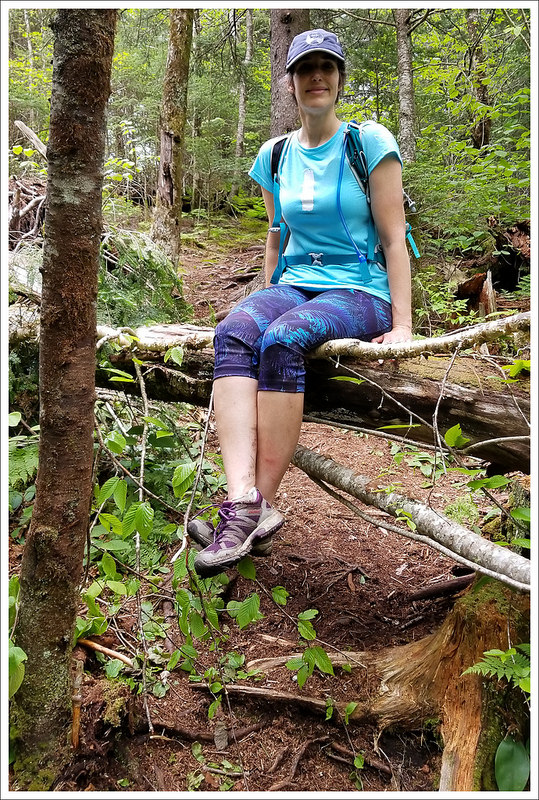


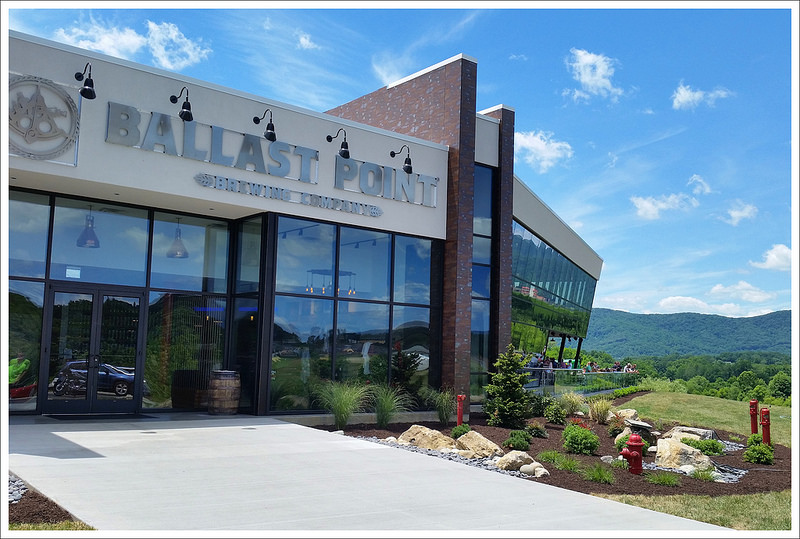
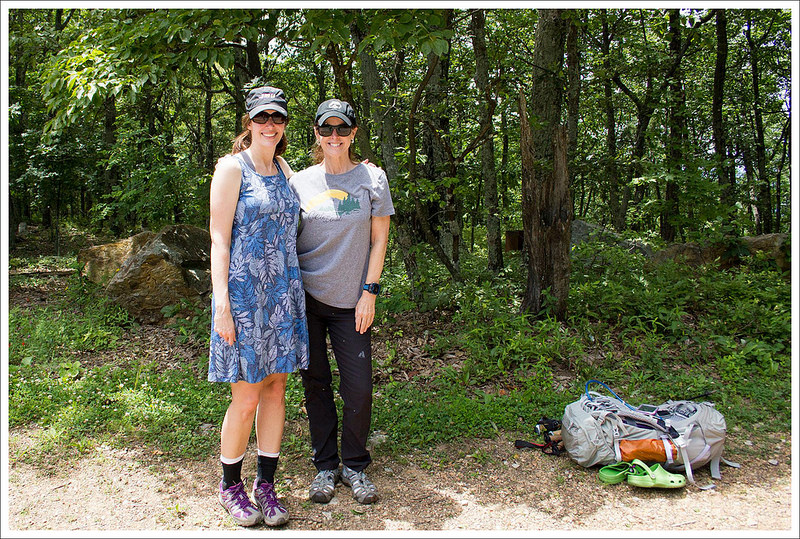
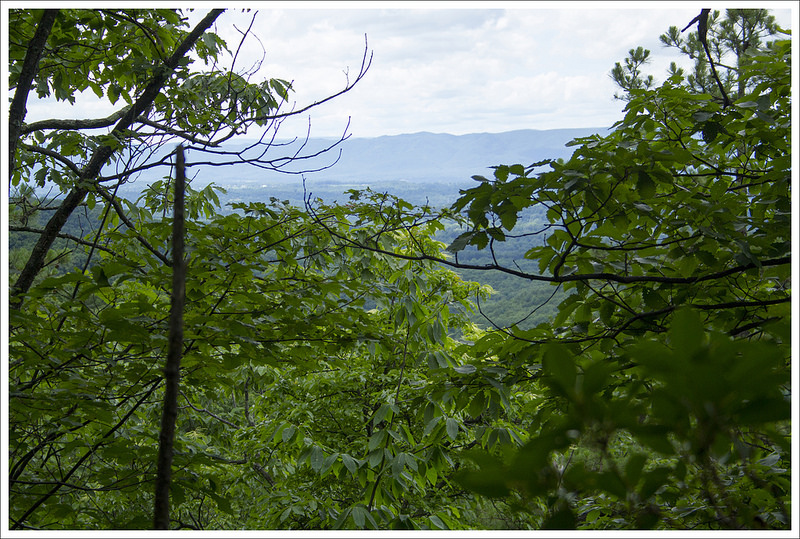

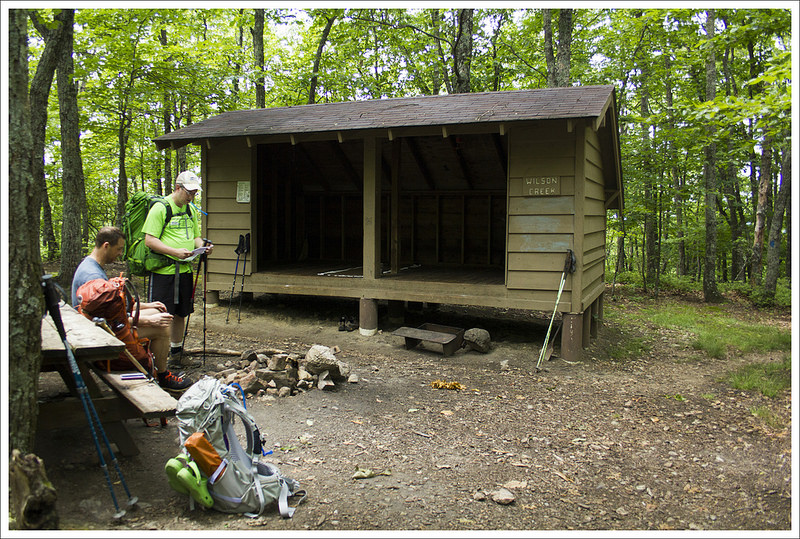
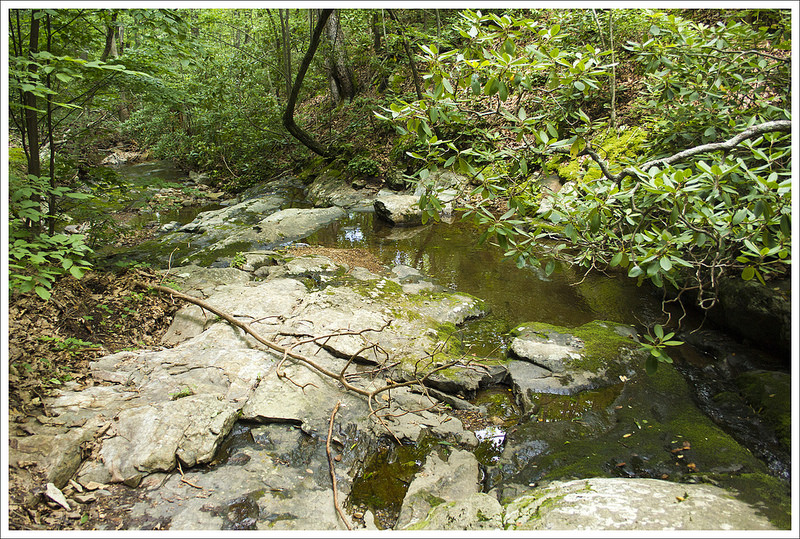
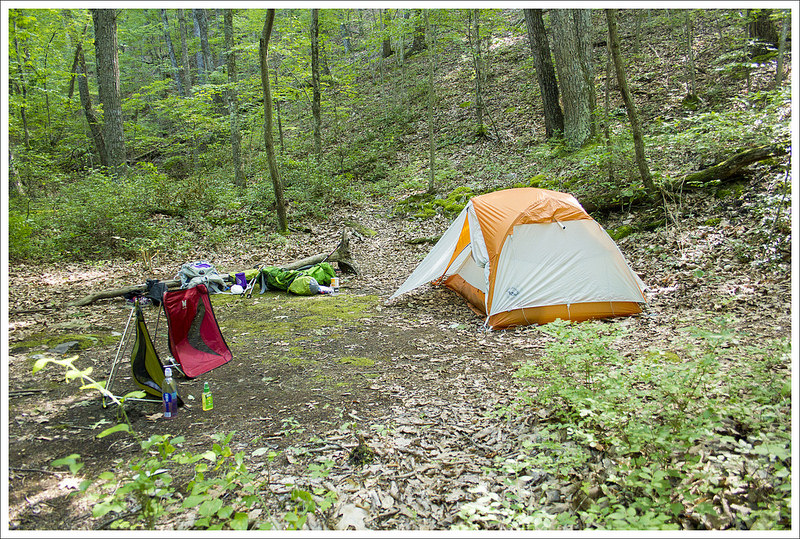
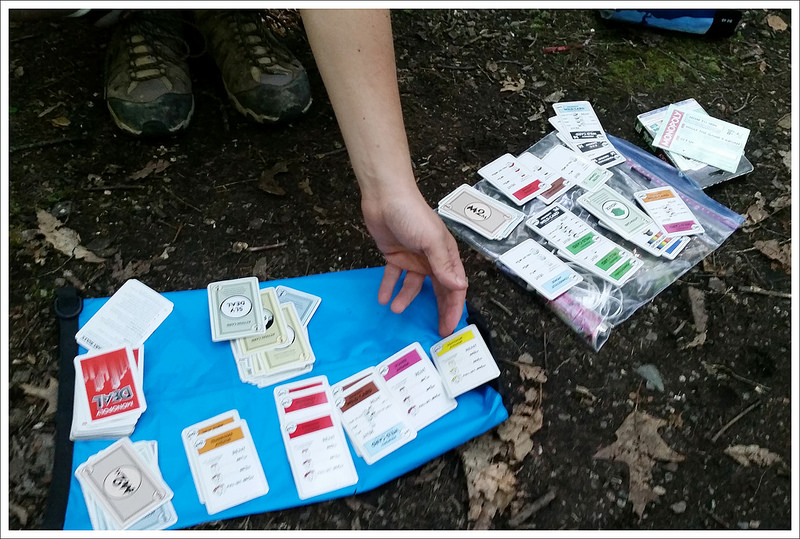

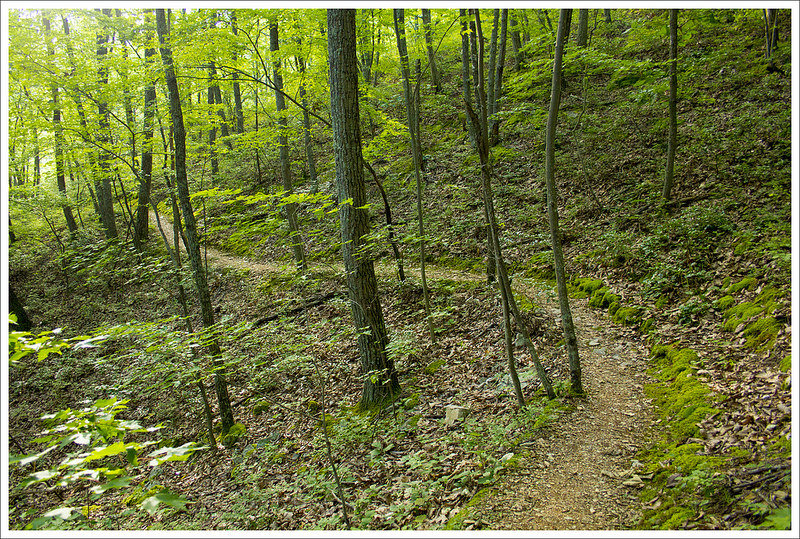
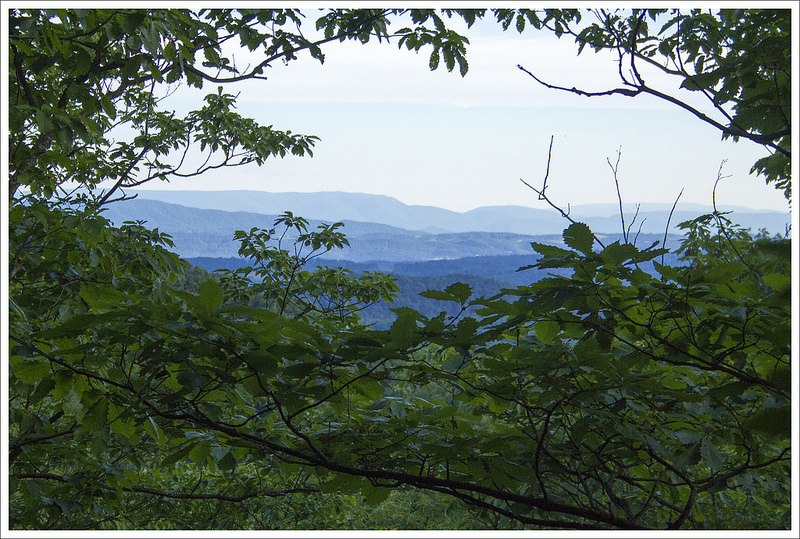
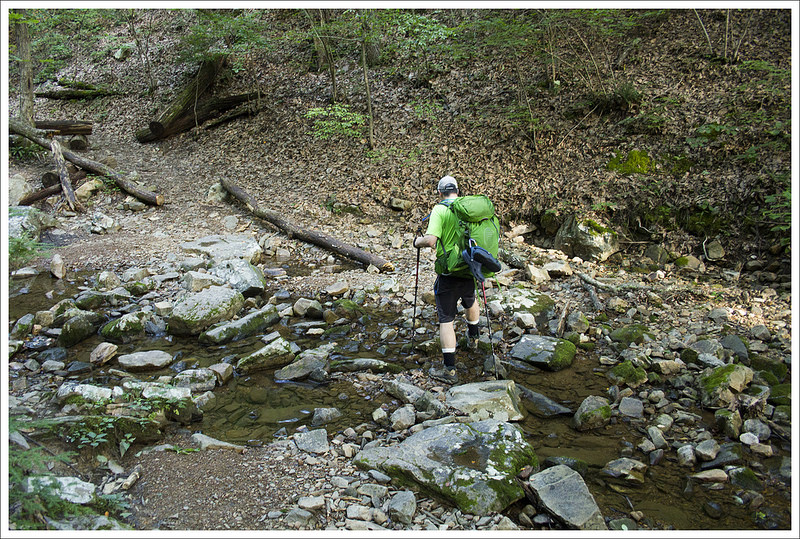


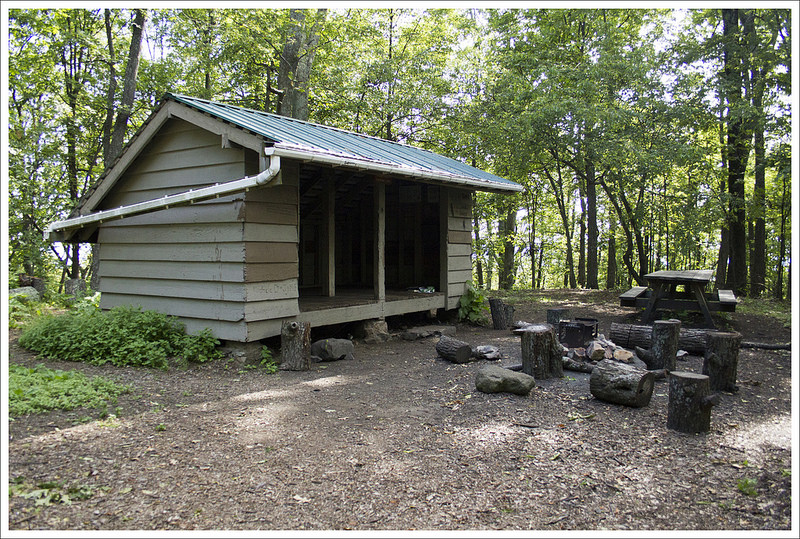

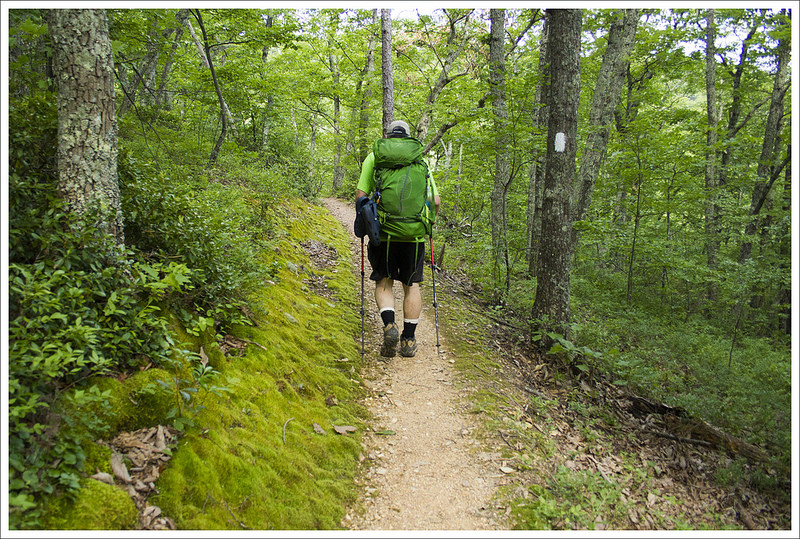
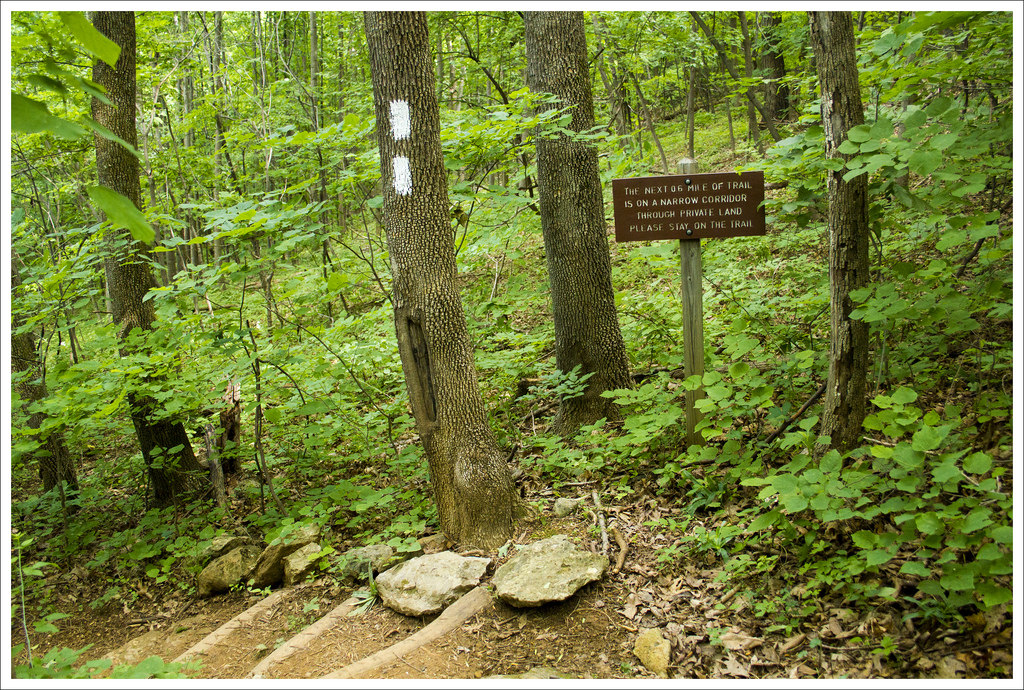
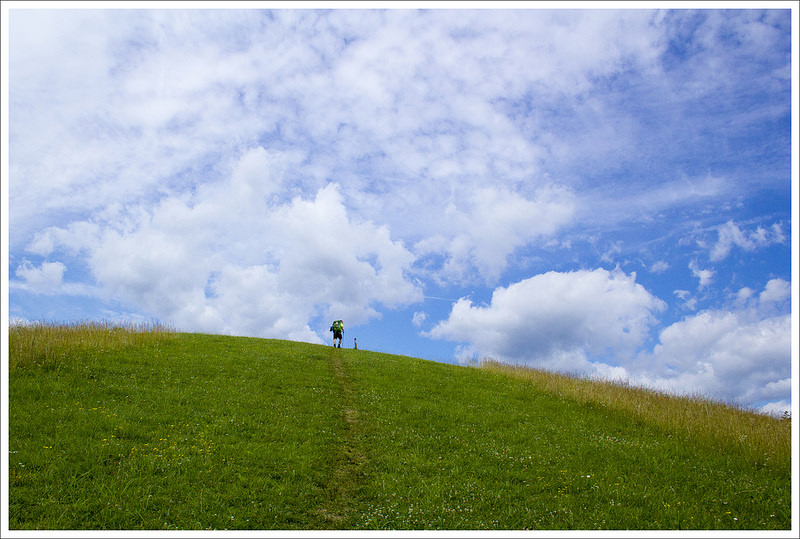

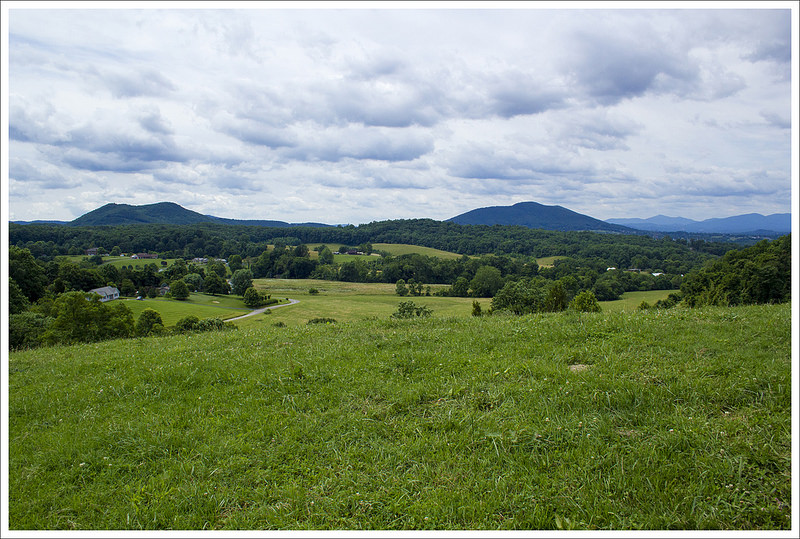


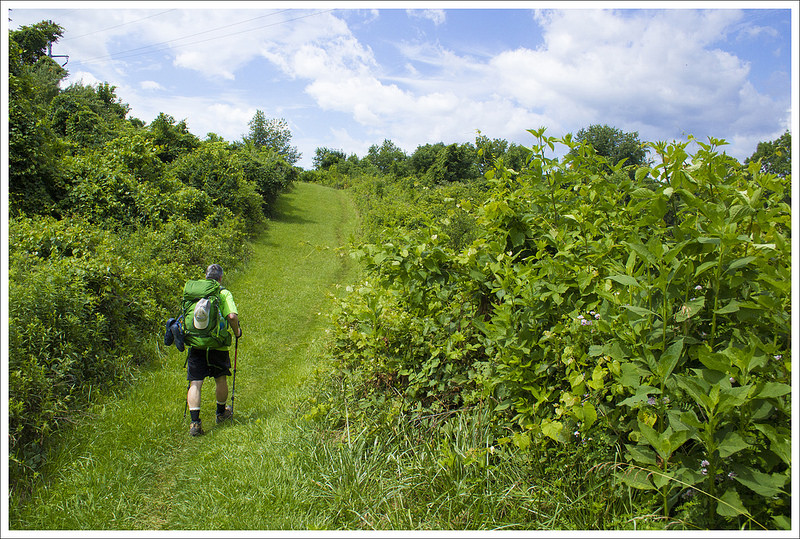

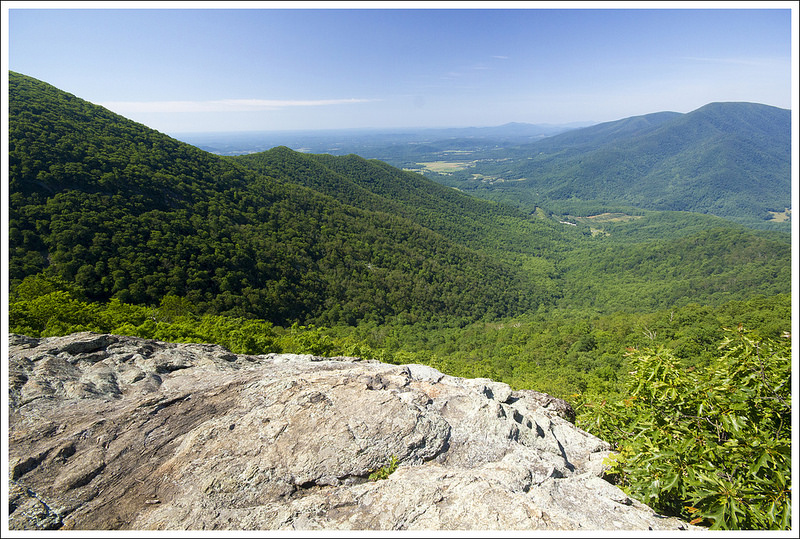
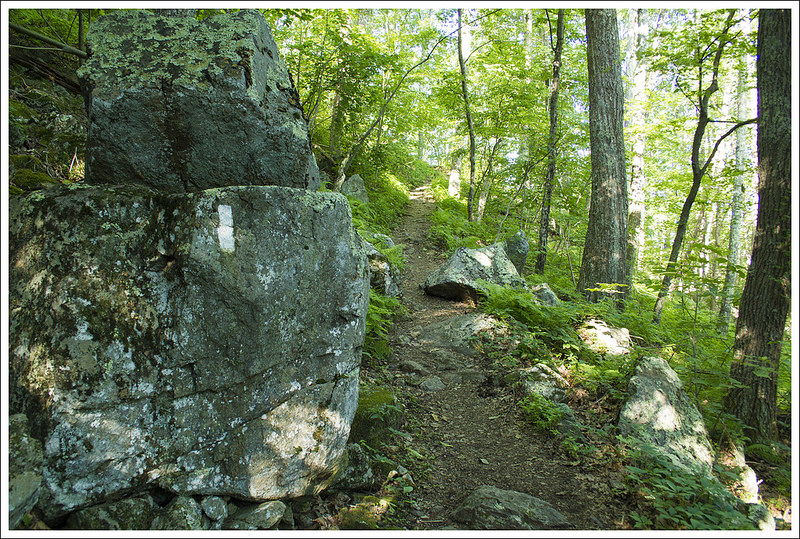
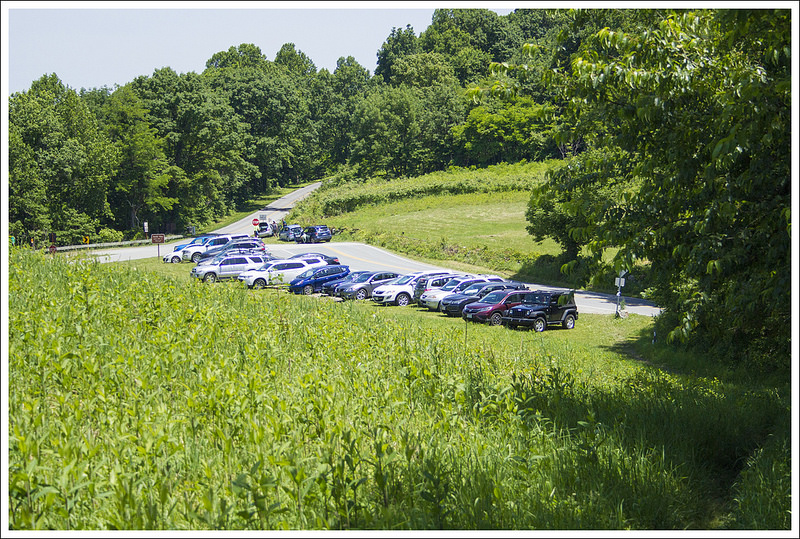
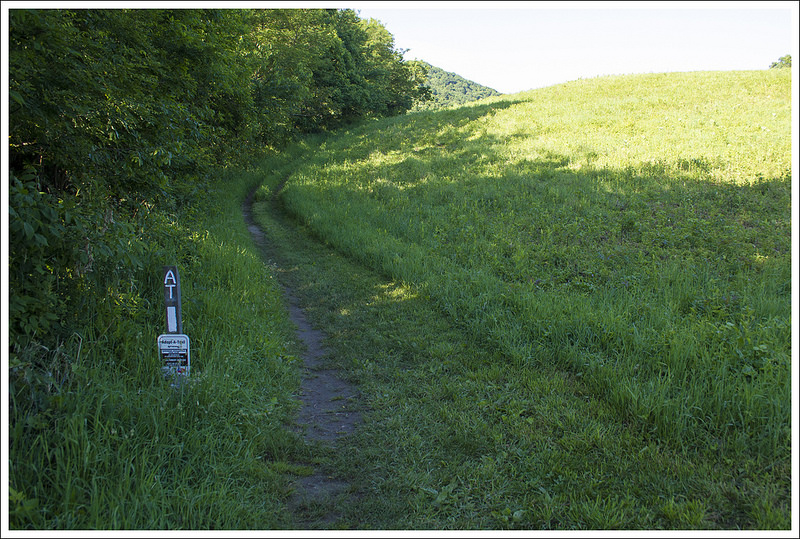
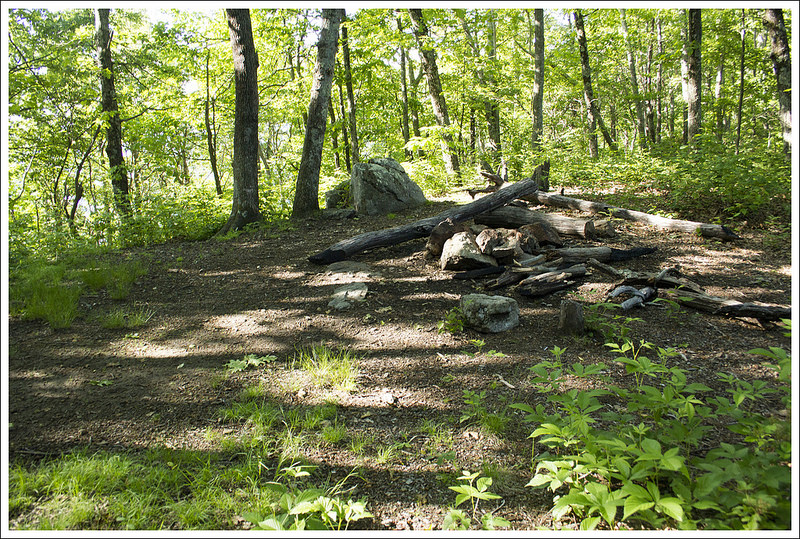
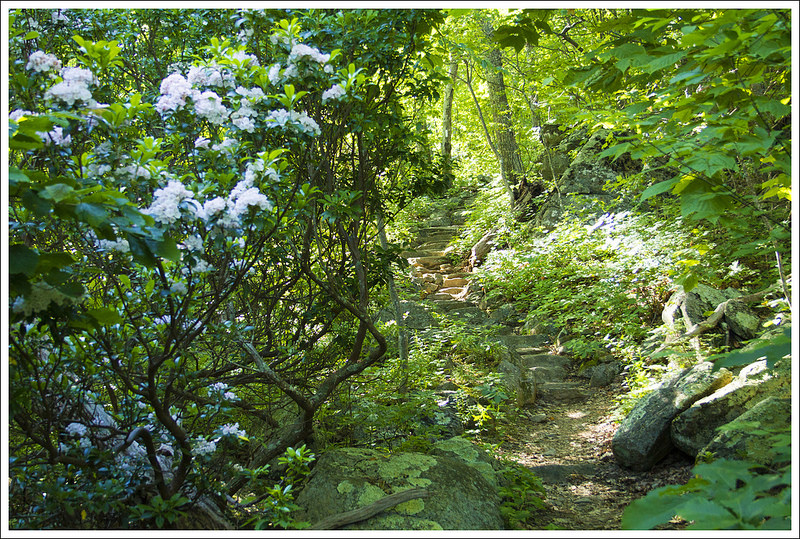
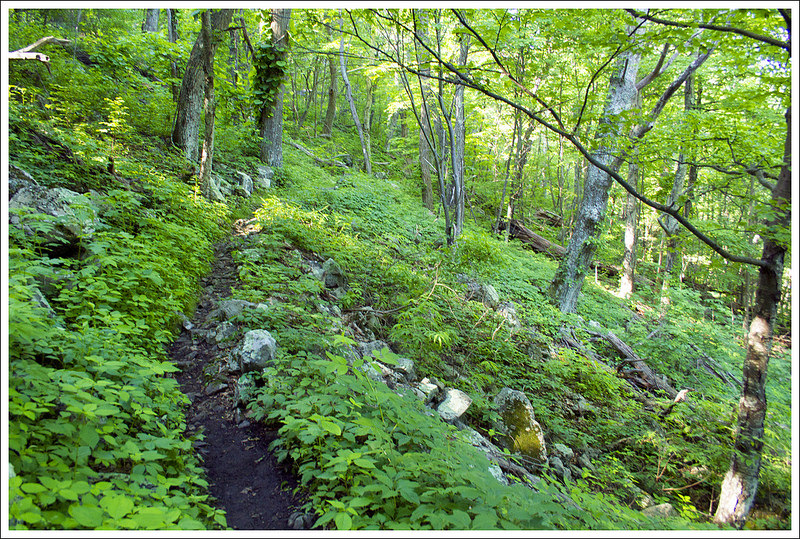
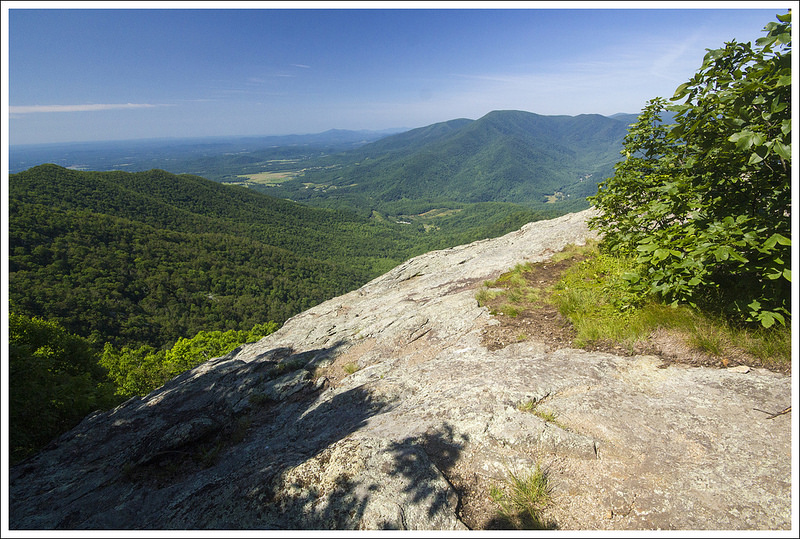


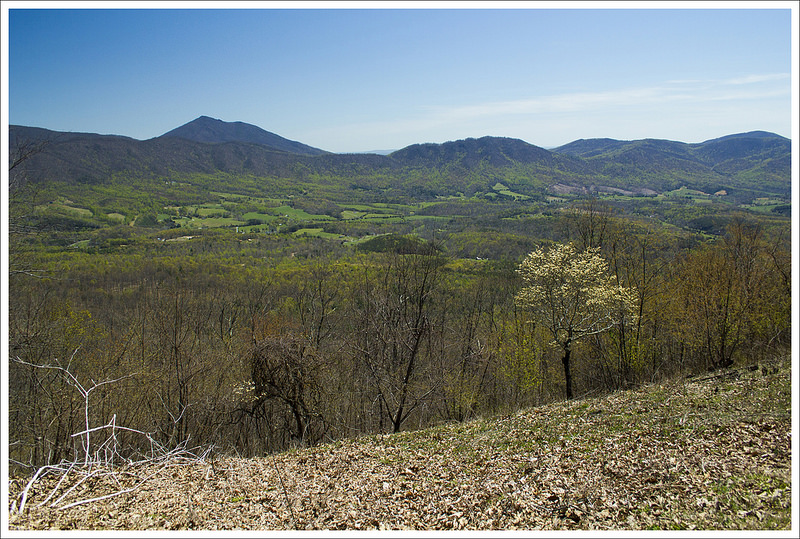


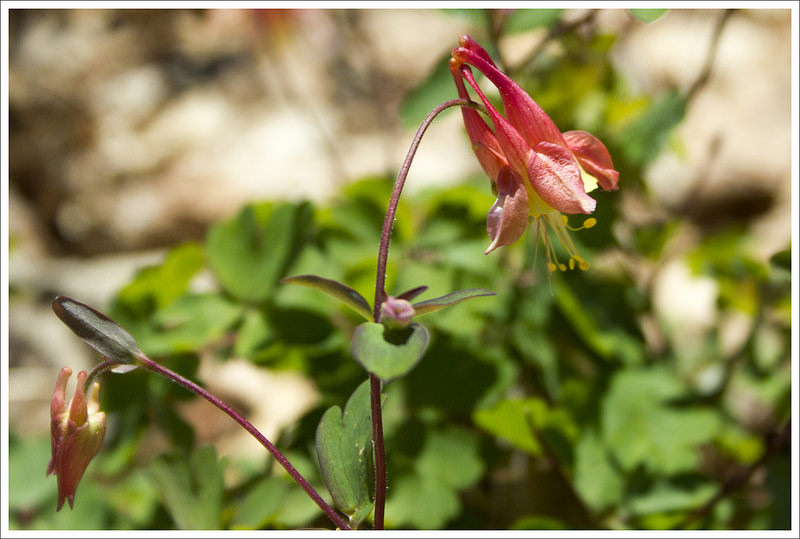


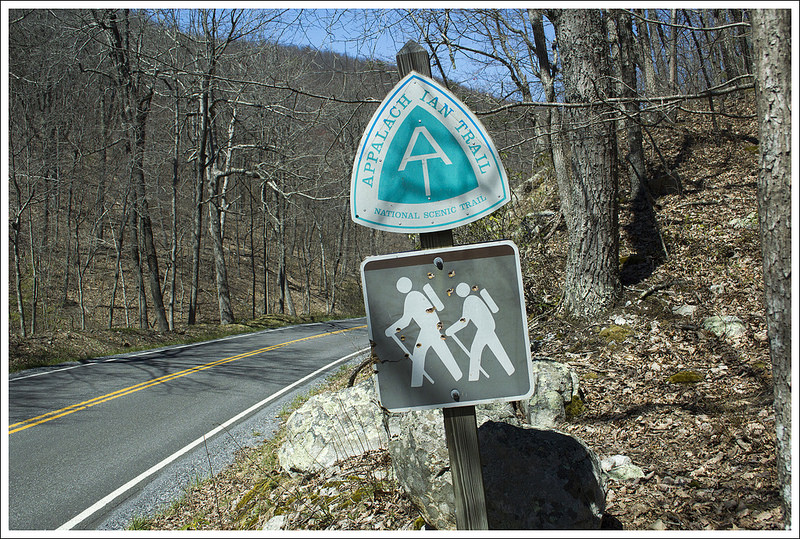


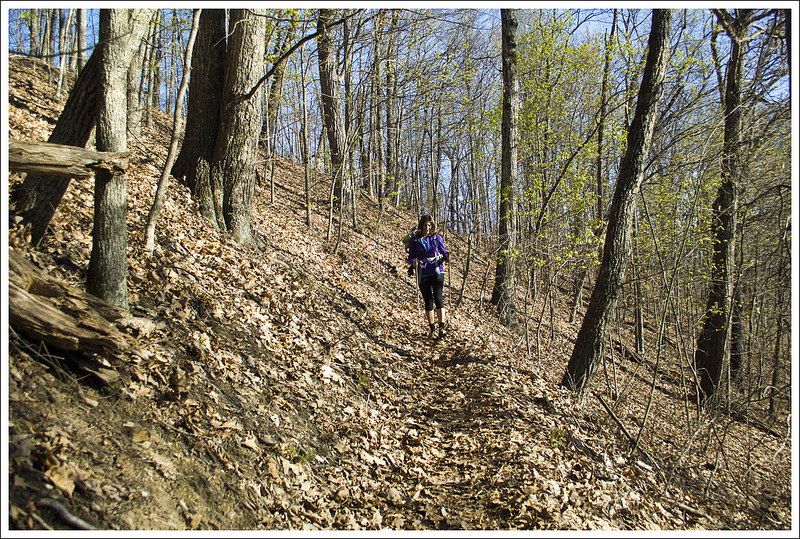
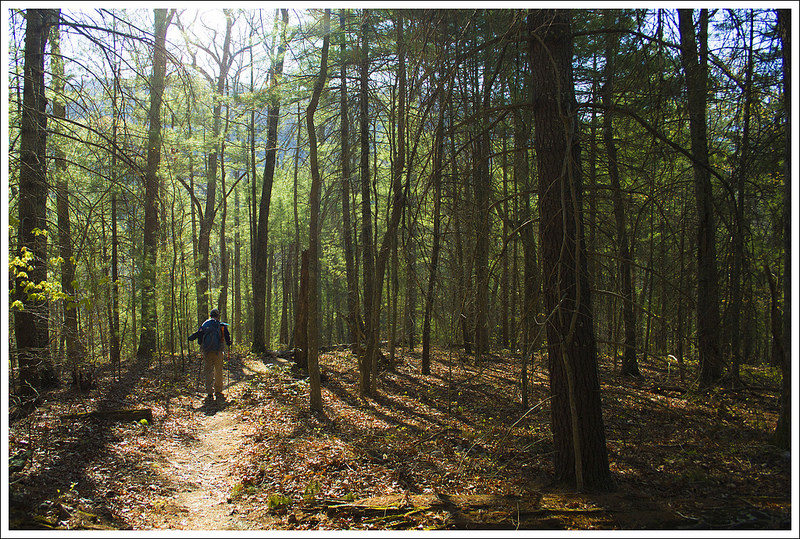


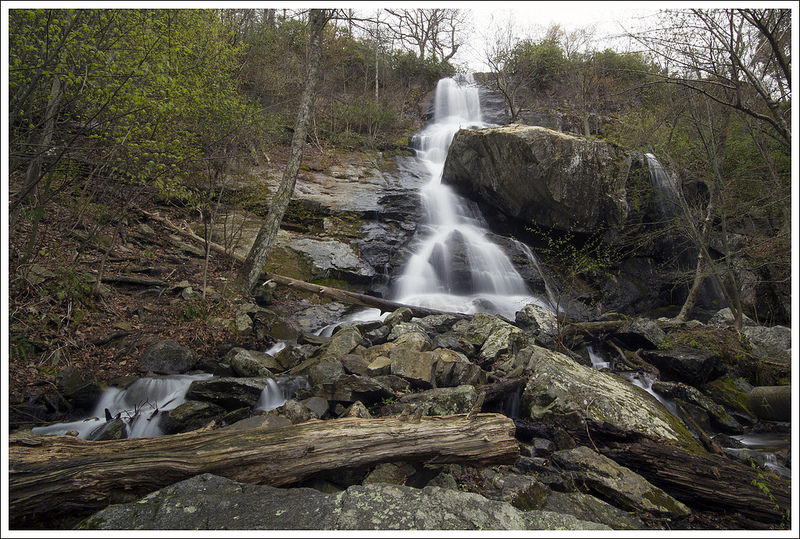
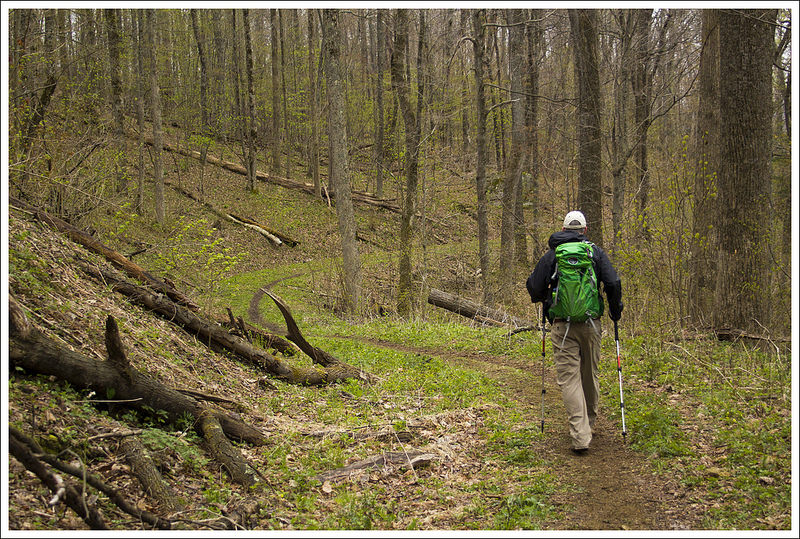
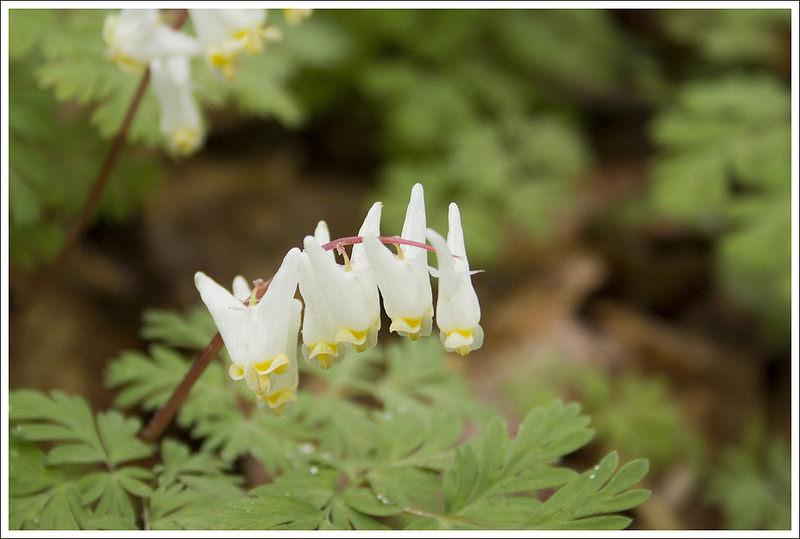
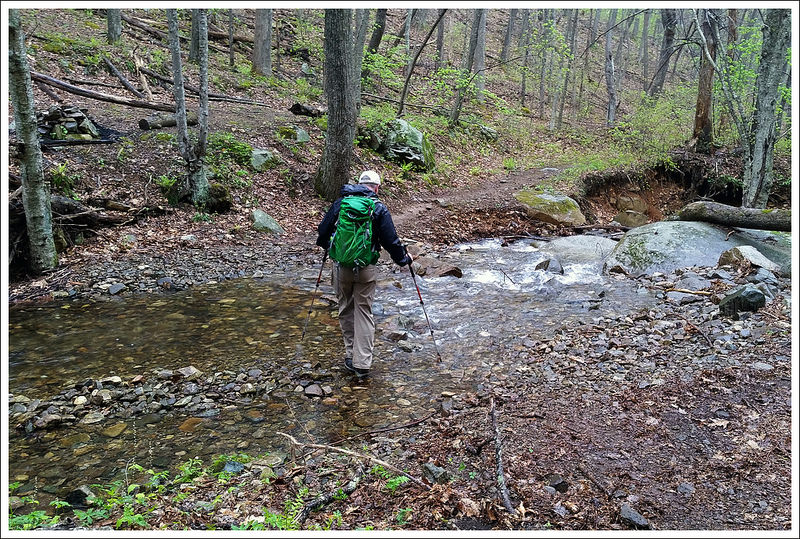
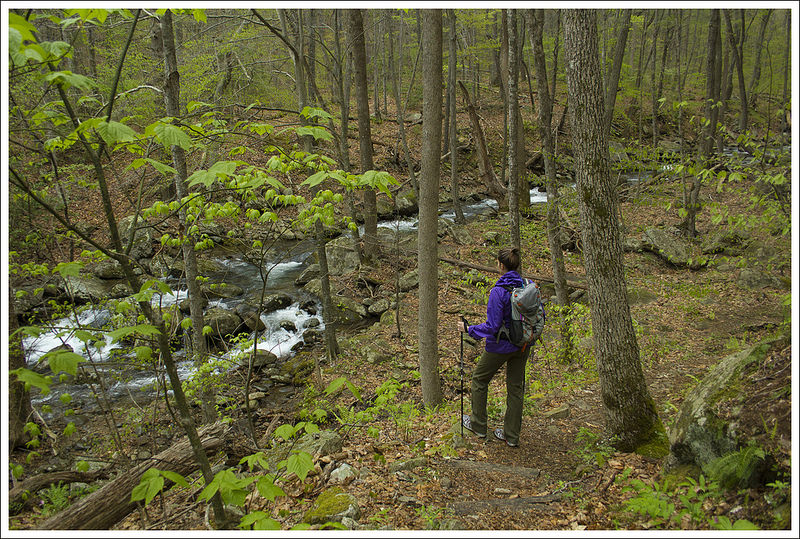
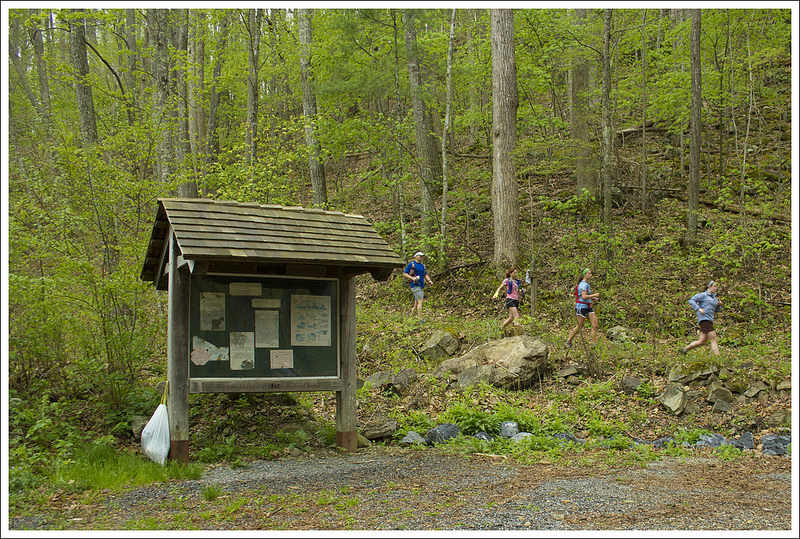
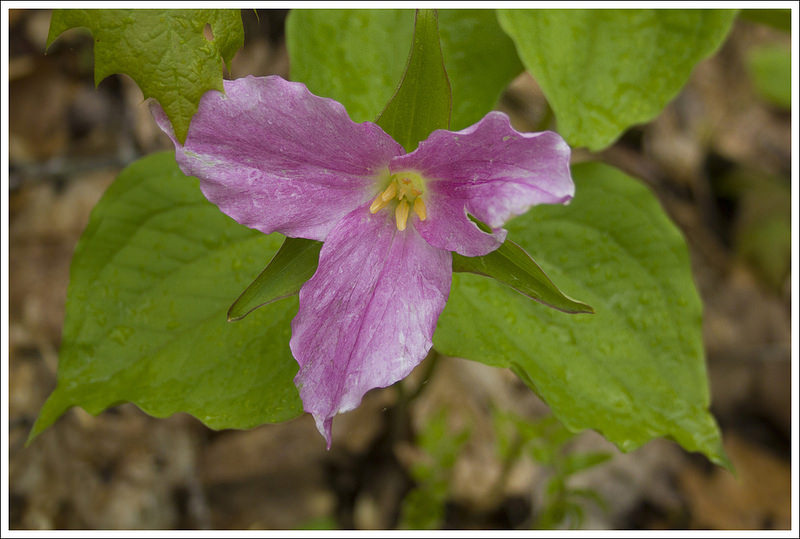
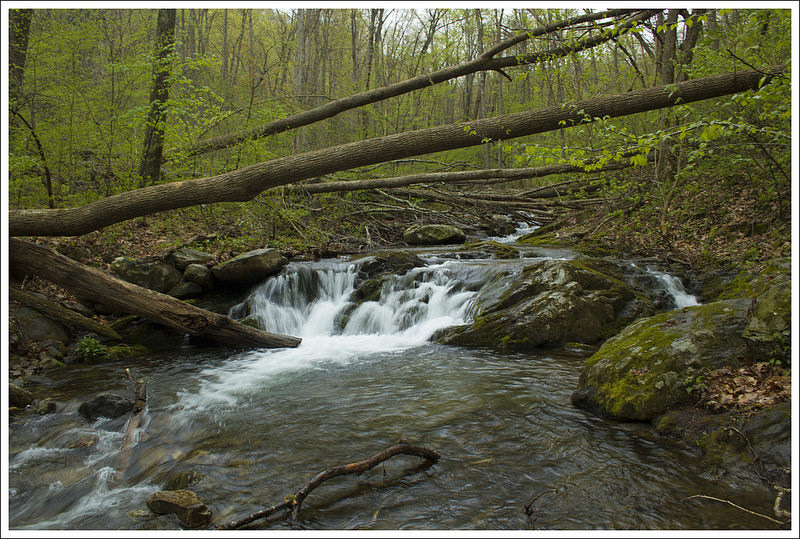
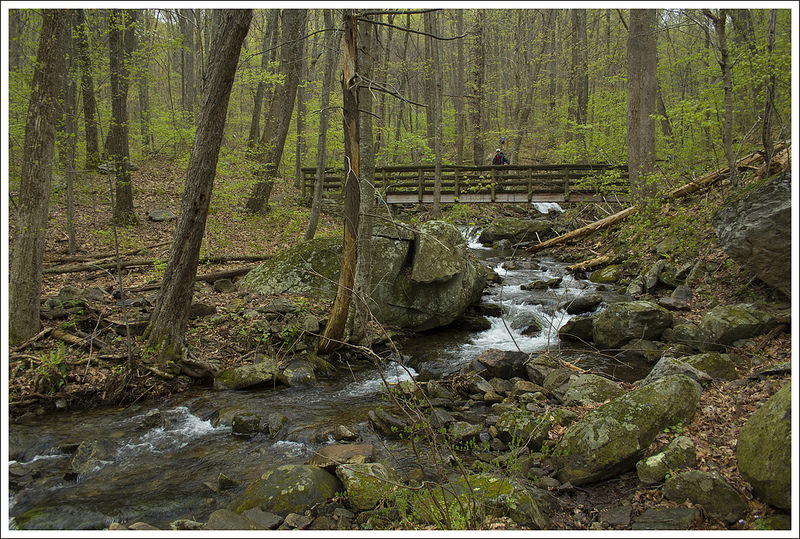
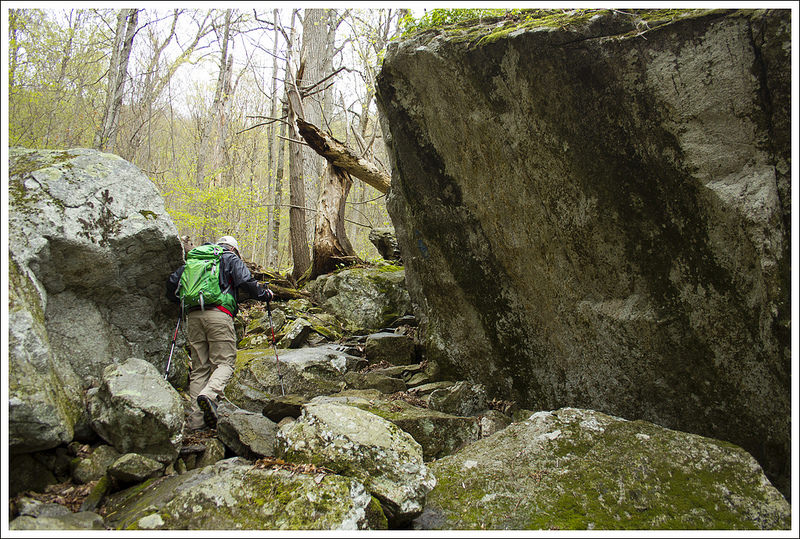
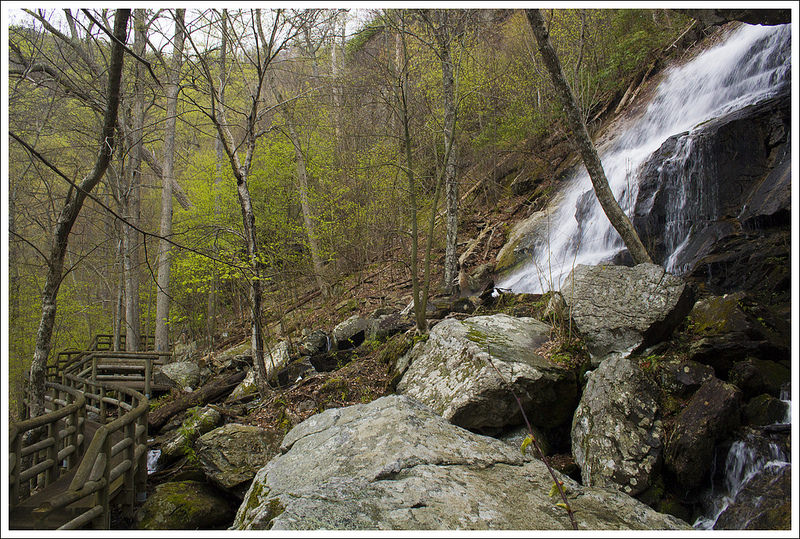
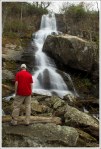
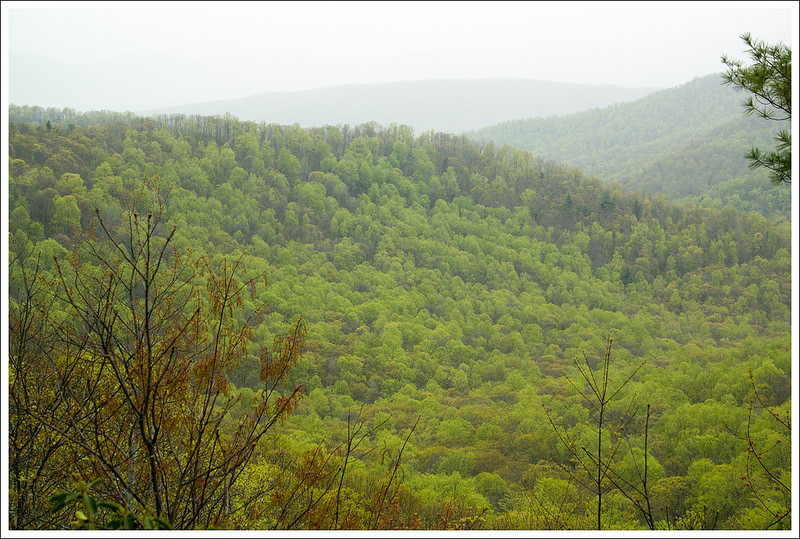
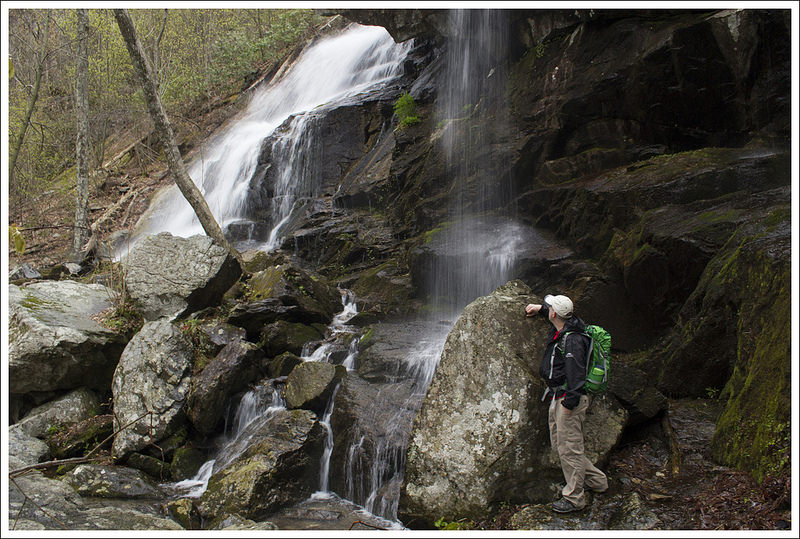
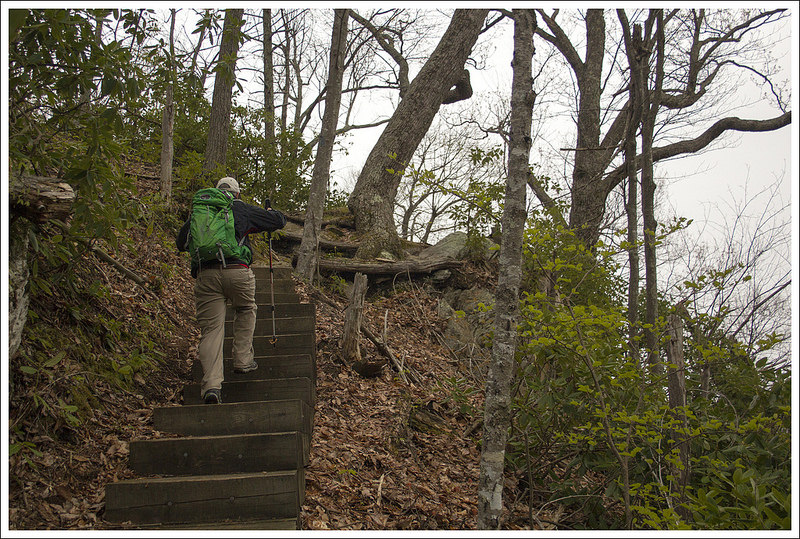
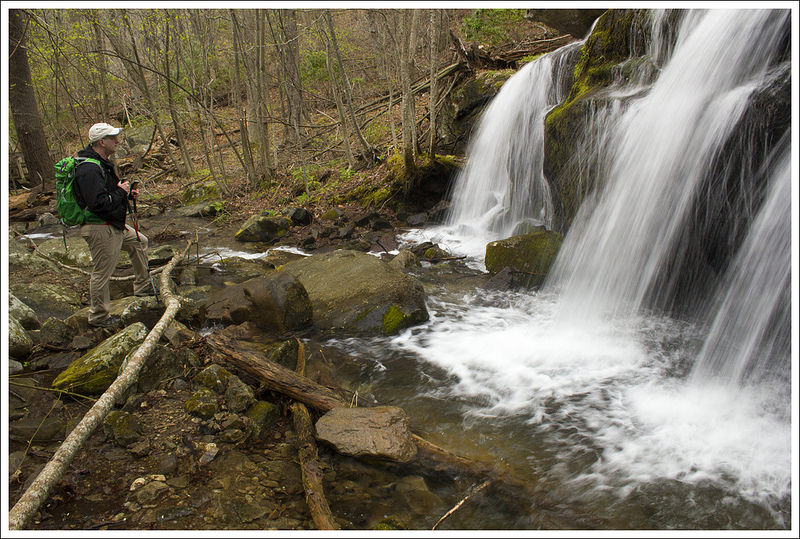

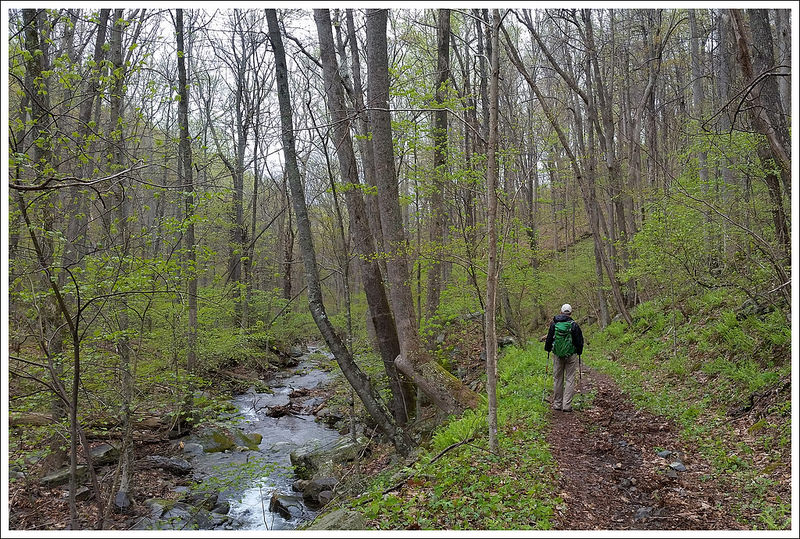
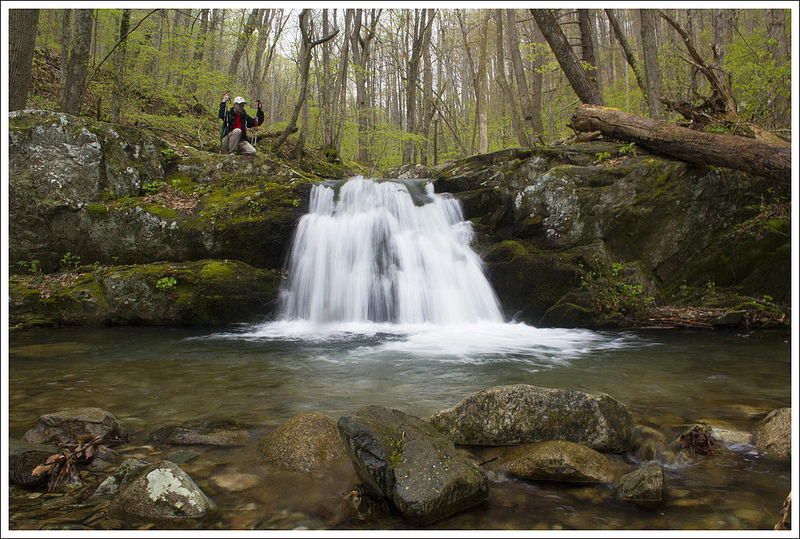
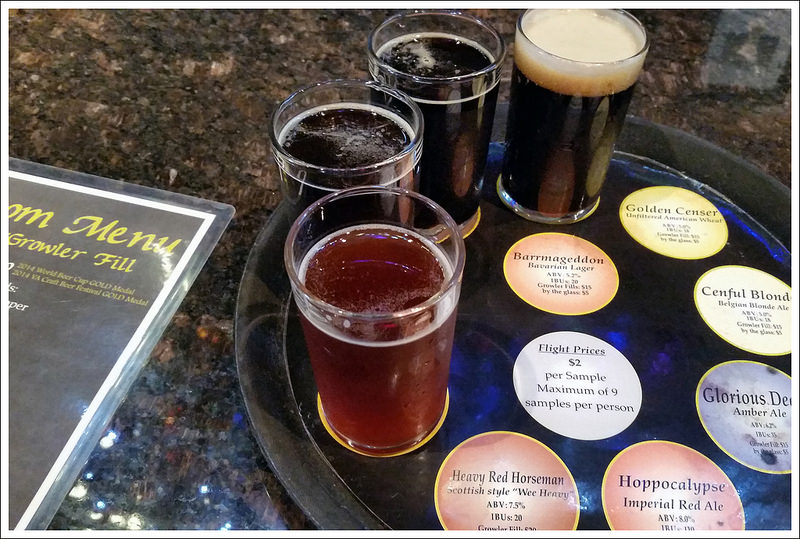


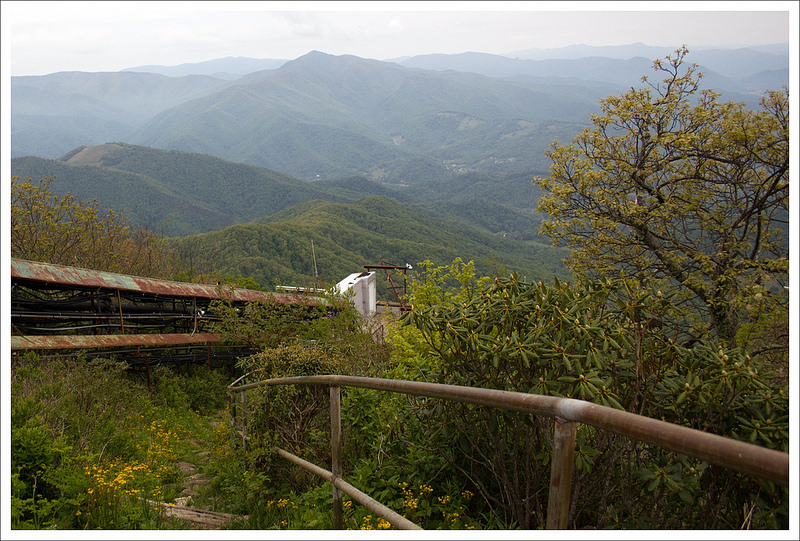


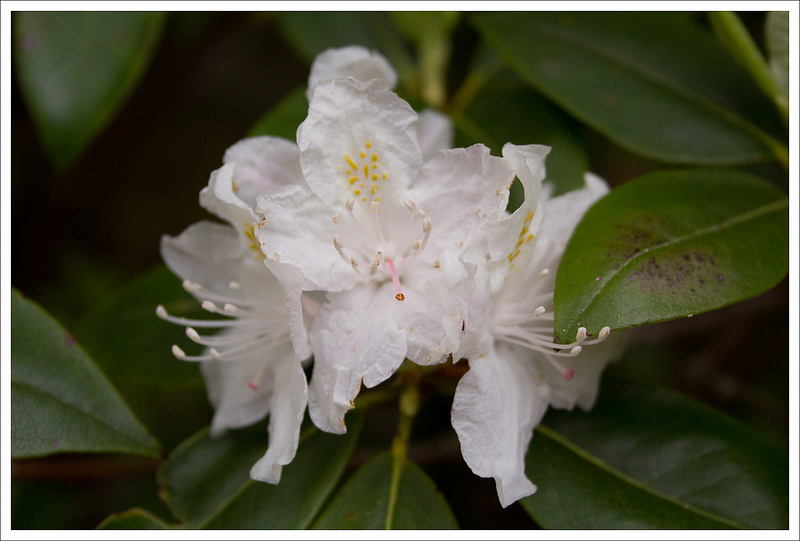
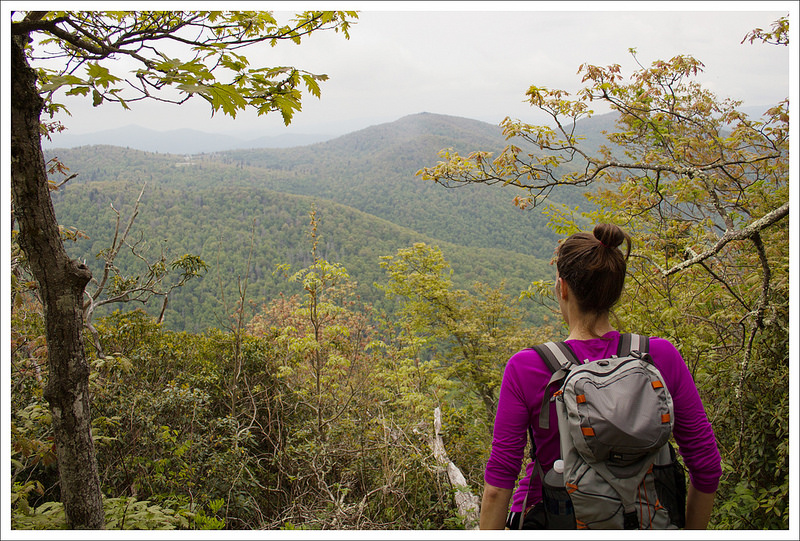
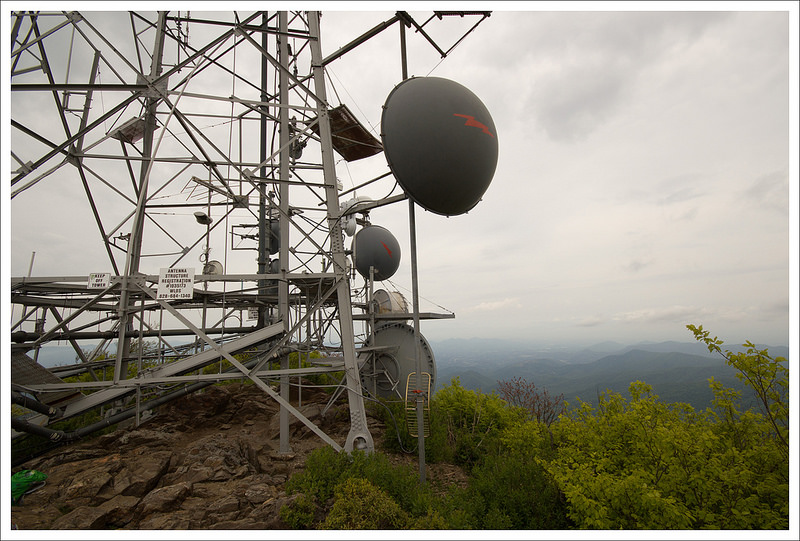


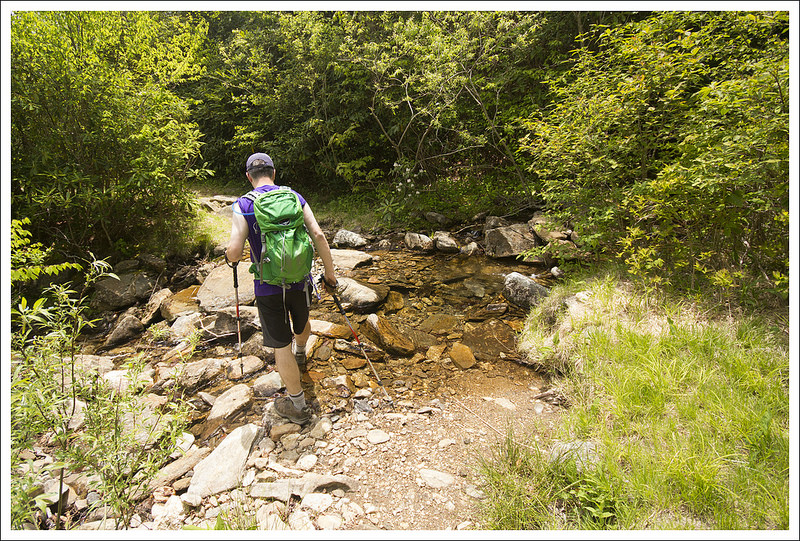
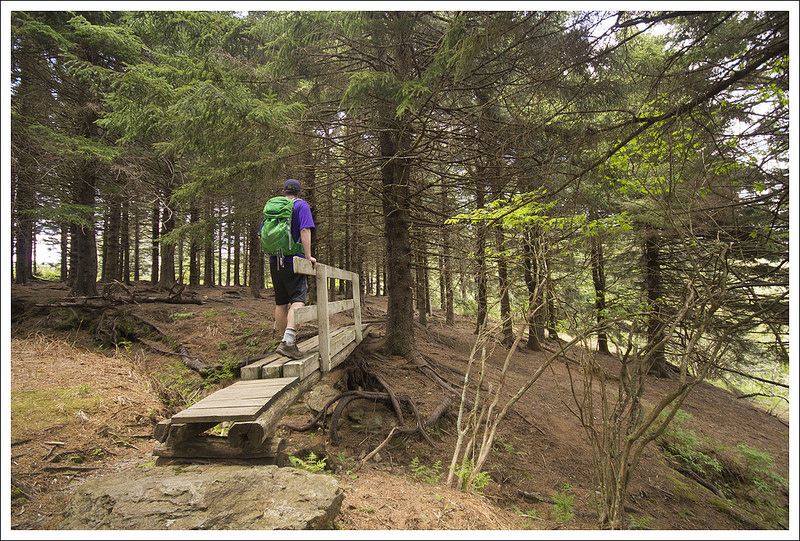
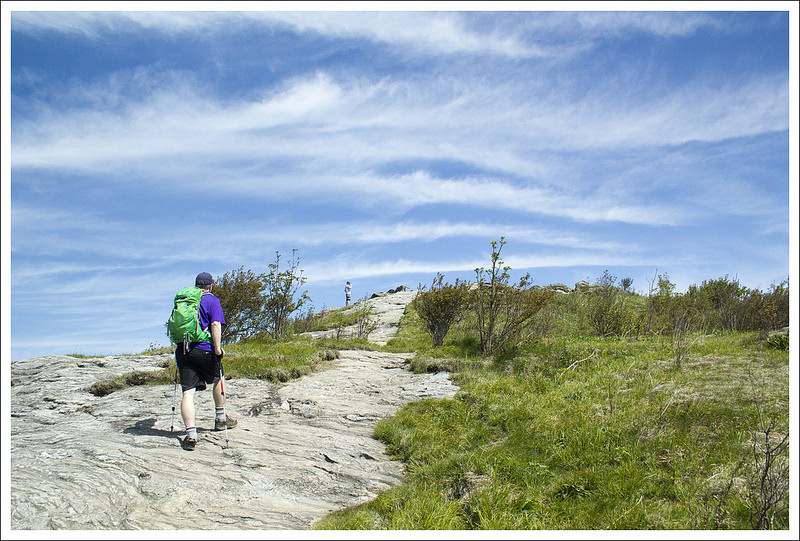
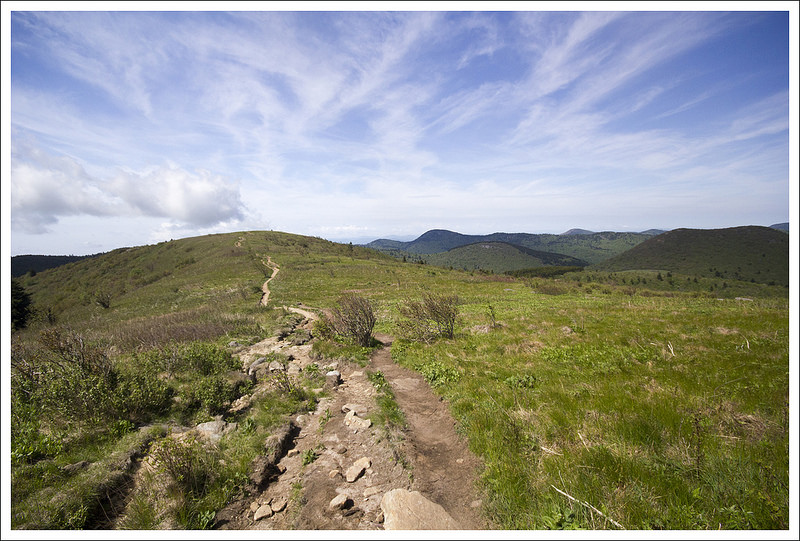


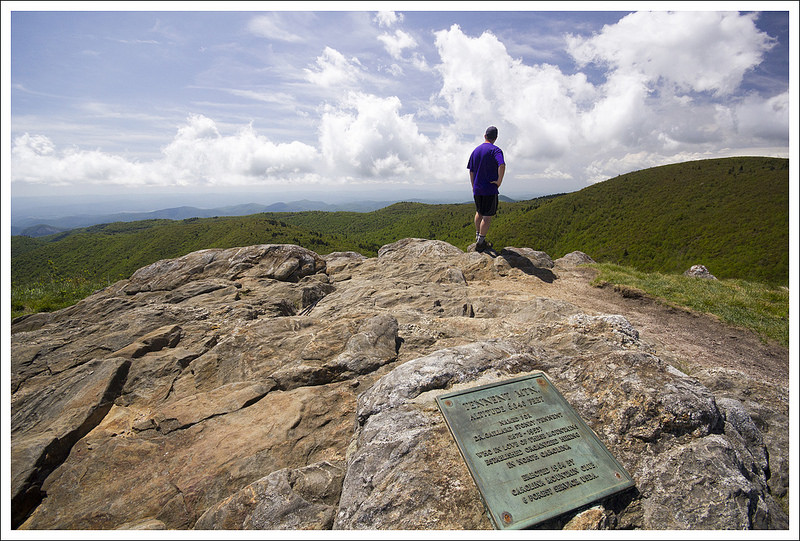


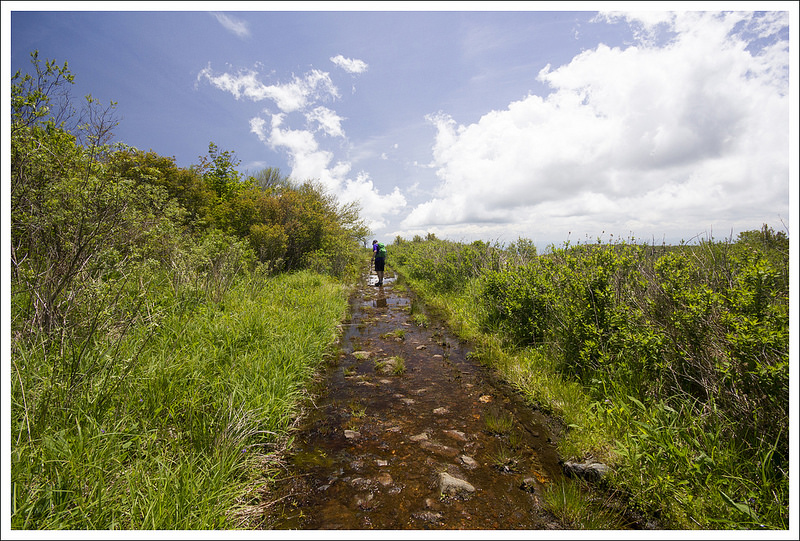


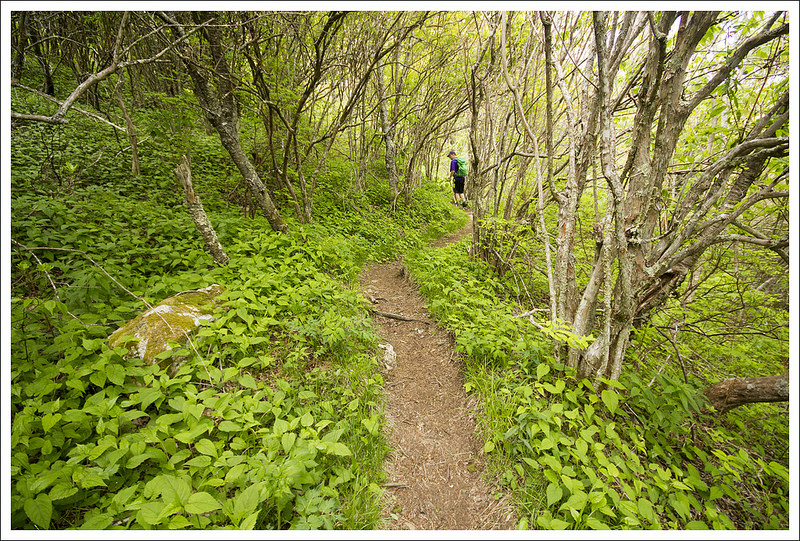
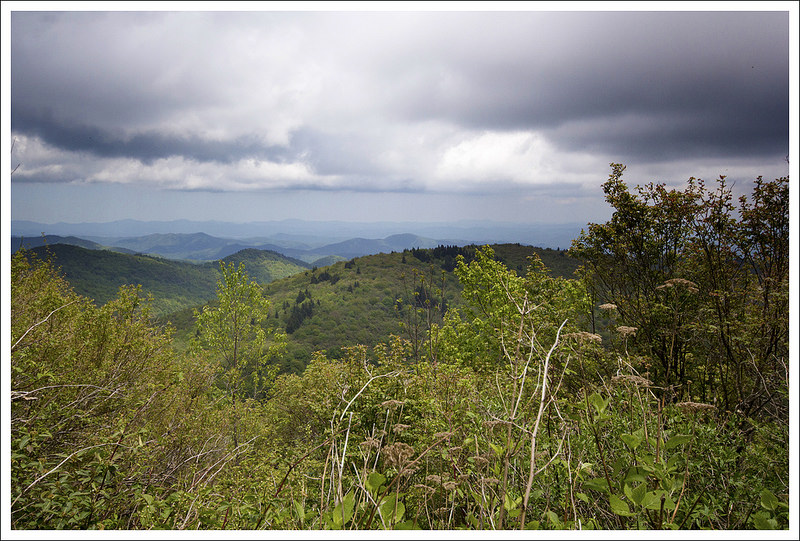

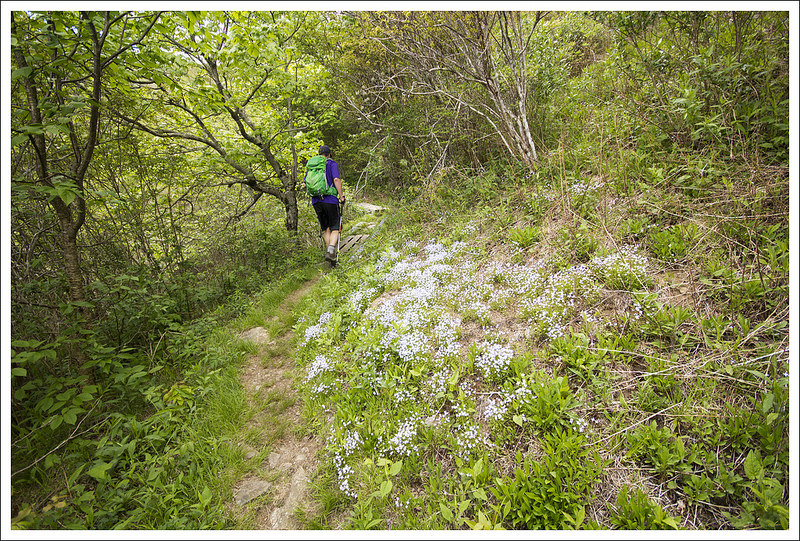

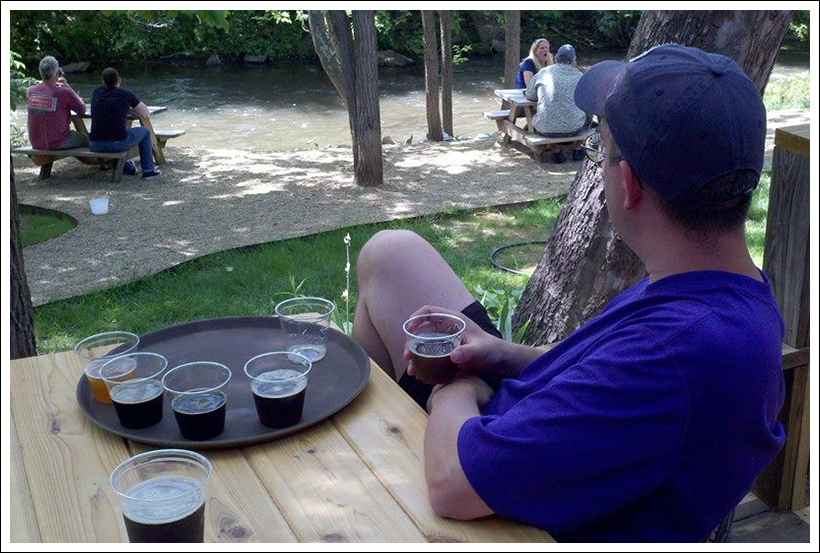

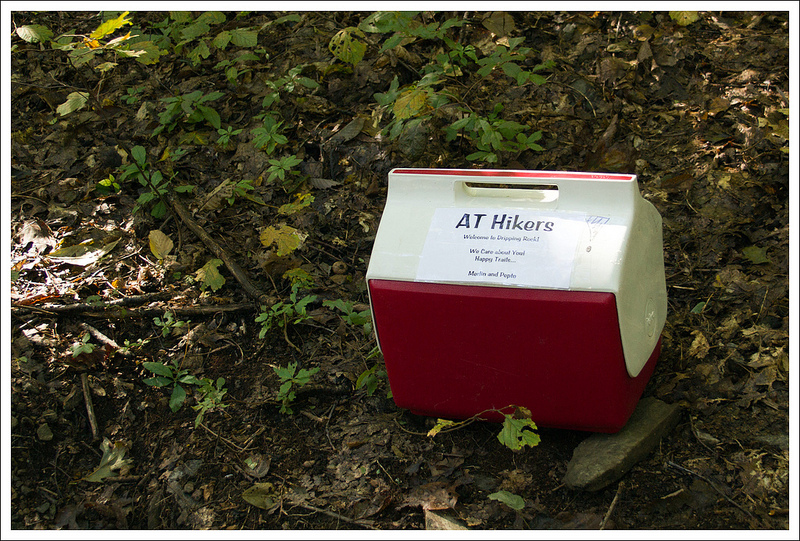
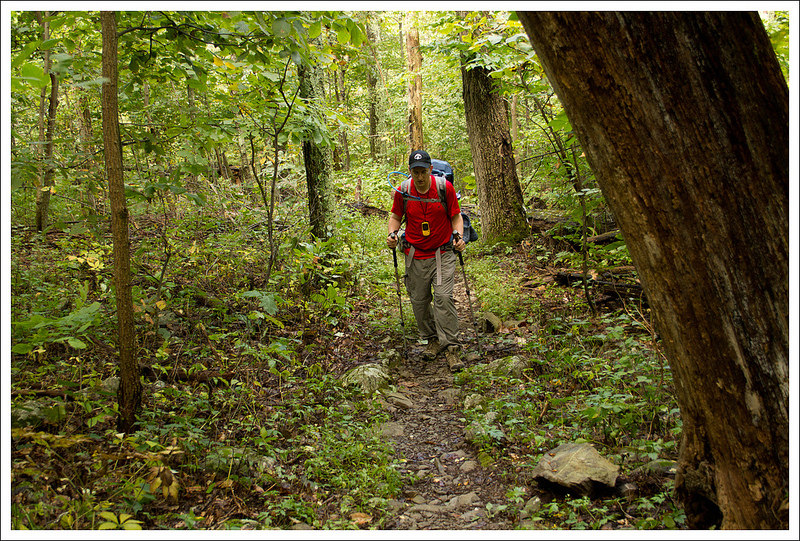
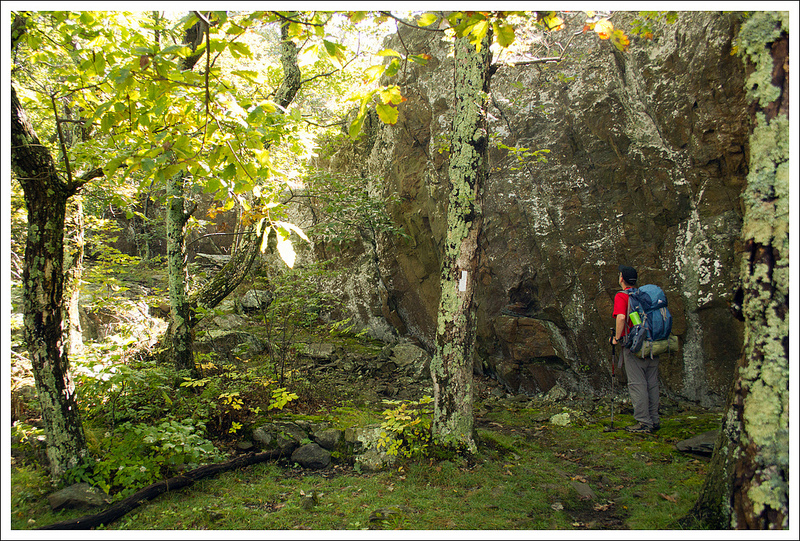

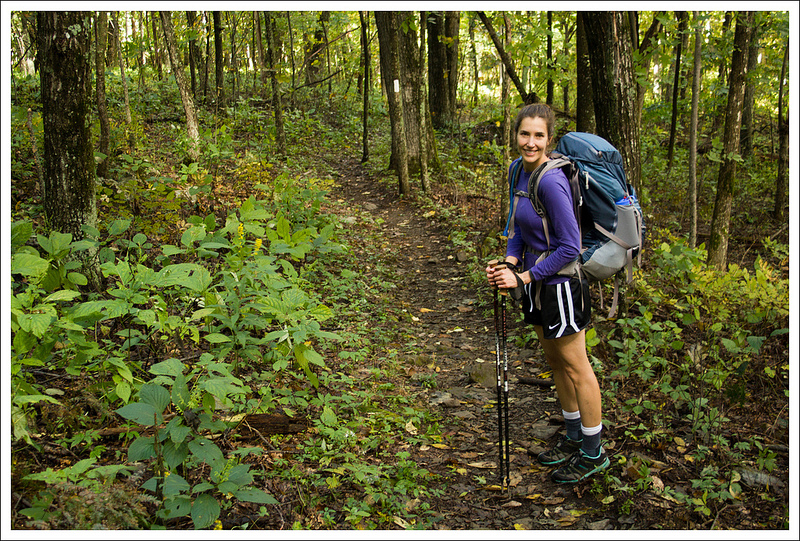
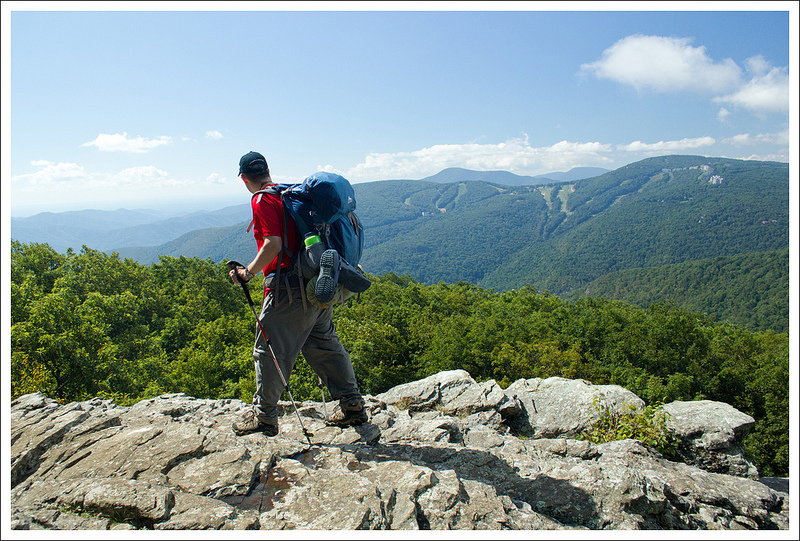
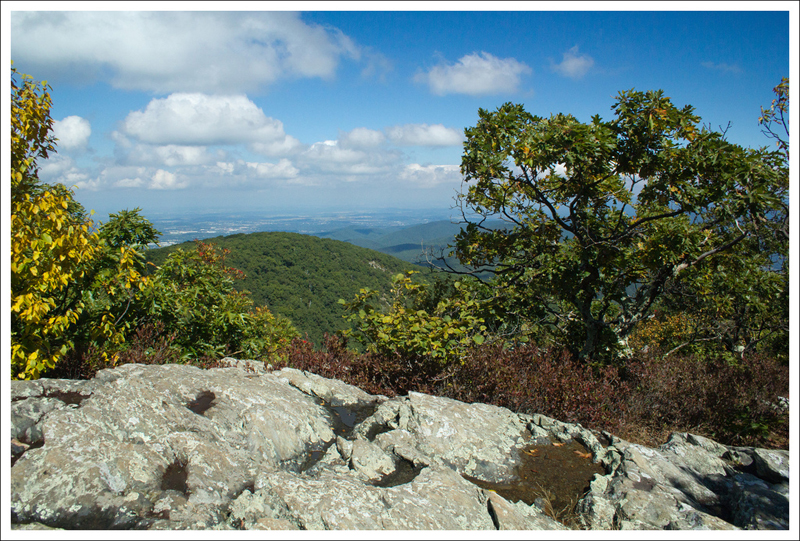
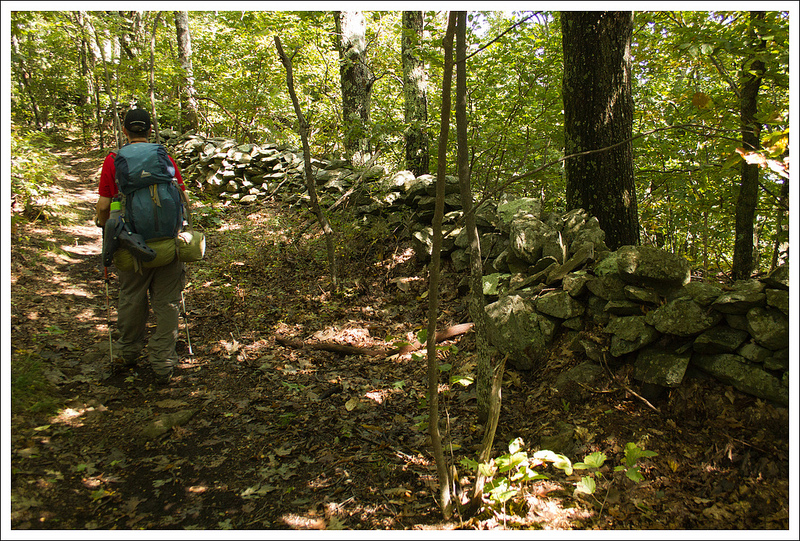
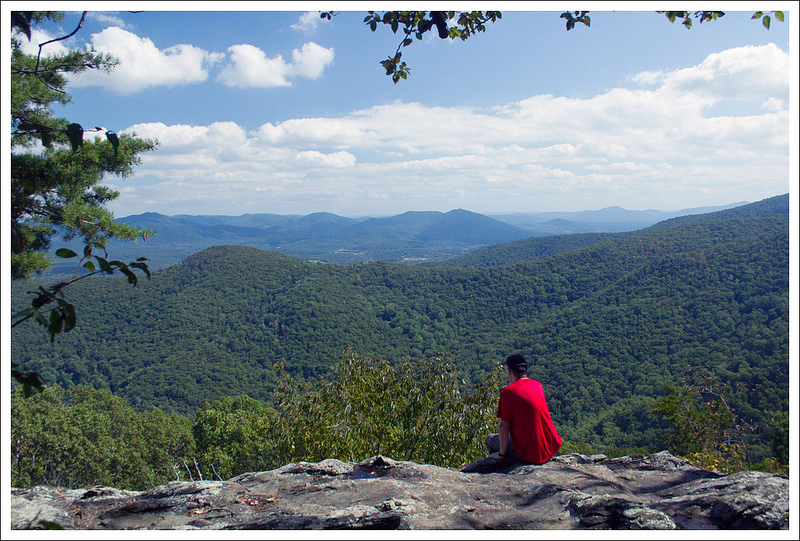
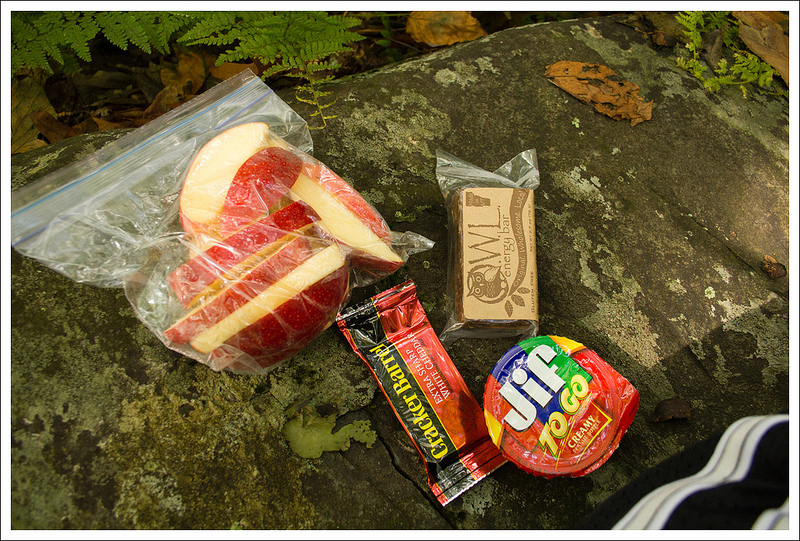
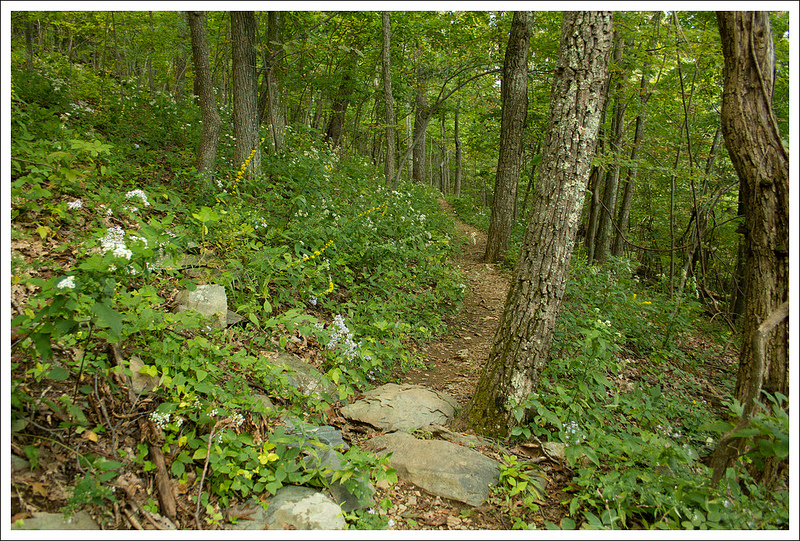
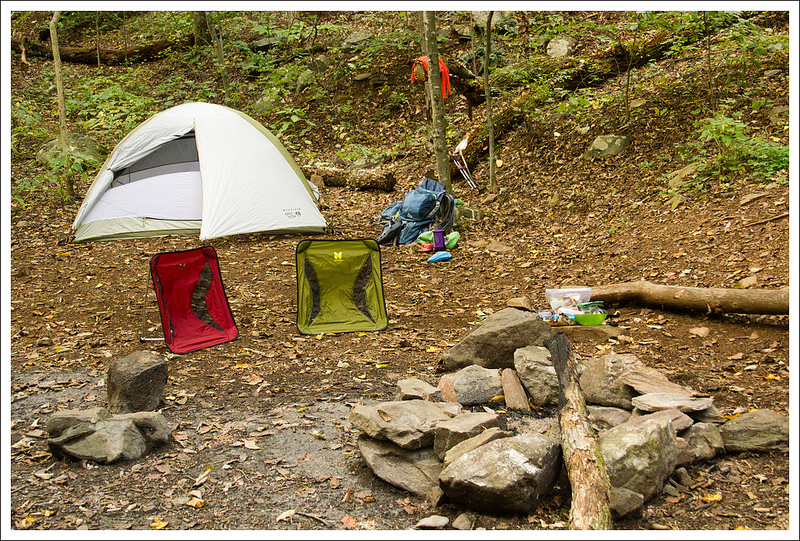
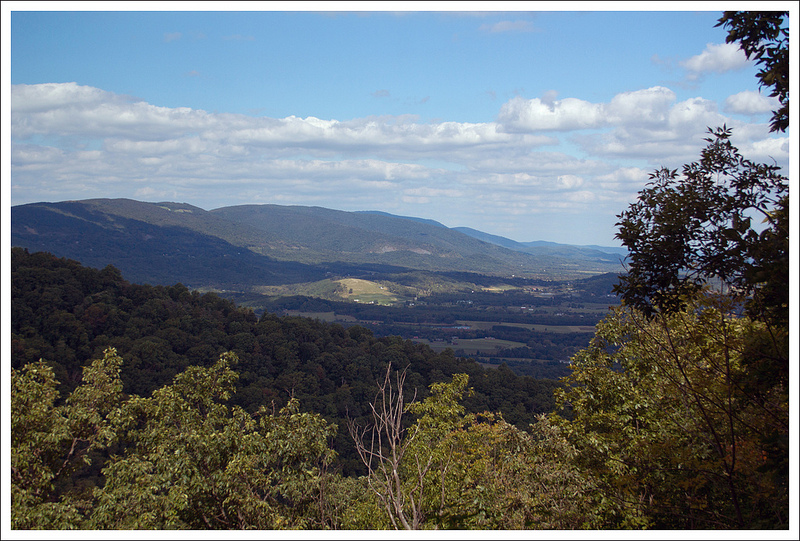
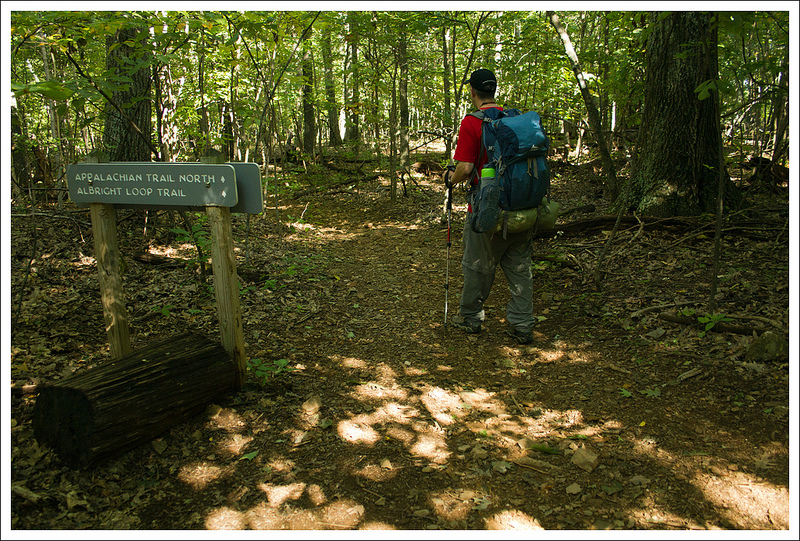
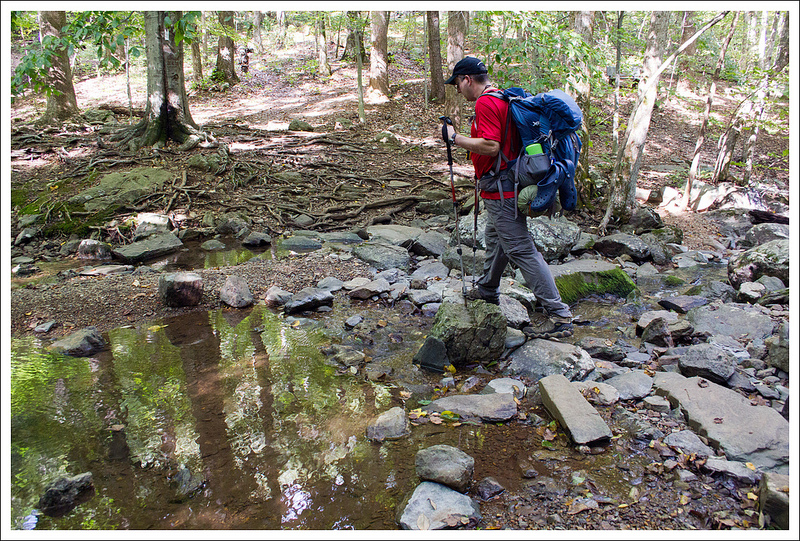
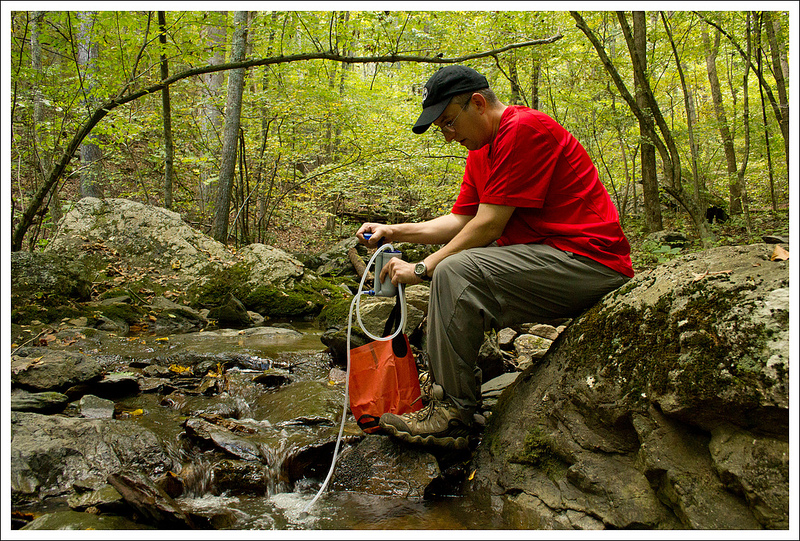
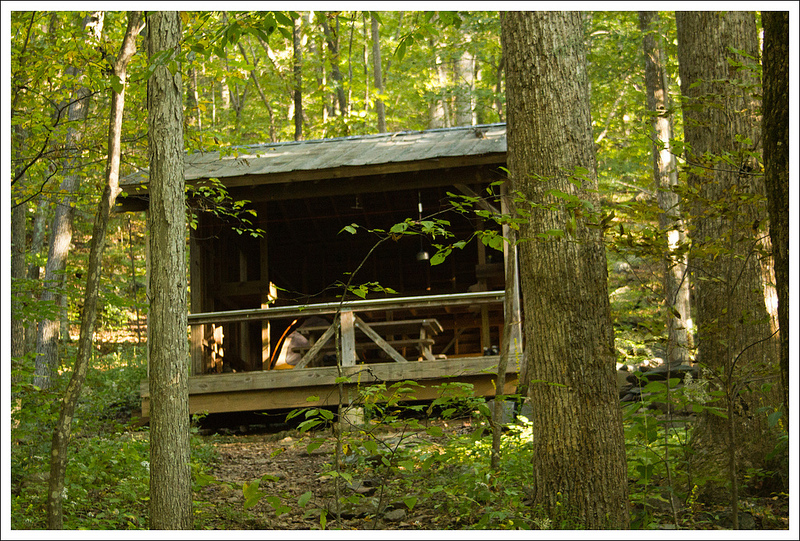
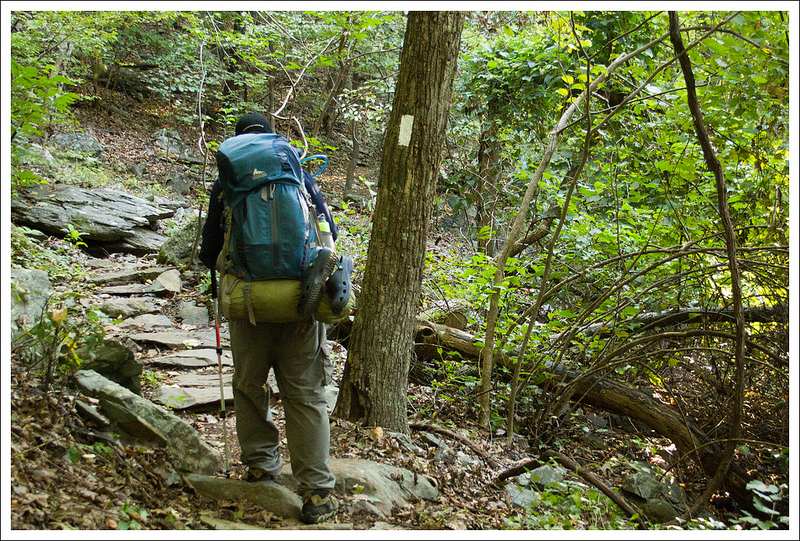
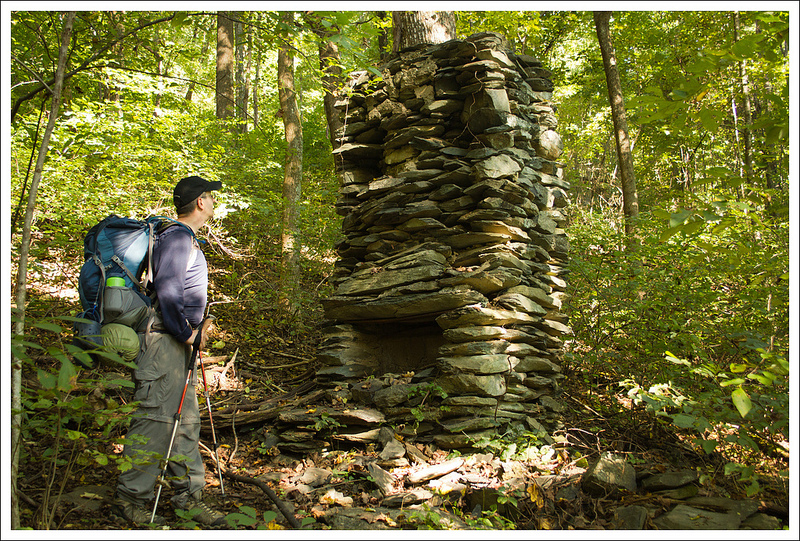
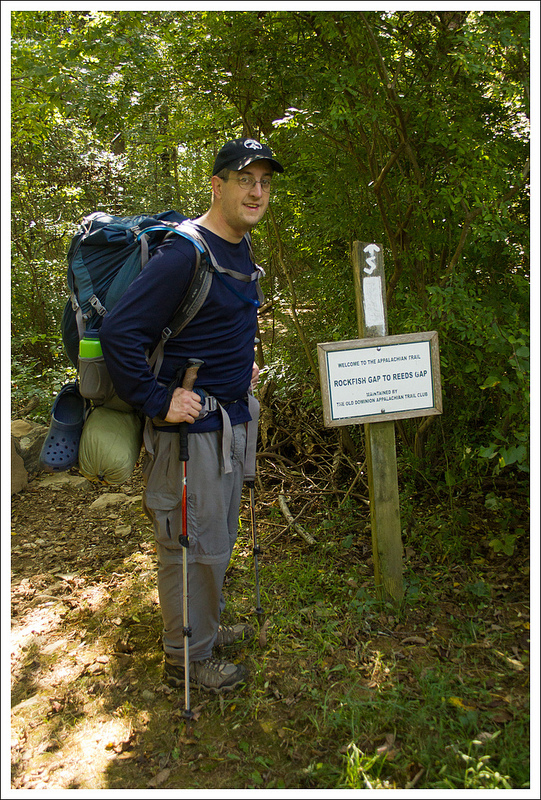
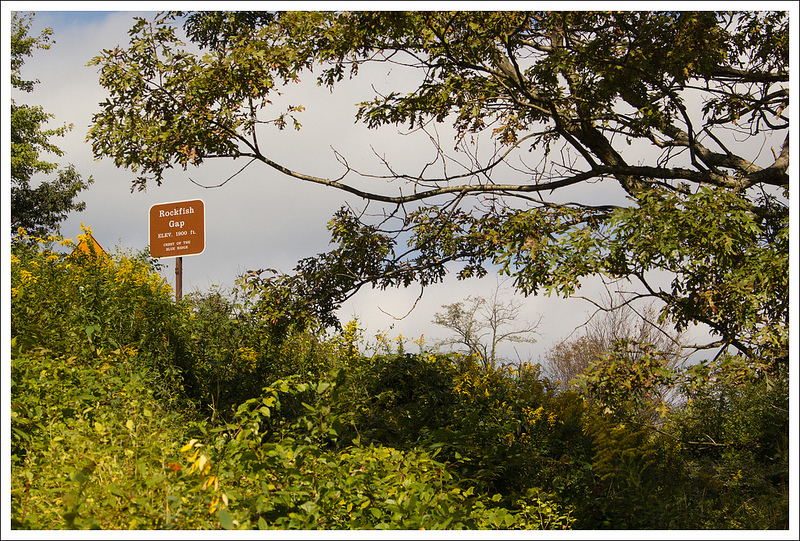


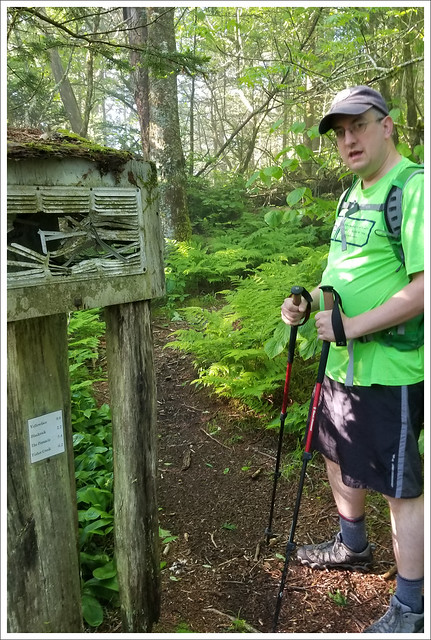
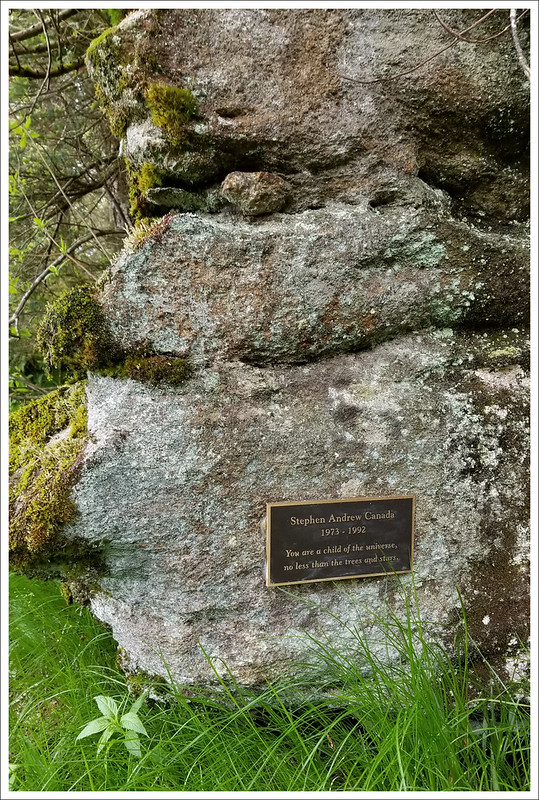