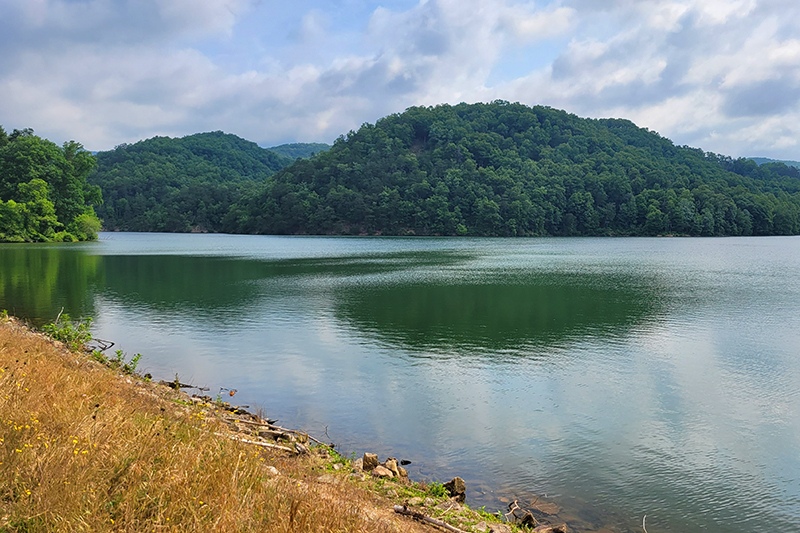
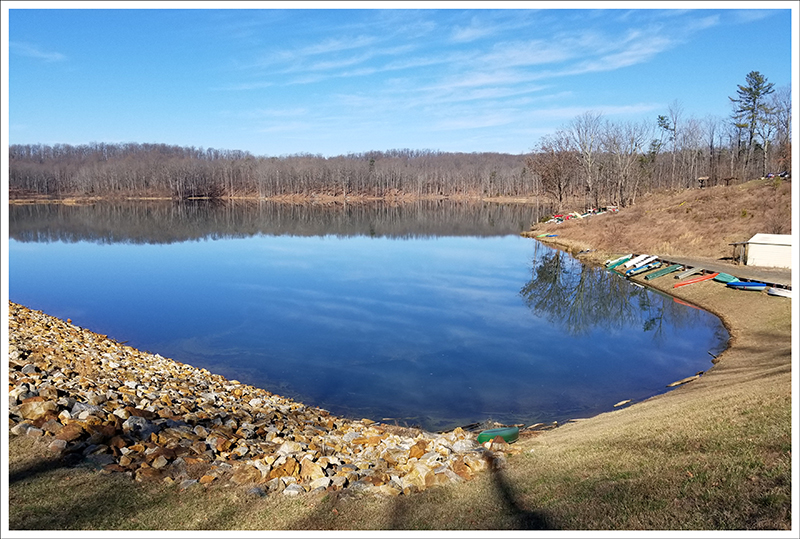
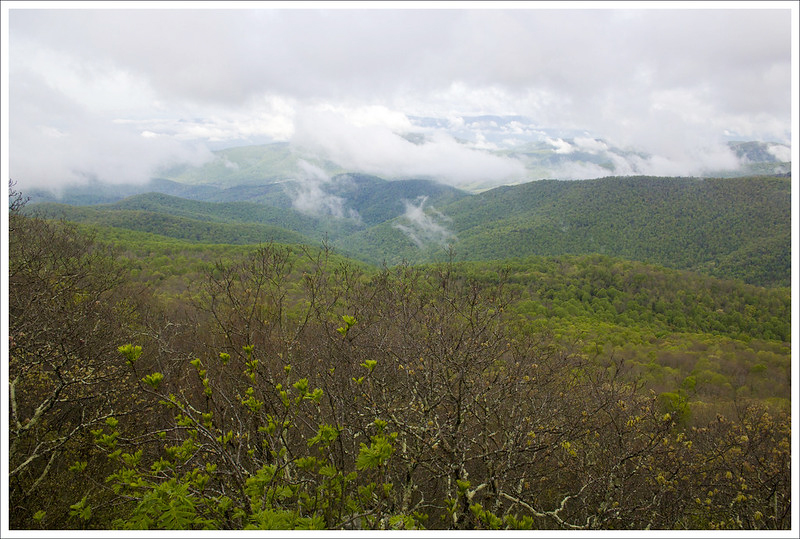
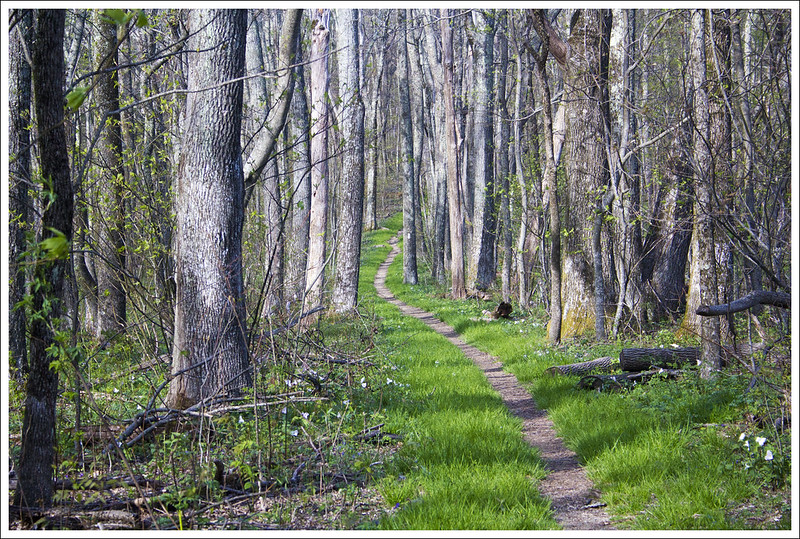
This 6.1 mile loop is located in Hungry Mother State Park. It follows the perimeter of the lake and has about 830′ of climbing along the loop. The developed side of the lake, where the hike begins, is flatter and often paved, while the backside of the lake is wooded and has more rugged terrain.
If you’re looking for a scenic-but-easy hike that’s longer than five miles, check out the Lake Loop at Hungry Mother State Park! We decided to tackle it as a bit of a recovery hike on our vacation to the area last June. The day before, we had hiked a piece of the Appalachian Trail from Damascus, VA to the Tennessee state line. It had been a significant uphill climb on a very hot day, so we wanted a hike that was a bit easier.
We’ve only visited Hungry Mother once before – to hike Molly’s Knob. If you’re interested in hiking Molly’s Knob as a longer loop with the Lake Trail, there are two junctions along the far side of the lake that will allow you to create this loop. You can download a copy of the Hungry Mother trail map from the park’s website.
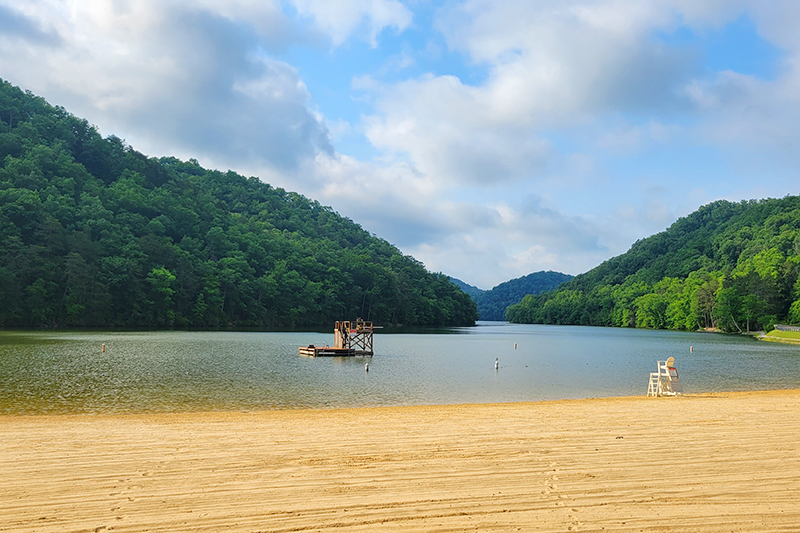
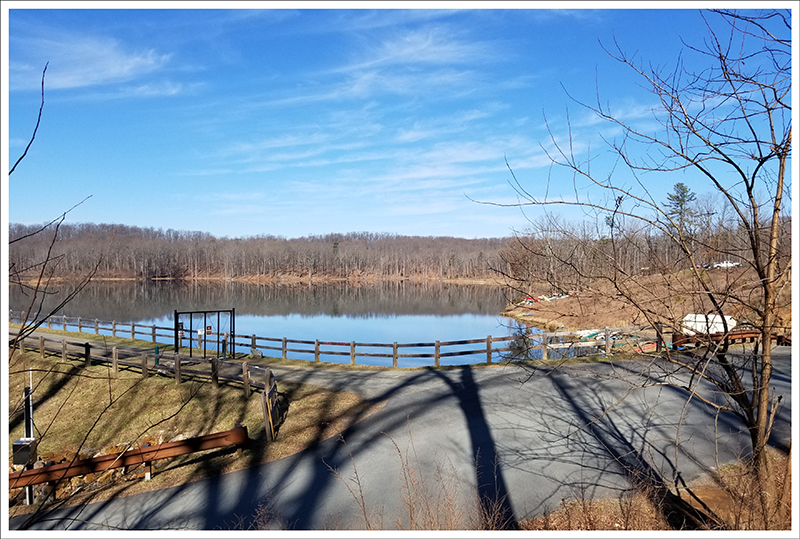
For this Lake Loop hike, we paid our entrance fee at a self check-in station and parked in a large lot along the waterfront. The trail can be started in different places, but we set off counter-clockwise from the busy, developed part of the park, where picnic shelters, guarded swimming, boat rentals, a snack bar, and restrooms are all located. Because we visited on a Monday, the park was really quiet and lightly trafficked. We ended up only seeing several people along the entire loop.
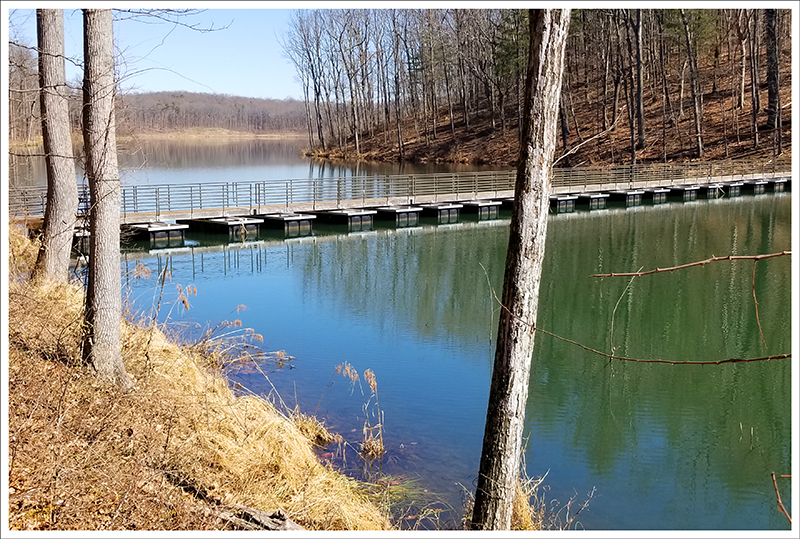
The trail began on paved, flat walkway following closely along the shoreline. The entire loop is open to foot and bike traffic, but you’re probably most likely to see bikes on the flatter. easier developed side of the lake.
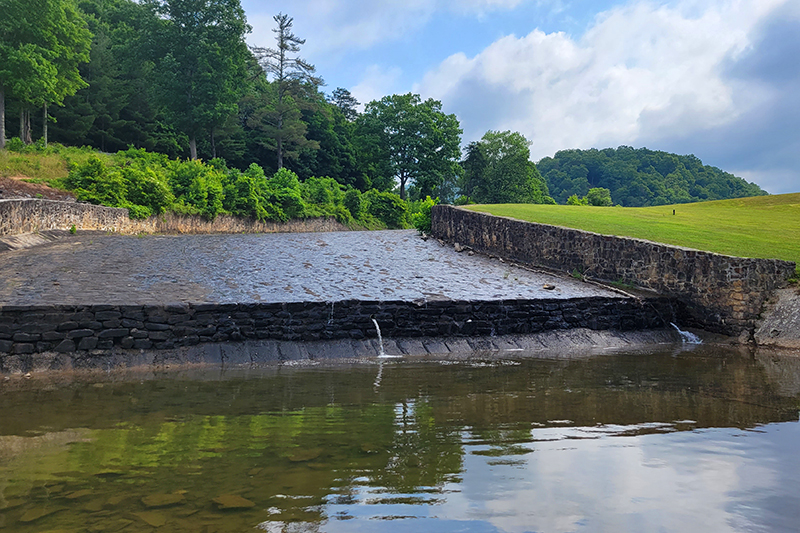
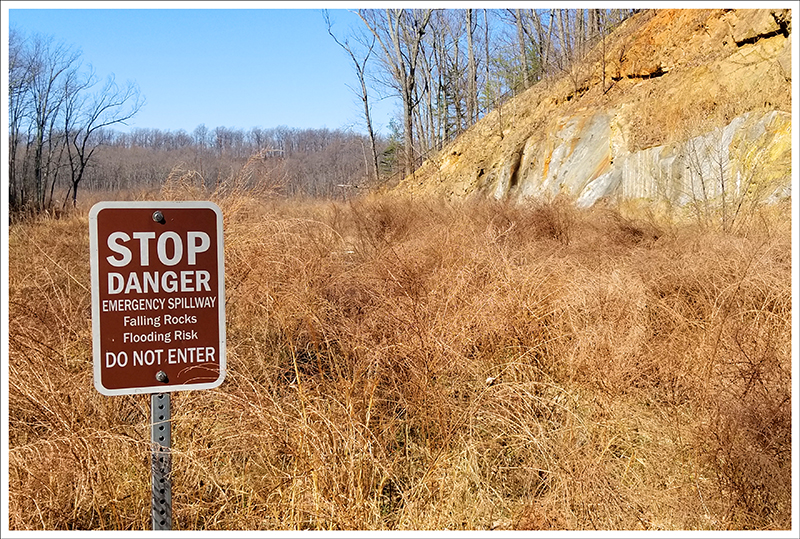
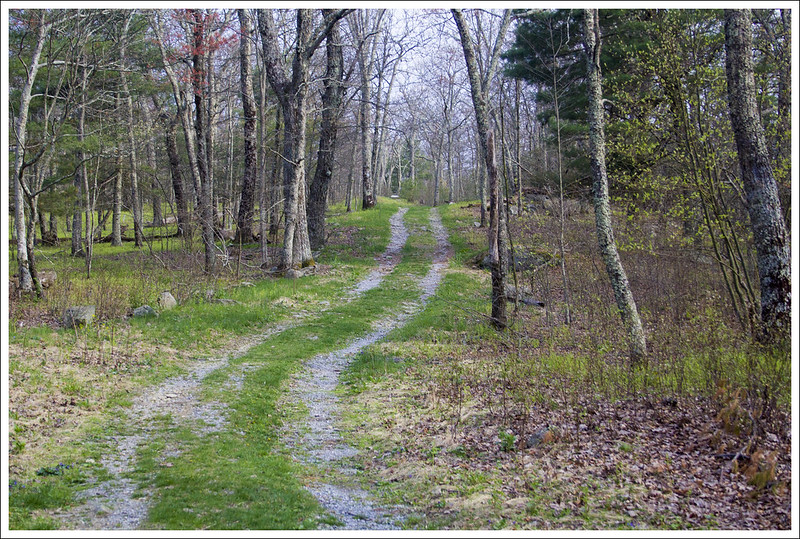
At the end of the lake, we passed a spillway/dam before reaching Camp Burson – the RV campground run by the state park. There is also a tent/yurt campground called Royal Oak at the other end of the park. After passing the campground, the trail crossed a bridge into the woods.
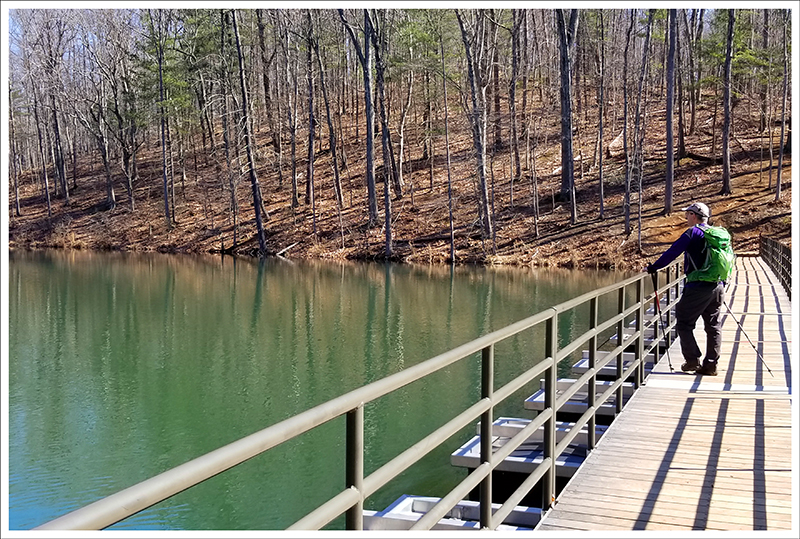
On the far side of the lake, the trail is a bit more rugged with many small ups and downs. The trail departs the lakeshore, and you only get glimpses of the lake through the trees for much of the way. On this side, we passed an old shed used by the CCC to store dynamite when the park was being built.
As we reached the end of the lake, the trail descended and began to follow the shoreline more closely, giving us lake views again. Eventually, we reached the park’s cabin area and found ourselves on flat footing back to our car.
All in all, this was a pleasant, easy walk in the woods. There are definitely more scenic and impressive hikes in the area, but this was a fun way to spend a recovery day.
More Photos
Spillway at Hungry Mother
Stream beyond the spillway at Hungry Mother
View from the top of the dam
Pretty blooms
Close up of pretty blooms
Leaving the campground area, There is a obstacle course/playground you can see in the far distance.
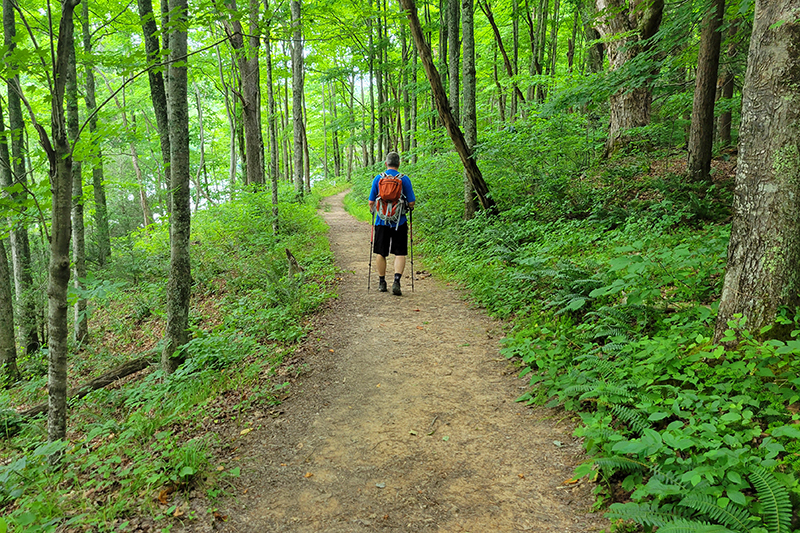
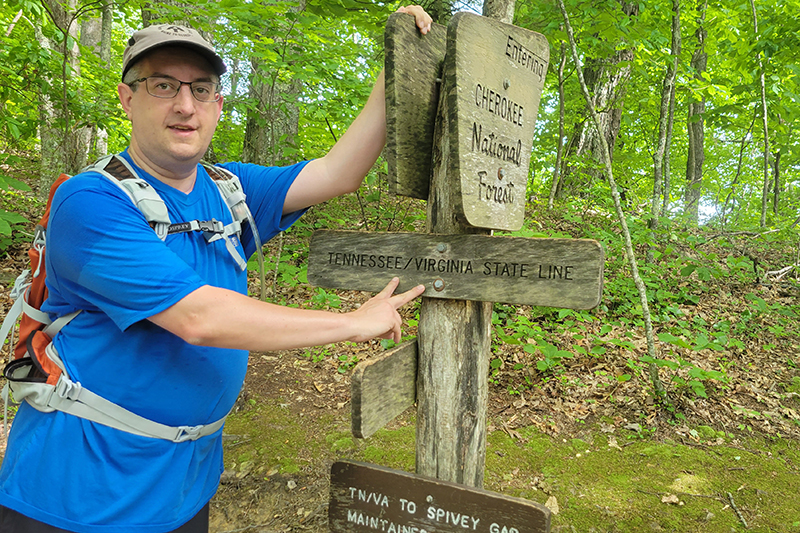
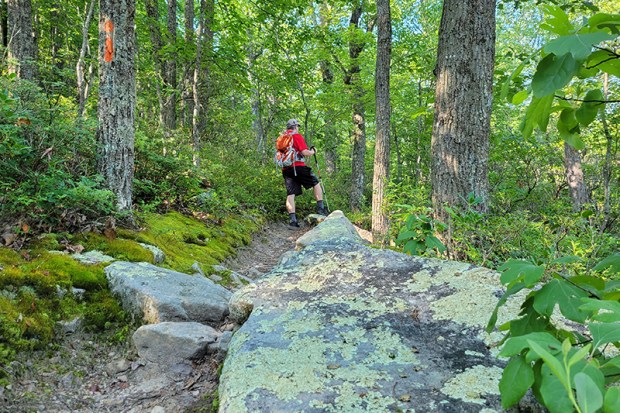
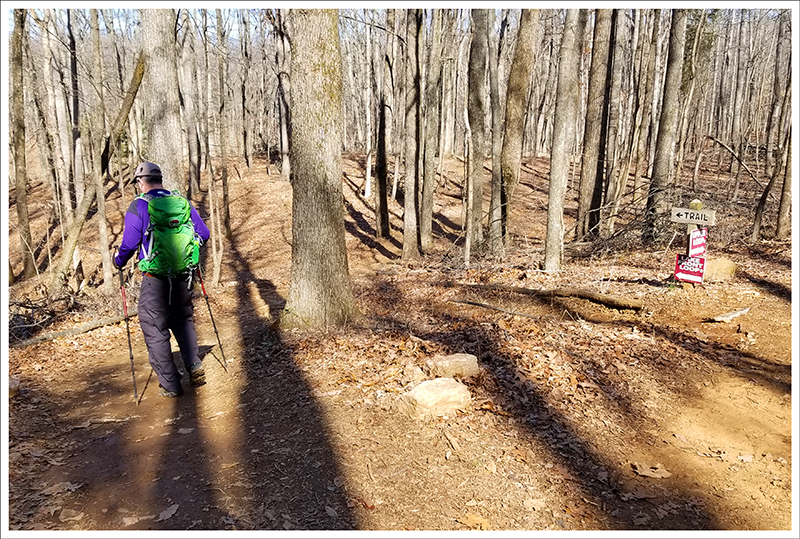
This 7.8 mile out-and-back is a section of trail we primarily did to work toward our completion of the entire Appalachian Trail in Virginia. This hike starts off in downtown Damascus and climbs 1,500 feet uphill to the Tennessee state line. There’s nothing in the way of views or noteworthy scenery – just a nice walk in the woods. We were lucky enough to have a great bear sighting on the trail.
Christine Says…
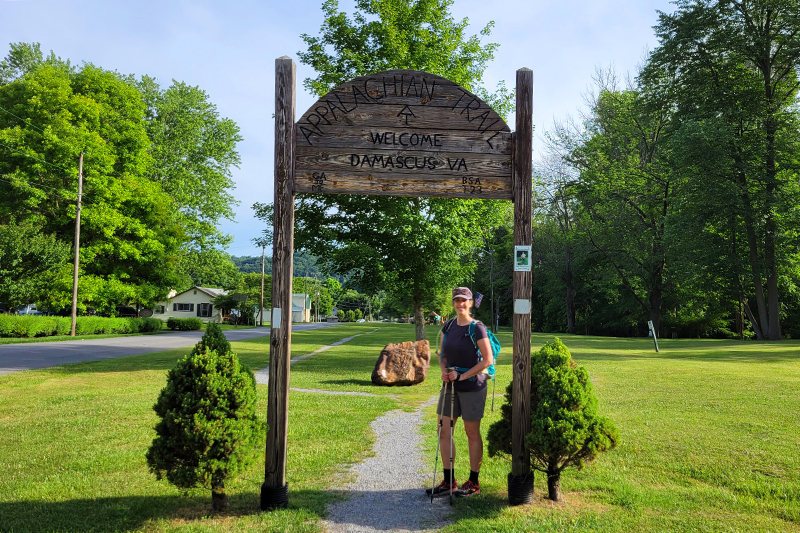
We seem to have a penchant for picking record-setting heat weeks for our vacations. I guess it’s not that unlikely when you’re limited to traveling in the summer, but man… this was an especially sweltering day to hike! Back in 2019, we did a week-long AT section hike that ended in Damascus at the parking lot across from Mount Rogers Outfitters. That left a 3.9 mile unhiked section between town and the Virginia/Tennessee border. As most of our regular readers know, we’re slowly section hiking our way across Virginia, so we had to fill in this little gap when we had a chance.
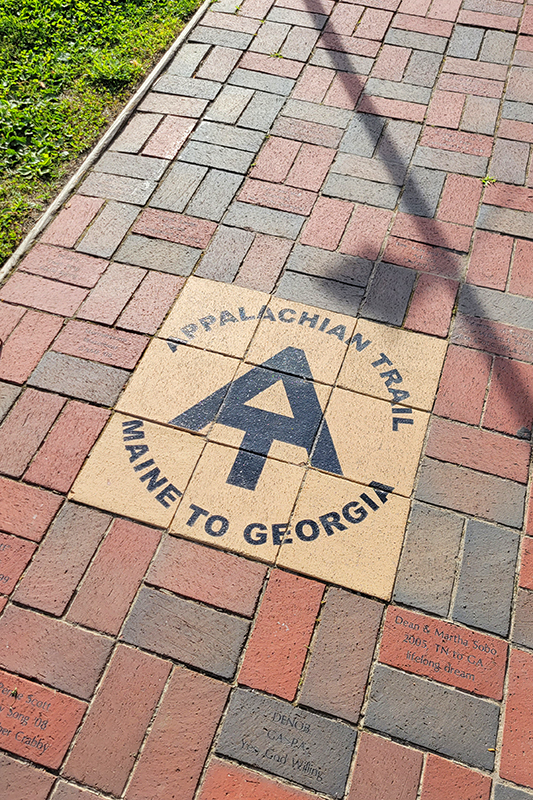
We parked in a public lot off of Laurel Street and picked up the AT where we left off in 2019. Headed south through town the trail is actually road walk, there are blazes on utility poles and AT logos built into the brick walkway. You can see people have made individual donations to have namesake bricks placed along the town section of trail. In a couple tenths of a mile, we turned left on Beaver Dam Ave. and walked through a little town park.
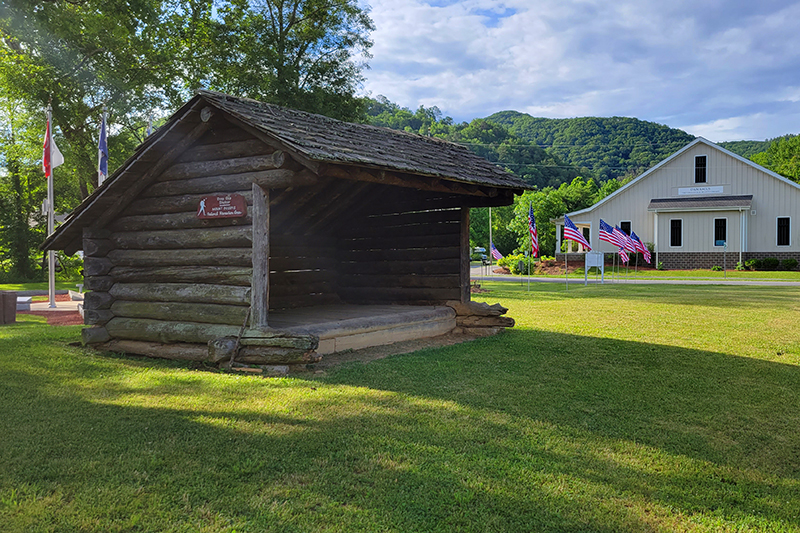
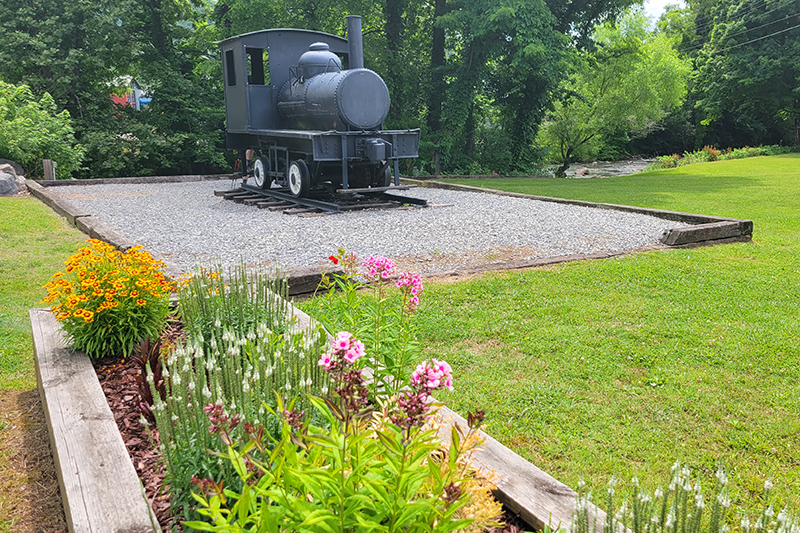
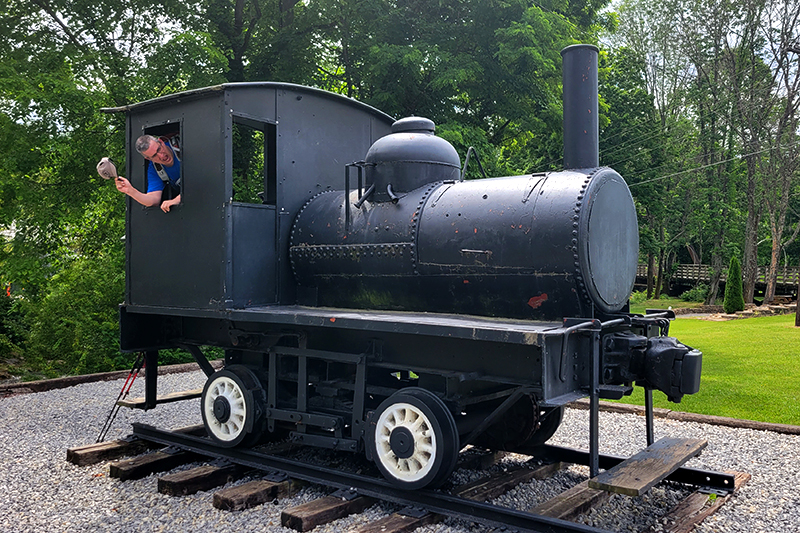
The park has an old train engine, a replica of an AT shelter, and the famous Damascus AT Welcome Arch. You’ve probably seen countless photos of hikers posing under the arch. We both took the obligatory photo for ourselves. After going through the park, the trail turns right onto Water Street, passing through a residential area before turning sharply uphill into the woods.
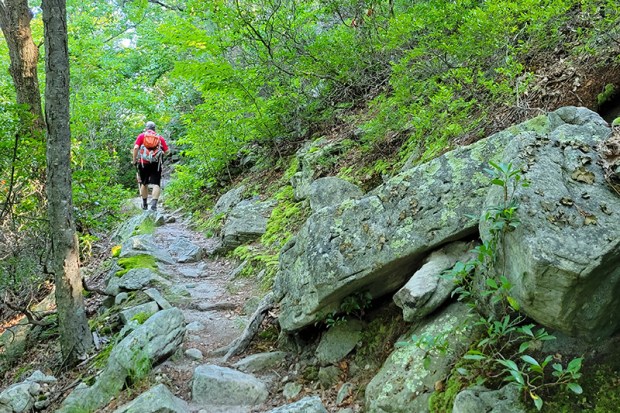
From there, the trail goes steadily uphill for 3.4 miles. About halfway up the climb, there’s a large campsite adjacent to a water source. I imagine some thru-hikers like the free camping right outside town the night before a resupply. Since we were hiking in late June, we had the trail all to ourselves, as most AT hikers are far north by then.
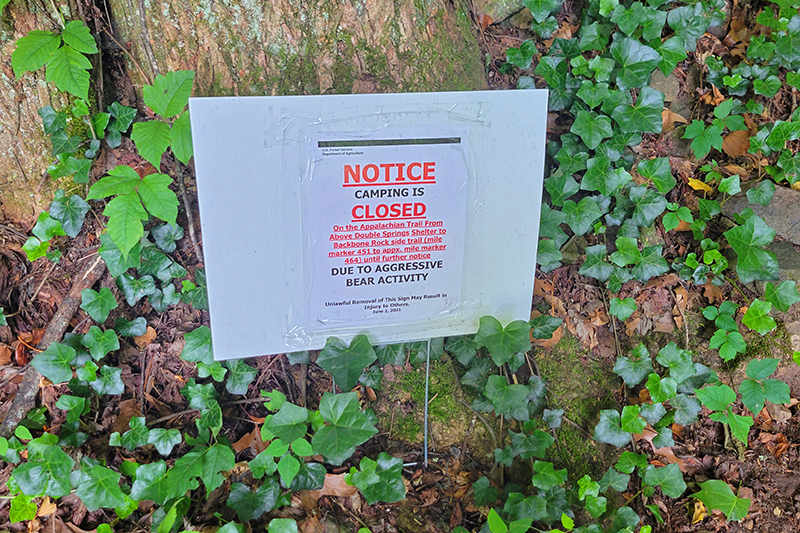
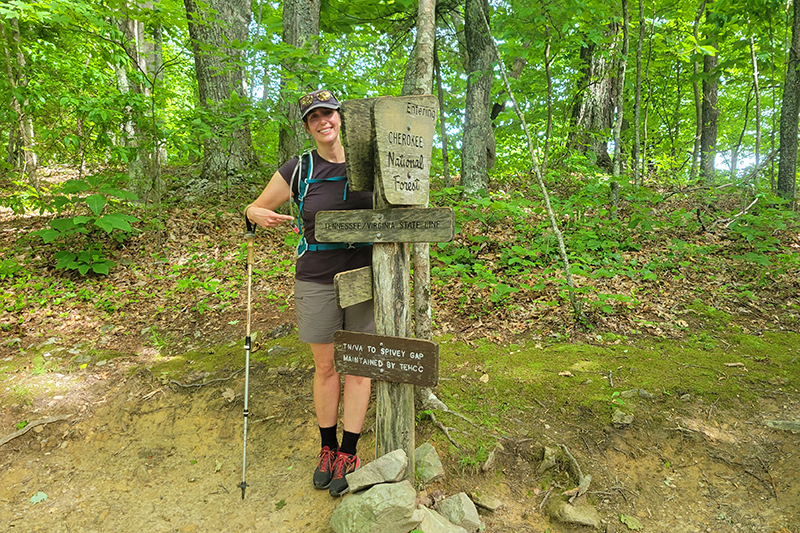
We plodded uphill until we finally reached the sign marking the state line! We both took a few steps into Tennessee, just for fun! We had a quick snack, and headed back down. The hike was naturally much easier going back downhill. We even saw a large, healthy-looking black bear about a mile south of town. Most of the bears we’re seeing in the Shenandoah are thin and mangy, so it was great to see a bear looking so fit. There had been a sign at the trailhead leaving Damascus warning of an aggressive bear further into Tennessee. I don’t think it was this bear, because this bear crashed away into the woods as soon as we saw him.
Pretty soon, we were back in town. It was even hotter in town as we walked the final third of a mile in the baking sun. After our hike, we went to Mojo’s Trailside Café for lunch and Off the Beaten Path for ice cream. Both are great stops post-hike!
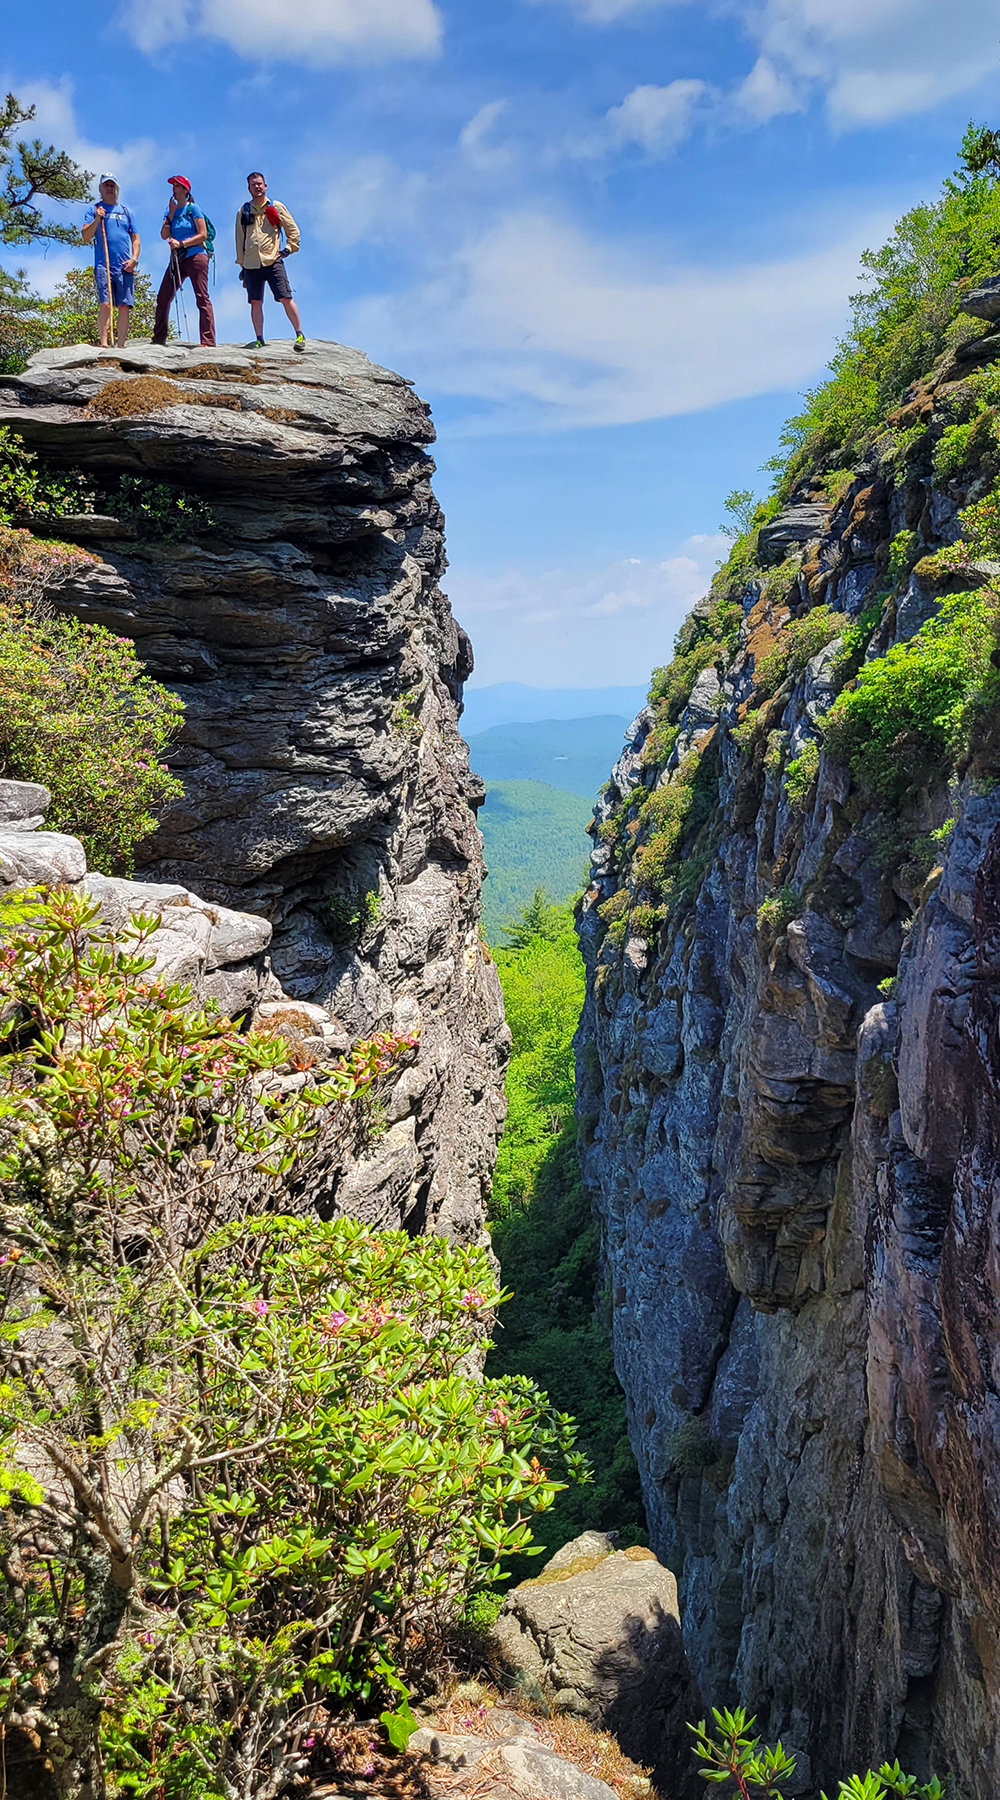
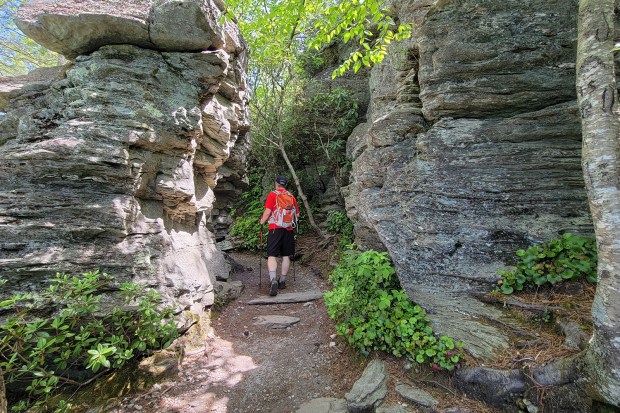
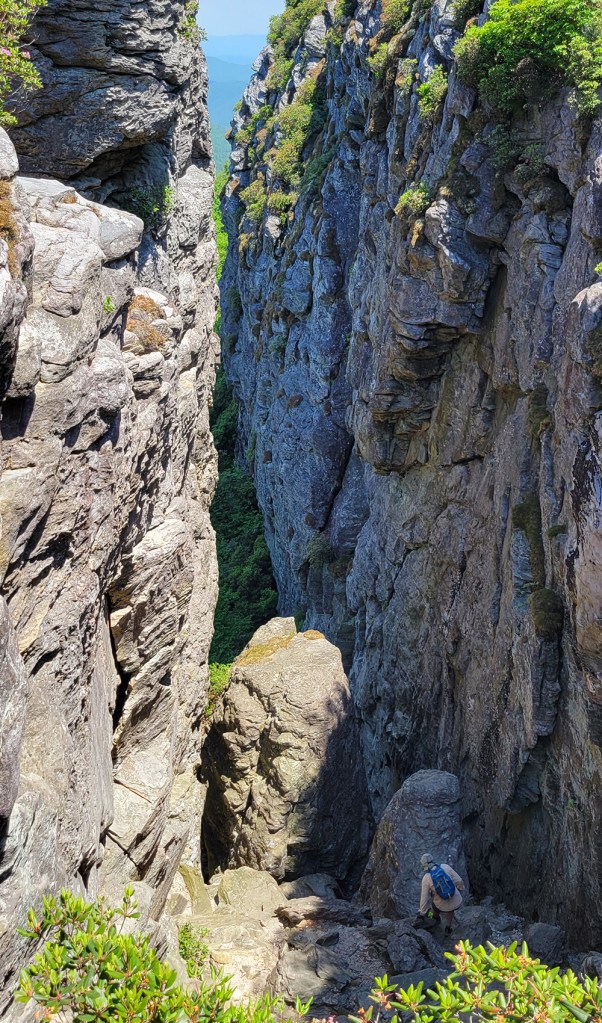
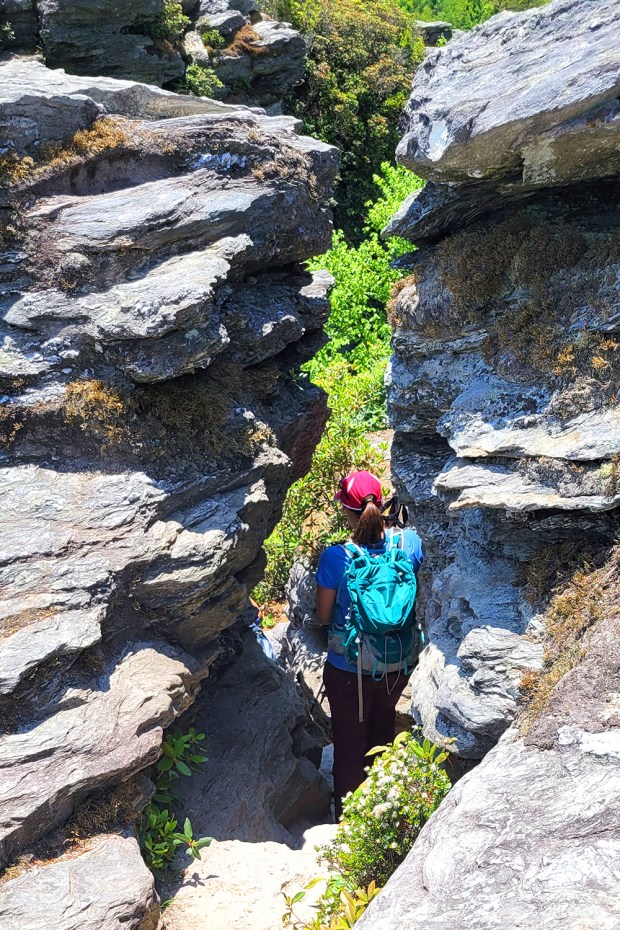
On our second day of vacation, we decided to check out some hiking in beautiful Linville Gorge – specifically Table Rock, the Chimneys, and the Devil’s Crack/Cellar. The total for the day was only 3.28 miles with 610′ of elevation gain, so it should have been an easy hike. For whatever reason – the hot sunshine, tiredness from sleeping in an unfamiliar bed, etc – it felt a lot tougher than it normally would. It was still a great hike with spectacular scenery, but next time I’d go earlier in the morning, in cooler clothing, with a lot more water and sunscreen! This is definitely an exposed trail where you will bake in the sun – or get hit by lightning if there are storms! The Table Rock section is pretty straight-forward, but the Chimneys section might not be great for unsupervised children or people with a fear of heights.
The drive from the main paved road out to the Table Rock parking area is a winding, dusty, bumpy 8.5 mile ride along forest service roads. You never think 8.5 miles is ‘far’ until you have to drive along a road like this – it takes forever to to cover the distance. Along the way, we passed the trailhead to Hawksbill Mountain – another spectacular hike we did several years ago. I actually think it’s probably the prettier hike.
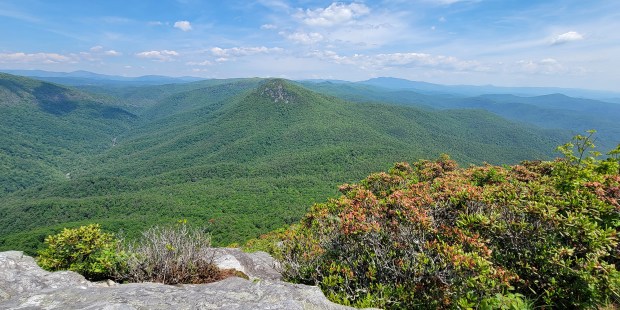
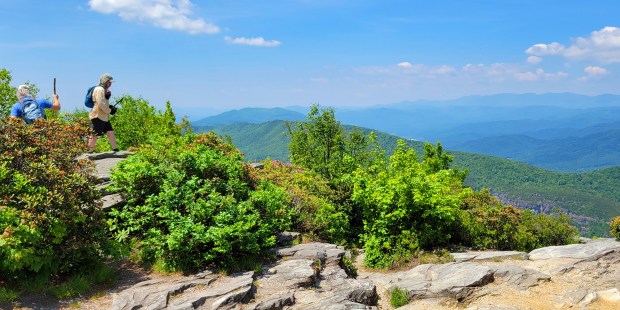
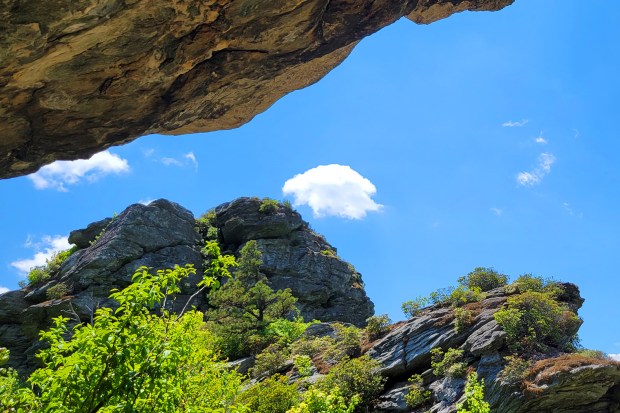
When we got to the Table Rock parking/picnic area, there were just a few cars there. Apparently, this area is immensely popular and we were lucky to hit it on a quiet day. The hike is a double out-and-back. We decided to go up Table Rock first. From the parking lot you can see the distinctive dome-shaped summit off to the left. The trail is gently graded with lots of interesting rock formations along the way. As you climb, you’ll begin to get views looking down into the gorge. It’s such amazing, dramatic scenery.
You’ll reach the summit of Table Rock after just about a mile of climbing, most of it along the Mountains to Sea trail. On the way up, you’ll pass two trail junctions, both on the left side of the trail – one is a continuation of the MTS trail. After you pass that junction, stay to the right to reach the Table Rock summit. The top is not a small outcropping that looks in one direction – it’s an entire mountaintop with views all around! You’ll see the foundation of an old fire tower. To the north, you can see Hawksbill Mountain. Supposedly, you can even see Linville Falls off in the distance, though we personally couldn’t spot it. You can also scramble over a bunch of boulders to get views to the south of Shortoff Mountain, and to the west – the Linville River.
After spending some time at the summit, we descended back the way we came. We took one of the unmarked side trails we had passed on our way up out to see Devil’s Crack/Cellar. I think the ‘cellar’ refers to the rock jumble heading down into the Gorge and the ‘crack’ is the big rock tower that splits from the main wall. I’ve read that some people just call the whole area “The Crack of the Devil.” I can’t be positive about the names, but I can tell you that it’s incredible and worth the short side-trip. The detour is only about a quarter mile off the main trail. The top of the rock tower is easy to climb up, and I suggest checking it out!
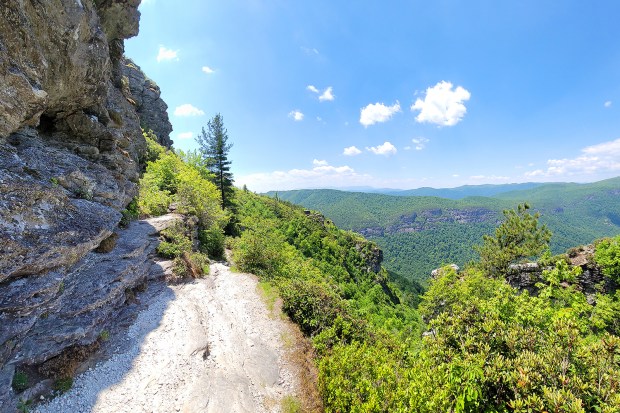
Afterwards, we descended back to the parking area. From there, we took the Mountains-to-Sea trail to the right. Almost immediately, you’ll pass pit toilets, the picnic area, and a large primitive campground. The trail is a gradual uphill for a few tenths of a mile. From there, it turns into a bit of a rock-scrambling roller coaster as it follows an exposed ridge.
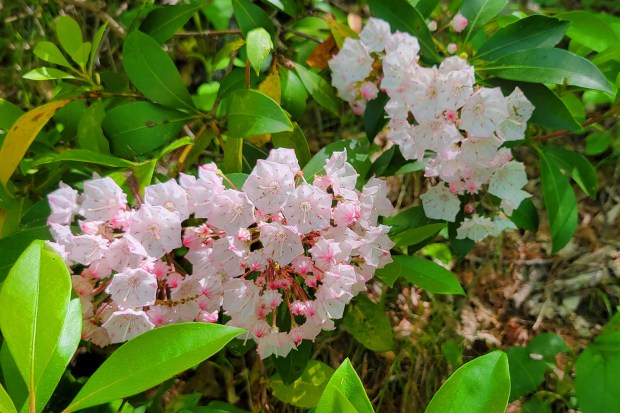
The trail had some steep drops and tricky obstacles to negotiate. I don’t particularly enjoy rock scrambling or exposed ledges, so I didn’t love this part of the hike. It was lovely, but it definitely triggered my vertigo. I can see why rock climbers are such big fans of the Chimneys – there are lots of precipitous things to scale. While I didn’t love the terrain, I did appreciate the blooming flame azaleas, mountain laurel, and Catawba rhododendron.
I ended up walking about .8 of a mile along this section of trail. After that, the terrain got even more exposed and tricky, and I really didn’t feel like negotiating any more rocks. So, I found one of the only shady spots along the way and decided to wait for the rest of the gang to come back. It’s no fun to be hot, dizzy and lightheaded on terrain where you really need good balance.
After a few minutes, Adam came back and we retraced our steps back to the car. I was pretty glad to get out of the sun and into the air-conditioning!
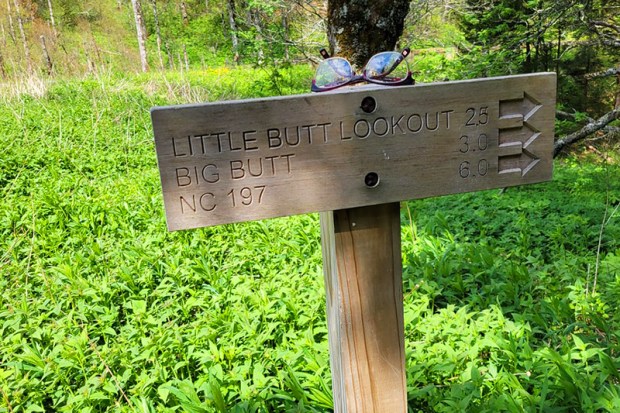
This is a 5.25 mile hike with 1237′ of elevation gain. The trail has LOTS of constructed stairs and a couple very steep climbs. Point Misery, which has no view, is the high elevation of the hike. The best view is from Little Butt, where you can enjoy vistas of Mt. Mitchell and the Black Mountains from a slab of rock. You can hike on an extra half mile to Big Butt, but there are no additional great views. This hike starts at Walker Knob overlook on the Blue Ridge Parkway.
Adam Says…
Last May, we stayed a week with our friends, Tony and Linda, who rented a cabin in North Carolina near the Blue Ridge Parkway. Fellow hiker, Zach, joined for several days as well (all members of the Hiking Upward team). As is common on a vacation with friends, we had a first night of celebrating being away and probably had a few too many beers among us.
The next day was hot, and we were definitely feeling a bit tired from the night before, so we decided to try something moderate. Eventually we landed on the Little Butt hike. You have to laugh at a hike with a name like that!
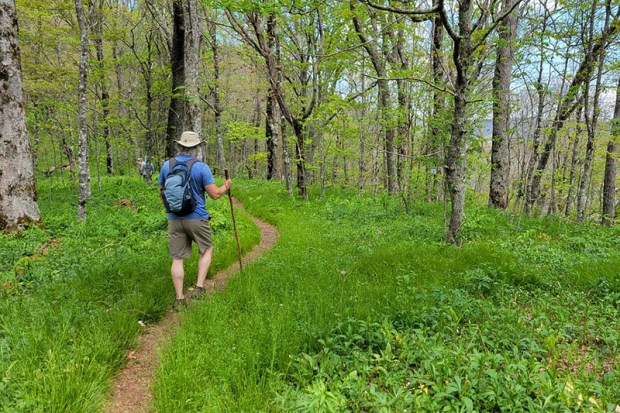
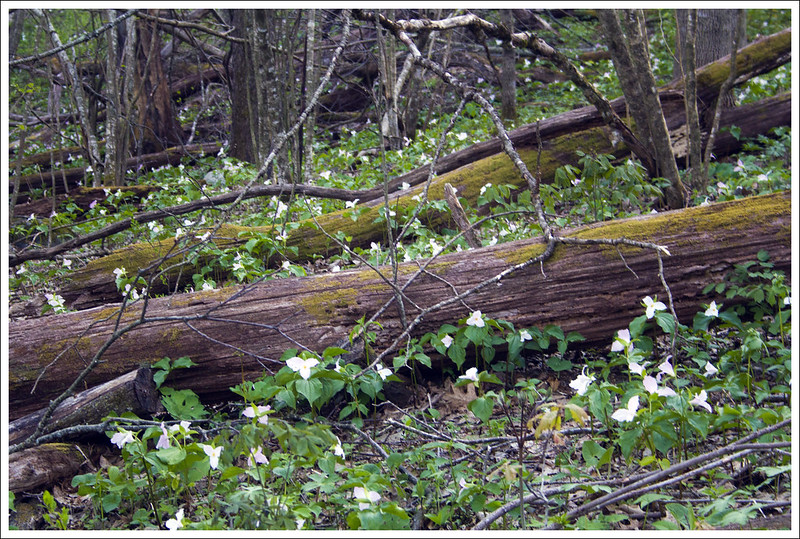
The trail started off with a gentle descent into a scenic forest landscape with lots of trillium along the way. The trail was worn through, but we could tell the spring growth would likely necessitate some maintenance as things get overgrown as the season goes on.
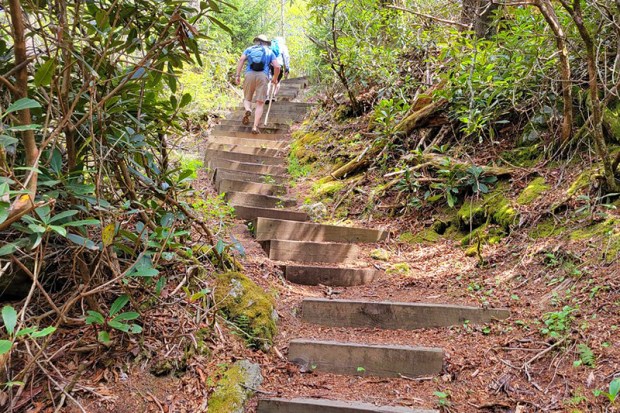
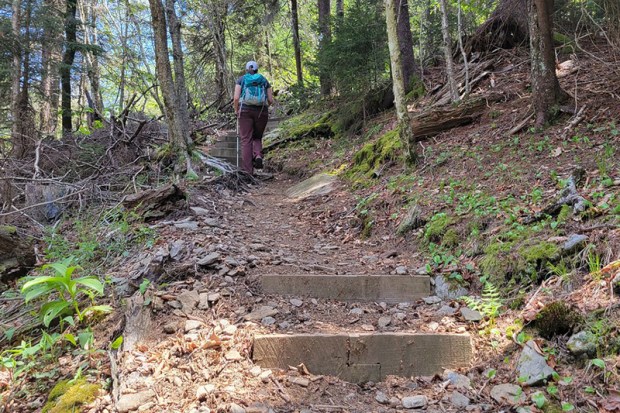
After we hit the bottom of the small gap, the trail starts to ascend steeply. It was tougher than we expected, even brutal at times. The climb topped out at Point Misery – about a mile and a half into the hike. From there, the trail dropped steeply for about half a mile, before going right back up for .4 miles. This section had many, many stairs constructed into the mountainside. I don’t know about you, but I typically hate to see stairs on a hike, because I know I’m in for a steep climb, since stairs are necessary to keep the trail in shape.
Once we got up through the forest staircase, the trail reaches more of a ridgeline and it was a short distance to get to the Little Butt overlook, a slab of rock where you can take in views of Mt. Mitchell and the Black Mountains.
At this point, Christine and I decided to stop and just enjoy the view. Big Butt is only half a mile from here, but we had read that it really didn’t have any views and was just another peak to bag. Zach and pressed on to Big Butt. We ate a quick snack at the overlook and then decided to hike back. Zach said he would catch up to us. We descended the stairs, climbed steeply back up to Point Misery, and were enjoying the easy downhill back to the car when we saw Zach running along to catch up. We were amazed at how much energy he had compared to us.
That night, we got back to our rental place and enjoyed a beautiful sunset and campfire. It was a great first day of adventure in North Carolina!
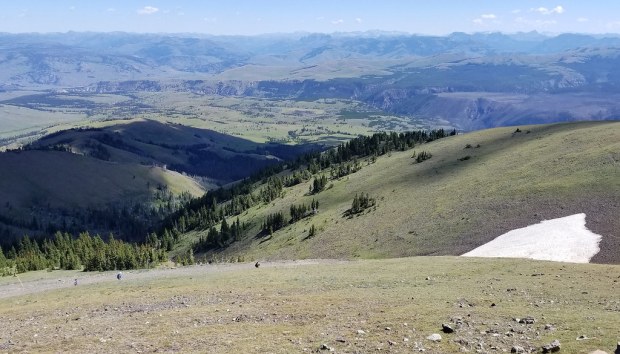
After coming off the Teton Crest Trail, we took a day off hiking and chilled in Jackson Hole. We stayed at a hotel, ate lots of good food, and checked out more of the Tetons by car. We initially planned to head into Yellowstone National Park the next day, where we had a campsite booked at Bridge Bay Campground for two nights. Adam’s back was still bothering him, so we decided to stay an extra night in a hotel before joining our friends at the campsite in Yellowstone.
The next day, we made a long, leisurely drive into Yellowstone National Park, stopping many places along the way for photos and wildlife-related traffic jams. We got to Bridge Bay midafternoon, set-up camp, and met our friends. We had dinner, enjoyed s’mores by the campfire, and attended the evening ranger program. It was like all the park camping experiences I remember from my childhood.
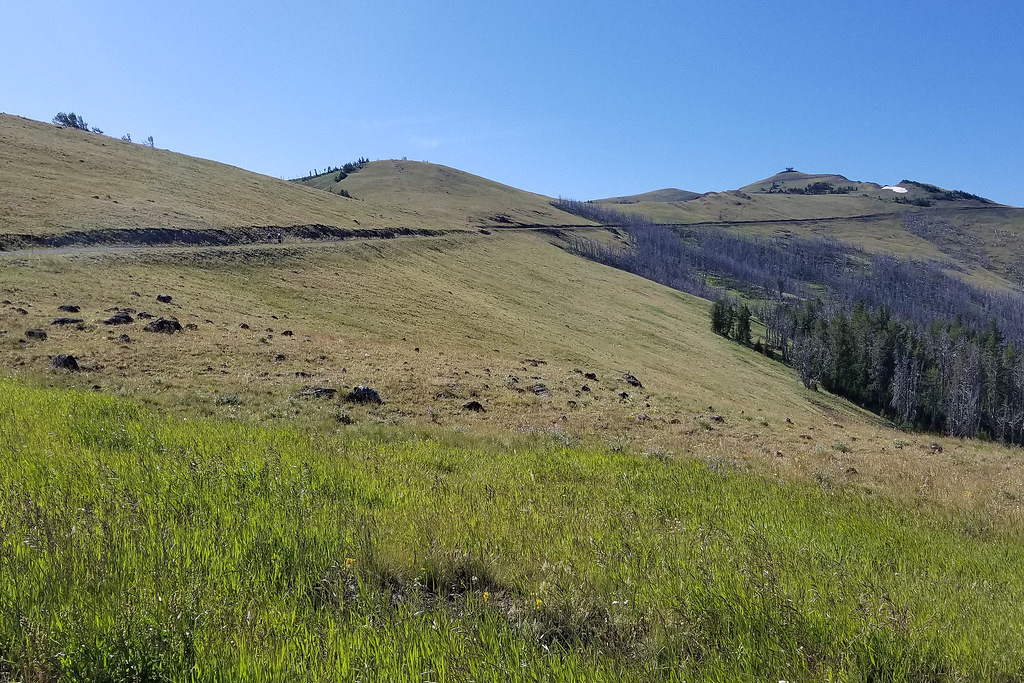
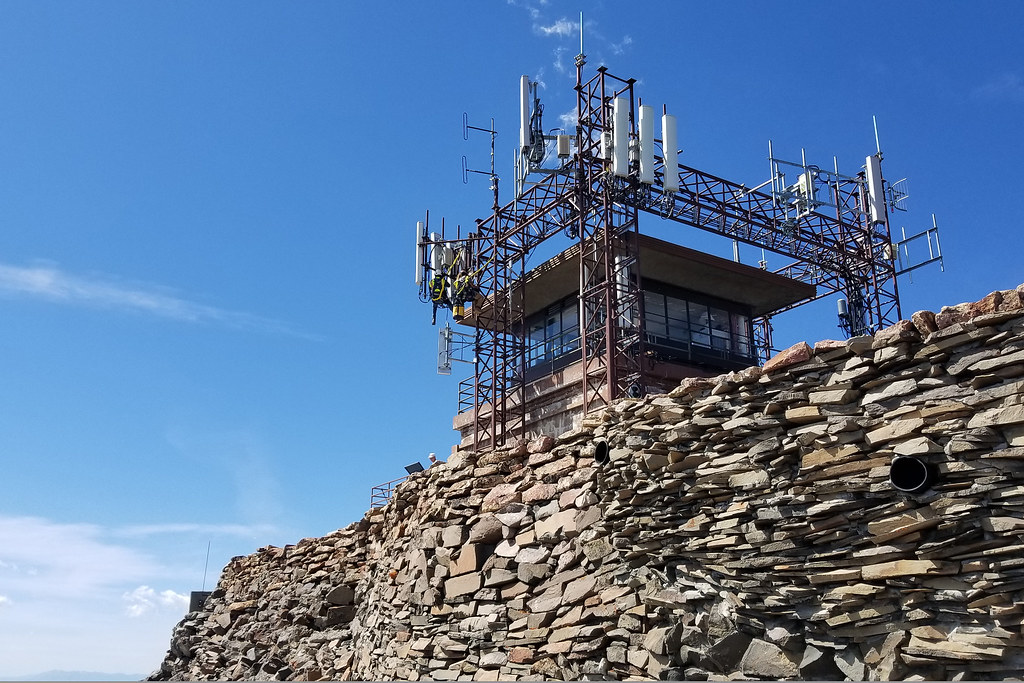
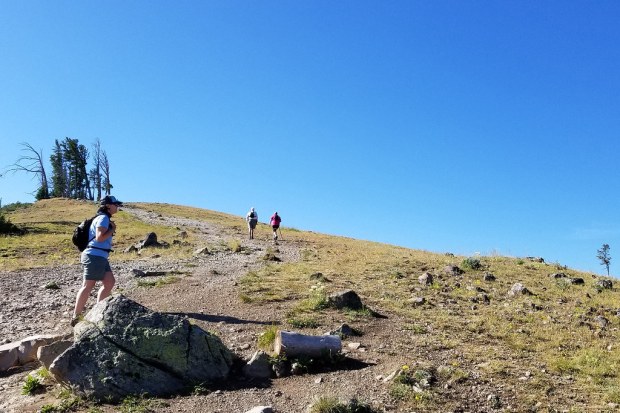
The next morning, we got up, grabbed breakfast, and discussed plans for the day. Brian decided to go fishing and the rest of us decided to hike up Mount Washburn. At 10,219′, Mount Washburn is the highest peak in Yellowstone’s Washburn range, and is also home to one of the park’s few remaining fire watch towers.
There are two hiking routes to the summit of Mount Washburn. The first option is to park at the Dunraven Pass Trailhead for a 6.5 mile hike with about 1400′ of climbing. We chose the second option – a shorter route starting at Chittenden Road. This route was only 4.5 miles, but has about the same elevation gain.
If I had it to do over, I would have started at Dunraven Pass and just done the longer hike. It’s supposedly prettier and has a more gradual ascent. I think my tired legs and oxygen deprived brain were just thinking “shorter is better!” I struggled with the altitude on this hike and felt queasy and dizzy most of the way. I think after seven really busy, active days with staying at a mix of campsites and hotels, I was just run down, tired, and dehydrated. I still had fun and I still made it to the top, but this was probably my toughest hike of the trip (even though it shouldn’t have been.)
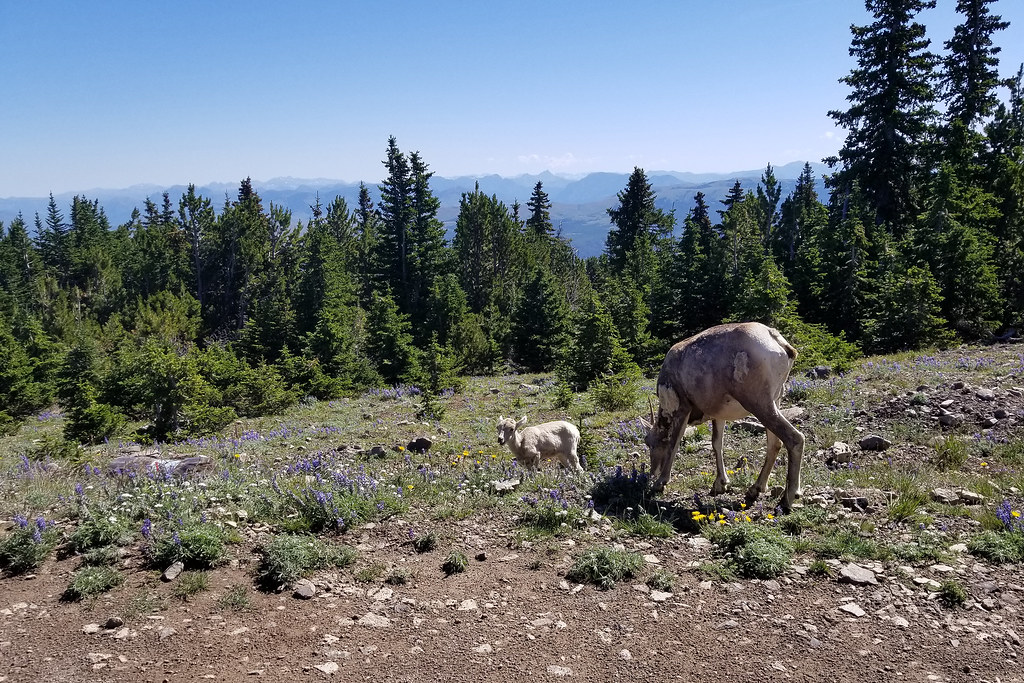
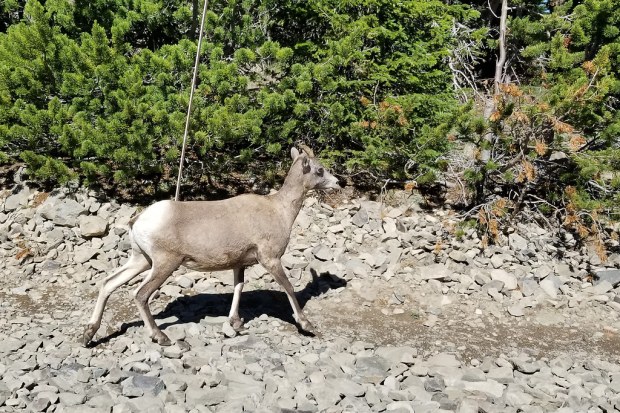
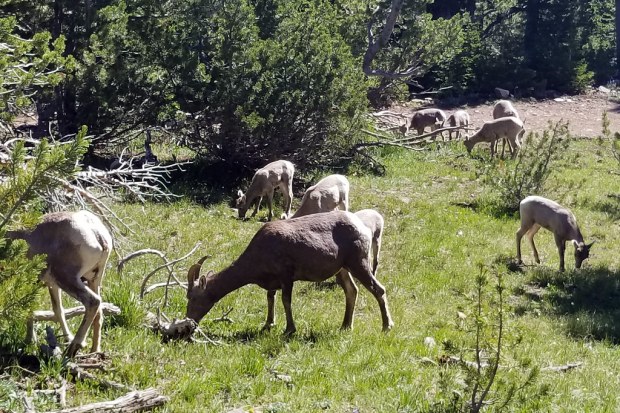
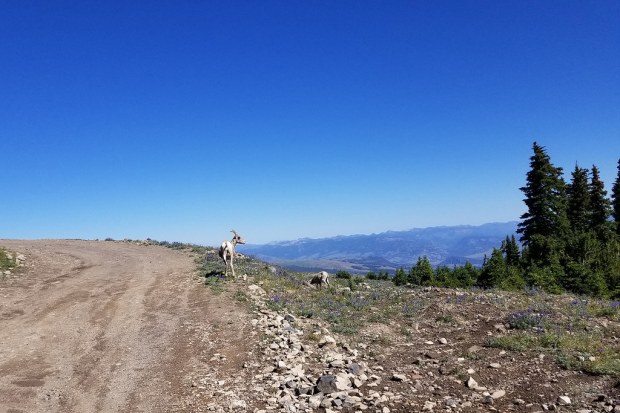
The Chittenden Road is all out in the open, so bring your sunscreen. The route follows a gravel roadbed straight up the mountain, not a switchback in sight! The major up-side of the unshaded terrain is that you always have views. When we visited there were also many wildflowers and maybe just as many bighorn sheep! It was neat to see the herd which was mostly mothers and babies. Although, we never did see a big ram with the classic curled horns.
At the top of the climb, you reach the summit tower. There are bathrooms, trash cans, and information at the top. There was a ranger staffing the tower, as well. We took lots of photos, had a snack, talked to some people wearing JMU gear (fellow alumni!) The vistas at the top are truly panoramic – you can see all across Yellowstone and back into the Tetons.
After the hike, we met back up with Brian (who had a great day fishing!) and moved on to our next campsite at Canyon Campground in Yellowstone. Canyon was a much nicer campground than Bridge Bay. It had better access to amenities and the campsites were lovely and tree-shaded. Bridge Bay was mostly an open field with tent-sites so close that we heard our neighbor snoring the entire night!
A couple things to consider before you plan this hike: 1) Check the road status on Yellowstone’s official website before you go! Oftentimes, the trailhead are not accessible due to either weather or construction. 2) Start this hike early in the day. It’s one of the park’s most popular and parking is competitive.
NOTE: Parking at Edith Gap was greatly restricted starting in fall 2020. If you attempt to park there, be sure to pay attention to the the new ‘No Parking, Tow Away’ signs. Unless you are very certain you are legally parked, we suggest following the updated route outlined below, starting from the horse trailer parking area for the Stephens Trail about a mile lower on the mountain.
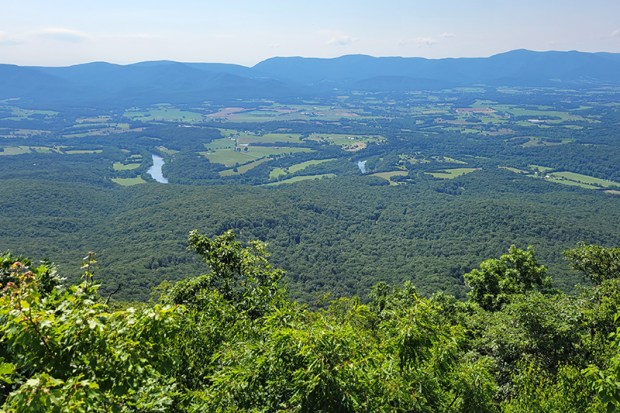
Kennedy Peak is an beautiful seven-mile out-and-back hike in the Lee District of George Washington National Forest. It gives hikers gorgeous views of the bends in the Shenandoah River.
The view from atop the Kennedy Peak Tower
Christine Says…
I love this hike. We’ve hiked it in winter and fall before, but this was the first time we’ve hiked it in the spring. Sunday afternoon was the kind of day that is custom made for hiking. It was dry, sunny, breezy and in the low 70’s. The trail was lined with brilliant, pink rhododendrons. All the trees were covered with new, spring green leaves and/or blossoms. Butterflies were fluttering all around the trail, taking pauses on the blooming trees and wildflowers. It was, in a word, idyllic.
Box Turtle, Swallowtail on Rhododendron, Indigo Bunting
We began in the Stephens Trail/horse trailer parking area on VA675. The Stephens Trail departs from the back of the parking area. You should look for the orange-blazed Massanutten Trail at the head of the parking lot. The trail climbs moderately uphill for .9 miles. At the top of the climb, you’ll exit onto VA675 at Edith Gap (the old parking area). On the road, take a sharp left, staying on the orange-blazed Massanutten Trail.
Hiking uphill along the Massanutten Trail, headed to Edith Gap.
The part of the trail starts off as a wide, almost road-like track. This part of the hike is extremely easy – climbing just a couple hundred feet over the next 1.75 miles.
At around mile 2.65, the trail takes a sharp, hairpin turn and begins to climb more steeply over increasingly rocky terrain. At this sharp switchback, you may be tempted to continue straight along a visible path, but be careful to make the turn and follow the orange blazes uphill. This slightly tricky misdirection has been blocked off by logs and rocks, but enough people have missed the turn that the false path remains well-trodden. We once followed it out of curiosity and it doesn’t lead anywhere. It eventually fades out into the forest.
Don’t miss this switchback!
After the switchback, the trail continues uphill for another half mile. There is a small outcropping on the left with a obstructed views and a tiny campsite (room for a hammock or a one-person tent). After you pass this spot, continue a couple tenths of a mile to the junction with the Stephens Trail. (Note: If you want to make a longer day, adding about two more miles to your route, you can descend back to your car via the Stephens Trail. We’ve heard it’s not very scenic and is often muddy and manure-covered, so we chose the out-and-back.)
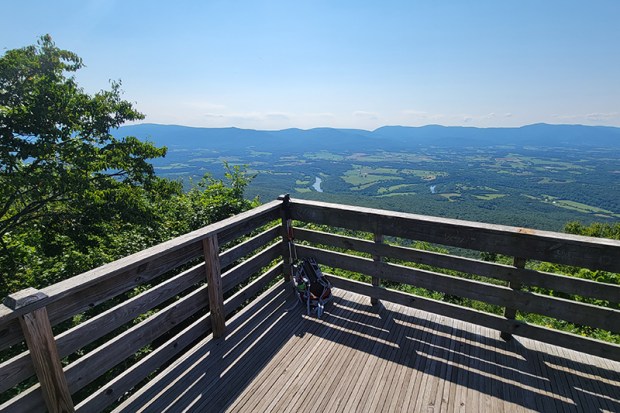
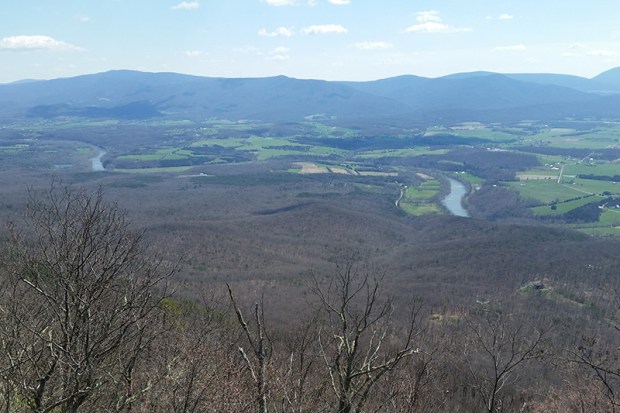
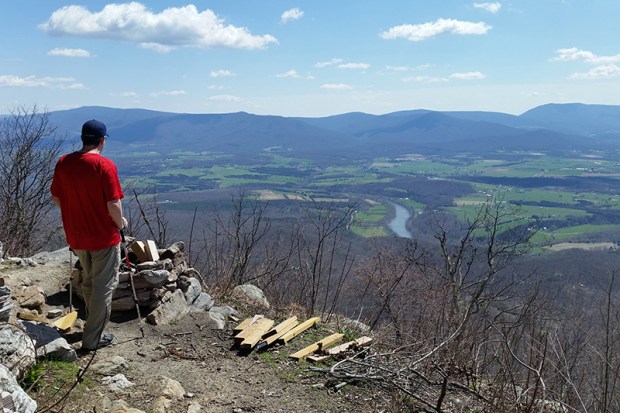
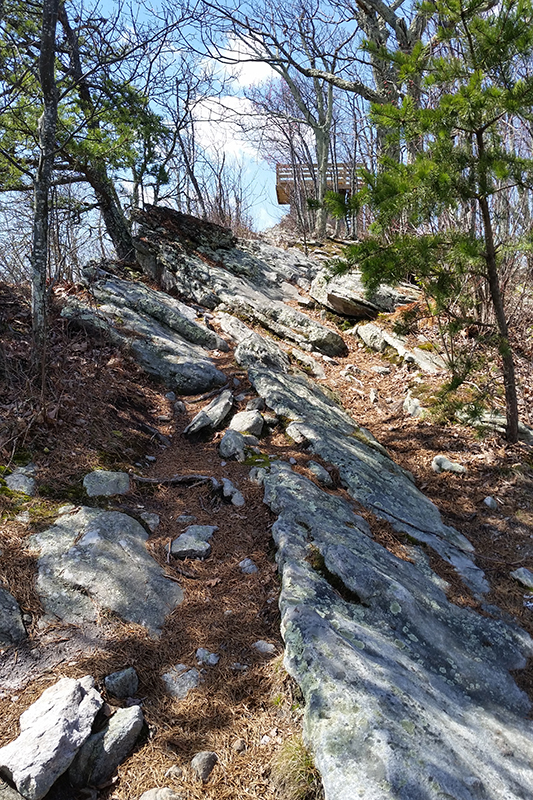
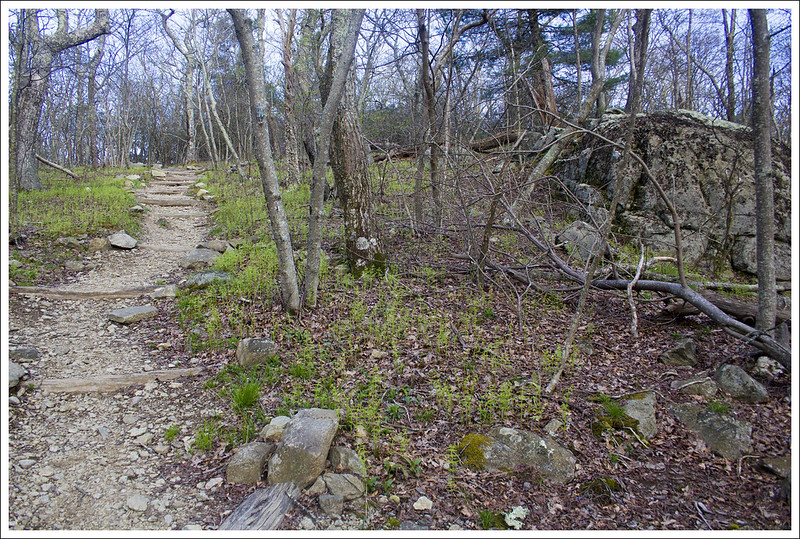
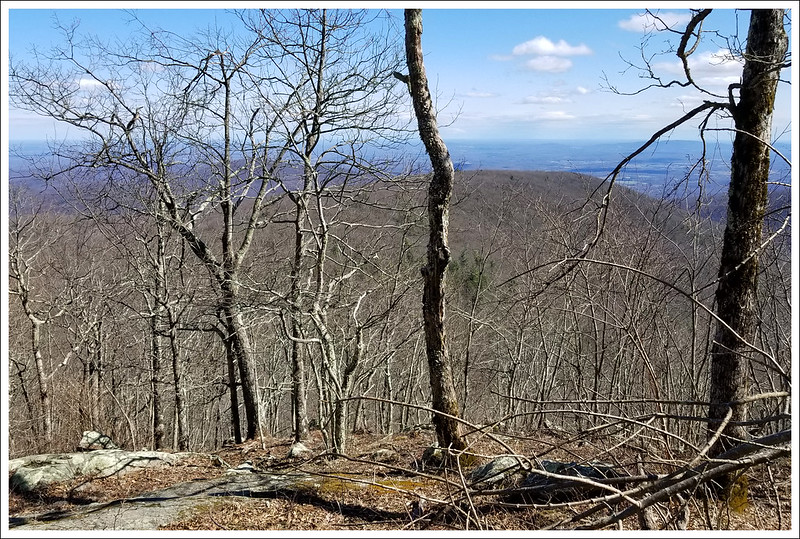
At the junction, you will turn right and follow the signs toward the fire tower. The tower is a little over .2 miles from the junction. The last stretch to the fire tower is steep and rocky. It’s really the only challenging section of the hike. The tower is a sturdy one-story structure with great views looking into the valley and Shenandoah National Park beyond.
When we got to the summit, we had the observation tower all to ourselves. We watched birds in the treetops, spotted lizards climbing around on the rocks and took in a fantastic view of the Shenandoah River and the Page Valley. It was one of the least hazy days we’ve had in a while, so we could clearly see Shenandoah National Park from this summit. Lots of vultures were soaring overhead, and even though they’re kind of creepy, they were casting cool bird-shaped shadows onto the mountain top. I always like it when they do that.
The trail is pretty rocky for the last half mile.
Sunday was the only time we’ve hiked Kennedy Peak in the afternoon. Adam and I tend to be morning hikers — it helps us avoid the crowds. But, the light is definitely prettier in the afternoon on Kennedy Peak. If you hike it in the morning, the sun shines right in your face at the summit. That makes it hard to appreciate the great view, and makes it nearly impossible to get any decent photos.
Adam Says…
This is one of our favorite hikes. This hike is not very steep and the payoff is wonderful. This is a good multi-use trail, since there are campsites and good footing for horses. There are a couple of campsites at the beginning of the trail, near the road. The nicest campsites are further up the trail. Once you are on the fire tower trail, you will find a couple of places where you can have some nice lookouts over the valley and the Shenandoah River. From some points, you can see several bends in the River. Once you reach the top, there is an observation tower where you can chill for a while before heading back down.
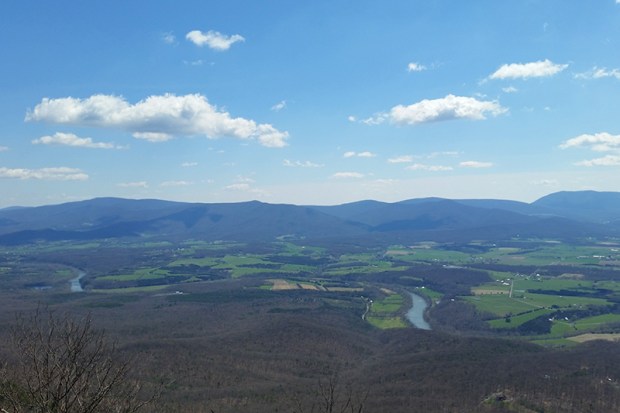
Views from the other side of the tower.
If you are into geocaching, look for the Presidential Peek Cache! After your hike, be sure to visit Camp Roosevelt – a great spot for a picnic.
Trail Notes
Distance – 7 miles round-trip
Elevation Change – 1300′
Difficulty – 3. The trail for the first miles is moderately uphill. The next two miles are either flat or gentle rolling terrain. The last third of a mile up to the observation tower is steeper, but very manageable.
Trail Conditions – 3. The trail is well-maintained, but there are a lot of rocks, so you’ll need to watch where you step.
Views – 4. You can really see some nice views close to the top.
Waterfalls/streams – 0. This trail is dry as a bone.
Wildlife – 2. Seems like a great bird-watching area. We saw an Indigo Bunting, Goldfinch, Wood Thrush, and Eastern Towhee. Also spotted a box turtle and Eastern fence lizard. We saw a bear when we hiked it in spring 2017.
Ease to Navigate – 4. Other than the one tricky spot at the switchback, it would be nearly impossible to get lost.
Solitude – 2. This trail is well-loved by a lot of locals, but the bulk of area tourists stick to the trails in Shenandoah National Park. You may see a few groups of hikers along the way, but it’s rarely a crowded trail.
All Photos
Directions to trailhead: The parking lot is the Stephens Trailhead on VA675. Coordinates: 38.72795, -78.51536
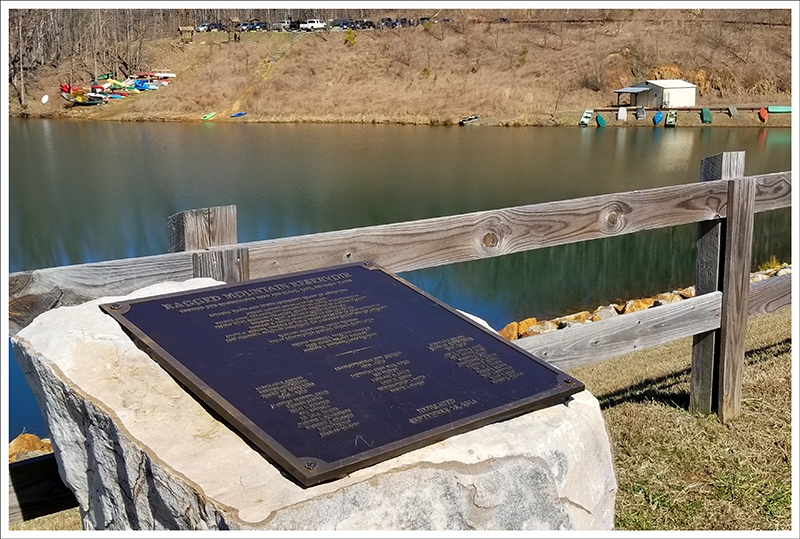
The 6-mile loop around Ragged Mountain Reservoir is a pleasant walk over rolling terrain. There are some nice views of the water along the way. Please note: DOGS ARE NOT ALLOWED IN THIS AREA
A view of the Ragged Mountain Reservoir. Fishing, kayaking, and canoeing are allowed – but no swimming or dogs! Below: The lower parking lot; Adam on the trail; Some, but not all of the trails have signage.
Christine Says:
Yes, we have been slacking at Virginia Trail Guide. We’ve been hiking a fair amount, but we’ve either been doing repeat trails that we’ve already posted on the site – or we’re hiking in faraway places (Wyoming, Idaho) that we have mixed feelings about sharing on Virginia Trail Guide. Also, both of our jobs have also been more demanding than usual, and we haven’t had as much time to hike or create new content. We’re really hoping to have a productive spring and have some more regular new content to share.
A couple weeks ago, we had a sunny and unusual warm Sunday, so we decided to head out toward Charlottesville for a field trip. We’ve never visited the Ragged Mountain Reservoir before and thought it would be a fun, easy hike. We started out at the lower parking area. If I were to do this hike again, I would skip this bit and just park at the upper lot. The spur from lower parking just added a pointless climb, with no extra scenery. The upper lot starts right on the reservoir’s edge and makes a true loop.
There are several neat wooden sculptures along the trail. Below: A woodpecker has been working at the bear sculpture; My favorite was the owl sculpture.
The loop itself was pretty and peaceful. There were rolling ups and downs the entire route, so while it was easy hiking, I still felt like I was getting a decent workout. Benches are posted roughly every mile and there are several neat wooden sculptures tucked into the woods. There are lots of unmarked side trails, but eventually they connect back to the main loop around the lake. So, while the trail system is a little bit confusing, it would be hard to get truly lost. You can download a full map of the trail network from the City of Charlottesville’s website.
The only real challenge of this hike was not slipping in the mud. The trail had some very slick and sloppy spots, so we were glad to have trekking poles for extra balance. All things considered, it was a nice walk on a perfect late winter day. We hiked the loop counter clockwise, so we ended the route crossing the dam.
After the hike, we stopped for lunch at Crozet Pizza and then grabbed a beer at Pro Re Nata.
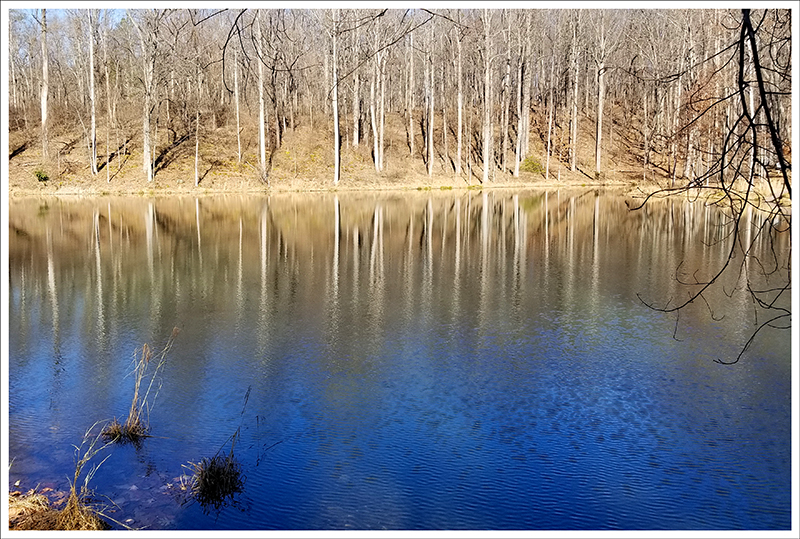
Reflections on Ragged Mountain Reservoir. Below: The floating bridge; Adam crossing the floating bridge; View across the reservoir from the bridge.
Adam Says:
We have been having some unseasonably warmer winter days in 2020, so it has been a good year to get out and do some hiking in more pleasant and non-snowy conditions. We opted to check out the Ragged Mountain trail system, since it had been on our list of things to do for years. This trail system is very popular with local people from the Charlottesville area. You will likely see families with younger children walking around, trail runners, and maybe even a mountain biker. There are gradual ups and downs on the trail, but it makes for easy walking/running/hiking if you want to cover some miles without a ton of elevation changes. Prior to 2014, there used to be two reservoirs, a pump house, and a slightly different trail system.
As Christine said, we started from the lower parking area and headed to the right (counter-clockwise) from the kiosk to start the trail. We printed out the trail map that we have linked to above, which may be handy to see how all the side loops of the trail connect to make sure you are covering the terrain just the way that you would like. One thing to also note that you will see on the map is there are benches at the numbered locations on the map; on these benches are mile markers showing how far along the loop from the dam you are but we found these mile markings not to be completely accurate with mileage. The trail began to wind uphill rather steeply for the first .25 miles until we reached the top of the trail where it joins up with the dam and road to the upper parking lot. From the viewpoint that we had from the first picture below, we decided to do the Ragged Mountain Loop Trail counter-clockwise, which ended up starting sharply behind us and to the right. At .35 miles, we reached the first junction, which was the Roundtop Mountain Loop. We avoided taking that spur loop since it just looked like an unnecessary uphill climb. Continuing forward, we passed the other end of the Roundtop Mountain Loop and came to the carved Mountain Man marker at .65 miles. These wood-carved statues that are placed in a few places are well done and nice to serve as good markers where other trail junctions also occur. From this marker, we had an option to take a longer loop to the right that led to a water tower or just to push forward. We decided to skip the water tower and headed straight on the trail to reach the Bear marker at the 1 mile mark. From this point there are also other options to take different loops around (we told you the trail map would be handy), so we took the route that looped closest around the reservoir. We were glad we chose this, since we got some nice views of the reservoir and could see some nice reflections as we made our way around.
Ragged Mountain Reservoir dam. Below: The emergency spillway; Plaque dedicating the dam, The trail goes across the top of the dam.
After a bit further, we reached the Eagle marker and passed over a small bridge to continue our loop staying close to the reservoir. This part of the trail wound uphill slightly and we ended up on an elevated part of the trail that paralleled the reservoir. Parts of this section were a bit muddy and slick, so be careful following rainy days. Eventually, we reached the last wood carvings on the trail of owls. From here, there is a short trail down to the water’s edge. The trail takes a sharp right turn away from the reservoir, but does wind back to follow along the reservoir once again. After more walking, we soon came upon views of cars on the highway, but then the trail turned down and led to a floating bridge across the reservoir. On the other side, the trail climbed up steeply and then wound around an emergency spillway. It was only a short distance after we passed the spillway that we ended up reaching the dam. We saw lots of canoes and kayaks parked on the hillside near the dam. We passed over the dam and then crossed the road to join back to the spur trail to the lower parking lot and back to our car.
Overall, the trail system here is a nice place to go out and stretch your legs. It has some interesting features with views of the reservoir and the wood carvings provide a nice touch to the experience. It would be nice to see how this looks in the fall, as I can imagine the trees along the waterside could make for some nice colorful reflections in the water. Expect a lot of people on your walk during a nice day.
Pro Re Nata Brewery. We had a triple IPA called Buddha Kind and a really tasty Red Velvet Ale (on nitro!). Below: Lunch was at Crozet Pizza. Yum!
Trail Notes
Distance – 6.1 miles
Elevation Change – 1,000 ft
Difficulty – 2. There are rolling hills all along this hike, but generally it is easy terrain.
Trail Conditions – 3. The dirt trails were very slippery and muddy when we hiked.
Views – 3. The lake is pretty and blue.
Streams/Waterfalls – 1. There are just a few small feeder streams along the way.
Wildlife – 2. We saw lots of near bird species along the water.
Ease to Navigate – 3. The trail signage is adequate, but there are some unlabeled trails that could lead you temporarily off course.
Solitude – 1. When we arrived at 9 a.m. on a pretty Sunday, we had it all to ourselves, but by the time we finished a couple hours later, it was packed.
Maps
Directions to trailhead: The lower parking lot is located off County Rd 702. GPS coordinates: 38.02692, -78.55583
If you’ve hiked the Laurel Prong-Mill Prong Loop, you’ve hiked over Hazeltop and past this viewpoint. But Hazeltop is fantastic on its own as an out-and-back. At 3.9 miles, this route is an easy stroll to a gorgeous vista.
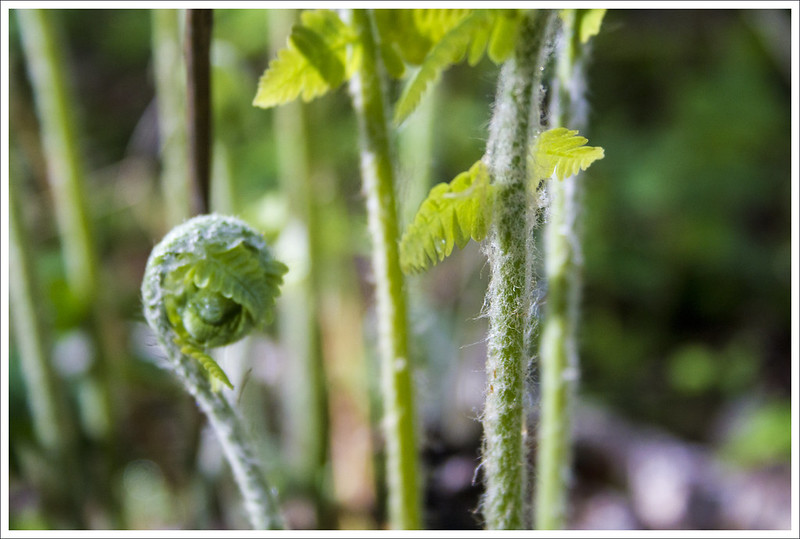
The pretty view from the summit of Hazeltop. Below: The Appalachian Trail at Milam Gap; The junction of the AT and the Mill Prong; Ferns unfurling.
Christine Says…
The day was supposed to be rainy and stormy, but I woke up to sunshine (and a dog with too much energy). I decided to hike Hazeltop Mountain in Shenandoah’s central section. It’s a beautiful, easy route with a nice viewpoint at the summit.
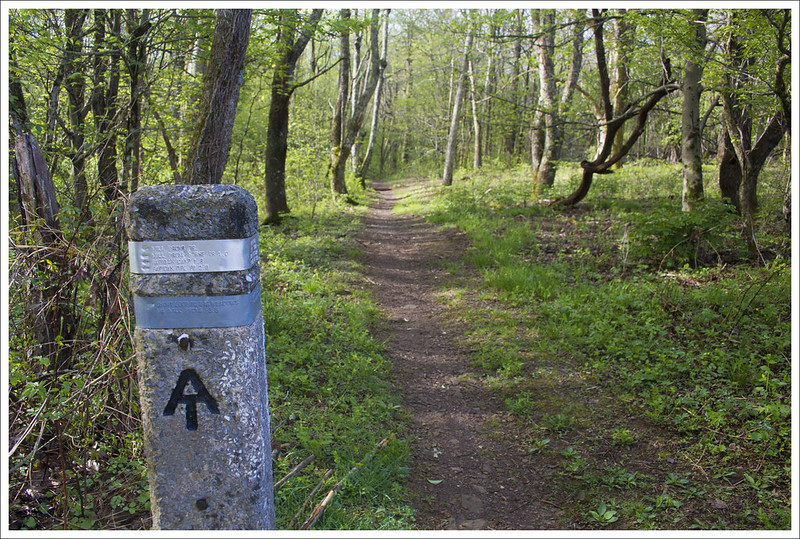
Park at Milam Gap on the western side of Skyline Drive. Follow the crosswalk across the Drive and pick up the Appalachian Trail headed south. At .1 mile, you’ll come to a cement marker. If you turn left, you’ll be on the Mill Prong Trail headed toward Hoover’s Rapidan Camp. Today, stay straight and continue on the white-blazed Appalachian Trail.
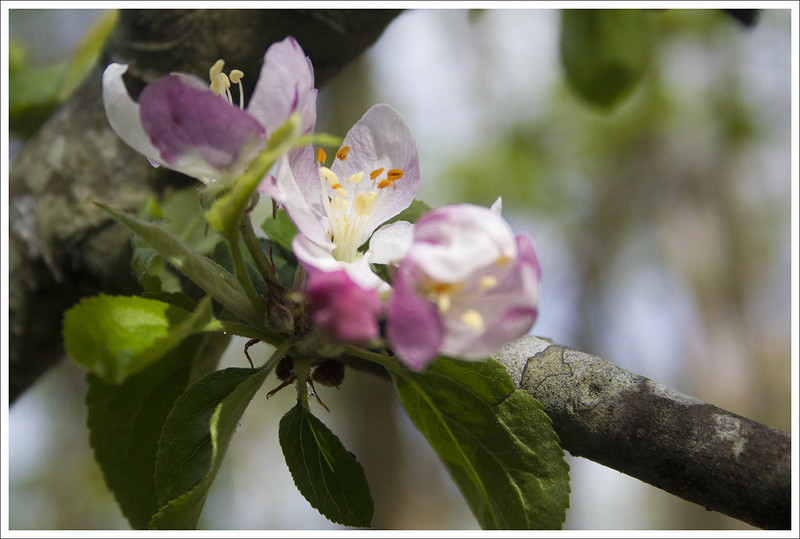
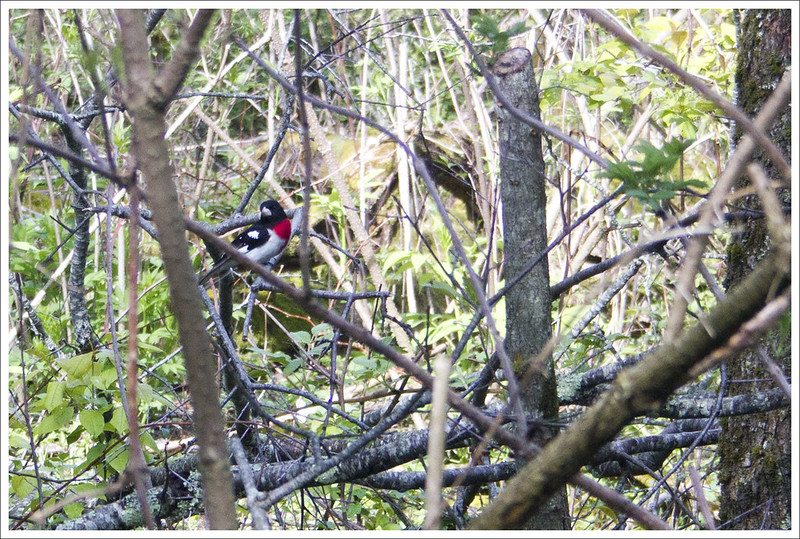
Pretty sure this is a blooming apple tree. Below: Rose-breasted Grosbeak; Appalachian Trail; Cool blazed rock along the trail.
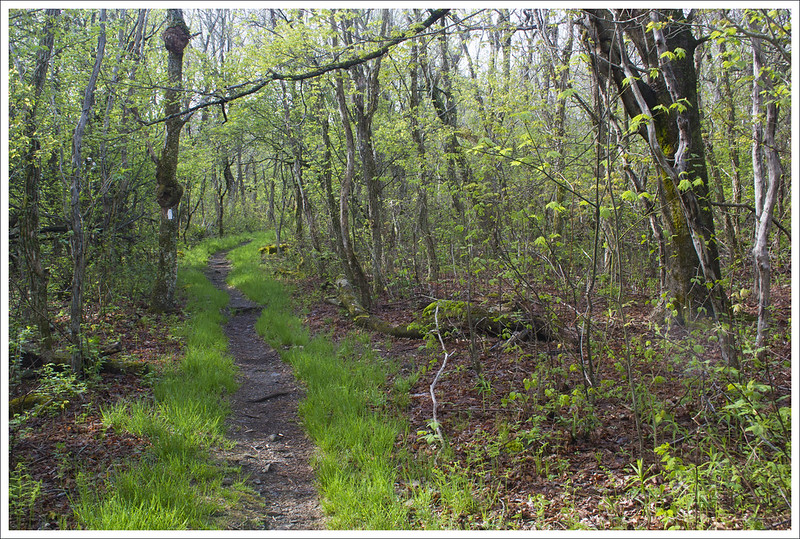
The trail goes very gently uphill through an area that once was used as an orchard. Apple trees are mixed in with the rest of the typical forest. There’s really nothing terribly noteworthy about the trail – it’s a pretty dirt ribbon through forest.
There are tons of wildflowers in the spring and lush ferns in the summer. On this particular day, I had really great luck with birds – I saw a rose-breasted grosbeak, an American restart, and (briefly) a turkey puffed up and showing his plumage. Indy scared the turkey away – and in case you didn’t know… turkeys can fly. They look very awkward doing so.
Indy on the spur trail to the viewpoint. Below: Appalachian Trail Scenery; Ridgeline of Hazeltop; Trillium.
At 1.9 miles, look for an unmarked spur trail on the right side of the trail. Follow the spur for about 50 yards through a grassy area with a rocky outcrop overlooking the western valley. It’s really a lovely spot! It can be easy to miss the spur if you’re not paying attention. The summit is not marked in any way. If you start descending, you’ve gone too far and will need to turn around and find the spur trail.
After you’ve enjoyed the view, return the way you came, arriving back at Milam Gap at 3.9 miles.
Another summit view.
Trail Notes
Distance – 3.9 miles roundtrip
Elevation Change – 597 ft.
Difficulty – 1.5. I think this hike feels mostly flat, but the profile says it’s a gradual uphill.
Trail Conditions – 4. The trail is smooth and well-maintained. There were a few blowdowns blocking the trail in spring 2019.
Views – 4. The view from the summit is excellent. There is a nice outcropping to sit on and plenty of space to enjoy lunch or a snack.
Streams/Waterfalls – 0. The trail is dry.
Wildlife – 5. I saw lots of bird species and a flock of turkeys. On other hikes along the same stretch, I’ve seen lots of deer and a few bears.
Ease to Navigate – 3. The Appalachian Trail is well marked and easy to follow, but don’t miss the unmarked spur trail to the viewpoint.
Solitude – 3. I usually see people, but never many.
Maps
Download a full size map.
Download a full elevation profile
Directions to trailhead: Located in Shenandoah National Park (fees apply). Parking is at Milam Gap. There is a large lot with space for about 12-15 cars. GPS Coordinates for parking: 38.501969, -78.445705.
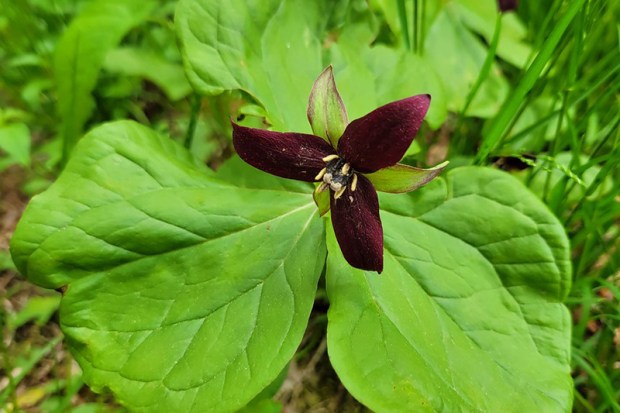
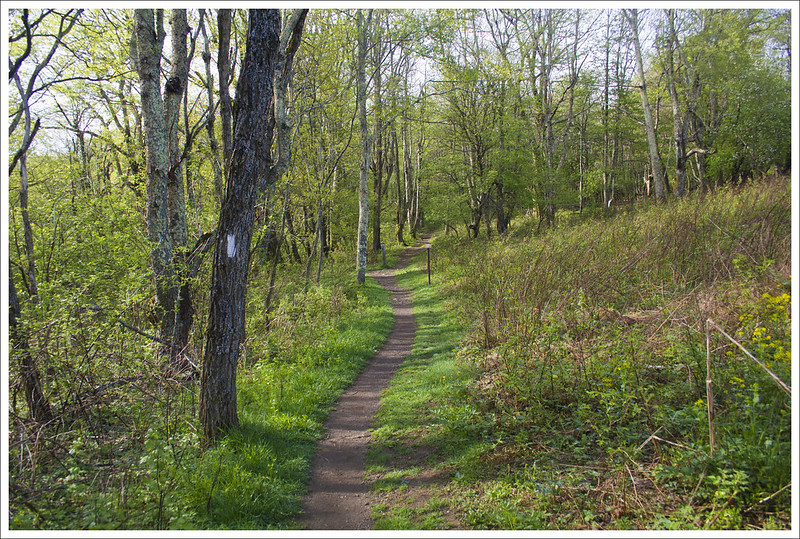
This 4.75 mile hike is probably one of the best places in the park to experience the spring trillium bloom. It’s nothing short of spectacular along this section of Appalachian Trail. This route also features two views – both are obstructed – so it’s best to hike this route before trees at higher elevations leaf out.
Abundant trillium along the Appalachian Trail. Below: Parking on the Pocosin Road; There thousands of blooming trillium along the trail; A view of the valley from the spring.
Christine Says…
When the days get longer, I find myself skipping the gym and hitting the trail instead. I like having an arsenal of short 3-5 mile hikes I can do on weeknights after I get off work. This route is one of my favorites, especially in the spring when the trillium are blooming in Shenandoah National Park. The flowers are so abundant along this stretch that they practically carpet the forest floor. It’s beautiful, but it’s also ephemeral. The trillium only last a couple of weeks each April into early May.
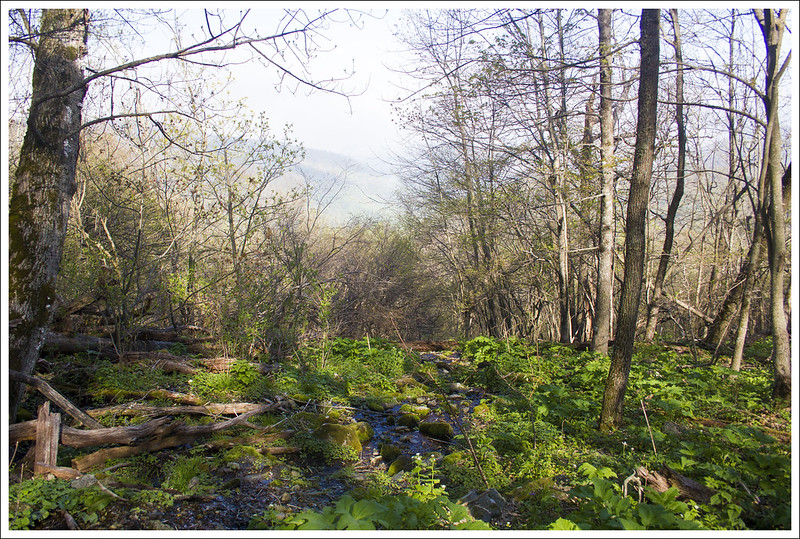
Last night, I loaded Indy the Hiker Pug into his crate and headed up to the park. Down in the valley, it was sunny and 87 degrees. When I parked along the Pocosin Fire Road – where the hike starts – it was a full 17 degrees cooler and delightfully breezy. We followed the fire road for .2 of a mile to its junction with the Appalachian Trail. If you continue straight down the road, you’ll pass the PATC’s Pocosin Cabin and eventually reach the old mission ruins. It’s a nice hike for another day. But for this route, take a left at the cement marker and head north on the Appalachian Trail. The trail meanders downhill for a couple tenths of a mile where you’ll cross a spring and get a pretty view of the valley to the east.
I like when the trail looks like a ribbon through the woods. Below: The slanted rock is visible from Skyline Drive as well – at this point of the hike, you’re very close to the road; The early part of Lewis Mountain Trail follows a utility road; Stairs on Lewis Mountain Trail.
From there, the trail levels out, allowing you to saunter along for about a mile. At about a mile and a half, the trail runs closely parallel to Skyline Drive. You’ll see cars passing – sometimes people wave. As the trail moves away from the road, you’ll begin to ascend gently but steadily uphill for about half a mile. At close to the two mile mark, you will reach a road and another cement marker at the southern end of Lewis Mountain Campground. If you need a snack or bathroom break, Lewis Mountain Campground has a camp store and restrooms open seasonally. Take a right, and follow the Lewis Mountain Trail. For the first tenth of a mile, the trail follows a utility road, but then it turns back into single track through the woods for the remaining few tenths of a mile. The forest around here is open and grassy. You’ll then climb some wooden stairs built into a hillside and pass through a small tunnel of mountain laurel. The trail hooks to the right and leads to the summit of Lewis Mountain – a small rocky spot with obstructed views to the east.
On this particular day, the weather was odd. Along the trail and to the west, skies were clear and sunny. But to the east, a dense bank of fog was lying against the side of the mountains. So, instead of an obstructed view, I got NO view. It was fine though, I think fog is pretty and I had some older photos of the view spot to share for this post. I gave Indy some water and rested for a few minutes before heading back. On the return hike, I chatted with a few section-hikers making their way to camp at Bearfence Hut. One of them was thrilled to see Indy on the trail. She also has a hiking pug named ‘Bronx’. She showed me a cute photo of Bronx hiking in Colorado. He wasn’t on this trip with her, but she was delighted to meet another pug that hikes.
I got back to the car pretty quickly – the return trip is mostly downhill or flat. When I got home, I had to remove THIRTEEN ticks from the dog. This is despite him being treated with Frontline regularly. I also spray his bed with permethrin. I think I got all the ticks off him, but if any were left hopefully the Frontline and permethrin will take care of killing them before they transmit any diseases. I know every year the media says ‘this is going to be a bad year for ticks’, but this year it’s the truth. In my four decades of hiking, I have never seen such issues with ticks. I want to remind everyone to take precautions. Tickborne diseases are nothing to mess with.
The view from Lewis Mountain on a clear day. Below: I got views of a fog bank this time; Passing through the mountain laurels; More ribbon trail.
One final note – starting at Pocosin is also a great way to hike Bearfence Mountain. I always feel like the Bearfence hike is too short, so I like parking at Pocosin and hiking north for about 3.5 miles to the Bearfence summit.
Trail Notes
Distance – 4.75 miles roundtrip
Elevation Change – 820 ft.
Difficulty – 2. This is an easy hike with gradual uphills.
Trail Conditions – 4. The trail is smooth and well-maintained.
Views – 2. There is a view of the valley along the trail early in the hike. There is also a view at the summit of Lewis Mountain, but it is quite grown in by larger trees.
Streams/Waterfalls – 1. You’ll cross one small spring.
Wildlife – 5. I’ve seen all kinds of birds, a bobcat, deer, and bears along this stretch.
Ease to Navigate – 4. The trail is well marked and easy to follow.
Solitude – 4. I guess because there are no grand vistas, you really don’t see many people dayhiking in this area. I usually only see backpackers making their way to Bearfence Hut.
Maps
Download a full size map.
Download a full elevation profile.
Directions to trailhead: Located in Shenandoah National Park (fees apply). Parking is located in several spots along the Pocosin Fire Road in the Central Section on Skyline Drive. The turn onto the road comes up quickly and is not marked, so pay attention. It’s near mile 59.5 on the Drive. GPS Coordinates for parking: 38.413585, -78.488959
This four mile hike is included among New Hampshires ‘52 with a View‘ – this list is composed of ‘view hikes’ with summits under 4,000 feet. They’re generally considered milder hikes compared to the above-treeline 4,000-footers. Mt. Israel is still a steep climb – ascending close to 2,000 feet in two miles. The view at the top wasn’t as nice as many other hikes we’ve done in the area, but it was still a good choice for a beautiful summer day.
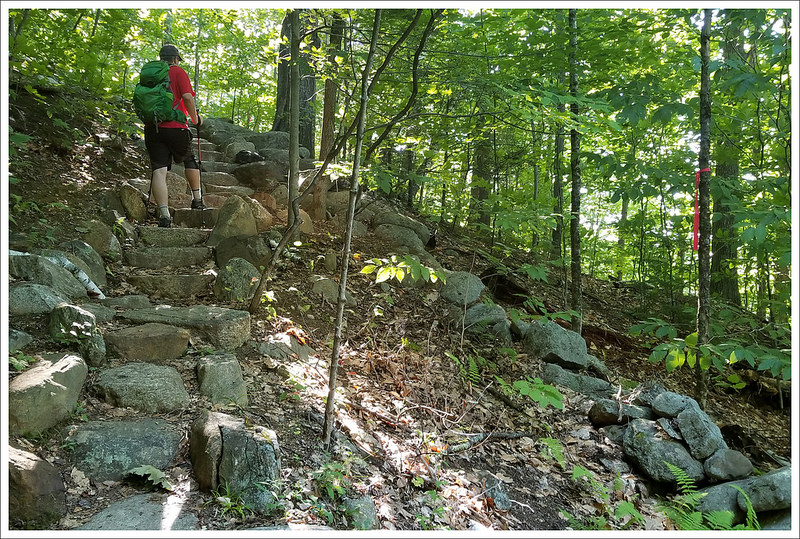
A few of Mt. Israel from the valley floor. Below: The Mead Base Conservation Center; The trailhead; Stone stairs.
Christine Says…
Our last day of vacation was the only day we had low-humidity, cool breezes, and bluebird skies! We had packing to do, so we needed a final hike that was relatively short and located close to my parent’s home. Mt. Israel was another hike we had passed over in our hiking guide several times. The route outlined in the book was an 8-mile loop with quite a bit of road walking. Generally, I prefer to avoid road walks, so we had always opted for other hikes. Then, I happened to stumble across a four-mile, no-road-walking route on the ‘52 with a View‘ list, and decided that Mt. Israel might fit the bill after all.
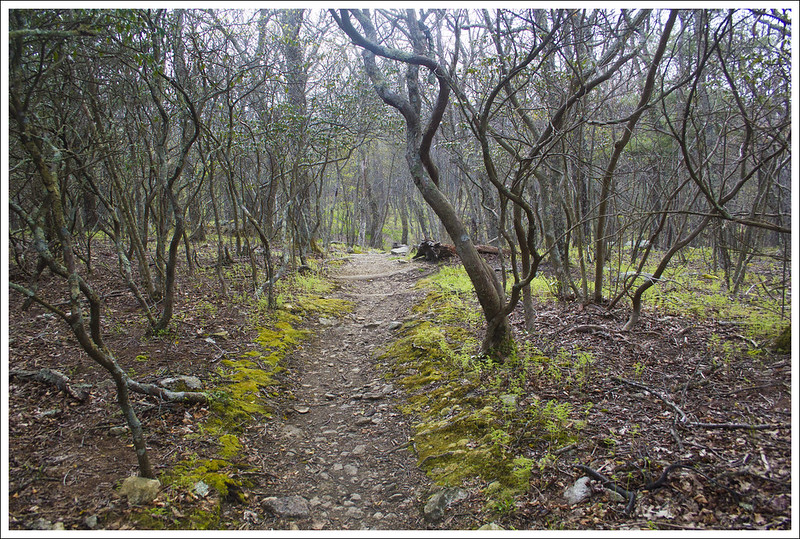
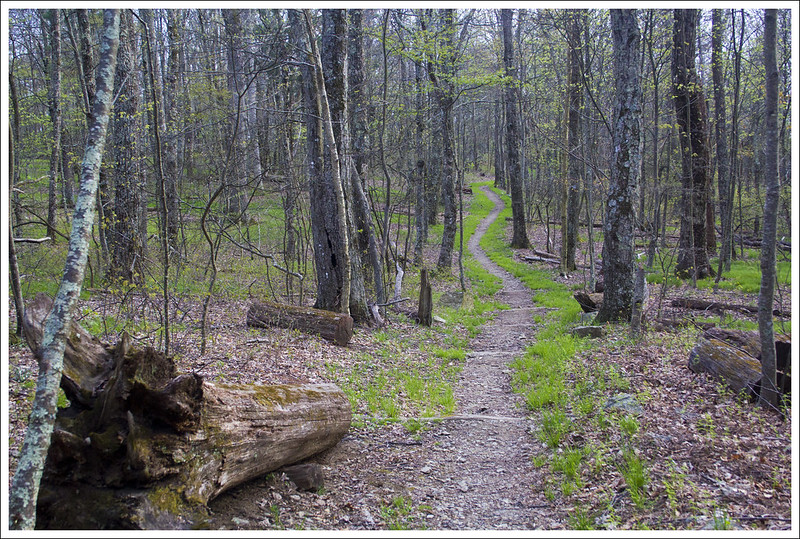
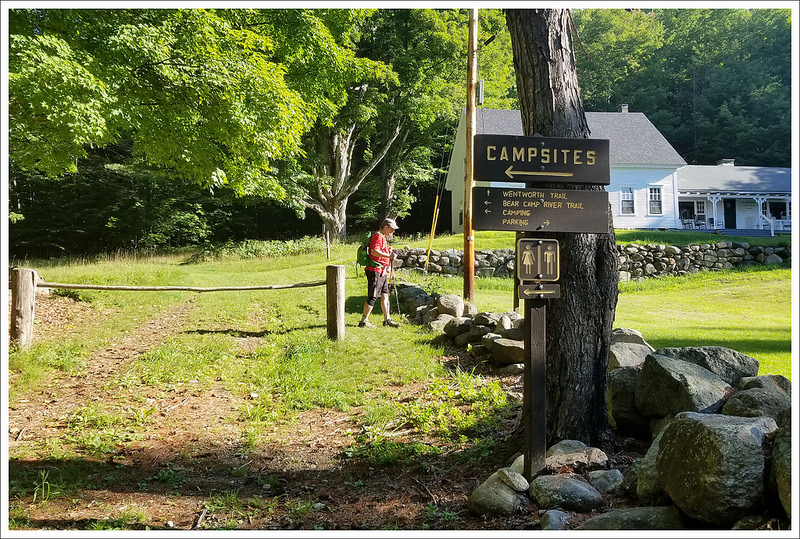
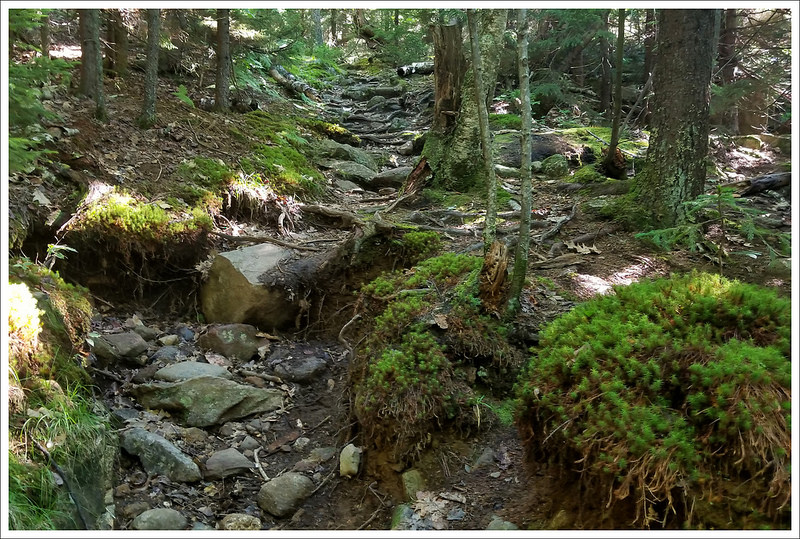
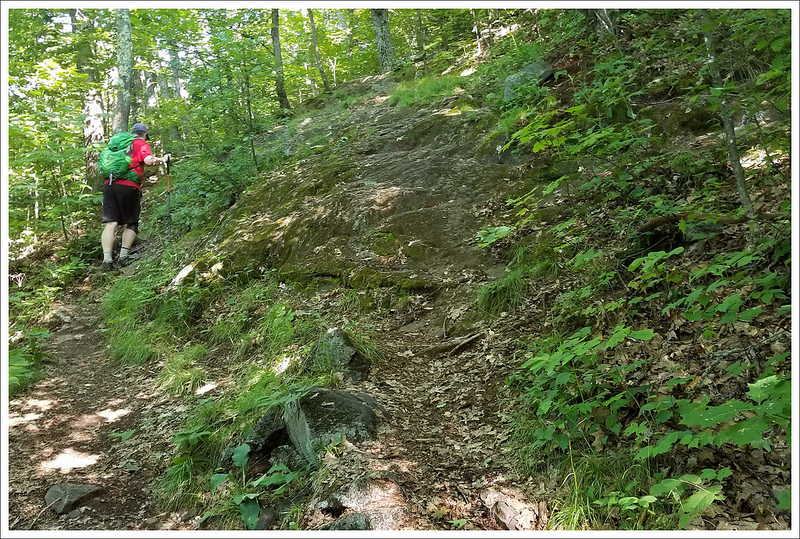
Parking for this hike was at the Mead Base Conservation Center. The center has programming, concerts, community events, camping, and plenty of parking for day hikers. Our route to the top, the Wentworth Trail, starts just to the left of the building (as you’re facing it). The hike gets off to a quick ascent and is relentlessly uphill all the way up to the ridgeline. Like most New Hamsphire trails, there are lots of roots and rocks. There are a few places with slick slab granite, but they’re not terribly steep or extensive. The terrain is generally simple and non-technical.
On the climb, you get an obstructed view of Squam Lake. Below: More scenes along the trail.
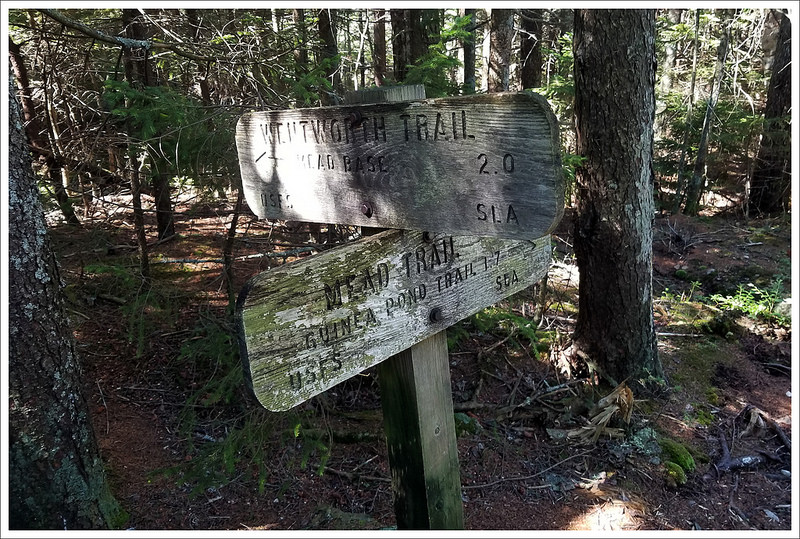
The first view comes from a little rocky outcropping about a mile and a half up the mountain. It’s obstructed, but if you peek over the trees, you’ll get a nice look at Squam Lake. You can’t see the lake from the actual summit, so this is a good spot to get a different vista. Shortly after the lake view, the trail levels out and goes through a mossy, piney, boggy area. Right before the ledges, you’ll pass the junction with the Mead Trail. The Mead Trail and Guinea Pond Trails are part of the loop I mentioned earlier in the post.
After the junction, you walk a short distance out onto a series of rock ledges. From the first ledge, bear to the right and continue following the trail through the trees. There is a little bit of very mild rock scrambling through a little saddle before you come out on more ledges. These ledges are more open and provide a nice mountain view. The actual summit of Mt. Israel supposedly is marked by a large cairn – however, it appeared to be mostly toppled when we hiked. The rock pile had once clearly been a cairn, but it was reduced to a gathering of football sized rocks.
We sat on the summit for a while, enjoying the picture-perfect day. We always love the time we spend in New Hampshire and appreciate the endless options for trails the area provides. We eventually made our way down, following the Wentworth Trail again. On our way home, we stopped one more time for lobster rolls at our favorite little lakeside shack. Until next time, New Hampshire!
Views from the climb of Mt. Israel.
Adam Says…
As Christine said, this was our last day before heading back to Virginia. We had trouble picking a hike for the last day. We love it when we can get an amazing hike to remember, but this wasn’t one of the best up here.
I would say that this is a great trail for trail runners. From my experience with trail runners, they tend to look more out for where their feet are stepping and less on the scenery around them. A trail like this one would give plenty of challenge with terrain and elevation gained, but the summit is less than ideal.
Christine enjoying the summit views from Mt. Israel. Below: The junction of the Wentworth Trail and the Mead Trail; Summit scenery.
The hike started off in thick forest and had some areas of rocky areas and narrow trail. There wasn’t anything dynamic to talk about much during the hike until we reached the view for Squam Lake. The view of Squam Lake in the distance was nice, but was probably nicer 10-15 years ago before the trees obstructed the view. About half a mile past this viewpoint, you reach the summit. The summit is actually just a larger boulder that you can climb to take in the view. Again, the trees growing up here has obstructed a lot of the view. We spent a while walking around from the summit boulder to try and see if there was a nicer spot for a viewpoint, but after investigating for quite some time, we found things were obstructed in every direction around here. We enjoyed a snack at the top before heading back. It is always nice to take in some New Hampshire mountain views, I just wish it had been more dynamic for our last hike of our visit. This may be in the ’52 with a view’ list, but there isn’t much of a view keeping this on the list.
Trail Notes
Distance – 4 miles
Elevation Change – 1808 feet
Difficulty – 4. The climbing is quite steady, but there is nothing tricky or technical.
Trail Conditions – 4. Trail clubs in the area have taken very nice care of this trail. There are some obvious improvements with stairs, waterbars, and grading along the route.
Views – 3.5. They weren’t as nice as we hoped for. Trees have grown taller, obscuring a lot of the view.
Waterfalls/streams – 0. None of noteworthiness.
Wildlife – 3. Normal squirrels, birds, and chipmunks.
Ease to Navigate – 4.5. The Wentworth Trail is a straight shot to the summit. There is one place that seems like it’s the top, but is actually a false summit. If you look out toward the view, the trail actually continues through the woods to the right. The actual summit is a few hundred yards past this point.
Solitude– 3. It’s a fairly popular trail with locals. We started early and saw a small handful of people, all on our way down the mountain.