Mt. Eisenhower (NH)

Special: New Hampshire Edition

Introductory Guide to Visiting the White Mountains

This 6.6 mile route is one of the fastest, easiest ways to get above treeline in the Presidentials. The trail is rocky (like everything in this area), but the climb is very moderate by White Mountain standards. Trivia: This peak was named Mt. Pleasant until after President Eisenhower’s death in 1969.

View the Full Album of Photos From This Hike

Summit of Mt. Eisenhower
The Summit of Mt. Eisenhower.  You can see Mt. Monroe and Mt. Washington off in the distance.

Adam Says…

We have made it up to New Hampshire the last several years. Each year we try to do at least one of the Presidential peaks – big, granite mountains named after our country’s past presidents. This year, we decided to tackle Mt. Eisenhower by way of the Edmands and Crawford Paths. We read in our Falcon Guide to Hiking New Hampshire that this trail route had a moderate grade and the footing was “pleasant”

We have learned to not trust New Hampshirite descriptions with regard to grade or footing. From a Virginian’s standpoint, most of the hiking in the White Mountains is so much tougher than anything we experience in our state. Your body will pay a price and you may end up cursing the granite you walk upon.

They Said It Had Pleasant Footing
So, they said the grades were moderate and called the footing pleasant. The rock jumble pictured above is the actual trail.  Below: Adam makes his way along the easy old road grade seen early in the hike; The climbing got much rockier and steeper as we went along.

Mt. Eisenhower Hike Mt. Eisenhower Hike Mt. Eisenhower Hike

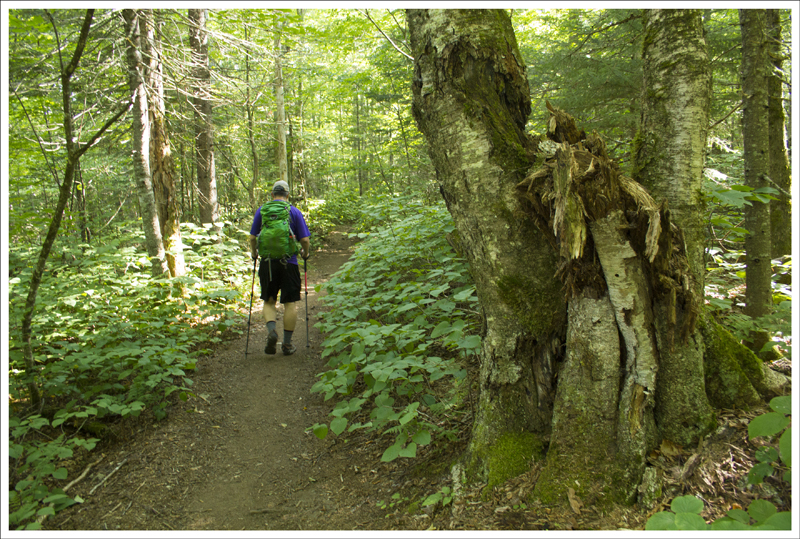
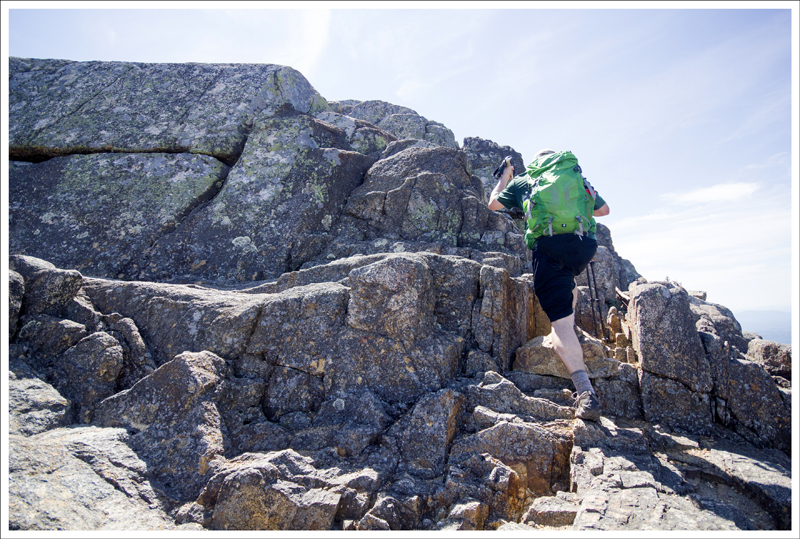
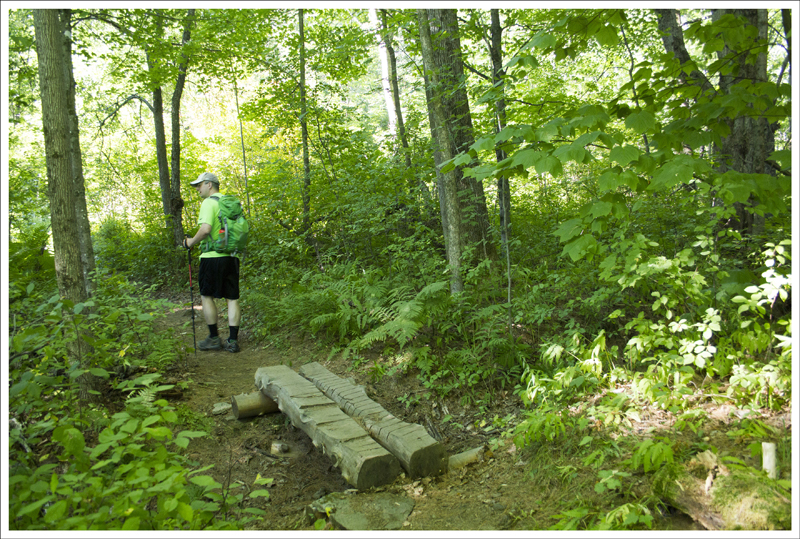
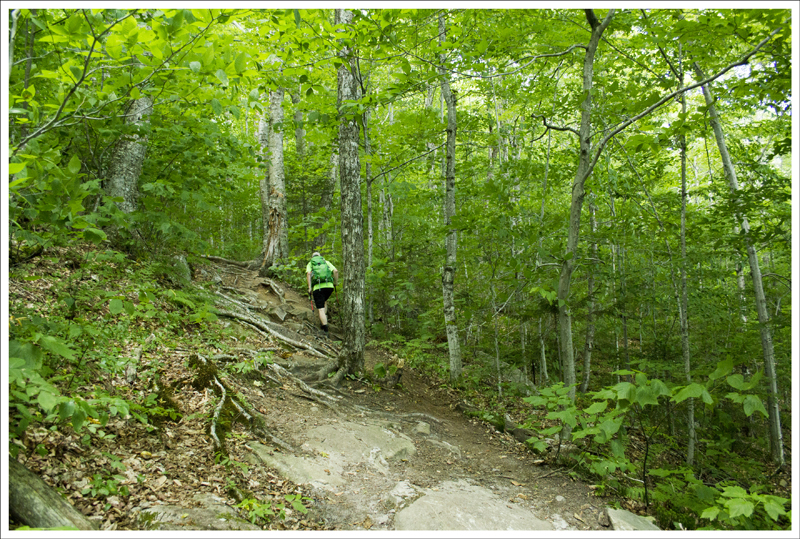
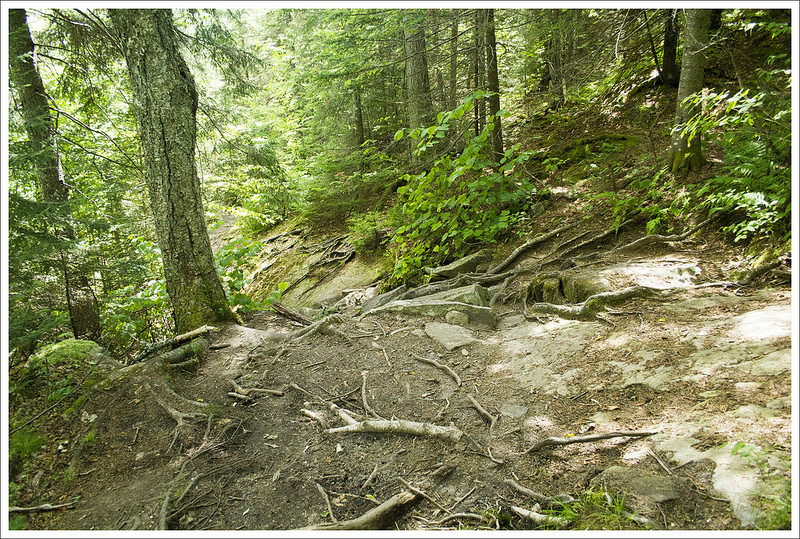
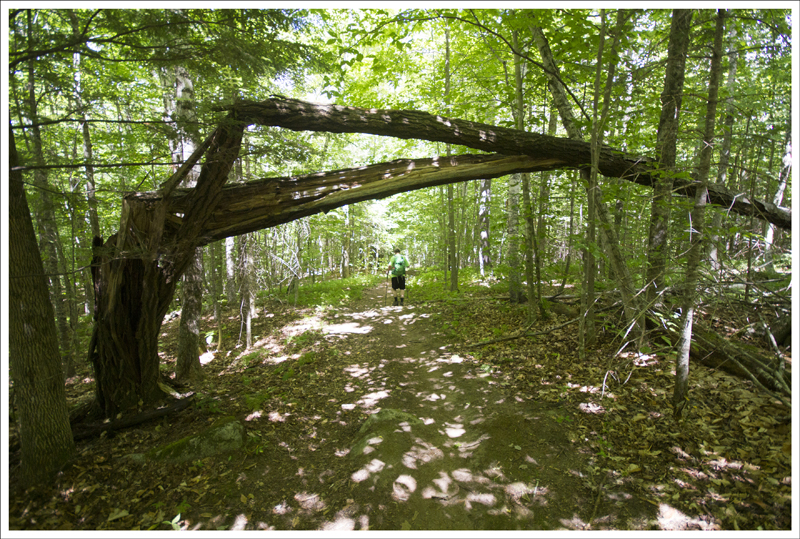
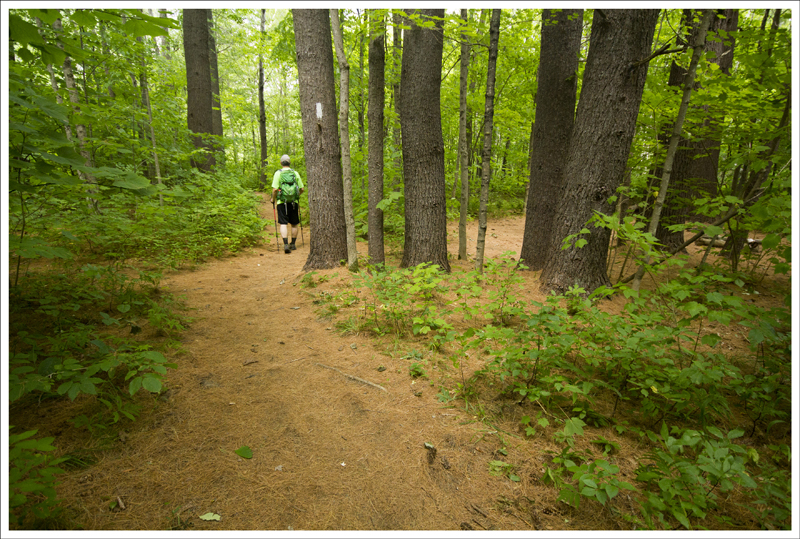
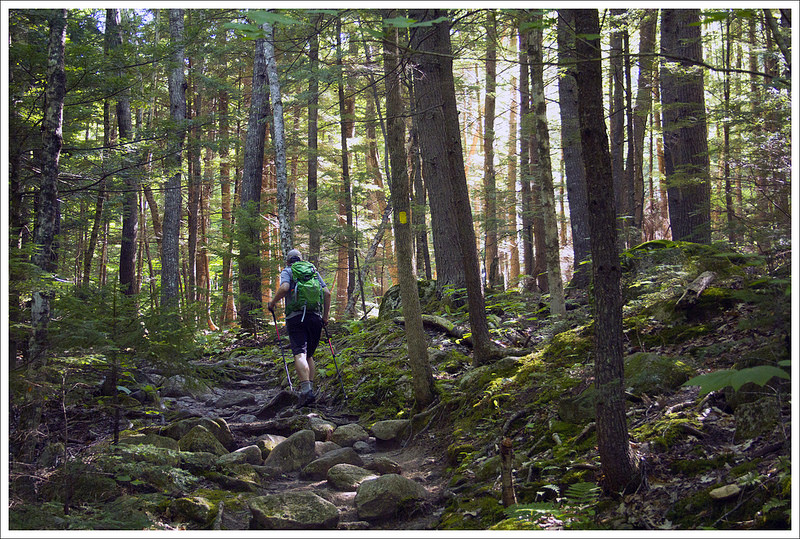
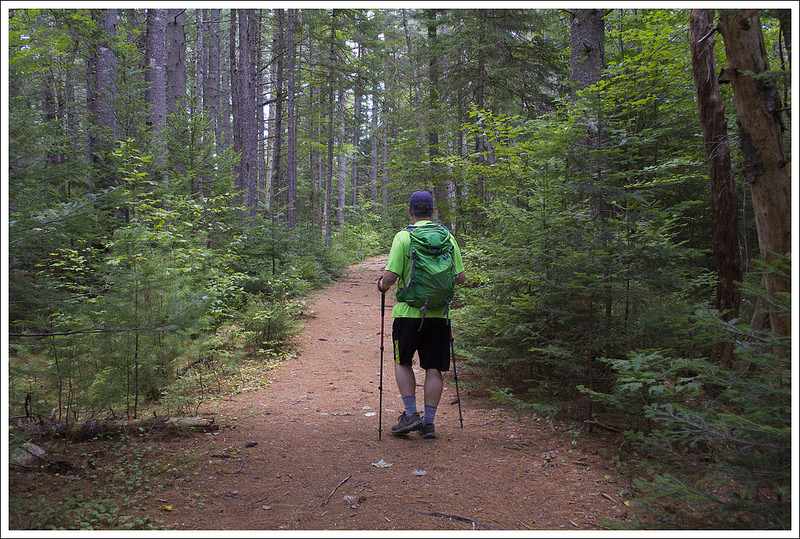
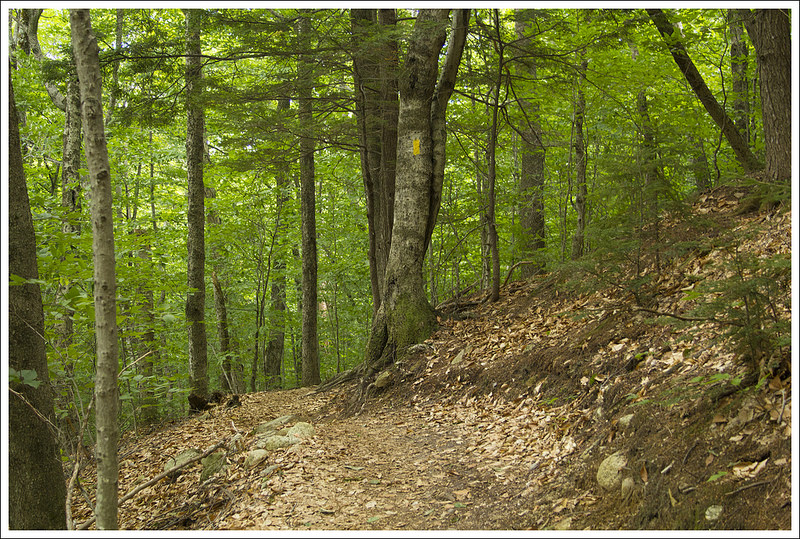
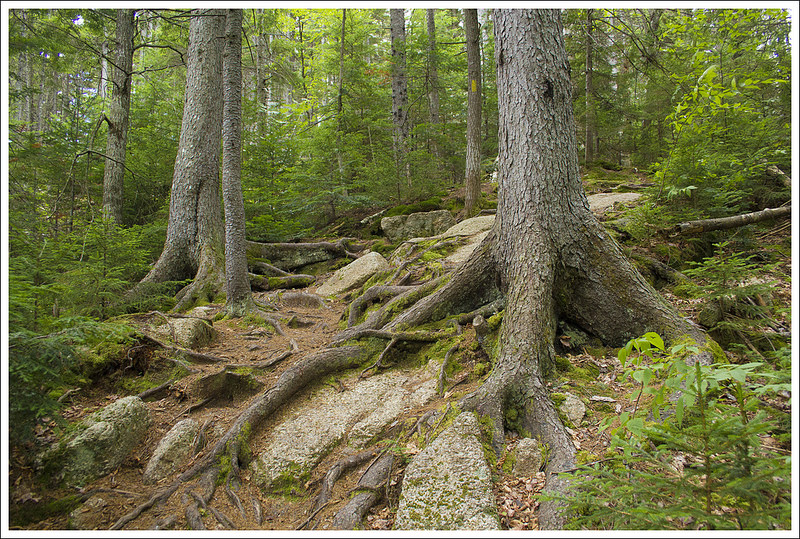
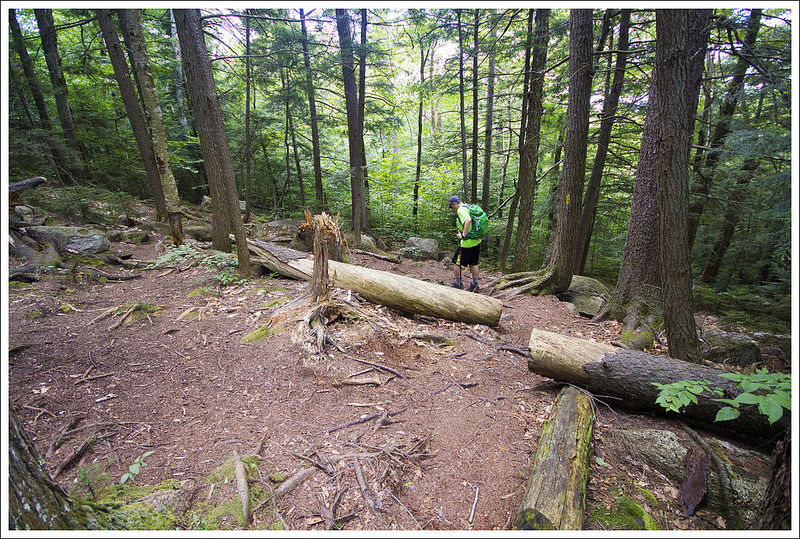
Over the first 1.4 miles of the Edmands Path, you gain about 650 feet of elevation, but in the last 1.5 miles, you gain 1750 feet. The first half of the outgoing hike is a steady climb, but the steeper grade and bigger steps on rock and gnarled roots take over pretty quickly!

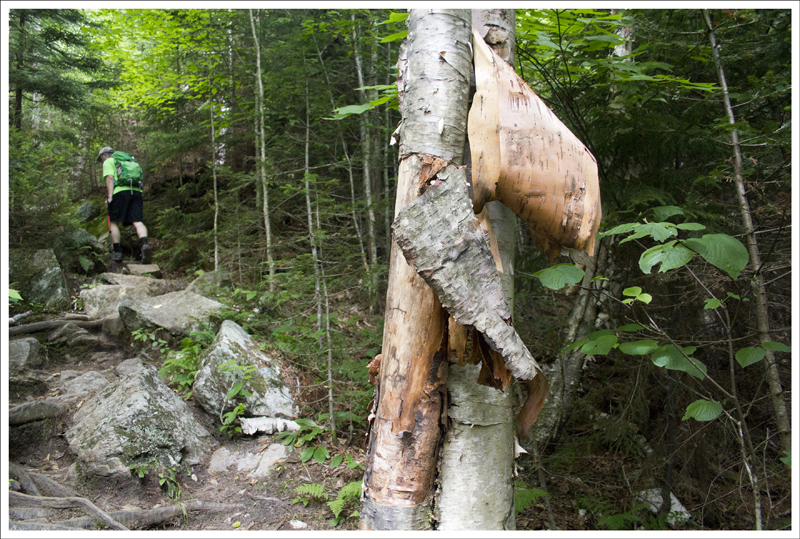
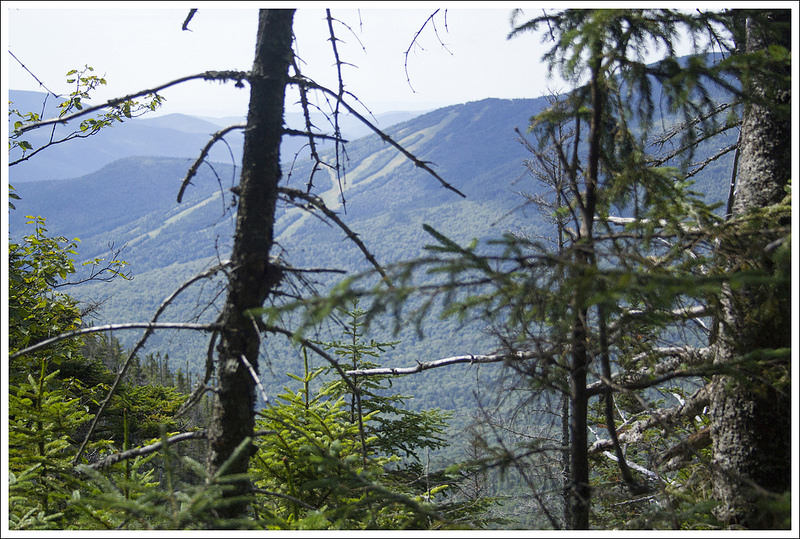
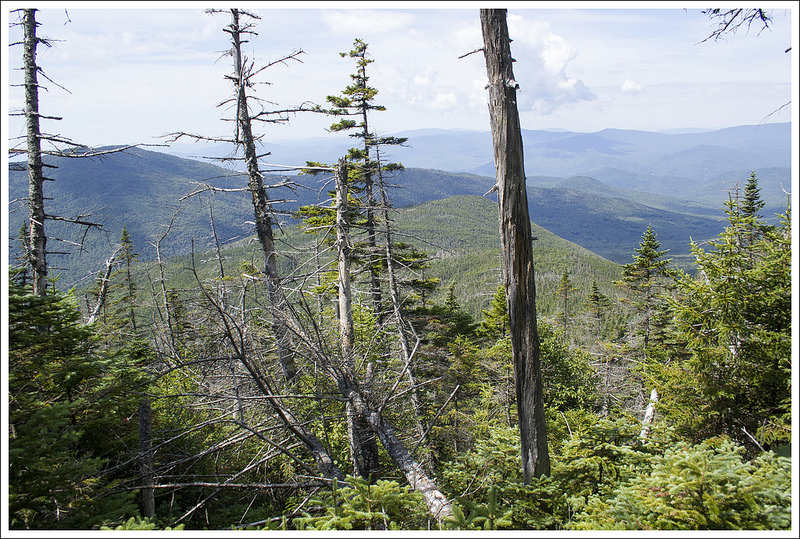
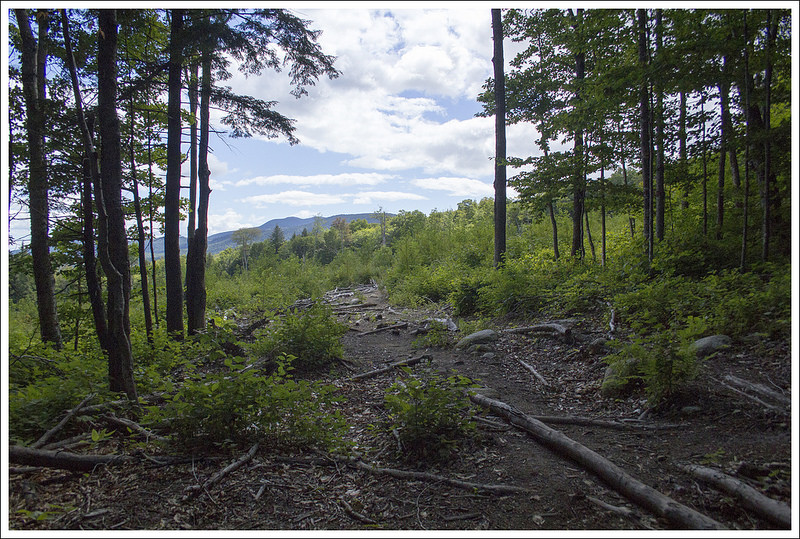
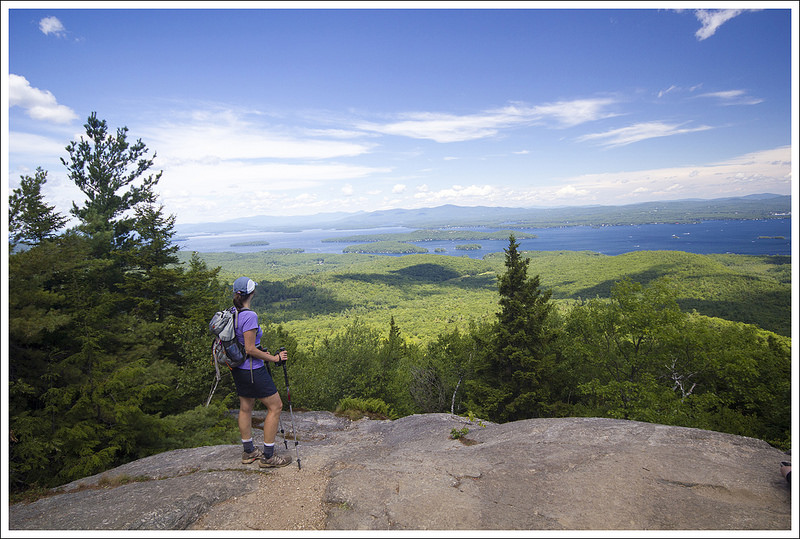
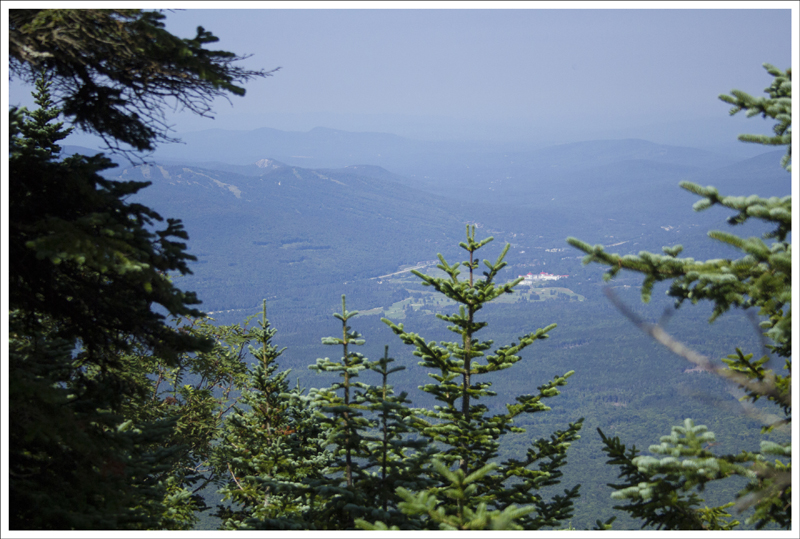
As we huffed and puffed up the mountain, we eventually got some views through the trees and knew that our hard work was going to pay off.  Through some of the openings we could see the red roof of the grand Mount Washington Resort below, which gave some perspective of how far we had come.

First Views
It’s always fun to get your first views from the trail.  You can see the red roof of the Mt. Washington Omni between the trees.  Below: Scenery as we reached the treeline.

First Views Mt. Eisenhower Climb Mt. Eisenhower Climb

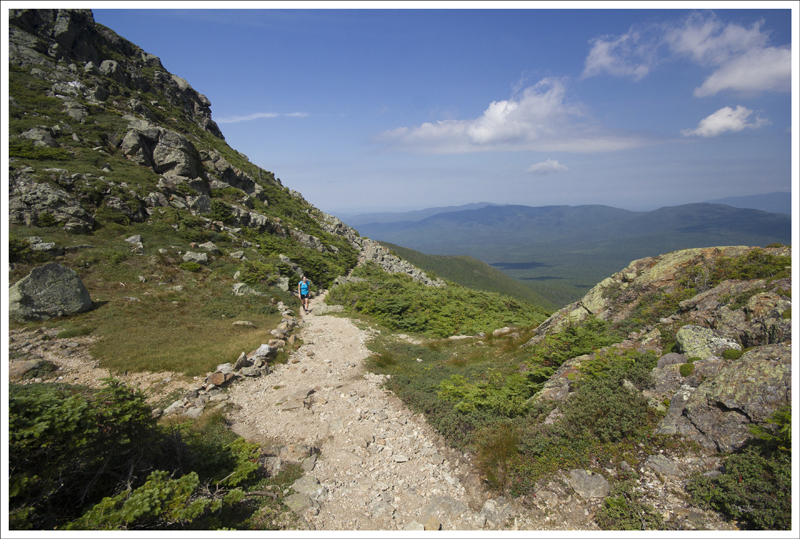
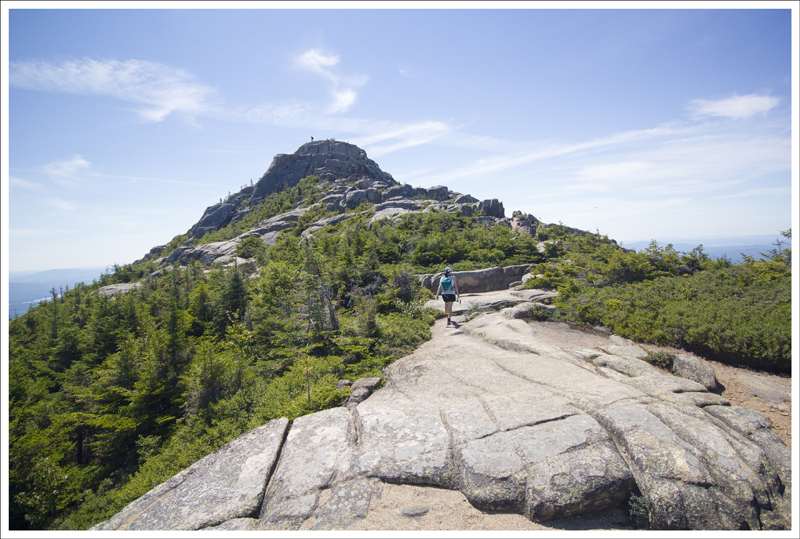
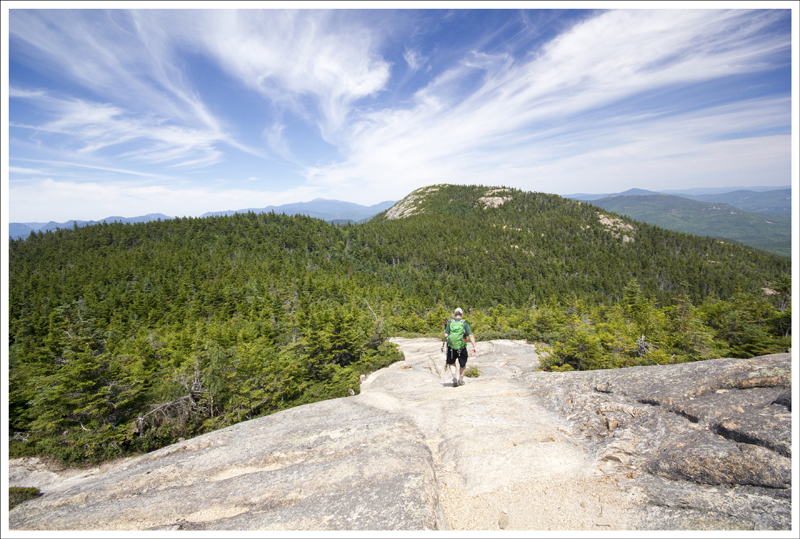
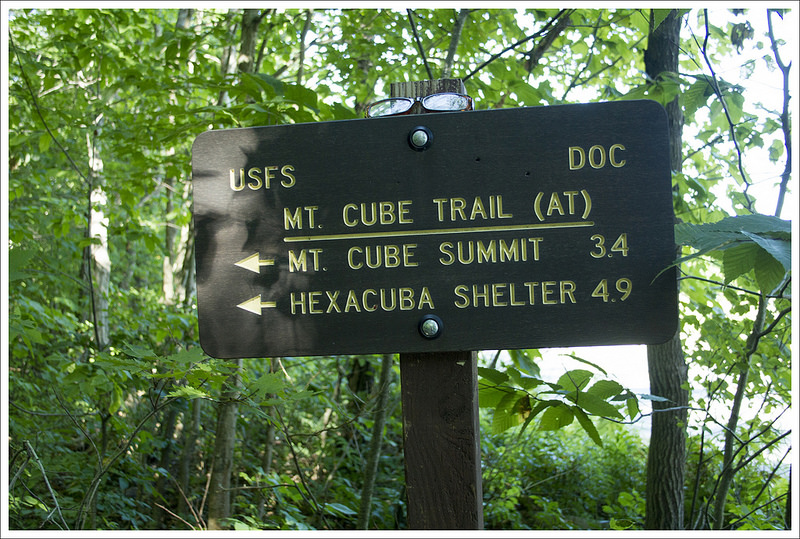
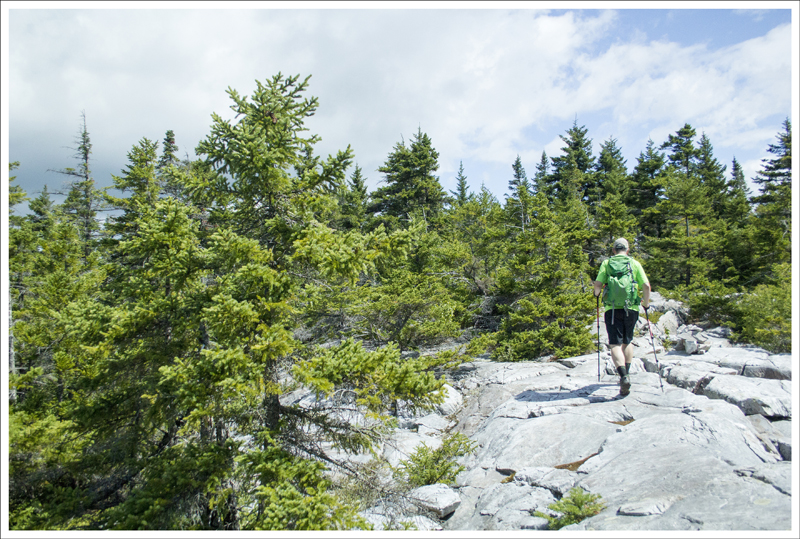
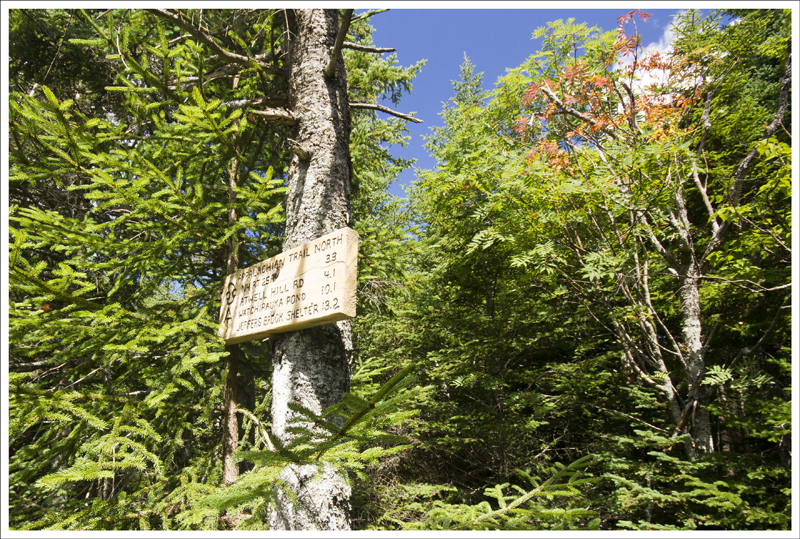
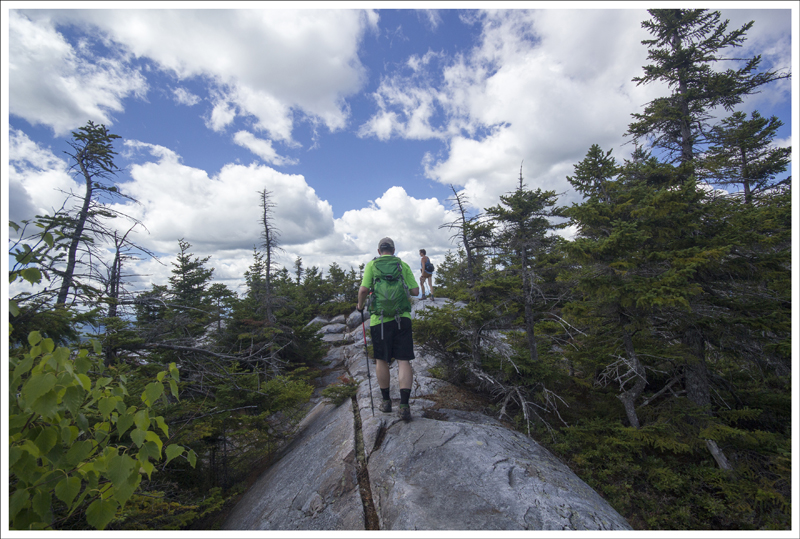
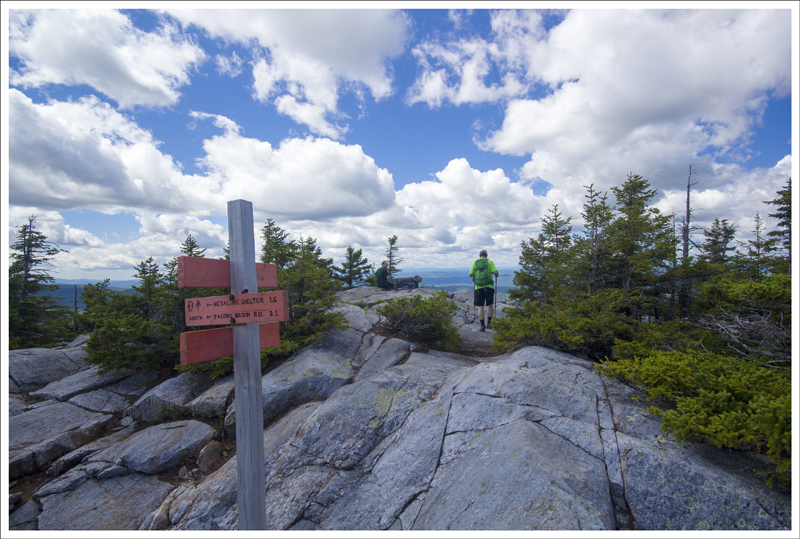
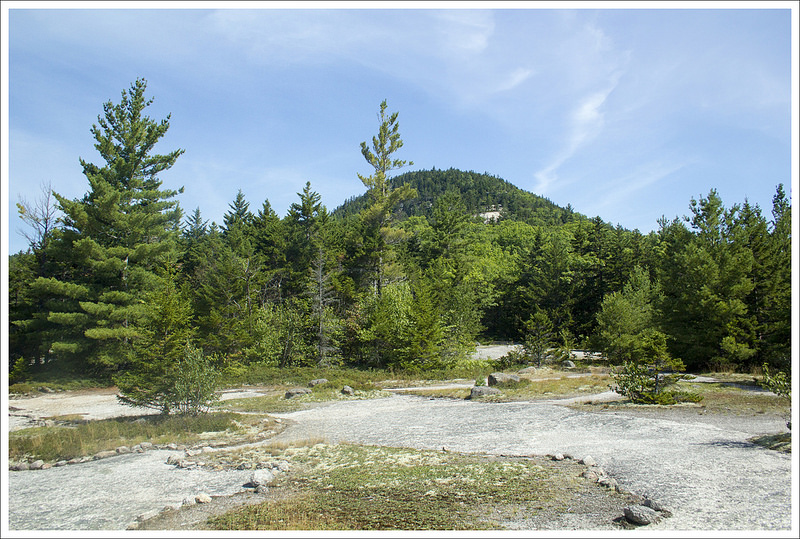
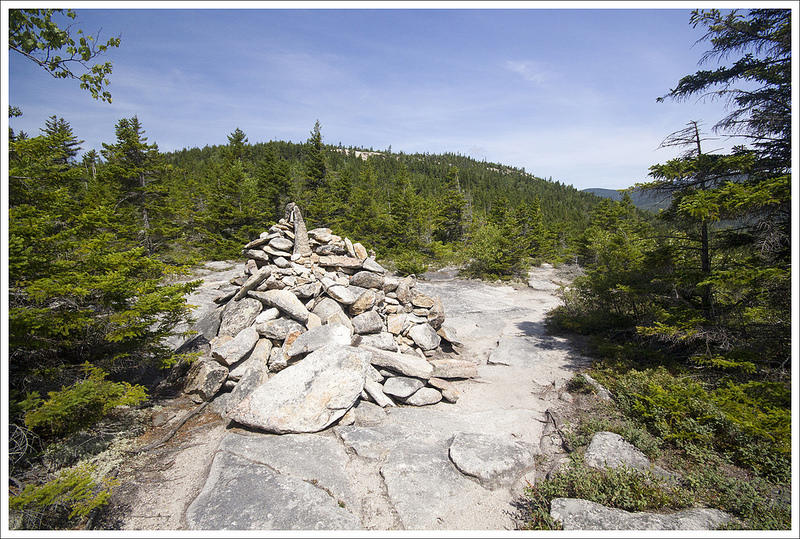
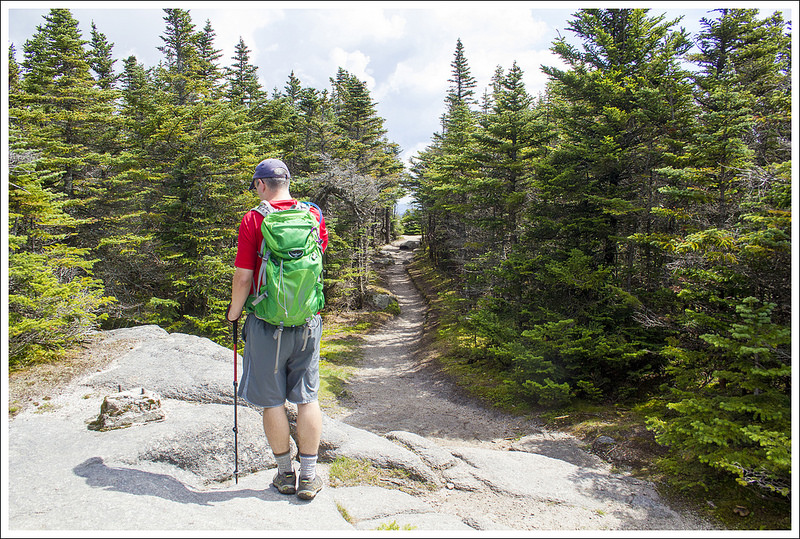
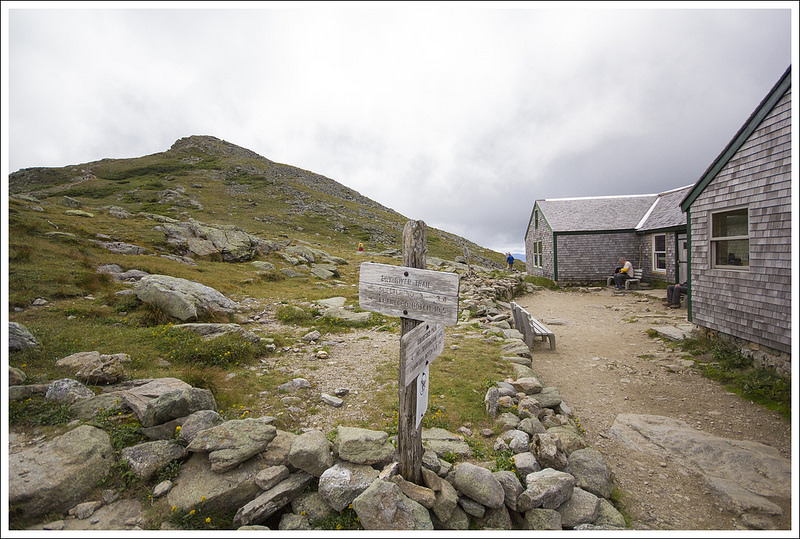
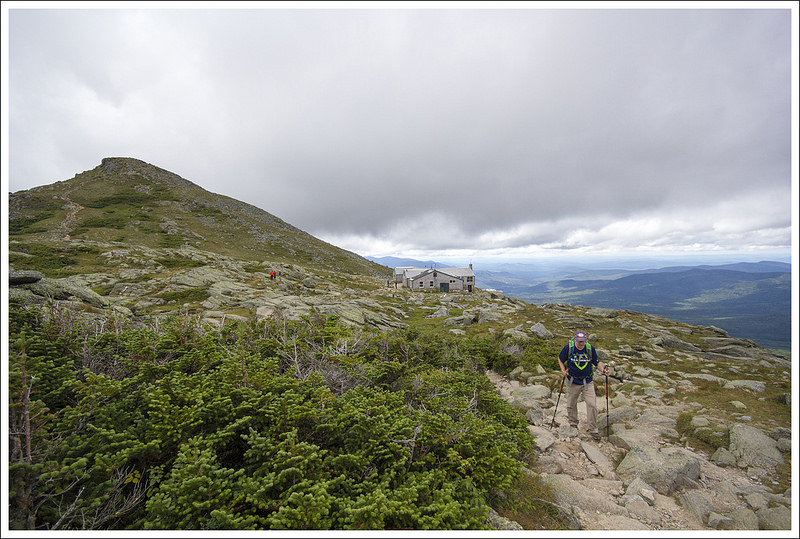
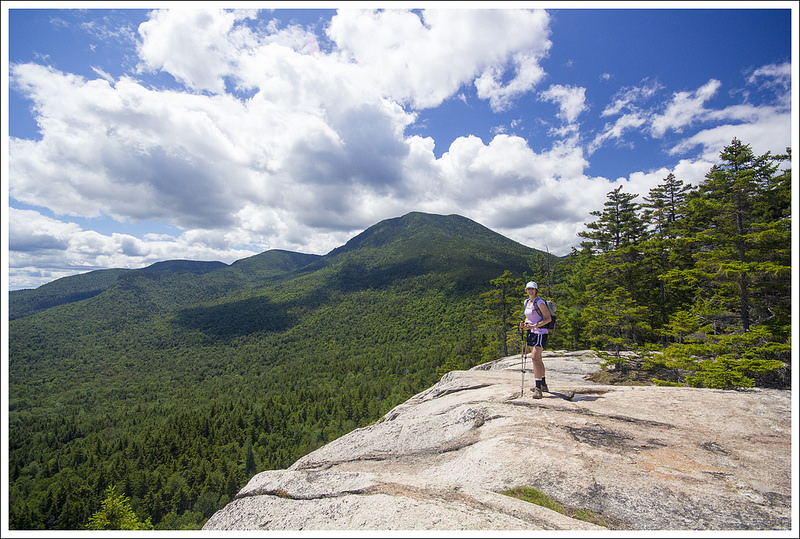
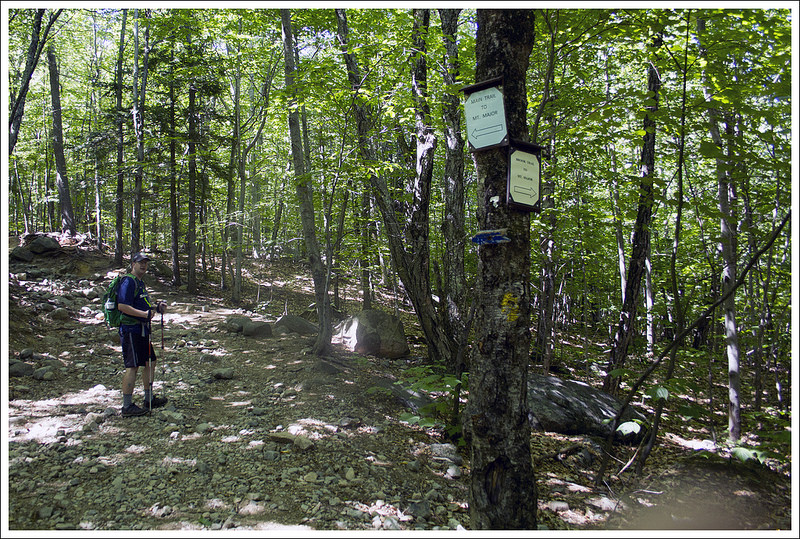
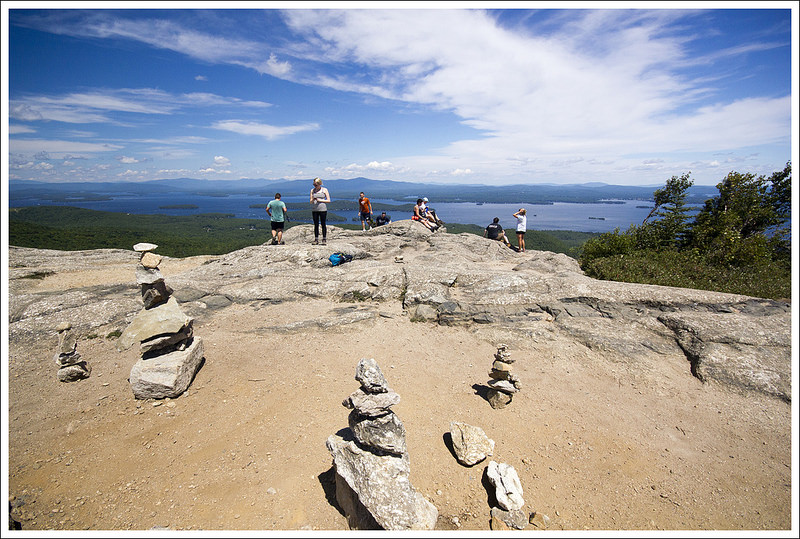
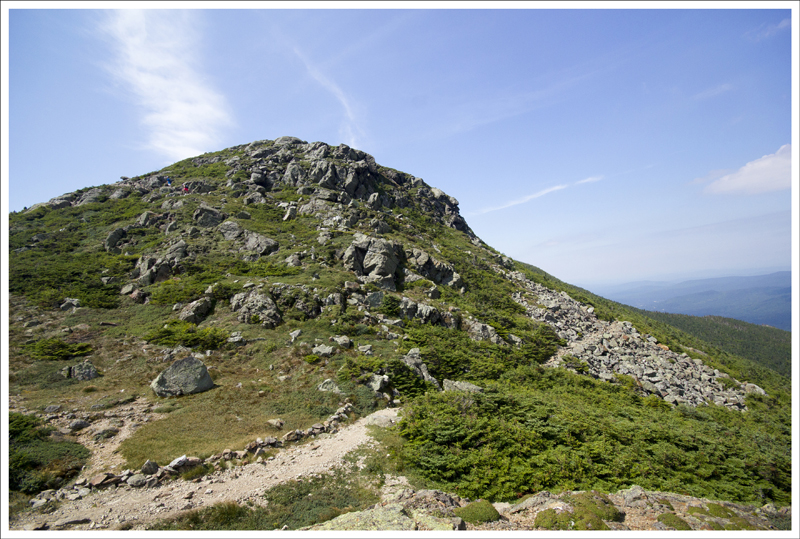
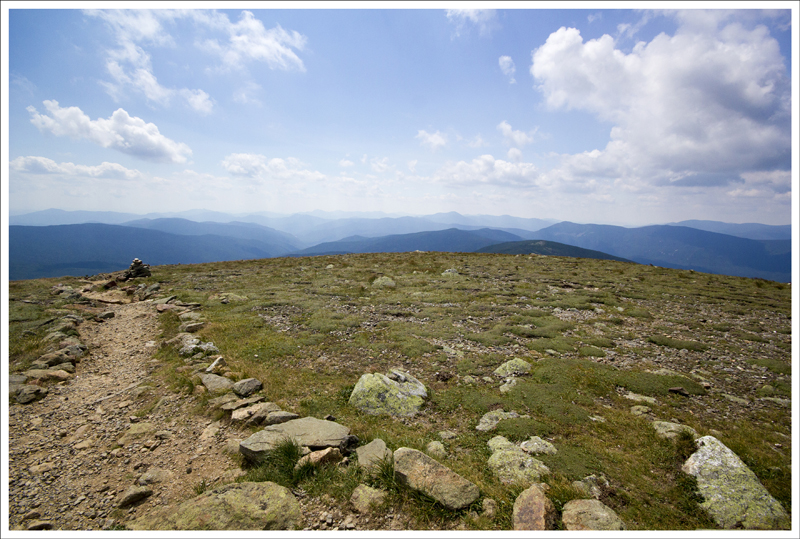
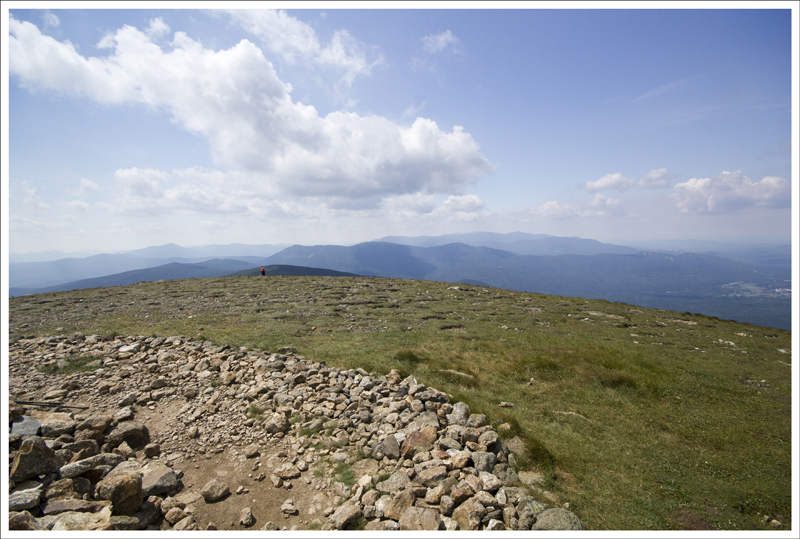
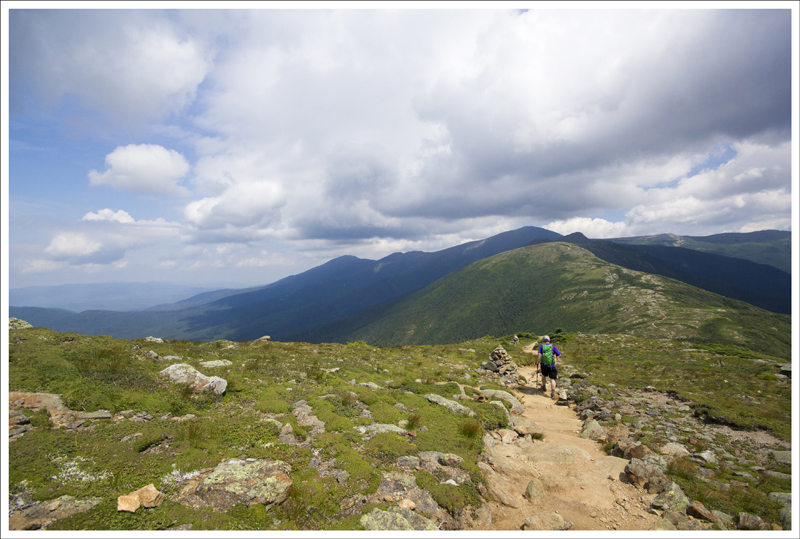
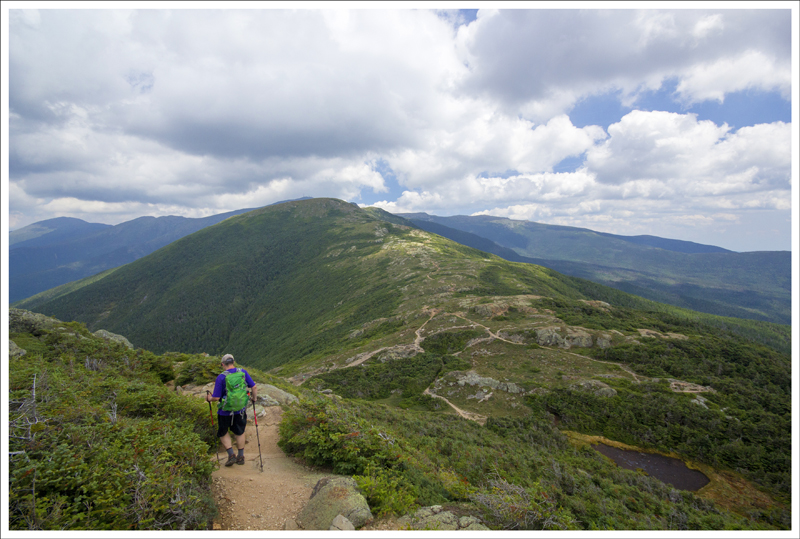
We eventually came across a U.S. Forest Service Alpine Zone sign warning us that we were entering an area with some of the worst weather in the world. This is definitely a sign to heed on rough weather days, but we had a gorgeous day of mostly clear skies above us. We arrived above treeline and were soon on a rocky path that skirted the shoulder of Mt. Eisenhower. At 2.9 miles, we reached the junction with the Crawford Path (the name given to the Appalachian Trail through these parts) and took the first right on the Eisenhower Loop Trail, which leads to the summit. The views from the junction were phenomenal as we were looking right at Mt. Monroe with Mt. Washington in the distance behind it. The path to the summit zig-zagged up some switchbacks on a skinny path that mostly had nice footing and in about .4 miles we had reached the summit.

Climbing to the Junction with the Crawford Path
Climbing to the junction with the Crawford Path.  Below: The junction of the Edmands Path and the Crawford Path; More open views.

Junction With the Crawford Path Mt. Eisenhower Mt. Eisenhower

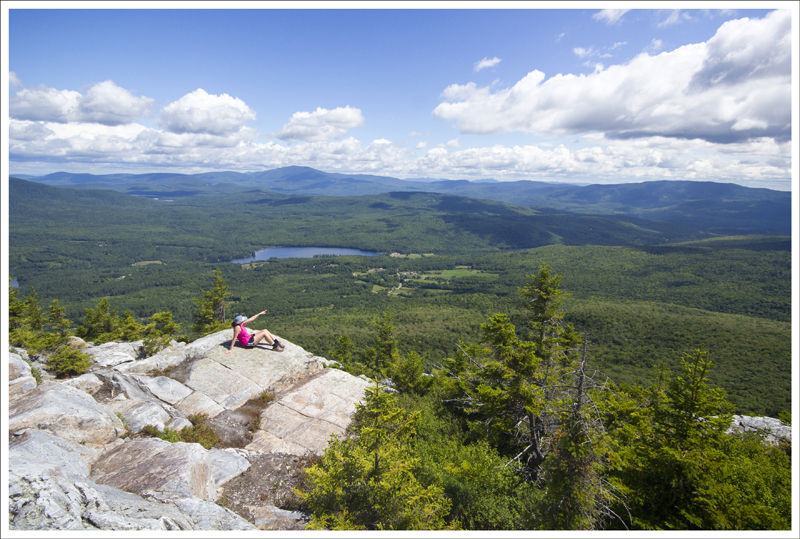
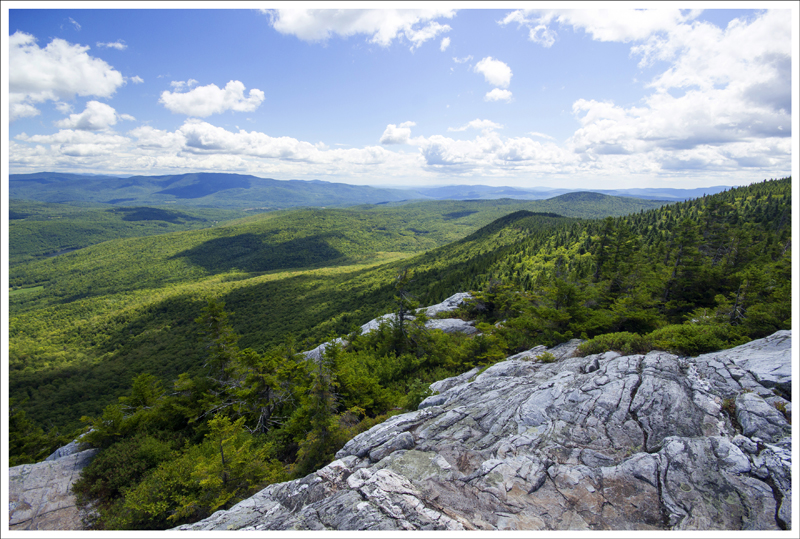
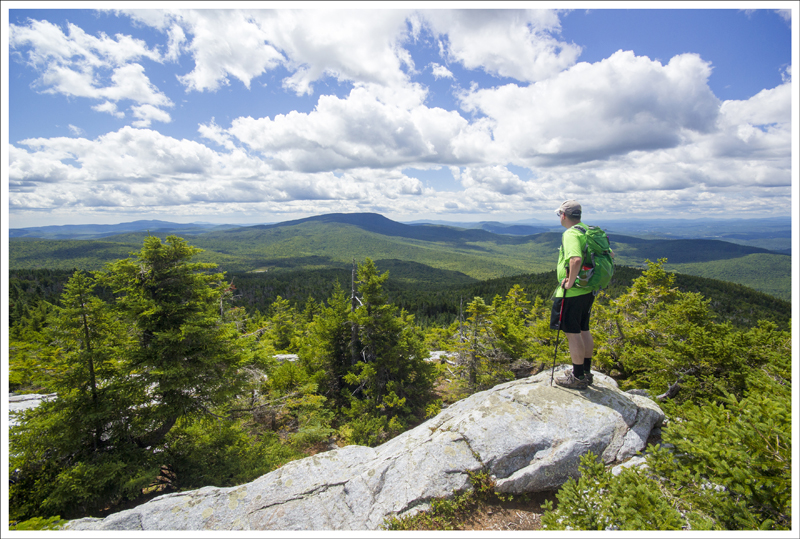
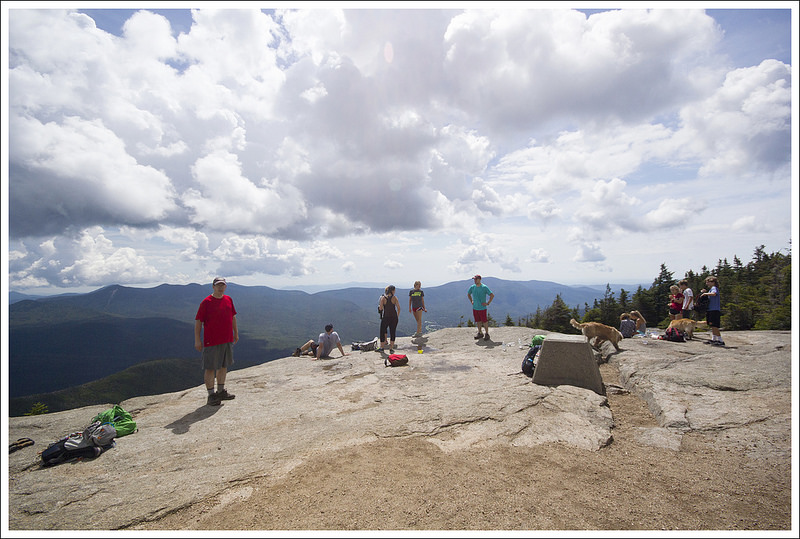
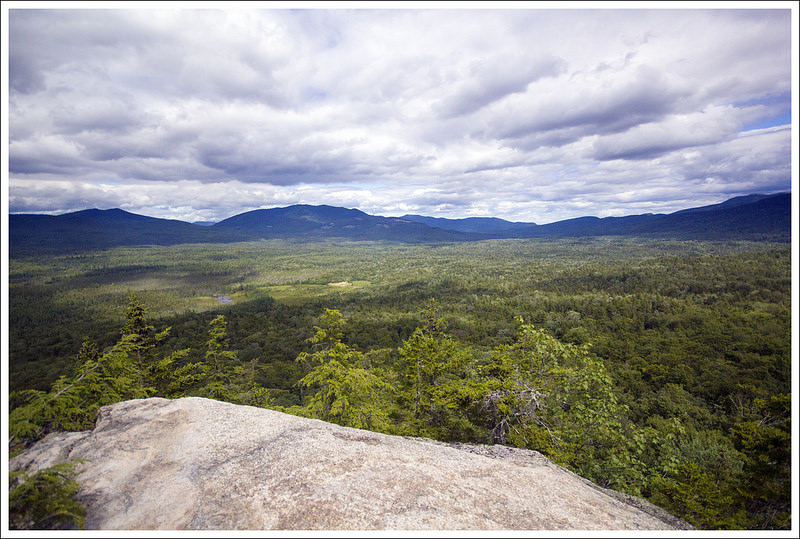
When we got to the top, we found lots of people that had hiked over from Lakes of the Clouds Hut or Mizpah Spring Hut. We ate our snack while taking in views in all directions. We took a ton of photos to capture the vast landscapes and beautiful partial cloud coverage.

We made our way back down the same way we came up, reaching the Crawford Path junction quickly. We then took the Edmands Path back down to our car.  We paused for a few moments before ducking back in below treeline to soak up some last views of the majesty of mountains and valleys below us. It is moments like this that we revisit in our minds to help us get through the stress of work and life through the rest of the year.

Climbing Mt. Eisenhower
On our way up Mt. Eisenhower.  The Eisenhower loop trail branches off the Crawford Path to give you an opportunity to see the summit.  Below: Scenery climbing up to the summit of Mt. Eisenhower.

Mt. Eisenhower Climbing Mt. Eisenhower Climbing Mt. Eisenhower

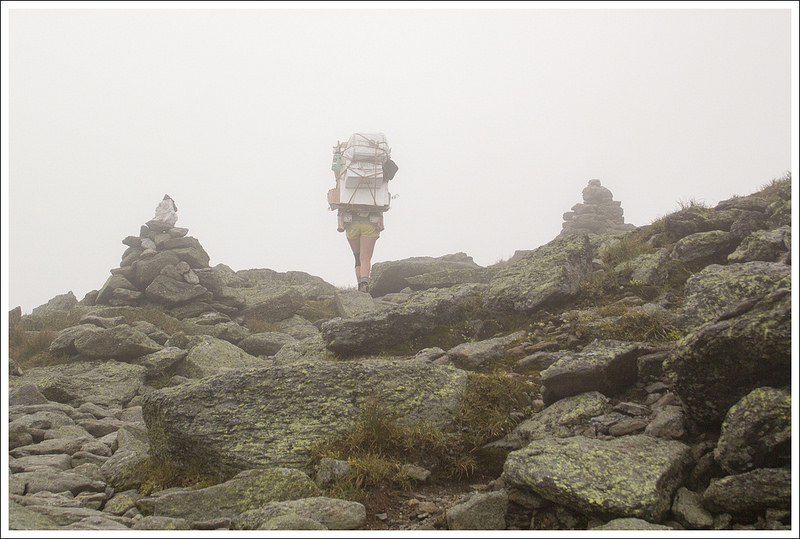
If you’re interested in visiting these high peaks, you can do a multi-day backpacking trip that is called a “Presidential Traverse”. The route connects Mt. Jackson, Mt. Pierce, Mt. Eisenhower, Mt. Monroe, Mt. Washington, Mt. Jefferson, Mt. Adams, Mt. Quincy Adams, and Mt. Madison. Hikers typically stay at the AMC huts along the way. This route is nice, because you only have to climb up from the valley floor once! The rest of the traverse is tough, but the bulk of the big climbing is done on the first day. The Presidential Traverse entails additional perils because the constantly changing weather can put you at risk for getting lost in the fog or pinned down by storms. We hope to do a Presidential traverse someday to take in the full experience, but for now we have settled for day hikes. We’ve enjoyed the majestic views, but we have had to work a little harder for each one (climbing all the way from the bottom to reach each summit).

Christine Says…

Mt. Eisenhower was a great choice for our 2016 Presidental climb! We had gorgeous, clear views and the mountain’s lofty elevation gave us a little bit of relief from the brutally hot summer day in the valley below.  The area broke a heat record on August 11 – close to 100 degrees at the base of the mountain. The normal high is usually closer to 80.

We got an early start and arrived at the Edmands Path parking area before the crowds.  We paid $3.00 for our WMNF one-day parking pass and set out on our way up the mountain. (There is a self-service parking fee station at one end of the lot.)

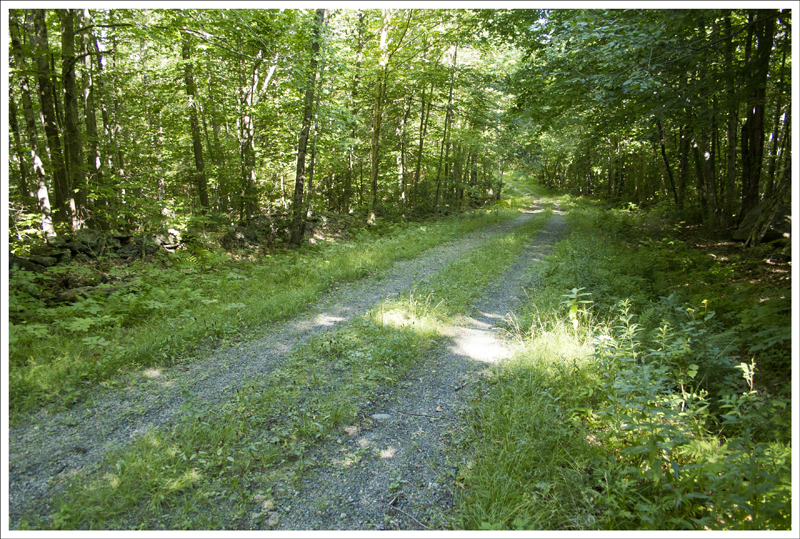
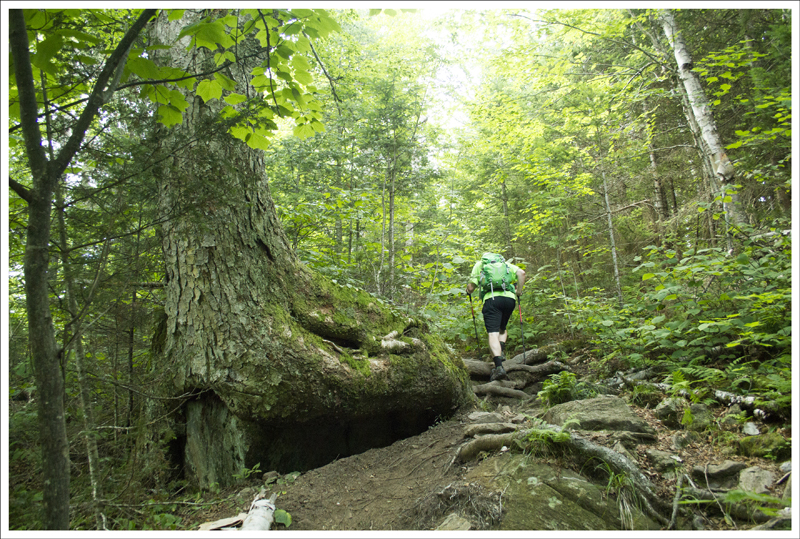
Like Adam said, nothing in Virginia really compares to the rigors of a New Hampshire climb, but this route was definitely a more moderate climb than others we’ve tackled. Today’s hikers can thank revolutionary trailbuilder J. Rayner Edmands for many of the gradual, meandering trails in the White Mountains. Edmands, one of the founding members of the Appalachian Mountain Club, modeled his eastern trails after the livestock trails he had climbed as a young man in the Rockies. He believed in the philosophy of “always climbing, never steeply” when it came to trail design.

On the Summit of Mt. Eisenhower
There were a lot of people on the summit of Mt. Eisenhower.  Below: Summit scenery.

On the Summit of Mt. Eisenhower On the Summit of Mt. Eisenhower On the Summit of Mt. Eisenhower
On the Summit of Mt. Eisenhower On the Summit of Mt. Eisenhower  Descending Mt. Eisenhower

He spent time surveying each mountain to find the best grades and the most favorable terrain to reach the summit. He built each trail like a puzzle; using large boulders, extensive cribbing, and selective tree clearing. His philosophy differed greatly from other well-known New Hampshire trail builders of the time; most of them opting for the shortest routes, regardless of steepness or terrain. Built in 1909, the Edmands Path was one of the last trails Edmands built before dying of a stroke at the age of 60 in 1910.

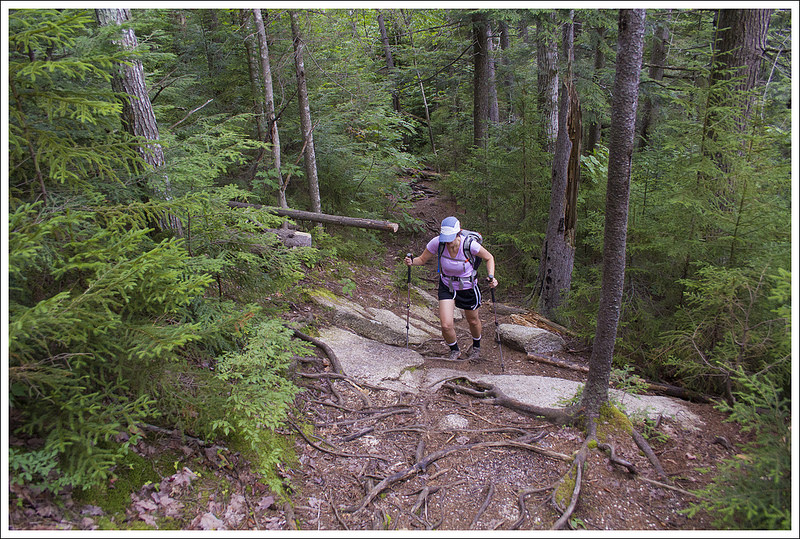
If we’re being completely honest, we have to say that there’s no truly easy way to hike to mountain summits in the Presidentials. Even with Edmands’ thoughtful design, you’re going to get a solid cardio workout climbing to the summit of Mt. Eisenhower.

Descending Mt. Eisenhower
Great views occur everywhere above treeline. Below: Making our way back down the mountain.

Descending Mt. Eisenhower Descending Mt. Eisenhower Descending Mt. Eisenhower

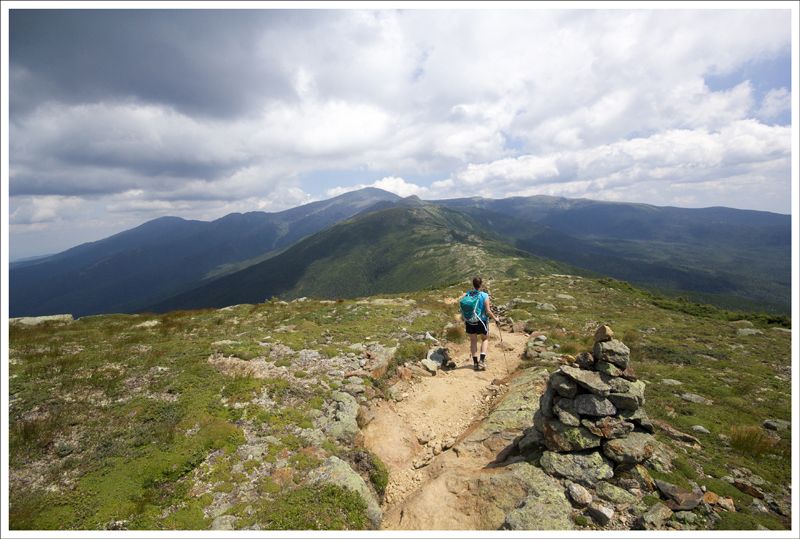
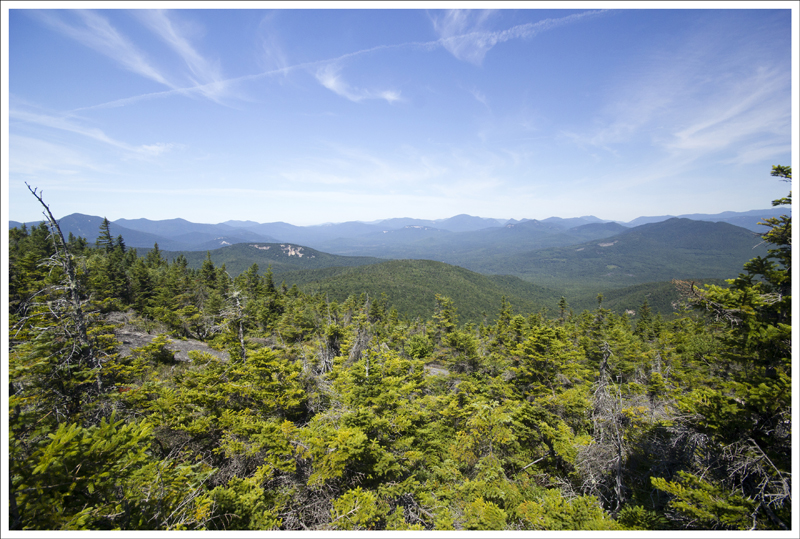
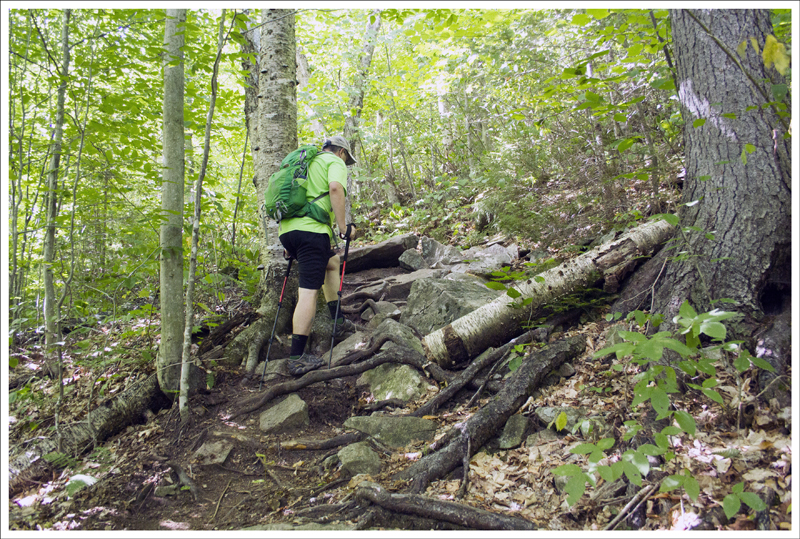
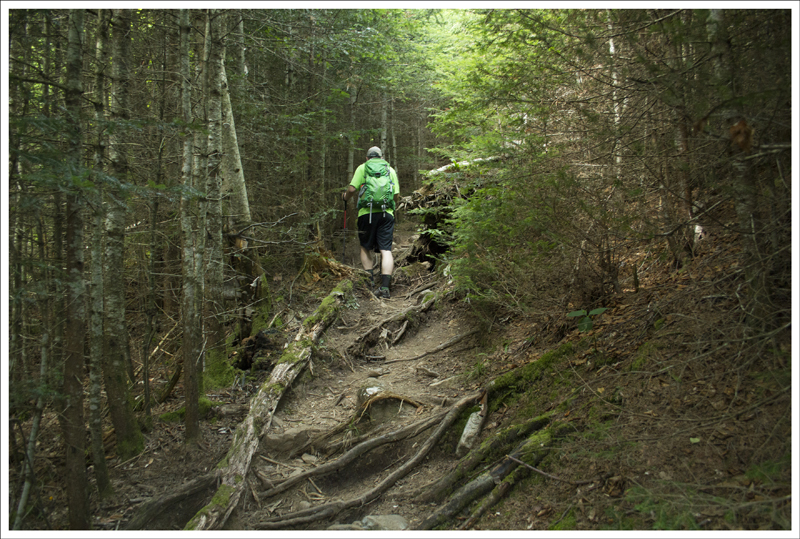
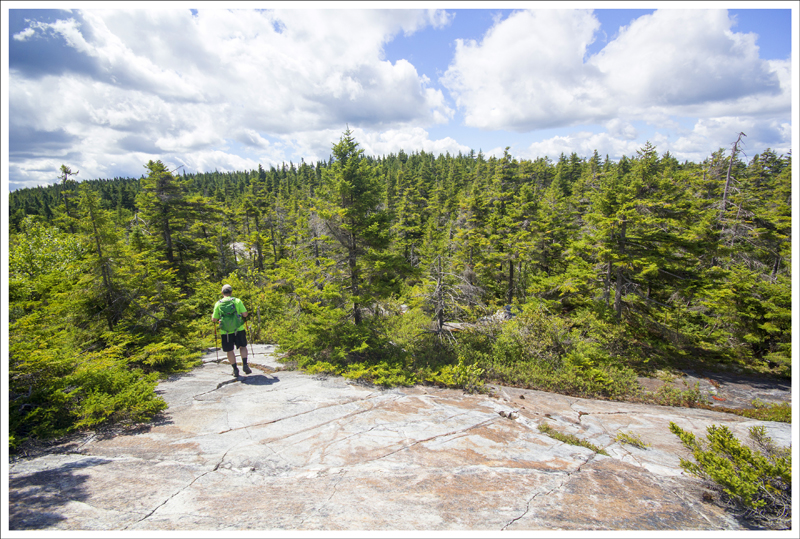
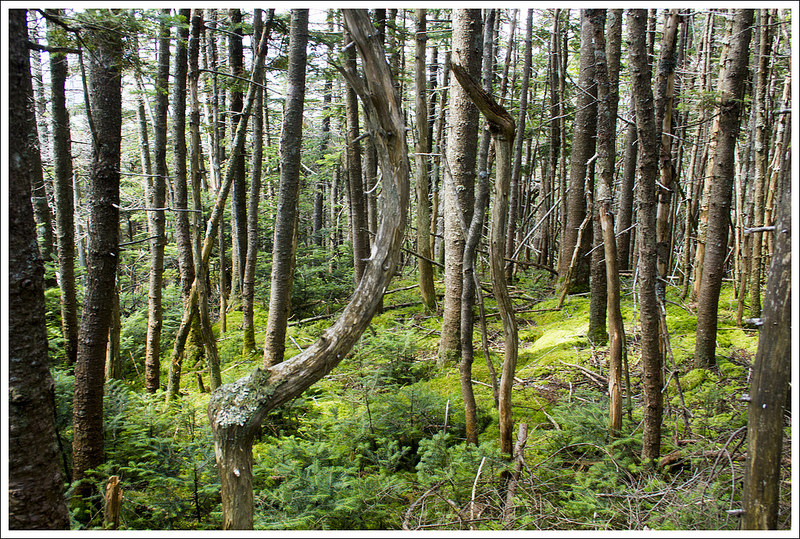
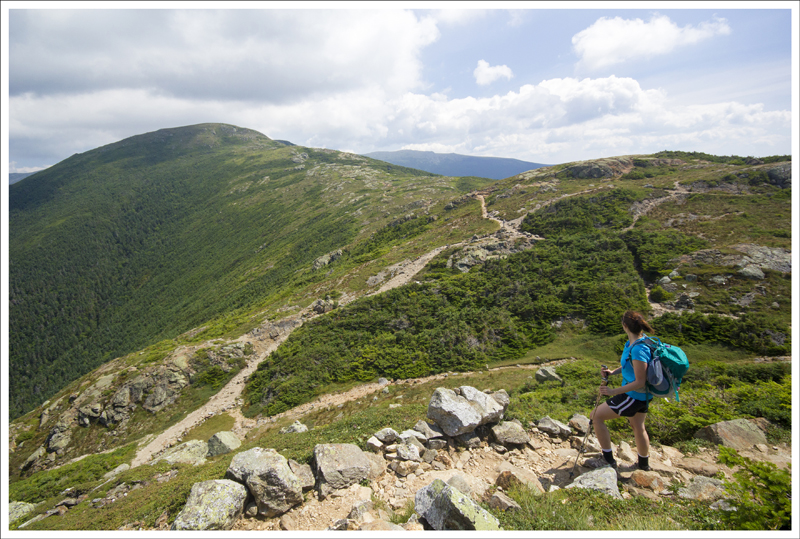
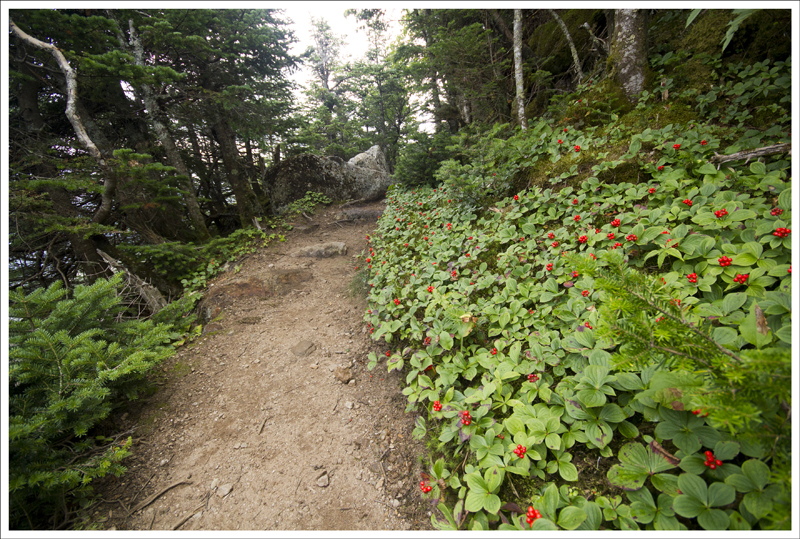
Since it was a hot day, we took many water breaks as we worked our way uphill.  Despite the effort, I still thought the tough climbing over boulders and roots went by quickly.  I was actually surprised when we reached the alpine zone sign… “Here? Already?”  The last bit of the Edmands Path before we reached the junction with the Crawford Path was almost flat and passed through a lush bed of alpine mosses and wildflowers.  After we cleared that last swath of green, the view gave way to a theater of bare granite mountains.

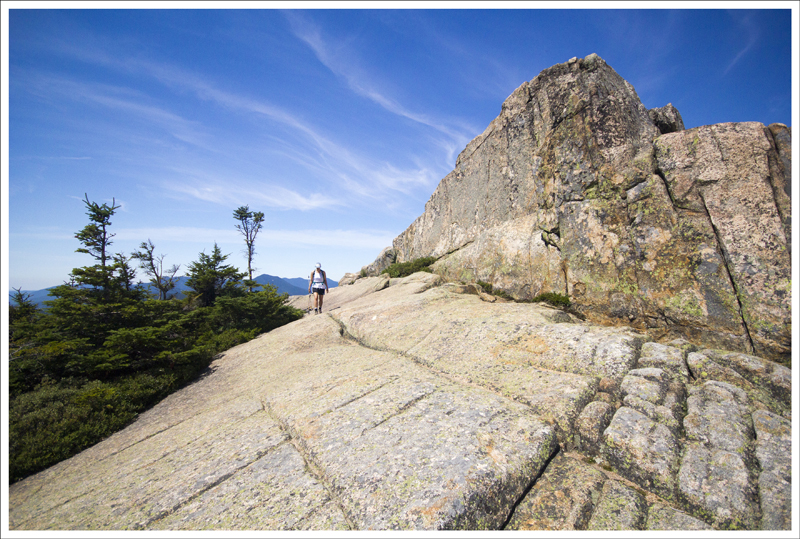
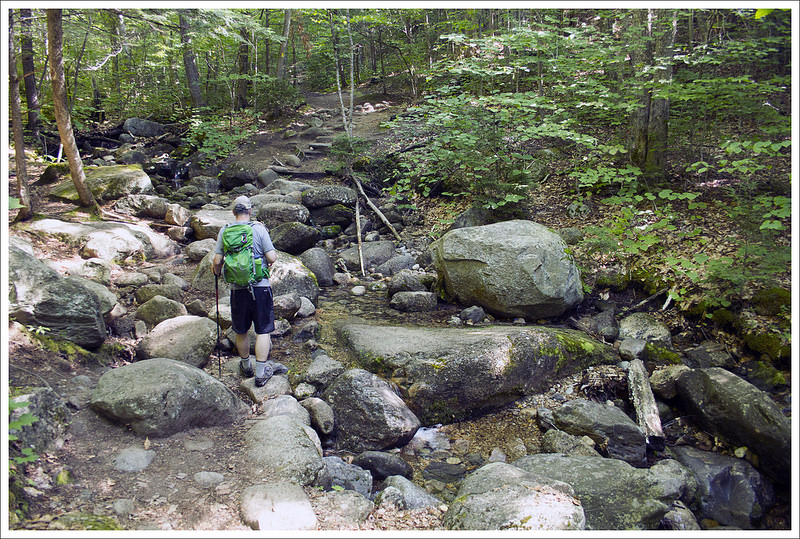
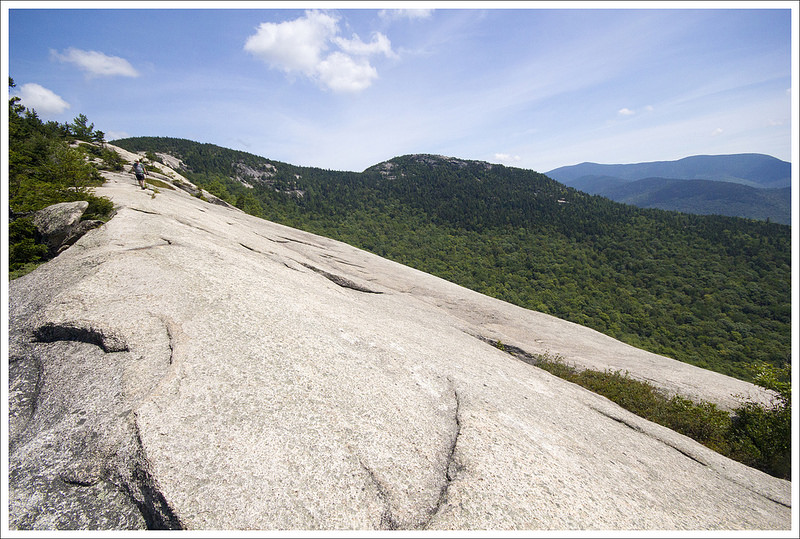
The last tenth of a mile before the junction with the Crawford Path was a jumble of football-sized rocks along an exposed cliffside. When it’s wet, a stream flows over these rocks, but on this day it was thankfully bone dry. In the winter, this particular spot is known for being treacherously icy and windy. I’m glad we only visit New Hampshire in the summer. Virginia winters are tough enough for me!

Descending Mt. Eisenhower
We saw interesting Alpine plants. Below: More scenery on the descent: Lunch afterwards at Moat Mountain Brewery & Smokehouse.

Alpine Plant Descending Mt. Eisenhower Post-Hike Meal at Moat Mountain

The last .4 miles of trail from the Crawford Path junction to the summit of Eisenhower follows the Eisenhower loop – essentially a spur trail that detours people from the Crawford Path over the summit. Most of the mountains in this area have an “over or around” option.  No matter which option you pick, you’re going to have SPECTACULAR views if you hike on a clear day. The majesty of the Presidentials is without compare – so much rugged beauty. It takes my breath away every time!

The hike down simply retraced our steps.  As we descended, we could feel the heat and humidity of the lower elevations closing in around us. I was glad we finished hiking rather early in the afternoon, as it gave us time to make a couple more stops before heading back to my parents’ house. First we detoured into Jackson. We stopped at a great bakery for cold drinks and cookies and paid a visit to the White Mountain Puzzle Company. If you enjoy working jigsaw puzzles, they make a great variety!  After Jackson, we hit one of our favorite lunch spots in the area – Moat Mountain Brewery and Smokehouse. A tasty lunch and cold craft beer made the perfect ending to another excellent New Hampshire day.

Trail Notes

  • Distance – 6.6 miles
    (Check out the stats from Map My Hike)*
  • Elevation Change – 2800 ft
  • Difficulty –  4.5.  The hiking may be moderate by New Hampshire standards, but it is a tough hike and you should be in decent hiking shape to tackle it.
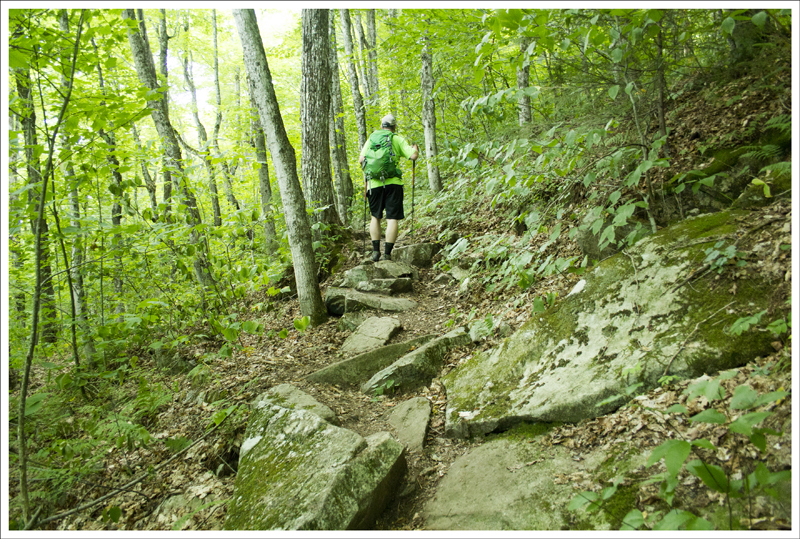
  • Trail Conditions – 2.  While the trail was well maintained, the boulders of rock that you have to climb in the last 1.5 miles of the Edmands Path makes it tough climbing. 
  • Views –  5.  The 360-degree views from the Presidential Range is hard to beat anywhere on a clear day.
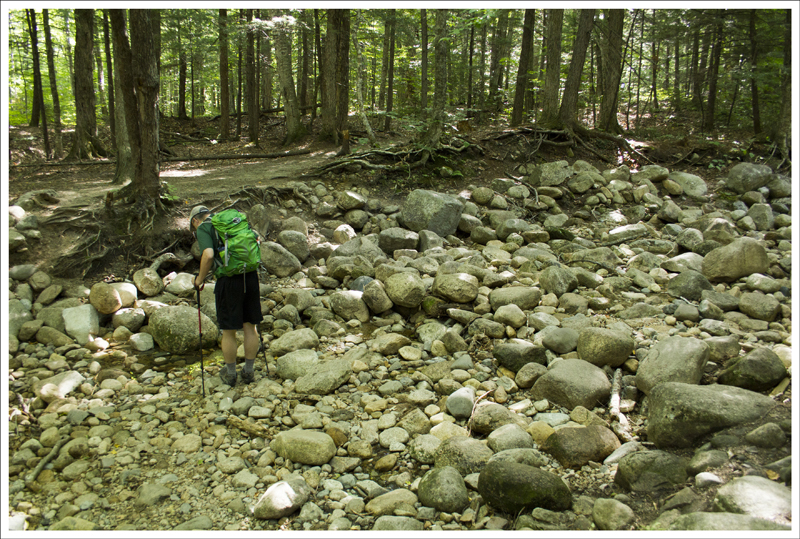
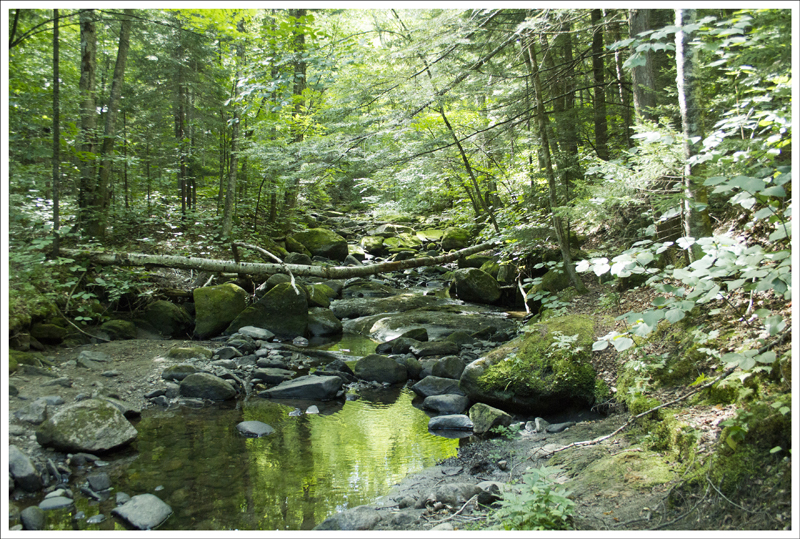
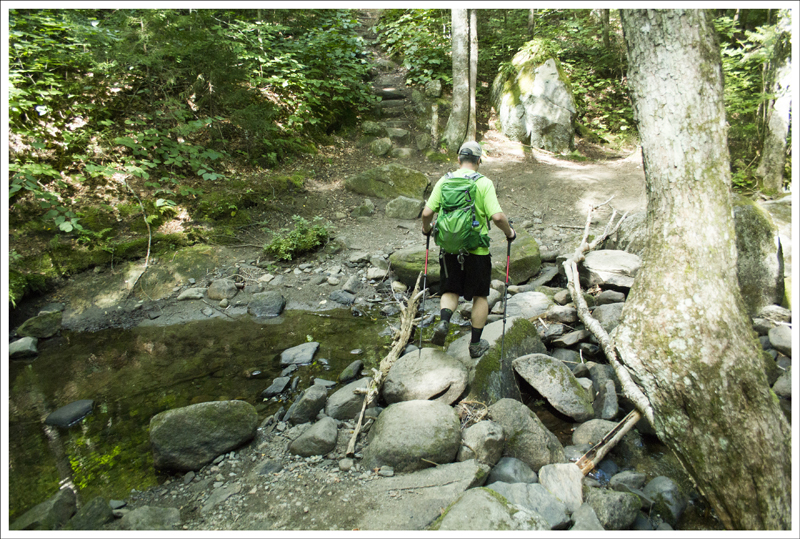
  • Waterfalls/streams 1.  You cross over a small stream early in the hike, but otherwise there wasn’t much water to see.  However, we visited in drought conditions.  In a normal to wet year, stream crossings may be more numerous and/or more difficult.
  • Wildlife – 1.5  Squirrels scampering and birds chirping will give you sounds along the way, but don’t expect anything once you go above treeline. 
  • Ease to Navigate – 4.5.  There is just one turn from the Edmands Path to reach the summit, so it should be very easy to follow.
  • Solitude – 3.  We didn’t come across many on the Edmands Path, but on a beautiful summer day, the summit had a lot of people. 

Download a trail map (PDF)

Directions to trailhead: Parking Coordinates: 44.248988, -71.391665.  The trailhead is on Mt. Clinton Road, off U.S. 302 near the AMC Highlands Center. The parking area requires a White Mountain National Forest parking pass.  You can buy an annual pass or use the self service station to pay the $3 day fee.  For more information about parking passes, visit the national forest website.

MapMyHike is not necessarily accurate, as the GPS signal fades in and out – but it still provides some fun and interesting information

Mt. Chocorua (NH)

Special: New Hampshire Edition

Introductory Guide to Visiting the White Mountains

This 7.2 mile hike takes you to a rocky summit with a 360 degree view of New Hampshire’s mountains and lakes. Chocorua is the easternmost peak in the Sandwich Range and stands at just 3,490 feet. It’s not one of New Hampshire’s famous 4,000-footers, but we found the views were spectacular and the summit offered unique terrain. The trail is mostly moderate but requires some trickier rock scrambling near the summit.

View the Full Album of Photos From This Hike

The Summit of Mt. Chocorua
The Summit of Mt. Chocorua offers majestic views.

Christine Says…

When we visited New Hampshire in August 2016, we got to chatting with a couple locals on the summit of Mt. Cube. They were surprised that we’d hiked so many lesser-known trails in the area, but had somehow overlooked popular Mt. Chocorua. We’d passed the trailhead many times, but had no idea it offered such spectacular views. Adam had taken to calling it Mt. Cocoa Puffs, which is significantly cheerier than the legend of how the mountain got its name.

Supposedly, in the 1720’s a Native American man named Chocorua had a son who was accidentally killed after drinking poison on a white settler’s farm. He took vengeance and killed the farmer’s wife and children. The farmer shot and wounded Chocorua, but he escaped up the mountainside. From the summit, he cursed all white settlers, their livestock, and their crops; and then leapt to his death. Like most legends, there are no records to authenticate the tale, but Wikipedia listed a couple different versions of the curse he made.

“May the Great Spirit curse you when he speaks in the clouds and his words are fire! Lightning blast your crops! Wind and fire destroy your homes! The Evil One breathe death on your cattle! Panthers howl and wolves fatten on your bones!”

We hiked this peak on a hot, humid day during an extremely droughty New Hampshire summer. The trail started off at the Champney Brook – Bolles Trail parking lot along the Kancamagus Highway. During fair weather, the parking lots fills by lunchtime so plan to get an earlier start. There is also a small recreational use fee ($3 in 2016) for parking. Payments are made at a self-service envelope station, so you will need small bills/cash to pay for parking.

New Hampshire in Drought Conditions
The White Mountains are in drought conditions. Twin Brook was completely dry where it crossed the trail.  Below: The early trail was a mix of roots and dirt;  Constructed stairs on the trail at the junction to visit Champney Falls and Pitcher Falls (we skipped the falls, assuming they’d be dry); The trail crew working that day was hoping for tips!

Rooty Trail Junction of Falls Trail Tips for Beer Money

The hike begins on the Champney Brook Trail.  You’ll almost immediately cross Twin Brook. There used to be a wooden footbridge over the brook, but it washed away in March of 2013 during heavy rains and snowmelt. Crossing was no problem when we visited – the brook was bone dry and nothing but a bed of cobblestones. At .1 miles, you’ll pass the junction with the Bolles Trail. Pass this and continue following the Champney Brook trail. At .25 miles, the trail will meet up with the brook. The trail and brook run parallel for about a mile. At 1.3 miles, you will reach a junction with the Champney Falls/Pitcher Falls spur. The spur trail departs to the left and follows the water more closely before rejoining the main Champney Brook trail once again about .3 miles later. Since everything was so dry, we decided to bypass the two waterfalls and continue our climb up the mountain.

Once you pass the waterfall spur trail, the climbing becomes significantly steeper and rockier. The terrain is made up of a mix of boulders, cobbles, and slabs of granite. At around the 2.4 mile mark there is a good view to the north on the right side of the trail. If it’s clear, you’ll have nice views looking toward the Presidentials. We spent some time relaxing and enjoying the sun on this ledge. After leaving this view, you’ll ascend seven steep switchbacks over about half a mile up to the junction of the Champney Brook trail and the Middle Sister Trail. Bear to the right, staying on the Champney Brook trail for .1 mile where you’ll reach its terminus at the junction with the Piper Trail.

First Views Through the Trees
Our first views through the trees.  We’re pretty sure the tallest peak is Mt. Washington.  Below: As we ascended the trail became significantly rockier.  The terrain was a mix of cobbles and slabs.

All Trails in New Hampshire Are Rocky Granite Slabs All Trails in New Hampshire are Rocky

Follow the yellow-blazed Piper Trail for .6 miles over open rock ledges and crags. Some parts will require scrambling on your hands and knees to negotiate the climb. The view keeps getting better and better as you go. I personally found some of the rock scrambling to be a bit frightening.  I have some vertigo issues and there were several places I felt like I might fall backwards and go tumbling down a cliffside. My hands were shaking and I felt panicky. But, Adam (and most of the other normal people) seemed to have a fun time climbing, so clearly this is a ‘me issue’.

At the top, we enjoyed a fantastic view of  what seemed like all of New Hampshire. We could see many lakes and peaks in every directions. The day we hiked was pretty clear, so we even had a great view of distant Mount Washington. The hike down came a lot easier for me and I enjoyed the wide, theatrical presentation of mountain scenery on the descent. We soon dipped back into the woods and made quick time climbing down to the parking area. On the ride home, we passed through Holderness where we stopped at Squam Lakeside for lime cream slushes and lobster rolls – a treat well-earned by a couple of tired hikers!

A View of Middle Sister
A View of Middle Sister. Below: Nice views from a ledge below Middle Sister Mountain; Making our way up to the summit of Chocorua.

Views from the Ledge The Bare Summit of Chocorua The Bare Summit of Chocorua

Adam Says…

We love hiking in New Hampshire!  There are so many amazing hikes to do up there and this one has to be one of my favorites for views in the “Live Free or Die” state.  We picked a perfect summer day to hike this which gave us clear skies to take in the sprawling majestic landscape around us.

Climbing Mt. Chocorua
Climbing Mt. Chocorua.  Below: More scenes from the rocky climb to the top.

Views on the Way Up Chocurua Climbing Mt. Chocorua Climbing Mt. Chocorua

As Christine mentioned, the trail had a moderate climb through the bulk of the hike.   As with most hikes in New Hampshire, you can’t escape the roots and rocks on hikes in this area which make for tougher climbing than what we are used to in Virginia mountains.  It was a bit of a slog uphill, but quite manageable.  When we got to the view below the Middle Sister, we were impressed with how high we had come up and the views from the open ledge were already magnificent.  Within a short distance from this overview, we reached the junction with the Piper Trail and made our way to summit Mt. Chocorua.  The hike up to the summit is quite tricky.  While Christine talked about how it was scary to her, it was a challenge to get to the summit.  The blazes at times were a little tricky to follow and you had to use handholds and footholds to navigate up some of the tricky rock scrambles to get to the summit.  When we were able to first see the rocky slabs of the climb up, we thought it was a short distance to the summit, but it was a false summit – you get to the top of this first outcropping and then you can see the true summit further up.  This would fall in the category of hikes that you hear those warnings of not being for the “faint of heart”.  But I will say that if you can muster up the courage, you will be rewarded.  From the north, on a clear day you can see Mount Washington sitting atop the Presidential range and from the west, you can see the Tripyramid, Mount Tecumseh, and Mount Whiteface.

The 360 Degree View from Mt. Chocorua
The 360 Degree View from Mt. Chocorua. Below: Summit scenery; A look back at the summit from below; Making the descent.

Summit of Mt. Chocorua Summit of Mt. Chocorua Descending Mt. Chocorua

Another thing I discovered when researching this hike was there used to be a three-story hotel called the Peak House that sat at the base of the summit.  It was built in the late 1800s and served meals and provided lodging for those that were hiking Mt. Chocorua.  It was, quite literally, blown off the mountain in September of 1915 from heavy winds (keep in mind this isn’t far from Mt. Washington which is known for some of the highest recorded winds in the world ever).  Supplies for the Peak House were brought up by oxen, horses, or manpower and the blueberry pies made from blueberries picked on the mountain, were legendary to visitors.  Nobody was staying in the house when it was blown over.   The Chocorua Mountain Club then built a structure to replace it in 1924, but that was also blown over by wind in 1932.  The U.S. Forest Service built the Liberty Cabin there in 1934, a smaller structure, that remains today (access is on the Liberty Trail) and can sleep 6 people on a first-come basis.  The roof of the Liberty Cabin is draped by heavy chains to keep it from blowing away, similar to what you see in structures at Mt. Washington.  This story reminded me of Monty Python and the Holy Grail, where the father is telling his son about the castle that was built on a swamp and kept getting destroyed.  I guess there is some stubbornness that sets in when people want to keep some semblance of the past.

I had to do some encouraging to Christine to make her want to fight through her vertigo and reach the summit, but I think she felt the journey was worth it and I was so proud of her for fighting through to make it to the summit.  Once she made it to the top, we enjoyed taking in the views and the climb back down was even more spectacular.  For hikers like us, it doesn’t get any better than spending a day in this scenery.

Views on the Hike Down Chocorua
The hike down was just as beautiful. Below: Scenes from the descent; Post-hike lunch of lobster rolls!

Views on the Hike Down Chocorua Views on the Hike Down Chocorua
Views on the Hike Down Chocorua Post-hike Rewards

Trail Notes

  • Distance – 7.2 miles
    (Check out the stats from Map My Hike)*
  • Elevation Change – 2100 ft
  • Difficulty –  4.5.  Much of the trail is moderate, but the scramble at the top increases the difficulty factor a little.
  • Trail Conditions – 3.5.  The trail is well maintained, but rocky like most of New Hampshire.  Crews were out doing maintenance on the day we hiked.
  • Views –  5.  One of the nicest views from a smaller mountain.  It’s truly a 360 degree view.
  • Waterfalls/streams – 2.  This score may very well have been higher, but we visited during a period of severe drought.  The streams and falls were dry.  Champney Falls has a reputation for being pretty during spring snow-melt, but is generally considered underwhelming compared to other falls in the area.
  • Wildlife – 3.  We saw lots of birds and red squirrels.
  • Ease to Navigate –  3.  There are a few turns to pay attention to, also the scramble to the top is not well marked and it can be tricky to find the best hand and foot holds.
  • Solitude – 1.  This trail is very popular.

Download a trail map (PDF)

Directions to trailhead: Parking coordinates are: 43.990146, -71.299888.  The trailhead is on the Kancamagus Highway near Albany, NH. Look for the sign marking the Champney Brook Trail – Bolles Trail parking area.

MapMyHike is not necessarily accurate, as the GPS signal fades in and out – but it still provides some fun and interesting information.

Mt. Cube (NH)

Special: New Hampshire Edition

Introductory Guide to Visiting the White Mountains

This is a beautiful section of Appalachian Trail with spectacular views from the two-summit peak of Mount Cube (2,909′).  The round-trip is  just over seven miles and traverses moderate terrain (by New Hampshire standards).   It’s a worthwhile day hike in the area, especially if you want to escape the crowds.

View the Full Album of Photos From This Hike

Christine Enjoys the North Summit of Mt. Cube
Christine Enjoys the North Summit of Mt. Cube – views look toward Upper Baker Pond and Mt. Moosilauke.

Adam Says…

As we slowly work on trying to cover the entire Appalachian Trail, piece by piece, we are always looking through our AWOL AT Guide to come up with day hikes when we are near the trail.  The AWOL guide is a great handbook to get elevation profiles, campsites, water sources, and local amenities for places along the Appalachian Trail.  The AWOL guide uses camera icons in the book to denote great view places that are worth taking pictures.  The guide tends to be pretty stingy with giving out these icons, so seeing two camera icons on this trail, we knew it would be worth checking out.   We had a gorgeous summer day to do this hike and we had a feeling the scenery would be stupendous, but we were even more surprised when we reached the top.

We parked alongside the road of NH-25A and then found the AT trailhead marker heading south (see directions below).  The first .4 miles of the hike are relatively flat.  We passed a campsite fairly early on.  After .4 miles, the trail begins to climb at an easy climb and at .6 miles, we crossed a forest road.  At .8 miles, we crossed a mostly-dry stream and at 1.7 miles we crossed over Brackett Brook, which was the only reliable water source we found on the trail.  After crossing the brook, the trail really begins to increase elevation and will get your heart going.  We always find that conversation tends to die down on the big uphill climbs.

Nice Campsites
There were several nice campsites along this stretch of Appalachian Trail. Below:  Trail signage; Crossing what would be a marshy area;  Forest road crossing.

Trail Signage Appalachian Trail Near Mt. Cube Appalachian Trail Near Mt. Cube

It was a tough slog for the next 1.5 miles of switchbacks up the mountain, but at 3.3 miles the climb levels and we reached a sign at an intersection.  We took a right to check out the northeast summit of Mount Cube first.  The trail is a little tough to follow to the summit.  Follow the sparse blazes through the woods and the trail opens up to above treeline.  Walking on the rocky surfaces made it hard to find the proper path, but we would pick up a blaze eventually and knew we were on the right path.  At 3.55 miles (just .25 miles from the junction), we reached the northeast summit.  The views were phenomenal and we found ourselves surrounded by wild blueberries on the shrubs around us, which made for a snack among the majestic views.  We spent a long time on the rocky ledges overlooking the valley, with views of Mt. Moosilauke in the far distance.

We were impressed we had the views entirely to ourselves, but we made our way back to the intersection to see what the southern main summit of Mt. Cube would give us.  At 3.8 miles, we reached the intersection and continued on the AT to the summit of Mt. Cube just .1 mile away from the intersection.  At the main summit, there were several people at the top.  While we found these views nice, we were at tree level and we felt if we were just about 10 feet higher the views would be more impressive.  We talked with a few people at the top and told them they shouldn’t miss the views from the northeast summit.  We ate a snack here and then made our way back to the intersection and back down the mountain the way we came.

Brackett Brook
Brackett Brook was the only water source still running along this stretch of trail.  Below: Crossing the brook; Scenes from the steeper part of the climb.

Crossing Brackett Brook The Climb to Mt. Cube The Climb to Mt. Cube
The Climb to Mt. Cube The Climb to Mt. Cube The Climb to Mt. Cube

When we got back to the road, we saw an older hiker waiting at the bottom of the trail.  Christine had thought it was Warren Doyle, a well-known AT hiker and supporter of others on the trail.  I told her I would find out and asked the gentlemen if he needed a ride.  He declined, since he was waiting for a friend to pick him up and I slipped the name “Warren Doyle” cleverly into the conversation to see if he would react.  He said that he knew Warren and he was actually going to get some help from him a little further up the trail and had been part of one of Warren’s fabled AT hikes years ago.  So, while we were wrong, it was still interesting to make that connection.

Mount Cube was a wonderful pick and the camera icons didn’t lie.  This is definitely worth doing on a nice spring/summer/fall day, but the ripe blueberries in August made this for a classic day in New England.

Christine Says…

While Mt. Cube isn’t a 4,000-footer, it still offers lofty views from two distinct summits.  It’s a great dayhike if you’re in the area and looking to escape the thicker crowds around the Presidential peaks. We hiked Cube on an absolutely gorgeous Sunday morning, and saw just a handful of other hikers – most of them Appalachian Trail thru-hikers nearing the end of their long voyage north. We hiked southbound on the AT, starting from the road-crossing near Orford, NH.

The Climb to Mt. Cube
There were many beautiful birch trees on the climb. Below:  The rocky, rooty climb continues; The junction for trails to the north and south summits.

The Climb to Mt. Cube The Climb to Mt. Cube The Climb to Mt. Cube

The first mile and a half of hiking was beautiful and easy.  We climbed gently uphill and passed through a mixed hardwood and pine forest.  The overhead canopy kept the trail shady and cool, even on this rather warm summer day.  Our guidebook marked a stream about 3/4ths of a mile into the hike.  When we got there, we found a southbound section hiker filtering what amounted to a mud puddle.  He was worried about running out of water and didn’t want to pass any source without gathering what little he could.  Last summer, New Hampshire experienced serious drought conditions.  Many streams that normally flow year-round were reduced to a trickle, so I understood his concern.

We reached the second stream marked in our guide, Brackett Brook, and found it was still flowing with clear, clean water.  Side note: I love how New England has brooks and notches instead of creeks and gaps. As a southerner, they just sound more exotic and picturesque. After crossing the brook, the climb became a bit steeper, but remained uncharacteristically smooth and uncomplicated.  We stopped to chat briefly with another thru-hiker.  I said something to him about how nice the terrain had been along this stretch of trail and he just replied ‘Ugh‘ and shook his head.  I thought to myself, ‘Hmmm… maybe there’s something I don’t know?’

Soon after that, the trail went from mostly dirt tread to a steep mix of roots, rocks, and log steps built into the earth. It still was pleasant terrain compared to most of what you see in the Whites, but I get the origin of the thru-hiker’s Ugh!  Near the summit, the trail leveled out through a stretch of hemlocks and pines. The footing was a mix of fallen needles and granite sand.

North Side Summit of Mt. Cube
North Side Summit of Mt. Cube.  Below: More of the north summit

Exploring the North Summit of Mt. Cube Exploring the North Summit of Mt. Cube mt-cube19

At the top, we decided to check out the north summit first.  To get to the north summit, you follow a spur trail that departs the AT.  It was gorgeous – ledges and blueberries and views for miles and miles!  Upper Baker Pond added a lovely water feature to the vista. The pond is home to vacation cottages and a summer camp called Camp Moosilauke.  We spent lots of time enjoying the solitude, taking photos, and eating our lunch.  Eventually we made our way back to the junction and followed the trail a few tenths of a mile to the south summit.

It was also beautiful, but lacked the majesty of the north summit.  We chatted with a few fellow hikers, including two women from the area. They gave us some hiking recommendations, but it turned out we had already hiked most of them.  The one we hadn’t yet hiked was Mt. Chocorua.  They told us it was a ‘must hike‘. (so, we hiked it – and it will be our next post).

South Summit of Mt. Cube
The South Summit of Mt. Cube. Below: South summit scenes; The return hike to the start point.

South Summit of Mt. Cube South Summit of Mt. Cube
The Hike Down Mt. Cube mt-cube24

After leaving the summit, we made quick work of the descent. With about a mile and a half left, I started having horrible foot and toe cramps.  I hobbled along for as long as I could before I finally sat down in the middle of the trail and told Adam I had to take my shoe off immediately.  Once I massaged it a bit and did some foot stretches, I was able to continue.  The injury has continued to plague me ever since this hike.  It stinks, but I’ve been able to manage the pain and hike through it.

After we got back to the car, I kicked off my trail runners and switched into my Oofos flip flops.  They’re the best for sore feet!  On the way home, we found a little country store that had a dozen different flavors of whoopie pies.  I tried a gingerbread-lemon pie that was so delicious.  It was the perfect way to wrap up another excellent day of New England hiking!

Trail Notes

  • Distance – 7.2 miles
    (Check out the stats from Map My Hike)*
  • Elevation Change – 2025 ft
  • Difficulty –  4.  Everything is a little tougher in New Hampshire, but we were able to take our time and enjoy it.
  • Trail Conditions – 4.  The trail was well-maintained and not very overgrown.  We didn’t experience any blowdowns.
  • Views –  4.5.  The expansive views from the northeast summit of Mt. Cube are not to be missed.
  • Waterfalls/streams 1.5.  We did find a water source on Brackett Brook, but most of the streambeds we saw were bone dry in the summer. 
  • Wildlife – 1.  We didn’t spot anything other than some squirrels and chipmunks.  There were a few juncos and chickadees at the summits.
  • Ease to Navigate – 3.5.  Overall, the trail was easy to follow, but we are marking it down due to the lack of blazes leading to the northeast summit.
  • Solitude – 3.  We were pleased to find nobody on the northeast summit, but there were several at the southern summit.  There is room to spread out, so if you want to avoid people, you can.

Download a trail map (PDF)

Directions to trailhead: GPS coordinates: 43.9013  -71.9838   Take Route 1 25A East out of Orford, NH. Pass through Orfordville in 2.5 miles and continue up the northern shoulder of Mount Cube, whose summit ledges are visible above the trees. After 8.3 miles, at the height-of-land, pass Mount Cube Farm and former governor Mel Thompson’s famous pancake house. Continue on Route 25A and descend steeply to Upper Baker Pond. Just before crossing a steel highway bridge, 10.2 miles from Orford, the AT south leaves from the right hand side of the road. Park in the parking lot across the bridge.

MapMyHike is not necessarily accurate, as the GPS signal fades in and out – but it still provides some fun and interesting information.

Welch-Dickey Loop (NH)

Special: New Hampshire Edition

Introductory Guide to Visiting the White Mountains

This 4.5 mile loop is a classic New England hike.  Even though Welch and Dickey mountains are diminutive compared to other mountains in the region, they provide stunning views from open ledges and ample opportunities to pick berries in late summer.

View the Full Album of Photos From This Hike

At the Summit of Welch Mountain
At the Summit of Welch Mountain.

Christine Says…

When my parents moved to New Hampshire several years ago, they immediately began exploring local trails.  The Welch-Dickey Loop kept popping up on lists of local ‘must do’ hikes.  Their guidebook described it as a great, moderate, family-friendly hike.  One summer morning they set out to hike the loop.

They made it around the loop, but my mom described it as one of the most harrowing hiking experiences of her life.  She said she spent much of the hike scooting on her rear end along the trail so she wouldn’t fall on the steep, slick granite. She described the hike as extremely difficult and in ‘no way suitable for a family’.

Her words stuck with me, and we avoided hiking Welch-Dickey for years. Steep granite scrambles are doubtlessly the type of terrain that make me the most uncomfortable.

Welch-Dickey Loop
Adam hikes through classic New Hampshire forest. Below: Streams along the trail were low due to drought conditions; All New Hampshire trails are rocky – it seems; Log bridges to cross marshy areas; Impressive trail building; A lot of work goes into maintaining Welch-Dickey; Cobbles give way to smooth slabs of granite as you climb upward.

Welch-Dickey Loop Welch-Dickey Loop Welch-Dickey Loop

On a sunny summer day, we finally decided to give the hike a shot, and it turned out the hike was just about perfect.  We hiked the loop counter-clockwise, reaching the Welch Ledges below the summit in less than an hour.  The ledges are expansive, flat, and wide open.  They provide a theater-like view of Mt. Tripyramid, the Sandwich Range, and the Mad River Valley.

From the ledges, we climbed steeply uphill to the summit of Welch Mountain.  From the ledges below, the climb to the summit looked like it would be steep, but it was easier than it looked.  Most of the climb was over bare granite.  We took lots of opportunities to look back and enjoy the views.

From the summit of Welch, we enjoyed a magnificent view Mt. Moosilauke,  the Pemigewasset Valley, and the impressive cliffsides along Dickey Mountain.  It looked like all of New Hampshire was rolling out beneath us. Reaching the summit of Dickey mountain required a steep climb down into a col between the two mountains.  The low point was marked with a giant cairn.

The First Ledges on Welch Mountain
The First Ledges on Welch Mountain. Below: Barriers in place to preserve fragile plants on Welch Ledges; The actual summit of Welch looms above the ledges; Climbing toward the summit of Welch.

The First Ledges on Welch Mountain The First Ledges on Welch Mountain Climbing the Summit of Welch

The climb up Dickey was a little steeper and required following yellow blazes and arrows carefully.  At the top, we took a faint spur trail through the bushes to enjoy another spectacular view of Franconia Ridge. From there, we walked along the cliffsides we had seen from the summit of Welch Mountain.  The view remained spectacular for much of the descent.  Eventually, we dipped back into the forest for the remainder of the hike.

It was a great hike!  It offered superb views for a reasonable amount of climbing. I would agree that it’s moderate and good for families – but only on a dry day.  If the granite had been wet or icy, even these small peaks could be perilous.

Adam Says…

This hike is often recommended by people that we have talked to when exploring central New Hampshire and it is worth the hype.  This may be one of my favorite below 4000 feet hikes in New Hampshire.  If you can do this hike on a clear, dry day in late September, you will probably see fall foliage you will remember for a lifetime.

Just a few yards from the parking lot, the trail splits.  The trail to the right is the one we chose, making a counter-clockwise loop of the Welch-Dickey trail, but you do have the option to do it the opposite direction.  Both paths have a two mile climb to the summit of either Welch or Dickey Mountain and there is a half mile connector trail in between the two summits.  The trail to the right started off with a rocky trail which is no surprise to us with all the hiking we have done in New England.   The trail stays in the woods, climbing gradually through rocky steps until it opens up at about 1.4 miles to the Welch ledges. As you approach, you will see areas blocked off to protect the vegetation so stay on the actual trail.  To the left, you will see the summit of Welch mountain looming above you but take some time to enjoy the dramatic views from the expansive open granite ledges.  Many families will just go to this point and back for a beautiful hike fit for people of most ages/abilities.   We spent quite a bit of time here thinking this could be the summit of Welch, but we were wrong.

Views in Every Direction on Welch Mountain
Views in Every Direction on Welch Mountain. Below: Views of the climb from Welch Ledges to the summit of Welch Mountain.

A Little Scrambling on Welch Mountain Granite Slabs on Welch Mountain Granite Slabs on Welch Mountain

Many of the blazes on Welch and Dickey are on open ledges, so look for yellow blazes painted on the rocks or small cairns to find your way.  From the ledges, the trail takes a left, cuts into a wooded area before it climbs steeply and opens up into some of the largest rock faces we have hiked.  The views are expansive all around you.  The footing was fine, but we imagined this would feel very slick and dangerous after a recent rainstorm.  It was hard take a few steps and not turn around and see the scenery behind you; the pictures we have don’t do the magnificence of the panoramic views proper justice.  At 2.0 miles, we reached the 2605 foot summit crown of Welch Mountain.  You will have gorgeous views of Waterville Valley below you.

Enjoying the View
Enjoying the View from Welch.  Below: A view of Dickey Mountain from the summit of Welch; Descending into the col between Welch and Dickey; Cairn in the col; Terrain looking back on the climb up Dickey.

Looking toward Dickey Descending Welch Toward Dickey
Descending Welch Toward Dickey Saddle Between Welch and Dickey

The connector trail continues further and descends down the steep rock face of Welch on ledges that serve as steps.  You will really want to secure your footing here as you are lowering your body down a steep section with nothing to grab onto in front of you.  Take your time and lower yourself on all fours if that helps.  The trail reaches bottom and then climbs back up as you approach Dickey Mountain.  You will reach the 2734 foot summit at 2.5 miles and will be treated with views of Franconia Notch.  Continue along the trail to complete the loop.  Your hike down from Dickey is dramatic as you will be walking on the top of what feels like a bowl below you which gives you dramatic views.  At about 3.2 miles, the trail finally goes back into the woods and you continue your descent along some rocky footing which eventually leads you back into more pleasant footing in the flatter woods.  You reach your initial junction and the parking lot at 4.5 miles.

Looking Back At Welch
Looking Back At Welch. Below: Climbing to the summit of Dickey; Views from Dickey; Descending Dickey.

Climbing the Summit of Dickey Welch-Dickey Loop Welch-Dickey Loop

If you are planning to do this hike, account for some extra time.  The views of this area will make you take your time to enjoy them and some of the climbing is tougher.  While it was only 4.5 miles, it took us longer than normal just from the pure enjoyment of being here.  This is a New England classic for a reason.  The Presidential range in the White Mountains will always have a special place in my heart when I think of hiking in New Hampshire, but this will go down as one of my favorites in the state.

Welch-Dickey Cliffs
Welch-Dickey Cliffs.  Below: Back into the woods.

Welch-Dickey Loop Welch-Dickey Loop

Trail Notes

  • Distance – 4.5 miles
    (Check out the stats from Map My Hike)*
  • Elevation Change – 1650 ft
  • Difficulty –  3.  By New England standards, this is a solidly moderate hike.  In Virginia, it would probably rate a 4.
  • Trail Conditions – 4.  The trail is expertly maintained, but the nature of New Hampshire terrain (rocks, roots, slick granite) will challenge anyone used to dirt trails.
  • Views –  5.  Amazing, spectacular, and panoramic (in multiple places)
  • Waterfalls/streams – 1.  There is a stream, but it was nearly dry when we visited.
  • Wildlife – 2.  Lots of red squirrels and birds.
  • Ease to Navigate – 4. The main loop is well-blazed and easy to follow.  The spur to the view of Franconia Ridge is the only tricky part.  It’s unblazed.
  • Solitude – 1.  This is an extremely popular trail.  Expect to see many other hikers. We hiked early on a weekday, and still saw quite a few people.

Download a trail map (PDF)

Directions to trailhead: Parking coordinates: 43.904207, -71.588824.  A parking permit is required for White Mountain National Forest hikes and you can purchase a permit at a green box in the lot (as of 2016 was $3 per day).


MapMyHike is not necessarily accurate, as the GPS signal fades in and out – but it still provides some fun and interesting information.

Pamplin Historical Park Trails

Pamplin Historical Park, located in Petersburg, Va is a hike that demonstrates a pivotal piece of civil war history that takes you through battlefields that led to the folding of the Confederate troops.

View the Full Album of Photos From This Hike

Pamplin Historical Park
If you’re interested in history, but still want to get some vigorous walking in, Pamplin Historical Park is a great place to visit.

Adam Says…

We are always looking for new and interesting places to hike in Virginia.  We were contacted a couple of months ago by Diane Willard, Director of Administration, Marketing, & Membership Services for Pamplin Historical Park about visiting their park and telling others about the trails they had on their property.  As I was visiting the area in late March, I was able to squeeze in a visit.  Please note, there is an entrance fee -as of 2016 adults $12.50, seniors 62+ $11.50, and children (6-12) $7.50.  The park is open seven days a week from Spring to Fall from 9AM-5PM daily, so plan accordingly. 

The focus of the park is to bring visitors into the history of the Civil War from one dramatic date – April 2, 1865.  On this day, the Sixth Corps Union troops under General Horatio Wright broke through the Confederate line at Petersburg.  The Confederate forces were working on maintaining a line of defense that stretched for 40 miles from north of Richmond, the Confederate capital, to southwest of Petersburg.   A rough winter and desertion had dwindled General Lee’s troops to 60,000 while Grant’s troops were double that size.  The day before, General Grant had cut through the Confederate supply lines and killed about 5,000 troops at Five Forks.  This line on April 2nd tried to hold off the Union troops, but in the early morning Union forces got to the Confederate trenches but nearly 4,000 Union troops were killed.   The battle raged on throughout the day, but by the end of the day, the Confederate troops decided to retreat and abandon the line.  Petersburg and Richmond were evacuated and a mere week later, General Lee surrendered to General Grant at the Appomattox Court House.

Pamplin Historical
Civil War Trench from the Fortification Exhibit; Below: National Museum of the Civil War Soldier, views of the battlefield, trail views go from woods to open fields

Pamplin Historical Park Pamplin Historical Park Pamplin Historical Park

There are several miles of hiking trails through this park and it also connects to the Petersburg Battlefields Trail if you want a longer hike.  I would recommend printing this map of the area, so you can get an idea of the landscape to start the hike.  The main entrance is known as The National Museum of the Civil War Soldier.  Leaving the building through the side entrance, you walk past a demonstration and then pass by the Tudor Hall plantation on the right.  Continuing ahead, you walk past a Fortification Exhibit which gives you a closeup view of a trench and the defense systems around them.  You then pass the Battlefield Center on the left and and begin the real hike on the Breakthrough Trail.  The Breakthrough Trail has a Main Loop, Short Loop, and Intermediate Loop.  Knowing I was going on a bit further, I started in .2 miles on the Main Loop.  The main loop is mostly wooded as you go through an area known as Arthur’s Swamp.  At .4 miles, you reach a junction where you can break off and take the Short Loop, but I continued on the Main Loop.  At .85 miles, you come to a junction where you can continue on the Main Loop or begin the Headwaters Trail.  I picked up a brochure at the junction and saw that The Headwaters Trail would actually connect as a large loop, so I decided to take the longer Headwaters Loop.  Along the way, you get to see several Confederate rifle pits, small dugouts that formed strategic encampments.  At 1.35 miles, you reach a short path that has a sign explaining an original logging bridge.  From here you can break off the Headwaters Trail and make your way on to the Petersburg Battlefields Trail.  The idea of checking out how these trails connected intrigued me, so I took this trail.  From here, you are leaving the Pamplin Historical Park boundary.  You go through some woods but then are left with great farmland views where you can imagine the feelings of the soldiers that were crossing this field.  You can only begin to think about how many people lost their lives on that fateful day to stand up for their beliefs.

Pamplin Historical Park
Battlefield Center.  Below: historic placards along the trails, wooded walkways, school trips learning about trench warfare and getting into formations

Pamplin Historical Park Pamplin Historical Park Pamplin Historical Park

Continuing on this trail allows you to get some open scenery, which is great for spotting birds in the fields.  I walked on an open path and then at 1.65 miles, followed the sign pointing towards the parking lot.  This trail continued to skirt around some open fields of farmland.  At 2.4 miles, the trail takes a sharp turn to the left where you come across some large earthworks, serving as barriers protecting the Union line.  I walked along these for a short distance and saw the trail continued further, but decided to make my way back.  On my way back, at 3.25 miles, I came to the junction of the sign (one way leading to the parking lot, the other pointing to the Petersburg Battlefield Trail).  Instead of taking a right, I decided to take a left to walk along the farmland and get more views, but I turned around after just .2 miles to get back to the trail I knew.  From the junction sign follow the sign pointing to the Petersburg Battlefield Trail and at 3.6 miles, you finally rejoin the Headwaters Trail.  At 4.0 miles, you reach a junction with the Woodlands Trail, which also leads back to the start, but I continued on the main Headwaters Trail.  In a short distance, you begin to see the large Confederate Earthworks, forming that historic line the Confederates tried to maintain.  The trail crosses over a break in the earthworks and then takes a sharp left turn to parallel the earthworks.  At 4.4 miles, you reach another junction where you have an option on which side of the earthworks that you like to walk along the Intermediate Loop.  At 4.5 miles, you reach a junction with the Woodlands Trail again and at 4.6 miles, you meet a junction with the Main Loop.  Staying straight on the Intermediate Loop, it joins the Short Loop in a short distance.  I took a right here and reached the Battlefield Center at 4.8 miles.  I explored inside the Battlefield Center and then took in the Tudor Hall Plantation before returning to the main entrance at the National Museum of the Civil War Soldier.

If you are a civil war history buff, this would be a great place to hike and explore.  I was thoroughly impressed with how much has been put into the care of the trails and the exhibits themselves.  You could easily spend most of the day exploring the trails and grounds here.  This would be a great hike to go as a family to learn about the history and if you have children, they may enjoy reading about the civil war on the placards along the way.  I must say that I was pleasantly surprised at how great the trails were maintained here.  I went in expecting that I could walk along some short, easy trails, but with adding the spur to the Petersburg Battlefield Trail, you can get a more serious hike into your day.

Pamplin Historical Park
The Tudor Hall Plantation.  Below: Open field views, statue at the entrance station.

Pamplin Historical Park Pamplin Historical Park

Trail Notes

  • Distance –5.0 miles.
    (Check out the stats from Map My Hike)*
  • Elevation Change –  100 ft.
  • Difficulty –  1.  Very easy walking on this one with very little elevation gain. 
  • Trail Conditions – 4.5  Trails are well-maintained and easy footing. 
  • Views – 2.5.  Not high views, but vast views of open, picturesque fields.
  • Waterfalls/streams 0. Non-existent.
  • Wildlife – 2.  Some decent bird-watching over boggy areas and expansive fields.
  • Ease to Navigate – 3.  When you leave Pamplin, things can get a bit confusing.
  • Solitude –  3.5.  You will see people at Pamplin Historical Park, but hardly anyone on the trail system. 

MapMyHike is not necessarily accurate, as the GPS signal fades in and out – but it still provides some fun and interesting information.

Download a trail map (PDF)

Directions to trailhead: From Richmond, take I-95 south to I-85 south, to Exit 63-A (U.S. 1 south). Proceed one mile to Park entrance on the left. The Park is 30 minutes south of Richmond, VA. Coordinates: 37.182980, -77.480095

Mount Osceola (NH)

Special: New Hampshire Edition

Introductory Guide to Visiting the White Mountains

This moderate 6.4 mile hike with take you to the top of 4,315′ Mount Osceola.  The trail is very rocky, but the ascent is moderate and non-technical.  It’s a great choice for newer hikers looking to bag their first 4,000-footer in New Hampshire.

View the Full Album of Photos From This Hike

Mount Osceola Summit
Mount Osceola is one of New Hampshire’s most accessible 4,000-footers.

Christine Says…

For our final hike of the week in New Hampshire, we wanted to do another 4,000 footer.  We settled on the 6.4 mile hike of Mount Osceola.  The mountain stands at 4,315 feet, but the hike only requires a little over 2,000 feet of vertical gain to reach the summit.  It’s a very moderate climb. We also read in our guidebook that it was also a rocky hike – even by New Hampshire standards.

Located off Tripoli Road, the hike was quite close to my parents’ house.  It was nice to have a short drive after spending so much time in the car on our Mt. Washington day.  We were also blessed with another beautiful weather day –sunny, warm, and a blue sky full of big, puffy clouds.

On the way to the trailhead, we passed so many fantastic backcountry campsites.  I think next time we visit New Hampshire, we’ll bring our overnight gear and do something multi-day.

The route up Mt. Osceola is about as straight-forward as you can get.  The trail goes all the way to the top without crossing a single trail junction.  It would be nearly impossible to get lost!

As our guidebook promised, the trail was rocky.  Personally, I didn’t think it was any rockier than other local trails.  I suppose the rocks were smaller and looser than a lot of the other area trails.  It would be easy to lose your balance or turn an ankle on this terrain.  In fact, I recently read on Facebook that a woman had to be carried off the Mount Osceola trail by local search and rescue after slipping and breaking her leg.  Still, I think I prefer this kind of rockiness to slippery slabs and boulder scrambles.

Hiking Mount Osceola
The hike up Osceola was quite rocky. Below: Trailhead signage;  Slabs of granite; Views of Tecumseh mountain skiing.

Mount Osceola Trailhead Granite Slabs on Mount Osceola View of Tecumseh Slopes

Generally, the climb up to the summit was very gradual and (dare I say) easy compared to other hikes we’d done recently.  We passed a forest service crew working on trail improvements.  We also passed quite a few slower hikers.  Mount Osceola and Mount Garfield are believed to be the easiest and most accessible of the 4,000 footers.  A lot of novice and not-regular hikers choose these mountains to garner experience before moving onto bigger things.

As we climbed, we got some nice views of the Mount Tecumseh ski area.  Near the top, the trail flattened out.  We passed remnants of an old fire tower and then came out on a wide, open ledge.  The view is first rate!  I read somewhere that you can see 41 of 48 of New Hampshire’s 4,000 footers from the summit.

We spent more time than usual at the summit.  We ate snacks and took photos.  We were both really grateful for having over two weeks of vacation time, beautiful weather, and the chance to hike lots of new places.  New Hampshire and New York are places we both want to visit again!

After a long stay at the summit, we hiked down the mountain.  It was over before we knew it!  I always feel a bit sad on final hikes of vacation weeks. We made the short drive back to my parents and spent the afternoon packing and getting ready for the long drive back to Virginia.  We decided to have one final celebratory meal out at the Six Burner Bistro in Plymouth.  The food there was creative and amazing.  It was the perfect end to our time in the Granite State.

Forest Near the Top of Mount Osceola
Tangled forest near the top of Mount Osceola. Below: First views from the trail; Passing the base of the first fire tower ruins; Views over the evergreens from a spur trail near the summit.

First Views from the Trail First Fire Tower Ruins View Over the Evergreens

Adam Says…

As Christine mentioned, the hike up Mt. Osceola is an accessible trail for those that want to try their hand (or feet) on a 4000-footer .  New Hampshire has 48 mountains that are 4000 feet above sea level and Osceola is the 24th highest of the 48 4000-footers, coming in at 4,340 feet.  This was named for the 19th century Seminole leader.   I’m not sure why they decided to name a mountain in New Hampshire after a Native American in Florida, but his name is also the name of cities in Missouri and Wisconsin.

The hike up Osceola was quite rocky.  This is one of those hikes where you do have to watch every step you take and your feet and knees will feel it after the hike, especially if you aren’t wearing good shoes and using trekking poles.

Nice View at the Top of Osceola
Christine takes in the nice summit view. Below: Muddy dog; View into Waterville Valley; Crowds atop the summit.

Muddy Dog on Osceola Waterville Valley View Popular Mount Osceola

The trail starts off in a lush forest area and continues a steady, uphill climb until you reach the summit.  The trail is fairly slow-going with the rockiness of the terrain.  We were one of the first of the day to start the trail, but we were passed by someone that was trying to get to his work-crew assignment.  The forest is so thick along the way.  I felt I should get some views earlier on in the hike, but the tall trees keep the scenery at bay.  Some of the rocky sections are larger flat rock faces that become very slick after heavy rains.

As Christine mentioned, there is just one straight trail here until you reach the summit.  At 3 miles, after ascending some larger rock face sections, the trail begins to rise as you reach the top of the tree line.   Right before the summit, there are a few side trails on both sides (one to an obstructed view and the other to a rough campsite), but the summit was absolutely gorgeous.

Hiking Down
Some scenes hiking down the mountain. Below: Whorled Asters (I think!)

Aster

As we got to the summit, we were amazed at the views of the ridgeline of mountains to the left.  This is scenery that pictures will never do justice.  We climbed down to a lower rock shelf to get some of the dramatic shots above.   This was one of those hikes that it was hard to convince ourselves to leave.    We made our way down with a faster pace and made it back to our car in under 1.5 hours.   It was a great finish to our vacation and covering a few new hikes in New Hampshire.

Trail Notes

  • Distance – 6.4 miles
  • Elevation Change –  2010 feet
  • Difficulty –  3.  This is a squarely moderate hike.
  • Trail Conditions – 3.5.  Everything in this area is rocky and challenging.
  • Views – 5.  Very beautiful and expansive!
  • Waterfalls/streams  0.  Other than a few trickles down the mountainside, this hike was dry.
  • Wildlife – 2.  Birds, chipmunks, and squirrels
  • Ease to Navigate – 4.5.  Very easy to follow – pretty much a straight shot on the one trail in the area.
  • Solitude – 2.  This is a popular hike due to it’s moderate climb.

Download a trail map (PDF)

Directions to trailhead: From I-93 North, take exit 28 for NH-49 toward NH-175/Campton/Waterville Valley.  Turn right and go 10.2 miles before turning left on Tripoli Road.  Tripoli Road is closed during the winters, so plan ahead.  Go 3.9 miles on the gravel Tripoli road until arriving at the parking lot on the left.  The trailhead is at the end of the parking lot.  There is a parking fee of $3 to park here at the Osceola trailhead. Coordinates: 43.983383, -71.559277

Mount Monroe (NH)

Special: New Hampshire Edition

Introductory Guide to Visiting the White Mountains

Mount Monroe is the fourth tallest peak in New Hampshire’s Presidential range.  You can hike to its summit from the valley floor – the Ammonoosuc Ravine trail is the most popular route – or you can make it an easy day hike by driving the auto road and starting from the summit of Mount Washington. This option makes a 3.8 mile hike with just 1,343 of climbing.  It’s a laid back way to visit this area with minimal effort.

View the Full Album of Photos From This Hike

Mount Monroe Summit
Clouds cleared as we stood on the Mount Monroe summit.  From the top of Monroe we could see the weather towers atop Washington.

Adam Says…

We hiked just about every day on our vacation, and hiking in the Adirondacks and the White Mountains usually involves tough climbs along granite-filled pathways.  We wanted to do one of the mountains in the Presidential Range in New Hampshire, but our bodies were asking something easy. So, we decided to drive up to Mount Washington and hike down and over to Mount Monroe.

We got an early start to try and beat the traffic and crowds on the slow-going Mount Washington Auto Road.  The drive up can be a harrowing experience.  As you are skirting the edges of precipitous drops, you are praying that another car isn’t coming down the mountain (another reason to get an early start).  The views are breathtaking on a clear day, but the driver may have to focus on the road more than the scenery.

Descending the Crawford Path
We made our way down the Crawford Path/AT from Mt. Washington.  You can see the area is extremely popular on pleasant summer days.  Below:  Adam at the Crawford Path;  One of the Lakes of the Clouds Croo members carries supplies; MWOBS equipment in the fog.

Crawford Path Sign Croo Observatory Towers

We found our way to the weather observatory building and found the white blaze which signified the Appalachian Trail (here called the Crawford Path).  The fog was thick on the mountain as it often is.  We made our way descending on the Crawford Path, following the cairns that guided us down a path off the summit.  There are people that have gotten lost and died on this mountain and I can understand why.  With limited visibility a person could easily miss a cairn.  Add the high winds and quick weather changes and this can truly be a dangerous place.  We had enough visibility to see the next cairn ahead and once we were off the highest parts of the mountains, we had better visibility of the trail.  At .2 miles, we came to a sign that showed that we had 1.4 miles to the Lakes of the Clouds hut, one of several huts maintained by the Appalachian Mountain Club.

The descent was very rocky and slow-going, but we managed to make it to Lakes of the Clouds fairly quickly.  The fog had us completely socked in and we couldn’t even see Mount Monroe when we arrived.  Lakes of the Clouds is probably our favorite of the huts in the White Mountains.  The remoteness of the hut, the serenity of the mountain-top lakes, and the views of the valley and Mount Washington make this such an amazing experience.  We ate some lunch inside the hut and decided to wait a while.  We eventually got some glimpses of Mount Monroe from inside the hut.  The clouds started to blow off somewhat.  At one point, I told Christine that I thought we should make an attempt to reach the summit.  My thought was if the clouds continued to blow, we may get a glimpse of views from the summit.   So, we gathered our gear and hiked up in the fog.  The wind had picked up, but we were hoping this was a good thing as it would carry some fog off with it.

Hut Comes into View
The hut comes into view. Below: Lakes of the Clouds Hut with Mount Monroe looming in the background; Christine arrives at the hut; Inside the hut… it was surprisingly uncrowded!

Lakes of the Clouds Arriving at the Hut Inside the Hut

The hike up Mount Monroe was steep but only a short few tenths of a mile.  We got to the top (the summit marker is only a small metal nub sticking up from a rock) and within minutes the clouds began to part and we got gorgeous views down below. We timed our trip perfectly and there was only two other people at the top.  Our ability to see views for a while seemed to rotate in patches around the mountain as clouds continued to pass.  It eventually opened up all around us and we were glad we made the break for it when we did.  After taking an ample number of photos, we descended back to Lakes of the Clouds and then back up to Mount Washington.  The fog got thicker again as we made our way back to the summit of Mount Washington.  We posed for our ceremonious summit photo and then got back to our car to descend back down the mountain.

Christine Says…

Many people think a hike only counts if you start from the bottom of the mountain. Call me a cheater, but I don’t care!  This summer, we took the auto road to the top of Mount Washington so we could enjoy exploring the alpine zone without doing all the work.  In 2013, we hiked up the Ammonoosuc Ravine and on to the summit of Washington.  On that trip, we skipped summiting Mount Monroe due to time constrictions. This trip gave us a chance to make up for what we missed!

Climbing Mt. Monroe
Adam makes his way up Mt. Monroe. Below: Climbing the mountainside; Tiny people perched on an outcropping; Christine near the summit.

Climbing Mt. Monroe Climbing Mt. Monroe Climbing Mt. Monroe

All week long, we had been checking the MWOBS higher summits forecast. Thursday, August 7 looked like it would be the best chance – with clearing skies, calm winds, and warm temperatures. We paid our toll and made our way to the top. The auto road has been open since 1861 and climbs 4,618 feet over 7.6 miles.  It’s a beautiful drive with great views for much of the way – only problem… we were in the clouds! Our clear day turned out to be not-so-clear at all!  Every now and then, the veil would thin enough that we could make out the hulking shapes of Clay, Adams and Madison across the gulf.

We were both a little disappointed with the clouds, but you never know how the weather is going to change on Mount Washington.  We pushed forward with hopes for clearing skies.

Climbing Mt. Monroe
Nice views from the summit.  The Appalachian trail is the ribbon of path in the distance.  Below: Descending the mountain; The lake comes back into view; View behind Lakes of the Clouds Hut.

Mt. Monroe Descending Monroe Passing Back by the Hut

From the summit buildings, we looked for white blazes and found our way to the marker for the Crawford Path (which is also the Appalachian Trail in this part of the state). From there, we hiked 1.5 miles to Lakes of the Clouds Hut.  The trail is all rocks and is marked with a combination of cairns and blazes.  The clouds were so thick it was almost like walking through white cotton candy.  The oddest part was the warmth and utter windlessness of the day.  I’ve never been in the Presidentials on a dead calm day.  I think the lack of a breeze was a big part of the reason the clouds were able to linger on the summits for such a long time.

Even in full cloud cover, the terrain of the mountain is incredibly beautiful!  It feels almost other-worldly.  Eventually, the clouds cleared enough that we could make out Lakes of the Clouds Hut in the distance.  There were many, many people scrambling both up and down the mountain.  It’s definitely earned the nickname ‘Lakes of the Crowds’.  Adam and I decided to hang out in the hut for a while and see if we could outlast the clouds -they did seem to be thinning.

Lakes of the Clouds
The lake was even prettier on the hike back. Below: Climbing back up Mount Washington with Monroe in the background; Christine takes a final look back;  The cog tracks at the Washington summit.

Hiking Back Up Hiking Back Up Cog Tracks

As we sat at one of the long tables, we saw the side of Mount Monroe emerge from the clouds.  If we were going to get a view, our time was now!  We made the short half-mile climb to the top of Monroe.  Although the mountain is a short, easy climb from Lakes of the Clouds, it’s still New Hampshire’s fourth tallest peak at 5,384 feet.  The summit was still in the clouds when we got to the top. But as we sat on the summit, a breeze picked up and within a matter of five minutes the view had completely opened.

We could see Mount Washington with the observatory towers on top. We saw Franklin and Pierce off in the distance.  We could see the cog station and the grand Mount Washington Hotel.  We could even see tiny hikers walking the Appalachian Trail below the summit.  It was breathtaking!

After a while, the clouds started to filter back in.  I was so grateful they opened for the briefest few minutes for us to enjoy!  We made our way back down to the hut, which had emptied out of the crowds from just 45 minutes earlier.  I guess everyone took advantage of the same opening in the weather!  We snacked on cake made by the Croo and then set out to climb back up Mt. Washington.

Summit of Mount Washington
Summit of Mount Washington.

On the way back up the mountain, the cotton candy clouds dropped over us once again.  By the time we reached the top of Washington, they had partially cleared off again.  We had our photo taken at the summit marker.  We spent a little time in the summit building, too.  Over the summer, they completely renovated the weather observatory museum.  It’s really nice and spacious, but they took away a few of our favorite exhibits – including the funny video of people trying to eat breakfast in famous Mount Washington winds.

The high summits went in and out of the clouds all day, but I still think we chose the best day of the week to visit.  Other days had thunderstorms and hail.  Compared to that, passing cloud cover is no problem!  All in all, we ended up hiking about 4 miles with 1,350 feet of climbing.  It was a fun and easy way to visit a challenging mountain.

Trail Notes

  • Distance – 3.8 miles
    (Check out the stats from Map My Hike)*
  • Elevation Change –  1343 feet
  • Difficulty –  3.  The elevation isn’t too tough, but the rockiness of the terrain adds to the difficulty.
  • Trail Conditions – 2.  Very rocky and many of the rocks are quite loose.  You have to always watch your feet.  
  • Views – 5.  On a clear day, they are quite spectacular.  
  • Waterfalls/streams  0.  Non-existent.
  • Wildlife – 1.  You won’t see any wildlife above treeline here other than a few birds.
  • Ease to Navigate – 2.5.  Marked down because you have to follow cairns and occasional blazes.  This can be extremely tough in foggy or bad weather.  On a clear day, this will be much easier.
  • Solitude – 2.  In the summer, you will always find people along the trail.  Mount Washington always attracts a lot of people.  You will likely also find many people in Lakes of the Clouds.  

Download a trail map (PDF)

Directions to trailhead: From Gorham, NH head south on NH-16 for 7.8 miles.  Take a right to get on to the Mount Washington Auto Road.  Pay at the gate (in 2015 was $28 per car and $8 for each additional passenger) and follow the road to the parking lot at the top. Coordinates: 44.269644, -71.302659

MapMyHike is not necessarily accurate, as the GPS signal fades in and out – but it still provides some fun and interesting information.


Hedgehog Mountain (NH)

Special: New Hampshire Edition

Introductory Guide to Visiting the White Mountains

Hedgehog Mountain is tiny compared to most of its neighbors, but this 5-mile hike still packs in tons of scenery and great views.  The ledges are also a super place to stuff your face with wild blueberries!

View the Full Album of Photos From This Hike

Hedgehog Mountain
The ledges along the side of Hedgehog Mountain offer great views of bigger mountains.

Christine Says…

After arriving in New Hampshire and hiking Mt. Major, we took a couple days off hiking to relax and spend time with family. The combination of daily hikes in New York paired with not sleeping or eating enough really wore me out.  So we took it easy and did other fun things like exploring Franconia Notch State Park, paddling kayaks across quiet ponds,  sampling craft beer at Schilling (Littleton, NH) and Long Trail (Bridgewater Corners, VT), and stuffing our faces with Cabot cheese and pastries from King Arthur Baking Company. By Wednesday, we were ready to hike again.  Our second hike in New Hampshire was a repeat trip to visit beautiful Lonesome Lake.  Our third hike was something entirely new – Hedgehog Mountain. It’s the most diminutive of New Hampshire’s ’52 With a View’ – a collection of the state’s nicest view hikes on mountains under 4,000 feet.

We started out the morning with a big breakfast at Polly’s Pancake Parlor.  Then I went for a short paddle with my dad across and around Echo Lake.  By 10:00 a.m., Adam and I were on our way across the mountains on the scenic Kancamagas Highway.  We parked at the Downes Brook parking area and paid our $3 parking fee.  The summit of Hedgehog is accessed by the UNH Loop Trail.  The trail gets its name from an old University of New Hampshire forestry camp that operated at the mountain’s base from the mid-1940s until 1964.

Old Railroad Grade
A railroad used to run along this section of wide, flat, open trail. Below: Early in the hike we passed this clearing.  The clearing work looked recent, but we’re not sure what’s planned for the land; Pretty forest along the trail; Everything was so shady and green.

Clearing Along the Trail Pretty Forest Along the UNH Loop Walking the UNH Loop

There were just a few cars in the lot, so we knew we would have a relatively quiet hike. We decided to hike the loop clockwise, allowing a more gradual ascent followed by views of the Presidentials on the way down.  The hike starts off along a lovely pine-shaded trail following the route of the old Swift River Railroad.  The hike climbs gradually, passes a clearing, and soon reaches a sign indicating the beginning of the loop portion.  We chose to turn left and cross the east ledges before reaching the summit.

For 1.2 miles we walked through a peaceful pine forest.  The climb was steady, but quite gentle.  There were roots and rocks, but they were always padded by fallen pine needles.  As we hiked on, the route became steeper and rockier and eventually opened onto bare cliffsides and ledges with magnificent views of so many big mountains – the Tripyramids, Carrigain, Chocorua, and Passaconaway.  Most of the ledges were wide and generous, but one section in particular was narrow and precipitous.  There were blueberries growing everywhere!  From the ledge, we could also see the last steep section of trail we had to climb to reach the summit.  The ledges were definitely my favorite part of the hike!

The last bit of climbing to the Hedgehog summit was steep – definitely more challenging than I expected on this loop!  At first we passed through a tangle of roots and boulders.  The higher we climbed, the roots gave way to smooth granite slabs and boulders that required scrambling.  I told Adam at one point that I was very tired of putting my knees down on granite!  Granite gives me so many bruises. The actual summit had nice views, but (in my opinion) the view from the lower ledges had been nicer.

UNH Trail Rocks and Roots
The trail became more covered with rocks and roots as it climbed. Below: Christine climbs toward the ledges; Towering pines; Adam finally clears the woods to get our first views of the day.

Climbing Toward the Hedgehog Mountain Ledges Pretty Pines First Views on the UNH Loop

Leaving the summit, we spied glimpses of the Presidentials off in the distance.  Evidently, on clear days one can even see the weather observatory atop Mount Washington.  We weren’t that lucky.  The descent was much rougher and steeper than the climb up.  I was really glad we had gone clockwise!  On the way down, we took the short spur trail to Allen’s Ledge.  The rocky outcropping offers a chance to take in a final sweeping view of many of the area’s bigger mountains. From Allen’s Ledge, the rest of the hike was a moderate descent back to the old railroad grade.

Over the course of the day, we only saw three small hiking groups.  That’s great solitude for a nice summer day in the White Mountains!  We would definitely recommend this hike if you’re looking for great views and don’t feel like tackling a 4,000-footer.

After the hike, we decided to drive into North Conway and look around the shops and have an early dinner at one of our favorite stops – Moat Mountain.  They brew a nice selection of beers and have fantastic food.  It was so tasty; I think I finished an entire half pound burger and all my fries!

Nice Views from the Ledges
Christine enjoys nice views from the ledges. Below: There were lots of slab of granite to traverse; In one place, the trail across the ledge was quite narrow; Walking across the ledges, you can see the rocky summit of Hedgehog Mountain.

Adam Crosses Slabs and Roots Traversing Narrow Ledges View of Hedgehog Summit

Adam Says…

As Christine mentioned, we started our day off a little later than normal.  It was a gloomy morning, with fog settled in.  Since Polly’s Pancake Parlor and Echo Lake were quite a distance from our home base, we decided to take a separate car from her parents and take off on our hike after we had done our morning activities with them.  When Christine and her dad went paddling earlier on Echo Lake, it was cold and there was a little bit of drizzle.  I can’t swim so I don’t like being on a canoe or kayak.  I was quite content to watch Christine and her dad go out paddling on the peaceful, yet foggy waters.

We were worried it wouldn’t warm up or be able to see the sun on our hike.  Two things that hiking in New England has taught me is to be patient and be an opportunist.  There have been a lot of hikes that we have done in the White Mountains that if you wait a few minutes, clouds may break.  So, we took our time that morning knowing that our best chance of seeing views would be a little later in the day.

Wild Blueberries
The ledges of Hedgehog Mountain were covered with wild blueberries. Below:  There was a wooded saddle between the ledges and the summit; The last bit of climbing to the summit was very steep and slick.

Saddle Between Ledges and Hedgehog Summit Granite to Climb

The trail started off very flat through a tunnel of pine trees.  After a short distance, it takes a sharp right and begins to ascend.  Within a few tenths of a mile, the trail crosses over with a clearing, but stay straight on the trail.  The trail continues on an ascent, but the terrain wasn’t too difficult.  With the morning activity of paddling, Christine bonked a bit so we paused to eat an energy bar before continuing onward.  The trail became a little steeper and more narrow as we navigated through some interesting terrain with pine trees and granite steps.  There were a few obstructed views along the way.  The woods were so quiet it was eerie – we felt a bear would jump out at any minute in this deep wilderness.  Eventually the trail became quite steep and rocky, leading to larger granite steps.  The trail soon popped up to some gorgeous cliffside panoramic views.  Not reading about this on trail reviews we found online we were quite surprised.  We navigated the cliffsides, going back into woods for a short time before coming out onto a large shelf of granite.  We spotted the summit above us, but below us were tons of blueberries.  We picked a few and enjoyed the gorgeous mountain and valley views around us.

View from the Hedgehog Mountain Summit
The summit view was not as nice as the view from the ledges. Below: On the way down, we could see a glimpse of the Presidentials.

Presidential View

The trail ducks back into the woods and descends a short bit through some thick forest.  There were blowdowns across the trail and the cobwebs were thick in places, making me think that many people don’t come on this section of trail to make it a loop.  The trail then began to ascend again through some very steep and rocky sections, requiring us to pull ourselves up with our hands in a few areas.  We finally reached the summit.  We ate a snack, talking with a woman who had done much hiking in the Whites while enjoying some obstructed views from the summit.  We both agreed that the views from below were more exceptional than the summit views.

As we were making a loop hike, we continued on and found another obstructed viewpoint to give you views of many of the Whites.  As Christine mentioned, we couldn’t see the summit of Mount Washington but we could spot a few of the Presidential range in the distance.   The return trip was quite steep and we were treated to a few views on the climb down, which you would likely miss if you did the loop in the opposite direction.  On our descent, we found a small side trail that led to Allen’s Ledge.  Allen’s Ledge also had some nicer views than the summit.  We relaxed at this spot for a few minutes before rejoining the UNH trail and making our way back down the mountain.  Before too long we had rejoined the loop where it split and returned to the parking area.

Steep Descent of Hedgehog Mountain
The descent of Hedgehog was quite a bit steeper than the climb up. Below: Allen’s Ledge; Eventually the descent leveled out.

Views from Allens Ledge More Gradual Descent of Hedgehog

While it isn’t as popular as some other hikes in the area, if you want some seclusion with great views, check out Hedgehog Mountain.   We were pleasantly surprised at how gorgeous the views were and the interesting terrain along the trail makes this a rewarding hike.

Trail Notes

  • Distance – 5 miles
  • Elevation Change –  1312 feet
  • Difficulty –  3.5.  There are a few steep, rocky sections, but most of the trail is gentle.
  • Trail Conditions – 3.5.  The trail is adequately maintained, but expect lots of rocks and roots.
  • Views – 4. In Virginia, these views would warrant a 5, but there are even grander views in this area.
  • Waterfalls/streams  0. None.
  • Wildlife – 2. Other than birds and squirrels, we didn’t see wildlife.
  • Ease to Navigate – 3.  There were a couple tricky spots, like the clearing early on the trail, but generally this was an easy route to follow.
  • Solitude – 4. By White Mountains standards on a nice summer day, we enjoyed quite a bit of solitude on this hike

Download a trail map (PDF)

Directions to trailhead: From Interstate 93, take exit 32 (NH-112E).  Follow NH-112E for 22 miles.  Parking is on the right in the Downes Brook – Mount Potash lot.  Parking Coordinates: 43.9960876,-71.3688126

Mount Major (NH)

Special: New Hampshire Edition

Introductory Guide to Visiting the White Mountains

Mount Major is a short, extremely popular hike in the Lakes Region of New Hampshire.  The summit offers excellent views of Lake Winnipesaukee.

View the Full Album of Photos From This Hike

Mount Major Summit
The summit has superb views of Lake WInnipesaukee. Below: Parking issues at the Mount Major Trailhead; The trail is well-marked and blazed blue; The lower part of the trail is very eroded.

Parking Issues at Mount Major Start of the Mount Major Trail Erosion on Mount Major Trail

Adam Says…

Hiking Mount Major seems to be a rite of passage for anyone that is visiting the lakes region of New Hampshire.  This has been a popular spot for hiking for a long time.  We had just hiked Mount Marcy two days before and our muscles were still recovering, but it was my 44th birthday and I wanted to celebrate with the views from a summit.

We got to the parking lot fairly close to 10:00 a.m. and the lot was completely full.   We began to see how popular this trail actually was.  We parked along the side of the road and then proceeded through the parking lot to the trailhead.  We noticed one car that was parked in a way that took up three spots.  Someone had left a note on their windshield letting them know just how they felt about their parking job.  New Englanders don’t mess around.

From the parking lot, we followed the main blue trail.  The trail was a wide, worn path through the woods.  When you are walking on a clear, dirt path you know this is a well-used trail.  The hike was uphill for the first few tenths of a mile, but levels out at .3 miles.  We enjoyed some flat walking through the trees.  At .7 miles, the trail reaches a junction.  Take a left to stay on the main, blue-blazed trail.  The trail begins to steepen at this point and becomes more rocky.  As we climbed up on our approach to the summit, you approach some more exposed large sections of rock that you can walk up or you can take a rugged trail up the side.  We opted to walk on the open rock surface on the way up, but chose the path on the way down.  As you walk on this open rock surfaces, you can look behind you to see the beginnings of some great views of Lake Winnipesaukee.    The trail was quite steep at this point and you have to be careful as you navigate up these large, rocky areas.

Wide Flat Mount Major Trail
For a time, the Mount Major trail is wide and flat. Below: The trail junction of Mount Major and the Brook Trail; The trail gets rockier; The trail went back and forth between open rockiness and shade.

Mount Major Trail Junction Rockier Trail Spots of Trees

Around the 1.6 mile mark, we reached the large open summit.  There were tons of people at the top, but because of the large area, you can always find a place to enjoy to yourself.  The wind was whipping across the summit.  We went to the summit marker that has a large rock foundation built around it.  We sheltered ourselves from the wind and ate a snack at the summit.  After eating, we walked around in all directions to enjoy the views around us.  While staring out at the gorgeous views, you can easily lose track of time.

We descended the way we came, but there are many options to make this a larger loop hike if you so desire.  Sometimes I feel that popular hikes are often over-hyped, but this hike didn’t disappoint.  We saw plenty of families hiking together on this hike of all skill levels.  Just take your time and most people should be able to make the hike that are in decent shape.   This was a great start to a birthday celebration and the views of Lake Winnipesaukee are some of the best you will get.

Christine Says…

Hey – it’s great to be back in New Hampshire! We had a spectacular, sparkling, bluebird day to hike Mt. Major.  It was a perfect hike for Adam’s birthday.

Mt. Major is probably the most popular dayhike in the Belknap Range – and no wonder, with its relatively short distance and commanding views of Lake Winnipesaukee.  We hiked on a Sunday morning.  Arriving by 10:00 a.m., we found the parking lot already jam-packed with cars. Adam and I had to park our car on the shoulder of the busy main road.

Opening Views on the Climb Up
The views got nicer the higher we climbed. Below: Rock piles on the summit; People gather around the Phippens’ cottage; Birthday photo!

On the Summit Summit of Mount Major Posing on the Summit

The Mount Major trail is blue blazed and begins climbing uphill on an extremely eroded fire road. The erosion is so deep it makes the trail look like a chute.  The trail eventually levels out and follows a pleasant, nearly flat path.  At around the .7 mile mark, the trail splits into two – the Mt. Major Trail is sharply to the left and the Brook Trail continues straight.  We continued on the Mt. Major Trail – this is when the real climbing began.  The entire 1.6 mile hike only has 1,150 feet of climbing – most of it packed into second half.

After about a quarter mile of climbing along rocky trail, we passed a family taking a breather on a large boulder jumble. The adult couple was bickering bitterly about turning around or continuing to the summit.  We could tell by their clothes and shoes that they were not regular hikers.  When the man made the decision to quit, we overheard his young son exclaim loudly ‘Daddy… you’re a FAILURE!’  Poor guy!

The last bit of climbing was tough, so it probably was for the best that the family turned around.  I think a lot of novice hikers see a short, popular hike and don’t realize how challenging it can be to ascend 1,000 feet in three-quarters of a mile. There were lots of steep rock ledges and smooth domes of rock, punctuated by short passes through trees.  There were two trail choices for the last quarter mile – ledges or ledge detour.  To be honest, the trails were both pretty haphazard with people blazing all kinds of different paths to the summit.  As we made our way up, we paused to look back and enjoy the ever improving view.

Phippens Cottage
George Phippens built a summit cottage in the early 1900s. Below: A view off the other side of the Mount Major summit; The rocky descent; Christine takes in one last view on the way down.

View off the Back Descent of Mount Major One Last View from Mount Major

At 1.6 miles, we reached the rocky summit of Mt. Major.  SUPERB!  Lake Winnipesaukee, framed by distant mountains, sparkled all across the horizon. As expected, the summit was very crowded. At the top of the mountain, there are remnants of an old stone cottage.  Later, I did some research into the history of the structure.  The summit of Mt. Major was once owned by a private citizen. New Hampshire resident, George Phippens, bought the mountain summit for $125 in 1914.  He loved the views and the blueberries, and kept the mountain open to all. He built a cottage at the top for hikers to use as shelter, but the roof kept blowing off in the winter.  Eventually, the Great Depression came along, and ownership of the summit reverted to the Town of Alton to cover Phippens’ taxes.  Read more about Mr. Phippens and his love of Mt. Major.

Adam and I spent some more time enjoying the views before making our way back down the mountain.  Many people descend via the Brook Trail, but we just went down the way we had come. By the time we got back to the car, we were starving!  We decided we would eat at the first restaurant we passed – which ended up being the Wise Owl Restaurant and Country Store in Alton, NH.  It was late for lunch, so we were the only diners there.  The food was good, but it took nearly an hour to get a simple lunch.  I almost passed out from hunger while we waited! Reminder to self: eat more snacks!

Trail Notes

  • Distance – 3.2 miles
  • Elevation Change –  1150 feet
  • Difficulty –  2.  There are some steep and rocky sections of the trail.  Most people can make it if they take their time.  Keep an eye on children along the trail. 
  • Trail Conditions – 4.  Most of the trail is open and easy to navigate.  Some of the rock surfaces are slick, so be careful especially on rainy days. 
  • Views – 4.5.  Panoramic views from both sides of the summit. 
  • Waterfalls/streams 0.  Non-existent. 
  • Wildlife – 1.  This is a popular trial so wildlife know to stay away. 
  • Ease to Navigate – 4.  There are a lot of paths to make it a loop.  Consult the map and pay attention to blazes along the way. 
  • Solitude – 0.  This is one of the most popular hikes in New Hampshire, so you will likely see lots of people.  Go during the weekday or early mornings to avoid crowds.

Download a trail map (PDF)

Directions to trailhead: From Laconia, NH, take NH-11A for 11.1 miles.  Turn right on to NH-11 and go 3.1 miles until you reach the parking lot on the right for Mount Major.  The trailhead is at the end of the parking lot.  Take the main, blue-blazed Mount Major trail using the trailhead at the back right of the parking lot.  Parking coordinates: 43.519676, -71.272813

Red Hill (NH)

Special: New Hampshire Edition

Introductory Guide to Visiting the White Mountains

This short, moderately challenging 3.5 mile hike has stunning views of both lakes and mountains from a summit fire tower!

View the Full Album of Photos From This Hike

Adam Takes in the View from Red Hill
Adam Takes in the View from Red Hill.  Below: Trail conservancy sign;  Adam makes his way up the trail; The foundation of an old farm house along the trail.

Trailhead signs Red Hill Trail Old Building Foundation

Christine Says…

We considered not hiking at all on our final day in New Hampshire – we needed time to pack and we still wanted to hang out a bit more with my parents.  But, it was too gorgeous to stay off the trail – crisp, cool, vivid blue skies punctuated by cottony white clouds. So, for our last hike, we chose something short, relatively easy, and close to my parents’ home in Plymouth.

I remembered a conversation we had earlier in the week with a docent from Castle in the Clouds. We had been asking her about the trails on the property.  After talking about options on the Lucknow estate, she asked if we’d ever hiked to the top of Red Hill.  She told us the hike was very popular with locals and that we should do it if we had time. We looked at maps, and decided Red Hill was the perfect distance and length.

When we got to the trailhead, we found the parking area blocked by a construction crew repairing a failed drain pipe under the road.  There had been heavy rains the day before, and it looked like the road had buckled and crushed the drain.  Luckily, we were able to find a small pullout for parking and walk up to the trailhead.

The Red Hill trail is maintained by the Lakes Region Conservation Trust.  You’ll see one of their informational panels at the beginning of the trail.  Early on, the hiking trail is crossed by snowmobile trails.  At about three tenths of a mile in, you’ll find remnants of the old Horne farm and another informational board.  Essentially, all that’s left is the foundation, but if you look closely you might see other hints of the farm.  Follow signs for the tower, passing a gate indicating an area closed to snowmobiles.

From there, the summit is a steady 1.4 mile climb.  The trail is not rocky or rooted, and we found it dry and easily passable – even after heavy rain one day before our hike.   The summit has a tall firetower and a couple associated buildings.  I read online that this is the only firetower in New Hampshire not run by the state.  Instead, this one is tended by the Moultonborough Fire Department.

From the summit we enjoyed a superb look at  Lake Winnipesaukee from above.  From the tower, we had great views of Squam Lake, the Sandwich Range and the Ossipee Range.  It was really windy on the observation platform of the tower, so we didn’t stay on top for long.  We shared some snacks and then headed down the way we came.

We were lucky to have the summit all to ourselves!  On our way down, we passed dozens of people – not surprising! It’s a very nice hike!  After getting back to the car, we called my parents and arranged to meet at the Town Docks in Meredith.  It was a beautiful day to enjoy one last lakeside lunch!

Fire Tower on Red Hill
The fire tower atop Red Hill. Below: Buildings at the top of Red Hill; Views in both directions from the fire tower.

Forest Service Building View from Red hill View from Red hill

Adam Says…

With our trip to New Hampshire coming to an end, we couldn’t resist hitting the trail one last time.  The previous day we had a lot of rain, so we had spent the day shopping around the area to get some souvenirs.  There was some flooding from the previous day in some areas.  Since we were facing a 12 hour drive the next day back home, we wanted to get a hike that was fairly close and not too long.  We remembered our talk with one of the volunteers at Castle in the Clouds and decided to see what this one was like.

This hike combines two things I always like to think about when visiting New Hampshire – the many lakes and the mountains.  From this viewpoint, you get a picturesque view of both.  This definitely is a hike for the locals.  We couldn’t find any great information in guide books, but we found a few write-ups online, including a winter trek up from Hike New England.

We started on the trail at the kiosk.  In .1 mile, the trail splits in half.  We opted for the trail to the right, which starts off on a fire road.  At .4 miles, the trail comes to the signage for the old farmstead here.  The trail takes a sharp left at the sign and continues uphill.  The trail was a continuous uphill climb, but the terrain was fairly nice, making for better footing considering the rain from the day before.  At 1.5 miles, the trail reaches a junction again with the Red Hill Loop Trail (we did not do the loop option).  Continuing to the right for another .2 miles, you’ll reach the summit and fire tower at 1.7 miles.

The summit had a nice picnic table at the top near one of the buildings giving you nice views of the lake below.  As I’ve mentioned before, I have a bit of a fear over man-made structures, so I felt uneasy about climbing up to the top of the tower.  The tower was a little rickety and the wind was blowing strongly, but I felt I couldn’t end the trip without taking in the view.  At the top of the tower, you do get some nice views, but we found it was hard to get clear, unobstructed photos due to all the wires and screen around the top.  I made my way back to the bottom to get the views that nature had intended from the safer ground.

When we arrived at the summit, there was one other person there, who quickly handed over the solitude of the views to us.  We stayed for a while to eat a snack and reflect on all of the great hiking we accomplished during this trip.  It is always a bitter feeling knowing that you have to return home and back to the doldrums of work and everyday living, but we will have the memories of these mountains, lakes, and beautiful skies to lift our hearts until the next adventure.

Trail Notes

  • Distance – 3.5 miles
    MapMyHike Stats *
  • Elevation Change –  1350 feet
  • Difficulty –  2.5.  The climbing is moderate, but steady.
  • Trail Conditions – 3.5.  This trail is in great shape.  The footing is nice and we didn’t have any trouble with mud, even after heavy rains.
  • Views – 4.5.  Beautiful – a small markdown because the cables and side panels of the tower block a little bit of the view.  You must climb the tower if you want the full view, too.  The picnic table at the base has a nice, but not panoramic, view.
  • Waterfalls/streams 0. None
  • Wildlife – 0. None
  • Ease to Navigate – 3.5 – There are a few crossing snowmobile trails, and there is a trail on the other side of the hill, but generally the route is easy to follow.
  • Solitude – 2.  While we enjoyed quite a bit of solitude on our early morning hike, we saw many people hiking up on our hike down.

Download a trail map (PDF)

Directions to trailhead: From I-93:  Take exit 24 on I-93 for US-3/NH-25 toward Ashland/Holderness.  Turn right on US-3 S/NH-25 E and go 9.2 miles.  Turn left on NH-25B E and go 2.9 miles.  Turn left on Kelsea Avenue and go .2 miles.  Turn left onto Bean Rd and go 1.3 miles.  Turn right on to Sibley Road and go 1.1 miles.  Take a left on to Red Hill Road and go about .2 miles until you reach the parking area to the right.  The trail starts off from the kiosk.