On our second day of vacation, we decided to check out some hiking in beautiful Linville Gorge – specifically Table Rock, the Chimneys, and the Devil’s Crack/Cellar. The total for the day was only 3.28 miles with 610′ of elevation gain, so it should have been an easy hike. For whatever reason – the hot sunshine, tiredness from sleeping in an unfamiliar bed, etc – it felt a lot tougher than it normally would. It was still a great hike with spectacular scenery, but next time I’d go earlier in the morning, in cooler clothing, with a lot more water and sunscreen! This is definitely an exposed trail where you will bake in the sun – or get hit by lightning if there are storms! The Table Rock section is pretty straight-forward, but the Chimneys section might not be great for unsupervised children or people with a fear of heights.
The drive from the main paved road out to the Table Rock parking area is a winding, dusty, bumpy 8.5 mile ride along forest service roads. You never think 8.5 miles is ‘far’ until you have to drive along a road like this – it takes forever to to cover the distance. Along the way, we passed the trailhead to Hawksbill Mountain – another spectacular hike we did several years ago. I actually think it’s probably the prettier hike.
When we got to the Table Rock parking/picnic area, there were just a few cars there. Apparently, this area is immensely popular and we were lucky to hit it on a quiet day. The hike is a double out-and-back. We decided to go up Table Rock first. From the parking lot you can see the distinctive dome-shaped summit off to the left. The trail is gently graded with lots of interesting rock formations along the way. As you climb, you’ll begin to get views looking down into the gorge. It’s such amazing, dramatic scenery.
You’ll reach the summit of Table Rock after just about a mile of climbing, most of it along the Mountains to Sea trail. On the way up, you’ll pass two trail junctions, both on the left side of the trail – one is a continuation of the MTS trail. After you pass that junction, stay to the right to reach the Table Rock summit. The top is not a small outcropping that looks in one direction – it’s an entire mountaintop with views all around! You’ll see the foundation of an old fire tower. To the north, you can see Hawksbill Mountain. Supposedly, you can even see Linville Falls off in the distance, though we personally couldn’t spot it. You can also scramble over a bunch of boulders to get views to the south of Shortoff Mountain, and to the west – the Linville River.
After spending some time at the summit, we descended back the way we came. We took one of the unmarked side trails we had passed on our way up out to see Devil’s Crack/Cellar. I think the ‘cellar’ refers to the rock jumble heading down into the Gorge and the ‘crack’ is the big rock tower that splits from the main wall. I’ve read that some people just call the whole area “The Crack of the Devil.” I can’t be positive about the names, but I can tell you that it’s incredible and worth the short side-trip. The detour is only about a quarter mile off the main trail. The top of the rock tower is easy to climb up, and I suggest checking it out!
Afterwards, we descended back to the parking area. From there, we took the Mountains-to-Sea trail to the right. Almost immediately, you’ll pass pit toilets, the picnic area, and a large primitive campground. The trail is a gradual uphill for a few tenths of a mile. From there, it turns into a bit of a rock-scrambling roller coaster as it follows an exposed ridge.
The trail had some steep drops and tricky obstacles to negotiate. I don’t particularly enjoy rock scrambling or exposed ledges, so I didn’t love this part of the hike. It was lovely, but it definitely triggered my vertigo. I can see why rock climbers are such big fans of the Chimneys – there are lots of precipitous things to scale. While I didn’t love the terrain, I did appreciate the blooming flame azaleas, mountain laurel, and Catawba rhododendron.
I ended up walking about .8 of a mile along this section of trail. After that, the terrain got even more exposed and tricky, and I really didn’t feel like negotiating any more rocks. So, I found one of the only shady spots along the way and decided to wait for the rest of the gang to come back. It’s no fun to be hot, dizzy and lightheaded on terrain where you really need good balance.
After a few minutes, Adam came back and we retraced our steps back to the car. I was pretty glad to get out of the sun and into the air-conditioning!
This is a 5.25 mile hike with 1237′ of elevation gain. The trail has LOTS of constructed stairs and a couple very steep climbs. Point Misery, which has no view, is the high elevation of the hike. The best view is from Little Butt, where you can enjoy vistas of Mt. Mitchell and the Black Mountains from a slab of rock. You can hike on an extra half mile to Big Butt, but there are no additional great views. This hike starts at Walker Knob overlook on the Blue Ridge Parkway.
Adam Says…
Last May, we stayed a week with our friends, Tony and Linda, who rented a cabin in North Carolina near the Blue Ridge Parkway. Fellow hiker, Zach, joined for several days as well (all members of the Hiking Upward team). As is common on a vacation with friends, we had a first night of celebrating being away and probably had a few too many beers among us.
The next day was hot, and we were definitely feeling a bit tired from the night before, so we decided to try something moderate. Eventually we landed on the Little Butt hike. You have to laugh at a hike with a name like that!
The trail started off with a gentle descent into a scenic forest landscape with lots of trillium along the way. The trail was worn through, but we could tell the spring growth would likely necessitate some maintenance as things get overgrown as the season goes on.
After we hit the bottom of the small gap, the trail starts to ascend steeply. It was tougher than we expected, even brutal at times. The climb topped out at Point Misery – about a mile and a half into the hike. From there, the trail dropped steeply for about half a mile, before going right back up for .4 miles. This section had many, many stairs constructed into the mountainside. I don’t know about you, but I typically hate to see stairs on a hike, because I know I’m in for a steep climb, since stairs are necessary to keep the trail in shape.
Once we got up through the forest staircase, the trail reaches more of a ridgeline and it was a short distance to get to the Little Butt overlook, a slab of rock where you can take in views of Mt. Mitchell and the Black Mountains.
At this point, Christine and I decided to stop and just enjoy the view. Big Butt is only half a mile from here, but we had read that it really didn’t have any views and was just another peak to bag. Zach and pressed on to Big Butt. We ate a quick snack at the overlook and then decided to hike back. Zach said he would catch up to us. We descended the stairs, climbed steeply back up to Point Misery, and were enjoying the easy downhill back to the car when we saw Zach running along to catch up. We were amazed at how much energy he had compared to us.
That night, we got back to our rental place and enjoyed a beautiful sunset and campfire. It was a great first day of adventure in North Carolina!
This 4.5 mile hike in North Carolina’s Plott Balsams had some great views, but the trail was in such poor shape that the hike was not that enjoyable. There were parts that were unpleasant (tall grass, blowdowns, and thick overgrowth), confusing (relatively few blazes), and even dangerous (slippery erosion and steep dropoffs).
All the unsettled weather and fog made for pretty sunrays in the woods. Below: Parking along the shoulder of the road; Park along the road way just beneath the turn-off to the visitors center; Lush ferns as you enter the trail.
Christine Says…
This hike started off along the Blue Ridge Parkway near the Waterrock Knob Visitors Center at BRP mile 451. There is parking right along the shoulder of the road (as pictured above). The entrance to the trail is unmarked, so you’ll need to search along the forest line to find where the trail begins. When you see this old, broken-down kiosk just inside the woods, you’ll know you’re on the right path. The trail has occasional purple/yellow blazes, but don’t count on seeing many along the way to guide you! This area is tricky – even for experienced hikers. Meanderthals hiking blog did a good write-up where they describe getting a bit lost along this stretch of trail.
The trail begins a gradual, easy, uphill climb through evergreen forest. There are ferns and mosses draping the ground everywhere. When we hiked in June, there was a ton of blooming Clintonia borealis – a lily found frequently in woodlands around the world. The initial climb goes on for just a couple tenths of a mile before opening up to a nice view to the southeast, including a look at Yellow Face mountain. After the view, the trail descends into a brief saddle. Fog from the unsettled weather seemed to sit in every dip in the trail along the way.
There were nice views from the trail in several spots. Below: Blooming Clintonia borealis; Adam negotiating the terrain; Tons of fog and moving clouds.
At just under three quarters of a mile, we reached the summit of Yellow Face. This mountain stands at just over 6,000 feet and was donated by the Eastern Band of the Cherokee Indians to the National Park Service around 2001 or 2002. In fact, the entire trail is cobbled together across land owned the the Nature Conservancy, the NPS, and the town of Sylva, NC. Some sources say the trail itself has existed (in varying forms) for hundreds of years and was used historically by the Cherokee people. It’s currently maintained completely by volunteers – the NPS and the forest service are not involved.
When we hiked, the ‘bald’ at the summit of Yellow Face was really overgrown with tall grasses and bramble bushes. The view was nice, but definitely closing in. Near the summit, there’s a memorial plaque to Stephen Andrew Canada. I tried finding more information about him, but came up empty. Maybe he died on this peak or maybe he just loved this peak.
After the summit of Yellow Face, the trail descends again into another saddle. You’ll encounter some blowdowns, a pretty spruce forest, and some more open terrain. Near the low point of the saddle, at 1.3 miles, there are campsites on the right side of the trail. The open grassy area is littered with remnant mechanical parts from old logging equipment. We didn’t see a water source near the campsites, so if you were to overnight at this spot, you would need to carry enough water to cook and drink.
This was just one of the many blowdowns across the trail. This was one of the easier ones to navigate. Below: Trail scenery; Campsites in the saddle; More blowdowns.
After passing the campsites, the trail climbed again for a few tenths of a mile. We passed over and through a couple more blowdowns. At 1.7 miles, things got tricky. We began walking along a very narrow ridgeline decorated with enormous boulders. The trail was so slippery and eroded that I put my camera away to fully focus on footing and safety. There are more photos of this section included on the return hike below. I don’t think any of the photos truly do justice to the trail conditions along this stretch. It was far sketchier than it appears. The tough terrain went on for about half a mile, where we reached an opening in a dense rhododendron tunnel at 2.2 miles.
I chose this point to stop. The climb after this point was described by another website as ‘a steep climb up roots and rocks requiring hands and feet‘. On a dry day, I would probably have no problem tackling that climb, but on this particular day I’d been slipping, stumbling, and sliding so much that I decided to stop 100 yards short of the summit. It’s always a tough decision to miss the final destination of a hike, but I think the phrase ‘discretion is the better part of valor’ exists for a reason. Adam went on without me to take photos of the final vista. When he eventually came back he told me that I made the right decision and that the final climb was really slippery and precipitous. I was relieved he made it back safely!
The foggy trail was beautiful. Below: Giant boulder; A view from the trail right before the final summit; The rhododendron tunnel right before the summit.
We slowly made our way back across all the terrain we had covered on our hike out. Very rarely do I feel this way, but the whole way back I kept thinking, “I can’t wait to get off this STUPID TRAIL!” We trekked through the overgrowth, slithered back through blowdowns, and slid down rocks and mud. It was a slog. It was a death march. It was not fun at all. We chatted with a couple other hikers who were hiking just to Yellow Face and back (good call!) We crossed paths with a naturalist group looking at plant life along the trail. But, generally, we had the hike entirely to ourselves for most of the day.
I was very grateful to get back to the car! Afterwards, we paid a quick visit to the Waterrock Knob Visitors Center and then made our way back toward Bryson City for lunch at Nantahala Outdoor Center’s River’s End Restaurant. I had fun counting all my new bruises and scrapes on the drive back to the valley. Maybe this hike would have been more fun on a clear day after a stretch of dry weather. But overall, it’s not a hike I enjoyed. If you’re picking a hike in this area, I recommend The Pinnacle instead. It had much more vertical gain, but the trail was in vastly better shape, and I thought the vista was much more accessible (and just as beautiful!)
Adam Says…
We had attempted to do this Blackrock hike last year. We drove along the Blue Ridge Parkway but the fog was so heavy, we couldn’t even find the trailhead. We hunted around, but with so little visibility, we decided to try this another time. This year, we had a much clearer morning and we were able to find the trailhead somewhat easily.The Blue Ridge Parkway has actually taken down the parking trailhead marker and it isn’t very well blazed (my guess is because of the danger). But, we were able to see an opening in the trees and once we were about 25 yards into the woods, we soon came to a sign that we knew we were on the right path.
Christine described the overall hike well. While the elevation gain wasn’t crazy for much of the hike, the footing was fairly horrendous. The overall hike to Yellow Face was not too bad, but the view isn’t that impressive since it is getting sucked away from overgrown flora. Once you arrive at the saddle, the footing gets very treacherous.
It was mostly in the clouds, but the views opened enough to take in the mountain majesty. Below: Another photo Adam captured at the Black Rock Summit.
At one point, you climb in a three or four-point stance to go up a very steep terrain on the ridgeline. While we were expecting a nice view from here, it was only a bit of an overgrown one. The trail then takes a precipitous drop down a sheer rock area. Christine decided to stop before descending. I knew the view had to be just ahead, so I pushed forward but it was not something I felt very safe doing. I had to climb down the side of a rock, hanging on to handholds on the rock on the left of me while the width of my foot wasn’t able to fully fit on a step down the rock. A wrong step here, means that you could easily fall about a hundred feet down to the right. We didn’t get pictures of this area because it wasn’t safe. Once I got to the bottom, there was another treacherous climb back up where I had to hang onto roots and pull myself up. Once I got to the summit rock, there is also no easy way to get up. I had to ultimately launch my body up like a wounded sea lion on to the rock and then pull the rest of my weight up with my upper body. Christine was very worried about me making it, so I texted her to let her know that I made it and took some photos, which reduced my heart rate a bit. The views from the summit were impressive, but I could see clouds moving in and it looked like rain was coming. I texted Christine again to let her know I was leaving again, but that text never went through so my goal of easing her mind didn’t really help.
We took more photos of the boulder section on the hike back. Below: Some scenes from the slippery, narrow ridge walk.
The hike back down and up was equally treacherous, but I was very glad to get reunited. On our way back, we came across an older couple, who we warned to just turn back (they were planning on it). We also came across a large group of naturalists (one was even walking the trail barefoot – crazy). We warned them also, but they said they would likely not make it all the way there since, as one told us, they “get easily distracted by every plant they walk by”. We were very glad when we got back to our car. While we thought this would have been a beautiful, fun hike, the danger really didn’t provide much enjoyment. So, if you attempt this hike, be very careful and feel free to turn around. I won’t be offended if you steal my pictures of the summit and say they were yours to show your family the summit.
Some more examples of trail overgrowth. Below: The memorial placque; One final blowdown before reaching the car!
Trail Notes
Distance – 4.5 miles
Elevation Change – 1800 ft
Difficulty – 4.5 While the climbing is never terribly strenuous, this hike is a series of constant ups and downs (some steep), punctuated by flat stretches. The trail isn’t in great shape, so this adds to the challenge factor you’ll experience on this hike.
Trail Conditions – 1.5. The trail was quite overgrown and eroded. The grass and bramble bushes were tall in sunny places. The steeper parts of the trail were eroded with loose soil. There were also many blows to negotiate along the route.
Views – 5 – We visited on a day with lots of fog and moving clouds, but on clear days the views would be magnificent. There are views to enjoy along the trail and at the vista.
Streams/Waterfalls – 0. None
Wildlife – 1. The trail was oddly devoid of animals – we heard a few birds, but we didn’t even see pedestrian wildlife like squirrels and chipmunks.
Ease to Navigate – 2.5. There is only one trail to follow, but it is overgrown in many places. Blowdowns may also take you off course. There are relatively few blazes along the route.
Solitude – 2. We saw a few people along the way (most turning around at Yellow Face), but generally this trail seems lightly traveled.
The Pinnacle is a 6.6 mile hike with a strenuous climb for the first two miles. Hikers are rewarded on a clear day with spectacular views from a rocky ridgeline and overlook point.
Split Rock is a landmark just a half mile into the hike. Below: The information board at Pinnacle Park. Make sure you fill out a free permit card before beginning your hike; Trail options starting from Pinnacle Park;
Adam Says…
This hike has an incredibly generic name. I can’t recall how many hikes we have been on with the name “Pinnacle” in the title. The same can be said about “bald” (“bald knob”, “bald rock”, etc.), “buzzard” (“buzzard rock”, “buzzard roost”, etc.), “black rock”, and “devil” (“devil’s marbleyard”, “devil’s stairs”, “devil’s bathtub”, etc.). While the hike name lacks originality, by using the word, “pinnacle”, hikers should expect great views and this one doesn’t disappoint.
Getting there caused us a bit of confusion because the directions we had seemed to want us to drive on private property. However, we stayed on the main road and it soon came to a dead end at Pinnacle Park. We parked and completed the permit form at the kiosk, which were quite damp since they were exposed to the elements. Just past the kiosk was the trailhead that led through a gate. As we were starting our hike, there was also a couple of women that were getting started as well. They had backpacks to help carry their toddlers and they were taking the trail all the way to the Blue Ridge Parkway, where they had dropped off another car. They said they were quite familiar with the trail. After we saw the steepness of the terrain, we were impressed with these young moms.
The streams along this trail were incredibly scenic after LOTS of rain. Below: Adam hikes uphill in the fog and drizzle; Mountain Laurel were just starting to bloom; Another small waterfall and stream crossing.
The day started off foggy and incredibly humid from the recent rains, which made the footing a bit tricky for parts of the hike with either slippery rocks or muddy areas. After going a short distance, you pass by a meadow and then reach a trail junction. There are some shorter trails that break off to the right of the trail that some families take to get a short walk through the woods next to the stream. We waited to confirm with the young moms, but our path led us steeply uphill to continue the hike. As we hiked up, we passed Split Rock and we had several opportunities to get good views of the cascading stream on the left. The hike had us breathing heavily due to the steepness of the terrain and the humidity made us work extra hard.
Around two miles, we reached the junction with the Pinnacle Trail taking off to the left. The good news is that the hardest part of the climbing is done. There is still more climbing to do on this spur trail, but it isn’t nearly as steep and some areas are quite flat. This section had some places where the trail was under water or extremely muddy due to all the rain, but I’m guessing is damp during lots of the year. After another 1.3 miles, the trail reaches the summit area. As we were hiking, we didn’t see any hope of the sun coming out, but we at least thought we could have a nice hike in the woods. Right before the summit, I decided to step off the trail a bit to urinate and as soon as I started, the sun came out. Christine got a big laugh since she thought this act had summoned the sun to appear (if you run into the same situation, it is worth a shot). So, we made a quick dash to the final summit area. The clouds were still preventing us from getting remarkable views, but we could see some views as the clouds were rolling over the summit path. We stopped here to eat a snack and take in the limited views. As soon as we packed up to leave, the clouds completely covered in everything so we lucked out. On our way back down, we ran into more hikers that were going up to the point. We almost felt like we were running on the way back down and it amazed us how steep the terrain was in parts.
Big clouds moved on an off the mountain throughout our hike. Below: The trail junction for Blackrock and the Pinnacle; A lot of the trail to the Pinnacle was underwater; This beard-like moss was hanging on everything.
Christine Says…
This hike was quite an adventure and a good cardio-challenge! The trailhead is located in Pinnacle Park, which is an 1,100 acre plot of land owed by the town of Sylva, NC and maintained by the Pinnacle Park Foundation. It used to provide the town’s watersource, but in the early 1990s it was put into conservation and opened for hiker access. The park has several backcountry campsites for backpackers. They ask that both dayhikers and backpackers complete a free permit form before beginning their hike. Blank forms are available at the trailhead’s informational kiosk.
When we arrived at the park (which is essentially just the dead end of the road), we had humid, foggy, drizzly conditions. The whole area was under the unsettled outer arms of Tropical Storm Alberto, so the weather was extremely changeable during our visit. We knew we had a big climb ahead of us, and really hoped the fog would clear off and let us have at least some views. It always stinks to climb and climb and climb, and then not even get a view. But, that’s the thing about these mountains – even when the valley is sunny, peaks over 4500′ often stay in the clouds and mist. You just never know what your summit weather is going to be until you get there.
The Pinnacle is a cool crag with great views all around. Below: The view moved constantly in and out of the clouds; Looking down into the valley; Upon leaving the summit, we went back into the fog.
After passing a gate, the hike starts off immediately and relentlessly uphill. The first two miles of the hike follow what seems to be an old forest service or logging road. It’s wide and covered with loose, round stones – a bit of an ankle-turner. In the first couple tenths of a mile, you’ll pass a stream with remnants of its history as a municipal water source. There are gauges and concrete channels that are now being reclaimed by nature. After that, you’ll make a wide switchback in a meadow. There will be a trail that comes in from the left. Stay to the right, climbing uphill, before eventually reaching a sign with trail mileage for the Pinnacle, Blackrock, and Waterrock Knob (on the Blue Ridge Parkway). Follow the trail toward Pinnacle. At a half mile into the hike you’ll pass Split Rock – an enormous cracked boulder right along the trail. The crack is big enough for an adult to climb in.
Shortly after the Split Rock, we had our first stream crossing. Even with the high water flow, all the stream crossings were safe and easy. I think I remember there being three crossings in the first two miles of hiking. The beauty of the stream along this trail is definitely something I’ll remember. I’m sure the water is not normally as impressive, but when we visited it was gorgeous – rapids and little waterfalls everywhere! Another thing I’ll remember from this hike is the CLIMBING! The first two miles ascend nearly 2,000 feet before moderating on the Pinnacle spur trail. It was definitely some of the steepest climbing we’ve done outside of New Hampshire. I guess the third memory from the hike is crossing paths with a Great Horned Owl! It swooped across the trail. That was an enormous bird – for a minute, we thought it was an eagle because it was so much bigger than any owl or hawk we’d seen before.
This fallen butterfly still had perfect wings. Below: There are five official campsites in this trail network; Blooming fire pink; A post hike stop at Innovation Brewing (after an excellent lunch at Haywood Smokehouse.)
After climbing steeply for two miles, we were relieved to reach the junction with the Pinnacle Trail. It was a traditional trail instead of a wide road. It was very wet and muddy in a few places, but generally in good condition. It follows gentle rolling terrain for about a mile before a steep (but brief) descent into dense rhododendron. On the other side of the rhododendron, the trail exits out onto a large rocky outcropping at just over 5,000′. There are views (and precipitous drops) in every direction. We felt so lucky to have the clouds partially clear when we were at the viewpoint. What a gorgeous spot!
We spent some time enjoying the vista and a snack of trail mix before hiking back the way we came up. Shortly after we left the view, the clouds rolled back around us and we were hiking in the fog again. The hike back went really quickly because it was all downhill! By the time we got to the bottom, it was full sun and blazing hot. After packing up, we headed into Sylva for some barbecue at the Haywood Smokehouse (so amazing) and beers at Innovation Brewing. These two places are both on my ‘must list’ for this area.
Trail Notes
Distance – 6.6 miles
Elevation Change – 2,441 ft
Difficulty – 4. The first two miles of climbing is relentless and steep. You’ll gain 1000 feet for each mile. Once you reach the junction with the Pinnacle Trail, the climb becomes moderate to flat.
Trail Conditions – 4. The trail follows an old road grade for most of the way. The footing is a bit challenging with lots of football-sized rocks, but overall the trail is in great shape!
Views – 5 – We visited on a day with lots of fog and moving clouds, but still had excellent views at the top.
Streams/Waterfalls – 4. We visited after a time of extremely heavy rain, so the stream along the trail was simply spectacular. There were many small waterfalls and cascades to enjoy. The stream rating is probably not this high most of the time.
Wildlife – 4. We saw a great horned owl swoop across the trail. There were also salamanders, a snake, and many small mammals.
Ease to Navigate – 3. The first couple tenths of a mile of this trail are a little confusing, but if you keep climbing uphill, you’ll eventually come to a directional sign. After the directional sign, the trail is very clear and easy to follow.
Solitude – 3. We saw just a few people out for the day.
This hike turned out to be a fantastic “plan B” after the weather at the higher elevations turned out to be overcast and drizzly with gusting winds. This section of Appalachian Trail was scenic with moderate grades and two nice vistas. The out-and-back route clocked in at just under six miles with 1,700′ of climbing.
We initially planned to do the Blackrock Mountain hike at the southern end of the Blue Ridge Parkway, but unsettled weather forced us to find an alternative hike that stayed below the cloud shelf. We skimmed our hiking books and searched a few websites before settling on an Appalachian Trail section in Nantahala National Forest. The hike started at Tellico Gap, which is also the trailhead for the Wesser Bald hike. We parked our car and made our way south along the white-blazed Appalachian Trail.
The terrain in this area was interesting because the road leading up to Tellico Gap had been the fire line during the cataclysmic forest fires that burned during fall 2016. One side of the road was burned, while the other side was practically untouched. At the parking lot, it was easy to see that the trail headed north to Wesser Bald was heavily charred and damaged, with entire hillsides of mountain laurel and rhododendron laid to waste. Fortunately, the trail headed south from Tellico toward Rocky Bald was still green, fern-covered and lush.
The hike started at Tellico Gap. Below: Lots of snails in this lush, wet forest; Flame azalea nearing the end of its bloom; Adam walks along the Appalachian Trail.
The trail began climbing pretty quickly and steadily, as it so often does when you leave a gap. At 1.5 miles into the hike, we passed the Big Branch Campsite on the right side of the trail. There was space for about four tents, a register log/box, a fire pit, and a water source. There are full shelters a few miles both north and south of the campsite, so I imagine the site is mostly in place to accommodate overflow during the busy thru-hiker season.
After we passed the campsite, the trail began to level out and follow a ridgeline. In .2 miles, we reached a blue-blazed spur trail to the left leading to the viewpoint at Rocky Bald. The trail climbed for about a tenth of a mile over a wide shelf of rock before reaching another fringe of trees. There were a few dry campsites tucked in to flat spots between the trees. At the outer edge of the line of trees, there was a rocky ledge with a log bench and an excellent vista. There was sunshine, but there were also many fast-moving low clouds. We weren’t sure how long the conditions would stay clear and dry, so we moved on to visit the next viewpoint.
This trailside campsite had a water source, tent space, and a log book.
The next vista was another 1.2 miles south along the Appalachian Trail. It was all ridge walking, so the terrain was rolling and fairly easy without any big climbs or descents. Our guidebook called the next view Copper Ridge Bald. It wasn’t really a bald. It was just a rock jumble with a partly obstructed view. If you’re hiking for scenery, I’d probably suggest hiking to Rocky Bald and skipping the second view – it just wasn’t that impressive. We stopped at the second view and ate lunch and watched the clouds thicken. When we started to hear distant rumbles of thunder, we decided it was time to head back.
The return hike was quick and almost completely downhill. We flew along the trail and made it back to the car in half the time it took us to climb up. Even though it wasn’t the day we planned, everything worked out perfectly.
Adam Says…
Christine mentioned that this was a “plan B” hike, but I thought I would elaborate on the “plan A”. We drove for about an hour along the Blue Ridge Parkway early in the morning to get started on our hike. However, there was heavy fog just about the entire drive up. We got to the trailhead and pulled the car over. I got out to try and find the trailhead, which was a challenge since at this point you could only see about ten feet in front of you. After we finally found the trailhead, we decided to see if we could wait a bit to see if the fog would lift. On some of these high elevations, the fog can blow over and clear out in a few minutes. So, we waited about an hour and there was no lifting. We knew we needed to do something else. The week that we were in North Carolina, we felt the weather was spotty and there were lots of low hanging clouds, so we ended up doing lots of lower elevation hikes to try and embrace what nature was allowing. So, we drove another hour and a half to get to a hike we hadn’t done yet.
Another look at the view from Rocky Bald. Below: The spur trail to Rocky Bald; Climbing the rock slab to get to the view; Nice views on the descent from Rocky Bald.
We got to the Tellico Gap parking lot and it was a little more packed than we were accustomed – likely due to our now later start. We got a parking spot and then headed south on the white-blazed Appalachian Trail. The trail was an uphill slog for the entire way to Rocky Bald, but the green and lush forest around us gave us nice scenery along the way. After we passed the campsite to the right, we arrived at the side trail to Rocky Bald at 1.7 miles. We took this side trail to Rocky Bald, which was a steep scramble up to the viewpoint. The viewpoint was marked with a nice log bench to sit on and view miles of mountains in front of us through the natural window. We took in the sites and decided to press on to Copper Ridge Bald. We rejoined the AT and continued south. This terrain was a fairly flat ridgeline. 1.2 miles away we reached the small overlook for Copper Ridge Bald. There was enough space for two of us to eat a snack, but the view was not as grand since some of the area was a bit overgrown. We questioned if we had reached the correct viewpoint so I scouted ahead and came across a hiker with his dog that said there were no viewpoints for the next bit. So, I returned and we ate our lunch (now joined by the dog begging for scraps) at Copper Ridge Bald. After eating, we made our way back the way we came and arrived back at our car quickly.
The walk to the second view was pretty. Below: The second view marked in our guidebook wasn’t as nice; Stopping at Wesser Brew and BBQ for beers after our hike; It’s our favorite outdoor riverside bar.
This was definitely a “when life gives you lemons, make lemonade” hike or maybe “when nature gives you fog over high mountains, go lower” is a better description. It wasn’t our original plan, but we had the ability to do some quick thinking and make a plan with what nature provided. When we do a lot of hiking on our vacation trips, we usually make a list of several hikes and pick what we want to do that morning. We didn’t have as much time to plan on this trip, so we had to do some “on the spot” planning. While it was a bit stressful to do so, we made a great decision and were rewarded with some nice views (and beat the impending rain storm). After the hike, we stopped at Wesser Brew and BBQ at the Nantahala Outdoor Center and enjoyed a beer under shelter by the riverside while the rain came down.
Directions to trailhead: From Bryson City, follow US 19/74 for 20 miles. Turn left on Wayah Road and follow it for five miles. Turn left on Otter Creek Road and drive 4.1 miles to Tellico Gap. The road is paved for the first 2.8 miles. At the crest of the hill, you will see the AT crossing and several parking spots. Follow the signs to Wesser Bald and Tellico Gap.
While the Road to Nowhere is popular and well-known, the adjacent Goldmine Loop seems lightly traveled and mysterious. We had a hard time finding reliable information about the trail and did some guesswork along the route. As it turns out, it’s a beautiful, jungle-like trail that leads down to the shores of Fontana Lake. The total route ended up being 4.7 miles with a moderate amount of climbing.
At the end of our hike, we enjoyed a rainbow over Fontana Lake.
Adam Says…
In early July, we made our way down to the southern end of the Smokies for a couple day stay in Bryson City, NC. There was lots of rain on and off during our trip, so we had to be strategic about timing our hiking possibilities. Our rental cabin was near a place in the Smokies called The Road to Nowhere. This is not a Talking Heads song reference, but a road that has an interesting history. In the 1930s and 1940s, Swain County donated a lot of its private land to the federal government to help create the Fontana Lake area of Great Smoky Mountains National Park. Hundreds of people were displaced from their homes when Old Highway 288 was covered by water after the creation of Fontana Dam. The government promised to create a new road that would connect Bryson City to Fontana (30 miles away to the west). They began work on constructing Lakeview Drive, but came across numerous environmental issues – a study released stated that completing the road would have major, adverse, long-term impacts to topography, geology, and soils. Construction was stopped at the long, impressive tunnel that marks the beginning of this hike. The environmental issue was eventually resolved, but the road was never continued. Ultimately in 2010, the Department of the Interior paid Swain County $52 million in lieu of finishing construction of the road.
The road ends in the tunnel and you come out on trail. Below: The trailhead; Blooming Rosebay Rhododendron; The tunnel.
The road ends at a gate before the tunnel, but before the gate there is a large parking lot on the right hand side of the road. You will see trail signs along the side of the road. We parked there, walked down the road, went around the gate, and made our way toward the tunnel. When you enter the tunnel, it will be quite dark. We used headlamps so we could see where we were stepping but the tunnel floor was quite flat and smooth. On the other side of the tunnel, the true Lakeshore Trail begins. Continuing a bit further up the trail, we reached a junction at .6 miles that is the Tunnel Bypass Trail. We took this trail which skirted alongside the hillside. It was incredibly humid from the recent rains and my glasses were fogging up and the ground was wet in many places. It continued to drizzle on and off.
Graffiti in the tunnel. Below: The first trail junction; Wet trail.
As we walked along we could clearly hear the sound of a barred owl nearby. It remained out of sight but was moving up ahead of us on the trail. At 1.8 miles, we reached the junction with the Goldmine Loop Trail. We took a right to get on this trail. The Goldmine Loop Trail descends for the next mile. At 2.4 miles we came to where Tunnel Branch runs alongside the trail. It was a very picturesque stream with lots of blooming rhododendron all around. At 2.8 miles, we reached the lowest part of elevation as we came to Goldmine Branch, a larger stream that leads into the Tuckaseigee River, which is part of the larger Fontana Lake waterway. Even though this is a river, it feels very much like a lake due to the beaver dams and high water level. A short side path leads you to a serene place to enjoy a waterside view. We continued back along the trail and our slow ascent began. This area was very mucky from all the water near this low part of the elevation and we slogged through some mud in a few places.
Near the trail’s low point, we saw a large hog trap that was placed by the park service. Wild hogs are destructive to the environment and have been known to be aggressive to humans. Just a short tenth of a mile from seeing the hog trap, we noticed something crashing through the woods toward us, followed by a deep guttural sound of a wild hog. Knowing how dangerous they are, we decided to move along quickly to leave the hog alone. It was quite a rush and we have never heard such sounds. At 3.2 miles, we reached a junction that leads to Campsite 67 (a site you must reserve through the GSMNP overnight camping permit system). We passed on checking this out since it was a bit off the trail and just continued onward. Shortly after this campsite trail, we came upon an old chimney from a home foundation. The ground was mucky and the area was heavily overgrown so we decided against checking out the site further. The trail then really began to ascend very steeply and we reached the junction with the Lakeshore Trail again at 4.1 miles. From here, we took a right on the Lakeshore Trail and then passed by the original Tunnel Bypass Trail junction just .1 mile later. We continued back the way we came to reach the tunnel and then back to our car on the other side to make this about a 4.7 mile round trip.
The rhododendron thickets here are extremely dense. Below: Rhododendrons; Views of storm clouds; Pretty, lush trail.
Christine Says…
We planned several amazing hikes for our whirlwind three-day Smokies trip… and not a single one panned out! Stormy weather and low clouds forced us to revisit all of the high elevation hikes we considered doing. We are capableof hiking in bad weather, but when you have a trail blog you want to do your best to capture views and landmarks. We did a bit of logistical scrambling to find lower elevation hikes where views might be open beneath the cloud shelf.
The first one we settled on was the Road to Nowhere paired with the Goldmine Loop. They hike was just a few minutes from our rental cabin, so it was easy to tackle after the rain stopped in the late afternoon. We didn’t get on the trail until almost 4:00 p.m. Online and printed guides listed the trail anywhere from three to seven miles. With the long days of summer in effect, we knew we could finish a hike in that range before the sun set. We still packed headlamps… just in case! They turned out to be handy for walking through the long, dark tunnel.
Adam sits alongside the Tuckaseigee arm of Fontana Lake. Below: Another angle on the water view; A hog trap; An old homestead chimney.
I thought the tunnel itself was really cool. It looks relatively short to the naked eye, but when you’re inside you walk much longer than you expect. The tunnel is a full quarter mile long and produces the most excellent echoes! The amount of graffiti was disappointing and seriously – can’t people think of better things to draw than penises? There were more of those drawn than any other element of graffiti. After the tunnel, we proceeded a short way down the trail to its junction with the Tunnel Bypass Trail.
The Bypass Trail descended into ever thickening rhododendrons. By the time we reached the Goldmine Loop, I felt like we were in a veritable jungle. I would never want to get lost off-trail in an area like this. The denseness of the forest would be very disorienting. I think the mist, the solitude, the hooting owl, the lack of good trail information, the hog sounds, and the thickness of the forest lent an eerie feeling to the entire hike. We’ve never hiked in the Smokies and seen so few people! I’ll admit, I felt a little bit uneasy on this hike. I rarely describe a hike as creepy, but this one may have approached that feeling!
I was pretty glad when the trail rejoined familiar terrain coming off the Goldmine Loop. On the return trip through the tunnel, we left our headlamps off and enjoyed the almost complete darkness. We just kept walking toward the spot of light at the far end of the tunnel. Soon we were back in the car and headed back to our little cabin in Bryson City. On the way, we stopped at an overlook that peered down into the watershed we just hiked. There was a gorgeous rainbow above and everything looked so peaceful below. It definitely didn’t feel eerie from above!
Difficulty – 3. The ground conditions made it a little tough and there was a steep ascent before we rejoined the Lakeshore Trail.
Trail Conditions –2. The trail was fairly well maintained, but the mucky conditions made for some times where we slogged along the trail at the lower elevations.
Views – 1. We did get a few obstructed views alongside the Tunnel Bypass Trail, but nothing much mentioning. Along the road leading up to the trail, there is a nice view of Fontana Lake alongside the road.
Streams/Waterfalls – 4. There were some nice stream views along the way and the mountain laurel created some extra scenery.
Wildlife – 4. This particular loop isn’t particularly well traveled, so don’t be surprised to find some wildlife. The wild hog encounter definitely gives this a higher score for us.
Ease to Navigate – 3. We had a hard time due to the lack of knowledge out there about the trail system. Hopefully, the map we are providing will help.
Solitude – 4. After we went through the tunnel, we only saw a few other people on the hike. This could be due to the recent rains, but this isn’t a popular area of the Great Smoky Mountain National Park except for local populations.
Directions to trailhead: From the center of Bryson City, NC head north on Everett Street. Everett Street becomes Fontana Road. Fontana Road becomes Lakeview Drive. Follow Lakeview Drive until you arrive at the parking lot before the road that closes off this Road to Nowhere, about 8.5 miles away from the center of Bryson City. Park in the parking lot and continue on foot up the road leading to the tunnel.
* MapMyHike is not necessarily accurate, as the GPS signal fades in and out – but it still provides some fun and interesting information.
This is an easy 4.25 mile hike that take you to visit two special spots – a beautiful waterfall and one of the most popular swimming holes in the Smokies.
Mouse Creek Falls may not be the largest or most impressive of the waterfalls in the Smokies, but it is still a beautiful spot.
Christine Says…
On our third day of the trip, we decided to head into the national park and explore an area we hadn’t visited before – Big Creek in Cataloochee. This area is known for its population of elk, and for being much quieter than other parts of the park, like Cades Cove or Clingmans Dome.
The drive was a bit further than our previous two hike, but we had heard that Mouse Creek Falls and Midnight Hole were both beautiful, worthwhile destinations. As usual, we got an early start and beat the crowds to the trailhead.
Easy terrain makes this a popular family hike. Below: Trailhead sign for Mouse Creek Falls; Adam standing along the stream; Horse hitch near the falls.
The hike up Big Creek really couldn’t be much simpler or easier. It follows a wide, old road bed the entire way. At first, you can hear the rushing sounds of the creek in the distance, but within several tenths of a mile, the trail begins to closely follow the water.
Like most creeks in the Smokies, Big Creek is a jumble of big boulders that create lots of cascading rapids and small waterfalls – so beautiful! We saw a serious photographer hiking back from the falls with a large pack of gear and a heavy tripod. He visited the falls on a perfect day for waterfall photography. It was overcast and windless, which allows the opportunity for long exposure images. I always love the silky misty effect a slow shutter speed lends to the water, and I was pretty happy with the shots I got on this hike!
On the hike up, we skipped Midnight Hole. We figured we’d see the waterfall first, and then stop at other pretty spots on the hike back. The falls were indeed lovely, though the mosquitoes and biting flies were abundant and aggressive! This was the first and only time on the trip that I had to use bug spray. We took tons of waterfall photos, and then made our way back down the trail.
Christine enjoys Mouse Creek Falls. Below: Pretty stream scenery along Big Creek. Mouse Creek Falls are formed where smaller Mouse Creek pours into Big Creek.
On the way back, there were many more people out and about. Lots of them were dressed in swimsuits and had water-wings and innertubes. Apparently, this creek is one of the areas favorites for mountain swimming. When we reached Midnight Hole, there was a family of five there. The two youngest sons were taking turns plunging off rocks into the pool below. It was a cool, cloudy day, so they squealed each time they hit the icy water. The pool itself is deep and brilliant green – really an idyllic spot for a swim.
After leaving Midnight Hole, we stopped at a couple more pretty rapids along the stream for more photos. When we were on the trail, we jogged to outrun the mosquito assault! It was so buggy!
After this hike, we decided to drive into Asheville (yes… filthy and covered with bug spray) so we could visit a few breweries and get some lunch. We also managed stops at Vortex Donuts and French Broad Chocolates.
Adam Says…
Mouse Creek Falls is an easy family hike that everyone can enjoy. With the distance being only a little over two miles to the waterfall and very little change in elevation, it is a hike that even small kids won’t complain too much to do.
We started off early and had most of the trail to ourselves. We saw there were lots of places to step off the side of the trail to get views of rocky rapids down Mouse Creek, but we decided to make a beeline for the main waterfall. The trail had a slight incline, but never felt like a steep walk. We arrived at Mouse Creek Falls and made a climb down to near the base of the falls to get some photos of the stream and the falls together. If you don’t feel like climbing to the base, you can still get a distant, yet unobstructed view of the falls from the top. When another family arrived, we decided to leave to give them the solitude that we enjoyed, but we were equally pressured by all the mosquitoes at the water. We didn’t feel a ton of mosquitoes on the way up, but the entire trip back we were swarmed.
Midnight Hole is a popular swimming spot in the Smokies. Below: The water in Midnight Hole is clear and reflects the green of the trees around it; There is a picnic area along this lovely spot on Big Creek.
About .5 miles back on our return trip, we stopped to enjoy Midnight Hole. A pond is created here by two small waterfalls that dump water into this serene swimming hole. We lingered a bit at this spot before making our way back to our car, chased by a cloud of mosquitoes who seemed to not mind the bug spray we used. We made it back to our car quickly at a little over four miles and saw many people making their way up. I’m sure this is an extremely popular hike and swimming hole spot for many people. If you want to miss the crowds, go as early as possible.
On our way out, we passed by several buses that were unloading people for whitewater rafting along the Pigeon River. We saw probably a hundred people on the river in rafts and it looked like a great way to spend the day. We headed into Asheville, NC from our hike to sample some beers. It was Asheville Beer Week, so all of the breweries in the area were doing special events. We started off with lunch at Wicked Weed, where we enjoy the food as much as the beverages. From there, we stopped by a few more breweries to try one small sample at each – Green Man, Burial, and Hi-Wire. While we were there, there was a disc golf competition where event organizers moved a portable basket and the competitors threw their discs down the streets and alleyways as they moved from one brewery to the next. Luckily, the competitors were very accurate and I didn’t see any spectators beamed in the head.
Directions to trailhead: GPS coordinates for this trailhead are 35.751094, -83.109993. From Asheville, NC take I-40 West for 46 miles before taking exit 451 toward Waterville Road. Turn left onto Green Corner Road at the end of the exit ramp which merges onto Tobes Creek Road. Take the first left to cross a bridge and stay on Tobes Creek Road. Once you cross the bridge, take the first left onto Waterville Road. Follow this for two miles and you will then enter the Big Creek Entrance Road. Follow this for about a mile and you will reach the Big Creek Campground. You will find a large parking lot on the right and just before entering the parking lot, you will pass the trailhead for the Big Creek Trail, which is your starting point. This parking lot fills up quickly, so you may have to park along the roadside.
Hiking from Wayah Gap to Wayah Bald is a fun, moderate 8.5 mile hike. The view from a top the stone observation tower has to be among the best in the area.
The view from Wayah Bald is majestic! Below: The Appalachian Trail cuts like a ribbon through the green of the forest; Adam looks at the rhododendron tunnel; Stairs climb back up to the trail after crossing a forest road.
Adam Says…
This hike was a true gem! When you are just reading text about a hike, you can’t get a great idea of how wonderful a hike will be (hopefully this write-up and pictures will help). What we couldn’t believe through the day was how uncrowded this trail was, especially at the fire tower. We went on a perfect weekend day and you can even drive up to the very top if you want to skip the hike but still get the views. Having a spot like this to yourself just doesn’t seem right.
“Wayah” comes from the Cherokee word for “wolf”, since red wolves were once part of this area. The tower was built in 1937 by the Civilian Conservation Corps and used as a lookout for fires in the area.
As we were driving on Wayah Road making our way to the top, we were both thankful that the drive up would take a lot of feet off the elevation. The road winds around the mountain as it is taking many switchbacks to get up to the top. At the crest was the sign for the Wayah Bald Fire Tower and a small parking lot to the side. We started on the white-blazed Appalachian Trail going north (the same side as the sign and the parking lot). You climb up a few water-bar stairs and then come to a sign for Wayah Gap. The trail runs parallel to a national forest road on the left for the first portion of the trail (this is the same forest road you can drive to get to the top without hiking).
There were many wildflowers and blooming trees along the trail. We enjoyed seeing red trillium, even though they were fading. Below: Flame azalea; Mountain Laurel; Something white?
The trail was filled with wildflowers and greenery everywhere you looked and overall the uphill climb was quite manageable. At 1.75 miles, you make a steeper climb up to a forest road (the same forest road leading to the top). The trail picks up on the other side, but there is a spring to the right of the trail if you need to refill water. Crossing the road, you head up some stairs and up a steeper section looking down on the fire road, before it resumes the gradual climb.
At 2.15 and 2.35 miles, you will see junctions with the yellow-blazed Bartram Trail (a 110 mile trail that goes from Northern Georgia into Southwest North Carolina) and a forest road on the left side. This trail loops around for an extra 5.4 miles, but stay on the main white-blazed Appalachian Trail. Since the Bartram Trail joins the AT through this section, you will often see yellow and white blazes together. At 2.5 miles the trail levels out and then starts to descend.
The Bartram Trail shares course with the Appalachian Trail for a while. We though the joint blazes looked like a beer with a foamy head. Below: The junction of the AT and the Bartram Trail; There is a nice campsite near the junction; Views from the trail from an old burn.
Descending through the forest, the trail then begins to skirt along the mountainside. The trail became narrow and overgrown as you walk through some high grass and brush. But, you do get some more open, yet obstructed views of the valley between the mountains. At 3.5 miles, the trail reaches its bottom and then begins to ascend again. At 3.8 miles, you cross the forest road again and at 4.15 miles, you reach the final junction with the paved forest road. Going to the right leads to a picnic area with nice views (and a bathroom if you need it). Heading to the left from the junction, leads to the Wayah Bald fire tower which we reached around 4.3 miles.
The views from the fire tower were amazing! Some fire towers are rickety and you wonder if all the bolts have been screwed and tightened in the last few decades. This structure was a nice stone fire tower with a few steps to the top. From the top of the tower are maps that will help you identify the mountains in the ranges around you. If you go on a clear day, you should be able to see for quite a distance.
We stayed at the top for quite a while and this was definitely my top hike from this trip. We ate our packed lunch and talked to the few people we saw at the top, but it was hard to pull me away from the stunning landscape around me. If you aren’t capable of doing the hike, this is still a place to visit on a trip in North Carolina.
Christine Says…
This was another hike I mapped out using my AWOL Guide for the Appalachian Trail. You can practically drive up to the tower, but we wanted to put in longer trail miles, so we opted to start at Wayah Gap, about four miles south of Wayah Bald.
It turned out to be a beautiful hike! There were tons of blooming wildflowers, a crisp breeze, abundant sunshine, and pleasant temperatures. I was thrilled to see the last few red trillium blooms and the first of the flame azaleas lighting up the forest. The hike was perfectly timed to see lots of wildflowers.
The view from the Wayah Bald Tower is almost 360. Below: The views are also nice from the Wayah Picnic Area; The tower; Inside the Wayah Tower.
We started early and had most of the trail to ourselves. Just a few tenths of a mile after starting, we passed a very early-season southbound thru-hiker. I didn’t know it at the time, but we learned later that he was Mountain Man – possibly the oldest person to ever complete a winter thru-hike. He finished about ten days after our paths crossed.
The terrain on the way to Wayah Bald was pretty gentle – moderate climbs and descents and lots of easy walking. We passed several really nice campsites along the way, with the largest and nicest being located at the junction of the AT and the Bartram Trail.
We walked through an area that was recently burned, leaving behind some open views and lots of fast-growing tall grass to wade through. Most of the sunny spots on the trail were pretty overgrown.
When we arrived at Wayah Bald, we took a wrong turn and ended up walking up to the picnic area. It was a lucky mistake, because the picnic area offers a second beautiful vista. Once we realized we were in the wrong place, we turned around an walked the opposite way up to the tower.
We never get tired of looking at our beautiful, velvety rolling mountains. Below: No idea why there were so many worms/grubs in a pile. It was gross and fascinating; We liked this lone tree in a small meadow we passed; Post-hike lunch at Big Wesser Brew & BBQ at the Nantahala Outdoor Center – one of our favorite riverside lunch stops.
There were only three or four other people at the tower, despite it being a beautiful holiday weekend. We climbed to the top and ate a snack. We loved looking at and identifying the other mountains that made up the panoramic vista. One of the most recognizable was Siler Bald – identified by the wide grassy swath leading to the summit. We spent a bit more time enjoying the spectacular view before making our way back.
After the hike, we decided to go to one of our favorite places – the Nantahala Outdoor Center. The place was hopping with Memorial Day activities, but we were still able to find a parking spot and a table at Big Wesser Brew & BBQ.
Difficulty – 3. The length makes this rated a 3, but the overall climb was manageable.
Trail Conditions – 3. The trail was well-maintained, but very overgrown from the junction with the Bartram Trail leading up to the summit. There weren’t many rocky sections, so it made for nice footing most of the trail.
Views – 5. Panoramic, 360-degree views from the Fire Tower on a clear day.
Streams/Waterfalls – 1. There were two adequate springs to use as water sources along the way.
Wildlife – 2. Nothing spotted on this trail.
Ease to Navigate – 4.0. As long as you follow the white blazes for the Appalachian Trail, you should be in good shape.
Solitude – 4. Maybe we hit this on an odd day, but we had a lot of solitude on a “should have been busy” day and even had the fire tower to ourselves for about 15 minutes.
Directions to trailhead: GPS coordinates for this trailhead are 35.153662, -83.580462. From Highway 74 in North Carolina (near Cherokee/Bryson City) take the US23 S/US 441 S exit for Dillsboro/Franklin/Atlanta. Follow this road for 20.4 miles to the junction with US64 W. Follow 64W for 3.7 miles. Take a right on Patton Road. Follow Patton for .3 of a mile and then turn left on Wayah Road. Follow Wayah Road for 9 miles until you reach the well-marked trail crossing. Follow the Appalachian Trail north from this point.
Standing Indian is a pleasant five mile (round trip) hike along the Appalachian Trail in North Carolina’s Southern Nantahala Wilderness. There is plenty of camping and a beautiful viewpoint at the summit.
The view from Standing Indian was almost completely socked in by fog. We did get a couple moments of partial clearing that let us enjoy the view. Below: Camping along the road crossing is closed in Deep Gap, but signs point to nearby sites; Camping around the shelter has also been closed to allow reforestation; Adam makes his way up the Appalachian Trail. This was all before the downpour started.
Christine Says…
When we visited the Smokies this year, we decided to spend the entire trip – an unfortunately short four days – on the southern side of the park. On our last few trips to the area, we enjoyed exploring the Appalachian Trail corridor just before it enters GSMNP. We thought Wesser Bald and Siler Bald were both fun hikes with spectacular views, so before we traveled, I spent some time perusing my AWOL Guide to see if there were other nice view hikes close to easily accessible road crossings. One of the hikes I came up with was Standing Indian Mountain.
By the miles, the drive to the trailhead was pretty short, but the last six miles to get to Deep Gap were along a narrow, steep, and winding forest/logging road. It took about 25 minutes to reach the road’s dead-end at Deep Gap Primitive Campground. There were some really nice campsites available, but the largest and flattest of the sites was closed for reforestation/restoration. Quite a few of the overused backcountry tent sites in this area have been closed to allow them to return to their natural state.
Standing Indian Shelter – there were tent sites behind the shelter. Below: The Appalachian Trail winds through the ferns; We saw dozens of these snails; Signage for the Southern Nantahala Wilderness.
We picked up the northbound Appalachian Trail at the end of the road. It was sunny and humid when we started hiking. The trail climbed steadily and gently the whole way on this hike. Just under a half mile into the hike, we passed a piped spring coming out of the mountainside. We passed a couple more closed campsites before arriving at the spur trail to Standing Indian Shelter at 1.1 miles. The shelter is barely a tenth of a mile off the trail. It had room for about eight people and was equipped with benches and a large fire pit. There were lots of flat, grassy tent sites behind the shelter. Supposedly there is a stream/water source 70 yards downhill of the shelter, but we didn’t take the time to explore. We signed the shelter log and continued our hike up the mountain.
Shortly after the shelter, sun gave way to fog. We figured it was just leftover moisture from storms the night before or a passing cloud. At 5,499′, Standing Indian is the tallest peak along the Nantahala River and often gets different weather than the valley below. We hiked on and the fog gave way to occasional raindrops. We assured one another it was just a passing shower and pressed on. By the time we reached a tunnel of rhododendron, the light shower had become a downpour. Adam wanted to put on our rain gear and stay sheltered under the canopy of rhododendron, but I was getting cold and wanted to push on. In the end, we decided to wait a little bit; hoping the storm would pass and allow us to enjoy the view that was to be the main point of the hike.
We saw lots of bluets on the hike up. Below: The forest was lush with ferns; A tunnel of mountain laurel gave us a little shelter from the rain; The trail soon was flowing like a stream.
After about 20 minutes, the rain still hadn’t slowed so I suggested we hike back to the shelter and wait a bit there. On our way down, the rain stopped, so we turned around and climbed back up. It started pouring again almost immediately after we turned around, so we admitted defeat and decided to just roll with whatever nature threw our way.
So, we hiked to the summit of Standing Indian in a deluge! The summit was completely socked it, but after waiting about ten minutes the fog moved enough to give us a cloudy, misty view of the mountains beyond. We enjoyed every second of the three minute vista before the fog fell back around. The hike back was really quick – all downhill over easy terrain. And wouldn’t you know it… the sun came back out as soon as we got to the parking lot!
Adam Says…
As Christine mentioned, this may not have been the best day for this hike. The weather forecast predicted some late afternoon storms, so we really thought we could get in a hike before things turned for the worse. It was quite humid from the recent rain. After we left the shelter, we noticed the clouds were getting thicker, but we pressed on hoping we could beat any rain. We made it to a large rhododendron tunnel and what started off as sprinkling rain quickly became a downpour. The rain was unrelenting. We talked about going to the top, but with all the rain, we didn’t think we would see anything, so we decided to turn around before reaching the summit.
As we made our way down, we came across a Appalachian Trail thru-hiker. She looked college-aged and was carrying a pack that looked like it weighed 60 pounds. The rain had soaked a bandana she was wearing as headband and the dye from the fabric was bleeding blue streaks all down her face.
The trail heading back was more like walking through a small stream in some spots as the heavy rain looked for a place to escape the steep slope of the mountain. The rocks on the trail were slippery from the rain. After making it back about halfway to the shelter, the rain slowed considerably so we changed our mind and decided to give the summit another go.
What a great campsite on the summit of Standing Indian. Below: Standing Indian summit marker; Rhododendrons blooming near the summit; Christine checks out a cool, gnarled, old tree.
At 2.45 miles, the trail comes to a junction with the Lower Ridge trail. You will see a sign for Standing Indian Mountain. Take a right off the Appalachian Trail to follow a path through a campsite area which leads to the summit of Standing Indian Mountain in just a tenth of a mile. There was a large fire pit at the top and a small nook to catch a view of the mountains around you. When we arrived, we were able to catch a quick view before the fog and clouds enveloped everything in a sea of gray. We were at least thankful to be up there to appreciate the view for a few minutes.
The name “Standing Indian Mountain” comes from Cherokee myth. An Indian warrior had been sent to the summit to watch for a winged monster that came from the sky and stole children. The monster was captured and destroyed with thunder and lightning from the Great Spirit. The Cherokee warrior had become afraid and ran away from his post and was turned into stone for his cowardice. The Cherokee referred to Standing Indian Mountain as “Yunwitsule-nunyi”, meaning “where the man stood”.
Fog and rain along the Appalachian Trail on Standing Indian Mountain. Below: A Blue Ridge two-lined salamander (we think); A black-chinned red salamander (we think): Post-hike beers at The Lazy Hiker (we know for sure!)
The rain continued for most of the hike down. But one treat the rain provided was the chance to see several salamanders hanging out on the trail. We first spotted a Blue Ridge two-lined salamander, but the real treat was seeing a black-chinned red salamander. The Great Smoky Mountains are known as the “Salamander Capital of the World”, so we were glad to catch a few species on this hike. We have yet to spot a hellbender salamander (which range from 12-29 inches long) in the wild there, but maybe one day we will.
After we made it back to the car, we decided to drive over to Franklin, NC for the afternoon. We stopped in a wonderful outfitter store called Outdoor 76. When we had stopped to take pictures of the salamanders, I realized my backpack was completely soaked inside which ruined our copy of our AWOL guide. So we purchased those as well as a couple of Pelican cases for our phones. They even have several beers on tap at the back of the store. It wasn’t until later that I thought about how my daypack has a built-in rain cover – ugh. We then went to grab some lunch at Motor Company Grill (just an average 50s-style burger and sandwich place) and then went to the Lazy Hiker Brewing Company. Since a lot of AT thru-hikers will spend a day off the trail to eat and resupply in Franklin, this place is a popular spot. They had great trail and hiking information posted inside and had some of the coolest hiking-related pint glasses I have seen. It is definitely worth a stop if you are in the area.
Difficulty – 2.5. The climbing on this trail is all very gradual and well-graded. We were surprised it even came out to 1300 feet!
Trail Conditions – 4. The local chapter of the Appalachian Trail Conservancy is working hard on restoration projects in this area and their work was definitely evident.
Views – 4. We are giving this the score it deserves on a nice day with good visibility. We still had a pretty view, but it could have been much nicer if the rain had held off.
Streams/Waterfalls – 1. There were a couple small springs (at least one was piped) that could be used as a water source.
Wildlife – 3. We saw a couple unique salamanders along the trail in the rain. They were both species we hadn’t seen before.
Ease to Navigate – 3. The trail is well blazed. The view at the top is hidden behind a spur trail through a bunch of campsites. If you don’t know to cut through the campsites, you would miss the view completely.
Solitude – 3. There were a ton of cars parked at Deep Gap, but we only saw a handful of people on the trail – probably because it was *pouring*!
Directions to trailhead: GPS coordinates for this trailhead are 35.039847, -83.552506. From Highway 74 in North Carolina (near Cherokee/Bryson City) take the US23 S/US 441 S exit for Dillsboro/Franklin/Atlanta. Follow this road for 20.4 miles to the junction with US64 W. Follow 64W for 14.5 miles. Take a left on Deep Gap Road. It will become a gravel forest service road almost immediately. Follow the forest road for almost 6 miles until you reach Deep Gap. Follow the Appalachian Trail north from this point.
Not to be confused with Silers Bald in the Great Smoky Mountains National Park, this 8.8 mile hike in Nantahala National Forest has some of the best views in the southern Appalachians – mountains roll out in every direction from the summit. The hike is moderate and doesn’t require any tough climbing or tricky terrain.
We thought this video really showcased how amazing the view is from Siler Bald! Sorry it’s so shaky!
Adam Says…
One thing we hoped to do on our trip was to hike some new piece of the Appalachian Trail. While it would have been nice to complete a larger section of the trail, when you only have one car you are stuck with doing some out-and-backs. When we were researching some different options we came upon Siler Bald. My first thought was “Didn’t we already hike this another time?” Oh, that was SilerS Bald, not Siler Bald. I always get a kick out of how many mountains and hikes have similar names. We have come across several Chimney Rocks in our travels. It reminds me of the unoriginal naming of cities in New England. You can find multiple Manchesters, Andovers, Portsmouths, Dovers, and Salems in the New England states, as if their goal is to get you lost when you try to navigate with your GPS. The nice thing about both of these similarly-named balds is they have great views so you can’t go wrong.
There wasn’t a GPS signal when we started this hike, so it was a little difficult to find the starting point. I had a map of the area and we were able to find the parking lot easily enough. The Appalachian Trail crosses over Hwy-64 near the parking lot. The southbound path is easy to find, it takes off from the parking lot. However, the northbound path was harder to find. I crossed the road and walked down the road heading east for about a hundred feet. Then, I saw the AT cut through on a small, overgrown path. I signaled back up to Christine that I found it and we began our hike.
There was a pretty small waterfall near the beginning of the hike. Below: Winding Stair Gap; National Forest Information, Stream crossing and nice campsite.
Heading into the woods, the white-blazed trail starts on a very gradual uphill slope. Like many parts of the AT, this hike can be called a green tunnel – one path cutting through lush, green forest. We reached a waterfall and forest service road in .2 miles, followed shortly by a stream crossing and a nice campsite area. The trail then continues uphill as you pass by Swinging Lick Gap at 1.1 miles and Panther Gap at 2 miles. Right before the sign of Panther Gap, we were startled as 5 grouse took off across the trail just ahead of us. When you are walking along the trail with nothing but the sounds of the woods around you, a big move from the brush can you make you almost leap out of your hiking boots. From Panther Gap, the trail then goes slightly downhill for about a quarter of a mile before going gradually uphill. We eventually reached a junction trail at 4.2 miles. The trail branches off to the Siler Bald Shelter, which is about .5 mile from this junction (this trail eventually loops around to the other side if you see it out after the summit). We didn’t take the trip to the shelter since we were getting hungry and wanted to make our way to the views.
There were still some colorful things growing and blooming along the trail.
Continuing on the AT, we met another junction with the Siler Bald summit trail. From here, we took the path up the hillside, requiring us to almost bushwhack through this thick, tall grass and brush for a short distance before we came out of it. We climbed a very steep .2 miles to reach the summit of Siler Bald at 4.4 miles. As you are climbing up, if you look behind you the views start opening up of the mountains around you, but when you reach the summit the views are spectacular. Having hiked without seeing anyone the entire day, we were surprised to see a thru-hiker at the top. He was hoping to get a ride into town, having a craving for a pizza. We talked with him for a while and were pleased to find out he was from Virginia as well. He made a call to have someone meet him at the trailhead and he was off in a flash. We ate our lunch and enjoyed the views all to ourselves. On our way back down, we did come across a few other people that were out for a backpacking trip. This hike is one that has outstanding views for a minimal effort and is not as well-traveled.
The trail was green and lush. Below: Tunnels of mountain laurel; There was a shelter on a side trail – we skipped visiting; Making our way up to the top of the bald.
Christine Says…
Three and a half days in the Smokies just aren’t enough! On our 2015 stay, we tried two new hikes in the park (Ramsey Cascades and Gregory Bald), revisited an old favorite (Charlies Bunion), and then picked something new! For our final hike of the trip, we chose a hike outside the park borders – Siler Bald. This hike is located just south of the park in Nantahala National Forest. It offers a spectacular, panoramic vista from a spur just off the Appalachian Trail.
We parked our car at Winding Stair Gap. There is a good-sized lot along Hwy-64. From the parking area, we crossed the highway and picked up the Appalachian Trail heading north. In the first couple tenths of a mile, we crossed a footbridge over a pretty small waterfall. On the other side of the bridge, there was a kiosk with information about the forest. Shortly after the sign, we crossed a wider stream with a lovely backcounty campsite next to it.
This was about the moment we realized ‘Wow… mountains everywhere!’ Below: Siler Bald scenery.
We hiked along, enjoying the abundance of interesting wildflowers and fungi. The climb was steady and slow. It was by far the easiest hike of our trip. We chuckled at the random sign posts in the woods declaring that a particular spot was a ‘gap’. None of the gaps really seemed to be low points between mountains, nevertheless their were signs indicating that we had passed through Swinging Lick Gap, Panther Gap, and Snowbird Gap. Other than enjoying the pleasant weather and small things along the trail, there’s nothing grand along the way to Siler Bald. The grandeur all comes shortly after you reach a grassy clearing about 4 miles into the hike.
From the grassy clearing, climb the spur trail steeply up through the meadow for .2 miles. When we visited, the meadow was full of tall grasses and daisies. At the very top, we reached a flat opening that looked out across what seemed like all of the southern Appalachians. We had great views of Standing Indian mountain, Wayah Bald, Lake Nantahala, and even into Georgia.
Storm clouds started to roll in. Below: Mountain views on the descent; Small waterfall
There’s a marker at the top of the bald declaring the mountain’s name and elevation (5,216 feet). There’s also an established fire pit and plenty of room for several tents. What a place to watch both sunrise and sunset!
Adam and I ate our lunch (so many peanut butter and jelly sandwiches on this trip), took lots photos, and spent some time chatting with a fellow Virginian we met atop the summit. Rambling Wreck was his name, and he was doing a flip-flop thru-hike of the Appalachian Trail. He was really the only person we saw all day until we were almost done with our hike.
Nachos and Beers at the NOC.
As we enjoyed the bald, darker clouds started to roll in. We knew thunderstorms were forecast for later in the day, so we decided to make our way down. The descent from the bald is nearly as magnificent as being on top – walking downhill with all the mountains laid out before me was breathtaking! I was probably paying too much attention to the view, because the toe of my shoe got hooked on a root hidden by deep grass. I took one of those epic falls that happen so fast you can do nothing to stop and catch yourself. I faceplanted and ended up with several deep, painful bruises, but nothing that stopped me from hiking on. When you’re a regular hiker, these things are bound to happen sooner or later!
The hike down went quickly and soon we arrived back at our car. We decided to make the drive out to the Nantahala Outdoor Center (NOC) for our next stop. On the way, we were pounded by thunderstorms. I’m glad we missed them on the trail! At the NOC we grabbed an outdoor riverside table at Big Wesser Brew and BBQ (one of our favorite spots) and shared nachos and a couple beers. Super day!
Directions to trailhead: GPS coordinates for this trailhead are 35.12175, -83.54435. It is located on US 64, 11 miles west of Franklin, NC. There is a spacious parking lot at Winding Stair Gap. From the parking lot, cross the road, head east about 100 feet, and begin hiking north along the Appalachian Trail.


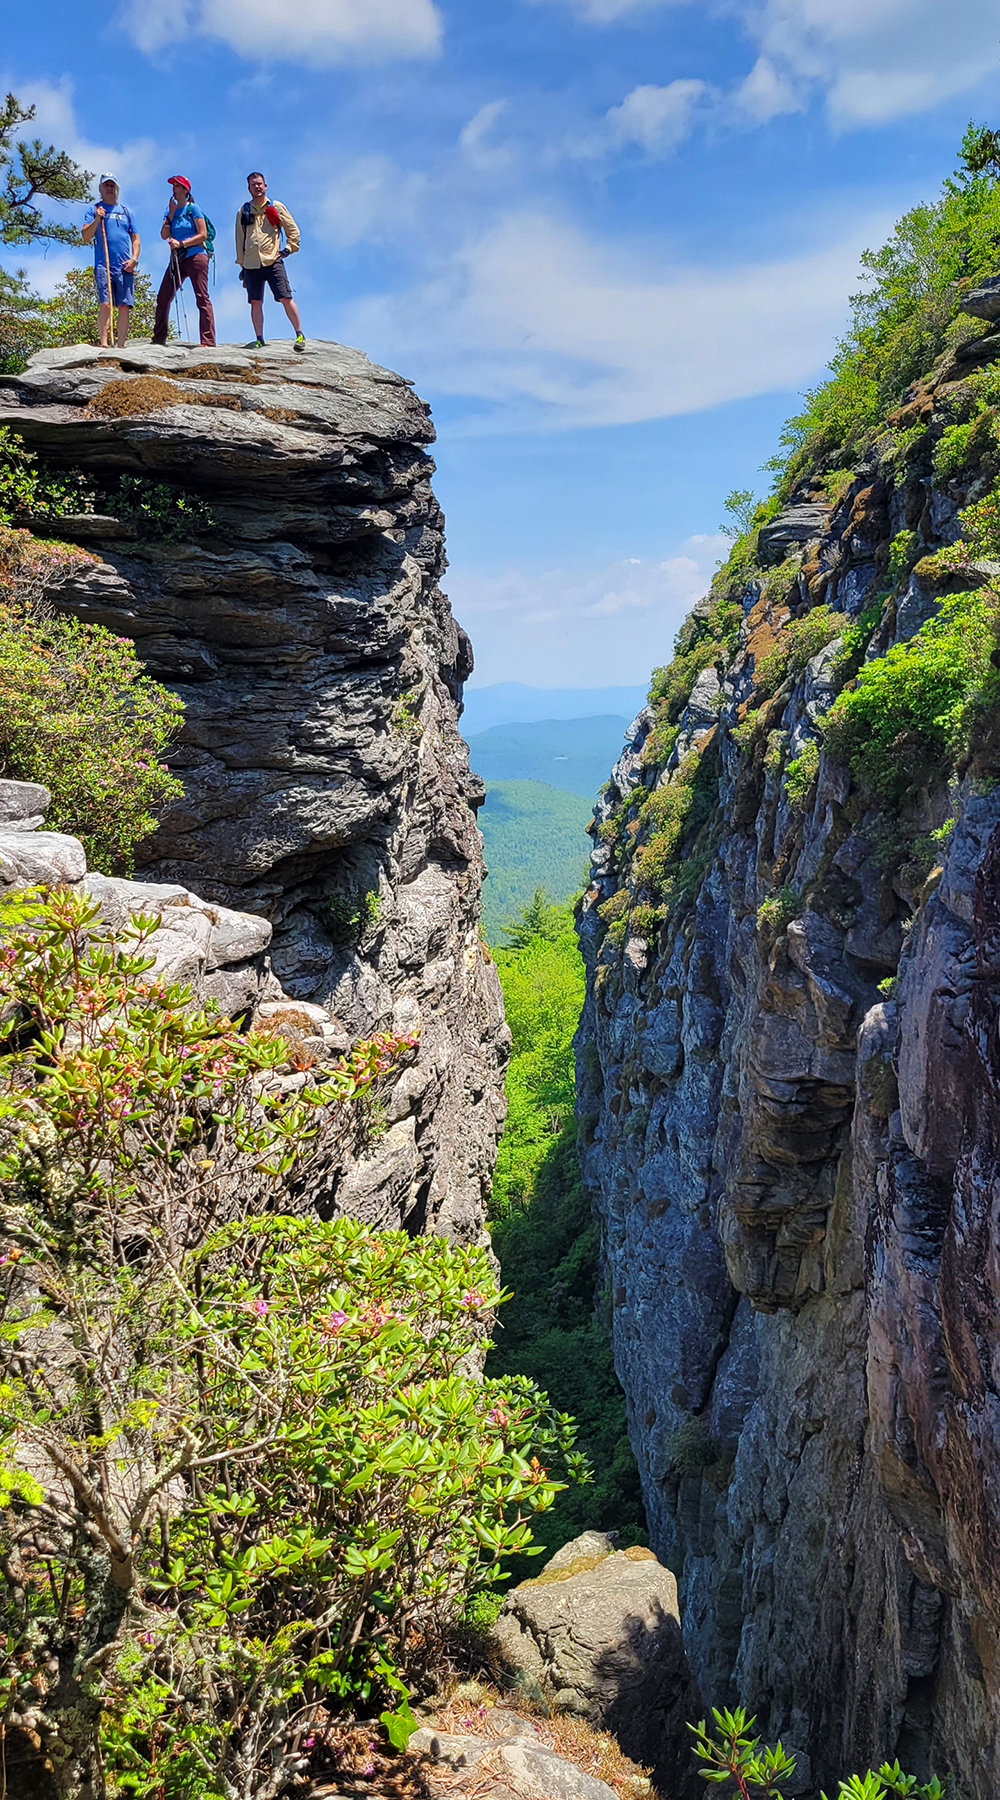


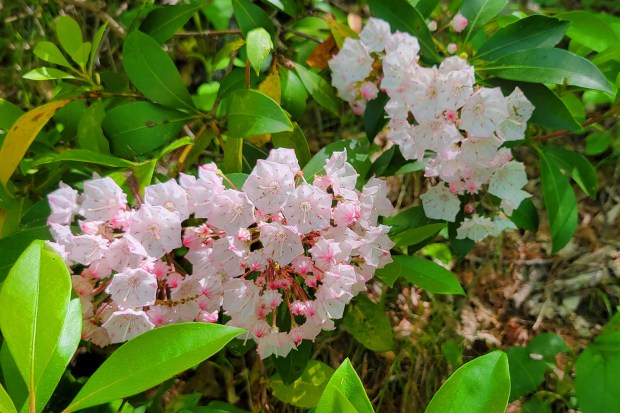
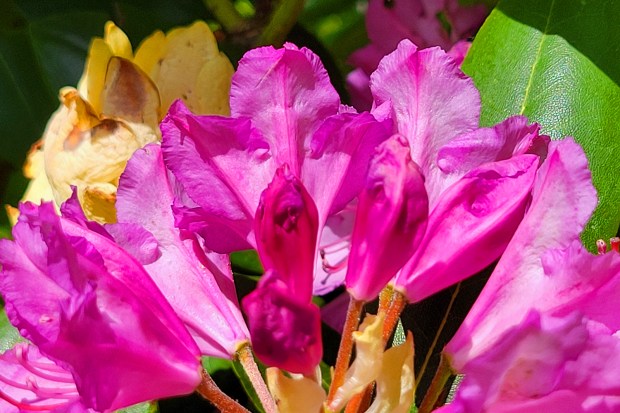
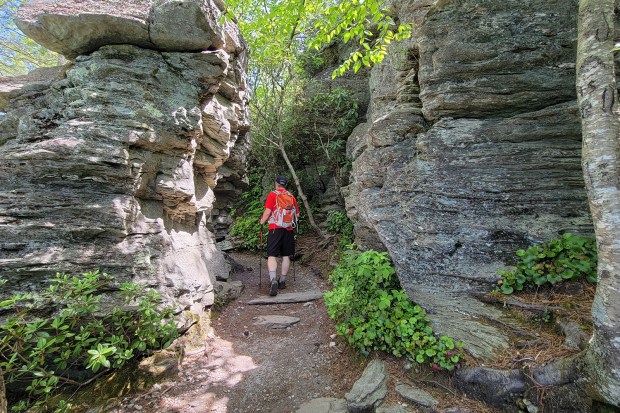
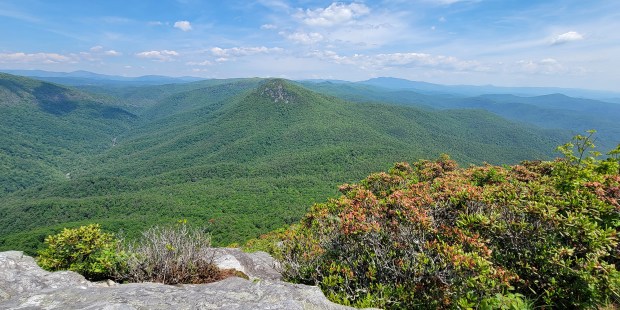
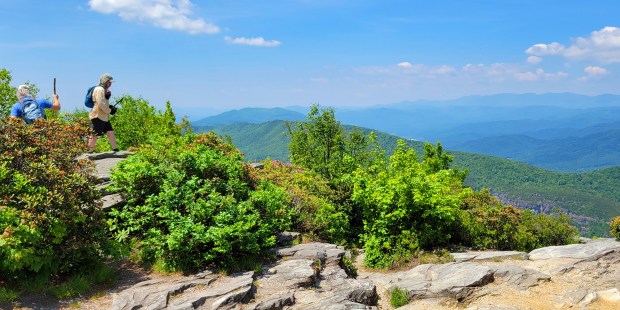


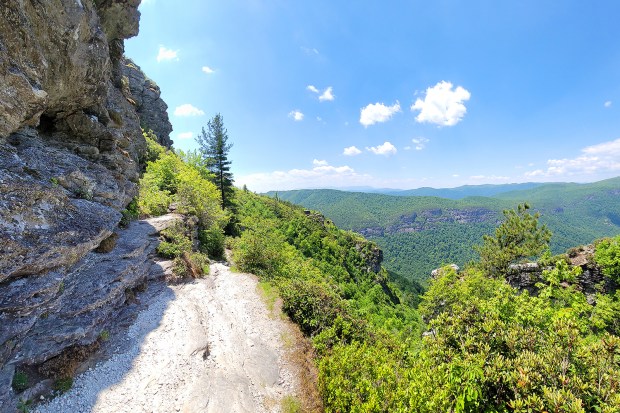
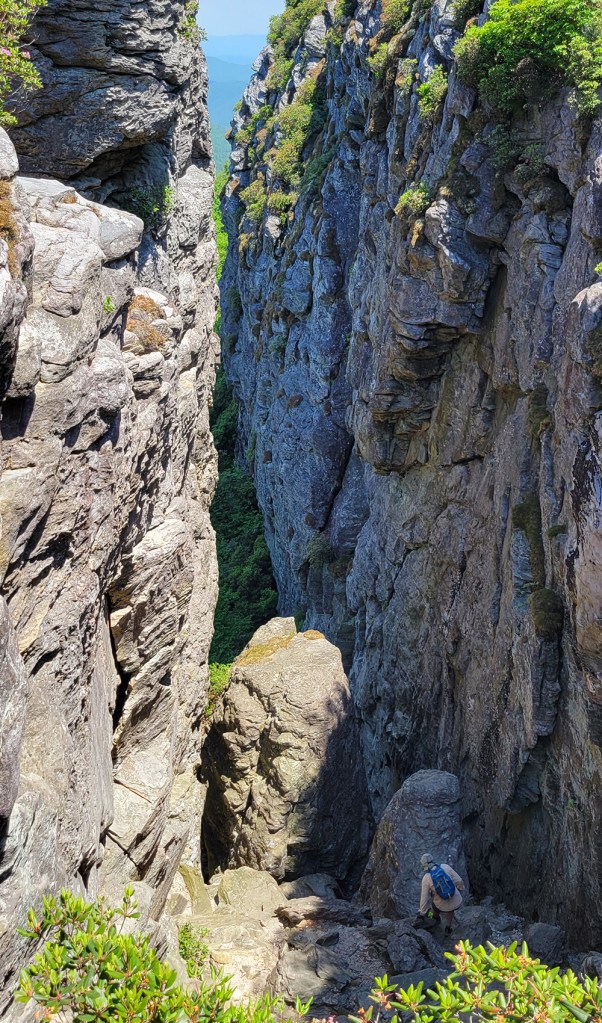
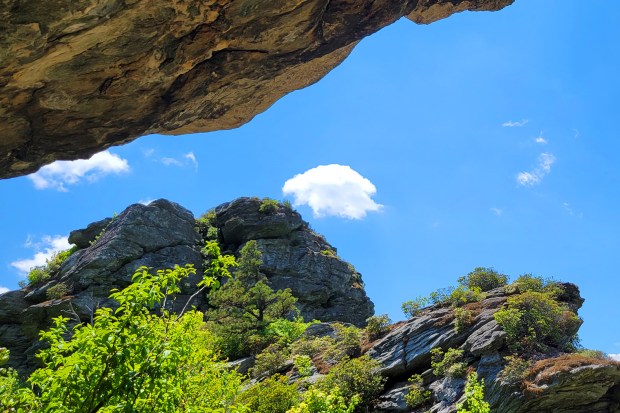
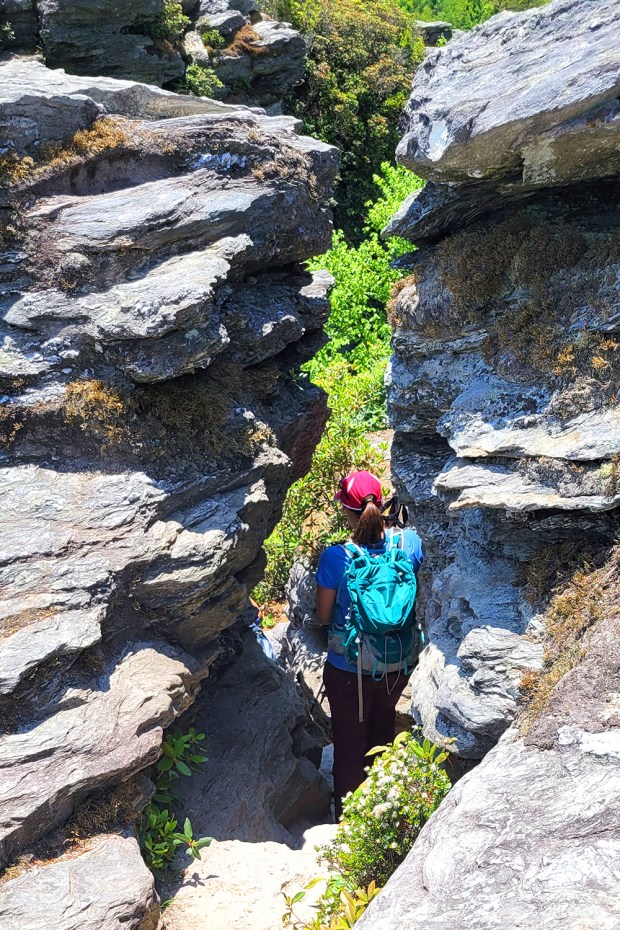


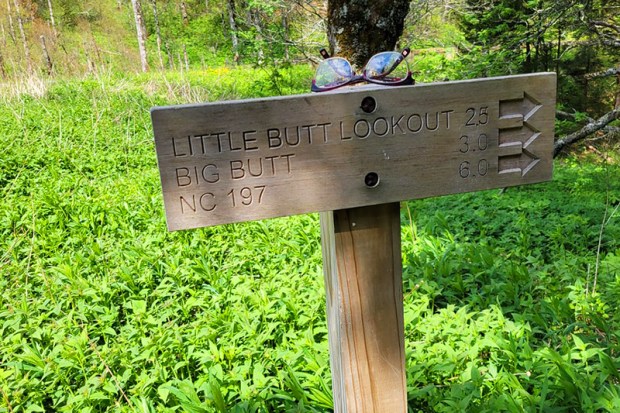
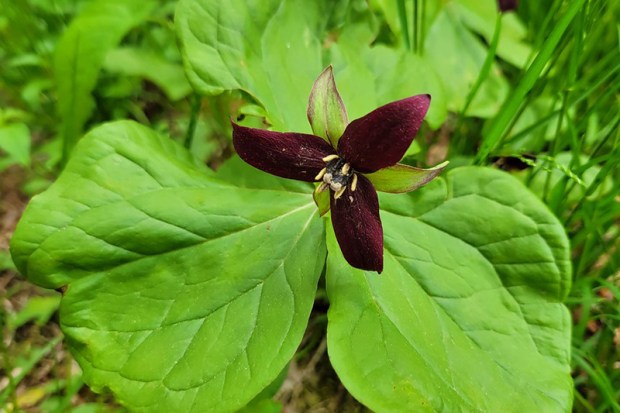
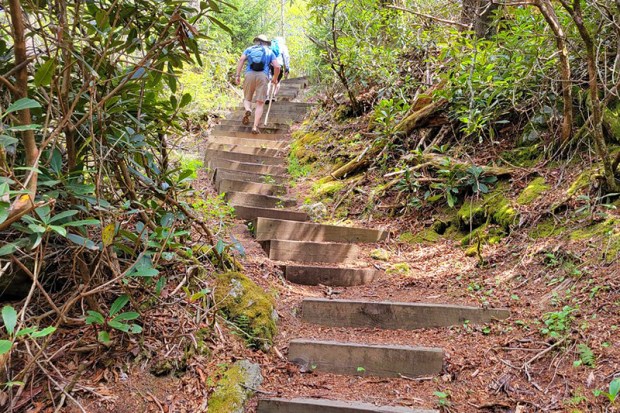

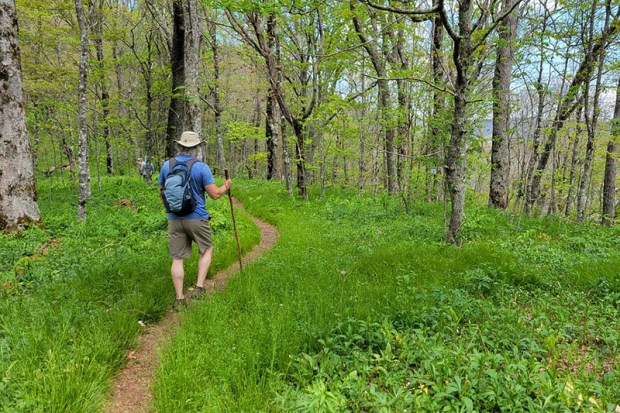
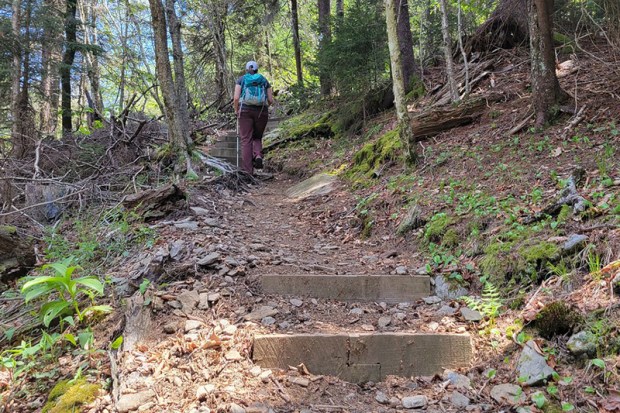
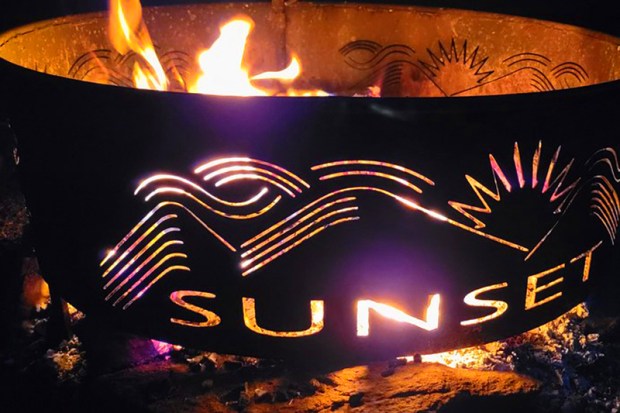
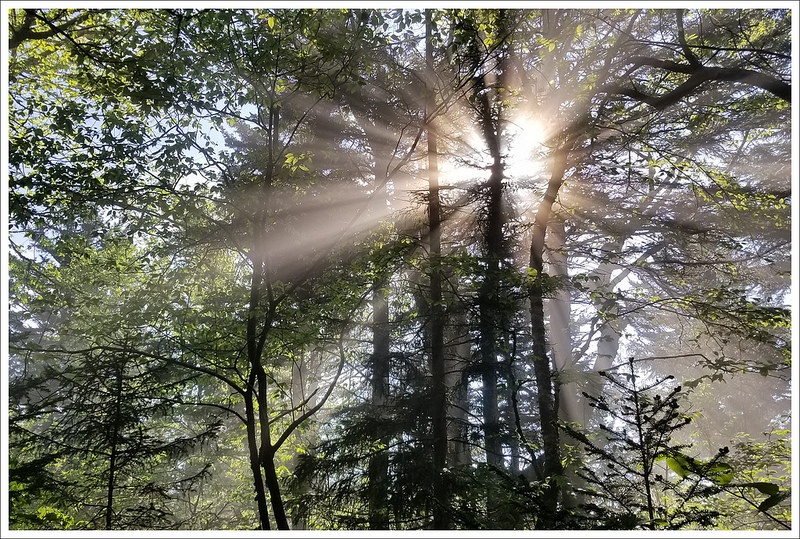
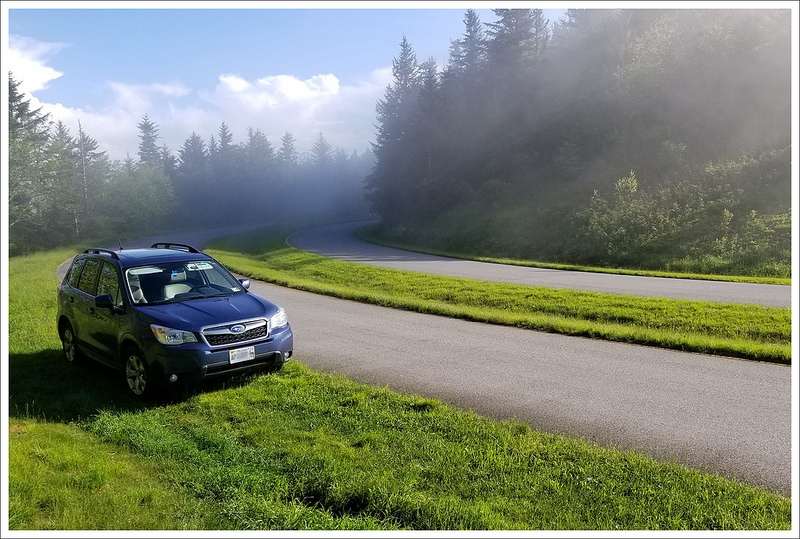


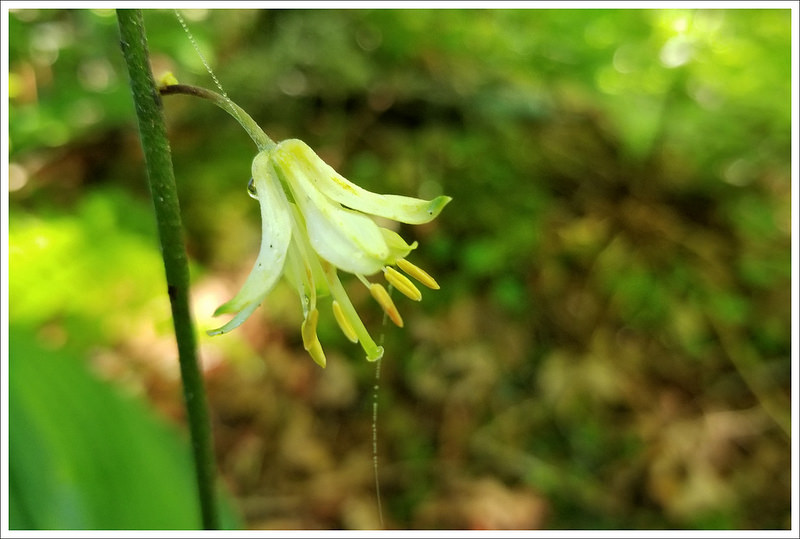


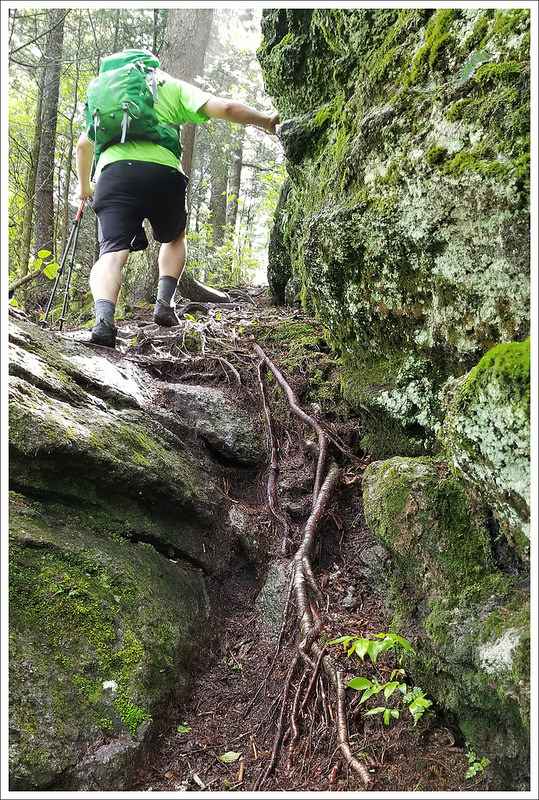


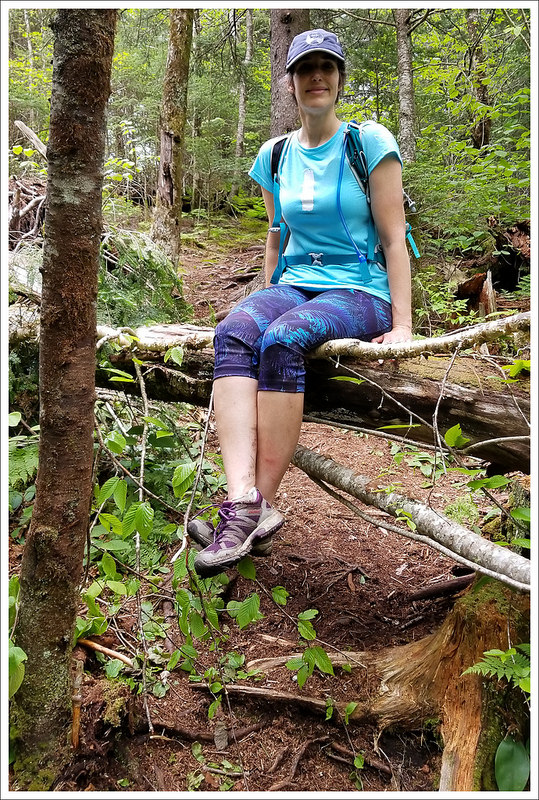


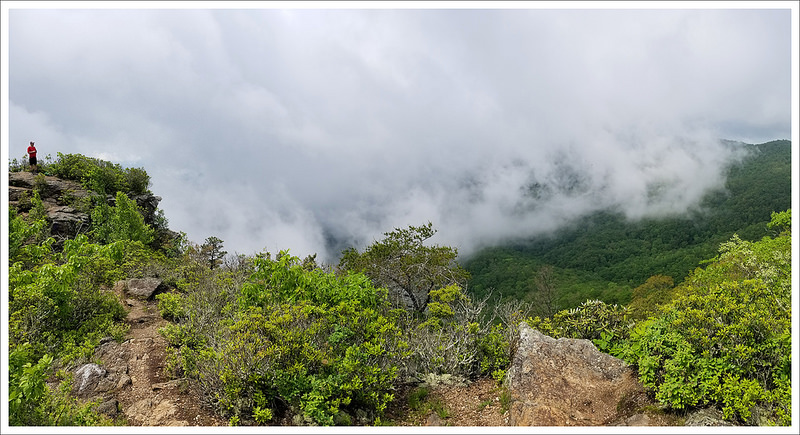

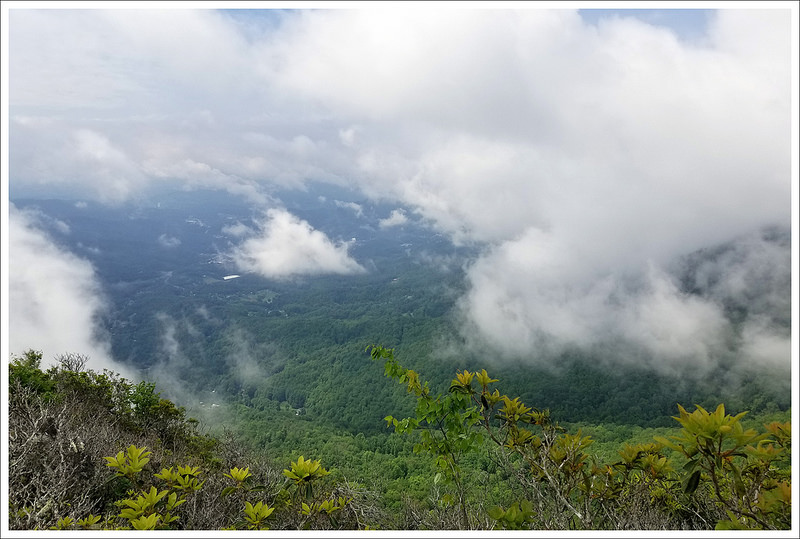


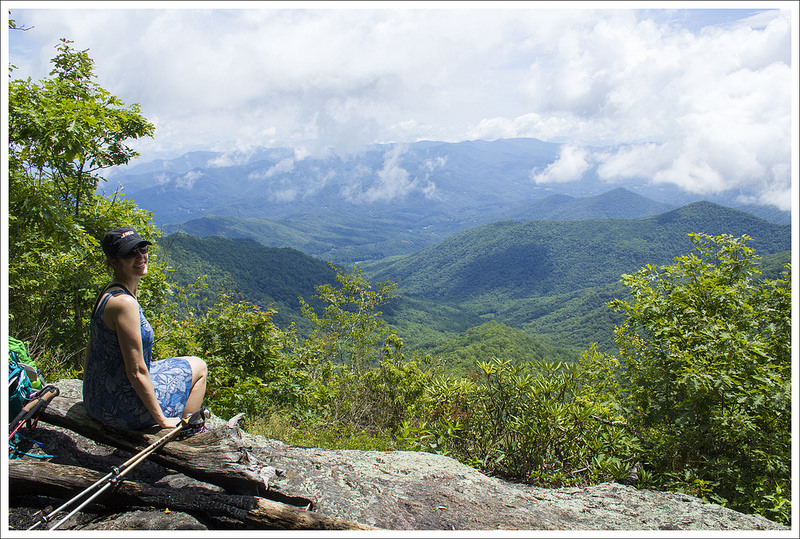
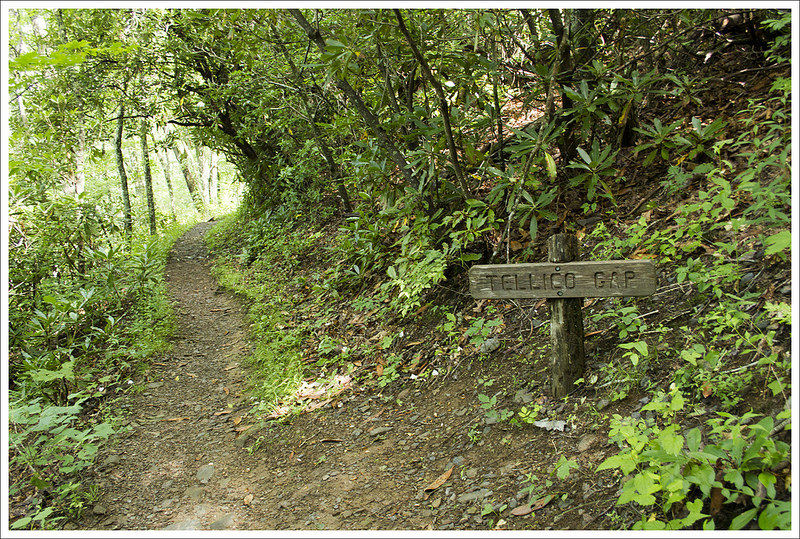

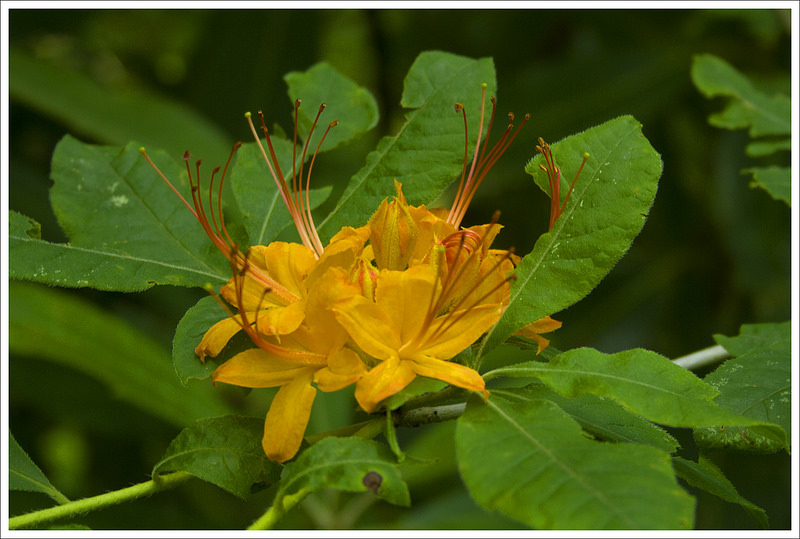
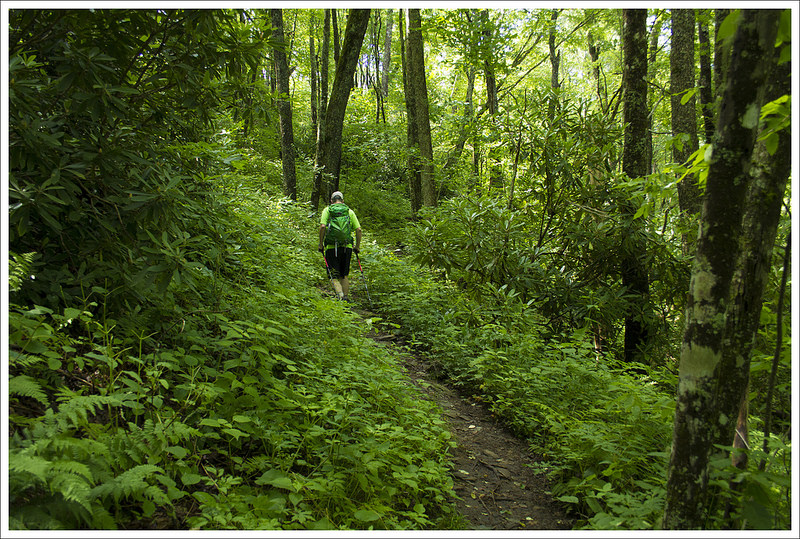


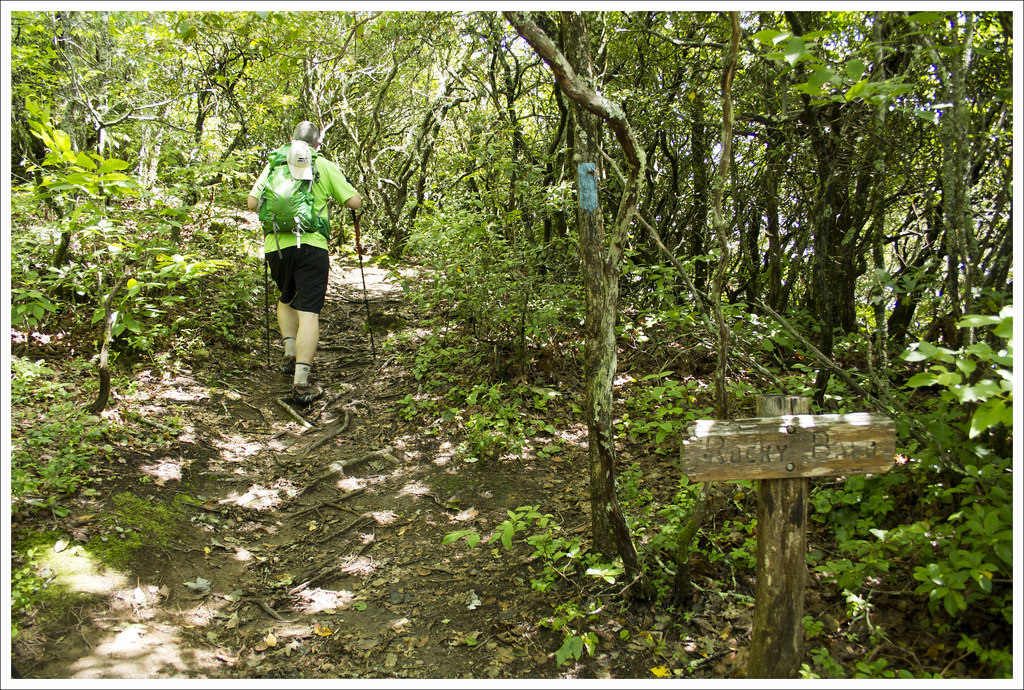
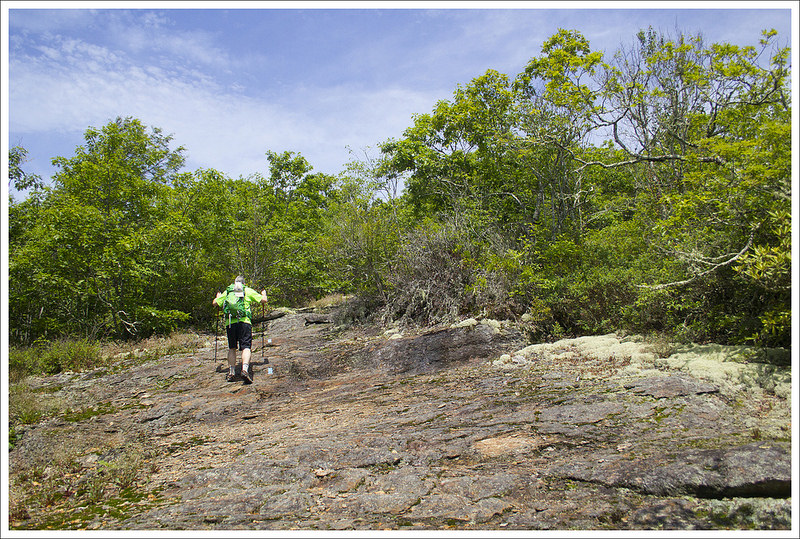
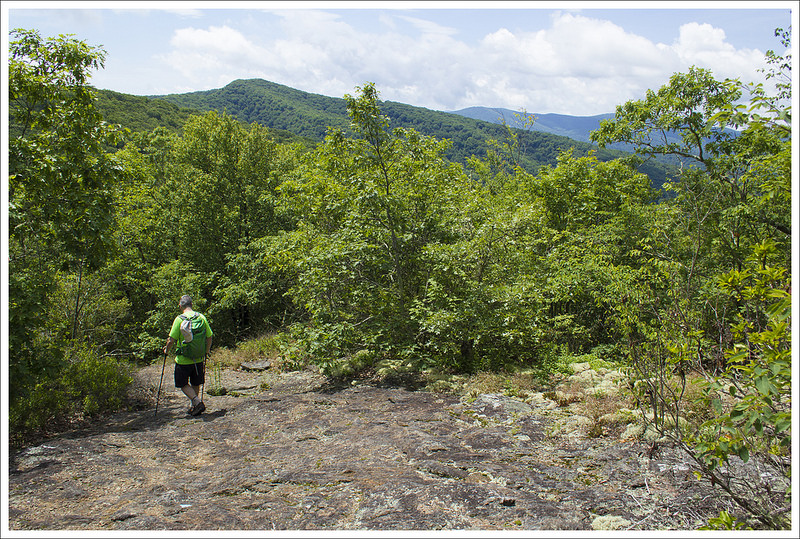
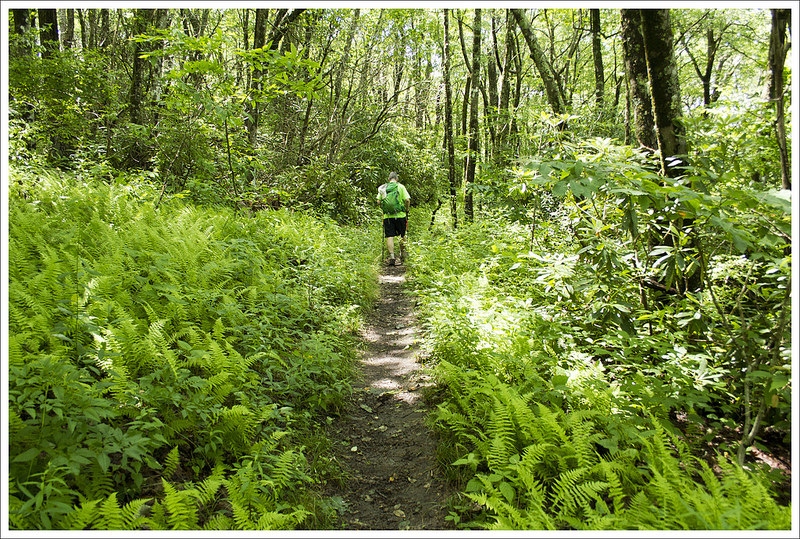
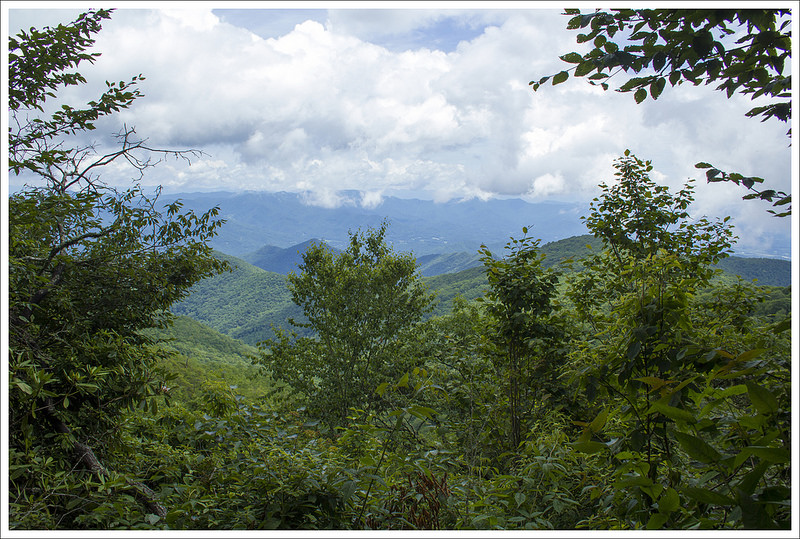
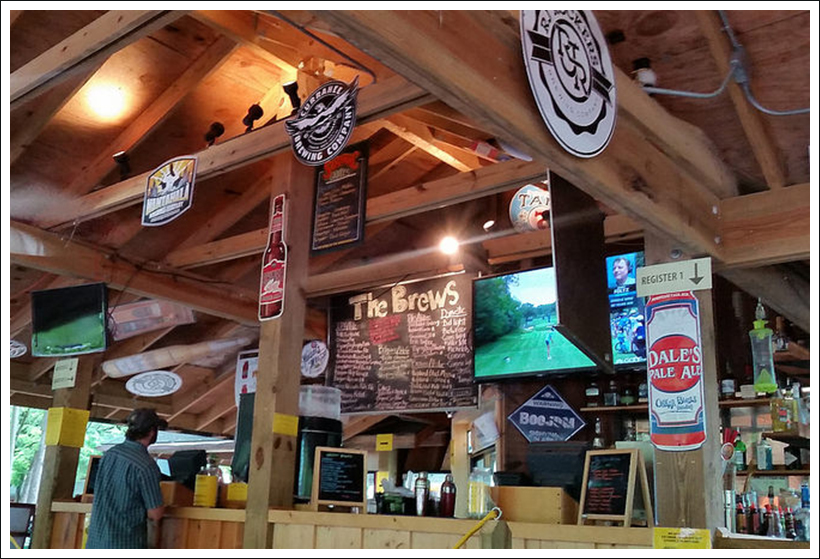


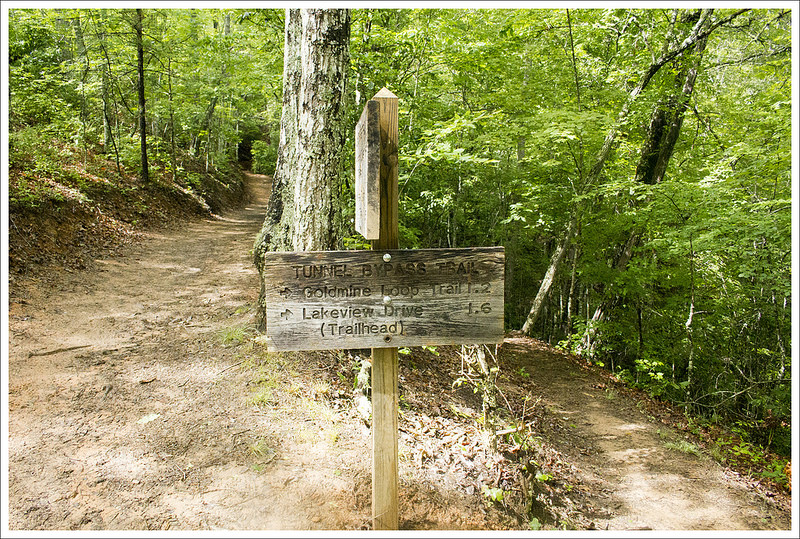


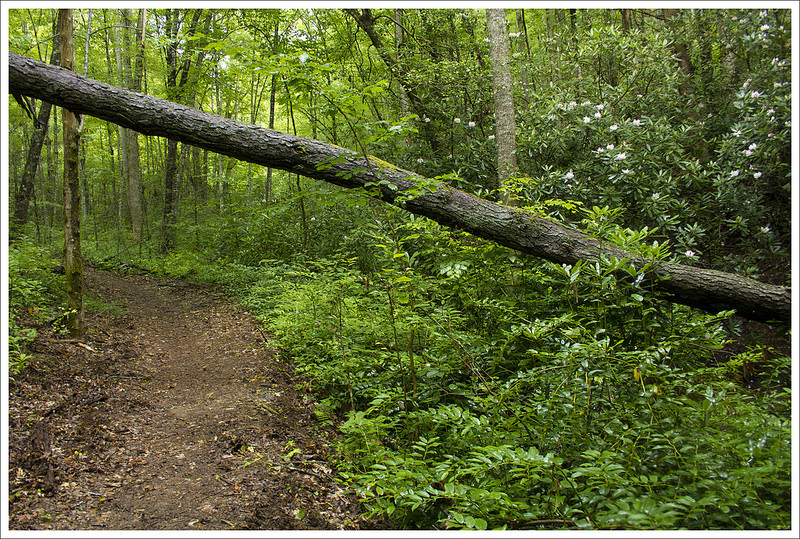
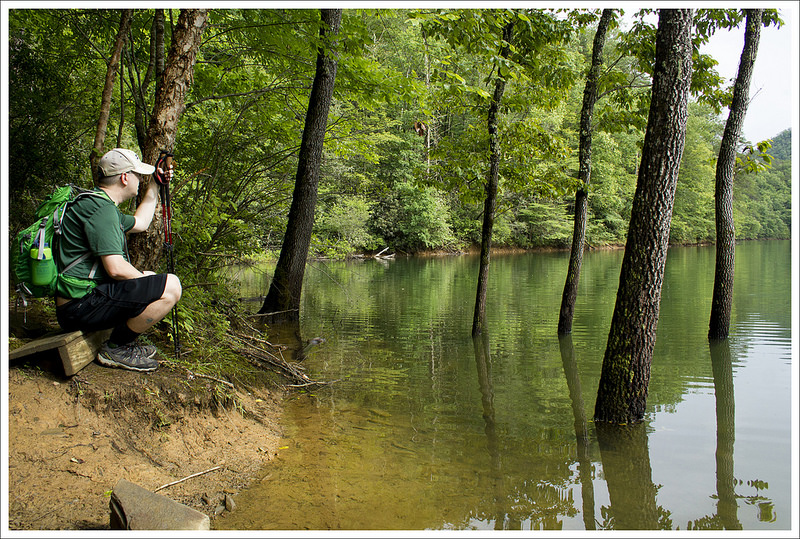

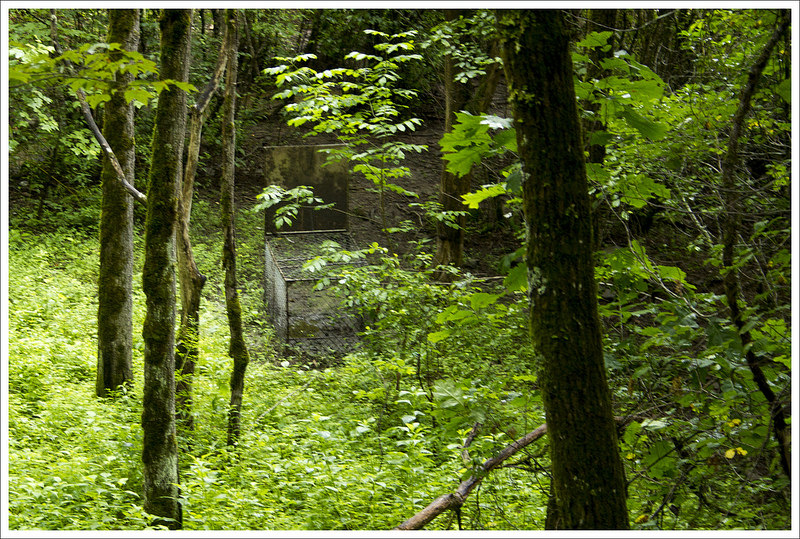


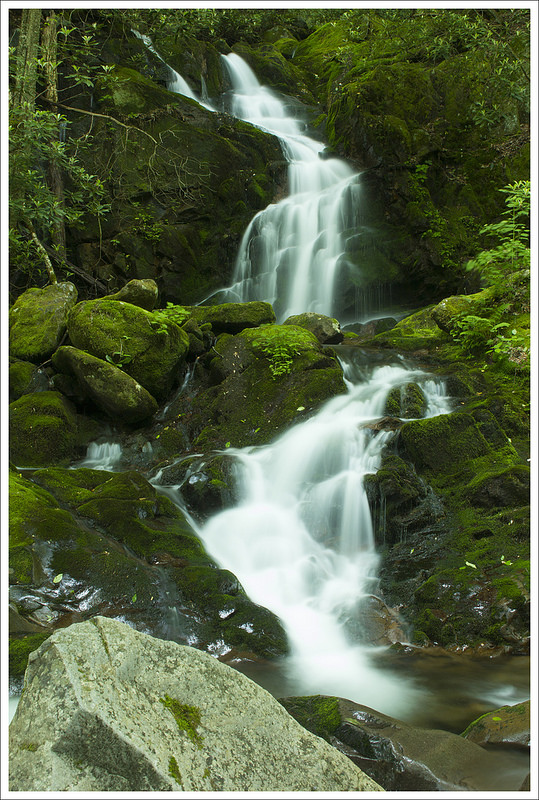
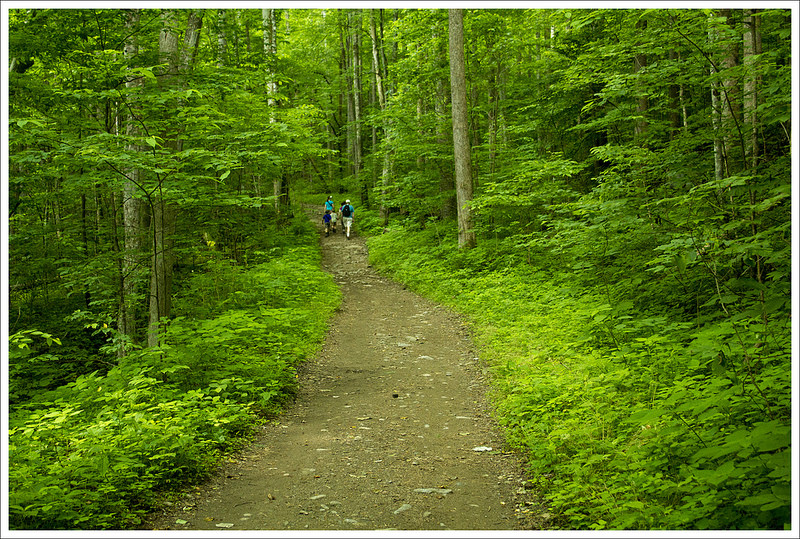


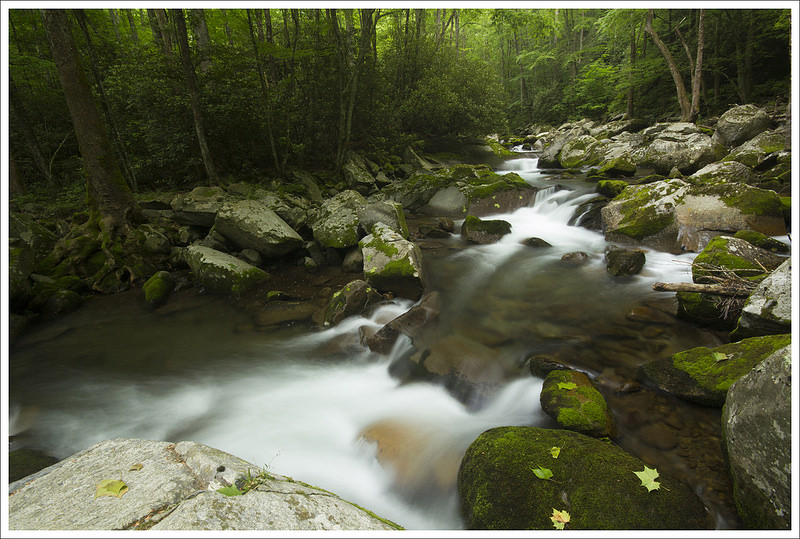


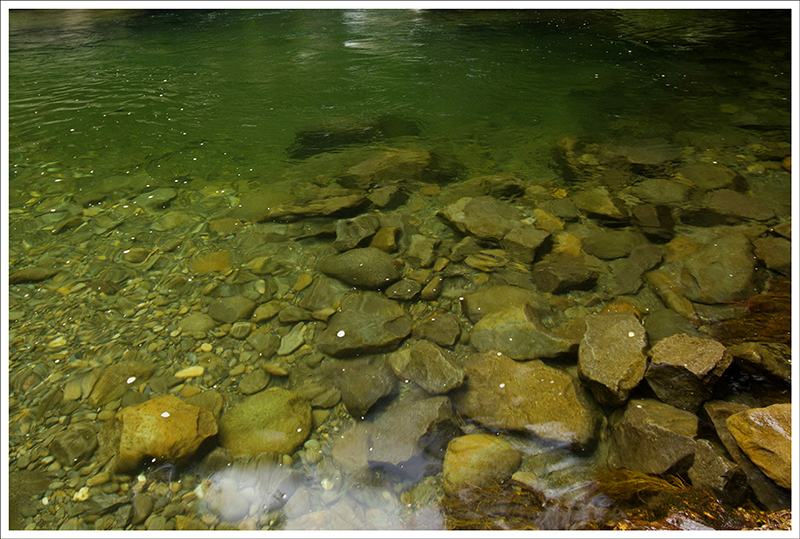


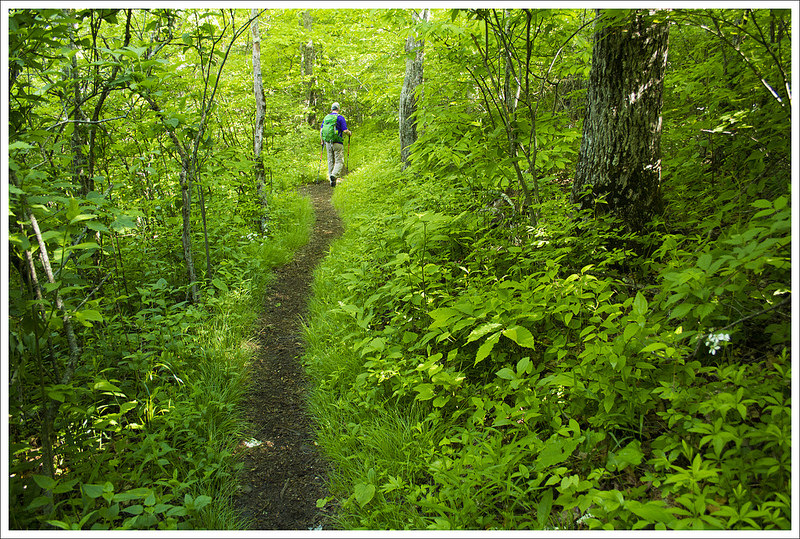

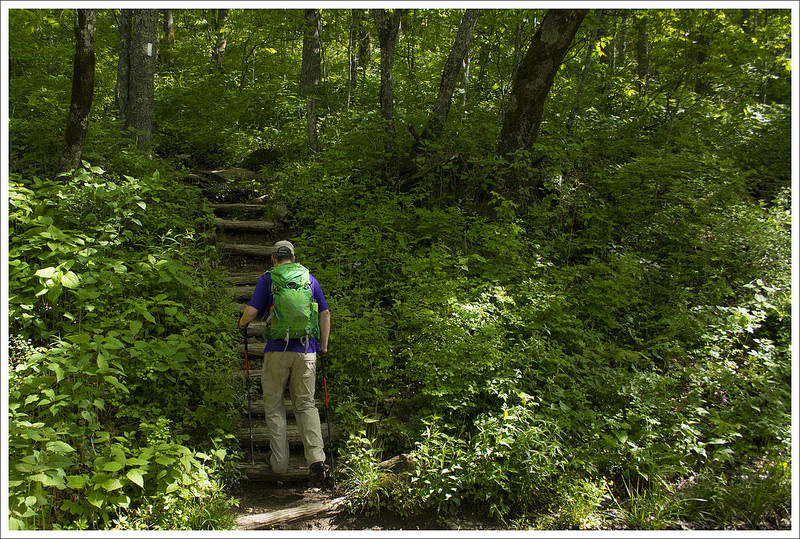


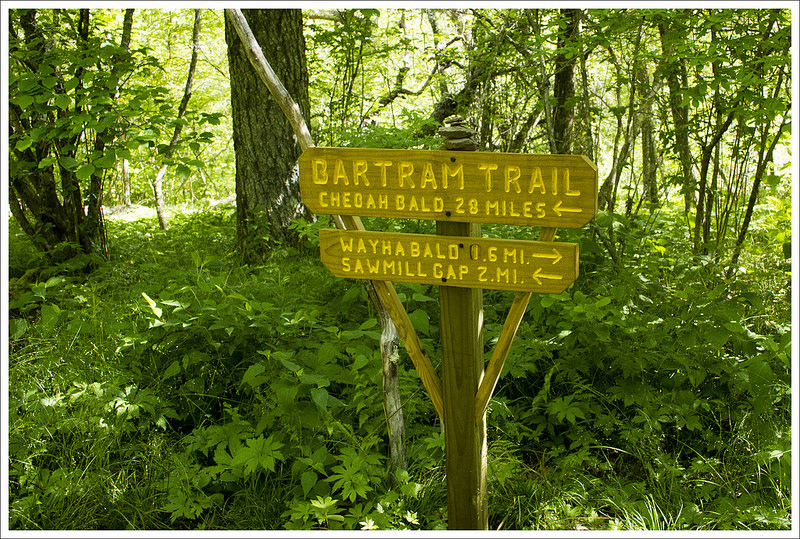

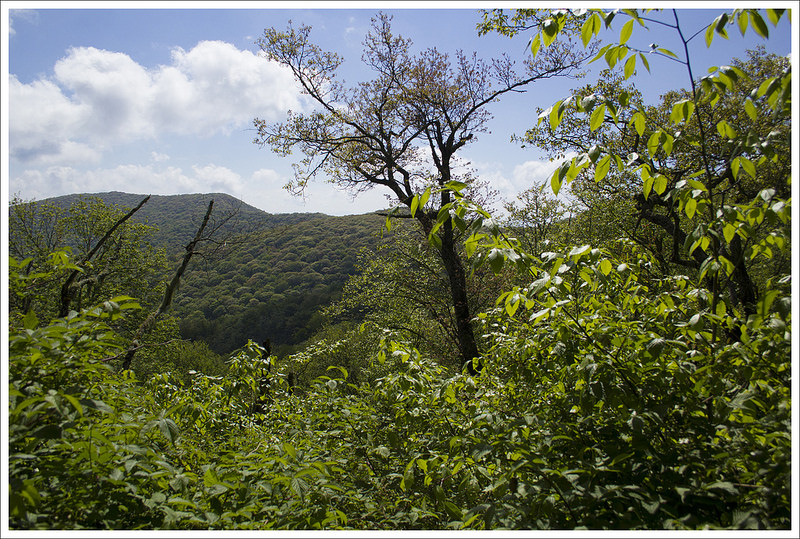
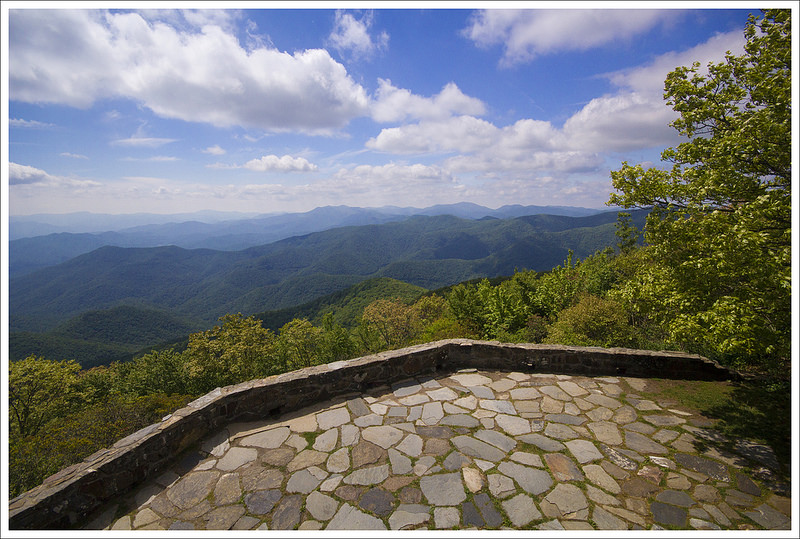


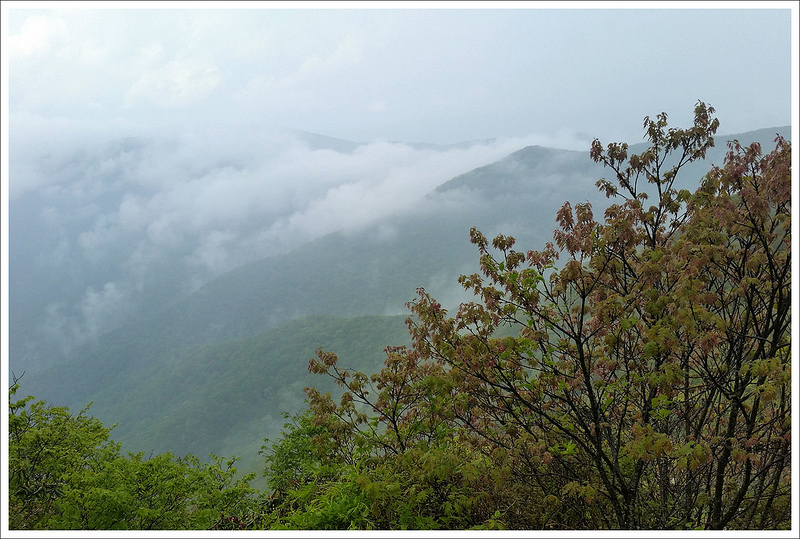


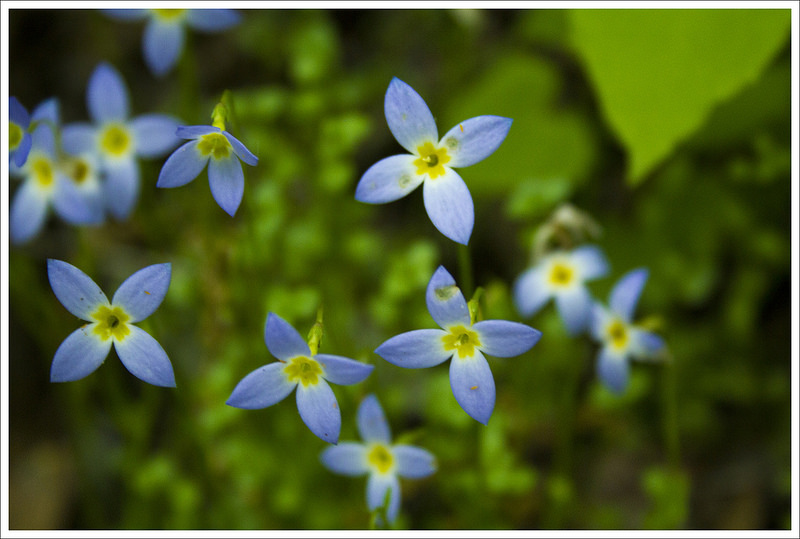


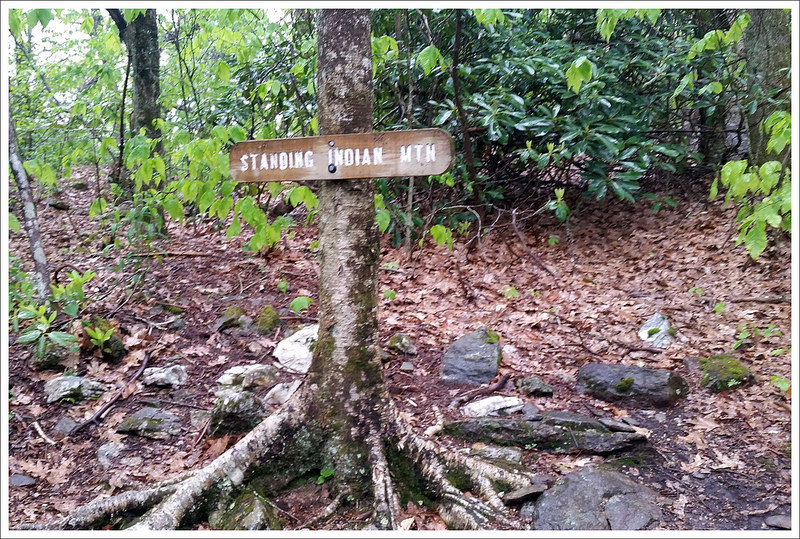

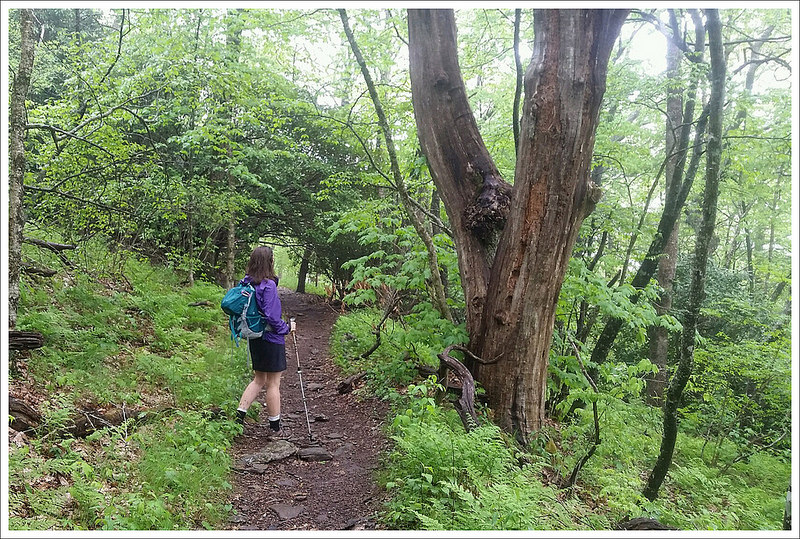


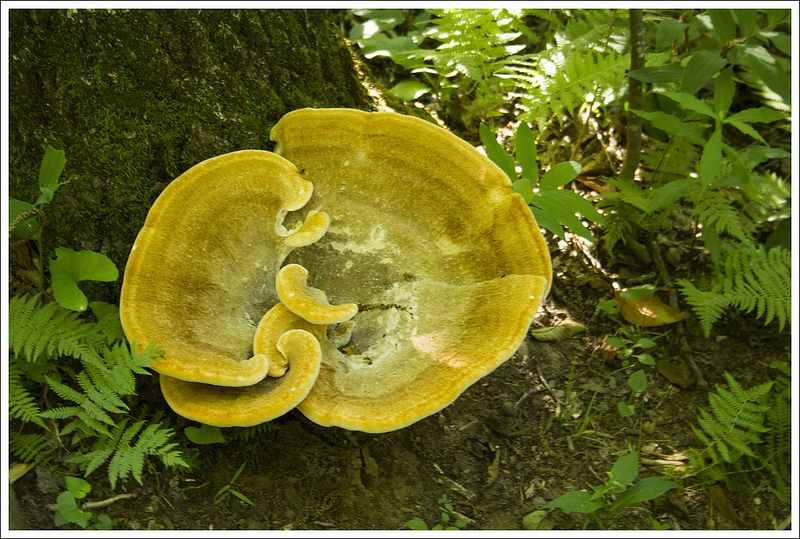
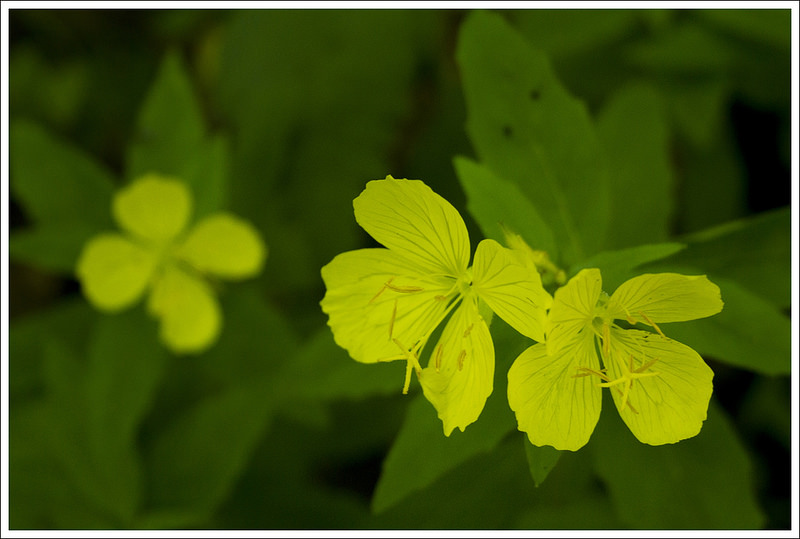


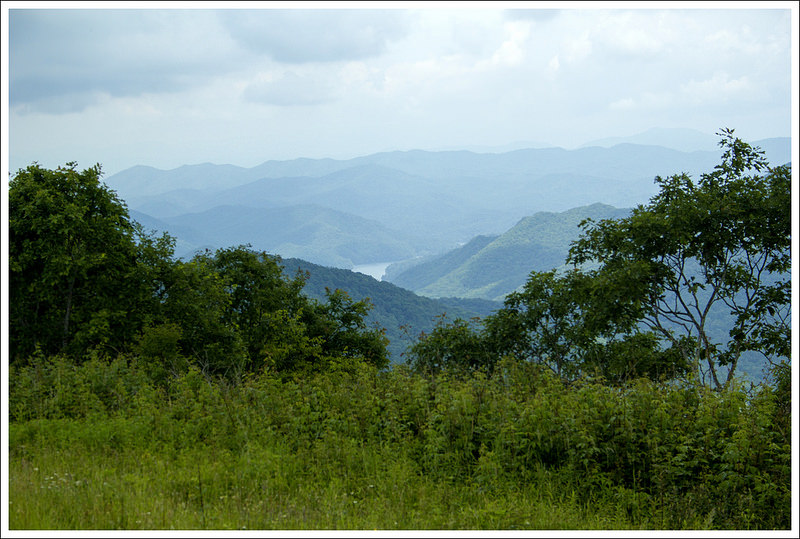


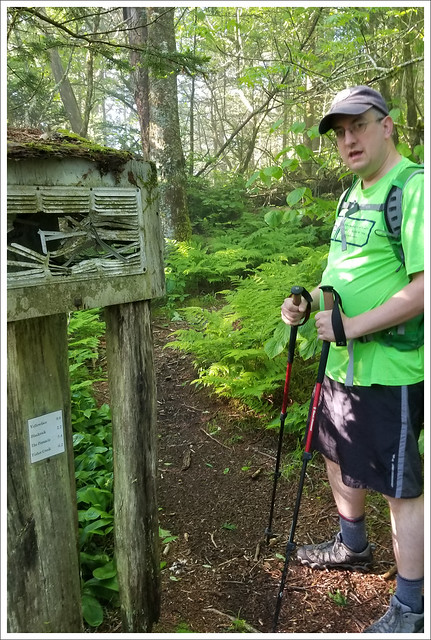
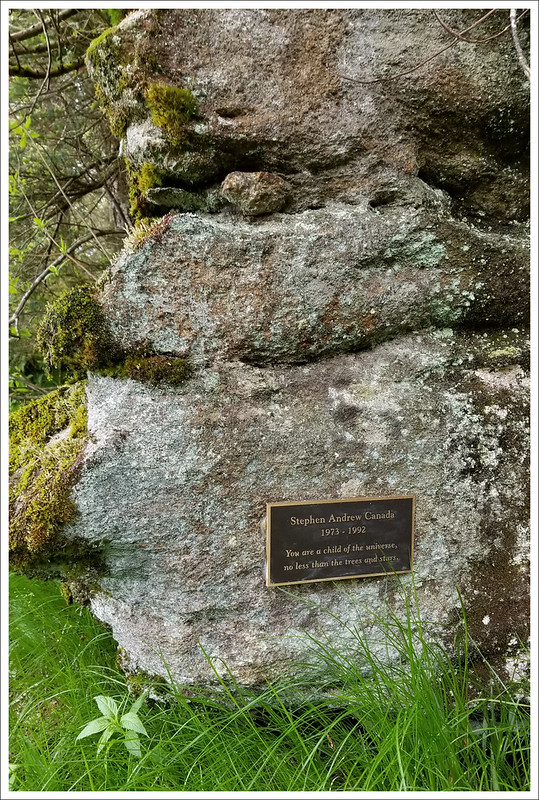