This 4 mile out-and-back is an easy hike to one of the Smokies’ lesser visited and under-appreciated waterfalls. The walk begins from the Smokemont Campground and follows a lovely stream and eventually reaches a pretty 25′ waterfall.
Pretty Chasteen Creek Cascade spills from the forest into a small pool below. Below: The trailhead at the end of Smokemont Campground. Adam tucked his pant legs in to avoid ticks; Mountain laurel along Bradley Fork; The trail is an old logging road.
Christine Says…
For the first few days of our trip, I wasn’t feeling great. Even after easy hiking days on Mt. Pisgah and Wesser Bald, I still wasn’t myself. Mentally, I had big hiking plans for every day of our trip, but in the end, my body dictated that we hike shorter, less strenuous trails.
On our second day in Bryson City, we woke up to lightning, rumbling thunder and torrential downpours. The local weather said that the heavy rain would clear out and leave us with a hazy, mostly cloudy, unsettled day. We decided that an easy waterfall hike would be perfect for those conditions. After breakfast at Mountain Perks (probably my favorite breakfast spot in Bryson City), we drove into the park.
Our hike started at the far end (section D) of the Smokemont Campground. For the first 1.2 miles, we followed the Bradley Fork Trail. It went gently uphill along the stream. The morning rain paired with the emerging sun made for a hot, muggy and buggy hike! Whenever we stopped for photos or to take in the scenery, we were swarmed by gnats and mosquitoes. Nonetheless, the trail was beautiful – so lush and green.
Adam Enjoys the Bradley Fork. Below: A marker for the Benton MacKaye trail along the shared portion of the hike; Someone built a ‘fairy house’ along the Bradley Fork; Trail junction with Chasteen Creek Trail; Campsite 50.
The trail along Bradley Creek is popular with horseback riders. In fact, the National Park Service concessionaire offers a trail ride from Smokemont Stables to the waterfall. I bet it’s a wonderful, scenic ride! The trail is also shared with the Benton MacKaye Trail – a 300 mile trail across the southern Appalachians. Almost 100 miles of the Benton MacKaye Trail passes through the Smokies. MacKaye, a forester from Massachusetts, is noteworthy because he came up with the idea for the Appalachian Trail… what a legacy to leave behind!
At 1.2 miles, the Bradley Fork Trail intersects with the Chasteen Creek Trail. At this junction, take a right and follow the trail toward Chasteen Creek. Almost immediately, on the right, you’ll pass Backcountry Campsite 50. It’s a pretty streamside spot with a fire ring and bear cables. The campsite can only be used if you have secured a paid permit. Evidently, permits in the Smokies can be hard to come by, so plan early!
After the campsite, walk another half mile along the Chasteen Creek Trail. Shortly after crossing a footbridge, you’ll come to a split in the trail. On the left side of the split, you should be able to see a hitching rail and mounting step for horseback riders – go in this direction.
From the clearing for horses, you’ll see a narrow footpath following the creek. In just about a tenth of a mile, you’ll come out at Chasteen Creek Cascade. It’s about a 25 foot waterfall. It’s not the kind of waterfall that plunges dramatically; rather it slides over the rocks into a pretty pool below. We had the waterfall all to ourselves and enjoyed the spot for about twenty minutes. Afterwards, we headed back the way we came and back into Bryson City for lunch at the Bar-B-Que Wagon. They have great Carolina-style barbecue with all the expected sides.
Christine walks along the Chasteen Creek Trail. Below: The split in the trail that leads to the falls; Hitching post and mounting block; Adam at the falls.
Adam Says…
When we talk to people about the Smokies, they seem to be surprised that some of the best highlights of the park are the waterfalls. In talking with the locals of the area, April and May tend to be very rainy seasons for the area. Storms move in and out quickly through the park, but they typically expect a little rain most days during this season. Rainy days are prime days for waterfall viewing and photography.
We started off our hike from the Smokemont Campground in the D section of the campground. In the winter, this may be blocked off and you may have to park and leave from the C section. The trailhead starts from a large gate near the designated parking area at the end of the campground. We doused ourselves with bug spray and moved on.
We saw a swarm of butterflies on the trail. Below: After lunch, we visited impressive Mingo Falls. It’s probably the tallest waterfall in the area; Nantahala Brewing Company and Anthony’s Pizza were the perfect way to end our time in Bryson City.
The trail was gradually uphill, but it mostly felt flat. In fact, we were surprised to see the elevation gain on the hike afterwards. The trail started off on a gravel road alongside Bradley Fork. The forest was lush with green from all of the rain, so it was a pleasant stroll through the woods. Because of the width of the trail, Christine and I could also walk side-by-side along the trail. At 1.1 miles, we crossed a large footbridge and at 1.2 miles we came to the intersection with the Chasteen Creek Trail. We took a right there and continued to walk on a wider trail, passing Campsite 50 at 1.3 miles. At 1.9 miles, we reached the side trail to the left with the horse hitching area. It was a short walk to get to the waterfall from there. We headed back the way we came for an easy, scenic hike.
If you wanted to make this a longer hike, after you visit the waterfall, return back the way you came. You could take a right at the junction with the Bradley Fork trail and connect to the Smokemont Loop Trail. This would make the grand total of distance about 8 miles, but would loop back to a different section of the campground.
You may see people fishing for rainbow trout along the Bradley Fork or Chasteen Creek. I can imagine many campers at the Smokemont Campground spend some time fishing in hopes of cooking some fish from the water.
After the hike, we had lunch then headed into Cherokee to check out the Qualla Arts & Crafts Mutual. Their traditional work is fascinating and beautiful. We always enjoy visiting. After that, we stayed on the reservation and visited Mingo Falls, one of the tallest and most impressive waterfalls in the Appalachians. It was a short walk, but there were many stairs!
Our wrap up for the day was a visit to Nantahala Brewery followed by pizza from Anthony’s. We consider those two stops to be ‘must-do’ in Bryson City! On to Gatlinburg tomorrow!
Difficulty – 1.5. This is an easy walk along a very gently graded trail.
Trail Conditions – 4.5. The trail is mostly wide and road-like. It’s only narrow and muddy at the base of the falls.
Views – 0. None.
Streams/Waterfalls – 4.5. Bradley Fork, Chasteen Creek and the falls are all beautiful!
Wildlife – 3. We didn’t see anything, but the Smokies have wildlife everywhere!
Ease to Navigate – 3.5. The trail is easy to follow if you read the junction markers. The shared/intersecting trails might be confusing if you’re not paying attention.
Solitude – 3. Chasteen Creek Falls is not one of the park’s more popular trails. You may see horses and occasional hikers from the campground, but generally this trail has less foot traffic than many others.
Directions to trailhead: From Newfound Gap Road (Route 441), follow signs to Smokemont Campground. The campground is located 3.5 miles north of the Oconaluftee Visitor Center and 26 miles south of the Sugarlands Visitor Center. Park in the hiker parking area at the end of section D of the campground.
This 2.8 mile out-and-back is an easy hike to one of the area’s best viewpoints. The platform atop the defunct firetower on Wesser Bald offers panoramic views of the spectacular Smokies (and all the other mountains in the area).
You get classic Smoky Mountain views from the tower atop Wesser Bald. Below: A sign points the way to Wesser Bald: The parking area at Tellico Gap provided a view of powerlines and a ‘cloud sea’; The drive into Tellico Gap follows the extremely scenic Otter Creek. It’s worth stopping to enjoy the rapids and small waterfalls.
Adam Says…
It is nice when you find a hike that the locals rave about. During our trip to North Carolina, I heard three different people mentioning that we needed to hike Wesser Bald. After getting to the top, I can see why this is so revered.
When we started off in the morning, it had been storming the night before. A fog had settled on the lower elevations. While we were driving, we were curious if we were going to get any views at all. On our drive there, the cloudy conditions gave us great views along the Nantahala River as we passed several scenic spots and chances to catch some roadside waterfalls and rapids. We made our way up Otter Creek Road and parked at Tellico Gap, where the Appalachian Trail crossed the road.
When we first parked, we noticed the sign that designated the start of the trail, but we noticed there was a white-blazed trail and a fire road to the left. We knew our hike was on the white-blazed Appalachian Trail, so we took the trail to the left. The fire road trail to the right also leads to the tower. I’m not sure how the conditions are on it, but it did seem to be shorter, since we found a family with kids that left after us beat us back to the parking lot (and they didn’t seem like fast hikers). The trail passed through a thick brushy area fairly quickly, but most of the trail was in a more opened-up wooded area. The hike was fairly uphill as it skirted the mountainside, but I didn’t find any of the trail to be incredibly steep. Instead, it winds There were a few switchbacks towards the end of the hike where it was a little steeper, but the switchbacks save you from going straight up the mountain.
Adam walks along the Appalachian Trail en route to Wesser Bald. Below: A cool, bent tree along the trail; Mountain laurel were just starting to bloom; In fact, there were many wildflowers blooming.
When we reached the top of the spur trail at 1.3 miles, there was a great viewpoint that gives you a small sample. If you are not willing to climb the fire tower, this would be the best views you would get on this hike. As you reach the top, take a right and you’ll reach the fire tower in a short distance. Make your way back to complete the out-and-back or you could press pass the fire tower to take the fire road back to make it a loop.
When we reached the fire tower, we could hear a couple people at the top of the tower. Christine quickly made her way up. I, on the other hand, needed to psych myself up. As you’ve probably seen in many pictures, I don’t mind getting out on rocks that are on the edge of a huge precipice; however, I don’t trust man-made structures when it comes to heights. I trust nature over man. I went up halfway and then I could start to see the sky through the gaps in the stairs and I just turned back around. But from the bottom, I could hear Christine and the others at the top of how beautiful everything was and I knew I needed to force myself to get up there. So, I took a second attempt and made it up. Christine and the others at the top applauded my efforts for overcoming my fear. I’m so glad I made it to the top, because the scenery was breathtaking and some of the best mountain views I’ve ever seen. We stayed up there a while and talked to a few different groups of people that made it up after we did.
After we made it back, we decided to head to the Nantahala Outdoor Center. We had a nice lunch at the River’s End and then we enjoyed a beer at Big Wesser BBQ & Brew, while watching kayakers and whitewater rafts go down the river. This is always one of our favorite spots while visiting near the Smokies and it is definitely a place you can spend hours during the afternoon. You can also hike from Tellico Gap to the Nantahala Outdoor Center on the Appalachian Trail for a one-way total of 7.5 miles if you want to do a shuttle option.
If you are interested in geocaching, there are three you can find on the trail:
The forecast for our week in the Smokies didn’t look good – stormy, rainy and unsettled every single day from Sunday to the next Saturday. So, when we woke up to dense fog on Monday morning, we weren’t completely surprised. However, the hourly forecast on weather.com made it look like the fog might burn off. We hoped that the odds would be in our favor, and headed off to hike a trail we’d been eying for a while. Wesser Bald is a short, moderate 1.4 mile hike along the AT to an old fire tower overlooking the southern Appalachians. It’s a spectacular view if you’re lucky enough to hit the spot on a clear day.
From Tellico Gap, we followed the AT as it made gradual, sweeping switchbacks through beautiful, lush forest. The trail was lined with wildflowers and blooming azaleas/rhododendron. I think I saw more pink lady slippers on this hike than I’ve ever seen anywhere else. It was gorgeous. The azaleas came in white, pink and orange and the rhododendron bloomed in their classic bright pinkish-purple color. I also spotted wild strawberries and some gorgeous purple spiderwort.
Christine enjoys the first view along the trail. This spot is at the head of the spur trail to the tower. Below: The fire tower is two stories high; The stairs are open and a little rickety; Christine atop the fire tower.
The humidity took some getting used to! Even though it wasn’t particularly hot, the day was windless and the air was completely saturated. By the time we got to the top, I looked like I’d been dunked in a pool! Just before reaching the tower, we passed a nice view looking toward the Smokies and Fontana Dam. Near the overlook, a short spur trail took us to the top of Wesser Bald. This bald is no longer actually a bald – it’s been let go and returned to the natural forest environment. So while the view has closed in from the base of the tower, the view from the two-story viewing platform is superb!
I climbed up to the top and said WOW! Adam didn’t feel comfortable with the open, rattling stairs, so he hung out at the bottom while I chatted with a couple at the top. They had hiked up earlier from the NOC and were waiting to meet up with their son, who was on a solo backpacking trip. They were really fun to talk to – both were veteran AT thru-hikers and REI employees. We talked about favorite spots on the AT and chatted a bit about gear. I always love meeting people like them on the trail!
Views from the Wesser Bald fire tower are majestic. Below: There were many pink lady’s slippers along the trail; Spiderwort: Christine enjoys a post-hike shandy at the Big Wesser Brew & BBQ at the Nantahala Outdoor Center.
While we were chatting, Adam mustered the courage to climb to the top of the tower. He was so glad he did, too! The views really blew both of us away! Even though it was hazy, we could still see for miles in every direction. We spent a long while atop the tower, enjoying the views and the fresh mountain air.
After a while, we decided it was time to make our way down and seek out some lunch. One of our repeat stops ever time we visit the Smokies is the Nantahala Outdoor Center. We enjoy lunch at the Riverside Cafe, browsing the nice outdoor gear store, and (of course) drinking a few beers by the river at Big Wesser. It’s so fun to sit at an umbrella table, drink a nice craft beer and watch kayakers shooting through the rapids. It’s also a great place to people-watch in general. While we were sitting and enjoying our drinks, the skies opened up and dumped a huge amount of rain in just a few minutes. I’m sure glad we had the rain at the NOC instead of on top Wesser Bald!
Trail Notes
Distance – 2.8 miles out-and-back
Elevation Change – 777 feet.
Difficulty – 2. The trail is mostly uphill, but not too steep.
Trail Conditions – 4. The trail was in great shape and the footing was fairly solid.
Views – 5. Absolutely spectacular views from the fire tower and another nice view right before the tower.
Streams/Waterfalls – 0. Non-existent.
Wildlife – 1. We only saw some birds along the way.
Ease to Navigate – 3. The confusion of the fire road at the beginning gives it a lower score, but other than that you should be fine. Follow the white-blazed AT.
Solitude – 2.5. Popular with locals, but this wouldn’t get the traffic that a hike in the nearby Smokies would.
Directions to trailhead: From Bryson City, follow US 19/74 for 20 miles. Turn left on Wayah Road and follow it for five miles. Turn left on Otter Creek Road and drive 4.1 miles to Tellico Gap. The road is paved for the first 2.8 miles. At the crest of the hill, you will see the AT crossing and several parking spots. Follow the signs to Wesser Bald.
This 3 mile out-and-back leads to the towering (literally) summit of 5,721 ft Mt. Pisgah. Due to the short length and proximity to lodging, a camp store, and a picnic area, this trail is exceedingly popular with families. The summit offers some nice views, but the presence of a huge television tower detracts from the natural beauty of the area.
The TV tower definitely detracts from the scenic beauty of Mt. Pisgah. Below: The trail to the top is short, but it gets steep and rocky in places; Not the prettiest of summits.
Christine Says…
Our second day in Asheville was just a half day, but we wanted to get a little more hiking in along the Blue Ridge Parkway before making our way down to Bryson City and the Smokies. Breakfast was at the popular Sunny Point Cafe. We got there just a couple minutes before they opened and were able to snag the last open table for two! It’s a very popular spot, so be prepared to get there early or have a long wait.
After breakfast, we headed up to the parkway to climb Mount Pisgah. Our book talked about great views, but described the hike as ‘strenuous’. In fact, there was a warning sign at the trailhead indicating that the hike was tough and steep. It actually only climbs about 700 feet, but it does so in a short distance. I suppose the warning is necessary for novice hikers or people who think they’re just out for a casual stroll.
The hike started out from a parking lot atop the Buck Springs Tunnel. There are actually a couple trailheads in that area – Mt. Pisgah, Shut-In Trail and the Buck Springs Trail. To get to the Pisgah Trail, drive to the far end of the parking lot.
The rhododendrons and azaleas were blooming when we visited. Below: The Mt. Pisgah trailhead; Hiking along the flatter, easier part of the trail; Spring blooms!
The hike started off gentle and flat – just a pleasant walk through the woods. We could see the conical summit of Pisgah, replete with its television tower, looming through the trees. The trail made a sweeping turn at around .4 miles and began a steady uphill climb. It was rocky and rough at times, but overall a moderate ascent. A couple tenths of a mile before the summit, we came across one nice view across the mountains.
After the nice view, we made the final push to the top. The summit has a wooden viewing platform and a serious eyesore of a television tower. I know they’re necessary, but I wish they could have put it on a less scenic, more remote peak! All that metal really ruins the scenic beauty of such an impressive summit.
We sat on the summit for a while. The views would have been pretty nice, but the day was overcast and hazy, so that took away some of the majesty from the experience. I think we were also the only people on the summit without kids! Mt. Pisgah is clearly a very popular family hike! There were more three-year-olds on that mountain top than any other demographic. I guess it makes sense – the hike is short, moderate and doesn’t have any steep drop-offs — perfect for a family with small children.
We hiked down the way we came, making speedy work of the descent. Now… on to the Smokies!
There was one nice view from the trail before we reached the summit of Pisgah.
Adam Says…
When we’re on vacation, we like to alternate longer hikes with shorter hikes to make sure we still have energy at the end of our trip. When we were researching different hikes to do near Asheville, NC, we came across Mt. Pisgah. With it being such a short hike and the trailhead being sort of en route to our next town stop, we thought this was a winner. We also read about wonderful views from the top so we figured it would be a high payoff for minimal effort.
The trail started off following a slight incline for the first few tenths of a mile. Then the trail went up more steeply in elevation and can be challenging at times. But, since the hike is pretty short, it is attainable by most people. We saw more families hiking on this trail with little children than anywhere else. While many of the kids were walking the trail in the beginning, we found most of them were being carried by the time they reached the summit.
Yes… the summit is a little disappointing. Below: A steeper, rockier section of the trail; The viewing platform atop Mt. Pisgah; Hazy views from the summit.
We arrived at the top in well under an hour. The tower was such an eyesore and we both were thinking this would be so much nicer of a hike without the 339-foot tower there. The wooden platform allowed for about 270-degree views (90 degrees taken up by the tower). While it was hazy, I could tell that on a clear day you would be able to see for quite a distance.
The origin of the name of the mountain comes from the Bible. The Reverend James Hall is attributed to being the first to call this area as “Pisgah”, taken from the biblical reference to the peak where Moses viewed the promised land. The Pisgah National Forest was historically owned by the Vanderbilts (who built the nearby Biltmore House in Asheville). 500,000 acres were sold to the government by the Vanderbilts as an effort to help preserve this land.
If you are interested in geocaching, there are several to find on this trail:
You can see the parking area and the Blue Ridge Parkway from the summit of Mt. Pisgah.
While this hike does have some nice views from the top, we were a little disappointed by the size of the tower and the popularity of the trail. As Christine mentioned, it would have been nice to have this on a more remote mountain (and also not the namesake for the entire National Forest).
Trail Notes
Distance – 3 miles
Elevation Change – 700 ft
Difficulty – 1.5. This trail is short with a moderate ascent.
Trail Conditions – 4. The trail was generally in good condition.
Views – 3.5 – Typically views from a peak like this would get higher marks, but the tower is such a distraction.
Streams/Waterfalls – 0. None
Wildlife – 1. Maybe some birds and squirrels.
Ease to Navigate – 5. There is only one trail to the top, and it’s very easy to follow.
Solitude – 1. This trail is popular and heavily traveled.
Directions to trailhead: From Asheville, take the Blue Ridge Parkway south to the Mount Pisgah Parking Area, on the left, at milepost 407.6. Park at the second parking area.
This 6.6 mile loop offers some of the area’s most amazing high-elevation, Appalachian bald scenery! It was right up there with Roan Mountain. The views are 360 degrees and showcase mountains in every direction. If we were to hike it again, we’d do it as an out-and-back and skip the return arm of the loop along Graveyard Ridge and Mountains to the Sea.
Hiking Black Balsam and Tennent reminded us of both the Whites (in New Hampshire) and Roan Mountain (in Tennessee). Such spectacular, wide-open views! Below: The most scenic parts of the hike followed the Art Loeb Trail; The Graveyard Ridge section was wet and had a stream crossing; The end of the hike took us across numerous boardwalks/bridges.
Adam Says…
When we were planning our trip to the Smokies, we decided we wanted to spend the first few days near the Asheville, NC area and check out a few hikes along the Blue Ridge Parkway. We had set out in the morning to check out the Graveyard Fields waterfalls. On a trip here many years ago, we remembered how beautiful the series of waterfalls were. We brought a book with a description of the hike that would include a visit to Black Balsam and Tennent Knob on the loop. However, we didn’t have a map of the area other than what our book had provided. After driving along the parkway for some time, we pulled up to where the parking lot would be (mile marker 418.8) and it was all blocked off by fencing. It appears they are doing some major renovations of the parking area and stairs down to the Second Falls. They had blocked off any access to the trail and instead had signs saying that you could access the trail from many miles away. We were very disappointed, but decided to drive up further along the Parkway. We took a right on the gravel road 816 (mile marker 420.2) and followed that until we saw a trail marker to the right that led up to Black Balsam Knob. We were relieved we were going to be able to see the balds and I realized we were picking up our loop trail but just a little differently than we had originally intended.
From the road, you start on the Art Loeb trail. In a few hundred feet, you will see a side trail to the right. This is the Mountains to Sea Trail that will be your return from the loop. Stay straight to continue on the Art Loeb Trail as it ascends past amazing vistas. You will reach the summit of the Black Balsam Knob at .9 miles and will see many campsites at the top. On a clear day from here you will have 360-degree views all around with the Smokies to the west and Mt. Mitchell to the north. The trail took a sharp left at this point as you continue on the Art Loeb trail. On Black Balsam Knob, there are many other trails cut-in over the years along the balds which makes it tricky to know if you are on the right trail. As we left the summit area, we came to a junction between two trails that both looked legitimate. One seemed to go over a hillside and the other went to the left and around. We took the one to the left and saw a very worn sign that read “Art Loeb” so we knew we made the correct choice. The trail wrapped around the hillside and went through a narrow path with waist-high shrubbery growing along the trail. Our legs got a little scratched along the way, but we pressed on. After a while the trail went through a few switchbacks while descending and then flattened out. At this point, we could see Tennent Mountain ahead of us, so we felt comfortable that we were going the right way. Soon, the shrubbery opened up into a clearing and we climbed up the rocky path and reached the summit of Tennent Mountain at 2.5 miles.
Hiking across open, grassy balds at 6,000 ft. is such a treat! Below: The trail looks like a ribbon across the mountain tops; Lots of colorful tents on Black Balsam Knob; You can see a glimpse of the parking lot at the trailhead.
The summit of Tennent Mountain was just as scenic with more views in every direction. From here we could also see Looking Glass Rock, one of the most iconic images along the Blue Ridge Parkway, in the distance. We had our lunch on the top of this spot and then made the decision to do the full loop instead of just the out-and-back to the summits. We continued forward on the Art Loeb Trail. From here, there were a few more nice views but then the trail descended into a more wooded trail. The trail passed a few more campsite options before we reached the area known as Ivestor Gap at 3.1 miles. Ivestor Gap is a large open junction point where many trails converge. There was a map that showed where we were, but none of the trails were marked to let us know which was the right one to take. When you reach Ivestor Gap, take the larger trail to the right that looks like an old road. This was the Graveyard Ridge Trail. We were on this for only .3 miles, before passing a small spring in the rocks on the lefthand side of the trail, and took a sharp right to stay on to the Graveyard Ridge Trail, another unmarked junction [staying straight on the trail would begin the Greasy Cove Trail]. The Graveyard Ridge Trail was very rocky and had a lot of water on the trail, so there was some times of rock-hopping and getting your shoes wet. While on this trail, you may have a few glimpses at Tennent Mountain above to see where you came from and there are a couple of spots for viewpoints.
At 5.1 miles, we reached another junction. Deciding to forego the trip to see the waterfalls to Graveyard Fields (which would have probably added another 4.5 miles roundtrip to our hike), we took a sharp right up the Mountains to Sea Trail. This trail was extremely steep and at times felt like a bushwhack as the trail was very overgrown. In about .5 miles, you’ll gain over 500 feet of elevation, so it is a slow effort. Eventually at 5.75 miles, the trail reached the top of the bubble and you got a few more views from a rocky outcropping. Blazes were painted on the rock that led the way as the trail descends below. The trail moves away from the ridgeline before switching back – it feels like the wrong direction, but it’s not. The trail descends for a few hundred feet before climbing up again. You’ll pass over several wooden footbridges along this section of the trail. At about the 6.5 mile mark, the trail goes into a deep wooded area again and you reach the junction again with the Art Loeb Trail. Turn left and you head back to 816 in a short distance.
Spectacular views with every step! Below: In the saddles between the high points, the trail was narrow and lined by dense shrubs; Adam stands atop Tennent Mountain; Summit of Tennent Mountain.
At the top of Tennent Mountain, there is a plaque on the rocks dedicated to Gaillard Stoney Tennent (1872-1953) who “established organized hiking in North Carolina.” I couldn’t find any more connections or information about Tennent online, but this sounds quite impressive.
If you are interested in Geocaching, there are several you could find along the trail (and it wouldn’t hurt to have a GPS handy):
While we tried to cover some extra ground on this trail by making it a loop (and leaving the option to inspect the waterfalls), I would recommend doing this trip as an out-and-back to Tennent Mountain. The trail system is very confusing here since trails are rarely marked and junctions are not labeled (we’re a little spoiled here in Virginia). We had to ask several people along the way if we were going in the right direction, so I can imagine a lot of people will feel lost at some point along this trail. All that being said, the views from Black Balsam Knob and Tennent Mountain are breathtaking. On a clear day, you can see for hundreds of miles and can see ridgeline after ridgeline of mountains around you with few glimpses of anything resembling civilization. Don’t miss this one if you are looking for a hike along the Blue Ridge Parkway!
Christine Says…
Our first full day in Asheville, we got up early and had an amazing breakfast at Biscuit Head. Seriously – if you’re in Asheville, go eat those biscuits! We had planned a 5.2 mile hike starting near Graveyard Fields on the Blue Ridge Parkway. We drove the hour from Asheville to the trailhead to find the area completely closed off with an 8-foot tall chain link fence and orange plastic mesh. Even the wooden stairs leading to the entire larger trail system were blocked off. So, we grabbed our Falcon Guide for Hiking the Blue Ridge Parkway and started scrambling for alternatives. We settled on a different hike that would still let us see Black Balsam Knob, and give us the option to visit the waterfalls (if we had energy to spare).
Who wouldn’t want to spend all day enjoying views like these! Below: Views from the ridge after crossing the summit of Tennent Mountain; Adam approaching Ivestor Gap; Shining Rock Wilderness sign at Ivestor Gap.
The Falcon Guide offered vague (at best) descriptions of the hikes along the parkway, so we weren’t really sure how long the hike would be, what kind of elevation change we’d experience, what the terrain would be like or even the names of all the trails we would traverse. We had a rough map of the area in the book, so we could make some educated guesses, but we definitely went into this hike with a lot less information than we normally do.
We found the trailhead parking area packed – the lot was full and cars lined both sides of the rough, potholed road. We started off on a white blazed trail that climbed gently to sweeping views from bald Black Balsam Knob. The first great views are less than a mile of relatively easy hiking from the trailhead, so we saw tons of people. There were at least 3-4 tents sent up atop the bald. It was gorgeous – but it was a zoo!
From there, the trail got a little confusing. There are so many social paths to campsites worn into the mountain. We had a hard time knowing for sure that we were still on the white-blazed Art Loeb trail. There weren’t any blazes to be seen, and the only sign was so weathered that it looked like a blank piece of wood on a post. We stood pondering our book/map for a few minutes, when a foursome passed and confirmed that they had hiked this area many times and we were indeed on the correct trail. A little later, we passed an actual Art Loeb trail sign.
Adam hikes in the stream that was the footbed on the Graveyard Ridge Trail. Below: Adam at the junction of the Graveyard Ridge and Mountains to Sea trails; Painted trillium; The early part of the Mountains to Sea trail was essentially a bushwhack.
The trail descended through thick, dense scrub – lots of berry bushes and rhododendron. Eventually the trail opened back up and we began another ascent to the summit of 6,000 ft.+ Tennent Knob. This outlook was even more spectacular than Black Balsam. We could see for miles in every direction. We stopped at this point and had lunch on the trail. I had packed an apple, a Kind bar and some cookies from a bakery in the top of my pack. The strong sunshine had warmed the cookies to the point that they tasted like they had just come out of the oven. So good!
After the summit of Tennent Knob, we descended again before reaching Ivestor Gap. At the Gap, there was a troop of Boy Scouts at the information station. We consulted our map again before heading down another unmarked trail that we believed to be correct.
The trail at this point became wet and streamlike. We came across another hiker and his backpacking beagle! The beagle was really sweet and apparently a good hiker – able to do 12 mile days! The man was filling up his water bottles at a spring along the trail. Right after the spring, the there was a trail junction. We took the sharp hairpin turn onto the unmarked Graveyard Ridge Trail. It was a mostly flat, but very sloppy trail. It was wet and muddy for most of the way.
The Mountains to Sea trail eventually became less of a bushwhack, but it was still tricky to follow in places. Below: Near the end of our hike, storm clouds filled the sky over the high peaks; One of the trickier spots along the Mountains to Sea trail – the blazes were not readily visible and the trail went the opposite way it seemed it should; Pretty wildflowers along the trail.
We eventually reached one of the only marked junctions on the hike, with a sign pointing toward the waterfalls and parkway one way and the Black Balsam Parking area the other way. This is where we picked up the Mountains to the Sea trail. This trail was also white blazed. The trail was more of a bushwack than anything for a while. It was very narrow and overgrown and headed steeply uphill. We soon came to a rocky ledge with more nice views… and no sign of the trail continuing. Again… we got the book out and were getting ready to make another guess. The trail we needed to follow seemed to go in completely the wrong direction. Adam looked at me and said ‘I’m just not confident this is the right trail!’ Fortunately, a couple hikers came up behind us. They told us they were following the same loop we were, had done it before and had gotten lost before! However, this time they were confident and able to point us in the right direction. The trail that looked totally wrong turned out to be exactly correct!
From the ledge, we descended into dark woods, traversed numerous wooden footbridges across swampy areas and made one final ascent back to the parking area along the road. All in all, we hiked 6.6 miles. It was a great hike with spectacular scenery from Black Balsam and Tennent. If I were to recommend the hike to others, I’d also suggest doing it as an out-and-back to see just the two bald summits. The loop option was poorly marked and didn’t offer much in way of scenery.
The last section of the hike had lots of planks, bridges and boardwalks that crossed swampy areas. Below: After the hike, we drove back to Asheville via Waynesville and stopped at Frog Level Brewery – nice stream-side setting and good beer!
After our hike, we decided to drive back to Asheville through Waynesville. We heard it was a cute town and that Frog Level Brewing was worth a visit. We were able to easily find the Brewery, and ended up enjoying samples at a nice picnic table by the river. Nice finish to the day!
Difficulty – 3. The real difficulty is the Mountains-to-Sea Trail as it goes brutally up the mountain in some points.
Trail Conditions – 2. The trail up to Black Balsam was the best maintained. The Art Loeb Trail around Black Balsam to Tennent Mountain was very brushy and overgrown. The Graveyard Ridge Trail had a ton of water on the trail and The Mountains-to-Sea Trail was also very overgrown.
Views – 5. Amazing views from Black Balsam and Tennent Knob.
Streams/Waterfalls – 1. Just a couple of small crossings through some water on the trail, but nothing scenic.
Wildlife – 1. We didn’t see anything other than a few birds on this trail.
Ease to Navigate – 1. You may often feel unsure if you are going the right way. Trails are not blazed well and junctions are not marked. The connection to the Graveyard Ridge trail is not marked. There are also lots of other trails that have been cut through by hikers, but they aren’t labeled, especially near the top of Black Balsam Knob on the Art Loeb trail.
Solitude – 2. On a nice day like we had, there were lots of others on the trail.
Directions to trailhead: At Mile Marker 420.3 on the Blue Ridge Parkway, turn onto 816. Stay on that road for about 1 mile. Park on the side of the road and you’ll see the trailhead on the right side of the road.
This wonderful little network of trails gives you the opportunity to view Linville Falls from every angle! You can choose short/easy routes or longer/harder routes depending what you’re in the mood to do. When all was said and done, we hiked a little over 3.5 miles and enjoyed several views of the falls.
Adam enjoys a bird’s eye view of Linville Falls. Below: The forest service information station; the trail network offers many options; beautiful blooming rhododendron.
Adam Says…
To finish our trip to North Carolina, we had to visit Linville Falls along the Blue Ridge Parkway. While overcast days are better days for photographing waterfalls, we had to take what we were given. The sun was high in the sky and it was quite hot on the hike, but we knew this wasn’t going to be too long of a hike.
We drove up the gravel Wiseman’s View Road and went first to the USFS Visitor’s Center. Two women were inside and gave us some information on how to tackle the falls. We were looking for a place to eat lunch before the hike and they recommended Famous Louise’s Rock House, especially for their pies. We took their advice and refueled for the hike. We ventured back up Wiseman’s View Road and parked in the large gravel lot at the to the left of the road. The trail starts from the eastern side of the lot and begins with a steep descent.
At about .2 miles of a descent, we reached a junction. We took a right here to make our way to the series of overlooks of the falls. In a short distance, we reached another smaller junction with the trail to the Upper Falls, but we decided to approach that on the way back. Since there are so many choices to make about the order in which you take in the views, I will not list all the distances; but you can tell from the downloaded map the distances to each. We opted first to take a left for the trail to Chimney View, which provided a viewpoint to see the upper and lower falls. From this point, we backtracked to the main trail and took a left. Shortly, we came on to the side trail on the right for the Gorge View. The views from here showed the canyon of the gorge but the views didn’t allow you to see the bottom of the canyon. Next was the end of the main trail, which ended at Erwins View. This view gave you the furthest view away from the falls, but it was still spectacular. We backtracked and made our way back to the Upper Falls viewpoint. From here, you could see the water plunge down the falls from a closer distance.
The upper falls view. Below: A view into the gorge; Adam hikes along.
From seeing people on the opposite side of the water and very close to the falls, we decided to take the trail down to the Linville Falls Visitor Center. The trail was wide, road-like and going slightly downhill. We eventually came to a bridge over the Linville River and the Visitor Center was on the opposite side. We grabbed a few cold waters from the center and talked to the rangers about the trails on the other side. We were fairly tired by this point, since we had done so much hiking during the week, but the temptation of the falls kept us pressing forward. From the front of the Visitor Center, the trail headed into the woods on the eastern side of the building. In a few feet, the trail branched and we took a right to head to the next overlook. This trail branched off after about .3 miles. We took a right at the junction, descending to reach the Plunge Basin overlook at .5 miles. This point gave you a vantage point to see the water shoot through the gorge and down below. We watched one man standing on the cliffside below, fishing from a precarious position. We then made our way back to our car by returning to the Visitor Center, back across the bridge, and taking a right to the trail junction that led us back to our vehicle.
We had a great time visiting Linville Falls and this is definitely a hike that most people could do with their families. A return trip in the peak of fall color with an overcast sky is something we will try to do. While many waterfalls allow you to get very close to them, the trails here mostly keep you at a distance. However, the view of the gorge with the waterfalls is breathtaking.
Christine Says…
Linville Falls was a perfect hike to end our trip through Tennessee and North Carolina – short and very easy! Ten hikes packed into eight days was pretty rigorous and I had the sore knees, bruises and sunburned arms to show for it! Truth be told, I was secretly pleased that the ninth day of our voyage was stormy and rainy, because it meant we’d go home a day early instead of biking the 33+ miles of the Virginia Creeper. Don’t get me wrong – I LOVE biking the Creeper, but I was exhausted from our whirlwind trip. Maybe we ought to relax more on vacations – like normal people! Nah…. probably not. 🙂
Linville Falls were a gift to the National Park Service from John D. Rockefeller. So many of our favorite parks would not have existed without his generosity. Acadia, Shenandoah, Yosemite, the Grand Tetons, and the Smokies were all established, in part, due to his financial support.
The plunge view of the falls. Below: The Linville River; Beautiful desserts from Storie Street Grille.
Adam did a thorough job describing all the different paths we took, so I don’t have a lot of details to add about the terrain. The only thing I would say is that you can walk to the bottom of the falls. It’s about about .8 miles of hiking (some steep). We opted to skip the view from the bottom on this trip, mainly because we were tired and could tell that the base of the falls was extremely crowded.
I enjoyed stopping in the visitors center and talking to the park ranger. He was a pretty serious hiker and we enjoyed trading trail tips. He suggested Crabtree Falls, NC for a future hike. I was also fascinated by the cross section of an enormous tree hanging in the center. It fell when the Linville Gorge flooded in September of 2004. The hurricane-related flooding was so severe, that it washed away half of the visitor’s center and left many gigantic, toppled trees in its wake. Water is such a powerful force!
Linville Falls has one of the highest water volumes of any waterfall in the Blue Ridge, so it’s not surprising that it floods so easily. The high volume of water also makes the gorge perilous for people. Swimming is not allowed in the river near the falls, but numerous fatalities have still occurred in the area.
After finishing our hiking for the day, we retreated back to our cabin at the Pineola so we could get showered and dressed for dinner. We decided to go fancy for our last evening in the area, and enjoyed a fabulous dinner at the Storie Street Grille in Blowing Rock, NC. In addition to lovely outdoor patio seating, hey had a great wine line, beautifully prepared entrees, and amazing desserts. Even though I’d already had pie a la mode earlier in the day, I could not pass up their dark chocolate – coconut bread pudding. Adam’s banana creme brulee was equally delicious. It was a fitting end to a fabulous trip!
Our next post will actually be a Virginia hike – shocking! But then we’ll be going back to some more out-of-state posts. We’re headed for the White Mountains of New Hampshire in a couple weeks, and are hoping to bring back at least a couple posts from that area. Stay tuned!
Difficulty – 1. The trail does have a little climbing up and down on the trail, but most people should be able to do it without too much trouble. We saw people of all ages and all levels of fitness on the trail, so it should be doable by anyone willing. The options for different viewpoints allow for people to choose what they can handle and decide when to stop.
Trail Conditions – 4.5. Most of the trail is either gravel or dirt and is well-worn.
Views – 4. Great views of the gorge and waterfalls.
Streams/Waterfalls – 5. There are many viewpoints to see the waterfalls. The only challenge will be to enjoy it with few others around.
Wildlife – 1. You may see squirrels and some birds flying around, but it would be unlikely to see much else.
Ease to Navigate – 4. There is a large branching of side trails here, but using the map should guide you along.
Solitude – 0. With such a close proximity to the Blue Ridge Parkway along with the ease of difficulty, this hike is crowded.
Directions to trailhead: From US 221, turn on to NC 183. In .7 miles, turn right on to Wisemans View Road at the large curve. The parking lot is a short distance on the left and the trail starts from the eastern side of the parking lot.
* MapMyHike is not necessarily accurate, as the GPS signal fades in and out – but it still provides some fun and interesting information.
The beautiful, myrtle-crowned summit of Hawksbill. The distinctly shaped mountains on the left side of the gorge are Table Rock and Short Off. Below: Trailhead sign; Adam climbs through thick laurels and rhododendrons; Blooming Catawba rhododendron.
Christine Says…
Shenandoah National Park has a Hawksbill Mountain. It’s a nice hike and has lovely views, but Hawksbill Mountain in North Carolina’s Pisgah National Forest is even more impressive! With a dramatic skyline of mountains with interesting profiles and a plunging view into Linville Gorge, this short hike offers scenery unparalleled by our Virginia Hawksbill. (sorry… I have to be honest!)
Adam and I woke up early on our last morning at the Pineola Inn. After a grueling day on Grandfather Mountain, we were in search of low-key hiking. My knee was hurting; every step I took on even the slightest downhill elicited stabbing pain under my kneecap. I thought to myself, ‘if only we could find a hike without much elevation change, I can gut this out!’ I referred to our hiking guide for the Blue Ridge Parkway and found a few short, easy hikes in the Linville Gorge area. The first was Hawksbill. The description was pretty vague, but it sounded easy and short – good enough to fit the bill for the day.
We had breakfast and made our way to the trailhead. The drive down Table Rock Road was dusty, bumpy and pitted with axle-rattling potholes. Fortunately, we were on the road only a short while. We parked near the trailhead and started up the Hawksbill Trail.
The views only get better from here! You have to scramble over boulders and through brush before the views really open up. Below: The steeper, rockier part of the trail; Blooming mountain laurel; The rocks at the summit had a wavy pattern in some places.
There’s really not a lot you can say about a .9 mile trail that pretty goes straight up a mountainside. There weren’t many noteworthy features on the route. It started off gentle, but became increasingly steep and rocky as we approached the summit. We saw mountain laurel and Catawba rhododendron blooming along the way. After a short while of walking, the trail leveled out on a rocky summit. At first, we didn’t see any views. But then we followed a series of worn footpaths through the brush and over boulders. On the other side, we found magnificent views that far exceeded any expectations we had for the hike. Linville Gorge is a precipitous plunge from the summit of Hawksbill. If you look deep into the canyon, you can see the river trailing through the forest. All the mountains around the gorge have unusual shapes. Instead of gentle rounded domes like most mountains, they have cliffs and plunges and missing chunks.
There were tons of places to sit and enjoy the views in every direction. When we visited, morning clouds were still swirling around the summits – making the vista even more dramatic. We saw a large group of cedar waxwings cross the summit, pausing to eat berries from the trees. Much of the summit was crowned with sand myrtle. And best of all, we had the entire place to ourselves! We stayed up there for about 45 minutes before climbing back down.
On the descent my knee nagged at me, but I still wanted to get one more little hike done after Hawksbill! Because, what would a visit to the Linville Gorge area be without a visit to the famous Linville Falls? We opted to stop for lunch at Famous Louise’s Rock House before visiting the falls. The restaurant sits simultaneously in three different counties (Burke, McDowell, and Avery), and is very well known for its pies. I enjoyed a slice of their five fruit pie with ice cream, then it was on to our final hike of the trip!
You can see the river making its way through the gorge. Below: A cedar waxwing; Another view of Table Rock and Short Off; The pattern in the rocks was beautiful!
Adam Says…
When we started off our hike from the parking lot up Hawksbill Mountain, there were lots of cars at the trailhead. After seeing some of the people preparing for the walk, we noticed they were bringing a supply of ropes and carabiners for rock climbing. As it turns out, Hawksbill is more popular for rock-climbing than hiking, featuring several moderate and difficult routes. We jumped on to the trail not knowing how many people we would see, but as it turns out we were the only ones hiking the trail on this gorgeous day.
We thought this rock formation looked like a diving board over the gorge. You can’t tell from the photo, but the drop beneath was pretty scary! Below: Pie!
The trail started off very gradual, which felt fine to our sore joints from hiking up Grandfather Mountain the previous day. At .6 miles, the trail took a sharp left up the mountain. I’m not sure, but this may be the point that the rock climbers veer off the main trail since we saw a faint trail leading out from this point. The trail then becomes more steep and there are some very large steps to take in places up rocks to keep climbing up the trail. At .8 miles, we reached the height of the trail. We headed to the left and within a short distance, we could see the views open up. We walked on a faint trail at the top until we reached a nice rock outcropping to take in the views of the gorge. Across from this viewpoint was Table Rock and Short Off. We talked about how we would like to come down here again and hike those two. As we were taking in the views, we saw several cedar waxwings chasing each other in the air.
We initially thought this viewpoint was what we came to see, but I wondered where the rock climbers were. So, while Christine took some more photos, I decided to scout back to the top of the trail we traveled and headed the opposite direction. I could tell this opened up to even grander views, so I backtracked and brought Christine back. We walked about .1 mile to this other viewpoint which had a large rocky cliff-face to take in the view. We climbed around on the rocks for a while taking in the views of the gorge and mountains. One rock that I stood on pictured above wobbled a bit when I stood on it, so be very careful on the edges!
We made our way back to the trail, again not encountering any other people. We were so glad that we had found this gem of a hike. This is another one of those hikes that has outstanding views with not a lot of effort. I would recommend it to anyone visiting the Linville Gorge area.
Difficulty – 2. A little bit of the hike is steep and rocky, but it’s so short that most people should be able to tackle the route with ease.
Trail Conditions – 4. The trail is in nice condition.
Views – 5. Beautiful views of the gorge, Table Rock Mountain and Short Off Mountain
Streams/Waterfalls – 0. None.
Wildlife – 2. We saw a flock of cedar waxwings and a lizard.
Ease to Navigate – 4. The trail is a straight shot up the mountainside. There are a variety of footpaths around the summit, and lots of places to take in the view.
Solitude – 4. Oddly, we did not see a single other person after we left the parking lot. We had the summit all to ourselves for a full 45 minutes.
Directions to trailhead: From Banner Elk, NC (a good hub for this area). Follow NC 105 south for about eight miles, turn left on NC-181 S/US-221 S/Linville Falls Hwy for about three miles, turn left onto NC-181 S/Jonas Ridge Hwy for six miles, turn right onto Ginger Cake road and continue onto Table Rock Rd. The trailhead will be marked with NFS signage.
* MapMyHike is not necessarily accurate, as the GPS signal fades in and out – but it still provides some fun and interesting information.
This five-mile hike is demanding, thrilling and beautiful! It has everything from ladders and cables to amazing views of the Watauga Valley and the Blue Ridge Parkway. If you’re a fit hiker looking for something a little different – Grandfather Mountain definitely fits the bill!
Sand Myrtle crowns Attic Window Peak on Grandfather Mountain, making the view all the more lovely. You can see the ‘Sugar Cube’ sitting on the mountain top off in the distance. Below: Hiker parking on Grandfather Mountain; A view looking back on the Mile High Swinging Bridge; Native pink azaleas.
Adam Says…
We have a love-hate relationship with Grandfather Mountain. I definitely enjoy the hike more than Christine, but both times we have hiked it, things haven’t gone as great as planned. The views on Grandfather Mountain are amazing, but some of the physical and mental challenges definitely take their toll.
The last time we hiked up Grandfather Mountain, we only made it a little past Attic Window peak. Christine wasn’t feeling well that day, so we decided we make a second attempt on this trip and make it to the highest peak, Calloway Peak.
We were some of the first people on the trail that day. The lady at the entrance gate (it costs $18 per adult) gave us a parking sign to put in our car window. This is used in case someone goes missing on the mountain and they need to perform a rescue. We were told they wanted us back at our car by an hour before closing. We parked in the lower Trails Parking area and were the first car in the parking lot. We quickly set off on to the Bridge Trail, which winds through a series of switchbacks, crossing underneath the Mile High Swinging Bridge, before reaching the upper parking lot at .4 miles. We made a quick trip into the gift shop and then took a quick trip across the Mile High Swinging Bridge. The wind was quite calm this time on the trail; last time, the bridge was singing and the wind was so strong, Christine could barely walk across the parking lot. I have a big fear of heights when it comes to man-made things (roller coasters, ziplines, ladders, etc.), so the swinging bridge is always a gut-check for me. The fact that the wind was calm made it easier for me. We walked on to the rocks on the other side and enjoyed some spectacular morning views to the west.
Crossing back across the bridge, we made our way down the stairs and across the parking lot to the large wooden sign to begin our real hike on the Grandfather Trail. We climbed up a few stairs and started our hike on the blue-blazed trail. The first part of the trail isn’t too tough. You reach an open area called The Patio at .6 miles and at .7 miles you reach the junction with the Grandfather Extension Trail. Continue past this trail and at .8 miles, you will pass the scenic Grandfather Gap area. Just ahead is a junction where the Underwood Trail branches off at .9 miles. We continued on the Grandfather Trail and here is where it can be challenging. Your first introduction to the difficulty of the hike is when you come across some cables that are helpful to grab onto to help yourself climb up or down the trail. When it is wet, the rocks can be steep and slippery, so it is helpful and often necessary to grab onto these.
Adam uses cables to assist him across a steep, slick rock. Below: Adam enjoys the views; Christine hiking along the easy part of the Grandfather Trail; Climbing one of the first ladders en route to MacRae Peak.
In a short distance as you are making way toward MacRae Peak, you have to navigate a series of ladders. The first one starts off as you squeeze along a rock that will have you hunched over and you climb up a tall ladder that is at an angle along a large rock face. This climb wasn’t as scary, but it is just a taste of what is to come. If you’re feeling uncomfortable climbing this ladder, I would recommend turning around. After climbing this first ladder, you will come upon more series of ladders. Some of these go directly up the cliff side and you are looking at huge drop-offs on the side. The first time I was definitely scared going up, but I felt more comfortable on this climb. The ladders are bolted into the rock and the ladders are placed at just enough angle that I didn’t feel I was going to plummet to my death. Once you navigate up through the ladders and climb up where it begins to level off, you are rewarded with more amazing views around you. We continued further and reached the sign to MacRae Peak at 1.3 miles. The sign rests at the bottom of another ladder. Climbing up to the top of the ladder, you then need to grab a cable to help pull yourself up to the summit boulder of MacRae Peak. The 360-degree views at this point are stunning on a clear day.
We took a short break at the top and then made our way back down the ladder to continue our hike. The trail begins to climb down and at 1.4 miles, you see another junction with the Underwood Trail. Continue the Grandfather Trail downhill with some big steps and cables. The trail then begins to climb again up to the Attic Window. You navigate through an area called The Chute, which has you climbing up a short but very steep area of small boulders to make your way to the top. As you crest the top at 1.6 miles, you can wind around to a rock outcropping known as Attic Window Peak, which serves as a great viewpoint. We had spotted someone sitting at the top of Attic Window Peak from MacRae peak. He was still there when we arrived and I noticed he was taking in the views while reading The Great Gatsby by F. Scott Fitzgerald. He was asking if any of the other views were worth the trip, since he came up via the Profile Trail. He was interested in seeing the Mile High Swinging Bridge, but when we saw him later on the trail, we learned that he decided to just go back the way he came.
Christine climbs the rocks. Below: Adam on a set of multiple ladders, Coming off the top of the ladder onto exposed cliffside; A well-earned view!
From Attic Window Peak, the trail goes downhill again, but then passes through a level area as you walk along a ridgeline with some great northwestern views (and a view of the steep Profile Trail). At 1.9 miles, you reach another overnight camping area known as Alpine Meadow. The trail descends again down another gap, before making the way up to Calloway Peak. At this point, the clouds were rolling in and sticking to the mountain, so our visibility was going away fast. We climbed up the Calloway Gap area and reached the junction with the Profile Trail at 2.3 miles. We pressed on, passing by the Cliffside Campsite at 2.4 miles. The trail continued to climb up some switchbacks. A sign came up at 2.7 miles which pointed the way to the Watauga View. Knowing there wasn’t much a view as we hiked in the fog, we made our way to the Calloway Peak. The trail at this point climbed up a couple of more technical ladders. We reached a rock that was the Calloway Peak at 2.8 miles. There was no sign designating this as the peak, but from ground markings, we could tell this is where the white-blazed trail of the Daniel Boone Scout Trail met the blue-blazed Grandfather Trail. I’m sure there is a view from the rocks here, but we could barely see 10 feet in front of our face. Disappointed, we made our way back down the ladders and took the side trail to the Watauga View. The view was barely there, but we stayed long enough to eat our packed lunch before making our way back. The views on the way back were getting swallowed by the clouds settling on the mountain, so we lost a lot of the views on the way back.
At 3.7 miles, we reached the junction with the yellow-blazed Underwood Trail. We decided to take that trail back to avoid some of the ladders. This trail is incredibly rocky and my knees were in so much pain after a short distance on this trail. I think if we do this trail again, I would rather take the ladders than this hellish, downhill knee-destroyer. Every step, I felt shooting pain in one of my knees and I wondered if I would need to be rescued (at least there was a sign in our car). We navigated down one large ladder and finally reached the junction with the Grandfather Trail again at 4.2 miles. I turned around to flip the bird to the trail for my personal enjoyment and reached the Grandfather Extension Trail junction at 4.4 miles. We took this red-blazed trail, which goes gradually downhill through a series of switchbacks until we reached the parking lot for our car at 5.0 miles. It was a tiring day, but if you are up for an adventurous hike, this is one you should definitely try.
Christine Says…
Oh… Grandfather Mountain – what can I say about this place.
On one hand, it’s a beautiful, rugged and exciting place to hike. On the other hand, things always seem to go wrong when I hike there – I’m sick, my technology fails, I injure myself. Maybe this mountain is trying to tell me something?
Adam enjoys the view from MacRae Peak. Below; Christine on MacRae Peak; Climbing the rocky trail.
The first time we hiked Grandfather, I developed a 101 degree fever, and ended up having to turn around near Attic Window Peak (the original goal had been to make it to Calloway Peak). I was just too dizzy and fatigued to hike anymore.
I was really excited to revisit the mountain and finish the hike we tried to do last fall. The morning started off with a great breakfast at the River Dog Café. We paid our entry fee to the park and headed up the mountain. The hiker parking lot was completely empty, skies were sunny and the wind was fairly gentle. It was pretty much the opposite of our last trip up the mountain.
We hiked up to the Mile-High Swinging Bridge. This time, we took the time to climb around the rocky outcropping on the far side of the bridge. Back in the fall, the wind had been so strong that we didn’t dare go out on the rocks!
We started up the Grandfather Trail, which departs from the upper parking area. We had the trail mostly to ourselves this time. We really didn’t see anyone else at all until the latter part of the hike. I enjoyed seeing the wild pink azaleas in bloom. Grandfather Gap was especially colorful with blossoms.
We negotiated the cables and ladders before coming to MacRae Peak. We scaled the ladder to the top and enjoyed the view from the big rock. One side of the mountain was clear, but the other was covered with low clouds and fog. The breeze pushed the clouds against the side of the mountain. They would hang along the ridge for a few minutes and then roll over and dissipate on the clearer side of the mountain. It was fun to watch the low clouds moving so quickly.
Adam crawls through the Subway. Below: Climbing up the Chute; Beautiful sand myrtle; Painted trillium along the trail.
From MacRae, we descended steeply through a slick and rocky gap. The descent was short and ended at an immense rock jumble called ‘The Subway’. Ladders and blazes lead you through openings between giant boulders. On the other side, you soon face ‘The Chute’. The chute is a narrow, steep rock scramble that you must negotiate to reach Attic Window Peak.
From Attic Window Peak, the hike offers some more moderate ridge walking with spectacular views all along the way. The rocky spine was covered with blooming sand myrtle, so it was especially pretty on this visit. In fact, when famed naturalist John Muir visited this mountain, he described this ridge as “the face of all Heaven come to earth.” Luckily, John Muir got to visit this area before some idiot approved the Sugar Mountain construction project. I swear, ‘The Sugar Cube‘ (the main building’s nickname) has to be one of the worst eyesores in Appalachian nature. I guess its construction did inspire a change in legislation, so mistakes like that are less likely to happen again.
From the crest of the mountain, the trail descends again before beginning the final ascent toward Calloway Peak. The uphill hike passes through rich, mossy evergreen forest. On the way to Calloway, don’t miss taking a few minutes to walk out to the Watauga View. It’s a lovely rocky outcropping that looks into the Watuaga Valley. It was also the last place we had a view on our hike! On the way to Calloway, a massive cloud bank moved in and parked atop the mountain. It was like it was stuck and couldn’t quite make it over the peak. Watauga View was also the place I noticed that my smart phone had crashed at some point and wouldn’t restart (sorry – no MapMyHike stats). Normally, this would be a small annoyance, but just the night before my MacBook Pro self-destructed. Such technology angst!
The Watauga View was partially obscured by clouds. Below: Hiking toward Calloway Peak; Foggy Calloway Peak
We finished the climb to Calloway (which required a couple more ladders), spotted the elevation benchmark and wondered what the view would have been like on a clear day. Had we continued hiking, we would have continued on the Daniel Boone Trail and soon reached the Hi-Balsam backcountry shelter. But the peak was our turnaround point.
We made our way back along the ridge before eventually reaching the junction of the Underwood Trail. I remembered the Underwood Trail as very rocky and difficult. And it certainly was! I think at this point of the hike, the exhaustion of six straight days of hiking kind of kicked in. We really struggled, physically and mentally, with the tough terrain on this stretch of the hike. I guess I was fatigued and not being careful, because my foot slipped and I felt a twinge in my knee. I shook it off and kept going, but after that I felt a nagging, sharp pain under my knee cap. It came and went, so I did my best to ignore it. (I continued to ignore it on our last two hikes of the trip the next day, and ended up at the orthopedist and off the trail for a month after our trip.)
When the Underwood Trail ended near Grandfather Gap, I was thrilled to be back on easier footing. The rest of the hike went by quickly and easily. After we got back to our car, we spent some time walking around the Nature Center. We saw bears, eagles and mountain lions and enjoyed eating giant cookies and icy soda.
Like I said at the beginning, I both love and hate this trail. It offers so much in terms of scenery and physical challenge, but it’s a tough hike and I always seem to pay some kind of price for hiking there. Maybe I’ll hike it again someday… maybe.
The Dreaded Underwood Trail. Below: Grandfather Gap; Almost back to the hiker parking area.
Trail Notes
Distance – 5.0 miles.
Elevation Change – 2084 ft
Difficulty – 5. Having to use cables and climb ladders should tell you something. While this route was only five miles, you will go very slowly during most of the hike due to the steepness of the terrain.
Trail Conditions – 4. The trail is well-maintained, but that doesn’t make it easy. There are lots of rocky parts to navigate, especially on The Chute up Attic Window and the footing on the Underwood Trail is grueling.
Views – 5. The best views are from the Mile High Swinging Bridge, MacRae Peak, and Attic Window Peak. The clouds were covering the area at Calloway Peak for us, but I could tell the views from the Watauga View would have been spectacular also.
Streams/Waterfalls – 0. None.
Wildlife – 1. We didn’t really see anything beyond birds.
Ease to Navigate – 4. All junctions are labeled and the trail is fairly easy to follow. We have seen people get turned around at certain points (including us previously).
Solitude – 1.5. I would expect to see people along the trail and lingering especially at the viewpoints. Starting out early in the day should help with the solitude.
Directions to trailhead: The entrance to Grandfather Mountain is located on US 221, two miles north of Linville, North Carolina, and one mile south of the Blue Ridge Parkway at milepost 305. Signs for the entrance are well-marked and an entrance station is right off the road with large gates. Travel up the road by car until you reach the parking lot designated for hiking trails. The trailhead for the Bridge Trail is on the left side of the parking lot as you are driving up. Coordinates for the hiker parking area are 36.096145, -81.831802.
This ten-mile hike follows the Appalachian Trail along the Tennessee-North Carolina border. Most of the hike is above a mile high, so in open spots you get some very impressive views of the Smokies. The bald itself is rather disappointing, as it’s been mostly reclaimed by the forest, but we did enjoy the vistas and visiting two Appalachian Trail shelters.
Since much of the hike is along a mile-high ridge, views can be spectacular (when you’re not in the clouds). Below: Adam climbs the foggy path to the Clingmans Dome Observation Tower, The tower looks kind of like a space ship; The Appalachian Trail in the fog.
Christine Says…
This is a hike we planned on doing on our Spring 2012 Smokies trip, but we had so much stormy weather that we didn’t want to risk a long, mostly unprotected hike along mile-high ridgeline. So, we settled for the shorter trip to Andrews Bald. In the end, it actually turned out that Andrews Bald was a larger, more scenic bald than Silers. But, we still found many reasons beyond the slightly disappointing bald to enjoy this hike.
We started pretty early on Tuesday morning, after a lavish breakfast at The Pancake Pantry (Swedish Crepes with lingonberries!!). It was sunny in Gatlinburg, but as we made the drive toward the summit of Clingmans Dome, clouds began to envelop the mountain. At the very top, we were completely socked in. We knew it would burn off over the course of the morning, so we started the climb up the paved road to the observation tower.
From there, we picked up the Appalachian Trail. We followed it, descending downhill, sometimes steeply and sometimes gently. There were some sections of descent that caused Adam and I to look at each other and say ‘This is not going to be a fun climb back up!’
Since we were completely in the fog, we had no idea what views or scenery the trail would have to offer on the return hike. It was almost like doing one hike in the morning, and a completely different hike in the afternoon. I kind of like that! Also, the fog made the woods extremely beautiful and mysterious. There’s just something about mist and evergreens!
Because of the high elevation, a lot of earlier season wildflowers were still blooming. This red trillium was especially pretty! Below: Many different kinds of moss grow abundantly in the high country here; Flowering tree; Wildflowers along the trail.
We saw lots of wildflowers, including some spectacular red trillium that Adam spotted. We listened to birds singing in the fog and watched the sky become increasingly brighter.
When we came to the first vista that wasn’t covered by fog, I got out my wide angle lens. Unfortunately, it had been sitting too close to my icy cold CamelBak water bag, so as soon as I got it out, it fogged up so badly I couldn’t take a single photo until it acclimated and dried out.
By the time we got to Double Springs Shelter, larger patches of blue were already opening in the sky. We took some time to read the shelter journal – lots of fun entries.
From Double Springs, the trail seemed to ascend and descend repeatedly. We watched the mileage on our GPS and thought that it was about time that we should be approaching the bald. Honestly, we could have passed it without notice. It wasn’t really much of a bald. It had been described in our guide as ‘a large, mostly grassy bald with a few heathers and berry bushes’. What we found was a small clearing with no grass, covered completely by tall bushes.
The forest is so beautiful, dense and ethereal.
We thought ‘This can’t possibly be it!?’ But, it was – as confirmed by GPS data and our imminent arrival at the second shelter – Silers Bald Shelter. We ate lunch at the shelter – Subway and these awesome locally-made trail bars by Granola Naturals (Toffee and Chocolate Granola Crunch Bar – YUM!) that we picked up at the NOC.
Right after lunch, we headed back the way we came. The hike back was tough, hiking ten miles after climbing LeConte the day before was probably not the best plan. But when we’re in the Smokies – we hike ‘til we drop.
Most of the way was hard, but not unbearably tough. However, the last push to Clingmans Dome was about a mile of very steep climbing. My legs were screaming and all I could think was ‘put one foot in front of the other, repeat, repeat, repeat’. The only thing that softened the pain of the climb were the spectacular views! These views made me oooh and ahhh repeatedly. Despite my exhaustion, I kept thinking ‘This is so darn gorgeous – worth every sore muscle and drop of sweat!’
There is nothing like hiking a mile-high ridge that offers views of the Smokies rolling out beneath you.
Adam checks out the shelter log at the Double Springs shelter. Below: Arriving at the shelter; It was interesting to read entries. Many thru-hikers struggled through deep snow in the Smokies.
Back at the Clingmans Dome observation tower, we were met by massive crowds. Lots of people had questions and made comments about our trekking poles. An older guy called us ‘show-offs’ – not really sure why, but it was done jokingly. Adam and I really enjoyed seeing our first clear view from the tower. The two previous visits had both been low visibility/cloudy, so this visit was a real treat!
After the hike, we headed back into town for a massive feast on Mellow Mushroom pizza followed by Kilwins Ice Cream and free samples of just about every wine, whiskey and moonshine offered in Gatlinburg. I think the town offers so many free alcohol samples to loosen tourists’ purse-strings. After 14 moonshine samples, who knows – you may just wake up owning a new airbrushed t-shirt that says ‘Sexy and I Know It’ (not that I did that).
Adam Says…
Christine and I had tried to get into good hiking shape for our trip to the Smokies. We had grand ideas of all we wanted to accomplish – Christine had picked about 120 miles of hiking trails she wanted to do. Christine did a much better job than I of getting in to shape. Accomplishing this 10 mile hike after finishing about 11.5 miles of hiking through steep terrain up Mount LeConte the previous day, took a toll on me. Since this hike is almost all downhill until you reach the bald and the shelter, I was dreading the return trip.
We enjoyed our trip last year to Andrews Bald where we were able to relax at a scenic spot from the bald area. Silers Bald is not very “bald” at all. In fact, I would say it doesn’t even show much of a receding hairline. But, there were some nice views along the trail elsewhere.
Silers Bald was less impressive than we expected. Evidently, 100 years ago, balds stretched from Clingman’s Dome all the way over to Gregory Bald (which is hiked from Cades Cove). The land was used for grazing. Since becoming a park, nature had filled most of the bald terrain back in. Below: One of our first views of the day not covered by clouds; As we approached Silers Bald, the forest changed from pines to grass and deciduous trees; Another view of Silers Bald.
As Christine mentioned, we started off the hike in the thick fog. Visibility was minimal. We were hoping that the hike would be similar to our first hike up Mount Rogers, where it felt like a different hike on the return trip. Luckily, the fog lifted to give us this same experience. It also made us feel that we were continuing to hike to get the best views; otherwise, this hike would have been more of a disappointment if we had the best views early.
We started off by hiking from the Clingman’s Dome parking lot up the steep hill for .5 miles. The walk on the paved road is short, but very steep. There is a reason there are benches on the side of the paved trail. – it can be a challenge for those out of shape. Most of the people that are visiting Clingman’s Dome will just walk up the paved trail and return without venturing further. Expect to see a ton of people on this part of the trail, but you’ll have a lot of seclusion for the rest of the trail. After you near the winding tower of Clingman’s Dome, take the trail to the left that begins your hike on the Appalachian Trail. You’ll stay on the Appalachian Trail throughout your hike. At .75 miles, the trail opens up into an area filled with views along the trail. Continue to go downhill (you’ll descend about 1100 feet over a little over the next two miles). At 2.75 miles, you’ll reach a junction with the Goshen Prong Trail. Continue to go downhill and at 3.25 miles, you’ll reach the Double Spring Gap Shelter. The trail goes up and down slightly over this next section and at 3.75 miles, you’ll reach a smaller bald area known as Jenkins Knob.
By the time we hiked back, skies had cleared and we had better views. Below: Silers Shelter – our lunch stop; The return hike had some tough climbing.
We found Jenkins Knob to be a little more impressive than Silers Bald in terms of views and openness. The trail continues to mostly go downhill until it finally bottoms out around 4.5 miles. At this point, the trail begins an uphill climb to Silers Bald. At 4.7 miles, you pass the junction with the Welch Ridge Trail. The trail becomes quite steep at this point until you reach the top of Silers Bald. We found a USGS benchmark on the ground to signify the top of Silers Bald. The trail begins to descend from the benchmark and opens up to the area that is Silers Bald. The trail goes through the small bald area and reaches the Silers Bald overnight shelter at 5.1 miles. Retrace your steps, largely uphill, to make your way back.
The views were much better from the tower on the return leg of our hike. Below: Adam at the end of the hike; Views from the observation tower.
We were dreading the climb back up, especially after hiking up Mount LeConte the day before, but we were rewarded with great views as the fog and clouds lifted. As we reached the paved trail to Clingman’s Dome, we climbed up to the top of the tower and we really felt like we earned the 360-degree views. The elevation is 6643 feet (the tower adds another 45 feet) and you can stand at the top of the tower knowing you are at the highest part of the Great Smoky Mountains. This spot is actually the third highest peak east of the Mississippi, to only be beaten by Mount Mitchell and Mount Craig. We enjoyed spotting Mount LeConte from the tower, since it is the sixth highest peak east of the Mississippi. We were ecstatic to see views from Clingman’s Dome, since the last two times we had visited we had clouds hanging on the mountain. The clouds were still taking up a lot of the skies, but it didn’t prevent us from seeing miles of mountain ranges around us.
Christine mentioned that we enjoyed going back to Gatlinburg, TN and eating some pizza and drinking some free moonshine and whiskey samples. While we didn’t feel the need to buy cheesy T-shirts, I definitely felt the need to visit the Hollywood Star Cars Museum. While Christine waited for me, I toured around quickly but the highlight for me was to sit in the Batmobile from the 1966 TV show with Adam West. I grew up watching re-runs of that show and it was my older brother’s favorite show as a child, so it was great to have something to make him jealous. You can pay a little extra on the tour to have your photo taken within some of the cars. I also got to see Ecto-1 from Ghostbusters, a DeLorean from Back to the Future, KITT from Knight Rider, and the General Lee from the Dukes of Hazzard. It’s a neat place to check out if you’re into Hollywood cars.
Elevation Change – About 2200 ft. – it looks like closer to 1500 ft on GPS, but with all the rolling climbs it adds up to quite a bit more!
Difficulty – 4. The climbing and descending never seem to end on this hike.
Trail Conditions – 4. This was mostly nice, well-worn Appalachian Trail walking. The climb to the observation tower in paved.
Views – 3.5. Very nice, but not quite panoramic.
Streams/Waterfalls – 0. None on the hike.
Wildlife – 2. We saw a lot of fresh bear scat on the hike, but no bears. Clearly, they frequent the area.
Ease to Navigate – 4. The trail is well-marked with white blazes and signed at each junction.
Solitude – 3. Expect thick crowds at the observation tower, thinning toward Double Spring Shelter. After Double Spring, we only saw a couple people.
Directions to trailhead: From US-441, head south a short distance from Newfound Gap. Take a right on to Clingmans Dome Road. Go 6.4 miles until you reach the large parking lot area. The paved trail up to Clingmans Dome starts at the end of the parking lot, passing a visitors center/gift shop.
* MapMyHike is not necessarily accurate, as the GPS signal fades in and out – but it still provides some fun and interesting information.
The 4-mile Kephart Prong hike ascends gently along a beautiful stream and end at the backcountry campsite – Kephart Shelter. This hike offers lovely cascades, wildflowers and history.
Adam crosses one of several log bridges over Kephart Prong. Below: The trailhead is located on the side of Rt.441. The first bridge takes you across the Oconaluftee River; The Oconaluftee is beautiful and cascading; So much of the Smokies seems to be wet, green and covered with moss.
Christine Says…
Our second day in the Smokies was earmarked for a hike to the summit of Mount LeConte, but we woke to gloomy weather. We decided that we didn’t want to hike ten tough miles and not even get payoffs in terms of views, so we devised a new plan! After redoing our Deep Creek Waterfall Loop Hike to get better photos, we were still ready for more hiking.
I perused our hiking guide and found a trail called Kephart Prong. It sounded interesting – remnants of an old railroad and a CCC camp, a backcountry camping shelter and the trail followed a (possibly pretty) stream. After redoing the earlier hike, the 4-mile length of the Kephart Prong was appealing, too – short and sweet! Also, it had the benefit of being closer to the Bryson City side of the park where we were staying for the early part of our trip.
It was still morning, so we grabbed a snack and made our way to the trail. What we found exceeded my expectations. The stream was incredibly beautiful – rapids and small waterfalls tumbling over mossy rocks and fallen hemlocks. In at least four places, rough, hewn log bridges traversed the stream. The sounds of running water carried through the entire hike. We saw lots of wildflowers – pink lady slippers, wild geranium, ragwort and many others I couldn’t name.
There were many kinds of wildflowers along the trail. This might be a wild geranium? Below: Adam explores the ruins of the old CCC camp in the area. This chimney was supposedly located in the barracks; There was once a railroad and a trout hatchery in this part of the Smokies, so look for abandoned rails, train parts and pipes from the hatchery. The item below appears to be an old pipe joint possibly; Another beautiful, mossy, log bridge over the stream.
The hike climbed gently the entire two miles until eventually arriving at the Kephart shelter – a sturdy stone and timber hut intended for backcountry camping. We chatted with other dayhikers using the hut for a lunch stop and one man who was there for an overnight stay.
Signs near the shelter showed that the Kephart Trail connects to the Sweat Heifer and Appalachian Trails. If we had continued to climb past the shelter, we would have arrived at Charlie’s Bunion in several miles.
Despite the draw of the Bunion, lunch was a higher calling, so we made our way back down the trail. It’s amazing how much faster the climb down always goes! We got back to the car around 1:00 and were back in Cherokee by 1:30. We couldn’t find anything that sounded good and was actually open on Sunday, so we pressed on back to Bryson City and ended up at a place we found on Yelp – The Bar-B-Que Wagon. They served great, traditional Carolina style pit barbecue with all the expected sides. We sat at a picnic table by the river and enjoyed an enormous, late lunch.
After lunch, we thought about going back to the hotel to shower, but instead we pushed on to visit the NOC (Nantahala Outdoor Center). The complex has a fantastic outdoor outfitter and a super cool riverside patio bar (Big Wesser BBQ + Brew). We got a few drinks and watched rafters and kayakers working the rapids. So relaxing! What a great day!
Adam Says…
The Kephart Prong Trail is one of the most definitive picturesque, riverside trails you’ll find. The lush forests surround you in a sea of green in every direction you turn.
The trail starts off by crossing a large bridge, giving you great views of the Oconaluftee River. Once you cross the bridge, the trail starts off as wide and gravel-covered. At .2 miles, you will come across the remnants of the Civilian Conservation Corps camp that was here from 1933-1942. You’ll see signs of a stone plaque and a tall chimney, among other partial walls.
At the .5 mile mark, you’ll reach your first footbridge over the stream. As you continue further, the trail continues a slow, gradual ascent to the end. You’ll cross three other footbridges, but these consist of narrow, split logs with wood handrails. The last of these was the only one I was a little concerned with crossing, since the handrail required you to stoop to be able to touch it and the log bounced some in the middle. The trail leads to the Kephart shelter, which was well-constructed. From the shelter, you can proceed on the Sweet Heifer Creek Trail which joins the Appalachian Trail in 3.7 miles or take the Grassy Branch Trail to the Sluice Gap Trail for a total of 3.8 miles to reach Charlies Bunion. Since this is a nice junction for an overnight trip, expect other people staying at the shelter in the nice summer-fall weekends. Backcountry reservations for overnight campers is $4/night and is required to be made in advance. See here for further regulations regarding backpacking permits.
Kephart Shelter sits under the shady evergreens. You must have a permit to stay the night in this shelter. The stream runs behind/left of the shelter. There used to be a logging camp where the shelter now stands. Below: Most of the trail follows the stream closely; Adam makes his way across the bridge; A trail sign near the shelter shows the directions to other trails higher up the mountain.
The Kephart Prong is named after Horace Kephart, who was instrumental in the establishment of the Great Smoky Mountains National Park. He was an extremely intelligent man, enrolling in graduate school at Cornell University at the age of 17. He became the head of the St. Louis Mercantile Libray, but he lost his job. He had turned to drinking and his wife and family left him for New York. He decided he wanted to re-establish himself in the wilderness of western North Carolina and Tennessee. There he wrote the book Camping and Wildlife, which was considered the “bible” of camping. When he became concerned that the Smoky Mountains were going to be heavily logged, he started writing letters to advocate for the establishment of this area as a national park. He soon became friends with a photographer, George Masa and together they started photographing and mapping this area. It was the partnering of Kephart’s words with Masa’s pictures that caught John D. Rockefeller Jr.’s attention, who donated $5 million to help purchase the lands to help secure the area to become a park. Kephart died in a car crash before the park was to be established, but Mount Collins was renamed Mount Kephart in his honor.
Big Wesser BBQ + Brew at the Nantahala Outdoor Center is a great place to enjoy drinks after a day on the trails. You can see the canoe/kayak course gates in the river. It’s fun to watch people coming down the rapids. Below: Carolina-style BBQ in Bryson City.
Another interesting spot almost immediately on the trail are the remnants of the site of the Civilian Conservation Corps (CCC) camp 411 here. You can see the large chimney and camp signboard on the side of the trail. This group of nearly 200 built rock walls, roads, trails, and footbridges that are still in use today. There is an interesting history of this from one of the leaders, James William Biggs.
We enjoyed this beautiful trail and I can see incorporating this trail as part of a backpacking trip in the future.
Difficulty – 1.5. The ascent on this hike is very gradual and easy.
Trail Conditions – 4. The trail is well-graded and in great condition.
Views – 0. No scenic views.
Streams/Waterfalls – 5. Very beautiful!
Wildlife – 2. We didn’t see anything other than chipmunks and squirrels.
Ease to Navigate – 4. The trail is very easy to follow to the shelter. Once you reach the Kephart Shelter, you may decide to continue on.
Solitude – 2. Because of the relatively short length and easiness of this hike, you will probably see a fair number of people.
Directions to trailhead: Head north on US-441 N from Cherokee, NC. Head 4 miles north of the Smokemont Campground. Parking is available on the shoulder of the road and the trail starts after crossing the bridge over the Oconaluftee River.
* MapMyHike is not necessarily accurate, as the GPS signal fades in and out – but it still provides some fun and interesting information.
Deep Creek is an area of the Smokies popular with tubers, bikers, horseback riders and hikers. This (roughly) 5.4 mile hiking route provides spectacular views of three waterfalls and the beautiful streams that feed them. We ended up hiking this trail twice on our trip – the second time was mostly to get better photos. 🙂
Toms Branch Falls is the first waterfall you’ll come to on the loop. It’s only about a quarter mile from the parking area. Below: Another angle of Toms Branch Falls; Horseback riders love the Deep Creek area; Tubers on Deep Creek; Christine enjoys stream scenery.
Adam Says…
We rolled into Bryson City, NC around 2:15 and almost immediately headed out for a hike. We were tired but our hotel wouldn’t let us check in even 45 minutes early. Evidently, the Microtel in Bryson City is very strict with their policies! We decided to do something close by, so we headed to Deep Creek campground for this hike with three waterfalls.
We knew we were getting close to the campground when we saw tons of “TUBES” signs. People were waving as we drove by, hoping that we would stop and rent tubes from them for floating down the river.
We arrived and got changed in the parking lot and made our way to the trailhead. The parking lot was crowded, mainly for tubing people. We followed the masses heading out carrying their inner tubes to their drop-in spots.
We started on the Deep Creek trail and soon passed the junction with the Juney Whank trail on the left. In just about .25 miles, we came across the first waterfall on the right, Toms Branch falls. This is a gorgeous waterfall that drops about 60 feet over several different rock shelves before plummeting into Deep Creek. We saw several people floating down the creek as we stopped for some photographs.
Adam enjoys beautiful Indian Creek Falls. Below: We spotted pink lady’s slippers along the trail. They were a little tattered at the end of their blooming season; Adam climbs the trail.
At .75 miles, we reached the junction with the Indian Creek Trail. This is actually the last spot where people can drop their tubes into the creek, but we continued on the Deep Creek trail. At 1.75 miles, this trail intersects with the Loop Trail. We took a right on to the Loop Trail which starts a steep ascent. At 2.4 miles, the trail reaches its peak and intersects with the Sunkota Ridge Trail. Continue on the Loop Trail which now descends at about the same rate as it ascended. At 3.0 miles, you reach the junction with the Indian Creek Trail. Take a right here.
At 3.8 miles, you’ll see a side trail that descends to Indian Creek Falls. Indian Creek Falls is a wide waterfall that has a gradual, sliding cascade into the water. After taking in the sight, head back to the trail and continue to the right. Shortly after passing the waterfall, you will reach the junction again with the Deep Creek Trail. Take a left here to retrace your steps. You could make this a shorter trip by initially taking a right at the junction, but we enjoyed putting a little extra effort to earn all three waterfalls.
Right before you reach the parking lot, you’ll see the junction trail again with the Juney Whank trail at 4.5 miles. Take the steep trail to the right up for .3 miles. Once you reach the top, you’ll see Asian which points you to the next waterfall. Descend down a short path and you’ll reach a footbridge and the waterfall. Juney Whank Falls is another great waterfall that plunges down after about a 80 foot cascade.
Continue to the other side of the footbridge and continue on the trail, heading left at the first junction. The trail descends rather steeply. You’ll see signs that lead you to the parking lot and back to your car.
The streams in the Smokies are so beautiful! Below: Since the trail is popular with horseback riders, there is a lot of manure along the way. Butterflies apparently love manure!; Beautiful Deep Creek; Adam on the loop portion of the trail.
We had a great time on this trail that maximizes your waterfall experience. The Deep Creek Trail and Indian Creek Trail both gave you great creek views almost the entire walk and it was fun to watch everyone float by us. I can see why this is such a popular place to hike and tube for families. We saw one person with a foot cast and met one woman with a pacemaker along the way, so most people should be able to handle this. If you want to see some great Smokies waterfalls, this is a hike for you!
Christine Says…
We wanted to do this hike last year when we visited Bryson City, but with so much to do in the Smokies, we just ran out of time. This year, we knew the lay of the land a bit better, and we ready to hit the ground running (or hiking, so to speak!)
We arrived to the area mid-afternoon on the Saturday of Memorial Day weekend. We tried to get into our hotel one before official check-in, but the desk clerk turned us away. We decided to drive over to the Deep Creek Campground, and check out an easy loop hike that took us by a couple waterfalls – Toms Branch Falls and Indian Creek Falls.
I changed clothes in the crowded parking lot. Let me tell you… switching from jeans and a shirt into shorts, wicking shirt and sports bra without flashing anyone is quite a feat!
We started off along a wide, road-like trail that followed parallel to Indian Creek. It was packed with people out enjoying the warm, sunny weather. Apparently, the Smokies have had an exceedingly cold and wet spring, so the bright, 80-degree Memorial Day weekend was a great chance for everyone in eastern Tennessee to go outside. Deep Creek is very popular with tubers. All up and down the road leading to the campground, various vendors have set up shop renting tubes for roughly $5 a day. Once you have a tube, you walk about a mile up the trail, and then bob and bump along the shallow, but rapid-y river. It looks like a lot of fun! As hikers, we were in the definite minority.
Juney Whank may be the prettiest waterfall on the loop. Below: Adam enjoys the falls from the bridge; Juney Whank is beautiful from every angle; Below the falls.
Walking along the Deep Creek Trail for about .25 miles, we came to the lovely Toms Branch Falls. It’s a tall waterfall that enters Deep Creek from the bank opposite the trail. Very impressive!
We walked along the creek until reaching a junction that makes a lollipop loop on the route. We decided to follow the longer arm of the loop so that we could visit Indian Creek Falls closer to the end of our hike. The trail mostly followed the stream before turning and climbing steadily uphill for about half a mile. At the highest point, the trail met the Sunkota Ridge Trail, which leads to higher elevations and a larger trail system. We remained on the loop and descended another half mile to meet another trail junction.
At this junction, we met a group of horseback riders. One rider was really struggling with her mule. She had dismounted because he had become so skittish. When we passed, he was bellowing and dancing around. She eventually got him under control and was able to ride on. He looked like quite a handful though!
In a few more tenths of a mile, we came upon Indian Creek Falls. These falls are not as steep, and are made up of a couple of small ‘shelf-drops’ before falling into one larger fall. Very beautiful!
About a tenth of a mile past the falls, you join back up with the beginning of the lollipop loop. From there, just follow the trail and the tubers back to the parking area.
The Nantahala Brewing Company – a good post-hike stop in Bryson City.
To be honest, I was really unhappy with my photos from this hike. Waterfalls, sunny conditions and photography simply don’t go together. So, I left this hike feeling a little disappointed with the photos I had to share. That regret quickly faded after a few beers at the Nantahala Brewing Company. What an awesome place! If you like craft beer, don’t miss a visit. After beers, we went for pizza at Anthony’s. It hit the spot and we loved our outdoor table facing the train depot.
I thought our experience with the waterfall hike was over, but the next morning we woke to gloomy, drizzly weather. Since it was such an easy hike, we went back and did it again so I could get better photos. And the second time, we added the .6 mile loop to visit Juney Whank Falls to the trip. These falls required a short, but steep climb, but may have been the prettiest of the three! And the better photos gained from a second trip around made this hike twice as nice!
Trail Notes
Distance –5.4 miles
(Check out the stats from MapMyHike)* These stats are from the first time we hiked the loop, so Juney Whank Falls are not included in the MapMyHike mileage or elevation.
Elevation Change – About 630 ft.
Difficulty – 2. The only tough parts of this hike are the steep trail on the Loop Trail and the side trail to the Juney Whank falls
Trail Conditions – 4. Most of the trail is gravel except for the Loop Trail. This is a multi-use trail and you will see hikers, bikers, and horses on this trail. The trails were in great shape with no blowdowns or rough footing.
Views – 0. No scenic views from the trail, but this is more for the waterfalls.
Streams/Waterfalls – 5. You’ll have the best stream views along Deep Creek and three gorgeous waterfalls.
Wildlife – 2. Don’t expect larger wildlife due to the crowds of people on this trail. We did hear lots of pretty warblers in the tree.
Ease to Navigate – 4. Good signage at the trail junctions for the most part except for coming off the Juney Whank falls trail.
Solitude – 1. Expect to see lots of people for most of the trail. A lot of people choose not to do the Loop Trail.
Directions to trailhead: Take exit 67 off of NC-74 towards Veterans Blvd. Go .6 miles and take a right on Main Street/NC-19. Take the second left on to Everett Street. You’ll see signs directing you to Deep Creek Campground. Go .3 miles and take a right on Depot Street. This road makes a quick left on Collins Street and then a quick right to continue on to Depot Street. This becomes Deep Creek Road. Go .3 miles and take a left on to West Deep Creek Road. Continue 2.4 miles until you enter the Great Smoky Mountains National Park – Deep Creek campground. A parking lot is on the left. The trailhead starts near the drop-off roundabout next to this parking lot.
* MapMyHike is not necessarily accurate, as the GPS signal fades in and out – but it still provides some fun and interesting information.

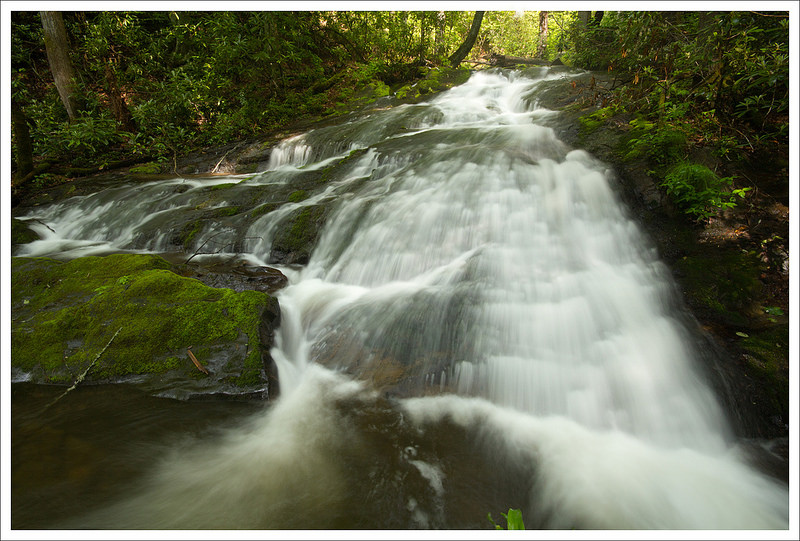


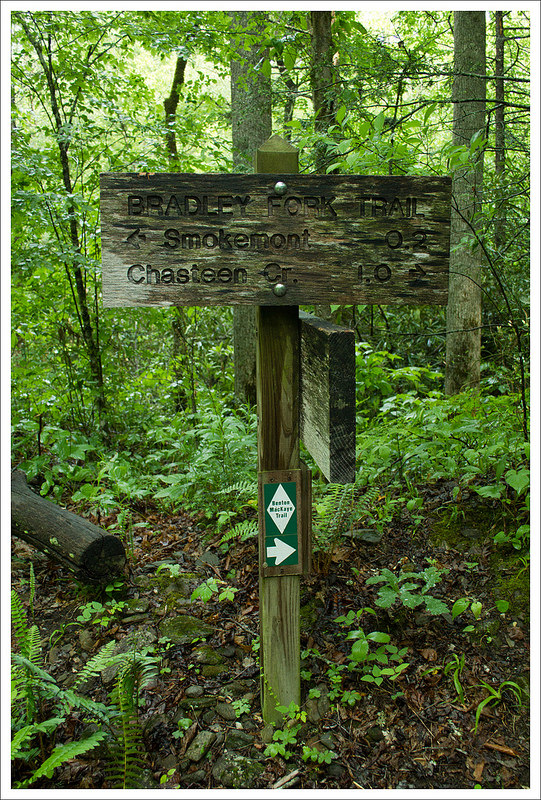

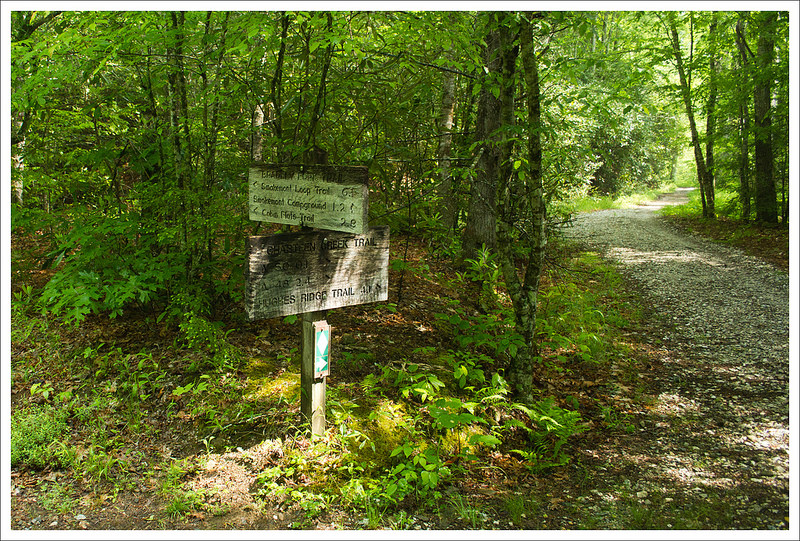

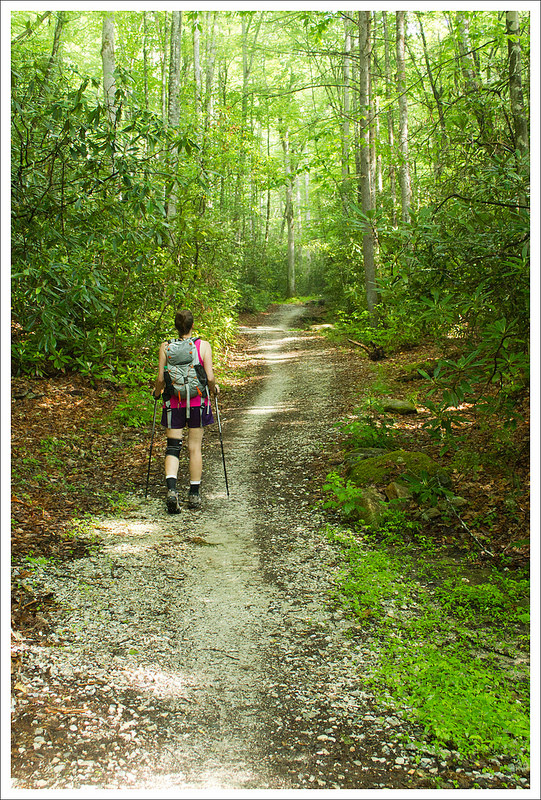


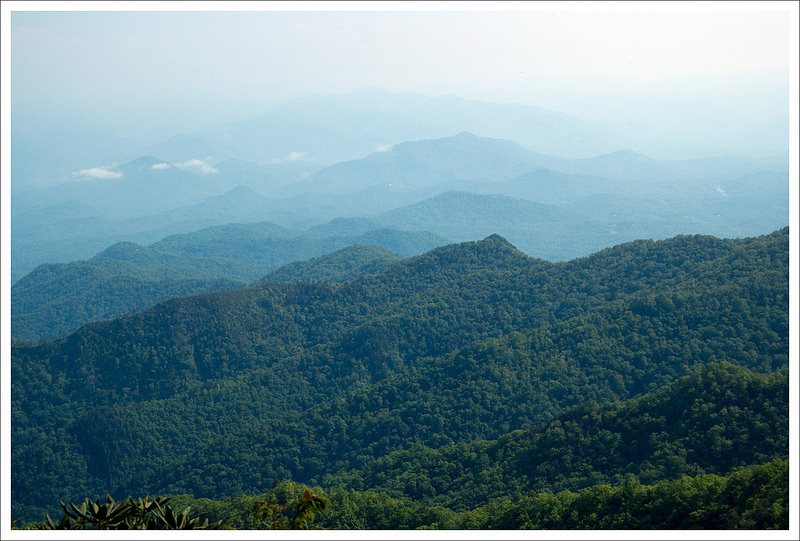


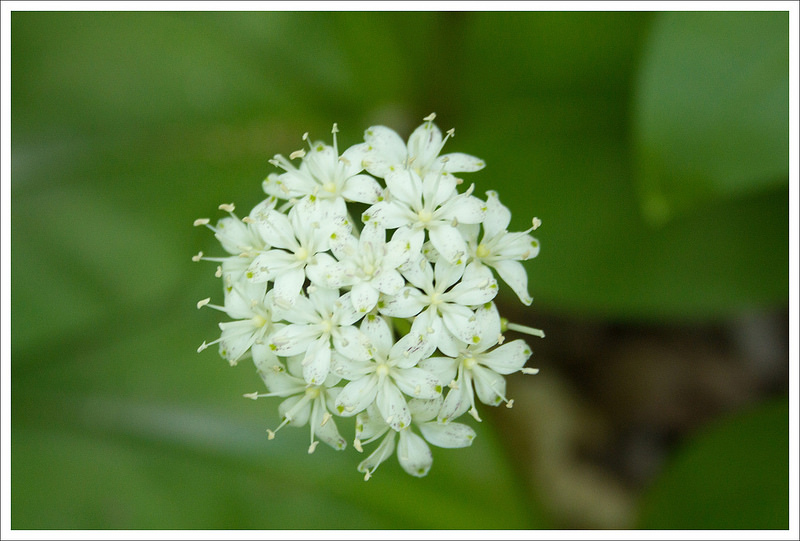


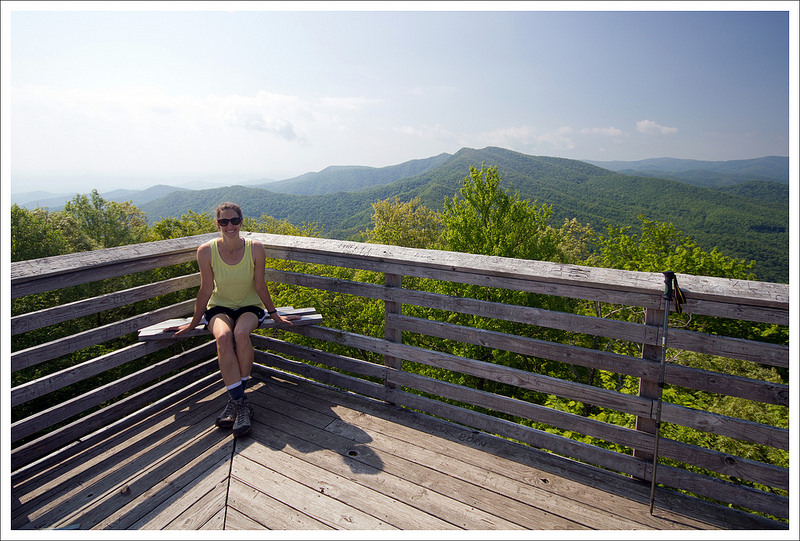
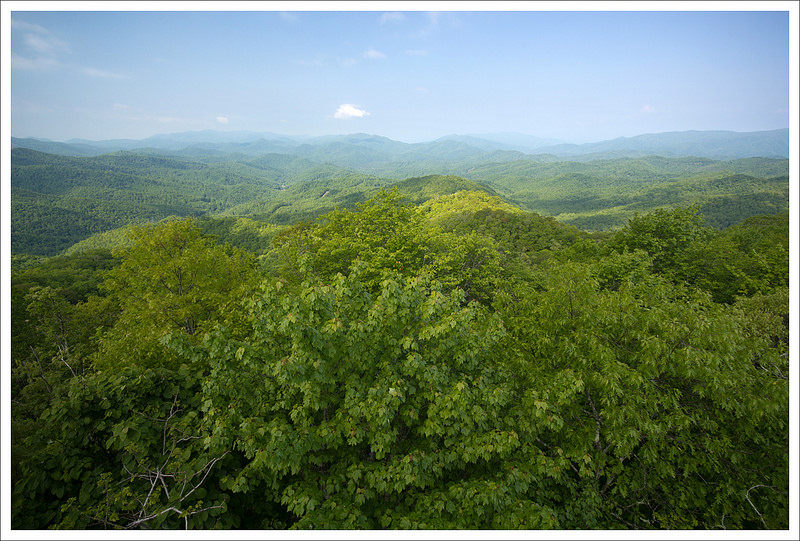
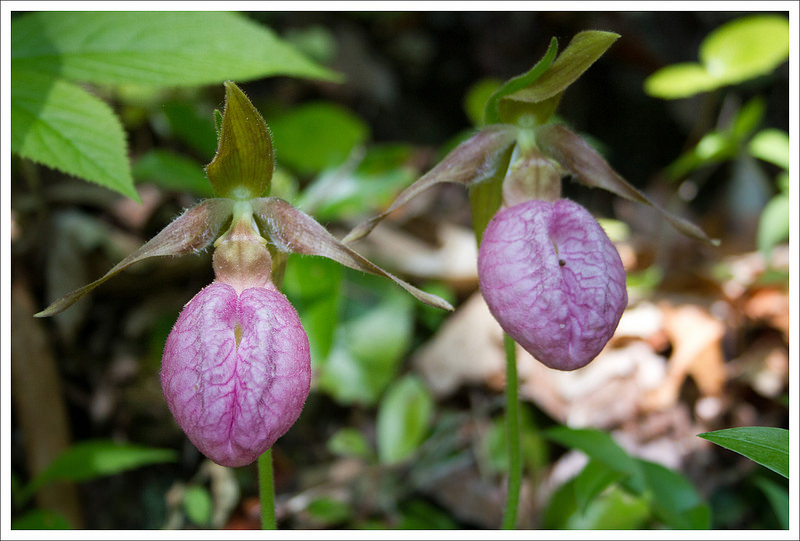
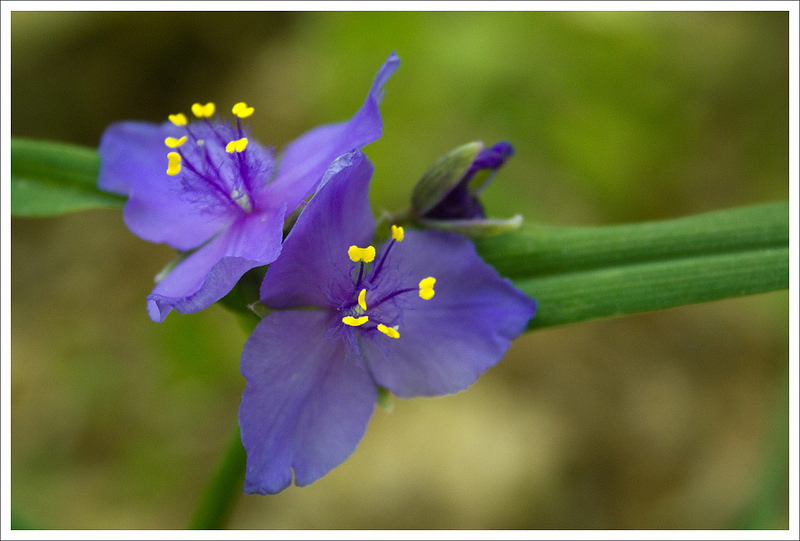


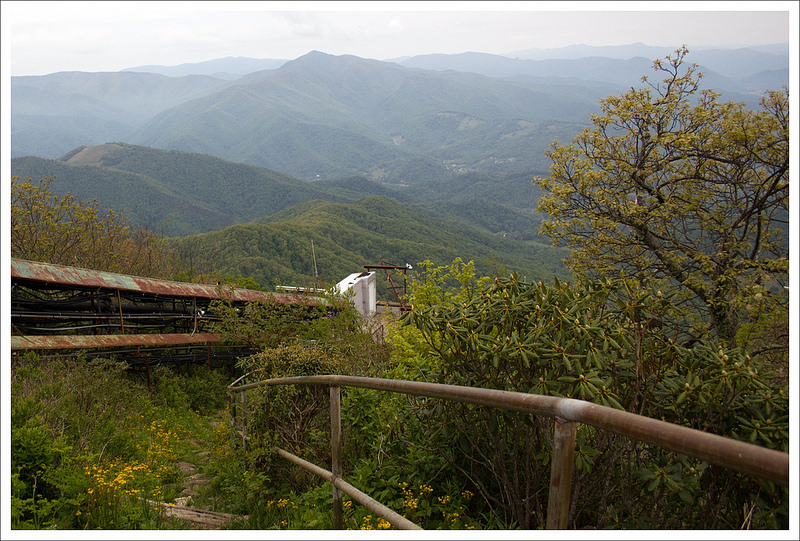


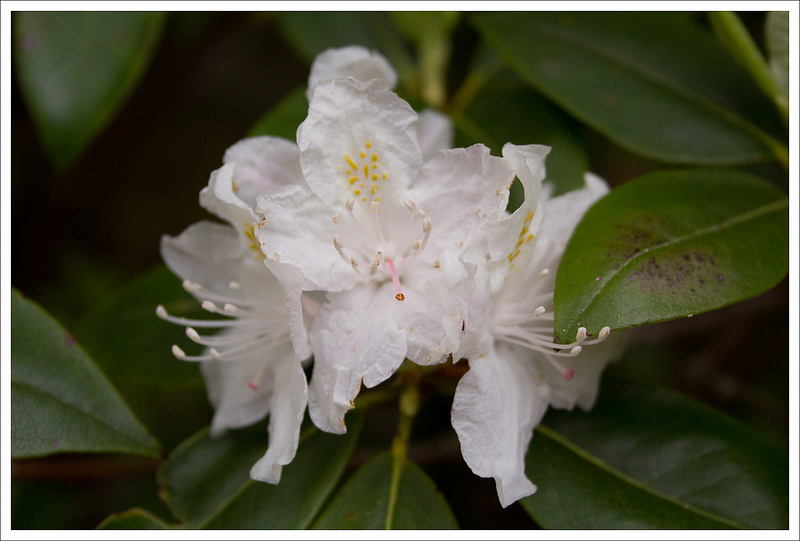
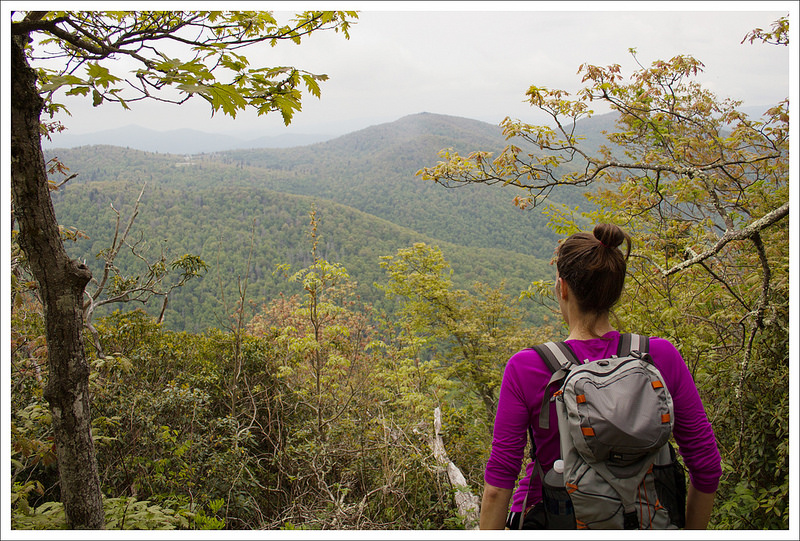
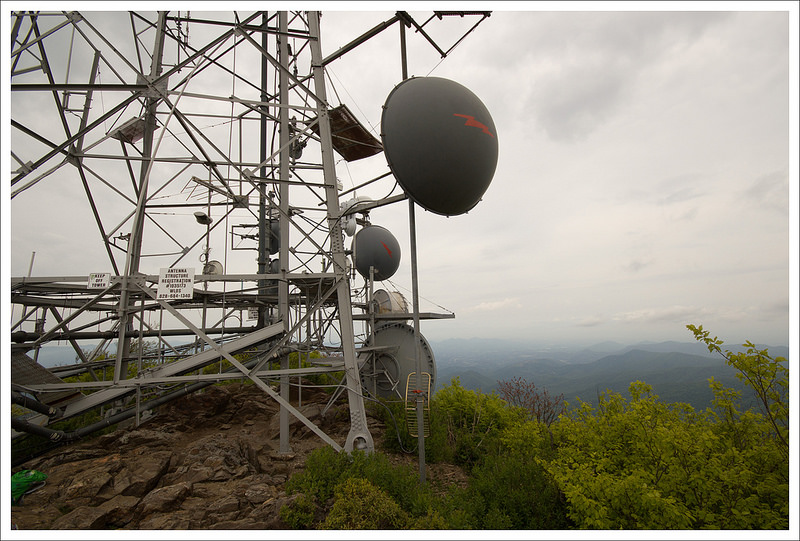


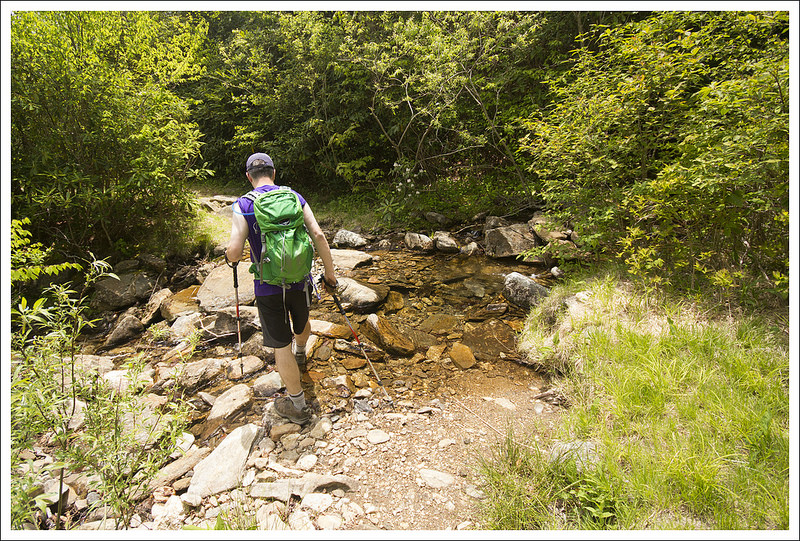
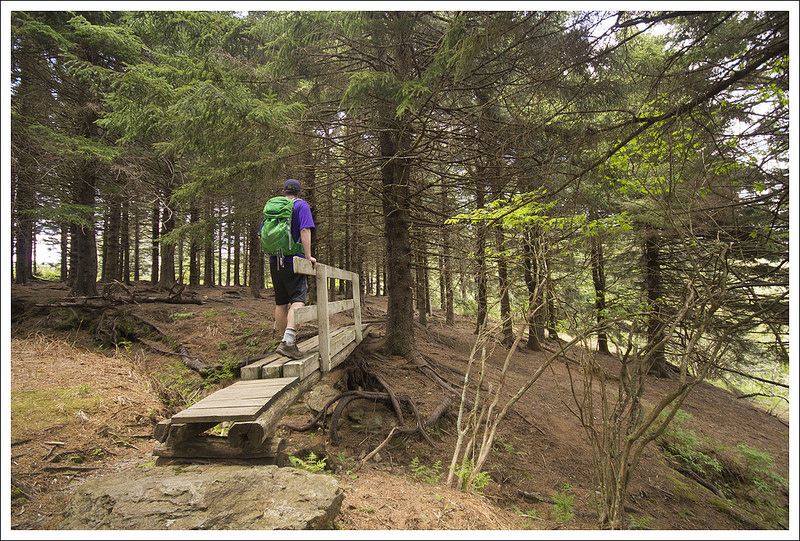
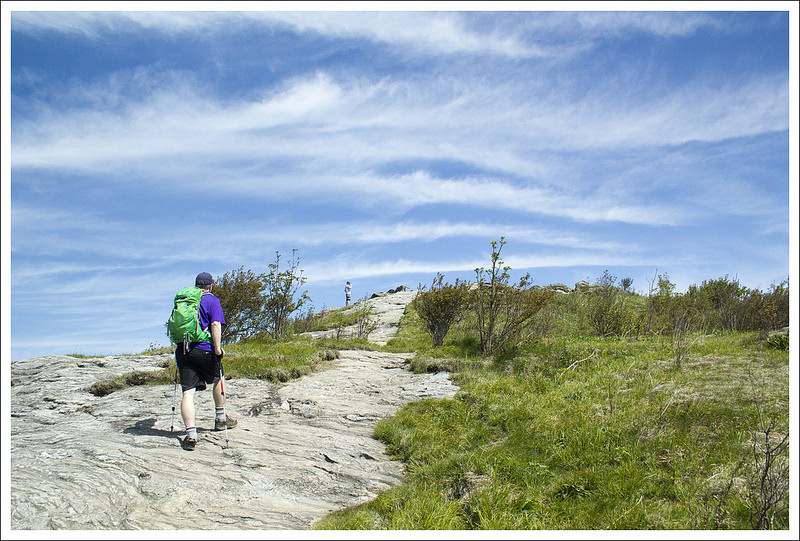
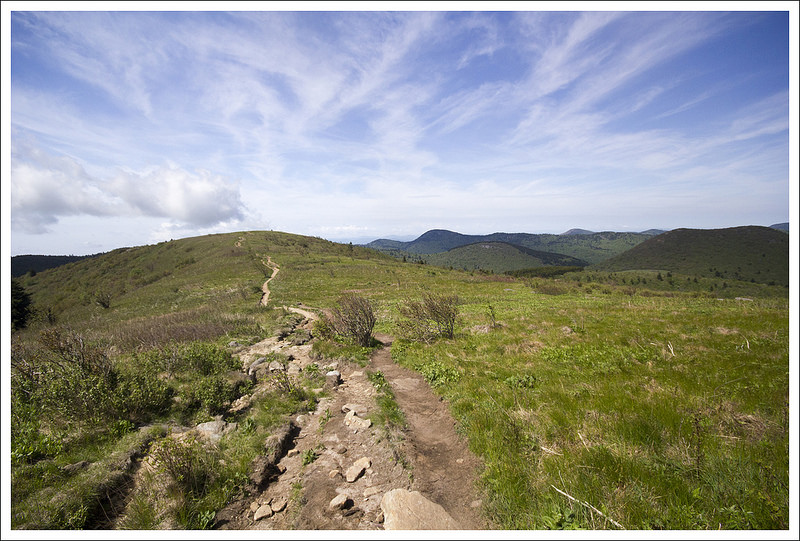


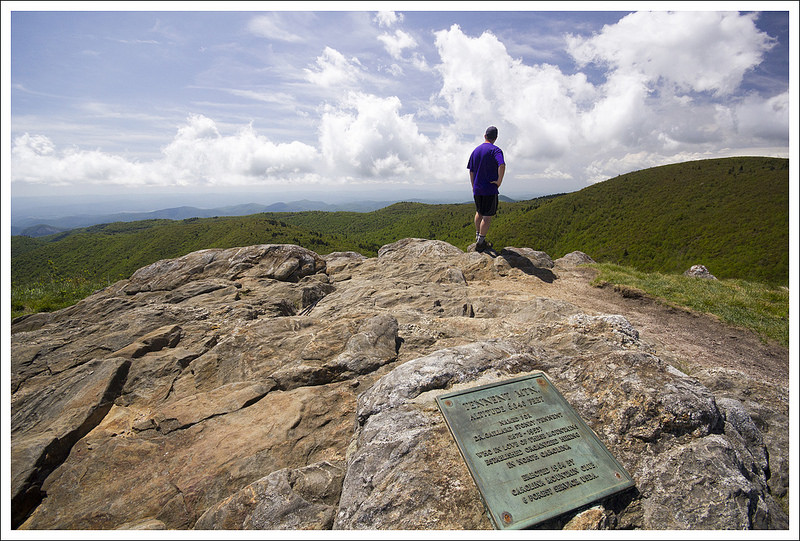


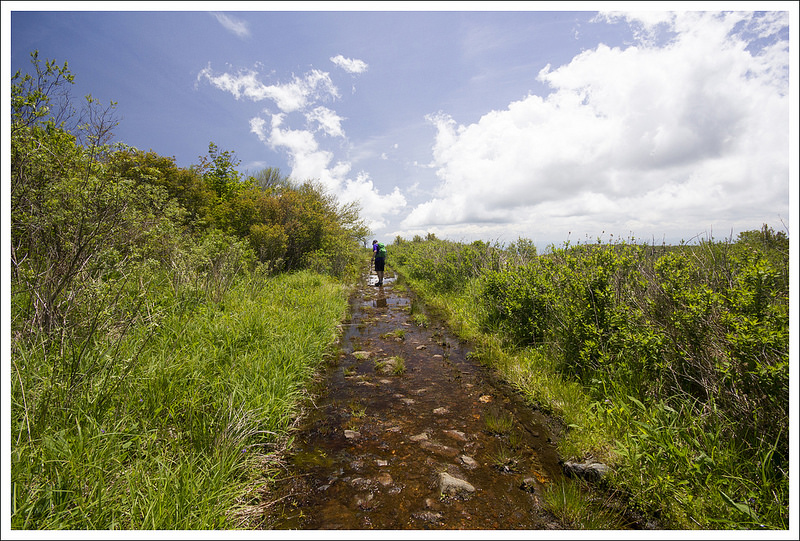


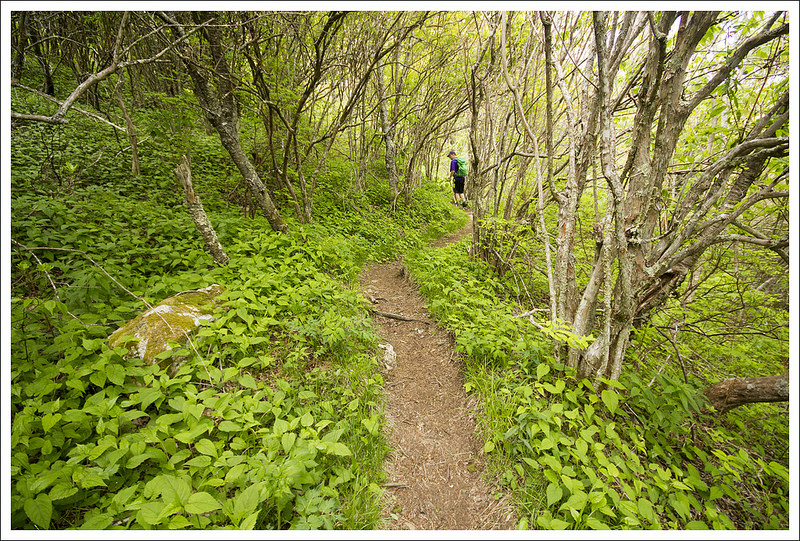
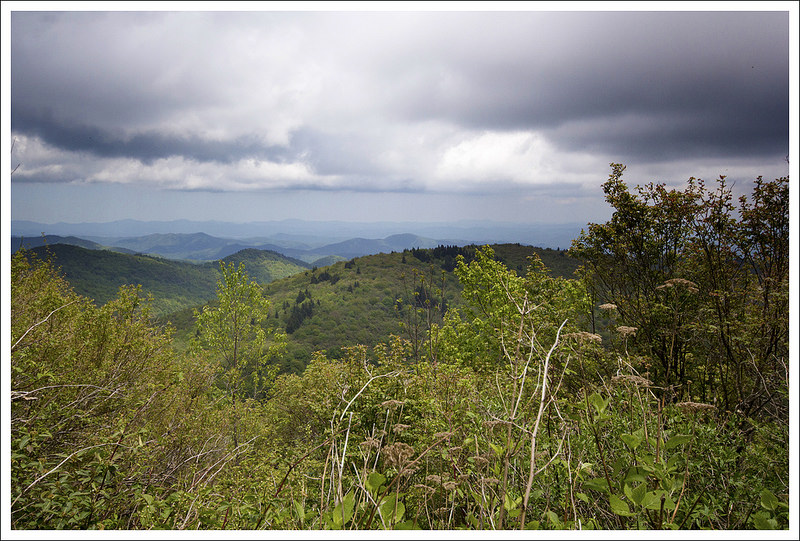

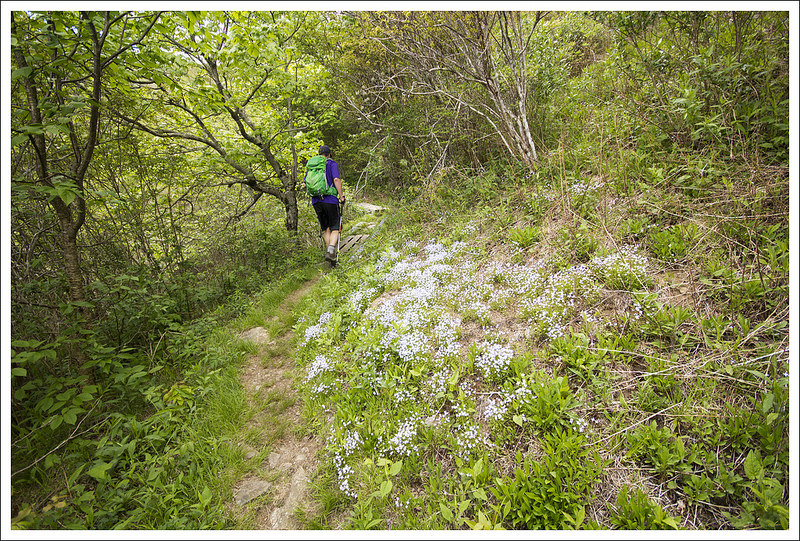

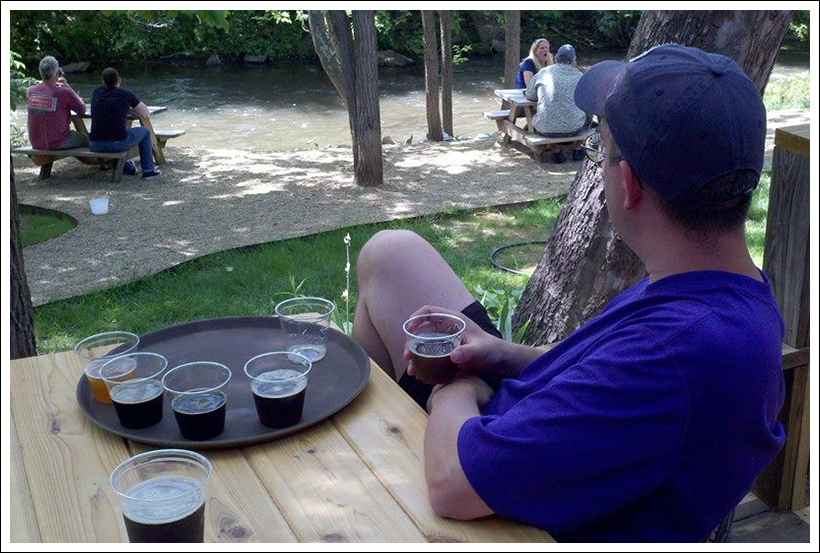


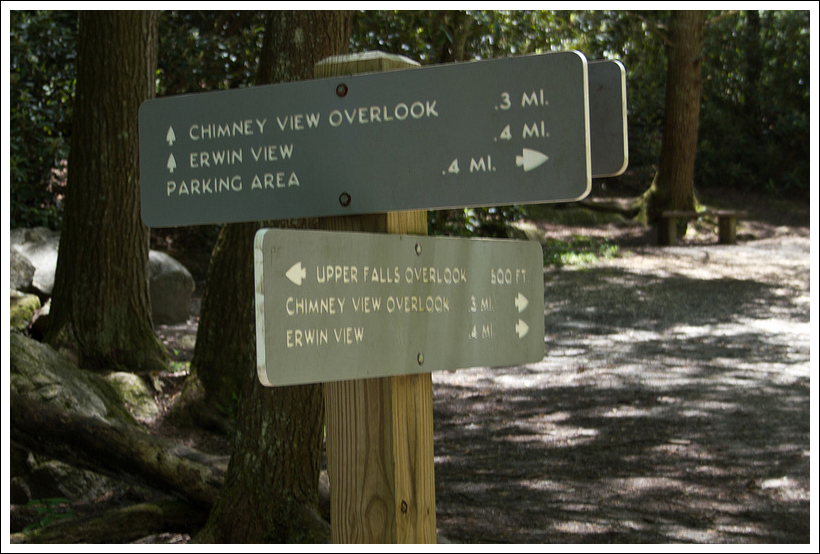


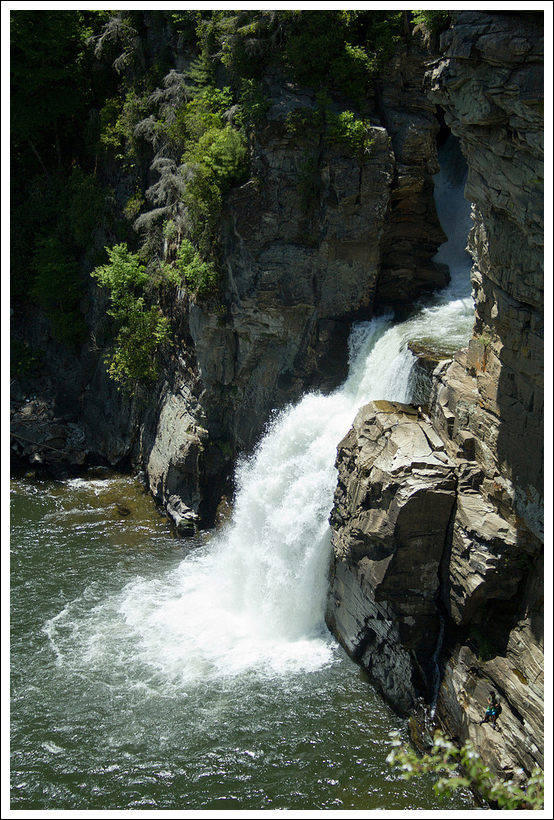
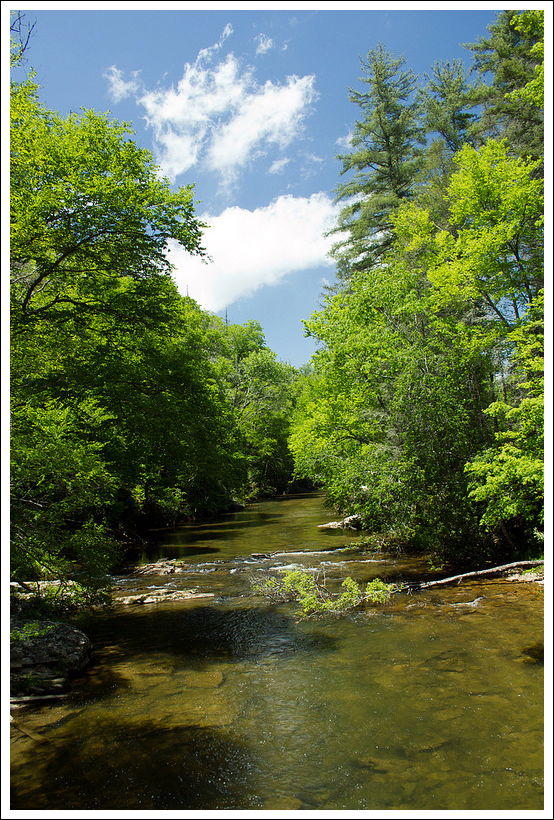


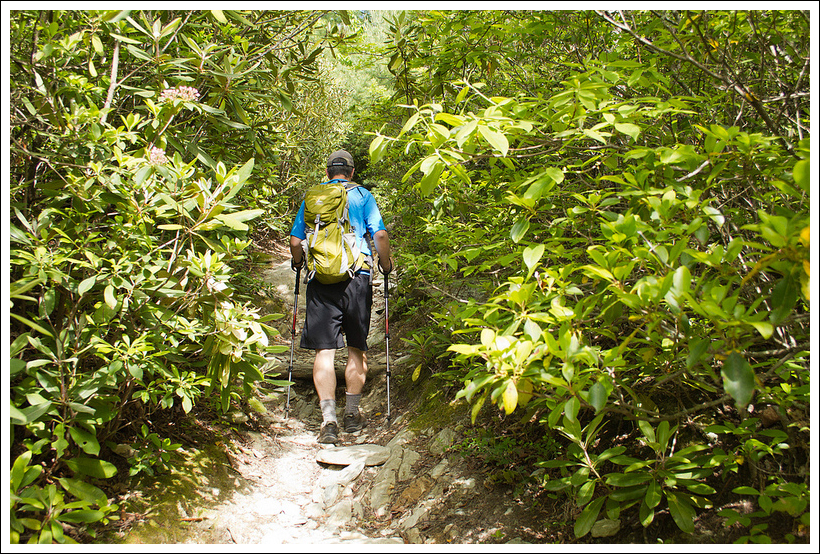

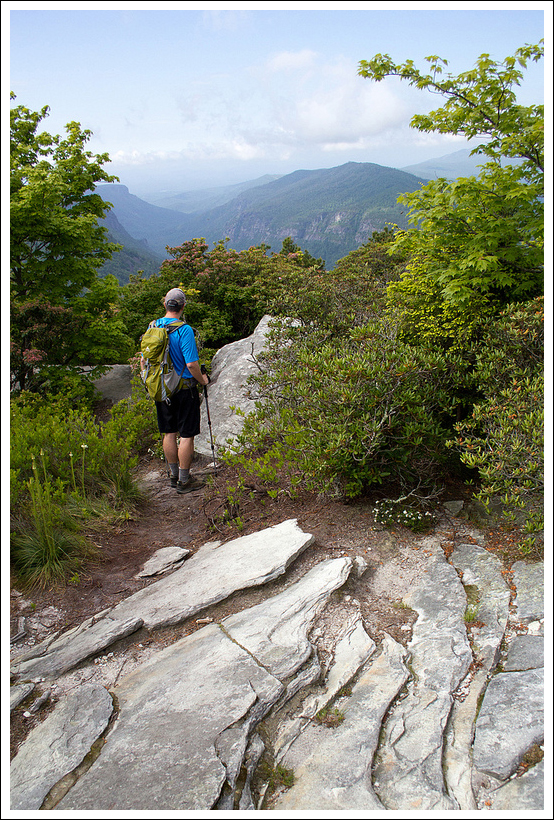
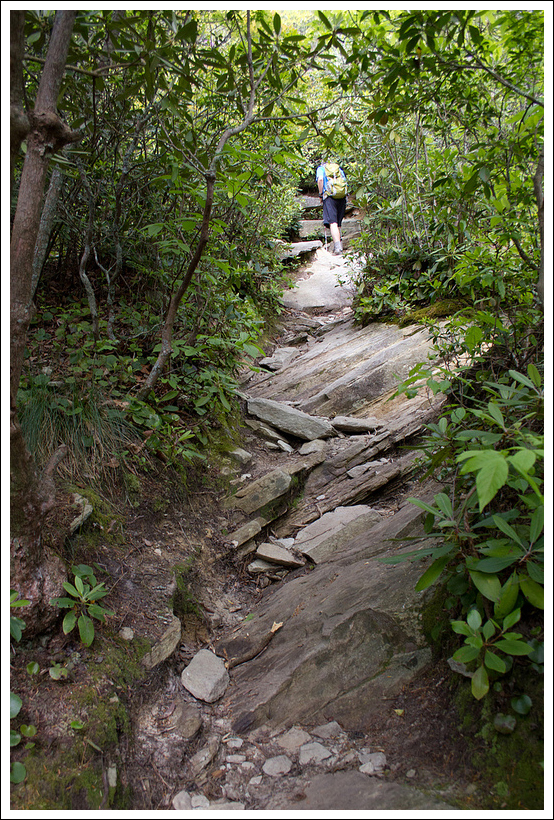


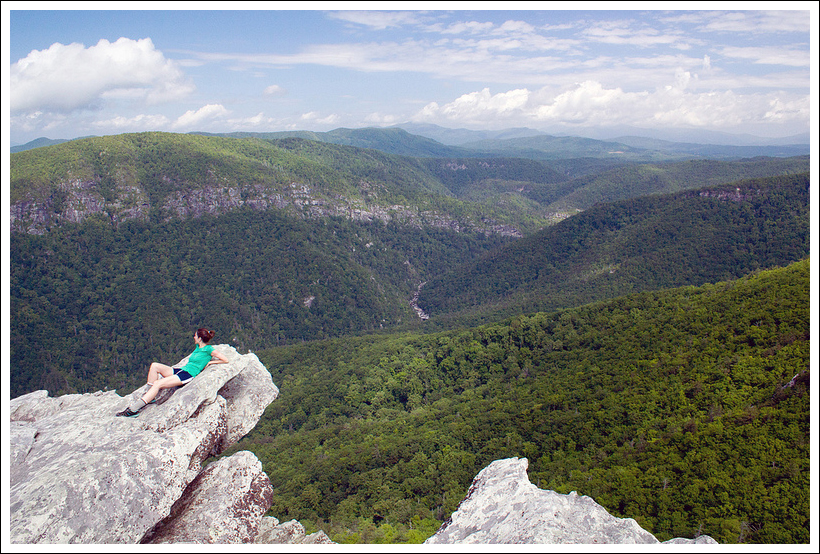

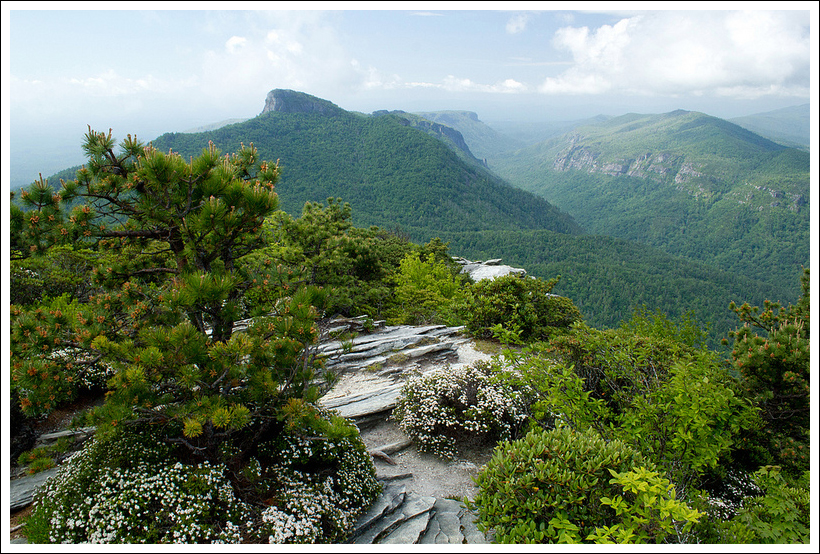


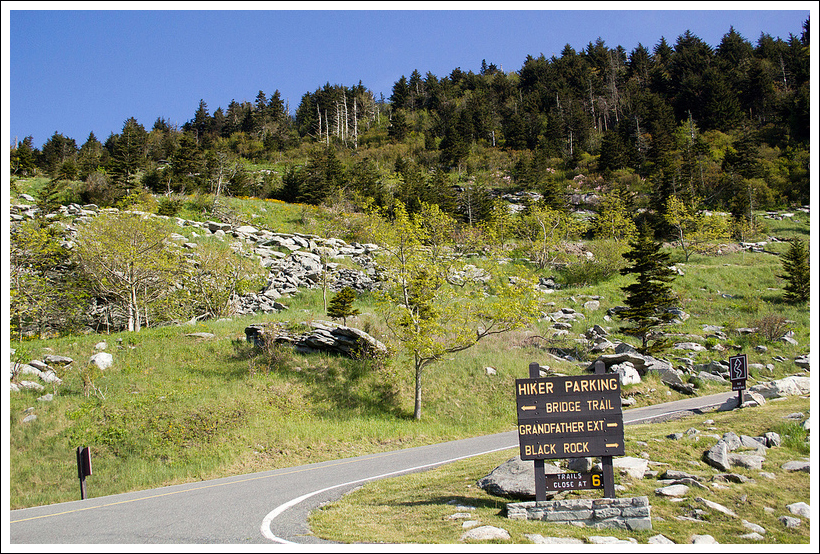

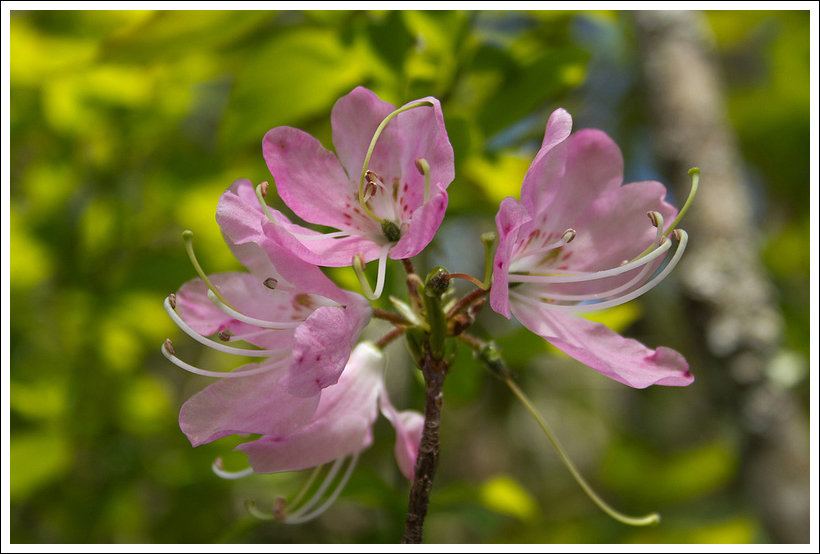

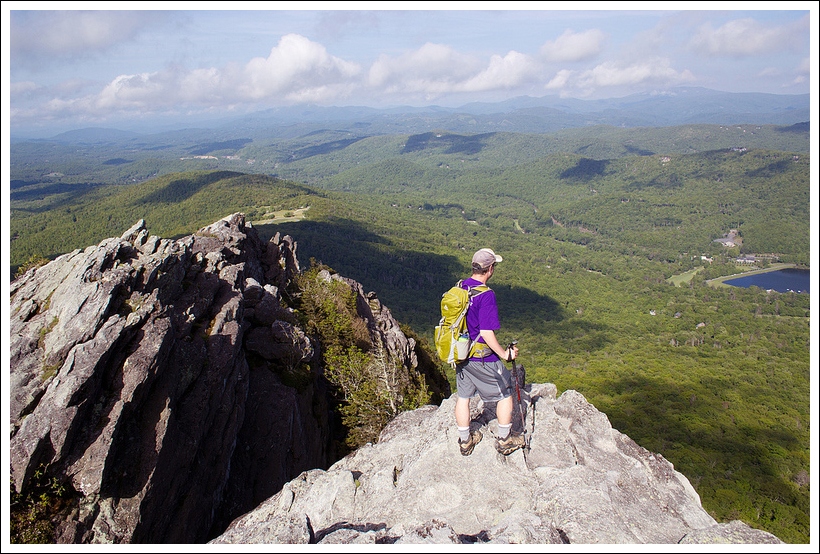
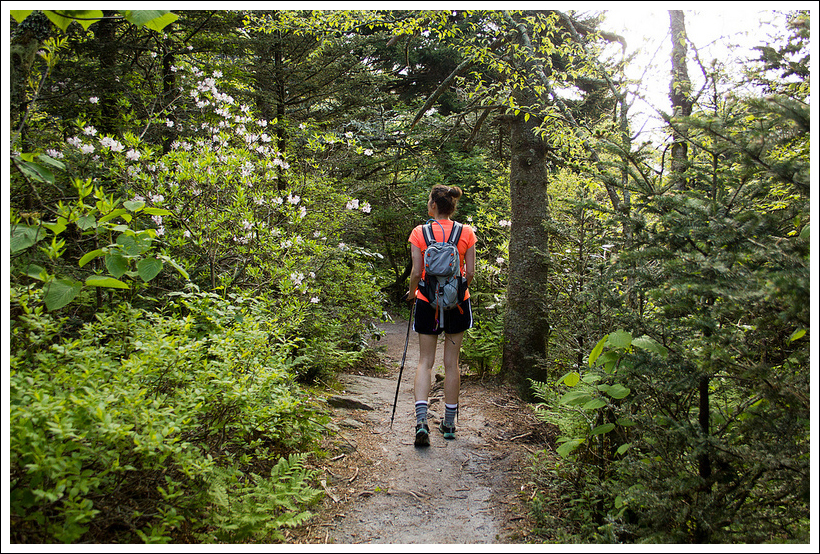
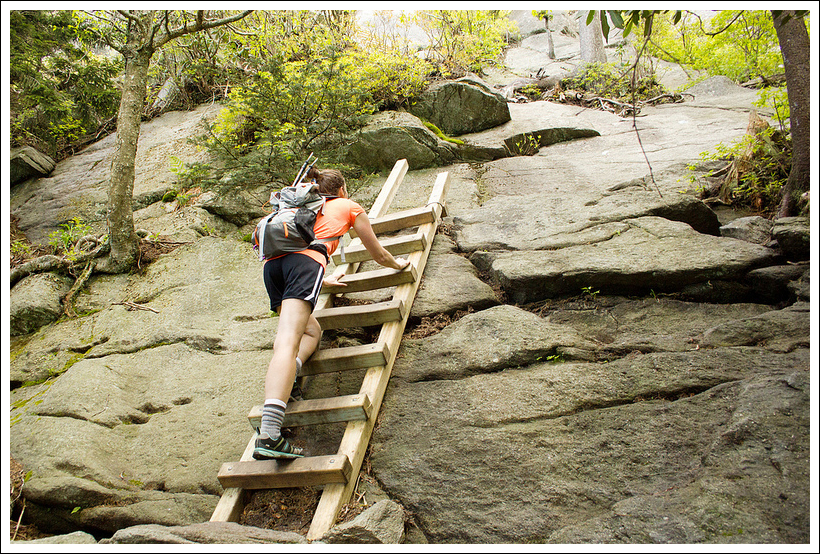
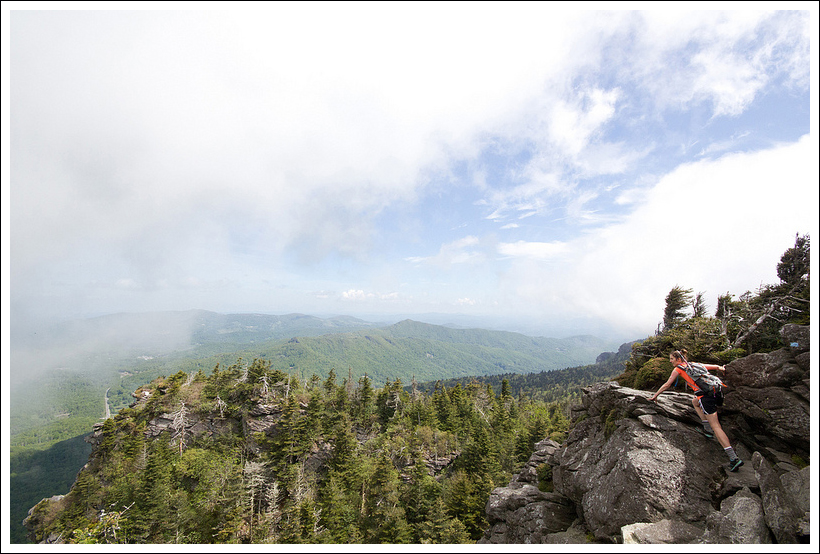

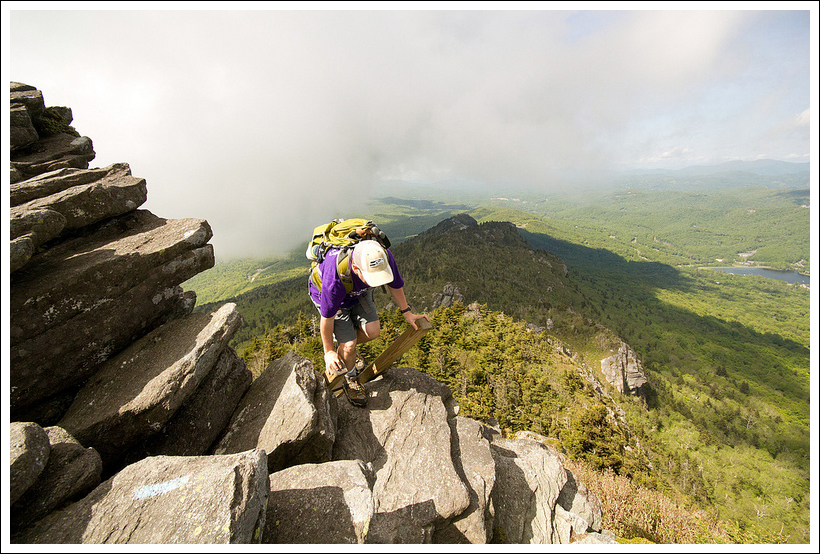
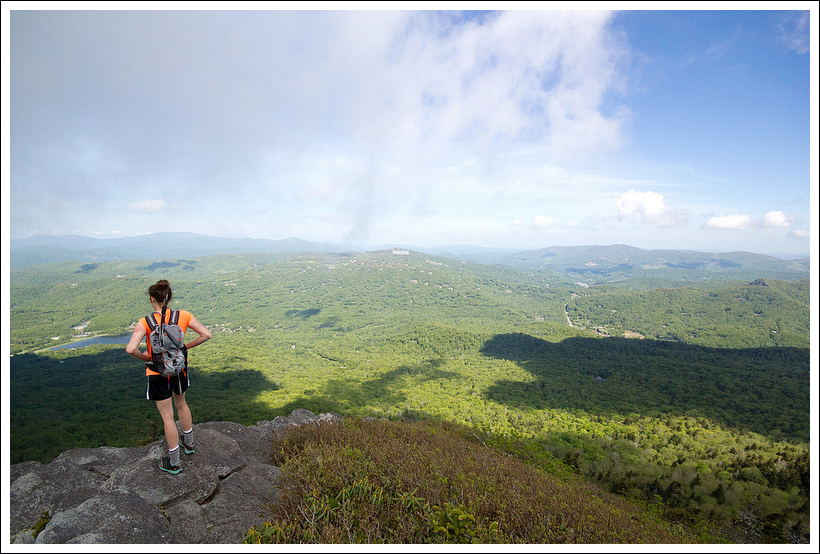
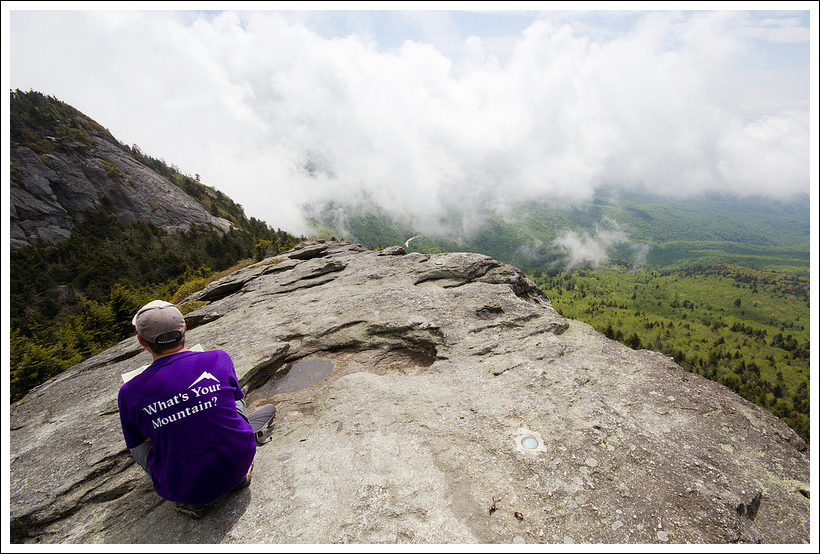
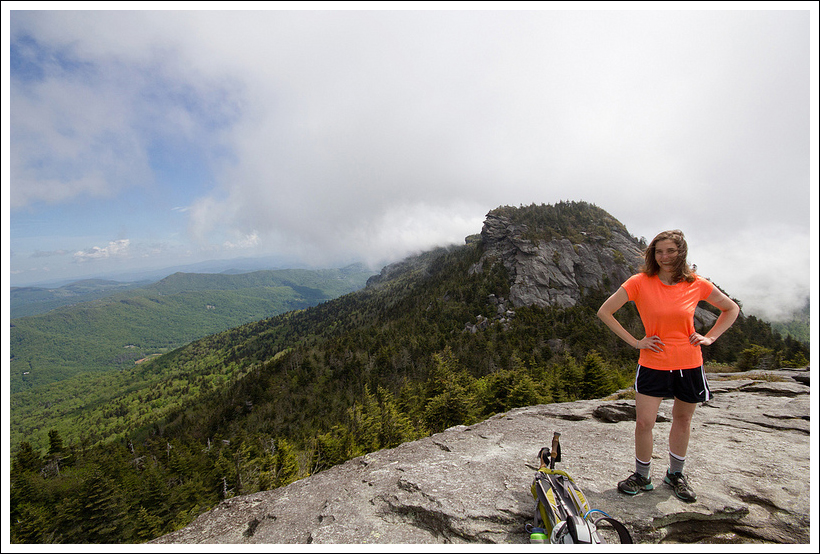
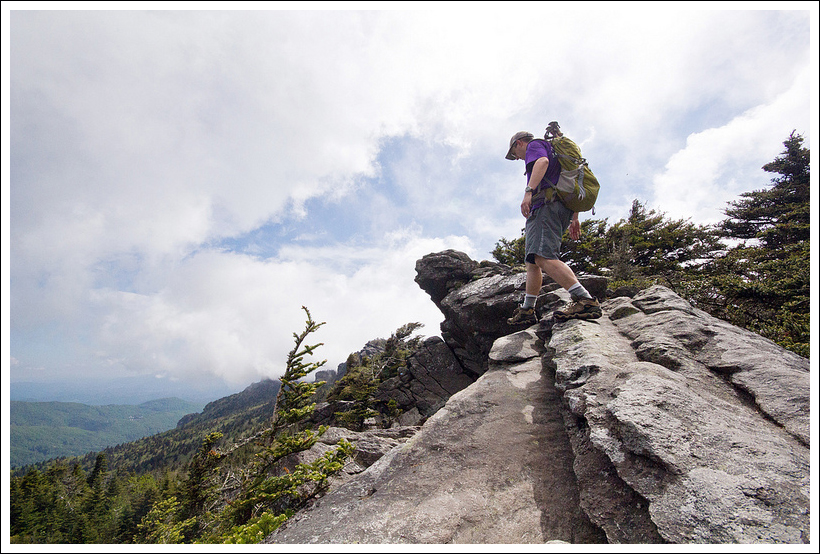
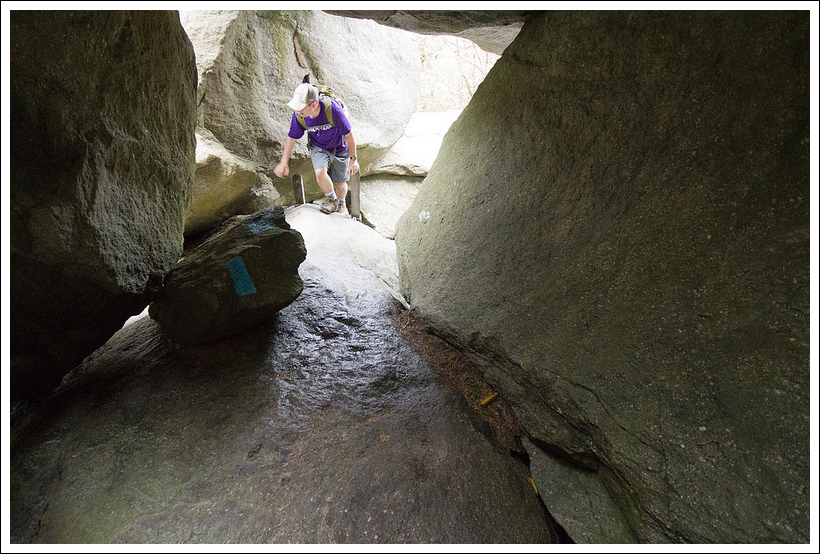
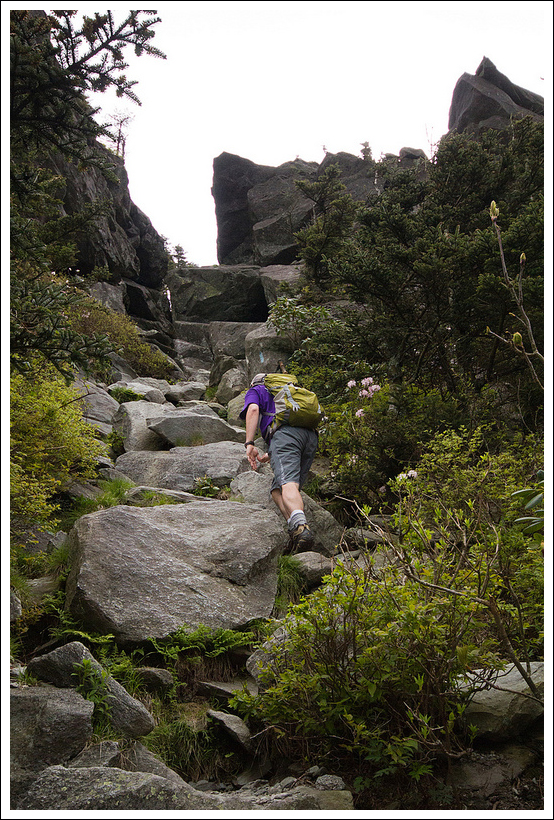
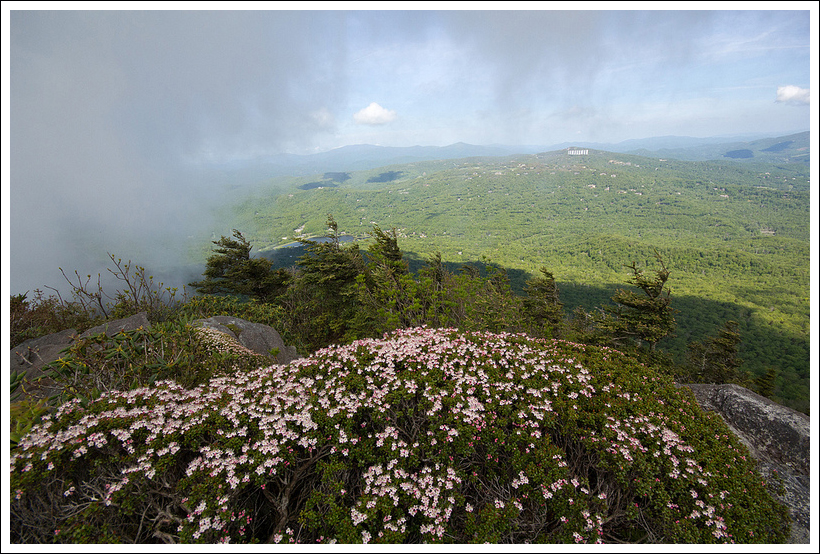
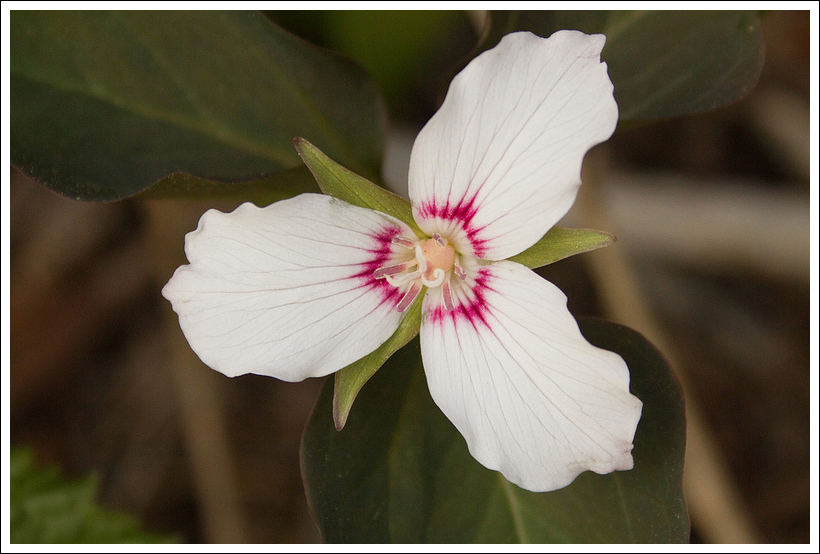
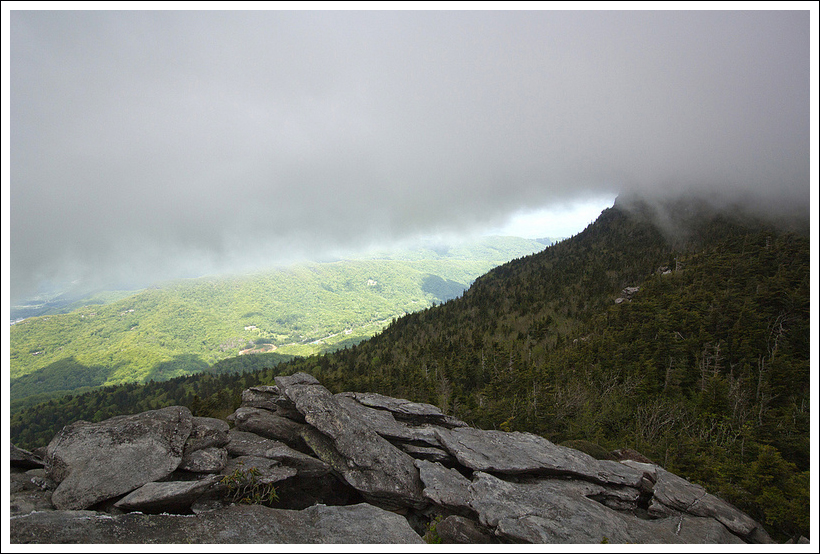
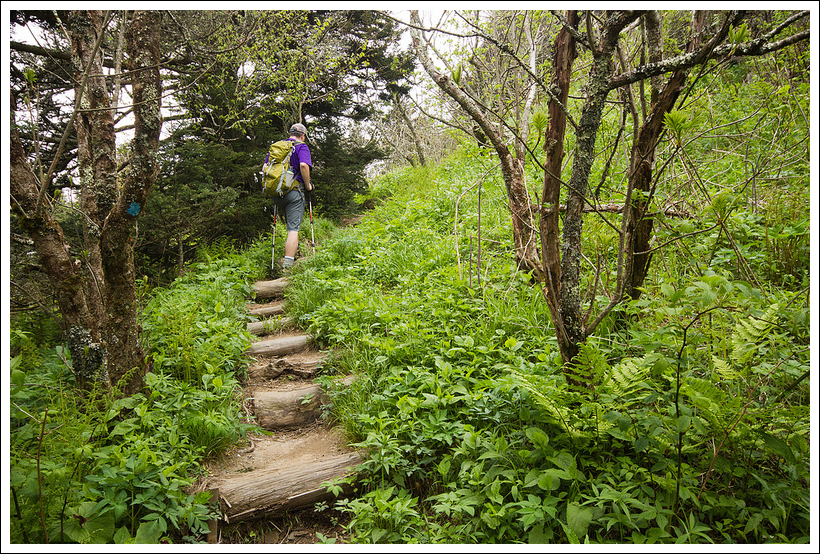
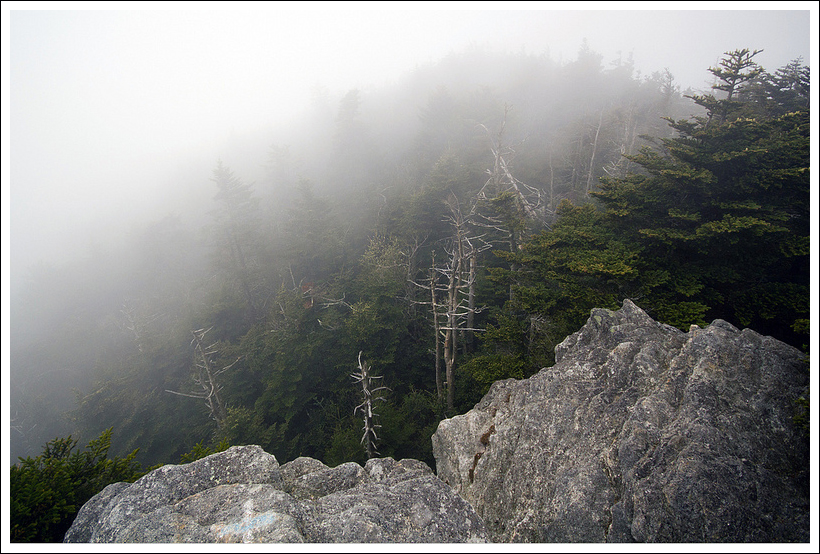

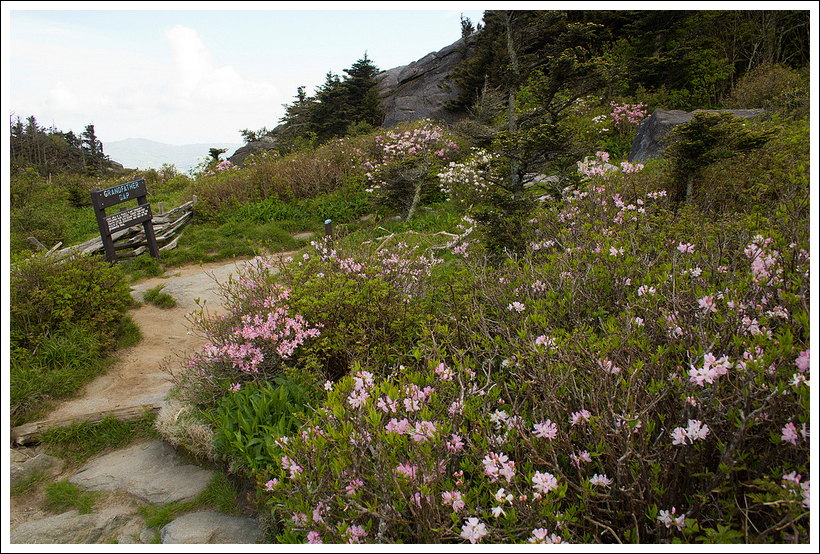


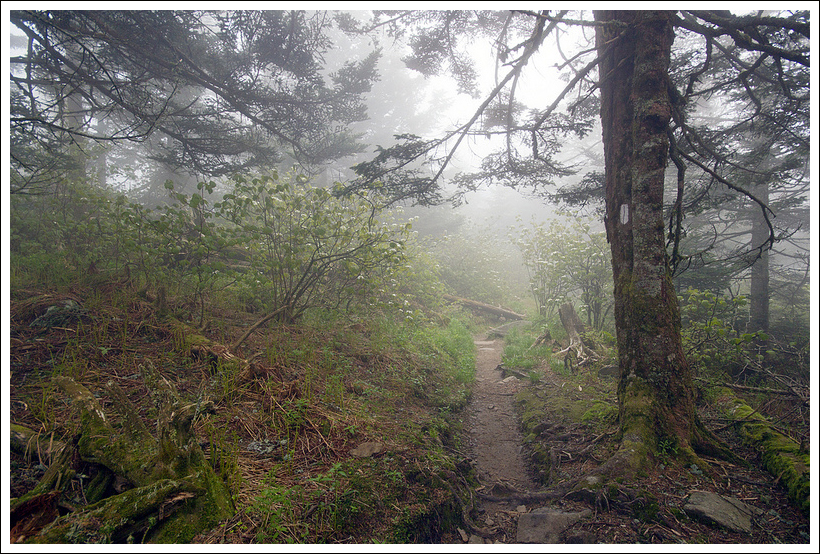


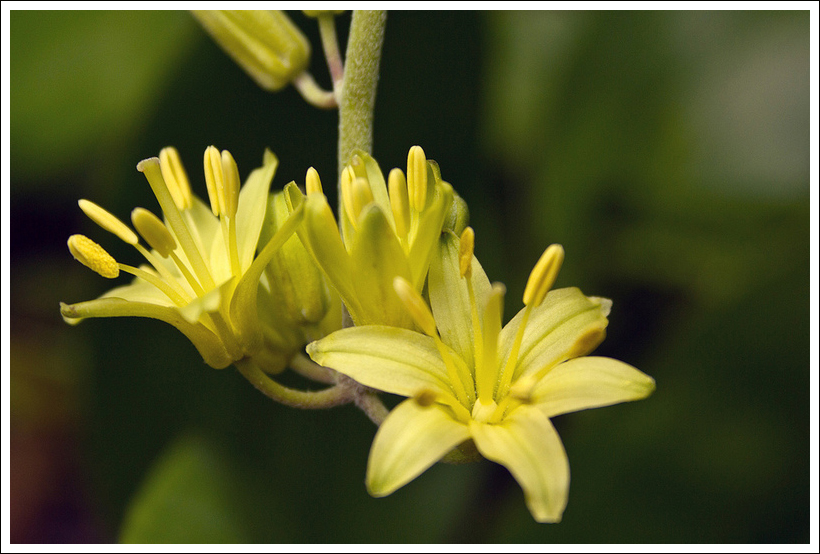


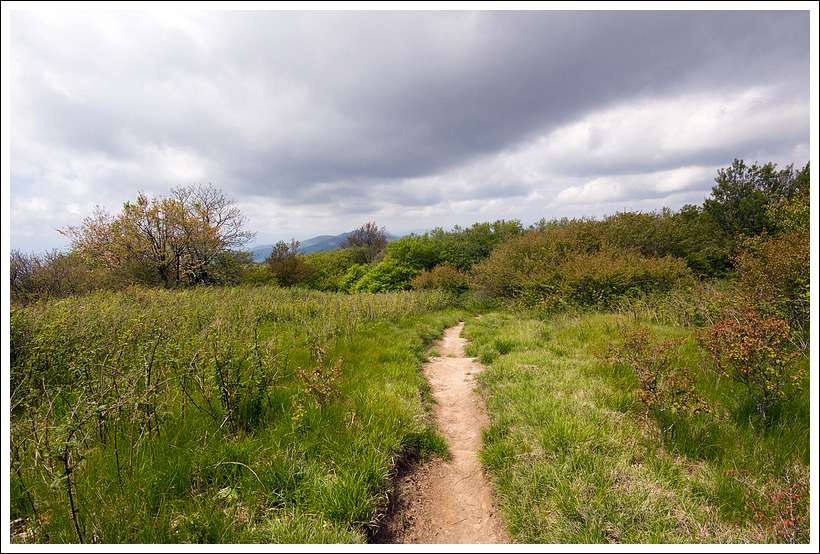


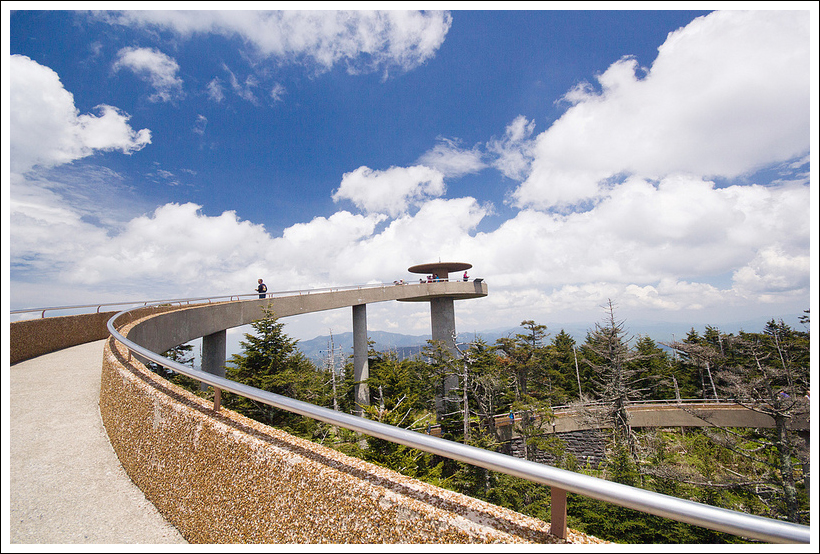

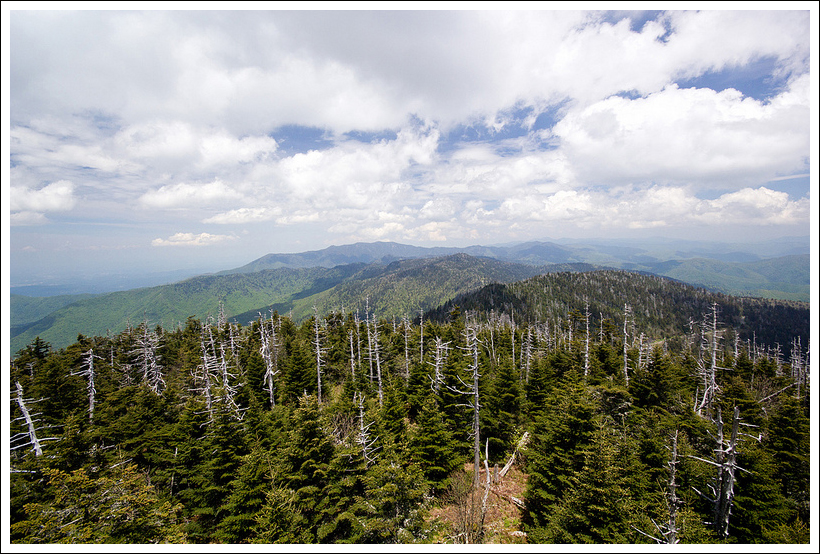


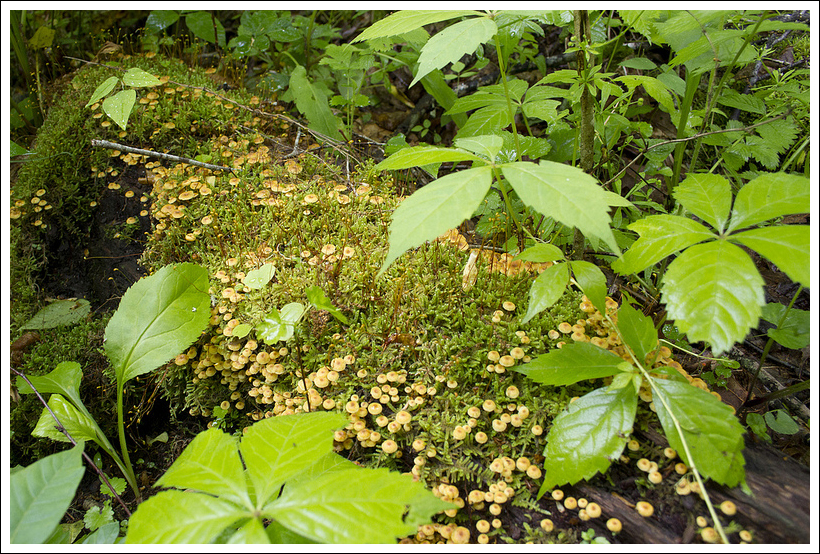

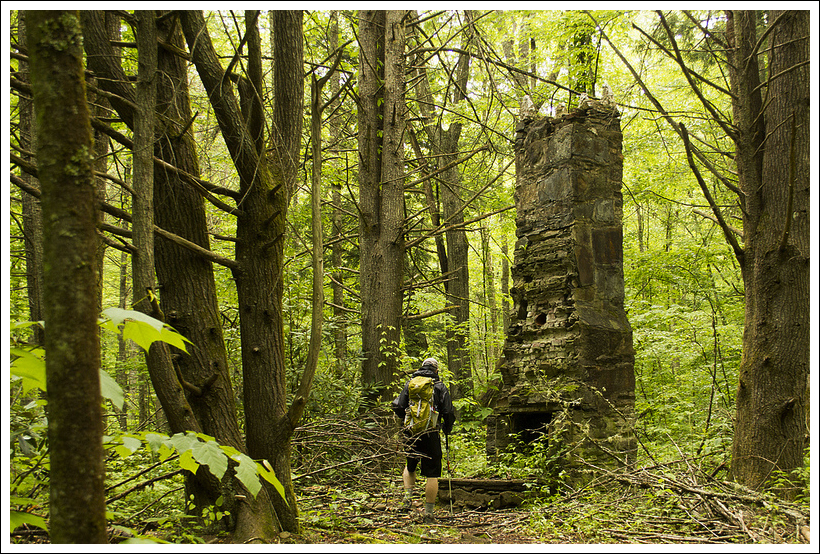


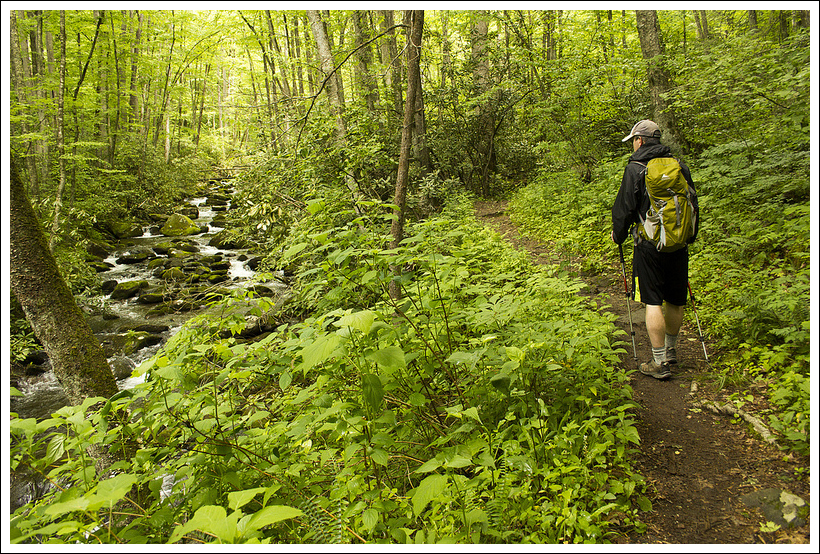


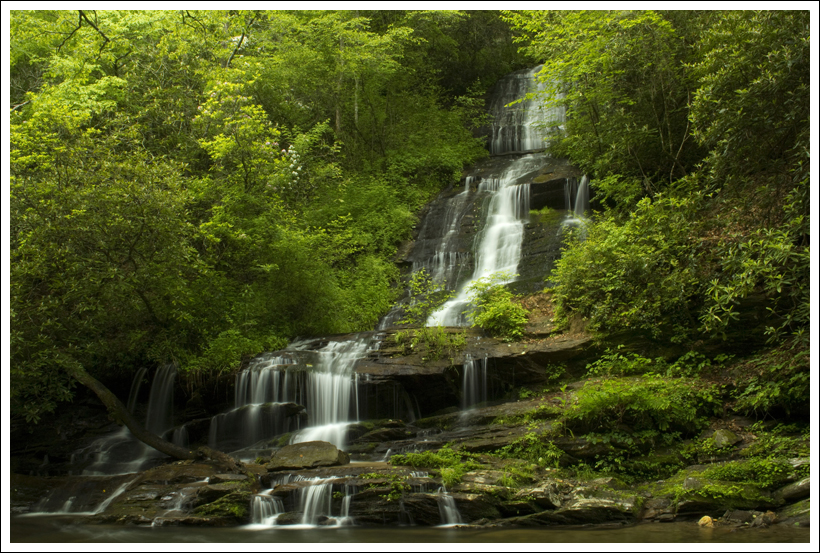
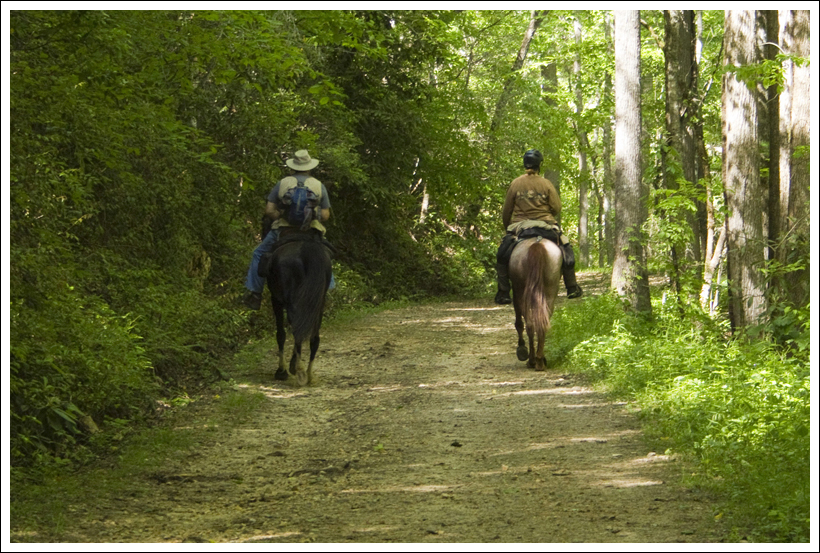


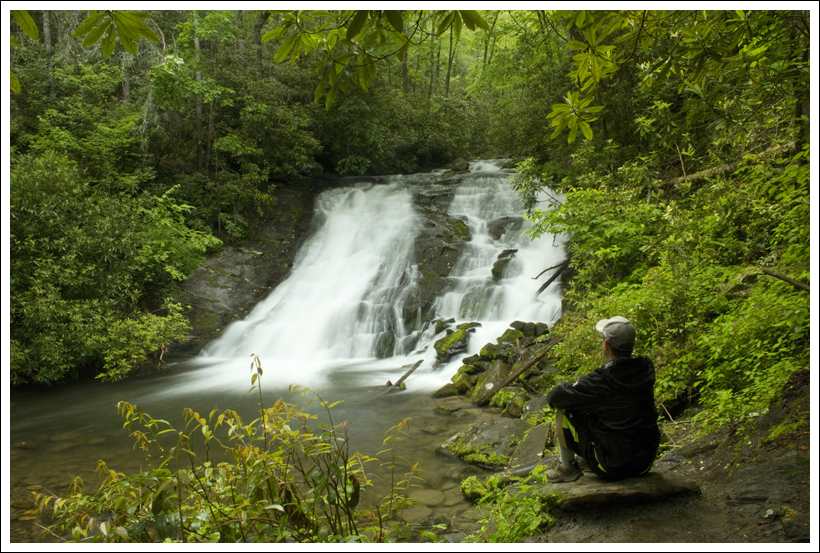


