Duncan Knob Backpacking Loop

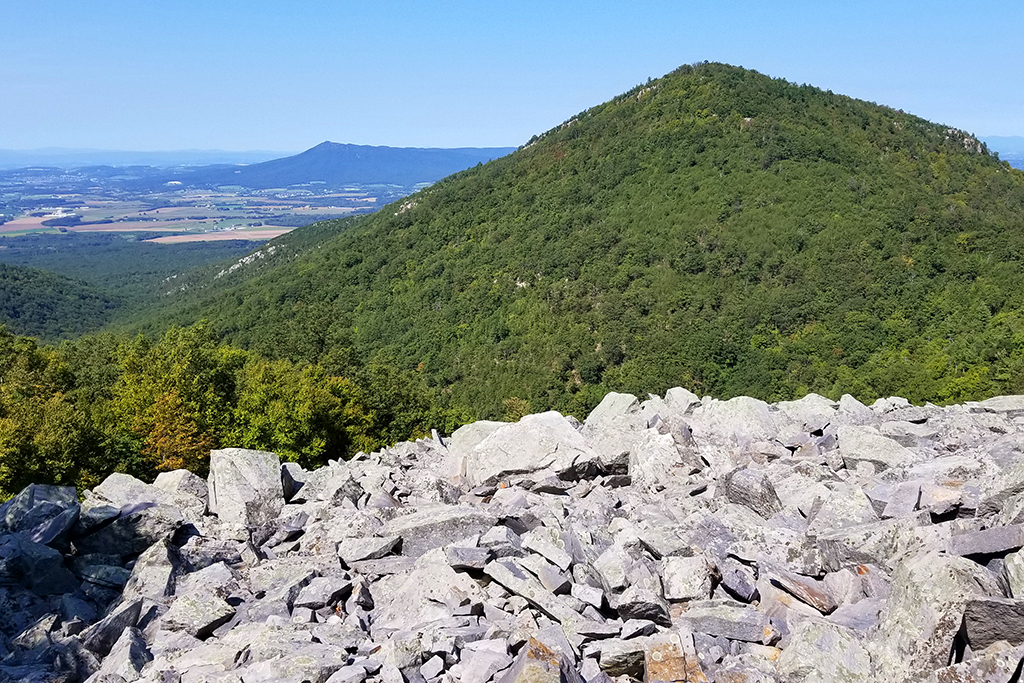
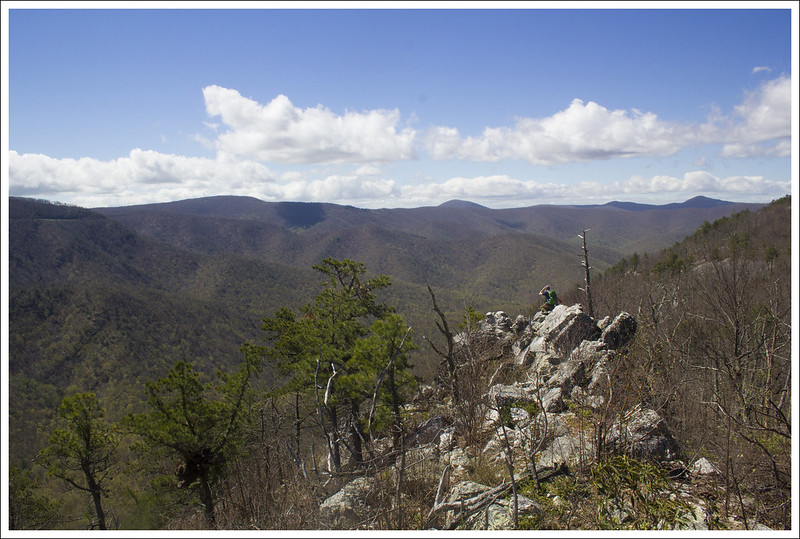
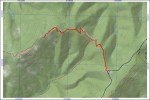
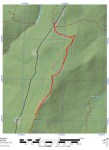
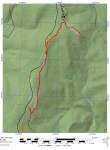
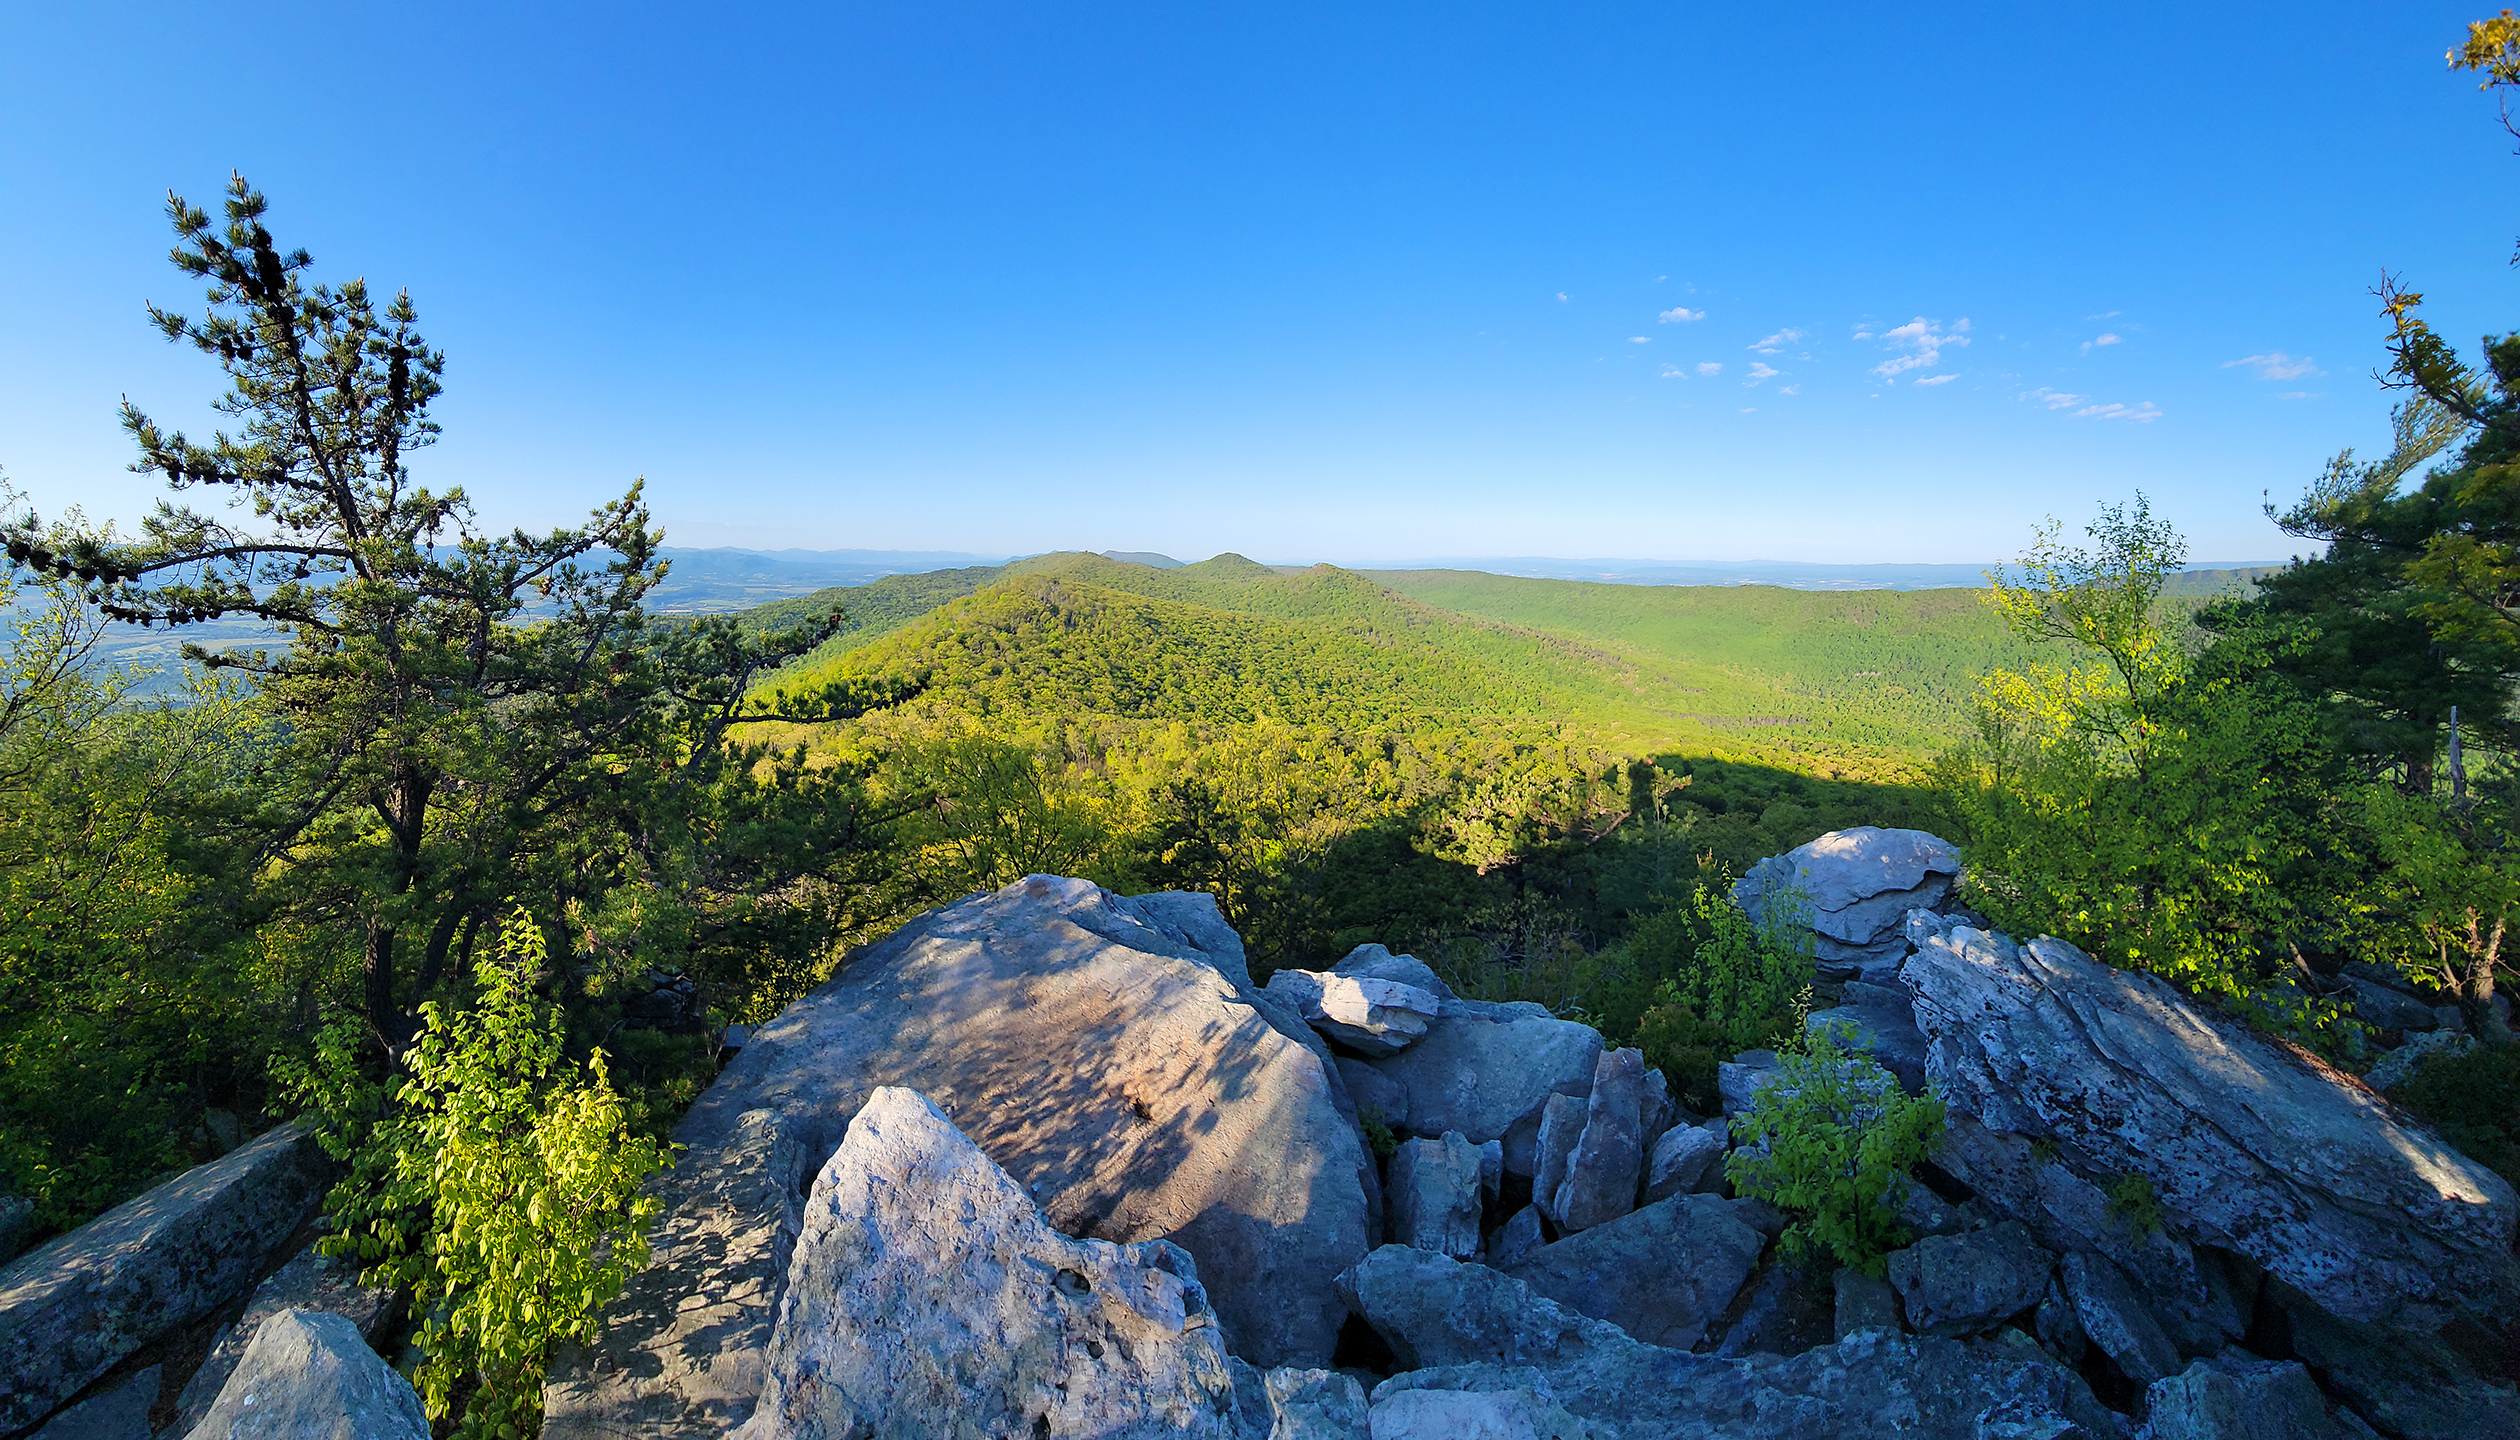
This nine-mile loop is perfect for a long day-hike or a quick overnight backpacking trip. We recommend backpacking, just to take advantage of the beautiful campsites near the summit. The rock scramble atop Duncan Knob is impressive and provides great views.

Full photo album is embedded at the bottom of the post!
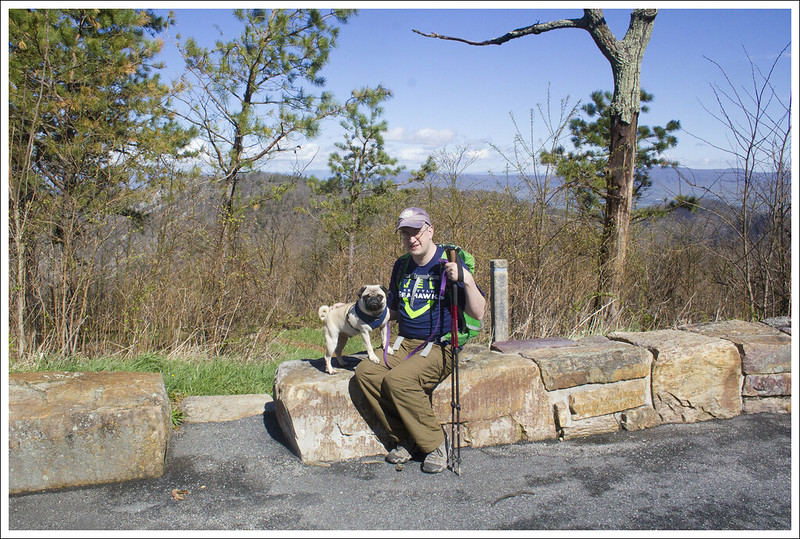
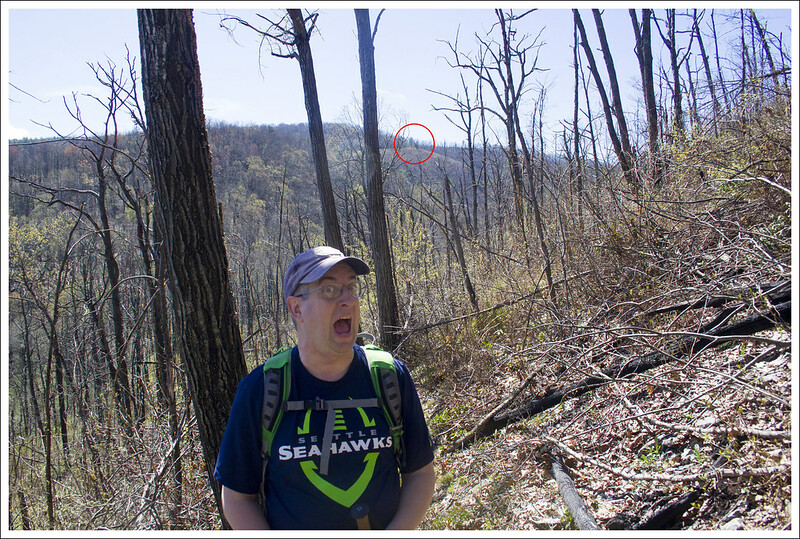
Adam Says (Day 1)

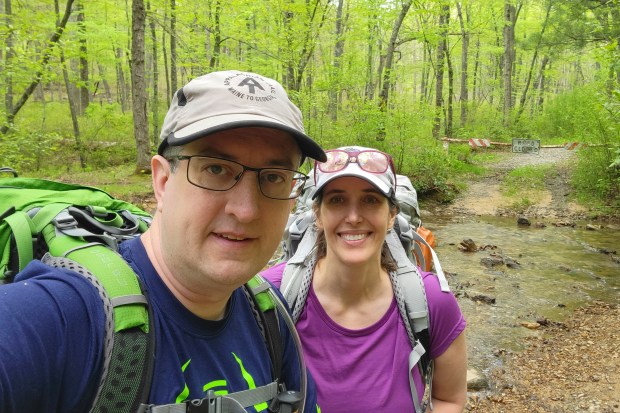
When the weather forecast looked like it was setting up to be a great weekend, we decided on short notice to pack our bags and go for an overnight backpacking trip. We had originally planned to do some miles of the Appalachian Trail we still wanted to accomplish, but there was a potential gas shortage coming so we came up with an idea that was closer to us and also wouldn’t require us to drive two cars to shuttle.

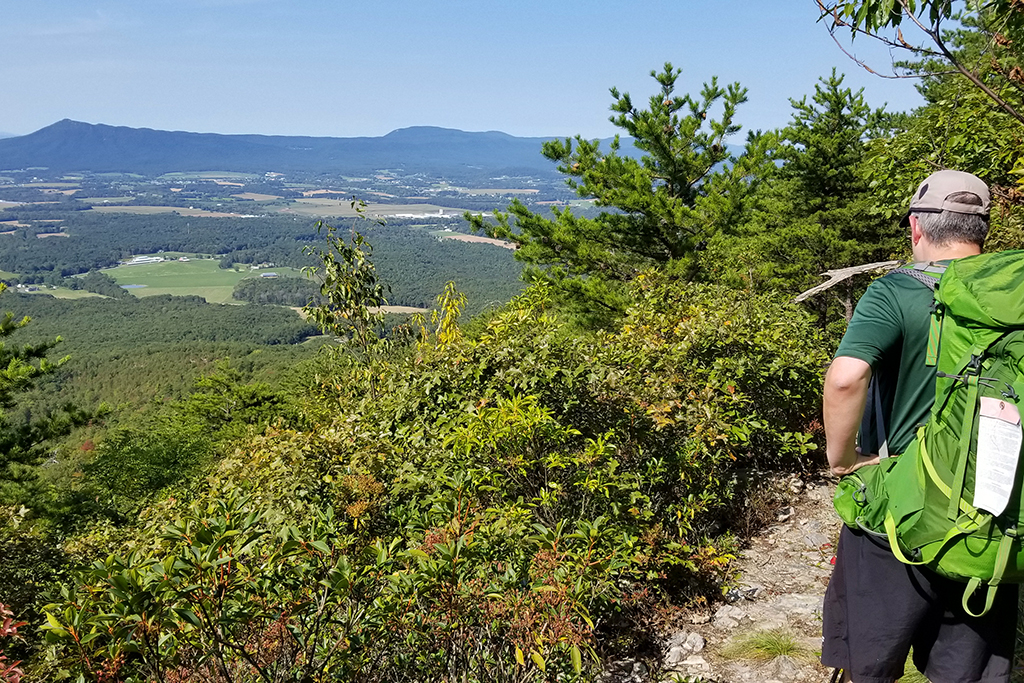
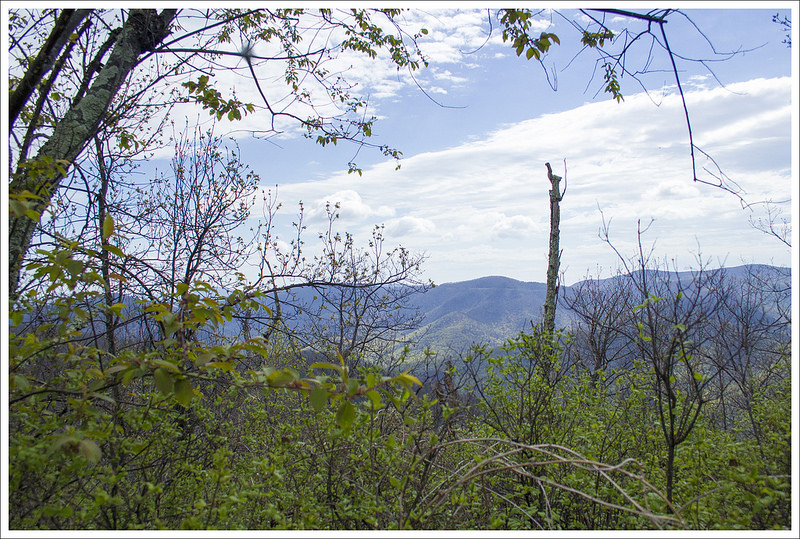
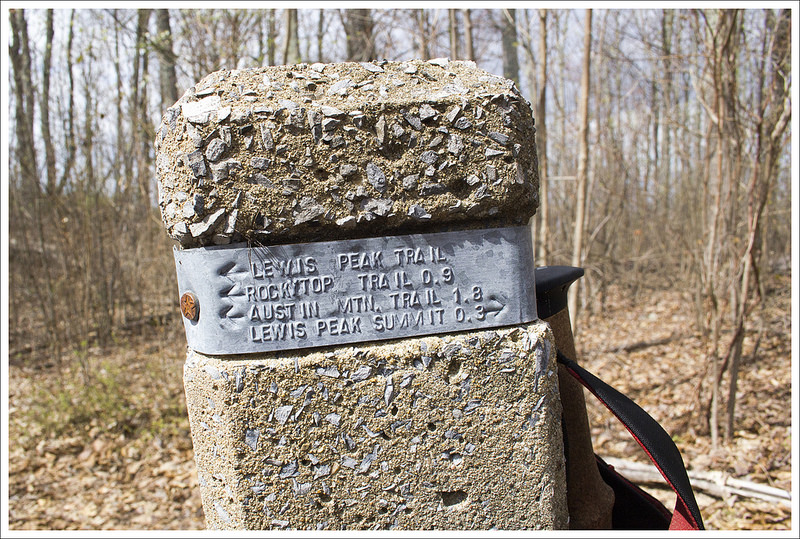
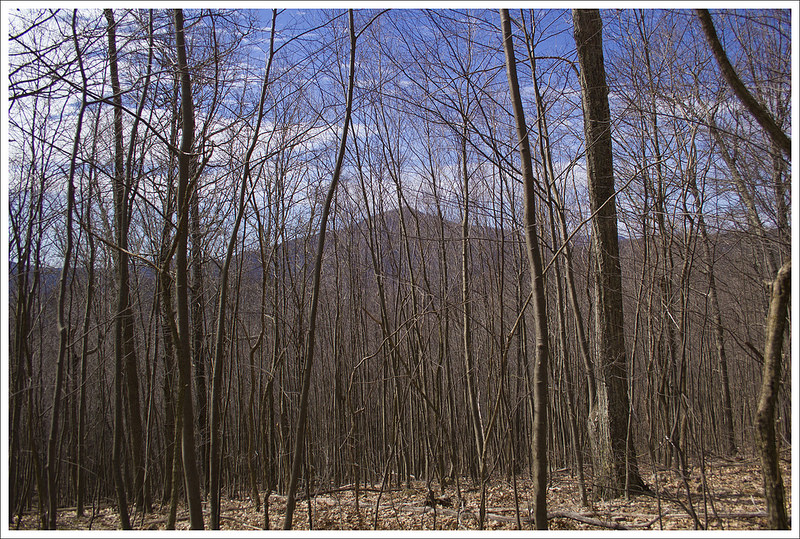
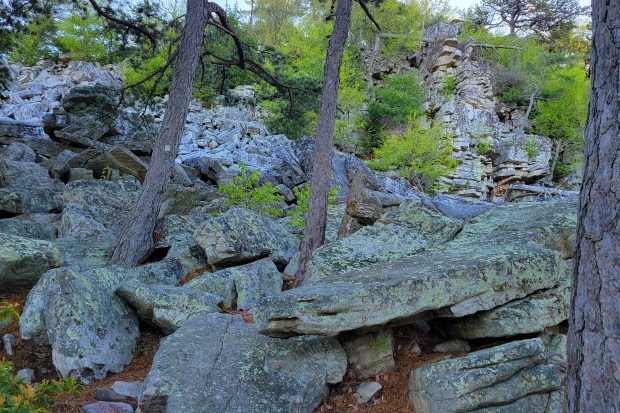
Duncan Knob and Strickler Knob are some of the more adventurous hikes in George Washington National Forest, since they both require some rock scrambling to get to the summit views. We opted for this route since we have done both Strickler and Duncan Knob as day hikes and had missed part of the trail system that makes this a doable overnight loop.

PHOTO: Blooming native pink azalea.

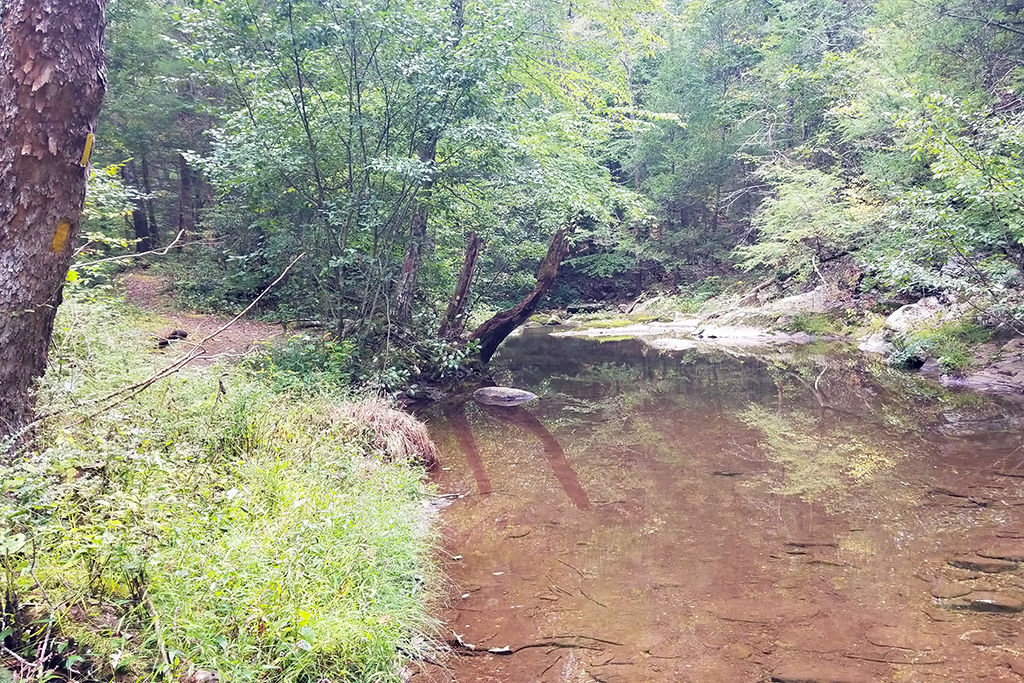
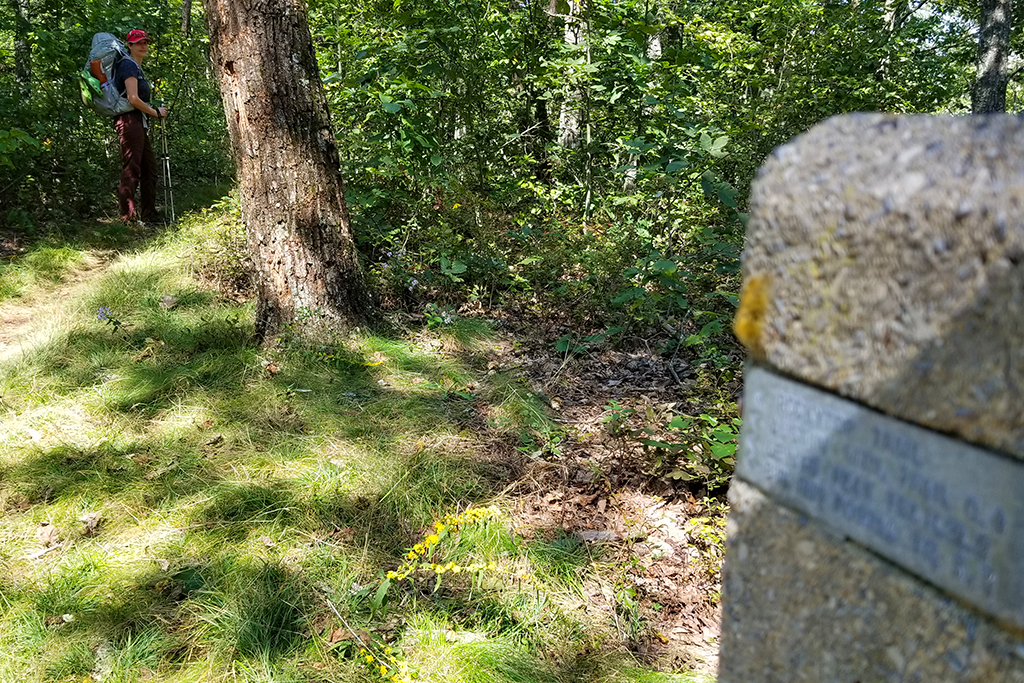
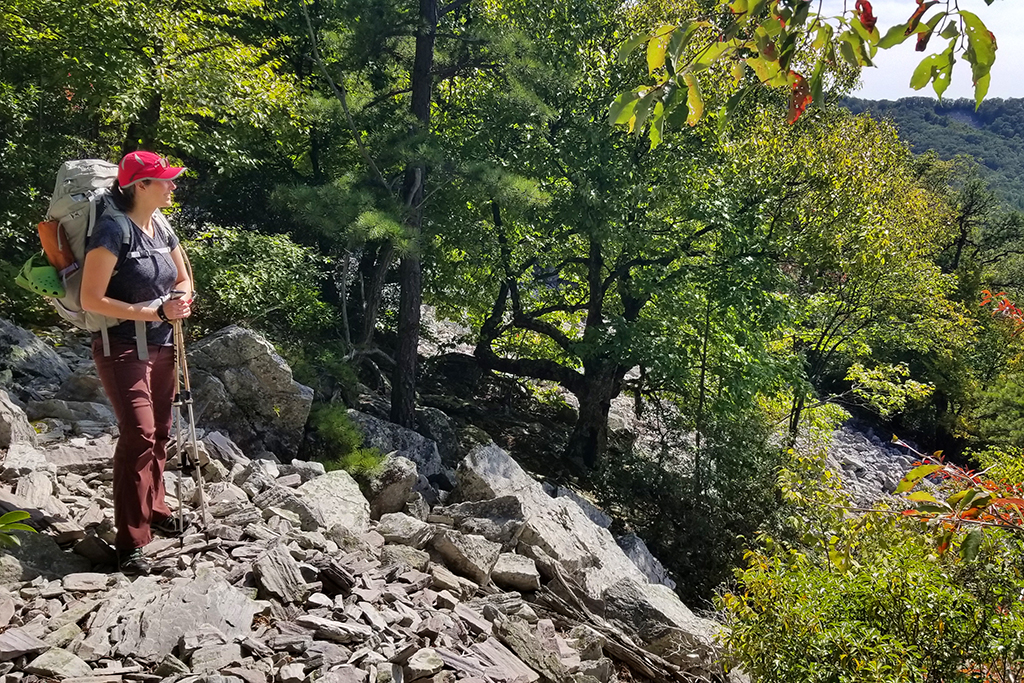
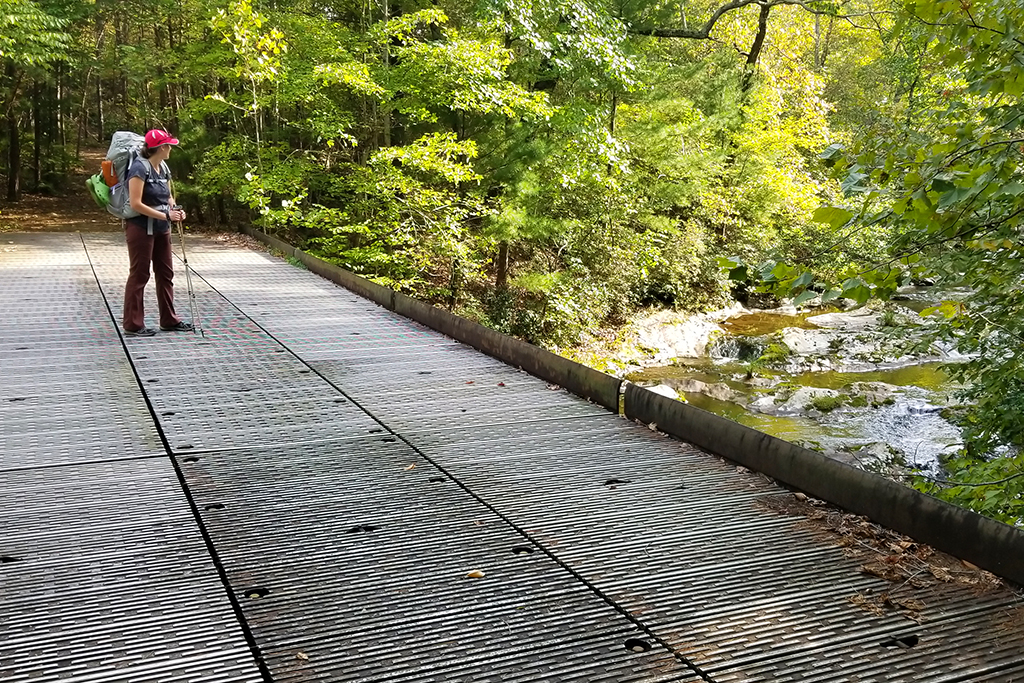
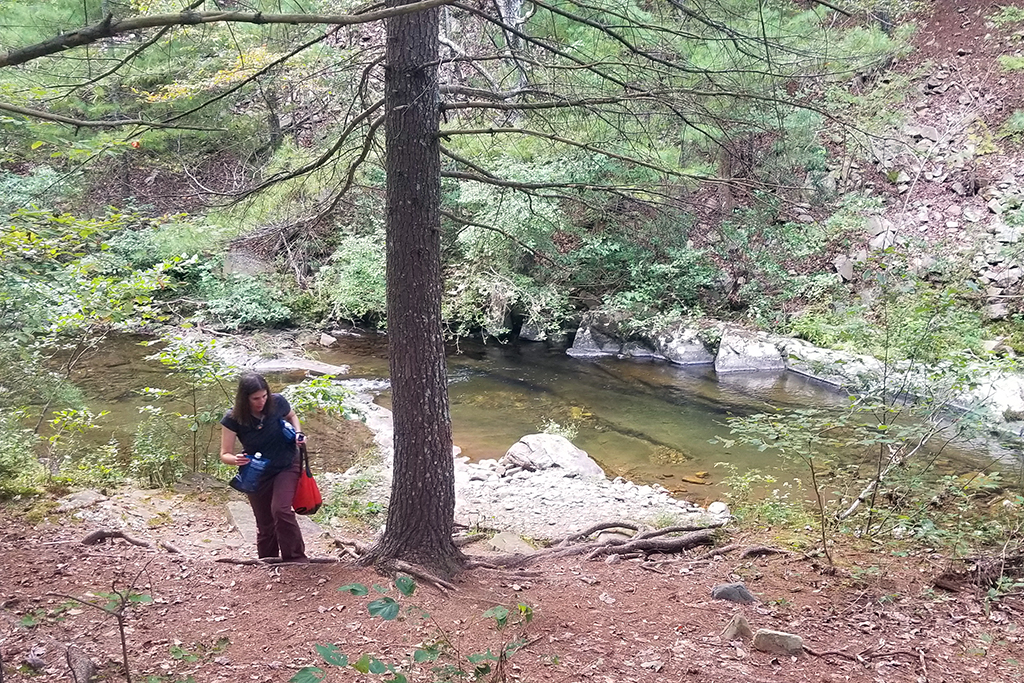
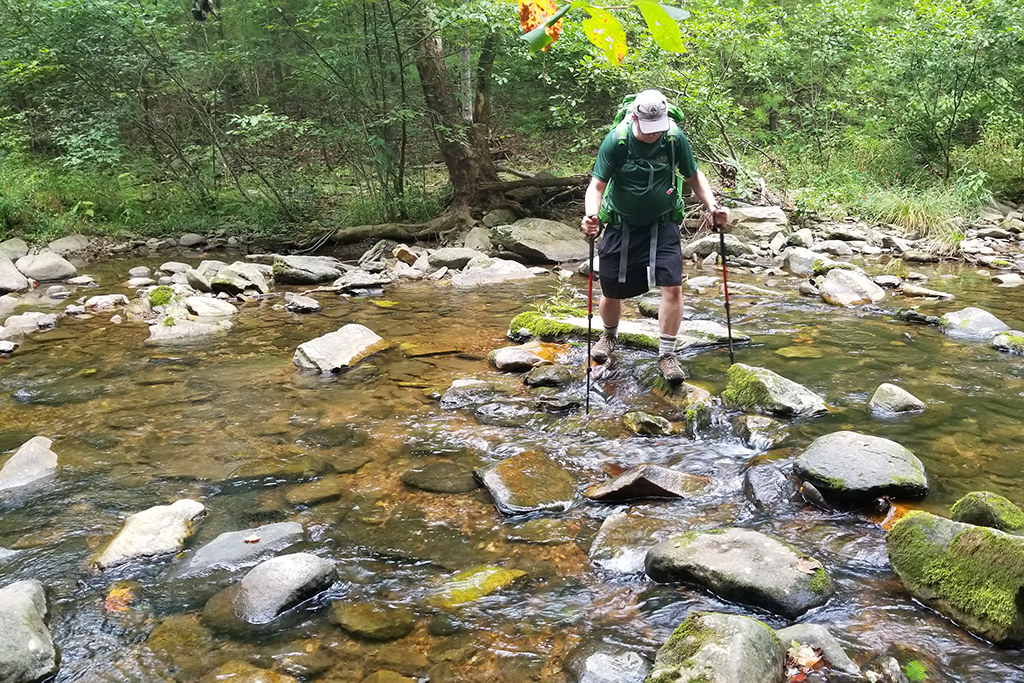
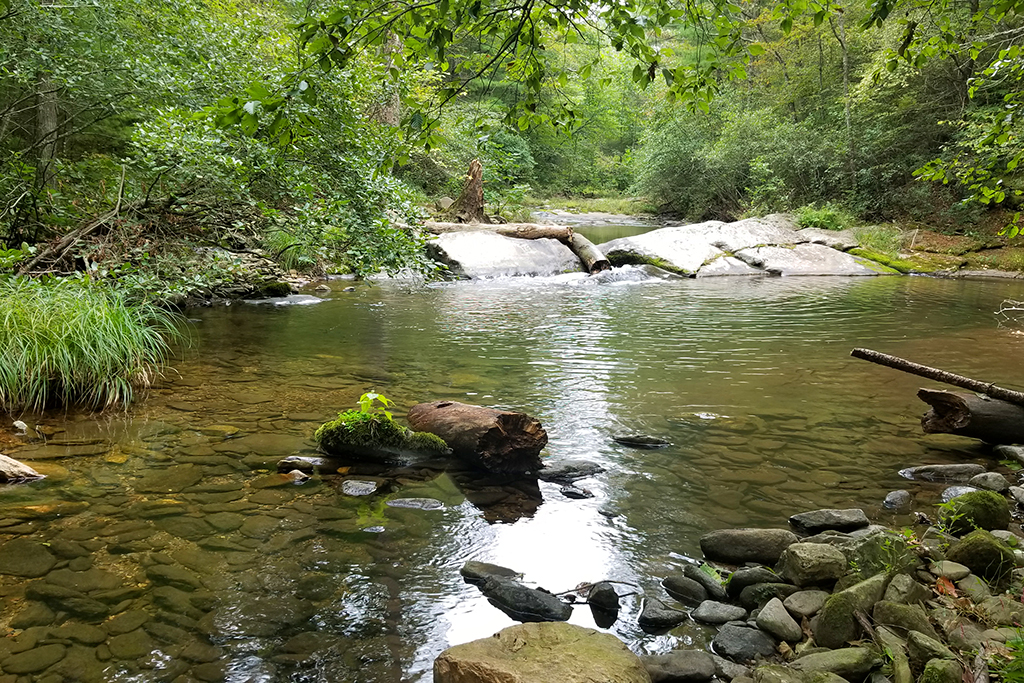
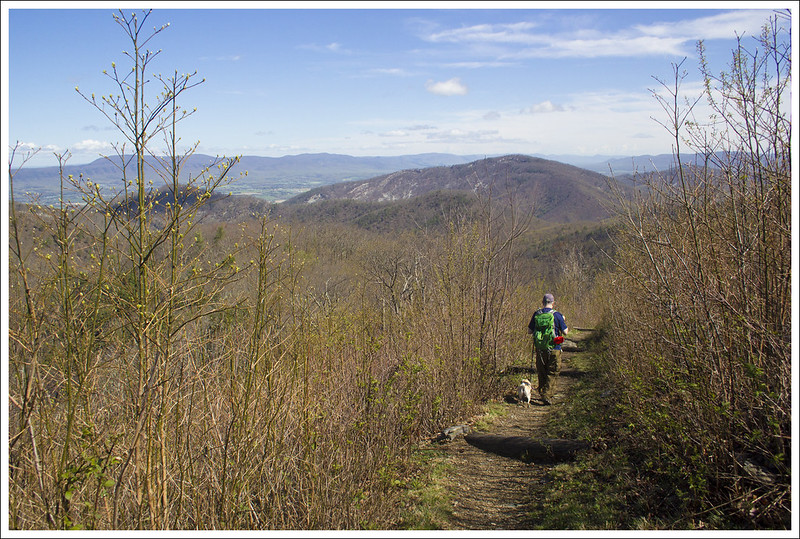
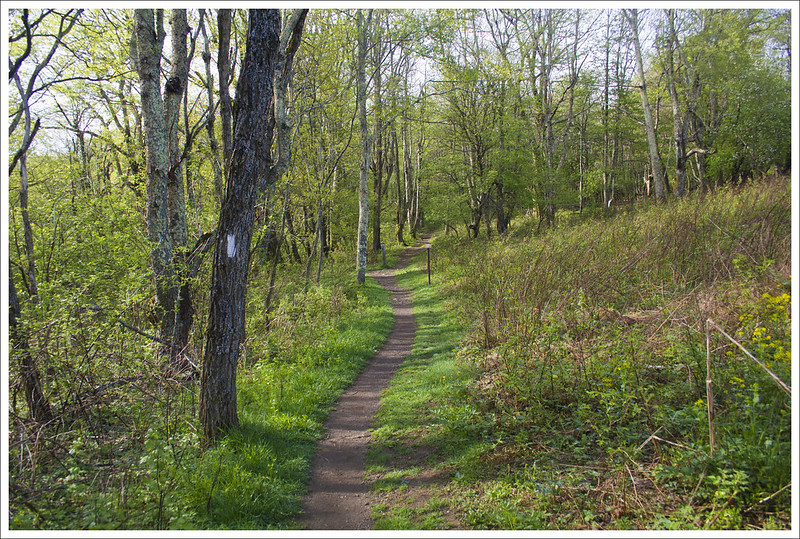
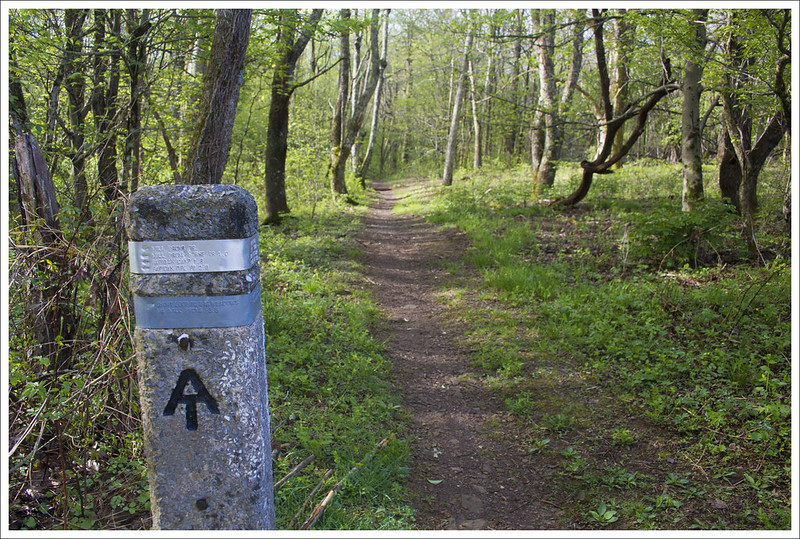
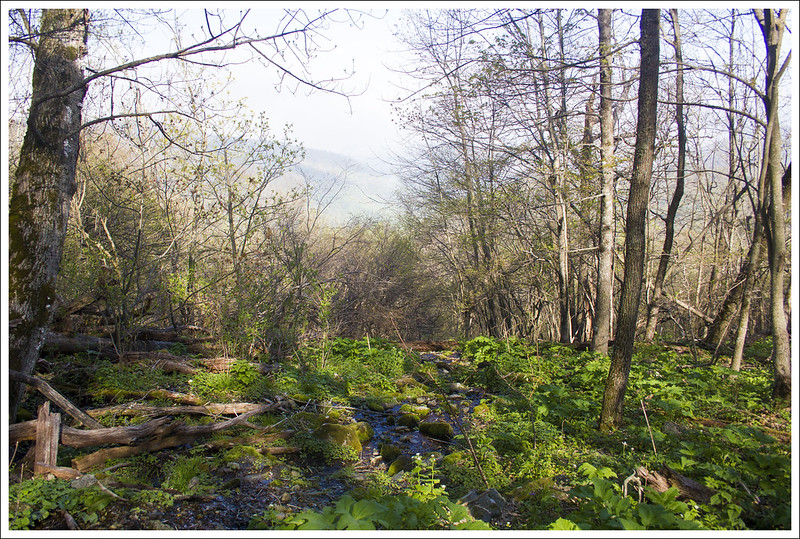
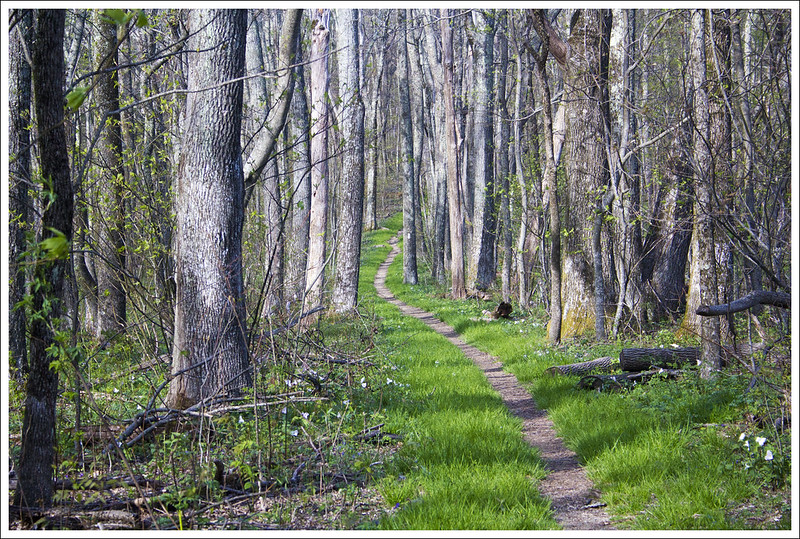
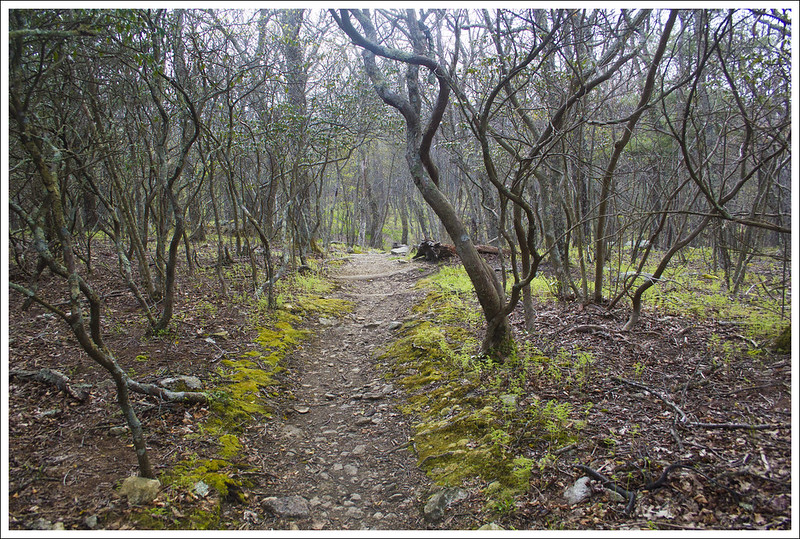
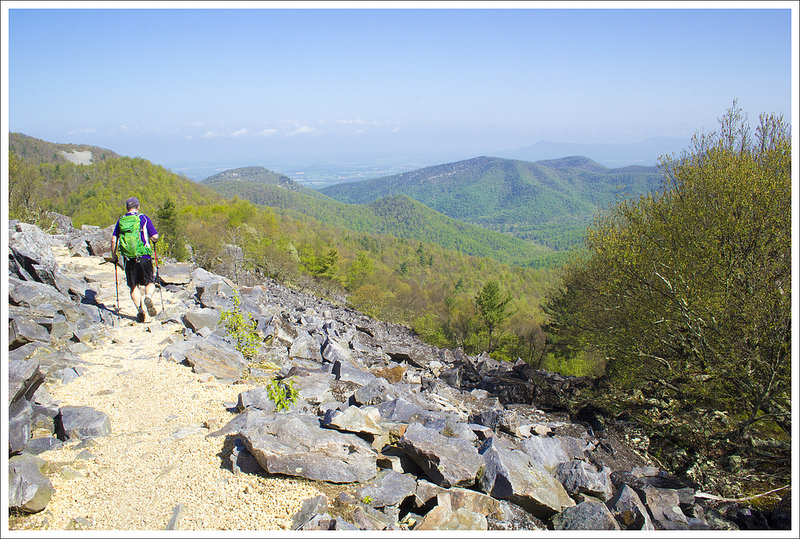
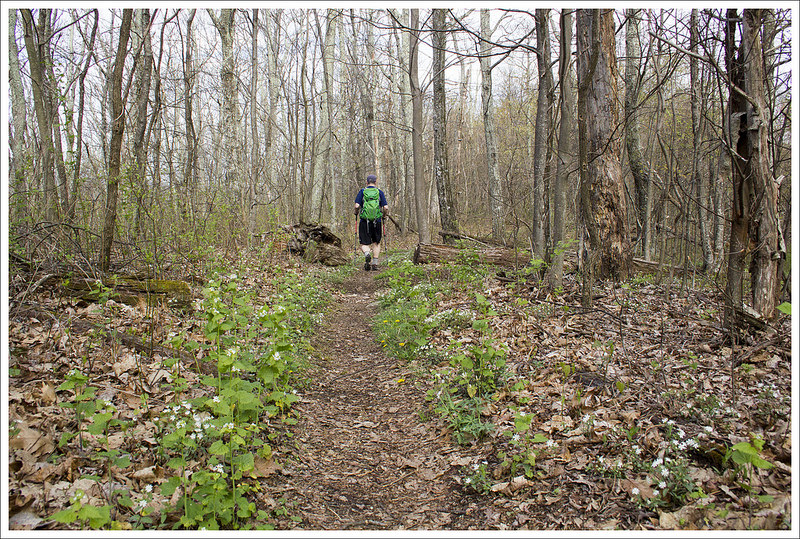
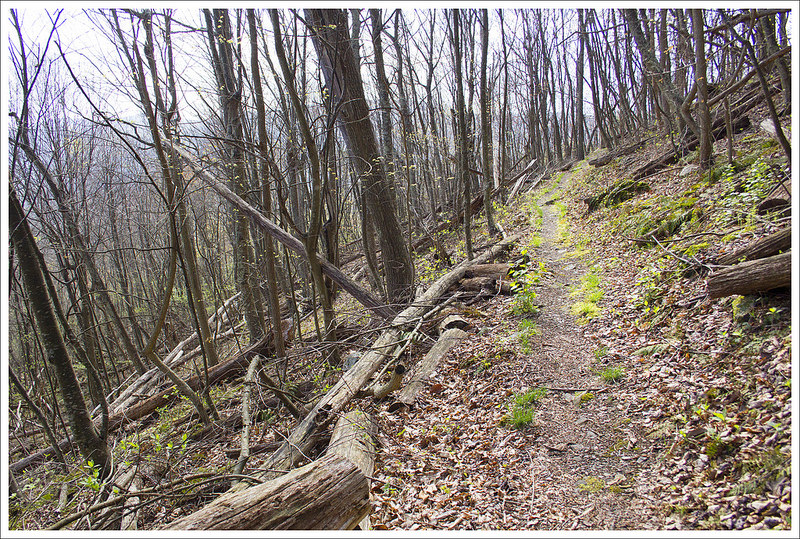
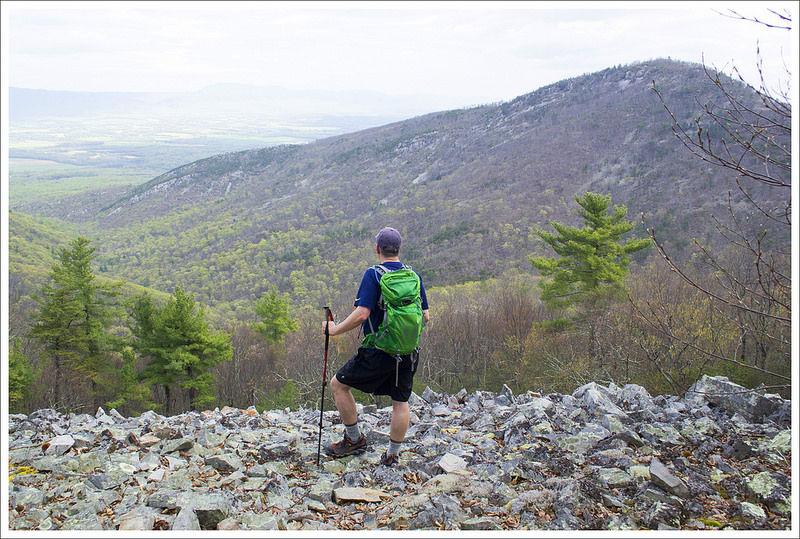
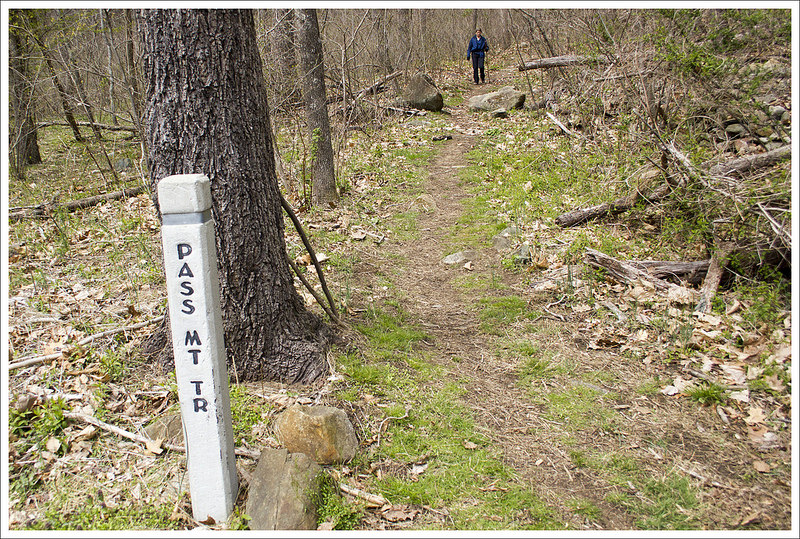
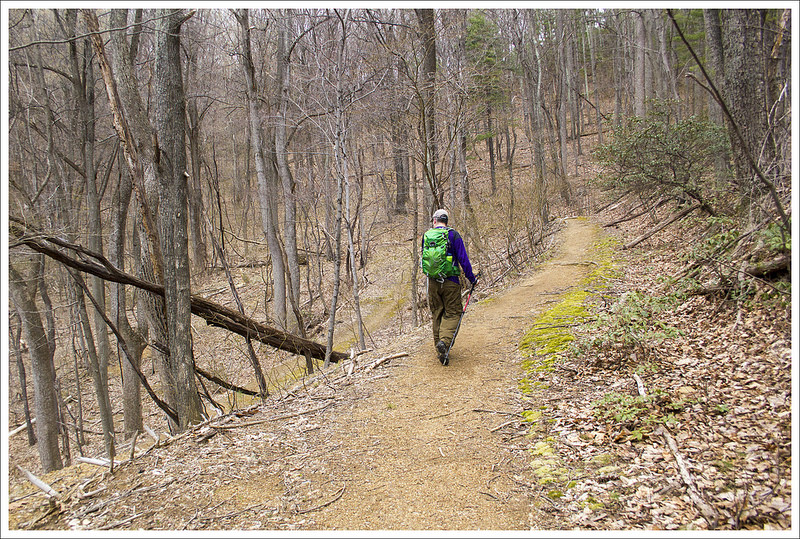
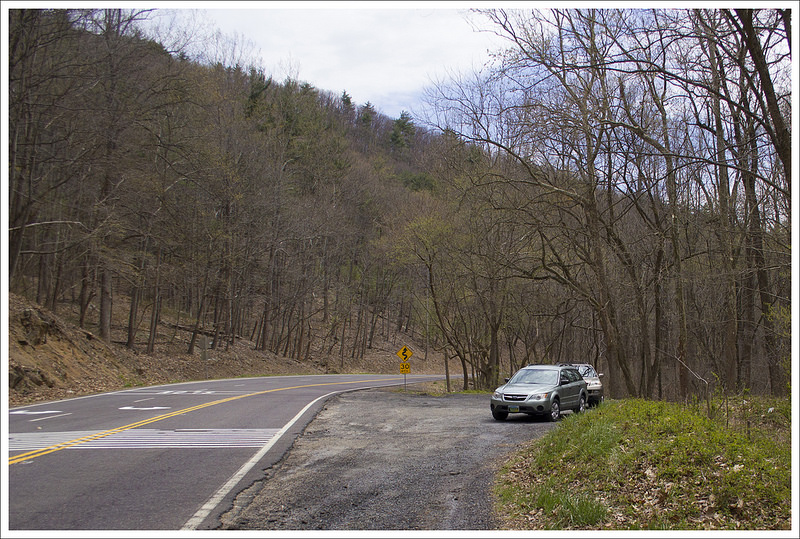
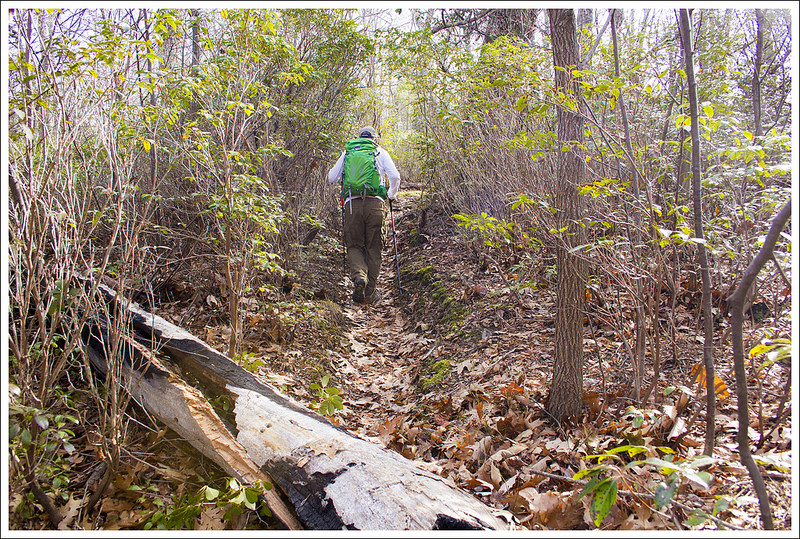
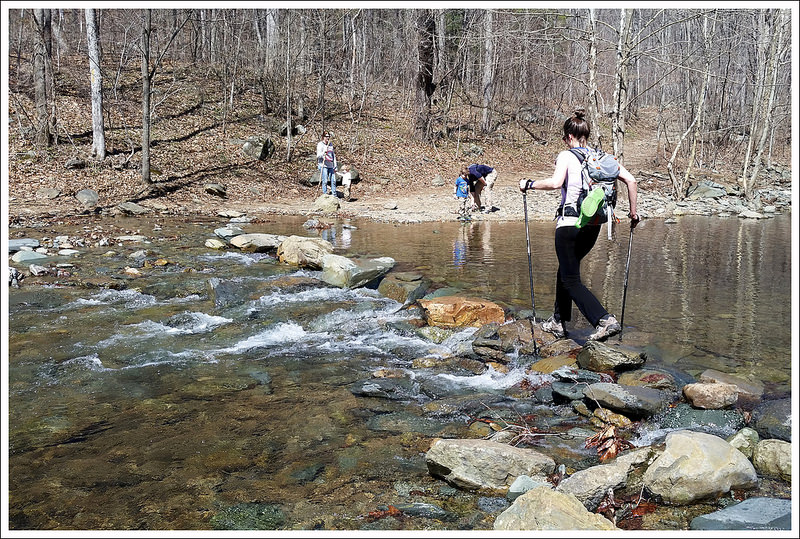
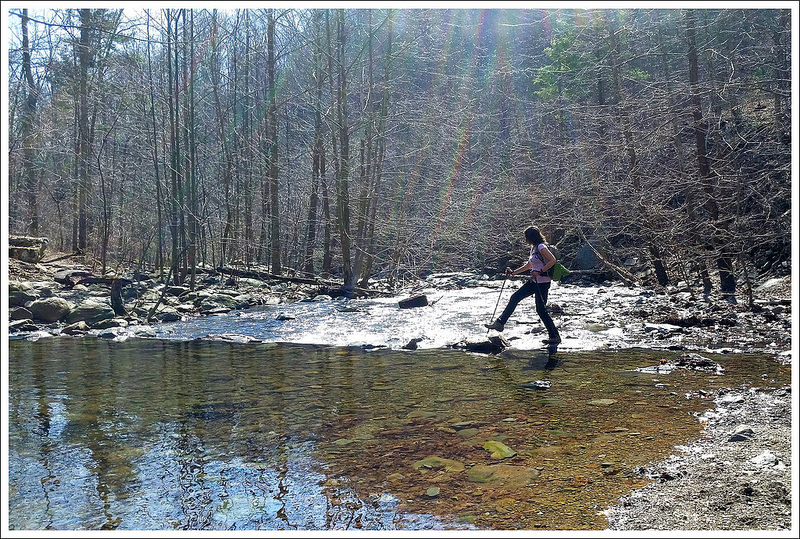
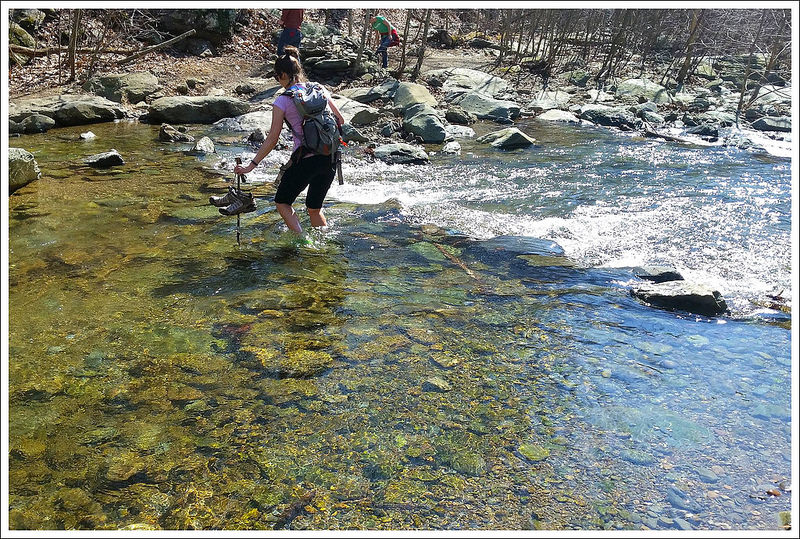
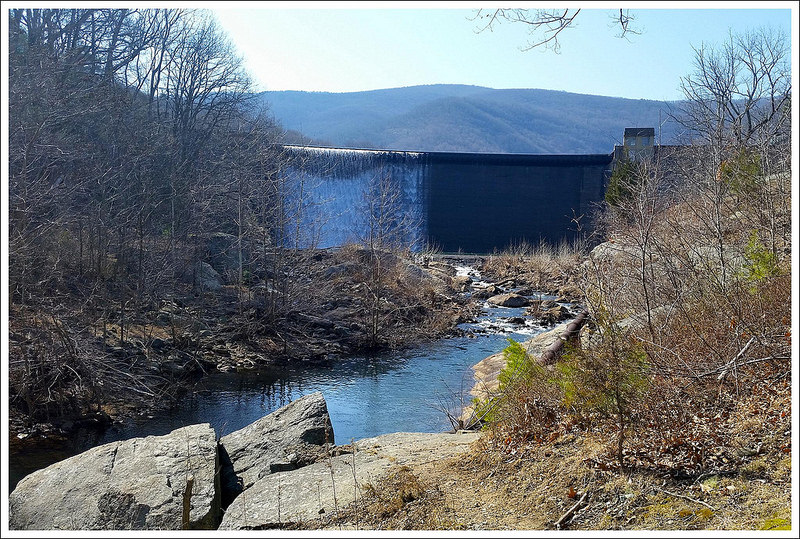
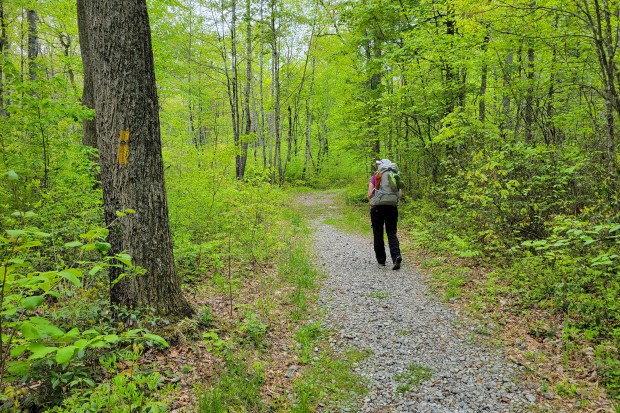
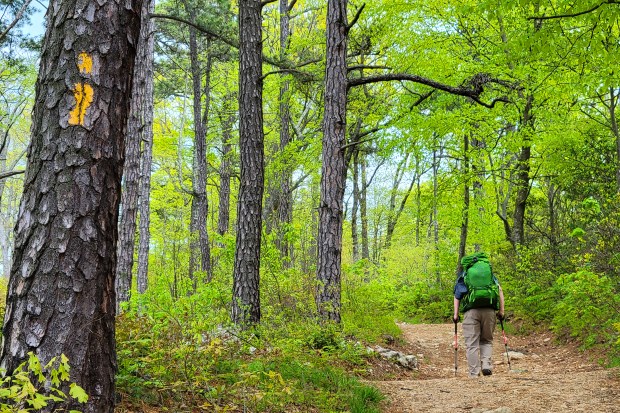
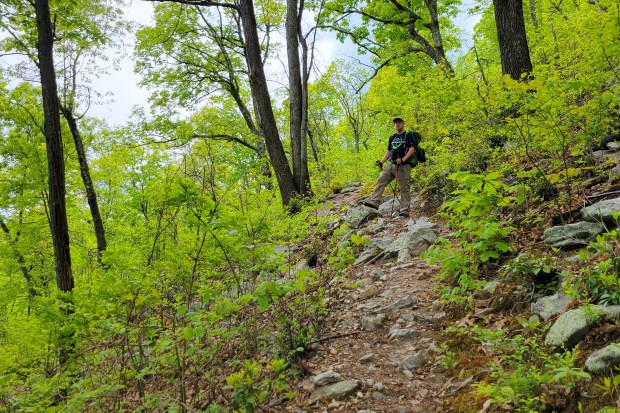
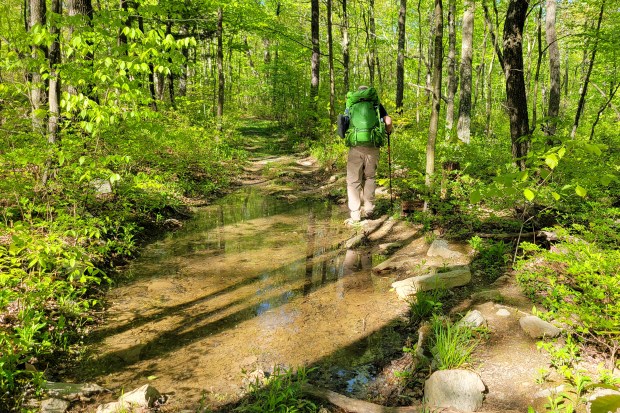
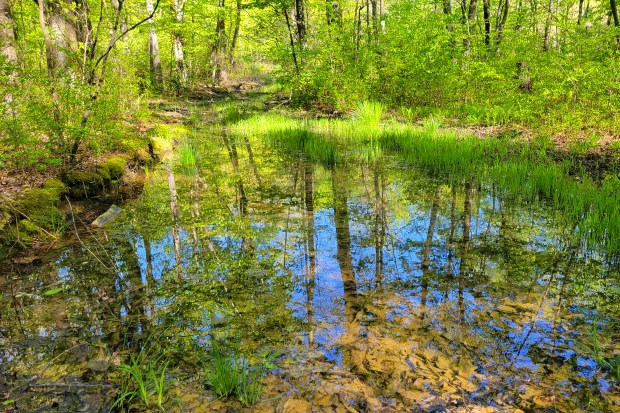
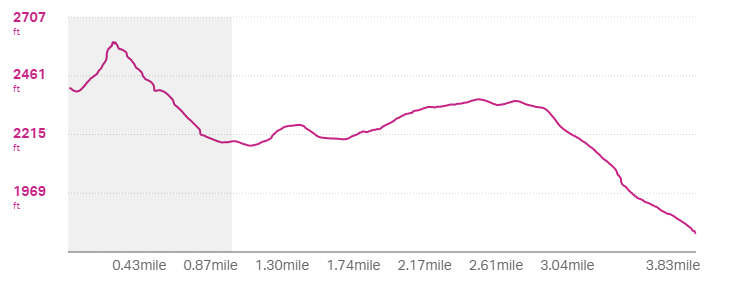
We started our hike from the Scothorn Gap parking area, quickly crossing the creek. The trail starts an uphill climb that is a bit steep in parts. We reached the junction with the Strickler Knob trail at the top of Middle Mountain. We ran into a few people that were doing that as a day hike. If you wanted to add Strickler Knob onto this loop of a trail, it would add another 1.4 miles to the trip – if you haven’t done Strickler Knob before, I would highly recommend it. We weren’t sure about camping and how far we wanted to go the first day, so we decided to skip Strickler Knob. The trail crests shortly after the junction with Strickler Knob and then descends. The descent at times was rocky and very muddy. We’ve read about the bugs on this trail and that can be largely from standing water.

PHOTO: A view from the crest of Middle Mountain (near the Strickler Knob Trail Junction)

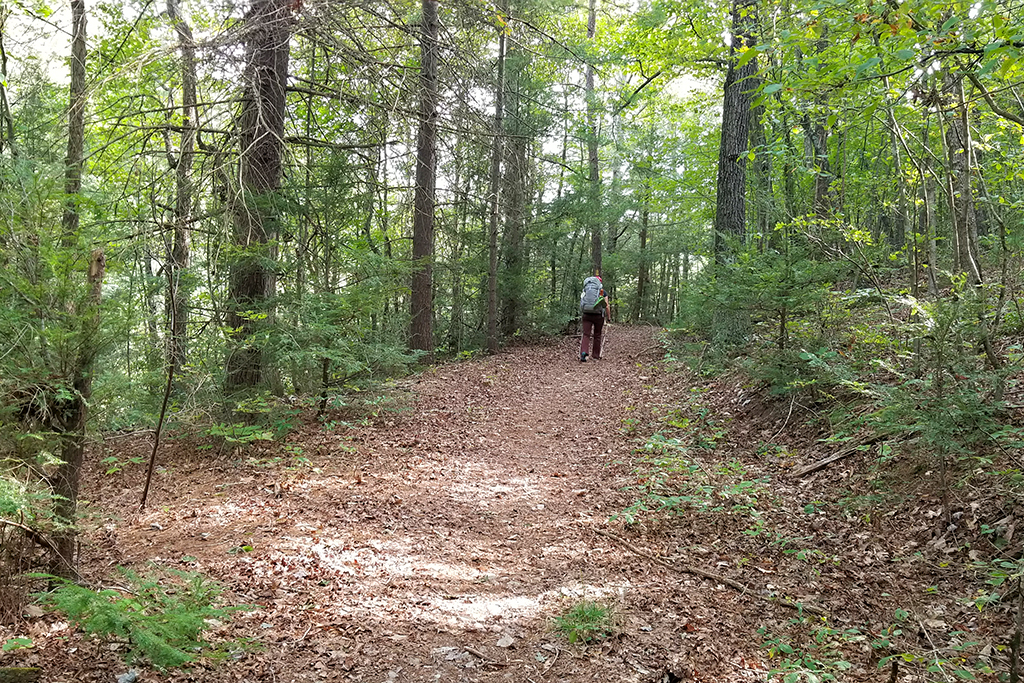
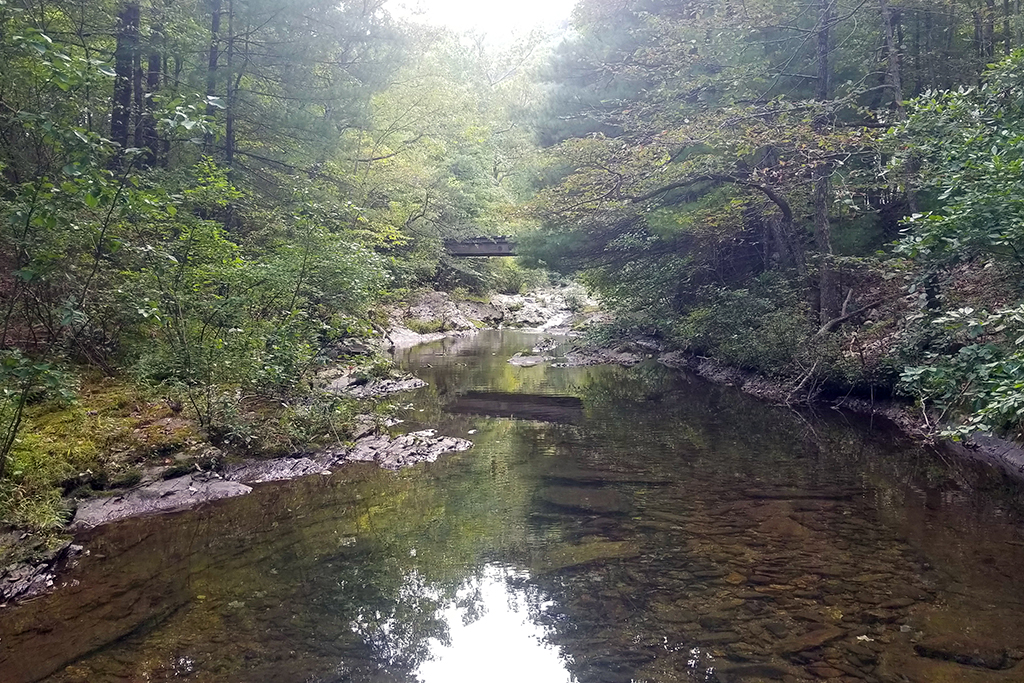
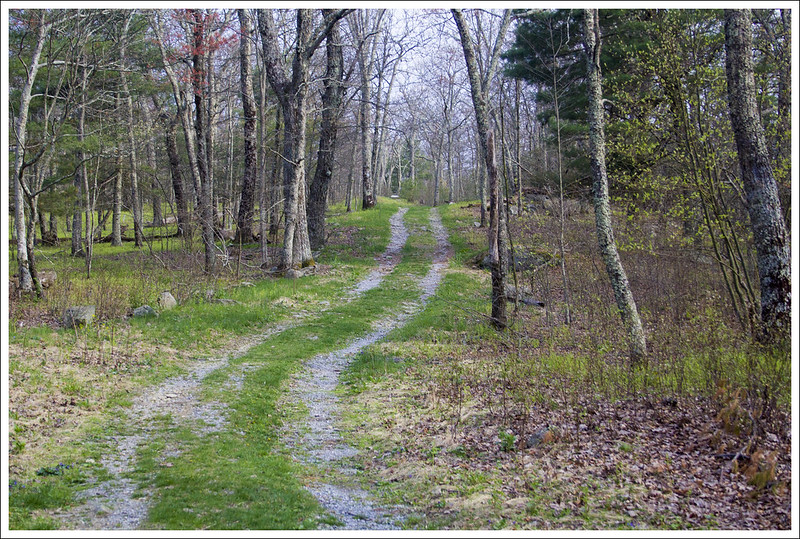
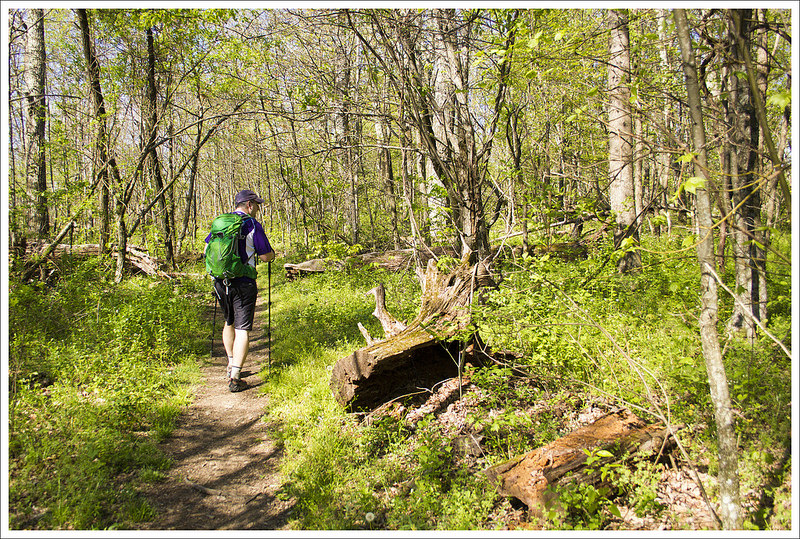
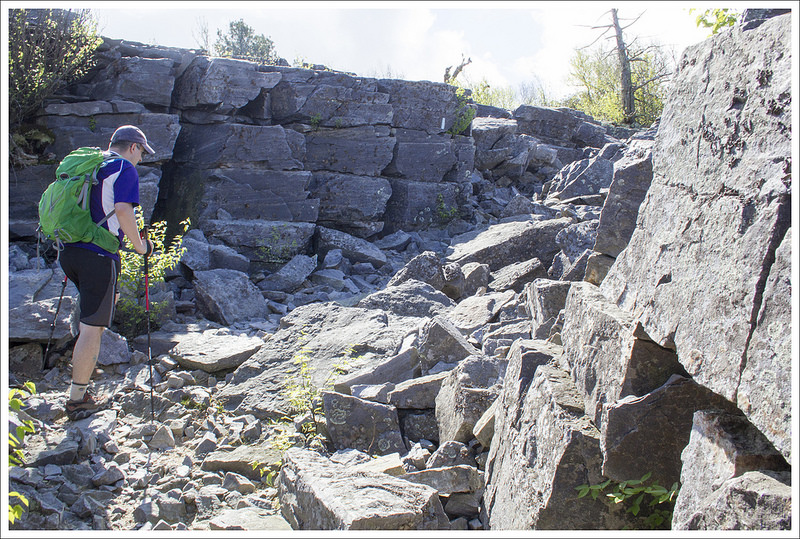
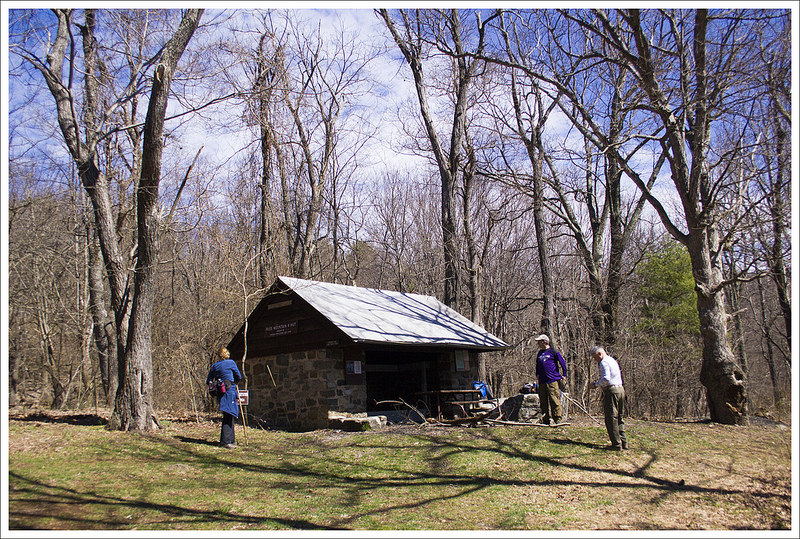
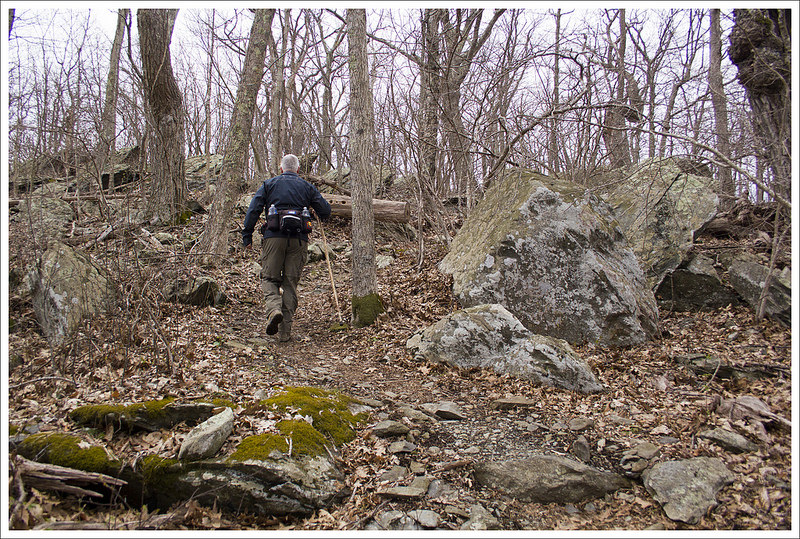
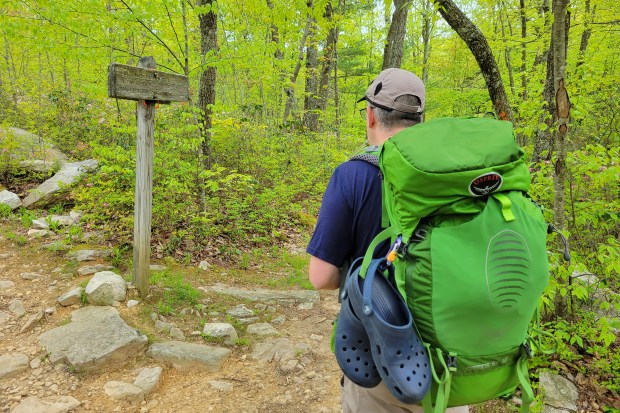
After descending for 2.2 miles, we came to another four-way junction with a campsite right next to a stream. There were already 4-5 guys there at the one spot that were setting up to camp, so we checked our water supply. Since we felt we had enough water to get us through the end of the hike and to cook with for dinner and breakfast, we decided to press on. The hike up from the creek was a very steep, narrow trail of .8 miles. With a full backpack, it made for slow work.

PHOTO: This was a tough uphill climb to camp!

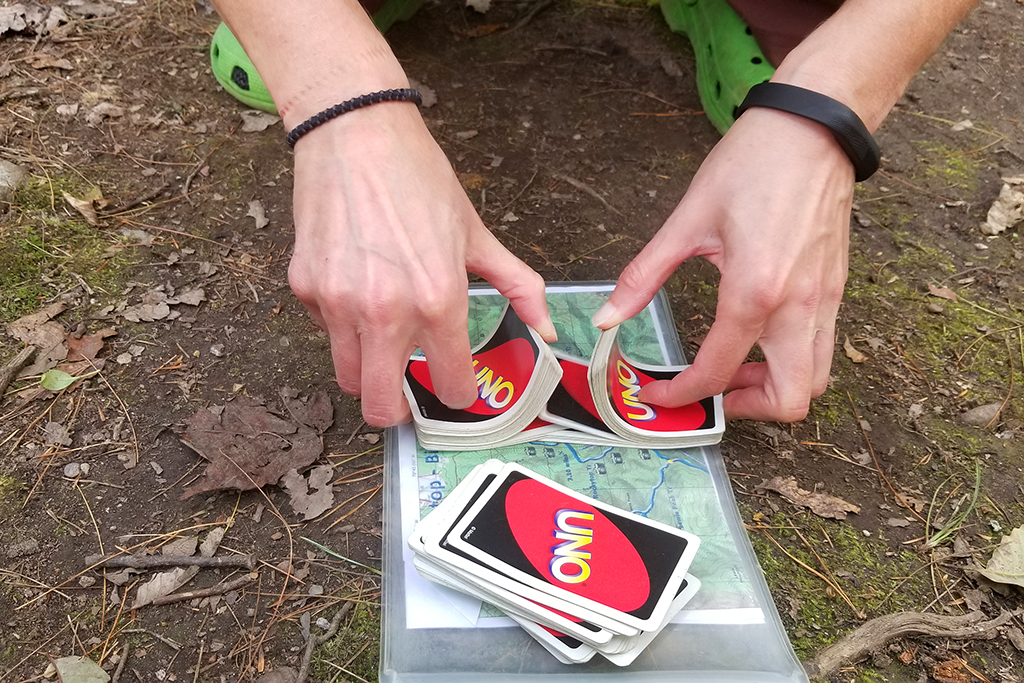
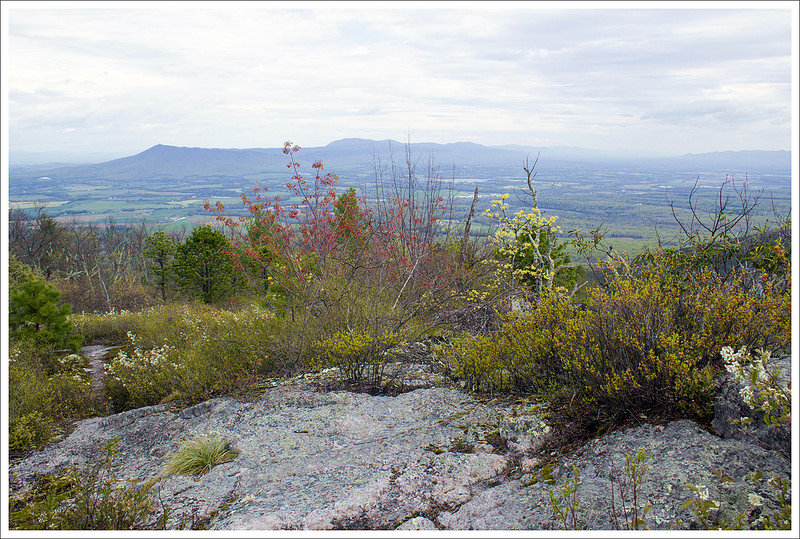
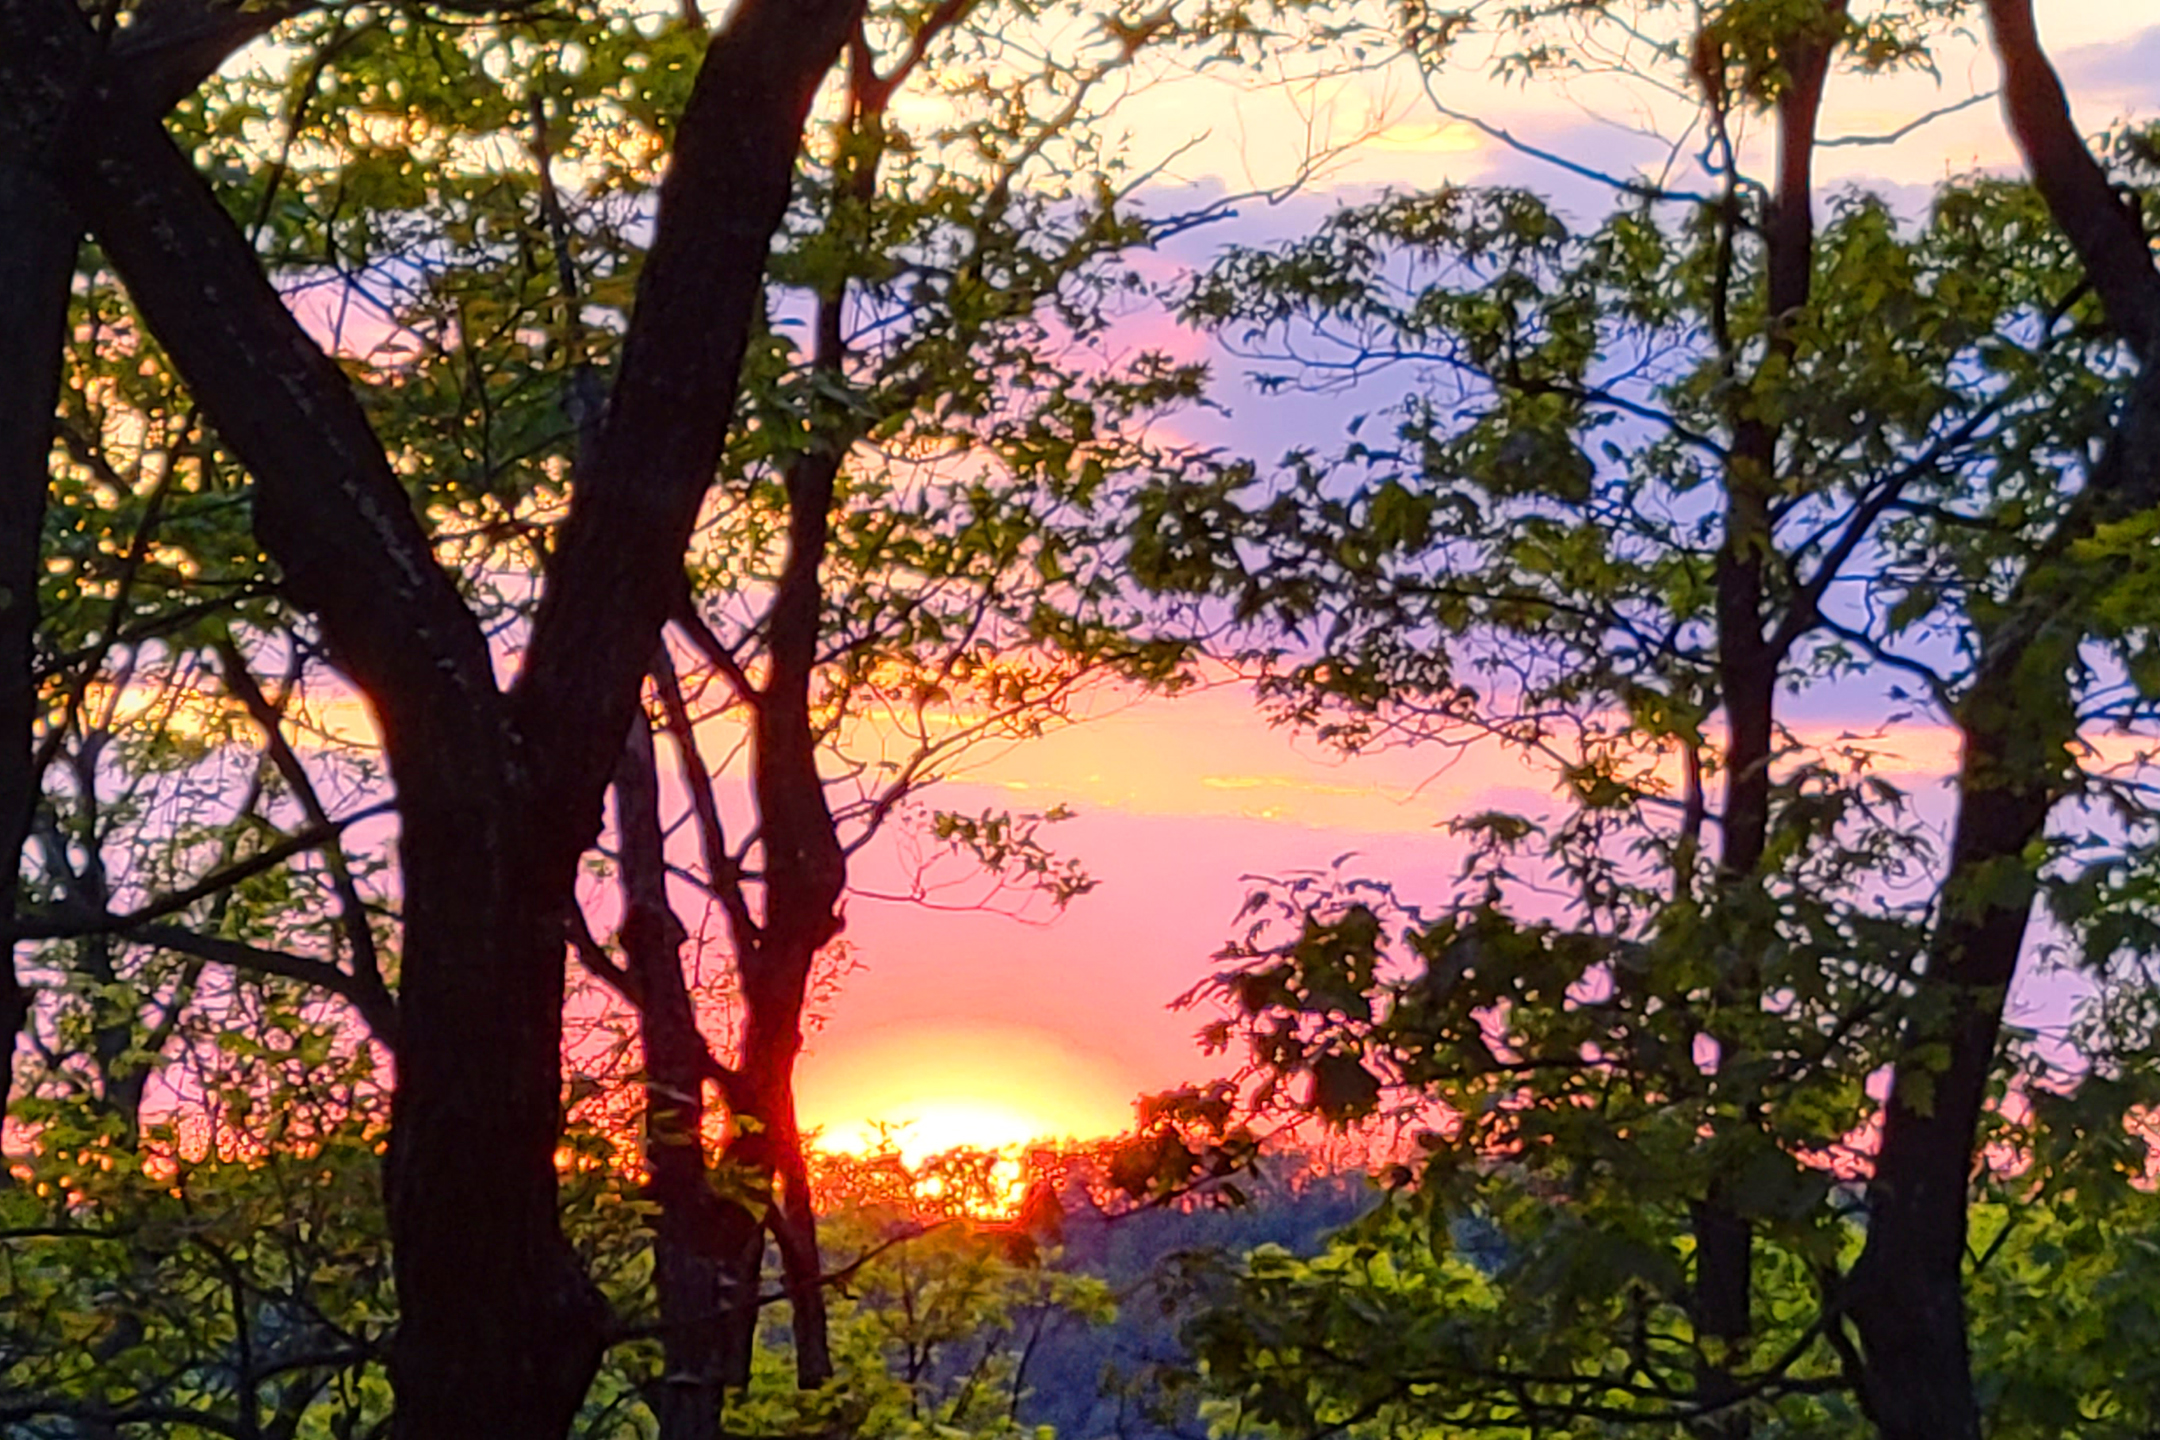
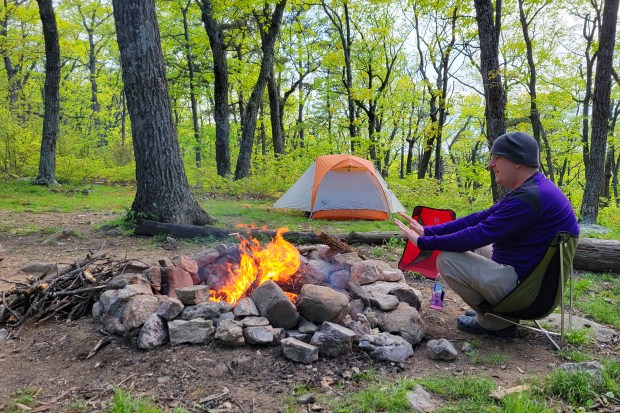
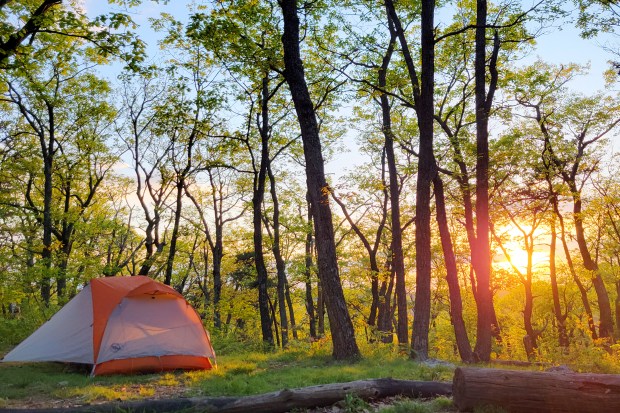
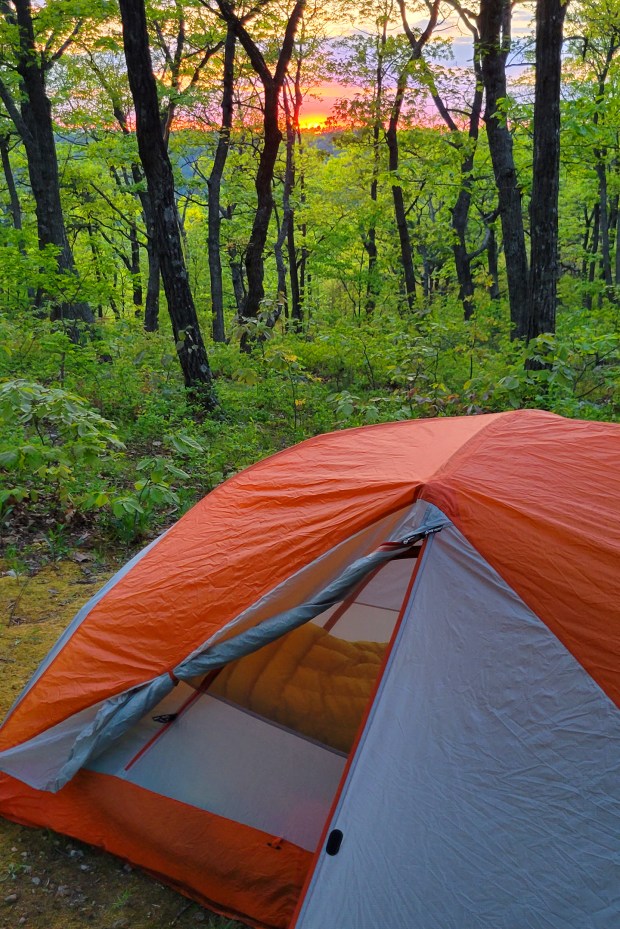
We decided to camp right at the saddle junction with the Duncan Knob trail. This area is called Peach Orchard Gap, and it has several awesome (but dry) campsites. We built a campfire and just relaxed for the rest of the afternoon and evening. Since we only did a bit over 5 miles that first day, it was a shorter trip that gave us a nice, relaxing time to enjoy our time in the woods. We decided to tackle the Duncan Knob peak the following morning where we didn’t have to haul our packs up the rock scramble.

PHOTO: This meal, by the British company Firepot, may have been one of the best freeze-dried meals we’ve ever had!

Turn-by-Turn for Day 1

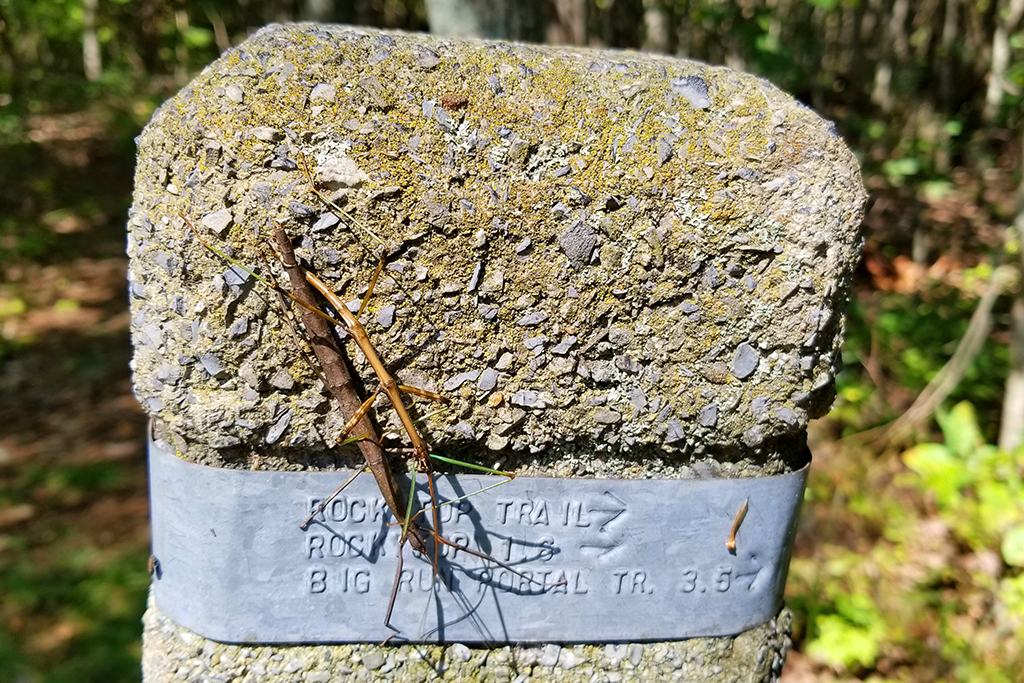
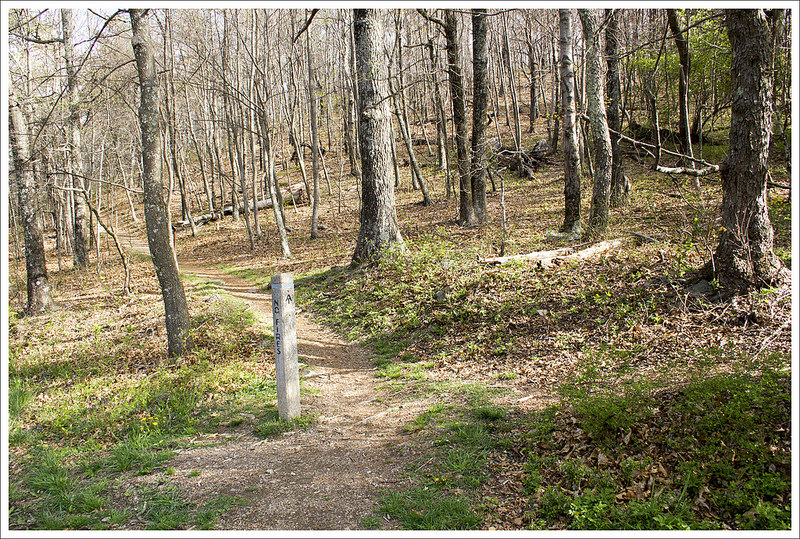
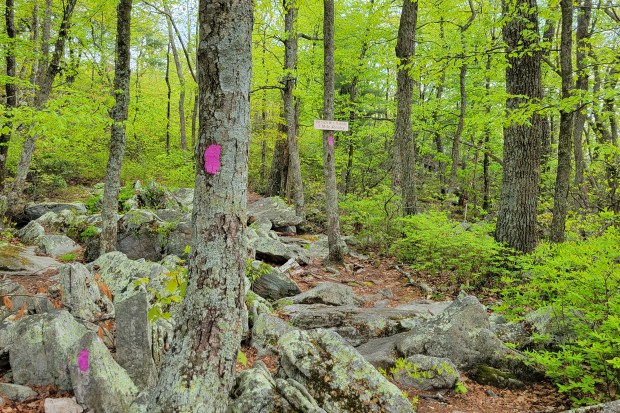
  • Cross Passage Creek and hike uphill on the yellow-blazed Scothorn Gap trail for 1.5 miles to a four-way trail intersection.
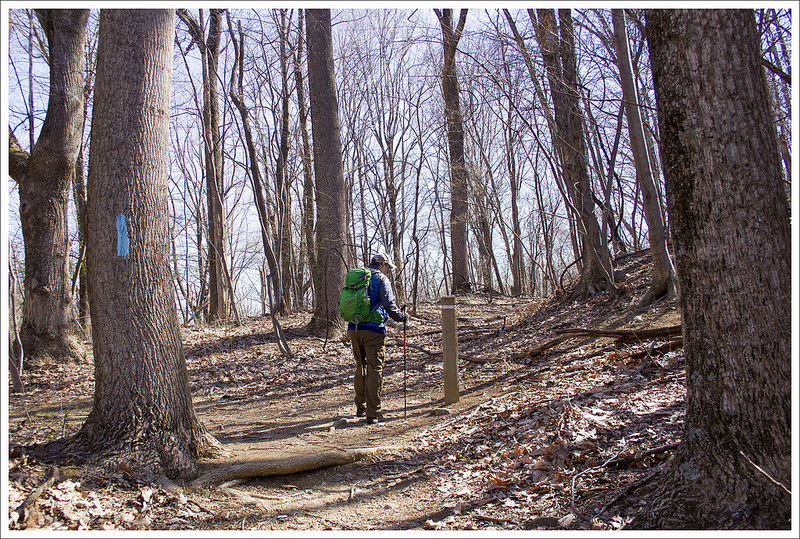
  • Stay straight at the intersection, heading uphill for .7 miles on the orange-blazed Massanutten Trail. At the top of Middle Mountain, you will see the pink-blazed Strickler Knob trail on the right.
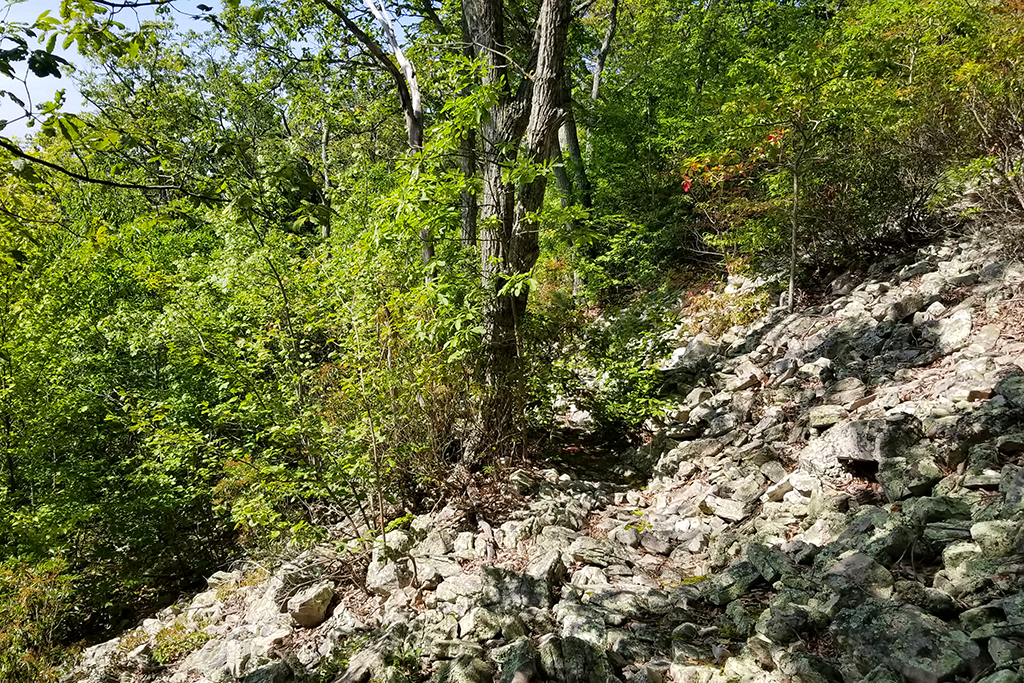
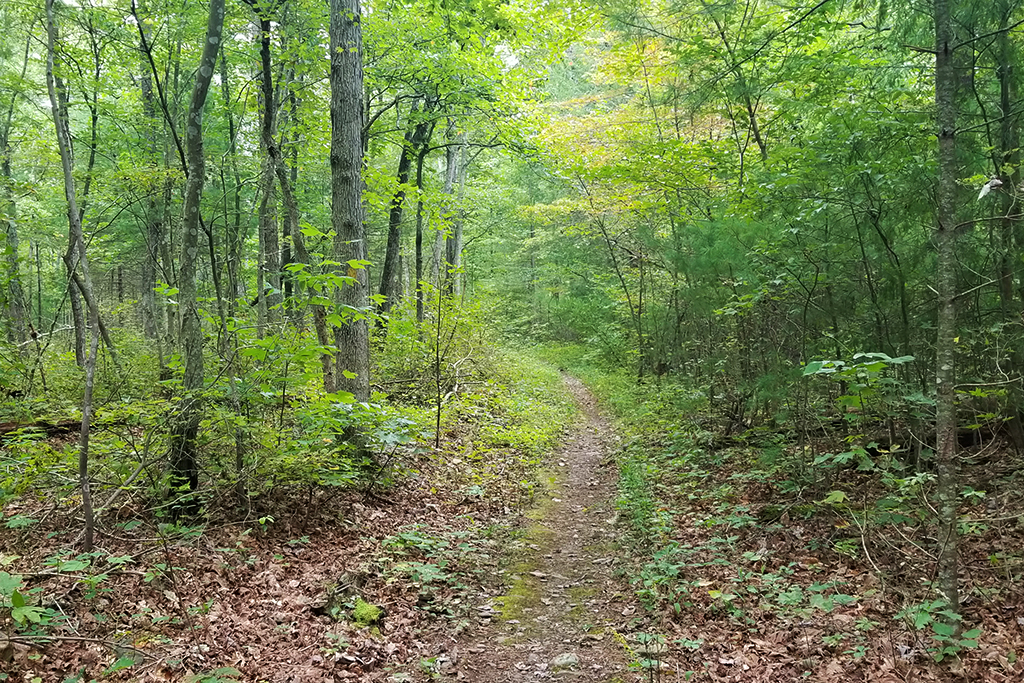
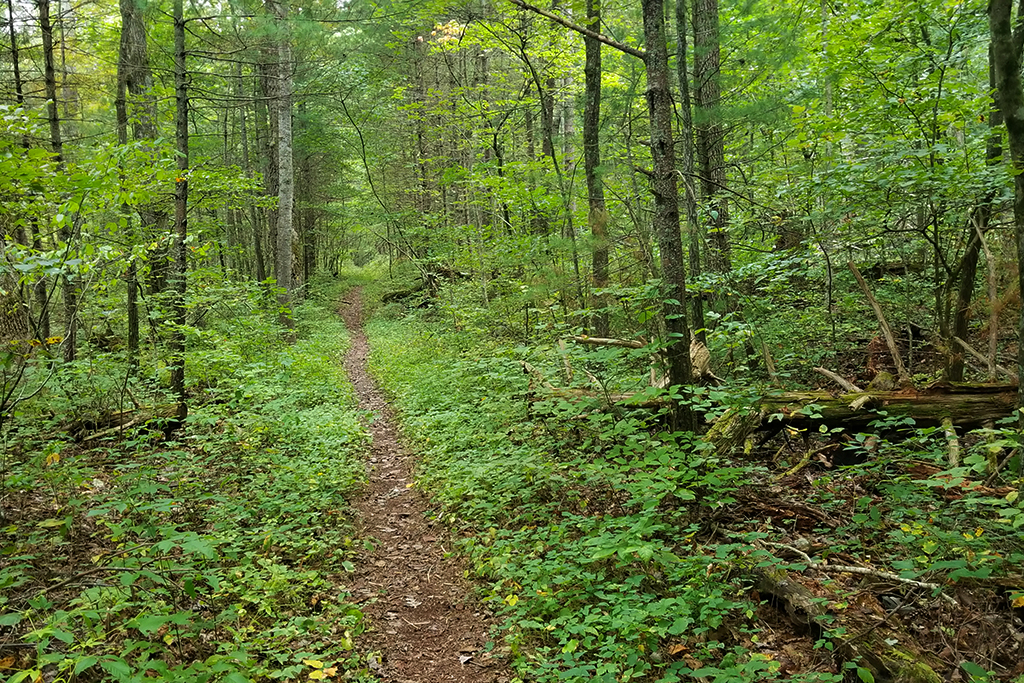
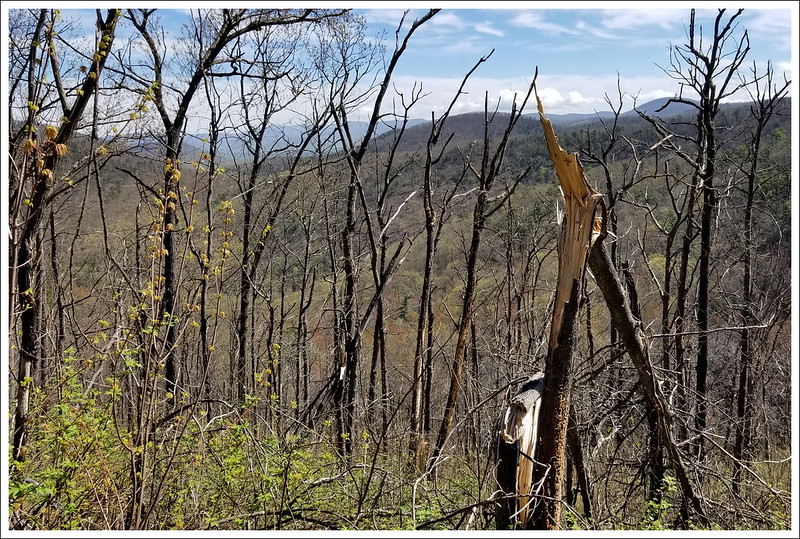
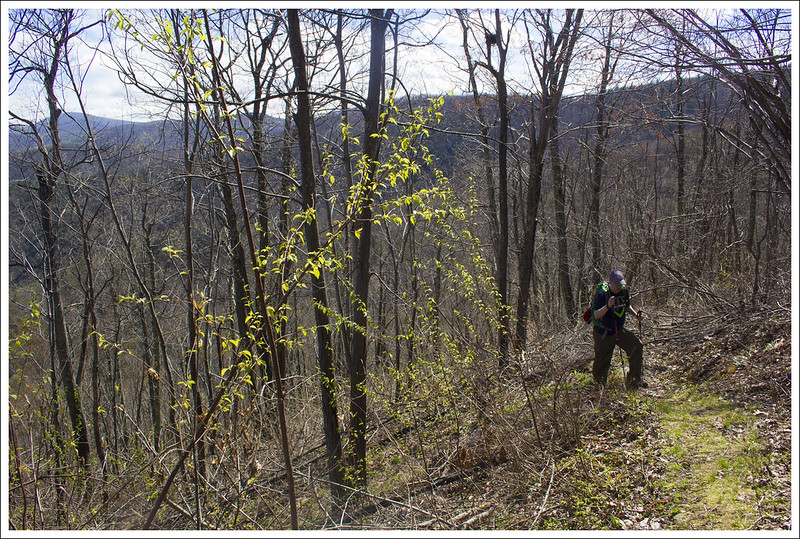
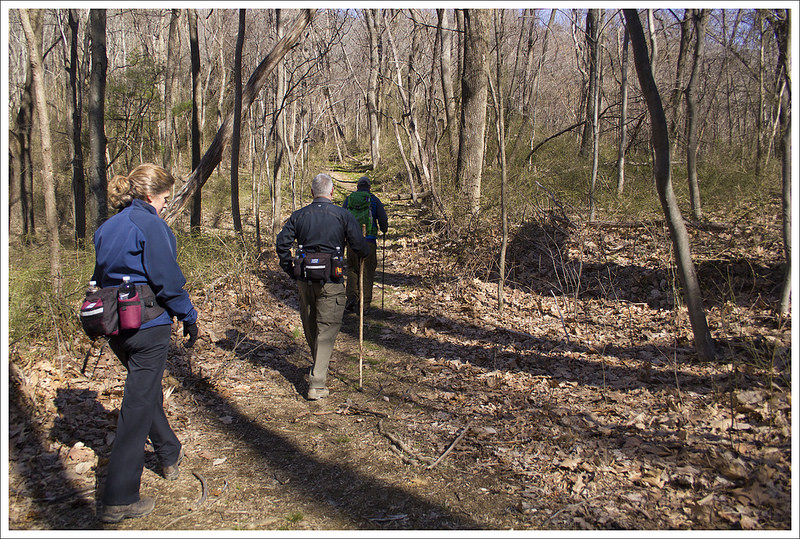
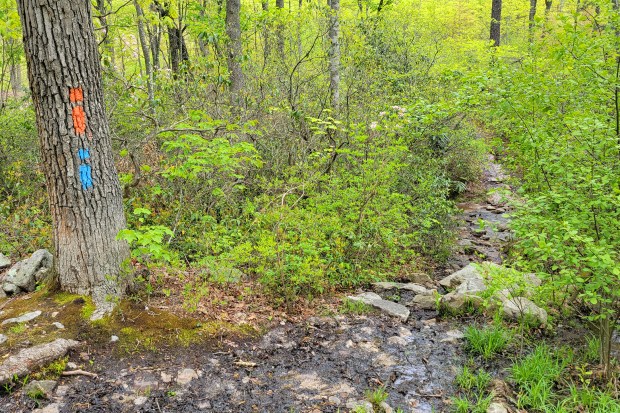
  • Pass the Strickler Knob trail, and continue over the crest of Middle Mountain on the orange-blazed Massanutten Trail. Descend for 2.2 miles. Much of this section of the trail is muddy and boggy. Check yourself for ticks!
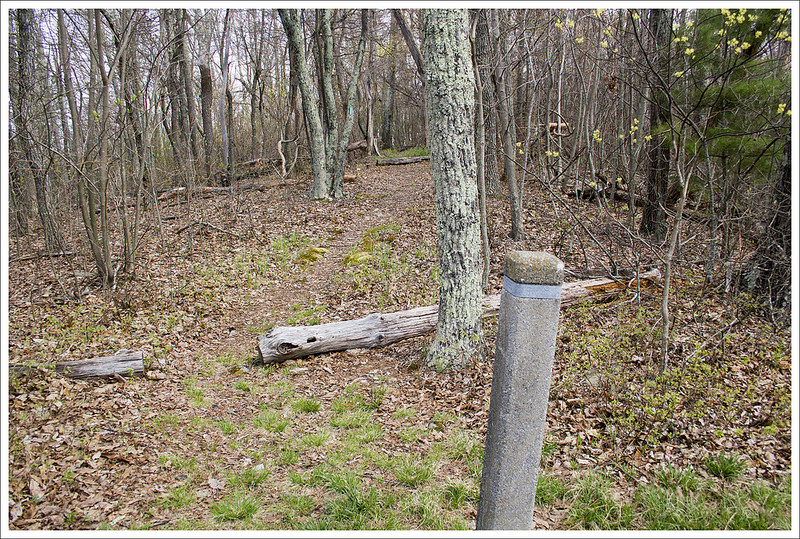
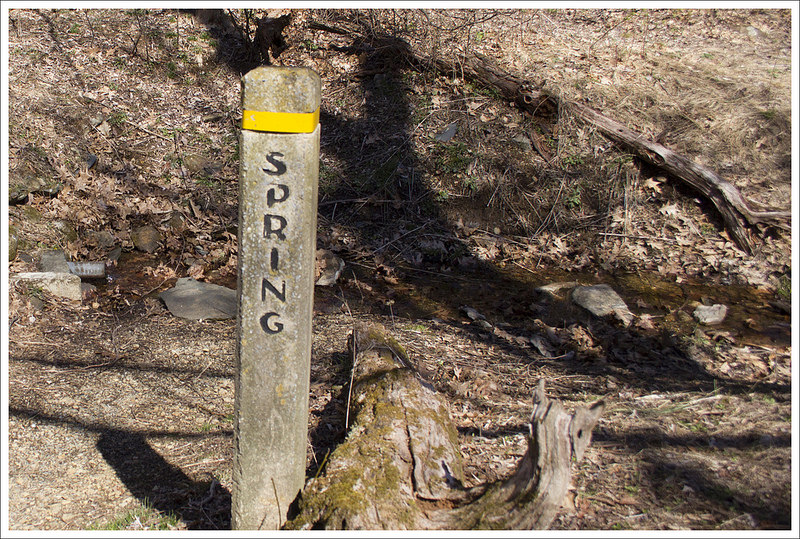
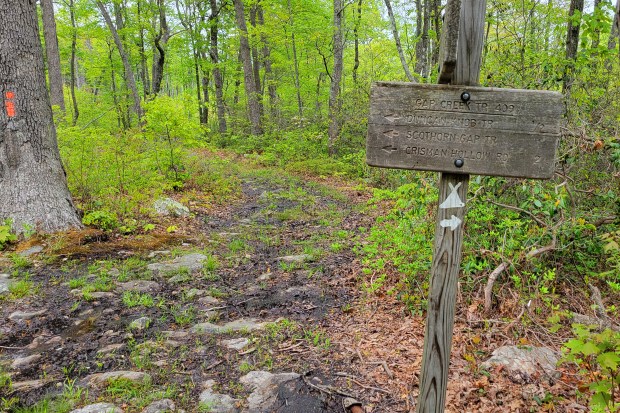
  • You will reach another junction near a streamside campground. The campsite will be on the right, turn left, heading very steeply uphill on the blue-blazed Gap Creek Trail. If you plan on camping at the top, this will be your last opportunity to refill your water supply. Campsites on the ridge are dry.
  • Ascend via the Gap Creek Trail for .8 miles before the trail levels out at Peach Orchard Gap. There are several nice, flat, open campsites along this ridge. This is where we chose to stop for the day.
PHOTO: A pretty sunset.

Christine Says (Day 2)

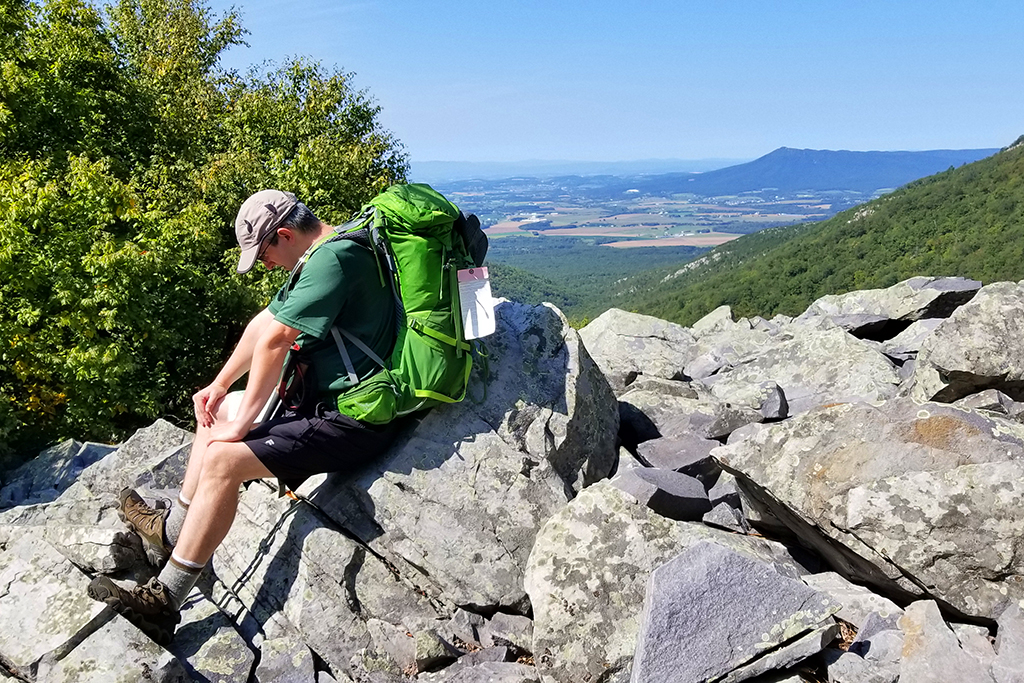
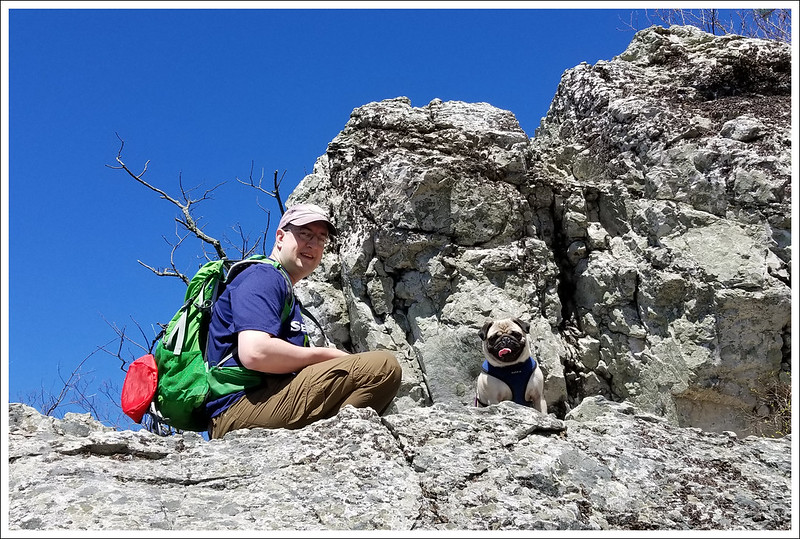
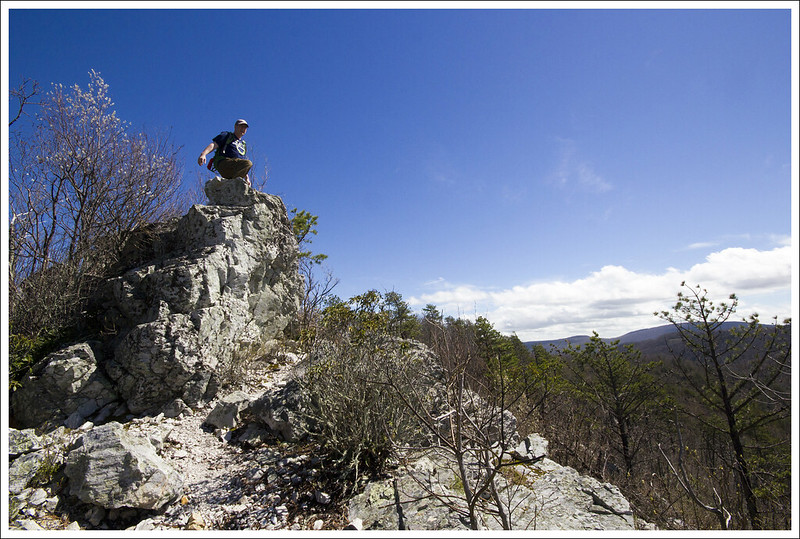
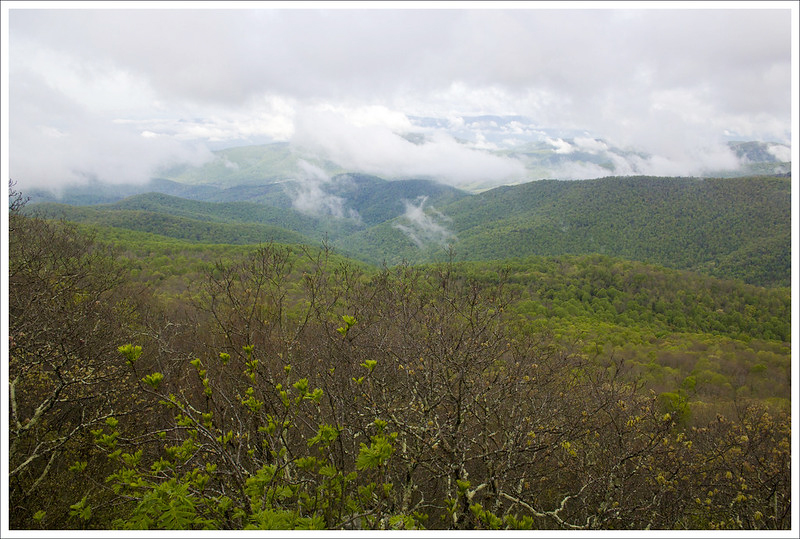
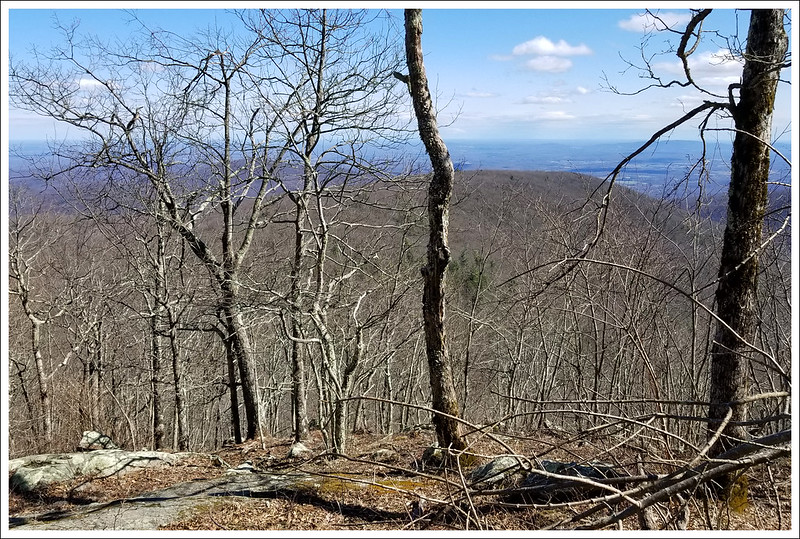
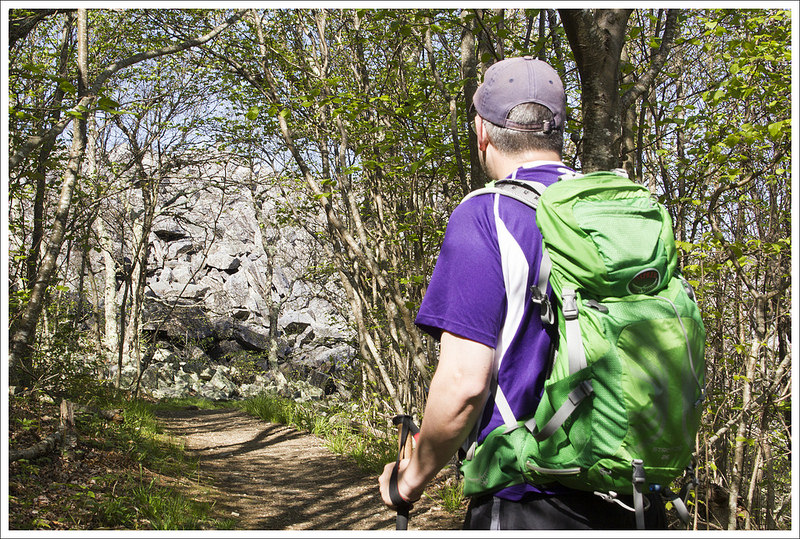
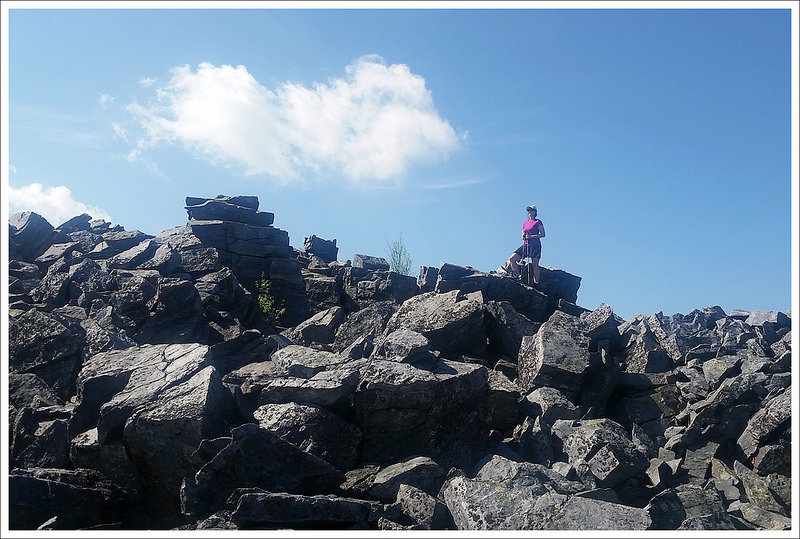
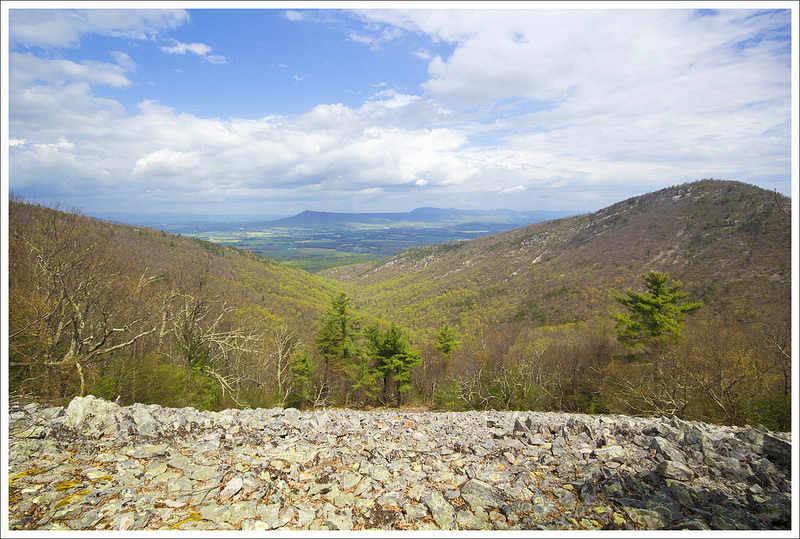
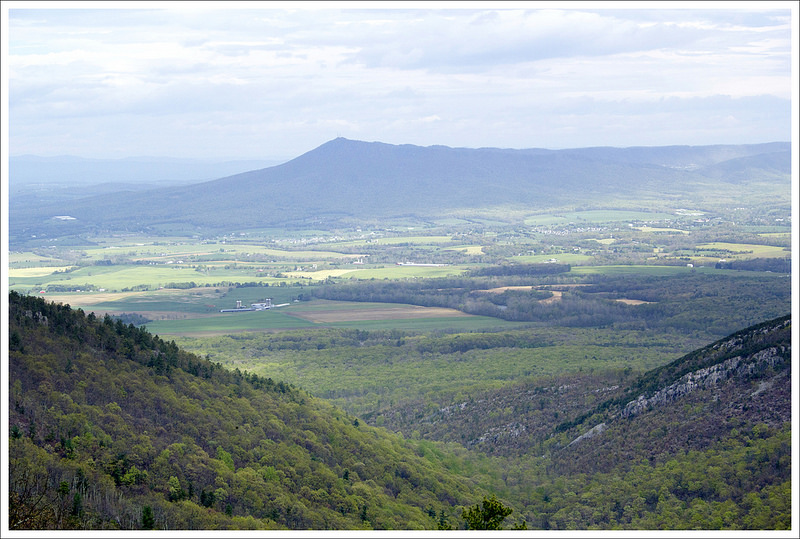
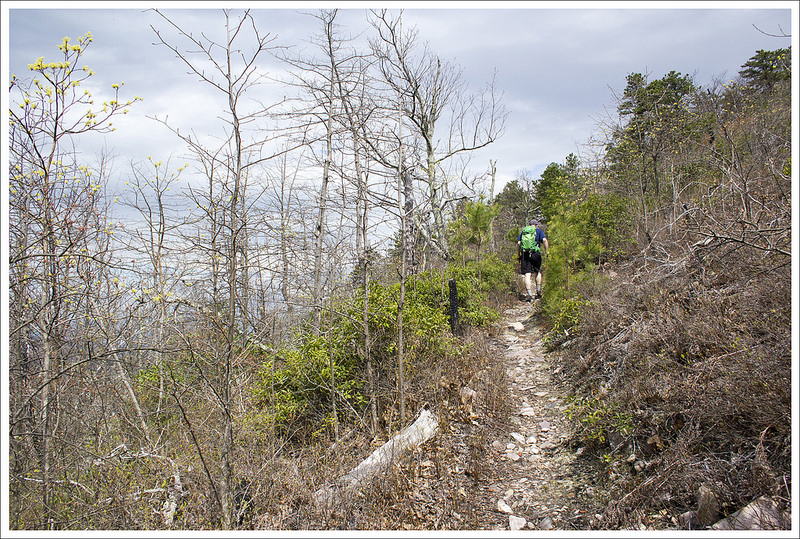
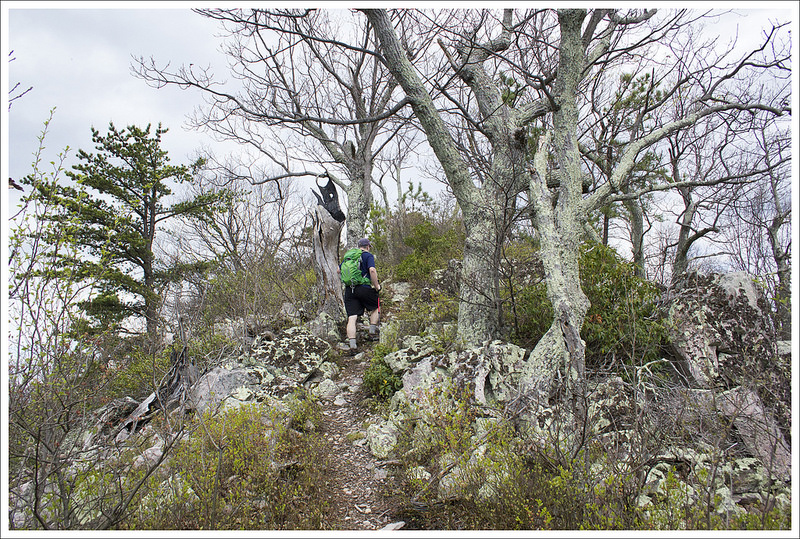
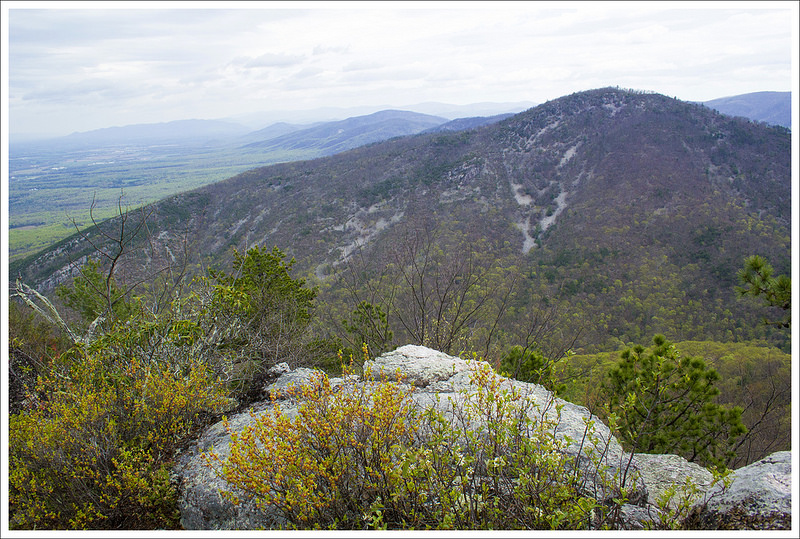
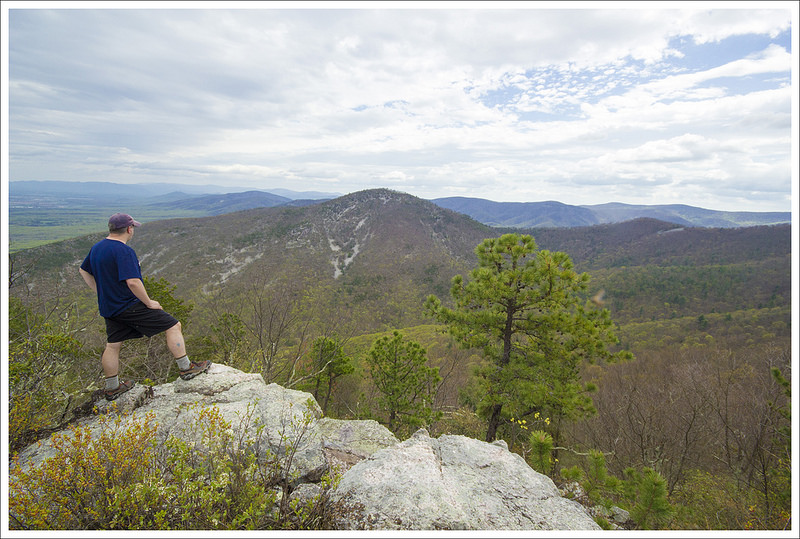
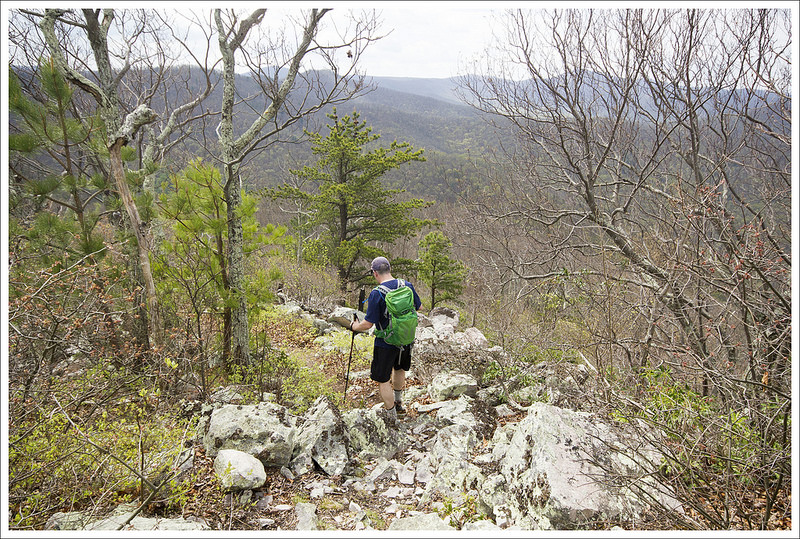
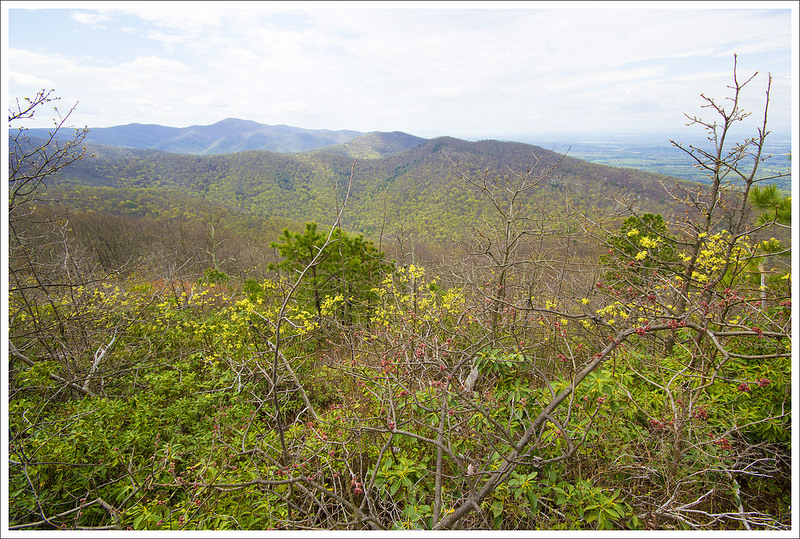
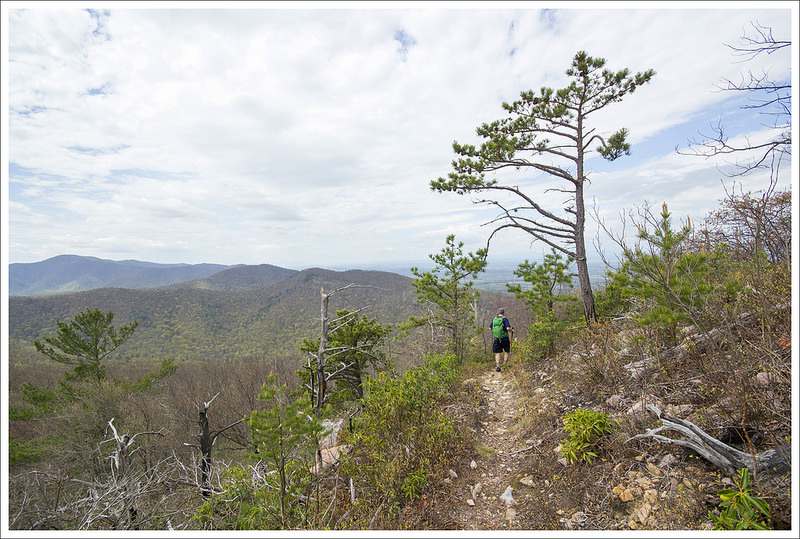
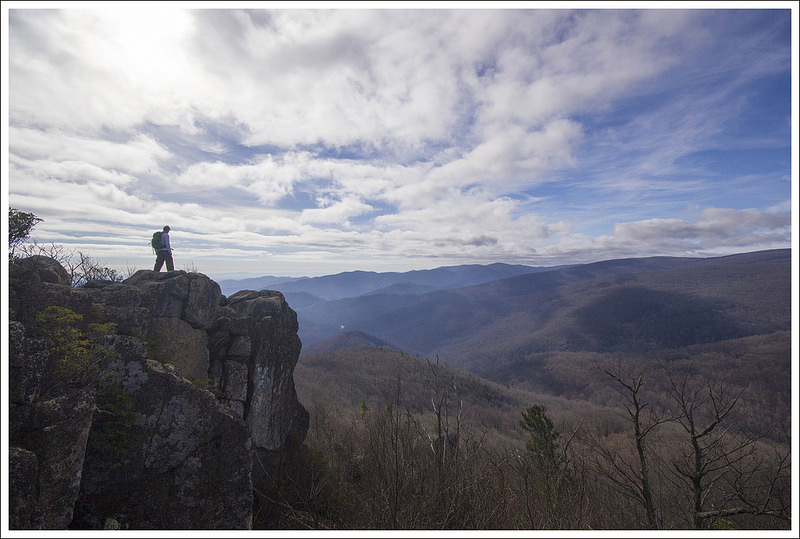
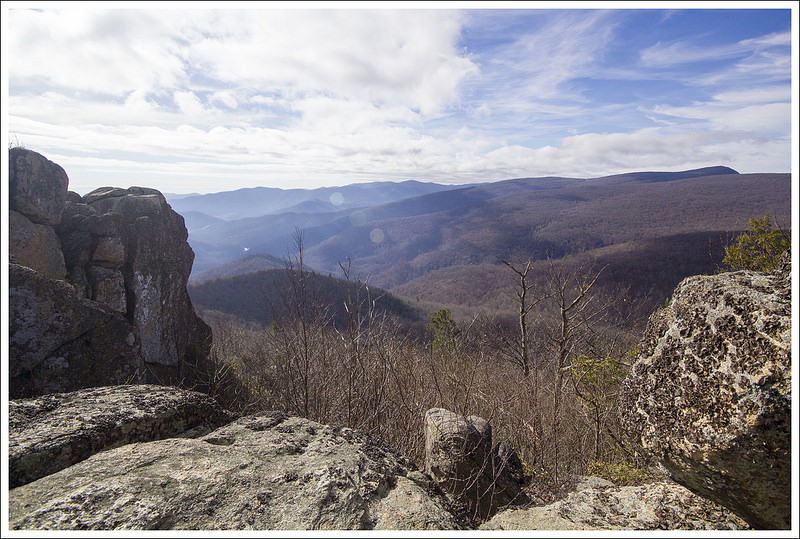
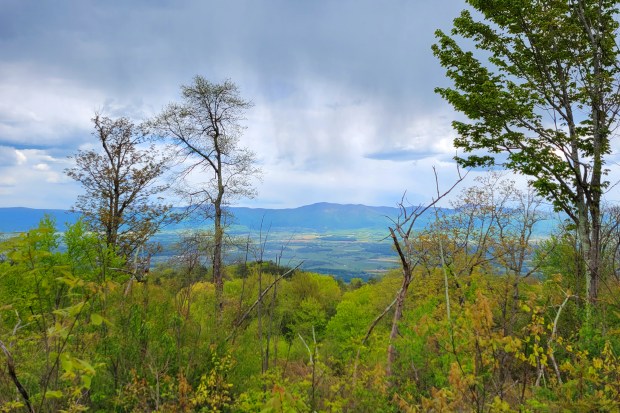
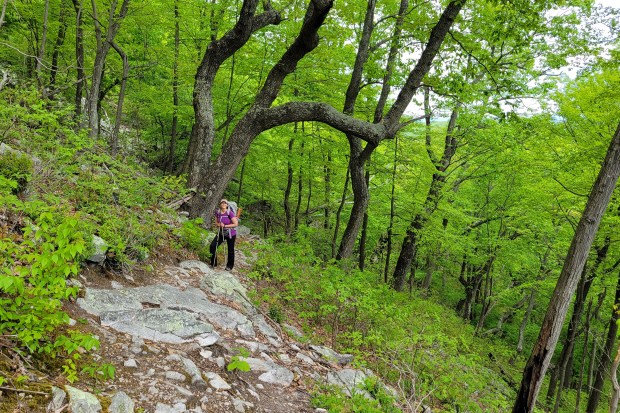
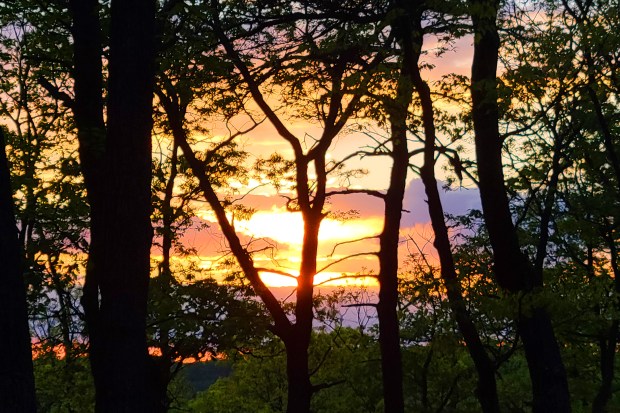
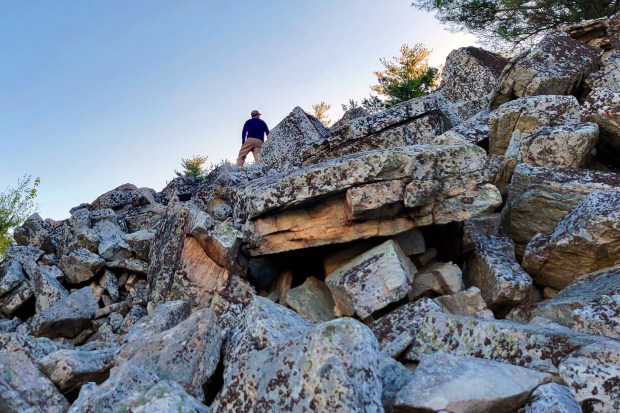
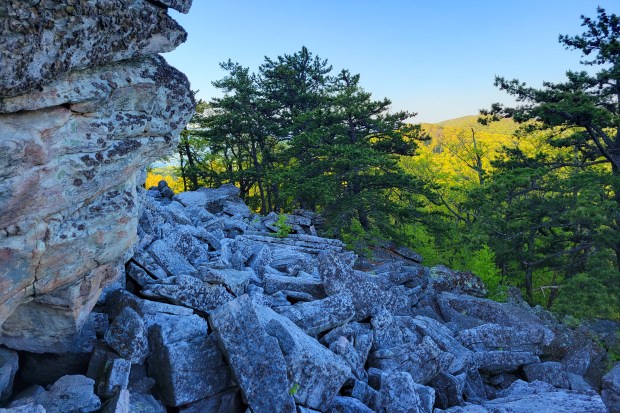
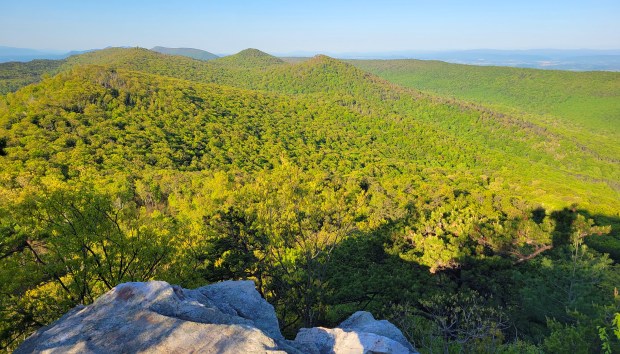
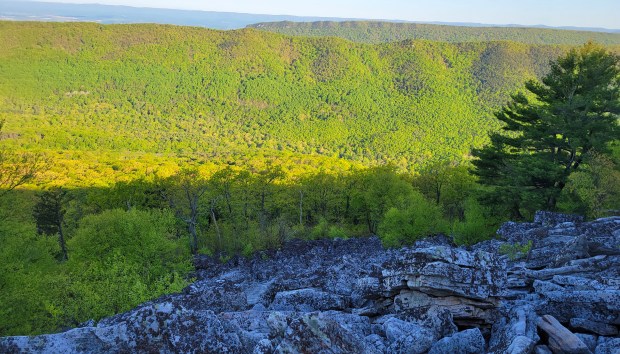
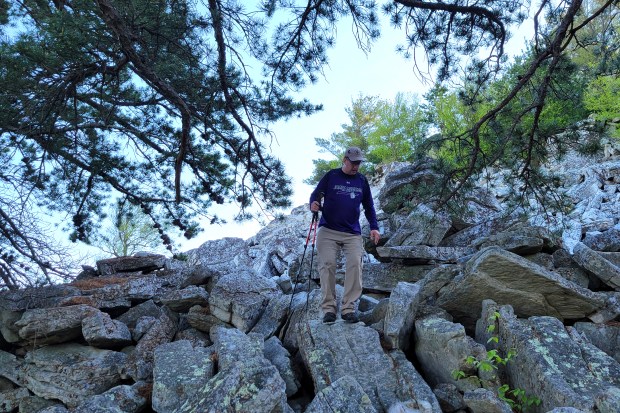
We got up with the sunrise, and hiked up to Duncan Knob without packs. It’s just a short few tenths of a mile to the rock scramble, so it was nice to leave everything behind and hike up empty-handed. As many of our regular readers know, I have chronic vertigo and don’t do well with rock scrambles. I can do them if I must, but it’s pretty scary and disorienting. I climbed about halfway up Duncan Knob’s scramble and found a nice flat rock that was high enough to provide an open view. Adam continued to the top of the knob on his own.

PHOTO: The rock scramble at Duncan.

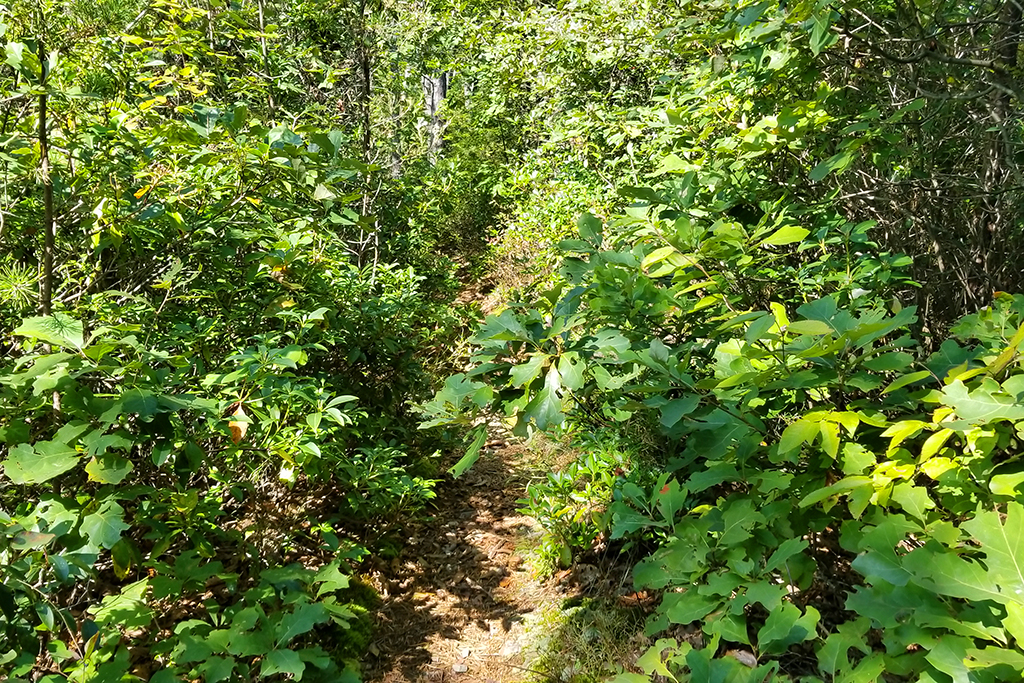
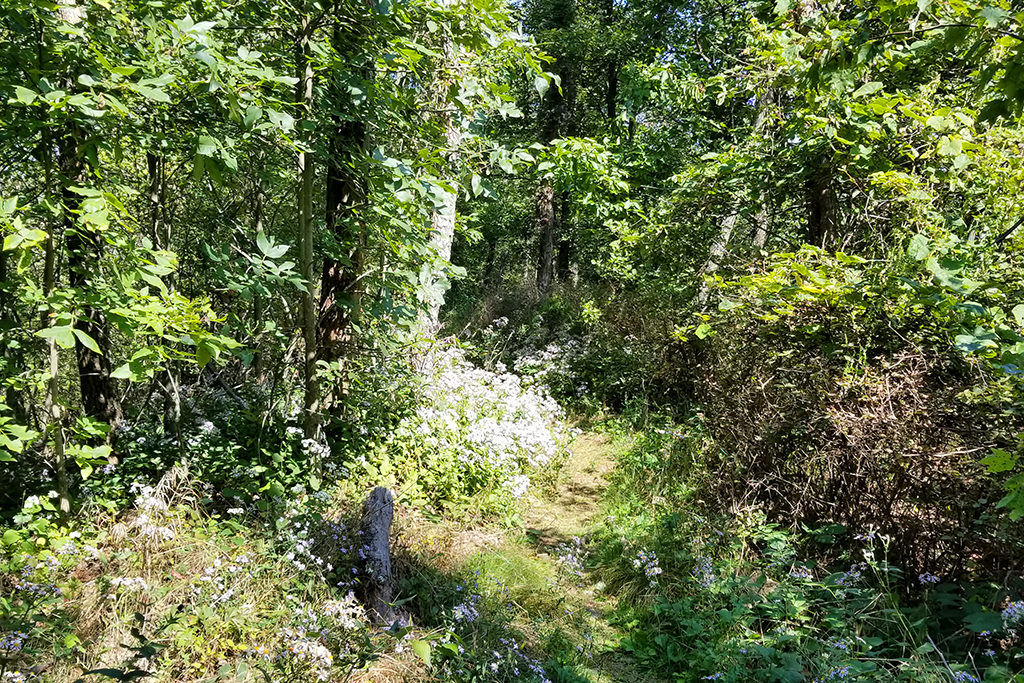
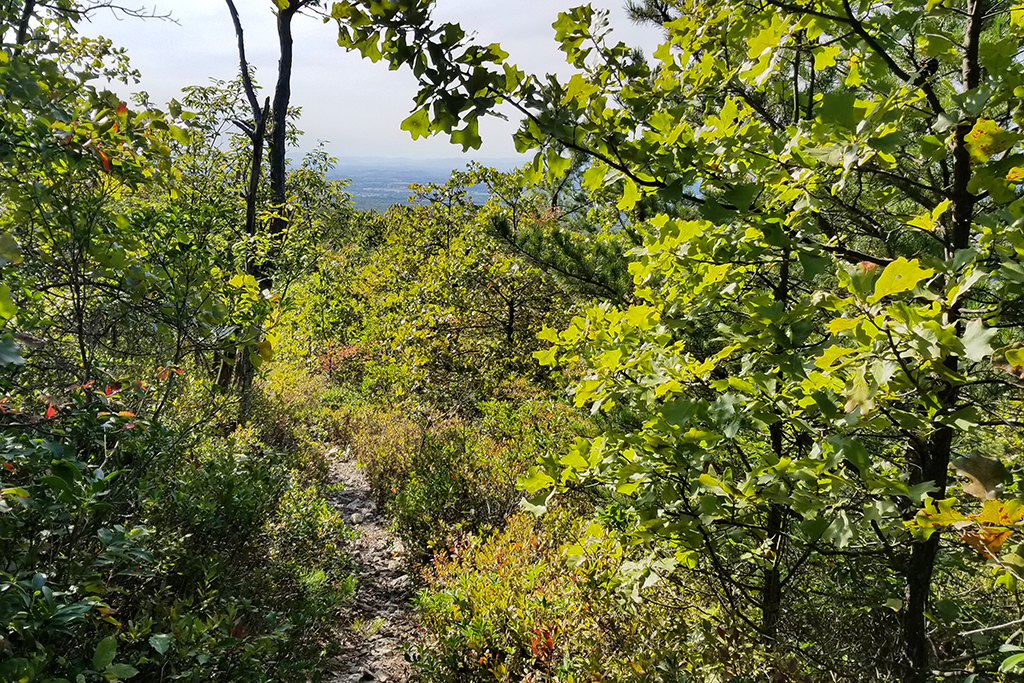
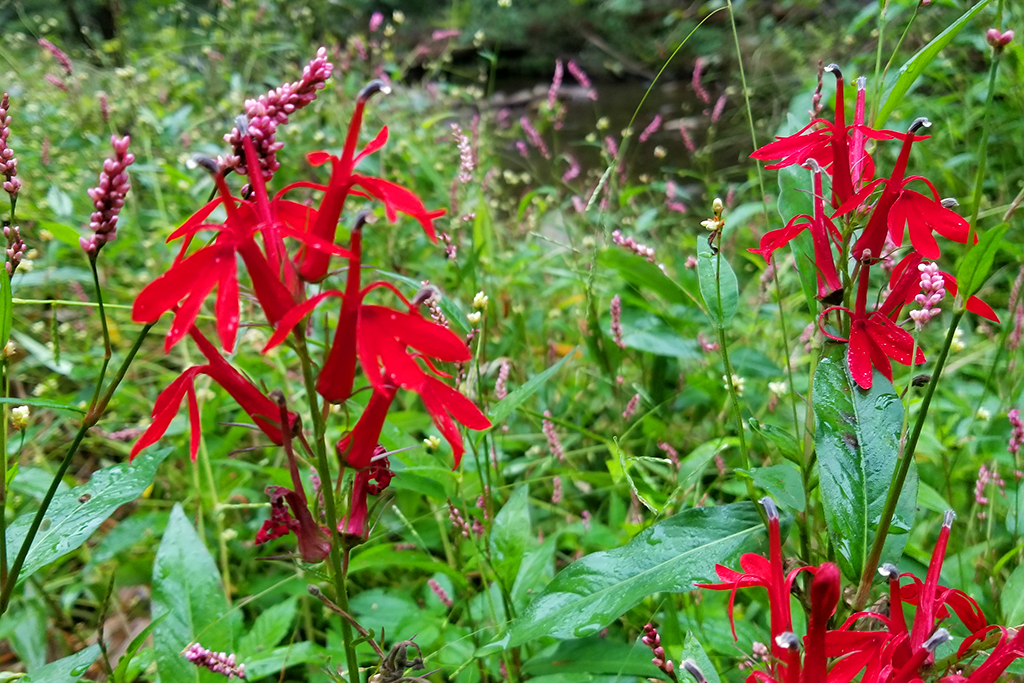
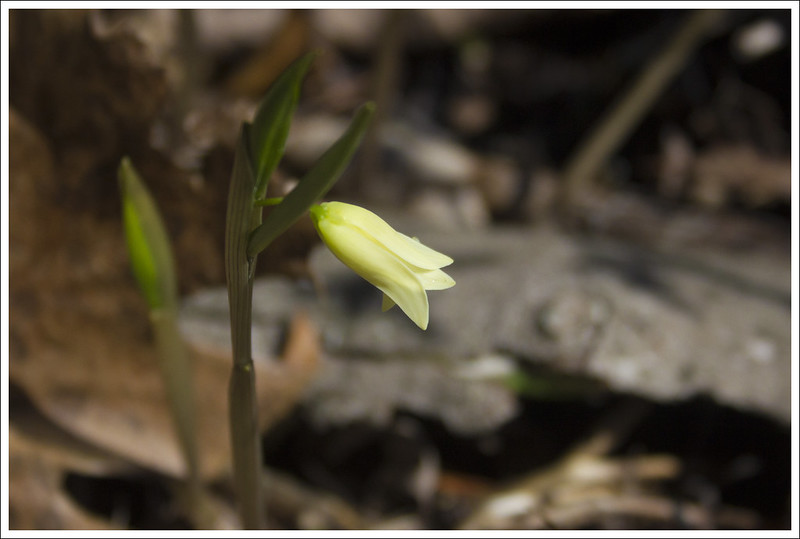
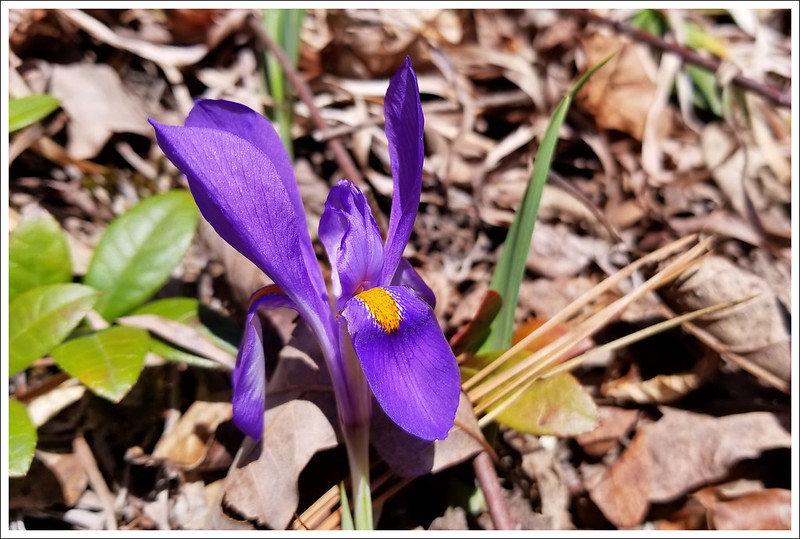
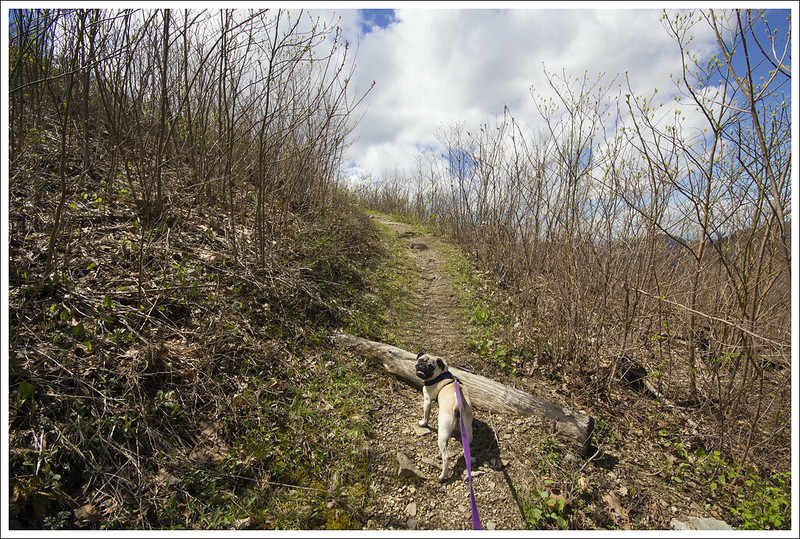
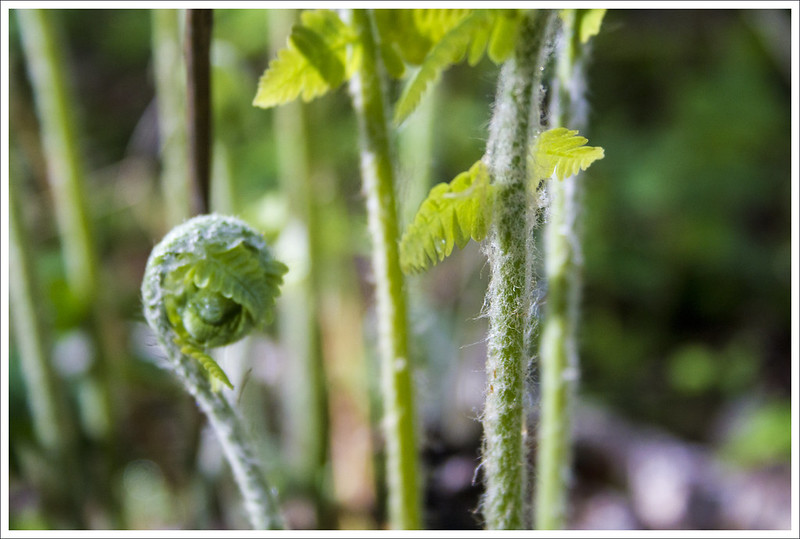
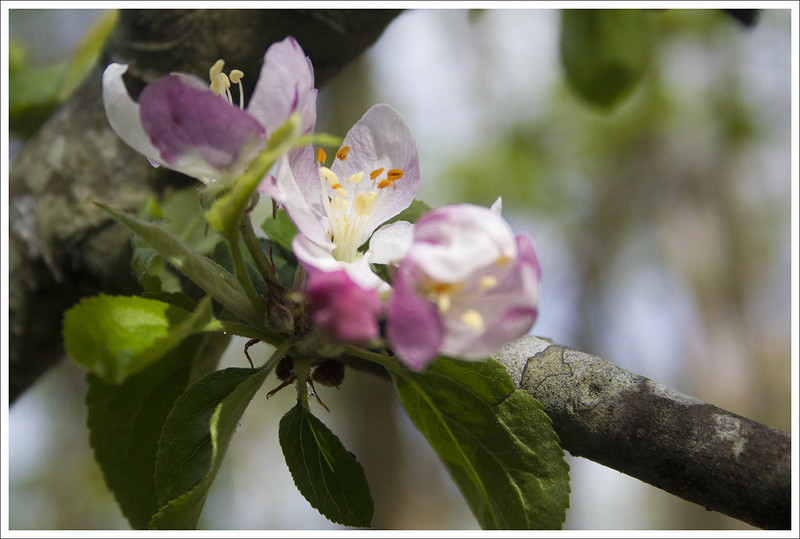
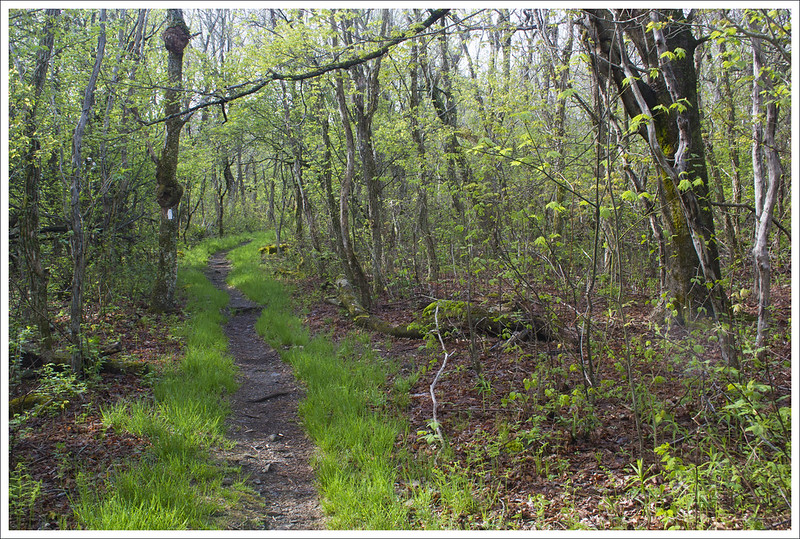
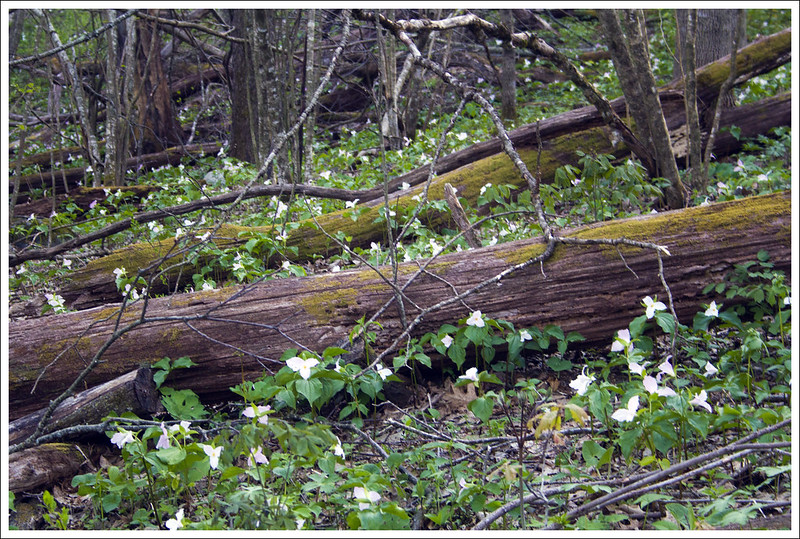
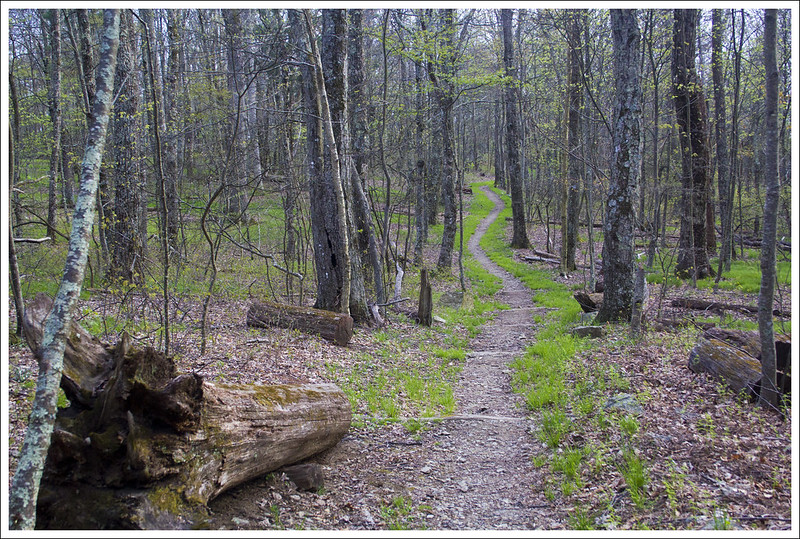
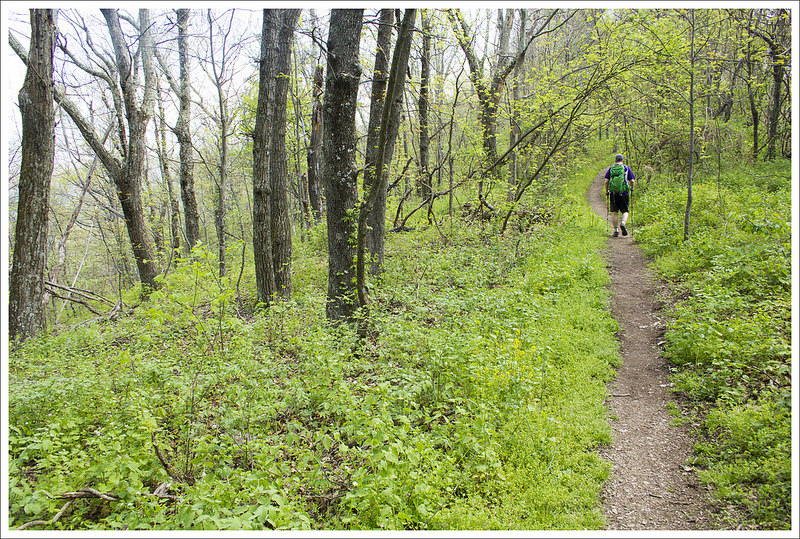
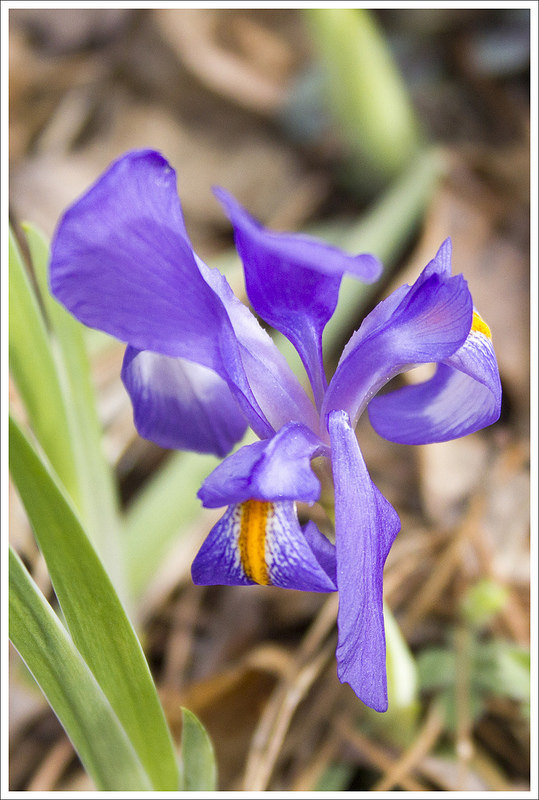
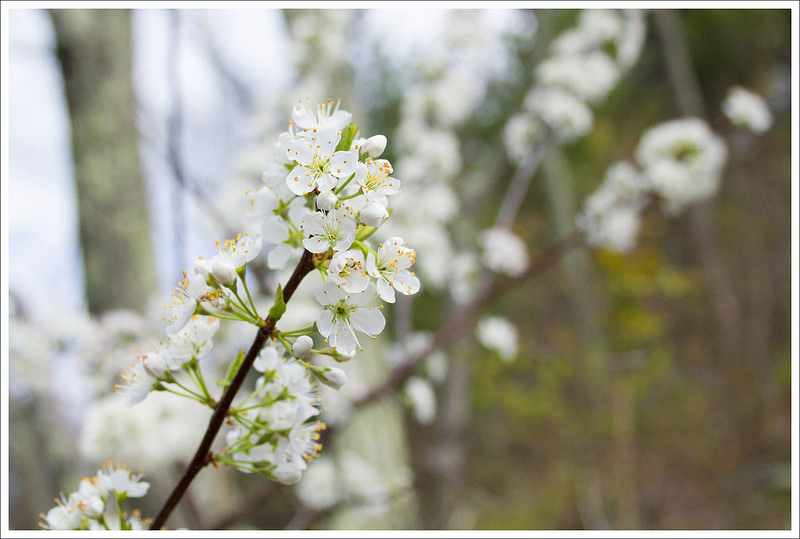
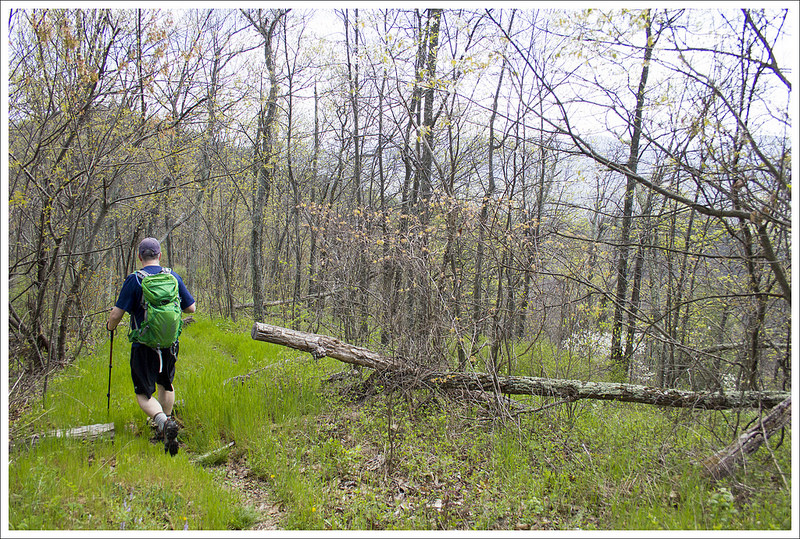
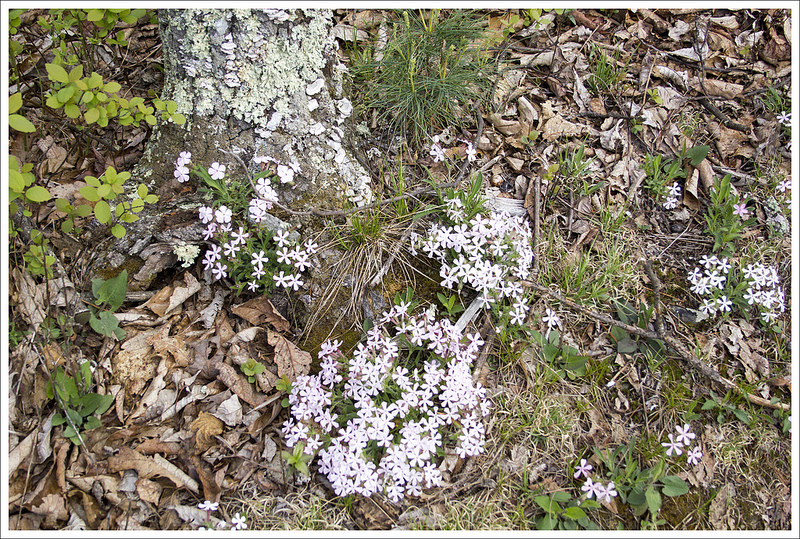
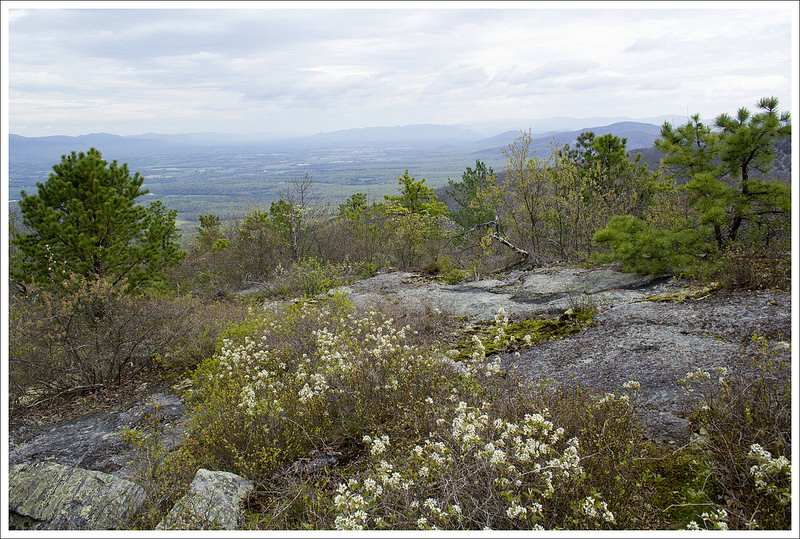
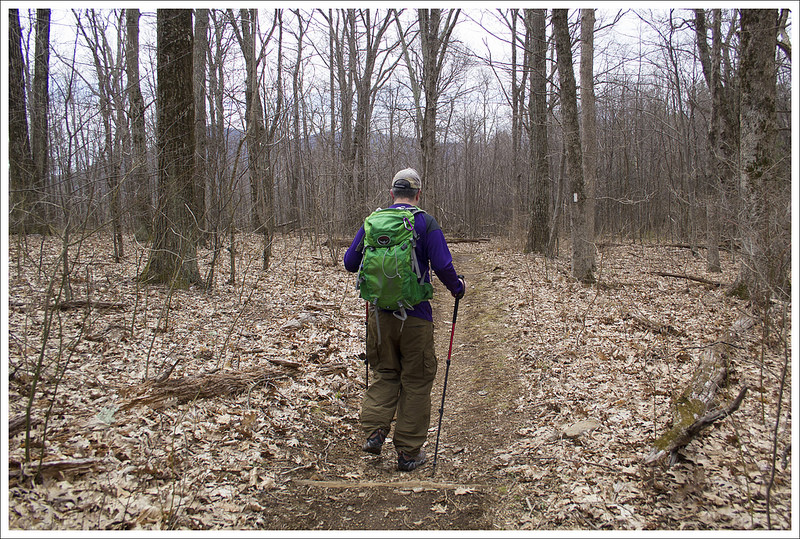
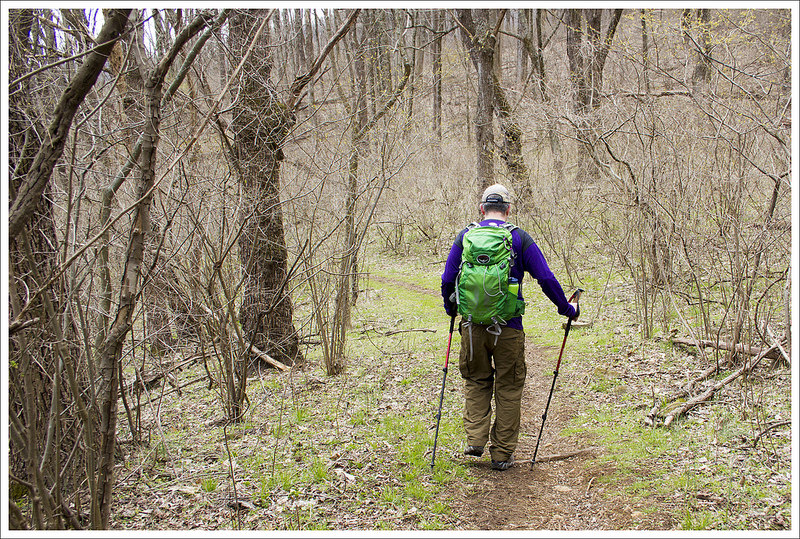
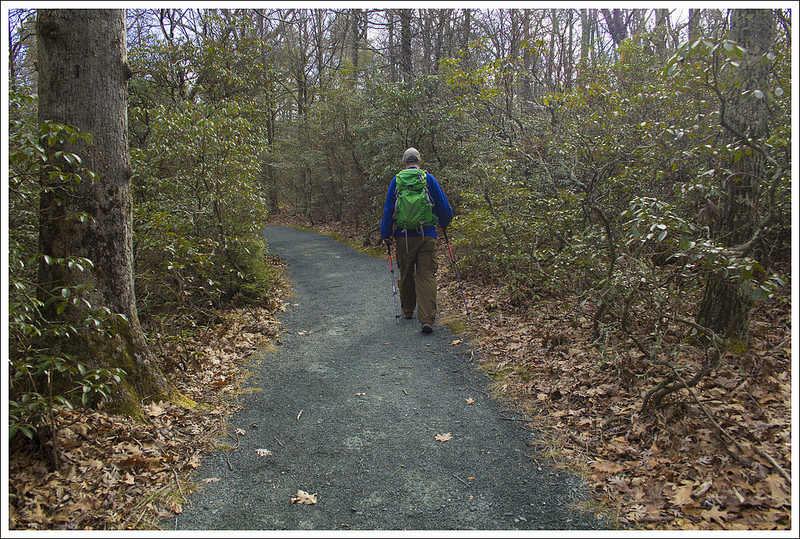
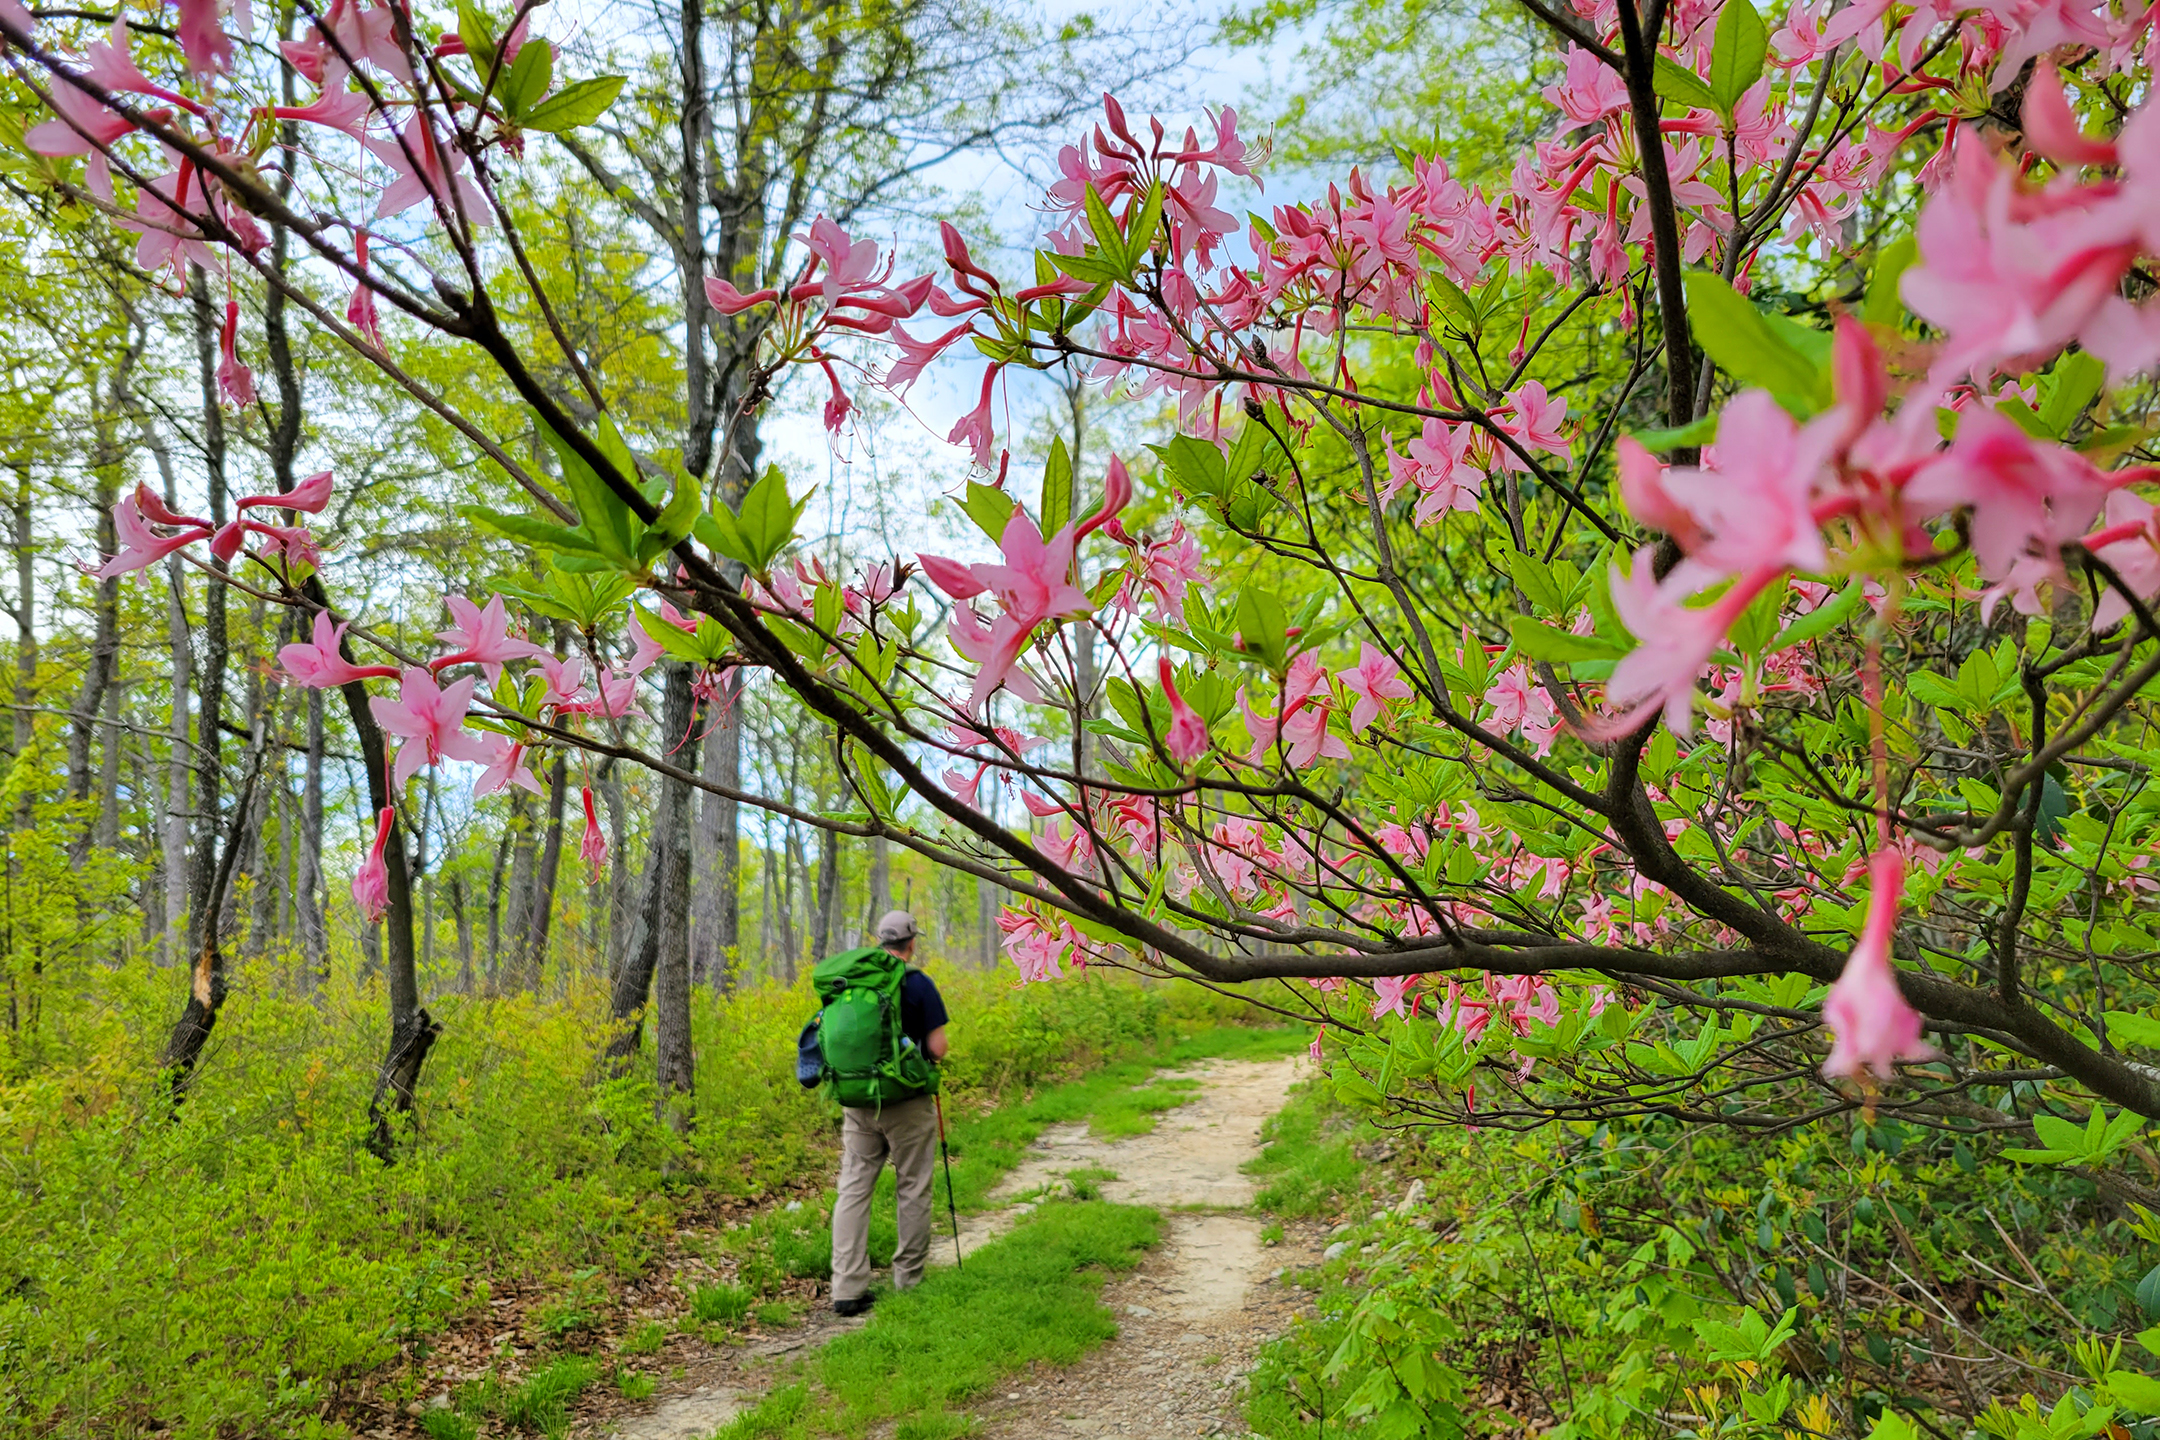
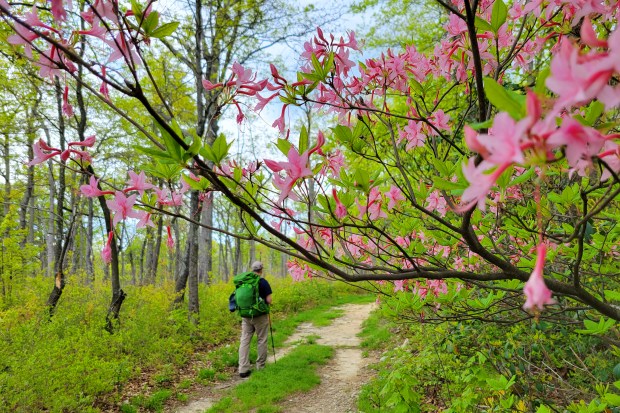
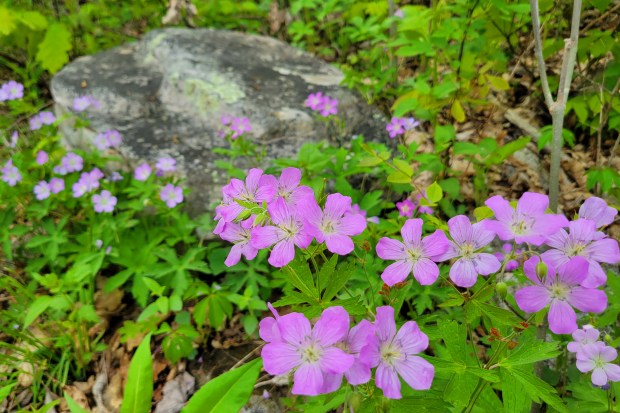
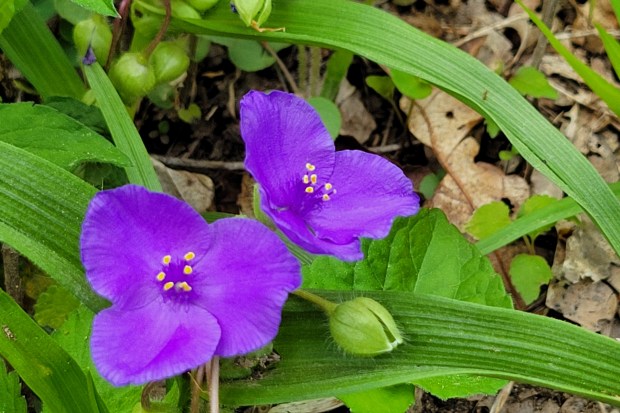
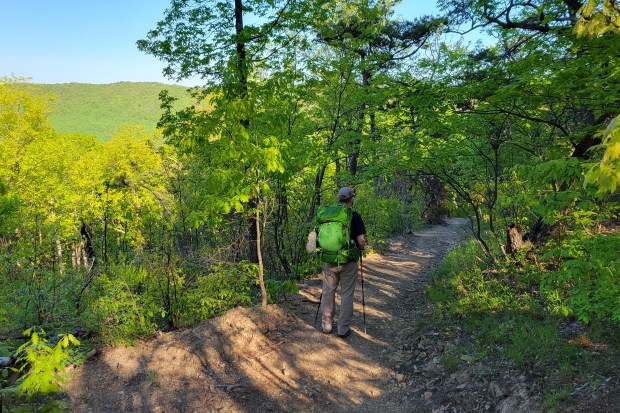
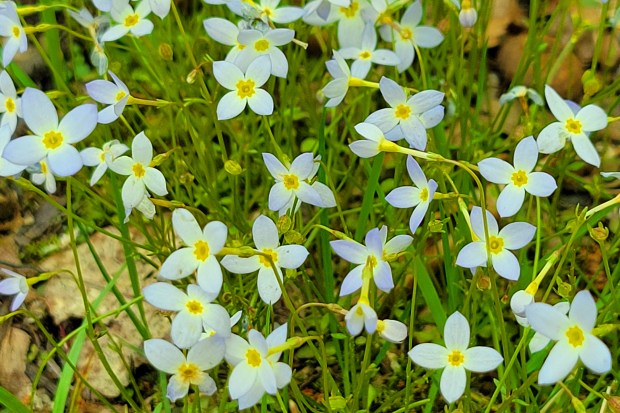
After enjoying the morning view, we headed back to our campsite at Peach Orchard Gap. We ate breakfast and broke down camp. The hiking on day two was mostly downhill or flat(ish). There were more muddy, swampy spots along the Scothorn Gap trail, but generally it was easy walking. There were plenty of native pink azaleas along the trail, and a few mountain laurels starting to get buds. Wild geraniums and spiderwort were also abundant.

PHOTO: A view from Duncan Knob

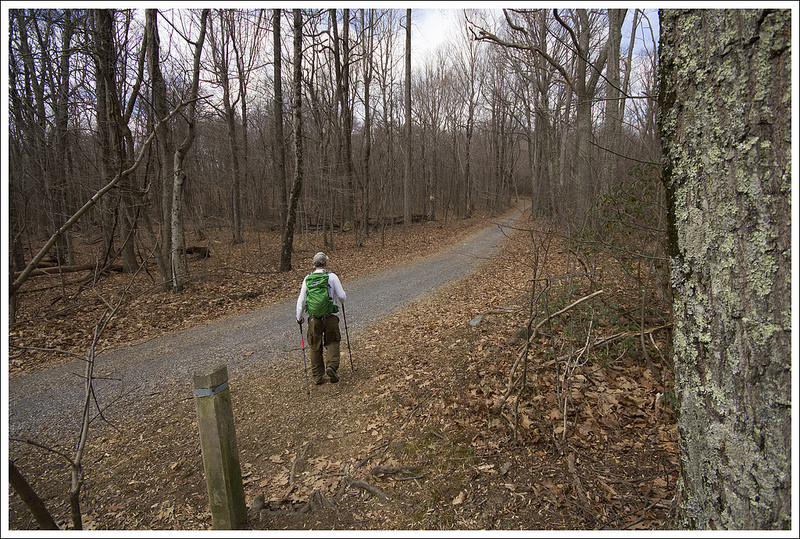
When we reached the last bit of the loop. we retraced our steps from the day before. It was the only time we really saw many people along the trail – mostly day-hikers headed up Strickler Knob. The entire distance for the second day was under 4 miles, so we were back at the car by about 9:30 a.m. We had initially planned on going to Woodstock Brewhouse for lunch and beers after the hike, but it was so early that we just went home.

PHOTO: Wet trail

Turn-by-Turn for Day 2

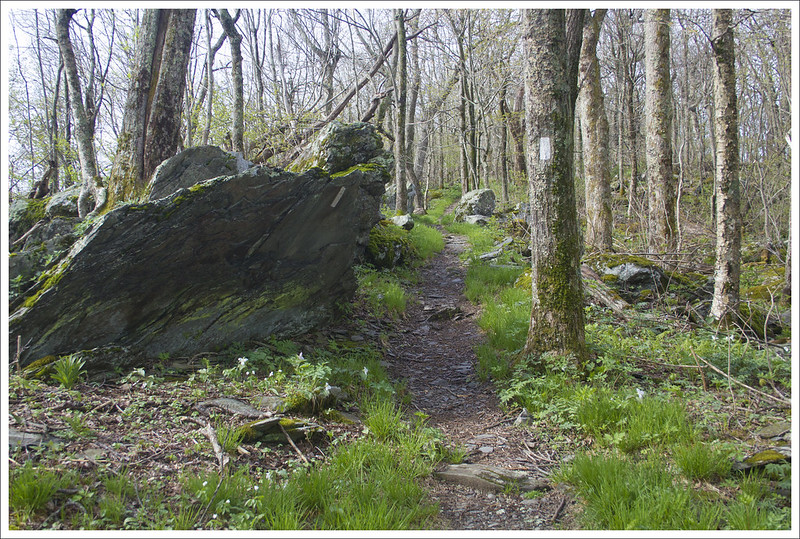
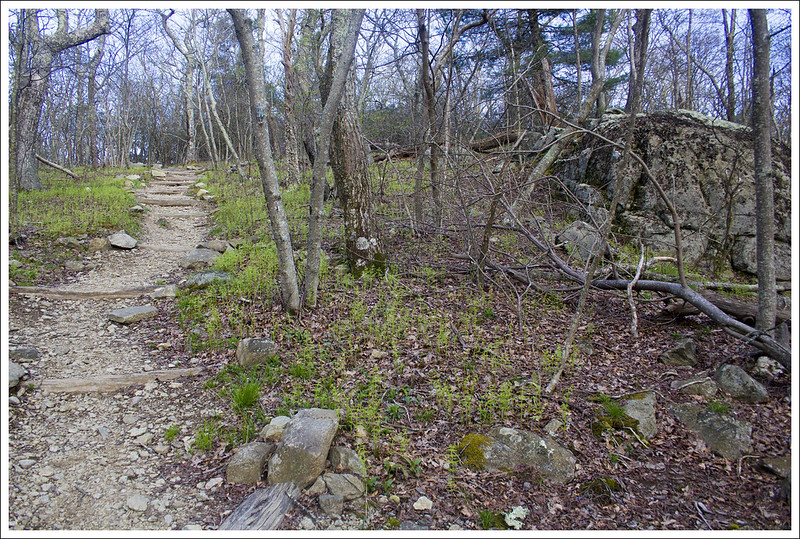
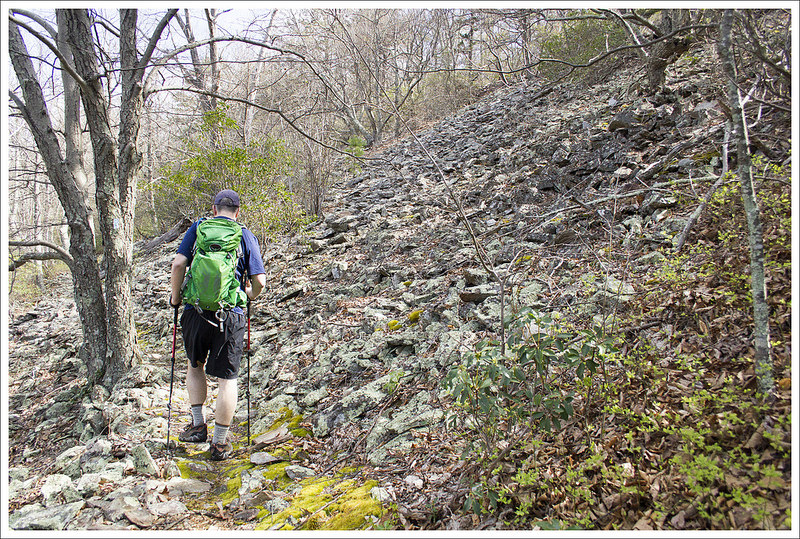
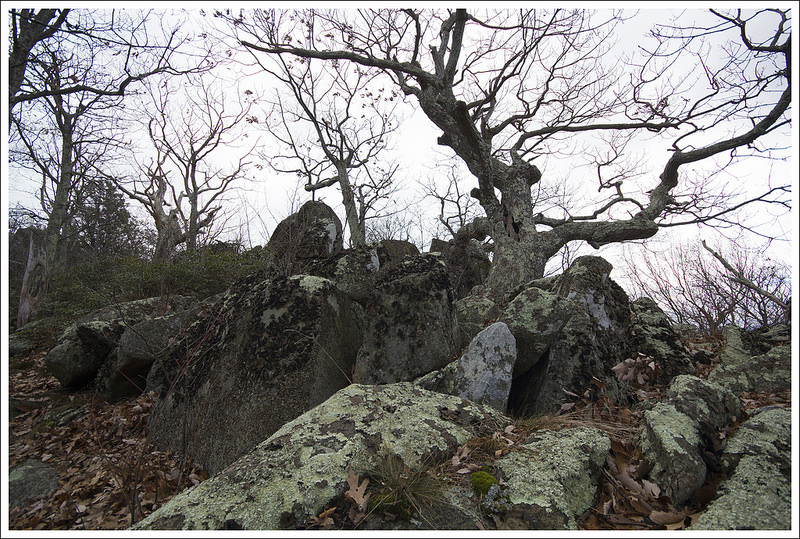
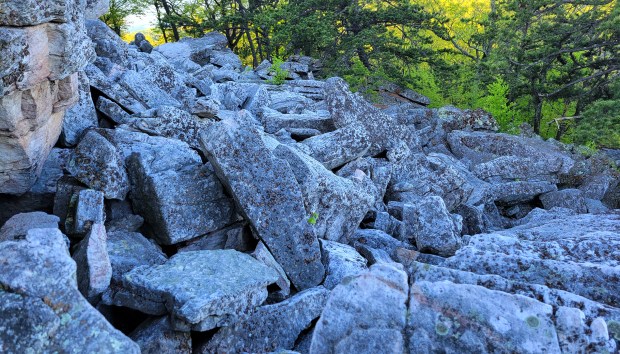
  • Start out from camp, following the white-blazed Duncan Knob trail for .3 miles. The trail will become rockier before turning into a boulder jumble. Climb as far up the boulders as you wish. There are one or two small campsites at the very top.
  • After enjoying Duncan Knob, retrace your steps for .3 miles back to Peach Orchard Gap.
  • Turn right, heading downhill on the blue-blazed Gap Creek trail. After .3 miles, you will reach an intersection – take a left onto the yellow-blazed Scothorn Gap trail.
  • Follow the Scothorn Gap trail for 1.4 miles until you come to the four-way junction you passed on Day One
  • Take a right, and follow the trail 1.5 miles back to your vehicle.

Trail Notes

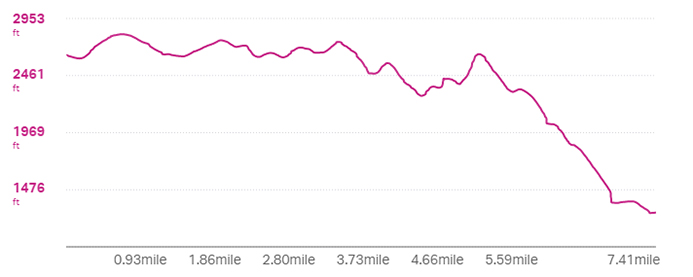
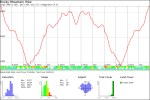
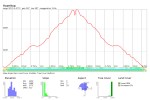
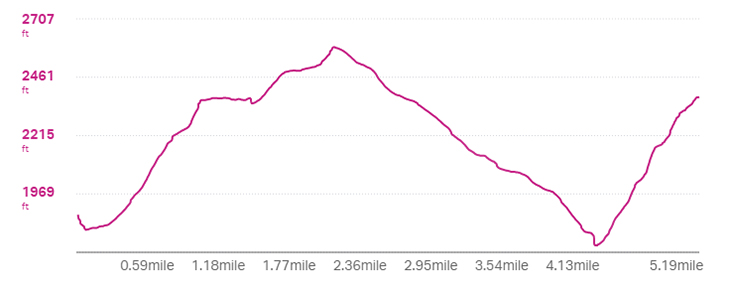
  • Distance – 9 miles (5.2 on Day 1, 3.8 on Day 2)
  • Elevation Change – 1780 ft. (1370′ on Day 1, 410′ on Day 2)
  • Difficulty –  3.  This is an overall moderate hike with a couple steep sections. There is one section right before you reach camp on Day One that requires a steep 700′ climb in less than .75 miles.
  • Trail Conditions – 3. There are some sections that are very boggy/muddy and some parts with quite a bit of loose rock.
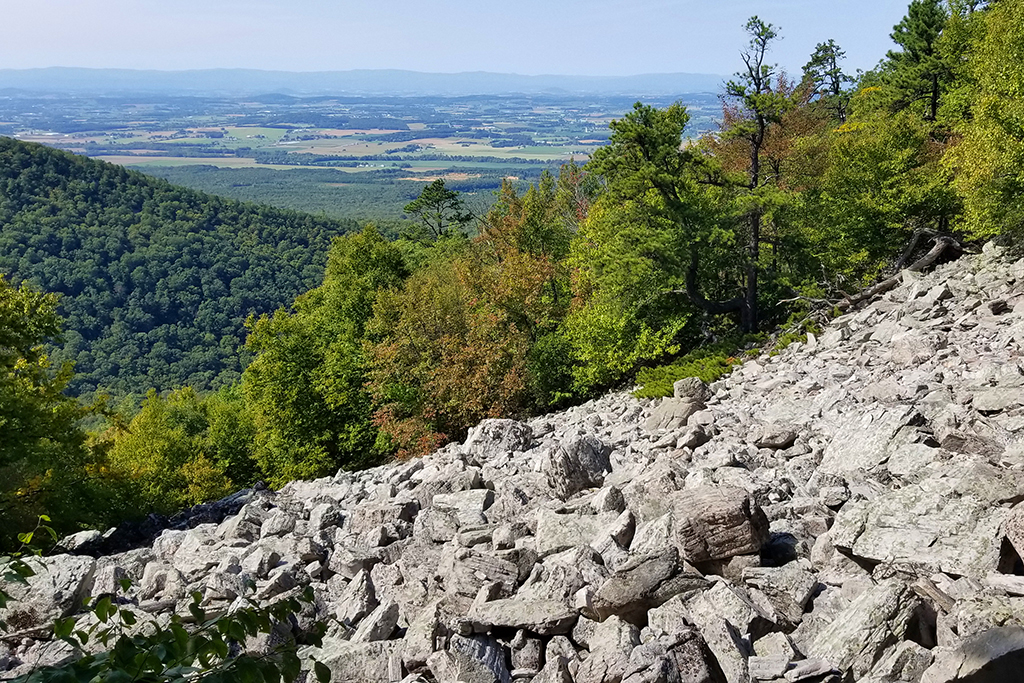
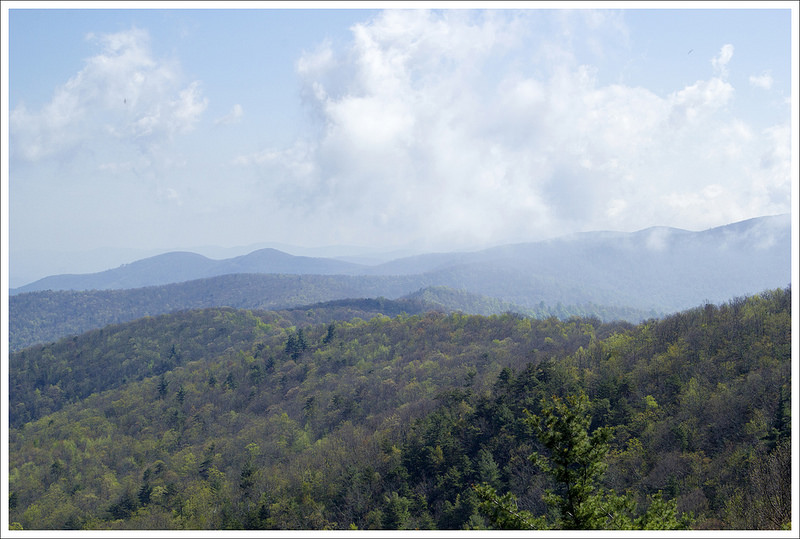
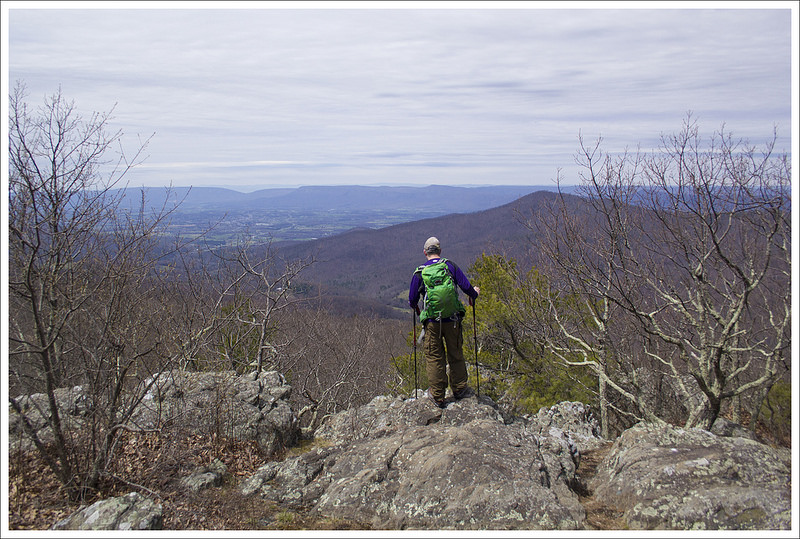
  • Views – 4. Duncan Knob is a pretty nice vista, but you have to climb all the way to the top of the scramble to get open views. Not all hikers will choose to climb the full scramble.
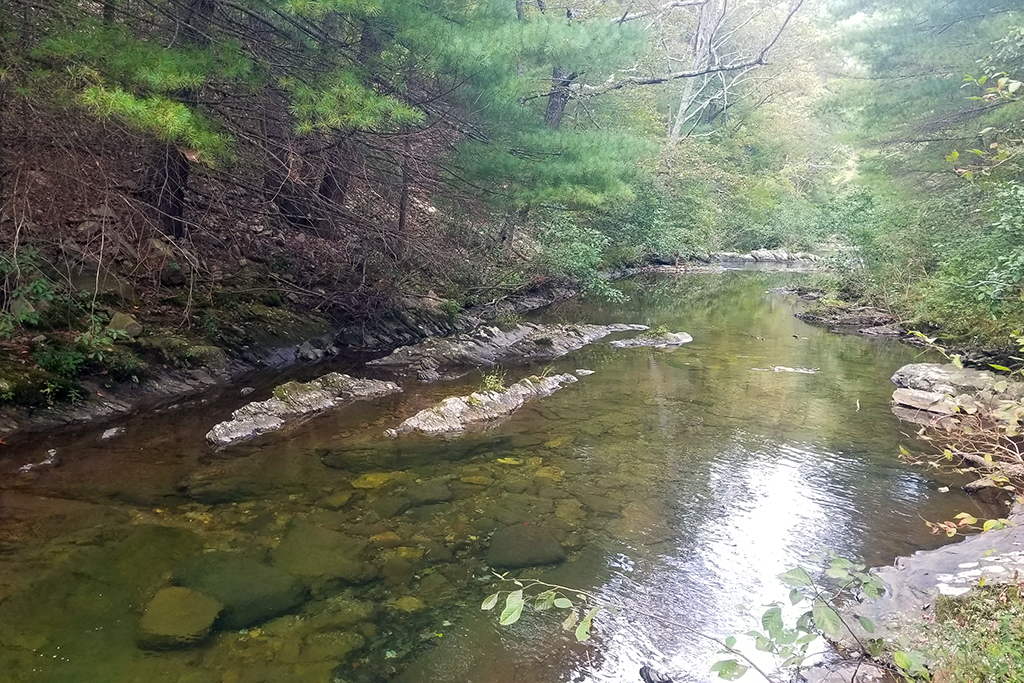
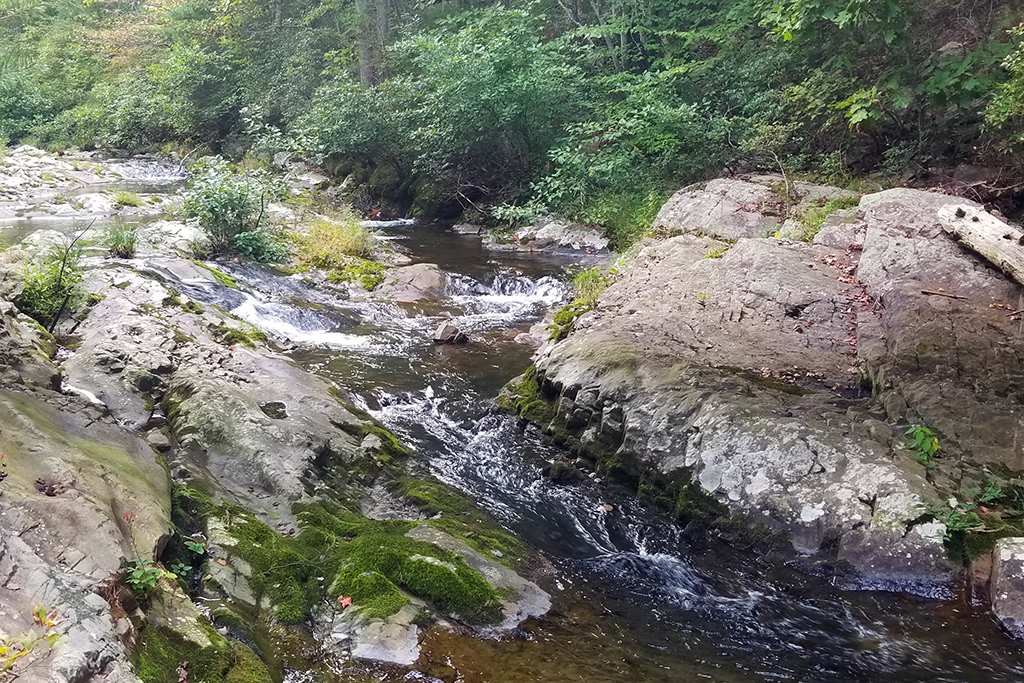
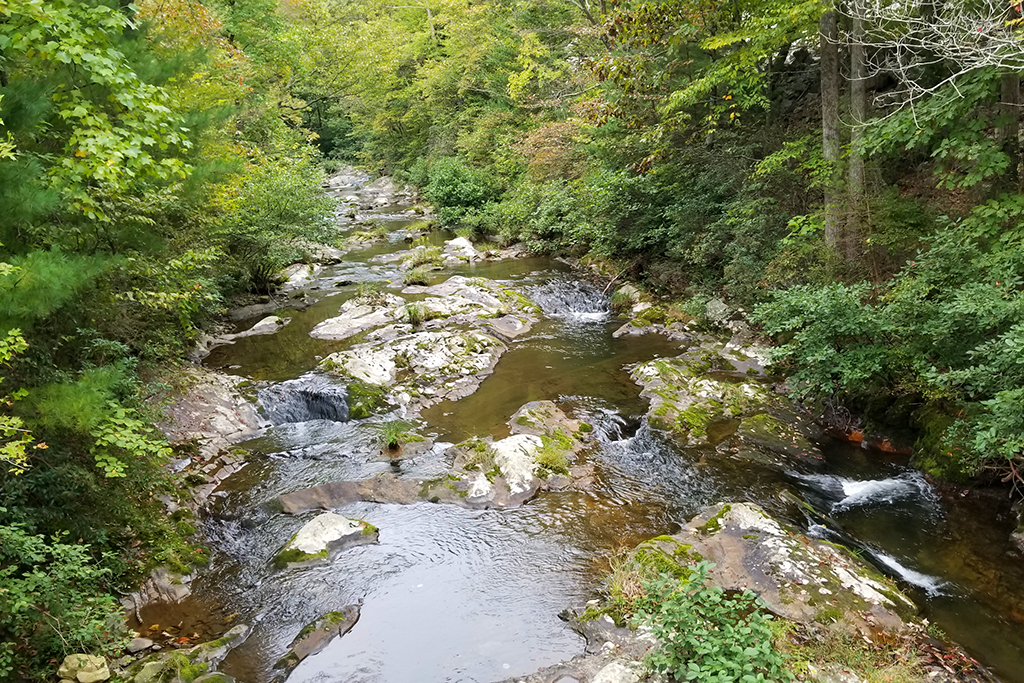
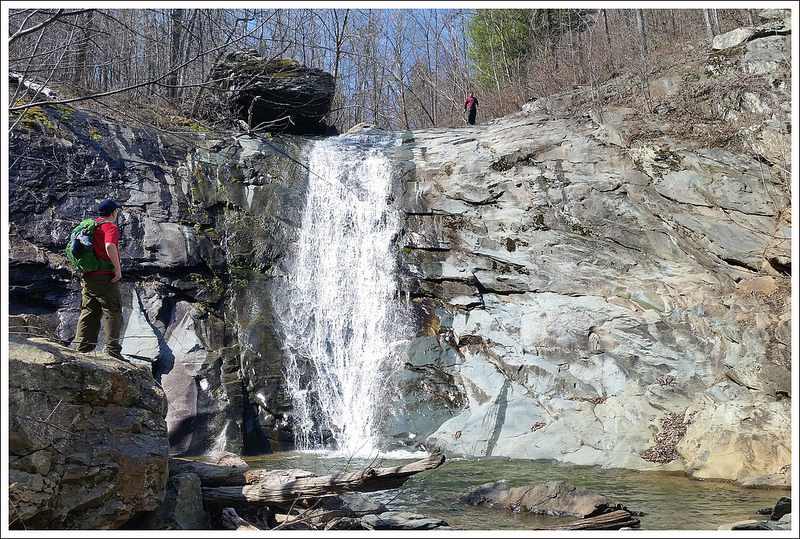
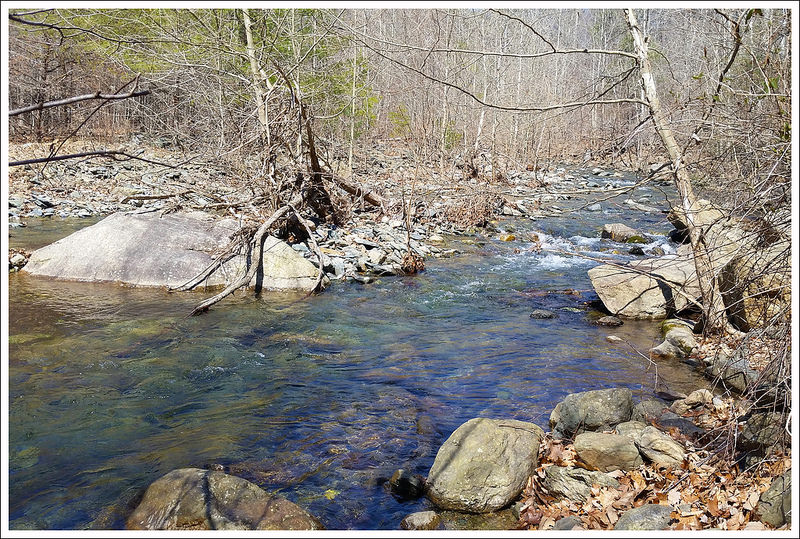
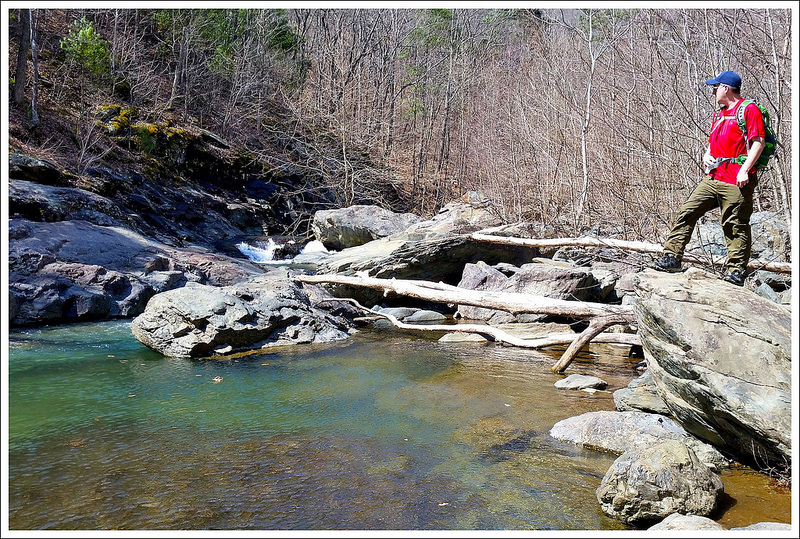
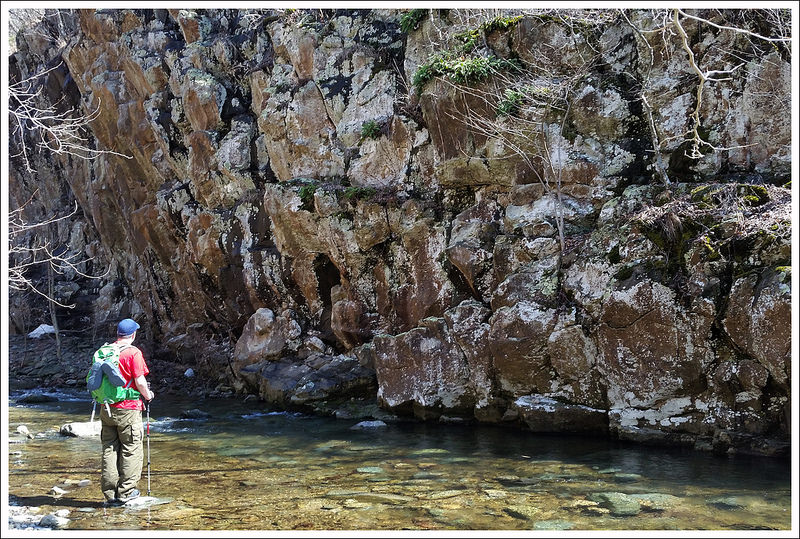
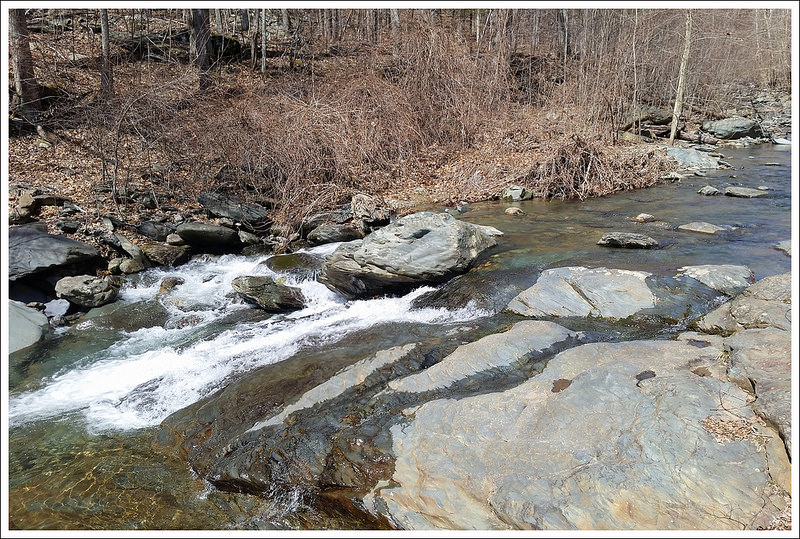
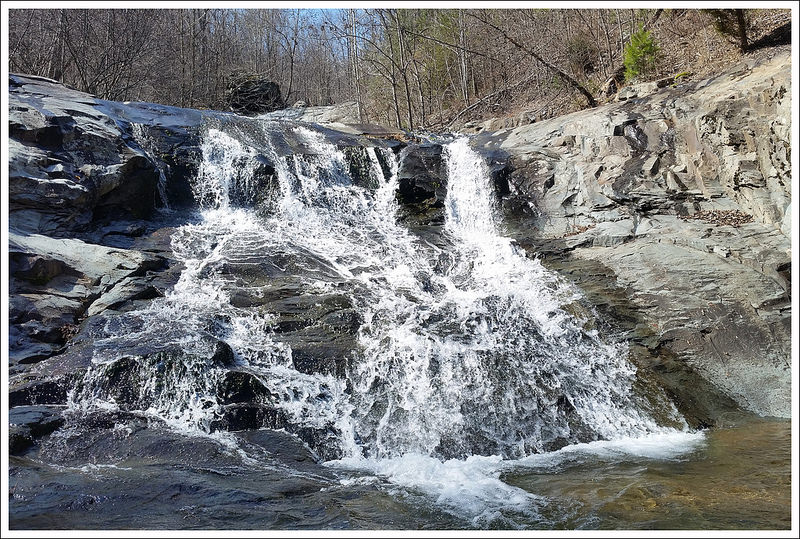
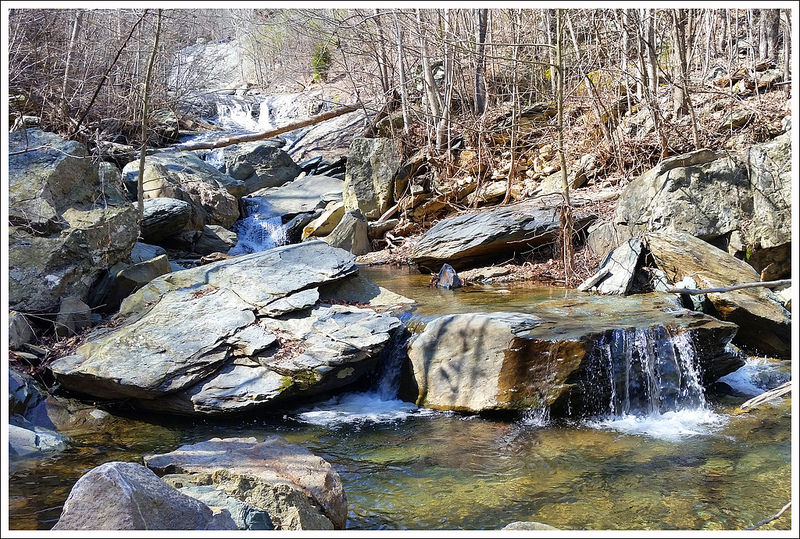
  • Streams/Waterfalls – 2. There are lots of small feeder streams along the route (may be dry certain times of the year). The beginning of the hike crosses Passage Creek. Camping near Duncan Knob is DRY. Fill up before climbing, or carry sufficient water if you plan to camp near the top.
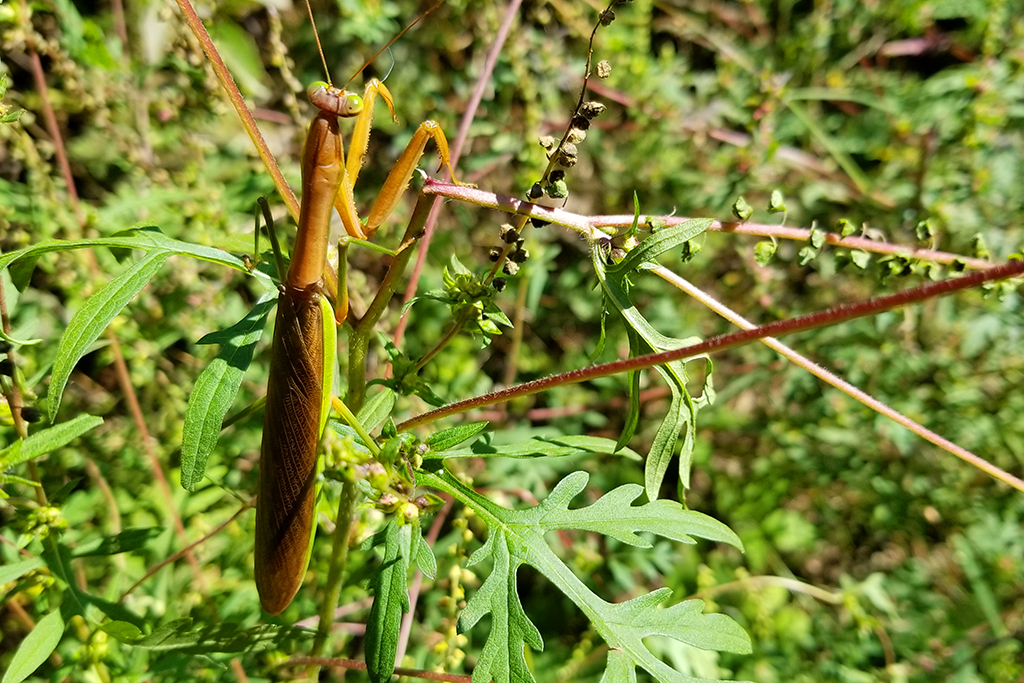
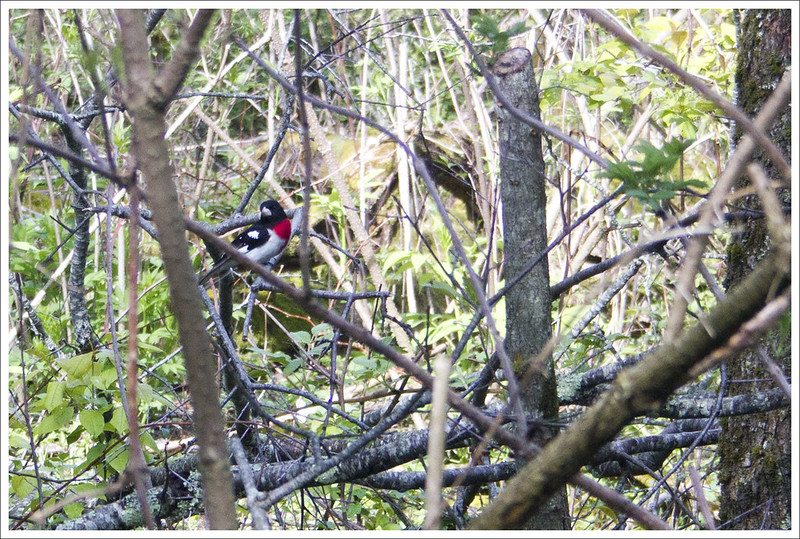
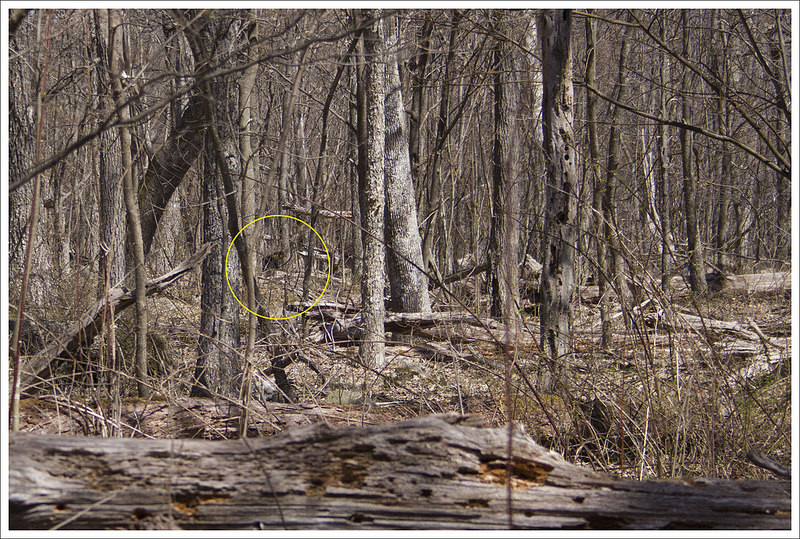
  • Wildlife – 3. We saw several turkeys and saw coyote scat.
  • Ease to Navigate – 5. The trail is very well marked and easy to follow. When we hiked in 2021, there were fresh and abundant blazes.
  • Solitude – 4. We hiked on a beautiful Friday-Saturday and only saw a few people until we got close to the car on Day Two. On Day Two, we saw many people ascending the Scothorn Gap trail toward Strickler Knob.

All Photos

Maps

Day One – Elevation Profile
Day Two – Elevation Profile

Directions to trailhead:  The parking lot is the Scothorn Gap trailhead on Crisman Hollow Rd. GPS coordinates: 38.69143, -78.58004

Rockytop – Big Run Loop

View all the photos from this hike

Christine Says (Day 1)

We did this hike mid-week in September to celebrate my birthday! It was our only backpacking trip together in all of 2020. We did get out to car camp once earlier in the year, and I went backpacking in the fall with a girlfriend. But, overall 2020 was definitely the least I’ve hiked and backpacked in many, many years. The pandemic made traveling difficult and honestly… trails were so overcrowded with new hikers that it just wasn’t that enjoyable to hike most of the time.

View from Rockytop -looking toward Lewis Peak and Massanutten.
View from Rockytop – looking toward Lewis Peak and Massanutten.

We picked this area because it’s less visited than most other parts of the park, and we had never done this particular loop before. The trail was relatively easy until we passed the junction with the Lewis Mountain Trail. From there until we reached the Big Run basin, the trail was extremely rocky and overgrown. Parts of the trail are not really even trail – it’s just blazes and talus slopes.

The trail across one of many talus slopes.

The low foot traffic on this trail meant that tree limbs and undergrowth impeded our progress. My clothes kept catching on thorns and branches, and I had to stay on high alert for back-swinging branches that Adam passed first. Despite the challenging and rugged terrain, there were excellent views along the trail. I especially liked the long descent toward Big Run. Forest fires over recent years have left open vistas from the trail. It’s like walking on a balcony affixed to the side of a mountain; with continual views as you go.

The trail was very overgrown.
Overgrown Trail

We were both pretty tired of rocky footing by the time we got to the old road bed of the Big Run Portal. After crossing the metal bridge over Big Run, we explored an unmarked footpath paralleling the stream and found excellent campsites. The sites were clear and flat, and nicely distanced from the stream (backcountry regulations for Shenandoah dictate that you must be 10 yards from a stream.)

Our awesome tent site.

We set up camp. Adam got to try his UGQ quilt for the first time, and I got to test my Nemo Tensor pad. We collected water from the stream and found our Sawyer Squeeze completely clogged (probably leftover from silty water sources we used on our trip out west in 2019) We ended up having to treat our water with Aquamira. I always carry it as a backup in case my filter malfunctions. We had freeze-dried meals for dinner – sweet and sour chicken and risotto with chicken. They were both Backpackers Pantry, which I’ve decided is my least favorite brand of backpacking meal. For dessert, I had carefully packed two pieces of leftover birthday cake in a crush-proof container. Yum! We carried our small bear canister on this trip to save the hassle of doing a bear hang.

We played many rounds of Uno until the sun went down and then retired to the tent to read.

A great water source for camping and a nice place to sit after dinner.

Turn-by-Turn for Day 1

  • Follow the AT north from the parking lot at Browns Gap (around MM 83 of Skyline Drive) for about .6 miles.
  • Look for the cement post marking the blue-blazed Big Run Trail, turn left.
  • Follow the Big Run Trail for .65 miles to a four-way intersection
  • Follow the trail straight onto the blue-blazed Rockytop Trail
  • Pass the junction of the Austin Mountain Trail in .4 miles (staying on Rockytop)
  • Pass the junction of the Lewis Mountain Trail in 1.8 miles (staying on Rockytop)
  • Follow the Rockytop Trail for another 3.5 miles, crossing many talus slopes with westward views showcasing Massanutten Mountain and Lewis Peak. The last two miles is a long (almost 1500′) descent into the Big Run basin.
  • At the bottom of the descent, turn right onto the yellow-blazed Big Run Portal Trail. It follows an old roadbed for about a half mile until you reach a large, sturdy metal bridge over Big Run.
  • Look for campsites after the bridge crossing – there are many and they’re all quite nice!

Adam Says (Day 2)

We had a good night of sleep and got up early to get breakfast started and continue our hike for the day. Rejoining the main Big Run Portal trail, we soon passed another large campsite to the right of the trail. The trail started off fairly flat as we were walking along the Big Run area. One difficult aspect about this section of the trail are all the water crossings.

One of many stream crossings you will encounter as the Big Run Portal Trail crosses over Big Run in several spots.

There were several water crossings that made it difficult to follow since it wasn’t very clear where the blazes were on the other side. In fact, on one stream crossing, we missed a blaze on the left on an “island” about halfway across the stream. Our map did not indicate the partial stream crossing. We went past this and fully crossed the stream, only to find no blazes. We bushwhacked and scouted around for about 20 minutes before going back across and then we saw the not-so-obvious blaze that we had missed the first time. This trail is really not a very popular trail, so foot traffic doesn’t create as obvious of a trail as you would see in more popular sections of the park. A few more trail blazes would definitely help navigate this Big Run Portal Trail.

More crossings and Big Run views along this section of the trail.

We continued along and passed the junctions with the Rocky Mountain Run Trail and Patterson Ridge Trail. When we reached the junction of the Big Run Portal and the Big Run Trail, we paused for a bit to gather some energy before the big climb up. This area used to have some established campsites, but these have been removed.

The climb up from here is brutal and relentless. Shortly after we started up this steep section of the Big Run Trail, a bear jumped off the trail and was booking it into the woods. The bear clearly had a lot more energy than we did and I’m sure my heavy-breathing up the trail had startled it. This uphill was quite a challenge for me, where my lack of hiking this year was showing. We paused for a bit at the four way junction.Taking a left here, we still had a little bit of climbing before getting back to the Appalachian Trail.

The climb up nearly broke Adam

Once we reached the AT junction, the trail was smooth and relatively flat or downhill until we reached our car. Overall, this backpacking trip was tough for an overnight trip. The terrain the first day was rough and overgrown and the second day was a feeling of worried we were lost, followed by an incredibly tough uphill climb. While we hadn’t done this loop before, I’m not sure if we would do it again due to the toughness. The campsite was the real bonus of the trip and we enjoyed the location and the times near the water. I would camp again at this spot, but I think there are better approach trails that aren’t as challenging.

Adam checks the map to make sure the climbing was finished at the top of the junction.

Turn-by-Turn for Day 2

  • Start out from camp, following the yellow-blazed Big Run Portal trail upstream. There will be many stream crossings. Pay close attention to blazes, they’re sometimes hard to find and the trail gets hard to follow at stream crossings
  • Pass a junction to the left with the Rocky Mountain Run Trail (staying on the Big Run Portal)
  • Soon after, pass the junction with the Patterson Ridge Trail, continue with several more stream crossings (staying on Big Run Portal). All told, you will remain on the Big Run Portal trail for about 4.5 miles.
  • Reach the junction of the Big Run Portal and Big Run trails. Take a right onto the Big Run Trail and climb steeply uphill for 1.2 miles. At the top of the climb, you will reach the 4-way junction you passed on Day 1.
  • At the junction, take a left and follow the Big Run trail for .65 miles back to the Appalachian Trail.
  • At the AT junction, take a right and follow the AT south back to your vehicle.

Trail Notes

  • Distance – 14.3 miles (7.41 on Day 1, 6.89 on Day 2)
  • Elevation Change – 2881 ft. (1020′ on Day 1, 1861′ on Day 2)
  • Difficulty –  5.  This is a tough hike with rugged terrain, water crossings, and steep climbs.
  • Trail Conditions – 2. The trail was extremely overgrown on Day 1 (crossing Rockytop) and water crossings can be challenging on Day 2.
  • Views – 4.5. Excellent views from Rockytop summit and all along the descent to Big Run.
  • Streams/Waterfalls – 5. Truly beautiful, rugged Shenandoah stream scenery and some of the nicest campsites near water in the park.
  • Wildlife – 4. We saw some deer and a yearling bear.
  • Ease to Navigate – 2. The overgrowth made the trail difficult to follow at times. The water crossings on Day 2 were poorly marked.
  • Solitude – 4.5. We did this trail midweek during a stretch of perfect September weather. We only saw a couple people on Day 1 and nobody on Day 2.

Maps

Day One – Elevation Profile
Day Two – Elevation Profile

Directions to trailhead:  The parking lot is Brown Gap along Skyline Drive in Shenandoah National Park.

More Photos

Rocky Mountain

Are you looking for a short hike with great views? This 3.2 mile route takes you through fire and storm-damaged terrain to a stunning vista on Rocky Mountain (not to be confused with Rocky Mount – another nearby hike in Shenandoah).

View the Full Album of Photos From This Hike

Rocky Mountain View
The nice view from Rocky Mountain on the Brown Mountain Trail. Below: The trail starts in an opening in the wall at the Brown Mountain Overlook; The very beginning of the trail has nice views; This area was heavily damaged by the 2016 fire and again by the 2018 ice storm.

Rocky Mountain Start Rocky Mountain Start 2016 Rocky Mount Fire in 2019

Adam Says:

We were trying to find a new hike to cover and I started looking through a PATC map of the southern section of Shenandoah National Park.  I noticed there was a trail off one of the overlooks that we hadn’t done before and then I was sold when I saw the icon they use for views.  Due to some of the twists and turns, it was hard to tell how far the trail was going to be before we got to the views, but we felt this was definitely worth exploring.

We started off from the Brown Mountain overlook, close to mile 77 on Skyline Drive.  This Brown Mountain trail starts at a break of the rock wall.  The trail winds down and provides some instant views (and you can actually see the rocky outcropping you will reach).  The trail soon ducks down into some more wooded areas and winds down on a steeper descent – keep in mind you have to hike back up at the end of this out-and-back hike.  You will see a lot of the fire damage that hit this area a couple of years ago with charred logs along the way, but nature has bounced back nicely.  At .6 miles, you reach the bottom of your descent and soon reach a junction with the Rocky Mountain Run Trail which takes off to the left (you could make this a larger 10+ mile loop by coming back this way).  Stay on the Brown Mountain Trail and you will begin to ascend again.  The ascent will ultimately take you close to the elevation you started on this hike, but you will have close to one mile to gain that elevation, so you will find the trail more manageable of an ascent at this point.

Brown Mountain Trail
Adam climbs the Brown Mountain Trail. Below: Our start point is marked by a red circle in this photo; Sessile belwort; Dwarf iris.

Start Point Sessile Belwort Dwarf Iris

Around the 1.4 mile mark, the trail will begin to level out and become rockier.  You will also be treated to some obstructed views along the way.  At a little over the 1.5 mark, we reached the rocky outcropping of aptly-named Rocky Mountain.  From the stunning viewpoint here, I was able to scramble up carefully up the main rock.  While Christine held Indy, I also ventured a little further along the outcropping to get to another viewpoint, but that was a more treacherous path consisting of stepping on knife-edge footing while finding hand and footholds along the way – definitely not recommended or very safe.  I came back to Indy to let Christine explore a little further.  Indy enjoyed the views and enjoyed a nice bowl of water to quench his thirst before the return hike.  We went back the way we came descending back to the saddle and climbing up the last .6 miles back to the car.  The climb at the end was steep, but short.  We had a great time exploring this area and were surprised to only see two people on the trail.  Since I don’t think this hike is covered very often on hiking websites or books, this has remained a hidden gem (at least until now).

Christine Says: 

This was a really beautiful hike through a fire and ice-damaged section of the park. Views that were probably closed in a few years ago were open and stunning. It also helped that we hiked in April before leaves fully emerged.  I was surprised there were so few people on the trail, because the weather was perfect and this trail connects into the popular Big Run watershed. I expected we would see many people out backpacking, but we only saw two guys.  They were both pretty surprised to see a pug on the trail, and one asked if he could photograph Indy to share with his mom. I swear, Indy is always a conversation starter on hikes!

At the Vista
Adam and Indy enjoyed climbing on the rocks at the viewpoint. Below: The trail was like walking on a balcony; Adam found a perch; Indy never runs out of energy.

Brown Mountain Trail Brown Mountain Trail Indy

While Adam enjoyed climbing around on the rocks, I hiked along the trail a bit further to see if there was anything worth seeing. The trail started to descend into another saddle, so I decided to save exploration for another day. I think there might be some more views along the trail – but probably not as good as the one we saw here.

I hiked back up to where Indy and Adam were waiting. We all hiked back the way we came in, enjoying the top-of-the world views. In addition to the vistas, this trail had many beautiful wildflowers. In April, the dwarf irises and sessile belwort were abundant. The hike back was as challenging as the hike out, with moderate climbs on both ends. We were all pretty hot and a little sunburned when we got back to the car, so we decided to cool off with blackberry milkshakes at the Loft Mountain Wayside.  Wouldn’t you know – their shake-making operation was broken AGAIN. This is the third year in a row that Loft has failed to produce my desired blackberry milkshake! This time it was the soft-serve machine that was down; last time it was the blender; and the time before that they were out of blackberry syrup.  Drat!  Oh well… it was still a great day.

Trail Notes

  • Distance – 3.2 miles
  • Elevation Change – 1,168
  • Difficulty –  3. This hike has climbs going both out and back. They’re moderately difficult, but should be doable for most hikers.
  • Trail Conditions – 4. PATC volunteers and other trail crews have worked very hard to clear the trail through this heavily damaged part of the park.
  • Views  4.5.  There were nice views at the start of the hike, along much of the trail, and at the summit.  The view is expansive and impressive.
  • Streams/Waterfalls – 0.  There was no water on this hike – it’s mostly high and dry on the ridge.
  • Wildlife – 3.  We saw a couple deer and quite a bit of bear scat.
  • Ease to Navigate – 4.  Trails are well-marked and thoroughly blazed. There is just one junction to watch for along the hike.
  • Solitude – 3.  All of Shenandoah is popular and busy, but on this beautiful April day, we just saw two backpackers.

Maps

Special note about the map below: We use CalTopo to produce maps for this website.  The CalTopo map for this area did not match the PATC’s map of the same area for trail naming. The CalTopo map labels the trail as Rocky Mountain Trail, but the park sign posts and the PATC map label the trail the Brown Mountain Trail.

Download a full size PDF trail map.

Download the full size PDF elevation profile

Directions to trailhead: Parking coordinates are 38.292938, -78.657899.  Park at the Brown Mountain Overlook on the west side of Skyline Drive. The trail begins through an opening in the stone wall.

Hazeltop Mountain

If you’ve hiked the Laurel Prong-Mill Prong Loop, you’ve hiked over Hazeltop and past this viewpoint. But Hazeltop is fantastic on its own as an out-and-back. At 3.9 miles, this route is an easy stroll to a gorgeous vista.

View the Full Album of Photos From This Hike

Hazeltop Summit
The pretty view from the summit of Hazeltop. Below: The Appalachian Trail at Milam Gap; The junction of the AT and the Mill Prong; Ferns unfurling.

AT AT Fiddleheads

Christine Says…

The day was supposed to be rainy and stormy, but I woke up to sunshine (and a dog with too much energy). I decided to hike Hazeltop Mountain in Shenandoah’s central section. It’s a beautiful, easy route with a nice viewpoint at the summit.

Park at Milam Gap on the western side of Skyline Drive.  Follow the crosswalk across the Drive and pick up the Appalachian Trail headed south.  At .1 mile, you’ll come to a cement marker. If you turn left, you’ll be on the Mill Prong Trail headed toward Hoover’s Rapidan Camp. Today, stay straight and continue on the white-blazed Appalachian Trail.

Apple Blossoms
Pretty sure this is a blooming apple tree. Below: Rose-breasted Grosbeak; Appalachian Trail; Cool blazed rock along the trail.

Rose-breasted Grosbeak AT Cool Rocks

The trail goes very gently uphill through an area that once was used as an orchard. Apple trees are mixed in with the rest of the typical forest.  There’s really nothing terribly noteworthy about the trail – it’s a pretty dirt ribbon through forest.

There are tons of wildflowers in the spring and lush ferns in the summer. On this particular day, I had really great luck with birds – I saw a rose-breasted grosbeak, an American restart, and (briefly) a turkey puffed up and showing his plumage. Indy scared the turkey away – and in case you didn’t know… turkeys can fly. They look very awkward doing so.

Indy on the Spur Trail
Indy on the spur trail to the viewpoint. Below: Appalachian Trail Scenery; Ridgeline of Hazeltop; Trillium.

AT AT Trillium

At 1.9 miles, look for an unmarked spur trail on the right side of the trail. Follow the spur for about 50 yards through a grassy area with a rocky outcrop overlooking the western valley. It’s really a lovely spot! It can be easy to miss the spur if you’re not paying attention. The summit is not marked in any way. If you start descending, you’ve gone too far and will need to turn around and find the spur trail.

After you’ve enjoyed the view, return the way you came, arriving back at Milam Gap at 3.9 miles.

Hazeltop Summit
Another summit view.

Trail Notes

  • Distance – 3.9 miles roundtrip
  • Elevation Change – 597 ft.
  • Difficulty –  1.5. I think this hike feels mostly flat, but the profile says it’s a gradual uphill.
  • Trail Conditions – 4.  The trail is smooth and well-maintained. There were a few blowdowns blocking the trail in spring 2019.
  • Views  4.  The view from the summit is excellent. There is a nice outcropping to sit on and plenty of space to enjoy lunch or a snack.
  • Streams/Waterfalls – 0.  The trail is dry.
  • Wildlife – 5. I saw lots of bird species and a flock of turkeys. On other hikes along the same stretch, I’ve seen lots of deer and a few bears.
  • Ease to Navigate – 3. The Appalachian Trail is well marked and easy to follow, but don’t miss the unmarked spur trail to the viewpoint.
  • Solitude – 3. I usually see people, but never many.

Maps

Download a full size map.

Download a full elevation profile

Directions to trailhead: Located in Shenandoah National Park (fees apply). Parking is at Milam Gap. There is a large lot with space for about 12-15 cars. GPS Coordinates for parking: 38.501969, -78.445705.

Lewis Mountain

This 4.75 mile hike is probably one of the best places in the park to experience the spring trillium bloom. It’s nothing short of spectacular along this section of Appalachian Trail. This route also features two views – both are obstructed – so it’s best to hike this route before trees at higher elevations leaf out.

View the Full Album of Photos From This Hike

Trillium
Abundant trillium along the Appalachian Trail. Below: Parking on the Pocosin Road; There thousands of blooming trillium along the trail; A view of the valley from the spring.

Parking on Pocosin Road Abundant Trillium Pocosin Spring

Christine Says…

When the days get longer, I find myself skipping the gym and hitting the trail instead. I like having an arsenal of short 3-5 mile hikes I can do on weeknights after I get off work. This route is one of my favorites, especially in the spring when the trillium are blooming in Shenandoah National Park. The flowers are so abundant along this stretch that they practically carpet the forest floor.  It’s beautiful, but it’s also ephemeral. The trillium only last a couple of weeks each April into early May.

Last night, I loaded Indy the Hiker Pug into his crate and headed up to the park. Down in the valley, it was sunny and 87 degrees.  When I parked along the Pocosin Fire Road – where the hike starts – it was a full 17 degrees cooler and delightfully breezy. We followed the fire road for .2 of a mile to its junction with the Appalachian Trail. If you continue straight down the road, you’ll pass the PATC’s Pocosin Cabin and eventually reach the old mission ruins.  It’s a nice hike for another day. But for this route, take a left at the cement marker and head north on the Appalachian Trail. The trail meanders downhill for a couple tenths of a mile where you’ll cross a spring and get a pretty view of the valley to the east.

Appalachian Trail
I like when the trail looks like a ribbon through the woods. Below: The slanted rock is visible from Skyline Drive as well – at this point of the hike, you’re very close to the road; The early part of Lewis Mountain Trail follows a utility road; Stairs on Lewis Mountain Trail.

Appalachian Trail Lewis Mountain Trail Lewis Mountain Trail

From there, the trail levels out, allowing you to saunter along for about a mile. At about a mile and a half, the trail runs closely parallel to Skyline Drive. You’ll see cars passing – sometimes people wave. As the trail moves away from the road, you’ll begin to ascend gently but steadily uphill for about half a mile. At close to the two mile mark, you will reach a road and another cement marker at the southern end of Lewis Mountain Campground.  If you need a snack or bathroom break, Lewis Mountain Campground has a camp store and restrooms open seasonally. Take a right, and follow the Lewis Mountain Trail. For the first tenth of a mile, the trail follows a utility road, but then it turns back into single track through the woods for the remaining few tenths of a mile. The forest around here is open and grassy. You’ll then climb some wooden stairs built into a hillside and pass through a small tunnel of mountain laurel. The trail hooks to the right and leads to the summit of Lewis Mountain – a small rocky spot with obstructed views to the east.

On this particular day, the weather was odd. Along the trail and to the west, skies were clear and sunny. But to the east, a dense bank of fog was lying against the side of the mountains. So, instead of an obstructed view, I got NO view. It was fine though, I think fog is pretty and I had some older photos of the view spot to share for this post. I gave Indy some water and rested for a few minutes before heading back. On the return hike, I chatted with a few section-hikers making their way to camp at Bearfence Hut.  One of them was thrilled to see Indy on the trail. She also has a hiking pug named ‘Bronx’. She showed me a cute photo of Bronx hiking in Colorado. He wasn’t on this trip with her, but she was delighted to meet another pug that hikes.

I got back to the car pretty quickly – the return trip is mostly downhill or flat.  When I got home, I had to remove THIRTEEN ticks from the dog. This is despite him being treated with Frontline regularly. I also spray his bed with permethrin.  I think I got all the ticks off him, but if any were left hopefully the Frontline and permethrin will take care of killing them before they transmit any diseases.  I know every year the media says ‘this is going to be a bad year for ticks’, but this year it’s the truth. In my four decades of hiking, I have never seen such issues with ticks. I want to remind everyone to take precautions. Tickborne diseases are nothing to mess with.

Lewis Mountain View
The view from Lewis Mountain on a clear day. Below: I got views of a fog bank this time; Passing through the mountain laurels; More ribbon trail.

Lewis Mountain View Mountain Laurel Appalachian Trail

One final note – starting at Pocosin is also a great way to hike Bearfence Mountain. I always feel like the Bearfence hike is too short, so I like parking at Pocosin and hiking north for about 3.5 miles to the Bearfence summit.

Trail Notes

  • Distance – 4.75 miles roundtrip
  • Elevation Change – 820 ft.
  • Difficulty –  2. This is an easy hike with gradual uphills.
  • Trail Conditions – 4.  The trail is smooth and well-maintained.
  • Views  2.  There is a view of the valley along the trail early in the hike. There is also a view at the summit of Lewis Mountain, but it is quite grown in by larger trees.
  • Streams/Waterfalls – 1.  You’ll cross one small spring.
  • Wildlife – 5. I’ve seen all kinds of birds, a bobcat, deer, and bears along this stretch.
  • Ease to Navigate – 4.  The trail is well marked and easy to follow.
  • Solitude – 4. I guess because there are no grand vistas, you really don’t see many people dayhiking in this area. I usually only see backpackers making their way to Bearfence Hut.

Maps

Download a full size map.

Download a full elevation profile.

Directions to trailhead: Located in Shenandoah National Park (fees apply).  Parking is located in several spots along the Pocosin Fire Road in the Central Section on Skyline Drive.  The turn onto the road comes up quickly and is not marked, so pay attention. It’s near mile 59.5 on the Drive.  GPS Coordinates for parking: 38.413585, -78.488959

Blackrock Summit

This easy 5.1 mile hike takes you to the magnificent viewpoint at Blackrock Summit.  Most people access the view by a .5 mile walk from Blackrock parking area, but this route lets you spend a little more time enjoying the beautiful Appalachian Trail.

View the Full Album of Photos From This Hike

Black Rock Summit
Blackrock Summit has spectacular views!

Christine Says…

Most of the time, we opt to hike the shortest and most direct route to any nice viewpoint. However, in the case of Blackrock Summit, the traditional one-mile round trip route from the Blackrock parking area is not enough of a hike to make the drive into the park worthwhile.  Without a doubt, Blackrock is one of the most expansive views in the park, and starting the hike at Brown Gap (a couple miles north) is one of the best ways to reach the vista!

We set out on this hike on a particularly hot and humid late April morning.  We parked at Brown Gap (near mile marker 83 on Skyline Drive).  From there, we crossed the road and followed the Appalachian Trail south. The first three tenths of a mile ascend gently uphill before reaching a mostly flat ridgeline.  Everything in the park was bright, spring green and the native pink azaleas were just starting to bloom.  At .7 miles, we passed the Dundo Group Campground.  The campground has water and restrooms (seasonally).

A Pleasant Walk on the Appalachian Trail
This hike is essentially a pleasant, easy walk on the Appalachian Trail. Below: Parking at Brown Gap; Walking the AT; The boulder pile comes into view.

Browns Gap Walking Along Arriving at Blackrock

At 1.3 miles, we passed the parking area for Jones Run. Another tenth of a mile after that, we crossed Skyline Drive a second time, and began a gradual uphill climb toward Blackrock Summit. In April, the trees along this stretch of trail had not fully leafed out, so we were able to catch views of the valley to the west.  At 1.9 miles into the hike, we passed Blackrock Parking area. After the parking area, the trail becomes a moderately steep uphill climb for .6 of a mile.

Near the top, the giant boulder pile comes into view through a tunnel of leaves. It’s impressive to see such a tall jumble of rocks! We took some time to climb up the pile for a loftier view.  Even if you choose to skip the climb, the views from this summit are spectacular. The Appalachian Trail skirts the western edge of the summit. At the far end of the rock pile, we reached the spur to the Trayfoot trail. If you want even more views and a chance to explore some interesting rock formations, follow the spur downhill for a couple tenths of a mile.  There are views in every direction and an interesting alley of boulders to pass through.

Once you’ve explored, head back the way you came for a hike of just over five miles.  It’s really a great way to see this popular summit!

Adam Says…

On a clear day like we had, you just have to pick a hike with views.  While we have done Blackrock many times, we decided to try a different approach that added a few miles and made it feel like we did something to earn the views.  With very little elevation gain on this hike, it is an easy hike that most people could handle.  This section of the AT is very well-maintained and traveled.  We enjoyed walking through the tunnel of trees with just a small brown path dividing all the green around us.

Climbing the Rock Pile
Climbing the rock pile at Blackrock Summit is fun.  Below: Adam passes through the boulders on the spur trail; More views of distant fog and clouds; Walking back on the Appalachian Trail.

Spur to Trayfoot Trail Low Fog Headed Back

Christine did a great job describing the path and turns above.  We didn’t really see anyone on the trail since we started the trail fairly early in the morning.  When we arrived at the summit, we had it all to ourselves.  The summit gives you the opportunity to climb around on the large pile of boulders if you prefer (but watch out for timber rattlesnakes) or you can enjoy taking a moment to enjoy the views from down below.  Our favorite spot is to travel down the Trayfoot trail because you get panoramic views on both sides of the trail.  We paused for a quick snack before heading back.  On our way back, we saw several others that had parked at the closest parking lot, but we were glad we had added a few extra miles.  If you have a clear day in the forecast and are looking for an easy hike with a big payoff in the southern section of Shenandoah National Park, put this on your list.

Trail Notes

  • Distance – 5.1 miles roundtrip
    (Check out the stats from Map My Hike)*
  • Elevation Change – 636 ft.
  • Difficulty –  1.5.  This was an easy hike with gentle climbs and descents.
  • Trail Conditions – 4.  The trail is smooth and well-maintained.
  • Views  5.  Blackrock Summit is one of the nicest views in the park.
  • Streams/Waterfalls – 0.  There are no scenic water features on this hike.  But there is an in-season source of drinking water at Dundo Group Camping.
  • Wildlife – 3.  We saw lots of birds, squirrels, and chipmunks along the walk.
  • Ease to Navigate – 4.  The trail is well marked and easy to follow.
  • Solitude – 2.  Blackrock is a popular viewpoint and can be accessed by a short .5 mile walk. You’ll likely see others.

MapMyHike is not necessarily accurate, as the GPS signal fades in and out – but it still provides some fun and interesting information.

Download a Trail Map (PDF)

Directions to trailhead: Located in Shenandoah National Park (fees apply).  The Brown Gap Parking lot is located around Mile Marker 83 in the Southern Section on Skyline Drive.  Park in this lot.  Cross the road and come to the cement marker marking the trail.  Head south on the Appalachian Trail.  GPS Coordinates: 38.240676, -78.710687

Lewis Peak

This nine mile hike is not very well-known, but it’s truly one of the park’s most scenic summits. Past fire damage has left the summit open, with views in every direction. We hope sharing this post won’t spoil the solitude we enjoyed on this hike.

View the Full Album of Photos From This Hike

Lewis Peak
This beautiful view is about half a mile from the true summit, but it was too beautiful to pass up!  Below: The hike starts northbound on the AT at Browns Gap; Pink azaleas were just starting to bloom; Adam hiking on the Big Run Trail.

Appalachian Trail at Brown Gap  Adam on Big Run

Adam Says…

How has this hike escaped us before?  We’ve covered most of what Shenandoah National Park has to offer, but this was a hidden gem that we are so glad we did.  While this hike is about 9 miles, the elevation gain feels fairly minimal considering the distance you are covering.  We were getting ready to do a multi-day backpacking trip in a couple of weeks and we wanted to get some training in before we hit some bigger miles with heavy packs.  Christine had seen a few photos from the viewpoint and mapped out this possibility of a hike.

Dwarf Iris
We saw a ton of these Dwarf Irises on the hike.  Below: Early spring on the Rockytop Trail; Adam crossing talus slopes on Rockytop; Everything in bloom!

 Talus Slopes on Rockytop Trail Everything is Blooming

The hike starts at Browns Gap (the sign reads “Brown Gap”, but maps of the area show “Browns Gap”), at mile marker 83 of Skyline Drive.  We parked our car and found the Appalachian Trail post from the parking lot and headed north on the white-blazed AT.  The trail climbs a bit from the beginning and parallels Skyline Drive.  At .5 miles, you come to the junction with the Big Run Loop Trail.  Take a left here to join the blue-blazed Big Run Loop Trail.  At 1.1 miles, you come to a four-way junction where the Big Run Loop Trail breaks off to the right and the Madison Run Spur Trail heads to the left.  You will just stay straight.  At 1.5 miles, the trail reaches another junction with the Austin Mountain trail bearing to the left; bear to the right to join the Rockytop Trail.  Around 2.3 miles, you will pass along a rockier section of trail as it passes through some large talus slopes.  At 3.4 miles, you reach the Lewis Peak Trail junction.  Take a left at this junction to make your way to Lewis Peak.  The trail descends at this point,  At 3.6 miles, you reach a great viewpoint off the trail to the right.  There is a large talus slope here that opens up into views of a valley between two mountains and Massanutten Mountain perfectly framed at the center in the distance.

Beautiful Views on Ridge
The ridgeline on the Rockytop Trail provided nice views.  Below: Mountain view from the ridgeline; Spring blooms; Junction of the Rockytop and Lewis Peak trails.

 Spring Blooms Turning onto the Lewis Peak Trail

The trail continues to descend from this viewpoint until you reach 4.0 miles and then the trail begins to climb again.  At 4.2 miles, you reach the junction with the Lewis Peak Summit Trail.  Take this trail to the right and you will climb rather steeply to the summit through a series of switchbacks that will eventually wind around until the trail reaches its end and the summit at 4.5 miles.  A forest fire from 2006 has destroyed a lot of the taller trees in the area, but it has created a very nice viewpoint from the summit.

We stopped here and ate a snack while enjoying the expansive views all around us.  Clouds were starting to roll in, but we had the stunning panoramic views all to ourselves.  When reflecting upon this hike, Christine and I both think that it may arguably have the best views from the southern district of Shenandoah National Park.  We made our way back the way we came.  There is some steep climbing on the way back, but most of the steep stretches are short-lived.  If you can handle the distance, put this on your upcoming hiking agenda.

Christine Says…

For the last week of March and the first three weeks of April, I was bed-ridden from a severe allergic reaction to antibiotics. I burned with fever, my skin blistered and peeled, I itched all over, and struggled with excruciating nerve pain.  As the weeks passed, I thought I would never be well enough to hike again. When I finally started feeling better, I went for short, easy walks around my neighborhood. But pretty soon, I felt a strong draw to get back to the ‘real’ trail. I don’t know what made me think a nine mile hike with 1500′ of climbing was a good idea for a ‘first hike back’.

View from the Lewis Peak Trail
This spectacular view is just a short distance from the junction of the Rockytop and Lewis Peak trails.

Talus Slopes Spur to Lewis Peak Summit Rocky Trail to the Summit

I’m not going to lie – I really struggled on this hike.  My endurance definitely took a hit from spending a month in bed.  On top of that, it was a hot, humid day. My doctor had directed me to fully cover up with long sleeved Capilene, long pants, a hat, and sunscreen to protect my healing skin.  I felt like I was sealed in plastic wrap. I just couldn’t cool off. The whole hike, I had a mantra… ‘just take the next ten steps.’ Fortunately, taking ten steps over and over again eventually adds up to a nine mile hike.

Despite the physical challenge, there were some memorable high points on this hike.  When we first set out we met a neat retired couple – Swallow and Blind Pig. They were section hiking Virginia’s Appalachian Trail. They were from Oregon and had previously finished hiking the Pacific Crest Trail. We talked to them about the park, the AT, gear, food, and wildlife. I hope when Adam and I are retired we’ll still be having adventures like Swallow and Blind Pig.

The Summit of Lewis Peak
Lewis Peak is steeper, rockier, and pointier than most mountains in Shenandoah. This are was burned out by a forest fire in 2006. Below: Views from the Lewis Peak summit are amazing! Clouds moved in on our hike, but on a clear day, you can see for miles!

Lewis Peak Summit Lewis Peak Summit 

I also really enjoyed all the signs of spring emerging in the park. Most of the high elevation trees were still leafless, but we could see the brilliant green of emerging leaves creeping up the mountainsides. There were a few azaleas starting to bloom, spring beauties were abundant, and we passed several large patches of dwarf irises. Spring is my favorite season. I love seeing color and life waking back up after dull winter.

A significant part of this hike followed a ridge, so we enjoyed views through the trees. The open vista of Massanutten from the Lewis Peak trail was simply spectacular. The mountains in the foreground perfectly framed the distinct peak of Massanutten.

Summit of Lewis Peak
A great view from the Lewis Peak summit.  Below:  The views descending Lewis Peak were excellent, too!  The area is so cleared out that you can see views in almost every direction.

 Descent Descent

When we started making switchbacks toward the summit of Lewis Peak, I knew we were going to have even more amazing views. The entire summit climb was open and there were wide open looks at mountains and the valley in every direction.  The summit itself is sharper and pointier than almost any other peak in Shenandoah. The end of the trail has a wide sweep of rock to sit upon while you enjoy the view. There were berry bushes growing all over the place. In mid to late summer, this would be a good place to pick wild blueberries.

We enjoyed the view and a couple snacks before heading back the way we came. The hike back had a couple steep climbs that challenged me. I hadn’t remembered any of the downhills feeling steep on the outward hike, so the uphill climbs surprised me on the way back!

Pretty Hike Back
The hike back was beautiful!

I was quite glad when we got back to the Appalachian Trail and the final gentle descent back to the parking area. After our hike, we stopped for lunch at the Loft Mountain wayside – grilled cheese sandwiches and our first blackberry milkshakes of the season. It was great to be back on the trail!

Trail Notes

  • Distance – 9.1 miles roundtrip
  • Elevation Change – 1527 ft.
  • Difficulty – 3.  The mileage is a little long for most people for a day hike, but with moderate climbs if you take your time it should be doable by most.
  • Trail Conditions – 4.  The trail was in great shape.  There was one larger blowdown on the Rockytop Trail we encountered, but otherwise was well maintained.
  • Views  4.5.  Amazing views from the summit and the viewpoint over the talus slopes just .5 miles from the summit.
  • Streams/Waterfalls – 0.  non-existent.
  • Wildlife – 3.5.  This area is a bit remote, so you may see some deer and bears on your hike.  Watch out for rattlesnakes, especially if you venture onto any of the talus slopes. 
  • Ease to Navigate – 3.  There are a number of turns to get to Lewis Peak on this hike, but all of the junctions are marked with concrete posts.
  • Solitude – 5. We didn’t see anyone on this hike.

Download a Trail Map (PDF)

Directions to trailhead: Located in Shenandoah National Park (fees apply).  You will park at MM 83 on Skyline Drive at the parking lot marked “Brown Gap”.  Parking coordinates are: 38.240652, -78.710379

Double Bear Rocks

This 8.3 mile hike follows the Pass Mountain Trail from the route 211 trailhead up to the Pass Mountain Hut.  From there, you’ll follow the Appalachian Trail north to the beautiful viewpoint at Double Bear Rocks.

View the Full Album of Photos From This Hike

Double Bear Rocks
The view from Double Bear Rocks looks in the direction of Strickler Knob, Kennedy Peak, and Duncan Knob.

Christine Says…

The first weekend in April, we met up with Tony & Linda (of Hiking Upward fame) for a day of exploring a new trail and a new brewery. When we were discussing route options, Tony tossed out the idea of climbing the Pass Mountain trail for a visit to the same-named Appalachian Trail shelter.  The route was about five miles with 1,300 feet of climbing – perfectly moderate for my recovering ankle injury.

We initially planned to hike on Saturday, but sleet, rain, and high winds compelled us to postpone for Sunday’s more pleasant forecast.  We met at the trailhead along Route 211, just a little bit west of Sperryville.  The trail begins at the cement marker post across the road.  211 can be very busy and its twists and turns are often traveled at speed, so be extremely careful crossing the road from your car to the Pass Mountain trail.

The Pass Mountain trail was beautifully maintained – blowdowns were cleared, branches were trimmed back, and it looked like someone had put a lot of time installing new water bars.  The hike began with a meandering series of switchbacks that climbed steadily but gently uphill. At about the one mile mark, we reached another cement marker.  At the marker, you’ll notice a defunct, unlabeled fire road; stay to the left and follow the blue-blazed Pass Mountain trail uphill.  The trail continues uphill for almost a mile before leveling out on the ridge.  If you happen to hike this trail in winter or early spring, you’ll get great views of Marys Rock through the trees.

Pass Mountain Trail
Our hike started from a trailhead on route 211 near Sperryville. Below: A trailmarker in the middle of the woods.  It appears there used to be another trail or fireroad at the marker that is no longer maintained; Our hiking entourage; A view of Marys Rock through the trees.

Trail Junction Hiking Entourage Mary's Rock Through the Trees

At 2.8 miles, the trail ends at Pass Mountain Hut – one of the park’s nine Appalachian Trail shelters.  The shelter is a typical structure with a nearby spring and privy.  The unusual thing about Pass Mountain Hut that sets it apart from other AT shelters in the park is that it has a fairly new bear locker instead of a bear pole.  A couple years ago, the Pass Mountain Hut was closed due to aggressive bear activity.  In late summer, a young, extremely thin black bear destroyed the tent of an ATC Ridgerunner.  She was out on patrol and came back to a flattened, saliva-covered tent.  Park authorities closed the shelter area until the bear could be trapped and relocated to a less populated part of the park.

We spent a few minutes at the shelter debating the rest of our hike.  I mentioned to Tony and Linda that I remembered a nice vista just north of the Pass Mountain summit.  My ankle felt OK and even though I wasn’t sure exactly how far it was to the viewpoint, I thought I would be OK pressing on.  We all agreed that a view always makes extra miles worthwhile.  We followed the blue-blazed spur trail from the hut to its junction with the Appalachian Trail.

We headed north on the AT for about a mile, reaching the rocky but viewless summit of Pass Mountain.  This summit does not have a cement marker.  You’ll know you crossed the summit only because you start descending again.  When we crossed the summit, we were still vaguely guessing about how much further we needed to hike to reach the view.  We explored off-trail a little on rocky outcroppings, but they all turned out to be closed in by trees.  Adam jogged ahead to scout for the view. Tony, Linda, and I were all several hundred yards back when we heard Adam shouting ‘BEAR, BEAR, BEAR(S)’.  We all raced ahead, too – because who wants to miss a bear sighting?

Pass Mountain Hut
Shortly before reaching the junction with the Applachian Trail, we passed the Pass Mountain Hut. Below: The hut’s water source; Shelter log; Adam hiking the AT.

Water Source at Pass Mountain Shelter Log Walking the AT

We got there just in time to see two big, furry rear ends disappearing into the brush.  Adam, however, got a great close-up view of the bears.  Lucky!  Just a couple tenths of a mile past the bears, we spotted the side path to the view – Double Bear Rocks, named for the high population of bears in this area.  The view itself is quite nice, but what I remember most about this rocky outcropping is its seasonal abundance in blueberries!  Last time we hiked by this spot, it was July and there were berries everywhere!  In the short time we sat and enjoyed the view, clouds moved in, so we decided to be on our way.

The hike back simply retraced our steps coming up.  Since it was mostly downhill, it went by really quickly.  Before we knew it, we were back at our cars for a total hike of 8.3 miles with 1,750 feet of climbing.  We were all quite ready to make our way into Sperryville for some post-hike refreshments.  We decided to pick up a  to-go order from the Creekside Deli.  It’s a humble-looking building painted bright yellow, but there is nothing humble about their baked goods.  They make top-notch sandwiches on homemade bread, cookies, brownies, and other pastries.   We took our food over to Pen Druid brewery to enjoy a couple beers with lunch.  The brewery doesn’t have a kitchen, so they follow picnic rules. The guys at Pen Druid do small batches of interesting beers – most featuring wild yeast strains.   We had great conversation and agreed that we really must get out together more often.  Great day with friends!

Adam Says…

We always enjoy hiking with Tony and Linda.  When you get people together that have done a lot of hiking, our conversations always quickly go through talking about different trail systems.  We can all talk through different routes as if we were following a map along in our heads.  I’m not sure if it is dull conversation for others, but we enjoy talking about the places we have been or have been hoping to go.  Both Hiking Upward and our site were created to share our experiences.  We may have different approaches to the content, but we do this because of our love of nature and the ability to share hiking ideas with others.  We consider ourselves lucky to live where we live and to be able to have all of these experiences so close by – and we hope you enjoy it as well.

With Christine nursing an ankle injury, we picked a route that she thought would be a decent test with a little elevation but not overly challenging.  This route isn’t well-traveled and is accessed from outside of Shenandoah National Park on US-211, in between Luray and Sperryville, VA.  We arrived a few minutes before Tony and Linda, so we parked where we felt was the correct spot – a gravel pull-off at the bottom of a steep curve.  I consulted a map of the area and felt we were correct, but we didn’t see a signpost to designate the beginning of the trail.  I got out of the car and crossed the road near the sharp curve in the road and found the trail marker.

Two Bears on the AT
We saw a mama bear and her yearling cub not far from the viewpoint. Below: Tony scales a rocky lump near the summit of Pass Mountain.

Rocky Portion

The trail starts as the Pass Mountain trail.  While we felt this isn’t a heavily-traversed trail, we were surprised at how well this small section has been maintained.  The hike on the Pass Mountain Trail is a steady uphill climb, but the conditions of the trail made for easy footing.  On the way up, we caught up with what was going on with our lives  – from aging parents to worrisome dogs to trail sections to hiker rescues to beer.  Around the 2.75 mile mark, we reached the Pass Mountain Shelter.  We stopped and ate a snack and checked out the hiking log.   Christine’s ankle was feeling decent, so we decided to press further up the trail.  At the shelter, there is a junction with the fire road (Pass Mountain Hut Road), but the trail ascends up to the left of the shelter as you are facing it.  We continued up the trail until we reached the junction with the Appalachian Trail at 3.0 miles.

We remembered we found a nice overlook on Pass Mountain that was off the trail and we didn’t think it was too terribly far so we decided to try and find it again together.  We took a right, heading north on the white-blazed AT.  The trail continued to go slightly uphill, but the grade wasn’t as steep as most of the Pass Mountain Trail.  When we carried onward for about a mile, I decided to scout ahead a bit since I didn’t want Christine to put a lot of undue pressure on her ankle.  Trekking up ahead at a brisk speed, I came across a mother bear and a yearling bear cub ambling close to the trail.  They were both curious about me, so I said a few “Hey, bears” to let them know I wasn’t a threat.  They slowly were walking away, paying me little mind so I shouted back at the rest of the group “BEAR, BEAR” to let them know I spotted one.  I wondered if the group thought I was shouting for beer instead, but they understood.  When they caught up, they were able to see the bears not too far off but they had moved away from their comfy spot.

The Descent of Pass Mountain
The trail down is nicely graded with switchbacks. Below: Green plants were just beginning to reappear; Parking area – the road crossing can be very treacherous.

Descent of Pass Mountain Parking

Right around the corner from where we spotted the bear, we saw the jumbled rocks on the left of the trail that we remembered as being the viewpoint.  We cut off the trail and out onto the rocks to enjoy a nice view to the west.  There are nicer views in the park, but on a clear day you can see ridges of mountains for miles.

After taking in the view for a few minutes, we made our way back to our cars.  We continued our trip to Creekside Deli and then Pen Druid Brewery for some delicious food and drink before parting ways.  We look forward to our next adventure with them!

Trail Notes

  • Distance – 8.3 miles roundtrip
    (Check out the stats from Map My Hike)*
  • Elevation Change – 1730 ft.
  • Difficulty –  3.  This was a nice, moderate hike with steady but well-graded climbing.
  • Trail Conditions – 4.5.  The trail was in fantastic shape – very well maintained and tended to by the PATC. 
  • Views  3.5.  There’s a beautiful, but not quite panoramic view on the northern flank of Pass Mountain.
  • Streams/Waterfalls – 0.  There isn’t any stream scenery, but there is a spring behind the Pass Mountain Hut.
  • Wildlife – 4.  We saw bears – a yearling cub and mama!
  • Ease to Navigate – 4.  The trail is well marked and easy to follow.
  • Solitude – 4.  We saw one couple at the hut, but no one else at all during the entirety of the 8+ mile hike.

MapMyHike is not necessarily accurate, as the GPS signal fades in and out – but it still provides some fun and interesting information.

Download a Trail Map (PDF)

Directions to trailhead: The trail is located off of US-211 about 12 miles east of Luray, VA and 2.8 miles east of where US-211 crosses Skyline Drive.  The gravel lot is located at 38.66855, -78.28999.   Cross the road (be careful as this is a blind curve and cars may not see you easily) and at the bottom of the steep, sharp curve you will see the signpost for the Pass Mountain Trail.

Robertson Mountain

This 6.0 mile hike follows fire roads and trails to the summit of Robertson Mountain – one of Shenandoah’s less visited, more interior peaks.  It’s a moderate hike with fantastic views!

View the Full Album of Photos From This Hike

Summit of Robertson Mountain
The summit of Robertson Mountain is less visited than many peaks in Shenandoah.

Christine Says…

Our traditional Thanksgiving day begins with a hike and ends with homemade pizza and beer.  I know it’s not the normal way to celebrate this holiday, but it’s what we’ve done for years now. Eating turkey would just be weird for us!  Last year, Skyline Drive was closed for weather, so we had a beautiful short hike along the Appalachian Trail in half a foot of fresh snow. I still remember losing the trail multiple times because branches were so heavily bowed over the path. Thanksgiving of 2015 was quite different! It was so warm and sunny that it felt more like early fall. Even with a brisk breeze, we were able to hike comfortably in t-shirts.

We wanted to hike something new, so we settled on Robertson Mountain. It’s not as well-known or popular as many other Shenandoah trail, but we heard it had nice views of Old Rag and the valley. The hike isn’t listed in any of our hiking guidebooks and most of the online information approaches Robertson Mountain from the Old Rag parking area. That route is known as one of the steepest climbs in the park.  We didn’t want to drive all the way around to Weakley Hollow, so we consulted our maps to find a route approaching the summit from Skyline Drive.

Buildings Along the Fire Road
This cluster of buildings is sometimes used for training events or ranger accommodations.  It was empty when we visited. Below: The hike started out on the Limberlost Trail; A pretty stream along the way; Most of this hike is walking on a fire road.

Limberlost Stream Along the Fire Road Old Rag Fire Road

We decided our best option was to park at Limberlost and follow that trail to the junction with the Old Rag fire road.  From there, we just followed the Old Rag fire road all the way down to its junction with the Robertson Mountain Trail.  At first, the route seemed a little confusing because the fire road and the Big Meadows Horse Trail shared course for a while.  Adam will give more specific details about benchmarks and distances in his portion of the post.  Most of the walking along the fire road was mundane.  We passed a pretty stream early on the route.  We also came across a cluster of backcountry cabins.  There wasn’t a sign marking them, but apparently they are used for training activities and ranger accommodations.   As we descended the fire road, eventually Robertson Mountain came into view.  Through the leafless trees, we could see it’s cone-like shape through branches.

We took a left onto the Robertson Mountain trail.  It’s the only ‘real’ section of trail on this hike – the majority is fire road and the graded path of Limberlost.  We climbed steadily for about three-quarters of a mile until we reached the top.  A side path made it’s way to a rocky outcropping.  We had the summit all to ourselves.  We enjoyed a light lunch and spectacular views of the mountains.  After leaving the summit, we explored a mountain-top campsite.  There was definitely enough room for a couple tents, but no water source.  Someone had recently put an illegal fire ring in at the site, so we dispersed the rocks before heading back down.

The hike back retraced our steps and was primarily an uphill climb back to Limberlost.  If you’re looking for the less steep, easier way to visit Robertson Mountain – this is your route!  The approach from Weakley Hollow is about the same total distance, but is a much steeper climb! All in all, this was a pleasant and moderate six mile hike.  The route wasn’t very exciting, but the great views more than made up for it. It was the perfect way to spend our Thanksgiving morning.

Approaching Robertson
We could see Robertson Mountain looming in the distance.  Below: Climbing the Robertson Mountain Trail; A campsite with remnants of an illegal fire near the summit; Arriving at the viewpoint.

Robertson Mountain Trail Campsite Near the Robertson Summit Arriving at Robertson Mountain Summit

Adam Says…

Robertson Mountain is one of those hikes that doesn’t get much publicity, but treats you with a serene view over a mountainous landscape with barely a glimpse of civilization.  Because of this, on most days, you will find that you can have this slice of serenity all to yourself.

We started our hike from the Limberlost Trail parking lot.  The Limberlost Trail is a small loop, but start heading on the left, clockwise from the parking lot.  There are several spurs that lead away from the Limberlost Trail and all of the junctions aren’t easily marked.  After going just a couple tenths of a mile, we came to a sign that states “Horse Trail” with arrows to Skyland and Big Meadows (the next trail that comes off the Limberlost Trail Loop is the White Oak Canyon Trail – this is not the trail you want).  Take this trail off the Limberlost Trail which is the Old Rag Fire Road.  The Old Rag Fire Road starts off mostly flat until the one mile mark.  At this point, it will start a steeper downhill.  At 1.7 miles, you reach a junction with the Indian Run trail, but stay on the Fire Road.  At 2.2 miles, you reach the bottom of the steep decline and reach another junction with the Corbin Hollow Trail. Stay on the Old Rag Fire Road and at 2.3 miles, you will see a small post on the left of the road that marks the beginning of the Robertson Mountain trail.

Robertson Mountain Summit
No one else to be seen on the trail on this day! Below: Gnarled trees near the summit; Descending Robertson Mountain; Returning to the junction of the Robertson Mountain Trail and the Fire Road.

Gnarled Trees Descending Robertson Mountain Back Up to Skyline Drive

Take this trail, which starts off through some thicker underbrush.  This trail is much steeper but it is a short climb of .6 miles.  The Robertson Mountain trail was very rocky and you think several times that you have reached a false summit, but the trail continues up.  At this 2.9 mile marker, there is a small side trail to the right that leads to the summit.   From the summit, you will see lots of nice rock outcroppings to enjoy the view.  Continue back the way you came to make this about a 6 mile out-and-back hike.

For those that want to bag a few different peaks from this hike, you can reach Old Rag from here also.  You could go back down the Robertson Mountain trail and then take a left at the Old Rag Fire Road.  Taking this and then joining the Saddle Trail would take another 4 miles to reach the summit of Old Rag.  This would give you about a 15-mile hike, so it could make a decent route for an overnight backpacking trip (but there isn’t really a water source) or a very long day hike for those that are very fit.  Shenandoah provides a nice, free trail map of this area on their website.

This was a great way to spend a day on a hidden gem of a hike.  While the fire road is not overly thrilling to see, it makes for some easy footing.  We feel we have done so much of Shenandoah National Park, so we were pleasantly surprised at how this tucked-away hike gave us some of the better views in the park.

Trail Notes

  • Distance – 6.0 miles roundtrip
    (Check out the stats from Map My Hike)*
  • Elevation Change – 1250 ft.
  • Difficulty –  2.5.  This was an easy to moderate hike.  The climbing was mostly gentle and well-graded.
  • Trail Conditions – 4.  Most of the hike was along accessible trail or fire road.  The Robertson Mountain trail was typical Shenandoah single-track.
  • Views  4.5.  Beautiful and fairly expansive!
  • Streams/Waterfalls – 2.  There was one pretty stream early in the hike.
  • Wildlife – 3.  We saw deer and birds.  I am sure some hikers cross paths with bears in this area too.  We saw some scat along the fire road.
  • Ease to Navigate – 4.  The junction of Limberlost and the Old Rag Fireroad is not well labeled, but it’s also hard to miss something as wide as a fire road.
  • Solitude – 4.  We saw some people around Limberlost, but nobody after that!

MapMyHike is not necessarily accurate, as the GPS signal fades in and out – but it still provides some fun and interesting information.

Download a Trail Map (PDF)

Directions to trailhead: Located in Shenandoah National Park (fees apply).  The Limberlost Parking lot is located around Mile Marker 43 on Skyline Drive.  Park in this lot.  Head left on the Limberlost Trail loop at the end of the parking lot.  Coordinates: 38.580055, -78.381473

Moormans River & Big Branch Falls

This 4.5-mile hike is close to Charlottesville and is extremely popular for its beautiful river scenery, swimming holes, and waterfalls.

View the Full Album of Photos From This Hike

Adam at the Falls
Adam at the Falls. Below: The beautiful Moormans River; Sugar Hollow Reservoir; Lunch stop after the hike.

Moorman's River Reservoir Crozet Pizza

Adam Says…

For people that are looking for a nice family-friendly waterfall near Charlottesville, look no further than this hike.  In fact, it was rare to not see groups of people that weren’t hiking as a family.  Most of the families with smaller children tended to stop along the river at some of the crossings to eat a snack or try and skip stones.  And I can’t think of any hike that I’ve been on where I have as many dogs on a trail.  So, if you want to take Fido for a walk (and a possible dip in the river) near Charlottesville, this would be a great spot as long as your dog is friendly with other dogs.  We saw a couple of dogs that were running full speed chasing each other and crashing into the water.  The park requires all dogs to be leashed, but we saw many (most!) people breaking this rule.

When we arrived at the trailhead, there were a ton of other cars here.  There are two parking lots on this hike – the first being the larger lot and the second being a half-mile further up a rough road, but I would recommend having a four-wheel drive due to the uneven ground (even though we did see a convertible BMW driving on here with reckless abandon).   The first, main parking lot was full, so we ended up parking along the roadside just a short distance prior to the first large parking lot.  From the parking lot, there are two trails.  You want to take the one that continues up the gravel road heading north (North Fork Trail).  Walking up the gravel road, we came to the second parking area at .5 miles.  There is a large closed gate directly behind the lot where the trail continues.

Stream Crossing
Christine rock hops across the stream. Below: The river was beautiful and clear; Adam checks out the rock wall at one of the crossings; Rapids from above.

Pretty River Rock Wall Scenic River

Most of the trail gives you nice views of the Moormans River as you are walking by.  In .75 miles, you reach your first of four river crossings.  There had been a recent, heavy rain so we were expecting these to be a little challenging.  The first three of the rock crossings were fairly easy to rockhop across.  The fourth crossing however required us to get our feet wet in the fast-flowing current.  We brought our crocs to change into for just this occasion and the cold water was refreshing.  It always makes us a little nervous carrying camera equipment though when the water is moving fast and you are not 100% sure of how deep the water is or if the rock you are putting your foot on is stable.  The water ended up halfway up my calf at one point, so if there has been a lot of rain, be careful.

At the 2.0 mile marker, the trail starts to gain some elevation.  At 2.15 miles, we took the side trail to Big Branch Falls.  You arrive at the lower falls fairly quickly, but continue further and you will see the larger Big Branch Falls at 2.25 miles.  Because of the recent rains, the water was flowing nicely over the top, but probably during the dry summer months, this would be less impressive.  After we took some time to enjoy the falls, we headed back the way we came to get back to our car at 4.5 miles.

After our trip, we headed to nearby Crozet, VA to try Crozet Pizza.  We had heard about how wonderful their pizza was for about 25 years now and I’m glad to say that we finally got to try it.  Then, we stopped right down the road at Starr Hill brewery to sample a few post-hike beers.

Christine Says…

What a beautiful March day we had to hike Moormans River!  It was the first day in a long time that actually felt warm.  Early wildflowers were starting to bloom and the sunshine felt great.  We started out pretty early, but found the parking lot already completely full at the trailhead.  We had to find a place alongside the gravel road with enough room to park our car.  After we were situated, I started MapMyHike, grabbed my camera, and started hiking.

I pointed my camera up to take a shot of the first trail marker, and the camera wouldn’t even turn on! Hmm… I had recently charged the battery, so it didn’t really make sense.  I pulled out the battery and memory card to reset everything, and still no power.  I figured that I had finally killed my Canon Rebel T2i.  That camera has accompanied me on countless hikes.  It’s been rained on, bumped against rocks, left sitting out overnight in the damp.  I’m not careful with it at all, because I find I just don’t take photos when my camera is safely packed away in its padded, waterproof bag.  I knew it would eventually meet this end.  So… today, you get photography from my cell phone!  Honestly, my phone takes decent photos – just not quite as nice as my dSLR. (Fortunately, when I got home, I found that the battery was drained after all.  I guess I stored it accidentally with the power button depressed.  The Rebel lives to fight another day!)

Lower Falls
The lower falls are really pretty. Below: A view of the upper and lower falls; Rock hopping; One crossing was too deep to rock hop – so we waded.

Looking up the Falls First Attempt  Better Wading

The water was flowing beautifully and we really enjoyed the sights and sounds of running water all through our hike.  The trail was one of the easiest we’ve hiked in a long time. It’s relatively level and not too rocky.  The stream crossings were all moderate to easy, with the exception of the final one. The last crossing required us to put on water shoes and wade across.  We saw several people attempt to rock hop, but they all ended up with wet boots.

When we reached the spur trail to the falls, there were several groups of people at each viewing point.  We waited our turn and spent a few minutes enjoying and taking photos of the upper falls. One group had climbed up to the top of the falls and was picnicking on the rocks alongside the cascade.  A man with the group walked out to the precipitous, domed edge of the falls several times. We were worried he might slip and have a nasty fall to the rocks below. Thankfully that didn’t happen!

On our way back down, we scrambled off the trail to a rock shelf beneath the lower falls. On the climb back up, I stuck my trekking pole in a hidden hole.  When the pole suddenly dropped and vanished under the weight of me climbing up, I slipped and smashed the bridge of my nose into the trekking pole handle.  Wow – did that hurt!  I thought I hit hard enough to break the skin open, but thankfully it was just swollen and lightly bruised.  Between that and the broken camera, it was not one of my luckier days on the trail!

Dam and Reservoir
The dam and reservoir. Below: Yum – Crozet Pizza; Flight at Starr Hill.

Crozet Pizza Starr Hill Beer

The hike back went very quickly.  After we got back to the car, we made our way to a great lunch at Crozet Pizza and a flight of beers at Starr Hill.  It was a fun day!  I would definitely recommend this hike when there has been significant, recent rain.  The falls dry up pretty quickly.

Trail Notes

  • Distance – 4.5 miles
    (Check out the stats from Map My Hike)*
  • Elevation Change – 625 ft.
  • Difficulty –  2.  The hike is not difficult with the distance and elevation, but the stream crossings could be a challenge.
  • Trail Conditions – 4.  The trail is heavily-used and well-maintained. 
  • Views  1.5.  You do get some elevated views of the river.  Views from the top of the dam (after the hike) are really nice too, but don’t count in the score because they’re not technically part of the hike!
  • Streams/Waterfalls – 4.  The waterfalls are nice to see (but could be disappointing in dryer months), but the highlight is probably walking along Moormans River. 
  • Wildlife – 0.  Due to the location and popularity, I wouldn’t expect to see much. 
  • Ease to Navigate – 4.  Once we knew where to go from the parking lot, it was easy to navigate. 
  • Solitude – 1.5.  I would expect on a nice day, you should see lots of people.  Go early to beat the crowds and to get parking. But, there weren’t as many people going all the way to Big Branch Falls.

Download a Trail Map (PDF)

Directions to trailhead:  From I-64 near Charlottesville, take exit 124 for US-250W.  Turn right on 250-W and go 5 miles.  Take the Country Road 654/Barracks Road exit.  Turn right on Barracks Road and go 2 miles.  Continue on SR 601/Garth Road for 9 miles.  Continue straight on to Sugar Hollow Road for 5.5 miles.  When you pass the Sugar Hollow Reservoir on the left, you are getting close.  The road turns into gravel and you will eventually arrive at the first large parking area.   Park here and walk further up the road for .5 miles until you reach the second parking area and closed gate.