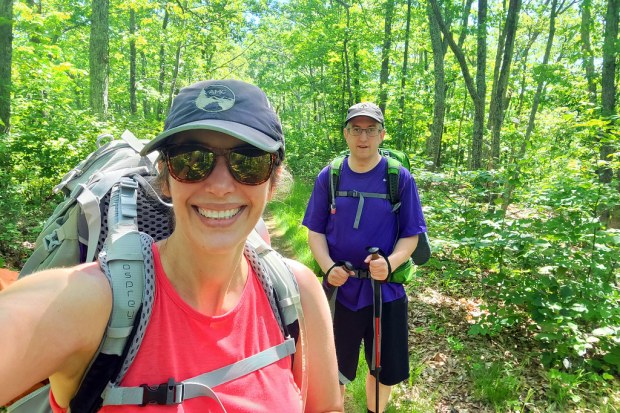
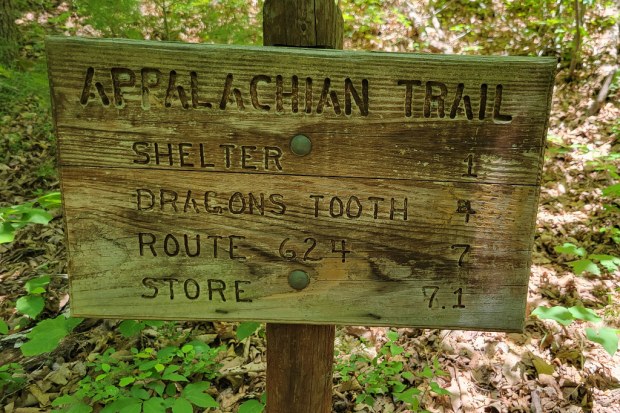
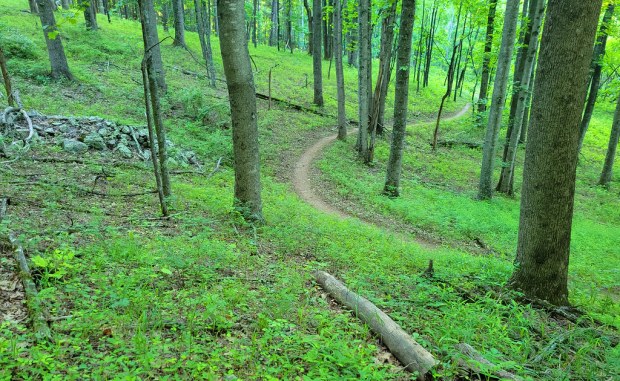
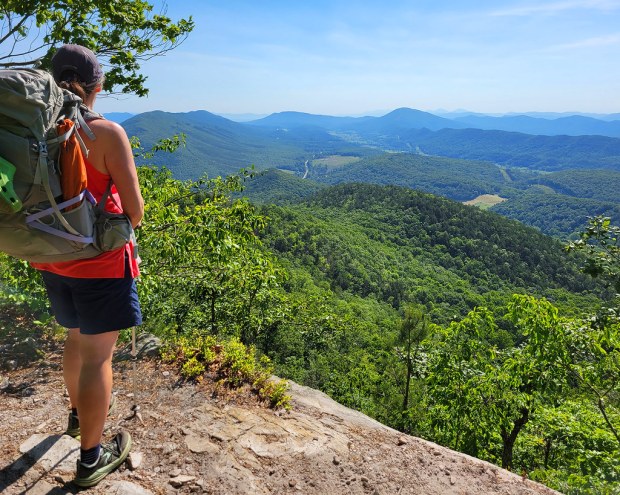
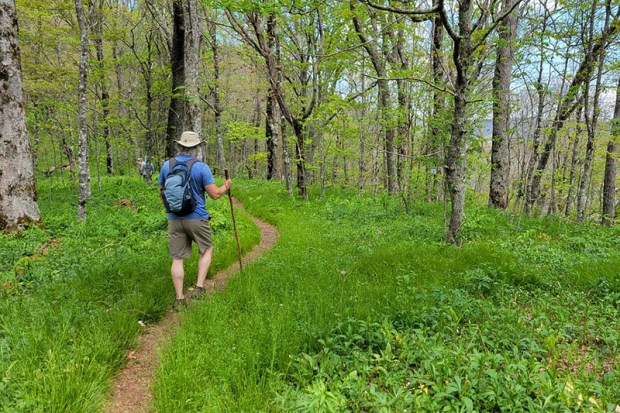
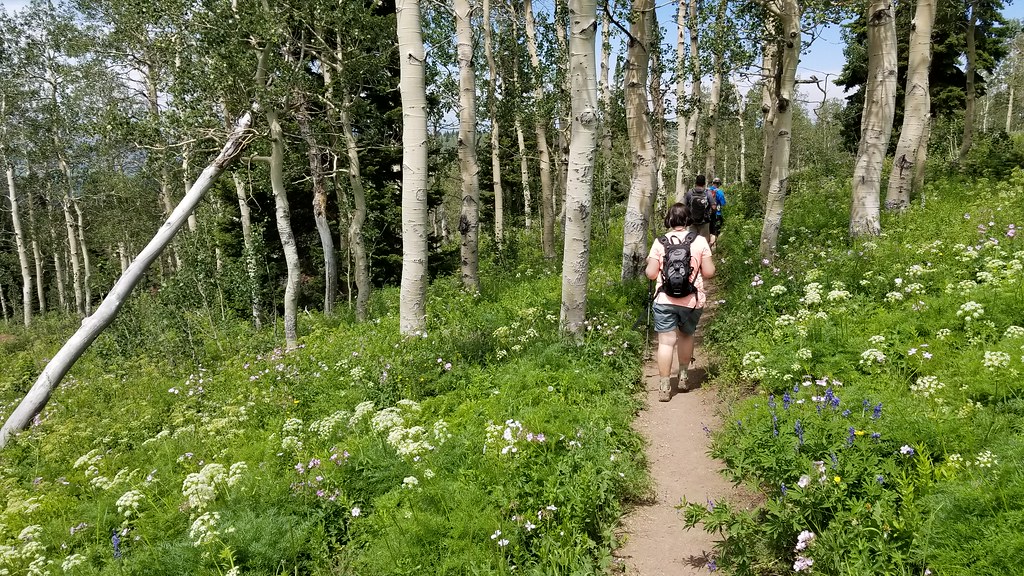
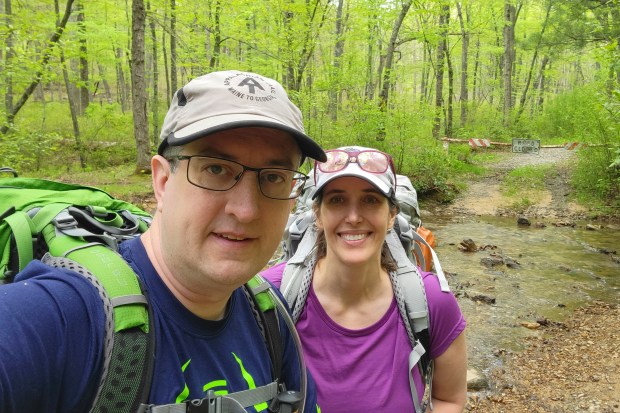
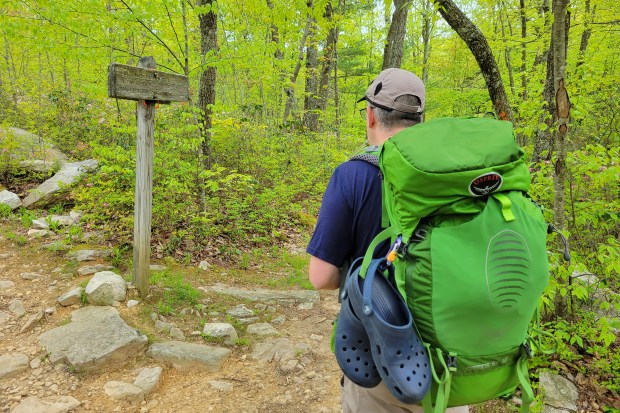
This two-day backpacking trip covered just over 23 miles and included a visit to the iconic Dragon’s Tooth, one of the three highlights that make up Virginia’s Triple Crown. We did this backpacking trip in June of 2022 and it’s been sitting unposted in our blog queue ever since. I decided to go ahead and share it… four years later!
You’ll find the full photo album at the bottom of this post.
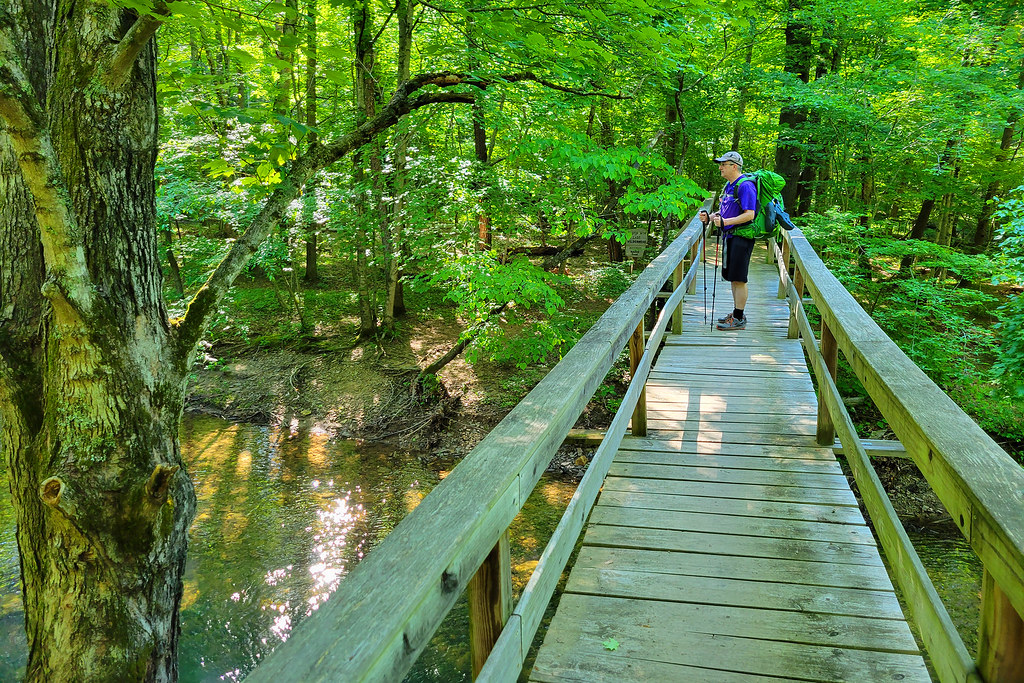
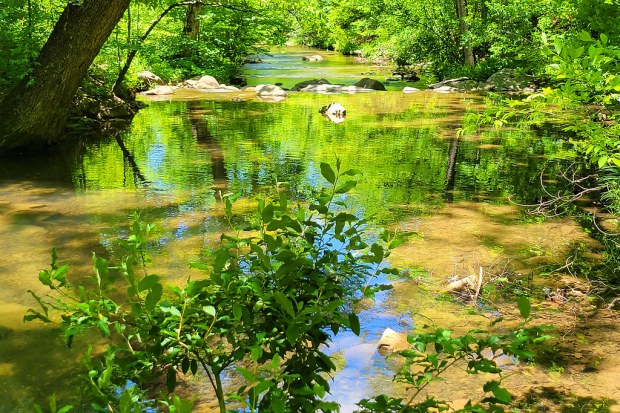
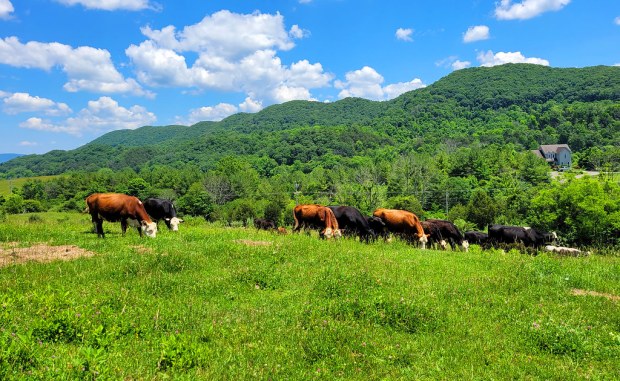
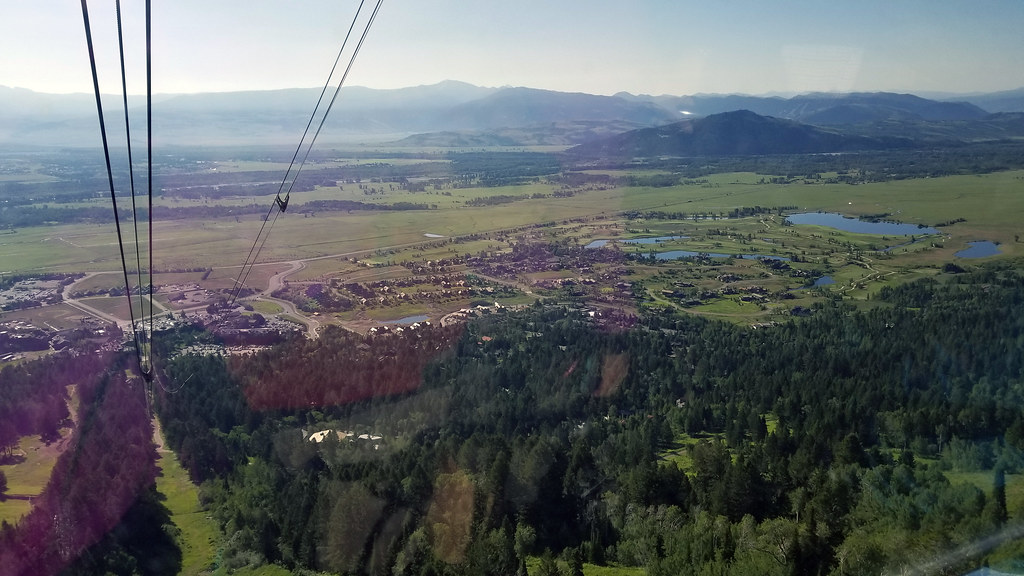
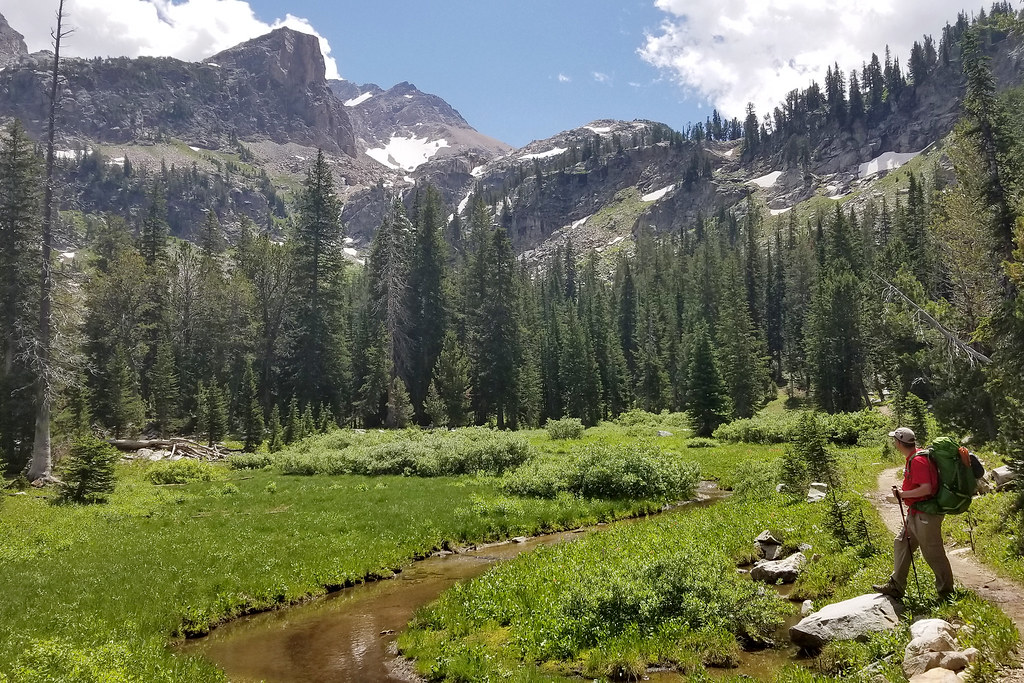
We started by parking a car at the McAfee Knob lot on VA 311, then caught a shuttle to Craig Creek. There used to be a footbridge spanning the creek, though I am not sure if it is still in place. It had washed out at one point, and I have not seen confirmation that it has been rebuilt.
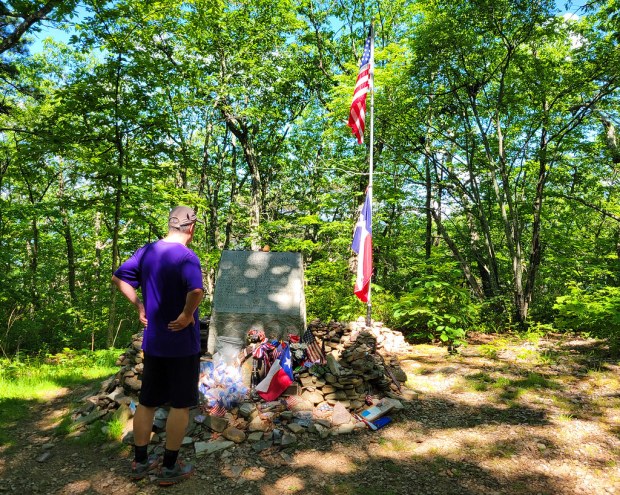
A few miles into the hike, we took a short spur trail to visit the Audie Murphy Monument. According to the inscription, Audie Murphy was World War II’s most decorated soldier. He died in a plane crash near this spot in 1971. It is a quiet, reflective place that is well worth the short detour. Check out this short video of the monument.
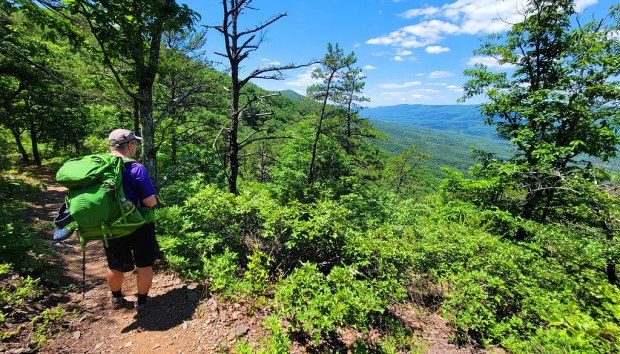
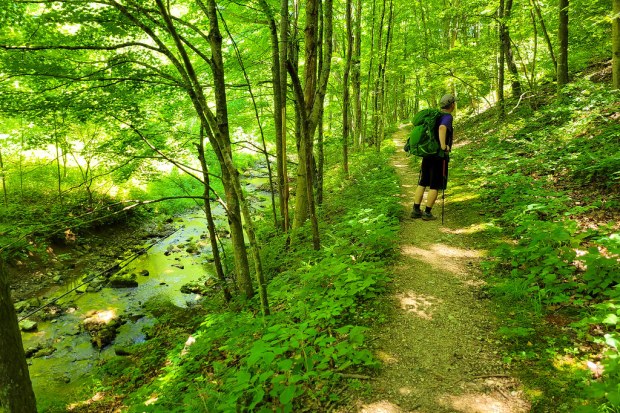
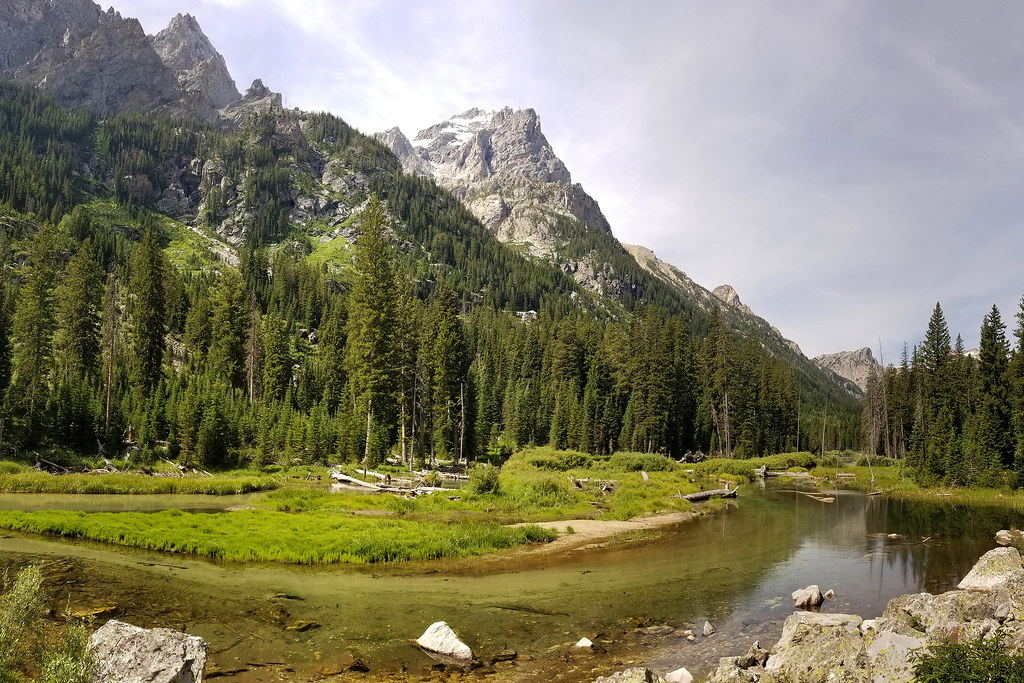
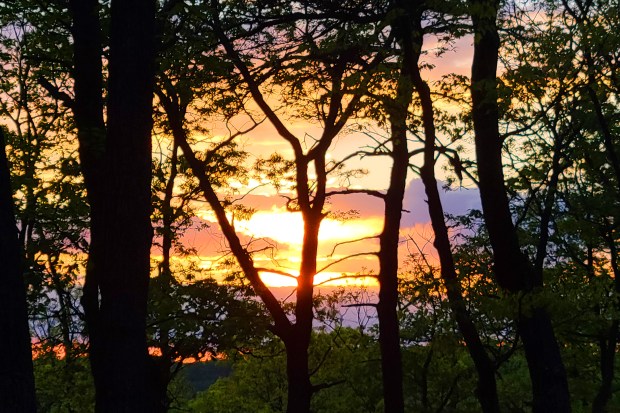
As the miles passed, we caught glimpses of views through the trees, a nice preview of what was to come. Late in the day, we descended to Trout Creek. Some kind folks relaxing by the water offered us cold beers, which was incredibly tempting, but we still had one more climb ahead before camp, so we kept moving.
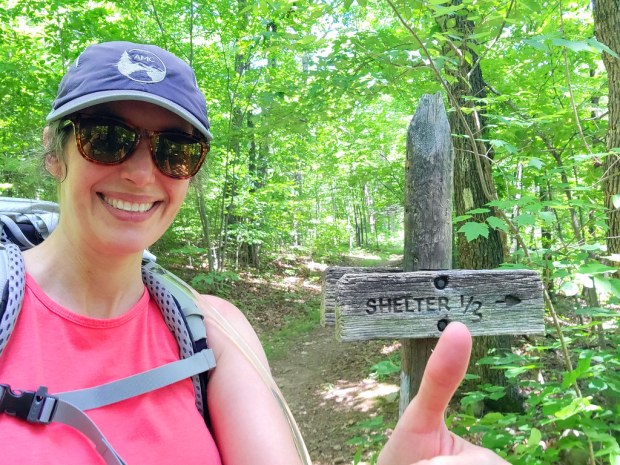
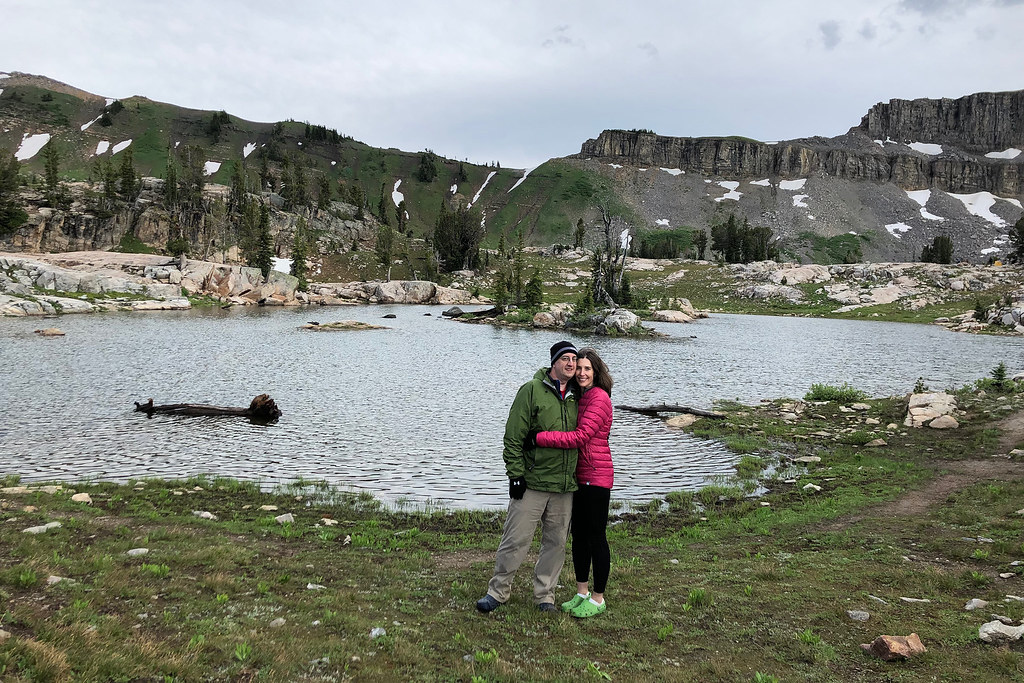
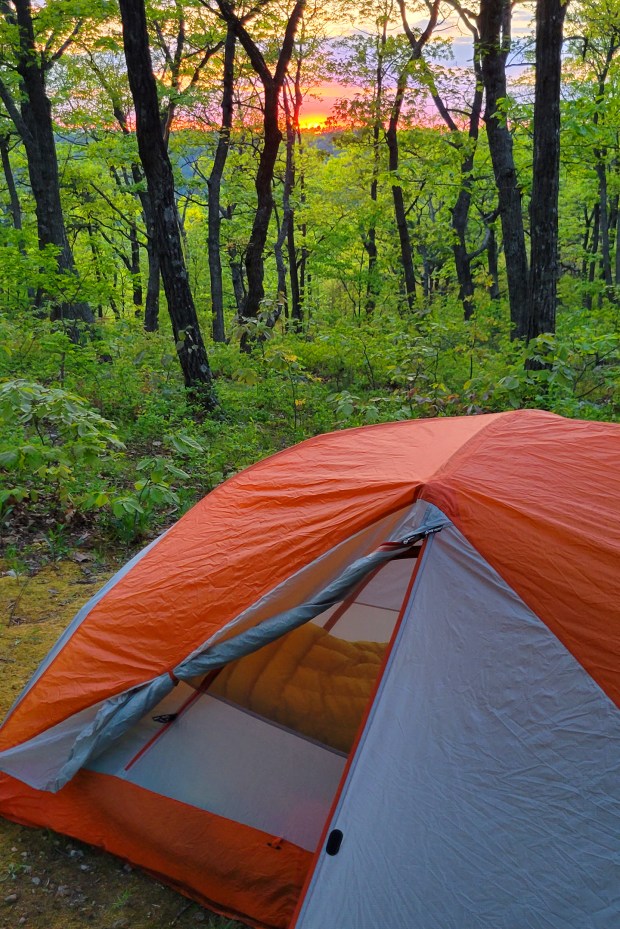
We had planned to stay near Pickle Branch Shelter, but our hiking app suggested a campsite just a bit farther up the trail and closer to water. It turned out to be a great decision. The site sat in a beautiful spot, and while collecting water took a little creativity, the source was still flowing and reliable.
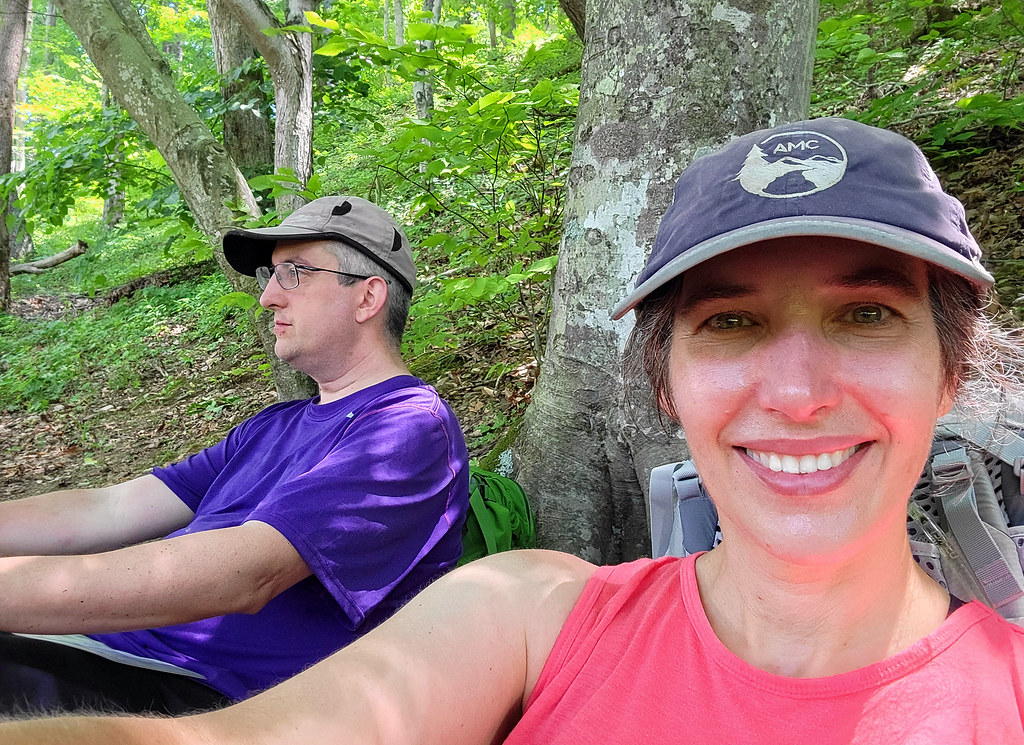
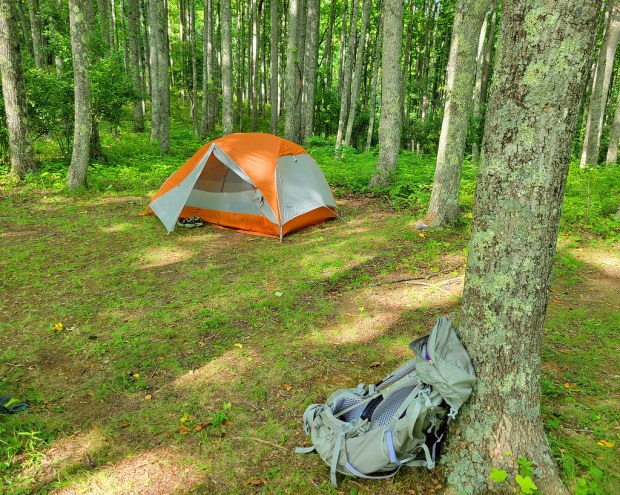
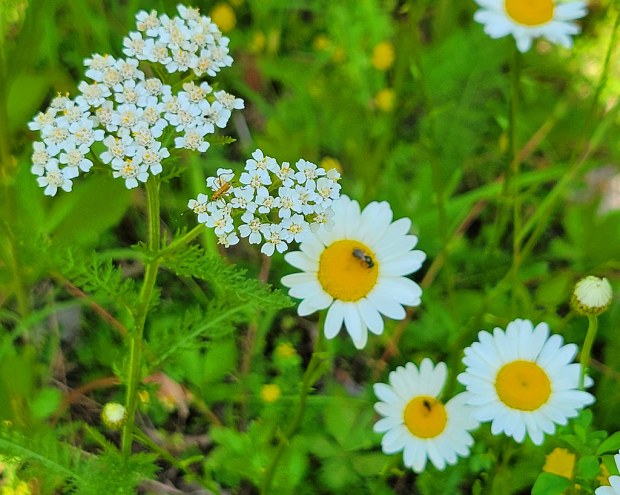
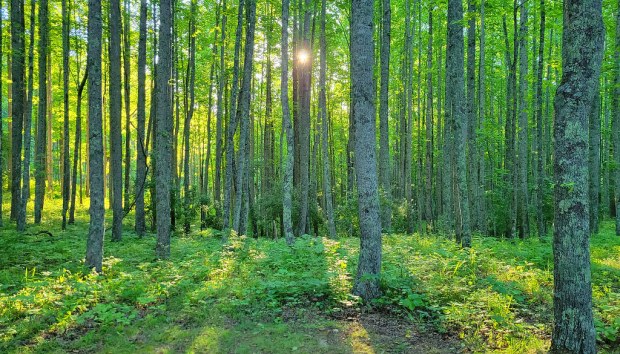
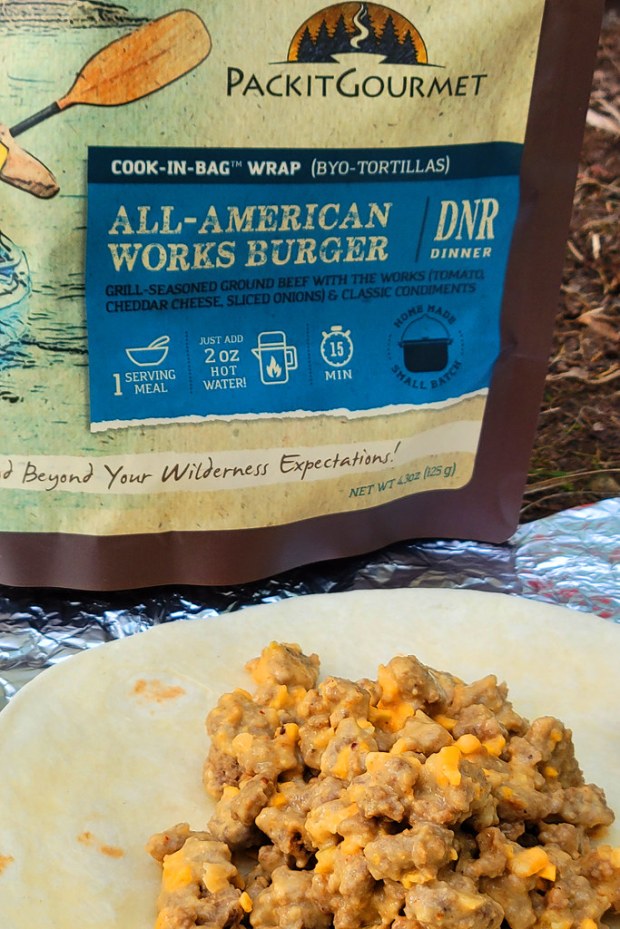
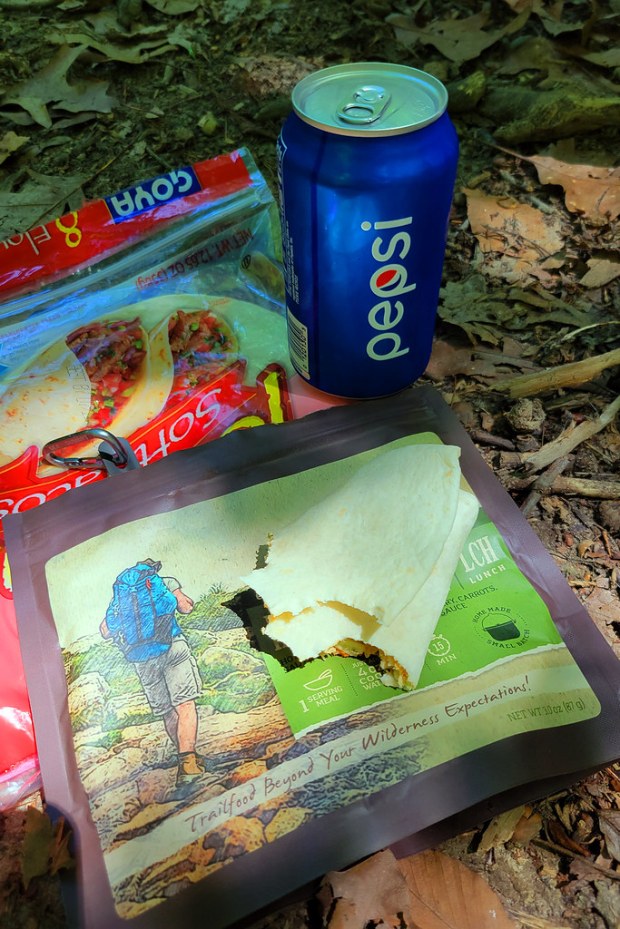
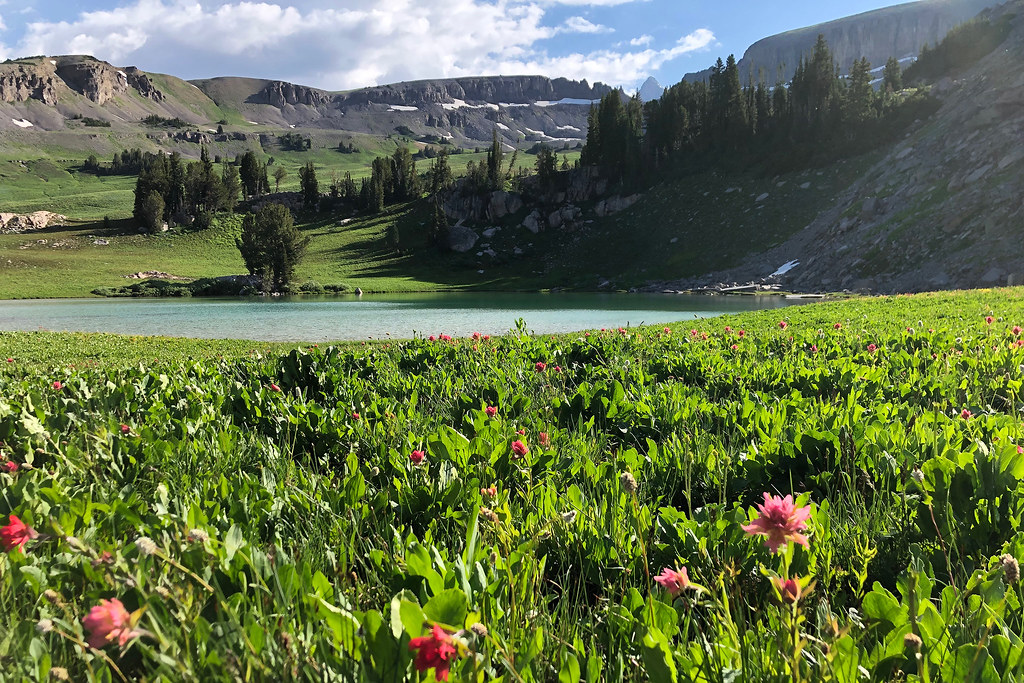
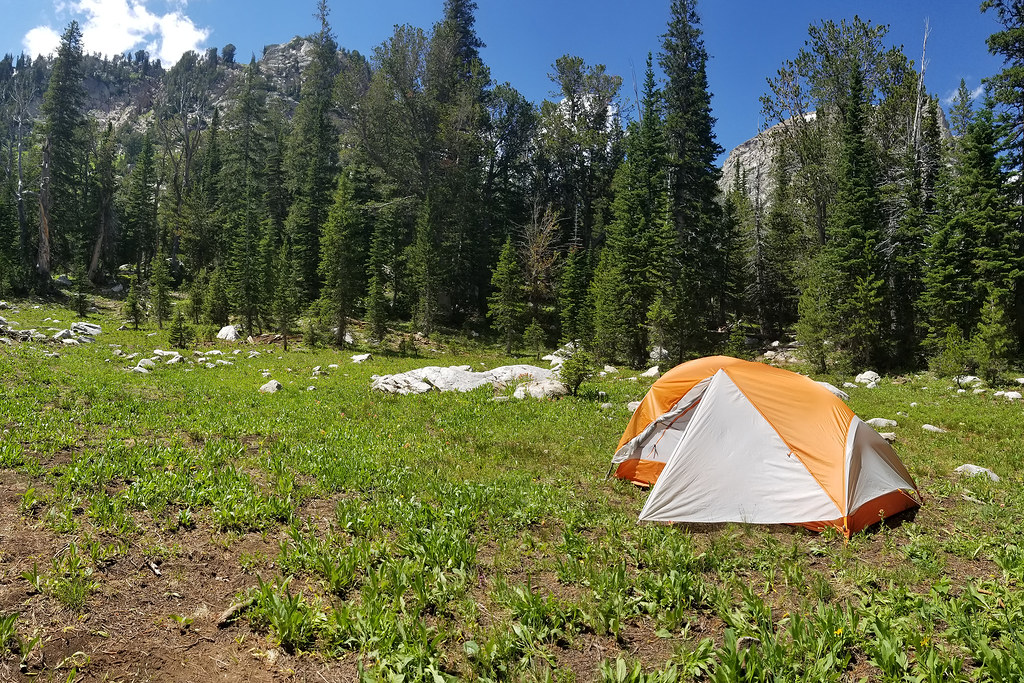
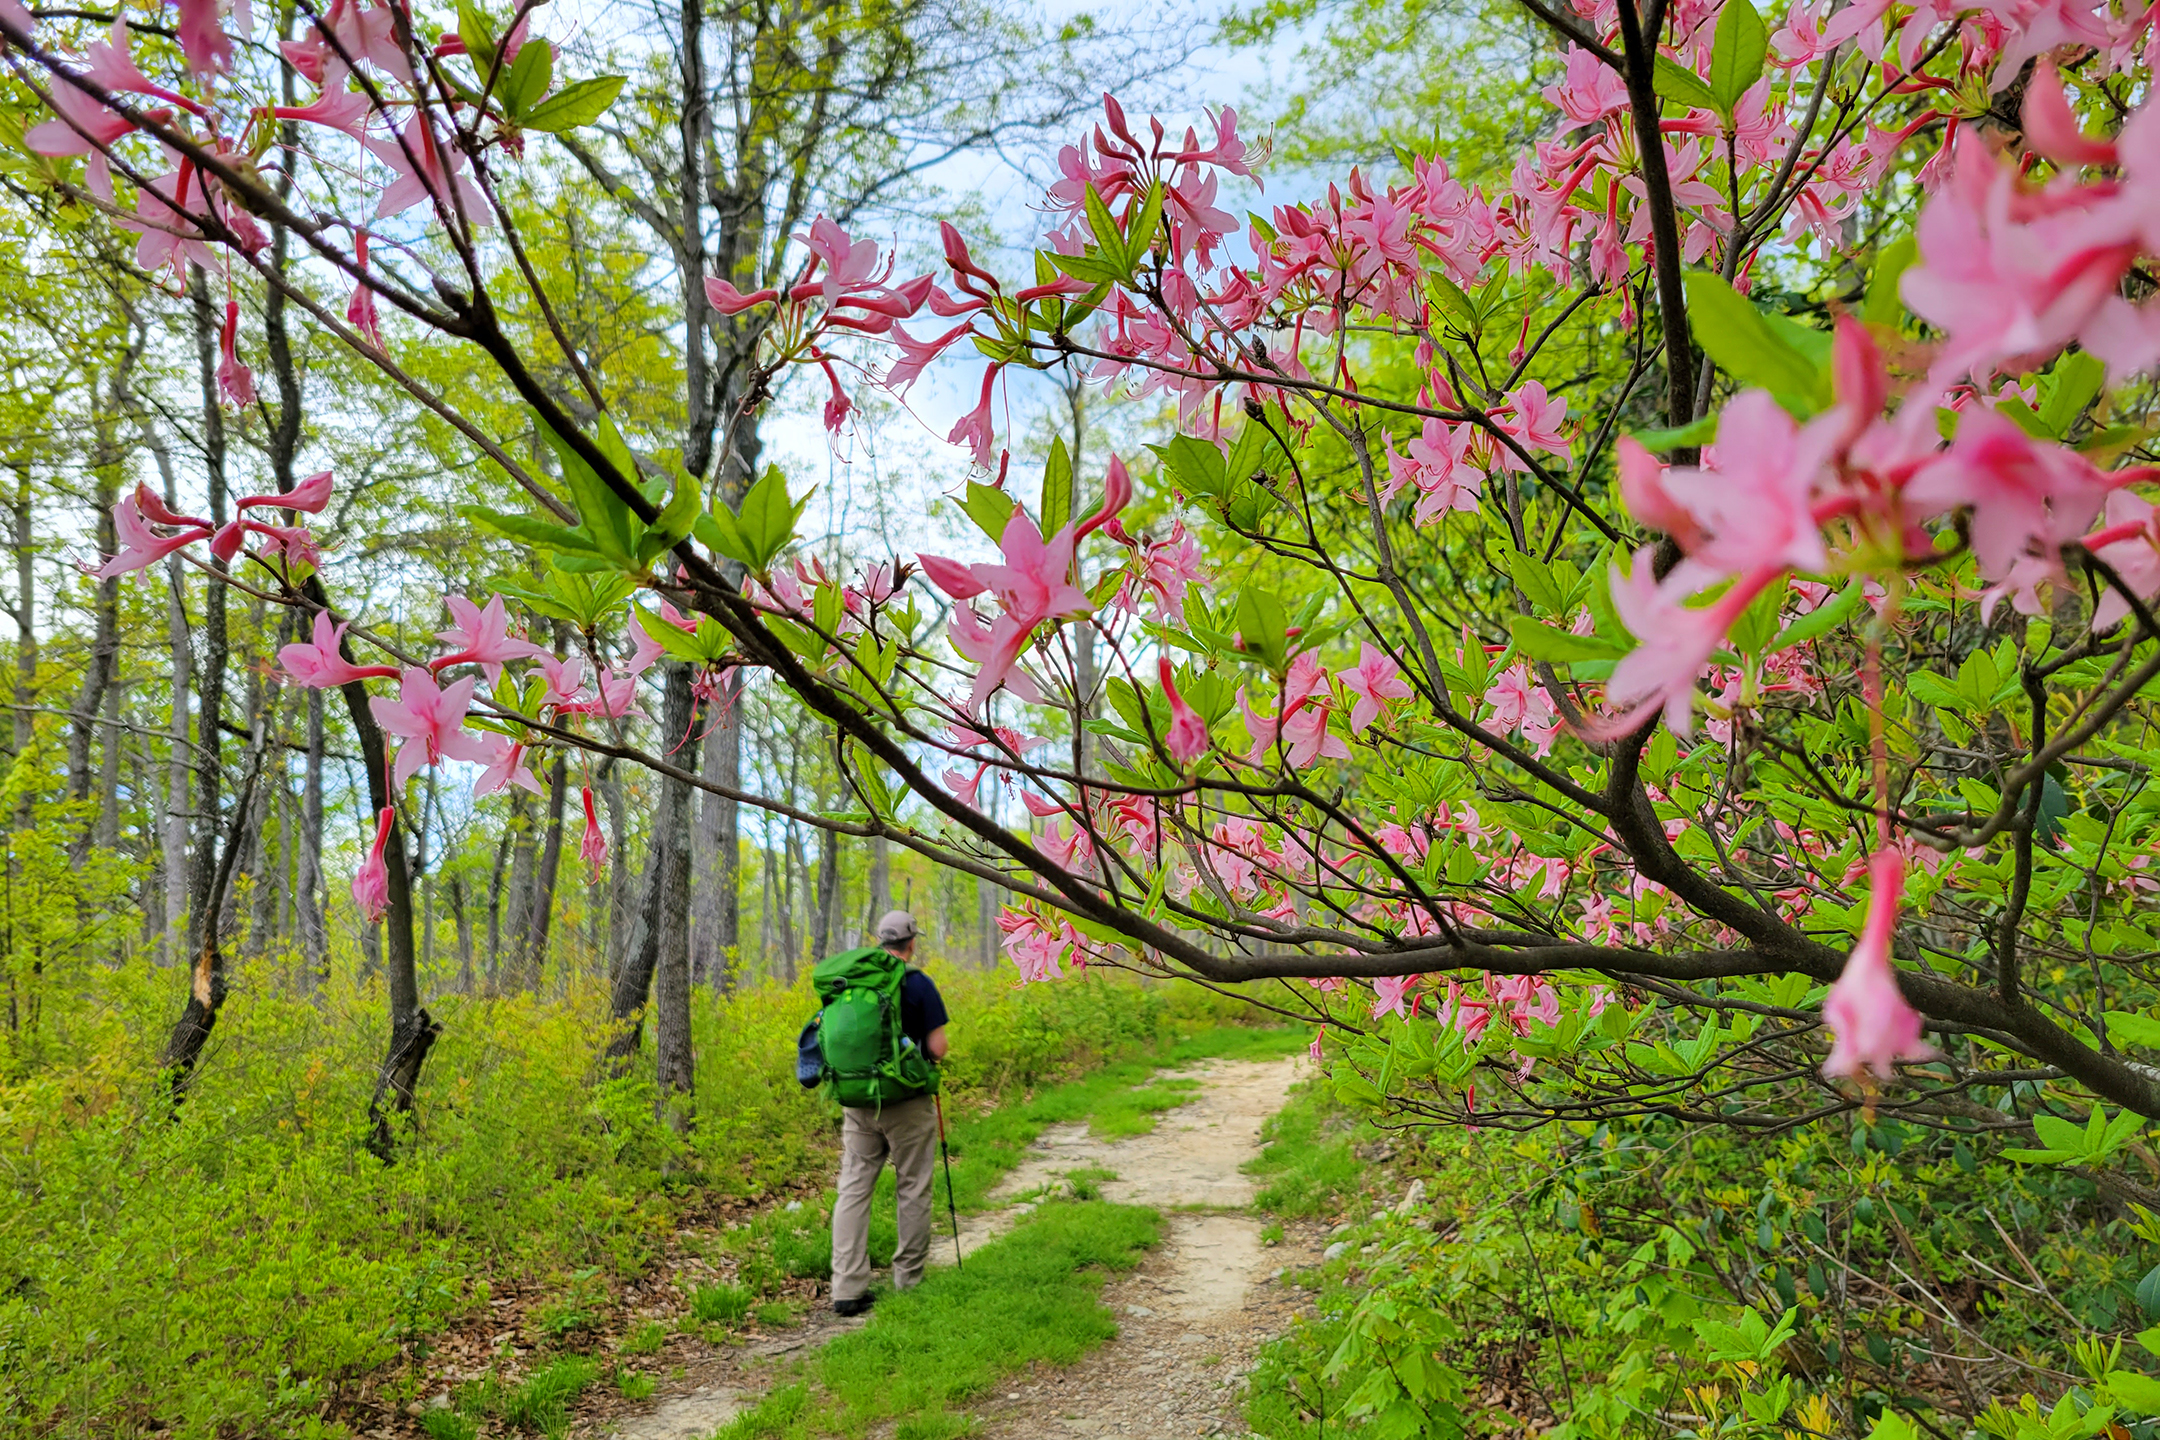
Our campsite was tucked into a poplar grove beside a meadow filled with wildflowers. After setting up, we settled in for dinner. That night’s meal was the All American Works Burger from PackIt Gourmet, one of our favorite brands for trail food. It comes together with just a small amount of hot water and, wrapped in tortillas, tastes remarkably like a fully loaded cheeseburger. It is one of those meals you genuinely look forward to at the end of a long day.
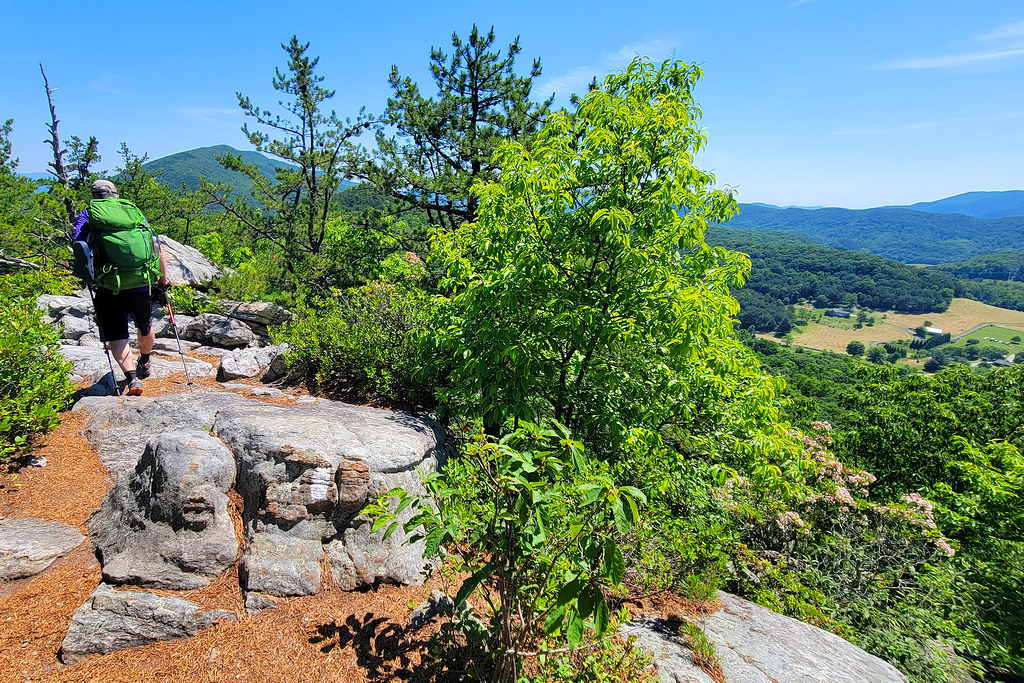
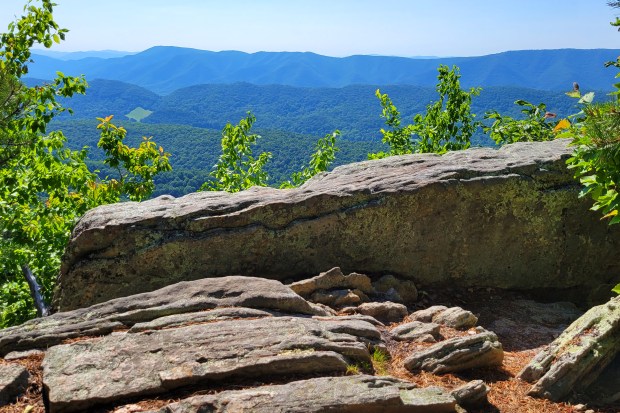
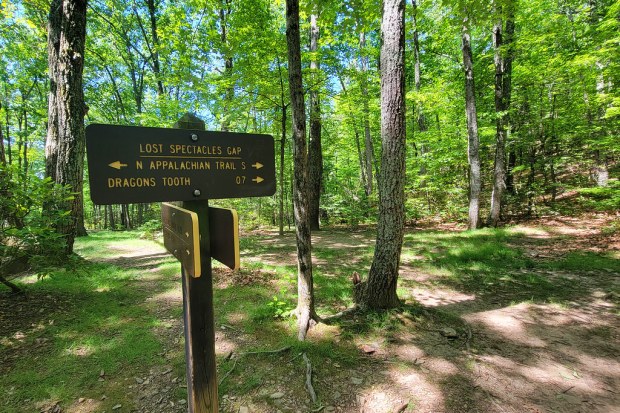
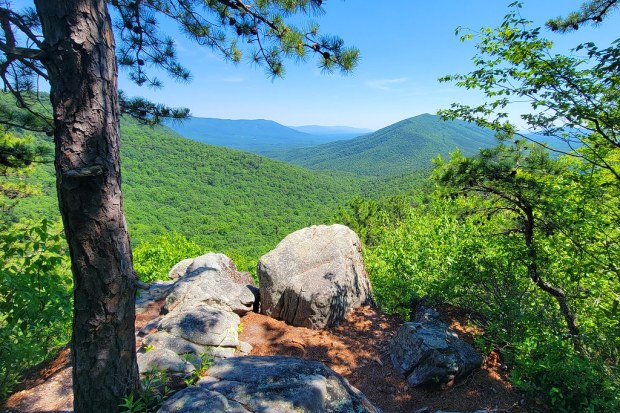
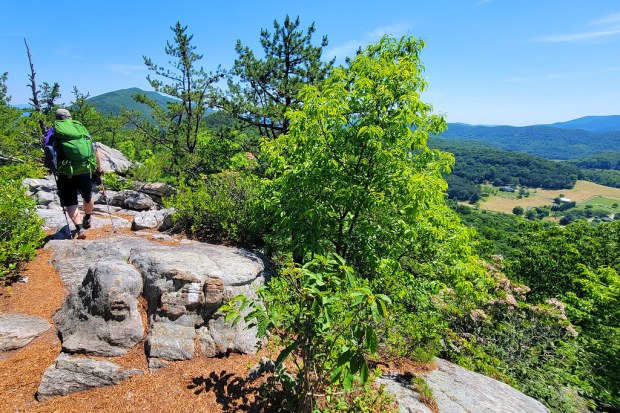
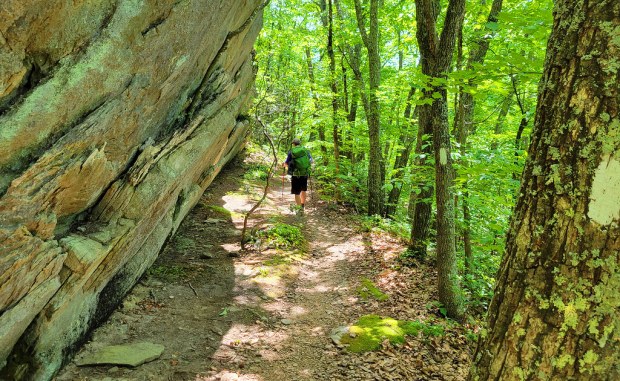
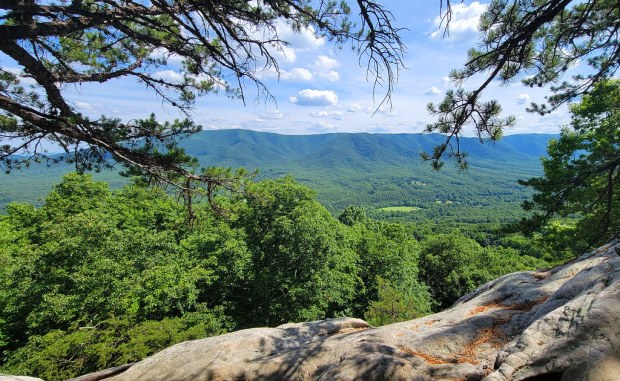
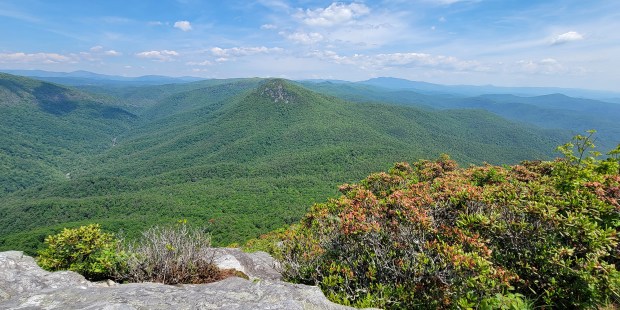
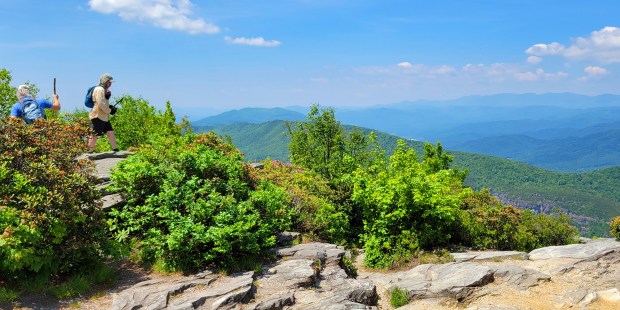
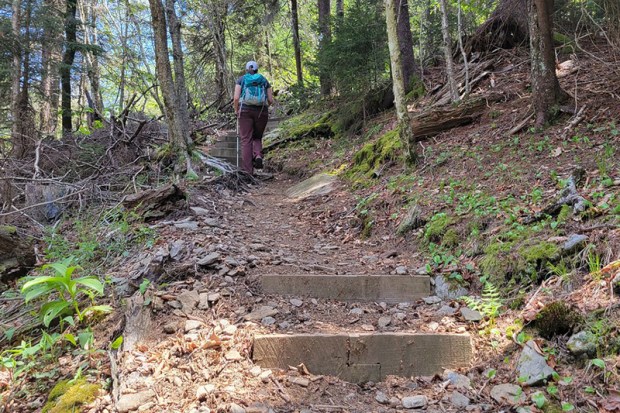
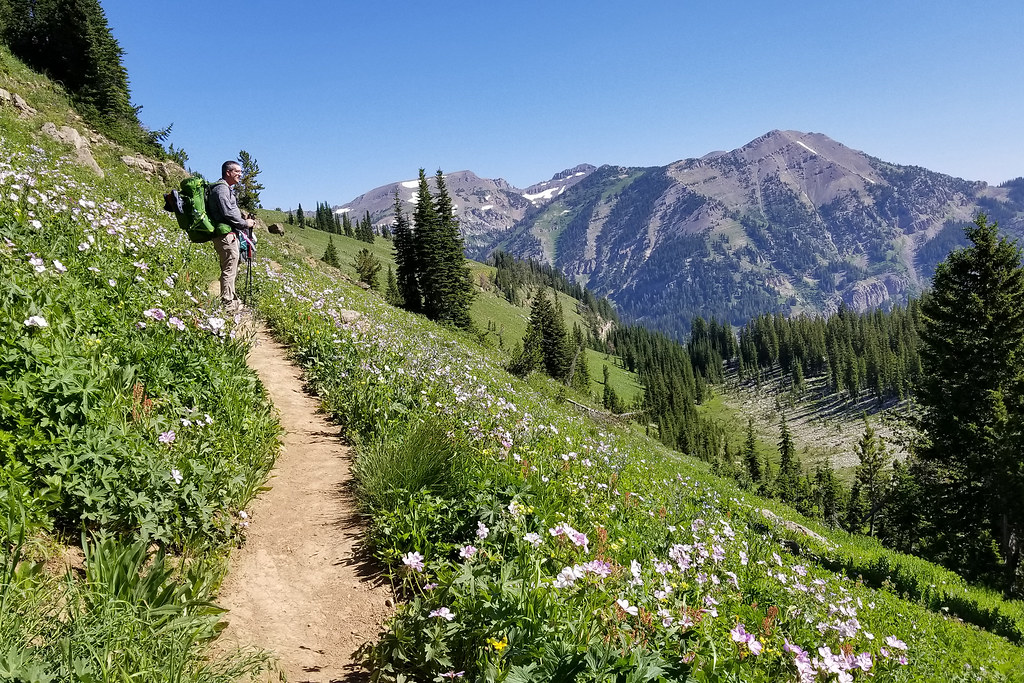
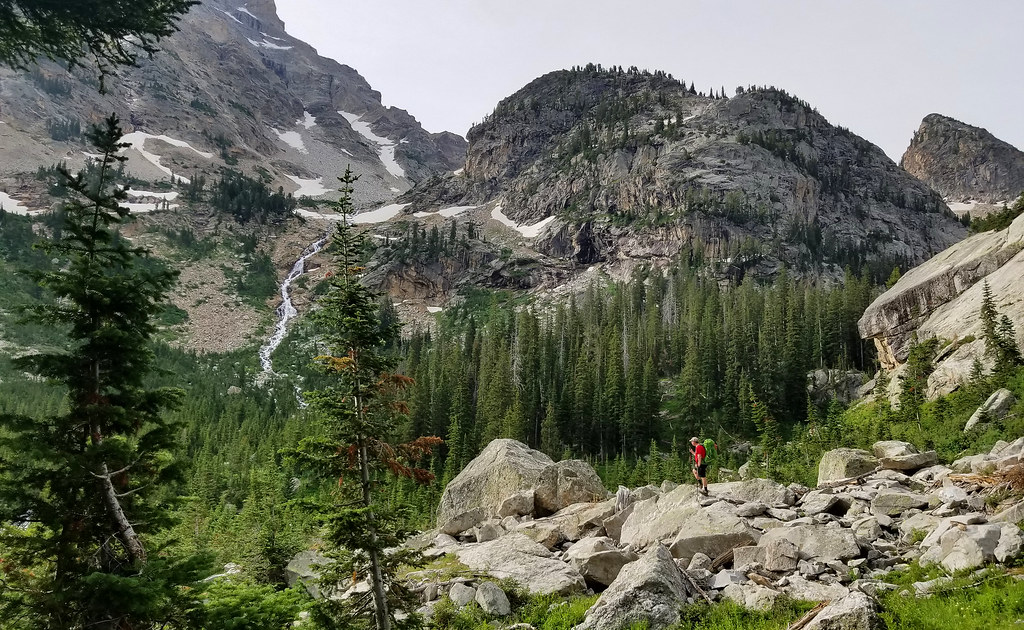
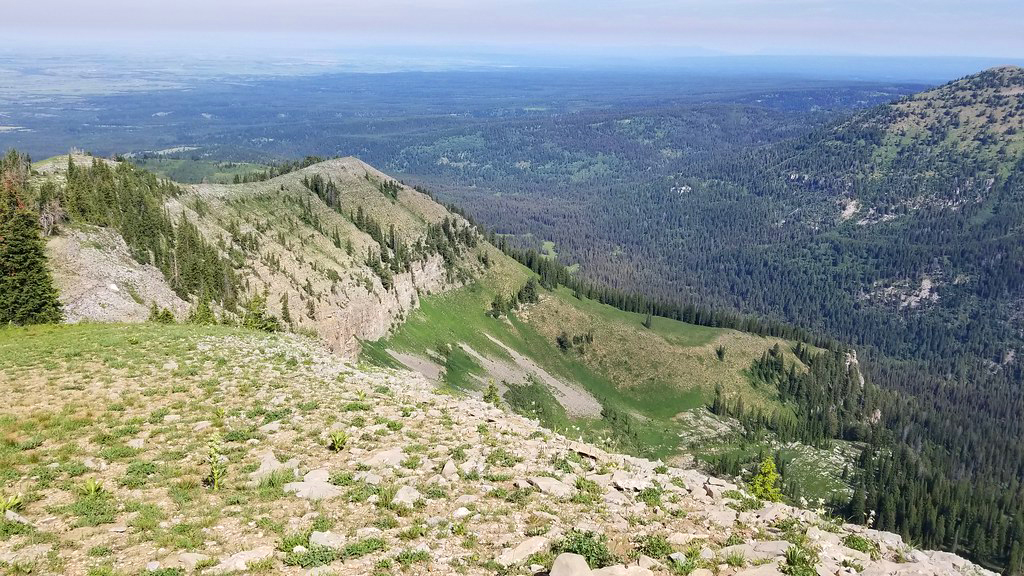
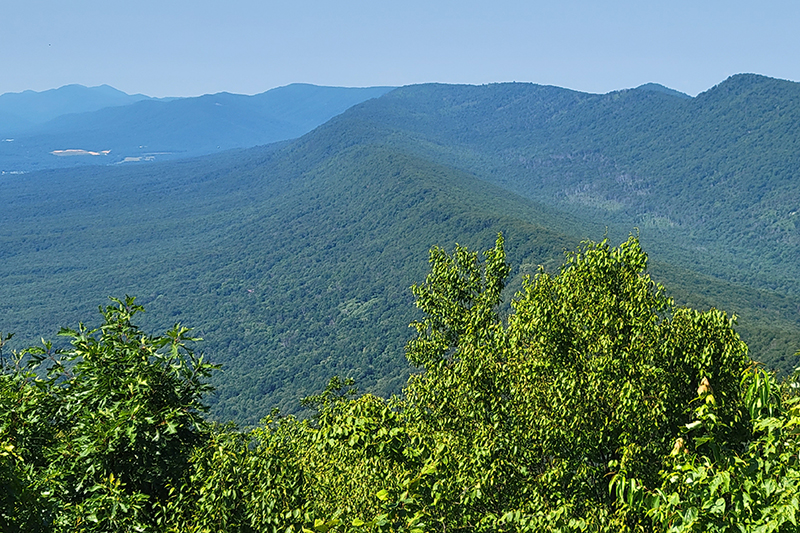
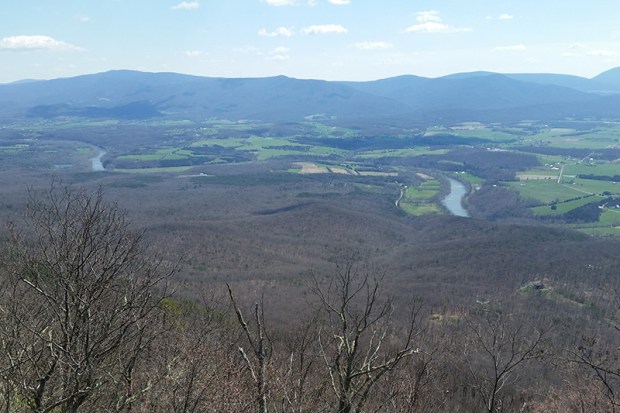
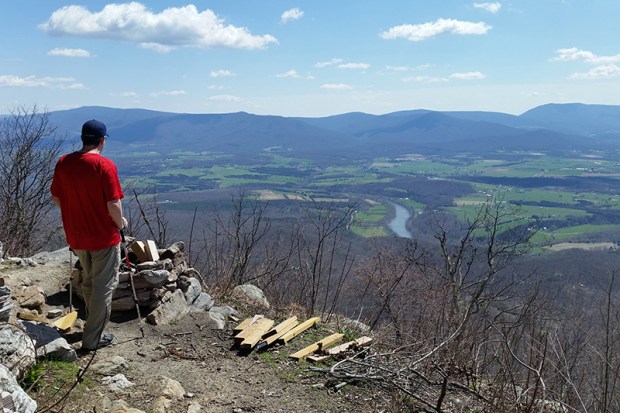
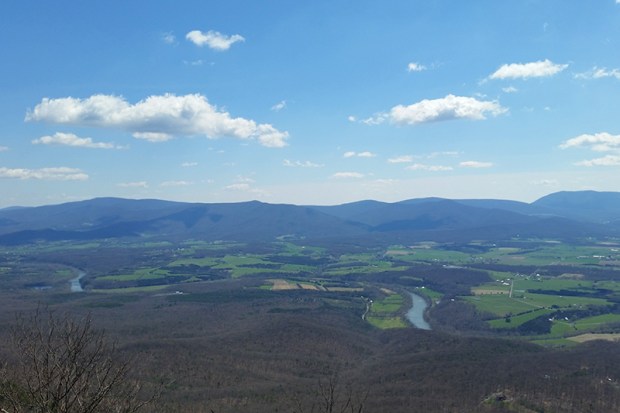
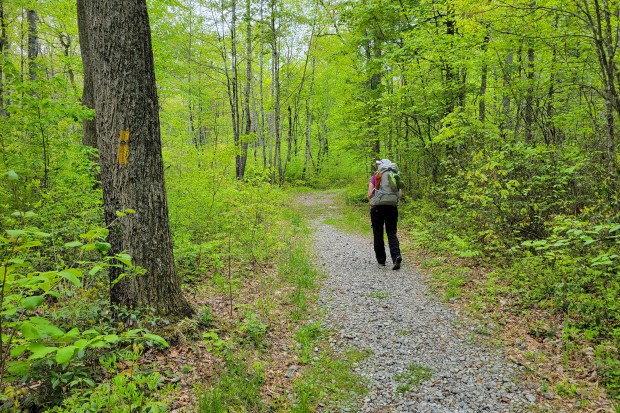
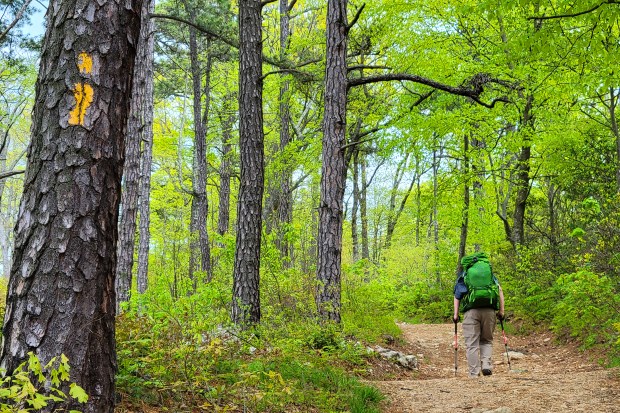
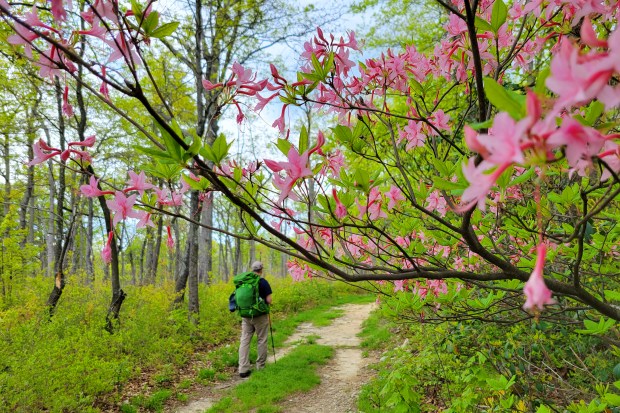
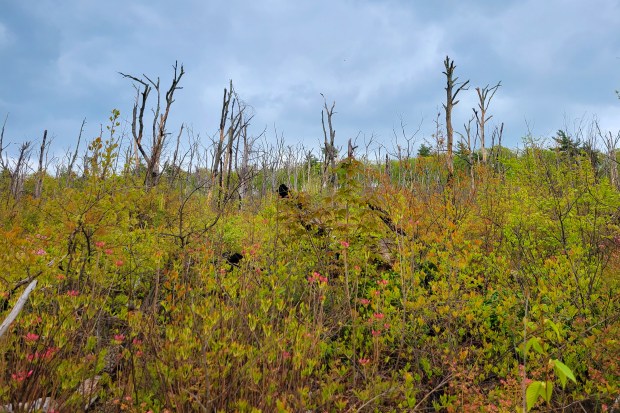
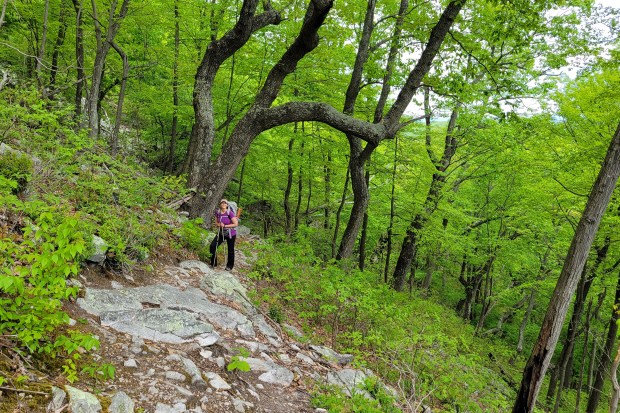
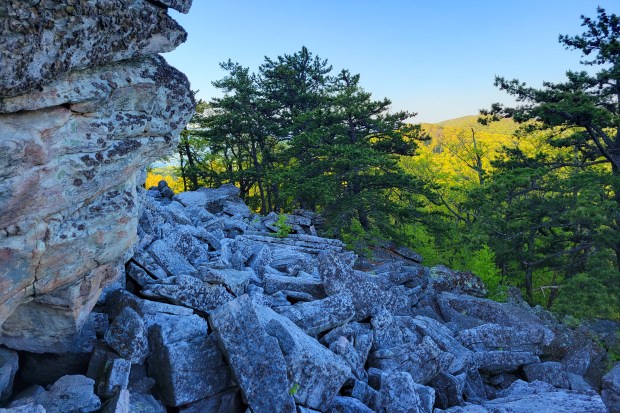
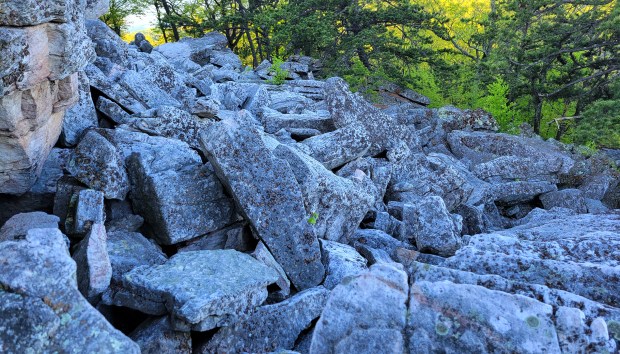
Day two brought more miles and more of a challenge, with around 2,500 feet of climbing and plenty of rocky terrain. The effort paid off with more frequent views and a pass by Dragon’s Tooth. We saw a few more people that day, including day hikers near the overlook and a handful of thru-hikers, but the trail still felt pleasantly uncrowded.
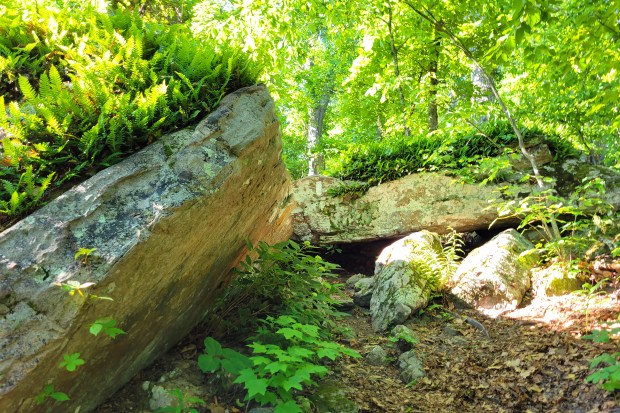
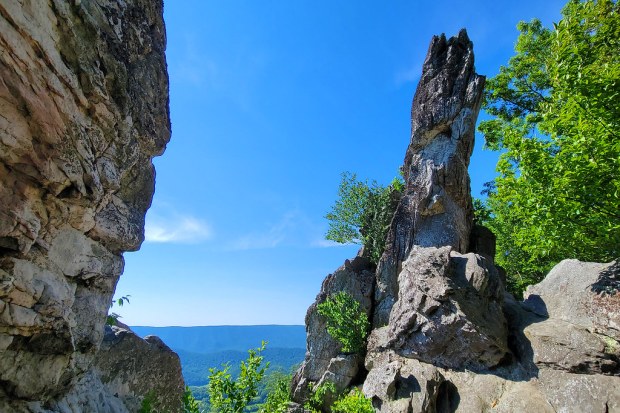
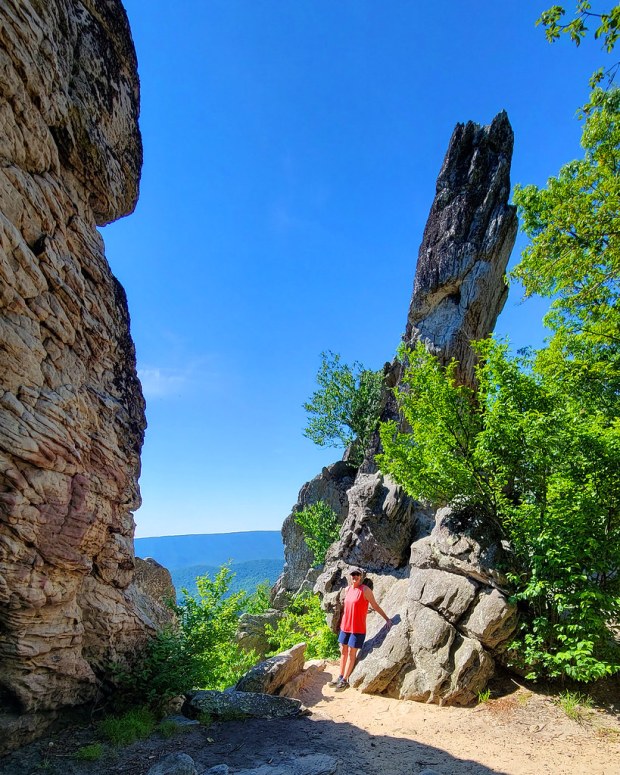
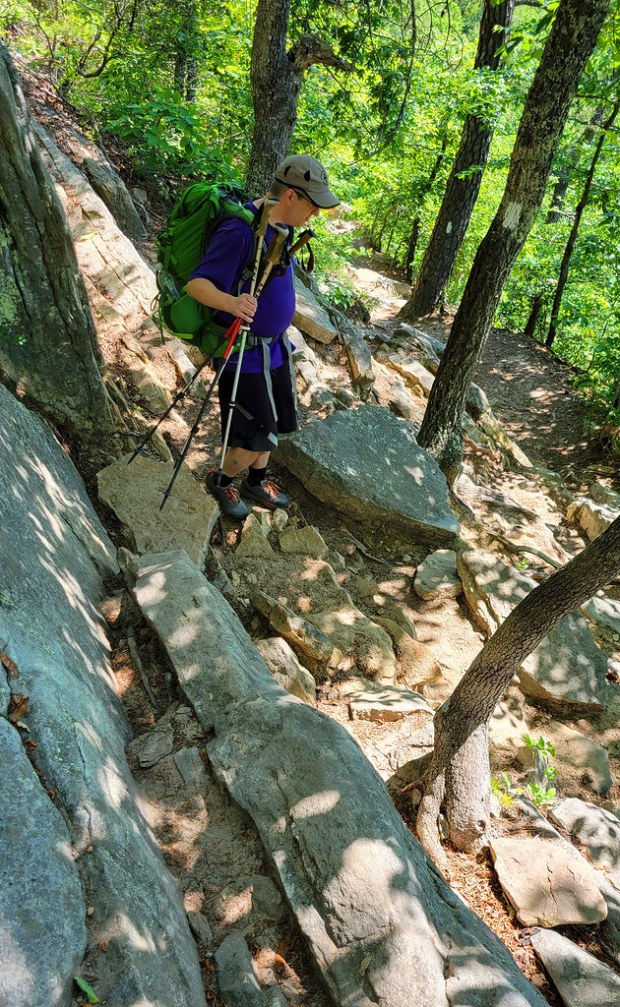
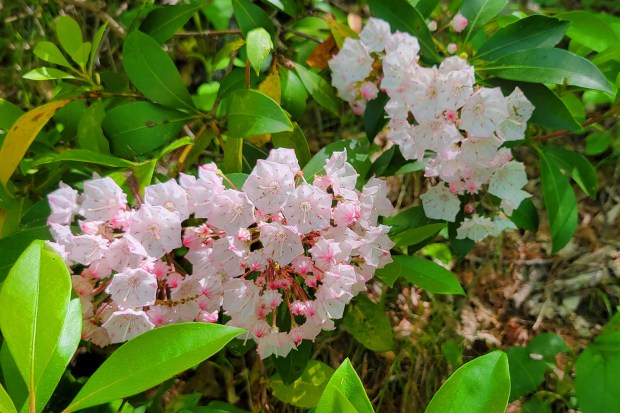
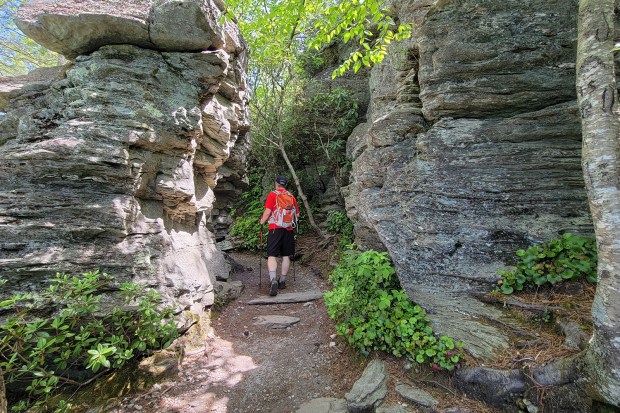
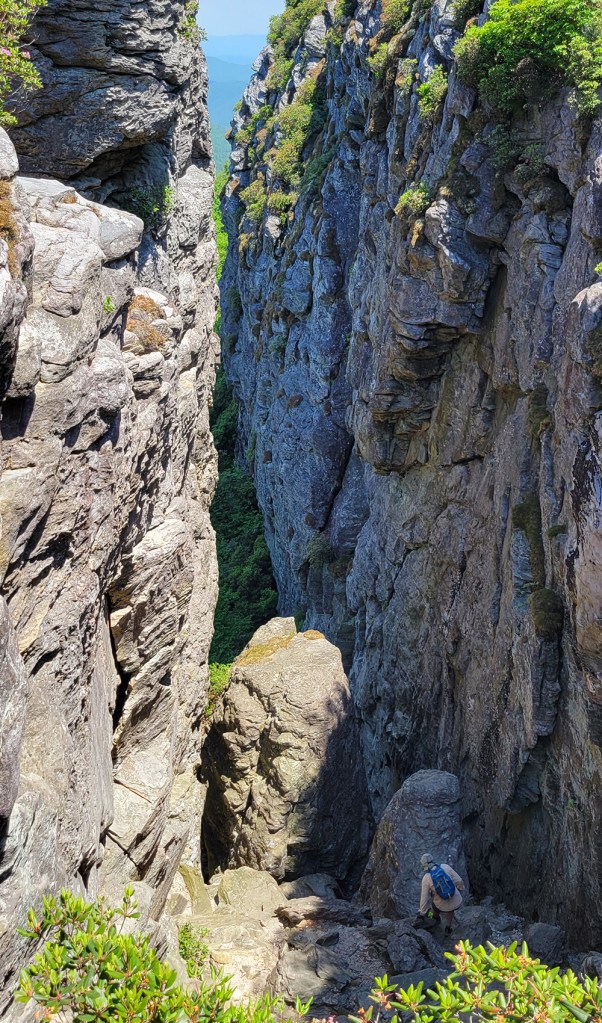
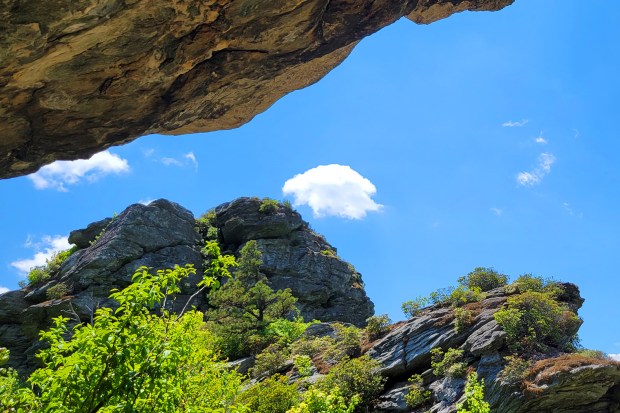
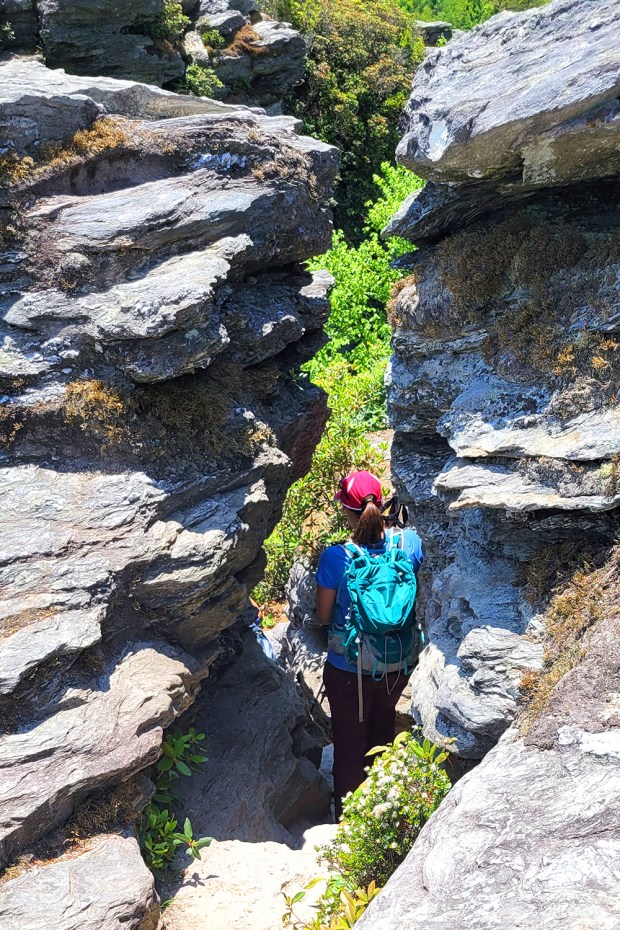
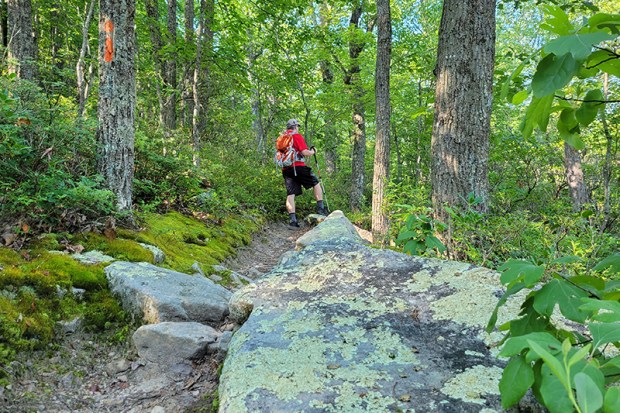
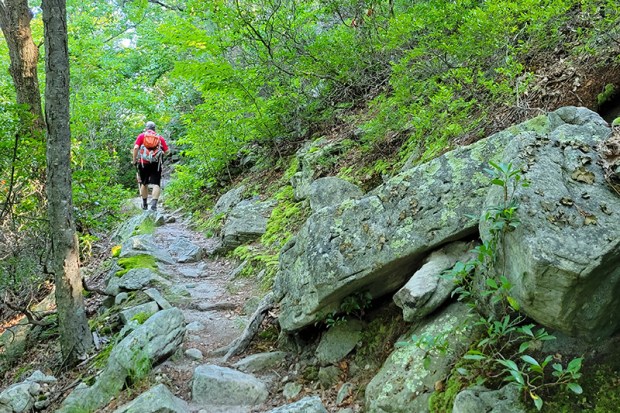
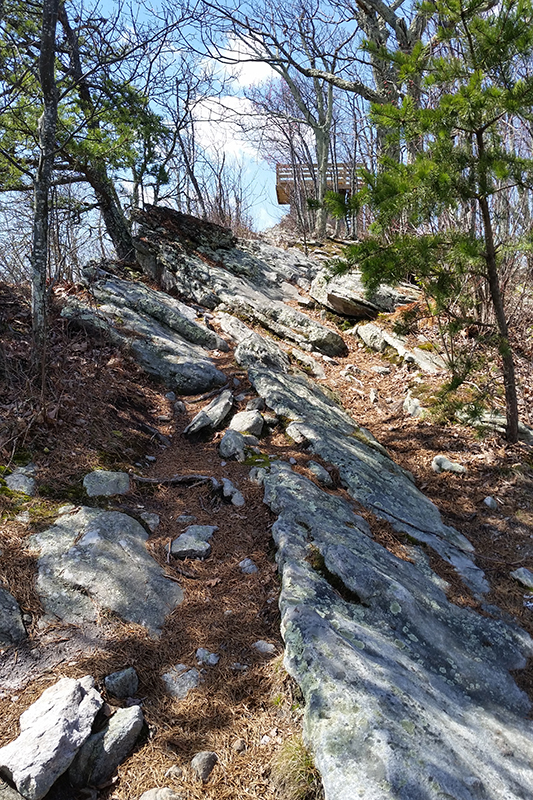
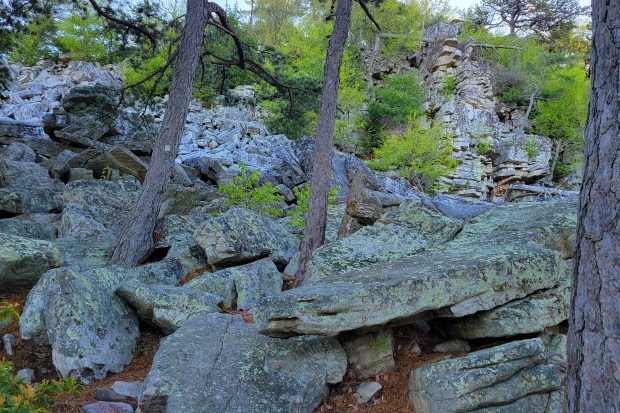
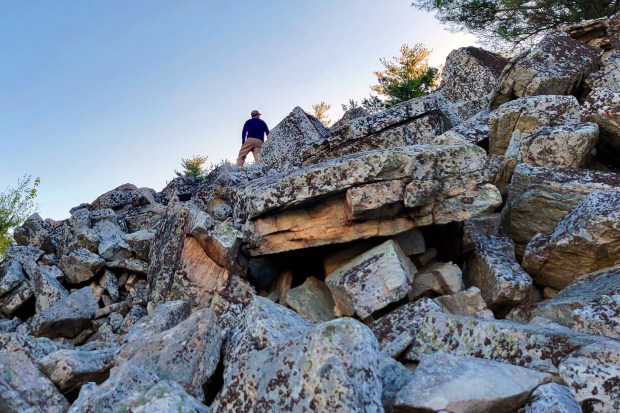
The first stretch of the morning was especially rocky, requiring careful footing. As we approached Dragon’s Tooth, the views began to open up. The formation itself is an impressive quartzite spire rising sharply from the ridge. It is possible to climb to the top if you are comfortable with heights, but we decided to skip it this time since we had done it before and still had a long day ahead.
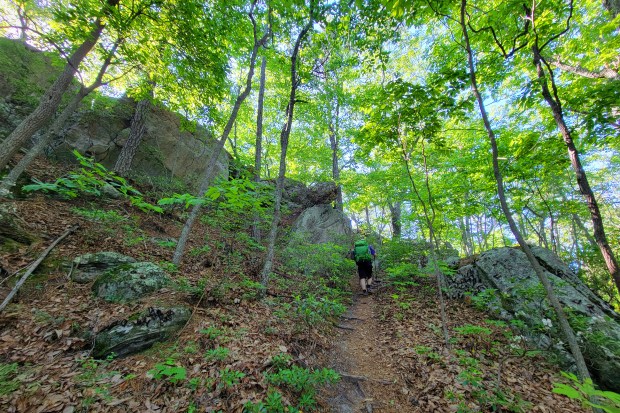
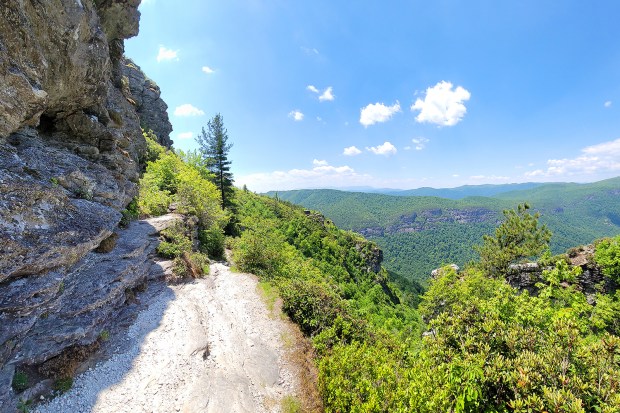
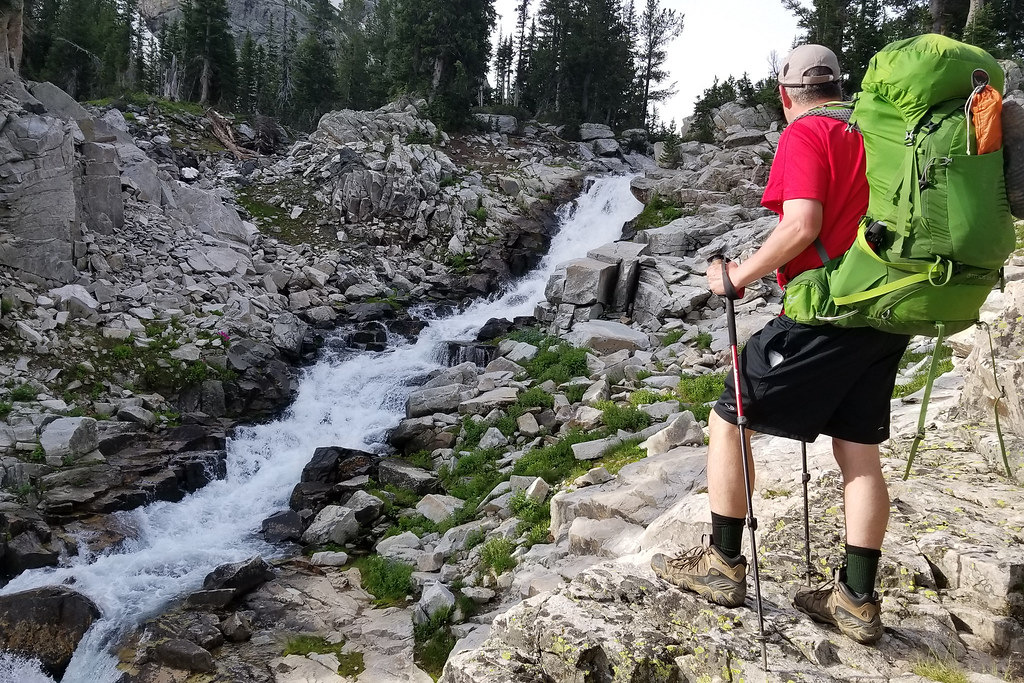
The descent heading north from Dragon’s Tooth is no joke. It is a steep, technical scramble over rocks and narrow ledges, made even trickier with overnight packs. We did not take many photos through this section since our focus was on staying upright.
The rocks continue for a while after the descent, easing only slightly but still demanding attention. Eventually, we reached a stream crossing near Newport Road and took a well-earned lunch break. Lunch was another PackIt Gourmet meal, a buffalo chicken wrap that rehydrates with cool water. We swapped the mayo for ranch dressing and wrapped it all in tortillas. It was another solid trail meal.
While we were eating, a mom pulled up to drop off her son, a thru-hiker heading back out after a weekend visit. She offered us ice-cold Pepsis, which felt like pure magic at that moment.
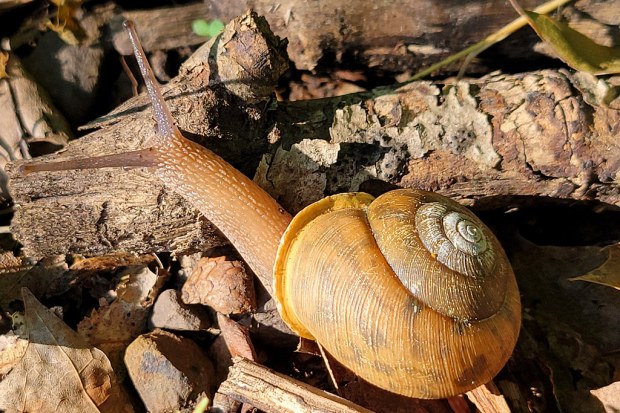
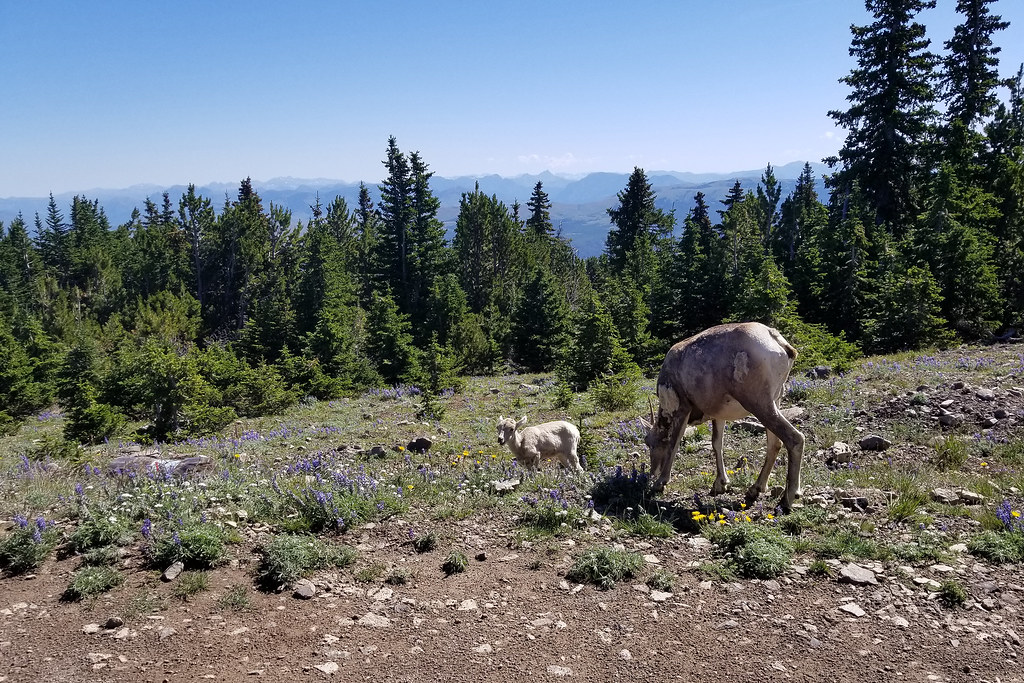
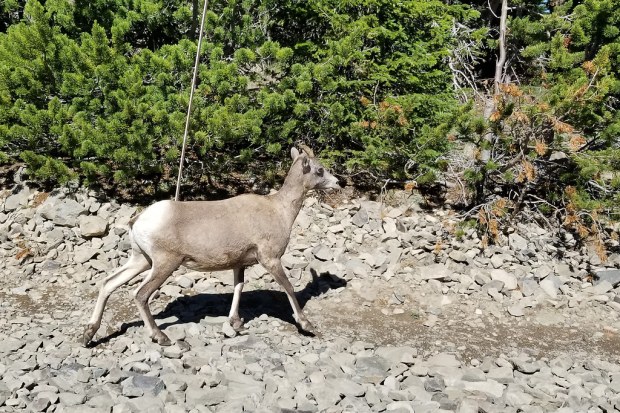
The trail eased up a bit after lunch. Along a quieter stretch, we spotted a mama deer and her fawn at a stream. Just moments later, a bear crossed the trail right in front of us, followed shortly by a large garter snake slipping through the grass. It was a memorable stretch packed with wildlife.
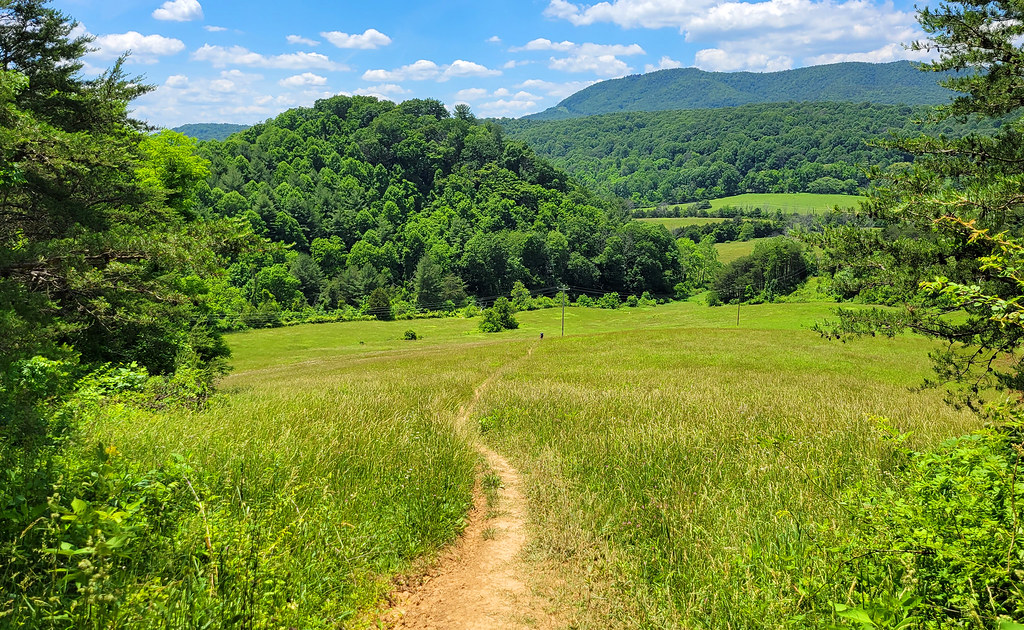
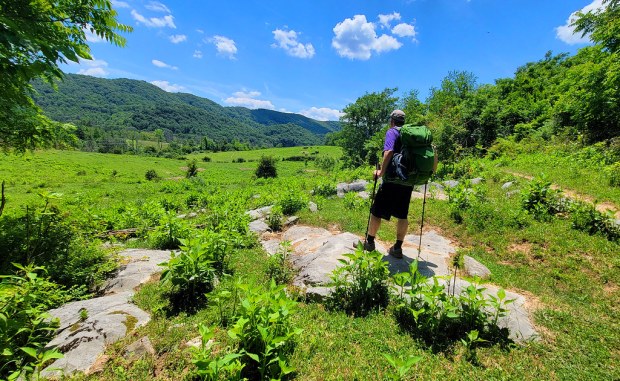
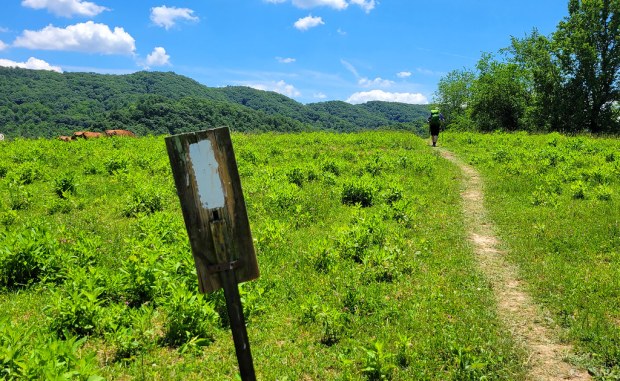
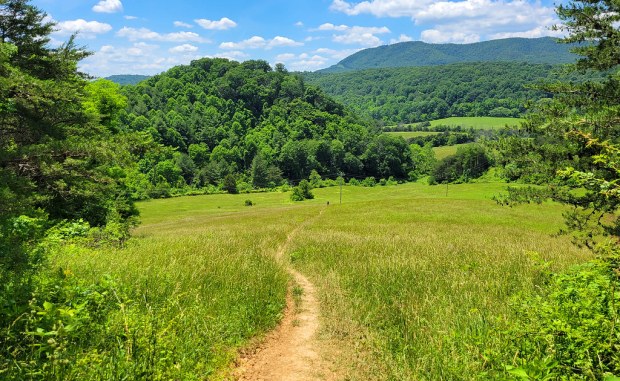
Soon after, we entered a long section of open pasture. The trail crossed several stiles and stretched for over a mile through sunny, exposed fields. It was hot, bright, and heavy with pollen.
By that point, Adam had already had a tough day. Earlier, he tripped on a root and took a hard fall, breaking his glasses and ending up with a swollen lip and a few cuts. Thankfully, it was not more serious. Later in the fields, the pollen triggered an asthma flare, and he needed his rescue inhaler. Even feeling worn down, he kept pushing forward and finished strong.
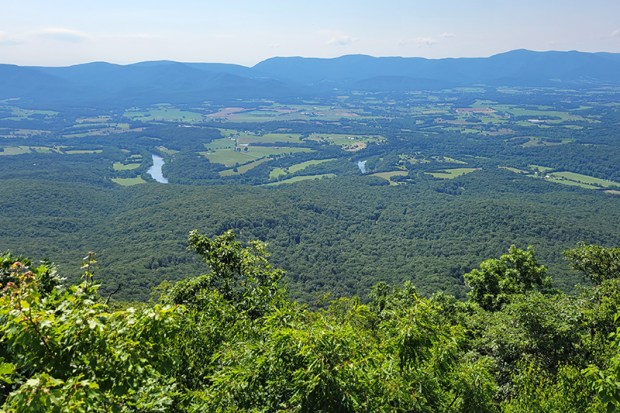
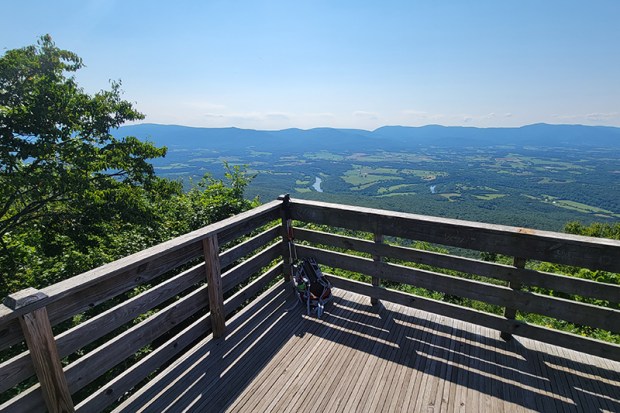
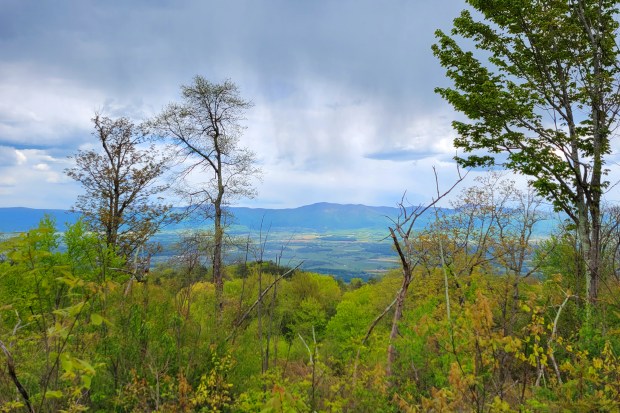
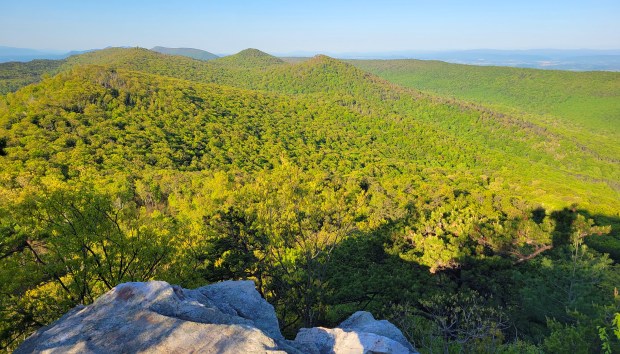
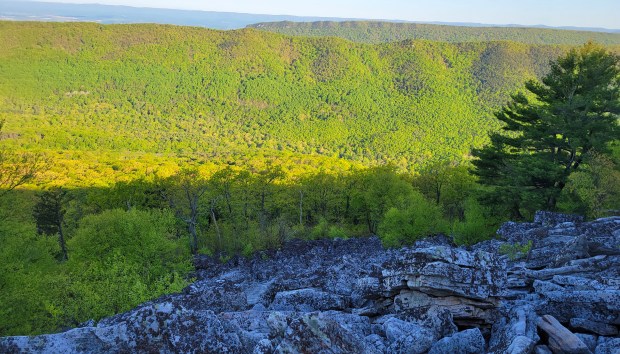
Not long before the end, we caught one last great view about a mile south of the McAfee Knob parking area where we had left our car. We made it back by mid-afternoon, grateful to be done with the miles as the day warmed up.
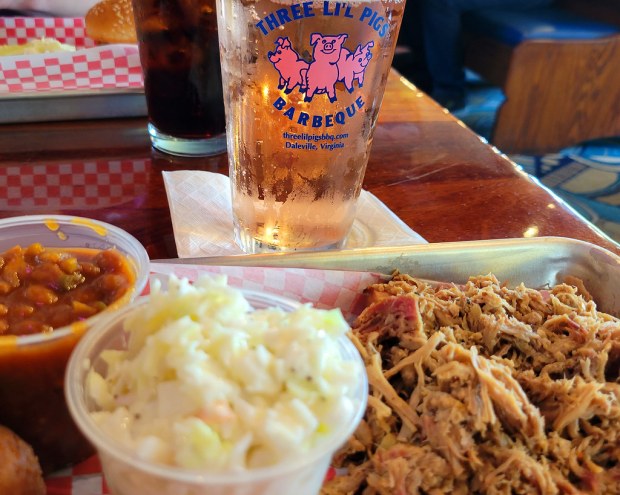
On the drive home, we made our usual stop at Three Li’l Pigs in Daleville for barbecue. It has become a bit of a tradition after hikes in the Roanoke area, and it was the perfect way to wrap up the trip.
Notes
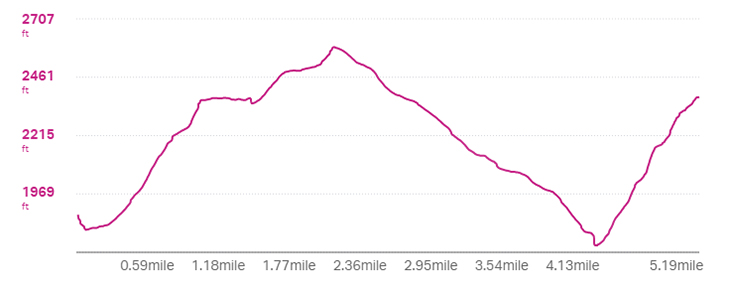
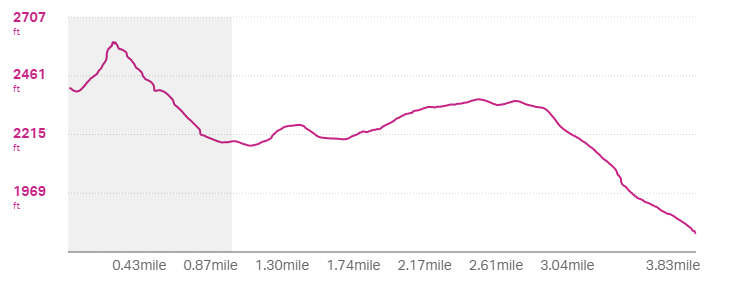
Distance – 23.35 miles (10.2 on Day 1, 13.15 on Day 2)
Elevation Change – 4528 ft. (2182′ on Day 1, 2346′ on Day 2)
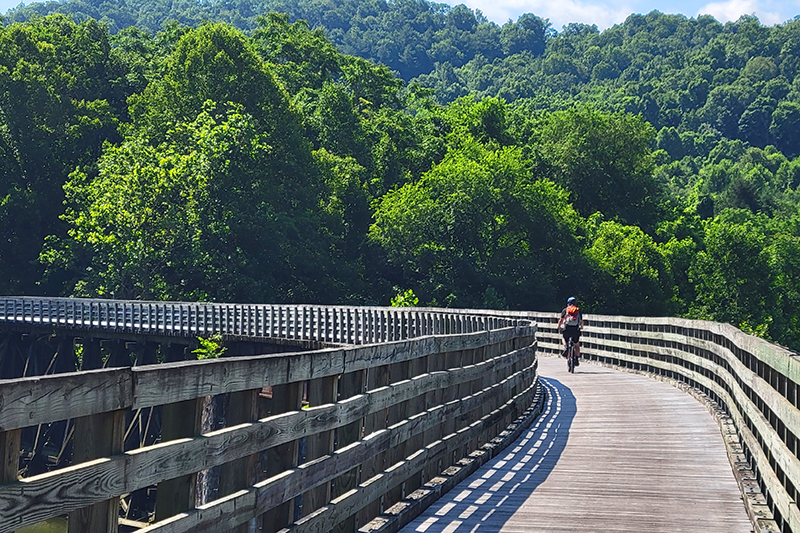
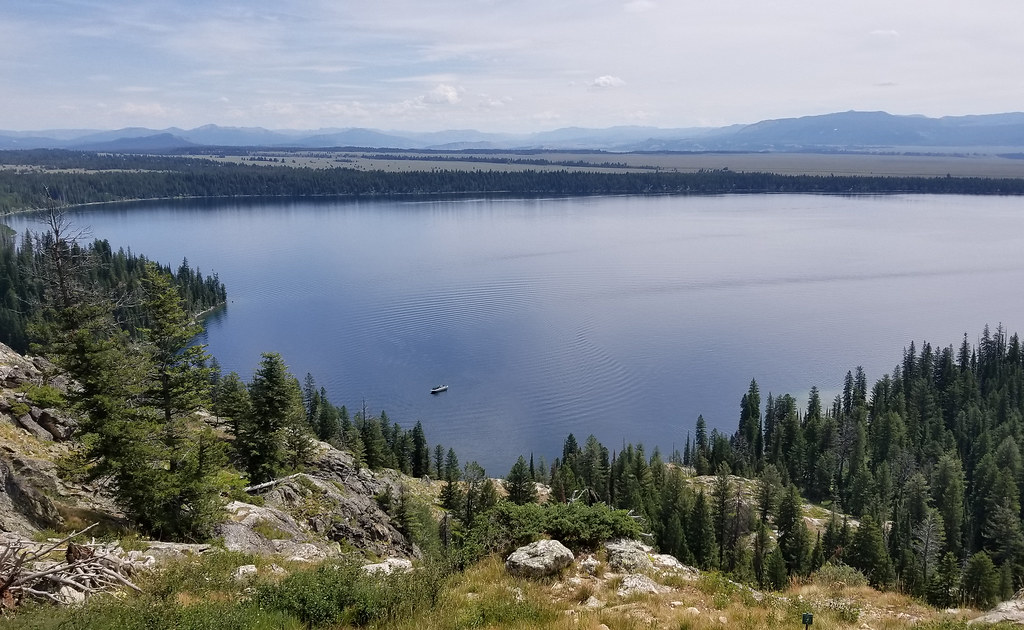
The Virginia Creeper Trail is a picturesque rails-to-trails path that winds its way for thirty-four miles through the Mount Rogers recreational area. The trail starts in Whitetop and ends in Abingdon, with Damascus sitting right in the middle.
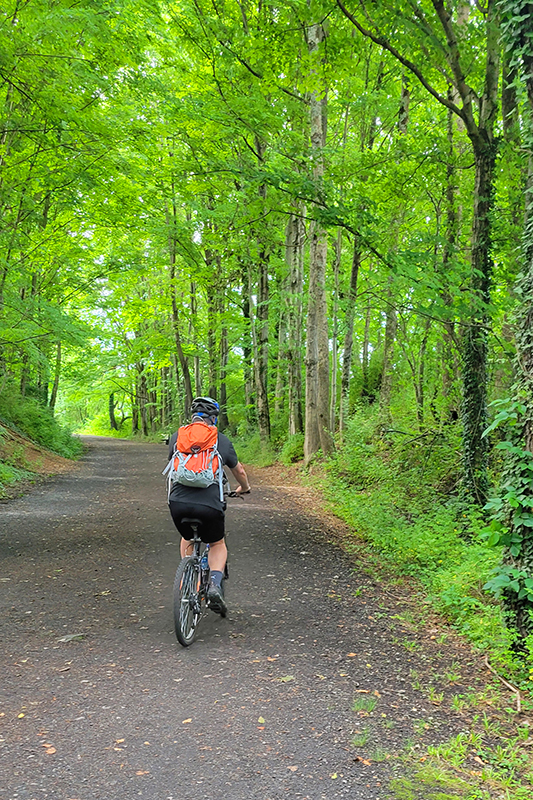
We biked the Creeper section from Whitetop to Damascus on a rainy day many years ago. We planned to do the whole thing that day, but the rain became a heavy downpour and it was too muddy to enjoy biking. We tried to come back a couple times to bike the second half, but were foiled by more rain and tornado damage. Last summer, we finally made it back to officially finish the remaining 16 miles between Abingdon and Damascus.
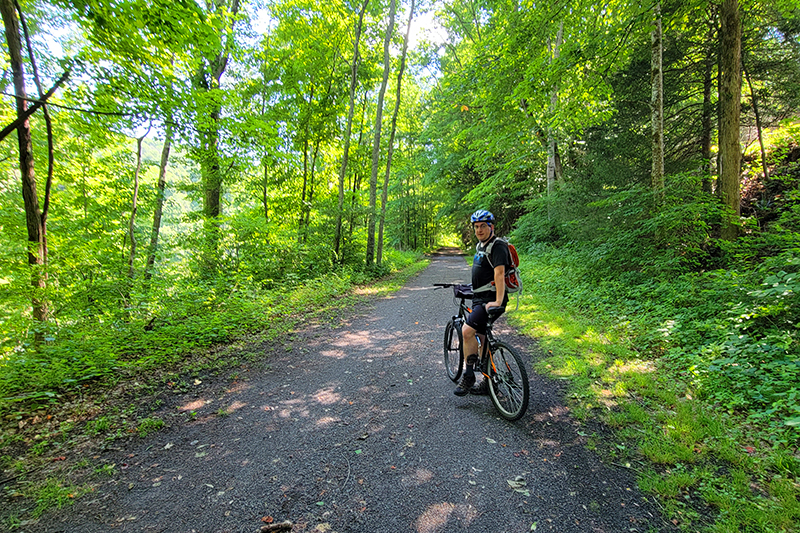
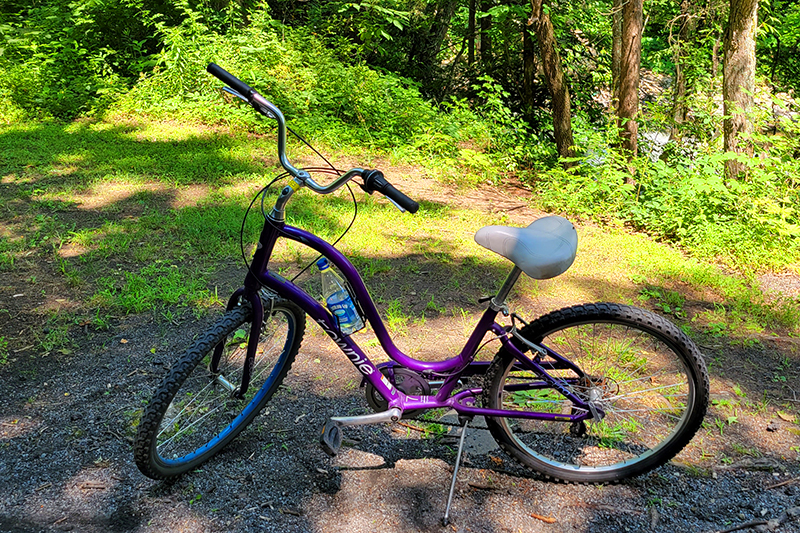
We have our own bikes, but they were badly in need of tune ups, so we left them home and rented from Blue Blaze Bike and Shuttle in Damascus, Va. Adam rented a mountain bike and I decided on a cool, purple cruiser. The trail’s terrain is generally smooth and covered with small gravel, so I decided to go with plush comfort rather than more rugged equipment. The rental shop was affordable and their bikes were impeccably maintained.
We booked seats on their first shuttle van of the day, and ended up being the only riders. Our driver was fun to talk to and was a regular hiker and biker. The shuttle took us from the shop back to mile zero in Abingdon, Va. From there, it was a mostly flat 16 mile ride back to their shop.
The section from Whitetop to Damascus is far more popular than the section we did this time – it’s a little more scenic and it’s all downhill, so it requires very little exertion. Our ride was still very easy, but we did have to pedal! The nice thing about biking the less popular half on a weekday was that we practically had the whole trail to ourselves. We saw just a handful of other runners and cyclists. The Creeper can get very crowded and congested, so this was a treat!
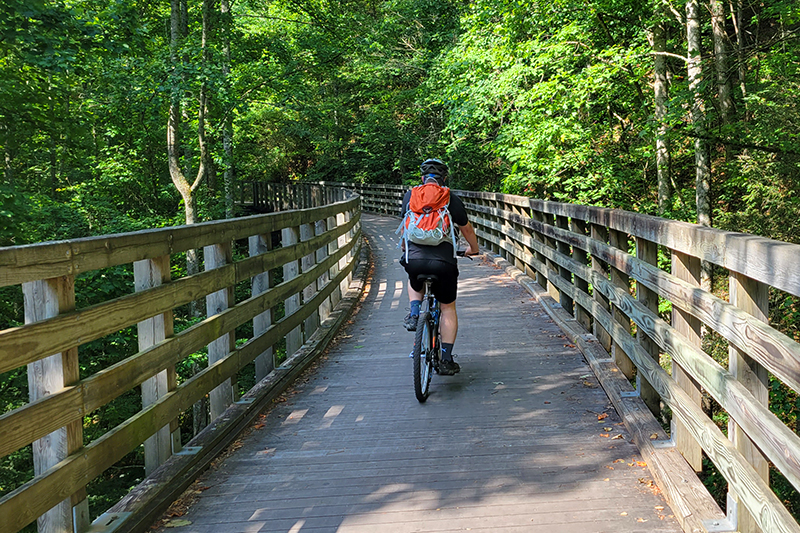
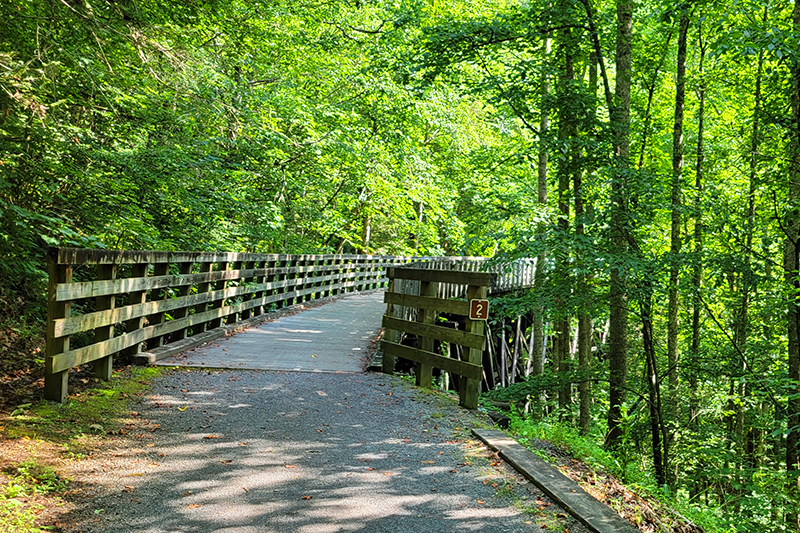
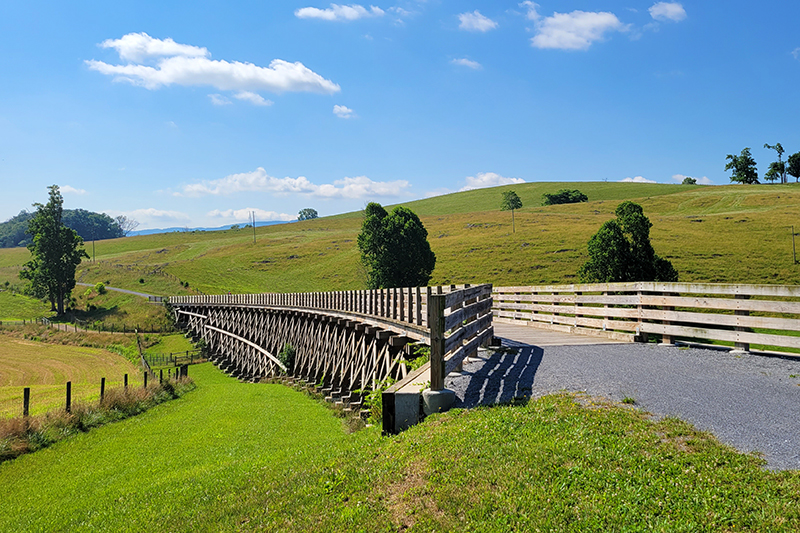
The main things to see along the Creeper Trail are beautiful waterways and railroad trestle bridges. The section we rode passed mostly through farmland, whereas the other half is more wooded. It was still really pretty, and the breeze from riding the bike made the heat bearable.
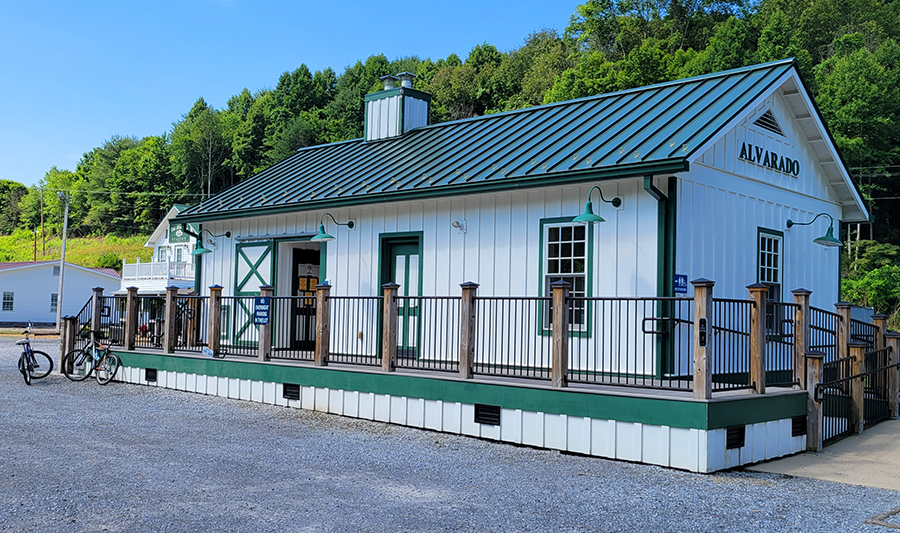
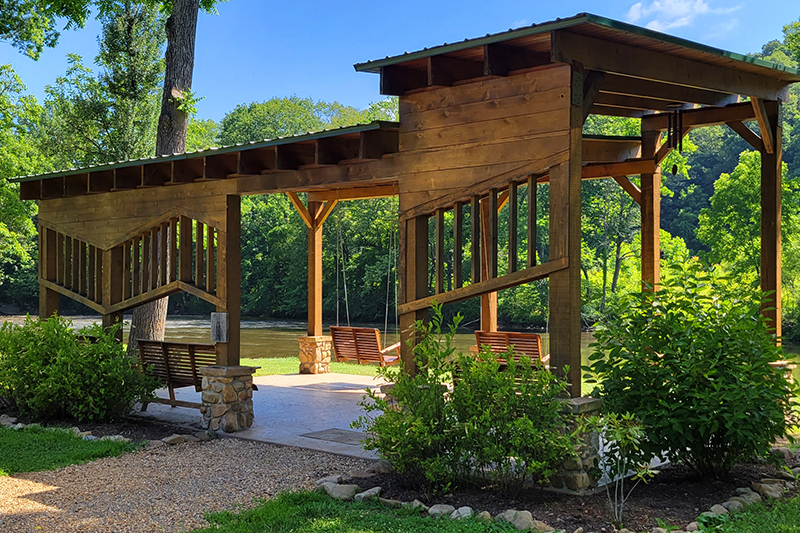
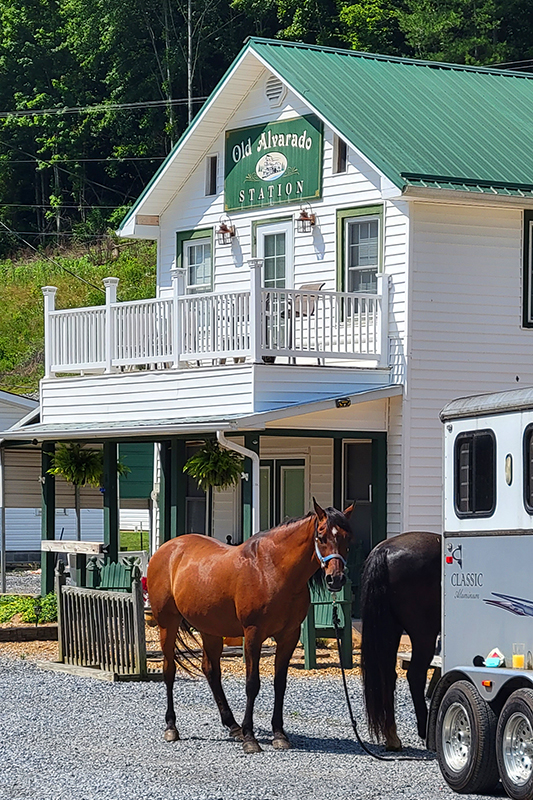
We stopped for a short snack and drink break at Alvarado Station about 8.5 miles into our ride. The station was once a railroad stop halfway between Abingdon and Damascus. It is the only stop for snacks and restrooms on this half of the trail. Across from the restroom building, there was a nice trailside park with a pavilion and porch swings. We sat by the river and enjoyed the view. We even saw a heron!
After our break we pedaled the remaining seven-ish miles into Damascus. The last mile or so follows the main road into town, so there are more road crossings and car noise. The nicest thing about trails like this is that the mostly keep car and bike traffic separated, so you always feel safe riding.
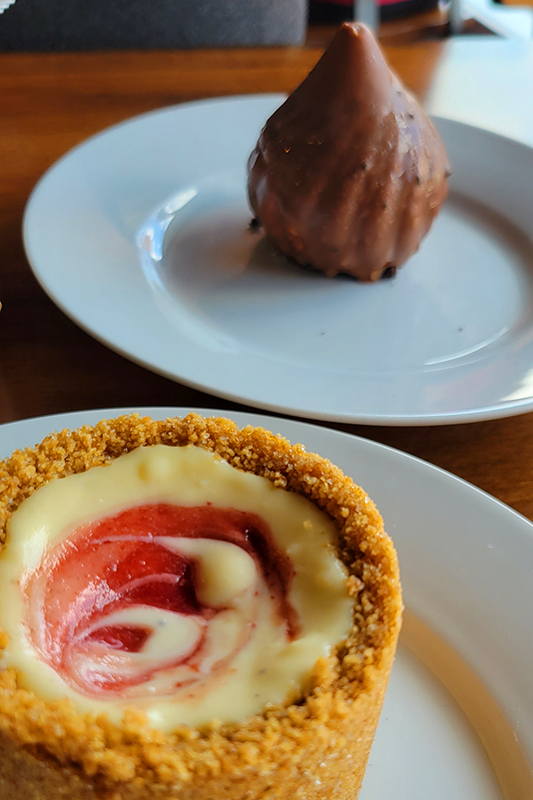
We got back into town, returned our rentals, got some lunch at Wicked Chicken Winghouse – another decent lunch stop in Damascus. Afterwards, we drove back to our AirBnB and picked up the dogs and took them for a two mile walk along the Creeper. After we got them nice and tired, we headed to Abingdon Vineyards to try some wine. The winery is dog friendly and has lots of outdoor tables along the stream. The day finished up with desserts from Anthony’s Desserts in Abingdon. If you’re in the area, this place has the most amazing sweets – don’t miss it!
More Photos
Trestle #1 on the Virginia Creeper
Biking on the Creeper
Crossing railroad trestles
Trestle #2 – they are all numbered and there are over 35!
Pretty farmland
Adam biking along
Taking a break in the shade
Alvarado Station park
Horses are welcome and common on the Creeper
My sweet purple cruiser
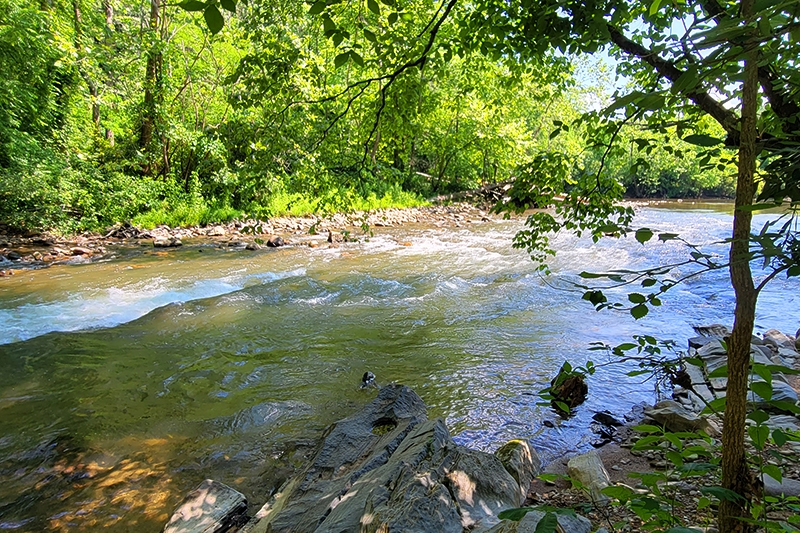
Some small rapids near Damascus
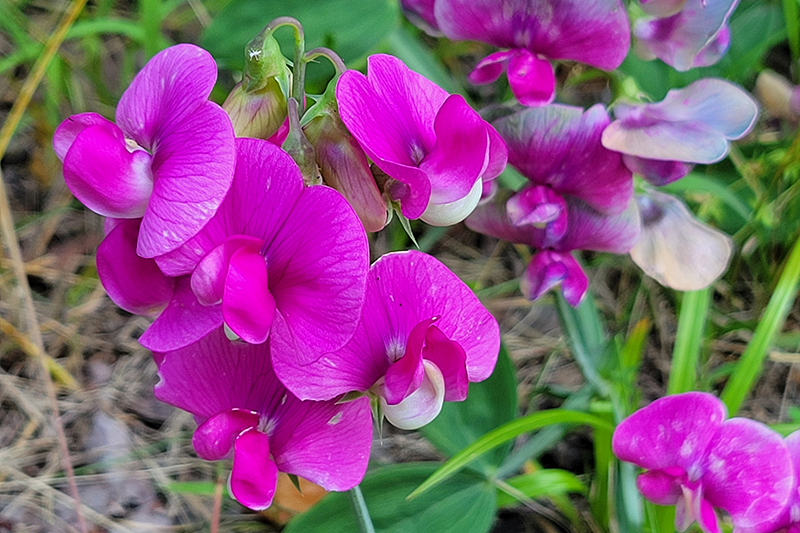
Pretty blooms along the trail
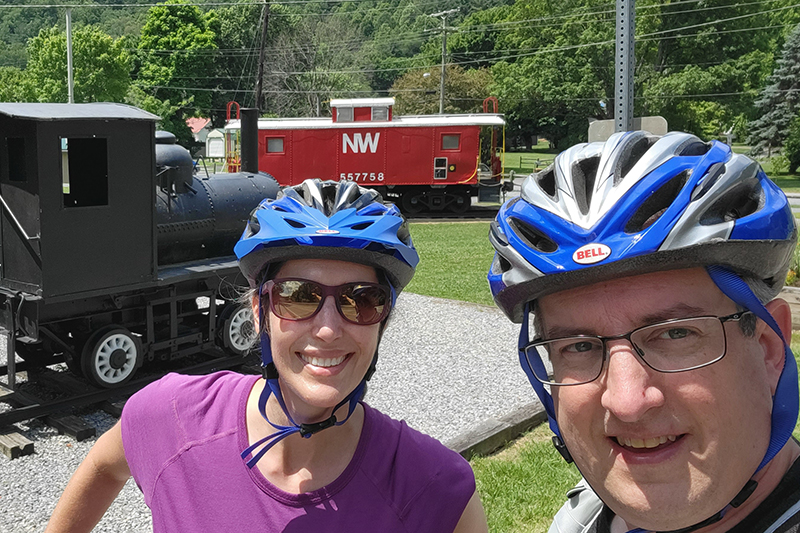
Bike selfie back in Damascus
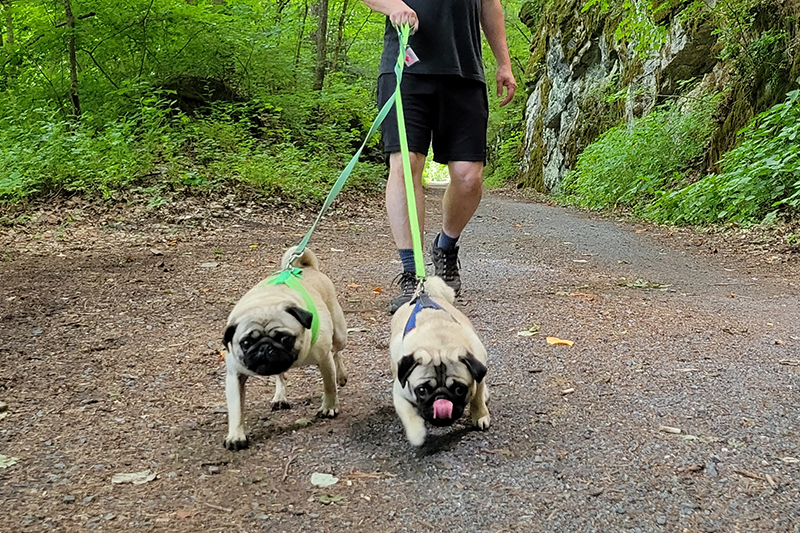
Pugs on the Creeper!
Abingdon Vineyard
Wine flight
Don’t miss Anthony’s Desserts in Abingdon
Seriously – don’t miss Anthony’s Desserts! This is just half the case!
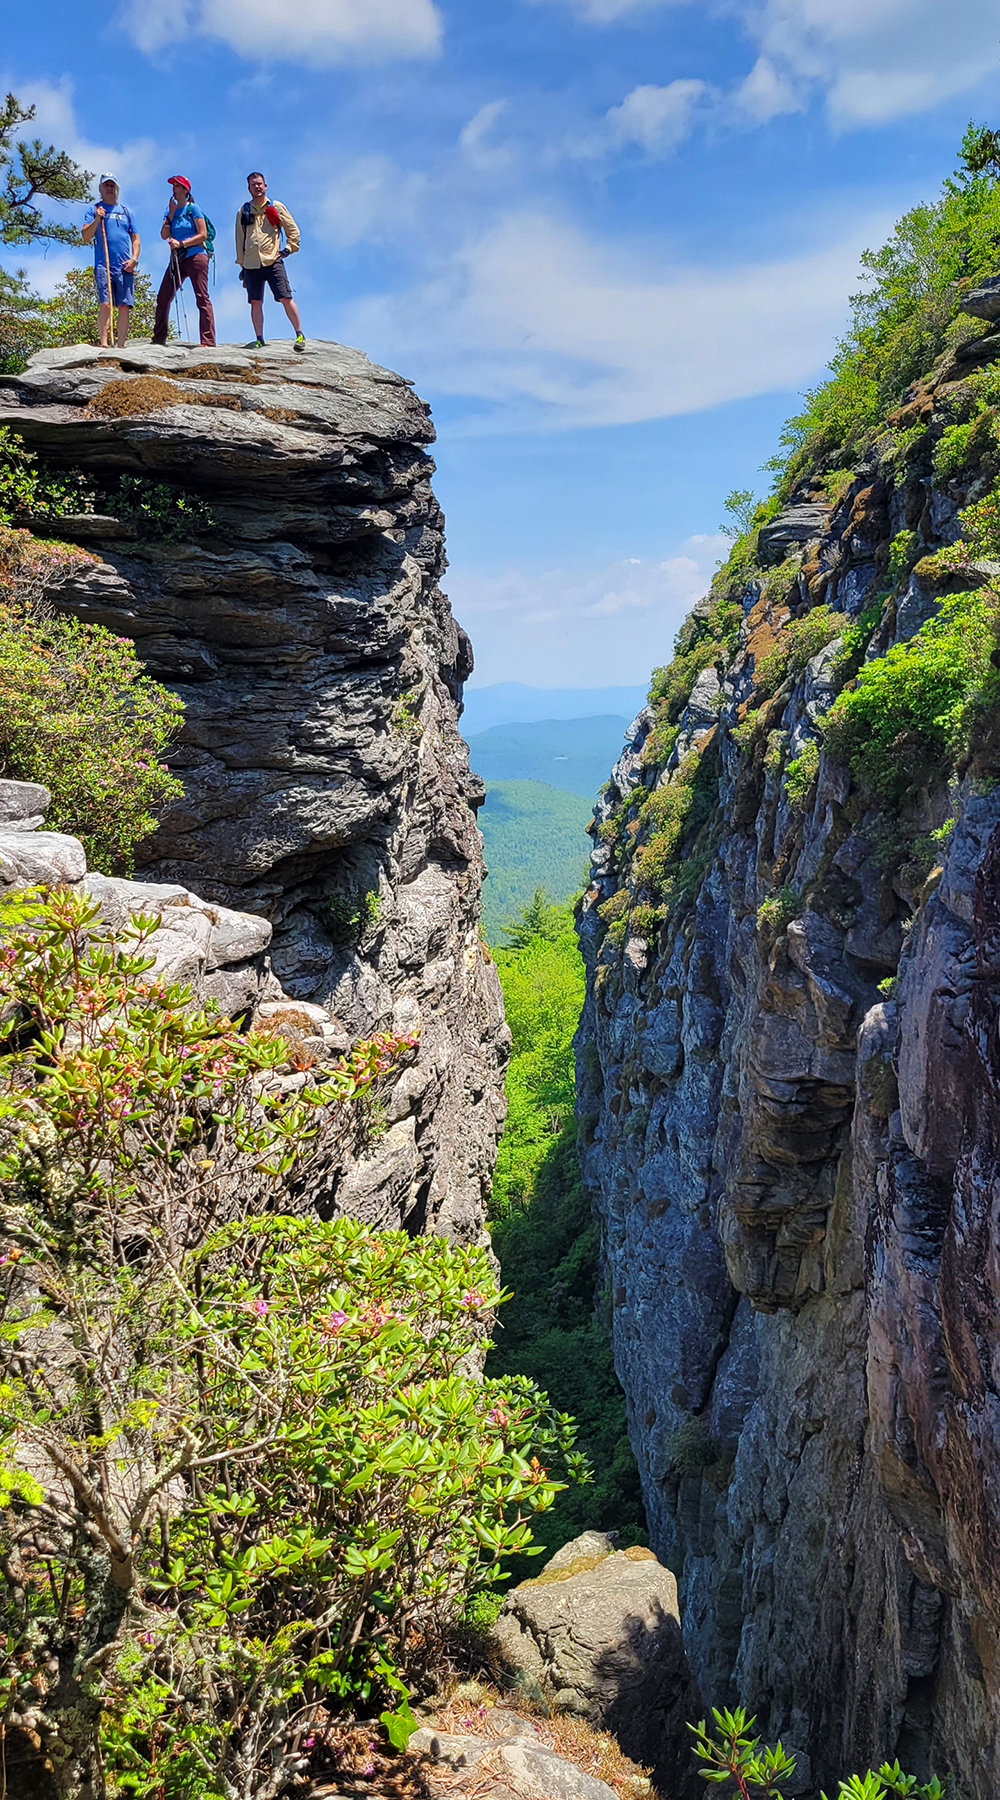
On our second day of vacation, we decided to check out some hiking in beautiful Linville Gorge – specifically Table Rock, the Chimneys, and the Devil’s Crack/Cellar. The total for the day was only 3.28 miles with 610′ of elevation gain, so it should have been an easy hike. For whatever reason – the hot sunshine, tiredness from sleeping in an unfamiliar bed, etc – it felt a lot tougher than it normally would. It was still a great hike with spectacular scenery, but next time I’d go earlier in the morning, in cooler clothing, with a lot more water and sunscreen! This is definitely an exposed trail where you will bake in the sun – or get hit by lightning if there are storms! The Table Rock section is pretty straight-forward, but the Chimneys section might not be great for unsupervised children or people with a fear of heights.
The drive from the main paved road out to the Table Rock parking area is a winding, dusty, bumpy 8.5 mile ride along forest service roads. You never think 8.5 miles is ‘far’ until you have to drive along a road like this – it takes forever to to cover the distance. Along the way, we passed the trailhead to Hawksbill Mountain – another spectacular hike we did several years ago. I actually think it’s probably the prettier hike.
When we got to the Table Rock parking/picnic area, there were just a few cars there. Apparently, this area is immensely popular and we were lucky to hit it on a quiet day. The hike is a double out-and-back. We decided to go up Table Rock first. From the parking lot you can see the distinctive dome-shaped summit off to the left. The trail is gently graded with lots of interesting rock formations along the way. As you climb, you’ll begin to get views looking down into the gorge. It’s such amazing, dramatic scenery.
You’ll reach the summit of Table Rock after just about a mile of climbing, most of it along the Mountains to Sea trail. On the way up, you’ll pass two trail junctions, both on the left side of the trail – one is a continuation of the MTS trail. After you pass that junction, stay to the right to reach the Table Rock summit. The top is not a small outcropping that looks in one direction – it’s an entire mountaintop with views all around! You’ll see the foundation of an old fire tower. To the north, you can see Hawksbill Mountain. Supposedly, you can even see Linville Falls off in the distance, though we personally couldn’t spot it. You can also scramble over a bunch of boulders to get views to the south of Shortoff Mountain, and to the west – the Linville River.
After spending some time at the summit, we descended back the way we came. We took one of the unmarked side trails we had passed on our way up out to see Devil’s Crack/Cellar. I think the ‘cellar’ refers to the rock jumble heading down into the Gorge and the ‘crack’ is the big rock tower that splits from the main wall. I’ve read that some people just call the whole area “The Crack of the Devil.” I can’t be positive about the names, but I can tell you that it’s incredible and worth the short side-trip. The detour is only about a quarter mile off the main trail. The top of the rock tower is easy to climb up, and I suggest checking it out!
Afterwards, we descended back to the parking area. From there, we took the Mountains-to-Sea trail to the right. Almost immediately, you’ll pass pit toilets, the picnic area, and a large primitive campground. The trail is a gradual uphill for a few tenths of a mile. From there, it turns into a bit of a rock-scrambling roller coaster as it follows an exposed ridge.
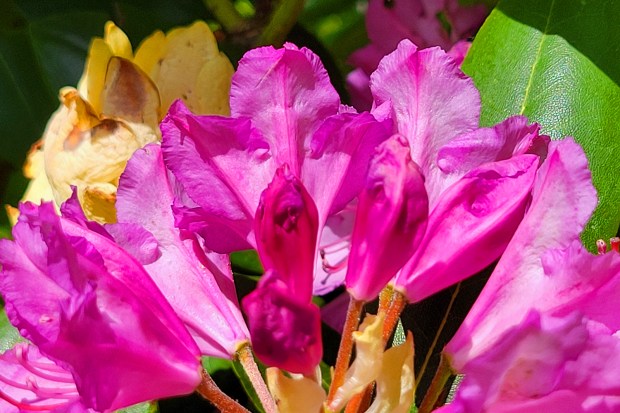
The trail had some steep drops and tricky obstacles to negotiate. I don’t particularly enjoy rock scrambling or exposed ledges, so I didn’t love this part of the hike. It was lovely, but it definitely triggered my vertigo. I can see why rock climbers are such big fans of the Chimneys – there are lots of precipitous things to scale. While I didn’t love the terrain, I did appreciate the blooming flame azaleas, mountain laurel, and Catawba rhododendron.
I ended up walking about .8 of a mile along this section of trail. After that, the terrain got even more exposed and tricky, and I really didn’t feel like negotiating any more rocks. So, I found one of the only shady spots along the way and decided to wait for the rest of the gang to come back. It’s no fun to be hot, dizzy and lightheaded on terrain where you really need good balance.
After a few minutes, Adam came back and we retraced our steps back to the car. I was pretty glad to get out of the sun and into the air-conditioning!
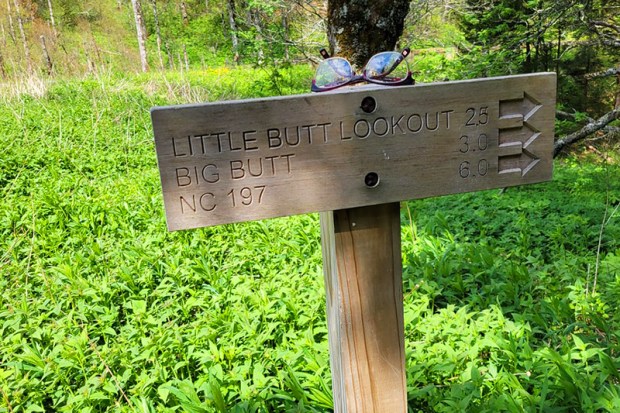
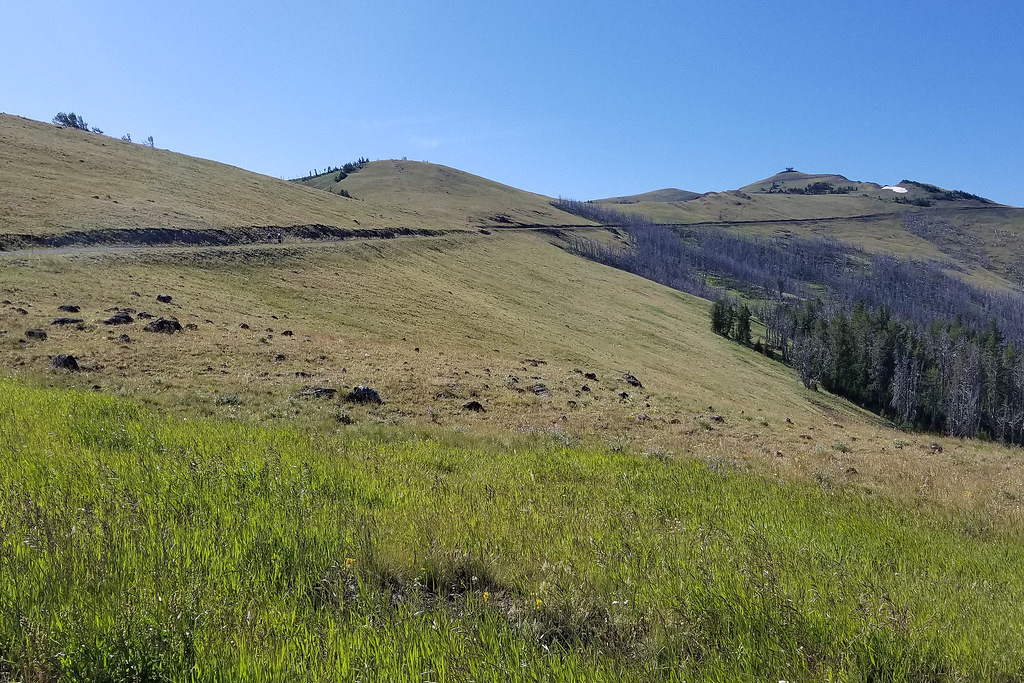
This is a 5.25 mile hike with 1237′ of elevation gain. The trail has LOTS of constructed stairs and a couple very steep climbs. Point Misery, which has no view, is the high elevation of the hike. The best view is from Little Butt, where you can enjoy vistas of Mt. Mitchell and the Black Mountains from a slab of rock. You can hike on an extra half mile to Big Butt, but there are no additional great views. This hike starts at Walker Knob overlook on the Blue Ridge Parkway.
Adam Says…
Last May, we stayed a week with our friends, Tony and Linda, who rented a cabin in North Carolina near the Blue Ridge Parkway. Fellow hiker, Zach, joined for several days as well (all members of the Hiking Upward team). As is common on a vacation with friends, we had a first night of celebrating being away and probably had a few too many beers among us.
The next day was hot, and we were definitely feeling a bit tired from the night before, so we decided to try something moderate. Eventually we landed on the Little Butt hike. You have to laugh at a hike with a name like that!
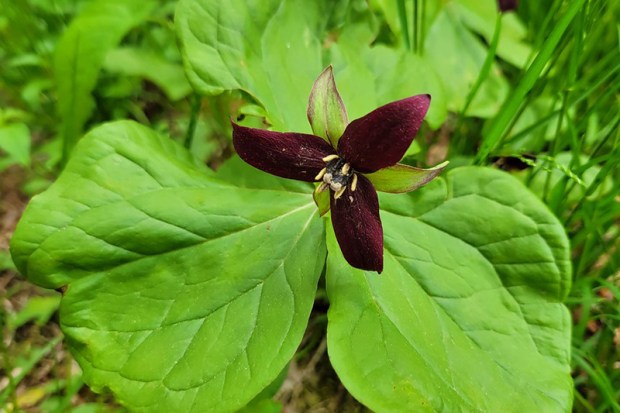
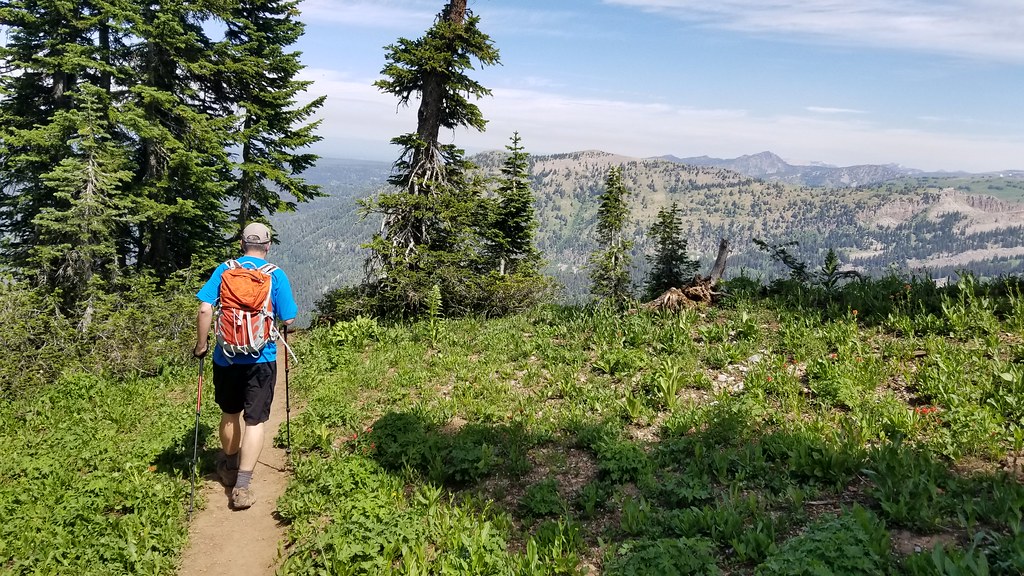
The trail started off with a gentle descent into a scenic forest landscape with lots of trillium along the way. The trail was worn through, but we could tell the spring growth would likely necessitate some maintenance as things get overgrown as the season goes on.
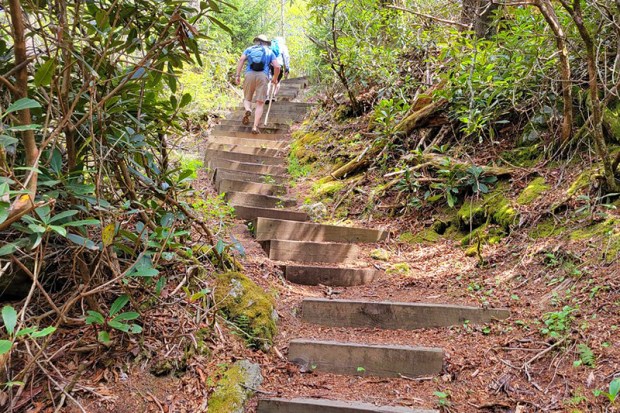
After we hit the bottom of the small gap, the trail starts to ascend steeply. It was tougher than we expected, even brutal at times. The climb topped out at Point Misery – about a mile and a half into the hike. From there, the trail dropped steeply for about half a mile, before going right back up for .4 miles. This section had many, many stairs constructed into the mountainside. I don’t know about you, but I typically hate to see stairs on a hike, because I know I’m in for a steep climb, since stairs are necessary to keep the trail in shape.
Once we got up through the forest staircase, the trail reaches more of a ridgeline and it was a short distance to get to the Little Butt overlook, a slab of rock where you can take in views of Mt. Mitchell and the Black Mountains.
At this point, Christine and I decided to stop and just enjoy the view. Big Butt is only half a mile from here, but we had read that it really didn’t have any views and was just another peak to bag. Zach and pressed on to Big Butt. We ate a quick snack at the overlook and then decided to hike back. Zach said he would catch up to us. We descended the stairs, climbed steeply back up to Point Misery, and were enjoying the easy downhill back to the car when we saw Zach running along to catch up. We were amazed at how much energy he had compared to us.
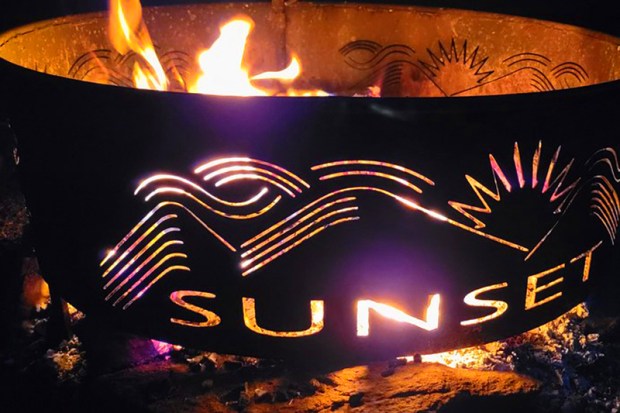
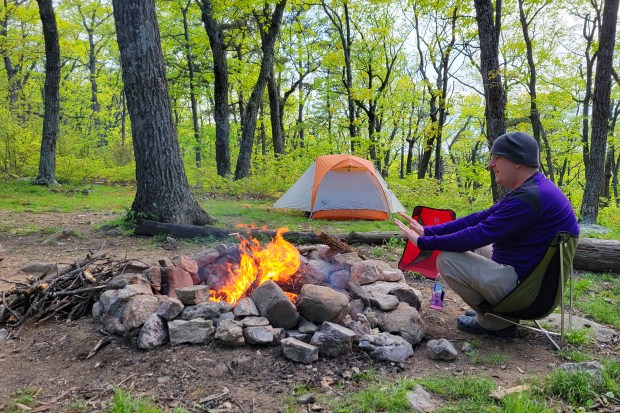
That night, we got back to our rental place and enjoyed a beautiful sunset and campfire. It was a great first day of adventure in North Carolina!
After coming off the Teton Crest Trail, we took a day off hiking and chilled in Jackson Hole. We stayed at a hotel, ate lots of good food, and checked out more of the Tetons by car. We initially planned to head into Yellowstone National Park the next day, where we had a campsite booked at Bridge Bay Campground for two nights. Adam’s back was still bothering him, so we decided to stay an extra night in a hotel before joining our friends at the campsite in Yellowstone.
The next day, we made a long, leisurely drive into Yellowstone National Park, stopping many places along the way for photos and wildlife-related traffic jams. We got to Bridge Bay midafternoon, set-up camp, and met our friends. We had dinner, enjoyed s’mores by the campfire, and attended the evening ranger program. It was like all the park camping experiences I remember from my childhood.
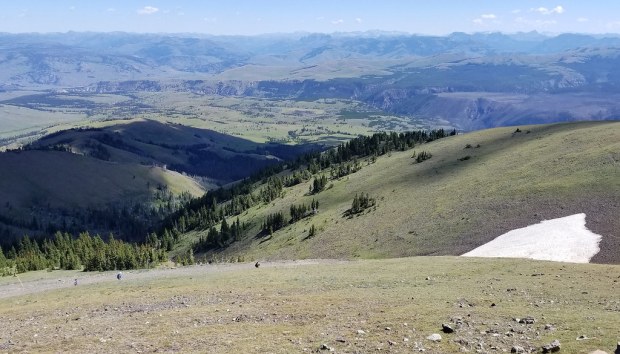
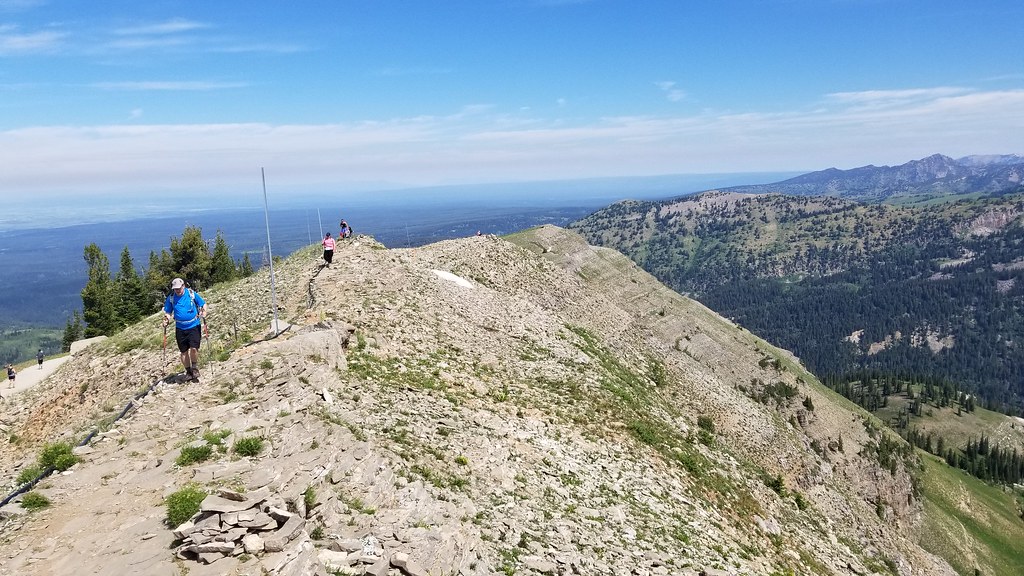
The next morning, we got up, grabbed breakfast, and discussed plans for the day. Brian decided to go fishing and the rest of us decided to hike up Mount Washburn. At 10,219′, Mount Washburn is the highest peak in Yellowstone’s Washburn range, and is also home to one of the park’s few remaining fire watch towers.
There are two hiking routes to the summit of Mount Washburn. The first option is to park at the Dunraven Pass Trailhead for a 6.5 mile hike with about 1400′ of climbing. We chose the second option – a shorter route starting at Chittenden Road. This route was only 4.5 miles, but has about the same elevation gain.
If I had it to do over, I would have started at Dunraven Pass and just done the longer hike. It’s supposedly prettier and has a more gradual ascent. I think my tired legs and oxygen deprived brain were just thinking “shorter is better!” I struggled with the altitude on this hike and felt queasy and dizzy most of the way. I think after seven really busy, active days with staying at a mix of campsites and hotels, I was just run down, tired, and dehydrated. I still had fun and I still made it to the top, but this was probably my toughest hike of the trip (even though it shouldn’t have been.)
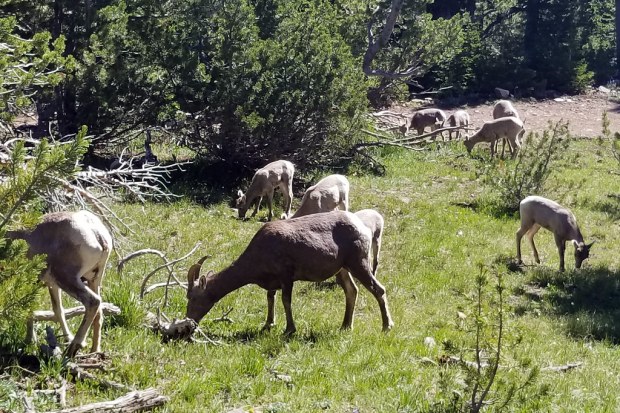
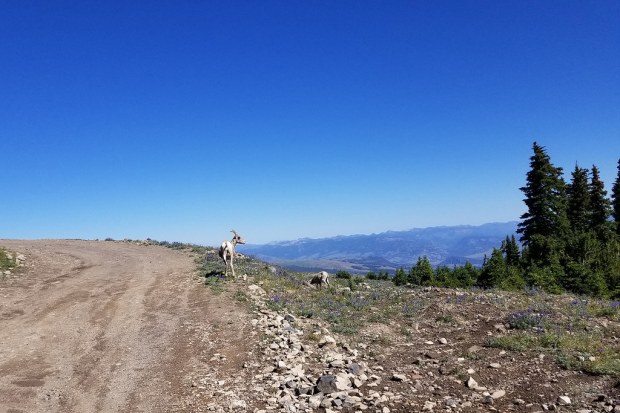
The Chittenden Road is all out in the open, so bring your sunscreen. The route follows a gravel roadbed straight up the mountain, not a switchback in sight! The major up-side of the unshaded terrain is that you always have views. When we visited there were also many wildflowers and maybe just as many bighorn sheep! It was neat to see the herd which was mostly mothers and babies. Although, we never did see a big ram with the classic curled horns.
At the top of the climb, you reach the summit tower. There are bathrooms, trash cans, and information at the top. There was a ranger staffing the tower, as well. We took lots of photos, had a snack, talked to some people wearing JMU gear (fellow alumni!) The vistas at the top are truly panoramic – you can see all across Yellowstone and back into the Tetons.
After the hike, we met back up with Brian (who had a great day fishing!) and moved on to our next campsite at Canyon Campground in Yellowstone. Canyon was a much nicer campground than Bridge Bay. It had better access to amenities and the campsites were lovely and tree-shaded. Bridge Bay was mostly an open field with tent-sites so close that we heard our neighbor snoring the entire night!
A couple things to consider before you plan this hike: 1) Check the road status on Yellowstone’s official website before you go! Oftentimes, the trailhead are not accessible due to either weather or construction. 2) Start this hike early in the day. It’s one of the park’s most popular and parking is competitive.
In late fall 2018, friends messaged us and asked “Would you like to hike the Teton Crest Trail with us next summer?” After a brief discussion the answer was a resounding YES! This is a once-in-a-lifetime kind of hike that makes you feel like you’re walking into scenery that belongs on the cover of Backpacker magazine.
It was such a privilege to go on this trip and we were so grateful for the invitation and our friends’ expertise. We’ve included some tips and planning advice at the bottom of this post. We’re by no means experts – we mostly wanted to share photos and our personal experience.
There are lots of route options for hiking the Teton Crest Trail. We hiked in via the Tram Approach and hiked out through Cascade Canyon to the Jenny Lake ferry – a total of about 29 miles. We hiked four days and camped three nights. What an adventure… read on!
Day One – Tram Approach to Death Canyon Shelf (9.8 miles)
Christine Says… I’ll admit it – my stomach was full of nervous butterflies when we stepped on the Aerial Tram at Jackson Hole Mountain Resort. The tram was our ride to the top of Rendezvous Peak, our start point for hiking the Teton Crest Trail (TCT).
Everything in the Tetons seems wilder and more dangerous than hiking in the east. I worried about the high altitude and how it would impact my cardio capacity. I wondered if I would react fast enough if I needed to use bear spray on a charging grizzly. I looked at the jagged peaks above and thought, “Do I really have any business going up there?”
As the gondola climbed ever upward to 10,450′, I took deep breaths and told myself I was going to have an amazing time on this four day adventure. How could I not? I was with my husband and some of my favorite hiking friends – Christy, Brian, and Kris. It was all good.
After getting off the tram, we took a few minutes for photos before descending through the pines for about 4 miles to our junction with the TCT. At each switchback, Christy made sure to say “Hey, Bear!” to make sure we didn’t startle any wildlife coming around a blind curve.
Once we were on the TCT, the terrain was open and vast. The sky was bluebird with only an occasional cotton-puff cloud. There were so many wildflowers and snow-frosted peaks to enjoy as we walked. After couple more miles, we reached our lunch stop at Marion Lake. We found some scrubby pines that offered a bit of shade while we ate. Marion Lake was lovely – cold and clear, so everyone made sure to collect and filter water.
After leaving Marion Lake, we had a 2.9 mile climb toward Fox Creek Pass. We crossed some snow along the way. There was no way around it – it was wider than it looks in the photos. Honestly, we were pretty lucky with our timing with snow – ice axes and crampons were necessary on the TCT just ten days before our visit. The snow had been deep and melted slowly in 2019.
Crossing Fox Creek Pass brought us to the Death Canyon Shelf ‘camping zone’ – which is where our permit designated we would spend our first night. The camping zone goes on for 3.4 miles of trail, and hikers can pick any suitable spot as a campsite. We had to hike another 1.5 mile or so before we found a good spot – near water – that would accommodate all three of our tents.
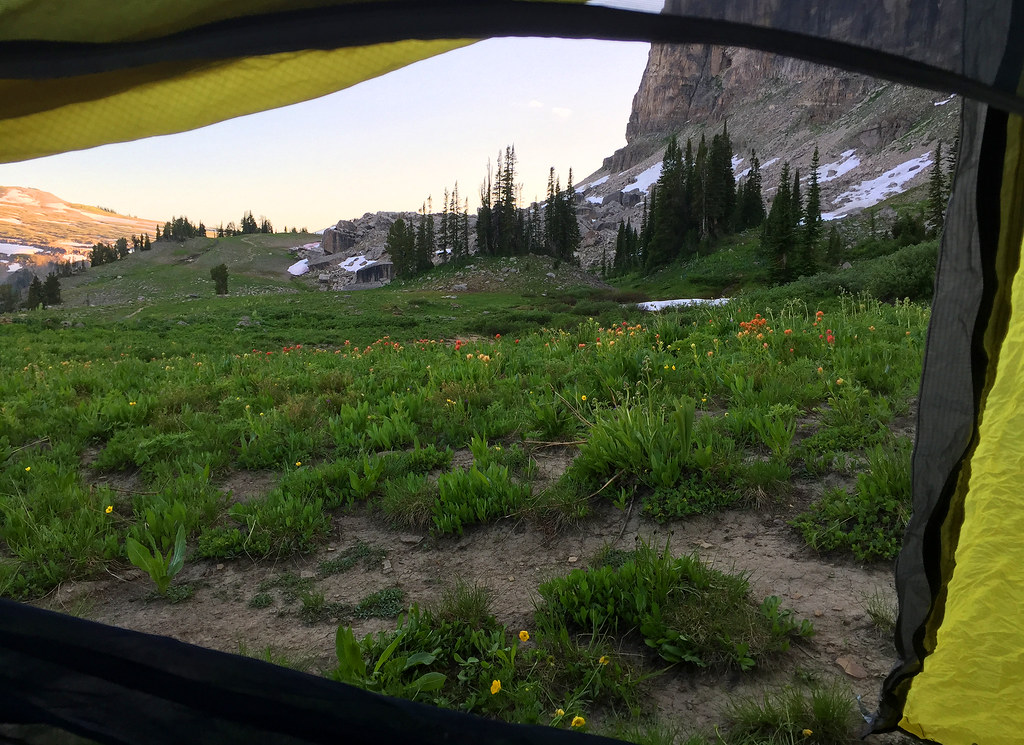
I’ve never camped in such an open, exposed area. It was literally like its name sounds – an open shelf with steep canyon walls both above and below it. It was so beautiful!
We got camp set-up, ate dinner, found a good place to stash our bear canisters, and went to bed early. We were all tired and my eyes were really dry from the wind, sun, and arid climate. When we zipped up our tents, it was nothing but clear skies! Even when I peaked out around 11pm, it was a dark sky filled with as many stars as I’ve ever seen.
But, as they like to say…weather changes quickly in the mountains! Sometime after midnight, we all were awakened by peals of thunder echoing down the canyon walls. Lightning was reaching across the sky and striking all around us. We heard Christy say from her tent “Hey guys, I think we need to bail to someplace less exposed.” I found my shoes and my jacket and followed the group to a place with a little more shelter and some medium height trees. Adam couldn’t find his shoes and socks easily, so we watched him from a distance, sitting in the tent, illuminated by lighting, rustling around half-asleep, trying to find his footwear. Thankfully, he made it out and joined us and didn’t get hit by lightning. We all got rained on a bit. Eventually the thunder and lightning subsided and we were able to get back in our tents.
There ended up being several more bands of storms, but none were as fierce as the first one. We stayed in our tent for the rest of them. It poured buckets of rain. It hailed a bit. The wind howled and shook our tent. I have to say, the Big Agnes Copper Spur UL2 held up like a champ! We slept as much as we could, but most of the night we were awake anticipating what our second day would be like.
Day Two – Death Canyon Shelf to Alaska Basin (5.2 miles)
Adam says… The second day started off with rain also. We hung out in our tents for a while, but when the rain finally slowed down, we thought it would be a good idea to attempt to make a quick breakfast and then pack up our gear for a day of hiking. We knew we were going to get more rain that day, but we felt we had a window to try and get some dry miles done.
Of course, with a lot of rain from the night before, the trail was full of slippery mud. The hiking was slow going for much of the day and we often had to stop to knock the mud off our shoes and boots as it caked on and made every step a bit more challenging. The trail started off a bit uphill as we continued up to Meeks Pass.
One of the amazing things about hiking here is that every steps feels like you are looking at a postcard. The beauty all around is amazing and there are a ton of expansive views! The hike started off for an early portion of the day with views of the Tetons ahead, so we knew we were making progress towards our goal.
Much of the hiking today was filled with expansive views and interesting rock formations that had been shaped from the glaciers and high elevation winds. As we made it up to the crest of Meeks Pass, there was a sign stating we were entering into Jedidiah Smith Wilderness.
The trail ultimately does a steeper downhill to arrive into Alaska Basin, our camping spot for the second night. We did not need a permit to camp in this area, as it’s outside the National Park boundary. Alaska Basin has a ton of small ponds and streams around with lots of rocks to hop around and investigate this interesting area. We found a secluded place to set up camp. We pitched our tents shortly before the rain started to downpour again. We ducked inside our sleeping bags and napped for most of the afternoon while listening to rain and hail coming down on our tent.
We lucked out with not getting soaked, but as we could see other groups arriving later in the day, they weren’t so fortunate. The rain stopped at one point in the late afternoon and we had a chance to make a hot meal and explore the area a bit before nightfall. Since this area allows people to have bear hangs, we hung up our trash, but Brian had a nightmarish time working on getting a tree to cooperate. We stretched and did some yoga (I am not very flexible) on some large rock outcroppings. We had a lot of fun despite the weather this day and the day was filled with laughter.
Day Three – Alaska Basin to Cascade Canyon (7.3 miles)
Christine Says… After a long afternoon of rain followed by a night of more storms, we wondered if we’d get a break in the weather to enjoy Hurricane Pass – which offers the hike’s best view of the iconic Grand Tetons. Luckily, I unzipped the tent to find sparkling sunshine and clear skies. I think there’s a particular clarity and cleanness to the air after storms, and this morning was especially fresh.
We ate breakfast, broke down camp, and prepared for a third day of hiking. We had some small streams and a moderate rocky ascent leaving Alaska Basin. From there, we descended again to beautiful Sunset Lake. We talked to a few people who had camped near the lake. They mostly talked about the assault by mosquitoes that they had endured. Death Canyon shelf really didn’t have any bugs!
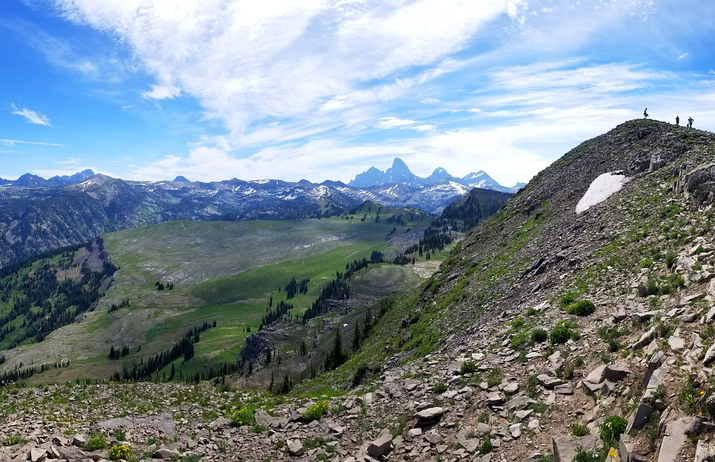
Leaving the lake, we could see Hurricane Pass off in the distance. It looked high and unreachable, but it ended up being a moderately steep climb for just a couple miles. We stopped near the top for a snack and some photos looking back into Alaska Basin.
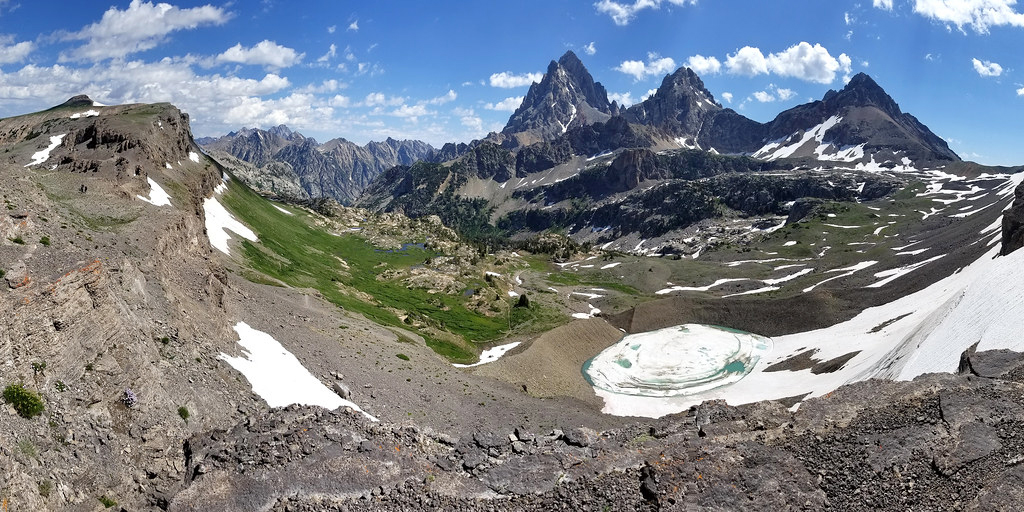
A short distance later we reached Hurricane Pass and its mind-blowing views of of South, Middle and Grand Teton. We spent a lot of time here, celebrating the view and feeling gratitude for the opportunity to have this adventure. I actually had tears in my eyes because I couldn’t believe I (ME!) was standing and beholding such a majestic view.
It’s hard to walk away from Hurricane Pass, but eventually we had to make our way down. Leaving the pass, the trail drops steeply toward Schoolroom Glacier. When I say steeply, I really mean it. The trail is a literal drop-off – one misstep could send you rolling down a very steep hillside. It was really the only obstacle on the trail that gave me any inkling of a nervous pause. Incidentally, I believe the NPS has a trail restoration project going on at this drop-off to repair erosion and make it safer.
Once I took the initial plunge, the trail was fine – lots of switchbacks leading down into Cascade Canyon. As we descended, the day got hotter and I got more and more dehydrated. I had been so careful the first two days to drink often, but I guess I got careless on the third day. As we hiked on, I started to feel kind of sick with cramps and an awful headache. Even after I started drinking again, it never felt like enough to quench my thirst. Even though I was struggling, I really enjoyed walking along the stream.
We eventually got to the South Fork Cascade camping zone, which is where we had a permit for our third night of camping. We found a great spot just uphill from the stream. There was room for two tents under a cluster of trees and room for many tents in an open meadow with a canyon wall as the backdrop. Adam and I set our tent up in the meadow. Kris and I walked down to the stream and soaked our tired feet in the icy water.
We cooked dinner and spent most of the evening reflecting on the trip – highs, lows, things we were still looking forward to seeing. With this group, there is always a ton of laughter and jokes, so camp is always a fun time. We even took some time to be silly and recreate the scene pictured on the Mountain House package our dinner came in.
This was also the only night I had to use a bug net over my head! For whatever reason, I am very attractive to mosquitoes and despite all the measures I took, I still got many, many bites. I was so itchy I had to take Benadryl before bed. It was hard to believe this was our last night of the trip, and the next day we would walk back out into civilization!
Day Four – Cascade Canyon to Jenny Lake Ferry (5.7 miles)
Adam says… Due to snow, the Paintbrush area was only safely accessible to people with ice axes, so we didn’t do a full Teton Crest Trail traverse. We came down Cascade Canyon to arrive at Jenny Lake for our last day.
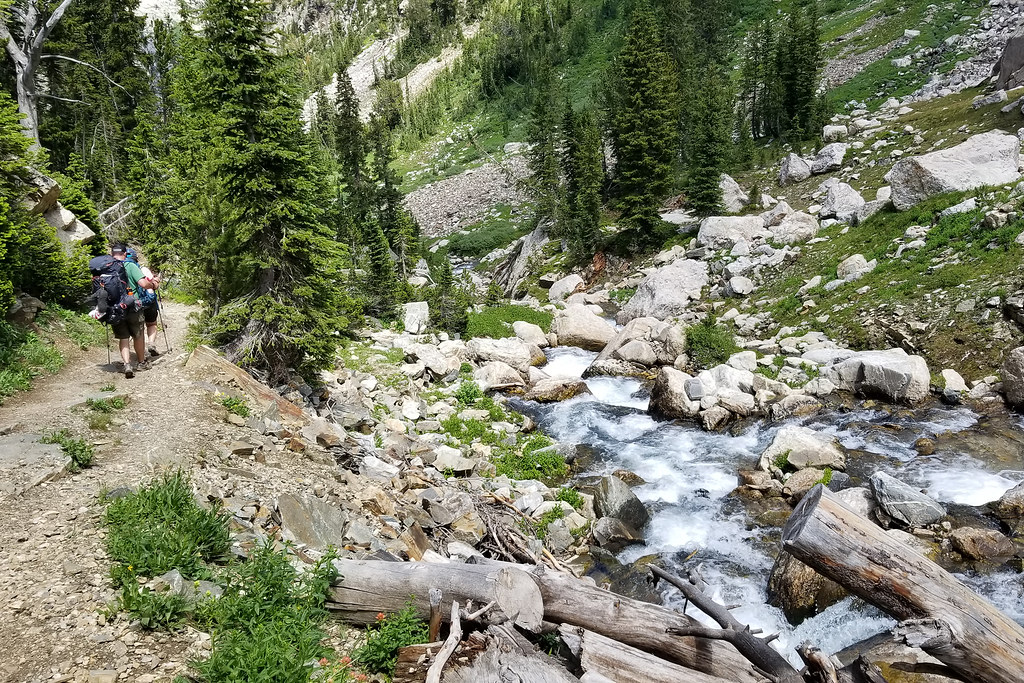
The trail went by some dramatic landscapes and hiked down along some fast-moving streams and waterfalls on the way down. The power of nature is really humbling through the vastness of the terrain of high elevations. As we made our way down to the Cascade Canyon area, we saw a couple of deer hanging out at a trail junction.
As we continued along Cascade Canyon, the trail was heading downhill and we started to see more day-hikers arrive as we got closer to Jenny Lake. Along the creek, we spotted a bull moose sitting in the brush and we were so glad we had the opportunity to see some of the wildlife we don’t get in Virginia.
The hike along Cascade Canyon was so scenic and we felt the warmer temperatures as we reached some lower elevations. Eventually, we reached the area known as Inspiration Point and there were a lot of day-hikers hear that were taking in the view. My back had been killing me that day, so I relaxed and worked on stretching out my back while we had a snack.
We had one last bigger descent to make down from Inspiration Point and we made it to the bottom to see tons of people along the trails. We took a short side trip to check out Hidden Falls, which is a most impressive waterfall.
From here, it was a short walk to the ferry, where we hopped on a boat to take us to the other side of Jenny Lake. While most of the passengers were just out for a short trip, they were all asking us questions about our trip over the mountains. With the cool lake breeze hitting us, we were refreshed yet exhausted from all we had done over the last several days. We picked up our car at Jenny Lake and we picked up our other cars at the tramway. Unfortunately, our rental car had been hit by another car in the parking lot, but that didn’t dampen our moods too much as we had just done a trip we will remember for a lifetime. If you’re fit enough and can navigate the permit process, make this a must-do adventure!
Final Thoughts: The Teton Crest Trail is not a trip you can go on without significant planning and preparation.
You have to get permits for each place you plan to camp along the route. Getting a permit can be competitive and the process opens in January on recreation.gov.
You’re going to need a ride at the end. This is a segment hike, so you’ll finish many miles from where you started. Plan ahead for this! Because we were in a group with multiple cars, we dropped one at our finish point the night before we started our hike.
You’ll have to carry a bear canister and bear spray. You must have an approved bear-proof container in GTNP. The ranger station can issue you a loaner if you need one. You also should plan to carry bear spray, since this is grizzly country!
If you’re arriving from the east (or anywhere considered low-country), plan to acclimate a few days before you attempt the Crest Trail. The high altitude can make you sick if you don’t give your body a bit of time to adjust.
Bring lots and lots of sunscreen! Seriously, there is very little shade along the trail. Paired with the high altitude, it is easy to get a bad sunburn very quickly.
While this hike seemed remote and intimidating, it was actually moderate terrain and I think it could be done by most people of average hiking fitness. It was not a killer-tough hike.
There are some good planning guides online that will help you plan. A couple examples:
In our visit to Grand Teton National Park, our big goal was to backpack a few days on the Teton Crest Trail. Still acclimating to the high altitudes and with a goal of also trying to conserve energy before the big trek, we picked this easy and scenic hike to Taggart Lake.
We started off fairly early and went for a drive along Moose Wilson road to start the day. On the side of the road, we were lucky enough to see a moose grazing in a clearing and we were so glad to start our day with such a fortuitous sighting! We stopped by the Jenny Lake Ranger Station to drop off a car for our return trip on the Teton Crest Trail and we were also able to swap out some of our backpacking permits for our trip so we had better camping options.
We then made our way to the Taggart Lake trailhead and parked to start our hike. The hike is 3.3 miles with only 300 feet of elevation gain. The hike is well traveled and in good condition, so most people will find this to be an easy, family hike with a big payoff.
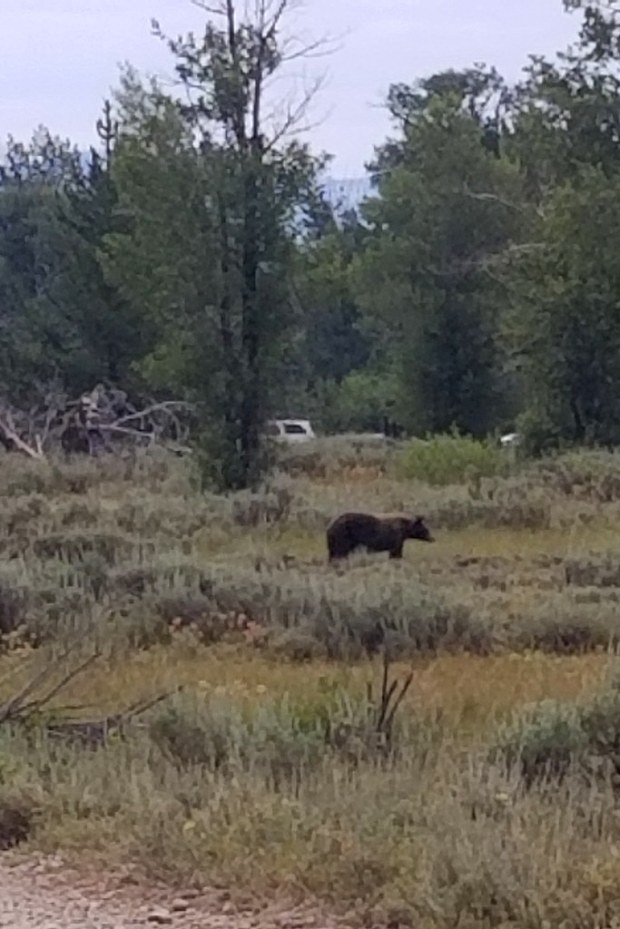
The trail starts off with an open field view. We veered to the right at the first junction. Just about two tenths of a mile along the hike on the gravel road, we saw a black bear far off in the distant. We headed the opposite way to the right to start the main part of the hike. Shortly after that, the trail ducks more into woods and we crossed over a footbridge over a roaring creek.
After a short distance, the trail then begins a slight climb as you hike along the Taggart Creek. About a mile into the hike, the trail then opens up again into a larger field where we had great views of the Tetons. After a short distance, we came upon the junction with the Bradley Lake Trail, but stayed on the Taggart Lake Trail.
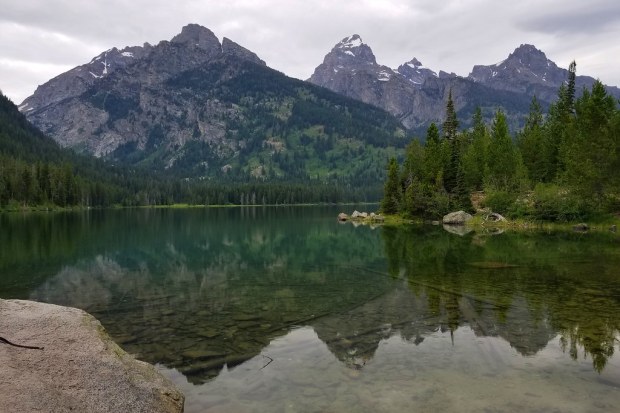
The trail stayed fairly flat from this point and in another half mile, we reached the edge of Taggart Lake. The day had been cloudy and a bit drizzly, but it made for nice reflections on the lake of the Tetons in front of us. There were a few different angles and rocks to spread out on, but this is a popular hike and you may not get the best solitude on a busy weekend. The lake was still and quite scenic and it just begged us to pause, relax, and take in the beauty of the reflections and the looming mountain backdrop.
After taking a ton of pictures, we made our way back and drove into Jackson Hole. We had lunch at Merry Little Piglets, which served delicious Tex-Mex food in a fun, decorated atmosphere. We then stopped by to get some groceries for our upcoming backpacking trip and made it back to our hotel to load our backpacks for the next day.
Note: Over the past couple years, we’ve struggled with what to do with Virginia Trail Guide. We love sharing the hikes we go on, but writing detailed posts with full turn-by-turn directions takes a ton of time. Also, it seems that most hikers prefer to visit AllTrails.com for maps and route options.
Because we still love sharing our adventures, Virginia Trail Guide is evolving! Actually, maybe devolving.. we originally started off as a blog to share photos and overall impressions of trails, while leaving mapping and wayfinding to you – the hiker. We’re going back to that model – Virginia Trail Guide will be pictures and opinions.
On that note, we have an immense pile of backlogged hikes we’ve never posted, because we simply didn’t have time to write up all the details. We’re going to be working through that backlog and sharing some of the amazing hikes we’ve done over the past few years.
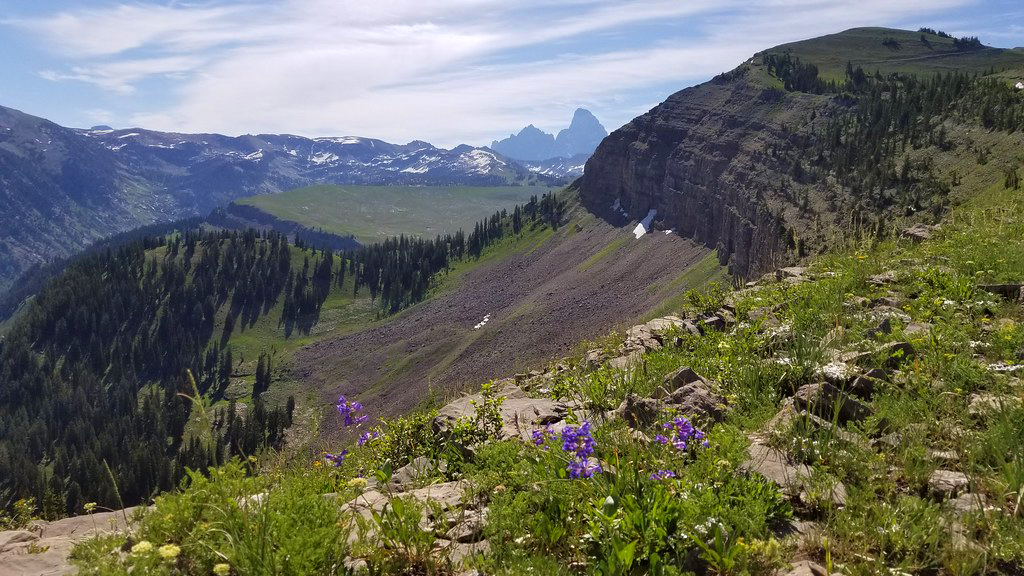
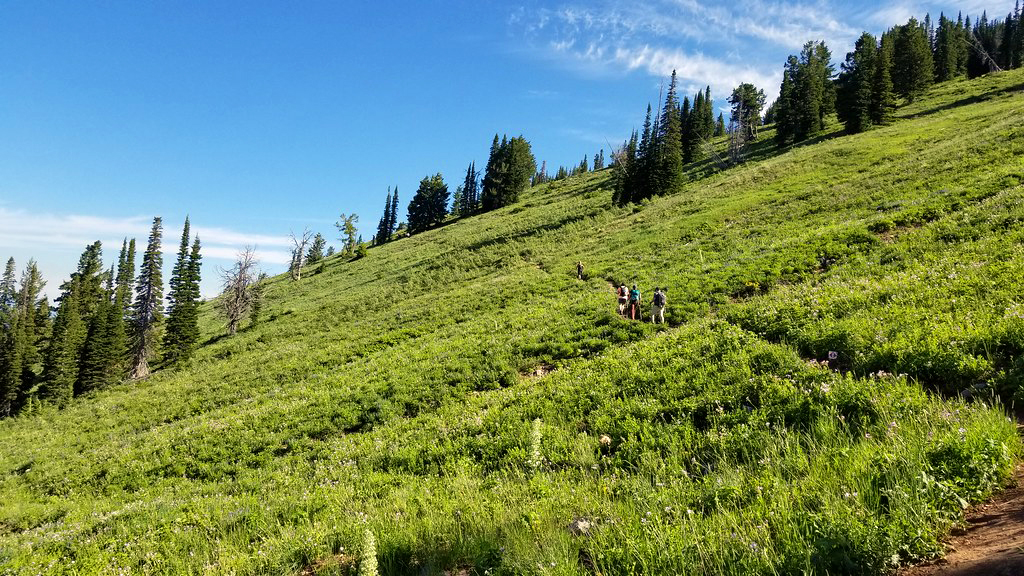
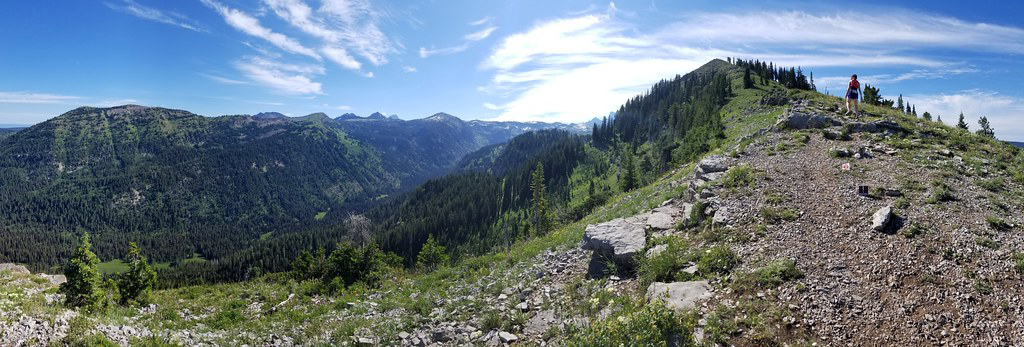
The first we want to share is this amazing hike we went on at Grand Targhee Resort in Alta, Wyoming in July 2019. Our friends (and guides for this trip), Christy and Brian, picked this hike out to serve as a solid training/acclimatization hike – in preparation for a bigger adventure we had planned later in the week (more about that in another post!)
The hike was about seven miles with a little over 1,900′ of elevation gain. The route used several trails on the resort property – the Bannock Trail, the Summit Trail, and the Mary’s Saddle Trail (View a Targhee Summer Trail Map.) The elevation gain was made even more challenging due to the fact that Targhee’s base sits at 8,000′ above sea level, with the final vista of the hike at close to 10,000′. Those lofty altitudes mean thinner air that leaves the unacclimated hiker gasping for oxygen.
Luckily, the hike is so beautiful that you kind of forget that you’re struggling to breathe! The early part of the trails meanders upward using switchback after switchback. The trail is very exposed to direct sun most of the way up the mountain, so you’ll definitely want to wear a wide-brimmed hat, sunglasses, and loads of sunscreen. You’ll also want to drink extra water – the arid climate and high elevation will dehydrate you more quickly than hiking in Virginia. You should also carry a canister of bear spray – this is grizzly country. Even though this trail is well-traveled, you should be prepared.
On the day we hiked, we happened to be sharing the route with a Ragnar race. There were many runners on course. It was impressive to see people running up those hills, as walking was challenging enough for me!
The objectives of this hike are the views from Mary’s Nipple and the vista of the Grand Tetons at the end of the Mary’s Saddle Trail. Along the ridge near the end of this hike, we could still see the last remnants of melting snow and the jagged peaks of the Tetons. It’s truly majestic scenery. Hiking out west is a totally different world compared to our rolling Appalachians.
This hike was an out-and-back, so after taking in the views, we hiked back down the same way we had come up. The hike down was spectacular, partly because the exertion of climbing uphill was done, but also because we were able to enjoy open views the whole way down! I also appreciated the huge variety of wildflowers along the trail.
After arriving back at the base, we enjoyed a late lunch at Grand Targhee’s Trap Bar & Grill. Of course, we had to get their famous Wydaho Nachos and ‘Sloshies’ (basically a boozy Slurpee).
NOTE: Parking at Edith Gap was greatly restricted starting in fall 2020. If you attempt to park there, be sure to pay attention to the the new ‘No Parking, Tow Away’ signs. Unless you are very certain you are legally parked, we suggest following the updated route outlined below, starting from the horse trailer parking area for the Stephens Trail about a mile lower on the mountain.
Kennedy Peak is an beautiful seven-mile out-and-back hike in the Lee District of George Washington National Forest. It gives hikers gorgeous views of the bends in the Shenandoah River.
The view from atop the Kennedy Peak Tower
Christine Says…
I love this hike. We’ve hiked it in winter and fall before, but this was the first time we’ve hiked it in the spring. Sunday afternoon was the kind of day that is custom made for hiking. It was dry, sunny, breezy and in the low 70’s. The trail was lined with brilliant, pink rhododendrons. All the trees were covered with new, spring green leaves and/or blossoms. Butterflies were fluttering all around the trail, taking pauses on the blooming trees and wildflowers. It was, in a word, idyllic.
Box Turtle, Swallowtail on Rhododendron, Indigo Bunting
We began in the Stephens Trail/horse trailer parking area on VA675. The Stephens Trail departs from the back of the parking area. You should look for the orange-blazed Massanutten Trail at the head of the parking lot. The trail climbs moderately uphill for .9 miles. At the top of the climb, you’ll exit onto VA675 at Edith Gap (the old parking area). On the road, take a sharp left, staying on the orange-blazed Massanutten Trail.
Hiking uphill along the Massanutten Trail, headed to Edith Gap.
The part of the trail starts off as a wide, almost road-like track. This part of the hike is extremely easy – climbing just a couple hundred feet over the next 1.75 miles.
At around mile 2.65, the trail takes a sharp, hairpin turn and begins to climb more steeply over increasingly rocky terrain. At this sharp switchback, you may be tempted to continue straight along a visible path, but be careful to make the turn and follow the orange blazes uphill. This slightly tricky misdirection has been blocked off by logs and rocks, but enough people have missed the turn that the false path remains well-trodden. We once followed it out of curiosity and it doesn’t lead anywhere. It eventually fades out into the forest.
Don’t miss this switchback!
After the switchback, the trail continues uphill for another half mile. There is a small outcropping on the left with a obstructed views and a tiny campsite (room for a hammock or a one-person tent). After you pass this spot, continue a couple tenths of a mile to the junction with the Stephens Trail. (Note: If you want to make a longer day, adding about two more miles to your route, you can descend back to your car via the Stephens Trail. We’ve heard it’s not very scenic and is often muddy and manure-covered, so we chose the out-and-back.)
At the junction, you will turn right and follow the signs toward the fire tower. The tower is a little over .2 miles from the junction. The last stretch to the fire tower is steep and rocky. It’s really the only challenging section of the hike. The tower is a sturdy one-story structure with great views looking into the valley and Shenandoah National Park beyond.
When we got to the summit, we had the observation tower all to ourselves. We watched birds in the treetops, spotted lizards climbing around on the rocks and took in a fantastic view of the Shenandoah River and the Page Valley. It was one of the least hazy days we’ve had in a while, so we could clearly see Shenandoah National Park from this summit. Lots of vultures were soaring overhead, and even though they’re kind of creepy, they were casting cool bird-shaped shadows onto the mountain top. I always like it when they do that.
The trail is pretty rocky for the last half mile.
Sunday was the only time we’ve hiked Kennedy Peak in the afternoon. Adam and I tend to be morning hikers — it helps us avoid the crowds. But, the light is definitely prettier in the afternoon on Kennedy Peak. If you hike it in the morning, the sun shines right in your face at the summit. That makes it hard to appreciate the great view, and makes it nearly impossible to get any decent photos.
Adam Says…
This is one of our favorite hikes. This hike is not very steep and the payoff is wonderful. This is a good multi-use trail, since there are campsites and good footing for horses. There are a couple of campsites at the beginning of the trail, near the road. The nicest campsites are further up the trail. Once you are on the fire tower trail, you will find a couple of places where you can have some nice lookouts over the valley and the Shenandoah River. From some points, you can see several bends in the River. Once you reach the top, there is an observation tower where you can chill for a while before heading back down.
Views from the other side of the tower.
If you are into geocaching, look for the Presidential Peek Cache! After your hike, be sure to visit Camp Roosevelt – a great spot for a picnic.
Trail Notes
Distance – 7 miles round-trip
Elevation Change – 1300′
Difficulty – 3. The trail for the first miles is moderately uphill. The next two miles are either flat or gentle rolling terrain. The last third of a mile up to the observation tower is steeper, but very manageable.
Trail Conditions – 3. The trail is well-maintained, but there are a lot of rocks, so you’ll need to watch where you step.
Views – 4. You can really see some nice views close to the top.
Waterfalls/streams – 0. This trail is dry as a bone.
Wildlife – 2. Seems like a great bird-watching area. We saw an Indigo Bunting, Goldfinch, Wood Thrush, and Eastern Towhee. Also spotted a box turtle and Eastern fence lizard. We saw a bear when we hiked it in spring 2017.
Ease to Navigate – 4. Other than the one tricky spot at the switchback, it would be nearly impossible to get lost.
Solitude – 2. This trail is well-loved by a lot of locals, but the bulk of area tourists stick to the trails in Shenandoah National Park. You may see a few groups of hikers along the way, but it’s rarely a crowded trail.
All Photos
Directions to trailhead: The parking lot is the Stephens Trailhead on VA675. Coordinates: 38.72795, -78.51536
This nine-mile loop is perfect for a long day-hike or a quick overnight backpacking trip. We recommend backpacking, just to take advantage of the beautiful campsites near the summit. The rock scramble atop Duncan Knob is impressive and provides great views.
Full photo album is embedded at the bottom of the post!
Adam Says (Day 1)
When the weather forecast looked like it was setting up to be a great weekend, we decided on short notice to pack our bags and go for an overnight backpacking trip. We had originally planned to do some miles of the Appalachian Trail we still wanted to accomplish, but there was a potential gas shortage coming so we came up with an idea that was closer to us and also wouldn’t require us to drive two cars to shuttle.
Duncan Knob and Strickler Knob are some of the more adventurous hikes in George Washington National Forest, since they both require some rock scrambling to get to the summit views. We opted for this route since we have done both Strickler and Duncan Knob as day hikes and had missed part of the trail system that makes this a doable overnight loop.
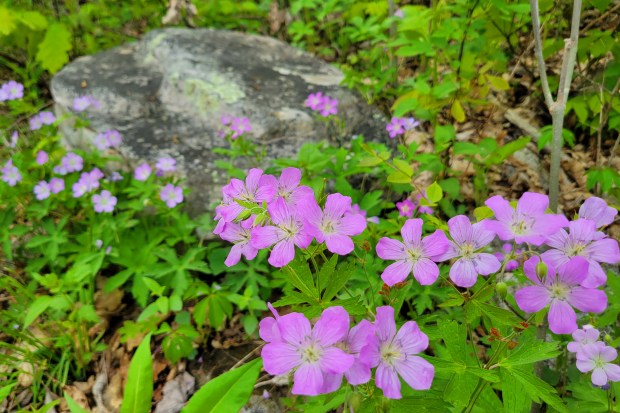
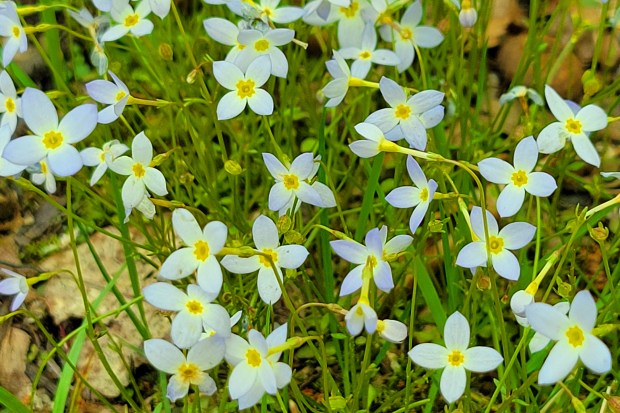
PHOTO: Blooming native pink azalea.
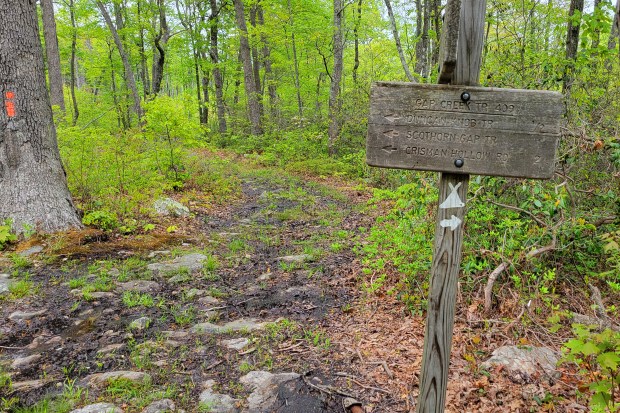
We started our hike from the Scothorn Gap parking area, quickly crossing the creek. The trail starts an uphill climb that is a bit steep in parts. We reached the junction with the Strickler Knob trail at the top of Middle Mountain. We ran into a few people that were doing that as a day hike. If you wanted to add Strickler Knob onto this loop of a trail, it would add another 1.4 miles to the trip – if you haven’t done Strickler Knob before, I would highly recommend it. We weren’t sure about camping and how far we wanted to go the first day, so we decided to skip Strickler Knob. The trail crests shortly after the junction with Strickler Knob and then descends. The descent at times was rocky and very muddy. We’ve read about the bugs on this trail and that can be largely from standing water.
PHOTO: A view from the crest of Middle Mountain (near the Strickler Knob Trail Junction)
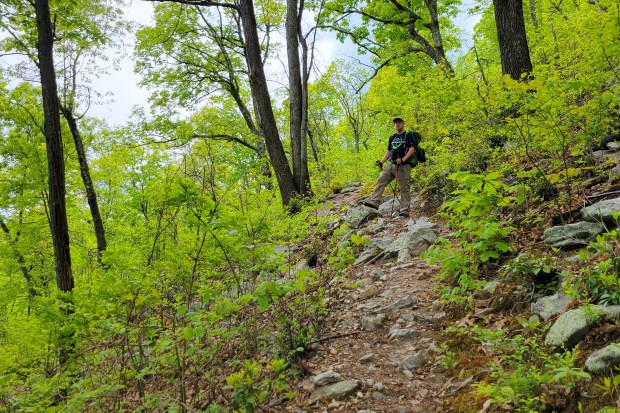
After descending for 2.2 miles, we came to another four-way junction with a campsite right next to a stream. There were already 4-5 guys there at the one spot that were setting up to camp, so we checked our water supply. Since we felt we had enough water to get us through the end of the hike and to cook with for dinner and breakfast, we decided to press on. The hike up from the creek was a very steep, narrow trail of .8 miles. With a full backpack, it made for slow work.
PHOTO: This was a tough uphill climb to camp!
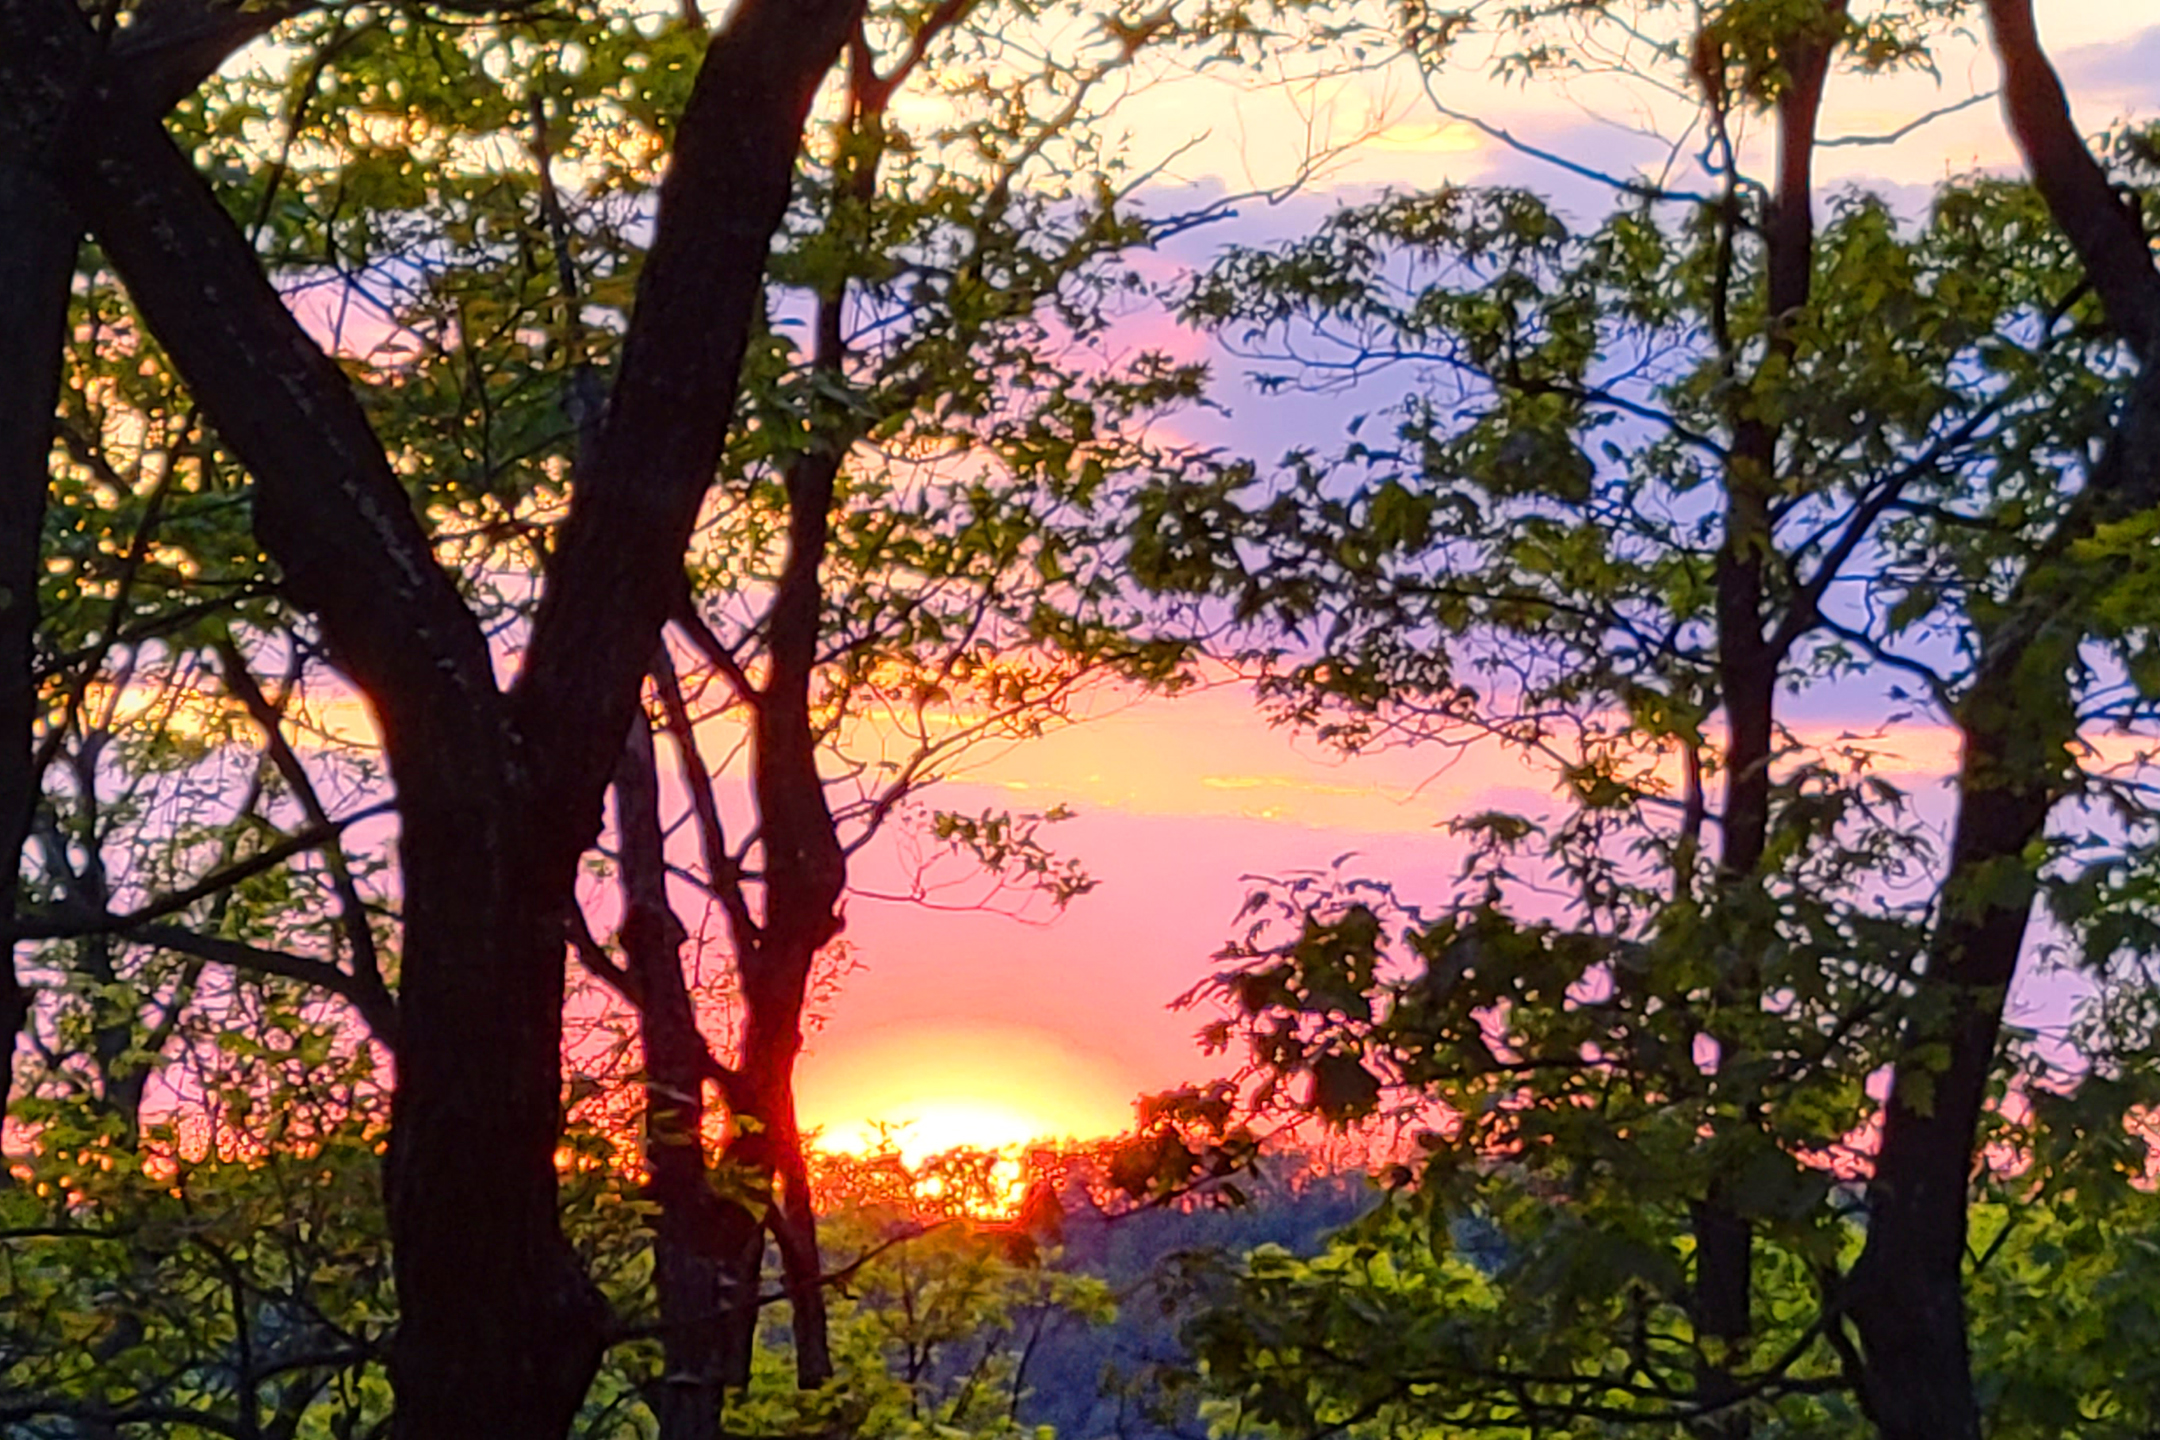
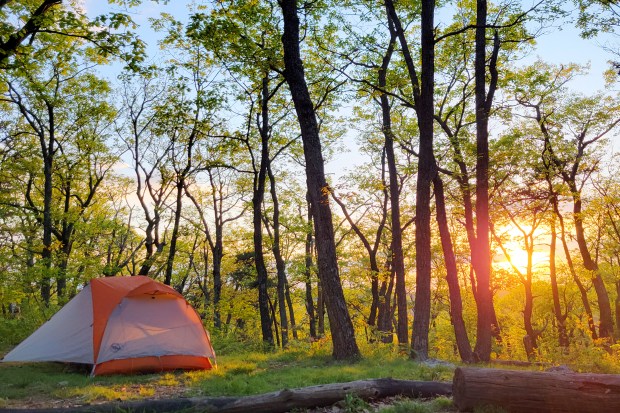
We decided to camp right at the saddle junction with the Duncan Knob trail. This area is called Peach Orchard Gap, and it has several awesome (but dry) campsites. We built a campfire and just relaxed for the rest of the afternoon and evening. Since we only did a bit over 5 miles that first day, it was a shorter trip that gave us a nice, relaxing time to enjoy our time in the woods. We decided to tackle the Duncan Knob peak the following morning where we didn’t have to haul our packs up the rock scramble.
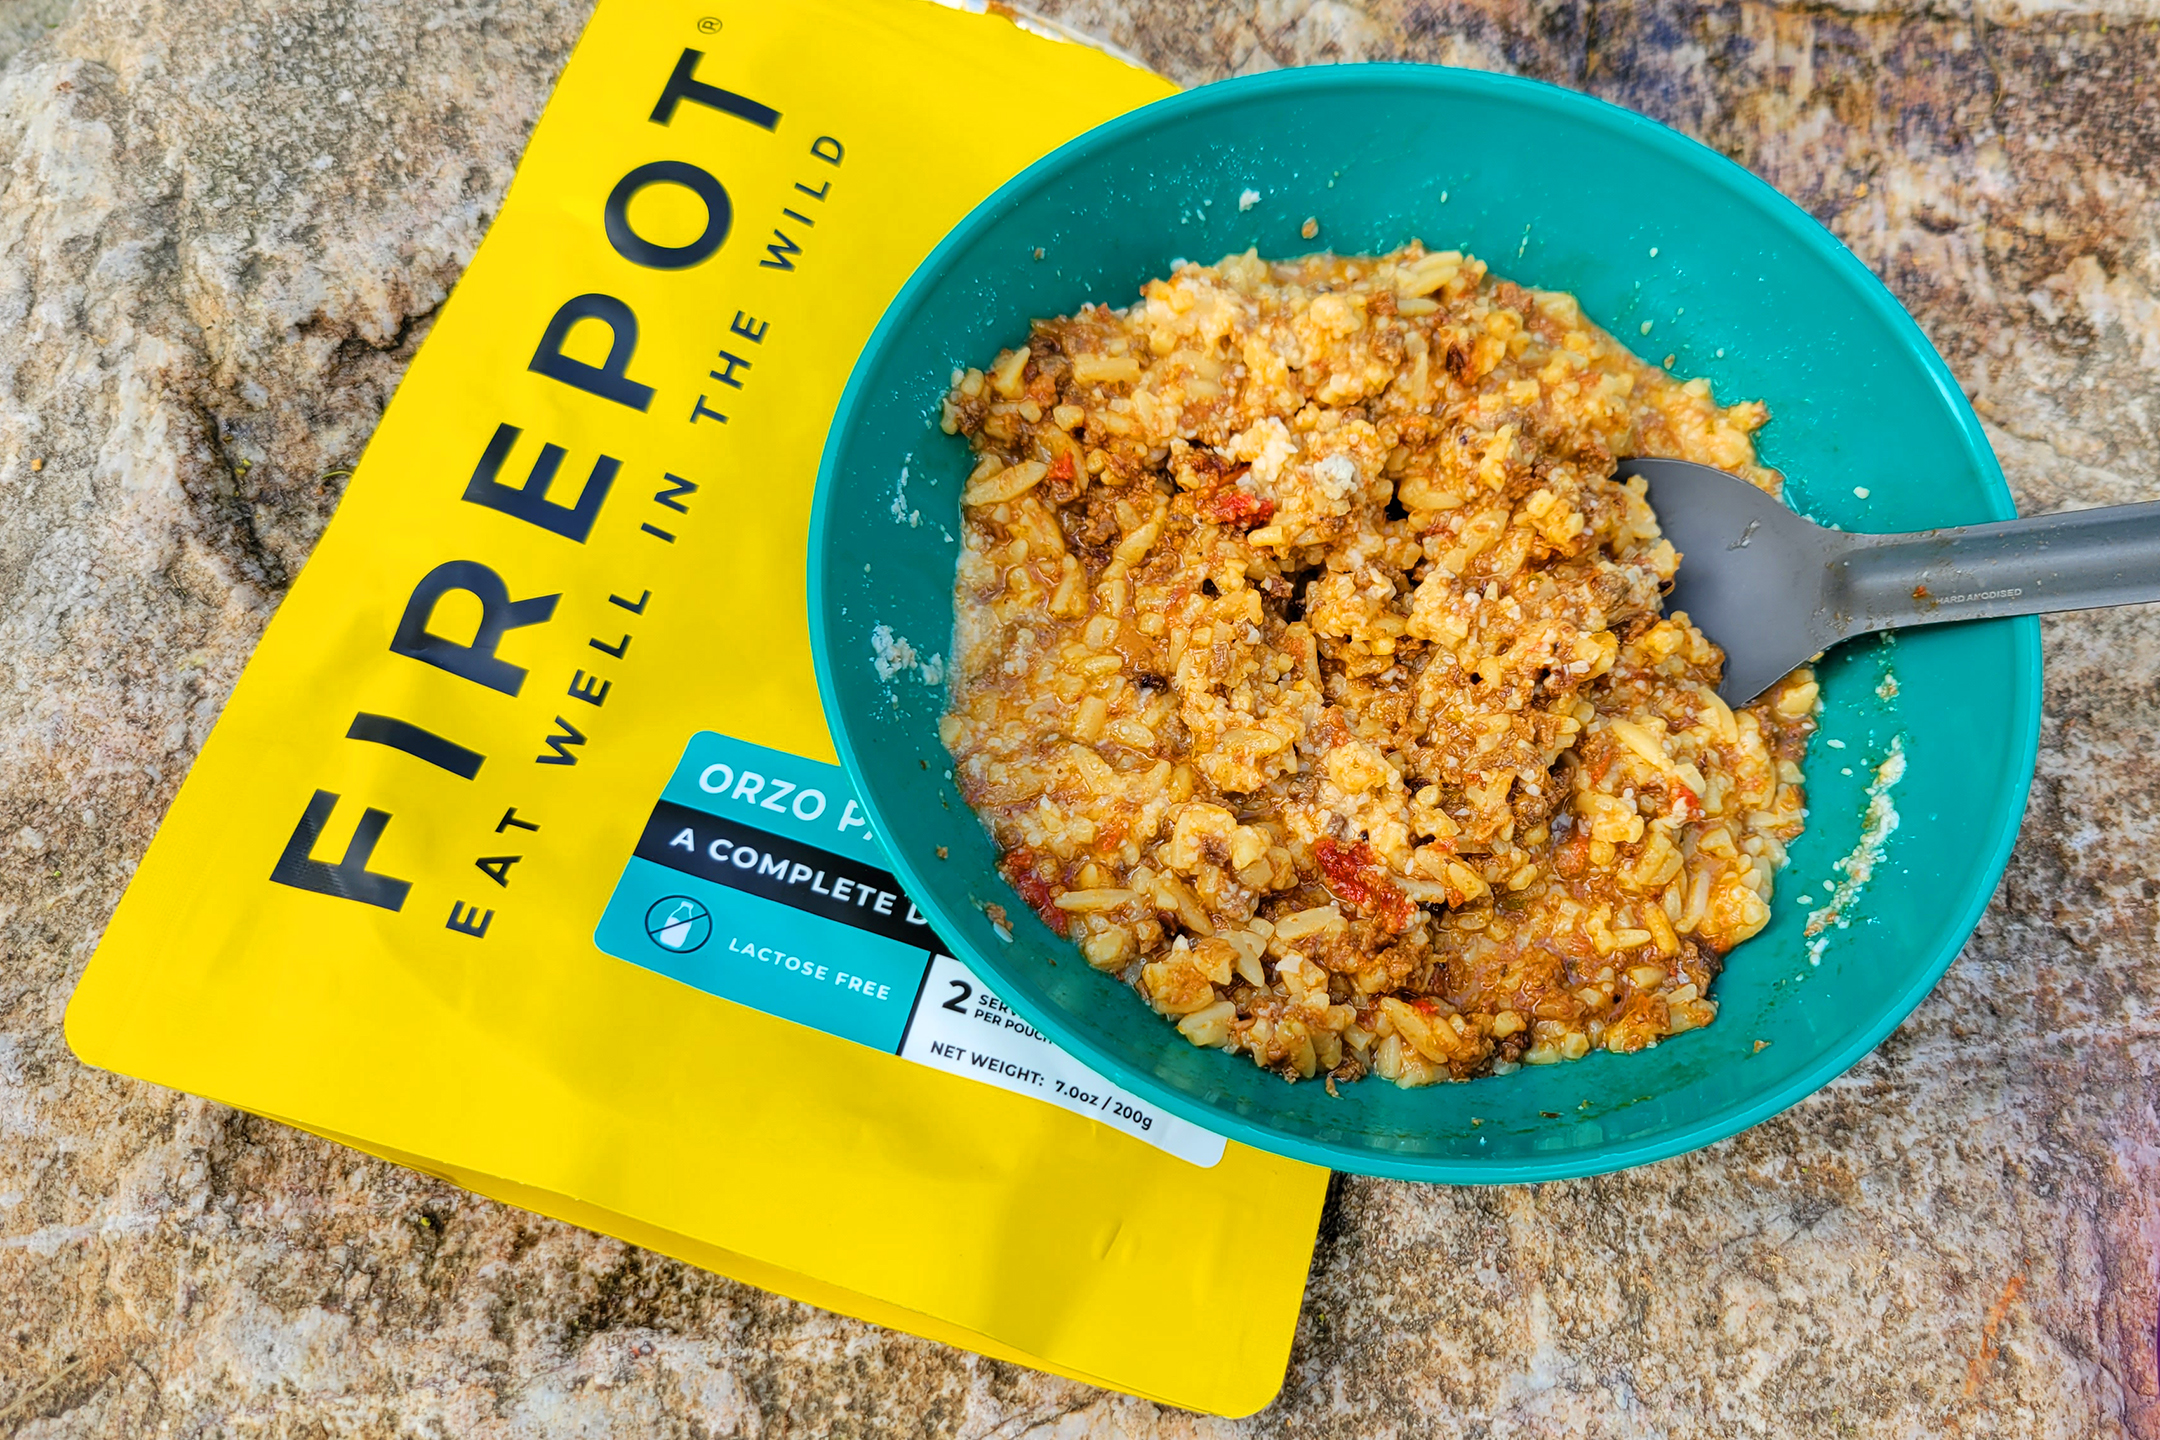
PHOTO: This meal, by the British company Firepot, may have been one of the best freeze-dried meals we’ve ever had!
Turn-by-Turn for Day 1
Cross Passage Creek and hike uphill on the yellow-blazed Scothorn Gap trail for 1.5 miles to a four-way trail intersection.
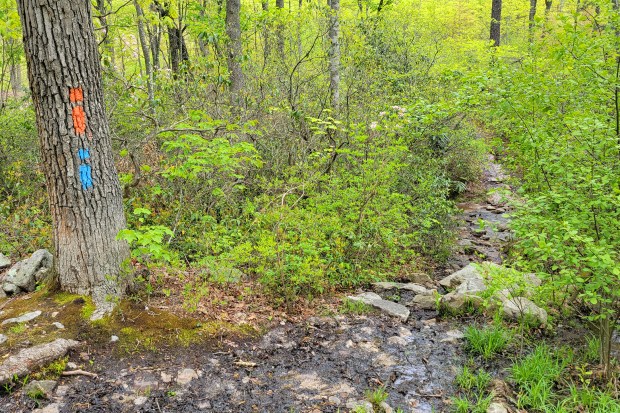
Stay straight at the intersection, heading uphill for .7 miles on the orange-blazed Massanutten Trail. At the top of Middle Mountain, you will see the pink-blazed Strickler Knob trail on the right.
Pass the Strickler Knob trail, and continue over the crest of Middle Mountain on the orange-blazed Massanutten Trail. Descend for 2.2 miles. Much of this section of the trail is muddy and boggy. Check yourself for ticks!
You will reach another junction near a streamside campground. The campsite will be on the right, turn left, heading very steeply uphill on the blue-blazed Gap Creek Trail. If you plan on camping at the top, this will be your last opportunity to refill your water supply. Campsites on the ridge are dry.
Ascend via the Gap Creek Trail for .8 miles before the trail levels out at Peach Orchard Gap. There are several nice, flat, open campsites along this ridge. This is where we chose to stop for the day.
PHOTO: A pretty sunset.
Christine Says (Day 2)
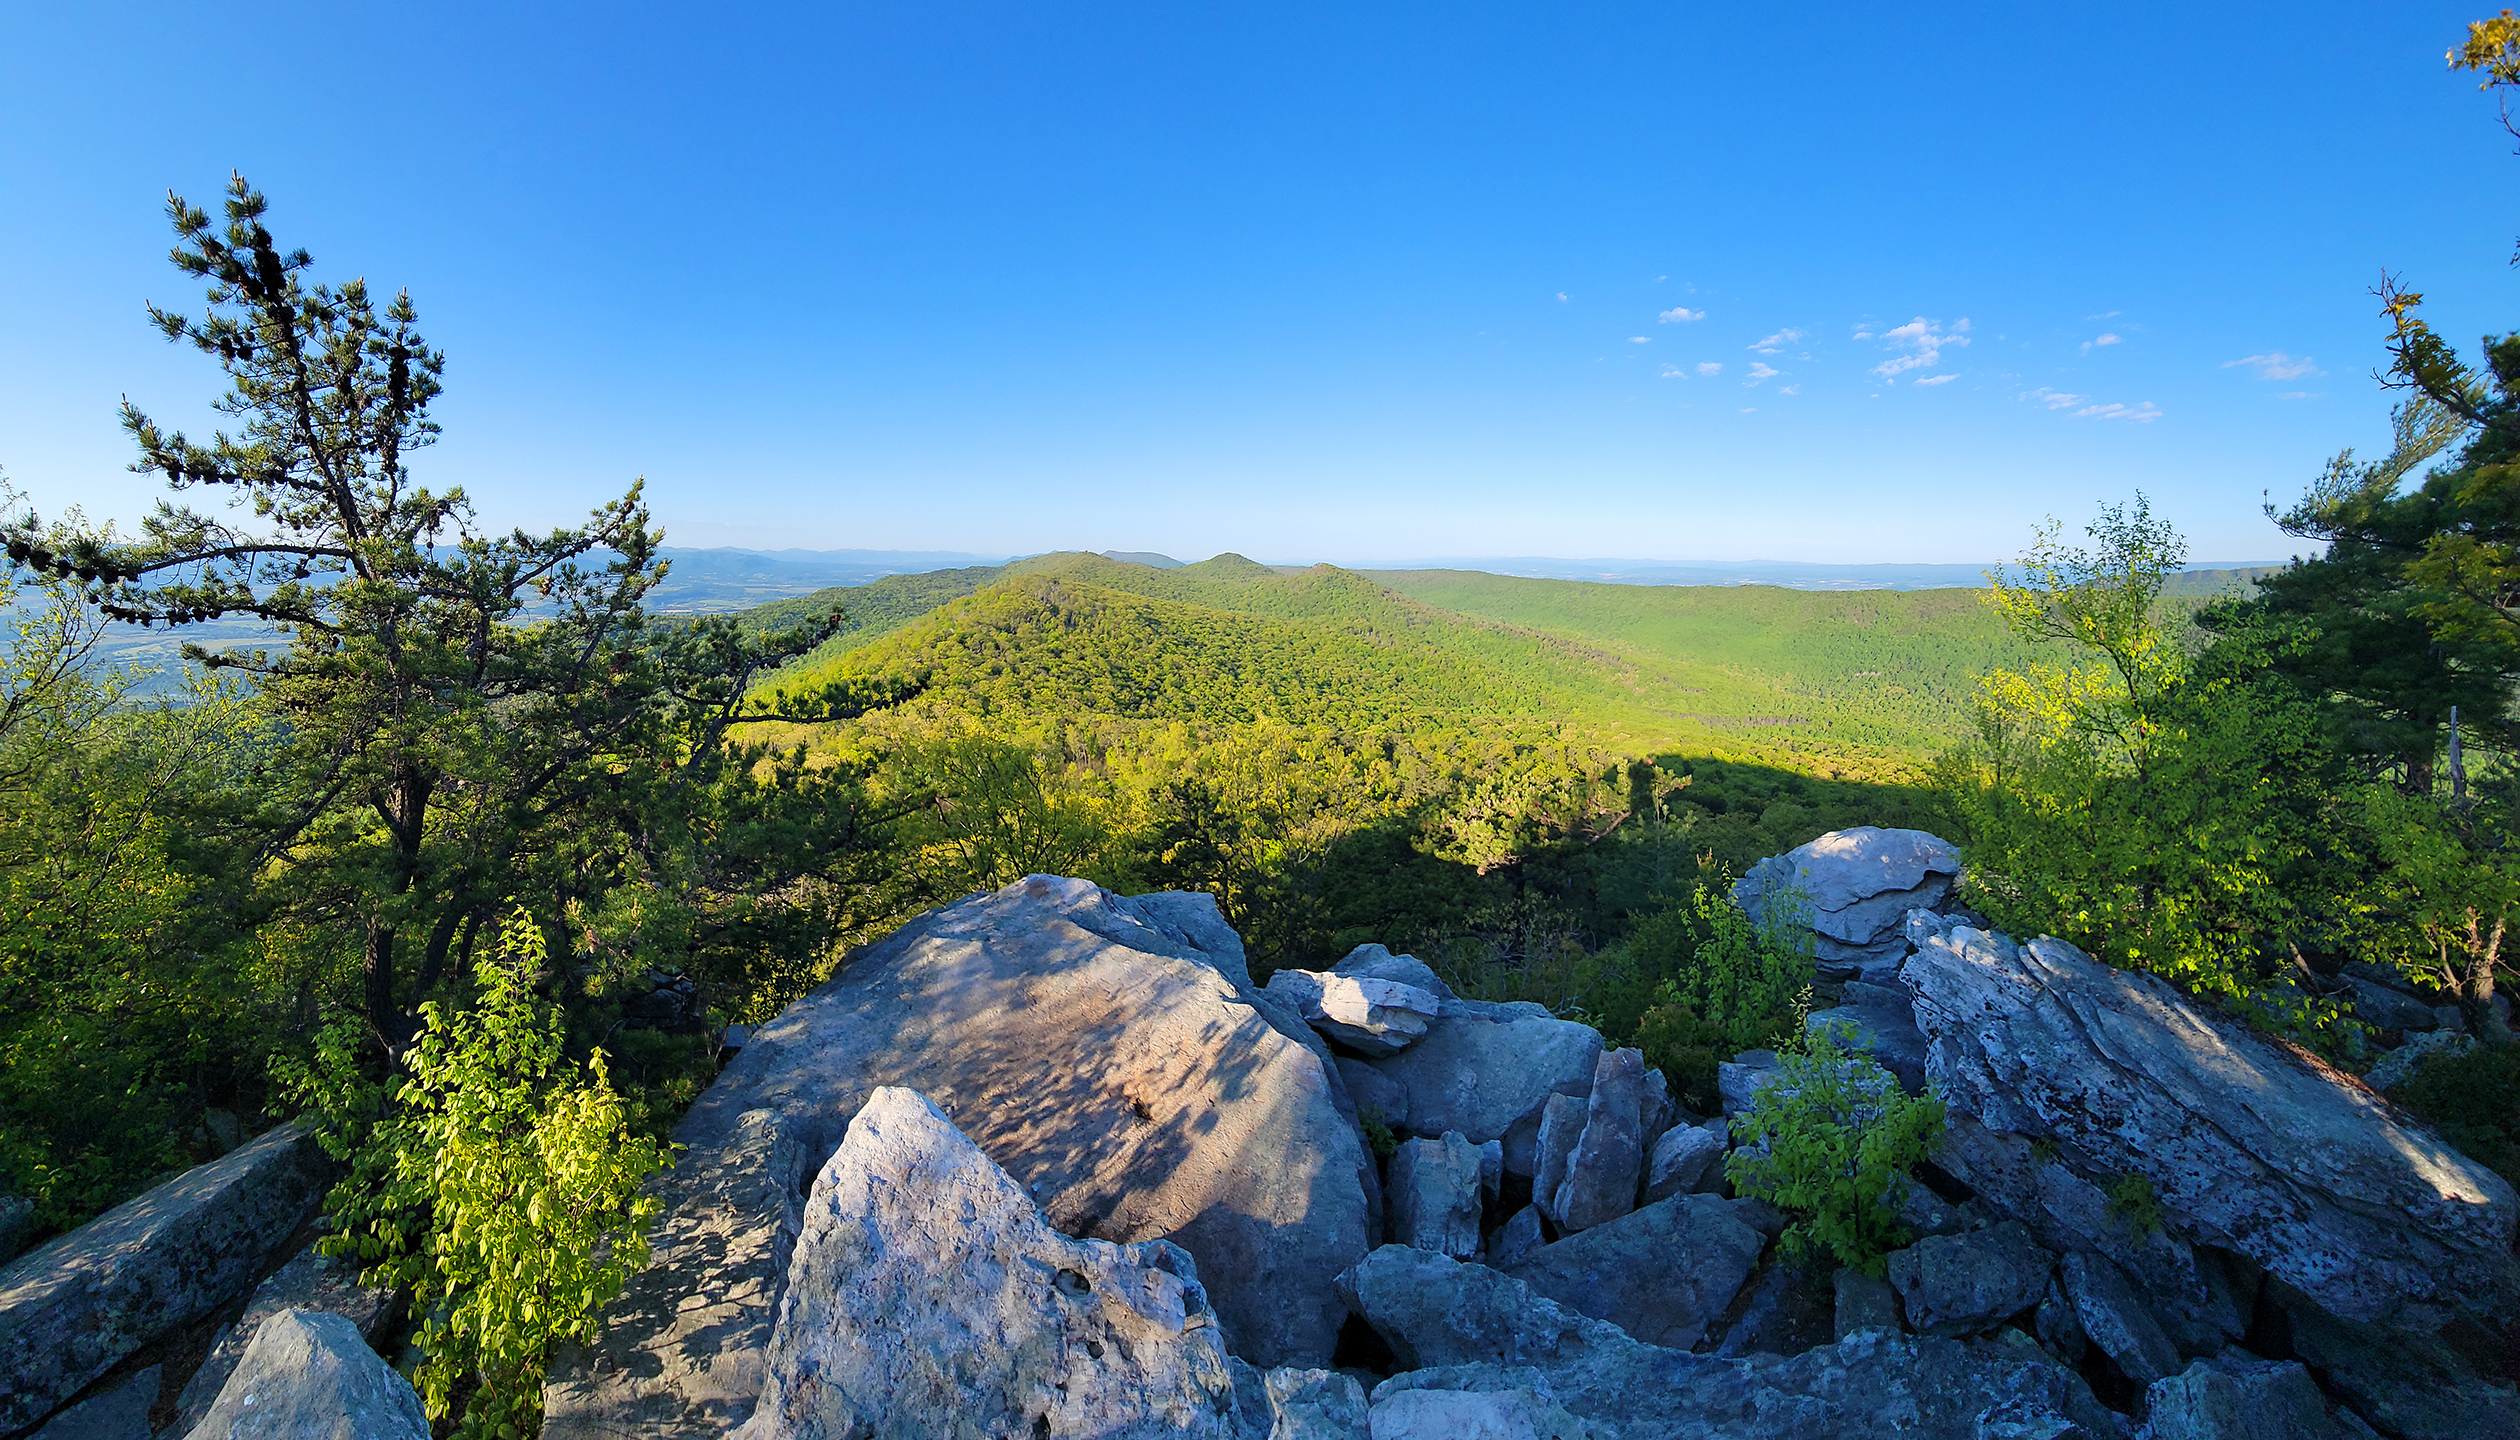
We got up with the sunrise, and hiked up to Duncan Knob without packs. It’s just a short few tenths of a mile to the rock scramble, so it was nice to leave everything behind and hike up empty-handed. As many of our regular readers know, I have chronic vertigo and don’t do well with rock scrambles. I can do them if I must, but it’s pretty scary and disorienting. I climbed about halfway up Duncan Knob’s scramble and found a nice flat rock that was high enough to provide an open view. Adam continued to the top of the knob on his own.
PHOTO: The rock scramble at Duncan.
After enjoying the morning view, we headed back to our campsite at Peach Orchard Gap. We ate breakfast and broke down camp. The hiking on day two was mostly downhill or flat(ish). There were more muddy, swampy spots along the Scothorn Gap trail, but generally it was easy walking. There were plenty of native pink azaleas along the trail, and a few mountain laurels starting to get buds. Wild geraniums and spiderwort were also abundant.
PHOTO: A view from Duncan Knob
When we reached the last bit of the loop. we retraced our steps from the day before. It was the only time we really saw many people along the trail – mostly day-hikers headed up Strickler Knob. The entire distance for the second day was under 4 miles, so we were back at the car by about 9:30 a.m. We had initially planned on going to Woodstock Brewhouse for lunch and beers after the hike, but it was so early that we just went home.
PHOTO: Wet trail
Turn-by-Turn for Day 2
Start out from camp, following the white-blazed Duncan Knob trail for .3 miles. The trail will become rockier before turning into a boulder jumble. Climb as far up the boulders as you wish. There are one or two small campsites at the very top.
After enjoying Duncan Knob, retrace your steps for .3 miles back to Peach Orchard Gap.
Turn right, heading downhill on the blue-blazed Gap Creek trail. After .3 miles, you will reach an intersection – take a left onto the yellow-blazed Scothorn Gap trail.
Follow the Scothorn Gap trail for 1.4 miles until you come to the four-way junction you passed on Day One
Take a right, and follow the trail 1.5 miles back to your vehicle.
Trail Notes
Distance – 9 miles (5.2 on Day 1, 3.8 on Day 2)
Elevation Change – 1780 ft. (1370′ on Day 1, 410′ on Day 2)
Difficulty – 3. This is an overall moderate hike with a couple steep sections. There is one section right before you reach camp on Day One that requires a steep 700′ climb in less than .75 miles.
Trail Conditions – 3. There are some sections that are very boggy/muddy and some parts with quite a bit of loose rock.
Views – 4. Duncan Knob is a pretty nice vista, but you have to climb all the way to the top of the scramble to get open views. Not all hikers will choose to climb the full scramble.
Streams/Waterfalls – 2. There are lots of small feeder streams along the route (may be dry certain times of the year). The beginning of the hike crosses Passage Creek. Camping near Duncan Knob is DRY. Fill up before climbing, or carry sufficient water if you plan to camp near the top.
Wildlife – 3. We saw several turkeys and saw coyote scat.
Ease to Navigate – 5. The trail is very well marked and easy to follow. When we hiked in 2021, there were fresh and abundant blazes.
Solitude – 4. We hiked on a beautiful Friday-Saturday and only saw a few people until we got close to the car on Day Two. On Day Two, we saw many people ascending the Scothorn Gap trail toward Strickler Knob.