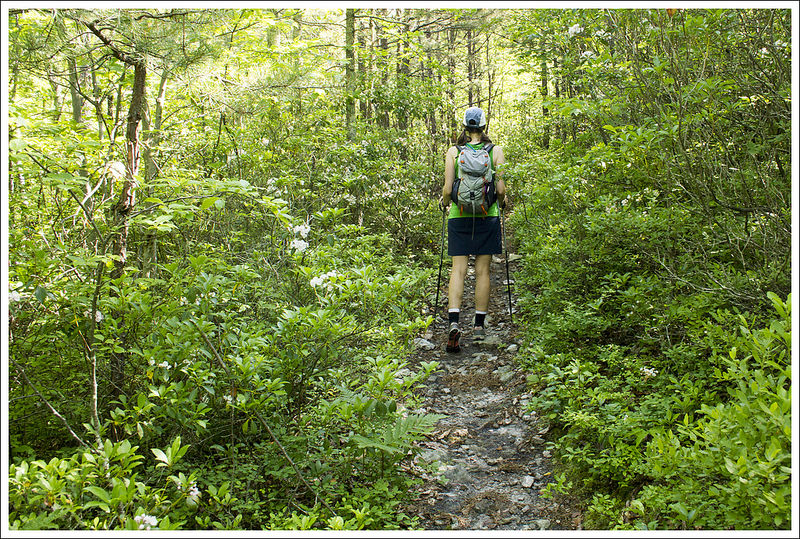
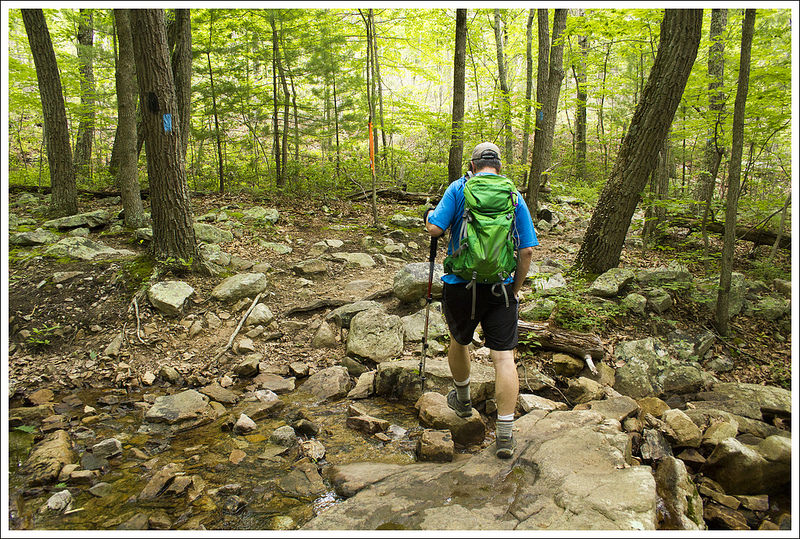
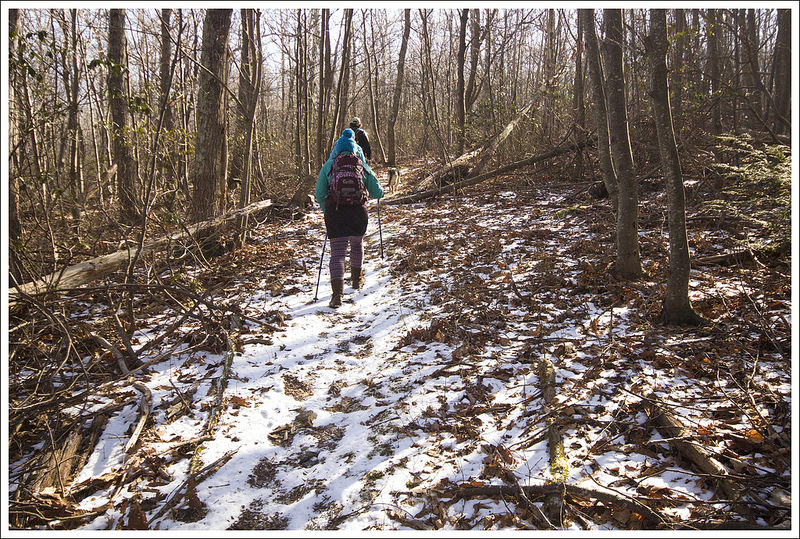
Appalachian Trail – Black Horse Gap to Jennings Creek

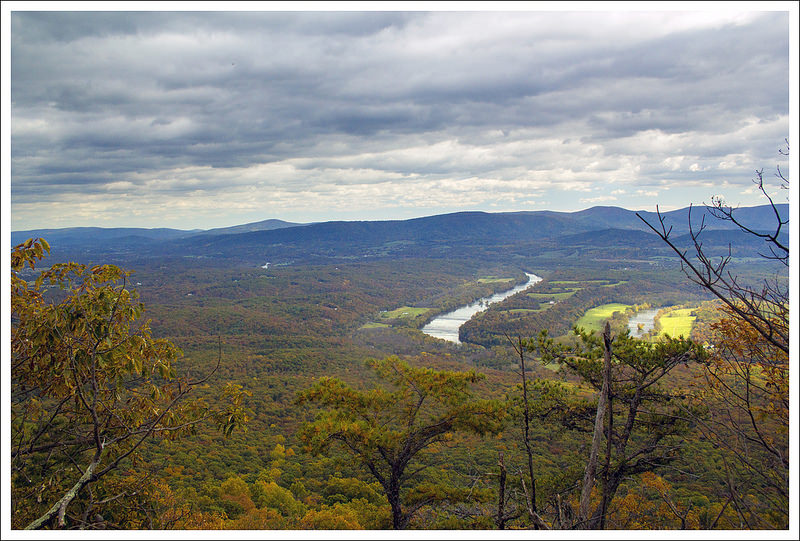
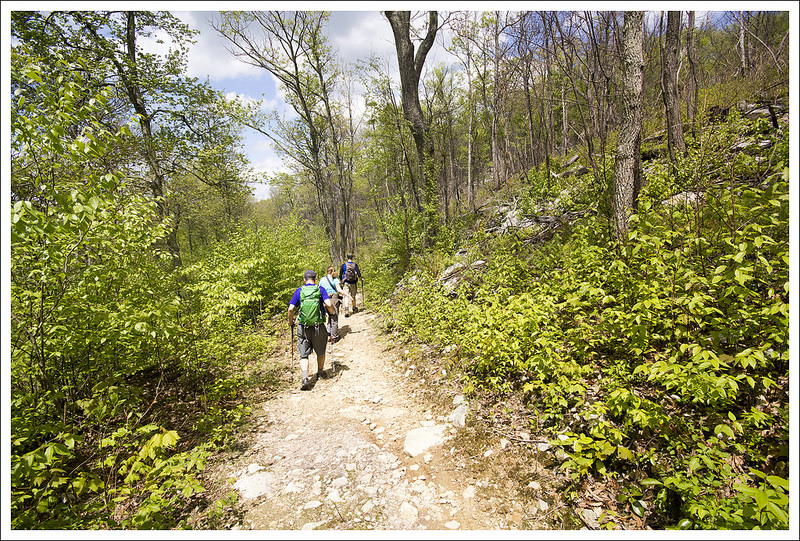
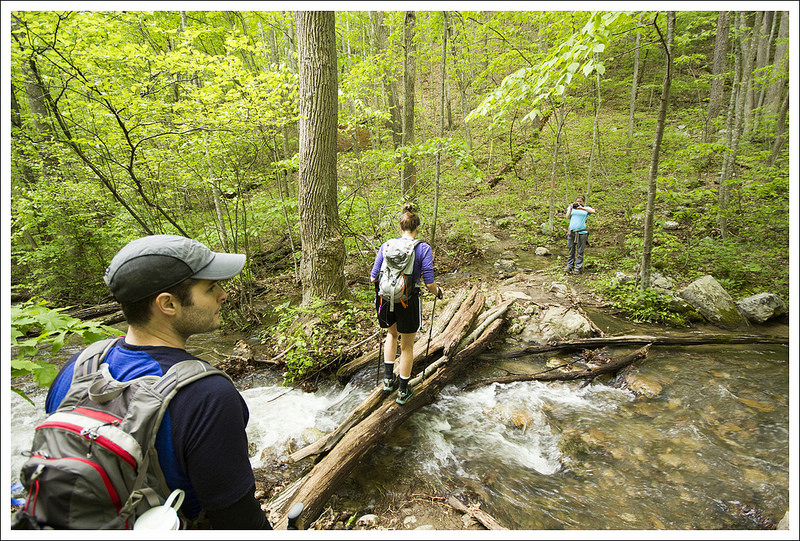
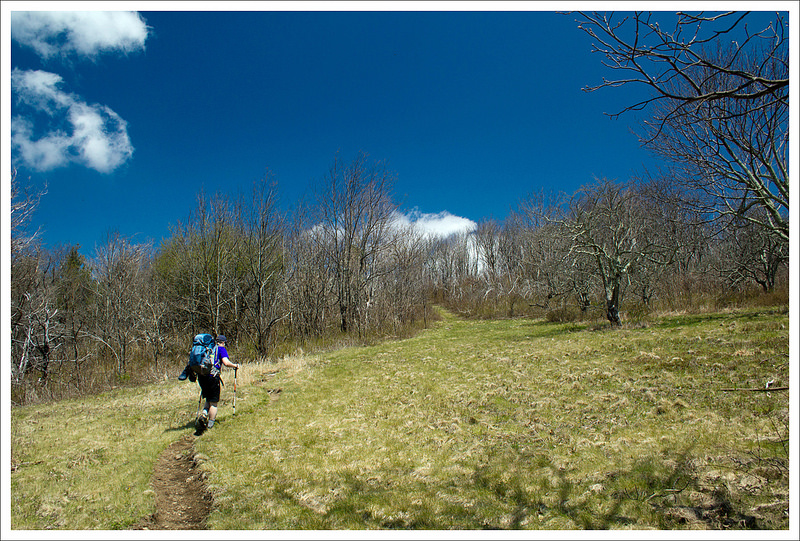
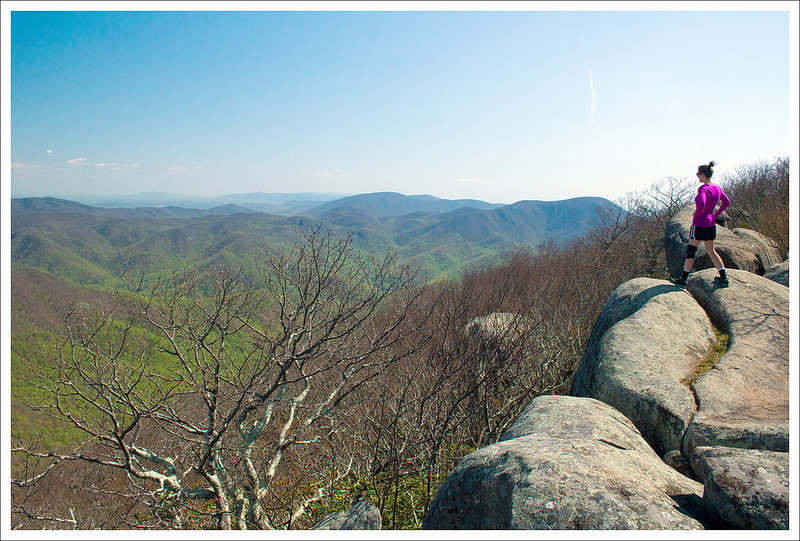
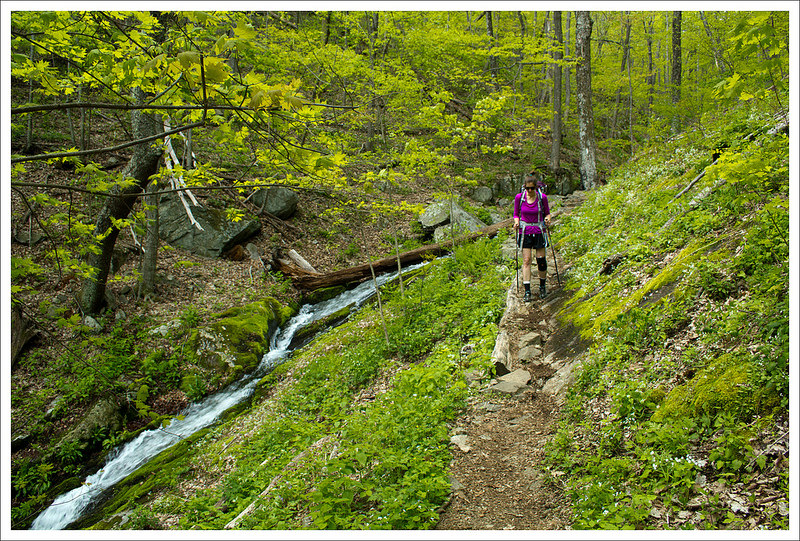
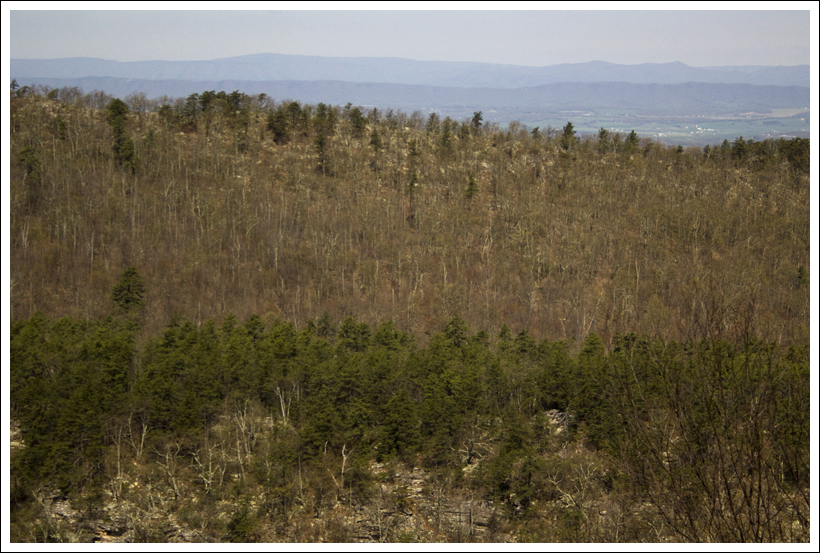
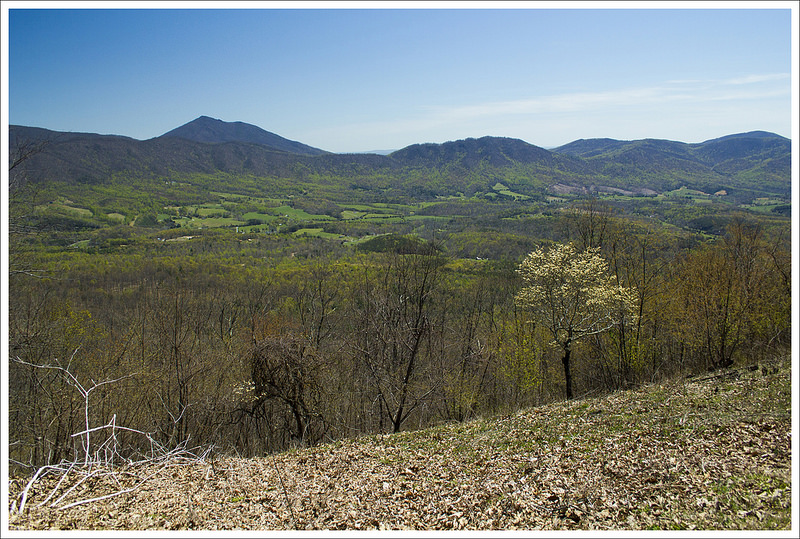
This 14.6 mile stretch of Appalachian Trail offers many splendid views as you closely follow the Blue Ridge Parkway.

View the Full Album of Photos From This Hike
Blackhorse Gap to Jennings Creek
Our first overnight backpacking trip of the season allowed us to watch the green of spring creeping its way up the mountainsides.

Day One…

When you are gifted a sunny 75-degree weekend in April, you must snatch it up and go backpacking!  At least, that is my belief on the matter. We had just such a weekend in mid-April this year, so we decided to get out there and work on completing some more Virginia Appalachian Trail miles.

We’ve already completed all the miles between Jennings Creek, VA and Harpers Ferry, WV, so we decided to pick up the next section south – Black Horse Gap northbound to Jennings Creek.  It was a relatively short route for an overnighter – twelve miles the first day and just three miles the second day.  We always try to do about 20 miles on a one-night trip, but access to road crossings for our shuttle drop-off made fifteen miles the best logistical option for this trip.

We looked up shuttle options in our AWOL Guide, and ended up hiring Homer Witcher to give us a ride to our start point.  Homer is a great trail ambassador – he’s in his 70s and still finds the time and energy to run on the AT most days.  He, his wife, and children are all avid, lifelong hikers – completing multiple section and thru hikes.  He told us he and his wife are planning another thru in 2017.  We greatly enjoyed talking to him on the ride over to Black Horse Gap.

Walking the Appalachian Trail
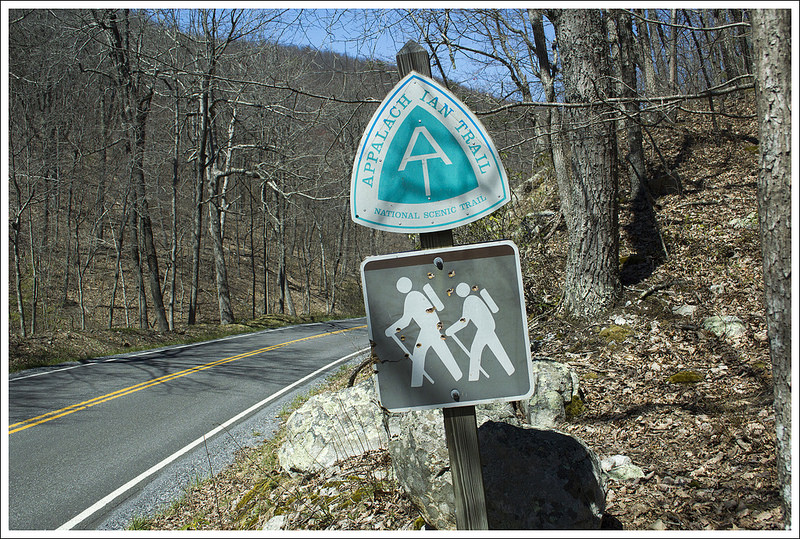
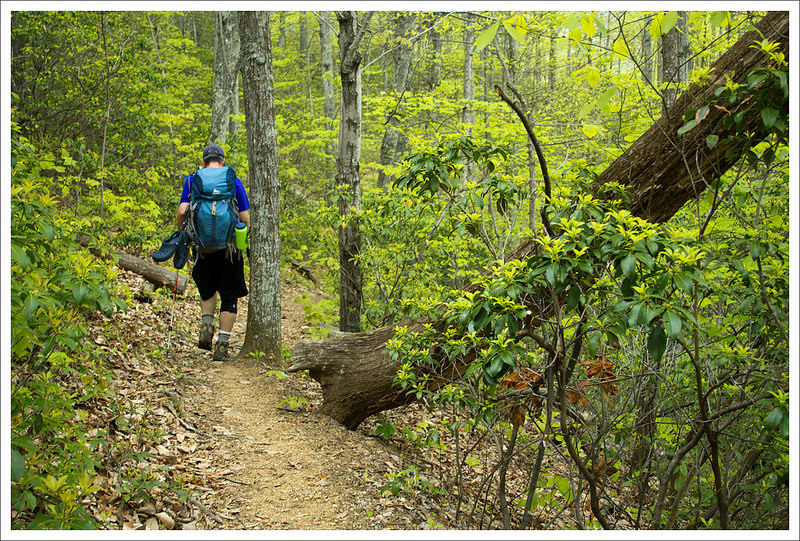
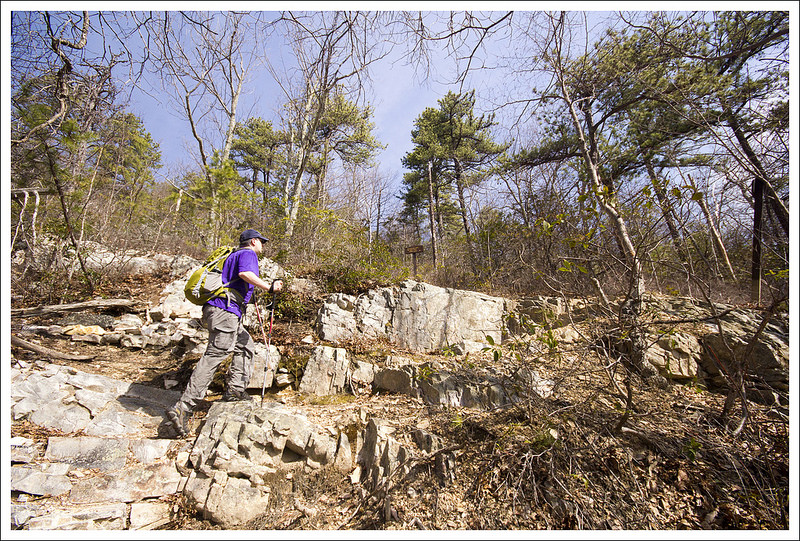
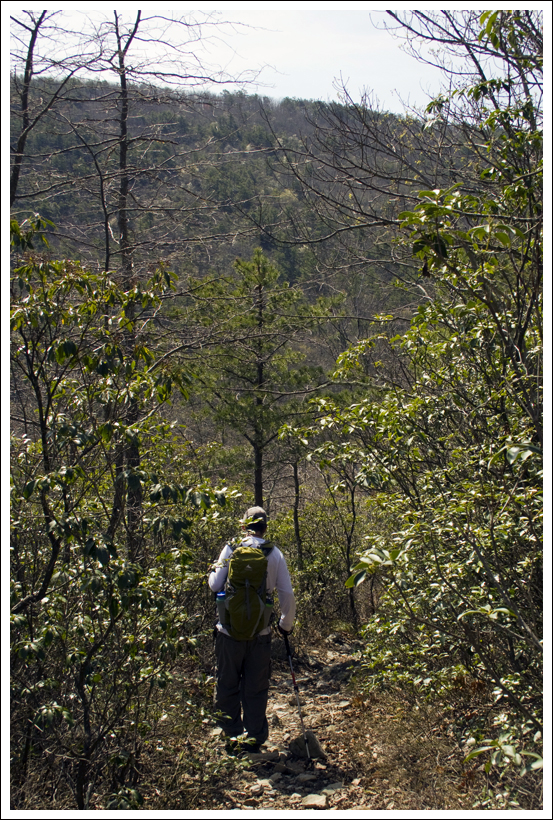
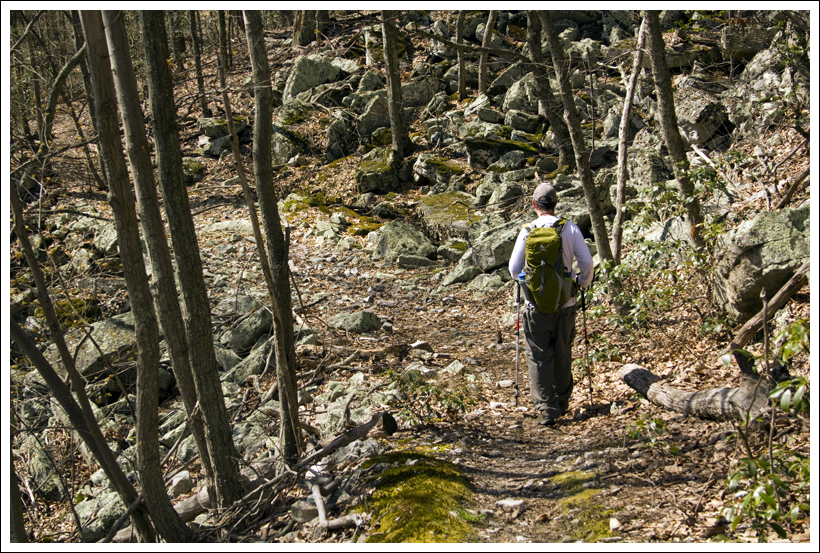
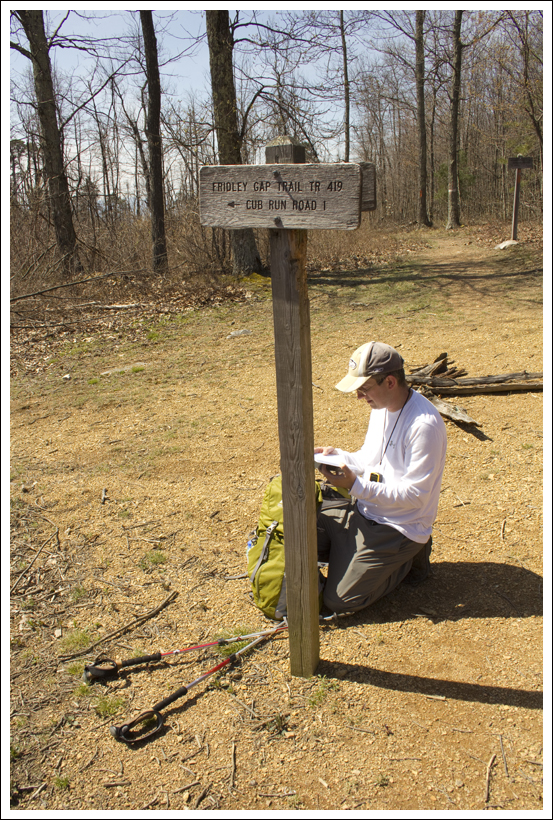
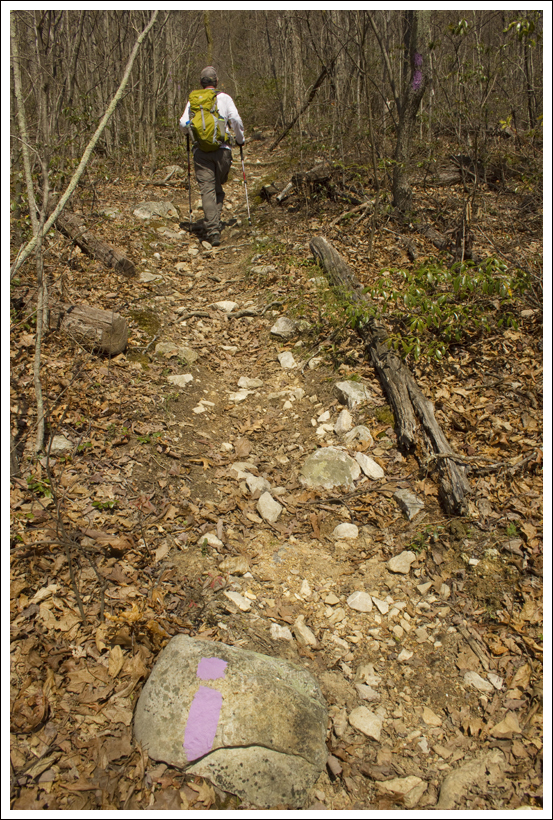
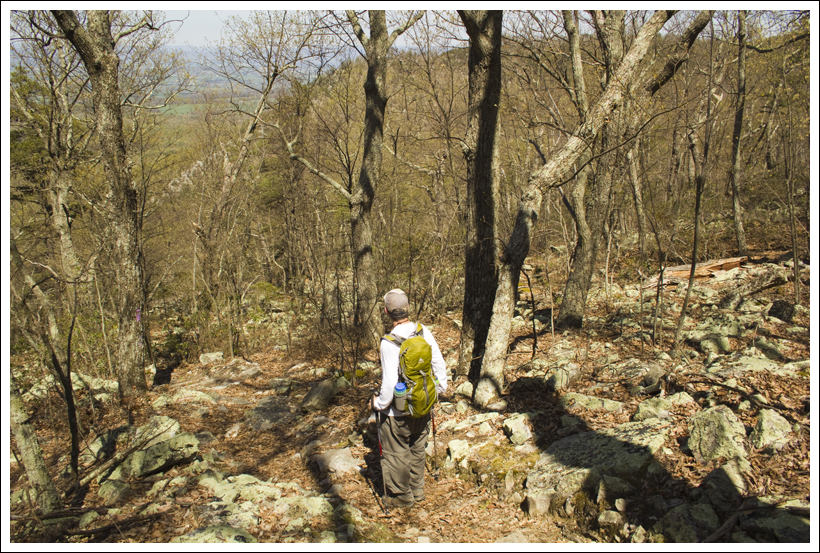
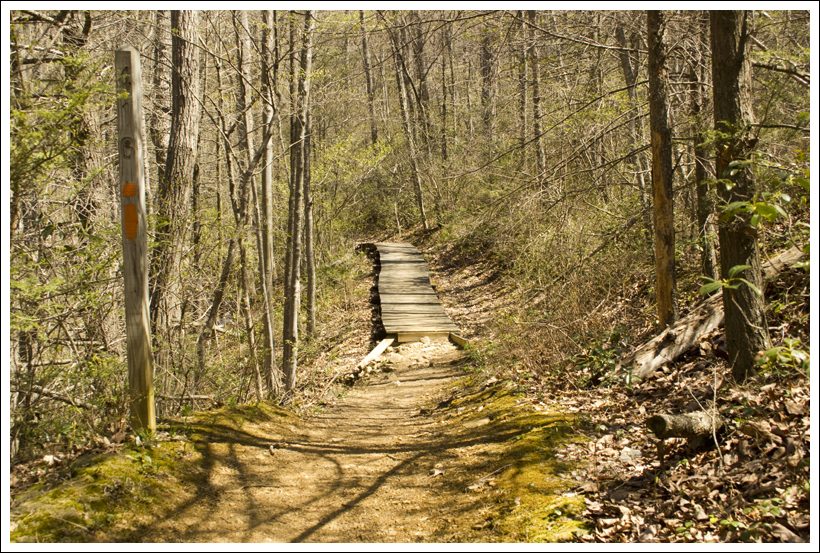
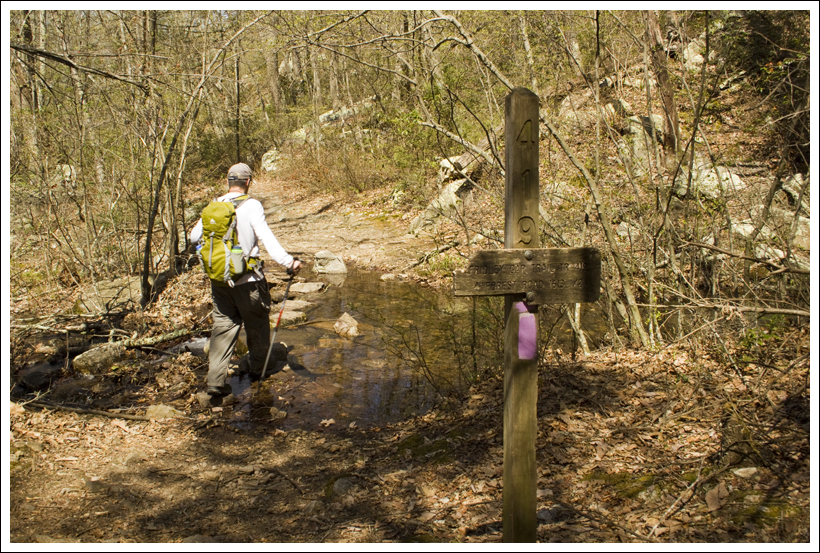
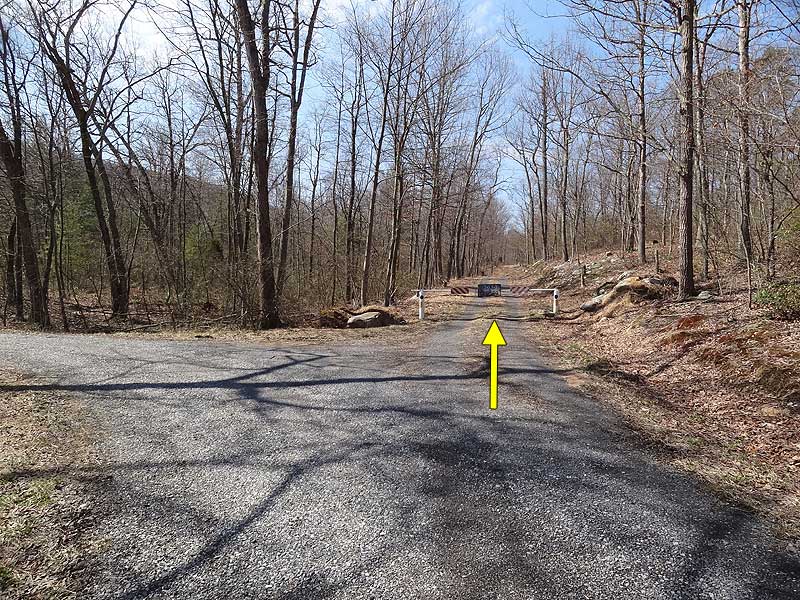
The signage for the AT along the Blue Ridge Parkway is nice. Below: Our start point at Black Horse Gap; Adam hikes through a rhododendron thicket; We had nice views through the trees for most of this hike.

Our Start Point Rhododendron Thicket Views Through the Trees

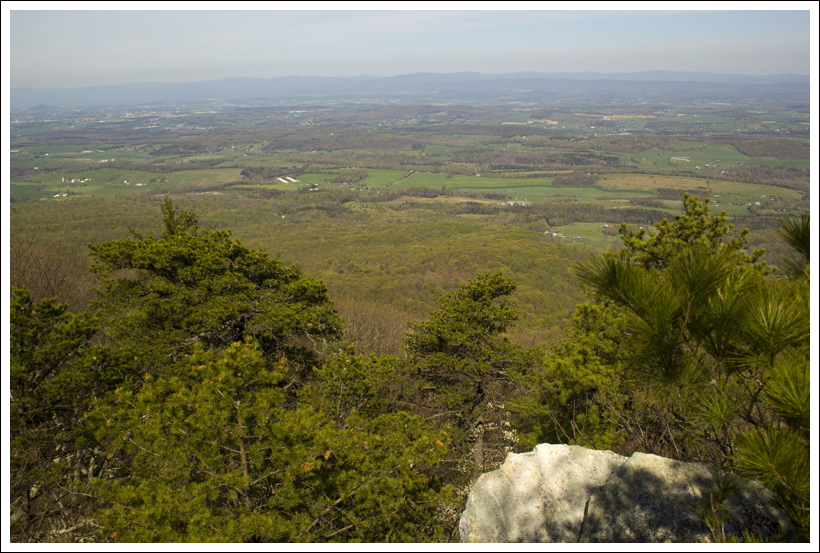
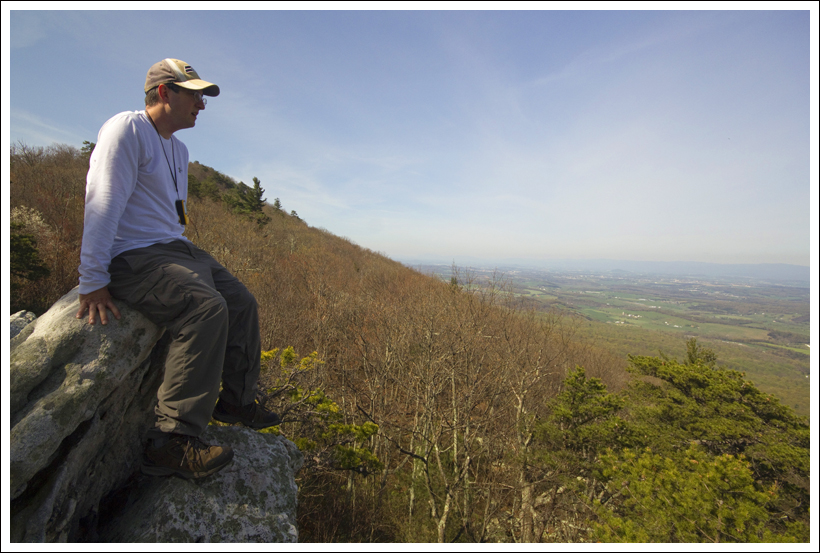
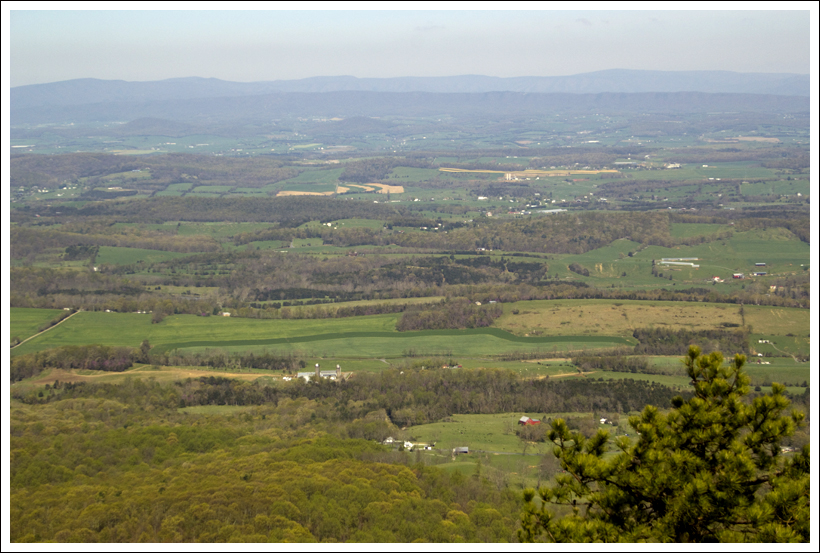
About a half hour later, we found ourselves standing along the Blue Ridge Parkway at Black Horse Gap.  We found the trail easily and started our northbound walk.  Over the first few miles of hiking, the AT crosses the Blue Ridge Parkway a couple times – at Taylors Mountain and Harveys Knob.  Both crossings offer panoramic vistas of the valley below.  Most of the views in this section include a nice look at Sharp Top, one of the areas most popular mountains for day hiking. The terrain along this stretch of trail could best be described as rolling – there were lots of ups and downs, none dramatic.  We passed a large group of Boy Scouts hiking along the trail.  They turned out to be pretty much the only people we saw on our hike.

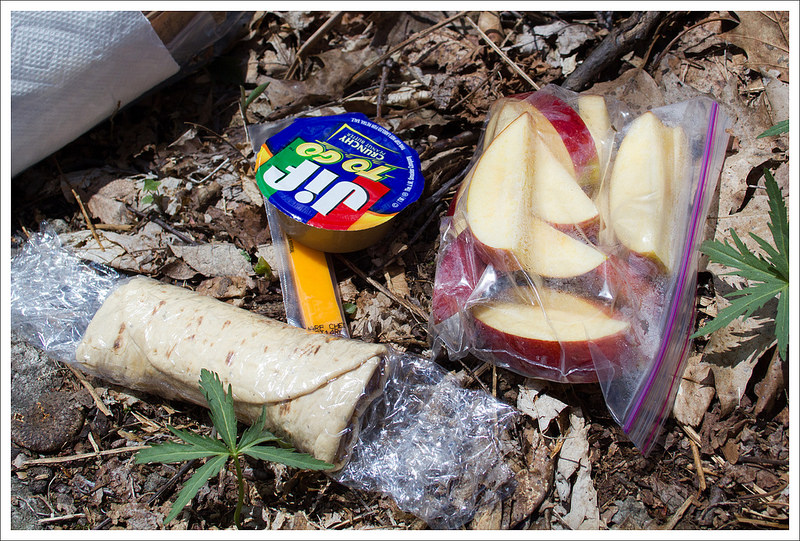
By 12:30, we reached our lunch stop at Bobblets Gap shelter. We ate and assessed our water supply.  We knew we’d have another chance to resupply water at around the 8 mile mark, but read that the water source at Bearwallow Gap was iffy and seasonal.  I still had over two liters of water, some in my Camelbak and a full Smartwater bottle.  Adam filled his Camelbak to three liters and also had a full Smartwater.  Our planned campsite at the Cove Mountain Shelter is dry (no spring, no stream) and the closest water source to camp is three miles away in either direction, so we tried to guess how much water we would need to cook and hike the next day.  It’s a delicate balance between carrying too much heavy water and not enough, risking dehydration.

After lunch, we leapfrogged the same group of scouts again.  They had decided to skip the shelter since they had moms and lunch waiting for them at a road crossing ahead.  The post-lunch hiking was decidedly more uphill than the morning hiking.  We gradually climbed, crossing the parkway two more times at Peaks of Otter and Mills Gap.  At Mills Gap, we were able to get rid of our lunch trash at a roadside trashcan – being able to get rid of garbage is a real treat for any backpacker!  We took a rest at Mills Gap, reclining on a picnic table in dappled shade.  The temperatures weren’t that hot – maybe high 60’s, but the sun was incredibly strong and relentless through the mostly leafless trees.  We both got sunburned despite using sunscreen.

Beautiful Views from the Blue Ridge Parkway
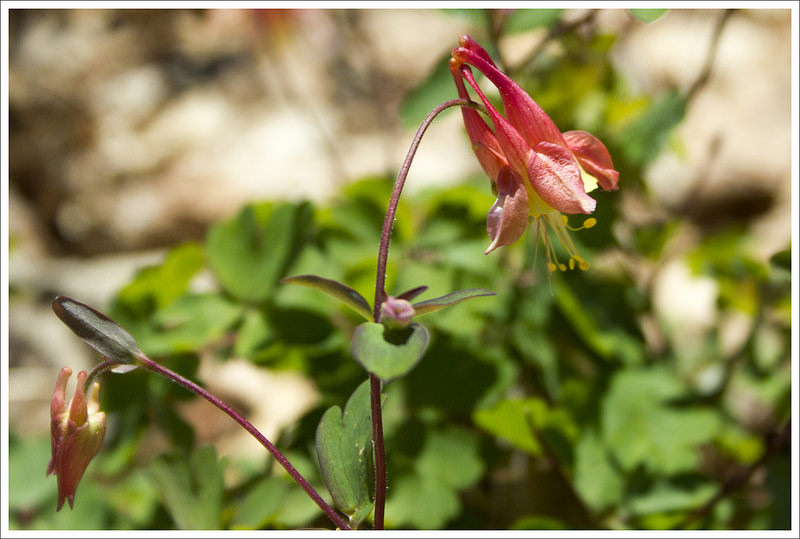
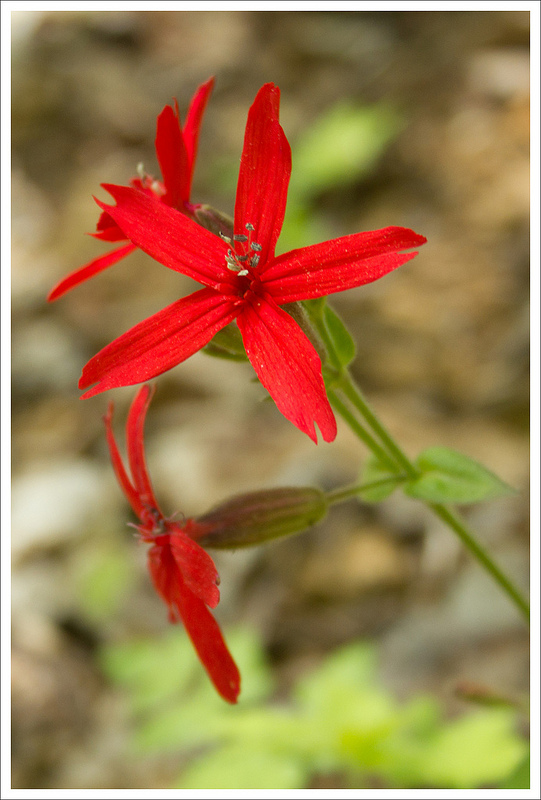
The trail crossed the parkway numerous times – usually near vistas. Below: One of many road crossings with a view;  Blooming columbines; A huge retaining wall under the parkway; Bobblets Gap Shelter; Lunch and shelter log; A very dank water source.

Vistas along the BRP Columbine Retaining Wall
Bobblets Gap Shelter Lunch at Bobblets Gap Dank Water Source

After a little more climbing from Mills Gap, we started a nice descent to Bearwallow Gap and the VA43 road crossing.  We passed a murky, dank wildlife pond along the way – maybe it’s the bear wallow!  At the road crossing, we sat like a pair of hobos under the Blue Ridge Parkway road sign.  People driving past looked at us like we were a novelty.  There turned out to be plenty of water in the seasonal stream at the crossing, but neither of us had drunk much more water so we decided not to resupply again. That wasn’t the best idea – more about that later!

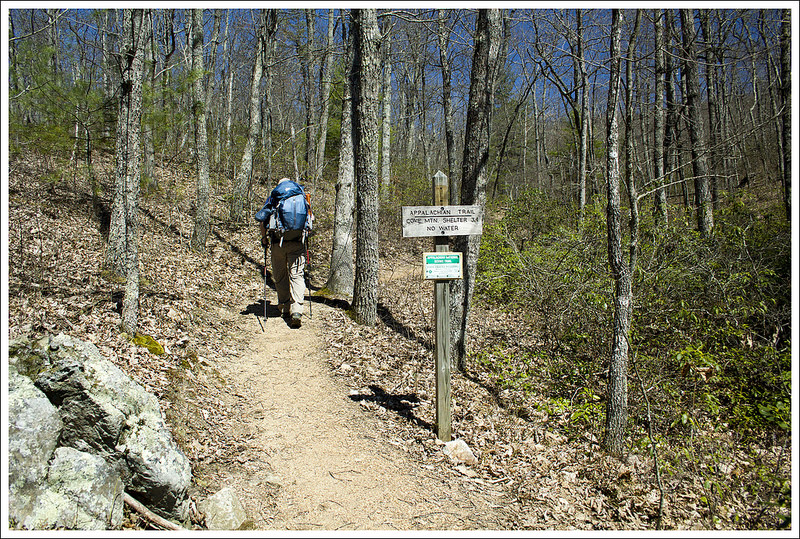
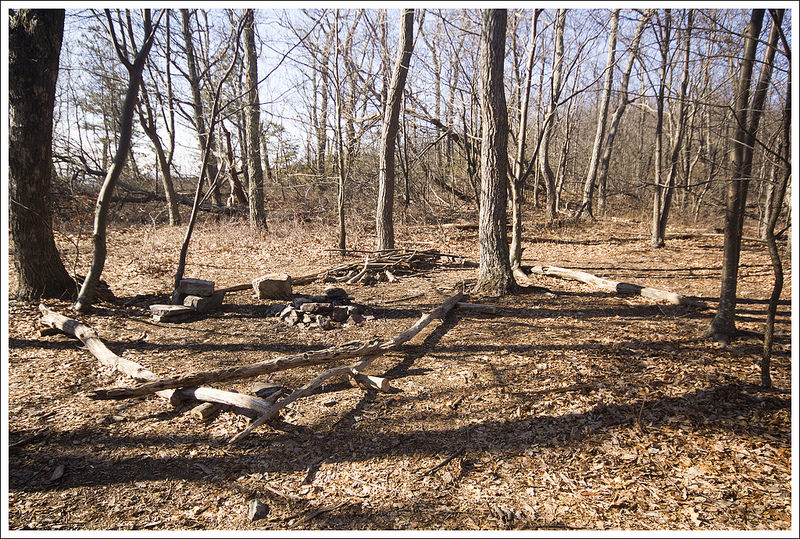
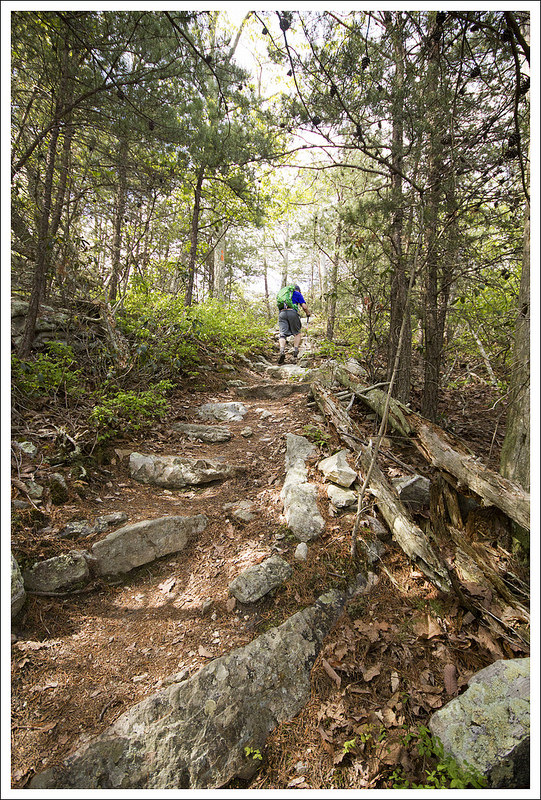
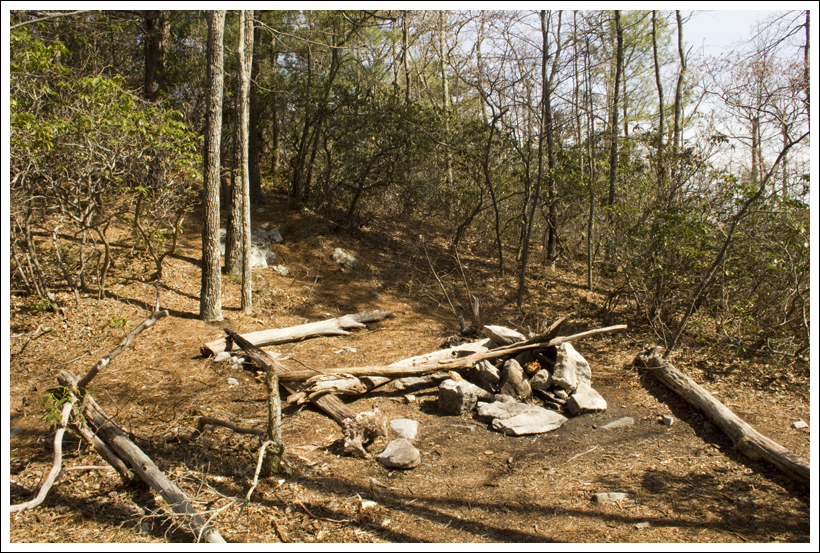
We crossed VA43 and immediately began the climb up Cove Mountain.   Within the first hundred feet there was a sign reminding us about the dry conditions at Cove Mountain Shelter.  We still were certain we had plenty of water.  As we ascended, I said to Adam “This isn’t bad!  The trail looked WAY steeper on the map!”  Adam replied, “I hope you’re not jinxing us.”  Well, I totally jinxed us.  The trail got much steeper and due to past forest fires, we were climbing in direct, unrelenting sunshine at the hottest part of the day.  We both went through much more water than we had planned for.  I chewed gum to try and preserve what water I had left.  We passed a couple small campsites along the ridge of Cove Mountain. We contemplated stopping for the day, but decided to press on to our planned stop.

Climbing Cove Mountain
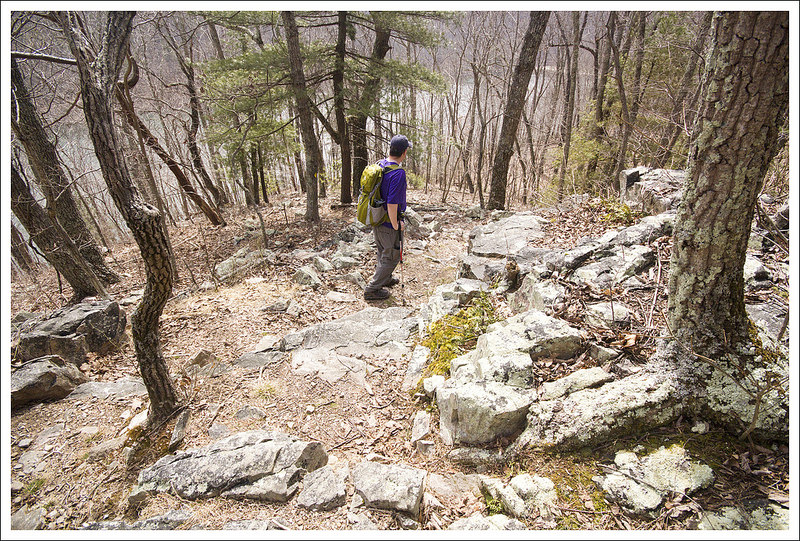
Cove Mountain (one of several mountains by this name in the Blue Ridge) was the only tough part of the day. Below: Sitting like a hobo at the road crossing; It’s not nice to shoot at hikers; Beginning the climb up Cove Mountain; Campsites along the top of Cove Mountain; Adam gets nice views as we begin the descent to the shelter; Evidence of an old forest fire.

Hobo Gunshots at AT Sign Climbing Cove
Campsite on Cove Mountain Beginning the Descent Burnt Out

The descent of Cove Mountain was incredibly beautiful.  I think the area burned in 2011 or 2012, leaving spectacular open views along the ridgeline.  I was thankful for such beautiful, distracting views the last couple miles because my feet were killing me.  In addition to not refilling water when we should have, I made the mistake of trying out new gear on a long(ish) hike.  For many years, I have hiked in Thorlo thick-cushion hiker socks with a pair of silk sock liners.  I don’t get blisters -ever- with that combo.  This time, I decided to wear my Darn Tough wool socks.  They’re super popular with hikers and were always comfortable for me on day hikes – even long day hikes, but apparently I do need the extra cushioning I get from Thorlos when I’m carrying a heavier pack.  Lesson learned – don’t mess with the tried and true, especially when it comes to your feet!

We hobbled into camp around 3:30 – almost 12 miles in about 6 hours included stops for lunch, rest, and photography – not a bad pace for our first trip of the season.  We set up camp and spent the remainder of the afternoon reading and napping.   Despite being dry, Cove Mountain Shelter is an idyllic spot.  The shelter is typical, the privy is new, and there was space for a good number of tents both around and on the ridge above the shelter. Recently, I learned an interesting piece of trivia about the Cove Mountain Shelter from my friend Jeff Monroe (of Wandering Virginia). Apparently, this shelter used to sit at Marble Springs (where we camped on the second night of our Jennings Creek to the James River section).  When the area around Marble Springs became designated wilderness, the shelter was moved to its current location on Cove Mountain.

Road Around Mountain
It was neat to see Rt. 43 wrapping around the mountain. Below: The Cove Mountain Shelter; Tents and bear bags.

Cove Mountain Shelter Bear Hangs and Tents

Before dinner, Adam found a good tree and slung the rope for our bear hang.  As we prepared dinner, we rationed out our water, so we’d have enough for breakfast and our second day of hiking.  We were both pretty thirsty and wished we had filled up to the maximum at Bearwallow.  We even ended up drinking our dishwashing water.  Lots of ‘Leave No Trace’ folks always drink their wash water, but it’s also acceptable to broadcast water away from camp.  We usually broadcast.  But this time, we enjoyed a lovely ‘tea’ flecked with a mélange of buffalo chicken, macaroni and cheese, and crème brulee.  Mmmm! Even after conserving water, we really didn’t have much left for both breakfast and tomorrow’s hiking.

As we were finishing dinner, Boy Scouts started rolling into camp – first two, then five more, then another four, then the final three an hour later.  We were sure they had come off the trail at VA43. They’d been hiking since 9:30 a.m. – many of them were first time backpackers, a few were first time hikers!  The troop was from Roanoke Rapids, NC.  They were nice folks, but clearly new to backpacking, as they took the time to remove our bear hang from the tree, thinking it was litter!  Adam was not happy about having to get the rope back over the precarious branch, but in the end he agreed it was a little bit funny.

Good Night
We got to watch sunset from the hillside above the shelter. Below: The sun goes down over the Blue Ridge; Enjoying our view!

Pretty Sunset Happy Place

After dinner, we hiked up the hill behind the shelter to catch sunset.  The view was lovely! As soon as the sun went down, it got cold pretty quickly.  The dry, breezy conditions precluded a campfire, so we crawled into our tent a little after 8:00 p.m.  I fell asleep but was woken several times during the night to sounds of foxes, whippoorwills, and owls! Despite the interruptions, it was a peaceful night and I was so glad to be out in the woods again!

Day Two…

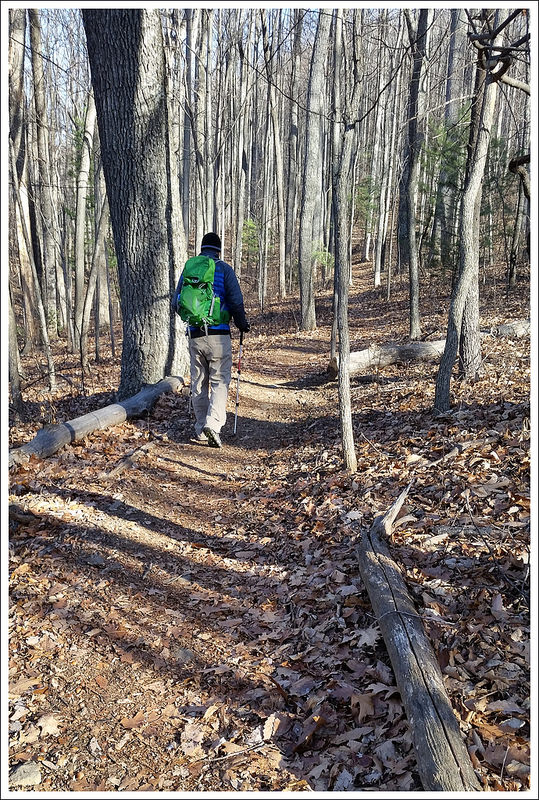
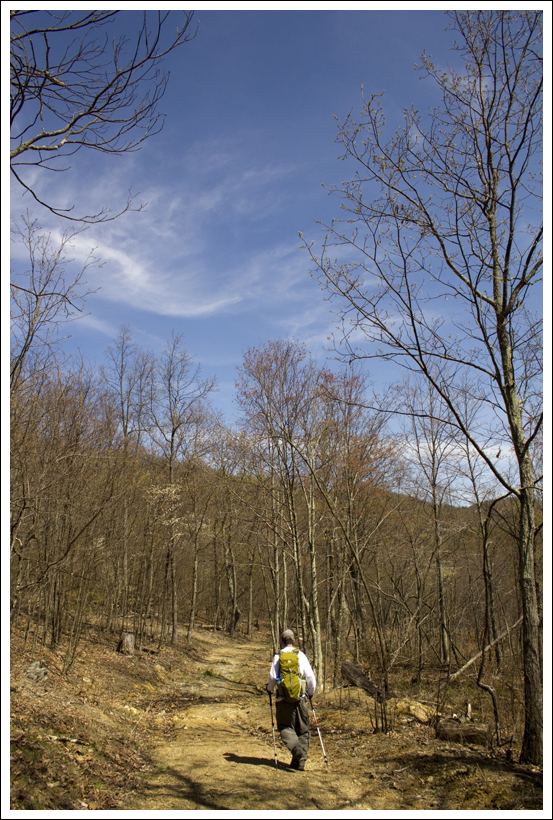
We knew our next day on the trail was going to be quite easy.  We woke up early before the Boy Scouts were even stirring.  It was quite chilly, so we were probably moving a little faster in the morning to get the blood flowing.  We packed away all of our stuff and enjoyed a breakfast of Little Debbie Peanut Butter Pies and coffee.  The plan was to have hot granola with Nido, but we didn’t have enough water left to make both hot cereal and coffee, so coffee and cookies won.  We left the shelter area and were on our way in a little over an hour.   Just about .2 miles away from the shelter, we came to a nice western morning view from the top of Cove Mountain.  The trail continued to ascend, but it was hardly noticeable.  From camp, the trail ascends about 200 feet in .8 miles.  At this point, the trail descends the rest of the way.  We were impressed with the views through the trees along the way.

View from Cove Mountain
A couple tenths of a mile past camp, we got a nice view from Cove Mountain. Below: Tents in the morning sun; Adam hikes along the Appalachian Trail; Christine descends toward Jennings Creek.

Tents in the Morning Walking the AT Descending to Jennings Creek

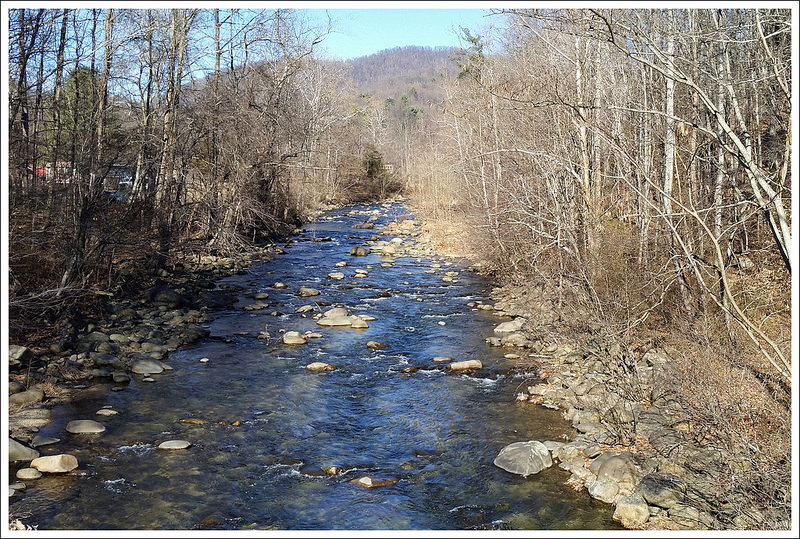
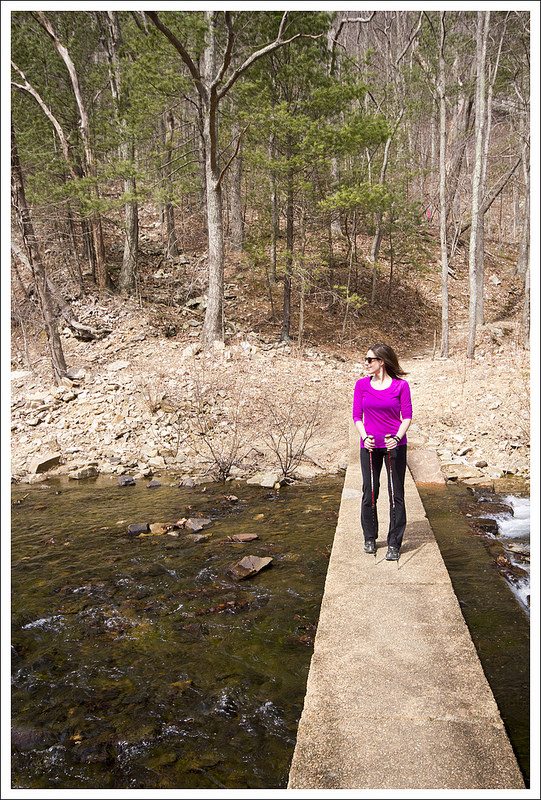
The trail on the descent was easy walking for the most part.  The trail had just a few longer switchbacks on it, but it was a nice, peaceful walk in the woods.  It was just a short amount of time before we could hear the sound of water from Jennings Creek and around 3.2 miles we were back at Jennings Creek Road.  We took a right and crossed over the creek for some picturesque creek scenes before getting to our car on the left side of the road.
Descending to Jennings Creek
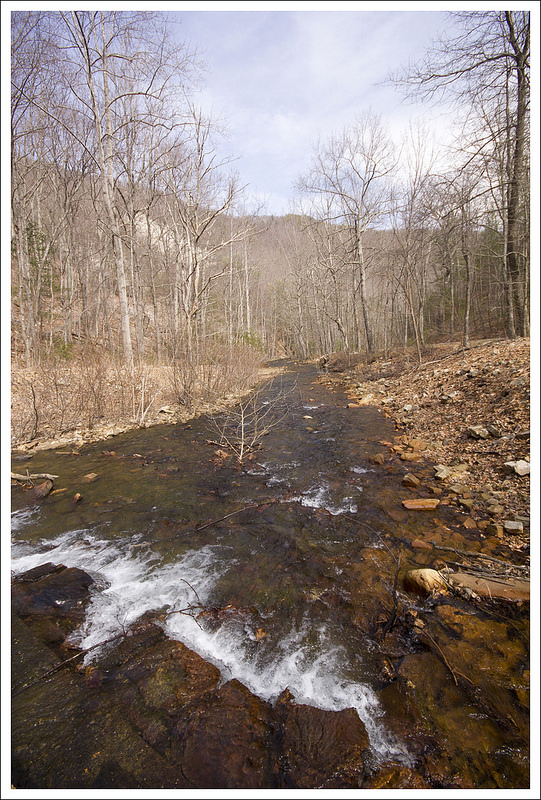
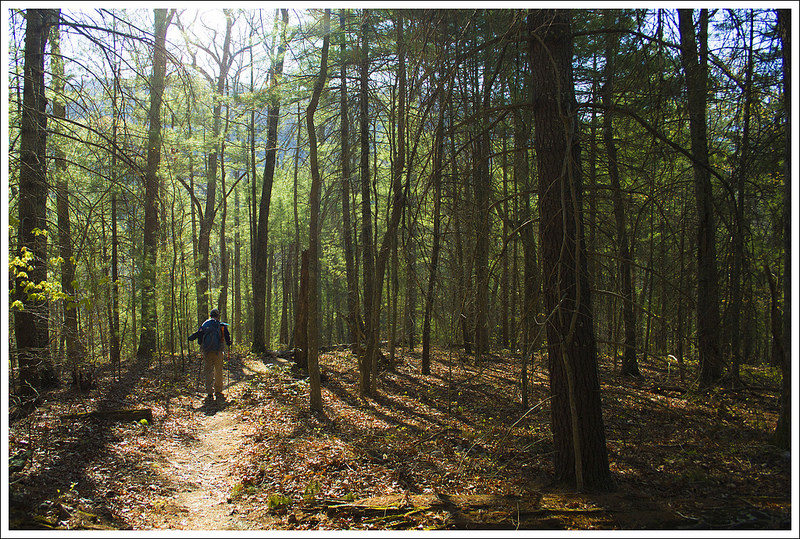
Adam makes his way downhill through the evergreens. Below: Pretty Jennings Creek; The parking area at the AT crossing; We saw zebras on the way home.

Jennings Creek Parking at Jennings Creek Zebras

We had previously planned to get to Sonic in Waynesboro for a celebratory lunch and a stop at Rockfish Gap Outfitter’s Anniversary Sale (where I got a new Osprey Atmos pack), but arriving at the car around 9 a.m., we knew we had some time to kill.  We decided to stop on our way at the Virginia Safari Park near Lexington.  If you are a fan of animals, this is a must-see place to visit.  We drove through the loop (we could even see rhinos through the window) with a bucket of feed while zebras, emus, alpacas, elk, and yaks tried to rip it from our hands.  After driving through the loop, we also walked through their other exhibits, where we could see giraffes at eye level, walk among kangaroos, and see other animals through cages – tigers, hyenas, and monkeys.  I believe this was our third time visiting and there are always new additions every time we visit.

This section of the Appalachian Trail has some wonderful scenery on it.  If you are looking for a shorter, overnight trip with lots of views along the way, this hike won’t disappoint – just plan for water.

Trail Notes

  • Distance – 14.6 miles
    Check out the stats from Map My Hike [Day 1] [Day 2]*
  • Elevation Change – 1650 ft.
  • Difficulty –  3.  This was a pretty easy backpacking route.  It was perfect for our first outing of the season and gentle injury recovery.
  • Trail Conditions – 4.  The trail was in typical Appalachian Trail shape for this part of Virginia – well maintained and nicely graded.
  • Views  5.  There are many fantastic viewpoints along this route.  Most of them come from overlooks along the Blue Ridge Parkway – which you’ll cross multiple times on this route.
  • Streams/Waterfalls – 0.  This is a quite dry stretch of trail. There is a small, low-flow spring at Bobblets Gap and a seasonal stream at Bearwallow Gap. There is NO WATER SOURCE at the Cove Mountain Shelter, so plan ahead.
  • Wildlife – 3.  We saw several deer and had a barred owl and a whippoorwill in camp.
  • Ease to Navigate – 4.  The trail is well marked and easy to follow. There are road crossings and several other trail junctions, but the white blazes are easy to follow in most places.
  • Solitude – 3.  We actually saw very few people on this hike considering the beautiful weather and its proximity to the parkway.  

MapMyHike is not necessarily accurate, as the GPS signal fades in and out – but it still provides some fun and interesting information.

Download a Trail Map (PDF)

Directions to trailhead: To drop off first car: Take exit 168 off of I-81 toward Arcadia, VA.  Turn on to State Route 614/Arcadia Road off the exit.  Arcadia Road becomes Jennings Creek Road.  After 4.5 miles, you will see a large gravel parking lot after crossing Jennings Creek and you will see a sign for where the Appalachian Trail crosses.  Park in this lot. Coordinates 37.529352, -79.622693  To drop off second car and start your hike:  Continue down Jennings Creek Road from where you parked (not arriving the way you came).  In 1.8 miles, turn right on to State Route 618/McFalls Creek Road.  Go 4.1 miles and then turn right on to the Blue Ridge Parkway.  Follow this for 8.6 miles until you reach the small pulloff on the right side for Black Horse Gap.  With not much space here for a vehicle, you will likely want to park along the side of the road.  Just a few feet on the fire road, you will see the sign for the Appalachian Trail junction. Coordinates: 37.424611, -79.757202. Head right and start on the trail.
Signal Knob

This 10.2 mile hike in the George Washington National Forest has nice views of Strasburg.  It also has rocks – lots and lots of pointy rocks.

View the Full Album of Photos From This Hike

Christine on Signal Knob
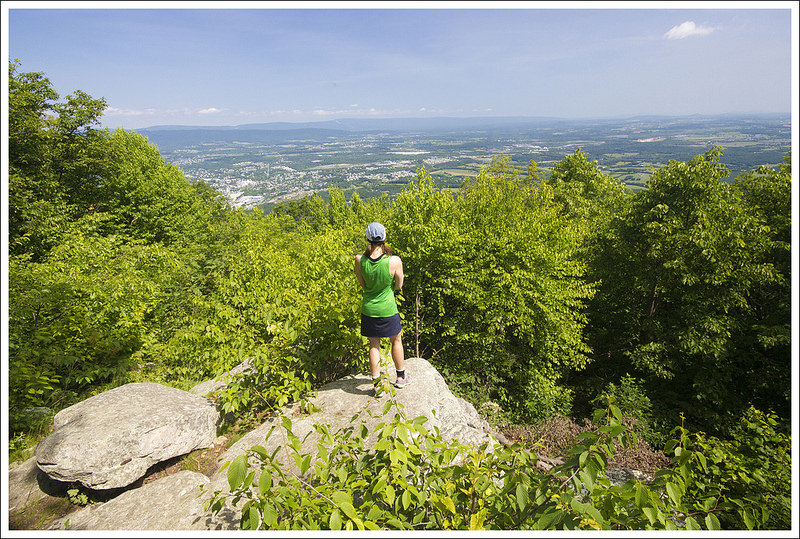
Christine takes in the view on Signal Knob.  Below: Adam checks out the GWNF information board; The stone cottage; Wild rose.

Trail Sign at the Beginning of Signal Knob Hike Stone Cottage Along the Trail Wild Rose

Christine Says…

Picking day hikes is getting challenging for us – we’ve done most of the popular ones in the area. Yet, somehow, Signal Knob had repeatedly escaped our notice.  We figured a pleasant Sunday in early June was a perfect day to tackle something new!

We started our day early with a big breakfast in Harrisonburg.  Then we stopped for donuts at Holy Moly in Strasburg.  We decided to save the donuts for post-hike, but Holy Moly is so popular (especially on the weekend) that we didn’t want to take the risk of them selling out.

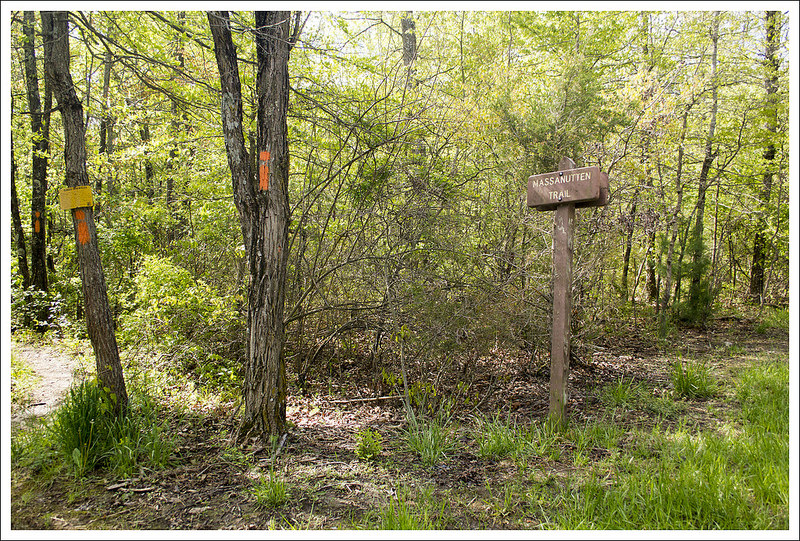
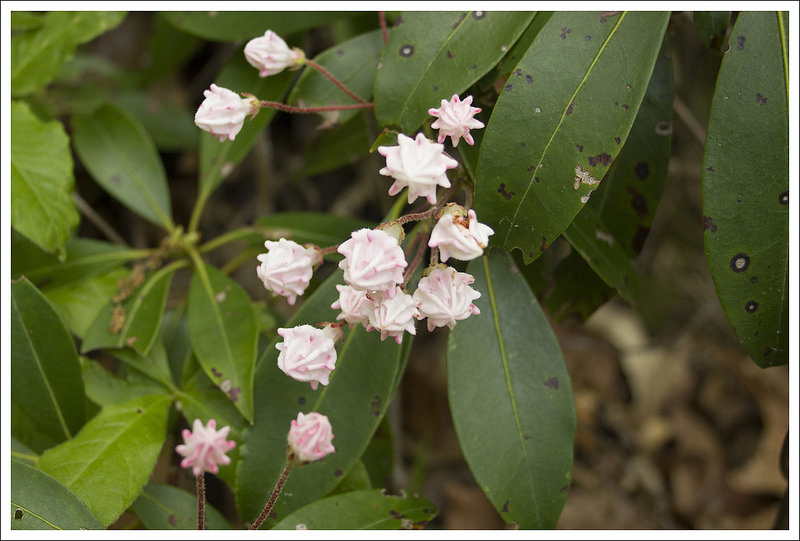
Parking at the Signal Knob trailhead is abundant and completely off-road.  When we arrived there was a small handful of other cars there.   We started out from the trail on the north side of the parking area – look for orange blazes (Massanutten Trail) and a GWNF information board.  The trail climbed steadily right away. We passed a really neat stone cottage right along the trail very early in our hike.  It was in great condition and still looked in-use.   Right after the cottage, we stepped over a small stream and continued uphill.  The lower parts of the trail were lined with wild roses and sweetpeas.  As we climbed higher, mountain laurel became abundant.   The trail was openly exposed to the sun and offered some nice views along the way.

Views Along the Climb to Signal Knob
There were some pretty views through the trees on the climb to Signal Knob. The higher we climbed, the prettier the mountain laurel became. Low elevation laurel had already gone to seed. Below: A neat tree before the Buzzard Rock Overlook; Buzzard Rock Overlook; Fort Valley Overlook.

A Cool Tree on Signal Knob Hike View from Buzzard Rock Fort Valley Overlook

At 1.5 miles, we reached an opening in the trees which gave a backlit view of Buzzard Rocks on the other side of the valley.  I can’t look at Buzzard Rocks without recalling the horrible ankle sprain I suffered there several years ago!  We chatted with an older gentleman at the overlook – he warned us that the trail was about to get rocky!  He wasn’t kidding!  For the next 1.25 miles, the trail was a loose jumble of pointy, shifting rock.

At about 2.5 miles, we passed the marked Fort Valley Overlook.  The view was mostly overgrown, but I can imagine it lovely when the trees were smaller!  Gradually the rockiness tapered off; and so did the climbing.  The trail became a pleasant stroll through the woods.  We passed several nice campsites and passed the junction of the Meneka Peak trail at about 3.5 miles.  The last .8 of a mile to Signal Knob was ever-so-slightly downhill.

When we reached the WVPT building, we thought the open vista behind the building might be the view.  We chatted with a pair of hikers there and asked ‘Is this the only view up here?’  Both of them said ‘Yes… it’s the only view we’ve ever seen and we’ve hiked here lots of times.’  We took them at their word and felt a little underwhelmed by the view – it was obstructed by powerlines and disrupted by a steady buzz from the broadcast tower.  Not wanting to doubt them directly, I whispered to Adam ‘This can’t be it… there’s no view of Strasburg and there’s supposed to be one!’  We decided to explore further before hiking down the fireroad.  I’m glad we did!

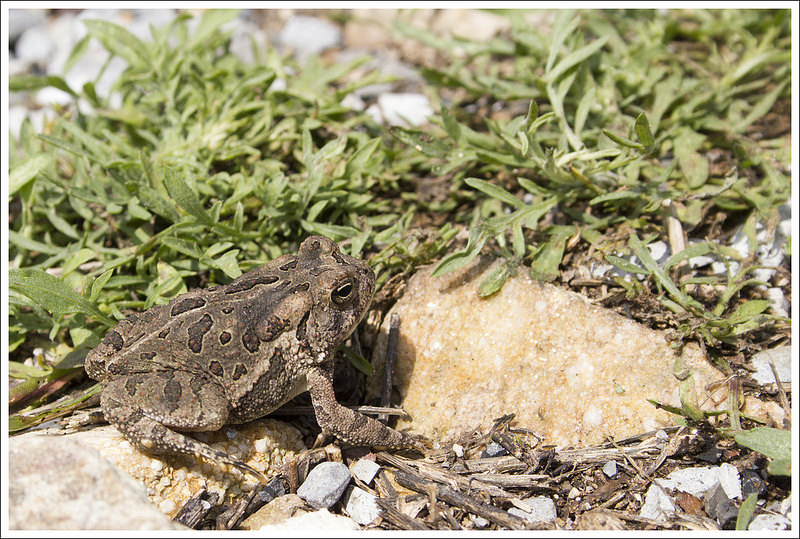
Leaving the WVPT tower, do not follow the fire road downhill.  Go past the tower and look for a trail than runs parallel to the ridge.  If you follow it a short distance, you’ll come to a marked overlook – Signal Knob.  We spent some time at the knob relaxing and enjoying a bit of breeze.  Signal Knob is a nice overlook, but not a spectacular one.   It’s a bit closed in and overgrown.  And, if I’m being 100% honest, looking down into Strasburg with its housing developments, water towers, and roads just isn’t as breathtaking as looking out into raw wilderness.   I did also enjoy our ‘company’ at the summit – for whatever reason, Signal Knob was hopping with toads.  We saw dozens of them!  I’ve never seen so many together!

The Signal Knob Trail is Very Rocky
The trail up Signal Knob is extremely rocky.  Below: Once you reach the ridge it’s a bit less rocky; WVPT broadcast; A view behind the tower.

Walking Along the Signal Knob Ridge WVPT View From WVPT

After enjoying the view, we followed the trail slightly downhill past the overlook.  A trail marker directed us toward the Tuscarora Trail. We soon merged onto the fire road we had seen near the broadcast tower.  We followed it downhill for almost a mile before reaching another trail junction.

The turn onto the Tuscarora trail is marked with another national forest information board.  There is also a nice bench at the junction – probably an Eagle Scout project!   Turning onto the Tuscarora Trail, you’ll immediately cross Little Passage Creek.  It was a very easy rock hop.  From there the trail climbs uphill for a little less than a mile. This section was a bit steeper than what was required to reach Signal Knob, but still squarely moderate.

Along the ridge, we passed the other side of the Meneka Peak trail.  Looking at how these trails interconnect is interesting and definitely opens up some longer loop options.   At about 6.4 miles, the trail passed through a small grassy area and began to descend steadily.  There really wasn’t anything remarkable about the rest of the hike.  It was just a walk through the woods.  We saw a big bird’s nest of some sort.  We saw tons of ripening blueberries.  We passed some boy scouts on a weekend backpacking trip. We passed the pink blazed Sidewinder trail at 8.1 miles.  We crossed a stream. At around 9.5 miles we passed a spur trail to Elizabeth Furnace.  At this point the blazes went back to orange.

We found this part of the hike a bit confusing.  Our maps and GPS disagreed on distances for waypoints late in the hike.  There was also a lot of trail construction and rerouting going on.  New paths were cut into the woods all over the place.  Fortunately they all went in the same general direction.  We tried to follow the most established paths.  A little over a half mile past our last trail marker, we spotted a parking lot through the trees.  Adam thought it was a different one from where we started, but our MapMyHike app indicated we made a full loop and we popped out on the south side of the lot where we had started our hike several hours earlier.

The day had become hot, humid, and overcast, so we were glad to be back at the car! We shared just one of the donuts (Peach Bellini!) so we could save room for a big lunch at Spelunker’s in Front Royal.  On the way to lunch, we talked about the hike a bit.  We both agreed that it wasn’t one of our favorites.  I think it’s popular because of its vicinity to northern Virginia, but of the knobs in the Massanutten/Fort Valley area – I like Strickler and Duncan quite a bit more!

Adam Says…

We have had many people recommend Strickler Knob to us over the years.  Knowing of its popularity, we thought it would be a good idea to get an early start.  When we arrived, there were not many cars there, but from the size of the parking lot we knew it was a matter of time.

We started out on the north (right) side of the parking lot.  The orange-blazed Massanutten trail started off our loop hike.  The trail starts uphill and soon passes a large stone cabin on the left, while you can see a stream below to the right.  You cross over the stream and then loop back in a northerly direction.  At 1.5 miles, we reached Buzzard Rocks overlook.  We talked there to an older man who was out for some morning exercise.  He warned us of about a mile of pointy rocks ahead.  Since he was hiking solo, he told us he doesn’t want to risk hurting himself and just goes to this overlook and back.

The trail takes a sharp left turn and then within a few minutes, we found the rocky area we had been warned about.  Wear comfortable shoes, as the rocks were pointy and you always had to look at your feet to navigate through safe footing.

The View from Signal Knob
You can see the town of Strasburg from Signal Knob. We weren’t terribly impressed with the view.  Below: Toads everywhere; The fire road; The information board at the junction with the Tuscarora Trail; A glimpse of a view.

Cute Toad The Fire Road Descending Signal Knob
Junction of the Massanutten and Tuscarora Trails View from the Tuscarora Trail

At 2.4 miles, we arrived at the sign for the Fort Valley overlook.  The trees and leaves have this very obstructed now, but you can get a glimpse of the valley below.  At 3.4 miles, we arrived at the junction with the white-blazed  Maneka Peak trail, but continue on the orange-blazed Massanutten Trail.  The trail leveled out at this point, giving us a nice forest walk until we reached the broadcast tower at 4.3 miles.   We walked behind the building on a small path and saw nice views on the backside of the tower.  We were feeling disappointed when the two girls had said this was the view.  My idea of views doesn’t include power lines cutting through the landscape.  There were lots of bugs flying around us, so we didn’t stay here long.

We pushed on from the tower and saw that there was a huge fire road leading down, but the trail blazes seemed to continue forward back into the woods.  We decided to take this route and then within a short distance came to the real view.  We both felt bad that these girls, who had been up here several times, had always missed the real view up here.  The view here did give us nice views of Strasburg below.  I noticed that one of the rocks had a plaque below it that was put in here for a couple that loved coming up here.

Walking the Tuscarora Trail
Adam walks along the Tuscarora Trail. Below: Stream crossing near the end of the hike; Pretty butterfly; Holy Moly!

Crossing Little Passage Creek Pretty Butterfly Holy Moly Donuts

The trail then loops back and does join the fire road very shortly.  We walked down the steep fire road and came upon another hiker who had just hiked up the fire road to the summit.  The fire road was a fairly steep descent and had nice wildflowers along both sides.  At 5.5 miles, we came across a bench and a junction with the blue-blazed Tuscarora trail.  We took this trail to start our return trip.  The Tuscarora Trail was more overgrown and the climb up Meneka Peak was the steepest climb on this hike.  We were finally finished with the uphill at 6.4 miles and then the trail descends on the other side of the ridgeline just as steeply.

The trail descends for a good distance.  At 8.1 miles, we passed by the pink-blazed Sidewinder trail and the trail leveled out a little more.  We continued on and the trail became orange-blazed again at 9.5 miles.  We followed the orange-blazed trail through the tricky section mentioned above and then arrived back at a lower section of the parking lot at 10.2 miles.

Overall, I was underwhelmed on this hike.  The views were nice, but I have seen a lot better view hikes.  I can imagine that in a few years, the trees and bushes may obstruct the main view even further.

Because of the inner-connectivity of all the trails in this area, there are many options for backpacking loops through this trail system.  The loop that we chose didn’t have a lot to offer after the summit.  If I was doing this again, I would likely do just an out-and-back hike to the summit, making this an 8.6 hike.

Trail Notes

  • Distance – 10.2 miles
    (Check out the stats from Map My Hike)*
  • Elevation Change – 2159 ft.
  • Difficulty – 3.  The climbing on this trail is all easy to moderate, but the distance and loose/rocky footing increase the difficulty rating.
  • Trail Conditions – 2.5.  The trail is rocky and shifty – especially the middle part.
  • Views  3.  There are descent views from Signal Knob and the WVPT broadcast facility.  While other reviews give the vistas on this hike top marks, we thought they were just OK.  The WVPT view had powerlines and the Signal Knob view is starting to get a bit overgrown and looks out toward an suburban area. 
  • Streams/Waterfalls – 2.  There were a couple small streams that could be used as water sources.  We believe they dry out pretty quickly based on the fact that they were already on the low side after a week of rainy days.
  • Wildlife – 3. We saw lots of cute toads hopping around, and supposedly this is a good place for a potential bear sighting.
  • Ease to Navigate – 2.5. The blazing in this area is very thorough, but trail junctions are inconsistently marked.  As of June 2015, it appears the forest service is working on a reroute of the last .5-.75 miles of the hike.  There are lots of unmarked trails that criss-cross the established, blazed trail.
  • Solitude – 3.  We saw a good number of couples and solo hikers out for a day hike.  We also saw a group of college students and a boy scout troop out backpacking.

Download a Trail Map (PDF)

Directions to trailhead:  From I-66, take exit 6 for US-340/US-522 for Front Royal/Winchester.  Turn on to US-340S/US-522S/Winchester Road.  Go 1.2 miles and take a right on to VA-55W/W Strasburg Road.  Go 5.1 miles and take a left on to State Route 678/Fort Valley Road.  Go 3.4 miles until you reach the large parking lot on the right.  Park here.  The trail starts on the right side of the lot.  You will see the wooden information board that will mark the beginning of your hike. Parking coordinates: 38.93503, -78.31956

Kepler Overlook

This easygoing 6-mile hike offered solitude, great backcountry campsites, and nice views at the top! It was a perfect hike to tackle with a group of friends and dogs.

View the Full Album of Photos From This Hike

Adam takes in the beautiful ,but hazy, view from the top.
Adam takes in the beautiful, but hazy, view from the top. Below: Walking to the trail from the parking area.  This was really the only confusing part of the hike; Crossing Cedar Creek; Right after crossing the creek there is a superb campsite with hewn benches and a high hewn counter-top for cooking.

Start of Hike Crossing Cedar Creek Nice Campsite

Christine Says…

Back in January, we planned a little section hike along the Appalachian Trail with a group of friends. However, icy conditions closed the Blue Ridge Parkway, leaving us scrambling for an alternate plan. We stumbled across the Kepler Overlook on Hiking Upward and decided it would be a good ‘plan B’. Our group met for breakfast at Mr’ J’s Bagels (yay carbs!) in Harrisonburg before heading up to the trailhead.

We expected to have to park about a third of a mile from the official trailhead, but we found the forest service gate open and were able to leave our cars right at the hike’s start point.   From the parking area, there are trails and forest service roads leading in several directions.  This was probably the most confusing part of the hike.  You want to go straight up the forest road with the permanently closed gate.  If you don’t reach the blue-blazed Tuscarora trail within the first .3 mile of your hike up the road, you’ll know you’ve gone the wrong way!

Hiking Along
The group hikes along the trail. Below: Crossing a small footbridge: Clark and Maia on the trail; Adam makes his way uphill.

Stream Crossing Clark & Maia Adam Climbs Uphill

At the junction with the Tuscarora trail, go left.  You’ll pass another closed gate before coming to Cedar Creek.  The crossing of Cedar Creek is fairly wide and might be tricky in wet conditions.  We were able to negotiate the crossing with some careful rock hopping.  Shortly after the crossing, you’ll come to one of the nicest backcountry campsites I’ve seen.  Someone has taken the time to build wide benches, a large fire pit, and even a high counter-top for cooking.  It would be a great group campsite with easy access to water.

From the campsite, continue to follow the blue-blazed trail.  There was one place that the trail appeared to go straight, but actually turned.  We all missed the turn and had to backtrack a few hundred feet where the trail crosses the stream again using a footbridge made of branches.

After crossing the stream, the trail climbs Tea Mountain.  It’s never a tough climb, but it’s a steady uphill.  The trail alternates between narrow footpath and wider road-like conditions.  The trail follows along several switchbacks.  At about 1.9 miles into the hike, you should see an unmarked side trail on the left.  If you follow this side trail for a few hundred feet, you’ll reach a large rock jumble.  From the top of the rock jumble you get a great view of the mountains beyond.

Spur Trail
Adam enjoys the first view of the hike. Below: A light dusting of snow on the shady side of the mountain; There were plenty of nice campsites along the ridge; The view was pretty but very hazy.

Dusting of Snow Campsite on the Ridge Hazy View

After taking in the view, return to the Tuscarora trail and continue uphill for about another mile or so until you reach the saddle between Tea and Little North Mountains.  Along this ridge, there are several nice viewpoints and lots of open, flat space for camping.  We took some time to explore a couple different vistas.  The views were nice, but the sky conditions were really hazy.

After enjoying the mountaintop, we descended the way we came up.  On our way home, we decided to check out a new farm brewery near Edinburg.  Swover Creek is a working farm – they grow fruit and hops, raise chickens, and make sausage from locally produced meat.  They’ve recently started a brewery and are working on building a tasting room in their old barn.  We all tried a flight of their four beers (the persimmon ale was my favorite).  We also had their house-made soft pretzels and mustard and enjoyed a sampling of their different sausages.  It was a fun stop and I definitely recommend checking them out if you’re in the area!

Adam Says…

The Kepler Overlook hike was one that we had been wanting to do since we heard about it from our friends at Hiking Upward.  This hike leads to nice views as you climb up to Little North Mountain.

The trail started off as we went past the closed gate up the fire road.  There is a sign just past the gate showing the inter-connected trail system.  Continue up the fire road for about .3 miles and then take a right on the blue-blazed Tuscarora Trail.  The Tuscarora Trail leads down to Cedar Creek.  Cross a small stream at .5 miles and you will reach a nice campsite.  Continue along the trail and the trail takes another stream crossing (this time over a small log bridge with a branch handrail).  The trail turns quickly to the left as you begin your climb up Tea Mountain.  At 1.9 miles on a switchback, you reach an unmarked  side trail.  Following this for about .1 miles will take you to a rock outcropping with some views to the west.  Backtrack to rejoin the Tuscarora Trail.

Nice View - Kepler Overlook
One of the rocky outcroppings along the ridge. Below: Time for a group selfie; Kris takes in the view; Descent.

Selfie More Views Descending

At 2.5 miles, the trail reaches a Saddle between Tea Mountain and North Mountain.  From here, climb up North Mountain.  The trail levels out at 3.0 miles at a large area for backcountry camping.  From here, you have two options for views.  Cut through the campsite to the right along the ridge for a nice view.  You can also go to the left and make your way again towards the ridge to get more views to the east.

We enjoyed our hike with friends and dogs.  You can check out Clark’s YouTube video below.  We were amazed at how much he was enjoying the hike and even took some time to enjoy the view himself.

Van Buren Furnace
Van Buren Furnace sits near the trailhead. Below: Post-hike beers at Swover Creek;  Pretty farm chicken!

Beers at Swover Creek Swover Creek Chicken

After the hike we hit Swover Creek Farm to try out their brewery.  Since the tasting room is not yet built, we enjoyed our beer in the farmhouse.  I have described this when talking to friends as if you were to go over to your grandmother’s house and drink beer.  We got our flight of beers from the small room downstairs and then took them upstairs to the larger “living room”.  There were some large tables and older furniture, so it really felt like a visit to your grandmother’s.  All of the people that were there were local people and one man brought a thermos to fill with beer instead of a growler.  They brought out samples of their sausage they made on the farm and we ended up buying some to take home.  It was such a warm, home environment and we thought they did a great job with the small-batch beers they had made.  This was a perfect post-hike stop.

guestdogsClark and Maia Say…

Our friends brought their lab (Clark) and shepherd (Maia) along on the hike!  They were great trail dogs to have along for the day!

Clark was fitted with a GoPro — so don’t miss seeing the hike from his point of view!  🙂

Trail Notes

  • Distance – 6 miles
    (Check out the stats from Map My Hike)*
  • Elevation Change – 1120 ft.
  • Difficulty –  3.  A pretty easy hike with a bit of steady, moderate climbing.
  • Trail Conditions – 4.  Trail was in great shape.
  • Views  3.5.  Nice, but slightly obstructed by trees.  
  • Streams/Waterfalls – 3.  Cedar Creek is pretty and a solid water source.
  • Wildlife – 2.  We didn’t see anything, but there are plenty of deer and bear in the area.
  • Ease to Navigate – 2.  There are a couple places where it’s easy to lose the trail.  Also, there are several trails and fire roads from the parking area that can easily be confused.
  • Solitude –4.  We saw only a small handful of people on a nice, sunny, winter weekend day.

Download a Trail Map (PDF)

Directions to trailhead:  Take exit 291 on I-81 heading west on SR 651.  Go 1.5 miles and take a left on SR 623.  Go 4 miles and take a right on to SR 600.  Go 4.4 miles and take a left on SR 603/Van Buren Road.  Continue on Van Buren Road for 2.7 miles and you will see parking on the left.  There are two parking areas here, but pass the first parking area to get to the second parking area which is on the lefthand side.  Park here and retrace your path a short distance to see the closed gate and the fire road where your hike will start.

MapMyHike is not necessarily accurate, as the GPS signal fades in and out – but it still provides some fun and interesting information.

Appalachian Trail – Tye River to Mau-Har Junction

This 3.8 mile hike on the Appalachian Trail completed a short 1.9 mile gap in unbroken Appalachian Trail mileage we left after hiking the Three Ridges circuit in 2012.  After you cross the scenic Tye River footbridge, the hike doesn’t boast any views or unique scenery.  It’s a moderate uphill climb to a junction marker in the woods.

View the Full Album of Photos From This Hike

Tye River Footbridge
Our hike started off headed northbound over the Tye River footbridge. Below: White Blaze painted on the bridge; Adam and Christine on the bridge.

White Blaze Adam and Christine on the footbridge

Adam Says…

We have been working on section hiking some of the Appalachian Trail through Virginia.  Hopefully one day, we will have the entire section that crosses Virginia on here.  In doing it in sections, we have ended up with a few small gaps between sections.  This gap was created when we hiked Three Ridges and did it as a loop trail that included a return trip on the Mau-Har trail.  I got a text from my friend Bryce from Hiking Upward that mentioned he was going to try and hike Spy Rock the next day.  I mentioned that we were trying to get this section done as well, so he agreed to accompany us on this section also.  It was January 1st and we wanted to start the year off right with a great day of hiking.

We parked our cars at the lot on 56 where the Appalachian Trail crosses the Tye River.  We crossed the road and almost immediately you come upon a large suspension bridge that crosses the Tye River.  We knew this was probably the highlight of the trip, so we took some time to get some pictures across the bridge and of the Tye River from under the bridge.

View Through the Trees
Looking through the trees toward the Priest. Below: Adam on the trail; Our stop point for this hike was just a sign at the junction of the AT and the Mau-Har trail.

Adam Hiking End Point

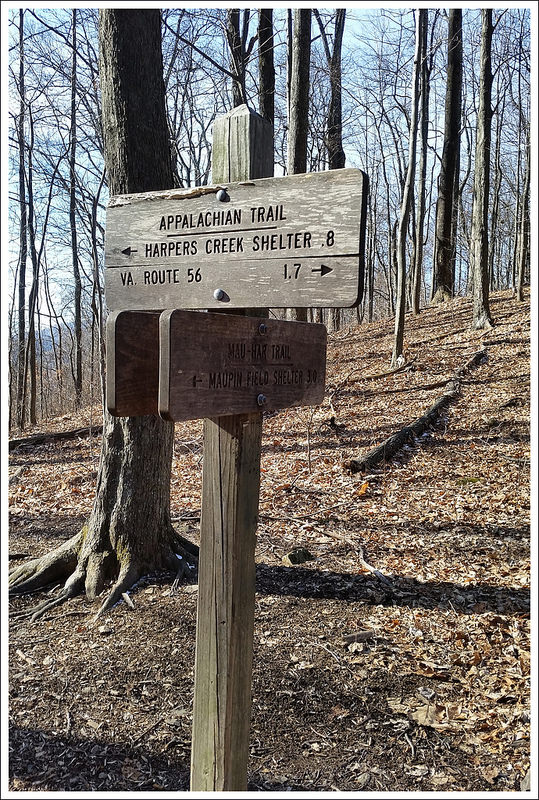
After crossing the bridge, the trail takes a few switchbacks and then starts a fairly steep uphill through the woods.  Looking back from the trail, we were able to see some obstructed views of Pinnacle Ridge and The Priest, but when spring hits these views will likely be more obstructed.  On our climb up, we saw a dog come racing towards us.  As it turns out, it was a bear-hunting dog, as it had a large radio collar around his neck.  The dog barely stopped at all and barreled past on a mission to try and find a bear.  We continued our hike up and came up to the sign post that marked the trail junction with the Mau-Har trail.  From this point, you could continue on the Appalachian Trail to the right to reach Chimney Rock and Three Ridges or take a left on to the Mau-Har Trail, to reach the Maupin Field Shelter.  We tapped the post to mark that we had completed this section and made our way back.

After our hike, we got in our cars and stopped by Crabtree Falls, which had frozen water on the sides.  This iconic waterfall is always a nice place to visit any time of year.  Our next stop was to hike up to Spy Rock.  When we first arrived, the parking lot was full of cars and vans.  We felt defeated and were about to make the decision to not do the hike, when someone came down the trail and mentioned that a few car loads were getting ready to leave.  We waited just a couple of minutes and two parking spaces opened up.  We hiked up to Spy Rock, which was covered in snow in some parts.  At the top of the trail, Bryce decided he wanted to bushwhack to another rock outcropping that would look back on Spy Rock.  So, we set a plan to try and take pictures of each other from the different summits.  The climb up Spy Rock was pretty dangerous, since the water that falls into the cracks that your normally use to help pull yourself up was frozen, making it very treacherous.  When we got up to the top of Spy Rock, the wind was blowing so hard and the temperatures from the wind chill put it way below freezing.  We waited for a few minutes at the top.  We eventually saw Bryce making his way to the rock outcropping.  We took a quick photo of him and then made our way off Spy Rock, since we felt we could get frostbite fairly quickly up there.  We reconvened where we had split up and then made our way back down the mountain.  We got back to our cars and headed to Staunton for lunch.

This area where we hiked is a real sweet spot for Virginia hiking.  You have The Priest, Three Ridges, Crabtree Falls, and Spy Rock all within a few miles.  If you want a place to get a few great days of Virginia hiking, this is a great destination.  We were glad to reconnect again with Bryce and getting another AT section checked off our to-do list.

Tye River
The lovely, scenic Tye River.  Below: Adam and Bryce crossing the footbridge at the end of the hike.

Adam Crossing the Tye River Footbridge

Christine Says…

I don’t really have anything to add about the hike!  It was just a pleasant walk in the woods that finished a hole in our continuous AT miles.  It was great to see Bryce (Hiking Upward) and spend the first day of 2015 on the trail!

After a couple little hikes, we all went for a decadent lunch and beers at Byers St. Bistro in Staunton.  They have great sandwiches and a nice variety of beers on tap.  Check it out if you’re in the area.

Trail Notes

  • Distance – 3.8 miles
    (Check out the stats from Map My Hike)*
  • Elevation Change – 1100 ft.
  • Difficulty –  3.  The climbing is steady and moderate the entire way up.
  • Trail Conditions – 4.5.  Well maintained, smooth trail.
  • Views  0.  No views other than a few glimpses through bare winter trees.
  • Streams/Waterfalls – 0.  The stream and waterfalls are a little further up trail from this spot.
  • Wildlife – 0.  We did see a hunting dog – that probably scares wildlife away.
  • Ease to Navigate – 4.  There’s really no place to go wrong here.
  • Solitude –2.  This trail leads up from a very popular AT access point.  You can expect to see a good number of people.

Download a Trail Map (PDF)

Directions to trailhead:  From I-81, take exit 213A to head on to US-11 South towards Greenville.  Go 8.2 miles and take a left on to US-56.  Go 16.6 miles down US-56 and you will come to a parking lot for the Appalachian Trail on the right-hand side of the road.  Park here and then cross the road to start hiking on the Appalachian Trail heading north.

MapMyHike is not necessarily accurate, as the GPS signal fades in and out – but it still provides some fun and interesting information.

Veach Gap – Morgan’s Road

This hike is easy for a 7-miler!  Gentle grades along an old roadbed take you to a lovely view of the Shenandoah River and mountains beyond!

View the Full Album of Photos From This Hike

Veach Gap Hike
The Point overlook on the Veach Gap hike offers nice views of the bends of the Shenandoah River and the mountains of the national park beyond. Below: Adam crosses the closed gate at the beginning of the trail;  Christine hikes the Veach Gap trail; The main trail junction on this hike.

Start of Hike Veach Gap Hike Signs

Christine Says…

Throughout fall 2014, our employer (and alma mater), James Madison University, participated in the Outdoor Nation Campus Challenge.  Basically, students and employees accrued points for outdoor activities. The school that compiled the most points in the end won a prize of cash and outdoor gear. One component of the competition was completing a collection of eight local hikes.  The list included many hikes we had already done (Old Rag, Humpback Rock, Fridley Gap, High Knob Fire Tower).  Veach Gap was one of the only hikes on the list we hadn’t done, so we decided to check it out.

From the end of Veach Gap Rd. in Fort Valley, the hike begins along the Veach Gap Trail (blazed in gold), which is an old road bed.  Supposedly, this trail is what remains of the historical Morgan’s Road.  General George Washington requisitioned the road during the Revolutionary War.  It was built to be used as a path of retreat from Yorktown.  As we all know from history, the war went America’s way, and the retreat route was never needed. The road was still used locally for many years before falling into disuse and transitioning into a trail.

At one mile in, the Veach Gap trail crosses Mill Run.  This is really the only potentially confusing spot to navigate on the hike.  The trail crosses at a diagonal, so look carefully for the gold blazes on a tree slightly upstream.  Shortly after crossing the stream, you may notice a rock formation in the shape of an upside down ‘U’.  This is called an anticline, and it’s a very unusual geological feature in our area. I’m kind of ashamed to admit this, but we didn’t even stop to look at the anticline.  I forgot it was there, and my mind was more focused on fall colors, lofty views, and potential wildlife sightings.  But, if you’re a geology buff – don’t miss this feature!

Crossing Mill Run
Crossing Mill Run. You can see the blaze on the tree on the opposite bank. Below: Pretty fall leaves on the water; Blazes for Veach Gap, Tuscarora, and the Massanutten Trails; After the main trail junction, the Massanutten Trail became a little steeper and rockier.

Fall Leaves on Water Blazes Rockier Massanutten Trail

A short distance after crossing the stream, the Veach Gap trail merges and becomes jointly blazed with the orange-blazed Massanutten Trail and the blue-blazed Tuscarora Trail. The three trails share the route for (at most) a couple tenths of a mile. AT 1.2 miles,  you’ll come to another trail sign.  To the right, the trail heads in the direction of the Little Crease Shelter.  Stay to the left (blazed orange and blue), headed up Little Crease Mountain and toward Sherman Gap.  About a half mile after this intersection, you’ll pass a marked group campsite on the right.

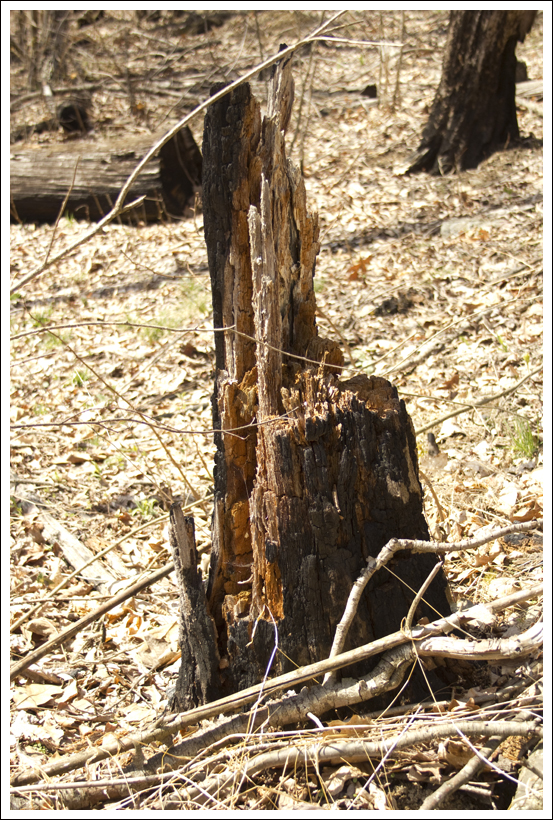
Continue meandering uphill along a gentle grade.  At three miles, the trail becomes a bit steeper with switchbacks.  There was a significant forest fire here in 2012, so the canopy is thin and allows nice views along the climb.  We saw lots of charred stumps and blueberry bushes along the increasingly rocky trail.  Eventually, the trail leveled out along the ridge.  We soon reached The Point Overlook – a small outcropping of rocks overlooking a sweeping bend on the Shenandoah River.

We had a snack, took a few photos, and spent some time chatting with a fellow hiker (Hi, DJ!) before heading back down the way we came. Veach Gap was really a lovely hike to enjoy at the peak of fall foliage season.  After getting back to our car, we made the short drive into Front Royal so we could enjoy burgers and shakes at Spelunkers.  Great day!

Adam Says…

When we were reviewing the peakbagging hikes that were listed for JMU students/faculty to try for the Outdoor Nation competition, we were surprised to see this one on there.  My guess is the coordinators looked up hikes that were close to Harrisonburg without thinking of what would be seen on the hike.  We initially thought this wouldn’t be that nice of a hike, since we hadn’t heard anyone mention it before to us, but the views made this a pleasant surprise.

When we pulled up to the parking lot, we saw a few cars already in the parking lot and a group getting ready to hit the trail when we did.  Of course, we saw vehicles for hunters, so we were a little worried about how this trail was being used overall.  We were glad that we had brighter clothes on, which is always a precaution to consider during hunting season.  We started off on the gold-blazed Veach Gap trail by crossing through the gate and walking on the fire road.  The trail was very flat and passed through some younger forest.  We were greeted with sights and sounds of Mill Run to the left of the trail.

Opening Views
The higher we hiked, the more views we got through the trees. Below: Adam takes in the view; The ridge was burned by a forest fire in 2012.  The damage is still fresh and evident; Adam descends.

Another Take on the View Rocky Ridge Descending

We soon came across two bow hunters, that seemed to be milling around, more about enjoying the outdoors than they were about hunting.  At .35 miles, the fire road turns into trail.  At 1.2 miles, take a left at the junction and join the blue and orange-blazed Massanutten Trail.  The trail continued a slow, gradual climb heading northeast.  At 3.0 miles, the trail takes a sharp, southern route and at 3.2 miles, it switches back to the normal northeastern direction.  On our climb up, we passed by a large group of boy scouts that were covering some miles over the weekend, but were looking to camp near the crossing at Mill Run.  The slightly-obstructed views of the mountains beside us were so colorful in this peak fall setting.

As you climb up to the ridge, you start seeing a lot of the forest fire damage.  Since this happened in 2012, you start seeing some of the plants starting to grow in place of those that burned.  We reached the ridge and followed it for about .15 miles.  At 3.5 miles, we found a pile of rocks marking a short climb to the overlook where we stopped.  The true highlight of the view is seeing the bends of the Shenandoah River from this rocky perch.  There wasn’t a ton of room at the top that was unobstructed, but it was enough for a few people to take in the view.

If you feel like you would like a view hike with a good amount of solitude, this may be a great selection.

Trail Notes

  • Distance – 7 miles
    (Check out the stats from Map My Hike)*
  • Elevation Change – 1100 ft.
  • Difficulty –  2.  This is an easy hike to a nice viewpoint.
  • Trail Conditions – 4.  The trail was in great shape in most places.  Dry, fallen leaves made some of the descents slippery.
  • Views  3.5.  The view of the bends of the Shenandoah River is nice, but slightly obstructed.
  • Streams/Waterfalls – 2.  The stream along the early part of the trail is really pretty.
  • Wildlife – 2.  We didn’t see anything but a few birds and squirrels.
  • Ease to Navigate – 3.  There are a few junctions and a few unmarked trails that cross the route, but you should be fine if you follow the blazes.
  • Solitude –4.  We did see a troop of Boy Scouts and a handful of others hiking in this area on a perfect fall weekend near peak foliage color, but generally this area is very quiet.

Download a Trail Map (PDF)

Directions to trailhead:  From Luray, VA, take SR 675/Camp Roosevelt Road.  Go .8 miles and take a left to stay on SR 675.  In 2.2 miles, take a right to stay on SR 675.  In 7.8 miles, take a right on to SR 678/Fort Valley Road.  Follow this for 9.7 miles and then take a right onto SR 774/Veach Gap Road.  Follow this about .75 miles to the end of the road, where you arrive at a parking area.  The trail starts after you walk around the gate.

MapMyHike is not necessarily accurate, as the GPS signal fades in and out – but it still provides some fun and interesting information.

Appalachian Trail – Hog Camp Gap to Punchbowl Mountain

This 17 mile overnight backpacking trip had beautiful views from Cole Mountain within the first two miles of the hike.  The rest of the hike was less scenic – mostly walking through quiet woods and along seasonally low streams.  The Lynchburg Reservoir and the swinging bridge over the Pedlar River were noteworthy features on the second day.  Adam will cover day one and Christine will take over with day two!

View the Full Album of Photos From This Hike

Adam Takes in the View from the Summit of Cole Mountain
Adam takes in the view from the summit of Cole Mountain.  Below: Coming out of the woods onto the grassy meadow is always breathtaking;  Great views from the top of Cole Mountain; Hints of fall color near the summit.

Breaking Out of the Trees Cole Mountain Summit Coming Fall Color on Cole Mountain

Day One (8.1 miles)…

We started off our trip by leaving one car where the AT crossed the Blue Ridge Parkway at the Punchbowl Mountain overlook.  From the lot, we could see the AT  southbound, but we didn’t see where we would return to our car from the north. It turns out it was just below us on the other side of the parking lot, but the morning fog made it a little hard to spot.  We dropped our car off and then headed to Hog Camp Rd, to start our journey.

From Hog Camp Gap, we headed south on the Appalachian Trail.  The trail started off through a wooded section uphill, fairly steeply in some parts.  Around 1.1 miles, the trail opened up to the beautiful, wide-open bald clearing that is Cole Mountain.  We have hiked Cole Mountain before as a loop and I do think it is one of the more under-appreciated hikes in Virginia.   The panoramic vistas make this look like something you would picture in an outdoors magazine.  You can’t help but want to stop and take a look at the scenery around you.  The way we split this section might not have been the best plan for enjoying vistas.  We knew we had the best views of the trip done in the first 1.5 miles of the hike.  But that is one of the biggest lessons I learned from hiking this section – you have to hold on to what you may have just seen, because there is no certainty about what is to come ahead.

Climbing Bald Mountain
The climb of Bald Mountain wasn’t terribly long or difficult. Bald Mountain also is not Bald!  Below: Adam checks out the map at our lunch stop – a clearing near the top of Bald Mountain; A little snip of a view through the trees along the top of Bald Mountain; Huge tree!

Lunch Stop Snip of a View Huge Tree

After reaching the summit of Cole Mountain, the trail descends and again enters the forest.  Around 2.5 miles, we reached a junction with a spur trail that led to the Cow Camp Gap overnight shelter and a water source.  We continued on the trail which starts an ascent up Bald Mountain.  We reached the summit at 3.5 miles and were hoping for some nice views at the top, but found that Bald Mountain wasn’t very bald (there were a few obstructed views through the trees).  We found a clearing and camp spot and had our lunch there before continuing on.  The rest of the day, the trail was a descent so our climbing was done (at least until tomorrow).

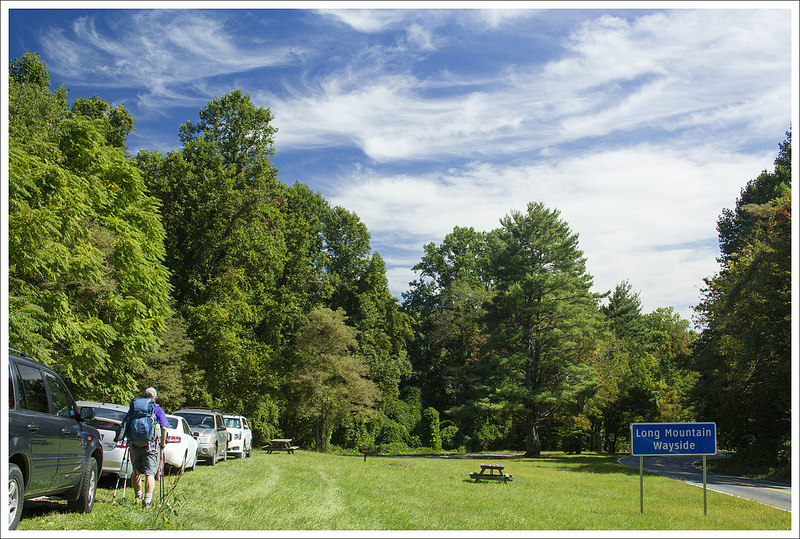
We crossed over USFS 507 at 5.5 miles and eventually came to US 60 and the Long Mountain wayside at mile 6.3.  We stopped at one of the picnic tables and took a break to eat a snack and give our backs a relief from the weight.  Local people just park on the roadside here and have a picnic at this spot.  It is also a way to do a longer out-and-back to Cole Mountain without parking or driving on a rough, gravel road.  After resting, we crossed US 60, spotting a sign for the continuation of the Appalachian trail to the right.  We continued our descent and at 7.1 miles, we reached Browns Creek, a reliable water source for a good stretch of trail.  At 8.2 miles, we reached the Brown Mountain Creek Shelter, our stop for the night.

The Brown Mountain Creek area is interesting from a historical/archaeological standpoint.  Much of the land along the creek was part of a large plantation predating the Civil War.  After the war, the land was primarily a settlement for freed African-Americans.  Houses, farms, orchards and even a gristmill could be found along the creek.  You can still see stone walls/stairs, pieces of metal, and other artifacts along the creek.

Long Mountain Wayside
The trail crosses US 60 at the Long Mountain Wayside.  Below: Information at the wayside: Descending to Brown Mountain Creek; Arriving at Brown Mountain Creek Shelter.

Wayside on Rt. 60 Descending to Brown Mountain Creek Arriving at Brown Mountain Creek Shelter

When we first got to the shelter, there was still a smoldering fire in the fire pit, so we realized someone had been there recently.  We also noticed a large pile of fresh bear scat next to the shelter.  While we didn’t think a bear had been roasting marshmallows by the fire, we felt it may be wise to not set up camp directly at the shelter.  We found a nice campsite right by the creek and decided that would be a better spot.  There was a boy scout troop that was camping on the other side of the creek.  We worried about them being too loud over the course of the night, but they were fairly well-behaved (except for trashing the privy – but that’s another story).  We set up our tent, filtered water for tonight and tomorrow, and began to unwind.

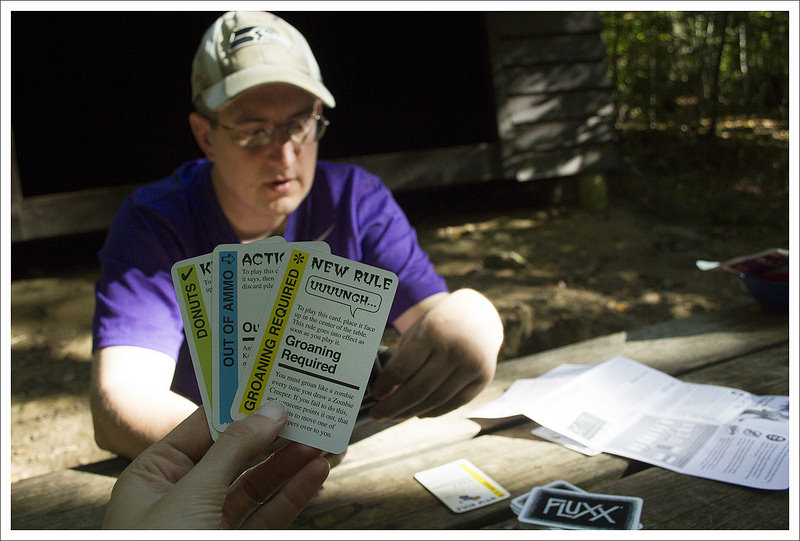
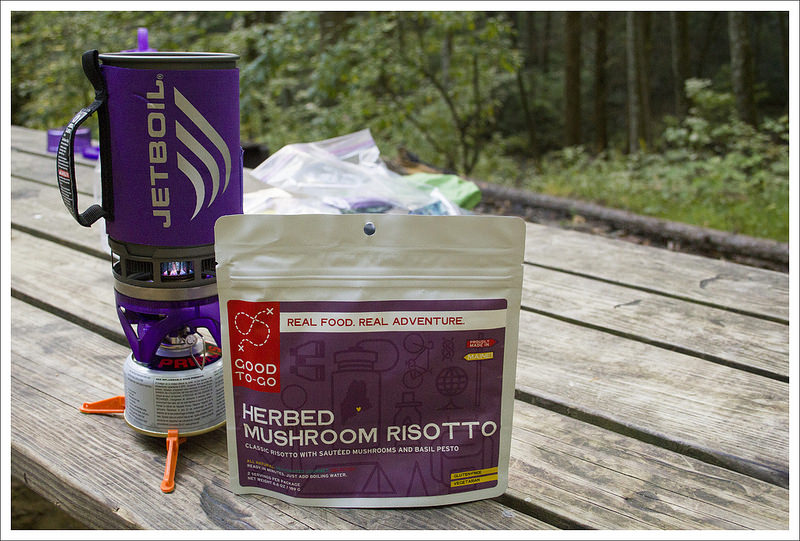
We cooked dinner up at the shelter (Good To-Go Herbed Mushroom Risotto)* and played Zombie Fluxx, a card game where the rules and objectives for winning constantly changed.  I always enjoy bringing a card game along the trail – the weight isn’t too bad for the entertainment it can provide.  We played a few hands (I recall Christine being better at killing zombies than I was) and then went back to our campsite after I hung our bear bag.  We started off reading books by headlamp outside our tent (continuing with the zombie trend I was reading Night of the Living Trekkies), but the bugs were awful.  We retired to our tent probably around 7:30, read for a little while longer, and went to bed very early.  We always typically go to bed around nightfall when backpacking, but hiking with the extra weight always makes you feel a little more physically exhausted.

* Good to Go is a new backpacking food manufacturer.  They use healthy ingredients and much less sodium.  We thought it was one of the best dehydrated meals we’ve had on the trail!  We added a foil packet of chicken breast to our dinner.

Games
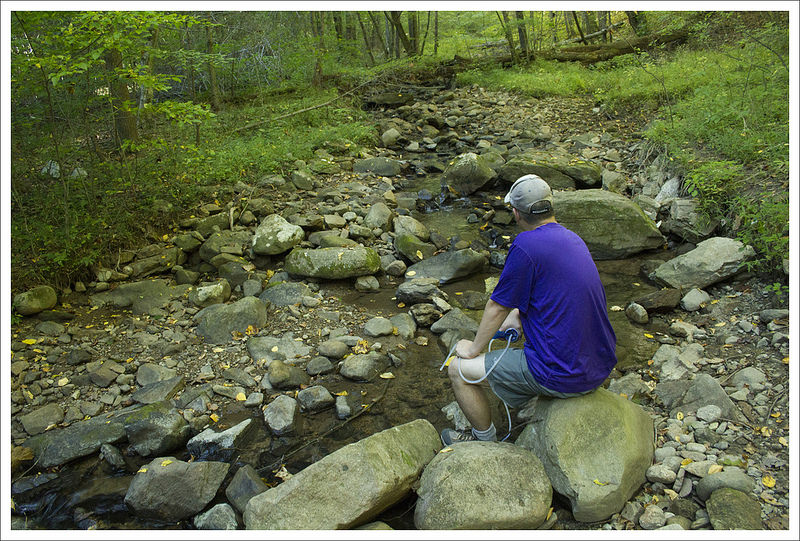
We arrived at camp fairly early, so after the tent was pitched and water collected, we spent some time playing Zombie Fluxx. Below: A group of 14 Boy Scouts camped along the opposite bank; Collecting water for cooking and drinking; We tried a new brand of dehydrated meal – Good to Go (tasty!)

Scouts Water Source Good to Go Risotto

Day Two (9.1 miles)…

Day two started earlier than expected (and with the added bonus of a huge, swollen mosquito bite on my eyelid – I looked like I’d been punched!) Like most Boy Scout troops we’ve met along the trail, the one camping near us on this trip was awake, packed up, and on their way before sun-up. This had pros and cons.  One con was all the crunching boots and headlamps moving around our tent in the dark.  A pro was the opportunity we had to enjoy the creekside in peace and solitude before starting our hike for the day. The solitude also meant I could find a place to dig a cat hole in complete privacy without having to worry about Boy Scouts spotting me!  I would have used the privy near the shelter, but let’s just say the privy turned out to be another con of camping near a big scout group. One of them had completely defiled the privy and there was no way I was going in there!

Breakfast was instant oatmeal, honey buns and coffee.  I’ve learned the hard way after running out of gas on past backpacking trips that one packet of instant oatmeal (140 calories) is not enough to fuel me across nine miles.  The Little Debbie Honey Bun has been a revelation for me.  I think it has the magical balance of fat and sugar I need to power through my morning miles.  They also hold up great in my pack – no smushing and no crumbling.  Some people like a healthier, protein-packed breakfast, but give me a honey bun!

Morning on Brown Mountain Creek
The morning was beautiful and quiet (after the Scouts left). Below: When water is running higher, this is probably a pretty little waterfall; Adam hikes along the Appalachian Trail: One of several small stream crossings.

Plunge Pool Walking Along the AT Stream Crossing

The first five miles of our second day were easy. The terrain was a very gradual overall descent with a couple brief uphill climbs.  The first mile or so followed Brown Mountain Creek.  The trail followed roughly parallel to the stream for much of the way.  I kept thinking how beautiful this area would be when water levels were higher.  We eventually crossed the creek via a wooden footbridge.  At this spot there was a small, but pretty, waterfall cascading into a plunge pool.  The flow was down to a trickle, but it was still a lovely spot.

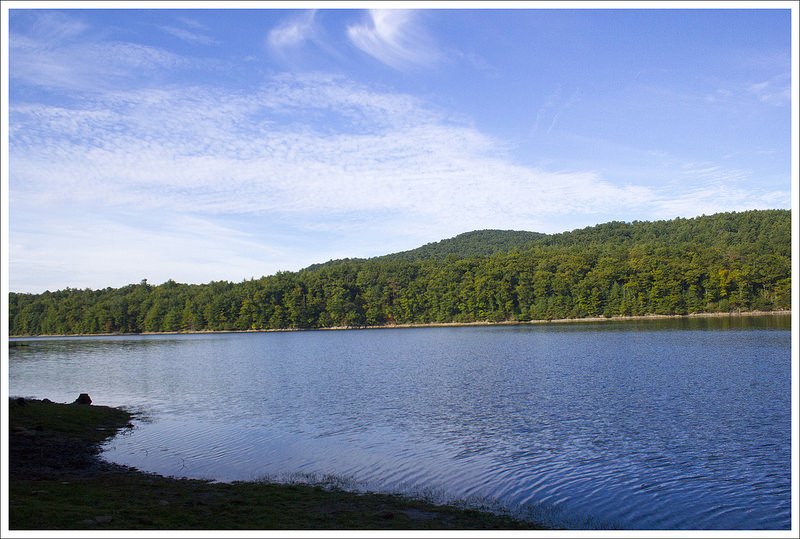
Departing Brown Mountain Creek, we walked through serene, quiet forest for a couple more miles.  There were two small stream crossings along the way.  The first didn’t seem to have a name, but the second was Swapping Camp Creek.  Both of these creeks end up flowing into the Lynchburg Reservoir.  At around 3 miles into our hike, we started seeing glimpses of the reservoir through the trees.  We followed an off-trail footpath steeply down to the shores of the water for a couple photos.  We saw several herons hunting in the mud.  There were ‘no camping’ signs posted everywhere, but there were also several well-used fire rings.  I’m guessing there are quite a few people that ignore the regulations and attempt to stealth camp in this area.

Lynchburg Reservoir
The trail skirts around the Lynchburg Reservoir. Below: The dam at the south end of the reservoir; The Pedlar River; The Pedlar River footbridge.

Dam Pedlar River Pedlar River Bridge

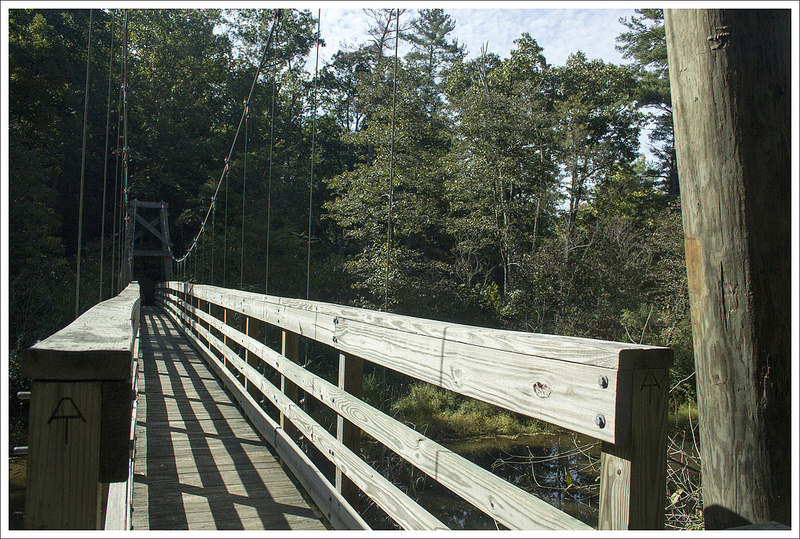
We climbed back up to the Appalachian Trail and continued south, skirting the eastern side of the reservoir.  At around 4.8 miles we came to the lowest elevation point of our hike – the Pedlar River crossing.  The trail crosses the river on a picturesque, bouncy suspension bridge.  From the middle of the bridge, we could see early fall colors reflecting from the trees onto the water’s surface.  After crossing the bridge, we came out on gravel-surfaced Reservoir Road.  We followed that briefly until we spotted another white blaze for the Appalachian Trail.

At this point, we began our toughest climb of the whole 17 miles.  The 2-mile ascent of Rice Mountain begins pleasantly enough.  The trail follows parallel to Little Irish Creek (which was running low and barely noticeable) and passes through a small plot of old growth forest.  There is an extremely weather-beaten sign explaining tree sizes in the area and how the area is used to study the local watershed.  Early parts of the climb are well-graded and moderate, but about .75 mile in, the trail pretty much goes straight up the mountain without the moderating benefit of switchbacks.  I wanted to push through the climbing and put it behind me, but Adam was ready for a snack.  We found some big rocks about 1.5 miles up the mountain and took a candy break.  After a half mile more climbing, we reached the ridge of Rice Mountain.  The forest was especially pretty along the top of the mountain – very open with lots of nice shade trees.

Climbing Rice Mountain
Climbing Rice Mountain was tougher than it looked on the topo map. Below: Another little peek at a view through the trees; A curly laurel thicket; The finish line!

Peek of a View Laurel Thicket The End

On the descent of Rice, we had one nice view through the trees.  We also saw more brilliant red fall colors and a lot more thickets of rhododendron and mountain laurel.  There really wasn’t anything remarkable to see or say about our last couple miles of hiking.  The terrain was rolling – there was a general uphill trend, but with small downhills as well.  There were no views or streams to speak off.  The lack of scenery gave me lots of time to fret over my feet. Two toes on my right foot had dislocated earlier in the day and were becoming increasingly painful.  With each step, it got a little harder to bear my weight plus the weight of my pack. I think if there had been waterfalls or great views, I would have been more easily able to distract myself.  But on this particular day, all I could think was ‘Ouch – when will this hike be over?’

At almost the end, we had one final road crossing at the junction of Robinson Gap Rd. and Panther Falls Rd.  After just another third of mile, we came up a small hill and found ourselves back at the parking area for Punchbowl Mountain on the Blue Ridge Parkway.  I don’t think I’d ever been so happy to end a hike. It felt great to take my boots off and change into a pair of Oofos.  While I enjoyed the great weather, the opportunity to be out, and the nice views from Cole Mountain, this wasn’t one of my favorite backpacking trips.

Trail Notes

  • Distance – 17.2 miles [Day One] [Day Two]
  • Elevation Change – About 2900 ft.
  • Difficulty – 4.  Mostly for distance, but the descent of Bald Mountain is a real knee-grinder and  the climb up Rice Mountain  (Day 2) is surprisingly challenging.  
  • Trail Conditions –  4.  The trail is in nice condition all across this stretch of AT.
  • Views – 5 (for Day 1) The views from Cole Mountain are indisputably spectacular.  Enjoy them early in your hike… they’ll be the last real views of the trip.
  • Streams/Waterfalls – 3.  This was hard to judge because of the unusually dry late summer/early fall.  I think under normal circumstances, Brown Mountain Creek would be beautiful with lots of small cascades and rapids.
  • Wildlife – 2.  We didn’t see any wildlife beyond a cute bullfrog in the creek.  But, there was LOTS of bear scat around Brown Mountain Creek Shelter.
  • Ease to Navigate – 4.  Just keep following the white-blazes and pay attention at road crossings/trail junctions to stay on the Appalachian Trail. 
  • Solitude – 3.  We saw quite a few people around Cole Mountain and spent the night at Brown Mountain Creek with a Boy Scout Troop.  We saw only one person along the trail on the second day.

Directions to trailhead:  Requires a shuttle.  We parked one car where the AT crosses the Blue Ridge Parkway near Punchbowl Mountain.  This is mile 51.7 on the Blue Ridge Parkway, about 6 miles south of where the Blue Ridge Parkway meets with US 60.  From this point, we drove our other car back north on the Blue Ridge Parkway for 6.0 miles and took the exit leading us to US-60 East.  We headed 4.3 miles on US 60 E before taking a left on SR 634/Coffeytown Road.  Follow this for 1.6 miles before taking a right on SR 755/Wiggins Spring Road.  Follow this gravel, bumpy road for 2.7 miles until you reach the parking area where the AT crosses the road.  Follow the white-blazed Appalachian trail heading south.

Strickler Knob – via Massanutten Trailhead

This 9.1 mile hike is challenging, but offers wonderful view payoffs and a fun rock scramble.  There is a shorter option for this hike for people wanting to skip the toughest part of the climb.

View the Full Album of Photos From This Hike

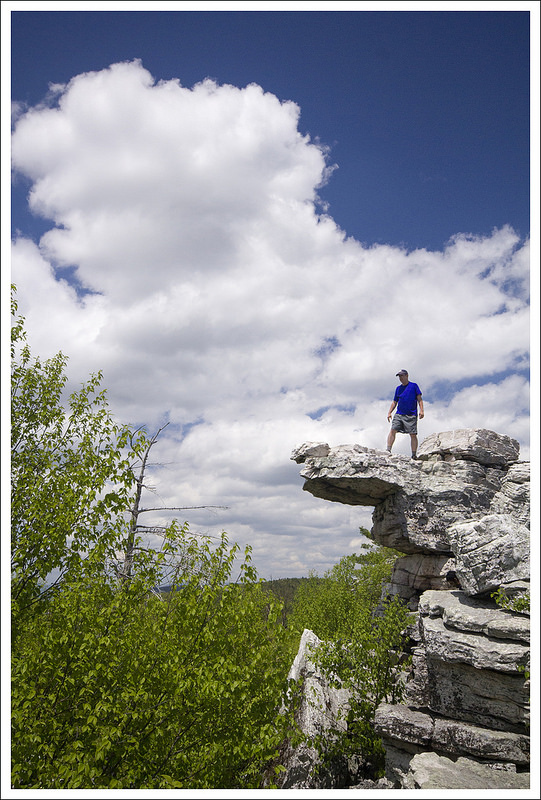
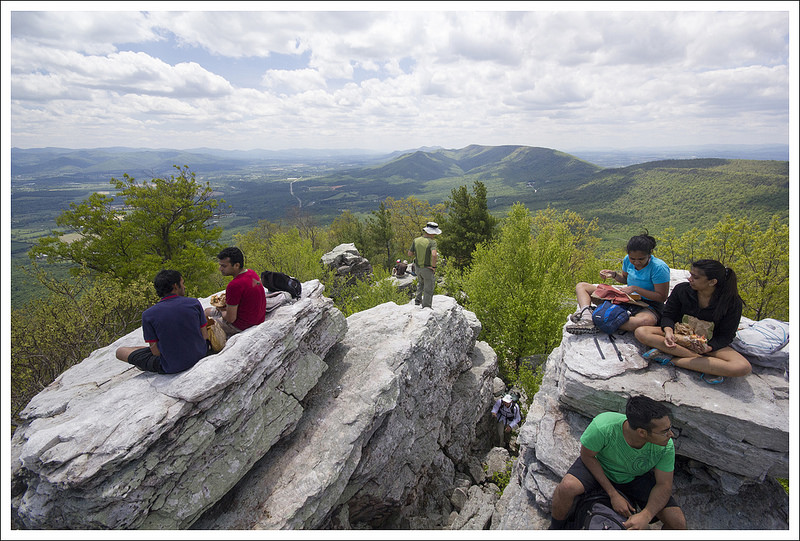
Crowds on Strickler Knob
Crowds gather on one of Strickler Knob’s perches. One person we met at the summit had a Cavalier King Charles spaniel in her backpack.  If you look closely at the photo, you can see the dog’s head sticking out of the pack.  Cute! Below: The Massanutten Trailhead on Crisman Hollow Rd.; Adam, Suzanne and Anthony begin the hike; Native pink azaleas.

Massanutten Trail Happy Hikers Pinkster

Christine Says…

Strickler Knob was the second hike we posted on Virginia Trail Guide… way back in May of 2009. In the years since we first did this hike, there was a bad forest fire in the vicinity, the Forest Service painted over the purple/pink blazes to the knob (and then someone put them back), and the trail became vastly more popular.

On this particularly beautiful morning, we were planning a hike in Shenandoah National Park, but at 7:45 a.m. a text popped up on my phone. It was from our friends, Suzanne and Anthony (we met them at PATC’s Backpacking 101 workshop several years ago). They had made a spur of the moment decision to drive down from Maryland to hike Strickler Knob and wondered if we might want to join them. We don’t see them often enough, so the answer was clearly YES!

However, I had a few concerns going into the hike. The first was the possibility of swift/deep streams and run off from the deluge of rain we had received a day earlier. Roads and bridges were washed out all over the area. The second was the fact that the MMT 100 was being run that weekend. I wasn’t sure if the trail would be crowded or have limited access due to the race. We decided to put those concerns aside and go for it.

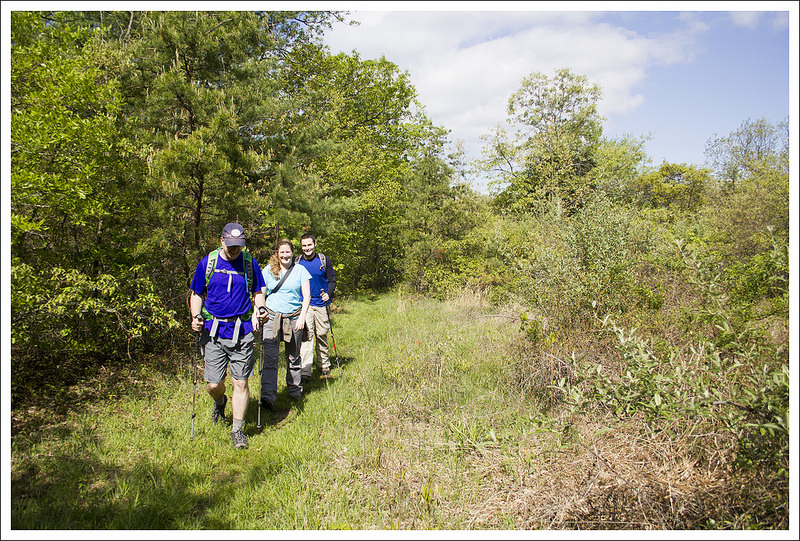
We met our friends at the defunct Massanutten Visitor’s Center on Rt. 211 near Luray. From there, we proceeded in one car to the Massanutten Trailhead on Crisman Hollow Rd. Right as we arrived, a carload of six was also unloading at the trailhead. We ended up playing leap frog with them along the trail all day long.

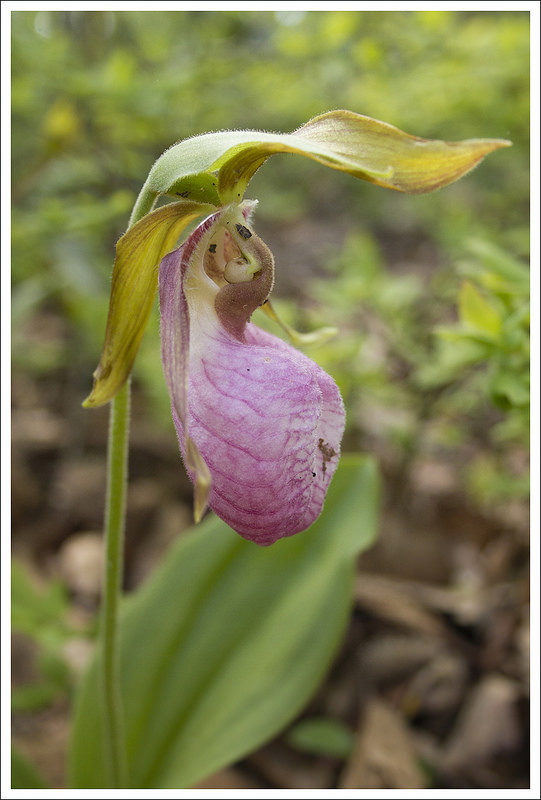
Lady's Slipper
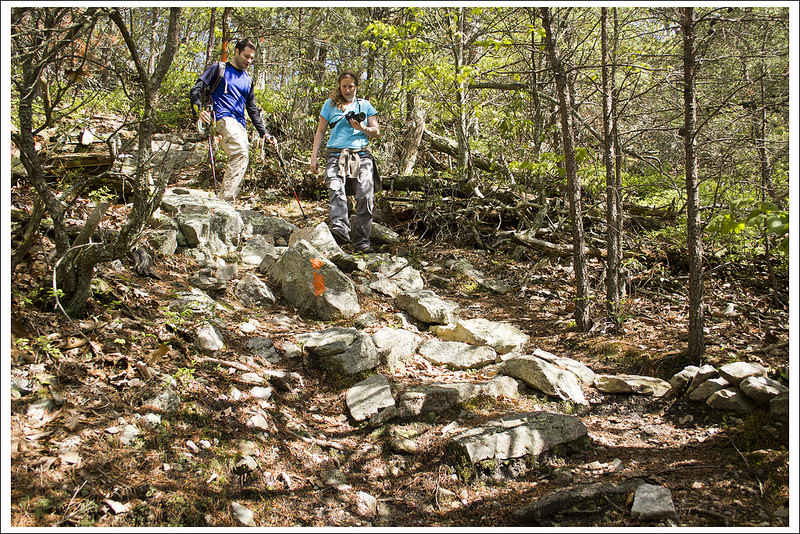
We spotted this beautiful pink lady’s slipper orchid along the trail. Below: Anthony and Suzanne make the steep descent of Waterfall Mountain; Mountain laurel is starting to bloom; Streams were running high.

Waterfall Mountain Descent Mountain Laurel Stream

The trail initially crossed a flat, open area and a view into the valley. But soon, the trail dropped very steeply downhill on Waterfall Mountain. I’m not really sure why it’s called Waterfall Mountain. We didn’t see any waterfalls along the way – maybe they’re someplace else, or maybe ‘waterfall’ just refers to the extremely quick drop in elevation. Along this section of trail, we all joked about what a tough climb uphill this would be at the end of the day. I enjoyed the flowers blooming along the trail. We spotted mountain laurel starting to bud and even a pink lady’s slipper!

Eventually the trail leveled out near a stream. We passed a large campsite near the water just before coming to our first stream crossing. The water was pretty high and fast, but some well-placed logs made the crossing doable. From there, the trail followed a series of ascents and descents with lots of little stream crossings along the way. Most of the small stream crossings are probably dry under normal circumstances. We soon came to a second large stream crossing. After that crossing, the trail followed the stream – literally. Due to the 4-5 inches of rain the area experienced, the trail was completely underwater. It didn’t even look like a trail, and the only way we were sure it was the trail was the presence of a blaze on a tree about 50 yards ahead. We walked for more than a mile in ankle deep water. It was fun, but it was also wet, sloppy and muddy!

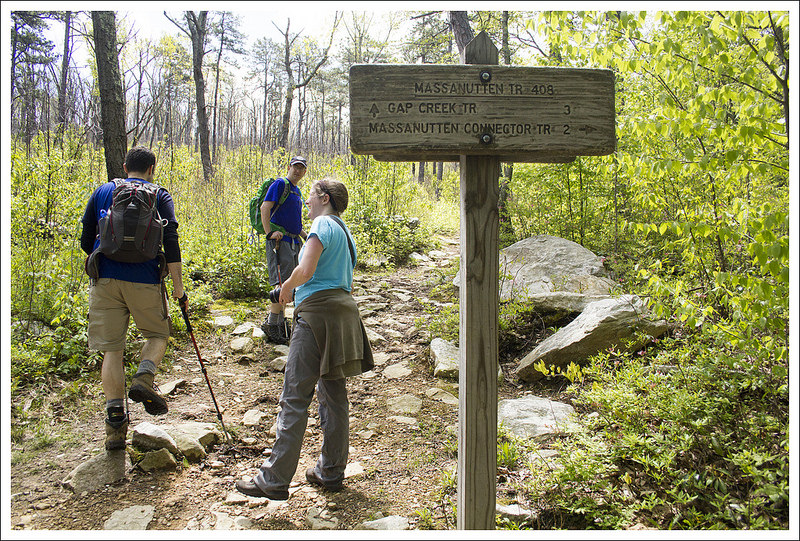
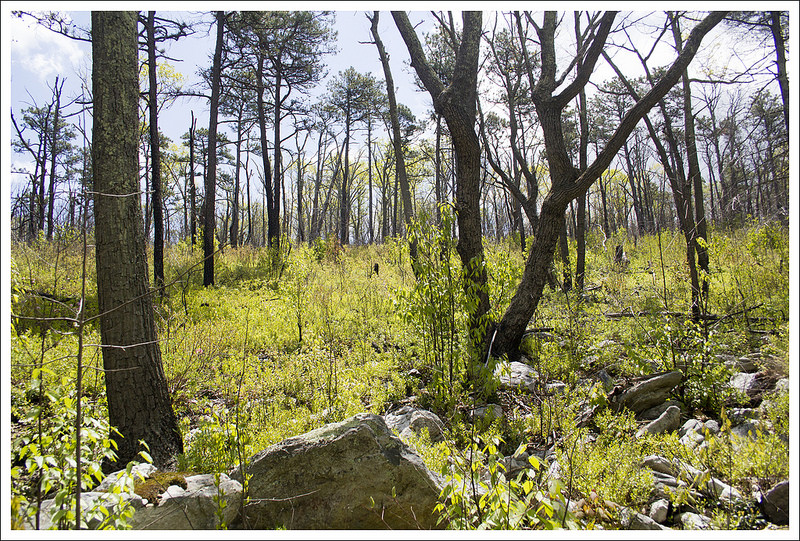
We reached trail junction 408. This is where the folks coming up from Scothorn Gap join the trail. At this point, we turned right and followed the orange-blazed Massanutten Trail uphill in the direction of the Gap Creek Trail. This part of the trail is really easy – wide and very gently graded.  There were lots of pink native azaleas on one side of the trail. On the other side, the area burned out by a forest fire stood, charred – but slowly growing back.

Stream Crossing
Anthony makes his way across the logs traversing the stream. Below: Adam walks along one of the only flat sections of the trail.  It was a really short section; Suzanne walks along the under-water trail; This is the trail junction that trips a lot of people up.  Make sure you go uphill, remaining on the Massanutten trail, in the direction of Gap Creek.

Flat Stream Walking Tricky

When we reached the ridge, there was an obstructed view where the trail continues over the crest and then downhill. If you find yourself going downhill on the orange-blazed trail, you’ve passed the turn to Strickler Knob! At the top of the ridge, look carefully for purple/pink blazes on rocks and a reddish disk stapled to a tree. This is the way to Strickler Knob.

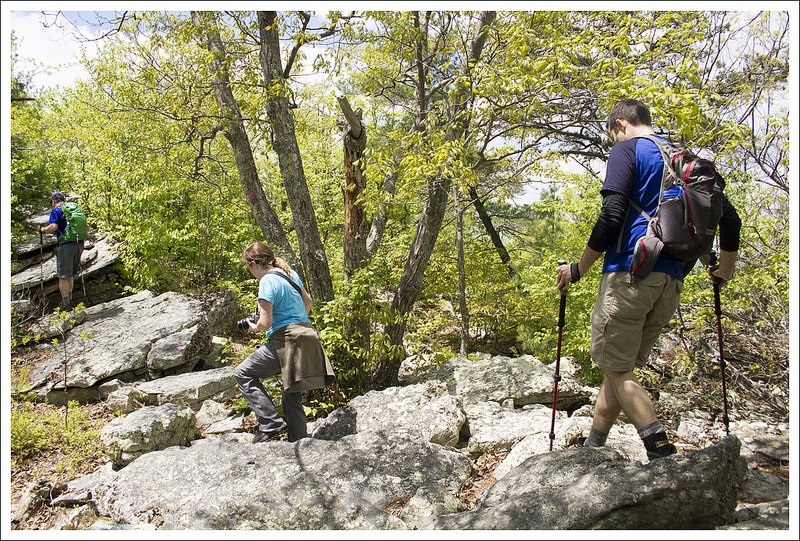
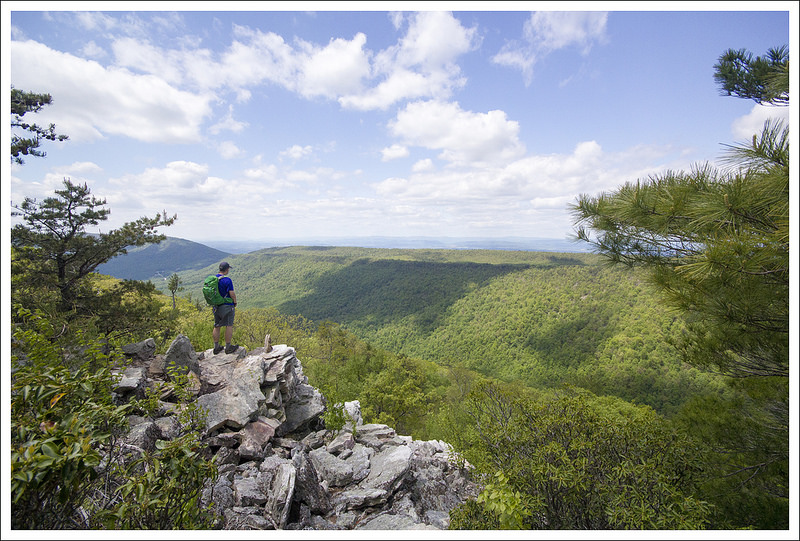
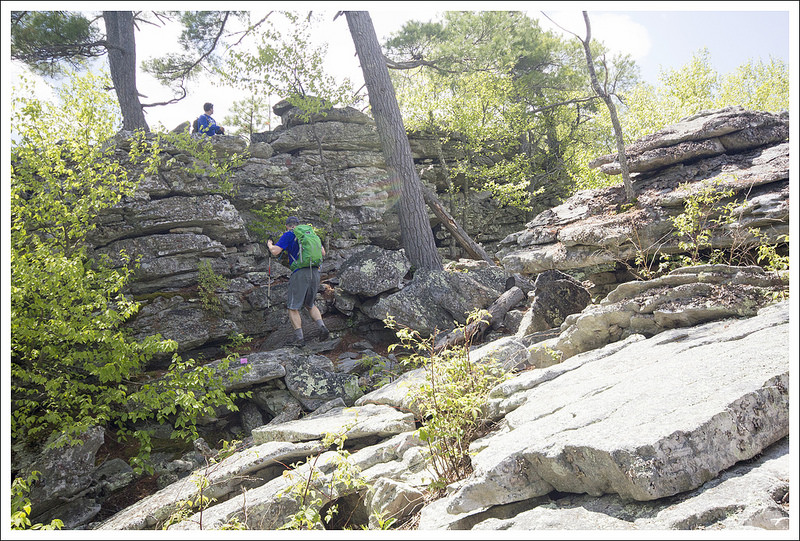
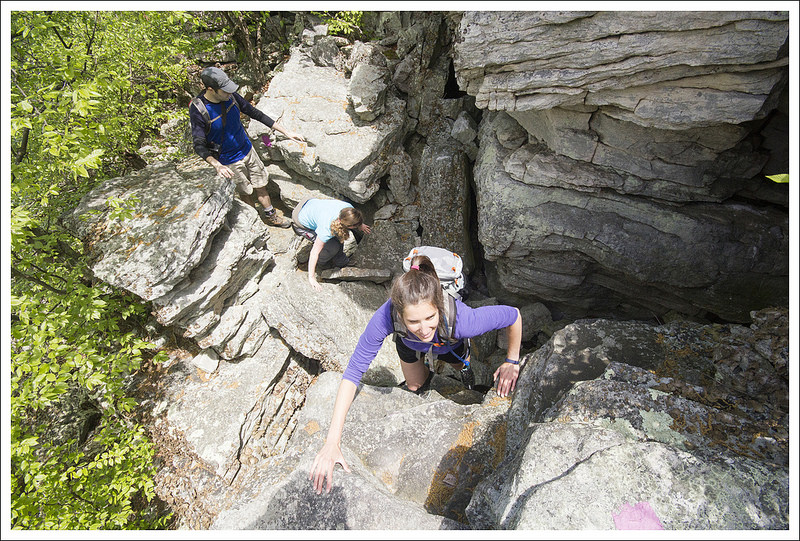
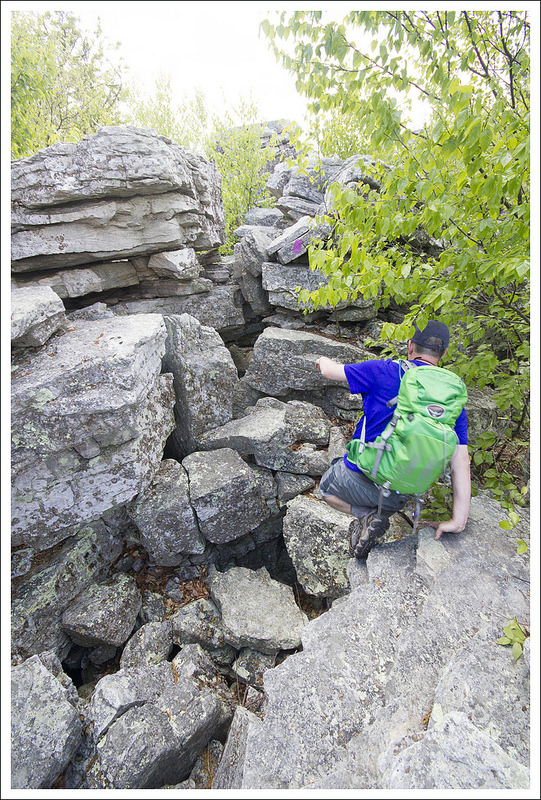
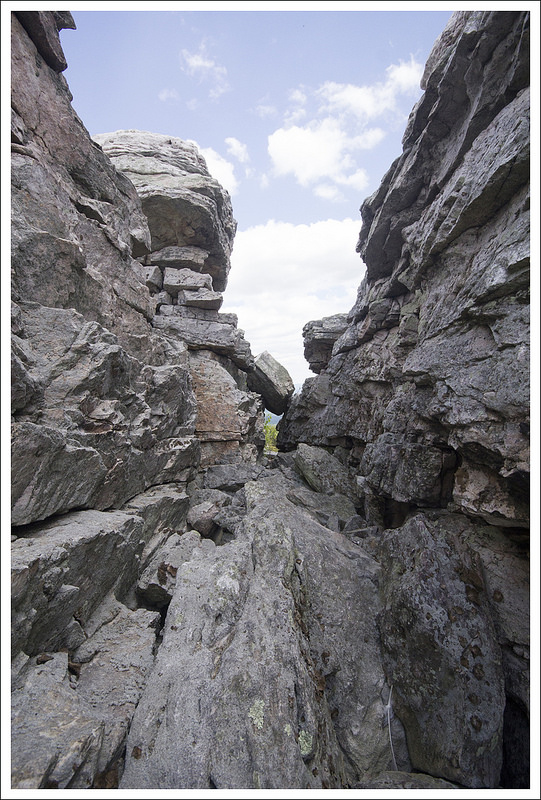
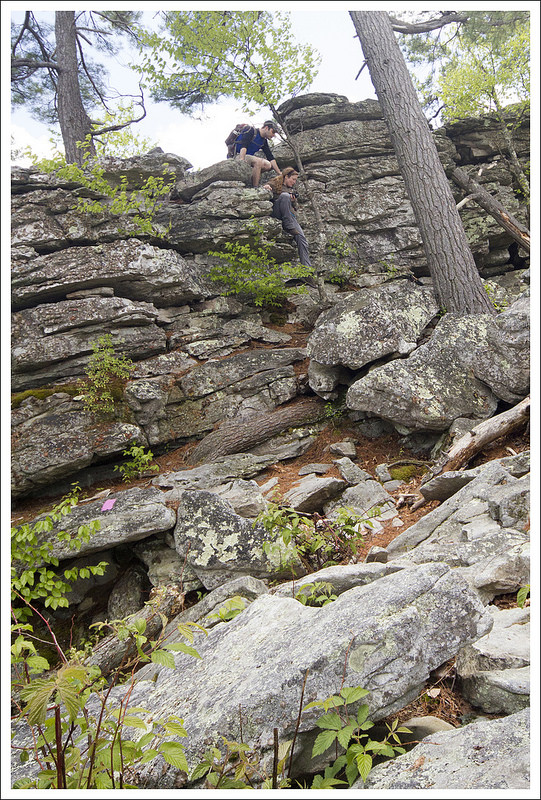
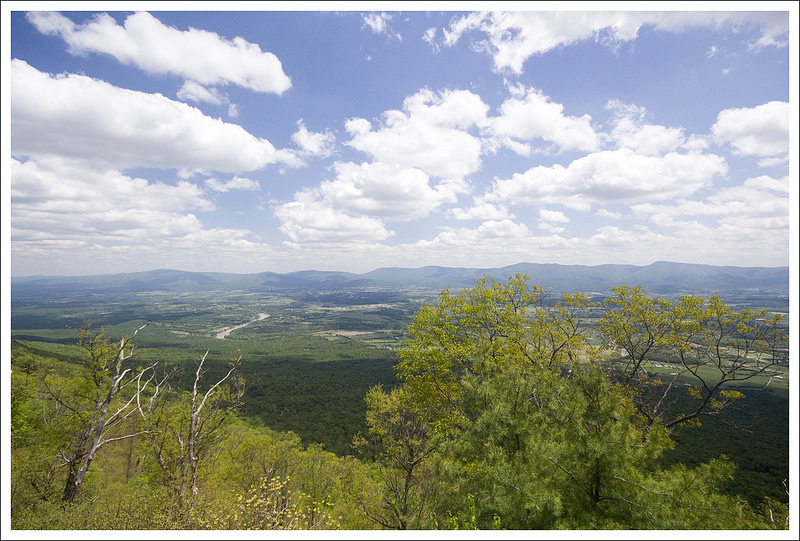
The walk to the knob starts off as a rocky but easily passable trail. But gradually the rocks become bigger, more jagged and trickier to traverse. It’s easy to lose the blazes as you pick your way along the rocks. You’ll come to one stunning viewpoint and think you’ve reached the end, but you still have the most intense part of the scramble to go! There are several steep, tall rock faces to negotiate before you finally come to a collection of towering rock stacks overlooking the Page Valley, Fort Valley and the Shenandoah River. The view from the knob is majestic!

On this particular day, Strickler Knob was packed. There were so many people at the overlook, it was hard to find a spot to sit. I think part of it was because the presence of two hiking clubs. But in addition to the clubs, there were also a number of couples and foursomes. Honestly, I’m shocked that this trail has become so popular! The crowds rivaled what I expect to see on a nice day on trails like Dark Hollow Falls or Hawksbill Mountain (in SNP).

We spent some time at the overlook eating lunch and taking photos. The hike back went really quickly. We walked in the water, we crossed the streams, we did all the little ascents and descents… and then we came to the base of Waterfall Mountain.

That climb was every bit as brutal as we all expected – gaining over 800 feet in about half a mile. The section isn’t climbed with mediating steps or switchbacks – it’s pretty much straight up the mountainside. We were all pretty glad when we got back to the flat, grassy section again!

When we got back to the car, the parking lot was much more crowded than when we had left it. We made the short drive back to the Massanutten Visitor’s Center and bid farewell to Anthony and Suzanne. It was a great hike and great to see them!

Burned Area
This area was burned by a forest fire several years ago. There is still a lot of black char, but new growth is starting to emerge. Below: The beginning of the Strickler Knob trail; Adam enjoys the first nice view; The scramble begins!

Strickler Trail First View Scrambling

Between the two routes to Strickler Knob, I would probably recommend the shorter route from Scothorn Gap to most hikers. You get all of the excellent scenery, and only miss the extremely challenging descent/ascent of Waterfall Mountain. The section on Waterfall Mountain doesn’t really offer any remarkable scenery, but it’s a great training hike if you’re looking for a cardio challenge or practice on elevation change. We probably benefited from the longer, tougher ascent to prepare for our upcoming Smokies Trip.

Adam Says…

Normally, when I describe the hike to Strickler Knob, I tell people that it’s an introductory rock-scrambling hike to see if you are ready for Old Rag.  While there is not as much rock-scrambling and navigating as Old Rag, there are a few spots towards the summit that will test you enough to see if you can pull yourself up some of the rocks and let you gauge your comfort-level with scrambling over some drops.  If you’ve already done Old Rag, this should be easy, but if you are intimidated by Old Rag from stories you’ve heard, try Strickler Knob first.  I would agree with Christine that this hike has become more popular over recent years.  When we had done the hike five years ago on a beautiful day, we only ran into one other couple on the entire trail; this time, it was crawling with people.

This is also a hike where people often get lost.  You won’t find the purple-blazed summit trail on any maps currently, so I would suggest bringing a copy of the map I’ve provided below.  I had a co-worker that tried to find the trail a few years ago (possibly when the blazes were still removed) to no luck.  We also came across a larger hiking group from Northern Virginia that had missed the trail completely.  When we gave them better directions, they turned around to attempt it again.  Part of this also has to do with what few blazes are actually on the trail.  You’ll know you are on a trail, you may just not be entirely sure which trail.

Scrambling
The group negotiates the rock scramble. Below: Adam makes his way through the rocks; Lots of rocks to climb; A nice perch on Strickler Knob.

Scrambling Rocks to Climb Adam on the Scramble

We started off the hike from the small parking area on Crisman Hollow Road.  The orange-blazed Massanutten trail starts off on nice, level terrain through a wooded area.  The trail soon opens up to more of a brushy, open field.  As the trail winds around through this area, there is even one spot that has a view into the valley below at .2 miles.  Shortly after this point as the trail winds around, the trail begins its very steep descent down Waterfall Mountain at .5 miles.  The entire time that we were hiking down, I was thinking this was going to be a pain to hike back up at the end of the hike.  The trail does have a few switchbacks, but the overall descent is tough on the knees as you descend about 800 feet in that half mile.  At the 1.0 mile marker, we finally reached the bottom of the descent and a junction with the Massanutten Connector Trail.  Take a left at this junction to stay on the main, orange-blazed Massanutten trail.  The trail begins to climb slightly at this point and at 1.2 miles, you will reach a nice back-country campsite along the side of the Big Run stream.  You’ll soon cross the stream (usually by balancing yourself along logs that have been laid across) and continue your climb.  After the second stream crossing, the trail begins a steeper climb with a large switchback to help ease the elevation gain.

Summit Crowd
The summit was very crowded, but the views were still fantastic!

Eventually the trail met the stream again and due to the heavy rains, the trail was completely submerged.  We ended up hiking what felt like almost a mile through a submerged trail by rock-hopping or just getting our feet wet and muddy.   The trail finally separated from the water and leveled out and we reached the junction with the yellow-blazed Scothorn Gap trail at 3.0 miles.  Take a right at this junction to stay on the orange-blazed Massanutten trail.  The trail feels more like a fire road at this point, as you’ll climb up slightly.  We were able to see a lot of the fire damage to the trees around, so there is little more than some lower brushy, understory on the trail at this point.  At 3.6 miles, you reach the crest of the trail and can see some obstructed views straight ahead.  At this point, look around to your right.  We found a small cairn on the ground and were able to see some red and purple blazes higher than eye-level on a few trees to mark the beginning of the purple-blazed trail to the summit of Strickler Knob.  The purple blazes at this point are typically marked on the rocks where you step.  The trail is very rocky at this point and you will be walking the ridgeline until you reach the summit.  The trail can also be a little hard to follow, but if you keep looking for the blazes and just remember you are walking the crest of the ridge, you should be fine.

At 4.2 miles, you reach a very nice viewpoint where you can get great views to the west.   Keep pressing forward and you’ll soon need to climb up a larger rock wall and then pass by a primitive campsite.  Just a few 100 feet away, you will reach the larger boulders of Strickler Knob at 4.5 miles.   You’ll see a large rock overhang that you’ll climb under.  There is a small area to take in a few views to the right.  For those that are most adventurous, the best views are to the left where the overhang is.  If you feel comfortable, you will need to navigate a crack between the two larger rock formations and hoist yourself up to the top of the rocks.  The views from both rock formations are absolutely breathtaking as you have 360-degree views from all around the valley.

Climbing Down
The climb down is as challenging as the climb up!  Below: More views from the top; The hike down; One final stream crossing.

View of the Valley Descent Stream Crossing

After eating a packed lunch, we made our way back the way we came.  We did have to face the waterlogged trail again.  We came across several groups on our way back that were also looking for directions.  One girl asked me if there was any other way back to the car other than going back up Waterfall Mountain.  I suggested that they make their way back through Scothorn Gap and then walk Crisman Hollow Road back.   We all definitely wished we didn’t have that steep trek back up Waterfall Mountain to do.  It is a very steep trail almost straight up the mountain and it takes quite an athlete to do this without taking a breather at some point on the return.  When we finally reached the top, we congratulated our success and then made the last .5 miles back to our car.

When we were hiking the trail, I kept thinking about the MMT 100 racers that were running this trail.  We had come across one of the race-workers and he told us that most of the fast runners were coming through this area near Waterfall Mountain around 8 p.m.  So, if you were a little slower than that you would be running this trail in the dark with a headlamp.  I can’t even imagine how tough this would be and how any of them would escape injury from running into a tree, twisting an ankle, or falling down the trail.

Brutal
The brutal ascent back up Waterfall Mountain at the end of the hike.

I would also recommend for most people to do the hike from Scothorn Gap instead of the route we took.  It is a lot of extra effort with nothing overly impressive to see along the way.

It was great to see our friends again.  We were all getting ready to head to the Great Smoky Mountains soon, so this was great training before we had to handle some of the tougher terrain that the park had to offer.

Trail Notes

  • Distance – 9.1 miles
  • Elevation Change – About 2250 ft.
  • Difficulty – 5. This rating is earned by both the hike length, the scramble to the knob, and the ascent of Waterfall Mountain that comes right at the end of the hike.  For an easier version of this hike, start at Scothorn Gap.
  • Trail Conditions –  2. No switchbacks, soggy streambeds, a couple crossings that can be challenging in wet weather, and a tough scramble.  This is not a beginner’s hike.
  • Views –  5.  Views from the knob are spectacular.
  • Streams/Waterfalls – 2.5.  The usually low streams were beautiful and running high when we visited, but they’re probably usually less impressive.
  • Wildlife – 0.  This trail is popular enough to scare away most wildlife.
  • Ease to Navigate –  2. Trails are sporadically blazed and can be hard to follow.  The junctions for trails leading to to the knob do not mention Strickler Knob.  We suggest bringing a map on this hike.
  • Solitude – 2.  This trail has become extremely popular!

Download a Trail Map (PDF)

Directions to trailhead:  From I-81, take exit 264 heading east through New Market.  Head east on West Old Cross Road for .2 miles.  Turn left on to US-11/N. Congress Street.  In .3 miles, turn right on to US-211/Lee Highway.  Go 3.6 miles and turn left on to Crisman Hollow Road (it is right before the green building on your right that is the Massanutten Visitors Center).  Follow Crisman Hollow Road for 2.2 miles (passing by the parking lot for the Massanutten Storybook Trail) until you reach where the orange-blazed Massanutten Mountain Trail crosses the road and the small parking area.  Park here, cross the road and start the trail.

Appalachian Trail – Hog Camp Gap to the Tye River

This 19.1 mile overnight backpacking trip has amazing views and pretty stream scenery.  The terrain is relatively easy, so it’s a great stretch if you’re looking to cover higher miles without a ton of uphill climbing. Since this is a longer post, Adam is going to cover day one, and Christine will cover day two.

View the Full Album of Photos From This Hike

First Views
The first views on our hike came within about a mile! Notice Christine’s new purple backpack! She upgraded from her Gregory Z55 to an Osprey Viva 65. It has a lot of useful features – her favorite: the hydration sleeve is on the outside of the pack, which is very convenient!  Below: Parking at Hog Camp Gap; Adam climbs out of the gap; Old stone walls.

Parking at Hog Camp Gap Climbing Out of the Gap Old Farm Wall

Day One (10.4 miles)…

This hike had a very rough start and almost became the hike that never happened.  The morning of our trip, we loaded up our cars and headed out.  We needed to take two cars since we were doing a shuttle.  About ten minutes into the drive, I looked in the rearview mirror and saw Christine turning back around and heading home.  She had forgotten her hiking shoes and was only wearing flip-flops in the car – not the best idea for a backpacking trip.  We made a quick return home. When I pulled into the driveway, black metallic smoke started rolling out from underneath our hood.  Not good at all!  But we didn’t want to throw in the towel yet.  We took the smoking car to Bob Wade Auto World (the Subaru dealership where we bought the car), but found they weren’t open yet.  So, we decided to fill up on a big breakfast at Cracker Barrel and stop by again when they opened at 9:00.  We got to the dealership and explained the problem.  They have great customer service! We ended up with a free loaner car to use while our Outback was in the shop. They were so quick with the paperwork and processing that we were back on the road in less than 15 minutes. Saved!!

Mayapples
Beautiful green mayapples! Spring is finally here!  Below: Trillium along the trail;  Lunch stop!; A perfect swallowtail.

Trillium Lunch Butterfly

We dropped our first car at our finish line where the Appalachian Trail crosses VA Route 56.   We then headed to the starting point.  It took us about 50 minutes to get to Hog Camp Gap, since there is no direct road that parallels the AT.  The last piece of road to get to Hog Camp Gap is very rocky and filled with potholes, but we made it there safely.  The parking lot was already crowded as this is a great starting point for many hikes, whether you’re going to Mt. Pleasant, Cole Mountain, Spy Rock, or camping near Cow Camp Gap shelter.  We got all of our gear together quickly and walked through the large break in the fence to start our hike on the white-blazed Appalachian Trail, heading north.   The trail began to climb up a hillside and within 1 mile, we were blessed with astonishing views, looking over the Tar Jacket Ridge to catch views of the bald on Cole Mountain, Mount Pleasant, and Pompey Mountain.  I knew at this point our luck was turning for the best.  I found it hard to pry myself away from the views, but knowing that we had a lot of distance to cover,  we pressed on.  The trail then begins to gradually descend from the ridgeline and we crossed USFS 62 and Salt Log Gap at 2.2 miles.

Stream Crossing
One of the few, small stream crossings on the hike.  Below: Seely-Woodworth Shelter; Christine filters water at Porters Field; Porters Field has space for lots of tents; Through the trees, we could see the ascent still ahead of us after dinner; Christine ascends the trail near Spy Rock; Finally at camp!

Seely Woodworth Shelter Filtering Water Porters Field
Mountain Ahead Spyrock Trail Camp

The trail was relatively flat for a good stretch of the trail going forward.  There were some views through the trees occasionally as we walked on, but the true treat was all the trillium that was on the trail.  This is by far Christine’s favorite wildflower.  She was hoping to see some along the trail and we were pleased to find entire hillsides filled with these flowers in perfect bloom.  We crossed USFS 246 at mile 3.6, Greasy Spring/USFS 1176A at mile 4.1 and reached the crossing of the North Fork of Piney River at mile 5.9.  We stopped and ate our lunch on the side of the trail.  The only excitement along this piece of trail was Christine swore she saw a bear, but it was just a person (dressed all in black) taking a lunch break far uphill from the trail (which we thought was an odd place to stop).  We pressed on along the trail and finally reached the Seely-Woodworth Shelter at mile 7.4.  When we arrived at the shelter there were several backpacks at the shelter, but no sign of people anywhere.  We took a long break and rested our feet.  We were joined shortly by Christine’s “bear man” who was doing a longer section hike and covering a lot of Virginia.  We shared some hiking stories (like how he never purifies water but has only got sick once).  Knowing that we had more miles to cover today, we strapped our heavy packs back on and continued.

We reached a junction with Porters Field (a fire road that used to be a railroad trail) at mile 8.4.  We had read on the hiking blog of a friend (thanks, Wandering Virginia), about a water source near this junction.  We took this short side trail past a campsite and then headed downhill towards the sound of water.  Water was coming out steadily from under a large rock.  We decided to cook some dinner here.  While we both weren’t overly starving since we had eaten lunch not too long ago, this seemed like the best place to cook some dinner and refill water.  We were shooting to camp at Spy Rock, which is a dry camp, so we needed to carry enough water for breakfast After dinner, we made our way back to the AT.  Christine typically doesn’t like hiking with a full stomach, but because we needed to get to our camp site for the night, we pushed on.  We crossed over the Fish Hatchery Road at Montebello at 9.6 miles.  On the other side of the road, we saw the steep ascent up to Spy Rock.  The trail climbed up about 400 feet in .5 miles, but when we reached the top of the hill, we found our perfect campsite at the base of Spy Rock.

NOTE:  Hikers are no longer allowed to camp at the base of Spy Rock. Usage rules for this area were changed in 2019.  We camped there long before the rule change, and we’re thankful we had that opportunity!

Spy Rock View
Spectacular views from Spy Rock. Below: Getting to the top takes some scrambling; Christine reaches the dome; Beautiful evening light on Spy Rock.

Climbing Climbing Beautiful Spot

We took off our packs and began to set up camp.  There were already a few campsites already claimed, but we found a nice flat spot with no rocks or protruding roots.  We had just bought a new two-person tent, the Big Agnes Copper Spur UL2, which was much lighter than our 3-person tent, and we were excited to try it out.  We set the tent and fly up and then made our way to check out the views from the summit of Spy Rock.  There is a little rock scramble up to the top of Spy Rock, but the 360-degree views from this spot are not to be missed.  We stayed up there a while to soak in as many views as we could, before making our way back to camp.  We had a long, tiring, day that started off stressful, so we were ready to go to sleep before the sun fully set.  We both read books for a while and then went to sleep.  Or rather, tried to go to sleep.  Right after sunset, the wind started to pick up.  At first it was an occasional rustle across the treetops, but by midnight it was moaning and howling over the mountains.

Beautiful Spot
Adam enjoying a beautiful spot! Below: Reflecting pools on Spy Rock;  Sunset is ‘hiker midnight’.  By the time the sun went down, it was already cold and windy.  Christine was glad for the hood on her sleeping bag!

Spy Rock Bedtime

Day Two (8.7 miles)…

That was a rough night to spend in a tent!  Even with it staked and guylined, it rattled and shook all night long.  The wind continually caught under the fly and funneled through the tent’s mesh.  Even in long pants, a hat, and layers of fleece, I was cold in my 35 degree bag.  It wasn’t even that cold outside – the wind was just really brutal!  Neither Adam nor I got much sleep.  I found myself wide awake when the first hints of dawn light started to brighten the tent.

NOTE:  Hikers are no longer allowed to camp at the base of Spy Rock. Usage rules for this area were changed in 2019.  We camped there long before the rule change, and we’re thankful we had that opportunity!

Sunrise on Spy Rock
I had some canine companionship at sunrise. This beautiful dog is half German shepherd, quarter Malamute and a quarter wolf! Below: Day Two got off to a very cold start; Spy Rock has several spacious, flat campsites; Adam checks out the few from Maintop Mountain.

Cold Camp Maintop

I told Adam I wanted to climb Spy Rock again to watch the sun come up.  He decided to stay back.  I grabbed my camera, scaled the rock and found a perch facing east.  It was a beautiful, though cloudless, sunrise.  I thought I was alone on the top of the rock, but suddenly a huge white dog we had met the night before came bounding across the rock and decked me.  He was friendly, and I was fine, but his owner was embarrassed and came chasing after the dog.   I stayed on Spy Rock watching the sun come up until I couldn’t take the wind and cold anymore.

When I came down, Adam was already in the process of breaking down camp.  We had a quick breakfast of oatmeal and coffee, and were back on the trail by around 7:30.   Day two of this trip had a bit more climbing than the first day.  Our first ascent was that of Maintop Mountain.  It was a moderate ascent with one nice view near the summit. I started the morning in a fleece jacket and gloves.  By the time we reached the summit, I had stripped them off.  Climbing really warms you up!

Confessions
Adam writes his confession in the Priest Shelter journal.  Below: Adam approaches FR826; Adam checks out the distance covered at the information board marking the beginning of the Priest Wilderness; The Priest Shelter.

Approaching the Fire Road Priest Wilderness Priest Shelter

From there, we descended into Cash Hollow.  We passed a southbound section hiker and a group of Boy Scouts.  We crossed a couple gravel roads – 826 and 526.  Off-roaders really enjoy these roads – they’re very rugged and tough to drive unless you have a serious 4WD vehicle.   After the second road crossing, signs and an informational board informed us that we had just entered The Priest Wilderness.

We had about a mile of climbing to reach the Priest shelter and the ridgeline of the mountain.  The climbing is really pretty moderate, but it seemed tough to my tired legs and sleepy mind.  We stopped at The Priest shelter for a snack and rest.  I changed into shorts – the day was warming very quickly!  Adam and I both made our ‘confessions’ in the Priest journal.  It’s one of the funniest we’ve seen along the AT – reading everyone’s confessions is definitely worth a stop!

Priest Summit
Christine enjoys the view near the Priest summit. Below: Spring slowly creeps up the mountainsides; Trillium were everywhere; Adam approaches a nice view from the Priest.

Priest Trillium Descending

From there, we completed our last couple hundred feet of ascent to the top of the Priest.  Near the top, we enjoyed amazing views of the valley and had a chance to see an adult bald eagle soar by on the wind.  The rest of our hike was a long, 4-mile, 4,000 foot descent to the Tye River.

We took it slowly, enjoying wildflowers along the way! The trail was abundantly lined with trillium, wild violets, and wild geraniums. Both of us remarked that we were glad to not be climbing up this side of the mountain! Southbound AT hikers experience one of Virginia’s toughest climbs when they encounter the Priest!

The first mile of the descent was the steepest.  As the grade moderated, we came to another outstanding overlook.  The opening in the trees revealed lush Virginia countryside – farms and ponds.  At this elevation, the trail was much greener.  Leaves were opening in the canopy and the ground cover was brilliant green.  We crossed Cripple Creek in several places.  The rain a couple days earlier had filled the stream and created several beautiful waterfalls.  We enjoyed walking through the woods and listening to the sounds of falling water.  We saw even more wild flowers – a hillside of scarlet catchfly was especially beautiful!

Priest Views
Classic Virginia terrain! Below: Walking alongside Cripple Creek; The latter part of the descent was smooth and gentle; Scarlet Catchfly wildflowers; Post-hike at Devil’s Backbone.  Is it totally horrifying that we go out to eat without showering?  Nah!

Cripple Creek Descent
Scarlet Catchfly Devil's Backbone

Eventually, we could see the sunlight catching on car windshields through the trees.  We were both pretty tired and happy to be back at the car!  We had covered almost 20 miles in roughly 24 hours.  It’s the furthest we’ve ever hiked in that time period, so we felt pretty accomplished.

We had a long car shuttle to get back to Hog Camp Gap.  After picking up the other car, we drove along the Blue Ridge Parkway to Reed’s Gap so we could have lunch at Devil’s Backbone.  It’s always great to eat a HUGE plate of food after a big hike – fries, a grilled brat and beer for me!

Trail Notes

  • Distance – 19.1 miles [Day One] [Day Two]
  • Elevation Change – About 3172 ft.
  • Difficulty – 4.  Mostly for distance.  This section of the AT has little climbing uphill overall, but the hike down The Priest is quite steep. 
  • Trail Conditions –  3.5.  The trail is well maintained and in good shape.  We did feel the hike down from The Priest was really rocky and hard on the feet and ankles. 
  • Views – 5.  This hike has AMAZING views from Tar Jacket Ridge, Spy Rock, and The Priest.
  • Streams/Waterfalls – 3.5.  The best views are along Cripple Creek, near the end of the hike, where you can see a small waterfall and a scenic creek surrounded by wildflowers.   There are options for filling up water near Greasy Spring, Porters Field, the Seeley-Woodworth Shelter, and Cripple Creek.
  • Wildlife – 2.  We didn’t see much wildlife other than birds along the trail.  We did have a great encounter with a male black-headed grosbeak, who was singing beautifully along the side of trail.
  • Ease to Navigate – 4.  Just keep following the white-blazes and pay attention to junctions to stay on the Appalachian Trail. 
  • Solitude – 3.  We didn’t run into too many people on our trip.  Spy Rock had a decent number camping at the top.

Download a Trail Map (PDF)

Directions to trailhead:  Requires a shuttle.  Park one car at the finish.  From the Blue Ridge Parkway, head east on VA-56/Crabtree Falls Highway for 11.2 miles.  Park car in large parking lot where the AT crosses the road.  From this point to reach Hog Camp Gap with your second car to start the route, continue east on VA-56/Crabtree Falls Highway for 6.9 miles.  Turn right on to VA-151S/VA-56E.  In 10.5 miles, take a right on to US-29 South.  In 3.1 miles, take the US-60 exit towards Amherst.  Take a right at the exit ramp to go on US-60 heading west.  In 18 miles, take a right on to State Route 634.  In 1.6 miles, take a right on to State Route 755/Wiggins Spring Road.  This road turns to gravel with large pot holes.  Follow this for 2.7 miles until you reach the parking lot where the Appalachian Trail crosses.  Park your second car here.  Go through the wooden fence and pick up the Appalachian Trail, heading north.

Sherando Lake Loop

This relatively easy 2.5 mile loop goes around Sherando Lake and follows a short spur to a great mountain view!

View the Full Album of Photos From This Hike

Sherando Lake
Sherando Lake is a popular camping/swimming area for locals. It’s just several miles off the Blue Ridge Parkway.

Adam Says…

This has been quite the harsh winter for snow and cold temperatures.  And when it hasn’t been too cold, it seems to have been raining.  So, we were glad to get out on a nice day to get a little exercise outdoors for a change.

Sherando Lake is a multi-purpose recreation area.  In nice weather, you will see people swimming, fishing, camping, and hiking.   To visit, there is a fee per vehicle – check out their fee schedule.   The area is officially open from early April through October.  The road gates are often closed during the off season based on weather.   There is camping available if you wanted to make a nice weekend trip, but reservations should be made in advance.

We started off our hike from the Fisherman’s Parking Area.  There were a few other vehicles there also, but they were all there for the fishing.  The lake is stocked with trout throughout the year.  Facing the lake, we started our hike on the left by heading up the Cliff Trail.  This trail was a short gradual climb with a few switchbacks before the trail levels out.  About .4 miles into the hike, there is a small outlook to the right from a rock that gives you a few obstructed views from the lake.  Continuing on the trail, it begins to descend and the lake gets back into view.  At .8 miles, you reach the lakeside and see the sign that shows the junction with the Lakeside Trail (a trail that wraps around the lake).   We took a few minutes to go out onto the sand and enjoy the views of the lake.   I saw a wood duck escorting a few ducklings on the far banks of the lake.

Dam End
The fisherman’s parking lot is located at the dam end of the lake. It is where our hike begins. Below: The trail starts off rocky; Overlook View.

Rocky Uphill Overlook Rock

We walked back behind the large building/gift shop, crossed a couple of bridges and rejoined the trail on the northwestern side of the bank.  We took the blue-blazed Blue Loop Trail, leading us past a few campsite areas before climbing up into the woods.  The trail is rockier, especially in the beginning, than the Cliff Trail and is steeper.  The trail climbed through a few switchbacks.  At 1.5 miles, you reach a junction shortly after a switchback with the Dam Trail.  This will be your return route.  Continue up the Blue Loop Trail, which begins to take an uphill climb to the left up the mountain.  At 1.75 miles, you reach Lookout Rock.  We took some time there to enjoy the view and then went back the way we came until we reached the junction with the Dam Trail.  We took this trail to the left, which leads steeply down the mountain.  You begin to see the lake through the trees again and we reached the lakeside around 2.25 miles.  We continued on the trail until it reached a small bridge that crossed over the dam stream and led back to the parking lot.

Enjoying the View
Adam takes in a beach/lake view. Below: Services are typically open April through October; Trails are well marked; Adam hikes the Blue Loop Trail.

Sherando Beach Area trailsystem uphill

One thing that was going through my mind during the hike is this would be great for a family outing.  Grab your family for a quick hike followed by a picnic by the lake.  Make a weekend of it if you want to do some camping, swimming, and fishing.

Christine Says…

I enjoy playing in the snow, but I’m very ready for warmer weather. I want to see flowers blooming. I want to feel warm sunshine on my face. I’m so ready to see a canopy of green across the mountaintops.  I have spring fever.  So, I was especially thankful for a particularly warm and sunny Saturday because it gave us a chance to get out and hike.

We chose Sherando Lake, mainly because it was nearby and easy. It would have been a great day to go on a longer hike, but Adam was still getting over a bad cold.  And I was not willing to spend more than an hour in the car. I had spent the past two weekends in a 12-passenger van, making a 15 hour ride to and from the Florida panhandle and was still a bit road weary.

Lookout Rock
Lookout Rock provides a nice view of the valley, lake and mountains. Below: Adam climbs his way toward Lookout Rock; Checking out the view, Making the descent.

Climb View descent

My trip to Florida was a service-learning trip with a group of nine JMU students.  We traveled to a Nature Conservancy preserve – Apalachicola Bluffs & Ravines to do a week’s worth of environmental work.  We camped, we hiked, we learned about the local ecosystem, and most importantly – we planted 90,000 plugs of native wiregrass seed that will be used to restore the natural habitat of that part of Florida.  It was hard work, but I think we made a difference. We even had one free day on our trip. We chose to spend it spotting manatees, gators, and other wildlife at Wakulla Springs State Park.  If you want to see more photos and read more about my service trip, I’ve uploaded a large set of captioned photos to my Flickr account.

Now, back to Sherando Lake!  I had been to the lake a couple times before, but had never actually taken the time to hike any of the trails in the area. I was pleasantly surprised by the trail system.  There is something for everyone – a practically flat trail that goes along the lake shore, a steeper trail around the lake that offers a couple nice views, and a connection into the larger, longer trail system along the Blue Ridge Parkway.

I liked sitting on the sand and enjoying the pretty lake view, and I really enjoyed climbing up to Lookout Rock on the Blue Loop Trail.  The rocky outcropping provides a nice view of the lake and the mountains beyond.  Although the snow was gone on the trails we walked, we could still see plenty of snow on the distant, higher ridges.

Spillway
The hike ends after crossing a cement bridge over the spillway. Below: The stream leading away from the lake; Christine crossing the concrete bridge, Blue Mountain Brewery food and brewery.

Stream Bridge Blue Mountain Brewey Blue Mountain

The walk back down from Lookout Rock was really steep and slick, especially with the thick bed of dry, fallen leaves.  Once we reached the bottom of the descent, we crossed a concrete bridge beneath the spillway and returned to our car.  We finished hiking a little bit before noon, so we decided to make the short drive to have lunch at Blue Mountain Brewery (near Afton Mountain).  They have great food and great beer.  Adam enjoyed a flight of nine different beers and I tried their Daugava Baltic Porter.  I think everyone in central Virginia had the same idea to visit the brewery for an outdoor lunch.  The place was packed, but it was a perfect ending to the day.

Trail Notes

  • Distance – 2.5 miles
    (Check out the stats from Map My Hike)*
  • Elevation Change – 998 ft.
  • Difficulty –  2.  The uphill to the Lookout Rock is a little steep, but overall most people should be able to do it.
  • Trail Conditions – 4.  This is well-traveled, so you should find the trail to be in good shape. 
  • Views  3.  Nice views of the lake from Lookout Rock and mountains around.  Some obstruction, but overall a decent view. 
  • Streams/Waterfalls – 2.  There is a small man-made water dam that creates a nice fall look.  The lake creates a picturesque setting. 
  • Wildlife – 2.  You shouldn’t expect a lot of larger wildlife.  We saw a pileated woodpecker swooping across our car when we arrived.
  • Ease to Navigate – 4.  The only place you may need to figure out is where to pick up the trail after going to the other side of the lake.
  • Solitude –1.  On a nice day, you’ll see plenty of people here.  Most will be near the lake, but expect some people at Lookout Rock. 

Download a Trail Map (PDF)

Directions to trailhead:  From I-64, take Exit 96 just east of Stuarts Draft. Go south on State Route 624, which becomes State Route 664 at Lyndhurst. Continue south on State Route 664 approximately 8 miles to the entrance to the Sherando Lake Recreation Area on the right. The gatehouse is approximately 0.5 miles ahead which will take the fee for your vehicle.  Past the gatehouse, you’ll take a right to the fisherman’s parking lot.  Park there and make your way to the left for the Cliff Trail.

MapMyHike is not necessarily accurate, as the GPS signal fades in and out – but it still provides some fun and interesting information.

Fridley Gap Loop

This six-mile loop hike in the Fridley Gap area of George Washington National Forest has everything – views, waterfalls, beautiful stream scenery, rugged climbing and great backcountry camping.  It’s a perfect hike to get away from the crowds in Shenandoah National Park.

View the full album of photos from this hike

Adam at the Overlook
If you miss spotting the faint side trail behind one of the many backcountry campsites along this loop, you’ll miss the best view of the hike! Below: Adam crosses the stream; A small waterfall on the stream; This loop has many choices for backcountry camp sites.

Adam Crossing Fridley Run Smal Waterfall Backcountry Site

Adam Says…

Last year, we made an attempt to do this Fridley Gap loop hike, but we had trouble finding one of the trails.  We bushwhacked for a while, but finally gave up.  This time when we returned, we had better directions and the blazes had recently been repainted on much of the loop.

From the top end of the parking lot, we started on the trail.  We saw both purple and blue blazes early on, and started to worry.  (Fortunately, it turned out that this was the only section of the trail that hadn’t been recently re-blazed.)  Early parts of the trail traverse large rocks, and it’s sometimes tough to see exactly which way the trail goes. We saw faded red Xs painted on the surface of some of the rocks which let us know that we were going the right way.  The trail is uphill but not too steep.  In .2 miles, you come to a fire road.  Take a right here and continue on the fire road.  You will pass by some small falls and Mountain Run to the right and a large boulder slide to the left.  The trail actually follows the streambed, and you will need to rock-hop to continue on.  At .45 miles, you will reach another falls area and you will cross over Mountain Run until you see the trail junction cement post.  This is also the point that Mountain Run and Fridley Run join.  It was at this point that we failed last time trying to find the orange-blazed Massanutten South trail.  Looking at the cement post as you approached it, look back around 4:00.  You will see the orange blazes on the Massanutten South trail as you will cross the water again (this time it is Fridley Run) and climb up the hillside.  These weren’t painted on the trees before (they look fresh now), so you should be able to find your way more easily.
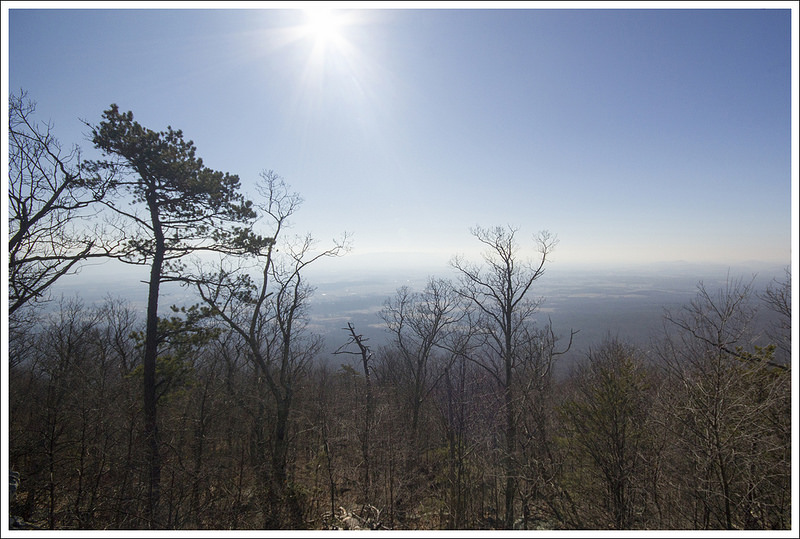
Walking in the Streambed
Early in the hike, the trail traverses the streambed. There are plenty of rocks, so it’s fairly easy to hop from spot to spot and avoid getting your feet wet. Below: Adam climbs up the trail shortly after the parking lot; A rockslide early on the hike; Blooming redbuds.

Adam Hiking Fridley Gap Trail Rock Slide Redbuds Blooming

The climb up the Massanutten South trail is quite steep and you may need to stop a few times along the way to catch your breath.  This trail is also narrow and you may have to cross over a few blown-down trees, but the trail wasn’t too hard to navigate with the recent re-blazing.  At 1.85 miles, you will reach a campsite area.  Look closely and you will see a path that leads to a rock outcropping called Grubbs Knob Overlook.  Take this path up to the overlook to get the best views along the hike.   You will see the top of Grubbs Knob to the left from the overlook and views to the west.  After taking in the view, go back to the campsite and continue along the Massanutten South trail.  At 2.05 miles, the trail reaches its peak and then you will start to descend, as the trail takes a steep turn to the left.  You will make your way back down this very narrow path and cross Fridley Run at 2.70 miles.
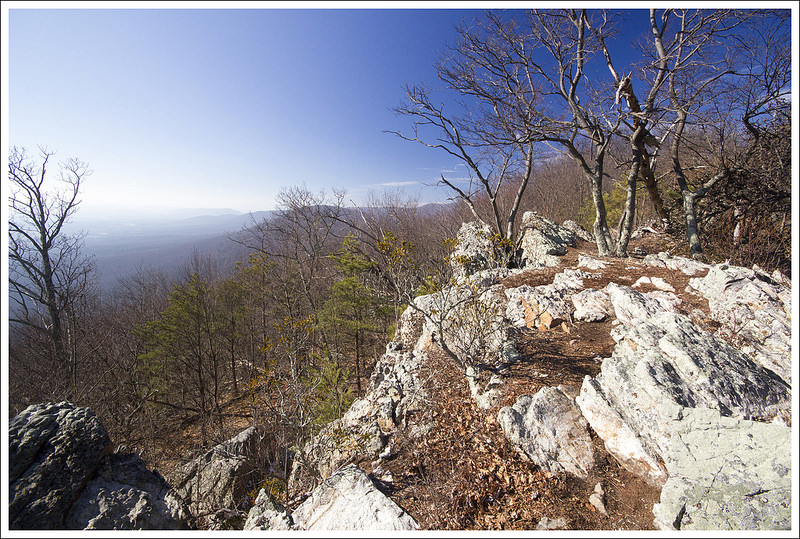
After crossing Fridley Run, you will begin to ascend on the trail again (turning again into a wider fire road) until you reach a rocky slide that gives you views of Fridley Gap and North Mountain at 3.25 miles.  Continue to ascend as you walk around part of Third Mountain. The fire road stops ascending at 3.5 miles.  The trail then descends and you reach another cement junction post at 3.84 miles.  Take a left on the purple-blazed Fridley Gap trail, which follow another wide fire road.  You will likely see lots of burned trees from a fire in 2010 that covered a big portion of this area.  At 4.5 miles, you will reach another junction. The purple-blazed Fridley Gap trail ascends to the left and continues through the woods.  Take this trail and begin a steep ascent across some switchbacks.  At 4.85 miles, you will reach the top of your climb and there are a few stones that you can rest on for a few minutes if you need to catch your breath.

Christine at the Small Waterfall
This small waterfall feeds one of the most popular swimming holes in the area. Below: More pretty cascades.

Mountain Run

The trail now begins to descend very steeply.  We were so glad we had our trekking poles since the rocks under the leaves were often loose and it helped to lower ourselves down the steep steps.  We were also glad we did this hike this direction rather than the clockwise version of the loop.  At 5.5 miles, we reached another junction with the Massanutten South trail.  Take a left on the orange and purple-blazed fire road (don’t go the way that crosses the bridge) and you will reach the junction that closes the loop at 5.65 miles.  Take a right here, crossing Mountain Run again and make your way back down the fire road.  Be sure to catch the rocky path at 5.8 miles that leads back to the parking lot at 6 miles.

A funny moment happened along the hike.  Christine had programmed her phone to use the MapMyHike app.  In a recent upgrade, it now includes some vocal updates along the way, usually at the mile increments.  One time, we heard the voice say “Don’t stop now.  Walgreen’s is behind you.”  (Walgreen’s is now advertising on MapMyHike.)  While this is meant to be a word of encouragement to keep hiking strong, I was thinking of it as “Walgreen’s is chasing us.”  As I sometimes do, I started thinking of a parody song to the tune of the Road Runner Show TV theme song.  So for your enjoyment, here are my lyrics: “Fridley hiker, Walgreen’s is after you. Fridley hiker, if he catches you, you’re through.  That Walgreen’s is really a crazy store.  They have pharmaceuticals, toiletries, and so much more.  Fridley hiker, never, never, never slow down.  Fridley hiker. Walgreen’s is after you.  Fridley hiker.  If he catches you, you’re through.

There is one geocache along the trail, Fridley’s Cache, a normal-sized cache near the swimming hole.

It is always a good feeling to know that we redeemed ourselves by covering a hike that we had previously failed to navigate.  If you are looking for good views of streams or a swimming hole, along with a challenging hike to get some views, this may be a great hike to try out some time.

Rocks at Grubbs Overlook
The rocks at Grubbs Overlook might trick people into thinking there isn’t an open view. Below: Views from Grubbs Overlook and the campsite that sits adjacent to the overlook.

View from Grubbs Adam at Grubbs
A View Into the Valley
Campsite at the Grubbs Overlook

Christine Says…

Hallelujah for freshly painted blazes!  I was so frustrated last year when our attempt to hike the Fridley Gap Loop ended in failure.  The failure was mostly my fault.  I tried to map out the hike based on a course I saw on someone’s Runkeeper page.  There were no directions, just the route overlaid on a rudimentary map of the area.  I thought we’d be able to figure things out on our own with a NatGeo map of the area.  It turns out that faded blazes and a large group of people camping in the middle of the trail are insurmountable challenges to my ability to navigate.  We’ll let bygones be bygones and get on to the successful version of our Fridley Gap hike.

Let me start by saying, I loved this hike!  It was even better than I expected.  The stream was running beautifully, the views of the valley ‘greening up’ below were lovely and the weather was perfect (sunny, cool and breezy enough to keep the bugs away).  I really enjoyed the little rock-hop as the trail followed the stream bed.  The small waterfall and swimming hole were so pretty.

The climb up the Massanutten South trail to Grubbs Knob was steep enough to be challenging, but not so steep that we had to stop for a breather.  On the way up, we could see all the little signs of spring creeping back into the forest – tiny buds on trees, tightly curled ferns and the occasional early season wildflower poking up through the leaves.  The overlook at Grubbs Knob is rather easy to miss.  It lies at the top of a faint footpath above a campsite.  When you first climb to the top of the footpath, vertical, spine-like plates of rock obstruct any possibility for a view.  But if you climb along the rocks, eventually you come to a few footholds that allow you to scramble to the top of the rocks.  Once you’re there, the valley below spreads out as far as the eye can see – farms dotted with red barns; small country towns; and wide, green fields make up most of the vista.

Downhill Through Dense Laurel
The climb downhill after Grubbs Knob takes you through dense mountain laurel. The harsh light makes for an ugly photo… but you get the idea.  Below: Adam approaches the stream; Crossing Fridley Run.

Approaching Fridley Run Crossing the Stream Again

After leaving the Grubbs Overlook, we ascended a few more moments before taking a sharp downhill turn.  The trail passed through dense mountain laurel, with occasional peeks toward the next ridgeline.  Eventually, we heard the sound of water again.  For a short way, the trail followed Fridley Run.  But soon, we had to cross the stream and head back uphill along a wide fire road.  From the fire road, we caught our second open viewpoint of the hike.  It was a nice view, but nowhere nearly as lovely as the one from Grubbs Overlook.  It’s one thing to slog uphill and come to a magnificent rocky outcropping with a sweeping vista to appreciate.  It’s a little less stirring to stop along a roadside and take in a view of a couple mountain ridges.

Eventually, the fire road met up at a four-way trail junction.  One direction headed toward the Boones Run shelter, another toward Cub Run Road, another continued along the Fridley Gap trail in the direction of Martins Bottom, and of course the fourth headed back in the direction from which we arrived.  Seeing this junction made me think of all the different ways these trails cross and connect.  There are definitely multiple possibilities for overnight backpacking loops in this area.

Second Overlook
The second overlooks comes at a spot along the fire road. Below: Adam checks out the map at this four-way trail junction; Continuing along the fire road before our climb up Third Mountain; Charred trees from the 2010 fire.

Four-way Junction Hiking Along the Fire Road Charred Trees

We followed the fire road to another junction.  Heading straight would have taken us toward Martins Bottom, but to stay on course we turned left and started very steeply uphill along the purple-blazed Fridley Gap trail.   By this point of the hike, I was pretty hungry and my energy was starting to flag.  If I were smarter, I would have eaten a snack before tackling the climb.  But I’m not smart, so I spent most of the climb complaining that I was hungry!
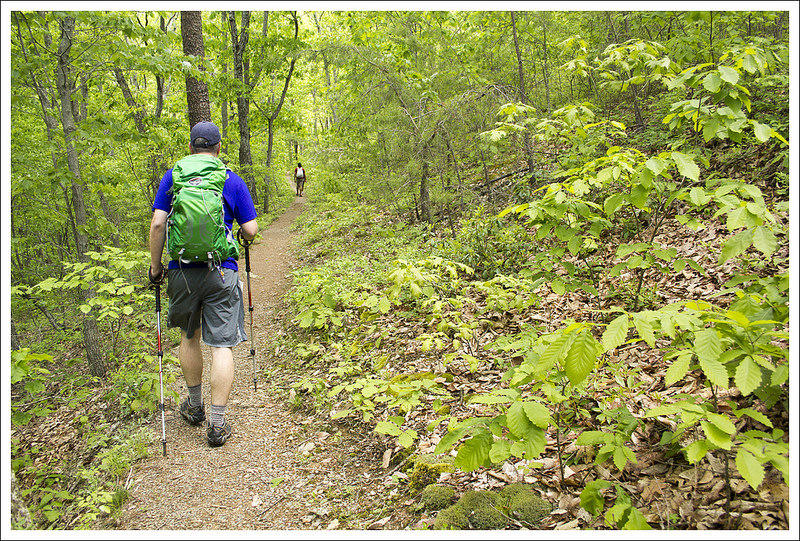
After a short break (and snack) atop the tree-covered peak of Third Mountain, we began a crazy-steep descent.  For three-quarters of a mile, we carefully picked our way down the craggy, leaf covered mountainside.  Through the trees, we could see some really fascinating rock formations on the shoulder of the next mountain over.  I kept trying to appreciate the view, but every time I did, I lost my footing a bit.  This climb down definitely makes the case for paying attention and using your trekking poles.

Steep Uphill Over Third Mountain
The ascent of Third Mountain may not look steep in this photo, but it is!  Below: Descending Third Mountain – you can see rock formations through the trees; A bridge not taken on the Massanutten trail; Adam once again crosses the stream we crossed early in our hike.

Steep Descent of Third Mountain Bridge on Massanutten Trail Final Stream Crossing

At the bottom of Third Mountain, we had just a short walk back to our original junction – the one where everything went wrong when we tried to hike Fridley Gap last year!  I was quite pleased to see that marker again and be 100% certain that we had actually found our way successfully this time around.  From the last junction, we retraced our steps through the streambed, past the rockslide and back to our car.

Trail Notes

  • Distance – 6 miles
    (Check out the stats from MapMyHike)*
  • Elevation Change –  1850 ft
  • Difficulty – 3.5.  The trail goes up and down several times. 
  • Trail Conditions – 3.  The trail had blowdowns, loose conditions, and narrowness, but there were also sections that followed a fireroad.  It gets an overall average rating. 
  • Views3.  The views from the Grubbs Knob overlook are the best on the trail, but if you miss the path from the campsite you’ll miss the best view on the loop.  The views along the path at 3.25 miles are nice, but not remarkable.
  • Waterfalls/streams – 4. The trail goes along (and through) Mountain Run and Fridley Run on several occasions.  The small falls and swimming hole gives it a bonus. 
  • Wildlife – 2. This may be a good hike for bird watching.  We saw a peregrine falcon soaring above at the Grubbs Knob overlook and enjoyed hearing the song of the eastern towhee along the way.
  • Ease to Navigate2.  If we got lost before, we have to give this a low rating.  The path to start the trail from the parking lot could be better blazed and there are several turns to make.
  • Solitude – 4.  You may see some people at the swimming hole or camping alongside the junction with Mountain Run and Fridley Run.  However, we only saw one other group after this point on a nice spring weekend day. 

Directions to trailhead:

From Harrisonburg, VA, head east on 33.  Take a left onto VA-620 North/Indian trail Road and continue for 1.7 miles.  The road will turn into Rt. 717.  Go 3.4 miles and take a right on Minie Ball Ln.  Go 1.1 miles.  At this point, the road will turn back into Rt. 620.  Go 2.7 miles and take a right, continuing on 620 for about half a mile.  Take a right onto Armentrout Path.  Take the first left onto Airey Ln.  Parking is a lot at the end of this gravel lane.  If you pass the lot, you are on private property. The directions to this trailhead are a little confusing, and we recommend putting the coordinates on the map below into your phone/GPS.

* MapMyHike is not necessarily accurate, as the GPS signal fades in and out – but it still provides some fun and interesting information.