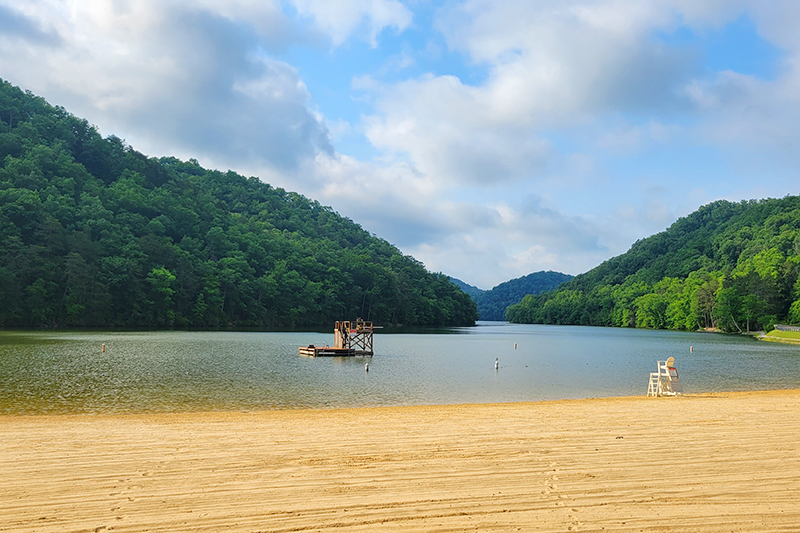
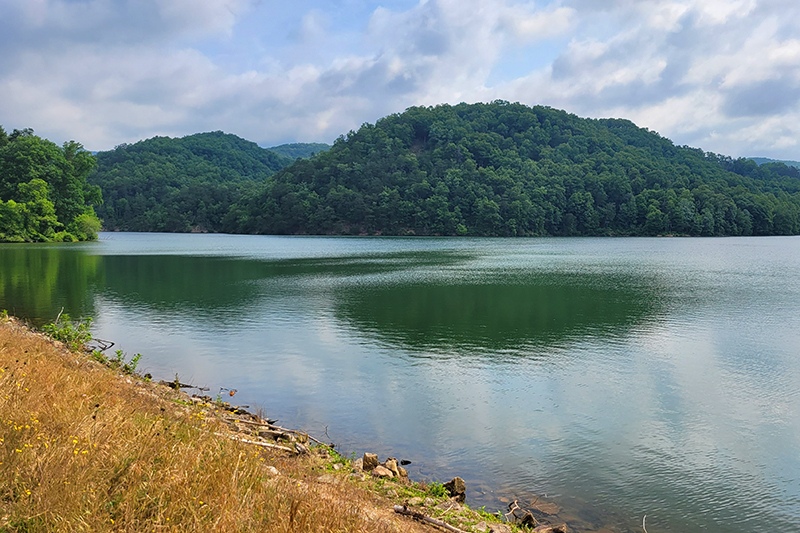
This 6.1 mile loop is located in Hungry Mother State Park. It follows the perimeter of the lake and has about 830′ of climbing along the loop. The developed side of the lake, where the hike begins, is flatter and often paved, while the backside of the lake is wooded and has more rugged terrain.
If you’re looking for a scenic-but-easy hike that’s longer than five miles, check out the Lake Loop at Hungry Mother State Park! We decided to tackle it as a bit of a recovery hike on our vacation to the area last June. The day before, we had hiked a piece of the Appalachian Trail from Damascus, VA to the Tennessee state line. It had been a significant uphill climb on a very hot day, so we wanted a hike that was a bit easier.
We’ve only visited Hungry Mother once before – to hike Molly’s Knob. If you’re interested in hiking Molly’s Knob as a longer loop with the Lake Trail, there are two junctions along the far side of the lake that will allow you to create this loop. You can download a copy of the Hungry Mother trail map from the park’s website.
For this Lake Loop hike, we paid our entrance fee at a self check-in station and parked in a large lot along the waterfront. The trail can be started in different places, but we set off counter-clockwise from the busy, developed part of the park, where picnic shelters, guarded swimming, boat rentals, a snack bar, and restrooms are all located. Because we visited on a Monday, the park was really quiet and lightly trafficked. We ended up only seeing several people along the entire loop.
The trail began on paved, flat walkway following closely along the shoreline. The entire loop is open to foot and bike traffic, but you’re probably most likely to see bikes on the flatter. easier developed side of the lake.
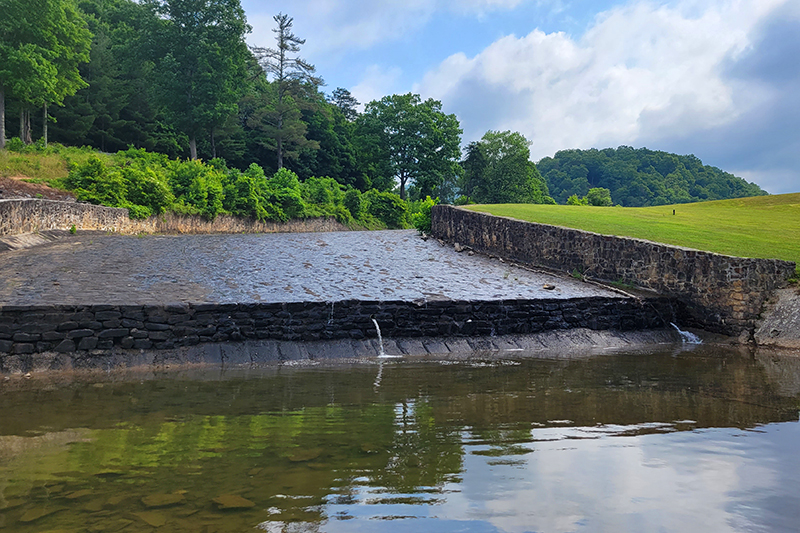
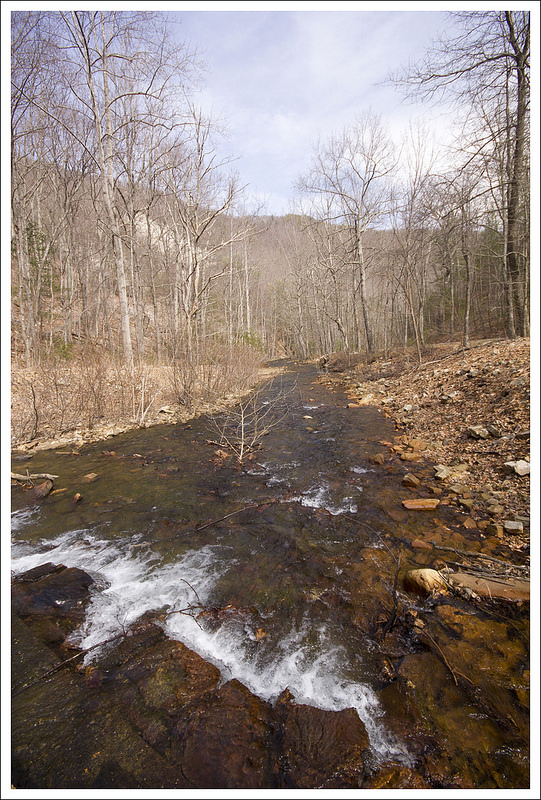
At the end of the lake, we passed a spillway/dam before reaching Camp Burson – the RV campground run by the state park. There is also a tent/yurt campground called Royal Oak at the other end of the park. After passing the campground, the trail crossed a bridge into the woods.
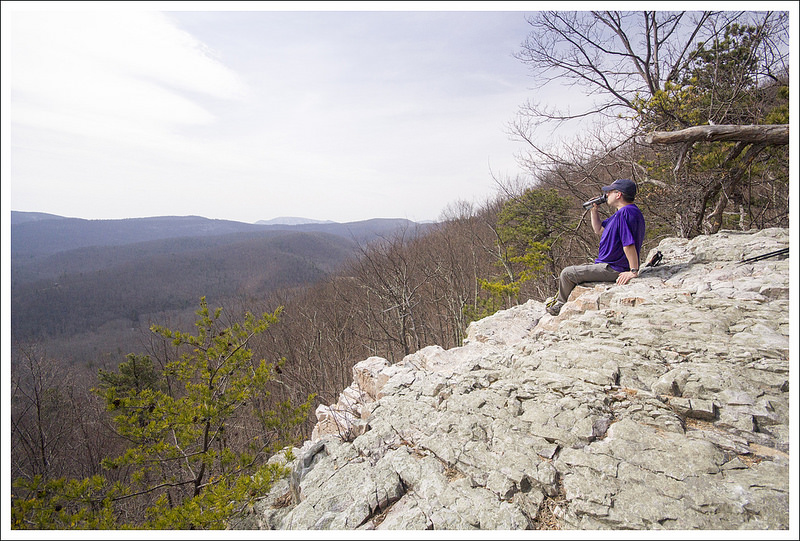
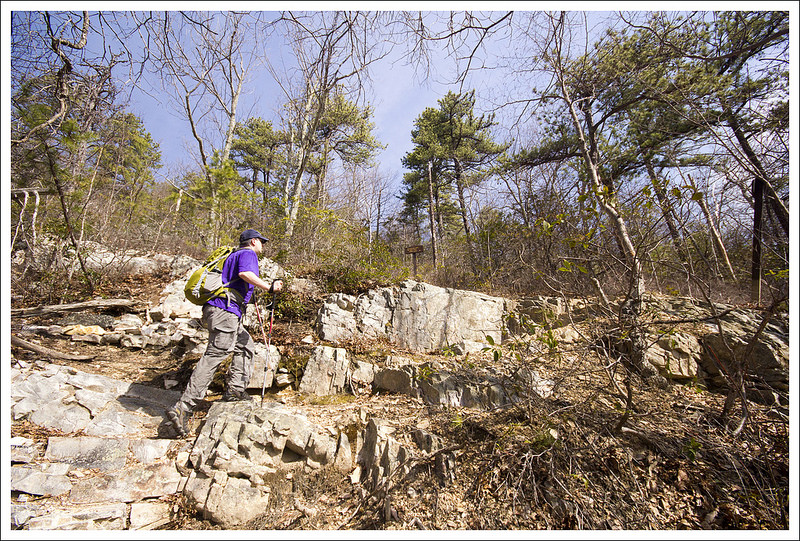
On the far side of the lake, the trail is a bit more rugged with many small ups and downs. The trail departs the lakeshore, and you only get glimpses of the lake through the trees for much of the way. On this side, we passed an old shed used by the CCC to store dynamite when the park was being built.
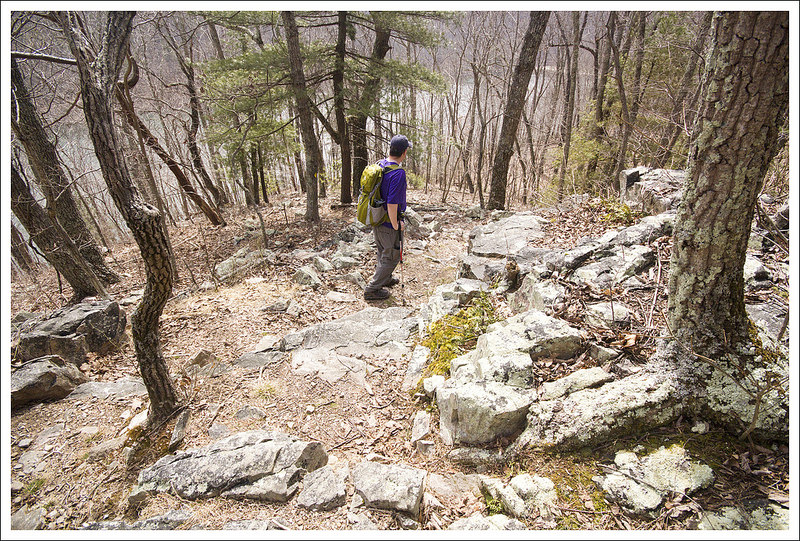
As we reached the end of the lake, the trail descended and began to follow the shoreline more closely, giving us lake views again. Eventually, we reached the park’s cabin area and found ourselves on flat footing back to our car.
All in all, this was a pleasant, easy walk in the woods. There are definitely more scenic and impressive hikes in the area, but this was a fun way to spend a recovery day.
More Photos
Spillway at Hungry Mother
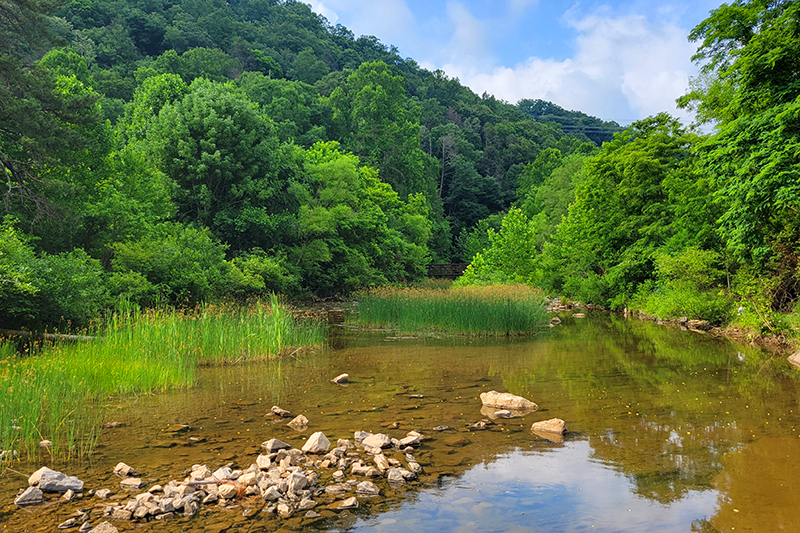
Stream beyond the spillway at Hungry Mother
View from the top of the dam
Pretty blooms
Close up of pretty blooms
Leaving the campground area, There is a obstacle course/playground you can see in the far distance.
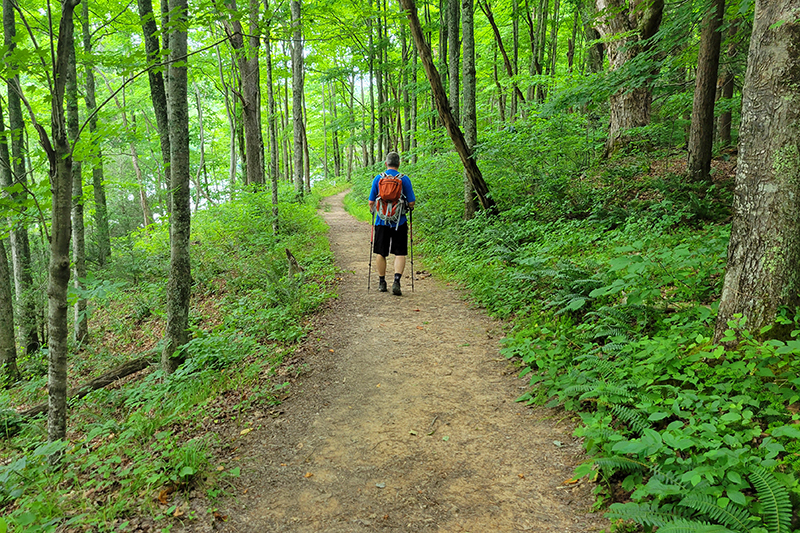
This 7.8 mile out-and-back is a section of trail we primarily did to work toward our completion of the entire Appalachian Trail in Virginia. This hike starts off in downtown Damascus and climbs 1,500 feet uphill to the Tennessee state line. There’s nothing in the way of views or noteworthy scenery – just a nice walk in the woods. We were lucky enough to have a great bear sighting on the trail.
Christine Says…
We seem to have a penchant for picking record-setting heat weeks for our vacations. I guess it’s not that unlikely when you’re limited to traveling in the summer, but man… this was an especially sweltering day to hike! Back in 2019, we did a week-long AT section hike that ended in Damascus at the parking lot across from Mount Rogers Outfitters. That left a 3.9 mile unhiked section between town and the Virginia/Tennessee border. As most of our regular readers know, we’re slowly section hiking our way across Virginia, so we had to fill in this little gap when we had a chance.
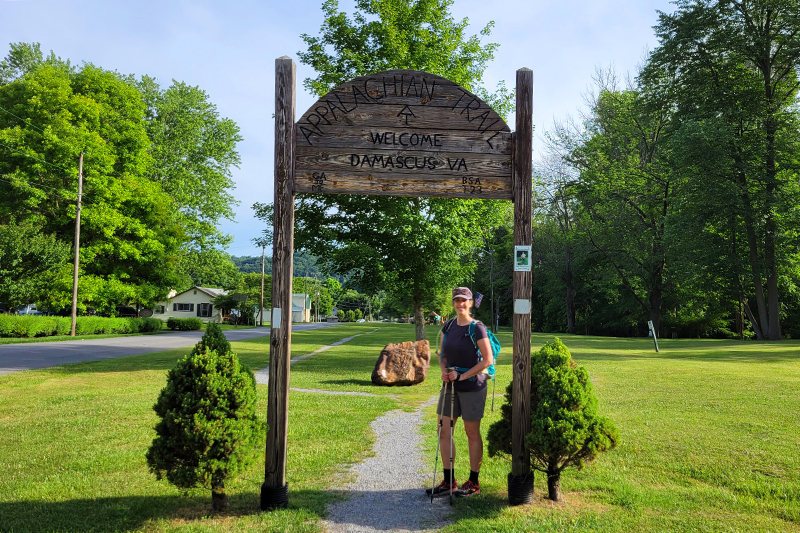
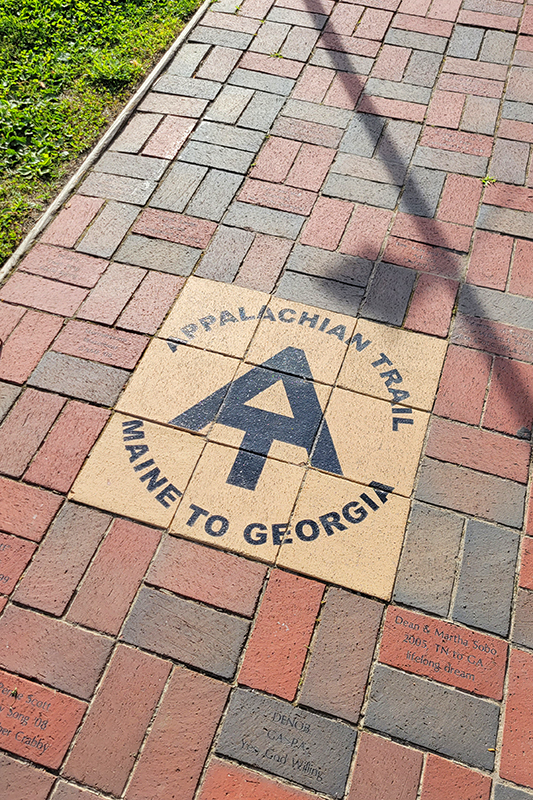
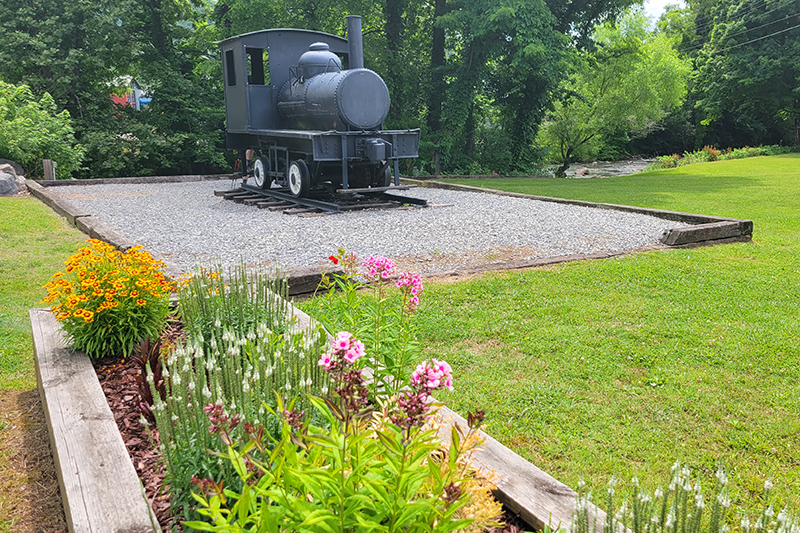
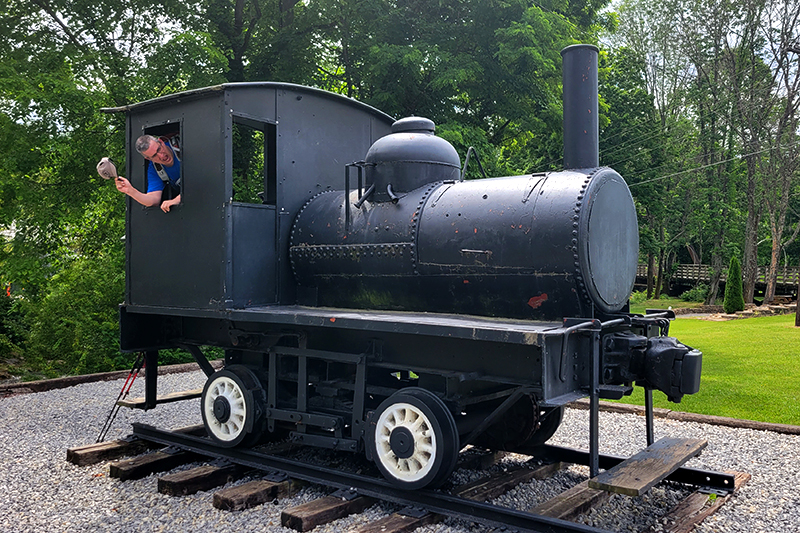
We parked in a public lot off of Laurel Street and picked up the AT where we left off in 2019. Headed south through town the trail is actually road walk, there are blazes on utility poles and AT logos built into the brick walkway. You can see people have made individual donations to have namesake bricks placed along the town section of trail. In a couple tenths of a mile, we turned left on Beaver Dam Ave. and walked through a little town park.
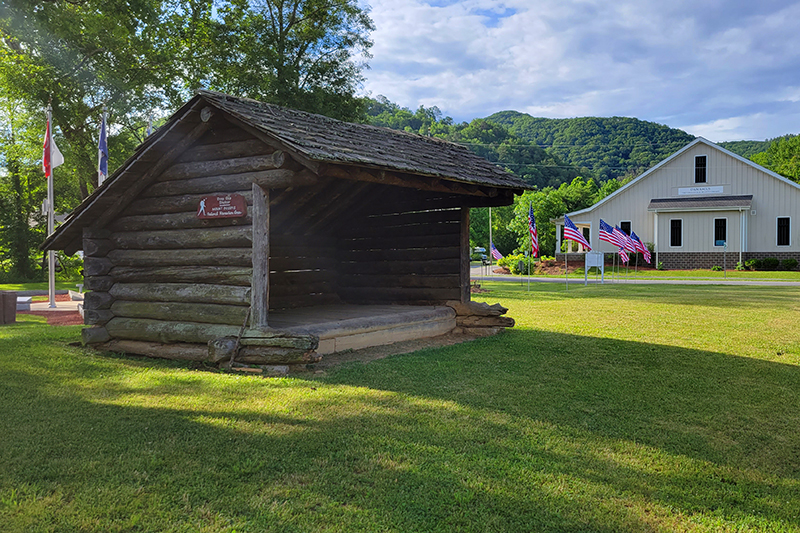
The park has an old train engine, a replica of an AT shelter, and the famous Damascus AT Welcome Arch. You’ve probably seen countless photos of hikers posing under the arch. We both took the obligatory photo for ourselves. After going through the park, the trail turns right onto Water Street, passing through a residential area before turning sharply uphill into the woods.
From there, the trail goes steadily uphill for 3.4 miles. About halfway up the climb, there’s a large campsite adjacent to a water source. I imagine some thru-hikers like the free camping right outside town the night before a resupply. Since we were hiking in late June, we had the trail all to ourselves, as most AT hikers are far north by then.
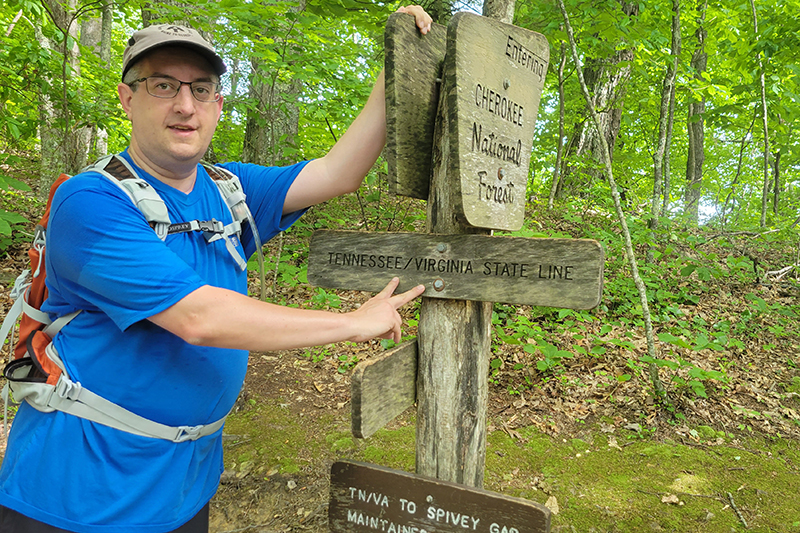
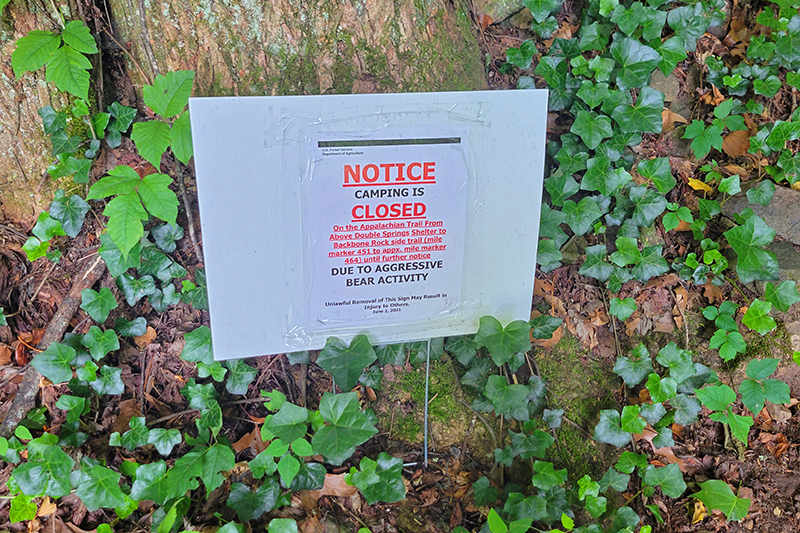
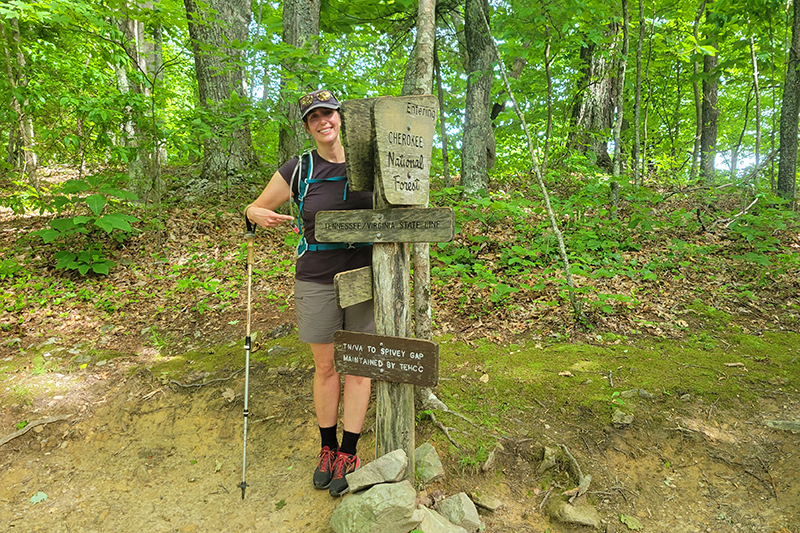
We plodded uphill until we finally reached the sign marking the state line! We both took a few steps into Tennessee, just for fun! We had a quick snack, and headed back down. The hike was naturally much easier going back downhill. We even saw a large, healthy-looking black bear about a mile south of town. Most of the bears we’re seeing in the Shenandoah are thin and mangy, so it was great to see a bear looking so fit. There had been a sign at the trailhead leaving Damascus warning of an aggressive bear further into Tennessee. I don’t think it was this bear, because this bear crashed away into the woods as soon as we saw him.
Pretty soon, we were back in town. It was even hotter in town as we walked the final third of a mile in the baking sun. After our hike, we went to Mojo’s Trailside Café for lunch and Off the Beaten Path for ice cream. Both are great stops post-hike!
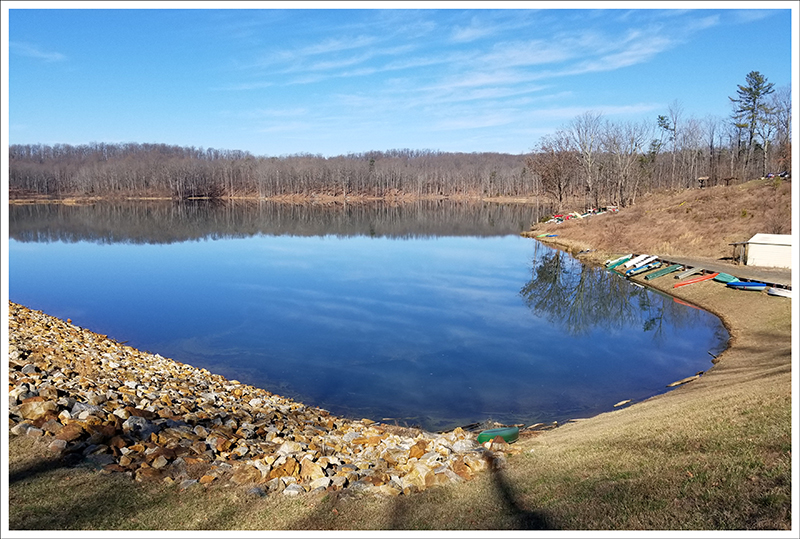
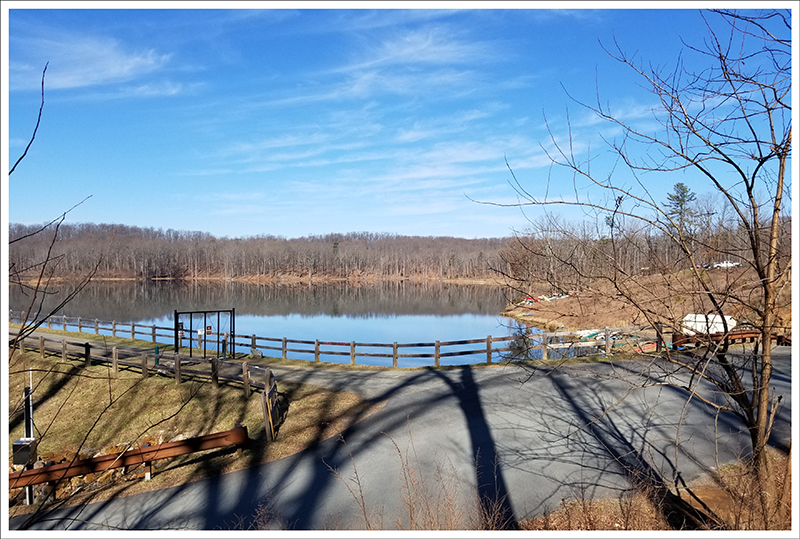
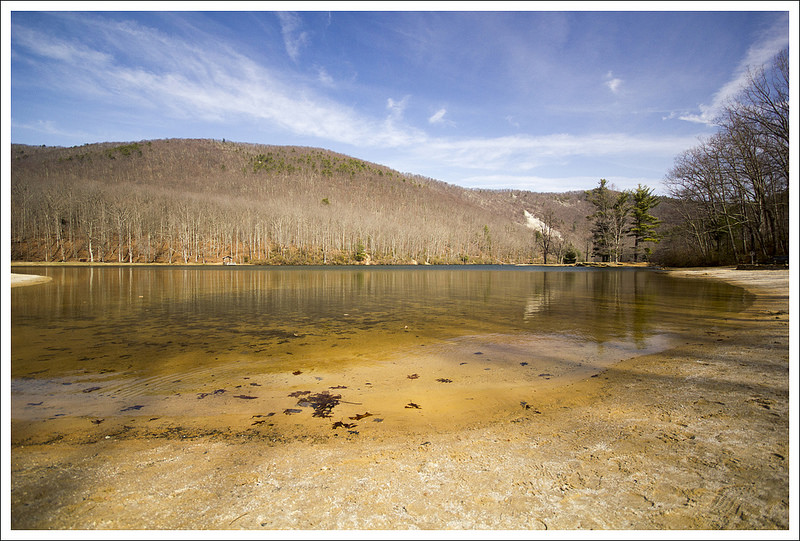
The 6-mile loop around Ragged Mountain Reservoir is a pleasant walk over rolling terrain. There are some nice views of the water along the way. Please note: DOGS ARE NOT ALLOWED IN THIS AREA
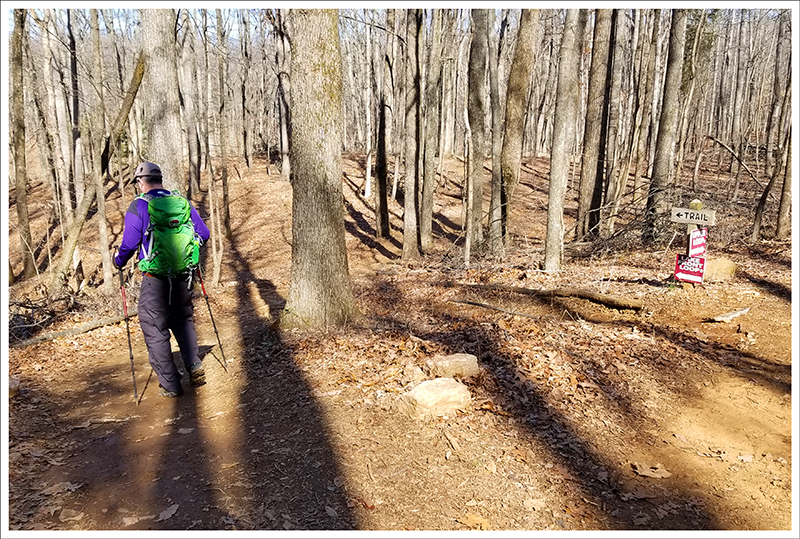
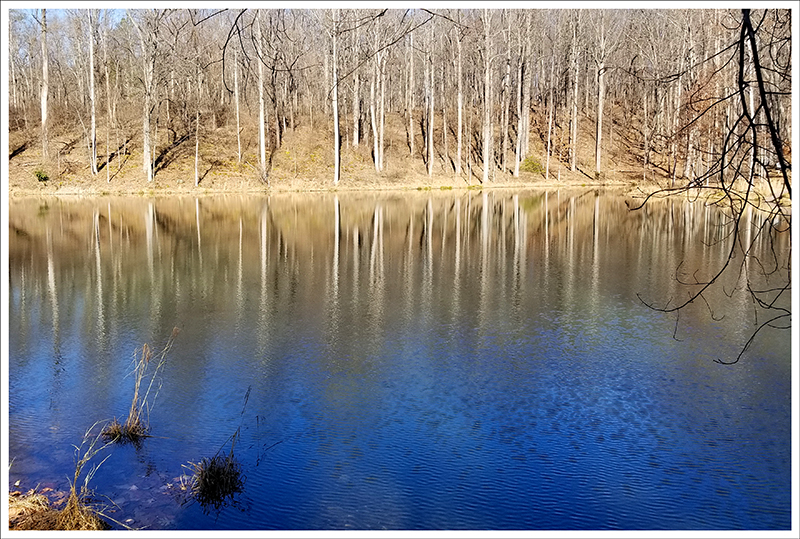
A view of the Ragged Mountain Reservoir. Fishing, kayaking, and canoeing are allowed – but no swimming or dogs! Below: The lower parking lot; Adam on the trail; Some, but not all of the trails have signage.
Christine Says:
Yes, we have been slacking at Virginia Trail Guide. We’ve been hiking a fair amount, but we’ve either been doing repeat trails that we’ve already posted on the site – or we’re hiking in faraway places (Wyoming, Idaho) that we have mixed feelings about sharing on Virginia Trail Guide. Also, both of our jobs have also been more demanding than usual, and we haven’t had as much time to hike or create new content. We’re really hoping to have a productive spring and have some more regular new content to share.
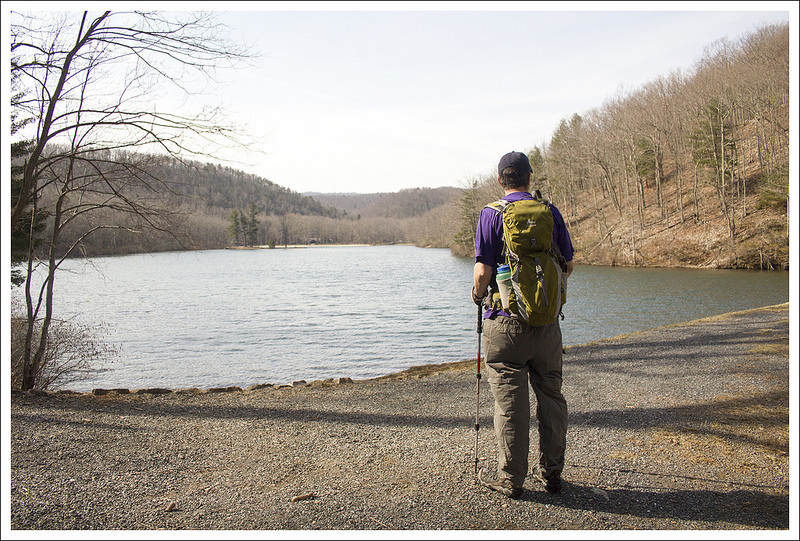
A couple weeks ago, we had a sunny and unusual warm Sunday, so we decided to head out toward Charlottesville for a field trip. We’ve never visited the Ragged Mountain Reservoir before and thought it would be a fun, easy hike. We started out at the lower parking area. If I were to do this hike again, I would skip this bit and just park at the upper lot. The spur from lower parking just added a pointless climb, with no extra scenery. The upper lot starts right on the reservoir’s edge and makes a true loop.
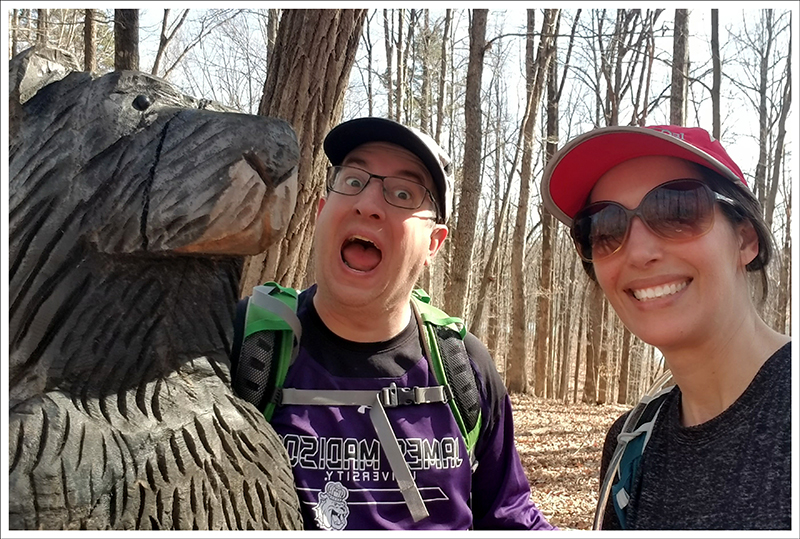
There are several neat wooden sculptures along the trail. Below: A woodpecker has been working at the bear sculpture; My favorite was the owl sculpture.
The loop itself was pretty and peaceful. There were rolling ups and downs the entire route, so while it was easy hiking, I still felt like I was getting a decent workout. Benches are posted roughly every mile and there are several neat wooden sculptures tucked into the woods. There are lots of unmarked side trails, but eventually they connect back to the main loop around the lake. So, while the trail system is a little bit confusing, it would be hard to get truly lost. You can download a full map of the trail network from the City of Charlottesville’s website.
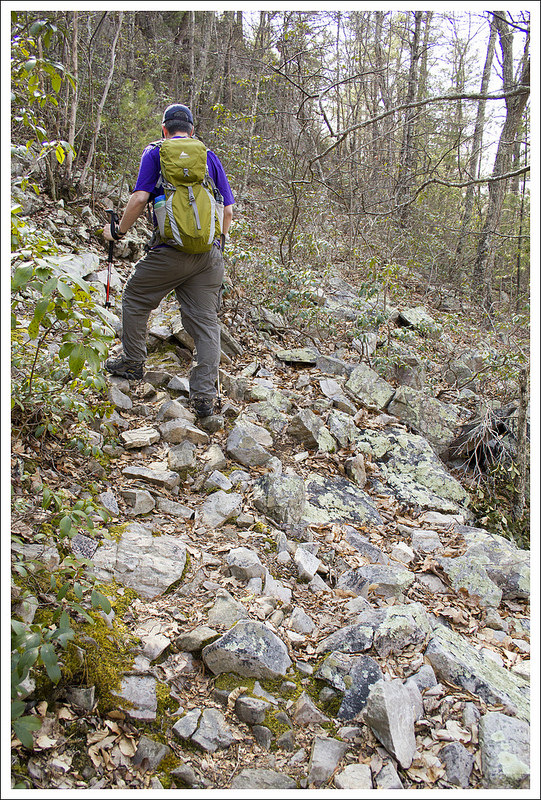
The only real challenge of this hike was not slipping in the mud. The trail had some very slick and sloppy spots, so we were glad to have trekking poles for extra balance. All things considered, it was a nice walk on a perfect late winter day. We hiked the loop counter clockwise, so we ended the route crossing the dam.
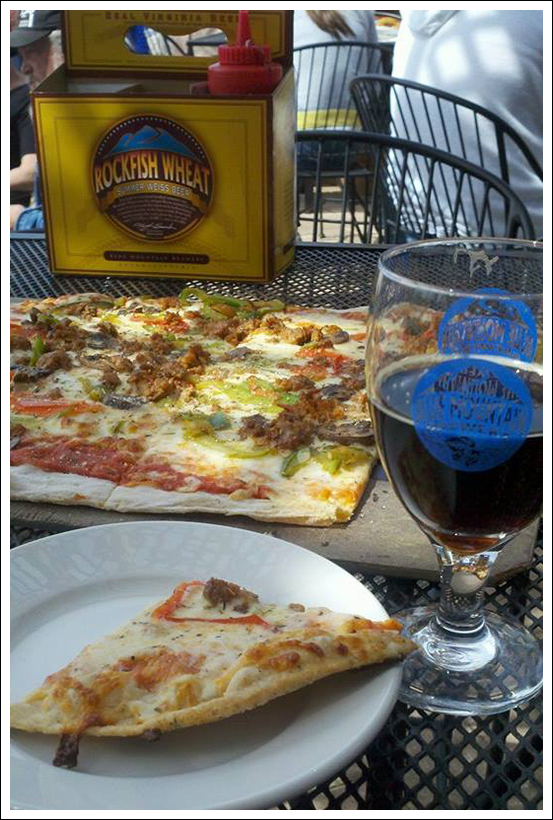
After the hike, we stopped for lunch at Crozet Pizza and then grabbed a beer at Pro Re Nata.
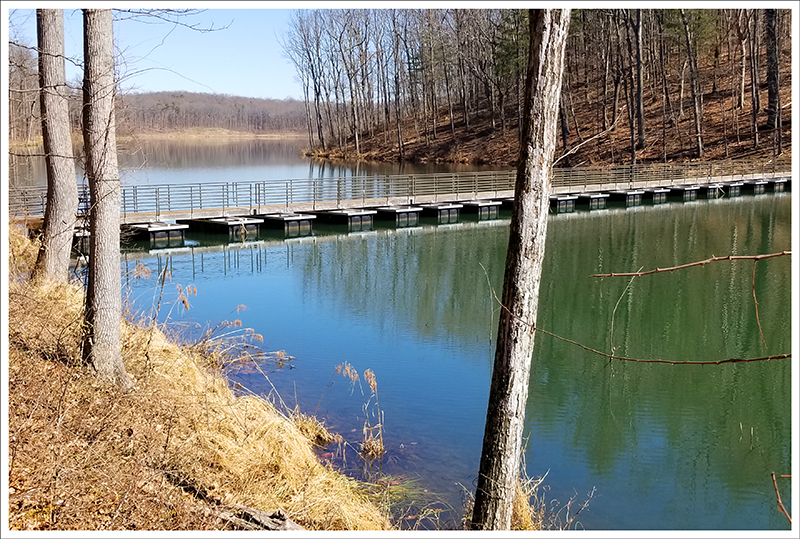
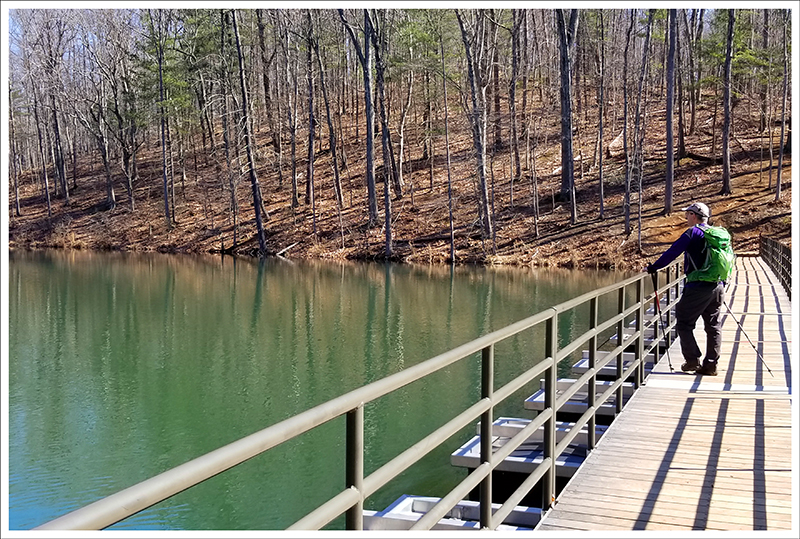
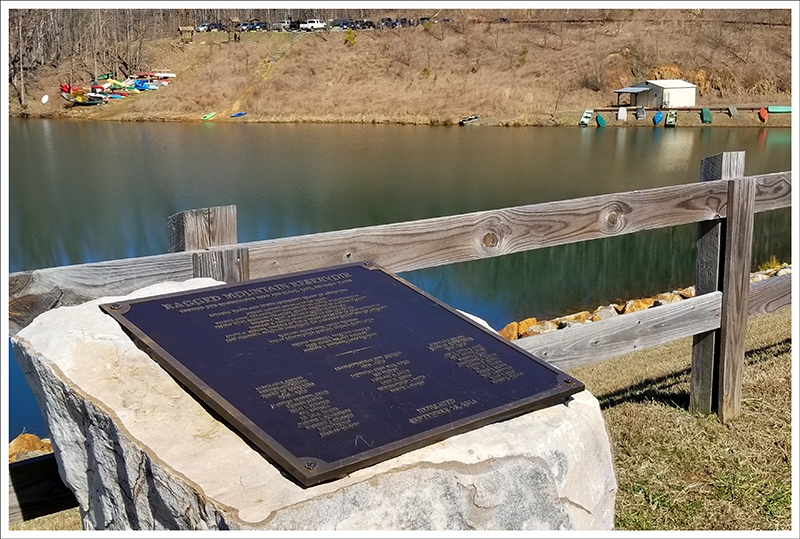
Reflections on Ragged Mountain Reservoir. Below: The floating bridge; Adam crossing the floating bridge; View across the reservoir from the bridge.
Adam Says:
We have been having some unseasonably warmer winter days in 2020, so it has been a good year to get out and do some hiking in more pleasant and non-snowy conditions. We opted to check out the Ragged Mountain trail system, since it had been on our list of things to do for years. This trail system is very popular with local people from the Charlottesville area. You will likely see families with younger children walking around, trail runners, and maybe even a mountain biker. There are gradual ups and downs on the trail, but it makes for easy walking/running/hiking if you want to cover some miles without a ton of elevation changes. Prior to 2014, there used to be two reservoirs, a pump house, and a slightly different trail system.
As Christine said, we started from the lower parking area and headed to the right (counter-clockwise) from the kiosk to start the trail. We printed out the trail map that we have linked to above, which may be handy to see how all the side loops of the trail connect to make sure you are covering the terrain just the way that you would like. One thing to also note that you will see on the map is there are benches at the numbered locations on the map; on these benches are mile markers showing how far along the loop from the dam you are but we found these mile markings not to be completely accurate with mileage. The trail began to wind uphill rather steeply for the first .25 miles until we reached the top of the trail where it joins up with the dam and road to the upper parking lot. From the viewpoint that we had from the first picture below, we decided to do the Ragged Mountain Loop Trail counter-clockwise, which ended up starting sharply behind us and to the right. At .35 miles, we reached the first junction, which was the Roundtop Mountain Loop. We avoided taking that spur loop since it just looked like an unnecessary uphill climb. Continuing forward, we passed the other end of the Roundtop Mountain Loop and came to the carved Mountain Man marker at .65 miles. These wood-carved statues that are placed in a few places are well done and nice to serve as good markers where other trail junctions also occur. From this marker, we had an option to take a longer loop to the right that led to a water tower or just to push forward. We decided to skip the water tower and headed straight on the trail to reach the Bear marker at the 1 mile mark. From this point there are also other options to take different loops around (we told you the trail map would be handy), so we took the route that looped closest around the reservoir. We were glad we chose this, since we got some nice views of the reservoir and could see some nice reflections as we made our way around.
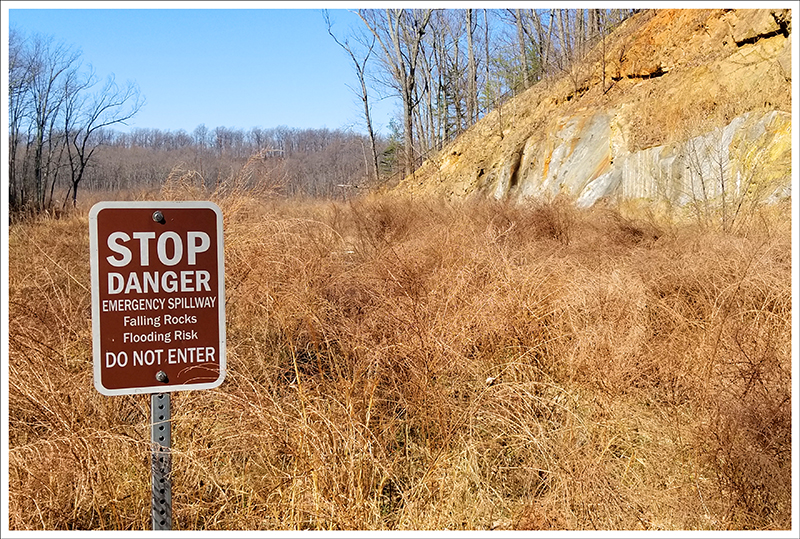
Ragged Mountain Reservoir dam. Below: The emergency spillway; Plaque dedicating the dam, The trail goes across the top of the dam.
After a bit further, we reached the Eagle marker and passed over a small bridge to continue our loop staying close to the reservoir. This part of the trail wound uphill slightly and we ended up on an elevated part of the trail that paralleled the reservoir. Parts of this section were a bit muddy and slick, so be careful following rainy days. Eventually, we reached the last wood carvings on the trail of owls. From here, there is a short trail down to the water’s edge. The trail takes a sharp right turn away from the reservoir, but does wind back to follow along the reservoir once again. After more walking, we soon came upon views of cars on the highway, but then the trail turned down and led to a floating bridge across the reservoir. On the other side, the trail climbed up steeply and then wound around an emergency spillway. It was only a short distance after we passed the spillway that we ended up reaching the dam. We saw lots of canoes and kayaks parked on the hillside near the dam. We passed over the dam and then crossed the road to join back to the spur trail to the lower parking lot and back to our car.
Overall, the trail system here is a nice place to go out and stretch your legs. It has some interesting features with views of the reservoir and the wood carvings provide a nice touch to the experience. It would be nice to see how this looks in the fall, as I can imagine the trees along the waterside could make for some nice colorful reflections in the water. Expect a lot of people on your walk during a nice day.
Pro Re Nata Brewery. We had a triple IPA called Buddha Kind and a really tasty Red Velvet Ale (on nitro!). Below: Lunch was at Crozet Pizza. Yum!
Trail Notes
Distance – 6.1 miles
Elevation Change – 1,000 ft
Difficulty – 2. There are rolling hills all along this hike, but generally it is easy terrain.
Trail Conditions – 3. The dirt trails were very slippery and muddy when we hiked.
Views – 3. The lake is pretty and blue.
Streams/Waterfalls – 1. There are just a few small feeder streams along the way.
Wildlife – 2. We saw lots of near bird species along the water.
Ease to Navigate – 3. The trail signage is adequate, but there are some unlabeled trails that could lead you temporarily off course.
Solitude – 1. When we arrived at 9 a.m. on a pretty Sunday, we had it all to ourselves, but by the time we finished a couple hours later, it was packed.
Maps
Directions to trailhead: The lower parking lot is located off County Rd 702. GPS coordinates: 38.02692, -78.55583
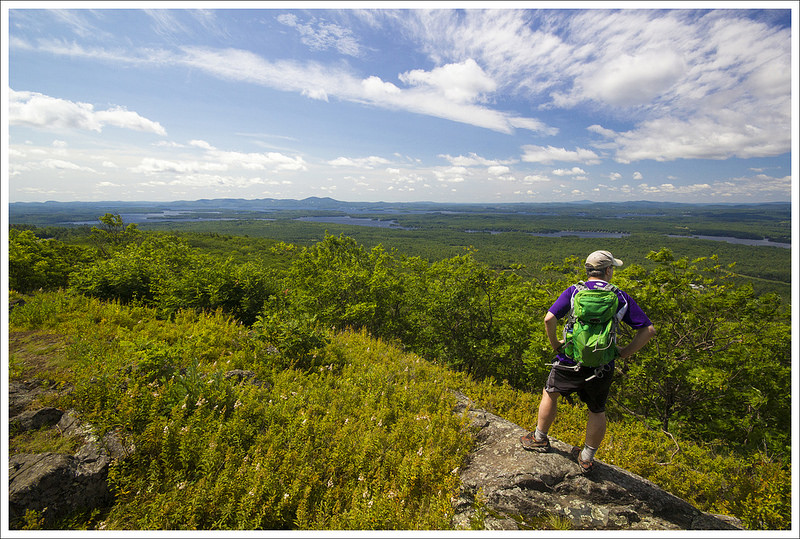
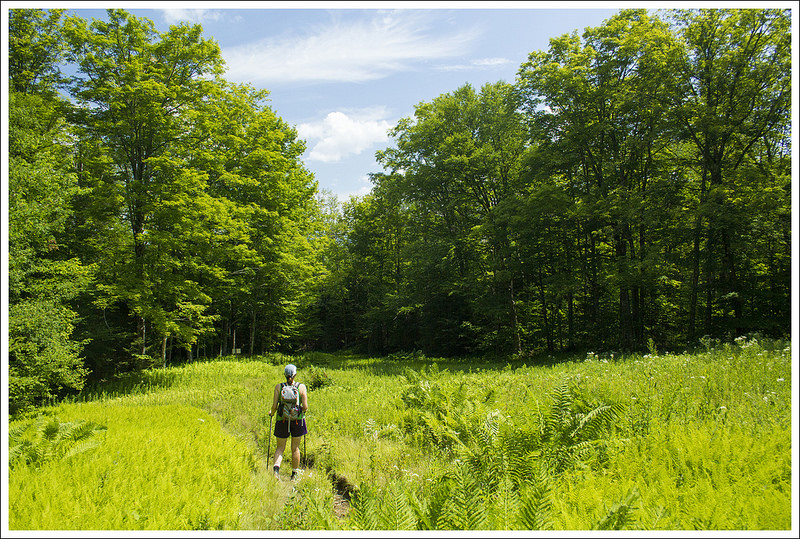
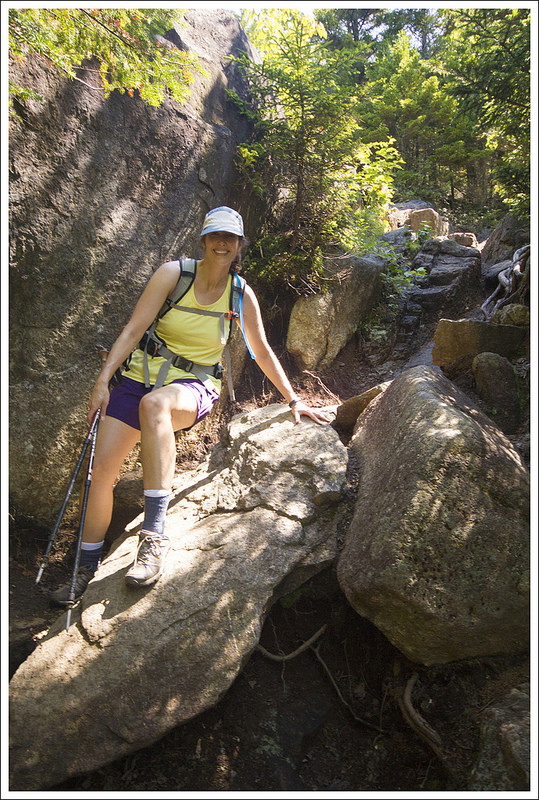
This 4.9 mile hike was such a pleasant surprise. Our hiking guide said there were views, but didn’t really mention how nice they were! The route had moderate grades and the most blueberries we’ve seen on any of our New England hikes.
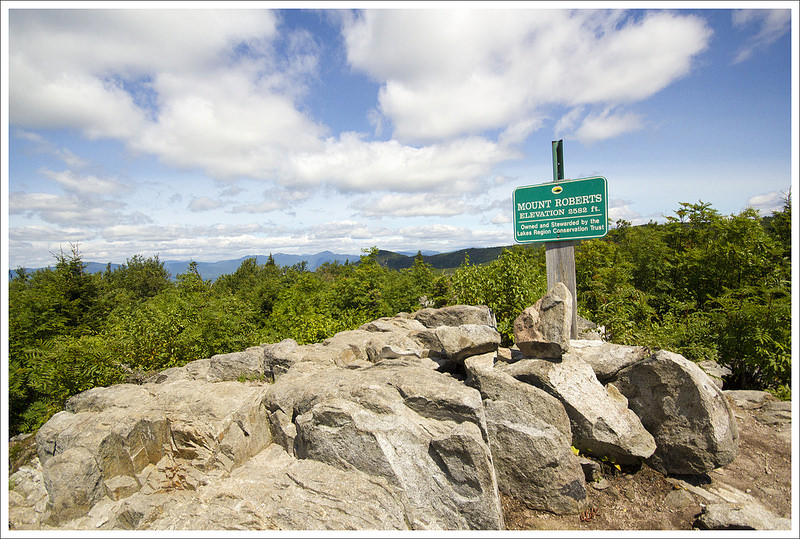
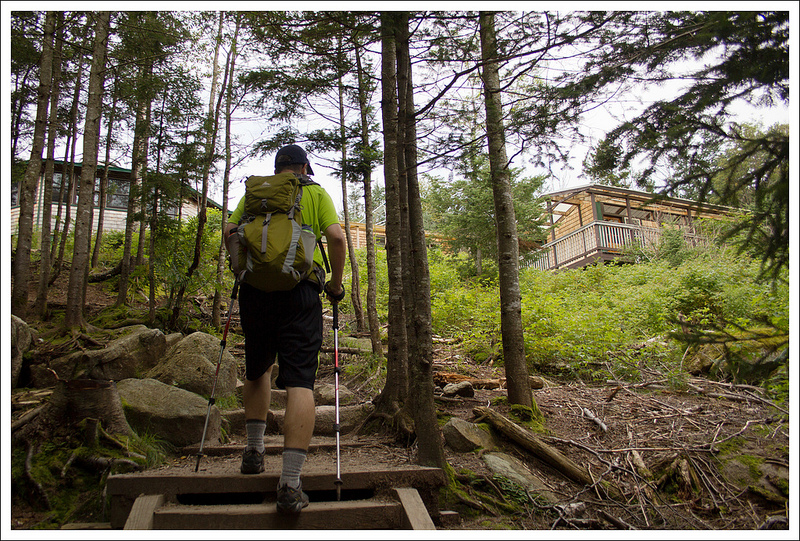
While Mount Roberts is a small peak, it offers great views of Lake Winnipesaukee. Below: The hike sets out on the grounds of Castle in the Clouds; Trails are well marked; The early part of the trail is very rocky!
Adam Says…
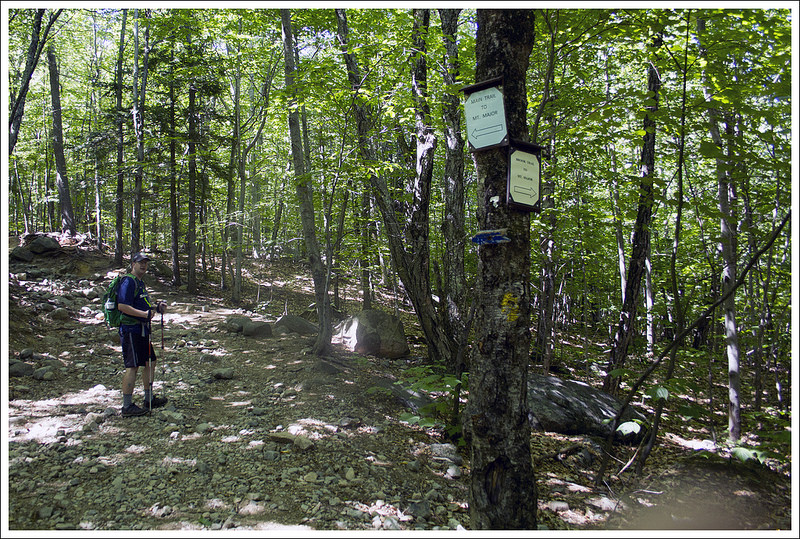
Since we did our big backpacking trip earlier in Vermont, we decided we would do a lot of easier hikes for the remainder of our trip to New England. We had been to Castle in the Clouds on a previous trip and there are a good number of hiking trails there that are maintained by the Lakes Region Conservation Trust. We saw a write-up about this hike in one of our hiking books, 50 More Hikes in New Hampshire, and decided to give it a try. We parked near the stables at the Castle in the Clouds. Walking up the road past the stables, the sign for the Mt. Roberts Trail was clearly labeled. We followed the trail which led us quickly into the woods and leads along the back side of the fenced-in stable property. The trail takes a sharp left and then a sharp right before you feel like you are really on a trail that is leading up a mountain.
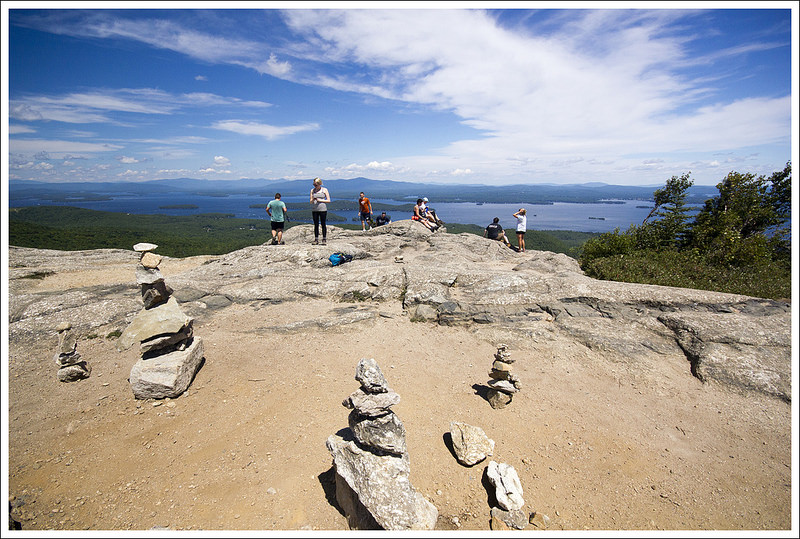
In 1.2 miles you reach a side path that leads you to an area that is called Sunset Hill. It provides a great panoramic view of the valley below you, Lake Winnipesaukee, and mountains that range from the Belknap Range, Mount Kearsarge, Mount Cardigan, Squam Range, and Mount Moosilauke among many others. We talked to an older couple that were taking in the view and were local to the area. The husband talked about how he had been visiting this view for many years – its nice to have this as a place you can revisit. If you want to take a short hike or have small children, this may be a perfect family short out-and-back to do. After enjoying the view, we pressed on to the summit.
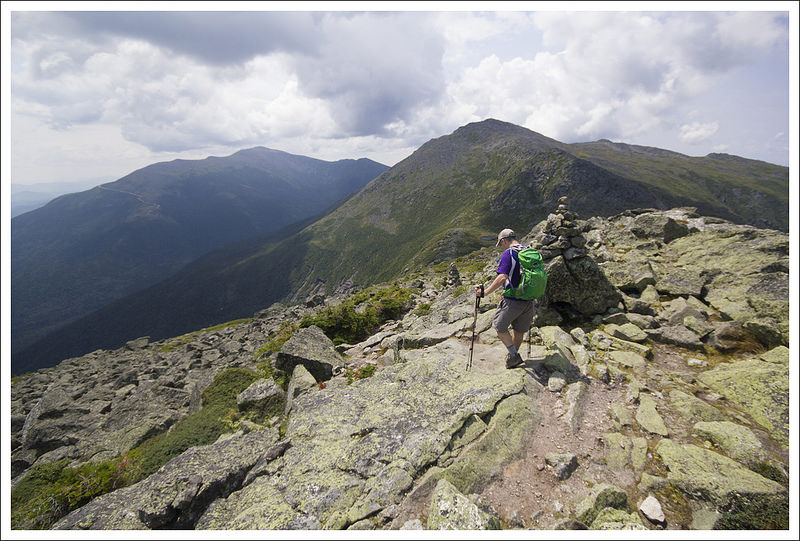
Most of the hike up Mount Roberts follows a ridgeline. Below: Adam makes his way along the granite ridge; Near the summit the trail goes back into a pine canopy; The summit.
The trail from this point began to be a little more steep, but overall we found it quite moderate. There were many times that the hike was in the open as we walked along rocky ridgeline, so keep an eye on the orange blazes painted on rocks to point where to go next. On the climb up, we noticed that most of the views were behind us, so we thought we would just press on and then enjoy most of the open views on the way back.
We reached the summit at 2.4 miles, which was marked by a sign in a cairn. The views from the summit were limited due to overgrowth around, but stepping on to the rocks gets you more of a view. As soon as we got to the summit marker, a snake darted out from the rocks so be careful where you step and place your hands. The view wasn’t as spectacular as what we had passed, so we made our way back after a short stay at the summit.
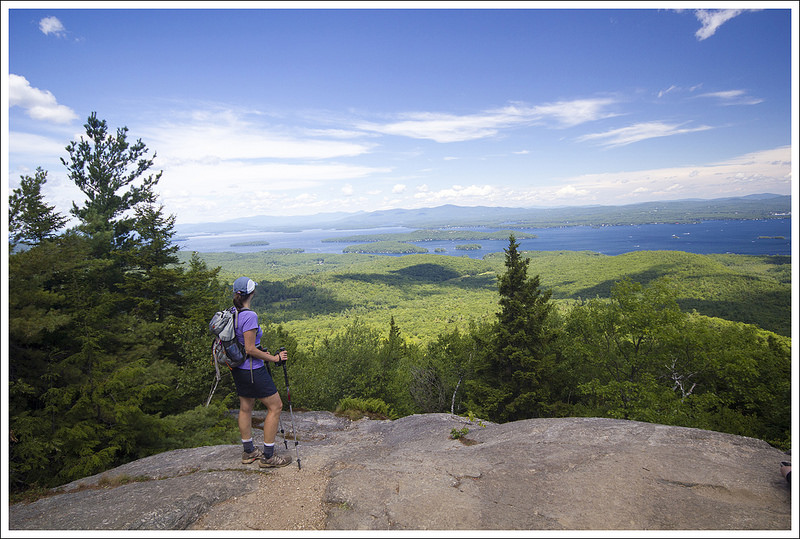
We noticed on our climb up, the abundance of blueberry bushes that were on the trail. We decided we would pick some to eat as a snack on the way back. I have never seen so many ripe, wild blueberries in one place than here. Everywhere we looked, there were blueberries and they were at the perfect ripeness – there is nothing like eating a snack provided by nature in a setting like this. On the way back, we took many more pictures and enjoyed the lake views from nice outcroppings.
We got back to our car at 4.9 miles and thought this was a perfect, easy hike that was much better than what we thought was described. I can see us visiting this hike often and I understand why that older couple keeps coming back. To finish the perfect day, we stopped by the Squam Lakeside, which serves our favorite lobster rolls with tons of fresh lobster and lime cream slushes.
Christine Says…
Adam described the hike really thoroughly, so I’ll chime in with just a few of my memories from the hike. The best part of the hike was the spectacular views on the hike down. It was like a mountain theater and truly breathtaking.
Another note – this hike was really popular with DOGS! I think we saw as many dogs as we did people along the way. From big labradors to jack russell terriers to a dachshund. After seeing one of the dogs make a ‘pit stop’ on the blueberries, it made me choose bushes that were far from from the trail to snack on.
You get great views of the Presidentials and Mount Chocorua from the summit of Roberts. Below: A great look at the rocky cone of Chocorua; Trail markers back to the castle grounds; This hike had so many blueberries!
Another thing that struck me on the early section of the hike was how tough the footing was to traverse safely. Climbing to Sunset Hill was a little bit steep, but the footing was the challenge. The area had a drought-y summer, so the dirt was loose and gritty. On top of the loose soil, there were lots of round, softball-sized stones. It was definitely ankle-turning terrain.
After we passed Sunset Hill, we came across a large group of backpackers from a girls’ summer camp. The Lakes Region of New Hampshire is packed with sleep-away camps. I was really glad to see such a big group of girls, campers and counselors alike, being exposed to overnight backpacking. When I was growing up, backpacking was typically something meant for boys. My Girl Scout troop’s camping trips were limited to cabins and platform tents. We learned to cook, do dishes, clean latrines, and make crafts. My first exposure to backpacking was a single overnight when I attended summer camp with the National Wildlife Federation the summer after my fourth grade year. After that, I never had the opportunity to backpack again until I was an adult. It’s something I truly love and I wish I’d started years before. Seeing all these girls on the trail also made me wonder how this hike hooks into the larger trail network in the area… something I plan to research!
You get great views looking toward the lake on the way down. Below: A moment to enjoy the lake view; Shuttles and the castle’s stable grounds; Post hike lunch of lobster rolls!
I guess another favorite memory from this hike was the great view of Mt. Chocorua and the Presidentials from the summit of Roberts. Yes… the mountains were far off and the view wasn’t panoramic, but those mountains are super impressive even at a distance. Mt. Chocorua was especially breathtaking from this angle, as you could really see the sheer stone cone of its summit.
And finally… who can forget lobster rolls! Squam Lakeside finds a way to pack about two full lobsters’ worth of tender meat onto a hot dog roll for each of their sandwiches. They’re nothing short of glorious!
Trail Notes
Distance – 4.9 miles
(Check out the stats from Map My Hike)*
Elevation Change – 1320 ft.
Difficulty – 2.5. With a short elevation gain, we never found this trail to be very tough. There are a few rocky areas, but they are short-lived.
Trail Conditions – 4. The Lakes Region Conservation Trust does a great job maintaining this trail. We never experienced any blow-downs or overgrown areas on the trail.
Views – 4.5. The Lake Winnipesaukee views were outstanding. Views from the summit were a bit disappointing, but you have plenty of other spots to enjoy on the way up.
Waterfalls/streams – 0. Non-existent.
Wildlife – 3. Watch out for snakes on the exposed rocks. Lots of bird watching to be done from the rocky overlooks also.
Ease to Navigate – 3.5. The trail was mostly easy to follow, but we did have to watch for some of the blazes on the open areas.
Solitude– 3. This is a popular hike in the summer. With that being said, there is plenty of space at the views to carve out your personal space if needed.
The summit has superb views of Lake WInnipesaukee. Below: Parking issues at the Mount Major Trailhead; The trail is well-marked and blazed blue; The lower part of the trail is very eroded.
Adam Says…
Hiking Mount Major seems to be a rite of passage for anyone that is visiting the lakes region of New Hampshire. This has been a popular spot for hiking for a long time. We had just hiked Mount Marcy two days before and our muscles were still recovering, but it was my 44th birthday and I wanted to celebrate with the views from a summit.
We got to the parking lot fairly close to 10:00 a.m. and the lot was completely full. We began to see how popular this trail actually was. We parked along the side of the road and then proceeded through the parking lot to the trailhead. We noticed one car that was parked in a way that took up three spots. Someone had left a note on their windshield letting them know just how they felt about their parking job. New Englanders don’t mess around.
From the parking lot, we followed the main blue trail. The trail was a wide, worn path through the woods. When you are walking on a clear, dirt path you know this is a well-used trail. The hike was uphill for the first few tenths of a mile, but levels out at .3 miles. We enjoyed some flat walking through the trees. At .7 miles, the trail reaches a junction. Take a left to stay on the main, blue-blazed trail. The trail begins to steepen at this point and becomes more rocky. As we climbed up on our approach to the summit, you approach some more exposed large sections of rock that you can walk up or you can take a rugged trail up the side. We opted to walk on the open rock surface on the way up, but chose the path on the way down. As you walk on this open rock surfaces, you can look behind you to see the beginnings of some great views of Lake Winnipesaukee. The trail was quite steep at this point and you have to be careful as you navigate up these large, rocky areas.
For a time, the Mount Major trail is wide and flat. Below: The trail junction of Mount Major and the Brook Trail; The trail gets rockier; The trail went back and forth between open rockiness and shade.
Around the 1.6 mile mark, we reached the large open summit. There were tons of people at the top, but because of the large area, you can always find a place to enjoy to yourself. The wind was whipping across the summit. We went to the summit marker that has a large rock foundation built around it. We sheltered ourselves from the wind and ate a snack at the summit. After eating, we walked around in all directions to enjoy the views around us. While staring out at the gorgeous views, you can easily lose track of time.
We descended the way we came, but there are many options to make this a larger loop hike if you so desire. Sometimes I feel that popular hikes are often over-hyped, but this hike didn’t disappoint. We saw plenty of families hiking together on this hike of all skill levels. Just take your time and most people should be able to make the hike that are in decent shape. This was a great start to a birthday celebration and the views of Lake Winnipesaukee are some of the best you will get.
Christine Says…
Hey – it’s great to be back in New Hampshire! We had a spectacular, sparkling, bluebird day to hike Mt. Major. It was a perfect hike for Adam’s birthday.
Mt. Major is probably the most popular dayhike in the Belknap Range – and no wonder, with its relatively short distance and commanding views of Lake Winnipesaukee. We hiked on a Sunday morning. Arriving by 10:00 a.m., we found the parking lot already jam-packed with cars. Adam and I had to park our car on the shoulder of the busy main road.
The views got nicer the higher we climbed. Below: Rock piles on the summit; People gather around the Phippens’ cottage; Birthday photo!
The Mount Major trail is blue blazed and begins climbing uphill on an extremely eroded fire road. The erosion is so deep it makes the trail look like a chute. The trail eventually levels out and follows a pleasant, nearly flat path. At around the .7 mile mark, the trail splits into two – the Mt. Major Trail is sharply to the left and the Brook Trail continues straight. We continued on the Mt. Major Trail – this is when the real climbing began. The entire 1.6 mile hike only has 1,150 feet of climbing – most of it packed into second half.
After about a quarter mile of climbing along rocky trail, we passed a family taking a breather on a large boulder jumble. The adult couple was bickering bitterly about turning around or continuing to the summit. We could tell by their clothes and shoes that they were not regular hikers. When the man made the decision to quit, we overheard his young son exclaim loudly ‘Daddy… you’re a FAILURE!’ Poor guy!
The last bit of climbing was tough, so it probably was for the best that the family turned around. I think a lot of novice hikers see a short, popular hike and don’t realize how challenging it can be to ascend 1,000 feet in three-quarters of a mile. There were lots of steep rock ledges and smooth domes of rock, punctuated by short passes through trees. There were two trail choices for the last quarter mile – ledges or ledge detour. To be honest, the trails were both pretty haphazard with people blazing all kinds of different paths to the summit. As we made our way up, we paused to look back and enjoy the ever improving view.
George Phippens built a summit cottage in the early 1900s. Below: A view off the other side of the Mount Major summit; The rocky descent; Christine takes in one last view on the way down.
At 1.6 miles, we reached the rocky summit of Mt. Major. SUPERB! Lake Winnipesaukee, framed by distant mountains, sparkled all across the horizon. As expected, the summit was very crowded. At the top of the mountain, there are remnants of an old stone cottage. Later, I did some research into the history of the structure. The summit of Mt. Major was once owned by a private citizen. New Hampshire resident, George Phippens, bought the mountain summit for $125 in 1914. He loved the views and the blueberries, and kept the mountain open to all. He built a cottage at the top for hikers to use as shelter, but the roof kept blowing off in the winter. Eventually, the Great Depression came along, and ownership of the summit reverted to the Town of Alton to cover Phippens’ taxes. Read more about Mr. Phippens and his love of Mt. Major.
Adam and I spent some more time enjoying the views before making our way back down the mountain. Many people descend via the Brook Trail, but we just went down the way we had come. By the time we got back to the car, we were starving! We decided we would eat at the first restaurant we passed – which ended up being the Wise Owl Restaurant and Country Store in Alton, NH. It was late for lunch, so we were the only diners there. The food was good, but it took nearly an hour to get a simple lunch. I almost passed out from hunger while we waited! Reminder to self: eat more snacks!
Trail Notes
Distance – 3.2 miles
Elevation Change – 1150 feet
Difficulty – 2. There are some steep and rocky sections of the trail. Most people can make it if they take their time. Keep an eye on children along the trail.
Trail Conditions – 4. Most of the trail is open and easy to navigate. Some of the rock surfaces are slick, so be careful especially on rainy days.
Views – 4.5. Panoramic views from both sides of the summit.
Waterfalls/streams – 0. Non-existent.
Wildlife – 1. This is a popular trial so wildlife know to stay away.
Ease to Navigate – 4. There are a lot of paths to make it a loop. Consult the map and pay attention to blazes along the way.
Solitude– 0. This is one of the most popular hikes in New Hampshire, so you will likely see lots of people. Go during the weekday or early mornings to avoid crowds.
Directions to trailhead: From Laconia, NH, take NH-11A for 11.1 miles. Turn right on to NH-11 and go 3.1 miles until you reach the parking lot on the right for Mount Major. The trailhead is at the end of the parking lot. Take the main, blue-blazed Mount Major trail using the trailhead at the back right of the parking lot. Parking coordinates: 43.519676, -71.272813
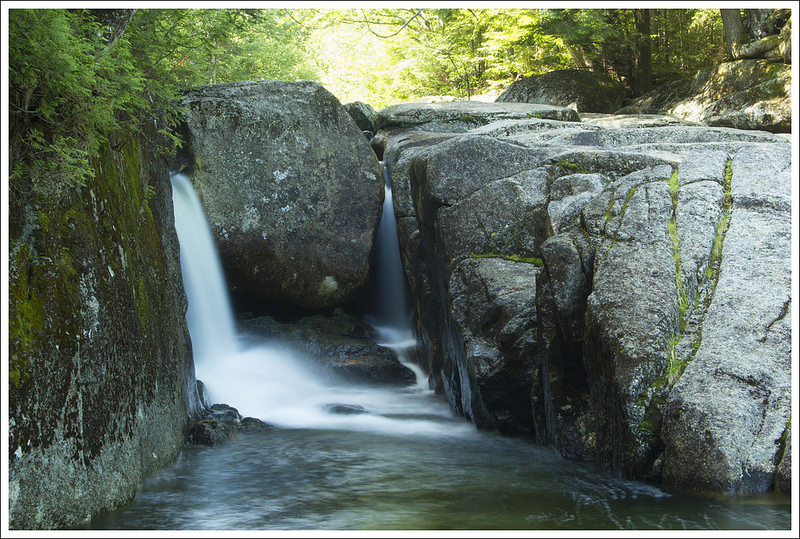
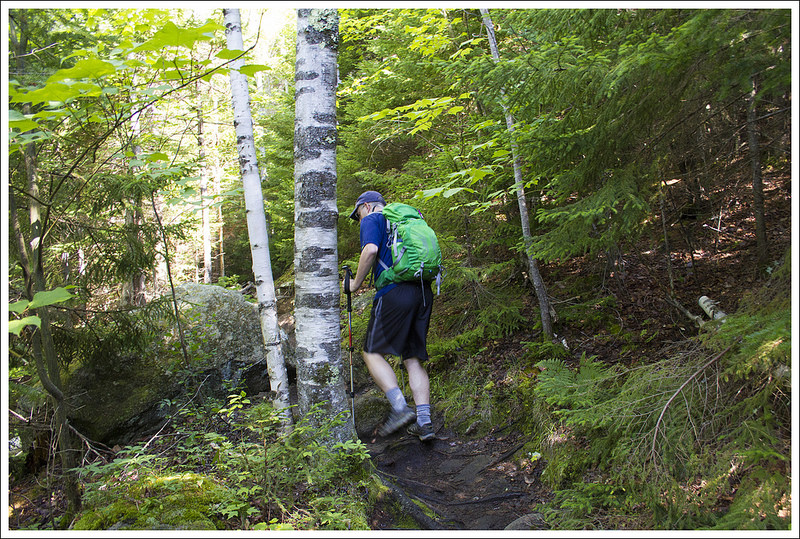
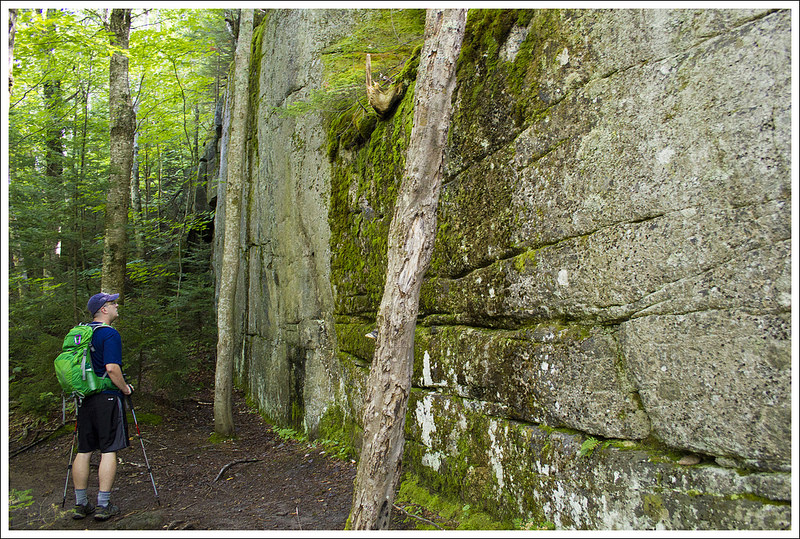
This practically flat 5-mile hike takes you to a small, but lovely, double waterfall. The pool beneath the falls is a great place to take a dip on a hot summer day. After visiting the falls, the hike continues around the perimeter of Heart Lake.
Rocky Falls is a small double waterfall. It may only be about 10 feet tall, but it’t located in a beautiful setting with an inviting plunge pool for swimming. Below: The trail is well marked and starts near the Adirondack Loj at Heart Lake; Entering the High Peaks Wilderness; Segments of logs are pressed into the trail tread to help manage muddiness and erosion.
Adam Says…
As we were trying to mix up some easy hikes with some tough hikes in the Adirondacks, we settled on picking this easy hike to a nice waterfall. This hike starts on the same path that led to Mt. Jo, beginning at the Heart Lake Program Center (the main hub for the Adirondack Mountain Club). The trailhead parking at Heart Lake was $10.00 a day for non-members (ADK member parking was $5 and all prices went down by half for parking arrivals after noon.) We recommend arriving early if you want to set out on any trail from this popular spot.
There were several shallow stream crossings on the way to Rocky Falls. Below: Some stream crossings had plank bridges; Signage along the trail; Gnarled tree roots.
The trailhead starts to the right of the entrance station. The trail starts off on a flat, easy path through the woods. You pass the Heart Lake Nature Museum and then pass the junction to the Mt. Jo trail at .25 miles. The trail stays flat and skirts along the north side of Heart Lake. There are a couple of paths that lead down to the lakeside for peaceful views. At .6 miles, you reach the junction that leads around Heart Lake, but stay straight on the trail. Most of the hike is relatively uneventful, as you walk through some dense forest areas, with just a couple of stream crossings along the way. We found very few people on the trail and it was an enjoyable walk slightly downhill. At 2.0 miles, we reached a junction that showed the side trail to Rocky Falls. It was only .2 miles to reach the falls.
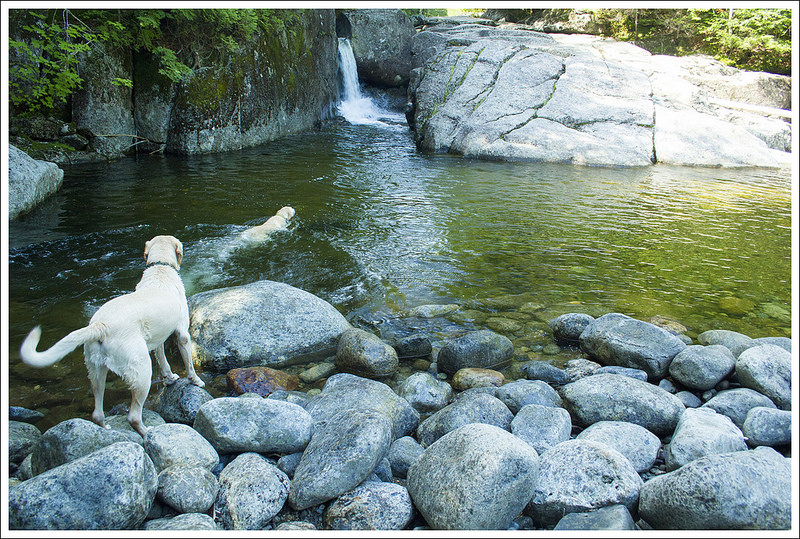
When I had seen pictures of the falls online, the falls reminded me of two eyes with cascading tears. We hung out a while at the bottom of the falls and were soon joined by a man with his two dogs. They enjoyed jumping in the swimming hole and fetching a stick. We could really tell they were having a great time and it was fun to watch their relentless pursuit. There is a small path that leads to the top of the falls, but the most picturesque view is of the bottom of the falls.
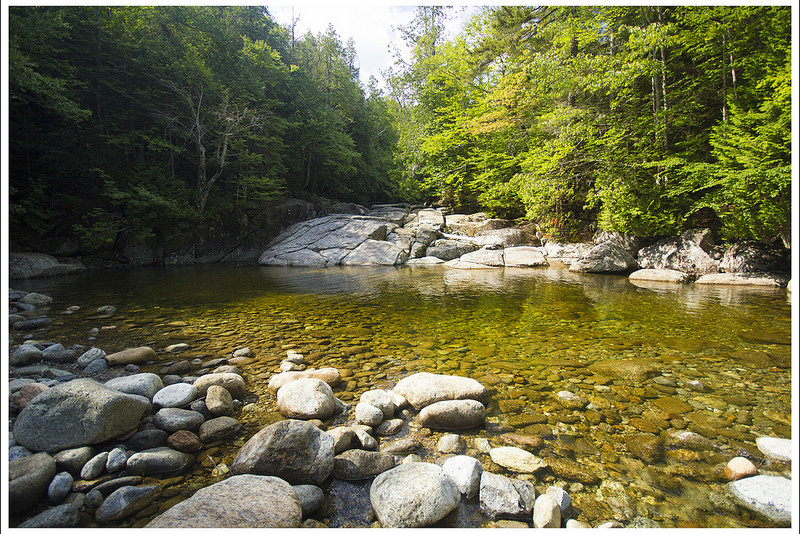
A wide view of Rocky Falls and its plunge pool. Below: A different viewpoint of the falls; The pool under the falls; Looking downstream from Rocky Falls.
We made our way back the way we came, now taking a slight uphill route from the falls. At 4.0 miles, we came back to the junction with the trail that led around Heart Lake. We decided to take this route in hopes of seeing the lake from a different angle. This route actually led away from the lake so it didn’t provide any great views along the side as the northside did. We passed through a short, open field used for skiing, but then came back into the woods. We passed a few cabins and campsites along the lake. At 4.5 miles, the trail met the lake again. I found a nice bench and sat and enjoyed the serenity of the lake. We then moved further down to the Adirondack Loj, where we saw several families that were out in the lake swimming, kayaking, and paddleboarding. We read books by the lake for a while, enjoying the sunny day and then made our way back to the car.
One thing I feel is really special about this area is the ability for families to enjoy the outdoors in many different ways. This hike and the surrounding areas is a great destination for people that enjoy the water, the views, and the hiking. While I have seen more impressive waterfalls, this would be an easy family outing if you are staying nearby.
Christine Says…
Adam and I planned to hike Mount Marcy as the grand finale of our Adirondack week, so for Wednesday’s hike, we decided to stick with another easy trail so we could save our energy for our big, 15-mile route a couple days later. Once again, we found ourselves setting off from the Adirondack Loj – it really is the heart of outdoor activity in that area.
We saw many dogs – especially Labradors – at the falls. Below: We enjoyed watching them dive, swim, and compete for their stick.
The trail leading to Rocky Falls was surprisingly flat and soft. I had come to believe that everything in the Adirondacks was either slick granite, boulders, cobbles, or a tangle of gnarled roots; so terrain like this was a welcome surprise. The wide dirt path passed through beautiful shady woods. Many of the muddy places along the trail had small logs pressed into the tread to make the mucky parts more passable. It’s a clever, easy way to manage areas prone to wetness.
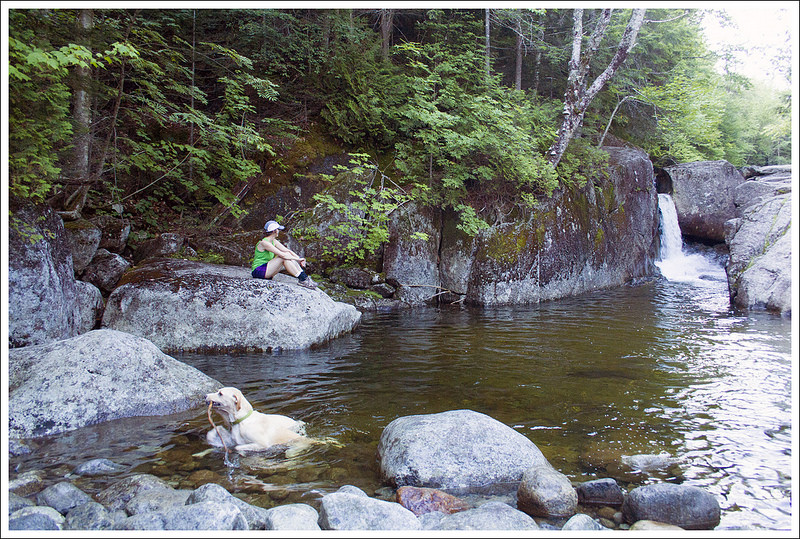
Another nice thing about the easy terrain was that it gave us a chance to cover ground at greater speed. I’m not saying I like to rush through hikes, but sometimes complicated terrain slows you to just a mile an hour. It felt good to stretch our legs and cover ground! We reached the falls pretty quickly. When we first arrived, there were a couple people climbing on the rocks above the waterfall, but we had the lower pool all to ourselves. I was able to take advantage of some passing clouds to get a couple long exposure photos of the waterfall. It was small, but very pretty. The pool beneath the falls was very inviting. I would have loved to go for a swim, but didn’t bring a towel or clothes to change into.
On the return hike, we followed the trail around the other side of Heart Lake. This took us by the Alice Waterhouse Ski Slope. Below: The trail didn’t follow Heart Lake’s shore very closely; One of the lean-to’s available for rent along Heart Lake; Canvas tents are also available.
After a few minutes, more people began to arrive. The two dogs Adam mentioned were fun to watch, but they also meant I had to put my tripod away. I don’t know what it is, but I am a wet dog magnet as soon as I get my good camera gear out! Every time I tried to take a shot, they would come bursting out of the water and running in my direction at a full, water-spraying shake! Oh well… I had already managed to take a few decent photos and really enjoyed watching the dogs dive and swim. When we went into Lake Placid the later, we actually ran into the hiker who had brought the dogs. It turned out that he worked at Eastern Mountain Sports. Funny… usually the people you pass on a day hike, you never see again.
After leaving the falls, we took the lake loop trail back to the Loj. It was mostly walking through the woods. Eventually we reached a cross country ski hill named in honor of Alice Waterhouse. Alice was an Adirondack legend – she hiked all the high peaks, skied, worked on trail maintenance, and volunteered her time working to preserve the area’s wilderness. You can read more about her on the ADK Blog.
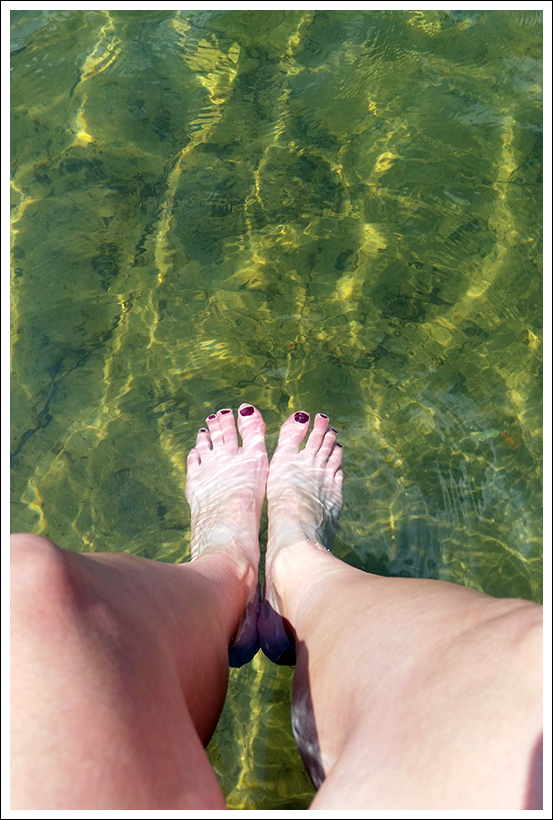
After we finished our hike, we sat along the shore of Heart Lake and ate lunch and read books. Below: The Adirondack Loj; Heart Lake is clear and cool – a perfect spot to dunk tired feet.
After passing the ski hill, we quickly reached the lakeside camping area. The lean-tos were really cute. They reminded me of the Appalachian Trail shelters we see through much of Virginia. It would be nice to camp there someday! Before we knew it, we were back at the Loj. We had packed a picnic of peanut butter sandwiches, chips, and cookies. I bought more cold drinks from the info center and staked out a nice spot with two Adirondack chairs overlooking Heart Lake. We spent the afternoon relaxing and reading books. We watched people paddling the lake and even spotted a loon diving. What a nice place to watch the world pass by.
Difficulty – 1.5. This trail is a rarity by Adirondack standards – the trail was flat and mostly dirt. We think most people could easily manage this hike.
Trail Conditions – 4. The trail was in great shape with only a few muddy spots.
Views – 2. Views of the mountains across Heart Lake are pretty, but there are no lofty vistas on this hike.
Streams/Waterfalls –3.5. The small double waterfall is the main point of this hike. It’s a pretty spot, but there are more impressive waterfalls in the area.
Wildlife – 2. The area is heavily traveled and popular with families and dogs. I wouldn’t expect to see lots of wildlife. Although, we did see a loon on Heart Lake.
Ease to Navigate – 4. Trails are generally easy to follow and well marked.
Solitude – 2. This is a popular trail in a busy area.
Directions to trailhead: From Lake Placid, go east on Rt. 73 to Adirondac Loj Rd., which is the first right after the ski jumps. The parking lots are 5 miles from Rt. 73. There is a $10/day parking fee. From the parking lot at the High Peaks Information Center at the end of Adirondak Loj Rd. return to the entrance station and find the trail at the far corner of the snowplow turnaround. GPS coordinates for this hike are: 44.1830461,-73.9644678
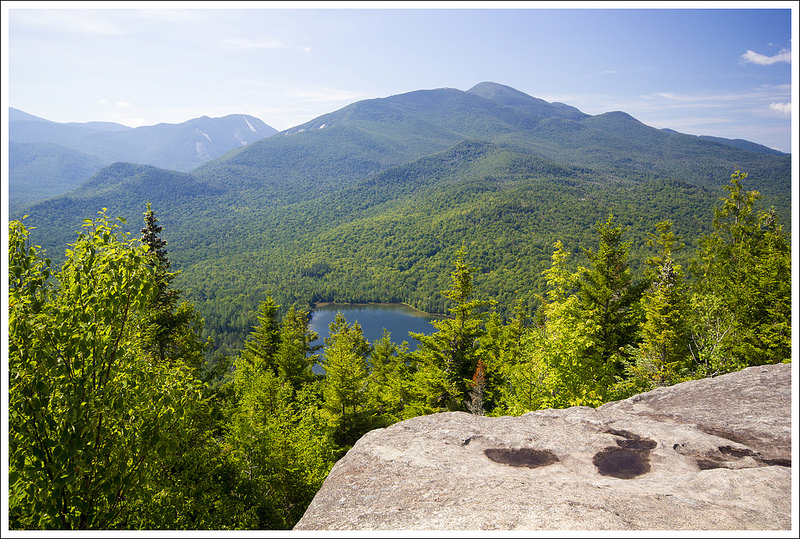
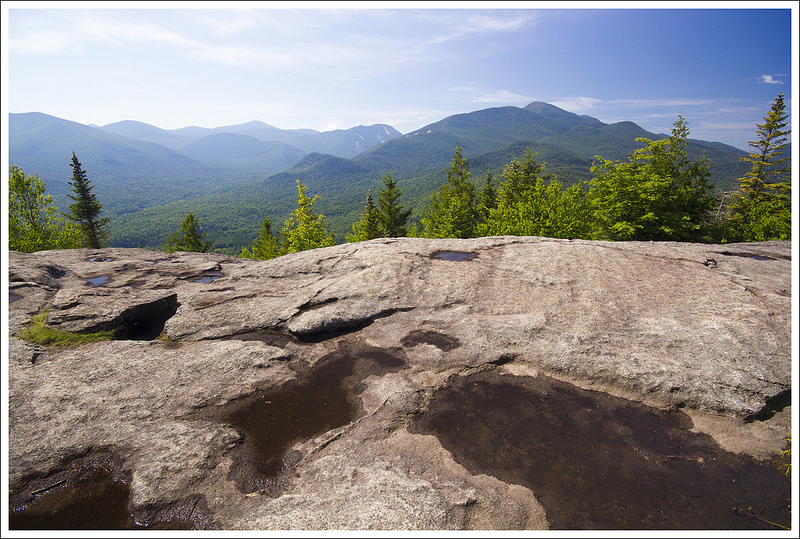
This delightful 2.4 mile hike offers fantastic views of Heart Lake and the High Peaks! With under 600 ft of elevation gain and a largely uncomplicated trail, this hike is perfectly suited for novices and young families. It’s certainly one of the area’s ‘do not miss’ hikes!
The summit of Mount Jo offers great views of the High Peaks and Heart Lake.
Christine Says…
After a strenuous day on Giant Mountain, we wanted to keep hiking – but we wanted something sort of laid back for our third day in the Adirondacks. We settled on Mount Jo – a relatively small peak (2,976′) rising above the shores of Heart Lake. We had read in multiple guides that Mount Jo offered the scenery of a 4,000 footer with only a fraction of the physical effort. That sounded perfect for our easy day!
Our hike began at the Heart Lake Program Center, which is the main hub for the Adirondack Mountain Club. The 700-acre property is home to the Adirondak Loj guest house, lots of rustic camping options, and the High Peaks Information Center. Many of the area’s most popular trailheads are located in the vicinity. At press time, trailhead parking at Heart Lake was $10.00 a day for non-members (ADK member parking was $5 and all prices went down by half for parking arrivals after noon.) When we visited, the 200-car lot was nearly full by 10 a.m. We recommend arriving early if you want to set out on any trail from this popular spot.
Beautiful Heart Lake. Below: The information board and trail register; Short Trail or Long Trail?; Adam makes his way up the Long Trail.
The trailhead for Mount Jo is located across from the entrance station at the end of the snowplow turnaround The hike started off along a wide path with flat, easy footing. We passed the Heart Lake Nature Museum and an open view of the beautiful lake. At trailpost #29 (all the junctions on the property are numbered!), turn right onto the Mount Jo trail. Shortly after the turn, there is an information board and a trail register. Most trailheads in the Adirondacks have a register for hikers to sign in, leave route details, and then sign out at the conclusion of their hike. It’s an imperfect system, but definitely helps keep hikers safe in a large and rugged area. About a quarter mile after the register, the trail branches in two directions – ‘short trail’ and ‘long trail’. Adam and I decided to take the long trail up and the short trail down, allowing us to see unique scenery along a loop.
The long trail was beautiful – shaded by pine trees with footing composed of gnarled roots and rocks. As we hiked, the trail became steeper and followed a stream bed. I imagine the stream bed is often dry in summer, but we hiked the morning after thunderstorms, so there was a trickle of water running. We met a chattering red squirrel along the route – they really are so much cuter than the gray squirrels we have in Virginia.
At the top of the climb, the long and short trails met up again and joined routes to the summit. For a short distance, the trail was practically flat, passing over muddy areas on wooden planks. There was a non-intimidating ladder traversing a slab of granite, followed by a short but steep climb over boulders to the summit. At the top of Mount Jo, we had superb views of Heart Lake, Cascade Mountain, Mount Marcy, Algonquin Peak, Mount Colden, Indian Pass, and the Great Range. With the popularity of Mount Jo and the Heart Lake area, we were surprised to have the summit all to ourselves! We really enjoyed the view!
We spotted an adorable red squirrel. Below: Rock wall on the long trail up Mount Jo; At places the trail followed a stream bed; The trail became increasingly rocky and rooty.
After a while, we were joined on the summit by a group of hikers led by one of the ADK’s summer naturalists. The club really offers a great variety of programs. We listened to the ranger describe and name the peaks and describe the geology of the area. I had no idea the Adirondacks had so many landslides and avalanches, but the scars she pointed out on the mountains made it very evident. You can view the named peaks (and learn more about the area) in this interpretive trail guide/map created by the ADK. After a little more time at the top, crowds began to arrive and we decided it was time to make our way down the mountain.
The short trail was a steeper route than the trail we had used to ascend. There were a lot more rocks to scramble over, but it was still mostly moderate terrain. We made sure we remembered to sign out in the register when we passed back by the trailhead. We also made a stop at the Nature Museum. They had neat, touchable displays demonstrating the flora and fauna present in the Adirondacks.
Mount Jo was the perfect stop for a day of light hiking! Back at the High Peaks Information Center, we bought a couple cold drinks and made our way back to the car. It was early afternoon, so we decided it was time to get some lunch and check out the town of Lake Placid. Town turned out to be brutally hot – in the mid 90’s. All the shop keepers and restaurant employees talked about the unusual heat and how lots of people didn’t have air conditioning. I guess even when you head north for vacation, sometimes you still can’t escape southern-style heat like we have in Virginia!
There was one tricky place to climb near the summit. Below: The long and short trails rejoin near the summit; Wooden planks over muddy areas; Arriving on the summit.
Adam Says…
After the tougher hike up Giant Mountain the previous day, we decided on this short but impressive hike up Mount Jo. This hike is located in the Mount Van Hoevenberg Recreation Area near Heart Lake, a jumpoff point for many great hikes. The trail starts across from the check-station and runs briefly along the side of Heart Lake. I always find some of the origins of naming mountains interesting and this mountain has a sad but romantic story –
Henry Van Hoevenberg came to the Adirondacks for the first time in 1877 because of health reasons. While he was up there he met Josephine Schofield from Brooklyn, NY. They climbed Mt. Marcy together and became engaged on the summit. From the summit they spotted a small lake that was about five miles away, they decided that that’s where they would live and build a tourist lodge in the wilderness. Josephine’s parents did not like the whole idea and took their daughter back to Brooklyn. Henry stayed and fulfilled the lovers dream. In 1880 he built the Adirondack Lodge on the shores of the lake. It was the largest log building in the United States at the time and had three stories. He changed the name of the lake from “Clear Pond” to “Heart Lake”. Ha also named the small mountain in the back of his land “Mt Jo” in honor of his lost love. – From summitpost
Mount Jo had a fantastic view. Below: Adam climbs down the ladder stairs; Christine descends the rocky short trail; There was a bit of scrambling necessary on the short trail descent.
The trail starts across from the check-station and starts off with a flat footpath that winds through some thick, but beautiful forest. Bear right at the first junction towards Mt. Jo. You’ll pass by the Heart Lake Nature Museum and then reach the junction (trailpost #29) that leads up Mt. Jo. At .5 miles, you will reach another junction that gives you options to take the long path or the short path. The short path is much steeper, so we opted for the long path, taking the left path up to the summit.
While the long path was easier, it was still fairly steep, having to climb up a rocky path. Luckily, this is a shorter hike so you can take your time if need be. At 1.1 miles, we reached the top of the junction with the short path and continued on towards the summit. The path levels out and it is just a quick .1 mile to reach the summit. Right before the summit there is a ladder and some other steep rocks to climb.
The views at the summit were outstanding on this clear, but hazy day. The ledge was fairly wide and we could see part of Heart Lake below with mountains extending above. I spotted several cedar waxwings that were landing on the tops of all the spruces around us. Cedar waxwings have always been one of my favorite birds because of their unique facial markings and this was the largest grouping of them I have ever seen.
The short trail was steeper and rockier than the long trail, but we still had lots of fun! Below: Christine signs us out in the trail register.
We had everything to ourselves for a few minutes before others started arriving – one of the advantages for starting our hike early. On the way back down, we decided to take the short path at 1.35 miles to enjoy some different scenery. The short path was much more steep and rocky so I am glad we made the choice to hike down this section instead of up. We saw many more people coming up as we descended and some were struggling. We arrived at the bottom of the junction with the short trail at 1.75 miles, having descended over 500 feet in that short span. We bore left at the junction and made it back the way we came for the rest of the way. We arrived back at the start at 2.4 miles.
When we got back to the parking lot, we stopped at the ranger station for some cold drinks. As I was waiting to check out, I overheard an older couple that were talking to the ranger about trying to hike up Mt. Marcy. We will cover Mt. Marcy in another post, but to put this into perspective it is the highest peak in New York and the most popular route takes at least 14.5 miles to hike it. It was probably around 1PM, they were wearing jeans, and only had one small liter of water with them. The man said he also had a bad back, but they really wanted to hike it. The ranger told them it was an incredibly bad idea and they didn’t have what they needed to prepare themselves for the hike. After a few minutes, the man came back inside and told the ranger they decided to do something easier (Mt. Jo) and the ranger told them that was a much better idea. I am sure we would have read the rescue story the next day in the news if they had proceeded.
After the hike, we decided to drive into Lake Placid. Every American that lived in the 1980s remembers the Winter Olympics held here and the Miracle on Ice when the American hockey team beat the Russians to win gold. This town still holds the memories of the Olympics and this historic game alive through the stores and shopping – there was even a bakery named Miracle on Icing. We made our way to Lake Placid Brewery and enjoyed a great lunch and sampled several beers from the brewery. We walked a little around the shops, but it was extremely hot that day so we decided to return back to the glorious AC in our cabin.
If you are looking for a family hike with great views for minimal effort, look no further than Mt. Jo.
We had lunch at the Lake Placid Pub and Brewery. Good food and beer!
Directions to trailhead: From Lake Placid, go east on Rt. 73 to Adirondac Loj Rd., which is the first right after the ski jumps. The parking lots are 5 miles from Rt. 73. There is a $10/day parking fee. From the parking lot at the High Peaks Information Center at the end of Adirondak Loj Rd. return to the entrance station and find the trail at the far corner of the snowplow turnaround. GPS coordinates for this hike are: 44.1830461,-73.9644678
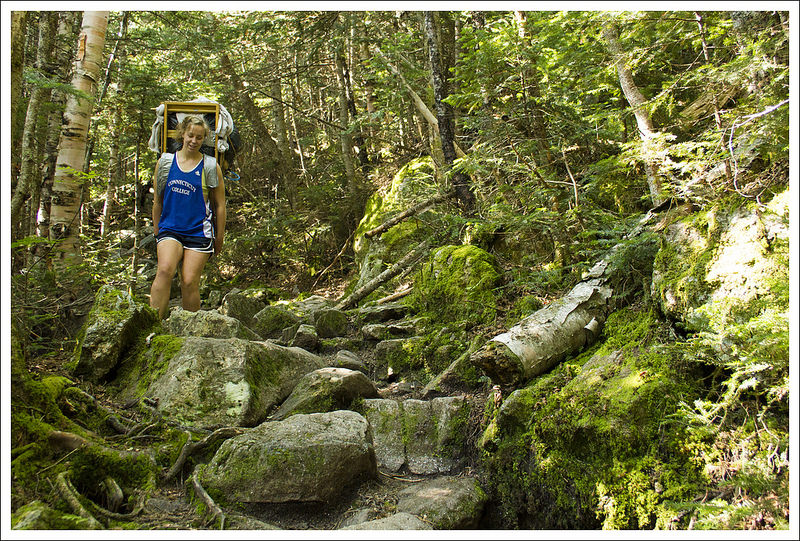
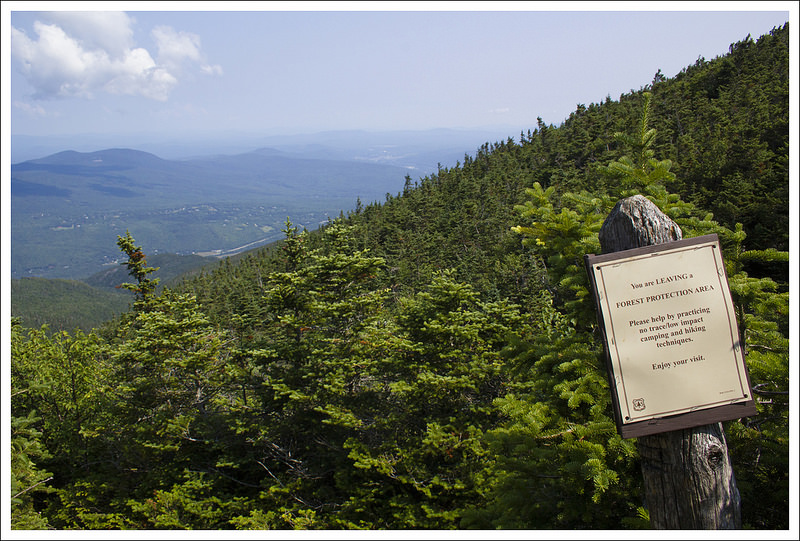
This 8.8 mile hike takes you past Madison Spring Hut and up to the summit of majestic Mt. Madison. The Valley Way Trail is known for being one of the safer, more protected routes into the heart of the White Mountains. While the terrain is less extreme than other trails in the area, the hike still requires a little over 4,100 feet of climbing. It’s a tough hike, but the views make it well worth the effort.
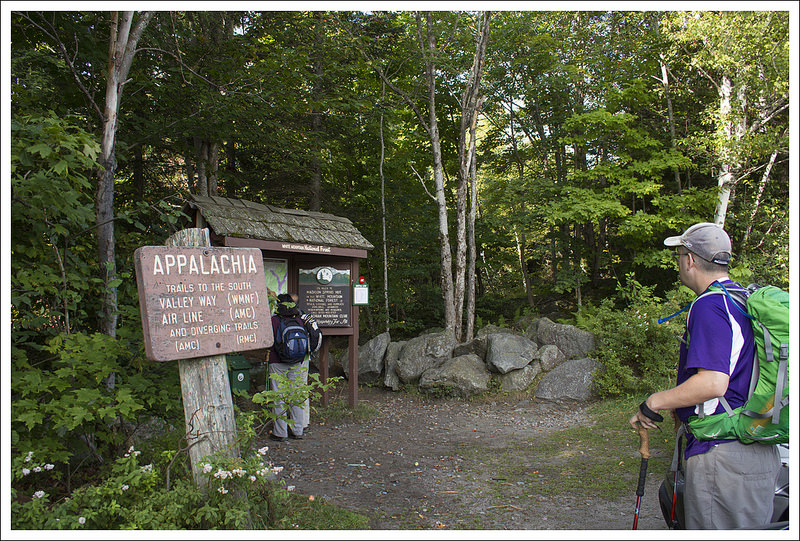
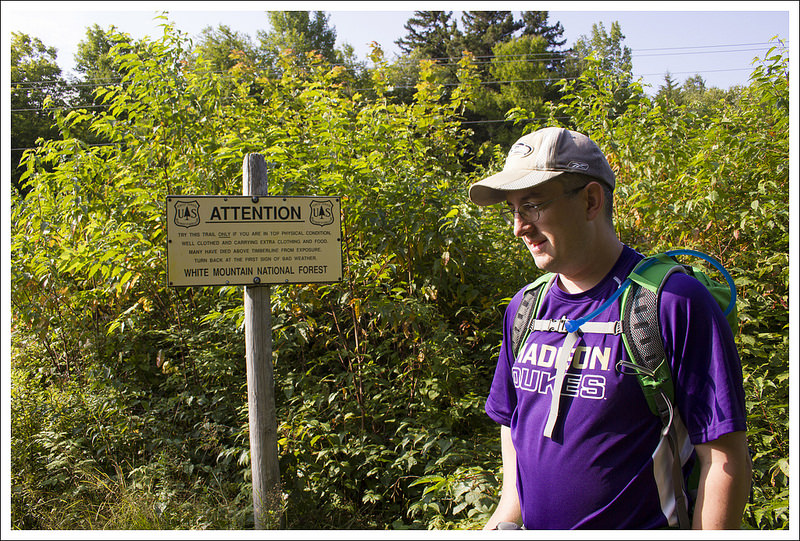
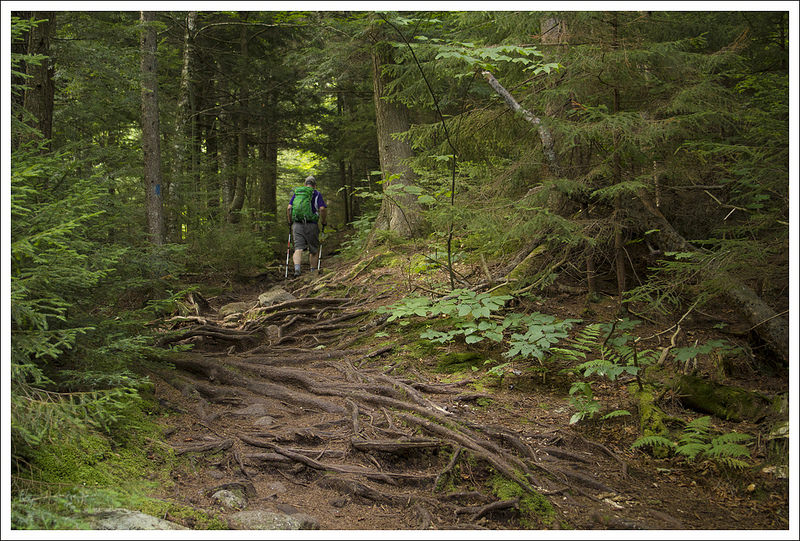
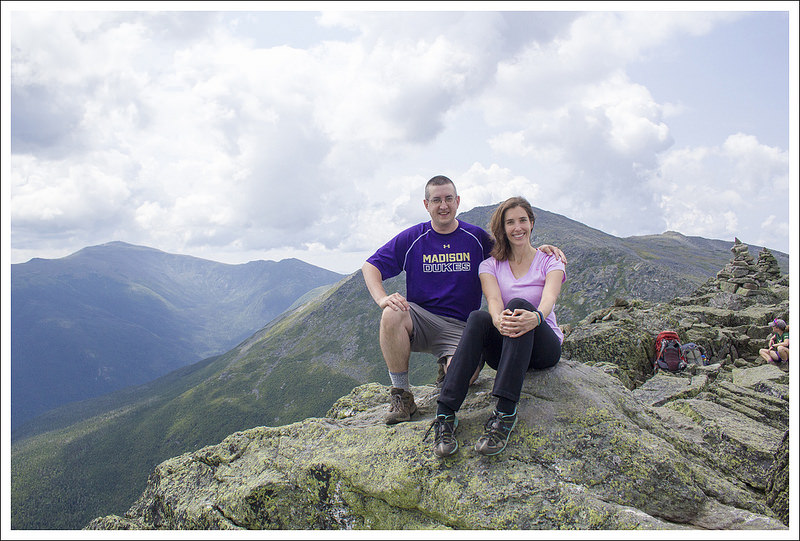
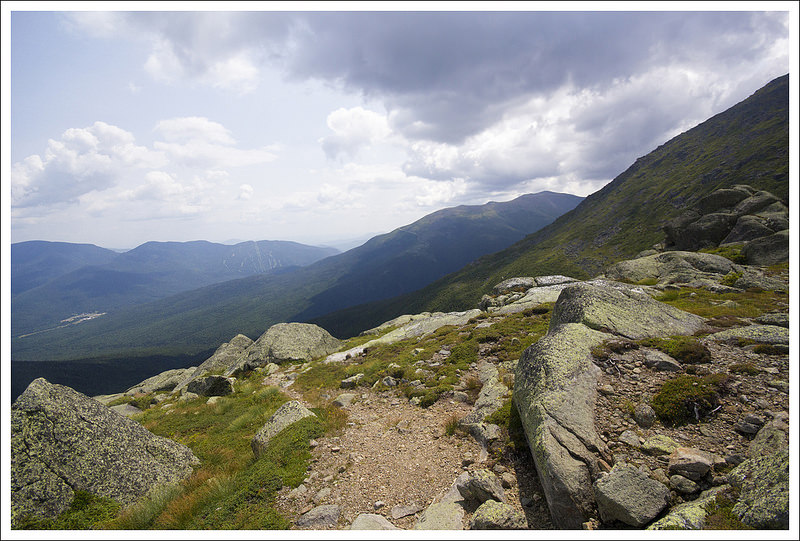
Adam makes his way across the summit ridge of Mt. Madison. The big mountain in the background is Mt. Washington. If you look closely, you can see the Auto Road snaking down the peak. Below: Plenty of parking and access to many trailheads at the Appalachia Parking area; Warning…. danger ahead – seriously, the White Mountains can be pretty extreme; The early part of the trail was fairly soft and gentle.
Adam Says…
My top goal for our 2014 New Hampshire trip was to hike up Mt. Madison. We both went to James Madison University and have worked there for years, so it only seemed fitting to take on the mountain that shared a name with our college. I even wore JMU Dukes gear almost like the guy that goes to a concert wearing a t-shirt for the band’s previous tour to show his super-fandom.
We started out the day on a rough note. Christine had put her hiking shoes and socks in the back of our car, so she could wear sandals on the car ride up. When we pulled over at one point, we realized one of our Camelbak tubes had pressed open and leaked all over the car, soaking her shoes and socks. We debated about if we would have been able to even do the hike in fear of blisters, but Christine decided to push forward.
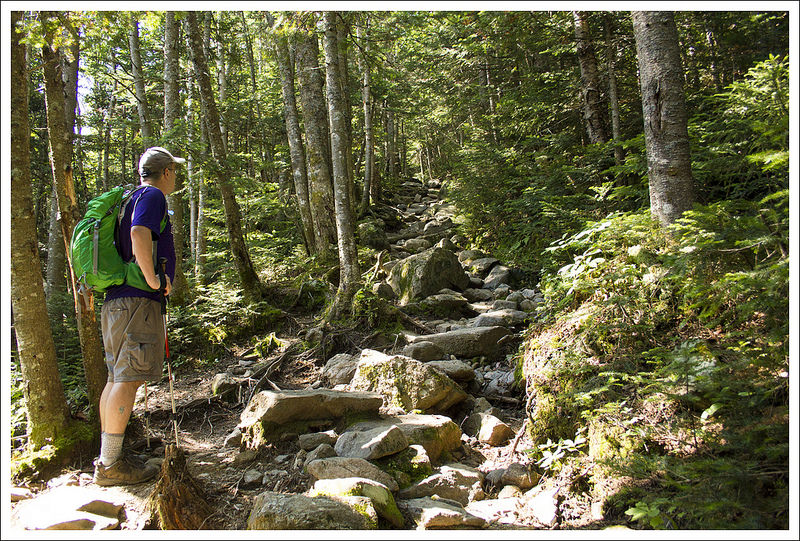
There are a lot of ways up Mt. Madison, but in our research we found the most popular way was to make our approach by going up the Valley Way trail. We parked at the large Appalachia parking lot (which was so full we needed to park on the road) directly on US-2. We were worried there would be so many people on the trail, but this parking lot holds the beginnings of lots of trails that lead up to many peaks (including Mt. Adams and Mt. Quincy Adams).
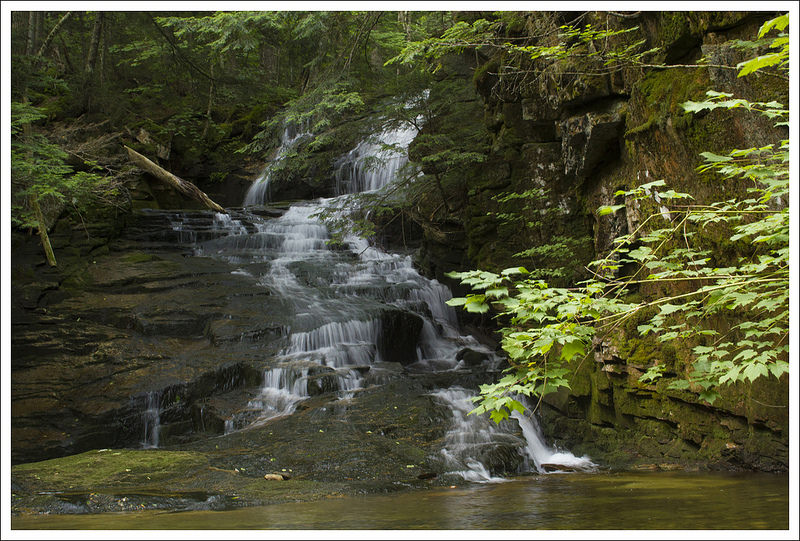
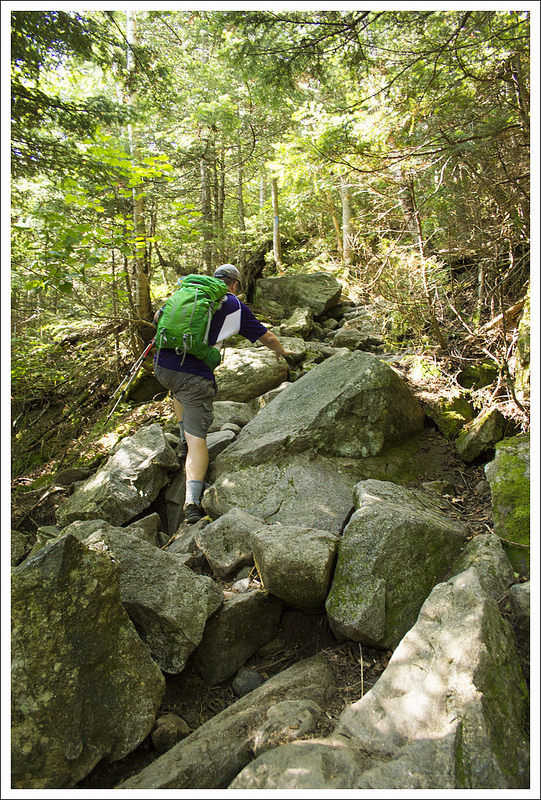
The early part trail follows Snyder Brook. By taking a short spur trial, you can visit beautiful 25′ Tama Falls. Below: We saw a couple Croo members on their way down from the Madison Spring Hut; Adam checks out all the rocks on the ‘not as rocky’ New Hampshire trail; The final push to the Madison Spring Hut was very steep and rugged.
The trail starts off from the back of the parking lot. The trail branches off in different directions but follow the signs for the Valley Way trail. The trail begins relatively flat and easy walking, as it runs along Snyder Brook. There were a few places where we could get some nice stream views and even a glimpse at the picturesque Tama Falls at .4 miles. At .7 miles, you reach another large junction, but continue to follow the signs to the Valley Way trail. The trail then begins the steeper uphill climb. Overall, I felt that the trail, while very rocky was not as steep and rocky as some of the other trails in the White Mountains. There is a relentless amount of climbing and many rocks to navigate, but it wasn’t as grueling on my feet as some hikes in New Hampshire have felt to me. At 3.0 miles, the trail gets very steep and rocky (often filled with larger small boulder-sized rocks to hoist onto) and will remain so until you reach the Madison Spring Hut at 3.8 miles. If you’re interested in camping on the mountain, but don’t want to stay at the hut, the Valley Way tentsite is at mile 3.1 on this hike.
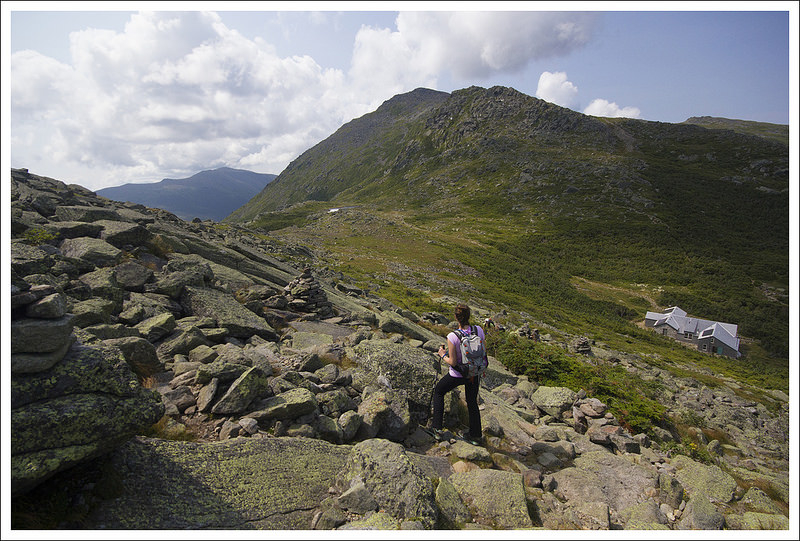
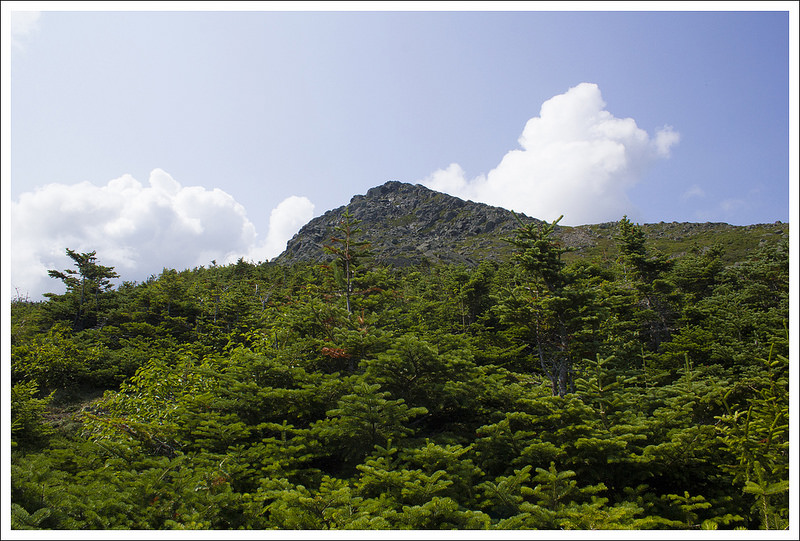
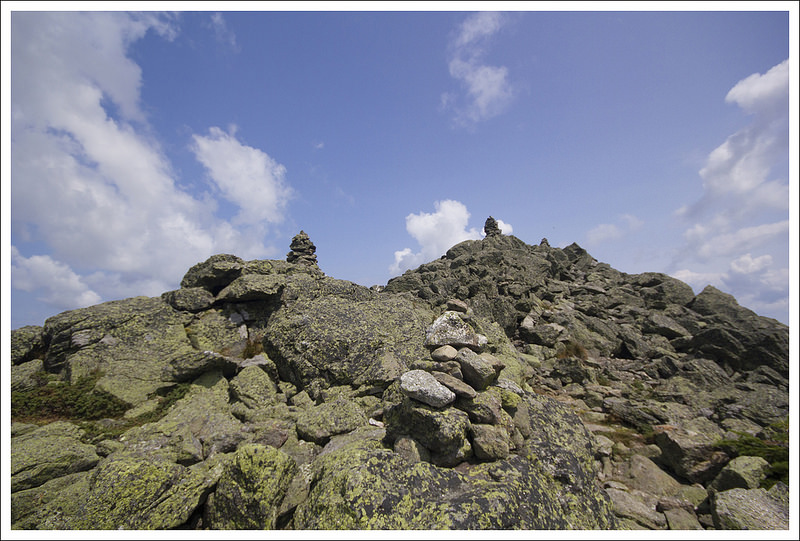
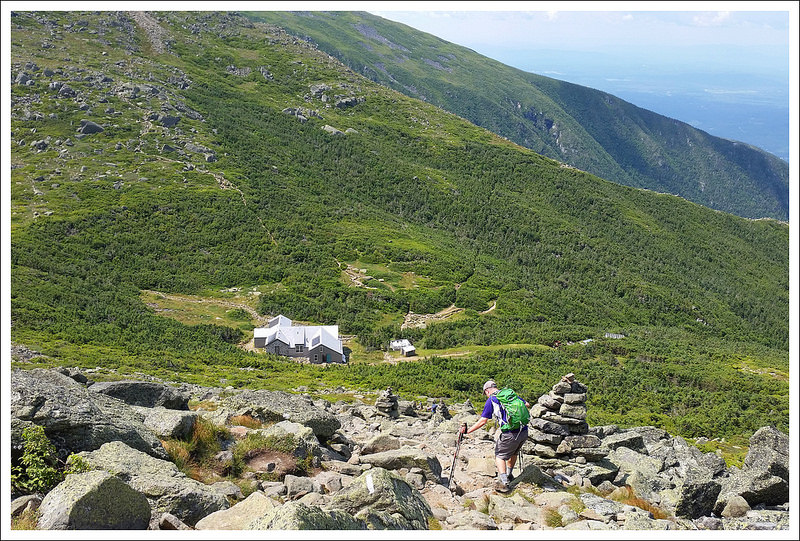
Once we arrived at the hut, we saw there were a couple of ways up to the summit of Mt. Madison. At this point, we were above treeline, so we saw the rocky summit up above us. I went in and found one of the Croo members and she told me the Osgood Trail had the most direct route and was a little easier than making our way via the Watson Path. The final ascent up to Mt. Madison was .5 miles along the Osgood Trail (which is also the Appalachian Trail in this area). You basically needed to walk acrpss large boulders, following cairns along the way until you reached the summit. When you are above treeline, the summits of mountains seem so close to reach, but it is very misleading. As we climbed up, we looked back and saw the hut shrink with each step, finally giving us some perspective of how far we had come. We stayed a while at the summit. The views were breathtaking and you could see for miles all around. It definitely was one of the most beautiful scenes I have witnessed hiking and to realize the work we had put in to attain the peak, made it feel even more worthwhile.
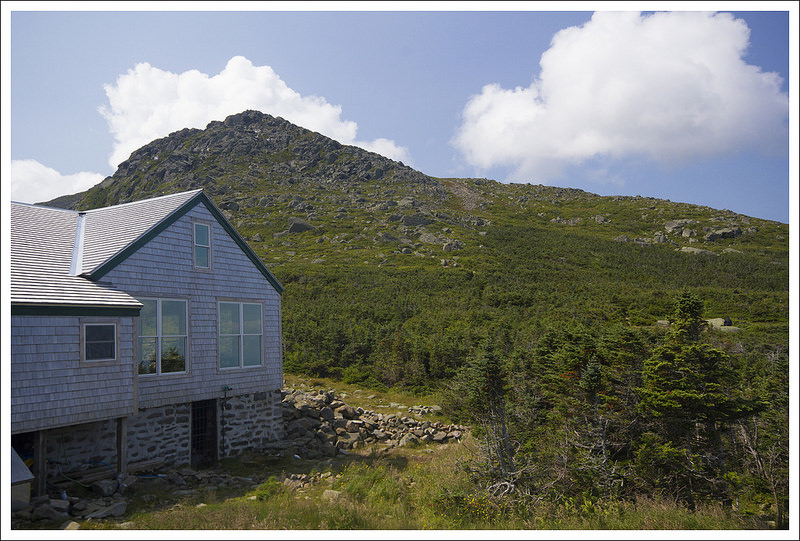
Christine makes her way up the Osgood Trail to the summit of Mt. Madison. Below: About to go above treeline; Even though the summits are far away, they always look close; A view of Madison Spring Hut with Mt. Adams in the background.
While we were at the summit, we met a woman who had a sign pinned to her that had 48 over 50 written on it. She was over 50 years old and she had a goal to do all 48 peaks over 4000 ft. in elevation in New Hampshire. She had saved Mt. Madison as her last hike to meet her goal, so we were thrilled to be able to see her experience accomplishing her goal. What an inspiration! We also talked to a gentleman at the summit who was from Colorado that had done this same hike 30 years ago. He was staying at the nearby Crag Camp, run by the Randolph Mountain Club, just as he had done when we was a teenager. He wanted to see if this hike was just as amazing as he had remembered and he told us it definitely was. It made me further realize that everyone likes to hike for their own reasons and it is always a privilege to get to hear people’s stories on the hike.
We made our way back down and ate some lunch at the Madison Spring Hut. We then ventured .2 miles on the Parapet Trail to see Star Lake. This is a spot you definitely shouldn’t miss. The lake is more like a small pond, but it was so beautiful to view the summit of Mt. Madison, as it reflected into Star Lake. We debated about tackling Mt. Adams to bag another peak, but we realized that the summit looked close, but it was still a steep 1 mile away. Not wanting to add even more to our hike, we decided to make our way back down. The trail seemed to be even rockier on the way back down. While you can normally fly down some parts of downhill trails, you need to take your time on this one to navigate all the rocks. On our way down, we came into a rain shower, making the rocks a little slick. The last .8 miles were quite easy again and we did pick up some time at this point. We made our way back to the parking lot to make the round trip 8.8 miles.
Christine Says…
The morning of our Mt. Madison hike started off cheerfully enough. We stopped for breakfast at Dunkin Donuts. I ate both a bagel with cream cheese and a Boston Cream donut. If I’m going to hike almost nine miles with over 4,000 feet of climbing, I’m going to enjoy any and all the baked goods I want! However, I was jolted out of my happy post-carb afterglow when I discovered my socks and sock liners completely soaked in the back of the car. A tough hike with wet socks sounded like a really bad idea. But, driving out of our way to find an outfitter with Thorlo socks seemed like an even worse idea. I’m super picky about socks, and Thorlo’s thick-cushion hiker socks are the only ones that keep my feet happy. I decided wet Thorlo socks were better than dry socks of another brand. (and they were … I hiked all day in wet socks and didn’t get a single blister!)
As Adam said in his post, the Valley Way trail is pretty moderate for White Mountain terrain. The trail is not as rocky and stays under the shelter of trees until you get to Madison Spring Hut. It’s a great choice if you want to visit the northern Presidentials, but stay largely sheltered from wind and other weather. There is still plenty of climbing, but until the last mile, it’s all gradual and moderate. Trails like the Valley Way exist due in part to people like J. Rayner Edmands. He was an early volunteer for the Appalachian Mountain Club. Starting in the 1880’s, he spent over 20 summers building trails in the White Mountains. He believed trails to the high peaks should be passable without stumbles, even in the dark. Backpacker Magazine did a neat article about Edmands in their October 2014 issue. Check it out if you have a few free minutes.
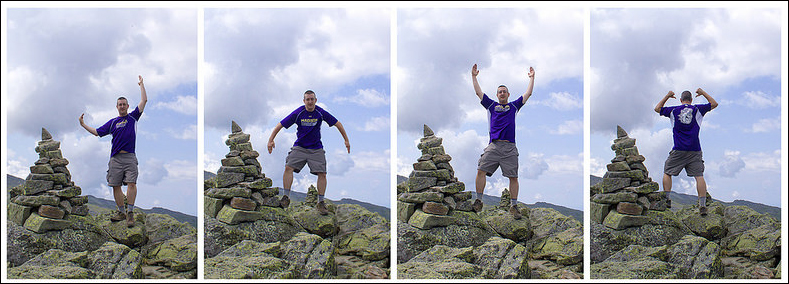
We paid tribute to our alma mater (James Madison University) on the namesake mountain. Go Dukes! Below: The trail was extremely rocky and rugged between the hut and the summit of Mt. Madison; Cairns mark the way; Christine and Adam enjoy a summit view; The descent.
I very much enjoyed the little rapids and waterfalls along Snyder Brook early in the hike. Tama Falls was especially impressive. After we moved away from the stream, the hike was basically just a climb in the woods. As we ascended the trail got rockier, bit by bit. The last half mile to the hut was insanely steep and rocky. In one spot, my shoe got so solidly wedged between two rocks that I had to unlace it and contort my ankle to free myself. It took efforts from both of us to release my shoe from the rocks. It’s a good thing trail runners are so soft and flexible, because my feet definitely needed both shoes on this hike! I think the steepness of the terrain is actually what stopped me from getting hurt when my foot got caught. We were moving very slowly, picking our way across the rocks. Had I been moving at any significant speed, I think I could have easily broken my ankle.
When we arrived at Madison Spring Hut, it was already starting to cloud up a little. It wasn’t really overcast, but the sky had that heavy, hazy look about it. The weather was definitely changing and I wanted to make sure we enjoyed the best views possible. We headed up the Osgood Trail toward the summit of Madison. I don’t know if you can really call the path to the top a ‘trail’. It’s more of a scramble across rocks, following cairns leading you to the summit. The climb to the top is slow going, simply because there is never a simple place to put your feet. On our way up it was fun to look back and marvel at the towering peaks and the tiny hut tucked into the col.
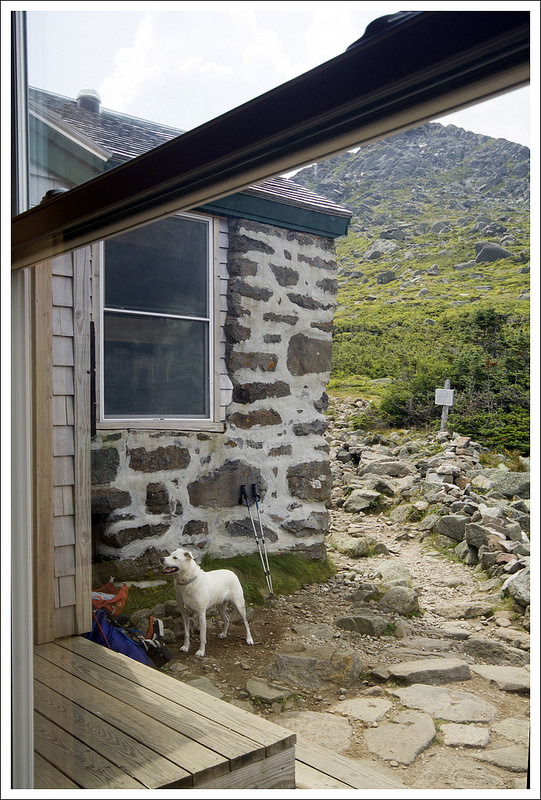
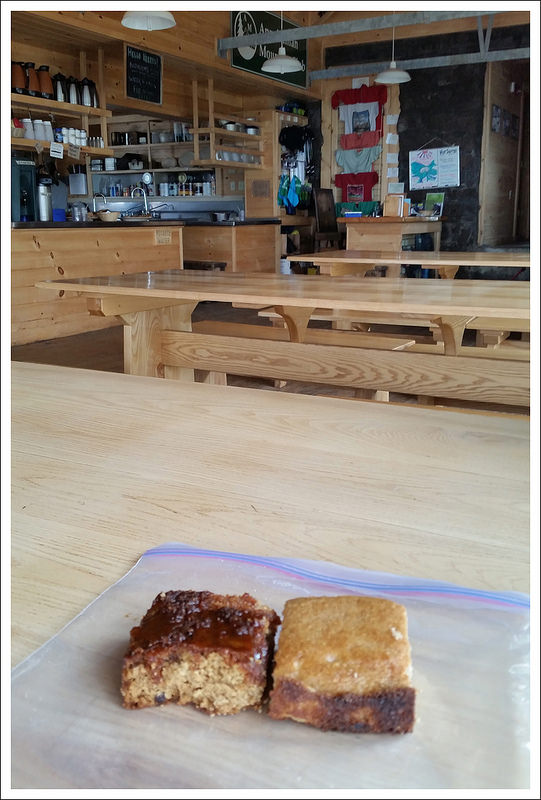
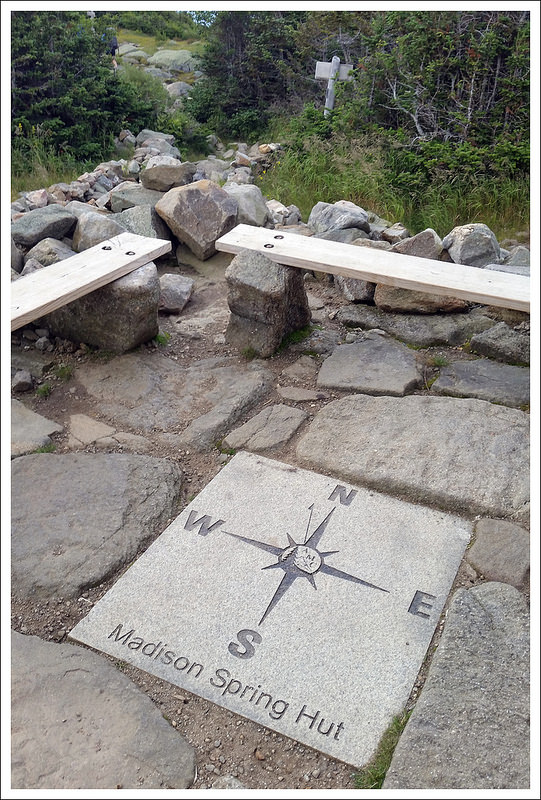
We decided to eat lunch at Madison Spring Hut. Below: Even pretty dogs aren’t allowed inside AMC huts; We always enjoy the baked goods for sale at huts; Compass on the hut porch.
At the top we enjoyed spectacular views of the Presidentials. Seeing the Mt. Washington Auto Road snaking down the mountain was really impressive! While the wind was a little brisk at the summit, it was really a warm, mild day for the White Mountain high peaks. Lots of people were hiking in shorts and t-shirts. Some people even basked shirtless in the summit sunshine. My blood is a little thin for that, but I wasn’t cold like I had been on the summit of Mt. Washington in 2013.
After taking lots of photos and doing our JMU rituals, we climbed back down and enjoyed our packed lunch at Madison Spring Hut. Of course, we supplemented our packed food with baked goods from the Croo. I always hear people talking about how huts are packed with dayhikers all summer long. I’m not sure if it’s our timing (we hike early), but we’ve found almost every hut we’ve visited nearly empty.
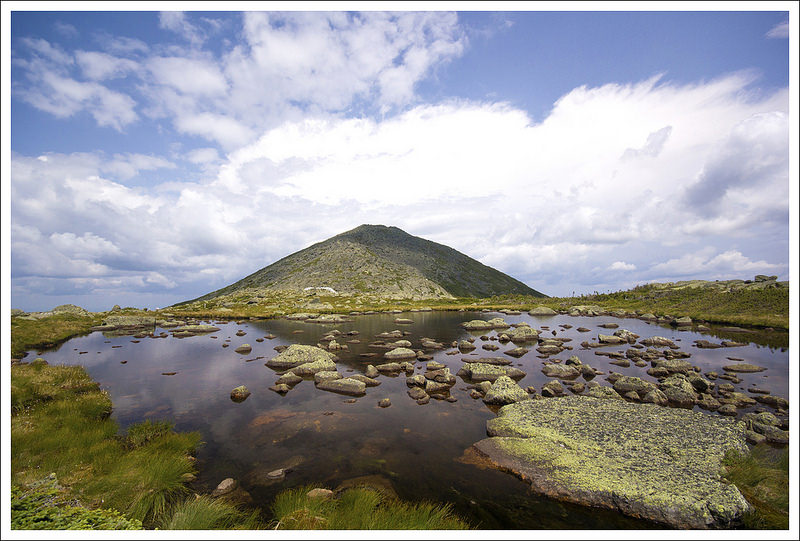
Beautiful star lake sits near Madison Spring Hut. Below: As we were leaving the lake, clouds started to roll in and we heard distant rumbles of thunder… time to leave the peaks and head back to the valley below.
After lunch, we walked out to Star Lake. What a beautiful spot. The lake itself is small and shallow, but it makes a gorgeous reflecting pool for Mt. Madison. We were lucky to visit on a picture perfect day! While we were admiring the lake and taking in our final peak views, we started to hear distant rumbles of thunder in the distance.
Being caught in a thunderstorm in the Whites is definitely something I’d be happy to NEVER experience. Lightning strikes happen frequently, wet granite is very slick, and stream levels can change drastically in mere minutes. In fact, just last week I read a harrowing account from a solo hiker caught by storms in the White Mountains. Seriously scary!
We made our way down as quickly as we safely could. With a couple miles of hiking left, the rain started to fall. Fortunately, it was light rain and none of the thunder/lightning seemed close. We got back to the car right before the skies opened up and poured! What a great day with perfect timing. I’m really thankful that we had weather that allowed us to visit two more Presidentials on our 2014 trip!
Difficulty – 5. The trail started off easier, but it is still a very tough, uphill climb.
Trail Conditions – 2.5. The trail was well-maintained, but the rocky parts of the trail make this a challenge. The final push to the summit on the Osgood Trail also took a lot of precision. Bring trekking poles.
Views – 5. It doesn’t get much better than this. If you are lucky enough to catch this on a day where clouds are off the mountain summits, you will be able to see all around you for miles.
Waterfalls/streams – 3. The Snyder Brook runs alongs the trail early on the hike and you can see a few smaller waterfalls along the trail.
Wildlife – 1. We didn’t really see any wildlife on the trail. I wouldn’t expect much at all once you get above treeline.
Ease to Navigate – 2.5. There are a lot of junctions and side trails on the route because there are a lot of trails in this area. Keep following the signs for the Valley Way Trail until you reach the hut and then follow the Osgood Path via the cairns to the summit.
Solitude– 2. We picked a gorgeous day in the summer to do this hike, so we weren’t surprised to see lots of people. We saw the most at the summit and the hut, but there was still places to find our own bit of solitude.
Directions to trailhead: From I-93: Take Exit 35 for Twin Mountain. Follow 3N for 12.4 miles. Turn right onto 115N for 9.7 miles. Turn tight onto 2E for 8 miles. The parking lot will be a large gravel area on the right.
* MapMyHike is not necessarily accurate, as the GPS signal fades in and out – but it still provides some fun and interesting information.
Sherando Lake is a popular camping/swimming area for locals. It’s just several miles off the Blue Ridge Parkway.
Adam Says…
This has been quite the harsh winter for snow and cold temperatures. And when it hasn’t been too cold, it seems to have been raining. So, we were glad to get out on a nice day to get a little exercise outdoors for a change.
Sherando Lake is a multi-purpose recreation area. In nice weather, you will see people swimming, fishing, camping, and hiking. To visit, there is a fee per vehicle – check out their fee schedule. The area is officially open from early April through October. The road gates are often closed during the off season based on weather. There is camping available if you wanted to make a nice weekend trip, but reservations should be made in advance.
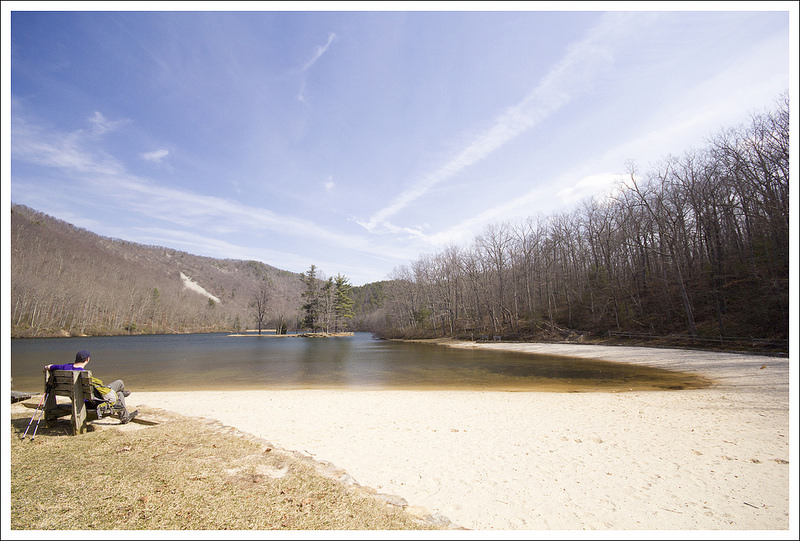
We started off our hike from the Fisherman’s Parking Area. There were a few other vehicles there also, but they were all there for the fishing. The lake is stocked with trout throughout the year. Facing the lake, we started our hike on the left by heading up the Cliff Trail. This trail was a short gradual climb with a few switchbacks before the trail levels out. About .4 miles into the hike, there is a small outlook to the right from a rock that gives you a few obstructed views from the lake. Continuing on the trail, it begins to descend and the lake gets back into view. At .8 miles, you reach the lakeside and see the sign that shows the junction with the Lakeside Trail (a trail that wraps around the lake). We took a few minutes to go out onto the sand and enjoy the views of the lake. I saw a wood duck escorting a few ducklings on the far banks of the lake.
The fisherman’s parking lot is located at the dam end of the lake. It is where our hike begins. Below: The trail starts off rocky; Overlook View.
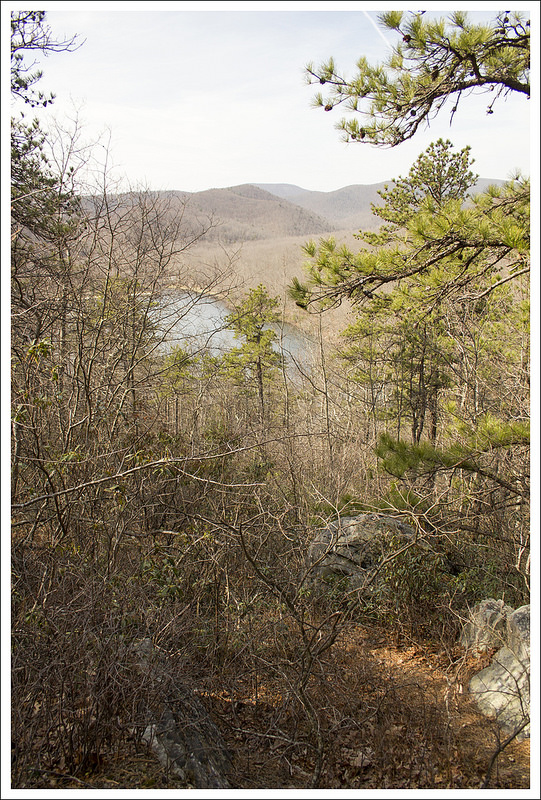
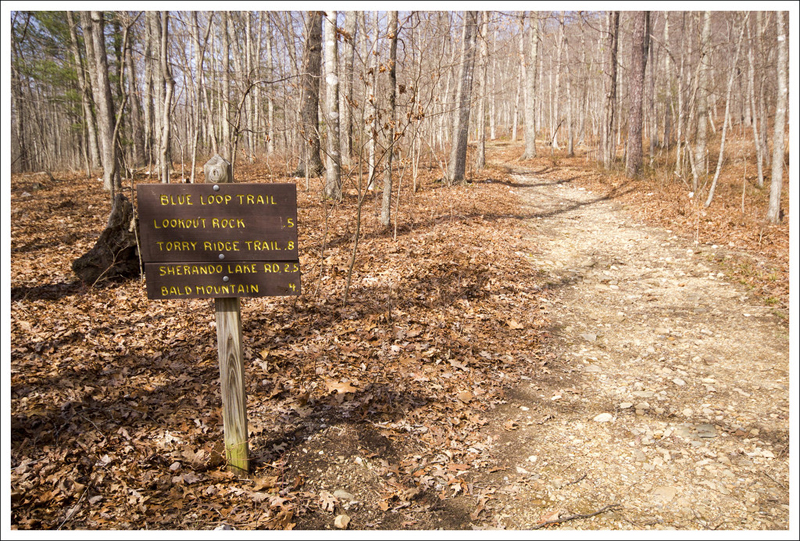
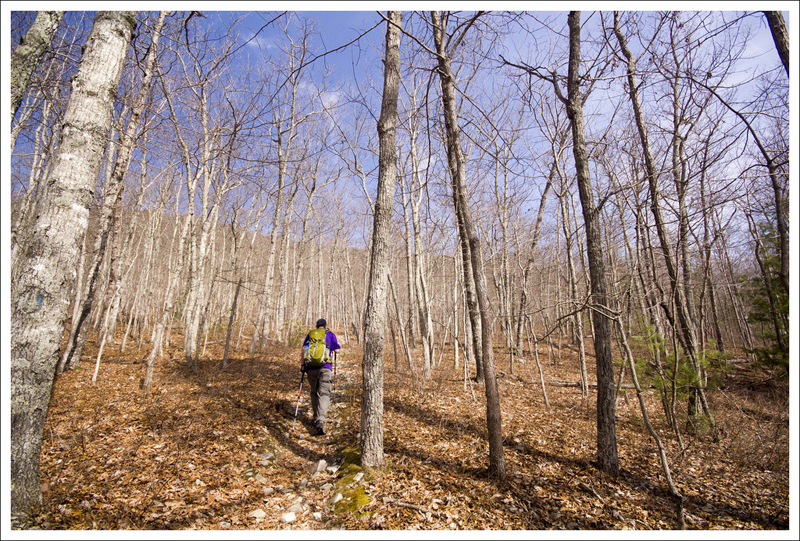
We walked back behind the large building/gift shop, crossed a couple of bridges and rejoined the trail on the northwestern side of the bank. We took the blue-blazed Blue Loop Trail, leading us past a few campsite areas before climbing up into the woods. The trail is rockier, especially in the beginning, than the Cliff Trail and is steeper. The trail climbed through a few switchbacks. At 1.5 miles, you reach a junction shortly after a switchback with the Dam Trail. This will be your return route. Continue up the Blue Loop Trail, which begins to take an uphill climb to the left up the mountain. At 1.75 miles, you reach Lookout Rock. We took some time there to enjoy the view and then went back the way we came until we reached the junction with the Dam Trail. We took this trail to the left, which leads steeply down the mountain. You begin to see the lake through the trees again and we reached the lakeside around 2.25 miles. We continued on the trail until it reached a small bridge that crossed over the dam stream and led back to the parking lot.
Adam takes in a beach/lake view. Below: Services are typically open April through October; Trails are well marked; Adam hikes the Blue Loop Trail.
One thing that was going through my mind during the hike is this would be great for a family outing. Grab your family for a quick hike followed by a picnic by the lake. Make a weekend of it if you want to do some camping, swimming, and fishing.
Christine Says…
I enjoy playing in the snow, but I’m very ready for warmer weather. I want to see flowers blooming. I want to feel warm sunshine on my face. I’m so ready to see a canopy of green across the mountaintops. I have spring fever. So, I was especially thankful for a particularly warm and sunny Saturday because it gave us a chance to get out and hike.
We chose Sherando Lake, mainly because it was nearby and easy. It would have been a great day to go on a longer hike, but Adam was still getting over a bad cold. And I was not willing to spend more than an hour in the car. I had spent the past two weekends in a 12-passenger van, making a 15 hour ride to and from the Florida panhandle and was still a bit road weary.
Lookout Rock provides a nice view of the valley, lake and mountains. Below: Adam climbs his way toward Lookout Rock; Checking out the view, Making the descent.
My trip to Florida was a service-learning trip with a group of nine JMU students. We traveled to a Nature Conservancy preserve – Apalachicola Bluffs & Ravines to do a week’s worth of environmental work. We camped, we hiked, we learned about the local ecosystem, and most importantly – we planted 90,000 plugs of native wiregrass seed that will be used to restore the natural habitat of that part of Florida. It was hard work, but I think we made a difference. We even had one free day on our trip. We chose to spend it spotting manatees, gators, and other wildlife at Wakulla Springs State Park. If you want to see more photos and read more about my service trip, I’ve uploaded a large set of captioned photos to my Flickr account.
Now, back to Sherando Lake! I had been to the lake a couple times before, but had never actually taken the time to hike any of the trails in the area. I was pleasantly surprised by the trail system. There is something for everyone – a practically flat trail that goes along the lake shore, a steeper trail around the lake that offers a couple nice views, and a connection into the larger, longer trail system along the Blue Ridge Parkway.
I liked sitting on the sand and enjoying the pretty lake view, and I really enjoyed climbing up to Lookout Rock on the Blue Loop Trail. The rocky outcropping provides a nice view of the lake and the mountains beyond. Although the snow was gone on the trails we walked, we could still see plenty of snow on the distant, higher ridges.
The hike ends after crossing a cement bridge over the spillway. Below: The stream leading away from the lake; Christine crossing the concrete bridge, Blue Mountain Brewery food and brewery.
The walk back down from Lookout Rock was really steep and slick, especially with the thick bed of dry, fallen leaves. Once we reached the bottom of the descent, we crossed a concrete bridge beneath the spillway and returned to our car. We finished hiking a little bit before noon, so we decided to make the short drive to have lunch at Blue Mountain Brewery (near Afton Mountain). They have great food and great beer. Adam enjoyed a flight of nine different beers and I tried their Daugava Baltic Porter. I think everyone in central Virginia had the same idea to visit the brewery for an outdoor lunch. The place was packed, but it was a perfect ending to the day.
Directions to trailhead: From I-64, take Exit 96 just east of Stuarts Draft. Go south on State Route 624, which becomes State Route 664 at Lyndhurst. Continue south on State Route 664 approximately 8 miles to the entrance to the Sherando Lake Recreation Area on the right. The gatehouse is approximately 0.5 miles ahead which will take the fee for your vehicle. Past the gatehouse, you’ll take a right to the fisherman’s parking lot. Park there and make your way to the left for the Cliff Trail.
* MapMyHike is not necessarily accurate, as the GPS signal fades in and out – but it still provides some fun and interesting information.
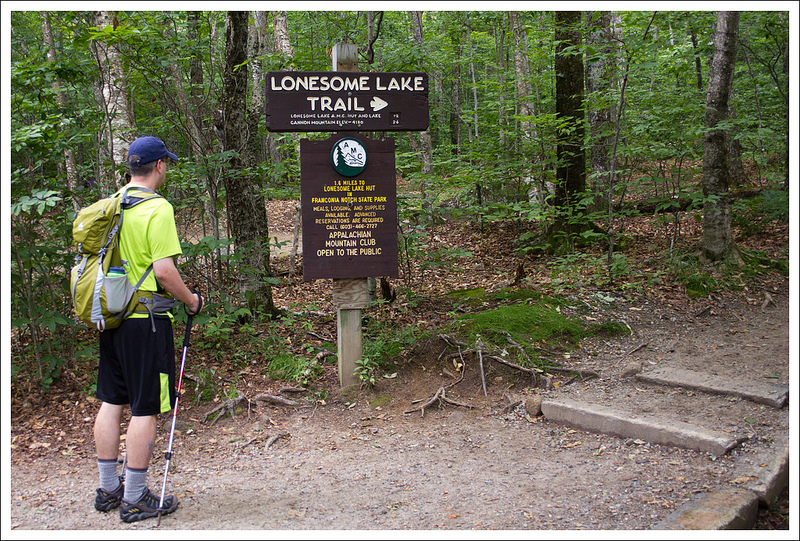
This 3.3 mile hike is one of the easiest and most accessible ‘hut hikes’ in the White Mountains. Lonesome Lake is beautiful and the hut provides a nice place to stop for a picnic lunch.
Lonesome Lake is beautiful and one of the easiest, most accessible ‘hut hikes’ in the White Mountains. Below: The trail for Lonesome Lake starts in the campground; Adam climbs the trail; As is the case with most New Hampshire trails, the path to Lonesome Lake is rocky and rooty.
Adam Says…
After our hike on Franconia Ridge, I had to take a day off to let my leg muscles recover. When we were ready to tackle another hike, we decided to do something on the easier side this time that didn’t have nearly as much elevation as our previous hikes. While we were hiking up the Franconia Ridge Trail, we noticed this serene lake in the far distance.
We started off our hike from the opposite side of I-93, so we walked underneath the interstate bridge and followed the signs for the Lonesome Lake hike. This led us into Lafayette Place campground, which has 98 campsites. With such nice weather we were having, it was no surprise that the campground was full. It always feels awkward to me to be walking by campsites while people are still sleeping, eating breakfast, or hanging out. We made our way along quietly and then reached the true trailhead next to campsite #93.
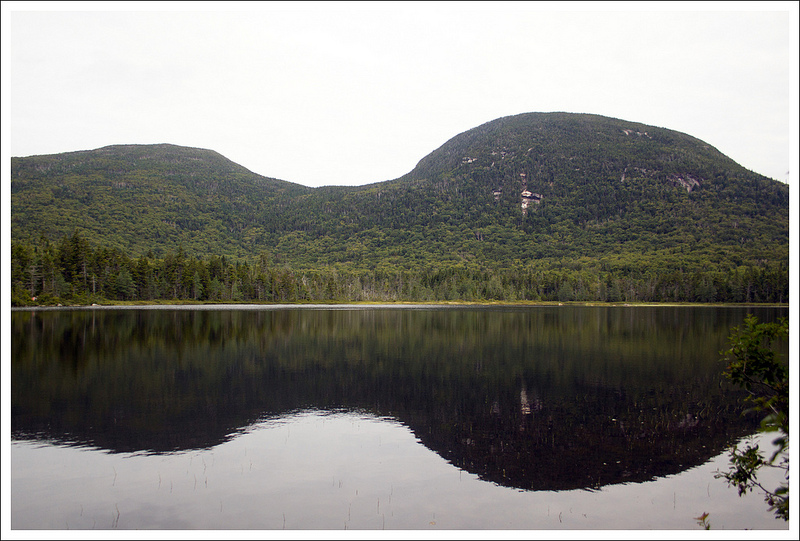
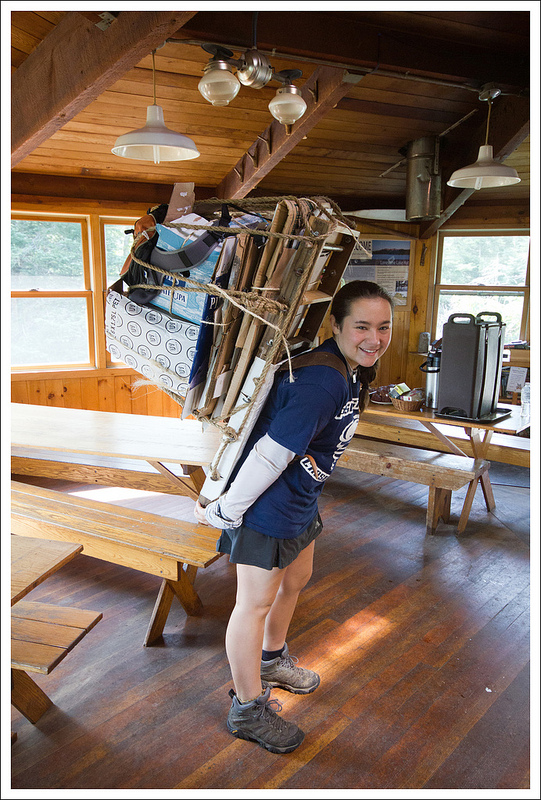
The Lonesome Lake trail consisted of a steady climb through sections that are covered with roots and steep rock steps. At 1.35 miles, we reached the ridge and came upon our first glimpse of Lonesome Lake at a junction point with several other trails. We stopped for a quick breather and to enjoy the view of the lake, a remnant of a glacier that had carved out the mountains. The uphill hiking was over, and we headed left on the Cascade Brook Trail, which winds around the side of the lake. The trail was boggy in many spots, but there were often footbridges, rock steps, or logs to walk on in the muck to make our way across easily. On our way, we passed a croo member from Lonesome Lake who was heading down the mountain with a wooden frame loaded with outgoing refuse from the hut.
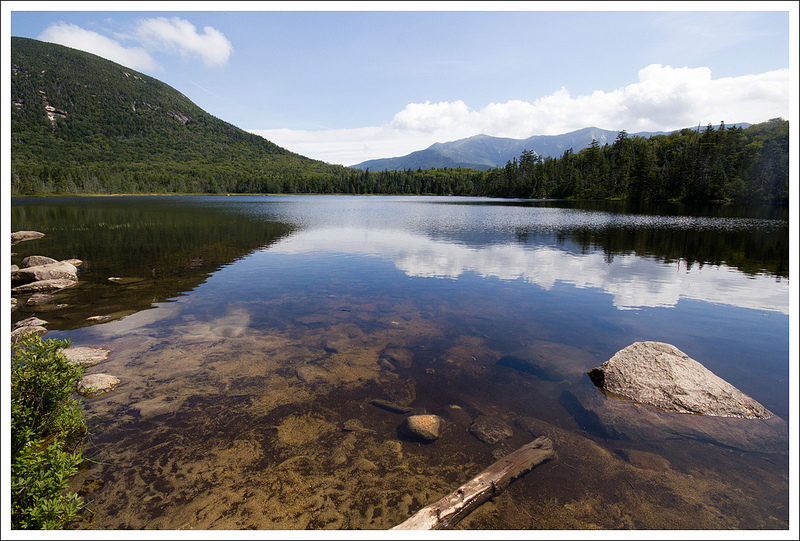
The mountains reflect in Lonesome Lake. Below: There are lots of trail junctions when you reach the end of the lake; The trail around the lake is muddy and traversed by planks and stepping stones; Climbing the stairs to Lonesome Lake Hut.
At 1.6 miles, we reached the junction with the Fishin’ Jimmy Trail. We took a right on to this trail and in a short distance we came to a large dock on the lakeside. There were a ton of teenagers on the dock, so we decided to check this out later. Right above the dock was a series of steps that led to the Lonesome Lake Hut. When we arrived in the hut, there was nobody there except for a few croo members. One was cleaning up the kitchen and the other was packing her frame to take down the mountain. We talked to her for a while and found out that they make several trips a week down to the base of the mountain where they meet up with someone to help them resupply for their trip back to the hut.
We rested a while on the back porch of the hut and talked to a family that was visiting from the Netherlands. They were on their way to visit Shenandoah National Park soon, so we gave them some tips on where to stay in the park and some of the things we would recommend they do while in Virginia. The large group of teenagers had cleared out, so we went to the dock to enjoy views of the southern end of the lake (now occupied by several families with toddlers). We made our way back the way we came to finish the out-and-back hike.
The inside of Lonesome Lake Hut is cozy, bright and cheerful. Below: Adam enjoys a nice seat on the large porch overlooking the lake; Whoopie pies and mountain views; The Lonesome Lake dock gets crowded!
We could tell from the people that we saw climbing up that this is a highly-trafficked hike. We hope in the next few years to do a larger hut-to-hut traverse across this area. It was nice to see a possible overnight location in advance. This is an easier hike that most families should be able to do if they take their time.
Christine Says…
After hiking Franconia Ridge, we decided to take a day off and be restful tourists rather than ambitious hikers. We spent the day visiting Dartmouth College, sampling Long Trail Ale, gorging ourselves on Cabot Cheese and watching glassblowers at Simon Pearce. The next morning, we were ready to get back on the trail. Adam’s knees and calf muscles were still bothering him, so we went with the easy hike to Lonesome Lake.
Lonesome Lake is lovely glacial pool sitting between North Kinsman and Cannon Mountains. The initial ascent to the lake is a little steep – about 1000 feet over 1.3 miles, but compared to many other hikes in the area, it’s considered a very easy trail.
When we began our hike, the morning was cold and sort of grey. The forecast called for brilliantly sunny weather, but you just never know what you’re really going to get in the White Mountains. We meandered through the Lafayette Place campground to reach the trailhead. The smell of campfires and cooking bacon was heavy in the air. That smell always makes me so nostalgic for the camping trips of my youth. My mom was a great camp cook – there were always sausages, bacon, pancakes and eggs. Nice memories…
Each hut is run by a ‘Croo’ – mostly college students on summer break. They carry supplies for the hut on their backs using these wooden racks.
The hike up to the small plateau where the lake sits is uphill and pretty, but generally unremarkable. Like most New Hampshire trails, you can expect to see lots of rocks and roots along the way. As you climb, the woods change from predominantly hardwood to a heavier evergreen mix.
At the tail-end of the lake, there was a junction sign with different trail options headed in many different directions. We followed an almost completely flat trail around the perimeter of the lake. We caught lots of glimpses of the water through the trees, but the most memorable feature of this trail was the mud! Thankfully, the trail is well maintained and rocks and planks were strategically situated the entire way, and we never had to get our boots muddy.
At the head of the lake, we crossed a wooden footbridge that came out between a wooden staircase and a lakefront dock. Since the dock was packed with kids from a summer camp group, we decided to check out Lonesome Lake Hut before enjoying the water. We climbed the stairs and found a charming cluster of wooden buildings that make up the ‘hut’. Unlike Greenleaf Hut, which is in a single building, Lonesome Lake Hut is a collection of cabins and a main dining room.
A couple members of the Croo were still cleaning up from breakfast. And of course, Adam managed to snag more free leftover pancakes! If you have a spare minute, check out this fun video about the 2013 hut Croo. If I had known there was such a job opportunity as ‘AMC Croo Member’ when I was in college, I would have leapt at the opportunity. It sure would have been more fun than filing procurement paperwork for the Army Corps of Engineers! (no offense to ACoE).
Christine sports her new knee brace. Below: The beautiful lake; Beginning the climb down; The ranger station at the base of the mountain.
At Lonesome Lake, we met another croo member who was loading up her packboard with empty boxes and other outgoing items to carry down the mountain. She said the trip down is typically a lighter load than the trip up, which includes food and other supplies. The AMC has a fun article about Packboarding Legends. Can you believe some people have carried packboards weighing over 100 pounds? The average is more in the 40-80 pound range, which is still extremely impressive!
After looking around the hut for a few minutes, we found a couple pleasant Adirondack chairs to relax upon. The back porch of Lonesome Lake hut is a great place to idle away a pretty summer afternoon. While we relaxed, the sun came out, making it even nicer for sitting. I shared a whoopie pie with Adam. We also had a very nice conversation with a family visiting from the Netherlands. They were greatly enjoying the expansive, forested terrain of New Hampshire – something they said they have little of at home.
After a while, we made our way back down to the lakeside dock. We found it still crowded, so I took some photos and didn’t linger for long. The hike back went very quickly. We saw lots of families hiking up to spend a night at the hut. I hope we’ll have the opportunity to do a hut stay on our next New Hampshire trip.
Difficulty – 2.5. The climb up was fairly steep, but because of the short distance, you can take your time.
Trail Conditions – 3.5. The trail is well-traveled and in good condition. There are some steeper sections and some worn-out areas that do require careful footing.
Views – 2. You do get views from the lake of the mountains around you, but the height of the mountains around the lake keeps you from getting distant views.
Waterfalls/streams – 4. While you don’t have waterfalls and very limited stream views, you are rewarded with a massive lake on this trail.
Wildlife – 1. We didn’t see anything on this hike other than squirrels.
Ease to Navigate – 3. There are some confusing spots where you wonder where the trail is leaving the campground. Also, the junction at the ridge has a lot of different trails to follow. Read the signs and you should be fine.
Solitude– 1. On a clear day, this hike is likely crawling with people.
Download a trail map (PDF) – Coming soon!
Directions to trailhead: Head north on I-93 until it becomes Franconia Notch Parkway. Pass exit 1 and the exit for the Basin. Take the next exit (for trailhead parking). Park in this parking lot. Leave your car and head underneath the bridge that is I-93. Follow the signs for the Lonesome Lake trailhead, going into the Lafayette Place Campground. The trailhead leaves near campsite #93.
* MapMyHike is not necessarily accurate, as the GPS signal fades in and out – but it still provides some fun and interesting information.