Cascade Falls

This four mile hike takes you by one of Virginia’s most beautiful waterfalls.  The trail is engineered and mostly flat, so this hike is suitable for hikers of all levels.

View the Full Album of Photos From This Hike

Cascades Falls in Giles County
The Cascades in Giles County.

Adam Says…

Cascade Falls is one of those must-do hikes in Virginia, featuring one of the most picturesque scenes of a waterfall that you’ll get.  We had been meaning to do this hike under more pleasant circumstances, but life doesn’t always work out that way.  We were picking up our pug, Wookie (who many of you may remember has contributed his thoughts to some of our posts) from the Virginia Tech Veterinary Hospital.  He has been suffering from chronic bronchitis – which is like COPD in humans – and had to have surgery to remove two of his lung lobes.  We had a late afternoon pick-up for him, so we decided to go on a hike that morning while we were in the area.

Pretty Stream Scenery
There was tons of stream scenery along the hike. Below: The parking lot was packed; There were several wooden bridges along the hike; The trail was well-developed and engineered.

Busy Parking Bridge on the Cascades Trail On the Way to the Cascades

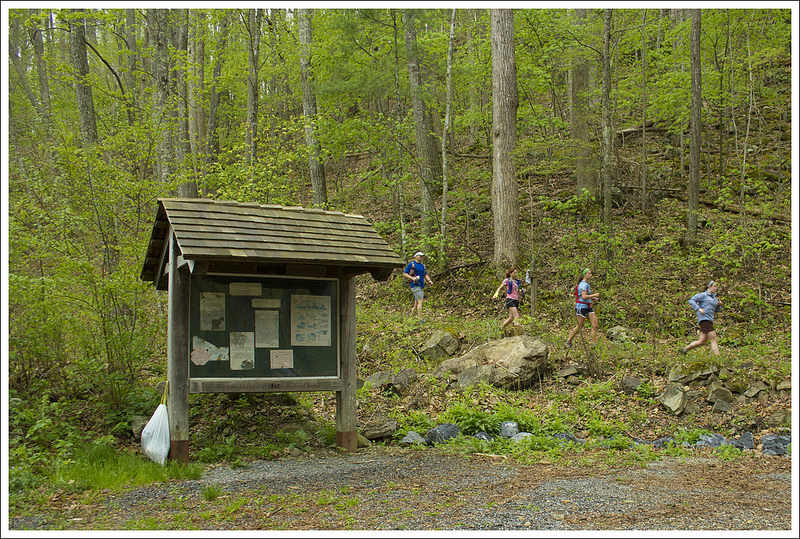
We arrived around 10:30 in the morning and found ourselves in a line of cars that were waiting for parking spaces.  The tobacco-spitting parking lot attendant said it wasn’t like this a few years ago, but since Virginia Tech added this hike to a bucket-list during orientation for all of their incoming freshman, the place has been packed.  Of course, we were doing this hike on the weekend before classes started at Virginia Tech, so there were students by the carload here.  Only about eight cars back in line, we still had to wait about 45 minutes before we could park. I can only imagine that people that arrived around 11:00 would be waiting an eternity for a parking spot.

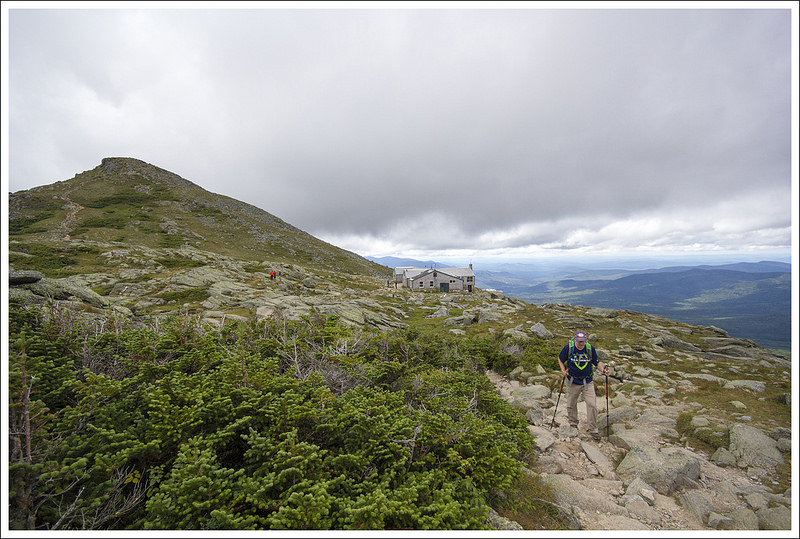
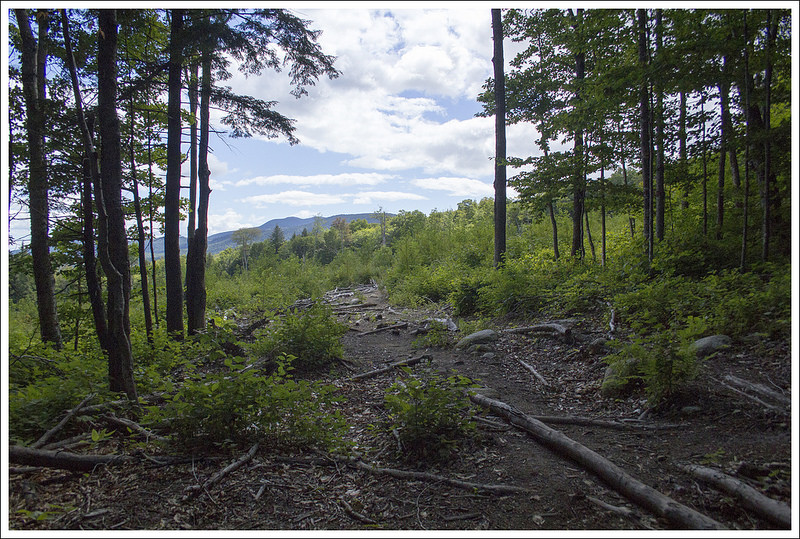
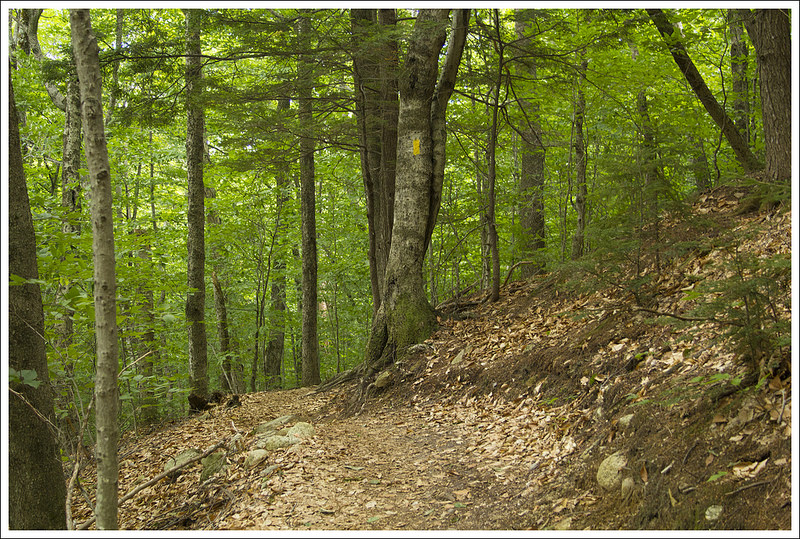
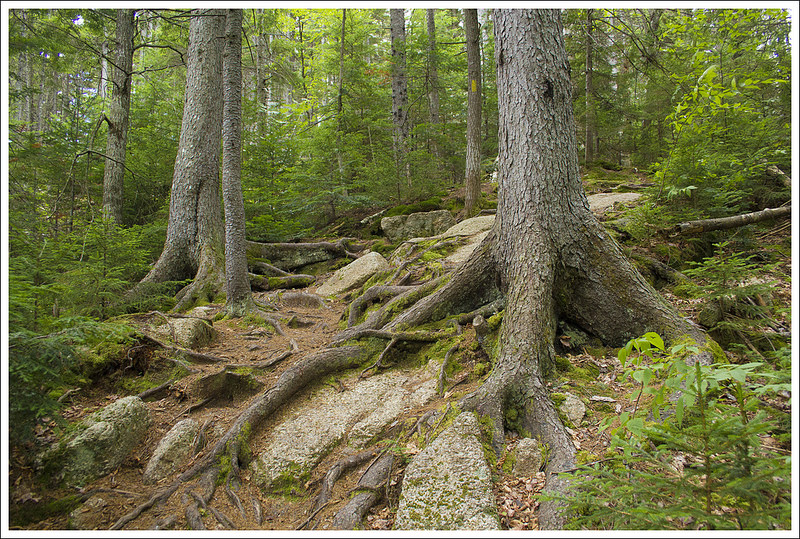
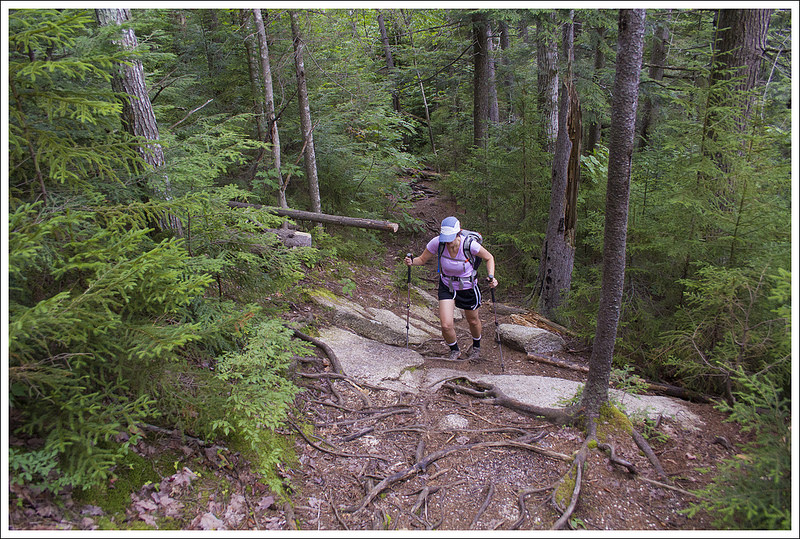
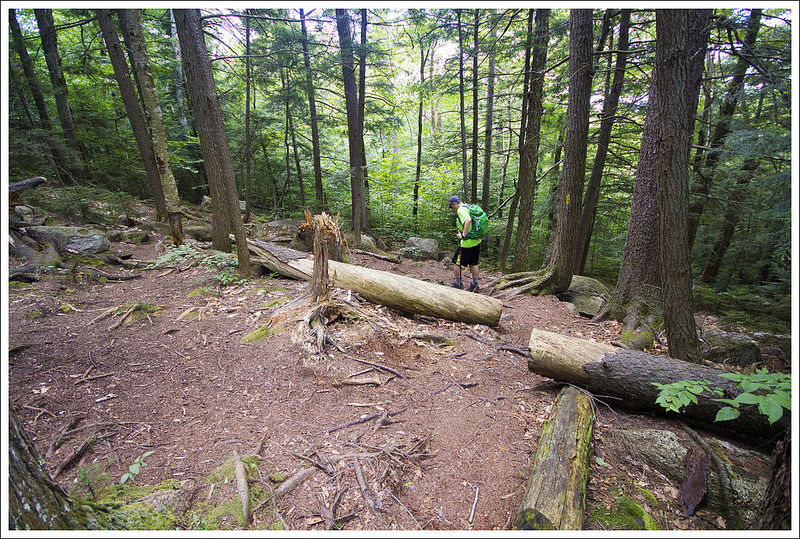
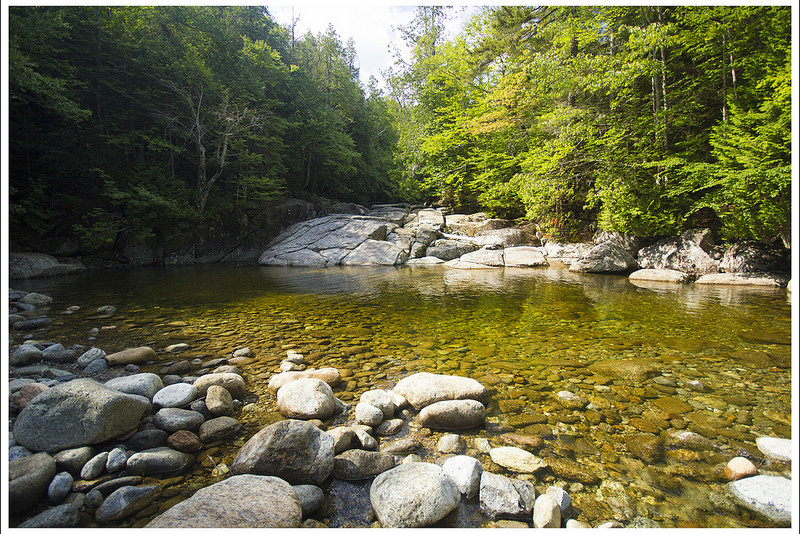
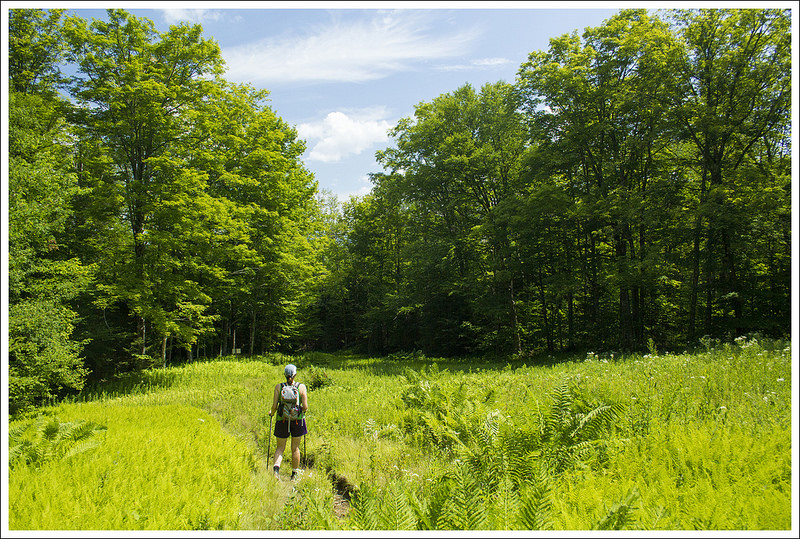
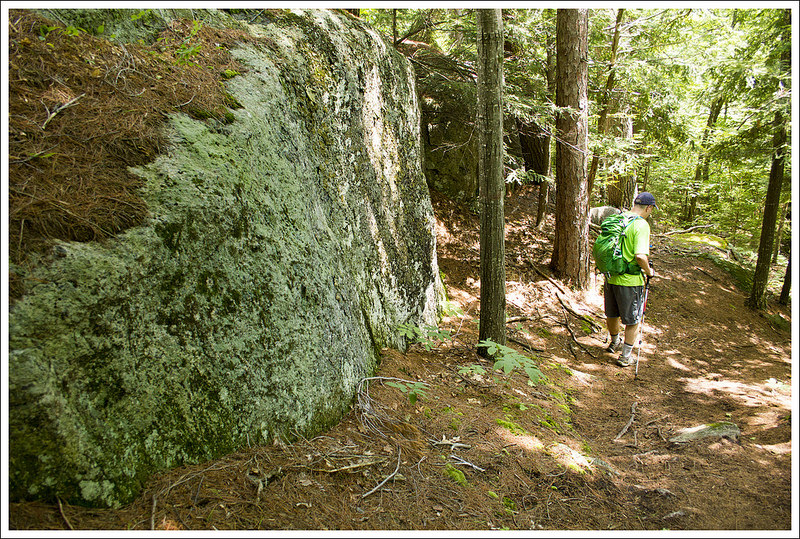
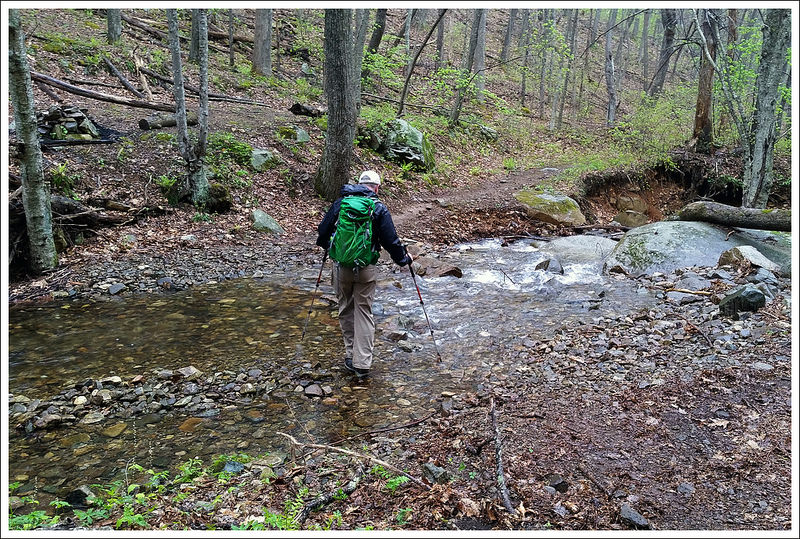
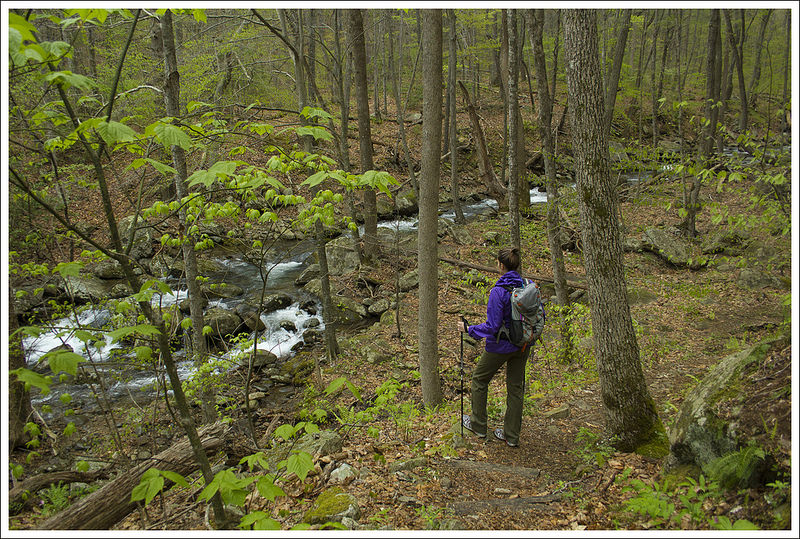
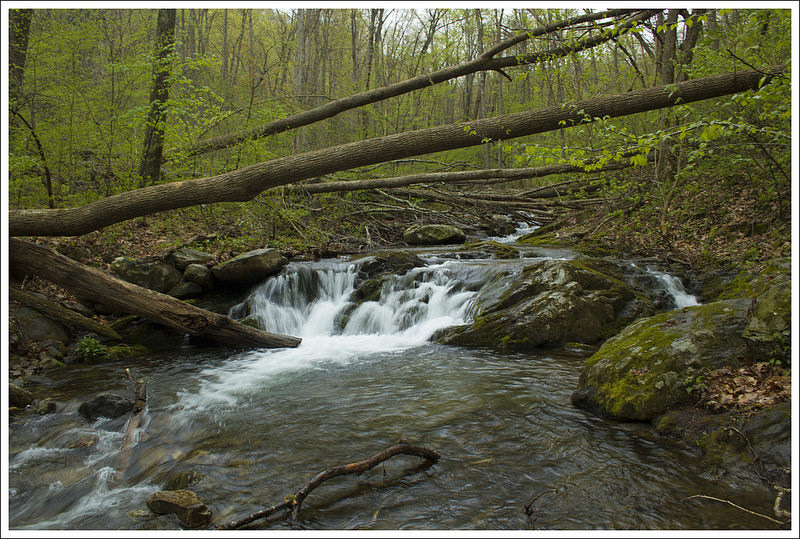
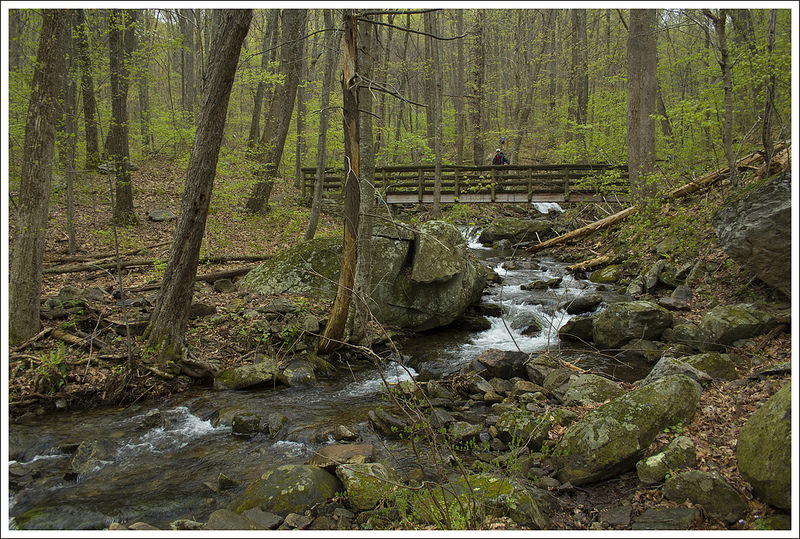
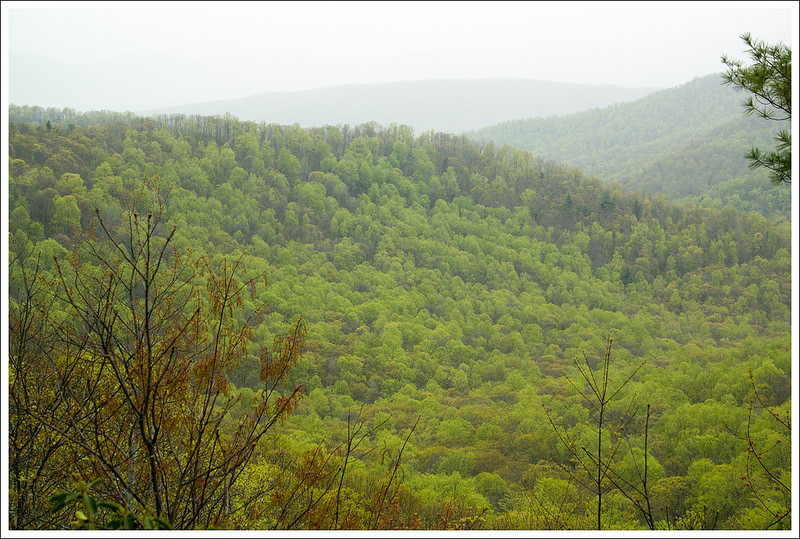
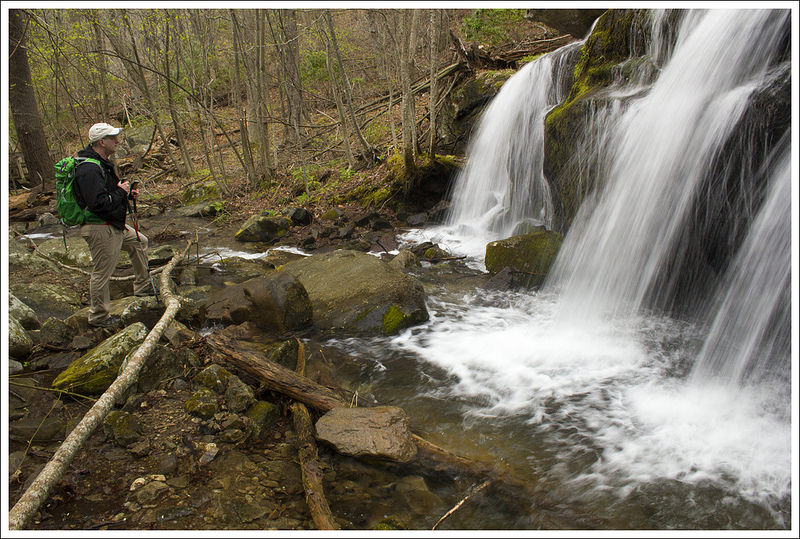
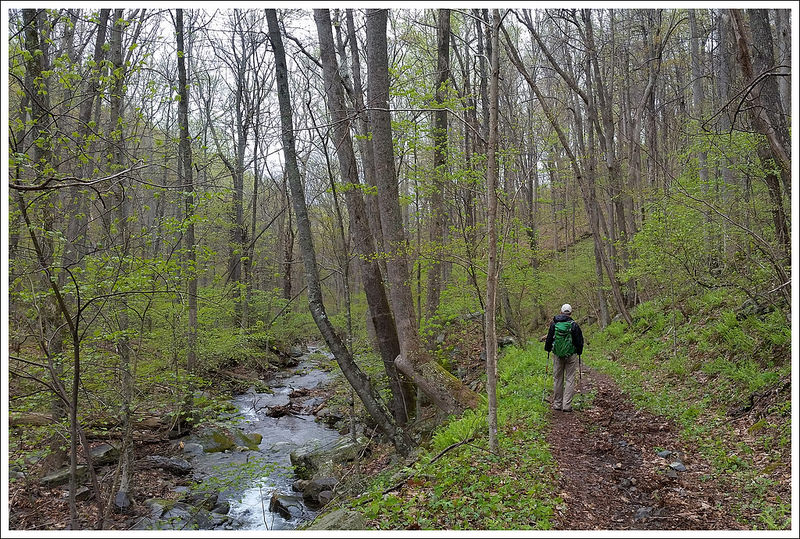
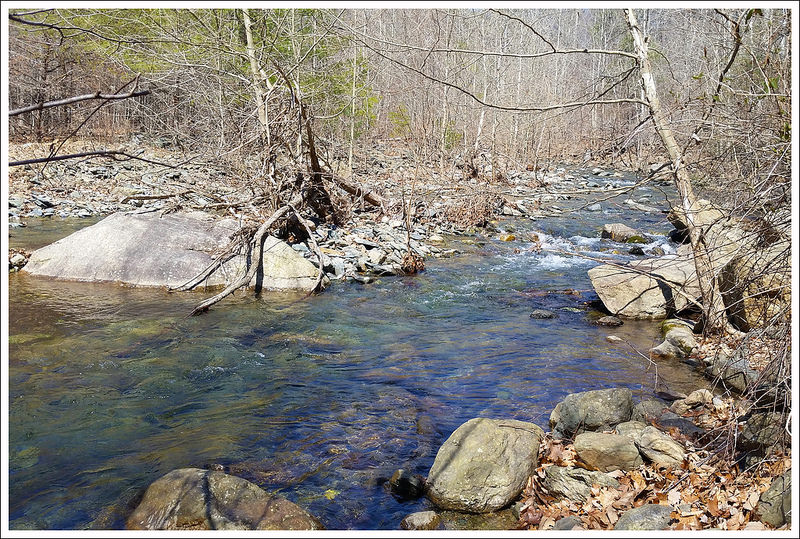
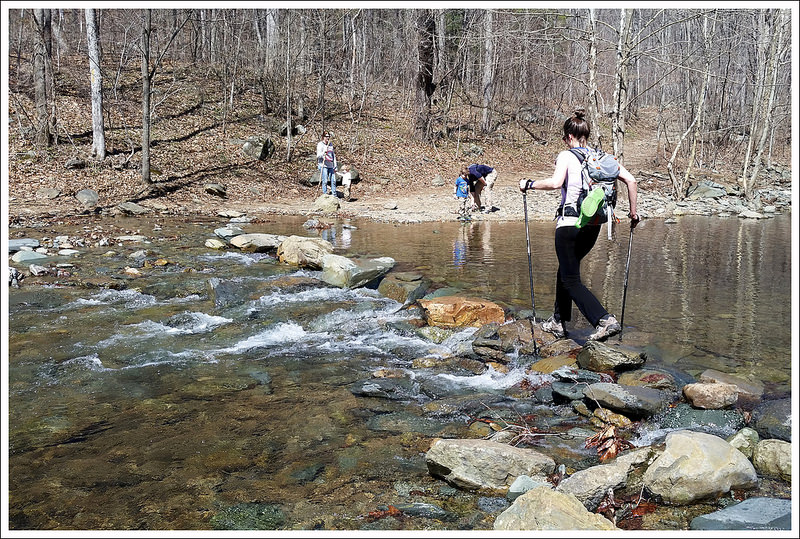
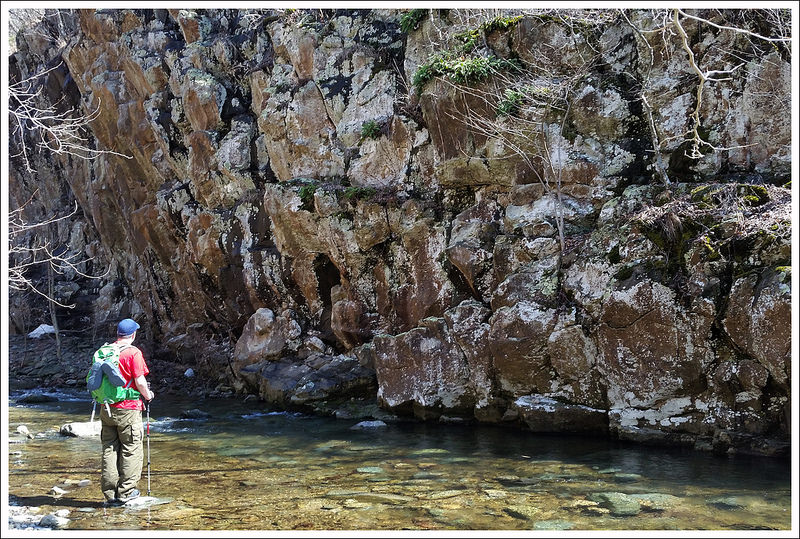
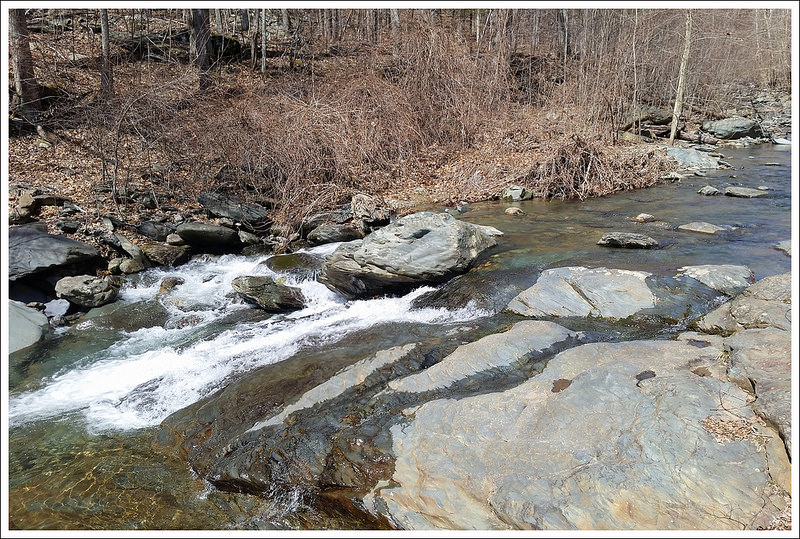
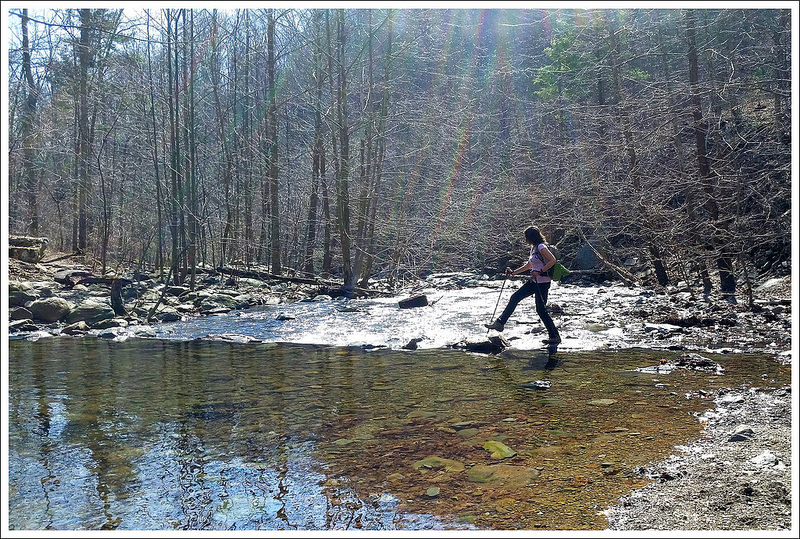
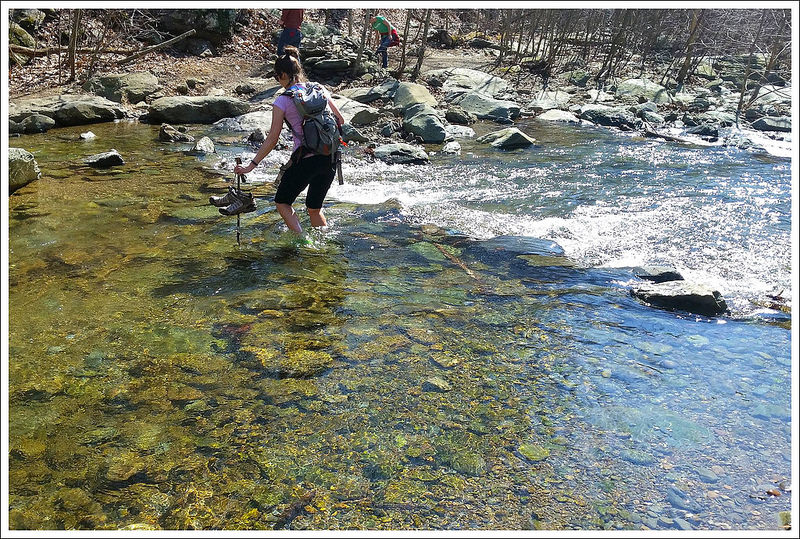
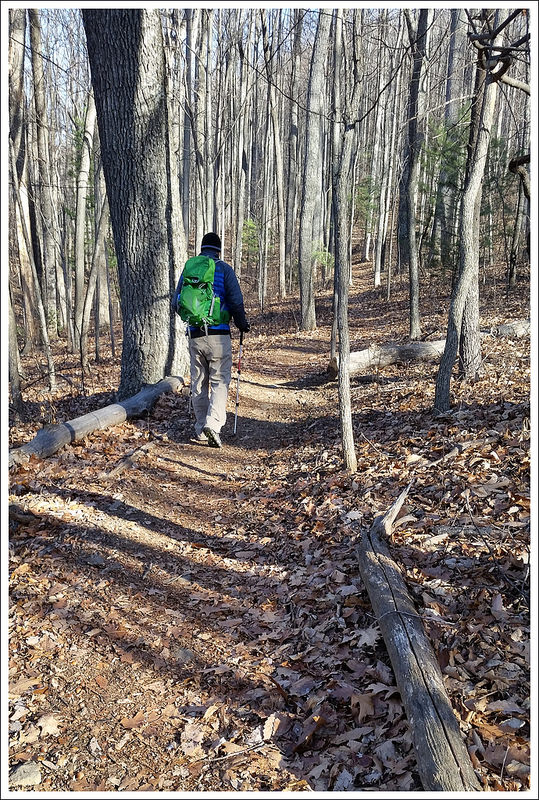
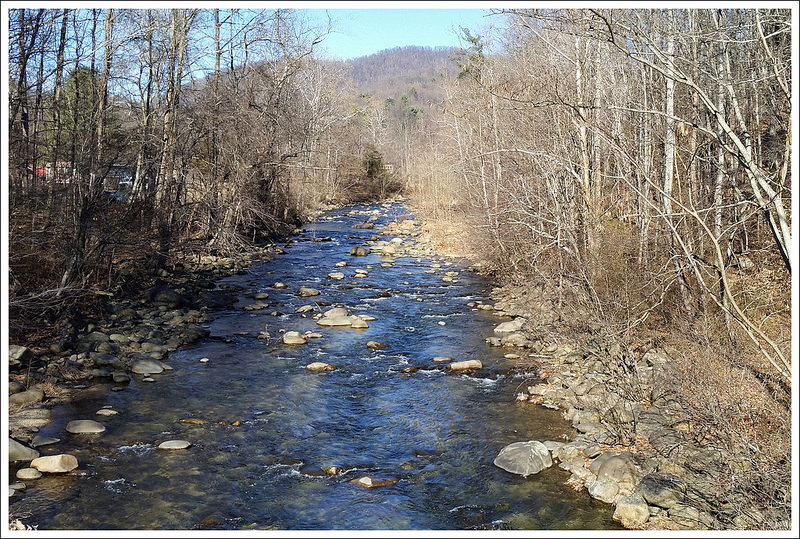
The trail starts at the end of the parking lot behind the information center and restrooms.  Soon, you arrive at a bridge.  The trail splits for an upper trail and lower trail.  The attendant had suggested that we approach from the lower trail and then make a loop and return on the upper trail.  We started on the lower trail, which hugs closely to Little Stony Creek the entire trip.  Little Stony Creek has tons of spots to enjoy the views of the creek. You may even see a few paths that crossed the creek that were wiped out during a flood in 1996.  The trail has been re-routed since then on the path you take now.  There are some ups and downs as you go along the creek, but overall you are climbing along the trail.

Adam Along the Stream
Adam enjoys the stream.

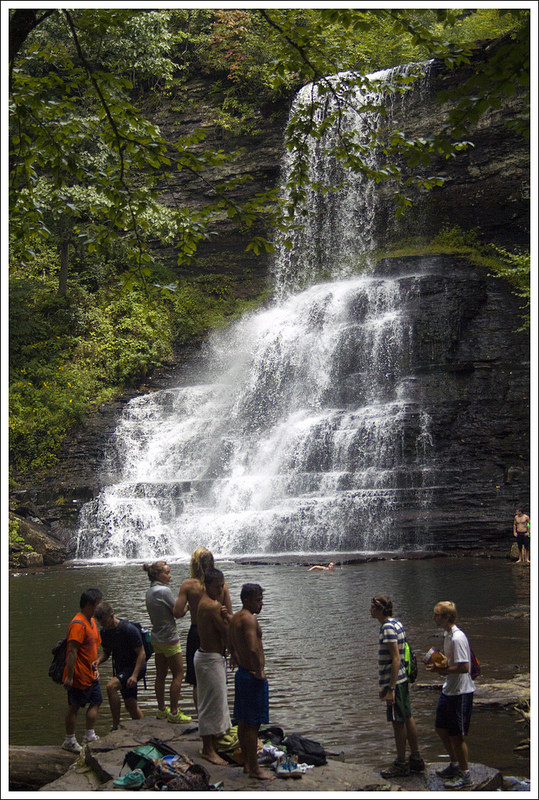
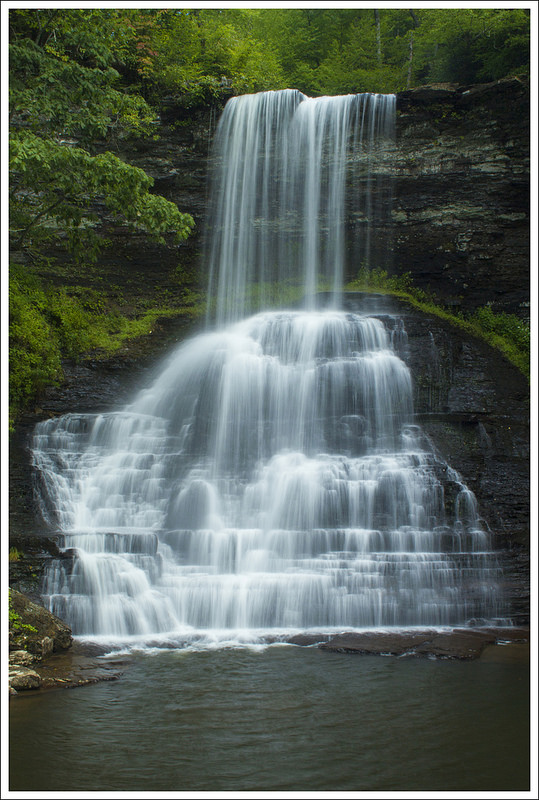
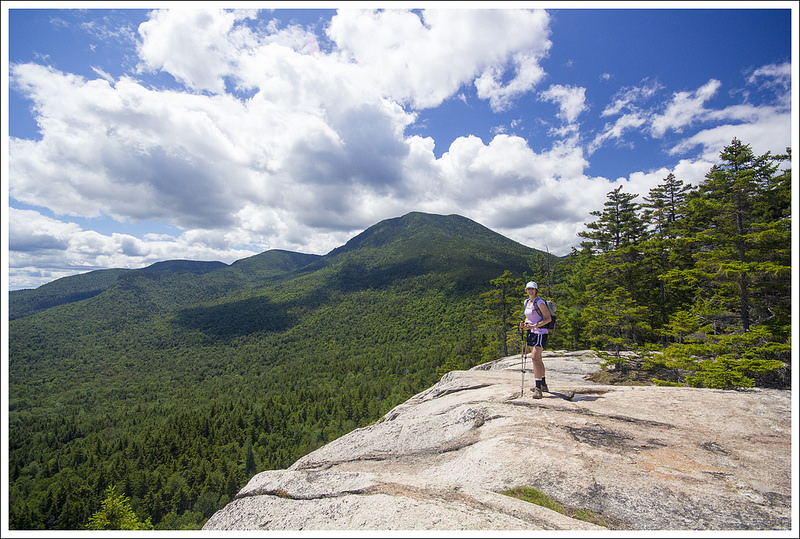
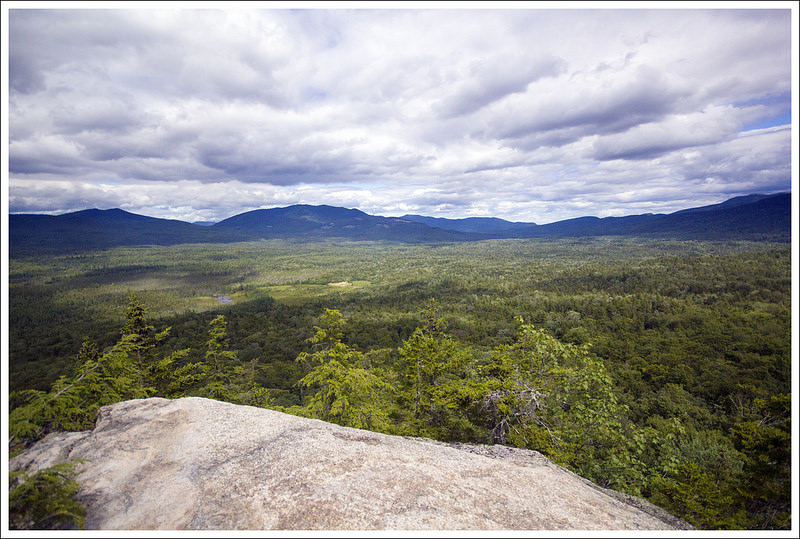
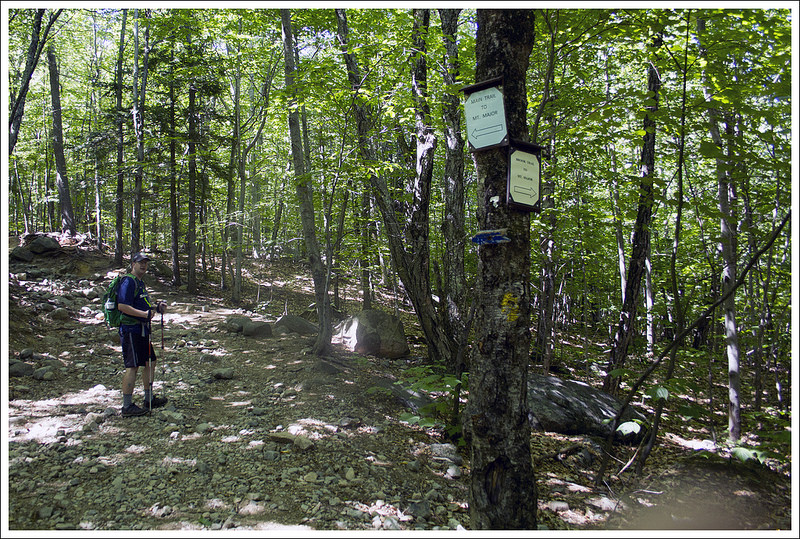
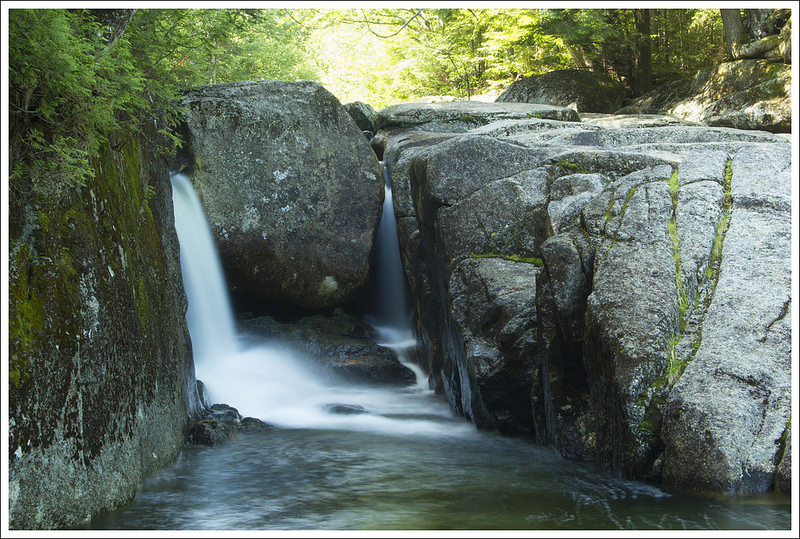
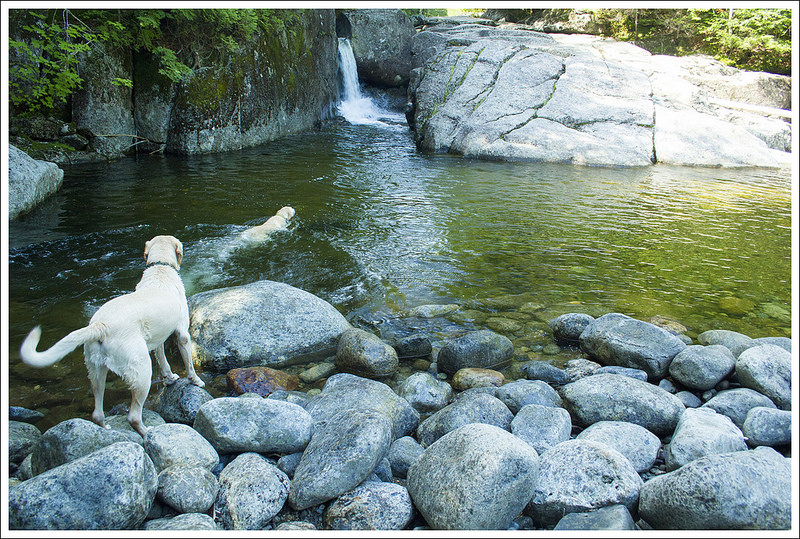
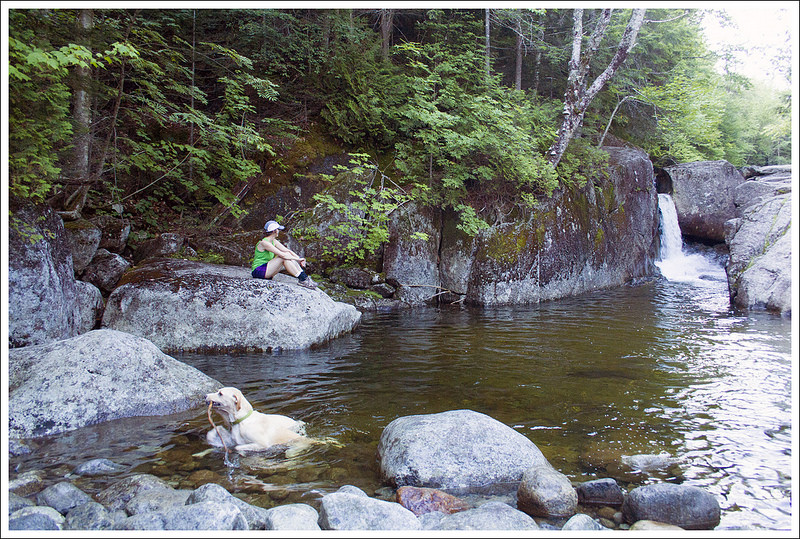
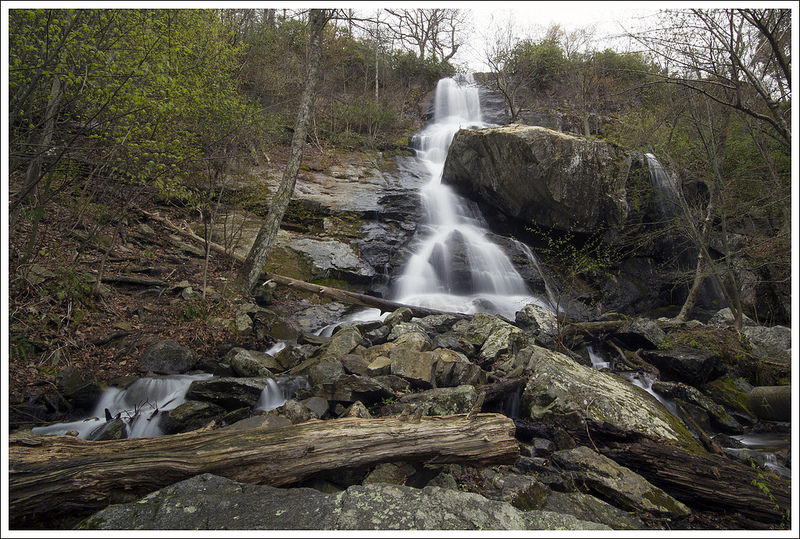
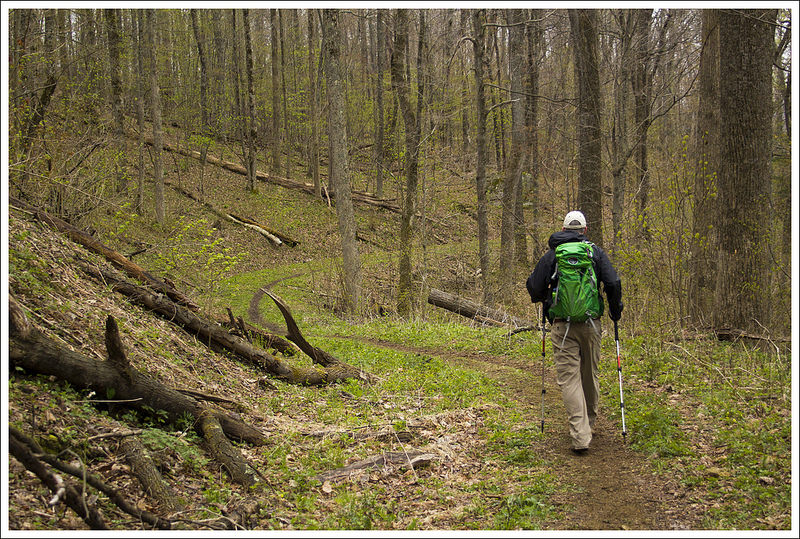
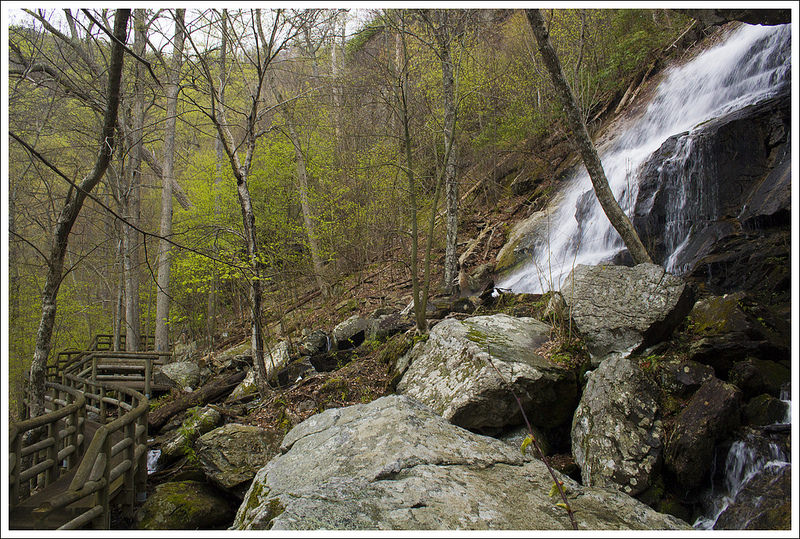
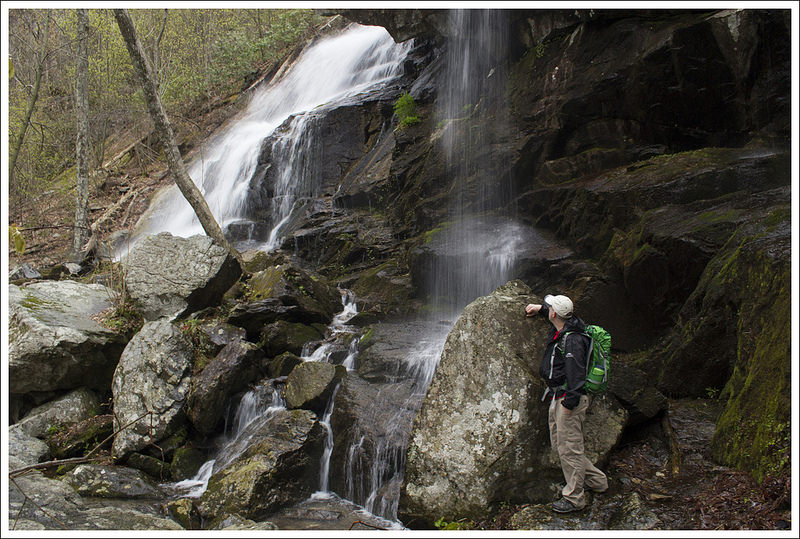
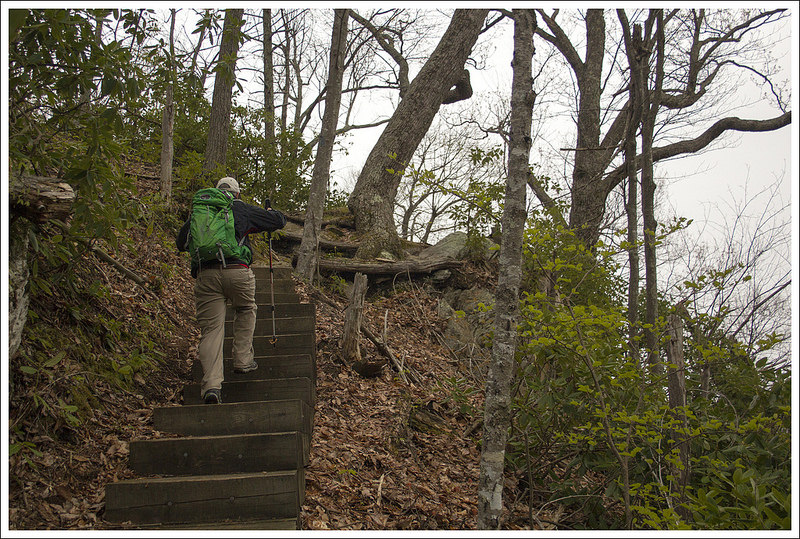
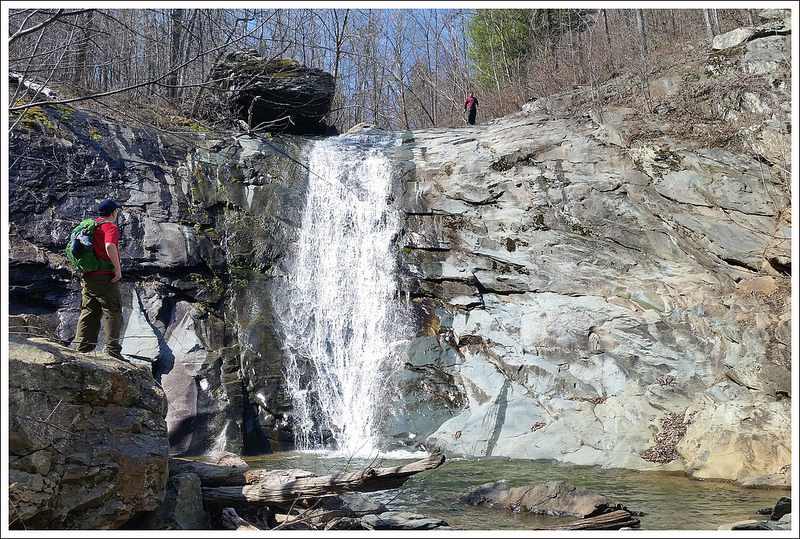
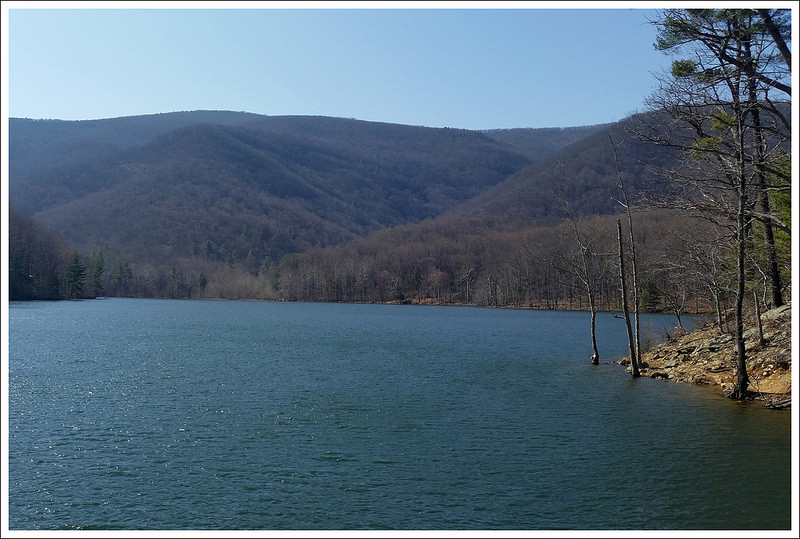
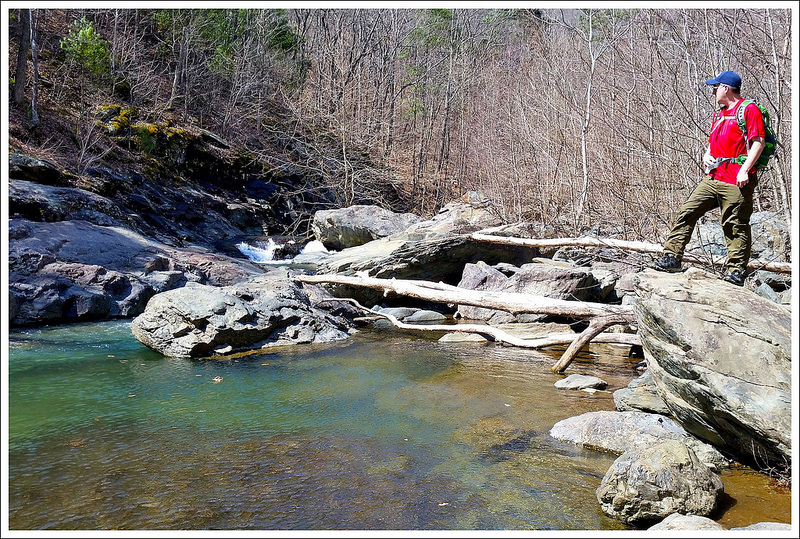
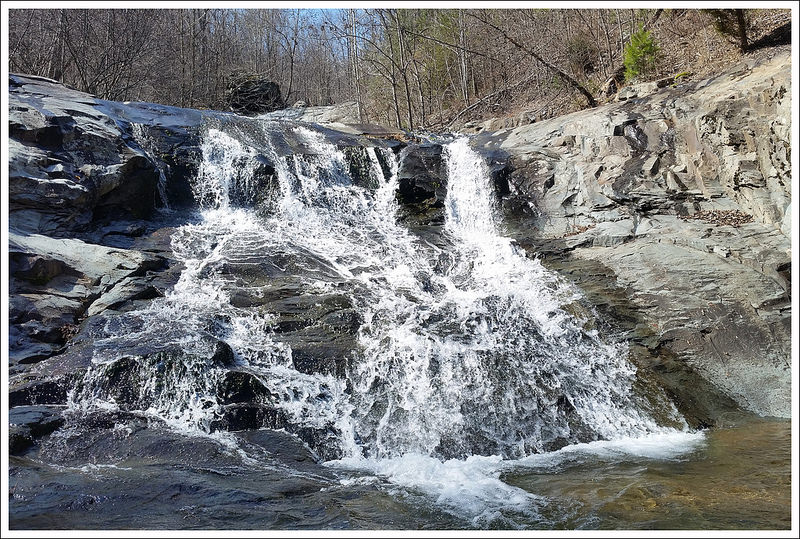
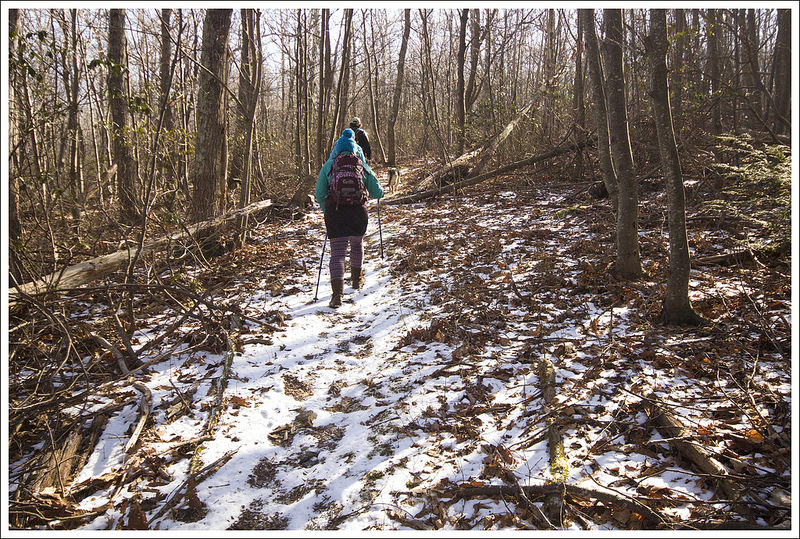
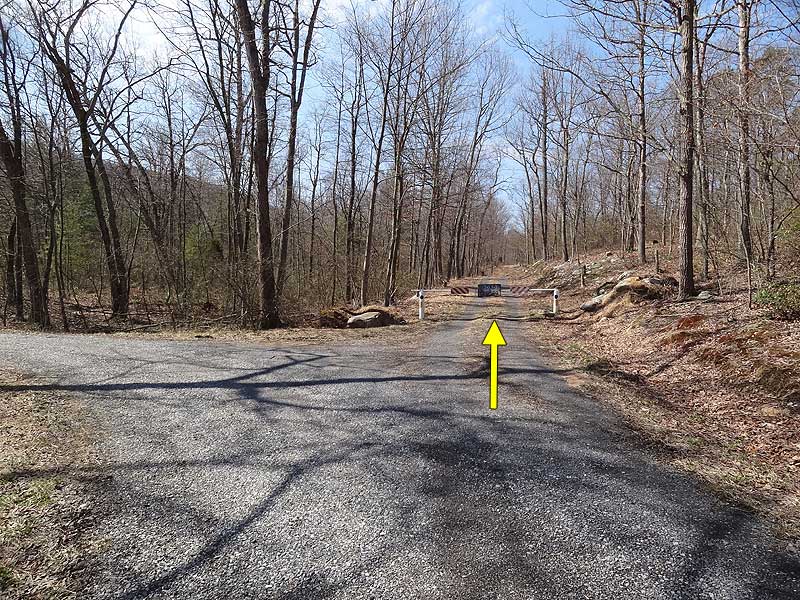
At 2.0 miles, you will reach the large Cascade Falls.  The water plunges 69 feet from the top over a large, wide wall making for an impressive scene.  We saw probably over 100 Virginia Tech students at the falls, some were swimming in the always-cold water while others were climbing on the rocks (or the large rock slide to the right of the falls).  It was nearly impossible to get any pictures without someone in it, but the shots do provide the sense of scale of the scene.  We enjoyed watching the falls for a while and then proceeded up the stairs to the left.  One path leads to another vantage point from next to the top of the falls, but this was more obstructed.  We ended up taking the trail from the top of the steps, heading to the left,  which came to a junction in a short distance.  To the right, the trail continues on to Barney’s Wall, but we decided to just descend the upper trail since we were out of time.  The upper trail consists of mostly a large fire road, making for much easier footing than the lower trail; however, you don’t get the views of Little Stony Creek like you did on the lower trail.  The return trip was a nice walk through the woods on the trail until we reached our car back at 4.0 miles.

Approaching the Falls
Adam makes the final approach. You can see the falls and the crowds if you look closely. Below: Some of the big trees from past flood damage still lay across the stream; Passing through dense mountain laurel and rhododendron; Virginia Tech students swimming in the plunge pool.

Storm Damage Rhodies Swimming Hole

We hopped in our car quickly to allow for the next waiting person to be able to take our spot.  The line of cars was quite long by this point.

Christine Says…

Cascade Falls – known better as ‘The Cascades’ – is a beautiful, easy hike to one of the nicest waterfalls I’ve seen!  The parking lot and trail were both insanely crowded, but I think we were probably there on one of the year’s busiest days.  It was a weekend, the weather was cool and sunny for August, and the new school year was about to start at nearby Virginia Tech.

I’ve never hiked anywhere that I’ve had to wait in line for a parking spot, but that was the case here!  Fortunately, we had all day to wait before our dog was discharged from the hospital, so we weren’t in any rush.

Cascades Close Up
People love to stand at the bottom on the falls. Below: Crowds at the falls.

Crowds

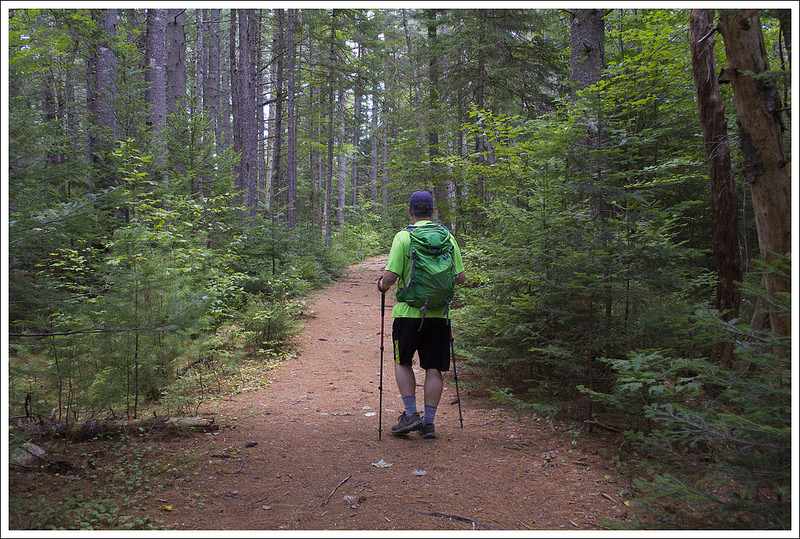
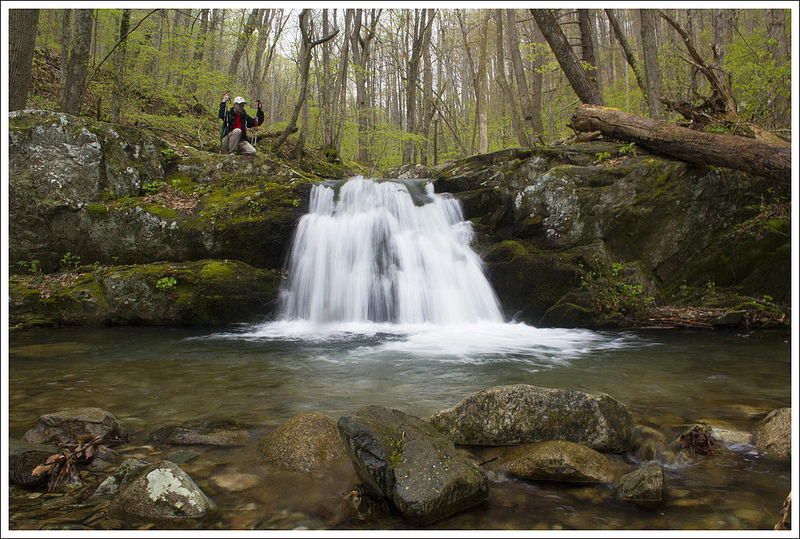
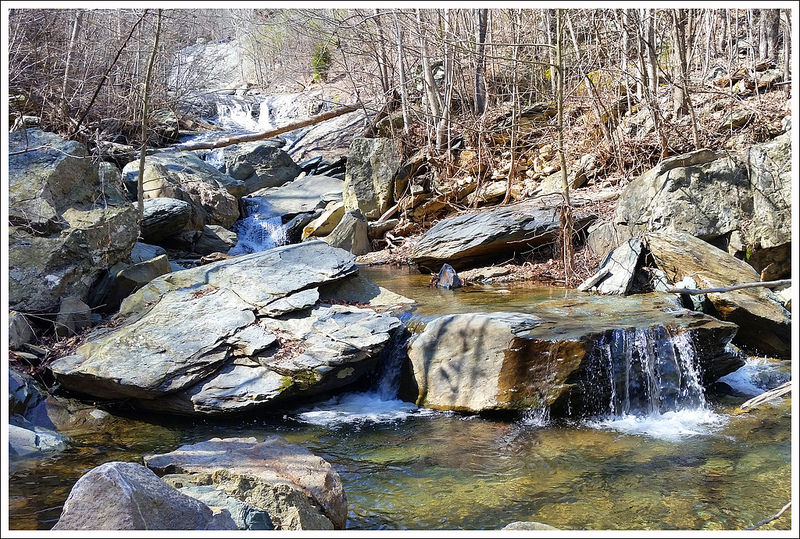
We walked the lower trail on our way to the falls.  It was more of an engineered pathway than a classic, dirt hiking trail.  There were paved walkways, stone stairs, and bridges most of the way to the falls.  All along the way, the trail followed a scenic stream.  There were tons of small waterfalls and cascading rapids to enjoy along the route.

A couple tenths of a mile before we reached the main waterfall, the trail passed through a dense mountain laurel and rhododendron thicket. After that, the path opened up onto a lovely grotto like scene.  The falls cascades over a cliff into a large plunge pool.  There were MANY kids swimming and sunbathing around the falls.  I think I still managed to get a couple decent photos.

Vertical View
A vertical view – without people! Below: The upper trail is accessed by a staircase above the falls; The hike back passed a cliff formation; Most of the hike back was on wide fire road.

Hiking Back Hiking Back Hiking Back

On the way back, we took the upper trail.  It was basically a wide, gentle fire road that led back to the parking area.  After the hike, I cleaned up in the parking area restroom.  It was nice!  Instead of a pit toilet, it had flush toilets, running water, and soap!  We stopped for beers and lunch at Bull & Bones Brewhaus, while we waited on the call to pick Wookie up from the vet.

I’d like to do this hike again sometime on a quieter day.  I’d also like to hike it when my mind isn’t preoccupied with worrying about my dog.  It was really a beautiful spot!

Trail Notes

  • Distance – 4.0 miles
    (Check out the stats from Map My Hike)*
  • Elevation Change –  742 feet
  • Difficulty –  1.5  Not much climbing and most people can make this.  This is a great family hike.  
  • Trail Conditions – 3.5  There are spots where things can be quite rocky/muddy.  Due to the traffic, some of the rocks are quite slick.  
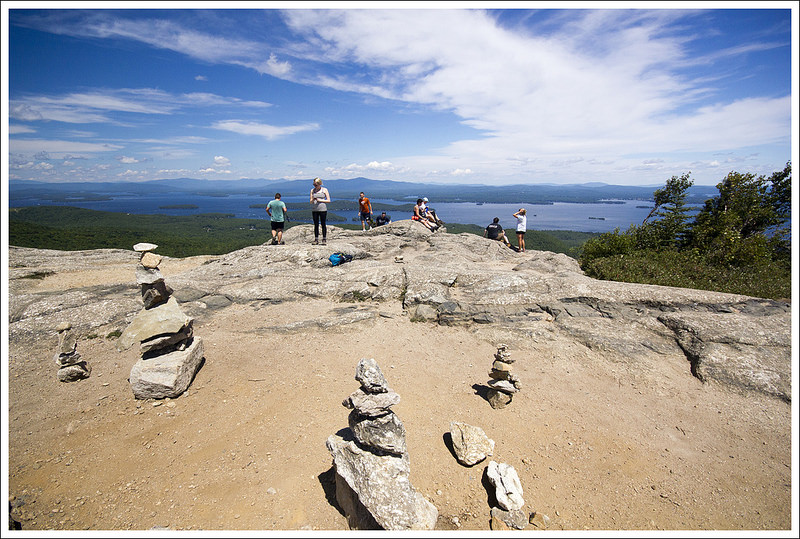
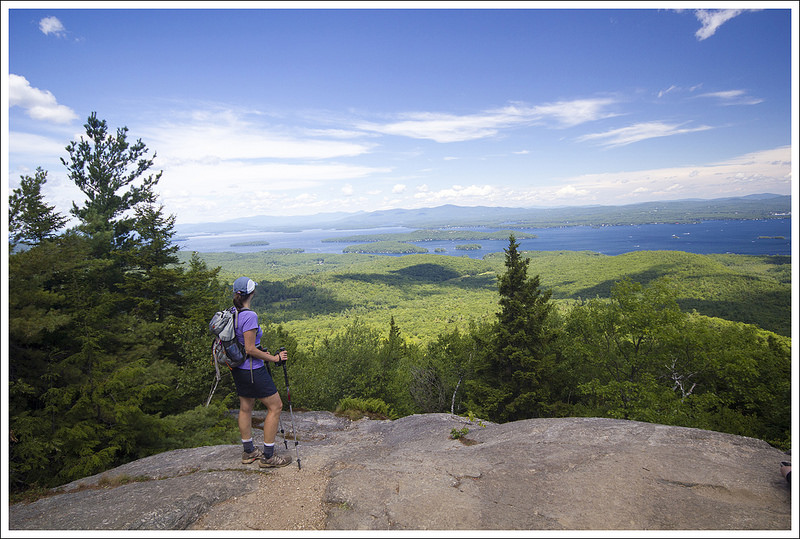
  • Views – 1.5  The one path to the top of the waterfall gives a nice view of the scene below, but not the best view of the waterfall.  
  • Waterfalls/streams  5 The waterfall is amazing and one of Virginia’s best.  The views along Little Stony Creek are great also.  
  • Wildlife – 1  Due to the popularity, you will likely only see birds in the trees.
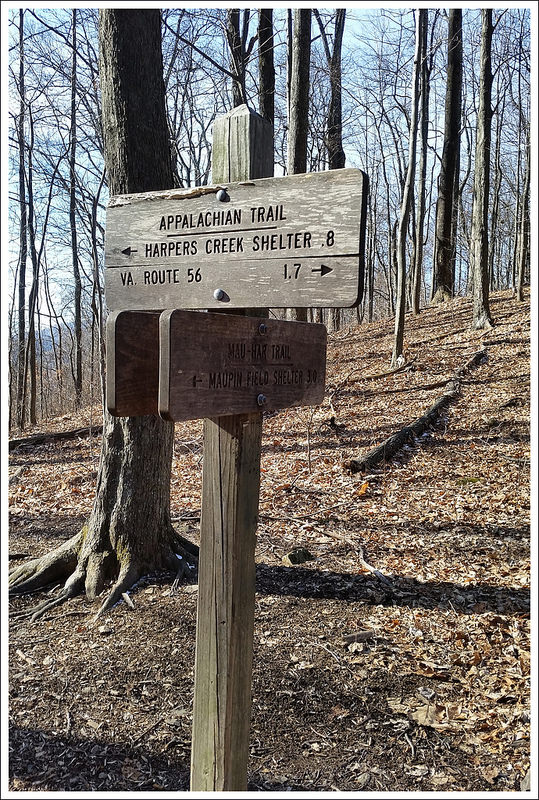
  • Ease to Navigate – 3.5  There aren’t any blazes on the trail, but the trail is evident.  We were a little confused trying to find our way to the upper trail since there are no signs marking the way.  
  • Solitude – .5 Due to the popularity, you will likely see a lot of people on this trail and especially at the waterfall.  Time your trip for a weekday, overcast or rainy day, or very early in the morning to beat the crowds.

Download a trail map (PDF)

Directions to trailhead: Take exit 118A-B-C on I-81. Take US-460W.  After 25.9 miles turn right onto Mill Road.  In .6 miles, take a right onto Cascade Dr (SR-T623) in Pembroke. The parking lot is in 2.9 miles.  Parking is $3 and cash is required (they noted they do not give back change). Coordinates: 37.353523, -80.599566

MapMyHike is not necessarily accurate, as the GPS signal fades in and out – but it still provides some fun and interesting information.

Mount Monroe (NH)

Special: New Hampshire Edition

Introductory Guide to Visiting the White Mountains

Mount Monroe is the fourth tallest peak in New Hampshire’s Presidential range.  You can hike to its summit from the valley floor – the Ammonoosuc Ravine trail is the most popular route – or you can make it an easy day hike by driving the auto road and starting from the summit of Mount Washington. This option makes a 3.8 mile hike with just 1,343 of climbing.  It’s a laid back way to visit this area with minimal effort.

View the Full Album of Photos From This Hike

Mount Monroe Summit
Clouds cleared as we stood on the Mount Monroe summit.  From the top of Monroe we could see the weather towers atop Washington.

Adam Says…

We hiked just about every day on our vacation, and hiking in the Adirondacks and the White Mountains usually involves tough climbs along granite-filled pathways.  We wanted to do one of the mountains in the Presidential Range in New Hampshire, but our bodies were asking something easy. So, we decided to drive up to Mount Washington and hike down and over to Mount Monroe.

We got an early start to try and beat the traffic and crowds on the slow-going Mount Washington Auto Road.  The drive up can be a harrowing experience.  As you are skirting the edges of precipitous drops, you are praying that another car isn’t coming down the mountain (another reason to get an early start).  The views are breathtaking on a clear day, but the driver may have to focus on the road more than the scenery.

Descending the Crawford Path
We made our way down the Crawford Path/AT from Mt. Washington.  You can see the area is extremely popular on pleasant summer days.  Below:  Adam at the Crawford Path;  One of the Lakes of the Clouds Croo members carries supplies; MWOBS equipment in the fog.

Crawford Path Sign Croo Observatory Towers

We found our way to the weather observatory building and found the white blaze which signified the Appalachian Trail (here called the Crawford Path).  The fog was thick on the mountain as it often is.  We made our way descending on the Crawford Path, following the cairns that guided us down a path off the summit.  There are people that have gotten lost and died on this mountain and I can understand why.  With limited visibility a person could easily miss a cairn.  Add the high winds and quick weather changes and this can truly be a dangerous place.  We had enough visibility to see the next cairn ahead and once we were off the highest parts of the mountains, we had better visibility of the trail.  At .2 miles, we came to a sign that showed that we had 1.4 miles to the Lakes of the Clouds hut, one of several huts maintained by the Appalachian Mountain Club.

The descent was very rocky and slow-going, but we managed to make it to Lakes of the Clouds fairly quickly.  The fog had us completely socked in and we couldn’t even see Mount Monroe when we arrived.  Lakes of the Clouds is probably our favorite of the huts in the White Mountains.  The remoteness of the hut, the serenity of the mountain-top lakes, and the views of the valley and Mount Washington make this such an amazing experience.  We ate some lunch inside the hut and decided to wait a while.  We eventually got some glimpses of Mount Monroe from inside the hut.  The clouds started to blow off somewhat.  At one point, I told Christine that I thought we should make an attempt to reach the summit.  My thought was if the clouds continued to blow, we may get a glimpse of views from the summit.   So, we gathered our gear and hiked up in the fog.  The wind had picked up, but we were hoping this was a good thing as it would carry some fog off with it.

Hut Comes into View
The hut comes into view. Below: Lakes of the Clouds Hut with Mount Monroe looming in the background; Christine arrives at the hut; Inside the hut… it was surprisingly uncrowded!

Lakes of the Clouds Arriving at the Hut Inside the Hut

The hike up Mount Monroe was steep but only a short few tenths of a mile.  We got to the top (the summit marker is only a small metal nub sticking up from a rock) and within minutes the clouds began to part and we got gorgeous views down below. We timed our trip perfectly and there was only two other people at the top.  Our ability to see views for a while seemed to rotate in patches around the mountain as clouds continued to pass.  It eventually opened up all around us and we were glad we made the break for it when we did.  After taking an ample number of photos, we descended back to Lakes of the Clouds and then back up to Mount Washington.  The fog got thicker again as we made our way back to the summit of Mount Washington.  We posed for our ceremonious summit photo and then got back to our car to descend back down the mountain.

Christine Says…

Many people think a hike only counts if you start from the bottom of the mountain. Call me a cheater, but I don’t care!  This summer, we took the auto road to the top of Mount Washington so we could enjoy exploring the alpine zone without doing all the work.  In 2013, we hiked up the Ammonoosuc Ravine and on to the summit of Washington.  On that trip, we skipped summiting Mount Monroe due to time constrictions. This trip gave us a chance to make up for what we missed!

Climbing Mt. Monroe
Adam makes his way up Mt. Monroe. Below: Climbing the mountainside; Tiny people perched on an outcropping; Christine near the summit.

Climbing Mt. Monroe Climbing Mt. Monroe Climbing Mt. Monroe

All week long, we had been checking the MWOBS higher summits forecast. Thursday, August 7 looked like it would be the best chance – with clearing skies, calm winds, and warm temperatures. We paid our toll and made our way to the top. The auto road has been open since 1861 and climbs 4,618 feet over 7.6 miles.  It’s a beautiful drive with great views for much of the way – only problem… we were in the clouds! Our clear day turned out to be not-so-clear at all!  Every now and then, the veil would thin enough that we could make out the hulking shapes of Clay, Adams and Madison across the gulf.

We were both a little disappointed with the clouds, but you never know how the weather is going to change on Mount Washington.  We pushed forward with hopes for clearing skies.

Climbing Mt. Monroe
Nice views from the summit.  The Appalachian trail is the ribbon of path in the distance.  Below: Descending the mountain; The lake comes back into view; View behind Lakes of the Clouds Hut.

Mt. Monroe Descending Monroe Passing Back by the Hut

From the summit buildings, we looked for white blazes and found our way to the marker for the Crawford Path (which is also the Appalachian Trail in this part of the state). From there, we hiked 1.5 miles to Lakes of the Clouds Hut.  The trail is all rocks and is marked with a combination of cairns and blazes.  The clouds were so thick it was almost like walking through white cotton candy.  The oddest part was the warmth and utter windlessness of the day.  I’ve never been in the Presidentials on a dead calm day.  I think the lack of a breeze was a big part of the reason the clouds were able to linger on the summits for such a long time.

Even in full cloud cover, the terrain of the mountain is incredibly beautiful!  It feels almost other-worldly.  Eventually, the clouds cleared enough that we could make out Lakes of the Clouds Hut in the distance.  There were many, many people scrambling both up and down the mountain.  It’s definitely earned the nickname ‘Lakes of the Crowds’.  Adam and I decided to hang out in the hut for a while and see if we could outlast the clouds -they did seem to be thinning.

Lakes of the Clouds
The lake was even prettier on the hike back. Below: Climbing back up Mount Washington with Monroe in the background; Christine takes a final look back;  The cog tracks at the Washington summit.

Hiking Back Up Hiking Back Up Cog Tracks

As we sat at one of the long tables, we saw the side of Mount Monroe emerge from the clouds.  If we were going to get a view, our time was now!  We made the short half-mile climb to the top of Monroe.  Although the mountain is a short, easy climb from Lakes of the Clouds, it’s still New Hampshire’s fourth tallest peak at 5,384 feet.  The summit was still in the clouds when we got to the top. But as we sat on the summit, a breeze picked up and within a matter of five minutes the view had completely opened.

We could see Mount Washington with the observatory towers on top. We saw Franklin and Pierce off in the distance.  We could see the cog station and the grand Mount Washington Hotel.  We could even see tiny hikers walking the Appalachian Trail below the summit.  It was breathtaking!

After a while, the clouds started to filter back in.  I was so grateful they opened for the briefest few minutes for us to enjoy!  We made our way back down to the hut, which had emptied out of the crowds from just 45 minutes earlier.  I guess everyone took advantage of the same opening in the weather!  We snacked on cake made by the Croo and then set out to climb back up Mt. Washington.

Summit of Mount Washington
Summit of Mount Washington.

On the way back up the mountain, the cotton candy clouds dropped over us once again.  By the time we reached the top of Washington, they had partially cleared off again.  We had our photo taken at the summit marker.  We spent a little time in the summit building, too.  Over the summer, they completely renovated the weather observatory museum.  It’s really nice and spacious, but they took away a few of our favorite exhibits – including the funny video of people trying to eat breakfast in famous Mount Washington winds.

The high summits went in and out of the clouds all day, but I still think we chose the best day of the week to visit.  Other days had thunderstorms and hail.  Compared to that, passing cloud cover is no problem!  All in all, we ended up hiking about 4 miles with 1,350 feet of climbing.  It was a fun and easy way to visit a challenging mountain.

Trail Notes

  • Distance – 3.8 miles
    (Check out the stats from Map My Hike)*
  • Elevation Change –  1343 feet
  • Difficulty –  3.  The elevation isn’t too tough, but the rockiness of the terrain adds to the difficulty.
  • Trail Conditions – 2.  Very rocky and many of the rocks are quite loose.  You have to always watch your feet.  
  • Views – 5.  On a clear day, they are quite spectacular.  
  • Waterfalls/streams  0.  Non-existent.
  • Wildlife – 1.  You won’t see any wildlife above treeline here other than a few birds.
  • Ease to Navigate – 2.5.  Marked down because you have to follow cairns and occasional blazes.  This can be extremely tough in foggy or bad weather.  On a clear day, this will be much easier.
  • Solitude – 2.  In the summer, you will always find people along the trail.  Mount Washington always attracts a lot of people.  You will likely also find many people in Lakes of the Clouds.  

Download a trail map (PDF)

Directions to trailhead: From Gorham, NH head south on NH-16 for 7.8 miles.  Take a right to get on to the Mount Washington Auto Road.  Pay at the gate (in 2015 was $28 per car and $8 for each additional passenger) and follow the road to the parking lot at the top. Coordinates: 44.269644, -71.302659

MapMyHike is not necessarily accurate, as the GPS signal fades in and out – but it still provides some fun and interesting information.


Hedgehog Mountain (NH)

Special: New Hampshire Edition

Introductory Guide to Visiting the White Mountains

Hedgehog Mountain is tiny compared to most of its neighbors, but this 5-mile hike still packs in tons of scenery and great views.  The ledges are also a super place to stuff your face with wild blueberries!

View the Full Album of Photos From This Hike

Hedgehog Mountain
The ledges along the side of Hedgehog Mountain offer great views of bigger mountains.

Christine Says…

After arriving in New Hampshire and hiking Mt. Major, we took a couple days off hiking to relax and spend time with family. The combination of daily hikes in New York paired with not sleeping or eating enough really wore me out.  So we took it easy and did other fun things like exploring Franconia Notch State Park, paddling kayaks across quiet ponds,  sampling craft beer at Schilling (Littleton, NH) and Long Trail (Bridgewater Corners, VT), and stuffing our faces with Cabot cheese and pastries from King Arthur Baking Company. By Wednesday, we were ready to hike again.  Our second hike in New Hampshire was a repeat trip to visit beautiful Lonesome Lake.  Our third hike was something entirely new – Hedgehog Mountain. It’s the most diminutive of New Hampshire’s ’52 With a View’ – a collection of the state’s nicest view hikes on mountains under 4,000 feet.

We started out the morning with a big breakfast at Polly’s Pancake Parlor.  Then I went for a short paddle with my dad across and around Echo Lake.  By 10:00 a.m., Adam and I were on our way across the mountains on the scenic Kancamagas Highway.  We parked at the Downes Brook parking area and paid our $3 parking fee.  The summit of Hedgehog is accessed by the UNH Loop Trail.  The trail gets its name from an old University of New Hampshire forestry camp that operated at the mountain’s base from the mid-1940s until 1964.

Old Railroad Grade
A railroad used to run along this section of wide, flat, open trail. Below: Early in the hike we passed this clearing.  The clearing work looked recent, but we’re not sure what’s planned for the land; Pretty forest along the trail; Everything was so shady and green.

Clearing Along the Trail Pretty Forest Along the UNH Loop Walking the UNH Loop

There were just a few cars in the lot, so we knew we would have a relatively quiet hike. We decided to hike the loop clockwise, allowing a more gradual ascent followed by views of the Presidentials on the way down.  The hike starts off along a lovely pine-shaded trail following the route of the old Swift River Railroad.  The hike climbs gradually, passes a clearing, and soon reaches a sign indicating the beginning of the loop portion.  We chose to turn left and cross the east ledges before reaching the summit.

For 1.2 miles we walked through a peaceful pine forest.  The climb was steady, but quite gentle.  There were roots and rocks, but they were always padded by fallen pine needles.  As we hiked on, the route became steeper and rockier and eventually opened onto bare cliffsides and ledges with magnificent views of so many big mountains – the Tripyramids, Carrigain, Chocorua, and Passaconaway.  Most of the ledges were wide and generous, but one section in particular was narrow and precipitous.  There were blueberries growing everywhere!  From the ledge, we could also see the last steep section of trail we had to climb to reach the summit.  The ledges were definitely my favorite part of the hike!

The last bit of climbing to the Hedgehog summit was steep – definitely more challenging than I expected on this loop!  At first we passed through a tangle of roots and boulders.  The higher we climbed, the roots gave way to smooth granite slabs and boulders that required scrambling.  I told Adam at one point that I was very tired of putting my knees down on granite!  Granite gives me so many bruises. The actual summit had nice views, but (in my opinion) the view from the lower ledges had been nicer.

UNH Trail Rocks and Roots
The trail became more covered with rocks and roots as it climbed. Below: Christine climbs toward the ledges; Towering pines; Adam finally clears the woods to get our first views of the day.

Climbing Toward the Hedgehog Mountain Ledges Pretty Pines First Views on the UNH Loop

Leaving the summit, we spied glimpses of the Presidentials off in the distance.  Evidently, on clear days one can even see the weather observatory atop Mount Washington.  We weren’t that lucky.  The descent was much rougher and steeper than the climb up.  I was really glad we had gone clockwise!  On the way down, we took the short spur trail to Allen’s Ledge.  The rocky outcropping offers a chance to take in a final sweeping view of many of the area’s bigger mountains. From Allen’s Ledge, the rest of the hike was a moderate descent back to the old railroad grade.

Over the course of the day, we only saw three small hiking groups.  That’s great solitude for a nice summer day in the White Mountains!  We would definitely recommend this hike if you’re looking for great views and don’t feel like tackling a 4,000-footer.

After the hike, we decided to drive into North Conway and look around the shops and have an early dinner at one of our favorite stops – Moat Mountain.  They brew a nice selection of beers and have fantastic food.  It was so tasty; I think I finished an entire half pound burger and all my fries!

Nice Views from the Ledges
Christine enjoys nice views from the ledges. Below: There were lots of slab of granite to traverse; In one place, the trail across the ledge was quite narrow; Walking across the ledges, you can see the rocky summit of Hedgehog Mountain.

Adam Crosses Slabs and Roots Traversing Narrow Ledges View of Hedgehog Summit

Adam Says…

As Christine mentioned, we started our day off a little later than normal.  It was a gloomy morning, with fog settled in.  Since Polly’s Pancake Parlor and Echo Lake were quite a distance from our home base, we decided to take a separate car from her parents and take off on our hike after we had done our morning activities with them.  When Christine and her dad went paddling earlier on Echo Lake, it was cold and there was a little bit of drizzle.  I can’t swim so I don’t like being on a canoe or kayak.  I was quite content to watch Christine and her dad go out paddling on the peaceful, yet foggy waters.

We were worried it wouldn’t warm up or be able to see the sun on our hike.  Two things that hiking in New England has taught me is to be patient and be an opportunist.  There have been a lot of hikes that we have done in the White Mountains that if you wait a few minutes, clouds may break.  So, we took our time that morning knowing that our best chance of seeing views would be a little later in the day.

Wild Blueberries
The ledges of Hedgehog Mountain were covered with wild blueberries. Below:  There was a wooded saddle between the ledges and the summit; The last bit of climbing to the summit was very steep and slick.

Saddle Between Ledges and Hedgehog Summit Granite to Climb

The trail started off very flat through a tunnel of pine trees.  After a short distance, it takes a sharp right and begins to ascend.  Within a few tenths of a mile, the trail crosses over with a clearing, but stay straight on the trail.  The trail continues on an ascent, but the terrain wasn’t too difficult.  With the morning activity of paddling, Christine bonked a bit so we paused to eat an energy bar before continuing onward.  The trail became a little steeper and more narrow as we navigated through some interesting terrain with pine trees and granite steps.  There were a few obstructed views along the way.  The woods were so quiet it was eerie – we felt a bear would jump out at any minute in this deep wilderness.  Eventually the trail became quite steep and rocky, leading to larger granite steps.  The trail soon popped up to some gorgeous cliffside panoramic views.  Not reading about this on trail reviews we found online we were quite surprised.  We navigated the cliffsides, going back into woods for a short time before coming out onto a large shelf of granite.  We spotted the summit above us, but below us were tons of blueberries.  We picked a few and enjoyed the gorgeous mountain and valley views around us.

View from the Hedgehog Mountain Summit
The summit view was not as nice as the view from the ledges. Below: On the way down, we could see a glimpse of the Presidentials.

Presidential View

The trail ducks back into the woods and descends a short bit through some thick forest.  There were blowdowns across the trail and the cobwebs were thick in places, making me think that many people don’t come on this section of trail to make it a loop.  The trail then began to ascend again through some very steep and rocky sections, requiring us to pull ourselves up with our hands in a few areas.  We finally reached the summit.  We ate a snack, talking with a woman who had done much hiking in the Whites while enjoying some obstructed views from the summit.  We both agreed that the views from below were more exceptional than the summit views.

As we were making a loop hike, we continued on and found another obstructed viewpoint to give you views of many of the Whites.  As Christine mentioned, we couldn’t see the summit of Mount Washington but we could spot a few of the Presidential range in the distance.   The return trip was quite steep and we were treated to a few views on the climb down, which you would likely miss if you did the loop in the opposite direction.  On our descent, we found a small side trail that led to Allen’s Ledge.  Allen’s Ledge also had some nicer views than the summit.  We relaxed at this spot for a few minutes before rejoining the UNH trail and making our way back down the mountain.  Before too long we had rejoined the loop where it split and returned to the parking area.

Steep Descent of Hedgehog Mountain
The descent of Hedgehog was quite a bit steeper than the climb up. Below: Allen’s Ledge; Eventually the descent leveled out.

Views from Allens Ledge More Gradual Descent of Hedgehog

While it isn’t as popular as some other hikes in the area, if you want some seclusion with great views, check out Hedgehog Mountain.   We were pleasantly surprised at how gorgeous the views were and the interesting terrain along the trail makes this a rewarding hike.

Trail Notes

  • Distance – 5 miles
  • Elevation Change –  1312 feet
  • Difficulty –  3.5.  There are a few steep, rocky sections, but most of the trail is gentle.
  • Trail Conditions – 3.5.  The trail is adequately maintained, but expect lots of rocks and roots.
  • Views – 4. In Virginia, these views would warrant a 5, but there are even grander views in this area.
  • Waterfalls/streams  0. None.
  • Wildlife – 2. Other than birds and squirrels, we didn’t see wildlife.
  • Ease to Navigate – 3.  There were a couple tricky spots, like the clearing early on the trail, but generally this was an easy route to follow.
  • Solitude – 4. By White Mountains standards on a nice summer day, we enjoyed quite a bit of solitude on this hike

Download a trail map (PDF)

Directions to trailhead: From Interstate 93, take exit 32 (NH-112E).  Follow NH-112E for 22 miles.  Parking is on the right in the Downes Brook – Mount Potash lot.  Parking Coordinates: 43.9960876,-71.3688126

Mount Major (NH)

Special: New Hampshire Edition

Introductory Guide to Visiting the White Mountains

Mount Major is a short, extremely popular hike in the Lakes Region of New Hampshire.  The summit offers excellent views of Lake Winnipesaukee.

View the Full Album of Photos From This Hike

Mount Major Summit
The summit has superb views of Lake WInnipesaukee. Below: Parking issues at the Mount Major Trailhead; The trail is well-marked and blazed blue; The lower part of the trail is very eroded.

Parking Issues at Mount Major Start of the Mount Major Trail Erosion on Mount Major Trail

Adam Says…

Hiking Mount Major seems to be a rite of passage for anyone that is visiting the lakes region of New Hampshire.  This has been a popular spot for hiking for a long time.  We had just hiked Mount Marcy two days before and our muscles were still recovering, but it was my 44th birthday and I wanted to celebrate with the views from a summit.

We got to the parking lot fairly close to 10:00 a.m. and the lot was completely full.   We began to see how popular this trail actually was.  We parked along the side of the road and then proceeded through the parking lot to the trailhead.  We noticed one car that was parked in a way that took up three spots.  Someone had left a note on their windshield letting them know just how they felt about their parking job.  New Englanders don’t mess around.

From the parking lot, we followed the main blue trail.  The trail was a wide, worn path through the woods.  When you are walking on a clear, dirt path you know this is a well-used trail.  The hike was uphill for the first few tenths of a mile, but levels out at .3 miles.  We enjoyed some flat walking through the trees.  At .7 miles, the trail reaches a junction.  Take a left to stay on the main, blue-blazed trail.  The trail begins to steepen at this point and becomes more rocky.  As we climbed up on our approach to the summit, you approach some more exposed large sections of rock that you can walk up or you can take a rugged trail up the side.  We opted to walk on the open rock surface on the way up, but chose the path on the way down.  As you walk on this open rock surfaces, you can look behind you to see the beginnings of some great views of Lake Winnipesaukee.    The trail was quite steep at this point and you have to be careful as you navigate up these large, rocky areas.

Wide Flat Mount Major Trail
For a time, the Mount Major trail is wide and flat. Below: The trail junction of Mount Major and the Brook Trail; The trail gets rockier; The trail went back and forth between open rockiness and shade.

Mount Major Trail Junction Rockier Trail Spots of Trees

Around the 1.6 mile mark, we reached the large open summit.  There were tons of people at the top, but because of the large area, you can always find a place to enjoy to yourself.  The wind was whipping across the summit.  We went to the summit marker that has a large rock foundation built around it.  We sheltered ourselves from the wind and ate a snack at the summit.  After eating, we walked around in all directions to enjoy the views around us.  While staring out at the gorgeous views, you can easily lose track of time.

We descended the way we came, but there are many options to make this a larger loop hike if you so desire.  Sometimes I feel that popular hikes are often over-hyped, but this hike didn’t disappoint.  We saw plenty of families hiking together on this hike of all skill levels.  Just take your time and most people should be able to make the hike that are in decent shape.   This was a great start to a birthday celebration and the views of Lake Winnipesaukee are some of the best you will get.

Christine Says…

Hey – it’s great to be back in New Hampshire! We had a spectacular, sparkling, bluebird day to hike Mt. Major.  It was a perfect hike for Adam’s birthday.

Mt. Major is probably the most popular dayhike in the Belknap Range – and no wonder, with its relatively short distance and commanding views of Lake Winnipesaukee.  We hiked on a Sunday morning.  Arriving by 10:00 a.m., we found the parking lot already jam-packed with cars. Adam and I had to park our car on the shoulder of the busy main road.

Opening Views on the Climb Up
The views got nicer the higher we climbed. Below: Rock piles on the summit; People gather around the Phippens’ cottage; Birthday photo!

On the Summit Summit of Mount Major Posing on the Summit

The Mount Major trail is blue blazed and begins climbing uphill on an extremely eroded fire road. The erosion is so deep it makes the trail look like a chute.  The trail eventually levels out and follows a pleasant, nearly flat path.  At around the .7 mile mark, the trail splits into two – the Mt. Major Trail is sharply to the left and the Brook Trail continues straight.  We continued on the Mt. Major Trail – this is when the real climbing began.  The entire 1.6 mile hike only has 1,150 feet of climbing – most of it packed into second half.

After about a quarter mile of climbing along rocky trail, we passed a family taking a breather on a large boulder jumble. The adult couple was bickering bitterly about turning around or continuing to the summit.  We could tell by their clothes and shoes that they were not regular hikers.  When the man made the decision to quit, we overheard his young son exclaim loudly ‘Daddy… you’re a FAILURE!’  Poor guy!

The last bit of climbing was tough, so it probably was for the best that the family turned around.  I think a lot of novice hikers see a short, popular hike and don’t realize how challenging it can be to ascend 1,000 feet in three-quarters of a mile. There were lots of steep rock ledges and smooth domes of rock, punctuated by short passes through trees.  There were two trail choices for the last quarter mile – ledges or ledge detour.  To be honest, the trails were both pretty haphazard with people blazing all kinds of different paths to the summit.  As we made our way up, we paused to look back and enjoy the ever improving view.

Phippens Cottage
George Phippens built a summit cottage in the early 1900s. Below: A view off the other side of the Mount Major summit; The rocky descent; Christine takes in one last view on the way down.

View off the Back Descent of Mount Major One Last View from Mount Major

At 1.6 miles, we reached the rocky summit of Mt. Major.  SUPERB!  Lake Winnipesaukee, framed by distant mountains, sparkled all across the horizon. As expected, the summit was very crowded. At the top of the mountain, there are remnants of an old stone cottage.  Later, I did some research into the history of the structure.  The summit of Mt. Major was once owned by a private citizen. New Hampshire resident, George Phippens, bought the mountain summit for $125 in 1914.  He loved the views and the blueberries, and kept the mountain open to all. He built a cottage at the top for hikers to use as shelter, but the roof kept blowing off in the winter.  Eventually, the Great Depression came along, and ownership of the summit reverted to the Town of Alton to cover Phippens’ taxes.  Read more about Mr. Phippens and his love of Mt. Major.

Adam and I spent some more time enjoying the views before making our way back down the mountain.  Many people descend via the Brook Trail, but we just went down the way we had come. By the time we got back to the car, we were starving!  We decided we would eat at the first restaurant we passed – which ended up being the Wise Owl Restaurant and Country Store in Alton, NH.  It was late for lunch, so we were the only diners there.  The food was good, but it took nearly an hour to get a simple lunch.  I almost passed out from hunger while we waited! Reminder to self: eat more snacks!

Trail Notes

  • Distance – 3.2 miles
  • Elevation Change –  1150 feet
  • Difficulty –  2.  There are some steep and rocky sections of the trail.  Most people can make it if they take their time.  Keep an eye on children along the trail. 
  • Trail Conditions – 4.  Most of the trail is open and easy to navigate.  Some of the rock surfaces are slick, so be careful especially on rainy days. 
  • Views – 4.5.  Panoramic views from both sides of the summit. 
  • Waterfalls/streams 0.  Non-existent. 
  • Wildlife – 1.  This is a popular trial so wildlife know to stay away. 
  • Ease to Navigate – 4.  There are a lot of paths to make it a loop.  Consult the map and pay attention to blazes along the way. 
  • Solitude – 0.  This is one of the most popular hikes in New Hampshire, so you will likely see lots of people.  Go during the weekday or early mornings to avoid crowds.

Download a trail map (PDF)

Directions to trailhead: From Laconia, NH, take NH-11A for 11.1 miles.  Turn right on to NH-11 and go 3.1 miles until you reach the parking lot on the right for Mount Major.  The trailhead is at the end of the parking lot.  Take the main, blue-blazed Mount Major trail using the trailhead at the back right of the parking lot.  Parking coordinates: 43.519676, -71.272813

Rocky Falls & Heart Lake (NY)

adirondacks

This practically flat 5-mile hike takes you to a small, but lovely, double waterfall.  The pool beneath the falls is a great place to take a dip on a hot summer day.  After visiting the falls, the hike continues around the perimeter of Heart Lake.

View the Full Album of Photos From This Hike

Rocky Falls Feature
Rocky Falls is a small double waterfall. It may only be about 10 feet tall, but it’t located in a beautiful setting with an inviting plunge pool for swimming. Below: The trail is well marked and starts near the Adirondack Loj at Heart Lake; Entering the High Peaks Wilderness; Segments of logs are pressed into the trail tread to help manage muddiness and erosion.

Rocky Falls Trail Signage Entering High Peaks Wilderness Hiking Along to Rocky Falls

Adam Says…

As we were trying to mix up some easy hikes with some tough hikes in the Adirondacks, we settled on picking this easy hike to a nice waterfall.  This hike starts on the same path that led to Mt. Jo, beginning at the Heart Lake Program Center (the main hub for the Adirondack Mountain Club).  The trailhead parking at Heart Lake was $10.00 a day for non-members (ADK member parking was $5 and all prices went down by half for parking arrivals after noon.)   We recommend arriving early if you want to set out on any trail from this popular spot.

Stream on Rocky Falls Trail
There were several shallow stream crossings on the way to Rocky Falls.  Below: Some stream crossings had plank bridges; Signage along the trail; Gnarled tree roots.

Stream Crossing on Rocky Falls Rocky Falls Trail Signage 2 Neat Old Trees on Rocky Falls Trail

The trailhead starts to the right of the entrance station.  The trail starts off on a flat, easy path through the woods.  You pass the Heart Lake Nature Museum and then pass the junction to the Mt. Jo trail at .25 miles.  The trail stays flat and skirts along the north side of Heart Lake.  There are a couple of paths that lead down to the lakeside for peaceful views.  At .6 miles, you reach the junction that leads around Heart Lake, but stay straight on the trail.  Most of the hike is relatively uneventful, as you walk through some dense forest areas, with just a couple of stream crossings along the way.  We found very few people on the trail and it was an enjoyable walk slightly downhill.   At 2.0 miles, we reached a junction that showed the side trail to Rocky Falls.  It was only .2 miles to reach the falls.

When I had seen pictures of the falls online, the falls reminded me of two eyes with cascading tears.  We hung out a while at the bottom of the falls and were soon joined by a man with his two dogs.  They enjoyed jumping in the swimming hole and fetching a stick.  We could really tell they were having a great time and it was fun to watch their relentless pursuit.  There is a small path that leads to the top of the falls, but the most picturesque view is of the bottom of the falls.

Rocky Falls Wide View
A wide view of Rocky Falls and its plunge pool. Below: A different viewpoint of the falls; The pool under the falls; Looking downstream from Rocky Falls.

Another View of Rocky Falls Rocky Falls Swimming Hole Looking Downstream from Rocky Falls

We made our way back the way we came, now taking a slight uphill route from the falls.  At 4.0 miles, we came back to the junction with the trail that led around Heart Lake.  We decided to take this route in hopes of seeing the lake from a different angle.  This route actually led away from the lake so it didn’t provide any great views along the side as the northside did.  We passed through a short, open field used for skiing, but then came back into the woods.  We passed a few cabins and campsites along the lake.  At 4.5 miles, the trail met the lake again.  I found a nice bench and sat and enjoyed the serenity of the lake.  We then moved further down to the Adirondack Loj, where we saw several families that were out in the lake swimming, kayaking, and paddleboarding.  We read books by the lake for a while, enjoying the sunny day and then made our way back to the car.

One thing I feel is really special about this area is the ability for families to enjoy the outdoors in many different ways.  This hike and the surrounding areas is a great destination for people that enjoy the water, the views, and the hiking.  While I have seen more impressive waterfalls, this would be an easy family outing if you are staying nearby.

Christine Says…

Adam and I planned to hike Mount Marcy as the grand finale of our Adirondack week, so for Wednesday’s hike, we decided to stick with another easy trail so we could save our energy for our big, 15-mile route a couple days later.  Once again, we found ourselves setting off from the Adirondack Loj – it really is the heart of outdoor activity in that area.

Dogs at Rocky Falls
We saw many dogs – especially Labradors – at the falls.  Below: We enjoyed watching them dive, swim, and compete for their stick.

Dogs Swimming at Rocky Falls Dogs Swimming at Rocky Falls 2 Dogs Swimming at Rocky Falls 3

The trail leading to Rocky Falls was surprisingly flat and soft.  I had come to believe that everything in the Adirondacks was either slick granite, boulders, cobbles, or a tangle of gnarled roots; so terrain like this was a welcome surprise. The wide dirt path passed through beautiful shady woods.  Many of the muddy places along the trail had small logs pressed into the tread to make the mucky parts more passable.   It’s a clever, easy way to manage areas prone to wetness.

Another nice thing about the easy terrain was that it gave us a chance to cover ground at greater speed.  I’m not saying I like to rush through hikes, but sometimes complicated terrain slows you to just a mile an hour.  It felt good to stretch our legs and cover ground!  We reached the falls pretty quickly.  When we first arrived, there were a couple people climbing on the rocks above the waterfall, but we had the lower pool all to ourselves.  I was able to take advantage of some passing clouds to get a couple long exposure photos of the waterfall.  It was small, but very pretty.  The pool beneath the falls was very inviting.  I would have loved to go for a swim, but didn’t bring a towel or clothes to change into.

Crossing the Ski Slope
On the return hike, we followed the trail around the other side of Heart Lake. This took us by the Alice Waterhouse Ski Slope. Below: The trail didn’t follow Heart Lake’s shore very closely; One of the lean-to’s available for rent along Heart Lake; Canvas tents are also available.

eturn Hke From Rocky Falls 2 ADK Lean To Canvas Tent

After a few minutes, more people began to arrive.  The two dogs Adam mentioned were fun to watch, but they also meant I had to put my tripod away.  I don’t know what it is, but I am a wet dog magnet as soon as I get my good camera gear out!  Every time I tried to take a shot, they would come bursting out of the water and running in my direction at a full, water-spraying shake!  Oh well… I had already managed to take a few decent photos and really enjoyed watching the dogs dive and swim. When we went into Lake Placid the later, we actually ran into the hiker who had brought the dogs.  It turned out that he worked at Eastern Mountain Sports.  Funny… usually the people you pass on a day hike, you never see again.

After leaving the falls, we took the lake loop trail back to the Loj.  It was mostly walking through the woods.  Eventually we reached a cross country ski hill named in honor of Alice Waterhouse. Alice was an Adirondack legend – she hiked all the high peaks, skied, worked on trail maintenance, and volunteered her time working to preserve the area’s wilderness.  You can read more about her on the ADK Blog.

Heart Lake
After we finished our hike, we sat along the shore of Heart Lake and ate lunch and read books. Below: The Adirondack Loj; Heart Lake is clear and cool – a perfect spot to dunk tired feet.

ADK Loj Wading

After passing the ski hill, we quickly reached the lakeside camping area.  The lean-tos were really cute.  They reminded me of the Appalachian Trail shelters we see through much of Virginia.  It would be nice to camp there someday!  Before we knew it, we were back at the Loj.  We had packed a picnic of peanut butter sandwiches, chips, and cookies.  I bought more cold drinks from the info center and staked out a nice spot with two Adirondack chairs overlooking Heart Lake.  We spent the afternoon relaxing and reading books.  We watched people paddling the lake and even spotted a loon diving.  What a nice place to watch the world pass by.

Trail Notes

  • Distance – 5 miles
    (Check out the stats from Map My Hike)*
  • Elevation Change – 377 ft.
  • Difficulty – 1.5.  This trail is a rarity by Adirondack standards – the trail was flat and mostly dirt.  We think most people could easily manage this hike.
  • Trail Conditions – 4. The trail was in great shape with only a few muddy spots.
  • Views  2.  Views of the mountains across Heart Lake are pretty, but there are no lofty vistas on this hike.
  • Streams/Waterfalls – 3.5. The small double waterfall is the main point of this hike.  It’s a pretty spot, but there are more impressive waterfalls in the area.
  • Wildlife – 2. The area is heavily traveled and popular with families and dogs.  I wouldn’t expect to see lots of wildlife. Although, we did see a loon on Heart Lake.
  • Ease to Navigate – 4. Trails are generally easy to follow and well marked.
  • Solitude – 2. This is a popular trail in a busy area.

Download a Trail Map (PDF)

Directions to trailhead: From Lake Placid, go east on Rt. 73 to Adirondac Loj Rd., which is the first right after the ski jumps. The parking lots are 5 miles from Rt. 73. There is a $10/day parking fee. From the parking lot at the High Peaks Information Center at the end of Adirondak Loj Rd. return to the entrance station and find the trail at the far corner of the snowplow turnaround. GPS coordinates for this hike are: 44.1830461,-73.9644678

Flume Knob (NY)

adirondacks

For our next five posts we’ll be sharing hikes in the Adirondacks High Peaks region.  Up first… Flume Knob – this surprisingly tough 4-miler leads to a beautiful view looking toward Wilmington and the Jays.

View the Full Album of Photos From This Hike

View From Flume Knob
On our Adirondacks trip, the area set heat records. Most of our week was hot, hazy and humid — just like Virginia. But really, a little summer misery can’t spoil a view like this!

Christine Says…

Well… here we are in New York’s Adirondacks!  We’ve wanted to visit the High Peaks region for years, and finally got around to making it happen.  We found a delightful cabin in the woods on VRBO.com and rented it for a full week.  We arrived late on a Saturday evening, so Sunday was the first day we had to hike.  We had seen signs along the way to our cabin saying ‘ALERT: Lake Placid Heavy Race Traffic Sunday’.  What we didn’t know was that it was the day of the Lake Place Ironman and most roads in the area would be closed in at least one direction – some roads closed completely.

We had initially selected a nice 9-mile waterfall loop – away from Lake Placid, in hopes of avoiding the race traffic.  With GPS coordinates set and maps in hand, we set out toward our trailhead. Our GPS kept re-routing us and the drive time to the trailhead fluctuated wildly from 20 minutes to an hour and 10 minutes.  Finally, we came upon a police officer directing traffic.  All the rerouting on the GPS was due to real-time road closures for the Ironman.  Boooo! We were forced onto a very long, one-way, circuitous route around the race – a route that took us nowhere near our planned hike.  At this point, cell service was gone and we didn’t have any way to select a new hike that we could actually get to. So we drove and drove.  We watched racers passing by on their bicycle leg  in the closed lane of traffic. We both agreed it was a pretty disappointing start to the trip – after spending 11 hours in the car on Saturday, we were ready to hit the trail!

Flume Falls
Flume Falls is a beautiful rapid of water that passes through a gorge right at the trailhead. Below: Before climbing to Flume Knob, we hiked the network of engineered paths around High Gorge Falls. It was impressive; The sign that caught our attention; The trailhead for Flume Knob.

High Gorge Falls Flume Trails Flume Knob Trailhead

Eventually, we came upon a sign for High Gorge Falls.  I told Adam ‘Go there – I remember reading about that place.  It looked pretty!’  As it turned out, we had the entirety of this popular tourist stop all to ourselves.  I guess no one else even tried to fight the Ironman traffic. We walked the network of trails and marveled at the impressive waterfall plunging through the chasm! After about an hour, we’d seen all there was to see and decided we’d try and figure out a way to get back to the house and spend the afternoon relaxing and enjoying our comfy little cabin.  But as luck would have it, we passed a sign on the road labeled ‘Flume Trails’. Adam looked at me and we knew instantly that we were going to stop and check it out.  The sign was brown and had little hiker stick figures – and that was good enough for us!  Sure… it wasn’t the hike we planned.  And yes – we had no idea how long the trail was, how difficult the trail was, or even where it led.

Fortunately, signage at the trailhead indicated that there was a 4-mile out-and-back to Flume Knob.  We agreed that knobs usually have decent views and set off along the trail.  The trail soon became a network of trails.  Some signs indicated the way to Flume Knob, others made no mention of it.  Trail names changed quickly from Corridor to Connector to Flume Knob.  We just kept hiking uphill, following the path that looked most worn, and then verifying we were still on the right route any time Flume Knob was mentioned on a sign.

I took very few photos on the hike up, because my hands were being kept busy swatting at the army of mosquitoes unleashed in the forest.  Bug spray didn’t slow them down – not even a little bit. What had become as an easy, gradual climb became steeper and steeper as we hiked along.  I was hiking as fast as I could to outrun the mosquitoes, but the terrain slowed my pace.  The trail climbed upward without the ameliorating effect of switchbacks. There were several sections of trail that were washed out and covered with loose, slippery scree.  There was a small rock pass that had a rope to help hikers pull themselves upward.  There were a couple small blow-downs to negotiate. It was pretty tough going for a little while.  After the hike was over, I read a description of the terrain on the Lake Placid website – they used the word ‘aggressive’.

Climbing to Flume Knob
The first half of the climb to Flume Knob was gradual with smooth, easy footing. The second part was more like this. Below: The wayfinding and signage on this trail network was a little confusing. We probably would have fared better with a map or some prior research; Trails in the Adirondacks are blazed with metal disks instead of paint; Some of the easier climbing.

Confusing Signs Blazes Through the Pines

It was all worth it in the end! The view from Flume Knob was magnificent!  We climbed around the side of a boulder and came out on a rocky outcropping with super views of the Adirondacks.  We could even see tiny specks of triathletes on the road in the valley below.  The viewpoint also had enough of a breeze to keep the insects at bay.  We enjoyed the view for a while until we were finally joined by a large family group.  They had been down in the valley cheering a family member along in the Ironman and decided to climb Flume Knob after he passed by.

The hike down was slow going until the terrain moderated.  There were many places that were steep and covered with loose footing.  We covered those parts with care and the added help of trekking poles. Once we descended a bit, we were able to complete the hike relatively quickly.  When we got back to the trailhead, we took some time to explore Flume Falls.  The falls are right next to the parking area and are definitely worth a look!

While it wasn’t the hike we planned, the day turned out really nicely overall!  Sometimes it’s fun to let go of expectations and see where fate takes you.  That said — I still don’t think I’m a fan of the Ironman!

Adam Says…

Christine did a great job with explaining the circumstances of doing this hike over other things we were considering for the day.  What she didn’t mention was the day before on our drive up, we decided that it would be nice to stop at a brewery on our way up to stretch our legs and give our dogs a chance to get outside.  We opted for Ommegang Brewery in Cooperstown, NY.  I haven’t been a big baseball fan since I was a teenager, so I have been a little out of the loop for the timing of baseball events.  When we arrived at Ommegang at 2:45PM, they said they were closing at 3PM for a private event (which wasn’t announced on their website).  I started seeing lots of people arriving Red Sox gear (which I thought was odd for New York).  It turns out they were closing things for a private party for Pedro Martinez for his induction into the Baseball Hall of Fame the next day.  I was quite ticked and now have a little disdain for Pedro Martinez.  Experiencing road closures this day that were keeping us doing the hike we wanted, I was not feeling the New York love.

The tough climbing on the hike and the incessant mosquitoes had me a little worried about how hiking would be overall in the Adirondacks.  However, I will say that if you can just pull off the road, pick a random trail and find views like these, the Adirondacks are quite impressive.  And luckily, those mosquitoes were the worst on this hike compared to the others we tried.  What was looking to be an irritating day turned out to be great.  It is amazing how a little bit of hiking and scenery can change your outlook quickly.

Arriving at Flume Knob
Climbing around the side of a boulder leads you to the viewpoint atop Flume Knob. Below: The lovely view from the top; By the time we left, we had a large family group sharing the viewpoint; We ate wild blueberries on the hike down.

Flume Knob View Company on Flume Knob Blueberries on Flume Knob

When we first pulled into the small parking lot for this hike, we were quickly joined by several other cars filled with people.  We thought they were just friends and families of Ironman participants and wouldn’t want to hike.  When we started to see them get on the trail, we decided to get our stuff together quickly to possibly get ahead of them so we weren’t stuck amidst a large group.  We were able to start ahead of most of the pack and made our way.  As you can see from the map below, there are a lot of interconnecting trails on this hike.  You may see people heading out for mountain biking, fishing, rock climbing, or hiking along these trails.

Our experiences with “knobs” typically means some rocky outcropping with decent views, so we decided to give Flume Knob a try.  The path started off from the parking lot and we soon took a right to head uphill on the trail as the signs directed.  As Christine mentioned, because of the interconnecting trails that happened early on the hike, they didn’t always post the direction to Flume Knob.  We did keep pressing forward on the widest, well-traveled trail and we eventually came on to other signs that showed we were going the correct way.

Rock Scramble with Rope
Some of the downhill climbing was challenging. Thank goodness for the dignity of skorts!

We kept a fast pace as best we could, more for survival purposes.  Stopping for a quick drink from a water bottle would mean you would be attacked instantly by the flying piranha-like mosquitoes.  The grade of the trail was very tough, with extremely steep sections to climb, often requiring you to pull yourself up with your hands to reach the higher step.  Christine got a good deal of sap on her hands from grabbing ahold of trees to help hoist herself up and down.  We felt this was one of the hardest two miles with the steepness of terrain.  We eventually made it to the top, which just required climbing up a large boulder to a nice view.  The viewpoint was a large slab of rock and we took a few moments to take in the view before others arrived.

We had it all to ourselves for about 20 minutes before the other families started to arrive.  It turns out all of them were family members or friends of those participating in the Ironman.  Their goal was to do a hike for the day and then meet up with them later.  When getting to the view, one man asked one of the children if the view was worth the climb and she said “No”.  But they pointed out to her that when she reflects back, she would change her mind.  I think we would both say the views were worth the climb.  On a clear day, you have miles and miles of mountains with barely any sign of civilization around you.

Steep Flume Knob Descent
The descent of Flume Knob was often steep and slick. Below: Boulders along the trail; Finally… some easier footing; Another look at the beautiful Ausable River – it feeds High Gorge Falls and Flume Falls.

Boulders on Flume Trail Easier Section of Flume Trail Ausable River

We made our way back down and started to see even more families making the trek up.  When we arrived back at our car, we took a side path from the parking lot which led down to a beautiful waterfall.  The waterfall has several platforms where the water drops into the gorge and is worth seeing.  If you cross the road from the parking lot, you can look down into the gorge to see even more impressive sights.

We felt we made the most of the day.  Getting great views on a random hike made us more excited for future hikes in this area.

Trail Notes

  • Distance – 4 miles
    (There are no MapMyHike stats from this hike because we forgot to stop tracking at the end of our hike – oops!)
  • Elevation Change – 1326 ft.
  • Difficulty – 4.  The climbing on this trail is mostly concentrated into a short, extremely steep section.  There are no switchbacks to alleviate the climb – it is straight up the mountainside!
  • Trail Conditions – 3.  The trail was nice easy footing for the first half of the ascent.  The footing was trickier with loose dirt and some eroded spots on the climb.  There was one section aided by a rope hand-pull.
  • Views  4.  Beautiful views over the valley and looking toward bigger peaks.
  • Streams/Waterfalls – 5.  There is an impressive waterfall gorge right at the beginning of the trail.  Don’t miss seeing it at either the beginning or end of your hike.
  • Wildlife – 2. We saw/heard red squirrels, chipmunks and birds.
  • Ease to Navigate – 1.5. The signage on this network of trails is quite confusing.  There are many foot and bike trails that cross multiple times in the woods.  Not every sign lists the destination of Flume Knob.  We basically continued on whatever trail seemed most uphill and checked our progress with the signs that did list Flume Knob.
  • Solitude – 3.  It’s hard for us to judge the popularity of this trail.  We hiked it on a day that traffic was mostly impeded by the Lake Placid Ironman.  Most people stayed away from the race course because the logistical issues it caused with traffic in the area.  We saw a few other hikers, most of them knew someone racing and were hiking to pass the time until they could meet up with their racing friend.

Download a Trail Map (PDF)

Directions to trailhead: From the intersection of Route 73 and Route 86 in Lake Placid, follow Route 86 toward Wilmington. Continue for 10.5 miles to the Flume Parking on the left. Coordinates for the parking lot are 44.3701899,-73.8363359.

Apple Orchard Falls – Cornelius Creek Loop

This 6-mile hike is jam-packed with spectacular stream scenery and waterfalls – the most impressive being the 200 foot Apple Orchard Falls.

View the Full Album of Photos From This Hike

Apple Orchard Falls
Beautiful Apple Orchard Falls plunges about 200 feet down the mountainside. Below: Even the fire roads were scenic on this hike; Abundant wildflowers including Dutchmans Breeches; There were several stream crossings to negotiate.

Fire Road Dutchmens Breeches Crossing

Christine Says…

Apple Orchard Falls has been on our ‘must hike’ list for years now, and I’m so glad we finally got out there and did it!  It’s a bit of a drive from our home-base of the central Shenandoah valley, but it was well worth the trip!  We hiked it on a cool, rainy day in mid-April.  We thought we’d have the trail all to ourselves, but as our car bumped along the forest road nearing the parking area, a runner went by.  Then three more runners… and then a cluster of ten.  Pretty soon we realized that there was some kind of race going on in the vicinity.  It turns out we picked the same day as the Promise Land 50K for our hike.  We ended up sharing the first half of our six-mile route with 300+ trail runners.

They were all friendly folks, but it was a little stressful to constantly be looking over my shoulder, watching to make sure there wasn’t a racer on my heels, needing to pass.  I certainly didn’t want to get in anyone’s way as they cruised toward victory or a personal record!  I still enjoyed the gorgeous stream scenery as we ascended alongside North Creek.  The sound of the water was soothing. The hillsides along the trail were covered with trillium and purple wild geraniums.  The air was filled with a light misty rain and all the trees were unfurling their brilliant spring green leaves.  With all these pleasures along the trail, I tried my best not to let the constant stream of passing racers disrupt the zen-like peace.

Christine checks out the creek early in the hike.
Christine checks out the creek early in the hike. Below: We hike the loop on the same day the Promised Land 50K was running.  It made for a crowded trail; Trillium was blooming everywhere; Pretty little rapids on the creek.

Promised Land 50K Runners Trillium Small Cascade on North Creek

The trail was in great shape and ascended steadily and moderately uphill.  There were several sturdy footbridges across the creek on our hike up.  Around 1.3 miles into the hike, the climb became a little steeper and rockier. Right before reaching the base of the falls, we passed through a jumble of huge boulders.  At first, we could only see the falls through the trees.  They were majestic, but obscured by the foliage.  We continued uphill, making a wide switchback before coming to a curved wooden bridge and a viewing platform at the base of the fall’s largest plunge.

Adam set up my tripod and I spent some time photographing the waterfall from a variety of angles.  I wish the trees around the falls had been a little more ‘leafed out’.  The green would have made an even more attractive frame for the falls, but it was still very nice.  I was challenged by the rain – which was beginning to fall at a steadier pace. Droplets kept landing on my lens, and making blurry bubbles on each of my photos. I used a hat as an umbrella as much as I could. While we were enjoying the waterfall,  the bulk of the racers passed us by.

After leaving the falls, we climbed the 175 stairs above the falls.  About halfway up the stairs, we caught our one open view of the hike – a pretty peek out over a spring green valley.  Shortly after the top of the stairs, we passed another small waterfall.   There was a nice established campsite near the smaller fall.  What a idyllic place to spend a night!  In fact, we saw many great campsites all along this loop.  I think it would make a great beginner backpacking trip or short gear shakedown route.

Bridge
There were several sturdy, well-constructed bridges on the trail toward the falls.  Below: Just before reaching the falls you climb through an opening between huge boulders; The viewing deck for the falls is very nice; Adam checks out the falls.

Boulders  Side View Falls

About a third of a mile past the small waterfall, we reached Apple Orchard Road, which is a grassy fire road that connects to the Cornelius Creek trail.  The racers all continued uphill toward the Blue Ridge Parkway.  We turned right and followed the fire road for about a mile to its intersection with the Cornelius Creek Trail.  Fire roads are typically sort of dull, but this one was actually quite nice – lush green, curvy, and decorated with wildflowers – more trillium, geraniums, violets, and enormous dense patches of Dutchman’s Breeches.

The Cornelius Creek trail was probably my favorite part of the hike.  The racers were off our tail, and I could fully focus on the spring forest and sound of flowing water.  The rain was coming down steadily, so my photo opportunities were a bit limited. Hopefully, I captured enough to adequately convey the feel of Cornelius Creek.  It was lovely with so many small cascades and swimming holes.  The only real challenge on this part of the hike were the two significant stream crossings.  The first (pictured at the top of the post) was wide, but not very deep.  Our toes got a little wet.  But the second was quite deep, wide, and fast-moving.  We packed all of our camera gear and electronics away in dry bags and plunged in.  Even rock-hopping, the water came halfway up to my knees.  The footing was small, shifty, and slick!  Thankfully, we made it across without falling completely into the water!  The last bit of walking was done with sodden shoes and socks – that squishy feeling is always so weird!

When we got back to the car the first thing I did was take off my soaked shoes and socks and put on flip flops!  Then we were off on our way for a well-deserved lunch at Peaks of Otter!

Adam Says…

We got up early to hit the road and beat the crowds on this hike.  With a gloomy day with some rain scheduled around the early afternoon, we wanted to make the best use of our day.  When we first saw the runners on the gravel road, I thought well at least they are going in the opposite way.  We parked our car at the end of the road and there was a race stop set up for people to check in, get some snacks and water and keep running.  Little did we know we would see most of them all again on the trail.

We got out of our car and found out that there were going to be runners on the trail.  We thought we would at least try to get a head start, so we jumped on the trail right away.  We took the blue-blazed Apple Orchard Falls trail left of the kiosk that came to a wooden bridge almost immediately.  We soon came across the first runner of the day on the trail, who we heard ended up coming in 2nd in the race.  Along the trail, there were funny signs to try and inspire the runners along the way (and most were done with Game of Thrones references).  At .2 miles, take a right at the intersection to stay on the trail.

Spring Green
A view into the valley on our way up the stairs. Below: Adam takes in a side view of the falls; Climbing the famous stairs, the smaller waterfall above Apple Orchard Falls.

Side View of Apple Orchard Stairs  Small Falls Above Apple Orchard

The trail continues along North Creek for a steady uphill.  At 1.2 miles, you reach a couple of bridges and a small creekside campsite.  Crossing over the second bridge, the trail becomes steeper uphill.  Eventually, you get some views of the falls to the right as you make the climb up.  But don’t worry, the trail leads right up to the falls.  The climb up to the falls is also very steep.  But, as you reach the falls at 2.0 miles, there is a nice bench and platform, inviting you to take your time to enjoy the views.  We stayed here for a while and saw a ton of runners pass by.  Some of them just took a quick glance, some walked slowly by, but one guy stopped to take a picture.  I guess the runners had different levels of competitiveness and different levels of exhaustion at this stage of the race.

The trail continues on and winds around the hillside before beginning a series of stairs.  Along the climb, there was a nice viewpoint that gave you glimpses of mountains to the west.  We continued uphill along the trail until we reached another waterfall around 2.3 miles.  There was a nice campsite by this waterfall also and we thought it would be a great overnight stop for a backpacking trip. At 2.5 miles, we reached a junction with a fire road.  We took this fire road to the right.  At 3.7 miles, the trail meets a junction with the Cornelius Creek Trail.  We headed straight to start the Cornelius Creek Trail.  This trail descends quite steeply.  As we had seen the runners on this trail when we first arrived at the parking lot, I felt that I too was having to run down the steepness of this trail in the beginning.  Be careful where you step, since the trail is incredibly steep and filled with loose rock, begging for a twisted ankle or fall.  At 4.2 miles, the trail runs along Cornelius Creek.

Walking the Cornelius Creek Trail
Christine walks along in the rain. Below: Most of the hike closely follows water; A lovely little cascade on the Cornelius Creek Trail; Post hike beers at Apocalypse Ale Works.

Cornelius Creek Small Falls on Cornelius Creek Post Hike Beers at Apocalypse

Cornelius Creek was a long exposure photographer’s dream.  There were so many spots where you saw small waterfalls and swimming holes along the way.  Contrasted with the lush green forest, it was truly beautiful to see.  We did have to cross Cornelius Creek a couple of times and with any recent rain, you are likely going to get your feet wet.  Be careful as there are some deep holes along the creek crossings that could have you up to your waist if you don’t step carefully.  We made it across and continued our hike.  The rain was coming down fairly steadily, so we didn’t stop a lot for fear of ruining camera gear, but it was one of the most beautiful creekside hikes you will see in Virginia.  Right before you return to the parking lot, you’ll see a large campsite (with even a rope swing put in).   We got back to the parking lot at the 6 mile marker.

On our way back home, we took a detour and drove along the Blue Ridge Parkway to have lunch at Peaks of Otter.  My family used to picnic here yearly, so this spot always holds a near and dear place in my heart.  We had a nice lunch with music from a local singer.  We decided also to stop by Apocalypse Ale Works brewery for one of our favorite post-hike things to do – beer sampling.  The drive back home was rainy most of the day, but we felt like we had accomplished a lot on a dreary day.

Trail Notes

  • Distance – 6 miles
    (Check out the stats from Map My Hike)*
  • Elevation Change – 1438 ft.
  • Difficulty –  3.  This is a great moderate hike!
  • Trail Conditions – 4. The trail is very pleasant to walk.  Sturdy bridges and a wide viewing platform are available so the walk up to the falls along North Creek is pleasant and safe.  There are a couple crossings on the Cornelius Creek descent that can be tricky when there has been recent rain.
  • Views  2.  There is one nice view when you’re climbing the stairs after visiting Apple Orchard Falls.
  • Streams/Waterfalls – 5.  Spectacular – you are within view of the stream for most of the hike.
  • Wildlife – 1.  Too many people to see much wildlife!
  • Ease to Navigate – 4. The signs make this route pretty easy to follow.  There are several places where trails go in multiple directions, but this route is well marked.
  • Solitude – 0.  It’s supposedly the most popular hike in Jefferson National Forest.  It was cool and rainy when we hiked it, so there weren’t many other day hikers.  But there were 300+ racers on the trail with us.

Download a Trail Map (PDF)

Directions to trailhead:  From I-81, take exit 168 for VA-614 toward Arcadia.  Turn on to VA-614 heading east and go 3.3 miles.  Turn left on to North Creek Road.  Go 2.8 miles and turn right on to an unnamed road*.  This road is a gravel road.  Follow it for 2.2 miles until you reach the large parking lot.  The trail starts left of the kiosk.  Right of the kiosk, the trail going uphill is your return route.  *Since this unnamed road can’t be found on GoogleMaps, I would suggest printing the trail map above to have a way to find this road.

Moormans River & Big Branch Falls

This 4.5-mile hike is close to Charlottesville and is extremely popular for its beautiful river scenery, swimming holes, and waterfalls.

View the Full Album of Photos From This Hike

Adam at the Falls
Adam at the Falls. Below: The beautiful Moormans River; Sugar Hollow Reservoir; Lunch stop after the hike.

Moorman's River Reservoir Crozet Pizza

Adam Says…

For people that are looking for a nice family-friendly waterfall near Charlottesville, look no further than this hike.  In fact, it was rare to not see groups of people that weren’t hiking as a family.  Most of the families with smaller children tended to stop along the river at some of the crossings to eat a snack or try and skip stones.  And I can’t think of any hike that I’ve been on where I have as many dogs on a trail.  So, if you want to take Fido for a walk (and a possible dip in the river) near Charlottesville, this would be a great spot as long as your dog is friendly with other dogs.  We saw a couple of dogs that were running full speed chasing each other and crashing into the water.  The park requires all dogs to be leashed, but we saw many (most!) people breaking this rule.

When we arrived at the trailhead, there were a ton of other cars here.  There are two parking lots on this hike – the first being the larger lot and the second being a half-mile further up a rough road, but I would recommend having a four-wheel drive due to the uneven ground (even though we did see a convertible BMW driving on here with reckless abandon).   The first, main parking lot was full, so we ended up parking along the roadside just a short distance prior to the first large parking lot.  From the parking lot, there are two trails.  You want to take the one that continues up the gravel road heading north (North Fork Trail).  Walking up the gravel road, we came to the second parking area at .5 miles.  There is a large closed gate directly behind the lot where the trail continues.

Stream Crossing
Christine rock hops across the stream. Below: The river was beautiful and clear; Adam checks out the rock wall at one of the crossings; Rapids from above.

Pretty River Rock Wall Scenic River

Most of the trail gives you nice views of the Moormans River as you are walking by.  In .75 miles, you reach your first of four river crossings.  There had been a recent, heavy rain so we were expecting these to be a little challenging.  The first three of the rock crossings were fairly easy to rockhop across.  The fourth crossing however required us to get our feet wet in the fast-flowing current.  We brought our crocs to change into for just this occasion and the cold water was refreshing.  It always makes us a little nervous carrying camera equipment though when the water is moving fast and you are not 100% sure of how deep the water is or if the rock you are putting your foot on is stable.  The water ended up halfway up my calf at one point, so if there has been a lot of rain, be careful.

At the 2.0 mile marker, the trail starts to gain some elevation.  At 2.15 miles, we took the side trail to Big Branch Falls.  You arrive at the lower falls fairly quickly, but continue further and you will see the larger Big Branch Falls at 2.25 miles.  Because of the recent rains, the water was flowing nicely over the top, but probably during the dry summer months, this would be less impressive.  After we took some time to enjoy the falls, we headed back the way we came to get back to our car at 4.5 miles.

After our trip, we headed to nearby Crozet, VA to try Crozet Pizza.  We had heard about how wonderful their pizza was for about 25 years now and I’m glad to say that we finally got to try it.  Then, we stopped right down the road at Starr Hill brewery to sample a few post-hike beers.

Christine Says…

What a beautiful March day we had to hike Moormans River!  It was the first day in a long time that actually felt warm.  Early wildflowers were starting to bloom and the sunshine felt great.  We started out pretty early, but found the parking lot already completely full at the trailhead.  We had to find a place alongside the gravel road with enough room to park our car.  After we were situated, I started MapMyHike, grabbed my camera, and started hiking.

I pointed my camera up to take a shot of the first trail marker, and the camera wouldn’t even turn on! Hmm… I had recently charged the battery, so it didn’t really make sense.  I pulled out the battery and memory card to reset everything, and still no power.  I figured that I had finally killed my Canon Rebel T2i.  That camera has accompanied me on countless hikes.  It’s been rained on, bumped against rocks, left sitting out overnight in the damp.  I’m not careful with it at all, because I find I just don’t take photos when my camera is safely packed away in its padded, waterproof bag.  I knew it would eventually meet this end.  So… today, you get photography from my cell phone!  Honestly, my phone takes decent photos – just not quite as nice as my dSLR. (Fortunately, when I got home, I found that the battery was drained after all.  I guess I stored it accidentally with the power button depressed.  The Rebel lives to fight another day!)

Lower Falls
The lower falls are really pretty. Below: A view of the upper and lower falls; Rock hopping; One crossing was too deep to rock hop – so we waded.

Looking up the Falls First Attempt  Better Wading

The water was flowing beautifully and we really enjoyed the sights and sounds of running water all through our hike.  The trail was one of the easiest we’ve hiked in a long time. It’s relatively level and not too rocky.  The stream crossings were all moderate to easy, with the exception of the final one. The last crossing required us to put on water shoes and wade across.  We saw several people attempt to rock hop, but they all ended up with wet boots.

When we reached the spur trail to the falls, there were several groups of people at each viewing point.  We waited our turn and spent a few minutes enjoying and taking photos of the upper falls. One group had climbed up to the top of the falls and was picnicking on the rocks alongside the cascade.  A man with the group walked out to the precipitous, domed edge of the falls several times. We were worried he might slip and have a nasty fall to the rocks below. Thankfully that didn’t happen!

On our way back down, we scrambled off the trail to a rock shelf beneath the lower falls. On the climb back up, I stuck my trekking pole in a hidden hole.  When the pole suddenly dropped and vanished under the weight of me climbing up, I slipped and smashed the bridge of my nose into the trekking pole handle.  Wow – did that hurt!  I thought I hit hard enough to break the skin open, but thankfully it was just swollen and lightly bruised.  Between that and the broken camera, it was not one of my luckier days on the trail!

Dam and Reservoir
The dam and reservoir. Below: Yum – Crozet Pizza; Flight at Starr Hill.

Crozet Pizza Starr Hill Beer

The hike back went very quickly.  After we got back to the car, we made our way to a great lunch at Crozet Pizza and a flight of beers at Starr Hill.  It was a fun day!  I would definitely recommend this hike when there has been significant, recent rain.  The falls dry up pretty quickly.

Trail Notes

  • Distance – 4.5 miles
    (Check out the stats from Map My Hike)*
  • Elevation Change – 625 ft.
  • Difficulty –  2.  The hike is not difficult with the distance and elevation, but the stream crossings could be a challenge.
  • Trail Conditions – 4.  The trail is heavily-used and well-maintained. 
  • Views  1.5.  You do get some elevated views of the river.  Views from the top of the dam (after the hike) are really nice too, but don’t count in the score because they’re not technically part of the hike!
  • Streams/Waterfalls – 4.  The waterfalls are nice to see (but could be disappointing in dryer months), but the highlight is probably walking along Moormans River. 
  • Wildlife – 0.  Due to the location and popularity, I wouldn’t expect to see much. 
  • Ease to Navigate – 4.  Once we knew where to go from the parking lot, it was easy to navigate. 
  • Solitude – 1.5.  I would expect on a nice day, you should see lots of people.  Go early to beat the crowds and to get parking. But, there weren’t as many people going all the way to Big Branch Falls.

Download a Trail Map (PDF)

Directions to trailhead:  From I-64 near Charlottesville, take exit 124 for US-250W.  Turn right on 250-W and go 5 miles.  Take the Country Road 654/Barracks Road exit.  Turn right on Barracks Road and go 2 miles.  Continue on SR 601/Garth Road for 9 miles.  Continue straight on to Sugar Hollow Road for 5.5 miles.  When you pass the Sugar Hollow Reservoir on the left, you are getting close.  The road turns into gravel and you will eventually arrive at the first large parking area.   Park here and walk further up the road for .5 miles until you reach the second parking area and closed gate.

Kepler Overlook

This easygoing 6-mile hike offered solitude, great backcountry campsites, and nice views at the top! It was a perfect hike to tackle with a group of friends and dogs.

View the Full Album of Photos From This Hike

Adam takes in the beautiful ,but hazy, view from the top.
Adam takes in the beautiful, but hazy, view from the top. Below: Walking to the trail from the parking area.  This was really the only confusing part of the hike; Crossing Cedar Creek; Right after crossing the creek there is a superb campsite with hewn benches and a high hewn counter-top for cooking.

Start of Hike Crossing Cedar Creek Nice Campsite

Christine Says…

Back in January, we planned a little section hike along the Appalachian Trail with a group of friends. However, icy conditions closed the Blue Ridge Parkway, leaving us scrambling for an alternate plan. We stumbled across the Kepler Overlook on Hiking Upward and decided it would be a good ‘plan B’. Our group met for breakfast at Mr’ J’s Bagels (yay carbs!) in Harrisonburg before heading up to the trailhead.

We expected to have to park about a third of a mile from the official trailhead, but we found the forest service gate open and were able to leave our cars right at the hike’s start point.   From the parking area, there are trails and forest service roads leading in several directions.  This was probably the most confusing part of the hike.  You want to go straight up the forest road with the permanently closed gate.  If you don’t reach the blue-blazed Tuscarora trail within the first .3 mile of your hike up the road, you’ll know you’ve gone the wrong way!

Hiking Along
The group hikes along the trail. Below: Crossing a small footbridge: Clark and Maia on the trail; Adam makes his way uphill.

Stream Crossing Clark & Maia Adam Climbs Uphill

At the junction with the Tuscarora trail, go left.  You’ll pass another closed gate before coming to Cedar Creek.  The crossing of Cedar Creek is fairly wide and might be tricky in wet conditions.  We were able to negotiate the crossing with some careful rock hopping.  Shortly after the crossing, you’ll come to one of the nicest backcountry campsites I’ve seen.  Someone has taken the time to build wide benches, a large fire pit, and even a high counter-top for cooking.  It would be a great group campsite with easy access to water.

From the campsite, continue to follow the blue-blazed trail.  There was one place that the trail appeared to go straight, but actually turned.  We all missed the turn and had to backtrack a few hundred feet where the trail crosses the stream again using a footbridge made of branches.

After crossing the stream, the trail climbs Tea Mountain.  It’s never a tough climb, but it’s a steady uphill.  The trail alternates between narrow footpath and wider road-like conditions.  The trail follows along several switchbacks.  At about 1.9 miles into the hike, you should see an unmarked side trail on the left.  If you follow this side trail for a few hundred feet, you’ll reach a large rock jumble.  From the top of the rock jumble you get a great view of the mountains beyond.

Spur Trail
Adam enjoys the first view of the hike. Below: A light dusting of snow on the shady side of the mountain; There were plenty of nice campsites along the ridge; The view was pretty but very hazy.

Dusting of Snow Campsite on the Ridge Hazy View

After taking in the view, return to the Tuscarora trail and continue uphill for about another mile or so until you reach the saddle between Tea and Little North Mountains.  Along this ridge, there are several nice viewpoints and lots of open, flat space for camping.  We took some time to explore a couple different vistas.  The views were nice, but the sky conditions were really hazy.

After enjoying the mountaintop, we descended the way we came up.  On our way home, we decided to check out a new farm brewery near Edinburg.  Swover Creek is a working farm – they grow fruit and hops, raise chickens, and make sausage from locally produced meat.  They’ve recently started a brewery and are working on building a tasting room in their old barn.  We all tried a flight of their four beers (the persimmon ale was my favorite).  We also had their house-made soft pretzels and mustard and enjoyed a sampling of their different sausages.  It was a fun stop and I definitely recommend checking them out if you’re in the area!

Adam Says…

The Kepler Overlook hike was one that we had been wanting to do since we heard about it from our friends at Hiking Upward.  This hike leads to nice views as you climb up to Little North Mountain.

The trail started off as we went past the closed gate up the fire road.  There is a sign just past the gate showing the inter-connected trail system.  Continue up the fire road for about .3 miles and then take a right on the blue-blazed Tuscarora Trail.  The Tuscarora Trail leads down to Cedar Creek.  Cross a small stream at .5 miles and you will reach a nice campsite.  Continue along the trail and the trail takes another stream crossing (this time over a small log bridge with a branch handrail).  The trail turns quickly to the left as you begin your climb up Tea Mountain.  At 1.9 miles on a switchback, you reach an unmarked  side trail.  Following this for about .1 miles will take you to a rock outcropping with some views to the west.  Backtrack to rejoin the Tuscarora Trail.

Nice View - Kepler Overlook
One of the rocky outcroppings along the ridge. Below: Time for a group selfie; Kris takes in the view; Descent.

Selfie More Views Descending

At 2.5 miles, the trail reaches a Saddle between Tea Mountain and North Mountain.  From here, climb up North Mountain.  The trail levels out at 3.0 miles at a large area for backcountry camping.  From here, you have two options for views.  Cut through the campsite to the right along the ridge for a nice view.  You can also go to the left and make your way again towards the ridge to get more views to the east.

We enjoyed our hike with friends and dogs.  You can check out Clark’s YouTube video below.  We were amazed at how much he was enjoying the hike and even took some time to enjoy the view himself.

Van Buren Furnace
Van Buren Furnace sits near the trailhead. Below: Post-hike beers at Swover Creek;  Pretty farm chicken!

Beers at Swover Creek Swover Creek Chicken

After the hike we hit Swover Creek Farm to try out their brewery.  Since the tasting room is not yet built, we enjoyed our beer in the farmhouse.  I have described this when talking to friends as if you were to go over to your grandmother’s house and drink beer.  We got our flight of beers from the small room downstairs and then took them upstairs to the larger “living room”.  There were some large tables and older furniture, so it really felt like a visit to your grandmother’s.  All of the people that were there were local people and one man brought a thermos to fill with beer instead of a growler.  They brought out samples of their sausage they made on the farm and we ended up buying some to take home.  It was such a warm, home environment and we thought they did a great job with the small-batch beers they had made.  This was a perfect post-hike stop.

guestdogsClark and Maia Say…

Our friends brought their lab (Clark) and shepherd (Maia) along on the hike!  They were great trail dogs to have along for the day!

Clark was fitted with a GoPro — so don’t miss seeing the hike from his point of view!  🙂

Trail Notes

  • Distance – 6 miles
    (Check out the stats from Map My Hike)*
  • Elevation Change – 1120 ft.
  • Difficulty –  3.  A pretty easy hike with a bit of steady, moderate climbing.
  • Trail Conditions – 4.  Trail was in great shape.
  • Views  3.5.  Nice, but slightly obstructed by trees.  
  • Streams/Waterfalls – 3.  Cedar Creek is pretty and a solid water source.
  • Wildlife – 2.  We didn’t see anything, but there are plenty of deer and bear in the area.
  • Ease to Navigate – 2.  There are a couple places where it’s easy to lose the trail.  Also, there are several trails and fire roads from the parking area that can easily be confused.
  • Solitude –4.  We saw only a small handful of people on a nice, sunny, winter weekend day.

Download a Trail Map (PDF)

Directions to trailhead:  Take exit 291 on I-81 heading west on SR 651.  Go 1.5 miles and take a left on SR 623.  Go 4 miles and take a right on to SR 600.  Go 4.4 miles and take a left on SR 603/Van Buren Road.  Continue on Van Buren Road for 2.7 miles and you will see parking on the left.  There are two parking areas here, but pass the first parking area to get to the second parking area which is on the lefthand side.  Park here and retrace your path a short distance to see the closed gate and the fire road where your hike will start.

MapMyHike is not necessarily accurate, as the GPS signal fades in and out – but it still provides some fun and interesting information.

Appalachian Trail – Tye River to Mau-Har Junction

This 3.8 mile hike on the Appalachian Trail completed a short 1.9 mile gap in unbroken Appalachian Trail mileage we left after hiking the Three Ridges circuit in 2012.  After you cross the scenic Tye River footbridge, the hike doesn’t boast any views or unique scenery.  It’s a moderate uphill climb to a junction marker in the woods.

View the Full Album of Photos From This Hike

Tye River Footbridge
Our hike started off headed northbound over the Tye River footbridge. Below: White Blaze painted on the bridge; Adam and Christine on the bridge.

White Blaze Adam and Christine on the footbridge

Adam Says…

We have been working on section hiking some of the Appalachian Trail through Virginia.  Hopefully one day, we will have the entire section that crosses Virginia on here.  In doing it in sections, we have ended up with a few small gaps between sections.  This gap was created when we hiked Three Ridges and did it as a loop trail that included a return trip on the Mau-Har trail.  I got a text from my friend Bryce from Hiking Upward that mentioned he was going to try and hike Spy Rock the next day.  I mentioned that we were trying to get this section done as well, so he agreed to accompany us on this section also.  It was January 1st and we wanted to start the year off right with a great day of hiking.

We parked our cars at the lot on 56 where the Appalachian Trail crosses the Tye River.  We crossed the road and almost immediately you come upon a large suspension bridge that crosses the Tye River.  We knew this was probably the highlight of the trip, so we took some time to get some pictures across the bridge and of the Tye River from under the bridge.

View Through the Trees
Looking through the trees toward the Priest. Below: Adam on the trail; Our stop point for this hike was just a sign at the junction of the AT and the Mau-Har trail.

Adam Hiking End Point

After crossing the bridge, the trail takes a few switchbacks and then starts a fairly steep uphill through the woods.  Looking back from the trail, we were able to see some obstructed views of Pinnacle Ridge and The Priest, but when spring hits these views will likely be more obstructed.  On our climb up, we saw a dog come racing towards us.  As it turns out, it was a bear-hunting dog, as it had a large radio collar around his neck.  The dog barely stopped at all and barreled past on a mission to try and find a bear.  We continued our hike up and came up to the sign post that marked the trail junction with the Mau-Har trail.  From this point, you could continue on the Appalachian Trail to the right to reach Chimney Rock and Three Ridges or take a left on to the Mau-Har Trail, to reach the Maupin Field Shelter.  We tapped the post to mark that we had completed this section and made our way back.

After our hike, we got in our cars and stopped by Crabtree Falls, which had frozen water on the sides.  This iconic waterfall is always a nice place to visit any time of year.  Our next stop was to hike up to Spy Rock.  When we first arrived, the parking lot was full of cars and vans.  We felt defeated and were about to make the decision to not do the hike, when someone came down the trail and mentioned that a few car loads were getting ready to leave.  We waited just a couple of minutes and two parking spaces opened up.  We hiked up to Spy Rock, which was covered in snow in some parts.  At the top of the trail, Bryce decided he wanted to bushwhack to another rock outcropping that would look back on Spy Rock.  So, we set a plan to try and take pictures of each other from the different summits.  The climb up Spy Rock was pretty dangerous, since the water that falls into the cracks that your normally use to help pull yourself up was frozen, making it very treacherous.  When we got up to the top of Spy Rock, the wind was blowing so hard and the temperatures from the wind chill put it way below freezing.  We waited for a few minutes at the top.  We eventually saw Bryce making his way to the rock outcropping.  We took a quick photo of him and then made our way off Spy Rock, since we felt we could get frostbite fairly quickly up there.  We reconvened where we had split up and then made our way back down the mountain.  We got back to our cars and headed to Staunton for lunch.

This area where we hiked is a real sweet spot for Virginia hiking.  You have The Priest, Three Ridges, Crabtree Falls, and Spy Rock all within a few miles.  If you want a place to get a few great days of Virginia hiking, this is a great destination.  We were glad to reconnect again with Bryce and getting another AT section checked off our to-do list.

Tye River
The lovely, scenic Tye River.  Below: Adam and Bryce crossing the footbridge at the end of the hike.

Adam Crossing the Tye River Footbridge

Christine Says…

I don’t really have anything to add about the hike!  It was just a pleasant walk in the woods that finished a hole in our continuous AT miles.  It was great to see Bryce (Hiking Upward) and spend the first day of 2015 on the trail!

After a couple little hikes, we all went for a decadent lunch and beers at Byers St. Bistro in Staunton.  They have great sandwiches and a nice variety of beers on tap.  Check it out if you’re in the area.

Trail Notes

  • Distance – 3.8 miles
    (Check out the stats from Map My Hike)*
  • Elevation Change – 1100 ft.
  • Difficulty –  3.  The climbing is steady and moderate the entire way up.
  • Trail Conditions – 4.5.  Well maintained, smooth trail.
  • Views  0.  No views other than a few glimpses through bare winter trees.
  • Streams/Waterfalls – 0.  The stream and waterfalls are a little further up trail from this spot.
  • Wildlife – 0.  We did see a hunting dog – that probably scares wildlife away.
  • Ease to Navigate – 4.  There’s really no place to go wrong here.
  • Solitude –2.  This trail leads up from a very popular AT access point.  You can expect to see a good number of people.

Download a Trail Map (PDF)

Directions to trailhead:  From I-81, take exit 213A to head on to US-11 South towards Greenville.  Go 8.2 miles and take a left on to US-56.  Go 16.6 miles down US-56 and you will come to a parking lot for the Appalachian Trail on the right-hand side of the road.  Park here and then cross the road to start hiking on the Appalachian Trail heading north.

MapMyHike is not necessarily accurate, as the GPS signal fades in and out – but it still provides some fun and interesting information.