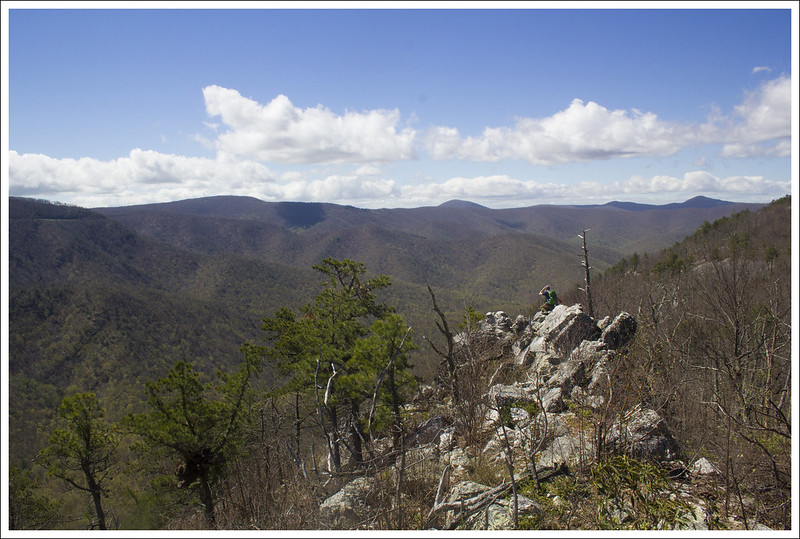
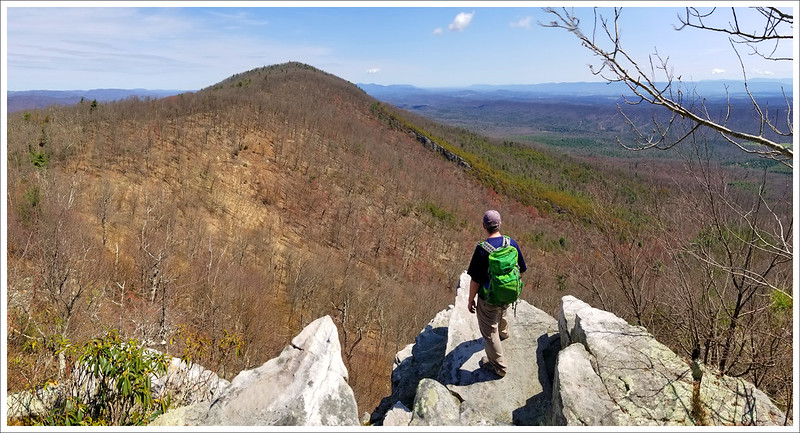
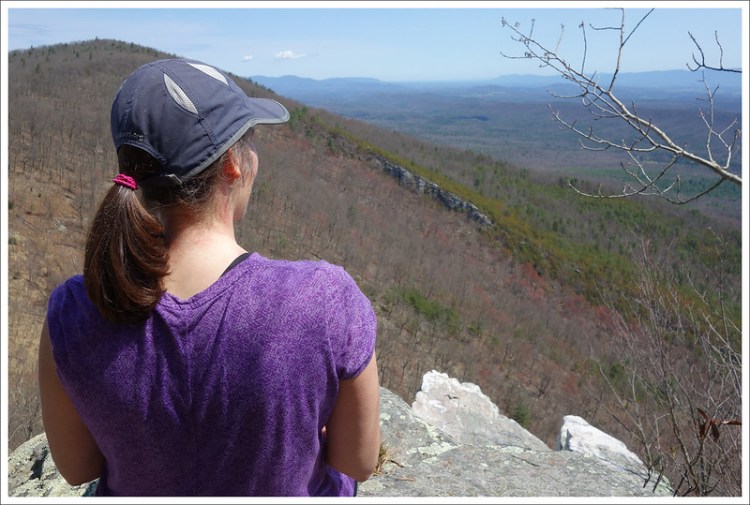
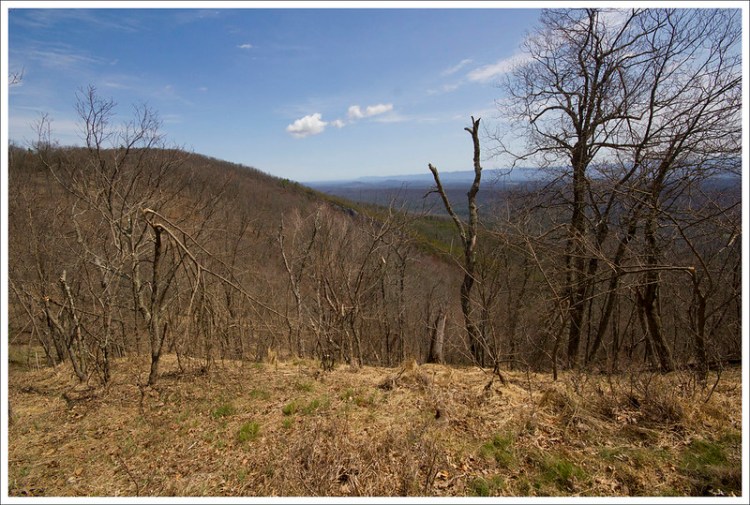
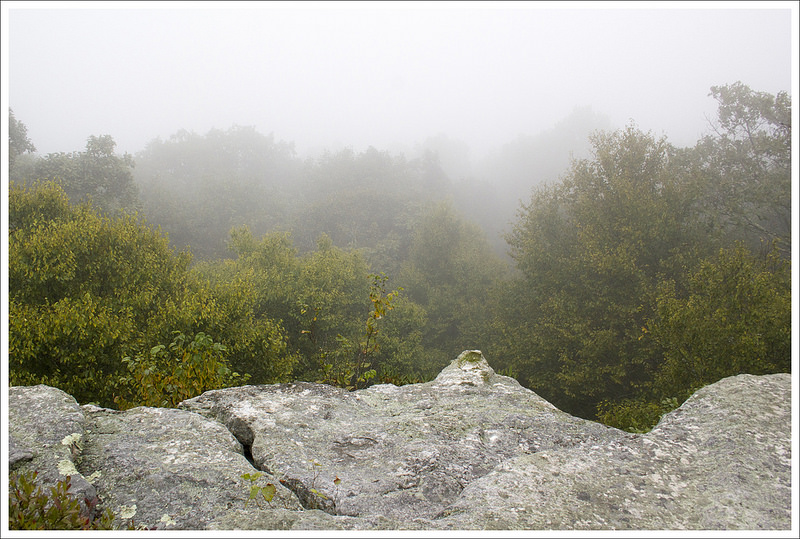
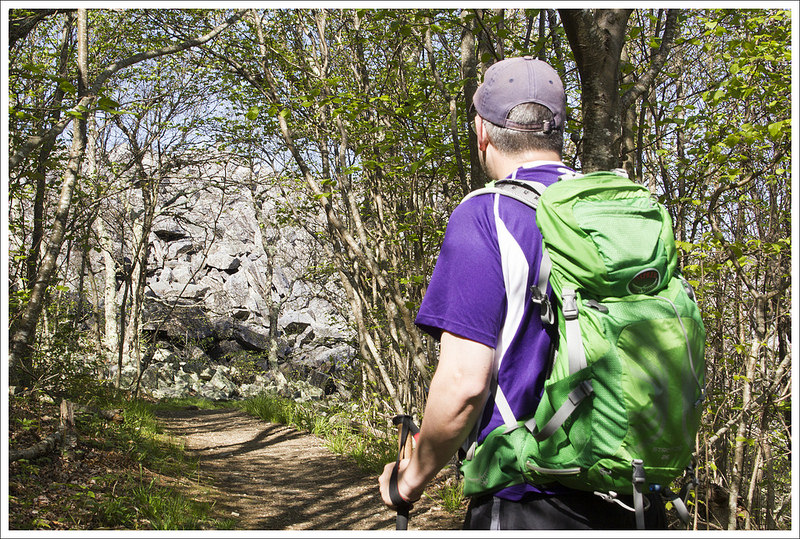
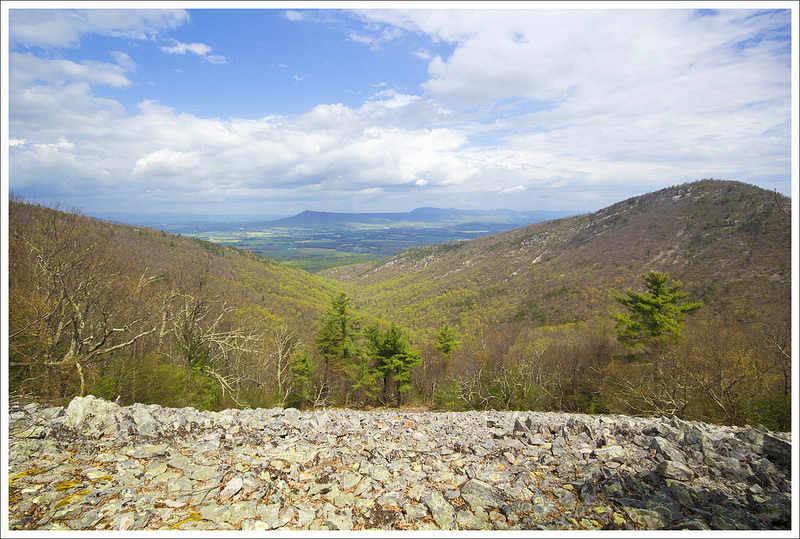
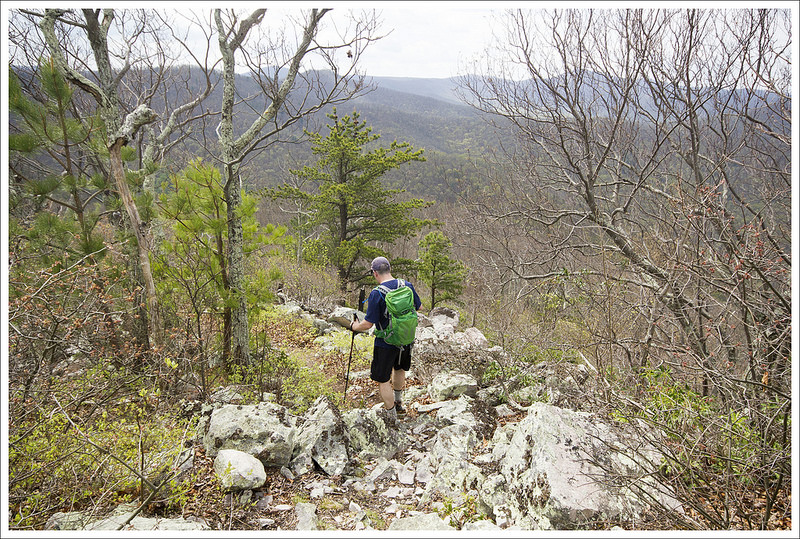
Are you looking for a short hike with great views? This 3.2 mile route takes you through fire and storm-damaged terrain to a stunning vista on Rocky Mountain (not to be confused with Rocky Mount – another nearby hike in Shenandoah).
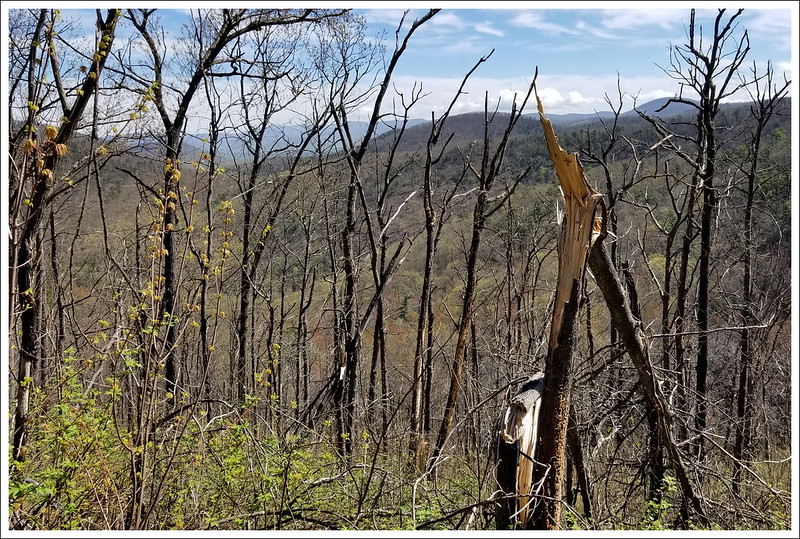
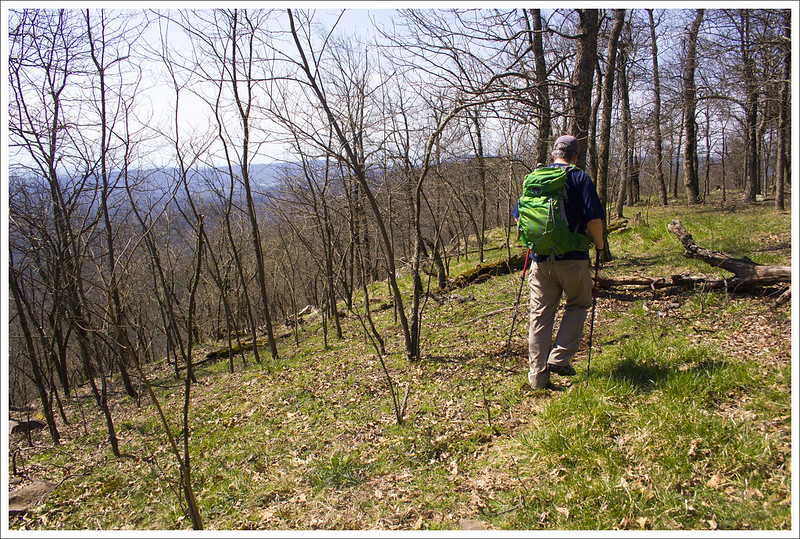
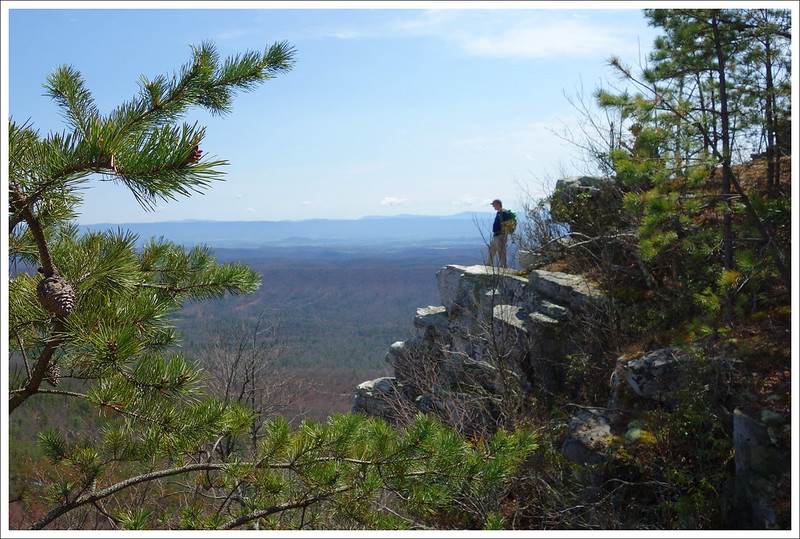
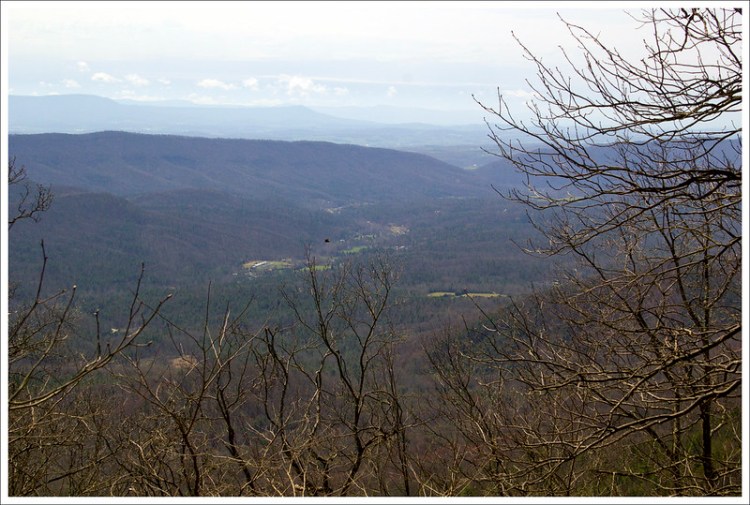
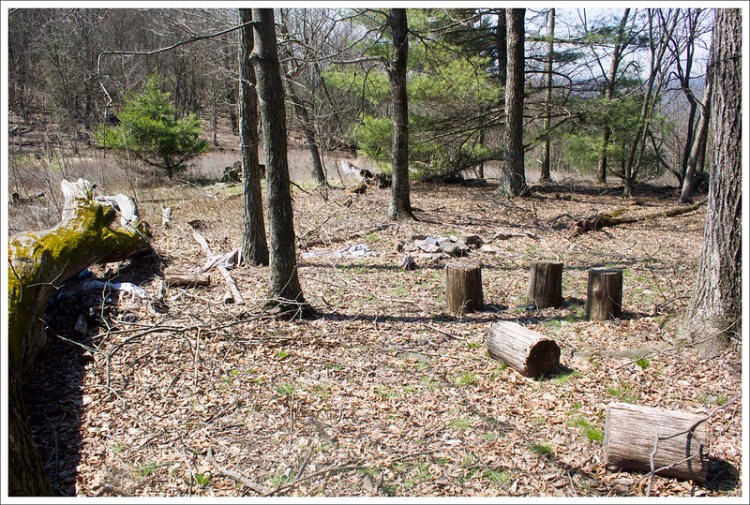
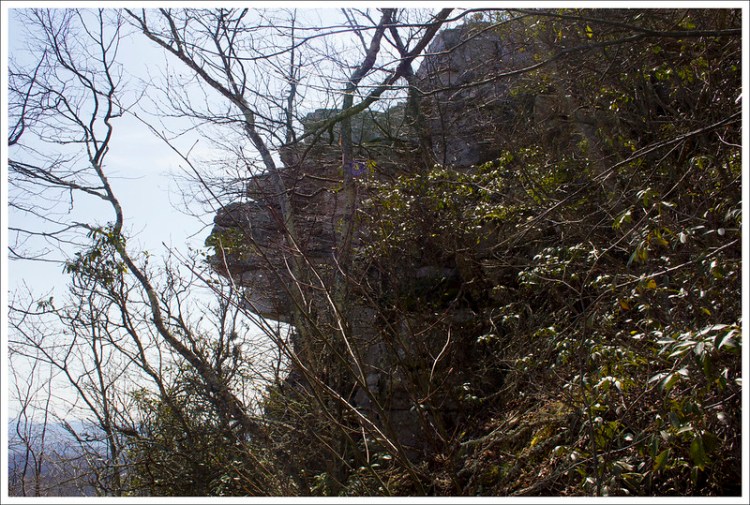
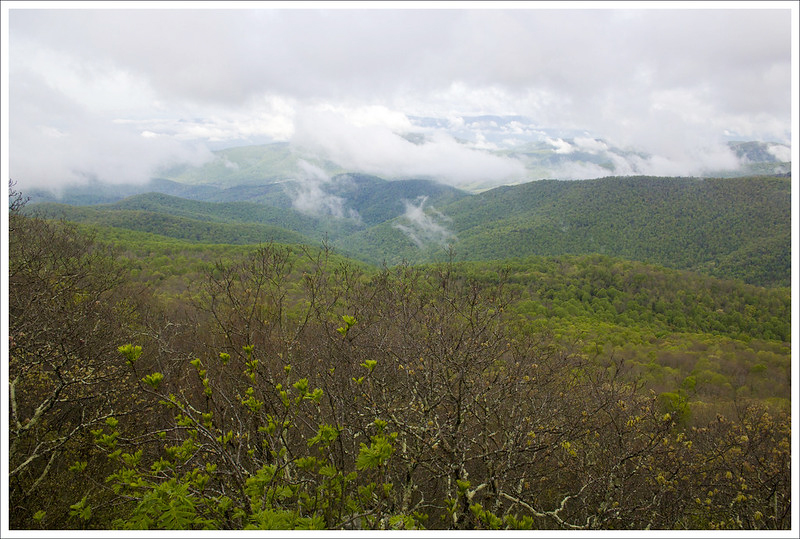
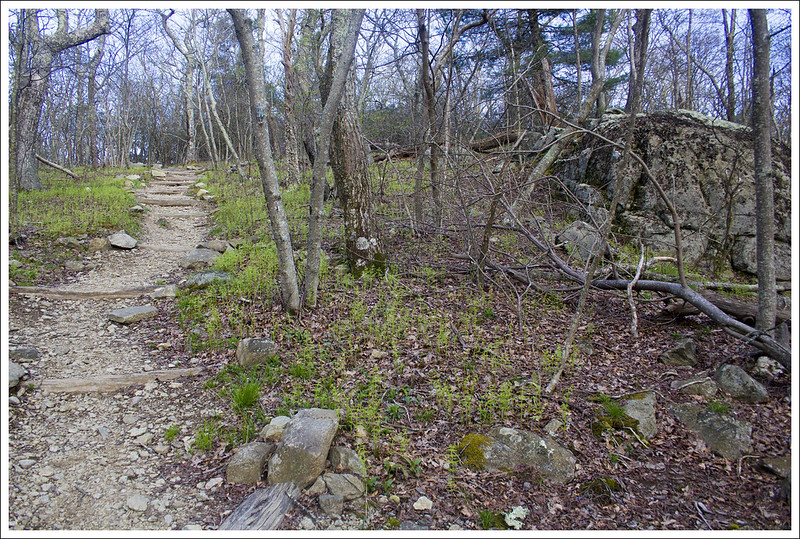
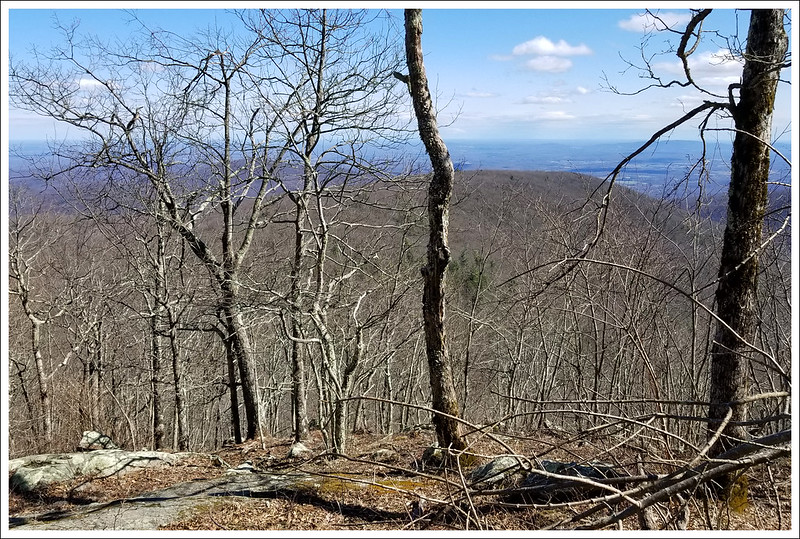
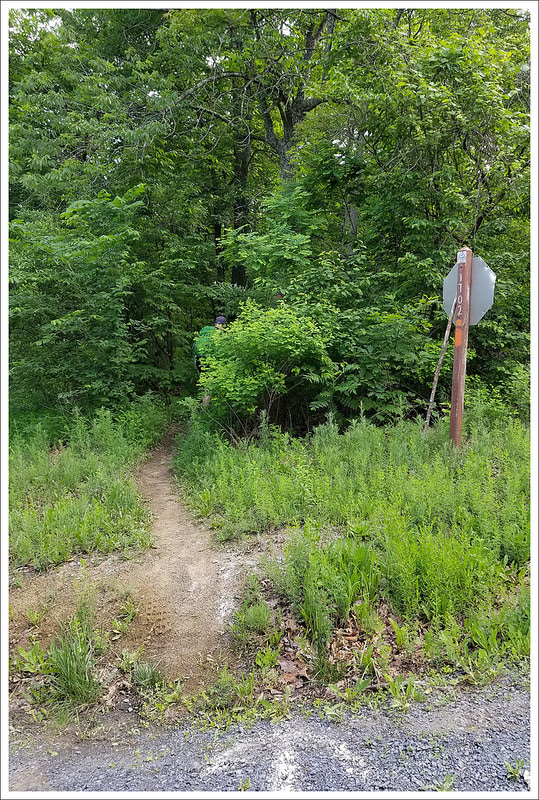
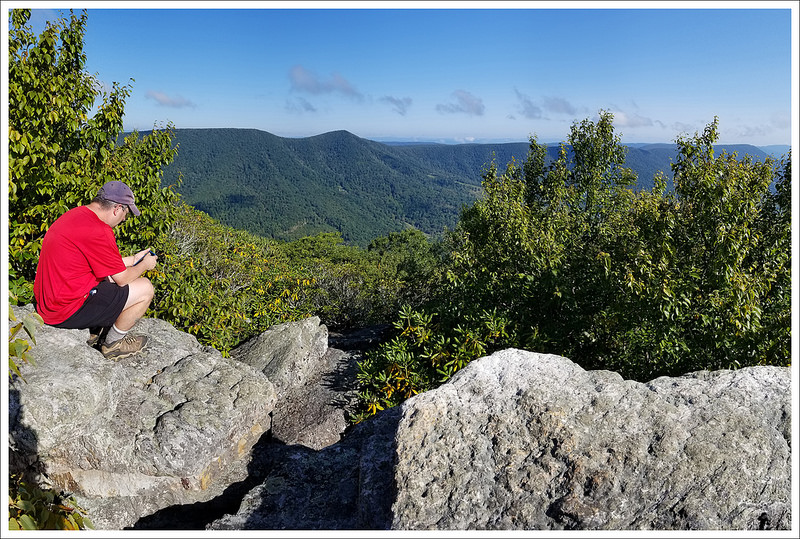
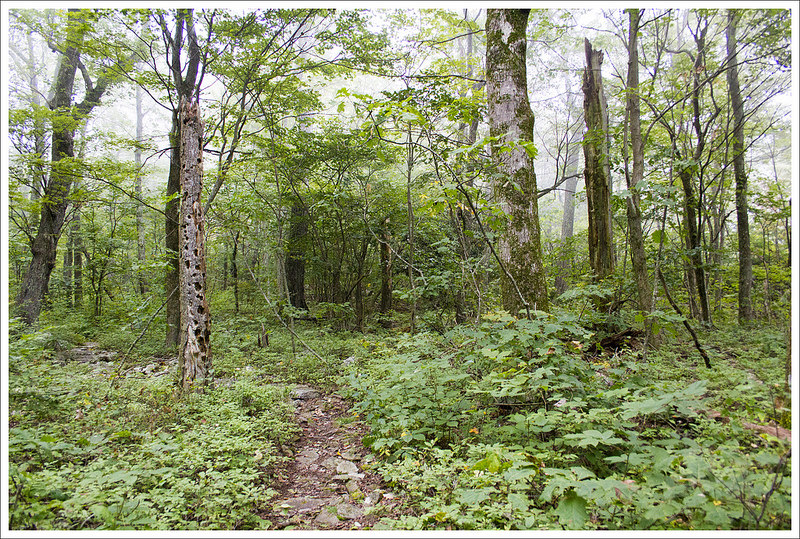
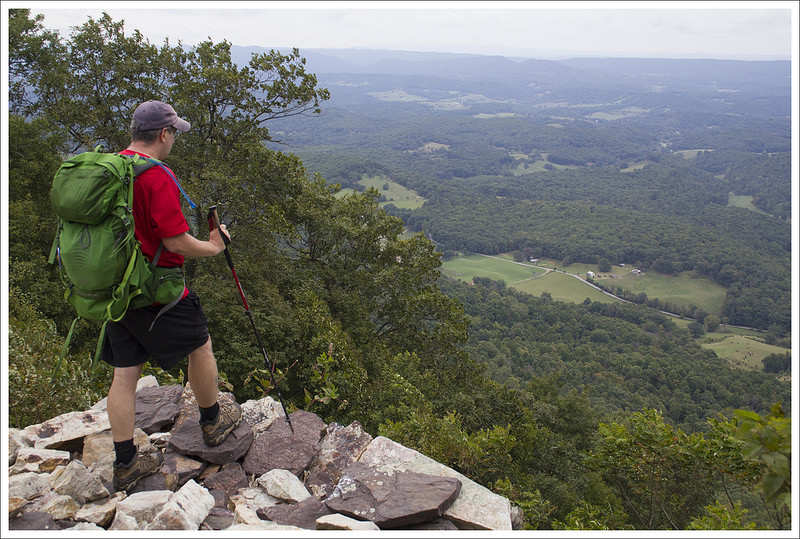
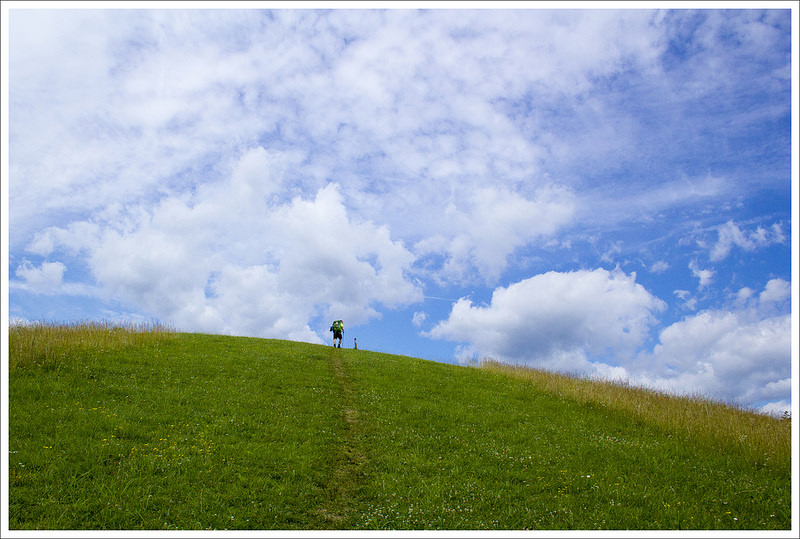
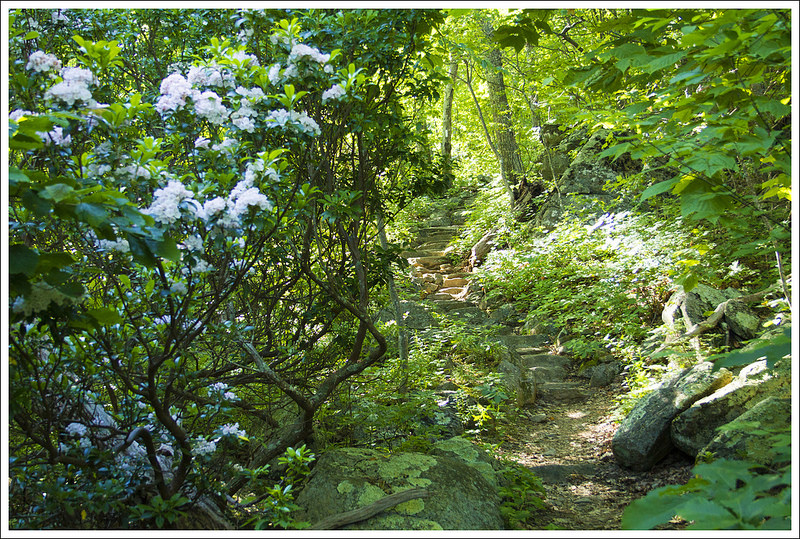
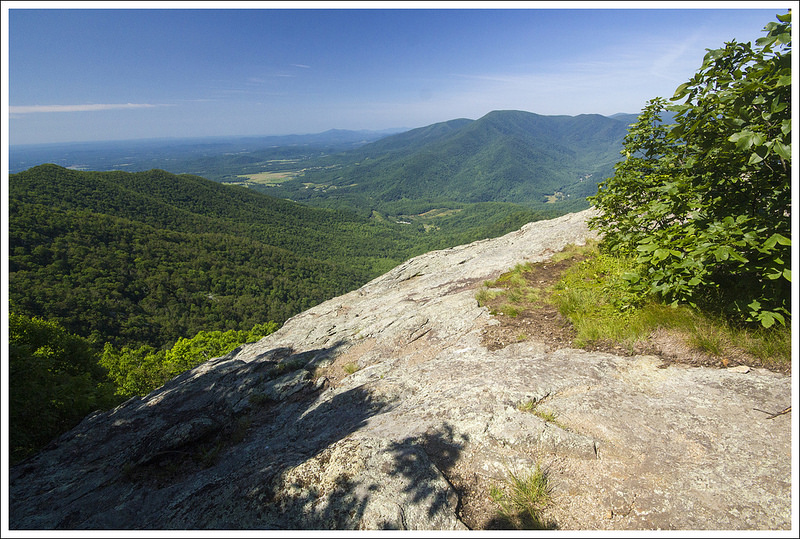
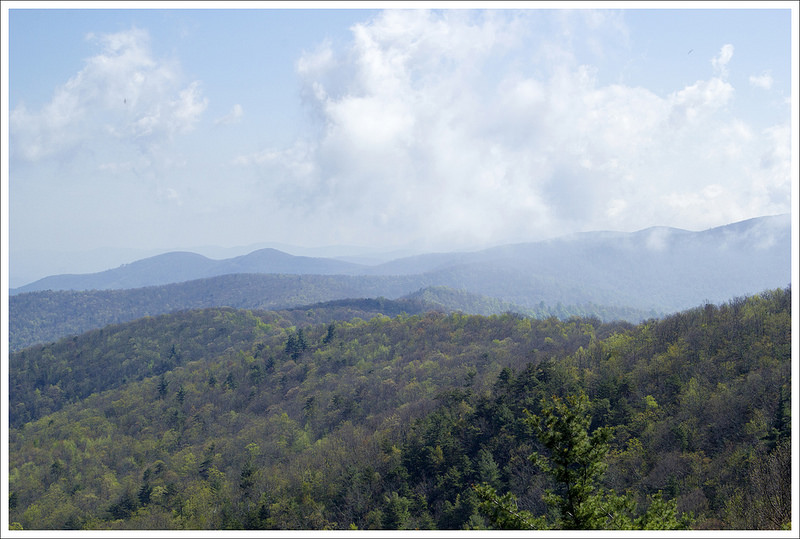
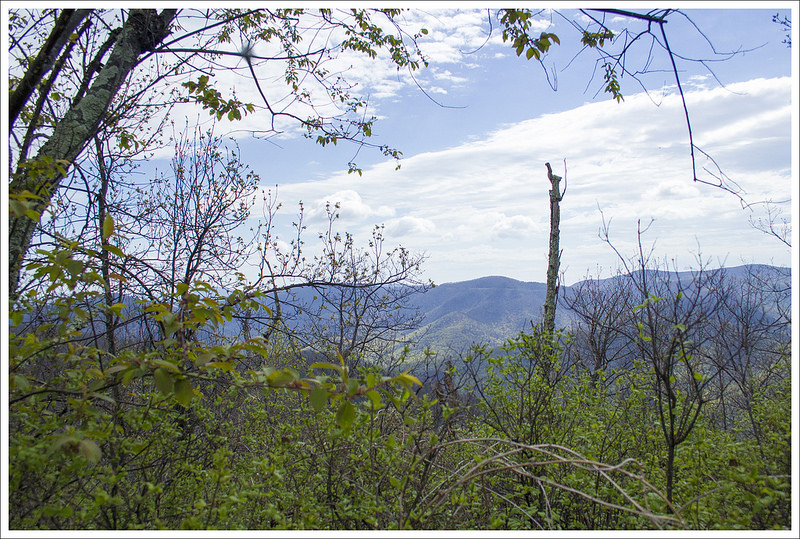
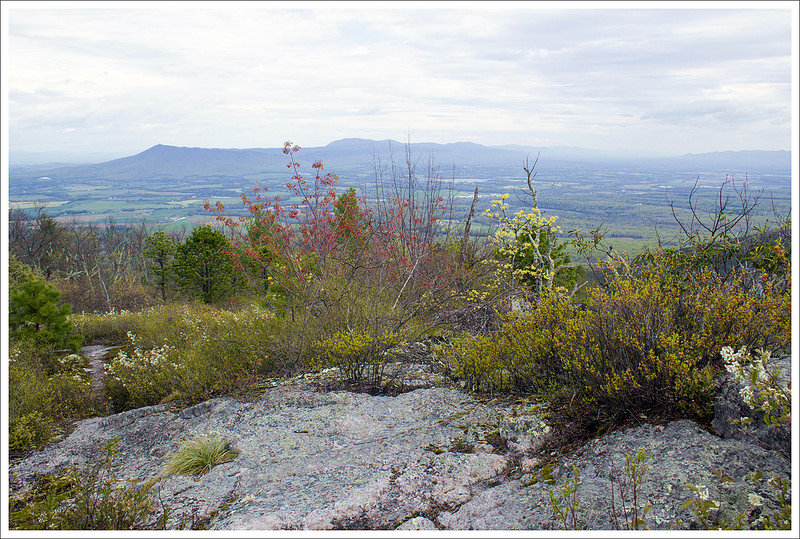
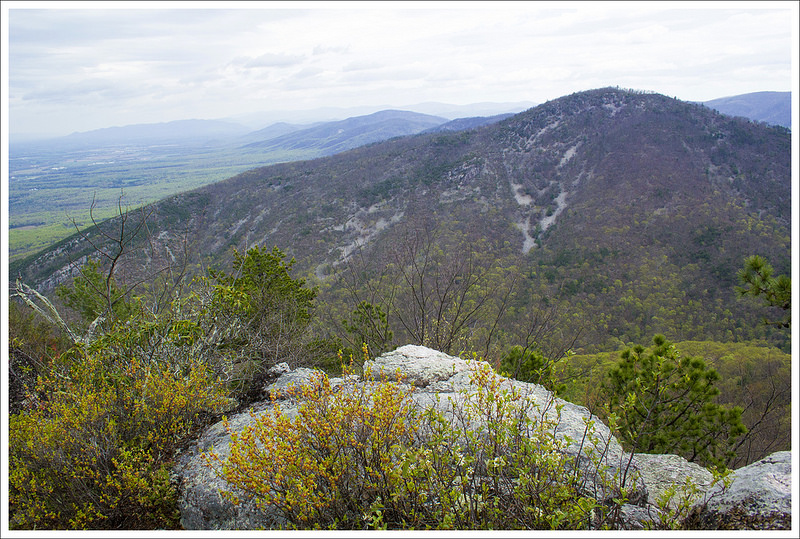
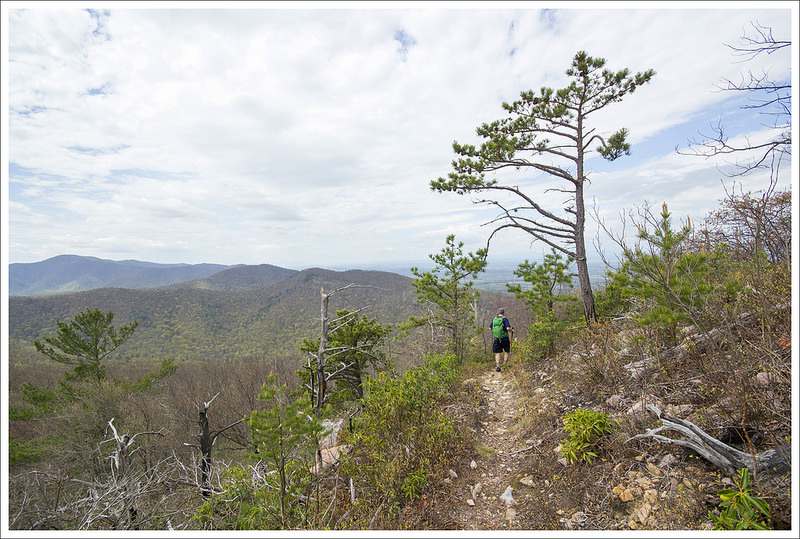
The nice view from Rocky Mountain on the Brown Mountain Trail. Below: The trail starts in an opening in the wall at the Brown Mountain Overlook; The very beginning of the trail has nice views; This area was heavily damaged by the 2016 fire and again by the 2018 ice storm.
Adam Says:
We were trying to find a new hike to cover and I started looking through a PATC map of the southern section of Shenandoah National Park. I noticed there was a trail off one of the overlooks that we hadn’t done before and then I was sold when I saw the icon they use for views. Due to some of the twists and turns, it was hard to tell how far the trail was going to be before we got to the views, but we felt this was definitely worth exploring.
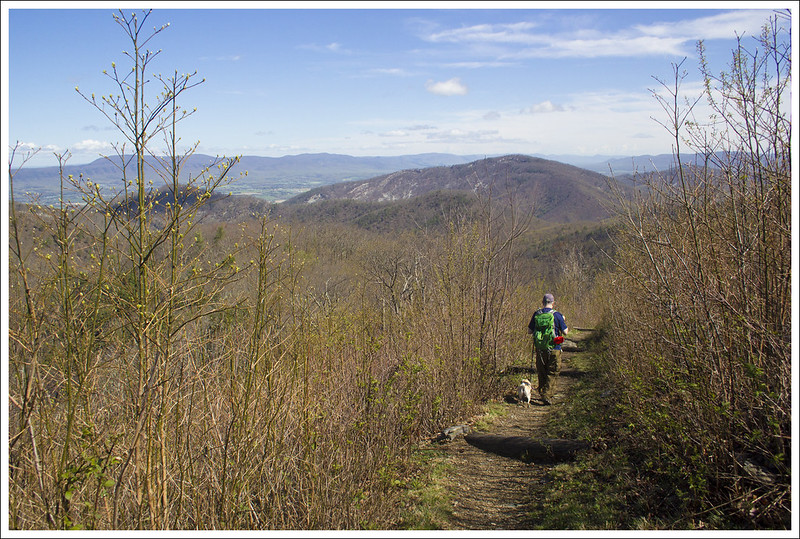
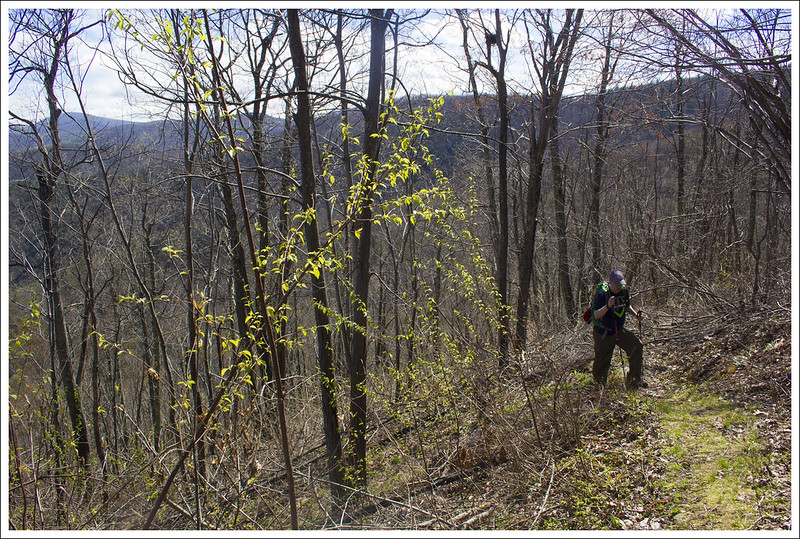
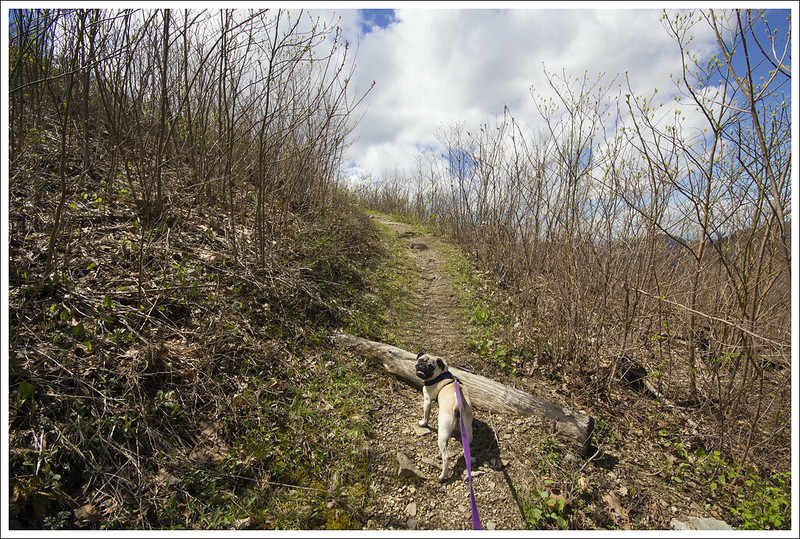
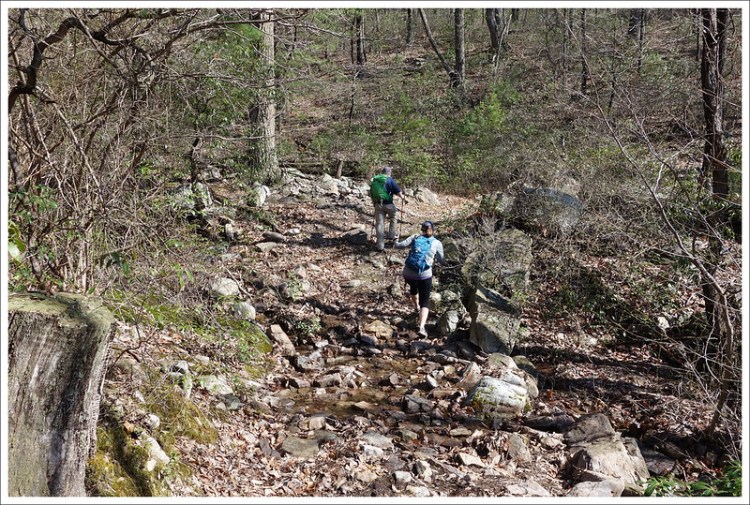
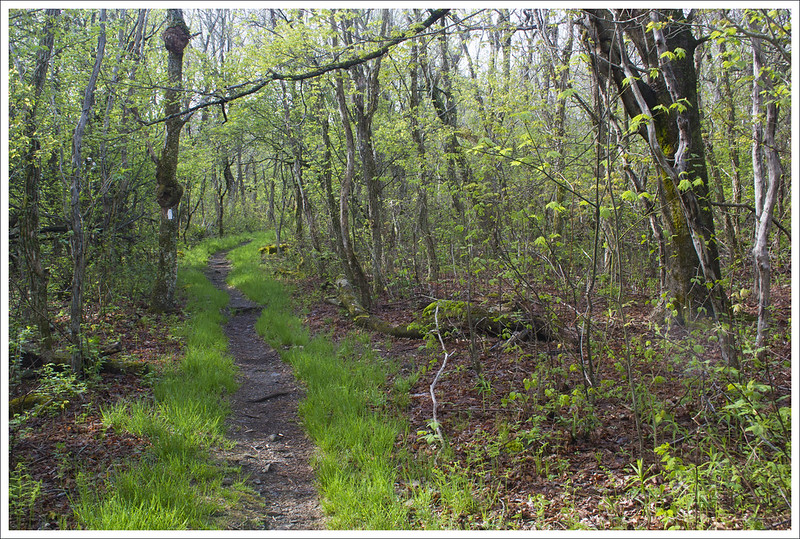
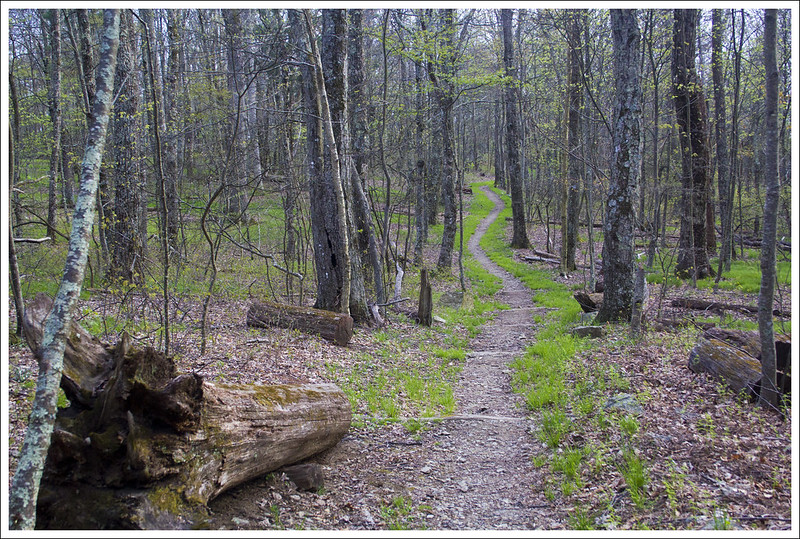
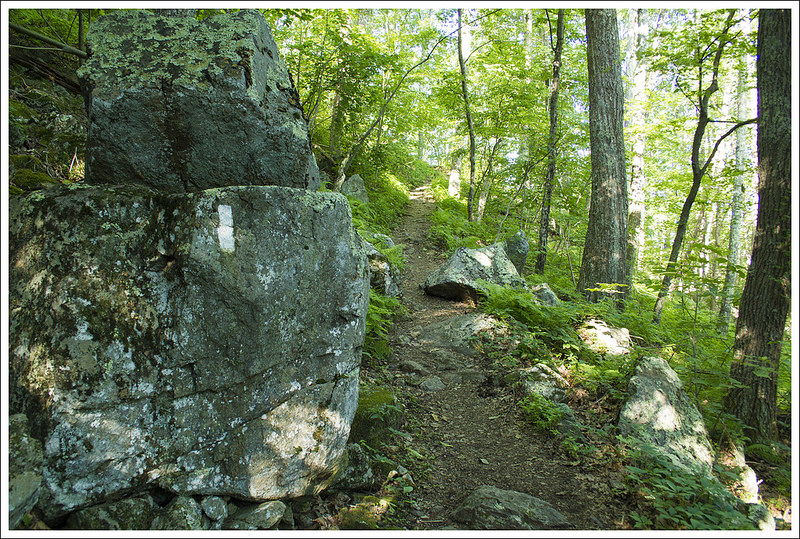
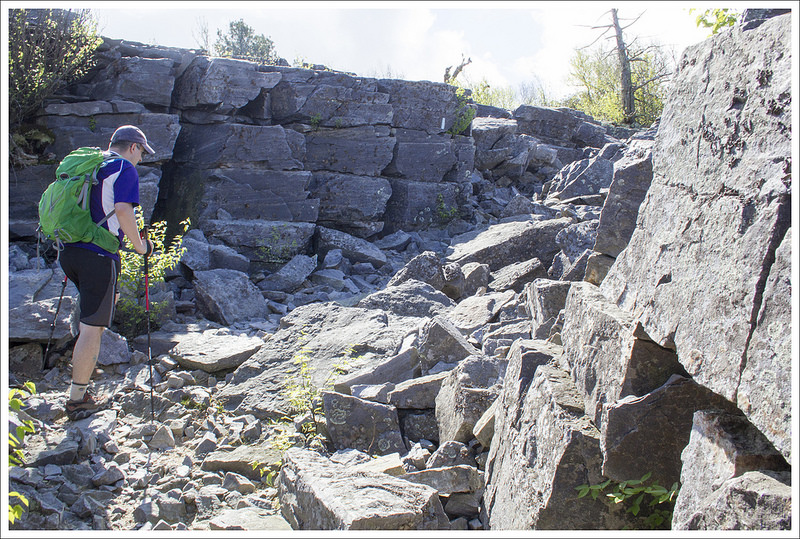
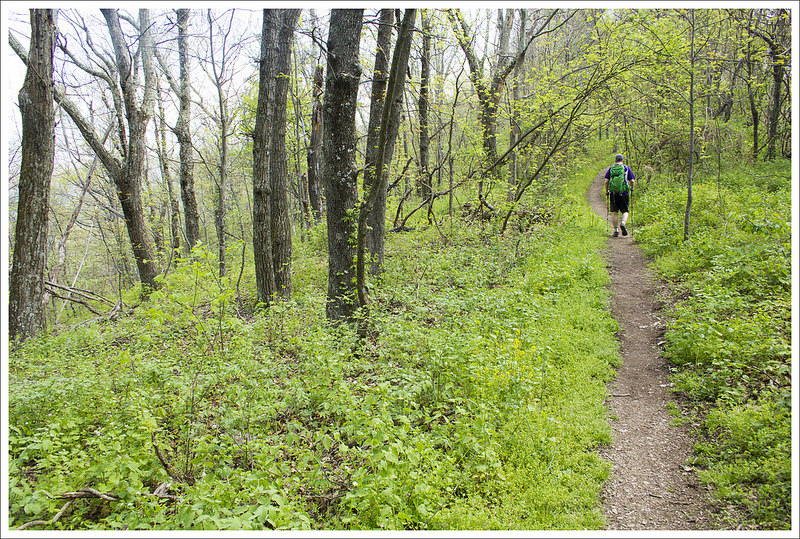
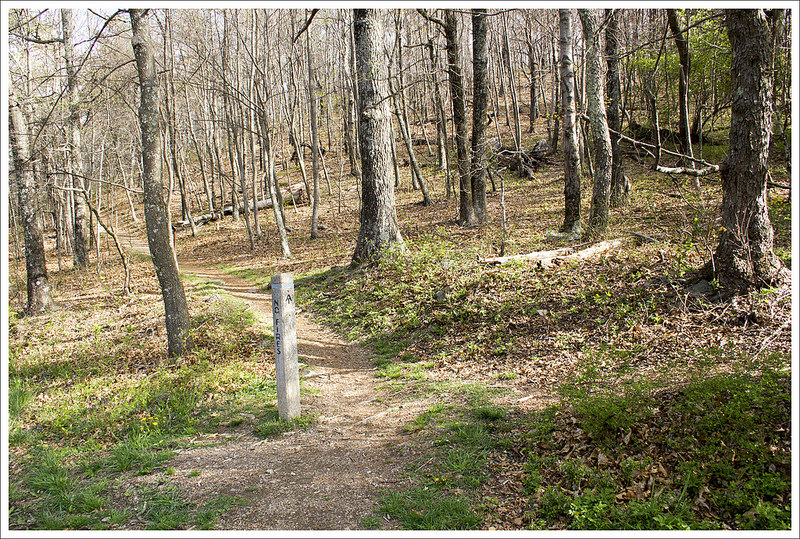
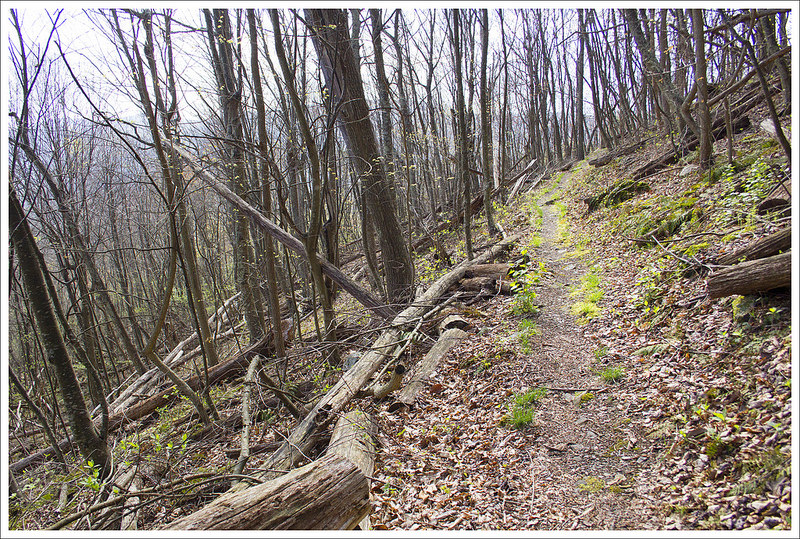
We started off from the Brown Mountain overlook, close to mile 77 on Skyline Drive. This Brown Mountain trail starts at a break of the rock wall. The trail winds down and provides some instant views (and you can actually see the rocky outcropping you will reach). The trail soon ducks down into some more wooded areas and winds down on a steeper descent – keep in mind you have to hike back up at the end of this out-and-back hike. You will see a lot of the fire damage that hit this area a couple of years ago with charred logs along the way, but nature has bounced back nicely. At .6 miles, you reach the bottom of your descent and soon reach a junction with the Rocky Mountain Run Trail which takes off to the left (you could make this a larger 10+ mile loop by coming back this way). Stay on the Brown Mountain Trail and you will begin to ascend again. The ascent will ultimately take you close to the elevation you started on this hike, but you will have close to one mile to gain that elevation, so you will find the trail more manageable of an ascent at this point.
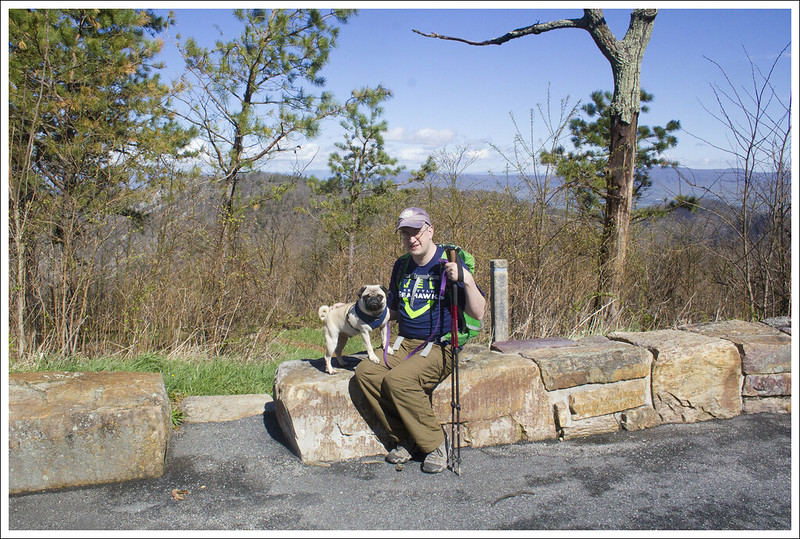
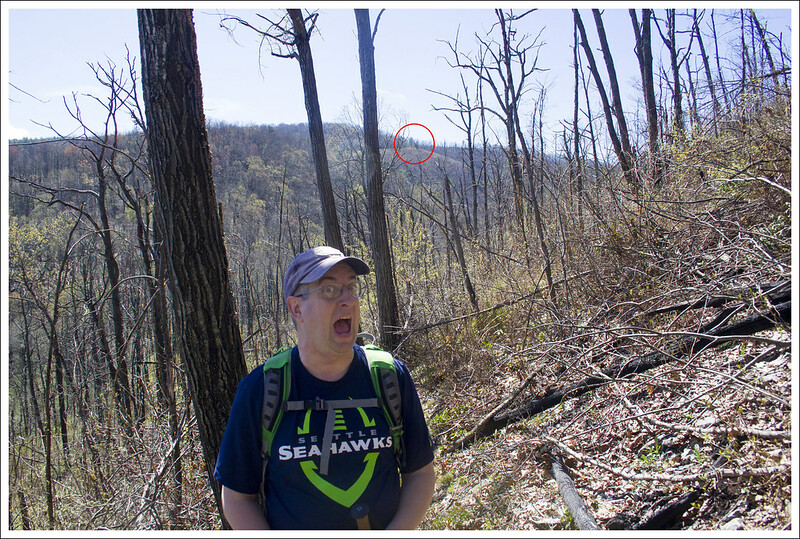
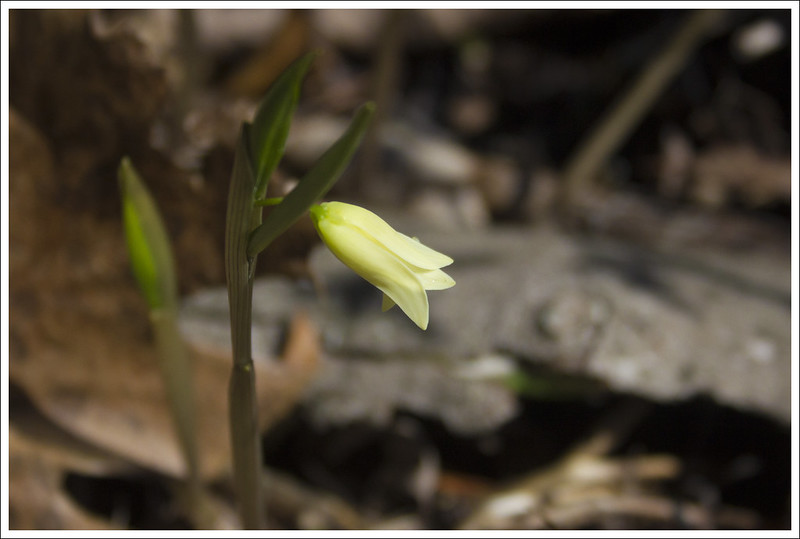
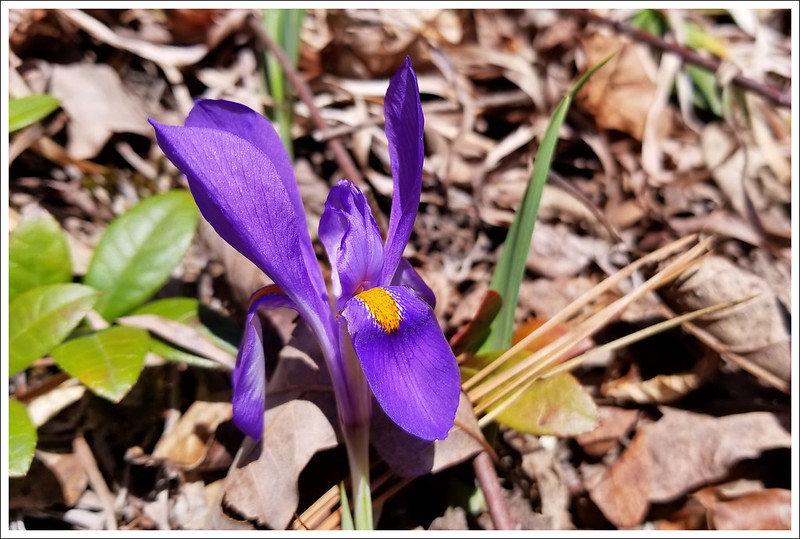
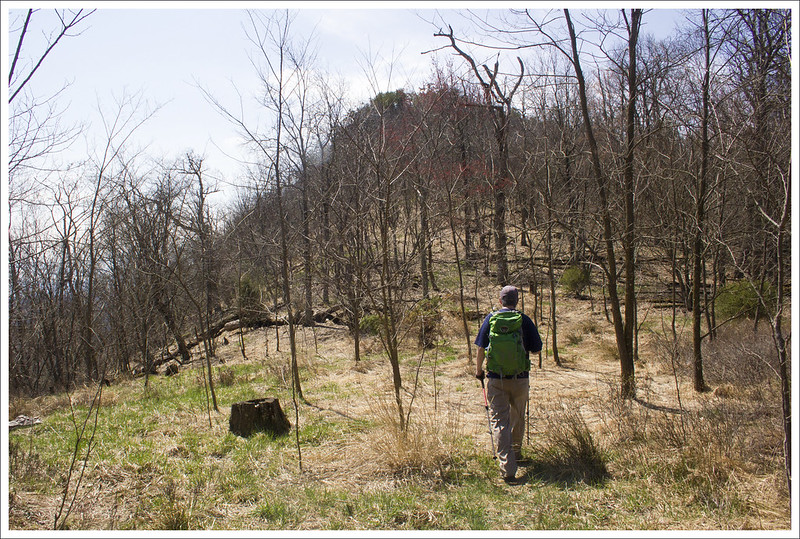
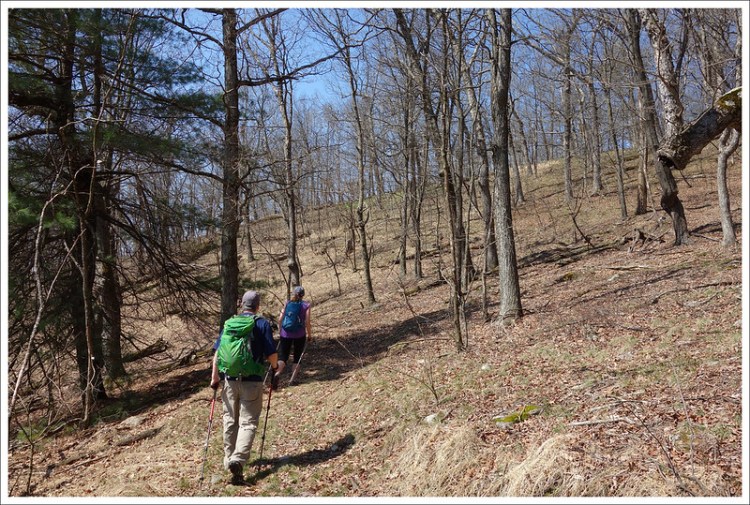
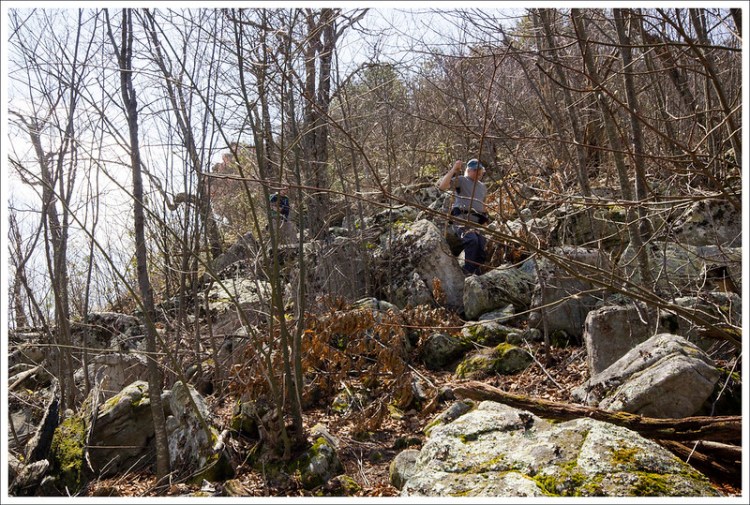
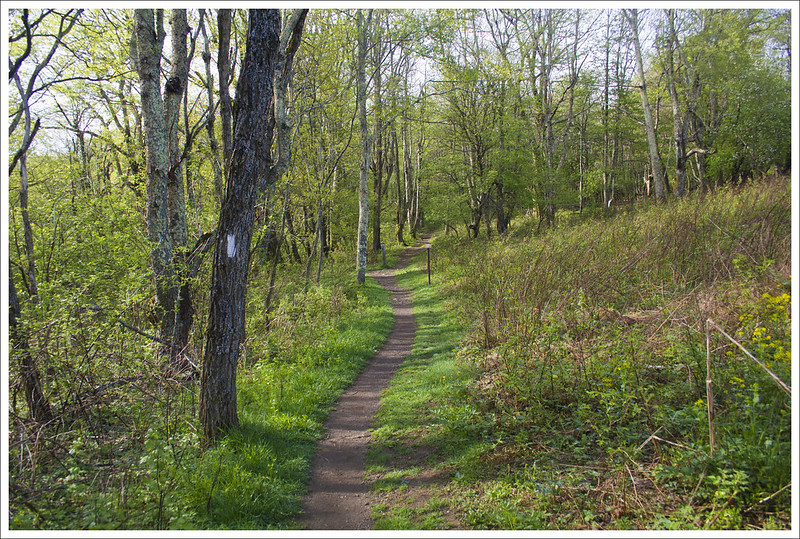
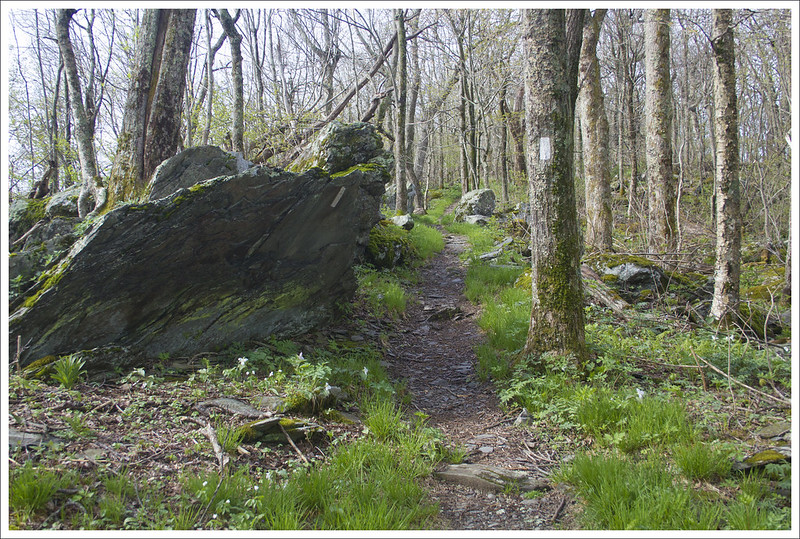
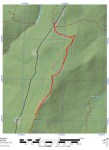
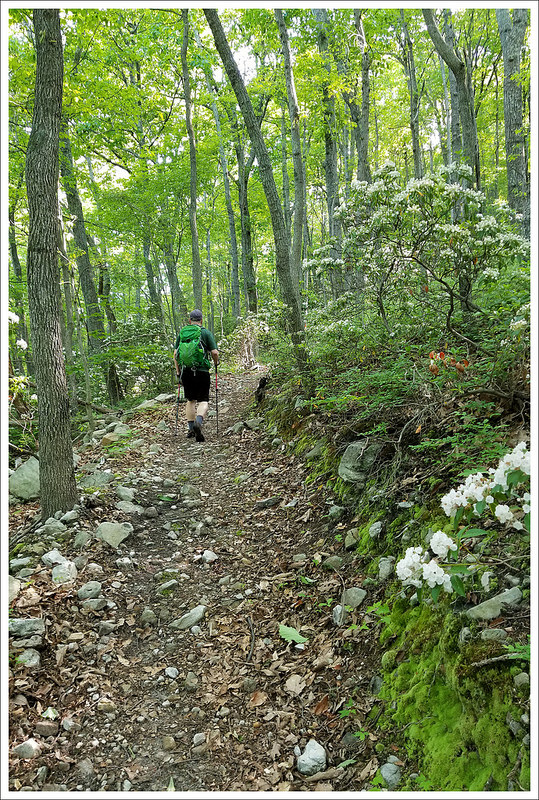
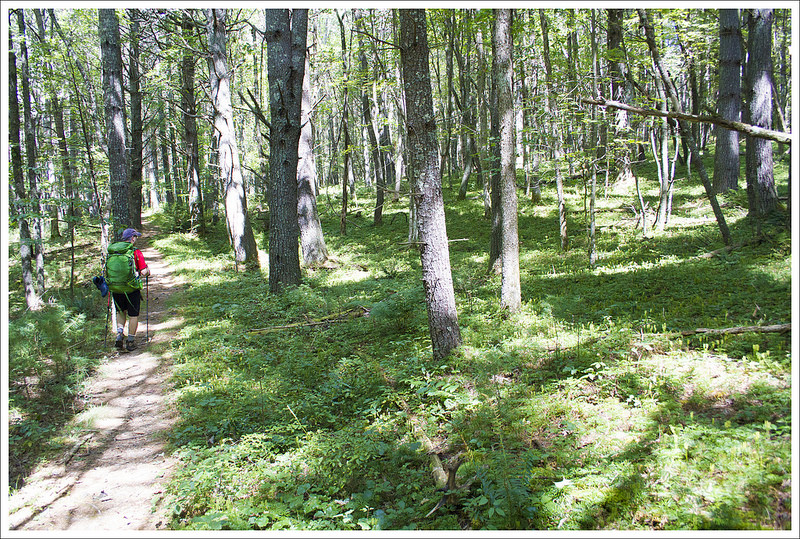
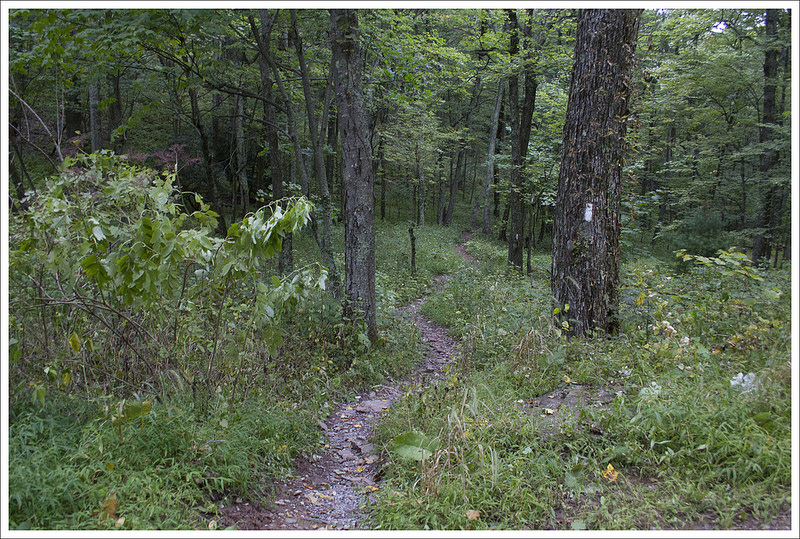
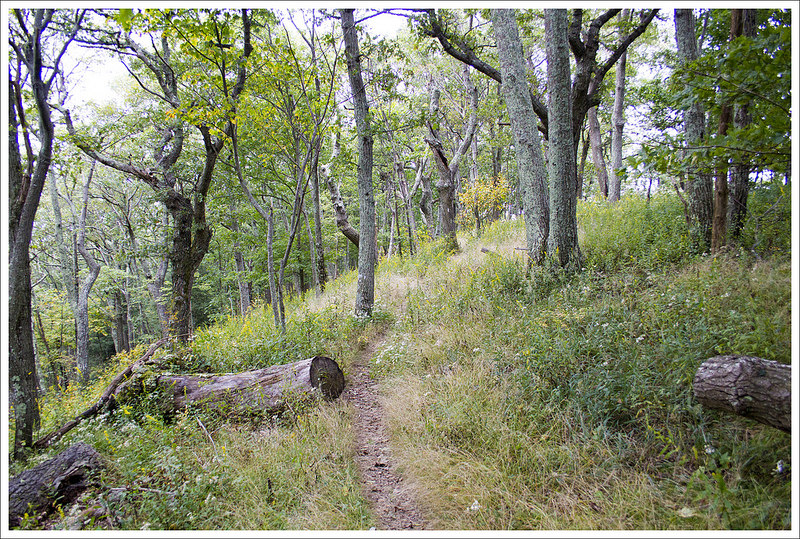
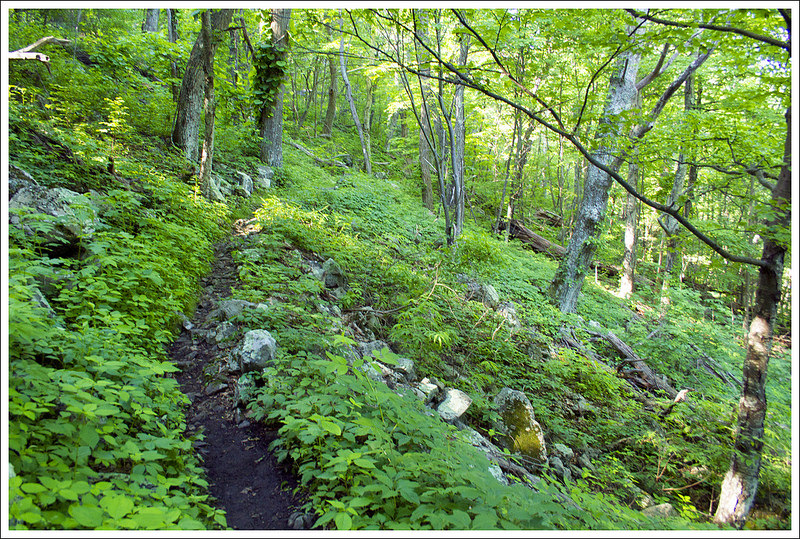
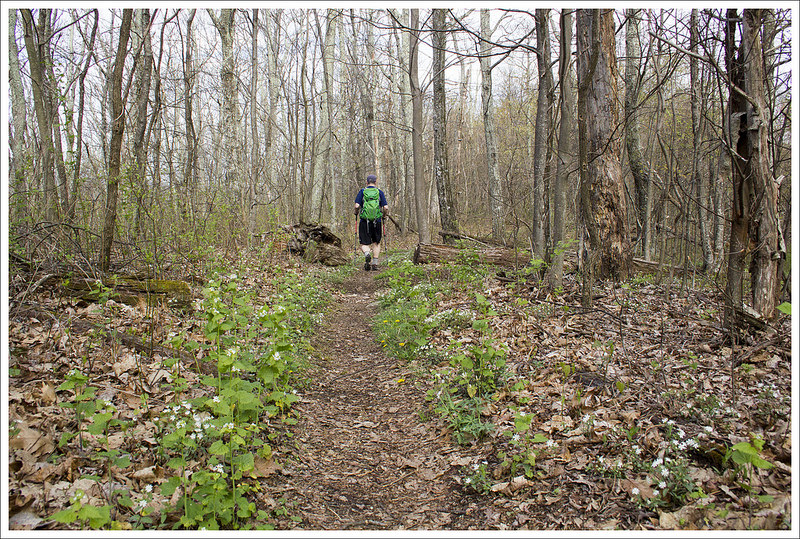
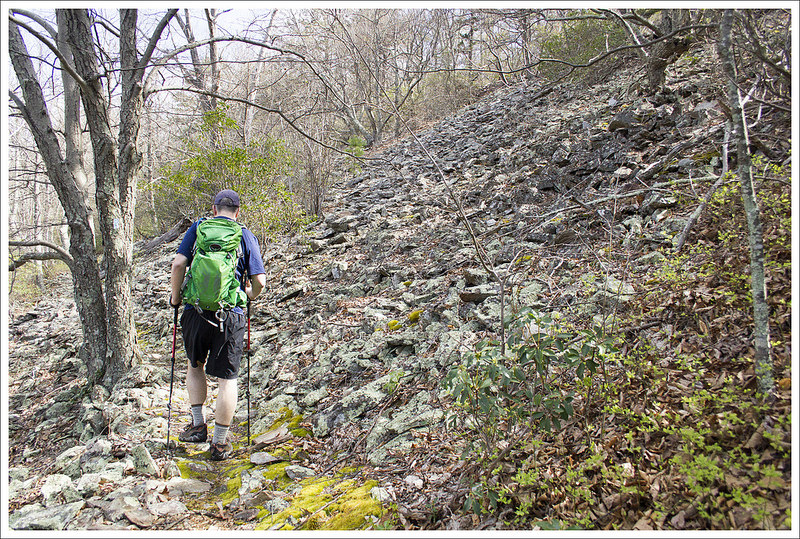
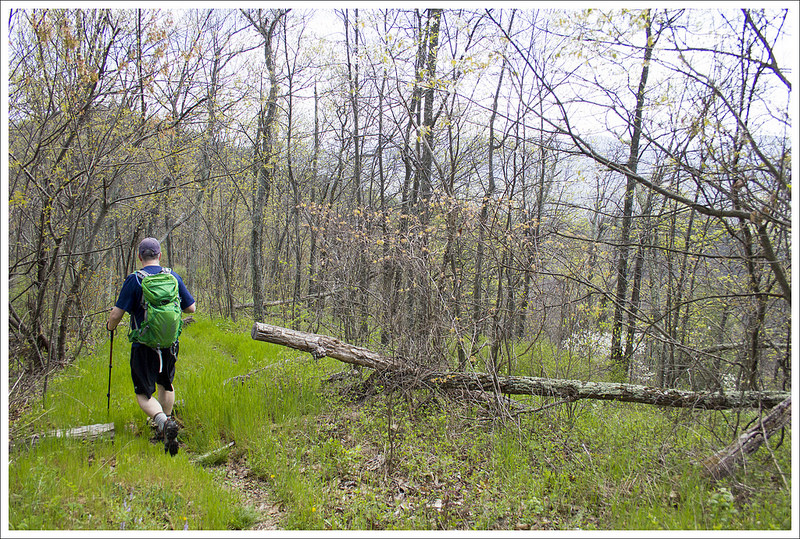
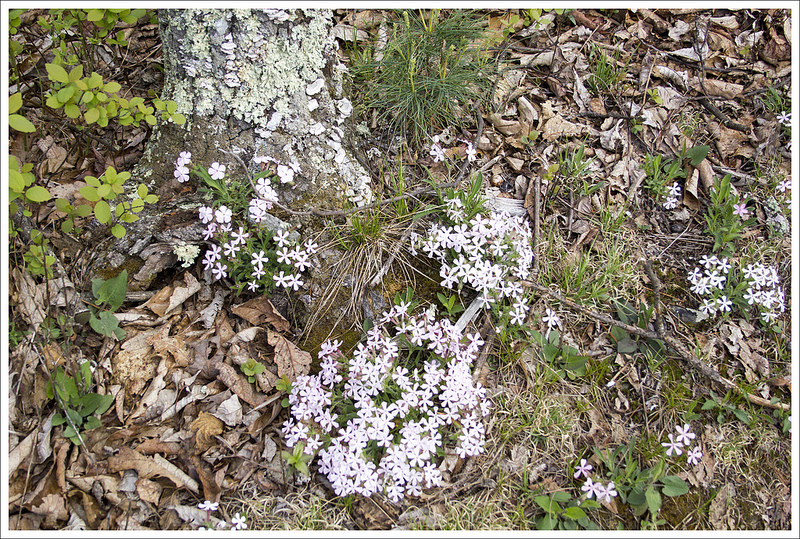
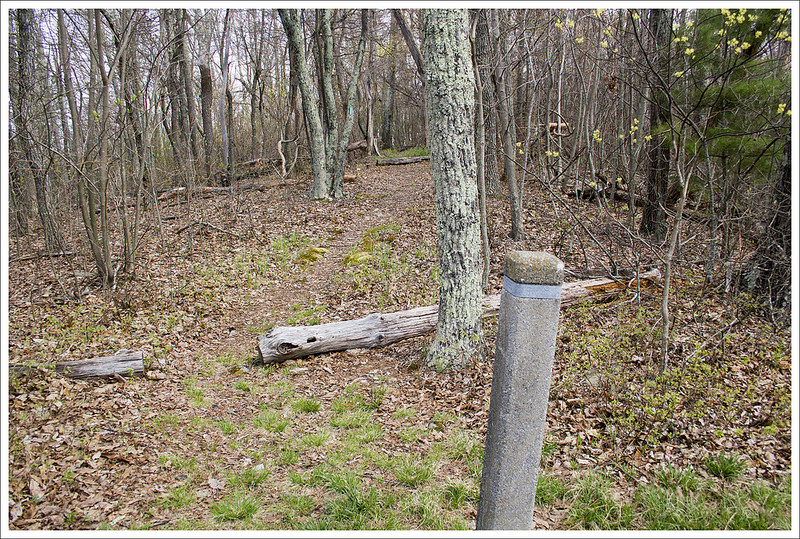
Adam climbs the Brown Mountain Trail. Below: Our start point is marked by a red circle in this photo; Sessile belwort; Dwarf iris.
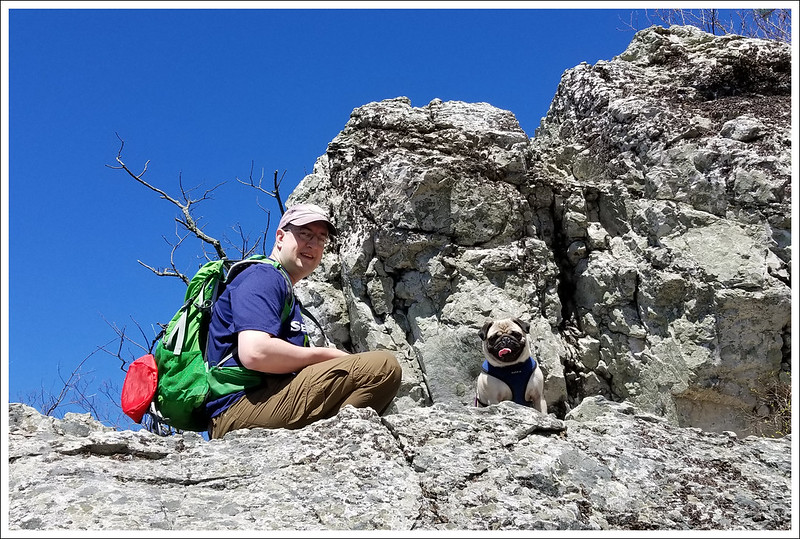
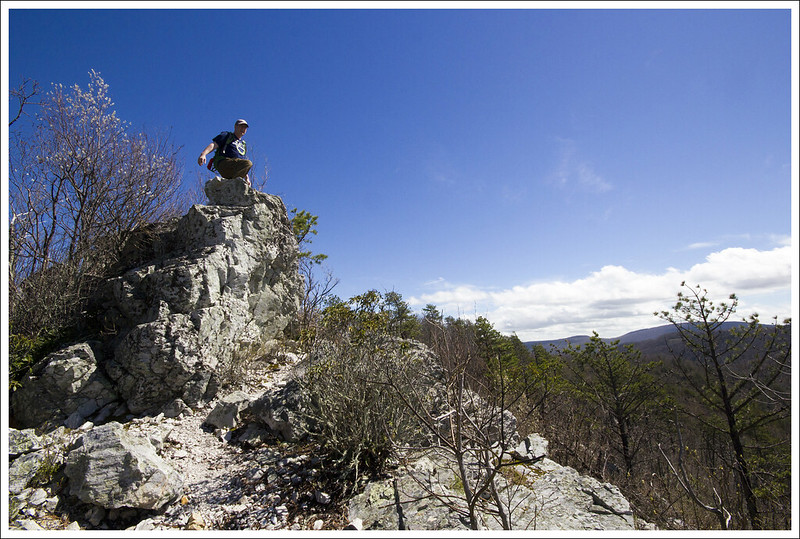
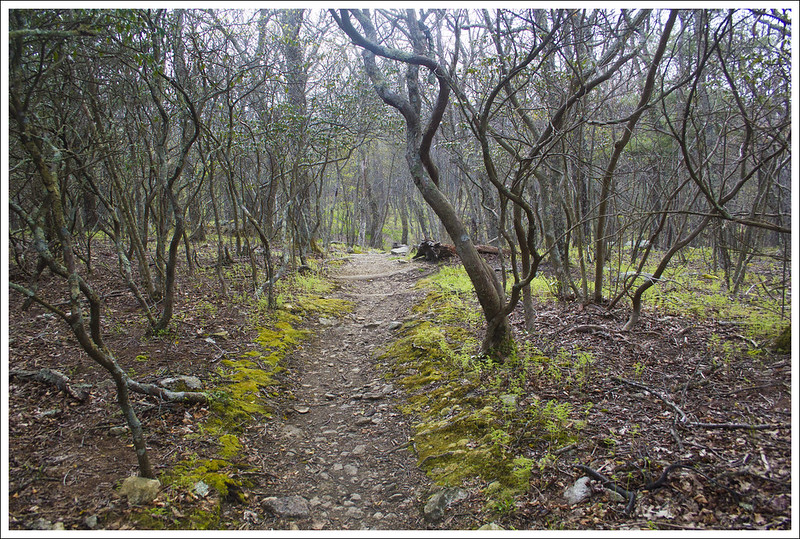
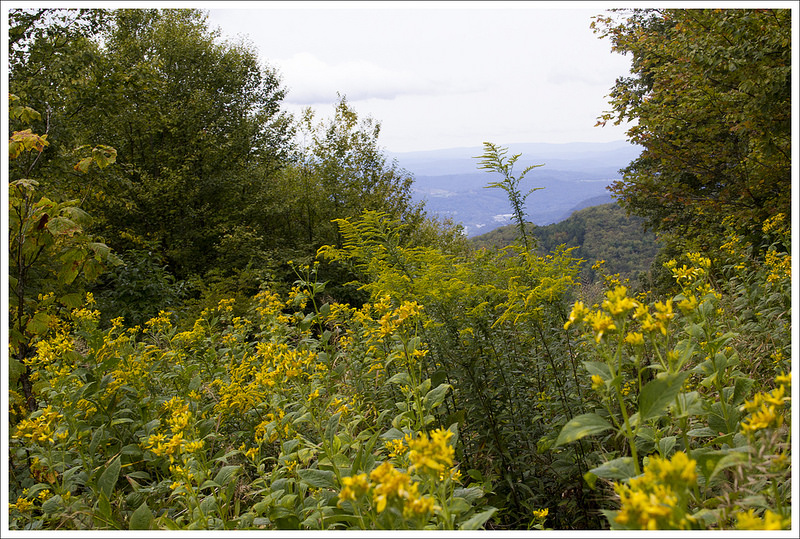
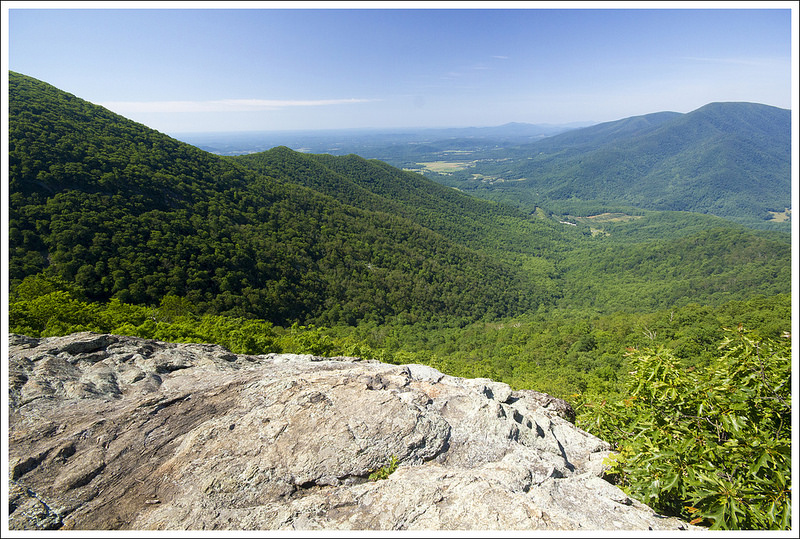
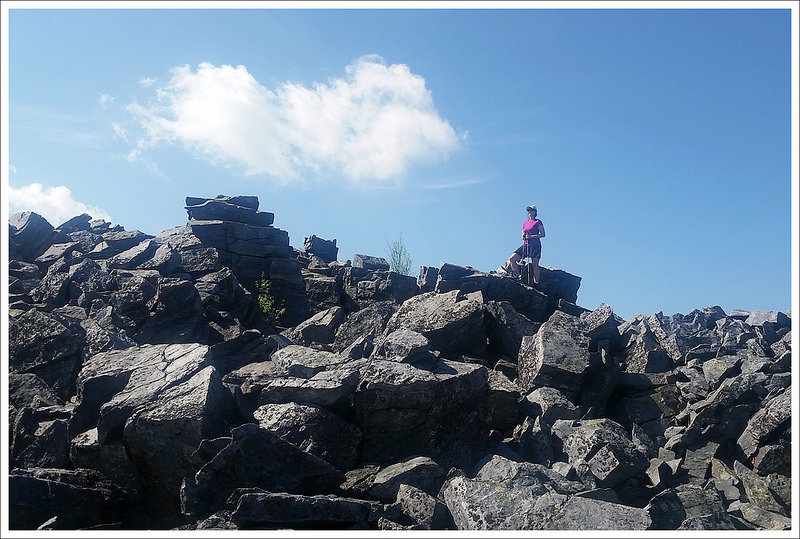
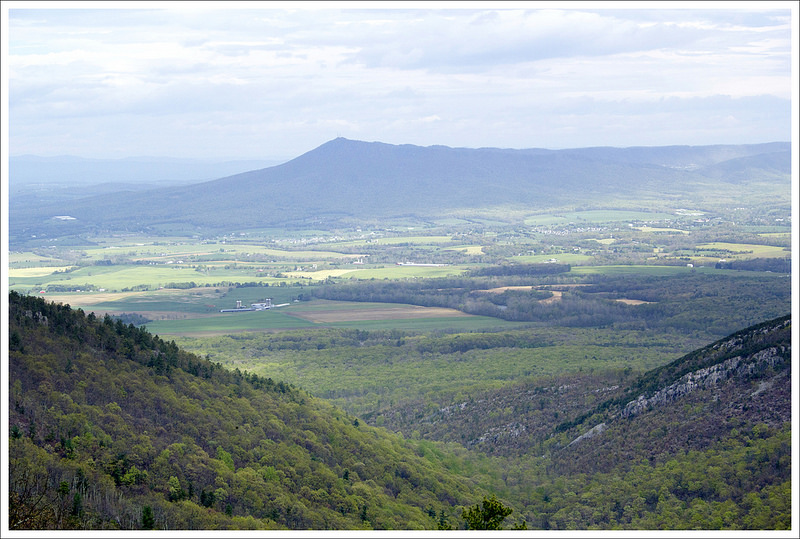
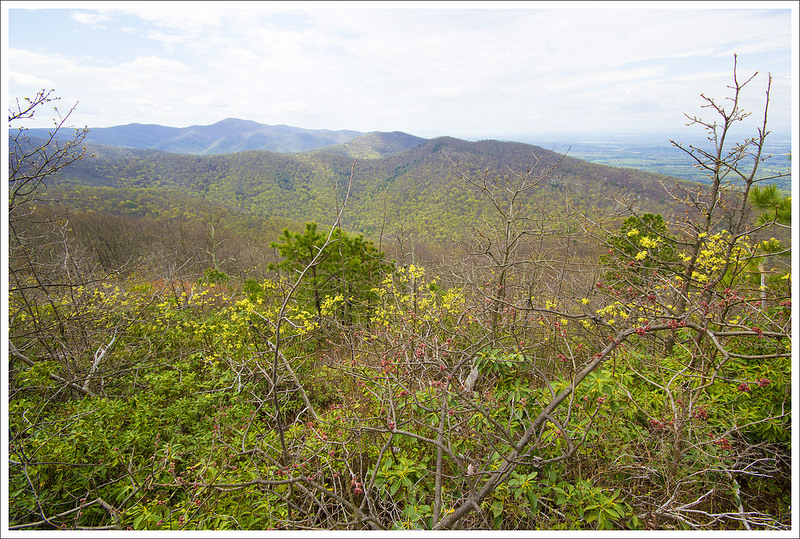
Around the 1.4 mile mark, the trail will begin to level out and become rockier. You will also be treated to some obstructed views along the way. At a little over the 1.5 mark, we reached the rocky outcropping of aptly-named Rocky Mountain. From the stunning viewpoint here, I was able to scramble up carefully up the main rock. While Christine held Indy, I also ventured a little further along the outcropping to get to another viewpoint, but that was a more treacherous path consisting of stepping on knife-edge footing while finding hand and footholds along the way – definitely not recommended or very safe. I came back to Indy to let Christine explore a little further. Indy enjoyed the views and enjoyed a nice bowl of water to quench his thirst before the return hike. We went back the way we came descending back to the saddle and climbing up the last .6 miles back to the car. The climb at the end was steep, but short. We had a great time exploring this area and were surprised to only see two people on the trail. Since I don’t think this hike is covered very often on hiking websites or books, this has remained a hidden gem (at least until now).
Christine Says:
This was a really beautiful hike through a fire and ice-damaged section of the park. Views that were probably closed in a few years ago were open and stunning. It also helped that we hiked in April before leaves fully emerged. I was surprised there were so few people on the trail, because the weather was perfect and this trail connects into the popular Big Run watershed. I expected we would see many people out backpacking, but we only saw two guys. They were both pretty surprised to see a pug on the trail, and one asked if he could photograph Indy to share with his mom. I swear, Indy is always a conversation starter on hikes!
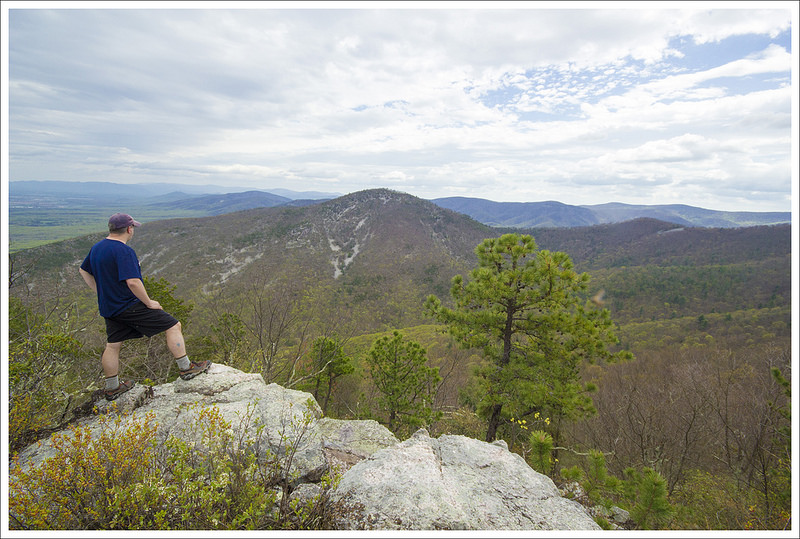
Adam and Indy enjoyed climbing on the rocks at the viewpoint. Below: The trail was like walking on a balcony; Adam found a perch; Indy never runs out of energy.
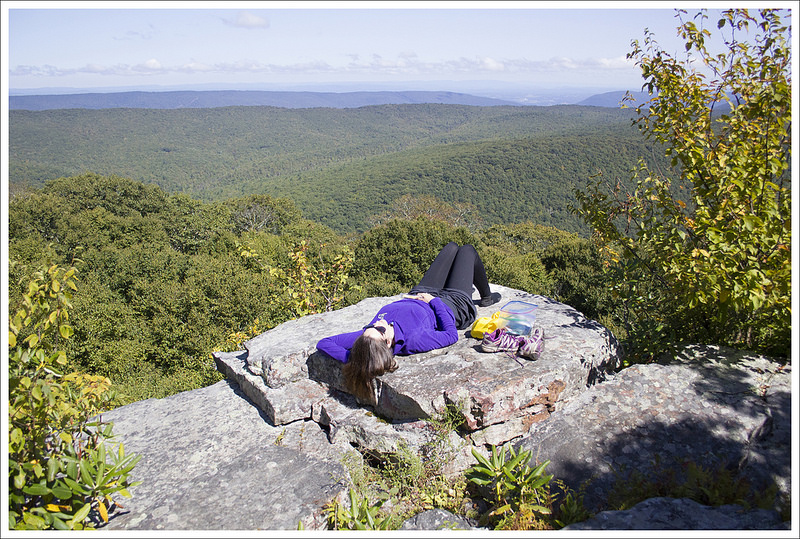
While Adam enjoyed climbing around on the rocks, I hiked along the trail a bit further to see if there was anything worth seeing. The trail started to descend into another saddle, so I decided to save exploration for another day. I think there might be some more views along the trail – but probably not as good as the one we saw here.
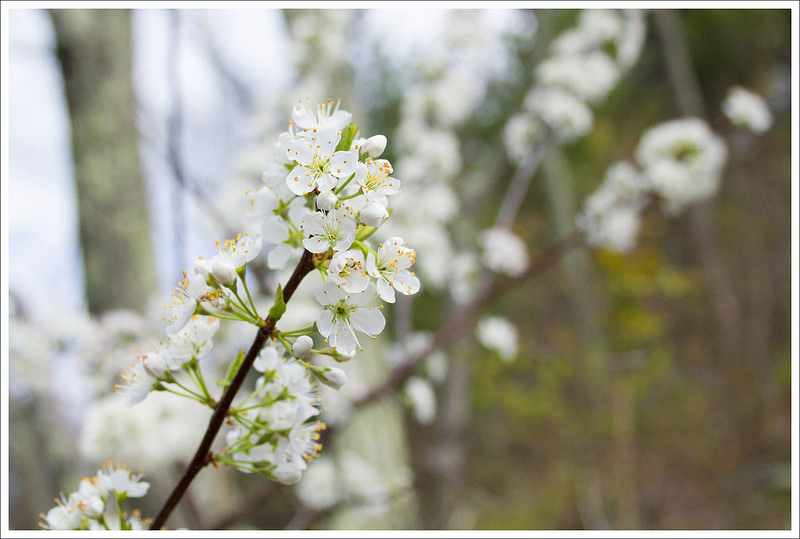
I hiked back up to where Indy and Adam were waiting. We all hiked back the way we came in, enjoying the top-of-the world views. In addition to the vistas, this trail had many beautiful wildflowers. In April, the dwarf irises and sessile belwort were abundant. The hike back was as challenging as the hike out, with moderate climbs on both ends. We were all pretty hot and a little sunburned when we got back to the car, so we decided to cool off with blackberry milkshakes at the Loft Mountain Wayside. Wouldn’t you know – their shake-making operation was broken AGAIN. This is the third year in a row that Loft has failed to produce my desired blackberry milkshake! This time it was the soft-serve machine that was down; last time it was the blender; and the time before that they were out of blackberry syrup. Drat! Oh well… it was still a great day.
Trail Notes
Distance – 3.2 miles
Elevation Change – 1,168
Difficulty – 3. This hike has climbs going both out and back. They’re moderately difficult, but should be doable for most hikers.
Trail Conditions – 4. PATC volunteers and other trail crews have worked very hard to clear the trail through this heavily damaged part of the park.
Views – 4.5. There were nice views at the start of the hike, along much of the trail, and at the summit. The view is expansive and impressive.
Streams/Waterfalls – 0. There was no water on this hike – it’s mostly high and dry on the ridge.
Wildlife – 3. We saw a couple deer and quite a bit of bear scat.
Ease to Navigate – 4. Trails are well-marked and thoroughly blazed. There is just one junction to watch for along the hike.
Solitude – 3. All of Shenandoah is popular and busy, but on this beautiful April day, we just saw two backpackers.
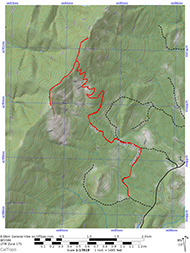
Maps
Special note about the map below: We use CalTopo to produce maps for this website. The CalTopo map for this area did not match the PATC’s map of the same area for trail naming. The CalTopo map labels the trail as Rocky Mountain Trail, but the park sign posts and the PATC map label the trail the Brown Mountain Trail.
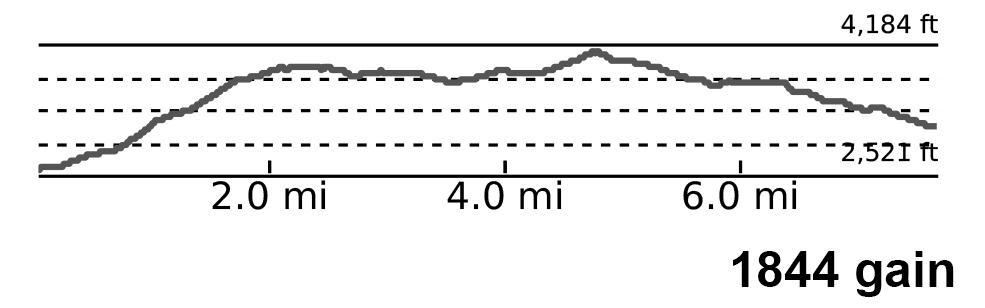
Download a full size PDF trail map.Download the full size PDF elevation profile
Directions to trailhead: Parking coordinates are 38.292938, -78.657899. Park at the Brown Mountain Overlook on the west side of Skyline Drive. The trail begins through an opening in the stone wall.
Adam takes in the view from the summit of Church Mountain.
On this eight-mile adventure, we visited a beautiful outcropping on Church Mountain. The hike had some steady climbing, a little bit of rock scrambling, some unfortunate bushwhacking, and a beautiful view at the top!
Christine Says:
We did this hike back in early April with our friends, Tony and Linda, of HikingUpward fame. (View their write-up for this hike) Tony noticed that this hike appeared for the first time on a recent edition of a PATC map and suggested we all go out and explore the relatively unknown area. He had heard rumor that there were two viewpoints to enjoy. We met them at a parking area along the forest service road (FR482). We could see the outcropping we were planning to hike to from the road below. Adam was still getting over an awful chest cold, so the distant view of the cliff-face made me worry for him. It looked very faraway and pretty high above us.
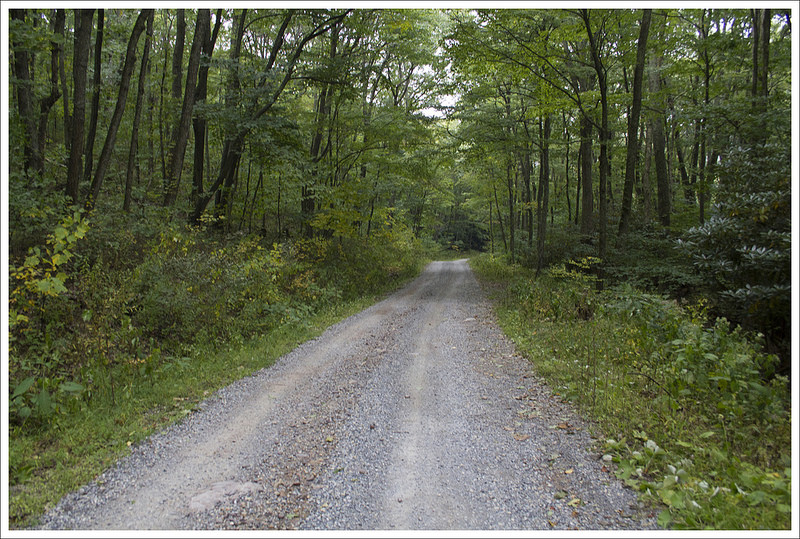
The first mile of walking followed the mile of FR482 that lies beyond a locked gate. During hunting season, you might find this gate open and be able to shave a couple miles off the total distance of the hike. At the end of a mile, you’ll find yourself at the start of the yellow-blazed Church Mountain Trail. There are no signs or trail markers – just blazes – so be careful to follow along. The trail crosses one shallow stream near the beginning of the trail. It also crosses several old road cuts (apparently there used to be TV towers on this mountain, or so I’ve heard). The climbing is fairly steady and unrelenting as you climb Church Mountain. The use of ten switchbacks makes the grade feel manageable, though I can see this feeling like a really tough climb on a hot day. There were some decent views of the rocky summit of Church Mountain from the trail.
A view of Church Rock from the trail below.
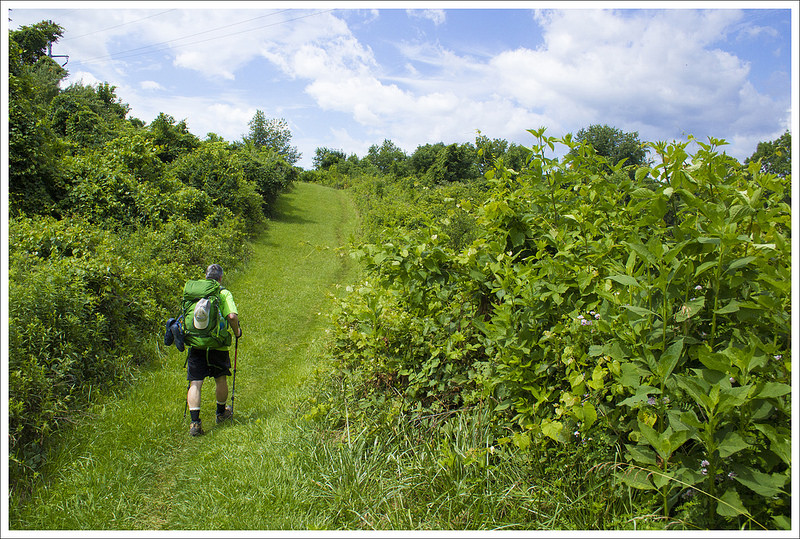
As you climb, the forest gets thinner and more open – almost meadow-like. When you reach the ridgeline at three miles, the trail is just a faint footpath through the grass. Look for a tree with a double set of white and yellow blazes. There should also be a small cairn slightly uphill of the two-blazed tree. This is the junction with the Talc Trail. From here, take a left and follow the white blazed Talc trail as it meanders over gentle terrain toward the summit of Church Mountain. This part of the trail was sparsely blazed and there were a couple significant blow-downs across the trail. I have a feeling that the vegetation along this stretch may get taller and thicker as the growing season progresses. I had permethrin-treated clothes and Repel spray on my exposed skin, but I still managed to pick up a tick somewhere along the Talc Trail. I noticed it already attached to my calf on the return leg of our hike. Gross!
The Talc Trail comes into a saddle about 3.6 miles into the hike. There is a large, very littered campsite in the saddle. There was an old tarp, several pots, old cans, shell casings, a satchel, and some other odds and ends laying around. It looked like hunters maybe used this spot as a base camp sometime in the last year or two. After passing the campsite, there’s a nice view of the valley off the left side of the trail. Once you pass this view, it’s time to start scrambling. The way to the top had a couple hard-to-see blazes and was pretty overgrown with brambles and thorns. I had capri length pants on, so my lower legs got scraped up quite a bit. Between the prickly vegetation and the ticks, I definitely suggest long pants for this hike.
Once at the top, there were lots of openings in the woods to explore different spots along the outcropping. There were several spots that offered beautiful, slightly obstructed views to the valley beyond. The slanted cliffside on the adjacent mountain was a unique feature to behold in the viewscape. I found two different geodetic markers on the outcropping – one with an arrow marking the direction of the true summit and another for the summit itself. We spent a bit of time enjoying and photographing the view, but I wouldn’t say this is a outcropping that would be good for a crowd or a lunch break. The space on the rocks is limited and most of the larger rock surfaces lie at precipitous angles. When I took photos of Adam standing on the pointy, blade-like rocks in the photo at the top of this post, my knees were knocking a bit. I don’t like looking through a camera lens when my feet are uneven ground – it gives me vertigo.
The ridge trail was through open, grassy forest.
After scrambling down from the summit of Church Mountain, we headed back along the Talc Trail. On this particular day, we decided to pass the junction for the trail down and continue to explore the other side of the white-blazed Talc Trail. It probably wasn’t a good idea. There was a tree with a mysterious blaze that sort of looked like it was trying to mark a campsite on a sidetrail, but we didn’t really find anything. Passing there, the trail dipped steeply down into an area that was badly overgrown with thorns and blocked by many blowdowns. There was clearly a trail there, but it was not maintained to the point it was worth following.
During the extra bit of exploration, my GPS said that we had come almost five miles. We were running low on snacks and water, so we opted to end our quest for a second vista and make our way back down. The return hike went by pretty quickly – all downhill, the same way we had hiked up. The beer and pizza at Swover Creek Farm Brewery were calling loudly. Refreshment was needed!
Adam Says:
As Christine mentioned, I was just getting over being sick. This was the fourth time I had been sick over the last 2.5 months (cold, sinus infections,etc.), so my cardio and ability to breathe well was still getting back to normal. Exploring a “new to us” trail when there isn’t any information about it online makes us feel like we are conquering uncharted territory. We had no idea how long the hike would be and we could vaguely guess at what elevation we would be climbing.
We did have a bit of a road walk through to get to the trailhead since the gate was closed. We walked on an open road that looks like had been heavily forested before. The scenery was open which made it more enjoyable than most fire road walks we have done. We eventually came to the upper parking lot and the trailhead. Once we started on the trailhead, we noticed the trail split after a few feet. There was an unblazed trail that went straight and then the yellow-blazed Church Mountain Trail took off to the right. Take this right and the trail starts a long gradual climb. Eventually, the switchbacks start and this is where you really begin to gain some elevation. There were a few times where we spotted the Church Rock cliff face through the trees and we were excited to see that the trail would eventually guide us to that impressive cliffside. The trail winds through several switchbacks until you eventually get to a part where the top of the hillside opens up into a grassy area and you follow sparse blazes up to the top of the hill.
Heading toward the Church Rock summit.
Eventually the trail comes to a junction with the white-blazed Talc trail. Take a left here to get to Church Rock. We paused at the junction for a bit to allow me to gain my breath and we ate some trail mix. Soon, a turkey hunter came up along the trail in full camo. This was the only person that we saw the entire day. Starting on the Talc Trail, we found the trail was very poorly blazed. You stay walking on this ridge for a bit and can see some views along the way. Eventually the Talc Trail descended and led us to an open meadow area where we saw the remains of a campsite with tarp and other items stowed here. We weren’t sure if these are things someone has just left behind to use the next time they camp up here or just someone that was littering heavily. Shortly after the campsite, the trail leads back up and you can see Church Rock sticking out. If I were to rename this rock jutting out, I would call it Young Man of the Mountain. It reminded me of Old Man of the Mountain that was a prominent rock feature in the White Mountains of New Hampshire that you may have seen prominently on New Hampshire license plates. The Old Man rock face fell off in 2003 which we regret never seeing. The profile of the rockface does look similar to it but it is much smaller. We got to the rock scramble just below Church Rock. Be very careful through here, because we commented how this would be a great place for snakes to hide in between all the cracks between the rocks or possibly sunning themselves on a warm day. There weren’t any clear blazes that really guided you up to the top, but we were able to find our way through the boulders and then were able to climb up a steep section to get to the top.
Summit of Church Mountain.
At the top, there were two areas where you could take in the view – and what an impressive view it was! On a clear day, you can see for miles at mountain ranges all around you. We found a couple of USGS markers at the top which named it Church Rock. If you do take in the view, be careful! There isn’t much space and the wind blowing at the top can make you feel uncomfortable. Falling from here would be deadly. When we left, I said that these may be some of the best views in Virginia and I will stick to that claim. The climb wasn’t terribly tough and we felt this is something that is probably best done during the year with fewer leaves as it opens up other views along the way. With this trail being fairly unknown (at least for now), the solitude made us feel like we had stumbled across a secret gem of Virginia. We headed back the way we came and explored a bit down the other side from the junction with the Talc Trail. That ended up being just a slog through the woods. There may be some views to be had with some heavy bushwhacking, but we didn’t feel like exploring that too long with all the blowdowns and briars on the trail.
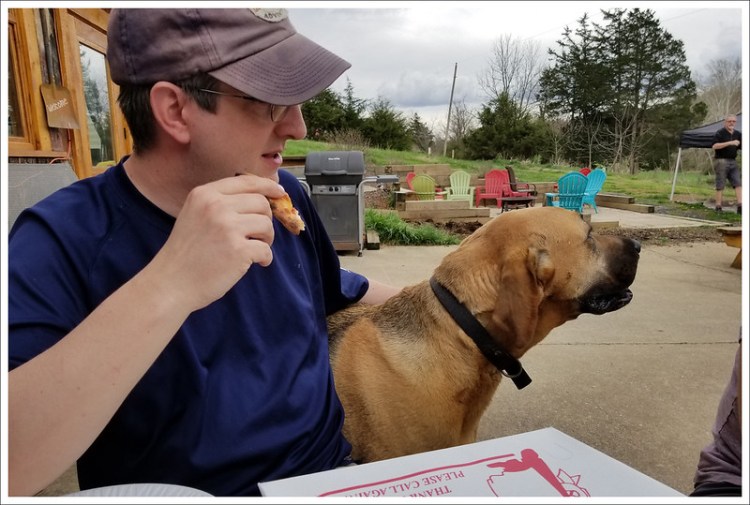
When we got back to the car, we drove to Swover Creek Brewery for some great pizzas and beer. The owners have some dogs that roam around and beg a bit for pizza, but they were sweet companions. One of the owners was prepping to do a chain saw sculpture for the early evening, but we needed to head home so we missed out. The outdoor scenery at Swover Creek capped off a great day on the trail with friends.
More Photos
Trail Notes
Distance – 8 miles This hike could be shortened 7.5 miles if you skip exploring to the right after the junction on the ridge. It could also be shortened to 5.5-6 miles if the lower forest service gate it open.
Elevation Change – 1,800 – 2,100 ft (depending on how far you explore)
Difficulty – 4. This hike’s climbing is never terribly steep, but it’s still three miles of unrelenting climbing. The scramble at the end is a bit challenging.
Trail Conditions – 2. We hiked in early spring and found the first couple miles of the trail in relatively good shape. There was some overgrowth, but it was still easy going. On the ridge, the blazes are harder to follow and there isn’t much of a trail. Hikers will mostly meander blaze to blaze. I also think this area will become very overgrown as the growing season progresses.
Views – 4. These views were spectacular! They would warrant a five star rating, but there is no real place to sit and take in the view with a second person. The view rocks are narrow and precipitous. Adam and I were both nervous standing on them.
Streams/Waterfalls – 1. There is one small stream shortly after you come off the forest service road and start walking the actual Church Rock trail.
Wildlife – 3. There was so much scat from various animals along the trail. We didn’t see anything, but animals are definitely out there.
Ease to Navigate – 3. Generally, blazes and trail were easy to follow. The yellow blazed trail was in great shape, the white blazed ridge trail was less clear.
Solitude – 5. Until all the fine, adventurous readers of Hiking Upward and this site get out there, this trail is truly an unknown gem.
Directions to trailhead: Parking coordinates are 38.73325, -78.8732. The parking area is along a gravel forest service road. If you find the gate open, you can drive another mile closer to the actual trailhead. When we hiked in spring 2019, the lower gate was locked and the road beyond it was blocked by a large blowdown.
Download the full size PDF elevation profileDownload a full size PDF trail map.
If you’ve hiked the Laurel Prong-Mill Prong Loop, you’ve hiked over Hazeltop and past this viewpoint. But Hazeltop is fantastic on its own as an out-and-back. At 3.9 miles, this route is an easy stroll to a gorgeous vista.
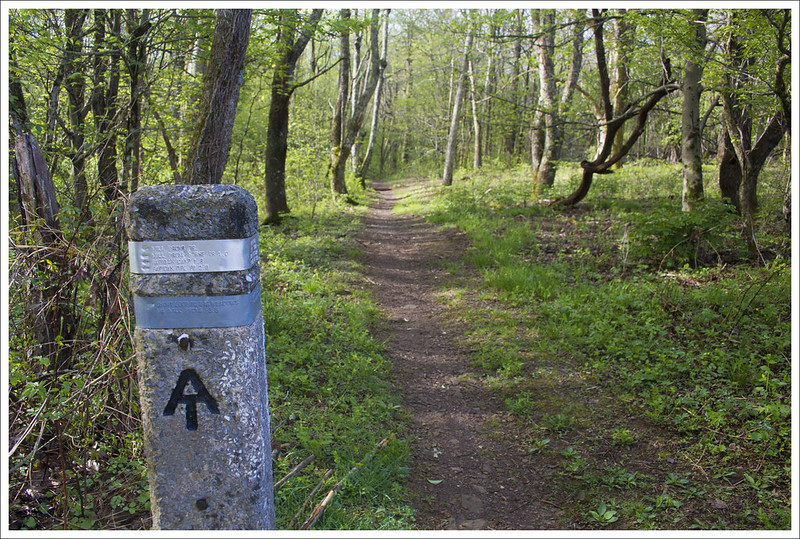
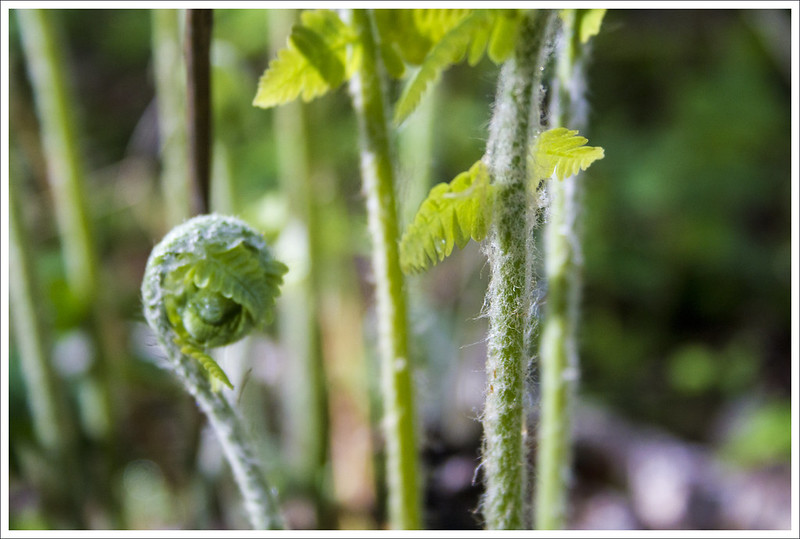
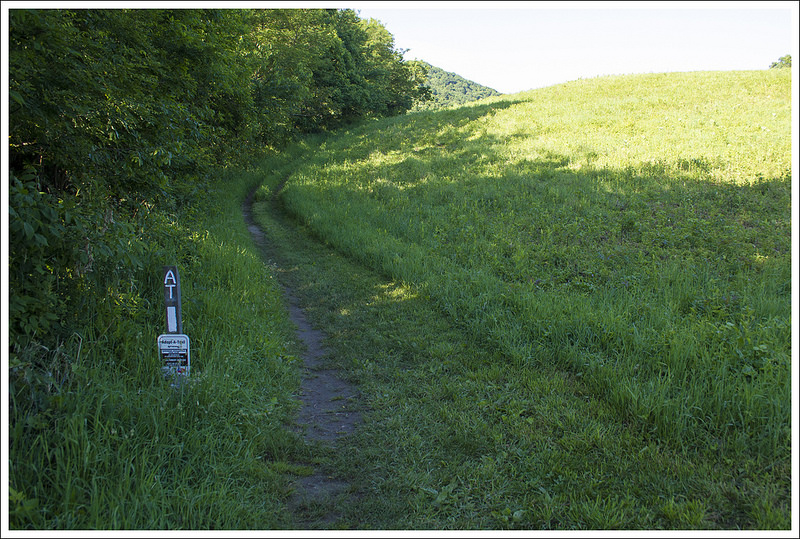
The pretty view from the summit of Hazeltop. Below: The Appalachian Trail at Milam Gap; The junction of the AT and the Mill Prong; Ferns unfurling.
Christine Says…
The day was supposed to be rainy and stormy, but I woke up to sunshine (and a dog with too much energy). I decided to hike Hazeltop Mountain in Shenandoah’s central section. It’s a beautiful, easy route with a nice viewpoint at the summit.
Park at Milam Gap on the western side of Skyline Drive. Follow the crosswalk across the Drive and pick up the Appalachian Trail headed south. At .1 mile, you’ll come to a cement marker. If you turn left, you’ll be on the Mill Prong Trail headed toward Hoover’s Rapidan Camp. Today, stay straight and continue on the white-blazed Appalachian Trail.
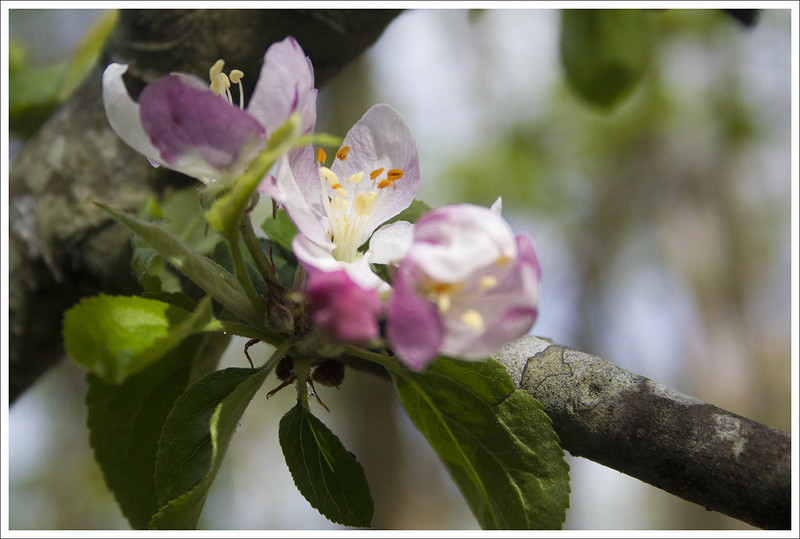
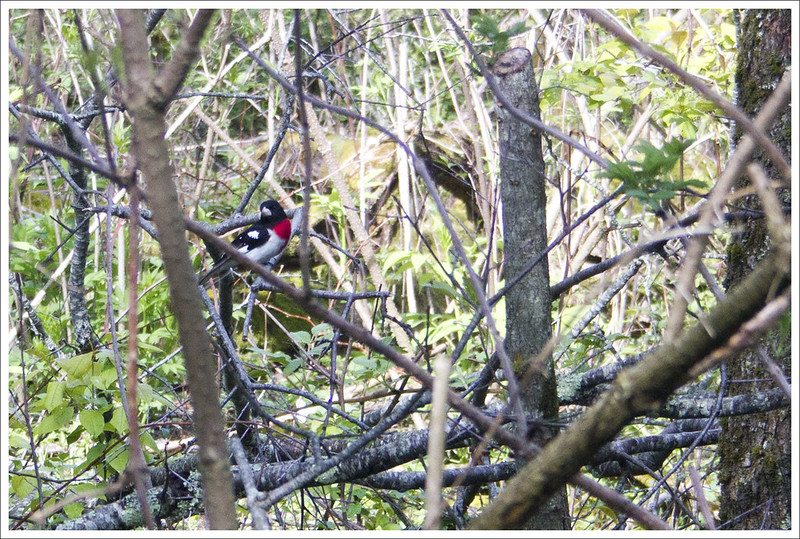
Pretty sure this is a blooming apple tree. Below: Rose-breasted Grosbeak; Appalachian Trail; Cool blazed rock along the trail.
The trail goes very gently uphill through an area that once was used as an orchard. Apple trees are mixed in with the rest of the typical forest. There’s really nothing terribly noteworthy about the trail – it’s a pretty dirt ribbon through forest.
There are tons of wildflowers in the spring and lush ferns in the summer. On this particular day, I had really great luck with birds – I saw a rose-breasted grosbeak, an American restart, and (briefly) a turkey puffed up and showing his plumage. Indy scared the turkey away – and in case you didn’t know… turkeys can fly. They look very awkward doing so.
Indy on the spur trail to the viewpoint. Below: Appalachian Trail Scenery; Ridgeline of Hazeltop; Trillium.
At 1.9 miles, look for an unmarked spur trail on the right side of the trail. Follow the spur for about 50 yards through a grassy area with a rocky outcrop overlooking the western valley. It’s really a lovely spot! It can be easy to miss the spur if you’re not paying attention. The summit is not marked in any way. If you start descending, you’ve gone too far and will need to turn around and find the spur trail.
After you’ve enjoyed the view, return the way you came, arriving back at Milam Gap at 3.9 miles.
Another summit view.
Trail Notes
Distance – 3.9 miles roundtrip
Elevation Change – 597 ft.
Difficulty – 1.5. I think this hike feels mostly flat, but the profile says it’s a gradual uphill.
Trail Conditions – 4. The trail is smooth and well-maintained. There were a few blowdowns blocking the trail in spring 2019.
Views – 4. The view from the summit is excellent. There is a nice outcropping to sit on and plenty of space to enjoy lunch or a snack.
Streams/Waterfalls – 0. The trail is dry.
Wildlife – 5. I saw lots of bird species and a flock of turkeys. On other hikes along the same stretch, I’ve seen lots of deer and a few bears.
Ease to Navigate – 3. The Appalachian Trail is well marked and easy to follow, but don’t miss the unmarked spur trail to the viewpoint.
Solitude – 3. I usually see people, but never many.
Maps
Download a full size map.
Download a full elevation profile
Directions to trailhead: Located in Shenandoah National Park (fees apply). Parking is at Milam Gap. There is a large lot with space for about 12-15 cars. GPS Coordinates for parking: 38.501969, -78.445705.
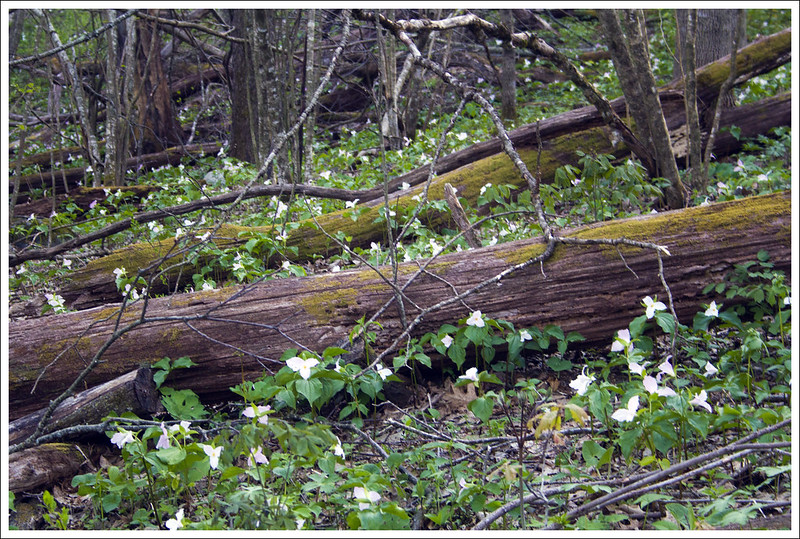
This 4.75 mile hike is probably one of the best places in the park to experience the spring trillium bloom. It’s nothing short of spectacular along this section of Appalachian Trail. This route also features two views – both are obstructed – so it’s best to hike this route before trees at higher elevations leaf out.
Abundant trillium along the Appalachian Trail. Below: Parking on the Pocosin Road; There thousands of blooming trillium along the trail; A view of the valley from the spring.
Christine Says…
When the days get longer, I find myself skipping the gym and hitting the trail instead. I like having an arsenal of short 3-5 mile hikes I can do on weeknights after I get off work. This route is one of my favorites, especially in the spring when the trillium are blooming in Shenandoah National Park. The flowers are so abundant along this stretch that they practically carpet the forest floor. It’s beautiful, but it’s also ephemeral. The trillium only last a couple of weeks each April into early May.
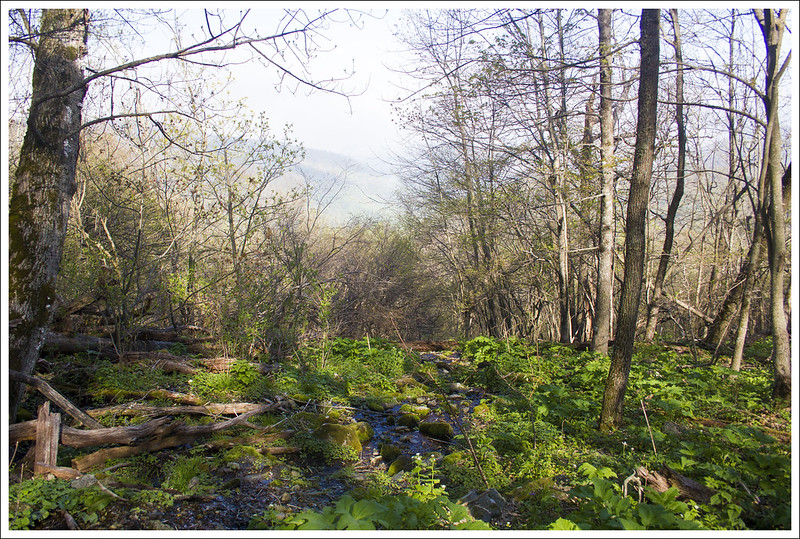
Last night, I loaded Indy the Hiker Pug into his crate and headed up to the park. Down in the valley, it was sunny and 87 degrees. When I parked along the Pocosin Fire Road – where the hike starts – it was a full 17 degrees cooler and delightfully breezy. We followed the fire road for .2 of a mile to its junction with the Appalachian Trail. If you continue straight down the road, you’ll pass the PATC’s Pocosin Cabin and eventually reach the old mission ruins. It’s a nice hike for another day. But for this route, take a left at the cement marker and head north on the Appalachian Trail. The trail meanders downhill for a couple tenths of a mile where you’ll cross a spring and get a pretty view of the valley to the east.
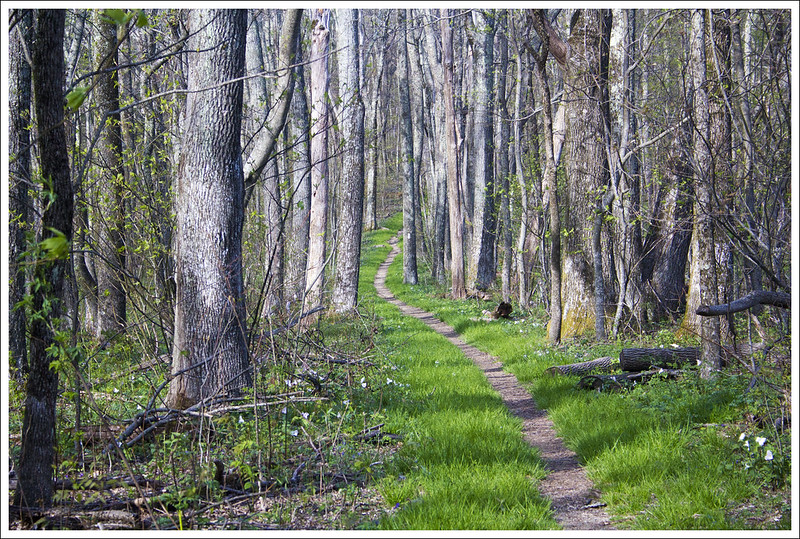
I like when the trail looks like a ribbon through the woods. Below: The slanted rock is visible from Skyline Drive as well – at this point of the hike, you’re very close to the road; The early part of Lewis Mountain Trail follows a utility road; Stairs on Lewis Mountain Trail.
From there, the trail levels out, allowing you to saunter along for about a mile. At about a mile and a half, the trail runs closely parallel to Skyline Drive. You’ll see cars passing – sometimes people wave. As the trail moves away from the road, you’ll begin to ascend gently but steadily uphill for about half a mile. At close to the two mile mark, you will reach a road and another cement marker at the southern end of Lewis Mountain Campground. If you need a snack or bathroom break, Lewis Mountain Campground has a camp store and restrooms open seasonally. Take a right, and follow the Lewis Mountain Trail. For the first tenth of a mile, the trail follows a utility road, but then it turns back into single track through the woods for the remaining few tenths of a mile. The forest around here is open and grassy. You’ll then climb some wooden stairs built into a hillside and pass through a small tunnel of mountain laurel. The trail hooks to the right and leads to the summit of Lewis Mountain – a small rocky spot with obstructed views to the east.
On this particular day, the weather was odd. Along the trail and to the west, skies were clear and sunny. But to the east, a dense bank of fog was lying against the side of the mountains. So, instead of an obstructed view, I got NO view. It was fine though, I think fog is pretty and I had some older photos of the view spot to share for this post. I gave Indy some water and rested for a few minutes before heading back. On the return hike, I chatted with a few section-hikers making their way to camp at Bearfence Hut. One of them was thrilled to see Indy on the trail. She also has a hiking pug named ‘Bronx’. She showed me a cute photo of Bronx hiking in Colorado. He wasn’t on this trip with her, but she was delighted to meet another pug that hikes.
I got back to the car pretty quickly – the return trip is mostly downhill or flat. When I got home, I had to remove THIRTEEN ticks from the dog. This is despite him being treated with Frontline regularly. I also spray his bed with permethrin. I think I got all the ticks off him, but if any were left hopefully the Frontline and permethrin will take care of killing them before they transmit any diseases. I know every year the media says ‘this is going to be a bad year for ticks’, but this year it’s the truth. In my four decades of hiking, I have never seen such issues with ticks. I want to remind everyone to take precautions. Tickborne diseases are nothing to mess with.
The view from Lewis Mountain on a clear day. Below: I got views of a fog bank this time; Passing through the mountain laurels; More ribbon trail.
One final note – starting at Pocosin is also a great way to hike Bearfence Mountain. I always feel like the Bearfence hike is too short, so I like parking at Pocosin and hiking north for about 3.5 miles to the Bearfence summit.
Trail Notes
Distance – 4.75 miles roundtrip
Elevation Change – 820 ft.
Difficulty – 2. This is an easy hike with gradual uphills.
Trail Conditions – 4. The trail is smooth and well-maintained.
Views – 2. There is a view of the valley along the trail early in the hike. There is also a view at the summit of Lewis Mountain, but it is quite grown in by larger trees.
Streams/Waterfalls – 1. You’ll cross one small spring.
Wildlife – 5. I’ve seen all kinds of birds, a bobcat, deer, and bears along this stretch.
Ease to Navigate – 4. The trail is well marked and easy to follow.
Solitude – 4. I guess because there are no grand vistas, you really don’t see many people dayhiking in this area. I usually only see backpackers making their way to Bearfence Hut.
Maps
Download a full size map.
Download a full elevation profile.
Directions to trailhead: Located in Shenandoah National Park (fees apply). Parking is located in several spots along the Pocosin Fire Road in the Central Section on Skyline Drive. The turn onto the road comes up quickly and is not marked, so pay attention. It’s near mile 59.5 on the Drive. GPS Coordinates for parking: 38.413585, -78.488959
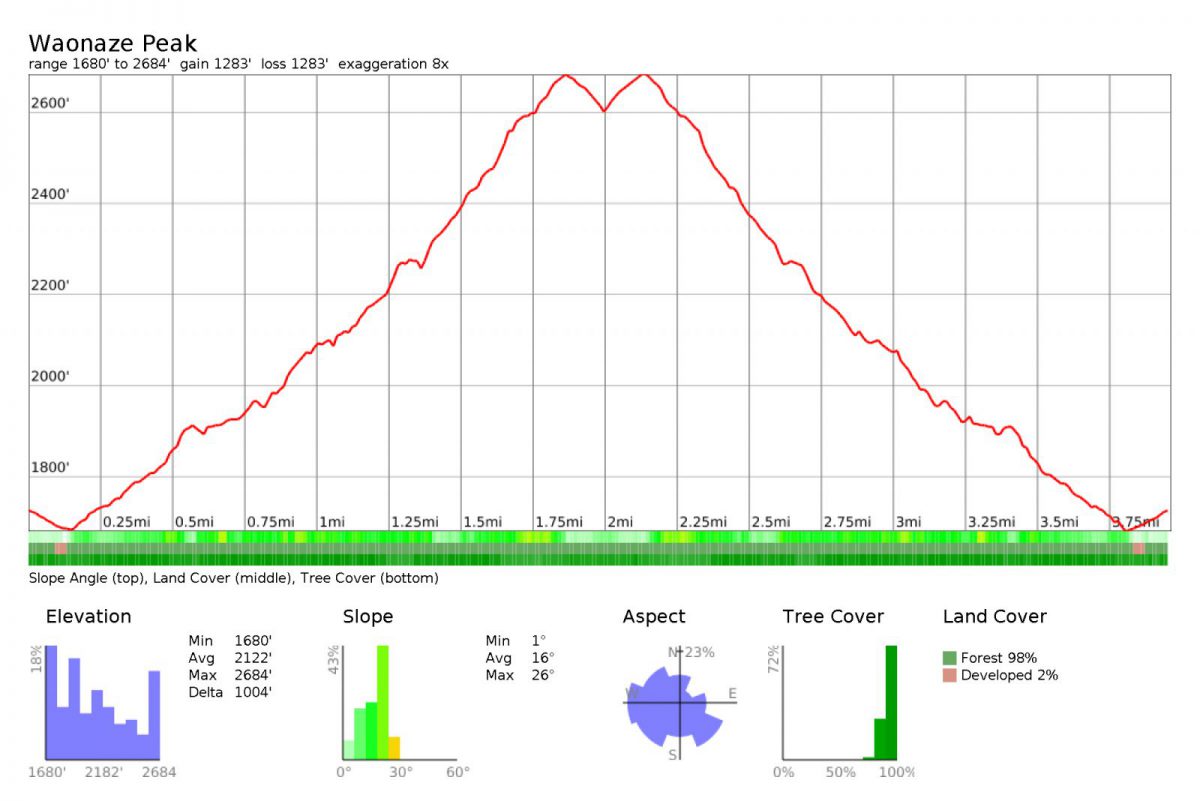
This four mile hike offers lots of hiker solitude and some nice obstructed views. The area is popular for dirt-bikes and ATV use, and while they have their own trail system, you may find engine noise distracting at times on this hike.
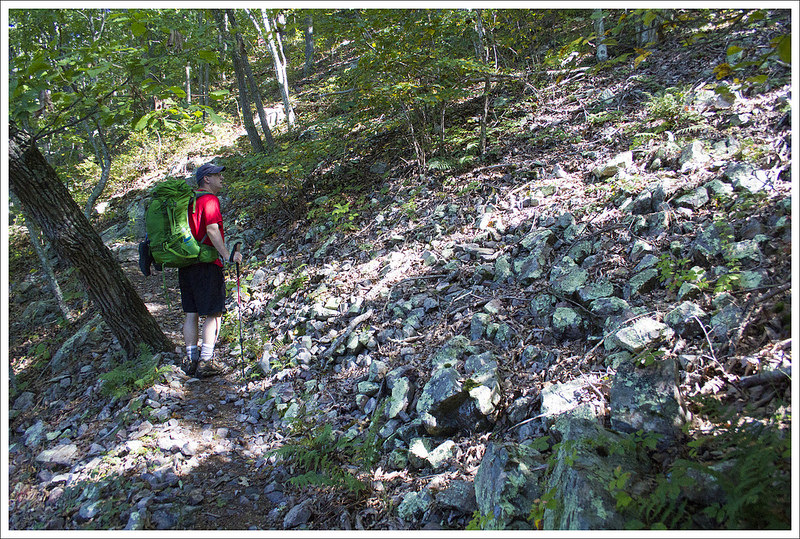
Adam hikes the Massanutten Trail toward Waonaze Peak. Below: Park in the ATV lot at Edinburg Gap; Look for the orange-blazed Massanutten trail on the other side of 675; Mountain laurel was in full bloom when we did this hike.
Christine Says…
Near the end of May, we met up with our friends, Tony and Linda, to do a little hiking near Edinburg along the Massanutten Trail. Our original plan was to hike out to Opechee Peak, but the forecast had some pretty fierce thunderstorms, so we cut it short and did a four-mile out and back to Waonaze Peak. I think both of those peaks have really interesting names for our area. I did a little research into the name origins (probably Algonquian), but didn’t find anything. I also wonder if Waonaze rhymes with mayonnaise. Hmmm…
Overall, the hike was pretty basic. We started at the big ATV parking area at Edinburg Gap. ATV trail users must pay a fee to ride the trails, but hiking is free. There’s a informational kiosk at the parking lot that outlines the different trails in the area. From the parking lot, we crossed the road and picked up the orange-blazed Massanutten Trail. The trailhead is a little hidden in the trees, so look for blazes and a mileage sign to make sure you start in the right direction.
For the first mile, the trail meanders gradually uphill through dense stands of mountain laurel. We were lucky enough to hike during the peak bloom, so it was especially beautiful. At one mile in, we came to marked spring. Shortly after the spring, we passed a second trail mileage marker. Funnily, it was identical to the marker at the Edinburg Gap crossing. The Bear Trap Trail was 2 miles away at Edinburg Gap and still two miles away at a little over a mile into the hike. I guess sometimes trail signs should just be regarded as estimates!
We saw a big, fat timber rattlesnake along the trail. Below: Trail signage was kind of funny. Even after we had come a mile, the distances on the signs had not changed. Bear Trap Trail was two miles ahead at all times; We passed a spring with a broken sign warning people to treat the water before drinking; A full view of the rattlesnake.
After the mileage sign, the trail gets quite a bit rockier and steeper. We saw a big timber rattlesnake basking in the sun. This terrain is ideal for them, so be sure you’re on the lookout. Timber rattlers are typically non-aggressive and reclusive. Basically, if you ignore them, they’ll ignore you. Someone once told me this quote about timber rattlers — “Timber rattlers are first cowards, then bluffers, and last of all warriors.” I’ve found this to be true with my encounters.
The steeper, rockier section of the hike makes several big switchbacks and passes several big boulder jumbles. As you climb toward the high point of Waonaze Peak, the view toward Fort Valley and Kennedy Peak opens up. The overlook itself is nice, but partly obstructed. It would be much prettier in the winter when leaves are down. After we reached the high point, the trail quickly begins to descend into a saddle between Waonaze and Opechee peaks. We turned around at that point, but will tackle Opechee another day.
After the hike, we headed into Woodstock for beers and lunch at Woodstock Brewhouse — always a favorite!
Adam Says…
As Christine mentioned, this is a hike that we plan to do again and get all the way to Opechee. Seeing that the summit views were a bit overgrown, our plan is to try this one again when it is cooler and leaves are mostly down. We were the only hikers from this parking lot as this area is primarily used by ATVs on the trail systems nearby. There were a few times that we could see the ATV riders through the trees (and more occasions that we could hear their engines). When we started the hike, we had heard there were storms coming in the early afternoon. With the violent storms we have been getting over the summer, we didn’t want to risk doing too long of a hike on this day.
The obstructed viewpoint near the top of Waonaze Peak. It would be better in the winter. Below: A rocky descent; The trail has lots of rocky footing and boulder jumbles; More pretty mountain laurel.
The first mile of the hike was uphill but not terribly tough in terms of elevation or footing. The mountain laurel in full bloom made this a gorgeous early stretch of trail. The second mile was a bit more windy and rocky with lots of loose stones, so watch your footing especially on the downhill. Eventually, we came to an area of trail that gave us some obstructed views of Kennedy Peak. We thought about calling this hike Kennedy “Peek”, since you get obstructed views but we thought that would be just too confusing. Tony and Linda stopped at the overview here, but we decided to press on. We were first trying to see if there were better views at the top of the hill, but then the trail took off away from the view and was leading us through the saddle towards Opechee. Not wanting to leave our friends too long (and worried about clouds rolling in), we decided to turn back and make our descent.
Post hike refreshment at Woodstock Brewhouse. It’s one of our favorite post-hike hangouts.
We caught up with our friends and then continued downhill. I’m not a fan of any snakes, so I was especially cautious when we neared the area where the timber rattler had been spotted earlier. He had moved on (making me a tad nervous looking around for other spots he could be hiding) and we didn’t see any other snakes on the way back. When we got back to the cars, we then headed over to one of our favorite post-hike spots – Woodstock Brewhouse. We always enjoy talking about our hikes over great food and beverages here. While this peak didn’t lead to an amazing viewpoint, it was a good leg-stretcher that we had not explored before.
Trail Notes
Distance – 4 miles (Check out the stats from Map My Hike)*
Elevation Change – 1280 feet
Difficulty – 2. It does have just a bit of uphill, but fairly easy if you take your time.
Trail Conditions – 3. The trail isn’t well traveled, which makes it a little tougher on conditions. There are some rocky, steep sections with loose rock on the trail.
Views – 2. During the winter, it would probably rate higher. The views of mountains and farms below is nice, but obstructed.
Waterfalls/streams –0. Non-existent.
Wildlife – 3. We did see lots of small toads and saw the timber rattler. My guess is that a lot of the bigger animals like bears and deer are scared away by the noise of nearby ATVs. There were lots of pretty bird calls in the air.
Ease to Navigate – 3.5. Once you find the trail, it is fairly easy to stay on course. The signs showing that Bear Trap Trail is always two miles away was quite funny, so I don’t know how much you can trust these.
Solitude– 4.5. The trail you should mostly have to yourself, but you will hear some ATVs early on in the hike on nice weekend days.
Directions to trailhead: GPS Coordinates for this hike are 38.789125, -78.519384. Look for the ATV/OHV parking area at Edinburg Gap. Cross Rt. 675 and look for the orange-blazed Massanutten Trail across the road from the parking lot.
* MapMyHike is not necessarily accurate, as the GPS signal fades in and out – but it still provides some fun and interesting information.
We did this 27-mile Appalachian Trail section over three days at the tail end of summer 2017. The trail was beautiful and quiet with lots of interesting things to see along the way. We camped one night and spent the other luxuriating at Woods Hole Hostel. This may have been one of Christine’s favorite sections yet!
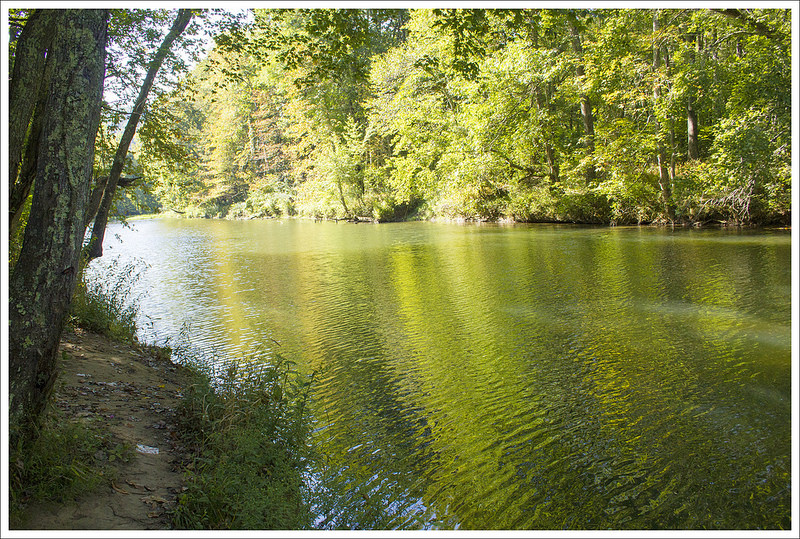
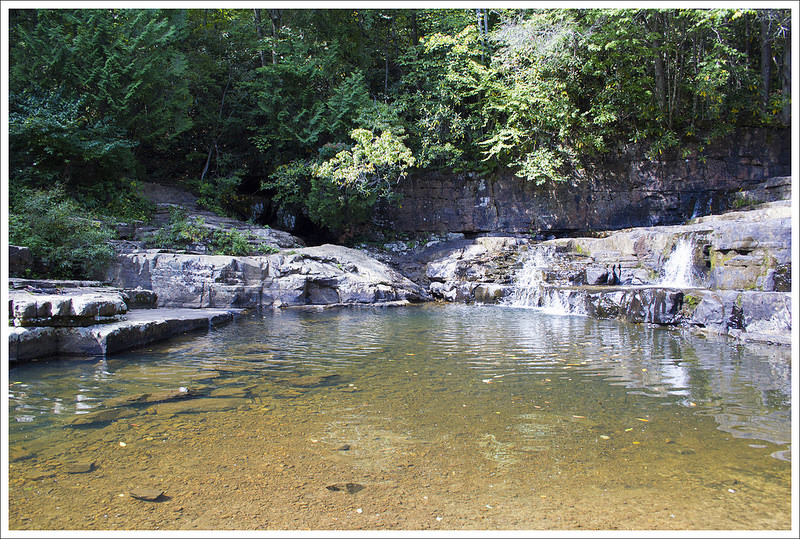
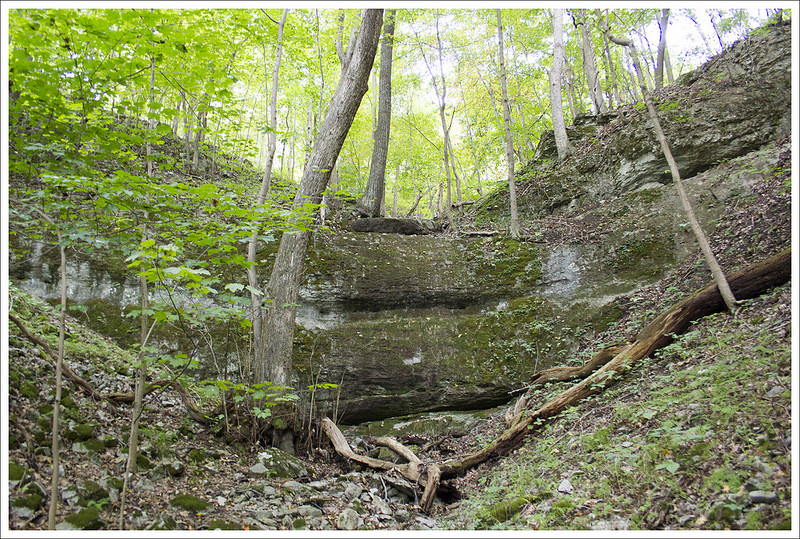
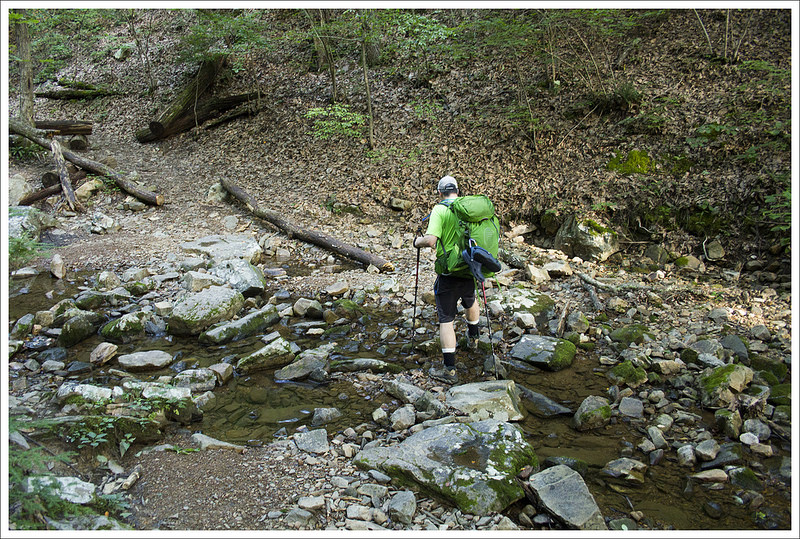
Kimberling Creek is beautiful, but not safe to drink from. There is a lot of cattle farming along the stream. Below: Some rocky slopes along the trail; The spur trail to Dismal Falls is well worth the detour; Shallow pools and flat rocks leading up to the falls.
We decided to celebrate Christine’s birthday by completing a section of the Appalachian Trail over a few days. I had a couple of surprises for her along the way which hopefully made it an even better trip for her. I arranged a shuttle driver to meet us at a parking lot off Narrows Road near Pearisburg, VA. We loaded up and he drove us on some beautiful back roads until we got to our dropoff point at Kimberling Creek. There was a small parking lot here and a suspension bridge that spanned the creek. We took a few pictures, crossed the road, and then started our trip north on the white-blazed Appalachian Trail on a two day trip back to our car. The trail started off with a bit of a steep climb, which is always a quick reminder of the weight you decided to pack in your backpack.
The water level was very low, but Dismal Falls was still beautiful. Below: Another angle on the falls; This area has tons of rhododendron tunnels; Walking through beautiful open forest.
The climb was short-lived and after about a mile, the trail started to slope back downhill. At 1.8 miles, we reached a side trail that showed that Dismal Falls was just .3 miles away. Since it was early in the day, we decided to check it out and we were so glad we did. Dismal Falls was one of the more picturesque waterfalls I have seen and the setting just invites you to waste some time there. Even with low amounts of water falling, it is a great swimming hole area with great places to perch above and watch the water. We ate some snacks, explored the nearby area, and took many pictures before deciding to head on. While we were there, we only had a few other people that came by and they all approached it from the roadside that we could see in the distance behind the waterfall. We were glad we put the effort to see such a beautiful place. We grabbed our stuff and then headed back to rejoin the AT, bringing our mileage to 2.4 miles.
This pond was a scenic spot along the trail. Below: While the trail was very dry when we hiked, this stretch has lots of bridges and planks to cross wet areas; The Waipiti Shelter used to be along this fire road. It was demolished after a couple hikers were murdered. A new shelter was built a little ways north; More beautiful forest.
Continuing on, most of the hiking for this day was rather pleasant – there was a slight uphill climb but overall was not too tough. There were lots of footbridges and water crossings along the way, so this was not a day where we felt like we needed to carry much water since we weren’t terribly far from a water source. Eventually, we hiked next to a large, scenic pond that joined up to a dirt road at about 8.4 miles. From here, it was just a couple of tenths of a mile to our first stop on our trip, Wapiti Shelter.
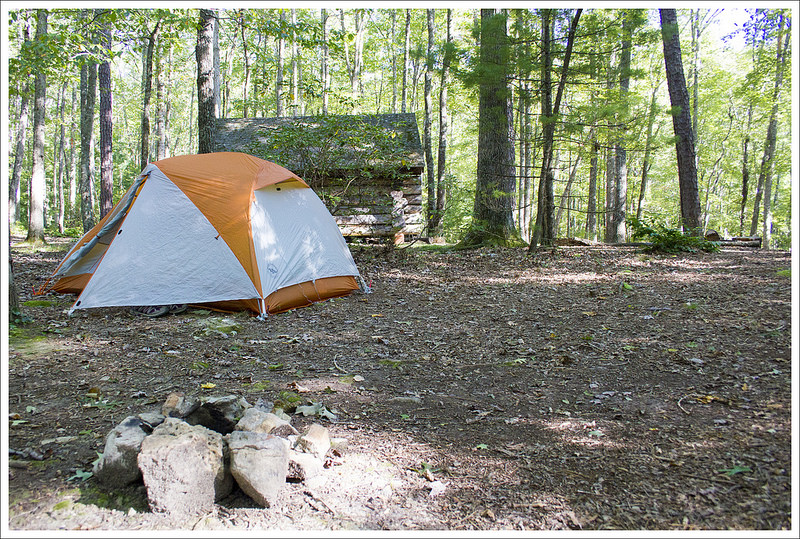
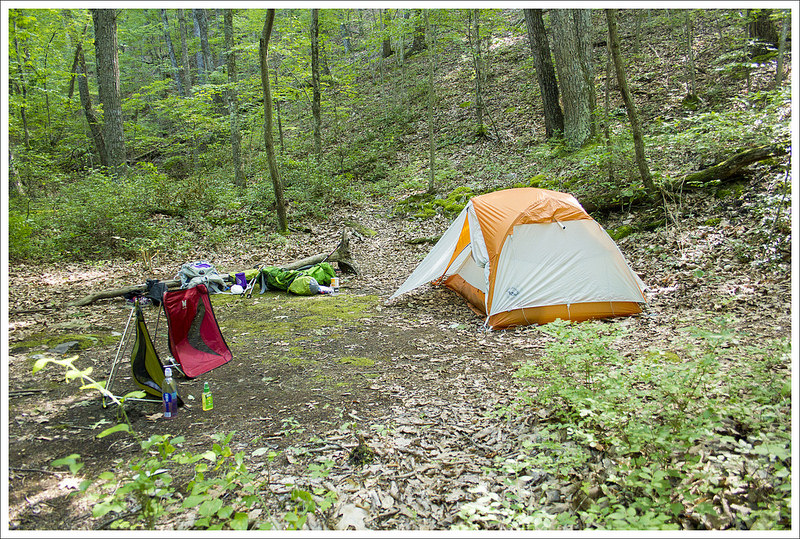
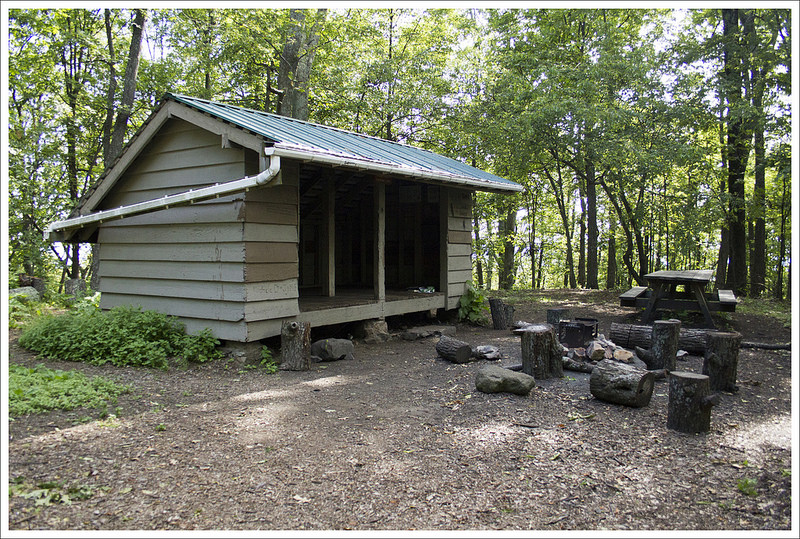
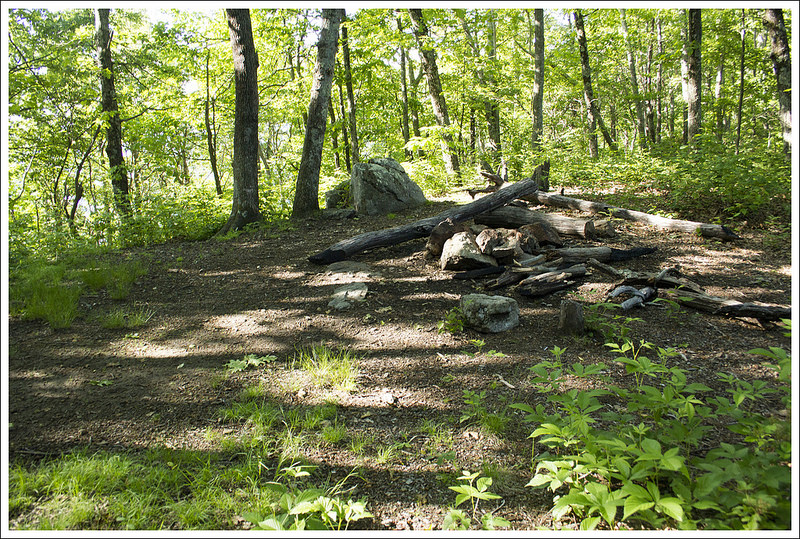
Our camp stop for the first night was the Waipiti Shelter. Below: The turn-off from the AT; Lots of entries in the log make mention of murders and hauntings, but this is not where the crime happened; Our tent site behind the shelter.
Wapiti Shelter has some dark history to it. Christine had already heard the story before, but she waited to tell me about it until we got there. The old Wapiti shelter was the place where a couple of murders had taken place in 1981. A man named Randall Lee Smith befriended a couple of hikers and then murdered them in their sleeping bags that night. Smith was captured and imprisoned, and then met parole to be released in 1996. In 2008, Smith returned just a few miles away and tried to kill two fisherman but wrecked his truck in the getaway and died from the injuries he sustained when he was taken to prison. If you want to read more about this story, check it out here. Keep in mind, that the shelter today is located a couple miles away from where the murder happened, so ghost stories that the trail journals would like you to believe are simply not true.
As we were setting up camp, I surprised Christine with an additional camp pillow for a birthday present. She had been complaining recently about how she wish she had multiple pillows when backpacking, because one inflatable pillow just wasn’t enough. She was thrilled when I brought the extra one out of my pack. We set up our tent not far from the shelter and a bit later, we were eventually joined by other hikers, including two from Australia and one from Germany. The best water source at this campsite was back the way we came at the bottom of the hill. We told the other campers about the murder story but only after they asked specifically about it after reading logbook entries. I think everyone slept well that night despite the ghost tale.
Christine Says: Day Two – Wapiti Shelter to Woods Hole Hostel (7.8 miles)
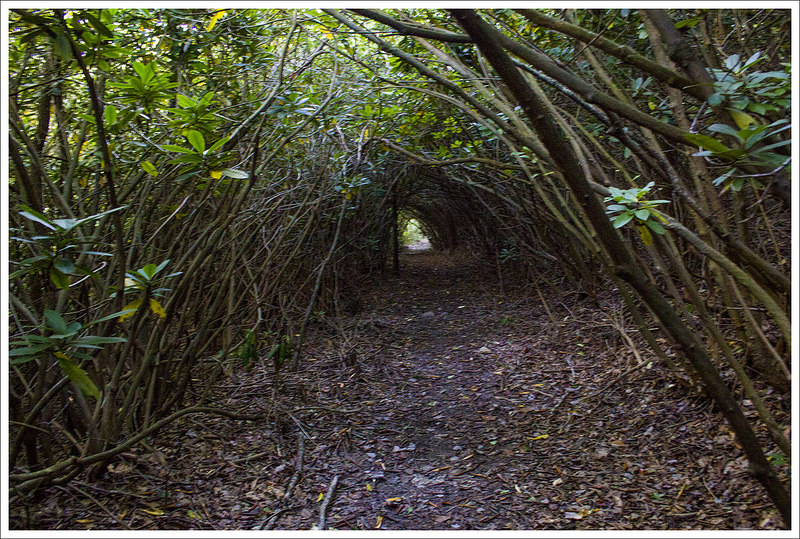
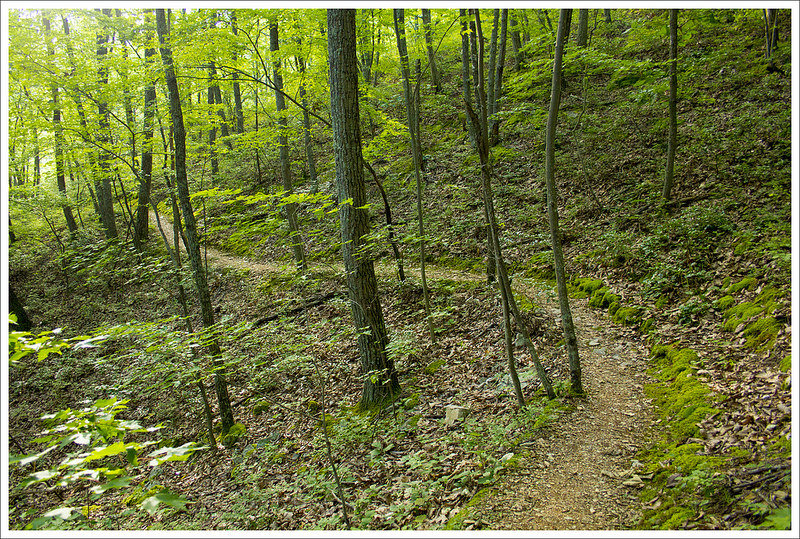
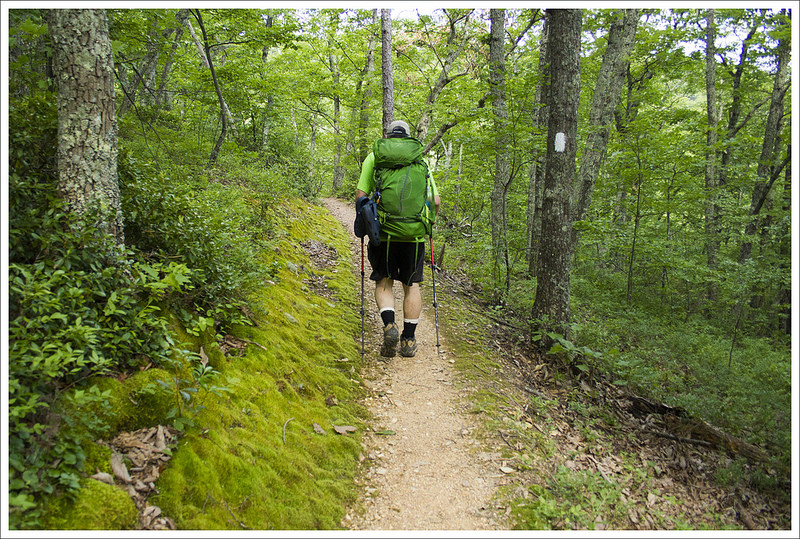
This section of Appalachian Trail had so many long, dark rhododendron tunnels. Below: Even when the rhododendron wasn’t a full tunnel, it was still very dense; The footbed was almost paved with flat, shale-like rock; I love trees with ‘arms’
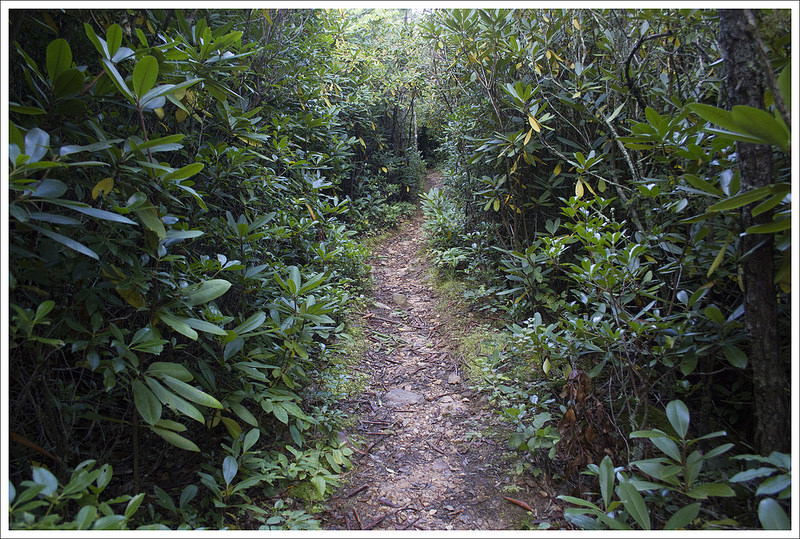
Brrr – that was a cold night! I was glad to have spent it bundled up in my warmer sleeping bag with two pillows. Eventually we got moving, packed up, ate breakfast, and started our hiking for the day. We had all day to go eight miles, so we set out at a leisurely pace. We had about three straight miles of moderate uphill to our first view of the day. The trail was all green tunnel. We passed through thickets of mountain laurel and rhododendron and traversed lush beds of ferns.
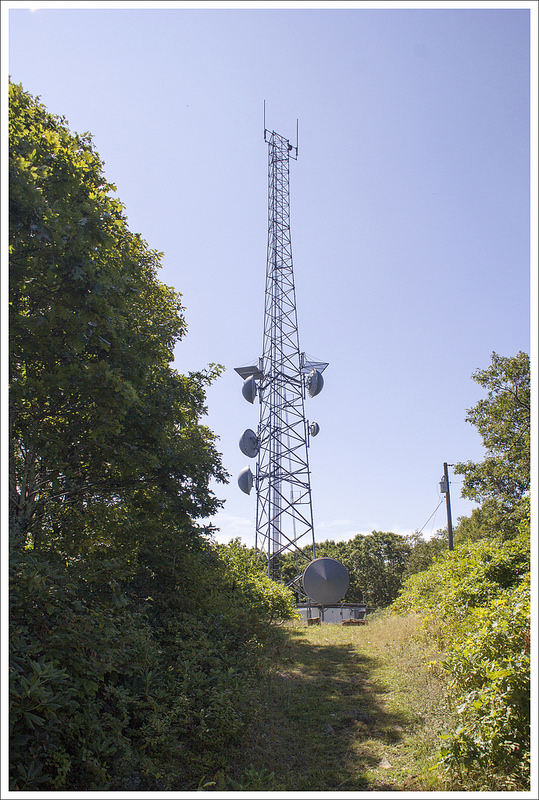
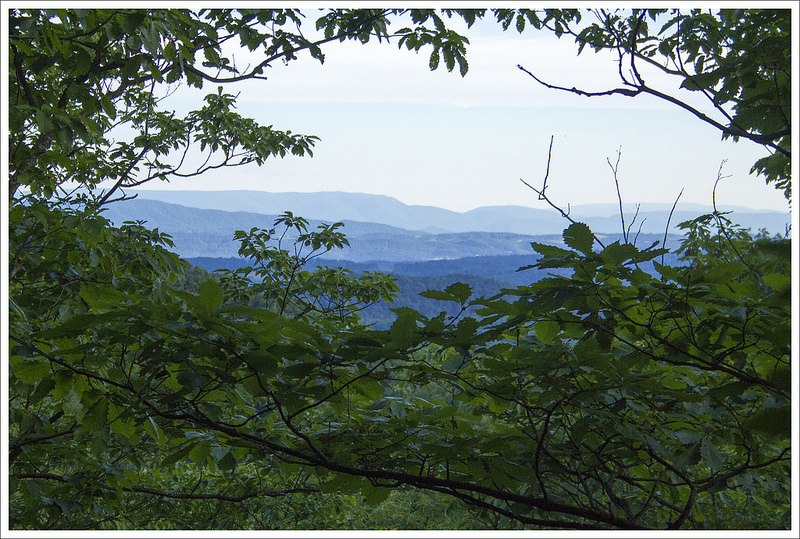
At 2.7 miles in we reached a pretty outcropping of rocks with a great view of the valley below. We stopped briefly to enjoy the vista, but weren’t ready for a snack or a long break. The next 2.3 miles covered rolling terrain with lots of small ups and downs. The trail was pretty, but not remarkable. At five miles into our day, we reached the radio tower on Flat Top mountain. The tower viewpoint is about .1 miles off the trail and worth making the small detour. Behind the tower, there is a series of small cliffs with a commanding view. It’s the perfect place to take a lunch break.
There were several nice views near between Waipiti and Woods Hole. Below: Views from the trail.
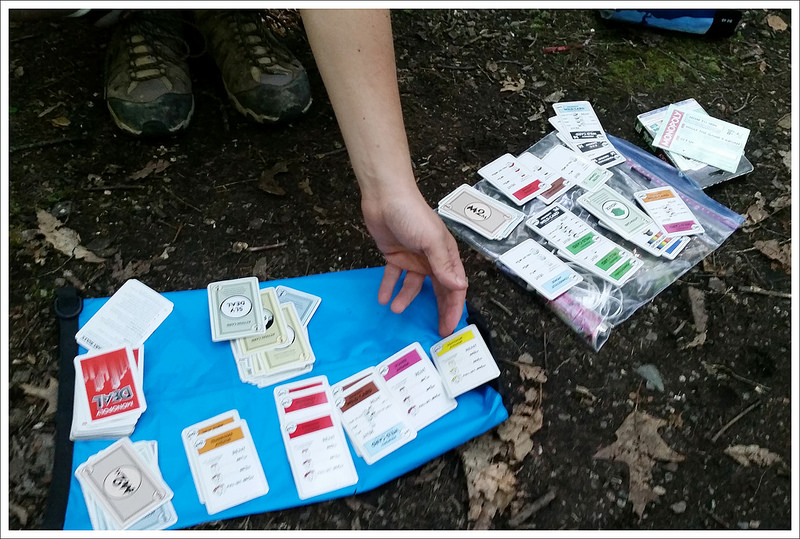
The day had warmed up a bit and we were both running really low on water. Thankfully, we had enough to make Pack-It Gourmet cheese spread for lunch. We had cheese and crackers with candy and dried fruit for our mid-day meal. We also took a good long break and rested atop the rocks. It was peaceful to watch hawks and buzzards soaring on the breeze.
After a full hour of resting, we packed back up and set out to cover our final 2.8 miles of the day. The rest of the route was mostly downhill with only a few brief bumps to climb. In about .7 miles, we crossed the Ribble Trail. The sign indicated that supplies (like propane) were available somewhere down the Ribble Trail, but I would think most people would just continue on to Woods Hole or even Pearisburg if they needed something. Apparently, there is also a nice AT-Ribble Trail loop that is popular with locals. If we were to have followed the Ribble Trail, it would have rejoined the AT near Waipiti shelter, where we spent the prior night. Maybe one day, we’ll go back and explore the area more.
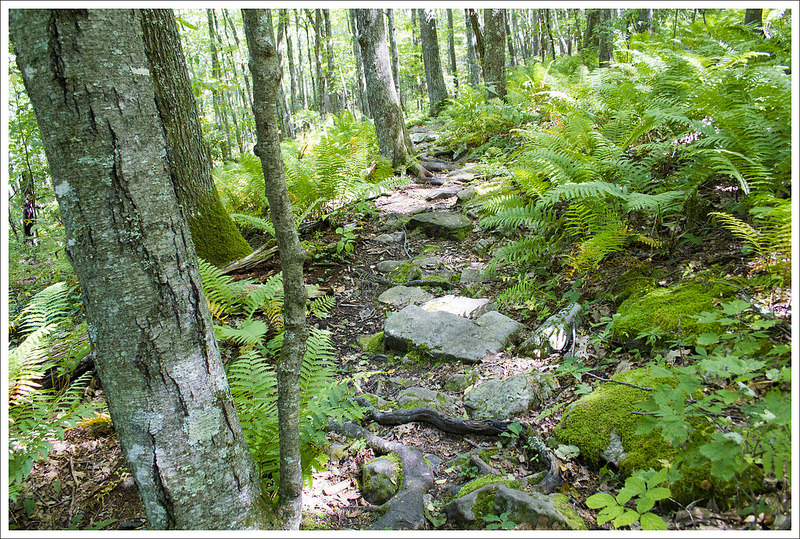
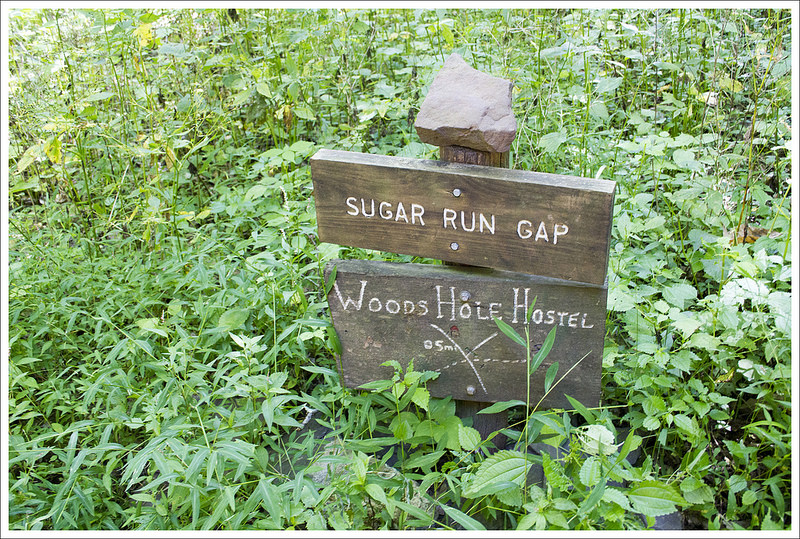
As long as you don’t look behind you, the view is pretty and pristine. Below: Descending toward Sugar Run Gap.
After crossing the junction with the Ribble Trail, we continued downhill; crossing Big Horse Gap/USFS 103 just a tenth of a mile later. In another 1.2 mile, we crossed another forest road. From this point, the last .5 miles of hiking went steeply downhill. The trail was a bit rocky and overgrown. At this point, I was starting to hit a wall. I was out of water and feeling really parched. We hadn’t passed a spring since first thing in the morning and the sun had been beating down on us all day. I told Adam I wanted to rest at the road crossing before we hiked down to Woods Hole Hostel – our destination for the evening. He said to me ‘But wouldn’t a massage be way more relaxing?’ It turned out he booked an hour long massage for me at the hostel. Say no more – I was up and ready to cover that last .5 miles of road walking to get to Woods Hole.
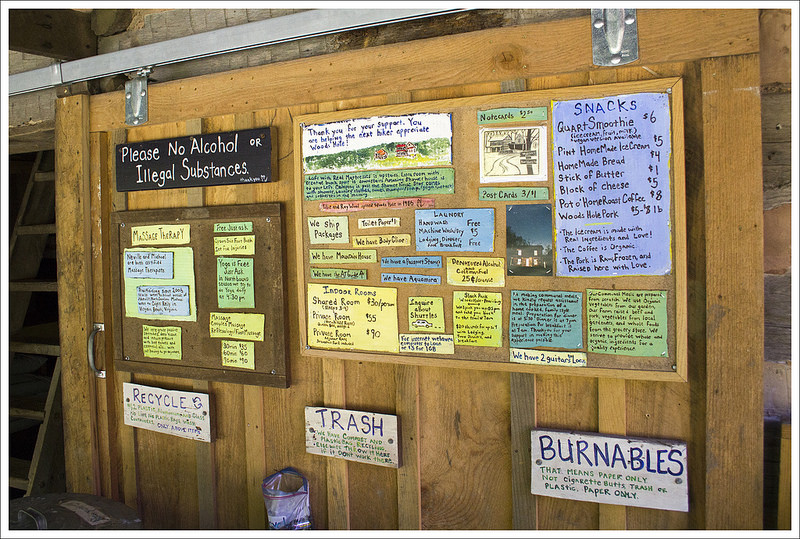
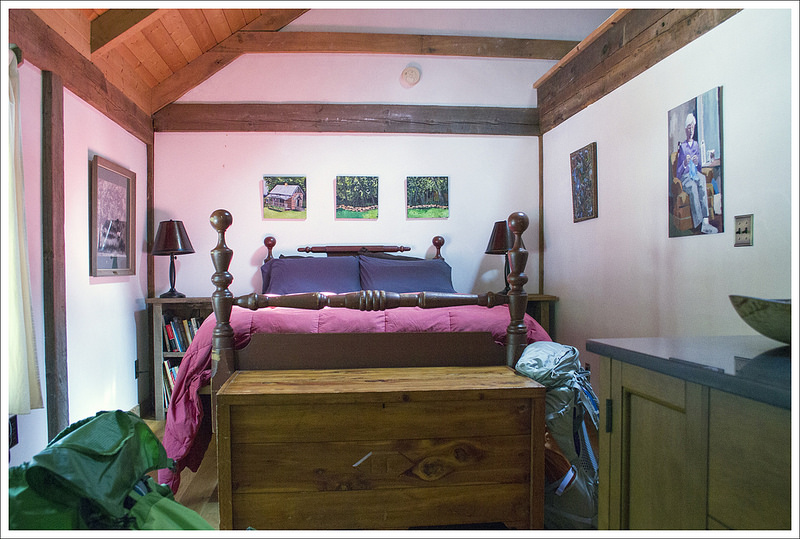
Normally, we wouldn’t stay at a hostel on a two-night backpacking trip, but Woods Hole is special. Family-run for decades, the quaint, old farmhouse is an Appalachian Trail legend and a beloved tradition for many hikers. The old farmhouse opened its doors to hikers in the 1980s. The hostel was originally run by Tillie and Roy Wood, but was taken over by their granddaughter Neville in 2007. Since then, she and her husband Michael have expanded on the hostel’s offerings, creating a mountain oasis that is simultaneously rugged and luxurious. There’s no television or cell phone signal, but there is beautiful organic food (that you get to help prepare!), massage services, and group yoga.
What a welcome site! Woods Hole Hostel was a luxurious stop on our backpacking trip. Below: Woods Hole scenes.
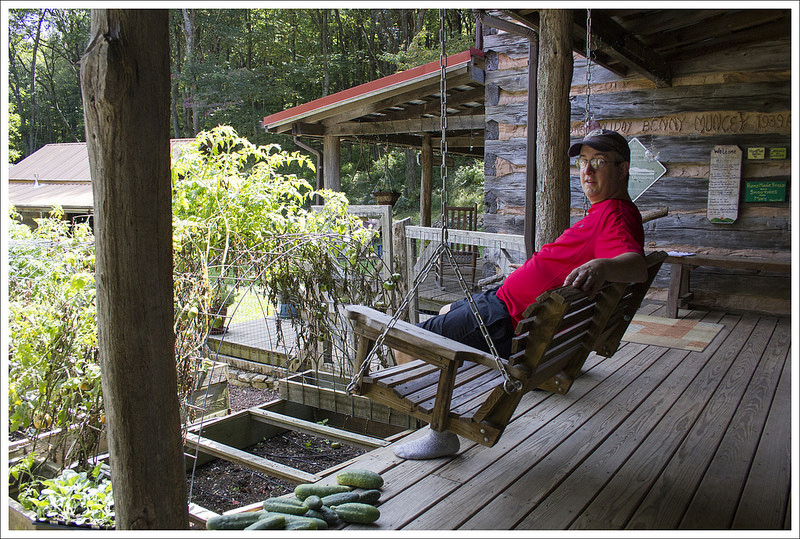
We arrived at the hostel around 2:00 p.m. Neville was still working on cleaning the house, so we bought a couple soda’s from the bunkhouse fridge, and settled into the swing on the front porch. We played with the dogs, said hello to the roaming duck, and peeked into the goat and pig sheds. The garden was still beautiful and abundant in late summer – tons of peppers, tomatoes, and squash. If you stay at the hostel, you can camp, stay in the bunkhouse, or stay in a private room inside the farmhouse. We chose to stay in ‘Tillie’s Room.’ It had a comfortable queen bed, private sink/vanity, and shared full bath. It was quite luxurious for trail accommodations. Even if you choose the more humble bunkhouse, it is still comfortable and neat as a pin. There are beds with fresh linens provided, a big common area with a couch, and a nice offering of snacks and supplies available for purchase. There are also shower and laundry facilities available for those staying in the bunkhouse.
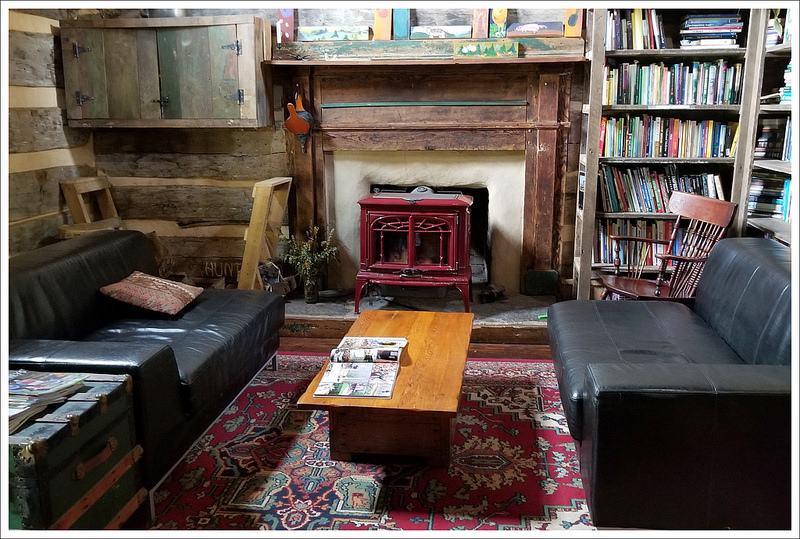
We visited during a really quiet time of year. There was a smattering of SoBo thru-hikers on the trail, but in mid-September we had the entire house to ourselves. Once we got checked in, I decided to shower and spend some time in the farmhouse’s library. It was full of all kinds of books and mementos. I especially enjoyed looking through scrapbooks chronicling the hostel’s history over the years. Around 5:00, Neville said she was ready to do my massage. It was a wonderful treat and felt fantastic on my tired shoulders and calves.
Aumakua – one of Woods Hole’s sweet dogs. Below: Our comfortable lodging.
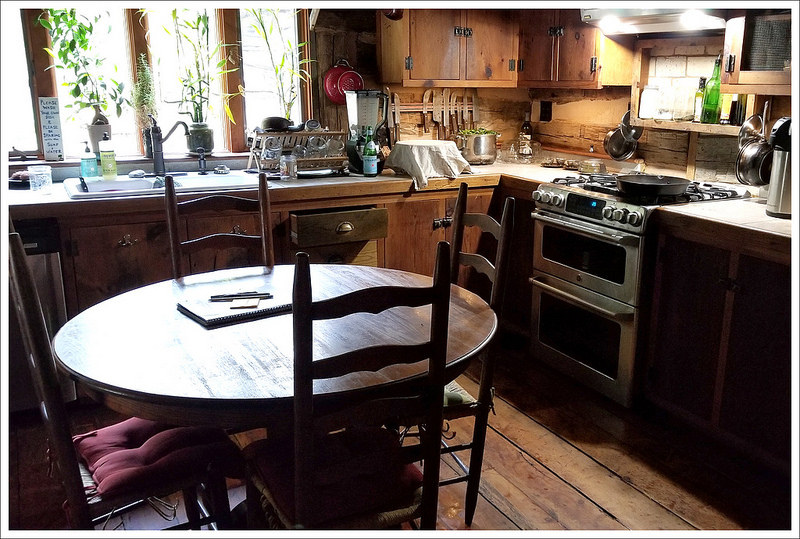
After the massage, we started to think about dinner! In the meantime, one southbound thruhiker arrived and booked a bed in the bunkhouse. Neville’s husband had errands to run, so it was just four of us for dinner. Neville and Michael typically prepare community meals with the help of hikers staying for the night. Everyone has a task and chips in to prepare and clean up after the meal. We had an amazing tomato-pepper-cucumber salad, homemade bread with aioli, locally raised pork, and a flavorful yellow Thai vegetarian curry for dinner. Everything was delicious, but the salad was a favorite and is something I’ve made at home ever since. Dessert was Neville’s homemade vanilla ice cream.
After dinner, Adam and I relaxed in the library and read until it was time for bed. It was lovely being lulled to sleep by the sound of a breeze in the trees outside. We both slept great!
Adam Says: Day Three – Woods Hole Hostel to Narrows (11.8 miles)
Our last day of hiking started in a blanket of fog. Below: Hiking up Sugar Run Road; The Appalachian Trail; Foggy views
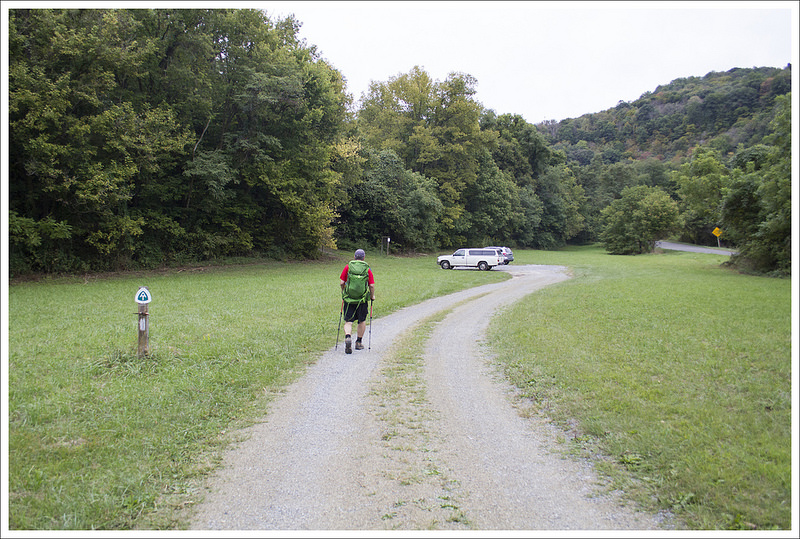
We had our longest day on the trail ahead of us with the third day. We got up, packed up our gear, and enjoyed a wonderful breakfast prepared by Neville. We had asked if we could leave most of our gear there during the day to be able to “slackpack” without the weight. We carried water, some lunch, and a few layers of clothes but we were able to dump out so much of the weight. With this extra added comfort, we started on our hike for the day. We climbed up the steep gravel road and we quickly were so thankful we had dropped off our weight. We rejoined the AT at .5 miles and began our hike.
As we climbed higher the view opened and the fog lifted. Below: Docs Knob Shelter; Views from the trail; Thick overgrowth.
The morning started off foggy and cold and the section of AT started off uphill. At 1.9 miles, we reached a viewpoint, but it was completely socked in the fog so there was no point staying. The trail then took a descent and at 2.8 miles, we came upon Docs Knob Shelter. It was a nice shelter, but we were glad we had luxurious accommodations at Woods Hole Hostel the night before. The trail was up and down for a bit, before rising a bit to a nice viewpoint at 6.5 miles. The fog had lifted so we enjoyed nice views of the river cutting through a scenic mountain view. We stopped and ate some lunch here, but had to eat a bit away from the viewpoint since there were strong, cold winds. We pushed on as the trail became to climb very slowly and at 8.6 miles we reached another viewpoint. This was probably the nicest one in our opinion of the trip, since you had panoramic views of farmlands and mountains around you.
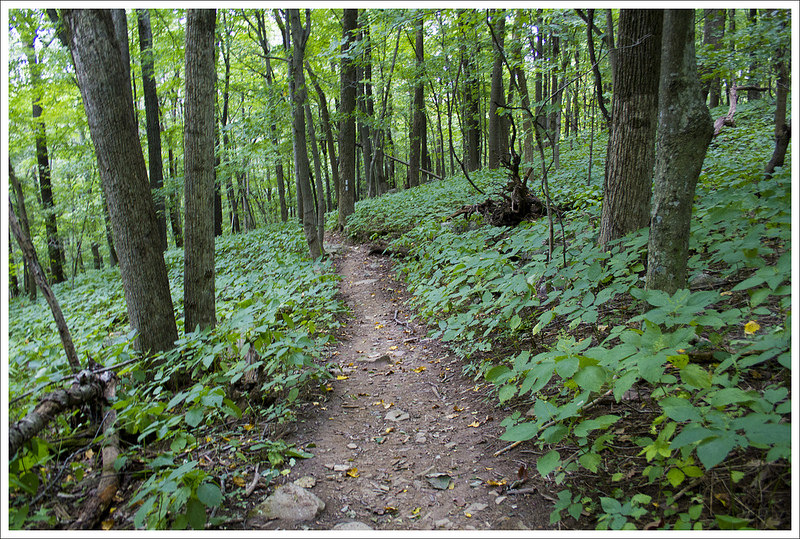
We had miles of easy walking along a ridge. Below: Late summer vegetation; Views from the trail; Descending to Angels Rest.
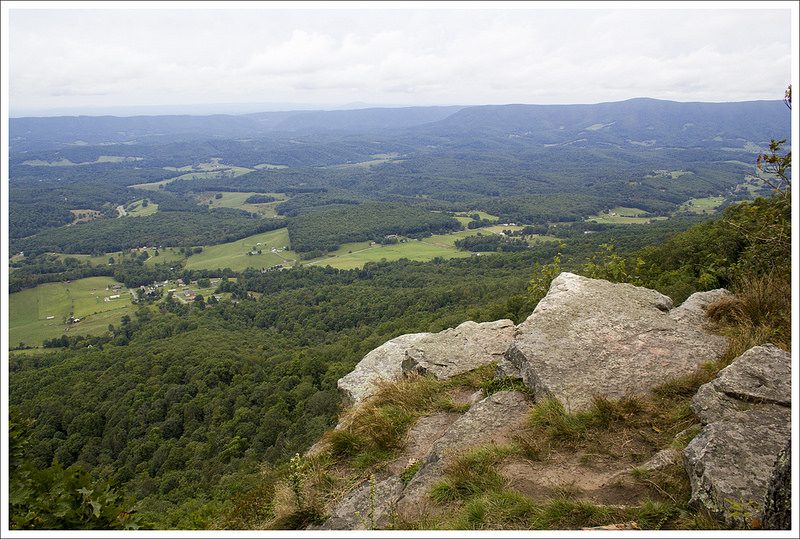
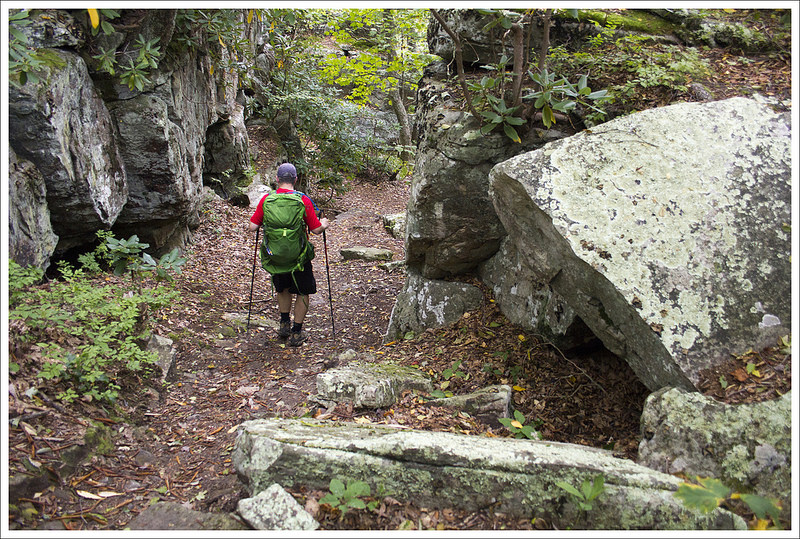
We continued the pleasant ridge walking and eventually the trail began to descend through an area that cut a path between very large rock boulders. We reached a sign that pointed to Angels Rest (a short .1 mile sidetrail) at 9.2 miles. Angels Rest is a large boulder that requires you to scale up it to get the view. We climbed up and the view is being combated by growing trees. The view in the distance is nice, but in my opinion the eyesore of looking down on a town (and correctional facility to boot) isn’t one that I particularly enjoy. I know lots of people hike up to this point from Pearisburg and return, but the better view would be if people would just continue a bit further. We climbed down disappointed this was the last view and then rejoined the trail.
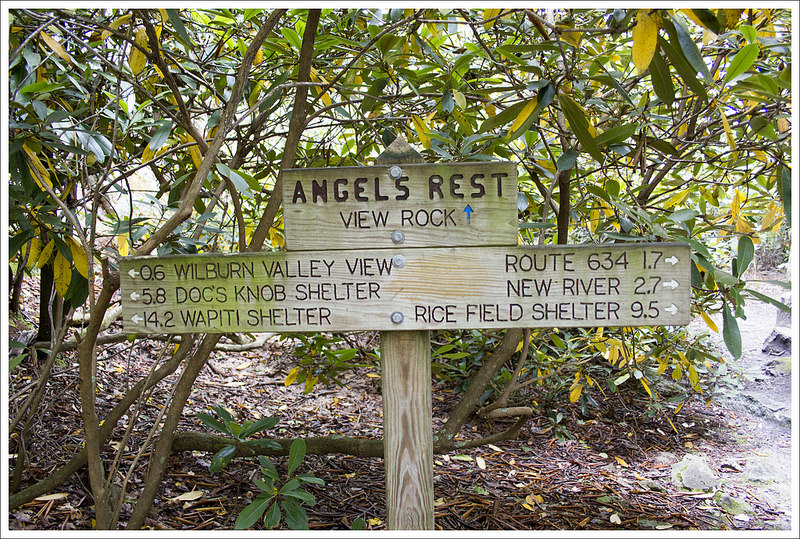
Angels Rest and a view into Pearisburg. Below: New signage around Angels Rest; The rock at Angels Rest; Descending into Pearisburg.
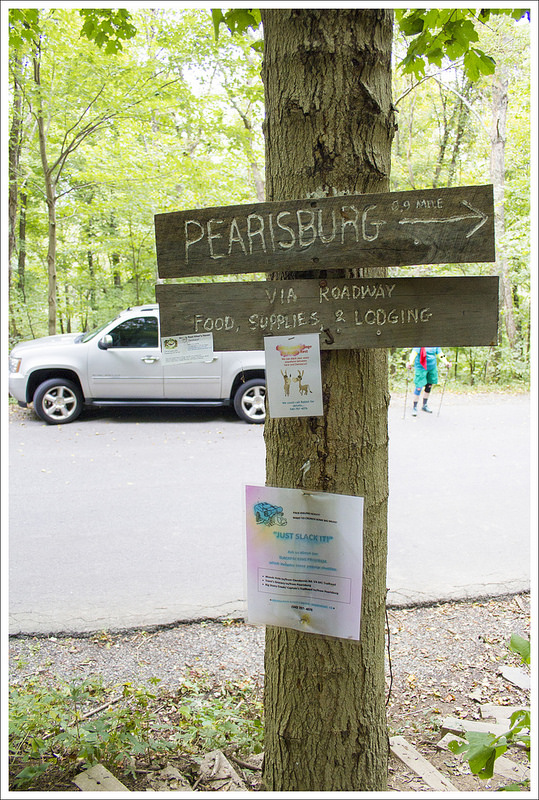
The hike down from Angels Rest was extremely steep. We made the downward trip the rest of the way fairly quickly. At 11 miles we crossed over Cross Avenue, VA 634. We then crossed over Lane Street at 11.4 miles and then made it to Narrows Road and our car at 11.8 miles. When we got back to our car, we drove back to pick up our gear at Woods Hole Hostel (and also bought a nice soup bowl crafted by the owner) and then made our way to Ballast Point for some post-hike dinner and flight of beers. It was such a great birthday celebration and we had a wonderful experience!
The road to Pearisburg. Below: The trail between Pearisburg and Narrows; Parking.
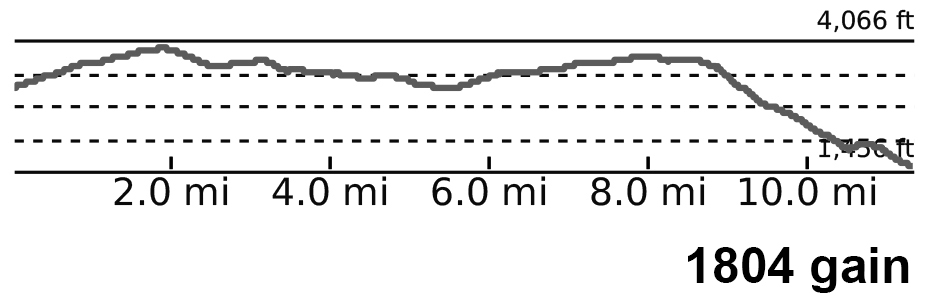
Trail Notes
Distance – 27 miles (plus a couple extra miles to access views, shelters, and Woods Hole Hostel) (Check out the stats from Map My Hike* [Day One] [Day Two][Day Three])
Elevation Change – 4,885 feet
Difficulty – 3.5. The second day was the toughest climbing. Overall, it wasn’t very tough, but it was 27 miles.
Trail Conditions – 3.5. Some of the trail was overgrown in parts, but overall was fairly maintained and footing was reliable through most of the hike.
Views – 4. The view leading up to Angels Rest was the best.
Streams/Waterfalls – 4. Lots of stream crossings, but the highlight was early in the hike with Dismal Falls.
Wildlife – 2. We didn’t run into many signs of wildlife on the trail, but did see an occasional deer.
Ease to Navigate – 4. Sticking to the AT, you just look for white blazes. The side trails we took were well marked.
Solitude – 4. We had most of the trail to ourselves. Expect people at Dismal Falls and Angels Rest and not much in between.
* MapMyHike is not necessarily accurate, as the GPS signal fades in and out – but it still provides some fun and interesting information.
Directions to trailhead: Coordinates to drop off car and meet shuttle: 37.3341, -80.7553 (Narrows AT Parking Lot Off road, room for quite a few cars.) Shuttle drop-off/hike start coordinates: 37.1757, -80.9083 (Kimberling Creek Suspension Bridge has a a small parking area along VA606)
This 13.7 mile stretch of Appalachian Trail is mostly a walk through ‘the green tunnel’. There isn’t any grand or memorable scenery, but as you approach Troutville, there are some pretty rolling meadows with mountain views.
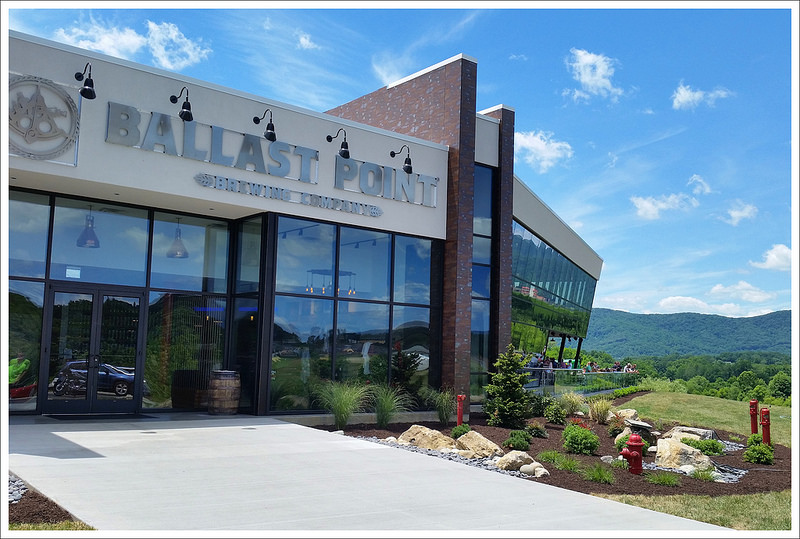
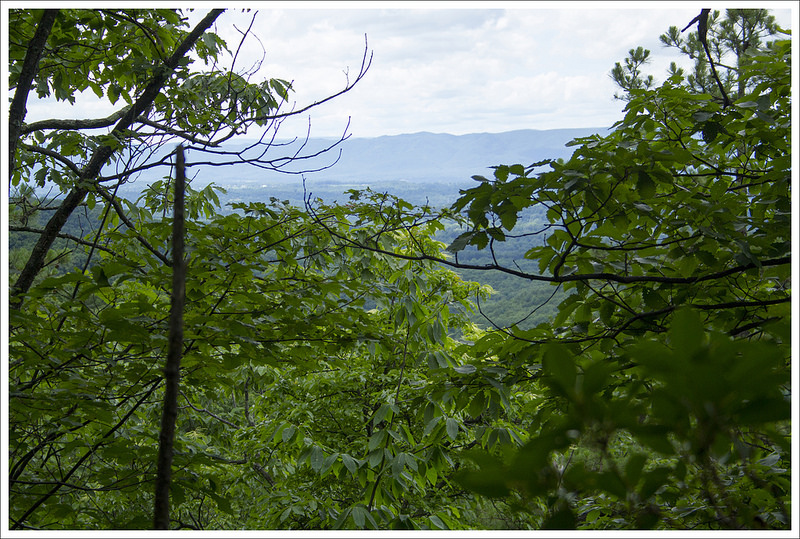
Adam walks along the Appalachian Trail. Below: We had lunch and beers at the brand new east-coast Ballast Point before setting off on our hike; Amazing Trail Angel, Molly, met us for lunch and gave us a ride; Glimpses of views through the trees.
Christine Says: Day One – Blackhorse Gap to Trailside Campsite (4.2 miles)
For quite a while, we’ve had this 13.7 mile section of trail standing out as ‘unhiked’ in the almost 360 mile unbroken stretch of Appalachian Trail we’ve completed so far. The section between Black Horse Gap and Daleville doesn’t offer any great scenery, so we never felt rushed to get out there and tackle the miles. Doing it as a day hike would have required four hours of driving and a shuttle service. The logistics of hiking it seemed like a hassle, so we filed it under ‘later’.
In late June, Adam and I were driving into work together and making weekend plans. It went something like this…
Adam: What do we have planned for the weekend?
Me: Nothing. Want to hike?
Adam: What’s the weather like?
Me: Gorgeous!
Both: Hey… let’s backpack that odd section we have left to finish!
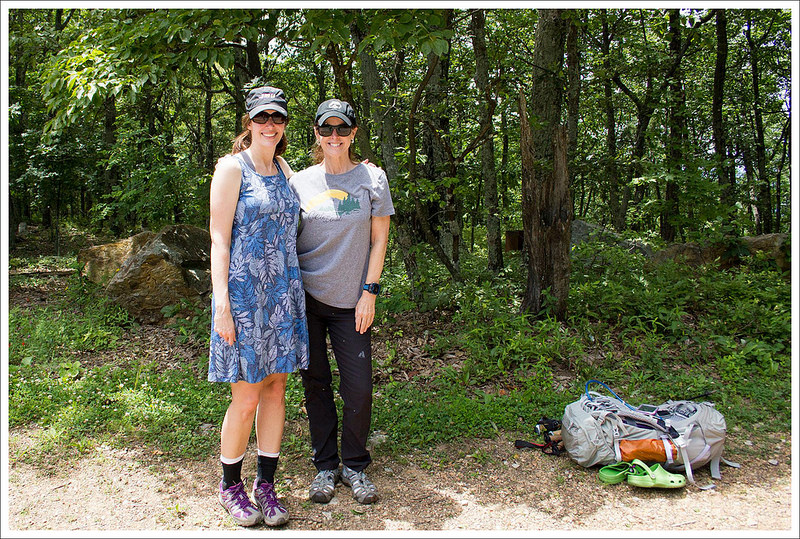
After making the decision to go, plans fell quickly into place. Our pet sitter was available. We had plenty of trail food left from our Maryland hike. Then, after a chat on Facebook, my friend Molly said she could shuttle us! The final icing on the cake was the fact that the new east coast Ballast Point brewery had just opened in Daleville. On Saturday, we met Molly at Ballast Point and had lunch before hitting the trail. People may go to the Ballast Point for the beer, but they’ll walk away remembering the great food. I had the best kale-quinoa-avocado chicken salad. I still daydream about it a month later.
After lunch, we left our car at Valley Cleaners in Daleville and Molly drove us to our start point at Black Horse Gap. I’ve been online friends with Molly for a while, but this was our first in-person meeting. She was just like I imagined she would be – friendly, enthusiastic, outdoorsy, and all-around awesome! I love all the people I’ve met through the Appalachian Trail community! We said our good-byes at the trailhead. Adam and I headed south, descending gradually but steadily.
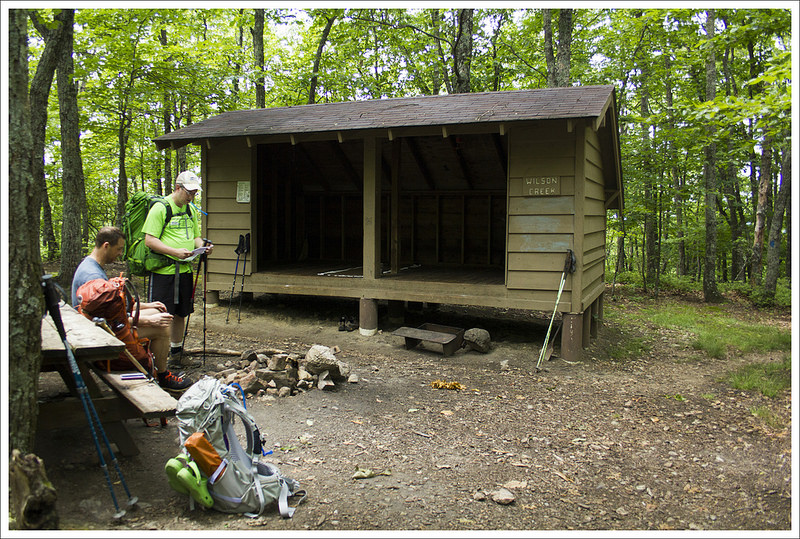
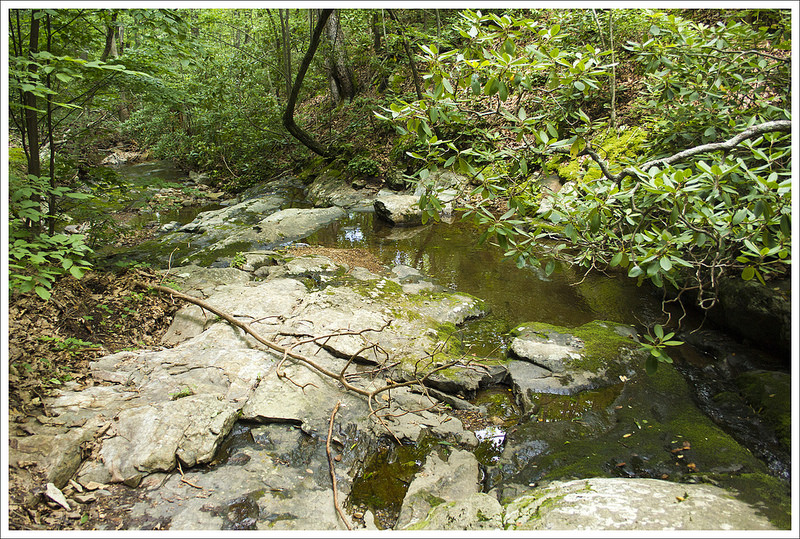
We reached Wilson Creek shelter really quickly. It was too early to stop and make camp, so we decided to push on and find a trailside campsite. Below: Wilson Creek; We found a nice campsite along a small, unnamed stream; Cards at camp.
The trail was really narrow and built into the shoulder of the mountainside. In 2.4 miles, we reached Wilson Creek shelter. It was only 2:00, but there were already a few hikers at the shelter, settled in for the night. We asked a couple northbounders if they’d passed any nice trailside campsites in their last few miles. Everyone said they remembered sites, but not specifically how far away they might be. Adam and I decided to continue hiking and gamble on finding a place to camp somewhere in the next couple miles.
After the shelter we decended another half mile down to Wilson Creek. There was a campsite, but it was literally right on the trail, so we kept hiking. After crossing Wilson Creek, we had a bit of uphill for about a mile. It wasn’t tough uphill, but it was still tiring in the mid-afternoon heat and humidity. At 4.2 miles, we reached an unnamed stream marked in our AWOL guidebook. There was an established campsite a couple hundred feet off the trail. It was the perfect site for the night – flat and close to water.
We set up camp, collected water, and spent the afternoon playing cards. We cooked dinner and spent the evening talking and reading. Before it got too dark, we set off to find a perfect tree for our bear hang. it turned out to be the one thing our otherwise perfect site was lacking. We did the best we could with a branch that was a little bit low and flimsy. Sometimes you just have to settle for the best possible option and hope that determined bears stay away from your campsite.
We got into the tent around 8:30, just as the woods were getting dark. It was a warm and sticky night, so we left the vent and the rainfly wide open. We both left our sleeping bags home on this trip and used lightweight quilts instead. It was a good decision and we both stayed warm (maybe a bit too warm) during the night. We eventually drifted off to the sound of distant owls and whippoorwills.
Adam Says: Day Two – Trailside Campsite to Daleville (9.5 miles)
The next morning, we ate breakfast, packed up camp, and were back on the trail in under an hour. We had a very steep but short section of uphill to climb to start things off. We were breathing deep, but we quickly reached the apex of the hill just about .2 miles in. The trail descended just as steeply and we arrived at Curry Creek at .8 miles. At the creek, there was a Curry Creek Trail to the west of the trail, but stay on the white-blazed AT. From the reliable water source of Curry Creek, we began to climb again up another steep section of trail. At the 1.9 mile mark, we reached an area where the trail then began to descend again. The trail descended for about a mile and then rose up again with a steep climb to reach the junction with the Fullhardt Knob Shelter at 4.4 miles. We took the side trail for .1 miles to reach the shelter. We stopped and ate a snack here, knowing that most of the climbing was behind us.
The Appalachian Trail climbed the mountain on a series of curves and switchbacks. Below: We saw a lot of views through the trees; Crossing Curry Creek; A whitetail deer watching us from the woods.
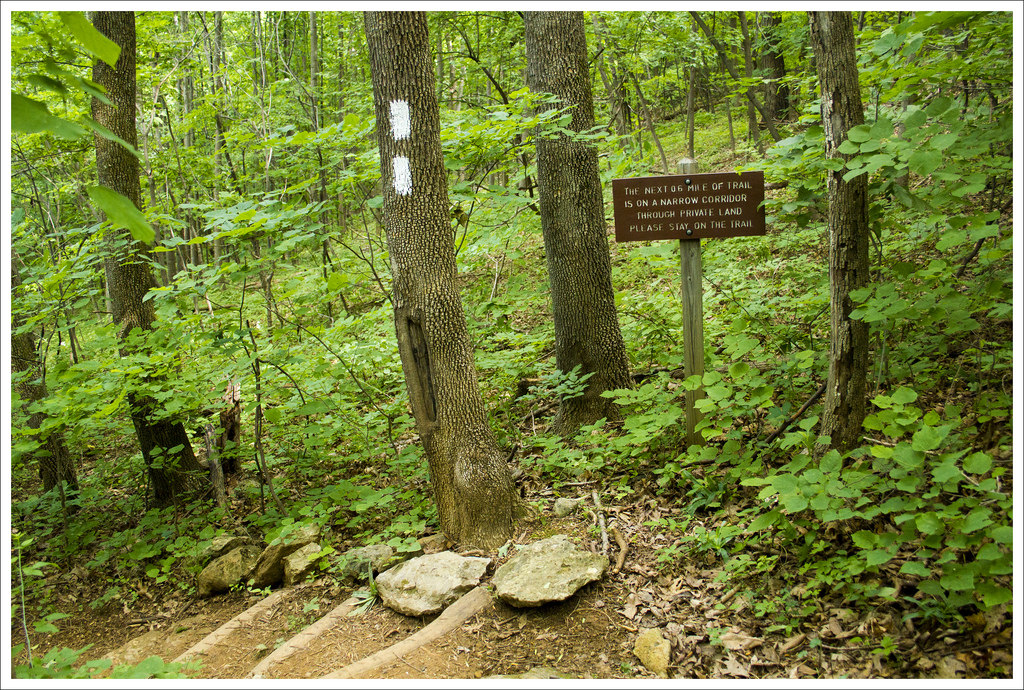
While we were at the shelter, we were joined by a couple that was working on section hiking the AT and we enjoyed talking about some of the things we had both seen along sections of the trail. At the shelter, there is a privy and a cistern behind the shelter to get water (water should still be treated before drinking). We were good on water, so after relaxing a few minutes, we pushed on. We rejoined the AT at 4.6 miles and began our big descent. The trail had a few switchbacks on the way down and it was rather steep in sections. We came across a sign stating that the trail soon passes through private lands and to stay on the trail. At 6.5 miles, we passed through a fence, beginning the start of some of these private lands. We had a short bump to climb before we reached VA 652/Mountain Pass Road at 6.8 miles. This bump however was the prettiest part of the trail as you ascend over a large field and have nice mountain and farmland views all around you from the top. A few tenths of a mile later, we went through another fence stile. We then crossed over another road, over train tracks and then US 11. At 7.6 miles, we passed underneath I-81 by walking on VA 779 underneath the interstate.
There were a couple moderate climbs in the morning.
The sun was hot and beating down on us. We were desperately hoping to find some shade, but most of the hike from here on is out in the open. We were at least glad we got an early start. The trail ascended to the left after the overpass and led us through a grassy swath of land that cut through some of the brushy area around it. Around the 9.5 mile area, we finally arrived at US 220 and Daleville, Va. We crossed the road to get back to our car that we had left at Valley Cleaners. When we got back to the car, it was right around noon. Whenever we go through Daleville around lunch, we always stop at Three Li’l Pigs barbecue. We were hot, tired, and hungry so it was a great place to cool down and eat some amazing food. Our waitress could see that we were hikers and we talked to her about what we were doing. While we chatted, she brought us an endless stream of Diet Dr. Pepper refills. She said she was hoping to do some AT hiking, but hadn’t decided if she wanted to do a section or the entire thing. As we continued to stuff our faces, she came over with a bowl of banana pudding. She told us that AT hikers get a complimentary serving of banana pudding. While I think this is more intended for thru-hikers, we didn’t turn it down!
The open meadows near Troutville were beautiful. Below: Posing at the road crossing; Open views from the meadow’s high point; Crossing the train tracks.
We then decided to bookend the trip with another visit to Ballast Point. We got to sample a few beers before we had started, but since they had over 20 on tap, we decided to get sample pours of a couple of others. We then made our way back home. We were very glad to finish this section of elusive trail.
The home stretch into Daleville. Below: The I-81 underpass; More open meadows before Daleville; Piney woods.
Trail Notes
Distance – 13.7 miles
Elevation Change – 2810 ft.
Difficulty – 3. This was a pretty easy backpacking route. The switchbacks early on day two were pretty long and steep, but it was the only challenging part of the hike.
Trail Conditions – 4. The trail was in typical Appalachian Trail shape for this part of Virginia – well maintained and nicely graded.
Views – 2. The rolling meadows near Troutville were lovely.
Streams/Waterfalls – 0. This is a quite dry stretch of trail. There is a small, low-flow spring at Bobblets Gap and a seasonal stream at Bearwallow Gap. There is NO WATER SOURCE at the Cove Mountain Shelter, so plan ahead.
Wildlife – 3. We saw several deer. At night we heard a barred owl and several distant whippoorwills.
Ease to Navigate – 4. The trail is well marked and easy to follow. There are road crossings, but the white blazes are easy to follow in most places.
Solitude – 3. We actually saw very few people on this hike considering the beautiful weather and its proximity to the parkway.
* MapMyHike is not necessarily accurate, as the GPS signal fades in and out – but it still provides some fun and interesting information.
Directions to trailhead: We parked our end point car at Valley Cleaners in Daleville. It’s along Route 220 where the Appalachian Trail crosses. Please ask the cleaners for permission to park here and park where they tell you to. Parking here is a courtesy provided to hikers that can be rescinded at any time if people take advantage. Coordinates for the dry cleaners are: 37.393538, -79.906817. From there, we took a shuttle to Black Horse Gap on the Blue Ridge Parkway. Coordinates for the hike’s start point are: 37.424611, -79.757202. Head right and start on the trail.
This 7.25 mile hike is a great choice for anyone who wants to experience Three Ridges’ spectacular views without having to complete the challenging 13+ mile loop. The route climbs moderately along the Appalachian Trail until you reach Hanging Rock – the best vista on Three Ridges mountain.
Last fall, I went on a girls’ backpacking trip from Cole Mountain to Waynesboro. Near the end of the trip, we hiked up and over Three Ridges. While we were eating lunch and enjoying views on Hanging Rock, I thought ‘This spot is gorgeous and it would be a fantastic dayhike.‘
Many casual hikers take a pass on Three Ridges because the 13+ mile hike with more than 4,000 feet of climbing can be intimidating. The full traverse of the Three Ridges – MauHar loop has the deserved reputation for being one of the toughest hikes in the state. But 7.25 miles with under 2,000 feet of climbing – that’s right in the dayhike sweet spot.
In early June, I had a Saturday with absolutely zero obligations. Adam decided to stay home and work on some chores and projects around the house. I set out to hike from Reeds Gap to Hanging Rock. I was at the trailhead by 8:00 a.m. in hopes of beating the heat, humidity, and weekend backpacking crowds.
The Appalachian Trail ascending Three Ridges. Below: Parking at Reeds Gap can get crowded; The AT ascends from the parking lot through a meadow; There are dry campsites along the top of Meadow Mountain.
When I arrived, there were still a few spots in the Reeds Gap parking area. The lot fills quickly – especially on weekends. I started southbound on the Appalachian Trail, climbing gradually uphill across the edge of an open meadow. Wild hibiscus was blooming and butterflies were everywhere. When the trail first enters the woods, it’s flat and comprised of soft dirt. But within a couple tenths of a mile, the trail begins to ascend steadily up Meadow Mountain. Along the ridge of Meadow Mountain there are a couple small, dry campsites.
After a short ridge walk, the trail descends Meadow Mountain. At 1.6 miles, I reached a three way junction. The Appalachian Trail continues straight. To the right are a fire road leading back to the Blue Ridge Parkway and a spur trail leading to Maupin Field Shelter and the MauHar Trail. This area is well-marked with trail signs, blazes, and a kiosk describing the wilderness area. I decided to pass the shelter and continue on to Hanging Rock.
The mountain laurel was in full bloom. Below: The Appalachian Trail is nicknamed ‘the green tunnel’ for a good reason; Rose of Sharon/Wild Hibiscus (I think); I missed the peak bloom of the Catawba Rhododendron.
After passing the junction, the trail climbed steeply, but briefly, to the top of Bee Mountain at 2.2 miles. The trail becomes rockier along this stretch and remains so until the viewpoint. Along the top of Bee, there are several more dry campsites. After a short ridge walk, the trail descends Bee Mountain for .2 miles into a small saddle. This is where the climb up Three Ridges Mountain begins.
The climb continues gradually for 1.2 miles. I thought this stretch of trail was so beautiful. It was a classic example of why the Appalachian Trail is nicknamed ‘the green tunnel‘. There were lush ferns, blooming mountain laurel, thick trees, and green vines. The forest floor was carpeted with the bright purple petals from Catawba rhododendron.
At 3.6 miles I reached the viewpoint at Hanging Rock. The view is on the right side of the trail and is accessed by following a small path through an opening in the trees. The actual high point of Three Ridges Mountain is another .8 mile south, but Hanging Rock is a perfect stopping point.
Another angle on the view. Below: Blooming mountain laurel; I stopped by the Maupin Field Shelter on my way back; Near the shelter the trail splits into the AT and a fire road. Make sure you remain on the well-marked AT.
The outcropping at Hanging Rock is wide and spacious. The views include the southern slopes of Three Ridges, the Tye River Valley, and the Priest. The Priest is the large mountain on the other side of the valley. Even though this is a popular area, I magically had the viewpoint all to myself for almost forty minutes. Just as I was stowing my camera and getting ready to leave, northbound thruhiker Tengo Hambre arrived at the view. He didn’t have a camera and his phone was dead. I ended up taking a photo of him and emailing it to his wife. He agreed that the vista was breathtaking and worth remembering with a photo.
I hiked back the same way I came up. I stopped a while to chat with the Tidewater Appalachian Trail Club member who was doing trail maintenance. Because Three Ridges is designated wilderness, he has to use hand tools (gas-operated weed whackers are not allowed in wilderness!) I also stopped briefly at Maupin Field Shelter on my way back. I like to stop and pack out any trash I find. When I reached the parking lot, it was overflowing with cars and the day was sweltering. I had timed my walk perfectly and had a great day!
This easy 5.1 mile hike takes you to the magnificent viewpoint at Blackrock Summit. Most people access the view by a .5 mile walk from Blackrock parking area, but this route lets you spend a little more time enjoying the beautiful Appalachian Trail.
Most of the time, we opt to hike the shortest and most direct route to any nice viewpoint. However, in the case of Blackrock Summit, the traditional one-mile round trip route from the Blackrock parking area is not enough of a hike to make the drive into the park worthwhile. Without a doubt, Blackrock is one of the most expansive views in the park, and starting the hike at Brown Gap (a couple miles north) is one of the best ways to reach the vista!
We set out on this hike on a particularly hot and humid late April morning. We parked at Brown Gap (near mile marker 83 on Skyline Drive). From there, we crossed the road and followed the Appalachian Trail south. The first three tenths of a mile ascend gently uphill before reaching a mostly flat ridgeline. Everything in the park was bright, spring green and the native pink azaleas were just starting to bloom. At .7 miles, we passed the Dundo Group Campground. The campground has water and restrooms (seasonally).
This hike is essentially a pleasant, easy walk on the Appalachian Trail. Below: Parking at Brown Gap; Walking the AT; The boulder pile comes into view.
At 1.3 miles, we passed the parking area for Jones Run. Another tenth of a mile after that, we crossed Skyline Drive a second time, and began a gradual uphill climb toward Blackrock Summit. In April, the trees along this stretch of trail had not fully leafed out, so we were able to catch views of the valley to the west. At 1.9 miles into the hike, we passed Blackrock Parking area. After the parking area, the trail becomes a moderately steep uphill climb for .6 of a mile.
Near the top, the giant boulder pile comes into view through a tunnel of leaves. It’s impressive to see such a tall jumble of rocks! We took some time to climb up the pile for a loftier view. Even if you choose to skip the climb, the views from this summit are spectacular. The Appalachian Trail skirts the western edge of the summit. At the far end of the rock pile, we reached the spur to the Trayfoot trail. If you want even more views and a chance to explore some interesting rock formations, follow the spur downhill for a couple tenths of a mile. There are views in every direction and an interesting alley of boulders to pass through.
Once you’ve explored, head back the way you came for a hike of just over five miles. It’s really a great way to see this popular summit!
Adam Says…
On a clear day like we had, you just have to pick a hike with views. While we have done Blackrock many times, we decided to try a different approach that added a few miles and made it feel like we did something to earn the views. With very little elevation gain on this hike, it is an easy hike that most people could handle. This section of the AT is very well-maintained and traveled. We enjoyed walking through the tunnel of trees with just a small brown path dividing all the green around us.
Climbing the rock pile at Blackrock Summit is fun. Below: Adam passes through the boulders on the spur trail; More views of distant fog and clouds; Walking back on the Appalachian Trail.
Christine did a great job describing the path and turns above. We didn’t really see anyone on the trail since we started the trail fairly early in the morning. When we arrived at the summit, we had it all to ourselves. The summit gives you the opportunity to climb around on the large pile of boulders if you prefer (but watch out for timber rattlesnakes) or you can enjoy taking a moment to enjoy the views from down below. Our favorite spot is to travel down the Trayfoot trail because you get panoramic views on both sides of the trail. We paused for a quick snack before heading back. On our way back, we saw several others that had parked at the closest parking lot, but we were glad we had added a few extra miles. If you have a clear day in the forecast and are looking for an easy hike with a big payoff in the southern section of Shenandoah National Park, put this on your list.
Directions to trailhead: Located in Shenandoah National Park (fees apply). The Brown Gap Parking lot is located around Mile Marker 83 in the Southern Section on Skyline Drive. Park in this lot. Cross the road and come to the cement marker marking the trail. Head south on the Appalachian Trail. GPS Coordinates: 38.240676, -78.710687
This nine mile hike is not very well-known, but it’s truly one of the park’s most scenic summits. Past fire damage has left the summit open, with views in every direction. We hope sharing this post won’t spoil the solitude we enjoyed on this hike.
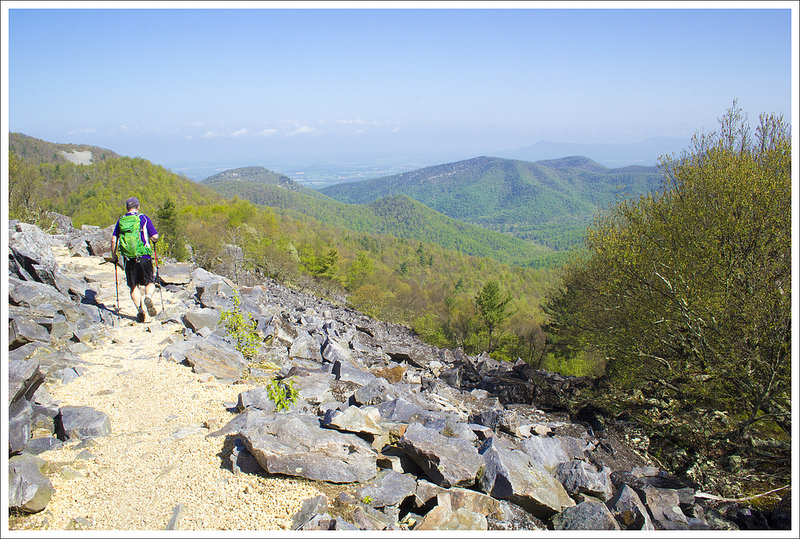
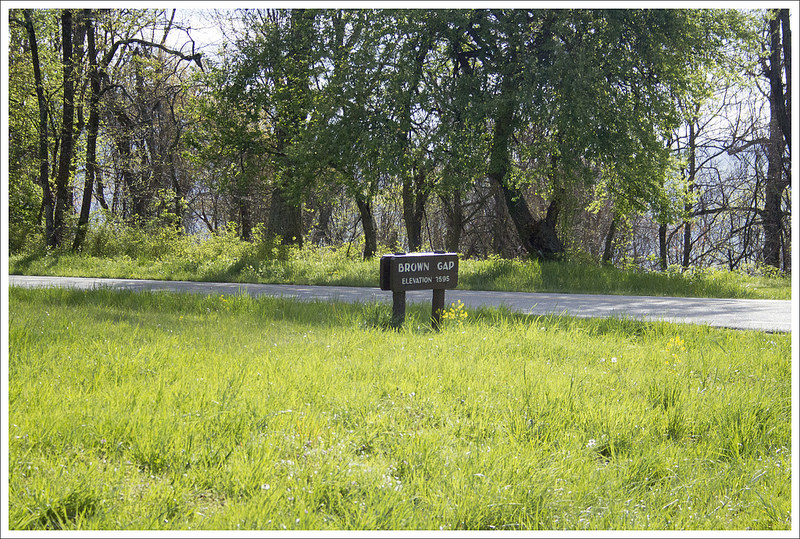
This beautiful view is about half a mile from the true summit, but it was too beautiful to pass up! Below: The hike starts northbound on the AT at Browns Gap; Pink azaleas were just starting to bloom; Adam hiking on the Big Run Trail.
Adam Says…
How has this hike escaped us before? We’ve covered most of what Shenandoah National Park has to offer, but this was a hidden gem that we are so glad we did. While this hike is about 9 miles, the elevation gain feels fairly minimal considering the distance you are covering. We were getting ready to do a multi-day backpacking trip in a couple of weeks and we wanted to get some training in before we hit some bigger miles with heavy packs. Christine had seen a few photos from the viewpoint and mapped out this possibility of a hike.
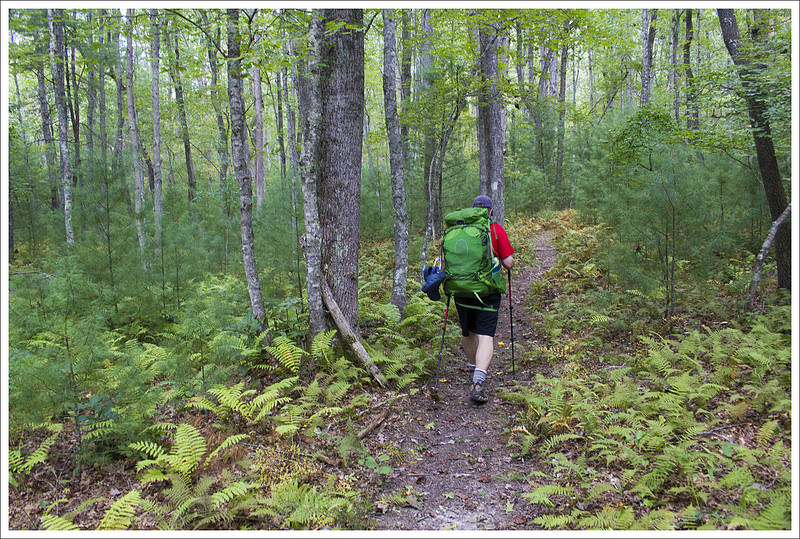
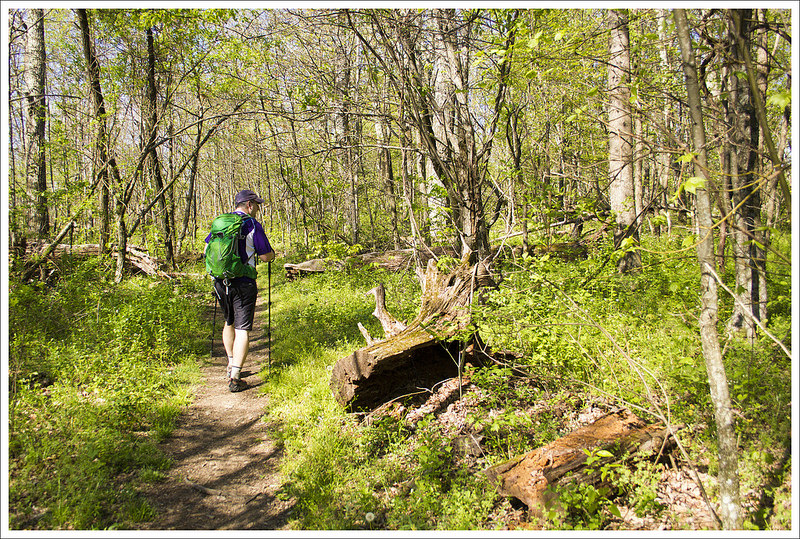
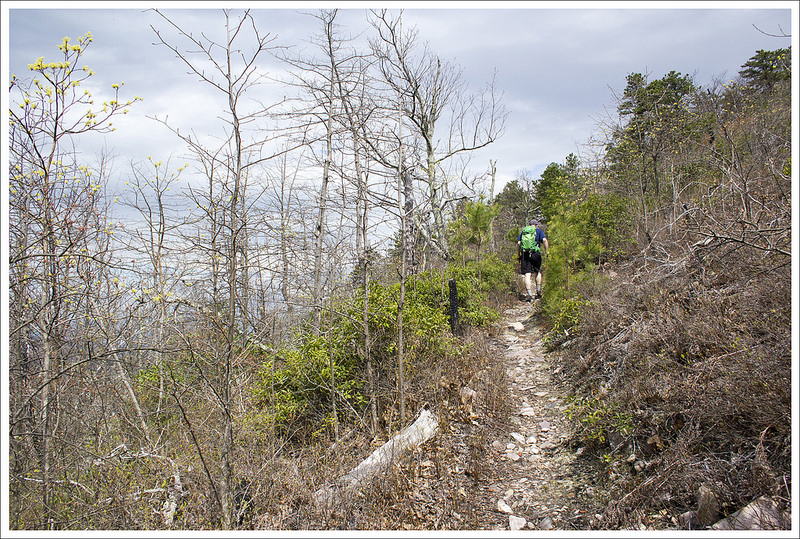
We saw a ton of these Dwarf Irises on the hike. Below: Early spring on the Rockytop Trail; Adam crossing talus slopes on Rockytop; Everything in bloom!
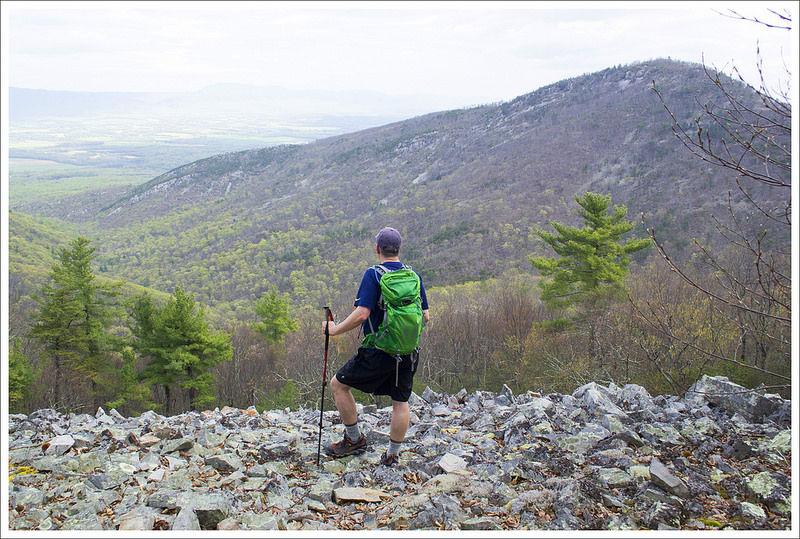
The hike starts at Browns Gap (the sign reads “Brown Gap”, but maps of the area show “Browns Gap”), at mile marker 83 of Skyline Drive. We parked our car and found the Appalachian Trail post from the parking lot and headed north on the white-blazed AT. The trail climbs a bit from the beginning and parallels Skyline Drive. At .5 miles, you come to the junction with the Big Run Loop Trail. Take a left here to join the blue-blazed Big Run Loop Trail. At 1.1 miles, you come to a four-way junction where the Big Run Loop Trail breaks off to the right and the Madison Run Spur Trail heads to the left. You will just stay straight. At 1.5 miles, the trail reaches another junction with the Austin Mountain trail bearing to the left; bear to the right to join the Rockytop Trail. Around 2.3 miles, you will pass along a rockier section of trail as it passes through some large talus slopes. At 3.4 miles, you reach the Lewis Peak Trail junction. Take a left at this junction to make your way to Lewis Peak. The trail descends at this point, At 3.6 miles, you reach a great viewpoint off the trail to the right. There is a large talus slope here that opens up into views of a valley between two mountains and Massanutten Mountain perfectly framed at the center in the distance.
The ridgeline on the Rockytop Trail provided nice views. Below: Mountain view from the ridgeline; Spring blooms; Junction of the Rockytop and Lewis Peak trails.
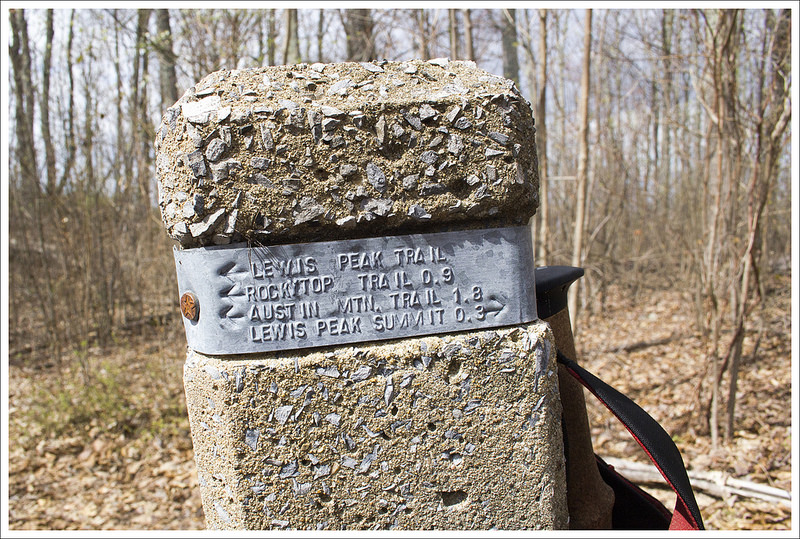
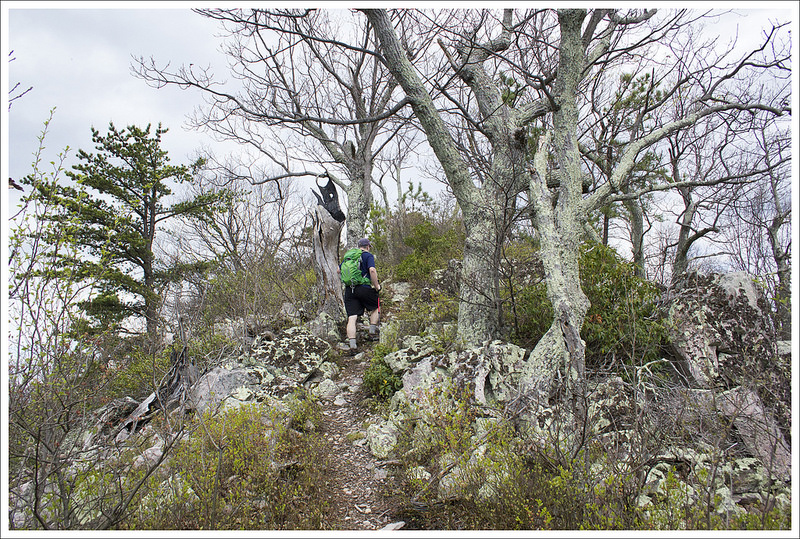
The trail continues to descend from this viewpoint until you reach 4.0 miles and then the trail begins to climb again. At 4.2 miles, you reach the junction with the Lewis Peak Summit Trail. Take this trail to the right and you will climb rather steeply to the summit through a series of switchbacks that will eventually wind around until the trail reaches its end and the summit at 4.5 miles. A forest fire from 2006 has destroyed a lot of the taller trees in the area, but it has created a very nice viewpoint from the summit.
We stopped here and ate a snack while enjoying the expansive views all around us. Clouds were starting to roll in, but we had the stunning panoramic views all to ourselves. When reflecting upon this hike, Christine and I both think that it may arguably have the best views from the southern district of Shenandoah National Park. We made our way back the way we came. There is some steep climbing on the way back, but most of the steep stretches are short-lived. If you can handle the distance, put this on your upcoming hiking agenda.
Christine Says…
For the last week of March and the first three weeks of April, I was bed-ridden from a severe allergic reaction to antibiotics. I burned with fever, my skin blistered and peeled, I itched all over, and struggled with excruciating nerve pain. As the weeks passed, I thought I would never be well enough to hike again. When I finally started feeling better, I went for short, easy walks around my neighborhood. But pretty soon, I felt a strong draw to get back to the ‘real’ trail. I don’t know what made me think a nine mile hike with 1500′ of climbing was a good idea for a ‘first hike back’.
This spectacular view is just a short distance from the junction of the Rockytop and Lewis Peak trails.
I’m not going to lie – I really struggled on this hike. My endurance definitely took a hit from spending a month in bed. On top of that, it was a hot, humid day. My doctor had directed me to fully cover up with long sleeved Capilene, long pants, a hat, and sunscreen to protect my healing skin. I felt like I was sealed in plastic wrap. I just couldn’t cool off. The whole hike, I had a mantra… ‘just take the next ten steps.’ Fortunately, taking ten steps over and over again eventually adds up to a nine mile hike.
Despite the physical challenge, there were some memorable high points on this hike. When we first set out we met a neat retired couple – Swallow and Blind Pig. They were section hiking Virginia’s Appalachian Trail. They were from Oregon and had previously finished hiking the Pacific Crest Trail. We talked to them about the park, the AT, gear, food, and wildlife. I hope when Adam and I are retired we’ll still be having adventures like Swallow and Blind Pig.
Lewis Peak is steeper, rockier, and pointier than most mountains in Shenandoah. This are was burned out by a forest fire in 2006. Below: Views from the Lewis Peak summit are amazing! Clouds moved in on our hike, but on a clear day, you can see for miles!
I also really enjoyed all the signs of spring emerging in the park. Most of the high elevation trees were still leafless, but we could see the brilliant green of emerging leaves creeping up the mountainsides. There were a few azaleas starting to bloom, spring beauties were abundant, and we passed several large patches of dwarf irises. Spring is my favorite season. I love seeing color and life waking back up after dull winter.
A significant part of this hike followed a ridge, so we enjoyed views through the trees. The open vista of Massanutten from the Lewis Peak trail was simply spectacular. The mountains in the foreground perfectly framed the distinct peak of Massanutten.
A great view from the Lewis Peak summit. Below: The views descending Lewis Peak were excellent, too! The area is so cleared out that you can see views in almost every direction.
When we started making switchbacks toward the summit of Lewis Peak, I knew we were going to have even more amazing views. The entire summit climb was open and there were wide open looks at mountains and the valley in every direction. The summit itself is sharper and pointier than almost any other peak in Shenandoah. The end of the trail has a wide sweep of rock to sit upon while you enjoy the view. There were berry bushes growing all over the place. In mid to late summer, this would be a good place to pick wild blueberries.
We enjoyed the view and a couple snacks before heading back the way we came. The hike back had a couple steep climbs that challenged me. I hadn’t remembered any of the downhills feeling steep on the outward hike, so the uphill climbs surprised me on the way back!
The hike back was beautiful!
I was quite glad when we got back to the Appalachian Trail and the final gentle descent back to the parking area. After our hike, we stopped for lunch at the Loft Mountain wayside – grilled cheese sandwiches and our first blackberry milkshakes of the season. It was great to be back on the trail!
Trail Notes
Distance – 9.1 miles roundtrip
Elevation Change – 1527 ft.
Difficulty – 3. The mileage is a little long for most people for a day hike, but with moderate climbs if you take your time it should be doable by most.
Trail Conditions – 4. The trail was in great shape. There was one larger blowdown on the Rockytop Trail we encountered, but otherwise was well maintained.
Views – 4.5. Amazing views from the summit and the viewpoint over the talus slopes just .5 miles from the summit.
Streams/Waterfalls – 0. non-existent.
Wildlife – 3.5. This area is a bit remote, so you may see some deer and bears on your hike. Watch out for rattlesnakes, especially if you venture onto any of the talus slopes.
Ease to Navigate – 3. There are a number of turns to get to Lewis Peak on this hike, but all of the junctions are marked with concrete posts.
Directions to trailhead: Located in Shenandoah National Park (fees apply). You will park at MM 83 on Skyline Drive at the parking lot marked “Brown Gap”. Parking coordinates are: 38.240652, -78.710379