This is a great alternative to the ‘classic’ ascent of Old Rag. You still get the same stunning summit, but this 5.4 mile route lets you bypass all the road walking, lessens your vertical gain, and skips the famous rock scramble (which can be a good or bad thing depending on how you feel about rock scrambles!)
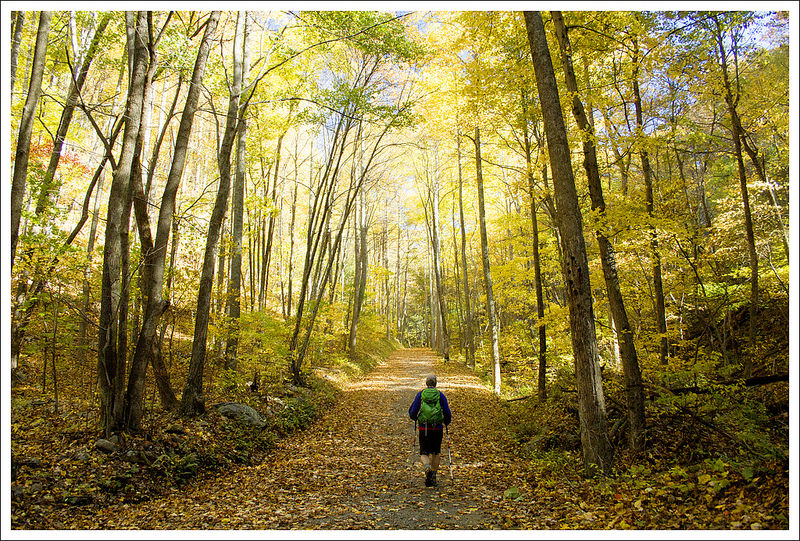
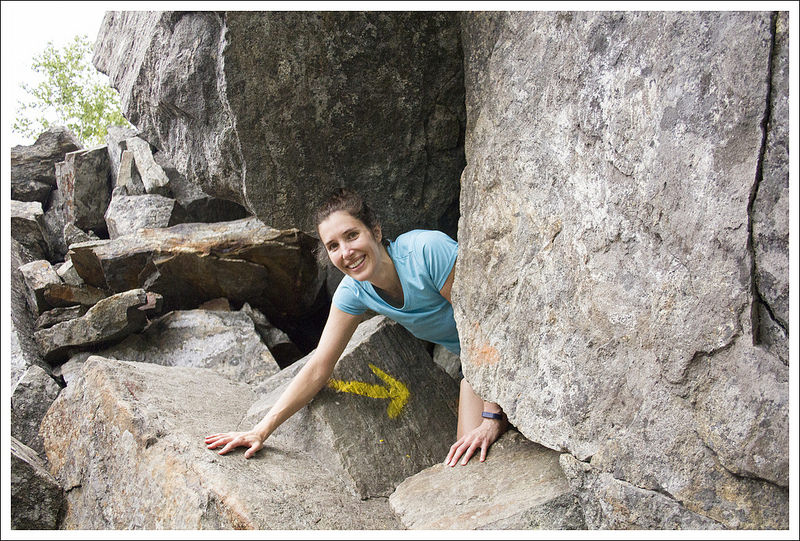
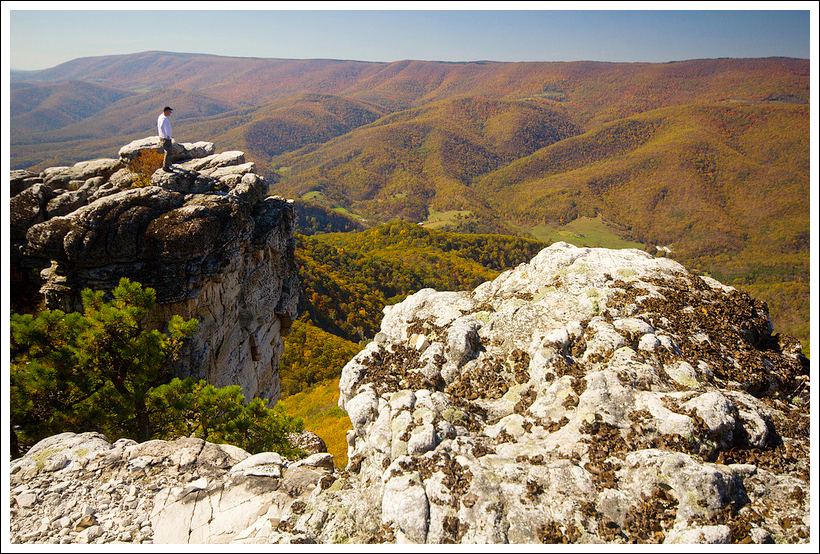
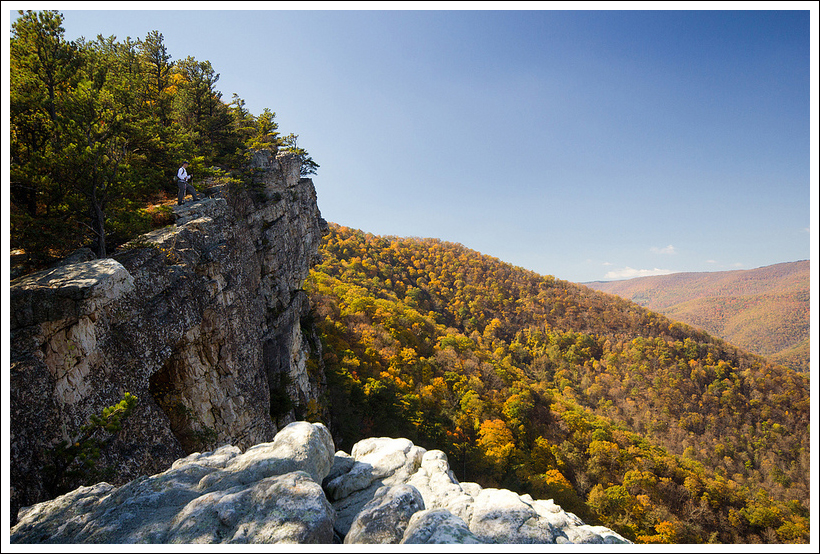
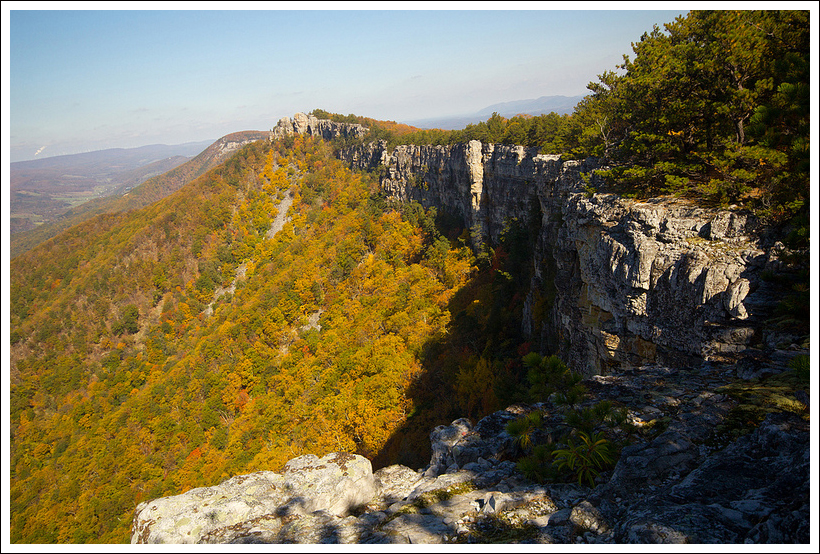
Adam takes in the view from the Old Rag Summit. Below: Berry Hollow Parking; A golden forest: You reach the Old Rag Day Use Shelter shortly after the fire road junction.
Adam Says…
Old Rag is one of those classic Virginia hikes that most avid hikers in the state want to do at some point. The views are truly spectacular, but the most popular route up Old Rag includes a technical rock scramble with exposed ledges and big drops. Some people might have a fear of heights or not be fit enough to tackle the scramble. The route via Berry Hollow is perfect for people wanting a ‘low key’ route to the peak.
We were on our way to hike White Oak Canyon, but the parking lot was completely full. Not wanting to give up for the day, we consulted our maps and noticed we were right next to Berry Hollow and the alternate route up Old Rag.
We arrived at the small parking lot at Berry Hollow and also found a very full lot. However, after waiting just a few minutes, some hikers came down the trail and said about 3-4 cars would be leaving in the next ten minutes as they were returning from an overnight/sunrise hike. So, we waited and sure enough, several spaces cleared up. I would recommend arriving at the lot early in the morning, because there is only space available for about 12 vehicles.
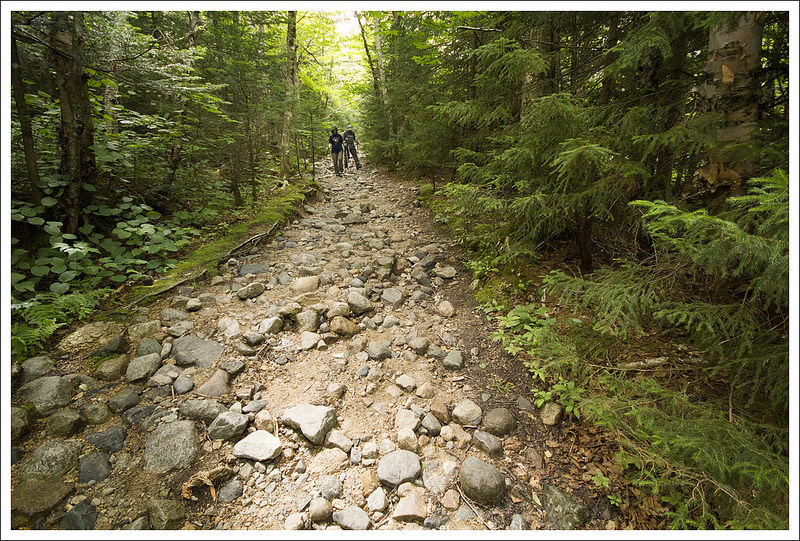
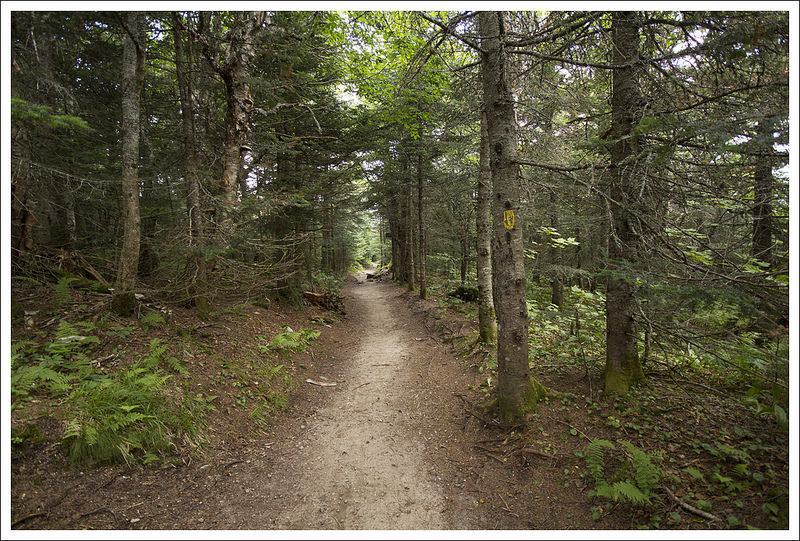
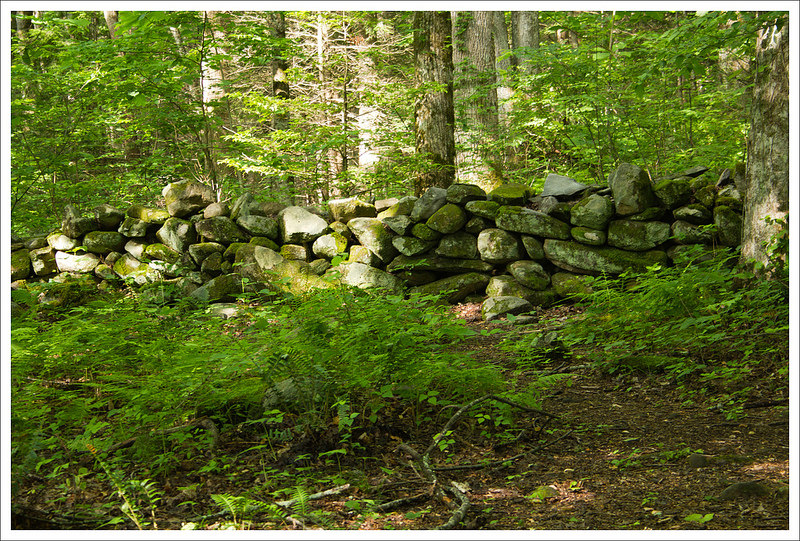
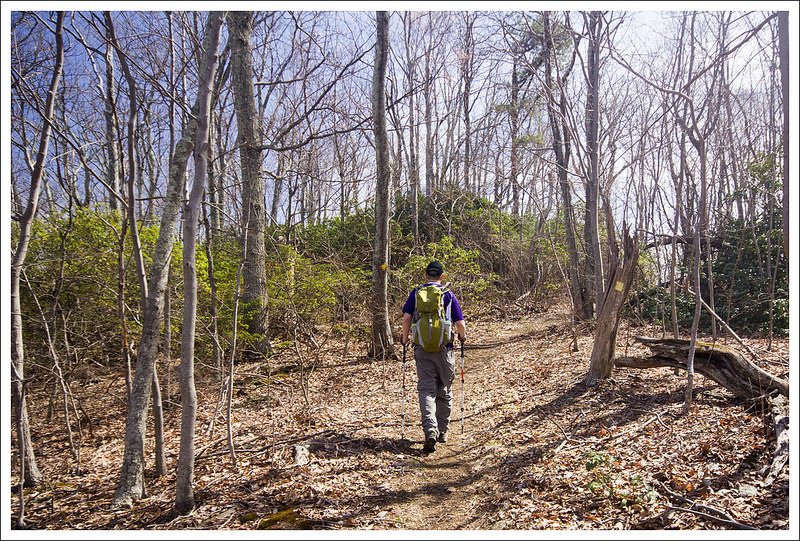
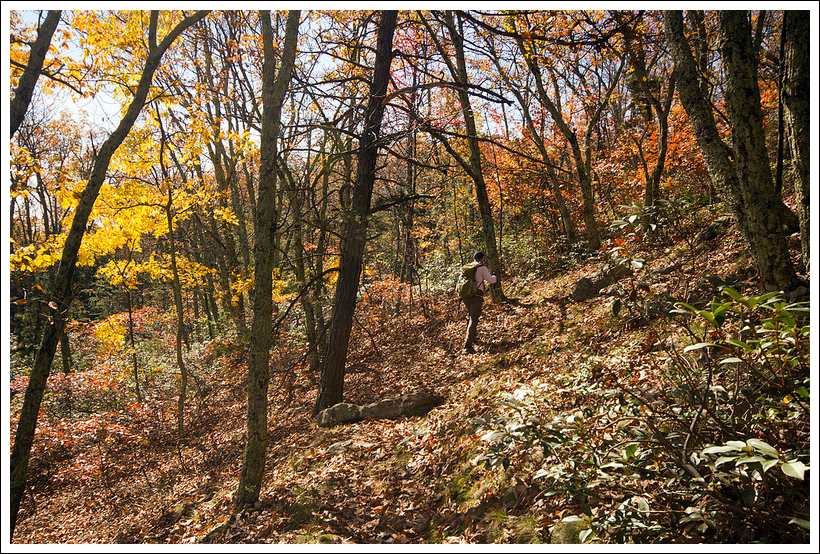
You begin the hike by making your way past a closed gate. You can see the path marked on the kiosk to the right of the trail. This route starts on the wide Berry Hollow fire road, which goes along the Berry Hollow stream for a while. Hiking the trail during a peak fall day, we were surrounded by brilliant yellows from fallen leaves on the trail and up above. At .8 miles, you reach a junction with the Saddle Trail. Take a right on to the Saddle Trail, which you will take all the way to the summit.
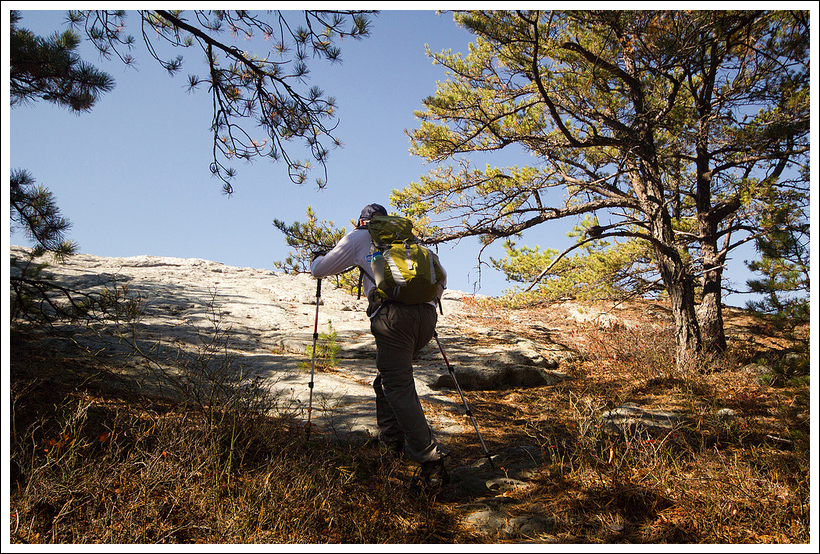
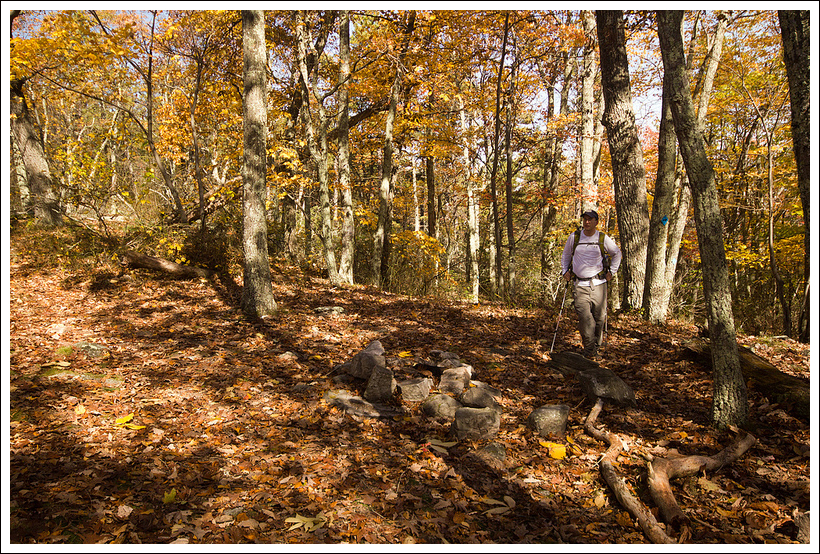
Adam walks the fire road on a perfect fall day. Below: Ascending the Saddle Trail; Large boulders as we climbed; The first viewpoint along the Saddle Trail.
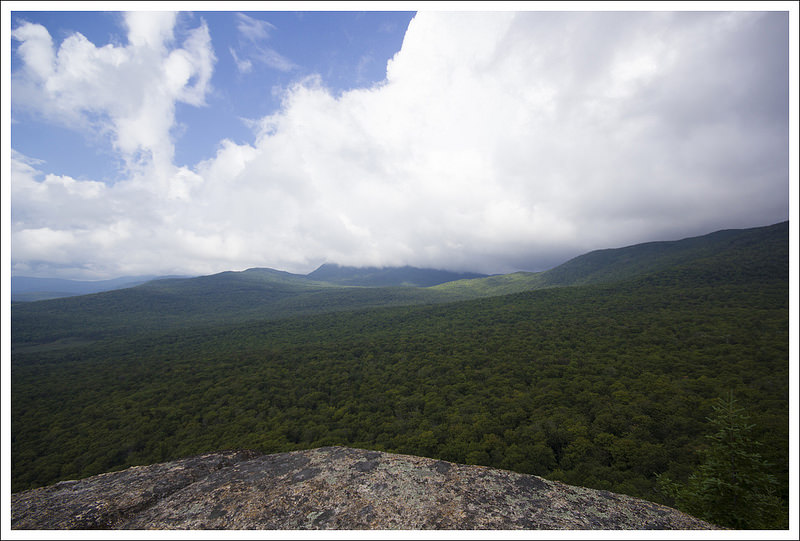
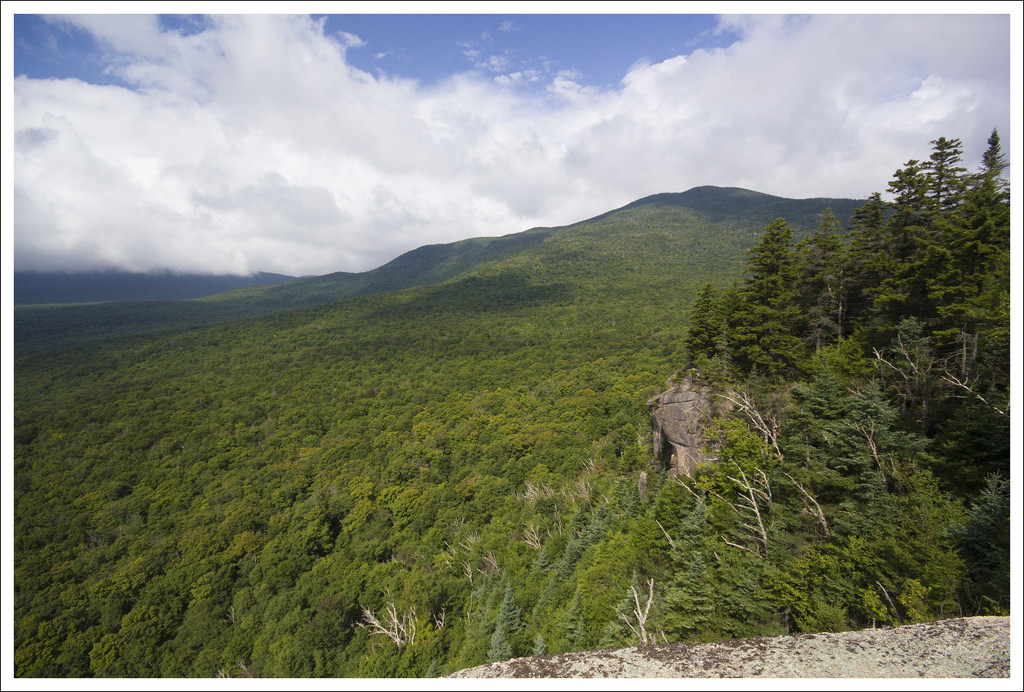
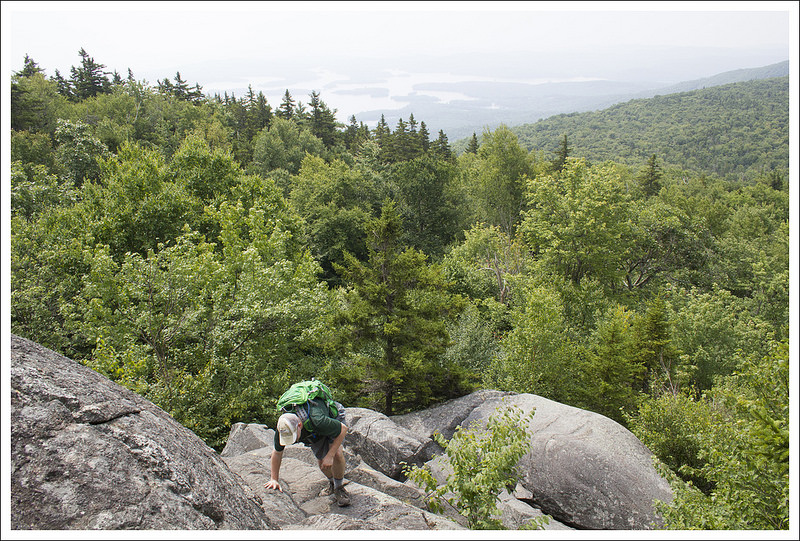
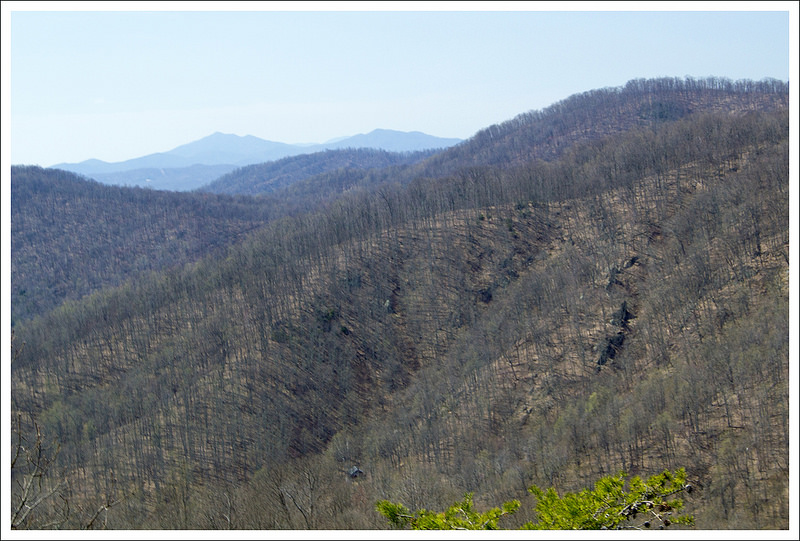
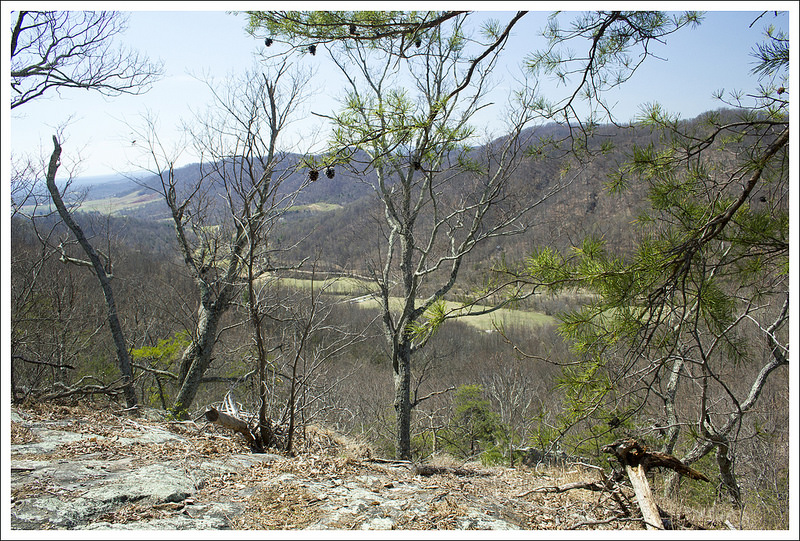
The Saddle Trail is more narrow and rocky, but is mostly a moderate climb. The steepest part of this trail comes between 1.2 and 1.5 miles as you gain about 300 feet of elevation in .3 miles. At 1.4 miles, you will pass by the Old Rag shelter which is only available for day use. At 2.15 miles, the trail gets another steep push to the summit. Continuing up the trail, you will also pass the Byrds Nest Shelter at 2.25 miles, another day use shelter. The trail does start to open up to some views along the way as you’ll pass a couple of rock outcroppings that give you nice views or a good excuse to stop if you need a breather.
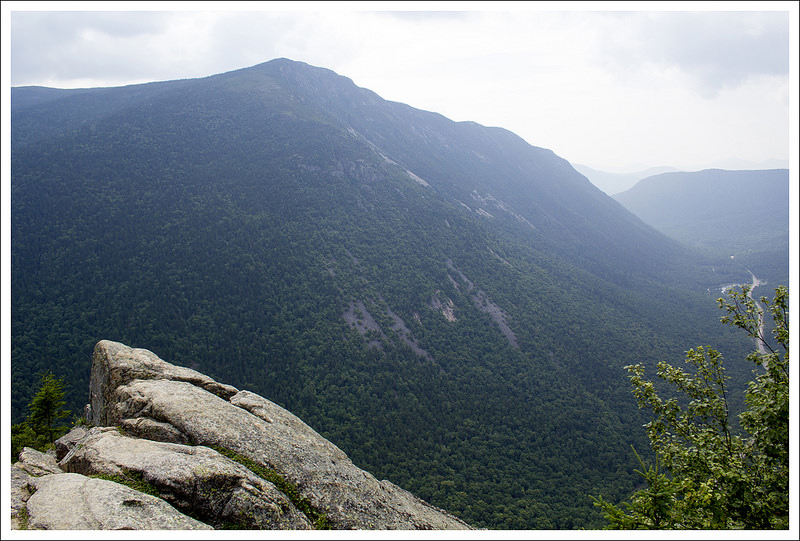
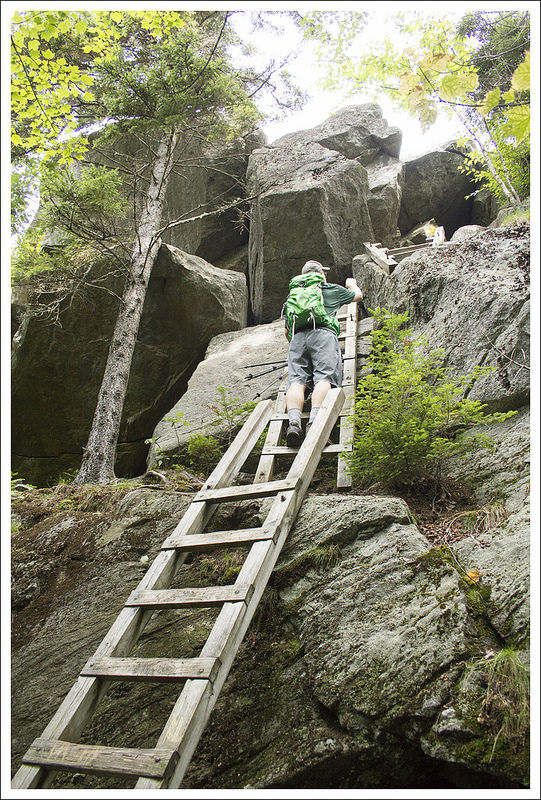
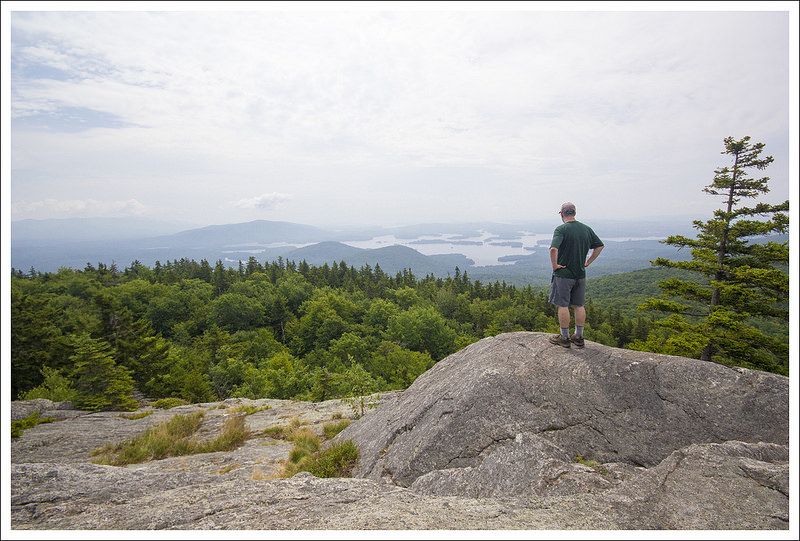
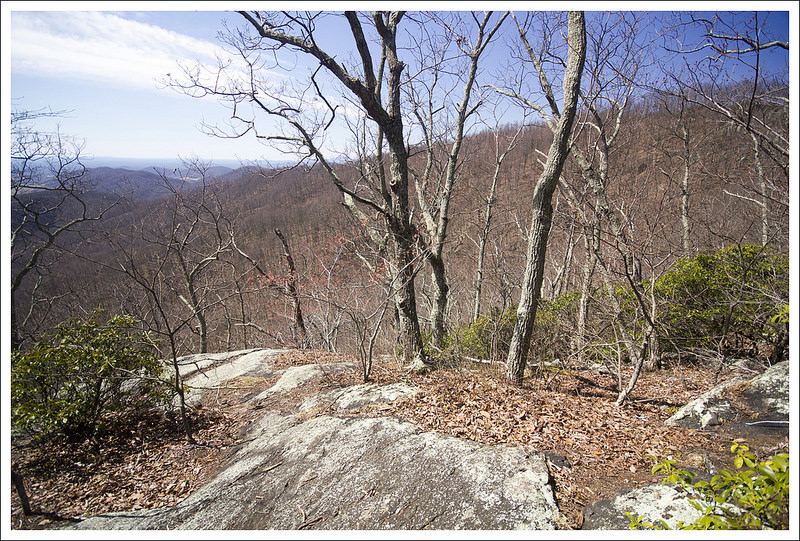
You arrive at the base of the summit which is marked by a sign. A short path leads up to the rocky summit. At this point, you can decide how adventurous you want to be at the summit. There are lots of nice ledges to enjoy the views, but some will want to scramble up the boulders to try to get even higher vantage points. Be very careful at this summit, especially if you have kids. People get injured often on this trail, most often at the rock scramble or at the summit.
The wind was incredibly strong on this day at the summit. It is usually quite windy at the summit, but with the colder temperatures, it was freezing at the top. We ate some snacks at the top, trying to shelter us from the wind, but decided quickly to get away from the exposed ledges to try and stay a little warmer.
We headed back the way we came. When we arrived back at our car, the lot was still at capacity, so we did luck out with a spot. After our hike, we went to one of our favorite places to eat, The Barbeque Exchange, in Gordonsville, VA and then hit Horton Vineyard for wine sampling on our way back home.
We were so pleased with this alternate route up Old Rag. I think we will probably use this as our go-to route for future hikes up the mountain.
Christine Says…
I make no secret of the fact that I am not a huge fan of the Old Rag Ridge Trail. Scrambling is not my favorite, but my primary issue is simple trail overuse. I think the park lets too many people hike the trail each day and that the mountain is becoming damaged beyond repair. We’ve hiked Old Rag on days that people are queued up all across the ridge, waiting in line for the people ahead of them to tackle obstacles. I wait in line in daily life enough that I’m simply not willing to wait in line on a mountain trail. It feels wrong! I also don’t prefer the significant amount of road walking necessary to complete the route via Weakley Hollow. In the end, more than half the trail is road walking. That said, I did really enjoy this ascent via Berry Hollow.
It was our anniversary weekend, peak fall color, and a perfect bluebird day to boot. We were sort of nuts to try hiking any of the park’s most popular trails, but somehow we were lucky enough to score a parking spot.
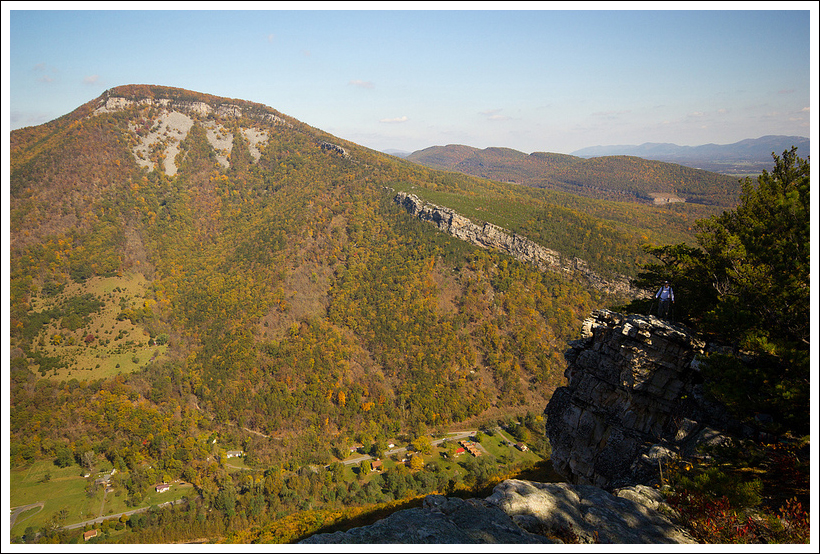
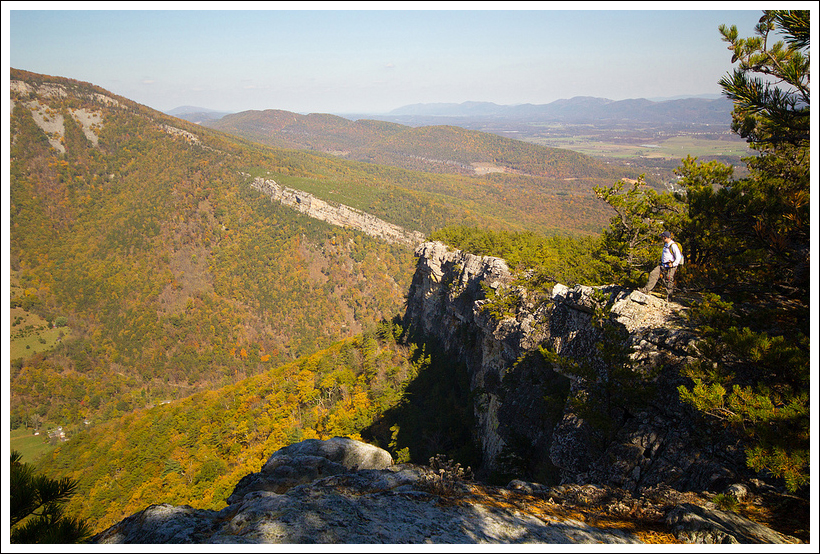
The summit of Old Rag offers spectacular views. Below: Views and crowds!
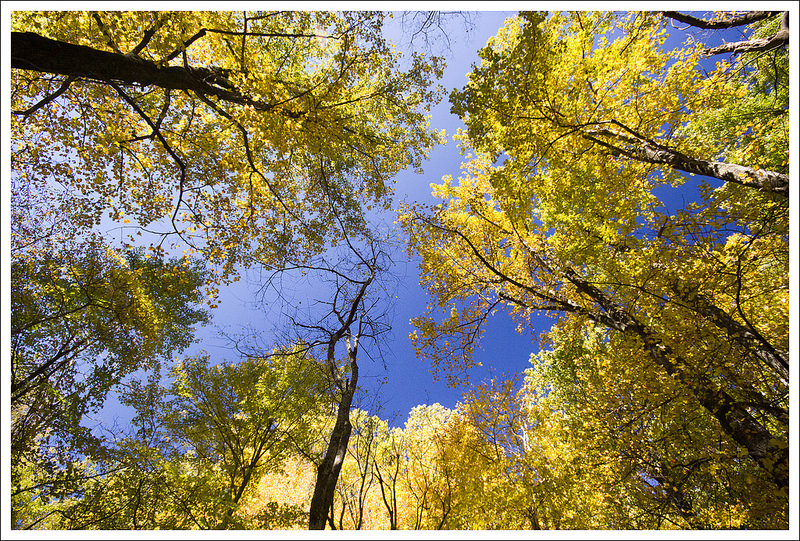
The walk up Berry Hollow fire road was gorgeous. The sun filtering through the fall leaves made a canopy of warm golden light. The road was carpeted with leaves of every color. We really didn’t see many people at all until we reached the junction of the fire road and the Saddle Trail.
The Saddle Trail is a moderate ascent. There are rock steps and interesting boulder jumbles to admire along the way. Through the trees we could see the rocky summit looming ahead. As we climbed the views became more impressive. After passing the second shelter (Byrds Nest), the trail passes out of tall hardwood forest into stand of stunted, windblown trees and tangled rhododendron.
All we had to do was look up to see all the fall glory! Below: One last view before descending; Trees near the top were already bare from the brisk wind; The shelter closest to the top – Byrds Nest – is also day-use only.
There are a couple nice views from the trail before you reach the actual summit. We took time to enjoy each of them. At the summit, there was a large crowd already congregating. Most people posed for photos and then found places behind the boulders to shelter from the wind. We stayed and enjoyed the summit until it became too crowded.
The way down was quick and easy! We even did our traditional ‘Old Rag Jog’ – it’s basically a slow run to make the fire road terrain pass quicker. On our way out, we stopped by Graves Mountain to get apples, pumpkin, and cider. Then we headed for a big barbecue feast and a wine tasting. It was a perfect fall day and a great way to celebrate our anniversary.
Trail Notes
Distance – 5.4 miles (Check out the stats from Map My Hike)*
Elevation Change – 1725 ft.
Difficulty – 3. This is a solid, moderate hike.
Trail Conditions – 4. The trail was in great shape in most places. There were a few muddy, mucky places between Byrds Nest and the Old Rag Shelter.
Views – 5. Gorgeous views at the top and several nice views along the way.
Streams/Waterfalls – 1. There is one small stream along the fire road.
Wildlife – 2. We didn’t see anything but squirrels, but there is apparently a nuisance bear near the Old Rag shelter.
Ease to Navigate – 4. There is just one well-marked junction.
Solitude –0. It’s Old Rag… expect to see many, many people.
Directions to trailhead: From Madison, VA on Route 29, take US-29 Business Route into Madison, VA. Turn on to VA-231 north. In 5.4 miles, take a slight left on VA-670. Follow this for 3.6 miles and take a slight right on to state route 643/Weakley Hollow Road. Follow this road for about 5 miles, which becomes a gravel, fire road and ends at the parking lot for the trailhead.
* MapMyHike is not necessarily accurate, as the GPS signal fades in and out – but it still provides some fun and interesting information.
Adam Takes in the View from Red Hill. Below: Trail conservancy sign; Adam makes his way up the trail; The foundation of an old farm house along the trail.
Christine Says…
We considered not hiking at all on our final day in New Hampshire – we needed time to pack and we still wanted to hang out a bit more with my parents. But, it was too gorgeous to stay off the trail – crisp, cool, vivid blue skies punctuated by cottony white clouds. So, for our last hike, we chose something short, relatively easy, and close to my parents’ home in Plymouth.
I remembered a conversation we had earlier in the week with a docent from Castle in the Clouds. We had been asking her about the trails on the property. After talking about options on the Lucknow estate, she asked if we’d ever hiked to the top of Red Hill. She told us the hike was very popular with locals and that we should do it if we had time. We looked at maps, and decided Red Hill was the perfect distance and length.
When we got to the trailhead, we found the parking area blocked by a construction crew repairing a failed drain pipe under the road. There had been heavy rains the day before, and it looked like the road had buckled and crushed the drain. Luckily, we were able to find a small pullout for parking and walk up to the trailhead.
The Red Hill trail is maintained by the Lakes Region Conservation Trust. You’ll see one of their informational panels at the beginning of the trail. Early on, the hiking trail is crossed by snowmobile trails. At about three tenths of a mile in, you’ll find remnants of the old Horne farm and another informational board. Essentially, all that’s left is the foundation, but if you look closely you might see other hints of the farm. Follow signs for the tower, passing a gate indicating an area closed to snowmobiles.
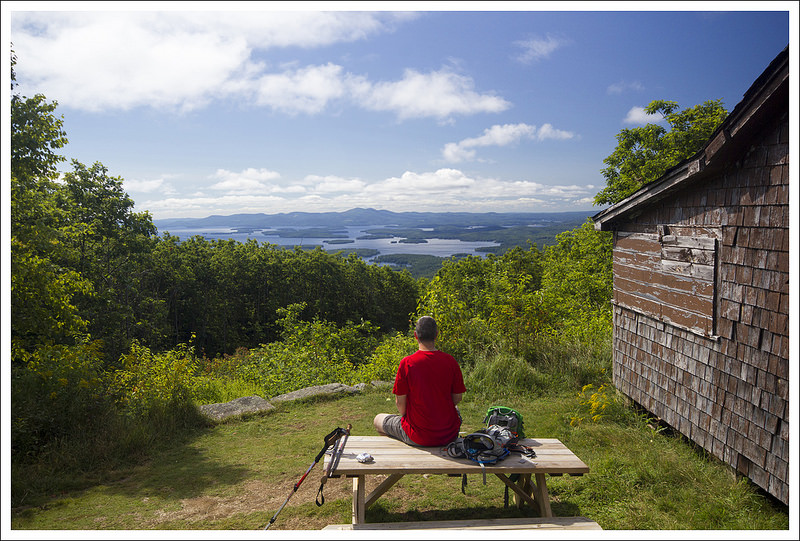
From there, the summit is a steady 1.4 mile climb. The trail is not rocky or rooted, and we found it dry and easily passable – even after heavy rain one day before our hike. The summit has a tall firetower and a couple associated buildings. I read online that this is the only firetower in New Hampshire not run by the state. Instead, this one is tended by the Moultonborough Fire Department.
From the summit we enjoyed a superb look at Lake Winnipesaukee from above. From the tower, we had great views of Squam Lake, the Sandwich Range and the Ossipee Range. It was really windy on the observation platform of the tower, so we didn’t stay on top for long. We shared some snacks and then headed down the way we came.
We were lucky to have the summit all to ourselves! On our way down, we passed dozens of people – not surprising! It’s a very nice hike! After getting back to the car, we called my parents and arranged to meet at the Town Docks in Meredith. It was a beautiful day to enjoy one last lakeside lunch!
The fire tower atop Red Hill. Below: Buildings at the top of Red Hill; Views in both directions from the fire tower.
Adam Says…
With our trip to New Hampshire coming to an end, we couldn’t resist hitting the trail one last time. The previous day we had a lot of rain, so we had spent the day shopping around the area to get some souvenirs. There was some flooding from the previous day in some areas. Since we were facing a 12 hour drive the next day back home, we wanted to get a hike that was fairly close and not too long. We remembered our talk with one of the volunteers at Castle in the Clouds and decided to see what this one was like.
This hike combines two things I always like to think about when visiting New Hampshire – the many lakes and the mountains. From this viewpoint, you get a picturesque view of both. This definitely is a hike for the locals. We couldn’t find any great information in guide books, but we found a few write-ups online, including a winter trek up from Hike New England.
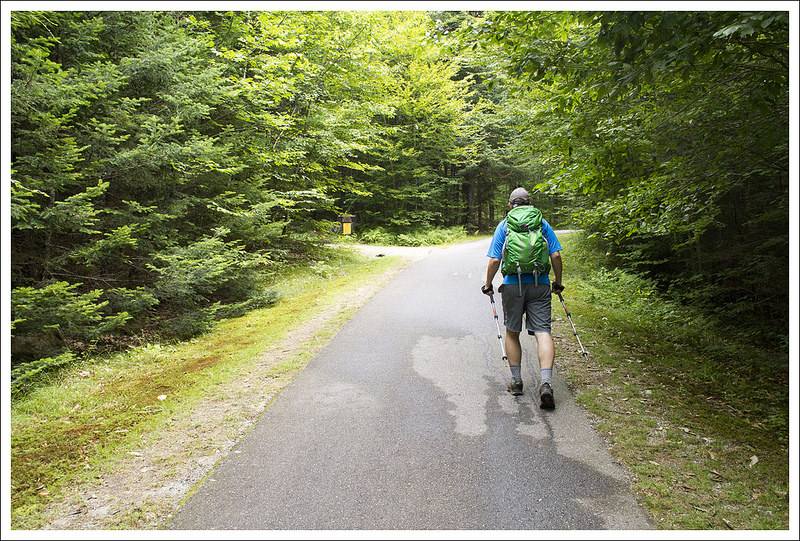
We started on the trail at the kiosk. In .1 mile, the trail splits in half. We opted for the trail to the right, which starts off on a fire road. At .4 miles, the trail comes to the signage for the old farmstead here. The trail takes a sharp left at the sign and continues uphill. The trail was a continuous uphill climb, but the terrain was fairly nice, making for better footing considering the rain from the day before. At 1.5 miles, the trail reaches a junction again with the Red Hill Loop Trail (we did not do the loop option). Continuing to the right for another .2 miles, you’ll reach the summit and fire tower at 1.7 miles.
The summit had a nice picnic table at the top near one of the buildings giving you nice views of the lake below. As I’ve mentioned before, I have a bit of a fear over man-made structures, so I felt uneasy about climbing up to the top of the tower. The tower was a little rickety and the wind was blowing strongly, but I felt I couldn’t end the trip without taking in the view. At the top of the tower, you do get some nice views, but we found it was hard to get clear, unobstructed photos due to all the wires and screen around the top. I made my way back to the bottom to get the views that nature had intended from the safer ground.
When we arrived at the summit, there was one other person there, who quickly handed over the solitude of the views to us. We stayed for a while to eat a snack and reflect on all of the great hiking we accomplished during this trip. It is always a bitter feeling knowing that you have to return home and back to the doldrums of work and everyday living, but we will have the memories of these mountains, lakes, and beautiful skies to lift our hearts until the next adventure.
Difficulty – 2.5. The climbing is moderate, but steady.
Trail Conditions – 3.5. This trail is in great shape. The footing is nice and we didn’t have any trouble with mud, even after heavy rains.
Views – 4.5. Beautiful – a small markdown because the cables and side panels of the tower block a little bit of the view. You must climb the tower if you want the full view, too. The picnic table at the base has a nice, but not panoramic, view.
Waterfalls/streams – 0. None
Wildlife – 0. None
Ease to Navigate – 3.5 – There are a few crossing snowmobile trails, and there is a trail on the other side of the hill, but generally the route is easy to follow.
Solitude– 2. While we enjoyed quite a bit of solitude on our early morning hike, we saw many people hiking up on our hike down.
Directions to trailhead: From I-93: Take exit 24 on I-93 for US-3/NH-25 toward Ashland/Holderness. Turn right on US-3 S/NH-25 E and go 9.2 miles. Turn left on NH-25B E and go 2.9 miles. Turn left on Kelsea Avenue and go .2 miles. Turn left onto Bean Rd and go 1.3 miles. Turn right on to Sibley Road and go 1.1 miles. Take a left on to Red Hill Road and go about .2 miles until you reach the parking area to the right. The trail starts off from the kiosk.
Adam on the summit of Mt. Pemigewasset. Below: The beginning of the hike follows the bike path for a short distance; One of the three tunnels on the hike; Adam crosses a small stream.
Christine Says…
The day before this hike, we made a quick trip over to Burlington, Vermont. We sampled beers at a couple breweries, stopped at a craft cider maker, toured a chocolate factory, ate lots of good food, enjoyed Lake Champlain, indulged in Ben & Jerry’s, and visited the chapel at Dog Mountain. It was an all-day trip with lots of miles in the car. When we woke up the next morning, we wanted to hike, but we wanted something that wouldn’t require a lot of time in the car. We also knew that thunderstorms were due to pop up starting around lunchtime. So, we chose the nearby and short hike of Mt. Pemigewasset.
There are two routes up Mt. Pemigewasset (also known as Indian Head because of its distinct, face-like profile). One is the Indian Head Trail which departs from a gravel parking area across from Indian Head Resort. We chose the Mt. Pemigewasset Trail that begins at the northern end of the Flume Gorge parking area.
Adam makes his way over the rocks and roots on the Mt. Pemigewasset Trail. Below: Christine climbs.
To start the hike, we followed the bike trail for a short distance before turning left onto the official trail. The trail started off relatively flat, and passed through three tunnels – one under Route 3 and two more under I-93. After a couple small stream crossings, the trail climbed steadily but moderately uphill. Like most New Hampshire trails, the way up was rocky and rooty. Near the top, the Indian Head Trail merged with the Mt. Pemigewasset Trail before emptying us out onto a smooth, wide ledge of granite. The drop-offs here are very steep and the granite can be slick/smooth, so take care!
When we reached the summit, it was still fairly early, so we only shared the vista with one other couple. We spent some time enjoying the views through the notch and watching the dramatic clouds swirling over Kinsman ridge. After about 20 minutes, more people started to arrive to the summit, so we made our way down. We were back at the car before noon. Since it was so early in the day, we decided to get some lunch at White Mountain Bagel Co. (great deli sandwiches) and see a matinee of Guardians of the Galaxy. While we were at lunch, a pressing cold front passed and it started *pouring*! The cold front was a welcome change, as it brought a forecast of clear, pleasant days – perfect for tackling bigger things! After a nice low-key day on Pemigewasset, we were definitely feeling ready to tackle some above-treeline Presidentials! Stay tuned!
The Kinsman Ridge was covered by clouds when we visited. Below: Views looking south along I-93 and the Lakes Region of New Hamsphire; The summit is made of smooth granite; More summit views.
Adam Says…
The names of places in New England (and particularly New Hampshire) always fascinate me. A lot of Native American names are used for mountains, towns, and rivers which leads to a lot of mispronunciations. Mt. Pemigewasset is named after the nearby river, the Pemigewasset River. It is an Abenaki word meaning “where entering current is”. A common joking name you hear is the “Pemi-gee-whats-it”, but many people don’t even attempt to try and pronounce it and just call it “The Pemi” for short.
The hike started at the northern end of the Flume Gorge parking area. You walk on the designated bike path for 150 yards and then you see the trailhead to the left. Take this and you will walk over fairly flat land as you go through three tunnels that go under US-3 and I-93. After the last tunnel, you begin your climb up the trail. Most of the trail is typical of the terrain in New Hampshire, with some rocky steps and roots to navigate. The overall terrain wasn’t too steep, but it is a constant uphill climb. At 1.7 miles, you reach a junction with the Indian Head Trail. Continue to the left and you gain the summit in another .1 mile.
Christine hikes down through the birch trees.
The summit is a huge rock outcropping that allows for views of other mountains, including Mt. Lafayette, Mt. Lincoln, the Tripyramids, and Mt. Moosilauke. The edge of the rock is a sheer cliff face, so be careful if you are approaching the edge, especially when it is wet.
Mt. Pemigewasset is a hike that should be possible for most people if you take your time. It is definitely easier than most of the hiking we have done in the White Mountains. One thing that played into our decision to do this hike was that we saw high clouds in the Presidential range. We felt this mountain, lower in elevation, would allow for some views down below and we predicted correctly. We were also able to do this hike fairly quickly based on the short distance and were back in our car before lunchtime.
Directions to trailhead: From I-93: Take Exit 34A for Franconia Notch State Park. The trailhead is begins from the northernmost point of the parking area.
* MapMyHike is not necessarily accurate, as the GPS signal fades in and out – but it still provides some fun and interesting information.
Mt. Willard is one of the most popular easy day hikes in the White Mountains region. Its highpoint of 2,800 feet is dwarfed by most every other mountain around, but it still offers a dramatic vista looking through Crawford Notch.
Looking through Crawford Notch from the summit of little Mt. Willard. You can see the road and the train tracks. Below: The trail starts across the train tracks at Crawford Notch Depot; Christine’s dad looks down at the Centennial Pool – one of the attractions on this hike; Enjoying the summit with family.
Adam Says…
Mount Willard is an extremely popular family hike in the White Mountains of New Hampshire. It’s quite accessible since the trail takes off from the train depot at Crawford Notch. Many hikes in the Presidential range can be intimidating, but this hike of only 3.2 miles is more manageable. The hike has some rocky, steep sections, but if you take your time most people with a little hiking experience can reach the peak.
We started off the hike by crossing the railroad tracks near the train depot station where the AMC Highland Center is located. The trail quickly leads into the woods and in .1 mile, you reach a junction. Take a left to climb the Mt. Willard Trail (the other trail at the junction is the Avalon Trail, leading to Mount Avalon and Mount Field). The trail has a small stream crossing and then begins the climb. The trail is rocky and somewhat steep, like most of the area in the White Mountains of New Hampshire.
The Centennial Pool has a small waterfall that cascades into a pretty plunge pool. Below: Adam crosses a stream early in the hike; Everyone makes their way uphill; The trail was mildly rocky.
Along the hike up, there is a small waterfall called the Centennial Pool on the right. There are a few steps down to reach the base of the falls, which is a nice cascade to give yourself an excuse to take a break on the way up. Continuing up the trail, eventually the path of the trail consists of smaller, but more abundant rocks. A short distance of climbing through this and then the trail begins to level off around 1.4 miles. It is a short distance at this point to reach the summit at 1.6 miles.
The summit gives you great views down into Crawford Notch as you can see down Rte. 302 and the train tracks that would leave from the depot. You can see the path of the glacier that carved out this area. There are some precipitous drops from the top, so keep a close eye on any children. We stayed at the top for a while until it started to become overcrowded with larger groups, so we made our way back down the way we came.
After the hike, we went into the train depot where they have a small gift shop to purchase shirts or hiking guides. After we left the area, we headed down to one of our favorite lunch spots, Moat Mountain in North Conway, NH. Their nachos are amazing and we’ve always been impressed with the beer they brew there.
Christine Says…
When I say that Mt. Willard is a favorite family day hike, I mean that literally! My parents walk to the summit of Willard several times a year. It’s probably one of my dad’s very favorite hikes in the region. It’s the right distance and right amount of climbing for them, plus they really enjoy the view from the top. They prefer to leave the high peaks and steep climbs for us to do on our own, but we always like to try and find a hike we can all do together. On this visit, Willard fit the bill perfectly.
Before setting out for our hike, we stopped in Sugar Hill for a big pancake breakfast at Polly’s Pancake Parlor. It’s a standing tradition to eat there at least once on every visit. I love all the different batters and pancake fillings. They also have delicious chicken-apple sausage.
Adam checks out the Mt. Willard Summit. Below: Summit scenes.
We got an early enough start that we were able to begin our hike by mid-morning. We set out across the train tracks and headed up the Mt. Willard trail. The climbing on Mt. Willard is steady, but never terribly steep. The trail is rocky, but nowhere nearly as rocky as what you see above treeline. It was a humid day, so everyone was sweating like crazy. Thankfully, the bugs weren’t too bad and we were able to hike without bug spray or constant swatting.
At half a mile, we passed the Centennial Pool. I scrambled down to the base of the falls and snapped a few photos before a large family group caught up to us. The group of twelve included many young children who wanted to scramble on the rocks around the pool. We left the spot to them and continued our uphill climb.
As we continued upward, the trail became rockier and wetter. Thunderstorms the day before left plenty of water still draining off the mountain. There were a couple places that the trail was more like a shallow stream. When we reached the summit, there were only a couple people there. We claimed a nice spot overlooking the notch below. We took photos and enjoyed the view together for a few quiet moments. Soon enough, lots of other hikers began to reach the summit. Children were running pellmell all over the summit. Fortunately, it’s a safe and wide summit. There are steep drop-offs, but the ledge is spacious enough that there is plenty of room to enjoy the view without ever getting close to the edge.
The trail is rocky and cobbled. Below: Some parts of the trail were wet from thunderstorms the night before; The trail is pretty, piney and shady: Returning to the depot.
After exploring the summits different views and angles, we decided it was getting a little too crowded at the top. We gathered our gear and started the descent. The hike down went pretty quickly. We passed many people climbing up as we descended. It’s definitely a popular and well-traveled trail. We soon arrived back at the train depot. After the hike, we headed into North Conway for lunch. It was a great day and I loved spending some time on the trail with my parents.
Directions to trailhead: From I-93, take exit 35 to merge onto US-3 N toward Twin Mountain/Lancaster. Stay on that for 10.4 miles and then take a right on US-302 E. Go 8.3 miles and the AMC Highland Center will be on the right. Park in the parking lot and make your way towards the train depot station. Cross the train tracks and you should see the trailhead leading into the woods.
Note: We’ll be taking you to New Hampshire for our next seven hikes! Enjoy the north country!
This 5.3 mile hike includes open ledges, ladders up cliff faces, caves, tight squeezes, and rock scrambling. At the summits of both Morgan and Percival, you get great views of Squam Lake. Look for blueberries along the way!
A view of Squam Lake from the summit. Below: Papery, white birches are iconic in New England; Eastern red-spotted newt at eft/juvenile stage; Adam slogs across wet trail. It was more like a stream in places.
Christine Says…
After two lengthy days of travel from Virginia to New Hampshire, the last thing we wanted to do was get back into the car for more than a short drive. So, for our first hike in the area, we chose the Mt. Morgan – Mt. Percival Loop. The 5.3 mile hike is just a few minutes from my parents’ house and offers great views of Squam Lake.
We hiked this loop in 2009, before we started including out-of-state hikes on Virginia Trail Guide. I remembered only a few generalities about this hike: challenging, exceedingly buggy, nice views, tons of blueberries. It definitely seemed worth another look!
By New Hampshire standards, this trail is rated moderate. On paper, that seems fair – 5.3 miles and 1,575 feet of climbing. But, by Virginia standards we probably would rate this hike more toward difficult due to the terrain. If you follow the route as we hiked it, there are ladders, exposed ledges, steep rock scrambles, and a tight-squeeze section that passes through a series of caves. It’s also very muddy, rocky and rooty. I would equate the skill-level/fitness needed for this hike to be similar to what you need to hike Old Rag.
We reach the ladder portion of the Mt. Morgan Trail.
We started off early in the morning, but the parking lot was already full when we arrived. We managed to wedge into one small space still remaining in the corner of the lot. I think most of the cars parked in the Mt. Morgan lot belonged to people hiking the Rattlesnakes on the other side of the road, because we saw relatively few people on our hike.
The Mt. Morgan trail started off at the end of the parking lot. The path was wide, gradually ascending, and covered with pine needles. There were beautiful, papery white birch trees all through the woods. As the trail continued, the climbing got rockier and steeper. We passed sections of old stone wall half buried in the forest. There were also several muddy stream-bed areas to traverse. At 1.7 miles, the Mt. Morgan trail and the Crawford-Ridgepole trails joined ways for about .4 miles before reaching a series of ladders affixed to a cliffside.
If you’re not into height and ladders, you can continue on the Mt. Morgan trail for several tenths of a mile to reach the summit. We chose the ladders. I did fine until there was a horizontal move from one ladder to another, followed by a step onto a large metal screw in the rock. I kind of panicked at that point because I couldn’t span the space with my arms. I could get my feet where they needed to be, but I couldn’t reach any solid handhold to pull myself up the rock face. Adam ended up giving me a hand up. We both passed through a small cave onto a steep, exposed ledge with views of Squam Lake. After enjoying the view for a moment, there was still a little more steep, scary boulder scaling we had to do to get to the summit of Mt. Morgan. I stood on the ledge and pondered whether I wanted to go back down the ladders and go around, or figure out a way up the rest of the rocks. I ended up opting for directly up the rock face, but I paid a price for it. I got several huge bruises and two gashes on my legs from the sharp, hard granite. What can I say… I never go home from New Hampshire unbranded!
Even after you reach the top of the ladders, you still have some challenging, steep scrambling to complete. Below: Adam navigates the ladders; At the top of the ladder, you’ll pass through a small cave; The scramble is scary because the granite is so smooth and steep.
The view from Morgan was lovely, albeit misty and hazy on the day we visited. There also weren’t as many blueberries as I remembered. We had a snack, took a few photos and pressed on to the next summit – Mt. Percival.
We followed the Crawford-Ridgepole trail for about .9 of a mile to the summit of Percival. The trail across the saddle between the two mountains was alternately rocky, boggy and piney. There were a few steep spots, by this section of trail was one of the easier parts of the hike.
Right at 3 miles, we reached the summit of Percival. The view was similar to that of Morgan – Squam Lake’s asymmetrical, island-dotted expanse. At the summit of Percival, there are two sets of blazes – one to the side and another that plunges steeply right of the front of the mountain. When we visited, there was no sign indicating where each trail headed, so we used our guidebook and map to make a guess. If you take the trail on the side, you’ll have steep (but normal) climb down the Mt. Percival trail. If you follow the blazes over the cliff, you’ll find yourself wedging your body through a series of caves and opening in boulder tumbles. The cliff route is fun and a little bit unnerving.
There were several places that Adam and I looked at each other and thought NO WAY! We had to pass backpacks and trekking poles through openings. There was even one place I thought I’d make it, but my backpack got hung up and left me stuck! After several squeezes, we came to the junction of the Mt. Percival Cliff Trail and Cave Trail.
After this point, the rest of the climb down Mt. Percival was just a steep, rocky, rooty, slippery, muddy knee grinder. I didn’t particularly enjoy this part of the hike. My knees and feet were hurting and I was being relentlessly menaced by bugs. It’s hard to pay attention to your footing when you’re flailing your hands to swat flies away from your face. I definitely slipped and slid several times.
Adam enjoys the summit of Mt. Morgan. Below: Scenes from the Crawford-Ridgepole Trail between the summits of Mt. Morgan and Percival. The terrain was rolling and varied.
I was pretty happy when, at 4.7 miles, we reached the junction with the Morse Trail, because it meant the hard hiking was behind us and we were almost back to the car. We flew along the Morse Trail, enjoying pretty streams and easier footing. We made one final left turn back onto the Mt. Morgan trail for the final tenth of a mile.
After wiping off the mud and doing a little minor first aid, we were on our way to a well-deserved lunch at Squam Lakeside. They have enormous lobster rolls and sherbet freezes. It’s a great place to eat outside and enjoy a view of the lake.
Adam Says…
This was one of those trails that I first discovered five years ago when I was researching nearby geocaches when we were visiting the White Mountains for the first time. I was also drawn to Mt. Percival due to my love for reading Arthurian legends when I was younger (Percival accompanied Sir Galahad on his quest for the Holy Grail). I remember this being a challenging hike, yet unlike anything we have in Virginia. As a hiking couple, we sometimes find that one of us enjoys a hike more than the other; we also face days where one of us is not having a strong hiking day. This hike was one that I enjoyed more than Christine. For me, if I experience something unusual on a hike (a rock scramble, ladders, exposed cliffside walks, a stream crossing where we have to wade across), I find that I really have fond memories of it. As I’m reflecting, I realize I enjoy the challenge of trying to figure out how to overcome an obstacle. This loop definitely has some of those memorable abnormalities on it.
The summit of Mt. Percival offers a similar view.
We were looking for a decent hike to start off our trip to the White Mountains. Since we had about a 12 hour drive from our home in Virginia to New Hampshire, we were looking forward to doing something active. We found the parking lot and trailhead along Rte. 113. The trail starts off level and at .1 miles, you reach the junction with the Morse Trail, your return route for the loop. Stay straight on the Mount Morgan Trail. The trail starts off with a gradual uphill, but the trail begins to get steeper and rockier as you continue. There wasn’t a lot to note on the hike up, but the sight of white-barked birch trees always makes me happy to be in New England. At 1.7 miles, you reach a junction with the Crawford Ridgepole Trail. Stay on the right to continue your hike up to Mt. Morgan. At 2.1 miles, we reached a sign that shows that you can reach the summit of Mt. Morgan through the ladders or circumvent and reach the summit by continuing on the trail.
During our first visit in 2009, I had decided to go up the ladders and Christine went the other way. In 2009, never having experienced ladders attached to large rocks before, I was very apprehensive and worried about climbing up that way. But when I saw an older man climb the ladders without any difficulty, I dug deep and forced my way up them. This time, I didn’t have any trepidation, most likely from the combination of climbing these ladders before and experiencing more harrowing ladder climbs at Grandfather Mountain in North Carolina. Once we reached the top of the ladders this time, we had some rock scrambling to do up some exposed rocks until we reached the summit of Mt. Morgan. I was proud of Christine tackling the ladders and the rock scramble, because these are definitely things she doesn’t usually enjoy.
Adam expresses disbelief at the way forward. Below: Different sections and tight squeezes on the cave trail.
We had a hazy day from the summit of Mt. Morgan, but the view over Squam Lake always amazes me with the small islands scattered through the lake. We climbed down from the summit and shortly reached the sign which pointed out the other option for reaching the Mt. Morgan summit. We continued on the rocky trail, which is fairly flat on the ridge, but does have some ups and downs as you are climbing over rocky areas of the ridgeline. At 3.0 miles, we reached the summit of Mt. Percival. The summit of Mt. Percival was very hazy and cloudy, which didn’t give us great views this day, but we remember the great views we had from here in 2009. The signage at the summit of Mt. Percival didn’t help us too much. We saw two sets of blazes leading down the mountain, but there was no signage stating where they headed. After consulting my map, we took the rightmost trail (facing the view) that seemed to lead straight down the rocks. It turns out this is the option to go down via the caves (the next trailhead down to the left of this one would be more of a cliffside trail but they join ahead). We climbed down this very steep section and then at one point, I said “You’ve got to be kidding me. How are we getting through that?” The trailblazes led down into a hole that wasn’t much bigger than my body.
This turns out to be the entrance to the cave on this trail. You can still see light shining through in spaces between the rocks, but it is fairly closed off and not a route for any claustrophobic people. We rock scrambled through the cave and then eventually the blazes lead you out of the cave through another hole not much larger than my body. When I peered through this opening, I couldn’t see what was ahead, but I plunged my body through and I felt like I was getting reborn through a rocky birth canal. On the other side was a family heading up, so we had to exit before they could try to enter. We made our way through and then had a little more downhill rock scrambling to do until we reached another sign. This one pointed the way to the summit via the cliffside trail or through the caves. This would have been helpful from the summit.
Christine exits the cave portion of the hike. Below: The descent of Percival was nothing but rock, roots and more rocks; We were glad to finally hit pine-needle covered trail again; Adam crosses one of the streams on the Morse Trail.
The trail at this point continued its rocky climb down and you can hear the sounds of Smith Creek at times. Eventually at 4.7 miles, we reached the junction with the Morse Trail, that ducks to the right. We took the Morse Trail, which was mostly flat but more overgrown and less traveled than the other trails. This trail joins the Mt. Morgan again at 5.2 miles. We took a right and made our way back to our car in just another .1 mile.
At the summit of Mt. Percival, we met a girl hiking with her dog. She was also trying to figure out which way led down Mt. Percival and she took the cave trail as well. I can’t even imagine how she navigated her dog through the caves, but we saw her at the junction with the Morse Trail. She told us how tough it was for her dog. She was training for her goal of trying to hike the 48 peaks of New Hampshire that are above 4000 feet with her dog. This goal has been most popularized by the book Following Atticus by Tom Ryan and you can read more about their adventures on his blog.
As we are always trying to cover new ground whenever possible, I’m not sure how often on our return trips to the White Mountains we will revisit this loop, but this is definitely a hike that you will remember. The interesting features and scenic views give you an introductory glimpse into what hiking is about in New Hampshire.
Difficulty – 4.5. Even with a moderate elevation gain and distance, the terrain of this trail warrants a higher difficulty rating.
Trail Conditions – 3. The trail was a muddy, slippery mess when we hiked, but generally the trail is well maintained and passable.
Views – 4. On a clear day, the view of Squam Lake is beautiful.
Waterfalls/streams – 2. There are lots of small streams and springs on this trail. Nothing mind-blowing (and a lot them just make mud), but a couple crossings along the Morse Trail are pretty.
Wildlife – 1. We saw red squirrels and a salamander.
Ease to Navigate – 2. There are multiple trails that lead the same place. Also, there isn’t a sign differentiating the cave and cliff trails on Mt. Percival.
Solitude– 3. This trail is not as popular as the nearby Rattlesnakes, but you’ll probably still see a number of hiking parties along the way.
Directions to trailhead: From I-93: Take Exit 24 and follow Rt. 3 South to Holderness. From the town Holderness, get on Rt. 113 and follow it northeast for about 5.5 miles. Parking will be in a gravel lot on the left. The large parking lot on the right is for the Rattlesnakes hike. If there is no space left in the Morgan lot, it is fine to park at Rattlesnakes.
* MapMyHike is not necessarily accurate, as the GPS signal fades in and out – but it still provides some fun and interesting information.
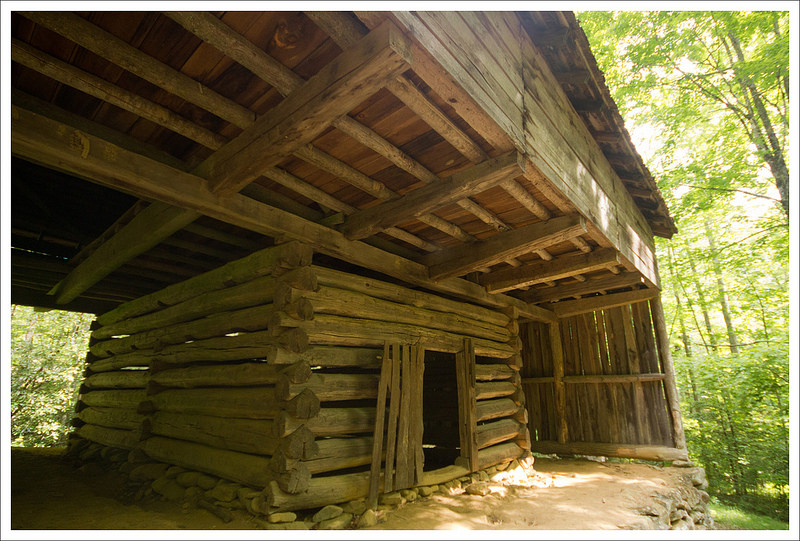
This 4 mile out-and-back follows beautiful Porter Creek to a small waterfall at Fern Branch. The waterfall itself was barely a trickle when we visited, but the lush Smoky Mountain forest was especially beautiful here. This hike also takes you by a historic barn and an old hiking club cabin.
Fern Branch Falls was running low, but it was still beautiful! Below: Pretty rapids on Porters Creek; Tall trees provided a wonderful canopy of shade; The Messer Barn.
Christine Says…
With our week in the Smokies winding down, we wanted to hike something special and something we had never hiked before. I found myself referring to the ‘Hiking In the Smokys‘ website again. They have a list of their personal top 10 favorite hikes. We didn’t want anything over 10 miles, so that ruled out Gregory Bald, Rocky Top and Mt. Cammerer. We had already hiked six of the others (LeConte, Charlies Bunion, Andrews Bald, Chimney Tops, The Jump Off, and Alum Cave). So that left just one from the favorites list – Porters Creek. It sounded like a lovely trail – old growth forest, streams, a waterfall and lots of history.
Before setting out on our hike, we got donuts from The Donut Friar. This made me exceedingly happy and was the perfect start to the day. There is something magical about their chocolate crullers. After donuts, we were on our way to the Greenbrier section of the Smokies. We’d never hiked anything in that area before, so we were excited to try someplace new.
The road into Greenbrier is mostly gravel, but is well-maintained and easy to drive. It’s also very scenic and follows the Little Pigeon River. The trailhead is about 4 miles down the road. It’s clearly marked and there is plenty of parking.
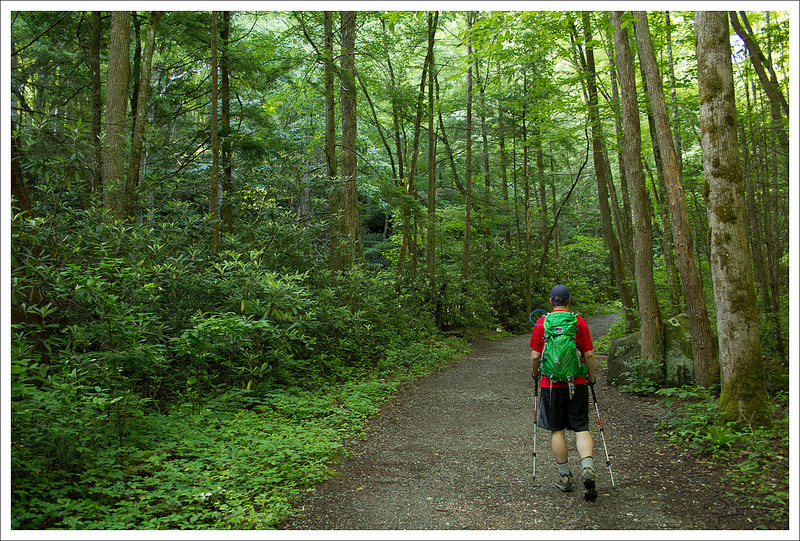
Adam hikes along the early parts of the Porters Creek Trail. Below: Porters Creek Trailhead – it ties into the larger trail system in the park; Overhead view of Porters Creek; Old stone walls.
The trail starts off as a wide, gravel road through the woods. Porters Creek runs along the trail, offering plenty of scenic water views. About .6 of a mile along the way, you’ll see signs of old stone walls and stairs on the right side of the trail. The remnants date back to the early 1900’s when Elbert Cantrell built a farm in this area. Immediately past the farm, you’ll pass the Ownby cemetery. Adam and I walked around the cemetery and noticed that most of the graves belonged to very young children. Sad – it really makes one appreciate modern medicine and vaccinations.
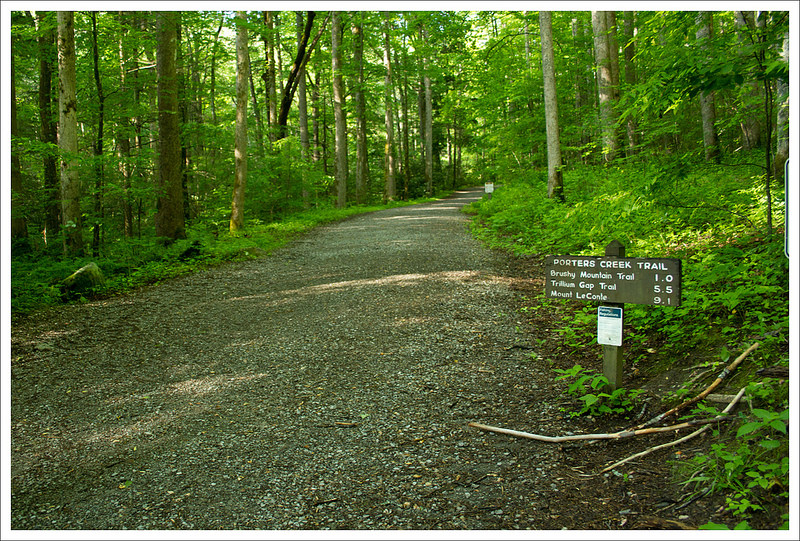
About a mile into the hike, you’ll cross a log footbridge over the creek and come to a Y-junction in the gravel road. The trail to the right goes to more historical structures, but we’ll cover those on the way back. We took the trail to the left and arrived almost immediately to another trail junction – continue bearing left on the Porters Creek Trail. At this point, the gravel road ends and becomes a ‘real’ trail.
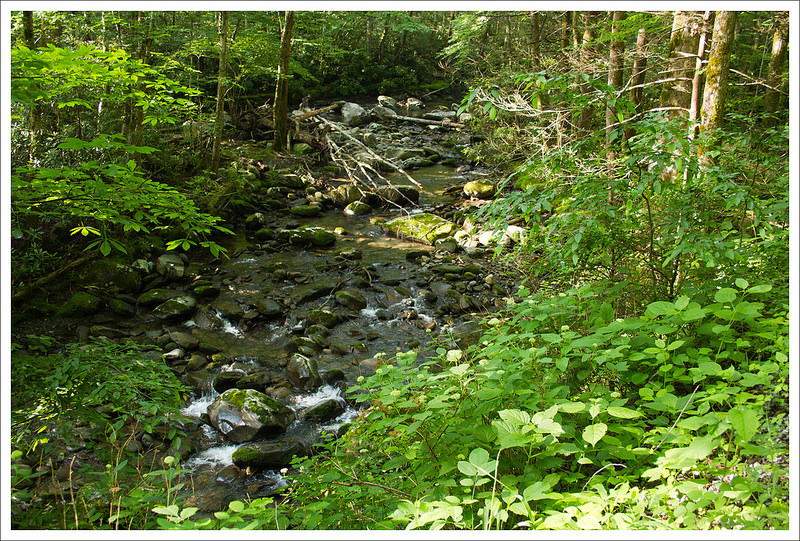
This section of the hike is beautiful – lots of big old, trees. It’s so green, shady and peaceful. At 1.6 miles we crossed another log footbridge. This one was much longer and crossed the stream crookedly. From there, the trail ascended gently until we reached Fern Branch falls at 2 miles. The falls are on the left side of the trail and set back a bit in the woods.
The first log foot bridge you come to is short and easy to cross. Below: The Ownby Cemetery; Adam at the trail junction before the path goes from old road to real trail; Little cascades on the creek.
When we visited the falls were not flowing very heavily. It was still a beautiful spot – especially with the sunlight filtering into the woods at the crest of the falls. We took some photos and then headed back the way we came.
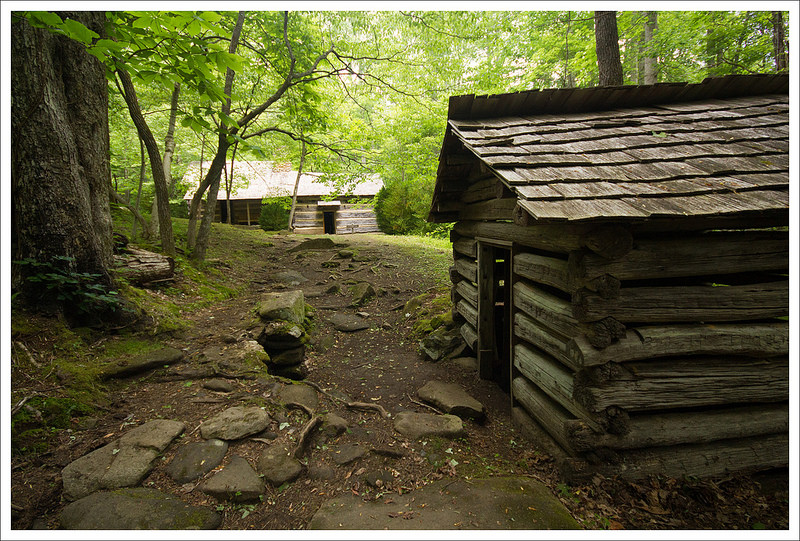
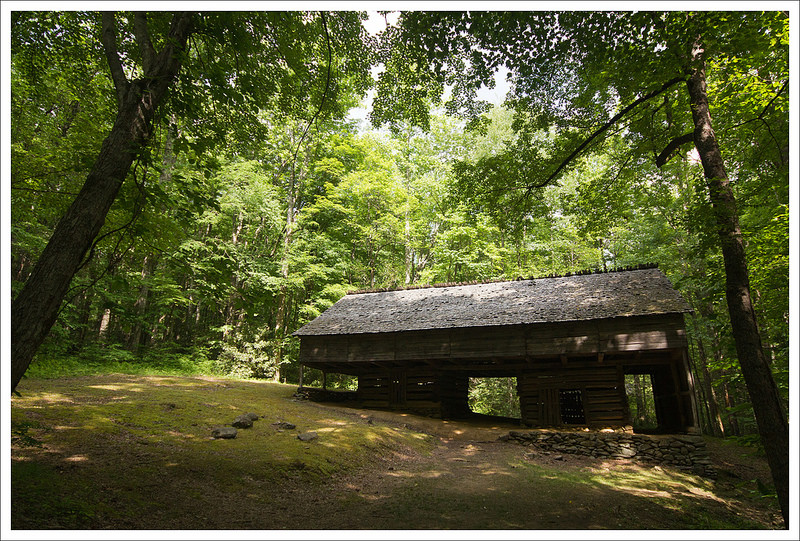
On the return arm of the trip, we stopped at the Y-junction and visited the John Messer farm site. The cantilevered barn is in excellent condition. Just past the barn, you can visit a springhouse and an old cabin built by the Smoky Mountain Hiking club. Overnight stays at the cabin are no longer permitted.
After visiting the barn and cabin, we made our way back to the car and headed back into town for lunch. We ended up at Hungry Bear Barbecue. It was great and definitely deserves the top ratings it has online.
Porters Creek was definitely beautiful and we would recommend the hike for a low-key, easy day. It would also be our last new hike of our 2014 spring trip. The next day, we chose to re-hike an old favorite – Charlies Bunion.
Adam Says…
Staying in Gatlinburg, TN for a few days, we wanted to explore some different sections of the Great Smoky Mountains National Park. We decided to check out the Porters Creek after reading about Fern Branch Falls and the wildflowers on the trail. When we got out of our car, we could tell from the wetness of the area and the humidity that it would be a good idea to douse ourselves in bug spray.
We crossed the gate and started along the wide fire road. As Christine mentioned, during the first mile you do get some stream views, ruins of an old farm, and a family cemetery. The trail does ascend, but very slowly, so it is not very challenging.
After the trail junction, the path became narrower and steeper. Everything was so green! Below: The second log foot bridge was segmented and much longer; wildflowers; Adam at the base of Fern Branch Falls.
At the .9 mile mark, there is a small footbridge you can use to cross a small stream (or you can rockhop across). At the 1.0 mile marker, you reach a large junction. There is a side trail to the Messer Barn and hiking club cabin and also a junction with the Brushy Mountain Trail. Take the left Porters Creek Trail. At 1.5 miles, you come to a large footbridge that crosses Porters Creek. This footbridge was much longer and can be a little unsettling since it is fairly high above the creek in some points. The railing for me was also below my hip in some spots, which didn’t give me the feeling that it would protect me if I did slip. After you cross the footbridge, the trail seems to change environments as you walk through a large area of wildflowers and fern. The forest floor was exploding in green! The trail then becomes steeper, narrower, and rocky through this portion until you reach the falls.
As we were walking along, we could hear a waterfall off to our right and got a faint glimpse from a distance, but this was not Fern Branch Falls. Instead, at 1.8 miles, we reached the large waterfall on our left. The trickle from the waterfall wasn’t overly impressive, but it was a nice scenic spot. We made our way back the way we came.
The Smoky Mountain Hiking Club used this cabin as an overnight camp until 1981. Below: Crossing the bridge on the return trip; The Messer barn is well-preserved example of a cantilevered barn; Adam checks out the interior of the hiking club cabin.
When we returned to the junction with the Brushy Mountain Trail, we took the short side trail that led to the barn. Behind the barn, you cross a small stream and then can find the hiking cabin and springhouse. Both the cabin and barn are open, so we enjoyed exploring the abandoned buildings.
We made our way back to our car and found several cars that were arriving to hike this trail. With the cabin, farm, ruins, and graveyard, this hike really does give you a glimpse into the life and environment of families that lived in this area and used these facilities in the late 1800s through the early 1900s. The hiking cabin actually permitted members to stay here until 1981.
Difficulty – 2. The climbing is gradual and gentle.
Trail Conditions – 3.5. The section from the trailhead to the Messer farm is essentially a road. The section from the farm to the falls is trail, but it’s in good shape. The only part that may challenge some hikers are the two log footbridges.
Views – 0. None
Streams/Waterfalls – 3.5. Porters Creek is lovely. Fern Branch falls would probably be more impressive in wetter weather. It was fairly small when we visited.
Wildlife – 3. We saw a couple salamanders and a big black snake. There are bear sightings in all parts of the Smokies.
Ease to Navigate – 4. Trails are well-marked and easy to follow. You may miss some of the historical remnants if you’re not paying attention.
Solitude – 3. We hiked on a pretty Thursday in late May and only saw a few other people.
Directions to trailhead: From Gatlinburg, go east on 321 for 6 miles. Take a right at the Greenbrier entrance to GSMNP. The road will turn to gravel. The road will fork at 3.1 miles, but continue straight at the fork to reach the Porters Creek parking area at about 4 miles.
This 4 mile out-and-back is an easy hike to one of the Smokies’ lesser visited and under-appreciated waterfalls. The walk begins from the Smokemont Campground and follows a lovely stream and eventually reaches a pretty 25′ waterfall.
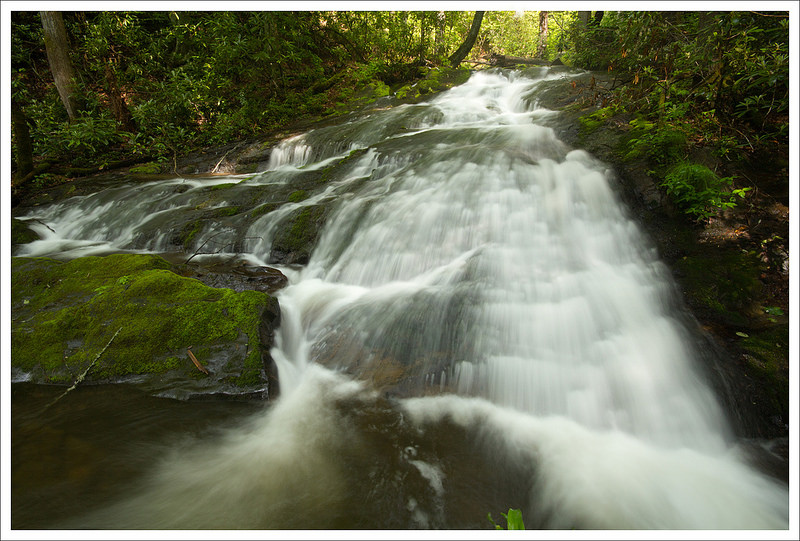
Pretty Chasteen Creek Cascade spills from the forest into a small pool below. Below: The trailhead at the end of Smokemont Campground. Adam tucked his pant legs in to avoid ticks; Mountain laurel along Bradley Fork; The trail is an old logging road.
Christine Says…
For the first few days of our trip, I wasn’t feeling great. Even after easy hiking days on Mt. Pisgah and Wesser Bald, I still wasn’t myself. Mentally, I had big hiking plans for every day of our trip, but in the end, my body dictated that we hike shorter, less strenuous trails.
On our second day in Bryson City, we woke up to lightning, rumbling thunder and torrential downpours. The local weather said that the heavy rain would clear out and leave us with a hazy, mostly cloudy, unsettled day. We decided that an easy waterfall hike would be perfect for those conditions. After breakfast at Mountain Perks (probably my favorite breakfast spot in Bryson City), we drove into the park.
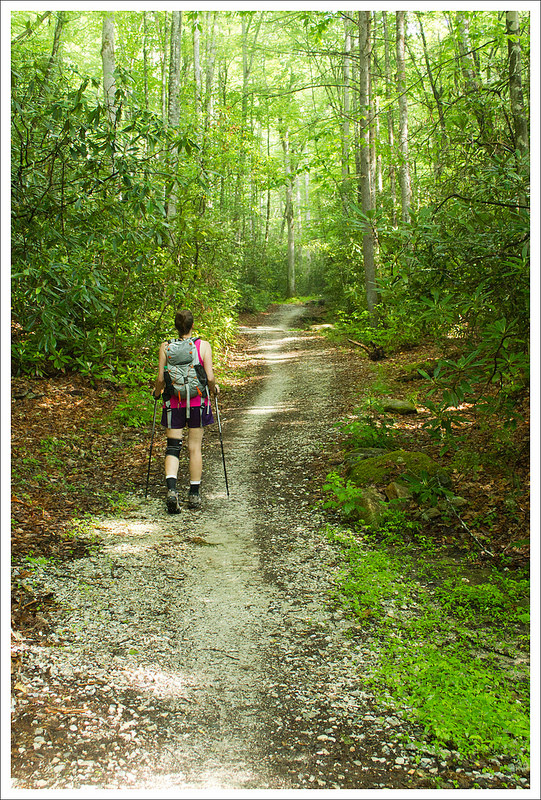
Our hike started at the far end (section D) of the Smokemont Campground. For the first 1.2 miles, we followed the Bradley Fork Trail. It went gently uphill along the stream. The morning rain paired with the emerging sun made for a hot, muggy and buggy hike! Whenever we stopped for photos or to take in the scenery, we were swarmed by gnats and mosquitoes. Nonetheless, the trail was beautiful – so lush and green.
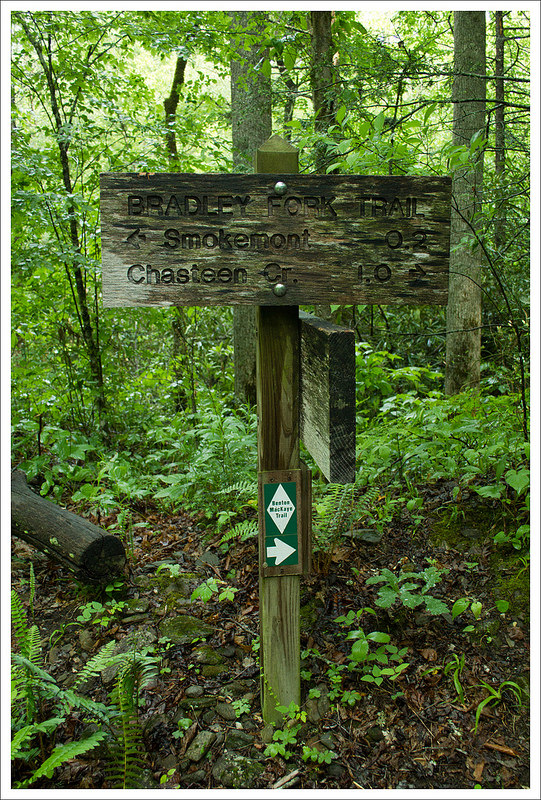
Adam Enjoys the Bradley Fork. Below: A marker for the Benton MacKaye trail along the shared portion of the hike; Someone built a ‘fairy house’ along the Bradley Fork; Trail junction with Chasteen Creek Trail; Campsite 50.
The trail along Bradley Creek is popular with horseback riders. In fact, the National Park Service concessionaire offers a trail ride from Smokemont Stables to the waterfall. I bet it’s a wonderful, scenic ride! The trail is also shared with the Benton MacKaye Trail – a 300 mile trail across the southern Appalachians. Almost 100 miles of the Benton MacKaye Trail passes through the Smokies. MacKaye, a forester from Massachusetts, is noteworthy because he came up with the idea for the Appalachian Trail… what a legacy to leave behind!
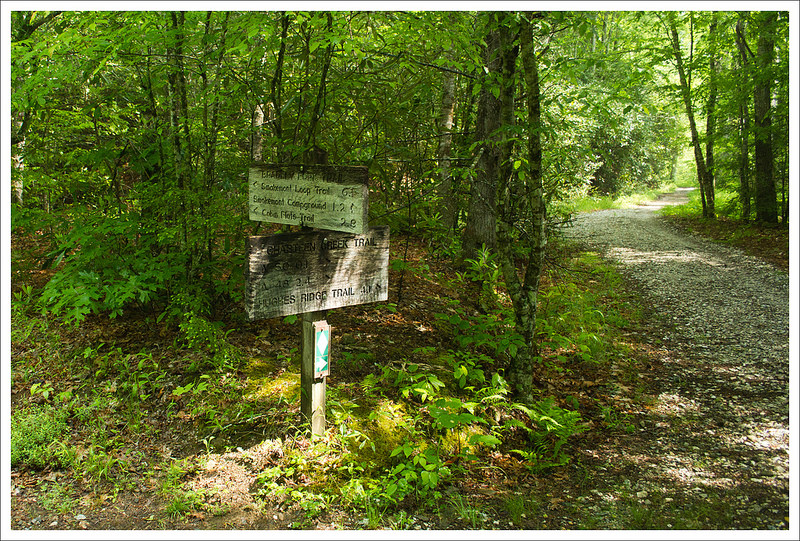
At 1.2 miles, the Bradley Fork Trail intersects with the Chasteen Creek Trail. At this junction, take a right and follow the trail toward Chasteen Creek. Almost immediately, on the right, you’ll pass Backcountry Campsite 50. It’s a pretty streamside spot with a fire ring and bear cables. The campsite can only be used if you have secured a paid permit. Evidently, permits in the Smokies can be hard to come by, so plan early!
After the campsite, walk another half mile along the Chasteen Creek Trail. Shortly after crossing a footbridge, you’ll come to a split in the trail. On the left side of the split, you should be able to see a hitching rail and mounting step for horseback riders – go in this direction.
From the clearing for horses, you’ll see a narrow footpath following the creek. In just about a tenth of a mile, you’ll come out at Chasteen Creek Cascade. It’s about a 25 foot waterfall. It’s not the kind of waterfall that plunges dramatically; rather it slides over the rocks into a pretty pool below. We had the waterfall all to ourselves and enjoyed the spot for about twenty minutes. Afterwards, we headed back the way we came and back into Bryson City for lunch at the Bar-B-Que Wagon. They have great Carolina-style barbecue with all the expected sides.
Christine walks along the Chasteen Creek Trail. Below: The split in the trail that leads to the falls; Hitching post and mounting block; Adam at the falls.
Adam Says…
When we talk to people about the Smokies, they seem to be surprised that some of the best highlights of the park are the waterfalls. In talking with the locals of the area, April and May tend to be very rainy seasons for the area. Storms move in and out quickly through the park, but they typically expect a little rain most days during this season. Rainy days are prime days for waterfall viewing and photography.
We started off our hike from the Smokemont Campground in the D section of the campground. In the winter, this may be blocked off and you may have to park and leave from the C section. The trailhead starts from a large gate near the designated parking area at the end of the campground. We doused ourselves with bug spray and moved on.
We saw a swarm of butterflies on the trail. Below: After lunch, we visited impressive Mingo Falls. It’s probably the tallest waterfall in the area; Nantahala Brewing Company and Anthony’s Pizza were the perfect way to end our time in Bryson City.
The trail was gradually uphill, but it mostly felt flat. In fact, we were surprised to see the elevation gain on the hike afterwards. The trail started off on a gravel road alongside Bradley Fork. The forest was lush with green from all of the rain, so it was a pleasant stroll through the woods. Because of the width of the trail, Christine and I could also walk side-by-side along the trail. At 1.1 miles, we crossed a large footbridge and at 1.2 miles we came to the intersection with the Chasteen Creek Trail. We took a right there and continued to walk on a wider trail, passing Campsite 50 at 1.3 miles. At 1.9 miles, we reached the side trail to the left with the horse hitching area. It was a short walk to get to the waterfall from there. We headed back the way we came for an easy, scenic hike.
If you wanted to make this a longer hike, after you visit the waterfall, return back the way you came. You could take a right at the junction with the Bradley Fork trail and connect to the Smokemont Loop Trail. This would make the grand total of distance about 8 miles, but would loop back to a different section of the campground.
You may see people fishing for rainbow trout along the Bradley Fork or Chasteen Creek. I can imagine many campers at the Smokemont Campground spend some time fishing in hopes of cooking some fish from the water.
After the hike, we had lunch then headed into Cherokee to check out the Qualla Arts & Crafts Mutual. Their traditional work is fascinating and beautiful. We always enjoy visiting. After that, we stayed on the reservation and visited Mingo Falls, one of the tallest and most impressive waterfalls in the Appalachians. It was a short walk, but there were many stairs!
Our wrap up for the day was a visit to Nantahala Brewery followed by pizza from Anthony’s. We consider those two stops to be ‘must-do’ in Bryson City! On to Gatlinburg tomorrow!
Difficulty – 1.5. This is an easy walk along a very gently graded trail.
Trail Conditions – 4.5. The trail is mostly wide and road-like. It’s only narrow and muddy at the base of the falls.
Views – 0. None.
Streams/Waterfalls – 4.5. Bradley Fork, Chasteen Creek and the falls are all beautiful!
Wildlife – 3. We didn’t see anything, but the Smokies have wildlife everywhere!
Ease to Navigate – 3.5. The trail is easy to follow if you read the junction markers. The shared/intersecting trails might be confusing if you’re not paying attention.
Solitude – 3. Chasteen Creek Falls is not one of the park’s more popular trails. You may see horses and occasional hikers from the campground, but generally this trail has less foot traffic than many others.
Directions to trailhead: From Newfound Gap Road (Route 441), follow signs to Smokemont Campground. The campground is located 3.5 miles north of the Oconaluftee Visitor Center and 26 miles south of the Sugarlands Visitor Center. Park in the hiker parking area at the end of section D of the campground.
This easy 4.5 mile out-and-back along the Appalachian Trail offers great views in many places! It would be a perfect family hike or a leg-stretcher for folks riding along Skyline Drive.
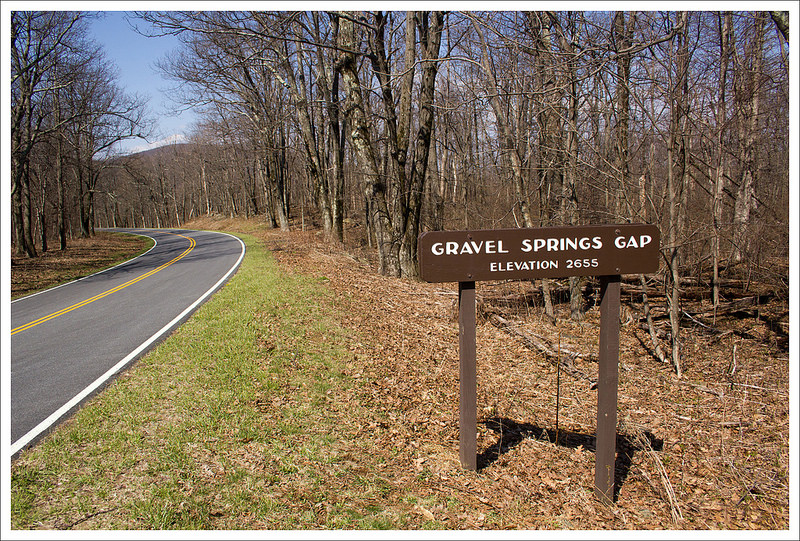
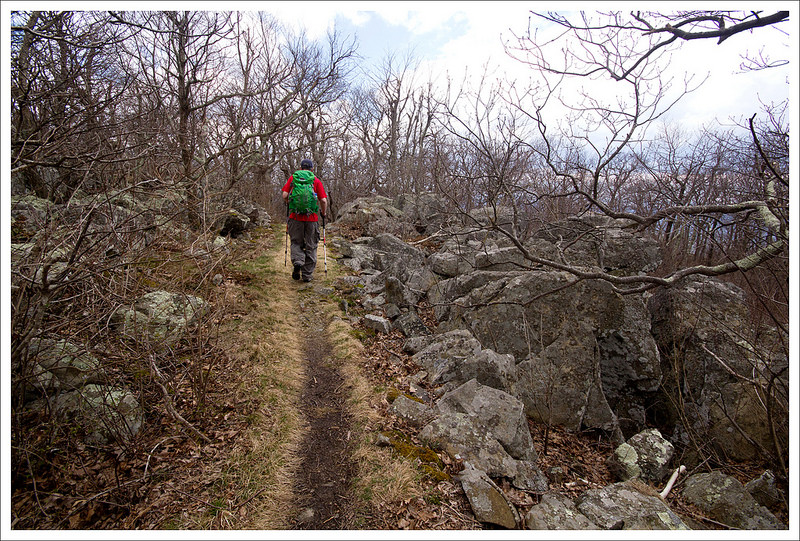
Adam takes in the view from North Marshall. Below: This hike starts from Gravel Springs Gap; Christine on the AT; Adam approaching South Marshall’s summit.
Adam Says…
This is one of those hikes where you get a lot of payoff for minimal effort. There are some great views from both South Marshall and North Marshall along the way, making this an excellent family hike. Technically, both peaks are part of the larger Mount Marshall, though they feel like two distinct mountains. We had covered the Marshalls on a longer section hike along the Appalachian Trail, but we felt this would be a great out-and-back that most people could do.
We started our hike from the Gravel Springs Gap parking lot. We crossed the road and picked up the white-blazed Appalachian Trail heading north. The trail goes through a wooded area and has a gradual ascent. After .9 miles, you reach your first grand set of views on your climb up South Marshall. Continuing a little further, there are a couple of other viewpoints along the ridge. At 1.1 miles, you reach the highest point of the trail over South Marshall and begin your descent. At 1.6 miles, you cross Skyline Drive to continue on the Appalachian Trail and begin your ascent up North Marshall.
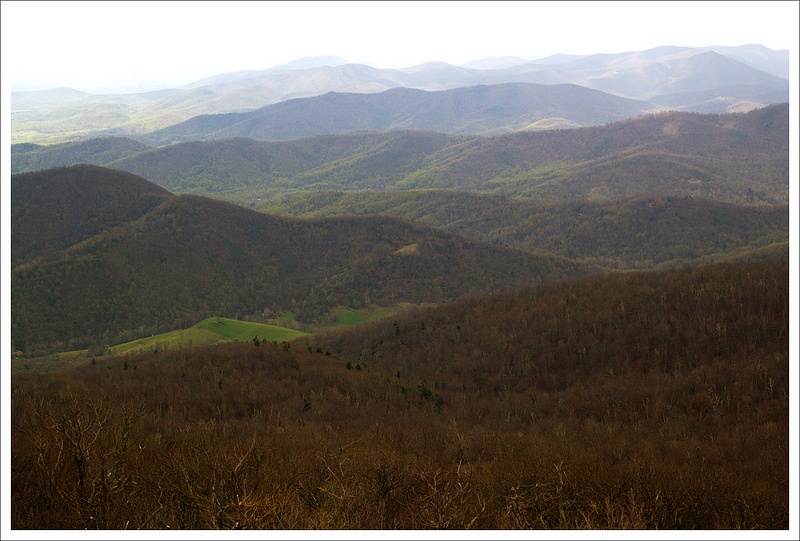
These views from South Marshall are the first on the trail. Below: Great view from South Marshall; Christine enjoys the rocky summit; There is another viewpoint along South Marshall’s ridge.
The trail up North Marshall is a steeper section than what you experienced at South Marshall. Around 1.7 miles, you reach a very steep, rocky section, resembling a stony staircase up the side of a hill. At the top of this staircase, you see a large, monolithic rock. On our climb towards this rock, we heard a loud crow that was cawing at us madly. The toughest part of the climb was now over. I noticed a small, unmarked path around this monolithic rock and decided to explore. I was pleased to find a few rock outcroppings on this path that led to more spectacular views and you can even see Skyline Drive snake through the mountains. The crow continued to announce his displeasure and I’m guessing there was a nest we were nearing. As I made my way around one of the rock outcroppings, I stuck my hand in a big pile of bird droppings – I’m guessing the crow got his last laugh. After cleaning up, we rejoined the trail. Around 2.2 miles, we reached the last set of views from North Marshall. We continued just a little further to reach the summit, marked only by a small metal survey marking post in the ground, to bag a second peak on the trail. We made our return trip from this point, reaching our car at 4.5 miles.
After crossing Skyline Drive, the climb of North Marshall begins.
The North and South Marshall Mountains were once known as Bluff Mountain, but were renamed in honor of John Marshall, who served as the fourth Chief Justice of the United States, serving for 35 years (the longest-serving justice in our history). He was appointed by President John Adams and previously served as Secretary of State and leader of the Federalist Party.
Christine Says…
We’ve been spending a lot more time hiking than writing lately! That’s a great thing (for us), but it’s leaving us quite a backlog of posts to pull together. This hike of The Marshalls is a route I wanted to cover for families and other people looking for shorter/easier hikes. I feel like most of the moderate hikes in Shenandoah are already heavily traveled and well-known. The Marshalls offer spectacular views, but I doubt many casual hikers even know they’re there!
We had great weather at the beginning of our hike. It was sunny and breezy – perfect for hiking. It was still early enough in the season that trees in the mountains were bare and only a few wildflowers were starting to bloom. Whenever we came to open vistas, we could see the vivid green color of spring trees starting to creep up the mountainsides from the lower elevations in the valley. It was beautiful!
More great views are to be found along an unmarked path that departs the Appalachian Trail. Below: The views from the unmarked path were fantastic; Adam making his way down from his perch.
When we hiked this area last time – on a backpacking tip in 2012, we skipped climbing the unmarked trail to the cliff-sides on North Marshall. I’m glad we stopped on this trip, because the rocks were fun to climb and provided some especially nice off-trail views.
After the cliff views, we reached the trailside view from North Marshall pretty quickly. I couldn’t remember if there were any additional views along the ridge, so we walked along a couple more tenths of a mile until we found the survey marker. After the survey marker, the trail descends into the deeper woods.
The view from North Marshall with the approaching front. Below: Walking the North Marshall ridge; South Marshall’s view was a lot different when we passed by on the return leg of our trip!
On our return hike, the weather shifted quickly. What had been a pleasant, sunny day quickly turned cloudy and windy as a front approached. We could see shadowy columns of rain off in the distance and the clouds looked dark and angry. We hiked faster than usual back to the car. We made it back to the car before any rain fell.
We decided to drive home through Luray so we could grab something quick for lunch. In this case – fried chicken! It’s not something I eat very often, but I always feel that hiking earns me an occasional indulgence. 🙂
Trail Notes
Distance – 4.5 miles (Check out the stats from Map My Hike)*
Elevation Change – About 900 ft.
Difficulty – 2. There is only one steeper section on the North Marshall Mountain, but it a short stretch.
Trail Conditions – 4. The trail was in excellent shape.
Views – 5. There are so many spots to get views on this hike.
Streams/Waterfalls – 0. Non-existent.
Wildlife – 2. You may see deer on this hike and a few soaring birds.
Ease to Navigate – 4. Just follow the white-blazed AT. Be careful and keep your bearings if you venture off the trail to get the views near the monolithic rock climbing up North Marshall.
Solitude – 3. Since this trail is in the northern section, expect to see more people that are visiting from Northern Virginia/DC. You should expect to see others near some of the view outcroppings.
Directions to trailhead: In the northern district of Shenandoah National Park. Park at Mile Marker 17.6 at the Gravel Springs Gap parking lot. Cross Skyline Drive to pick up the Appalachian Trail, heading north-bound.
* MapMyHike is not necessarily accurate, as the GPS signal fades in and out – but it still provides some fun and interesting information.
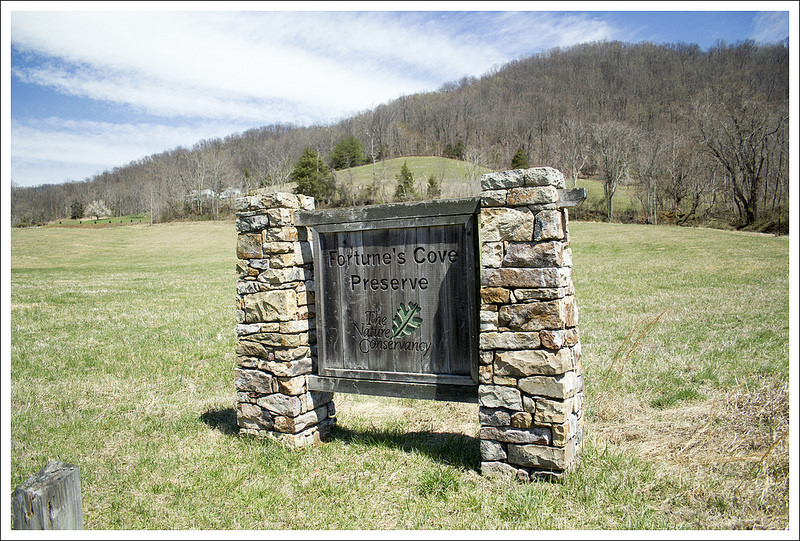
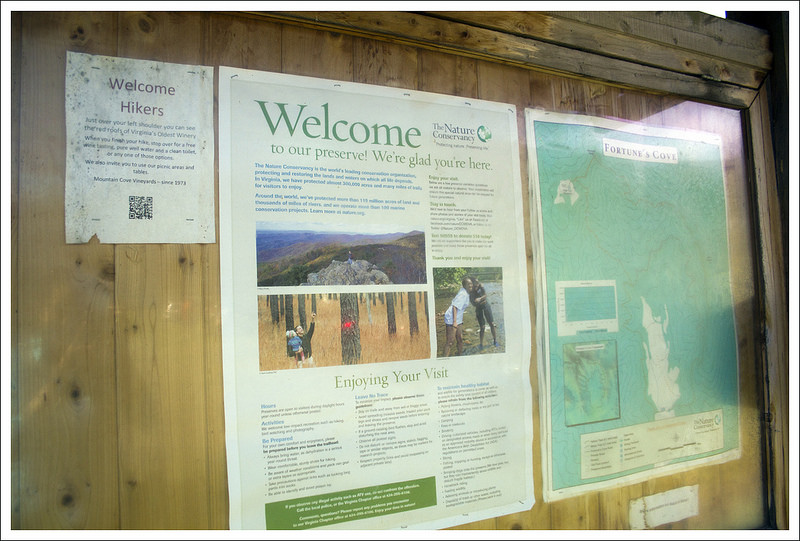
Views from the Fortune’s Cove trail. Below: The preserve at Fortune’s Cove is operated by the Nature Conservancy; The trails are all well-marked and carry the Conservancy logo; Informational panel at the trailhead.
Christine Says…
Wow – the first weekend of April 2014 was GORGEOUS! I think we (and every other hiker in Virginia) decided to hit the trails. We tossed around the idea of going backpacking, but we just didn’t get our act together. We perused our hiking book collection, a bunch of maps and several websites. We settled on a hike we found on Hiking Upward – Fortune’s Cove. It wasn’t a long drive from our house and looked like a good choice for early-season hiking.
We got to the trailhead parking lot right around 10:00 and found it jam-packed. There was one group of about 15 hikers getting ready to depart. I feel a little bad saying this, but I’m always a little deflated when I get someplace and find that we’re going to have lots of company on our hike. We set out immediately, in hopes of putting a little distance between ourselves and the large group. We hike quite a bit faster than most social groups, but the self-inflicted pressure to keep moving made me feel like I couldn’t pause to take photos. I took most of my pictures while still walking, so they might be a little blurry or random.
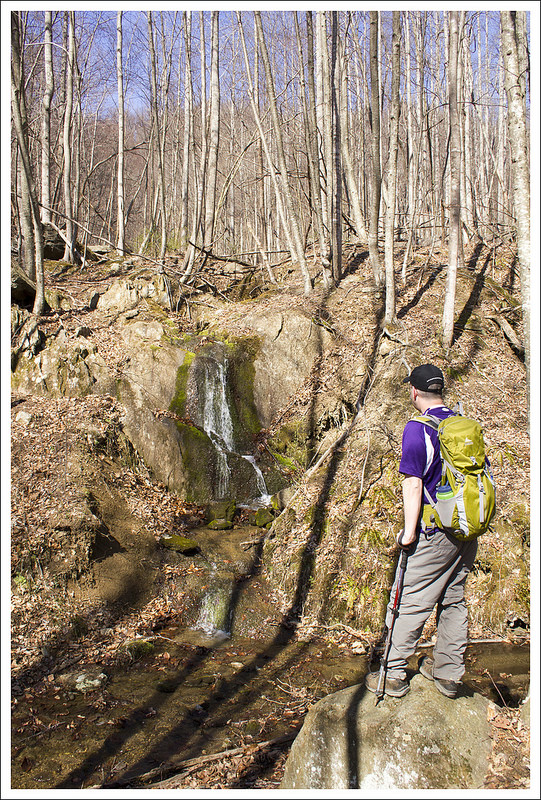
We passed this small, but pretty, waterfall early in the hike.
We hiked the trail in the opposite direction of Hiking Upward. In retrospect, I think I’d go the way their directions suggested – the ascent is longer, but more gradual. We started our hike at the end of the parking lot with the informational bulletin board. The trail actually starts from the main road, right before the turn-off to the parking lot. Initially, the hike rambled along over rolling hills, climbing gradually uphill above the cove. After crossing a small wooden footbridge over a creek, we were treated to a small but pretty waterfall. After the waterfall the hike followed a series of switchbacks uphill. We eventually crossed a fire road and continued a short flat section of trail. Soon, we reached a junction. At this point, you can take the shorter, easier Lower Loop around the cove, or follow the challenging, longer Upper Loop. We wanted views, so we went with the Upper Loop. From the junction to the cell towers atop the high knob, the climbing was pretty brutal – I’m not going to lie. Sometimes there were switchbacks to ease the ascent, but other times the trail went straight up the mountainside. We were still hiking hard to stay ahead of the group, so I was very relieved when the towers came into view through the trees. The climb was almost DONE!
Near the towers, the trail comes to another junction. One spur leads to the tower and several decent views (although – the presence of towers really does detract from the beauty of the views). The other direction continues to follow the Upper Loop trail around the perimeter of the cove. The remainder of the loop is rolling hills and ridge walking. There are several big descents and a couple short, steep ascents, but all the tough uphill is behind you at this point. We chose to have lunch at the first little rocky outcropping with views. It was nice to see Wintergreen and The Priest through a few (still bare) trees. There was a ton of mountain laurel on the back half of this hike. It should be beautiful in late May – early June!
Adam traverses steps on one of the steeper uphill sections. Below: the trail junction of the Upper and Lower Loop Trails; Adam approaches the towers at the high point of the hike; The views from the tower area are decent, but a little obstructed by trees.
Some of the downhill on the back loop was very steep and covered with deep, slick, dry leaves. We were both really thankful to have trekking poles. We continued to enjoy occasional views, mostly looking into the cove, as the hike progressed. At one point, we were hiking along in companionable silence, when suddenly a large German Shepherd bounded in our direction, barking loudly – fortunately he was friendly. It turned out that a couple of hikers had two unleashed dogs on the trail. We love dogs, but they’re not allowed in Fortune’s Cove. The restriction is clearly marked at trail entries and the rules are posted online, so please leave your dog home!
Eventually the Upper Loop and Lower Loop met back up at the final trail junction of the hike. The last bit of the hike was fairly consistent, knee-grinding downhill. Adam asked me to hike in front of him, so he could ‘grimace in pain’ in the rear. I was hiking along, when out of the blue, Adam bellowed and shouted. At first I thought he hurt himself, but it turned out that a gigantic black snake had just slithered across his feet. The thing was easily five feet long. I love snakes – Adam is less fond.
Through the trees, we could see our car in the parking lot drawing closer and closer. We walked the last little bit of trail, enjoying the budding and blossoming trees at the lower elevations. We saw cherry, redbud and pear all starting to flower. It was a great hike for a pretty spring day.
There were nice views through the trees on the descent. Below: Our lunch spot; Abundant mountain laurel, Nice mountain views.
Adam Says…
Fortune’s Cove Preserve consists of 755 acres that was donated by Jane Heyward to The Nature Conservancy. The staff and volunteers help maintain this land and hiking trails.
As Christine mentioned, when we arrived at Fortune’s Cove, there were a ton of cars in the parking lot and a bunch of hikers ready to hit the trail. I told Christine “Grab your stuff quickly and let’s get going.” We didn’t want to experience this hike with a larger group and having to play leapfrog up the trail as we stop to take pictures. I know that some people like to meet new people and enjoy the outdoors as a group, but we tend to hike with just the two of us or just another couple of people. When we took our first pause for photos, we could see the group approaching, so we rushed ahead. In fact, I would say we ascended the trail much faster than normal so we could stop to take photos at all. Since this was one of our first hike with real elevation change in a while, we probably pushed ourselves harder than we wanted.
From the ridge, you could see the winding road through the cove. Below: More views on the way down; Blooming bloodroot; Redbuds are started to bloom, too!
From the parking lot and behind the large trail map of the preserve, we walked up the road about 20 yards and then saw the trail sign on the right of the road that marked the start of the trail. The yellow-blazed trail starts off on a small ascent through a serene, wooded area. You can see glimpses of the farmland to the right of the trail as you skirt around the property. Eventually you will cross a couple of bridges over some creek beds and see a small, yet picturesque waterfall along the lefthand side of the trail around .75 miles. Continuing from this point, the trail starts a more steady ascent. At 1.1 miles, you reach the intersection with the white-blazed lower loop trail. We took the upper loop trail, which had a warning sign for the steepness of the trail. This truly was no joke as the trail had us slogging up the mountainside. At 2.25 miles, we finally reached the top summit. There was a small trail (only a tenth of a mile) to the left which led to the top of High Top Mountain, which had a large cell tower at the top. The view was obstructed around us and being near a large tower didn’t make us feel like we were getting away to nature. We rejoined the upper loop trail and continued on our hike. We were now doing ridge-walking, so the toughest bit of climbing was behind us. We took a brief rest to eat our packed lunch while seeing the obstructed views of The Priest and Wintergreen across the valley in front of us.
We pressed along the ridge hike, which quickly began to lead back down the mountain. We were pleased to see there were several spots along the trail that led to some outcroppings of rocks with open views. The views below sum up what I picture when I think of Central Virginia – rolling mountains and farm houses. We continued down the steep trail, which had my knees feeling some pain. At 4.4 miles, you reach another intersection with the white-blazed lower loop trail. We continued down the mountain and made our way back to our car at 5.1 miles, passing through two blue posts before reaching the road and parking lot.
The cove from the parking lot at the bottom. Below: Pear trees blooming; Blue Mountain Barrel House is just a few miles down Rt. 29; Beers!
After the hike, we decided we had earned a trip to the nearby Blue Mountain Barrel House to sample some beer and get a snack from the food truck located outside. We enjoyed sitting outside with a few beers and were able to look out into the mountains on a gorgeous spring day. If wine is more of your thing, you can get samples from March-November on Wednesday-Sunday afternoons at Mountain Cove Vineyards, Virginia’s oldest vineyard.
Elevation Change – 1700 ft. (the big climb is about 1450, but once you add in all the little ups and downs, it’s closer to 1700)
Difficulty – 4. There is some pretty serious climbing on this hike. It surprised us how challenging it was!
Trail Conditions – 4. The trail was in great shape in most places. There were a couple mucky spots near drainage, and dry, fallen leaves made some of the descents slippery.
Views – 3. From the cell towers atop the High Knob to the junction with the Lower Loop, there are nice views in many spots along the trail. Even though there are many views, we’ve marked this down to a 3 because most of the viewpoints are partially obstructed.
Streams/Waterfalls – 2. There is a small waterfall that probably only runs part of the year on the early part of this hike.
Wildlife – 2. We didn’t see anything but a few birds and squirrels. DOGS ARE NOT ALLOWED ON THIS PRESERVE!
Ease to Navigate – 5. The trails on this preserve are more abundantly marked/blazed than almost any other place we’ve been.
Solitude –1. We had heard this place wasn’t well known or popular, but on the day we went, we encountered a large group people hiking together (shout out to the PATC – Charlottesville Chapter) , plus about a dozen groups of 2-4 people. It was a very busy day on the trail. We’re not sure if this is the norm, but we’d give this hike low marks for solitude.
Directions to trailhead: From Charlottesville, head south on US-29 for 28 miles. Take a right on State Route 718. Follow this for 1.6 miles and take a right on to State Route 651. Follow this for 1.6 miles, passing Mountain Cove Vineyards on the right and then reaching the small parking lot. The way we approached the route, was walk on the road past the large trail map board about 20 yards. You’ll see the trail post to mark the start of the trail on the right side of the road.
* MapMyHike is not necessarily accurate, as the GPS signal fades in and out – but it still provides some fun and interesting information.
This 6-mile hike is a bit challenging – tough climbing and a little hard to follow – but payoffs at the end make the effort well worth your while. The views are spectacular – some of the best in the mid-Atlantic!
Amazing views from Chimney Top! Below: Adam checks out the trail information board; The spine of the mountain offers many magnificent views, if you’re willing to do a little climbing.
Adam Says…
Our first experience hiking on North Fork Mountain was on my birthday in 2012 (birthday hikes are a tradition for us!) We decided tackle a little piece of the the trail from the base of the mountain to the well-known outcropping of Chimney Top. This August day ended up being one of the hottest days of the year. While hiking up the backside of this mountain, there was absolutely no breeze so the air was stifling. We were quickly questioning why we chose this one, but we had to press on for tradition’s sake. We reached the ridgeline and walked along for a while. We eventually came across a few rocks that seemed to denote a path up. We semi-bushwhacked up this trail and came to a rock column and climbed up to the top to enjoy the views. We thought this may have been Chimney Top. When we got back home and did more research, we realized we hadn’t found the true Chimney Top, so we vowed to return – and we did… on our sixteenth wedding anniversary in fall 2013.
The first outcropping offers stunning views. Below: The view in the other direction from the first outcropping,
It was a perfect October day with the leaves just a shade past peak. One of the difficulties about this trail is there are no solid online resources for maps and even using our mapping software (alltrails.com), the full trail doesn’t appear on any kind of topo maps. We used our MapMyHike app on our phones to try and get accurate readings and I traced that outline on a topo map through alltrails.com to try and get a good resource if you want to attempt this hike.
We arrived at the small parking area and made our way up the trail. The trail meanders for the first two miles through the woods with some slow switchbacks to help you gain elevation. The thick canopy is high above you, but you will notice you will rarely feel much wind on this side of the mountain. Around 1.5 miles, you make a steeper ascent up the mountain and reach the top of the ridgeline around 2.0 miles. Once you reach the top, you can see down below to the North Fork of the South Branch of the Potomac River and WV-28/55 on the other side. Both times we have been, you can see dots of people fishing in the river. Across the way, you will see ridges of mountains with Canaan Valley hidden behind them. Looking along the ridgeline, you’ll see sheer cliffs of rock, making this quite a remarkable scene. From this ridgeline, we continued along the path. The trail stays on the ridgeline allowing for several opportunities to check out the views for the next .5 mile. Around 2.5 miles, the trail has been rerouted away from the ridgeline and you descend the mountain. The signs say that it was to protect the nesting/hatching peregrine falcons, who have nested on the cliff faces. The signs are at least five years old, and October is not nesting season, so we’re not sure if the signs are still valid.
Fall color was pretty nice! Below: The trail is often rocky and rough; Adam walks along the increasingly hidden trail.
The trail continues through this terrain for another .5 miles and then starts to gain elevation again. At 3.0 miles, we came to a well-established campsite and could see the ridgeline just above it. I walked over to the ridge, but the views were fairly obstructed. I then saw a smaller campsite to the right of the trail. Going to that campsite, I walked a short distance behind it on a small trail towards the ridgeline to discover the elusive Chimney Top. The photos we will place should lead you to the proper campsite that leads to the correct trail. We ate some lunch from the top of the cliffs near Chimney Top Exploring a little around this area, you are able to see a most-impressive cliff face (where I’m assuming is the section protected for peregrine falcons).
After we ate our lunches and took in the scenery, I decided I wanted to try to climb up Chimney Top. I had to find some good footholds, but I was able to get up without too much trouble, but please be careful if you try to do the same. There are many sheer drops from here, so I wouldn’t advise any unsupervised children to be given free reign on this hike. Head back the way you came to make this a 6 mile out-and-back.
I do believe that the scenery from this spot is one of the most dramatic and beautiful views you will get in Virginia and West Virginia. The trail was called the best trail in West Virginia by Outside magazine in 1996 and I can see why. Some people like to backpack the entire 34 miles of North Fork Mountain. Since you are at the top of the ridgeline for this hike, there isn’t a reliable water source to be found so you would need to pack in a lot of water for this backpacking trip. I would strongly recommend trying this hike on a beautiful spring or fall day.
Christine Says…
I’ll admit – I’m the reason it’s taken over three months to get this hike posted. A foot injury, a lingering cold, and the unusually frigid temperatures have sent me into a state of lassitude. I haven’t felt particularly motivated to hike or write. I’m sure I’ll snap out of it completely sooner or later. But today, I decided to give myself a little push and get this post live!
Fall foliage and amazing views. Below: Adam checks out one of the campsites; A nice view of the cliff face along the mountainside.
We were really excited to try this hike again. Our trip on Adam’s birthday had been rewarding even though we missed out on the main view. We started the morning with a big breakfast at Bright Morning Inn (Pumpkin Pancakes with Walnuts and Maple Butter Sauce!). It’s one of our favorite places to eat in Canaan Valley/Davis – everything is always excellent there!
After parking, we started climbing the mountain, following the familiar ground we had covered the previous summer. We spent a little time exploring the first of several impressive rock outcroppings on this hike. While there, we took some time to chat with the only other two people we saw on the trail – a couple from Pennsylvania. They were recent empty-nesters and were returning to backpacking for the first time in 20+ years. They still had all their gear from the late 80’s/early 90’s – external frame packs, old fashioned sleeping pads, and I think I may have seen something cast iron! It looked like a heavy load!
After leaving the first view, we pushed along the trail, passing the spur trail to our lunch spot from the 2012 attempt. This spot is marked by a rock cairn and the worn footpath is well established.
I thought this rock formation near Chimney Top looked like a tortoise. Below: More views; Adam checking out another rock outcropping along the way.
The route follows a series of rolling hills after passing the spur trail. I thought the trail was pretty hard to follow along this section. It’s a reroute, and vestiges of the old trail are still apparent. It may have been because the trail was under so many leaves, but I still think the reroute isn’t fully established. As we continued along, I asked Adam how much further we should go. According to old information, we had hiked far enough to be well past Chimney Top. As it turns out, the reroute is just longer and follows a wide arc around the preserved cliff face.
Eventually, we reached a spot with numerous campsites. That’s usually a good indicator that you’re near something desirable to hikers/campers. In this case, spotting the campsites let us find yet another unmarked trail that led out to the spectacular view from Chimney Top.
We spent quite a while up there, enjoying the fall foliage and awesome views, eating our lunch and taking photos. The hike back went very quickly… mostly downhill and along a route that felt a little more familiar.
Difficulty – 3.5. The trail has some decent climbing on it. Both times we’ve hiked it, there wasn’t any wind until the top, so the temperatures can be stifling.
Trail Conditions – 1.5. Trails are largely unmarked with reroutes not always clear. Finding the actual viewpoint of Chimney Top can be a little challenging. Watch out for loose rock on the ridgelines in case you go to check out any views.
Views – 5. Absolutely stunning views and great ridgeline walking.
Streams/Waterfalls – 1. From way above, you’ll see North Fork Gap. There isn’t a water source on this trail.
Wildlife – 1. We barely saw squirrels, but you may have some views of preying birds. Watch out for timber rattlesnakes on the rocky ridgeline.
Ease to Navigate – 2.5. There is basically one trail to follow here, but it can be tricky finding Chimney Top.
Solitude – 4.5. Typically, you’ll only see a few people on this trail. Most will go to the first overlook and stop.
Directions to trailhead: From Seneca Rocks, WV head northeast on WV-28N/WV-55E for 15.2 miles. Take a right on to County Route 28/11/Smoke Hole Road. You immediately cross a bridge where you may see people fishing in the stream. In about .4 miles, there is a small parking lot on the right-hand side. You’ll see the brown board which denotes the start of the trailhead.
* MapMyHike is not necessarily accurate, as the GPS signal fades in and out – but it still provides some fun and interesting information.