This 9.5 mile out-and-back is a relatively easy backpacking route with countless stream crossings. The full photo album is embedded at the bottom of this post!
Crossing Ramsey’s Draft on Day One
My friend Kris, her silver lab, Ridgley, and I wanted an easy overnight backpacking trip that didn’t require a long drive for a beautiful April weekend. We settled on a hike in Ramsey’s Draft Wilderness, following the Ramsey’s Draft and Jerry’s Run trails to the ruins of the old Sexton Cabin.
This route is well known for its flowing streams, abundant wildflowers, and dying hemlocks. When we visited, recent rains had the streams running high, and the countless water crossings were full. We came prepared to get wet, each of us carrying a pair of Crocs for wading.
Fallen hemlocks
We parked at the Mountain House Picnic Area and hiked about a quarter mile to the official start of the Ramsey’s Draft Trail. At the beginning of the hike, you’ll see options for both the Bridge Hollow Trail and the Road Hollow Trail, but continue straight on Ramsey’s Draft. Follow it for about 2.5 miles until you reach the junction with the Jerry’s Run Trail.
Not long after passing the wilderness boundary sign (and stopping for the obligatory photo), the trail settled alongside a beautiful, wide stream. We passed an old Forest Service shed and soon reached some impressive rock ledges at the first stream crossing. From there, the crossings just kept coming. We encountered at least four more major crossings, along with countless smaller ones.
Red trillium
A little over 2.75 miles into the hike, you’ll reach the junction with the Jerry’s Run Trail on the left. From there, the trail climbs gently uphill as it follows the stream, with several more small crossings along the way. After another couple of miles, you’ll arrive at the large grassy clearing where the Sexton Cabin once stood. That’s where we made camp for the night.
It turned out to be an ideal campsite. There was plenty of room for multiple groups to spread out without feeling crowded, a small stream with more than enough water for filtering and cooking, soft, level ground for tents, and several well-established fire rings.
Old Sexton Cabin site
Once camp was set up, we collected firewood, relaxed in our camp chairs, and spent an alarming amount of time pulling ticks off Ridgley. (Yikes!) He had spent much of the hike happily bounding through the undergrowth off leash, and the warm, wet April weather had the ticks out in force. He made for a very appealing meal to those nasty ticks. Thankfully, I didn’t find a single tick on myself.
That evening we built a campfire, cooked dinner, and enjoyed several hours of good conversation before turning in for the night.
Our campsite and campfire
The next morning we packed up and retraced our steps. Without the pressure of reaching camp before others claimed the best campsites, we took more time to admire the wildflowers and the enormous fallen hemlocks. It was heartbreaking to see so many magnificent trees lost to the invasive hemlock woolly adelgid.
We also abandoned any attempt to keep our feet dry. Rather than changing into Crocs at every crossing, we simply walked straight through the streams and embraced the feeling of squishy hiking shoes.
Obligatory photo with the wilderness area sign
We reached the car just as clouds began rolling in—perfect timing. It was exactly the kind of backpacking trip we’d hoped for: beautiful, relaxing, and uncomplicated. I’d highly recommend this route to anyone looking for an easy overnight with lots of water crossings. If you’re hoping for something longer, there are also plenty of options in Ramsey’s Draft to turn this into a loop or extend the adventure.
Trail Notes
Distance – 9.5 miles (out-and-back, with 4.75 miles each day)
Elevation Change – 946 ft. (900′ on Day 1, 46′ on Day 2)
Difficulty – 2. This is an easy hike, but you should be confident with water crossings
Trail Conditions – 3. Some deadfall and potentially tricky water crossings
This 56-mile backpacking trip traverses some of Virginia’s very best Appalachian Trail scenery! There are panoramic vistas, windswept balds, meadows full of wildflowers, pretty streams, and even wild ponies. We were lucky enough to have six days of nearly perfect weather and not a single drop of rain!
We hiked across an open pasture full of cattle. Below: Mt. Rogers Outfitters provided safe parking and shuttle service for our trip; Crossing the footbridge over the South Fork of the Holston River; Signing the log book as we begin our hike.
Day One – South Fork Holston River to Hurricane Creek Campground (9 miles) – Christine
Bright and early on Monday, May 20, we piled into our car and made the three and a half hour trip down to Damascus, Virginia. Town was busy with many thru-hikers still lingering after Trail Days (the huge, annual hiker festival and party hosted by the town.) Knowing we had six days of oatmeal and trail mix ahead of us, we enjoyed a fresh lunch at Mojo’s Trailside Cafe. Their food is excellent and the place has such a cool hiker vibe. After eating, we drove over to Mt. Rogers Outfitters to meet our ride. Our shuttle driver turned out to be a local woodworking artist named Matthew Newman (he has a gallery in town.) He was right on time and the trip to our start point flew by as he shared stories about the area’s history and geology. The Appalachian Trail crossing of the South Fork of the Holston River is in the middle of nowhere – just a tiny one-car pullout along a lonesome back road. We crawled out of his van, made sure we had all our stuff, and hit the trail. It was already 1:30 and we had nine miles to go before we reached our first camp stop.
We signed the wilderness-area logbook and crossed the wooden footbridge over the Holston River. We immediately started a gentle climb uphill through the woods. Eventually we reached a gravel road that paralleled a farm field. We climbed over a stile into a livestock pasture. The cows were completely indifferent to us, grazing and swinging their tails to swat flies away. The trail climbed steadily across the open terrain. We had some nice views of mountains behind us, but the sun felt hot and strong. We were glad to get to the stile on the south end of the pasture and duck back into the shade. After leaving the pasture, we had almost four miles of non-stop climbing. It wasn’t terrible uphill, but it was steady. Kris and I took a detour and visited Trimpi Shelter about a mile into the climb. It was a cute shelter with a center aisle, indoor stone fireplace, and abundant flat space for tenting around the shelter. Even though it was only a bit after 2:00, there were already a few hikers stopped for the day.
Comer Creek Falls was small but pretty. Below: Blooming Catawba Rhododendron; Abundant ferns along the trail; The AT is like a ribbon through the woods.
We climbed for another three miles. At the end of the ascent, we had a gorgeous, flat ridgewalk through lush fern. We trekked along until we reached the junction with a blue-blazed side trail that leads down to the forest service campground at Raccoon Branch. We stopped at the junction for a snack and gave Kris a chance to check on her feet. She was feeling a few hot spots in her new hiking boots and was dismayed to find several big blisters already forming just several miles into our hike! From there, we had a long meandering downhill to Dickey Gap. We passed lots of blooming flame azaleas and Catawba rhododendrons – and even a few early mountain laurels. We got to Dickey Gap a bit after 4:30. We chatted with a couple thru-hikers sitting in the shade under kiosk at the road crossing. They asked about the terrain headed north and indicated that they were going to try and make it to Marion (which was still 14 miles away!) You really have to admire thru-hikers’ ability to crush big miles like that.
The trail sign on the other side of the road said we had about 2.5 miles to go to reach our first campsite of the trip. About a mile later, we found ourselves at the base of Comer Creek Falls. The bridge across the creek was partially sealed off with yellow hazard tape. A sign indicated that the bridge was closed and hikers should backtrack and follow the detour indicated on the map. Well… we were all tired, Kris’s blisters were excruciating, and Adam was having back spasms. We just wanted to get to camp. We made a joint judgment that the bridge looked sturdy enough and decided to cross it one by one. Clearly, since I’m now writing this post — we lived! It really wasn’t all that dangerous. And, I guess sometimes you have to break the rules and live on the edge.
It’s nice to have a private campsite with your own picnic table. Then you’re free to spill your food and gear out everywhere and take up the whole table. When you’re at a shelter with others, you have to be nice and share space. Below: The bath-house at Hurricane Creek; One of many beautiful campsites at the campground.
A mile later, we found the spur trail down to Hurricane Creek Campground – one of the USFS campgrounds in the area. We had already paid for a site ahead of time, but found the entire campground pretty much empty. We easily could have claimed any of the walk-in, first-come-first-served sites. I chatted briefly with the campground host. He handed me a pamphlet and told me a bear had been opening car doors and stealing food. He recommended we store our food in the locked trunk of our vehicle. Hmmm… I guess he didn’t really notice that we all showed up on foot!
One of the perks of staying at the campground instead of an AT shelter was the fact that the campground had hot showers. I don’t need a shower every day on the trail, but any time I can get one, it’s a nice morale boost. It feels good to be clean when I crawl into my sleeping bag at night. We made a campfire, cooked dinner, and did our best to dodge the thick clouds of mosquitoes swarming around. Adam wrote a hilarious rap tune for our section hike, and each night during the trip he added and performed a new verse about our adventures for the day. After discussing the bear issues in the area, we ended up storing our food inside the vault toilet building across from our campsite. The door to the bathroom latched securely and the campground was empty, so it seemed like the best option. We ended up staying up until almost 10:00 – way past typical hiker midnight. Eventually, we headed to our tents and drifted off to sleep.
Download DAY ONE Maps and Elevation Profiles
Day Two – Hurricane Creek Campground to Old Orchard Shelter (8.7 miles) – Adam
Day two was completely in the green tunnel – no views. If you look closely, you can see Adam making his way uphill. Below: Hurricane Mountain Shelter; Taking a break from the heat and the strain of carrying packs; More trail scenery from the second day.
We started off day two from the campground, following the spur trail for about .7 mile back to the junction with the Appalachian Trail. Most of the day consisted of uphill climbing, but fortunately there were many water sources, so we didn’t have to carry a large (and heavy) amount of water.
About 1.5 miles into our walk, we passed through a beautiful section of trail surrounded by blooming rhododendron and azaleas. For a while, the trail was rolling and easy, but at the junction with the Hurricane Creek Trail, the trail took a turn steeply uphill along a wide, road-like section. Around the 3.9 mile mark, we took the .1 mile side trail on the right that led us to Hurricane Mountain Shelter. It was a nice place to eat a snack and stretch out our legs and backs (and tend to our feet). After the shelter, we had just over a mile more of steep climbing to reach an area known as Chestnut Flats. We had climbed about 1400 feet already; this wasn’t that bad over a long stretch, but there were some short steep sections along the way. At this top bump, the AT also reaches a junction with the Iron Mountain trail. We passed lots of hikers sitting trailside, using their phones. This was one of the few spots on the hike that actually had cell reception. Lots of people were catching up with texts, calls, and social media. We also came across a thru-hiker that told us there was some great trail magic ahead. That is always a motivator to any backpacker – you want to move quickly so you don’t miss out.
Trail Magic provided by Greybeard and Been There. Christine is eating a hot dog and Kris is using some of the first aid supplies to fix her feet. Below: The footbridge over Fox Creek; Our last climb of the day; Dropping packs at our selected campsite for the night.
It was a steep downhill for the next mile and a half, but we soon reached Fox Creek, VA 603. As soon as I crossed the road and parking lot, I saw a sign in the tree pointing to Trail Magic. When I walked into the area, I was blown away by the setup. There were two guys, Greybeard and Been There, that had set up a large trail magic area. They said all hikers – thru and section – were welcome. They had grilled hot dogs, marinated chicken, a tub of fruit, homemade pie, cold sodas, and tons of snacks to take with you. They had a table filled with medical supplies for the taking and a handwashing station. They even had camp chairs (with backrests – a true luxury) and a campfire. Greybeard has been setting up here for years on the week after Trail Days. He runs a GoFundMe page for contributions to buy all of the food and supplies. Been There was helping out with cooking and making sure everyone was in good health and spirits. It truly restores your faith in humanity to see people out there caring for other hikers and it was great to relax and talk trail with everyone there. Greybeard left camp while we were there because he found a stuff sack of food that one of the thru-hikers had left behind. He went further up the trail to leave it at a shelter the hiker would find – it would stink to leave days worth of food behind. They also told us the previous night they had a bear come into camp. After not getting food near the tents and campfire, he ambled over to the nearby parking area and broke into a trailer. Apparently, he made off with a full case of hot cocoa packets before moving on to steal feed from the horse camp across the road.
The nice people we shared a campfire with at Old Orchard. Below: Our lovely campsite under the shady tree canopy; Old Orchard Shelter; The privy at this shelter was huge and airy.
While it was tempting to stay near the trail magic camp, we pressed forward to our planned stop. We had another steep climb to reach our endpoint, but we felt renewed from our brief respite. At 8.7 miles, we reached Old Orchard Shelter. We were one of the first groups to arrive for the day, so we staked out a prime spot on in a flat grassy area – taking care to avoid the abundant poison ivy. Over the course of the evening, more than 20 people arrived and set up their own tent sites. The water source was a bit of a walk from the right side of the shelter, but was flowing nicely. We set up camp and then began to make some dinner – PackIt Gourmet Kickin’ Chicken Wraps. There was an odd-acting person at the shelter, so we ended up having about 14 people come sit at our campfire. We joked that we felt like the “cool kids” since everyone came to hang out with us. You always meet interesting people on these hikes. We met a Texas acupuncture doctor (who I discovered knew a mutual friend), a woman that was flying home to get married in just a few days, a woman from Germany out with a guide, a college professor hiking with her niece, and a couple of fire fighters from New York that drove down to do a section. It’s crazy how so many different people can come together over a fire that all share a passion for hiking. We had a great night talking with everyone and were excited about the next couple of days on the trail.
Download DAY TWO Maps and Elevation Profiles
Day Three – Old Orchard Shelter to Massie Gap (8.7 miles) – Christine
Adam climbs the Appalachian Trail leaving Old Orchard Shelter. Below: The gate at the top of Pine Mountain; Sunshine on Pine Mountain; Descending toward Scales Livestock Corral.
Our miles for the day started with a thousand foot climb to the summit of Pine Mountain. At the top of the mountain, we passed through a gate and followed the edge of a sunny meadow for a short distance before going through another gate where the trail went back into the woods. We descended through pretty forest for about a mile – there were pine roots, ferns, and abundant yellow flowers. As the trail leveled out, we found ourselves walking in a cloud. The sunshine we’d had back at the top of Pine Mountain had given way to low clouds settling between mountains. Through the mist, we could see a small building on a hillside off in the distance. At first I thought we were coming up on Wise Shelter, but I soon figured out the shelter was still miles away. What I actually saw was the vault toilet building at Scales Livestock corral. It has to be the most scenic privy in Virginia!
Adam hikes toward Scales Livestock Corral. Below: The prettiest pit toilet in Virginia; Fog on Stone Mountain; Flame Azalea.
After Scales, we had a short but steep uphill to the top of Stone Mountain – the four mile mark for our day. The long, pleasant ridge-walk should have offered beautiful views, but we were still socked in by heavy clouds. It was cold and windy along the summit walk. After a gradual descent of Stone Mountain, we entered Little Wilson Creek Wilderness. It was lovely and green. At 6.2 miles, we reached Big Wilson Creek and the junction with the horse trail. We crossed the stream on a wooden footbridge and went over another stile. I was paying close attention to my footing as I crossed a rocky area. Adam looked back at me from ahead and nonchalantly said, “Hey… I’m going to stop here and take photos of some ponies.” PONIES! I thought he was kidding at first. I didn’t expect to see ponies until day four. But sure enough… there was a band of six ponies grazing in marshland along the trail. Adam stepped slightly off trail to get a better view when suddenly a tiny black foal popped out of the deep grass. He couldn’t have been more than a week old and he was beautiful! The three of us all greatly enjoyed spending time watching these wonderful animals. The ponies eventually wandered deeper into the marsh, and we continued another .2 mile to Wise Shelter – our lunch stop for the day.
Our first Highlands ponies of the trip. We loved the tiny foal. Below: Little Wilson Creek Wilderness; Watching the rocky footing right before seeing ponies; What a gorgeous pony; Wise Shelter – our lunch stop.
We decided to take a long break and enjoy a hot lunch. We had some extra food to use up since we had a trail magic lunch the day before. Kris made a salmon pesto meal and Adam and I shared a package of Good To Go Mushroom Risotto (one of our favorites!). We had delightful lunch companions – two women from Sweden, a man from Kentucky, and a British guy – all thru-hikers. After they hiked on, we were joined by a man who was less-than-pleasant company, so we packed up and made our way into Grayson Highlands State Park. The park’s boundary is just south of the shelter.
From the shelter, we just had about 1.5 miles of climbing to reach the spur trail to the parking area at Massie Gap – our end point for day three. That 1.5 miles was incredibly scenic. The area is covered with only low shrubs and small pine trees, so the views are open in every direction. There are rock formations, wide meadows, ponies grazing, and (if you’re lucky like we were) blooming rhododendrons. We took tons of photos, watched ponies frolic, and enjoyed the magnificent views. It was everything we hoped the trip would be!
Approaching Grayson Highlands. Below: Adam is on top of the world; Blooming rhododendron; More beautiful ponies.
Around 2:30, we made our way down to Massie Gap where we were meeting the owner of the Grayson Highlands General Store and Inn. We had called him from the junction of the AT and the spur trail down to parking. After about 15 minutes of waiting, Dennis came along in a truck and whisked us away for a night of hiker-luxury. We had reserved the inn suite for the three of us. We also sent a resupply box with food for the second half of our trip. Carrying a full week of food is very heavy (backpackers typically carry 1 – 1.5 pounds of food per day), so it’s a treat to be able to resupply every 3-4 days. At the inn, we enjoyed pizza, beer/wine, and ice cream! Our suite had two bedrooms, a kitchen, a bathroom, and even a washer/dryer. We were all able to shower and wash our sweaty clothes. We spent most of the evening relaxing and repacking our bear canisters. It was nice to sleep in a queen size bed – so spacious compared to the floor space in our tiny tent! I would highly recommend the Grayson Highlands General Store for anyone who wants a night off-trail in the area. The accommodations are simple, but they’re very clean, affordable, and comfortable. Also, the staff at the inn takes great care of hikers! We really enjoyed our stay.
Waiting for our shuttle Below: Grayson Highlands General Store and Inn; Great hiker supplies; Cheers with a Wolf Hills ‘White Blaze Honey Cream Ale’!
Download DAY THREE Maps and Elevation Profiles
Day Four – Massie Gap to Whitetop (10 miles) – Adam
Day four was the highlight of the entire trip. It turned out to be the toughest day physically, but everything we saw helped make the pain bearable. We started off our morning with breakfast at the inn. Kris and I had french toast with bacon and Christine had a grilled bacon and cheese sandwich. We also got some deli sandwiches to pack for lunch on the trail. Dennis, the inn’s owner, gave us a shuttle ride back to Massie Gap parking. We had about a mile walk back up to where we rejoined the Appalachian Trail.
We started day four of our hike in Grayson Highlands State Park. Below: Massie Gap in Grayson Highlands State Park; The rocky trail through Grayson Highlands; Storm clouds and windswept terrain.
We took a left and headed south on the AT. The climb was steep and slow going at the beginning, but we were soon greeted with expansive views all around. It was quite easy to just say that you were stopping to take photos when you really needed to catch your breath. The terrain was relentlessly rocky and rugged. The clouds that were hanging above the mountains added to the visual drama. We thought we were going to get stormed on, but luckily the rain held off all day. The one thing that amazes me about this area is how fitting the word “Highlands” is to describe the terrain – in this area you may feel like you are walking in Scottish Highlands.
The Grayson Highlands are like no other place in Virginia. Below: Kris scales a steep rocky section; Christine scrambles along the trail; The Fat Man Squeeze.
At about the 1.5 mile mark, we reached the southern edge of Grayson Highlands State Park, marked by a turnstile to an open field. From here we went back onto national forest land. The trail climbs up steeply and we reached a spot called ‘Fatman Squeeze’ at 2.2 miles. It is an interesting rock formation that you can climb through. It wasn’t that much of a squeeze, but if you don’t want to risk humiliation or don’t like the claustrophobic feel there is a path that loops around the feature.
After the Squeeze, we reached Wilburn Ridge at 2.5 miles. As we crossed over the bump, we spotted another band of ponies lounging next to the trail. While they call these “wild” ponies, they are accustomed to people and may try to grab some food from an unattended backpack. The ponies all have such interesting markings and we talked about which one was our favorite. The trail had another short uphill bump before we came to Rhododendron Gap and a junction with the Pine Mountain Trail. On the ground, someone had arranged rocks into “500” noting the 500 mile mark of the Appalachian Trail for northbound hikers. There is another bit of fairly easy walking on this ridgeline – and the views keep coming if you’re lucky to visit on a clear day.
This area is known as the crest zone. The views are open and the ponies like to hang out in this area. Below: PONIES, PONIES, PONIES!
At 4 miles, we reached the Thomas Knob shelter. As I approached the shelter, I paused to take a photo and startled a retired police officer eating lunch there. Just a minute before I arrived, a bear had come right up to the shelter where she was sitting. She thought I was the returning bear. We stopped to eat lunch and heard more from the woman about the bear. The shelter log said that at night, gleaming bear eyes can be seen in the nearby trees, watching the open shelter.
Adam hiking in one of Virginia’s most scenic places. Below: The crest zone is the open area all along the ridge leading to Mt. Rogers; Christine enjoys the majestic views; Thomas Knob Shelter.
The area has been extremely problematic for aggressive bears over the last couple years. In 2018, several miles of AT in this area were closed to camping after tents were shredded and over 70 hikers’ food bags were taken by a bear. Now, there are bear lockers installed near the shelter, so be sure to store food and other ‘smellables’ securely if you decide to stay near Thomas Knob. Despite the addition of bear lockers, some hikers are still continuing to sleep with food in their tents and in the shelter, so bear problems have persisted into the 2019 season. After lunch, we continued on and just a short distance along the trail we reached a junction with a spur trail that leads to the summit of Mt. Rogers (we wrote about this in another post – no views but something worth doing if you want to bag the highest peak in Virginia).
It was sad to leave the beautiful Mt. Rogers and Grayson Highlands. Below: This spur trail leads to the summit of Mt. Rogers – Virginia’s highest peak; As you descend from the Highlands, the forest changes quickly to pines; The descent from the crest zone was very rocky.
After the Mt. Rogers junction, the trail descends steeply over rocky terrain until you reach Deep Gap at 6 miles. We saw dozens and dozens of northbound thruhikers coming the opposite direction as we descended from Grayson Highlands. More than a few mentioned that they were not enjoying the big climb and asked if the scenery ahead was as amazing as reputed. We assured everyone that the big climb was totally worth the payoff at the summit.
We took off our packs for a break, but we knew we still had more miles to cover. Continuing on, we kept descending and reached the beautiful mustard fields of Elk Garden. It was hot in the open sun. We crossed VA 600 at 8 miles and ran into a grandfather that was hoping to meet his thru-hiking granddaughter along the trail. We hadn’t seen her yet (we would the next day), but we rested again for a bit as we reentered the woods.
Elk Garden was a meadow of golden flowers. Below: Christine and Adam pose for a photo in the meadow; The climb up Whitetop Mountain; The last uphill of the day.
The day had already been tough and we had a big climb ahead of us. We debated stopping there for the night, but decided to camp where we had originally planned. We summoned what little strength we had left and pressed on to the end. We had 2.4 miles of an uphill climb to make it to the end of our day and it was all fairly steep. We hiked separately, setting our own paces, with Christine in the lead.
When we got to the high point on Whitetop Mountain, almost all the campsites had been taken, but Christine managed to grab the last decent one when she arrived. It was probably the worst of the campsites that we had for the trip, but it was still fine. Lots of other hikers ended up squeezed into tilted rocky sites that couldn’t have been comfortable.
This soft glowy light was a true reward at the end of the day. Below: This sign made us all thankful because we knew the climb was ending; Kris filtering water at camp; More beautiful evening scenery.
Water was quite a distance from camp, but on our way to the source we enjoyed great views along an open ridge. The water source was a piped spring that came out of the mountainside. It gushed ice cold water and might be one of the nicest water sources we’ve ever seen. Christine and I both doused our heads and splashed our faces and rinsed away a lot of the day’s salty sweat. We made PackIt Gourmet All American Cheeseburger Wraps for dinner – maybe our new favorite backpacking meal. They were delicious! After brushing our teeth and finding a good place to wedge our bear canisters, we watched sunset from the open ridge, and then went to bed before 9:00. We were all exhausted. It had been an amazing, but tiring, day.
Download DAY FOUR Maps and Elevation Profiles
Day Five – Whitetop to the Virginia Creeper Junction (8.5 miles) – Christine
Day five dawned with our high-elevation campsite blanketed in fog. We hoped enough of the mist would lift to allow us to enjoy the views from Buzzard Rock, but with only a mile to cover, we were at the vista about twenty minutes after hiking out of camp. At the viewpoint, we found ourselves still standing in the middle of a cloud. Luckily, we could still make out faint views of the valley below. Even veiled, Buzzard Rock is a gorgeous spot – and also our last opportunity to enjoy the highlands on this trip. Shortly after the viewpoint, the trail takes a steady 3.8 mile downhill drop from 5,080′ all the way down to 3,160′. At the beginning of the descent, we saw the fading final red trillium of spring and at the bottom of the descent, we saw abundant pink lady’s slippers. The drop in elevation let us see both early and later bloomers on the same day!
Adam climbs through the fog to Buzzard Rock. Below: Buzzard Rock outcropping, Faint views into the valley below; Adam and Kris leave the Virginia high country for lower altitudes.
At the bottom of the descent, we crossed Route 58 and made our way back uphill for a mile to reach Lost Mountain Shelter. The lower elevation brought on the extra heat and humidity. Paired with the exertion of climbing, we were all pretty hot and tired when we arrived at the shelter for lunch. The area was crowded with a crew of volunteer maintainers from the local trail club and about ten thru-hikers in for a mid-day break. The trail club kindly carried out everyone’s garbage! It’s such a small thing, but to have a day hiker offer to take your trash out is true trail magic! We collected water and decided to make our PackIt Gourmet cheese spread for lunch. It’s a really delicious meal, but I think everyone was too hot to really be hungry. We couldn’t finish everything, so we passed our leftovers on to a thru-hiker from Colorado.
The terrain and trees changed vastly over the course of the day. Below: Lush green forest; A fading red trillium near the top of the day; Pink lady’s slippers near the low point of the day; Lost Mountain shelter; Descending toward camp; The trail followed a pretty stream at the end of the day.
After lunch, we had a tiny bit more uphill climbing before the trail switchbacked downhill for 1.8 miles to its junction with the Virginia Creeper Trail. The Creeper is and old railroad grade converted to a multi-use trail. It’s most heavily used by bikers, but also by equestrians, hikers, runners, and even the occasional dog-sledder in the winter! Kris was about fifteen minutes behind us, so Adam and I sat on the Luther Hassinger Memorial Bridge and waited for her to catch up. While we waited, we noticed that there were several really nice streamside campsites under the bridge.
When Kris caught up, we had a team meeting and decided to camp under the bridge instead of hiking another 2.3 (mostly uphill) miles to our planned campsite. We were all hot and tired, and the campsite ahead sounded not-so-great (stagnant, mosquito-laden pond nearby) according to accounts in our Guthooks AT App. We set up camp, waded in the stream, played cards, and had a relaxing evening at camp. We even met a couple guys fishing nearby, and they kindly shared a couple cold beers with us.
The Luther Hassinger Bridge is where the AT and Virginia Creeper meet and share course for a while. Below: Our campsite for night five; Our water source was a lovely stream; We used the trestle bridge to bear hang a bag of garbage.
Over dinner, we discussed altering our plan for days six and seven. We tossed around the idea of finishing in one day instead of two and following the Creeper Trail instead of the AT. We agreed to sleep on the plan and make a decision in the morning. It was really a fantastic campsite and everyone slept so well with the sound of rushing water nearby.
Download DAY FIVE Maps and Elevation Profiles
Day Six – Virginia Creeper Junction to Damascus (11 miles) – Adam
We woke up early and discussed our plan for the day. Kris’ feet were in pain and we knew the elevation gain and rough terrain were going to be hard on her blisters. The initial thought was that I would stay on the AT, while Christine and Kris would walk back along the Creeper Trail, but meet up along a spur between the two trails to camp together. After looking at our AWOL guide and the Guthooks app, there was no solid information on how the spur trail would connect or how far it would be. I ultimately made the call to stick together and finish in one day via the Creeper Trail back to Damascus. I am probably more of an AT purest and want to hit every blaze, but Christine was fine just getting to Damascus another way. But, she promised to come back together and do the AT miles to appease my desire to see every white blaze. Sticking together was definitely the best call for everyone’s safety and peace of mind.
We started the final day of our trip on both the Appalachian Trail and the Virginia Creeper Trail. Below: Adam crosses the Hassinger bridge; A beautiful cascade on Whitetop Laurel Creek; Easy terrain on the Virginia Creeper Trail.
The AT parallels the Creeper Trail for a good portion, but it is much higher in elevation and there aren’t really any easy access points between the two trails. Going back the way of the Creeper Trail also meant that the entire hike was either flat or downhill and the footing for trail conditions was much easier on injured feet (the AT section would have added about 1800 feet of climbing and a couple more miles).
We packed up camp and were on our way. We crossed the Hassinger bridge, where the AT and Creeper begin to share trail for about .7 miles until the AT takes a hard right up the mountainside. We stayed on the Creeper Trail, crossing 21 trestle bridges and enjoying gorgeous stream scenery along the way. When we biked this section many years ago, it was raining which forced us to rush along the trail, so it was nice to take in the sights at a leisurely pace. Much of the Creeper Trail follows Whitetop Laurel Creek – one of Virginia’s largest and most pristine trout streams.
There were a good number of bikers out for the Memorial Day weekend, so we got used to hearing “ON THE LEFT” as they sped past. A few cyclists paused and gawked at us carrying our gear. For some of these casual family bikers I guess we seemed like hardcore professional athletes. People randomly applauded and one woman said she was ‘in awe of us.’ It was funny!
Whitetop Laurel Creek is one of the best trout streams in Virginia. Below: One of the many bridges over the stream; Crossing open farmland; Rock walls along the stream.
Overall the Creeper Trail is fairly shady, but we also passed by farm houses and through wide pastures. The sun was quite hot in open areas. After finishing a long sunny stretch, we stopped in the shade along a roadside. A father and son were fishing nearby. When they saw us, they offered us a cold Mountain Dews and homemade cookies from their truck. We never stop being amazed by the kindness of strangers. We eventually managed to motivate ourselves to get back up and shoulder our heavy packs.
As we drew closer to town, there were billboards on the side of the trail advertising places to eat and drink in Damascus – they helped motivate us to finish. We ended up crossing US-58 on the outskirts of Damascus. The Appalachian Trail comes down a steep set of stairs on the right and rejoins the Creeper Trail again as it passes through town. We finished our hike walking alongside the road in the blazing sun. Kris had a near brush with danger as a kid on a bike carelessly ran her off the side of the trail. That was a real issue near the congested town section, since many bikers may not be as well-trained on etiquette or skilled enough to avoid others. We talked to another couple that had been hit twice by inexperienced cyclists on their run.
After eleven miles of hiking we made it back to Damascus. Below: Blooming mountain laurel along the trail; Billboards advertising food and drink along the trail; The Appalachian Trail rejoins the Creeper Trail just north of town; Our lunch stop and hike’s end… cheers!
We made it back into town and ate at Wicked Chicken Winghouse & Tavern. There was a guy outside singing and playing guitar and a ton of people enjoying the music, food, and ice cream. We ate inside the air-conditioned restaurant and had some great wings and beers from Damascus Brewery. When we were finished eating, I walked a few tenths of a mile back into town (following the Creeper Trail further into town and then going down Shady Ave to get back to Mount Rogers Outfitters) to pick up our car. Christine and Kris stayed at the restaurant and finished their beers before I picked them up. Before we headed home, we stopped and got some souvenirs from Sun Dog Outfitter.
We had an amazing trip and shared a lot of good memories together while covering a bunch of miles. Everything isn’t always easy when you do a longer section of trail like this, but we felt very accomplished and glad to have each other to help us get through.
Download DAY SIX Maps and Elevation Profiles
Trail Notes
Distance – 56 miles
Elevation Change – 11,095 ft. (daily gain is included on each profile download)
Difficulty – 3. Most of the terrain is moderate and uncomplicated.
Trail Conditions – 4. The trail was clear and easy to follow. Bridges and footing were mostly in passable condition. The bridge at Comer Creek Falls was technically closed when we hiked. We had one tough blowdown to negotiate in Little Wilson Creek Wilderness.
Views – 5. We had spectacular views on three of the six days of the trip.
Streams/Waterfalls – 4. There were many beautiful cascading streams along the route. Comer Creek Falls was small, but lovely.
Wildlife – 5. High chances of seeing bears along this section. Even though the ponies aren’t technically wild, we count them as wildlife.
Ease to Navigate – 5. The trail is well marked and easy to follow.
Solitude – 0. This is a very popular section of Appalachian Trail. We maximized crowds by 1)Joining the thru-hiker bubble 2) Starting the day Trail Days ended 3) Hiking over a holiday weekend. If you choose a different time of year, you might have significantly more solitude.
Directions to trailhead: We left a car in Damascus at Mt. Rogers Outfitters. We used their shuttle service to drop us off at the Appalachian Trail Crossing at the South Fork of the Holston River. GPS coordinates for our start point are: 36.7631, -81.4939.
The Pinnacle is a 6.6 mile hike with a strenuous climb for the first two miles. Hikers are rewarded on a clear day with spectacular views from a rocky ridgeline and overlook point.
Split Rock is a landmark just a half mile into the hike. Below: The information board at Pinnacle Park. Make sure you fill out a free permit card before beginning your hike; Trail options starting from Pinnacle Park;
Adam Says…
This hike has an incredibly generic name. I can’t recall how many hikes we have been on with the name “Pinnacle” in the title. The same can be said about “bald” (“bald knob”, “bald rock”, etc.), “buzzard” (“buzzard rock”, “buzzard roost”, etc.), “black rock”, and “devil” (“devil’s marbleyard”, “devil’s stairs”, “devil’s bathtub”, etc.). While the hike name lacks originality, by using the word, “pinnacle”, hikers should expect great views and this one doesn’t disappoint.
Getting there caused us a bit of confusion because the directions we had seemed to want us to drive on private property. However, we stayed on the main road and it soon came to a dead end at Pinnacle Park. We parked and completed the permit form at the kiosk, which were quite damp since they were exposed to the elements. Just past the kiosk was the trailhead that led through a gate. As we were starting our hike, there was also a couple of women that were getting started as well. They had backpacks to help carry their toddlers and they were taking the trail all the way to the Blue Ridge Parkway, where they had dropped off another car. They said they were quite familiar with the trail. After we saw the steepness of the terrain, we were impressed with these young moms.
The streams along this trail were incredibly scenic after LOTS of rain. Below: Adam hikes uphill in the fog and drizzle; Mountain Laurel were just starting to bloom; Another small waterfall and stream crossing.
The day started off foggy and incredibly humid from the recent rains, which made the footing a bit tricky for parts of the hike with either slippery rocks or muddy areas. After going a short distance, you pass by a meadow and then reach a trail junction. There are some shorter trails that break off to the right of the trail that some families take to get a short walk through the woods next to the stream. We waited to confirm with the young moms, but our path led us steeply uphill to continue the hike. As we hiked up, we passed Split Rock and we had several opportunities to get good views of the cascading stream on the left. The hike had us breathing heavily due to the steepness of the terrain and the humidity made us work extra hard.
Around two miles, we reached the junction with the Pinnacle Trail taking off to the left. The good news is that the hardest part of the climbing is done. There is still more climbing to do on this spur trail, but it isn’t nearly as steep and some areas are quite flat. This section had some places where the trail was under water or extremely muddy due to all the rain, but I’m guessing is damp during lots of the year. After another 1.3 miles, the trail reaches the summit area. As we were hiking, we didn’t see any hope of the sun coming out, but we at least thought we could have a nice hike in the woods. Right before the summit, I decided to step off the trail a bit to urinate and as soon as I started, the sun came out. Christine got a big laugh since she thought this act had summoned the sun to appear (if you run into the same situation, it is worth a shot). So, we made a quick dash to the final summit area. The clouds were still preventing us from getting remarkable views, but we could see some views as the clouds were rolling over the summit path. We stopped here to eat a snack and take in the limited views. As soon as we packed up to leave, the clouds completely covered in everything so we lucked out. On our way back down, we ran into more hikers that were going up to the point. We almost felt like we were running on the way back down and it amazed us how steep the terrain was in parts.
Big clouds moved on an off the mountain throughout our hike. Below: The trail junction for Blackrock and the Pinnacle; A lot of the trail to the Pinnacle was underwater; This beard-like moss was hanging on everything.
Christine Says…
This hike was quite an adventure and a good cardio-challenge! The trailhead is located in Pinnacle Park, which is an 1,100 acre plot of land owed by the town of Sylva, NC and maintained by the Pinnacle Park Foundation. It used to provide the town’s watersource, but in the early 1990s it was put into conservation and opened for hiker access. The park has several backcountry campsites for backpackers. They ask that both dayhikers and backpackers complete a free permit form before beginning their hike. Blank forms are available at the trailhead’s informational kiosk.
When we arrived at the park (which is essentially just the dead end of the road), we had humid, foggy, drizzly conditions. The whole area was under the unsettled outer arms of Tropical Storm Alberto, so the weather was extremely changeable during our visit. We knew we had a big climb ahead of us, and really hoped the fog would clear off and let us have at least some views. It always stinks to climb and climb and climb, and then not even get a view. But, that’s the thing about these mountains – even when the valley is sunny, peaks over 4500′ often stay in the clouds and mist. You just never know what your summit weather is going to be until you get there.
The Pinnacle is a cool crag with great views all around. Below: The view moved constantly in and out of the clouds; Looking down into the valley; Upon leaving the summit, we went back into the fog.
After passing a gate, the hike starts off immediately and relentlessly uphill. The first two miles of the hike follow what seems to be an old forest service or logging road. It’s wide and covered with loose, round stones – a bit of an ankle-turner. In the first couple tenths of a mile, you’ll pass a stream with remnants of its history as a municipal water source. There are gauges and concrete channels that are now being reclaimed by nature. After that, you’ll make a wide switchback in a meadow. There will be a trail that comes in from the left. Stay to the right, climbing uphill, before eventually reaching a sign with trail mileage for the Pinnacle, Blackrock, and Waterrock Knob (on the Blue Ridge Parkway). Follow the trail toward Pinnacle. At a half mile into the hike you’ll pass Split Rock – an enormous cracked boulder right along the trail. The crack is big enough for an adult to climb in.
Shortly after the Split Rock, we had our first stream crossing. Even with the high water flow, all the stream crossings were safe and easy. I think I remember there being three crossings in the first two miles of hiking. The beauty of the stream along this trail is definitely something I’ll remember. I’m sure the water is not normally as impressive, but when we visited it was gorgeous – rapids and little waterfalls everywhere! Another thing I’ll remember from this hike is the CLIMBING! The first two miles ascend nearly 2,000 feet before moderating on the Pinnacle spur trail. It was definitely some of the steepest climbing we’ve done outside of New Hampshire. I guess the third memory from the hike is crossing paths with a Great Horned Owl! It swooped across the trail. That was an enormous bird – for a minute, we thought it was an eagle because it was so much bigger than any owl or hawk we’d seen before.
This fallen butterfly still had perfect wings. Below: There are five official campsites in this trail network; Blooming fire pink; A post hike stop at Innovation Brewing (after an excellent lunch at Haywood Smokehouse.)
After climbing steeply for two miles, we were relieved to reach the junction with the Pinnacle Trail. It was a traditional trail instead of a wide road. It was very wet and muddy in a few places, but generally in good condition. It follows gentle rolling terrain for about a mile before a steep (but brief) descent into dense rhododendron. On the other side of the rhododendron, the trail exits out onto a large rocky outcropping at just over 5,000′. There are views (and precipitous drops) in every direction. We felt so lucky to have the clouds partially clear when we were at the viewpoint. What a gorgeous spot!
We spent some time enjoying the vista and a snack of trail mix before hiking back the way we came up. Shortly after we left the view, the clouds rolled back around us and we were hiking in the fog again. The hike back went really quickly because it was all downhill! By the time we got to the bottom, it was full sun and blazing hot. After packing up, we headed into Sylva for some barbecue at the Haywood Smokehouse (so amazing) and beers at Innovation Brewing. These two places are both on my ‘must list’ for this area.
Trail Notes
Distance – 6.6 miles
Elevation Change – 2,441 ft
Difficulty – 4. The first two miles of climbing is relentless and steep. You’ll gain 1000 feet for each mile. Once you reach the junction with the Pinnacle Trail, the climb becomes moderate to flat.
Trail Conditions – 4. The trail follows an old road grade for most of the way. The footing is a bit challenging with lots of football-sized rocks, but overall the trail is in great shape!
Views – 5 – We visited on a day with lots of fog and moving clouds, but still had excellent views at the top.
Streams/Waterfalls – 4. We visited after a time of extremely heavy rain, so the stream along the trail was simply spectacular. There were many small waterfalls and cascades to enjoy. The stream rating is probably not this high most of the time.
Wildlife – 4. We saw a great horned owl swoop across the trail. There were also salamanders, a snake, and many small mammals.
Ease to Navigate – 3. The first couple tenths of a mile of this trail are a little confusing, but if you keep climbing uphill, you’ll eventually come to a directional sign. After the directional sign, the trail is very clear and easy to follow.
Solitude – 3. We saw just a few people out for the day.
We did this 27-mile Appalachian Trail section over three days at the tail end of summer 2017. The trail was beautiful and quiet with lots of interesting things to see along the way. We camped one night and spent the other luxuriating at Woods Hole Hostel. This may have been one of Christine’s favorite sections yet!
Kimberling Creek is beautiful, but not safe to drink from. There is a lot of cattle farming along the stream. Below: Some rocky slopes along the trail; The spur trail to Dismal Falls is well worth the detour; Shallow pools and flat rocks leading up to the falls.
We decided to celebrate Christine’s birthday by completing a section of the Appalachian Trail over a few days. I had a couple of surprises for her along the way which hopefully made it an even better trip for her. I arranged a shuttle driver to meet us at a parking lot off Narrows Road near Pearisburg, VA. We loaded up and he drove us on some beautiful back roads until we got to our dropoff point at Kimberling Creek. There was a small parking lot here and a suspension bridge that spanned the creek. We took a few pictures, crossed the road, and then started our trip north on the white-blazed Appalachian Trail on a two day trip back to our car. The trail started off with a bit of a steep climb, which is always a quick reminder of the weight you decided to pack in your backpack.
The water level was very low, but Dismal Falls was still beautiful. Below: Another angle on the falls; This area has tons of rhododendron tunnels; Walking through beautiful open forest.
The climb was short-lived and after about a mile, the trail started to slope back downhill. At 1.8 miles, we reached a side trail that showed that Dismal Falls was just .3 miles away. Since it was early in the day, we decided to check it out and we were so glad we did. Dismal Falls was one of the more picturesque waterfalls I have seen and the setting just invites you to waste some time there. Even with low amounts of water falling, it is a great swimming hole area with great places to perch above and watch the water. We ate some snacks, explored the nearby area, and took many pictures before deciding to head on. While we were there, we only had a few other people that came by and they all approached it from the roadside that we could see in the distance behind the waterfall. We were glad we put the effort to see such a beautiful place. We grabbed our stuff and then headed back to rejoin the AT, bringing our mileage to 2.4 miles.
This pond was a scenic spot along the trail. Below: While the trail was very dry when we hiked, this stretch has lots of bridges and planks to cross wet areas; The Waipiti Shelter used to be along this fire road. It was demolished after a couple hikers were murdered. A new shelter was built a little ways north; More beautiful forest.
Continuing on, most of the hiking for this day was rather pleasant – there was a slight uphill climb but overall was not too tough. There were lots of footbridges and water crossings along the way, so this was not a day where we felt like we needed to carry much water since we weren’t terribly far from a water source. Eventually, we hiked next to a large, scenic pond that joined up to a dirt road at about 8.4 miles. From here, it was just a couple of tenths of a mile to our first stop on our trip, Wapiti Shelter.
Our camp stop for the first night was the Waipiti Shelter. Below: The turn-off from the AT; Lots of entries in the log make mention of murders and hauntings, but this is not where the crime happened; Our tent site behind the shelter.
Wapiti Shelter has some dark history to it. Christine had already heard the story before, but she waited to tell me about it until we got there. The old Wapiti shelter was the place where a couple of murders had taken place in 1981. A man named Randall Lee Smith befriended a couple of hikers and then murdered them in their sleeping bags that night. Smith was captured and imprisoned, and then met parole to be released in 1996. In 2008, Smith returned just a few miles away and tried to kill two fisherman but wrecked his truck in the getaway and died from the injuries he sustained when he was taken to prison. If you want to read more about this story, check it out here. Keep in mind, that the shelter today is located a couple miles away from where the murder happened, so ghost stories that the trail journals would like you to believe are simply not true.
As we were setting up camp, I surprised Christine with an additional camp pillow for a birthday present. She had been complaining recently about how she wish she had multiple pillows when backpacking, because one inflatable pillow just wasn’t enough. She was thrilled when I brought the extra one out of my pack. We set up our tent not far from the shelter and a bit later, we were eventually joined by other hikers, including two from Australia and one from Germany. The best water source at this campsite was back the way we came at the bottom of the hill. We told the other campers about the murder story but only after they asked specifically about it after reading logbook entries. I think everyone slept well that night despite the ghost tale.
Christine Says: Day Two – Wapiti Shelter to Woods Hole Hostel (7.8 miles)
This section of Appalachian Trail had so many long, dark rhododendron tunnels. Below: Even when the rhododendron wasn’t a full tunnel, it was still very dense; The footbed was almost paved with flat, shale-like rock; I love trees with ‘arms’
Brrr – that was a cold night! I was glad to have spent it bundled up in my warmer sleeping bag with two pillows. Eventually we got moving, packed up, ate breakfast, and started our hiking for the day. We had all day to go eight miles, so we set out at a leisurely pace. We had about three straight miles of moderate uphill to our first view of the day. The trail was all green tunnel. We passed through thickets of mountain laurel and rhododendron and traversed lush beds of ferns.
At 2.7 miles in we reached a pretty outcropping of rocks with a great view of the valley below. We stopped briefly to enjoy the vista, but weren’t ready for a snack or a long break. The next 2.3 miles covered rolling terrain with lots of small ups and downs. The trail was pretty, but not remarkable. At five miles into our day, we reached the radio tower on Flat Top mountain. The tower viewpoint is about .1 miles off the trail and worth making the small detour. Behind the tower, there is a series of small cliffs with a commanding view. It’s the perfect place to take a lunch break.
There were several nice views near between Waipiti and Woods Hole. Below: Views from the trail.
The day had warmed up a bit and we were both running really low on water. Thankfully, we had enough to make Pack-It Gourmet cheese spread for lunch. We had cheese and crackers with candy and dried fruit for our mid-day meal. We also took a good long break and rested atop the rocks. It was peaceful to watch hawks and buzzards soaring on the breeze.
After a full hour of resting, we packed back up and set out to cover our final 2.8 miles of the day. The rest of the route was mostly downhill with only a few brief bumps to climb. In about .7 miles, we crossed the Ribble Trail. The sign indicated that supplies (like propane) were available somewhere down the Ribble Trail, but I would think most people would just continue on to Woods Hole or even Pearisburg if they needed something. Apparently, there is also a nice AT-Ribble Trail loop that is popular with locals. If we were to have followed the Ribble Trail, it would have rejoined the AT near Waipiti shelter, where we spent the prior night. Maybe one day, we’ll go back and explore the area more.
As long as you don’t look behind you, the view is pretty and pristine. Below: Descending toward Sugar Run Gap.
After crossing the junction with the Ribble Trail, we continued downhill; crossing Big Horse Gap/USFS 103 just a tenth of a mile later. In another 1.2 mile, we crossed another forest road. From this point, the last .5 miles of hiking went steeply downhill. The trail was a bit rocky and overgrown. At this point, I was starting to hit a wall. I was out of water and feeling really parched. We hadn’t passed a spring since first thing in the morning and the sun had been beating down on us all day. I told Adam I wanted to rest at the road crossing before we hiked down to Woods Hole Hostel – our destination for the evening. He said to me ‘But wouldn’t a massage be way more relaxing?’ It turned out he booked an hour long massage for me at the hostel. Say no more – I was up and ready to cover that last .5 miles of road walking to get to Woods Hole.
Normally, we wouldn’t stay at a hostel on a two-night backpacking trip, but Woods Hole is special. Family-run for decades, the quaint, old farmhouse is an Appalachian Trail legend and a beloved tradition for many hikers. The old farmhouse opened its doors to hikers in the 1980s. The hostel was originally run by Tillie and Roy Wood, but was taken over by their granddaughter Neville in 2007. Since then, she and her husband Michael have expanded on the hostel’s offerings, creating a mountain oasis that is simultaneously rugged and luxurious. There’s no television or cell phone signal, but there is beautiful organic food (that you get to help prepare!), massage services, and group yoga.
What a welcome site! Woods Hole Hostel was a luxurious stop on our backpacking trip. Below: Woods Hole scenes.
We arrived at the hostel around 2:00 p.m. Neville was still working on cleaning the house, so we bought a couple soda’s from the bunkhouse fridge, and settled into the swing on the front porch. We played with the dogs, said hello to the roaming duck, and peeked into the goat and pig sheds. The garden was still beautiful and abundant in late summer – tons of peppers, tomatoes, and squash. If you stay at the hostel, you can camp, stay in the bunkhouse, or stay in a private room inside the farmhouse. We chose to stay in ‘Tillie’s Room.’ It had a comfortable queen bed, private sink/vanity, and shared full bath. It was quite luxurious for trail accommodations. Even if you choose the more humble bunkhouse, it is still comfortable and neat as a pin. There are beds with fresh linens provided, a big common area with a couch, and a nice offering of snacks and supplies available for purchase. There are also shower and laundry facilities available for those staying in the bunkhouse.
We visited during a really quiet time of year. There was a smattering of SoBo thru-hikers on the trail, but in mid-September we had the entire house to ourselves. Once we got checked in, I decided to shower and spend some time in the farmhouse’s library. It was full of all kinds of books and mementos. I especially enjoyed looking through scrapbooks chronicling the hostel’s history over the years. Around 5:00, Neville said she was ready to do my massage. It was a wonderful treat and felt fantastic on my tired shoulders and calves.
Aumakua – one of Woods Hole’s sweet dogs. Below: Our comfortable lodging.
After the massage, we started to think about dinner! In the meantime, one southbound thruhiker arrived and booked a bed in the bunkhouse. Neville’s husband had errands to run, so it was just four of us for dinner. Neville and Michael typically prepare community meals with the help of hikers staying for the night. Everyone has a task and chips in to prepare and clean up after the meal. We had an amazing tomato-pepper-cucumber salad, homemade bread with aioli, locally raised pork, and a flavorful yellow Thai vegetarian curry for dinner. Everything was delicious, but the salad was a favorite and is something I’ve made at home ever since. Dessert was Neville’s homemade vanilla ice cream.
After dinner, Adam and I relaxed in the library and read until it was time for bed. It was lovely being lulled to sleep by the sound of a breeze in the trees outside. We both slept great!
Adam Says: Day Three – Woods Hole Hostel to Narrows (11.8 miles)
Our last day of hiking started in a blanket of fog. Below: Hiking up Sugar Run Road; The Appalachian Trail; Foggy views
We had our longest day on the trail ahead of us with the third day. We got up, packed up our gear, and enjoyed a wonderful breakfast prepared by Neville. We had asked if we could leave most of our gear there during the day to be able to “slackpack” without the weight. We carried water, some lunch, and a few layers of clothes but we were able to dump out so much of the weight. With this extra added comfort, we started on our hike for the day. We climbed up the steep gravel road and we quickly were so thankful we had dropped off our weight. We rejoined the AT at .5 miles and began our hike.
As we climbed higher the view opened and the fog lifted. Below: Docs Knob Shelter; Views from the trail; Thick overgrowth.
The morning started off foggy and cold and the section of AT started off uphill. At 1.9 miles, we reached a viewpoint, but it was completely socked in the fog so there was no point staying. The trail then took a descent and at 2.8 miles, we came upon Docs Knob Shelter. It was a nice shelter, but we were glad we had luxurious accommodations at Woods Hole Hostel the night before. The trail was up and down for a bit, before rising a bit to a nice viewpoint at 6.5 miles. The fog had lifted so we enjoyed nice views of the river cutting through a scenic mountain view. We stopped and ate some lunch here, but had to eat a bit away from the viewpoint since there were strong, cold winds. We pushed on as the trail became to climb very slowly and at 8.6 miles we reached another viewpoint. This was probably the nicest one in our opinion of the trip, since you had panoramic views of farmlands and mountains around you.
We had miles of easy walking along a ridge. Below: Late summer vegetation; Views from the trail; Descending to Angels Rest.
We continued the pleasant ridge walking and eventually the trail began to descend through an area that cut a path between very large rock boulders. We reached a sign that pointed to Angels Rest (a short .1 mile sidetrail) at 9.2 miles. Angels Rest is a large boulder that requires you to scale up it to get the view. We climbed up and the view is being combated by growing trees. The view in the distance is nice, but in my opinion the eyesore of looking down on a town (and correctional facility to boot) isn’t one that I particularly enjoy. I know lots of people hike up to this point from Pearisburg and return, but the better view would be if people would just continue a bit further. We climbed down disappointed this was the last view and then rejoined the trail.
Angels Rest and a view into Pearisburg. Below: New signage around Angels Rest; The rock at Angels Rest; Descending into Pearisburg.
The hike down from Angels Rest was extremely steep. We made the downward trip the rest of the way fairly quickly. At 11 miles we crossed over Cross Avenue, VA 634. We then crossed over Lane Street at 11.4 miles and then made it to Narrows Road and our car at 11.8 miles. When we got back to our car, we drove back to pick up our gear at Woods Hole Hostel (and also bought a nice soup bowl crafted by the owner) and then made our way to Ballast Point for some post-hike dinner and flight of beers. It was such a great birthday celebration and we had a wonderful experience!
The road to Pearisburg. Below: The trail between Pearisburg and Narrows; Parking.
Trail Notes
Distance – 27 miles (plus a couple extra miles to access views, shelters, and Woods Hole Hostel) (Check out the stats from Map My Hike* [Day One] [Day Two][Day Three])
Elevation Change – 4,885 feet
Difficulty – 3.5. The second day was the toughest climbing. Overall, it wasn’t very tough, but it was 27 miles.
Trail Conditions – 3.5. Some of the trail was overgrown in parts, but overall was fairly maintained and footing was reliable through most of the hike.
Views – 4. The view leading up to Angels Rest was the best.
Streams/Waterfalls – 4. Lots of stream crossings, but the highlight was early in the hike with Dismal Falls.
Wildlife – 2. We didn’t run into many signs of wildlife on the trail, but did see an occasional deer.
Ease to Navigate – 4. Sticking to the AT, you just look for white blazes. The side trails we took were well marked.
Solitude – 4. We had most of the trail to ourselves. Expect people at Dismal Falls and Angels Rest and not much in between.
* MapMyHike is not necessarily accurate, as the GPS signal fades in and out – but it still provides some fun and interesting information.
Directions to trailhead: Coordinates to drop off car and meet shuttle: 37.3341, -80.7553 (Narrows AT Parking Lot Off road, room for quite a few cars.) Shuttle drop-off/hike start coordinates: 37.1757, -80.9083 (Kimberling Creek Suspension Bridge has a a small parking area along VA606)
We did this 4.6 mile hike on an especially beautiful, misty summer morning. It was a moderate climb with lots of interesting things to see along the way – from an old sugar house to the headwaters of a flume gorge, to the lovely viewpoint.
Beautiful misty sunshine on the Kinsman Trail. Below: Trailhead sign; Early parts of the trail.
Christine Says…
This was the last hike of our 2017 trip up north. By the end of two weeks that involved five different dayhikes and a three-day overnight backpacking trip, we were both sore, bruised, and covered with bug bites and scratches. We were both pretty tired, but the weather was nice and we felt we should squeeze one more quick hike in before the long 12-hour drive home. The hike up the Kinsman Trail to Bald Peak was close to my parents’ house and didn’t look too grueling, so we decided it would be the perfect grace note on our wonderful summer vacation.
We parked in the lot for the Kinsman Trail on Route 116. We arrived early and there were plenty of open spots, however it was overflowing by the time we got back to the car around 11:00 a.m. The trailhead is popular as it provides access to the 4,000 footer, Mount Kinsman. Bald Peak isn’t a true summit, it’s a rocky outcropping on the shoulder of a mountain. While it might not be the pinnacle, it provides nice views and is well worth doing.
The first half mile of the hike meanders along single-track trail through the forest. The terrain is rolling and there are abundant ferns and shady hemlocks along the way. At .5 miles in, the trail will arrive a a junction with a wider, road-like trail. Take a right onto the wide trail. In a tenth of a mile, you’ll pass a neat, but overgrown, sugar house. It didn’t look like it had been used in many years. Follow the road/trail for another half mile before coming to another junction. Bear to the right, continuing to follow the steepening blue-blazed Kinsman Trail. Keep an eye out for the blue blazes to keep yourself on track.
This rundown, old sugar house is right along the trail. Below: Scenes along the Kinsman Trail
About .35 miles later, you’ll make your first stream crossing – there are several on this hike, along with several lovely (albeit small) waterfalls. The waterfall pictured below was at the second stream crossing. Continue following the Kinsman Trail for .65 miles to your third stream. This is Flume Brook. Once you cross the water, look for a small sign pointing to the right. Follow a spur trail steeply downhill along the gorge. The rock walls that make the flume are steep and deep, but you will hear water rushing in the gorge below. Be careful looking down into the gorge – the terrain around it is extremely steep and slippery. A fall here would necessitate a dangerous rescue operation if you even survived the initial plunge.
After enjoying the flume, backtrack up to the main Kinsman Trail. Hike a couple more short tenths of a mile uphill, and you’ll reach the next junction. Bearing to the left will take you up the Kinsmans, so stay to the right and head along the Bald Peak spur. The trail is blazed yellow and follows a short series of ups and downs for about a quarter mile. The spur was a beautiful mix of evergreens, moss, and granite. At the end of the spur, you’ll come out onto a wide rocky ledge. From the viewpoint, you should be able to see Mount Kinsman, Mount Moosilauke, and a great peek into Vermont. Once you’ve enjoyed the view, return to your car the same way you hiked up for a round trip of 4.6 miles.
Small waterfall on the Kinsman Trail to Bald Peak. Below: Mist in the forest; Small cascades; A look into the gorge.
Adam Says…
The Bald Peak hike had a lot of things that made us pick it – close by to where we were staying, waterfalls, plunging gorge, and view. This hike doesn’t get a lot of traffic except by locals since people will opt for bigger, grander views, but this one has a nice sampling of things to see.
The trail always seemed more of a gradual uphill and never felt too tough for us. In that first half mile, we came across the sugar house on the side of the trail. I peaked through the spaces in between the boards and saw some of the old materials used to collect maple sap inside.
Mosses on the Kinsman Trail. Below: The spur to Bald Peak; Hiking along the spur
We had picked a morning to hike this right after rain the previous day. The morning mist rising up through the trees caught the morning sunlight and the beams of light cast a mystical picture across the forest. The rain also made the hike slippery over some of the roots and rocks that you always have to step on in a hike in New Hampshire.
As Christine mentioned, when you pass over Flume Brook there is a small sign to view the gorge. We both started down this side trail, but it was incredibly slick. Christine stopped, but I decided I wanted to go further to see if I could actually be able to look down into the gorge. Christine was freaking out a bit that I was pushing on, but I did want to see if I could get some pictures. I went a bit further and actually slipped, sliding about 10 feet before I caught myself on the trail. One false step here could mean your death. The gorge was located just a few feet away from the trail and all I could see was that it went down quite a bit. There was never a good place to actually be able to see down into the gorge, so I would recommend skipping this feature – it’s too dangerous, anyway.
Bald Peak views. Below: More perspectives on the viewpoint.
When we reached the view at the top, I was impressed. It was a fairly clear morning so we could see all around us and far off to Vermont. We talked with a couple of women that loved to hike together that lived locally. They had been working on the 48 peaks above 4000 feet and had a lot of advice on places to hike in the future. We love picking the brains of local people for hiking suggestions. Many people that you may come across use this trail to go all the way to Mt. Kinsman without taking this spur trail to Bald Peak for an extra view. You will likely have solitude on this peak during most days. This was a nice final spot to take in some views of New England before heading back to Virginia.
Trail Notes
Distance – 4.6 miles
(Check out the stats from Map My Hike)*
Elevation Change – 1400 ft.
Difficulty – 3. Moderate and well-graded.
Trail Conditions – 3.5. The trail was nice, with some rocks and roots typical to the area.
Views – 4. Very nice, but not quite 360.
Waterfalls/streams – 4. The headwaters of the flume are pretty cool and there are several small waterfalls along the trail.
Wildlife – 3. Typical squirrels and birds.
Ease to Navigate – 4. The route was well-blazed/marked and easy to follow.
Solitude– 4. We only saw a handful of others along the way. This trail gets far less traffic than more popular hikes in the area.
This 3.6 mile, family-friendly hike has a bit of steady climbing to reach the ridgeline, but with two summits – both with amazing vistas – it’s a hike that should not be missed when visiting this area.
Adam takes in the amazing views from Middle Sugarloaf.
Adam Says…
If you are visiting the White Mountains of New Hampshire, I would definitely put Sugarloaf on your list of must-do hikes. With a total of just 3.6 miles to cover both summits, it’s a great family hike and the views on a clear day are hard to beat.
From the parking lot, cross the bridge. You will see the yellow-blazed trail head off to the right just past the bridge. This is the Trestle Trail and it goes along the Zealand River. There are a few places to duck off the trail and get some gorgeous water views. In just a quarter of a mile, the junction for the Sugarloaf summits branches off to the left. The trail goes over some boggy areas at first before coming to a boulder field. You will see two huge boulders (among others), that were dropped off by glacial melt many years ago. The trail really starts to climb at this point and at one mile, you will reach a junction sign that points to the left for Middle Sugarloaf and to the right for North Sugarloaf.
The hike starts off along the scenic Zealand River. Below: Trailhead parking along Zealand Road. For some reason, the pay stations were covered; Adam follows the Sugarloaf Trail away from the road; The trail follows the stream for a little while.
We opted to go to Middle Sugarloaf first. The trail continues to climb, often through some very rocky areas. Eventually, you come to a ladder staircase that is your last climb before reaching the summit area at 1.4 miles. After the staircase, the trail opens up from the trees and the vast expanse of views are all around you on a large open ledge. When you first emerge, straight ahead of you is Mt. Hale looking to the south. If you wind around towards the right, you will have great views of North Twin and South Twin mountains. If you wind around to the left, you will come to a viewpoint to the east where you can see the far-off Presidential Range and a keen eye may even see the tower at the top of Mount Washington on a clear day. This open area is a photographer’s dream, as there are gorgeous views no matter which way you look and it is easy to lose track of time exploring the summit area.
We eventually returned the way we came and reached the junction at 1.8 miles (keep in mind if you are tracking distances, you may have walked a couple of tenths around the summit of the Middle Sugarloaf). We then headed toward the North Sugarloaf summit, which is not as steep but winds around until it reaches the summit at 2.1 miles. The summit here gives you views of US-302 cutting through the landscape before the Presidential range, but you still have gorgeous views of mountains all around. This summit would look outstanding on most hikes but we were a little spoiled from the views at Middle Sugarloaf. Since North Sugarloaf is usually less crowded (many people just do an out-and-back to Middle Sugarloaf), you may have a little more solitude. We did come up to some families that were staying at the Sugarloaf campgrounds near the initial parking lot, that were alternating doing hikes to both summits on different days.
After a bit of climbing, you’ll reach this junction. We visited Middle Sugarloaf first. Below: A few scenes from the climb up to the ridge: wooden trestles over a muddy area, a giant boulder you can walk by (or through… see photo later in post), typical New Hampshire rockiness.
After taking in the views at North Sugarloaf, we headed back the way we came, reaching the junction at 2.5 miles and then getting back to our car around 3.6 miles. These peaks were ones that I’m sure we will come back to time and time again on a clear day. When you want a relatively easy hike for this region with a big payoff, look no further than this one. I would recommend hitting it in the early morning since this is an extremely popular hike so you can pick your prime place to sit down and soak in the beauty of the White Mountains.
Christine Says…
I don’t know what took us so long to do this hike. It’s been on our radar for years – ever since my parents initially moved to New Hampshire. I guess there are just so many amazing trails in the area, that sometimes we overlook the short/popular hikes for fear of them being overrun by crowds.
Honestly, the key for maximizing solitude on hiking is simply getting up early. I find it’s true everywhere. If you can get to trailhead parking just as the sun is coming up, you’ll almost always beat the big crowds of casual hikers that come out mid-morning.
There is a ladder-stair to reach Middle Sugarloaf. Below: The forest along the ridgeline was lush and gorgeous; Adam standing on Middle Sugarloaf; Middle Sugarloaf offers views in every direction.
We got a little bit turned around when we first started this hike. There is a trail that leads directly away from the parking area. We missed the fact that we had to cross the bridge to get to the Sugarloaf Trail and instead started walking along the closer trail. In a couple tenths of a mile, we reached a campground and knew we were going the wrong way. We backtracked, reread our guidebook, and were set straight a couple minutes later.
The early part of the hike followed the scenic Zealand river. The boggy areas Adam described were extremely buggy – mosquitoes everywhere! We had to stop and coat ourselves with OFF in order to proceed. The big climb starts pretty quickly after passing the huge boulders. It’s a steady climb until the junction. Once you reach the ridgeline, the hike becomes more moderate. We opted to visit the prettier Middle Sugarloaf first. As we were walking along, I wondered why there was a north and middle summit, but no mention of a South Sugarloaf. Apparently, there is a south summit, but it’s a total bushwhack and is therefore rarely visited. I found photos of that summit on another hiking blog, and it looks like a beautiful spot for people who have orienteering skills and enjoy exploring off-trail.
The views from Middle Sugarloaf are truly spectacular. Below: After passing the junction, we climbed up North Sugarloaf; The forest had a lot of evergreens, The summit had a some trees between two different places to take in the view.
On Middle Sugarloaf, we enjoyed the summit all to ourselves for a good 30 minutes. I basked in the sun and ate my traditional New England hiking snack of a whoopie pie. I rarely eat them in Virginia, but I have to have them on the trail in New England. It just seems right – possibly mandatory. 🙂
When a few more hiking groups began arriving at the summit, we decided it was time to make our way over to North Sugarloaf. The hike was pleasant and easy. When we got to the vista, we were a bit disappointed. It was just a small rock ledge with a partial view. It was packed with a large family group. Luckily, we realized this wasn’t the actual viewpoint – the trail continued from one opening back into the trees before coming out on a larger open area with another panoramic view. North Sugarloaf still doesn’t impress as much as Middle, but it was definitely worth checking out.
After enjoying a few more minutes of the view, we hiked down and made our way to one of our favorite post-hike hangouts in the area – the AMC Highlands Center. The rustic lodge serves as the main hub and information center for the White Mountain’s Presidential range. There is a gear shop, lodging, a lounge, and a decent cafe. We got sandwiches and beers and sat at a table outside so we could take in the view and sunshine. What a great day!
The views from North Sugarloaf are different, but also very nice! Below: Another North Sugarloaf view; This is the boulder you can walk through. There is a big slit in the middle; Another look at the beautiful Zealand River.
Trail Notes
Distance – 3.6 miles
(Check out the stats from Map My Hike)*
Elevation Change – 925 ft
Difficulty – 2.5. There is some climbing on this one, but since the distance is shorter take your time. Great for a family hike.
Trail Conditions – 4. This hike is very popular, so the trail is well worn.
Views – 5. On a clear day, you can see for hundreds of miles around you.
Waterfalls/streams – 4. Passing by the Zealand River in the very beginning of the hike gives you gorgeous river views.
Wildlife – 1. Other than birds, you likely won’t see a lot of wildlife due to the popularity of the hike.
Ease to Navigate – 4. There are a couple of turns to make, but overall the trail is well-blazed and signs at the junctions are helpful.
Solitude– 1.5. On a clear day in the summer, this will be a popular hike. There is typically more solitude on North Sugarloaf. Start early to avoid crowds and get good parking.
Directions to trailhead: Parking coordinates are: 44.254858, -71.503993. The trail begins on the far side of the bridge on the right, on the same side of the road as the parking area. There is normally a fee station box here, but the box was sealed when we were there. Typically, the hikes here would charge $3 for parking, so bring some cash for an envelope to pay the fee.
* MapMyHike is not necessarily accurate, as the GPS signal fades in and out – but it still provides some fun and interesting information.
While the Road to Nowhere is popular and well-known, the adjacent Goldmine Loop seems lightly traveled and mysterious. We had a hard time finding reliable information about the trail and did some guesswork along the route. As it turns out, it’s a beautiful, jungle-like trail that leads down to the shores of Fontana Lake. The total route ended up being 4.7 miles with a moderate amount of climbing.
At the end of our hike, we enjoyed a rainbow over Fontana Lake.
Adam Says…
In early July, we made our way down to the southern end of the Smokies for a couple day stay in Bryson City, NC. There was lots of rain on and off during our trip, so we had to be strategic about timing our hiking possibilities. Our rental cabin was near a place in the Smokies called The Road to Nowhere. This is not a Talking Heads song reference, but a road that has an interesting history. In the 1930s and 1940s, Swain County donated a lot of its private land to the federal government to help create the Fontana Lake area of Great Smoky Mountains National Park. Hundreds of people were displaced from their homes when Old Highway 288 was covered by water after the creation of Fontana Dam. The government promised to create a new road that would connect Bryson City to Fontana (30 miles away to the west). They began work on constructing Lakeview Drive, but came across numerous environmental issues – a study released stated that completing the road would have major, adverse, long-term impacts to topography, geology, and soils. Construction was stopped at the long, impressive tunnel that marks the beginning of this hike. The environmental issue was eventually resolved, but the road was never continued. Ultimately in 2010, the Department of the Interior paid Swain County $52 million in lieu of finishing construction of the road.
The road ends in the tunnel and you come out on trail. Below: The trailhead; Blooming Rosebay Rhododendron; The tunnel.
The road ends at a gate before the tunnel, but before the gate there is a large parking lot on the right hand side of the road. You will see trail signs along the side of the road. We parked there, walked down the road, went around the gate, and made our way toward the tunnel. When you enter the tunnel, it will be quite dark. We used headlamps so we could see where we were stepping but the tunnel floor was quite flat and smooth. On the other side of the tunnel, the true Lakeshore Trail begins. Continuing a bit further up the trail, we reached a junction at .6 miles that is the Tunnel Bypass Trail. We took this trail which skirted alongside the hillside. It was incredibly humid from the recent rains and my glasses were fogging up and the ground was wet in many places. It continued to drizzle on and off.
Graffiti in the tunnel. Below: The first trail junction; Wet trail.
As we walked along we could clearly hear the sound of a barred owl nearby. It remained out of sight but was moving up ahead of us on the trail. At 1.8 miles, we reached the junction with the Goldmine Loop Trail. We took a right to get on this trail. The Goldmine Loop Trail descends for the next mile. At 2.4 miles we came to where Tunnel Branch runs alongside the trail. It was a very picturesque stream with lots of blooming rhododendron all around. At 2.8 miles, we reached the lowest part of elevation as we came to Goldmine Branch, a larger stream that leads into the Tuckaseigee River, which is part of the larger Fontana Lake waterway. Even though this is a river, it feels very much like a lake due to the beaver dams and high water level. A short side path leads you to a serene place to enjoy a waterside view. We continued back along the trail and our slow ascent began. This area was very mucky from all the water near this low part of the elevation and we slogged through some mud in a few places.
Near the trail’s low point, we saw a large hog trap that was placed by the park service. Wild hogs are destructive to the environment and have been known to be aggressive to humans. Just a short tenth of a mile from seeing the hog trap, we noticed something crashing through the woods toward us, followed by a deep guttural sound of a wild hog. Knowing how dangerous they are, we decided to move along quickly to leave the hog alone. It was quite a rush and we have never heard such sounds. At 3.2 miles, we reached a junction that leads to Campsite 67 (a site you must reserve through the GSMNP overnight camping permit system). We passed on checking this out since it was a bit off the trail and just continued onward. Shortly after this campsite trail, we came upon an old chimney from a home foundation. The ground was mucky and the area was heavily overgrown so we decided against checking out the site further. The trail then really began to ascend very steeply and we reached the junction with the Lakeshore Trail again at 4.1 miles. From here, we took a right on the Lakeshore Trail and then passed by the original Tunnel Bypass Trail junction just .1 mile later. We continued back the way we came to reach the tunnel and then back to our car on the other side to make this about a 4.7 mile round trip.
The rhododendron thickets here are extremely dense. Below: Rhododendrons; Views of storm clouds; Pretty, lush trail.
Christine Says…
We planned several amazing hikes for our whirlwind three-day Smokies trip… and not a single one panned out! Stormy weather and low clouds forced us to revisit all of the high elevation hikes we considered doing. We are capableof hiking in bad weather, but when you have a trail blog you want to do your best to capture views and landmarks. We did a bit of logistical scrambling to find lower elevation hikes where views might be open beneath the cloud shelf.
The first one we settled on was the Road to Nowhere paired with the Goldmine Loop. They hike was just a few minutes from our rental cabin, so it was easy to tackle after the rain stopped in the late afternoon. We didn’t get on the trail until almost 4:00 p.m. Online and printed guides listed the trail anywhere from three to seven miles. With the long days of summer in effect, we knew we could finish a hike in that range before the sun set. We still packed headlamps… just in case! They turned out to be handy for walking through the long, dark tunnel.
Adam sits alongside the Tuckaseigee arm of Fontana Lake. Below: Another angle on the water view; A hog trap; An old homestead chimney.
I thought the tunnel itself was really cool. It looks relatively short to the naked eye, but when you’re inside you walk much longer than you expect. The tunnel is a full quarter mile long and produces the most excellent echoes! The amount of graffiti was disappointing and seriously – can’t people think of better things to draw than penises? There were more of those drawn than any other element of graffiti. After the tunnel, we proceeded a short way down the trail to its junction with the Tunnel Bypass Trail.
The Bypass Trail descended into ever thickening rhododendrons. By the time we reached the Goldmine Loop, I felt like we were in a veritable jungle. I would never want to get lost off-trail in an area like this. The denseness of the forest would be very disorienting. I think the mist, the solitude, the hooting owl, the lack of good trail information, the hog sounds, and the thickness of the forest lent an eerie feeling to the entire hike. We’ve never hiked in the Smokies and seen so few people! I’ll admit, I felt a little bit uneasy on this hike. I rarely describe a hike as creepy, but this one may have approached that feeling!
I was pretty glad when the trail rejoined familiar terrain coming off the Goldmine Loop. On the return trip through the tunnel, we left our headlamps off and enjoyed the almost complete darkness. We just kept walking toward the spot of light at the far end of the tunnel. Soon we were back in the car and headed back to our little cabin in Bryson City. On the way, we stopped at an overlook that peered down into the watershed we just hiked. There was a gorgeous rainbow above and everything looked so peaceful below. It definitely didn’t feel eerie from above!
Difficulty – 3. The ground conditions made it a little tough and there was a steep ascent before we rejoined the Lakeshore Trail.
Trail Conditions –2. The trail was fairly well maintained, but the mucky conditions made for some times where we slogged along the trail at the lower elevations.
Views – 1. We did get a few obstructed views alongside the Tunnel Bypass Trail, but nothing much mentioning. Along the road leading up to the trail, there is a nice view of Fontana Lake alongside the road.
Streams/Waterfalls – 4. There were some nice stream views along the way and the mountain laurel created some extra scenery.
Wildlife – 4. This particular loop isn’t particularly well traveled, so don’t be surprised to find some wildlife. The wild hog encounter definitely gives this a higher score for us.
Ease to Navigate – 3. We had a hard time due to the lack of knowledge out there about the trail system. Hopefully, the map we are providing will help.
Solitude – 4. After we went through the tunnel, we only saw a few other people on the hike. This could be due to the recent rains, but this isn’t a popular area of the Great Smoky Mountain National Park except for local populations.
Directions to trailhead: From the center of Bryson City, NC head north on Everett Street. Everett Street becomes Fontana Road. Fontana Road becomes Lakeview Drive. Follow Lakeview Drive until you arrive at the parking lot before the road that closes off this Road to Nowhere, about 8.5 miles away from the center of Bryson City. Park in the parking lot and continue on foot up the road leading to the tunnel.
* MapMyHike is not necessarily accurate, as the GPS signal fades in and out – but it still provides some fun and interesting information.
This 3.6 mile hike takes you over more than 15 water-crossings to see a series of small waterfalls and swimming holes. The main scenic draw of this hike is the visit to the Devils Bathtub – a beautiful sandstone formation in the streambed.
The Devils Bathtub is a perfectly clear, oval pit in the sandstone. It really does look like a bathtub! When we visited the water levels were very low. Normally the striated area above the tub forms an even larger pool. Below: Stairs at the beginning of the hike; First water crossing; Early part of the trail.
Christine Says…
The Devils Bathtub popped up on our radar after getting quite a bit of attention on the internet. Sometime after 2014, it started showing up on Pinterest, on Reddit, on lists of most beautiful places in each state – even the Weather Channel called it Virginia’s hidden gem. As dedicated hikers, we wondered how such an amazing place could have escaped our notice for so long.
As it turned out, this hike has been hiding in our plain sight for years. The route to the Devil’s Bathtub is fully outlined in Bill and Mary Burnham’s ‘Hiking Virginia’ guidebook as part of the larger Devil’s Fork loop. Burnham’s description of the scenery was far less dramatic than accounts we read on the internet. And, we’re rarely in the far southwest corner of Virginia, so we stayed in the dark like most outdoorsy Virginians.
However, on our summer trip to the Abingdon area, we finally had a chance to find out first-hand if the Devil’s Bathtub lived up to its internet hype.
First off, the Devil’s Bathtub is in the middle of nowhere in Scott County, Virginia. There isn’t a nearby gas station to ask for directions or use the restroom. You probably won’t have any cell service, so make sure you have good directions and all your trail information ahead of time. Second, the last bit of road to get to the trailhead parking is quite rugged with mud and deep potholes in the road bed. Our Subaru did fine, but it was a bumpy ride! Third, parking for this hike is extremely limited with room for just a few cars. We visited early in the morning on a quiet, overcast weekday, so there was just one other car when we arrived. We’ve heard parking can be a nightmare for this hike, so time your visit strategically.
We saw dozens and dozens of these efts. Below: Scenery along the stream
Once we got past the logistical challenges – location, road access, and parking, we were all set to see this spectacular beauty spot! The hike started at the top of a staircase at the top of the parking area. At the top of the stairs, follow the trail to the left, passing almost immediately under/around a locked metal gate. In just a quarter mile, you’ll have your first of many stream crossings. The first crossing was the widest and deepest we experienced on the hike – and we visited during drought conditions. During periods of heavier rain or snow melt, this stream crossing could be quite a bit deeper and wider.
Shortly after the first stream crossing, you’ll reach marked split in the trail. You’ll want to bear to the left, following the arrow in the direction of the Devils Bathtub. The sign says it’s 1.8 miles to the Bathtub, but our GPS calculated the hike at almost a full half mile shorter by the end of the round trip. This route is also the most direct way to the scenery and is an out-and-back hike. There is a full 7-mile loop of this area, but all recent accounts say that most of the trail is poorly blazed, covered with blowdowns, and beset by aggressive wasps.
After the junction, we continued along following the yellow blazes. Even though the trail doesn’t climb much in elevation, it still provides challenges with its sporadic blazing and 15+ water crossings. It was really easy to lose the yellow blazes, as the trail is eroded and appears to have been relocated several times. We made our way by carefully looking for yellow blazes any time the trail wasn’t abundantly clear. We were lucky to visit in a time of low water, so all of the water crossings were easily passable. I imagine the way could be really tricky when there is more rain.
We passed a neat cliff-side that looked like it was built out of block. It was set off the trail, about 20 feet into the woods. Shortly after the cliff, the trail dipped down along an eroded bank next to the stream. There was a rope fixed to the uphill side of the trail to make passage a little easier. At the end of the rope, we reached the beautiful sandstone streambed that makes this area so popular.
Rock Formations on the Devils Bathtub Hike. Below: More stream scenery; A rope assist along the eroded trail; Steep eroded bank
The trail crossed the stream one final time at the base of a large pool with a small waterfall. I imagine a lot of people reach this point and think it’s the Bathtub. It’s a pretty spot with deep, clear green water. But, to get to the Bathtub you should continue along the trail up a short but very steep scramble up the bankside.
At the top of the bank, a newer wooden sign indicates that you’ve reached the Devil’s Bathtub. If you follow the footpath down to the stream’s edge, you’ll find the formation at the base of another small waterfall. It’s a gorgeous spot, though smaller than I expected it to be. The water was low on our trip, so I’d say the tub was only about half full!
We explored and photographed the area for a while… dismayed by the enormous amount of garbage left behind by other hikers. We saw dirty diapers, Styrofoam cups, beer cans/bottles, tampon applicators, sodden socks, discarded t-shirts, empty pudding cups, a spent asthma inhaler, and countless cigarette butts. I simply can’t understand how a person can visit such a naturally lovely place, and feel alright about leaving their trash behind. Adam and I ended up carrying out three bags of garbage, and it didn’t even make a dent in what was still left behind.
After a while, a couple more groups of hikers joined us at the Bathtub, so we decided to pack up and make our way back to the car. To exit, we simply retraced our steps. On the way out, I kept thinking about all the litter we saw on our hike. If you choose to do this hike (and we hope you will) please bring a trash bag and help clean up along the way! This is a gorgeous area – but it’s overused and fragile.
Adam Says…
A friend of mine had asked me about a year ago if we had hiked Devil’s Bathtub yet. After checking out pictures online, I knew this is one we had to put on our radar. Living several hours away and the fact this is a short hike made our decision to incorporate this hike into a four-day trip to check out a bunch of hikes in southwest Virginia.
This hike does have some challenges involved – navigating to parking without reliable GPS signal, the bumpy drive on the fire road to get to parking, the often poor blazing on the trail, and the numerous stream crossings. But with a little determination, we found our way to this gorgeous spot.
Adam enjoys the Devils Bathtub. Below: Signage; Terrain around the Bathtub; The Bathtub
From the parking lot, we heading up the short flight of stairs where we met the trail. There are no signs to say which way to go, but we took a left at the top of the stairs and found we were correct. The yellow-blazed trail leads to a gate and passing through, the trail leads down to your first of about 15 stream crossings at .15 miles. When we went, the water was at a low level, so if you are hiking when there has been a lot of rain, expect your feet to get wet and plan to do a lot of rock hopping. At about .2 miles, you reach a junction with the straight fork ridge spur trail. Bear left to stay straight on the trail.
The Devils Pool. Below: Small cascades; Pools along the stream.
At .7 miles, we reached the first of the hard to navigate sections. We approached this larger creek section and saw some blazes straight ahead, but also to the right of us. We went straight ahead and up a steep bank that went down a steep, slick hill back to the creek, only to realize this section had been re-routed. We went back to the original spot to cross, bore right to the larger fire road and found the blaze to continue on the trail.
At .9 miles, at the fifth stream crossing, we had a hard time finding where the blazes continued. We reached the large stream bed and rock-hopped and walked ahead on the creek about 75 yards before finding the yellow blaze going up a steep bank to the other side. Our instincts led us the right way, but the lack of blazes made this an unnecessary challenge. We got back on the trail and just a little over a tenth of a mile, we were standing above a swimming hole, looking down to the left. From the trash and abandoned clothing left behind, we could tell many people have taken a dip in this spot before. Continue on the trail and continue to cross the stream several more times.
A beautiful green, waterfall-fed swimming hole. Below: A sampling of litter; Butterflies
At about 1.5 miles, the trail reaches a large rock formation and you scale the side of it on a narrow path, but with some assistance to an anchored rope that guides you along. You then climb down to a stream crossing and swimming hole before making your way up a very steep bank to continue on the trail. From here, the hike is relatively flat and at 1.7 miles, you reach the sign for Devil’s Bathtub. There is a small lookout over the bathtub from here, but if you want to see it up close, the best thing to do is continue past the sign and stay on the trail. When you reach the stream again, cross it and then navigate along the side (the rocks were very slippery here) until you make your way down to the bathtub at 1.8 miles. The water again was low, so we were expecting a deeper basin of water from what we have seen in some pictures. The rock around the bathtub was covered in algae and very slick, so be careful!!
It took us a while to just remove enough trash around the site to get some decent pictures. As Christine mentioned, please bring a trashbag and help pick up around the area. The devastation of litter here made me quite sad that people would treat such a picturesque spot with such disrespect. We made our way back the way we came and saw a few people on our way back.
The green water plunging over and into the Devil’s Bathtub makes for one of those truly magical places in Virginia. If you are ever down in the southwestern part of Virginia, put this on your must-hike list.
Trail Notes
Distance – 3.6 miles
(Check out the stats from Map My Hike)*
Elevation Change – 580 ft
Difficulty – 3. The climb is easy and very small/gradual. The challenge factor is increased by the number of water crossings you must negotiate.
Trail Conditions – 2.5 The trail is eroded in numerous places and there is a real issue with litter.
Views – 0. None on this hike.
Waterfalls/streams – 5. The stream scenery is gorgeous!
Wildlife – 2. We saw lots of newts.
Ease to Navigate – 2.5 The trail is poorly blazed and hard to follow in several spots.
Solitude– 2. We visited on a quiet weekday, and still saw multiple groups of people.
Directions to trailhead: Parking coordinates: 36.819106, -82.628852. This location is very isolated and not really close to anything. It’s best to use the GPS coordinates and navigate fro=m your home direction.
* MapMyHike is not necessarily accurate, as the GPS signal fades in and out – but it still provides some fun and interesting information.
This 10 mile (round-trip) hike takes you past some of Dolly Sods most beautiful scenery. The dense rhododendron thickets, unblazed trails, and rugged terrain will have you feeling like you’re truly in the wild. Camping along Red Creek is popular and can be crowded with weekend backpackers, but it’s still one of West Virginia’s most spectacular places.
Beautiful Red Creek was our destination for this short overnighter. Below: Our excellent hiking crew (Maia the dog not included in the photo!); Making our way onto the Rohrbaugh Plains Trail; The trail is only lightly maintained so you have to climb blowdowns and navigate without the help of blazes.
Day One…
Back in early June, we were at happy hour with our friends Christy and Brian. Over beers, we cooked up a vague plan for a weekend backpacking trip in late July. In the weeks to come, we added our mutual friend, Kris, into the mix and settled on a route. The plan was to take two cars, and do a trans-navigation of Dolly Sods starting at the picnic area and ending at Bear Rocks. It was about a 16 mile route with tons of camping options along Red Creek.
As it turned out, a heat wave settled over the mid-Atlantic that weekend. It was the hottest, most humid weekend of the summer. We still thought we could make the full 16 miles, so we met at Bear Rocks and shuttled in our car to the start point at the Dolly Sods Picnic area. On the ride, we learned that you really can fit five adults, five big backpacks, and one German Shepherd in a Subaru Forester. It was like a clown car!
We parked at a small pullout near the picnic area, and picked up the Rohrbaugh Plains Trail on the opposite side of the road. The trail meandered through dense rhododendron forest. A lot of the rhododendron was Rosebay near the peak of its bloom. So pretty! The air was thick, still, and heavy with humidity. It felt like walking through the jungle. At one point, Kris said, “I feel like we might see monkeys!’
Walking through meadows. Below: Maia enjoys a shady pool under the rhododendrons; Walking across Rohrbaugh Cliffs; A nice spot for lunch!
The trails in Dolly Sods are well-traveled but very lightly maintained. There are no blazes. The only wayfinding signs are at trail junctions. There are lots of rocks, blowdowns, and mud pits to navigate. Even though the area is complete wilderness, the high traffic through the area keeps the trails apparent and fairly easy to follow.
We walked the Rohrbaugh Plains trail for about 2.5 miles before reaching the spectacular viewpoint off Rohrbaugh Cliffs. The area is near and dear to my heart because it was one of the first places I ever camped in the backcountry. The cliffs offer great views across the valley to the Lions Head (another popular rocky outcropping in Dolly Sods) and down into the Red Creek basin. Just past the cliffs, there is a patch of open forest with space for many tents. It’s still one of the most beautiful campsites I’ve ever had the pleasure of staying at.
We decided to take a lunch break at the cliffs. At first, the breeze across the open terrain felt nice. Maybe the heat wasn’t so bad? But after a few minutes of sitting in the direct sun, we were all pretty hot. I could feel my shoulders starting to burn. After lunch, we packed up and continued another .6 mile down the Rohrbaugh Plains Trail. At 3.1 miles, we passed the junction with the Wildlife Trail. We stayed to the left, continuing on the Rohrbaugh Plains trail.
We passed a small (mostly dry) waterfall and crossed over some extremely rocky footing. At 3.5 miles the Rohrbaugh Trail meets the Fisher Spring Run Trail. We followed the Fisher Spring Trail to the left, beginning to descend for 1.2 miles. At first the descent is smooth a gradual, but it becomes steeper and follows a couple switchbacks down to a rocky crossing of Fisher Spring Run.
We set up camp at a large site along Red Creek. Below: Most of the trails in Dolly Sods are rocky; Crossing Fisher Springs Run before arriving at camp; Our campsite had a private swimming hole nearby.
After the crossing , the trail follows the stream on high ground. There are several nice campsites at the bottom of extremely steep spur trails. A few sections of this trail are quite eroded, leaving the trail narrow and precipitous. Take your time and watch your footing, especially if you’re carrying a heavy pack.
At 4.7 miles the Fisher Spring Run Trail ends at the Red Creek Trail. We took a right, following the trail down toward Red Creek. In about three tenths of a mile, we passed the first of many stellar campsites. At the very first one, I thought to myself, “That’s a really sweet campsite. I wouldn’t mind sleeping here!’
Our group decided to take a break and discuss camping plans and how much of the route we wanted to cover on day one of our trip. We all agreed that we were pretty hot, the campsite was ideal, and Red Creek looked really inviting. We figured on day two, we could either hike 11 miles or hike out the way we came in and make our trip a short 10-mile out-and-back.
Adam and I explored several more campsites along the stream before agreeing that the very first site was the prettiest and most private. There was easily space for four tents. The ground was flat and clear. We had easy access to water. We even had a large fire pit with a stone couch someone had constructed. We all unpacked and set up camp. Maia, our friends’ German Shepherd, supervised the operations. She was on her first backpacking trip ever, and she took to it like a pro!
Red Creek is a beautiful place to camp and swim. Below: Fun in the water and fun at camp!
It was only around 2:30, so most of us spent the entire afternoon swimming and playing in Red Creek. The water was so cold and refreshing. The small rapids and waterfalls felt like hydrotherapy for our hot, tired muscles. Adam opted to restock everyone’s water and read a book at camp, but even he enjoyed splashing in the cold water near camp.
Around 5:00 we decided to get dinner started. Everyone brought their own dinner, but Christy and Brian brought a shared dessert – Rocky Road pudding. Kris contributed a two-bottle capacity bag of wine to the feast. After dinner we played cards and sat around our campfire. Even at 9:00 p.m., it was still 75 degrees. That’s unusually warm for Dolly Sods at night!
Around 10:00 we let the fire die down, and everyone started retreating to their tents. Adam and I opted to leave the rain fly off in hopes that it would keep us cooler. Honestly, it didn’t really cool off until sometime around 3:00 a.m. It was a steamy night and I was very glad to have left my sleeping bag home in favor of a light summer quilt. I enjoyed falling asleep to the sound of the running stream. Any time I woke up during the night, I took a moment to marvel at the brilliance and magnitude of the stars in the sky. It’s such a gift to be able to visit places like this and have good friends to share the experience. I felt so fortunate that night in my tent.
Day Two…
The next morning we awoke at daybreak. We thought Maia would have woken up the group, but she was a perfect camp companion and let us get up when we wanted. We enjoyed some of Christine’s homemade granola with Nido and then made our way back to the car. With a warm night and temperatures climbing quickly in the morning, we decided to get an early start to get back to our cars before the temperatures peaked in the afternoon. It is always uncomfortable when you feel like you never had a chance to cool down, so everyone felt hot within a few minutes back on the trail.
Maia did great on her first backpacking trip. Below: Hiking back out the way we came in!
We climbed back up the steep Red Creek Trail and Fisher Spring Run trail very slowly as we were all quickly drenched with sweat. We got back to the junction with the Rohrbaugh Trail in about 1.5 miles and we knew our toughest work was behind us. In another .4 miles, we reached the junction with the Wildlife Trail and took a right to make our way to the Rohrbaugh Cliffs again. We paused for a snack and some more pictures from Rohrbaugh Cliffs, which is probably my favorite spot in Dolly Sods. Looking over the creek and seeing nothing but mountains around you is a scene that begs you to pause and appreciate nature.
Taking in the view from Rohrbaugh Cliffs. Below: The small waterfall along the Rohrbaugh Trail was running very low; Climbing on the rocks of Rohrbaugh Cliffs; Back to the Forest Road.
With the strong sun beating down, we decided to press on and continue our journey back to the car. We made our way back fairly quickly, passing by a group of about 10 women that were enjoying the weekend as well. We got back to our car just a bit before lunch and carpooled Christy, Brian, and Maia back to their car. We had a great adventure together and we were really glad to share this amazing piece of wilderness. We parted ways with Christy and Brian, and Christine, Kris, and I headed to Lost River Brewing Company in Wardensville, WV for some celebratory beers and food. It was a great trip, but we vowed to return when it isn’t the hottest weekend of the year to do the traverse across Dolly Sods like we originally planned.
If you are looking for a hike or overnight trip that combines majestic views, creeks with a waterfall and swimming possibilities, and great overnight camping, this may be a perfect one to experience.
Trail Notes
Distance – 10 miles (Check out the stats from Map My Hike [Day One] [Day Two])*
Elevation Change – 1480 feet
Difficulty – 3. The elevation gain/loss is moderate, but the rugged nature of the footing adds difficulty to this route.
Trail Conditions – 2. Trails are unblazed. Be prepared for mud, blowdowns, and lots of rocks.
Views – 5. The view from Rohrbaugh Cliffs is pretty spectacular!
Waterfalls/streams – 5. You will want to spend all day enjoying the beautiful rapids and waterfalls along Red Creek. This is some of the best stream swimming in West Virginia.
Wildlife – 2. We saw a white tail doe with two fawns on the drive in, but generally the woods were quiet and we didn’t feel like there was much wildlife in the camping area.
Ease to Navigate – 2. There are no blazes, but junctions were marked, and the trail was generally easy to follow. Navigation gets trickier near Red Creek where you depend on cairns to mark stream crossings.
Solitude– 3. This is tough to call! We saw almost nobody on the trail when we were hiking, but there were many people camped along Red Creek.
* MapMyHike is not necessarily accurate, as the GPS signal fades in and out – but it still provides some fun and interesting information.
Directions to trailhead: GPS Coordinates for Parking are 38.962019, -79.355024.From Seneca Rocks, go North on WV 28 for 12 miles. Take a left on Jordan Run Road. Go one mile up Jordan Run Road and take a left on to Forest Road 19. In 6 miles, Forest Road 19 comes to a T on to Forest Road 75. Take a right, heading north on Forest Road 75. Drive for about eight miles until you reach the Dolly Sods Picnic Area. The Rohrbaugh Plains Trailhead will be across the road from the picnic area.
This is an easy 4.25 mile hike that take you to visit two special spots – a beautiful waterfall and one of the most popular swimming holes in the Smokies.
Mouse Creek Falls may not be the largest or most impressive of the waterfalls in the Smokies, but it is still a beautiful spot.
Christine Says…
On our third day of the trip, we decided to head into the national park and explore an area we hadn’t visited before – Big Creek in Cataloochee. This area is known for its population of elk, and for being much quieter than other parts of the park, like Cades Cove or Clingmans Dome.
The drive was a bit further than our previous two hike, but we had heard that Mouse Creek Falls and Midnight Hole were both beautiful, worthwhile destinations. As usual, we got an early start and beat the crowds to the trailhead.
Easy terrain makes this a popular family hike. Below: Trailhead sign for Mouse Creek Falls; Adam standing along the stream; Horse hitch near the falls.
The hike up Big Creek really couldn’t be much simpler or easier. It follows a wide, old road bed the entire way. At first, you can hear the rushing sounds of the creek in the distance, but within several tenths of a mile, the trail begins to closely follow the water.
Like most creeks in the Smokies, Big Creek is a jumble of big boulders that create lots of cascading rapids and small waterfalls – so beautiful! We saw a serious photographer hiking back from the falls with a large pack of gear and a heavy tripod. He visited the falls on a perfect day for waterfall photography. It was overcast and windless, which allows the opportunity for long exposure images. I always love the silky misty effect a slow shutter speed lends to the water, and I was pretty happy with the shots I got on this hike!
On the hike up, we skipped Midnight Hole. We figured we’d see the waterfall first, and then stop at other pretty spots on the hike back. The falls were indeed lovely, though the mosquitoes and biting flies were abundant and aggressive! This was the first and only time on the trip that I had to use bug spray. We took tons of waterfall photos, and then made our way back down the trail.
Christine enjoys Mouse Creek Falls. Below: Pretty stream scenery along Big Creek. Mouse Creek Falls are formed where smaller Mouse Creek pours into Big Creek.
On the way back, there were many more people out and about. Lots of them were dressed in swimsuits and had water-wings and innertubes. Apparently, this creek is one of the areas favorites for mountain swimming. When we reached Midnight Hole, there was a family of five there. The two youngest sons were taking turns plunging off rocks into the pool below. It was a cool, cloudy day, so they squealed each time they hit the icy water. The pool itself is deep and brilliant green – really an idyllic spot for a swim.
After leaving Midnight Hole, we stopped at a couple more pretty rapids along the stream for more photos. When we were on the trail, we jogged to outrun the mosquito assault! It was so buggy!
After this hike, we decided to drive into Asheville (yes… filthy and covered with bug spray) so we could visit a few breweries and get some lunch. We also managed stops at Vortex Donuts and French Broad Chocolates.
Adam Says…
Mouse Creek Falls is an easy family hike that everyone can enjoy. With the distance being only a little over two miles to the waterfall and very little change in elevation, it is a hike that even small kids won’t complain too much to do.
We started off early and had most of the trail to ourselves. We saw there were lots of places to step off the side of the trail to get views of rocky rapids down Mouse Creek, but we decided to make a beeline for the main waterfall. The trail had a slight incline, but never felt like a steep walk. We arrived at Mouse Creek Falls and made a climb down to near the base of the falls to get some photos of the stream and the falls together. If you don’t feel like climbing to the base, you can still get a distant, yet unobstructed view of the falls from the top. When another family arrived, we decided to leave to give them the solitude that we enjoyed, but we were equally pressured by all the mosquitoes at the water. We didn’t feel a ton of mosquitoes on the way up, but the entire trip back we were swarmed.
Midnight Hole is a popular swimming spot in the Smokies. Below: The water in Midnight Hole is clear and reflects the green of the trees around it; There is a picnic area along this lovely spot on Big Creek.
About .5 miles back on our return trip, we stopped to enjoy Midnight Hole. A pond is created here by two small waterfalls that dump water into this serene swimming hole. We lingered a bit at this spot before making our way back to our car, chased by a cloud of mosquitoes who seemed to not mind the bug spray we used. We made it back to our car quickly at a little over four miles and saw many people making their way up. I’m sure this is an extremely popular hike and swimming hole spot for many people. If you want to miss the crowds, go as early as possible.
On our way out, we passed by several buses that were unloading people for whitewater rafting along the Pigeon River. We saw probably a hundred people on the river in rafts and it looked like a great way to spend the day. We headed into Asheville, NC from our hike to sample some beers. It was Asheville Beer Week, so all of the breweries in the area were doing special events. We started off with lunch at Wicked Weed, where we enjoy the food as much as the beverages. From there, we stopped by a few more breweries to try one small sample at each – Green Man, Burial, and Hi-Wire. While we were there, there was a disc golf competition where event organizers moved a portable basket and the competitors threw their discs down the streets and alleyways as they moved from one brewery to the next. Luckily, the competitors were very accurate and I didn’t see any spectators beamed in the head.
Directions to trailhead: GPS coordinates for this trailhead are 35.751094, -83.109993. From Asheville, NC take I-40 West for 46 miles before taking exit 451 toward Waterville Road. Turn left onto Green Corner Road at the end of the exit ramp which merges onto Tobes Creek Road. Take the first left to cross a bridge and stay on Tobes Creek Road. Once you cross the bridge, take the first left onto Waterville Road. Follow this for two miles and you will then enter the Big Creek Entrance Road. Follow this for about a mile and you will reach the Big Creek Campground. You will find a large parking lot on the right and just before entering the parking lot, you will pass the trailhead for the Big Creek Trail, which is your starting point. This parking lot fills up quickly, so you may have to park along the roadside.
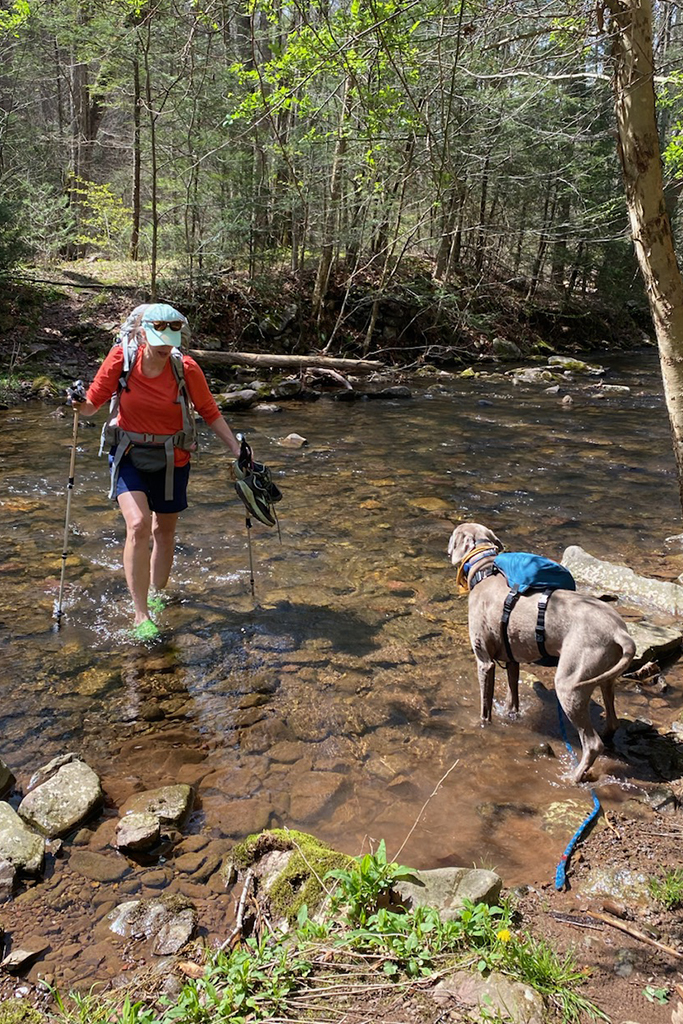

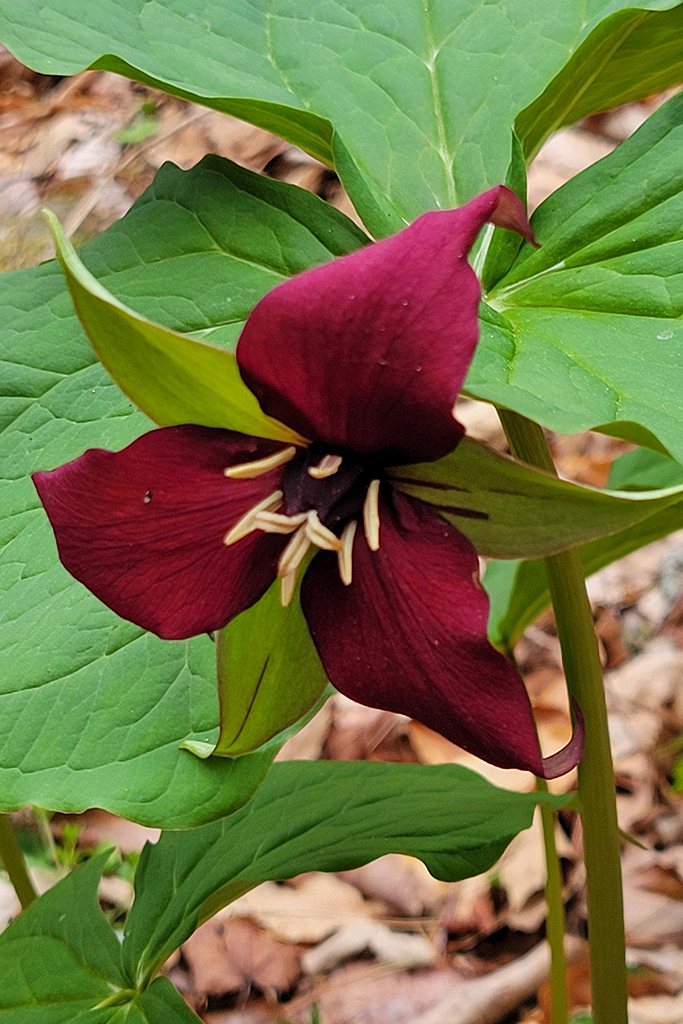

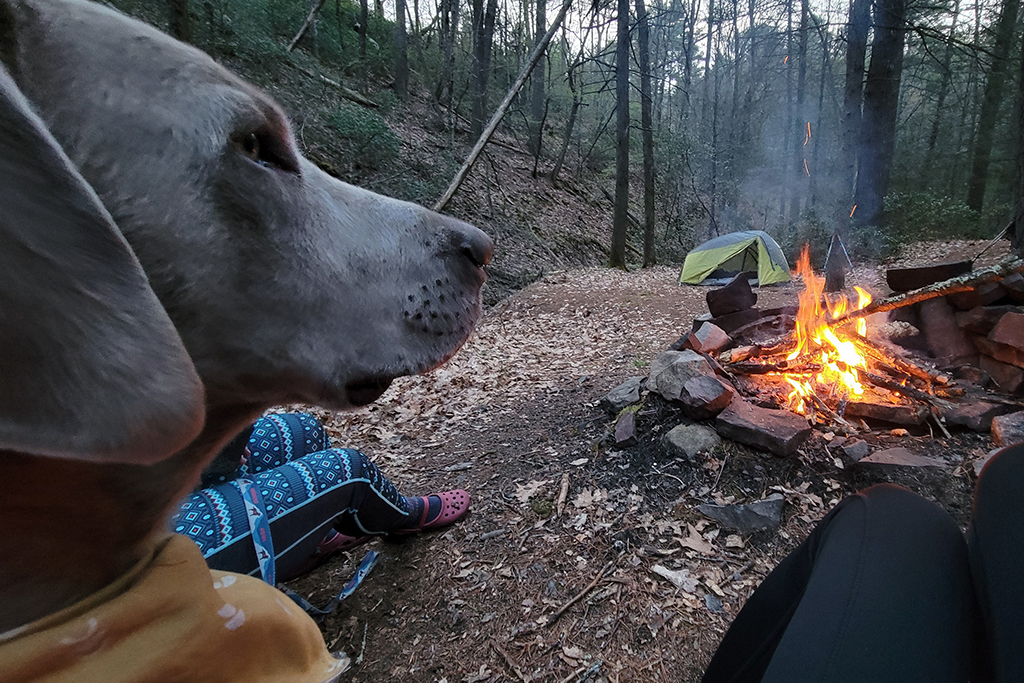

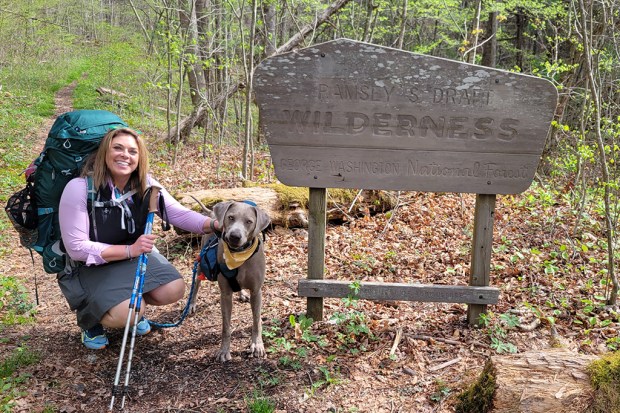
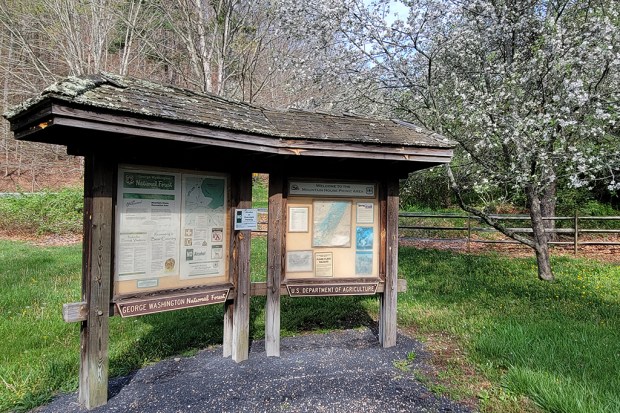
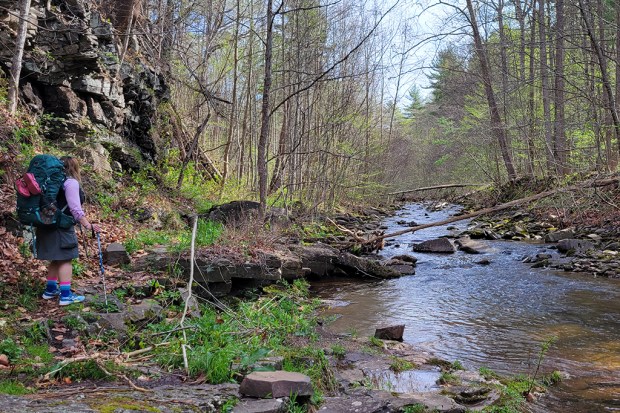
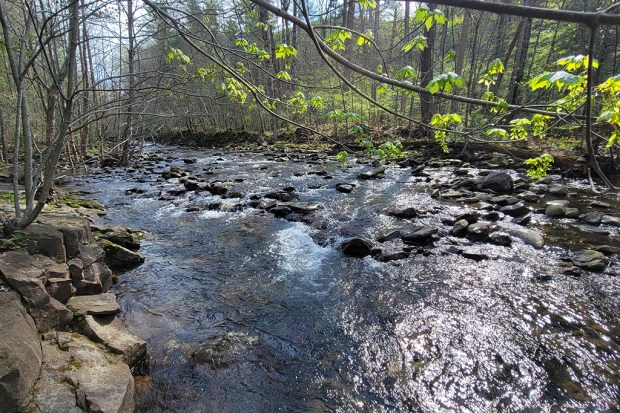
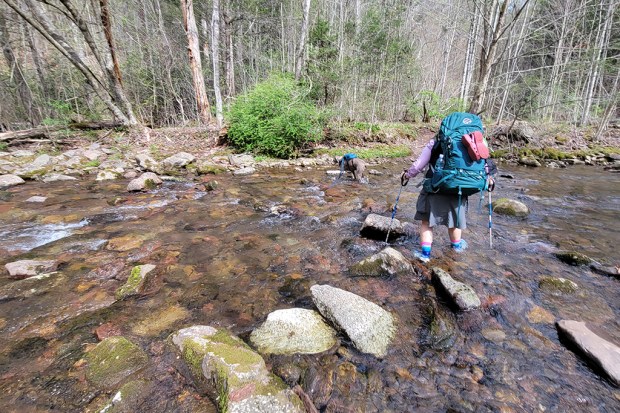
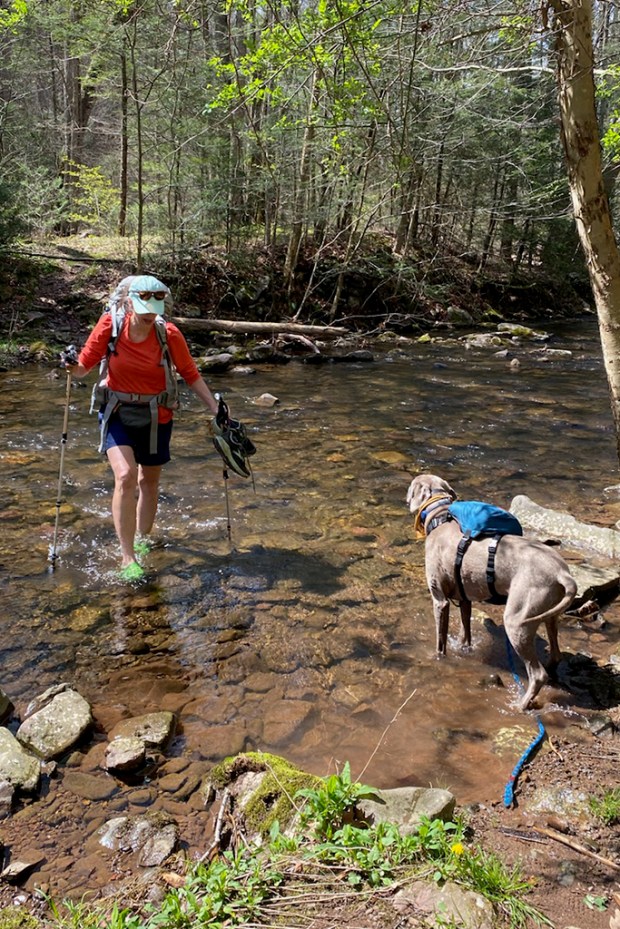
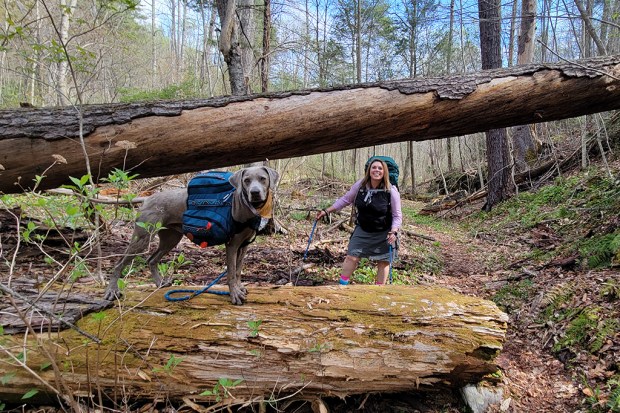
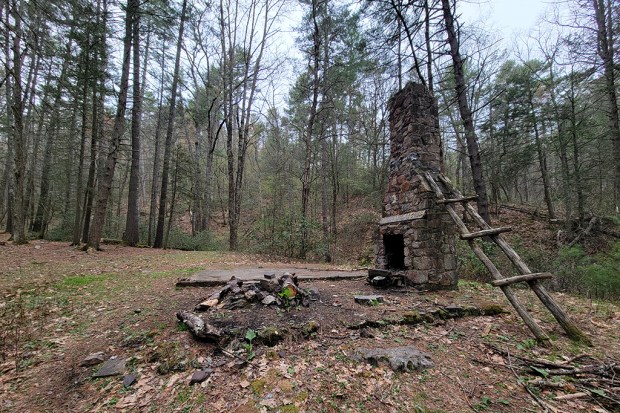
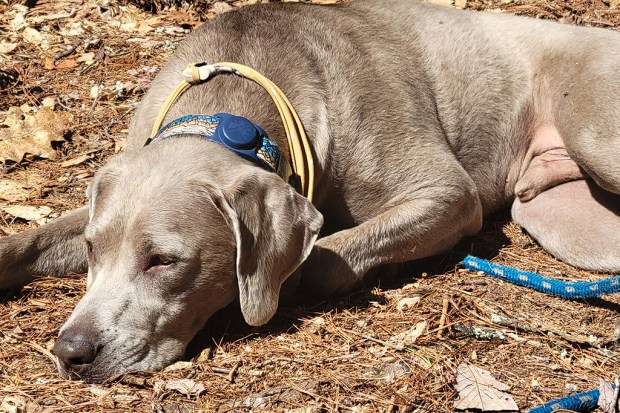
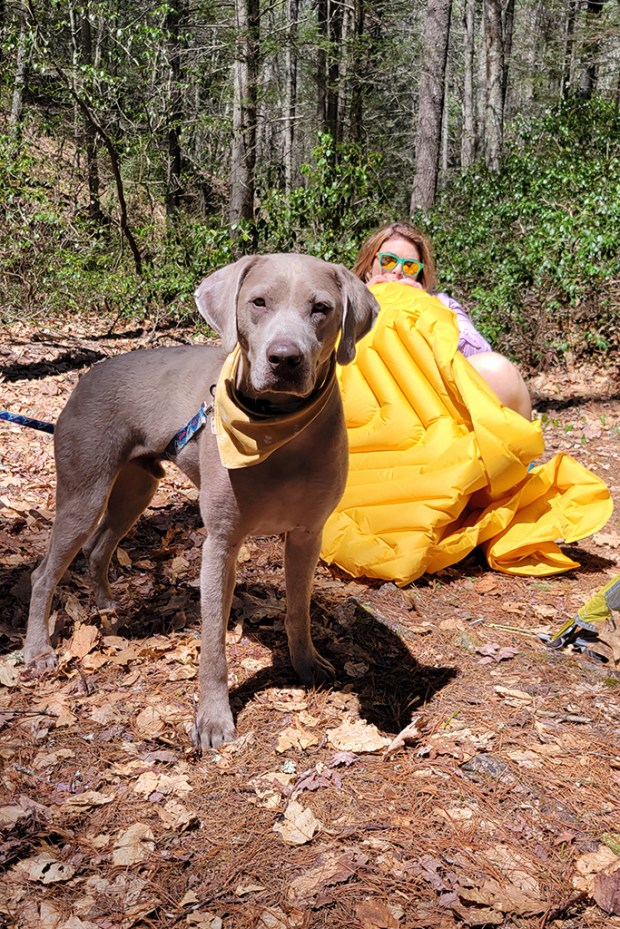
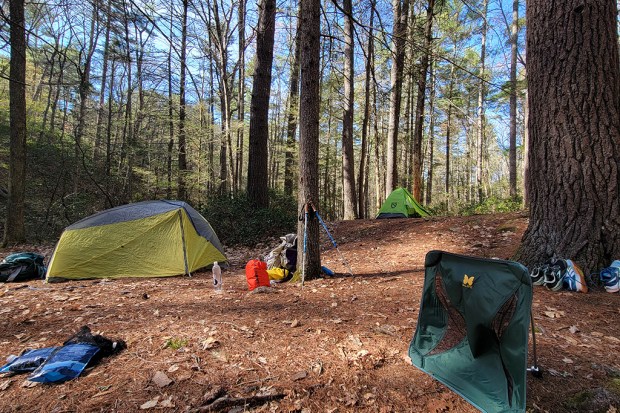
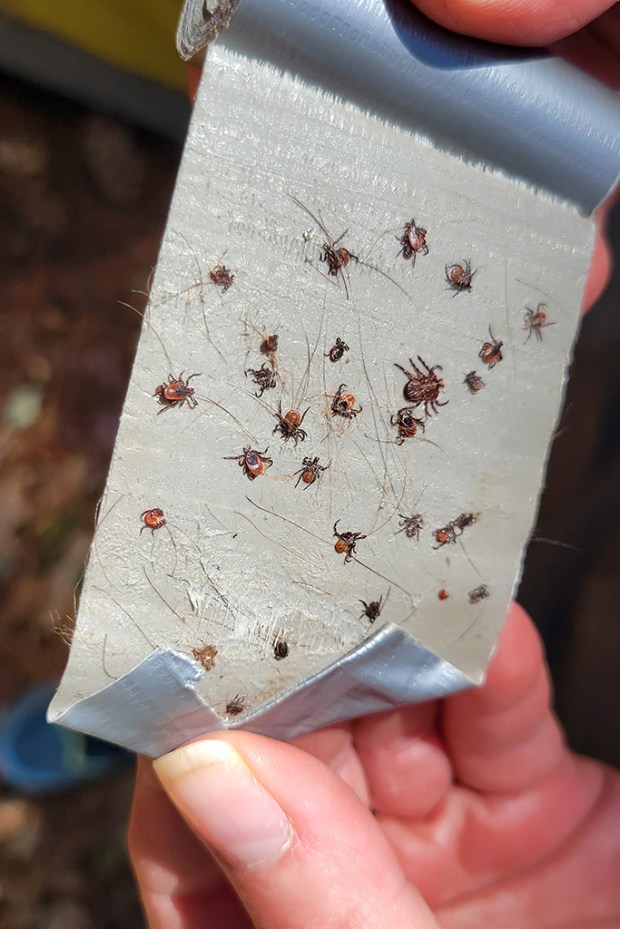

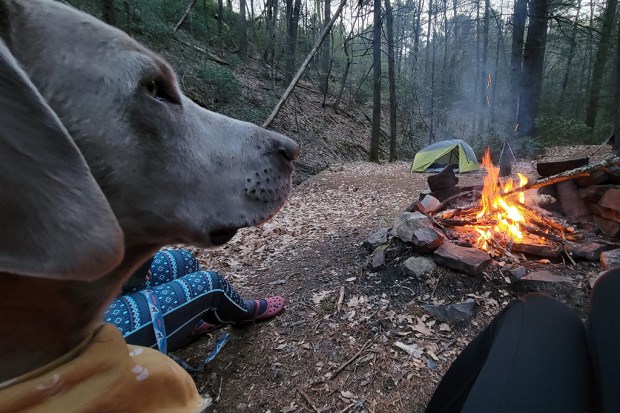
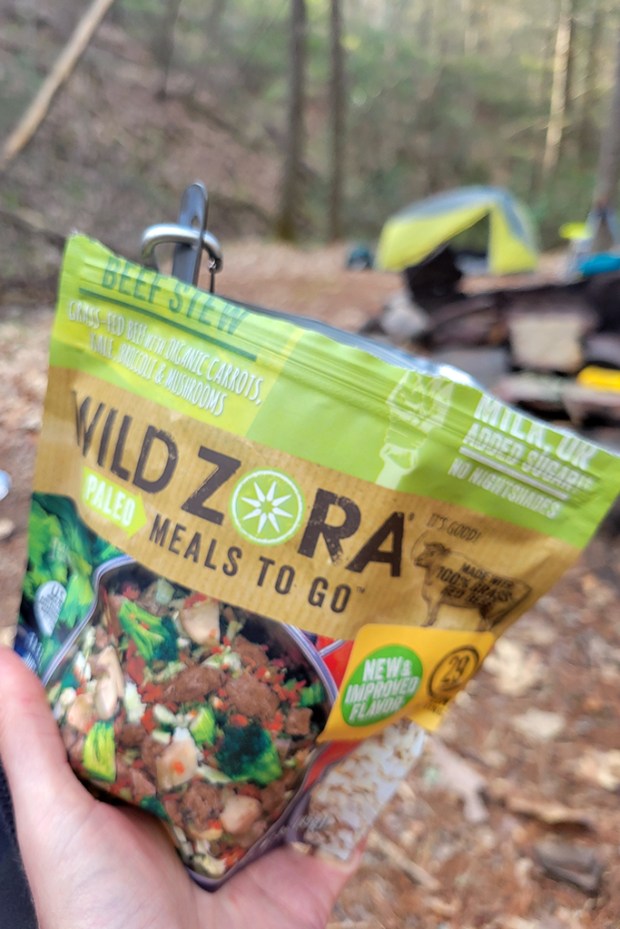
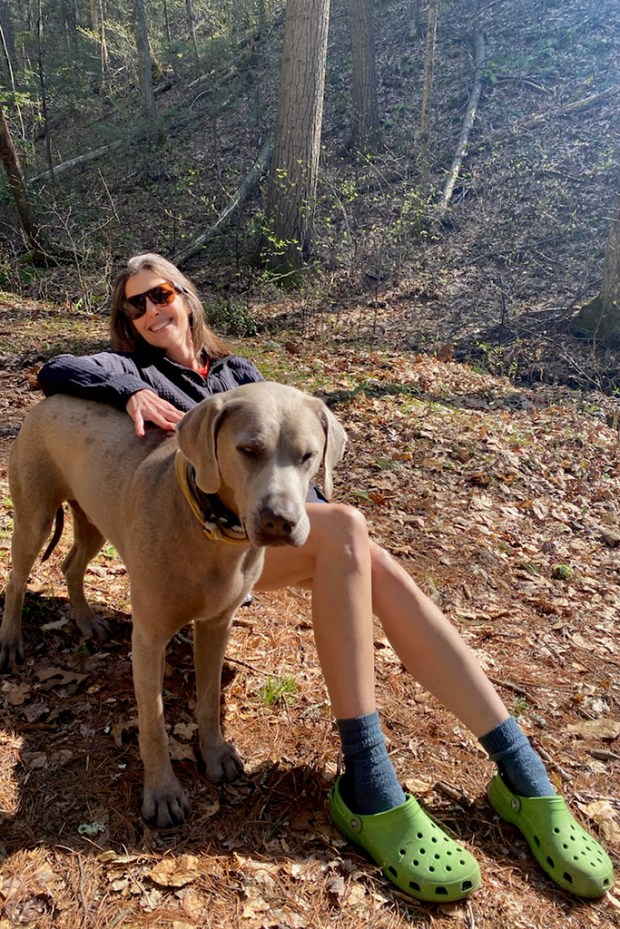
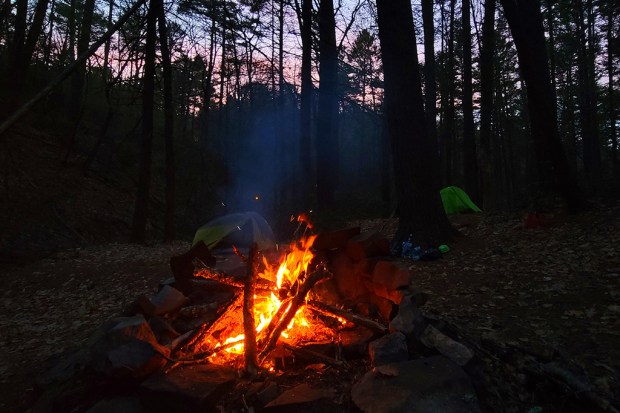
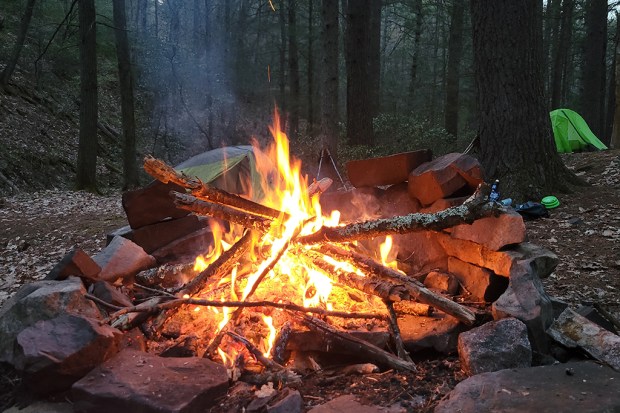
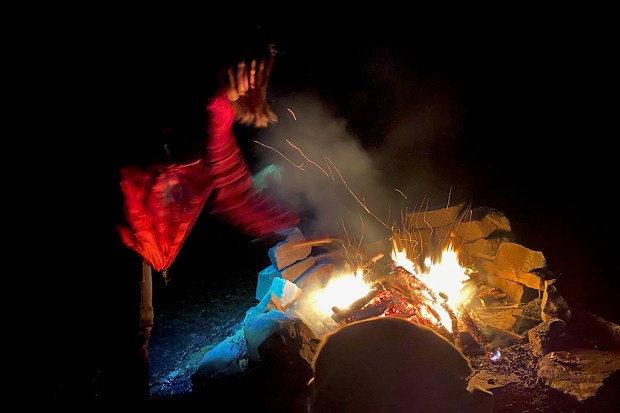
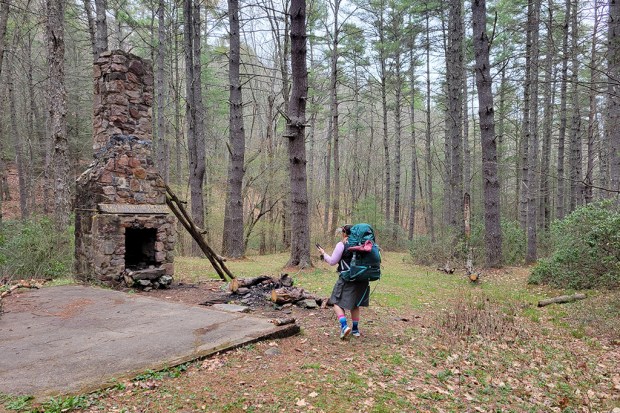
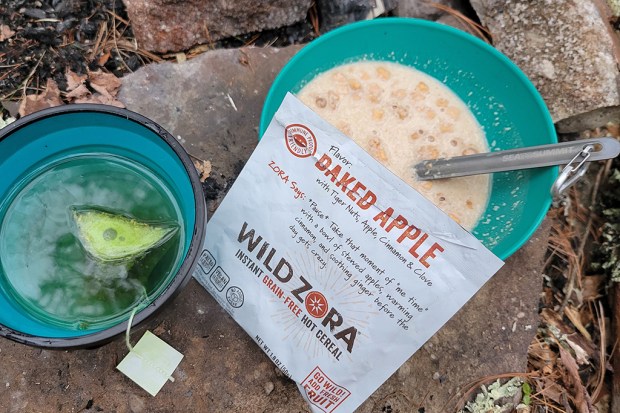

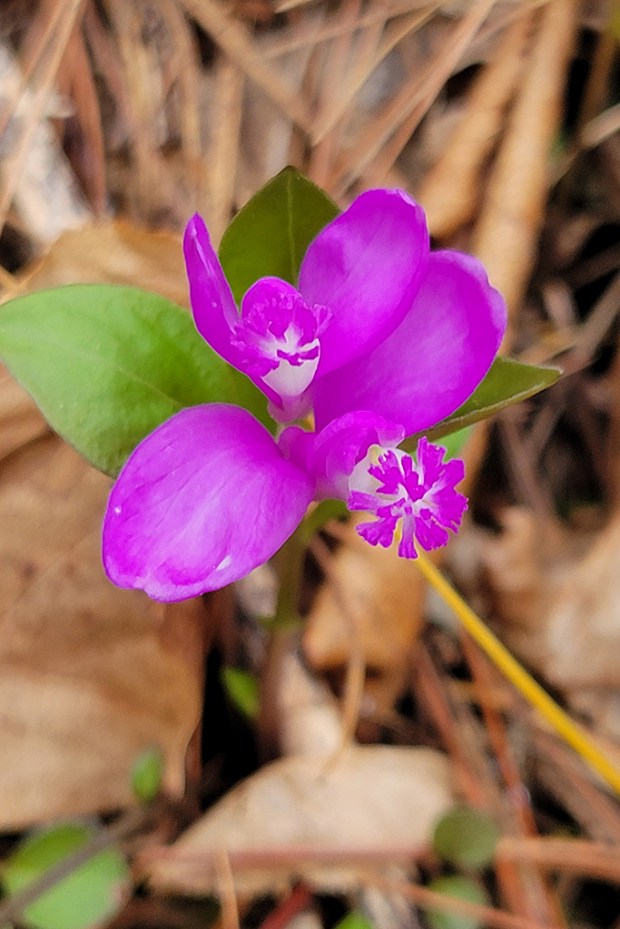
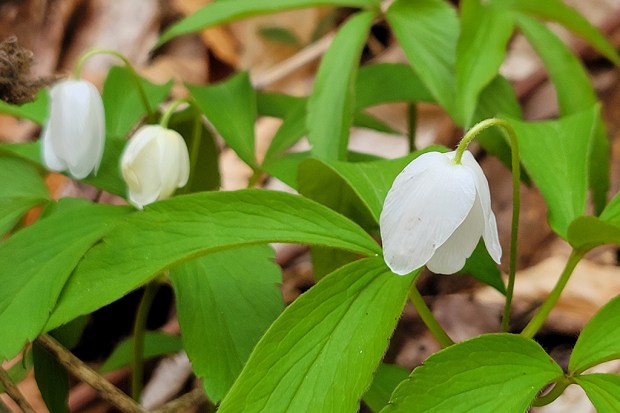
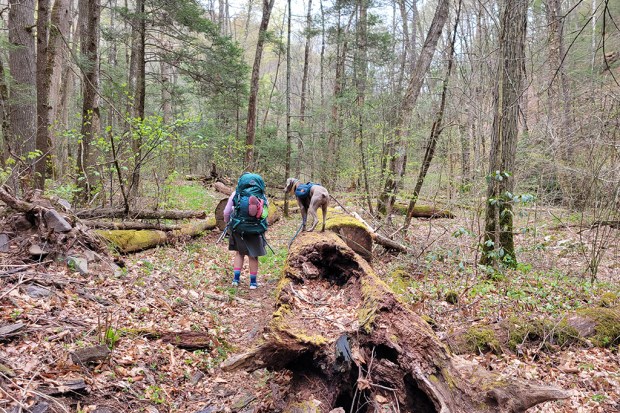
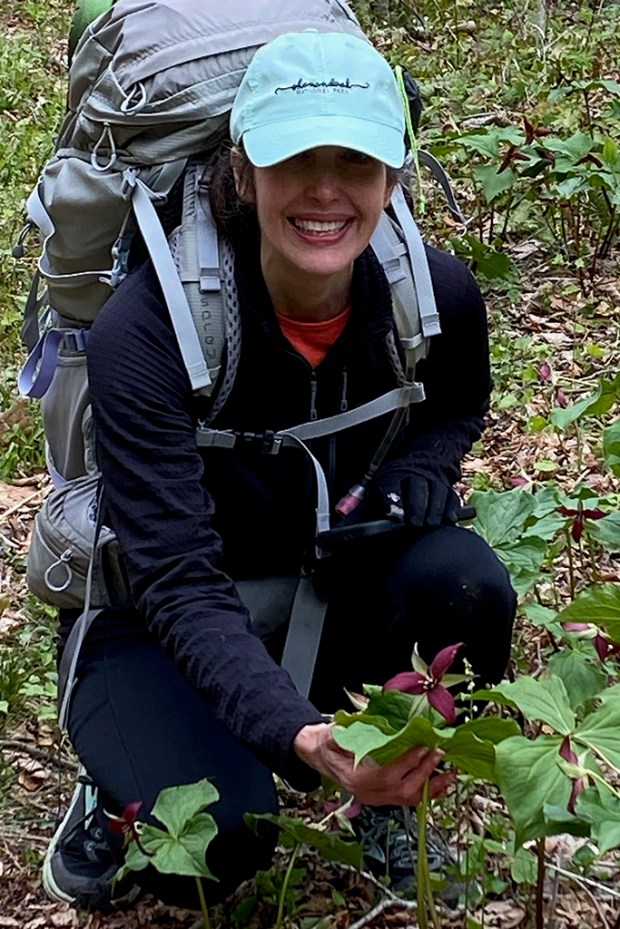
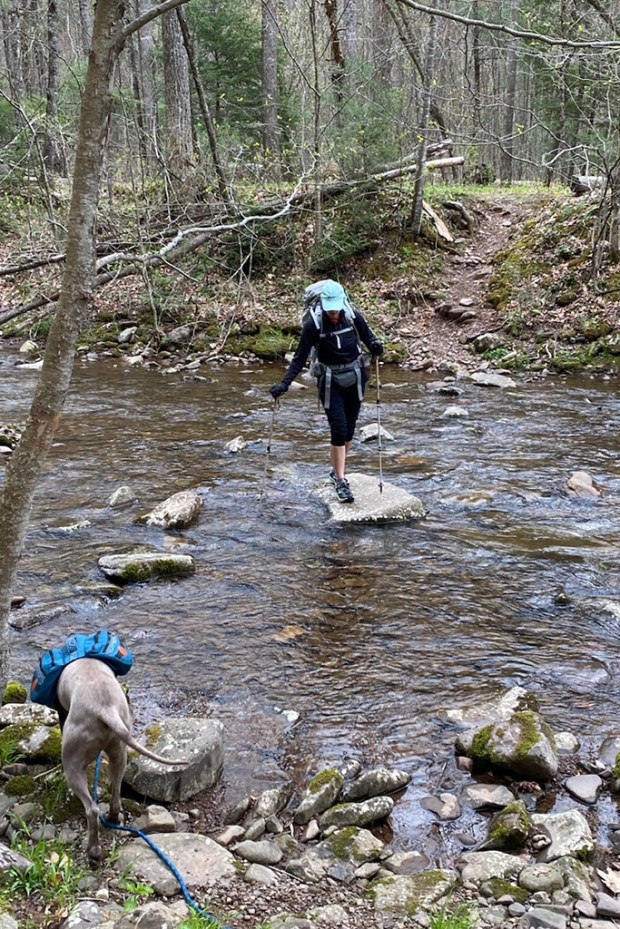
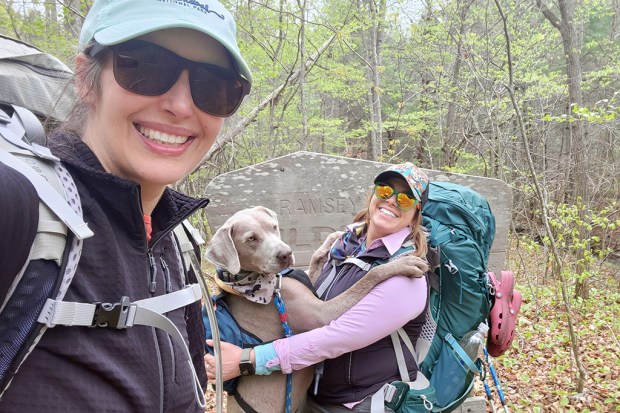


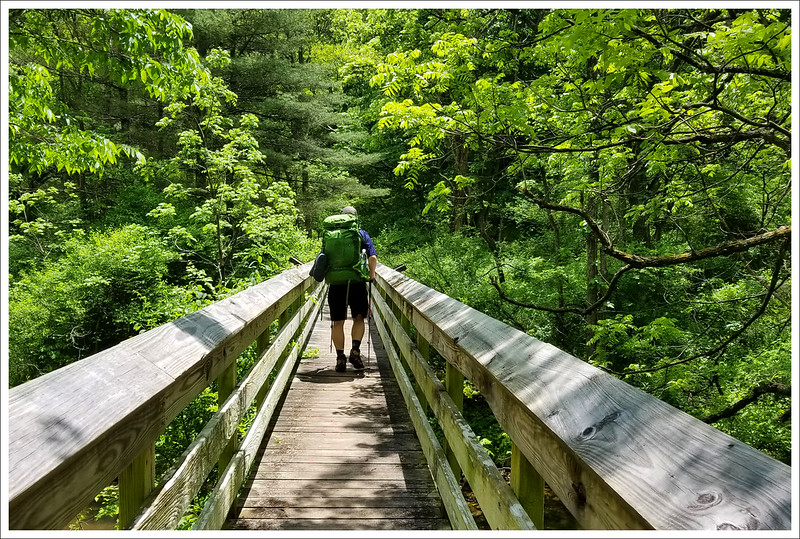

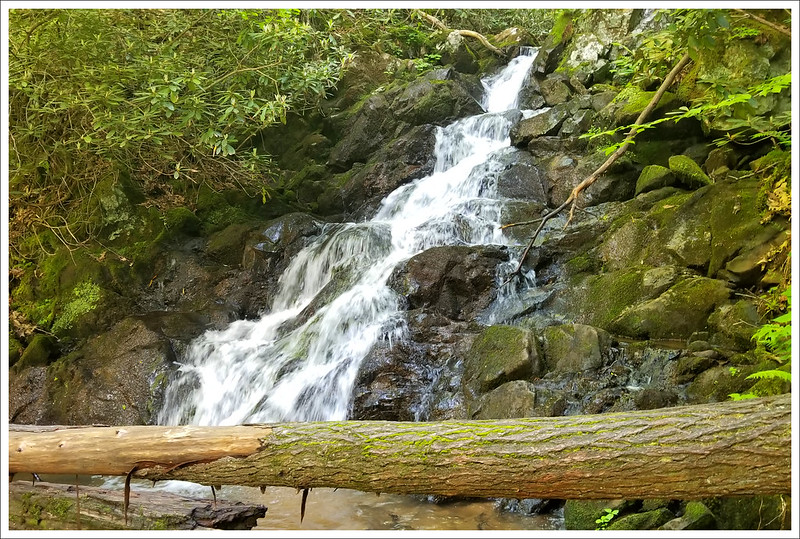

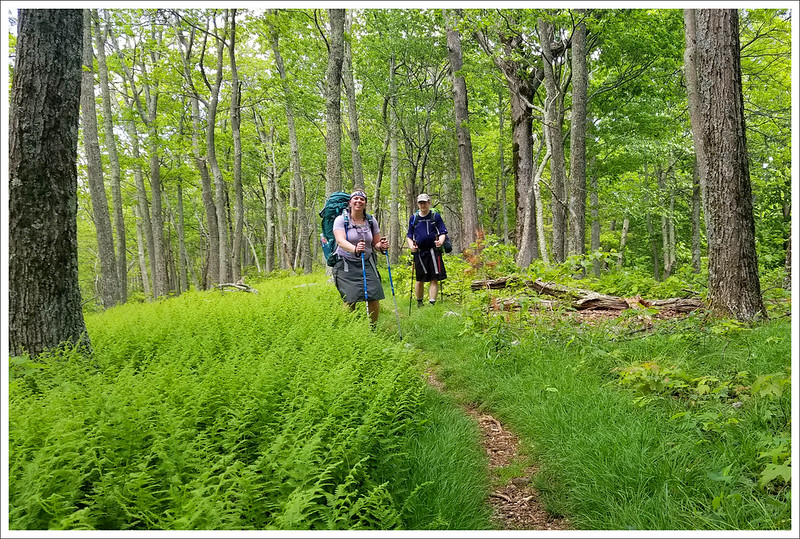
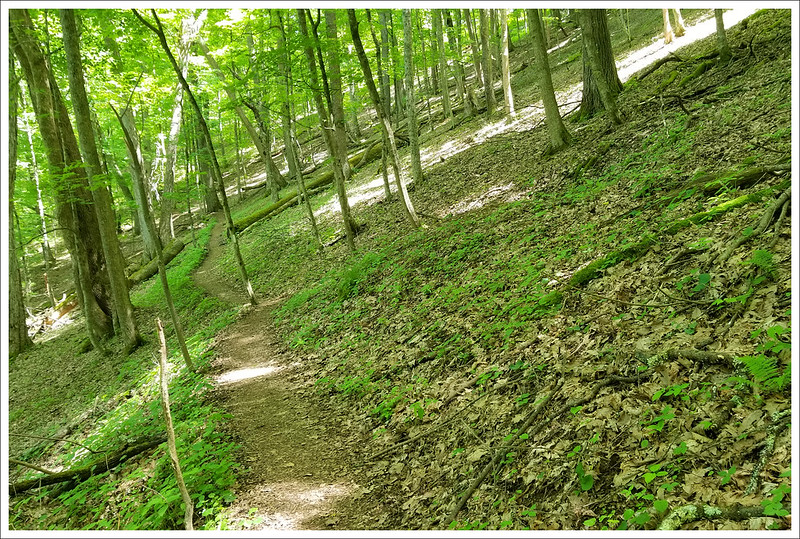
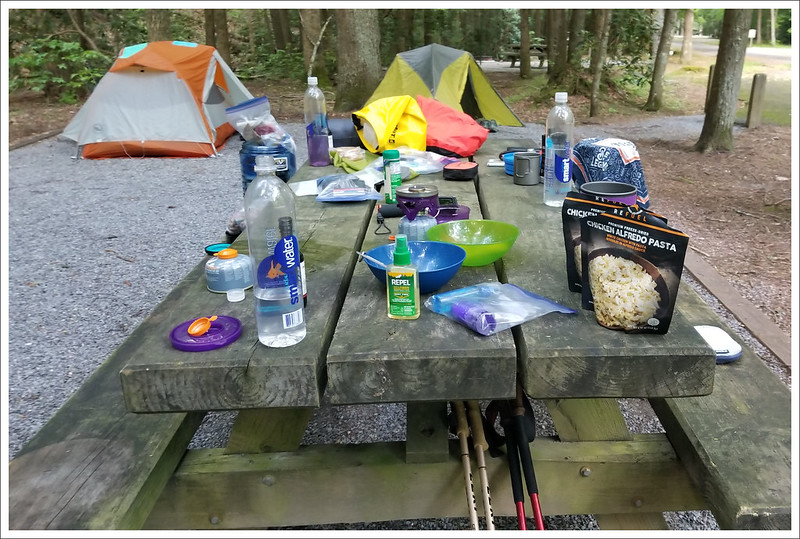

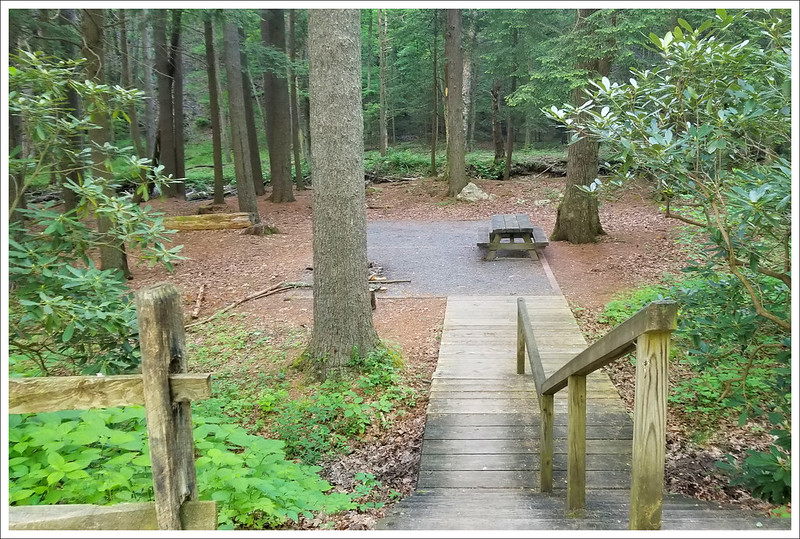
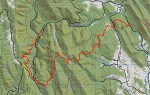

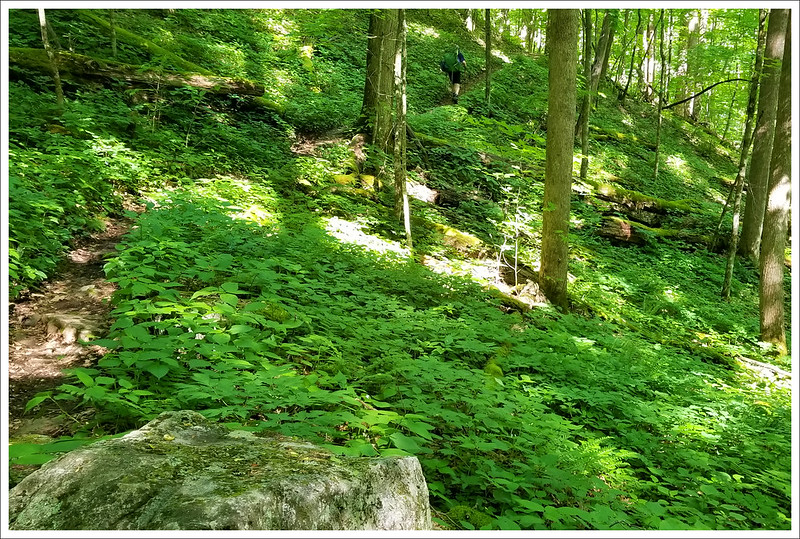


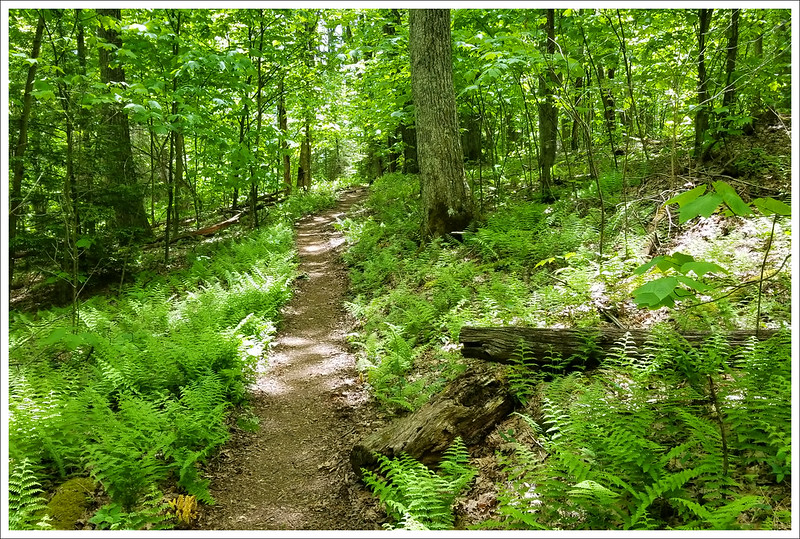


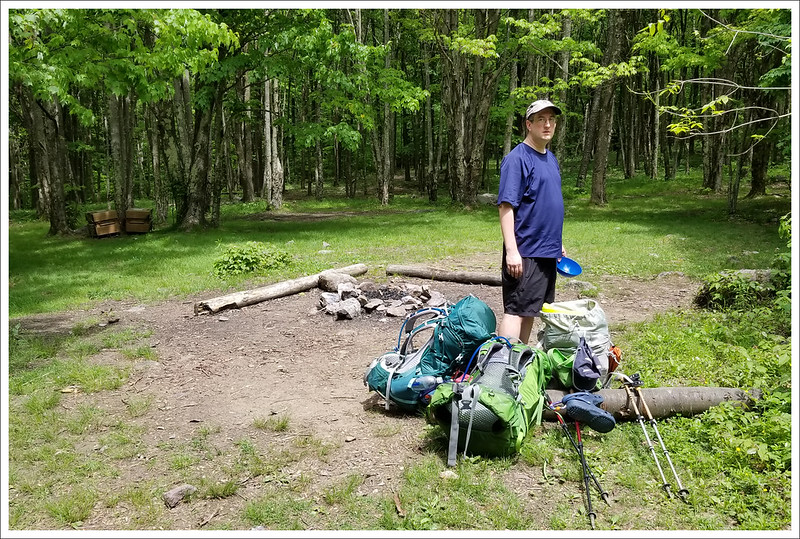

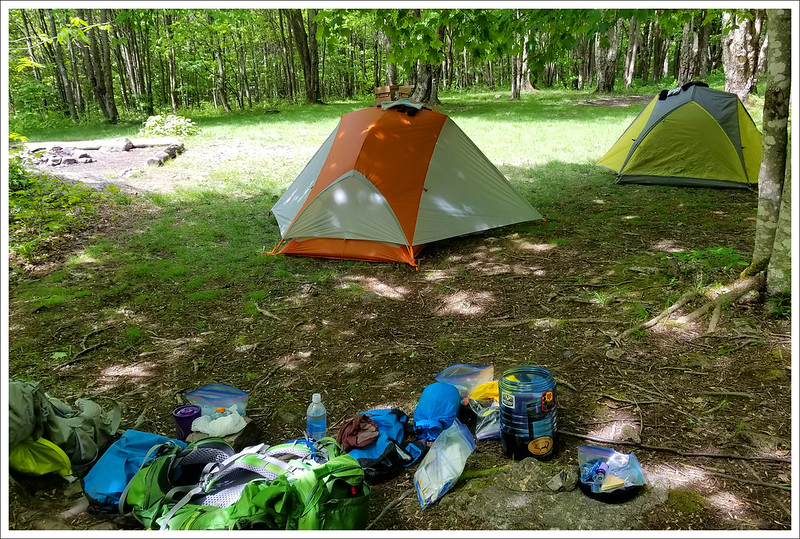
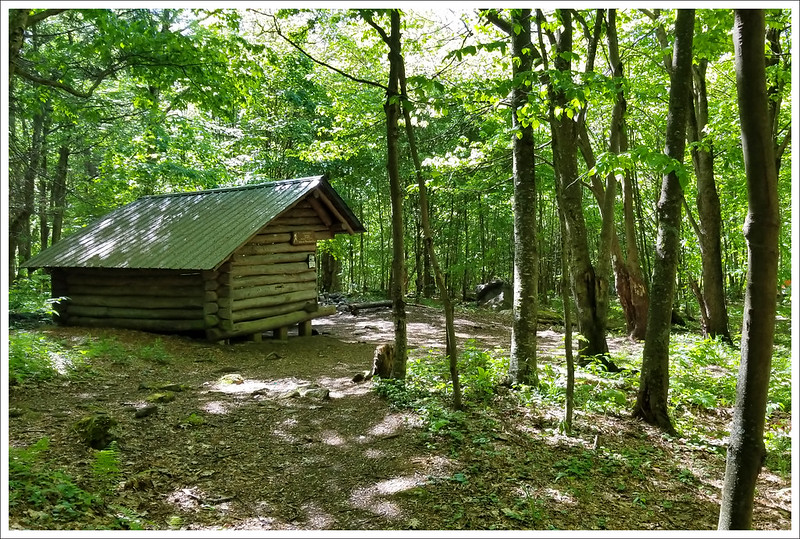
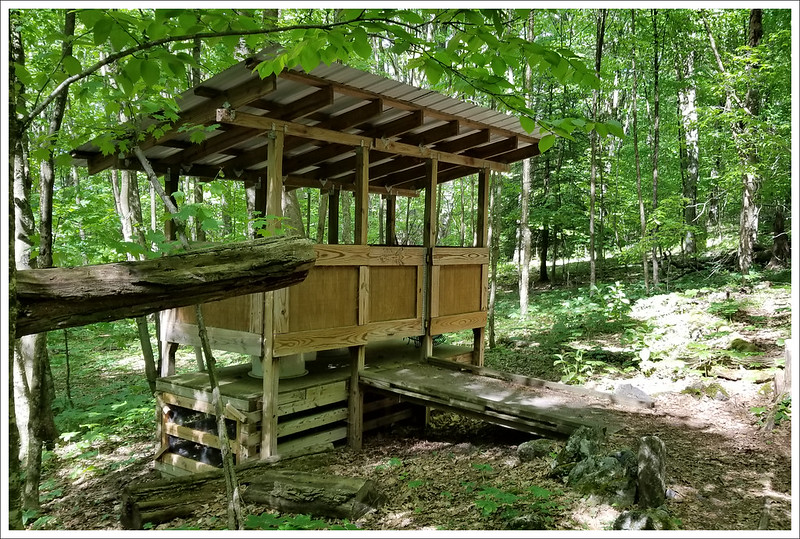
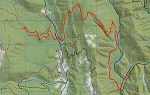

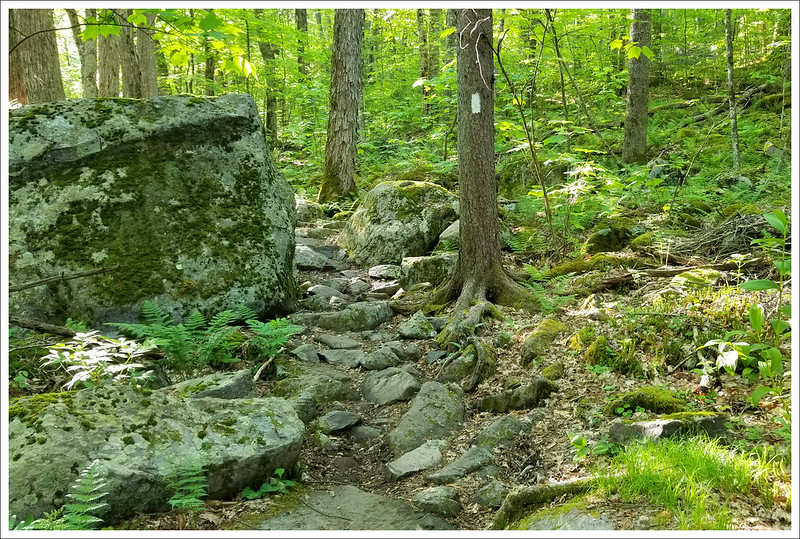
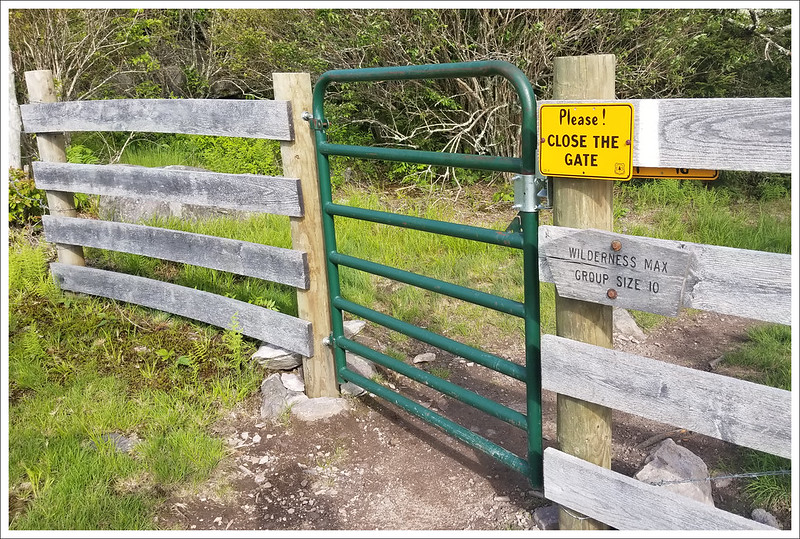
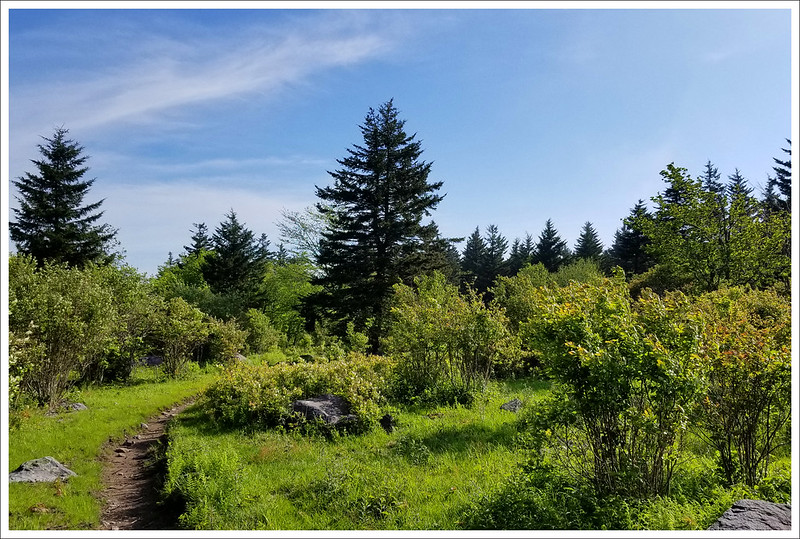
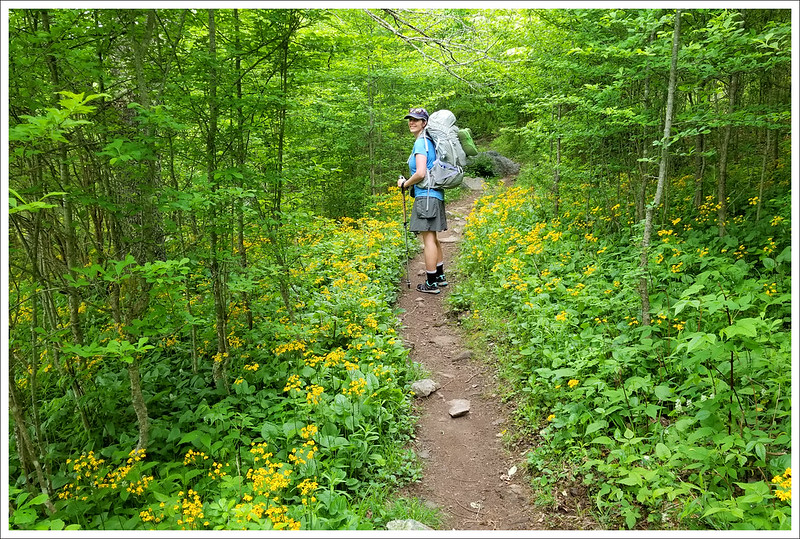

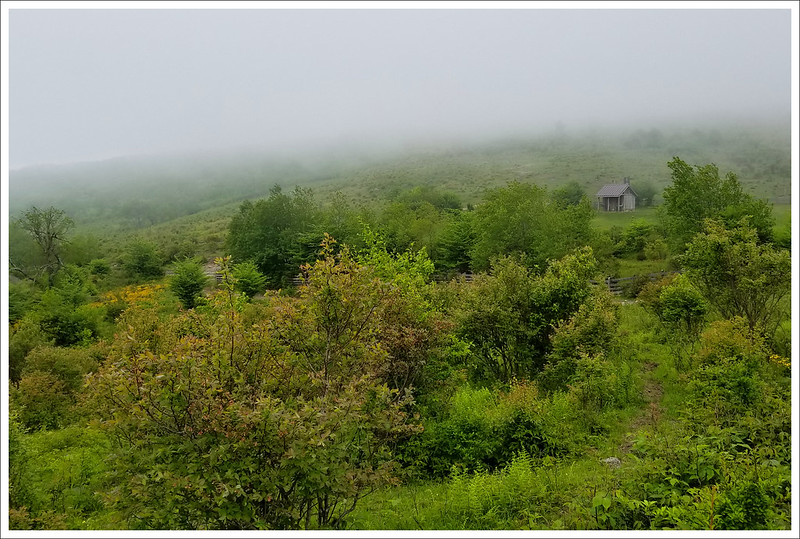

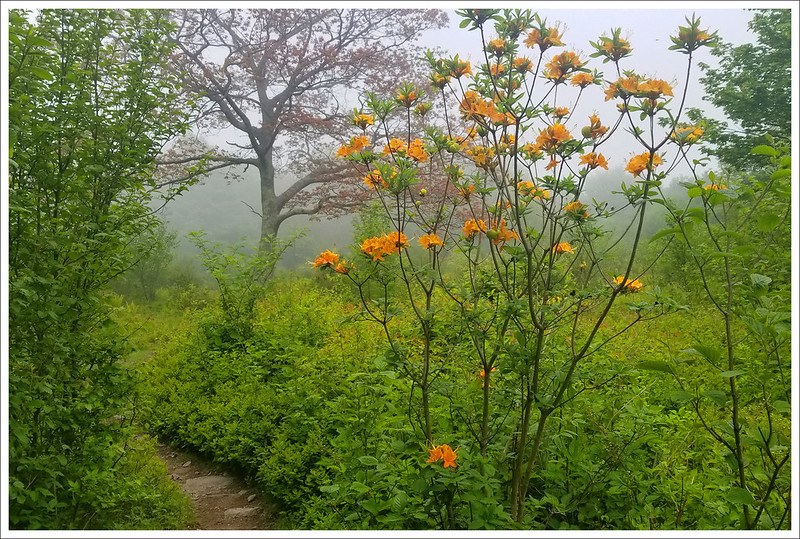
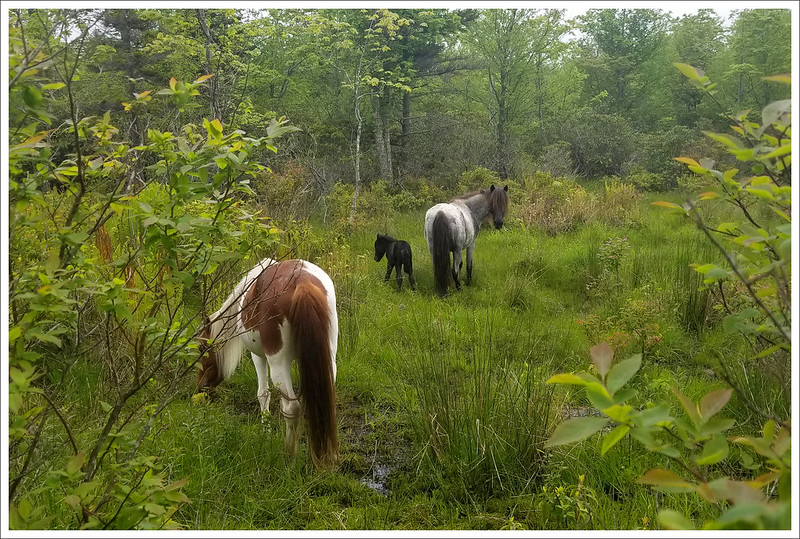


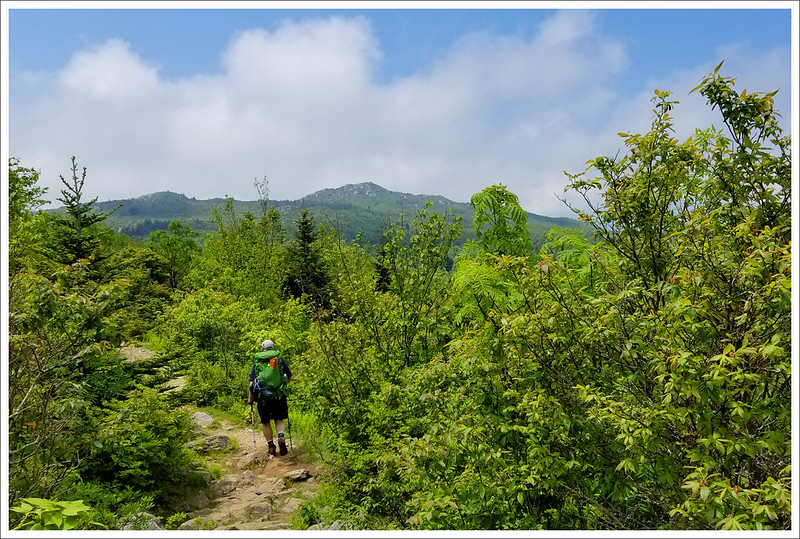
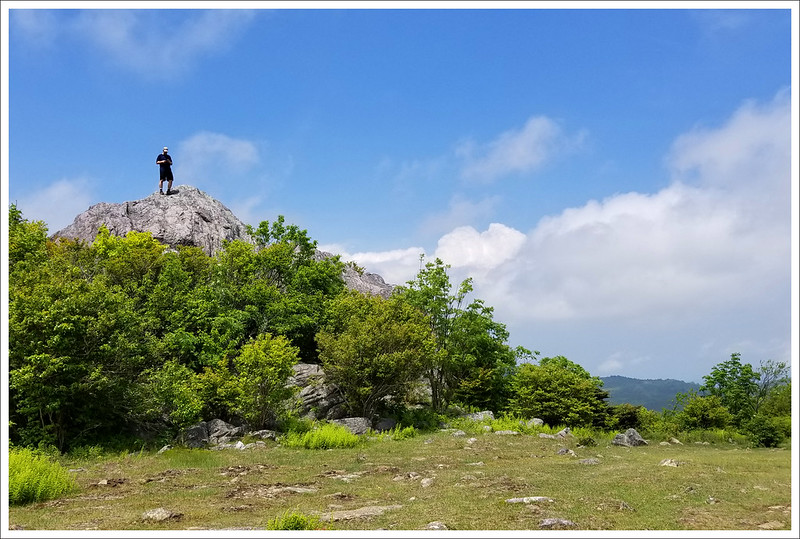


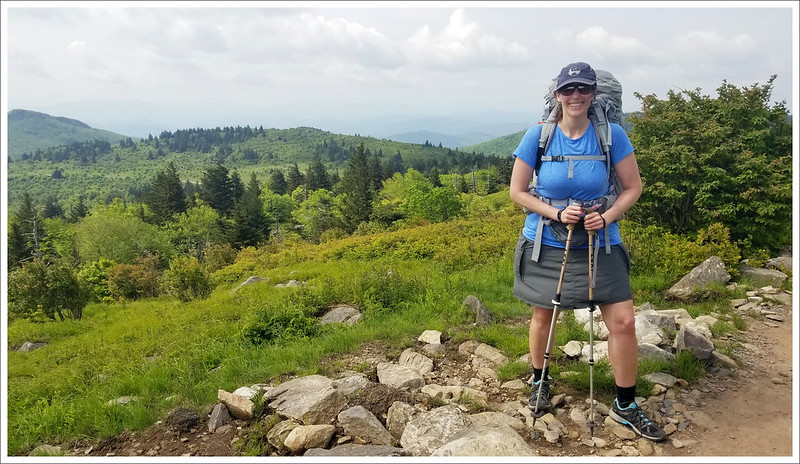

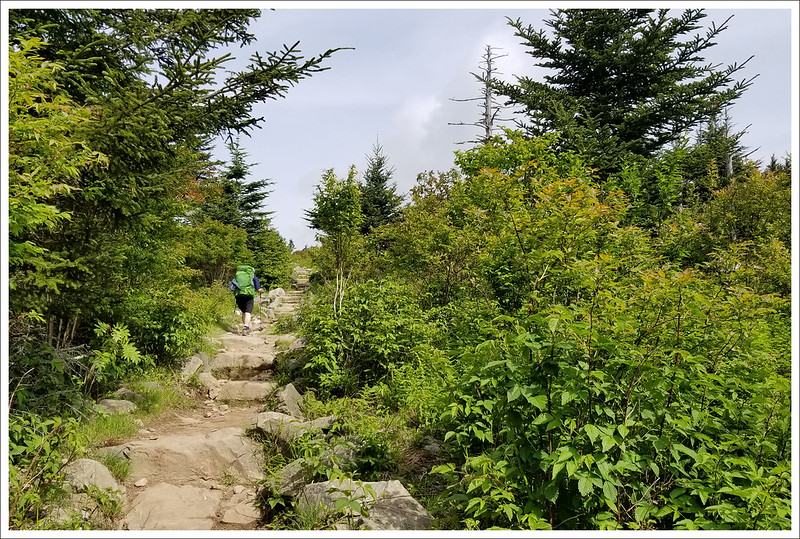
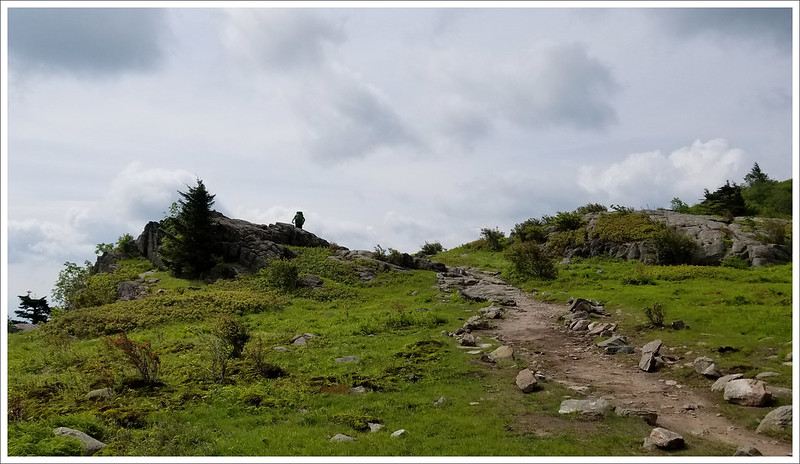


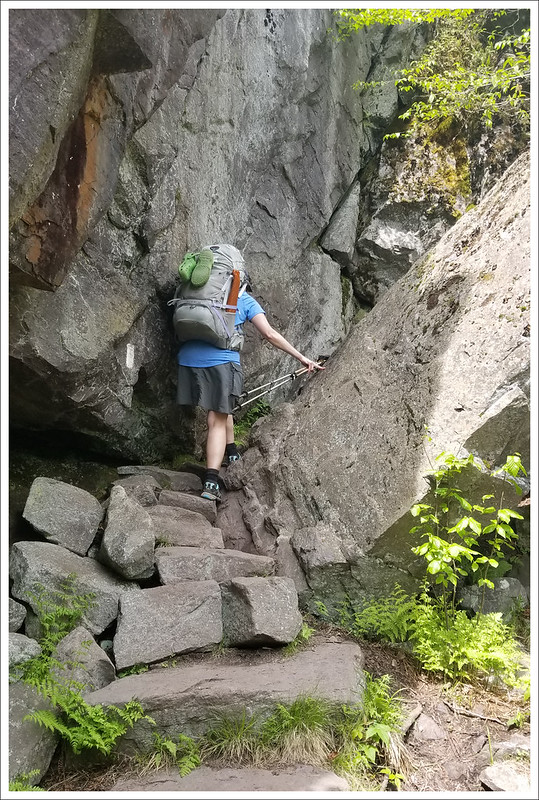
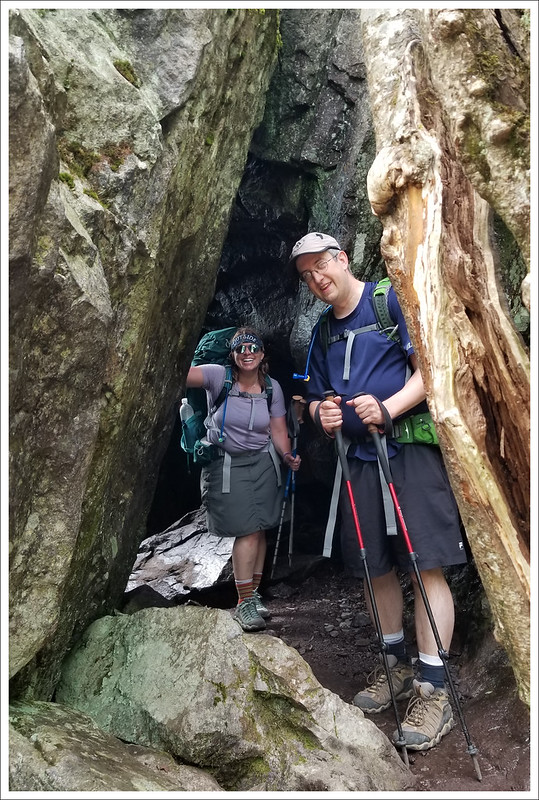
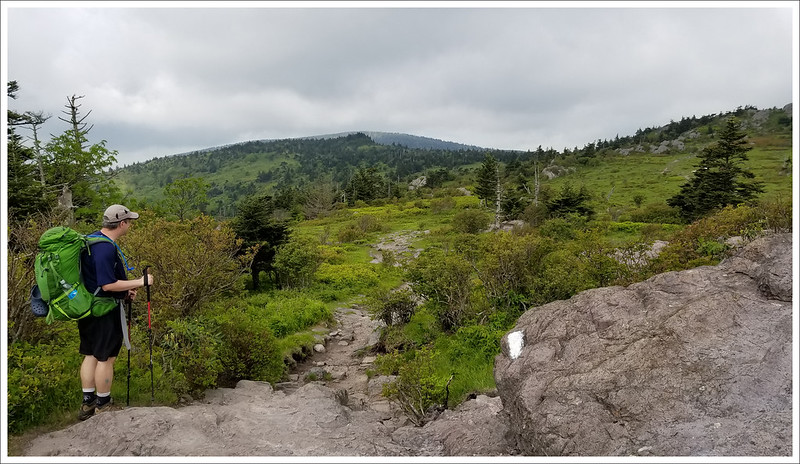
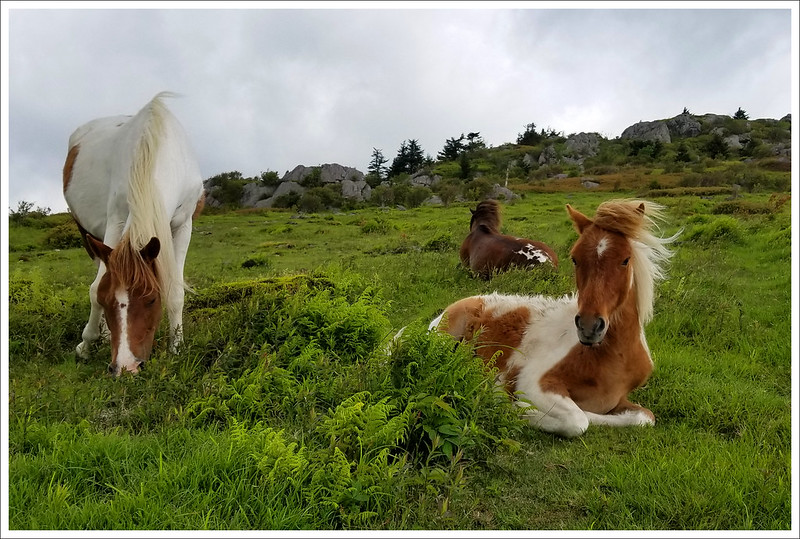
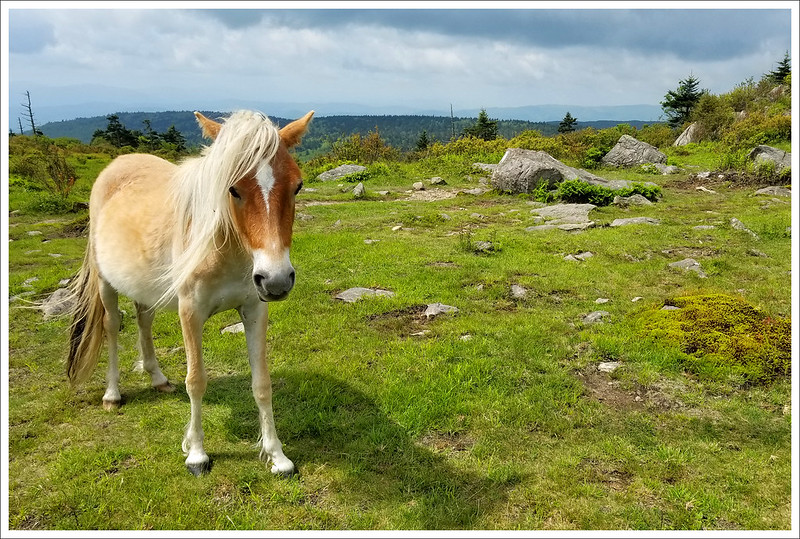


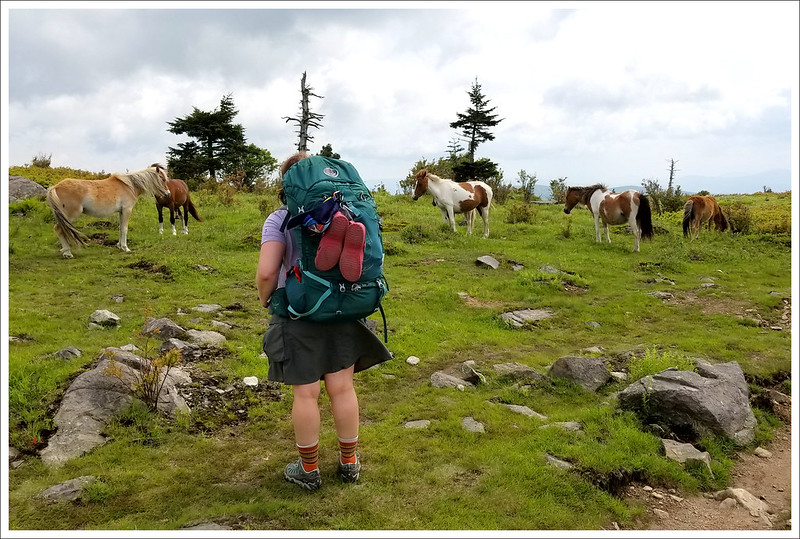

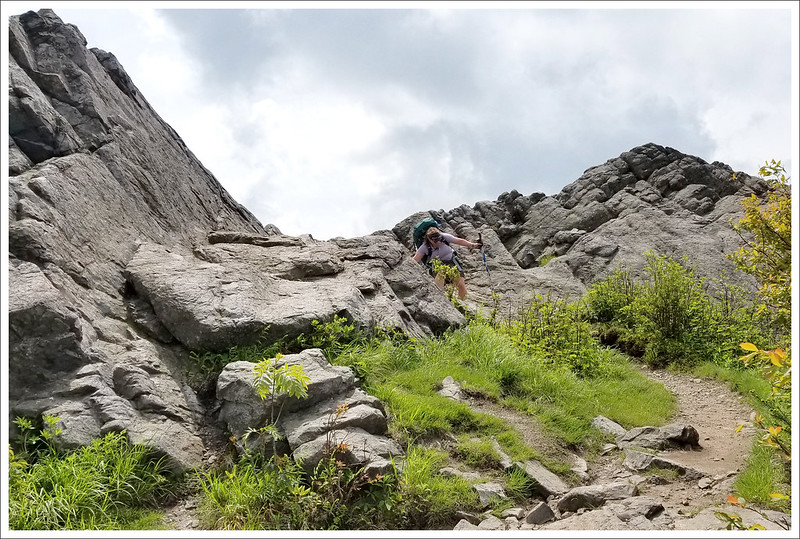
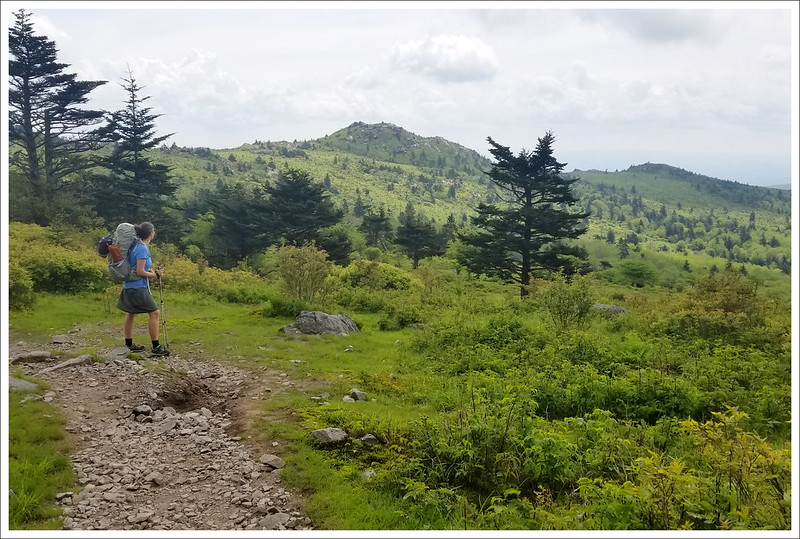

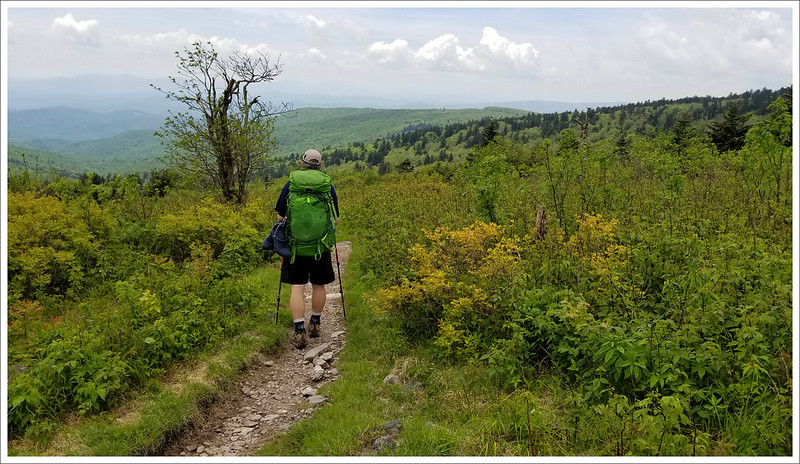

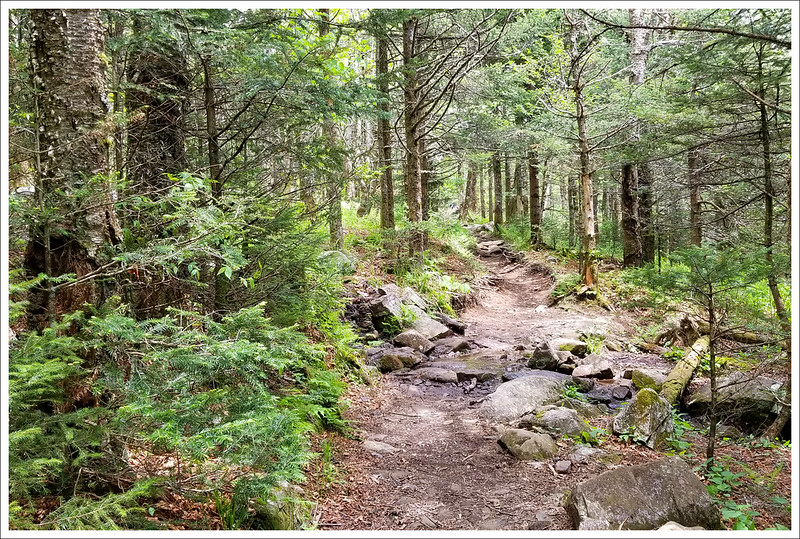

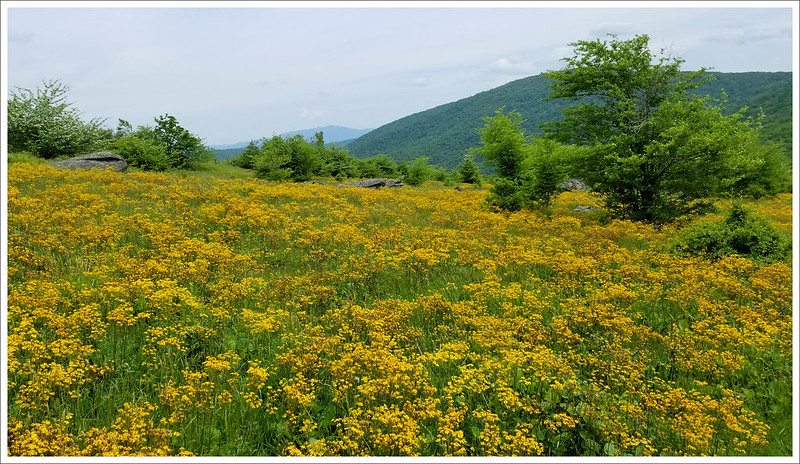

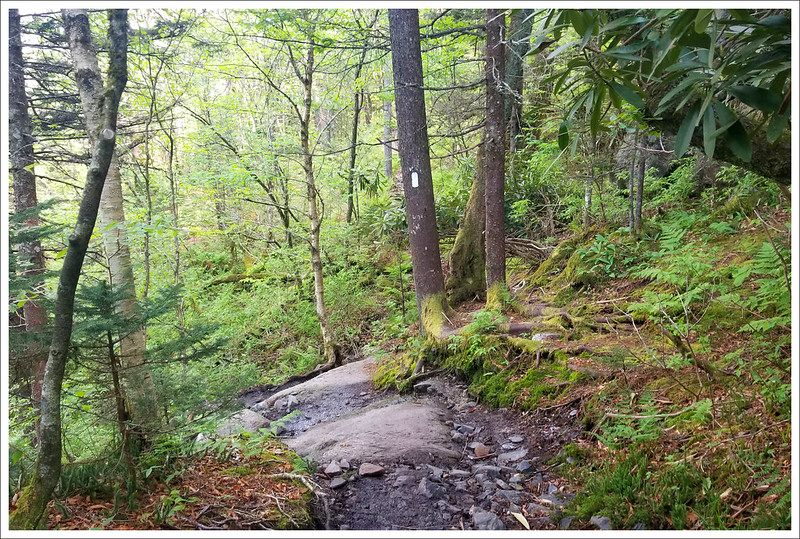

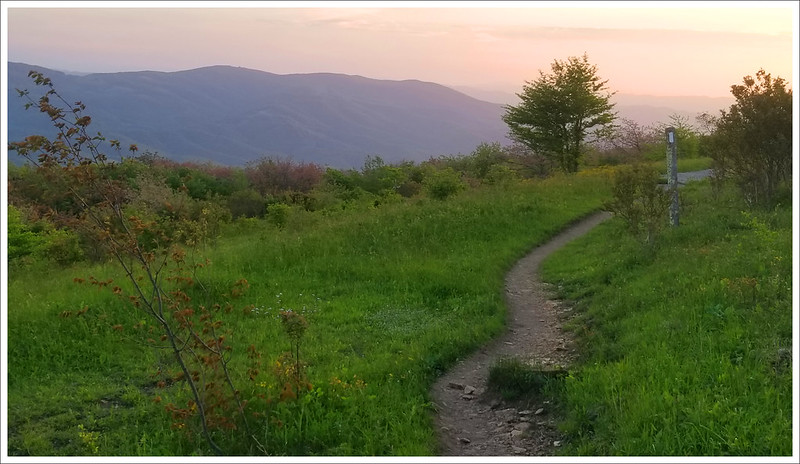

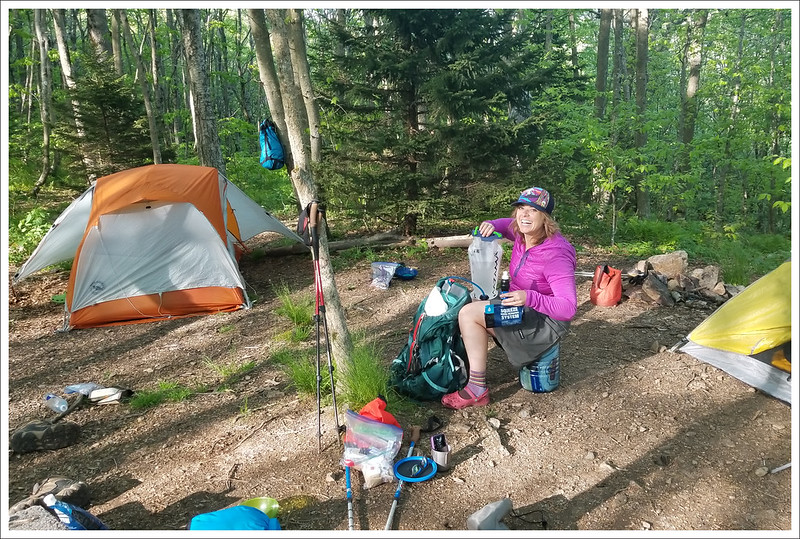
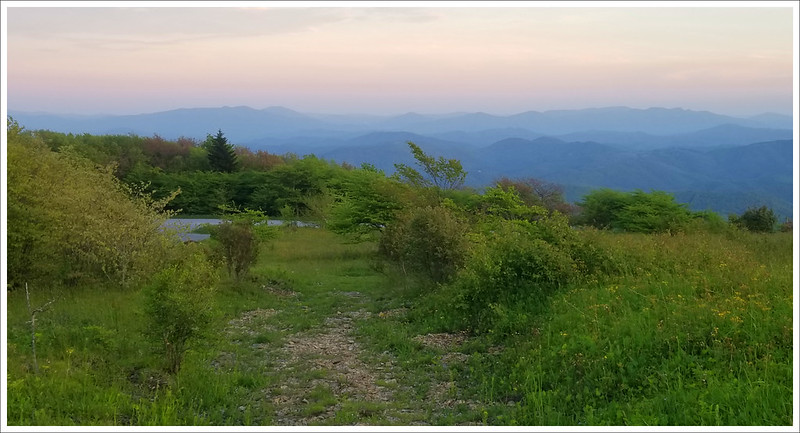


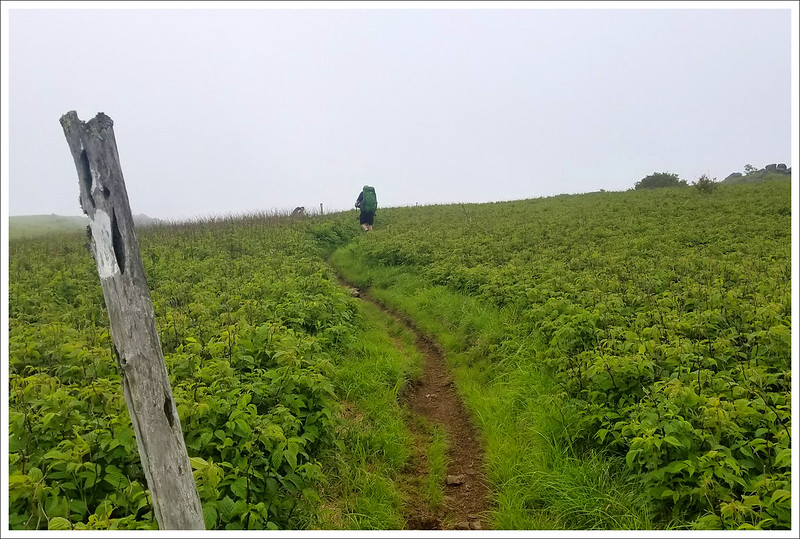
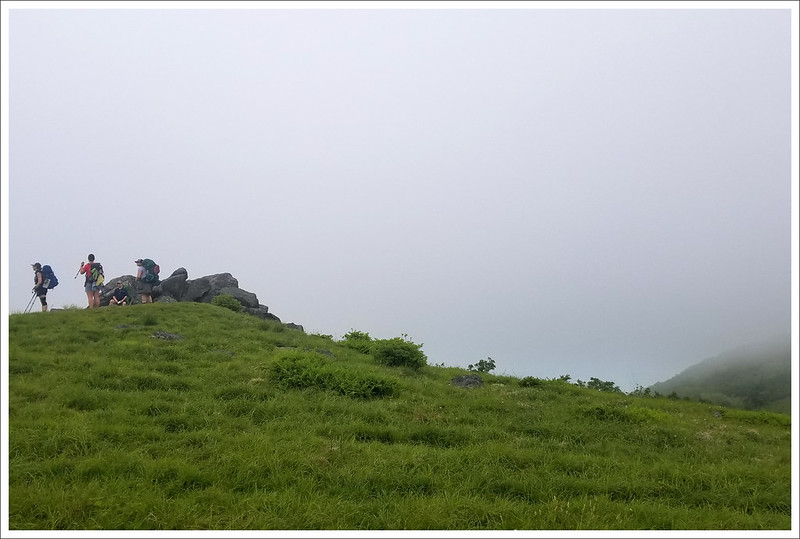
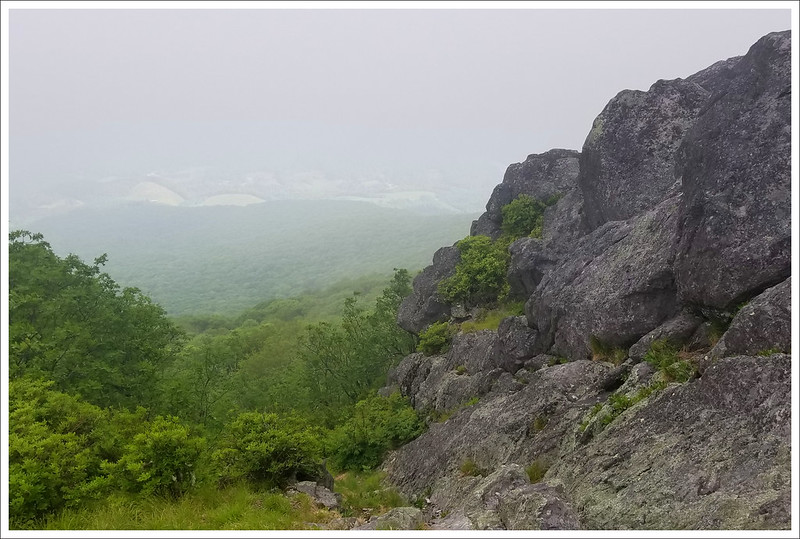
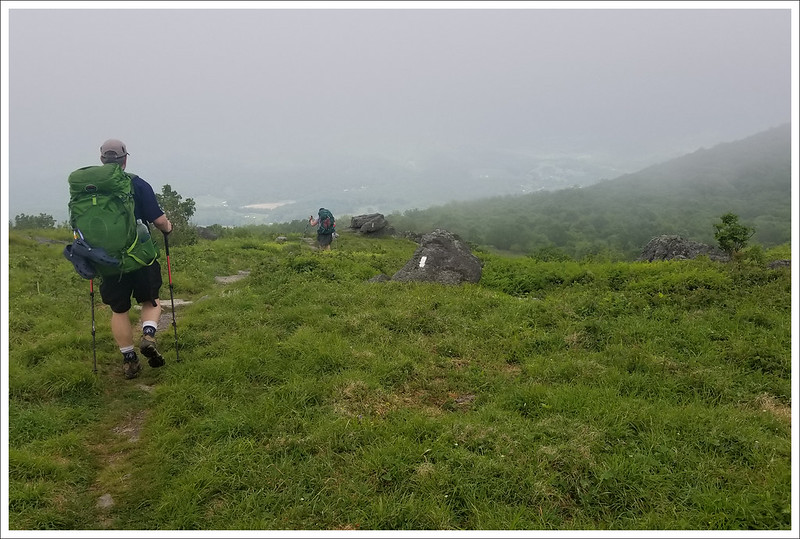

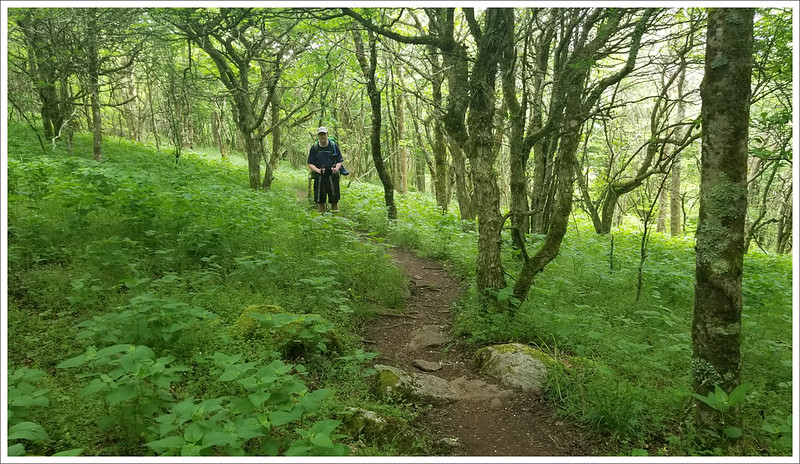

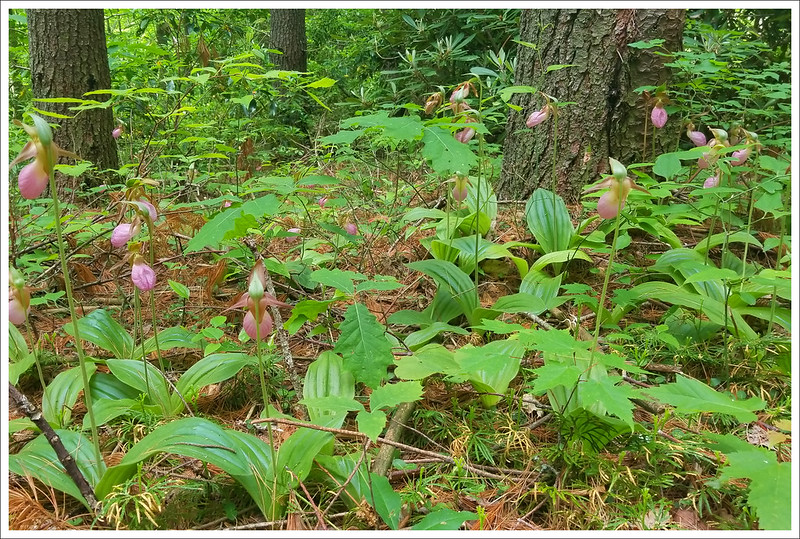
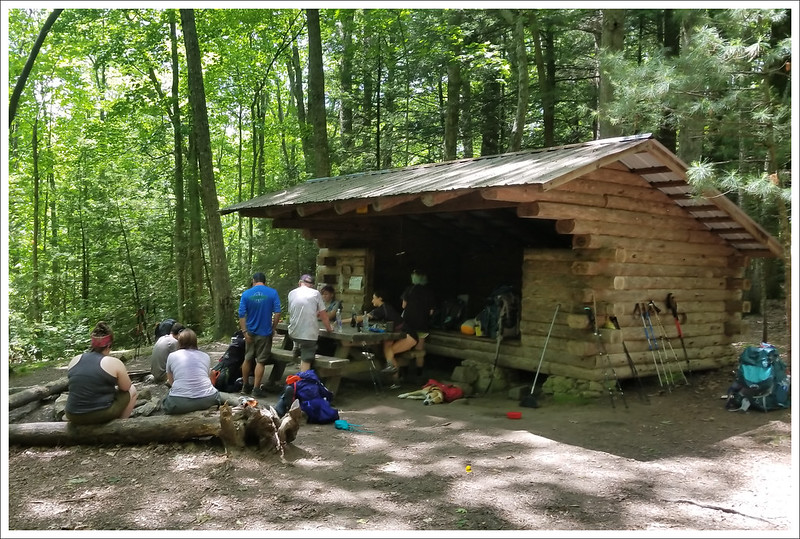


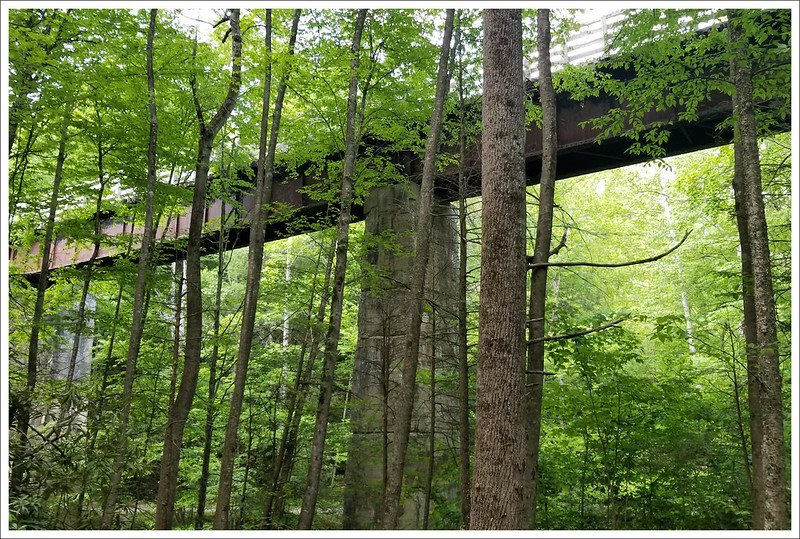

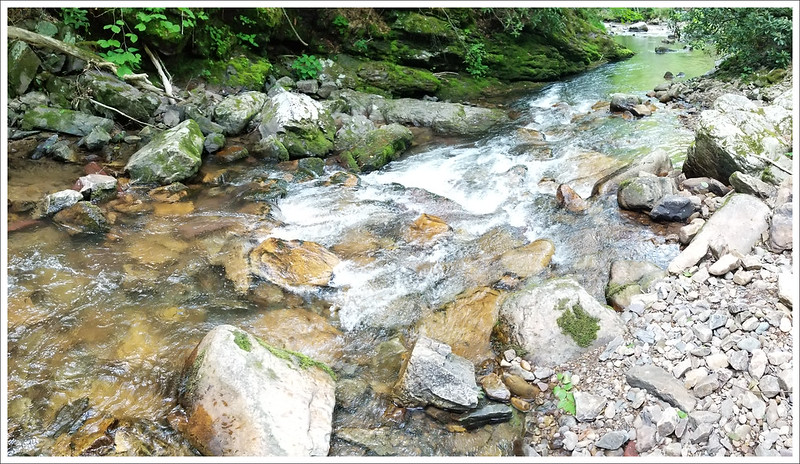
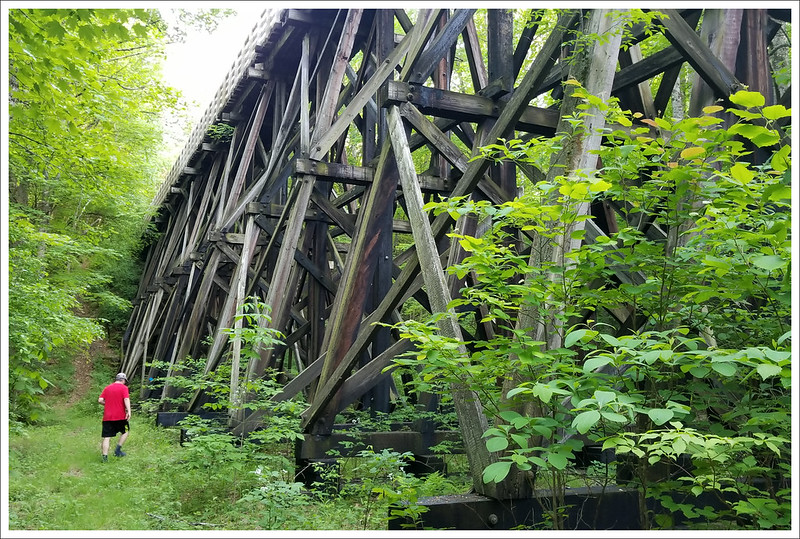
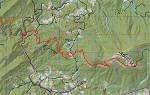


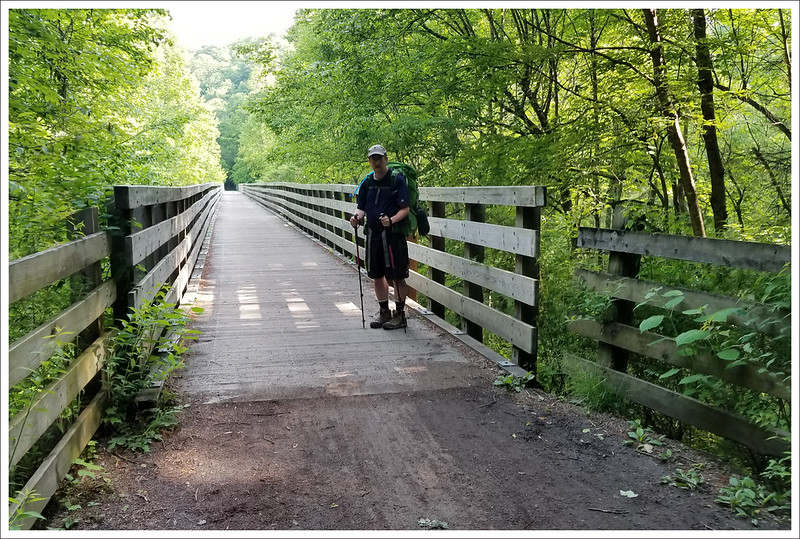
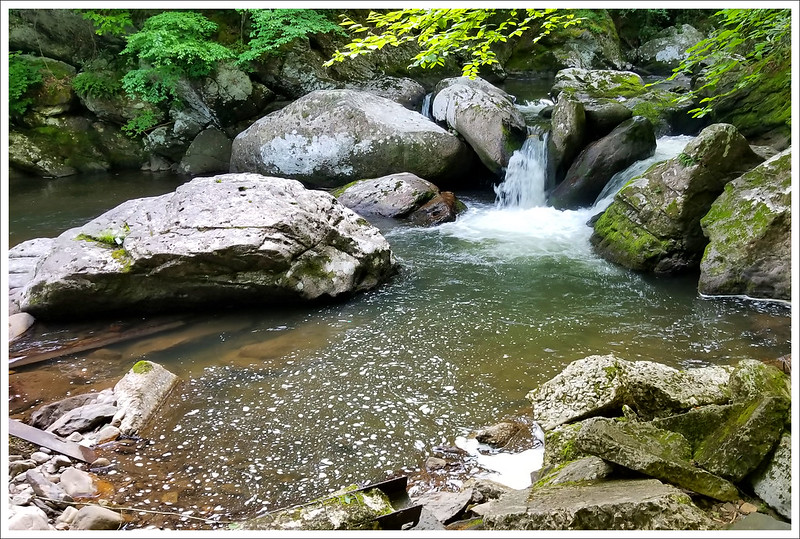
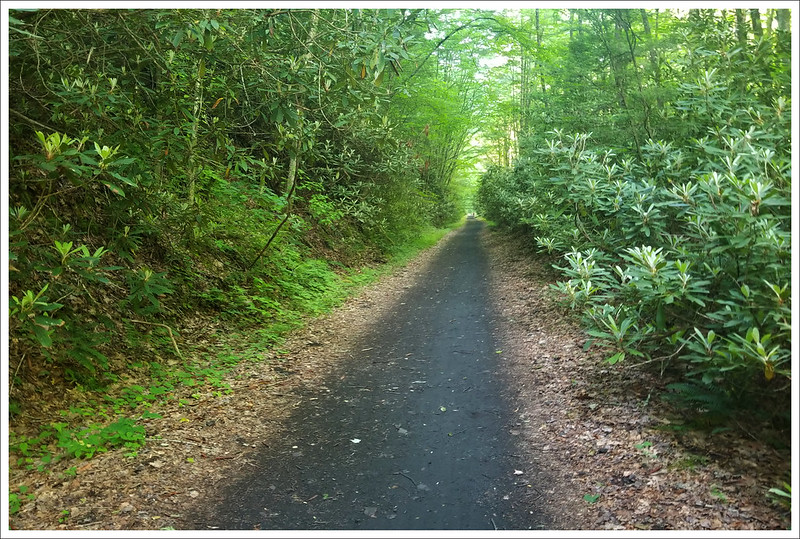

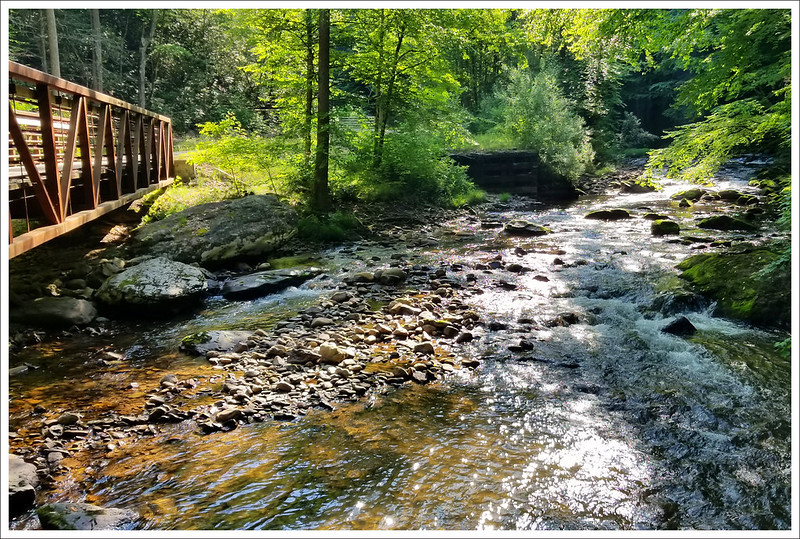

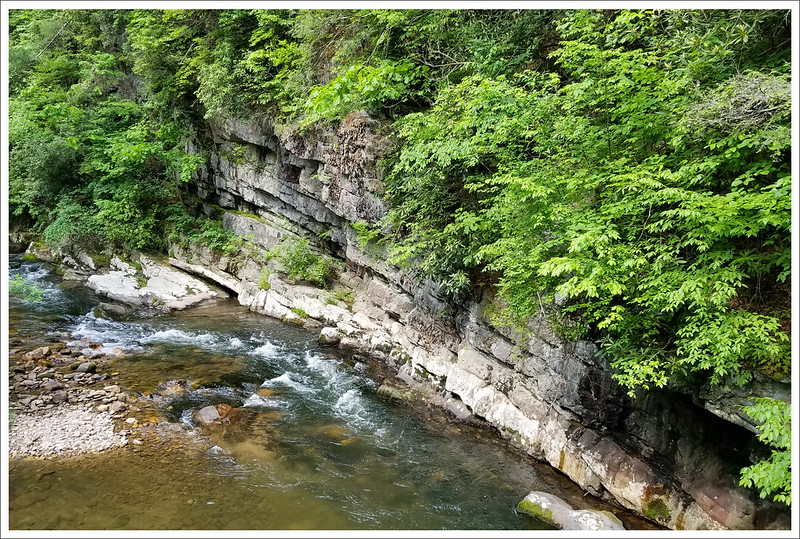
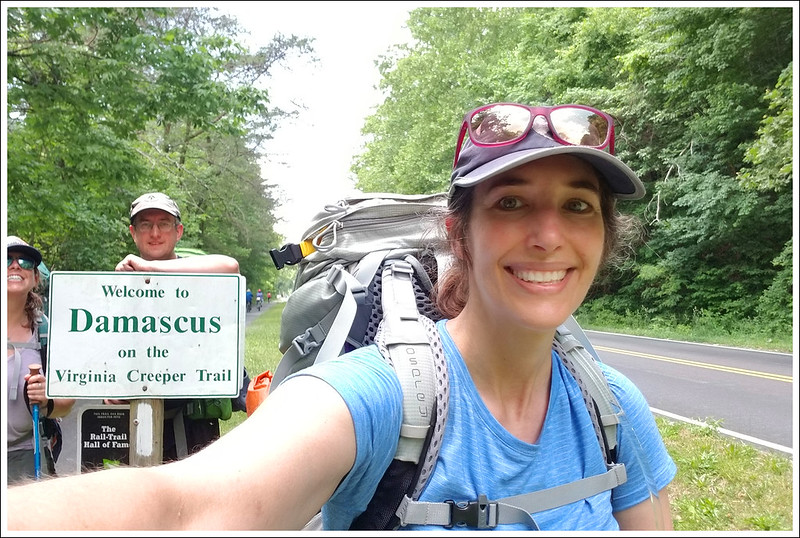
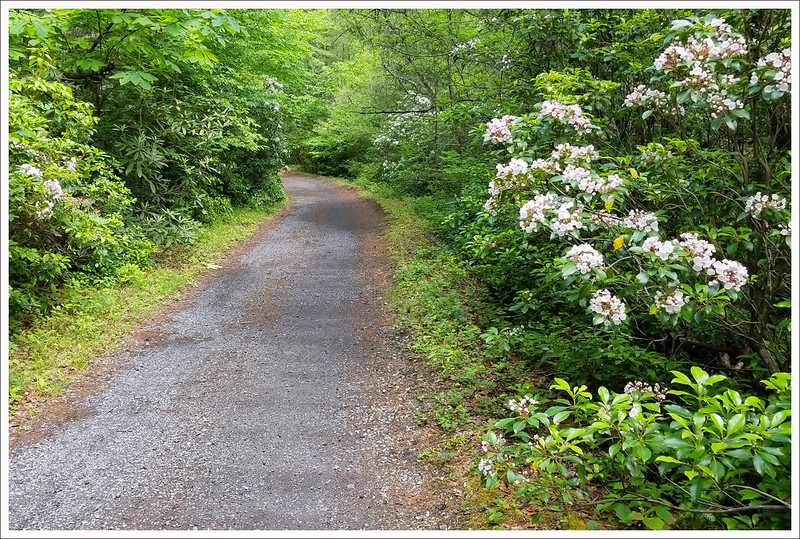

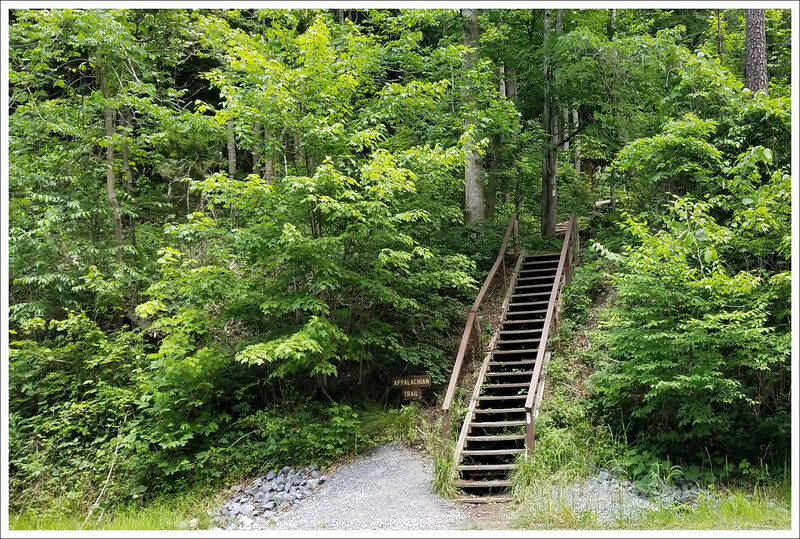

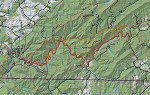


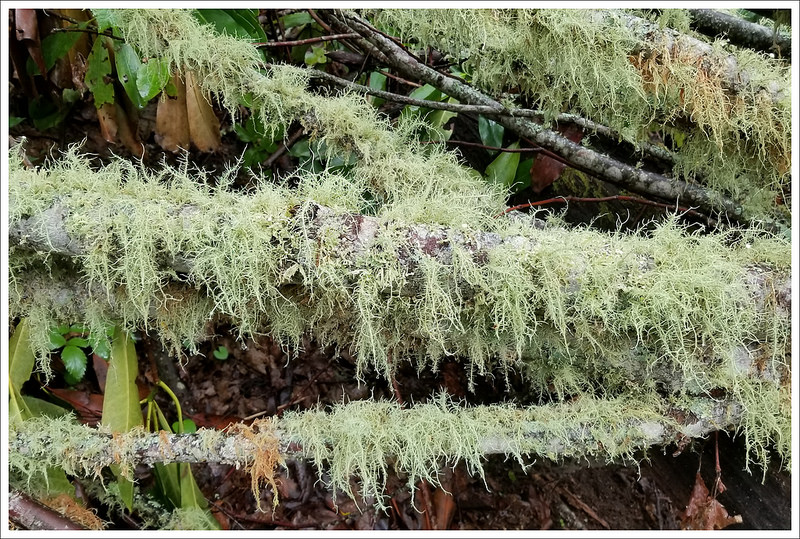
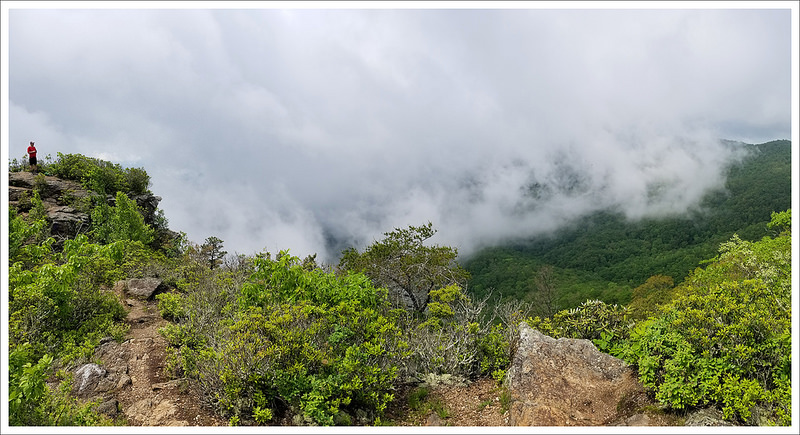

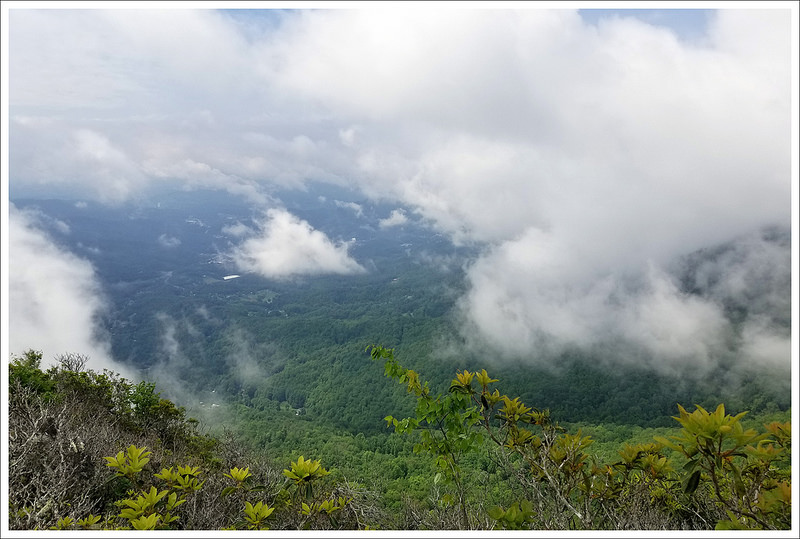


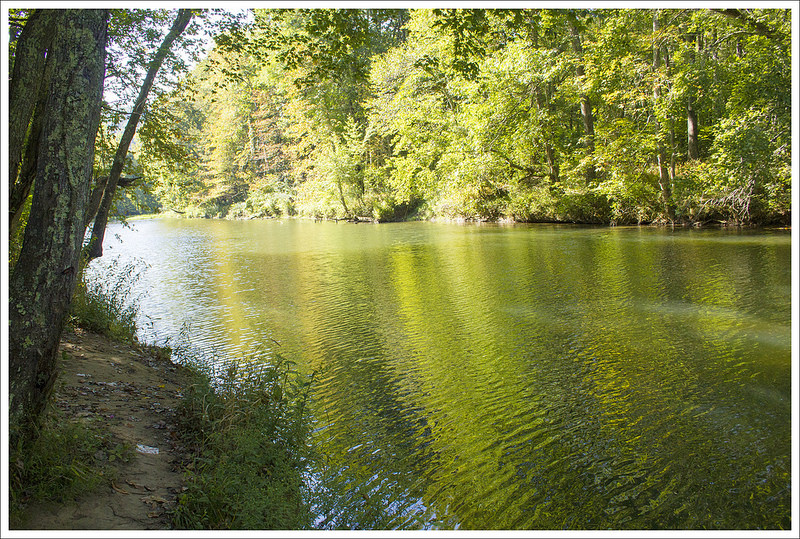
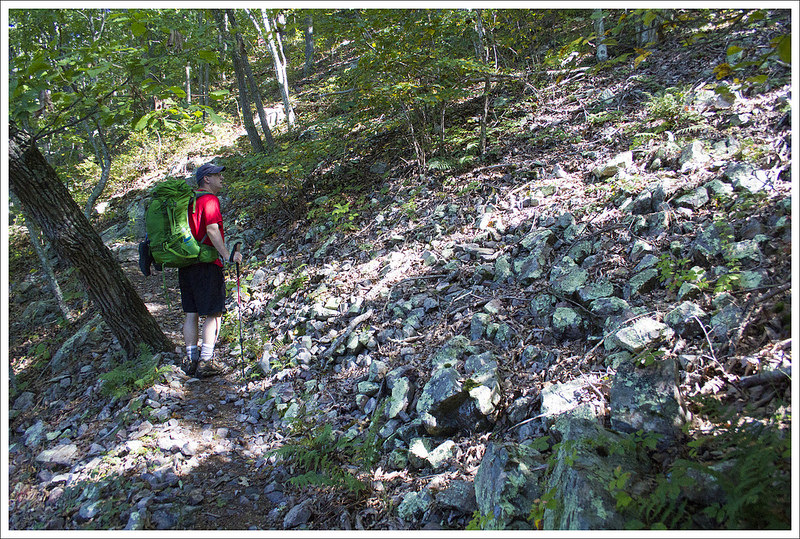


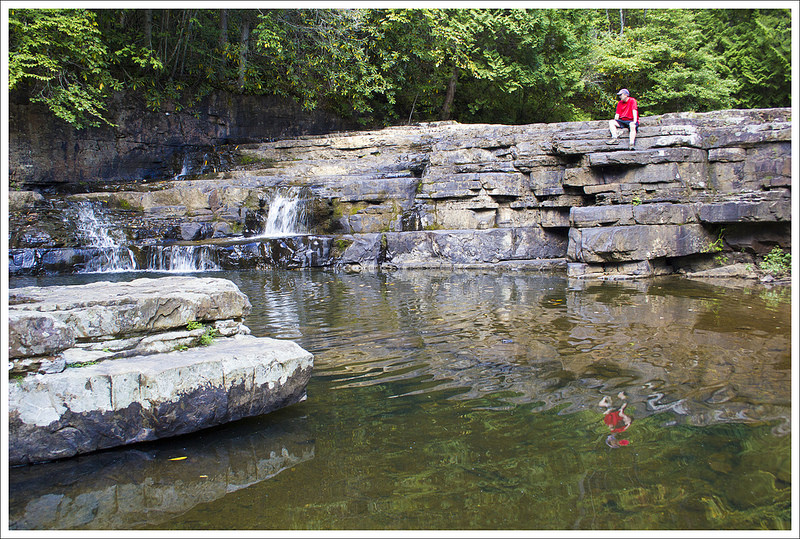
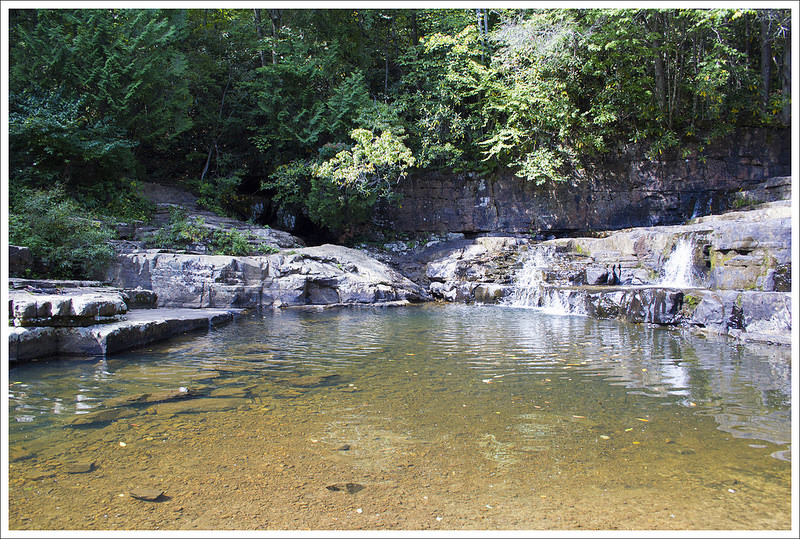

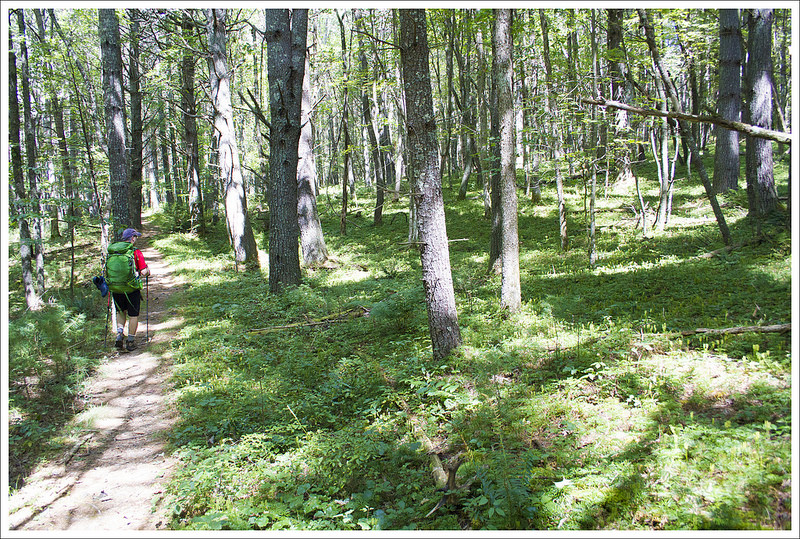

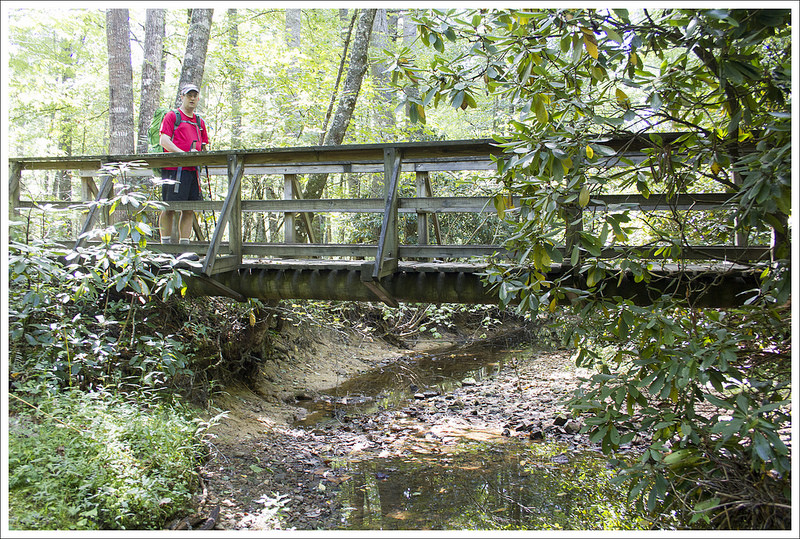

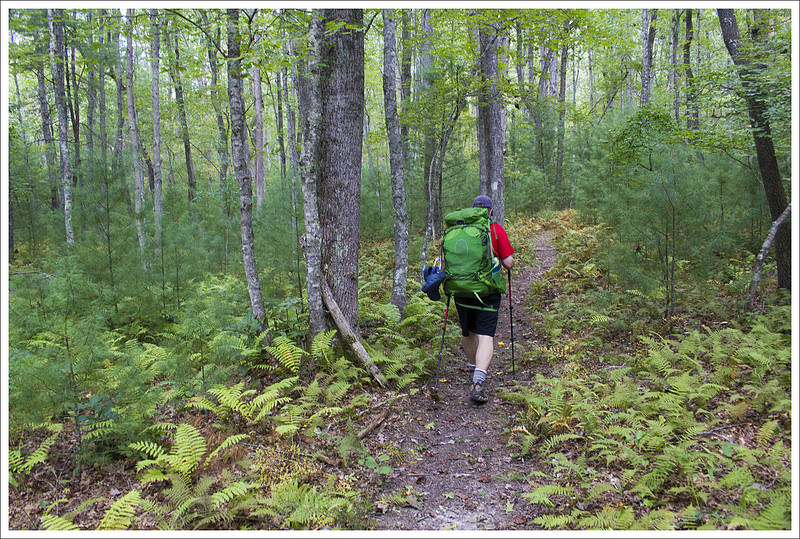


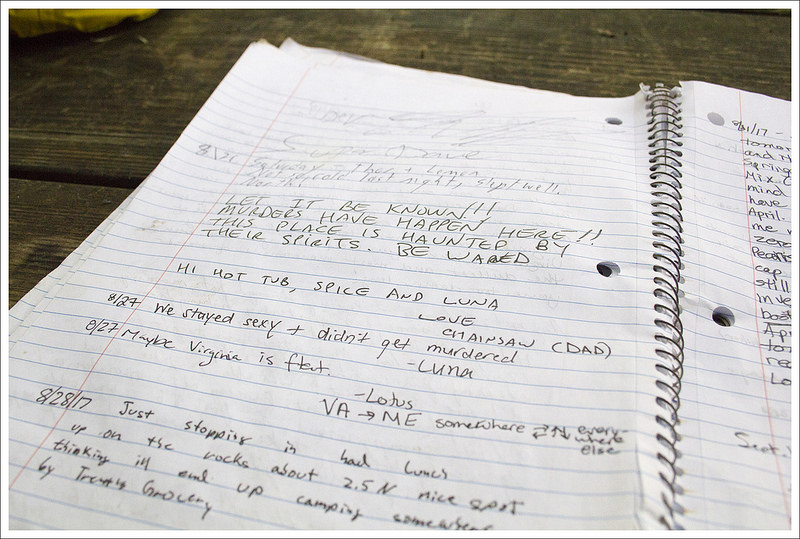
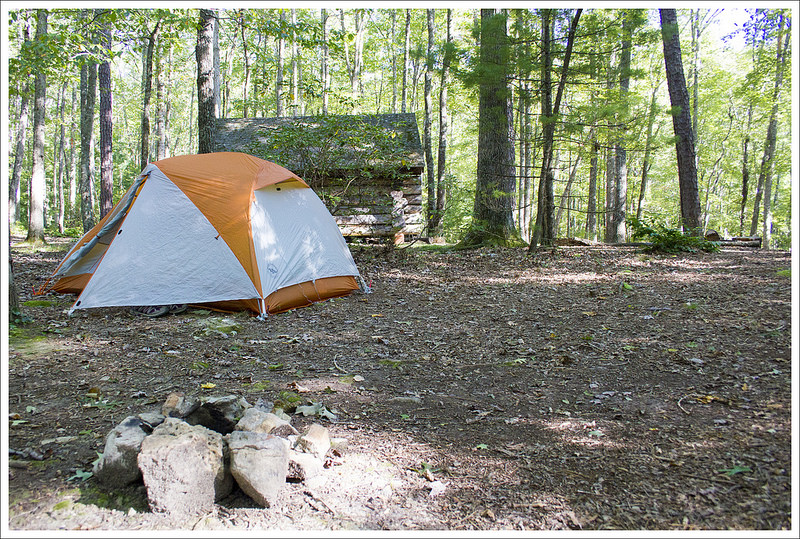
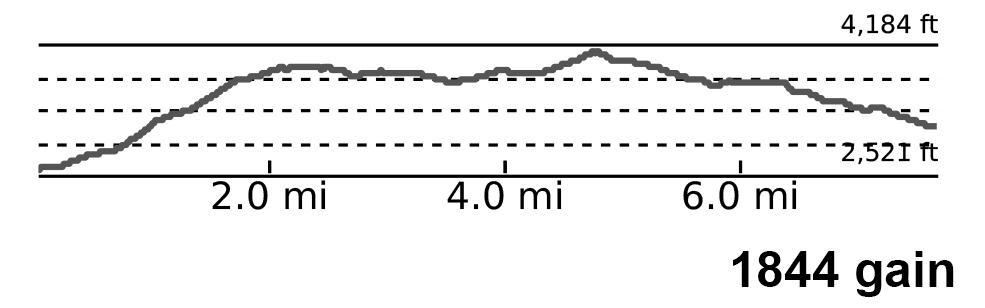
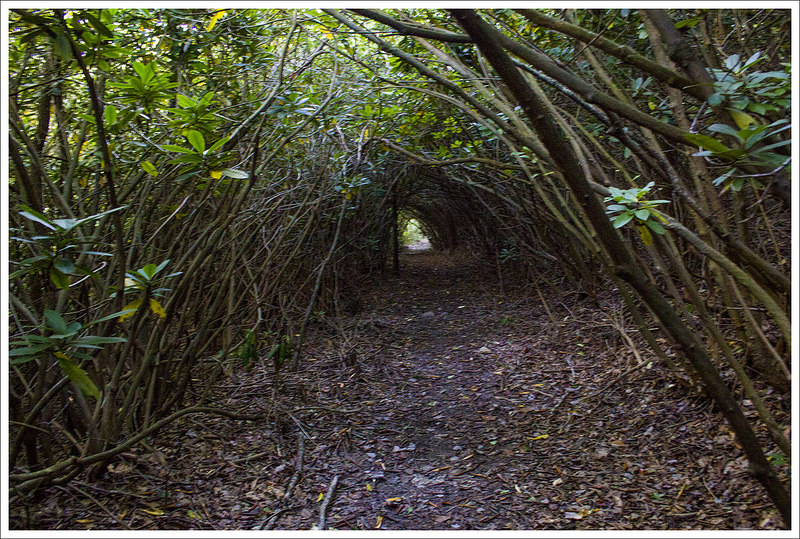
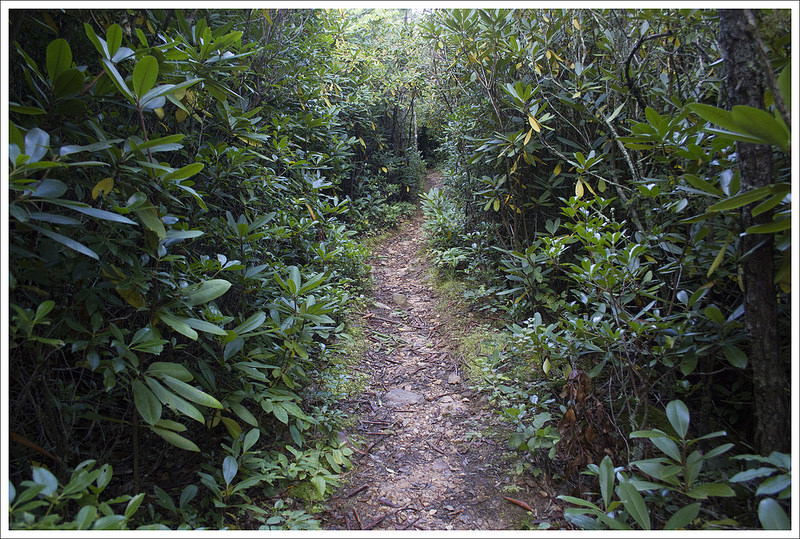


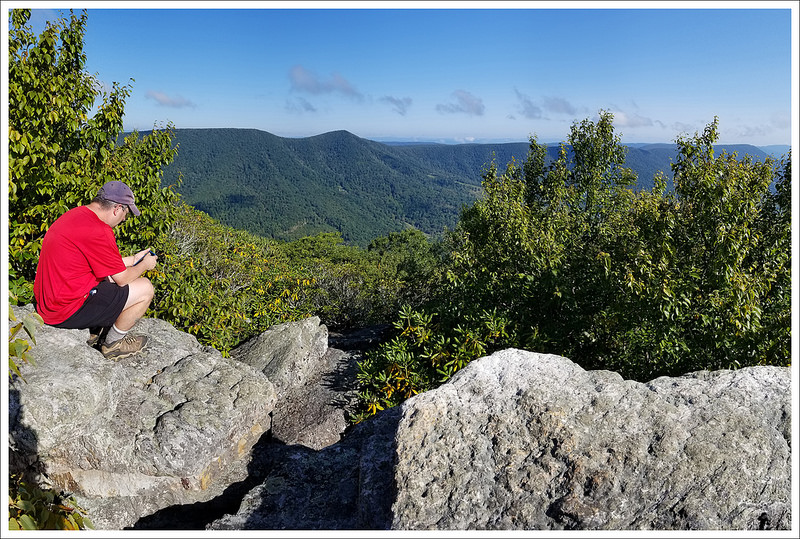
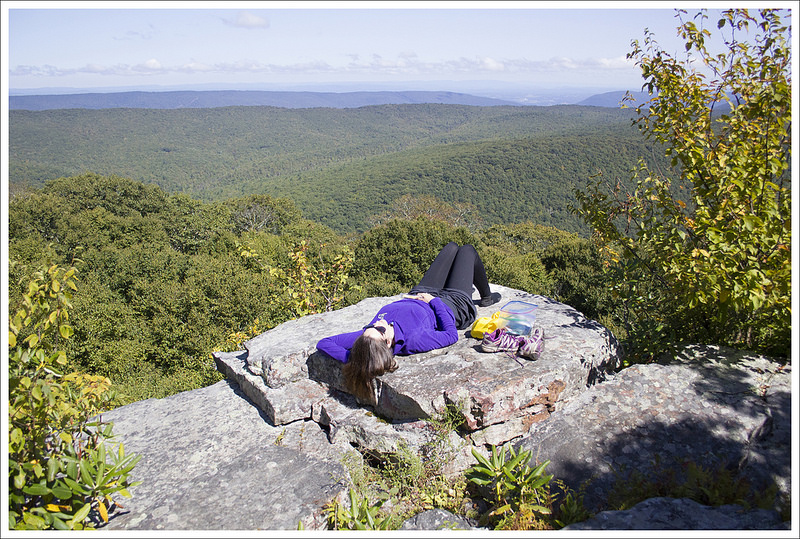
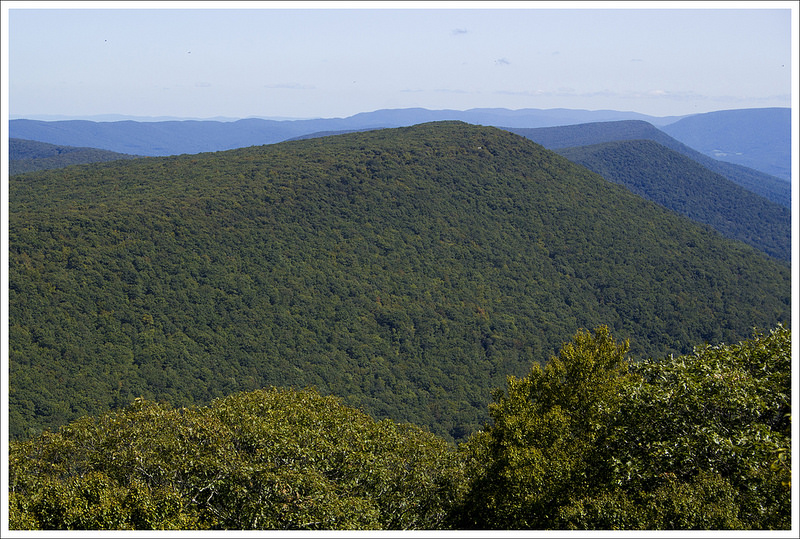

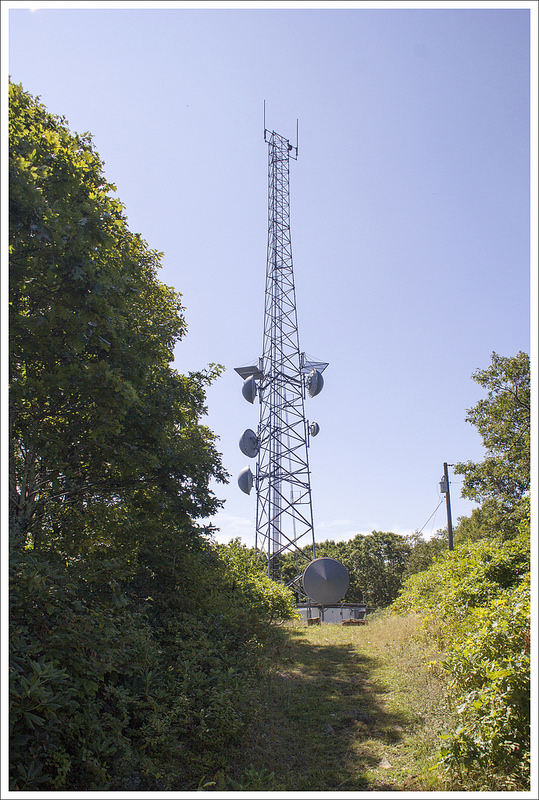

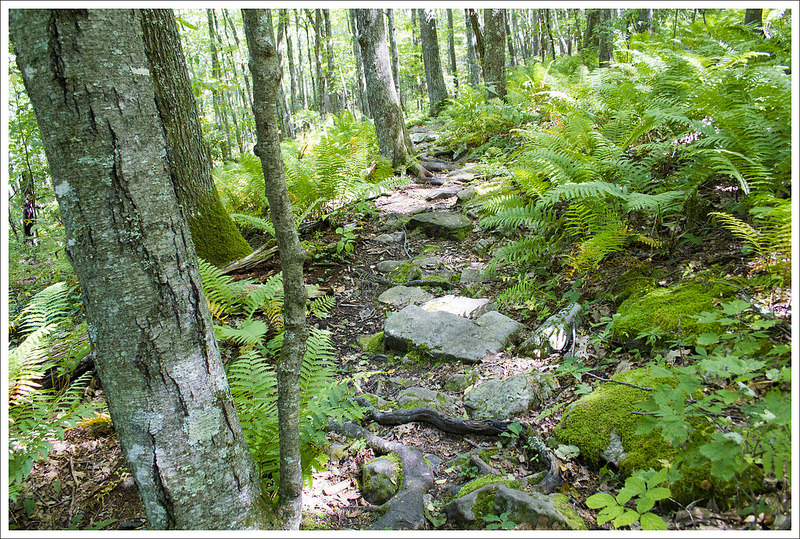
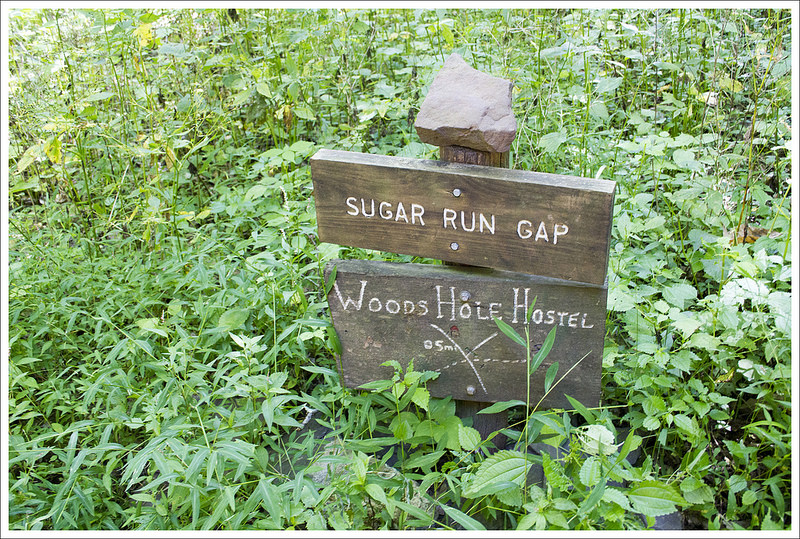

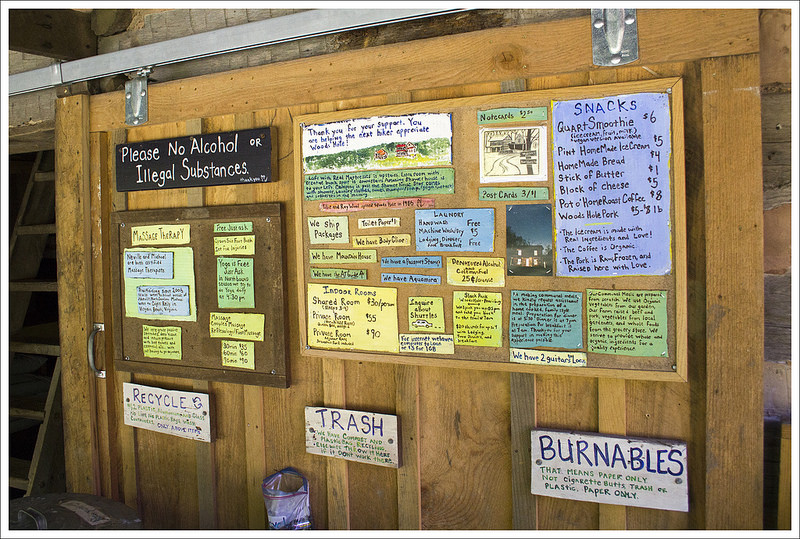
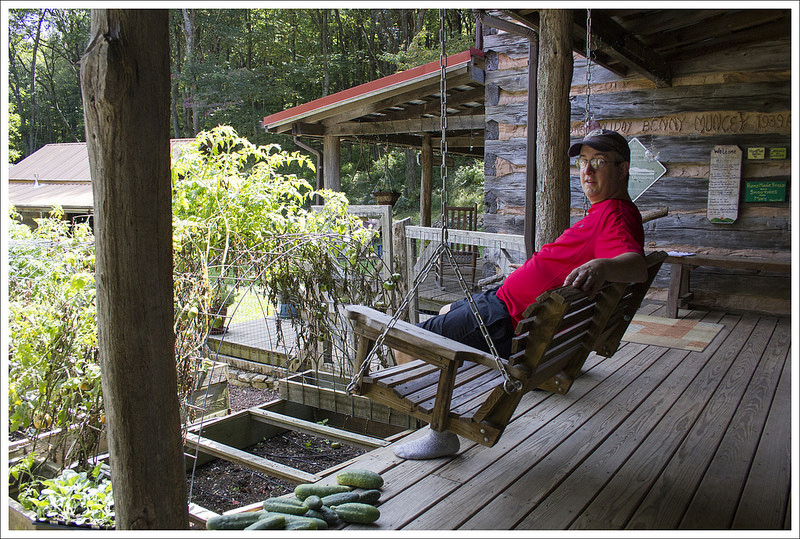


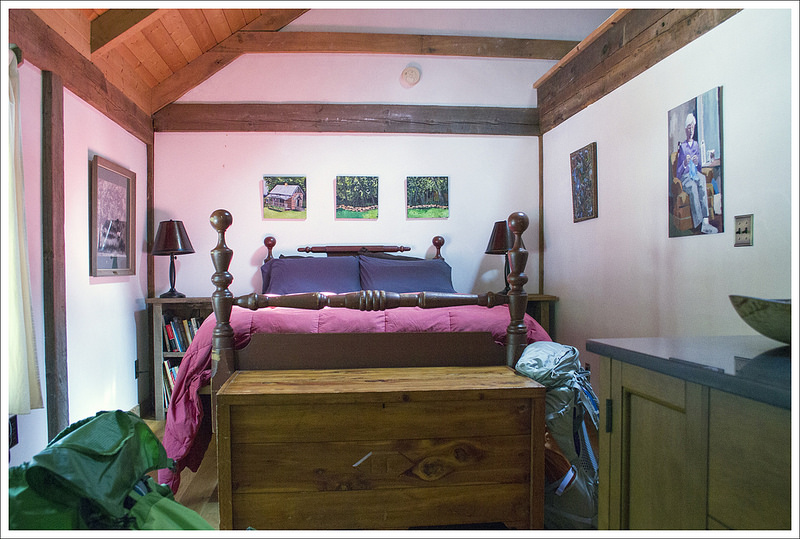
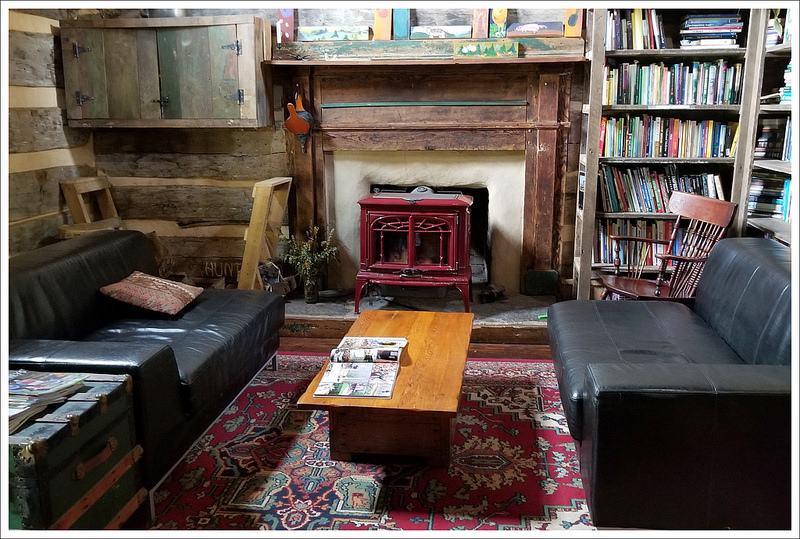
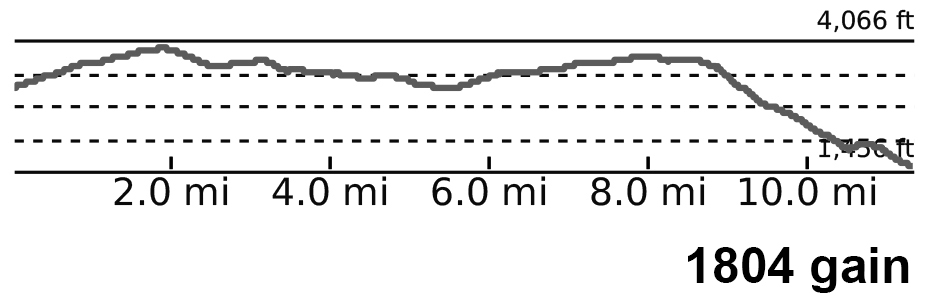
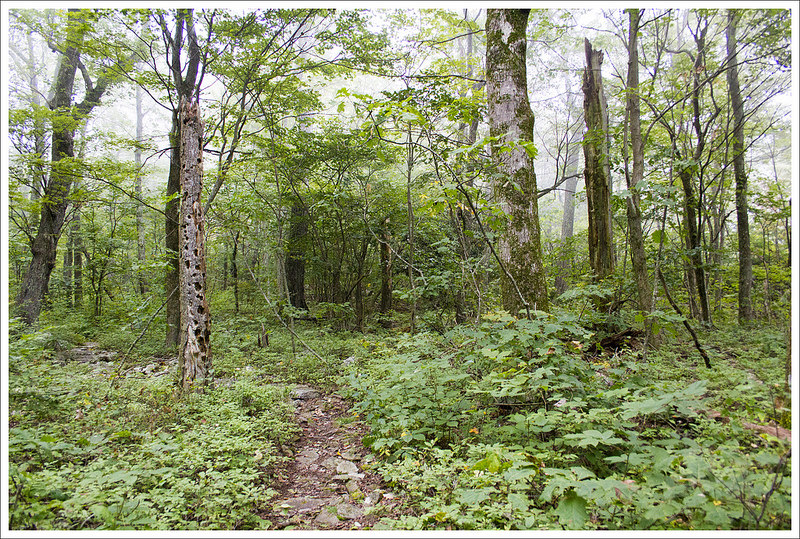
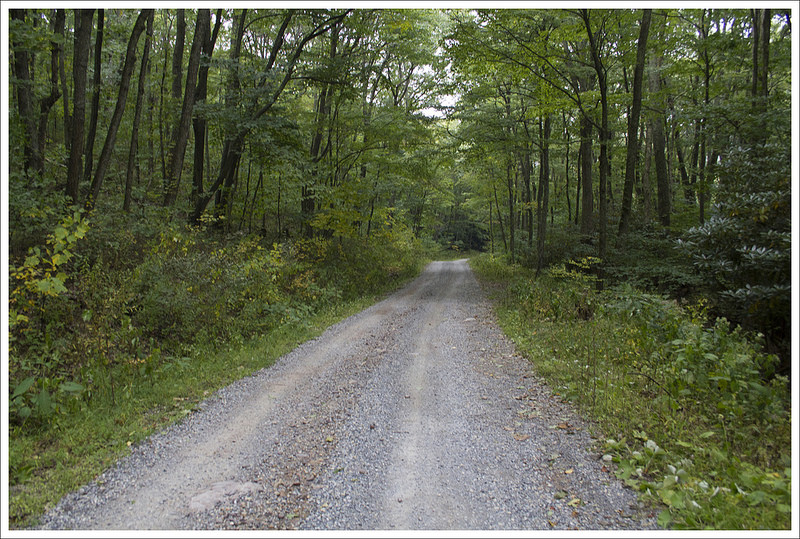
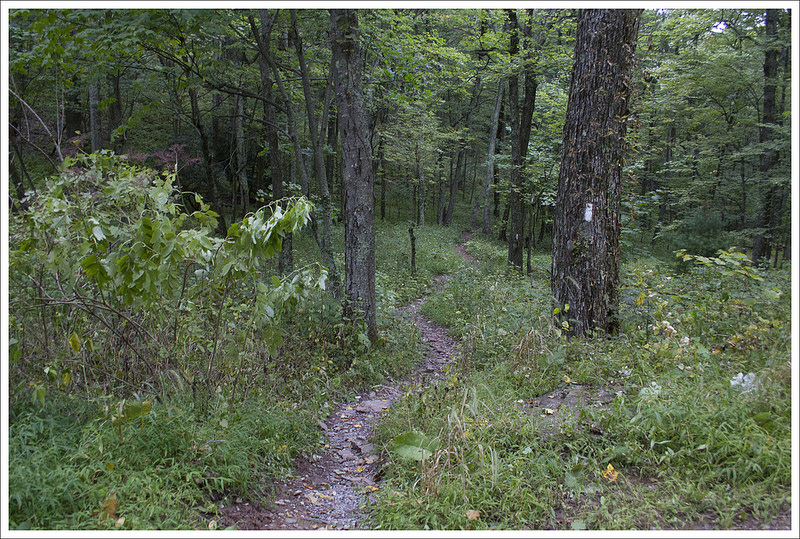
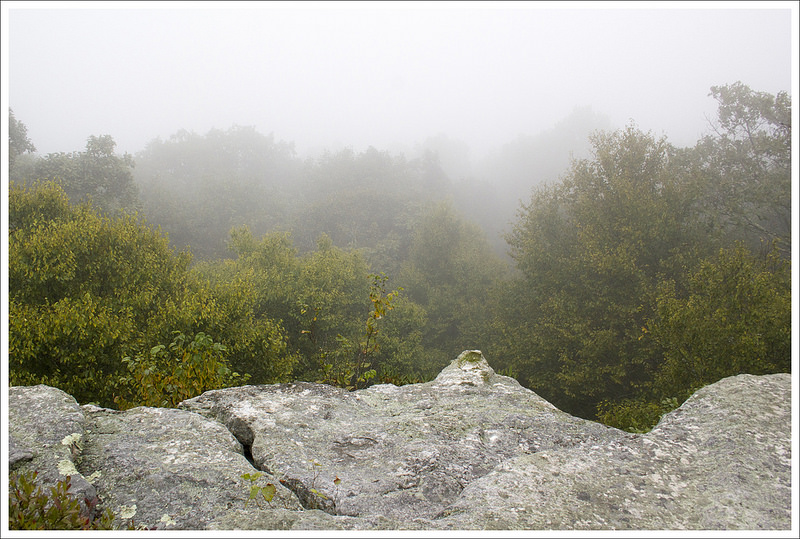

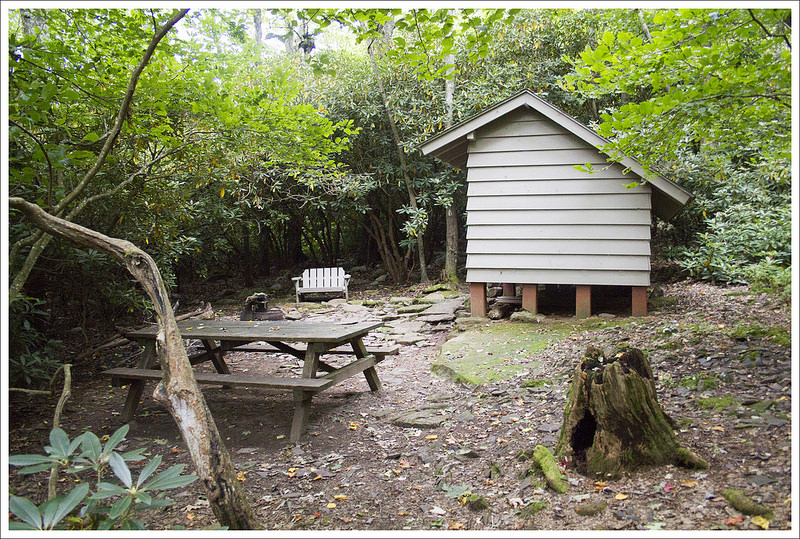
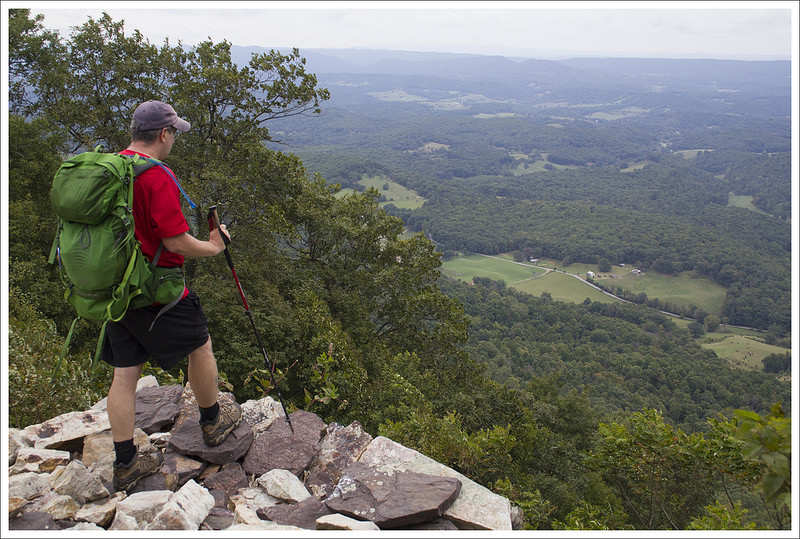

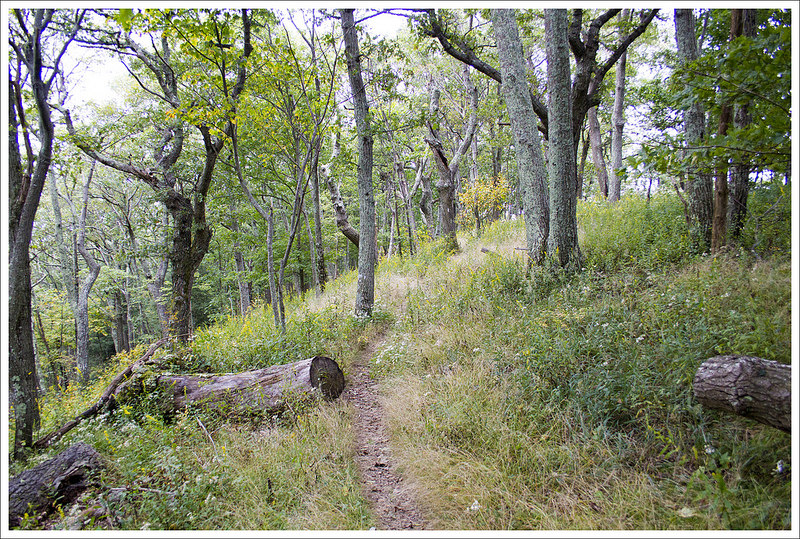
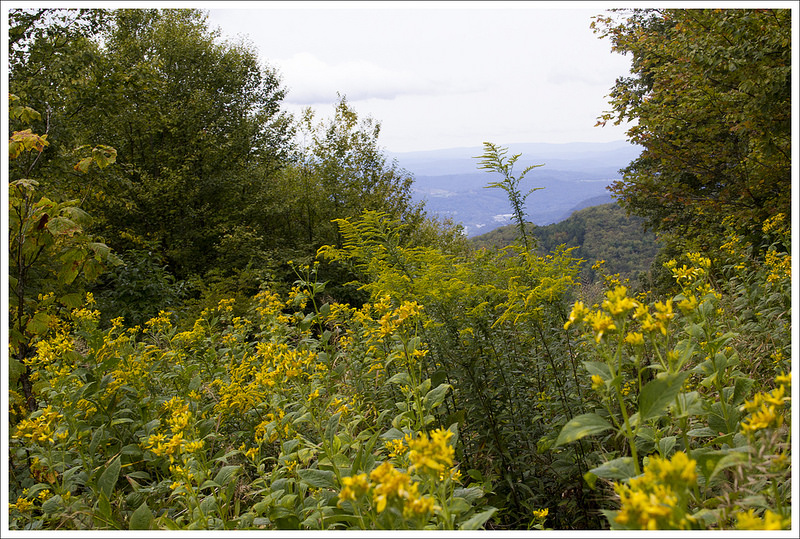
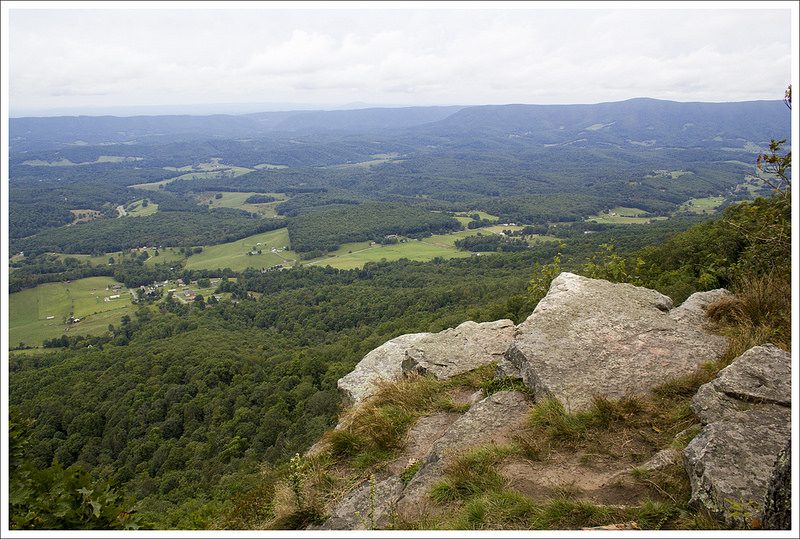
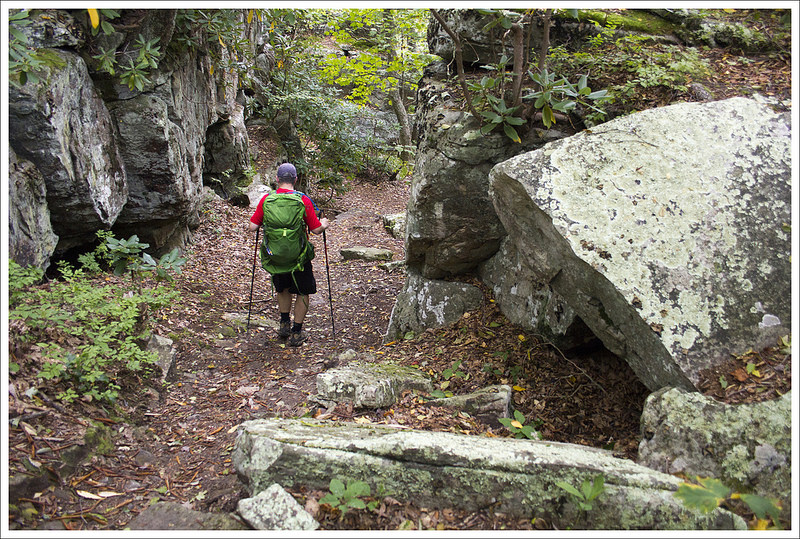

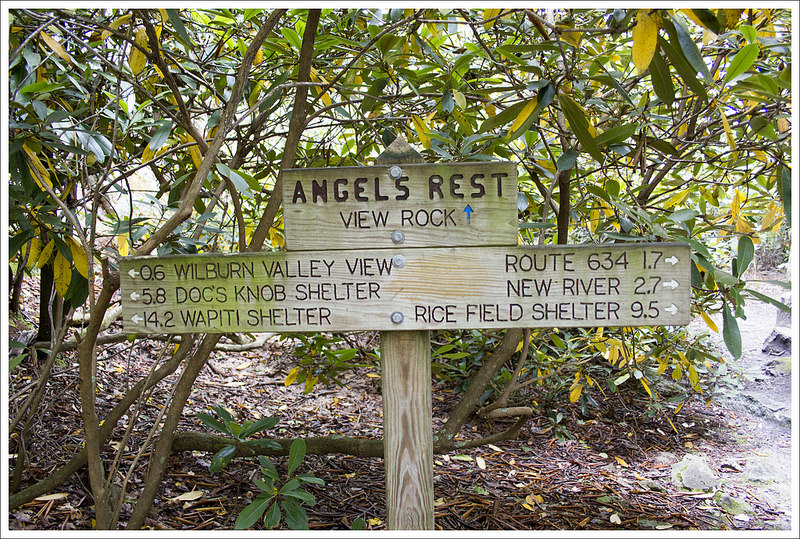

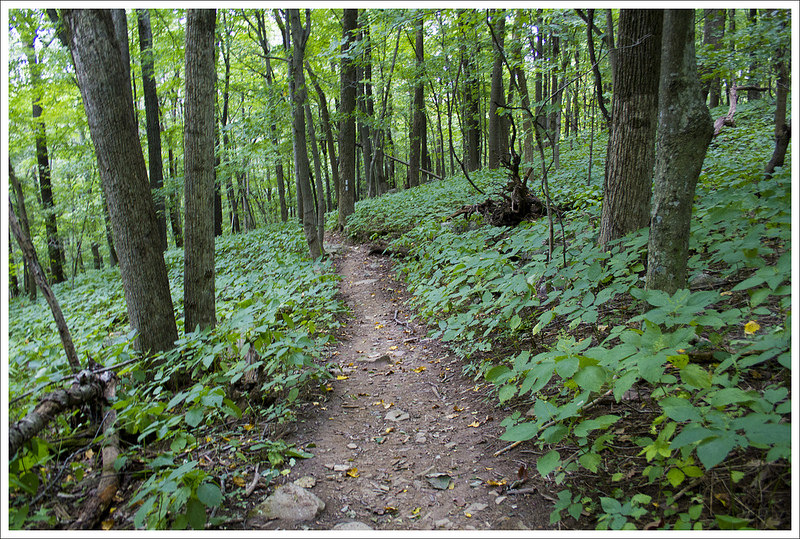
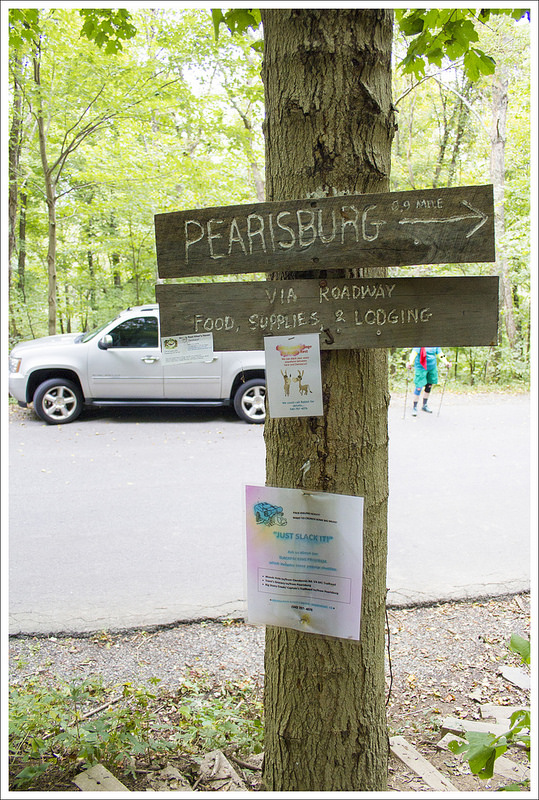
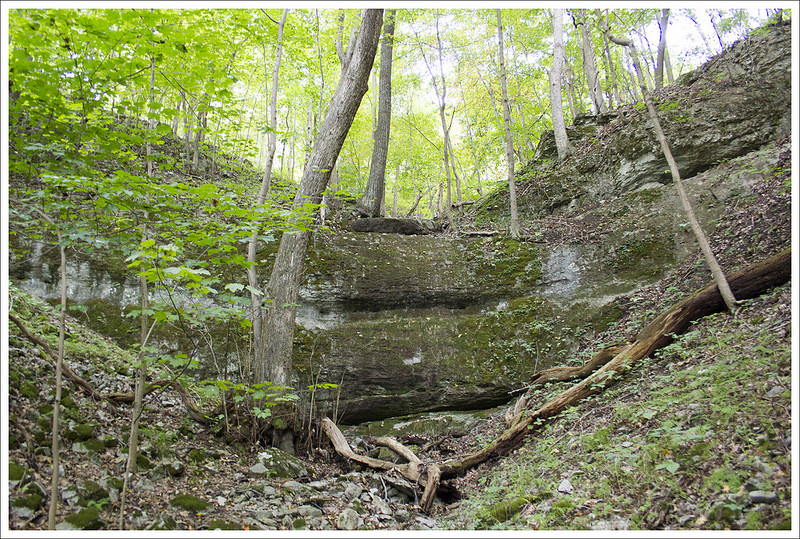

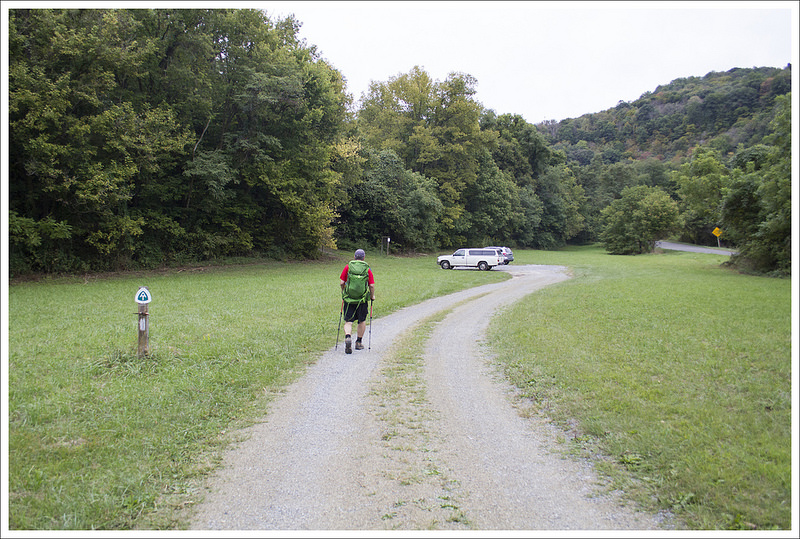


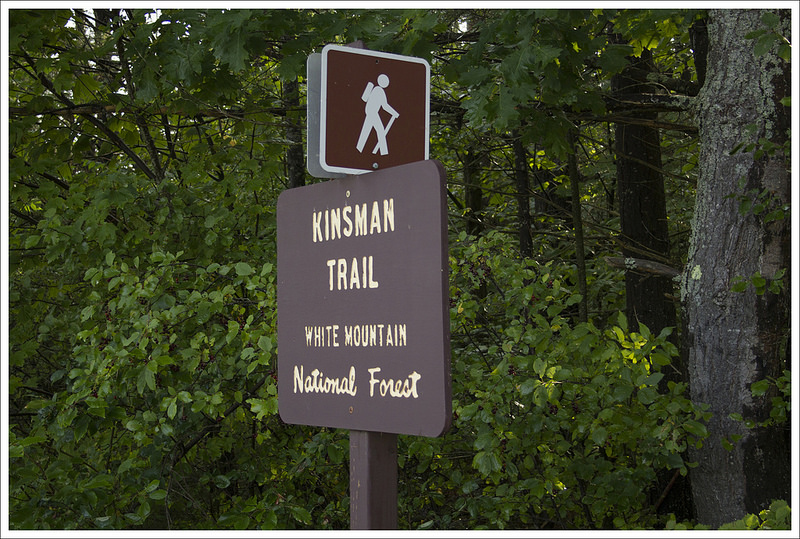


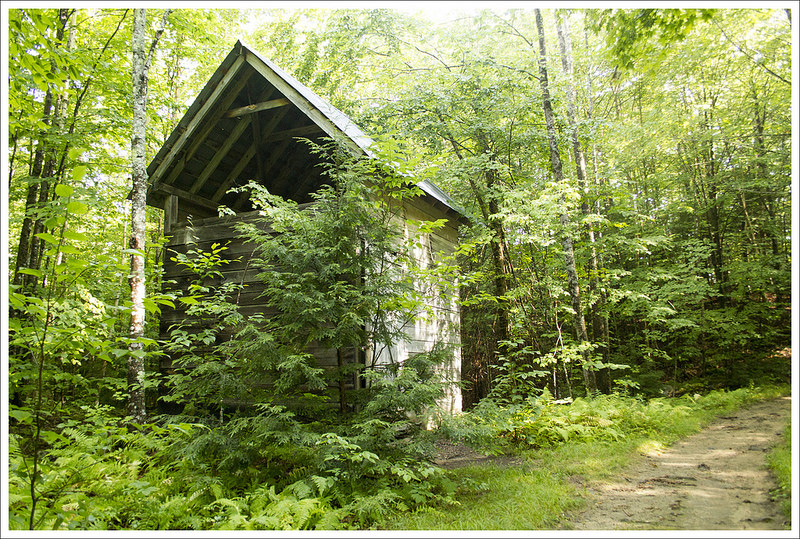


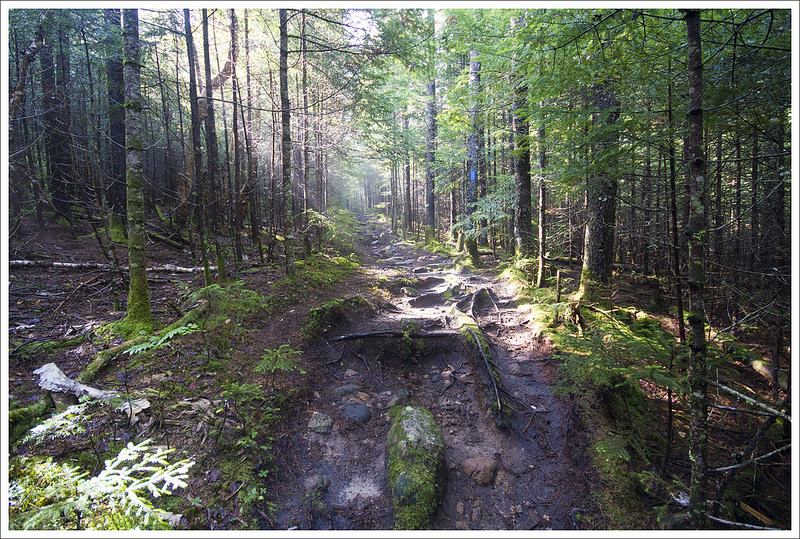
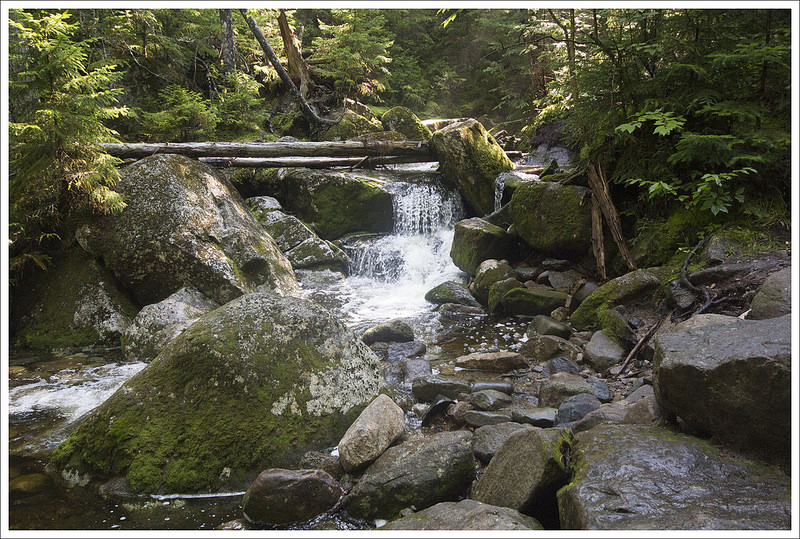


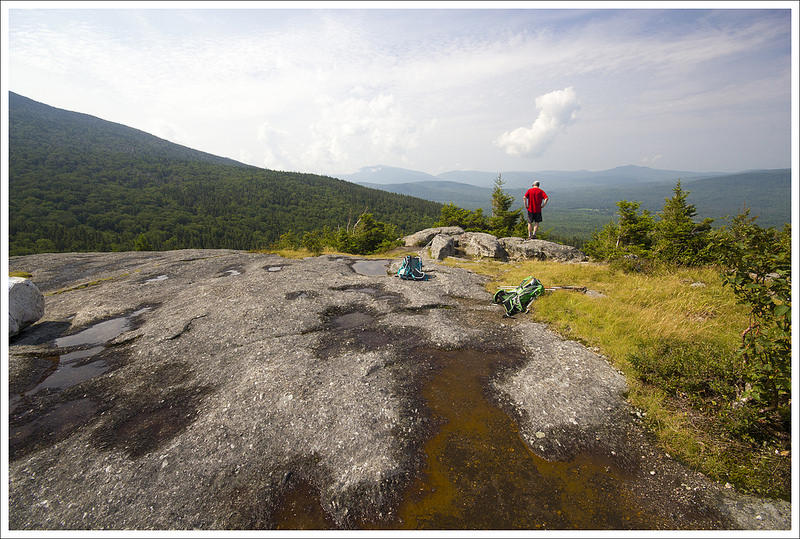


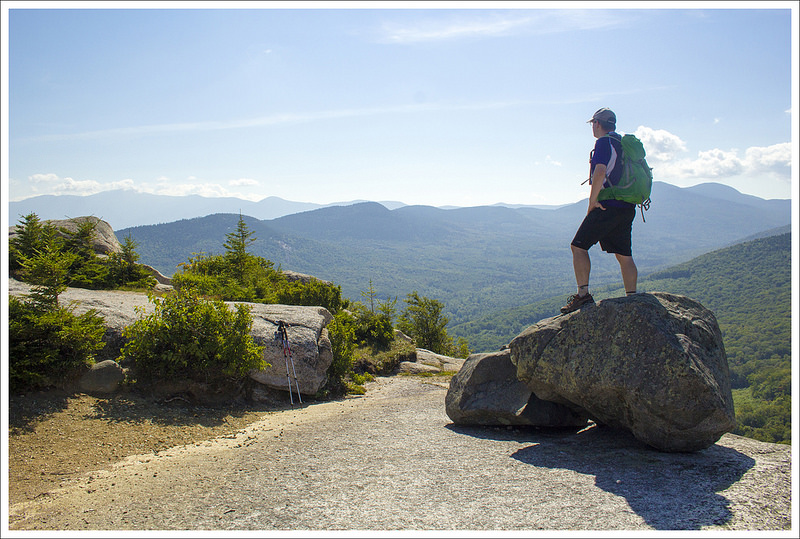


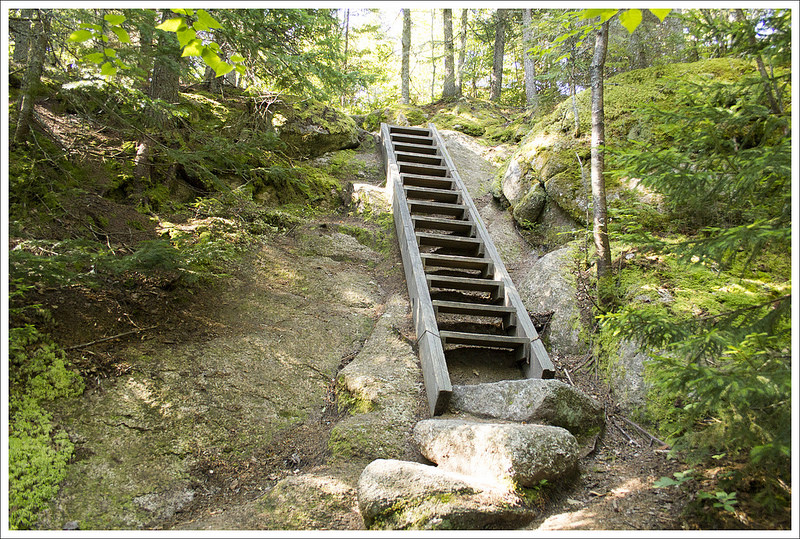


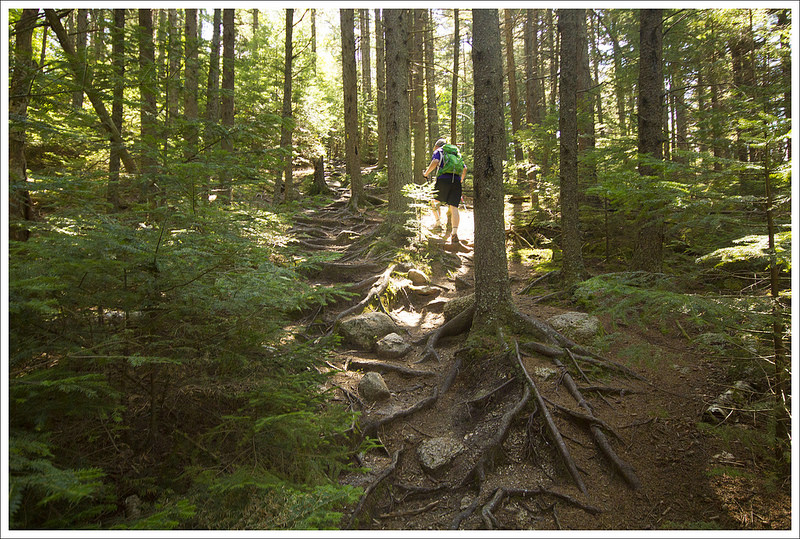


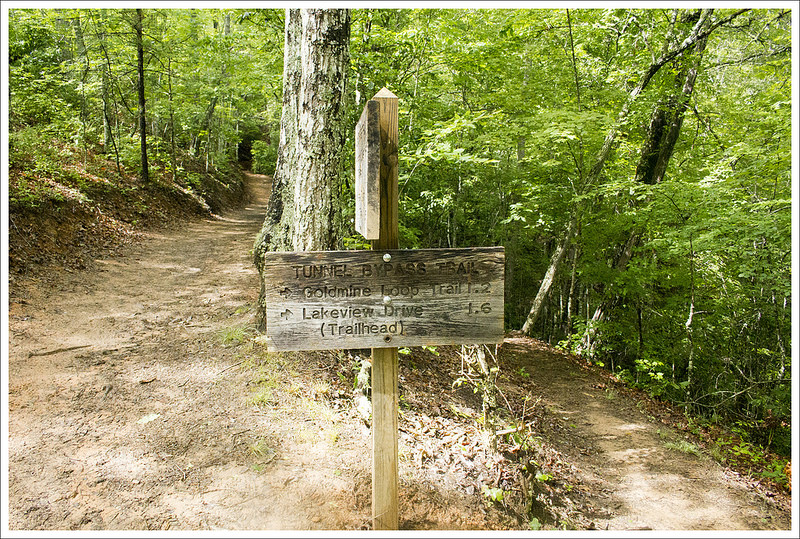


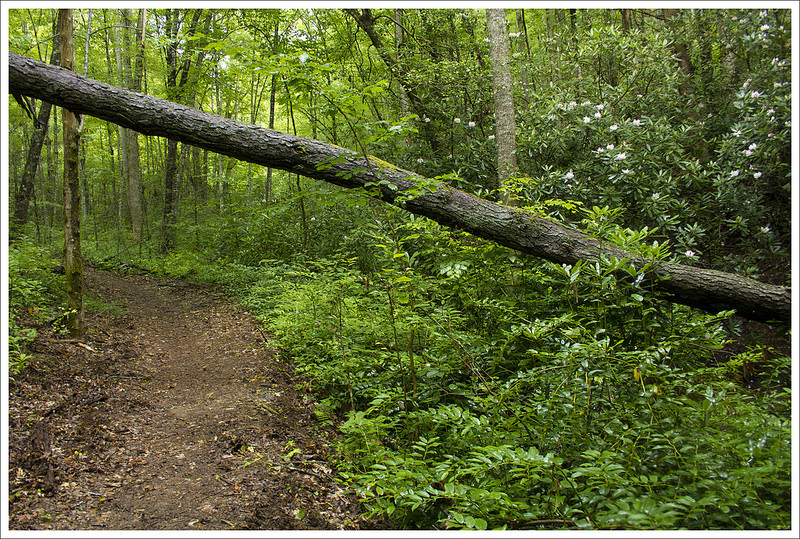
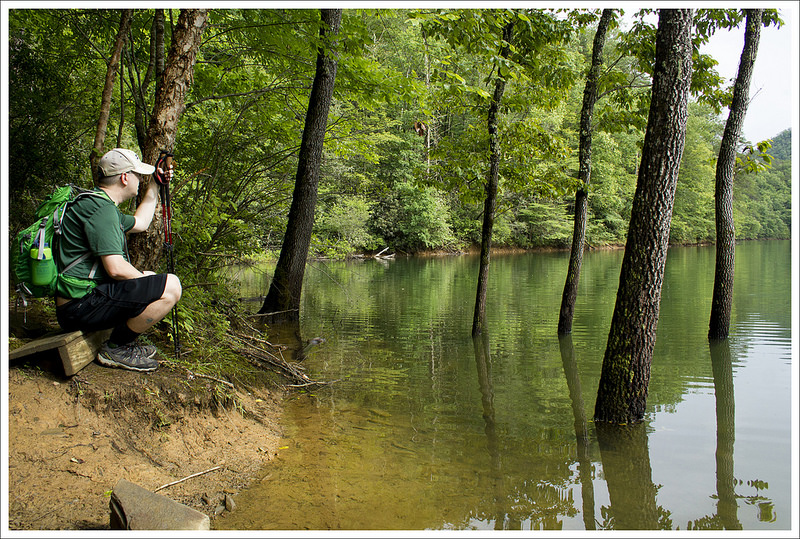

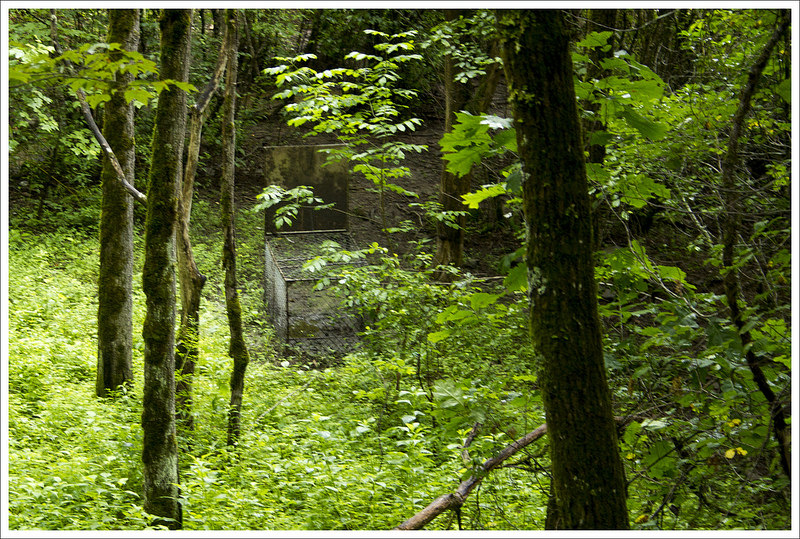


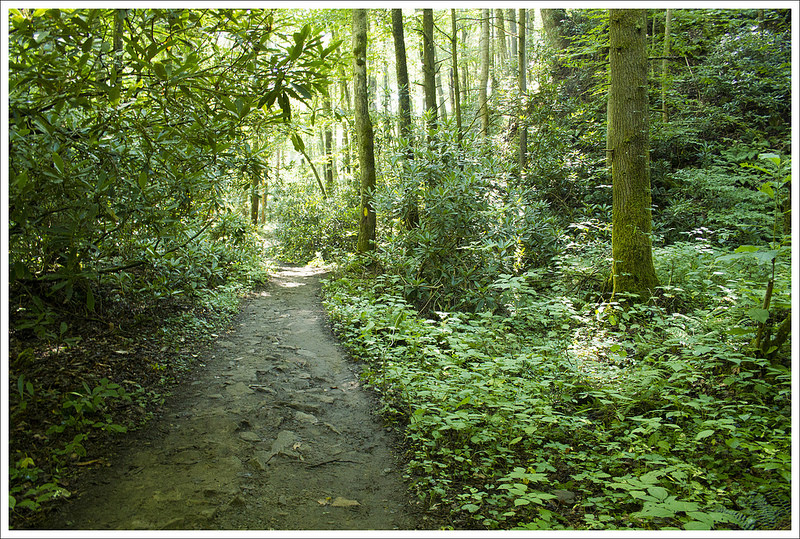

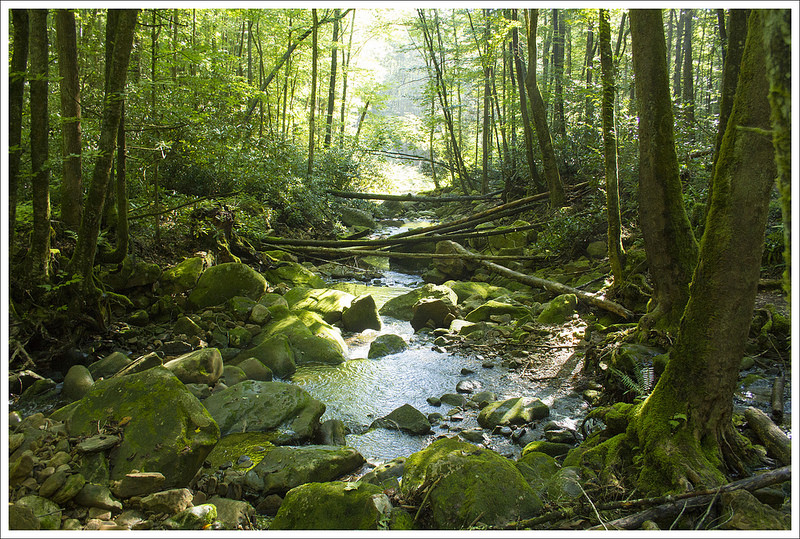
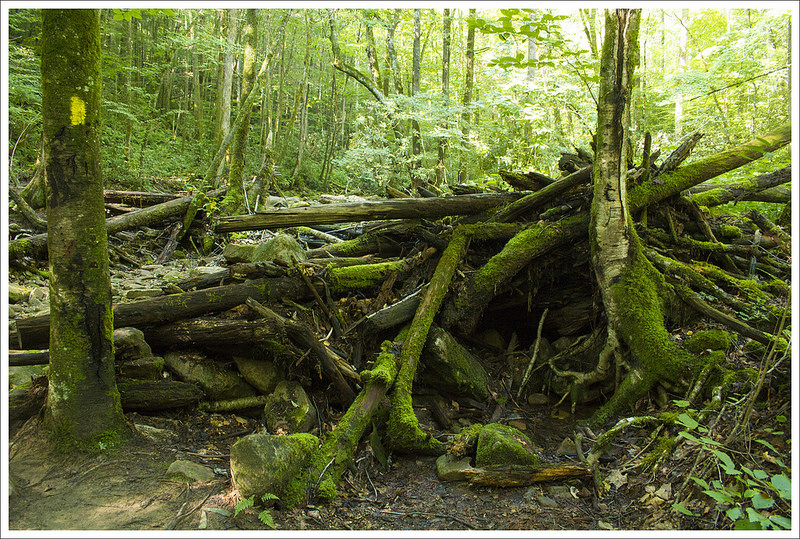
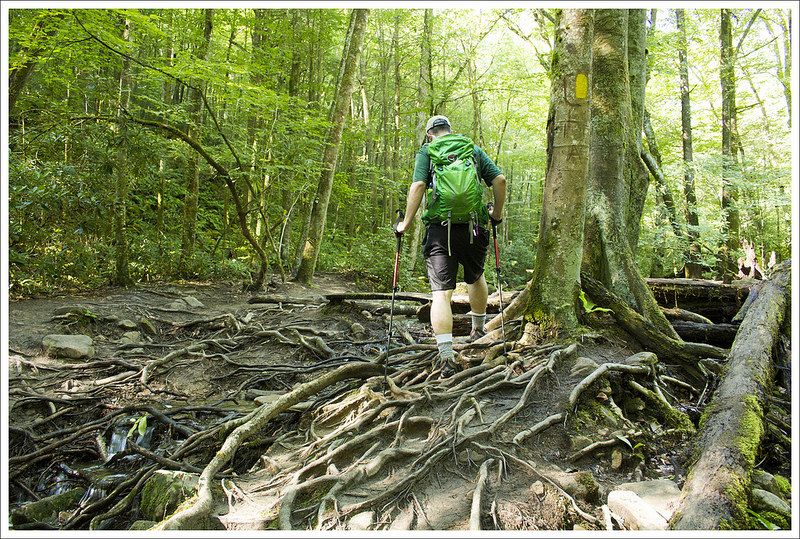
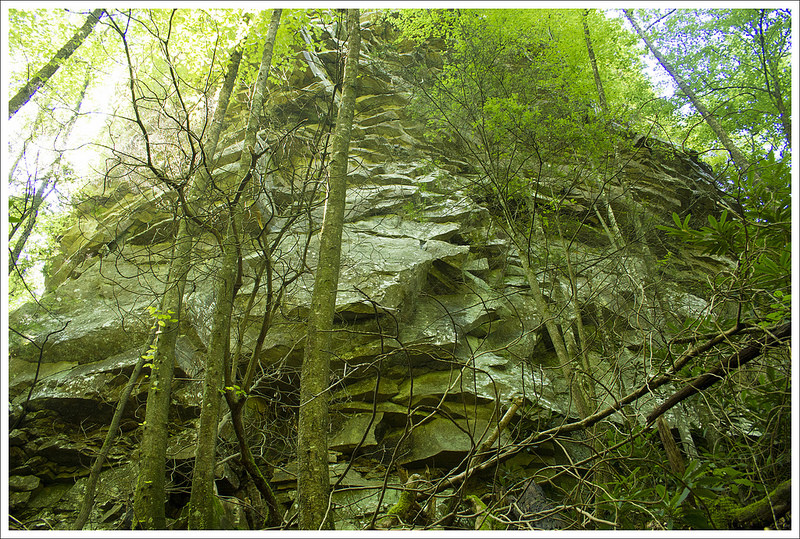


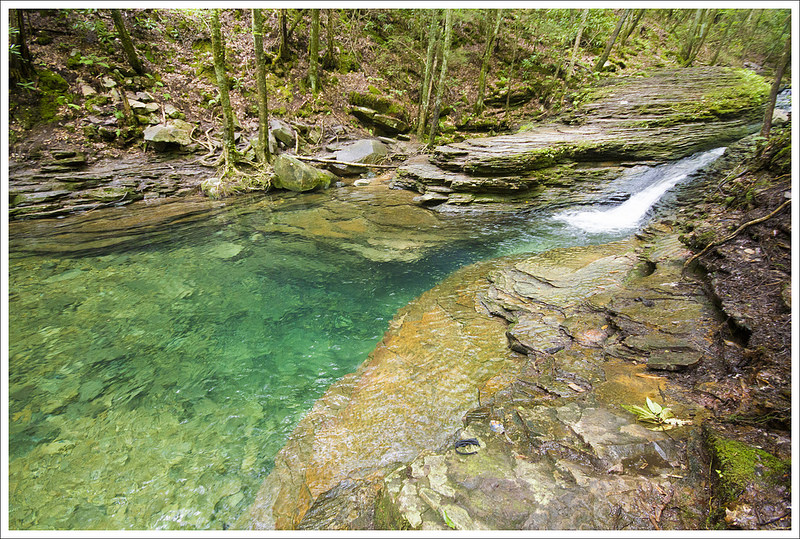


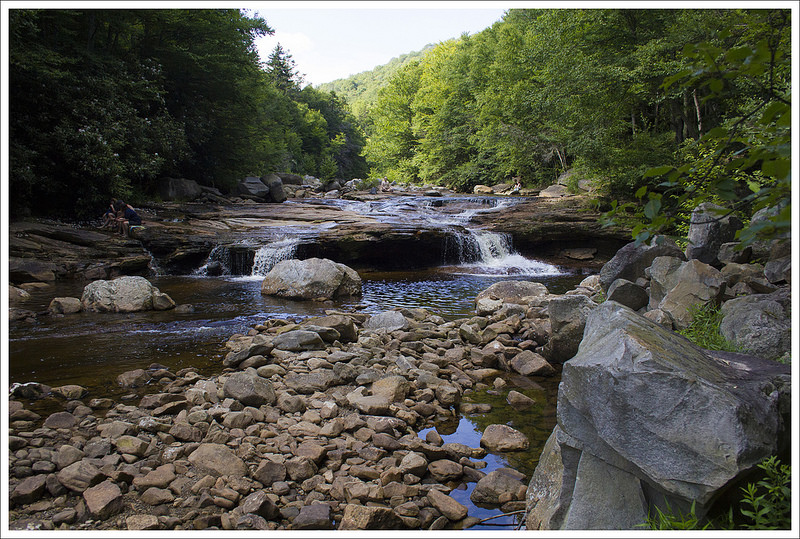
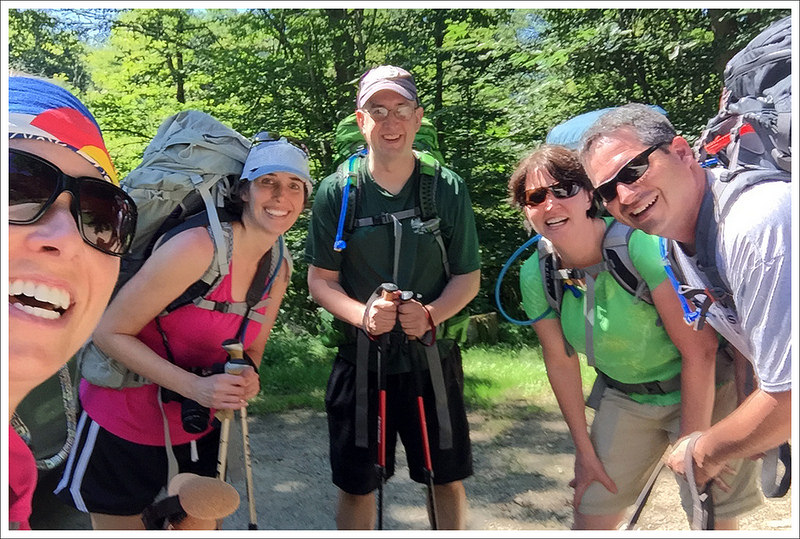


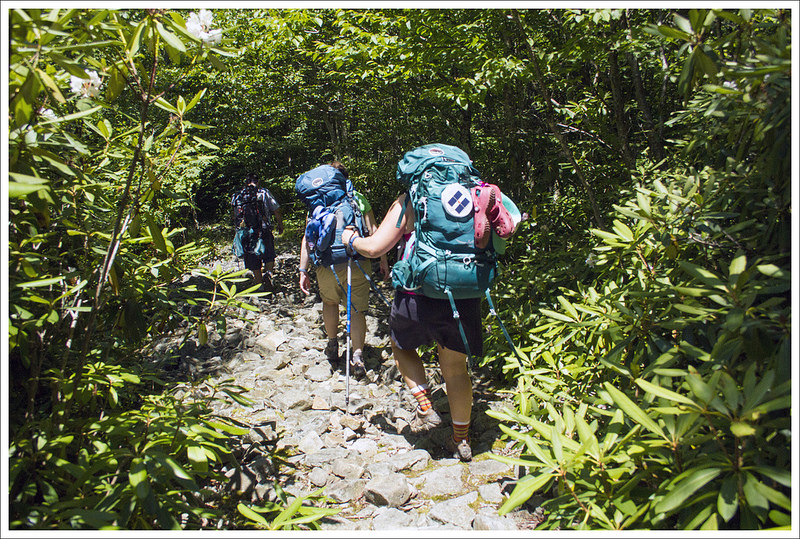


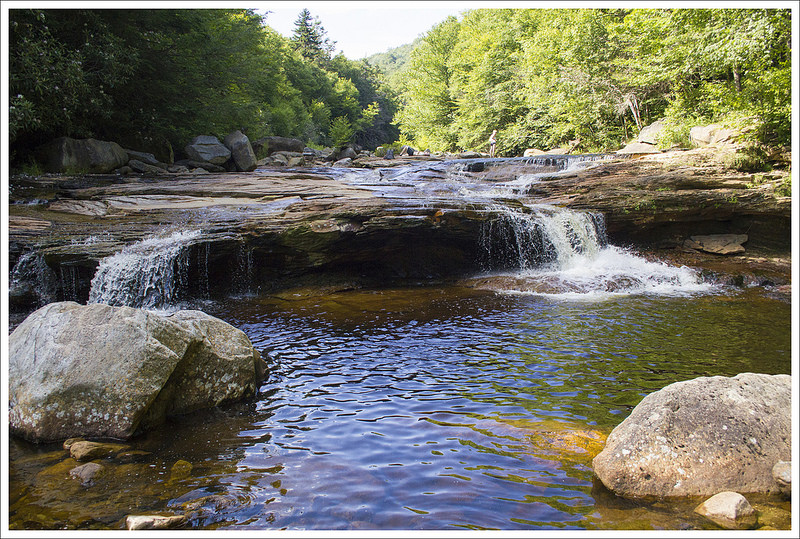


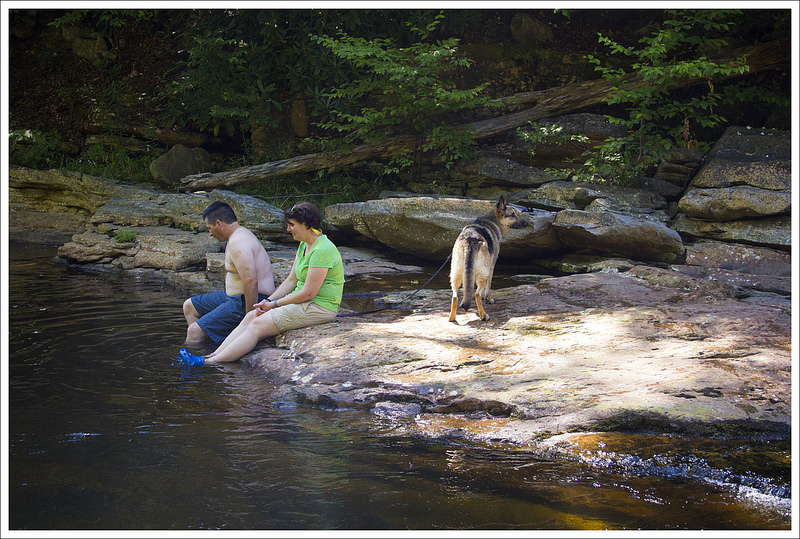


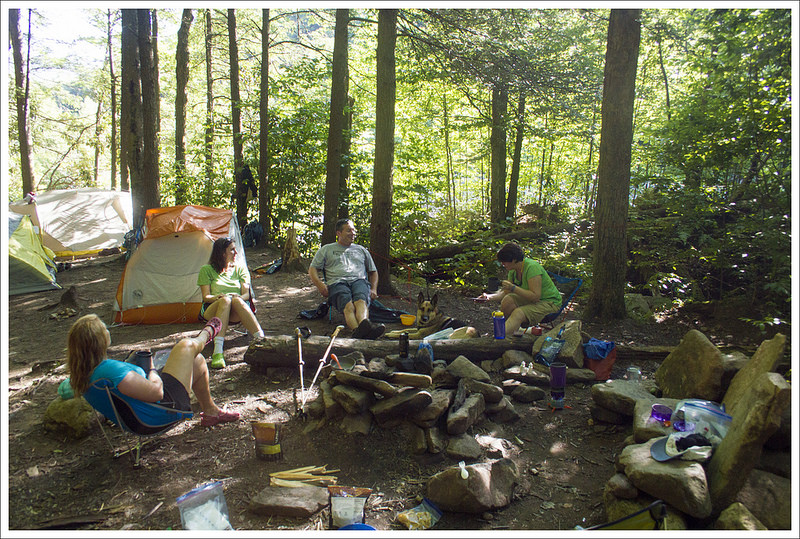
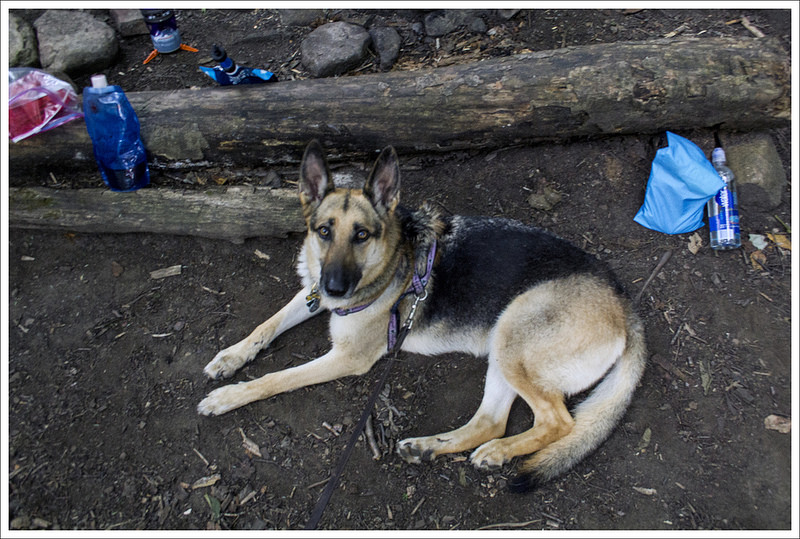


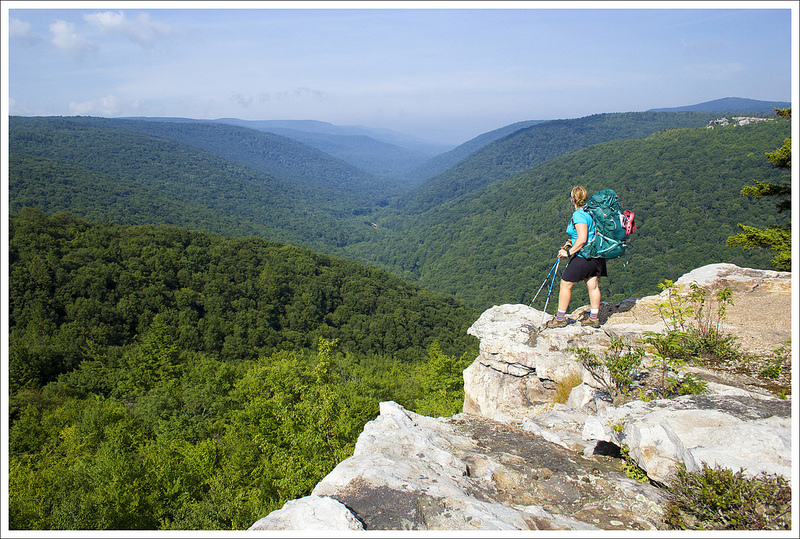
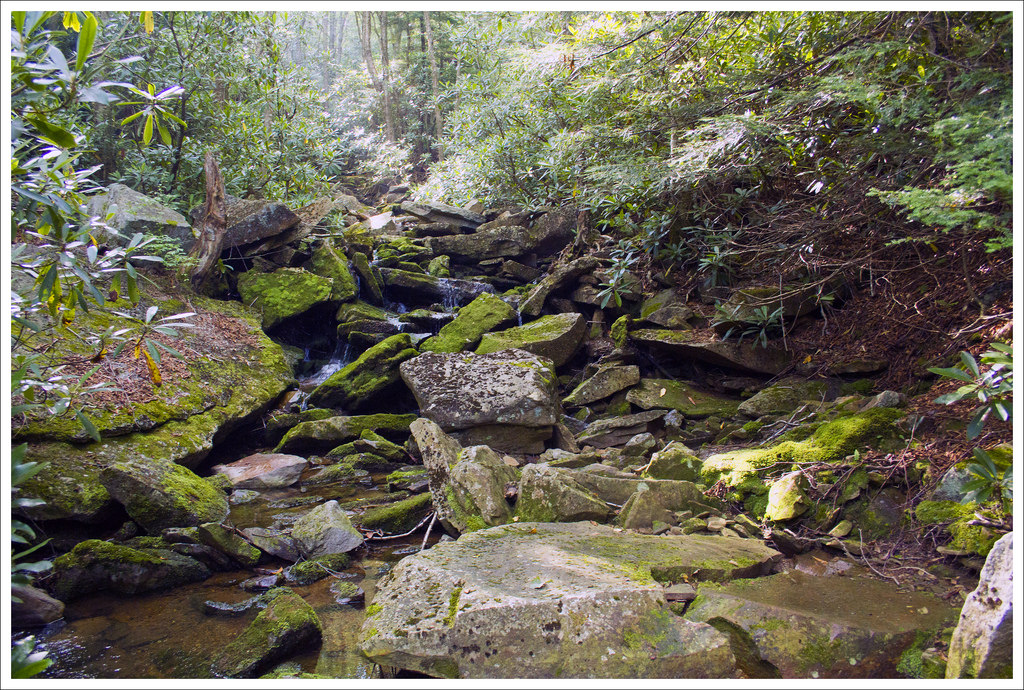
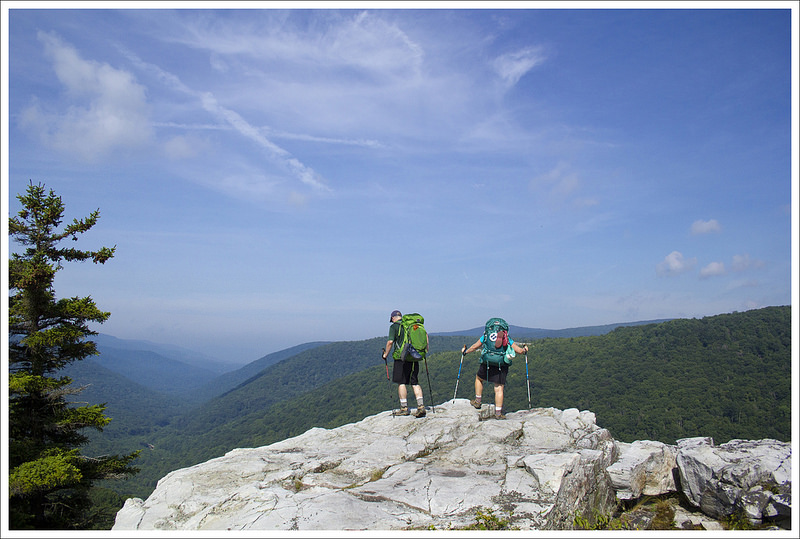

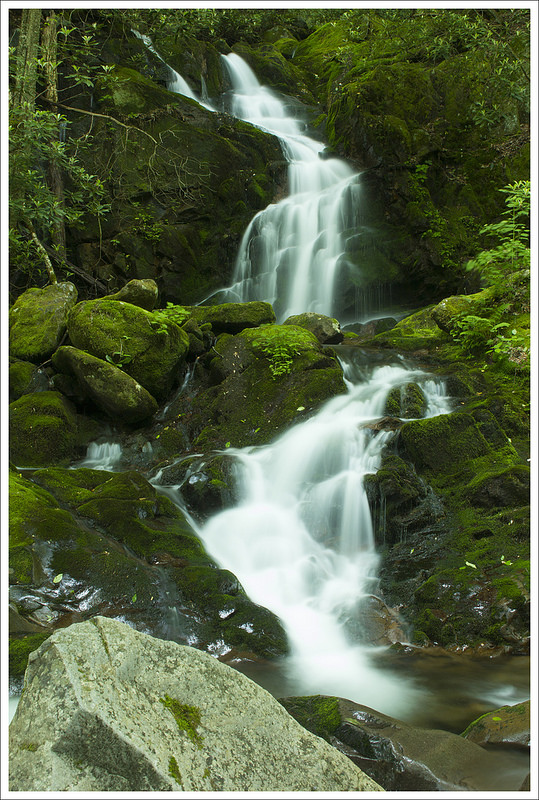
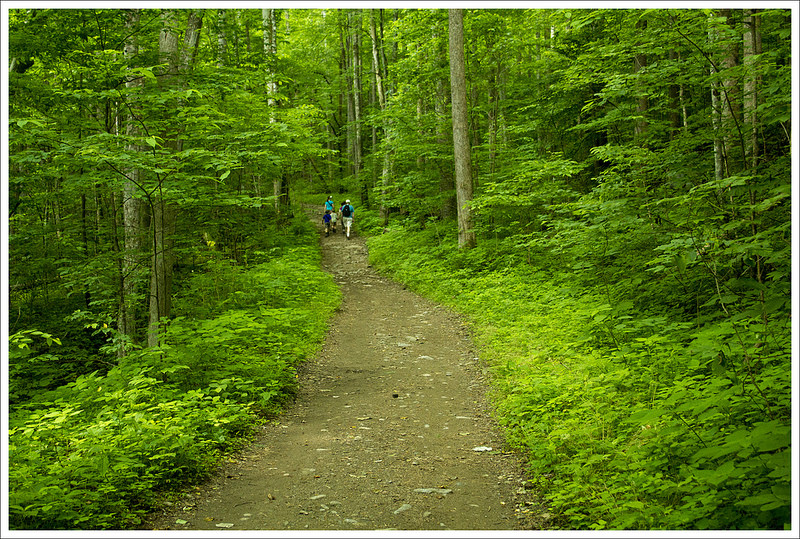


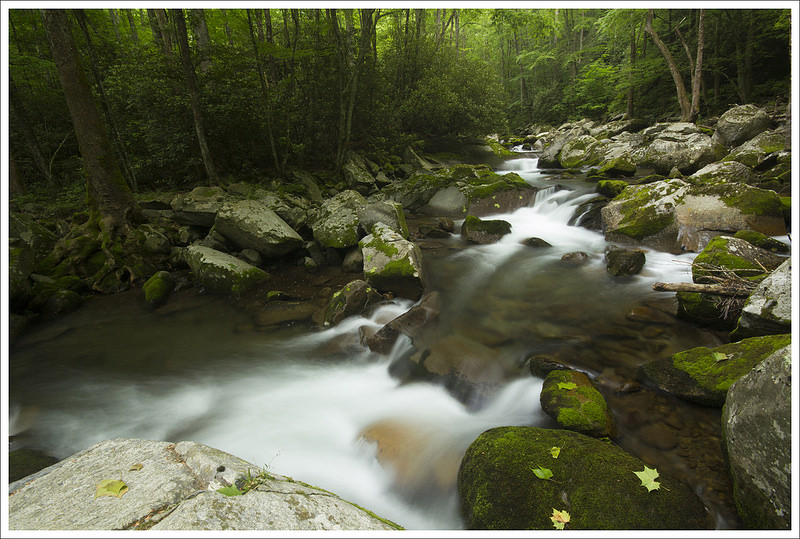


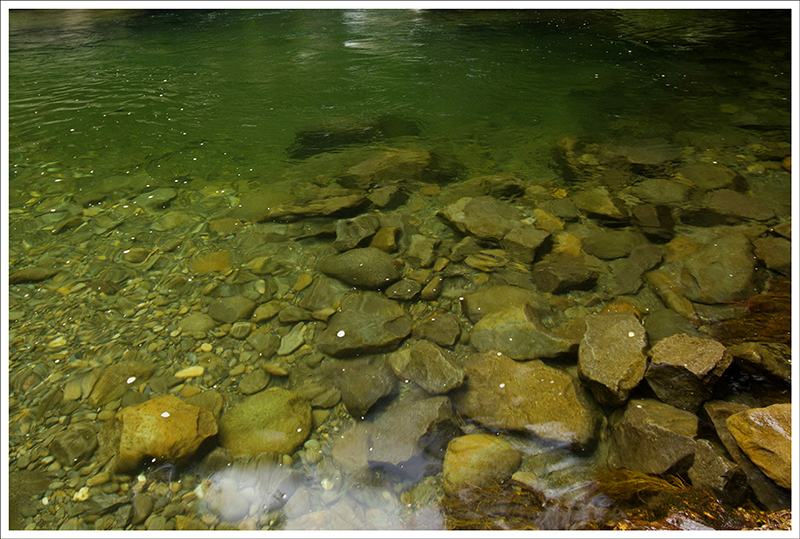


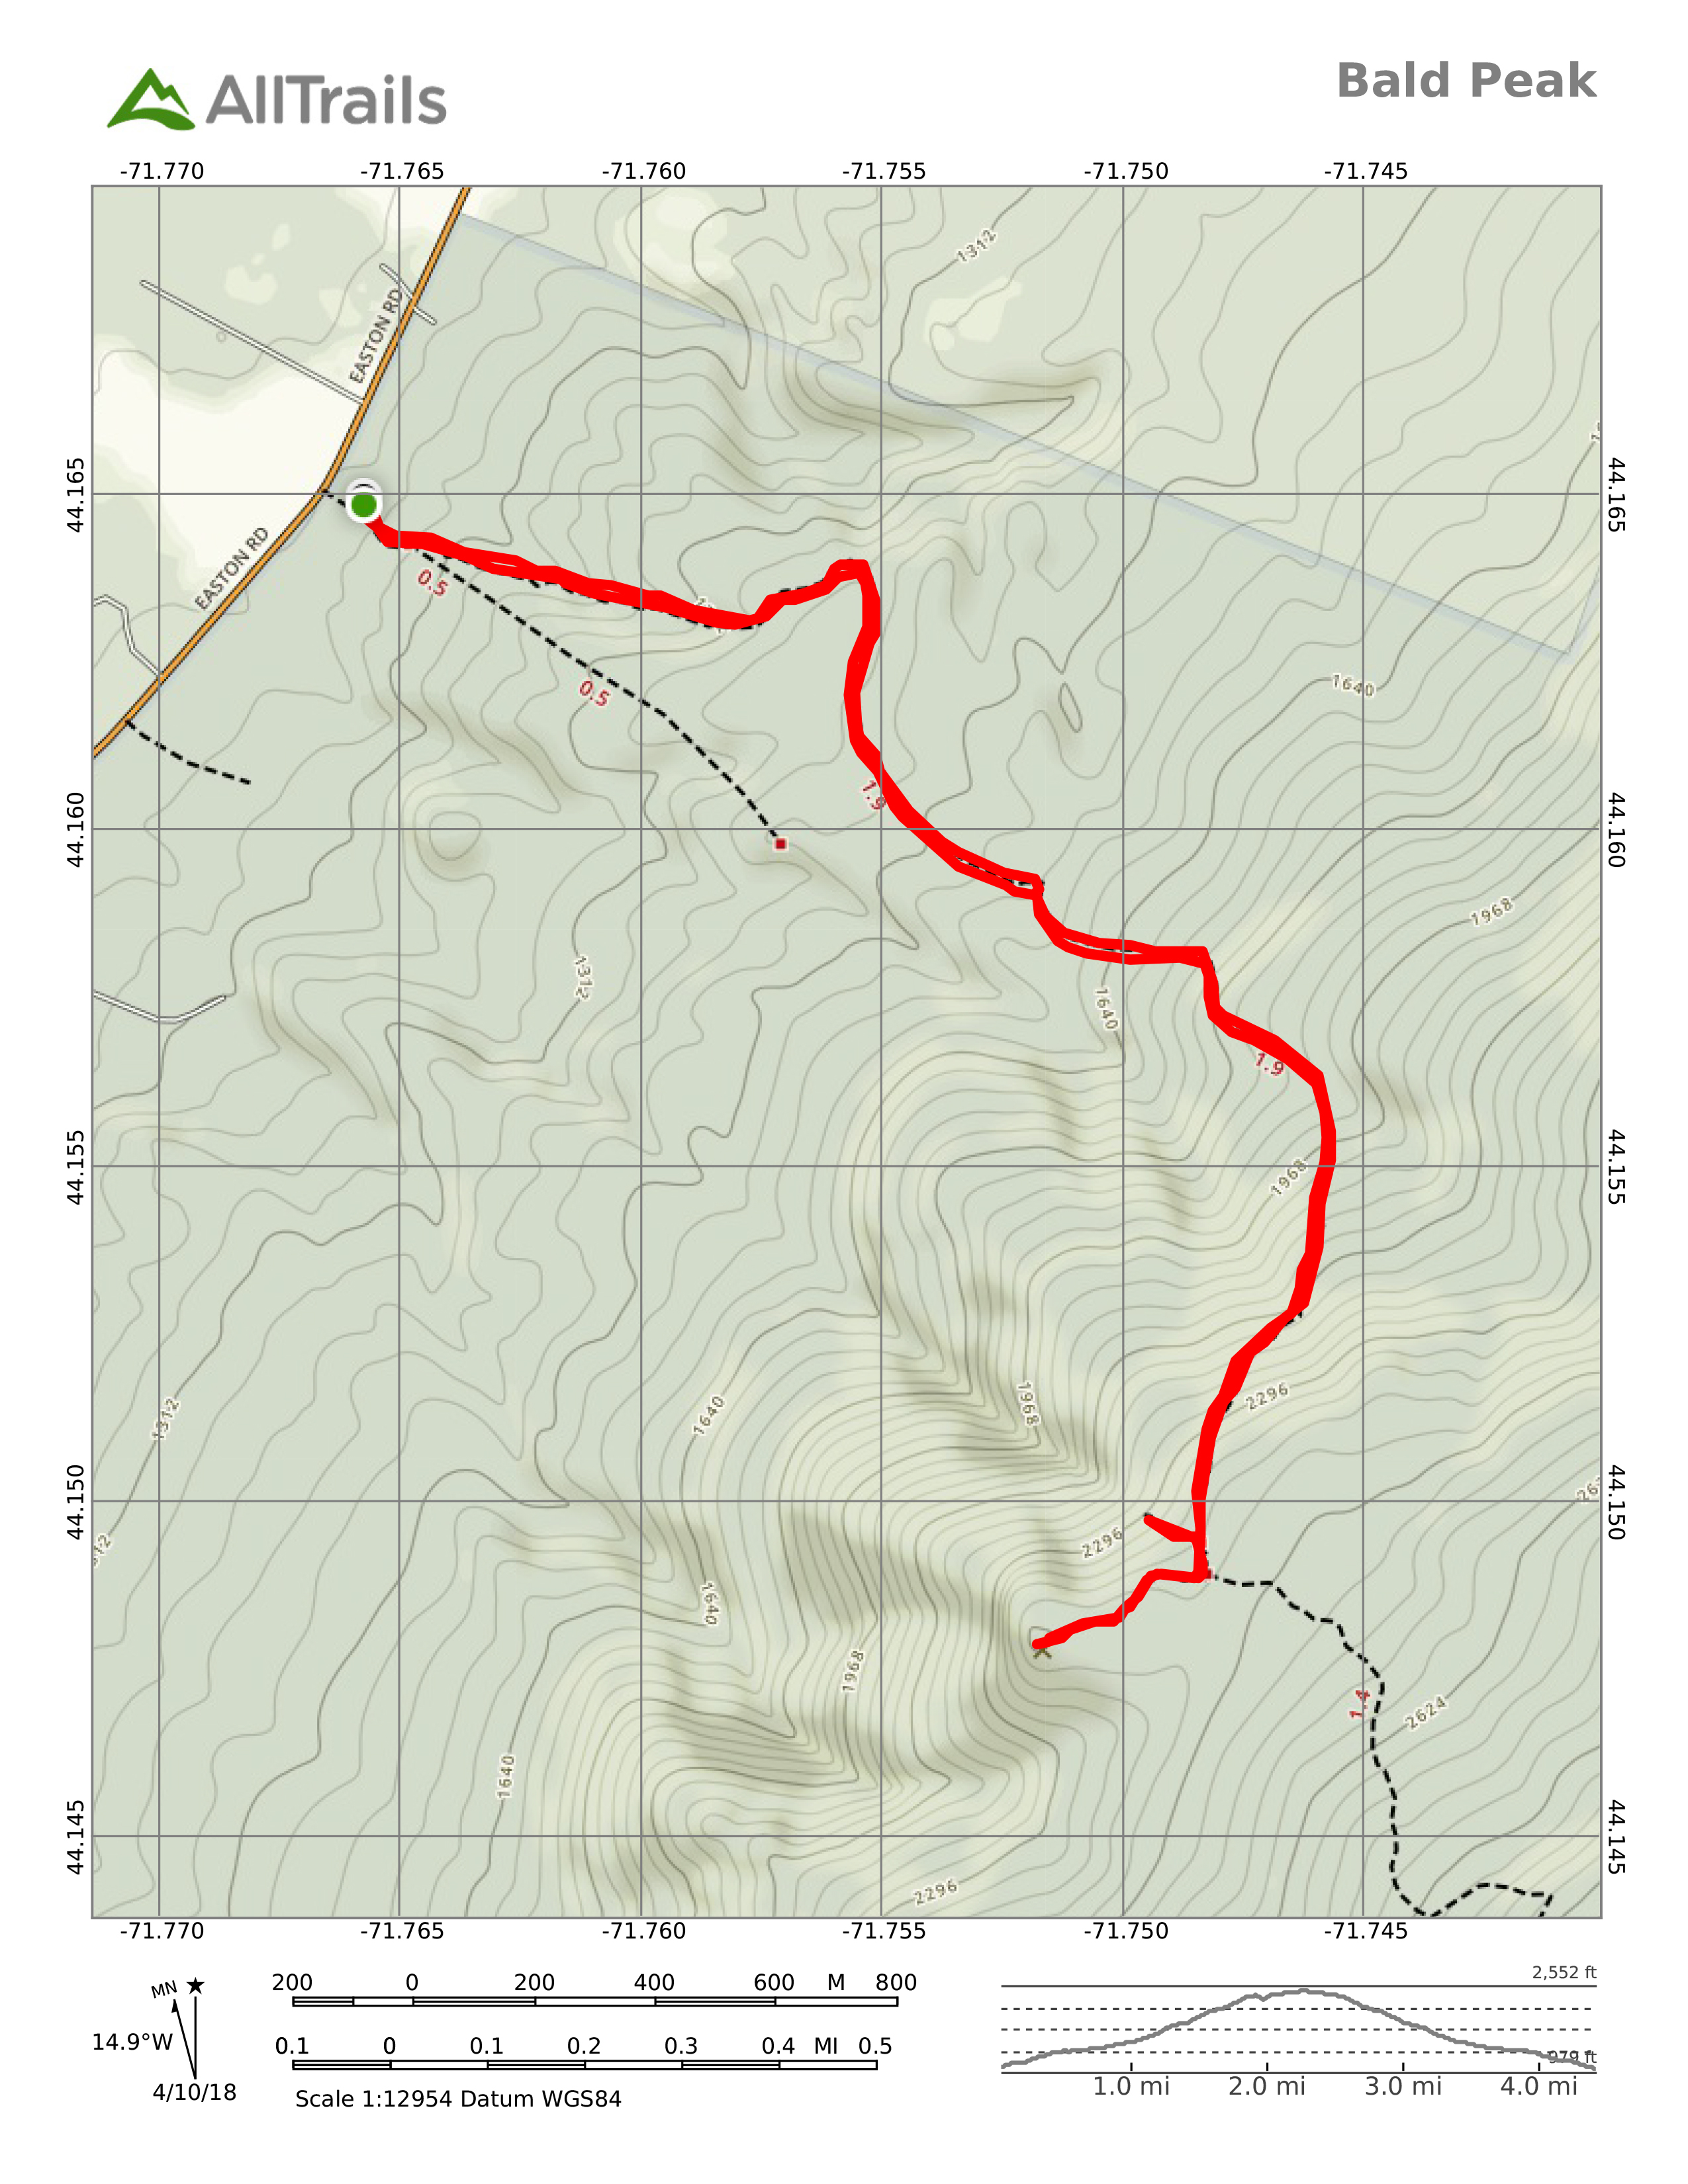