Trail Notes

Mount Major (NH)

Special: New Hampshire Edition

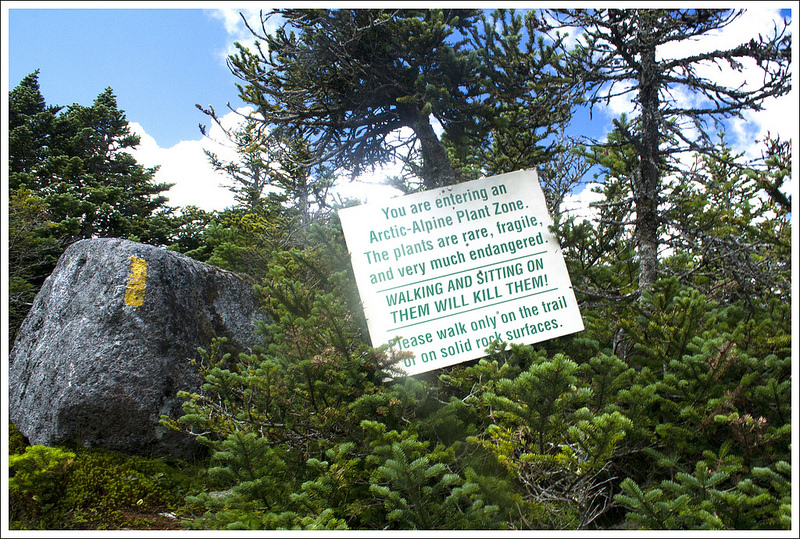
Introductory Guide to Visiting the White Mountains

Mount Major is a short, extremely popular hike in the Lakes Region of New Hampshire.  The summit offers excellent views of Lake Winnipesaukee.

View the Full Album of Photos From This Hike

Mount Major Summit
The summit has superb views of Lake WInnipesaukee. Below: Parking issues at the Mount Major Trailhead; The trail is well-marked and blazed blue; The lower part of the trail is very eroded.

Parking Issues at Mount Major Start of the Mount Major Trail Erosion on Mount Major Trail

Adam Says…

Hiking Mount Major seems to be a rite of passage for anyone that is visiting the lakes region of New Hampshire.  This has been a popular spot for hiking for a long time.  We had just hiked Mount Marcy two days before and our muscles were still recovering, but it was my 44th birthday and I wanted to celebrate with the views from a summit.

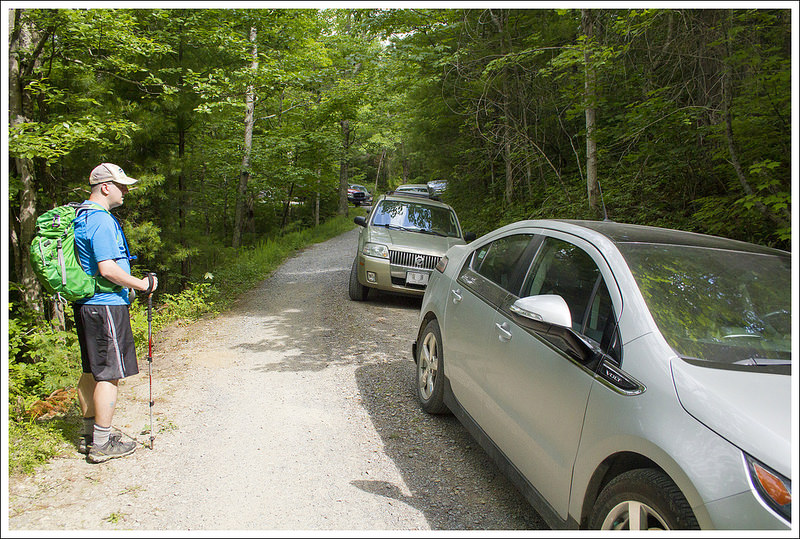
We got to the parking lot fairly close to 10:00 a.m. and the lot was completely full.   We began to see how popular this trail actually was.  We parked along the side of the road and then proceeded through the parking lot to the trailhead.  We noticed one car that was parked in a way that took up three spots.  Someone had left a note on their windshield letting them know just how they felt about their parking job.  New Englanders don’t mess around.

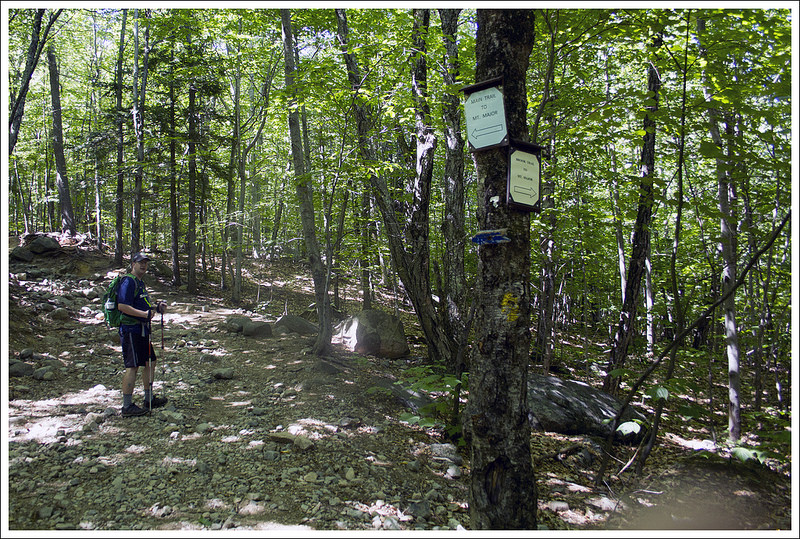
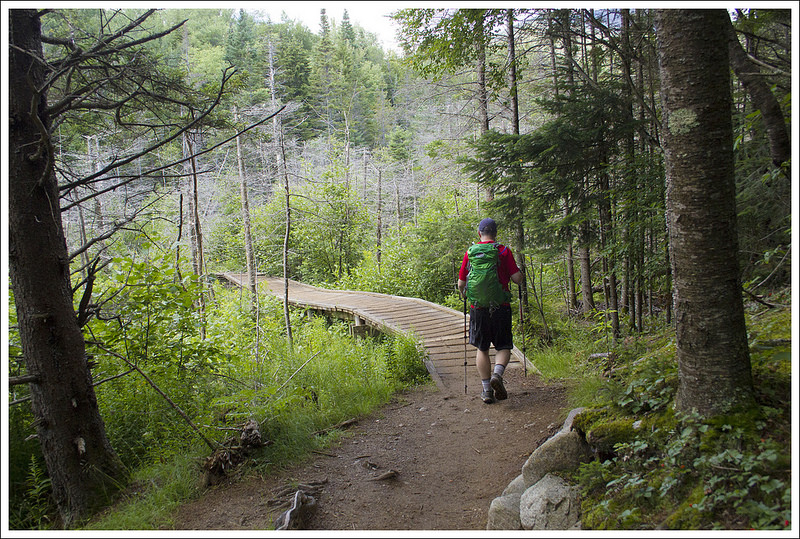
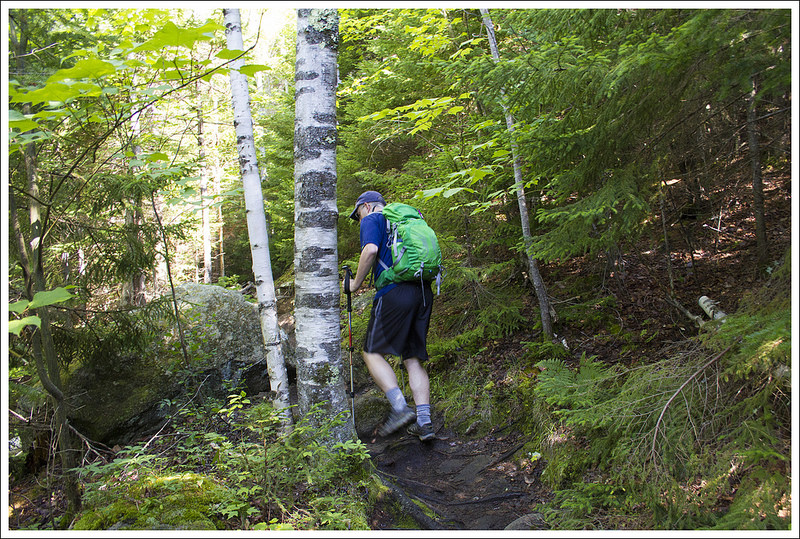
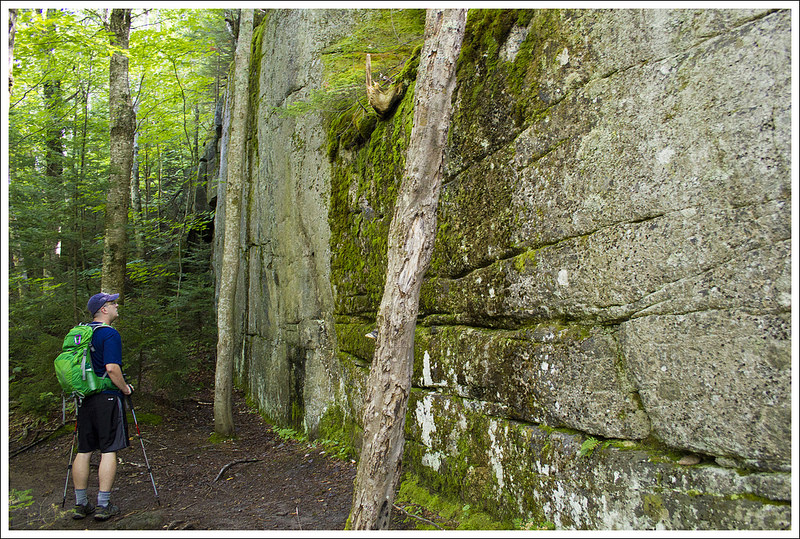
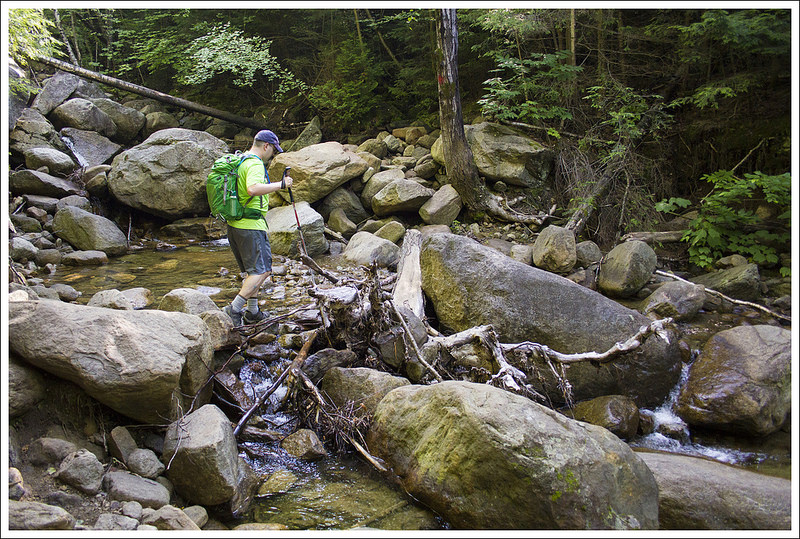
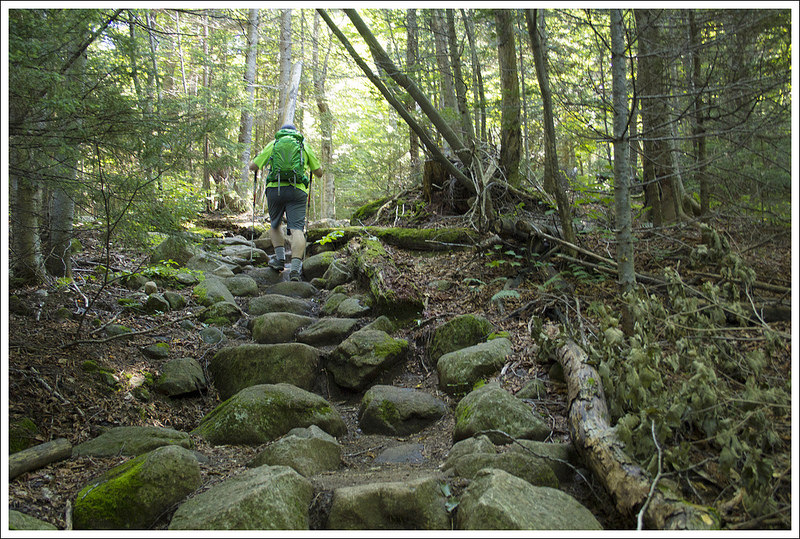
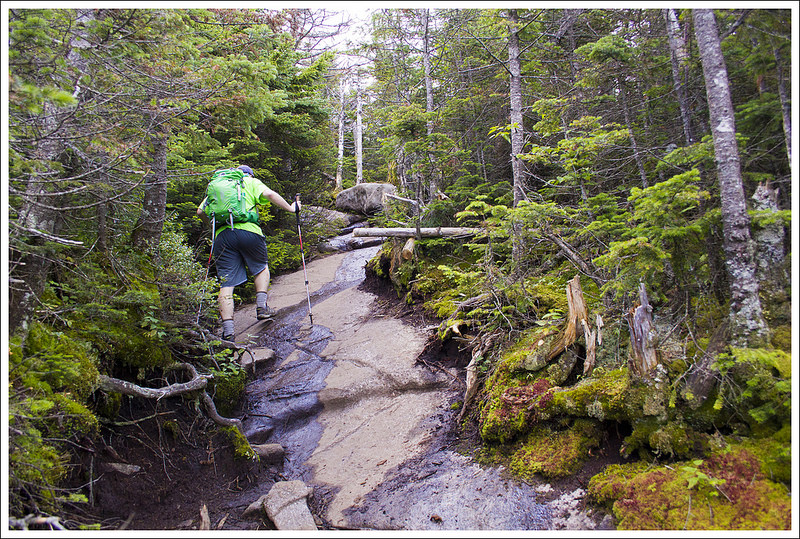
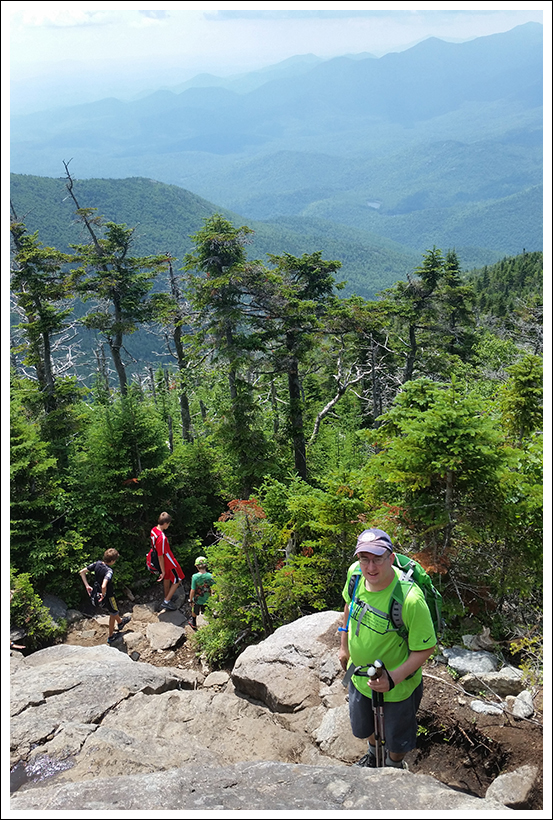
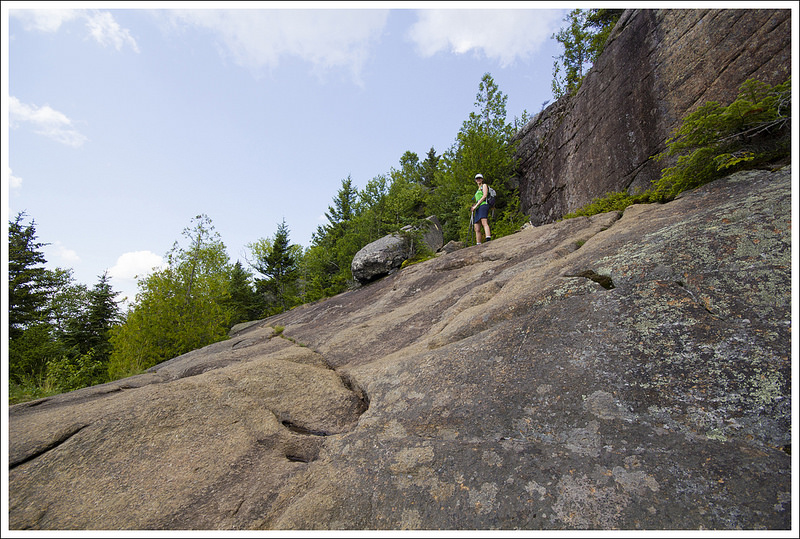
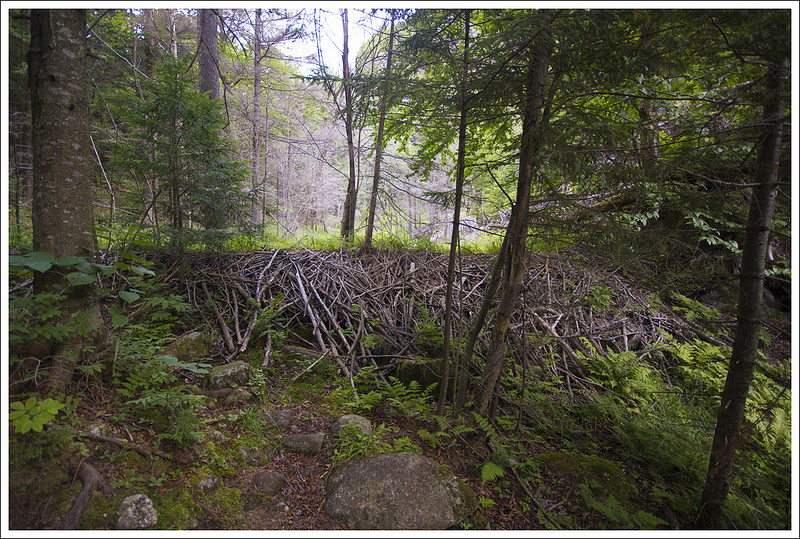
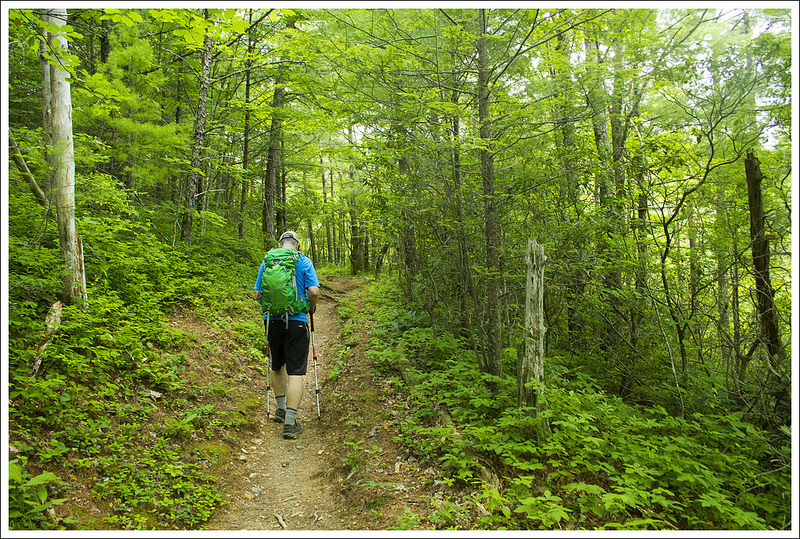
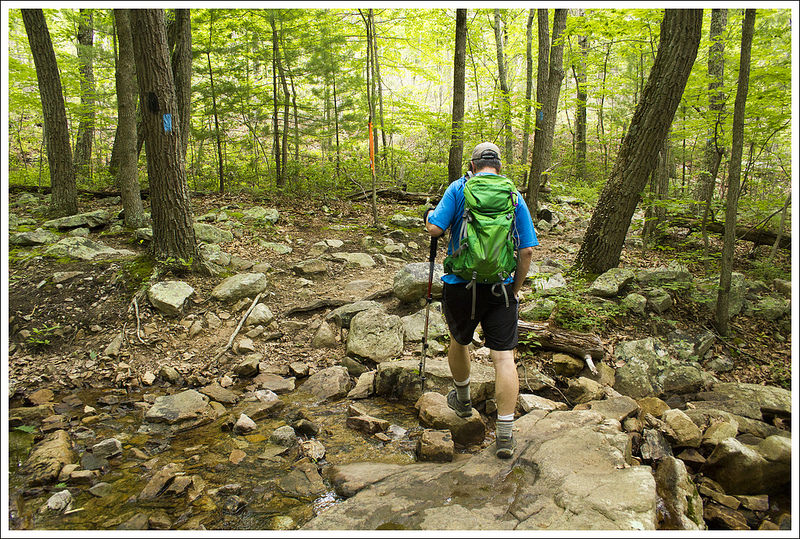
From the parking lot, we followed the main blue trail.  The trail was a wide, worn path through the woods.  When you are walking on a clear, dirt path you know this is a well-used trail.  The hike was uphill for the first few tenths of a mile, but levels out at .3 miles.  We enjoyed some flat walking through the trees.  At .7 miles, the trail reaches a junction.  Take a left to stay on the main, blue-blazed trail.  The trail begins to steepen at this point and becomes more rocky.  As we climbed up on our approach to the summit, you approach some more exposed large sections of rock that you can walk up or you can take a rugged trail up the side.  We opted to walk on the open rock surface on the way up, but chose the path on the way down.  As you walk on this open rock surfaces, you can look behind you to see the beginnings of some great views of Lake Winnipesaukee.    The trail was quite steep at this point and you have to be careful as you navigate up these large, rocky areas.

Wide Flat Mount Major Trail
For a time, the Mount Major trail is wide and flat. Below: The trail junction of Mount Major and the Brook Trail; The trail gets rockier; The trail went back and forth between open rockiness and shade.

Mount Major Trail Junction Rockier Trail Spots of Trees

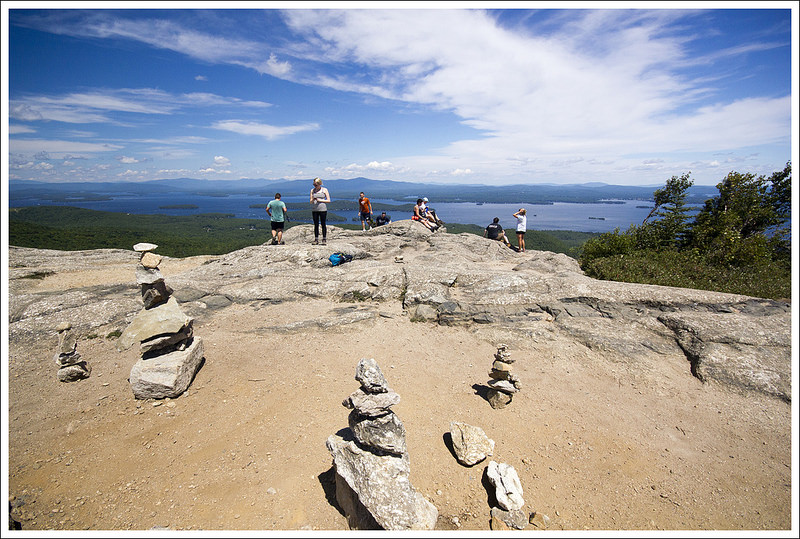
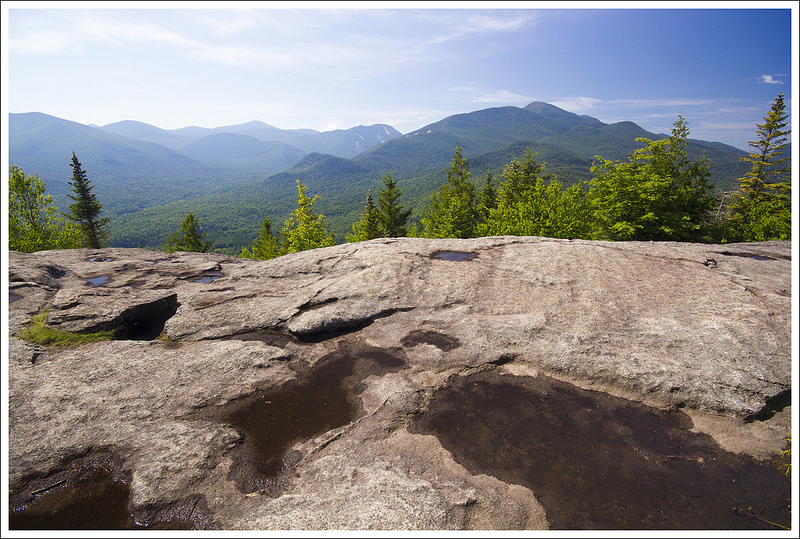
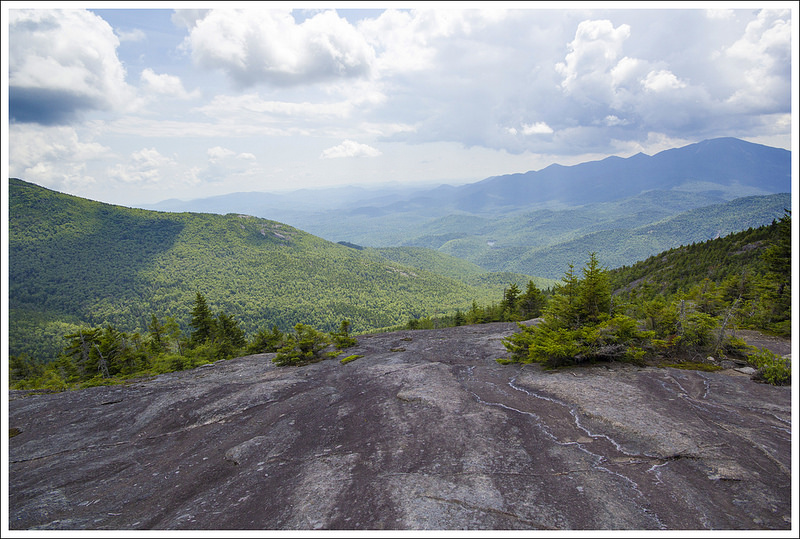
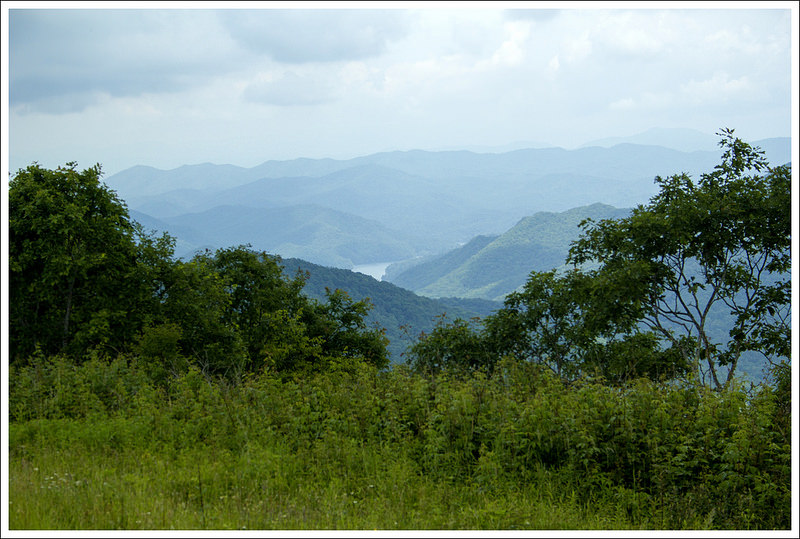
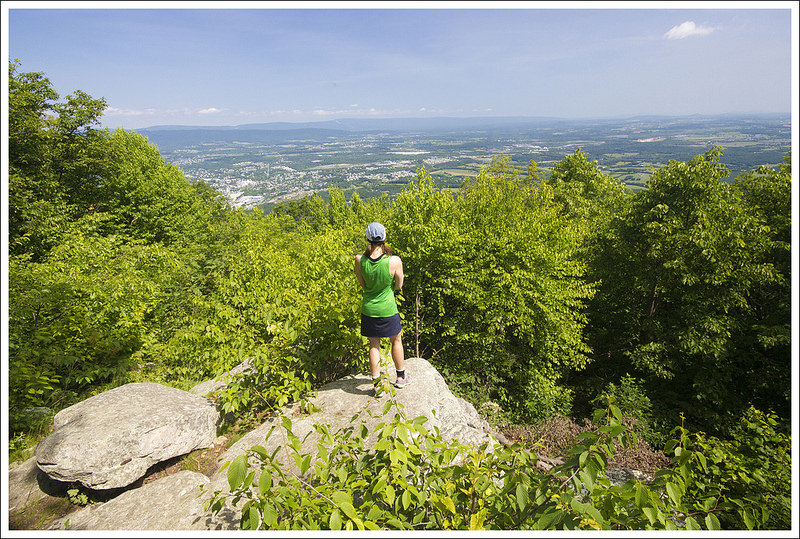
Around the 1.6 mile mark, we reached the large open summit.  There were tons of people at the top, but because of the large area, you can always find a place to enjoy to yourself.  The wind was whipping across the summit.  We went to the summit marker that has a large rock foundation built around it.  We sheltered ourselves from the wind and ate a snack at the summit.  After eating, we walked around in all directions to enjoy the views around us.  While staring out at the gorgeous views, you can easily lose track of time.

We descended the way we came, but there are many options to make this a larger loop hike if you so desire.  Sometimes I feel that popular hikes are often over-hyped, but this hike didn’t disappoint.  We saw plenty of families hiking together on this hike of all skill levels.  Just take your time and most people should be able to make the hike that are in decent shape.   This was a great start to a birthday celebration and the views of Lake Winnipesaukee are some of the best you will get.

Christine Says…

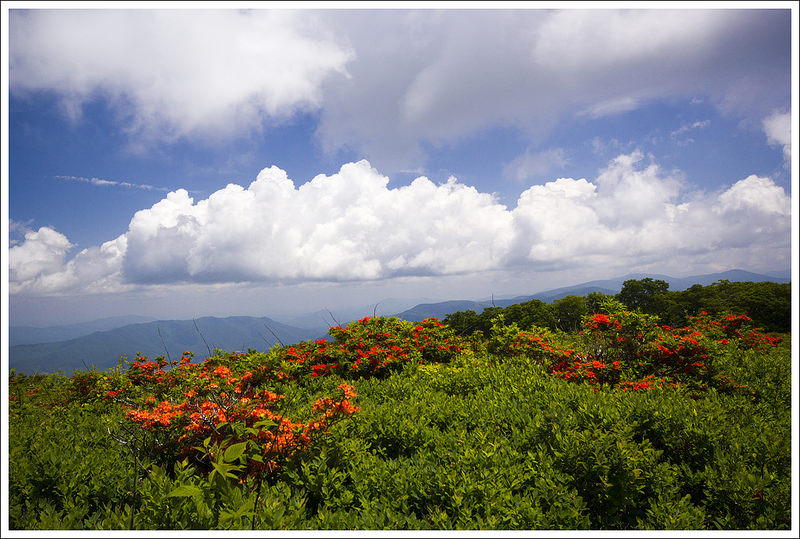
Hey – it’s great to be back in New Hampshire! We had a spectacular, sparkling, bluebird day to hike Mt. Major.  It was a perfect hike for Adam’s birthday.

Mt. Major is probably the most popular dayhike in the Belknap Range – and no wonder, with its relatively short distance and commanding views of Lake Winnipesaukee.  We hiked on a Sunday morning.  Arriving by 10:00 a.m., we found the parking lot already jam-packed with cars. Adam and I had to park our car on the shoulder of the busy main road.

Opening Views on the Climb Up
The views got nicer the higher we climbed. Below: Rock piles on the summit; People gather around the Phippens’ cottage; Birthday photo!

On the Summit Summit of Mount Major Posing on the Summit

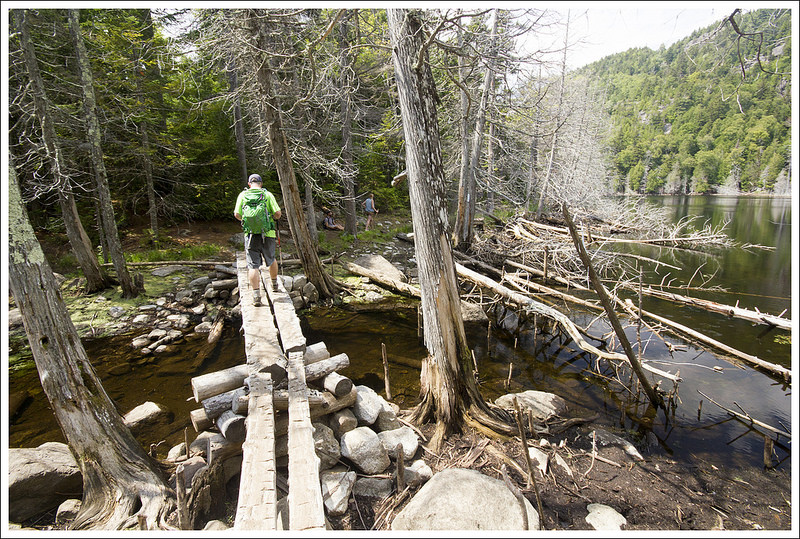
The Mount Major trail is blue blazed and begins climbing uphill on an extremely eroded fire road. The erosion is so deep it makes the trail look like a chute.  The trail eventually levels out and follows a pleasant, nearly flat path.  At around the .7 mile mark, the trail splits into two – the Mt. Major Trail is sharply to the left and the Brook Trail continues straight.  We continued on the Mt. Major Trail – this is when the real climbing began.  The entire 1.6 mile hike only has 1,150 feet of climbing – most of it packed into second half.

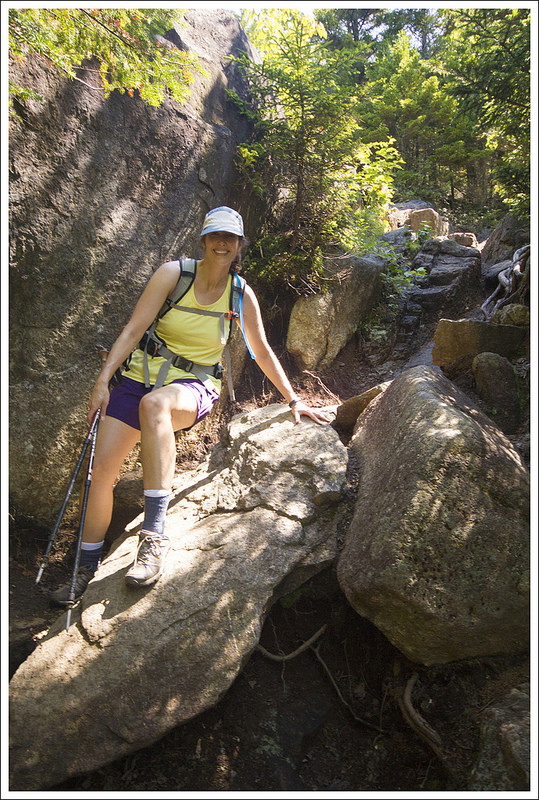
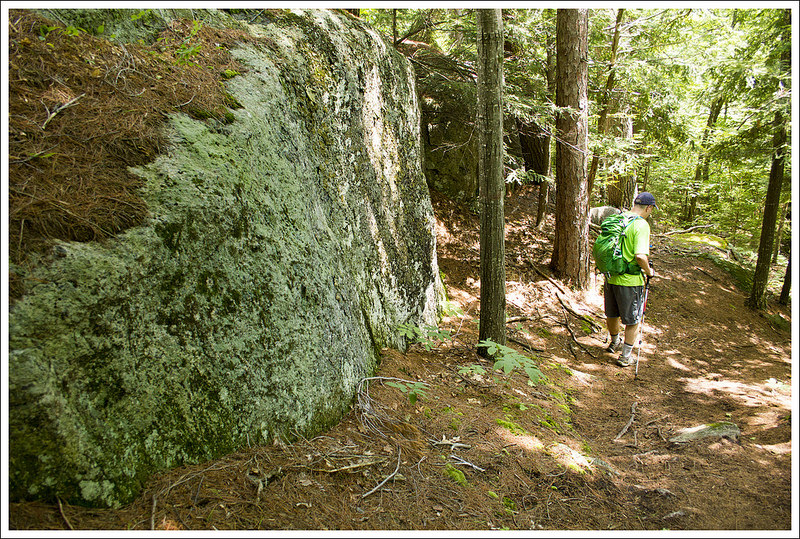
After about a quarter mile of climbing along rocky trail, we passed a family taking a breather on a large boulder jumble. The adult couple was bickering bitterly about turning around or continuing to the summit.  We could tell by their clothes and shoes that they were not regular hikers.  When the man made the decision to quit, we overheard his young son exclaim loudly ‘Daddy… you’re a FAILURE!’  Poor guy!

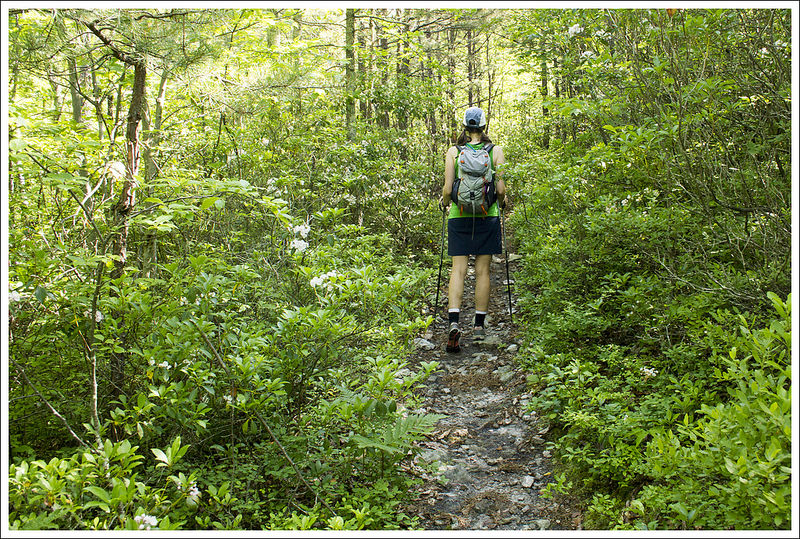
The last bit of climbing was tough, so it probably was for the best that the family turned around.  I think a lot of novice hikers see a short, popular hike and don’t realize how challenging it can be to ascend 1,000 feet in three-quarters of a mile. There were lots of steep rock ledges and smooth domes of rock, punctuated by short passes through trees.  There were two trail choices for the last quarter mile – ledges or ledge detour.  To be honest, the trails were both pretty haphazard with people blazing all kinds of different paths to the summit.  As we made our way up, we paused to look back and enjoy the ever improving view.

Phippens Cottage
George Phippens built a summit cottage in the early 1900s. Below: A view off the other side of the Mount Major summit; The rocky descent; Christine takes in one last view on the way down.

View off the Back Descent of Mount Major One Last View from Mount Major

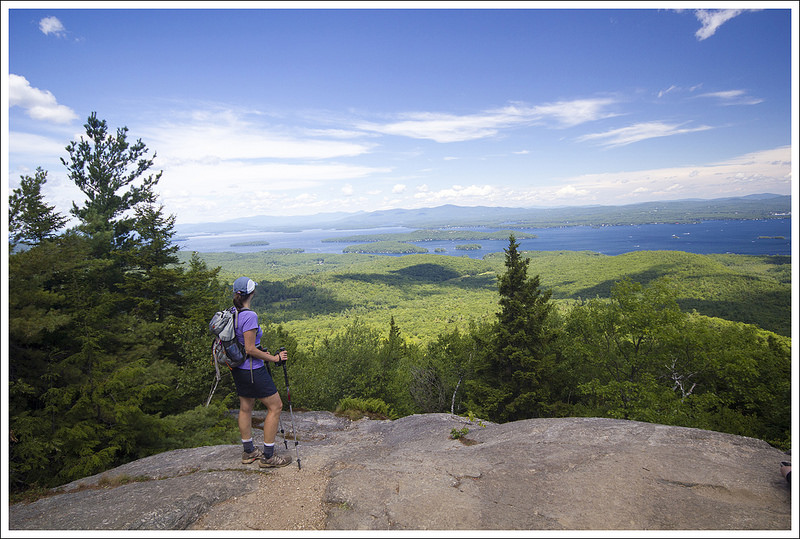
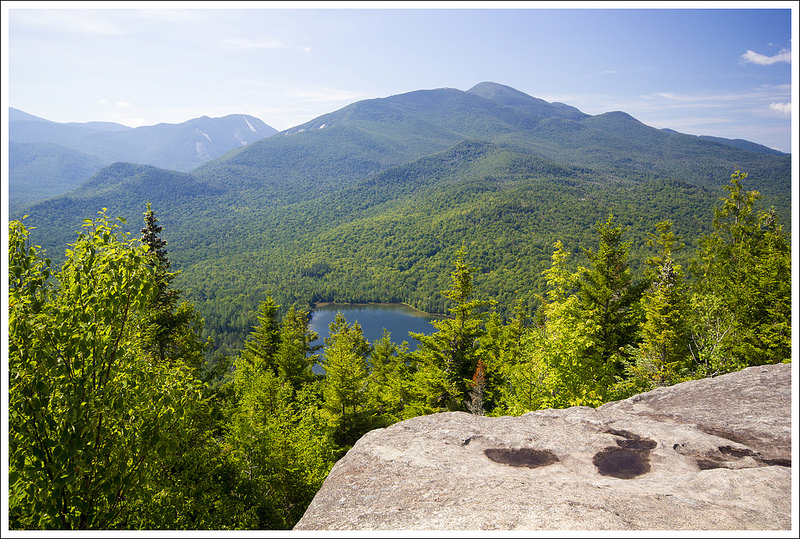
At 1.6 miles, we reached the rocky summit of Mt. Major.  SUPERB!  Lake Winnipesaukee, framed by distant mountains, sparkled all across the horizon. As expected, the summit was very crowded. At the top of the mountain, there are remnants of an old stone cottage.  Later, I did some research into the history of the structure.  The summit of Mt. Major was once owned by a private citizen. New Hampshire resident, George Phippens, bought the mountain summit for $125 in 1914.  He loved the views and the blueberries, and kept the mountain open to all. He built a cottage at the top for hikers to use as shelter, but the roof kept blowing off in the winter.  Eventually, the Great Depression came along, and ownership of the summit reverted to the Town of Alton to cover Phippens’ taxes.  Read more about Mr. Phippens and his love of Mt. Major.

Adam and I spent some more time enjoying the views before making our way back down the mountain.  Many people descend via the Brook Trail, but we just went down the way we had come. By the time we got back to the car, we were starving!  We decided we would eat at the first restaurant we passed – which ended up being the Wise Owl Restaurant and Country Store in Alton, NH.  It was late for lunch, so we were the only diners there.  The food was good, but it took nearly an hour to get a simple lunch.  I almost passed out from hunger while we waited! Reminder to self: eat more snacks!

Trail Notes

  • Distance – 3.2 miles
  • Elevation Change –  1150 feet
  • Difficulty –  2.  There are some steep and rocky sections of the trail.  Most people can make it if they take their time.  Keep an eye on children along the trail. 
  • Trail Conditions – 4.  Most of the trail is open and easy to navigate.  Some of the rock surfaces are slick, so be careful especially on rainy days. 
  • Views – 4.5.  Panoramic views from both sides of the summit. 
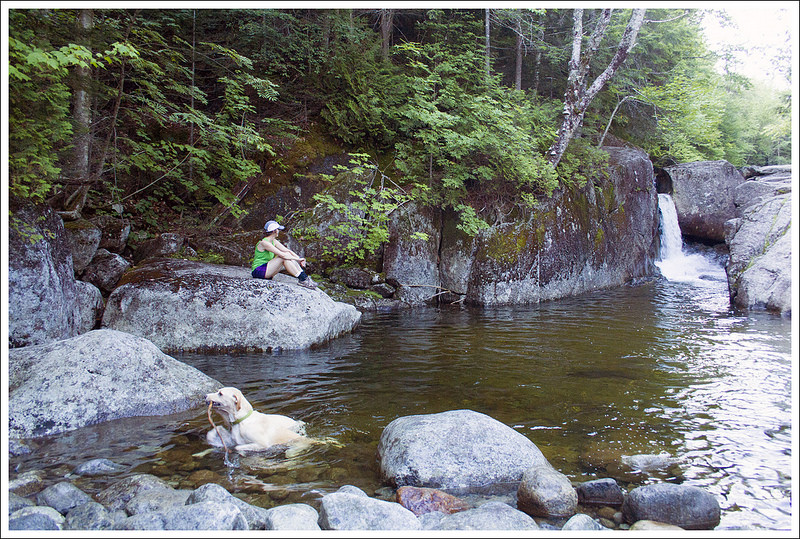
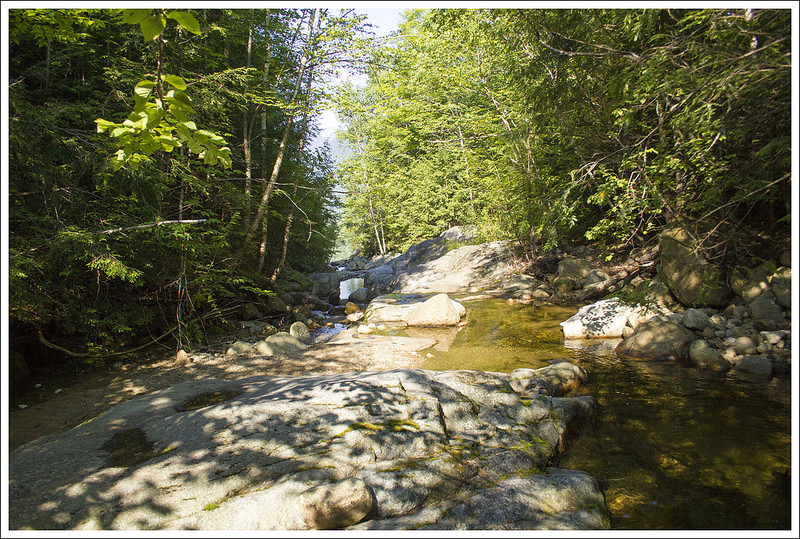
  • Waterfalls/streams 0.  Non-existent. 
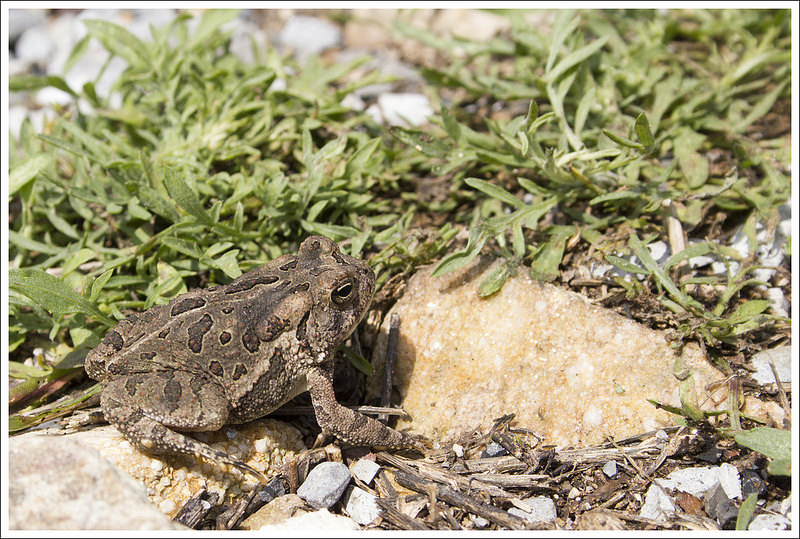
  • Wildlife – 1.  This is a popular trial so wildlife know to stay away. 
  • Ease to Navigate – 4.  There are a lot of paths to make it a loop.  Consult the map and pay attention to blazes along the way. 
  • Solitude – 0.  This is one of the most popular hikes in New Hampshire, so you will likely see lots of people.  Go during the weekday or early mornings to avoid crowds.

Download a trail map (PDF)

Directions to trailhead: From Laconia, NH, take NH-11A for 11.1 miles.  Turn right on to NH-11 and go 3.1 miles until you reach the parking lot on the right for Mount Major.  The trailhead is at the end of the parking lot.  Take the main, blue-blazed Mount Major trail using the trailhead at the back right of the parking lot.  Parking coordinates: 43.519676, -71.272813

Mount Marcy (NY)

adirondacks

This 14.5 mile hike follows a moderate route to the summit of New York’s tallest mountain. At 5,343 feet, Mt. Marcy offers commanding views of the region from her above-treeline summit.  This is definitely the crowning jewel of a hiking week in the Adirondacks!

View the Full Album of Photos From This Hike

Mount Marcy Summit
The summit of Mount Marcy offers a spectacular view of the High Peaks region.

Christine Says…

For our grand finale in the High Peaks, we decided we had to hike New York’s tallest mountain – Mount Marcy!  After a day of rain (that caused us to bail out a mile short of the summit of Mt. Van Hoevenberg), we woke to bluebird skies and crisp, cool temperatures.  After a week of hazy, muggy conditions, we were going to get the prettiest day of our entire vacation week to hike the big mountain.  Perfect!

The hike of Mt. Marcy is almost 15 miles round-trip with 3,200 feet of climbing.  The trail is never horribly steep, but it’s still a long, challenging day for most hikers.  We set out early with our backpacks stuffed with essentials – several liters of water, multiple snacks, and warm layers for the summit.  We (once again) parked at the Heart Lake Program Center.

Despite our early start, there were crowds of hikers setting out for the day.  We never really had the trail to ourselves or experienced much solitude – not that we were expecting it on such a popular trail.  It was also one of those hikes that made me feel guilty each time I paused to take photos. At every photo stop, the slightly slower hikers behind us would catch up and pass us; only to have us on their heels saying ‘excuse me… may we pass?’ ten minutes later.  Because the crowd situation was a little stressful, I didn’t take a ton of photos on the ascent.

Marcy Dam Stream
Even though the pond disappeared when Hurricane Irene washed the sluicegate away, Marcy Dam is still very scenic. Below: Early parts of the hike were gentle and easy; The footbridge across the Marcy Dam; The dam spillway.

Early Flat Trail to Marcy Marcy Dam Bridge Marcy Spillway

The first couple miles of the hike were easy going – it was mostly flat trail through lush mixed forest.   The first notable landmark we reached was Marcy Dam.  Until Hurricane Irene struck in 2011, the dam held back the waters of a scenic pond.  When the monster storm passed over, it washed away the sluice gate leaving behind a nothing but a mud flat with a stream passing through.  When we hiked by, I was unaware of the history and still found the dam extraordinarily beautiful!  Mount Colden, Avalanche Pass, and Wright Peak still stood tall over still water full of cloud reflections.  The New York DEC is planning on removing the dam completely over the next few years, so who knows how the vista will change. Read more about the dam.

On the far side of the dam, we signed the trail register and began the climb toward the summit of Marcy.  The terrain was extremely varied – there were stream crossings, boulders, cobblestones, root jumbles, muddy spots, plank bridges, logs pressed into mud, and basic dirt trail.  The climbing was steady, but gentle almost the entire way to the summit.  One odd thing about the hike was that it was not very well-marked.  There were several major trail junctions that simply did not list the Marcy summit on the signs.  We consulted our map and hiking guide and were able to find the right way, but we met confused hikers at each junction.

Stream Crossing on Marcy
This stream crossing came shortly after passing Marcy Dam. Below: It was odd to see big signs stating ‘TOILET’ in the woods; The check-in station after crossing Marcy Dam; There was a bit of smooth granite early in the hike.

Toilets in the Woods Marcy Sign In Granite on Marcy

After passing through a stretch of trail with big logs pressed into the mud for footing, we reached a saddle on the mountain’s shoulder.  Plank bridges passed across an open, grassy marsh, giving us our first clear view of the bald, granite summit of Mount Marcy.

From there, the climbing became a bit more intense and steep.  We scrambled across granite faces and over boulders, following blazes and cairns along the way.  I didn’t particularly enjoy climbing up this part of the mountain.  I always feel like I’m slipping on smooth granite.  Also, my legs were covered with bruises from all the other rocks I’d climbed earlier in the week.  I’m like a ripe peach when it comes to bruising! At one point, I looked back at Adam and said ‘Seriously… more rocks.  I already look like an accident victim’.  Of course, Adam caught my expression on camera.  I’m not including that photo in the post, but it’s in the Flickr album if you want a good laugh.  I was not a happy hiker at that moment!

Marcy Cobbles
Much of the hike to the summit of Mount Marcy is covered with cobbles. Below: But there are also planks; And root tangles; And a bit of smooth, dirt trail.

Marcy Planks Marcy Roots Marcy Dirt Trail

We slowly but surely made our way to the top – and it was so worth it! What a spectacular view!  The Adirondacks almost rival the White Mountains of NH for their terrain and views.  The wind was whipping across the summit, so I put on my jacket and found a place to eat lunch.  I had tired of PB&J, so I had pepperoni, cheese, and crackers and half of the biggest cookie I’ve ever seen.  The day before hiking Marcy, we had stopped for lunch at the Big Mountain Deli and Creperie.  In addition to amazing sandwiches (all named after the High Peaks) and crepes, they also sell giant cookies perfect for giant hikes.  I definitely recommend a stop there if you’re in Lake Placid!

After a while on top the world, it was time to climb down. We slithered and slid down the steepest parts, enjoying views all along the descent.  When we got back to the marshy saddle that had given us our first view of Marcy, I noticed that one of my trekking poles felt shorter than the other.  I figured that heavy use on the descent, had forced the pole to retract.  However, when I went to adjust it, I found the entire bottom third of my pole was GONE. It was too late and we had covered too much ground to go back for it.  I was able to extend the middle third and use the remnant of my pole the rest of the way down, but I was so bummed.  Those were great Komperdell poles and they carried me over many miles.

The rest of the descent was pretty easy and passed by quickly.  Sometime after Marcy Dam, my right foot decided it had enough for the day and started cramping.  It really hurt, but I was able to hobble my way back to the trailhead parking. We were both pretty happy to see the car!  What a great day and what a fitting end to our first week in the Adirondacks.  We can’t wait to visit again!

Marcy Log Trail
In the wetter, muddier areas, layers of logs were used to create a passable tread. Below: Signage was sometimes sporadic and incomplete;  As we climbed higher we started getting views of the mountains; Entering the Alpine Zone; From a marshy area, we got a nice view of the summit of Mount Marcy. (sorry for the hazy smears on the photos – the lens got wet!)

Marcy Signage Starting to Climb
 Marcy Alpine Zone Marsh on Marcy Flank

Adam Says…

When we first planned our trip to the Adirondacks, we both had put on our goals to hike Mount Marcy.  Being the tallest peak in New York, it is a big draw to people living or visiting the North Country of New York.  When we arrived in the parking lot early in the morning, we kept seeing groups upon groups of people hitting the start of the trail.  I felt pressure to try and get started as we knew more and more people were going to get on the trail as each minute passed.  This was a beautiful day, so we knew it would be a little more crowded than normal.

At the beginning of the trailhead there was a large stack of rocks with a sign asking to carry one to the top of Mount Marcy.  We didn’t realize the full purpose until we got to the summit, but the goal was to bring some small rocks up for preservation projects.  We both grabbed a rock, signed the registry at the kiosk, and started the hike.  The trail starts off mostly flat, with very little elevation gained.  The trail began as a beautiful path through thick woods.  We crossed a footbridge through a marshy area.  Further up the trail, we passed a sign that pointed towards Fangorn Forest.  As big Lord of the Rings fans, we quickly got the reference – I said to Christine, “What madness drove them in there?”, a quote from the movie The Two Towers and we both chuckled.  Staying on the main trail, we came to a large junction at the one mile marker.  There are a lot of trails that criss-cross through the hike up Mount Marcy.  We saw a lot of people consulting maps trying to decide what to do.  We did the same and I bore us left at the junction following the direction to the Marcy Dam lean-tos.  The trail begins to climb a bit here.

Scaling the Summit of Mount Marcy
More views of the summit above treeline. Even though it appears tree-covered, the trees are stunted and leaned to the side.  The remainder of the climb from this point traversed granite boulders and ledges. Below: Lots of granite to climb on – some of it was quite steep!

Climbing Mount Marcy Scaling the Granite on Marcy
Climbing Mount Marcy Almost to the Top of Mount Marcy

At 2.3 miles, we arrived at Marcy Dam, a very picturesque spot to enjoy some reflective water with mountains ahead.  The trail winds down and then crosses the water on a longer footbridge, before leading to the other side with another perspective view.  You will come across signs on this side of the water crossing that are pointing to several lean-tos, bathrooms, and campsites along the way.  We found it strange to have toilets this far off the main trail.  We didn’t realize until our return trip that a ton of people like to camp out here.  Many of the groups that we saw heading on the trail go no further than to one of these campsites, so numbers on the trail can be misleading.

From the other side of the dam, we found another kiosk which we signed again and followed the signs that pointed us to Mt. Marcy.  The trail starts off with a gradual climb here.  At 3.0 miles, we reached a junction with a side trail that led to Phelps Mountain.  Peakbaggers seeking all of the 46 mountains over 4000 feet would follow this side trail to summit Phelps Mountain, #32 on the list, in 1.2 miles (2.4 miles roundtrip from this point).  We skipped Phelps and continued up the trail.  The trail became steeper and rockier.

Looking Back at the View
Along the way, we took lots of opportunities to pause and take in the view behind us. Below: We deposited our small stones on the collection pile.  They’ll be used to build up the protected alpine environment; View from the summit; Adam is happy to be at the top!

Rock Collection on Mount Marcy Descent View Adam on Summit

At 4.2 miles, we reached another junction, which seemed to be the most confusing.  There were no signs stating which way went to Mt. Marcy.  The sign was weathered and half of the letters were hard to read, which only added to our confusion.  We saw several people at this junction trying to figure out the correct path.  Staying straight on the trail would lead you to Table Top Mountain, but we had to take a right on this trail and up a few rock stairs to stay on the trail to summit Mt. Marcy.  At about 4.4 miles, we came to another junction,  We bore to the left, which was the correct path.  The trail continued to be rocky and wet from recent rain.

At about 6.2 miles, we reached a large clearing, which gave us our first views of the summit.  At about 6.6 miles, we arrived at another junction, bore right, and the views above began to open up as we headed above treeline.  The last .6 miles were challenging, with some areas requiring you to scramble up using your hands as well as your feet.  There were also some sheer, slick granite faces, so you had to pay attention and take care.  We finally reached the top at 7.25 miles.  The wind was whipping around us fiercely, but the views were absolutely breathtaking.  I would say these views compare very similarly to some of the views we have seen in Mount Washington and Franconia Ridge in New Hampshire, two of our favorite all-time hikes.

Summit of Marcy
We made it to the summit! Below:  Summit scenery; A well-earned giant cookie!

Summit of Marcy Summit Descent giant cookie

At the summit, there was another sign asking for everyone that carried their rock to drop it here.  While we stopped to eat a snack, we were greeted by a summit steward.  The Adirondack Mountain Club has hired people to talk to others at Mt. Marcy and other summits to educate people about the ecosystems and fragile plants that live on the top of these mountains.  They explained to us how the rocks we brought up would be placed to form barriers to protect plants from the wind and people.  I was amazed the ADK has people that hike Mt. Marcy every day to keep counts of people and talk to people at the summit.  We told the summit steward we have always wanted to be paid to hike and she was getting that dream job of ours. Read more about summit stewards.

We knew we had a long way back down, so we eventually pulled ourselves from the summit to make our way back down.  The views were so stunning coming down also.  On the way back down, I slid and pulled a muscle in my shoulder trying to stop my fall.  The mountains are no joke up here.

Summit Descent 3
After a nice stay, it was time to head down. Below: Steep descent and the last confirmed sighting of the bottom third of Christine’s trekking pole, Adam enjoys one last lofty view; Back into the woods for the rest of the climb down.

Summit Descent 4 Summit Descent 2 Adam Descending Marcy

We finally got back to our car after a long hike downward at 14.5 miles.  After the hike, we were completely beat.  We drove to Lake Placid and stumbled into Johnny’s, a pizza place.  I hobbled in and we ate in a pure exhausted state.

The memories on Mt. Marcy will last with me for the rest of my life.  It is an iconic mountain that definitely won’t disappoint if you can handle the climbing and distance.

Trail Notes

  • Distance – 14.5 miles
  • Elevation Change – 3200 ft.
  • Difficulty – 4.5.  It’s hard to give this a 5, because while the hike is long, it’s never a difficult hike.
  • Trail Conditions – 3. Parts of the trail are fantastic, other parts are a mess.
  • Views  5.  Spectacular, panoramic, top-of-the-world.
  • Streams/Waterfalls – 3. There are a few pretty streams along the hike.
  • Wildlife – 3. Red squirrels and lots of birds.
  • Ease to Navigate – 1.5.  With several junctions not giving good directions on which way to Mt. Marcy, bring along our map below and consult at every junction. 
  • Solitude – 1. This is a popular trail and you’ll see lots of people.

Download a Trail Map (PDF)

Directions to trailhead: From Lake Placid, go east on Rt. 73 to Adirondac Loj Rd., which is the first right after the ski jumps. The parking lots are 5 miles from Rt. 73. There is a $10/day parking fee. Park in one of the large lots near the High Peaks Information Center.  The trailhead is on the far side of the parking lot directly across from the High Peaks Information Center. GPS coordinates for this hike are: 44.1830461,-73.9644678

Rocky Falls & Heart Lake (NY)

adirondacks

This practically flat 5-mile hike takes you to a small, but lovely, double waterfall.  The pool beneath the falls is a great place to take a dip on a hot summer day.  After visiting the falls, the hike continues around the perimeter of Heart Lake.

View the Full Album of Photos From This Hike

Rocky Falls Feature
Rocky Falls is a small double waterfall. It may only be about 10 feet tall, but it’t located in a beautiful setting with an inviting plunge pool for swimming. Below: The trail is well marked and starts near the Adirondack Loj at Heart Lake; Entering the High Peaks Wilderness; Segments of logs are pressed into the trail tread to help manage muddiness and erosion.

Rocky Falls Trail Signage Entering High Peaks Wilderness Hiking Along to Rocky Falls

Adam Says…

As we were trying to mix up some easy hikes with some tough hikes in the Adirondacks, we settled on picking this easy hike to a nice waterfall.  This hike starts on the same path that led to Mt. Jo, beginning at the Heart Lake Program Center (the main hub for the Adirondack Mountain Club).  The trailhead parking at Heart Lake was $10.00 a day for non-members (ADK member parking was $5 and all prices went down by half for parking arrivals after noon.)   We recommend arriving early if you want to set out on any trail from this popular spot.

Stream on Rocky Falls Trail
There were several shallow stream crossings on the way to Rocky Falls.  Below: Some stream crossings had plank bridges; Signage along the trail; Gnarled tree roots.

Stream Crossing on Rocky Falls Rocky Falls Trail Signage 2 Neat Old Trees on Rocky Falls Trail

The trailhead starts to the right of the entrance station.  The trail starts off on a flat, easy path through the woods.  You pass the Heart Lake Nature Museum and then pass the junction to the Mt. Jo trail at .25 miles.  The trail stays flat and skirts along the north side of Heart Lake.  There are a couple of paths that lead down to the lakeside for peaceful views.  At .6 miles, you reach the junction that leads around Heart Lake, but stay straight on the trail.  Most of the hike is relatively uneventful, as you walk through some dense forest areas, with just a couple of stream crossings along the way.  We found very few people on the trail and it was an enjoyable walk slightly downhill.   At 2.0 miles, we reached a junction that showed the side trail to Rocky Falls.  It was only .2 miles to reach the falls.

When I had seen pictures of the falls online, the falls reminded me of two eyes with cascading tears.  We hung out a while at the bottom of the falls and were soon joined by a man with his two dogs.  They enjoyed jumping in the swimming hole and fetching a stick.  We could really tell they were having a great time and it was fun to watch their relentless pursuit.  There is a small path that leads to the top of the falls, but the most picturesque view is of the bottom of the falls.

Rocky Falls Wide View
A wide view of Rocky Falls and its plunge pool. Below: A different viewpoint of the falls; The pool under the falls; Looking downstream from Rocky Falls.

Another View of Rocky Falls Rocky Falls Swimming Hole Looking Downstream from Rocky Falls

We made our way back the way we came, now taking a slight uphill route from the falls.  At 4.0 miles, we came back to the junction with the trail that led around Heart Lake.  We decided to take this route in hopes of seeing the lake from a different angle.  This route actually led away from the lake so it didn’t provide any great views along the side as the northside did.  We passed through a short, open field used for skiing, but then came back into the woods.  We passed a few cabins and campsites along the lake.  At 4.5 miles, the trail met the lake again.  I found a nice bench and sat and enjoyed the serenity of the lake.  We then moved further down to the Adirondack Loj, where we saw several families that were out in the lake swimming, kayaking, and paddleboarding.  We read books by the lake for a while, enjoying the sunny day and then made our way back to the car.

One thing I feel is really special about this area is the ability for families to enjoy the outdoors in many different ways.  This hike and the surrounding areas is a great destination for people that enjoy the water, the views, and the hiking.  While I have seen more impressive waterfalls, this would be an easy family outing if you are staying nearby.

Christine Says…

Adam and I planned to hike Mount Marcy as the grand finale of our Adirondack week, so for Wednesday’s hike, we decided to stick with another easy trail so we could save our energy for our big, 15-mile route a couple days later.  Once again, we found ourselves setting off from the Adirondack Loj – it really is the heart of outdoor activity in that area.

Dogs at Rocky Falls
We saw many dogs – especially Labradors – at the falls.  Below: We enjoyed watching them dive, swim, and compete for their stick.

Dogs Swimming at Rocky Falls Dogs Swimming at Rocky Falls 2 Dogs Swimming at Rocky Falls 3

The trail leading to Rocky Falls was surprisingly flat and soft.  I had come to believe that everything in the Adirondacks was either slick granite, boulders, cobbles, or a tangle of gnarled roots; so terrain like this was a welcome surprise. The wide dirt path passed through beautiful shady woods.  Many of the muddy places along the trail had small logs pressed into the tread to make the mucky parts more passable.   It’s a clever, easy way to manage areas prone to wetness.

Another nice thing about the easy terrain was that it gave us a chance to cover ground at greater speed.  I’m not saying I like to rush through hikes, but sometimes complicated terrain slows you to just a mile an hour.  It felt good to stretch our legs and cover ground!  We reached the falls pretty quickly.  When we first arrived, there were a couple people climbing on the rocks above the waterfall, but we had the lower pool all to ourselves.  I was able to take advantage of some passing clouds to get a couple long exposure photos of the waterfall.  It was small, but very pretty.  The pool beneath the falls was very inviting.  I would have loved to go for a swim, but didn’t bring a towel or clothes to change into.

Crossing the Ski Slope
On the return hike, we followed the trail around the other side of Heart Lake. This took us by the Alice Waterhouse Ski Slope. Below: The trail didn’t follow Heart Lake’s shore very closely; One of the lean-to’s available for rent along Heart Lake; Canvas tents are also available.

eturn Hke From Rocky Falls 2 ADK Lean To Canvas Tent

After a few minutes, more people began to arrive.  The two dogs Adam mentioned were fun to watch, but they also meant I had to put my tripod away.  I don’t know what it is, but I am a wet dog magnet as soon as I get my good camera gear out!  Every time I tried to take a shot, they would come bursting out of the water and running in my direction at a full, water-spraying shake!  Oh well… I had already managed to take a few decent photos and really enjoyed watching the dogs dive and swim. When we went into Lake Placid the later, we actually ran into the hiker who had brought the dogs.  It turned out that he worked at Eastern Mountain Sports.  Funny… usually the people you pass on a day hike, you never see again.

After leaving the falls, we took the lake loop trail back to the Loj.  It was mostly walking through the woods.  Eventually we reached a cross country ski hill named in honor of Alice Waterhouse. Alice was an Adirondack legend – she hiked all the high peaks, skied, worked on trail maintenance, and volunteered her time working to preserve the area’s wilderness.  You can read more about her on the ADK Blog.

Heart Lake
After we finished our hike, we sat along the shore of Heart Lake and ate lunch and read books. Below: The Adirondack Loj; Heart Lake is clear and cool – a perfect spot to dunk tired feet.

ADK Loj Wading

After passing the ski hill, we quickly reached the lakeside camping area.  The lean-tos were really cute.  They reminded me of the Appalachian Trail shelters we see through much of Virginia.  It would be nice to camp there someday!  Before we knew it, we were back at the Loj.  We had packed a picnic of peanut butter sandwiches, chips, and cookies.  I bought more cold drinks from the info center and staked out a nice spot with two Adirondack chairs overlooking Heart Lake.  We spent the afternoon relaxing and reading books.  We watched people paddling the lake and even spotted a loon diving.  What a nice place to watch the world pass by.

Trail Notes

  • Distance – 5 miles
    (Check out the stats from Map My Hike)*
  • Elevation Change – 377 ft.
  • Difficulty – 1.5.  This trail is a rarity by Adirondack standards – the trail was flat and mostly dirt.  We think most people could easily manage this hike.
  • Trail Conditions – 4. The trail was in great shape with only a few muddy spots.
  • Views  2.  Views of the mountains across Heart Lake are pretty, but there are no lofty vistas on this hike.
  • Streams/Waterfalls – 3.5. The small double waterfall is the main point of this hike.  It’s a pretty spot, but there are more impressive waterfalls in the area.
  • Wildlife – 2. The area is heavily traveled and popular with families and dogs.  I wouldn’t expect to see lots of wildlife. Although, we did see a loon on Heart Lake.
  • Ease to Navigate – 4. Trails are generally easy to follow and well marked.
  • Solitude – 2. This is a popular trail in a busy area.

Download a Trail Map (PDF)

Directions to trailhead: From Lake Placid, go east on Rt. 73 to Adirondac Loj Rd., which is the first right after the ski jumps. The parking lots are 5 miles from Rt. 73. There is a $10/day parking fee. From the parking lot at the High Peaks Information Center at the end of Adirondak Loj Rd. return to the entrance station and find the trail at the far corner of the snowplow turnaround. GPS coordinates for this hike are: 44.1830461,-73.9644678

Mount Jo (NY)

adirondacks

This delightful 2.4 mile hike offers fantastic views of Heart Lake and the High  Peaks!  With under 600 ft of elevation gain and a largely uncomplicated trail, this hike is perfectly suited for novices and young families.  It’s certainly one of the area’s ‘do not miss’ hikes!

View the Full Album of Photos From This Hike

Mount Jo Feature
The summit of Mount Jo offers great views of the High Peaks and Heart Lake.

Christine Says…

After a strenuous day on Giant Mountain, we wanted to keep hiking – but we wanted something sort of laid back for our third day in the Adirondacks.  We settled on Mount Jo – a relatively small peak (2,976′) rising above the shores of Heart Lake.  We had read in multiple guides that Mount Jo offered the scenery of a 4,000 footer with only a fraction of the physical effort.  That sounded perfect for our easy day!

Our hike began at the Heart Lake Program Center, which is the main hub for the Adirondack Mountain Club.  The 700-acre property is home to the Adirondak Loj guest house, lots of rustic camping options, and the High Peaks Information Center. Many of the area’s most popular trailheads are located in the vicinity.  At press time, trailhead parking at Heart Lake was $10.00 a day for non-members (ADK member parking was $5 and all prices went down by half for parking arrivals after noon.) When we visited, the 200-car lot was nearly full by 10 a.m.  We recommend arriving early if you want to set out on any trail from this popular spot.

Heart Lake
Beautiful Heart Lake.  Below:  The information board and trail register; Short Trail or Long Trail?; Adam makes his way up the Long Trail.

Info Board at Mount Jo Long Trail or Short Trail Mount Jo Long Trail

The trailhead for Mount Jo is located across from the entrance station at the end of the snowplow turnaround  The hike started off along a wide path with flat, easy footing. We passed the Heart Lake Nature Museum and an open view of the beautiful lake.  At trailpost #29 (all the junctions on the property are numbered!), turn right onto the Mount Jo trail.  Shortly after the turn, there is an information board and a trail register.  Most trailheads in the Adirondacks have a register for hikers to sign in, leave route details, and then sign out at the conclusion of their hike.  It’s an imperfect system, but definitely helps keep hikers safe in a large and rugged area. About a quarter mile after the register, the trail branches in two directions – ‘short trail’ and ‘long trail’.  Adam and I decided to take the long trail up and the short trail down, allowing us to see unique scenery along a loop.

The long trail was beautiful – shaded by pine trees with footing composed of gnarled roots and rocks.  As we hiked, the trail became steeper and followed a stream bed.  I imagine the stream bed is often dry in summer, but we hiked the morning after thunderstorms, so there was a trickle of water running.  We met a chattering red squirrel along the route – they really are so much cuter than the gray squirrels we have in Virginia.

At the top of the climb, the long and short trails met up again and joined routes to the summit. For a short distance, the trail was practically flat, passing over muddy areas on wooden planks. There was a non-intimidating ladder traversing a slab of granite, followed by a short but steep climb over boulders to the summit.  At the top of Mount Jo, we had superb views of  Heart Lake, Cascade Mountain, Mount Marcy, Algonquin Peak, Mount Colden, Indian Pass, and the Great Range.  With the popularity of Mount Jo and the Heart Lake area, we were surprised to have the summit all to ourselves! We really enjoyed the view!

Red Squirrel
We spotted an adorable red squirrel. Below:  Rock wall on the long trail up Mount Jo; At places the trail followed a stream bed; The trail became increasingly rocky and rooty.

Rock Wall on Mount Jo Hiking in Stream Bed on Mount Jo Rocks and Roots on Mount Jo

After a while, we were joined on the summit by a group of hikers led by one of the ADK’s summer naturalists.  The club really offers a great variety of programs.  We listened to the ranger describe and name the peaks and describe the geology of the area.  I had no idea the Adirondacks had so many landslides and avalanches, but the scars she pointed out on the mountains made it very evident. You can view the named peaks (and learn more about the area) in this interpretive trail guide/map created by the ADK. After a little more time at the top, crowds began to arrive and we decided it was time to make our way down the mountain.

The short trail was a steeper route than the trail we had used to ascend.  There were a lot more rocks to scramble over, but it was still mostly moderate terrain.  We made sure we remembered to sign out in the register when we passed back by the trailhead.  We also made a stop at the Nature Museum.  They had neat, touchable displays demonstrating the flora and fauna present in the Adirondacks.

Mount Jo was the perfect stop for a day of light hiking! Back at the High Peaks Information Center, we bought a couple cold drinks and made our way back to the car.  It was early afternoon, so we decided it was time to get some lunch and check out the town of Lake Placid.  Town turned out to be brutally hot – in the mid 90’s.  All the shop keepers and restaurant employees talked about the unusual heat and how lots of people didn’t have air conditioning.  I guess even when you head north for vacation, sometimes you still can’t escape southern-style heat like we have in Virginia!

Boulder Scramble to Summit of Mount Jo
There was one tricky place to climb near the summit. Below: The long and short trails rejoin near the summit; Wooden planks over muddy areas; Arriving on the summit.

Mount Jo Trail Junction Planks on Mount Jo Mount Jo Summit

Adam Says…

After the tougher hike up Giant Mountain the previous day, we decided on this short but impressive hike up Mount Jo.  This hike is located in the Mount Van Hoevenberg Recreation Area near Heart Lake, a jumpoff point for many great hikes.  The trail starts across from the check-station and runs briefly along the side of Heart Lake.  I always find some of the origins of naming mountains interesting and this mountain has a sad but romantic story –

Henry Van Hoevenberg came to the Adirondacks for the first time in 1877 because of health reasons. While he was up there he met Josephine Schofield from Brooklyn, NY. They climbed Mt. Marcy together and became engaged on the summit. From the summit they spotted a small lake that was about five miles away, they decided that that’s where they would live and build a tourist lodge in the wilderness. Josephine’s parents did not like the whole idea and took their daughter back to Brooklyn. Henry stayed and fulfilled the lovers dream. In 1880 he built the Adirondack Lodge on the shores of the lake. It was the largest log building in the United States at the time and had three stories. He changed the name of the lake from “Clear Pond” to “Heart Lake”. Ha also named the small mountain in the back of his land “Mt Jo” in honor of his lost love. – From summitpost

Descending Mount Jo
Mount Jo had a fantastic view. Below: Adam climbs down the ladder stairs; Christine descends the rocky short trail; There was a bit of scrambling necessary on the short trail descent.

Ladder Descending Mount Jo on Short Trail 2 Descending Mount Jo on Short Trail 3

The trail starts across from the check-station and starts off with a flat footpath that winds through some thick, but beautiful forest.  Bear right at the first junction towards Mt. Jo.  You’ll pass by the Heart Lake Nature Museum and then reach the junction (trailpost #29) that leads up Mt. Jo.  At .5 miles, you will reach another junction that gives you options to take the long path or the short path.  The short path is much steeper, so we opted for the long path, taking the left path up to the summit.

While the long path was easier, it was still fairly steep, having to climb up a rocky path.  Luckily, this is a shorter hike so you can take your time if need be.  At 1.1 miles, we reached the top of the junction with the short path and continued on towards the summit.  The path levels out and it is just a quick .1 mile to reach the summit.  Right before the summit there is a ladder and some other steep rocks to climb.

The views at the summit were outstanding on this clear, but hazy day.  The ledge was fairly wide and we could see part of Heart Lake below with mountains extending above.  I spotted several cedar waxwings that were landing on the tops of all the spruces around us.  Cedar waxwings have always been one of my favorite birds because of their unique facial markings and this was the largest grouping of them I have ever seen.

Descending Mount Jo on Short Trail
The short trail was steeper and rockier than the long trail, but we still had lots of fun! Below: Christine signs us out in the trail register.

Signing Out

We had everything to ourselves for a few minutes before others started arriving – one of the advantages for starting our hike early.  On the way back down, we decided to take the short path at 1.35 miles to enjoy some different scenery.  The short path was much more steep and rocky so I am glad we made the choice to hike down this section instead of up.  We saw many more people coming up as we descended and some were struggling.  We arrived at the bottom of the junction with the short trail at 1.75 miles, having descended over 500 feet in that short span.  We bore left at the junction and made it back the way we came for the rest of the way.  We arrived back at the start at 2.4 miles.

When we got back to the parking lot, we stopped at the ranger station for some cold drinks.  As I was waiting to check out, I overheard an older couple that were talking to the ranger about trying to hike up Mt. Marcy.  We will cover Mt. Marcy in another post, but to put this into perspective it is the highest peak in New York and the most popular route takes at least 14.5 miles to hike it.   It was probably around 1PM, they were wearing jeans, and only had one small liter of water with them.  The man said he also had a bad back, but they really wanted to hike it.  The ranger told them it was an incredibly bad idea and they didn’t have what they needed to prepare themselves for the hike.  After a few minutes, the man came back inside and told the ranger they decided to do something easier (Mt. Jo) and the ranger told them that was a much better idea.  I am sure we would have read the rescue story the next day in the news if they had proceeded.

After the hike, we decided to drive into Lake Placid.  Every American that lived in the 1980s remembers the Winter Olympics held here and the Miracle on Ice when the American hockey team beat the Russians to win gold.  This town still holds the memories of the Olympics and this historic game alive through the stores and shopping – there was even a bakery named Miracle on Icing.  We made our way to Lake Placid Brewery and enjoyed a great lunch and sampled several beers from the brewery.  We walked a little around the shops, but it was extremely hot that day so we decided to return back to the glorious AC in our cabin.

If you are looking for a family hike with great views for minimal effort, look no further than Mt. Jo.

Lake Placid
We had lunch at the Lake Placid Pub and Brewery. Good food and beer!

Lake Placid Beer Samples

Trail Notes

  • Distance – 2.4 miles
    (Check out the stats from Map My Hike)*
  • Elevation Change – 555 ft.
  • Difficulty – 2.5.  While the climb is steep in a few areas, the route is short and mostly easy to moderate.
  • Trail Conditions – 4.  The trail is well maintained and marked.  It is still rocky and slippery in places, like most of the terrain in this area.
  • Views  5.  You get fantastic payoffs for a relatively easy climb.
  • Streams/Waterfalls – 1. There are a couple small trickles of a stream, but nothing noteworthy.  Heart Lake, however, is beautiful!
  • Wildlife – 3. The heavy foot traffic on this trail probably scares away most wildlife, but we did see a garter snake and a red squirrel.
  • Ease to Navigate – 4.  Trails are well marked and generally easy to follow.
  • Solitude – 2.  This is a popular and well-traveled hike.

Download a Trail Map (PDF)

Directions to trailhead: From Lake Placid, go east on Rt. 73 to Adirondac Loj Rd., which is the first right after the ski jumps. The parking lots are 5 miles from Rt. 73. There is a $10/day parking fee. From the parking lot at the High Peaks Information Center at the end of Adirondak Loj Rd. return to the entrance station and find the trail at the far corner of the snowplow turnaround. GPS coordinates for this hike are: 44.1830461,-73.9644678

Giant Mountain (NY)

adirondacks

Giant Mountain is New York’s 12th tallest peak and the hike to the top is no joke!  With about 3,400 feet of elevation gain in just 3.4 miles, lots of slick granite and tangled roots to negotiate, and several short rock scrambles, this is not a beginner’s hike.  The views at the top and along the descent make the effort worthwhile, though.  The hike winds down with a visit to a lovely glacial pond called the Giant Washbowl.

View the Full Album of Photos From This Hike

Giant Mountain Summit
Crowd gathered on the summit of Giant Mountain. Most of the people were part of one very oversized hiking group. Below: Trailhead information; There was fog catching the sunlight early in our hike; The steady climb begins early on the route.

Giant Mountain Trailhead Giant Mountain Fog in the Woods Giant Mountain Climbing

Adam Says…

Giant Mountain is one of the Adirondack High Peaks, a collective name given to the 46 mountains that rise above 4000 feet.  A survey later showed that four of these peaks are actually slightly below 4000 feet (and one other should have been included), however the ADK is keeping all of the original 46 peaks in this club.   Giant Mountain stands as the 12th highest mountain in New York at 4,627 feet.  One thing we quickly discovered on our trip to this area is that there are lots of people trying to peakbag all 46 peaks – kind of a rite of passage for serious NY hikers.  So, you will likely find fellow hikers on the trail.  Giant also has several different ways to approach the summit, but this path would be the most popular, mostly because of the length and the access to see the Giant Washbowl and Nubble.  Some peakbaggers will approach this hike from another trail to the east to bag Rocky Peak Ridge, #20 on the Adirondack High Peak list.

We found the parking lot without much trouble and began our hike on the Roaring Brook Trail.  Within the first couple of tenths of a mile, the trail branches off to the left (the trail to the right leads to the base of Roaring Brook Falls) up a steady incline.  The trail starts off with a lot of roots, but these are soon replaced with lots of large rocks to navigate.  At about .5 miles, you reach a side trail while leads to a nice large campsite and the top of Roaring Brook Falls.  Be very careful if you check out the stream at the top, since people have fallen over the falls and died.  Backtrack your steps and rejoin the trail to continue the uphill climb.  At 1.2 miles, you reach a junction that leads to the Giant Washbowl and Nubble (your return trip on this loop).

Steep Rocks to Scale
The terrain ascending Giant Mountain is varied with rock scrambles, smooth granite, cobbles, roots, stream crossings and more! Below: The top of Roaring Brook Falls; A stream crossing;  Trail Junctions were well marked.

Top of the Falls Stream Crossing  Trail Junction

Continue uphill on the Roaring Brook Trail.  Keep an eye on where you place your feet as you have to navigate along rocky steps through most of the rest of the hike.  At 2.9 miles, you reach another junction.  Turn left to head to the summit of Giant.  This part of the trail had some extremely slick granite slabs to walk up.  We had just had rain a couple of days ago, so some of these giant slabs were very tricky to climb.   Eventually, you will reach the summit at 3.6 miles. Views at the top are truly breathtaking.

On our descent, we returned back the way we hiked up.  Christine was worried about the descent over the slick granite, but we took our time and even scooted down some surfaces on our butts to be extra safe.  At 4.4 miles, we reached the junction of the Ridge Trail (also known as the Zander Scott trail) and Roaring Brook Trail.  Instead of taking the Roaring Brook Trail back the way we came, we decided we wanted to see the Giant Washbowl.   The descent was steep this way down, but there weren’t as many slick granite rocks – the area is more exposed and the sun dries the rock off more quickly.  The way back on this trail gave us more incredible panoramic views, so we instantly knew we made the right choice.  I would recommend to descend on this trail rather than trying to ascend, because by descending you get the views in front of you instead of having to turn around constantly to enjoy the views.  We went at a slow pace through this section since it kept opening up to views.  At 5.5 miles, we reached another trail junction.  The trail that branches off to the right leads to the Giant Nubble.  We opted not to take this route, but from what I have read there are some great views that overlook the Washbowl and surrounding mountains.

Ladder
There was even a ladder to climb on the hike up. Below: Some of the climb involved clambering over big rounded rocks; Other parts were across smooth (often slippery) granite, Sometimes you had to drag yourself along the brush at the bottom of a granite slide.

Climbing the Cobbles Climbing the Granite Granite Slide

Continuing down the Ridge Trail, we came to the Giant Washbowl.  The Washbowl is a large pond, serving as a picturesque spot begging you to reflect along the calm waterside.  We crossed over a long, but low to the ground, log bridge that stretched over part of the creek.  On the other side of the log bridge was another junction and trail sign.  We took a right and followed this Giants Washbowl Trail that skirted the edge of the Washbowl.  On the other side of the Washbowl, we saw a huge beaver dam and tree stumps marked with gnawing beaver teeth.  The trail was mostly level, but did go slightly up and down at minimal climbs and descents.  I found this part of the trail to be more wet and slick with some rocks and almost had a bad fall, but was saved by my trekking poles.

At 6.3 miles, this section of the trail rejoined the opposite side of the Nubble Trail.  We kept straight on the trail and at 6.7 miles, we reached the junction with the Roaring Brook Trail.  We took a left here at this junction and followed the trail back to our car, which should bring you back around the 8 mile mark.

This hike was intimidating and a bit of a challenge.  I remember we had read this was a great family hike.  We were thinking they would never describe this as a family hike in Virginia, but I guess New York Adirondack hikers are a stronger breed than we are used to in Virginia.  We found that to be the case for most of the people we met up here.  People in the Adirondacks look healthier, seem to be in better shape, and have a close connection to the outdoors.  If you enjoy a bit of a challenge, the views are definitely worth it on this hike.  Pictures can’t do the views justice.  Be sure to add this one to your agenda if you are looking for a great hike in the High Peaks area.

Christine Says…

Adam did a great job doing all our pre-trip hike research  for our Adirondacks vacation! Over the course of the week, we hiked a mix of big mountains and small mountains. We saw quiet ponds and cascading waterfalls. Some days were easy strolls and other days were grueling climbs.  The hike of Giant Mountain was not our longest hike of the week, but I think it was definitely our toughest.  It had a monster elevation gain and I found the terrain physically challenging and a bit frightening in spots.

Super Steep
Near the summit, the climbing was tough and traversed large boulders. Below: First glimpses of the view; Before reaching the top, the trail offered a brief reprieve from relentless climbing as we walked across a saddle between peaks; Giant Mountain Summit

First Vies Saddle Giant Summit

The climb started off through lovely, shady forest.  The trail was cris-crossed with roots, but the footing was generally soft dirt.  The climb was steady and relatively steep.  As we climbed higher, the dirt trail gave way to increasing rocks.  At first, it was jumbles of boulders and cobbles.  We made our way, stepping carefully from stone to stone – making sure each was level and anchored before committing our full weight to the step.

Eventually, we started seeing fewer round boulders, and started seeing mostly smooth, slanted granite faces.  The granite was wet from storms the night before.  It was also covered with a coating of incredibly slick granite sand.  The climbing was very mentally challenging for me.  I get really nervous when I have to cover slippery terrain that lacks anything to grab onto in case of a slip or slide.  My vertigo makes me more prone to the sensation of losing my footing.

There were several spots on the climb of Giant that paralyzed me with panic and fear.  On one especially smooth, steep pass; I actually burst into tears because I was so certain I was going to fall off the mountain and die.  I gripped the tiny hand and foot holds, took deep breath, focused on the rock face in front of me, and climbed.  It sounds silly, but confronting and prevailing over fear like that makes me feel proud.  Of course, just when I’m feeling my proudest – some wiry, lean 22-year old guy trots up the same rock face with the agility of a mountain goat.  🙂  I just remind myself that my vertigo is an extra challenge and I still did it!!!

Giant Mountain Summit
Super views from the summit of Giant Mountain. Below: We had fantastic views on the hike down the Ridge Trail; Sometimes the trail disappeared; Our first view of the Giants Washbowl.

Great Views on Descent Direction First View of Giants Washbowl

Before reaching the summit, we crossed a nice saddle between knobs.  The trail was fairly level and soft and it was a great reprieve before one final scary rock scale to the summit.  It took me a few minutes of deep breathing and positive thinking to climb the one last steep spot to the summit.  And the summit was MAGNIFICENT!  Of course, some of the beauty was stolen from me because I was already thinking ‘How the heck am I going to get down from here?’  I need to remember to stay in the moment and wish I had taken more time just to enjoy being at the top of Giant.

We chatted with other hikers at the top.  We took photos.  And then it was time to climb down!  As luck would have it, the descent turned out to be no big deal for me.  I took my time, scooted on my rear end, and used my trekking poles and tree branches to brace myself.  One of the hikers we chatted with at the summit took a hard fall on slick rocks climbing down.  It looked like he hit his head, so I shouted to him to stay put and not try to get back up.  I started climbing back up toward him to make sure he was OK.  Fortunately, he was fine – just bruised and stunned.  It’s so easy for one misstep to become a serious injury on terrain like this.  In fact, there is a website that lists search and rescue missions for the Adirondacks.  Typically, crews go on anywhere from 5-15 missions a week to help injured, sick, and lost hikers.

Great Views on Descent
The descent on the ridge trail offered great views. It was like a theater with the mountains up on stage. Below: Some steep descents along the granite; So much granite; Really… there was a lot of granite.

Steep Slick Granite More Rock Faces Lots of Rocks

At the junction of the Roaring Brook and Ridge Trail, we stopped to review our map.  We started chatting with another couple we had met on the summit.  They didn’t have a map or a plan, so we shared information with them.  They decided to hike with us down the Ridge Trail to see the Giant Washbowl.  They had an adorable Jack Russell mix dog named Judy!  She was an agile and energetic hiker.

The views coming down the Ridge Trail were as nice as the summit.  It was like walking into a theater of mountains.  There were lots of granite faces and cobbles to negotiate on the way down.  Sometimes the trail was so rugged you were left wondering if it really was the trail!

We started seeing glimpses of the Washbowl from above.  It was even more beautiful up close.  I loved seeing the reflections of clouds and mountains in the water.  From there, the rest of the hike was pretty easy and the terrain was much more moderate.  We passed (and greatly angered) a couple red squirrels.  They’re pretty cute when they’re mad – chattering at you from tree branches.

Giants Washbowl
The Giants Washbowl is a beautiful mountain pond. Below: Seriously, these rocks are the trail; A bridge over the end of the pond; A dam at the top of the pond.

Seriously Rocks Bridge Over Pond Dam

When we were almost back to the car, we passed a large family group.  There were two women and about ten kids under the age of ten – all dressed in swimsuits and sandals.  They were considering walking to the top of the waterfall and asked what the terrain was like.  Fortunately, we were able to dissuade them from hiking the steeper rockier terrain by telling them that there was nothing really to see – which was true.  The top of the falls was really low and unimpressive.

We reached our car and decided ice cream was in order!  We definitely earned a treat after a hike like that!

Trail Notes

  • Distance – 8.1 miles
  • Elevation Change – 3408 ft.
  • Difficulty – 5.  The hiking up here is tough.  
  • Trail Conditions – 2.  While the trail is well-maintained, there are  a lot of rocks that make for very tricky footing.  There is also a few sections that require you to go up slick granite rocks that can be especially dangerous after recent rainstorms.  
  • Views  5.  Outstanding panoramic views.  Great views of many other high peaks in the area.  
  • Streams/Waterfalls – 2.5  The first mile of the trail gives you some occasional views of Roaring Brook.  A small side trail leads to the top of the Roaring Brook Falls.  The Giant Washbowl is also impressive to see.  
  • Wildlife – 2.  This is a popular trail so I wouldn’t expect to see much more than birds.
  • Ease to Navigate – 4.  Signs gave good information at the junctions.  There are different options to include trips to Giant Nubble and also to connect to Hopkins Moutain and Owl Head Lookout from the summit.
  • Solitude – 2.  Expect to see plenty of people on a nice day at the summit.  The summit has a lot of space to spread out and enjoy your own view.  

Download a Trail Map (PDF)

Directions to trailhead: From Keene, NY head southeast on NY-73E/NY-9 S.  Continue on NY-73E for about 6.1 miles.  There is a small parking lot on the left, which is shortly after you pass through St. Huberts.  The trailhead is at the end of the lot. Coordinates for trailhead parking are 44.1502704,-73.7676257.

Flume Knob (NY)

adirondacks

For our next five posts we’ll be sharing hikes in the Adirondacks High Peaks region.  Up first… Flume Knob – this surprisingly tough 4-miler leads to a beautiful view looking toward Wilmington and the Jays.

View the Full Album of Photos From This Hike

View From Flume Knob
On our Adirondacks trip, the area set heat records. Most of our week was hot, hazy and humid — just like Virginia. But really, a little summer misery can’t spoil a view like this!

Christine Says…

Well… here we are in New York’s Adirondacks!  We’ve wanted to visit the High Peaks region for years, and finally got around to making it happen.  We found a delightful cabin in the woods on VRBO.com and rented it for a full week.  We arrived late on a Saturday evening, so Sunday was the first day we had to hike.  We had seen signs along the way to our cabin saying ‘ALERT: Lake Placid Heavy Race Traffic Sunday’.  What we didn’t know was that it was the day of the Lake Place Ironman and most roads in the area would be closed in at least one direction – some roads closed completely.

We had initially selected a nice 9-mile waterfall loop – away from Lake Placid, in hopes of avoiding the race traffic.  With GPS coordinates set and maps in hand, we set out toward our trailhead. Our GPS kept re-routing us and the drive time to the trailhead fluctuated wildly from 20 minutes to an hour and 10 minutes.  Finally, we came upon a police officer directing traffic.  All the rerouting on the GPS was due to real-time road closures for the Ironman.  Boooo! We were forced onto a very long, one-way, circuitous route around the race – a route that took us nowhere near our planned hike.  At this point, cell service was gone and we didn’t have any way to select a new hike that we could actually get to. So we drove and drove.  We watched racers passing by on their bicycle leg  in the closed lane of traffic. We both agreed it was a pretty disappointing start to the trip – after spending 11 hours in the car on Saturday, we were ready to hit the trail!

Flume Falls
Flume Falls is a beautiful rapid of water that passes through a gorge right at the trailhead. Below: Before climbing to Flume Knob, we hiked the network of engineered paths around High Gorge Falls. It was impressive; The sign that caught our attention; The trailhead for Flume Knob.

High Gorge Falls Flume Trails Flume Knob Trailhead

Eventually, we came upon a sign for High Gorge Falls.  I told Adam ‘Go there – I remember reading about that place.  It looked pretty!’  As it turned out, we had the entirety of this popular tourist stop all to ourselves.  I guess no one else even tried to fight the Ironman traffic. We walked the network of trails and marveled at the impressive waterfall plunging through the chasm! After about an hour, we’d seen all there was to see and decided we’d try and figure out a way to get back to the house and spend the afternoon relaxing and enjoying our comfy little cabin.  But as luck would have it, we passed a sign on the road labeled ‘Flume Trails’. Adam looked at me and we knew instantly that we were going to stop and check it out.  The sign was brown and had little hiker stick figures – and that was good enough for us!  Sure… it wasn’t the hike we planned.  And yes – we had no idea how long the trail was, how difficult the trail was, or even where it led.

Fortunately, signage at the trailhead indicated that there was a 4-mile out-and-back to Flume Knob.  We agreed that knobs usually have decent views and set off along the trail.  The trail soon became a network of trails.  Some signs indicated the way to Flume Knob, others made no mention of it.  Trail names changed quickly from Corridor to Connector to Flume Knob.  We just kept hiking uphill, following the path that looked most worn, and then verifying we were still on the right route any time Flume Knob was mentioned on a sign.

I took very few photos on the hike up, because my hands were being kept busy swatting at the army of mosquitoes unleashed in the forest.  Bug spray didn’t slow them down – not even a little bit. What had become as an easy, gradual climb became steeper and steeper as we hiked along.  I was hiking as fast as I could to outrun the mosquitoes, but the terrain slowed my pace.  The trail climbed upward without the ameliorating effect of switchbacks. There were several sections of trail that were washed out and covered with loose, slippery scree.  There was a small rock pass that had a rope to help hikers pull themselves upward.  There were a couple small blow-downs to negotiate. It was pretty tough going for a little while.  After the hike was over, I read a description of the terrain on the Lake Placid website – they used the word ‘aggressive’.

Climbing to Flume Knob
The first half of the climb to Flume Knob was gradual with smooth, easy footing. The second part was more like this. Below: The wayfinding and signage on this trail network was a little confusing. We probably would have fared better with a map or some prior research; Trails in the Adirondacks are blazed with metal disks instead of paint; Some of the easier climbing.

Confusing Signs Blazes Through the Pines

It was all worth it in the end! The view from Flume Knob was magnificent!  We climbed around the side of a boulder and came out on a rocky outcropping with super views of the Adirondacks.  We could even see tiny specks of triathletes on the road in the valley below.  The viewpoint also had enough of a breeze to keep the insects at bay.  We enjoyed the view for a while until we were finally joined by a large family group.  They had been down in the valley cheering a family member along in the Ironman and decided to climb Flume Knob after he passed by.

The hike down was slow going until the terrain moderated.  There were many places that were steep and covered with loose footing.  We covered those parts with care and the added help of trekking poles. Once we descended a bit, we were able to complete the hike relatively quickly.  When we got back to the trailhead, we took some time to explore Flume Falls.  The falls are right next to the parking area and are definitely worth a look!

While it wasn’t the hike we planned, the day turned out really nicely overall!  Sometimes it’s fun to let go of expectations and see where fate takes you.  That said — I still don’t think I’m a fan of the Ironman!

Adam Says…

Christine did a great job with explaining the circumstances of doing this hike over other things we were considering for the day.  What she didn’t mention was the day before on our drive up, we decided that it would be nice to stop at a brewery on our way up to stretch our legs and give our dogs a chance to get outside.  We opted for Ommegang Brewery in Cooperstown, NY.  I haven’t been a big baseball fan since I was a teenager, so I have been a little out of the loop for the timing of baseball events.  When we arrived at Ommegang at 2:45PM, they said they were closing at 3PM for a private event (which wasn’t announced on their website).  I started seeing lots of people arriving Red Sox gear (which I thought was odd for New York).  It turns out they were closing things for a private party for Pedro Martinez for his induction into the Baseball Hall of Fame the next day.  I was quite ticked and now have a little disdain for Pedro Martinez.  Experiencing road closures this day that were keeping us doing the hike we wanted, I was not feeling the New York love.

The tough climbing on the hike and the incessant mosquitoes had me a little worried about how hiking would be overall in the Adirondacks.  However, I will say that if you can just pull off the road, pick a random trail and find views like these, the Adirondacks are quite impressive.  And luckily, those mosquitoes were the worst on this hike compared to the others we tried.  What was looking to be an irritating day turned out to be great.  It is amazing how a little bit of hiking and scenery can change your outlook quickly.

Arriving at Flume Knob
Climbing around the side of a boulder leads you to the viewpoint atop Flume Knob. Below: The lovely view from the top; By the time we left, we had a large family group sharing the viewpoint; We ate wild blueberries on the hike down.

Flume Knob View Company on Flume Knob Blueberries on Flume Knob

When we first pulled into the small parking lot for this hike, we were quickly joined by several other cars filled with people.  We thought they were just friends and families of Ironman participants and wouldn’t want to hike.  When we started to see them get on the trail, we decided to get our stuff together quickly to possibly get ahead of them so we weren’t stuck amidst a large group.  We were able to start ahead of most of the pack and made our way.  As you can see from the map below, there are a lot of interconnecting trails on this hike.  You may see people heading out for mountain biking, fishing, rock climbing, or hiking along these trails.

Our experiences with “knobs” typically means some rocky outcropping with decent views, so we decided to give Flume Knob a try.  The path started off from the parking lot and we soon took a right to head uphill on the trail as the signs directed.  As Christine mentioned, because of the interconnecting trails that happened early on the hike, they didn’t always post the direction to Flume Knob.  We did keep pressing forward on the widest, well-traveled trail and we eventually came on to other signs that showed we were going the correct way.

Rock Scramble with Rope
Some of the downhill climbing was challenging. Thank goodness for the dignity of skorts!

We kept a fast pace as best we could, more for survival purposes.  Stopping for a quick drink from a water bottle would mean you would be attacked instantly by the flying piranha-like mosquitoes.  The grade of the trail was very tough, with extremely steep sections to climb, often requiring you to pull yourself up with your hands to reach the higher step.  Christine got a good deal of sap on her hands from grabbing ahold of trees to help hoist herself up and down.  We felt this was one of the hardest two miles with the steepness of terrain.  We eventually made it to the top, which just required climbing up a large boulder to a nice view.  The viewpoint was a large slab of rock and we took a few moments to take in the view before others arrived.

We had it all to ourselves for about 20 minutes before the other families started to arrive.  It turns out all of them were family members or friends of those participating in the Ironman.  Their goal was to do a hike for the day and then meet up with them later.  When getting to the view, one man asked one of the children if the view was worth the climb and she said “No”.  But they pointed out to her that when she reflects back, she would change her mind.  I think we would both say the views were worth the climb.  On a clear day, you have miles and miles of mountains with barely any sign of civilization around you.

Steep Flume Knob Descent
The descent of Flume Knob was often steep and slick. Below: Boulders along the trail; Finally… some easier footing; Another look at the beautiful Ausable River – it feeds High Gorge Falls and Flume Falls.

Boulders on Flume Trail Easier Section of Flume Trail Ausable River

We made our way back down and started to see even more families making the trek up.  When we arrived back at our car, we took a side path from the parking lot which led down to a beautiful waterfall.  The waterfall has several platforms where the water drops into the gorge and is worth seeing.  If you cross the road from the parking lot, you can look down into the gorge to see even more impressive sights.

We felt we made the most of the day.  Getting great views on a random hike made us more excited for future hikes in this area.

Trail Notes

  • Distance – 4 miles
    (There are no MapMyHike stats from this hike because we forgot to stop tracking at the end of our hike – oops!)
  • Elevation Change – 1326 ft.
  • Difficulty – 4.  The climbing on this trail is mostly concentrated into a short, extremely steep section.  There are no switchbacks to alleviate the climb – it is straight up the mountainside!
  • Trail Conditions – 3.  The trail was nice easy footing for the first half of the ascent.  The footing was trickier with loose dirt and some eroded spots on the climb.  There was one section aided by a rope hand-pull.
  • Views  4.  Beautiful views over the valley and looking toward bigger peaks.
  • Streams/Waterfalls – 5.  There is an impressive waterfall gorge right at the beginning of the trail.  Don’t miss seeing it at either the beginning or end of your hike.
  • Wildlife – 2. We saw/heard red squirrels, chipmunks and birds.
  • Ease to Navigate – 1.5. The signage on this network of trails is quite confusing.  There are many foot and bike trails that cross multiple times in the woods.  Not every sign lists the destination of Flume Knob.  We basically continued on whatever trail seemed most uphill and checked our progress with the signs that did list Flume Knob.
  • Solitude – 3.  It’s hard for us to judge the popularity of this trail.  We hiked it on a day that traffic was mostly impeded by the Lake Placid Ironman.  Most people stayed away from the race course because the logistical issues it caused with traffic in the area.  We saw a few other hikers, most of them knew someone racing and were hiking to pass the time until they could meet up with their racing friend.

Download a Trail Map (PDF)

Directions to trailhead: From the intersection of Route 73 and Route 86 in Lake Placid, follow Route 86 toward Wilmington. Continue for 10.5 miles to the Flume Parking on the left. Coordinates for the parking lot are 44.3701899,-73.8363359.

Siler Bald (NC)

Special: Smokies Edition

Introductory Guide to Visiting Great Smoky Mountains National Park Area

Not to be confused with Silers Bald in the Great Smoky Mountains National Park, this 8.8 mile hike in Nantahala National Forest has some of the best views in the southern Appalachians – mountains roll out in every direction from the summit.  The hike is moderate and doesn’t require any tough climbing or tricky terrain.

View the Full Album of Photos From This Hike

We thought this video really showcased how amazing the view is from Siler Bald!  Sorry it’s so shaky!

Adam Says…

One thing we hoped to do on our trip was to hike some new piece of the Appalachian Trail.  While it would have been nice to complete a larger section of the trail, when you only have one car you are stuck with doing some out-and-backs.  When we were researching some different options we came upon Siler Bald.  My first thought was “Didn’t we already hike this another time?”  Oh, that was SilerS Bald, not Siler Bald.  I always get a kick out of how many mountains and hikes have similar names.  We have come across several Chimney Rocks in our travels.  It reminds me of the unoriginal naming of cities in New England.  You can find multiple Manchesters, Andovers, Portsmouths, Dovers, and Salems in the New England states, as if their goal is to get you lost when you try to navigate with your GPS.  The nice thing about both of these similarly-named balds is they have great views so you can’t go wrong.

There wasn’t a GPS signal when we started this hike, so it was a little difficult to find the starting point.  I had a map of the area and we were able to find the parking lot easily enough. The Appalachian Trail crosses over Hwy-64 near the parking lot.  The southbound path is easy to find, it takes off from the parking lot.  However, the northbound path was harder to find.  I crossed the road and walked down the road heading east for about a hundred feet.  Then, I saw the AT cut through on a small, overgrown path.  I signaled back up to Christine that I found it and we began our hike.

Small Waterfall near Winding Stair Gap
There was a pretty small waterfall near the beginning of the hike. Below: Winding Stair Gap; National Forest Information, Stream crossing and nice campsite.

Parking at Winding Stair Gap Nantahala National Forest Sign Stream and Nice Campsites

Heading into the woods, the white-blazed trail starts on a very gradual uphill slope.  Like many parts of the AT, this hike can be called a green tunnel – one path cutting through lush, green forest.  We reached a waterfall and forest service road in .2 miles, followed shortly by a stream crossing and a nice campsite area.  The trail then continues uphill as you pass by Swinging Lick Gap at 1.1 miles and Panther Gap at 2 miles.  Right before the sign of Panther Gap, we were startled as 5 grouse took off across the trail just ahead of us.  When you are walking along the trail with nothing but the sounds of the woods around you, a big move from the brush can you make you almost leap out of your hiking boots.  From Panther Gap, the trail then goes slightly downhill for about a quarter of a mile before going gradually uphill.  We eventually reached a junction trail at 4.2 miles.  The trail branches off to the Siler Bald Shelter, which is about .5 mile from this junction (this trail eventually loops around to the other side if you see it out after the summit).  We didn’t take the trip to the shelter since we were getting hungry and wanted to make our way to the views.

Scarlet Flycatch
There were still some colorful things growing and blooming along the trail.

Orange Azalea Fungus Yellow Wildflowers

Continuing on the AT, we met another junction with the Siler Bald summit trail.  From here, we took the path up the hillside, requiring us to almost bushwhack through this thick, tall grass and brush for a short distance before we came out of it.  We climbed a very steep .2 miles to reach the summit of Siler Bald at 4.4 miles.  As you are climbing up, if you look behind you the views start opening up of the mountains around you, but when you reach the summit the views are spectacular.  Having hiked without seeing anyone the entire day, we were surprised to see a thru-hiker at the top.  He was hoping to get a ride into town, having a craving for a pizza.  We talked with him for a while and were pleased to find out he was from Virginia as well.  He made a call to have someone meet him at the trailhead and he was off in a flash. We ate our lunch and enjoyed the views all to ourselves.  On our way back down, we did come across a few other people that were out for a backpacking trip.  This hike is one that has outstanding views for a minimal effort and is not as well-traveled.

Appalachian Trail Near Siler Bald
The trail was green and lush.  Below: Tunnels of mountain laurel;  There was a shelter on a side trail – we skipped visiting; Making our way up to the top of the bald.

Rhododendron Tunnel Siler Bald Shelter Sign Climbing the Bald

Christine Says…

Three and a half days in the Smokies just aren’t enough!  On our 2015 stay, we tried two new hikes in the park (Ramsey Cascades and Gregory Bald), revisited an old favorite (Charlies Bunion), and then picked something new! For our final hike of the trip, we chose a hike outside the park borders – Siler Bald.  This hike is located just south of the park in Nantahala National Forest. It offers a spectacular, panoramic vista from a spur just off the Appalachian Trail.

We parked our car at Winding Stair Gap.  There is a good-sized lot along Hwy-64.  From the parking area, we crossed the highway and picked up the Appalachian Trail heading north.  In the first couple tenths of a mile, we crossed a footbridge over a pretty small waterfall.  On the other side of the bridge, there was a kiosk with information about the forest. Shortly after the sign, we crossed a wider stream with a lovely backcounty campsite next to it.

Almost to the Top of Siler Ba
This was about the moment we realized ‘Wow… mountains everywhere!’ Below: Siler Bald scenery.

So Many Mountains from Siler Bald Lake Nantahala Summit Campsite and Marker on Siler Bald

We hiked along, enjoying the abundance of interesting wildflowers and fungi. The climb was steady and slow.  It was by far the easiest hike of our trip.  We chuckled at the random sign posts in the woods declaring that a particular spot was a ‘gap’.  None of the gaps really seemed to be low points between mountains, nevertheless their were signs indicating that we had passed through Swinging Lick Gap, Panther Gap, and Snowbird Gap. Other than enjoying the pleasant weather and small things along the trail, there’s nothing grand along the way to Siler Bald.  The grandeur all comes shortly after you reach a grassy clearing about 4 miles into the hike.

From the grassy clearing, climb the spur trail steeply up through the meadow for .2 miles.  When we visited, the meadow was full of tall grasses and daisies.  At the very top, we reached a flat opening that looked out across what seemed like all of the southern Appalachians. We had great views of Standing Indian mountain, Wayah Bald, Lake Nantahala, and even into Georgia.

Storm Clouds
Storm clouds started to roll in. Below: Mountain views on the descent; Small waterfall

Starting the Hike Down Bridge at the Bottom

There’s a marker at the top of the bald declaring the mountain’s name and elevation (5,216 feet).  There’s also an established fire pit and plenty of room for several tents.  What a place to watch both sunrise and sunset!

Adam and I ate our lunch (so many peanut butter and jelly sandwiches on this trip), took lots photos, and spent some time chatting with a fellow Virginian we met atop the summit.  Rambling Wreck was his name, and he was doing a flip-flop thru-hike of the Appalachian Trail.  He was really the only person we saw all day until we were almost done with our hike.

Nachos and Beers at the NOC
Nachos and Beers at the NOC.

The NOC

As we enjoyed the bald, darker clouds started to roll in.  We knew thunderstorms were forecast for later in the day, so we decided to make our way down.  The descent from the bald is nearly as magnificent as being on top – walking downhill with all the mountains laid out before me was breathtaking!  I was probably paying too much attention to the view, because the toe of my shoe got hooked on a root hidden by deep grass.  I took one of those epic falls that happen so fast you can do nothing to stop and catch yourself.  I faceplanted and ended up with several deep, painful bruises, but nothing that stopped me from hiking on.  When you’re a regular hiker, these things are bound to happen sooner or later!

The hike down went quickly and soon we arrived back at our car.  We decided to make the drive out to the Nantahala Outdoor Center (NOC) for our next stop.  On the way, we were pounded by thunderstorms.  I’m glad we missed them on the trail!  At the NOC we grabbed an outdoor riverside table at Big Wesser Brew and BBQ (one of our favorite spots) and shared nachos and a couple beers. Super day!

Trail Notes

  • Distance – 8.8 miles
    (Check out the stats from Map My Hike)*
  • Elevation Change – 1737 ft.
  • Difficulty – 3.  The climbing on this trail is all easy to moderate until the last couple tenths of a mile, up to the top of the bald.
  • Trail Conditions – 4.  The trail was nice, smooth, dirt with very few rocky sections.
  • Views  5.  Breathtaking, expansive, amazing, beautiful!
  • Streams/Waterfalls – 2.  There were a couple small streams and a small waterfall near the beginning of the hike.
  • Wildlife – 3. We saw some bear scat on the trail, so I’m sure bear sightings happen in this area.
  • Ease to Navigate – 3. The trail is clearly blazed and the spur to Siler Bald is pretty obvious.
  • Solitude – 4.  We saw one thru-hiker atop the bald and one group of four men backpacking together.  It has immensely more solitude than trails in GSMNP.

Download a Trail Map (PDF)

Directions to trailhead:  GPS coordinates for this trailhead are 35.12175, -83.54435. It is located on US 64,  11 miles west of Franklin, NC.  There is a spacious parking lot at Winding Stair Gap. From the parking lot, cross the road, head east about 100 feet, and begin hiking north along the Appalachian Trail.

Azaleas Atop Gregory Bald

Gregory Bald (TN)

Special: Smokies Edition

Introductory Guide to Visiting Great Smoky Mountains National Park Area

Gregory Bald is famous for its brilliant display of flame azaleas each June.  On prior trips to the Smokies, we were in the area too early to catch the bloom.  This time, we hit it just right, and enjoyed this wonderful, challenging 9.5 mile hike (includes .5 mile of walking the trails around the bald).  The views and blooms did not disappoint!

Update Spring 2016:  Parsons Branch Road (the route to this trailhead) is indefinitely closed to vehicular traffic.  It’s been determined by the National Park Service that towering dead hemlocks pose too great of a falling risk.  You may still walk up Parsons Branch Road or take the longer hiking route outlined here: http://www.hikinginthesmokys.com/gregory.htm

View the Full Album of Photos From This Hike

Azaleas Atop Gregory Bald
In June, the summit of Gregory Bald explodes with the color of blooming azaleas.

Christine Says…

Goodness… we’re doing a lot of hiking and not much writing!  Here we are in mid-August, still playing catch-up on hikes from June.  We have a backlog of twelve (yikes!) hikes to write about.

The first is this wonderful climb to Gregory Bald that we did on our Smokies a couple months ago.  Typically, we visit the Smokies in late May.  Mid-spring is a gorgeous time of year for cool temperatures, wildflowers, and smaller crowds.  This year, we had to put our trip off until mid-June.  It was much hotter and the park was more crowded, but the timing gave us the opportunity to finally climb Gregory Bald when the flame azalea was at peak.

There are a couple routes up to the bald.  The most common route is probably the ascent along the Gregory Ridge trail.  It’s an 11.3 mile hike with just over 3,000 feet of climbing.  It’s more popular because it’s easier to access by car and is supposedly a little more scenic along the way.  We chose to climb via the Gregory Bald trail from Parson Branch Rd.  It’s a shorter hike with less elevation gain. It’s also much harder to get to! Parson Branch Rd. is a one-way, seasonal road (closed in the winter) that requires 4WD/AWD.  We had four 8-9 mile hikes planned in 3.5 days, so the shorter/easy route appealed to us.  Thankfully, our little Subaru proved up to the challenge and we successfully jolted and bumped along the rugged road until eventually reaching the trailhead.

Rosebay Rhododendron
Rhodendron blooming along the lower trail. Below: Trailhead sign, Crowded parking along Parson Branch Road; Adam starts off down the trail.

Trailhead on Parsons Branch Road Parking on Parsons Branch Gregory Bald Trail

We got there pretty early, but there were already tons of other cars filling the small lot and lining the dirt road.  We geared up and hit the trail.  Honestly, there isn’t much to see along the 4.5 mile walk to the bald.  It’s a lovely wooded trail, but there aren’t any noteworthy features until you reach the bald.

Adam and I walked along, chatting and talking about past hikes.  Suddenly, Adam froze in his tracks and said ‘SNAKE!’.  It was a beautiful, dark-colored timber rattler sunning itself across the trail.  Adam hates snakes, but I find them beautiful and fascinating.  He stepped back while I tried to get a few photos – which proved difficult with my wide angle lens.  I tossed some small pebbles near the snake to encourage him off the trail.  He obliged and we were on our way!

Near the ridge, we passed Sheep Pen Gap campsite.  It was occupied by a group of extremely well-equipped horse campers.  They had a full camp kitchen, coolers, and canvas tents big enough to stand in – definitely the opposite of our ultralight gear!  There was a piped water source near the campsite.  It was flowing nicely, but it was definitely water you’d want to boil or filter due to the large amount of horse manure in the area.

Gregory Bald Trail
There was nothing remarkable about the trail to the top. Below: We did see lots of snails; And a timber rattler; We crossed one shallow stream.

Snail Rattlesnake Stream

About a half mile past the campsite, we emerged onto the bald.  It was absolutely exploding with color – azaleas in red, salmon, pink, orange, gold, and white!  I can understand why people come from all over to witness this display first-hand.  On top of the amazing floral display, the summit also offered panoramic views.  We ate our lunch overlooking Cades Cove and then spent some time walking around and admiring all the different colored azaleas.  We even met a fellow JMU grad on the summit.

The longer we stayed atop the bald, the more people arrived, and we decided it was time to make our way down.  The descent went very quickly, as the trail had easy, uncomplicated footing.  About a mile from the parking lot, we ran up on the JMU alumni we had met earlier.  He and his girlfriend were stopped in the middle of the trail.  A bear had just crossed in front of them and they were waiting and making sure it was safe to proceed.  Adam and I were disappointed that we had missed seeing the bear.

We ended up walking the last mile with them, chatting about hiking and the Bonnaroo festival they had just attended.  Before we knew it, we were back at the car!  The remaining stretch of one-way Parsons Branch Rd. was an adventure, too.  I think we must have driven our car through at least a dozen streams before eventually coming out on the famous Tail of the Dragon road.  I’ll let Adam talk more about that!  It was a fun day, and I’m so glad I finally got to see the famous Gregory Bald azalea bloom!

Adam Says…

The hike to Gregory Bald has been one we have been considering for years.  Some of the balds in the Smoky Mountains have been quite overgrown, since the park service has wanted to return them to their natural state over time.  I was preparing myself to be disappointed, but luckily that was not the case.  The day we visited was the peak of the blooming azaleas and the skies were so dramatic that it was a photographer’s paradise.

Gregory Bald is named after Russell Gregory, a resident of Cades Cove who died in 1864.  Russell lived in a stone house near the summit during the spring and summer, while his cattle grazed on the summit.  A Union support, Gregory was killed by a Confederate soldier while protecting his land and cattle.  The Cherokee had named this mountain “Tsitsu’yi”, meaning “Rabbit Place” and it was believed that the chief of all rabbits lived on the summit.

Abundance of Color
The azaleas bloom in many colors, but mostly oranges and reds. Below: Campsite at Sheep Pen Gap; Arriving at the bald; Beautiful azaleas.

Sheep Pen Gap Arriving at Gregory Bald Views from Gregory Bald

As Christine mentioned, the drive was a chore.  To access Parson Branch road, we had to go through Cades Cove most of the way.  Drives to me to Cades Cove are always frustrating to me.  Before you even get to the Cades Cove area, people were driving 12mph in an area where you can go much faster.  When we arrived in Cades Cove finally, we had more of the same.  Nobody would pull over to let us pass on the one-way road.  Instead, we had people in front creeping a long at 5mph with doors opened on both sides of their mini-vans to enhance their wildlife/scenery viewing.  What felt like 500 hours later, we finally were able to turn off the Cades Cove loop onto Forge Creek Road.  Once we turned on to Parson Branch road, the gravel road became extremely steep and filled with potholes and uneven road.  While we don’t do a lot of “offroad” driving for hiking, this was one of the roughest stretches of roads I’ve driven.  We made it to the top of the hill eventually and found the full lot and line of cars on the side of the road.  We parked along the side of the road as best we could, I crawled to the passenger’s side to escape the vehicle, and we made our way to the trailhead.

The hike up to Gregory Bald was a steady uphill, but the trail was in decent shape and not rocky, to allow for easy footing.  The trail was mostly shaded by trees all around, so it kept the sun and heat off of us for most of the day.  Other than seeing the rattlesnake, it was mostly uneventful – a nice walk through the woods without a lot to see.

Close-Up Gregory Bald Azaleas
Close-Up Gregory Bald Azaleas  Below: Orange azaleas; More views of the bald and the mountains beyond.

Orange Azaleas Views at the Top of Gregory Bald Mountain Views from Gregory Bald

Around the four-mile mark, we reached the Sheep Pen Gap campsite area on the right.  Shortly after the campsite, there is a junction with the Wolf Ridge Trail.  Take a left here to stay on the Gregory Bald Trail to reach the summit.  This short section of trail was much steeper, but the terrain was still comfortable.  After a couple of tenths of a mile, a side trail shot to the right leading to a small clearing with the first of the azalea blooms.  We decided to press on to the summit which was just ahead.  When we stepped into the scene from the summit, it was breathtaking.  The shape of the ridge doesn’t always give you the best views of mountains all around you, but the colors were all around.   There was lush green in the grass, reds and oranges around us in every direction from the azaleas, blue skies with large, puffy white clouds in the sky.  It reminded me of one of those beautiful yet sadistic jigsaw puzzles you get where you could only group things by  a few colors, taking forever to solve.  We ate our lunches under this gorgeous spectacle and then spent a long time exploring the summit on all of the interweaving foot trails, searching for all of the different color variations of azaleas.

We made our way back down the way we came.  When we got back to the car, we proceeded down the mountain on the one-way road.  The road was in a little better shape on this side of the mountain.  There were several stream crossings we had to make with our car; we weren’t scared to cross through the shallow water, but it reminded me of what you may see occasionally on SUV commercials.  When we got on to the main road, we took a right and found ourselves on the Tail of the Dragon on US-129.  This dangerous section of windy roads includes 318 curves over 11 miles.  Since it is a popular destination for motorcycles that like to live dangerously, we passed several photographers stationed on the side of the road that take pictures all day of all the cars and motorcycles that pass.  They sell the photos online for people to buy.  The first couple of ones I thought were ridiculous, but then I put up my “heavy metal” hand gesture and rock-out face to the last photographer.  When I got back to the hotel, I looked it up online and laughed -the Subaru Outback is not the epitome of a vehicle living on the wild side.

Tree at the Top
This neat tree provides shade atop the bald.  Below: Horse campers at Sheep Pen Gap; The descent; We saw another group of horse campers hiking up.

Horse Camping Rhodie Tunnel Horses Going Uphill

Trail Notes

  • Distance – 9.5 miles (includes distance to the bald, and a half mile of walking the network of trails on the bald)
    (Check out the stats from Map My Hike)*
  • Elevation Change – 2290 ft.
  • Difficulty – 4.  The climbing on this trail is relentless and moderate to strenuous.
  • Trail Conditions – 4.  The trail was smooth, uncomplicated dirt.
  • Views  5.  Gorgeous and made even moreso by the blooming azaleas.
  • Streams/Waterfalls – 1.  There were a couple very low streams that were usable as water sources, but not scenic.
  • Wildlife – 4.5. We saw a timber rattlesnake and the couple right ahead of us crossed paths with a black bear!
  • Ease to Navigate – 4. The trail is easy to follow and the one junction is well-marked
  • Solitude – 2.  The trail is one of the park’s most popular.

Download a Trail Map (PDF)

Directions to trailhead: Do not attempt to access this trailhead without an AWD vehicle.  Parson Branch road is one-way, gravel, and very rough.  You will traverse steep inclines, deep potholes, and many small streams in your vehicle.  Our Subaru Outback did fine, but I wouldn’t have wanted to attempt the drive with less.

From Gatlinburg, TN, take US-441S into Great Smoky Mountains National Park.  In 1.6 miles, take a right on to Fighting Creek Gap Road.  Stay straight until you reach Cades Cove as Fighting Creek Gap Road becomes Little River Gorge Road, Laurel Creek Road, and Cades Cove Loop Road over the next 30 miles.  Once you enter Cades Cove and pass the visiting station, stay on the loop road for 5.6 miles.  Then turn right on to Forge Creek Road.  In 2.1 miles, turn right on to Parson Branch Road (this road is closed November-March).  Continue up the one-way Parson Branch road for about 3.5 miles until you reach the small parking lot on the right.  The trailhead is across the road.  The parking lot only has room for a couple of cars, so you may need to park on the side of the road during weekends or the summer.

Ramsey Cascades (TN)

Special: Smokies Edition

Introductory Guide to Visiting Great Smoky Mountains National Park Area

We’re back in the Smokies region for the next three hikes! Ramsey Cascades is the tallest waterfall in the park.  It’s also one of the most popular – despite the fact that the hike is a strenuous 8-miler!

View the Full Album of Photos From This Hike

Beautiful Ramsey Cascades
We’ve seen a number of the big waterfalls in the Smokies. Ramsey Cascades might be one of the prettiest. Below: Adam at the trailhead; The first part of the trail was along an old road; You could see and hear water for most of the hike.

Ramsey Cascades Trailhead Easy Start to Ramsey Cascades Hike Pretty Stream Along the Trail

Adam Says…

Our May vacation plans fell through due to a sick pet, but we were fortunate enough to slip away on a last-minute four day trip to the Smokies in mid-June. When we vacation, we tend to go hard.  We try to pack in as much as we can during every waking moment of the day. While it may not be as relaxing as some people like on vacation, we feel we want as many experiences as possible.  We like to tell each other that we can be tired and act like zombies at work for the first day back, so we stay “on the go” during vacation.  So, to maximize our time, we woke up around 4:30 a.m., packed up the car, and headed out to the Smokies.  When we got to the trailhead, it was a little after noon and the temperature and humidity made it feel like over 100 degrees.  We typically like to start hiking (especially in the warmer months) early in the morning before you can feel the height of the day’s heat.  This time, we were stuck with it.  The small parking lot for the trail was packed with cars, so we ended up having to park a little down the road.  So, we quickly got on the trail and pushed on.  Most of the trail was fairly shady, so not being in direct sunlight helped.

Scary Bridge
The foot log across this chasm was narrow and long. Below:  The chasm beneath the log bridge; Another view of the bridge’s narrowness; Christine under the giant tulip poplar.

Stream Below the Bridge Almost Across Tulip Poplar

The trail starts on a wide gravel fire road which made for easy footing.  One family had ventured out before us when we were trying to find parking. We saw the mother of the family doubling back along the trail, looking for the rubber foot that was lost on one of her children’s trekking poles.  When we came upon the rest of the family, it looks like they sent the mom off about a mile to look for it.  We felt bad that the mom was spending all of this time searching while the rest of the group was just relaxing.  At 1.5 miles, you reach an area that comes to edge of the stream.  To the left, the trail goes through a deep tunnel of rhododendron.  It is here the trail begins to climb and the trail becomes narrower.

At 2.1 miles, we reached a long foot log bridge.  As I’ve stated before, I hate man-made things when it comes to heights.  We had just passed another family on the hike, so I thought I would try to cross before they got there.  I got a little ways along, chickened out, and returned to the start of the bridge.  I knew it would take me a while to muster the strength to do it and I didn’t want to feel the pressure of judging eyes as I made my way across.  I debated internally if I should just wait here and let Christine continue on, but I knew I would regret not making it to the falls.  We let two families go by, one boldly taking selfies on the log.  After they were out of sight, I decided to give it another try.  As you can tell from the picture above, the bridge is only wide enough for an average person’s feet.  I’m not sure how far the drop would be if you fell off, but I would guess you would likely break something if you fell.  I decided to shuffle my feet side-by-side, while gripping the handrail white-knuckled.  During half of the traverse, I could feel the bridge bounce slightly up and down with each step, not easing my comfort-level at all.  I finally made it across and double-checked my map.  I was hoping there was a loop on this hike, but since this is a straight out-and-back hike, I’d have to face this beast again.  I rested on the other side a while, because I felt like I had just burned 2000 calories through the stress and adrenaline used crossing the log.

Stone Stairs
After crossing the narrow log bridge, the trail became increasingly steep and rugged. Below: Hiking along the rocky part of the trail; The second L-shaped log footbridge; Rocky trail; Arriving at the falls.

Rocky Trail Another Easier Log Bridge
Steep and Rocky Warning Sign

At 2.6 miles, we came across the three large tulip poplars.  The size of these trees was truly impressive!  There was a large group of high school JROTC students stopping here, so we decided to take time to appreciate them more on the way back.  We continued up the steep trail, which was very tough in this muggy, hot weather.   Eventually, at 4.0 miles, we arrived at Ramsey Cascades.  The waterfall is probably 90 feet across and plunges down through cascading rocks over 100 feet.  The rock outcropping to view the falls was packed with people, but we waited a while and eventually most of them left.  This is one of the prettiest waterfalls in the Smokies, so it was worth the sweat and effort (and maybe even crossing that log bridge).

We made our way back fairly quickly since the hike was mostly downhill.  We stopped to enjoy the large tulip trees along the way.  When I got to the bridge this time, I folded up my trekking poles (which I didn’t do on the way across initially) and immediately went across.  I was much quicker this time across, but it still took a toll on me.  I rested again, ate some jelly beans to replenish my sapped energy, and continued back.  The rest of the trip was easy and we made quick time back to our car.

We cranked up the AC in the car and drove to our hotel in Gatlinburg.  Gatlinburg was even hotter than the trail, so it was hard to get cooled down for the rest of the day.  But, we were so glad we made the trip out to view Ramsey Cascades.

Christine Says…

It was a little nuts to hop into the car at five in the morning just so we could pack one more day of hiking into our whirlwind, too-short, almost-completely-unplanned trip to the Smokies.  We’ve visited the area for three consecutive years, but there are still so many mountains and streams for us to explore.  We love coming back to this area!

The first hike on deck was Ramsey Cascades.  It’s one of the park’s most popular and impressive waterfalls, and we’ve wanted to hike it for a while now.  We arrived to the area a little before mid-day, so we decided to fuel up with a quick lunch at The Sub Station.  It had great reviews on Yelp and it was right along our route.  We scarfed down pulled pork sandwiches and then made our way to the Greenbrier section of the Smokies.

Arriving right at noon, the parking lot was already jam-packed with cars, so we had to find a pull off further down the road.  As soon as I stepped out of the car, the heat and humidity hit me like a sucker punch. I looked at Adam and said, “We’re not used to this heat… this is going to be a brutal hike!”  The area went on to set several heat records during our visit.

The first part of the hike followed an old gravel road.  It climbed steadily uphill, but was nicely graded and easy to traverse.  We saw lots of rosebay rhododendron starting to bloom along the trail.  We also enjoyed the constant sound of running water from the Little Pigeon River.

Swimmers at Ramsey Cascades
Some people opted to swim in the basin beneath the falls.  Below: A vertical version.

Christine at the Falls

About a mile and a half in, the gravel road ended and the route became a narrow footpath through the lush green forest.  This section of the hike followed alongside the Ramsey Prong which drains down the side of 6621-foot Mt. Guyot – the second tallest mountain in the park.   As we walked, I tried to focus on the loveliness of the trail instead of how I was feeling.  I was utterly gassed.  The heat was getting to me and making me feel weak and lightheaded. I kept drinking water, but it just made the sandwich I’d had for lunch churn in my stomach. Maybe eating had been a bad idea.  I kept pushing my physical discomfort to the back of my mind and focusing on putting one foot in front of the other.  Sometimes, it just what you have to do!

At 2.1 miles, we reached the narrow log bridge that Adam described so thoroughly.  The Smokies are full of these split log bridges, but this was the longest and highest one we’ve seen!  I suppose these log bridges keep streams cross-able when water is high (as opposed to a rock hop) and are less expensive than real bridges to build/maintain.  I like the way they blend into the natural scenery so nicely.

After crossing the bridge, we soon reached a grove of giant, old growth trees.  There are three tulip poplars that you’ll notice immediately.  They rise, straight and proud, from the forest floor – all of them dwarfing the other trees around them.  They were such impressive trees!

The last mile to the falls was increasingly steep and rocky.  We climbed stone steps, crossed another L-shaped log bridge, scrambled over boulders, and stepped over a couple shallow streams before reaching the falls.  At first, we could just see it through the woods, but after climbing over one last large boulder, we came to a big clearing.

Giant Tulip Poplar
We stopped by the three giant tulip poplars again on the hike back. Below: Adam crossing one of the small streams; Back across the scary footbridge; Pretty green Smokies forest.

Hike Back Hike Back green smokies

The falls were so impressive, plunging over 100 feet down the mountainside into a beautiful pool.  There were tons of people gathered on the rocks.  It was hard to find a place to sit and relax, but we eventually did.   Despite warning about treacherous conditions, people were still swimming, wading, and climbing on rocks around the falls.  We saw one young teenager come very close to taking a terrible fall onto the rocks.  He was lucky that he caught himself at the last minute.

We stayed and enjoyed the falls for quite a while. This gave me a chance to cool off and eat a little sugary snack.  That definitely made me feel better and helped my dizziness and fatigue.  Eventually, the crowd thinned and we had the falls to ourselves.  Or I should say mostly to ourselves with the exception of bees!  I don’t know why it is, but there are massive numbers of bees living in hives around the falls.  There are hundreds of them and they’re constantly buzzing around.  Fortunately, they’re not aggressive and seemed happy to share the falls.   Just be careful about sitting or putting your hands down. I’m sure they’d sting if someone tried to squish them!

After taking a bunch more photos, we made our way back down the trail.  The downhill hiking went really quickly.  Adam crossed the scary log bridge boldly on the return trip. We were back at the parking lot in half the time it took us to climb up!

Post Hike Dinner
Great steak dinner at Smoky Mountain Brewery post-hike. Below: Smoky Mountain Brewery flight; Pretzels and beer cheese!

Beers pretzels

Before we got in the car, I was very tempted to jump into the Little Pigeon River.  The spot where we parked was right next to a deep, cool swimming hole.  Adam told me it was a bad idea and that I’d be soaking wet in the car – so phooey – I passed on my chance to plunge in!

We had a short drive into Gatlinburg from the hike.  Because we didn’t plan ahead for this trip, our choices for lodging were fairly limited – but we picked a winner.  We ended up stayed at the Mountain House Motor Inn.  It was clean and comfortable, with a super-strong air conditioner.  It was also located within walking distance of all the downtown restaurants and shops.

We checked in, showered, and headed out for a great dinner at the Smoky Mountain Brewery!  What a great first day of this mini vacation.

Trail Notes

  • Distance – 8 miles
    (Check out the stats from Map My Hike)*
  • Elevation Change – 2240 ft.
  • Difficulty – 4.5.  The trail starts off fairly easy and gradual, but becomes steeper and rockier after the first 1.5 miles.  The last few tenths of a mile to the falls are a scramble over boulders.
  • Trail Conditions – 3.  The trail is rocky in places.  There is also a long, narrow log bridge that might intimidate some hikers.  It crosses a chasm over a stream and feels precipitous to anyone afraid of heights.
  • Views  0.  No views here – it’s all about the stream scenery!
  • Streams/Waterfalls – 5.  The stream is beautiful and Ramsey Cascades is one of the park’s prettiest waterfalls.
  • Wildlife – 0. There were so many people on the trail we didn’t see any animals.
  • Ease to Navigate – 4. The trail is simple to follow. There aren’t any turns or junctions.
  • Solitude – 1.  The trail is one of the park’s most popular.

Download a Trail Map (PDF)

Directions to trailhead: From Gatlinburg, TN, take US-321 N/East Parkway for about 5.5 miles.  Turn right onto Greenbriar Road.  Follow this for 3.1 miles before turning left onto Ramsey Prong Road.  Go 1.5 miles and you should reach the parking lot for the trailhead.  The trailhead starts at the end of the parking area. Coordinates: 35.702730, -83.357599

Signal Knob

This 10.2 mile hike in the George Washington National Forest has nice views of Strasburg.  It also has rocks – lots and lots of pointy rocks.

View the Full Album of Photos From This Hike

Christine on Signal Knob
Christine takes in the view on Signal Knob.  Below: Adam checks out the GWNF information board; The stone cottage; Wild rose.

Trail Sign at the Beginning of Signal Knob Hike Stone Cottage Along the Trail Wild Rose

Christine Says…

Picking day hikes is getting challenging for us – we’ve done most of the popular ones in the area. Yet, somehow, Signal Knob had repeatedly escaped our notice.  We figured a pleasant Sunday in early June was a perfect day to tackle something new!

We started our day early with a big breakfast in Harrisonburg.  Then we stopped for donuts at Holy Moly in Strasburg.  We decided to save the donuts for post-hike, but Holy Moly is so popular (especially on the weekend) that we didn’t want to take the risk of them selling out.

Parking at the Signal Knob trailhead is abundant and completely off-road.  When we arrived there was a small handful of other cars there.   We started out from the trail on the north side of the parking area – look for orange blazes (Massanutten Trail) and a GWNF information board.  The trail climbed steadily right away. We passed a really neat stone cottage right along the trail very early in our hike.  It was in great condition and still looked in-use.   Right after the cottage, we stepped over a small stream and continued uphill.  The lower parts of the trail were lined with wild roses and sweetpeas.  As we climbed higher, mountain laurel became abundant.   The trail was openly exposed to the sun and offered some nice views along the way.

Views Along the Climb to Signal Knob
There were some pretty views through the trees on the climb to Signal Knob. The higher we climbed, the prettier the mountain laurel became. Low elevation laurel had already gone to seed. Below: A neat tree before the Buzzard Rock Overlook; Buzzard Rock Overlook; Fort Valley Overlook.

A Cool Tree on Signal Knob Hike View from Buzzard Rock Fort Valley Overlook

At 1.5 miles, we reached an opening in the trees which gave a backlit view of Buzzard Rocks on the other side of the valley.  I can’t look at Buzzard Rocks without recalling the horrible ankle sprain I suffered there several years ago!  We chatted with an older gentleman at the overlook – he warned us that the trail was about to get rocky!  He wasn’t kidding!  For the next 1.25 miles, the trail was a loose jumble of pointy, shifting rock.

At about 2.5 miles, we passed the marked Fort Valley Overlook.  The view was mostly overgrown, but I can imagine it lovely when the trees were smaller!  Gradually the rockiness tapered off; and so did the climbing.  The trail became a pleasant stroll through the woods.  We passed several nice campsites and passed the junction of the Meneka Peak trail at about 3.5 miles.  The last .8 of a mile to Signal Knob was ever-so-slightly downhill.

When we reached the WVPT building, we thought the open vista behind the building might be the view.  We chatted with a pair of hikers there and asked ‘Is this the only view up here?’  Both of them said ‘Yes… it’s the only view we’ve ever seen and we’ve hiked here lots of times.’  We took them at their word and felt a little underwhelmed by the view – it was obstructed by powerlines and disrupted by a steady buzz from the broadcast tower.  Not wanting to doubt them directly, I whispered to Adam ‘This can’t be it… there’s no view of Strasburg and there’s supposed to be one!’  We decided to explore further before hiking down the fireroad.  I’m glad we did!

Leaving the WVPT tower, do not follow the fire road downhill.  Go past the tower and look for a trail than runs parallel to the ridge.  If you follow it a short distance, you’ll come to a marked overlook – Signal Knob.  We spent some time at the knob relaxing and enjoying a bit of breeze.  Signal Knob is a nice overlook, but not a spectacular one.   It’s a bit closed in and overgrown.  And, if I’m being 100% honest, looking down into Strasburg with its housing developments, water towers, and roads just isn’t as breathtaking as looking out into raw wilderness.   I did also enjoy our ‘company’ at the summit – for whatever reason, Signal Knob was hopping with toads.  We saw dozens of them!  I’ve never seen so many together!

The Signal Knob Trail is Very Rocky
The trail up Signal Knob is extremely rocky.  Below: Once you reach the ridge it’s a bit less rocky; WVPT broadcast; A view behind the tower.

Walking Along the Signal Knob Ridge WVPT View From WVPT

After enjoying the view, we followed the trail slightly downhill past the overlook.  A trail marker directed us toward the Tuscarora Trail. We soon merged onto the fire road we had seen near the broadcast tower.  We followed it downhill for almost a mile before reaching another trail junction.

The turn onto the Tuscarora trail is marked with another national forest information board.  There is also a nice bench at the junction – probably an Eagle Scout project!   Turning onto the Tuscarora Trail, you’ll immediately cross Little Passage Creek.  It was a very easy rock hop.  From there the trail climbs uphill for a little less than a mile. This section was a bit steeper than what was required to reach Signal Knob, but still squarely moderate.

Along the ridge, we passed the other side of the Meneka Peak trail.  Looking at how these trails interconnect is interesting and definitely opens up some longer loop options.   At about 6.4 miles, the trail passed through a small grassy area and began to descend steadily.  There really wasn’t anything remarkable about the rest of the hike.  It was just a walk through the woods.  We saw a big bird’s nest of some sort.  We saw tons of ripening blueberries.  We passed some boy scouts on a weekend backpacking trip. We passed the pink blazed Sidewinder trail at 8.1 miles.  We crossed a stream. At around 9.5 miles we passed a spur trail to Elizabeth Furnace.  At this point the blazes went back to orange.

We found this part of the hike a bit confusing.  Our maps and GPS disagreed on distances for waypoints late in the hike.  There was also a lot of trail construction and rerouting going on.  New paths were cut into the woods all over the place.  Fortunately they all went in the same general direction.  We tried to follow the most established paths.  A little over a half mile past our last trail marker, we spotted a parking lot through the trees.  Adam thought it was a different one from where we started, but our MapMyHike app indicated we made a full loop and we popped out on the south side of the lot where we had started our hike several hours earlier.

The day had become hot, humid, and overcast, so we were glad to be back at the car! We shared just one of the donuts (Peach Bellini!) so we could save room for a big lunch at Spelunker’s in Front Royal.  On the way to lunch, we talked about the hike a bit.  We both agreed that it wasn’t one of our favorites.  I think it’s popular because of its vicinity to northern Virginia, but of the knobs in the Massanutten/Fort Valley area – I like Strickler and Duncan quite a bit more!

Adam Says…

We have had many people recommend Strickler Knob to us over the years.  Knowing of its popularity, we thought it would be a good idea to get an early start.  When we arrived, there were not many cars there, but from the size of the parking lot we knew it was a matter of time.

We started out on the north (right) side of the parking lot.  The orange-blazed Massanutten trail started off our loop hike.  The trail starts uphill and soon passes a large stone cabin on the left, while you can see a stream below to the right.  You cross over the stream and then loop back in a northerly direction.  At 1.5 miles, we reached Buzzard Rocks overlook.  We talked there to an older man who was out for some morning exercise.  He warned us of about a mile of pointy rocks ahead.  Since he was hiking solo, he told us he doesn’t want to risk hurting himself and just goes to this overlook and back.

The trail takes a sharp left turn and then within a few minutes, we found the rocky area we had been warned about.  Wear comfortable shoes, as the rocks were pointy and you always had to look at your feet to navigate through safe footing.

The View from Signal Knob
You can see the town of Strasburg from Signal Knob. We weren’t terribly impressed with the view.  Below: Toads everywhere; The fire road; The information board at the junction with the Tuscarora Trail; A glimpse of a view.

Cute Toad The Fire Road Descending Signal Knob
Junction of the Massanutten and Tuscarora Trails View from the Tuscarora Trail

At 2.4 miles, we arrived at the sign for the Fort Valley overlook.  The trees and leaves have this very obstructed now, but you can get a glimpse of the valley below.  At 3.4 miles, we arrived at the junction with the white-blazed  Maneka Peak trail, but continue on the orange-blazed Massanutten Trail.  The trail leveled out at this point, giving us a nice forest walk until we reached the broadcast tower at 4.3 miles.   We walked behind the building on a small path and saw nice views on the backside of the tower.  We were feeling disappointed when the two girls had said this was the view.  My idea of views doesn’t include power lines cutting through the landscape.  There were lots of bugs flying around us, so we didn’t stay here long.

We pushed on from the tower and saw that there was a huge fire road leading down, but the trail blazes seemed to continue forward back into the woods.  We decided to take this route and then within a short distance came to the real view.  We both felt bad that these girls, who had been up here several times, had always missed the real view up here.  The view here did give us nice views of Strasburg below.  I noticed that one of the rocks had a plaque below it that was put in here for a couple that loved coming up here.

Walking the Tuscarora Trail
Adam walks along the Tuscarora Trail. Below: Stream crossing near the end of the hike; Pretty butterfly; Holy Moly!

Crossing Little Passage Creek Pretty Butterfly Holy Moly Donuts

The trail then loops back and does join the fire road very shortly.  We walked down the steep fire road and came upon another hiker who had just hiked up the fire road to the summit.  The fire road was a fairly steep descent and had nice wildflowers along both sides.  At 5.5 miles, we came across a bench and a junction with the blue-blazed Tuscarora trail.  We took this trail to start our return trip.  The Tuscarora Trail was more overgrown and the climb up Meneka Peak was the steepest climb on this hike.  We were finally finished with the uphill at 6.4 miles and then the trail descends on the other side of the ridgeline just as steeply.

The trail descends for a good distance.  At 8.1 miles, we passed by the pink-blazed Sidewinder trail and the trail leveled out a little more.  We continued on and the trail became orange-blazed again at 9.5 miles.  We followed the orange-blazed trail through the tricky section mentioned above and then arrived back at a lower section of the parking lot at 10.2 miles.

Overall, I was underwhelmed on this hike.  The views were nice, but I have seen a lot better view hikes.  I can imagine that in a few years, the trees and bushes may obstruct the main view even further.

Because of the inner-connectivity of all the trails in this area, there are many options for backpacking loops through this trail system.  The loop that we chose didn’t have a lot to offer after the summit.  If I was doing this again, I would likely do just an out-and-back hike to the summit, making this an 8.6 hike.

Trail Notes

  • Distance – 10.2 miles
    (Check out the stats from Map My Hike)*
  • Elevation Change – 2159 ft.
  • Difficulty – 3.  The climbing on this trail is all easy to moderate, but the distance and loose/rocky footing increase the difficulty rating.
  • Trail Conditions – 2.5.  The trail is rocky and shifty – especially the middle part.
  • Views  3.  There are descent views from Signal Knob and the WVPT broadcast facility.  While other reviews give the vistas on this hike top marks, we thought they were just OK.  The WVPT view had powerlines and the Signal Knob view is starting to get a bit overgrown and looks out toward an suburban area. 
  • Streams/Waterfalls – 2.  There were a couple small streams that could be used as water sources.  We believe they dry out pretty quickly based on the fact that they were already on the low side after a week of rainy days.
  • Wildlife – 3. We saw lots of cute toads hopping around, and supposedly this is a good place for a potential bear sighting.
  • Ease to Navigate – 2.5. The blazing in this area is very thorough, but trail junctions are inconsistently marked.  As of June 2015, it appears the forest service is working on a reroute of the last .5-.75 miles of the hike.  There are lots of unmarked trails that criss-cross the established, blazed trail.
  • Solitude – 3.  We saw a good number of couples and solo hikers out for a day hike.  We also saw a group of college students and a boy scout troop out backpacking.

Download a Trail Map (PDF)

Directions to trailhead:  From I-66, take exit 6 for US-340/US-522 for Front Royal/Winchester.  Turn on to US-340S/US-522S/Winchester Road.  Go 1.2 miles and take a right on to VA-55W/W Strasburg Road.  Go 5.1 miles and take a left on to State Route 678/Fort Valley Road.  Go 3.4 miles until you reach the large parking lot on the right.  Park here.  The trail starts on the right side of the lot.  You will see the wooden information board that will mark the beginning of your hike. Parking coordinates: 38.93503, -78.31956