Mt. Pierce (NH)

Special: New Hampshire Edition

Introductory Guide to Visiting the White Mountains

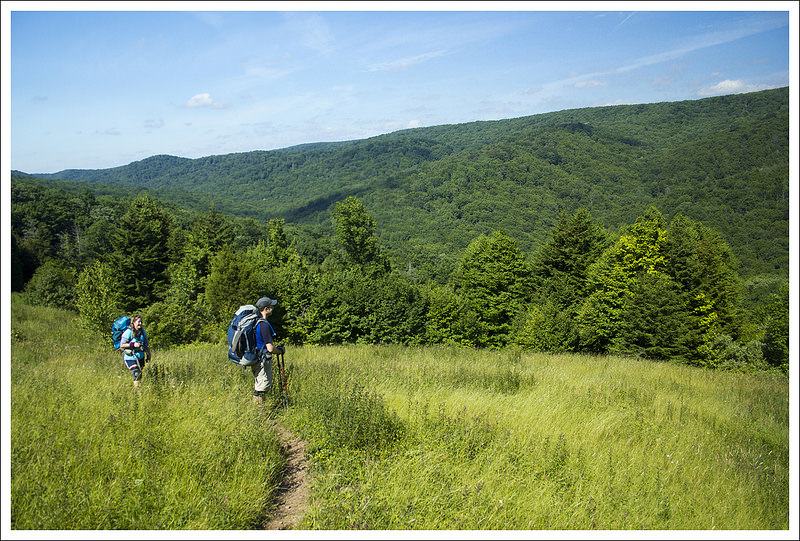
This hike is one of the shorter, more moderate approaches into the Presidential range of New Hampshire.  While the hike is only about 6.5 miles, we hiked an extra 2.4 miles for the chance to enjoy some views!

View the Full Album of Photos From This Hike

Mt. Pierce Summit
On our second pass-by, we were lucky to hit the summit with mostly clear views!  Below: Adam makes his way up the Crawford Connector – a short spur trail from the parking lot to the Crawford Path; Trail signs and a sign for Mizpah Spring Hut; Gibbs Falls.

Crawford Connector Trail AMC and Trail Sign Gibbs Falls

Adam Says…

Charles Dickens started off A Tale of Two Cities with the line, “It was the worst of times, it was the best of times.”  When I was thinking about starting to write about Mt. Pierce, I was thinking, it was A Tale of Two Hikes with the worst and best of times.  All of us have good days and bad days on the trail and this was a bad one for me.  I wasn’t really feeling the hike deep down and I felt like I was just going through the motions rather than taking a moment to enjoy what I was able to do.  The morning started off with a lot of fog around, which didn’t really help my mood.  I was thinking it may burn off by the time we got to the top, but we weren’t so lucky.

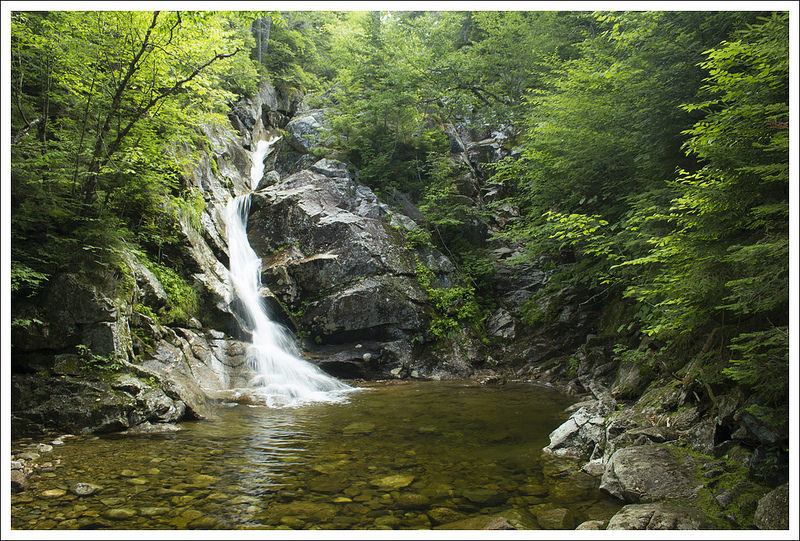
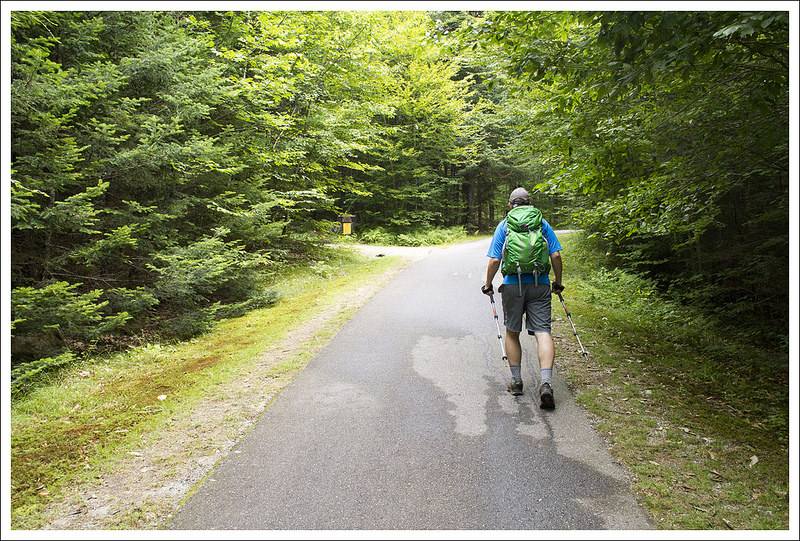
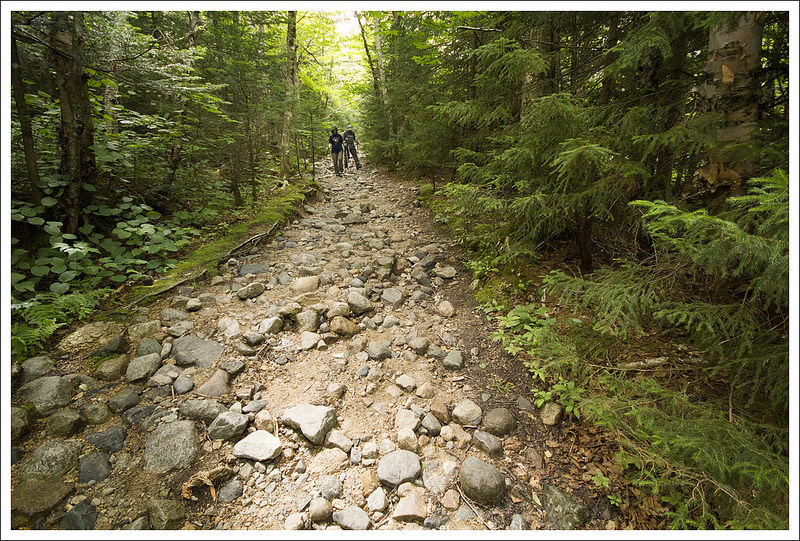
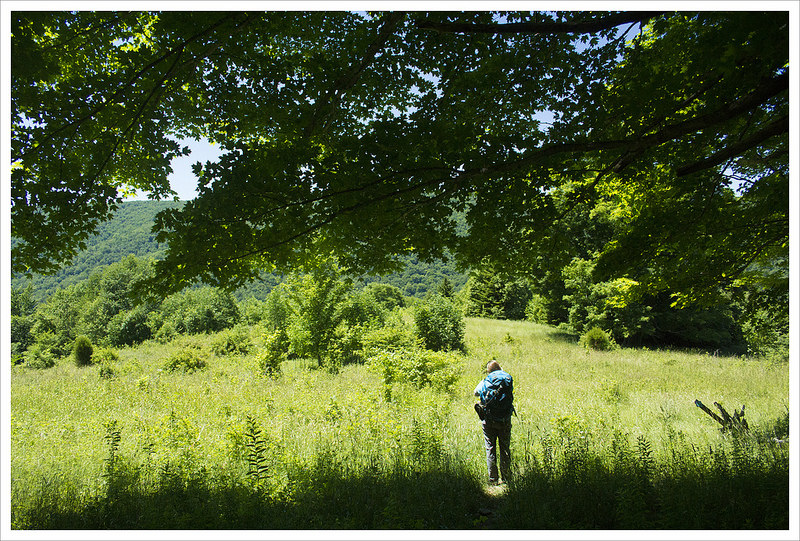
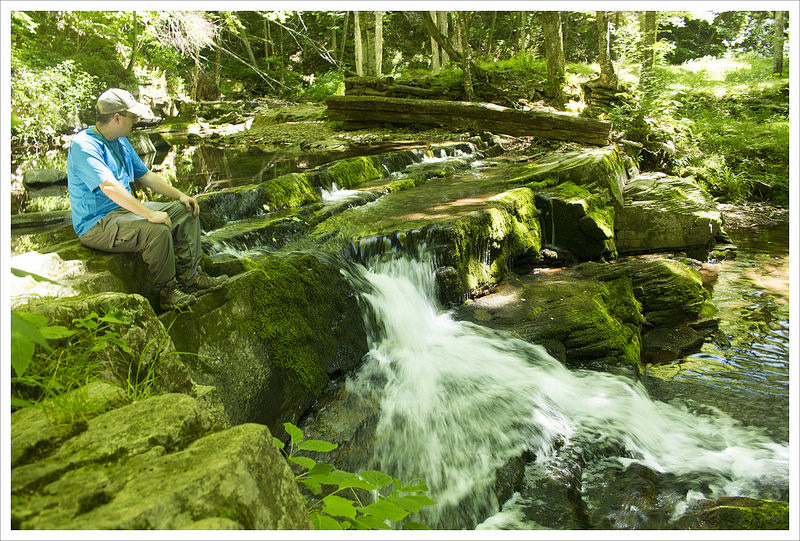
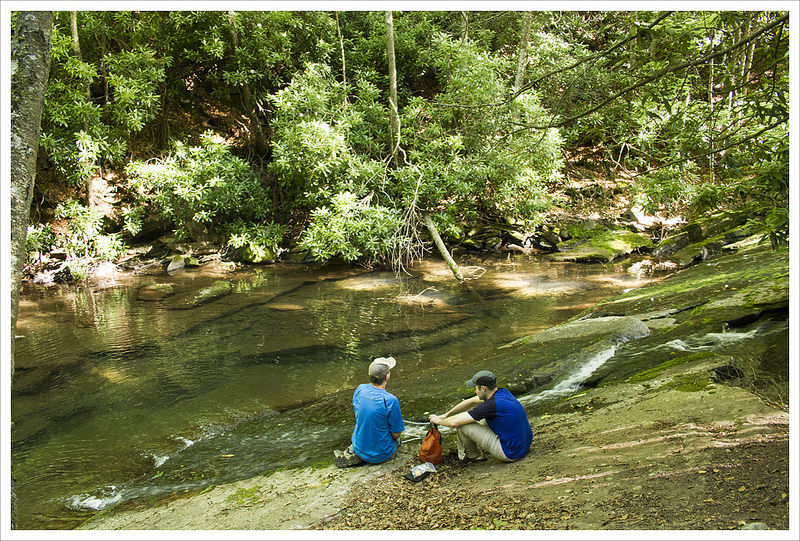
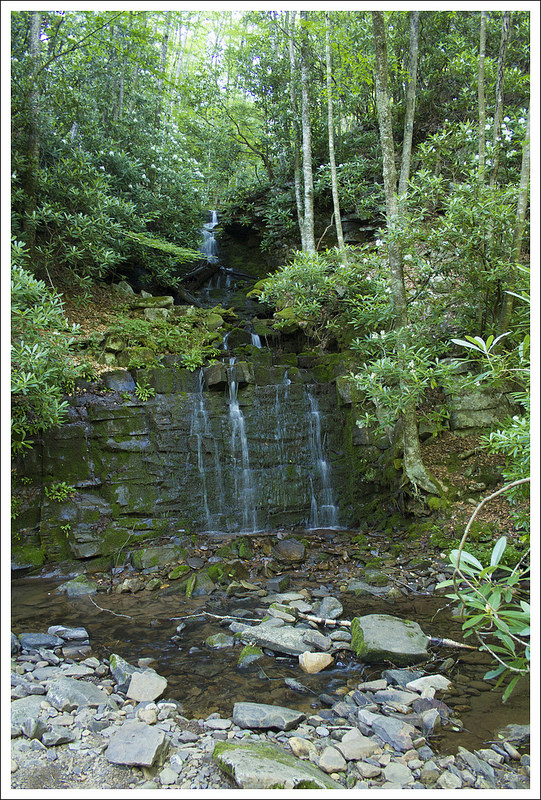
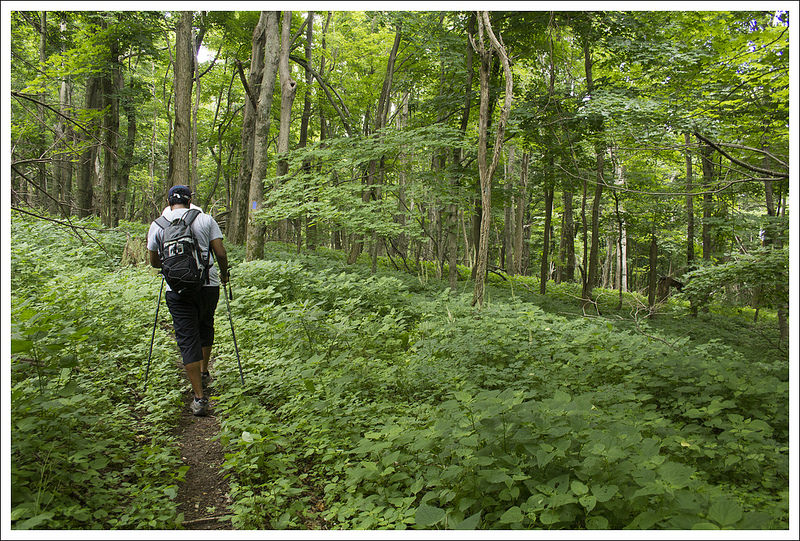
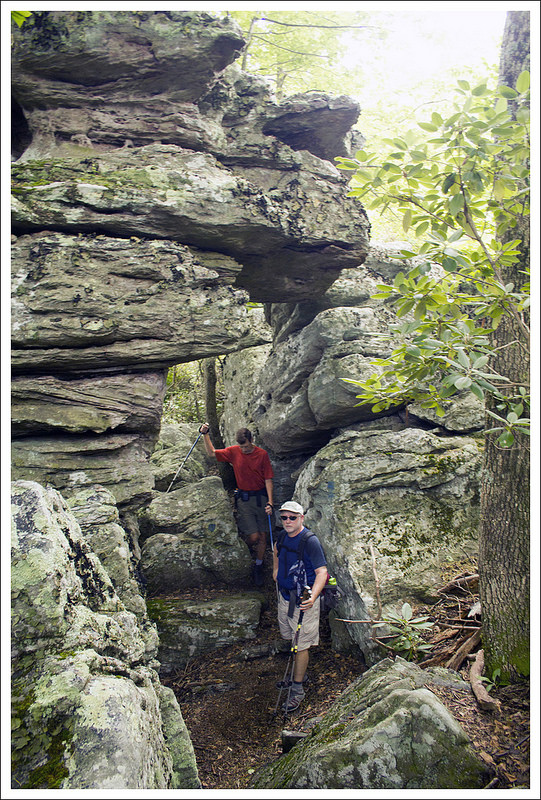
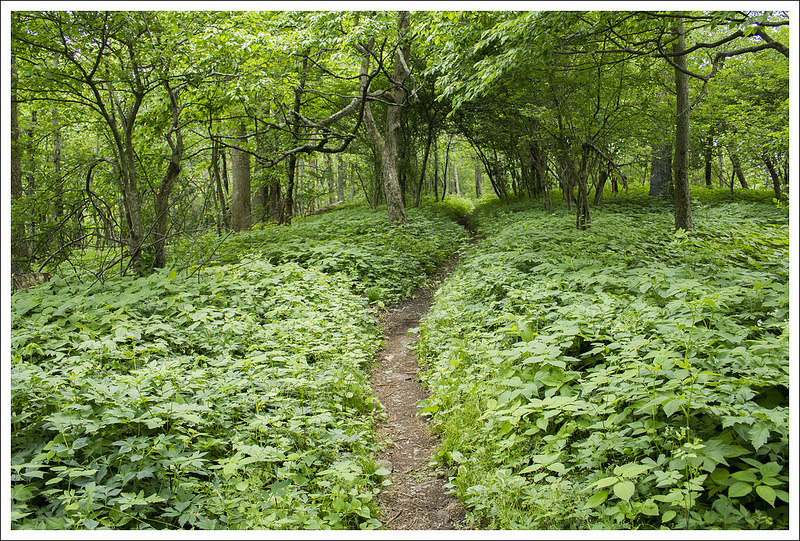
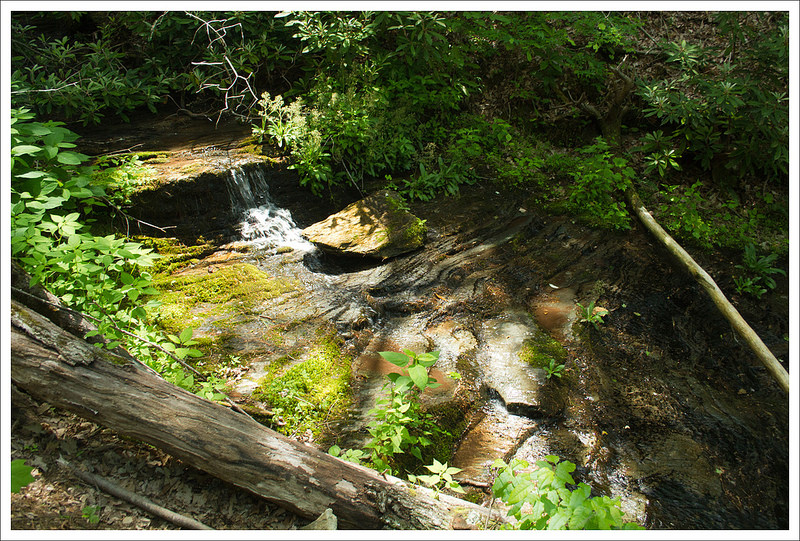
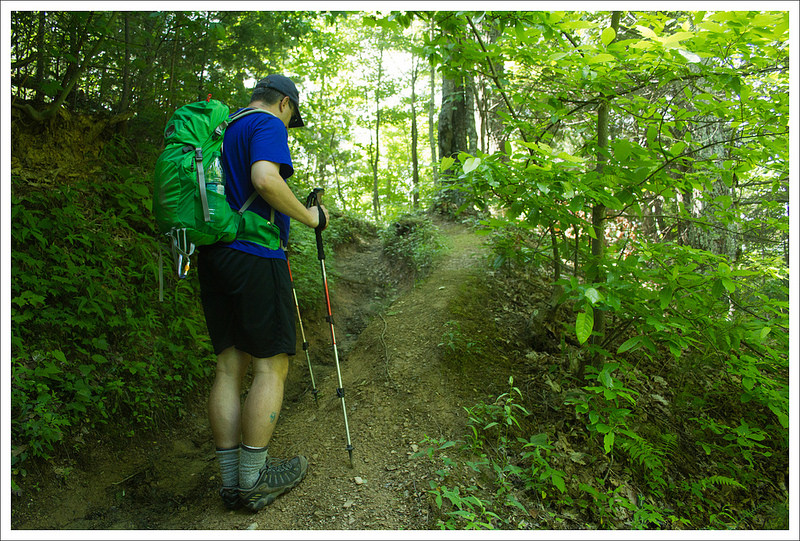
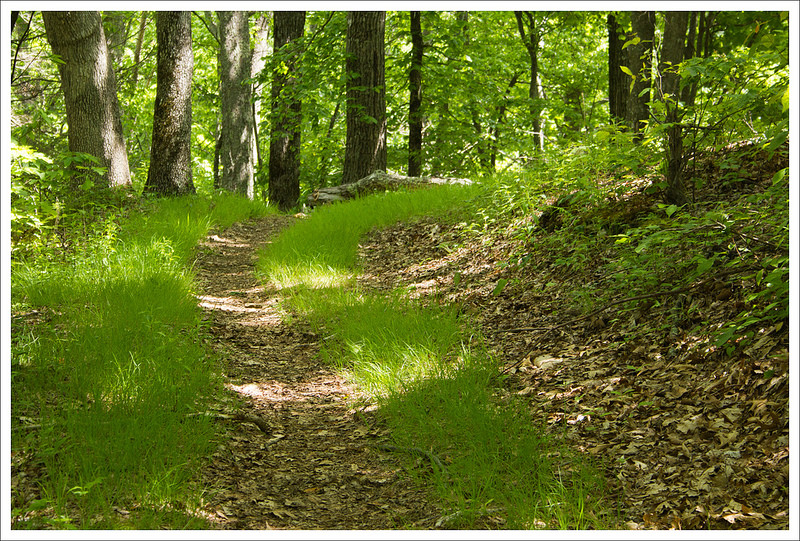
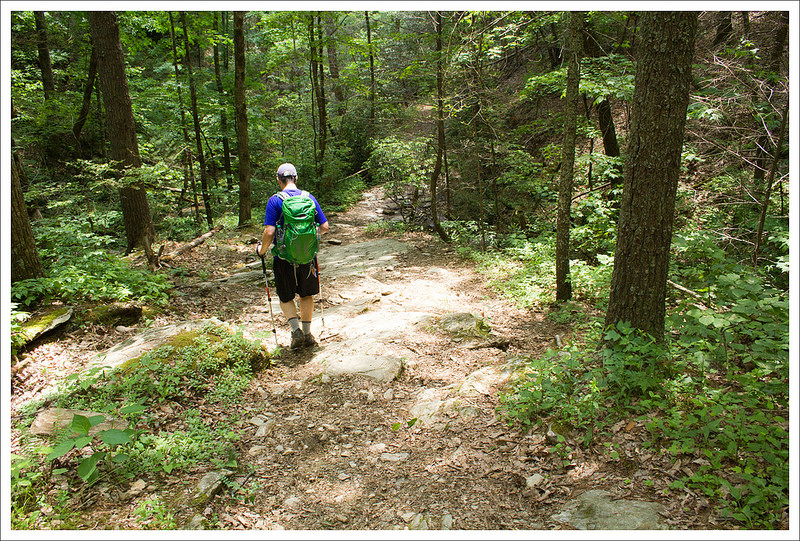
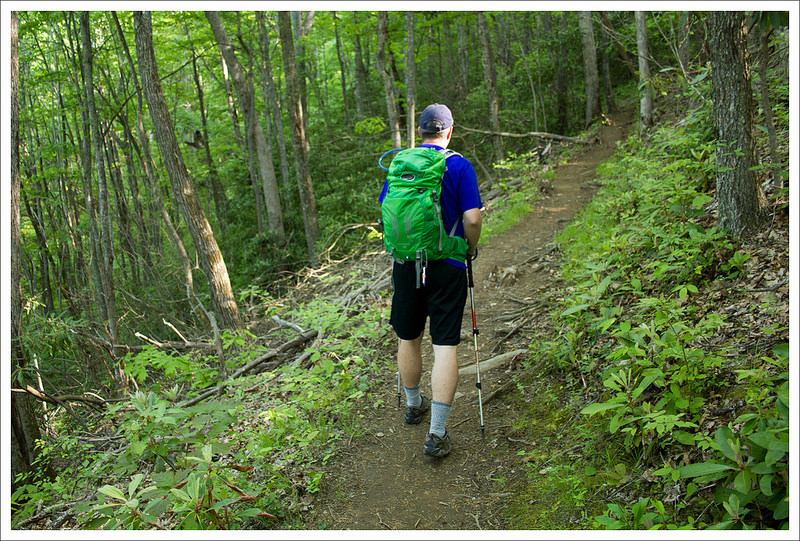
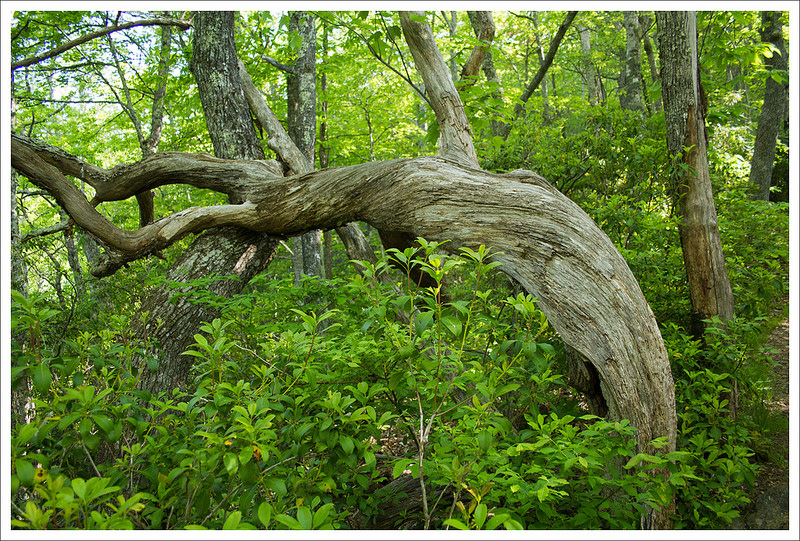
The first .4 miles along the trail were relatively flat as it meandered through a wooded area.  We crossed a footbridge at the base of a small waterfall and at .4 miles, we reached a junction with the Crawford Path.  Taking a left at the junction, we began our ascent.  The ascent begins while paralleling the Gibbs Brook on the left of the trail.  The trail was extremely rocky which was making each step a challenge, as I felt like I was doing a demented, granite-laden version of a StairMaster.  Most of the trail to the summit consists of having to step on rocks, so there is little evidence of soft ground to place your feet.  I would recommend shoes with good padding, thick comfortable socks, ankle support, and trekking poles to help yourself along.

Rocky Trail
Even though the Crawford Path to the summit of Pierce is one of the least steep trails in the Whites, it is still very rocky and slick.  Below: As we climbed, the woods got foggier and foggier; By the time we made it to the junction with the Mizpah Cutoff Trail we started to worry that we wouldn’t have a view at all; The Mizpah Cut-Off Trail departs the Crawford Path a little over a mile from the summit of Mt. Pierce.

Into the Clouds Fog Mizpah Cutoff

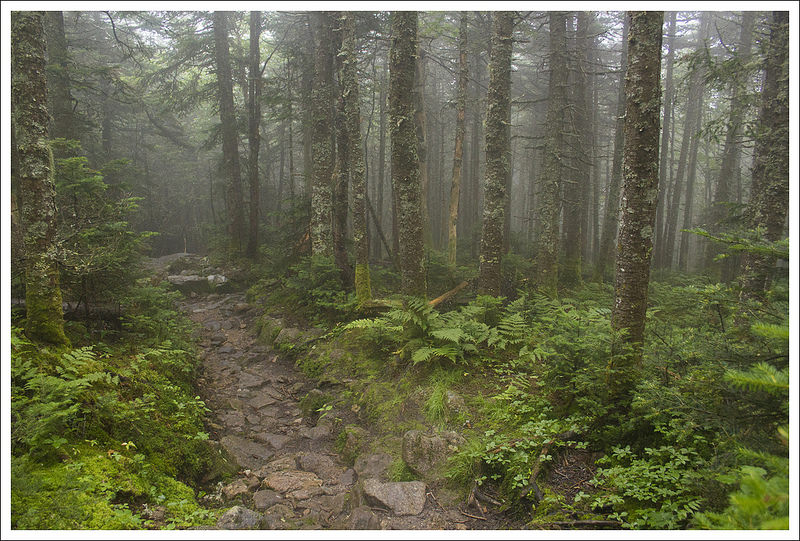
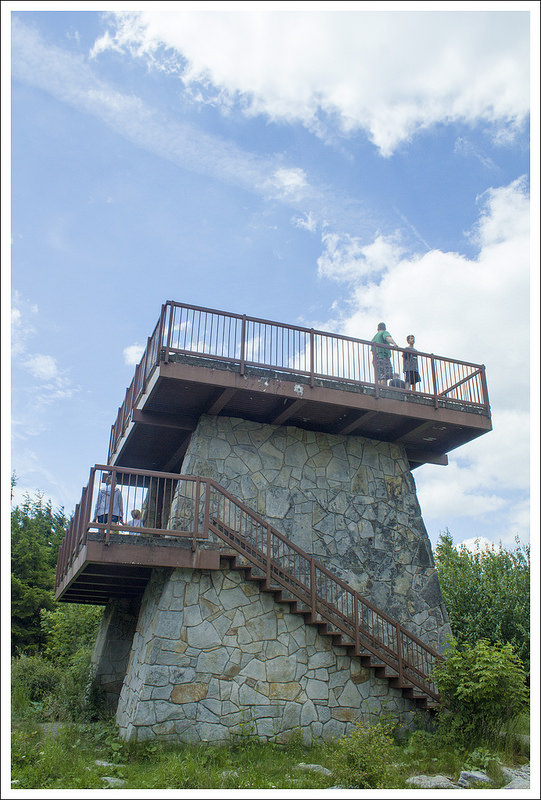
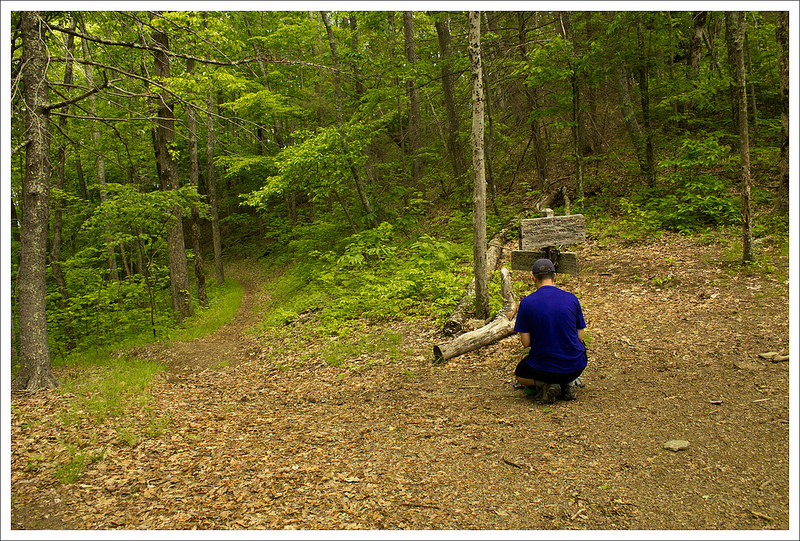
At 1.9 miles, we reached a junction that led to the Mizpah Spring Hut, which is the return trip for this lollipop loop.  Stay left and continue to climb up to the summit.  The trail continued to be rocky and the fog was just sticking to the mountaintop as we progressed.  I was feeling hopeless about being able to spot any views.  As we got higher, we could tell the views would have opened up to the left of the trail but all we could see was a sea of gray.  At 3.1 miles, we reached a large rocky, outcropping and waited a while for the views to open up.  While the wind was picking up, we felt there was no end to the fog.  At the outcropping, another sign for a junction pointed us to the summit and the Webster Cliff trail to the Mizpah Spring Hut (continuing on the Crawford Path would lead to the summit of Mt. Eisenhower in 1.6 miles).  We took that sharp right and headed up to the top, where we reached the summit of Mt. Pierce in a short distance.

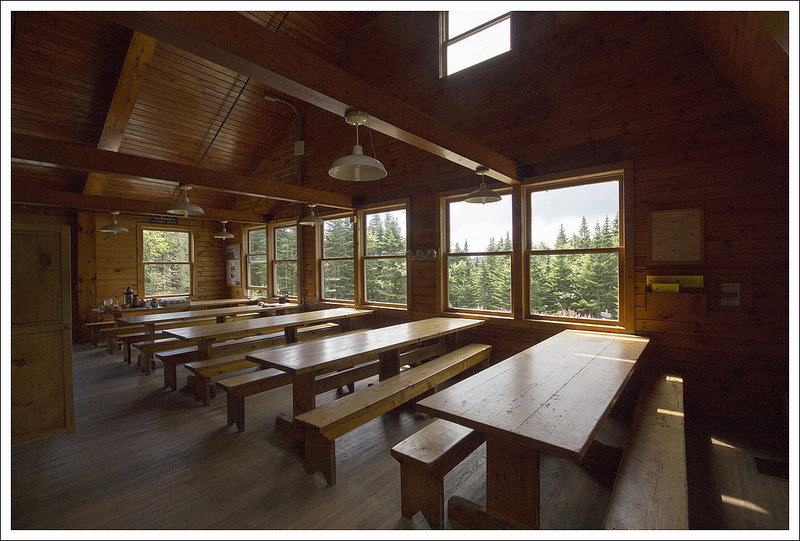
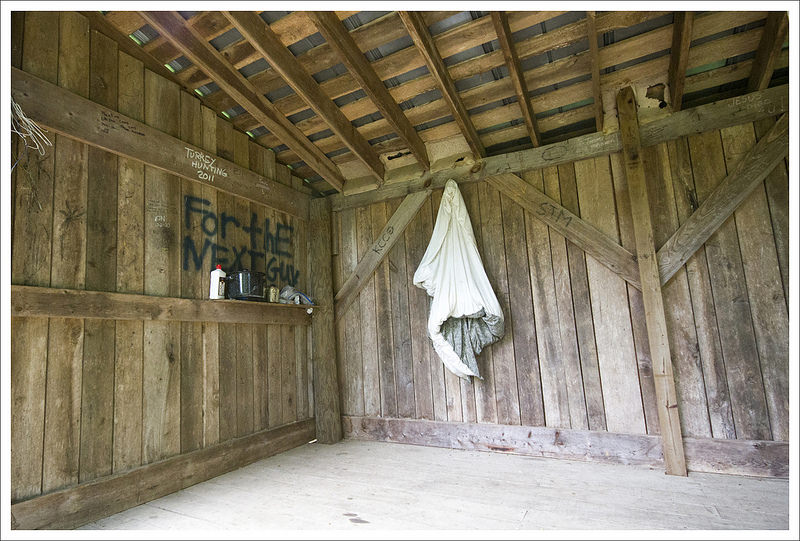
At this point the trail began to descend.  The first part of the trail was a gradual descent, but eventually the trail was some of the steepest, rockiest downhill my feet and knees have witnessed.  At 4.0 miles, we reached the Mizpah Spring Hut, maintained by the AMC and beds can be reserved in advance.  We stopped for a while here and ate lunch.  The croo (yes, that is how they spell it) that maintains the hut and cooks dinner and breakfast for overnight guests, had baked some cookies which we purchased and supplemented our lunch.  As we were enjoying our lunch, we could see that the fog was finally lifting.

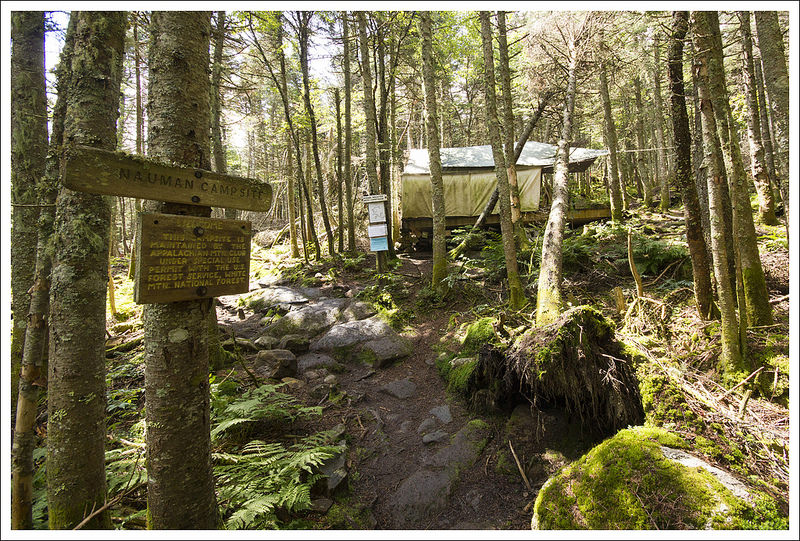
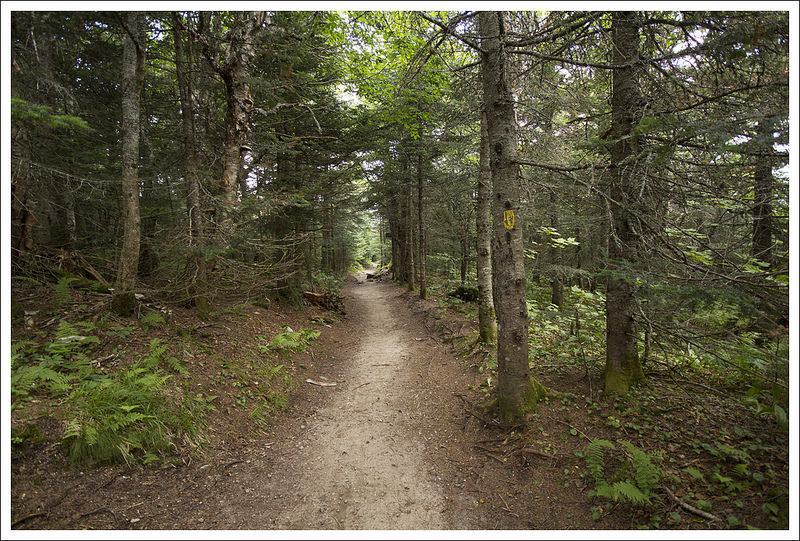
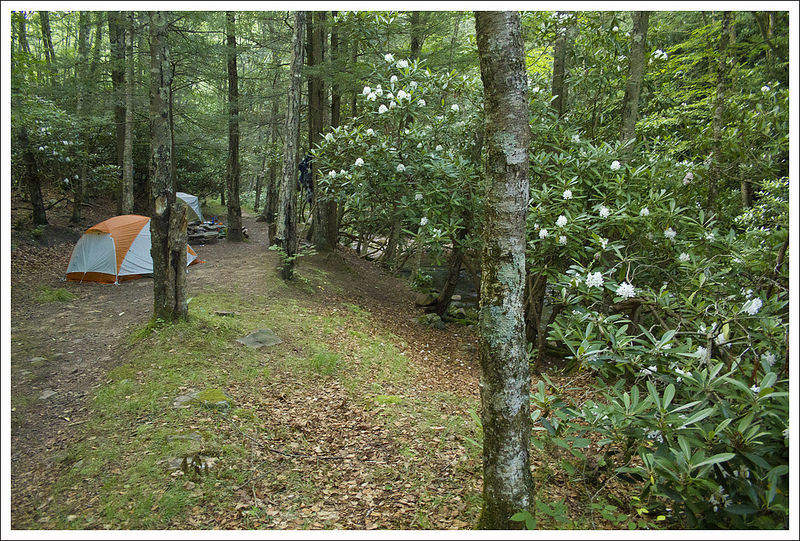
From the hut, we explored the nearby Nauman tent area (also able to be reserved for outside camping) and then proceeded on to the Mizpah Cutoff Trail to complete the lollipop section of the hike.   The Cutoff Trail starts off flat, but is a relatively easier descent.  We reached the junction with the Crawford Path at 4.7 miles.  A return trip to your car by taking a left would make this a 6.6 mile hike.  However, we had a debate about what to do.  Going back up to the summit would be adding another grueling, rocky 2.4 miles, but the views could finally be opening up.  What we had researched before told us how great the views were, so the temptation was hard to resist.  I felt like I owed it to myself (and our readers) to change my attitude and fight through to see these views.  I could tell Christine wanted to see the views as well, so we decided to hike up to the summit again.

Cairns in Fog Boardwalks on Webster Cliffs Starting to Clear

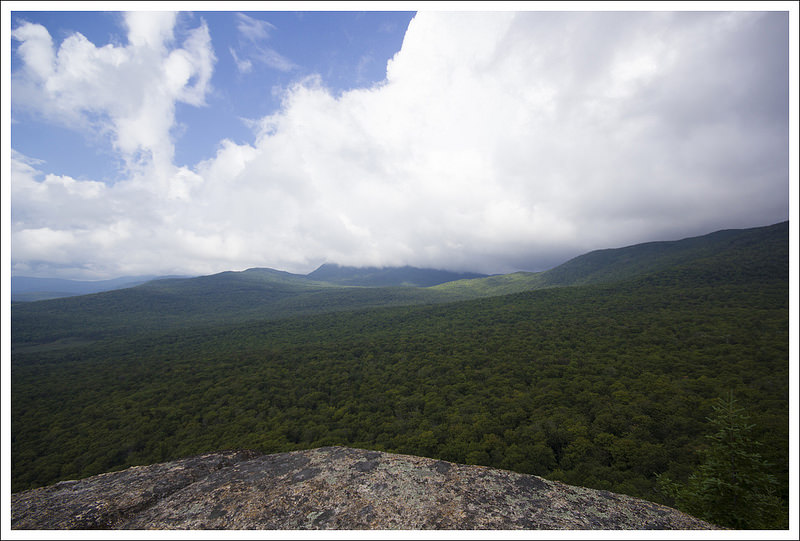
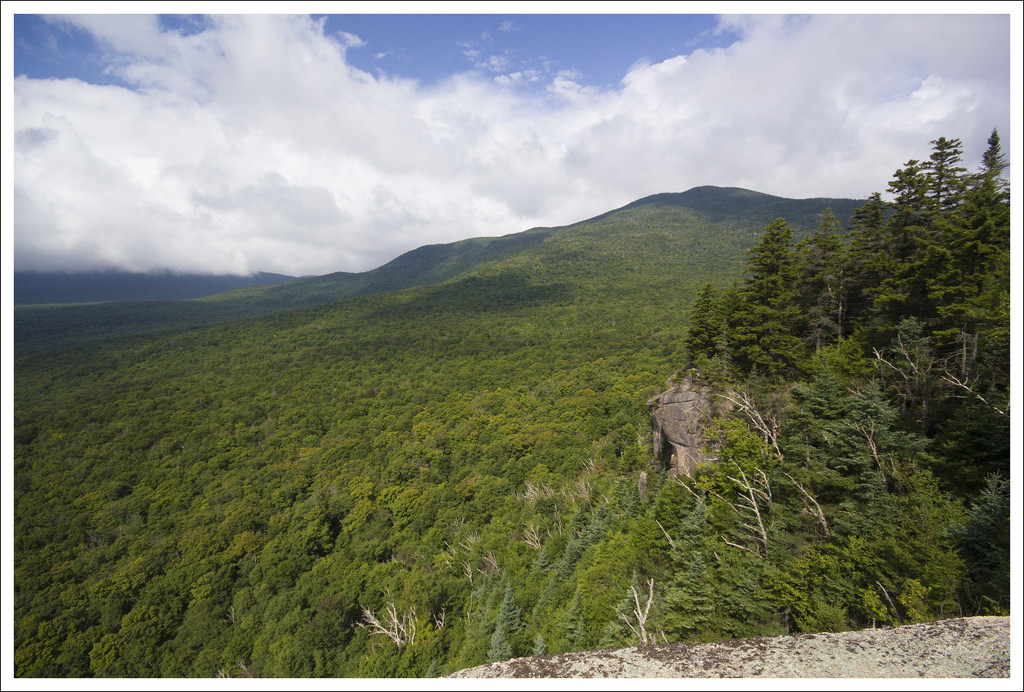
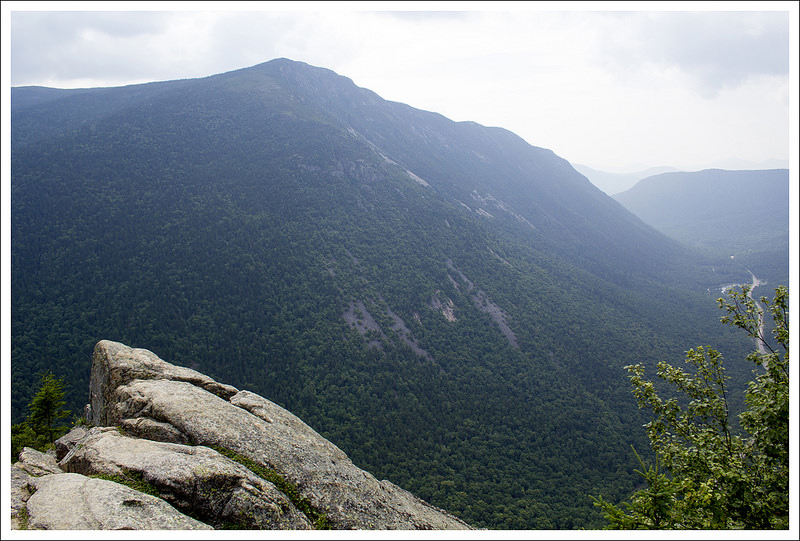
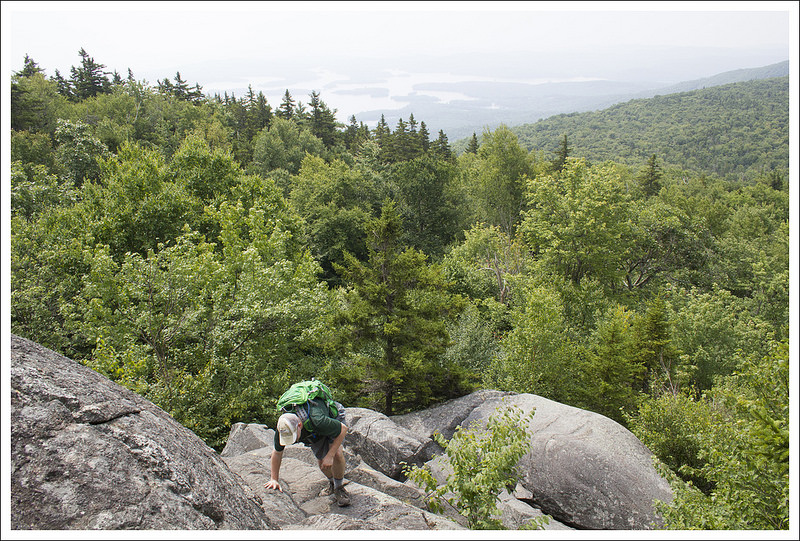
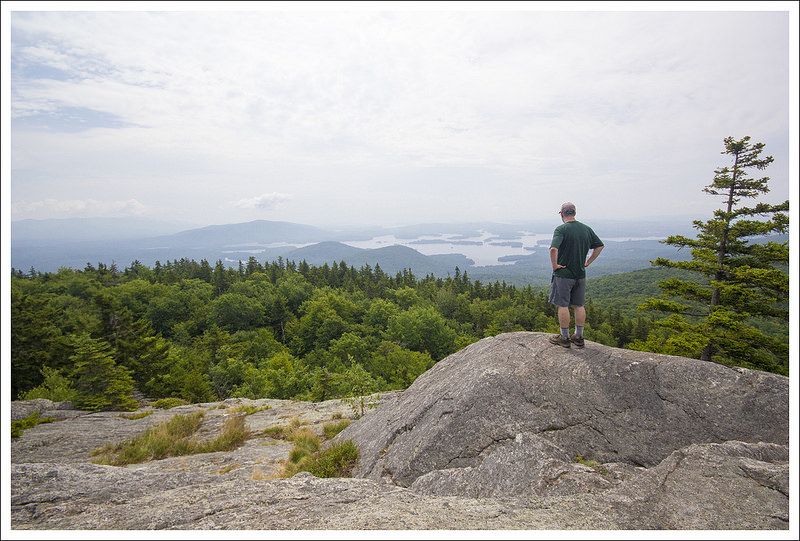
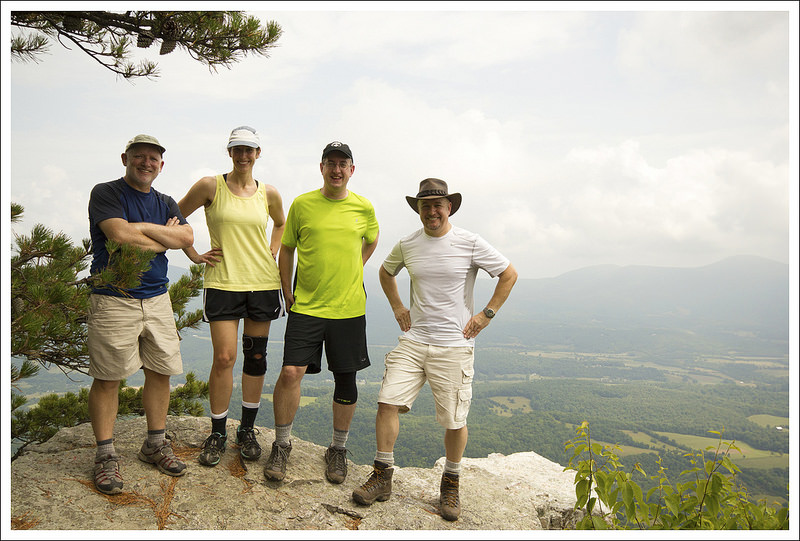
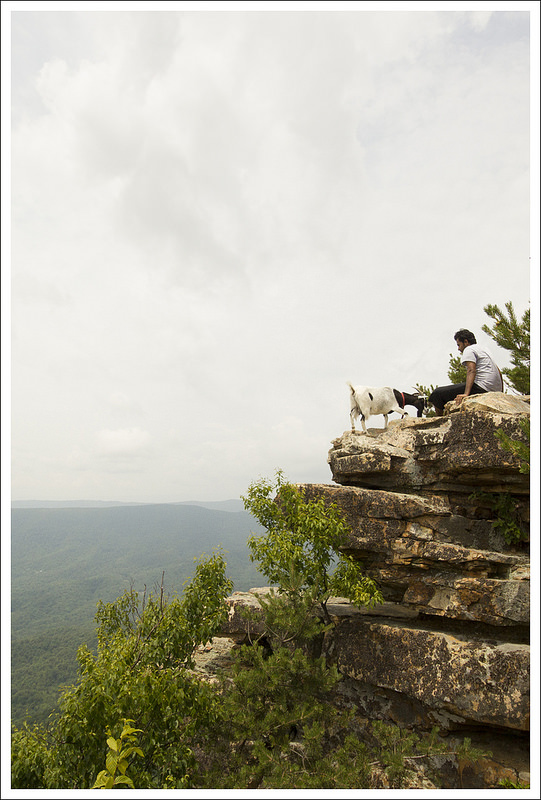
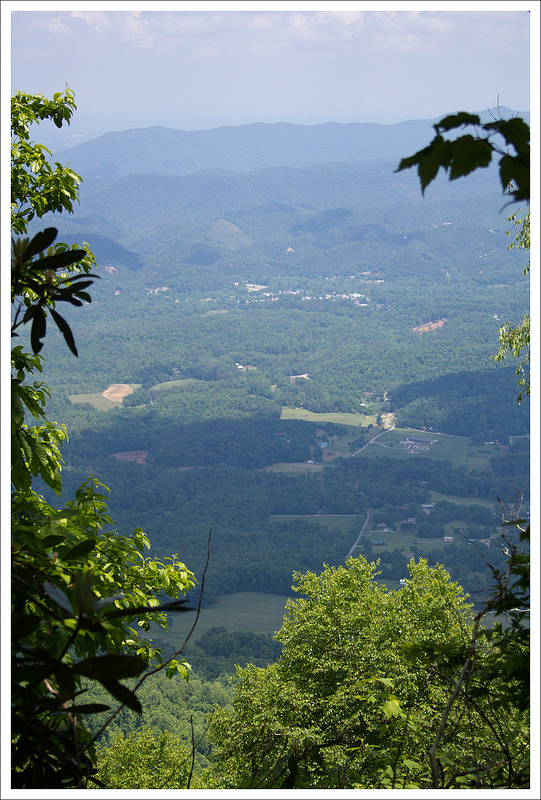
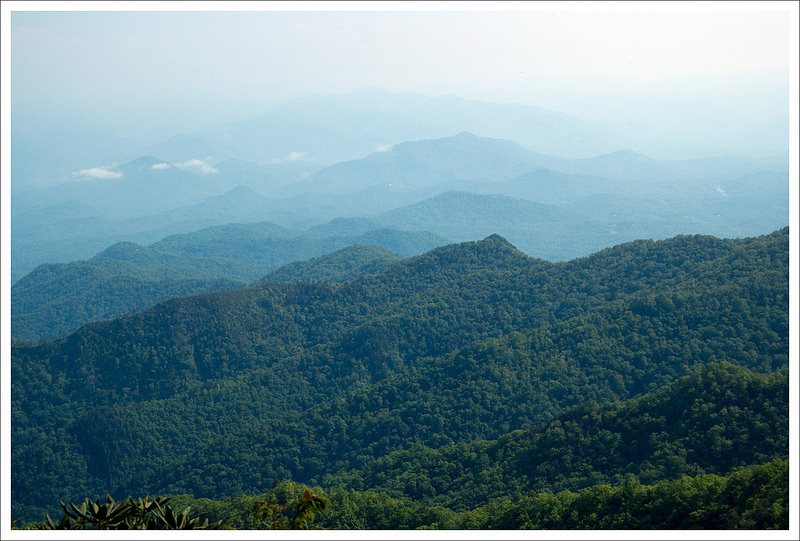
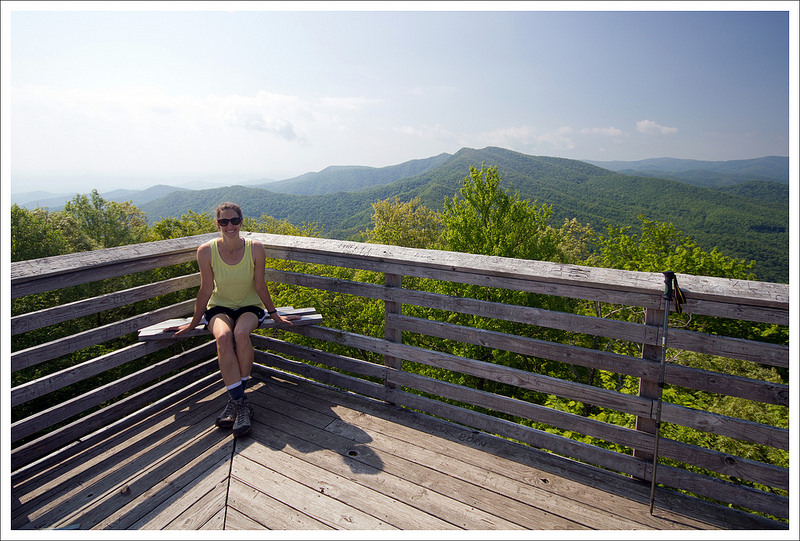
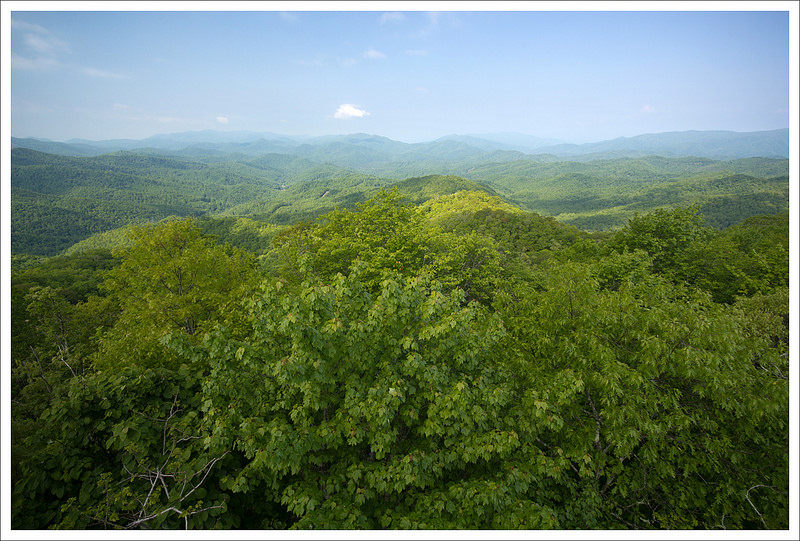
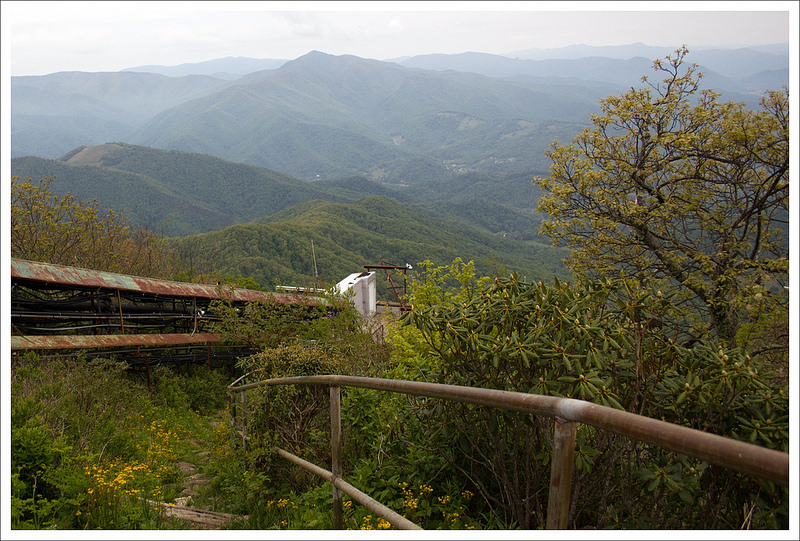
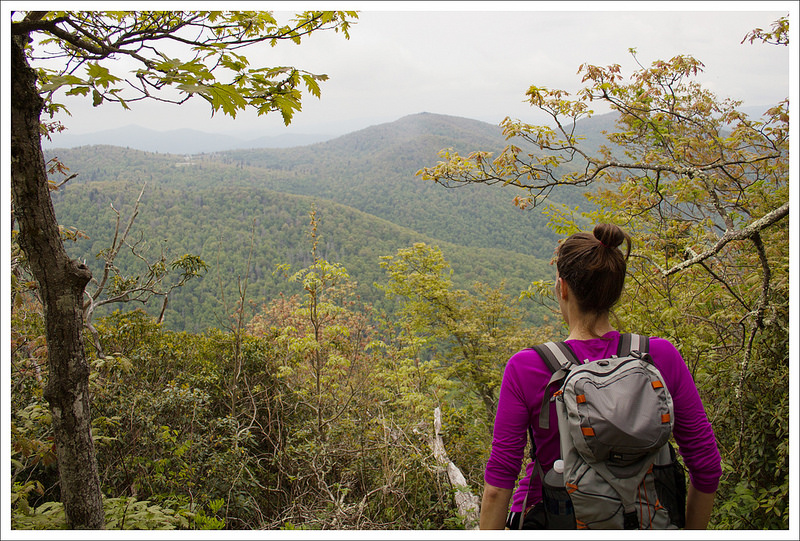
As we climbed, we saw people descending that we had seen earlier on our hikes.  I stopped to ask everyone if they had seen views, thinking if there was still little hope we could turn back around.  Early on, some were saying that we may get lucky to see things, but as we got closer, we were told the views had opened up.  As people were descending, we ran into several people that we had seen before near the summit and they had wondered if we were hiking the summit again.  We got looks of admiration, which made us feel like we fit in with New Hampshire hikers – we weren’t just some normal, Virginia couple that isn’t used to hiking the tough, challenging White Mountains.  When we reached the rocky outcropping near the summit, the views were spectacular.  There were still clouds in the distance that was stuck to Mt. Washington and some of the other high peaks, but we could still see miles of beautiful mountain ranges around us.

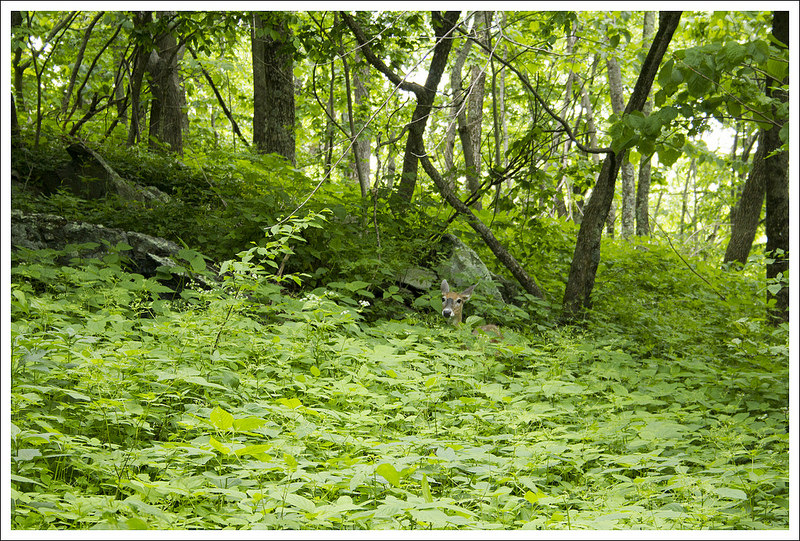
We hiked again up to the summit and the views got more amazing as we looked behind us each step.  We stayed up here a little longer to take in the views.  After getting our fill, we went back down the Crawford Path and made our way back to the car.  When we reached the end, we were a little more tired and had covered more miles than we had planned, but it was a rewarding day.  At the parking lot, we saw a fox standing next to our car, but it quickly darted off into the woods.

One thing to note about Mt. Pierce is that it was once named Mt. Clinton.  When hearing some people refer to it as Mt. Clinton, my initial thought was that Mt. Pierce had been renamed for President Clinton.  I thought that would be odd, since Franklin Pierce was the only President born in New Hampshire and I couldn’t see them changing the name for a President from Arkansas.  But the original name was from DeWitt Clinton, a governor of New York and U.S. Senator, also known for being largely responsible for the construction of the Erie Canal.  Even though the name was changed in 1913, some people have still held onto the original name of Mt. Clinton.

Christine Says…

Summiting Mt. Pierce has been on our New Hampshire ‘To Do’ list for several years now.  I’m sad Adam didn’t have a better day on the trail, because I really enjoyed myself and had a strong hiking day.  It’s always tough when your hiking partner is in pain or having a hard time with terrain, because there’s really nothing you can do beyond cheer them on (which is sometimes annoying) or stay quiet and let them work through the challenge.

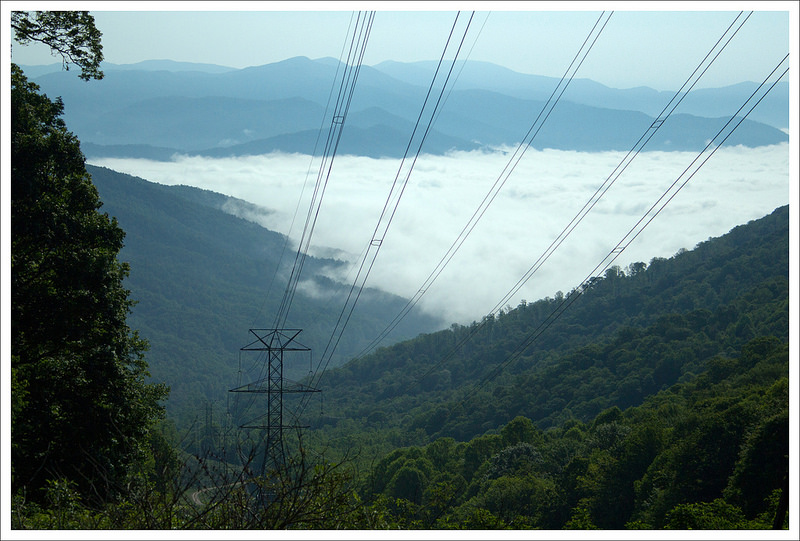
We chose to hike Pierce on a day forecast to be clear and beautiful.  As typical in the Whites, the clouds and drizzle stuck to the mountains far longer than the valley.  It was sunny and pleasant at the AMC Highlands Center, but the peaks loomed in the clouds.  We decided to start our hike on good faith that the clouds would blow off before we reached the summit.

Mizpah Spring Hut
By the time we arrived at Mizpah Spring Hut, the sun was fully out.  Below: The Webster Cliffs trail is steep in places and is traversed by ladders and wooden stairs; Inside Mizpah Spring Hut; Cookies!

Webster Cliffs Trail Inside Mizpah Cookies at Mizpah

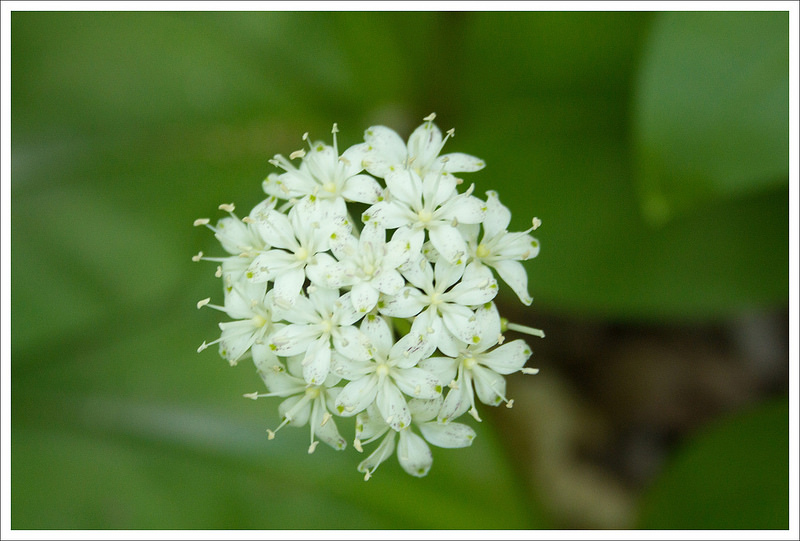
Hiking along the stream early in the hike was pretty and pleasant.  Gibbs falls were lovely and I always enjoy the sound of water running through the woods!  As we continued to climb uphill, the fog did the opposite of what we hoped/expected – it just got thicker!  In fact, every time I paused to take a photo I had to wipe the lens with my shirt to get the droplets and mist off the glass.

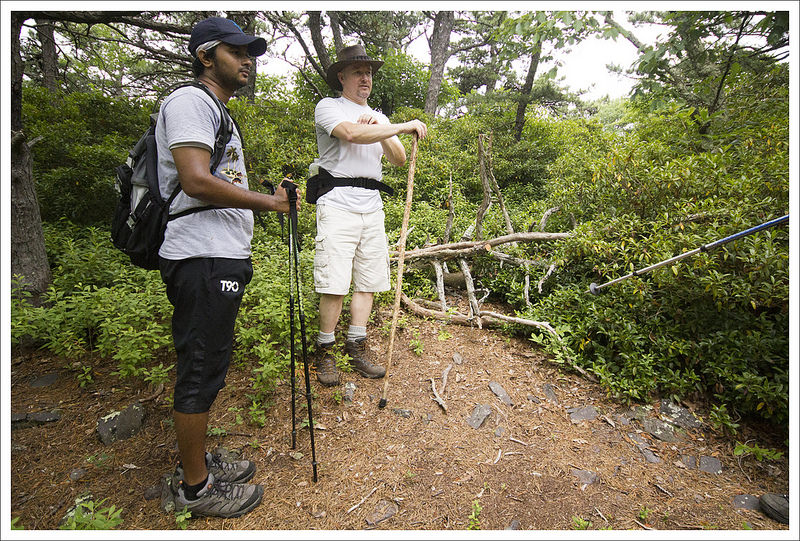
Between the Mizpah Cut-Off trail and the summit, we were passed by a pair of trail runners.  Running on mid-Atlantic mountain trails is challenging enough.  I can’t even imagine keeping that pace over the rocks and roots of New Hampshire!

As we ascended, the fog enveloped the mountain even more.  We debated taking the Mizpah Cut-Off trail, and visiting the hut first, but decided to chance the summit so that we’d hit the hut closer to lunchtime. That turned out to be the wrong call.  At the summit of Pierce, we sat on the rocky outcropping looking into a sea of clouds.  We couldn’t even tell which direction held the spectacular view we’d heard described in our hiking guide.

Christine on the Summit of Pierce
We hiked back up to the summit of Pierce to enjoy clear views.  Below: The Nauman Tentsite is a short distance from the hut; A typical tent platform in the Whites; More views from the summit.

Nauman Tentsite Tent Pad More Views from Pierce

We sat in the clouds for a few minutes before deciding to push on to the hut.  The Webster Cliff trail crossed a ridge for a while, using boardwalks and traditional trail.  We stopped at one last high point and checked out the movement of the clouds.  Every now and then, the clouds would blow off enough that we could see the shoulder of a mountain or the faint shape of a peak through the mist.  We again discussed waiting/going back to the summit versus heading down to the hut.  We agreed that it would still be a while before the view would clear, and proceeded to Mizpah Spring.

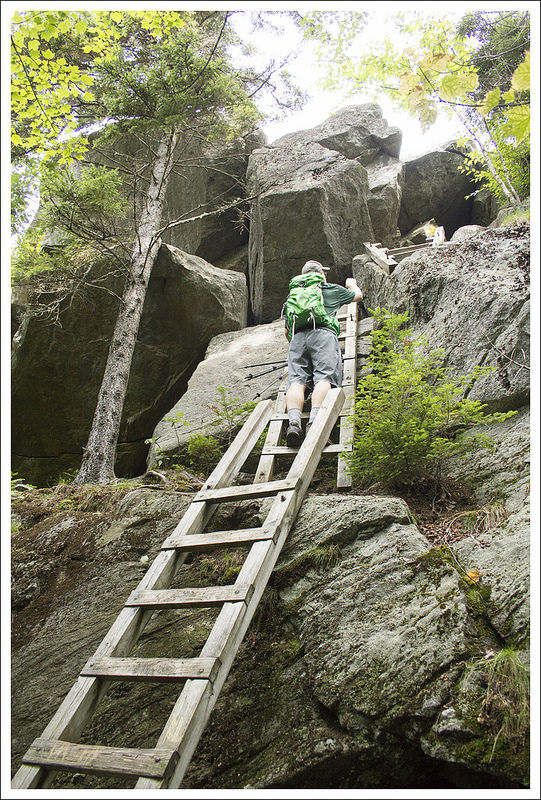
The Webster Cliff trail got steeper and slippery, using wooden stairs and ladders in a couple places.  We eventually reached the hut.  While we ate our lunch, the last of the clouds blew off, leaving bright bluebird skies above the White Mountains.  We discussed climbing back up to the summit.  Neither of us wanted to ascend via Webster Cliff, so we decided to delay our summit decision until after we walked the Mizpah Cut-Off back to its junction with the Crawford Path.

At the junction, we agreed that you don’t climb a presidential peak and pass on the opportunity to take in a spectacular view.  We hiked the extra 1.2 miles (2.4 miles round trip)  with 1,000 feet of elevation gain a second time.  And you know what… it was SO WORTH IT.  The views were spectacular, expansive, breathtaking.  Even with Mt. Washington still in the clouds, it was a stunning view.

The hike down was long and slippery.  We were passed again by the trail runners we had seen earlier.  They had been all the way to the summit of Mt. Washington and back.  Wow! We didn’t go that far, but we still felt our hike was worthy of celebration with a huge meal at The Italian Farmhouse in Plymouth.  It’s always such a gift to have a great view day in the White Mountains!

Trail Notes

  • Distance – 6.5 miles
    MapMyHike Stats *
  • Elevation Change –  2500 feet
  • Difficulty –  4.  While there are steeper, more challenging trails in the White Mountains, this one is still challenging. 
  • Trail Conditions – 2.  The trail is mostly rock, requiring big steps and unsteady footing. 
  • Views – 4.5.  From the summit of Mt. Pierce on a clear day, you can see miles of the Presidential range. 
  • Waterfalls/streams 3.5.  Early in the hike, you can see Gibbs Falls and the start of the Crawford Path part of the hike goes along the scenic Gibbs Brook. 
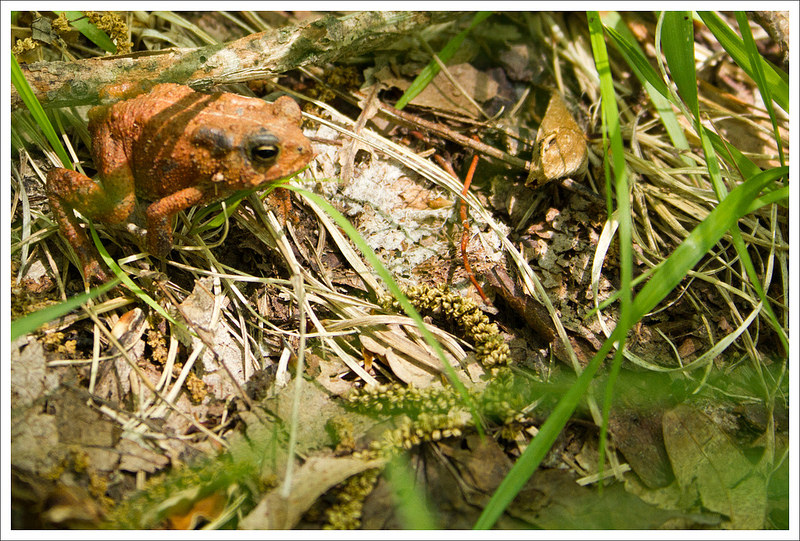
  • Wildlife – 2.  We weren’t expecting to see much, but we were lucky enough to see the fox at the end of our hike.  Keep a lookout for the rare Bicknell’s Thrush. 
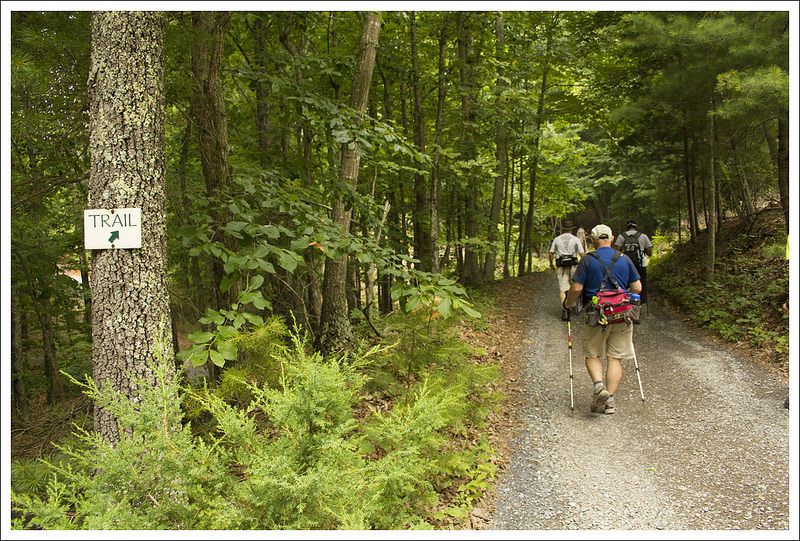
  • Ease to Navigate – 3.5.  Signage was fairly good at the junctions, but we were a little confused on how to get to the Mizpah Cutoff Trail from the hut. 
  • Solitude – 2.  This is a popular trail since the Mizpah Spring Hut is one of the easiest of the AMC huts to access.  Expect to see people at the summit of Mt. Pierce and the hut mostly.  Clear days in the summer could make this quite popular. 

Download a trail map (PDF)

Directions to trailhead: From I-93: Take Exit 35 for Twin Mountain. Follow 3N for 10.4 miles. Turn right onto 302E and proceed for 8.2 miles.  Turn left onto Mt. Clinton Road.  There will be a large gravel parking lot at the trailhead ($3 fee applies).

* MapMyHike is not necessarily accurate, as the GPS signal fades in and out – but it still provides some fun and interesting information.

Mt. Pemigewasset (NH)

Special: New Hampshire Edition

Introductory Guide to Visiting the White Mountains

This moderate 3.2 mile hike in Franconia Notch takes you to a spectacular viewpoint overlooking Kinsman Ridge and the Lakes Region.

View the Full Album of Photos From This Hike

Mt. Pemigewasset Summit
Adam on the summit of Mt. Pemigewasset.  Below: The beginning of the hike follows the bike path for a short distance; One of the three tunnels on the hike; Adam crosses a small stream.

Bike Path Tunnel Stream Crossing on Mt. Pemigewasset Trail

Christine Says…

The day before this hike, we made a quick trip over to Burlington, Vermont. We sampled beers at a couple breweries, stopped at a craft cider maker, toured a chocolate factory, ate lots of good food, enjoyed Lake Champlain, indulged in Ben & Jerry’s, and visited the chapel at Dog Mountain.  It was an all-day trip with lots of miles in the car.  When we woke up the next morning, we wanted to hike, but we wanted something that wouldn’t require a lot of time in the car.  We also knew that thunderstorms were due to pop up starting around lunchtime.  So, we chose the nearby and short hike of Mt. Pemigewasset.

There are two routes up Mt. Pemigewasset (also known as Indian Head because of its distinct, face-like profile).  One is the Indian Head Trail which departs from a gravel parking area across from Indian Head Resort.  We chose the Mt. Pemigewasset Trail that begins at the northern end of the Flume Gorge parking area.

Climbing the Mt. Pemigewasset Trail
Adam makes his way over the rocks and roots on the Mt. Pemigewasset Trail.  Below: Christine climbs.

Christine Climbs

To start the hike, we followed the bike trail for a short distance before turning left onto the official trail.  The trail started off relatively flat, and passed through three tunnels – one under Route 3 and two more under I-93.  After a couple small stream crossings, the trail climbed steadily but moderately uphill.  Like most New Hampshire trails, the way up was rocky and rooty.  Near the top, the Indian Head Trail merged with the Mt. Pemigewasset Trail before emptying us out onto a smooth, wide ledge of granite.  The drop-offs here are very steep and the granite can be slick/smooth, so take care!

When we reached the summit, it was still fairly early, so we only shared the vista with one other couple.  We spent some time enjoying the views through the notch and watching the dramatic clouds swirling over Kinsman ridge.  After about 20 minutes, more people started to arrive to the summit, so we made our way down.  We were back at the car before noon.  Since it was so early in the day, we decided to get some lunch at White Mountain Bagel Co. (great deli sandwiches) and see a matinee of Guardians of the Galaxy.  While we were at lunch, a pressing cold front passed and it started *pouring*!  The cold front was a welcome change, as it brought a forecast of clear, pleasant days – perfect for tackling bigger things! After a nice low-key day on Pemigewasset, we were definitely feeling ready to tackle some above-treeline Presidentials!  Stay tuned!

Clouds over the Kinsman Ridge
The Kinsman Ridge was covered by clouds when we visited.  Below: Views looking south along I-93 and the Lakes Region of New Hamsphire; The summit is made of smooth granite; More summit views.

View Toward the Lakes Region Mt. Pemigewasset Summit Mt. Pemigewasset Summit

Adam Says…

The names of places in New England (and particularly New Hampshire) always fascinate me.  A lot of Native American names are used for mountains, towns, and rivers which leads to a lot of mispronunciations.  Mt. Pemigewasset is named after the nearby river, the Pemigewasset River.  It is an Abenaki word meaning “where entering current is”.  A common joking name you hear is the “Pemi-gee-whats-it”, but many people don’t even attempt to try and pronounce it and just call it “The Pemi” for short.

The hike started at the northern end of the Flume Gorge parking area.  You walk on the designated bike path for 150 yards and then you see the trailhead to the left.  Take this and you will walk over fairly flat land as you go through three tunnels that go under US-3 and I-93.  After the last tunnel, you begin your climb up the trail.  Most of the trail is typical of the terrain in New Hampshire, with some rocky steps and roots to navigate.  The overall terrain wasn’t too steep, but it is a constant uphill climb.  At 1.7 miles, you reach a junction with the Indian Head Trail.  Continue to the left and you gain the summit in another .1 mile.

Framed by Birches
Christine hikes down through the birch trees.

The summit is a huge rock outcropping that allows for views of other mountains, including Mt. Lafayette, Mt. Lincoln, the Tripyramids, and Mt. Moosilauke.  The edge of the rock is a sheer cliff face, so be careful if you are approaching the edge, especially when it is wet.

Mt. Pemigewasset is a hike that should be possible for most people if you take your time.  It is definitely easier than most of the hiking we have done in the White Mountains.  One thing that played into our decision to do this hike was that we saw high clouds in the Presidential range.  We felt this mountain, lower in elevation, would allow for some views down below and we predicted correctly.  We were also able to do this hike fairly quickly based on the short distance and were back in our car before lunchtime.

Trail Notes

  • Distance – 3.2 miles
    MapMyHike Stats *
  • Elevation Change –  1350 feet
  • Difficulty –  2.5.  The climbing is steady, but easy to moderate.
  • Trail Conditions – 3. There are rocks and roots, but generally this trail is easily walkable and in nice condition.
  • Views – 4.5.  Beautiful views, but not quite full panoramic.
  • Waterfalls/streams 1.  There are several small streams to cross.
  • Wildlife – 2. We heard a lot of birds and saw several red squirrels.
  • Ease to Navigate – 4.  The trail is easy to follow.  The only place to go wrong would be turning onto the Indian Head Trail.
  • Solitude – 1. Because of its location, length, and moderate challenge, this trail is very popular.

Download a trail map (PDF)

Directions to trailhead: From I-93: Take Exit 34A for Franconia Notch State Park.  The trailhead is begins from the northernmost point of the parking area.

* MapMyHike is not necessarily accurate, as the GPS signal fades in and out – but it still provides some fun and interesting information.

Mt. Willard (NH)

Special: New Hampshire Edition

Introductory Guide to Visiting the White Mountains

Mt. Willard is one of the most popular easy day hikes in the White Mountains region.  Its highpoint of 2,800 feet is dwarfed by most every other mountain around, but it still offers a dramatic vista looking through Crawford Notch.

View the Full Album of Photos From This Hike

The View from Mt. Willard
Looking through Crawford Notch from the summit of little Mt. Willard. You can see the road and the train tracks. Below:  The trail starts across the train tracks at Crawford Notch Depot; Christine’s dad looks down at the Centennial Pool – one of the attractions on this hike; Enjoying the summit with family.

Train Station centennial pool2 Family

Adam Says…

Mount Willard is an extremely popular family hike in the White Mountains of New Hampshire.  It’s quite accessible since the trail takes off from the train depot at Crawford Notch.  Many hikes in the Presidential range can be intimidating, but this hike of only 3.2 miles is more manageable.  The hike has some rocky, steep sections, but if you take your time most people with a little hiking experience can reach the peak.

We started off the hike by crossing the railroad tracks near the train depot station where the AMC Highland Center is located.  The trail quickly leads into the woods and in .1 mile, you reach a junction.  Take a left to climb the Mt. Willard Trail (the other trail at the junction is the Avalon Trail, leading to Mount Avalon and Mount Field).  The trail has a small stream crossing and then begins the climb.  The trail is rocky and somewhat steep, like most of the area in the White Mountains of New Hampshire.

Centennial Pool
The Centennial Pool has a small waterfall that cascades into a pretty plunge pool.  Below: Adam crosses a stream early in the hike; Everyone makes their way uphill; The trail was mildly rocky.

Stream Crossing Hiking Up Hiking Up

Along the hike up, there is a small waterfall called the Centennial Pool on the right.  There are a few steps down to reach the base of the falls, which is a nice cascade to give yourself an excuse to take a break on the way up.  Continuing up the trail, eventually the path of the trail consists of smaller, but more abundant rocks.  A short distance of climbing through this and then the trail begins to level off around 1.4 miles.  It is a short distance at this point to reach the summit at 1.6 miles.

The summit gives you great views down into Crawford Notch as you can see down Rte. 302 and the train tracks that would leave from the depot.  You can see the path of the glacier that carved out this area.  There are some precipitous drops from the top, so keep a close eye on any children.  We stayed at the top for a while until it started to become overcrowded with larger groups, so we made our way back down the way we came.

After the hike, we went into the train depot where they have a small gift shop to purchase shirts or hiking guides.  After we left the area, we headed down to one of our favorite lunch spots, Moat Mountain in North Conway, NH.  Their nachos are amazing and we’ve always been impressed with the beer they brew there.

Christine Says…

When I say that Mt. Willard is a favorite family day hike, I mean that literally!  My parents walk to the summit of Willard several times a year.  It’s probably one of my dad’s very favorite hikes in the region.  It’s the right distance and right amount of climbing for them, plus they really enjoy the view from the top.  They prefer to leave the high peaks and steep climbs for us to do on our own, but we always like to try and find a hike we can all do together.  On this visit, Willard fit the bill perfectly.

Before setting out for our hike, we stopped in Sugar Hill for a big pancake breakfast at Polly’s Pancake Parlor.  It’s a standing tradition to eat there at least once on every visit.  I love all the different batters and pancake fillings.  They also have delicious chicken-apple sausage.

Mt. Willard Summit
Adam checks out the Mt. Willard Summit.  Below:  Summit scenes.

Mt. Willard Summit Mt. Willard Summit Mt. Willard Summit

We got an early enough start that we were able to begin our hike by mid-morning.  We set out across the train tracks and headed up the Mt. Willard trail.  The climbing on Mt. Willard is steady, but never terribly steep.  The trail is rocky, but nowhere nearly as rocky as what you see above treeline.  It was a humid day, so everyone was sweating like crazy.  Thankfully, the bugs weren’t too bad and we were able to hike without bug spray or constant swatting.

At half a mile, we passed the Centennial Pool.  I scrambled down to the base of the falls and snapped a few photos before a large family group caught up to us.  The group of twelve included many young children who wanted to scramble on the rocks around the pool.  We left the spot to them and continued our uphill climb.

As we continued upward, the trail became rockier and wetter.  Thunderstorms the day before left plenty of water still draining off the mountain.  There were a couple places that the trail was more like a shallow stream.  When we reached the summit, there were only a couple people there.  We claimed a nice spot overlooking the notch below.  We took photos and enjoyed the view together for a few quiet moments.  Soon enough, lots of other hikers began to reach the summit.  Children were running pellmell all over the summit.  Fortunately, it’s a safe and wide summit.  There are steep drop-offs, but the ledge is spacious enough that there is plenty of room to enjoy the view without ever getting close to the edge.

Cobbled Trail
The trail is rocky and cobbled.  Below: Some parts of the trail were wet from thunderstorms the night before; The trail is pretty, piney and shady: Returning to the depot.

Hiking Up trail Return

After exploring the summits different views and angles, we decided it was getting a little too crowded at the top.  We gathered our gear and started the descent. The hike down went pretty quickly.  We passed many people climbing up as we descended.  It’s definitely a popular and well-traveled trail.  We soon arrived back at the train depot.  After the hike, we headed into North Conway for lunch.  It was a great day and I loved spending some time on the trail with my parents.

Trail Notes

  • Distance – 3.2 miles
    MapMyHike Stats *
  • Elevation Change –  980 feet
  • Difficulty –  3.  Not too tough by New Hampshire standards, but a moderate uphill climb.
  • Trail Conditions – 3.  The trail is rocky and does have some loose rock. Due to the popularity of the trail, the path is normally clear of debris. 
  • Views – 3.5.  There are some nice views from the summit. 
  • Waterfalls/streams 2.5.  The Centennial Pool is a picturesque waterfall on the way to the summit. 
  • Wildlife – 1.  I wouldn’t expect to see anything on this trail. 
  • Ease to Navigate – 4.5.  Once you find the trail and take a left at the junction, it is just on one trail so it should be easy to find your way. 
  • Solitude – .5.  This trail is extremely popular.  Start off early in the morning if you want the summit to yourself.

Download a trail map (PDF)

Directions to trailhead: From I-93, take exit 35 to merge onto US-3 N toward Twin Mountain/Lancaster.  Stay on that for 10.4 miles and then take a right on US-302 E.  Go 8.3 miles and the AMC Highland Center will be on the right.  Park in the parking lot and make your way towards the train depot station.  Cross the train tracks and you should see the trailhead leading into the woods.

Mt. Morgan – Mt. Percival Loop (NH)

Special: New Hampshire Edition

Introductory Guide to Visiting the White Mountains

Note: We’ll be taking you to New Hampshire for our next seven hikes!  Enjoy the north country! 

This 5.3 mile hike includes open ledges, ladders up cliff faces, caves, tight squeezes, and rock scrambling.  At the summits of both Morgan and Percival, you get great views of Squam Lake.  Look for blueberries along the way!

View the Full Album of Photos From This Hike

Squam Lake View
A view of Squam Lake from the summit.  Below: Papery, white birches are iconic in New England; Eastern red-spotted newt at eft/juvenile stage; Adam slogs across wet trail.  It was more like a stream in places.

Birch Eft Wet Mt. Morgan Trail

Christine Says…

After two lengthy days of travel from Virginia to New Hampshire, the last thing we wanted to do was get back into the car for more than a short drive. So, for our first hike in the area, we chose the Mt. Morgan – Mt. Percival Loop. The 5.3 mile hike is just a few minutes from my parents’ house and offers great views of Squam Lake.

We hiked this loop in 2009, before we started including out-of-state hikes on Virginia Trail Guide. I remembered only a few generalities about this hike: challenging, exceedingly buggy, nice views, tons of blueberries. It definitely seemed worth another look!

By New Hampshire standards, this trail is rated moderate. On paper, that seems fair – 5.3 miles and 1,575 feet of climbing. But, by Virginia standards we probably would rate this hike more toward difficult due to the terrain. If you follow the route as we hiked it, there are ladders, exposed ledges, steep rock scrambles, and a tight-squeeze section that passes through a series of caves. It’s also very muddy, rocky and rooty. I would equate the skill-level/fitness needed for this hike to be similar to what you need to hike Old Rag.

Ladders on Morgan Trail
We reach the ladder portion of the Mt. Morgan Trail.

We started off early in the morning, but the parking lot was already full when we arrived.  We managed to wedge into one small space still remaining in the corner of the lot. I think most of the cars parked in the Mt. Morgan lot belonged to people hiking the Rattlesnakes on the other side of the road, because we saw relatively few people on our hike.

The Mt. Morgan trail started off at the end of the parking lot. The path was wide, gradually ascending, and covered with pine needles. There were beautiful, papery white birch trees all through the woods. As the trail continued, the climbing got rockier and steeper. We passed sections of old stone wall half buried in the forest. There were also several muddy stream-bed areas to traverse. At 1.7 miles, the Mt. Morgan trail and the Crawford-Ridgepole trails joined ways for about .4 miles before reaching a series of ladders affixed to a cliffside.

If you’re not into height and ladders, you can continue on the Mt. Morgan trail for several tenths of a mile to reach the summit. We chose the ladders. I did fine until there was a horizontal move from one ladder to another, followed by a step onto a large metal screw in the rock. I kind of panicked at that point because I couldn’t span the space with my arms.  I could get my feet where they needed to be, but I couldn’t reach any solid handhold to pull myself up the rock face. Adam ended up giving me a hand up. We both passed through a small cave onto a steep, exposed ledge with views of Squam Lake. After enjoying the view for a moment, there was still a little more steep, scary boulder scaling we had to do to get to the summit of Mt. Morgan. I stood on the ledge and pondered whether I wanted to go back down the ladders and go around, or figure out a way up the rest of the rocks. I ended up opting for directly up the rock face, but I paid a price for it. I got several huge bruises and two gashes on my legs from the sharp, hard granite. What can I say… I never go home from New Hampshire unbranded!

Scrambling Up Morgan
Even after you reach the top of the ladders, you still have some challenging, steep scrambling to complete.  Below: Adam navigates the ladders; At the top of the ladder, you’ll pass through a small cave; The scramble is scary because the granite is so smooth and steep.

Adam on the Ladders Cave Ladder Scrambling

The view from Morgan was lovely, albeit misty and hazy on the day we visited. There also weren’t as many blueberries as I remembered. We had a snack, took a few photos and pressed on to the next summit – Mt. Percival.

We followed the Crawford-Ridgepole trail for about .9 of a mile to the summit of Percival. The trail across the saddle between the two mountains was alternately rocky, boggy and piney. There were a few steep spots, by this section of trail was one of the easier parts of the hike.

Right at 3 miles, we reached the summit of Percival. The view was similar to that of Morgan – Squam Lake’s asymmetrical, island-dotted expanse. At the summit of Percival, there are two sets of blazes – one to the side and another that plunges steeply right of the front of the mountain. When we visited, there was no sign indicating where each trail headed, so we used our guidebook and map to make a guess. If you take the trail on the side, you’ll have steep (but normal) climb down the Mt. Percival trail. If you follow the blazes over the cliff, you’ll find yourself wedging your body through a series of caves and opening in boulder tumbles. The cliff route is fun and a little bit unnerving.

There were several places that Adam and I looked at each other and thought NO WAY! We had to pass backpacks and trekking poles through openings. There was even one place I thought I’d make it, but my backpack got hung up and left me stuck! After several squeezes, we came to the junction of the Mt. Percival Cliff Trail and Cave Trail.

After this point, the rest of the climb down Mt. Percival was just a steep, rocky, rooty, slippery, muddy knee grinder. I didn’t particularly enjoy this part of the hike. My knees and feet were hurting and I was being relentlessly menaced by bugs. It’s hard to pay attention to your footing when you’re flailing your hands to swat flies away from your face. I definitely slipped and slid several times.

Mt. Morgan Summit
Adam enjoys the summit of Mt. Morgan.  Below: Scenes from the Crawford-Ridgepole Trail between the summits of Mt. Morgan and Percival.  The terrain was rolling and varied.

Crawford-Ridgepole Trail Crawford-Ridgepole Trail Crawford-Ridgepole Trail

I was pretty happy when, at 4.7 miles, we reached the junction with the Morse Trail, because it meant the hard hiking was behind us and we were almost back to the car. We flew along the Morse Trail, enjoying pretty streams and easier footing. We made one final left turn back onto the Mt. Morgan trail for the final tenth of a mile.

After wiping off the mud and doing a little minor first aid, we were on our way to a well-deserved lunch at Squam Lakeside. They have enormous lobster rolls and sherbet freezes. It’s a great place to eat outside and enjoy a view of the lake.

Adam Says…

This was one of those trails that I first discovered five years ago when I was researching nearby geocaches when we were visiting the White Mountains for the first time.  I was also drawn to Mt. Percival due to my love for reading Arthurian legends when I was younger (Percival accompanied Sir Galahad on his quest for the Holy Grail).  I remember this being a challenging hike, yet unlike anything we have in Virginia.  As a hiking couple, we sometimes find that one of us enjoys a hike more than the other; we also face days where one of us is not having a strong hiking day.  This hike was one that I enjoyed more than Christine.  For me, if I experience something unusual on a hike (a rock scramble, ladders, exposed cliffside walks, a stream crossing where we have to wade across),  I find that I really have fond memories of it.  As I’m reflecting, I realize I enjoy the challenge of trying to figure out how to overcome an obstacle.  This loop definitely has some of those memorable abnormalities on it.

Mt Percival Summit
The summit of Mt. Percival offers a similar view.

We were looking for a decent hike to start off our trip to the White Mountains. Since we had about a 12 hour drive from our home in Virginia to New Hampshire, we were looking forward to doing something active.  We found the parking lot and trailhead along Rte. 113.  The trail starts off level and at .1 miles, you reach the junction with the Morse Trail, your return route for the loop.  Stay straight on the Mount Morgan Trail.  The trail starts off with a gradual uphill, but the trail begins to get steeper and rockier as you continue.  There wasn’t a lot to note on the hike up, but the sight of white-barked birch trees always makes me happy to be in New England.  At 1.7 miles, you reach a junction with the Crawford Ridgepole Trail.  Stay on the right to continue your hike up to Mt. Morgan.  At 2.1 miles, we reached a sign that shows that you can reach the summit of Mt. Morgan through the ladders or circumvent and reach the summit by continuing on the trail.

During our first visit in 2009, I had decided to go up the ladders and Christine went the other way.  In 2009, never having experienced ladders attached to large rocks before, I was very apprehensive and worried about climbing up that way.  But when I saw an older man climb the ladders without any difficulty, I dug deep and forced my way up them.  This time, I didn’t have any trepidation, most likely from the combination of climbing these ladders before and experiencing more harrowing ladder climbs at Grandfather Mountain in North Carolina.  Once we reached the top of the ladders this time, we had some rock scrambling to do up some exposed rocks until we reached the summit of Mt. Morgan.  I was proud of Christine tackling the ladders and the rock scramble, because these are definitely things she doesn’t usually enjoy.

Cave Trail
Adam expresses disbelief at the way forward. Below:  Different sections and tight squeezes on the cave trail.

Cave Trail Cave Trail Cave Trail

We had a hazy day from the summit of Mt. Morgan, but the view over Squam Lake always amazes me with the small islands scattered through the lake.  We climbed down from the summit and shortly reached the sign which pointed out the other option for reaching the Mt. Morgan summit.  We continued on the rocky trail, which is fairly flat on the ridge, but does have some ups and downs as you are climbing over rocky areas of the ridgeline.  At 3.0 miles, we reached the summit of Mt. Percival.     The summit of Mt. Percival was very hazy and cloudy, which didn’t give us great views this day, but we remember the great views we had from here in 2009.  The signage at the summit of Mt. Percival didn’t help us too much.  We saw two sets of blazes leading down the mountain, but there was no signage stating where they headed.  After consulting my map, we took the rightmost trail (facing the view) that seemed to lead straight down the rocks.  It turns out this is the option to go down via the caves (the next trailhead down to the left of this one would be more of a cliffside trail but they join ahead).  We climbed down this very steep section and then at one point, I said “You’ve got to be kidding me.  How are we getting through that?”  The trailblazes led down into a hole that wasn’t much bigger than my body.

This turns out to be the entrance to the cave on this trail.  You can still see light shining through in spaces between the rocks, but it is fairly closed off and not a route for any claustrophobic people.  We rock scrambled through the cave and then eventually the blazes lead you out of the cave through another hole not much larger than my body.  When I peered through this opening, I couldn’t see what was ahead, but I plunged my body through and I felt like I was getting reborn through a rocky birth canal.  On the other side was a family heading up, so we had to exit before they could try to enter.  We made our way through and then had a little more downhill rock scrambling to do until we reached another sign.  This one pointed the way to the summit via the cliffside trail or through the caves.  This would have been helpful from the summit.

Cave Exit
Christine exits the cave portion of the hike.  Below: The descent of Percival was nothing but rock, roots and more rocks; We were glad to finally hit pine-needle covered trail again;  Adam crosses one of the streams on the Morse Trail.

Mt. Percival Trail Mt. Percival Trail Morse Trail

The trail at this point continued its rocky climb down and you can hear the sounds of Smith Creek at times.  Eventually at 4.7 miles, we reached the junction with the Morse Trail, that ducks to the right.  We took the Morse Trail, which was mostly flat but more overgrown and less traveled than the other trails.  This trail joins the Mt. Morgan again at 5.2 miles.  We took a right and made our way back to our car in just another .1 mile.

At the summit of Mt. Percival, we met a girl hiking with her dog.  She was also trying to figure out which way led down Mt. Percival and she took the cave trail as well.  I can’t even imagine how she navigated her dog through the caves, but we saw her at the junction with the Morse Trail.  She told us how tough it was for her dog.  She was training for  her goal of trying to hike the 48 peaks of New Hampshire that are above 4000 feet with her dog.  This goal has been most popularized by the book Following Atticus by Tom Ryan and you can read more about their adventures on his blog.

There are several geocaches along this trail:

Lunch at Squam Lakeside

As we are always trying to cover new ground whenever possible, I’m not sure how often on our return trips to the White Mountains we will revisit this loop, but this is definitely a hike that you will remember.  The interesting features and scenic views give you an introductory glimpse into what hiking is about in New Hampshire.

 Trail Notes

  • Distance – 5.3 miles
    MapMyHike Stats *
  • Elevation Change –  1575 feet
  • Difficulty –  4.5.  Even with a moderate elevation gain and distance, the terrain of this trail warrants a higher difficulty rating.
  • Trail Conditions – 3.  The trail was a muddy, slippery mess when we hiked, but generally the trail is well maintained and passable.
  • Views – 4.  On a clear day, the view of Squam Lake is beautiful.
  • Waterfalls/streams 2.  There are lots of small streams and springs on this trail.  Nothing mind-blowing (and a lot them just make mud), but a couple crossings along the Morse Trail are pretty.
  • Wildlife – 1.  We saw red squirrels and a salamander.
  • Ease to Navigate – 2. There are multiple trails that lead the same place.  Also, there isn’t a sign differentiating the cave and cliff trails on Mt. Percival.
  • Solitude – 3. This trail is not as popular as the nearby Rattlesnakes, but you’ll probably still see a number of hiking parties along the way.

Download a trail map (PDF)

Directions to trailhead: From I-93: Take Exit 24 and follow Rt. 3 South to Holderness. From the town Holderness, get on Rt. 113 and follow it northeast for about 5.5 miles. Parking will be in a gravel lot on the left.  The large parking lot on the right is for the Rattlesnakes hike.  If there is no space left in the Morgan lot, it is fine to park at Rattlesnakes.

* MapMyHike is not necessarily accurate, as the GPS signal fades in and out – but it still provides some fun and interesting information.

Spruce Knob – Seneca Creek (WV)

This 16.5 mile overnight backpacking trip has cooler temperatures in the summer, beautiful streams and waterfalls, high mountain meadows, abundant berry bushes, and even an old plane wreck to explore. It’s a great change of pace from hiking the Appalachian Trail.

View the Full Album of Photos From This Hike

Hiking Along the Huckleberry Trail
The high meadows along this hike were beautiful! Below: Backpacks in the car; Everyone checks out the information at the trailhead; Suzanne picks ripe blueberries along the Huckleberry Trail; The Huckleberry Trail passes through several small meadows; Spruce-shaded areas on the Huckleberry Trail; Signage along the way.

Backpacks in the Car Getting Started Blueberry Picking
Views from the Huckleberry Trail Spruce Trees in the Sun Trail Sign

Day One…

Initially, we  planned on doing very little hiking in July this year.  Our goal was to stay out of the heat and to rest up a bit so we wouldn’t overdo things before we tackle our trip to New Hampshire later this summer.  But the weather was too nice and we had lots of invitations to go hiking.  Over the 4th of July weekend, our friends Anthony and Suzanne suggested we go on a backpacking trip together.  We always enjoy hiking with them, so plans were made to hike in the Spruce Knob area.  This was actually the second 4th of July weekend we’ve spent on the trail with Anthony and Suzanne.  A couple years ago, we did a trip to Dolly Sods.

Our friends came down and spent the night before the trip at our house. We divided up some group gear and then packed the car and headed out fairly early to start our trip.  We arrived at the trailhead mid-morning.  We saw the short trail to the Spruce Knob summit fire tower, but we decided to visit that at the end of the loop the next day to feel like we had truly earned it.  Spruce Knob is the highest peak in West Virginia.

The printed maps we have found of this area are fairly outdated and online maps also don’t have the trails completely accurate.  The best map I have found of the entire area has been from Mid-Atlantic Hikes and it may be helpful to bring that along since there are lots of trail options here.

Descending to Junction
Adam descends to our junction with the Lumberjack Trail. Below:  Anthony makes his way along the Lumberjack Trail.  The trail has a reputation of being sloppy/muddy, but it wasn’t too bad when we visited; Someone moved a piece of the plane from the wreck site up to the trail – probably to mark the spot; Even after 4+ decades on the mountainside, the plane wreck is still mostly intact.

Walking the Lumberjack Trail Plane Window Fuselage
Mud Nettles First Large Meadow

We started off our first day of the hike on the Huckleberry Trail (TR533).  The trail starts off with a little bit of crushed gravel on the trail, but that goes away in a short distance.  This first section of the trail was fairly flat or downhill and alternates from going from dense Spruce forests to more open fields. There are numerous dry campsites along the trail. In the fields, we found tons of blueberries that were just starting to ripen.  We stopped along the way for a few handfuls before pressing on.  At 3.4 miles, you will reach a campsite and a sign that points to the trail going right.  Follow this trail and in another short distance, you’ll come to another sign pointing you to go left as the trail winds around a dense forest area.  You’ll soon reach another sign that shows that the Lumberjack Trail is .4 miles away.  The last .4 miles of the Huckleberry trail drops rather steeply to the large trail junction at 4.7 miles.  Take a right at this junction to join the Lumberjack Trail (TR534).

The Lumberjack Trail is a relatively flat trail.  We were warned that it can be very muddy and wet, but we found that even after some recent heavy rains there were only a few 20-foot sections that had mud to slog through.  Most of the trail had rocks or logs placed that saved us from having to get our shoes wet or muddy.  Around mile 5.8, we saw a plane door hung on a tree and a short, yet steep trail that led down to plane wreckage (a Piper PA-23 that crashed here in 1973 with two casualties).  Be respectful if you decide to visit this site.  We stayed on the Lumberjack Trail until it came to a junction with the High Meadows Trail at mile 6.7.  Take a left to join the High Meadows Trail (TR564).

The High Meadows Trail was the most overgrown trail we came across.  There were times that it felt like we were bushwhacking.  There are stinging nettles everywhere along the trail and grass was up to our knees in some portions.  The High Meadows Trail also has alternating landscapes; you will go from dense forests to large open meadows several times.  Keep an eye out for blue blazes on posts or trees as you navigate through these high grass areas.  The trail descended through these gorgeous meadows and it is not surprising that we were thinking of the Sound of Music when we were walking through these fields surrounded by mountains.

High Meadows
The high meadows on this hike were so beautiful!  Below: Adam admires the high meadows; Grass in the meadows was tall;  There were several meadows separated by short sections of shade;  Most of the shady spots were densely overgrown with berry brambles; Black-eyed susans; Adam crosses out of the final meadow.

Adam in Meadow Meadow Walking Shade Between Meadows
Overgrown Susans Leaving the Meadows

Eventually, you will enter into the woods again and cross a small creek.  At 8.6 miles, you will reach another trail junction. Take a right here and you will descend even more as you make your way through a scenic forest landscape.  You will soon hear water flowing from Seneca Creek below you.  The trail crosses the creek and comes to a junction with the Seneca Creek Trail at 9.1 miles.   At this point, you will cross Seneca Creek to reach the trail on the other side.  The water was flowing to make a nice small waterfall.  Before we crossed, we ventured just a short distance (about 75 yards) to the right down the Seneca Creek Trail and came across one of the most beautiful waterfalls/swimming holes I’ve seen – Seneca Falls.  We dropped our bags on the trail and scrambled down to reach the base of the falls.  There was a large cavernous rock overhang to the right of the falls.  In the water, we could see brook trout swimming around, occasionally breaching the water to catch flies that were dancing along the water surface.  Once we climbed back up from the basin, another group came down to the falls jumped into the swimming hole at the base of the falls.  From the screams when they jumped in, we could tell the water was extremely cold.  We made our way back to our original junction and then determined the best place to cross the creek was at the very top of the small waterfall.  We all made it across safely.

Christine hit a wall with her energy level, so we stopped a few minutes to eat a snack on the opposite side of the creek at a nice campsite.  Knowing we still had a distance to go, we pressed on further.  The Seneca Creek Trail went to the side of Seneca Creek for the entire way.  We crossed the creek in a couple of places.  Around mile 10.4, we began to see a ton of campsites.  We were surprised to see that there were so many people that were camped here overnight.  When we kept passing people on the trail, we felt that we would have our picks of campsites, but we didn’t realize how many people come here a different way (mostly from the lower Spruce Knob parking lot and taking the Seneca Creek Trail to these campsites).  Anthony and Suzanne hurried ahead, while I waited a while for Christine to try and regain her strength.

Seneca Falls
Seneca Falls is an impressive waterfall with an emerald green plunge pool. Below: Leaving the high meadows for Seneca Creek; A small waterfall above Seneca Falls; A side view of the falls; The trickiest of the stream crossings; Pretty wildflower; Lovely Seneca Creek.

Start of the Seneca Creek Trail Small Waterfall Seneca Falls
Crossing Wildflower Seneca Creek

We caught back up with our friends soon and they had claimed a gorgeous campsite (even though it was hard to imagine a bad one here) at 10.6 miles that was near a waterfall that plunged into the creek.  While there were lots of larger groups out here, we found a nice, secluded campsite that had a nice waterslide that created a babbling brook sound throughout the night.  We set up camp and started to make some dinner.  I always enjoy bringing a card game with us when we do an overnight backpack and this time I brought the game Hike.  It was pretty brainless fun and plays similar to Uno with specialty cards that create twists in the game.  It was starting to get dark, so we created a small, but nice fire in the pit.  Once the sun set and the fire died out, we retired to our tents.  It may have been the sound of the brook, but I probably slept the best I have ever slept backpacking that night.  What a great first day!

Campfire
The evening concluded with dinner, card games and a great campfire. Below: There were abundant rosebay rhododendron all along the stream; Our campsite had nice, flat space enough for 2-3 tents; We also had a pretty waterfall and pool for our water source.

Rosebay Camp Filtering

Day Two…

As usual on backpacking trips, we both woke up right around first light. We spent a little while longer in our sleeping bags, chatting and stretching.  It was a chilly morning, so we weren’t quite ready to climb out into the cold.

Eventually we emerged from our tent to start the day.  I put on gloves and a light jacket and  headed downstream to take a few photos of the big waterfall at the next campsite over.  The folks camping there had packed up and departed very early.  Adam went to get the bear bags down while I took photos.

Campsite Falls
One lucky group gets to camp on a site right across from this pretty waterfall.  Below: Our campsite in the morning; You can see smoke from other campsites downriver; Crossing the footbridge across Seneca Creek before our big uphill climb.

Campsite in the Morning Downriver Footbridge

We got everything out for breakfast and started taking down our tent, rolling up sleeping pads and stuffing our sleeping bags back into compression sacks.  I decided that I was going to eat a huge breakfast, so I wouldn’t bonk again on our second day of hiking.  Adam didn’t go into much detail in his day one post, but right around mile ten of our hike the day before, I hit a wall – HARD! It was right after we visited Seneca Falls and crossed the stream.  I sat on the ground and told everyone that I was feeling really lightheaded and sick.  I didn’t feel hungry.  I had been drinking water all day.  Regardless, my legs just felt like jelly and I just didn’t want to walk another single step.  Adam, Suzanne and Anthony all told me that they thought I needed to eat.  Turns out they were right – I had been hiking for ten miles with a 25 lb. pack on under 700 calories.  I guess I just didn’t realize how little I had eaten until I did the calorie math.  My appetite always goes away when I’m doing strenuous activities.  Usually, it doesn’t cause problems and I just eat when I get to camp.  I guess this time I just expended all my short term energy before we finished for the day.  I need to do a better job forcing myself to eat enough.

Alright… off that tangent and back to breakfast!  As promised, I ate a large breakfast – oatmeal, cheese, a honeybun and coffee.   It was about 600 calories of food and much more in line with my energy needs for a tough uphill and 6 miles of hiking.  Everyone had eaten and packed up camp by around 9:45 and we were on our way again.

Final Meadow
Adam climbs steeply uphill across our final large meadow of the hike.  Below: Anthony and Suzanne take a look back toward Seneca Creek;  We had spectacular skies; Making progress back to our start point.

One Last Look Toward the Creek Beautiful Skies Trail Sign

We had a short distance left to walk along Seneca Creek.  Within about a quarter mile, we reached a small wooden footbridge across the stream.  We crossed and continued uphill on the Seneca Creek Trail.  The steepest climbing was across a beautiful, expansive meadow.  We got great views of the valley and our last glimpse into the Seneca Creek watershed.  The high meadows on this hike are truly majestic and are definitely one of the trip’s highlights.

After crossing out of the meadow, we continued uphill through the woods back to the four-way junction of Seneca Creek/Lumberjack/Huckleberry.  Staying straight took us back onto the Huckleberry Trail.  From there, we retraced our steps from the day before.  It was a little slower going and felt longer on the second pass.  It was all uphill and everyone was a little tired.  It’s always funny how different the same four miles can feel under different circumstances.

Adam on the Huckleberry Trail
Hiking the Huckleberry Trail reminded us of hiking in New England.  Below: More lovely views from the Huckleberry Trail;  The trail was often paved with rock; A well-appointed campsite on the Huckleberry Trail; Ripe berries; A view from the talus slope.

Huckleberry Views Laurels Campsite
Ripe Berries Talus

We enjoyed the sunny, unseasonably cool July weather.  We stopped and picked many blueberries along the walk back.  I also took a little side trail from one of the meadows and found a talus slope with nice views across the mountains.

We got back to the car around noon.  We threw our packs into the back of the car and took the short, flat walk to check out views from the observation tower atop Spruce Knob.  It’s just a short quarter mile walk and well-worth the extra time and steps.  We spent some time enjoying the lofty views and cool breezes.  Anthony, Adam and Suzanne decided to walk to one more nearby viewpoint on the Whispering Spruce Trail.  It was just a tenth of a mile down the trail and provided even more spectacular views.  I headed back to the car to eat some more candy and switch my trail shoes for flip flops.

Tower Views
Anthony and Adam take in views from the observation tower on Spruce Knob.  Below: Views from the tower; The hiking crew; Views from the Whispering Spruce Trail; The tower.

Views Hikers Whispering Spruce
Observation Tower

After a few minutes, everyone was back at the car and we were on our way back to Harrisonburg for a celebratory meal and beer.  We all decided that Jack Brown’s was the best spot for lunch.  They have fantastic gourmet burgers and a great beer list.  It’s a perfect post-hike indulgence.

We couldn’t have asked for better weather, scenery, or company for this 4th of July weekend backpacking trip.  After lunch, we bid farewell to Anthony and Suzanne.  They’re such great hiking buddies and we always feel lucky when we get to hit the trail together.

Trail Notes

  • Distance – 16.5 miles [Day One] [Day Two]
  • Elevation Change – About 2300 ft.
  • Difficulty –  4.  The distance makes it fairly tough and the second day has a lot of uphill on the trail. 
  • Trail Conditions – 3.  Most of the trail was well-maintained.  The High Meadows Trail was quite overgrown.  There are some rocky, loose sections on this trail too, which can be a little rough on the feet.
  • Views – 5.  The best views are from the Spruce Knob trail near the fire tower.  The fire tower has wonderful views, but once you take the .5 mile trail around the fire tower, you will have gorgeous, breathtaking views from the highest point in West Virginia.  The views along the main backpacking trip were mostly during the High Meadows Trail.  There are gorgeous mountain views and no sign of civilization. 
  • Wildlife – 3.  There were lots of birds to be found on the High Meadows Trail.  We did have a deer visit us several times at camp. 
  • Ease to Navigate – 2.  The Huckleberry Trail and High Meadows Trail could use more signage.  I would suggest printing out our step-by-step desciption and bringing the midatlantichikes map to help guide your way. 
  • Solitude – 2.  This is a popular spot for people to do overnight camping.   Expect to see lots at the campsites, but you will have more solitude until you get to Seneca Creek. 

Download a Trail Map (PDF)

Directions to trailhead:  Directions vary so greatly depending on the direction you’re coming from.  Please refer to the trailhead marked on the map below to determine your best route.

House Mountain

This tough 8.75 mile hike follows a vaguely Y-shaped route to two outstanding viewpoints.  There are ample opportunities for backcountry camping on this route.  If you’re lucky, you may be joined on part of your hike by the famous House Mountain hiking goat!

View the Full Album of Photos From This Hike

The view from Goat Point on Big House Mountain
The view from Goat Point on Big House Mountain.  Below: Parking on this hike is limited and clearly marked; Early portions of the hike take place along a fire road through private property; Some nice views from the fire road.

Parking Fire Road View from Fire Road

Christine Says…

Like most hikers in Virginia, Adam and I are fans of Hiking Upward.  It’s one of our primary resources for route information.  We’ve been in touch with Bryce and Tony (the creators of HU) off and on the past few years.  We had casually tossed around the idea of meeting up for a hike or backpacking trip, but our schedules never seemed to work out.  Finally, in June, we found a date that suited everyone and made plans to meet up for a hike of House Mountain.  The HU guys were working on updating information for the re-routed trail up Little House Mountain and we were hiking the area for the first time.

The morning started off gloomy and gray.  I was a bit worried about missing out on views, but we got in the car and hoped for clearing skies.  Everyone got to the trailhead around 8:30 a.m.  We made our formal introductions and started the hike right away.  Our hiking party was made up of Adam and me, Tony and Bryce (HU team), and two of Bryce’s friends from work – Wayne and Bharath.  It was a great group to hike with and we all fell into easy conversation on the hike up.

The first couple miles of this route follow the Saddle Ridge Trail.  This portion of the hike starts off as a gravel road and passes a number of private residences.  After the first half mile, the route becomes more trail-ish and passes through shady woods.  There is one decent view of rolling hills and field on the right side of the trail.

At about two miles in, you reach the saddle between the Big House and Little House summits.  The saddle was historically a homestead and a fruit orchard before being turned over to public use.  There is still plenty of open pasture space for tent camping in the saddle.  Take a few minutes to read the informational signs about the area while you’re at the saddle. They provide information about the area’s history and the conservation efforts that made these trails possible.

Little House Trail
The Little House trail was recently re-routed to make the climb more gradual.  Below: Christine and Adam at the trail board for the new route up Little House; Adam checks out the other informational board in the saddle between Big & Little House. You can see Big House in the background; The ascent of Little House is still pretty steep.

Start of the Little House Trail View of Big House Climbing Little House Mountain

When we visited, we decided to hike Little House first.  The trail to the summit is a recent re-route.  The old trail was extremely steep, climbing straight up the mountainside without the amelioration of switchbacks.  The new trail is still quite steep, but the switchbacks definitely ease the climbing.  The trail was just blazed in spring of 2014, so if you hike anytime soon you’ll see plenty of fresh blue blazes marking the way.

We caught some nice views through the trees on the way up before finally gaining the ridge.  The ridge made for more moderate walking and included lots of interesting rock formations.  There were several small campsites along the ridge walk, too.

Eventually, we reached the end of the trail and a beautiful viewpoint.  It was still pretty overcast, but the low clouds had lifted enough to give us a view of the valley below and surrounding mountains.  We took time for a snack and a few photos before making our way back down to the saddle.  On the return trip, Tony and Bharath decided to take the old trail back down.  They beat us back to the saddle by a few minutes.

With everyone regrouped, we headed up the trail to the Big House summit.  Within the first couple tenths of a mile, we passed the House Mountain backcountry shelter.  It was a nice spot with a new privy and a side trail leading to a spring.  We found the shelter stocked with lighter fluid, plastic silverware and other often-forgotten necessities.  This hike would make a great beginner backpacking trip!  You’d have a couple miles of hiking with a pack.  But then you could set up camp and visit the two summits pack-free.

Most of the climb to Big House is along a rugged ATV trail.  It’s straight up the mountainside until you reach one large switchback.  At the switchback, look carefully for a very rocky, less-worn footpath departing the trail.  Depending on the vegetation, this might be an easy spot to miss.  If you take the switchback and continue the trail in that direction, you’ll just have a longer walk in the woods and no views.

View from Little House Mountain
Nice views from the summit of Little House Mountain.  Below: Walking along the ridge was rocky; There were some interesting rock formations; We saw a small eastern box turtle.

Rocky Little House Trail Rock Formations Box Turtle

We started scrambling up the rocks when all of a sudden a black and white animal wearing a red collar bounded out of the woods.  At first,  I thought it was another random hunting hound that was lost in the mountains.  But no… it was a GOAT!  She hiked with us the rest of the way to the viewpoint.

At the summit, she followed us around – begging for food and vigorously licking the salty sweat off our arms and legs.  It was a hoot and we really enjoyed such a friendly and novel companion on the trail.  We ate more snacks, took more photos and spent time hanging out with our new goat buddy.

On the hike down, the goat left us shortly after the switchback.  She gave us several loud farewell bleats before she bounded back into the woods.   The return hike to our car was all downhill, passing the saddle one last time before retracing our steps on the Saddle Ridge Trail.  Near the end of the hike, we had the privilege of meeting Brian.  He lives in one of the houses along the trail and is one of the primary people who works on building/maintaining the trails on these mountains.  If you see him, be sure to say thanks!

At our cars, we decided to head into downtown Lexington for some post-hike food and beers!  As Bryce put it ‘Every good hike should end in a pub!’  We had a good meal and more fun conversation at ‘The Palms’.  It was mid-afternoon and not very crowded when we visited – probably a good thing to not subject too many fellow diners to the smell of dirty hikers.  🙂  After lunch, we made our farewells and parted ways.  We had a great day and can’t wait to hit the trail with these guys again.

Adam Says…

It was great to finally meet up with Hiking Upward.  We do most of our hiking with just the two of us, so there is always a little anxiety about hiking with new people.  Because of all the miles they have covered, I wondered if we would be able to keep up or were going to get left in the dust of their hiking boots.  Along with our pace, I also wondered what we’d talk about.  However, within a few minutes, I knew we were quite the kindred spirits.  We talked about many things from hiking experiences to favorite microbrews.  As we were sharing some of our favorite trails, we were bringing up names of trails as if we were consulting maps.  I guess when we all write these hiking entries, that knowledge sticks with us.  I know this was the first of many adventures we will share together.

We started off from the parking lot (pay attention to the sign to know where to park and respect the boundaries).  We made our way up the road and at .3 miles, you reach a gate that begins the official trailhead.  Past the gate, you start a gradual ascent up a fire road, passing by a residence to the left.  At 2.25 miles, you reach the saddle between Big and Little House Mountain and the junction between the two trails.

The Group on the Summit of Little House Mountain
It was great to meet the guys from Hiking Upward. Below: Another nice view from a different rocky outcropping on Little House; The old route up Little House was blocked by a bramble of sticks; Making the steep descent; A view through the trees along the trail.

Another Little House View Old Route
Steep Descent View on Descent of Little House

We started off by hitting Little House Mountain first, taking a right at the information signs and following the blue-blazed trail.  The trail starts off relatively flat, but as you round the mountain the trail is very narrow and requires you to be mindful of where you step.  At 2.5 miles, the trail then begins to climb up the ridge very steeply and you begin a series of switchbacks until you gain the ridge at 3.1 miles.  The trail at this point goes through a thick area of rhododendron and remains slightly flat or downhill until you reach the viewpoint.  Along the way, you pass through some areas of larger rocks.  At 3.6 miles, the trail opened up to breathtaking views.  We paused here for a while to eat a snack and take some photos.  There are a few different places to get views from the rocks nearby.

We made our way back to the junction and saddle area, which we reached at 5.0 miles.  Now, it was time to take on Big House Mountain.  We took the opposite trail at the junction (as you were originally climbing up the trail, it is the trail to the left), making our way through some grassy areas before the trail opened up.  Within a short distance, we passed a nice overnight shelter to the right.  This shelter had it all – there was a sleeping bag someone left behind and even some cans of Yuengling for someone else to enjoy (if warm beer is your thing).  There was a privy building a short distance away.  We noticed another blue-blazed trail, which we were told later (by Brian, the trail maintainer) leads to a water source.

Shelter
There is a backcountry shelter a short distance up the Big House Mountain Trail. Below: The saddle is open and grassy – perfect for camping; The shelter was well-stocked with lighter fluid and various other items; Most of the climb up Big House was along an ATV trail.

Saddle Meadow Inside Shelter Ascending Big House

After we passed the shelter, the trail opened up to a larger fire road again which kept up a steady, tough climb gaining 400 feet in .4 miles.  The trail came to a junction with a switchback trail to the right that leads to the true summit of Big House Mountain, but the views are gained by staying straight on the trail.  The trail becomes very rocky at this point and we were soon joined by our goat friend.  Her nimbleness on the rocks amazed us and she led us to the rocky Goat Point viewpoint at 5.9 miles.  There was an upper perch and a lower perch for taking in some of the gorgeous views.  As I was heading to the lower outcropping, I spotted a geocache behind one of the rocks.  As I was signing the log, the goat jumped down from the high perch, scaring me and almost making me fall down the mountainside.  Be careful out there, especially when there are salt-craving goats waiting to pounce.

We Met a Goat
This cute goat joined us on the final climb to the summit of Big House Mountain. Below: The goat was a strong and agile climber; In the end, she mostly wanted food.

Strong Climber Begging

We headed back after taking in the views for a while (and being thoroughly licked by the goat).  I will say that I think I was the favorite of the goat.  This wasn’t the first time I had been amply licked by a goat while hiking – the other time was when we hiked the Massanutten Ridge trail.  Maybe the salt from my sweat tasted the best or I was the most agreeable to being licked – I’m not sure.  But, as we headed back down the goat followed us until we reached the rocky junction with the switchback to the summit.  She stared at us from the top as if to beg us to come back to his place for more licking.  We said our goodbyes to the goat and then made our way back.  We reached the saddle junction again at 6.6 miles and made it back to our car at 8.75 miles.

Friendly Goat
She was a friendly goat!  Below: More nice views from Big House summit;  It was a hazy, mostly cloudy day; The goat liked the salt in Adam’s sweat.

Nice Views from Big House Vertical View Goat Lick

If you are interested in geocaching, there are 17 different geocaches to find on the Little House Mountain and Big House Mountain trails.  I won’t list them all here, but here are the two at the summits:

After we arrived back at our vehicles, we decided to hit The Palms in Lexington for some great food and a few beers.  We had such a great day with our new friends!  I can’t believe that we had not heard much about this hike before.  This is a true gem of a hike with so many panoramic views!

Trail Notes

  • Distance – 8.75 miles
    MapMyHike Stats*
  • Elevation Change – 2850 ft.
  • Difficulty –  4.5.  There is some pretty serious climbing on this hike.  Not many hikes of this length in Virginia have quite so much elevation gain.
  • Trail Conditions – 4.  The trail was in great shape and the hard work put into maintaining this trail is evident.  The newer trail to the summit of Little House Mountain is narrow and steep with some loose sections.  We recommend a hiking stick or trekking poles to help keep yourself upright!
  • Views  4.5.  Gorgeous!  I’d love to visit on a crystal clear fall day sometime!
  • Streams/Waterfalls – 0.  None – but there is a small piped spring near the camping shelter.
  • Wildlife – 3.  Any trail that has a wild(ish) goat gets a few wildlife bonus points!
  • Ease to Navigate – 4.  The trails in this area are very well-marked.  The one tricky spot might be finding the viewpoint on Big House Mountain.  If you miss the rocky path departing the trail at the hairpin turn, you might miss the views altogether.
  • Solitude –3.  We saw a fair number of hiking groups along the trail, but had both overlooks to ourselves.

Download a Trail Map (PDF)

Directions to trailhead:  From I-81, take the I-64 exit 191 toward Lexington/Charleston.  Follow I-64 for six miles to exit 50 (US 60 East).  Follow US 60 East for 2.2 miles, turn right on Route 639.  Go .8 miles and bear left onto Route 638.  Follow 638 for 1.1 miles.  Turn right on Route 641, go 1.1 miles.  Turn right onto Route 643.  Parking is on the left side of the road in .3 miles.  Make sure you follow the parking signs on private property.

MapMyHike is not necessarily accurate, as the GPS signal fades in and out – but it still provides some fun and interesting information.

Bear Church Rock – via Bootens Gap

This 10.2 mile hike to Bear Church Rock from Bootens Gap (on Skyline Drive) is a great alternative to the route that begins down in the valley at Graves Mill.  While this route doesn’t include the scenic Staunton River or the Jones Mountain Cabin, it crosses some of the deepest, least traveled parts of Shenandoah National Park.  And in the end, you reach the same great viewpoint.  While this route is a little longer than the alternative, it has less climbing and feels a little more moderate.

View the Full Album of Photos From This Hike

View from Bear Church Rock
The view from Bear Church Rock reveals nothing but wilderness. The Staunton River flows through the valley below.  Below:  The hike begins on the AT northbound at Bootens Gap;  Christine passing large boulders on the Laurel Prong trail; Mountain laurel starting to bloom.

The AT at Bootens Gap Boulders on Laurel Prong TrailBoulders on Laurel Prong Trail Mountain Laurel Starting to Bloom

Adam Says…

Bear Church Rock really impressed us when we hiked it a few years ago, approaching it from Graves Mill.  However, we were thinking it would be nice to take a different route that would be more accessible from Skyline Drive.  This approach is a bit longer, but it has 400 fewer feet of elevation gain, making this an overall easier climb.

We started off from the Bootens Gap parking lot at Mile Marker 55 on Skyline Drive in the Central District of Shenandoah National Park.  We took the Appalachian Trail from the parking lot, heading north.  In .5 miles, we reached the junction with the Laurel Prong Trail.  We took a right to join this trail.  The Laurel Prong Trail ends up going through a relatively steep decline through a loose, rocky section.  The trail eventually bottoms out and you reach a junction with the Cat Knob Trail at 1.5 miles.  We took the Cat Knob Trail and began a steep incline.  The trail hits another junction with the Jones Mountain Trail at 2.2 miles.  Take a right on the Jones Mountain Trail.  At this point, the trail is relatively flat or downhill for most of the way to Bear Church Rock.  As you near your goal, you’ll see some pretty amazing standalone boulders along the trail. You will know you’re getting close to the viewpoint when the trail takes a sudden, precipitous downhill drop.  At 5.1 miles, you will reached an unmarked side trail that takes you up a about ten feet through the laurels onto a large rock outcrop with majestic, wilderness views.  Return the way you came to make this a 10.2 mile out-and-back.

Adam Hiking the Jones Mountain Trail
The Jones Mountain Trail traversed an expansive bed of lush, green ferns.  Below: Adam climbs Cat Knob – one of the few steep portions of the trail;  Park boundaries were well marked; One of many pink ladys slippers along the trail.

Climbing Cat Knob NPS Boundary Marking Pink Lady's Slipper

One thing to note on the trail is you do come across several times where the National Park crosses back and forth across boundary lines with the Rapidan Wildlife Management Area.  You may see some US Boundary markers in several places that marks the portion that is under National Park control versus Virginia control.

When we reached the highest point of the Cat Knob Trail, we found the largest concentration of pink lady slippers I have ever seen.  Everywhere we turned, we kept seeing more and more and they were at the peak of their bloom.  That was such a nice reward by coming this route.

Many Lady's Slippers
Usually photos of lady’s slippers are close-ups. This wider shot gives a better idea how these wildflowers are situated in the forest.  Below:  The portion of the trail outside the park is blazed differently;  The Rapidan Wildlife Management area; Adam makes the last final, steep descent to Bear Church Rock.

Blazes Wildlife Management Descent to Rock

Somewhere along the Jones Mountain Trail as we were making our approach to Bear Church Rock, my knee buckled and gave me a lot of pain for the rest of the day.  One hard part about hiking is if you get injured, you don’t have a lot of choice but to keep going.  I stopped about .25 mile before we reached the summit and rested.  I wasn’t sure if I would be able to make it all the way.  Christine went ahead to scout the way and see how much further.  Not wanting to be separated too long, I pushed myself onward and found her at the rock overlook.  We stayed there to rest for a while and we had the rock all to ourselves.  We were joined in about 20 minutes from a man from China who had come up the route from Graves Mill.  He didn’t speak English and we heard him on his walkie-talkie talking to someone that we presumed to be his wife.  We were guessing she was farther behind and he was assuring her he made it.  The climb the other way is quite steep, so I wouldn’t be surprised if she had either turned around or was just taking longer to get to the rock.

The views were spectacular.  While we had a bit of a cloudy day, it was nice to see the shadows from the clouds creeping along the mountain ridges in the distance.

We decided to make our way back.  I felt like the time at the viewpoint allowed me to rest my knee enough to make the return trip. I was hobbling slowly, but I had to keep pushing forward.  We got back to the car and I was glad to not have to take any more steps.

Christine Says…

It was National Trails Day, the weather was great – and even though neither of us was in the mood to go on a long car ride to a distant trailhead, we had to get out and hike! We settled on the hike from Skyline Drive to Bear Church Rock – mostly because it was close to home, but also because we’d never hiked it before. A few years ago, we hiked from the valley bottom in Graves Mill up to Bear Church Rock. That was a challenging and beautiful hike, so we thought it would be fun to visit the rock from the other approach.

From the parking lot at Bootens Gap, we headed north on the Appalachian Trail, gradually ascending Hazeltop Mountain. I was amazed by how lush and green everything in the park looked. It almost looked as green as the Smokies! Our last hike in the park had been in late April, before the leaves fully emerged. Spring always take a long time to fully arrive in the mountains.

After a short, easy stretch on the AT, we reached the junction with the Laurel Prong Trail. We turned right onto the trail and followed it downhill, over many rock jumbles along the shoulder of the mountain. In a saddle between two mountains, we reached the junction with the Cat Knob Trail.

Taking in the View at Bear Church
Adam takes in the view at Bear Church Rock.  Below: You’ll pass these rock formations on the final descent to Bear Church;  The rocks were covered with blooming mountain laurel;  There were also lots of ripening blueberries.

Rock Formations Mountain Laurels Blueberries

That trail climbed steeply over Cat Knob before reaching the junction with the Jones Mountain Trail. The Jones Mountain trail bears to the right. This section of trail actually departs Shenandoah National Park and enters the Rapidan Wildlife Management Area. You’ll notice park boundary signs and different orange/red blazes (as opposed to Shenandoah’s blue blazes) when you’re on this part of the hike.

This section of trail is incredibly beautiful! We enjoyed the expansive understory of ferns and countless pink lady’s slippers. The mountain laurel was just starting to bloom. The terrain along the Jones Mountain trail was rolling – lots of ups and downs, none of them too steep.   This route to Bear Church is probably less popular than the route from Graves Mill, so the trail was narrow and overgrown. Tall grasses brushed our legs all along the way. Adam said, “All I can think of is ticks. I feel like I’m crawling with them!’ Luckily, the permethrin we’ve been using on our clothes and gear really seems to be working. Neither of us found any ticks during a thorough post-hike check.

Around 4.9 miles into the hike, the trail took an incredibly steep downward turn. We lost about 200 feet of elevation in just over a couple tenths of a mile. We passed a few rocky outcroppings that looked like they might potentially have views, but they all turned out to be obscured by trees. Watch carefully for the spur trail to Bear Church Rock. It’s not a marked spur, so one could easily miss it.

On the hike, Adam had begun to wonder if we passed the view or if maybe it had been closed in by trees. I told him that it was a really open, spectacular view and that it had to be nearby. I told him I’d scout ahead and shout back if I found it. I ended up walking almost another half mile before I reached the spur trail! The distances in our guidebook were way off on describing the last mile of the hike to the viewpoint. Other sources I checked afterwards all put the distance anywhere between 9.5 and 11 (rather than the 8.5 miles indicated by our book).

Lush Green
Everything was so abundant and green on this pretty June day.  Below: Adam makes the steep ascent on the return from Bear Church Rock.  Fortunately it is only this steep for a short time; Coming off Cat Knob; We spotted a doe and fawn in the understory.  The fawn was pretty well hidden.

Steep Climb Coming Off Cat Knob Doe

There was a large hiking group on the rock, so I felt weird about shouting for Adam. They told me they were headed out the way we came and would send Adam down when they passed him. But, just as the final hiker departed, Adam arrived.

We had lunch on the rock and enjoyed the unspoiled, pristine views of the park. One of the nice things about Bear Church is that you really don’t see civilization from the viewpoint. You get great views of Fork Mountain, Cat Knob and the Staunton River Valley – but no roads or houses or farms. It’s beautiful! The mountain laurel around the rocky viewpoint were in full bloom and quite spectacular!

After a nice rest, we hiked back the way we came. Most of the return trip was uphill, but other than a short section of climbing right after leaving Bear Church it was very moderate, gradual climbing. The last little bit along the AT was smooth downhill. We saw a doe and fawn hiding in the ferns right before we got back to the car. Once we were back in the car, we decided to head up to Big Meadows for blackberry milkshakes (yay!) and to say hello to our PATC friends. We were glad to catch up with the pair of PATC volunteers who led our Backpacking 101 course several years ago. Good day!

Trail Notes

  • Distance10.2 miles
  • Elevation Change – About 1800 feet
  • Difficulty – 4.  The climb down and back up are not overly tough, but the distance gives it an above average difficulty. 
  • Trail Conditions – 2.5.  The rocky slope climbing down the Laurel Prong trail did have some loose rock.  The Jones Mountain Trail was quite overgrown along the way and we were walking through a lot of knee-high grassy areas.  Wear bug spray and check for ticks afterwards.
  • Views– 5.  Great mountain views from Bear Church Rock. 
  • Streams/Waterfalls – 0.  Non-existent. 
  • Wildlife – 2.  We didn’t really see much wildlife on this trail.  We thought much of it would be a great place to spot a bear since it is in a very wide part of Shenandoah National Park and not as well-traveled. 
  • Ease to Navigate – 3.  You do take four different trails to get to Bear Church Rock, so pay attention at the junction markers.
  • Solitude – 3.  Most of the people we saw on the trail were on the Laurel Prong portion (typically making their way to the Rapidan Camp).  I would expect that you would see someone at Bear Church Rock.

Download a Trail Map (PDF)

Directions to trailhead:  Follow Skyline Drive to mile marker 55.  Park at the Bootens Gap parking area on the east side of the drive.  The AT departs from the end of the parking lot.

Rich Mountain Loop (TN)

Special: Smokies Edition

Introductory Guide to Visiting Great Smoky Mountains National Park

This 8.7 mile loop didn’t offer much in the way of natural scenery – no great views, no plunging waterfalls, but we did see a bear!  Apparently, this is a great trail to spot bears, as all ten hikers we spoke to on the loop saw at least one bear over the course of their hike.  This trail also passes the historic John Oliver cabin.

View the Full Album of Photos From This Hike

View Into Cades Cove
There was one decent view into Cades Cove on the Rich Mountain Loop. Most views were obscured by trees.

Adam Says…

The Cades Cove section of Great Smoky Mountains National Park has a lot to offer – camping, drives around the loop to view wildlife, biking (covered in a previous post), and a historic view into the way people lived and farmed in this area.  Honestly, I have a little love/hate relationship with this section.  The biking and wildlife viewing can’t be beat around this area.  However, the traffic is so incredibly slow through this area.  Expect people to go WAY below the posted speed limit, so getting to Cades Cove can take a lot longer than expected.  I think most of the way traveling from the Sugarlands Visitors Center, multiple people were driving about 10-15 mph for the entire 17 miles, so it was a drag getting there.  Christine and I typically like to get out early in the morning to beat traffic and heat through the day, so I would recommend the same if visiting Cades Cove.

Since we had biked the loop and hiked Abrams Falls (also on the Cades Cove loop) before, we looked for some other options for hikes.  Our book Day Hikes in the Smokies (by Carson Brewer) had this listed as a nice option for a hike.  According to the description, there was a waterfall, some views, and a historic homestead so we felt this would be a nice option to take.

The open meadows and mountain backdrops define Cades Cove.
The open meadows and mountain backdrops define Cades Cove.  Below: Adam at the trailhead; A meadow view early in the hike; Stream crossings were shallow and easy when we hiked.

Trailhead Meadow View Stream Crossing

We parked in the lot past the information kiosk as you enter the Cades Cove loop.  There was plenty of parking in the lot, as most people either park their car to bike the loop or just ask the rangers at the kiosk some questions about the area.  We parked at one of the furthest parking spots and then crossed the road.  In a short distance, the trailhead appeared and we started off on the Rich Mountain Loop trail.  This trail was relatively flat.  It was mostly wooded, but there were a few spots where it opened up to views of meadows.  In .5 miles, the trail reached a junction with the Crooked Arm Ridge trail.  We took a right here to start the Crooked Arm Ridge trail.  At .8 miles, you reach the Crooked Arm Cascade, which was no more than a small trickle when we viewed it.  This trail is the steepest section of the hike, as you are climbing up the entire trail gaining close to 1800 feet by the time you reach the end of the trail at mile 2.7.  The humidity this day was very high and there was no breeze, so we felt like we were pouring buckets of sweat on our relentless climb through many switchbacks along the trail.

At 2.7 miles, we passed the junction with the Scott Mountain Trail, but the junction wasn’t clearly marked to let you know it was the Scott Mountain Trail (Note: This might be because the Scott Mountain Trail is closed from campsite #6 to Schoolhouse Gap.  However, Campsite #6 is still open.  Check park information for the latest updates on trail closures.)  Staying straight, the trail turns into the Indian Grave Gap Trail.  It continues to climb gradually, and there are some occasional obstructed views from the ridge.  You finally reach the peak of climbing around mile four,  near Cerulean Knob (3686 ft. – no views).  We continued walking the ridge for a while, then the trail then starts its descent.   At 5.3 miles, the Indian Grave Gap Trail reaches a junction.  Continue on the Rich Mountain Loop trail.

Crooked Arm Falls
Our hiking guide said that Crooked Arm Falls ‘was no Niagara’. They really weren’t kidding!  Below: The trail was eroded and had a deep chute in the middle; The ridge walking was pleasant and breezy; We saw several of these cute toads.

Eroded Trail Ridgewalking Cute Toad

The trail continues to descend and you do get some nice views along the way of a branch that leads to Abrams Creek.  Around 7.2 miles, the trail leads to the John Oliver Place, a historic cabin.  If you are interested in learning more about the Oliver family and life in the 1800’s in Cades Cove, I would recommend checking out the history of the Olivers and the cabin and what pioneer life was like in Cades Cove.  We paused to check out the cabin and as you face the house, take the rightmost trail behind the house (there are several small paths here) to continue on to the Rich Mountain Loop.  You will have a few stream crossings (minor rock hopping is required) until you reach the first junction you met at mile 8.2.  Continue straight to take the Rich Mountain Loop trail to arrive back at your car at mile 8.7.

As mentioned in the short description at the top, we kept coming across people that had seen bears along the trail.  Until we started the descent from Cerulean Knob, everyone we crossed told us they had seen various bears across the trail.   Of course everyone also said they watched the bears and then they ran off.  Always excited to see bears, we felt like everyone else had chased them away.  As we were descending we were convinced that we probably wouldn’t see anything, but as soon as we voiced this doubt, Christine spotted a bear right off the side of the trail.  The bear just watched us indifferently while it ate some leaves.  Then it took a slow walk and then squatted to do what bears do in the woods.  As soon as it was done, it shot through the woods at a breakneck pace like its poop had scared him.  I guess that is why they call it “bear scat”, because he really did scat after doing his business.

One lesson that I quickly learned on this trail was that humidity is relative.  While we were doing the tough climb up to the ridgeline, we came across another couple (who of course were telling us about a bear they saw).   Feeling that I was quite the sight from all the sweat coming off my body, I commented on how hot and humid it was.  They said, “Wow.  We haven’t been sweating at all today.”  They then explained they were from Mississippi so they were more accustomed to the heat and humidity and thought it was quite comfortable.  Of course this reminded me on some of our trips to Maine and talking to people that couldn’t handle the heat of 85 degrees without humidity and we thought it was quite pleasant.

While we felt the hike wasn’t overly impressive based on the description we originally read, we felt grateful that we saw a bear in the Smokies.  If you’re looking for a bit of a challenge and some variety of terrain in this area of the Smokies, this is a hike to consider.

Christine Says…

After a third day of shorter, easier hikes, I was finally feeling better and we were on the move from Bryson City to Gatlinburg for the remainder of our week in the Smokies. We decided it was time to hike something a little longer/tougher. We considered a few trails on the northern side of the park, including Gregory Bald, Ramsey Cascades, and Rich Mountain. In the end, we settled on Rich Mountain because our guidebook said it had views, a waterfall and a historic cabin. I like trails with a variety of attractions, so it seemed like the perfect choice for the day.

Another perk of the Rich Mountain loop is that the trailhead can be accessed at the head of Cades Cove, before the start of one-way traffic.   The Cades Cove loop is something every GSMNP visitor should drive (or bike) at least once. It’s a great place to spot wildlife and it showcases the park’s fascinating human history. But, if I’m being fully honest, the traffic in Cades Cove can be insufferable when you just want to get to a trailhead and start your hike. On this particular day, I was very happy to be avoiding the gridlock!

We followed the Rich Mountain Loop trail for about half a mile to our first junction. At the marker, we took a right onto the Crooked Arm Ridge Trail. Most people seem to hike the trail clockwise, but we decided to go the other way for to get the climbing done a little earlier and a little faster in the loop.

One of the first landmarks we passed was Crooked Arm Falls, which our hiking guidebook described as ‘not Niagara, but still very nice’. That turned out to be quite the understatement! The ‘waterfall’ was barely a trickle of water over a short rock shelf. Maybe it’s more impressive when there has been a ton of rain!

Bear
We spotted an adolescent bear along the trail!  Below: Adam checking out trail distances at one of the junctions; Flame azalea; Mountain laurel.

Trail Junction Flame Azalea Mountain Laurel

After passing the waterfall, our climb began in earnest. Neither of us was used to hiking in the heat and humidity. Virginia had been having lots of cool, pleasant days that spring, so it was very tough going. When we got back to the car and had smartphone access again, I checked the temperatures and real feel estimates – it had been about 88 degrees with a real feel of 95. Honestly, that’s kind of the outer limit of heat in which I’m willing to hike.

We slogged along uphill for a couple miles. The air was really still and steamy, with any chance of a breeze blocked by the shoulder of the mountain. The trail was deeply eroded in several sections, with the middle of the footpath looking like a chute in the ground. The views promised by our guidebook were mostly closed in by the leaves on the trees and we started to think we may have picked a dud of a hike. I was feeling really overheated and crabby.

Eventually we reached the junction with the Indian Grave Gap Trail. At this point, the climbing became easier and we felt a breeze across the ridge. We started to see more wildflowers – mountain laurel and flame azalea. We spotted several cute toads hopping across the trail. We stopped for a snack near an opening in the trees. We had a decent view into Cades Cove. Along this section of trail, we passed two other hiking parties – both mentioned that they’d had bear sightings before the junction with the Rich Mountain Loop. One group had spotted an adolescent bear and the other a mother bear with two cubs.   Between the breeze, the wildflowers, and the likelihood of a bear spotting; my attitude turned a little more positive. Adam was more skeptical than I was, saying ‘If all these people already saw bears, we’ll probably be the only ones who don’t!’

We walked along, trying to stay quiet for the wildlife. We reached the junction of the Indian Grave Gap Trail and the Rich Mountain Loop Trail without spotting a bear. I figured that we were out of luck, and started chatting with Adam again. As we were descending toward a stream bed, I caught a shuffle of movement through the trees. I stopped abruptly, waved my hand up to stop Adam behind me and whispered ‘BEAR!’ Ten feet from the edge of the trail, we spotted a handsome yearling bear foraging for food. He knew we were there, but continued to move along at a normal pace. Other than once upward glance, he completely ignored us. Suddenly, he broke into a full gallop and went crashing deeper into the woods and out of view. It was a GREAT sighting and made the hike totally worthwhile.

John Oliver Cabin
The John Oliver Place is the oldest cabin in Cades Cove. Below: A friendly yellow warbler we spotted along the trail; Adam descends the Rich Mountain Loop Trail; The woods shortly before reaching the Oliver cabin were very pretty.

Warbler Descent Woods

The rest of the hike between the bear and the John Oliver cabin was downhill, steeply at times. For a couple hundred yards, we were followed by a cute yellow warbler. The bird hopped from tree to tree right alongside us before finally flying off. We had a couple easy, shallow stream crossings on the section of trail.

We reached the Oliver cabin and were met with crowds of Cades Cove tourists. Most people visiting the cabin park along the loop road and then walk a short distance up to the house. I think this cabin is the oldest structure in the Cove.   After spending a little time exploring the cabin, we headed back onto the Rich Mountain Loop trail.

After the cabin there wasn’t anything remarkable left on the trail to see. I don’t think I took a single photo! It was just an easy walk for about a mile back to our first junction of the day, followed by a half mile stretch back to the parking area on the loop road. It felt great to be back in the air-conditioned car!

On our way out of Cades Cove, we stopped by the snack bar at the campground. I got a gigantic Gatorade and a bag of generic Cheetos. The Gatorade tasted miraculous after miles of drinking lukewarm Camelbak water! About an hour later, we were checking into our hotel in Gatlinburg. After showering, we headed out to the Smoky Mountain Brewery. On the way, we got caught in one of the biggest downpours I’ve ever experienced. We ate dinner soaked, but the beer and steak were so good I didn’t care.

So, I guess in closing… would I recommend the Rich Mountain Loop? Probably – it seems like a great place to hike if you want good odds of seeing a bear in the wild, but don’t go expecting great views and waterfalls.

Trail Notes

  • Distance – 8.7 miles
  • Elevation Change – 1800 ft.
  • Difficulty – 3.5  The hike up the Crooked Arm Ridge trail was tough.
  • Trail Conditions –  3.  The trail was clear, but there were some eroded parts on the climb up the Crooked Arm Ridge Trail.  On the hike down, there was some loose rock also.
  • Views – 2.  There were some obstructed views from the ridgeline.
  • Streams/Waterfalls – 2.  The Crooked Arm Cascade was a disappointment with little water, but the streams on the back end of the loop were nice. 
  • Wildlife – 4.5.  We did see a bear and it looked and sounded like a lot of bear activity here.  We also saw some deer along the way.
  • Ease to Navigate –  1.5.  Trails were not marked very clearly, especially at junctions.  Also, there is confusion around the John Oliver place on which way to go to complete the loop back.
  • Solitude – 2.5.  Cades Cove is a very popular area.  I would expect to see some people on the trail most days, but less in the upper elevations.  There will also be lots of people that will park on the main road to check out the John Oliver Place. 

Download a Trail Map (PDF)

Directions to trailhead:   From the Sugarlands Visitor Center in GSMNP, follow signs towards Cades Cove. Follow Little River Road for about 17 miles.  At the intersection near Townsend, the road will become Laurel Creek Road.  Follow Laurel Creek road for 7.4 miles to the parking area at the head of Cades Cove.  Park in the lot on the left hand side of the road right before the traffic becomes one way.  The trail starts about 25 yards ahead on the opposite side of the road from parking.

Wesser Bald (NC)

Special: Smokies Edition

Introductory Guide to Visiting Great Smoky Mountains National Park
(while Wesser Bald is technically outside GSMNP, it’s still part of the greater Smokies region)

This 2.8 mile out-and-back is an easy hike to one of the area’s best viewpoints.  The platform atop the defunct firetower on Wesser Bald offers panoramic views of the spectacular Smokies (and all the other mountains in the area).

View the Full Album of Photos From This Hike

Smokies View from Wesser View
You get classic Smoky Mountain views from the tower atop Wesser Bald.  Below: A sign points the way to Wesser Bald:  The parking area at Tellico Gap provided a view of powerlines and a ‘cloud sea’; The drive into Tellico Gap follows the extremely scenic Otter Creek.  It’s worth stopping to enjoy the rapids and small waterfalls.

Wesser Sign Tellico Gap Stream

Adam Says…

It is nice when you find a hike that the locals rave about.  During our trip to North Carolina, I heard three different people mentioning that we needed to hike Wesser Bald.  After getting to the top, I can see why this is so revered.

When we started off in the morning, it had been storming the night before.  A fog had settled on the lower elevations.  While we were driving, we were curious if we were going to get any views at all.  On our drive there, the cloudy conditions gave us great views along the Nantahala River as we passed several scenic spots and chances to catch some roadside waterfalls and rapids.  We made our way up Otter Creek Road and parked at Tellico Gap, where the Appalachian Trail crossed the road.

When we first parked, we noticed the sign that designated the start of the trail, but we noticed there was a white-blazed trail and a fire road to the left.  We knew our hike was on the white-blazed Appalachian Trail, so we took the trail to the left.   The fire road trail to the right also leads to the tower.  I’m not sure how the conditions are on it, but it did seem to be shorter, since we found a family with kids that left after us beat us back to the parking lot (and they didn’t seem like fast hikers).  The trail passed through a thick brushy area fairly quickly, but most of the trail was in a more opened-up wooded area.  The hike was fairly uphill as it skirted the mountainside, but I didn’t find any of the trail to be incredibly steep.  Instead, it winds There were a few switchbacks towards the end of the hike where it was a little steeper, but the switchbacks save you from going straight up the mountain.

Wesser Bald Trail
Adam walks along the Appalachian Trail en route to Wesser Bald.  Below: A cool, bent tree along the trail; Mountain laurel were just starting to bloom; In fact, there were many wildflowers blooming.

Bent Tree Mountain Laurels Wildflowers

When we reached the top of the spur trail at 1.3 miles, there was a great viewpoint that gives you a small sample.  If you are not willing to climb the fire tower, this would be the best views you would get on this hike.  As you reach the top, take a right and you’ll reach the fire tower in a short distance.  Make your way back to complete the out-and-back or you could press pass the fire tower to take the fire road back to make it a loop.

When we reached the fire tower, we could hear a couple people at the top of the tower.  Christine quickly made her way up.  I, on the other hand, needed to psych myself up.  As you’ve probably seen in many pictures, I don’t mind getting out on rocks that are on the edge of a huge precipice; however, I don’t trust man-made structures when it comes to heights.  I trust nature over man.  I went up halfway and then I could start to see the sky through the gaps in the stairs and I just turned back around.  But from the bottom, I could hear Christine and the others at the top of how beautiful everything was and I knew I needed to force myself to get up there.  So, I took a second attempt and made it up.  Christine and the others at the top applauded my efforts for overcoming my fear.  I’m so glad I made it to the top, because the scenery was breathtaking and some of the best mountain views I’ve ever seen.   We stayed up there a while and talked to a few different groups of people that made it up after we did.

After we made it back, we decided to head to the Nantahala Outdoor Center.  We had a nice lunch at the River’s End and then we enjoyed a beer at Big Wesser BBQ & Brew, while watching kayakers and whitewater rafts go down the river.  This is always one of our favorite spots while visiting near the Smokies and it is definitely a place you can spend hours during the afternoon.   You can also hike from Tellico Gap to the Nantahala Outdoor Center on the Appalachian Trail for a one-way total of 7.5 miles if you want to do a shuttle option.

If you are interested in geocaching, there are three you can find on the trail:

Christine Says…

The forecast for our week in the Smokies didn’t look good – stormy, rainy and unsettled every single day from Sunday to the next Saturday. So, when we woke up to dense fog on Monday morning, we weren’t completely surprised. However, the hourly forecast on weather.com made it look like the fog might burn off. We hoped that the odds would be in our favor, and headed off to hike a trail we’d been eying for a while. Wesser Bald is a short, moderate 1.4 mile hike along the AT to an old fire tower overlooking the southern Appalachians. It’s a spectacular view if you’re lucky enough to hit the spot on a clear day.

From Tellico Gap, we followed the AT as it made gradual, sweeping switchbacks through beautiful, lush forest. The trail was lined with wildflowers and blooming azaleas/rhododendron. I think I saw more pink lady slippers on this hike than I’ve ever seen anywhere else. It was gorgeous. The azaleas came in white, pink and orange and the rhododendron bloomed in their classic bright pinkish-purple color. I also spotted wild strawberries and some gorgeous purple spiderwort.

First View
Christine enjoys the first view along the trail. This spot is at the head of the spur trail to the tower.  Below: The fire tower is two stories high;  The stairs are open and a little rickety; Christine atop the fire tower.

Fire Tower Climbing On Top the Tower

The humidity took some getting used to! Even though it wasn’t particularly hot, the day was windless and the air was completely saturated. By the time we got to the top, I looked like I’d been dunked in a pool! Just before reaching the tower, we passed a nice view looking toward the Smokies and Fontana Dam. Near the overlook, a short spur trail took us to the top of Wesser Bald. This bald is no longer actually a bald – it’s been let go and returned to the natural forest environment. So while the view has closed in from the base of the tower, the view from the two-story viewing platform is superb!

I climbed up to the top and said WOW! Adam didn’t feel comfortable with the open, rattling stairs, so he hung out at the bottom while I chatted with a couple at the top. They had hiked up earlier from the NOC and were waiting to meet up with their son, who was on a solo backpacking trip. They were really fun to talk to – both were veteran AT thru-hikers and REI employees. We talked about favorite spots on the AT and chatted a bit about gear. I always love meeting people like them on the trail!

View from the Tower
Views from the Wesser Bald fire tower are majestic. Below: There were many pink lady’s slippers along the trail; Spiderwort: Christine enjoys a post-hike shandy at the Big Wesser Brew & BBQ at the Nantahala Outdoor Center.

Lady's Slippers Spiderwort Nantahala Outdoor Center

While we were chatting, Adam mustered the courage to climb to the top of the tower. He was so glad he did, too! The views really blew both of us away! Even though it was hazy, we could still see for miles in every direction. We spent a long while atop the tower, enjoying the views and the fresh mountain air.

After a while, we decided it was time to make our way down and seek out some lunch. One of our repeat stops ever time we visit the Smokies is the Nantahala Outdoor Center. We enjoy lunch at the Riverside Cafe, browsing the nice outdoor gear store, and (of course) drinking a few beers by the river at Big Wesser. It’s so fun to sit at an umbrella table, drink a nice craft beer and watch kayakers shooting through the rapids. It’s also a great place to people-watch in general. While we were sitting and enjoying our drinks, the skies opened up and dumped a huge amount of rain in just a few minutes. I’m sure glad we had the rain at the NOC instead of on top Wesser Bald!

Trail Notes

  • Distance – 2.8 miles out-and-back
  • Elevation Change – 777 feet.
  • Difficulty – 2.  The trail is mostly uphill, but not too steep.
  • Trail Conditions –  4.  The trail was in great shape and the footing was fairly solid.
  • Views – 5.  Absolutely spectacular views from the fire tower and another nice view right before the tower.
  • Streams/Waterfalls – 0.  Non-existent. 
  • Wildlife – 1.  We only saw some birds along the way. 
  • Ease to Navigate –  3.  The confusion of the fire road at the beginning gives it a lower score, but other than that you should be fine.  Follow the white-blazed AT. 
  • Solitude – 2.5.  Popular with locals, but this wouldn’t get the traffic that a hike in the nearby Smokies would. 

Download a Trail Map (PDF)

Directions to trailhead:   From Bryson City, follow US 19/74 for 20 miles.  Turn left on Wayah Road and follow it for five miles. Turn left on Otter Creek Road and drive 4.1 miles to Tellico Gap. The road is paved for the first 2.8 miles. At the crest of the hill, you will see the AT crossing and several parking spots.  Follow the signs to Wesser Bald.

Mt. Pisgah (NC)

North Carolina Hikes

This 3 mile out-and-back leads to the towering (literally) summit of 5,721 ft Mt. Pisgah.  Due to the short length and proximity to lodging, a camp store, and a picnic area, this trail is exceedingly popular with families.  The summit offers some nice views, but the presence of a huge television tower detracts from the natural beauty of the area.

View the Full Album of Photos From This Hike

Mt. Pisgah Summit
The TV tower definitely detracts from the scenic beauty of Mt. Pisgah.  Below: The trail to the top is short, but it gets steep and rocky in places;  Not the prettiest of summits.

Pisgah Trail At the Top of Mt. Pisgah

Christine Says…

Our second day in Asheville was just a half day, but we wanted to get a little more hiking in along the Blue Ridge Parkway before making our way down to Bryson City and the Smokies. Breakfast was at the popular Sunny Point Cafe. We got there just a couple minutes before they opened and were able to snag the last open table for two! It’s a very popular spot, so be prepared to get there early or have a long wait.

After breakfast, we headed up to the parkway to climb Mount Pisgah. Our book talked about great views, but described the hike as ‘strenuous’. In fact, there was a warning sign at the trailhead indicating that the hike was tough and steep. It actually only climbs about 700 feet, but it does so in a short distance. I suppose the warning is necessary for novice hikers or people who think they’re just out for a casual stroll.

The hike started out from a parking lot atop the Buck Springs Tunnel. There are actually a couple trailheads in that area – Mt. Pisgah, Shut-In Trail and the Buck Springs Trail. To get to the Pisgah Trail, drive to the far end of the parking lot.

Blooming Rhododendron
The rhododendrons and azaleas were blooming when we visited. Below: The Mt. Pisgah trailhead;  Hiking along the flatter, easier part of the trail; Spring blooms!

Trailhead Hiking Along the Pisgah Trail Blooming

The hike started off gentle and flat – just a pleasant walk through the woods. We could see the conical summit of Pisgah, replete with its television tower, looming through the trees. The trail made a sweeping turn at around .4 miles and began a steady uphill climb. It was rocky and rough at times, but overall a moderate ascent. A couple tenths of a mile before the summit, we came across one nice view across the mountains.

After the nice view, we made the final push to the top. The summit has a wooden viewing platform and a serious eyesore of a television tower. I know they’re necessary, but I wish they could have put it on a less scenic, more remote peak! All that metal really ruins the scenic beauty of such an impressive summit.

We sat on the summit for a while. The views would have been pretty nice, but the day was overcast and hazy, so that took away some of the majesty from the experience. I think we were also the only people on the summit without kids! Mt. Pisgah is clearly a very popular family hike! There were more three-year-olds on that mountain top than any other demographic. I guess it makes sense – the hike is short, moderate and doesn’t have any steep drop-offs — perfect for a family with small children.

We hiked down the way we came, making speedy work of the descent.  Now… on to the Smokies!

First View
There was one nice view from the trail before we reached the summit of Pisgah.

Adam Says…

When we’re on vacation, we  like to alternate  longer hikes with shorter hikes to make sure we still have energy at the end of our trip.  When we were researching  different hikes to do near Asheville, NC, we came across Mt. Pisgah.  With it being such a short hike and the trailhead being sort of en route to our next town stop, we thought this was a winner.  We also read about wonderful views from the top so we figured it would be a high payoff for minimal effort.

The trail started off following a slight incline for the first few tenths of a mile.  Then the trail went up more steeply in elevation and can be challenging at times.  But, since the hike is pretty short, it is attainable by most people.  We saw more families hiking on this trail with little children than anywhere else.  While many of the kids were walking the trail in the beginning, we found most of them were being carried by the time they reached the summit.

Summit of Mt. Pisgah
Yes… the summit is a little disappointing. Below: A steeper, rockier section of the trail; The viewing platform atop Mt. Pisgah; Hazy views from the summit.

Rocky Climb Mt. Pisgah Viewing Platform View from Mt. Pisgah

We arrived at the top in well under an hour.  The tower was such an eyesore and we both were thinking this would be so much nicer of a hike without the 339-foot tower there.  The wooden platform allowed for about 270-degree views (90 degrees taken up by the tower).  While it was hazy, I could tell that on a clear day you would be able to see for quite a distance.

The origin of the name of the mountain comes from the Bible.  The Reverend James Hall is attributed to being the first to call this area as “Pisgah”, taken from the biblical reference to the peak where Moses viewed the promised land.  The Pisgah National Forest was historically owned by the Vanderbilts (who built the nearby Biltmore House in Asheville).  500,000 acres were sold to the government by the Vanderbilts as an effort to help preserve this land.

If you are interested in geocaching, there are several to find on this trail:

Parkway View
You can see the parking area and the Blue Ridge Parkway from the summit of Mt. Pisgah.

While this hike does have some nice views from the top, we were a little disappointed by the size of the tower and the popularity of the trail.  As Christine mentioned, it would have been nice to have this on a more remote mountain (and also not the namesake for the entire National Forest).

Trail Notes

  • Distance – 3 miles
  • Elevation Change – 700 ft
  • Difficulty – 1.5.  This trail is short with a moderate ascent.
  • Trail Conditions –  4.  The trail was generally in good condition.
  • Views –  3.5 – Typically views from a peak like this would get higher marks, but the tower is such a distraction.
  • Streams/Waterfalls –  0.  None
  • Wildlife – 1.  Maybe some birds and squirrels.
  • Ease to Navigate –  5.  There is only one trail to the top, and it’s very easy to follow.
  • Solitude – 1.  This trail is popular and heavily traveled.

Download a Trail Map (PDF)

Directions to trailhead:   From Asheville, take the Blue Ridge Parkway south to the Mount Pisgah Parking Area, on the left, at milepost 407.6. Park at the second parking area.