Backpacking Gear Review – 2015 Edition

Camp 2The last time we did a gear review it was 2010 and we were brand new to backpacking!  We bought a lot of our gear based on reviews, recommendations, and cheap prices. In the five years since then, we’ve made a lot of changes to what we carry on overnight trips. We’ve both managed to make our loads significantly lighter!

Gear List – The Basics

2015 2010
Pack: Gregory Z65 (Adam)
This pack has served well, but due to wear-and-tear (including mouse-eaten hipbelt pockets), 2015 will probably be this pack’s last year on the trail.  Overall has fit well and does allow for air to get between your back and the pack, which is a great feature to keep you cool.
Same
Pack: Osprey Aura AG 50 (Christine)
The Z55 I was using is designed for a man and never really fit me properly. I tried an Osprey Viva 65 in 2014. It was a decent pack, but had more capacity than I needed. I also found that the pack’s simple suspension made it ride heavier than what was comfortable. The new Osprey anti-gravity suspension technology is nice and I’ve really been enjoying carrying this pack. Sometimes 50 liters is a tight squeeze, but it forces me to make wise packing choices. The only things I don’t care for are the center-back placement of the water port and the split compartment in the pack lid.  The water port is too tight and it’s proximity to the frame makes it hard to shove the drinking hose through the opening.  The split compartment lid means the compartments are both smaller.  One large compartment would have been better for me personally because I like to stow my snack bag in the pack lid. Sometimes I have a hard time fitting my treats in either of the smaller zippered areas.
Gregory Z55 (Christine)
Tent: Big Agnes Copper Spur UL2
In 2014, we upgraded our tent and saved over 3.5 pounds of pack weight. The Copper Spur is certainly a tight fit for two tall(ish) people, but the saved weight is worth it for more comfortable trail miles. The tent fits compactly inside Adam’s pack and he no longer has to strap our shelter to the outside of his pack. Honestly, we only notice the tightness of the space for a few minutes while we’re falling asleep, but once we’ve drifted off the small quarters are fine.
Mountain Hardware Drifter 3
Sleeping Bag: L.L. Bean Semi-Rectagular Down (Adam)
This used to be Christine’s bag, but we traded so she would stay warmer. I sleep hot, so the trade worked out well for both of us!  Easy to get in and out and compresses down nicely in the pack.
Traded
Sleeping Bag: Sierra Designs Tomichi (Christine)
Adam and I traded bags because this one is just a little warmer due to the tighter mummy fit. When I first started out, I didn’t like the snugness of a mummy, but now I do. It’s cozier and I stay warmer. Both of our bags are considered ‘summer bags’, but they’ve always been warm enough for spring/summer/fall in Virginia. We also have silk Cocoon liner for added warmth if needed. When it’s really warm in summer, we both leave sleeping bags home in favor of a Thermarest sheet and tech blanket. We don’t camp when it’s cold, so we don’t own winter bags.
Traded
Sleeping Pad: Big Agnes Insulated Air Core
We both have and really like this pad. It has served well and we plan on continuing to use them.
Same
Water Purification: Sawyer Mini
In 2015, we switched to a Sawyer Mini after seeing most thru-hikers favoring them over older style pump filters. We really like it. We bought both 32 and 64 oz pouches. The carry weight is almost nothing. The unit requires no assembly and very little field maintenance. We store the Sawyer in an easily accessible spot in our pack and can quickly filter water at any source we cross. The ease-of-use factor means we’re carrying less water in our packs. The weight savings between 3 liters of water and a liter and a half of water is mind blowing! The only challenge is when there are just standing water sources.  Non-flowing water would be a challenge to expand the bag.  We also carry Aquamira as a backup. And yes… Christine is still paranoid about giardia and feels a little creeped out drinking water from random streams and springs in the woods.
Katadyn Hiker Pro
Hydration: Camelbak 3L
We both carry a 3L Camelbak in our pack. Christine usually carries about 1.5 liters of water. Adam carries a bit more. We like having the extra capacity so we can stock up on water if we’re going to be hiking across a dry area. We both also carry an empty, light plastic bottle (like SmartWater). Disposable-type plastic bottles weigh nothing and are handy to have for mixing drink powder into water at camp. We both get tired of plain water and like having a bottle to mix lemonade or Gatorade powder for a flavored drink with dinner.
Nalgene bottles and Camelbaks
Stove: JetBoil
We like our JetBoil. It’s compact, boils water quickly, and is easy to use. We don’t ‘cook’ at camp. Everything we eat simply requires the addition of boiling water, so we like the simplicity of this all-in-one system over a separate cookpot and stove.
Same

Other Bits & Pieces

  • Trail Comfort: Trekking Poles. We are both still using the same trekking poles we had in 2010.  Neither of us can imagine ever hiking without them.  They take so much strain off your knees and make it easier to balance with a pack on uneven terrain.
  • Camp Comfort: Crocs.  Yes, they are still dorky, but you can’t beat their weight or comfort around camp (as long as you wear them with socks).
  • Camp Comfort: Headlamps.  We both have good quality (Petzl/Black Diamond) headlamps.
  • Safety: Downsized First Aid Kit.  We used to carry a large, fully-stocked first aid kit — just in case.  It was quite heavy and essentially had larger quantities of the items in a smaller kit. Now we carry a small kit with bandages, gauze, blister care, painkillers, antihistamines,  anti-bacterial wipes/ointment, cortisone cream, anti-diarrheal, tweezers, and duct tape. It fits in a small case about the size of a hand and covers all the basics and necessities.  It’s a calculated risk to not have splints, large ace bandages, scissors, safety pins, and a manual – but it saves a pound of pack weight.
  • Safety: Dealing with Ticks.  We treat our clothes and gear with Sawyer Permethrin throughout spring, summer, and fall.  Lyme disease is becoming more prevalent, and permethrin reduces the risk of having ticks attach.  We spray our shoes, socks, hiking clothes, and camp/sleep clothes.  If we’re going somewhere that’s very dense and brushy, we also use DEET on bare skin.
  • GPS Unit: Unnecessary.  Adam used to carry a Garmin handheld GPS unit. Now we just carry a compass, printed map of the area/AWOL Guide page, and a smartphone.  We used to bring those items in addition to the GPS unit and found it redundant.  We use the MapMyHike app on our phone to help with calculating routes and either carry maps or pre-print routes using AllTrails.com.
  • Space Saver: Compression Sack.  Instead of just a regular stuff sack, we now use Sea to Summit compression sacks for our sleeping bags.  It makes them really compact and small.  Why did we wait so long to get these?
  • Comes in Handy Often: Collapsible Bucket.  When water is running low or slow, the Sea to Summit bucket makes it easy to gather a large amount of water at once. We can then take water back to camp for filtering and cooking at our leisure.  The bucket is free standing, weighs 2.8 ounces, and holds 10 liters of water.
  • Luxury Item We Carry: Alite Monarch chairs.  I know that chairs seem like a waste of pack weight and space to some.  Yes… the chairs add a little over a pound (1 pound, 5 ounces to be specific) to our load. Many would point out that you can sit on the ground, lean against a tree, or use your pack as a backrest.  While all these things may be true, nothing beats being able to be off the ground and semi-reclined with back support after a long day on the trail. Christine went chairless on an overnight earlier this year. She regretted it.
  • Luxury Item We Carry: Cocoon Ultralight pillows.  A lot of people will use their clothes bag, a jacket, or empty pack for a pillow.  We found all of those options to be too slick and lumpy.  Cocoon’s pillows pack down smaller than the size of a fist and weigh less than 6 ounces.  It’s another luxury item that we find well worth carrying.
  • Luxury Item We Carry: Thermarest sheet.  It’s just 4 ounces and it makes laying on the sleeping pad a lot more comfortable.  You never feel sticky or clammy with the sheet.

Intro to the White Mountains of New Hampshire

Special: New Hampshire Edition

Driving into Franconia Notch
Interstate 93 passes through Franconia Notch. While the road is classified as interstate, it narrows to two lanes (total) and has scenery and wildlife along the way. Below: Mt. Washington looms over the historic hotel bearing its name; Inside the AMC’s Lonesome Lake Hut; The Basin… one of the most beautiful spots in Franconia Notch.

Mt. Washington Hotel Lonesome Lake Hut The Basin - Franconia Notch State Park

Some General Tips for Hiking in the Area


The White Mountains are TOUGH
The trails are steep and the rocks are hard. Trails considered moderate in New Hampshire may have 3,000+ feet of elevation gain over just a few miles.  Much of the footing on trails is root-snarled and rock-covered, with loads of mud, shifting boulders underfoot and swift-moving streams to cross. The weather changes without warning in the Whites.  On a sunny 80 degree day in the valley, you may experience 50mph winds, 45 degree temps and heavy fog on a mountain top.  Even in the heat of summer, it’s likely you’ll want a hat, gloves and a windproof/waterproof shell. There aren’t many trails in Virginia that can adequately prepare you for what you’ll see in the Whites.

In fact, in its section about Mt. Washington, the AMC’s White Mountain Guide states:

To a person unused to mountain trails or in less than excellent physical condition, this unrelenting uphill grind can be grueling and intensely discouraging. If you are not an experienced hiker or a trained athlete, you will almost certainly enjoy the ascent of Mount Washington a great deal more if you build up to it with easier climbs in areas with less exposure to potentially severe weather.

So, heed that advice and pick tough Virginia hikes to train/practice on before you make your White Mountains visit.

New Hampshire has a Negligent Hiker Law.
Be prepared to take care of yourself in the Whites.  Carry the ten essentials in your pack, let someone know your route, stay on the trail, stay with your group, be willing to turn back if the weather or your ability dictates, and don’t do anything stupid.  If you need rescue because of your own negligence, you may receive a hefty bill from the state.  Visit HikeSafe.com for more information.

Many New Hampshire State Parks Are as Impressive as National Parks.
OK… now that we’ve sufficiently scared you with bad weather, tough climbs and personal liability, it’s time for the good stuff!  New Hampshire is incredibly spectacular and wild.  When you compare many of New Hampshire’s state parks to the state parks we have in Virginia, prepare yourself to be blown away!  The scenery, wildlife and expansiveness of New Hampshire parks like Franconia Notch, Mount Cardigan and Mount Washington rivals (OK… let’s be honest – exceeds) what you see in Shenandoah National Park.

Hiking Guides
There are lots of great hiking guides for New Hampshire.  We recommend the AMC’s White Mountain Guide, Hiking New Hampshire (Falcon Guide) and 50 Hikes in the White Mountains.  We suggest photocopying the pages you need for the day of the hike, as it saves you from carrying the extra weight of a guidebook.  The website Hike New England is also a super resource.

Stay Alert for Wildlife on Highways
Each time we’ve visited the White Mountains, we’ve seen moose hit by cars on I-93.  It’s very sad and dreadfully dangerous to hit a moose. We’ve seen bears and deer along the interstate, too.

Where to Stay in the Area
We have free lodging in the Holderness/Plymouth area (thanks Mom & Dad!).  It’s a great location – nestled right between the Lakes Region and the White Mountains Region.  If you want lodging even closer to prime trails in the Whites,  North Conway (very crowded, very touristy) and Lincoln are great choices.  Both have tons of amenities and are close to popular trails.  The area also has loads of camping, and for the true adventurer, the Appalachian Mountain Club maintains a series of seasonal backcountry lodging.

Must-See Things That Don’t Involve Hiking

  • Take a Drive on the Scenic Kancamagus Highway There are great views, cascading streams, opportunities to spot wildlife, and access to many of the area’s easier family trails.
  • Visit the Squam Lakes Natural Science Center (Christine’s mom is a volunteer).  This center has fantastic hands-on displays for children and a nice variety native animals on display (bears, bobcats, eagles, etc).  The Center also runs boat excursions to observe loons in the wild on Squam Lake.
  • Rent Bikes and ride through Franconia Notch.  There is a ten-mile paved bike path that runs the length of the notch.  You can rent a bike, arrange a shuttle and coast downhill through the park stopping at all the scenic/historical sites along the way.
  • Watch an Optical Illusion Put the Old Man of the Mountain Back Into Place – In May of 2003, New Hampshire’s most notable natural landmark fell from the face of Cannon Cliffs.  Now, due to the generosity and ingenuity of interested individuals and companies, you can visit Profile Plaza and watch the Old Man reappear on the cliffside.  This stop was very cool!
  • Sample Craft BeerMoat Mountain, Woodstock Inn, Tuckerman’s, Smuttynose, Schilling and Long Trail (among others) are all located roughly in this region (some require a bit more driving than others).
  • Visit Castle in the Clouds – This beautiful, historical mansion overlooks Lake Winnipesaukee.  The grounds are beautiful and traversed by an extensive network of trails.
  • Take a Day Trip to the Coast – In about an hour and a half you can be in York/Ogunquit eating lobsters and chowder by the oceanfront.  There are lighthouses, beachfront strolling, mansions, ice cream… everything you expect to see at a New England Beach.  York/Ogunquit has the Marginal Way – which is a beautiful walk.  If you visit, don’t miss stopping by the Stonewall Kitchen flagship store.  If you enjoy cooking or eating, it’s a great stop! Lunch at Lobster Cove in York was especially delicious and memorable.
  • Take a Day Trip Into Burlington (Vermont) –  Burlington is a beautiful city on the shore of Lake Champlain.  On various day trips, we’ve stopped at many shops in town and toured the University of Vermont.  In 2014, we visited several breweries (Magic Hat, Citizen Cider and Zero Gravity) and took a tour of Lake Champlain Chocolate. We also had a fantastic dinner at the farm-to-table restaurant/brewery Prohibition Pig in Waterbury. If you take the northern route past St. Johnsbury, stops at Ben & Jerry’s, the Cabot Cheese headquarters, and Dog Mountain (an absolute must for pet lovers!) are all worthwhile.
  • Take a Day Trip to the Quechee Gorge (Vermont) – There is a lot to see on this drive!  On the way to Quechee, you’ll get the chance to stop in Hanover and visit the beautiful grounds of Dartmouth College.  This route also takes you by the King Arthur Flour headquarters.  I know, many of you are thinking ‘flour?’ – but trust me, it’s another super stop for anyone who likes to cook or eat!  Quechee is also home to another Cabot Shop and Simon Pearce Glassblowers.  A little extra driving will take you to both the Harpoon and the Long Trail breweries.

King Arthur Flour Simon Pearce Long Trail Sampling
The Dog Chapel - St. Johnsbury, Vermont Stonewall Kitchen Nubble Lighthouse
Lobster Cove Marginal Way Covered Bridge
Profile Plaza Squam Science

Above: King Arthur Flour Company Bakers, Simon Pearce Glassblowers, Sampling at Long Trail, The Dog Chapel, Stonewall Kitchen Store & Cooking School, Nubble Lighthouse; Classic Maine Lobster Roll, Along the Marginal Way, Covered Bridges are everywhere, Profile Plaza recreates an optical illusion of the Old Man of the Mountain; Adam enjoys the children’s exhibits at the Squam Natural Science Center

A Restaurant Recap

  • Six Burner Bistro (Plymouth, NH) offers fantastic casual fine dining.  They had a great beer and wine list and all the food was excellent!
  • Schilling Beer Co. (Littleton, NH) is primarily a brewery – and their beers are top notch.  But their food is also top-notch – their hearth-baked pizzas and breads are outstanding.  There brats were the best Adam has ever tried.
  • Polly’s Pancake Parlor (Sugar Hill, NH) is celebrating its 75th year of making customized, made-to-order pancakes.  They have several batter choices and several add-in choices, so you can mix-and-match to create an endless number of combinations. Their maple-apple chicken sausage is delicious!  Don’t forget to pose on Trot-Trot before or after your breakfast!
  • Flatbread Company (North Conway, NH) serves handmade, wood-fire cooked pizzas that make heavy use of local, seasonal, organic ingredients.  We went there for lunch on the one rainy day of our 2013 trip and loved sitting next to the huge, brick pizza oven.  So cozy!
  • Lucky Dog (Plymouth, NH) is a reliable college-town pub.  They serve endless cheese and a wide variety of bar food – burgers, nachos, wings, etc.  It’s nothing fancy, but it’s always good when we go.
  • The Common Man (throughout New Hampshire) is a local chain of unique, independently run restaurants.  They exist in many styles and iterations all over New Hampshire.  We ate at three different restaurants under the Common Man umbrella on our 2013 visit.  Italian Farmhouse, Town Docks and The Common Man – Ashland.  All three were equally great!
  • White Mountain Bagel Company (Lincoln, NH) was a great post-hike stop for sandwiches.  Creative combos and everything was very fresh!
  • Moat Mountain Smokehouse & Brewery (North Conway, NH) is a favorite stop for craft beer, but they also serve fantastic barbecue!  We never miss a stop to eat at Moat when we visit the area.
  • The Woodstock Station Restaurant (Woodstock, NH) is another brewery-restaurant combination.  We visited early for dinner on a Monday evening, and the place was packed.  The service has a reputation for being slow (and it was), but the food and beer was good.  They have the biggest gluten-free menu we’ve ever seen, so if you have to avoid wheat and want a large selection, this is a great place to go!

Town Docks Moat Mountain Nachos Flatbread Pizza Oven
Polly's Pancakes Woodstock Inn

Above: Town Docks by The Common Man has excellent outdoor, lakeside seating, Moat Mountain nachos, Flatbread Company pizza oven, Polly’s pancakes and maple-apple chicken sausage, Woodstock Station Inn

Trails We Covered in the White Mountains

2018

2017

2016

2015

2014

2013

2010

Intro to Great Smoky Mountains National Park

Special: Smokies Edition

Our original introduction to the Smokies was written in 2012!  We’ve visited the park twice since then, so it was time to update our list of tips and recommendations.  Enjoy!

Smoke in the Smokies
We loved seeing ‘smoke’ in the Smokies. When we visited, the rhododendron were just starting to bloom. Below: Adam sitting alongside the Oconaluftee River; A Smoky Mountains view; The obligatory pose at the park entrance.

Adam Sitting by the Oconoluftee River View Into the Deep Creek Area Welcome to the Smokies

The Smokies Are Big and Rugged – We were surprised how different the Smoky Mountains are from the Blue Ridge in Virginia.  The mountains are so much taller and steeper. Mountaintops soar to over 6,000 ft. instead of the 3,000-4,000 we’re more used to in the Shenandoahs. The trees are bigger, there are more firs and pines, and everything is greener, mossier, and wetter.  Water flows freely and abundantly throughout the park.  The waterfalls and rapids are very impressive.

Entering The Smokies Is Free – Most of the national parks we’ve been to make visitors enter through a fee station and charge $10-$20 for a week’s visit.  The Smokies have no fee stations, but there are plenty of donation boxes throughout the park.  We always put $20 in one of the boxes each week we visit.  National Parks are something we both treasure and twenty dollars is a small gift to help support a resource we love.

Best Hiking Book – We had purchased Falcon Guide Hiking Great Smoky National Park by Kevin Adams.  While the descriptions of the trails were decent, the author seemed a little bit negative about the park.  His descriptions made us feel that we were going to be constantly overwhelmed by crowds and never have a moment of solitude.  While we were there, we picked up two books that we recommend over the Falcon Guide.  Day Hikes of the Smokies by Carson Brewer and Friends gave us some great ideas and was broken down by easy, moderate, and strenuous hikes.  Also available is Hiking Trails of the Smokies.  This book was recommended to us by a park ranger as ‘their Bible’ for the trails in the Smokies.  Both can be purchased online through the Great Smoky Mountains Association.  The one drawback of the books is that they embellish the features of hikes.  Sometimes we found ourselves disappointed when features didn’t live up to the rhapsodizing descriptions in the guide.  We also love  the website Hiking in the Smokys.  Their descriptions of hikes are very accurate and their indexing system for locations and hike difficulty makes it really easy to find the right hike for you.

Food Is Scarce In The Park – Besides a few vending machines at visitors centers, food is nowhere to be found in the park.  The park does not have restaurants or gas stations.  You should definitely plan on packing snacks or a lunch if you plan on spending the day in the park. The only exceptions we found were the Cades Cove campground and the LeConte Lodge.  The snack bar at Cades Cove had burgers, hotdogs, BBQ sandwiches, ice cream, chips and sodas.  LeConte offers drinks, baked goods and bag lunches, but you have to hike anywhere from 5-12 miles to get to the lodge.  Sit down dining is only available for reserved overnight guests.

The Smokies Are Crowded – Millions of people visit GSMNP each year – it’s the most-visited national park in the country. The busiest times are June 15-August 15 and October (especially weekends).  While we did see lots of people in late May, I think a good rule of thumb is to get an early start.  We typically woke up before 7:00 most mornings, grabbed some breakfast, and headed to the park.  We were able to hit most trails before 8:30 a.m. and typically had the views or waterfalls all to ourselves for at least a few minutes before anyone else came along.  When we were done with our hikes, the parking lots were always more crowded.  If you arrive 10:00 a.m. or later, expect to share vistas and waterfalls with lots of other people.  Cades Cove is by far the most crowded place in the park.  If you want to drive the loop, plan at least half a day, maybe all day. Here is a great online guide to driving the loop. Traffic is very heavy and slow moving.  If you’re trying to get to a trailhead on the loop, bring your patience with you and enjoy the scenery along the way!

The Smokies Are Hazy – The views are amazing, but there was usually a thick haze over everything.  Due to research the NPS has done, the haze is a result of air pollution and acid rain.  Occasionally you get a day that is strikingly clear, but fog, mist and haze are the norm.

Bear Cub
We spotted this adorable bear cub in a tree along Little River Road, leading into Cades Cove. Shortly after spotting the cub, we noticed momma bear watching us from the hillside above the road. Below: One of the many small, roadside waterfalls we spotted.

Roadside Waterfall

Best Place To See Wildlife – Cades Cove had the best wildlife viewing.  The first year, we saw seven bears on our way into or around the Cades Cove loop.  In 2014, we saw a bear within 15-20 feet while hiking the Rich Mountain Loop (trailhead in Cades Cove). While black bears can be seen throughout the park, the heaviest concentration and the better likelihood of spotting them is in this area.  You will also see tons of deer and wild turkeys in the fields.  If you want to see elk, the largest population is in the Cataloochee Valley area. But there is also a small herd near the Oconaluftee Visitor Center.  We were lucky enough to get a private ranger-led walk out to spot the Oconaluftee elk in 2012.

Don’t Just Stay In One Place – We stayed in Bryson City, NC for the first half of the week and ended our trip with a couple of days in Gatlinburg, TN. In 2012, we spent one night in the middle of the week at the LeConte Lodge that sits atop the Smokies’ third tallest peak.  Bryson City is a quaint, peaceful town with a Mayberry-esque feel.  The people were friendly and there were some good restaurants in town.  On the southern end of the park, more people probably stay in Cherokee, NC, which is about ten miles from Bryson City.  It’s located in the middle of the Qualla Cherokee Indian Reservation for the Eastern band of Cherokee Native Americans.  The town of Cherokee is definitely more commercial.  There is a large Harrah’s casino and lots of souvenir shops.  Without a doubt, Gatlinburg, TN is the most popular park town.  It reminded us of a town you would find at a touristy beach.  The downtown area had tons of shops selling kitsch (airbrush shirts, old-time photos, plastic trinkets and T-shirts emblazed with neon letters proclaiming ‘I’m Sexy and I Know It’ and ‘YOLO’).  There are also tons of mini golf courses, Ripley’s Believe It or Not attractions, and four moonshine distilleries.  The food in Gatlinburg was great and I’m sure we’ll mention some of our meals in our upcoming posts.  We prefer the quiet areas, so we were glad to spend the bulk of our time in Bryson City.   The largest benefit we experienced was by staying in different spots, we were able to get to different areas of the park quicker.

Must-See Things That Don’t Involve Hiking 

  • Visit the Museum of the Cherokee Indian in Cherokee, NC.  The exhibits were interesting and give you a good overview of Cherokee history and culture.
  • Across the street is the Qualla Arts and Crafts Mutual, which serves as a co-op and gallery showcasing the traditional work of over 250 Cherokee artists.  The items you’ll find here are quality, hand-made arts and crafts, so expect to pay a higher price than you would for the replicas and knock-offs seen in other shops.  The baskets, carvings, pottery and jewelery are all very beautiful.
  • Visit the Nantahala Outdoor Center located southwest of Bryson City.  There are several places to eat, an amazing/knowledgeable outdoor outfitter, and a bridge that carries the Appalachian Trail over the river.  They have an even larger outdoor outfitter shop in Gatlinburg.  It was nicer than any REI we’ve been to, so if you like hiking, camping, kayaking or backpacking – don’t miss the NOC! One of our favorite things to do at the NOC, is to get a beer at Big Wesser Brew & BBQ, sit at a riverside umbrella table and watch kayakers run the river.
  • Drive through Cades Cove.  As mentioned above, it is a great place to see wildlife, but there are some interesting homesteads, churches and farms from a bygone era. Traffic is very slow, so if you’re not the ambling, sightseer type – you’ll need a lot of patience to visit this part of the park.  If you want a more laid-back experience in Cades Cove, try biking it on one of the mornings it’s closed to car traffic.  It’s still crowded, but you can go at your own pace without getting stuck in traffic jams.
  • Drive to Newfound Gap and Clingmans Dome.  There are gorgeous views from some of the highest areas of the park here!
  • Visit the park’s many spectacular waterfalls and streams.  The Smokies are a rainforest fed by numerous streams and rivers.  They’re so beautiful!
  • Visit Nantahala Brewing (Bryson City) and Lazy Hiker (Franklin) to sample their fantastic craft beer.
  • Taste some moonshine –  Ole Smoky Tennessee Moonshine and Sugarlands (both in Gatlinburg) are fun (and offer cheap samples)!

A Restaurant Recap – We had lots of good food on our visit!

Pancake Pantry Breakfasy
Pancake Pantry breakfast!  Below: Barbecue at the Bar-B-Que Wagon in Bryson City; Sugarlands Moonshine; Nantahala Brewery in Bryson City; Lunch at the River’s End Cafe; Pizza at Anthony’s, Enjoying a beer at Big Wesser at the NOC.

Carolina 'Cue shine nantahala
riversend pizza bigwesser

  • In Bryson City, we ate at Pasqualino’s (huge portions, cute atmosphere, the best calzone Adam has ever had), River’s End Restaurant at the NOC (good chili, salads, yummy onion rings with a tasty dipping sauce, pizza, burgers), Soda Pop’s for ice cream, Bar-B-Que Wagon had delicious, classic Carolina-style barbecue, for pizza – Anthony’s (located right next to Nantahala Brewing) has really good food, and for a quick breakfast and great coffee, Mountain Perks! In 2015, we finally got to try The Bistro at Everett Hotel. It was worth the hype and the crepes were amazing.
  • Sylva/Dillsboro is worth a visit – don’t miss Haywood Smokehouse and Innovation Brewing.
  • In Gatlinburg, we ate at the Smoky Mountain Brewery (house-brewed beer, amazing burgers – Christine thought the Brewery ‘Ale’ Steak was the best steak she had ever eaten).  We also ate at Mellow Mushroom which is a chain, but definitely a good one!  They had delicious pizza, good beer selection, and a fun environment.  Hungry Bear had excellent barbecue with all the trimmings. For a quick on-the-go breakfast, you must go to the Donut Friar.  They have the best donuts we’ve ever eaten – lightly crisp exterior with a soft, airy interior.  If you have time for a more leisurely breakfast, don’t miss the Pancake Pantry.  They have Gatlinburg’s best pancakes and they make them a million different ways.  We both got crepes and they were phenomenal!  And lastly, for ice cream and candy – Kilwin’s.  They had lots of creative flavors of ice cream and the candy selection was out of this world.
  • We recommend packing lunches for your day in the park.  The Smokies are big and it’s time-consuming to drive to one of the gateway towns for lunch.  We packed a lot of energy bars, candy, trail mix and Lunchables so we wouldn’t have to drive out of the park to get something to eat mid-day.

Trails We Covered in (or Near) the Smokies

2018

2017

2016

2015

2014

2013

2012

Backpacking Gear Review – 2010 Edition

Gear ReviewFinding good backpacking gear seems to be an exercise in trial and error.  Preferences are wildly varied and highly subjective, so we thought it would be fun and informative to share our gear assessments as we go along.
This backpacking trip was the first time we field tested our new gear, and (thankfully) most of it worked out really nicely!

Backpacks:

Adam – I’m a big fan of the Gregory Z65.  My back tends to give me a lot of problems due to my long torso.  I feel that the Z65 gives me good back support with the extra padding.  My back also tends to be the part that sweats the most, so I like the air flow that is created between the pack and my back.  It definitely holds a good amount of gear that could last for a weeklong trip.  Even though we will not be doing a lot of long backpacking trips, this pack has a lot of ability to tighten around the gear you have, making it versatile for smaller trips.  The only two cons I would have is that it doesn’t have a pocket to slide some easily accessible stash in the front and the pockets for water bottles are a little hard to reach personally.  It does have a sleeve for a hydration bladder.    For daytrips, I use the Gregory Z30.  It has all the benefits listed above for the Z65, but of course doesn’t hold as much.  It holds enough that you could possibly use it for an overnight trip also.

Christine – I chose the Gregory Z55.  I liked the air flow channel between my back and the pack.  It kept me nice and cool, despite the hot weather.  I was easily able to fit 28 pounds of gear inside the bag, with lots of room to spare.  I wish the pack had water bottle holsters built in, but it does have a sleeve for a hydration bladder.  Gregory makes a women’s model (the Jade 50/60) that is similar to the Z55.  I ended up going with the men’s model pack because I have wider shoulders than the average woman.  The men’s shoulder straps just seemed to fit me better. I’m not sure the frame is exactly the perfect size for me, but it’s close.  I fall sort of between a small and medium in Gregory’s sizing.

Tent:

Adam – We chose the Mountain Hardware Drifter 3 tent.  We decided to go with a three-person tent to give us a little extra room.  We had more than enough room in our tent for our bags, with plenty of space on either side and the foot and head for essential gear storage.  The tent is easy to set up and is about a typical weight of 6 lbs.  I carried the tent, fly, and footprint and had Christine carry the stakes to split up the weight a little.

Christine – I love the design of the Mountain Hardware Drifter 3.  It felt a bit bigger than a queen size bed inside.  It was easy to pitch and the mesh allowed plenty of air circulation.  What I didn’t like was that the rainfly seemed to have few seams that were not sealed well.  When we had a thunderstorm roll through in the late afternoon, the tent dripped slowly at several places where hooks attach the fly to the tent frame.

Sleeping Bags:

Adam – I can sleep fairly easily.  I went with a Sierra Design Tomichi 35 degree (discontinued) sleeping bag.  Being down-filled, it is extremely light and is quite warm.  The mummy-style bag does work for me.  I found a great price on it at Sierra Trading Post.   During the summer, it is too hot to sleep in but does provide good padding underneath you.  It also has straps that you can fit your sleeping pad underneath to keep your bag from sliding around on top.

Christine – I tend to be an active sleeper.  I roll around a lot and don’t like to have my feet bound together, so I wanted to avoid a narrow mummy-style bag.  I also preferred the lighter weight and compressibility of a down bag.  It was really hard to find a bag that met both of these specifications, but I came across a nice semi-rectangular bag at L.L. Bean.  Most of the night, I slept on top my bag because it was so hot and humid.  I crawled inside for a little while, in the hour right before dawn.  I found the bag to be soft and just spacious enough to not make me feel claustrophobic.  The zipper ran very smoothly and didn’t catch at all.  It packs down nicely in a stuff sack and weighs in at just over two pounds.  Not bad!

Sleeping Pads:

Adam – Christine coaxed me to get the Big Agnes Insulated Air Core pad.  It does give you a good amount of padding between the ground and your body.  I never once felt like I felt anything sticking into me.  Inflating and deflating the pad was easy and it compacts down to a very small size.  I have heard these aren’t the best in cold weather, since the amount of air in this pad can get cold, but I think this is great for three-season camping.

Christine – I thought the Big Agnes pad was very comfortable.  I could roll from my back to my stomach to my side without feeling even the slightest hint of hard ground under me.  The pad does require you inflate it manually, but this really wasn’t a big deal.   It took less than five minutes of puffing to fill the pad completely.

Water Purification:

Adam – We decided to get the Katadyn Hiker Pro pump filter.  It does have a good filter system and packs down fairly well.  You can clean out the filter and it includes an adapter so you can pump directly into a Nalgene bottle.

Christine – Personally, I’m still undecided on the Katadyn Hiker Pro pump filter.  I don’t think there’s anything wrong with it per say… I’m just still not completely reconciled to the idea of drinking stream water.  I’m sure I’ll get over it in time, but I still feel the urge to treat my water with multiple methods of purification – boiling, SteriPen, Micropur tablets and then filtering.

Hydration:

Adam – Right now, I’m just using water bottles, but I plan on picking up a CamelBak or Platypus reservoir soon.

Christine – A few days before our trip, I picked up a CamelBak 3 Liter reservoir.  I give this item two big thumbs up!  Instead of hassling with water bottles, I could sip water as I walked.  I stayed hydrated much more easily than usual on this hike.  The full reservoir added about seven pounds to my pack weight, but it was well worth it.  The water stayed surprisingly cold all day long, too.

Trekking Poles:

Adam – I use the Trail Ergo Cork trekking poles from Black Diamond.  The cork grip keeps your hands dry and from slipping and the locking mechanism keeps the poles from moving.  I can’t believe that I hiked without them before.

Christine – I got a pair of Komperdell Mountain Explorer poles about a year ago, and they’ve become indispensable.  I used to think hikers with trekking poles were just gadget-hounds who bought into a bunch of hype.  But now that I’ve used them, I can say with certainty that they conserve energy and take a lot of strain off the knees.  I hike farther and faster when I use poles.

Shoes/Boots:

Adam – For backpacking trips, I will definitely bring along my Oboz Sawtooth boots.  Comfort on the bottom of my foot is key since I suffer from plantar fasciitis, but these didn’t make my feet hurt at all.  They are waterproof, provide great ankle support,  and also felt quite light compared to leather boot options.

Christine – When we started the Backpacking 101, a couple of the instructors swore up and down that everyone needed tall, leather boots with a steel shank and Vibram sole.  I took their advice, and chose a pair of Garmont Sitka boots.  They’re comfortable, but they are also hot, heavy and make my ankles feel stiff and immobile.   Since the class ended, I’ve been paying attention to the footwear used by other backpackers and thru-hikers.  I noticed that most of them use trail runners and hiking shoes over traditional boots.  This is the footwear I have always hiked in, so I decided to go back to it for our backpacking trip.  I went with a pair of Columbias on this most recent trip, but also have shoes by Merrell and Vasque. They worked out great!  My feet stayed cool, light and comfortable the whole trip.

Other Bits & Pieces

Adam –

  • For hiking, navigating, and geocaching, I use the Garmin eTrex Venture hand-held GPS.  It does have some limits, but is a good basic GPS to find your way.
  • A big hit at camp were the REI mugs we brought.  They are clear and insulated and have measuring amounts on the size, which make it great for scooping.
  • For good dental hygiene on the trail, pick up some mini Colgate Wisps.  These are easy to pack, provide a tooth pick, and are easier to carry than the standard toothbrush/toothpaste.

Christine –

  • I *hated* my Crocs.  Apparently, a lot of people think they make great camp shows.  I thought they were uncomfortable and allowed the mosquitoes to feast on my toes (and they’re ugly!).  I’ll try them one more time, but with socks. I’ll be the biggest dork in the forest, but I suppose it’s worth a try.
  • Using a stuff sack as a pillow didn’t really work out for me.  The slippery fabric allowed my head to slide all over the place.  I tried wrapping the sack in my hiking pants, but that wasn’t much better.  One person in our party had two nice camp pillows – one by Slumberjack and one by Thermarest.  I’ll definitely be adding a pillow to my gear before I head out again.
  • In the warm summer months, I decided that I don’t necessarily want to carry a sleeping bag.  I’m going to ask my mom to sew a sheet for my Big Agnes pad and carry a lightweight blanket.  I think that will be a lot more comfortable in the heat.
  • I decided that I don’t really like and probably don’t need sock liners.  I hiked one day with them and one day without them, and I found I definitely prefer the soft, looped pile inside my merino wool socks to the slick, silky material of the liners.
  • Next time, I’ll bring a spare bandanna.  It looked silly on me, but it did a great job keeping the sweat from dripping into my eyes.

Part 3: Backpacking 101 with the PATC

Christine Says…

I can’t think of any other class where it would be acceptable for an instructor to say “Now imagine me with my pants pulled down.”  But Backpacking 101 is quite different from other classes.

Prince William Forest Park
Prince William Forest Park was the location for Backpacking 101’s weekend-long field class.

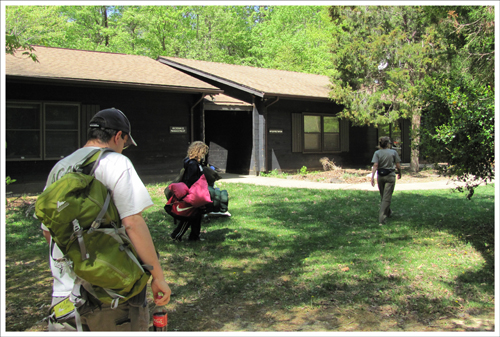
The third day of instruction also took place at Prince William Forest Park.  Adam and I showed up for class freshly showered, warm and well-rested.  We were among the few students who opted out of the group camping experience.  We would have liked to camp, but my parents live too close to the park to not pay them a visit for the weekend.  It was probably good that we had a place to go escape the pollen.  It was the worst pollen I’d ever seen – you could see it raining down from the sky and everyone’s shoes and pant-legs were coated with a thick, yellow dust.

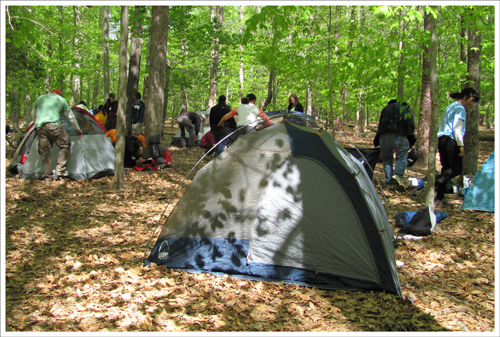
The morning started off with an explanation of the different brands and styles of tents used for backpacking.  We walked around the group campsite, looking at about ten different models owned by class participants.  I really liked a particular REI tent and also one from Sierra Designs.  We’ll likely be purchasing a three-person tent so we have room to keep little gear inside.  I was amazed by the miniscule size of most two-person tents.  They left me wondering… what two people?… Lilliputians, leprechauns, pygmies?

Camp was set up with a variety of tents.

Tents We liked this tent

After tents, we had a thorough discussion of water filtration/purification methods.  I found this to be the most fascinating part of the day.  Access to clean, safe water is probably one of the things I find most worrisome about backpacking.  We saw demonstrations of a Katadyn Filter system, iodine tablets, AquaMira and talked about boiling.  A couple of the instructors seemed to favor SteriPen systems, but we didn’t see a demo of one in action.   I think the pump filter system looked like the fastest and easiest of the methods, but I think I might use some AquaMira or Micropur as a second layer of protection for my personal drinking water.  I figure that an extra layer of prevention is a good idea, especially when the consequence could be explosive diarrhea.

After water, we moved on to campsite selection.   This included discussion of where to pitch tents, set up the “kitchen”, where to place your bear hang and how to designate a bathroom area.  This session provided the perfect segue to the other part of backpacking that I sort of dread… catholes.  In short, I simply do not want to poop in the woods.  I am a princess about these things … but I suppose I have to get over it because poop happens.  I think most of you will have figured out that the opening quote for this blog posted was pulled directly from the cathole session.  I won’t go into all the gory details, but I will share one prophetic term and leave the rest to your imagination – “Poop Soup”.  Beyond that, I am not going there.  As one person in the class put it “I don’t think I’ll be able to look any of you in the eyes again after this trip.”  I guess nobody really likes pooping in the woods.

The last sessions of the day covered personal hygiene, flora and fauna (poison ivy, ticks, bears and snakes) and Leave No Trace principles. At the conclusion of the class session, the class broke into outing groups.  We had the option of easier or moderate – with easier groups covering about four miles a day and the moderate groups covering six miles a day. We chose the easier group because at this point, I’m still not sure if my sprained ankle will be healed in time.

The class split just about in half between the moderate and easier groups.  Adam is one of only three males in the easier group.  I’m dragging him down to my level.  🙂

Honestly, we’re both THRILLED to be in the easier group, because we get to go to Dolly Sods for our outing.  Our group leaders (Dave, Jen and Dave) chose Dolly Sods because it’s an easier place to accommodate a large backpacking group than Shenandoah National Park.  There are eleven people in our group.  We’ll hike and have meals together, but split into two groups for camping. We love the people in our group.  Everyone seems to be nice and so many group members have a great sense of humor.

Now everyone needs to stay tuned for the actual post from the outing (coming sometime in May.)  I will say that we’re really excited about the trip.  The PATC Backpacking 101 Workshop gave us exactly the information we were looking for.  I feel like we’re kicking off our backpacking experience the right way, and that’s given me a lot of confidence and hope that I actually can do this.

Part 2: Backpacking 101 with the PATC

Adam Says…

I must admit that had some anxiety about the Backpacking 101 course through Potomac Appalachian Trail Club.  I was a little worried about the status of Christine’s ankle sprain, the dynamics of the group, and wondering if people would be a little too “hard-core” about backpacking in general.

TREC Center
Most of the classroom sessions took place in the Turkey Run Education Center (T.R.E.C.)

I think all the worry was quickly alleviated once we started the weekend course.  Christine and I are both so happy that we signed up.

The first session of the day started with Trip Planning.  We brainstormed ideas on what you need to think about to plan a good backpacking trip.  I felt our group came up with great ideas and covered all of the necessities.  One group seemed more like the “party group” because they were concerned with who was bringing the frisbee, harmonica, and alcohol.  I don’t think most serious backpackers would want to lug the extra weight or dehydrate themselves with a bottle of whiskey.

Backpackers
These backpackers did a good job planning.

We then had a “Bio-Break”.  I remember when I saw this on the agenda initially, I was wondering what this could be.  It turns out to mean just a bathroom break.  Christine and I have started using this and I think we’ll teach this phrase to our dogs.   They also know “Go outside” and “Drain your lizard”, so what’s one new phrase for them to learn?

The next session taught us about clothing.   We learned about layering and the purpose for each layer of clothing.  This should help minimize what needs to be packed and ensures that our clothing is keeping our bodies at the right temperature and keeping us dry.  All of the students in class learned the mantra of “No Cotton”, since it gets wet easily and takes a long time to dry.

Next, we learned some basic skills in map reading, which I found to be quite easy.  I think most of the class was fairly confident with map reading, but it was great to work on map skills as small groups.  We also learned some basics on reading a compass.  I typically use my hand-held GPS, but it was good to have a refresher.   Our instructor suggested that we take a compass for when we leave the trail/camp for the bathroom.  We found a spot to approach and then followed the compass to get us there and back.

We took a short lunch break and then learned about the Ten Essentials that everyone needed to have available in their packs.

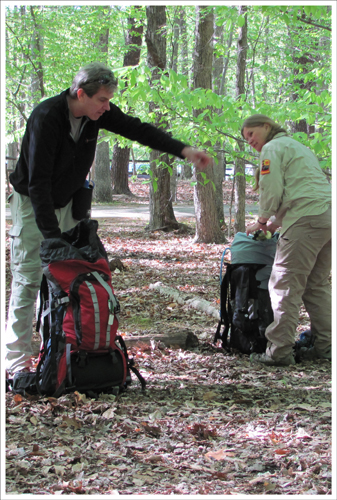
The instructors demonstrated different types of backpacks and talked about the pros and cons of internal frame packs, external frame packs, and frameless packs.  We split into groups based on height and learned about the different packs the instructors had.  We tried on various packs, discussed how to adjust for your individual needs, and then looked at how each of them were packed.  I personally liked the Gregory brand packs best, because I feel they worked a little better with my back and they gave some breathing room between my back which tends to sweat.   I ordered a Gregory Z65 and I’m excited to try it out.

The next session involved discussing sleeping bags and pads.  It seems that most backpackers go with a mummy-style bag.  They tend to be a little lighter, but they are not for the claustrophobic.  I know Christine will definitely want something different since she likes to not feel confined when she is sleeping.  I can usually fall asleep easily anywhere, so I’m not as concerned.   The instructor also showed us some different styles of sleeping pads (foam and self-inflating).   Again, I’m not as concerned about the type I get, but Christine will probably want a self-inflating pad, like what is offered from Therm-a-Rest.

Stove Demon
We saw a demo of a variety of stoves. Below: We liked the JetBoil.

We loved the JetBoil

Many of the people in our class decided to stay in Prince William Forest Park for the night.  We were staying with family nearby, so we didn’t brave the cold with the others.  Those staying overnight were given time to pitch their tents before dark.  This was a great opportunity for us to look around initially at some of the different tent options there are.  We did an instructor-led tour of the different tent options the next morning.

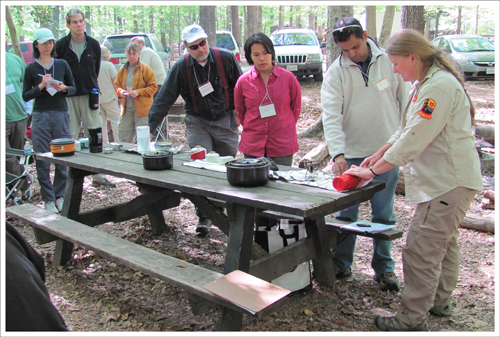
The end of the first full day involved a demonstration of stoves, cooking, and clean up.  We looked at a variety of stoves and talked about the benefits of each.  Our favorite that we will likely purchase is an integrated stove system made by JetBoil.  We felt that based on what we will likely do in the future, this will serve our needs well.  A co-worker is loaning me one this weekend to try out and learn more about.   The instructors then did a skit, acting out a “good backpacking trip” vs. a “bad backpacking trip”.  It was quite funny and showed the importance of planning ahead, delegating duties, and what to pack.  We then started on preparing dinner.   We split into four groups, with each group preparing a different meal.  This gave us all some experience with using a camp stove and understanding how things could be prepared in advance to save weight and time.  We had plenty to eat between all of the groups and we were able to sample a few of the other meals.  The one we cooked was rice-based, but flavored with cheese and dehydrated hamburger.  I think it was my favorite.

We all enjoyed a great camp dinner
Cheesy Rice and Beef.

After everyone had enough to eat, we worked on cleaning the pots.  Cleanup is a necessity and does have to be done after each cooked meal.  We learned different techniques of Leave No Trace ethics to ensure that cleanup was done in a way that leaves little to no impact on the environment.

I really felt liked I learned a ton of information in this first day of class and we were looking forward to another full day.  I felt the PATC did a wonderful job of explaining all the different types of gear and how to prepare for a backpacking trip.  After the next day of sessions, I feel well-prepared and excited to go on our first trip.

Part 1: Backpacking 101 with the PATC

Christine Says…

(instead of doing both a Christine Says and an Adam Says section for this series, we’ll be taking turns with writing.  We’ll be back to team blogging when we hit the trails again)

Anyone who has read the About section of our website already knows that we’re not backcountry campers/backpackers.  Although I grew up camping with my family, we were always strictly “frontcountry.”  We had a pop-up camper and spent a lot of vacations in developed campgrounds with electricity, playgrounds and hot showers.  Adam definitely has more experience roughing it than I do.  He did a lot of primitive camping in high school and college.

PATC Headquarters
The first session of Backpacking 101 was held at the Potomac Appalachian Trail Club’s headquarters in Vienna, Virginia.

My only backpacking experience came when I was ten years old and attending summer camp with the National Wildlife Federation (Ranger Rick Wildlife Camp).  We did a couple one-night backpack trips in the woods of western North Carolina.  I don’t remember anything from those trips other than the poison ivy.  Our hippie camp counselor encouraged us to walk barefoot through the forest to “be one with nature.”  That was one of the worst ideas ever.

The last time I camped in any way, shape or form was in the mid 90’s.  Adam and I had just started dating, and decided to go camping on one of our first trips together.  The weather was supposed to be nice, but we ended up having freak storms with torrential downpour.  Our tent leaked, we couldn’t get a fire going, Adam got hypothermia – basically everything went wrong.  We ended up bailing out and sleeping in the car.  The next day, we broke camp and moved back into the great indoors. I’ve never looked back, because honestly… I love a soft mattress, a hot bath and access to a microwave.

Recently, I’ve decided to give sleeping outdoors another chance.  I’ve been on so many hikes with places that I’ve stopped and thought “Wow – I’d love to wake up right here and see the sunrise!”  So, when we got a Potomac Appalachian Trail Club (PATC) newsletter, we were intrigued by a workshop called Backpacking 101.  It’s an adult class for backpacking newbies.  I’m hoping that their expert instructors will be able to show us how to backpack and camp in a way that makes it safe, fun and comfortable.

Last Monday, we had our first class meeting to go over course expectations, physical conditioning and how to choose boots.  The class has 28 participants – all very diverse in age, gender, experience and fitness level.  We’ll be spending the next two class sessions doing field learning – everything from how to purify water to how to load your backpack properly to how to choose a campsite.  The class will conclude with a weekend-long backpack trip to put everything we learn into practice.   At this point, my ankle sprain is still too painful to hike. I’m really hoping it will be healed enough by May for the weekend trip.  Keep your fingers crossed for me!

We’ll be blogging about each of the sessions… so stay tuned!  Maybe we’ll become backpackers yet!

Short and Scenic West Virginia Walks

Last Saturday, we made a quick trip over the mountains into West Virginia.  The foliage in the Canaan Valley (Tucker County) area is always way ahead of the color change in Virginia.  We set out from home at 5:00 a.m. and made stops at Blackwater Falls State Park, Canaan Valley State Park, Douglas Falls and Dolly Sods Wilderness.  Our whirlwind trip got us thinking about how many short walks in that area have major scenic payoffs.

Let’s start off with a few beautiful spots in Blackwater Falls State Park.  All of the spots listed below are clearly marked on the park’s trail map. Pick up a copy at the lodge.

Lindy Point

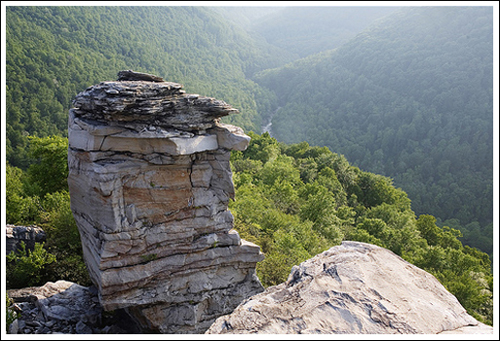
The view from Lindy Point looks down into the Blackwater Canyon.

The walk out to Lindy Point is no more than a third of a mile along a relatively level path.  The trail passes through dense rhododendron and can be quite muddy if there has been rain.  At the end of the trail, you’ll come out to a platform built onto the side of the rocky cliff.   The point offers a spectacular view of the Blackwater Canyon.   If you sit quietly, chances are good that you’ll hear the river rushing through the chasm below.  The view is made even more unique due to the enormous free-standing rock “chimneys” that surround the platform.  There are several places that you can crawl through the rhododendron to stand directly on the rocks for a better view.  Despite the spot’s beauty, Christine has not had great luck photographing this spot, but it’s all been a matter of timing.  We’ve just never been lucky enough to hit the point on a day with nice “photo skies.”   The photo included really doesn’t do the place justice.


Elakala Falls

There are several "falls of Elakala" along Shays Run.
There are several “falls of Elakala” along Shays Run.

frozenelakala

This pretty waterfall is accessed by a short trail starting out from the park’s main lodge.  The falls are less than a quarter mile down the trail.   You’ll know you have reached the waterfall when you come to a wooden footbridge over Shays Run.  The falls cascade directly under your feet at this point.  The trail really doesn’t give you a good look at the waterfall, so take the time to follow the “unofficial” foot path down the ravine to the base of the falls.  Elakala is prettiest in times of heavy waterflow.  The stream leaving the base of the falls takes  a beautiful swirling path across the moss-greened rocks.  Don’t miss climbing a little farther down the ravine to see a couple other pretty waterfalls on Shays Run.  The stream actually cascades all the way down to the bottom of the Blackwater Canyon, but it’s not really safe to go much beyond the second or third cascade.  Last winter we were lucky enough to see Elakala falls completely frozen over.   The sound of the water running under the ice was magical that day.


Blackwater Falls

The main attraction in Blackwater Falls State Park

This 62 foot cascade is park’s namesake and #1 attraction.  You’ll have a couple options for accessing the waterfall.  The park road that heads toward the main lodge has a paved, wheelchair-accessible path to a viewing platform far above the waterfall.  The road that heads toward the picnic ground has a longer “staircase-path” that leads to several wooden viewing platforms.  This path puts you a lot closer to the waterfall and offers a much prettier view.   We’ve always liked visiting Blackwater Falls as soon as the sun comes up.  At dawn, the path is deserted and the falls are often shrouded in a thin veil of fog.  During more normal times, the area is extremely crowded with tourists.


And now a couple favorites outside the park.

Douglas Falls – Thomas, WV

The colors of Douglas Falls are amazing!

Blackwater Falls might be the area’s best-known waterfall, but we think Douglas Falls is the most beautiful.   The rocks are brilliant red and the water is vivid green, making for a wonderfully photogenic color contrast.  The color of the rocks is sadly unnatural, created by acid drainage from the mines and coke ovens in the area.  It’s amazing that pollution could create something so pretty.  The ride out to the falls is extremely rugged and potholed.  You should plan on walking a mile or two if you don’t have a 4WD vehicle.   The footpath down to the falls is very short, but very steep. Once you get down to the base of the falls, there is a path that follows the stream for a couple hundred yards.  The whole area is worth exploring, but take extreme caution on the slippery rocks.  The rocks around the stream are coated with slick, clear algae.  We always move “crab-style” along the rocks to keep from falling.


Bear Rocks – Dolly Sods Wilderness

The landscape of Dolly Sods reminds us of Maine.

bear rocks

Another place to visit in the area is Bear Rocks in the Dolly Sods Wilderness Area.  The overlook is surrounded by a vast plain of huckleberry and blueberry bushes that turn blaze red in the autumn.  It’s a great place to spot migrating hawks.  The rocky cliff is endlessly fun to scramble around on and provides beautiful views of the valley below.  The plains framing the cliff are patterned with pathways through the berry bushes and punctuated with monolithic white rocks that have been sculpted by time and the elements.  Whenever we visit Dolly Sods, we feel like we’re someplace far north of the Mid-Atlantic region.  It feels more like Maine or Canada. There are several routes into Dolly Sods.  We recommend the route from WV32 onto Laneville Road as the most passable and scenic.  You might even see a black bear along the road if you’re lucky.

Our Hiatus Has Come to an End

Virginia Trail Guide is back after taking a couple months off!  During our hiatus, we spent a week visiting New Hampshire.  We hiked a couple trails in the White Mountains and one near the Squam Lakes.  New Hampshire is beautiful country – abundant with rushing streams, waterfalls and panoramic mountain views.

Franconia Notch State Park (NH) is home to many spectacular streams and waterfalls. Don't miss visiting Flume Gorge!
Franconia Notch State Park (NH) is home to many spectacular streams and waterfalls. Don’t miss visiting Flume Gorge!

After New Hampshire, we headed over to Maine for a week-long stay on Mt. Desert Island (Acadia National Park).  We did several long bike rides along Acadia’s carriage roads and hiked several mountains (Cadillac, Gorham, Champlain and Penobscot).  We’ve visited Maine every summer for over a decade now.  It’s a fantastic vacation spot for any outdoor-enthusiast.  Whether you’re into paddling, biking or hiking, there are endless options for every skill level.

Gorham Mountain
Gorham Mountain’s mix of ocean and mountain scenery makes this hike a perennial favorite. The pink granite mountaintops are an iconic part of Acadia National Park.

The last few weeks of our hiatus were occupied by Christine’s art show.  For the last month, she’s been showing her work in “The Cabin” at Rockingham Springs Arboretum.  On Sunday, the urge to hike overwhelmed our lack of free time.  We woke up early so that we could squeeze in a short hike before the art show opened at 1:00.   We’ll be posting a write-up about Shenandoah National Park’s Hightop Mountain Trail in the next few days.

Also, stay tuned for posts from Virginia’s highland region.  We have a weekend trip planned near Abingdon/Damascus, and are hoping to hike Mt. Rogers and bike the Virginia Creeper Trail.

Now that we’re finally getting some free time, we’re looking forward to a great fall season on the trails!

Visiting West Virginia

While we want to focus on Virginia trails on our site, we can’t resist occasionally sharing some of the hikes that West Virginia has to offer.  Many of West Virginia’s most beautiful hiking spots are just a couple hours drive away for many Virginians.  We’re really excited about having a full week to explore the Canaan Valley/Blackwater Falls area next week.  We have lots of hikes and bike rides planned (as long as the area’s notoriously mercurial weather behaves for us.)  We’ll probably make side trips to the Seneca Rocks, Dolly Sods and Deep Creek Lake areas while we’re there as well.

The entire area is rugged and pristine, with many waterfalls, high meadows, bogs, rushing streams and mountain views.  It’s a paradise for both outdoor activities and photography.

The area is beautiful and (mostly) untouched.

When visiting the area, Canaan Valley makes a great base for all your excursions.  There are cabins for rent, lodges at the state parks, a couple motels and loads of camping options.  Our family has had a unit at Black Bear Resort for over 20 years now, so we stay there for free.  We’ve also camped and stayed in the cabins at Canaan Valley Resort.

When you visit, don’t miss Sirianni’s Pizza (no website), Mountain State Brewing Company and breakfast at the Bright Morning Inn (mmm… banana walnut pancakes).